Glossy Plastic Text in Photoshop Home Photoshop Tutorials Text Effects Preview of Final Results...
11
Glossy Plastic Text in Photoshop by Arindam Bhaduri on May 24, 2012 Home Photoshop Tutorials Text Effects Learn a quick and easy way to create reflective plastic text in Photoshop from scratch. Three layer styles will be combined to achieve this effect. We will also explore blending modes and their effective use to achieve this type effect with layer styles. Same effect can be use on shapes also because of its simple and highly customizable nature. Preview of Final Results
-
Upload
fitk-uinjkt -
Category
Documents
-
view
1 -
download
0
Transcript of Glossy Plastic Text in Photoshop Home Photoshop Tutorials Text Effects Preview of Final Results...
Glossy Plastic Text in Photoshop
by Arindam Bhaduri on May 24, 2012Home Photoshop Tutorials Text Effects
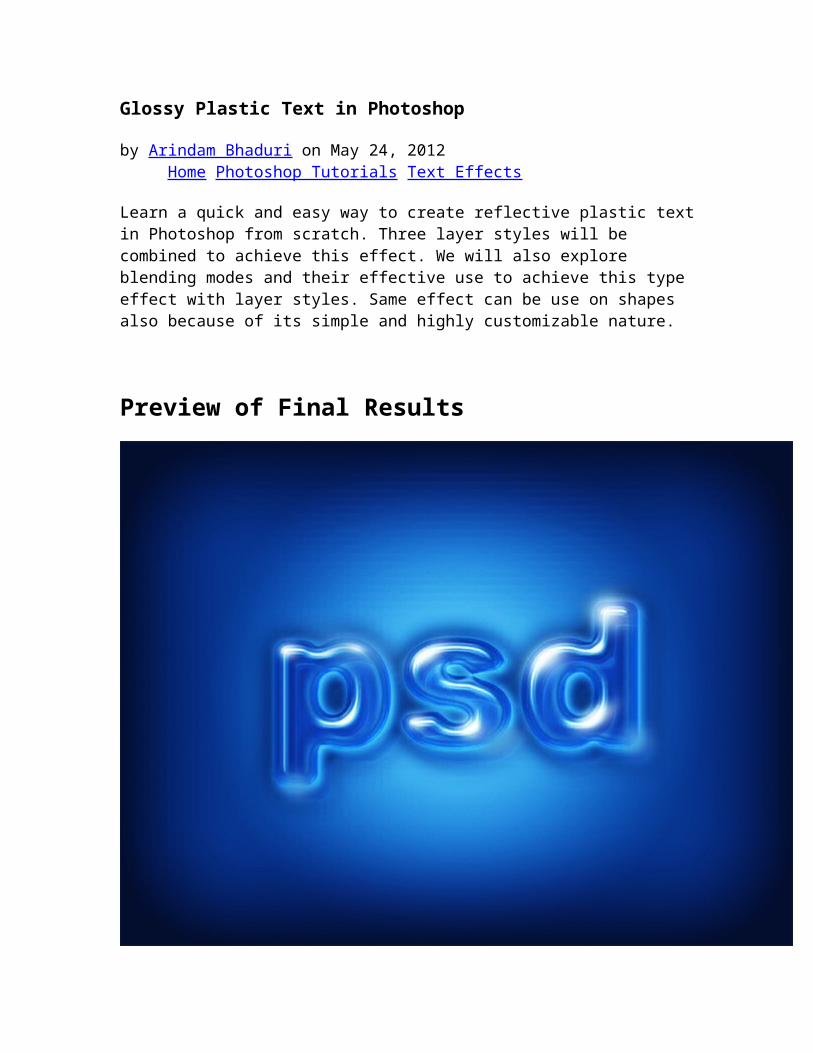
Learn a quick and easy way to create reflective plastic textin Photoshop from scratch. Three layer styles will be combined to achieve this effect. We will also explore blending modes and their effective use to achieve this type effect with layer styles. Same effect can be use on shapes also because of its simple and highly customizable nature.
Preview of Final Results

Glossy Plastic Text Photoshop Tutorial
Step 1
Open a new file in Adobe Photoshop with the following settings.
Step 2
Select Type Tool (T) and in the Option Bar select Arial Black, 325 pt, smooth. Then type the word “psd” in lower case.
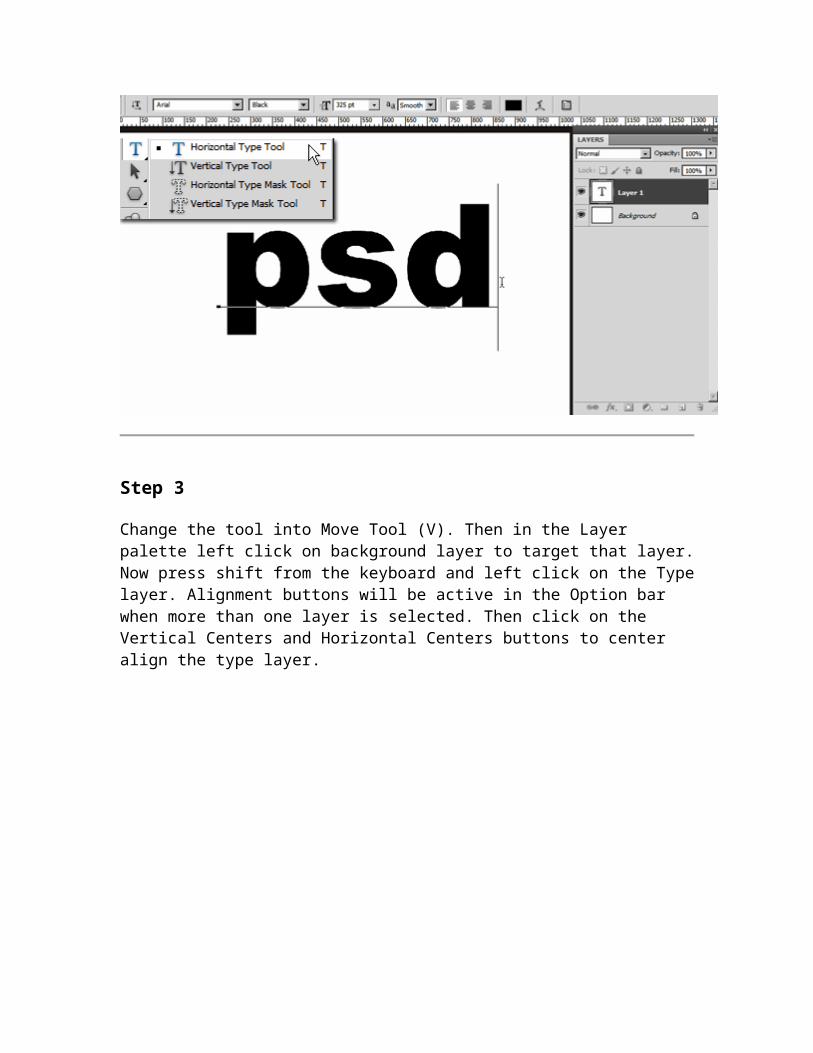
Step 3
Change the tool into Move Tool (V). Then in the Layer palette left click on background layer to target that layer.Now press shift from the keyboard and left click on the Typelayer. Alignment buttons will be active in the Option bar when more than one layer is selected. Then click on the Vertical Centers and Horizontal Centers buttons to center align the type layer.
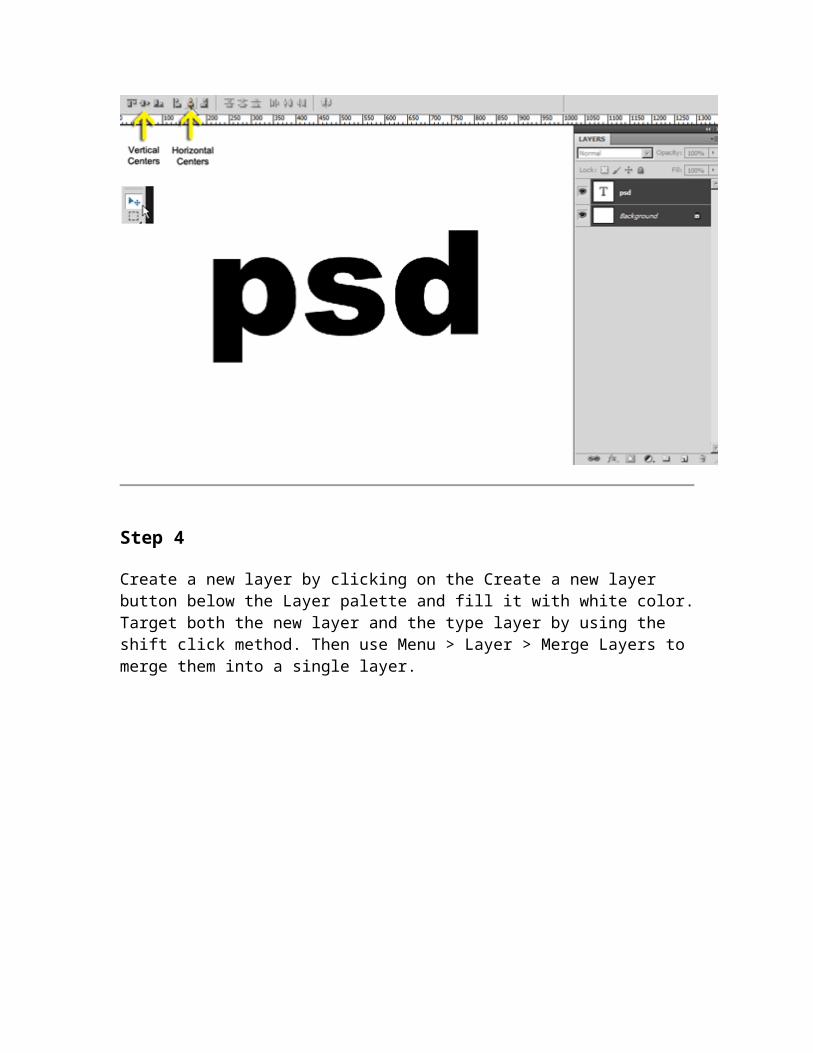
Step 4
Create a new layer by clicking on the Create a new layer button below the Layer palette and fill it with white color.Target both the new layer and the type layer by using the shift click method. Then use Menu > Layer > Merge Layers to merge them into a single layer.

Step 5
For creating a reflective glossy plastic text effect we needa bold or chunky round corner type face. Because round edgescatch more light than the corner edge. But edges of Arial Black are corner not round. So let’s explore a quick and easy technique to change any edge from corner to round. First on “psd” layer apply Filters > Blur > Gaussian Blur (Radius: 8 px).

Step 6
Then on the same layer Image > Adjustments > Levels. In the Input Levels area drag the Left (Shadow) Input Slider to theright and the Right (Highlight) Input Slider to the right. This will remove or rather convert the resulting grey blurryarea produced by the application of Gaussian Blur and changethat area into solid black. Due to that the corner edges arenow rounded.

Step 7
Select the Magic Wand Tool (W) and click on the black area of the “psd” layer to select the black text. Selection active, create a new blank layer on top of the “psd” layer by clicking on the Create a New Layer button below the LayerPalette. Then fill the selection with 50% gray and also rename the layer as “base style”. Deselect by Select > Deselect or press Ctrl + D.

Step 8
You can delete the “psd” layer as we don’t need it anymore. Double click on the Background layer to convert it to a normal layer (Layer 0). Now double click on the text “Layer 0″ and rename it to “gradient bg”. Then double click on the “gradient bg” layer to open the Layer Style dialogue box. First create a Radial gradient in the Gradient Overlay with the following settings.

Step 9
Then create an Inner Glow with the following settings. This will create a texture variation of the Gradient Overlay.

Step 10
Target the “base style” layer. Double click on it to open the Layer Style dialogue box. Let’s start building the main Plastic Layer Style. First in the Blending Option section, reduce the Fill Opacity to 0%. This will make the Plastic Style transparent.
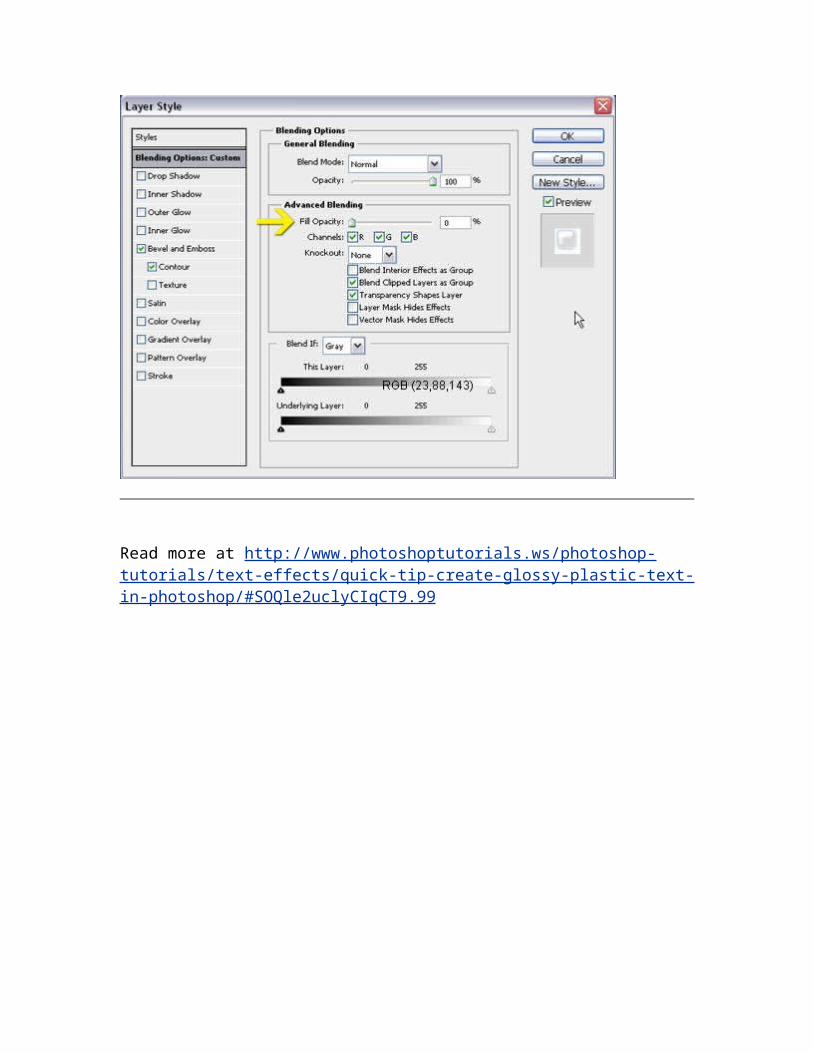
Read more at http://www.photoshoptutorials.ws/photoshop-tutorials/text-effects/quick-tip-create-glossy-plastic-text-in-photoshop/#SOQle2uclyCIqCT9.99