![[ARIA (Allergic Rhinitis and its Impact on Asthma). Achievements in 10 years and future needs in Latin America]](https://static.fdokumen.com/doc/165x107/6333c8977a687b71aa08605d/aria-allergic-rhinitis-and-its-impact-on-asthma-achievements-in-10-years-and.jpg)
Future Rockhounds of America Badge Program
393
1 AMERICAN FEDERATION OF MINERALOGICAL SOCIETIES Future Rockhounds of America Badge Program Fifth Edition Jim Brace-Thompson AFMS Juniors Program Chair [email protected] (805) 659-3577 This manual is available on-line on the AFMS website: www.amfed.org © 2020
-
Upload
khangminh22 -
Category
Documents
-
view
3 -
download
0
Transcript of Future Rockhounds of America Badge Program
1
AMERICAN FEDERATION OF
MINERALOGICAL SOCIETIES
Future Rockhounds of America
Badge Program
Fifth Edition
Jim Brace-Thompson
AFMS Juniors Program Chair [email protected]
(805) 659-3577
This manual is available on-line on the AFMS website: www.amfed.org
© 2020

2
Fair Use and Copyright Notification
The Future Rockhounds of America Badge Program and Manual have been written,
produced, and published specifically for use by certified members, clubs, and societies
within the seven regional Federations holding an affiliation with the American Federation
of Mineralogical Societies (AFMS). These are:
California Federation of Mineralogical Societies
Eastern Federation of Mineralogical and Lapidary Societies
Midwest Federation of Mineralogical and Geological Societies
Northwest Federation of Mineralogical Societies
Rocky Mountain Federation of Mineralogical Societies
South Central Federation of Mineral Societies
Southeast Federation of Mineralogical Societies
While other individuals or groups may access and use activities contained herein when
working with children or others not affiliated with AFMS or its member Federations,
only duly charted clubs and societies are eligible to receive and to award the free badges
that accompany each badge unit. Non-affiliated individuals or groups seeking an
affiliation should inquire with the regional Federation in which their communities reside.
To find the regional Federation that encompasses your local community, turn to the
AFMS website (www.amfed.org). You will find links to all seven regional Federations
on the home page. You may also send inquiries directly to Jim Brace-Thompson via the
contact information included on the title page of this Manual, which he has authored.
All rights are reserved to all content herein. Any individual or group not affiliated with
AFMS should secure proper permission if seeking to print or republish this manual in
part or in whole.
© 2004, 2008, 2010, 2012, 2016, 2020 Jim Brace-Thompson & the American Federation
of Mineralogical Societies

3
Table of Contents
Mission Statement…………………………………………………………..4
Introduction Philosophy behind the FRA Badge Program & Suggestions on Using It………...4
Suggestions on Forming a New Youth Group in Your Club……………………..7
“Swearing In” Your New Pebble Pups and Junior Members……………………10
Rewarding Kids for their Work: Awarding and Displaying Earned Badges……11
Rewarding Kids for their Work: Beyond the Badges…………………………...11
Helping the Youngest-Among-Us……………………………………………….12
The “Big Changes” in this Fifth Edition…………………………………………13
Acknowledgements for this Fifth Edition………………………………………..13
In Closing………………………………………………………………………...14
How to Use this Manual How It Works…………………………………………………………………….16
The Structure of this Manual…………………………………………………….16
Achievement Checklist…………………………………………………………..17
Badge Images…………………………………………………………………….22
Future Rockhounds of America Membership Patch……………………….23
Badge 1: Rocks & Minerals……………………………………………… 24
Badge 2: Earth Resources…………………………………………………54
Badge 3: Fossils…………………………………………………………...68
Badge 4: Lapidary Arts……………………………………………………93
Badge 5: Collecting………………………………………………………109
Badge 6: Showmanship…………………………………………………..124
Badge 7: Communication……………………………………………...…142
Badge 8: Field Trips…………………………………………………...…155
Badge 9: Leadership & Citizenship……………………………………...172
4
Badge 10: Earth Processes………………………………………………..189
Badge 11: Earth in Space………………………………………………....221
Badge 12: Gold Panning & Prospecting………………………………….236
Badge 13: Gemstone Lore & Legend……………………………………..253
Badge 14: Stone Age Tools & Art………………………………………..264
Badge 15: Rocking on the Computer……………………………………..277
Badge 16: The World in Miniature……………………………………….293
Badge 17: Special Effects………………………………………………...321
Badge 18: Fluorescent Minerals…………………………………………..342
Badge 19: Reaching Across Generations…………………………………358
Badge 20: Maps…………………………………………………………...372
Rockhound Badge………………………………………………………...389
AFMS Cloisonné Pin for Rock Stars……………………………………..391
Acknowledgements for Editions 1 through 4……………………………..392
5
AMERICAN FEDERATION OF MINERALOGICAL SOCIETIES
Future Rockhounds of America Badge Program
MISSION STATEMENT
Future Rockhounds of America is a nationwide nonprofit program within the American Federation of Mineralogical Societies that develops and delivers quality youth activities in the earth sciences and lapidary arts in a fun, family environment. Our underlying goals are to foster science literacy and arts education through structured activities that are engaging and challenging and by which kids—and the adults who mentor them—learn while having fun.
INTRODUCTION
.
Philosophy behind the FRA Badge Program & Suggestions on Using It
I’ve developed this manual so as to enable the American Federation of Mineralogical
Societies to sponsor a youth program via Future Rockhounds of America, a program that
rewards kids on an on-going basis as a means of encouraging and cultivating their interest
in the earth sciences and lapidary arts. Through this, each of our individual clubs and
societies will uphold our chartered goals as nonprofit, educational organizations by
actively seeking to foster and develop science literacy and arts education amongst our
youngest members.
My guiding philosophy has three underpinnings. They come from both my own values
as a person invested in the positive development of young people and from a wealth of
academic research indicating that if one wants to design and deliver programs that
effectively promote positive development among young people, three steps are crucial.
First, we must provide young people opportunities to learn important skills. Second, we
must provide these opportunities in the context of positive and continuing youth-adult
relationships. Third, once youth have mastered these skills, we should give them
opportunities to participate as leaders in the programs we present to them.
So first step: we learn by doing. Book knowledge is great, but reading 1,001 books
won’t craft a cab. You’ve got to roll up your sleeves, slice a rock, and watch your
thumbnails disappear as you shape and grind that first special gem! Second point: we
are motivated by goals that are attainable and that offer tangible rewards and recognition,
especially if we’re given a clear roadmap and consistent support and guidance toward
reaching those goals. With kids, this means encouraging supportive adult-youth
relationships through adult mentors who pledge a relatively long-term commitment. The
best program would be one in which children, youth, and adults work, learn, and grow
together. The importance of fostering—and maintaining—supportive relationships
cannot be stressed enough. A basic expectation of clubs enrolling kids in FRA should be

6
genuine, active, and sustained commitment on the part of the individual youth leaders and
the entire club in order to foster strong relationships between adults and young people
and between young people and their peers. Third step: kids are motivated the most when
they participate the most, both in choosing the activities they’d like to engage in and in
helping to shape those activities. In this regard, I’m especially proud to note that one of
our badge units, Reaching Across Generations, was proposed and developed by a junior
member, Erica Nathan. At last word, she was a college student pursuing her dreams.
Another junior member—Jem Burch—suggested the “Elements” activity now included
within our Rocks & Minerals badge for this Fourth Edition of the manual.
It is with these thoughts in mind that I’ve developed an AFMS/FRA series of guided
activities modeled after the Boy and Girl Scouts Merit Badge™ systems. In the
following pages, I describe clusters of activities children and youth could do either on
their own or at club meetings or workshops and the badges they can earn as a result. For
instance, one is a Rocks & Minerals cluster that involves building one’s own mineral ID
kit with readily available tools then demonstrating how to use it to identify several
common minerals. Another cluster revolves around Lapidary Arts and requires planning
and crafting a project such as a cab, wire-wrapped necklace, or soapstone sculpture while
learning the basics of shop tools and safety.
In this packet, I lay the groundwork for twenty badges covering the full spectrum of our
hobby, including:
Rocks & Minerals Earth in Space
Earth Resources Gold Panning & Prospecting
Fossils Gemstone Lore & Legend
Lapidary Arts Stone Age Tools & Art
Collecting Rocking on the Computer
Showmanship The World in Miniature
Communication Special Effects
Field Trips Fluorescent Minerals
Leadership & Citizenship Reaching Across Generations
Earth Processes Maps
Local youth leaders are encouraged to adjust the level of each activity to match the age
range of the kids involved. Take, for instance, the mineral identification project (Activity
1.2). Very young children might be taught only the basics of color and hardness, and the
youth leader could guide them through a hands-on session with just a few very common
minerals that are easily identified, such as quartz, calcite, sulfur, malachite, galena, mica,
pyrite, and hematite. Older kids might be given more of a challenge, using a wider range
of characteristics to identify a much wider range of minerals on their own or in teams
after a basic overview. Don’t take the activities at face value; adjust as necessary!
You’ll also find some activities overlap and can be used to help earn more than one badge
at the same time. For instance, among the activities for the Rocks & Minerals and Fossils
badges, kids are encouraged to collect rocks, minerals, and fossils, thus simultaneously

7
fulfilling the requirements of Activity 5.1 for the Collecting badge. These aren’t intended
to be isolated, individual activities but part of an integrated whole that ultimately will
help kids earn a “Rockhound” badge as a mark of significant achievement after earning a
minimum of six of the twenty badges and a “Rock Star” pin if completing all twenty. On
the “Kids Corner” section of the AFMS web site, we publish “Honor Roll” listings of
kids who have diligently worked their way to becoming Rockhounds and Rock Stars.
Youth should become a central part of our efforts in order to best ensure that we are
providing activities our kids find engaging and worth their time. Thus, I welcome
suggestions from both local youth leaders and kids themselves. How can existing
activities be improved? What new activities can we add? In addition, please alert me to
websites that are no longer be active. For our 2020 Fifth Edition, I have checked every
website and have removed those that are no longer in service, but that’s a never-ending
battle as websites come and go, and I can use all the help I can get to continue monitoring
and updating any websites recommended within these pages. (I was tempted to include
YouTube pages in this latest edition to provide animated multimedia, but YouTube pages
seem to be even more ephemeral than websites.) I envision this as an evolving program
that grows, adapts, and improves with time and use and with the help of all who use it.
It’s also with youth voice and commitment in mind that I developed the Leadership badge
with activities that encourage our more enthusiastic and ambitious junior members to take
charge of selecting and organizing activities for their peers.
Kids should have choices about which activities they participate in, and they should have
a chance to help shape those activities. It’s through youth voice and participation that we
engender empowerment and a social commitment and sense of belonging. It’s often said
that our clubs and societies are declining and, therefore, that we need to attract more
young people in order to keep our clubs alive. But saying it in this way puts the cart
before the horse. Instead, the focus needs to be on what is best for our youth. Only then
will we fire the interest of kids in ways that engender a sense of belonging, with
meaningful opportunities from which a lifelong interest and commitment will emerge
naturally. Let us not put our clubs first—let us put kids first! If we can find ways to
make youth responsible and fully engaged participants, not just recipients, the long-term
health of our clubs will follow as a natural result.
Suggestions on Forming a New Youth Group in Your Club
I’m often approached via email or phone by a member of a local society that would like
to use this Badge Program but doesn’t have a youth group in place. How, they ask, can
we get started? Here are seven general suggestions I’ve developed as a result of talking
with folks who have taken the initiative to begin one:
1. Go to where the kids are. Based on a survey conducted by a natural history
museum, the age group with the most kids interested in rocks is 5 to 10, or the
elementary school bracket. It’s with that group you’ll likely find most success.
Work with local school teachers and youth groups (Boy and Girl Scouts, Big
Brother/Big Sister, 4-H, Boys and Girls Clubs, YMCA, summer camps, etc.) and

8
volunteer to give earth science related talks to them in ways that are relevant and
that benefit their goals—for instance, by helping teachers cover curricular
guidelines in the sciences, or by helping a scout leader complete a geology badge.
Have a Kids Booth at your annual show with sign-up sheets for parents whose
kids have a fascination with rocks and fossils and who would like more
information about your club and its activities. Arrange to set up a club booth or
table at community events and festivals. In other words, sketch out and
implement a proactive plan to raise your profile within the community and to let
everyone know what you can offer in helping to educate and cultivate kids with
an interest in our hobby. And if you have just one child in your club, encourage
that child to bring a friend. Then provide fun activities that catch their attention in
ways that will bring them back month after month, along with still more friends.
2. Capitalize on your existing pool of talent. Every successful youth group I’ve
observed has one “champion”—one committed individual who brings it all
together and “makes it happen.” But don’t depend on just one person. It’s hard to
find someone who knows everything about every facet of rockhounding, but in
most clubs you find an amazingly diverse storehouse of individual knowledge.
One person has an intense love of fossils, another is an expert cab crafter, while
yet another has an amazing mineral collection. Start by identifying adults within
your club’s ranks and their individual strengths. Then gather commitments! Just
one member a month committing to help with a presentation or activity will carry
you through your first year. Make it clear that this needs to be a club
commitment, not the project of any single individual. And while I note a key
element is that central “champion” who then recruits volunteers, equally
important is training those volunteers. Delineate expectations, provide support,
and plan ahead, giving volunteers ample advance notice. What’s the time limit
for a presentation? Do you have a general outline that a program provider can
follow? Do you want samples to distribute to kids and/or hands-on activities and
of what sort? Don’t just call for volunteers; assist, guide, and support them.
3. Plan before you start. How will your activities be organized? You should have
procedures spelled out, and they should be more-or-less consistent from meeting-
to-meeting so expectations are clear for everyone involved and to create a familiar
sense of rhythm for the kids. You might choose to devote 10 to 20 minutes of
your usual club meeting to a Pebble Pup Presentation; or you might choose a
monthly activity or workshop at a member’s home. Whatever you choose, keep
the structure and expectations more-or-less consistent. In addition to planning the
structure of a typical meeting, you should plan your entire first year’s calendar in
advance, gathering commitments from club members to take on specific months.
Then, publicize the schedule in your club bulletin and elsewhere so everyone
knows what’s coming and appropriate preparations can be made well in advance
rather than moving from meeting to meeting in a last-minute rush to find a new
topic, activity, or speaker and suddenly “dumping” expectations on a volunteer at
the very last minute.

9
4. Center meetings on an activity and topics of interest and appeal. Most adult
meetings are centered around a lecture or presentation, and during these, you’ll
observe kids a) sleeping or b) running the hallways. (I know this based on first-
hand experience with my own kids!) The best way to channel kids’ curiosity and
energy is through hands-on activities. There should be a brief presentation to set
the stage, but the bulk of your meeting should be activity-oriented. For instance,
in introducing fossils, you very briefly should give kids the utmost basics on what
a fossil is and on the fossilization process and then move quickly to just a few
high impact and sturdy specimens kids can see and touch, perhaps with a couple
large-format picture books, posters, or dinosaur models as illustrations—or with a
laptop computer hooked to a large monitor and keyed into relevant websites or
images. Then move on to the main event: an activity making clay and plaster
casts so kids can walk away with their very own plaster fossil at the end of the
night. Get kids learning by doing, and they’ll want to come back for more. In
addition, pitch each talk to things you know kids will be interested in. Mark
Uhran, a director at NASA, once noted in a presentation to fellow scientists about
how to get more young people into science, “Space and dinosaurs are the two
things that turn kids on more than anything else. If we could grow dinosaurs on
the space station, we’d have this thing nailed.” What topics, samples, and hands-
on activities will nail the interest of your club’s kids?
5. Reward kids with something tangible after each meeting. Kids like to collect, so
one goal should be to help them build a basic collection. In addition to whatever
they may end up with from the activity session of each meeting (like the fossil
cast described above), you might also open each meeting with a raffle where
every kid is a winner. Spread out a selection of rocks, minerals, and fossils, and
give each child a raffle ticket and let them pick from the selection when their
numbers are called. Or give each child the same sort of specimen. (Encourage
adult members, when going on field trips, to stockpile and bring home a supply of
whatever they’re seeking for the kids, whether quartz crystals, fossil shark teeth,
agates, or barite roses.) Whatever route you choose to go, label specimens with
info on what they are and where they came from to begin teaching kids the basics
of documenting their collections to add both personal and scientific value.
6. Involve parents. A youth program should not turn into a babysitting service.
Kids have a lot of energy (my own energy was constantly getting me into trouble
when I was in elementary school, as my second-grade “D” in conduct will
attest…), and parents should be expected to help channel that energy in positive,
productive directions and to lend their support. The larger the youth group, the
more important it is that a number of adults are on hand to provide individual
attention and to prevent the inevitable tendency toward chaos. As an added
benefit, getting parents involved in running your activities will help in cultivating
future youth leaders for your club, thus avoiding the common problem of burn-out
if a single individual is asked to run the youth program year after year.

10
7. Safeguard children. Finally, I need to emphasize a point I wish we didn’t have to
go into, but it is absolutely vital to raise and to underscore, namely, having youth
leaders who are well known by all in the club for sound moral values and having
multiple adults on hand when working with kids. There are, unfortunately, some
who would abuse the natural trust of children. My home state of California has
Megan’s Law, which requires registration of sex offenders on a public web site
with photos and information about offenders. Some societies require background
checks for any club members volunteering to work with juniors, and this is a good
policy to explore with your own club board. Always have multiple adults
working with the kids, and prevent any sort of abuse, whether physical, sexual,
mental, emotional, or verbal. In addition, safeguard children from fellow children
by making clear that any sort of hazing or bullying among kids is wrong and is
never permitted. The Houston Gem & Mineral Society has developed an official
“HGMS Policy on Children” that outlines policies, procedures, and expectations
on the parts of children, parents, and club members to ensure a safe, enjoyable
environment for children while engaged in any HGMS functions. Consider
putting a similar policy in writing for your society. For guidance on this issue, I
recommend all youth leaders within AFMS-affiliated societies read the excellent
and thorough materials entitled “Youth Protection” contained on the web site of
the Boy Scouts of America: http://scouting.org/Training/YouthProtection.aspx
Although the Boy Scouts organization has had a troubled record in this regard as
widely reported in the media, their advice is important and is well worth heading.
The safety of our youth is paramount, and any obvious or even suspected
abuse should be reported and dealt with through proper legal authorities.
A terrific source filled with other ideas on forming a youth group is Working With Young
People, by Mabel Kingdon Gross. This manual was prepared for and published by the
Eastern Federation of Mineralogical and Lapidary Societies. It’s an excellent guide to
starting a juniors’ program from scratch as well as a resource of activity tips. I’m not
sure if it is still available, but you can explore the Eastern Federation website to see about
getting a copy: https://efmls.org
“Swearing In” Your New Pebble Pups and Junior Members
A couple of people have asked me about any sort of “swearing-in” ceremony we might
have for new kids, similar to the Boy Scout Oath. We have no such pledge at the national
level, but we encourage local clubs to come up with their own if they hold ceremonies
welcoming new junior members. At a recent California Federation show, I saw an
interesting poem inscribed on a plate in a CFMS History display:
The house may bulge with rocks galore,
Some bought, some swapped, some found.
Yet off we go on each new jaunt,
Rock see; rock find; ROCK-HOUND!
11
Sounds like a perfectly good oath for a swearing-in ceremony to me! If you have other
suggestions, I welcome them!
Rewarding Kids for their Work: Awarding and Displaying Earned Badges
When & How to Award Badges
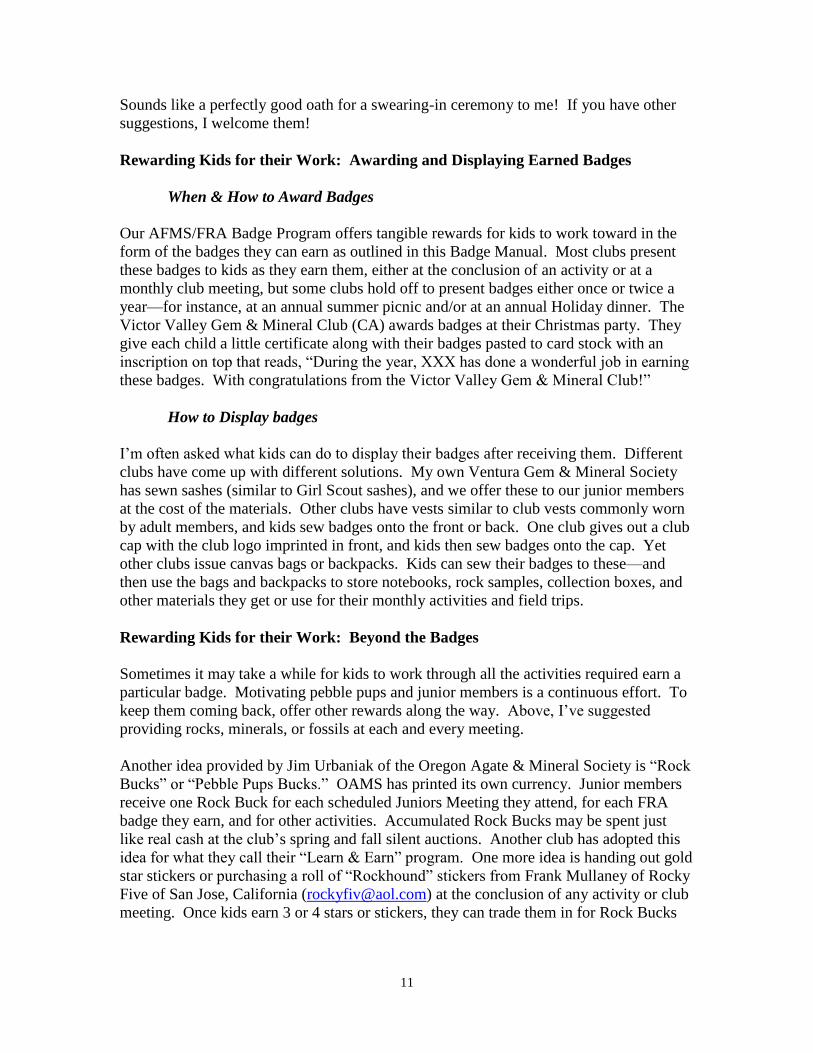
Our AFMS/FRA Badge Program offers tangible rewards for kids to work toward in the
form of the badges they can earn as outlined in this Badge Manual. Most clubs present
these badges to kids as they earn them, either at the conclusion of an activity or at a
monthly club meeting, but some clubs hold off to present badges either once or twice a
year—for instance, at an annual summer picnic and/or at an annual Holiday dinner. The
Victor Valley Gem & Mineral Club (CA) awards badges at their Christmas party. They
give each child a little certificate along with their badges pasted to card stock with an
inscription on top that reads, “During the year, XXX has done a wonderful job in earning
these badges. With congratulations from the Victor Valley Gem & Mineral Club!”
How to Display badges
I’m often asked what kids can do to display their badges after receiving them. Different
clubs have come up with different solutions. My own Ventura Gem & Mineral Society
has sewn sashes (similar to Girl Scout sashes), and we offer these to our junior members
at the cost of the materials. Other clubs have vests similar to club vests commonly worn
by adult members, and kids sew badges onto the front or back. One club gives out a club
cap with the club logo imprinted in front, and kids then sew badges onto the cap. Yet
other clubs issue canvas bags or backpacks. Kids can sew their badges to these—and
then use the bags and backpacks to store notebooks, rock samples, collection boxes, and
other materials they get or use for their monthly activities and field trips.
Rewarding Kids for their Work: Beyond the Badges
Sometimes it may take a while for kids to work through all the activities required earn a
particular badge. Motivating pebble pups and junior members is a continuous effort. To
keep them coming back, offer other rewards along the way. Above, I’ve suggested
providing rocks, minerals, or fossils at each and every meeting.
Another idea provided by Jim Urbaniak of the Oregon Agate & Mineral Society is “Rock
Bucks” or “Pebble Pups Bucks.” OAMS has printed its own currency. Junior members
receive one Rock Buck for each scheduled Juniors Meeting they attend, for each FRA
badge they earn, and for other activities. Accumulated Rock Bucks may be spent just
like real cash at the club’s spring and fall silent auctions. Another club has adopted this
idea for what they call their “Learn & Earn” program. One more idea is handing out gold
star stickers or purchasing a roll of “Rockhound” stickers from Frank Mullaney of Rocky
Five of San Jose, California ([email protected]) at the conclusion of any activity or club
meeting. Once kids earn 3 or 4 stars or stickers, they can trade them in for Rock Bucks

12
or for a mineral or fossil. Here are just a few ideas about how and when to award
“Pebble Pup Bucks” or gold stars or stickers:
for attending a monthly Pebble Pups or Juniors meeting or program
for attending a monthly club membership meeting
for helping with set-up and/or tear-down at a monthly program
for working a certain number of hours at a club show
for helping with clubhouse maintenance (small jobs like dusting or sweeping)
for giving a full presentation or a short show-and-tell at a membership meeting
for writing a newsletter article or sending in an original drawing or photo
for giving a show-and-tell presentation at school
for participating in a Science Fair
for entering a display in a county fair or other local gathering
for earning badges related to geology via Boy or Girl Scouts
Consider these ways and more in acknowledging and rewarding kids.
Helping the “Youngest Among Us”
As I’ve noted above, we have Pebble Pups and Junior Members in a wide range of ages,
and I’ve encouraged adapting our activities to match the age and ability of each child.
Beth Simmons and Susanne Peach of the Denver Gem & Mineral Guild have come up
with activities to provide members or siblings who may be too young to actively
participate and appreciate a certain activity. Rather than expect them to participate fully
(and possibly disrupt a gathering), give them their own table with a coloring activity
related to the topic at hand. One great source for coloring book pages is Diamond Dan
(www.diamonddanpublications.net). You can also obtain free coloring pages by
googling specific topics as follows: “gemstones, coloring pages,” “dinosaurs, coloring
pages,” “volcanoes, coloring pages,” “jewelry making, coloring pages,” “meteorites,
coloroing pages,” etc. Sometimes you get weird results, but I always find at least a few
good ones to print for a coloring table.
Joan Stoker of the Indian Mounds Rock & Mineral Club (Michigan) puts kids 5-years-old
and younger into a separate group. She notes their limited reading ability and attention
span doesn’t necessarily qualify them to earn badges. To encourage them and retain their
interest, she still awards each with our big blue Membership patch. But rather than give
them activity badges, she provides homemade laminated “I Love Rocks” badges for each
activity along with certificates. She calls this very young group her “Pebble Pup
Recruits.” Each may begin earning badges once they progress beyond Kindergarten age.
To provide further thoughts on working with especially young children, here is a
condensed version of an article I wrote for our AFMS Newsletter. “In my experience, we
normally deal with kids between second and fifth grade, and we treat them like mature
young scientists, eager to soak up imparted knowledge in the form of facts, figures, and
such. But I urge you to re-listen to the song Puff, the Magic Dragon. Rather than even

13
attempt to talk in dry detail about dinosaurs or fluorescent minerals, think of the song’s
message about the innocence and wonder and sense of limitless adventure in very young
minds. Instead of ‘dinosaurs,’ have fun exploring the time when Earth was ruled by
magical dragons. Instead of trying to explain the science behind fluorescence, use a
“sorcerer’s wand” (a fluorescent flashlight) to magically command bright colors from a
dull gray rock. Rather than demand attention, let kids roam, explore, touch, and ask
spontaneous questions. Does such an approach work? Will it leave a lasting impression?
I don’t know. But I did once get a nice hug from one little girl as the group departed.
Especially for kids at a very young age, is it not better to engage their imagination, to
spark their enthusiasm, and to key into their sense of wonder? Let’s wait until they hit
the jaded old age of, oh, say nine or ten before smoothering them with knowledge.
Meanwhile, keep it fun!”
The “Big Changes” in this Fifth Edition
While I have not added new badges, I have tweaked virtually every badge unit in this
Fifth Edition. Without getting into the weeds, here’s a snapshot of the big changes:
I’ve added pagination!!! (As some will say: “It’s about time!”)
I’ve added a Table of Contents coordinated to the pagination (“about time!”).
I’ve added a large number of photos to better illustrate activity instructions.
Many come from my own photos assembled over the years; others have been sent
by Youth Leaders of local clubs. Their wonderful photos have been appreciated
as much as their efforts in leading their clubs’ kids. Keep ’em coming!
I’ve gone through to ensure all suggested websites are still functional, and I have
replaced any that have gone by the wayside (a very frustrating endeavor).
My original intent was to add still more multimedia, such as YouTube videos, but
many of those seem to have short half-lives. Thus, rather than providing a link to
a specific YouTube video, here and there I suggest that you do a web search for
such a YouTube link (for instance, for “recipes” on growing crystals).
I’ve expanded our “Leadership Badge” into a badge labeled “Leadership &
Citizenship.” We have awarded very few Leadership Badges, but I hope the
expansion to include “Citizenship” will see us awarding many more of this
particular badge. It is one that I, personally, consider important to impart.
I’ve added a new section to our “Maps” badge about utilizing the Earth’s natural
magnetic field in “reading” a compass and how to make a “floating compass.”
I’ve added a new activity to each and every badge, namely, “WILD CARD: Do
Your Own Thing.” This provides flexibility for clubs to add activities that match
their kids and their local resources so as to allow for creativity and locally sourced
ideas. A “WILD CARD” can be a whole-club activity or an activity chosen by
each individual child. I welcome hearing about WILD CARD activities that we
might add to our next edition of this Badge Manual
Acknowledgements for this Fifth Edition
When I began developing this Badge Manual more than 16 years ago, my goal was to
bring out revised and expanded editions every four years. Hard to believe it is already

14
time for a Fifth Edition. Thank you to all who have helped with this latest iteration!
These include the following (with apologies to anyone I may have inadvertently
overlooked):
Multiple clubs have sent photos of their kids engaged in activities, and I have included
many. Thank you to each and every one, and keep those photos coming! Dennis
Gertenbach of the Flatirons Mineral Club (Colorado) has been great in keeping in touch
and offering suggestions and tweaks to activities throughout the Manual. In particular, it
is thanks to Dennis that I have added the “WILD CARD: Do Your Own Thing” option to
each and every one of our badges. He also provided a link from Craig Hazelton on how
to produce a simple wire-wrap project easy for kids to do (see unit 4.2) and to YouTube
videos I now reference for Badge 3 on fossils. Mike Havstad, Conejo (CA) Gem &
Mineral Club, provided suggestions on a meteorite demo for Earth in Space. Joyce
DeGarmo of the Victor Valley Gem & Mineral Club (CA) has provided a wonderful idea
for how to make awarding badges a special occasion. Elizabeth Triano has helped in
alerting me to necessary updates with the Diamond Dan contact info. Ron Brooks
(Huachuca Mineral & Gem Club, AZ) suggested “Learn & Earn” ideas toward
encouraging kids to work toward obtaining Rockhound status. Beth Simmons and
Susanne Peach of the Denver Gem & Mineral Guild (Colorado) and Joan Stoker of the
Indian Mounds Rock & Mineral Club (Michigan) provided suggestions on working with
very young members of our societies, and Joan also provided materials I’ve incorporated
into the Gold Panning and the World in Miniature badges. Mary Beatty of the Santa
Lucia Club (CA) offered advice on how to display earned badges on backpacks they
purchased at reasonable prices via Amazon. Lynn Varon, newsletter editor of the
Ventura (California) Gem & Mineral Society came up with the idea for holding a
“writer’s workshop” with club kids to help them generate articles. Angela and Luther
Brown (Ventura Gem & Mineral Society, California) introduced me to the Maps activity
on crafting a “floating compass.” “Bench Tips by Brad Smith” provided info for 16.8 on
how to craft a jerry-rigged microscope with a loupe and a cell phone camera. Annette
Nelson (West Seattle Rock Club, WA) alerted me to a need to replace a defunct website
for unit 1.5 on crafting 3-D models of mineral structures. Christopher Picou of the Gem
& Mineral Society of Louisiana introduced me to the “Diamond Dog Mine” activity now
in unit 1.10. Susanne Peach (Denver Gem & Mineral Guild, CO) suggested an easy dino
Christmas tree ornament idea and Dick Wills (Knoxville, TN) shared his website on how
to hunt for dinosaur fossils for unit 3.7. Lisa Batchelder-Hetrick (Ventura Gem &
Mineral Society, CA) suggested the “dinosaur length” activity for unit 3.7.
To one and all who have taken an active interest in using, improving, and expanding the
range of our Badge Program: my sincere gratitude and thanks on behalf of all the kids
who stand to benefit. More ideas are welcomed as we now embark on our Sixth Edition!
In Closing…
When all is said and done and I am no longer around to write the next edition while life
moves on, as it does for us all, I hope this program will have accomplished two things:
15
1) support the youth leaders at local Federation-affiliated societies by giving them a
variety of proven, organized activities that offer their kids challenging educational
and artistic opportunities on an on-going basis, and
2) provide motivation for pebble pups and junior members to work toward earning
tangible rewards and recognition as they learn satisfying lifelong skills and
knowledge along with memorable friendships while—as always—having fun!
Jim Brace-Thompson, AFMS Juniors Program Chair
July 2004, updated Feb. 2008, Mar. 2012, Aug. 2016, Nov. 2020

16
HOW TO USE THIS MANUAL
1. How it Works
Welcome to the AFMS Future Rockhounds of America! We wish to help you as the
youth leader of your local club by providing the series of guided activities that follow.
We offer a total of 20 badges. To earn a badge, kids must complete at least 3 of the
designated activities for that badge. Talk with the kids in your club and involve them in
deciding which activities to do. In addition, we encourage you to adapt the level of each
activity to best match the ages of the kids in your club. You don’t need to follow the
activities exactly as laid out; rather, you should feel free to improvise to make any
activity as accessible as possible for the kids with whom you’re working. It’s the concept
that matters! As long as you are helping your kids master a general concept, we’re not
overly concerned about the specific steps or techniques employed along the way.
Sheets are provided where kids can check off the activities as they complete them. Once
3 or more are checked, both the kids and their youth leaders should sign and date the
checklist and the youth leader should send it to the AFMS Juniors Program Chair (Jim
Brace-Thompson, 7319 Eisenhower Street, Ventura, CA 93003) to receive the badge to
award to youth members during club meetings. This information can also be phoned,
(805) 659-3577, or emailed ([email protected]) to speed processing time.
There is also a master checklist following this introduction that kids can use to keep track
of their overall progress. Once they’ve earned 6 badges, they may receive a Rockhound
badge, signifying a graduation from “pebble pup” to official “rockhound.” Juniors
earning all 20 badges receive an AFMS cloisonné pin and graduate to “Rock Star” status.
We suggest awarding these in a special ceremony at your club, perhaps at the end of the
year when you hold your installation of new officers and/or at mid-year, perhaps during a
club picnic or at a club show. It is up to the local juniors leader to keep track and notify
Jim when a junior member has achieved either Rockhound or Rock Star status.
2. The Structure of This Manual
In the pages that follow the master checklist, for each badge you’ll find:
a) a brief introduction/overview followed by a list of activities and their basic
requirements (we encourage you to copy and distribute this to your kids);
b) an activity checklist for signature by kids and leaders to send to the AFMS Juniors
Program Chair to receive badges (again, you ought to copy and distribute this to your
kids); and
c) back-up resources for youth leaders (some is background material for your own
information; some is to share with your kids to help them with their projects).

17
Achievement Checklist
To keep track of your achievements, put a checkmark in the boxes next to each activity.
To earn a badge, you should complete at least 3 activities for each category and then have
your leader send a signed notice to the AFMS Juniors Activities Chair. You become a
“Rockhound” after earning 6 badges and a “Rock Star” if earning all 20!
1. Rocks & Minerals Date badge earned:____________
□ 1.1 Learning the characteristics of minerals.
□ 1.2 Making and using a mineral ID kit.
□ 1.3 Building a mineral collection.
□ 1.4 The three rock types.
□ 1.5 Crystal shapes.
□ 1.6 Growing crystals and making geodes.
□ 1.7 State rocks, minerals, and gemstones.
□ 1.8 The elements.
□ 1.9 Name that mineral!
□ 1.10 WILD CARD: Do your own thing!
2. Earth Resources Date badge earned:____________
□ 2.1 Everyday uses of rocks and minerals.
□ 2.2 Minerals in the home.
□ 2.3 Collecting everyday objects and the minerals that went into them.
□ 2.4 Field trip to a mine or quarry.
□ 2.5 Field trip to a hardware store.
□ 2.6 Careers in the earth sciences.
□ 2.7 WILD CARD: Do your own thing!
3. Fossils Date badge earned:____________
□ 3.1 The geological time chart.
□ 3.2 Types of fossilization and making or excavating fossils.
□ 3.3 The forms of life.
□ 3.4 Collecting fossils.
□ 3.5 A fossil-collecting field trip.
□ 3.6 Your state fossil.
□ 3.7 Dinosaurs.
□ 3.8 Fossil and dinosaur names.
□ 3.9 WILD CARD: Do your own thing!
4. Lapidary Arts Date badge earned:____________
□ 4.1 Learning about lapidary rocks.
□ 4.2 Choosing a lapidary project.
□ 4.3 *Workshop safety and maintenance* (required to earn this badge).
□ 4.4 *Completing a lapidary project* (required to earn this badge).
□ 4.5 Sharing your lapidary project.

18
□ 4.6 Gemstone minerals.
□ 4.7 WILD CARD: Do your own thing!
5. Collecting Date badge earned:____________
□ 5.1 Building a collection.
□ 5.2 Cataloging and labeling your collection.
□ 5.3 Storing a collection.
□ 5.4 Displaying your collection.
□ 5.5 Reporting about your collection.
□ 5.6 WILD CARD: Do your own thing!
6. Showmanship Date badge earned:____________
□ 6.1 Techniques for effective displays.
□ 6.2 Holding a workshop on display ideas.
□ 6.3 Observing and evaluating displays.
□ 6.4 *Making your own public display* (required to earn this badge).
□ 6.5 Entering competition.
□ 6.6 WILD CARD: Do your own thing!
7. Communication Date badge earned:____________
□ 7.1 Oral report.
□ 7.2 Written report or newsletter article.
□ 7.3 Bulletin board or poster board displays.
□ 7.4 Corresponding with experts.
□ 7.5 Holding a symposium.
□ 7.6 Writing a field trip guide.
□ 7.7 WILD CARD: Do your own thing!
8. Field Trips Date badge earned:____________
□ 8.1 *Field trip etiquette, safety, & AFMS Code of Ethics* (required to earn this badge).
□ 8.2 Field trip planning.
□ 8.3 *Taking a field trip* (required to earn this badge).
□ 8.4 Record keeping.
□ 8.5 The indoor and virtual field trip.
□ 8.6 WILD CARD: Do your own thing!
9. Leadership & Citizenship Date badge earned:____________
□ 9.1 Becoming a youth officer.
□ 9.2 Organizing a group display.
□ 9.3 Leading a show-and-tell session or presentation.
□ 9.4 Planning and leading a field trip.
□ 9.5 Overseeing a newsletter column or an entire youth newsletter.
□ 9.6 Managing a youth activity booth at a local gem show.
□ 9.7 Mentoring.
□ 9.8 Recruiting.
□ 9.9 Fundraising.

19
□ 9.10 Citizenship and civic engagement
□ 9.11 WILD CARD: Do your own thing!
10. Earth Processes Date badge earned:____________
□ 10.1 What is a rock?
□ 10.2 Plate tectonics and the rock cycle.
□ 10.3 Igneous rocks.
□ 10.4 Sedimentary rocks.
□ 10.5 Metamorphic rocks.
□ 10.6 Making 3D models of geologic features related to plate tectonics.
□ 10.7 Earthquakes.
□ 10.8 WILD CARD: Do your own thing!
11. Earth in Space Date badge earned:____________
□ 11.1 Modeling the solar system.
□ 11.2 Learning about visitors from space.
□ 11.3 Effects of meteorites and famous craters.
□ 11.4 More fun measuring impact cratering.
□ 11.5 Collecting meteorites and tektites.
□ 11.6 Collecting meteorite dust.
□ 11.7 WILD CARD: Do your own thing!
12. Gold Panning & Prospecting Date badge earned:____________
□ 12.1 Gold as a mineral.
□ 12.2 Uses of gold.
□ 12.3 Gold throughout history.
□ 12.4 Gold resources in your own state or region.
□ 12.5 Field trip to a gold mine.
□ 12.6 Panning for gold.
□ 12.7 Metal detecting for gold, coins, and other artifacts.
□ 12.8 WILD CARD: Do your own thing!
13. Gemstone Lore & Legend Date badge earned:____________
□ 13.1 Anniversary stones.
□ 13.2 Birthstones and the Zodiac.
□ 13.3 Fabled gemstones.
□ 13.4 Gems in religion.
□ 13.5 Mysticism and minerals.
□ 13.6 WILD CARD: Do your own thing!
14. Stone Age Tools & Art Date badge earned:____________
□ 14.1 Rocks and minerals used as tools.
□ 14.2 Making stone tools.
□ 14.3 Making stone tools and art from clay.
□ 14.4 Making rock art.
□ 14.5 Recording and interpreting rock art.

20
□ 14.6 Visiting a museum or Native American cultural center.
□ 14.7 WILD CARD: Do your own thing!
15. Rocking on the Computer Date badge earned:____________
□ 15.1 *Exploring the web safely and securely* (required to earn this badge).
□ 15.2 Reporting on favorite websites.
□ 15.3 Making presentations with the computer.
□ 15.4 Cataloging your collection electronically.
□ 15.5 Maps and GPS to find your way.
□ 15.6 Joining an online community and holding online meetings.
□ 15.7 WILD CARD: Do your own thing!
16. The World in Miniature Date badge earned:____________
□ 16.1 Collecting, preparing, and storing miniature minerals.
□ 16.2 Collecting, preparing, and storing thumbnail minerals.
□ 16.3 Collecting, preparing, and storing microminerals.
□ 16.4 Collecting, preparing, and storing miniature fossils.
□ 16.5 Collecting, preparing, and storing thumbnail fossils.
□ 16.6 Collecting, preparing, and storing microfossils.
□ 16.7 Collecting and classifying sand.
□ 16.8 Drawing or photographing microminerals, microfossils, or sand.
□ 16.9 WILD CARD: Do your own thing!
17. Special Effects Date badge earned:____________
□ 17.1 Magnetism.
□ 17.2 Triboluminescence.
□ 17.3 Birefringence, or double refraction.
□ 17.4 Chatoyancy: cat’s eye and asterism.
□ 17.5 Natural fiber optics, or “TV stone.”
□ 17.6 Phantoms and inclusions.
□ 17.7 Other special effects.
□ 17.8 The amazing mineral magic show!
□ 17.9 WILD CARD: Do your own thing!
18. Fluorescent Minerals Date badge earned:____________
□ 18.1 *What is “fluorescence” and why do some minerals fluoresce?* (required)
□ 18.2 Famous fluorescent mineral localities.
□ 18.3 Collecting fluorescent minerals.
□ 18.4 Creating a fluorescent display case and exhibiting your collection.
□ 18.5 *Safety with fluorescent lamps.* (required to earn this badge)
□ 18.6 Special effects of some fluorescent minerals.
□ 18.7 Making fluorescent minerals with glow-in-the-dark paints.
□ 18.8 Finding the fluorescent mineral in the “Magic Cave”
□ 18.9 WILD CARD: Do your own thing!
21
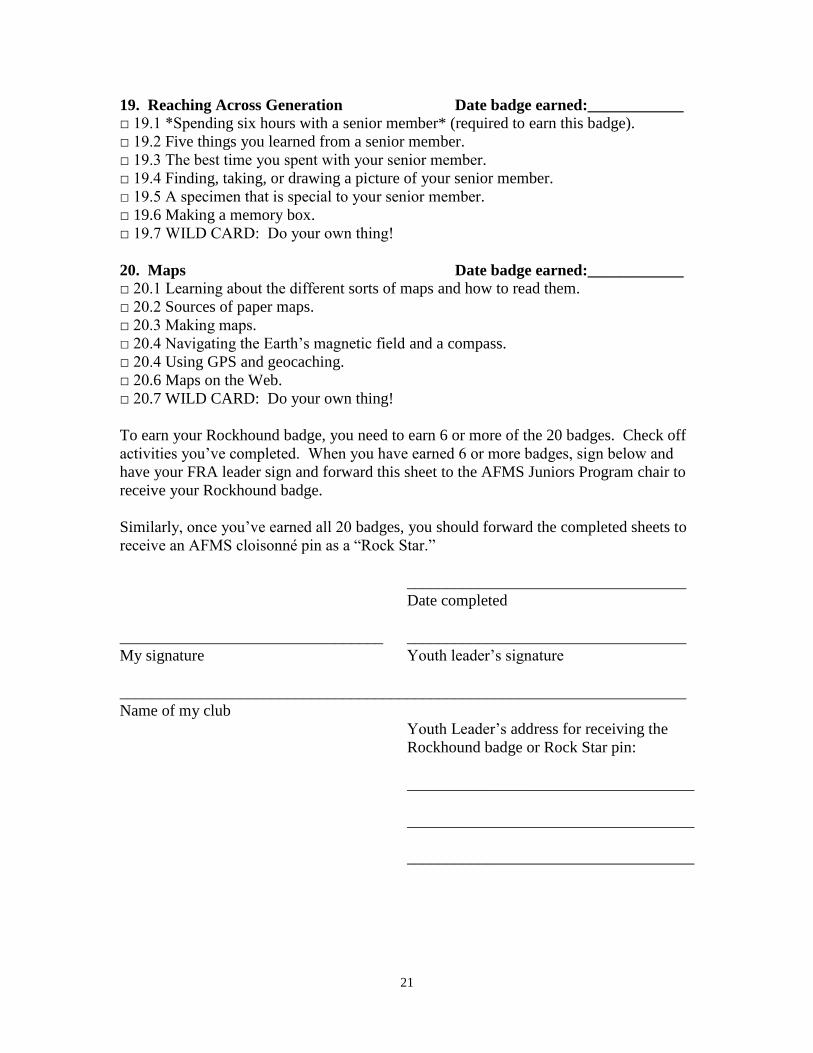
19. Reaching Across Generation Date badge earned:____________
□ 19.1 *Spending six hours with a senior member* (required to earn this badge).
□ 19.2 Five things you learned from a senior member.
□ 19.3 The best time you spent with your senior member.
□ 19.4 Finding, taking, or drawing a picture of your senior member.
□ 19.5 A specimen that is special to your senior member.
□ 19.6 Making a memory box.
□ 19.7 WILD CARD: Do your own thing!
20. Maps Date badge earned:____________
□ 20.1 Learning about the different sorts of maps and how to read them.
□ 20.2 Sources of paper maps.
□ 20.3 Making maps.
□ 20.4 Navigating the Earth’s magnetic field and a compass.
□ 20.4 Using GPS and geocaching.
□ 20.6 Maps on the Web.
□ 20.7 WILD CARD: Do your own thing!
To earn your Rockhound badge, you need to earn 6 or more of the 20 badges. Check off
activities you’ve completed. When you have earned 6 or more badges, sign below and
have your FRA leader sign and forward this sheet to the AFMS Juniors Program chair to
receive your Rockhound badge.
Similarly, once you’ve earned all 20 badges, you should forward the completed sheets to
receive an AFMS cloisonné pin as a “Rock Star.”
___________________________________
Date completed
_________________________________ ___________________________________
My signature Youth leader’s signature
_______________________________________________________________________
Name of my club
Youth Leader’s address for receiving the
Rockhound badge or Rock Star pin:
____________________________________
____________________________________
____________________________________

22
23
Future Rockhounds of America Membership Patch
All kids belonging to clubs affiliated with Future Rockhounds of America automatically
receive the FRA Membership Patch. The youth leader of the local FRA-affiliated club
should contact the Juniors Program Chair of the AFMS to receive these patches. Because
our budget is modest and we hope to maintain this program cost-free to local clubs and
individual kids, our annual supplies are limited. Thus, we ask that local youth leaders
help us keep this program free by being judicious and only requesting necessary
minimum quantities on an as-needed basis for the kids actually signed up in your club.
Welcome to Future Rockhouds of America!
24
1. Rocks and Minerals
To earn this badge, you should demonstrate how to identify many of the most common
minerals and learn the basic rock types. Other activities you might choose involve
learning about crystals and growing crystals and your State Rock, State Mineral, or State
Gemstone. This unit also helps you start building, curating, and maintaining your own
rock and mineral collection.
Activity 1.1: Learning the characteristics of minerals.
Buy a book or pick one up at the library or turn to websites to learn all about minerals.
Make a chart of common minerals and their characteristics in terms of things such as
color, streak, cleavage, fracture, luster, hardness, crystal shape, and/or weight (specific
gravity). In your chart, list various common minerals down the first column, then have
separate columns to note characteristics of each mineral.
Activity 1.2: Making and using a mineral ID kit.
Make a mineral ID kit that will allow you to demonstrate familiarity with characteristics
of minerals such as color, streak, hardness, relative weight, reaction to a weak acid
solution such as vinegar, etc. Using your mineral ID kit, along with a chart of mineral
characteristics, successfully identify at least a half dozen minerals presented by your
youth leader.
Activity 1.3: Building a mineral collection.
Build a collection of 10 to 20 minerals. Some collectors focus on a single mineral with
specimens from around the world to show different forms. A quartz collection might
include amethyst from Brazil, clear crystals from Arkansas, smoky quartz from Pikes
Peak, cairngorm from Scotland, and rose quartz from South Dakota, California, or
Switzerland. Other collectors concentrate on a local area and collect all the minerals that
might be found in one quarry, city, county, or state. Still others focus only on self-
collected minerals. Most of us opt for variety and collect a little bit of everything.
Whichever form you choose for your collection, be sure to follow the basics of good
curation: label each specimen and keep a catalog with key information about what it is
and where it came from. (See Badge 5: Collecting.)
Activity 1.4: The three rock types.
Learn about and describe the three basic rock types (igneous, sedimentary, and
metamorphic) and build a collection with samples of each type. (See Badge 10: Earth
Processes.)
Activity 1.5: Crystal shapes.
Draw crystal shapes and/or make crystal models with blocks of styrofoam or with
styrofoam balls and dowels, with construction paper or cardboard or other materials, or
with a 3D printer, which you can sometimes find in the “makerspace” of a public library.
Some common crystal shapes are cubic, hexagonal, orthorhombic, monoclinic, triclinic,
tetragonal, and trigonal. Construct as many different varieties as you can.

25
Activity 1.6: Growing crystals and making geodes.
Using a material that dissolves in water like sugar, table salt, borax, or Epsom salts, grow
different forms of crystals, create an “eggshell geode,” and/or craft a stalagmite.
Activity 1.7: State rocks, minerals, and gemstones.
Just as each state has its own flag, many have a State Mineral, a State Gemstone, and/or a
State Rock. Find out what your state rock, mineral, or gemstone is and write a report
about it for your club newsletter or talk about it at one of your club meeting. If your state
doesn’t have an official mineral or rock, write to your governor and state legislature to
nominate one!
Activity 1.8: The elements.
Learn what an element is and about the periodic table of chemical elements and how each
element is classified into different groups (transition metals, halogens, etc.). Then pick
one of the following activities to complete: 1) pick an element and write about its traits
and properties; 2) write about what makes each group of elements different than the
others and the properties of the elements in that group; or 3) make a collection of “native
element minerals.” If you choose to make a collection, be sure to follow the basics of
good curation. Label each specimen and keep a catalog with information about what it is
and where it came from. Identify on your label what the atomic number and chemical
symbol are for each native element mineral in your collection. (See Badge 5: Collecting)
Activity 1.9: Name that mineral!
With your youth leader serving as the moderator, participate with fellow club members in
a panel like a TV game show. The moderator will describe characteristics of rocks and
minerals and their uses. The participant who can name the most correctly wins! To
prepare, review Activity 1.1 on the characteristic of minerals and Activity 2.1 on
everyday uses of minerals.
Activity 1.10: WILD CARD: Do your own thing!
Do you have an idea for learning about rocks and minerals that isn’t included in this
manual? If so, do your own thing! When your Youth Leader sends in your badge
request, let us know what you did as a WILD CARD activity. Who knows? Maybe your
idea will be included in the next edition of the Badge Manual!

26
1. Rocks & Minerals
□ 1.1 Learning the characteristics of minerals
□ 1.2 Making and using a mineral ID kit
□ 1.3 Building a mineral collection
□ 1.4 The three rock types
□ 1.5 Crystal shapes
□ 1.6 Growing crystals and making geodes
□ 1.7 State rocks, minerals, and gemstones
□ 1.8 The elements
□ 1.9 Name that mineral!
□ 1.10 WILD CARD: Do your own thing!
To earn your Rocks & Minerals badge, you need to complete at least 3 of the 10
activities. Check off all the activities you’ve completed. When you have earned your
badge, sign below and have your FRA leader sign and forward this sheet to the AFMS
Juniors Program chair.
___________________________________
Date completed
_________________________________ ___________________________________
My signature Youth leader’s signature
_______________________________________________________________________
Name of my club
Leader’s preferred mailing address for
receiving badge:
____________________________________
____________________________________
____________________________________
27
Back-up page 1.1: Learning the characteristics of minerals.
Definition: A mineral is a solid chemical element or compound which:
1) occurs naturally;
2) is inorganic (not a product of biological or life forces);
3) has a definite chemical composition; and
4) has an orderly atomic structure often expressed in a crystal form.
For instance, graphite and diamonds (made of carbon) are considered minerals but coal
(also made of carbon) is not because coal is an organic product that formed from fossil
remains of plants, or once-living organisms.
Kids should learn to identify several common minerals using simple tests of physical
properties such as color, streak, luster, crystal shape, cleavage, fracture, hardness,
chemical reactivity, and/or weight (specific gravity). To help them, you should direct
them to a rock and mineral guidebook and encourage them to buy at least one for their
own reference. Many good ones are available to purchase at all levels of pricing or to
borrow from a library. Following is a sampling from the seemingly endless supply.
Blackburn & Dennen, Encyclopedia of Mineral Names (1997)
Bonewitz, Smithsonian Rock & Gem (2005)
Chaline, Fifty Minerals that Changed the Course of History (2012)
Chesterman, National Audubon Society Field Guide to North American Rocks &
Minerals (1978)
Cook, Minerals & Gemstones: 300 of the Earth’s Natural Treasures (2007)
Eid & Viard, Minerals of the World (1995)
Farndon, The Complete Guide to Rocks & Minerals (2006)
Farndon & Parker, The Complete Illustrated Guide to Minerals, Rocks & Fossils
of the World (2012)
Fuller, Pockets Rocks & Minerals (2003)
Hurlbut, Dana’s Manual of Mineralogy (1971—or any recent edition or reprint)
Jackson, What’s that Rock or Mineral? A Beginner’s Guide (2014)
Korbel & Novák, The Complete Encyclopedia of Minerals (1999)
Lagomarsino, A Pocket Guide to Rocks & Minerals (2008)
Peck, Mineral Identification: A Practical Guide for the Amateur Mineralogist
(2007)
Pellant, The Complete Book of Rocks & Minerals (1995)
Pough, Rocks & Minerals: Peterson Field Guide (1996)
Roots, et al., The Nature Companion’s Rocks, Fossil & Dinosaurs (2002)
Schuman, Handbook of Rocks, Minerals, & Gemstones (1993)
Simon & Schuster’s Guide to Rocks & Minerals (1978)
Whitman Publishing, A Guide Book of Minerals, Rocks, & Gemstones (2008)
Zim & Shaffer, Rocks, Gems, & Minerals: A Golden Guide, Revised (2001)
Just a sampling of the many guidebooks available on mineral identification.

28
The “official” book for use in naming and labeling minerals entered into Federation-
sponsored competitions is Fleischer’s Glossary of Mineral Species (from The
Mineralogical Record, www.mineralogicalrecord.com). For one-stop shopping,
distributor Gem Guides Book Company (www.gemguidesbooks.com) offers a whole
range of books on all topics rock-related, as does the annual Lapidary Catalog of
Kingsley North, Inc. (www.kingsleynorth.com).
Farndon’s e.guides Rock and Mineral (2005) combines the traditional print content of a
book with links to websites offering interactive multimedia, games and quizzes, and
downloadable images. Since I’ve now transitioned to websites, any number have sprung
up to help with mineral ID. A fun one is “Yup…Rocks,” www.yuprocks.com. Another
geared specifically to kids is “Mineralogy4Kids” at www.mineralogy4kids.org/mineral-
identification. In addition to providing an interactive way for kids to identify a mineral
by going step-by-step through a series of questions, this website has sections on crystals,
the rock cycle, uses of minerals, etc. Another site geared to kids and to interactive
learning is “The Learning Zone” from the Oxford University Museum of Natural History:
www.oum.ox.ac.uk/thezone/minerals/. “Mineralogy Database,” www.webmineral.com
hosts a thorough compendium of 4,300 minerals with all manner of info. Finally, the
mineral identification website that has become a standby for rockhounds young and old is
the “Mineral Database,” www.mindat.org. Guide your kids to these and other websites
when working on Badge 15: Rocking on the Computer.
Here are some basics of mineral identification:
Color can be the most striking aspect of a mineral, and some can be identified by
color. For instance, malachite is always green, azurite is blue, realgar is red. But
color alone is usually not enough. For example, quartz occurs in many colors caused
by minute impurities and may be clear, cloudy (milky quartz), yellow-orange
(citrine), purple (amethyst), pink (rose quartz), a sparkly green (aventurine), etc.
Streak is the color left when a mineral is scratched on an unglazed porcelain tile
plate. This can surprise you in that it is sometimes very different from the mineral’s
outward color. For instance, silvery gray hematite leaves a red streak and golden
pyrite a green-black streak.
Luster is a reflective property of mineral surfaces. The way a mineral reflects light
may make it look hard and shiny or dull or waxy. A mineral may be metallic (pyrite),
adamantine (sparkling like a diamond), vitreous or glassy (quartz), silky (gypsum),
waxy (jade), resinous, pearly, earthy, greasy, etc.
Crystal shape is the characteristic appearance of a crystal, usually determined by the
underlying atomic structure. Crystal shape may be cubic (pyrite or galena),
octahedral (fluorite), rhombohedral (calcite), hexagonal (quartz), etc. For more on
crystal shapes, see Back-up page 1.5: Crystal Shapes.
Cleavage is the tendency of some minerals to split or break along characteristic
planes corresponding to directions of minimum cohesion. For instance, mica cleaves
in thin sheets, a form known as basal cleavage. Other common forms of cleavage
include rhombohedral (calcite), cubic (galena), and octahedral (fluorite).

29
Fracture is the manner in which a rock or mineral breaks if it doesn’t exhibit
cleavage. For instance, a break may be conchoidal (curved like a clam shell, as in
breaks on obsidian), uneven (with a rough surface, e.g., lepidolite), or fibrous
(splintery, e.g., ulexite).
Hardness is the resistance of a mineral to scratching. The Mohs’ scale is a relative
measure of this property, comparing the hardness of ten different minerals from
softest to hardest: 1 – talc, 2 – gypsum, 3 – calcite, 4 – fluorite, 5 – apatite, 6 –
feldspar, 7 – quartz, 8 – topaz, 9 – corundum, 10 – diamond. To arrive at
approximate hardness, you can use some common tools: a fingernail is hardness 2.5,
a penny is 3, a pocketknife blade or steel nail is 5, glass is 5.5, a steel file is 6.5.
Chemical reactivity. Some minerals will chemically react. For instance, a good test
for carbonates (calcite, limestone, dolomite, etc.) is a drop of acetic acid, or vinegar.
If it fizzes, it contains calcium.
Weight, or Specific Gravity. To determine the weight, or specific gravity, of a
mineral requires special equipment. Specific gravity (SG) is technically defined as
the density of a mineral compared to the density of water. The light mineral borax
has SG 1.7, whereas the heavy mineral gold has SG 19.3. For most purposes, kids
can just judge the relative weight, or heft, of a mineral, whether heavy, light, or in-
between.
Other. Some minerals may be identified by other tests, including magnetism (use a
magnet), fluorescence (use a UV light), radioactivity (use a Geiger counter—and
beware of these minerals!), or even taste (for instance, halite, or salt—although
licking most minerals is not especially recommended!).
Darryl Powell (aka “Diamond Dan”) has prepared a wonderful variety of mineral
identification resources you may wish to purchase to use with your club’s kids in learning
about minerals. These include The World of Minerals & Crystals (a coloring book
introducing minerals from A to Z, with commentary on physical properties, forms, and
uses in everyday life) and his Mini Miners Monthly, the only monthly periodical on
minerals aimed specifically at and for kids. These resources and others may be
purchased from Diamond Dan Publications, c/o Darryl Powell, phone 585-278-3047,
email [email protected], www.diamonddanpublications.net.
For those who like to play games that also educate, check around for the Smithsonian
Institution’s What Do You Know About Rocks, Minerals, and Gems? Quiz Deck. It’s a
deck of cards, each with a colorful photograph and question on one side and answers on
the back. It’s published by Pomegranate Communications, Inc., www.pomegranate.com.
The following tables provide “cheat-sheets” on a variety of minerals and their
characteristics although it falls far short of the nearly 5,500 identified mineral species!
I’ve provided a blank table you can give to kids to fill in with different minerals they
wish to test. To go alongside these tables, check “The Image,” www.theimage.com.
There, you will find similar tables with properties of nearly 200 minerals and gemstones
and 1,700 photos to show kids all manner of minerals in all their diversity and variety.

30
Back-u
p p
age 1
.1:
Tab
le f
or
Min
era
l Id
entificatio
n
WE
IGH
T
3.1
-3.3
3.8
4.4
2.6
-2.9
1.7
5
2.7
2-2
.3
8-8
.2
8.9
4
3.5
2.8
-2.9
2.5
-2.7
SH
AP
E
Hexagonal
Mo
noclin
ic
Ort
horh
om
bic
Trig
onal /
hexagonal
Mo
noclin
ic
Isom
etr
ic
(rare
)
Trig
onal /
hexagonal
Mo
noclin
ic
Hexagonal
Isom
etr
ic /
Cubic
Trig
onal /
hexagonal
Isom
etr
ic /
cubic
Hexagonal
Mo
no-
or
tric
linic
HA
RD
NE
SS
5
3.5
-4
3-3
.5
7-8
2-2
.5
3
3
2-4
2-2
.5
2.5
-3
9
10
3.5
-4
6-6
.5
LU
ST
ER
Vitre
ous,
gre
asy
Eart
hy/d
ull
Gla
ssy/p
early
Gla
ssy
Vitre
ous,
dull,
resin
ous
Me
talli
c
Gla
ssy
Gla
ssy o
r
waxy
Eart
hy
Me
talli
c
Gla
ssy
Adam
antin
e t
o
gre
asy
Vitre
ous
Gla
ssy o
r
pearly
FR
AC
TU
RE
Conchoid
al
Conchoid
al
Uneven
Conchoid
al
Conchoid
al
Uneven
Conchoid
al
Conchoid
al
Uneven
Hackly
Conchoid
al
Conchoid
al
Conchoid
al &
uneven
Uneven
CL
EA
VA
GE
Basal,
imperf
ect
Perf
ect
Basal, p
erf
ect
Basal, p
oor
Perf
ect
None
Rhom
bohedra
l
perf
ect
None
Perf
ect
in 3
directio
ns
None
None;
basal
part
ing
Perf
ect, 4
directio
ns
Rhom
bohedra
l
2 p
erf
ect
cle
avages
ST
RE
AK
White
Lig
ht
blu
e
White
White o
r
colo
rle
ss
White
Gra
y-b
lack
White
White
Red-b
row
n
Shin
y b
row
n
White
White
White
White
CO
LO
R
Bro
wn, yello
w,
gre
en
Blu
e
Lig
ht
blu
e, bro
wn,
yello
w
Cle
ar,
gre
en,
blu
e,
gold
en
Cle
ar,
white
Bro
nze
Cle
ar,
white,
gre
en,
ora
nge,
yello
w,
blu
e
Sky b
lue,
gre
en
Red,
red-b
row
n
Copper
Red (
ruby),
Blu
e , e
tc.
Cle
ar
& m
any c
olo
rs
White, gra
y, pin
k
White, yello
w,
pin
k,
gra
y,
gre
en
MIN
ER
AL
Apatite
Azurite
Barite
Bery
l
Bora
x
Born
ite
Calc
ite
Chry
socolla
Cin
nabar
Copper
Coru
ndum
Dia
mo
nd
Dolo
mite
Fe
ldspar

31
Back-u
p p
age 1
.1:
Tab
le f
or
Min
era
l Id
entificatio
n (c
ont.)
WE
IGH
T
3.1
7.4
-7.6
3.5
-4.3
15.6
-19.3
1.9
-2.3
2.3
2.1
-2.2
4.9
-5.3
3.2
-3.5
3.5
-3.7
4.9
-5.2
3.9
-4
2.8
3.3
-4.3
SH
AP
E
Cubic
or
isom
etr
ic
Cubic
Isom
etr
ic
Isom
etr
ic /
cubic
Trig
onal /
hexagonal
Mo
noclin
ic
Isom
etr
ic /
cubic
Trig
onal /
hexagonal
Mo
noclin
ic
Triclin
ic
Isom
etr
ic /
cubic
Mo
noclin
ic
(rare
)
Mo
noclin
ic
Ort
horh
om
bic
HA
RD
NE
SS
4
2.5
6.5
-7.5
2.5
-3
1-2
2
2-2
.5
5.5
-6.5
6.5
-7
5.5
-7
5.5
-6.5
3-4
2.2
-3
6.5
-7
LU
ST
ER
Gla
ssy
Me
talli
c
Gla
ssy
Me
talli
c
Shin
y, m
eta
llic
Pearly, gla
ssy
Gla
ssy
Me
talli
c
Waxy o
r
pearly
Vitre
ous
Meta
llic
Silk
y,
dull
Pearly
Gla
ssy,
vitre
ous
FR
AC
TU
RE
Uneven,
subconchoid
al
Conchoid
al
Conchoid
al
Hackly
Fib
rous
Conchoid
al or
splin
tery
Conchoid
al
Uneven
Uneven,
difficult
Splin
tery
Sem
i-
conchoid
al
Conchoid
al or
splin
tery
Uneven
Conchoid
al
CL
EA
VA
GE
Octa
hedra
l,
perf
ect
Cubic
, perf
ect
None
None
Basal, p
erf
ect
Perf
ect
Cubic
, perf
ect
None
None
Good,
two
directio
ns
None
Perf
ect, o
ne
directio
n
Basal, p
erf
ect
Indis
tin
ct
ST
RE
AK
White
Gra
y
White
Yello
w-g
old
en
Gra
y-b
lack
White
White
Red-b
row
n
White
White
Bla
ck
Lig
ht
gre
en
Gra
y-b
row
n o
r
white
White
CO
LO
R
Cle
ar,
yello
w,
gre
en,
blu
e
Silv
er-
gra
y
Red,
gre
en,
bla
ck,
bro
wn
Gold
en
Bla
ck, dark
gra
y
White, yello
w,
bro
wn,
cle
ar
White, pin
k,
blu
e,
cle
ar
Bla
ck, ste
el-gra
y
Gre
en,
white, bla
ck,
purp
le
Blu
e to w
hite
Bla
ck
Gre
en
Bla
ck-b
row
n, cle
ar
Gre
en-y
ello
w,
bro
wn
MIN
ER
AL
Flu
orite
Gale
na
Garn
et
Gold
Gra
phite
Gypsum
Halit
e
Hem
atite
Jade
Kyanite
Ma
gnetite
Ma
lachite
Mic
a
Oliv
ine

32
Back-u
p p
age 1
.1:
Tab
le f
or
Min
era
l Id
entificatio
n (c
ont.)
WE
IGH
T
2
4.9
-5.2
2.6
5
2.3
-2.6
10.1
-11.1
4.3
-4.5
2.3
3.9
-4.1
2-2
.1
2.7
-2.8
3.4
-3.6
3-3
.3
2.6
-2.8
6.5
-7
SH
AP
E
None
Cubic
/
isom
etr
ic
Trig
onal /
hexagonal
None
Isom
etr
ic
(rare
)
Trig
onal (r
are
)
Cubic
(ra
re)
Cubic
/
isom
etr
ic
Ort
horh
om
bic
Mo
noclin
ic
(rare
)
Orh
orh
om
bic
Hexagonal
Triclin
ic
Te
tragonal
HA
RD
NE
SS
5.5
-6.5
6-6
.5
7
3-5
2.5
-3
4-4
.5
5.5
-6
3.5
-4
1-2
.5
1
8
7-7
.5
5-6
3
LU
ST
ER
Gla
ssy,
pearly
Me
talli
c
Gla
ssy,
vitre
ous
Waxy, silk
y
Me
talli
c
Vitre
ous
Vitre
ous
Subm
eta
llic,
gre
asy
Waxy,
resin
ous
Eart
hy,
dull
or
gre
asy
Vitre
ous
Gla
ssy,
vitre
ous
Waxy,
eart
hy,
or
dull
Resin
ous,
adam
antin
e
FR
AC
TU
RE
Conchoid
al
Uneven
Conchoid
al
Uneven o
r
splin
tery
Hackly
Uneven
Uneven t
o
conchoid
al
Conchoid
al
Conchoid
al
Uneven
Uneven,
subconchoid
al
Conchoid
al
Uneven o
r
conchoid
al
Subconchoid
al
CL
EA
VA
GE
None
Cubic
&
octa
hedra
l
None
Basal, p
erf
ect,
or
fib
rous
None
Perf
ect,
rhom
bohedra
l
6 d
irectio
ns,
poor
Dodecahedra
l
None
Perf
ect, o
ne
directio
n
Basal
None
None
Pyra
mid
al
ST
RE
AK
White
Gre
enis
h-
bla
ck
White
White
White, silv
ery
White
White
White/y
ello
w
or
pale
bro
wn
Yello
w
White
White
White
Pale
blu
e-
gre
en o
r w
hite
White
CO
LO
R
White, varicolo
red
Bra
ssy y
ello
w
Cle
ar,
pin
k,
bla
ck,
purp
le,
gre
en, m
ilky
Gre
en,
bla
ck
Silv
er,
bla
ck
Gre
en,
bro
wn,
yello
w
Azure
-blu
e
Yello
w, re
d,
bro
wn,
bla
ck
Yello
w
White, gre
en,
yello
w, pin
k
Yello
w, bro
wn,
pin
k,
gre
en
Bla
ck, re
d, gre
en,
gold
en
Lig
ht
blu
e, blu
e-
gre
en
Ora
nge-y
ello
w,
bro
wn
MIN
ER
AL
Opal
Pyrite
Quart
z
Serp
entin
e
Silv
er
Sm
ithsonite
Sodalit
e
Sphale
rite
Sulfur
Ta
lc
To
paz
To
urm
alin
e
Tu
rquois
e
Wulfenite

33
Back-u
p p
age 1
.1:
Sam
ple
Table
to U
se for
Min
era
l Id
entification
(
No
te:
not im
port
ant
tha
t every
box b
e f
illed f
or
every
min
era
l.)
WE
IGH
T
SH
AP
E
HA
RD
NE
SS
LU
ST
ER
FR
AC
TU
RE
CL
EA
VA
GE
ST
RE
AK
CO
LO
R
MIN
ER
AL

34
Back-up page 1.2: Making and using a mineral ID kit
Following is the Moh’s Scale and examples of some common tools kids can use to help
judge the relative hardness of different minerals by creating their own mineral ID kit:
Moh’s Hardness Mineral Common Tools 1 Talc easily scratched by a fingernail
2 Gypsum fingernail (hardness 2.5)
3 Calcite copper penny (3 to 3.5)
4 Fluorite easily scratched by a knife
5 Apatite knife blade/steel nail/steel washer (5)
6 Feldspar glass/a glass marble (5.5); a steel file (6.5)
7 Quartz easily scratches glass
8 Topaz easily scratches glass
9 Corundum easily scratches glass
10 Diamond scratches all other materials
Common minerals associated with the Moh’s Scale of hardness.

35
A do-it-yourself mineral identification kit!
In addition to the tools noted in the above table, a mineral ID kit might include an
unglazed porcelain tile for checking the streak of a mineral and a bottle of acetic acid
(vinegar) to test whether a mineral contains calcium carbonate (which would cause
fizzing). Professional geologists often buy “Deluxe Hardness Picks” to test rocks when
in the field, like the set pictured below.
A professional mineral identification kit for checking Moh’s hardness.

36
See the table accompanying Back-up page 1.1 for info about various characteristics for a
number of common minerals. A blank table is provided for you to copy and give to kids
to use to complete a mineral identification exercise, or you can encourage them to create
their own table listing just the characteristics they wish to test.
A good selection of minerals to present to juniors to demonstrate ability to identify
minerals might include sulfur, pyrite, fluorite, quartz, hematite, galena, mica, and calcite.
There are a number of ways of testing a kid’s ability to identify minerals. The most basic
is to provide kids individually with an assortment of minerals and to ask them to apply
various tests. You might also create a bag of sand and gravel. “Salt” it with some of the
minerals noted above and ask kids to screen out various minerals to identify. To make it
challenging, include two specimens that look similar (for instance, a clear piece of quartz
and a clear piece of topaz).
An even more fun activity is the “Mineral Identification Game.” At a club meeting, have
an assortment of a dozen to two dozen minerals spread out on a table, each with a
number. Give kids sheets of papers with numbers down the side and ask them to go
around the table identifying and writing down the names of each mineral matched to the
appropriate number. Give them perhaps 15 minutes to do this before discussing the
answers. This could be done individually, or kids could be divided into teams and this
could be made into a contest to see which team gets the most correct answers.
In another version of the Mineral Identification Game, different mineral specimens might
be put on a table along with mineral identification books. The first kid to identify a
particular “mystery mineral” correctly gets to keep it. This is a definite motivator!
Anyone winning a mineral steps out of the contest so that one child doesn’t end up
walking away with all the specimens.
Finally, for an even more dramatic activity to play with your club kids, see Activity 1.9.
A note on working with very young kids.
As I noted in the Introduction to this manual, you are encouraged to adjust the level of
each activity to match the age range of the kids involved. So for instance with this
activity, very young children might be taught only the basics of color and hardness, and
you should guide them through a hands-on session with just a few very common minerals
that are easily identified, such as quartz, calcite, sulfur, malachite, mica, pyrite, and
hematite. The main things we wish to impart are basic concepts, so we should be thrilled
if a younger child correctly grasps that calcite is “softer” than quartz and therefore
“hardness” can be used to help identify and differentiate the two. Older kids should be
given more of a challenge, using a wider range of characteristics to identify a much wider
range of minerals on their own or in teams after a basic overview. Don’t take the
activities at face value for each and every child. Adjust as necessary!

37
Back-up page 1.3: Building a mineral collection.
Back-up pages for Badge 5 on Collecting provide information on building a collection.
You should refer to those back-up pages for reference in assisting kids in satisfying
Activity 1.3. For instance, there you’ll find information about how to organize a catalog
or logbook for an entire collection, how to create labels for individual specimens within a
collection, and how to store a collection.
Encourage kids to build their own mineral collections.
Note: Kids can use this activity to satisfy requirements toward earning the Collecting badge
simultaneously (Activity 5.1).

38
Back-up page 1.4: The three rock types.
In this activity, kids would be expected to
a) explain the differences among the three basic rock types of igneous, sedimentary, and
metamorphic and how these different rock types typically form;
b) identify specific examples of each rock type; and
c) build a small collection of representative samples.
The three basic rock types are:
Igneous. Igneous rocks are formed by crystallization of magmas, either deep within
the earth (intrusive igneous rocks: granite, gabbro, diorite, granodiorite) or extruded
onto the surface (basalt, andesite, dacite, rhyolite, obsidian, pumice, scoria, ash, etc.).
Sedimentary. Sedimentary rocks are formed by clastic sediments such as gravel,
sand, or mud created by the eroding actions of wind, water or ice breaking down
older rocks (examples: conglomerate, breccia, sandstone, siltstone, mudstone, shale)
or chemically by minerals precipitating out of water (limestone, dolomite, evaporates
such as gypsum, anhydrite, or halite). They might also be biologic in origins (coal,
diatomaceous earth, chert).
Metamorphic. Metamorphic rocks have been changed by heat and/or pressure and
other earth forces and are classified as foliated (slate—formed from shale; schist—
formed from shale that’s been more intensely altered; gneiss—formed from granite)
or non-foliated (quartzite—formed from sandstone; marble—formed from limestone).
The rock cycle and the three rock types: igneous, sedimentary, and metamorphic.
Abdo Publishing provides three little books from their Core Library Rocks and Minerals
series geared to kids in grades 3-5: Lisa Owings’ Igneous Rocks (2015), Rebecca E.
Hirsch’s Sedimentary Rocks (2015), and Jennifer Swanson’s Metamorphic Rocks (2015).

39
This series includes still more books on crystals, fossils, gems, and the rock cycle. Each
book includes glossaries, “Learn More” references to other books and websites, and links
to more info on the publisher’s website. It’s a great basic series for both kids and adults!
For this activity, you might provide kids with the following fill-in-the-blank page to use.
Note: Kids can use this activity toward satisfying requirements for the Earth Processes badge
simultaneously (Activities 10.1, 10.3, 10.4, and 10.5).

40
The Three Rock Types & My Collection
Igneous rocks are defined as: My collection includes the following igneous rocks: Sedimentary rocks are defined as: My collection includes the following sedimentary rocks: Metamorphic rocks are defined as: My collection includes the following metamorphic rocks:

41
Back-up page 1.5: Crystal shapes.
Crystals come in wonderful and amazing shapes that are based on their underlying
chemical structure. Some common forms are cubic, tetragonal, triclinic, orthorhombic,
hexagonal, monoclinic, and trigonal. The shape of a crystal is an important trait that can
help identify a mineral, so you should familiarize kids with these basic crystal forms.
Cubic: very symmetric and orderly, shaped like a square cube, with 6 faces, or sides
(note, however, some are shaped like octahedrons—or diamond-shaped—with 8
faces, and still others are shaped like dodecahedrons, with 10 faces)
Tetragonal: shaped like cubic crystals that have been stretched out along one axis
with pyramids at top and bottom.
Triclinic: triclinic crystals are similar to monoclinic but aren’t usually symmetrical
from one side to the other; they can look like monoclinic crystals that someone
stepped on and squished!
Orthorhombic: these crystals look like a shoebox or like two elongated pyramids
stuck together, but they’re skewed at a bit of an angle.
Hexagonal: these crystals look like six-sided prisms; viewed from the top, they look
like hexagons.
Monoclinic: these are shaped almost like tetragonal crystals that have been skewed
or tilted in one angle.
Trigonal: similar to hexagonal, but possessing a 3-fold axis of rotation instead of the
6-fold axis of hexagonal crystals.
Brief descriptions and images of some basic crystal shapes.

42
Because it can be difficult to visualize these systems using words alone, and because the
shapes often vary from those I’ve pictured, you should get a book illustrating different
crystal forms and bring in pictures and samples of minerals that illustrate each (for
instance, a cubic pyrite or fluorite crystal; a hexagonal quartz crystal).
Simple activities provide kids with hands-on fun in learning about these shapes. In one,
build crystal shapes using tinker toys, or dowels and Styrofoam balls, or gum drops and
toothpicks. (Kids like the last option because they can eat candy while creating!)
Another spin on “gum drop” models is to create plastic and magnetic models, which are
often available at a teacher supply shop under the “magnet” section.
Examples of crystal models I crafted from plastic and magnetic parts.
Another way to illustrate crystal shapes in hands-on fashion is by making models by
folding colorful construction paper or cardstock and pasting or taping them together.
Darryl Powell (aka “Diamond Dan”) has prepared a couple of great resources you may
wish to purchase to use with your club’s kids, if still available. These include Corundum
Carl’s Great Crystal Adventure (introduces crystallography and includes 13 crystal
models that can be cut out and folded into 3-dimensional crystal shapes, along with a
recipe for growing crystals) and Crystal Clips V (a CD-ROM holding over 900 mineral
and crystal drawings in both color and black-and-white in TIFF and JPEG formats). I’ve
purchased these from Diamond Dan Publications, c/o Darryl Powell, phone 585-278-
3047, email [email protected], www.diamonddanpublications.net.
Here’s another website to check out for 3D model downloads from James Madison
University: http://csmgeo.csm.jmu.edu/geollab/fichter/Minerals/cleavage.PDF
When I googled “crafting 3D models of crystal shapes,” a whole set of free templates
popped up. Print such templates on cardstock for your club kids to cut-and-fold and tape
or paste together models of crystal shapes of all sorts. Another nice resource is Rebecca
Hirsch’s book Crystals (2015), a part of a whole series from Abdo Publishing called the
Core Library Rocks and Minerals series geared to kids in grades 3-5.

43
Back-up page 1.6: Growing crystals and making geodes.
Growing Crystals.
Some minerals grow into crystals in water solutions. This process can be observed using
readily available materials, such as sugar, salt, alum, borax, and Epsom salts dissolved
into a saturated solution in boiling hot water. A saturated solution contains the
maximum amount of salt that will dissolve in a given amount of hot water.
Materials.
Crystal-building material: table salt, sugar, Epsom salts (from a pharmacy), or
powder alum (from the grocery store spice section). Other materials might include
borax, photographic fixer, or saltpeter. Copper sulfate (from pool supply or hardware
stores) is used to create blue chalcanthite crystals. With very young kids, though, it is
probably best to stick with basics, such as table salt or sugar.
Water
Measuring cups
Spoon
Cooking pan
Glass jars
Pebbles
Stick or pencil
String (cotton twine), cut into small lengths, with a paperclip tied to one end
(optional) food coloring
Procedure.
1. Heat water to a boil, then turn off the heat.
2. If using table salt, mix one-half cup of salt into three-quarters cup of hot water. If
using sugar, mix 3 cups sugar to 1 cup hot water. If using Epsom salts, mix one-half
cup Epsom salts into 1 cup hot water. If using alum, mix one-quarter cup alum into 1
cup hot water.
3. Stir your solution. If all of your mineral dissolves, the solution is not yet saturated,
and you should add a bit more mineral until no more will dissolve. (Note: you can
make colorful crystals by adding drops of food coloring.)
4. Place a few pebbles in the bottom of a glass jar and pour your solution over the
pebbles. Or, tie string to a stick or pencil, pour your solution into a glass jar, and dip
the string into the solution. You may—or may not—want to attach a paperclip or
other object to weigh the string down. Leave the string hanging there from the pencil.
5. Set your jar aside in a spot where it won’t be disturbed and don’t bump or bounce it.
Check every so often over the next few days. As water evaporates, you’ll see crystals
forming on your pebbles or string.
To get nice step-by-step visual instructions, google “YouTube, crystal growing.” When
I did this, up popped a HUGE number of videos telling how to make crystals using the
ingredients I’ve listed above, plus odd ingredients such as Pepto-Bismol, no less!
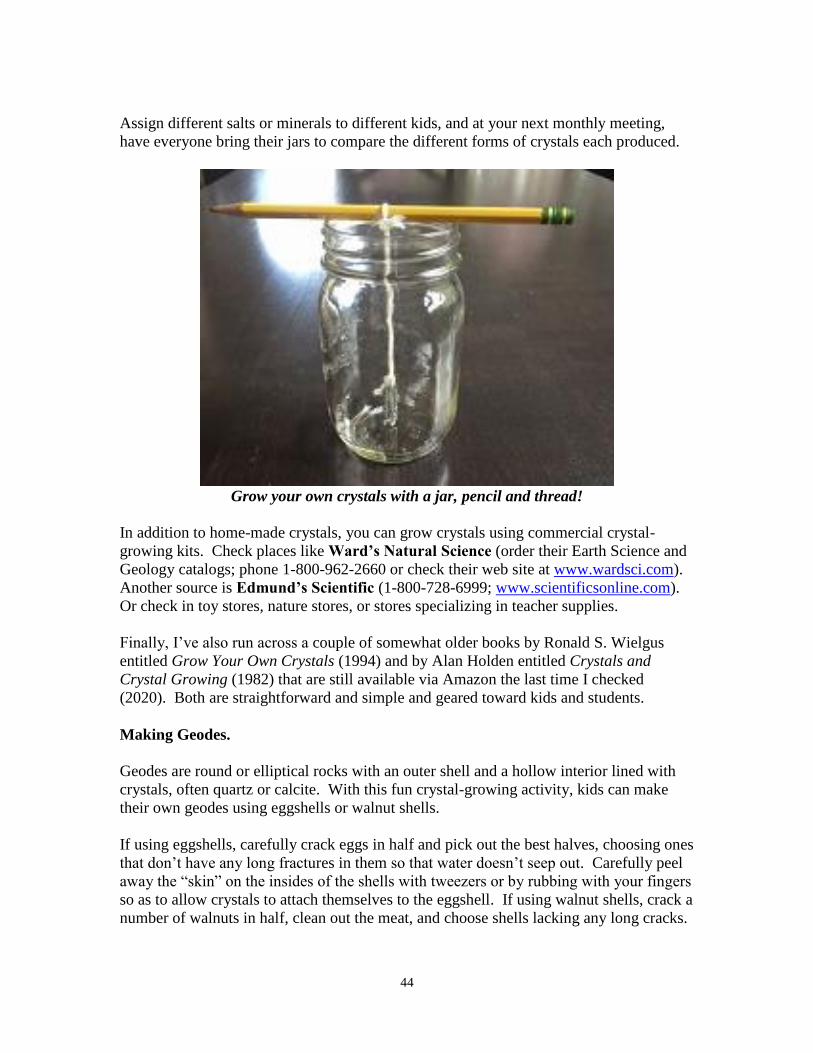
44
Assign different salts or minerals to different kids, and at your next monthly meeting,
have everyone bring their jars to compare the different forms of crystals each produced.
Grow your own crystals with a jar, pencil and thread!
In addition to home-made crystals, you can grow crystals using commercial crystal-
growing kits. Check places like Ward’s Natural Science (order their Earth Science and
Geology catalogs; phone 1-800-962-2660 or check their web site at www.wardsci.com).
Another source is Edmund’s Scientific (1-800-728-6999; www.scientificsonline.com).
Or check in toy stores, nature stores, or stores specializing in teacher supplies.
Finally, I’ve also run across a couple of somewhat older books by Ronald S. Wielgus
entitled Grow Your Own Crystals (1994) and by Alan Holden entitled Crystals and
Crystal Growing (1982) that are still available via Amazon the last time I checked
(2020). Both are straightforward and simple and geared toward kids and students.
Making Geodes.
Geodes are round or elliptical rocks with an outer shell and a hollow interior lined with
crystals, often quartz or calcite. With this fun crystal-growing activity, kids can make
their own geodes using eggshells or walnut shells.
If using eggshells, carefully crack eggs in half and pick out the best halves, choosing ones
that don’t have any long fractures in them so that water doesn’t seep out. Carefully peel
away the “skin” on the insides of the shells with tweezers or by rubbing with your fingers
so as to allow crystals to attach themselves to the eggshell. If using walnut shells, crack a
number of walnuts in half, clean out the meat, and choose shells lacking any long cracks.

45
Next, set your eggshell or walnut shell halves in egg cartons, where they’ll be stable and
secure. Using the same recipes described earlier for growing crystals, prepare a crystal-
growing solution and pour or spoon a little into each egg- or walnut shell. Set the egg
carton aside in a warm, dry spot where it won’t be disturbed for the next week or more as
the water evaporates, leaving you with sparkling geode halves.
An “eggshell geode”
The Women in Mining (WIM) Educational Foundation (www.womeninmining.us)
provides a neat geode activity wherein you split a coconut, clean out the meat, drill a hole
in one half, and lacquer the outside of both halves. Once all has dried, glue the two
halves back together with silicone and pour a crystal-growing solution into the hole. A
week or two later, pour out any remaining solution and cut open the coconut along the
seam to reveal a sparkling interior.
Growing Stalactites, Stalagmites, and Towers.
Stalactites, stalagmites, and towers grow in caves by the steady drip-drip of mineral-laden
groundwater oozing from a cave ceiling. Usually that water is laden with calcium
carbonate (calcite and limestone). With this activity, kids can grow their own stalactites,
stalagmites, and towers with a powder you can find with the detergents and washing
supplies at your local grocery store.
Materials.
10 tablespoons of borax (washing soda)
24 ounces of hot water
Measuring spoon and cup
Stirring spoon or stick
Cookie sheet
2 pint-size glass jars + 1 jar lid

46
Strip of old towel (1X18 inches), yarn, or other cloth strip or thick fiber.
Procedure.
1. Place a cookie sheet in an area where it will be undisturbed for several days or even a
couple weeks.
2. Place 2 jars on the cookie sheet next to each other with a jar lid in between.
3. Measure out and fill each jar with 12 ounces of hot water and 5 tablespoons of borax
then stir until the borax is fully dissolved in each jar.
4. Place one end of the towel/string in each jar with a dip in the center between the jars.
5. Exercise patience! Now it’s time to let nature take its course, so sit back and observe.
The borax/water solution will travel along the towel or string. At the dip you created in
the center, the solution should build up then drip down into the jar lid and the water will
evaporate, leaving behind the borax that was held in solution. Drop-by-drop, it should
create a stalactite hanging from the towel and a stalagmite growing up from the jar lid. If
let go long enough, the stalactite and stalagmite eventually will meet and grow together
to create a tower. All three features are common in limestone caves.
A string or a bit of cloth between 2 jars can create a stalactite!
By the way, for those like me who always get confused as to which is which, here’s an
easy mnemonic for remembering the distinction between a stalactite and a stalagmite.
The word “stalactite” has a “c” in the middle. Let that stand for “ceiling.” A stalactite
grows down from the ceiling of a cave. The word “stalagmite” has a “g” in the middle.
Let that stand for “ground.” A stalagmite grows up from the ground of the cave. (Now if
someone would only come up with a mnemonic for helping me remember how to spell
“mnemonic”!)
Popcorn or Bubble Rock.
For about five bucks, you can purchase what’s packaged and sold as “Popcorn Rock” or
“Bubble Rock.” Both are billed as “the rock that grows.” Basically, these are small
chunks of gray limestone or dolostone from Utah. As you soak them for 1 to 3 weeks in
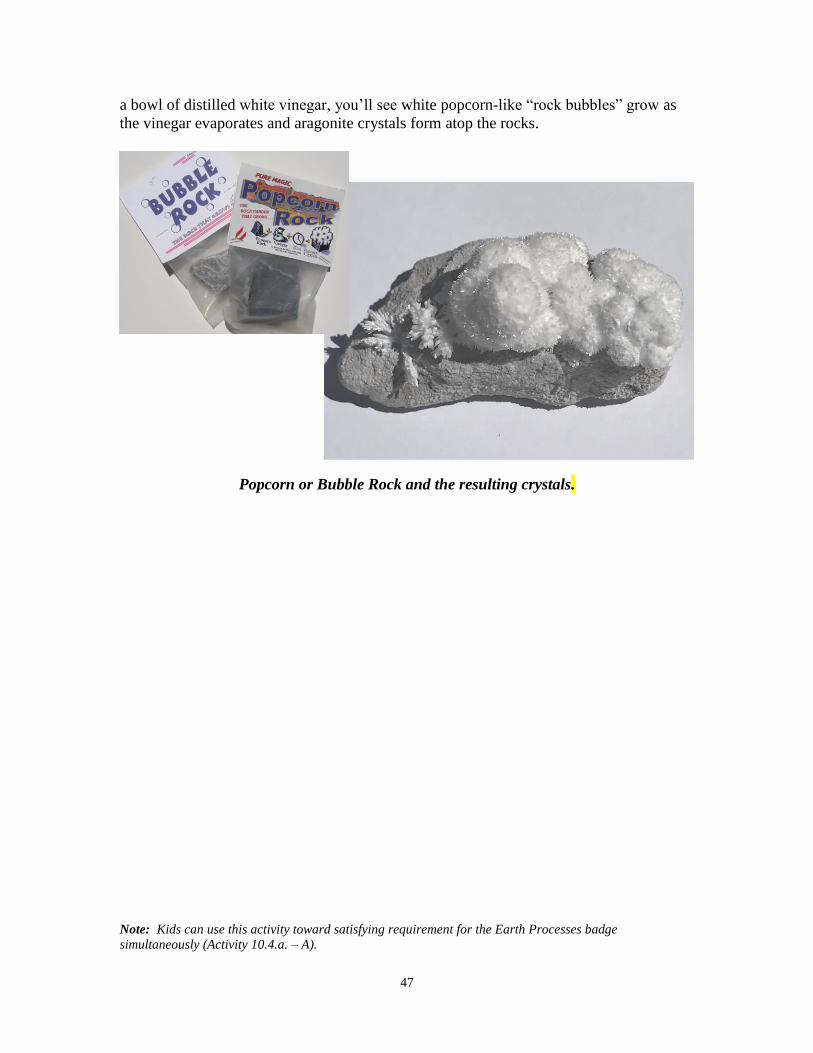
47
a bowl of distilled white vinegar, you’ll see white popcorn-like “rock bubbles” grow as
the vinegar evaporates and aragonite crystals form atop the rocks.
Popcorn or Bubble Rock and the resulting crystals.
Note: Kids can use this activity toward satisfying requirement for the Earth Processes badge
simultaneously (Activity 10.4.a. – A).

48
Back-up page 1.7: State rocks, minerals, and gemstones.
The following table lists the officially designated rock, mineral, and/or gemstone for each
state in the U.S. Have your kids to learn why their particular rock, mineral, or gemstone
was selected. Some were selected because the rock or mineral was especially important
to the economy of the state. For instance, limestone is the state rock of Indiana because
of the contribution of limestone quarries to the state’s economy. Indiana limestone
helped to rebuild Chicago after its big fire in the nineteenth century and has been used in
such historic buildings as the Washington Monument and the Empire State Building.
Other state emblems were selected because they are unique to that particular state. For
instance, benitoite was chosen as the state gemstone of California because it’s only found
in California in significant gemstone quality and quantity.
Kids can check with the state geological survey to learn the details behind their state
rock, mineral, and/or gemstone, or they might try to unearth the original legislation that
designated the official rock. They can also google for their state symbols. A number of
web sites have been established devoted to this very subject. See, for instance,
https://statesymbolsusa.org/.
If you don’t see a rock, mineral, or gemstone for your state, encourage your pebble pups
and junior members to organize a letter-writing campaign to your state governor and
legislature to nominate one! In organizing such a campaign, they should tell why the
rock, mineral, or gemstone has special significance for the state. They might also write to
rock clubs across the state to encourage others to join in their effort.
State Rock Mineral Gemstone
Alabama Marble Hematite Star Blue Quartz
Alaska Gold Nephrite Jade
Arizona Petrified Wood Copper Turquoise
Arkansas Bauxite Quartz Diamond
California Serpentine Gold Benitoite
Colorado Yule Marble Rhodochrosite Aquamarine
Connecticut Garnet
Delaware Sillimanite
Florida Agatized Coral Moonstone
Georgia Staurolite Amethyst Quartz
Hawaii Black Coral
Idaho Star Garnet
Illinois Fluorite
Indiana Salem Limestone
Iowa Geode
Kansas Greenhorn Limestone
Galena Jelenite Amber
Kentucky Kentucky Agate Coal Freshwater Pearl
Louisiana Agate Lapearlite (oyster shell)
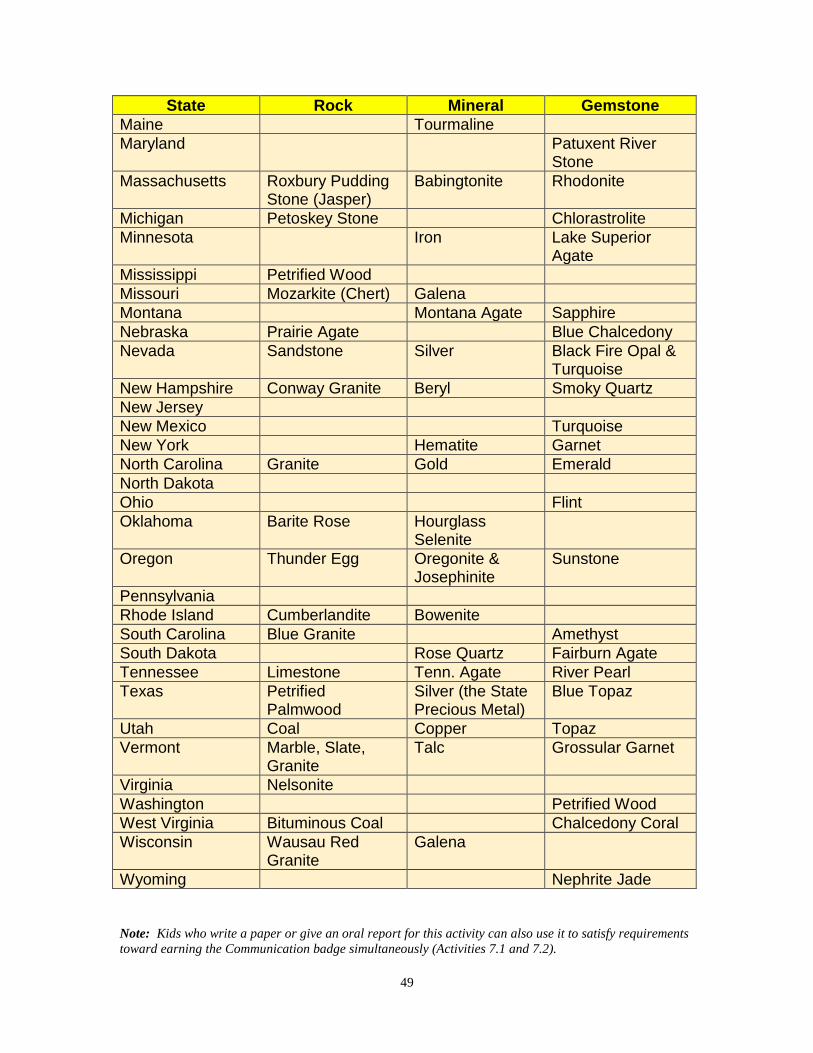
49
State Rock Mineral Gemstone
Maine Tourmaline
Maryland Patuxent River Stone
Massachusetts Roxbury Pudding Stone (Jasper)
Babingtonite Rhodonite
Michigan Petoskey Stone Chlorastrolite
Minnesota Iron Lake Superior Agate
Mississippi Petrified Wood
Missouri Mozarkite (Chert) Galena
Montana Montana Agate Sapphire
Nebraska Prairie Agate Blue Chalcedony
Nevada Sandstone Silver Black Fire Opal & Turquoise
New Hampshire Conway Granite Beryl Smoky Quartz
New Jersey
New Mexico Turquoise
New York Hematite Garnet
North Carolina Granite Gold Emerald
North Dakota
Ohio Flint
Oklahoma Barite Rose Hourglass Selenite
Oregon Thunder Egg Oregonite & Josephinite
Sunstone
Pennsylvania
Rhode Island Cumberlandite Bowenite
South Carolina Blue Granite Amethyst
South Dakota Rose Quartz Fairburn Agate
Tennessee Limestone Tenn. Agate River Pearl
Texas Petrified Palmwood
Silver (the State Precious Metal)
Blue Topaz
Utah Coal Copper Topaz
Vermont Marble, Slate, Granite
Talc Grossular Garnet
Virginia Nelsonite
Washington Petrified Wood
West Virginia Bituminous Coal Chalcedony Coral
Wisconsin Wausau Red Granite
Galena
Wyoming Nephrite Jade
Note: Kids who write a paper or give an oral report for this activity can also use it to satisfy requirements
toward earning the Communication badge simultaneously (Activities 7.1 and 7.2).
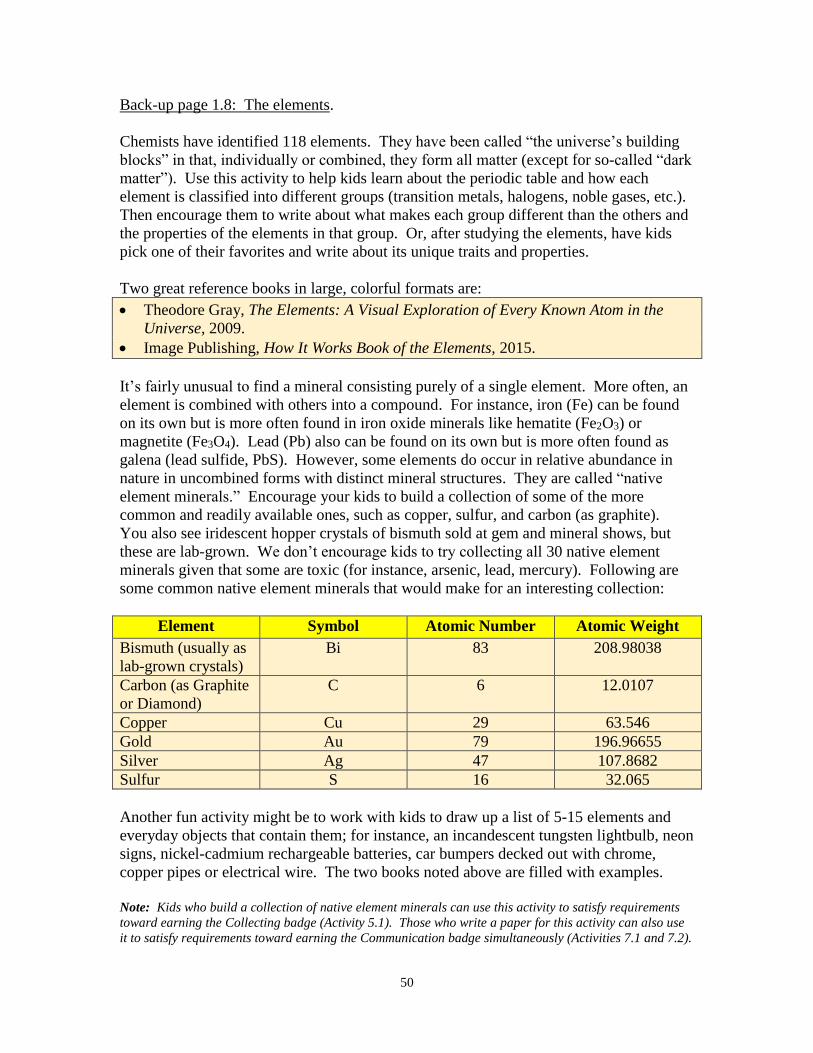
50
Back-up page 1.8: The elements.
Chemists have identified 118 elements. They have been called “the universe’s building
blocks” in that, individually or combined, they form all matter (except for so-called “dark
matter”). Use this activity to help kids learn about the periodic table and how each
element is classified into different groups (transition metals, halogens, noble gases, etc.).
Then encourage them to write about what makes each group different than the others and
the properties of the elements in that group. Or, after studying the elements, have kids
pick one of their favorites and write about its unique traits and properties.
Two great reference books in large, colorful formats are:
Theodore Gray, The Elements: A Visual Exploration of Every Known Atom in the
Universe, 2009.
Image Publishing, How It Works Book of the Elements, 2015.
It’s fairly unusual to find a mineral consisting purely of a single element. More often, an
element is combined with others into a compound. For instance, iron (Fe) can be found
on its own but is more often found in iron oxide minerals like hematite (Fe2O3) or
magnetite (Fe3O4). Lead (Pb) also can be found on its own but is more often found as
galena (lead sulfide, PbS). However, some elements do occur in relative abundance in
nature in uncombined forms with distinct mineral structures. They are called “native
element minerals.” Encourage your kids to build a collection of some of the more
common and readily available ones, such as copper, sulfur, and carbon (as graphite).
You also see iridescent hopper crystals of bismuth sold at gem and mineral shows, but
these are lab-grown. We don’t encourage kids to try collecting all 30 native element
minerals given that some are toxic (for instance, arsenic, lead, mercury). Following are
some common native element minerals that would make for an interesting collection:
Element Symbol Atomic Number Atomic Weight
Bismuth (usually as
lab-grown crystals)
Bi 83 208.98038
Carbon (as Graphite
or Diamond)
C 6 12.0107
Copper Cu 29 63.546
Gold Au 79 196.96655
Silver Ag 47 107.8682
Sulfur S 16 32.065
Another fun activity might be to work with kids to draw up a list of 5-15 elements and
everyday objects that contain them; for instance, an incandescent tungsten lightbulb, neon
signs, nickel-cadmium rechargeable batteries, car bumpers decked out with chrome,
copper pipes or electrical wire. The two books noted above are filled with examples.
Note: Kids who build a collection of native element minerals can use this activity to satisfy requirements
toward earning the Collecting badge (Activity 5.1). Those who write a paper for this activity can also use
it to satisfy requirements toward earning the Communication badge simultaneously (Activities 7.1 and 7.2).

51
Back-up page 1.9: Name that mineral!
Here’s your chance to be a TV game show host! Review back-up pages for Activities 1.1
and 2.1 and prepare questions to test your kids’ knowledge of mineral characteristics and
uses. Then, as in a game show, stand behind a podium with your questions (and their
answers) on large cards. Have participating kids lined up and seated behind a table with
name cards in front of each or with name tags on their shirts. Then let the contest begin!
Award five points for each correct answer. You might award partial points if kids come
up with an answer than is justifiably close but not exactly what you were looking for. For
instance, if the hints are that the mineral is blue with a light blue streak and soft hardness
of 3.5-4.0 Mohs and the answer is “azurite,” but someone answers “aquamarine”, you
might award partial points. Aquamarine is a blue form of beryl, but it leaves a colorless
or white streak and is much harder at 7-8 Mohs. Still, it is blue!
Have a really nice mineral specimen as a prize for the winner with the most points. You
might also have second and third place prizes, ribbons, a little trophy, “Pebble Pup
Bucks” or cash, or whatever prizes your society decides is best. The main thing is to
have fun! You might do this as a program at one of your monthly meetings. (Adults,
especially parents, are not allowed to shout out hints!)
Here are examples of questions you might ask:
Question: This mineral has a distinctive blue color. In fact, its name even means
“blue.” It leaves a light blue streak and is fairly soft on the Mohs scale at 3.5-4.
Name that mineral! Answer: azurite.
Question: This is the hardest of all minerals. In fact, it’s 10 on the Mohs scale.
Many married women wear it on a finger. Name that mineral! Answer: diamond.
Question: This mineral has one name if it’s red but a different name if it’s blue or
other colors. It’s very hard; in fact, it’s the mineral for 9 on the Mohs scale. It’s a
precious gemstone and is faceted for jewelry. Cabbed forms can exhibit asterism, or
a star effect. Name that mineral! Answer: corundum (ruby and sapphire).
Question: This mineral has a shiny pinkish-red or orange-brown color with metallic
luster. It is soft and malleable. You might find it in your home’s plumbing or in your
electrical wiring. Name that mineral! Answer: copper.
Question: This mineral forms very soft crystals that are clear or white and that leave
a white streak. You may find it in your laundry detergent. Large quantities of it are
mined in Boron, California. Name that mineral! Answer: borax.
Question: You might find yourself sprinkling this salty soft and cubic mineral on
your dinner or on an icy sidewalk. Name that mineral! Answer: halite.
Questions to consider for a “Name that Mineral!” game.
At the 2019 Show & Convention of the California Federation of Mineralogical Societies,
I saw a version of this game being played right on the floor of the exhibit hall alongside

52
the Kids’ Booth. Janie Duncan of the Monrovia Rockhounds set up a table with a
spinning wheel for a game called “School of Rocks.” The wheel had slots for numbers 1
to 14. A board on the table then had a grid for two rows of seven rocks each with a rock,
mineral or fossil specimen accompanied by a card that had info about that specimen.
Kids spun the wheel. When it settled on a number, they turned to the board, and the
person behind the table read the description of the rock, mineral, or fossil from the card.
If a child correctly identified the specimen, it was his/hers to keep. It made for a very
fun, interactive way to engage kids at a local rock and gem show while allowing them to
demonstrate their knowledge.
Kids play “School of Rocks” at the 2019 CFMS Show

53
Back-up page 1.10: WILD CARD: Do your own thing!!
While I’ve tried to provide a wide-ranging variety of activities to choose from, no one
manual can “do it all.” There are many other great ideas out there that clubs have found
to match their local interests and resources.
Plus, the Youth Leaders of some clubs have expressed concern that some activities
included in the manual may be beyond the abilities of their youngest members. Here’s
your chance to tailor-make activities for the youngest-among-us.
Take, for example, the “Diamond Dogs Mine” crafted by the Gem & Mineral Society of
Louisiana. They’ve crafted a sand box using a five-foot baby pool filled with sand and
gravel and salted with mineral treasures. Craft a similar “mine.” Then see which kids
might find—and correctly identify—the most different specimens of rocks and minerals.
Kids in a mineral-laden sandbox at the international gem show in Munich, Germany
If you and your fellow club members have an idea for learning about rocks and minerals
that isn’t included in this manual, go for it! When you send in your badge request, just let
me know what you did as a WILD CARD activity. Who knows? Maybe your idea will
be included in the next edition of the Badge Manual!

54
2. Earth Resources
These activities introduce the practical side of minerals, or how rocks and minerals are
used in everyday life. We are surrounded by our mining heritage, from gypsum in walls
to brass knobs on doors or clay in flowerpots and on pages of glossy magazines.
Mineral resources may be divided into three classes: metals (iron, copper, nickel, etc.),
nonmetals (sand, clay, limestone, salt), and fossil fuels (coal, oil, natural gas). The
following activities will help you appreciate the role mining and minerals play in day-to-
day life.
Activity 2.1: Everyday uses of rocks and minerals.
In a group, circle around a flipchart, chalkboard or white board. Look around the room
you are in and list everyday things and the rocks and minerals you think went into them.
(If using a good old black chalkboard, you can start with the chalk itself and the slate of
the chalkboard.)
Activity 2.2: Minerals in the home.
Write a report or make a poster about at least 10 rock and mineral products in your home
or in a particular room in your home: your bedroom, bathroom, kitchen, living room, etc.
Activity 2.3: Collecting everyday objects and the rocks and minerals that went into them.
Build a collection of everyday objects and minerals that went into them. You can get
specimens by collecting them in the field, trading with other club members, or purchasing
them at nature stores, museum gift shops, rock shops, or gem shows. Here are examples
to get you started: a penny and a copper nugget; a nail and a piece of hematite; a tube of
fluorinated toothpaste and a fluorite crystal; laundry detergent and a borate mineral; table
salt and a cluster of halite crystals, matches and a piece of sulfur, a fishing weight and a
galena crystal. Display your collection of everyday objects and their source minerals at a
local gem show, the library, during show-and-tell at school, at one of your club meetings,
or wherever else a public display might be possible.
Activity 2.4: Field trip to a mine or quarry.
Take a field trip to an active working mine or quarry. It might be a gold mine, a
tourmaline, sapphire or other precious gemstone mine, a limestone quarry, a coal mine, a
gravel pit, or whatever is closest to you. Afterwards, write a report for your Youth
Leader or club newsletter or make a presentation at the next club meeting describing what
was being mined, how it was being mined, and how it is ultimately used. If you were
able to get a sample of what was being mined, bring it to your next meeting and show-
and-tell everyone all about it.
Activity 2.5: Field trip to a hardware store.
Take a “field trip” or a “scavenger hunt” to a local hardware store or a home building
supply store. List things you see there and their source rocks and minerals (for instance,
plumbing pipes, derived from copper). If going as a group, divide into teams and see
which team can come up with the biggest list in 20 or 30 minutes!

55
Activity 2.6: Careers in the earth sciences.
Learn about careers in the earth sciences (mining, teaching, gemology, the jewelry
business, seismology, etc.). Maybe even interview someone in such a job, such as a local
jeweler. Write a brief paper imagining yourself in such a career and some adventure you
might undertake in that job. For instance, an oil geologist might be taking a boat ride to
an off-shore oil platform. A paleontologist with a museum or university might be
prospecting for fossils in the Gobi Desert. A gemologist might be cutting the world’s
largest blue diamond. What would be an interesting job to you?
Activity 2.7: WILD CARD: Do your own thing!
Do you have an idea for learning about earth resources that isn’t included in this manual?
If so, do your own thing! When your Youth Leader sends in your badge request, let us
know what you did as a WILD CARD activity. Who knows? Maybe your idea will be
included in the next edition of the Badge Manual!
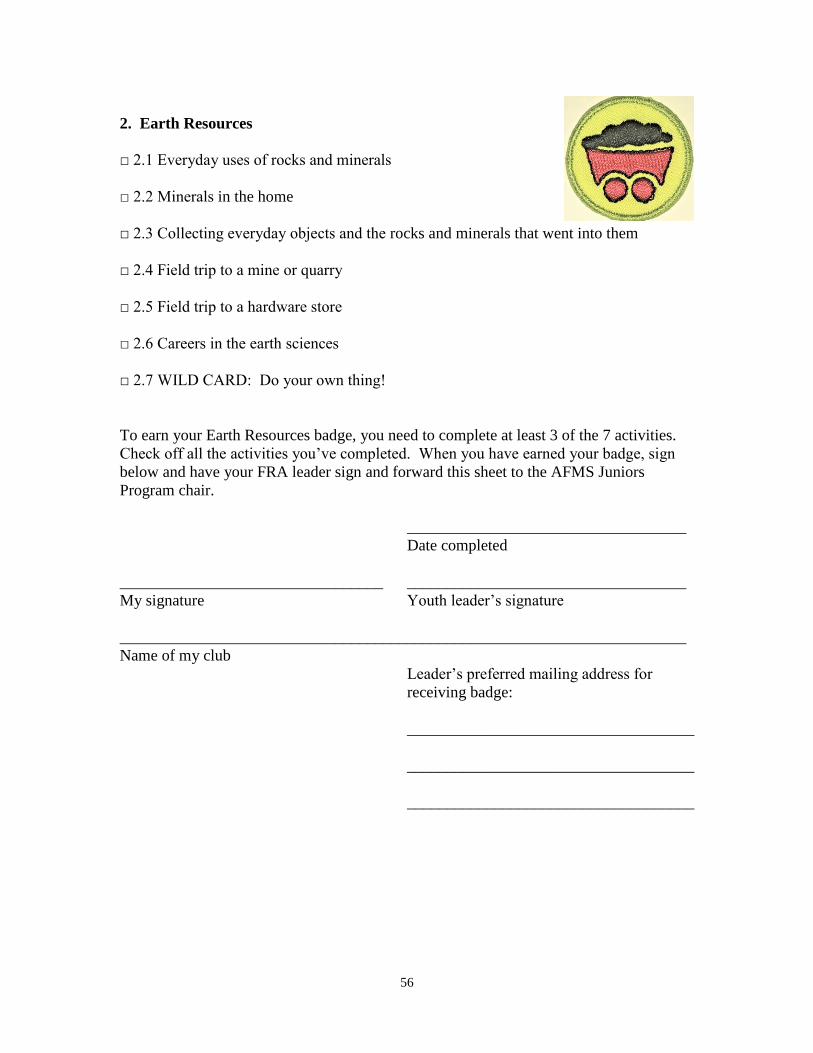
56
2. Earth Resources
□ 2.1 Everyday uses of rocks and minerals
□ 2.2 Minerals in the home
□ 2.3 Collecting everyday objects and the rocks and minerals that went into them
□ 2.4 Field trip to a mine or quarry
□ 2.5 Field trip to a hardware store
□ 2.6 Careers in the earth sciences
□ 2.7 WILD CARD: Do your own thing!
To earn your Earth Resources badge, you need to complete at least 3 of the 7 activities.
Check off all the activities you’ve completed. When you have earned your badge, sign
below and have your FRA leader sign and forward this sheet to the AFMS Juniors
Program chair.
___________________________________
Date completed
_________________________________ ___________________________________
My signature Youth leader’s signature
_______________________________________________________________________
Name of my club
Leader’s preferred mailing address for
receiving badge:
____________________________________
____________________________________
____________________________________

57
Back-up page 2.1, 2.2, 2.3: Everyday objects and the minerals that went into them.
You could conduct Activity 2.1 as a single group activity or make a competition of it,
dividing the kids into two or more teams and seeing who can make the longest list in 15
or 20 minutes. To conclude the activity, you might unveil a collection of mineral
specimens, revealing the actual raw materials that went into some of the things in the
room, as shown in the table below.
Sitting at my computer when I first considered Activity 2.1, I quickly saw a brass lamp,
windows made of silica, all sorts of things made of plastic derived from petrochemicals,
bricks in the fireplace derived from clay (or kaolinite), an old tin cup holding my graphite
pencils, a gold wedding ring on my finger, walls made of plasterboard comprised of
gypsum, steel nails in the furniture, and paint on the walls containing diatomite as filler.
In fact, the television off to the corner contains no less than 35 different metals and the
telephone handset has no less than 42 different minerals! To get kids primed to think
about what things are made of, you might hold up a couple common items that serve as
good teaching examples:
1) an old watch you can take apart (especially one with luminescent hands) has a
glass/silica top, a metal body made of brass, aluminum, gold-plate, etc., interior parts
that might include gemstones, radioactive minerals for luminescence, etc.
2) a salt shaker with an aluminum top and glass body, filled with salt (halite) crystals.
3) an incandescent light bulb with glass exterior (made from silica, soda ash, lime, coal,
and salt), brass or aluminum screw-in base, tungsten filament, copper and nickel lead-
in wires, molybdenum tie and support wires, aluminum heat deflector, etc.
4) a pencil may have a wooden body, but it is filled with a rod composed of graphite
mixed with kaolinite and has an eraser that may hold pumice for grit and that is held
in place with a band of metal that may be aluminum (bauxite) or brass (copper and
zinc/sphalerite). Wow! As many as five or six rocks and minerals in a simple
common pencil!
There are several good web sites you can consult that provide handy lists and tables
linking minerals to everyday objects. Two particularly good ones are the Minerals
Education Coalition (www.mineralseducationcoalition.org) and Women in Mining
(www.womeninmining.org). The Minerals Education Coalition web site provides a nice
graphic illustrating all the minerals going into a light bulb; the ones I’ve described above
are just a few on their list. Our U.S. Geological Survey (USGS) has a website for the
National Minerals Information Center (http://minerals.usgs.gov/minerals/) that provides
statistics and information on minerals essential to the economy.
Following is just a small, selected list of economic minerals and the everyday objects
they help create.
Rock or Mineral Everyday Object
Barite Glass; paints; textiles; toothpaste; green color in fireworks
Bauxite (aluminum ore) Cans & other containers; aluminum foil; autos; airplanes; building components like aluminum siding, window frames

58
Rock or Mineral Everyday Object
Borax Laundry detergent
Calcite Cement; plaster; glass; steel; toothpaste
Cassiterite (tin ore) Cups, plates, & cans; coinage; opalescent glass; enamel; weather-resistant vinyl siding; solder
Celestite Fireworks; caustic soda
Chalk Chalk; quicklime; mild abrasive; fingerprint powder
Cinnabar (mercury ore) Batteries; thermometers; barometers
Coal A “fossil fuel for heating; generating electric power
Copper Coinage; electrical wiring; electronics; plumbing pipes; brass
Corundum Ruby & sapphire gemstones; abrasives
Diamond Jewelry; abrasives; cutting tools and drills
Diatomite Swimming pool and other filters; toothpaste; metal polishes
Dolomite Magnesia for medical/industrial uses; crushed road stone
Feldspar Clay products (pottery; ceramics); glass; gemstones
Fluorite Toothpaste; hydrofluoric acid; steelmaking; nonstick pans
Galena (lead ore) Fishing weights; car batteries; machine parts; solder; linings for radiation protection; bullets
Garnet Sandpaper and other abrasives; jewelry
Gold Jewelry; dentistry; electronic components; coinage; toner in photography; a coating in some catalytic converters; heat conductor to de-ice aircraft cockpit windows; astronaut face masks are gold-coated to protect against solar radiation!
Granite Ornamental building stone; monuments; gravel
Graphite Dry lubricant; brake linings; molds in foundries; pencil lead
Gypsum Plaster-of-Paris; wallboards; fertilizer
Halite (salt) Food; highway de-icing; chemicals; source of chlorine
Hematite (iron ore) Nails & screws; steel; machine parts; tools; chains and fences; bikes; cars; bridges; building frames
Kaolinite (clay) Tiles; kitty litter; bricks; dinnerware and other ceramics; toilets, sinks & bathtubs; glossy paper; fiberglass; stomach medicines; pencil lead; chimney liners
Kyanite Sparkplugs; electrical insulators; porcelain products
Limestone Cement; crushed road stone; building stone; steel making
Lepidolite (lithium ore) Rechargeable batteries; electric car batteries; ornaments
Malachite Ornamental stone & jewelry; copper; green pigment
Manganese Used in making steel
Marble Architectural & ornamental purposes; statuary
Mica Electronic insulators; joint compounds; paints; plastics; rubber products; toothpaste; Christmas tree “snow”
Nickel Coinage; alloys; nickel steel (stainless steel); magnets; electroplating; rechargeable batteries; electric guitar strings
Phosphate Fertilizer; animal feed supplements
Pumice Concrete blocks; abrasives; Lava-brand soap; cosmetic stone to rub away dead skin
Pyrite Sulfuric acid; decorative rock sometimes used in jewelry
Quartz (silica) Glass; gemstones; spectrographic lenses; clocks & watches; also, quartz sand has many uses when mixed with other substances as in cement

59
Rock of Mineral Everyday Object
Rutile (titanium ore) Ore of titanium—used in jetliners & artificial hips & knees
Sand & gravel Concrete; asphalt; road fill; blocks; bricks
Silver Jewelry & ornaments; silverware utensils; coinage; mirrors; photography; solar cells; batteries; photosensitive glass
Slate Roofing shingles; blackboards; patio slabs; the beds on high-quality pool & snooker tables
Sphalerite (zinc ore) Metals & alloys (brass); rust-proof coating on other metals; nails & screws; batteries; water & gas valves; paint; pigments in rubber; skin creams
Sulfur Sulfuric acid; fertilizer; gunpowder & other explosives; rubber( e.g., “vulcanization” to make rubber tougher); pesticides & fungicides; medicines; rayon & cellophane; bath salts; etc.
Talc Talcum powder; cosmetics; ceramics; rubber; plastics; paper
Trona, or Soda Ash (sodium carbonate)
Glass containers (such as light bulbs); fiberglass; detergents; medicine; food additives; photography; pH control of water
Tungsten Filament in light bulbs
Vermiculite Insulation
Wolframite (tungsten) Light bulb filaments; cemented carbides; steel additive
Zircon (zirconium ore) High-temperature ceramics; nuclear reactors; abrasives
Suggested activity for everyday uses of rocks and minerals.
To illustrate a practical use of a rock or mineral, get a box of diatomite from the
swimming pool supply area of a hardware store. Poke a number of holes in the bottom of
a large, sturdy paper cup. Line the bottom of the cup with a few layers of cheesecloth.
Fill the cup a quarter- to half-full with a mixture of diatomite and pea gravel. Cut the top
off a plastic water bottle and insert your cup on top. Pour muddy water into the cup and
allow it to sit. You should end up with more-or-less clear water at the bottom of the
water bottle (it will still be a little muddy, but not nearly as muddy as it began) as a result
of the filtration properties of diatomite, which is composed of microscopic silica
“skeletons” or tests of fossil diatoms that are peppered with tiny holes. The porous nature
of these tests makes diatomite a perfect filter.
Materials.
1) Diatomaceous earth (from a swimming pool supply section of a hardware store)
2) Pea gravel (from a hardware or garden supply store)
3) A large, sturdy paper cup (with numerous holes poked in the bottom)
4) Cheesecloth
5) Plastic water bottle (with top cut off)
6) Muddy water (the muddier, the better!)
Note: Kids who write a report about minerals in the home for Activity 2.2 can simultaneously satisfy
requirements toward earning their Communication badge (Activity 7.2).

60
Back-up page 2.3: Collecting everyday objects and the minerals that went into them.
For pointers on building a collection, see back-up pages for Badge 5 on Collecting.
To help your kids collect minerals that have everyday applications see units 2.1 and 2.2,
then start by approaching fellow club members to see if they might have supplies of
minerals they’ve collected that they would be willing to donate to the cause (these might
include quartz crystals, fluorite, galena, limestone, gypsum, hematite, mica, slate, marble,
granite, etc.). Many common minerals are inexpensive and readily available from show
dealers, and sometimes dealers will offer special bulk discounts if you approach them
about your project.
In the retail arena, nature stores sell common minerals (pyrite, tumble-polished quartz or
hematite, etc.). Toy and crafts stores are other spots to try, as well as stores selling
teaching supplies and the gift shops of natural history museums. If you have active mines
in your area, they may be willing to donate samples. For instance, the vast borax mine in
Boron, California, is happy to lead tours and provide free samples of various borate
minerals. Still other sources (although more expensive) are the various scientific supply
houses, such as Ward’s, Edmund Scientific’s, etc.
A display showing minerals (below) & everyday objects (above) that they helped create.
This display included a quiz asking viewer to match the mineral to the everyday object.
Note: Kids can use this activity to satisfy requirements toward earning their Collecting badge
simultaneously (Activity 5.1). And those who put together a public display can use it toward satisfying
requirements for earning the Showmanship badge (Activity 6.4).
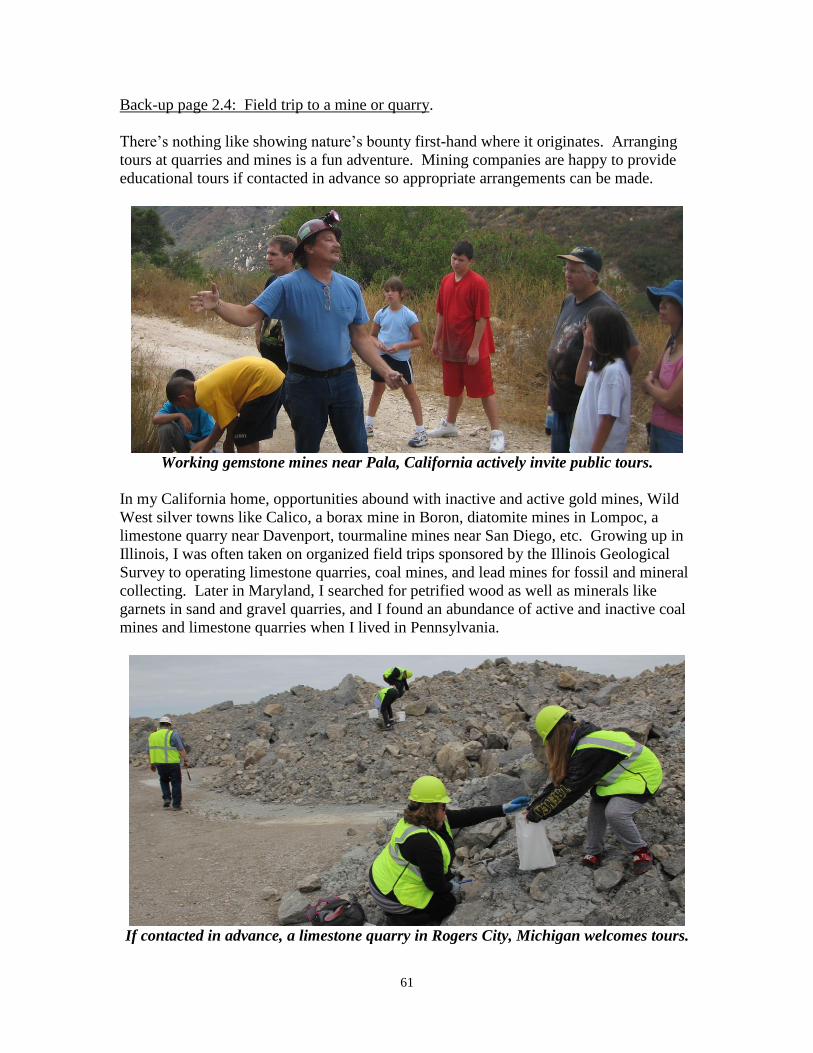
61
Back-up page 2.4: Field trip to a mine or quarry.
There’s nothing like showing nature’s bounty first-hand where it originates. Arranging
tours at quarries and mines is a fun adventure. Mining companies are happy to provide
educational tours if contacted in advance so appropriate arrangements can be made.
Working gemstone mines near Pala, California actively invite public tours.
In my California home, opportunities abound with inactive and active gold mines, Wild
West silver towns like Calico, a borax mine in Boron, diatomite mines in Lompoc, a
limestone quarry near Davenport, tourmaline mines near San Diego, etc. Growing up in
Illinois, I was often taken on organized field trips sponsored by the Illinois Geological
Survey to operating limestone quarries, coal mines, and lead mines for fossil and mineral
collecting. Later in Maryland, I searched for petrified wood as well as minerals like
garnets in sand and gravel quarries, and I found an abundance of active and inactive coal
mines and limestone quarries when I lived in Pennsylvania.
If contacted in advance, a limestone quarry in Rogers City, Michigan welcomes tours.

62
How do you find out about local quarries and mines? One possibility is the Yellow
Pages. For instance, in my local phone book, I found Best Rock Mining Company listed
under “Mining Companies.” Look under “Mining,” “Rock,” “Quarries,” etc. Try the
local Chamber of Commerce.
Other good bets are state geological surveys, which maintain lists of mineral resources
and active mining companies. You can locate your state survey via a Google search on
the computer or by looking in the phone book “Blue Pages” under State Government
listings, where it might be included under the Department of Conservation or Geological
Survey. On the web site of the United States Geological Survey (http://www.usgs.gov/),
you should be able to locate information on your state for regional geologic information.
The National Mining Association offers a state-by-state listing of mines and mining
museums that offer tours. You can access this at https://nma.org/about-nma-
2/resources/mining-museums-and-tours/
As always in our electronic era, if all else fails, try Google! I entered “active mines,
Ventura County” and discovered no less than 35 mines (and over 1,000 “claims”) in my
own home region!
After a field trip to a mine or quarry, have kids prepare written reports or make individual
or group presentations at the next club meeting describing what was being mined, how it
was being mined, and how it’s ultimately used. They can also bring and share samples
collected at the mine (some mines allow this; others don’t) and perhaps use the
experience as the basis for an educational display case at your next show or to share at
their school or a science fair.
If you can’t make it to a mine or quarry, never fear! The World Wide Web comes to the
rescue. Check out “Virtual Quarry Interactive” (www.virtualquarry.co.uk). This website
offers a simulated field trip to a rock quarry and, under “Teacher’s Desk,” 20 lesson plans
related to quarrying and rock products used in everyday life. It’s a British site, so the
narrator has an accent and some of the terminology may be unusual for American
students (e.g., “lorry” instead of “truck”), but it’s a fun, informative site, nonetheless.
Note: Kids can use this activity toward satisfying requirements for the Field Trips badge simultaneously
(Activity 8.3). Also, kids who write a report or give a talk about their trip can simultaneously satisfy
requirements toward earning the Communication badge (Activities 7.1 and 7.2).

63
2.5 Field trip to a hardware store.
A home building supply or hardware store, especially one that also has a garden center, is
a great place to vividly underscore just how much that’s all around us derives from rocks
and minerals. This makes for a great “indoor field trip” that can be turned into a
scavenger hunt to see which kids (or teams of kids) can come up with the biggest list of
everyday items and the rocks and minerals that went into them. If doing an activity like
this with a fairly large group of kids, contact the store manager in advance to ensure a
warm welcome. You may find they’re more than willing to help in the hunt!
To get you started, here are a few things that come immediately to my mind as to what
you can find in your local hardware store derived from common rocks and minerals:
steel and iron nails (made from iron ores such as hematite)
plaster and plasterboard or drywall (made from gypsum)
electrical wiring, pipes, and plumbing fixtures (made from copper)
aluminum and tin siding and roofing (made from bauxite and cassiterite)
brass screws and ornamental plates (brass is an alloy of copper and zinc)
lead solder (made from galena)
diamond on drill bits and saw blades used for cutting title, concrete, etc.
sandpaper (several varieties: garnet, silicon carbide, and corundum, or emery)
glass (made from silica sand)
rough and crushed rocks and stones for ornamental use (river rock, pea gravel, red or
black volcanic cinders or scoria, limestone, marble, etc.)
sand for mixing with concrete, for kids’ sand boxes, etc.
bricks and ceramic products (made from fired clay, or kaolinite)
salt (or halite) for melting icy buildup on sidewalks or for water softeners
slate slabs for high-priced shingles and flagstones
enormous slabs of various sorts for ornamental use, as in kitchen countertops (made
from granite, marble, labradorite, etc.)
diatomaceous earth for swimming pool filters
Using this list as a starting point, see what else your kids can find. Again, this can make
for a really fun event, especially if you turn it into a competitive scavenger hunt with
prizes at the end. If you have a fairly large group of kids, I suggest forming teams.
Assign a parent to accompany each team, and give that parent a pencil and a clipboard
with a sheet of paper containing a table with one column for “everyday object” and a
second column for “what rock or mineral/s went into it.”
Following is a photo collage from a stroll that I took through my local hardware store
today while working on this Fifth Edition of our Badge Manual. In just some 10 to 15
minutes I spotted: copper pipes; river rocks for decorative stones; a tile saw embedded
with diamond chips; bags of sand for concrete, plaster, and sand boxes; diatomaceous
earth for swimming pool filters; and natural salt crystals for water softening. See what
your club’s kids can find!

64

65
Back-up page 2.6: Careers in the earth sciences.
As a multi-disciplinary science, geology draws from and applies chemistry, physics,
biology, mathematics, and engineering. Subfields include geophysics, hydrogeology,
oceanography, paleontology, environmental engineering, mining and mineral resources,
and more. Geology students learn about earth processes and their effects on the general
environment and life. Well-trained geologists help in charting pathways that are both
environmentally and economically sound in addressing issues related to human
interaction with both resources and hazards, crafting solutions to benefit the general
public. In addition to geology, gemology is a career direction for kids interested in
minerals and gemstones, whether as a miner seeking new sources of rough gemstones, a
distributor in the wholesale business, a retailer, or an artisan crafting fine jewelry.
Kids might become a jewelry artist and gem shop owner!
Great resources to help kids learn about such careers are web sites for the Minerals
Education Coalition and Women in Mining: www.mineralseducationcoalition.org and
www.womeninmining.org. You and your kids can also explore the web site of the U.S.
Geological Survey: www.usgs.gov. And there are the American Geosciences Institute
(AGI, www.americangeosciences.org) and the Gemological Institute of America (GIA,
www.gia.edu). If you live near a college or university that has a geology department, you
might contact the department because they will often have information about careers in
geology for advising their students. Here are just a few ideas about earth science careers:

66
college or university professor of geology or paleontology
laboratory research worker and technician
natural history museum curator
petroleum geologist
economic geologist, staff geologist or field geologist for a mining company
mining engineer and engineering geologist
geochemists and geophysicists
geochronologists and stratigraphers
glacial geologists
volcanologist investigating volcanoes and volcanic hazards
seismologist studying earthquakes and their affects and how to mitigate those effects
planetary geologist for NASA
surveyor & cartographer
independent consultant assessing geological hazards for the construction industry
metallurgist
environmental scientist conducting environmental impact studies and remediation
marine geologist studying ocean-floor and continental border boundaries
hydrogeologist or hydrologist evaluating and developing groundwater resources
gemologist evaluating the value and worth of gemstones
independent fossil or rock and mineral dealer
professional jewelry designer and craftsperson
jewelry store owner
Encourage kids to read about or interview someone in one of these careers.
One career I always dreamed of was as a fossil curator in a museum.
Note: Kids who write a paper for this activity can use it toward satisfying requirements for the
Communication badge simultaneously (Activity 7.2).
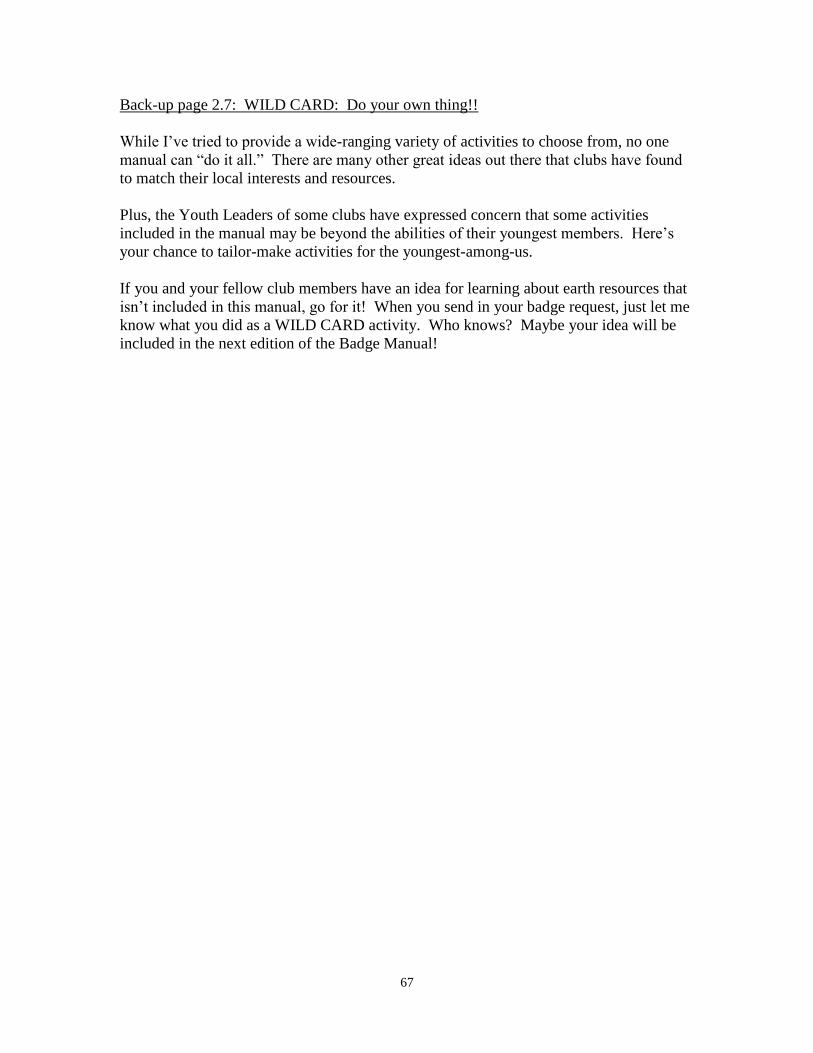
67
Back-up page 2.7: WILD CARD: Do your own thing!!
While I’ve tried to provide a wide-ranging variety of activities to choose from, no one
manual can “do it all.” There are many other great ideas out there that clubs have found
to match their local interests and resources.
Plus, the Youth Leaders of some clubs have expressed concern that some activities
included in the manual may be beyond the abilities of their youngest members. Here’s
your chance to tailor-make activities for the youngest-among-us.
If you and your fellow club members have an idea for learning about earth resources that
isn’t included in this manual, go for it! When you send in your badge request, just let me
know what you did as a WILD CARD activity. Who knows? Maybe your idea will be
included in the next edition of the Badge Manual!

68
3. Fossils
Fossils represent a merger between the sciences of geology and biology. They are at the
core of the science of paleontology, or the study of past life. To study fossils, you need
to learn about different forms of life now on earth, the history of that life, and the
geological processes that preserve life’s record. The following activities will assist you.
As a start, you should get a book. There are many good, basic guidebooks at reasonable
prices, such as Rhodes, Zim, and Shaffer’s Fossils: A Guide to Prehistoric Life, Palmer’s
Pockets Fossils, Walker and Ward’s Smithsonian Handbooks: Fossils, and more. You
can also find many good books like these in your public library.
Activity 3.1: The geological time chart.
Memorize the geological eras and periods and some key facts about each one. Then
make a geological time line showing all the geological periods on a long sheet or roll of
paper. Illustrate it with drawings of fossils and prehistoric plants and animals that are
characteristic of each period.
Activity 3.2: Types of fossilization and making or excavating fossils.
Explain the different types of fossilization (e.g., carbonization, mineralization, molds and
casts, etc.). Then do one or more of the following. Make a “fossil” with clay and plaster,
make paper or cardstock cut-and-fold fossil models, bake a Tri-lo-“Bite,” make a sponge
fossil bone, make artificial amber with insects, or excavate a real or plastic fossil.
Activity 3.3: The forms of life.
Demonstrate knowledge of the major groups of invertebrates, vertebrates, and plants.
Activity 3.4: Collecting fossils.
Build a fossil collection of 10 to 20 specimens. Some collectors concentrate on a single
sort of plant or animal (for instance, trilobites or shark teeth) and try to collect a wide
range of species. Others concentrate on one locality or formation and build an array of
all the plants and animals that locality has to offer. Still others opt for diversity, trying to
collect a little bit of everything (clams, brachiopods, corals, shark teeth, trilobites, etc.).
Whichever form you choose, be sure to follow the basics of good curation, labeling each
specimen and keeping a log book with key information (what it is, where it came from,
age of the fossil, etc.). (See Badge 5: Collecting.)
Activity 3.5: A fossil-collecting field trip.
Learn and demonstrate knowledge of the AFMS Code of Ethics and the rules of field trip
etiquette (as well as the laws of your state or region), then head out on a fossil-collecting
trip. (See Badge 8: Field Trips.)
Activity 3.6: Your state fossil.
Just as each state has its own flag, most (but not all!) have an official state fossil. Find
out what your state fossil is and write a report about it for your club newsletter or talk
about it at one of your meetings. If your state does not yet have a state fossil, discuss
69
what would be a good fossil to nominate. Then work with your fellow club members to
write to your governor or local state legislature to suggest it! You would be surprised at
just how many state fossils and other state symbols began with the efforts of local rock
clubs and kids just like you in elementary and middle schools!
Activity 3.7: Dinosaurs.
Everyone loves one fossil in particular: dinosaurs! With your fellow club members, take
part in a dinosaur identification game or other dinosaur-related activities, such as crafting
cut-and-fold paper or cardstock dinosaur models.
Activity 3.8: Fossil and dinosaur names.
Fossils, including dinosaurs, often have long names that seem impossible to pronounce.
Sometimes, they were built around the name of a person (for instance, a famous
paleontologist or the person who first discovered the fossil). Other times, they are named
for the place where they were found or for some characteristic. The names are then put
into Latin or Greek form. Pick your favorite fossils or dinosaurs and learn how its name
came about and what it means. Or develop a new dinosaur name built around the name
of your society or town. Or create a whole new fossil animal and give it a name!
Activity 3.9: WILD CARD: Do your own thing!
Do you have an idea for learning about fossils that isn’t included in this manual? If so,
do your own thing! When your Youth Leader sends in your badge request, let us know
what you did as a WILD CARD activity. Who knows? Maybe your idea will be
included in the next edition of the Badge Manual!

70
3. Fossils
□ 3.1 The geological time chart
□ 3.2 Types of fossilization and making or excavating fossils
□ 3.3 The forms of life
□ 3.4 Collecting fossils
□ 3.5 A fossil-collecting field trip
□ 3.6 Your state fossil
□ 3.7 Dinosaurs
□ 3.8 Fossil and dinosaur names
□ 3.9 WILD CARD: Do your own thing!
To earn your Fossils badge, you need to complete at least 3 of the 9 activities. Check off
all the activities you’ve completed. When you have earned your badge, sign below and
have your FRA leader sign and forward this sheet to the AFMS Juniors Program chair.
___________________________________
Date completed
_________________________________ ___________________________________
My signature Youth leader’s signature
_______________________________________________________________________
Name of my club
Leader’s preferred mailing address for
receiving badge:
____________________________________
____________________________________
____________________________________
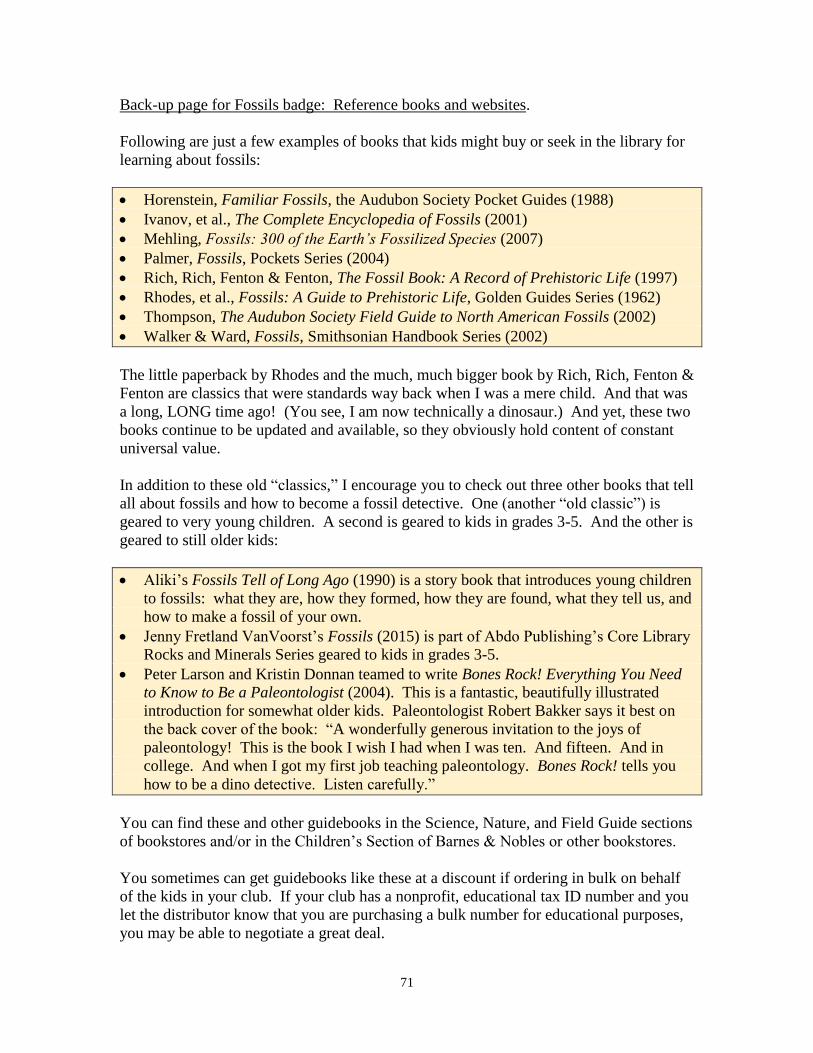
71
Back-up page for Fossils badge: Reference books and websites.
Following are just a few examples of books that kids might buy or seek in the library for
learning about fossils:
Horenstein, Familiar Fossils, the Audubon Society Pocket Guides (1988)
Ivanov, et al., The Complete Encyclopedia of Fossils (2001)
Mehling, Fossils: 300 of the Earth’s Fossilized Species (2007)
Palmer, Fossils, Pockets Series (2004)
Rich, Rich, Fenton & Fenton, The Fossil Book: A Record of Prehistoric Life (1997)
Rhodes, et al., Fossils: A Guide to Prehistoric Life, Golden Guides Series (1962)
Thompson, The Audubon Society Field Guide to North American Fossils (2002)
Walker & Ward, Fossils, Smithsonian Handbook Series (2002)
The little paperback by Rhodes and the much, much bigger book by Rich, Rich, Fenton &
Fenton are classics that were standards way back when I was a mere child. And that was
a long, LONG time ago! (You see, I am now technically a dinosaur.) And yet, these two
books continue to be updated and available, so they obviously hold content of constant
universal value.
In addition to these old “classics,” I encourage you to check out three other books that tell
all about fossils and how to become a fossil detective. One (another “old classic”) is
geared to very young children. A second is geared to kids in grades 3-5. And the other is
geared to still older kids:
Aliki’s Fossils Tell of Long Ago (1990) is a story book that introduces young children
to fossils: what they are, how they formed, how they are found, what they tell us, and
how to make a fossil of your own.
Jenny Fretland VanVoorst’s Fossils (2015) is part of Abdo Publishing’s Core Library
Rocks and Minerals Series geared to kids in grades 3-5.
Peter Larson and Kristin Donnan teamed to write Bones Rock! Everything You Need
to Know to Be a Paleontologist (2004). This is a fantastic, beautifully illustrated
introduction for somewhat older kids. Paleontologist Robert Bakker says it best on
the back cover of the book: “A wonderfully generous invitation to the joys of
paleontology! This is the book I wish I had when I was ten. And fifteen. And in
college. And when I got my first job teaching paleontology. Bones Rock! tells you
how to be a dino detective. Listen carefully.”
You can find these and other guidebooks in the Science, Nature, and Field Guide sections
of bookstores and/or in the Children’s Section of Barnes & Nobles or other bookstores.
You sometimes can get guidebooks like these at a discount if ordering in bulk on behalf
of the kids in your club. If your club has a nonprofit, educational tax ID number and you
let the distributor know that you are purchasing a bulk number for educational purposes,
you may be able to negotiate a great deal.

72
In addition to books, many websites help you explore fossils with kids. To give you just
a few examples, check out the following links, then explore for more on your own,
particularly websites connected to major natural history and science museums.
National Park Service Junior Paleontologist Program
http://nature.nps.gov/geology/paleontology/jr_paleo.cfm
“The Learning Zone,” Oxford University Museum of Natural History,
http://www.oum.ox.ac.uk/thezone/
The Royal Ontario Museum (Toronto, Canada), www.rom.on.ca, has a number of
fossil-related sections and activities, including neat ones connected to the “Cambrian
explosion” and the Burgess Shale formation from Canada. Both informative and fun!
University of California Museum of Paleontology, www.paleoportal.org. Produced
in coordination with the PaleoSociety, the Society of Vertebrate Paleontologists, and
the USGS, this is an entry point to paleontology resources for audiences of all levels.
Topics for exploration include Exploring Time & Space, Fossil Gallery, Famous
Flora & Fauna, Careers, Resources, K-12, Collections, and PaleoPeople.
At a more advanced level, send your truly serious junior paleontologists to
Fossilworks and its Paleobiology Database: www.paleodb.org.
The opening page of the PaleoPortal.
Finally, when introducing especially young kids to fossils, you may want to do some sort
of song-and-dance activity based around the “Fossil Rock Anthem.” “The what?” you
ask. Check it out on YouTube. There are many varieties of this fun song. Google
“Fossil Rock Anthem, YouTube,” and you’ll get a great variety to choose from.
73
Back-up page 3.1: The geological time chart.
It took humans a long, long time to fully appreciate the long, long history of our planet
Earth. As that appreciation dawned, scientists began constructing stratigraphic and
geologic time scales and charts.
Today, an International Commission on Stratigraphy researches official names, dates, and
ages to set a consistent and uniform chart. This serves as the go-to reference source for
academic and professional researchers and students. Work with your kids to learn about
the geological time chart and the different plants and animals that lived during the
different eras and periods.
A basic geologic time chart, with examples of common fossils from each period, is
provided on the next page as a reference. A similar table with blank spaces is provided
for kids to fill in era, period, and epoch names as best they can.
Alternatively, you can encourage your kids to create their own timeline in whatever way
they like. For instance, some kids prefer a horizontal timeline, illustrating it to show
different creatures that supplanted one another through time. If you get a long roll of
large paper, this also makes a neat group activity. Roll the paper the entire length of a
room and divide it up into the geological time scale. Then pass out pencils, colorful
markers and crayons, and assign kids to different periods to illustrate with fossils and
reconstructions of plant and animal life of those periods.
Another neat activity for illustrating the vast scale of geologic time is to make a timeline
in chalk on a sidewalk with one inch equaling one million years. To go from the
beginning of the Cambrian Period to the present, your time line would stretch 544 inches,
or more than 45 feet! And that’s ignoring the preceding four billion years of earth
history—for that, you’ll need a bigger piece of chalk! Give kids pieces of colored chalk
to draw pictures of appropriate fossils at different spots along the timeline, with trilobites
in the Cambrian, dinosaurs in the Jurassic, woolly mammoths and saber-tooth cats in the
Pleistocene, and so forth.
Finally, a couple of great web sites help teach kids at many levels all about geologic time:
One site related to the geologic time scale, along with animations, has been put
together by the Planet Habitability Laboratory of the University of Puerto Rico:
http://phl.upr.edu/library/notes/thedistributionofcomplexlifeinthelast540millionyears
Another great site from the University of California Museum of Paleontology at
Berkeley has materials to help teach kids in grades 5 to 10. It includes both a
teacher’s section and a student’s section:
www.ucmp.berkeley.edu/education/explorations/tours/geotime/geotime.html

74
ERA PERIOD/EPOCH
Cenozoic “recent life”
dinosaurs dead / mammals ahead
mammals diversify
first humans
Quaternary (modern humans appear; mastodons
& mammoths & other Ice Age mammals)
Holocene 11,000 years
Pleistocene 1.6 million years
Tertiary (by the Eocene, many modern
types of mammals appear,
including whales; large running mammals appear in Oligocene;
large carnivores and grazing
mammals are abundant starting
in the Miocene; earliest
hominids appear in late
Miocene or early Pliocene)
P
ale
ogen
e
│ N
eogen
e
Pliocene 5.2 million years
Miocene 23 million years
Oligocene 35 million years
Eocene 56 million years
Paleocene 65 million years
Mesozoic “middle life”
dinos rule / mammals drool
first dinosaurs & first mammals
appear toward end of Triassic
Era ends in great mass extinction (end
of dinosaurs) likely caused by
asteroid impact
Cretaceous (earliest placental mammals; earliest flowering plants; bony fish proliferate; dinosaurs and ammonites proliferate but become extinct by the end of the
period)
145 million years before present
Jurassic (dinosaurs are abundant on land and ammonites in the sea; earliest birds)
208 million years before present
Triassic (earliest dinosaurs & mammals; cycads & conifers diversify)
245 million years before present
Paleozoic “ancient life”
invertebrates reign supreme
Cambrian “explosion” ushers in
complex multicellular life
First land plants as early as
Ordovician
First land vertebrates and rise of seed
plants toward end of Devonian
Era ends in largest mass extinction in
earth history; cause still unknown
Permian (mammal-like reptiles emerge; largest mass extinction event on earth) 290 million years before present
Pennsylvanian (great coal-forming forests of scale trees & seed ferns; abundant insects)
323 million years before present
Mississippian (abundant sharks & amphibians & crinoids; earliest reptiles)
362 million years before present
Devonian (fish become abundant; extinction of armored fish; earliest amphibians and ammonoids) 408 million years before present
Silurian (great diversity of ostracods; earliest land plants and insects)
439 million years before present
Ordovician (graptolites abundant; invertebrate marine animals proliferate, especially
coelenterates, mollusks, brachiopods, bryozoans, and arthropods)
510 million years before present
Cambrian (appearance of burrowing animals and most contemporary
forms of complex multicellular life; trilobites common)
544 million years before present
Pre-Cambrian
Divided into Proterozoic Eon (2.5 to
.54 billion years ago), Archean Eon
(3.8 to 2.5 billion years ago), and
Hadean Eon (starting 4.6 billion
years ago, when earth formed)
Vendian or Ediacaran (enigmatic soft-bodied Ediacaran fossils appear
shortly before the Cambrian)
600 million years before present
(Single-celled life emerges and proliferates: bacteria, algae, stromatolites)
4.6 billion years before present

75
ERA PERIOD/EPOCH
__

76
Back-up page 3.2: Types of fossilization and making or excavating fossils.
Forms of Fossilization.
Fossils are preserved remains or evidence of past life: plant and animal, microscopic and
macroscopic. These include actual remains of the plant or animal (such as teeth),
carbonized impressions, molds and casts of shells and other body parts, etc., as well as
evidence of an organism’s activity, such as chemical traces, burrows, footprints, and
fossil poo or coprolites (known as trace fossils). A simple YouTube video provides a
clear explanation: www.youtube.com/watch?v=TVwPLWOo9TE. Following are some
of the most common forms of fossilization.
Molds and casts. Calcareous shells may dissolve, leaving a cavity in a rock that is
later filled with sediment or minerals, forming a mold and cast of the original
organism. Only the general shape and form of the original organism is left.
Mineralization, replacement, or petrification. Original shell, bone, or wood may be
infiltrated or totally replaced by a mineral that seeps into pores via mineral-laden
groundwater. When this happens, scientists can observe even tiny details of cell
structure in bones and the cells and growth rings in petrified wood.
Re-crystallization. Shells may re-crystallize, leaving original shell material but in a
different mineral form. For instance, many shells are formed from calcium or
aragonite, which changes to calcite during fossilization.
Carbonization. Between layers of finely bedded shale, original organic material may
be compressed and distilled away, leaving only a thin film of carbon on a bedding
plane, as often happens with leaves and insects that fossilize.
Original remains. Sometimes, animal or plant remains may undergo little to no
alteration at all. Such is often the case with fossils such as teeth that are resistant to
decay. Or an animal like an insect may be captured in sap, which hardens into amber,
creating a natural time capsule that preserves the original organic material.
(Scientists have been able to extract bits of ancient DNA from such insects!) In
Siberia, creatures such as woolly mammoths have been found locked in ice that has
remained frozen since the Ice Ages.
Making a Fossil Using Clay and Plaster.
This activity simulates how fossils in the forms of molds and casts are created.
Materials.
Plaster of Paris small cardboard containers
jug of water shells, leaves, or fossil models
modeling clay paper towels
vegetable oil masking tape
paintbrush (1-inch wide) pen or market
paper cups roll of large paper/newspapers
dowels or sticks (optional) paints and paint brushes

77
Procedure.
1. This can be messy, so start by protecting your tabletop or other work surface by
spreading out a roll of paper, newspaper, or some sort of drop cloth.
2. Place a chunk of modeling clay into the bottom of a small cardboard container (the
cut-off bottoms of milk cartons, paper cups, or Pringles potato chip cans work well) and
press into a flat, smooth surface.
3. With your 1-inch wide paintbrush, brush a light coating of vegetable oil across the
surface of the clay. This is to make it easy to remove your fossil model and, later, the
plaster cast. Otherwise, the clay will stick.
4. Have kids select the fossil they wish to make. Use real leaves or seashells or plastic
models of fossils. Such models may be found in museum gift shops. Ward’s
(www.wardsci.com) also sells a set of plastic fossil models. Ones that seem to be most
popular with kids are trilobites, ammonites, and shark teeth.
5. Press the fossil model or seashell into the clay and remove it to create a mold.
6. Mix and stir plaster and water in a paper cup with a dowel to consistency of a
milkshake. Pour it into the mold created in the clay. Use the dowel to get all the plaster
out. If you’re making a number of fossils and will need to re-use the dowel, wipe it clean
right away with paper towels before the plaster hardens on it.
7. Gently tap the bottom of your container with the clay and plaster several times against
the tabletop to ensure that the plaster completely fills the mold and to remove air bubbles
in the plaster.
8. It takes 15 to 20 minutes for the plaster to dry enough to complete this project. If
you’re working with a lot of kids, it’s easy to mix up which fossil belongs to whom.
Have kids write their names on masking tape with markers and affix them to their fossil
containers. Set all containers aside to dry. During this drying period, you should have
another activity; otherwise, you’ll hear “Is my fossil ready?” about 200 times. This is a
nice activity to do prior to a meeting. Once the meeting is over and before everyone goes
home, you can return to the fossils. Or, after setting everything aside to dry, you might
show a video about fossils and cap it off by having everyone unveil and share their newly
minted fossils.
9. Once the plaster has dried, tear the cardboard container and peal the cardboard away,
leaving a layer of clay attached to a layer of plaster. This gives you a chance to talk
about layers of sediment and to show kids how fossil-bearing sediments usually (but not
always) form in discrete layers.
10. Peal the clay away, and your kids will find a cool fossil in their slab of plaster. Many
kids then write their names on the backs of their fossil slab.
11. Optional. Have kids paint their fossils. Glossy or flat enamel paints (the kinds used
with plastic model airplanes and cars) work well in shades of black, gray, brown, or
beige. Craft stores often carry textured “sand” paints, so kids can paint the surface
around the fossil to resemble a real matrix. I’ve also found a pearly coating at one craft
store. I painted it over an ammonite cast that I had painted a brassy brown. The pearl
coating gave a glossy, iridescent sheen just like real mother-of-pearl. Experiment with
different sorts of paints and coatings like these.
78
I’ve also been told about a fossil-making activity that calls for mixing together one cup of
used coffee grounds, one-half cup of cold coffee, one cup of flour, and one-half cup of
salt in a mixing bowl. Knead this into a dough, flatten it on a sheet of waxed paper, and
cut out small squares or circles. Press objects such as scallop, snail, or clam shells into
the dough, remove the object, and either allow the dough to harden for a day or two or
bake it briefly in an oven. The resulting items have the look and feel of a real fossil in
matrix. Or, for yet another, simpler process to make fossils using just self-hardening
clay, see the back-up page for 10.4.b) Sedimentary rocks: Making fossils.
Note: You can use any of the activities described above to help kids satisfy requirements toward earning
both their Fossils and Earth Processes (Activity 10.4.b) badges simultaneously.
Making Cut-and-Fold Fossil Models Using Cardstock.
The following website from the U.S. Geological Survey provides masters you can
download and print for free onto cardstock for kids to craft cut-and-fold 3D models of
trilobites and nautiloids: https://pubs.usgs.gov/of/1994/0667a/report.pdf.
Making Tri-lo-“Bites” and Other Delectable Fossil Treats.
Even more fun than making plaster or paper fossils—especially for younger kids—is
making Tril-o-“Bites.” Dennis Gertenbach of the Flatirons Mineral Club in Colorado
sent this activity. Haul out your grandma’s Christmas cookie recipe, gather kids in the
kitchen, and work with them to fashion, bake, and decorate cookies with frosting in the
forms of trilobites, ammonites, star fish, dinosaurs, and other fossil creatures. In fact, at
specialty shops I’ve found cookie cutters in the shapes of different dinosaurs, in star
shapes, etc., which made this activity even easier. As they make-and-bake, kids will be
learning about the names and shapes of different fossils in a way that should leave a good
taste in their mouths when everyone gets to eat their fossil creations!
The Kentucky Geological Survey website has a Trilobite Cookie recipe as well as recipes
for “Prehistoric Appetizers”. Go to www.uky.edu/KGS/education/trilobitecookies2.htm
and www.uky.edu/KGS/education/cookbook.htm. Those appetizers include Ammonites-
in-a-Blanket, Cephalopods-in-a-Blanket, and Cephalopod Celery. This is one activity
that is both fun and yummy!
Making Fossil Bones from Sponges.
Cut sponges into the shapes of bones and set them in a pan or tray. Pour a saturated
solution of hot water and Epsom salts into the pan and over your sponges then set the pan
aside for a week or so until all the water has been absorbed into the sponges or has
evaporated and the sponges have dried. You should end up with stiff sponges with pores
holding crystals of Epsom salts, just as petrified dinosaur bones turn rock-hard from the
minerals that flowed through their cells.

79
Making Artificial Amber with Insects.
Amber is resin from trees that has hardened over the ages. Basically, it’s fossilized tree
sap. It is often sought by lapidary artists to be crafted into jewelry with beautiful golden
transparency. In fact, amber is considered an “organic” gemstone. It is also sought by
fossil collectors because that resin sometimes trapped insects, leaves, or other critters
when it was still gooey and sticky. These make for some of the best fossils around in that
every detail of the insect is preserved in three dimensions, right down to antennae and the
tiniest hairs on an insect leg. It’s literally like a window into ancient life!
Help kids make artificial amber using dead and dried insects and polyester or epoxy
casting resins. Such resins usually come in kits along with a hardener. Look for them in
craft stores. I’ve also run across instructions on a website called RockHoundBlog for
making amber using clear nail polish colored with yellow food coloring along with a drop
of red. Unfortunately, that website is now defunct, but you apparently use a small
container, like a bottle cap, drop in a dead insect, and cover it with nail polish that has
been colored with food coloring.
While the activities above result in great paperweights, another activity results in great
snacks! A now-defunct “ehow” website once offered recipes for creating edible “jello
amber” and “amber brittle.” For jello amber, just mix regular banana or lemon jello, add
a few drops of red food coloring, and press in gummy bugs at half the recommended chill
time for the jello. For amber brittle, heat equal parts water and sugar in a saucepan to a
syrupy texture. Add perhaps a dozen drops of yellow food coloring and 6 drops red.
Pour the thick syrup onto a cookie sheet lined with wax paper, then push in gummy bugs.
After all cools overnight, you should be able to break your “brittle” into many pieces.
Excavating a Fossil.
Materials.
Plaster of Paris mixing bowl
coarse-grained washed plaster sand dowel or spoon for mixing
diatomite large cups or bucket with damp sand
water fossils or plastic fossil models
Pam vegetable oil spray nails or bamboo skewers
This activity gives kids a fun way to learn about the basics of fossil excavation without
leaving home! Mix together a scant quarter cup of plaster of Paris (keep it loose and
fluffy, not tamped down), a generous overflowing cup of coarse-grained washed plaster
sand (available in bags at hardware stores) that has been thoroughly dried, and,
optionally, a bit of diatomite (available with swimming pool supplies in hardware stores).
Add water to this mixture and stir in a mixing bowl with a dowel or spoon to the
consistency of pancake batter. You may need to experiment to get the right proportions
and consistency. For instance, too much plaster will make it difficult to chip out the

80
fossil, but too little will result in a crumbly mess! (Also, don’t use beach sand. It’s too
compact and the salt within it also seems to impact the results.)
Pour the wet “matrix” you’ve just made into three fist-sized containers or cups.
Alternatively, fill the bottom of a 5-gallon bucket with damp sand and make three fist-
sized cavities to fill with matrix by pressing in and removing a rock. Set a fossil into the
matrix in each container or cavity. Lightly spraying the fossil with a vegetable oil like
Pam will make it easier to chip out. You might use a real fossil (a crinoid stem fragment,
brachiopod, shark tooth, ammonite, etc.) or a small plastic dinosaur skull or skeleton
from a toy store. (I obtained some at our local 99¢ Store.) Pour just a little more matrix
to cover the fossil and tamp it down. Keep a tip of the fossil emerging from the top so
kids will know where to begin excavating.
Once the matrix has hardened, it can be removed from the container to dry thoroughly for
two or three days under the sun. Make one for each kid in your group, and give everyone
a nail to “excavate” fossil treasures. You can also use bamboo skewers as excavating
tools. Because bits of matrix may go flying as kids chip away, eye protection is
recommended. Once all fossils have been chipped out into the open, have your junior
paleontologists learn about the fossil that each has just excavated.
Matrix with the foot of a dino emerging (above) and an excavated dino (below).
In addition to mixing your own matrix for excavation, you can find pre-made kits
containing blocks, digging tools, and a brush. Look for these in museum gift shops,
stores catering to teachers, the science section of toy stores, and similar venues.

81
Back-up page 3.3: The forms of life.
The AFMS publishes the AFMS Fossil List. This represents the approved reference list
of classifications and common names of fossils used in judging competitive exhibits of
fossil collections. This highly detailed list serves as an invaluable reference tool.
You can receive information about obtaining a copy by contacting the AFMS central
office at the following email address: [email protected]. Or you can download
a copy yourself from http://www.amfed.org/rules/rules.htm. Once in the site, click on
“AFMS Approved Reference List of Classifications and Common Names for Fossils,”
and then make sure you have a good supply of paper in your printer because the
document is over 20 pages long.
In addition to the AFMS Fossil List, you’ll find classifications provided in the many fossil
guidebooks listed above on the first back-up page for the Fossils badge. And you might
check out the website “Yup…Rocks” (www.yuprocks.com), which features a photo
gallery of fossils from the major phyla.
To get a truly global and comprehensive view of life in all its glorious forms and
variations, check out the online Encyclopedia of Life (EOL). Hosted by the Smithsonian
National Museum of Natural History, it may be accessed at www.eol.org.
A note on working with kids in different age groups.
How much detailed knowledge kids should have of the different forms of life will vary
with the ages of the kids with whom you’re working. For younger kids, it’s enough that
they learn to use common names and to distinguish among, say, clams, starfishes,
sponges, etc. The older the kids, the more detail they should be expected to learn,
moving from common names to scientific nomenclature, using Bivalvia (previously
called Pelecypoda), Asteroidea, Porifera, and so on.
On the next page, you’ll find a general listing of the major fossil taxa most often included
in the collections of amateur fossil hunters.
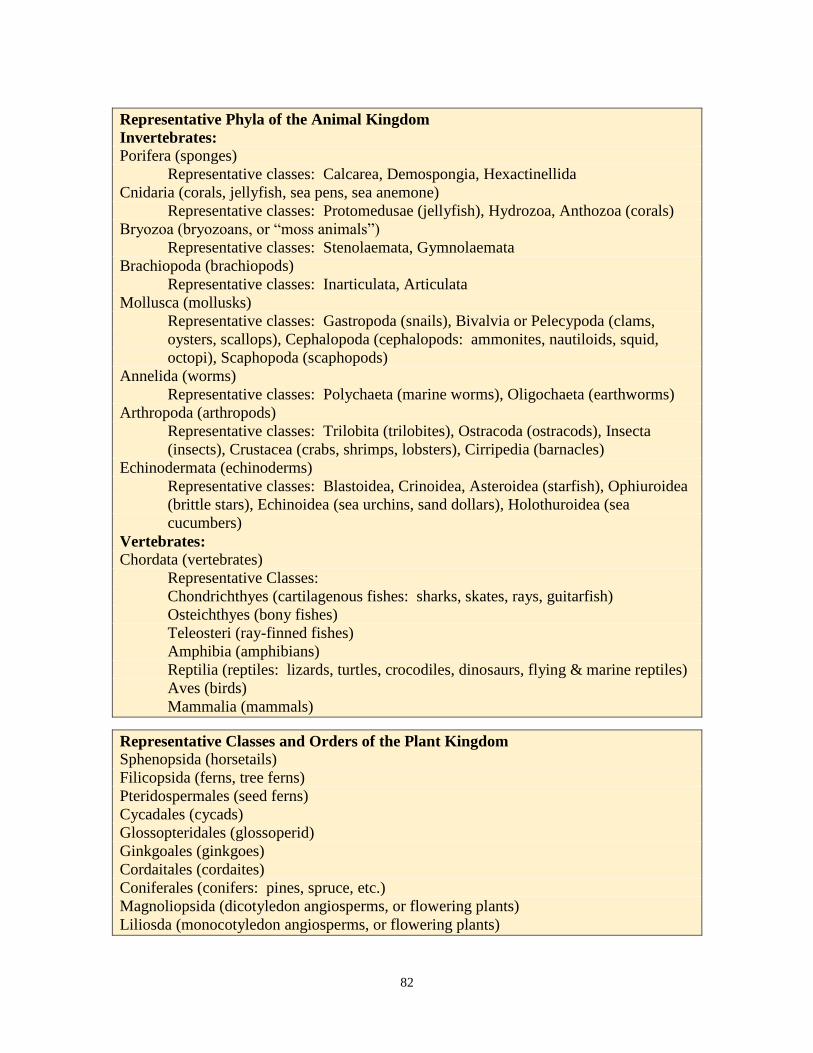
82
Representative Phyla of the Animal Kingdom
Invertebrates:
Porifera (sponges)
Representative classes: Calcarea, Demospongia, Hexactinellida
Cnidaria (corals, jellyfish, sea pens, sea anemone)
Representative classes: Protomedusae (jellyfish), Hydrozoa, Anthozoa (corals)
Bryozoa (bryozoans, or “moss animals”)
Representative classes: Stenolaemata, Gymnolaemata
Brachiopoda (brachiopods)
Representative classes: Inarticulata, Articulata
Mollusca (mollusks)
Representative classes: Gastropoda (snails), Bivalvia or Pelecypoda (clams,
oysters, scallops), Cephalopoda (cephalopods: ammonites, nautiloids, squid,
octopi), Scaphopoda (scaphopods)
Annelida (worms)
Representative classes: Polychaeta (marine worms), Oligochaeta (earthworms)
Arthropoda (arthropods)
Representative classes: Trilobita (trilobites), Ostracoda (ostracods), Insecta
(insects), Crustacea (crabs, shrimps, lobsters), Cirripedia (barnacles)
Echinodermata (echinoderms)
Representative classes: Blastoidea, Crinoidea, Asteroidea (starfish), Ophiuroidea
(brittle stars), Echinoidea (sea urchins, sand dollars), Holothuroidea (sea
cucumbers)
Vertebrates:
Chordata (vertebrates)
Representative Classes:
Chondrichthyes (cartilagenous fishes: sharks, skates, rays, guitarfish)
Osteichthyes (bony fishes)
Teleosteri (ray-finned fishes)
Amphibia (amphibians)
Reptilia (reptiles: lizards, turtles, crocodiles, dinosaurs, flying & marine reptiles)
Aves (birds)
Mammalia (mammals)
Representative Classes and Orders of the Plant Kingdom Sphenopsida (horsetails)
Filicopsida (ferns, tree ferns)
Pteridospermales (seed ferns)
Cycadales (cycads)
Glossopteridales (glossoperid)
Ginkgoales (ginkgoes)
Cordaitales (cordaites)
Coniferales (conifers: pines, spruce, etc.)
Magnoliopsida (dicotyledon angiosperms, or flowering plants)
Liliosda (monocotyledon angiosperms, or flowering plants)

83
Back-up page 3.4: Collecting fossils.
Back-up pages for Badge 5 on Collecting provide info on building a collection. You
should refer to those back-up pages for reference in assisting kids in satisfying Activity
3.4. For instance, there you’ll find info about how to organize a catalog or logbook for an
entire collection, how to create labels for individual specimens, and how to store a
collection.
There are many easy, inexpensive ways to store a fossil collection.
Note: Kids can use this activity to satisfy requirements toward earning the Collecting badge
simultaneously (Activity 5.1).

84
Back-up page 3.5: A fossil-collecting field trip.
Back-up pages for Badge 8 on Field Trips provide info on field trips. Refer to those
pages for reference in assisting kids in satisfying Activity 3.5. For instance, there you’ll
find the AFMS Code of Ethics, general rules of field trip etiquette, and suggestions on
organizing and conducting a field trip and the tools and supplies you’ll need.
Shovel to dig and move large amounts of dirt and sediment.
Rock hammers and chisels (along with gloves and eye protection) to break open rocks
holding fossils.
Paint brushes to wipe sediment off of fossils as you uncover them.
Dental picks and ice picks to pick away sand grains and other sediment.
Toilet paper, paper towels, and aluminum foil to wrap around delicate fossils.
Backpacks, buckets or cardboard flats to carry out fossils
Just a few of the basic tools and supplies needed in collecting fossils in the field.
Field trips are always wonderful and memorable adventures!
Note: Kids can use this activity toward satisfying requirements for the Field Trips badge simultaneously
(Activity 8.3).

85
Back-up page 3.6: Your state fossil.
A terrific book to share with your kids is Stephen Brusatte’s Stately Fossils: A
Comprehensive Look at the State Fossils and Other Official Fossils (2006). Brusatte
provides background about each fossil and how it came to be the designated state fossil.
Alabama – Basilosaurus cetoides (Eocene whale)
Alaska – Mammuthus primigenius (Pleistocene
woolly mammoth)
Arizona – Araucarioxylon arizsonicum (Triassic
petrified wood) – State Fossil + Sonorasaurus
thomponi – State Dinosaur
Arkansas – Arkansaurus fridayi (Cretaceous
dinosaur) – State Dinosaur
California – Smilodon (californicus) fatalis
(Pleistocene saber tooth cat) – State Fossil +
Augustynolophus morrisi – State Dinosaur
Colorado – Stegosaurus stenops (Jurassic dinosaur)
Connecticut – Eubrontes giganteus (Jurassic
dinosaur footprint) – State Fossil + Dilophosaurus –
State Dinosaur
Delaware – Belemnitella americana (Cretaceous
cephalopod, or belemnite)
District of Columbia – Capitalsaurus (dinosaur)
Florida – Eupatagus antillarum (Eocene heart
urchin)
Georgia – Tertiary Shark Teeth
Hawaii – none
Idaho – Equus simplicidens (Pliocene “Hagerman
horse”)
Illinois – Tullimonstrum gregarium (Pennsylvanian
“Tully Monster”)
Indiana – none
Iowa – none (crinoid has been proposed)
Kansas – Pteranodon longiceps – State Flying Fossil
+ Tylosaurus kansasensis – State Marine Fossil
Kentucky – Paleozoic Brachiopod
Louisiana – Palmoxylon (Oligocene petrified palm)
Maine – Pertica quadrifaria (Devonian plant)
Maryland – Ecphora gardnerae (Miocene marine
gastropod) + a state dinosaur, Astrodon johnstoni
(Cretaceous dinosaur)
Massachusetts – Jurassic Dinosaur Tracks
Michigan – Mammut americanum (Pleistocene
mastodon) + the State Rock is a fossil, Hexagonaria
percarinata (Devonian coral, or “Petoskey Stone”)
Minnesota – None (Giant Beaver once proposed)
Mississippi – Basilosaurus and Zygorhiza kochii
(Eocene whales)
Missouri – Delocrinus missouriensis (Pennsylvanian
crinoid) + Hypsibema missouriensis – State Dino
Montana – Maiasaurus peeblesorum (Cretaceous
dinosaur) Nebraska – Elephas primigenius (Pleistocene
mammoth)
Nevada – Shonisauris ichthyosaurus (Triassic
ichthyosaur, a marine reptile)
New Hampshire – none
New Jersey – Hadrosaurus foulkii (Cretaceous
dinosaur)
New Mexico – Coelophysis (Triassic dinosaur)
New York – Eurypterus remipes (Silurian sea
scorpion)
North Carolina – Megalodon shark tooth
North Dakota – Teredo Petrified Wood (Paleocene
wood bored by shipworms)
Ohio – Isotelus (Ordovician trilobite)
Oklahoma – Saurophaganax maximus (Jurassic
dinosaur) – State Fossil + Acrocanthosaurus
atokensis – State Dinosaur
Oregon – Metasequoia (Eocene dawn redwood)
Pennsylvania – Phacops rana (Devonian trilobite)
Rhode Island – none
South Carolina – Mammuthus columbi (Pleistocene
Columbian Mammoth)
South Dakota – Tricerotops prorsus (Cretaceous
dinosaur)
Tennessee – Pterotrigonia thoracica (Cretaceous
bivalve)
Texas – Paluxysaurus jonesi (Cretaceous dinosaur)
Utah – Allosaurus fragilis (Jurassic dinosaur) – State
Fossil + Utahraptor ostrommaysorum – State
Dinosaur
Vermont – Delphinapterus leucas (Pleistocene
beluga whale) – State Fossil + Mammuthus
primigenius (Pleistocene woolly mammoth) – State
Terrestrial Fossil
Virginia – Chesapecten jeffersonius (Pliocene
pecten, or scallop)
Washington – Mammuthus columbi (Pleistocene
Columbian mammoth)
West Virginia – Megalonyx jeffersoni (Pleistocene
ground sloth)
Wisconsin – Calymene celebra (Silurian trilobite)
Wyoming – Knightia (Eocene herring) + a state
dinosaur, Tricerotops (Cretaceous dinosaur)
Note: Kids who write a paper or give an oral report for this activity can also use it to satisfy requirements
toward earning the Communication badge (Activities 7.1 and 7.2).
86
Back-up page 3.7: Dinosaurs.
Dinosaurs exert an almost universal pull on kids. It’s as if dinosaur fascination is built
into kid DNA! Younger kids especially love reading stories about dinos, playing with
dino toys, and learning their long, complicated scientific names. Here activities
revolving around dinosaurs to help you capitalize on that fascination:
Do you live in an area rich with dinosaur fossils with localities open to collecting?
Then check out Dick Wills’ “Finding a Dinosaur” website. Wills is an amateur
paleontologist who has made numerous dino finds. He shares his experiences and
collecting tips for fellow amateur collectors at www.findingadinosaur.com.
Test dinosaur identification skills with flashcard games or plastic models. Dinosaur
cards are commercially available, or you can make your own by cutting pictures of
dinosaurs from books, magazines, or web sites. If using plastic models, you can
reward kids who come up with the right name by giving them the model—one model
per child in your group. You can also give kids pages from a dinosaur coloring book,
with each child coloring a different dinosaur and sharing—and naming—the results
with the group. And for yet another activity for testing dino-ID skills, construct
crossword puzzles with names of dinosaurs.
Have kids hatch “dino eggs” to test dinosaur identification skills. You can make eggs
by inflating and coating balloons with paper mache made from strips of newspaper
soaked in water and flour. Once the paper mache has dried, use a pin to pop the
balloon inside, cut a slit, insert a plastic dinosaur model, then paper mache over the
slit. Once dry, paint the egg. Or, for a simpler process, just buy big plastic eggs that
show up at stores prior to Easter that can be opened to insert candy. Instead of candy,
insert small dinosaur models of different species. Give each junior member an egg to
crack open and have them identify the dinosaur inside.
Draw and color dinosaur murals or timelines on a long sheet of paper, incorporating
dinosaur stickers. Sheets of dinosaur stickers can be found in party or gift-wrapping
sections of stores, in craft stores, bookstores, etc.
Create dino-dioramas with models in shoe boxes. Talk with your kids about which
dinosaurs in the diorama are plant eaters versus meat eaters and who’s hunting whom.
Make dinosaur masks on cardboard sheets using templates available from web sites or
from books such as Shaffer’s Cut & Make Dinosaur Masks or Smith’s Dinosaur
Punch-Out Masks. You can also make 3-D masks by coating large inflated balloons
with papier-mâché and building out snouts or using grocery bags, cardboard, glue,
colorful markers, and other readily available materials.
Make dinosaur hand puppets by following the directions at www.bgs.ac.uk of the
British Geological Survey. Go to the “Educational Downloads” section and you will

87
find cut-out models for crafting Pterosaur, Styracosaur, and T. rex puppet heads, as
well as orthoceras nautiloids and trilobites. Fun!
Assemble dinosaur skeletons from chicken bones (see Chris McGowan’s books,
Make Your Own Dinosaur out of Chicken Bones and T-Rex To Go: Build Your Own
from Chicken Bones). Commercial kits are available from places like Edmunds
Scientific for “excavating” bones and/or building skeleton models with wooden or
plastic bones. A fun group activity for assembling a 6-foot dino skeleton involves
cutting large bones out of cardboard and hiding them around a room. Then hold a
scavenger hunt. Once all bones have been found, assemble them with brass fasteners.
Hold a fact-or-fiction quiz contest game. A site devoted to “Dinosaurs: Facts &
Fiction” is on the USGS web site: http://pubs.usgs.gov/gip/dinosaurs/ There’s also
the book by Scotchmoor, et al., Dinosaurs: The Science behind the Stories, 2002.
Make collections of fossils from the age of dinosaurs. Some parts of the U.S., like
Texas, the Dakotas, the Rocky Mountain states, and the West in general, abound in
marine and land fossils from the Mesozoic Era, and localities with Cretaceous marine
fossils are common on the East Coast and the Southeast.
Make dinosaur footprint molds and casts with clay and plaster and the feet of plastic
dinosaur models.
If you host a dinosaur activity close to the Holidays, you can sometimes find wooden
dinosaur cut-outs at places like the Dollar Tree or craft shops like Michael’s. Drill a
hole in the top of each one and have kids color or paint them, add glitter, rhinestone
eyes, etc., and insert ribbon through the holes to craft Christmas tree ornaments.
Wooden templates to craft dino Christmas tree ornaments.

88
How big were dinosaurs? Plant-eating sauropods (like Apatosaurus) could reach
lengths well in excess of 100 feet while big meat-eating theropods (like T. rex) were
as long as 50 feet. To help kids appreciate just how big this is, have two of your
junior club members stretch out a 100-foot-long rope. (This exercise courtesy of Lisa
Batchelder-Hetrick of the Ventura Gem & Mineral Society.)
Simulate the sounds of dinosaurs! Hadrosaurs had large, hollow crests on their heads.
Paleontologists believe they used these to “honk” to one another. Using two 3- or 4-
foot lengths of PVC pipe joined by a U-shaped connection, you can craft a simulated
hadrosaur crest. With a big breath, blast into it as you would with a tuba, blowing air
through pursed lips. The honk of a hadrosaur will fill the air, some 66 million years
after the last hadrosaur honk blasted across the land.
Two kids use “hadrosaur horns” to blast out hadrosaur harmonics.
Visit a museum with dino skeletons or go on a dinosaur-related field trip to a place
like a dinosaur track-way park. Daniel and Susan Cohen have written a handy book
whose title says it all: Where to Find Dinosaurs Today (1992). It’s a state-by-state
listing with descriptions of museums with dinosaur fossils. Dated but still useful!
Send kids on a “Dino Scavenger Hunt.” At a monthly meeting, ask them to come to
next month’s meeting with a list of places they saw dinosaurs. For instance, I’ve seen
them on cereal boxes at the grocery store, on TV cartoons, on lunch boxes, on T-
shirts, on gift-wrapping paper, and in the toy store. Did dinosaurs really go extinct 66
million years ago? Hard to tell, given that they still seem to surround us!

89
Get packs of colorful origami folding paper from a craft or art store. Then hit the web
to order some fun books and project kits, such as Dino-Gami with 20 origami projects
or Creative Kids: Origami Dinosaurs. These show fun ways to craft any number of
dinosaur species with paper. There’s even Jurassic Towel Origami!
Dino-Gami is one fun way to teach dinosaur anatomy!
You can find dinosaur activities, quizzes, and more on museum web sites. For
instance, enter “Dinosaur Dig” into the search box of the San Diego Natural History
Museum web site, www.sdnhm.org. Check for similar sections on the web sites of
major museums around the country, such as the Chicago Field Museum, American
Museum of Natural History in New York City, Natural History Museum of Los
Angeles County, Smithsonian Natural History Museum in Washington, DC, etc.
To access many dinosaur facts, games, activities, printables, coloring pages, and
more, go to “The Teacher’s Guide” at http://theteachersguide.com, and enter
“Dinosaurs” into the search box.
To get images of all sorts of dinosaurs, go to www.search4dinosaurs.com. In addition
to images, this site offers all sorts of facts about all sorts of dinos. While many of the
images are copyrighted, some permit downloading for educational purposes.
In addition to the websites already noted, one book offers one-stop shopping for all
sorts of dino-related sites: R.L. Jones and Kathryn Gabriel’s Dinosaurs On-Line: A
Guide to the Best Dinosaur Sites on the Internet (2000). Given that this is now 20
years old, I can’t guarantee how many of the sites are still up-and-running, but many
of the best still exist somewhere out there in the cloud!
90
One book with all sorts of dinosaur facts and trivia is Rachel Firth’s Dinosaurs
(2001), in the Usborne Discovery Internet-Linked Series. It offers links to
recommended web sites to extend learning beyond the pages of the printed book via
the Usborne Quicklinks Website at www.usborne-quicklinks.com, where you enter
the keywords “Discovery: Dinosaurs.” The featured web sites offer further
information, animations, games, activities, and more, including pictures kids can
download and use in reports.
In addition to these activities, there’s no end of dinosaur activity books geared to every
age level. One example is Janice VanCleave’s Dinosaurs for Every Kid. Another is
Mryna Martin’s Dinosaurs: Hands-on Activities.
When doing a dinosaur activity with especially young kids, finish it off with dino treats
and song! At a housewares and kitchen store I found T. rex and Triceratops cookie
cutters. We baked a batch using a Christmas cookie recipe, frosted them, and served
them up to our Ventura club juniors when we did a dino-related activity. As a grand
finale, have someone bring a laptop and tune into one of many “Dinosaur Stomp” songs
via YouTube, like the following: https://www.youtube.com/watch?v=AM3VomijOw8
Not convinced by any of the activities I’ve outlined above? Well, then check
Amazon.com, the kids’ sections of bookstores, teacher supply stores, and the web. Just
type “dinosaur” into a search engine like Google, and thousands of possibilities spring
up. Pick one or more to do a dinosaur activity with your club’s kids. With this Badge
Program, I’m easy! I’ll accept whatever works best for you and for your pebble pups and
junior members so long as true learning is involved and so long as it’s engaging and fun.
So go for it!
Finally, you should thank Mitty Scarpato (Conejo Gem and Mineral Club, California) for
suggesting that we include Dinosaur activities in the FRA Badge Program!
91
Back-up page 3.8: Fossil and dinosaur names.
Fossils, including dinosaurs, often have long names that seem impossible to pronounce
but that, somehow, kids seem to master with ease. These names may look strange to
English readers because they are often put into Latin or Greek forms.
Teach how dinosaurs and other fossils were named by exploring Latin and Greek root
words. Fossils are sometimes given Greek or Latin names for where the fossil was
found. For instance, the dinosaur Utahraptor, stands for “Utah predator” for a meat-
eating dinosaur that was discovered in the state of Utah. Or a fossil is sometimes named
in honor of a significant person. For instance, Darwinius masillae is a fossil primate
named for a Latinized version Charles Darwin as well as for the Latinized place it was
discovered: Messel, Germany. Or the fossil may be described—in Latin or Greek—for
its characteristics. Thus, Tyrannosaurus rex stands for “king of the tyrant lizards” and
Titanosaurus—the largest of all dinosaurs—stands for the Titans of Greek mythology.
Two websites contain good information on dinosaur names, in particular:
www.Kidsdigdinos.com/dinosaurnames.htm
www.bing/images/search?q=%22dinosaur+names*%22&FORM=HDSC2
Myrna Martin’s book Dinosaurs: Hands-on Activities has a nice table on page 9 showing
root words from Latin or Greek and their meanings in English, such as alto (high),
cephalo (head), crypto (hidden), echino (spiny), nano (dwarf), rex (king), etc.
As one activity, suppose your junior members discover an entirely new dinosaur and get
to name it after your society. For instance, my society’s juniors might name it
Venturasaurus (“Ventura lizard”) after the Ventura Gem & Mineral Society. In fact,
there already exists a fossil sand dollar called Dendraster venturaensis! What would
your club’s new dinosaur be named?
As an alternative activity, challenge kids to create a new dinosaur or other fossil creature
and draw pictures of this new animal or plant. Then have them name it and explain why
they gave it that name.
Or, instead of creating and naming an entirely new fossil, ask kids to select a fossil and
explore its scientific name. What is the origin of that name? Has it been translated into
Greek or Latin? Why was the fossil given that name? Perhaps assign them to write an
article about the name for your society newsletter or to give a report at a club meeting.
As a reward, you might give each child a piece of genuine dinosaur bone or a sample of
whatever fossil you were using for a naming exercise (a trilobite, crinoid stem,
brachiopod, sea urchin, coral, etc.).
Note: Kids who prepare an oral or written report can use this activity toward satisfying requirements for
the Communication badge simultaneously (Activities 7.1 and 7.2).
92
Back-up page 3.9: WILD CARD: Do your own thing!!
While I’ve tried to provide a wide-ranging variety of fun and educational activities to
choose from, no one manual can “do it all.” There are many other great ideas out there
that clubs have found to match their local interests and resources.
Plus, the Youth Leaders of some clubs have expressed concern that some of the activities
included in the manual may be a bit beyond the abilities of their youngest members.
Here’s your chance to tailor-make activities for the youngest among us.
As one example of a do-your-own-thing activity for especially motivated and talented
older youth, natural history and science museums all around the country seek volunteers
to help in many ways. Whether collecting in the field, cleaning fossils, or serving as
docents for museum visitors, the possibilities and opportunities are many. For instance,
collecting fossils for museums encompasses prospecting, excavation, preparation,
curation, research, and exhibiting and educating. Museum staff can use help in each and
every one of these endeavors!
Museums seeking volunteers include the George C. Page Museum of La Brea
Discoveries in California, the Calvert Marine Museum in Maryland, the Dallas Museum
of Natural History in Texas, the Denver Museum of Nature & Science in Colorado, the
Field Museum in Illinois, the Peabody Museum of Natural History in Connecticut, or any
number of other major museums all across the U.S.
As yet another example, encourage your kids to participate in National Fossil Day, an
annual celebration of fossils sponsored by the National Park Service to promote public
awareness of our fossil resources: https://www.nps.gov/subjects/fossilday/index.htm.
If you and your fellow club members have an idea for learning about fossils that isn’t
included in this manual, go for it! When you send in your badge request, just let me
know what you did as a WILD CARD activity. Who knows? Maybe your idea will be
included in the next edition of the Badge Manual!
93
4. Lapidary Arts
Many rocks that look dull and uninspiring on the outside harbor a gem within. Lapidary
arts allow you to unlock the gleaming beauty. As with any art, successfully completing a
lapidary project requires planning, guidance by an experienced mentor, and practice,
practice, and more hands-on practice! To start, you should read an illustrated guidebook,
such as James Mitchell’s The Rockhound’s Handbook or Pansy Kraus’s Introduction to
Lapidary to learn about the various lapidary arts and to pick a project that interests you.
Equally important, learn about safety in the workshop. Lapidary arts usually involve
saws, grinding wheels, and other spinning machines that require care and attention in
using them. Once you’ve learned about and have mastered the basics of workshop safety
(Activity 4.3), jump in and practice, practice, and practice some more. It’s fun, and the
outcome can be a thing of beauty forever!
Activity 4.1: Learning about lapidary rocks.
Different rocks have different characteristics. Some are hard, some soft. Some are
uniform in color, others are banded. Still others are mottled and mixed in color and in
hardness (making them especially challenging to work with). Learn the qualities of
different rocks for lapidary projects, such as soft soapstone or hard agate. List several
different rocks and the sorts of lapidary projects they may be good for.
Activity 4.2: Choosing a lapidary project.
Buy or borrow a book on lapidary arts and read about one or more of the arts you would
like to try, be it cabbing, faceting, inlay, wire wrapping, silver smithing, beading, carving,
and/or rock tumbling. Work with your youth leader to determine the materials and
equipment you’ll need. Then outline the steps for your chosen project.
Activity 4.3: *Workshop safety and maintenance.*
Note: This activity is required to earn this badge.
Make a list of safety rules to follow in completing your lapidary project and demonstrate
your knowledge of safety in a workshop and the special precautions to be taken with
different machines and equipment, be they spinning wheels or saw blades or torches
spitting fire.
Activity 4.4: *Completing a lapidary project.*
Note: This activity is required to earn this badge.
Complete your lapidary project.
Activity 4.5 Sharing your lapidary project.
A thing of beauty is a thing to be shared! You can do this in several ways. Bring your
finished project to a club meeting to share with friends and explain the steps that went
into its creation. Or write an article for your club newsletter describing your project and
outlining the steps you took in making it. Or display your work at a club gem show.

94
Activity 4.6: Gemstone minerals.
Learn about the rarest, most valued of lapidary materials: the precious and semi-precious
gemstones. Then write a report about your favorite gemstone for your society newsletter.
If you have access to the machinery and a skilled mentor to train you, consider faceting a
gemstone crystal or cabbing a star garnet, rose quartz, ruby, or sapphire.
Activity 4.7: WILD CARD: Do your own thing!
Do you have an idea for learning about lapidary arts that isn’t included in this manual? If
so, do your own thing! When your Youth Leader sends in your badge request, let us
know what you did as a WILD CARD activity. Who knows? Maybe your idea will be
included in the next edition of the Badge Manual!

95
4. Lapidary Arts
□ 4.1 Learning about lapidary rocks.
□ 4.2 Choosing a lapidary project.
□ 4.3 *Workshop safety and maintenance* (required to earn this badge).
□ 4.4 *Completing a lapidary project* (required to earn this badge).
□ 4.5 Sharing your lapidary project.
□ 4.6 Gemstone minerals.
□ 4.7 WILD CARD: Do your own thing!
To earn your Lapidary Arts badge, you need to complete at least 3 of the 7 activities.
(Please note that successfully completing Activities 4.3 and 4.4 are required to earn this
badge.) Check off all the activities you’ve completed. When you have earned your
badge, sign below and have your FRA leader sign and forward this sheet to the AFMS
Juniors Program chair.
___________________________________
Date completed
_________________________________ ___________________________________
My signature Youth leader’s signature
_______________________________________________________________________
Name of my club
Leader’s preferred mailing address for
receiving badge:
____________________________________
____________________________________
____________________________________
96
Back-up page 4.1: Learning about lapidary rocks.
The goal of this activity is to orient and familiarize kids with the most commonly used
lapidary materials. For beginners, focus on inexpensive and commonly available forms.
Agate (a hard stone that is easy to work and to polish; good for cabbing)
Jasper (similar to agate in taking an easy polish; good for cabbing)
Flint (good for knapping to make arrowheads and spear points, utilizing proper safety
precautions; also good for cabbing)
Petrified Wood (good for cabbing, book ends, specimens for display; one problem,
though, is that petrified wood has a tendency to split or flake)
Soapstone (a very soft rock especially good for beginners to rock carving)
Travertine Onyx (a soft rock good for carving)
Alabaster (another soft rock good for carving)
Marble (a bit harder than travertine onyx or alabaster but still excellent for rock
carving; takes a good polish)
Examples of common, inexpensive and easily available lapidary stones.
Except for quartz and garnet, stones in the following box are much more expensive
and/or often require more skill and craftsmanship to work.
Opal (gorgeous but soft; layers of “fire” and “flash” are all-too-easily ground away)
Jade (hard and notoriously difficult to polish without creating “orange peel” effect)
Lapis (often has varying mineral composition, making an even polish difficult)
Amber (even softer than opal, this stone requires true craftsmanship to cab or carve)
Stones for faceting and/or cabbing: varieties of quartz (clear, rose, amethyst, smoky,
citrine), topaz, tourmaline, emerald, aquamarine, peridot, garnet, corundum
(ruby and sapphire), diamond (most are expensive and often small)
More expensive lapidary stones often require more skill to work and polish.
Encourage adult club members to bring in examples of finished cabs, carvings, faceted
stones, and other projects they’ve done. They also should bring examples of the rough
material from which the finished stones were crafted to show your kids “before” and
“after” pieces. Give kids a good, well-rounded look at the variety of lapidary rocks, from
those most readily available and relatively easy to work (agate, marble, etc.) to the most
precious and expensive of stones requiring great skill on the part of the lapidary artist
(rubies, sapphires, emeralds, and diamonds). Keep the focus, though, on the more
common stones suitable for those just beginning in the lapidary arts. Use Activity 4.6 to
take kids into the more rarified part of the hobby with precious gemstones. After
presenting rocks of various sorts, quiz the kids about what rocks they think might work
best for different sorts of projects.
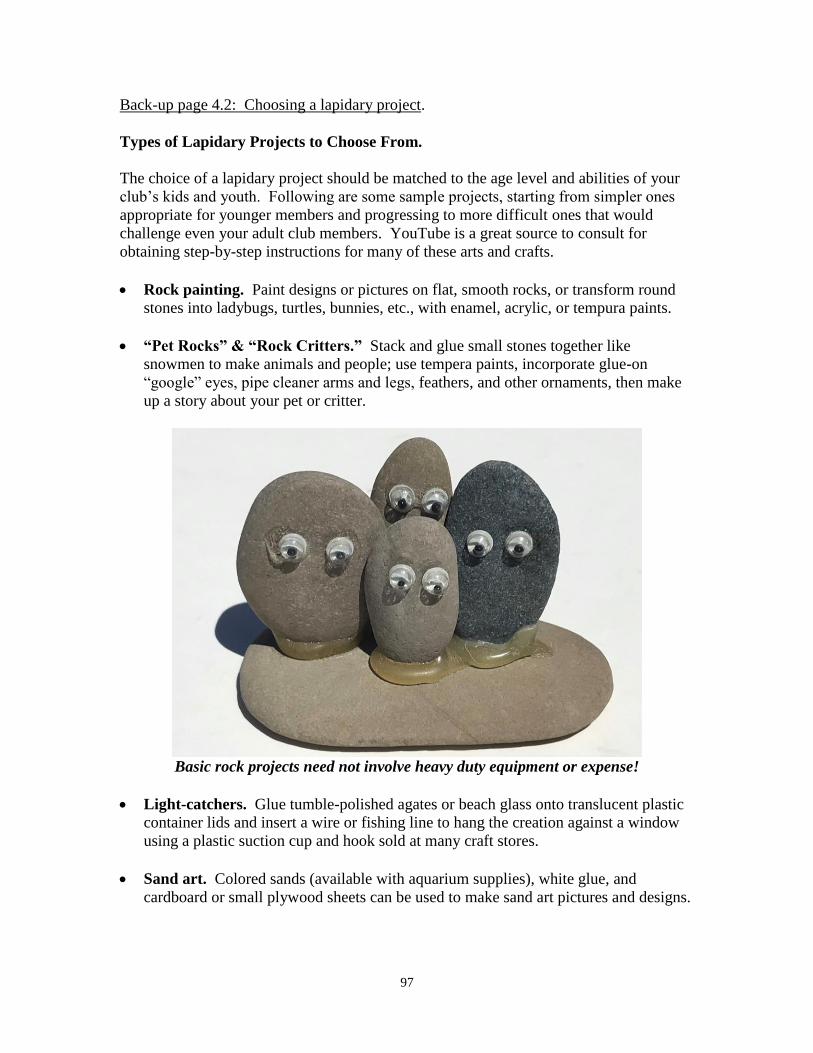
97
Back-up page 4.2: Choosing a lapidary project.
Types of Lapidary Projects to Choose From.
The choice of a lapidary project should be matched to the age level and abilities of your
club’s kids and youth. Following are some sample projects, starting from simpler ones
appropriate for younger members and progressing to more difficult ones that would
challenge even your adult club members. YouTube is a great source to consult for
obtaining step-by-step instructions for many of these arts and crafts.
Rock painting. Paint designs or pictures on flat, smooth rocks, or transform round
stones into ladybugs, turtles, bunnies, etc., with enamel, acrylic, or tempura paints.
“Pet Rocks” & “Rock Critters.” Stack and glue small stones together like
snowmen to make animals and people; use tempera paints, incorporate glue-on
“google” eyes, pipe cleaner arms and legs, feathers, and other ornaments, then make
up a story about your pet or critter.
Basic rock projects need not involve heavy duty equipment or expense!
Light-catchers. Glue tumble-polished agates or beach glass onto translucent plastic
container lids and insert a wire or fishing line to hang the creation against a window
using a plastic suction cup and hook sold at many craft stores.
Sand art. Colored sands (available with aquarium supplies), white glue, and
cardboard or small plywood sheets can be used to make sand art pictures and designs.

98
Wind chimes. Starting with 8- to 15-inch wooden rods or driftwood limbs, space
screw eyes 1- to 1.5-inches apart. Attach varying lengths of fishing line or base metal
chain to each eye. Then attach agate slabs, seashells, or obsidian needles with bell
caps or glue-on leaf bails and jump rings.
Rock tumbling and “free-form” jewelry. Tumble small agates and jasper and top
the best pieces with bell caps and jump rings to make necklaces and dangling pieces
for bracelets or key chains. You also can insert tumbled stones into “wire cages.”
These are pre-made oval-shaped spirals of wire (available from dealers selling
findings and other jewelry supplies) into which you can slip a tumbled stone to craft a
pendant in no time. Or kids can wire wrap tumbled stones with simple copper wire.
Rock tumbling is a time-tested lapidary art for all rockhounds!
Other tumbled stone projects. The easiest way to turn tumbled stones into art is to
pile them in a bowl or glass vase to decorate a tabletop. Or glue them, along with
seashells, in the shapes of flowers or other designs to the backing of a picture frame.
You also can coat a flower pot with wet plaster of Paris or self-hardening clay and
press tumbled stones into the plaster or clay before it sets for a mosaic or inlay effect.
If you have a club member with a drill who can drill a large number of tumbled
stones for your kids, you can teach them to make bead necklaces with free-form
tumbled stones. The more you experiment, the wider range of projects you’ll find for
turning tumbled stones into lapidary art!
Polishing soft stones by hand. Relatively soft stones (opals, Petoskey stones,
alabaster, or travertine onyx) can be sanded and polished by hand with wet-or-dry
emery sandpaper in coarse, medium, and fine grits. You can purchase 8.5X11-inch

99
sheets of sandpaper and cut them into quarters for each child. After working through
the three grits, kids coat a square of leather with a polishing compound like aluminum
oxide and water to work up a final polish. This process is easier if you first cut small
cabs and mount them on dop sticks for each child in your group.
Cabbing. Create domed cabs for brooches, belt buckles, necklaces, and bolo ties.
Flat-lapping. Create bookends or polished agates, geodes, and thunder egg halves.
Beading. Craft wire-wrapped rings, bracelets, brooches, ear rings, or necklaces with
natural and synthetic beads and supplies purchased from a bead store. Learn pearl
knotting, proper ways of attaching clasps, and how to size a bead or cabochon.
Wire wrapping. With brass or copper wire, turn fossil shark teeth into necklaces or
wrap a cab to hang from a necklace. For a wire wrap project easy for kids to produce,
check out the following YouTube video: www.youtube.com/watch?v=pqOzlsFyXvI
Even simple wire wrapping projects produce pretty results!
Gemstone trees. Small, polished gemstone chips from a tumbler can be transformed
into leaves when glued onto tree limbs swirling out of twisted copper wires.
Carving and sculpting. Soft rocks like soapstone or alabaster can be carved, shaped,
and burnished fairly easily with such simple hand tools as hack saws, awls, files, and
sandpaper.

100
Soapstone carving is fun and doesn’t require many tools or materials.
Knapping. Turn flint, agate, or obsidian into arrowheads and knife blades.
Knapping, though, can lead to nasty cuts, so appropriate training and precautions,
along with eye protection, are mandatory!
Scrimshaw. Sales of ivory have been banned in the U.S., but one way to continue
the long New England tradition of scrimshaw is by inscribing and inking scenes onto
tagua nuts. You can also use materials such as antler or bone.
Intarsia, inlays, and mosaics. This craft required much precision and patience.
Sphere making. You’ll need an expensive machine and a lot of saw cuts!
Faceting. This requires expensive machinery and a lot of time and patience.
Forging glass beads. Due to the fire hazard, this is for your oldest juniors.
Metal smithing. Due to working with torches, this, too, is for your oldest juniors.
Simple metal projects can more easily be made with Precious Metal Clay (PMC).
Resources to Guide You in Choosing and Practicing a Lapidary Art.
Many magazines and books provide good ideas for lapidary projects, and don’t overlook
your own fellow club members!
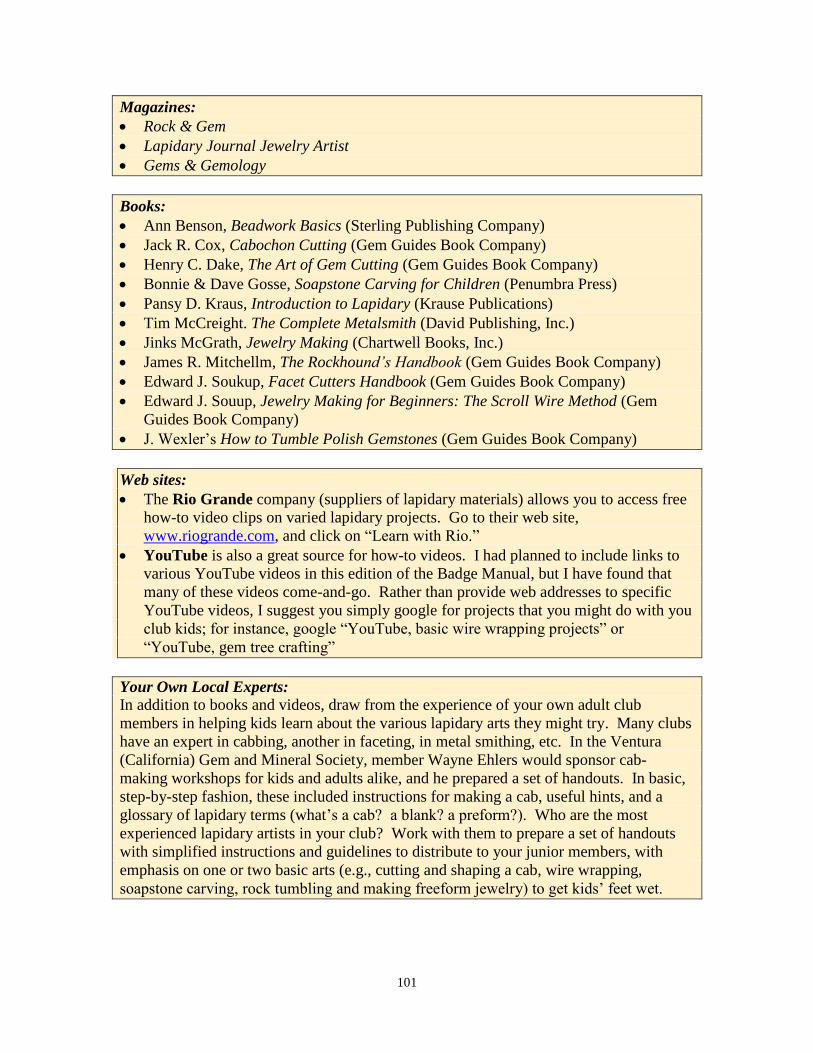
101
Magazines:
Rock & Gem
Lapidary Journal Jewelry Artist
Gems & Gemology
Books:
Ann Benson, Beadwork Basics (Sterling Publishing Company)
Jack R. Cox, Cabochon Cutting (Gem Guides Book Company)
Henry C. Dake, The Art of Gem Cutting (Gem Guides Book Company)
Bonnie & Dave Gosse, Soapstone Carving for Children (Penumbra Press)
Pansy D. Kraus, Introduction to Lapidary (Krause Publications)
Tim McCreight. The Complete Metalsmith (David Publishing, Inc.)
Jinks McGrath, Jewelry Making (Chartwell Books, Inc.)
James R. Mitchellm, The Rockhound’s Handbook (Gem Guides Book Company)
Edward J. Soukup, Facet Cutters Handbook (Gem Guides Book Company)
Edward J. Souup, Jewelry Making for Beginners: The Scroll Wire Method (Gem
Guides Book Company)
J. Wexler’s How to Tumble Polish Gemstones (Gem Guides Book Company)
Web sites:
The Rio Grande company (suppliers of lapidary materials) allows you to access free
how-to video clips on varied lapidary projects. Go to their web site,
www.riogrande.com, and click on “Learn with Rio.”
YouTube is also a great source for how-to videos. I had planned to include links to
various YouTube videos in this edition of the Badge Manual, but I have found that
many of these videos come-and-go. Rather than provide web addresses to specific
YouTube videos, I suggest you simply google for projects that you might do with you
club kids; for instance, google “YouTube, basic wire wrapping projects” or
“YouTube, gem tree crafting”
Your Own Local Experts:
In addition to books and videos, draw from the experience of your own adult club
members in helping kids learn about the various lapidary arts they might try. Many clubs
have an expert in cabbing, another in faceting, in metal smithing, etc. In the Ventura
(California) Gem and Mineral Society, member Wayne Ehlers would sponsor cab-
making workshops for kids and adults alike, and he prepared a set of handouts. In basic,
step-by-step fashion, these included instructions for making a cab, useful hints, and a
glossary of lapidary terms (what’s a cab? a blank? a preform?). Who are the most
experienced lapidary artists in your club? Work with them to prepare a set of handouts
with simplified instructions and guidelines to distribute to your junior members, with
emphasis on one or two basic arts (e.g., cutting and shaping a cab, wire wrapping,
soapstone carving, rock tumbling and making freeform jewelry) to get kids’ feet wet.

102
Back-up page 4.3: *Workshop safety and maintenance.*
Note: This activity is required for kids to earn the Lapidary Arts badge.
Before kids are allowed to flip on a single power switch in a workshop, they should be
required to read and sign a sheet outlining workshop safety rules and learn about all
equipment. Machinery can be dangerous. Help kids learn how to operate rock saws,
grinding wheels, and other tools safely, and make sure experienced adults are present in
helping them through their projects. Whether working with kids or adults: safety first!
There are all sorts of lapidary arts, each requiring different materials, tools, and
procedures. Also, according to Murphy’s Law, anything that can go wrong will go
wrong. Thus, no listing of safety rules can ever be complete, and any listing that tried
would end up filling several volumes. There are, however, some basic safety rules. Kids
should be encouraged to create their own set to match the project they undertake. Here
are a few examples:
Always have at least two people in the shop when equipment is in operation.
Keep your workspace neat and organized and your equipment clean and in good
condition; clean up equipment immediately after each use.
Learn about equipment before flipping the “on” switch; know your equipment: read
manuals and take note of manufacturers’ safety precautions and warnings.
Stock a first-aid kit in your workshop, along with an emergency phone number.
Keep a fire extinguisher in your workshop and be sure it is in good working order.
Decide what you need for your project ahead of time, and then have all necessary
materials and equipment close at hand.
Don’t walk away and leave running equipment unattended; turn off machines if not
being used.
Wear safety glasses or goggles when hammering, sawing, grinding, or knapping.
Keep a workplace thoroughly ventilated to avoid breathing rock dust or fumes from
adhesives and, if necessary, wear a facemask to protect your lungs.
If dry sanding, check frequently to make sure your stone does not overheat, and wear
a facemask and/or work with a suction ventilating device.
Diamond saw blades should not be run dry because the heat generated will ruin them;
always use a lubricating coolant with a diamond saw blade.
Don’t overload electrical circuits.
Make sure any belts connecting grinding wheels or saws to motors are shielded.
Don’t wear loose sleeves when working with saws or grinding wheels and tie back
long hair.
Keep electric motors and switches dry and grounded to prevent electric shocks.
Don’t allow grinding wheels to soak up water while idle to avoid unbalanced wheels.
When grinding small stones or grinding without a dop stick, you can protect your
fingers by wrapping the tips in tape or bandages.
Don’t use too much pressure when sawing or grinding stones; let the blades and
grinding stones to the work.
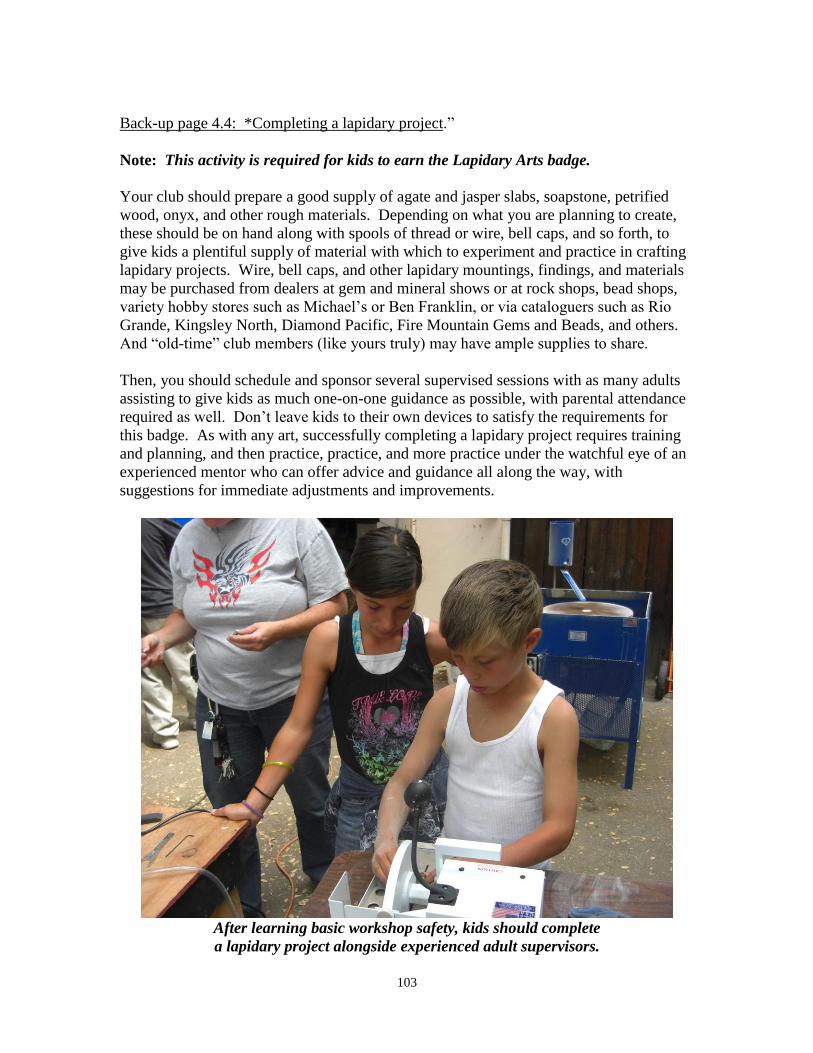
103
Back-up page 4.4: *Completing a lapidary project.”
Note: This activity is required for kids to earn the Lapidary Arts badge.
Your club should prepare a good supply of agate and jasper slabs, soapstone, petrified
wood, onyx, and other rough materials. Depending on what you are planning to create,
these should be on hand along with spools of thread or wire, bell caps, and so forth, to
give kids a plentiful supply of material with which to experiment and practice in crafting
lapidary projects. Wire, bell caps, and other lapidary mountings, findings, and materials
may be purchased from dealers at gem and mineral shows or at rock shops, bead shops,
variety hobby stores such as Michael’s or Ben Franklin, or via cataloguers such as Rio
Grande, Kingsley North, Diamond Pacific, Fire Mountain Gems and Beads, and others.
And “old-time” club members (like yours truly) may have ample supplies to share.
Then, you should schedule and sponsor several supervised sessions with as many adults
assisting to give kids as much one-on-one guidance as possible, with parental attendance
required as well. Don’t leave kids to their own devices to satisfy the requirements for
this badge. As with any art, successfully completing a lapidary project requires training
and planning, and then practice, practice, and more practice under the watchful eye of an
experienced mentor who can offer advice and guidance all along the way, with
suggestions for immediate adjustments and improvements.
After learning basic workshop safety, kids should complete
a lapidary project alongside experienced adult supervisors.
104
Cabbing Without a Workshop.
Relvan Zeleznik of Stamford, Connecticut, shared this activity for junior groups not
allowed to work in the adults’ workshop (a rule that many clubs have and that continues
to perplex and to vex me!) or for those whose societies lack workshop facilities
altogether. If you face such challenges, you can turn to other activities described in
Activity 4.2 (rock tumbling, beading, wire wrapping, making rock critters, etc.).
Still, there is a way, described by Relvan, for kids to learn the basic principles of cabbing
and producing a nice, finished cabochon. For this, you’ll need someone in your club who
can slab and cut soft stones (calcite, common opal, Petoskey stone, alabaster, travertine
onyx, etc.) as small, thumbnail-sized preforms. If you don’t have a club member who
can prepare these, you might approach a dealer for a supply. The main consideration is to
obtain preforms that are on the soft end of the spectrum (preferably Mohs 4 or lower).
Dop the stones atop nail heads with dop wax and give one to each child, along with small
square sheets of coarse, medium, and fine wet-or-dry emery. Start with the coarse emery.
Placing the sheet in your palm, add a few drops of water and begin grinding the stone
against it using a rocking, twisting, circular motion. Grind, adding drops of water as
necessary, until the cab is domed and smooth. Then rinse the stone and wipe it clean and
repeat with medium and then fine emery.
For a final polish, give each child a small leather pad dabbed with a light frosting of
aluminum oxide polish mixed with water on the rough side of the pad. (This can also be
done on the back of one of the emery paper sheets.) Just as before, kids should use a
rocking, twisting, circular motion until they feel their stone is completely polished.
To remove the stone from the nail, place it in a freezer for just a few minutes. It should
then pop right off with gentle pressure. While the results may not be as shiny nor as even
as if done with an expensive Genie, this “poor man’s Genie” ain’t bad for a first-time
cabbing experience!

105
Back-up page 4.5: Sharing your lapidary project.
Encourage kids to bring a finished lapidary project to a club meeting to share with friends
and to explain steps that went into its creation. Or you might have kids write brief
articles for the newsletter to describe their projects and the steps taken in crafting them.
Have kids share projects they’ve crafted, like this obsidian wind chime.
Finally, as a third possibility, you might help kids craft an exhibit for your local gem
show. Such an exhibit could be devoted to a single lapidary art, showing all the steps that
went into crafting the finished item (for instance, showing how a rough rock was slabbed,
preformed, ground, polished, and then set in a finding), or it might be an exhibit
showcasing a variety of finished works (tumble-polished stones, cabs, carvings, wire-
wrapped jewelry, light catchers, etc.) crafted by a number of the club’s kids.
Note: Kids who prepare an oral or written report can use this activity toward satisfying requirements for
the Communication badge simultaneously (Activities 7.1 and 7.2). Those who display their lapidary work
in a case at a gem show or some other public venue can use this activity toward satisfying requirements for
the Showmanship badge (Activity 6.4).

106
Back-up page 4.6: Gemstone minerals.
Activity 4.1 introduces kids to a full range of lapidary rocks with emphasis on the most
readily available and affordable stones that are relatively easy to cut and work. These
include materials like agate, jasper, marble, or soapstone. Activity 4.6 shifts to the true
rarities of the lapidary world: precious and semi-precious gemstones.
The term “gemstone” can be applied not only to minerals but also to certain rocks and
organic materials. The common denominators are that they tend to be colorful and rare
and can be polished and/or cut to be used for fine jewelry or other ornamental purposes.
Once cut and polished, they are referred to as “gems.” Gemstone minerals include
diamond, emerald, and sapphire. Gemstone rocks include charoite, labradorite, lapis
lazuli, and jade. Organic gemstones include pearls, jet, ivory, coral, and amber—all of
which were produced by once-living organisms.
Gemstones include minerals (emerald), rocks (lapis), and organic stones (amber).
Although certain rocks and organic materials have been classified as gemstones, most
commonly we associate rare minerals as gemstones. Such mineral gemstones often are
divided into two groups: precious and semi-precious.
Precious gemstones are the most rare, beautiful, and durable. They are hard on the Mohs
scale (7.5-10). All experts categorize three minerals as precious gemstones: diamond,
corundum (varieties sapphire and ruby), and beryl (variety emerald). Some also include
pearl, jade, beryl (variety aquamarine), topaz, and opal. Value increases with size, color
intensity, clarity, and perfection of a stone. Semi-precious gemstones, while still rare, are
usually more abundant and include such minerals as garnet, zircon, peridot, quartz
(varieties amethyst and citrine), and tourmaline. They tend to be softer than precious
gemstones (around Mohs 5-7).
As an aside, I was taken to task for promoting the “old fashioned” divide between
precious and semi-precious gemstones in an R&G Kids article I wrote for Rock & Gem
magazine. The person spanking me insisted a gemstone is a gemstone is a gemstone and

107
that “no one” still divides them between “precious” and “semi-precious.” I proceeded to
visit several jewelry shops in my hometown. In each and every one, they divided their
wares between precious stones (diamonds, sapphires, emeralds, etc.) and semi-precious
stones (tourmaline, amethyst, turquoise, etc.) So, go figure! I’m an old-fashioned kind
of guy, so I’ll continue to refer to stones as precious or semi-precious until a new
generation takes over revision of this particular Badge Manual!
Precious and semi-precious gemstones vary from transparent to translucent or even
opaque. If transparent, they are usually faceted. If translucent to opaque (like jade, jet,
turquoise, star rubies, or star sapphires), they are usually cut as cabochons or carvings.
Translucent or opaque gemstones often are cut as
cabochons, like this star sapphire in my wedding ring.
Whether precious or semi-precious, clear or opaque, if it’s rare, beautiful, and desirable
for jewelry, it’s a gemstone! Enlist adult members of your society who have both natural
and faceted or cabbed specimens to do a show-and-tell presentation on precious and
semi-precious gems for your society’s kids. Then encourage each junior member to
select a favorite and to write a brief article for your newsletter. Encourage them to
illustrate the articles with drawings or photographs of the gemstones they’ve selected.
If you have access to the machinery and a skilled and willing mentor within the ranks of
your adult members, consider giving faceting classes to your more advanced juniors who
seem up to the task, or assist them in cabbing a star garnet, star ruby, or star sapphire
while teaching them how to orient a stone so that the star appears just right.
Note: Kids who write a report about gemstones for Activity 4.6 can simultaneously satisfy requirements
toward earning their Communication badge (Activity 7.2).

108
Back-up page 4.7: WILD CARD: Do your own thing!!
While I’ve tried to provide a wide-ranging variety of activities to choose from, no one
manual can “do it all.” There are many other great ideas out there that clubs have found
to match their local interests and resources.
Plus, the Youth Leaders of some clubs have expressed concern that some of the activities
included in the manual may be a bit beyond the abilities of their youngest members.
Here’s your chance to tailor-make activities for the youngest among us.
If you and your fellow club members have an idea for learning about lapidary arts that
isn’t included in this manual, go for it! When you send in your badge request, just let me
know what you did as a WILD CARD activity. Who knows? Maybe your idea will be
included in the next edition of the Badge Manual!

109
5. Collecting
Kids of all ages love to collect, and most rockhounds are pack rats at heart. We like
nothing better than to assemble an assortment of rocks found on our journeys, traded with
fellow collectors, and/or purchased at gem shows and rock shops or online. A proper
collection, however, is more than a bunch of rocks and/or fossils simply tossed into a
drawer or a box.
The value of a collection lies in its “curation,” or in the information included with each of
your specimens. What is it? Where did it come from? Who collected it? What other
information is unique or significant about it? The collection also should be properly
organized and stored so individual specimens can be cared for and retrieved easily.
Curating your treasures provides an opportunity to learn about the specimens you’ve
collected while improving both the scientific and economic value of your collection.
Here are some activities to help you work toward these goals:
Activity 5.1: Building a collection.
Build a rock, mineral, fossil, and/or lapidary art collection with at least 10 to 20
specimens. A collection can focus on just one sort of thing (a collection of minerals, a
collection of fossils, a collection of jewelry), or it can be a mixture of all these things.
Some people get very specialized, collecting, for instance, different kinds of shark teeth
or different forms of quartz or the minerals and/or fossils found in one specific locality.
Ultimately, a collection reflects the interests of the collector.
Activity 5.2: Cataloging and labeling your collection.
Take care to curate your collection. Number your specimens and, for each one, include a
label and keep a logbook or catalog with key information. For rocks and minerals, this
includes what it is and where it came from. For fossils, you should include both those
facts as well as information about the age of the fossil and its scientific name, if you can
determine these. Labels for a lapidary project might include what it is, what it’s made
from, when it was made, and who made it.
Activity 5.3: Storing a collection.
Store your collection safely and securely. Each specimen should be in its own small box
or baggie. The small boxes might then be kept in trays, shoe boxes, cigar boxes, shallow
shelves, soda flats, or whatever works best for you and the space you have to store your
collection in a way that keeps each specimen dust-free and free from nicks and dings.
Simple egg cartons work well in this regard!
Activity 5.4: Displaying your collection.
Prepare a display to exhibit to your fellow pebble pups at a club meeting or to show to the
public in a club show or at other venues. In this display, you should include not just your
specimens but also labels to tell your viewers what it is they’re seeing. (See Badge 6:
Showmanship.)

110
Activity 5.5: Reporting about your collection.
Give a presentation or write an article for your club newsletter or a report for your youth
leader about your collection. For instance, what do you like to collect and why? Do you
have any special stories to tell about two or three of the specimens in your collection? If
you have a mineral collection, what’s your most valuable mineral and why? If you have
a fossil collection, what’s your oldest fossil? Youngest? Most interesting? If you have a
collection of lapidary arts, describe how a particular piece was made. (See Badge 7:
Communication.)
Activity 5.6: WILD CARD: Do your own thing!
Do you have an idea for learning about collecting that isn’t included in this manual? If
so, do your own thing! When your Youth Leader sends in your badge request, let us
know what you did as a WILD CARD activity. Who knows? Maybe your idea will be
included in the next edition of the Badge Manual!

111
5. Collecting
□ 5.1 Building a collection
□ 5.2 Cataloging and labeling your collection
□ 5.3 Storing a collection
□ 5.4 Displaying your collection
□ 5.5 Reporting about your collection
□ 5.6 WILD CARD: Do your own thing!
To earn your Collecting badge, you need to complete at least 3 of the 6 activities. Check
off all the activities you’ve completed. When you have earned your badge, sign below
and have your FRA leader sign and forward this sheet to the AFMS Juniors Program
chair.
___________________________________
Date completed
_________________________________ ___________________________________
My signature Youth leader’s signature
_______________________________________________________________________
Name of my club
Leader’s preferred mailing address for
receiving badge:
____________________________________
____________________________________
____________________________________

112
Back-up page 5.1: Building a collection.
Collections come in many sorts. Some people try to collect as many different minerals or
fossils as possible to create a reference or species collection of all the rocks, minerals, or
fossils to be found worldwide.
Because it is virtually impossible for one person to collect every mineral or fossil in
existence, most choose to specialize with a specialty collection focusing on just one or
more areas, for instance, fluorescent minerals, trilobites, agates, ore minerals, etc.
A “specialty collection” might focus on just one thing, such as trilobites.
Then there’s a locality collection with specimens from just one area or country, or even
just one quarry. Some opt for a self-collected collection of minerals or fossils they have
personally found on field trips. A gem collection consists of precious and semi-precious
stones that are used for jewelry. There are also historical collections, native element
collections, type locality collections, systematic or Dana collections, and more. The
collection, ultimately, reflects the interests of the collector.
To help as a child begins to build a collection, a couple of nice reference books are
Krause’s Mineral Collector’s Handbook (1996), and Currier’s About Mineral Collecting
(2008/2009). In addition, Darryl Powell offers good advice in an article on the following
website: https://kidsloverocks.com/build-a-mineral-collection.
To help illustrate the range of collectibles, have adult members of your club bring in
examples from their collections. For instance, in my own club we have one member who
specializes in trilobites and has a collection of literally thousands of these little bugs.
Another member loves petrified wood and has assembled a collection of beautifully

113
polished rounds from all across the world. Yet another only self-collects and has an array
of natural mineral specimens he’s found in the deserts of California and Nevada. Yet
another member loves to self-collect agates and jasper in their many forms and to craft
what he finds into cabochons; he’s got a great collection of cabs in all the colors of the
rainbow along with samples of the rough from which they were made. Still others have
colorful collections of polished banded agates, personally faceted gemstones, an
assortment of fossil insects, and on and on.
Adult members sharing samples from their collections will illustrate to kids the range of
possibilities for creating their own collections. It’s also just plain neat for kids to hear
stories from adults about what got them started in collecting the things they do and of
their adventures as kids, especially any funny stories and misadventures, as when I got so
excited pointing to a rock next to a wooden pier that I fell into a river in South Dakota.
In encouraging kids to collect, also teach responsibility. For instance, discourage “over-
collecting” in the field. We should take only what we need and can reasonably use and
leave some for those who might follow us. We should respect private property and
protected items and report any rare or especially unusual items to a museum or other
authority. Federal and state laws protect some items, for instance, vertebrate fossils or
Native American artifacts. Refer kids to the AFMS Code of Ethics included with Back-
up page 8.1: http://amfed.org/ethics.htm. This Code goes as follows:
American Federation of Mineralogical Societies
CODE OF ETHICS
I will respect both private and public property and will do no collecting on privately
owned land without permission from the owner.
I will keep informed on all laws, regulations or rules governing colleting on public
lands and will observe them.
I will, to the best of my ability, ascertain the boundary lines of property on which I
plan to collect.
I will use no firearms or blasting materials in collecting areas.
I will cause no willful damage to property of any kind such as fences, signs, buildings,
etc.

114
I will leave all gates as found.
I will build fires only in designated or safe places and will be certain they are
completely extinguished before leaving the area.
I will discard no burning material—matches, cigarettes, etc.
I will fill all excavation holes which may be dangerous to livestock.
I will not contaminate wells, creeks, or other water supplies.
I will cause no willful damage to collecting material and will take hope only what I
can reasonably use.
I will practice conservation and undertake to utilize fully and well the materials I
have collected and will recycle my surplus for the pleasure and benefit of others.
I will support the rockhound project H.E.L.P. (Help Eliminate Litter Please) and will
leave all collecting areas devoid of litter, regardless of how found.
I will cooperate with field-trip leaders and those in designated authority in all
collecting areas.
I will report to my club or federation officers Bureau of Land Management or other
authorities, any deposit of petrified wood or other materials on public lands which
should be protected for the enjoyment of future generations for public educational
and scientific programs.
I will appreciate and protect our heritage of natural resource.
I will observe the “Golden Rule”, will use Good Outdoors Manners and will at all
times conduct myself in a manner which will add to the stature and Public Image of
Rockounds everywhere.
Finally, kids should strive to learn about the items they collect and should record
observations and notes about what they’ve collected (see Activity 5.2) to turn the activity
of collecting into an educational opportunity.
Note: Because several other badges involve building a collection, kids can work toward earning their
Collecting badge and other badges simultaneously. For instance, see Activities 1.3 and 1.4 (Rocks &
Minerals), 2.3 (Earth Resources), 3.4 (Fossils), 10.1, 10.3, 10.4, and 10.5 (Earth Processes), 11.4 and 11.5
(Earth in Space), 12.6 (Gold Panning & Prospecting), 14.1 (Stone Age Tools & Art), 16.1 through 16.7
(The World in Miniature), and 18.3 (Fluorescent Minerals).
115
Back-up page 5.2: Cataloging and labeling your collection.
Properly caring for, or curating, a collection greatly improves both its ultimate scientific
and economic value. Kids should be taught how best to curate the rocks, minerals, and
fossils they collect and the lapidary works they create. Detailed information about the
collection as a whole and the specimens contained within it should be kept in a logbook
or a catalog using 3X5 or 5X7 notecards, a notebook, a loose-leaf binder, or an electronic
database. Basically, whatever works best for the individual collector. Then, for each
specimen, a label should be created.
The Logbook or Catalog.
A logbook or catalog provides a systematic resource for recording and retrieving
information about the contents of a collection. Collectors are generally encouraged to
number their specimens, placing a dab of white enamel paint in an inconspicuous spot
that won’t show if the specimen is exhibited, and writing a specimen number in black
India ink. Sometimes you can write directly on the specimen without the use of paint.
Once the ink has dried, you might coat it with clear nail polish. Instead of white paint, I
once tried typewriter correction fluid, or white-out, but I found that over the years, my
ink gradually faded away on this material.
There’s no one universal way to number a collection. Each collector should choose a
system that works best for his or her collection and preferences. The simplest method is
starting with the first specimen you’ve collected and consecutively numbering each
subsequent specimen: 1, 2, 3, 4, etc. However, it’s more useful to use a number system
that incorporates descriptive information. For instance, I’ve organized my fossil
collection by geological period or epoch and then by locality. So I have trays for the
Eocene Epoch that are subdivided by localities. All fossils collected from the Eocene
Epoch are given a number starting with “E” for Eocene. Then they’re given a locality
designation: “O” for Ojai, California, “P” for Pender County, North Carolina, or “K” for
Kemmerer, Wyoming. Then each fossil from a specific locality is numbered starting
with “1.” Thus, my Eocene fossils from Kemmerer, Wyoming, are numbered EK1, EK2,
EK3, etc., and my Eocene fossils from Ojai, California are numbered EO1, EO2, etc.
A mineral collection might be numbered by a specific locality, county, state, or country.
Thus, all your minerals from Brazil might be labeled B1, B2, B3, etc., with “B” standing
for Brazil. Or you might choose to number by type of mineral. Thus, all your quartz
specimens might be numbered Q1, Q2, Q3, etc., where “Q” stands for quartz, while your
fluorite specimens are numbered F1, F2, F3, etc.
A collection of lapidary arts might be numbered by the sort of artwork (grouping all cabs
together under “C,” all faceted stones under “F,” etc. Whether the simple system of just
1, 2, 3, 4, etc., or a more complex system incorporating locality and age information, the
important things are to pick a system that proves most useful to you and that records
essential information that it is all-too-easy to forget years down the road. (I’m old, with a
big collection, so I know all-to-well about forgetting!)
116
Once you’ve settled on a system and have begun to attach numbers to your specimens,
the number for each should be recorded in the logbook or catalog along with other key
information. For rocks and minerals, this includes what it is and where it came from. If
the specimen is self-collected, you should record detailed information about the
collecting site, including written directions and a map for how to get to it.
If you purchase a specimen, you should get as much information as you can from the
dealer about where the mineral came from, including, if possible, a specific location or
mine. (This is one way to separate truly excellent dealers who are interested in the
scientific value of minerals from those who are in it just to make a buck and who don’t
take the care to record and keep such information.) You might also record when you
collected or purchased the specimen.
A complete catalog entry for a mineral might include the following fields:
Specimen number assigned to the mineral.
Common name of the mineral, along with variety.
Locality where the mineral was found.
An indication as to whether it was self-collected, traded, purchased, or a gift.
Name of the person who collected it.
Date it was collected, purchased, traded, or given as a gift.
If purchased, name of the dealer and the price and any info about previous owners.
Miscellaneous notes, including directions and map to the locality if self-collected, and
notes about the collecting site.
For fossils, you should include all of the above as well as information about the scientific
name of the fossil and its geological age:
Specimen number assigned to the fossil.
Common name of the fossil.
Taxonomic information, including the scientific name of the fossil. (You may get as
detailed as you like with this, but most include at least the Genus and Species.)
Age of the fossil. (The more detail, the better. At the very least, you should record
the geological Period or Epoch; at best, you should include the Formation and even
the specific horizon within a Formation.)
Locality where the fossil was found.
Name of the person who collected it.
Date it was collected or purchased.
If purchased, name of the dealer and the purchase price.
Miscellaneous notes, including directions and map to the locality if self-collected, and
notes about the collecting site.
An entry for a lapidary project might include a specimen number, what it is, what it is
made from (and the purchase price of the individual components, or information about
where you collected or purchased the rough material to use in your project), when it was
made, who made it, and estimated value. You might also include notes about any special
techniques and equipment used to create your project.

117
It is very seldom that any of us are compulsive enough (or have the time on our hands) to
record all of the information I’ve just indicated. For instance, I myself have not been
quite so diligent. So do as I say, not as I do! In the end, the effort is worth it for
enhancing the ultimate value of a collection; thus, you should encourage kids to make
cataloging a routine part of their collecting activity.
Labels.
A label is simply an abbreviated version of the full catalog entry, capturing only a few
key points that will fit on a card small enough to store with a specimen or to show
alongside a specimen in a display. For a mineral, at the least you should include the
common name of the mineral and its locality. For a fossil, you should include the
common name, scientific name (Genus and Species), locality, and age (period or epoch).
For a lapidary project, you might include what it is, what it’s composed of, and who
made it (e.g., a Jade Vase, created by Jane Doe.)
Examples of basic info to include on mineral, fossil, and lapidary labels.
While the above may be fine for most purposes, if entering competition in an AFMS
show or a regional federation show, you will find specific requirements for labeling
contained within the AFMS Uniform Rules, which should be consulted for different
categories of displays: www.amfed.org/rules/rules.htm.
Electronic Data Keeping.
As a collection grows, it can become increasingly difficult to remember and keep track of
your specimens, even if recorded in a handwritten logbook. Also, over time a
handwritten logbook can prove inflexible to use as ever more specimens get entered.
One invaluable alternative is the computer. You can use the database or spreadsheet
functions that come packaged with most computers to create your own electronic catalog,
or you can turn to commercially available software. For instance, Carles Millan has
created free software for cataloguing mineral collections that can be downloaded at
http://carlesmillan.cat/min/main.php. Another free collection management tool is
available at Geology365, https://www.geology365.com/.

118
Advantages of a computerized database are the ability to easily edit information and to
quickly and easily pull up information about a specific desired field. For instance, if you
have a quartz collection from around the world, you might want to pull up the records for
just your amethyst specimens. Or perhaps you’re putting together a display of quartz
specimens from a single country or region. A computerized database makes it relatively
easy to pull up related files like these. And some programs come with the ability to then
quickly gin out labels, as well.
With digital photography, some collectors even incorporate photos of collecting sites and
their individual specimens into their electronic databases to make it even easier to match
an entry in a catalog with a specimen in a drawer.
Cataloging and Labeling Group Activity.
Turn cataloging and labeling into a group activity! Have kids bring parts of their
collections to a meeting and work with them to devise numbering systems. Then work
further to identify, label, and store specimens, thus giving them hands-on experience
before going home to catalog and label the rest of their collections.
Note: Kids who create an electronic catalog can use this activity to satisfy requirements for earning the
Rocking on the Computer badge simultaneously (Activity 15.4).
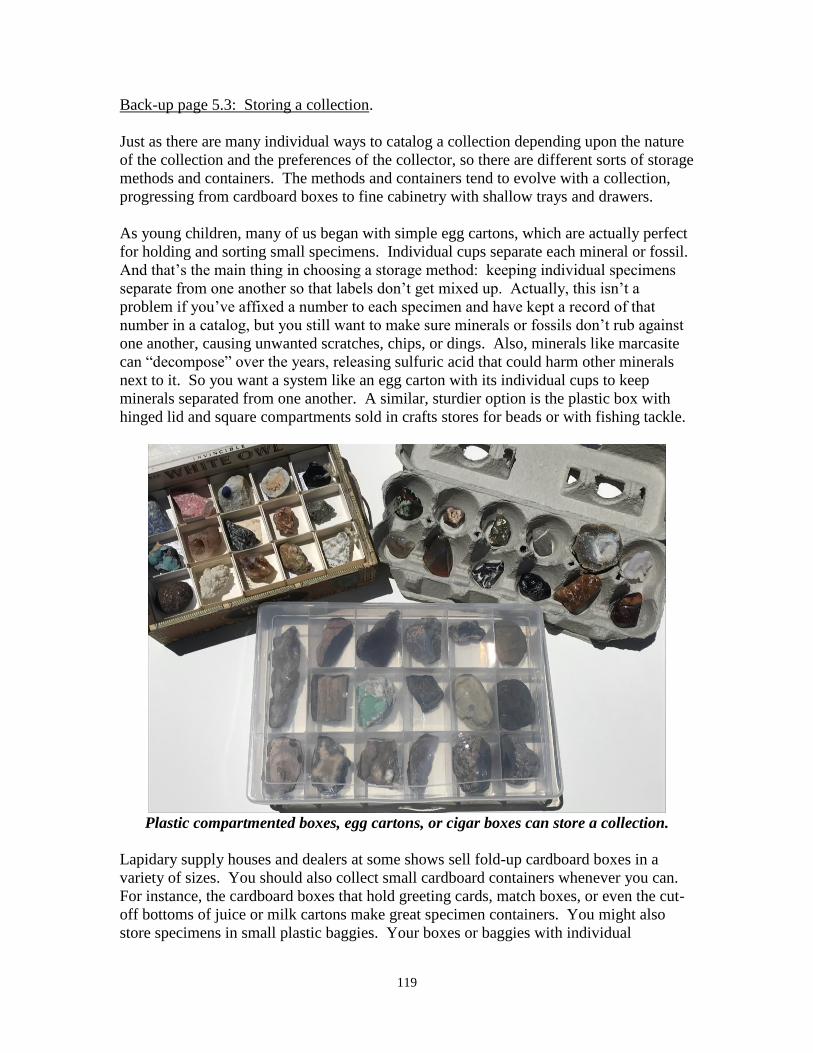
119
Back-up page 5.3: Storing a collection.
Just as there are many individual ways to catalog a collection depending upon the nature
of the collection and the preferences of the collector, so there are different sorts of storage
methods and containers. The methods and containers tend to evolve with a collection,
progressing from cardboard boxes to fine cabinetry with shallow trays and drawers.
As young children, many of us began with simple egg cartons, which are actually perfect
for holding and sorting small specimens. Individual cups separate each mineral or fossil.
And that’s the main thing in choosing a storage method: keeping individual specimens
separate from one another so that labels don’t get mixed up. Actually, this isn’t a
problem if you’ve affixed a number to each specimen and have kept a record of that
number in a catalog, but you still want to make sure minerals or fossils don’t rub against
one another, causing unwanted scratches, chips, or dings. Also, minerals like marcasite
can “decompose” over the years, releasing sulfuric acid that could harm other minerals
next to it. So you want a system like an egg carton with its individual cups to keep
minerals separated from one another. A similar, sturdier option is the plastic box with
hinged lid and square compartments sold in crafts stores for beads or with fishing tackle.
Plastic compartmented boxes, egg cartons, or cigar boxes can store a collection.
Lapidary supply houses and dealers at some shows sell fold-up cardboard boxes in a
variety of sizes. You should also collect small cardboard containers whenever you can.
For instance, the cardboard boxes that hold greeting cards, match boxes, or even the cut-
off bottoms of juice or milk cartons make great specimen containers. You might also
store specimens in small plastic baggies. Your boxes or baggies with individual

120
specimens and their labels can then be organized and stored in cardboard soda flats to
hold a whole collection. Get soda flats of two slightly different sizes so that one can
serve as a top to protect a collection from dust and so that you can stack a collection as
you fill more and more boxes. Shoeboxes and cigar boxes also work well for holding
various specimens. Also, boxes that hold reams of typing paper can make great flats by
trimming the bottom down to match the top to create a perfect storage box with lid.
A nice container for both storing and displaying a collection is a Riker mount. This
consists of a sturdy cardboard bottom filled with cotton. Specimens are arranged in the
cotton. Then a top with glass is fitted over and held in place with pins.
The most sophisticated and permanent way of storing a collection is in a unit of wooden
shelves or trays kept in a cabinet. I’ve built several of my own and found it to be a lot
easier than I initially imagined. Or, if you can afford it, you can buy shallow shelves
meant for storing maps or art supplies or wooden or metal shelves built specifically for
mineral and fossil collections from scientific supply houses, like Ward’s. But such
professionally produced units can easily run into the thousands of dollars—not an option
for the budget of 99.9 percent of the kids I’ve ever worked with!
As an activity, bring in a variety of shoeboxes, cigar boxes, cardboard flats with lids,
plastic fishing tackle and crafts boxes, and small boxes and baggies to talk about
organizing a collection with hands-on examples. Follow this up at your next meeting by
having kids bring in examples of how they’ve decided to store their collections.
Varied ways to store a collection include soda flats, cabinets, and Riker mounts.

121
Back-up page 5.4: Displaying your collection.
Back-up pages for Badge 6 on Showmanship provide information on where and how to
display a junior member’s collection. You should refer to those back-up pages for
reference in assisting kids in satisfying Activity 5.4.
Gem shows and county fairs are great venues for displaying a collection!
Note: Kids can use this activity to satisfy requirements toward earning the Showmanship badge
simultaneously (Activity 6.4).

122
Back-up page 5.5: Reporting about your collection.
Back-up pages for Badge 7 on Communication provide information on preparing an oral
or written report. You should refer to those back-up pages for reference in assisting kids
in satisfying Activity 5.5.
Preparing an oral report can result in a “two-fer” if you then adapt the
presentation you’ve already given into an article for your club newsletter.
Note: Kids can use this activity toward satisfying requirements for the Communication badge
simultaneously (Activities 7.1 and 7.2).

123
Back-up page 5.6: WILD CARD: Do your own thing!!
While I’ve tried to provide a wide-ranging variety of activities to choose from, no one
manual can “do it all.” There are many other great ideas out there that clubs have found
to match their local interests and resources.
Plus, the Youth Leaders of some clubs have expressed concern that some of the activities
included in the manual may be a bit beyond the abilities of their youngest members.
Here’s your chance to tailor-make activities for the youngest among us.
If you and your fellow club members have an idea for learning about collecting that isn’t
included in this manual, go for it! When you send in your badge request, just let me
know what you did as a WILD CARD activity. Who knows? Maybe your idea will be
included in the next edition of the Badge Manual!
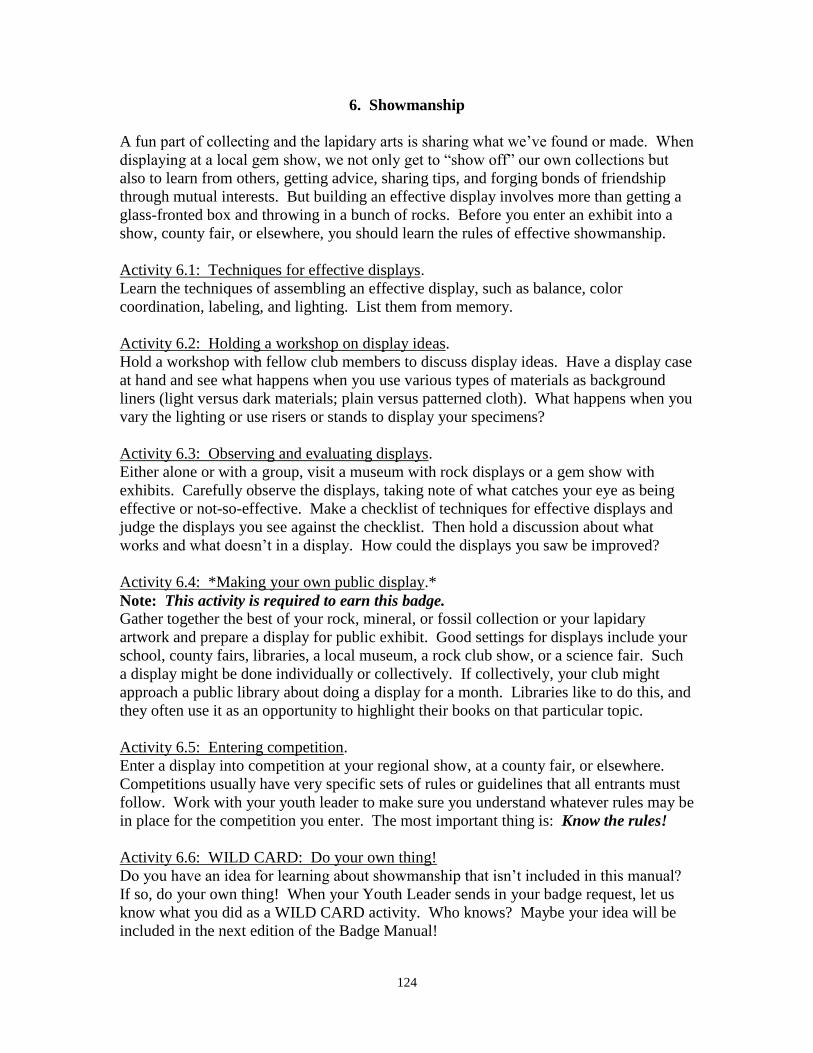
124
6. Showmanship
A fun part of collecting and the lapidary arts is sharing what we’ve found or made. When
displaying at a local gem show, we not only get to “show off” our own collections but
also to learn from others, getting advice, sharing tips, and forging bonds of friendship
through mutual interests. But building an effective display involves more than getting a
glass-fronted box and throwing in a bunch of rocks. Before you enter an exhibit into a
show, county fair, or elsewhere, you should learn the rules of effective showmanship.
Activity 6.1: Techniques for effective displays.
Learn the techniques of assembling an effective display, such as balance, color
coordination, labeling, and lighting. List them from memory.
Activity 6.2: Holding a workshop on display ideas.
Hold a workshop with fellow club members to discuss display ideas. Have a display case
at hand and see what happens when you use various types of materials as background
liners (light versus dark materials; plain versus patterned cloth). What happens when you
vary the lighting or use risers or stands to display your specimens?
Activity 6.3: Observing and evaluating displays.
Either alone or with a group, visit a museum with rock displays or a gem show with
exhibits. Carefully observe the displays, taking note of what catches your eye as being
effective or not-so-effective. Make a checklist of techniques for effective displays and
judge the displays you see against the checklist. Then hold a discussion about what
works and what doesn’t in a display. How could the displays you saw be improved?
Activity 6.4: *Making your own public display.*
Note: This activity is required to earn this badge.
Gather together the best of your rock, mineral, or fossil collection or your lapidary
artwork and prepare a display for public exhibit. Good settings for displays include your
school, county fairs, libraries, a local museum, a rock club show, or a science fair. Such
a display might be done individually or collectively. If collectively, your club might
approach a public library about doing a display for a month. Libraries like to do this, and
they often use it as an opportunity to highlight their books on that particular topic.
Activity 6.5: Entering competition.
Enter a display into competition at your regional show, at a county fair, or elsewhere.
Competitions usually have very specific sets of rules or guidelines that all entrants must
follow. Work with your youth leader to make sure you understand whatever rules may be
in place for the competition you enter. The most important thing is: Know the rules!
Activity 6.6: WILD CARD: Do your own thing!
Do you have an idea for learning about showmanship that isn’t included in this manual?
If so, do your own thing! When your Youth Leader sends in your badge request, let us
know what you did as a WILD CARD activity. Who knows? Maybe your idea will be
included in the next edition of the Badge Manual!

125
6. Showmanship
□ 6.1 Techniques for effective displays
□ 6.2 Holding a workshop on display ideas
□ 6.3 Observing and evaluating displays
□ 6.4 *Making your own public display* (required to earn this badge)
□ 6.5 Entering competition
□ 6.6 WILD CARD: Do your own thing!
To earn your Showmanship badge, you need to complete at least 3 of the 6 activities.
(Please note that successfully completing Activity 6.4 is required to earn this badge.)
Check off all the activities you’ve completed. When you have earned your badge, sign
below and have your FRA leader sign and forward this sheet to the AFMS Juniors
Program chair.
___________________________________
Date completed
_________________________________ ___________________________________
My signature Youth leader’s signature
_______________________________________________________________________
Name of my club
Leader’s preferred mailing address for
receiving badge:
____________________________________
____________________________________
____________________________________

126
Back-up page 6.1: Techniques for effective displays.
For detailed information on displays, purchase Patricia Mummert and William Shelton’s
Exhibiting: The Show Biz Aspect of the Hobby, available from the Eastern Federation of
Mineralogical and Lapidary Societies. Help your kids develop a “tip sheet” of do’s and
don’ts for effective displays and exhibits. For instance, consider the following.
Use neutral liners to highlight and enhance your specimens. “Busy” liners tend
to distract the viewer’s eye from the specimen you wish to show.
Display cases often look best when lined with cloth wrapped tightly around sheets of
cardboard, plywood, or foam board cut to fit snuggly along the case sides and bottom.
Two rules govern choice of cloth. First, you want the viewer’s eye to focus on your
specimens, not the background, so choose a cloth that is neutral in appearance. Avoid
patterns (spots, checkers, paisley, stripes, flowers, etc.) and avoid cloth that is glossy and
reflects light or that is garish or neon-bright in color. Plain linen, suede, canvas, or burlap
fabrics in a neutral colors usually work best.
Dark, patterned liners “hide” specimens; neutral liners highlight them.
Second, choose a color that will highlight your specimens. Dark specimens can get lost
against a dark liner. Instead, use pastel shades of light blue, tan, eggshell white, etc. If
displaying light-colored specimens, a dark liner (black, navy blue, dark olive green) may
be more appropriate. Choose a color that enables your specimens to “pop out” in the
eyes of the viewer.
Use balance (in size of specimens, colors, and arrangement) to guide the viewer’s
eye across a display in an aesthetically pleasing way.
Choose specimens that complement one another in size and shape and arrange them
symmetrically around a center. A large specimen shoved to the side of a case can make a
display look lopsided. However, a single large piece placed in the center and surrounded
by smaller pieces can provide a pleasing effect. If using risers, place specimens so that
larger ones aren’t hiding or obscuring smaller ones. If displaying colorful minerals,
arrange the colors in a way that provides interest to the viewer; for instance, alternate
dark and light colored specimens.
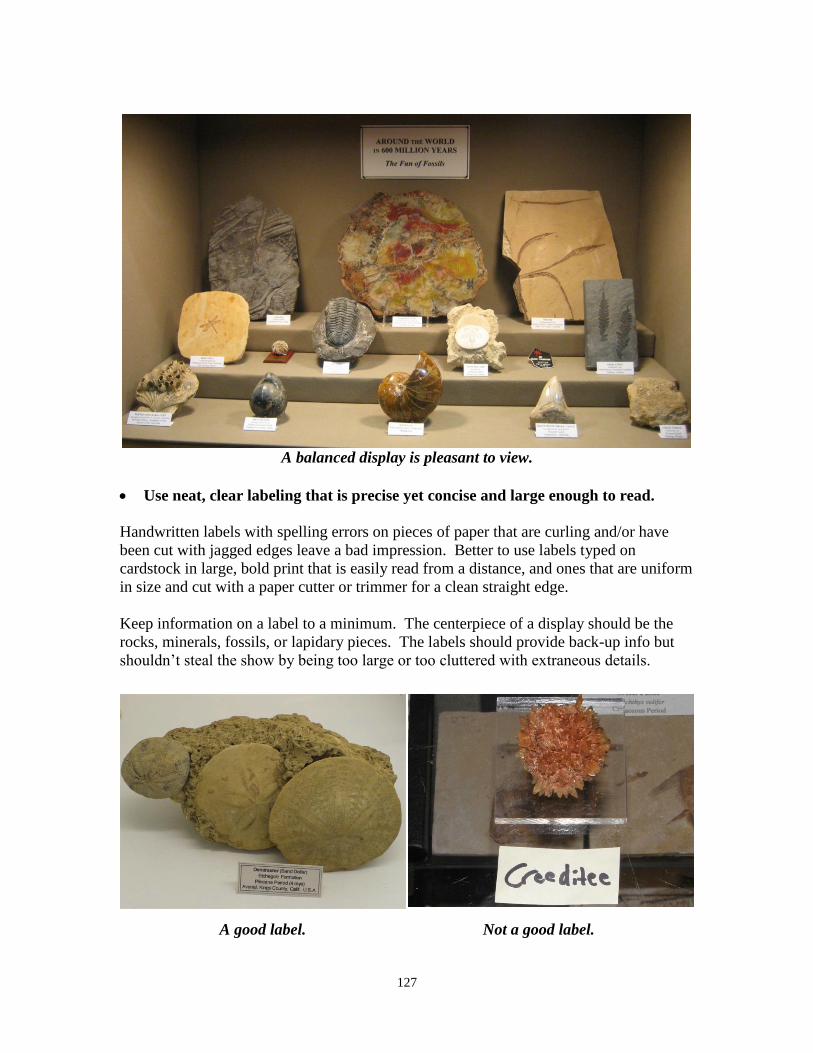
127
A balanced display is pleasant to view.
Use neat, clear labeling that is precise yet concise and large enough to read.
Handwritten labels with spelling errors on pieces of paper that are curling and/or have
been cut with jagged edges leave a bad impression. Better to use labels typed on
cardstock in large, bold print that is easily read from a distance, and ones that are uniform
in size and cut with a paper cutter or trimmer for a clean straight edge.
Keep information on a label to a minimum. The centerpiece of a display should be the
rocks, minerals, fossils, or lapidary pieces. The labels should provide back-up info but
shouldn’t steal the show by being too large or too cluttered with extraneous details.
A good label. Not a good label.
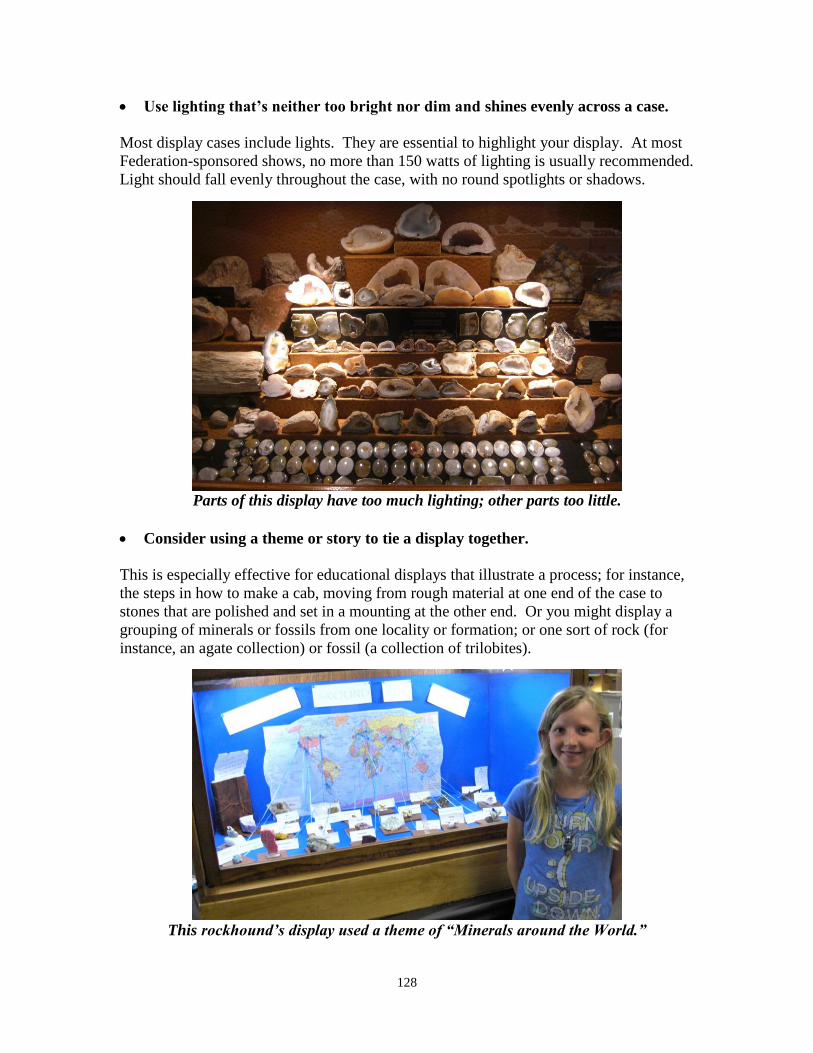
128
Use lighting that’s neither too bright nor dim and shines evenly across a case.
Most display cases include lights. They are essential to highlight your display. At most
Federation-sponsored shows, no more than 150 watts of lighting is usually recommended.
Light should fall evenly throughout the case, with no round spotlights or shadows.
Parts of this display have too much lighting; other parts too little.
Consider using a theme or story to tie a display together.
This is especially effective for educational displays that illustrate a process; for instance,
the steps in how to make a cab, moving from rough material at one end of the case to
stones that are polished and set in a mounting at the other end. Or you might display a
grouping of minerals or fossils from one locality or formation; or one sort of rock (for
instance, an agate collection) or fossil (a collection of trilobites).
This rockhound’s display used a theme of “Minerals around the World.”

129
Back-up page 6.2: Holding a workshop on display ideas.
Once your kids are familiar with the basics of assembling an effective display, hold a
workshop at one of your monthly meetings to review those basics in an interactive
manner. Such a workshop should be hands-on, with a display case front-and-center to
vividly illustrate display techniques.
For instance, bring in different sorts of liners to show how specimens get lost against a
“busy” background of plaid or paisley versus how they are highlighted against a neutral
background. Demonstrate how dark specimens “pop” more effectively against beige,
eggshell white, or light blue but get lost against a black background. Conversely, show
how light-colored specimens are enhanced against that same black background.
Show the difference that lighting can make, starting with no light at all, and then
illustrating problems of high-wattage light bulbs that glare or bulbs that are too small and
that create “spotlighting” effects within a case.
Demonstrate appropriate use of labeling. Show labels that are too large and too crammed
with dense text versus those that are small, simple, and convey “just the facts, ma’am.”
Illustrate the difference between hand-written labels cut out jaggedly with scissors versus
typed or printed labels measured for uniformity and sliced evenly with a paper cutter.
Show labels printed on thin paper that ends up curling at the edges versus labels printed
on stiff card stock.
Illustrate effects that risers or glass shelves or display stands can have in adding depth to
a display. For instance, show an assortment of rocks lined up in rows in an unlined case.
Then show that same assortment in a case that a) has been lined, b) has tiered risers, and
c) includes stands beneath the specimens.
In a display, especially one entered into a competition, all specimens should be free of
dust, dirt, and fingerprints. Leave a cluster of clear quartz crystals outside for several
weeks and bring it in along with a pan of water and a toothbrush to illustrate the dramatic
effect a simple scrubbing can have on specimens. (But don’t try this with your halite!)
After reviewing general display techniques, let the kids themselves play around with a
case. You can bring in materials yourself for them to experiment with, or you can have
them bring in their own collections. Don’t just lecture and distribute a list of “do’s” and
“don’t’s.” Let the kids see for themselves what happens when they try different
arrangements and display techniques. If you have members who have taken photos of
displays at various shows, a nice touch is a brief PowerPoint or slide show or photo
album of award-winning cases to vividly show how it can all come together.
The Geo-Juniors of the Summit Lapidary Club (Ohio) have prepared a nice worksheet
you might copy and distribute to help your juniors work through an evaluation session as
shown on the next page.
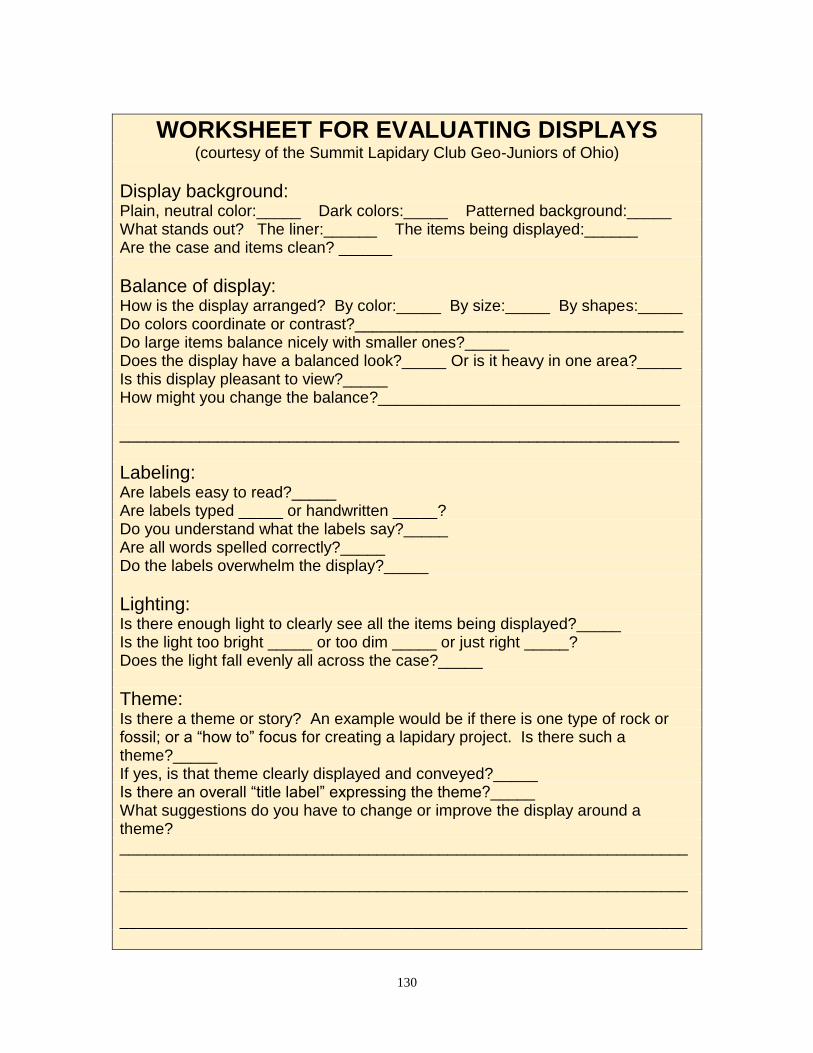
130
WORKSHEET FOR EVALUATING DISPLAYS (courtesy of the Summit Lapidary Club Geo-Juniors of Ohio)
Display background: Plain, neutral color:_____ Dark colors:_____ Patterned background:_____ What stands out? The liner:______ The items being displayed:______ Are the case and items clean? ______
Balance of display: How is the display arranged? By color:_____ By size:_____ By shapes:_____ Do colors coordinate or contrast?_____________________________________ Do large items balance nicely with smaller ones?_____ Does the display have a balanced look?_____ Or is it heavy in one area?_____ Is this display pleasant to view?_____ How might you change the balance?__________________________________ _______________________________________________________________
Labeling: Are labels easy to read?_____ Are labels typed _____ or handwritten _____? Do you understand what the labels say?_____ Are all words spelled correctly?_____ Do the labels overwhelm the display?_____
Lighting: Is there enough light to clearly see all the items being displayed?_____ Is the light too bright _____ or too dim _____ or just right _____? Does the light fall evenly all across the case?_____
Theme: Is there a theme or story? An example would be if there is one type of rock or fossil; or a “how to” focus for creating a lapidary project. Is there such a theme?_____ If yes, is that theme clearly displayed and conveyed?_____ Is there an overall “title label” expressing the theme?_____ What suggestions do you have to change or improve the display around a theme? ________________________________________________________________ ________________________________________________________________ ________________________________________________________________

131
Back-up page 6.3: Observing and evaluating displays.
To satisfy requirements for this activity, have kids write an evaluation of 2 or 3 cases
they’ve seen at a show, museum, or jewelry store window. As a start for gathering info
for their report, they might use the worksheet contained in Activity 6.2. In their report,
they should illustrate basic awareness of techniques for effective displays and should
recommend ways by which the displays might be improved, whether through better
lighting, better labels, a different arrangement of specimens, or a simple dusting of the
display case. (You would be surprised how many cobwebs you can find in some museum
displays!) You also might distribute a sheet with photographs of several display cases,
like the following, and ask kids to evaluate each. How might each be improved?

132
Back-up page 6.4: *Making your own public display.*
Note: This activity is required for kids to earn the Showmanship badge.
A fun and rewarding aspect of our hobby is sharing what we’ve found, collected, crafted,
and learned with others. Collections aren’t meant to be hoarded and hidden away.
Encourage kids to share their collections in a public display. The best venue is your own
club’s annual gem and mineral show or a show held by a neighboring club or society.
If you club doesn’t hold a show and if neighboring clubs are too far away to conveniently
attend, other options include a county fair, a library lobby or window display, a case at a
school, or a science fair. Opportunities abound. For instance, my local library has a
display case in its foyer and welcomes nonprofit organizations installing educational
displays for a month at a time. Regional museums sometimes provide a display case for
rotating displays. These often must be reserved months in advance, so do some early
legwork to locate such public spaces. Check for opportunities like these within your
community. Then assist your kids in taking advantage of them!
In addition to gem shows, you can exhibit in a library lobby or at a county fair.
Note: Because several other badges involve making a public display, kids can work toward earning their
Showmanship badge and other badges simultaneously. For instance, see Activities 2.3 (Earth Resources),
4.5 (Lapidary Arts), 5.4 (Collecting), 7.3 (Communication), 9.2 (Leadership),17.8 (Special Effects), and
18.4 (Fluorescent Minerals) .

133
Back-up page 6.5: Entering competition.
Federation competitions.
Each year, each of the seven regional Federations of the AFMS holds a show and
convention that includes the opportunity to enter a display into competition to earn
ribbons and plaques. Junior members can even win a financial reward!
The AFMS holds a joint show and convention with one of the regional federations,
rotating over the years to each region. The junior’s case earning the most points at an
AFMS-affiliated show wins the AFMS Lillian Turner Award, which includes a
certificate, a $100 Series “E” Bond, and (usually) a mineral specimen. Thus, it really can
“pay” to enter!
Over the years, AFMS has devised a detailed system of rules for all the different sorts of
displays that represent the varied aspects of our hobby. They refer to this as the AFMS
“Uniform Rules.” Categories range from all manner of lapidary arts (sphere-making,
cabbing, faceting, beading, intarsia, etc.) to mineral collecting and fossil collecting (with
categories for micromounts, thumbnail specimens, and larger specimens; for self-
collected fossils and purchased specimens; for materials from a single locality and those
collected from around the world; for meteorites; and so on).
Each category comes with its own requirements and rules, and—in order to ensure
uniformity in judging—these rules have been collected together in a rather thick packet.
Many complain this packet is a little too thick and too bureaucratic for its britches. For
example, the U.S. Tax Code looks rather simple by comparison! I’ve been told, though,
that before the Uniform Rules came along, there was much personal bias in judging
displays and there were many instances in which judges found themselves in something
of a bind because they were comparing “apples to oranges,” so to speak. Thus, the
Uniform Rules were designed to bring clarity and transparency to the entire process.
While I applaud and support that intent, I personally agree that the AFMS Uniform Rules
is presented in a way that is more complex than need be and, in many ways, impedes
creativity. (Also, I’m not entirely convinced it has eliminated bias in judging, given the
variance in scoring I’ve observed over the years for the very same case that has been
evaluated at a regional Federation show versus a national Federation show.)
But—it is what it is. Should one wish to enter Federation competition, the way toward
success, as in other life endeavors, is understanding and following the rules, whether you
agree with them or not. This, too, is an important lesson for kids to learn.
The junior program leader should obtain a copy of the AFMS Uniform Rules, read
through it, and be on hand to help guide kids who wish to enter a competitive display.
The rules can be complex and difficult for even an adult to follow, and entering
competition can be daunting for anyone, young or old. While you shouldn’t construct
134
your kids’ displays for them, you should be on hand to provide support, pointers, and
advice based on a full knowledge of the AFMS rules for exhibiting.
The AFMS Uniform Rules may be purchased through the American Federation of
Mineralogical Societies or your regional federation, or it may be downloaded free from
the AFMS web site at http://www.amfed.org/rules/rules.htm. It is a long document, so be
sure you have plenty of toner and paper in your printer and print “double-sided”!
Within the Uniform Rules are sheets that explain at-a-glance the things to be judged
within specific categories and the number of points allocated to each thing. You should
copy these sheets to share with kids entering a particular category. All-to-often, I’ve
unfortunately seen a perfectly fine case discounted because one or two rules were
unnecessarily overlooked by the exhibitor. If entering, be compulsive and rule-driven!
Other competitions to consider.
Federation-sponsored shows aren’t the only opportunities for kids to enter competitions.
There are many others that encourage a lot more creativity via much more flexibility in
their rules and regulations. Check around your local area. For instance:
County fairs often sponsor competitions for hobbies and collections, and some have
divisions specifically focused on gems, minerals, fossils, and lapidary arts.
Many school districts sponsor science fairs.
Among its many offerings and activities, 4H has units on Geology, Collecting, and
Science Discovery. The first ribbon I ever won was for a 4H collection I entered into
the Winnebego County Fair in Illinois under “Do Your Own Thing” since they didn’t
include Geology and Collecting at that time—way, way back in the last century!
Several clubs host competitions in a way that is informal and fun, namely, a “Towel
Show.” One club meeting a year is devoted to this. Tables are set up throughout the
meeting room, and everyone brings in a bath towel and takes part in competitions for
such categories as Best Mineral, Best Fossil, Best Collection, Material I Collected
Last Year, Ugliest Rock, and more. These contests might be open to everyone in the
club, or there might be divisions for adults and for kids. Does your club host an
informal “Towel Show”? If not, start one. From what I’ve seen, these are fun,
flexible, and open to a whole lot of creativity!
If you come up dry, hold your own competition for your junior members and pebble
pups at your club’s annual show utilizing the AFMS Uniform Rules. Or consider
developing rules of your own, such as the ones on the next few pages sent in by
Audrey Vogelpohl of the West Seattle Rock Club.
135
JUNIOR DISPLAY EDUCATION
(courtesy of Audrey Vogelpohl, West Seattle Rock Club of Washington) Assisting junior members to display what they have collected, whether self-collected or purchased from commercial dealers, can be accomplished with this simple set of guidelines designed specifically for juniors. These guidelines are meant to be used at the club level for local show displaying. Any junior can participate. The guidelines are designed with display categories, age grouping, judging, points, and ribbons. Displays must be a junior’s own work and effort, with coaching from a parent, guardian, or sponsor. Rules of participation are kept simple and aimed at the Junior level. These guidelines are not intended to distract or prohibit any junior from entering formal Federation show competition under the AFMS Uniform Rules but to provide a somewhat more simplified introduction to competing at the local level. Ribbons only will be awarded. There will be no trophies unless a junior is participating in competition under the AFMS Uniform Rules at a regional or national Federation show. The points used for this local program are for training only and are not equivalent to the points system used with AFMS Uniform Rules. Judging will be education-centered in order to provide the junior with helpful, constructive written feedback for any points taken off. Literally all judging criticisms need to be fully explained so the junior will have a primer to work from and improve. The goal should be to build confidence in the junior exhibitor to move to the next step of entering competition at a Federation level.
A NOTE TO PARENTS It is very important to have your support. We hope that you will work with your child or children if they have an interest in displaying their material. These guidelines are to assist you in understanding the process of juniors entering a display in our own local club show. Please ask questions of the Juniors Chair and other fellow club members and learn basic steps that will help your own child create an excellent display for the public to appreciate.

136
RULES FOR JUNIOR DISPLAYING
PART 1. GENERAL GEM & MINERAL SHOW DISPLAY GUIDELINES
1.1 Decide what you want to display a. What do you like to collect?
b. Specimens from a special field trip? c. What is the show subject or theme? d. What will make your display special? (unique, best quality, complete collection, dramatic specimen, favorite)
e. Examples of your lapidary skills? (carving, cabs, faceting) f. Have you made jewelry or gem trees?
1.2 Communications from your display
a. Present your display as if you are speaking to a new friend that you have not met yet.
b. Purpose of your display is sharing the art of nature, public education, and promoting your interests and club hobby.
c. Keep it simple without too much wording. d. Coordinate colors that are pleasant to your eye and that highlight the
specimens. e. Avoid use of excess “props” (feathers, sticks, photos, glass, wood, metal) in your case because they steal attention from specimens.
1.3 Specimens you decide to display
a. All same material or different types of gems, minerals, or fossils. b. Size may be large or small, uniform or mixed. c. Quality should always be the very best you can provide. d. Number of specimens should be just enough to make your display
easy to view and not look too “busy” or overfilled. e. Large specimens in back of display case, smaller in front. f. Always wash/clean your specimens before placing in the case.
1.4 Labeling your display a. Always have accurate names, correct spelling, punctuation, and
information. To help avoid mistakes, proofread twice, then ask someone else to read the labels.
b. Use uniform size of lettering on the labels and make letters large enough to read at about two feet from the front of the case.
c. Individual labels for each specimen should include, at a minimum, correct name of mineral or fossil and origin, or where found.
d. If all material in a case is the same sort of material (all calcite; all trilobites), identify on a single label at the back or floor of the case.
e. Lettering should be typed or laser-printed on durable cardstock (not paper) than handwritten. Plastic covered labels are too reflective.

137
f. Prepare a label with your name and age, but only place it into the case after judging is over.
1.5 Display case for your specimens
a. Good display cases are hard to find so begin by borrowing a case for the show.
b. Typical cases are “Federation Style,” which are about two feet high, two feet deep, and four feet wide, with a glass front. Dimensions usually vary slightly because there are different builders.
c. Your case should always have a liner that is lighter color (white or pastels are best) than the dominant colors of your specimens. Dark or “flashy” liners will usually distract from the color effects of the displayed specimens.
d. Wash hands before installing liners in the case to prevent smudging with finger prints.
e. Best lighting is clear, incandescent bulbs or tube fluorescent bulbs that are “cool white” type, not to exceed 150 watts total per case.
f. After you have arranged and labeled the specimens, be sure to clean the inside of the front glass before securing to the front of the case.
PART 2. DISPLAY AGE GROUPS For AFMS and Regional Federation competitions, juniors are defined as having reached the 8th birthday and not yet having reached the 18th birthday as of the opening date of the show. But for local shows, you might consider a wider range of ages, broken up into several groups, for instance:
Age Group 1: ages 4 through 7 Age Group 2: ages 8 through 11 Age Group 3: ages 12 through 15 Age Group 4: 16 through 17
Having a wider range allows for fairer groupings and also for awarding more prizes. For more experienced kids who have exhibited before, particularly those in Age Group 4, you might consider applying the AFMS Uniform Rules when judging to prepare them for that next step in competitive exhibiting. PART 3. DISPLAY CATEGORIES Adapt categories to your own local club interests, but these may include:
3.1 Self-Collected Specimens Any type, size, or location. Labels must include the specimen name and location where specimen was found. Date it was found is helpful, if available.

138
3.2 Minerals Any size, type, or location. Must include accurate mineral names and locations on labels. 3.3 Educational Any topic or theme relevant to rockhounding or rock uses. Brief, to-the- point wording is best on all labels. 3.4 Lapidary Tumbling, polishing, faceting, carving, etc. On the labels, must include names of lapidary materials used. 3.5 Gem Trees Must name stones, enamels, and/or metals used. 3.6 Fossils Any type, size, or location. On labels, identify common names, genus and species names, locations, and geological age (period or epoch).
PART 4. JUDGING CATEGORIES AND POINTS Points will be allotted out of an overall total of 100 as follows:
4.1 Showmanship: 30 points. Overall appearance, detail, arrangement. Does the display stand out
amongst the others?
4.2 Workmanship: 20 points. Quality of lapidary and jewelry work or mineral and fossil cleaning and preparation. How neat and distinct is the work?
4.3 Labeling: 10 points. Individual and group labels. Judges will evaluate accuracy only. Other aspects of the labels, such as whether handwritten or printed or whether done on paper versus cardstock, will be evaluated under Showmanship. Deductions of 2 points per error to a maximum of 10 points.
4.4 Quality: 20 points.
Color, size, rarity, definitive/classic specimen. Are your specimens the best you can reasonably find?
4.5 Educational Value: 20 points.
Use of maps, graphs, print, historical background, photos, etc. Will the viewer learn something from your display?
139
PART 5. AWARDS
5.1 Blue Ribbon for 90-100 points 5.2 Red Ribbon for 80-89 points 5.3 White Ribbon for 70-79 points 5.4 Certificate for Participating for under 70 points
The points used for this program are for training only and are not equivalent to the point system used with AFMS Uniform Rules. Remember, this program is designed for beginners training, so when you enter your display in competition at a Federation show to compete for Federation trophies, be sure you ONLY use the current updated AFMS Uniform Rules that are available from your regional Federation publications office or from the AFMS website, www.amfed.org. PART 6. REFERENCE SOURCES FOR LABELING In addition to the AFMS Uniform Rules, several other resources are contained on the AFMS website (www.amfed.org) to be used in properly labeling mineral, lapidary, and fossil specimens. These include:
6.1 AFMS Mineral Classification List This lists the most current names used for properly identifying minerals based on Fleischer’s Glossary of Mineral Species. It also lists names that have been replaced or that are now considered obsolete.
6.2 AFMS Approved Reference List of Classifications and Common Names of Fossils This list of over 20 pages helps exhibitors place fossils within their taxonomic context, within their phyla, classes, orders, and subclasses.
6.3 AFMS Approved Reference List of Lapidary Material Names A lapidary material sometimes goes by a different name than would be used if the same specimen was entered as a mineral or fossil. For instance, “Turritella Agate” is an accepted lapidary name, but if the same material were entered as a fossil, it would be called Goniobasis sp. The AFMS list provides accepted lapidary names to use in competition.

140
JUNIOR DISPLAY APPLICATION
Exhibitor’s Name or #:_____________________________________Age:____
Place an “X” next to the number of the category for your display: ____ 1. Self-Collected Specimens ____ 4. Lapidary ____ 2. Minerals ____ 5. Gem Tree ____ 3. Educational ____ 6. Fossils ---------------------------------Do No Write Below This Line----------------------------------
For Judges: Judging Categories & Points Please provide explanations for any and all points deducted, along with helpful
suggestions. Add comments to the back of the sheet as necessary.
Showmanship – 30 points possible Points awarded:_____ Overall appearance, detail, arrangement.
Comments: Workmanship – 20 points possible Points awarded:_____ Quality of lapidary and jewelry work or mineral and fossil cleaning and preparation.
Comments: Labeling – 10 points possible Points awarded:_____ Accuracy only. Other aspects of the labels (handwritten; printed on paper; etc.), to be evaluated under Showmanship. Deductions of 2 points per error to a maximum of 10 points.
Comments: Quality – 20 points possible Points awarded:_____ Color, size, rarity, definitive/classic specimen. Are specimens the best one can reasonably find?
Comments: Educational Value – 20 points possible Points awarded:_____ Use of maps, graphs, print, historical background, photos, etc.
Comments:
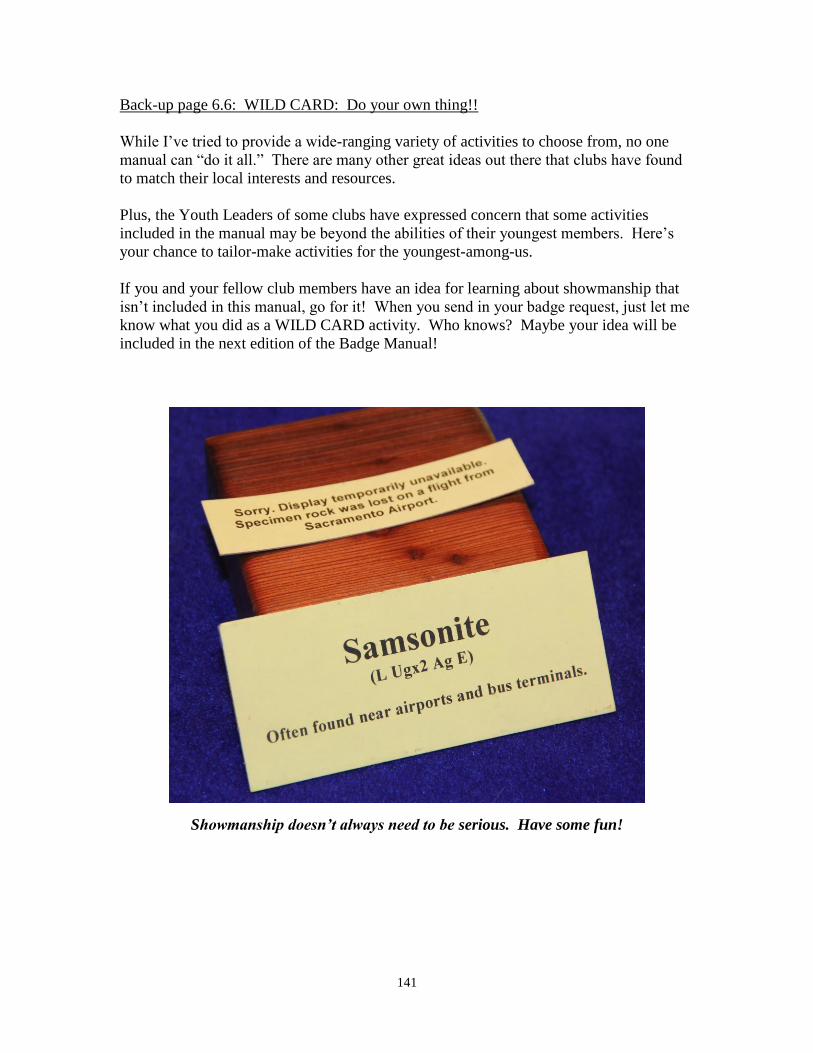
141
Back-up page 6.6: WILD CARD: Do your own thing!!
While I’ve tried to provide a wide-ranging variety of activities to choose from, no one
manual can “do it all.” There are many other great ideas out there that clubs have found
to match their local interests and resources.
Plus, the Youth Leaders of some clubs have expressed concern that some activities
included in the manual may be beyond the abilities of their youngest members. Here’s
your chance to tailor-make activities for the youngest-among-us.
If you and your fellow club members have an idea for learning about showmanship that
isn’t included in this manual, go for it! When you send in your badge request, just let me
know what you did as a WILD CARD activity. Who knows? Maybe your idea will be
included in the next edition of the Badge Manual!
Showmanship doesn’t always need to be serious. Have some fun!

142
7. Communication
Part of enjoying a hobby or any other endeavor in life is sharing your love with others!
They say you don’t truly “know” something until you are able to teach it to another.
Here is your chance…
Learning to communicate effectively is an important life skill. If you go on to become a
geologist or paleontologist, you’ll discover that science isn’t complete until your findings
are written up and shared with colleagues, either in a public address or in a journal article
or a book. If you go on to become a lapidary artist, you’ll find great enjoyment in sharing
your skills and techniques with others as an informal mentor or as a teacher in formal
workshop settings or via an online video lesson.
In short, you will find lifelong benefit to learning the basics of effective communication,
both within the hobby and beyond.
Activity 7.1: Oral report.
Give a talk to your club or to your class at school about a trip you took, a project you did,
a special rock or fossil you’ve collected, etc. In preparing your presentation, consider the
key questions that all reporters ask: Who? What? Where? When? How? Why?
Activity 7.2: Written report or newsletter article.
Write a 250- to 500-word article for your club newsletter. Follow the news reporter’s
questions of who, what, where, when, how, and why and consider accompanying it with a
photograph or drawing. If one is sponsored by your Youth Leader or club Newsletter
Editor, attend a club “writer’s workshop” to learn valuable tips.
Activity 7.3: Bulletin board or poster board displays.
Prepare a bulletin or poster board display for your show, library, or school on rocks,
fossils, minerals, or the lapidary arts. Use pictures to convey most of your information,
with writing kept to a minimum, mostly in the form of banners and headlines.
Activity 7.4: Corresponding with experts.
A great way to learn is by corresponding with experts who have made a career out of
gemology, paleontology, or geology. Write or email a local jeweler, a paleontologist in a
museum, a geology professor at a university, etc. These people are usually very busy, so
you should briefly tell them who you are and what you’re interested in. Then ask
something very specific you’d like to know about their work. Share their answers with
your fellow club members at your next meeting or in a report for your club newsletter.
Activity 7.5: Holding a symposium.
Geologists and paleontologists often get together in meetings to exchange ideas, give
lectures, and hold symposiums. A symposium is a series of 3 or 4 brief talks organized
around a specific topic. Each speaker presents, and then there’s an opportunity for
questions and discussions. Come up with a topic and hold your own symposium.

143
Activity 7.6: Writing a field trip guide.
Write a guide to your favorite collecting locality. Provide a brief overview of what’s to
be found; how to get to the site, with written directions and a map; and the tools you’ll
need and how to go about collecting. (Are the specimens on the surface? Do you need to
dig for them with a shovel?) If several members of your club write guides to different
sites, you can put them together into a local guidebook for your club and school.
Activity 7.7: WILD CARD: Do your own thing!
Do you have an idea for learning about communication that isn’t included in this manual?
If so, do your own thing! When your Youth Leader sends in your badge request, let us
know what you did as a WILD CARD activity. Who knows? Maybe your idea will be
included in the next edition of the Badge Manual!

144
7. Communication
□ 7.1 Oral report
□ 7.2 Written report or newsletter article
□ 7.3 Bulletin board or poster board displays
□ 7.4 Corresponding with experts
□ 7.5 Holding a symposium
□ 7.6 Writing a field trip guide
□ 7.7 WILD CARD: Do your own thing!
To earn your Communication badge, you need to complete at least 3 of the 7 activities.
Check off all the activities you’ve completed. When you have earned your badge, sign
below and have your FRA leader sign and forward this sheet to the AFMS Juniors
Program chair.
___________________________________
Date completed
_________________________________ ___________________________________
My signature Youth leader’s signature
_______________________________________________________________________
Name of my club
Leader’s preferred mailing address for
receiving badge:
____________________________________
____________________________________
____________________________________

145
Back-up page 7.1: Oral report.
Every aspiring journalist is taught to answer six essential questions in covering a story:
Who? What? Where? When? How? Why? You should teach your kids to consider
these questions in delivering an oral report. This handy list helps them both to organize
the report and to come up with ideas about what to say. For instance, if they wish to tell
about a field trip adventure, who went on the trip? What were they hoping to find, and
what did they actually find? Where did they go? When did they go there? How did they
find out about the collecting spot and/or how did they go about collecting there? And
why might they recommend this site to others? Or, a talk might be organized like a story,
with a beginning, middle, and end. For instance, in describing a field trip, they might tell
how they got the idea to visit a specific locality, then describe the trip itself, and end by
showing what they found there. In telling how to do a particular lapidary project, they
might describe the necessary tools, go through each step in the process, and end by
unveiling the finished product.
In giving an oral report, it’s important that the audience be engaged in ways that capture
and hold attention. Good public speakers incorporate jokes to bring out smiles. In fact,
they often begin their talks with a joke or an amusing anecdote to begin in an entertaining
way. And, just like in a book, good illustrations can spice up the presentation, so kids
should be encouraged to show or pass around specimens, to include maps, pictures or
posters, or to otherwise visually reinforce what they’ll telling the audience.
Public speaking can be daunting but fulfilling for a junior member!
Finally, a good way to end a talk is with questions and answers, so time should be left for
the audience to ask questions or to share their own experiences.
Note: Because several other badges involve giving an oral report or presentation, kids can work toward
earning their Communication badge and other badges simultaneously. For instance, see Activities 1.7
(Rocks & Minerals), 2.4 (Earth Resources), 3.6 (Fossils), 4.5 (Lapidary Arts), 5.5 (Collecting), 9.3
(Leadership), 12.2, 12.3, and 12.4 (Gold Panning & Prospecting), 13.3, 13.4, and 13.5 (Gemstone Lore &
Legend), 14.1 and 14.5 (Stone Age Tools & Art), 15.2 and 15.3 (Rocking on the Computer), 17.8 (Special
Effects), and 19.5 (Reaching across Generations).

146
Back-up page 7.2: Written report or newsletter article.
At Federation levels, awards are given for best articles published in club newsletters, with
categories for kids under age 12 and 12 to 17. Encourage your kids to contribute to your
club newsletter, or, if you don’t have one, to write a brief report to share with other club
kids. Learning to write a good report is a skill that will benefit kids in school and
beyond. In teaching your kids to write an article, you should use the same key questions
from Activity 7.1: Who? What? Where? When? How? Why? This handy list helps
them both to organize the report and to come up with ideas for what to say in their article.
In addition, encourage kids to try different “genres” or types of articles. One genre is the
anecdote, or story. Kids might write about a memorable event that happened while on a
field trip that, at the same time, packs in useful info about where they went and what
could be found there. I remember a field trip article that told the story of an encounter
with a wild burro ransacking a campsite near the Mojave mining town of Darwin. The
focus was the encounter with the burro. But in telling the story, the author provided a lot
of history about mining days in the desert, minerals that collectors can find in the mine
dumps, and the wonderful wildlife and colorful characters living in the region.
Another genre is the technical article. Such an article is scientific in nature and involves
background research. It might describe how a geode or petrified wood forms. It might
describe the classifications of crystal structures. In writing a technical article, kids should
end with a list of works they consulted for their information.
Yet another genre describes a process, or provides a set of directions. An example of
such an article would be one that describes the steps for completing a lapidary project,
such as crafting a cab. These articles usually begin with a brief overview of what is being
made. Then, the necessary tools and materials are listed. Finally, each step in the
process is described in numbered or outlined form. For examples of such an article, see
Back-up page 1.6 on “Growing Crystals” or Back-up page 3.2 on “Making a Fossil.”
A “process article” often includes photos showing necessary tools and steps.

147
Still another genre is the tall tale, or the humorous story that conveys information or
expresses an opinion in a way that elicits a laugh. Mark Twain was the master of this!
Although my club has made efforts to encourage newsletter submissions by kids, we
most often come up dry. I assume this is true with other clubs. Thus, consider hosting a
writer’s workshop as an activity with your kids. Gather together adult members with
writing experience, then sit down with kids to offer ideas about topics (your favorite rock,
a field trip adventure, a museum visit, etc.). Offer very brief pointers on structuring a
basic article, then jump in! The goal will be to keep the lesson stuff to a minimum and
hands-on writing to a maximum for the period of a one- or two-hour session. If kids hit a
block, help them through it. Perhaps one child might want to draw a picture to jumpstart
her thoughts. Another might want to start with an outline or a story board to get going.
The most important thing: getting going and getting words flowing on a page!
Kids can use “story boards” to jot thoughts, verbally and as drawings.
At the end of such a session, not only will kids have enjoyed a fun experience, your
newsletter editor should have a full set of kids’ articles to spread out and publish in the
newsletter throughout the year. Such a session produces immediate concrete results as
opposed to holding a dull and boring classroom lecture and then sending everyone off
with a “homework” assignment and naively expecting to receive articles in the days or

148
weeks to follow. The hope is that you can structure this such that kids are having so
much fun they won’t even realize they are actually learning!
Encourage kids who show talent to write several articles and to try different styles
(funny/serious; technical/ informal) until they find a style that suites them best. Publish
as many as you can in your club newsletter. Seeing their names in print can be a boost
for kids’ self-confidence and—as noted above—it might also lead to recognition by a
regional Federation and by the national AFMS if your newsletter editor submits articles
into consideration for annual Federation awards.
A sample Federation score sheet used to judge kids’ articles.
Note: Because several other badges involve writing a paper, kids can work toward earning their
Communication badge and other badges simultaneously. For instance, see Activities 1.7 (Rocks &
Minerals), 2.2, 2.4, and 2.6 (Earth Resources), 3.6 (Fossils), 4.5 (Lapidary Arts), 5.5 (Collecting), 8.4
(Field Trips), 9.5 (Leadership), 11.3 (Earth in Space), 12.2, and 12.3 (Gold Panning & Prospecting), 13.3,
13.4, and 13.5 (Gemstone Lore & Legend), 14.5 (Stone Age Tools & Art), 15.2 (Rocking on the Computer),
and 19.3 and 19.5 (Reaching across Generations).

149
Back-up page 7.3: Bulletin board or poster board displays.
Bulletin boards are found in many locations: local schools, public libraries, homes for
senior citizens, local and county government centers, etc. Explore options within your
community and make arrangements for providing educational displays on rocks, fossils,
minerals, or the lapidary arts (or on all these aspects of our hobby). You might assign
this to individual kids within your club, or you might make this a group activity.
With a bulletin board display, your audience is usually passing by and isn’t likely to stand
still and read a great deal of text. You need to grab attention quickly and to get your
message across efficiently. As with billboards along a highway, vivid and memorable
pictures should do most of the talking and supporting text should be kept to a minimum,
mostly in the form of headlines and brief captions.
For instance, a bulletin board about rockhounding in general might ask the question, in
large, colorful print: “WANT A NEAT HOBBY?” At the bottom, in equally large print,
you might write “TRY ROCKHOUNDING!” These two large banner headlines very
quickly broadcast the main message of the bulletin board. Then the middle of the bulletin
board can be filled with large photographs, drawings, and other visual images about
various aspects of the hobby. Each might be provided with a small caption where you
can go into a bit more information. But remember, unlike an article in a newspaper or
newsletter, folks will be reading this while standing up and usually while on their way
elsewhere, so each caption should be as brief and to-the-point as possible and in print
that’s large and easily read at a distance.
Poster board displays should have eye-appeal with big headlines and pictures.
Junior leader Sandra Corry of the Tennessee Valley Rock & Mineral Club worked with
her juniors to present a “Geology Science Fair” to their club. They created tri-fold poster

150
boards (like the one illustrated above) on different topics. At the end of the day, they had
a nice supply of “traveling posters” they could take to other public education events
around town.
The Carmel Valley Gem & Mineral Society (California) has a similar supply of tri-fold
poster boards (one on fossils, one on dinosaurs, one on mineral identification, one on
earth processes, etc.) that are set up on tables around the kids’ booth at their annual show
and that are taken to schools for educational talks and programs. My Ventura, California
club has made a set of such poster boards on topics like California dinosaurs, magnetic
minerals, fluorescent minerals, field trips, and volcanoes. In addition to using these
during school visits, we’ve found that they also are great for filling in gaps in the exhibits
area of our annual show, especially when one or two exhibitors fail to show up and we
find ourselves with an empty space at the last minute.
Tri-fold poster boards provide a great way for kids to make more-or-less permanent
educational displays about our hobby that can be conveniently stored, then transported
and set up in all sorts of venues.
Note: Kids can use this activity to satisfy requirements toward earning the Showmanship badge
simultaneously (Activity 6.4).

151
Back-up page 7.4: Corresponding with experts.
In encouraging kids to correspond with experts, you may want to do some advance
legwork to make sure that they’ll get a timely response. It would be a shame to build up
a child’s expectations and enthusiasm only to see a letter, email, or phone message go
unanswered.
Start by asking kids what it is they’d like to learn about. Then decide who might be a
good expert to address their questions. For instance, a child might want to know where
all those diamonds come from in the jewelry store windows downtown or in the mall. Or
they may want to know how a particular dinosaur got its name. The first question would
be appropriate to address to a local jeweler and the second to a museum paleontologist or
a university professor. You should help decide who would be the best person to address
the question and to track that person down and see in advance if they would be willing to
help in your project with your club’s kids.
Local jewelers. Check online or via your yellow pages (if your community still has
yellow pages!) under “Jewelers” or “Jewelry.” They usually have a number of
different categories: Jewelers-Manufacturers, Jewelers-Retail, Jewelers-Wholesale,
Jewelry Buyers, Jewelry Designers, Jewelry Engravers, Jewelry Repairing, etc. Other
categories to try include “Gemstones,” “Appraisers,” or “Lapidaries.”
College professors. Check the web site of the nearest college or university to
connect with academic geologists and paleontologists. Once on a university web site,
check under “Geology,” “Earth Sciences,” or “Earth & Planetary Sciences” to get to
the department site. Such department web sites usually have a listing of all faculty on
staff, with brief descriptions of their areas of expertise. Someone there may be able
to help you or to give you the name and contact information of a colleague at another
college or university.
Museum curators or researchers. Call up the closest natural history museum to see
if they have a staff geologist or paleontologist or educational docent with good
knowledge of rocks, minerals, gemstones or fossils.
Professional geologists and other earth scientists. The U.S. Geological Survey
web site has links that may help address earth science questions and provide further
links via the USGS education site: http://www.usgs.gov/education/.
Mining experts. Two groups have web sites that provide much educational
information on mining and mineral resources, along with links to ask questions. One
is the Minerals Education Coalition (http://mineralseducationcoalition.org) and
another is Women in Mining (http://www.womeninmining.org).
Examples of different experts you might contact and how to track them down.
152
Back-up page 7.5: Holding a symposium.
A symposium is a group event involving several co-presenters, not just one, with each
offering different thoughts on a particular topic. Thus, organizing a symposium takes
special advance planning.
First, you need to select a topic that will be of interest to a number of people in your
group and about which people may have differing but equally useful opinions and
experiences to relate. The goal of a symposium isn’t to come to a single correct answer
to a question. Instead, the goal is to share information and tips that a variety of people
have formulated in tackling the question at hand, thus giving everyone involved new
insights and ideas to consider.
For instance, one good topic for a symposium is how to catalog a collection. Everyone
seems to have a different system (see Back-up page 5.2: Cataloging and labeling your
collection). It can be useful to hear how different people have organized their collections
in different ways and can give kids a number of useful ideas for deciding how they may
wish to catalog their own collections.
Another helpful symposium topic might be on cabbing and how to bring out the best
shine in a cab. Different minerals have different characteristics, and some—such as
jade—can prove especially difficult to polish to a high shine. What sorts of techniques
have different club members developed over the years? What sorts of polishing
compounds would they recommend? What sorts of techniques have they used with
different minerals? Etc.
Usually, a symposium has three or four co-presenters, along with a host or moderator.
The moderator introduces the topic and then introduces each speaker in turn and makes
sure they stick to their allotted time. Each person might talk for 10 or 15 minutes. At the
end, the moderator summarizes, followed by opportunities for the audience to pose
questions or to share their own thoughts, experiences, and insights in a follow-up
discussion.
Kids themselves might organize, run, and participate in their own symposium. Or, they
might come up with the topic, make the plans, and then invite adult members to serve as
speakers or as moderators, followed by questions from the kids.
Note: Kids who help organize and run a symposium can use this activity to satisfy requirements toward
earning the Leadership badge simultaneously (Activity 9.3).

153
Back-up page 7.6: Writing a field trip guide.
The best model to provide to kids for writing a field trip guide to their favorite local
collecting site is one of the many published field guides. The geological surveys of some
states publish rockhounding guidebooks you can use as models, and two publishing
companies publish guides covering many states.
Gem Guides Book Company publishes the “Gem Trails” series. In these guidebooks, the
first paragraph for a particular locality tells what can be collected there. This is followed
by directions for how to get to the site and instructions for how to collect (for instance, by
searching the surface of the ground, by digging in specific layers, by splitting shale, etc.).
Then there’s usually a photograph of the locality and people collecting there, followed by
a map. They also often give special words of advice or warning. For instance, there may
be special issues regarding status of ownership of the land and needs for making advance
arrangements or getting special passes or paying fees. There may be warnings about
hazards such as rattlesnakes, open mine pits, extreme heat in the summer, etc.
Falcon Press Publishing Company publishes “The Rockhound’s Guide” series. In the
one for California, the author starts with a listing of the Land Type (desert versus coastal
versus mountain, etc.), Best Season to visit, Tools, Material to be collected, Special
Attractions, Vehicle Type needed to reach the site, etc. This list is followed by
directions, or “Finding the Site,” and then “Rockhounding,” or paragraphs describing
what you’ll find and how best to collect it. A map and a photo of the site then usually
follow.
Any of these can provide helpful and useful models for your kids to follow.

154
Back-up page 7.7: WILD CARD: Do your own thing!!
While I’ve tried to provide a wide-ranging variety of activities to choose from, no one
manual can “do it all.” There are many other great ideas out there that clubs have found
to match their local interests and resources.
Plus, the Youth Leaders of some clubs have expressed concern that some activities
included in the manual may be beyond the abilities of their youngest members. Here’s
your chance to tailor-make activities for the youngest-among-us.
If you and your fellow club members have an idea for learning about communication that
isn’t included in this manual, go for it! When you send in your badge request, just let me
know what you did as a WILD CARD activity. Who knows? Maybe your idea will be
included in the next edition of the Badge Manual!

155
8. Field Trips
The ultimate hands-on activity is a field trip! Little can replace the thrill of discovering a
gemstone or fossil. Also, a lapidary project has a lot more personal value and meaning if
you collected the rough material yourself. But before you start down the road, you need
to know the laws of your state and rules governing proper behavior for collectors and
respecting private property. You also need to consider what you’ll be collecting and how
you’ll collect it and then make plans and gather together the proper equipment. The
follow activities will help you get the most out of your field trip adventure.
Activity 8.1: *Field trip etiquette, safety, & AFMS Code of Ethics.*
Note: This activity is required to earn this badge.
Learn and demonstrate knowledge of the AFMS Code of Ethics. Make a permission
release form. Demonstrate field trip etiquette on your next trip. If the trip was on private
land, did you first gain permission? Did you provide the owner with a release form? Did
you fill in any holes you made? If at a road cut, did you keep rocks off the roadway?
Activity 8.2: Field trip planning.
Choose a locality for a field trip from a guidebook or from suggestions by adult members
in your club. Draw a map and directions to your site. List what you expect to find, then
list the tools and supplies you’ll need to collect and transport your finds home.
Activity 8.3: *Taking a field trip.*
Note: This activity is required to earn this badge.
Take a field trip while following proper etiquette during field trip—and have fun!
Activity 8.4: Record keeping.
Start and maintain a “field journal” of what you did and what you found during your field
trips in a composition or spiral-bound notebook, three-ring binder, or other record book
or on the computer. Take notes while in the field and later write up a formal report
including observations about the locality and specimens. Pinpoint where you found your
rocks, minerals, or fossils, so that others could locate the spot. Was there a specific layer
containing the fossil or mineral deposit? If so, how could others locate and identify that
layer? If you have a camera, illustrate your field journal with photos, or provide
drawings that may prove useful to others wishing to visit the site.
Activity 8.5: The indoor and virtual field trip.
Organize a trip to a college geology department or to a museum, calling in advance to
arrange a tour not just of exhibits on public display, but the treasures behind the scenes.
Many museums also now offer “virtual” field trips via their web sites.
Activity 8.6: WILD CARD: Do your own thing!
Do you have an idea for learning about field trips that isn’t included in this manual? If
so, do your own thing! When your Youth Leader sends in your badge request, let us
know what you did as a WILD CARD activity. Who knows? Maybe your idea will be
included in the next edition of the Badge Manual!

156
8. Field Trips
□ 8.1 *Field trip etiquette, safety, & AFMS Code of Ethics*
(required to earn this badge)
□ 8.2 Field trip planning
□ 8.3 *Taking a field trip* (required to earn this badge)
□ 8.4 Record keeping
□ 8.5 The indoor and virtual field trip
□ 8.6 WILD CARD: Do your own thing!
To earn your Field Trips badge, you need to complete at least 3 of the 6 activities.
(Please note that successfully completing Activities 8.1 and 8.3 are required to earn this
badge.) Check off all the activities you’ve completed. When you have earned your
badge, sign below and have your FRA leader sign and forward this sheet to the AFMS
Juniors Program chair.
___________________________________
Date completed
_________________________________ ___________________________________
My signature Youth leader’s signature
_______________________________________________________________________
Name of my club
Leader’s preferred mailing address for
receiving badge:
____________________________________
____________________________________
____________________________________

157
Back-up page 8.1 *Field trip etiquette, safety & AFMS Code of Ethics.*
Note: this activity is required to earn this badge.
Before setting foot in the field, kids should be taught proper field trip etiquette. This
includes the do’s and don’ts governing proper—and legal—behavior when collecting
natural resources. It also includes safety to ensure everyone comes home unharmed.
If organizing a group field trip, as the group leader, it’s your responsibility to teach by
example. First and foremost, be aware of the laws of both the U.S. and your state
government regarding fossils. Some areas, and some types of fossils, are regulated and,
if anything, such regulations will only increase in coming years. Here are just a couple
examples. While common invertebrate and plant fossils are usually okay to collect, no
vertebrate fossils may be collected on federal lands without special permits, which are
usually only granted to scientists conducting a formal research study. Also, while plant
fossils are usually okay to collect, no more than 25 pounds of petrified wood, plus one
piece, may be collected in a single day, up to a limit of 250 pounds per year. No
collecting of any sort is allowed within National Parks.
Whether searching for fossils, rocks, or minerals, always secure necessary permits and be
aware of regulations. For instance, if collecting in a National Forest (as distinct from a
National Park), you’re not allowed to do more than surface collect (no digging or
disturbing the natural features of the land) and you may need to purchase an “Adventure
Pass” to park on national forest land. (Keep up-to-date on this because regulations for
National Forest lands have recently been in flux.)
Respect posted signs & regulations on field trips, no matter how tempting the venue.
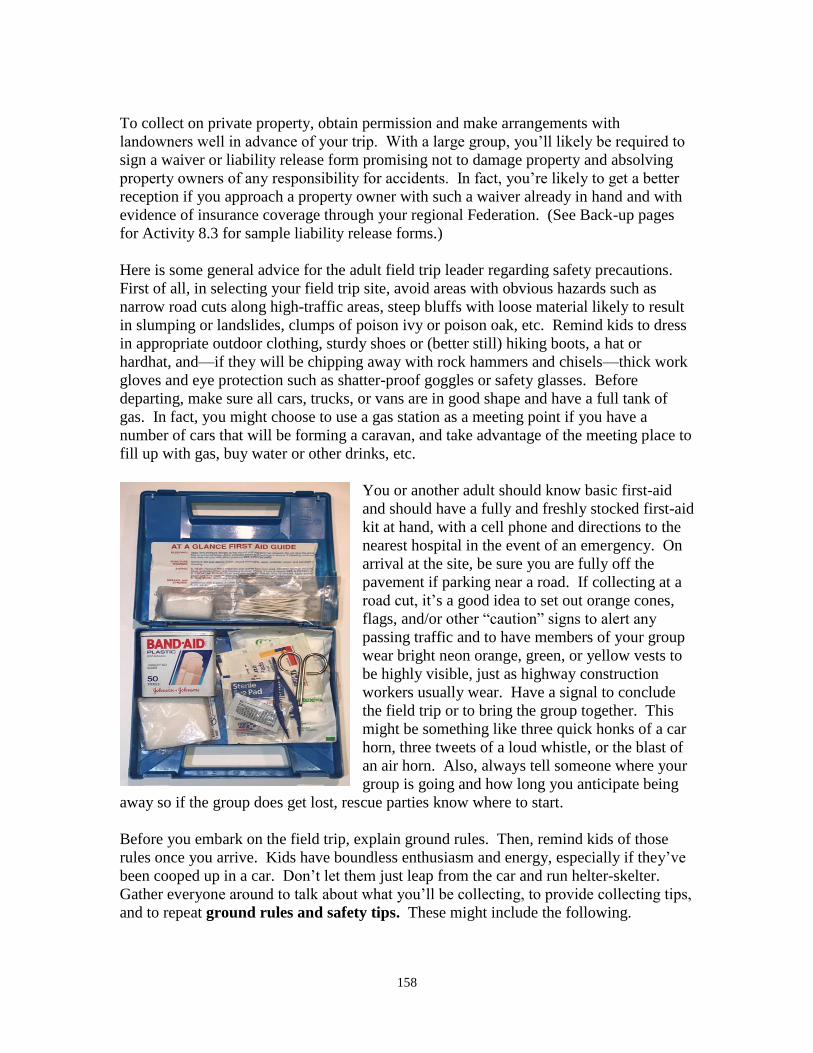
158
To collect on private property, obtain permission and make arrangements with
landowners well in advance of your trip. With a large group, you’ll likely be required to
sign a waiver or liability release form promising not to damage property and absolving
property owners of any responsibility for accidents. In fact, you’re likely to get a better
reception if you approach a property owner with such a waiver already in hand and with
evidence of insurance coverage through your regional Federation. (See Back-up pages
for Activity 8.3 for sample liability release forms.)
Here is some general advice for the adult field trip leader regarding safety precautions.
First of all, in selecting your field trip site, avoid areas with obvious hazards such as
narrow road cuts along high-traffic areas, steep bluffs with loose material likely to result
in slumping or landslides, clumps of poison ivy or poison oak, etc. Remind kids to dress
in appropriate outdoor clothing, sturdy shoes or (better still) hiking boots, a hat or
hardhat, and—if they will be chipping away with rock hammers and chisels—thick work
gloves and eye protection such as shatter-proof goggles or safety glasses. Before
departing, make sure all cars, trucks, or vans are in good shape and have a full tank of
gas. In fact, you might choose to use a gas station as a meeting point if you have a
number of cars that will be forming a caravan, and take advantage of the meeting place to
fill up with gas, buy water or other drinks, etc.
You or another adult should know basic first-aid
and should have a fully and freshly stocked first-aid
kit at hand, with a cell phone and directions to the
nearest hospital in the event of an emergency. On
arrival at the site, be sure you are fully off the
pavement if parking near a road. If collecting at a
road cut, it’s a good idea to set out orange cones,
flags, and/or other “caution” signs to alert any
passing traffic and to have members of your group
wear bright neon orange, green, or yellow vests to
be highly visible, just as highway construction
workers usually wear. Have a signal to conclude
the field trip or to bring the group together. This
might be something like three quick honks of a car
horn, three tweets of a loud whistle, or the blast of
an air horn. Also, always tell someone where your
group is going and how long you anticipate being
away so if the group does get lost, rescue parties know where to start.
Before you embark on the field trip, explain ground rules. Then, remind kids of those
rules once you arrive. Kids have boundless enthusiasm and energy, especially if they’ve
been cooped up in a car. Don’t let them just leap from the car and run helter-skelter.
Gather everyone around to talk about what you’ll be collecting, to provide collecting tips,
and to repeat ground rules and safety tips. These might include the following.

159
Pair up with a buddy and stay close to one another so if an accident happens, there is
someone who can lend immediate assistance and get help if needed.
Don’t wander off alone; stay within view of the group at all times and keep aware of
your surroundings and your bearings.
Have some sort of safety signal (for instance, three sharp blasts on a whistle) to use in
case anyone gets separated and lost or urgent help is needed for any reason. (If using
a whistle, make sure everyone uses it only for emergencies.)
No rushing up steep slopes of loose talus that could cause a slip and a broken ankle or
that might send rocks rolling toward those behind and beneath you.
Don’t toss rocks onto a roadway—or toward other field trippers.
Don’t try lifting or rolling overly heavy rocks alone.
Don’t undermine overhangs since that can lead to a deadly cave-in.
Don’t leave unfilled holes that people or livestock might trip in.
If using a rock hammer, wear goggles or safety glasses to avoid eye damage from
flying rock chips.
Don’t enter mine shafts due to dangers of cave-ins, unseen deep holes, bad air, rotten
timbers or planks, etc.
Stay away from any wild animals; even a cute one is still wild and can give a nasty
scratch or bite or, worse yet, transmit rabies.
Be aware of any venomous or other nasty creatures in the collecting area (rattle
snakes, water moccasins, scorpions, black widow spiders, wasps, ticks, chiggers, etc.)
and how to avoid them. Use bug spray in buggy areas with mosquitoes, midges, etc.
Know how to recognize plants to avoid, like stinging nettles, poison oak or poison
ivy, etc.
Remind everyone to keep hydrated and—if collecting in a hot, sunny area, to wear a
brimmed hat. Two of the most common maladies among field trippers and hikers are
dehydration and heat stroke.
Watch the weather and be ready to leave in the event of thunderstorms and lightning.
In desert regions, even a far-off storm can create flash-flood conditions miles away in
an instant.
While most of our collecting is done in warm-weather months, if doing “polar bear
collecting” in the winter, watch for hypothermia and frostbite.
Sample ground rules when conducting a field trip.
The American Federation of Mineralogical Societies has devoted a section of its website
to safety tips like these and more, with reprints of articles that go into detail. Go to
http://www.amfed.org/safetytips.htm Before leading kids on a field trip, I suggest
making a list of safety rules tailored to the locality where you’ll be collecting. Then print
a quantity and distribute it in advance, with more copies on hand to give to any stragglers
who may show up unexpected. Review those rules upon arriving at the locality.
In addition to safety tips and rules, all your club members—adults and juniors—should
have a copy of and should be intimately familiar with the AFMS Code of Ethics, which
read as follows.

160
American Federation of Mineralogical Societies CODE OF ETHICS
I will respect both private and public property and will do no collecting on privately
owned land without permission from the owner.
I will keep informed on all laws, regulations or rules governing colleting on public
lands and will observe them.
I will, to the best of my ability, ascertain the boundary lines of property on which I
plan to collect.
I will use no firearms or blasting materials in collecting areas.
I will cause no willful damage to property of any kind such as fences, signs, buildings,
etc.
I will leave all gates as found.
I will build fires only in designated or safe places and will be certain they are
completely extinguished before leaving the area.
I will discard no burning material—matches, cigarettes, etc.
I will fill all excavation holes which may be dangerous to livestock.
I will not contaminate wells, creeks, or other water supplies.
I will cause no willful damage to collecting material and will take hope only what I
can reasonably use.
I will practice conservation and undertake to utilize fully and well the materials I
have collected and will recycle my surplus for the pleasure and benefit of others.
I will support the rockhound project H.E.L.P. (Help Eliminate Litter Please) and will
leave all collecting areas devoid of litter, regardless of how found.
I will cooperate with field-trip leaders and those in designated authority in all
collecting areas.
I will report to my club or federation officers Bureau of Land Management or other
authorities, any deposit of petrified wood or other materials on public lands which
should be protected for the enjoyment of future generations for public educational
and scientific programs.
I will appreciate and protect our heritage of natural resource.
I will observe the “Golden Rule”, will use Good Outdoors Manners and will at all
times conduct myself in a manner which will add to the stature and Public Image of
Rockounds everywhere.

161
Back-up page 8.2: Field trip planning.
Choosing a Field Trip Locality
It’s best for juniors leaders to get together with the club field trip chair in January for a
Field Trip Planning Meeting to schedule trips for the entire year so that everyone can
work them into their calendars. In choosing a locality, select sites relatively rich in
minerals or fossils. By nature, kids are impatient and will want to start finding “stuff”
right away. Your goal, after all, should be to foster enthusiasm, not to tax their patience.
If you don’t know of suitable exposures in your area, ask around at a local college. Many
geology departments have road logs for earth science field trips. Three publishers have
guidebook series covering many states in the U.S.: Mountain Press publishes the
Roadside Geology Series; Gem Guides publishes the Gem Trails series; and Falcon Press
publishes The Rockhound’s Guide series. In addition, state geological surveys often have
guidebooks to their states or individual educational reports and road logs on specific
mineral or fossil localities. The U.S. Geological Survey web site (http://www.usgs.gov/)
is a good starting point toward finding regional geologic information for your state.
Field Trip Supplies
Different localities have different materials and, therefore, different requirements in terms
of the tools and supplies necessary for collecting. Select the materials appropriate to the
site you’ll visit. The following list is meant to be representative, not exhaustive.
- Protective clothing (durable long-sleeved shirt and long pants; rain gear, if needed)
- Sturdy hiking boots (preferably steel-toed) and heavy work gloves
- Hard hat if in a quarry or elsewhere with a danger of falling rocks
- Baseball cap or wide brimmed hat and sunscreen against sun exposure; insect repellant.
- Shatterproof goggles or safety glasses if hammering rocks
- Detailed area maps, compass, GPS unit
- Backpack, rucksack, and/or 5-gallon bucket to carry supplies and specimens
- Rock hammer, rock pick, sledge hammer, along with chisels, gads, pry bar
- Shovel, trowel, hand rake
- Sifting screens
- Pocket knife and an ice pick
- Hand or whisk broom, paint brushes, toothbrushes
- Toilet paper, paper towels, newspapers, bubble wrap for wrapping delicate specimens
- Masking tape
- Small storage boxes, ziplock baggies (with ability to write on with magic markers)
- Cardboard flats or other boxes or containers for transporting specimens
- Cards for writing locality info to wrap in the field with your specimens
- Magnifying glass, hand lens, or loupe
- Spray bottle of water to check for potential lapidary material
- Field notebook and pencils/pens to record info about a site
- Camera to keep a visual record of a site and specific collecting horizons
- First aid kit (fully stocked with fresh materials)
- Plenty of water in canteens or bottles, food, and—if going overnight—camping gear
- Cell phone or 2-way radio and a field companion or “buddy” in event of an accident
- trash bags or containers to take out any litter
Examples of supplies to take along on a field trip.

162
Back-up page 8.3: *Taking a field trip.*
Note: this activity is required to earn this badge.
The first step in taking a field trip is planning. You should follow the recommendations
in Back-up page 8.2 for selecting a field trip site and choosing the appropriate supplies.
You should make a map and write out clear directions to the site, along with a list of
recommended tools and materials to bring, and distribute this to field trip participants.
And you should know how many people you’ll be leading on the trip. A trip with just a
few participants is a lot less intrusive—especially on a rancher’s private land—than a trip
with 30 to 50 participants. The larger the group, the more management concerns to
consider, and the more adults you’ll need to help chaperone. So get a clear idea as to the
size of your group by circulating a field trip sign-up sheet. (See example within the
following pages.)
It’s usually a good requirement to have one or both parents accompany their kids on a
field trip. If they can’t, any absent parents should sign a permission slip and liability
release, providing phone numbers where they may be reached during the time you’ll be
on the trip, and you should let them know when you’ll return and where to call in case of
questions. Everyone (kids and adults) participating in a field trip should also sign a
personal injury and liability release form. Finally, during the trip itself, it’s best to use
the buddy system with two kids always together in case one is injured.
Well-planned field trips provide the ultimate in rockhounding fun!
Following are forms to assist you in planning and conducting a field trip. These are
provided as examples, and you should adapt them for your own needs and purposes.
Note: Because several other badges involve taking a field trip, kids can work toward earning their Field
Trips badge and other badges simultaneously. For instance, see Activities 2.4 (Earth Resources), 3.5
(Fossils), 9.4 (Leadership), 11.4 (Earth in Space), 12.5 and 12.6 (Gold Panning & Prospecting), 14.5 and
14.6 (Stone Age Tools & Art), and 20.4 (Maps).

163
FIELD TRIP SIGN-UP SHEET Trip location:_______________________________ Trip date:_____________
NO. NAME (PLEASE PRINT) HOME PHONE & EMAIL
1
2
3
4
5
6
7
8
9
10
11
12
13
14
15
16
17
18
(This form courtesy of Richmond Gem & Mineral Society)

164
PERSONAL INJURY & LIABILITY RELEASE FORM TO:____________________________________________________________ Name of Company, Quarry, Mine, or Property Owner SUBJECT: Release of the above named from any responsibility should personal injury or property damage occur while visiting, collecting, or otherwise being on the property owned or operated by the above. INSURANCE: The________________________________________________ Name of Club or Society is covered by a blanket policy issued to the California Federation of Mineralogical Societies that covers Bodily Injury and/or Property Damage. A copy of said policy can be made available upon request. We the undersigned hereby waive any right to make claim against the host for any injury or property damage that may occur while a guest on property owned or operated by the host company or landowner. ______________________________ ______________________________ ______________________________ ______________________________ ______________________________ ______________________________ ______________________________ ______________________________ ______________________________ ______________________________ ______________________________ ______________________________ ______________________________ ______________________________ ______________________________ ______________________________ ______________________________ ______________________________ ______________________________ ______________________________ ______________________________ ______________________________ ______________________________ ______________________________
(This form courtesy of Richmond Gem & Mineral Society)

165
LIABILITY RELEASE (Place the name of your club here)
To whom it may concern: I, the undersigned parent or guardian, do hereby give permission for _______________________________ to participate in the events as scheduled by the youth advisors of the (insert the name of your club here). It is understood that any personal loss or injury, should such occur to _______________________________ while a participant in the scheduled activity remains our responsibility and that no claim may be made against either the advisors or the (insert the name of your club here). It is further understood that the blanket insurance policy for the society covers the third party (i.e., host or property owner) should damage occur while a guest on said premises during a scheduled field trip by (insert the name of your club here). Should emergency first aide or medical attention be needed while ______________________________ is participating in the scheduled activity, permission is granted to attend to the need. Our own health and accident insurance is carried with____________________________________________. (name of insurer) and the policy number is____________________________________________. I/we can be reached by telephone at ____________home or___________office. If unable to reach anyone, a third party may be called_____________________. (name and phone number) Signing this release signifies validation for as long as the above named child remains a member in good standing of the (insert name of your club here). _______________________________ Print name of Parent(s) or Guardian _______________________________ Signature of Parent(s) or Guardian _______________________________ Date
(This form courtesy of Richmond Gem & Mineral Society)

166
(name of club here) A Member Society of the California Federation of Mineralogical Societies
Educational Nonprofit Tax Exempt Organizations
INFORMED CONSENT * ASSUMPTION OF RISK * WAIVER OF LIABILITY for (name of club here) Field Trips & Activities
Trip/activity host:_______________________________________________________ Trip/activity date/s:______________________________________________________ Trip/activity Location/s:__________________________________________________ Attendee’s name:_______________________________________________________ Attendee’s address:_____________________________________________________ Please read the following information before beginning the field trip or activity. Sign and date this form to acknowledge you have read and understand the information presented below. I understand that the field trip activity that I am participating in, of the above named Society, may include one or more of the following hazard(s) that may result in personal harm: Unpredictable and dangerous environmental conditions/hazards, including but not limited to snow, rain, wind, very cold and very hot temperatures, lightning, altitude, loose rock, falling rock, rock slides, avalanche, river hazards, mud slides, mud, ice, other slippery conditions, and contact with poisonous reptiles, wild fauna and toxic plants.____ (initial) I understand the risks inherent in all outdoor activities existing in the environment, either natural or man-made.____ (initial) I understand that I am required to use appropriate safety equipment pertinent to the field trip activity in which I will be participating. I accept full responsibility for my actions and accept liability for any resulting damages or injuries.____ (initial) By participating, I am assuming the risks inherent in this field trip or activity and am releasing the above named societies, their officers, directors and individual members, from any liability for claims or lawsuits by the undersigned participant, his or her heirs or assignees, arising out of this field trip activity. I have read all of the aforementioned information and the list of safety rules accompanying this form and understand any and all of it. Any questions which have occurred to me have been answered to my satisfaction. I am participating in these activities of my own free choice. If the participant is under 18 years of age, this form must be read and signed by a parent or legal guardian before participation in this field trip or activity. _______________________________________________ ______________________ Signature of Participant Date _______________________________________________ ______________________ Signature of Parent/Legal Guardian Date
(This form courtesy of the California Federation of Mineralogical Societies)

167
Back-up page 8.4: Record keeping.
Much of the value of a mineral or fossil lies in its context: where did it originate and
what might that tell us about its formation and about its place within the overall geology
of a region and its geologic history? While a gemstone may hold intrinsic value and
economic worth even if its ultimate source is unknown, a fossil that lacks context lacks
scientific value and thus becomes a mere curiosity or a purely commercial object. Even a
gemstone is further enhanced if it has a story behind it—if it’s the “Moguk Ruby” or a
“Virgin Valley Opal.” Whether it’s minerals, gemstones, or fossils, kids should be
encouraged to look beyond economic value and the “gee whiz” factor of a neat object and
to consider the scientific and educational value of what they collect.
Thus, kids should be taught to maintain a field journal of what they did and what they
found during their trips in a notebook, three-ring binder, or on the computer. I do both.
I’ve bought a small, sturdy, bound diary in which I can jot notes, make sketches, and
rough out maps while in the field. Once home, I transfer the info in a more organized
fashion on the computer to print and maintain on three-hole punched sheets that can be
inserted into a binder or manila folders for easy storage and easy reorganization as
additional sheets accumulate. These records are used to pinpoint where rocks, minerals,
or fossils were found so others could locate the spot—or so I can find it again years later
as memory fades. The records also augment sheets with catalog information about each
specimen (see Back-up pages for Activity 5.2 on cataloging and labeling a collection),
additional information I find and photocopy about the geology or paleontology of a
particular site, and sheets of slides or prints that I’ve photographed of a locality.
Encourage kids to pick a way that suits them best in keeping records of their trips.

168
Kids should be as specific as possible in record keeping. What are the directions to the
site? What distinguishing permanent landmarks might mark the site? For instance, both
a “bright yellow-and-white striped cliff face” and “a 30-foot-tall red boulder” are much
more likely to be around 40 years from now as opposed to “a small, rotting log at the
turn-out” or “a leaning saguaro cactus” or “a pile of old tires.” In this day-and-age, kids
also can provide GPS data, bypassing the need for physical landmarks.
Once guiding folks to a site with specific driving directions, get even more specific. Was
there a particular layer containing the fossil or mineral deposit? If so, how could others
locate and identify that layer? What was found, and was it abundant or scarce? Did kids
notice anything unique, such as certain minerals or fossils occurring together with other
sorts of specimens, or on their own?
In short, the more detail, the better. Once in the field, the impulse is to collect, collect,
and collect some more. But while collecting specimens of rocks, minerals and fossils,
kids should take the time to carefully collect information to accompany those specimens.
These written records of their adventures can sometimes be even more interesting than
the rocks themselves!
Encourage kids to augment written entries with drawings, maps, and photos. I always
make a camera and/or a cell phone with a camera an essential part of my collecting
toolkit. In recording information about a locality, a picture really is worth a thousand
words, especially if augmented by a drawing that sketches the landscape, an outcrop, and
the specific position of a mineral- or fossil-bearing layer.
Sketches made and photos taken in the field can prove useful in other ways, as in
preparing a PowerPoint slide show, illustrating a bulletin board display, or illustrating the
backs and sides of a display case of specimens at a gem show. Photos also help in
providing visual relief and support in an article. Most professional magazines require
contributing authors to provide visually interesting photos if submitting an article for
consideration. An interesting aside: few people realize that The Beatles once met Elvis
at Elvis’s home. The reason? Elvis insisted on no photographs. Thus, no newspapers
and no magazines reported the event without a striking visual image to support it and to
“make it real.” Apparently, pictures matter. Take a bunch the next time you venture out
on a field trip!
Note: Kids who write trip reports can use this activity to satisfy requirements toward earning the
Communication badge simultaneously (Activity 7.2).
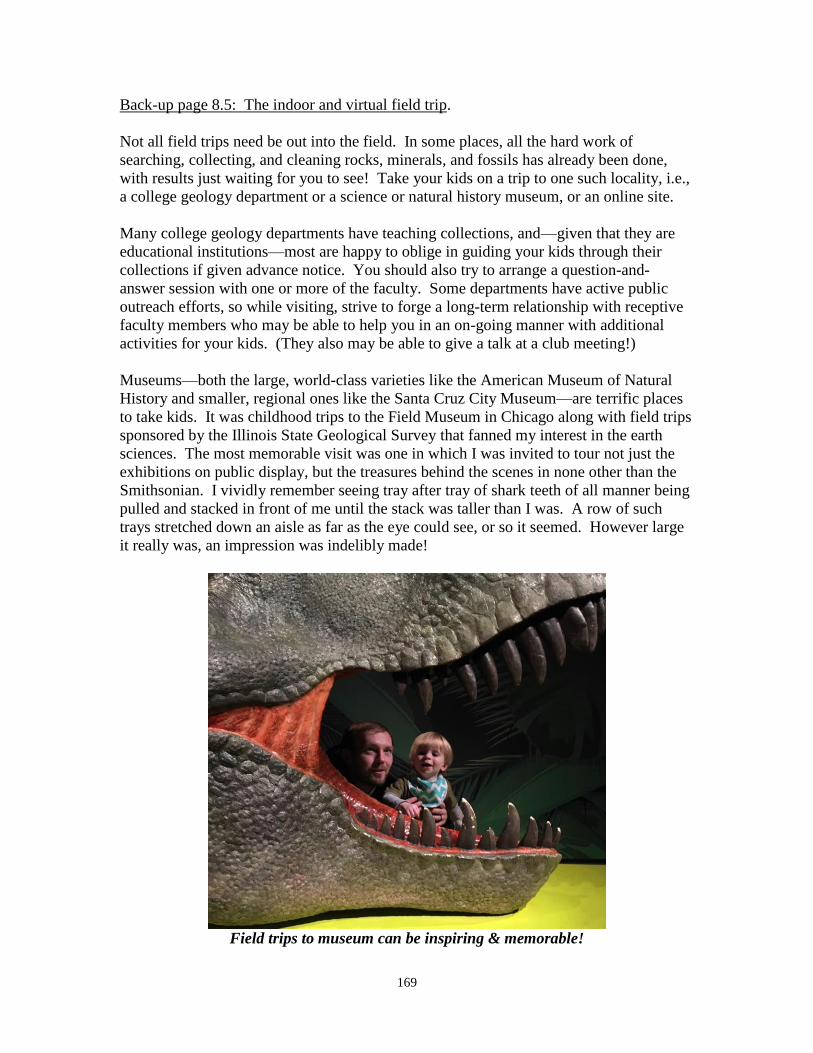
169
Back-up page 8.5: The indoor and virtual field trip.
Not all field trips need be out into the field. In some places, all the hard work of
searching, collecting, and cleaning rocks, minerals, and fossils has already been done,
with results just waiting for you to see! Take your kids on a trip to one such locality, i.e.,
a college geology department or a science or natural history museum, or an online site.
Many college geology departments have teaching collections, and—given that they are
educational institutions—most are happy to oblige in guiding your kids through their
collections if given advance notice. You should also try to arrange a question-and-
answer session with one or more of the faculty. Some departments have active public
outreach efforts, so while visiting, strive to forge a long-term relationship with receptive
faculty members who may be able to help you in an on-going manner with additional
activities for your kids. (They also may be able to give a talk at a club meeting!)
Museums—both the large, world-class varieties like the American Museum of Natural
History and smaller, regional ones like the Santa Cruz City Museum—are terrific places
to take kids. It was childhood trips to the Field Museum in Chicago along with field trips
sponsored by the Illinois State Geological Survey that fanned my interest in the earth
sciences. The most memorable visit was one in which I was invited to tour not just the
exhibitions on public display, but the treasures behind the scenes in none other than the
Smithsonian. I vividly remember seeing tray after tray of shark teeth of all manner being
pulled and stacked in front of me until the stack was taller than I was. A row of such
trays stretched down an aisle as far as the eye could see, or so it seemed. However large
it really was, an impression was indelibly made!
Field trips to museum can be inspiring & memorable!

170
If you call in advance to arrange a group tour of a museum, many will assign a specific
guide or docent to escort you and your kids and you may be able to obtain a group or
educational discount at those museums charging an admission fee. When calling, be sure
to ask about the possibility of a “behind the scene” tour in addition to the public displays.
The web is a great place to locate the nearest natural history museum. For instance, just a
few seconds after typing “Natural History Museums” into the Google search engine when
I wrote the second edition of this Badge Manual, I found a long list of sites, with four that
I explored in more detail. Each offered excellent and thorough listings of museums
around the U.S. and the world, complete with links that took you to the museums’ own
web site. Unfortunately, in the crazy and temporary environs of the World Wide Web,
most of those had gone “extinct” by the time I wrote the fourth edition of this manual,
and the one I loved best (from the University of Washington Library) has also now
disappeared. For the moment, one comprehensive listing remains, courtesy of Wikipedia:
https://en.wikipedia.org/wiki/List_of_natural_history_museums_in_the_United_States
As one good result of the 2020 COVID-19 coronavirus pandemic, many museums
initiated “virtual museum tours” given that they had to shut down normal operations and
were prevented from inviting the public into their halls. While a “virtual” experience can
never fully replace the “real thing,” something is better than nothing, so give it a try!
Even before the pandemic, per an October 2017 article in the journal Science, “field trips
are a great way to engage [kids] and give them a first-hand understanding of a subject—
but they’re not always practical.” The article went on to note how “virtual field trips”
offer one way to take kids out into so-called “digital nature” for the next-best thing. Kids
today seem to have been born connected to a digital device (per one study, kids on
average spend 7 hours each day in front of electronic media as compared to 4 to 7
minutes of outdoor play), so take advantage of their e-fascination by offering e-fieldtrips.
Following are a few examples of some “virtual tours” you might check out, assuming that
these particular sites persist after the pandemic.
National Museum of Natural History, https://naturalhistory.si.edu/visit/virtual-tour
Oxford Museum of Natural History, https://www.oumnh.ox.ac.uk/collections-
online#/search
Paleontological Research Institution, www.priweb.org/blog-post/learn-at-home
Check out a “virtual tour” of a major museum for your kids to take an e-fieldtrip.

171
Back-up page 8.6: WILD CARD: Do your own thing!!
While I’ve tried to provide a wide-ranging variety of activities to choose from, no one
manual can “do it all.” There are many other great ideas out there that clubs have found
to match their local interests and resources.
Plus, the Youth Leaders of some clubs have expressed concern that some of the activities
included in the manual may be a bit beyond the abilities of their youngest members.
Here’s your chance to tailor-make activities for the youngest among us.
If you and your fellow club members have an idea for learning about field trips that isn’t
included in this manual, go for it! When you send in your badge request, just let me
know what you did as a WILD CARD activity. Who knows? Maybe your idea will be
included in the next edition of the Badge Manual!

172
9. Leadership & Citizenship
Learning to lead is an important skill that benefits you far beyond our hobby. It will help
you in school, in other clubs and associations you may wish to join, in your chosen
career, and within your family and your community. As you learn from your youth
leader, we hope you will be inspired to take the initiative to become a leader yourself. As
you develop and deepen your knowledge and skills gained through FRA activities, assist
in teaching your fellow youth members and in helping your youth leader to decide which
activities to pursue with the group.
We also encourage you to expand your interests, activities, and leadership beyond your
rock club for the benefit of your community as a whole. The following are intended to
help you assume and develop a leadership role within your club and beyond.
Activity 9.1: Becoming a youth officer.
Become an officer within your youth group and help decide what topics and activities
your group will do this year.
Activity 9.2: Organizing a group display.
Take charge of organizing a group pebble pup display at your club show or at another
venue, such as a library display window.
Activity 9.3: Leading a show-and-tell session or presentation.
Lead a group show-and-tell session, presentation, or symposium to adult members of
your club.
Activity 9.4: Planning and leading a field trip.
Plan and lead a field trip.
Activity 9.5: Overseeing a newsletter column or an entire youth newsletter.
Oversee a monthly or occasional column for a year in your club’s newsletter or start and
edit your own junior members’ newsletter.
Activity 9.6: Managing a youth activity booth at a local gem show.
Either on your own or working with adult members of your club, help to decide on
activities to include in a Kids’ Activity booth at your local gem show, and then help to
run the booth during the show.
Activity 9.7: Mentoring.
Become a mentor to younger or less experienced members of your club, sharing your
knowledge and experience with them in a specific project, such as how to craft a cab,
how to build and curate a collection, etc.
Activity 9.8: Recruiting.
Help grow your club by bringing in a new member who attends at least three meetings—
and, hopefully, ends up joining!
173
Activity 9.9: Fundraising.
Just as Girl Scouts sell cookies to help support their activities, work with your youth
leader to come up with ways to raise funds to help support your club and its youth
activities.
Activity 9.10: Citizenship and civic engagement.
Seek ways to help within your community as a “good citizen.” This might involve
joining other clubs and community groups, helping with a clean-up day at a park or beach
or planting trees, visiting community leaders to learn about their duties and why they
assumed them, taking part in a local or school sports team or other school group,
participating in charitable activities via a church, synagogue or mosque, volunteering at a
hospital or senior center, etc. The list is endless. It also involves simply being kind and
generous, for example, helping a blind or elderly person safely across a street, fostering a
lost dog, or donating to a fundraiser for a worthy cause. Find a way to help your
community and fellow citizens—then go out and do it!
Activity 9.11: WILD CARD: Do your own thing!
Do you have an idea for learning about leadership that isn’t included in this manual? If
so, do your own thing! When your Youth Leader sends in your badge request, let us
know what you did as a WILD CARD activity. Who knows? Maybe your idea will be
included in the next edition of the Badge Manual!

174
9. Leadership & Citizenship
□ 9.1 Becoming a youth officer
□ 9.2 Organizing a group display
□ 9.3 Leading a show-and-tell session or presentation
□ 9.4 Planning and leading a field trip
□ 9.5 Overseeing a newsletter column or an entire youth newsletter
□ 9.6 Managing a youth activity booth at a local gem show
□ 9.7 Mentoring
□ 9.8 Recruiting
□ 9.9 Fundraising.
□ 9.10 Citizenship and civic engagement.
□ 9.11 WILD CARD: Do your own thing!
To earn your Leadership & Citizenship badge, you need to complete at least 3 of the 11
activities. Check off all the activities you’ve completed. When you have earned your
badge, sign below and have your FRA leader sign and forward this sheet to the AFMS
Juniors Program chair.
___________________________________
Date completed
_________________________________ ___________________________________
My signature Youth leader’s signature
_______________________________________________________________________
Name of my club
Leader’s preferred mailing address for
receiving badge:
____________________________________
____________________________________
____________________________________

175
Back-up page 9.1: Becoming a youth officer.
Building leaders is essential to the future of our clubs, providing the guidance, ideas, and
inspiration that keep us all going. It’s never too early to start cultivating the leaders of
tomorrow!
You should think about assigning or electing youth officers, especially if you have a large
group and have older, experienced kids within that group. The overall structure might
mirror the offices of your adult club but with fewer positions and fewer demands. Adjust
the type and number of offices to the ages and abilities of the kids in your group and the
size of your group.
If you have a large number of older kids who prove enthusiastic and ambitious, some
basic offices to consider might be a youth group President to oversee meetings and to
help decide what topics and activities to pursue for the coming year. A Recording
Secretary would keep notes from meetings to outline, distribute, and archive and to
include in the regular club newsletter. A Treasurer could help lead efforts to raise funds
to be used for special youth events and might help run the youth activity booth at your
local gem show (see Activity 9.6). A Newsletter Editor might oversee constructing a
youth newsletter or a special monthly youth section of your club’s regular newsletter,
soliciting and encouraging at least one article a month by a fellow junior member (see
Back-up page for Activity 9.5). A Field Trip Coordinator could work with the club’s
adult Field Trip Chair to help decide on two or three special trips for the kids in your club
to organize and to take over the course of a year (for instance, an outdoor collecting trip
during warmer weather and an indoor visit to a museum for the colder or rainier seasons).
If you have a small group with mostly young kids, you may end up appointing a single
Youth Assistant from among the older, experienced, and more mature kids within the
group. Such an assistant might help give advice about activities to try in a group setting
that he or she believes would be the most interesting to his/her friends and could help you
come in early to do any advance preparations and set-up.
With all the demands kids have on their time today, however, don’t overload them. This
should be an enjoyable, rewarding experience, not a burden or a drudge.

176
Back-up page 9.2: Organizing a group display.
As I travel about my home state of California, one thing I always look for at a local gem
show is a Pebble Pup group display. Most often, I come away disappointed from this
search. Frequently, adult members of a club might band together to enter a so-called
“Society Exhibit” or “Publicity Display” at shows of neighboring clubs. Their combined
efforts and materials make for truly outstanding exhibits that they assemble in an effort to
attract people to join their club.
Similarly, while one young child just starting out in the hobby may not have many pieces
in his or her collection, the combined efforts of all the kids in a club can result in a great
display that illustrates the range of individual interests and the overall scope of the hobby.
Kids in any club should be encouraged to put together such a group display to exhibit at
their own club show, at the shows of neighboring clubs, and in venues like a county fair.
It is even better if the kids themselves truly and actually take charge of organizing and
arranging it. All-too-often, kids supply the specimens but then a parent takes over to
design and install the display. (I fully confess, your honor. I, myself, was just such a
“helicopter parent” some 30 years ago with my own kids. Guilty as charged!) Let’s
resist this natural parental urge and let the kids express themselves. So what if the
display then has something of a “rough” look to it, with clutter, handwritten labels, and a
lopsided balance? Que sera, sera. It will be what it will be! Such displays should reflect
the efforts and initiative and sense of fun inherent within the kids themselves.
Displays crafted entirely by kids themselves versus parents and adults
are usually fairly obvious. Let kids be kids in crafting their own displays!
For any kids who volunteer to oversee or help in the effort of crafting a group pebble pup
display, all interested adults should lend advice and assistance freely and gladly should
the need become apparent and as requested. But then, back off! Back off, back off, back
off! Hold a meeting with the kids organizing the effort to discuss how to go about it and
share the Back-up pages for Badge 6 – Showmanship, especially Activity 6.1 on
techniques for effective displays. Then, let the kids have at it!
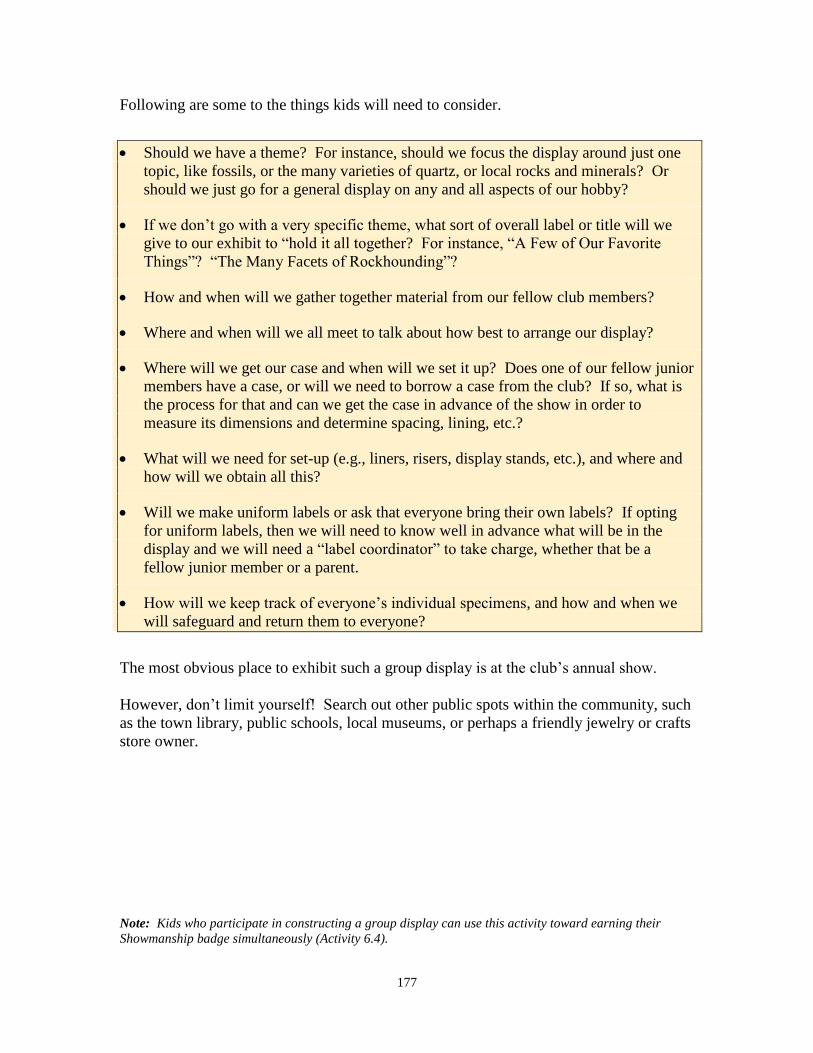
177
Following are some to the things kids will need to consider.
Should we have a theme? For instance, should we focus the display around just one
topic, like fossils, or the many varieties of quartz, or local rocks and minerals? Or
should we just go for a general display on any and all aspects of our hobby?
If we don’t go with a very specific theme, what sort of overall label or title will we
give to our exhibit to “hold it all together? For instance, “A Few of Our Favorite
Things”? “The Many Facets of Rockhounding”?
How and when will we gather together material from our fellow club members?
Where and when will we all meet to talk about how best to arrange our display?
Where will we get our case and when will we set it up? Does one of our fellow junior
members have a case, or will we need to borrow a case from the club? If so, what is
the process for that and can we get the case in advance of the show in order to
measure its dimensions and determine spacing, lining, etc.?
What will we need for set-up (e.g., liners, risers, display stands, etc.), and where and
how will we obtain all this?
Will we make uniform labels or ask that everyone bring their own labels? If opting
for uniform labels, then we will need to know well in advance what will be in the
display and we will need a “label coordinator” to take charge, whether that be a
fellow junior member or a parent.
How will we keep track of everyone’s individual specimens, and how and when we
will safeguard and return them to everyone?
The most obvious place to exhibit such a group display is at the club’s annual show.
However, don’t limit yourself! Search out other public spots within the community, such
as the town library, public schools, local museums, or perhaps a friendly jewelry or crafts
store owner.
Note: Kids who participate in constructing a group display can use this activity toward earning their
Showmanship badge simultaneously (Activity 6.4).
178
Back-up page 9.3: Leading a show-and-tell session or presentation.
Kids expressing an interest in leading a group show-and-tell session, presentation, or
symposium should be provided with the Back-up pages for Badge 7 – Communication,
especially for Activity 7.1 – Oral report and Activity 7.5 – Holding a symposium.
Show-and-tell sessions are the easiest to arrange and might be organized around a theme.
Here are just a few ideas:
Things I collected on club field trips.
Things I purchased at our annual club show or elsewhere.
What I’ve made at our club workshop or at home.
My most interesting or valuable specimen and why I like it.
Themes to consider for a show-and-tell session.
However, a theme is not necessary. Just ask kids to bring in what they like best from
their collections! Ask kids in advance to bring in specimens and stories to relate about
them, and to invite questions from their audience. The main thing is to ensure that those
kids do indeed then show up, so the junior in charge of organizing this session should be
sure to not just issue an invitation but also to follow up with a reminder and a last-minute
check-in before the meeting when the session is to take place.
While a free-flowing show-and-tell session can more-or-less run itself once it gets going,
your oldest or most experienced junior members should be appointed to oversee it using
the following suggested structure.
Introduce each person stepping up to share
Ask for any questions from the audience after a rock has been shared
Thank the person who has shared and audience members who have asked questions
Thank everyone at the overall conclusion of the session
How to structure a show-and-tell session
A full-scale group presentation or symposium can take a great deal more planning. If
your junior members choose to go with this latter route, be sure to take the time to review
Back-up page 7.5, and then—have fun!
Note: Kids who participate in a group show-and-tell session or presentation can use this activity toward
earning their Communication badge simultaneously (Activities 7.1 and 7.5).

179
Back-up page 9.4: Planning and leading a field trip.
A youth member expressing a desire to plan and lead a field trip should first exhibit
complete familiarity with Badge 8 on Field Trips and should have earned that badge. A
field trip leader should be experienced by having taken multiple field trips in the past and
should exhibit familiarity with all field trip protocols.
Field trips represent the most fun a Rockhound can have!
For kids who express an interest in taking on the responsibility of leading a field trip,
share all Back-up pages from Badge 8 and draw in assistance from your club’s adult
Field Trip Chair. That Chair should work together with the junior member/s to ensure a
successful adventure for one and for all.
Note: Kids who participate in a field trip as part of this badge activity can use this toward satisfying
requirements to earn the Field Trip badge simultaneously (Activities 8.2 and 8.3).

180
Back-up page 9.5: Overseeing a newsletter column or an entire youth newsletter.
When I belonged to the Carmel Valley Gem and Mineral Society in California, we had
one youth member who was dinosaur crazy. It was the same time that Jurassic Park hit
the scene, and you couldn’t round a corner, walk into a grocery store, or turn on the TV
without seeing a dinosaur. “Dinosaur Bob,” as he came to be known, took the initiative
to start his own “Fact of the Month” column in the club newsletter, a column devoted
solely to the topic of fossils (usually dinosaurs) and graced with his own dino drawings.
Encourage a similar child or youth with a passionate interest in the hobby to do the same.
You could either have a single youth correspondent who pens a monthly column or you
could establish a Youth Column and encourage kids to take turns contributing to it. To
make the column stand out, you should place it at the same spot in each issue of the
newsletter, where it’s easy to flip to—such as the last page or a middle fold.
Dinosaur Bob had a theme going for him, making it easy to come up with topics each
month. His columns usually started with a simple question that grew into a short essay:
What color were dinosaurs? Were dinosaurs warm-blooded or cold? How did the
dinosaurs die? A year-long series of mineral columns can evolve from focusing on the
birthstone of the month. A lapidary column might take the form of a Dear Abby column,
addressing such vexing questions as, “One writer asks, ‘Why won’t my jade take a decent
polish?’” “How do you avoid flat spots on a cab?” You might establish themes like
these, or simply allow kids to write what tickles their fancy at the time.
Caution: Don’t undertake the following unless you’re willing to commit a great deal
of time! If you have a truly enthusiastic bunch of kids, including some real wordsmiths,
a great project is pulling together a full-scale juniors newsletter—a newsletter by and for
junior members. A terrific model is the “Mineral Mites Bulletin” inaugurated by Ismael
Sanchez, Advisor to the Bakersfield Mineral Mites of California. Their newsletter
consists of the Advisor’s Report (written by the adult youth leader), the Assistant
Advisor’s Report, juniors officers contributions, an events calendar, a “Mineral of the
Month” column, clippings from articles in other rock club newsletters, jokes, poems,
games, juniors activities (for instance, learning about mining with a chocolate chip
cookie), notice of awards for Mineral Mites accomplishments, and Federation reports. In
addition to contributions from the Mineral Mites officers, all junior members are
encouraged to become involved in the publication. It’s printed in 4-color and includes
clip art and photos. A truly outstanding effort!
However, if you have just a small group and limited resources, even a much smaller
effort can prove to be a lot of fun and a great learning experience for your kids. You
could put together a single-page monthly flyer or fold a sheet of paper and create a four-
page mini-newsletter. But for even a modest newsletter, heed the warning posted above!
A monthly newsletter just simply takes time and effort, no matter how long or short, and
no two ways about it!
Note: Kids who work on this activity can use it to work toward earning the Communication badge
simultaneously (Activity 7.2).

181
Back-up page 9.6: Managing a youth activity booth at a local gem show.
Every show should have a youth activity booth, and it’s even better if youth are actually
running it! But for that, you need to be sure to have older kids in charge with a good
degree of responsibility. One thing my own kids often eagerly volunteered for—even
after they grew older and began to tire of the old man’s fascination with rocks and
fossils—was helping to run the youth activities booth at our annual show. They
especially liked the part where you take money and spin the spinning wheel or sell a grab
bag. Mostly, they like taking the money!
You should hold a meeting with kids to decide what activities they’ll want to sponsor and
how much space they’ll need. Following are just a few activity suggestions.
A “Wheel of Fortune” spinning wheel, where every spin wins a rockhound prize of a
mineral specimen, crystal, polished slab, fossil, etc., donated by club members. If
you don’t have a spinning wheel, a variation is to have kids draw a numbered ticket
from a hat or a bowl and match it to numbered specimens on a prize table.
Grab bags filled with tumbled stones.
Making fossils (see Activity 3.2).
Sand-sifting with a screen or colander for small fossils and gemstones in a sandbox or
plastic tub.
A “Pirate’s Treasure Chest” filled with tumbled stones from which kids get to pick an
assortment.
Black Sand Fun, where a container is filled with magnetic sand and a bunch of
magnets.
Making rock critters by gluing together flat or round stones and attaching eyes, pipe
cleaner arms or antennae, feathers, etc., to make snowmen, caterpillars, bugs, etc.
Rock painting, creating lady bugs, fat cats, and other creatures by painting on large,
smooth flat or round stones with tempura.
Coloring and drawing with coloring book pages of earth science scenes (available at
children’s bookstores, teaching stores, etc.) or on large sheets of paper rolled out on a
table. (This activity should be free. In addition to having activities that kids pay for
at a show, you should always have a few that any child can do free-of-charge, such as
coloring and drawing or the Black Sand Fun.)
A small sampling of what might appear in a Youth Activity Booth.
More activities may be found on the CFMS web site: https://www.cfmsinc.org/fra-youth-
home/kids-show-activities/ Click on the photo of the little girl when the web page
comes up to get into the manual called “CFMS Menu of Kids’ Show Activities & Display
Ideas.”

182
Kids have fun helping run a Youth Activity Booth at a local show!
In addition to deciding what activities to sponsor, kids should work in concert with
experienced adult members to determine a budget, help get the supplies they’ll need
(relying as much as possible on donations from adult members and sympathetic local
store owners within the community), and work on the layout and set-up of the Kids
Activities Booth. They’ll also need to draw up a work schedule so that all kids get a
chance to rotate through overseeing various activities while still allowing time to enjoy
the show themselves.
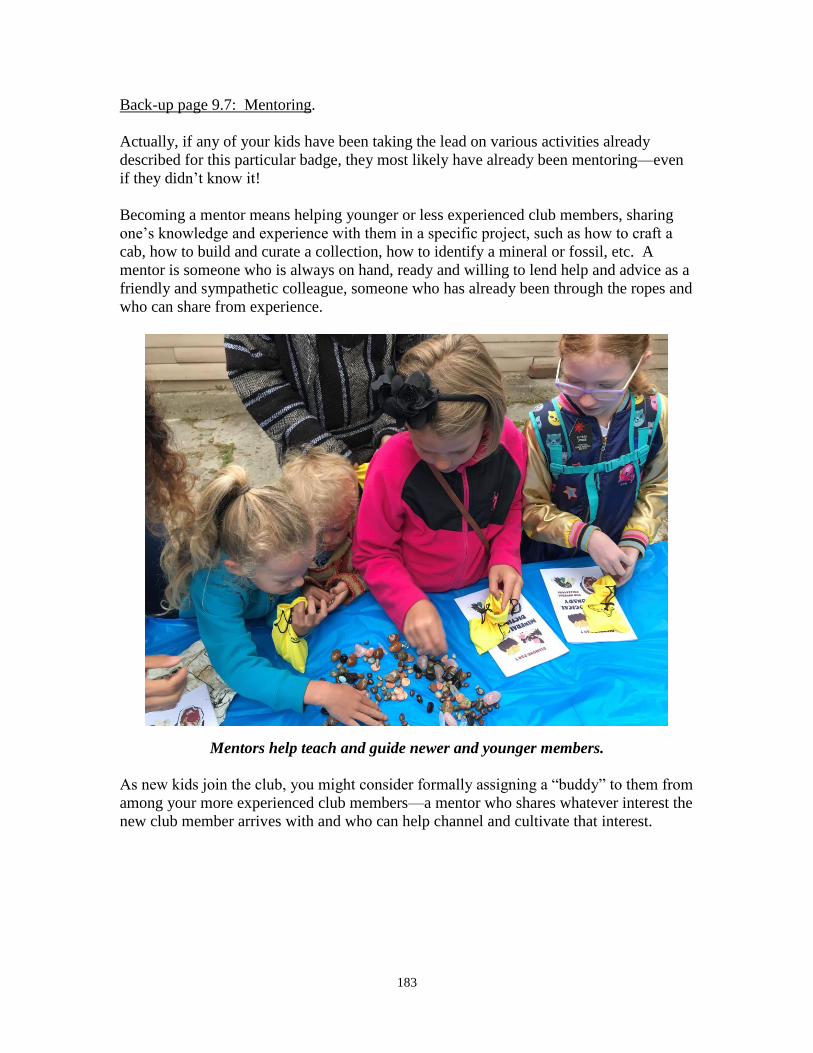
183
Back-up page 9.7: Mentoring.
Actually, if any of your kids have been taking the lead on various activities already
described for this particular badge, they most likely have already been mentoring—even
if they didn’t know it!
Becoming a mentor means helping younger or less experienced club members, sharing
one’s knowledge and experience with them in a specific project, such as how to craft a
cab, how to build and curate a collection, how to identify a mineral or fossil, etc. A
mentor is someone who is always on hand, ready and willing to lend help and advice as a
friendly and sympathetic colleague, someone who has already been through the ropes and
who can share from experience.
Mentors help teach and guide newer and younger members.
As new kids join the club, you might consider formally assigning a “buddy” to them from
among your more experienced club members—a mentor who shares whatever interest the
new club member arrives with and who can help channel and cultivate that interest.

184
Back-up page 9.8: Recruiting.
One thing is as certain as night follows day: kids grow up! And when they do, they often
head off in directions that lead them away from an early interest in rocks. That happened
in my own life. After collecting fossils since I was knee high to a grasshopper and
enrolling in college as a geology major, I switched to humanities, got a job in publishing,
and only many years later returned to my early passion.
From my experience (and from survey work with a local natural history museum), it is
mostly kids in the elementary school age bracket who are fascinated and even infatuated
with rocks, minerals, and fossils. By junior and senior high school, many things compete
for their interest: computers, cell phones, and social media, extracurricular activities
(sports, music, drama, etc.), cars, the opposite sex, etc., etc., etc.
The only way to maintain a vibrant youth program is to continually bring in new recruits.
For that, turn to your own junior members! This activity is considered accomplished if a
youth member brings in a friend who attends at least two meetings.
It is also consider accomplished if a youth member helps at a “recruiting station” at the
Kids Booth during your annual club gem show. My own club reserves a little corner of
the Kids Booth where we have a dedicated member standing by with a clipboard holding
a sign-up sheet. If a child shows interest in the club, we invite a parent or guardian to
leave the parent’s name, the child’s name, and a phone number or email address so that
we can get back in touch. We answer questions and hand out our standard club brochure
and a smaller quarter-page flyer describing our Pebble Pups Program in just 175 words.
Craft a flyer that is brief and to-the-point for recruitment efforts.

185
A true recruiter does more than just bring a friend along to a meeting or convince a
stranger to join the club. Anyone working on this activity should also serve as a host or
hostess or mentor to introduce that friend or stranger to the hobby and to the club in ways
that will make them feel welcomed and that will spur interest and a desire to return and
become a fellow Rockhound.

186
Back-up page 9.9: Fundraising.
Kids should learn where money comes from and the effort it takes to earn it, how to
manage it wisely, and how to save for things of value. The following four suggestions
for a fundraising activity are intended to help in this effort.
1. Decide how to spend your money. The first step in a fundraising project is
determining what you need or want, then finding out how much it will cost. If your club
holds a local show, you might take the kids around to the various dealers to see what sorts
of things are out there before meeting as a group to decide what to buy. Guide kids to
think in terms of things that will benefit the most club members while remaining within a
reasonable budget. This could be a piece of lapidary equipment like a rock tumbler that
could be filled with stones provided by each child. Or perhaps they’d like to start a
library with how-to lapidary books geared to kids. With everyone gathered around a
flipchart or whiteboard, toss around and list ideas and take a vote.
2. Set fundraising goals. Once you know what your kids want, you’ll be able to
determine a target dollar amount to raise. Raising the necessary amount could be a long-
term project, with various fundraising activities held over the course of a year. Teach the
kids to track their fund via simple, basic accounting. Make a large poster-board
thermometer calibrated with dollar amounts leading to their goal, and use it to motivate
the kids by keeping both their goal and their progress literally in sight.
3. Determine fundraising activities. In addition to involving kids in decisions about
what to buy, involve them in decisions about how to buy it. After holding a
brainstorming session and a vote on what to buy, hold another session on fundraising
activities everyone can participate in. For instance: running a Kids’ Booth at your local
club show; running a Kids Silent Auction; making and selling lapidary crafts; garage,
lemonade, and bake sales. To motivate potential customers, kids might make a poster
showing what they’re planning to purchase with their money and asking customers for
help in reaching their goal, showing folks how the money is going to a good cause.
4. Help “give back” to the AFMS. Our AFMS/FRA Badge Program is provided free
of charge to participating clubs, but it is not without costs; for instance, mailing badges
and materials to all the clubs using the program and—most significantly—manufacturing
the badges. I am happy to provide Certificates of Merit to any clubs contributing to the
Badge Program to instill a sense of belonging among youth members.
Teaching the value of money and the long-term vision and patience to save for something
worthwhile will help kids learn lessons that will benefit them all their lives.

187
Back-up page 9.10: Citizenship and civic engagement.
Get to know the kids in your club, and you may be surprised—and inspired—to learn
how many already have earned this activity! If a child has joined your rock club by his or
her own accord, s/he has shown a spirit of civic engagement, i.e., taking the initiative to
join a community group, interacting with fellow citizens, and participating toward a
greater good.
To help your club’s kids find ways within your boarder community to engage and serve
as “good citizens,” consider the following:
joining other clubs and community groups (Boy Scouts, Girl Scouts, 4H, Big
Brothers Big Sisters of America, Key Club, YMCA/YWCA, etc.)
helping with a community clean-up day at a park or a beach or in a neighborhood, or
planting trees with a local conservation group or parks department
visiting a community leader or elected official to learn about their duties and why
they assumed them (among others, such officials may include mayors, city managers,
city council members, school board members, judges and city attorneys, or school
superintendents)
taking part in a community or school sports team or other school group or activity
(band or choir, drama, debate club, etc.)
participating in charitable activities via a church, synagogue or mosque
participating in a county fair, a science fair, or similar educational community event
volunteering with a soup kitchen, homeless shelter or thrift store devoted to the
homeless, abused, or other needy or underprivileged members of the community
volunteering at a hospital or senior center (as my big sister did as a “Candy Striper”
over 50 years ago)
The list is endless. It also involves simply being kind and generous, for example, helping
a blind or elderly person safely across a street, fostering a lost cat or dog, taking part in a
fundraiser for a worthy cause, or congratulating a person on a job well done.
Help your club’s kids find ways to help your community and fellow citizens—then
encourage them go out and do it! If they already have, ask them to write up a brief essay
of a page or so describing what they have done, why they have done it, and what they
have learned from their experiences that have helped them grow as a citizen.

188
Back-up page 9.11: WILD CARD: Do your own thing!!
While I’ve tried to provide a wide-ranging variety of activities to choose from, no one
manual can “do it all.” There are many other great ideas out there that clubs have found
to match their local interests and resources.
Plus, the Youth Leaders of some clubs have expressed concern that some of the activities
included in the manual may be a bit beyond the abilities of their youngest members.
Here’s your chance to tailor-make activities for the youngest among us.
If you and your fellow club members have an idea for learning about leadership and
citizenship that isn’t included in this manual, go for it! When you send in your badge
request, just let me know what you did as a WILD CARD activity. Who knows? Maybe
your idea will be included in the next edition of the Badge Manual!

189
10. Earth Processes
While the ground beneath our feet may seem stable, our Earth is actually an amazingly
dynamic and fluid planet. Huge sections of crust called “plates” are always on the move,
spreading apart from each other at some places like under the Atlantic Ocean, sliding past
each other at other places like along the San Andreas Fault, crashing together at still other
places to lift mountains like the Himalayas. Here you will learn about such processes, the
definition of a rock, and how rocks of different sorts are formed by earth processes.
Activity 10.1: What is a rock?
Learn the definition of a rock and the three rock types (igneous, sedimentary, and
metamorphic). Collect at least one of each of the three rock types.
Activity 10.2: Plate tectonics and the rock cycle.
Our earth is made of huge segments, or plates, that are constantly on the move. They
recycle rocks and create processes and conditions that lead to igneous, sedimentary, and
metamorphic rocks. Make a poster showing the rock cycle. Include specific examples of
the different sorts of rocks you might find along different parts of the rock cycle.
Activity 10.3: Igneous rocks.
Learn about different sorts of igneous rocks, how they formed, and how they differ from
one another, such as granite versus basalt versus obsidian versus pumice. Then do one of
the following activities: a) use a sugar candy recipe to demonstrate the effects of quick
versus slow cooling and gas bubbles in forming the texture of an igneous rock; b) make a
plaster or clay volcano and set it off for your fellow club members; or c) make an igneous
rock collection of 3 or more different types.
Activity 10.4: Sedimentary rocks.
Learn about wind and water erosion and deposition and chemical precipitates and
evaporates in order to understand how sedimentary rocks form. Then do one of the
following activities: a) make a precipitate or sandstone, conglomerate, and breccia and
create a geologic column of these in a milk carton or observe sedimentary processes in
nature or in the lab; b) make fossils with clay and plaster; or c) make a sedimentary rock
collection of 3 or more different types.
Activity 10.5: Metamorphic rocks.
Learn about “parent rocks” and the formation of metamorphic rocks due to heat and
pressure. Then do one of the following activities: a) using clays of different colors as
your “parent rocks,” make a metamorphic rock with pressure and heat by twisting and
rolling the clays together and then baking them in an oven; or b) make a metamorphic
rock collection with 3 or more different types.
Activity 10.6: Making 3D models of geologic features related to plate tectonics.
Understanding some earth processes can be hard without visualizing them. Craft 3D
models out of paper or cardstock to illustrate geologic features related to plate tectonics.

190
Activity 10.7: Earthquakes.
Somewhere in the world, an earthquake is happening even as you read this sentence.
Explore how and why by researching major earthquakes throughout history, exploring the
underlying causes of earthquakes, or modeling their effects.
Activity 10.8: WILD CARD: Do your own thing!
Do you have an idea for learning about earth processes that isn’t included in this manual?
If so, do your own thing! When your Youth Leader sends in your badge request, let us
know what you did as a WILD CARD activity. Who knows? Maybe your idea will be
included in the next edition of the Badge Manual!

191
10. Earth Processes
□ 10.1 What is a rock?
□ 10.2 Plate tectonics and the rock cycle
□ 10.3 Igneous rocks
□ 10.4 Sedimentary rocks
□ 10.5 Metamorphic rocks
□ 10.6 Making 3D models of geologic features related to plate tectonics.
□ 10.7 Earthquakes.
□ 10.8 WILD CARD: Do your own thing!
To earn your Earth Processes badge, you need to complete at least 3 of the 8 activities.
Check off all the activities you’ve completed. When you have earned your badge, sign
below and have your FRA leader sign and forward this sheet to the AFMS Juniors
Program chair.
___________________________________
Date completed
_________________________________ ___________________________________
My signature Youth leader’s signature
_______________________________________________________________________
Name of my club
Leader’s preferred mailing address for
receiving badge:
____________________________________
____________________________________
____________________________________

192
Back-up page 10.1: What is a rock?
Minerals are inorganic substances with unique chemical compositions created in
nature. “Inorganic” means they are not alive. Minerals often produce crystals, and a
particular type of mineral always has the same chemical make-up that gives it a
distinctive crystal form and color/s. Minerals are the individual units or building blocks
that, brought together, make up a rock.
Rocks are inorganic solids from the earth’s crust that are made up of one or more
minerals. To provide a comparison for kids, you might say that everyone in your club
represents an individual mineral. You have boy minerals, girl minerals, mother and
father minerals, etc. Scattered around town, each is an individual, but when you bring
them together in the same room, the individual boys and girls and parents become
something new: a rock club. Just so, when individual minerals come together in a group,
they create a rock.
Pegmatite granite is a good example for showing how rocks are made of collections of
minerals because crystals of the individual minerals making pegmatite granite are
especially large and visible as compared to some other types of rocks. Pegmatite granite
is made of the minerals quartz, feldspar, mica, and schorl tourmaline. The quartz will
tend to be clear or milky white and shiny like glass. The feldspar might be white or gray
and somewhat dull. Mica will appear as glittery silver flakes. And the schorl tourmaline
will appear as black rods or specks. Have kids examine a specimen of pegmatite granite
under a magnifying glass to see the different types of minerals in order to gain an
appreciation of how a rock is made up of different minerals that have grown together, as
show in the following illustration:
MINERALS A ROCK
Quartz Feldspar =
Mica Schorl
Pegmatite Granite

193
Rocks are divided into three groups:
1. Igneous rocks cooled and crystallized from hot, molten magma, either on the
surface of the earth or deep below ground. “Igneous” is derived from the Latin
word igneus, meaning “fire.” Examples of igneous rocks your kids might collect
include granite, basalt, rhyolite, obsidian, gabbro, tuff, andesite, pegmatite, or
pumice.
2. Sedimentary rocks formed by gravel, sand, or mud that got buried and hardened
due to pressure from overlying rocks. Sedimentary rocks start by processes of
erosion that create gravel, sand, or mud that settles to the bottom of a basin
(ocean, lake, or river valley) in layers. These layers eventually harden to become
conglomerate, sandstone, or shale. “Sedimentary” is derived from the Latin word
sedimentum, which means “to settle or sink down.” Sedimentary rocks also
include those that precipitate out of water, either through chemical action or
evaporation, such as limestone, gypsum, or halite (salt). Examples of sedimentary
rocks your kids might collect are shale, sandstone, breccia, conglomerate,
limestone, coquina, diatomite, dolomite, travertine, or gypsum.
3. Metamorphic rocks are pre-existing rocks that have been altered by extreme heat
and/or pressure to create a rock with a new form and mineral structure.
“Metamorphic” is derived from the Greek word metamorphōsis, which means “to
change” or “to transform.” Examples of metamorphic rocks are marble, gneiss,
slate, schist, quartzite, soapstone, greenstone, and serpentine.
Note: Kids can use this activity to satisfy requirements toward earning their Rocks & Minerals badge
(Activity 1.4) and Collecting badge (Activity 5.1) simultaneously.

194
Back-up page 10.2: Plate tectonics and the rock cycle.
Some have described our Earth as a round soft-boiled egg with a partly solid/partly liquid
hot core surrounded by a syrupy hot layer of soft rock known as the mantle, both
contained within a thin and brittle outer shell or crust of hardened rock.
Source: United States Geological Survey website, “Education” link.
On Earth, rocks making up the crust are constantly on the move in a cycle of formation
and change through processes involved with plate tectonics. The thin, brittle crust of the
Earth is not an even shell, as with our soft-boiled egg example, but rather, is cracked and
divided into a number of plates that float and travel over the more fluid mantle. Much of
the earth’s seismic activity (earthquakes, volcanic eruptions, mountain building) occurs at
the boundaries of these plates, where plates collide (as in the Himalaya Mountains),
diverge (as along the mid-Atlantic ridge), slide past one another (as at the San Andreas
fault), or where one overrides another (as along the east coast of Japan). Several web
sites offer animations and/or instructions on making “earthquake models” so that you can
demonstrate their effects and illustrate the different sorts of plate boundaries. For
instance, see:
“How to Make an Earthquake Model for Kids”
www.ehow.com/how_5347246_make-earthquake-model-kids.html
“3D Paper Models”
https://www.usgs.gov/media/files/3d-paper-models-0
For photos of various earthquake events, you might check out the web site
“Yup…Rocks,” www.yuprocks.com.

195
As a result of these tectonic processes, with plates colliding, diverging, overriding, or
sliding past one another, new rock is formed, old rock is worn down and re-deposited as
sediment, and other rocks are changed through heat and pressure. You can use various
types of rocks to illustrate this rock cycle.
Igneous rocks formed from hot, molten magma, either deep underground (e.g.,
granite) or extruded onto the planet’s surface (e.g., basalt). Igneous processes
can form volcanoes and mountains that lift land up and create new land.
Sedimentary rocks, on the other hand, result from processes that wear the earth
down. Gravity, combined with the weathering properties of wind, rain, and
freezing, disintegrates rocks, breaks them into smaller components, and transports
them into valleys and basins as gravel, sand, or mud. There, they pile up in layers
and eventually harden into the sedimentary rocks known as conglomerate,
sandstone, and mudstone or shale. Sedimentary rocks also form chemically, as
when calcium carbonate precipitates out of tropical seas to form limestone or
when seas or lakes evaporate, leaving behind desert deposits of halite or gypsum.
Sometimes, igneous and sedimentary rocks get buried under other rocks and get
caught up in the immense forces involved in plate tectonics and mountain
building. When this happens, these rocks get heated and squeezed, and the
pressures can change their very structures and transform them into whole new
rocks, known as metamorphic rocks. These include rocks such as gneiss, schist,
slate, or marble.
Here are some illustrations of how rocks move through a “rock cycle.” Granite is an
igneous rock that hardened and crystallized from molten magma deep beneath the earth.
You’ll see bits of crystallized quartz in granite. When granite weathers, these quartz
crystals get worn down into grains of sand. When deposited in a valley, lakebed, or
ocean, sand can harden into the sedimentary rock called sandstone. If the sandstone is
buried and subjected to heat and pressure, it will transform into the metamorphic rock
called quartzite.
Granite → Sand → Sandstone → Quartzite igneous sedimentary metamorphic
The mica and feldspar in igneous granite can get worn down into silt and clay. When that
hardens, it becomes sedimentary shale. And when shale is subjected to heat and pressure,
the original mica re-crystallizes to form flat, platy layers of metamorphic slate or schist.
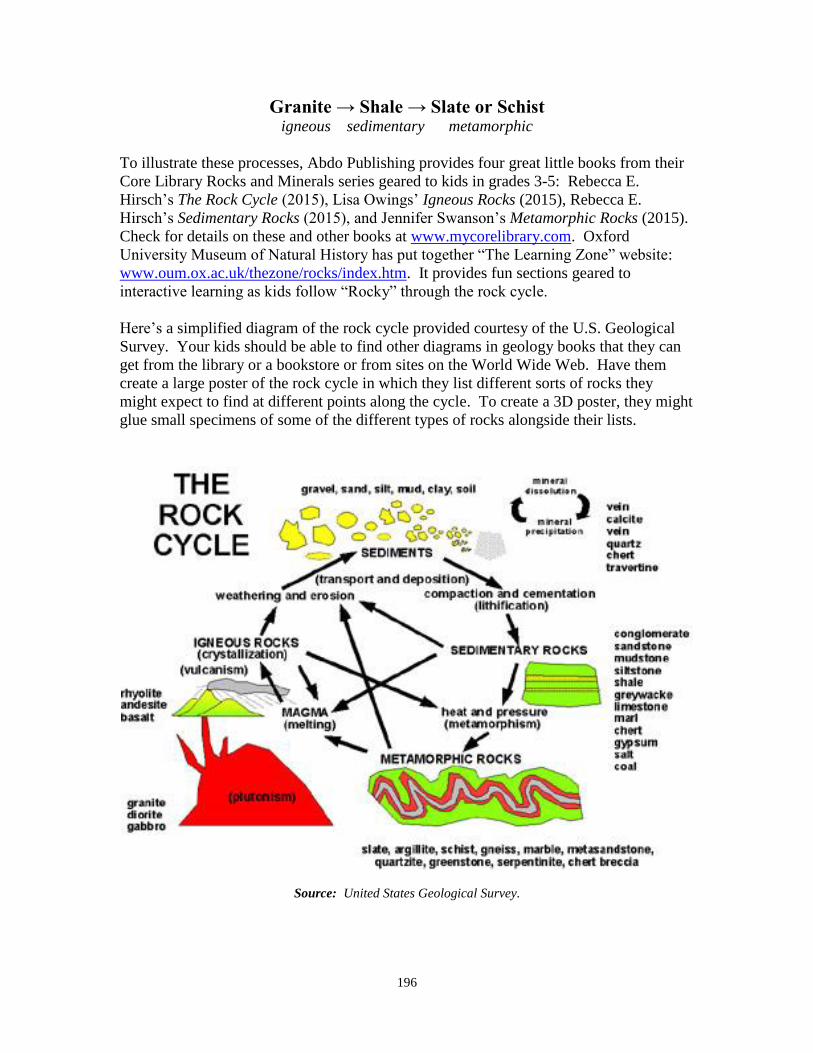
196
Granite → Shale → Slate or Schist igneous sedimentary metamorphic
To illustrate these processes, Abdo Publishing provides four great little books from their
Core Library Rocks and Minerals series geared to kids in grades 3-5: Rebecca E.
Hirsch’s The Rock Cycle (2015), Lisa Owings’ Igneous Rocks (2015), Rebecca E.
Hirsch’s Sedimentary Rocks (2015), and Jennifer Swanson’s Metamorphic Rocks (2015).
Check for details on these and other books at www.mycorelibrary.com. Oxford
University Museum of Natural History has put together “The Learning Zone” website:
www.oum.ox.ac.uk/thezone/rocks/index.htm. It provides fun sections geared to
interactive learning as kids follow “Rocky” through the rock cycle.
Here’s a simplified diagram of the rock cycle provided courtesy of the U.S. Geological
Survey. Your kids should be able to find other diagrams in geology books that they can
get from the library or a bookstore or from sites on the World Wide Web. Have them
create a large poster of the rock cycle in which they list different sorts of rocks they
might expect to find at different points along the cycle. To create a 3D poster, they might
glue small specimens of some of the different types of rocks alongside their lists.
Source: United States Geological Survey.

197
Back-up page 10.3.a) Igneous rocks: Demonstrating effects of cooling and gases.
Igneous rocks form from molten magma from inside the earth that cools and solidifies as
it nears or reaches the surface. To show kids how a hot, liquid substance can become
rock hard when it cools, here are a couple easy demonstrations.
A. Fast cooling versus slow cooling. As molten magma cools, crystals form. If the
magma cools very slowly, those crystals have a chance to grow large. This is what
happens in granite, an intrusive igneous rock that generally forms deep underground
and takes an extremely long time to cool.
Granite, with large crystal components.
If magma cools more quickly, crystals don’t have a chance to grow as large, so the
resulting rock has a smaller crystal structure. This is seen in basalt, an extrusive
igneous rock formed from magma that rose to the surface of the earth where it cooled
more quickly in the air. Sometimes magma cools super-fast, and when that happens,
crystals may not have a chance to form at all, as seen in smooth obsidian.
Basalt and obsidian cooled quickly, with small or no crystal formation.
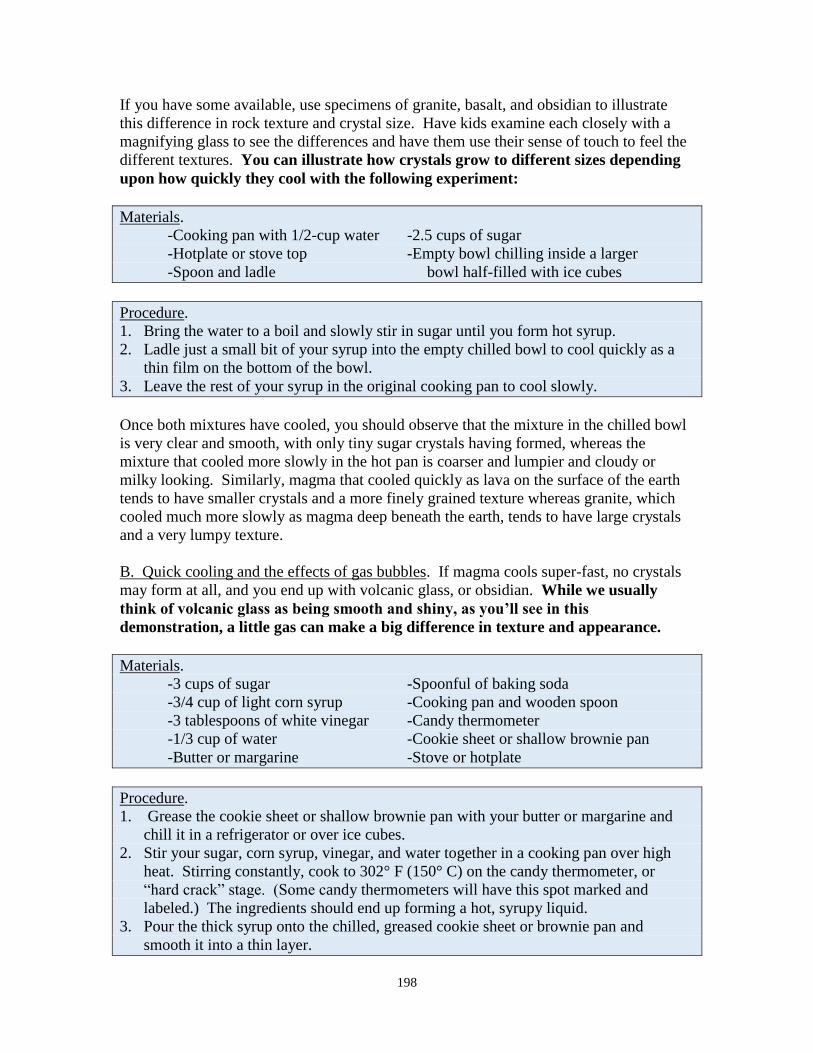
198
If you have some available, use specimens of granite, basalt, and obsidian to illustrate
this difference in rock texture and crystal size. Have kids examine each closely with a
magnifying glass to see the differences and have them use their sense of touch to feel the
different textures. You can illustrate how crystals grow to different sizes depending
upon how quickly they cool with the following experiment:
Materials.
-Cooking pan with 1/2-cup water -2.5 cups of sugar
-Hotplate or stove top -Empty bowl chilling inside a larger
-Spoon and ladle bowl half-filled with ice cubes
Procedure.
1. Bring the water to a boil and slowly stir in sugar until you form hot syrup.
2. Ladle just a small bit of your syrup into the empty chilled bowl to cool quickly as a
thin film on the bottom of the bowl.
3. Leave the rest of your syrup in the original cooking pan to cool slowly.
Once both mixtures have cooled, you should observe that the mixture in the chilled bowl
is very clear and smooth, with only tiny sugar crystals having formed, whereas the
mixture that cooled more slowly in the hot pan is coarser and lumpier and cloudy or
milky looking. Similarly, magma that cooled quickly as lava on the surface of the earth
tends to have smaller crystals and a more finely grained texture whereas granite, which
cooled much more slowly as magma deep beneath the earth, tends to have large crystals
and a very lumpy texture.
B. Quick cooling and the effects of gas bubbles. If magma cools super-fast, no crystals
may form at all, and you end up with volcanic glass, or obsidian. While we usually
think of volcanic glass as being smooth and shiny, as you’ll see in this
demonstration, a little gas can make a big difference in texture and appearance.
Materials.
-3 cups of sugar -Spoonful of baking soda
-3/4 cup of light corn syrup -Cooking pan and wooden spoon
-3 tablespoons of white vinegar -Candy thermometer
-1/3 cup of water -Cookie sheet or shallow brownie pan
-Butter or margarine -Stove or hotplate
Procedure.
1. Grease the cookie sheet or shallow brownie pan with your butter or margarine and
chill it in a refrigerator or over ice cubes.
2. Stir your sugar, corn syrup, vinegar, and water together in a cooking pan over high
heat. Stirring constantly, cook to 302° F (150° C) on the candy thermometer, or
“hard crack” stage. (Some candy thermometers will have this spot marked and
labeled.) The ingredients should end up forming a hot, syrupy liquid.
3. Pour the thick syrup onto the chilled, greased cookie sheet or brownie pan and
smooth it into a thin layer.

199
4. When the syrup mixture cools, it will become a hard lump. (In this case, it’s a hard-
candy lump that should be edible.)
As in this experiment, hot, soft, liquid molten magma solidifies into a hard igneous rock
when it cools. In this instance, you will have created a smooth, clear “rock” with a
texture somewhat like obsidian. Obsidian is lava that cooled very quickly, so quickly
that crystals didn’t have a chance to grow, thus resulting in smooth volcanic glass.
Another volcanic rock that cools to a glassy state is pumice, but unlike smooth obsidian,
pumice is rough and porous. It’s shot through with thousands of tiny bubbles from gases.
These gases whipped up a volcanic “froth” that cooled quickly in the air. Here’s how to
illustrate this effect:
Procedure.
Follow the same recipe outlined above but with the following twist. After pouring just
half of your syrup into one chilled and greased pan or cookie sheet, set your cooking pan
down and quickly stir a spoonful of baking soda into the remaining half of your mixture.
The baking soda will react with the vinegar to release carbon dioxide bubbles throughout
the mixture, which you should now pour into a second chilled and greased pan.
When both mixtures have cooled, shatter both into smaller pieces and have your kids
compare pieces side-by-side along with specimens of obsidian and pumice.
Obsidian and pumice: two very different forms of volcanic glass!

200
Back-up page 10.3.b) Igneous rocks: Making a volcano.
The classic earth science project is making a model volcano that erupts with a slow flow
or a bang. Here’s how!
Materials.
-2-foot square sheet of poster board -Baking soda
or plywood -Vinegar
-A small can (empty tomato paste or -Red and yellow food coloring
small mushroom cans work well) -Dishwashing liquid
-Newspaper, foil, or wire mesh -Measuring cups
-Plaster of Paris, mixing bowl, spoon -Plastic film canister with snap top
-Water -Alka-Seltzer or denture cleanser
-Paint, spray adhesive, sand, lacquer -Water
(optional) -Newspapers or drop cloth
Procedure.
1. On your poster board or plywood base, make a mound or cone shape from damp and
wadded newspapers, wadded foil, wire mesh, or other suitable material.
2. At the very top, wrap this material around a small can or bottle.
3. Mix plaster of Paris (two parts plaster, one part water), and coat your mound with it,
leaving the can open at the top. Then set it aside to let the plaster dry.
4. You can either use the volcano the way it is, or you and your kids can paint the
volcano whatever colors you prefer or, for a realistic touch, apply a spray adhesive
and sprinkle your volcano with sand (or glitter, for an artistic touch).
5. If you plan on re-using the volcano many times, you should coat the finished work
with a lacquer so that it may be easily wiped clean after each volcanic eruption.
You now have a dormant volcano. Here’s how to make it active and ready to erupt in
ways that will simulate two types of volcanic eruptions.
A. Lava flow eruption. Some volcanic eruptions are relatively mild. Rather than a
single, massive explosion, they issue a flow of hot, basaltic lava, like we see with lava
flows on the Hawaiian Islands or with the extinct cinder cone volcanoes and lava fields in
the American West. Here’s how to simulate this sort of eruption:
1. Place your volcano on newspapers or a drop cloth.
2. Fill the can at the top of your volcano one-third with baking soda.
3. In a separate cup, mix one-third cup of vinegar with a couple drops of red and yellow
food coloring and two drops of liquid detergent.
4. Pour this mixture into your volcano with the baking soda to creating a sudden
eruption and lava flow!

201
Simulating the slow flow of a shield volcano.
If you have specimens available, show kids samples of basalt, pahoehoe, or a’a. These
are the sorts of igneous rocks formed in a lava flow like the one you’ve demonstrated.
B. Explosive eruption. Other volcanic eruptions involve massive, violent explosions,
like that which blew the top off of Mount Saint Helens in 1980.
1. Fill a plastic film canister (or similar container with a snap-on top) three-fourths with
water or vinegar.
2. Drop in an effervescent tablet (Alka-Seltzer or denture cleanser work well).
3. Quickly snap on the canister lid, give it a hard shake, and quickly place the canister
into the mouth of your volcano, with the lid of the canister pointing up.
4. Keep kids back from the volcano as they wait. After just a second or two, the lid of
the canister will pop many feet into the air along with a quick squirt of foamy water.
(This works very quickly if using vinegar along with Alka-Seltzer, but may take a bit
longer if using water with a denture cleanser tablet.)
Simulating the explosive eruption of a stratovolcano.
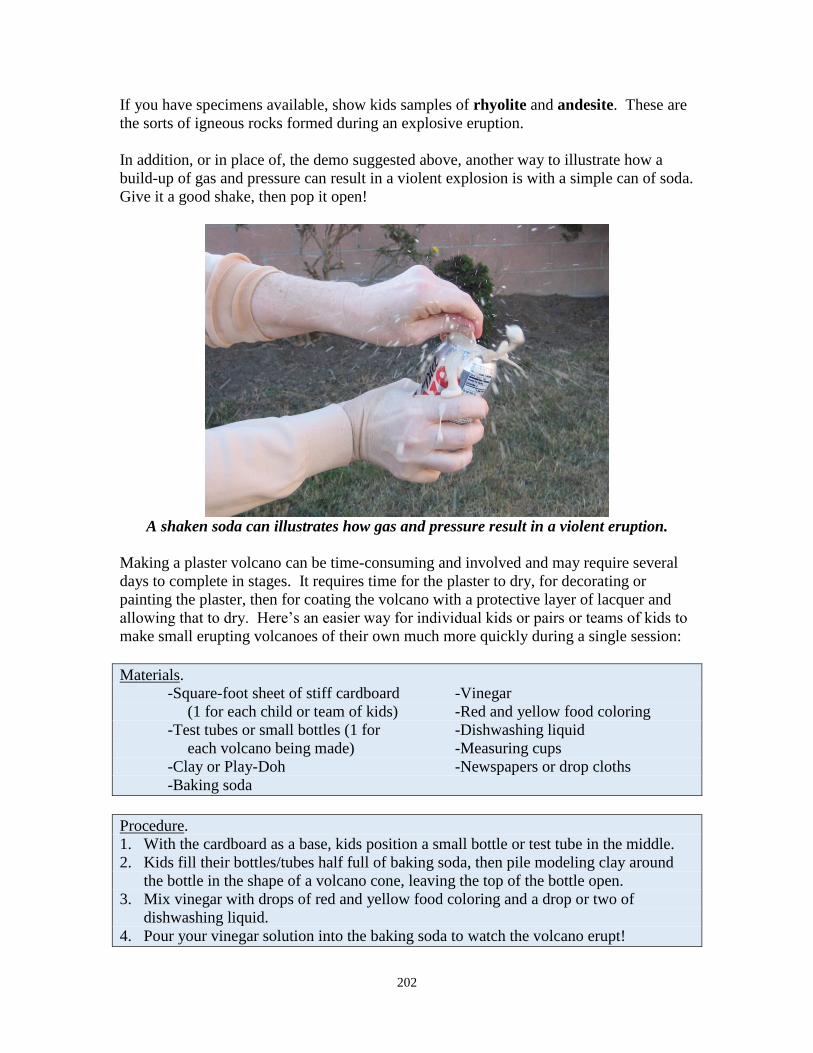
202
If you have specimens available, show kids samples of rhyolite and andesite. These are
the sorts of igneous rocks formed during an explosive eruption.
In addition, or in place of, the demo suggested above, another way to illustrate how a
build-up of gas and pressure can result in a violent explosion is with a simple can of soda.
Give it a good shake, then pop it open!
A shaken soda can illustrates how gas and pressure result in a violent eruption.
Making a plaster volcano can be time-consuming and involved and may require several
days to complete in stages. It requires time for the plaster to dry, for decorating or
painting the plaster, then for coating the volcano with a protective layer of lacquer and
allowing that to dry. Here’s an easier way for individual kids or pairs or teams of kids to
make small erupting volcanoes of their own much more quickly during a single session:
Materials.
-Square-foot sheet of stiff cardboard -Vinegar
(1 for each child or team of kids) -Red and yellow food coloring
-Test tubes or small bottles (1 for -Dishwashing liquid
each volcano being made) -Measuring cups
-Clay or Play-Doh -Newspapers or drop cloths
-Baking soda
Procedure.
1. With the cardboard as a base, kids position a small bottle or test tube in the middle.
2. Kids fill their bottles/tubes half full of baking soda, then pile modeling clay around
the bottle in the shape of a volcano cone, leaving the top of the bottle open.
3. Mix vinegar with drops of red and yellow food coloring and a drop or two of
dishwashing liquid.
4. Pour your vinegar solution into the baking soda to watch the volcano erupt!

203
Materials for erupting either a clay or plaster volcano are readily available.
For a wealth of information all about volcanoes, centered on the sorts of questions kids
ask, a great resource is the little paperback book 101 Questions About Volcanoes by John
Calderazzo (Western National Parks Association, 1994).
Want to share more about volcanoes with your club kids? Here’s one neat website:
www.swisseduc.ch/stromboli
204
Back-up page 10.3.c) Igneous rocks: Collecting igneous rocks.
Following are igneous rocks kids may be able to collect if they live in the right area of the
country, or that they may be able to purchase from rock dealers or to trade through the
mail via the AFMS Patricia Egolf Rock Pals program as a club project with kids in other
AFMS/FRA clubs who live in areas where igneous rocks are common:
Andesite is a gray to black volcanic rock with a high silica content that commonly
erupts as thick, sticky lava flows from stratovolcanoes, such as those in the Andes
Mountains, which gave this igneous rock its name.
Basalt is generally a hard, dense, heavy, dark gray or black rock formed from magma
that flowed out of a volcano or vent in thick streams or sheets. Basalt can come in a
variety of forms. A’a (pronounced “ah-ah”) is variety that cooled with a jagged,
rough and rubbly surface. Pahoehoe (pronounced “pah-hoi-hoi”) cooled with a
glassy smooth hummocky or ropy texture.
Gabbro is a dark (often black), coarse-grained, intrusive igneous rock chemically
equivalent to basalt but that cooled deep beneath the Earth’s surface, resulting in large
crystal structures within the rock that sparkle in the light.
Granite cooled from magma deep under the earth and as a result usually has large
mineral crystals all grown together. Depending on the type of granite, these minerals
might include quartz, feldspar, mica, olivine, etc.
Obsidian is a heavy, smooth, and shiny volcanic glass rich in iron and magnesium
that cooled very quickly during an eruption, so quickly that crystals didn’t have time
to grow, thus resulting in glass. Chemically, it’s often identical to pumice, which
makes it terrific to use for compare-and-contrast with pumice.
Pegmatite is a very coarse-grained igneous granite consisting of quartz, feldspar, and
mica and commonly also containing large gemstone crystals such as tourmaline,
aquamarine, and kunzite. Pegmatites form as a magma that cools quickly after
intruding as a dike or sill into other rock.
Pumice is formed from magma that shoots out during a particularly violent, explosive
eruption. Gases dissolved in liquid magma expand rapidly during the eruption,
making pumice extremely frothy (like froth created when you shake a soda can and
open it). Millions of tiny gas bubbles leave cavities shot through pumice, making it
extremely light—so light that it can often float on water!
Rhyolite is often a banded light-colored, fine-grained rock that formed when thick,
sticky lava flowed for relatively short distances.
Scoria is similar to basalt, but whereas basalt usually flows in a thick, fluid layer
from a volcano, scoria is shot into the air as a cinder during explosive eruption events.
Thus, like Swiss cheese, it’s peppered with holes from gas bubbles, making it much
lighter than basalt.
Tuff is volcanic ash and cinder that settles while still quite hot and becomes welded
and compacted into layers of coarse, often lightweight rock that’s usually white or
gray or cream in color.
Note: Kids can use this activity toward satisfying requirements for other badges, too: Rocks & Minerals
(Activity 1.4) and Collecting (Activity 5.1).

205
Back-up page 10.4.a) Sedimentary rocks: Making sedimentary rocks.
Sedimentary rocks start by processes of erosion that create boulders, cobbles, gravel,
sand, mud, or clay. These settle to the bottom of a basin (low-lying land or an ocean,
lake, or river valley) in layers. These layers eventually harden to become what are called
“clastic” sedimentary rocks: conglomerate, sandstone, or shale. Sedimentary rocks also
include those that precipitate out of water either through chemical action or evaporation,
such as limestone, gypsum, or halite. These are “nonclastic” sedimentary rocks, or
precipitates and evaporites. Via the following activities, kids can make artificial
sedimentary rocks, including evaporites, sandstone, conglomerate, and breccia.
A. Creating precipitates and evaporites. Some sedimentary rocks, such as limestone and
gypsum, chemically precipitated out of minerals in water or were left behind when water
in a lake or sea evaporated. You can demonstrate this process using water solutions
created with readily available materials.
Materials.
-Table salt, Epsom salt, or alum -Pebbles
-Water -Stick or pencil
-Measuring cups -String (cotton twine), cut into
-Spoon small lengths and dampened
-Cooking pan -Food coloring (optional)
-Glass jars
Procedure.
5. Heat water to a boil, then turn off the heat.
6. If using table salt, use ½-cup salt with ¾-cup hot water. With Epsom salt, use ½-cup
salt with 1-cup water. If using alum, use ¼-cup alum with 1-cup water.
7. Slowly add and stir salt into the hot water until it becomes a “saturated solution.” A
saturated solution contains the maximum amount of mineral that will dissolve in a
given amount of water. If all of your salt dissolves, the solution is not yet saturated,
and you should add a bit more salt. Stop when no more salt will dissolve.
8. Optional: You can make colorful crystals by adding a couple drops of food coloring.
9. Place a few pebbles in a glass jar and pour your solution over the pebbles. Or, tie a
piece of string to a stick or pencil. Dampen the string with your solution and roll it in
salt to provide “seed crystals.” Then pour your solution into a glass jar, and dip the
string into the solution. Leave it hanging there from the stick or pencil.
10. Set the jar in a spot where it won’t be disturbed. Check now and again the next few
days. As water evaporates, you’ll see crystals form on your pebbles or string.

206
Assign different salts to different kids. Once everyone’s water has evaporated, bring
their jars together to compare the different forms of crystals each produced.
You can also grow crystals using commercially available crystal-growing kits from
places like toy and craft stores, museum gift shops, or scientific supply houses. Two
reliable supply houses are Ward’s Natural Science (order their Earth Science and
Geology catalogs; phone 1-800-962-2660; web site www.wardsci.com), or Edmund’s
Scientific (phone 1-800-728-6999; web site www.scientificsonline.com).
Note: Kids can use this activity for satisfying requirements toward earning the Rocks & Minerals badge
simultaneously (Activity 1.6).
B. Creating sandstone. Sandstone forms when sand is buried and mineral-rich
groundwater flows through it. Minerals in groundwater act as cement to glue sand grains
together while overlying layers of sediment exert pressure to compact it. Your kids can
simulate sandstone formation with an easy activity to make their own artificial sandstone.
Materials.
-Paper cups -Pan or Pyrex measuring cup
-Sand (from beach or hardware store) -Spoon, dowel, or popsicle stick
-Epsom salt, sodium silicate solution -Food coloring (optional)
(also called water glass), or plaster -Paper towels
-Water
Procedure.
11. Fill the bottom of a paper cup with a layer of sand about an inch deep.
12. Make a solution of mineral-rich “groundwater” in a pan or Pyrex measuring cup by
dissolving Epsom salt in boiling hot water (keep stirring in salt until no more will
dissolve). An alternative to Epsom salt is a sodium silicate solution (water glass)
diluted with water. As an option, have different kids add drops of different food
colorings to their solutions to make sandstones of different tints.
13. Pour the “groundwater” into the sand and stir it all together with a spoon, dowel, or
popsicle stick to make sure all the sand is wet. However, you don’t want to make
soup, so don’t pour in too much water!
14. Lightly tap the bottom of the cup on a countertop or desktop to settle the sand.
15. Set the cup, uncovered and undisturbed, in a sunny, warm open spot to evaporate the
water. If you poured in too much solution, you may find you need to soak up excess
water with wadded paper towels after you’ve allowed the mixture to sit for awhile.
16. After about a week, the mixture should have completely dried. When it has, tear off
the paper cub, and you should end up with a rock that looks and feels similar to real
sandstone.
I’ve had mixed success with using these Epsom salt and water glass solutions. They took
a long time to dry, and Epsom salt often produced just a thin crust at the top of the sand.
Here’s an alternative that’s worked with greater consistency. Fill cups with an inch-thick

207
layer of sand and add a heaping tablespoon of plaster of Paris. Have kids add different
food colors to different cups, and then add water and mix the sand and plaster together.
This variation also tends to dry more quickly than Epsom salt or water glass solutions. In
yet another variation, use two parts white glue to one part water. Mix this together with
the sand in the bottom of your paper cup and allow to dry, then peel off the cup.
Kids will notice that the artificial sandstone is softer, crumblier, and not as heavy as the
real thing. Ask if they can think of why. (Answer: the real sandstone not only has been
cemented together by minerals in groundwater but also has been compacted when it was
buried beneath other rocks. The weight of overlying rocks and earth pressures squeezed
sand grains together as much as possible, forcing out air pockets and making the real
sandstone much denser than our artificial sandstone.)
If you have specimens of real sandstone, you might notice that it comes in different
colors, from yellow or brown hues to bright reds, grays, greens, etc. The color of
sandstone may have two explanations:
i) Sometimes, sand grains are made of different minerals, and the color of the sandstone
is caused by the color of the sand grains themselves. For instance, black sand
beaches in Hawaii are derived from the dark basaltic lavas. White sand dunes
covering an extensive area of New Mexico were derived from the mineral gypsum.
ii) Other times, the color of sandstone may be due to the color of the minerals deposited
around sand grains by the groundwater. For instance, some groundwater holds iron
oxide in it, and this will often cause a rusty color, “painting” the sandstone red.
Many times, the color of a piece of sandstone represents a combination of colors derived
from the sand grains themselves along with the color/s of any minerals that were
deposited around those sand grains to glue them together. You can demonstrate the
coloring effect of minerals in groundwater by having different kids add different colors of
food coloring to their ground water solutions. Have some add a couple drops of red, have
others add a couple drops of blue, and have others use no food coloring and compare the
resulting sandstones when all have dried.
C. Creating conglomerate and breccia. Conglomerate is a clastic sedimentary rock
formed by the cementing of rounded cobbles and pebbles that have been worn smooth
during transport in streams, rivers or ocean shores. The individual cobbles and pebbles
(or “clasts”) get compacted and cemented together in the same manner as sand grains in
sandstone. Breccia is basically the same thing as conglomerate except that its cobbles
and pebbles are sharp and angular, indicating that the rock fragments had not been
transported very far before being deposited and buried. To make a conglomerate or
breccia, you can follow a similar procedure as that used to make sandstone and just add
pebbles to your sand mixture:
Materials.
-Paper cups -Sodium silicate solution (water
-Sand (from beach or hardware store) glass) or plaster of Paris

208
-Gravel (both smooth and rough -Water
pebbles from a beach or river bed, or -Pan or Pyrex measuring cup
purchase bags of smooth and rough -Spoon, dowel, or popsicle stick
pebbles at aquarium supply stores or -Paper towels
hardware stores)
Procedure.
17. Fill the bottom of a paper cup with a layer of sand and gravel about an inch thick.
(Give half your kids rounded pebbles and the other half the rougher, angular pebbles.)
18. If using sodium silicate (water glass), make a solution of mineral-rich “groundwater”
in a pan or Pyrex measuring cup by diluting the sodium silicate in water.
19. Pour the “groundwater” into the sand and gravel mixture and stir it all together with a
spoon, dowel, or popsicle stick to make sure all the sand and gravel is wet. However,
you don’t want to make soup, so don’t pour in too much water!
20. Alternatively, if using plaster of Paris, put a heaping tablespoon of dry plaster into
each kid’s cup of sand and gravel and then add just enough water to be able to stir and
mix everything together. (Again, don’t make soup!)
21. Lightly tap the bottom of the cup on a countertop or desktop to settle the sand, gravel,
and water mixture.
22. Set the cup, uncovered and undisturbed, in a sunny, warm open spot to help the
drying process. If you poured too much solution, you may find you need to soak up
excess water with wadded paper towels after you’ve allowed the mixture to sit.
23. Once, the mixture has completely dried, tear off the paper cub, and you should end up
with a rock that looks and feels similar to the conglomerate or breccia, especially if
you break your artificial specimens in half.
Those kids who used the smooth, water-worn pebbles will have created artificial
conglomerate. Those who used the rougher pebbles with sharp edges, on the other hand,
will have created artificial breccia.
A natural deposit of conglomerate in an outcrop.

209
D. Creating a geologic column. The geologic column is the sequence of rocks that
document our Earth’s ancient history. For instance, a layer of limestone that’s capped by
a layer of shale that’s capped by a layer of sandstone might tell of a time when a sea
began to retreat. When the sea was deep and clear, it left a deposit of limy, fossil-filled
sediments that would eventually become limestone. But as the sea began to retreat and
shrink away from its original banks, the floor of the sea would grow muddier from dirt
washing in from the land and from swamps and estuaries advancing at the edge of the
sea. This mud would eventually become a layer of shale. As the land continued its
advance and the sea continued to retreat, a layer of sand from a beach might be deposited
over the older layers of limestone and shale and eventually become sandstone.
Geologists study sequences of sediments like this from all around the earth. By studying
sedimentary layers, they tease out stories each layer tells about Earth history, and they
assemble and organize various layers by time into the “geologic column,” which is like
assembling pages in a history book that progresses from ancient history to modern time.
You and your kids can create a small geologic column as follows:
Materials.
-Several cupfuls of sand and gravel -Food coloring (red, blue, green)
-Small seashells and thick leaves -Half-gallon cardboard milk carton
-Petroleum jelly -Bowl or large plastic cups
-Waxed paper -Spoon, dowel, or sticks
-Plaster of Paris -Apron and paper towels
-Water
Procedure.
1. Cut the top off a half-gallon rectangular cardboard milk carton.
2. Spread your seashells and leaves across a sheet of waxed paper and lightly coat one
side of each seashell and leaf with petroleum jelly.
3. Mix equal amounts of sand and plaster of Paris (about a half to one cup of each) in a
bowl or large cup.
4. Add a few drops of red food coloring and water and stir to a thick, smooth
consistency.
5. Pour this colored sand/plaster mixture into your milk carton.
6. Take some seashells and/or leaves and gently press them atop your sand/plaster layer
with the oiled sides up. (Don’t bury them completely into the sand/plaster layer; just
nudge them in a bit, with the oiled tops showing.)
7. Repeat this process using sand/plaster layers colored by different food colorings (with
some layers of no food coloring, just natural sand and plaster), placing oiled seashells
or leaves between each layer as you build up a multi-colored “layer cake” inside the
milk carton. For variation, in some of the layers you might mix in some pea-sized
gravel along with the sand and plaster. Continue adding different colored layers until
the milk carton is filled to the top.
8. Once the milk carton is full, let everything harden for a day or so.

210
9. When all is dry, peal off the milk carton to reveal your layers of sediment.
10. By tapping between layers with a hammer and chisel, you should be able to split your
sedimentary rock into layers to reveal fossils and their impressions in the form of the
seashells and leaves you dropped between layers.
Craft and crack open a layered geologic column!
E. Observing sedimentation in action. Rather than making artificial examples of
sedimentary rocks, send kids outdoors to observe sedimentation in action. For example,
they might see:
rocks chipping off and piling up at the base of a cliff;
a tree with roots growing into and cracking rocks and boulders at an outcrop (or
buckling and cracking a cement sidewalk in their neighborhood);
a gully cutting into a hillside and carrying away soil, sand, or gravel;
sand bars and cobbles piling up in bars along a river bank.
Have kids look around and bring back lists of what they see in the natural environment,
including these and any other examples.
F. Observing sedimentation in the lab. Kids can observe sedimentation in “the lab” with
the following activities:
Fill a large glass jar or water bottle one-third to one-half full of a mixture of
gravel, sand, and dirt. Pour in water to the top of the jar and screw on the cap.
Shake vigorously with up-and-down and circular motions. Then set the jar down
and allow the mixture to settle. If all goes well, the sediments should have settled
in clear layers by weight, with gravel on the bottom, mud on top, and sand in
between.
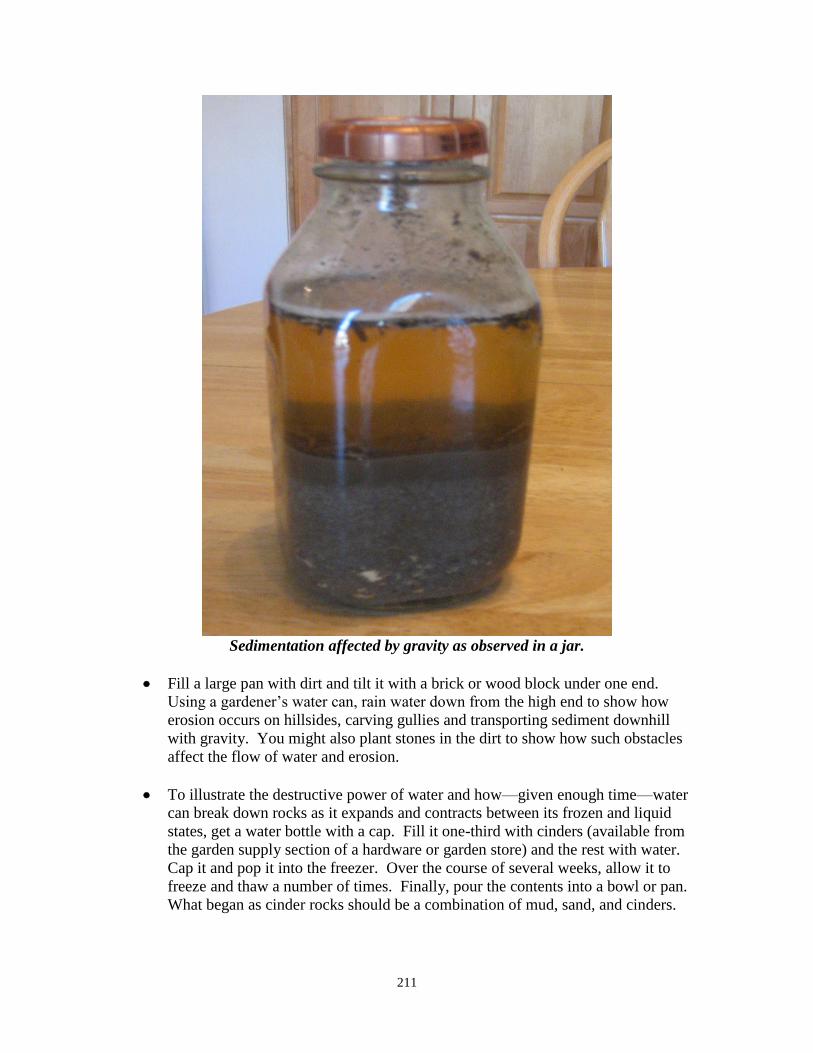
211
Sedimentation affected by gravity as observed in a jar.
Fill a large pan with dirt and tilt it with a brick or wood block under one end.
Using a gardener’s water can, rain water down from the high end to show how
erosion occurs on hillsides, carving gullies and transporting sediment downhill
with gravity. You might also plant stones in the dirt to show how such obstacles
affect the flow of water and erosion.
To illustrate the destructive power of water and how—given enough time—water
can break down rocks as it expands and contracts between its frozen and liquid
states, get a water bottle with a cap. Fill it one-third with cinders (available from
the garden supply section of a hardware or garden store) and the rest with water.
Cap it and pop it into the freezer. Over the course of several weeks, allow it to
freeze and thaw a number of times. Finally, pour the contents into a bowl or pan.
What began as cinder rocks should be a combination of mud, sand, and cinders.

212
Back-up page 10.4.b) Sedimentary rocks: Making fossils.
Fossils are the remains of past life that got buried within sediments that turned into
sedimentary rocks. This includes remains of animals (bones, teeth, shells) or plants
(impressions of leaves or stems or petrified wood) or even imprints such as footprints that
a dinosaur left on a beach or tubes that worms burrowed through mud.
Kids can make fossil imprints with clay and organic materials they bring in themselves,
such as flowers, leaves, ferns, chicken bones, or seashells. Here’s what they’ll need:
Materials.
-Self-hardening clay -Shells, leaves, chicken bones, etc.
-Paper plates or sheets of waxed paper -Vegetable oil or talcum powder
-Rolling pin (optional) -Paint (optional)
Procedure.
Give each child a sheet of waxed paper or a paper plate and a lump of self-hardening
clay.
Either with their palms or with a rolling pin, have kids flatten their clay into a thin,
even layer about a half-inch thick on the waxed paper or paper plate.
Have your kids press a flower, leaf, fern, chicken bone, or seashell gently into the
clay and lift it out. (With seashells that have deep ridges or indentations, they first
may need to coat the shell lightly with vegetable oil or talcum powder to be able to
lift it out of the sticky clay with ease.)
Let the clay dry and harden, and each of your kids will have a fossil impression.
For a realistic touch with impressions of ferns or other leaves, students can paint the
impression with black, brown, or gray paint after the clay has dried. Most plant
fossils are carbonized films, and the paint will replicate the film of carbon left on the
impression.
Note: For other, somewhat more involved projects to make fossils using clay and plaster, see the back-up
page for Activity 3.2. You can use any of these activities to help kids satisfy requirements toward earning
both their Earth Processes and Fossils badges simultaneously.
213
Back-up page 10.4.c) Sedimentary rocks: Collecting sedimentary rocks.
Following are sedimentary rocks kids may be able to collect if they live in the right area
of the country, or that they may be able to purchase from rock dealers or to trade through
the mail via the AFMS Patricia Egolf Rock Pals program as a club project with kids in
other AFMS/FRA clubs who live in areas where sedimentary rocks are common:
Breccia is a clastic sedimentary rock composed of cobble- and pebble-sized rock
fragments that are sharp and angular, indicating that the rock fragments had not been
transported very far before being deposited and buried.
Coal originated from compressed vegetation, often derived from swamps, that was
buried rapidly in thick masses. High in combustible carbon content, coal-burning
facilities are the largest source for generation of electricity.
Conglomerate is a clastic sedimentary rock formed by the cementing of rounded
cobbles and pebbles that have been worn smooth during transport in streams, rivers or
ocean shores.
Coquina is similar to conglomerate, but rather than being formed by rounded cobbles
and pebbles, it’s formed by masses of broken seashells, coral fragments, and other
biologically-derived materials that are poorly cemented together.
Diatomite, a soft chalk-like sedimentary rock, is composed primarily of silica from
the fossilized shells of billions and billions of microscopic diatoms, which are algal-
like organisms at the base of the ocean’s food chain. It has many industrial uses as a
filter (you’ll see it in hardware stores with pool supplies), a mild abrasive, and as
filler (as in house paints); under high magnification, the individual diatom shells look
like snowflakes.
Gypsum is a chemical sedimentary rock precipitated from highly saturated salt
waters that left behind thick deposits of sulfate hemihydrate. Gypsum is the main
ingredient in plaster of Paris and is also used in drywall, so you may well be
surrounded by gypsum at this very moment.
Limestone is a type of non-clastic, chemical sedimentary rock also called calcium
carbonate because of its high content of calcium. It generally forms as a limy ooze
precipitated on the ocean floor and includes shells from marine animals.
Sandstone is a clastic sedimentary rock formed from the cementing of sand-sized
grains, often from minerals in groundwater, along with pressure.
Shale is one of the most common sedimentary rocks. It’s composed of silt, mud, or
clay that has been compacted to form a solid rock.
Travertine is a form of calcium carbonate (like limestone) deposited through the
action of water, such as mineral-rich springs. It’s often soft and beautifully banded,
making it a favored sculpting stone. It’s also sometimes called onyx and alabaster.
Note: Kids can use this activity toward satisfying requirements for other badges, too: Rocks & Minerals
(Activity 1.4) and Collecting (Activity 5.1).

214
Back-up page 10.5.a) Metamorphic rocks: Making a metamorphic rock with clay.
Metamorphic rocks are formed when pre-existing rocks (referred to as “parent rocks”) are
altered by extreme heat and/or pressure. This often creates a whole new sort of rock with
a new form and mineral structure.
To illustrate how pressure along with heat can change a rock into something new, you
can do a demonstration with clay that Lowell Foster of the Ventura Gem and Mineral
Society of California has shared:
Materials.
-Bars of clay of various colors: red, blue, yellow, white, etc. (Caution: Use clays
that may be baked hard in an oven. Be careful in selecting your clay because
not all clays are suitable for baking, and some synthetic varieties might
actually catch on fire! That’s because some synthetics are made from
petroleum products. Most clays available in craft stores indicate on their labels
whether or not they may be fire-hardened)
-Baking tray or pan
-Toaster oven or your home oven
Procedure.
1. If kids twist and press together a bar of blue clay with a bar of red clay with a bar of
white clay, the pressure and the twisting make a new clay with a swirl pattern.
(Before they start twisting, have them break off and set aside small pieces of their
original clay for comparison at the end of this activity.)
2. The more you twist and mix, the more the pattern and color will change, with blue
and red combining to purple in places, or red and white turning pink.
3. If you now add heat to the equation by baking your new clay, you’ll get a hard
ceramic-like rock with a swirl pattern. You can bake specimens in your own home
oven or in a small, portable toaster oven if it’s capable of baking at 265° F for 30
minutes or so.
Making a metamorphic rock

215
The tough new rock that comes out of the oven will be very different in color, pattern,
and texture from the three individual soft pieces of clay your kids began with. In a
similar manner, metamorphic rocks end up changed in color, pattern, and texture from
their parent rocks by the combined effects of pressure and heat.
Have your kids compare-and-contrast pieces of their original red, blue, and white soft,
wet clay alongside the lump of twisted, mixed, and hard-baked porcelain.
To conclude this activity, you can use thin strips of clay of many different colors stacked
atop one another and apply pressure from the sides and/or twist and turn to make wavy
patterns, or press holes into yellow clay and insert small balls or squares of red or blue
clay to see what happens to their shapes when you then press down. Give clay to your
kids, and let them get creative!

216
Back-up page 10.5.b) Metamorphic rocks: Collecting metamorphic rocks.
Following are metamorphic rocks kids may be able to collect if they live in the right area
of the country, or that they may be able to purchase from rock dealers or to trade through
the mail via the AFMS Patricia Egolf Rock Pals program as a club project with kids in
other AFMS/FRA clubs who live in areas where metamorphic rocks are common:
Gneiss (pronounced “nice”) is a “high grade” metamorphic rock derived from various
sources (e.g., granite, shale, conglomerate, etc.) that were subjected to intense heat
and pressure, heat so high that the rock nearly melted to a magma, resulting in
minerals that drew together in distinct banding patterns under the high pressure.
Greenstone is a fine-grained massive metamorphic rock with a dull luster that comes
in varying shades of green; in California, it’s associated with gold-bearing veins in
the Mother Lode mining country.
Marble is limestone that has been altered through metamorphic action. Soft, easily
carved, semi-translucent, and capable of taking a polish, it’s often used by sculptors
and builders. Marble comes in various forms, depending on the elements contained
in its parent rock. For instance, limestone marble contains mostly calcium carbonate
and may have interesting veining (or “marbling”) with colors due to different mineral
impurities. Dolomite marble had a parent rock of dolomite, which is similar to
limestone, but with magnesium in addition to calcite as a constituent mineral. And
mariposite (named after Mariposa, California, where it occurs in abundance) is a
form of dolomite marble with a high green chromium muscovite mica content that
gives it a distinctive green marbling.
Quartzite is a massive, medium-grained metamorphic rock with a sugary texture
often derived from sedimentary sandstone.
Serpentine is a fairly soft metamorphic rock that may be waxy to the touch and has
apple-green to black, mottled coloring that can look like serpent scales. It’s the
official California State Rock.
Slate is a “low grade” metamorphic rock (meaning it was subjected to only low heat
and pressure) formed from sedimentary shale; it splits, or cleaves, in flat surfaces, and
has been used as roofing shingles and blackboards.
Soapstone consists mostly of an impure, massive variety of talc. Soft, with a pearly
sheen, it’s a popular sculpting material, but has many other uses, such as in the
manufacture of laboratory tabletops, firebricks, and electrical apparatus due to its
resistance to heat, electricity, and acids.
Note: Kids can use this activity toward satisfying requirements for other badges, too: Rocks & Minerals
(Activity 1.4) and/or Collecting (Activity 5.1).

217
Back-up page 10.6: Making 3D models of geologic features related to plate tectonics.
It can be hard to fully understand some earth processes without visualizing them. The
United States Geological Survey has stepped in to help in a hands-on way. In addition to
the USGS, quite a number of other folks and associations have come up with designs for
crafting cut-and-fold 3D paper models to illustrate geologic features related to plate
tectonics, including volcanoes, seafloor spreading and subduction, earthquake features
and different types of faults (normal, reverse or thrust, strike-slip or lateral, transform,
oblique, etc.), landforms and structural geology (synclines and anticlines, unconformities,
etc.), and much more.
The U.S. Geological Survey has conveniently compiled several of these together on a
single website that describes each model then provides a direct link to the source where
you can download and print masters for free to make copies for your club’s kids. They
note that the models exhibit better structure and stability when printed on cardstock.
Here’s the link:
https://www.usgs.gov/media/files/3d-paper-models-0
The models offered include:
Earthquake effects
Paper Model Showing Motion on the San Andreas Fault
How to construct 7 paper models that describe faulting of the Earth
This resource provides cut-and-fold models you can use for other badges. For instance,
you’ll find models illustrating the different crystal shapes of minerals for the Rocks &
Minerals badge (Activity 1.5), models of a variety of fossils and dinosaurs that can be
used when working on the Fossils badge (Activities 3.2 and 3.7), and models of the Earth
and other planets that can be used when working on the Earth in Space badge (Activity
11.1). Cutting out, folding, and gluing or taping engages kids in a hands-on way that
provides a lot of fun while crafting a finished product that educates in the process!
In addition, to illustrate the effects of earth pressures that create synclines and anticlines,
you can stack different colors of clay and then squeeze the stack between blocks of wood
for a fun hands-on demonstration of one earth process:
Use clay to show how earth pressures can bend and buckle sediments.

218
Back-up page 10.7: Earthquakes.
Some parts of our continents are stable and the earth seldom moves under our feet. But at
places like my home state of California along the edge of two major tectonic plates (the
North American plate and the Pacific plate), the earth is anything but stable! Earthquakes
are a daily occurrence somewhere in the state. Most are small-scale and go undetected
except by monitoring stations with very sensitive seismometers. But others can level
entire cities. Here are some activities you can select from to do with your kids to explore
earthquakes and their effects. Or, come up with earthquake activities of your own!
Modeling liquefaction. When an earthquake hits an area that is sandy or covered
with fine-grained soils or landfill, the effects can be devastating. To show why, fill a
bowl with sand and set rocks on top. Flood the bowl with water then, very gently but
rapidly, tap the edges of the bowl repeatedly. You’ll see the rocks sink out of sight.
Similarly, during an earthquake sand particles become suspended in water. The result
is a lack of strength in the ground that allows buildings to subside and collapse.
Modeling effects on tall buildings versus short buildings. Embed flexible metal
rods of varying lengths into a section of 2X4 wood—for instance, a 6-inch rod, a 12-
inch rod, and a 36-inch rod. Top each rod with a bolt or other heavy object. Then
start shaking the 2X4. (You can put wheels on the bottoms of the 2X4s to better
rock-and-roll.) Notice the effects on the tallest rod versus the shortest rod. Similar
effects happen with high-rise buildings versus low-rise homes. Ask you kids:
“Which do you think will sustain the most damage during an earthquake?”
Illustrating earthquake effects with rods of different lengths.

219
As another way to model effects of earthquakes on buildings, make a pan of jello and
loosely construct a house out of toothpicks or ice cream sticks. Embed the sides into
the jello and give it a vigorous shake. Similarly, make little buildings and set them
atop a piece of flat granite or embed them in hard clay and give it a shake. What is
the effect upon buildings of the different forms of substrate? As the “wise man” says
in the Bible, “build your home upon a rock.” See why with this simple
demonstration!
Making models of different sorts of faults. Construct 3D paper models of faults
and other earthquake structures by going to the following website to get templates:
https://www.usgs.gov/media/files/3d-paper-models-0. You also can make models
with thin stacked layers of play dough of different colors. Slice it at an angle and
slide two blocks past one another or push together to see the results as one block rides
up over the other. What are the underlying geologic forces and structures that cause
earthquakes of different sorts and what are the effects?
Monitoring and reporting earthquakes. With the Internet, everyone can help
advance the science of earthquake monitoring and reporting. For instance, the U.S.
Geological Survey (USGS) allows folks to go online to share info about the effects of
any earthquake they experience to help create a map of shaking intensities and
damage. Check it out on the USGS web pages: http://earthquake.usgs.gov. Click on
the “Did You Feel It?” tab. On it, you’ll be asked to rate earthquakes by answering
such question as whether only dishes rattled or if heavy furniture overturned.
Major earthquakes throughout history. Have kids select and research major
earthquakes such as the San Francisco earthquake of 1906, the New Madrid
earthquakes of 1811-1812, the Lisbon, Portugal earthquake of 1755, the Sumatra
earthquake of 2004, or the Kobe, Japan earthquake of 1995. What caused each and
what were the effects? How did they compare against other earthquakes? Can those
areas expect still more earthquakes any time soon? If so, why?
The infamous San Andreas Fault slicing through California’s Carrizo Plain.

220
Back-up page 10.8: WILD CARD: Do your own thing!!
While I’ve tried to provide a wide-ranging variety of activities to choose from, no one
manual can “do it all.” There are many other great ideas out there that clubs have found
to match their local interests and resources.
Plus, the Youth Leaders of some clubs have expressed concern that some of the activities
included in the manual may be a bit beyond the abilities of their youngest members.
Here’s your chance to tailor-make activities for the youngest among us.
If you and your fellow club members have an idea for learning about earth processes that
isn’t included in this manual, go for it! When you send in your badge request, just let me
know what you did as a WILD CARD activity. Who knows? Maybe your idea will be
included in the next edition of the Badge Manual!

221
11. Earth in Space
While we usually keep our eyes on the ground when rockhounding, geology isn’t only
underfoot. Our Earth is like a little blue marble floating among other marbles and big
gassy balls, accompanied by metallic BBs and splinters of ice in the form of meteors and
comets. On a clear night, look to the sky, and you might see streaks left by meteors
burning up in our atmosphere. Sometimes, though, they make it to the earth’s surface
where we can collect them and hold a piece of space in our hands. This unit will teach
you about such visitors from space.
Activity 11.1: Modeling the solar system.
Check out a book or explore websites to learn about Earth and its fellow planets. Then
use materials like marbles, balls, and similar round items to make a model of our solar
system. You can also make paper or cardstock cut-and-fold models of the Earth and
other planets. Or draw a colorful poster of our solar system on long paper or a big sheet
of poster board.
Activity 11.2: Learning about visitors from space.
In addition to planets, our solar system is filled with “cosmic debris” in the form of
meteors, an asteroid belt between Mars and Jupiter, and the Oort cloud of comets. Read
about our solar system and learn the definitions of a.) meteorite, b.) tektite, c.) asteroid,
and d.) comet. If someone in your club has a collection of meteorites or tektites, invite
them to show-and-tell so that you can hold a space rock in your hand.
Activity 11.3: Effects of meteorites and famous craters.
Most meteors are tiny and burn up in our atmosphere, creating bright streaks in the night
sky that we often call “shooting stars.” But some bigger meteors make it to the Earth’s
surface. If they’re big enough, they create craters and shoot out glassy fragments called
tektites when they melt rock from our earth’s crust on impact. Make a crater by dropping
or tossing marbles or ball bearings into flour, wet sand, or mud. Find pictures of meteor
craters in a book or on a web site. Then pick one crater and learn everything you can
about it and write a report on it for your club newsletter.
Activity 11.4: More fun measuring impact cratering.
This activity is an extension of 11.3, where you were able to learn the effects of
meteorites via impact craters. Activity 11.4 provides a more detailed exercise by which
you can see and measure the effects of multiple impacts and how they might be used to
date the surfaces of planets and moons.
Activity 11.5: Collecting meteorites and tektites.
If you happen to be lucky enough to live near a known “strewn field” where a meteor
exploded and left fragments over a wide area and you have club members with metal
detectors, organize a field trip to search for a meteorite. However, meteorites are very
rare and hard to identify in the field. So if you want to add a meteorite or tektite to your
rock collection, your best bet will be to purchase one at a rock shop, gem show, museum
gift shop, or through a meteorite dealer on the web.
222
Activity 11.6: Collecting meteorite dust.
While large meteorites are rare and hard to find, a constant “rain” of meteorite dust falls
through our atmosphere. By some estimates, 30,000 to 90,000 tons of such dust falls
every year! Work with your youth leader to develop a way to collect such dust to
examine under a hand lens or a microscope.
Activity 11.7: WILD CARD: Do your own thing!
Do you have an idea for learning about Earth in space that isn’t included in this manual?
If so, do your own thing! When your Youth Leader sends in your badge request, let us
know what you did as a WILD CARD activity. Who knows? Maybe your idea will be
included in the next edition of the Badge Manual!

223
11. Earth in Space
□ 11.1 Modeling the solar system
□ 11.2 Learning about visitors from space
□ 11.3 Effects of meteorites and famous craters
□ 11.4 Collecting meteorites and tektites
□ 11.5 Collecting meteorite dust
□ 11.6 More fun measuring impact cratering.
□ 11.7 WILD CARD: Do your own thing!
To earn your Earth in Space badge, you need to complete at least 3 of the 7 activities.
Check off all the activities you’ve completed. When you have earned your badge, sign
below and have your FRA leader sign and forward this sheet to the AFMS Juniors
Program chair.
___________________________________
Date completed
_________________________________ ___________________________________
My signature Youth leader’s signature
_______________________________________________________________________
Name of my club
Leader’s preferred mailing address for
receiving badge:
____________________________________
____________________________________
____________________________________

224
Back-up page 11.1: Modeling the solar system.
When I was a kid, modeling our solar system was easy. We just memorized this little
ditty: “My very earnest mother just served us nine pizzas.” The first letter of each word
represents the first letter of each planet in order from the sun: Mercury, Venus, Earth,
Mars, Jupiter, Saturn, Uranus, Neptune, Pluto.
Since that simple time, we’ve filled our solar system with an asteroid belt between Mars
and Jupiter, an Ort cloud of comets surrounding our solar system along with a Kuiper belt
and Centaurs, and a host of interesting moons we’ve begun exploring via spacecraft.
Plus, most scientists have kicked poor Pluto out of the family of planets, demoting it to a
mere “dwarf planet”! Others have added a planet or two in the form of icy bodies like
Xena, larger than Pluto, that have been found in the outer reaches of our solar system, or
dwarf planet Ceres in the asteroid belt.
As I prepared the 2016 update to our Badge Manual, newspapers announced a potential
ninth planet to replace Pluto, a hypothetical planet 5,000 times bigger than Pluto (or
nearly as large as Neptune) that is so far out in the solar system it would take 10,000-
20,000 years to circle the sun! So far, it is just being called “Planet 9” but stay tuned!
We’ll see if this “predicted” planet proves real. Meanwhile, use this as an example of
how science is always changing and incorporating new theories, data, and information.
Work with kids to create a model of our solar system or to draw and color it on a long
sheet of paper or poster board. The easiest is a model of the planets. You might choose
to go with a 3-dimensional model using marbles and balls of varying sizes to show how
big different planets are relative to one another (from tiny, pea-sized Pluto to giant
basket-ball sized Jupiter), and you might include a lamp to represent the sun. If you
spread planets across a room, the heat emitted by a light bulb can illustrate how the sun’s
warmth that nurtures us on Earth makes for broiling conditions on Mercury yet barely
reaches poor, maligned Pluto. You can also purchase models or posters of the solar
system online or at teacher supply stores or in natural history museum gift shops. The
California Institute of Technology provides a page on their website with neat activities
for modeling the solar system: https://www.jpl.nasa.gov/edu/teach/activity/modeling-
the-structure-of-the-solar-system/
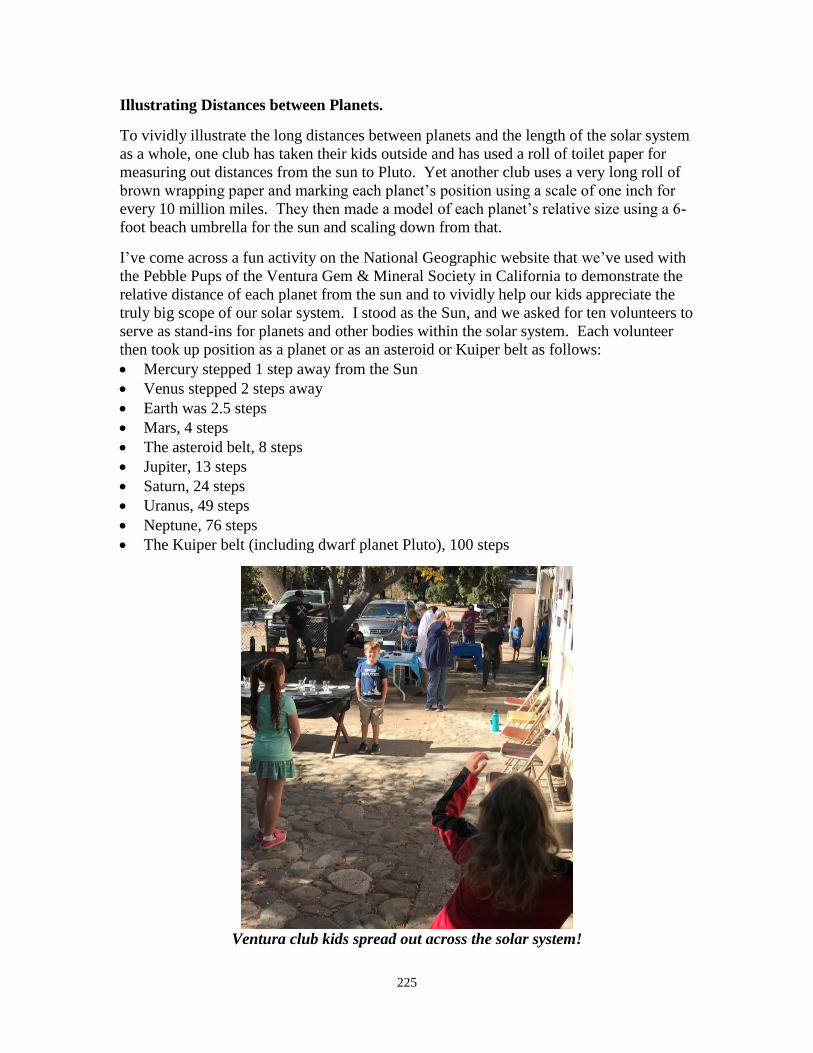
225
Illustrating Distances between Planets.
To vividly illustrate the long distances between planets and the length of the solar system
as a whole, one club has taken their kids outside and has used a roll of toilet paper for
measuring out distances from the sun to Pluto. Yet another club uses a very long roll of
brown wrapping paper and marking each planet’s position using a scale of one inch for
every 10 million miles. They then made a model of each planet’s relative size using a 6-
foot beach umbrella for the sun and scaling down from that.
I’ve come across a fun activity on the National Geographic website that we’ve used with
the Pebble Pups of the Ventura Gem & Mineral Society in California to demonstrate the
relative distance of each planet from the sun and to vividly help our kids appreciate the
truly big scope of our solar system. I stood as the Sun, and we asked for ten volunteers to
serve as stand-ins for planets and other bodies within the solar system. Each volunteer
then took up position as a planet or as an asteroid or Kuiper belt as follows:
Mercury stepped 1 step away from the Sun
Venus stepped 2 steps away
Earth was 2.5 steps
Mars, 4 steps
The asteroid belt, 8 steps
Jupiter, 13 steps
Saturn, 24 steps
Uranus, 49 steps
Neptune, 76 steps
The Kuiper belt (including dwarf planet Pluto), 100 steps
Ventura club kids spread out across the solar system!
226
In the exercise above, our Sun would be less than 1.3 centimeters (half an inch) in
diameter! This exercise vividly illustrated and impressed upon kids the relative distance
between planets and across our solar system as a whole.
Teaching the Names of our Solar System’s Planets.
Before setting kids loose to make models or posters of the solar system, a fun activity to
teach the names of our planets is via flashcards. You can make your own set of
flashcards by cutting planet photos from old astronomy or National Geographic
magazines and pasting them onto cardboard. Or you can go to web sites to download and
print images of each planet onto cardstock and print or write the name of the planet on
the back. See http://pds.jpl.nasa.gov/planets/ for terrific NASA photos. Images of
planets have certainly come a long, long way since I was a kid! However you choose to
go, flashcards are one great way to show kids the amazingly varied planets residing
within our solar system.
Wherefore Art Thou, Pluto?
To return to the fate of Pluto, the International Astronomical Union’s 2006 revised
definition of a planet demoted Pluto with this resolution: “(1) A ‘planet is a celestial
body that (a) is in orbit around the Sun, (b) has sufficient mass for its self-gravity to
overcome rigid body forces so that it assumes a hydrostatic equilibrium (nearly round)
shape, and (c) has cleared the neighborhood around its orbit. (2) A ‘dwarf planet’ is a
celestial body that (a) is in orbit around the Sun, (b) has sufficient mass for its self-
gravity to overcome rigid body forces so that it assumes a hydrostatic equilibrium (nearly
round) shape, (c) has not cleared the neighborhood around its orbit, and (d) is not a
satellite. (3) All other objects, except satellites, orbiting the Sun shall be referred to
collectively as ‘Small Solar System Bodies.’”
Use Pluto as an example for talking about how we define a planet versus a moon, a dwarf
planet, and small solar system bodies such as asteroids, comets, or mere celestial debris.
Kids should learn that science isn’t always fixed or definitive. Definitions change, and
scientists often debate and challenge one another and don’t always come to a consensus
as new discoveries come to light. In fact, some scientists still insist that Pluto is, indeed,
a true planet in every sense of the word! Teach your club’s kids to always question and
to always insist on facts to support conclusions.

227
Back-up page 11.2: Learning about visitors from space.
Here are some basic definitions for four visitors from space:
meteorite: a particle from space (rocky or metallic, or both) that
reaches the surface of Earth without burning up in the atmosphere.
(While still in space, it’s referred to as a meteor.) Cordelia Tomasino
(Michigan) points to a NASA web site where you enter “Edible Rocks”
to get a ready-made activity teaching kids the characteristics of different
sorts of meteorites using common candy bars:
http://www.nasa.gov/centers/jpl/education/ediblerocks.html
tektite: a glassy body that forms when a meteor or asteroid crashes into
Earth, melting rocks below it during an explosive impact and blasting
them into the atmosphere or even outer space. On their return to earth,
they cool and harden during their fall into round, oblong, tear- or pear-
shaped glassy rocks often pock-marked with tiny pits.
asteroid: celestial bodies larger than meteors but smaller than planets,
most often found in our solar system between the orbits of Mars and
Jupiter. It’s believed they represent debris formed from colliding planets
or material that failed to form into planets during the creation of our
solar system. They sometimes cross earth’s orbit, and some are believed
to have caused spectacular explosions, such as the one that exterminated
the dinosaurs 66 million years ago.
comet: a celestial body of ice, dust, and other compounds that circles the
sun in a looping, eccentric orbit (sort of an egg-shaped orbit as opposed
to the more uniform circular orbits of planets). As its orbit nears the sun,
particles burn off and form a long tail pointing away from the sun.
To help your kids learn more about these visitors from space, you might direct them to
books and websites like these and others:
Carman, Collecting Meteorites: Starting in Your Own Back Yard (1995), 78 pages.
Although focused on Australia, this is a great, handy introduction for the beginner
anywhere on earth.
McSween, Meteorites and Their Parent Planets, Second Edition (1999), 310 pages.
Written by a past-president of the Meteoritical Society, this is a somewhat more
technical book describing the nature of meteorites, where they come from, and how
they get to Earth.
Norton, Rocks From Space: Meteorites and Meteorite Hunters, Second Edition
(1998), 447 pages. This is considered one of the best all-round meteorite books for a
general audience. It is a must on the shelf of anyone who gets seriously interested.

228
Notkin, Meteorite Hunting: How to Find Treasures from Space (2011), 84 pages.
Written by the host of the one-time TV series Meteorite Men, this brief guide is filled
with color photos and info written in accessible language.
Smith, The Meteor Crater Story (1996), 79 pages. The story of one meteor crater
near Winslow, Arizona, this book ends with a handy appendix listing known impact
sites throughout the world.
Smith, Russell, Almeida, Meteorites: The Story of Our Solar System, Second Edition
(2019), 128 pages. An approachable and nicely illustrated overview from Firefly
Books.
Meteorite Times (www.meteorite-times.com). A free monthly online magazine.
The UCLA Meteorite Gallery. http://meteorites.ucla.edu. UCLA is home to one of
the largest meteorite collections in the U.S., and they’ve set up a website to showcase
a gallery they’ve opened to the public. The website includes a wonderful pamphlet
all about meteorites that you can download and print for free.
Just a few places for learning more about meteorites.

229
Back-up page 11.3: Effects of meteorites and famous craters.
While most meteors burn up on hitting the atmosphere, some meteorite, asteroid, and
comet impacts have had profound effects. For instance, it is now accepted that an
immense impact off Mexico’s Yucatan Peninsula 66 million years ago was responsible
for the extinction of the dinosaurs and many other creatures. Also, it has been postulated
that a comet exploding over North America did in Ice Age mammals like woolly
mammoths, ground sloths, and saber-toothed cats as recently as 10,000 years ago. In a
remote spot of Siberia in 1908, an enormous explosion known as “the Tunguska event”
flattened trees in every direction over 770 square miles and could be heard over a 500
mile radius. (That’s 800,000 square miles!) On a smaller scale, a couple of cars and a
mailbox have been hit by small meteorites, and one even crashed through an Alabama
woman’s home to bounce off her hip, leaving a nasty bruise and a very surprised woman.
The most visible and obvious effect of a large meteorite strike is a crater on the ground.
As an activity to show kids how craters form, have them create small craters by
dropping or tossing marbles, ball bearings, golf balls, rocks, or other objects into
wet sand or mud or a tub of dry white flour whose surface has been dusted with dry
powdered paint or a powder like cocoa or cinnamon. See if it makes a difference in
crater size and shape by how hard the object impacts, whether it drops straight or from an
angle, or whether you use a large, small, heavy, or light object.
Creating meteorite craters in flour dusted with cocoa, straight down & from an angle

230
As a follow up to this activity, particularly with older kids in your group, the web site
www.lpl.arizona.edu/impacteffects lets you calculate the destructive power of meteorites
of different sizes and trajectories.
Assign craters to kids in your group to research all they can about them. Have them
report back to the group and/or write articles for the club newsletter. Some include:
Campo del Cielo (Argentina)
Chicxulub (Yucatan, Mexico)
Henbury Craters (Australia)
Manicouagan Crater (Canada)
Meteor Crater (Arizona, USA)
Monturaqui Crater (Chile)
Odessa Crater (Texas, USA)
Sikhote-Alin strewnfield (Siberia)
Whitecourt Crater (Canada)
Wolf Creek Crater (Australia)
Meteor Crater in Arizona is one of the most famous meteor craters on Earth.
This is a view I saw from my airplane window during a cross-country flight.
Have kids pick a crater from this list, or let them read books or surf web sites to find
craters of their own to explore. For instance, they may want to find out about a crater
closest to their own homes. Dean Smith’s brief book The Meteor Crater Story ends with
a handy appendix listing known impact sites throughout the world and O. Richard
Norton’s Rocks From Space has a similar list in an appendix. In addition to books like
these, here’s a web site you might direct kids toward to find more famous meteor craters:
http://geology.com/meteor-impact-craters.shtml. Using satellite images, this site includes
a Meteor Crater Map of the world that allows you to click on a highlighted spot and zoom
in with the “+” button for close-up views of 50 selected craters. The Planetary and Space
Science Centre of the University of New Brunswick (Canada) manages the Earth Impact
Database listing all known craters and crater fields. Finally, Wikipedia has an article all
about impact craters, as well as a table of known craters on Earth. You can access these
at the following web addresses:
http://en.wikipedia.org/wiki/Impact_crater
http://en.wikipedia.org/wiki/List_of_impact_craters_on_Earth
Here’s another neat activity to illustrate effects—or non-effects—of meteors. Some
meteors have enough heft and acceleration to punch right through our atmosphere and to

231
land on Earth, where they become known as meteorites. But many meteors get deflected
by Earth’s atmosphere and go bouncing off back into space.
Mike Havstad of the Conejo Gem & Mineral Club in California has devised a nifty tool
to illustrate this. Using a piece of aluminum angle trim as a channel, he has attached a
small square of light cardstock midway down the channel. This cardstock serves as a
stand-in for Earth’s atmosphere. Drop a ping pong ball down the channel, and it gets
deflected out and away by the “atmosphere.” But drop a heftier golf ball, and it punches
right through the “atmosphere” of the cardstock to fly all the way down to Earth.
Mike Havstad’s “Earth atmosphere simulator”
Note: Kids who write a report about a famous meteor crater can use this toward satisfying requirement
toward earning their Communication badge simultaneously (Activity 7.2).
232
Back-up page 11.4: More fun measuring impact cratering.
Activity 11.3 explores effects of meteorites with craters made by dropping marbles or
other objects into tubs of dusted flour, sand, or mud. This new activity provides a more
detailed exercise by which you can see and measure effects of multiple impacts and how
they might be used as a relative means of dating surfaces of planets and moons.
Via plate tectonics, Earth continually recycles its crust. Plus, we have an atmosphere
with dynamic weather that creates erosion and moves sediments around. That
atmosphere is relatively thick, causing smaller meteors to burn up before they might hit
the surface. For all these reasons, we don’t see as many craters on the surface of Earth as
we see on other planets and moons within our solar system, such as Mercury, Mars, or
our own Moon. Basically, on planets and moons with little-to-no atmosphere and that are
tectonically inactive, the older the planet, the more meteorite craters it will contain. And
older craters will be degraded by subsequent crater formation. The number of craters
might also tell us, on an otherwise heavily cratered planet, if an area experienced volcanic
activity and flooding, creating one spot less heavily cratered than elsewhere.
To illustrate these points, fill two large petri dishes or similar containers with very fine-
grained sand, much finer than typical beach sand (check at a pet shop with aquarium
supplies). Place a dish on the floor on top of a drop cloth or newspaper. Fill an
eyedropper with water from a cup. Hold the eyedropper at chest level and hold a piece of
fine mesh window screen about a foot beneath the eyedropper and above the dish of sand.
Now, one drop at a time, drip just a couple drops from the eyedropper. The mesh screen
will break the drops into smaller droplets. Let these fall onto the surface of the sand.
Move the screen around so that drops keep hitting dry screen to break into droplets. You
should see several craters formed atop your sand. Pick up and set your dish aside. Then
repeat with a second dish of sand, but this time rain several drops.
Count the number of craters in each dish. Which has more? Look at the condition of the
craters in each dish. You should notice in the dish that was rained on longer, not only are
there more craters, there also are more craters that overlap and degrade one another.
Similarly, one way scientists date surfaces of extraterrestrial bodies is by looking at the
number of craters and the conditions of craters. Take your first dish and simulate an
outpouring of volcanic lava by pouring a little sand to cover over the craters at the top of
the dish. Return the dish to the floor and rain a couple drops, then compare the
appearance of the top of the dish to the bottom. What was the effect of your simulated
volcanic activity?
This exercise is derived from a 1998 NASA publication entitled Planetary Geology: A
Teacher’s Guide with Activities in Physical and Earth Sciences. For this and other
helpful resources for exploring space, go to the following link on the NASA website:
http://www.nasa.gov/audience/foreducators/index.html.

233
Back-up page 11.5: Collecting meteorites and tektites.
Given their extraterrestrial origins and rarity, meteorites have a lot of appeal. Once bitten
by the meteorite bug, it’s easy to get hooked into seeking a specimen of your own.
However, this is no easy task, both because of the rarity of meteorites (for those seeking
to collect one in the field) and their price (for those seeking to purchase one). If you’re
fortunate to live near a “strewn field” where a meteorite is known to have exploded into
hundreds or thousands of fragments (as near Odessa, Texas), your chances of collecting
one on your own are greatly increased. O.R. Norton’s book Rocks from Space includes
lists of strewn fields, and the Meteoritical Bulletin Database is an online resource listing
all known and classified meteorite falls. But getting to a strewn field is the easy part.
You then have to be able to pick out a rock that may look like every other rock on the
ground. Because some meteorites have a high nickel-iron content, collectors use metal
detectors or magnets attached to strings or a walking stick. One famed meteorite hunter,
H. H. Nininger, used to drive his jeep through the desert towing a magnetic rake!
Still, even experienced meteorite hunters consider it a lucky day when they make a find.
Thus, your most effective way of digging up a meteorite for your collection is with the
“silver pick,” or reaching for your wallet to buy one from a dealer. The most reasonably
priced pieces for a child’s budget are Nantan meteorites from China and small, black,
pear-shaped tektites from Southeast Asia. I’ve seen these at almost every show I’ve
attended. (Caution, though! I’ve heard that artificial tektites are being produced in China
from black glass and entered into the gem and mineral market as the real deal. No fair!)
Encourage kids to check with dealers at rock and gem shows, rock shops, and museum
gift stores, or to write or email for catalogs from such companies as:
The Universe Collection (www.universecollection.com, Bethany Sciences, P.O. Box
3726-T, New Haven, CT 06525-0726, phone 203-393-3395). Write or call for their
annual catalog, but be warned: this is a high-end enterprise, with prices to match.
Most specimens are priced by the gram, and meteorites tend to be very, very heavy!
Meteorite Central (www.meteoritecentral.com). Log onto this web site and get a
password to join “The Meteorite Mailing List” to join 1,700 members with an interest
in collecting meteorites who exchange info to learn about and purchase meteorites.
The Meteorite Exchange Network (www.meteorite.com). This site has info about
meteorites and the community of meteorite enthusiasts and dealers. In fact, it links to
dozens of dealers, web sites, and eBay auctions and eBay stores.
Aerolite Meteorites, LLC (www.aerolite.org). Geoffrey Notkin, host of the one-time
TV series Meteorite Men, started this company and website, which has meteorites,
meteorite photos, expedition reports, science articles, and more.
Club Space Rock (www.meteorites.ning.com). An online “meteorite community.”
Note: Kids can use this activity toward satisfying requirements for the Collecting badge simultaneously
(Activity 5.1). Those who seek meteorites in the field can apply this toward earning the Field Trips badge
(Activity 8.3). Kids who join “Club Space Rock” can use that toward earning the Rocking on the
Computer badge (Activity 15.6).

234
Back-up page 11.6: Collecting meteorite dust.
Kids who really get into meteorites will itch to collect their own. However, they run into
two problems. First, even professional meteorite hunters have a hard time finding and
collecting meteorites in the field. They are rare and elusive and hard to identify by
scanning the ground. Second, although you can sometimes find small Nantan meteorites
from China and little black tektites from Southeast Asia at reasonable prices at gem
shows and rock shops, most meteorites are priced, well, out of this world.
How to get a meteorite into a kid’s hands? Think small! A website tells how to collect
“micrometeorites”: www.pbs.org/wgbh/nova/teachers/activities/3111_origins.html. Also,
check out 2 books by Jon Larsen: In Search of Star Dust: Amazing Micrometeorites &
Their Terrestrial Imposters (2017) and On the Trail of Stardust: The Guide to Finding
Micrometeorites: Tools, Techniques, and Identification (2019).
Most meteors burn up in our atmosphere, but as they do, they leave a trail of tiny dust
grains. That dust is constantly raining down. By one estimate, over 40,000 tons of
extraterrestrial material falls on Earth each year! The web site I’ve referenced gives
instructions on how to collect such dust, or micrometeorites. Essentially, you need to
create a “meteorite trap.” Suggestions include: keeping a bucket under a down-spout
during a rainstorm to collect dust in runoff water from a roof; placing a water-filled
bucket on a rooftop or other elevated spot for 4 weeks (checking periodically to refill the
water as it evaporates); and laying a large plastic sheet (a shower curtain) in an open spot
or at the bottom of a wading pool and collecting residue from the sheet every two days
for a little over a week. Another technique involves placing a strong magnet in a paper
cup and tapping the cup on the ground around downspouts. Black specks will attach
themselves to the bottom of the cup until you remove the magnet and tap them loose over
a sheet of white paper. Examine the flecks under a microscope, searching for ones that
are spherical and pitted.
With all these techniques, most of what you’ll collect will be ordinary earthbound dirt.
You’ll need to collect, concentrate, and dry the residue, sort out dead insects, leaves, etc.,
then use magnets to separate potential meteorite dust from earth dust. Viewed under a
microscope, meteorite dust is often rounded and may have small surface pits. Perhaps the
most amusing or quirky incidence regarding meteorite dust comes from Norway, where
Ragnar Martinsen, sitting in the outhouse of his cabin, suddenly heard an explosion and
later found tiny grains of rock in aluminum pans he had left in his yard. Scientists
reported these to be pieces of only the 14th recorded meteorite landing in Norway.
Unlike old lucky Ragnar, at best you’re not likely to get more than a piece the size of a
sand grain or smaller. But a meteorite is a meteorite, and how many people can claim to
have collected one on their own?! This fun activity also vividly illustrates how the earth
we’re on is part of the larger universe, floating through space with cosmic debris that
sometimes pays a visit, no matter how large or small the size.
Note: Kids can use this activity toward satisfying requirements for the Collecting badge simultaneously
(Activity 5.1), as well as The World in Miniature badge (Activity 16.3).
235
Back-up page 11.7: WILD CARD: Do your own thing!!
Coming Up with Ideas of Your Own
While I’ve tried to provide a wide-ranging variety of activities to choose from, no one
manual can “do it all.” There are many other great ideas out there that clubs have found
to match their local interests and resources.
Plus, the Youth Leaders of some clubs have expressed concern that some activities in this
manual may be beyond the abilities of their youngest members. Here’s your chance to
tailor-make activities for the youngest-among-us.
If you and your fellow club members have an idea for learning about Earth in Space that
isn’t included in this manual, go for it! When you send in your badge request, just let me
know what you did as a WILD CARD activity. Who knows? Maybe your idea will be
included in the next edition of the Badge Manual!
Exploring Resources from NASA
In line with trying other ideas, our National Aeronautics and Space Administration
(NASA) is a spectacular resource for all manner of activities regarding Earth in Space.
Check them out at http://spaceplace.nasa.gov

236
12. Gold Panning & Prospecting
Gold has been highly valued throughout human history as a precious metal. This unit
will teach you why. You can learn about gold as a mineral, its uses and history, and even
how to become a prospector to find a gold flake or nugget of your own. In addition to
gold, search for other valuables! Modern-day prospectors use metal detectors to find not
just gold but also coins, artifacts, and other metal objects.
Activity 12.1: Gold as a mineral.
Buy a book on minerals or pick one up at the library to learn about the properties of gold
as a mineral: its color, streak, cleavage, fracture, luster, hardness, crystal shape, and
weight or specific gravity. Compare all these to properties of pyrite, or “fool’s gold.”
Activity 12.2: Uses of gold.
Write a report about why gold is considered valuable and the many ways it’s used.
Publish your report in your club newsletter or present what you’ve learned at a club
meeting.
Activity 12.3: Gold throughout history.
Gold has been valued, sought, and fought over throughout history. Learn about a
historical event involving gold and either write a report about it for your club newsletter
or prepare a presentation or poster board about it for your fellow club members.
Activity 12.4: Gold resources in your own state or region.
Where has gold been found near you? From your library, from adult members of your
club or society, from online sources, or from your state geological survey, learn and then
report to your fellow club members about areas closest to you where gold has been found.
Show locations on a map. Gold is rare, so the closest spot may be in a neighboring state
or region.
Activity 12.5: Field trip to a gold mine.
If there are any active gold mines within a convenient drive of your hometown, work
with your youth leader to see if they would allow a group visit. Then go and see for
yourself how gold is mined.
Activity 12.6: Panning for gold.
If there are streams in your area that are known to hold gold, arrange a field trip and pan
for some gold of your own. If the nearest gold streams are too far away, you can still pan
for gold in your own backyard. Some companies sell bags of “gold concentrate,” or
gravel from gold-bearing streams that you can buy and pan through in a tub of water. See
if you can add a gold flake—or even a nugget!—to your rock collection.
Activity 12.7: Metal detecting for gold, coins, and other artifacts.
Learn how to use a metal detector, then take one to a beach, park, playground or other
area where many people have been to see if you can dig up any lost coins, jewelry or

237
other objects. First, though, learn about the “Code of Ethics” for metal detecting and
respect all laws and property rights whenever you go treasure hunting.
Activity 12.8: WILD CARD: Do your own thing!
Do you have an idea for learning about gold panning and prospecting that isn’t included
in this manual? If so, do your own thing! When your Youth Leader sends in your badge
request, let us know what you did as a WILD CARD activity. Who knows? Maybe your
idea will be included in the next edition of the Badge Manual!

238
12. Gold Panning & Prospecting
□ 12.1 Gold as a mineral
□ 12.2 Uses of gold
□ 12.3 Gold throughout history
□ 12.4 Gold resources in your own state or region
□ 12.5 Field trip to a gold mine
□ 12.6 Panning for gold
□ 12.7 Metal detecting for gold, coins, and other artifacts
□ 12.8 WILD CARD: Do your own thing!
To earn your Gold Panning & Prospecting badge, you need to complete at least 3 of the 8
activities. Check off all the activities you’ve completed. When you have earned your
badge, sign below and have your FRA leader sign and forward this sheet to the AFMS
Juniors Program chair.
___________________________________
Date completed
_________________________________ ___________________________________
My signature Youth leader’s signature
_______________________________________________________________________
Name of my club
Leader’s preferred mailing address for
receiving badge:
____________________________________
____________________________________
____________________________________
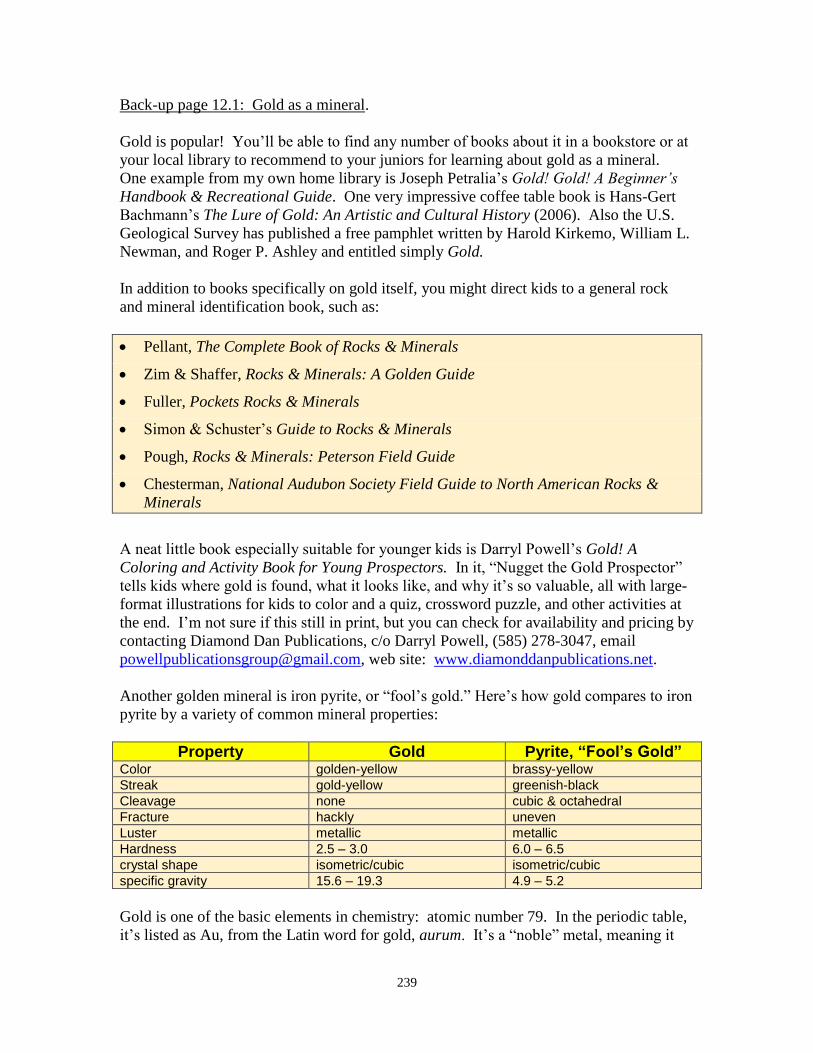
239
Back-up page 12.1: Gold as a mineral.
Gold is popular! You’ll be able to find any number of books about it in a bookstore or at
your local library to recommend to your juniors for learning about gold as a mineral.
One example from my own home library is Joseph Petralia’s Gold! Gold! A Beginner’s
Handbook & Recreational Guide. One very impressive coffee table book is Hans-Gert
Bachmann’s The Lure of Gold: An Artistic and Cultural History (2006). Also the U.S.
Geological Survey has published a free pamphlet written by Harold Kirkemo, William L.
Newman, and Roger P. Ashley and entitled simply Gold.
In addition to books specifically on gold itself, you might direct kids to a general rock
and mineral identification book, such as:
Pellant, The Complete Book of Rocks & Minerals
Zim & Shaffer, Rocks & Minerals: A Golden Guide
Fuller, Pockets Rocks & Minerals
Simon & Schuster’s Guide to Rocks & Minerals
Pough, Rocks & Minerals: Peterson Field Guide
Chesterman, National Audubon Society Field Guide to North American Rocks &
Minerals
A neat little book especially suitable for younger kids is Darryl Powell’s Gold! A
Coloring and Activity Book for Young Prospectors. In it, “Nugget the Gold Prospector”
tells kids where gold is found, what it looks like, and why it’s so valuable, all with large-
format illustrations for kids to color and a quiz, crossword puzzle, and other activities at
the end. I’m not sure if this still in print, but you can check for availability and pricing by
contacting Diamond Dan Publications, c/o Darryl Powell, (585) 278-3047, email
[email protected], web site: www.diamonddanpublications.net.
Another golden mineral is iron pyrite, or “fool’s gold.” Here’s how gold compares to iron
pyrite by a variety of common mineral properties:
Property Gold Pyrite, “Fool’s Gold” Color golden-yellow brassy-yellow
Streak gold-yellow greenish-black
Cleavage none cubic & octahedral
Fracture hackly uneven
Luster metallic metallic
Hardness 2.5 – 3.0 6.0 – 6.5
crystal shape isometric/cubic isometric/cubic
specific gravity 15.6 – 19.3 4.9 – 5.2
Gold is one of the basic elements in chemistry: atomic number 79. In the periodic table,
it’s listed as Au, from the Latin word for gold, aurum. It’s a “noble” metal, meaning it

240
doesn’t oxidize under normal conditions. By contrast, iron pyrite is a compound (iron
disulfide, or FeS2) made from the elements iron and sulfur. In the air, pyrite tends to
decompose over time, reacting with oxygen and water to form sulfuric acid. While gold
has many uses (see Back-up page 2.2), pyrite has just a few, such as the manufacture of
sulfuric acid and sulfur dioxide, as an aid in the recovery of other metals (iron, gold,
copper, cobalt, nickel, etc.), or to make inexpensive costume jewelry.
The “Golden Bear Nugget” of the California Federation of
Mineralogical Societies is an example of crystallized gold.

241
Back-up page 12.2: Uses of gold.
Gold has a pleasing heft to it and a brilliant shiny color that doesn’t tarnish, corrode, or
rust. It’s a rare mineral (known as a “precious mineral”), and that rarity along with its
shiny beauty gives it value. It’s also a soft mineral. The most malleable and ductile of
our metals, it can be beaten into sheets as thin as a few microns thick, and it can be pulled
into thin wire. Because it’s so easy to work with, it has many uses, which further adds to
its value. It also conducts heat and electricity very well. Have kids learn why gold is
considered valuable and explore its many uses. Then encourage them to publish their
findings in the club newsletter or give a presentation at a club meeting.
A good resource for this assignment is the web site of the Minerals Education Coalition,
or MEC (http://mineralseducationcoalition.org). MEC is a nonprofit organization that
provides educational programs to teach kids about the importance of natural resources,
how we use them in everyday life, and where they come from.
To give you a start, here’s a partial listing of some of gold’s many uses:
economics (gold is melted and formed into bricks or ingots and held in gold reserves
by many nations, like the supply the U.S. keeps at the Fort Knox Bullion Depository)
jewelry (this is where most gold ends up)
medallions and coins (some medallions used as awards—such as Olympic Gold
Medals or the Nobel Prize—are crafted from gold, and although we no longer do so,
for thousands of years many countries used precious metals such as gold and silver in
making their coins; the U.S. stopped using gold in common coinage in 1933)
architecture (you’ll see “gold leaf” on the domes of many state capitol buildings)
dentistry (nearly 50 pounds of gold are used in dental work every day for procedures
such as crowning teeth or for permanent bridges)
medicine (a radioactive isotope of gold is used in some cancer treatments, and another
variety has been used to treat rheumatoid arthritis)
scientific and electronic instruments (gold has a pure, stable nature and seldom
oxidizes or combines with other elements; due to this, as well as a good capacity for
conducting electricity, gold is a key part of semiconductor circuits; it’s also used as a
coating in some catalytic converters and in cell phones)
the space program (for electronic components; to reflect heat off satellites and space
capsules)
the electro-plating industry (as an electrolyte)
photography (gold toners shift black-and-white tones to brown or blue, and on sepia-
tone prints, gold toners produce red tones)
glass and acrylic coating (gold-coated acrylic windows are used in the cockpit of
some airplanes to keep windows clear of frost and fogging and to help maintain
temperatures in the cabin; it also coats visors in astronaut helmets to protect against
solar radiation; and the world’s largest telescopes have mirrors coated with pure gold)
Note: Kids who give a presentation, write an article, or craft a tri-fold poster about gold can use this
activity toward earning their Communication badge simultaneously (Activities 7.1, 7.2, and 7.3).
242
Back-up page 12.3: Gold throughout history.
Gold has been valued, sought, and fought over throughout history. Help your kids pick a
specific event to research where gold had in important historical role. Then have them
share what they’ve learned with one another, give a presentation to the club, and/or write
a brief report about it for the club newsletter.
The Minerals Education Coalition (MEC) has terrific educational materials on gold,
including a “Mining Legends Activity,” on their web site that you can download for free.
Go to http://mineralseducationcoalition.org and give this web site a thorough exploration
for all that it includes about all things gold related—and more!
Here are a few historic events you may wish to pick from to assign a topic, or you can let
kids explore and find an event on their own:
In the 14th century B.C., Tutankhamun (“King Tut”) was pharaoh of Egypt, and when
Howard Carter and Lord Carnarvon discovered his tomb in 1922, they found
spectacular gold items that have come to be known as the “Treasures of
Tutankhamun.” Have kids find out what’s included among those treasures.
Have you heard the story of the Golden Fleece of Jason and the Argonauts in Greek
mythology? The story is believed to have its roots in the practice of using sheepskin
to recover gold dust from river sands feeding into the Black Sea in 1200 BC.
In 300 BC, the Greeks and Jews of ancient Alexandria started the practice of
alchemy, or the effort to turn common metals like lead into precious gold. The quest
continued and intensified—to no avail—with Medieval alchemists.
The lure of gold is said to have been one cause of the Second Punic Wars between the
Roman Empire, which had few gold resources, and Carthage, which was expanding
its colonial empire in Hispania, or gold-rich Spain, around 200 BC.
In 1511, King Ferdinand of Spain launched massive expeditions of Conquistadores to
bring back all the gold to be found in the New World; most was obtained by
plundering Aztec and Inca treasuries of Mexico and Peru. It also led to quests for the
mythical country of El Dorado, where the streets were said to be lined in gold.
A gold rush started in North Carolina in 1803, sparked in part by the 1799 discovery
of a 17-pound nugget by a 12-year-old boy in Cabarrus County. Before the discovery
of gold in California, North Carolina had become known as the “Golden State,” and
prior to 1829, all the gold coined at the Philadelphia mint was from North Carolina.
The Forty-Niner Gold Rush that brought so many adventurers to California and
eventually led to California statehood started when flakes of gold were found in 1848
during construction of a sawmill for John Sutter along a river near Sacramento.

243
Sutter’s Mill offers one great subject for kids writing about the history of gold!
The impact of gold discoveries in the Black Hills of South Dakota in the 1860s and
1870s led, among other things, to Custer’s Last Stand.
Another gold rush was sparked with discoveries in Cripple Creek, Colorado, in 1892.
The discovery of gold by two prospectors in the Klondike of Canada’s Yukon
Territory sparked a rush into the cold regions of Western Canada and Alaska in 1898.
A couple of neat books geared to kids are Kalman’s Life in the Old West: The Gold Rush
and Diamond Dan Publications’ Gold! – An Activity Book for Young Prospectors.
Note: Kids who give a presentation or write an article can use this activity toward earning their
Communication badge simultaneously (Activities 7.1 and 7.2).
244
Back-up page 12.4: Gold resources in your own state or region.
Help kids learn about gold resources that may be found in them-thar hills of their own
home state or region. Use the U.S. Geological Survey web site (www.usgs.gov) to guide
you to information about mineral resources in your state.
Check bookstores and outdoor or camping supply stores for guides and maps to gold
regions in your state. In bookstores, these are often found in sections selling field guides
or regional books. In camping supply stores, these are often found in the maps and
publications section. While most guides focus on gold-rich states like Alaska, Nevada, or
California, you can find guides for many other states and regions. Wherever there’s gold,
there seems to be a book about it. For instance, here’s a partial selection:
Koschmann, Principal Gold Producing Districts of Alabama, Georgia, Virginia,
Pennsylvania, and Tennessee
Wendt, Where to Prospect for Gold in Alaska without Getting Shot!
Preston, Arizona Gold and Gem Maps
Toole, Where to Find Gold in California
Voynick, Colorado Gold: From Pike’s Peak Rush to the Present
Dwyer, Lake Superior Gold: An Amateur’s Guide to Prospecting
Stevens, Memoirs of a Maine Gold Hunter and other books by Stevens
Klein, Where to Find Gold and Gems in Nevada
Preston, Nevada Gold and Gems Maps: Then & Now
Wilson, Gold Panning in New Mexico: From Map Reading to Staking the Claim
Koschmann, Principal Gold Producing District of New Mexico
Knapp & Glass, Gold Mining in North Carolina: A Bicentennial History
Gerrick, Gold Prospecting in Ohio
Beydler, Virginia Gold Mines: The Golden Piedmont
Battien, Gold Seekers: A 200 Year History of Mining in Washington, Idaho, Montana
and Lower British Columbia
Joseph Petralia’s Gold! Gold! A Beginner’s Handbook & Recreational Guide: How &
Where to Prospect for Gold talks about the history of gold and prospecting methods, and
then includes a chapter that gives a general idea as to where gold has been found in the
Southeast, Rocky Mountain states, and the West.
In addition, look in back issues of Rock & Gem magazine. They publish an annual issue
devoted to gold, and for a long time, they’ve been including as a regular feature maps to
specific gold-panning locations at various accessible spots across the country. Check
around for publications like these, whether in your local library, bookstores, camping
supply stores, or your state geological survey or division of mines.
Note: Kids who give a presentation on where gold can be found can use this activity toward earning their
Communication badge simultaneously (Activities 7.1).
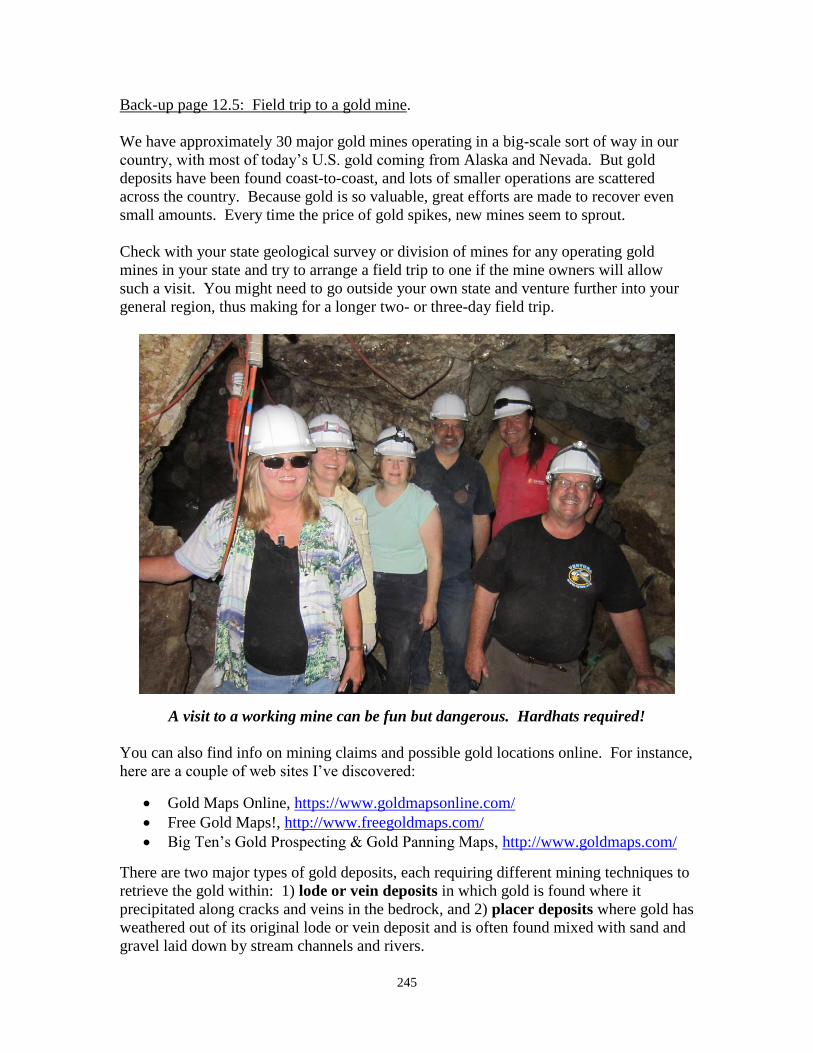
245
Back-up page 12.5: Field trip to a gold mine.
We have approximately 30 major gold mines operating in a big-scale sort of way in our
country, with most of today’s U.S. gold coming from Alaska and Nevada. But gold
deposits have been found coast-to-coast, and lots of smaller operations are scattered
across the country. Because gold is so valuable, great efforts are made to recover even
small amounts. Every time the price of gold spikes, new mines seem to sprout.
Check with your state geological survey or division of mines for any operating gold
mines in your state and try to arrange a field trip to one if the mine owners will allow
such a visit. You might need to go outside your own state and venture further into your
general region, thus making for a longer two- or three-day field trip.
A visit to a working mine can be fun but dangerous. Hardhats required!
You can also find info on mining claims and possible gold locations online. For instance,
here are a couple of web sites I’ve discovered:
Gold Maps Online, https://www.goldmapsonline.com/
Free Gold Maps!, http://www.freegoldmaps.com/
Big Ten’s Gold Prospecting & Gold Panning Maps, http://www.goldmaps.com/
There are two major types of gold deposits, each requiring different mining techniques to
retrieve the gold within: 1) lode or vein deposits in which gold is found where it
precipitated along cracks and veins in the bedrock, and 2) placer deposits where gold has
weathered out of its original lode or vein deposit and is often found mixed with sand and
gravel laid down by stream channels and rivers.

246
In a lode deposit, mining involves blasting ore and crushing huge amounts of it to recover
small amounts of gold. The crushed ore is heated or “smelted” to melt and release the
gold, which is usually poured into bar shapes. In placer deposits, huge quantities of sand
and gravel must be sorted and screened with the help of running water to retrieve gold
nuggets. Gold is very heavy, with a density of 16 to 18 as compared to a density of about
2.5 of “waste rock” (the sand and gravel). This difference in density means that miners
can use gravity to help separate gold from gravel by devices that agitate the rocks and
collect the gold. Such devices include hand-held gold pans, rockers, and sluice boxes.
Lode gold in quartz and a nugget of placer gold panned from a riverbed.
Gold is also recovered using various chemical procedures, such as amalgamation (where
mercury, or quicksilver, bonds with gold from ore) or the cyanide process (where
potassium cyanide is used to dissolve and recover gold from low-grade ore). It is
probably best not to use those particular procedures with your club’s kids!
Note: Kids can use this activity toward satisfying requirements toward earning their Field Trip badge
simultaneously (Activity 8.3).

247
Back-up page 12.6: Panning for gold.
See suggestions provided in Back-up page 12.4 on how to locate gold fields nearest you
to arrange a panning trip with your club’s juniors. You might need to go outside your
own state and venture further into your general region, thus making for a longer, more
ambitious two-, three-, or even four-day field trip adventure.
A reminder: always obtain permission from landowners before undertaking any
field trip, especially when prospecting for a valuable resource like gold, and check to
make sure the spot you’re panning or prospecting is not under a claim. Don’t be a
“claim-jumper”!
Panning for gold is one of the ultimate rockhounding adventures!
However, no matter how hard you look for a good local gold-panning locality, the
unfortunate reality is that not every state is rich in gold resources. If the search for a
gold-panning site within reasonable proximity for your kids comes up dry, a good
alternative is to set up tubs of water on a driveway or backyard patio and provide bags of
gold concentrate for your junior members.
You can order such concentrate from many places through the web. In a search engine,
just enter “gold panning concentrate,” and a host of commercial sites pop up, many from
California and Alaska. Prices range from “practice” bags at 2 pounds for around $15.00
to super-deluxe 20-pound bags at over $400. I’ve even seen one “guaranteed success”
bag going for as much as $2,500. Yikes! Holy yikes! (For your club’s first attempt, I
recommend the practice bags…) Here are just two examples of the many sources you
can find on the web to purchase gold panning concentrate, along with gold pans and the
other equipment you’ll need:

248
Minerals Education Coalition (http://mineralseducationcoalition.org). Click on the
tab for the “MEC Store.” They sell a “Gold Panning Kit” with gold concentrate, pan,
instructions, etc., which was going for just $15 when I last checked, as well as
individual pans and individual bags of concentrate at reasonable prices.
Gold Fever Prospecting (http://store.goldfeverprospecting.com/goldpanning.html).
Get a variety of equipment, books, and concentrates from the California Motherlode.
Note: companies and offers come and go. When I prepared the Third Edition of this
AFMS/FRA Badge Manual, I listed several sources. Half of those are no longer to be
found on the web, and others displayed totally different offerings (and prices) to be had.
So be prepared to do quite a bit of web surfing for new companies and new sources of
supplies as they come and go.
No gold panning sites nearby? Buy concentrate for “backyard” panning fun!
Some companies selling concentrate also sell equipment or provide a “beginner’s
package” with concentrate, a pan, and instructions. Panning equipment usually includes
a pan, a small shovel or scoop to scoop up river gravel and sediment, a hand lens (loupe),
a magnet, an eyedropper or “sniffer bottle” (for picking up gold flecks), tweezers, a small
gold vial, and a long screwdriver or other rod to dig sediment out of crevices. You might
also use large mesh screens to assist in sifting out bigger pebbles and rocks before
pouring the sediment into your pan.
Basically, gold panning involves combining sand and gravel with water in a gold pan and
swirling and shaking so that the heavier grains of gold settle to the bottom while lighter
sand and gravel is removed from the pan.
249
Here are just a few of many good resource books about gold panning and prospecting:
Butler, Recreational Gold Prospecting for Fun and Profit (1998)
Koch, Gold Prospecting and Placer Deposits: Finding Gold Made Simpler (2013)
Lagal, The New Gold Panning is Easy: Prospecting and Treasure Hunting (2003)
Walsh, Treasure Hunter’s Handbook (2014)
Check out these books and more to help your kids go gold prospecting!
Joan Stoker of the Indian Mounds Rock & Mineral Club in Michigan has shared the
following list of terms you will likely hear from experienced gold panners:
Nugget: a truly large chunk of waterworn gold (every prospector’s dream!)
Picker: a piece smaller than a nugget but big enough to pick out with fingers
Flake: a piece so small that you’ll need tweezers to pick it up
Speck: a piece so small you’ll need an eyedropper or sniffer bottle to retrieve it
Fleck: basically, a flat speck
Four: gold that is so small, it looks like powder
Note: Kids who go into the field to pan can use this activity toward satisfying requirements for their Field
Trip badge simultaneously (Activity 8.3), as well as the Collecting badge (5.1).

250
Back-up page 12.7: Metal detecting for gold, coins, and other artifacts.
People lose things all the time.
Whether at a beach, park, playground, school yard, fairgrounds, sports stadium, or
anywhere else where many people congregate, coins fall out of pockets, rings or earrings
fall off, and other metal objects mysteriously disappear and fall to the ground to be buried
in the sand or soil. Also, around especially old houses and fence lines people sometimes
had trash heaps in the days before garbage trucks rolled up on a weekly basis.
These are all great areas for kids to go out equipped with metal detectors to find man-
made treasures. And they may want to go out to known gold fields for natural treasures.
Using a metal detector, Australian Kevin Hillier found a 61-pound gold nugget buried in
the soil that sold for over a million dollars!
Metal detectors help us pick up all sorts of buried treasures!
Before kids pick up a metal detector, they should learn the “Code of Ethics” for detecting
and respect all laws and property rights. A code has been developed by The Task Force
for Metal Detecting Rights Foundation. Among other things, it states: “I will follow all
laws relating to metal detecting on federal and state lands as well as any laws pertaining
to the local areas I may be searching; I will respect private property and attain the
owner’s permission before metal detecting; I will recover targets in a way that will not
damage or kill vegetation and I will fill in holes completely, leaving the area looking as it
was; I will use common courtesy and common sense at all times.” In just a few short
months after I learned of this organization and code, however, their web site seemed to
have disappeared. I did find similar codes on other sites, though, by googling “metal
detecting code of ethics.” Following are just a few of the many sites that popped up:

251
https://www.seriousdetecting.com/metal-detecting-code-of-ethics-laws/
https://www.metaldetector.com/learn/buying-guide-articles/getting-started/code-
of-ethics
http://www.metaldetectingintheusa.com/metal-detecting-code.html
A number of great websites introduce folks to metal detecting. Here are just two:
http://gometaldetecting.com
http://metaldetectingworld.com/how_to_metal_detect_p1.shtml
Just how expensive are metal detectors? I’ve found many models in the range of $400-
$750. Those with more power and features tend to be in the $1,000 range, and
professional grade models can be $2,000 or more.
But don’t despair! I did find one model that seems perfect for kids. The “Bounty
Hunter® Junior Metal Detector” was listed (as of August 2020) at just $69.99 and was on
sale at Cabela’s for nearly half that. So reasonably priced models do exist—you just need
to shop around! A good website to help you is Metal Detector Reviews, a site devoted to
listing, comparing, and reviewing metal detectors of all grades and brands:
http://metaldetectorreviews.net.
A nice reference book for kids to read is Liza Gardner Walsh’s Treasure Hunter’s
Handbook (2014). A good reference for adults is Garret Romaine’s The Modern
Rockhounding and Prospecting Guide (2014), which has a solid chapter on detecting
supplemented with many good website recommendations. This book covers the whole
rockhounding hobby, not just detecting, so it’s great for your overall reference shelf.

252
Back-up page 12.8: WILD CARD: Do your own thing!!
While I’ve tried to provide a wide-ranging variety of activities to choose from, no one
manual can “do it all.” There are many other great ideas out there that clubs have found
to match their local interests and resources.
Plus, the Youth Leaders of some clubs have expressed concern that some activities
included in the manual may be beyond the abilities of their youngest members. Here’s
your chance to tailor-make activities for the youngest-among-us.
If you and your fellow club members have an idea for learning about gold panning and
prospecting that isn’t included in this manual, go for it! When you send in your badge
request, just let me know what you did as a WILD CARD activity. Who knows? Maybe
your idea will be included in the next edition of the Badge Manual!

253
13. Gemstone Lore & Legend
Because they are so rare and beautiful, gemstones and precious metals have always
fascinated people. We give them as gifts to mark special occasions, like a diamond ring
for an engagement or a gold watch for retirement. And many cultures have invested
gems with mystical, magical powers and legends. These units let you explore gemstone
lore and legend and to compare legend against what contemporary science says.
Activity 13.1: Anniversary stones.
A 25th anniversary is considered a silver anniversary and a 50th anniversary is golden.
Construct a list of all the gemstones and precious metals used to mark anniversaries from
1 to 100.
Activity 13.2: Birthstones and the Zodiac.
Each month is marked by its own “modern” or “traditional” birthstone or a “zodiac”
stone. List birthstones for all the months of the year and find out as much as you can
about your own birthstone.
Activity 13.3: Fabled gemstones.
Some especially large and valuable gemstones have been lost, stolen, and/or vested with
supernatural powers or curses. Pick a famous gemstone and explore its history and any
legends associated with it.
Activity 13.4 Gems in religion.
Whether the religion is Christianity, Judaism, Islam, Hinduism, Buddhism, or others,
you’re sure to find gemstones and precious metals mentioned in its holy books, including
the Bible, Koran, Torah, etc. Pick a religious text and see what gemstones are mentioned
and their significance.
Activity 13.5: Mysticism and minerals.
Many gemstone minerals have important scientific, economic, medical, nutritional, and
artistic uses and value. In addition to valuing them for such practical uses, some people
and cultures have assigned mystical or magical properties to certain minerals and
gemstones. Pick a mineral or gemstone and explore what legend and lore says about its
mystical uses and properties. Then compare that to what contemporary science says
about the mineral.
Activity 13.6: WILD CARD: Do your own thing!
Do you have an idea for learning about gemstone lore and legend that isn’t included in
this manual? If so, do your own thing! When your Youth Leader sends in your badge
request, let us know what you did as a WILD CARD activity. Who knows? Maybe your
idea will be included in the next edition of the Badge Manual!
254
13. Gemstone Lore & Legend
□ 13.1 Anniversary stones
□ 13.2 Birthstones and the Zodiac
□ 13.3 Fabled gemstones
□ 13.4 Gems in religion
□ 13.5 Mysticism and minerals
□ 13.6 WILD CARD: Do your own thing!
To earn your Gemstone Lore & Legend badge, you need to complete at least 3 of the 6
activities. Check off all the activities you’ve completed. When you have earned your
badge, sign below and have your FRA leader sign and forward this sheet to the AFMS
Juniors Program chair.
___________________________________
Date completed
_________________________________ ___________________________________
My signature Youth leader’s signature
_______________________________________________________________________
Name of my club
Leader’s preferred mailing address for
receiving badge:
____________________________________
____________________________________
____________________________________

255
Back-up page for Gemstone Lore & Legend badge.
A good general-purpose guidebook for kids exploring gemstone lore and legend is Emma
Foa’s Pockets Gemstones (DK Publishing: New York, NY, 2003). Part of the Dorling
Kindersley Pockets Full of Knowledge series, this particular book has several advantages.
At $6.99, it’s inexpensive and thus a good match for a child’s budget. (Note: that
price is the one I’ve seen most recently. Who knows what it is today??)
It’s written to a wide, general-purpose audience, so it’s clear and easy to read, with
information appearing in brief overview paragraphs and captions. Each two-page
spread is a self-contained unit on a particular topic or gemstone.
It’s heavily illustrated with beautiful color photos, each supported by surrounding
text.
In addition to talking about gemstones as ornaments of beauty, it goes into other uses
of gems, their formation and crystal structure, gemstone mining, and their appearance
in myth and medicine.
It includes a section on famous and legendary gems.
It has a nice reference section talking about gem care and jewelry making, as well as
a section on how gems are cut and polished.
It includes a glossary of terms and a table of the basic mineralogical properties of 53
gemstones.
It concludes with a list of resources, including major museums with gemstone
collections and organizations such as the Gemological Institute of America, followed
by a comprehensive index.
All this is contained in a small, compact book just 5-inches by 3-3/4-inches and 128
pages long that slips easily into a pocket.
For all these reasons, this handy little volume
is highly recommended as a resource for all
kids working on earning their Gemstone Lore
& Legend badge.

256
Back-up page 13.1: Anniversary stones.
Kids can obtain lists of anniversary stones from jewelry shops, web sites, or books about
gems and jewelry. The lists vary—sometimes considerably—and there are actually two
different lists, “traditional” and “modern.” Following is what I’ve been able to find, but
you are very likely to find lists that differ:
Anniversary Traditional Modern 3rd crystal or glass
5th silverware
6th iron
7th copper or brass
8th bronze
10th tin or aluminum diamond jewelry
11th steel fashion jewelry & accessories
12th pearls or colored gems
14th ivory gold jewelry
15th crystal or glass
16th silver hollowware
19th bronze
20th platinum
21st brass or nickel
22nd copper
23rd silver plate
25th silver sterling silver
30th pearl diamond
33rd amethyst
34th opal
35th coral or jade jade
37th alabaster
38th beryl or tourmaline
40th ruby or garnet ruby
45th sapphire sapphire
50th gold gold
55th emerald or turquoise emerald
60th diamond or gold diamond
75th diamond or gold
80th diamond or pearl
85th diamond or sapphire
90th diamond or emerald
95th diamond or ruby
100th 10-carat diamond

257
Back-up page 13.2: Birthstones and the Zodiac.
You can obtain lists of birthstones from jewelry stores or from books on gems and
jewelry. The lists often vary (by one count, there are nearly 50 different lists!) but the
following table shows commonly accepted birthstones, along with some backups:
Month Modern or Traditional Birthstones Mystical Birthstones January garnet (or tanzanite or rose quartz) emerald
February amethyst (or tourmaline or onyx) bloodstone
March aquamarine (or bloodstone) jade
April diamond (or nephrite jade or quartz) opal
May emerald (or agate or chrysoprase) sapphire
June pearl (or alexandrite or moonstone) moonstone
July ruby (or onyx or carnelian) ruby
August peridot (or sardonyx) diamond
September sapphire (or malachite or lapis) agate
October opal (or tourmaline) jasper
November topaz (or citrine or rubellite) pearl
December turquoise (or blue topaz, zircon, lapis lazuli, tanzanite, or coral)
onyx
When it comes to Zodiac Stones, lists vary tremendously. In fact, for each sign of the
Zodiac, some ascribe a whole range of stones: a birthstone, a zodiac stone, a talisman
stone, a mystical stone, a planet stone—even a lucky charm stone! This only adds to the
confusion when it comes to ascertaining just what is supposed to be one’s birth stone.
While I’ve seen lists of all sorts, the following is what I’ve settled on. Be aware, though,
that kids in your club may very well come up with different lists.
Zodiac or Birth Stones amethyst
(also, garnet) Aquarius
(Jan. 20-Feb. 19)
emerald (also, sapphire)
Taurus (April 20-May 20)
ruby (also, onyx)
Leo (July 23-Aug. 22)
topaz (also, beryl)
Scorpio (Oct. 24-Nov. 22)
sapphire (also, amethyst)
Pisces (Feb. 20-March 20)
moonstone (also, agate)
Gemini (May 21-June 20)
peridot (also, carnelian)
Virgo (Aug. 23-Sept. 22)
turquoise (also, pearl) Sagittarius
(Nov. 23-Dec. 21)
diamond (also, bloodstone)
Aries (March 21-Apr. 19)
pearl (also, emerald)
Cancer (June 21-July 22)
opal (also, peridot)
Libra (Sept. 23-Oct 23)
garnet (also, ruby) Capricorn
(Dec. 22-Jan. 15)

258
Back-up page 13.3: Fabled gemstones.
Many especially large and valuable gemstones have been lost, stolen, and/or vested with
supernatural powers or curses. One of the most famous is the Hope Diamond, currently
residing under heavy protection in the Smithsonian. According to legend, it was stolen
from the eye of a Hindu idol, and various owners have suffered ignoble fates ever since:
being torn apart by wolves, beheadings, suicide, even death by starvation! Thus, it has
become legendary for bringing misfortune to those who would possess it.
The Hope Diamond is an especially fabled gem!
Below, I’ve listed a number of prominent gemstones with interesting histories, stories, or
legends behind them. Some of these fabled gemstones are famous merely for being the
biggest or best of their kind (for instance, the largest yellow diamond, the most flawless
emerald, etc.). Others are famous for their long histories and owners who have included
sultans and slaves, kings and queens, industry titans and movie stars. Still others are
infamous for legendary curses and daring thefts.
The famed Cullinan Diamond was cut into many smaller stones.

259
Assign a different stone to each of your kids to research. Then at your next meeting or
gathering, have them sit in a circle to report back to the group what they’ve discovered,
or have them prepare articles for the club newsletter. Pick from the list below, or have
kids find famous stones on their own.
The Hope Diamond
The Blue Diamond of the Crown
The Koh-i-Noor (Mountain of Light)
The Shah Diamond
The Regent Diamond
The Braganza Diamond
The Cullinam I & II Diamonds (aka,
“The Great Star of Africa” and “The
Lesser Star of Africa”)
The Tiffany Diamond
The Sancy Diamond
The Duke of Devonshire Emerald (aka,
“The Duke’s Diamond”)
The Chalk Emerald
The Mogul Emerald
The Hooker Emerald
The Mackay Emerald
The Andamooka Opal (aka, “The
Queen’s Opal”)
The Aurora Australis Opal
The Black Prince Opal (aka, “The
Harlequin Prince”)
The Empress of Australia Opal
Fire Queen Opal (“Dunstan’s Stone”)
The Pride of Australia Opal (aka, “The
Red Emperor”) The Flame Queen Opal
The Olympic Australis Opal
The Pearl of Lao Tzu (aka, “The Pearl
of Allah”)
The DeLong Star Ruby
The Hixon Ruby Crystal
The Midnight Star Ruby
The Millennium Star Diamond
The Neelanjali Ruby
The Rajaratna Ruby
The Rosser Reeves Ruby
The Black Prince’s Ruby
The Timur Ruby
The Samarian Spinel
The Logan Sapphire
The Queen Marie of Romania Sapphire
The Ruspoli Sapphire
The Star of Asia Sapphire
The Star of Bombay
The Star of India
The Stuart Sapphire
The American Golden Topaz
Note: Kids who give a presentation or write an article can use this activity toward ear
260
Back-up page 13.4: Gems in religion.
Gems and precious metals are mentioned in many holy books and have places in various
religious and cultural traditions. Have your kids pick a religion or native culture and
research mention of gems in religious texts or traditions. One helpful reference work you
may be able to find in the library is R.V.S. Wright and Robert L. Chadbourne’s Gems &
Minerals of the Bible: The Lore & Mystery of the Minerals & Jewels of Scripture, from
Adamant to Zircon (Keats Publishing, 1988). Here are a few examples to start things off:
Judeo-Christian:
In Exodus 28:17-21, the gold filigree breastplate of the high priest is described as
adorned with four rows of three stones each: sard, topaz, and carbuncle; emerald,
sapphire, and diamond; ligure (jacinth, or hyacinth), agate, and amethyst; and beryl,
onyx, and jasper. Each of the stones represents one of the twelve tribes of Israel.
The Twelve Apostles have corresponding gemstones: Andrew – sapphire, Matthias –
chrysolite, Bartholomew – peridot, Peter – jasper, James – chalcedony, Philip –
carnelian or sardonyx, James bar Alpheus – topaz, Simon – zircon, John – emerald,
Thaddeus – chrysoprase, Matthew – amethyst, and Thomas – beryl.
In Revelation 21:18-21, we see a vision of the New Jerusalem in which the
foundations of the walls of the heavenly city are adorned in twelve layers of precious
stones. From bottom to top, these are jasper, sapphire, chalcedony, emerald,
sardonyx, sard, chrysolite, beryl, topaz, chrysoprase, jacinth, and amethyst.
The prophet Ezekiel wrote: “Then I looked, and, behold, in the firmament that was
above the head of the cherubim there appeared over them as it were a sapphire stone,
as the appearance of the likeness of a throne.”
Buddhism:
Buddhist monks in India are said to have used amethyst to help in meditation.
For Tibetans, chalcedony symbolizes the purity of the Lotus flower.
Garnet is considered a holy stone bringing enlightenment and wisdom.
Islam:
In Arab countries, moonstone is often given as a gift and blessing for a large family.
Native American:
Jade was revered by many cultures in Central and South America. For Mayans, jade
preserved love, and nephrite jade was believed to stave off wounds.
For some Native American tribes, jasper is a magical rain stone.
Some North American Indians believe jet to be a protective stone that can bring
comfort after the death of a relative.
According to legend, when Apache warriors leapt from a mountain to their death
rather than being captured by enemies, tears of their families hit the ground and, as
signs of enduring sorrow, they’re now found as Apache tears obsidian.
Turquoise has long been considered a holy stone by American Indians; for some, it
provides protection against harm.
Note: Kids who give a presentation or write an article can use this activity toward earning their
Communication badge simultaneously (Activities 7.1 and 7.2).

261
Back-up page 13.5: Mysticism and minerals.
From time immemorial, human eyes have been captivated by the color and sparkle of
gemstones, and we’ve come to invest some with mystical, magical powers. To put my
cards on the table, I don’t put much stock in mysticism.
Still, it is fascinating stuff, especially when viewed from a cultural or historical angle,
which is the perspective I encourage taking in exploring this activity with kids. To get
you started, here’s just a brief sampling of some classic gems and a couple beliefs
associated with each:
Amethyst: Amethyst is supposed to ward off evil thoughts and drunkenness and, so doing,
induce a sober mind. The Chinese ground it to cure bouts of bad dreams.
Aquamarine: Called “the sailor’s gem,” aquamarine was believed to have originated in a
mermaid’s jewelry box and provides safe passage on stormy seas. It was also thought to
make soldiers invincible and to bring pure love.
Diamond: Diamond has long been valued and has been viewed as a symbol of wisdom and
enlightenment, self-confidence and power. While Greeks believed it protected against
poisons, Hindus believed a flawed stone could invite misfortune.
Emerald: Emeralds were believed to restore failing eyesight. Related to this, they were also
believed to provide clairvoyance, or an ability to see into the future.
Garnet: Garnets were thought to protect against depression and to deter liver disease and
problems with blood circulation, perhaps because of their blood-red color.
Opal: Opal was considered an unlucky stone in Europe and was even believed to have
caused The Plague. By contrast, it’s a stone of eternal hope in Asia.
Ruby: Rubies were once thought to counteract poison and the plague and, rubbed on the
skin, were supposed to restore youth and vitality.
Sapphire: Sapphire has been considered a powerful protective stone. Some thought rays
reflected from it could kill poisonous creatures. Persians believed the Earth itself rested on a
giant sapphire that reflected the blue of heaven into our sky.
Topaz: Once thought to be a cure for bad moods and madness, topaz has also been thought
to bestow wisdom and to help ascertain the truth.
To guide your kids to more info about a greater variety of gems, you can find any number
of books in New Age sections of a bookstore or library, like Peschek-Böhmer and
Schreiber’s Healing Crystals & Gemstones: From Amethyst to Zircon. Check also Foa’s
Pockets Gemstones. This handy, inexpensive pocketbook has two pages each devoted to
27 different gems. For each, it includes a small box entitled “Myth & Magic” with two
or three beliefs about that particular gemstone through the ages. See also Knuth’s Gems
in Myth, Legend, & Lore or Kunz’s The Curious Lore of Precious Stones.
A huge number of websites have also spring up devoted to “new age” mysticism and the
supposed magical or healing power of gems. Here are just a couple of examples of sites
that delve into this realm:
Valuable Stones: The Online Encyclopedia of Gemstones,
http://valuablestones.com/ancient_myths.htm
262
Precious Possessions, Ltd., https://www.preciousltd.com/gemstone-folklore/
The Loupe, from TrueFacet Fine Jewelry, https://www.truefacet.com/guide/folklore-
and-meanings-behind-gemstones/
Let your kids pick gems of special interest to them. Then have them explore associated
myths and legends and supposed mystical powers each stone possesses.
But don’t end there! Have them compare what modern science has to say about their
gemstones. Or let them test a gem’s power for themselves. For instance, it is said that an
emerald will melt the eyes of any snake that gazes upon it. Have an emerald? Have a
young boy with a snake? I see potential for an experiment!
Mysticism and Fossils.
In addition to minerals and gemstones, much folklore and mythology has sprung up
surrounding fossils. Strange beliefs about mystical, magical and healing powers of
certain fossils go back thousands of years and cut across cultures. Explore mystical
beliefs folks have attached to such things as so-called dragons’ teeth, toadstones,
thunderstones, snakestones, devil’s toenails, and more! A great book to consult is Ken
McNamara’s Dragons’ Teeth and Thunderstones: The Quest for the Meaning of Fossils
(Reaktion Books, Ltd.: London, 2020).
Note: Kids who give a presentation or write an article can use this activity toward earning their
Communication badge simultaneously (Activities 7.1 and 7.2).

263
Back-up page 13.6: WILD CARD: Do your own thing!!
While I’ve tried to provide a wide-ranging variety of activities to choose from, no one
manual can “do it all.” There are many other great ideas out there that clubs have found
to match their local interests and resources.
Plus, the Youth Leaders of some clubs have expressed concern that some of the activities
included in the manual may be a bit beyond the abilities of their youngest members.
Here’s your chance to tailor-make activities for the youngest among us.
If you and your fellow club members have an idea for learning about gemstone lore and
legend that isn’t included in this manual, go for it! When you send in your badge request,
just let me know what you did as a WILD CARD activity. Who knows? Maybe your
idea will be included in the next edition of the Badge Manual!

264
14. Stone Age Tools & Art
Rocks have different properties and textures. For instance, obsidian is smooth and makes
flakes with razor-sharp edges, kaolin (clay) is soft and moist and easily shaped when first
dug from the ground, and granite is coarse and heavy. Early humans and stone-age
cultures have taken advantage of the properties of different rocks to make tools and art
from them. These activities will guide you in making your own stone tools and art.
Activity 14.1: Rocks and minerals used as tools.
Make a list of rocks and minerals that have been used as stone tools and art. Describe the
properties of each one on your list that made them useful to stone-age cultures. Collect
some of the rocks or minerals on your list and show them to fellow club members.
Activity 14.2: Making stone tools.
If you have a source for rocks such as basalt or granite in the form of large, rounded
cobbles, work with your youth leader to craft clubs, tomahawks, or a grinding stone. Or
watch a master flint knapper craft an arrowhead.
Activity 14.3: Making stone tools and art from clay.
Try one or both of these activities. a) Roll clay into long ropes and coil it to make pots,
cups, and other vessels. You can press patterns into the outside surface of your pot with
your fingernails, feathers, or twigs and then bake it hard in an oven. b) Fashion beads
from clay and bake them hard. Combine them with other natural materials such as wood,
seeds, shells, and feathers and string them together to create necklaces and bracelets.
Activity 14.4: Making rock art.
Pick one of these art projects to try: a) Some cultures have left paintings in caves
showing animals they hunted, their own hand prints, and mysterious zig-zags and
squiggles. They made paints from ground minerals mixed with water, grease, or oil.
Make your own paint and create a cave painting on a large, flat stone. b) Other cultures
left behind petroglyphs, or images chipped into stone. Make your own petroglyph, using
a hard, pointed rock to chip images onto the flat surface of a softer rock. c) Use sands of
different colors to craft a temporary design on a sidewalk or floor, or make a more
permanent artwork by making a design with white glue on plywood or cardboard and
sprinkling sands of different colors into your pattern.
Activity 14.5: Recording and interpreting rock art.
If you live near a painted cave or a petroglyph site, visit it and photograph or sketch the
patterns you see. Try to determine what the rock art may be telling of how Indians
lived—the animals they kept and hunted, the ways they dressed, ceremonies they held,
etc. Write your thoughts in your club newsletter or give a presentation at a club meeting.
Activity 14.6: Visiting a museum or Native American cultural center.

265
Take a trip to a museum, Native American cultural center, or college archeology
department that has artifacts and learn about tools that Indians fashioned and the rocks
and minerals they used.
Activity 14.7: WILD CARD: Do your own thing!
Do you have an idea for learning about stone age tools and art that isn’t included in this
manual? If so, do your own thing! When your Youth Leader sends in your badge
request, let us know what you did as a WILD CARD activity. Who knows? Maybe your
idea will be included in the next edition of the Badge Manual!

266
14. Stone Age Tools & Art
□ 14.1 Rocks and minerals used as tools
□ 14.2 Making stone tools
□ 14.3 Making stone tools and art from clay
□ 14.4 Making rock art
□ 14.5 Recording and interpreting rock art
□ 14.6 Visiting a museum or Native American cultural center
□ 14.7 WILD CARD: Do your own thing!
To earn your Stone Age Tools & Art badge, you need to complete at least 3 of the 7
activities. Check off all the activities you’ve completed. When you have earned your
badge, sign below and have your FRA leader sign and forward this sheet to the AFMS
Juniors Program chair.
___________________________________
Date completed
_________________________________ ___________________________________
My signature Youth leader’s signature
_______________________________________________________________________
Name of my club
Leader’s preferred mailing address for
receiving badge:
____________________________________
____________________________________
____________________________________

267
Back-up page 14.1: Rocks and minerals used as tools.
Following are examples of rocks and minerals that have been used by indigenous cultures
around the world in crafting tools or making artworks.
Flint: flakes easily, with sharp edges, making it good for knapping into arrowheads,
spear points, and knives.
Obsidian: another source for knapping into arrowheads, spear points, scrapers, and
knives.
Agate and jasper: two more sources of stone suitable for flaking and knapping.
Kaolin, or clay: soft and malleable but bakes rock-hard when heated, thus making it
perfect for crafting cups, bowls, and other vessels and for making beads.
Granite: heavy and coarse, and thus good as a grinding stone or for making
tomahawk or club heads.
Basalt: also heavy and coarse and good as a grinding stone.
Tar: at places with oil seeps, native cultures have exploited tar for things such as
caulking boats or waterproofing bowls (note: tar is technically not a mineral, but it is
a natural resource that has long been exploited by people).
Hematite: ground to make red paint.
Azurite or lapis: ground to make blue paint.
Malachite: ground to make green paint.
Just some of the rocks, minerals and earth resources used by Stone Age cultures.
An interesting book that goes into all sorts of materials used by stone-age peoples to craft
tools for survival is David Wescott’s Primitive Technology: A Book of Earth Skills
(Gibbs Smith, Publisher, 2001). The materials he discusses include stone, wood, bone,
natural fibers, fire, etc. He even includes a chapter on primitive art and music.
Note: Kids who make a collection of rocks and minerals used to make stone tools can use this activity
toward satisfying requirements for earning the Collecting badge simultaneously (Activity 5.1). If they give
a presentation to share their collection and talk about how these rocks have been used as tools, they can
also use that presentation toward earning their Communication badge, as well (Activity 7.1).
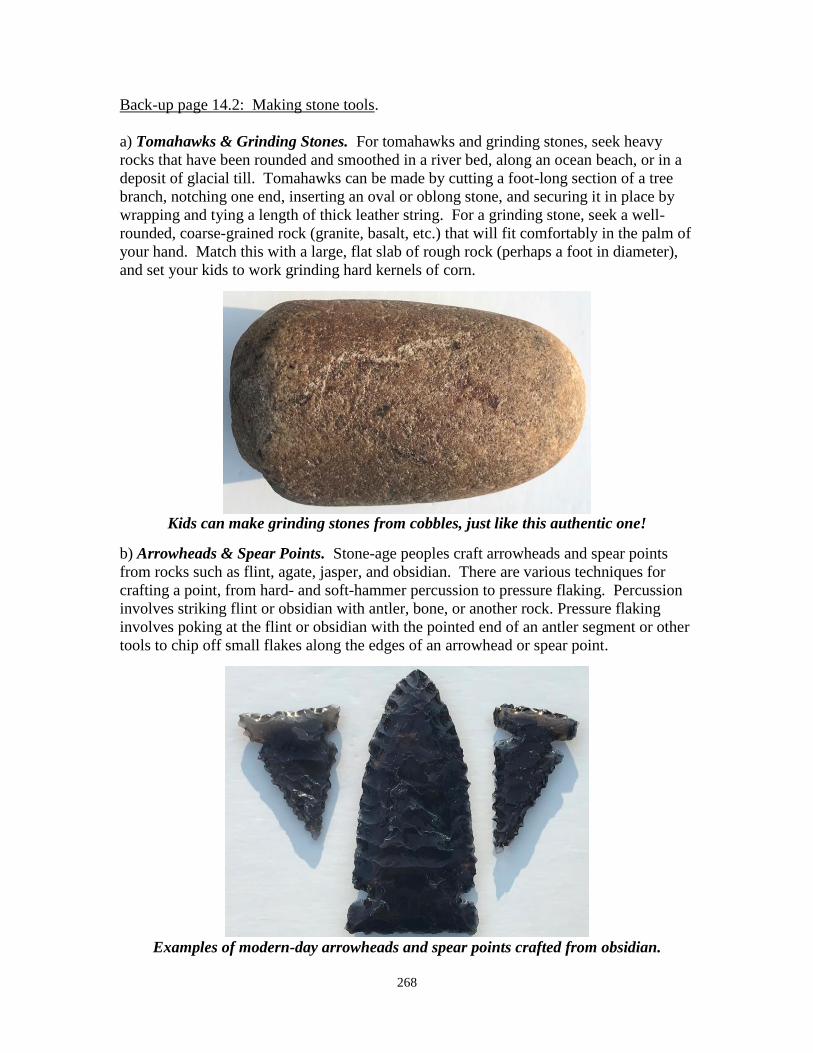
268
Back-up page 14.2: Making stone tools.
a) Tomahawks & Grinding Stones. For tomahawks and grinding stones, seek heavy
rocks that have been rounded and smoothed in a river bed, along an ocean beach, or in a
deposit of glacial till. Tomahawks can be made by cutting a foot-long section of a tree
branch, notching one end, inserting an oval or oblong stone, and securing it in place by
wrapping and tying a length of thick leather string. For a grinding stone, seek a well-
rounded, coarse-grained rock (granite, basalt, etc.) that will fit comfortably in the palm of
your hand. Match this with a large, flat slab of rough rock (perhaps a foot in diameter),
and set your kids to work grinding hard kernels of corn.
Kids can make grinding stones from cobbles, just like this authentic one!
b) Arrowheads & Spear Points. Stone-age peoples craft arrowheads and spear points
from rocks such as flint, agate, jasper, and obsidian. There are various techniques for
crafting a point, from hard- and soft-hammer percussion to pressure flaking. Percussion
involves striking flint or obsidian with antler, bone, or another rock. Pressure flaking
involves poking at the flint or obsidian with the pointed end of an antler segment or other
tools to chip off small flakes along the edges of an arrowhead or spear point.
Examples of modern-day arrowheads and spear points crafted from obsidian.

269
WARNING!! Do not do a knapping exercise with kids! Knapping produces razor-
sharp edges (sharper than scalpels) and can send sharp shards flying through the air. Eye
protection is a must, as are thick leather gloves. Even then, one guarantee is that
knapping will lead to cuts—and sometimes very nasty ones! Thus, this isn’t the sort of
exercise you want to do with young kids. Instead, this is better left as a demonstration
performed by a trained expert well versed in the craft. I recommend you get a master
knapper from your own club or a nearby club to provide a demonstration. Thousands of
Americans practice this art form, connecting via newsletters and the Internet and
gathering at regional “knap-ins” to share techniques and materials. You can get a sense
of “who’s who” in this community in John Whittaker’s book American Flintknappers:
Stone Age Art in the Age of Computers (2004). If you can’t find a local knapper, you can
still provide a demo for your kids via a video: “Flintknapping with Bruce Bradley,
Ph.D.” I purchased a copy of this terrific 45-minute video from the Mammoth Site of
Hot Springs, South Dakota, through their on-line store at http://www.mammothsite.com.
Knapping requires gloves, leather pads, and special precautions!
Again, I stress the warning not to do knapping with kids! Even for adults, thorough
preparation and great care is required in pursuing a knapping project, as emphasized in
the safety chapter of any one of the several books that have been published on the art of
knapping. You may wish to purchase one of these as a reference for your club library:
Gravelle, Early Hunting Tools: An Introduction to Flintknapping (1995)
Hellweg, Flintknapping: The Art of Making Stone Tools (1984)
Patten, Old Tools – New Eyes: A Primal Primer of Flintknapping (1999)
Waldorf, Art of Flint Knapping, Fourth Edition (1993)
Waldorf & Martin, Getting Started in Flint Knapping (1998)
Whittaker, Flintknapping: Making & Understanding Stone Tools (1994)
You can find many books on the art of flint knapping.

270
Back-up page 14.3: Making stone tools and art from clay.
Clay is the mineral kaolin, and it has been used throughout human history and prehistory
because it is soft and easily shaped when moist yet bakes rock hard to create water-tight
vessels and other tools. Using designs you find in books on North American Indians,
lead your kids in fun activities fashioning pots, vessels, and beads from clay.
a) Pots and Vessels. In leading kids in this activity, first stock up on a big supply of
modeling or pottery clay. Depending on your resources, choose clay that is either self-
hardening or that may be fire-hardened in a standard oven. Or, if you have one available,
you can go with clay that may be hardened in a potter’s kiln.
Have kids start by flattening a circle of clay for a base, using their hands or a rolling pin.
Next, have them make long “ropes” of clay by rolling a lump of clay between their
palms. They then coil their clay rope around the base, building upwards and making and
adding new lengths of clay rope as needed until they have a pot or vessel of just the right
size they want.
Crafting bowls with self-hardening modeling clay.
Your kids now have several options. They can leave the pot just as it is. Or they can
make hash-mark (///////) or X (XXXXX) patterns or other interesting designs all around
their clay ropes by pressing into the clay with their fingernails, feathers, or twigs. Or
they might massage the sides of their pots smooth with their fingers and paint a design on
the outside. Then bake the pots hard in an oven or let them self-harden.

271
Examples of designs left in Stone Age pottery.
If you have pottery artists in your club, get together with them for more creative ideas
and for more sophisticated techniques.
b) Beads. Have kids roll clay into small balls, ovals, cylinders, etc., for beads, and pierce
holes in each bead with kabob sticks before baking them hard. Combine them with other
natural materials such as wood, seeds, shells, and feathers and string them all together to
create necklaces and bracelets.
Note: You might consider applying this activity toward the Lapidary Arts badge, as well (Activity 4.4).

272
Back-up page 14.4: Making rock art.
a) Cave painting. Near my home in southern California are cave paintings, or
pictographs, left by Chumash Indians. The primary colors are red from hematite, black
from charcoal or burnt manganese, and white from clay or diatomaceous earth. Indians
ground such materials with mortars and pestles, then mixed the resulting powdery
pigments with a binder (water, grease from animal fat, or oil from crushed seeds). Paint
brushes were crafted from feathers, coarse hair or fur, or vegetable fibers bound together
or inserted into cane tubes. Paint also was applied simply by finger. Work with your
kids to make paint and use it to decorate large, flat rocks. Here are some minerals that
have been crushed, mixed with oils or animal fats, and used in paints over the ages (as an
alternative to oils or animal fats, you can use white glue diluted in water as your binder):
green clay
yellow clay
yellow limonite
brown clay
red clay
white clay
white chalk
white gypsum
black charcoal
blue azurite
green malachite
an earthy variety of red hematite
WARNING!! In some books, you may read that yellow and red paint pigments can be
ground from orpiment and realgar. While this is true, both are sulphides of arsenic
and can be dangerous and even toxic. Don’t use these with your club’s kids!
b) Petroglyphs. Petroglyphs are images chipped into stone and are often seen at cliff
sites or covering large boulders in the American Southwest. In deserts, rocks often get
coated with a dark crust called desert varnish. Native Americans chipped though this to
create their petroglyph artworks, sometimes creating huge murals stretching across a cliff
face. To help kids make petroglyphs, provide soft, flat rocks such as slabs of shale or
sandstone. (If you don’t have a source that you can collect from the field, try a building
supply store for flagstones. See if they have any broken ones they may be willing to
donate for free.) You also can make a soft, flat surface with plaster. Lightly coat the
surface of your rock or plaster slab with a red-brown or black paint to simulate desert
varnish. Then give kids small, pointed rocks to chip images into the desert varnish.
A petroglyph from the California Mojave Desert

273
c) Sand painting. The Navajo, Tibetan monks, and Australian Aborigines are just some
cultures that craft intricate patterns using colored sands. These are not usually meant to
be permanent artworks but instead living, flowing works, just as sand blows across the
landscape in the wind. Your kids could make similar, temporary works by drizzling sand
in desired patterns onto a sidewalk or a sheet of cardboard. Or, for a permanent work of
sand painting, you can provide sheets of cardboard or plywood and have kids make
patterns with white glue over which they sprinkle sands of different colors. If you have a
nearby source from gullies, beaches, or river beds, you can use natural sands, or you can
purchase a variety of vividly colored sands from art or aquarium supply stores.
White glue and colorful art or aquarium sands make great sand paintings!
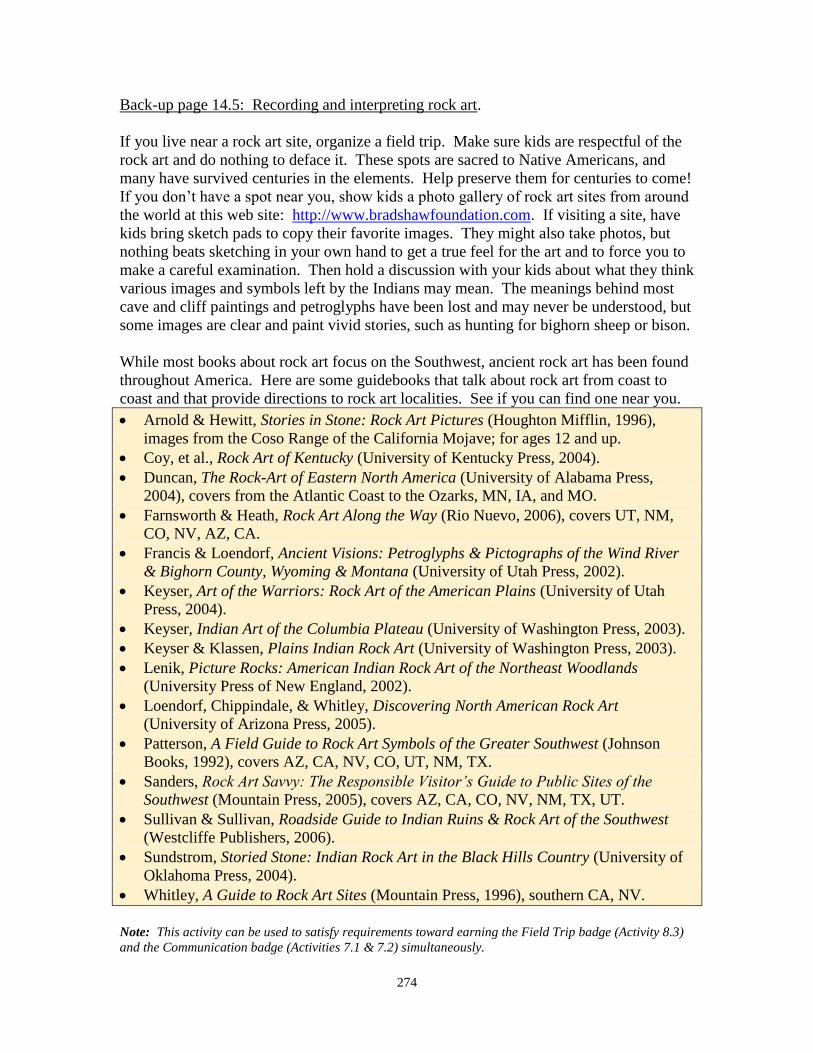
274
Back-up page 14.5: Recording and interpreting rock art.
If you live near a rock art site, organize a field trip. Make sure kids are respectful of the
rock art and do nothing to deface it. These spots are sacred to Native Americans, and
many have survived centuries in the elements. Help preserve them for centuries to come!
If you don’t have a spot near you, show kids a photo gallery of rock art sites from around
the world at this web site: http://www.bradshawfoundation.com. If visiting a site, have
kids bring sketch pads to copy their favorite images. They might also take photos, but
nothing beats sketching in your own hand to get a true feel for the art and to force you to
make a careful examination. Then hold a discussion with your kids about what they think
various images and symbols left by the Indians may mean. The meanings behind most
cave and cliff paintings and petroglyphs have been lost and may never be understood, but
some images are clear and paint vivid stories, such as hunting for bighorn sheep or bison.
While most books about rock art focus on the Southwest, ancient rock art has been found
throughout America. Here are some guidebooks that talk about rock art from coast to
coast and that provide directions to rock art localities. See if you can find one near you.
Arnold & Hewitt, Stories in Stone: Rock Art Pictures (Houghton Mifflin, 1996),
images from the Coso Range of the California Mojave; for ages 12 and up.
Coy, et al., Rock Art of Kentucky (University of Kentucky Press, 2004).
Duncan, The Rock-Art of Eastern North America (University of Alabama Press,
2004), covers from the Atlantic Coast to the Ozarks, MN, IA, and MO.
Farnsworth & Heath, Rock Art Along the Way (Rio Nuevo, 2006), covers UT, NM,
CO, NV, AZ, CA.
Francis & Loendorf, Ancient Visions: Petroglyphs & Pictographs of the Wind River
& Bighorn County, Wyoming & Montana (University of Utah Press, 2002).
Keyser, Art of the Warriors: Rock Art of the American Plains (University of Utah
Press, 2004).
Keyser, Indian Art of the Columbia Plateau (University of Washington Press, 2003).
Keyser & Klassen, Plains Indian Rock Art (University of Washington Press, 2003).
Lenik, Picture Rocks: American Indian Rock Art of the Northeast Woodlands
(University Press of New England, 2002).
Loendorf, Chippindale, & Whitley, Discovering North American Rock Art
(University of Arizona Press, 2005).
Patterson, A Field Guide to Rock Art Symbols of the Greater Southwest (Johnson
Books, 1992), covers AZ, CA, NV, CO, UT, NM, TX.
Sanders, Rock Art Savvy: The Responsible Visitor’s Guide to Public Sites of the
Southwest (Mountain Press, 2005), covers AZ, CA, CO, NV, NM, TX, UT.
Sullivan & Sullivan, Roadside Guide to Indian Ruins & Rock Art of the Southwest
(Westcliffe Publishers, 2006).
Sundstrom, Storied Stone: Indian Rock Art in the Black Hills Country (University of
Oklahoma Press, 2004).
Whitley, A Guide to Rock Art Sites (Mountain Press, 1996), southern CA, NV.
Note: This activity can be used to satisfy requirements toward earning the Field Trip badge (Activity 8.3)
and the Communication badge (Activities 7.1 & 7.2) simultaneously.
275
Back-up page 14.6: Visiting a museum or Native American cultural center.
Take your clubs’ kids to a museum, Native American cultural center, or college
archaeology department. Here, kids can see actual tools, artwork, and other artifacts
crafted from rocks and minerals and other natural materials. By calling in advance to
make arrangements, you may be able to have knowledgeable experts guide your group
and—in museums and archaeology departments—perhaps even give a peek at research
collections in back rooms not normally open to the public. Surf the web or check with
your town’s visitor center or chamber of commerce to explore possibilities, then call to
see what sorts of collections are in your area and what arrangements might be made. For
instance, spending less than two hours surfing the web on my computer this morning, I
found the following that offer good possibilities for either brief morning or afternoon
adventures or day trips within easy access of my hometown of Ventura, California, which
for centuries has been inhabited by Chumash tribes.
For a brief morning or afternoon trip:
The Museum of Ventura County, located in the heart of downtown, has exhibits of
early Chumash culture from the time when Ventura was a village called Shisholop.
The Albinger Archaeological Museum, located across the street from the Museum of
Ventura County, displays Native American stone relics from 1600 to 100 BC.
The Robert J. Largomarsino Visitor Center at Channel Islands National Park includes
artifacts and publications about seafaring Chumash from our offshore islands.
Our local community college, Ventura College, offers courses on archaeology and
has knowledgeable experts who would be worth calling to see if they might meet with
a group of kids and/or offer advice about other area resources.
For a longer day trip still within easy driving distance of Ventura:
Chumash Painted Caves State Historic Park, near the San Marcos Pass above Santa
Barbara, preserves fine examples of pictographs in a rock shelter.
More pictographs can be viewed along trails in the Santa Monica Mountains National
Recreation Area, which even offers third and fourth graders a program on the
Chumash in their Satwiwa Native American Cultural Center.
Oakbrook Regional Park Chumash Interpretive Center to my south provides an
artifact exhibit, a rock art exhibit, and ongoing events and activities.
Both the Santa Barbara Museum of Natural History and the Museum of Natural
History of Los Angeles County offer great Native American displays.
The Anthropology Department at the University of California, Santa Barbara, holds
the Repository for Archaeological & Ethnographic Collections.
UCLA has several relevant programs—an Anthropology Department, American
Indian Studies Center, and an Institute of Archaeology—as well as their Fowler
Museum of Cultural History with artifacts from native cultures worldwide.
Check your community for similar opportunities for an adventure with your club’s kids!
Note: This activity can be used to satisfy requirements toward earning the Field Trip badge
simultaneously (Activity 8.3).

276
Back-up page 14.7: WILD CARD: Do your own thing!!
While I’ve tried to provide a wide-ranging variety of activities to choose from, no one
manual can “do it all.” There are many other great ideas out there that clubs have found
to match their local interests and resources.
Plus, the Youth Leaders of some clubs have expressed concern that some of the activities
included in the manual may be a bit beyond the abilities of their youngest members.
Here’s your chance to tailor-make activities for the youngest among us.
If you and your fellow club members have an idea for learning about Stone Age tools and
art that isn’t included in this manual, go for it! When you send in your badge request,
just let me know what you did as a WILD CARD activity. Who knows? Maybe your
idea will be included in the next edition of the Badge Manual!

277
15. Rocking on the Computer
Are you “wired to learn”? The computer offers all sorts of fun, from video games to
chat-rooms and instant messaging to websites where you can meet new people and learn
about new things. The activities in this unit will help you use the computer to learn more
about the hobby of rockhounding, to create presentations, to organize your collection, to
find your way to collecting sites, and to safely connect with fellow collectors.
Activity 15.1: *Exploring the web safely and securely.*
Note: This activity is required to earn this badge.
Gather around a computer with your youth leader and other members of your club to
explore the web via search engines like Google or Yahoo. Learn “safety tips” for things
to beware of when exploring the web. Then come up with topics (like quartz, or
dinosaurs, or gem cutting) to see what you can find.
Activity 15.2: Reporting on favorite websites.
Explore the web on your own to find two or three websites related to your own areas of
interest (minerals, fossils, geodes, meteorites, lapidary arts, natural history museums,
etc.). Write down the web address of each site and a brief description of what you found
on the site to share with your fellow club members.
Activity 15.3: Making presentations with the computer.
Create a PowerPoint presentation about your favorite minerals, fossils, or collecting site
using images from the web or from pictures taken with a digital camera and show it to
your fellow club members. If you have the right equipment (including an iPhone) and
skills, try incorporating video clips. (See Badge 7: Communication.)
Activity 15.4: Cataloging your collection electronically.
Create an electronic catalog or list of your rock, mineral, or fossil collection that includes
the name of each specimen and its locality and any other information you would like to
remember about the specimen. For instance, if you bought it, you may want to record
where you bought it and how much you paid for it. If it’s a fossil, you should record the
age of the fossil and the period or formation that it’s from. (See Badge 5: Collecting.)
Activity 15.5: Maps and GPS to find your way.
Learn about different types of traditional paper maps (roadmaps, topographic maps,
geological maps, etc.). Then explore mapping resources that are on the web, such as
MapQuest or Google Earth or maps available via the websites of geological surveys.
Learn about GPS and how it can help you find collecting spots. (See Badge 20: Maps.)
Activity 15.6: Joining an online community and holding online meetings.
See if there’s an online community focused around your particular area of interest, be it
fossils, rock tumbling, meteorites, minerals, agates, gold prospecting, metal detecting,
lapidary arts, beading, fluorescence, etc. Then, being mindful of safety tips from Activity
15.1, explore the site and report back to your juniors group about why you would—or

278
would not—recommend it. Also, consider holding or hosting an online meeting with the
other kids in your own club as one way to stay in touch. It’s fun!
Activity 15.7: WILD CARD: Do your own thing!
Do you have an idea for learning about rocking on the computer that isn’t included in this
manual? If so, do your own thing! When your Youth Leader sends in your badge
request, let us know what you did as a WILD CARD activity. Who knows? Maybe your
idea will be included in the next edition of the Badge Manual!

279
15. Rocking on the Computer
□ 15.1 *Exploring the web safely and securely*
(required to earn this badge)
□ 15.2 Reporting on favorite web sites
□ 15.3 Making presentations with the computer
□ 15.4 Cataloging your collection electronically
□ 15.5 Maps and GPS to find your way
□ 15.6 Joining an online community and holding online meetings
□ 15.7 WILD CARD: Do your own thing!
To earn your Rocking on the Computer badge, you need to complete at least 3 of the 7
activities. (Please note that successfully completing Activity 15.1 is required to earn this
badge.) Check off all the activities you’ve completed. When you have earned your
badge, sign below and have your FRA leader sign and forward this sheet to the AFMS
Juniors Program chair.
___________________________________
Date completed
_________________________________ ___________________________________
My signature Youth leader’s signature
_______________________________________________________________________
Name of my club
Leader’s preferred mailing address for
receiving badge:
____________________________________
____________________________________
____________________________________

280
Back-up page 15.1: *Exploring the web safely and securely.*
Note: This activity is required to earn this badge.
Exploring the web.
Gather kids around a computer with an Internet connection to explore the web via search
engines like Google or Yahoo. Start by showing how to access a search engine. Then
show procedures for conducting a basic search, as well as how to conduct a more refined
search to narrow the number of resulting websites that pop up. If you don’t narrow the
search, you’ll unfortunately find a large and bewildering array of results, the vast
majority have nothing in common with what you are actually seeking.
Finally, brainstorm with your kids to come up with rock-related topics of interest to them
for exploration. This might be quartz crystals. Or it may be dinosaurs. Or perhaps a
lapidary art, like gem cutting. After soliciting several topics from the kids, type them in
one at a time to see what you can find, refining each topic as you go along to ensure best
results.
A good setting for an exercise like this is your local public library, providing of course
you don’t suddenly surprise the staff there with a flood of 20 noisy kids! In fact, your
local librarians most likely would be thrilled to help in organizing and leading such a
session. Stop in and talk with them and see what might be arranged. In one of my old
day jobs at a publishing company, I interacted a lot with librarians when I signed and
developed library reference books. Librarians are extremely bright and knowledgeable
people engaged in a service profession. Thus, as a general rule they love to help people,
and they are trained to help you find just the information you need that has been
thoroughly vetted to be useful and reliable.
Safety and security.
Librarians are able to provide your juniors with warnings about the dangers of the online
environment. While I don’t want to overstate such dangers, “on-line predators” do exist,
as well as an unfortunate overabundance of websites of a less than savory nature that you
want kids to avoid, not to mention the potential for getting “tagged” by spammers or by
warped individuals who get a cheap thrill sending around digital worms and viruses if
you open the wrong sort of document.
One of the benefits of conducting a workshop like this in your public library—in addition
to the safe and friendly community environment it provides—is that their computers
generally do include firewalls and screens that prevent access to less desirable sites.
Librarians also can provide tips and warnings on how to avoid infecting your personal
computer with viruses.
Following are some safety tips to pass along to kids when plugging into the online
environment.

281
Seek parents’ permission before exploring websites.
If you engage in on-line chats in public places, do not extend a chat to your personal
email address.
Do not give out personal info should a site ask for a name, address, phone number,
picture, password, etc.
Never agree to meet in-person with someone you meet online unless your parents
agree and go with you.
Tell a parent about anything you find uncomfortable on the web; for instance if
someone tells you to keep something a secret or asks you to reveal anything you
deem personal and private.
Avoid sites requiring you to register, and seek advice from parents before taking any
action like that. Such sites sometimes demand money.
Open attachments or downloads only from trustworthy sources.
When exploring the web, do so safely!
Your local librarians will likely have additional safety tips to offer, so visit your local
librarians, utilize their expertise, take advantage of computers set up and meant for public
access, and arrange a web workshop for your club’s kids!

282
Back-up page 15.2: Reporting on favorite web sites.
Activity 15.1 brings your kids together as a group to learn how to explore the web and to
see the sorts of things they can find related to our hobby while doing so with safety and
security in mind. Activity 15.2 now sends them off to explore the web on their own and
to report back. Each junior member should surf the web to explore his or her own area of
interest, be it rocks, minerals, fossils, geodes, meteorites, dinosaurs, famous gemstones,
lapidary arts, museums, field trips, etc.
Have kids settle on the two or three websites related to their topic that they find the most
interesting. They should thoroughly explore the sites and then do a brief write-up to
report back that includes: 1) the web address of each site and its title, if it has one; 2) a
brief description of what’s to be found on each site; and 3) a “thumbs-up” conclusion
about why they would recommend each site to other club members. You can let kids
explore totally on their own, or you can provide suggestions as starting points. Here are
some specific websites you might recommend:
General Information:
http://www.google.com Google is a search engine that connects to anything and
everything on the web. The only problem is that when you enter a search term, you
could end up getting tens of thousands of results or “hits.” Teach kids to use the
advanced search features to attempt to narrow a search to more relevant sites.
http://en.wikipedia.org Wikipedia has become an all-purpose “crowd-sourced” font
of knowledge covering any and all topics. It’s often a good first stop. Then follow
up by pursuing links and references that conclude Wikipedia articles.
www.YouTube.com YouTube is filled with all manner of video clips, both silly and
serious. Search such topics as “mineral collecting” or “collecting rocks and minerals”
and see what comes up.
http://earth.google.com From Earth to the moon to Mars, Google Earth lets you
explore it all with ever-increasing detail.
http://usgs.gov The United States Geological Survey website provides links to maps,
images, videos and animations, and more. See what your tax payer dollars have
provided!
Minerals and Earth Resources:
http://mineralseducationcoalition.org The Minerals Education Coalition provides a
wealth of info and resources on minerals, their uses, and careers in the earth sciences.
www.womeninmining.org Women in Mining provides good info and resources on
minerals and their uses, along with links to other interesting earth science sites.
283
www.theimage.com This Mineral Gallery shows gorgeous gemstones with info on
the properties of nearly 200 different types of minerals; it also provides tips on
shooting mineral photos with digital cameras.
www.zacksrocksandminerals.com Zack’s Rocks & Minerals is a nice all-purpose
rock-and-mineral web site that was initially designed when Zachary was a teenage
junior member of the Lynchburg (Virginia) club. He has continued to update and
expand the site. This provides an inspiring illustration of where a junior’s interest
might take him or her!
www.mindat.org The Mineral Database is a mineral-by-mineral treasure trove of
information on mineral compositions, descriptions, localities, etc. It is said to have
become the world’s largest database of mineral information.
www.minrec.org Website of Mineralogical Record magazine, the most authoritative
mineral collector’s journal in the world. This web site upholds that tradition.
www.webmineral.com Web Minerals is a mineralogy database of 4,714 mineral
species with a vast image library and links to other resources.
www.rockhounds.com Bob’s Rock Shop is the first “Zine” devoted to rocks and
minerals! It’s run by a “regular rockhound” and continues to provide a fine service.
www.e-rocks.com eRocks is a commercial site with ongoing online auctions, which
can help provide estimated value to your mineral collection.
www.njminerals.org/ Chris’s Mineral Collecting includes info on identifying
minerals, how-to-do micromounting, and more.
www.minsocam.org/msa/collectors_corner/MineralCollecting.htm The
Mineralogical Society of America provides a complete primer on mineral collecting.
See their page www.mineralogy4kids.org/games.html
Fossils:
https://www.nps.gov/subjects/fossils/index.htm The National Park Service helps kids
explore how paleontologists work, with links to more sites, activities, and resources.
www.paleoportal.org The Paleontological Portal of the University of California
Museum of Paleontology is an entry point to fossil resources for all age levels.
www.fossilmuseum.net The “Virtual Fossil Museum” is an educational resource
welcoming contributions by educators, scientists, and amateur fossil enthusiasts. It
includes pictures and photos, fossil sites, geological history, paleobiology and more!
284
Lapidary Arts:
www.rockhounds.com “Bob’s Rock Shop” teamed with Rock & Gem magazine to
provide a first-class resource on topical information for hobbyists.
www.gemsociety.org/reference-library/ This web site of the International Gem
Society has a great “Jewelry & Lapidary” section that aids in learning all about
gemstones, gemology, jewelry making and the lapidary arts.
Museums:
http://paleo.cc/kpaleo/museums.htm “Kuban’s Guide to Natural History Museums”
features annotated links to larger museums with fossil displays.
www.amnh.org/education/resources/ The American Museum of Natural History
provides on-line activities and resources specifically for kids.
www.naturalhistory.si.edu/visit/virtual-tour Take a “virtual tour” of our nation’s
museum, the Smithsonian Museum of Natural History.
www.peabody.yale.edu/exhibits/david-friend-hall Check out the minerals to be found
in the David Friend Hall of the Yale Peabody Museum of Natural History.
https://www.sdsmt.edu/Campus-Life/The-Campus/Virtual-Tour/O-Harra/ Here’s a
virtual tour of the Museum of Geology at the South Dakota School of Mines &
Technology with a really cool video of a mosasaur exhibit being assembled.
https://mgmh.fas.harvard.edu/ Harvard University has one of the oldest mineral
collections in the U.S. Check it out!
www.oumnh.ox.ac.uk The Oxford University in the United Kingdom has terrific
collections of fossils and minerals!
www.priweb.org/blog-post/learn-at-home The Paleontological Research Institute in
Ithaca, New York, has all sorts of fun activities to explore on their site.
Note: Kids can use this activity to satisfy requirements toward earning the Communication badge
simultaneously (Activities 7.1 or 7.2).
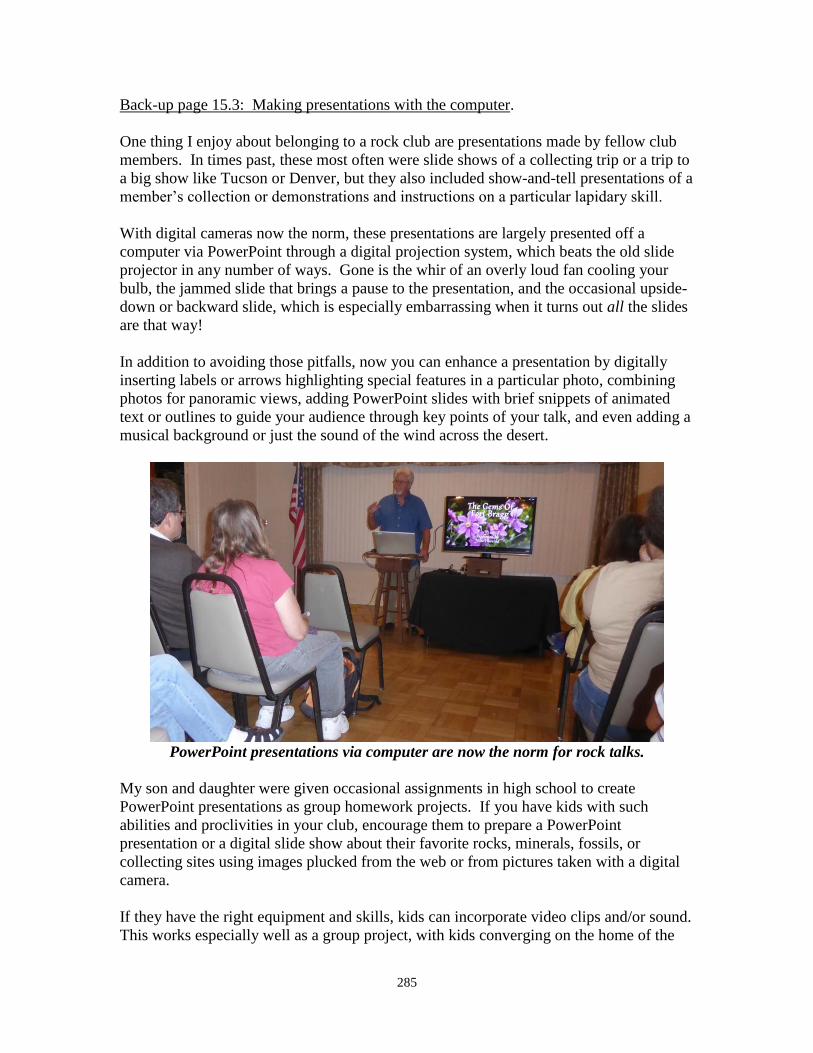
285
Back-up page 15.3: Making presentations with the computer.
One thing I enjoy about belonging to a rock club are presentations made by fellow club
members. In times past, these most often were slide shows of a collecting trip or a trip to
a big show like Tucson or Denver, but they also included show-and-tell presentations of a
member’s collection or demonstrations and instructions on a particular lapidary skill.
With digital cameras now the norm, these presentations are largely presented off a
computer via PowerPoint through a digital projection system, which beats the old slide
projector in any number of ways. Gone is the whir of an overly loud fan cooling your
bulb, the jammed slide that brings a pause to the presentation, and the occasional upside-
down or backward slide, which is especially embarrassing when it turns out all the slides
are that way!
In addition to avoiding those pitfalls, now you can enhance a presentation by digitally
inserting labels or arrows highlighting special features in a particular photo, combining
photos for panoramic views, adding PowerPoint slides with brief snippets of animated
text or outlines to guide your audience through key points of your talk, and even adding a
musical background or just the sound of the wind across the desert.
PowerPoint presentations via computer are now the norm for rock talks.
My son and daughter were given occasional assignments in high school to create
PowerPoint presentations as group homework projects. If you have kids with such
abilities and proclivities in your club, encourage them to prepare a PowerPoint
presentation or a digital slide show about their favorite rocks, minerals, fossils, or
collecting sites using images plucked from the web or from pictures taken with a digital
camera.
If they have the right equipment and skills, kids can incorporate video clips and/or sound.
This works especially well as a group project, with kids converging on the home of the

286
one with the most sophisticated computer equipment and with the more knowledgeable
kids sharing computer know-how and savvy with the less knowledgeable (I include
myself in the latter category) and with everyone contributing ideas toward producing a
final product for presentation at a club meeting.
At a simpler level, encourage kids with digital cameras to take photos on their collecting
trips showing the surrounding countryside, the specific locality and any identifying
landmarks, and samples of what they found there. They then can pick out the best shots
to burn to CDs to copy and share with other kids in the club or to start storing in a club
library as a digital archive of collecting localities.
See how far your kids’ computer skills can take them as they apply those skills toward
rockhounding. Who knows? You might be providing training for your future club
webmaster!
Note: Kids can use this activity to satisfy requirements toward earning the Communication badge
simultaneously (Activity 7.1).
287
Back-up page 15.4: Cataloging your collection electronically.
When I was a kid, I used a composition book to catalog my fossil collection, listing new
fossils as I got them, and supplementing that master list with a collection of 4X6 index
cards where I scribbled locality info, with data about the formation and the sorts of fossils
I had collected. The card system made it easy to find my locality info: it was all stored
alphabetically by the name of the locality (most often the name of the closest town, like
“Stockton Bryozoan Patch” or “Braidwood Concretions” or “LaSalle Crinoid Quarry”),
and new cards could be inserted easily in their alphabetical place.
The whole system worked fine while my collection was small and manageable, but the
larger it grew, the more difficult it was to leaf back through my master list in that
composition notebook, in which fossils were listed as they were acquired rather than by
some more logical system, such as class or family of fossil, geological age, locality, etc.
Eventually, I found faults in my index card system, too. For instance, instead of grouping
by locality name, would it make more sense to group all the cards together by geological
time period in case I wanted to find all the Ordovician localities represented in my
collection? So I made divider cards for each major period and then organized localities
alphabetically within each period. But then, what if I specifically wanted to find all
localities holding a specific type of fossil, like trilobites? How would I easily find those?
The advent of the personal home computer made such questions moot. Collectors (both
kids and adults) have access to intuitively easy-to-use database and spreadsheet software
programs that come already loaded on new computers when purchased. You can now set
up master fields. For fossils, these might include things such as specimen number,
common name, taxonomic information, period and/or formation, and locality. For
minerals: specimen number, common name, locality, etc. Once master fields are set up
and data for each specimen entered, it’s easy to reorganize your list and pull up just the
things you want, for instance, all my fossil fish from the Eocene Epoch, or all my fossil
crinoids regardless of locality or time period, or all my specimens of quartz crystals.
An easier alternative to creating your own database from scratch is purchasing software
packages expressly designed to help rockhounds catalog their collections. These often
have blank fields that simply need to be filled in, and the program does the rest of the
work, even allowing you to print custom labels. One example is Carles Millan’s free
software for cataloguing mineral collections: http://carlesmillan.cat/min/main.php.
Another free collection management system is available on the website of Geology 365:
https://www.geology365.com/.
For more about cataloging a collection and electronic data keeping, see Back-up page
5.2: Cataloging and labeling your collection, in the Collecting Badge unit. Work with
your kids to come up with the best system for cataloging their collections and encourage
those who are technologically proficient to make full use of the computer.
Note: Kids can use this activity to satisfy requirements toward earning the Collecting badge
simultaneously (Activity 5.2).
288
Back-up page 15.5: Maps and GPS to find your way.
Use this activity to show kids the different types of maps they’ll find useful in pursuing
our hobby, from traditional guidebooks, road maps and geographic/political maps
showing locations of towns, county borders, etc., to topographic maps showing the ups
and downs of our landscape and geological maps revealing the formations under our feet
in colorful patterns. (See Maps Activity 20.1.) With that background under their belts,
then turn to digital maps.
Maps have come a long way since the days we stopped at gas stations to get the bulky
fold-out variety to distract us as we drove and that never seemed to fold back in the way
they folded out. Those maps still exist and still serve a purpose. Good sources for
roadmaps continue to be gas stations (sometimes!), along with drug stores and variety
stores, AAA offices, etc. More detailed maps and atlases are available through
companies like DeLorme, Rand McNally, and Thomas Guides and can be found in
variety stores, bookstores, or outdoor supply stores. To get topographical and geological
maps, turn to the geological survey of the state you’re planning to visit. Most will have a
catalog or online listing of maps they offer. To find a link to your state geological
survey, go to the web site of the U.S. Geological Survey: http://www.usgs.gov.
The most exciting development with maps is how getting from Point A to Point B has
been transformed in the digital age. Show your kids how they can enter start and end
points into MapQuest (http://www.mapquest.com) or similar services and get directions,
driving distances, and estimated travel time, along with a color map highlighting their
route. In fact, skip MapQuest! Cars increasingly are equipped with built-in navigation
systems that will even talk to you and tell you when you’ve gone a road too far. On the
web, mapping services such as Google Earth (http://earth.google.com) combine
traditional maps with satellite images that allow you to zoom in for a close-up look at
your destination. Gather kids around a computer and explore these neat features, picking
destinations the kids throw out.
Finally, the Global Positioning System (GPS) has truly transformed how we might go
about finding our old-time favorite collecting spots, even in those desert localities where
the unmarked fork in the road turns out to be three or four forks, none seeming to line up
exactly with the guidebook in our lap. In fact, those guidebooks increasingly include
GPS coordinates for collecting spots. Some now consist purely of coordinates, entirely
forgoing the traditional maps and directions, for instance, David A. Kelty’s GPS Guide to
Western Gem Trails. Other guidebooks are popping up, like Delmer G. Ross’s
Rockhounding the Wiley’s Well District of California: The GPS User’s Guide.
If you or other adult members of your club or society have GPS devices, give your kids a
demo of GPS in action, perhaps by doing a “geocache,” or treasure hunt. Hide a
container or bag with enough crystal or fossil specimens for each of the kids in your
group and plant it in a field or park, noting its GPS coordinates. Then play GPS hide-
and-go-seek with your kids. Give each participant a rocky reward once the geocache has
been located.

289
Nowadays, you don’t need a separate GPS device as in years gone by. Simply access a
GPS app on your smartphone and have at it! Such apps will often show existing
locations of geocaches stashed away in areas near you.
Kids in the Ventura Gem & Mineral Society count out steps while following GPS
coordinates on cell phones to find hidden treasure in a fun geocache adventure.
Note: Kids can use this activity to satisfy requirements toward earning the Maps badge simultaneously
(Activities 20.5 & 20.6).

290
Back-up page 15.6: Joining an online community and holding online meetings.
Online Communities.
Being mindful of the “safety tips” noted on Back-up page 15.1 (required to earn this
badge), you might encourage your older, more computer-savvy kids to join an online
community in an area of specific interest. Such communities can put them in touch with
knowledgeable hobbyists and experts around the world with like-minded interests,
offering blogs, message and bulletin boards, discussion groups, news updates, photo
galleries, YouTube videos, and more. Kids can find answers to their questions,
suggestions and tips, leads to further resources, and even opportunities to trade specimens
through the mail.
The downside is that discussions held on such sites don’t always proceed in a grown-up
manner as the occasional “flame war” erupts in part as a result of misunderstandings
arising from the nature of online communication, where, for example, an effort at humor
may get misinterpreted as an insult. You’ll also find people engaging in fatuous ego trips
now and then, painfully and embarrassingly reminiscent of candidates for the U.S. Senate
or Presidency. Still, the benefits outweigh the occasional downside, and online
communities can be both educational and fun if you look past the banter and egos that
sometimes go off track.
I recommend consulting your local librarian to help discover good, established, reputable
groups. Fellow club members also might be able to offer advice based on groups that
they may already belong to. To give you a flavor, here are a few fairly well established
groups that I’m aware of:
LA-Rocks, an on-line group of Southern California rockhounds who share
information on gems and minerals, collecting sites, shows, and field trips.
http://groups.yahoo.com/group/LA-Rocks/
Rock Tumbling Hobby, a site for over 4,000 rock tumbling enthusiasts to trade
tumbling tips, share photos, and arrange swaps of tumbling rough.
www.rocktumblinghobby.com
Club Space Rock, a site which bills itself as “the world’s largest meteorite
community,” with folks ranging from rank amateurs to world-class scholars.
www.meteorites.ning.com
Bob’s Rock Shop, billed as “the Internet’s First ’Zine for Rockhounds,” this includes
a “Rock Talk” discussion group and message forum, along with all sorts of other
information, photo galleries, links, and more. As it says on its opening page,
“proudly serving 75,000 rockhounds per month.”
www.rockhounds.com

291
Online Meetings.
When the COVID-19 pandemic struck the world in the early months of 2020, many gem
and mineral clubs were barred from in-person gatherings, both for their adult membership
meetings and for Pebble Pup and Junior Program lessons. But those of us in the Ventura
Gem & Mineral Society and elsewhere were still able to connect—courtesy of the
computer and the Zoom teleconferencing platform!
We were able to conduct Board meetings, membership meetings (including PowerPoint
presentations by guest speakers), and even a live auction while enjoying the opportunity
to see one another face-to-face. Soon, we extended this to our Pebble Pups Program.
Kids were given notice of the topic and an assignment or two to complete in advance.
Then parents and kids all met together over the computer to enjoy seeing one another,
learning via PowerPoint presentations and videos, and finally sharing an activity. One
time, they had all been given recipes for producing homemade crystals (see Activity 1.6),
and everyone shared their results. Another time, instructions were given on how to craft
a baking-soda-and-vinegar volcano (see Activity 10.3.b), and we ended the session by
having a half dozen volcanoes all go off at once all across the county. As a follow-up,
kids were mailed packets with educational flyers, coloring books, and/or mineral
specimens related to the topic of the day—along with AFMS/FRA badges they earned by
taking part.
Could online meetings prove too successful? Some members are now asking why we
don’t just meet like this all the time! Well, now, I just don’t know about THAT…
Even when you can’t meet in-person, you can still meet—via Zoom!

292
Back-up page 15.7: WILD CARD: Do your own thing!!
While I’ve tried to provide a wide-ranging variety of activities to choose from, no one
manual can “do it all.” There are many other great ideas out there that clubs have found
to match their local interests and resources.
Plus, the Youth Leaders of some clubs have expressed concern that some of the activities
included in the manual may be a bit beyond the abilities of their youngest members.
Here’s your chance to tailor-make activities for the youngest among us.
If you and your fellow club members have an idea for learning about rocking on the
computer that isn’t included in this manual, go for it! When you send in your badge
request, just let me know what you did as a WILD CARD activity. Who knows? Maybe
your idea will be included in the next edition of the Badge Manual!
293
16. The World in Miniature
When we collect, we usually seek the biggest rock on the ground. But you may be
surprised at what you’ll find within the world in miniature! Step through the magnifying
glass and learn to collect, clean, and store the smaller wonders of the mineral and fossil
world and discover truly great specimens most people walk right over.
Many people focus on cabinet specimens (ones that are fist-sized). Here, you’ll learn
about miniatures (specimens small enough to fit within a 2-inch cube), thumbnails (fits
within the space of a 1-inch cube) and micromounts (specimens so small as to require
magnification with a hand lens or microscope to identify and evaluate).
Learn not only how to collect micromounts but also how to capture images to share with
others by drawing or photographing your specimens. You’ll find one thing for certain:
these small specimens sure are easy to store!
Activity 16.1: Collecting, preparing, and storing miniature minerals.
Except for their size, miniatures aren’t a lot different from larger specimens you may
have collected, but you may need to use special techniques to trim and store a small
mineral. Learn those techniques and make a collection of 5 to 10 miniature minerals.
Activity 16.2: Collecting, preparing, and storing thumbnail minerals.
You might extract thumbnail minerals from a cavity in a rock, sift them from soil, or
carefully split one away from a larger mass of crystals. Learn special techniques to
collect, mount, and store thumbnail minerals, and make a collection of 5 to 10.
Activity 16.3: Collecting, preparing, and storing microminerals.
Microminerals are a special class requiring extra special care and materials. Because
they are so very tiny, they’re easily lost or destroyed. Learn what special efforts to take
to collect, mount, and store them, and make a collection of 5 to 10 microminerals.
Activity 16.4: Collecting, preparing, and storing miniature fossils.
Sometimes you’ll find small fossils in mint condition sitting right on the surface. More
often, you’ll need special techniques to collect, trim, and store a small fossil without
damaging it. Learn those techniques and collect 5 to 10 different miniature fossils.
Activity 16.5: Collecting, preparing, and storing thumbnail fossils.
Learn how to use small chisels, saws, and nippers to trim matrix from around thumbnail
fossils. Also learn how to safely store your small treasures so they aren’t lost or
destroyed. Then make a collection of at 5 to 10 different thumbnail fossils.
Activity 16.6: Collecting, preparing, and storing microfossils.
You can find microscopic fossils loose in the dirt at a fossil site. Learn about graduated
screens for sifting sediment to retrieve tiny fossils. Also learn how to store your tiny
treasures so they aren’t lost or destroyed, then collect of 5 to 10 different microfossils.

294
Activity 16.7: Collecting and classifying sand.
A heap of sand is basically a collection of microminerals and microfossils. Form a sand
collection and explore the world of sand grains with sand samples from at least five very
different locations. Explain why your samples may look different from each other.
Activity 16.8: Drawing or photographing microminerals, microfossils, and sand.
In order to better share your micromineral, microfossil, or sand collection with others,
make drawings or take photographs to magnify your specimens.
Activity 16.9: WILD CARD: Do your own thing!
Do you have an idea for learning about the world in miniature that isn’t included in this
manual? If so, do your own thing! When your Youth Leader sends in your badge
request, let us know what you did as a WILD CARD activity. Who knows? Maybe your
idea will be included in the next edition of the Badge Manual!
295
16. The World in Miniature
□ 16.1 Collecting, preparing, and storing miniature minerals
□ 16.2 Collecting, preparing, and storing thumbnail minerals
□ 16.3 Collecting, preparing, and storing microminerals
□ 16.4 Collecting, preparing, and storing miniature fossils
□ 16.5 Collecting, preparing, and storing thumbnail fossils
□ 16.6 Collecting, preparing, and storing microfossils
□ 16.7 Collecting and classifying sand
□ 16.8 Drawing or photographing microminerals, microfossils, or sand
□ 16.9 WILD CARD: Do your own thing!
To earn your World in Miniature badge, you need to complete at least 3 of the 9
activities. Check off all the activities you’ve completed. When you have earned your
badge, sign below and have your FRA leader sign and forward this sheet to the AFMS
Juniors Program chair.
___________________________________
Date completed
_________________________________ ___________________________________
My signature Youth leader’s signature
_______________________________________________________________________
Name of my club
Leader’s preferred mailing address for
receiving badge:
____________________________________
____________________________________
____________________________________

296
Back-up page for the World in Miniature badge.
Let’s start with some definitions…
A cabinet specimen fits within a 5-inch cube. These are the specimens we often see
on display at gem shows. They’re usually fist-sized and fit comfortably within the
palm of your hand. But that’s not what this unit is about…
A miniature is a specimen that fits within the confines of a two-inch cube.
A thumbnail is a specimen that fits within the confines of a one-inch cube.
A micromount is a specimen so small that it requires a hand loupe (generally 10X or
20X) or a microscope to identify and appreciate it. Usually, it is also permanently
glued and mounted in a small box or slide to safeguard it.
Collectible minerals are classified by several size categories.
Miniature, thumbnail, and micromount garnets (shown life-size)
It’s best to start kids exploring smaller specimens with “miniatures.” The smaller you get
on the scale presented above, the more complicated and expensive it can become to build
a collection, and micromounts are pursued primarily by “connoisseurs” of the mineral
and fossil world. These tiny specimens often represent the pinnacle of perfection. Many
of those stunningly perfect crystals you see featured in magazines are actually
micromounts. Take a close look at the captions, and you’ll see measurements expressed
in terms of millimeters!
Still, it doesn’t have to be complicated nor expensive to make a start with a micromount
collection. In this unit, we won’t try to be comprehensive but instead will focus on
simple, inexpensive basics while providing recommended resources for anyone wishing
to go into more depth, particularly with microminerals and microfossils.

297
Smaller specimens provide a great way to get kids started in collecting. For one thing,
such specimens are often a lot kinder to a child’s budget if purchasing specimens at a
gem show. While perfect crystals of precious gemstones such as rubies, sapphires,
diamonds, or emeralds are going to cost a bundle no matter what the size, many common
specimens of such minerals as quartz, calcite, or pyrite, or of fossils like brachiopods,
horn corals, or ammonites usually cost a whole lot less the smaller they are.
Kids are also more likely to find “mint” condition fossils or crystals of smaller sizes
when collecting in the field. They just need to be trained to look for and appreciate these
smaller specimens. When I was a child, I was on the lookout for the twelve-foot long
petrified log or the T. rex skull—perhaps somewhat unrealistically, given that I grew up
in Illinois….I haven’t done a formal count, but I’d safely wager that the vast majority of
my own self-collected fossils fall within the categories of miniatures and thumbnails.
A miniature or thumbnail collection certainly takes a lot less space to store. While those
fist-sized cabinet specimens could fill up shoebox after shoebox in a child’s closet or
under the bed, over 100 thumbnail mineral specimens can easily fit in a space just one
foot by two feet and literally thousands of microfossils mounted on slides can be tucked
compactly into a space no bigger than a breadbox. Finally, as a fringe benefit, working
with small specimens refines hand-eye coordination and helps a child in developing
concentration, patience, and focus.

298
Back-up page 16.1: Collecting, preparing, and storing miniature minerals.
Collecting miniatures.
One good way to start kids collecting miniature minerals is in the backyard of a willing
club member who has a 40-year accumulation of rock sinking into the ground, with small
chips and pieces scattered all about. Let kids know they won’t be seeking a spectacular
giant hunk but instead rejects and cast-offs: the quartz or calcite-filled geode that
shattered under a hammer blow and now sits in unwanted pieces. On close inspection,
and with a little scrubbing, these pieces may yield perfect miniatures. Encourage kids to
get up-close-and-personal with the rocks. Other sources of miniatures include gem
shows, swaps with fellow club members, and—of course—field trips to mines and
mineral localities listed in guidebooks for self-collecting.
Tools for field collecting miniatures will be the same as those used for collecting bigger
specimens (see Back-up page 8.2): a rock hammer and chisel, goggles for eye protection,
work gloves to protect hands, a roll of toilet paper for wrapping specimens so crystal tips
and faces don’t get chipped or scratched, zip-lock baggies for transporting specimens
safely home in buckets, knapsacks, or soda flats, and masking tape, markers, and
notebooks for recording locality and other field information for each specimen.
Preparing miniatures.
Preparing miniatures basically involves trimming away matrix and unwanted damaged
crystals. Kids shouldn’t try to trim excess matrix in the field but rather at home, where
they can better control the trimming. Basic supplies needed include lapidary hammers
and small chisels (along with eye protection), rock or tile nippers and/or special vice-like
rock trimmers to snip away pieces of matrix, a small rock saw, and a hack saw fitted with
a grit-edge or tungsten carbide blade rod.
Here are a few of the tools you might use to trim matrix from a mineral specimen
(from left to right): tile nippers, a vice-like rock trimmer, small chisels and hammer.

299
It is helpful to have a regular hand magnifying glass or, better, a bench magnifier that
allows one to work with both hands free. Small sand bags are also helpful to secure a
specimen and to absorb the shock of any hammer-and-chisel blows, which should be
administered with a light touch after a good deal of examination and consideration of the
specimen in-hand.
For sturdier, non-soluble minerals and crystals, cleaning often involves nothing more
than a scrubbing with soapy water and a toothbrush. I’ve also used steel dental picks and
a dental water pick to get at stubborn dirt packed within tiny crevices.
Storing miniatures.
Miniatures may be stored in egg cartons, small fold-up cardboard specimen boxes, or
compartmentalized plastic storage boxes with fold-top lids sold with fishing tackle or in
bead-supply stores. A more expensive option is the 2-inch Perky box, named after its
creator, Willard Perkins of Burbank, California, who was known to friends as “Perky.”
By definition, a “miniature” mineral must fit within a 2-inch cube, like this
Perky box (shown life-size), which is also a fine way to store a miniature mineral!
For use with miniatures, Perky boxes come in two sizes: medium (1-3/8"X2"X2") and
large (2.25"X2.5"X2.5"). These small plastic boxes, available from mineral suppliers,
usually have a black bottom lined with Styrofoam and a clear plastic top. Specimens can
be pushed into the Styrofoam or held in place with a dab of mineral- or poster-tack.
These Perky boxes, in turn, can be stored in soda flats or small cabinets.
Note: Kids can use this activity to satisfy requirements toward earning the Collecting badge
simultaneously (Activity 5.1).

300
Back-up page 16.2: Collecting, preparing, and storing thumbnail minerals.
Collecting thumbnail minerals.
See Back-up page 16.1 on ways to collect miniatures. It’ll be much the same when
approaching thumbnails. However, the “tools of the trade” get a little more specialized.
You’ll need the same tools used for collecting miniatures, augmented with a loupe, flat
screwdrivers and ice picks, and chisels of various sizes but especially small ones. The
screwdrivers and ice picks can be used to probe small crystal-lined pockets and to remove
mud and clay from cavities. If trying to chip out a little crystal-lined vug, stuff bits of
rags (or shaving cream) into the cavity, both to protect crystals from shocks of hammer
blows and to keep them in place so they don’t go flying. In areas where small crystals
may be loose in the dirt or gravel or when searching through mine tailings, your best
tools are hand rakes, small shovels or trowels, and quarter-inch mesh screens in wooden
frames. This is how many fee dig sites operate, with a pile of earth from mine tailings to
be dumped into screens and sifted in water for quartz crystals, tourmalines, garnets, etc.
Also handy: a supply of small zip-lock baggies to store finds.
Thumbnail minerals are truly special in their beauty and perfection!
Preparing thumbnail minerals.
For thumbnails, as with miniatures, the goal is to reduce larger rock blocks with hammers
and chisels if the crystals can take the shock of blows being delivered around them. You
want to trim away as much matrix as possible without damaging the crystals, switching to
increasingly delicate techniques the closer you get. Instead of delivering sharp blows
with a standard rock hammer and chisel, you’ll switch to small chisels and deliver
delicate blows with small lapidary hammers (while wearing eye protection). You can
also use rock or tile nippers and vice-like rock trimmers. For especially stubborn matrix,
you may need to use a trim saw lubricated with water rather than oil, but most collectors
prefer a “natural” edge on matrix as opposed to the straight edge of a saw cut. One way
to create a natural edge is to saw a shallow groove from below and then tap with a small
chisel and hammer from above. When using hammers and chisels to remove matrix close
to your specimen, place your rock on a sand bag to cushion blows, and use a bench
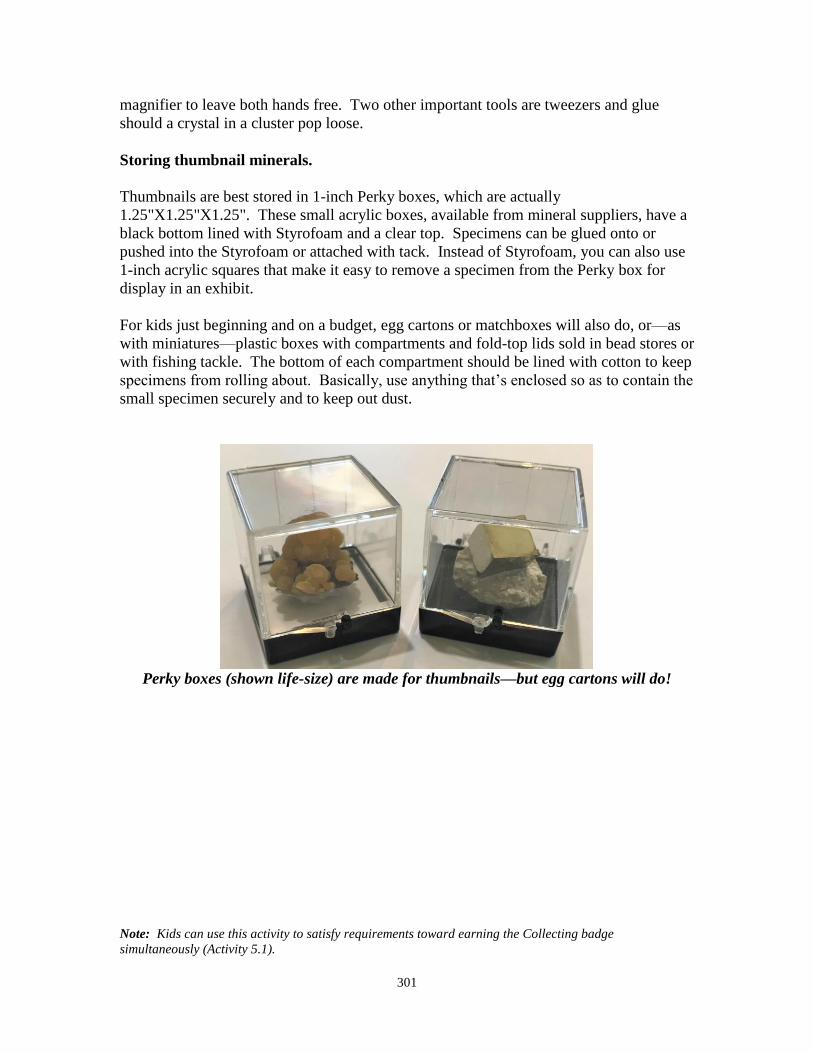
301
magnifier to leave both hands free. Two other important tools are tweezers and glue
should a crystal in a cluster pop loose.
Storing thumbnail minerals.
Thumbnails are best stored in 1-inch Perky boxes, which are actually
1.25"X1.25"X1.25". These small acrylic boxes, available from mineral suppliers, have a
black bottom lined with Styrofoam and a clear top. Specimens can be glued onto or
pushed into the Styrofoam or attached with tack. Instead of Styrofoam, you can also use
1-inch acrylic squares that make it easy to remove a specimen from the Perky box for
display in an exhibit.
For kids just beginning and on a budget, egg cartons or matchboxes will also do, or—as
with miniatures—plastic boxes with compartments and fold-top lids sold in bead stores or
with fishing tackle. The bottom of each compartment should be lined with cotton to keep
specimens from rolling about. Basically, use anything that’s enclosed so as to contain the
small specimen securely and to keep out dust.
Perky boxes (shown life-size) are made for thumbnails—but egg cartons will do!
Note: Kids can use this activity to satisfy requirements toward earning the Collecting badge
simultaneously (Activity 5.1).

302
Back-up page 16.3: Collecting, preparing, and storing microminerals.
Collecting microminerals.
What does a chunk of rotting granite shedding flakes of mica and crystals of quartz,
feldspar, and hornblende have in common with a freshly cracked geode with interior
crystals speckled with black dots?
On close inspection, both may yield perfect microminerals! In collecting microminerals,
kids need to dive in nose-first and really get up-close-and-personal with the rocks. It’s
not enough to scan the ground from above. Kids need to get on hands and knees or even
on their bellies when searching through gravel or over matrix likely to hold tiny crystals,
and they’ll definitely need to bring their 10X or 20X loupes to look closely at what they
spy. I’ve found tiny but perfect “Pecos diamond” quartz crystals while lying on the
ground and picking through the sandy ruble of an ant hill near Roswell, New Mexico—
although I also learned that those particular ants sting. Ouch!
Preparing microminerals.
Preparing microminerals involves trimming away matrix—very carefully, very slowly,
just a little at a time and constantly checking as you go. Basic supplies include hammers
and small chisels (along with eye protection), nippers and/or special vice-like rock
trimmers, a small rock saw, Dremel-type grinding and cutting bits, dental picks, pointed-
nose pliers, tweezers of various sorts, glue, magnifying glasses, and a bench magnifier
that allows for hands-free work or even better, a binocular stereomicroscope, commonly
called a dissecting microscope.
Micromounters often start with magnifying glasses but work up to microscopes.

303
Storing microminerals.
To best preserve and conserve them, microminerals are usually permanently glued into a
protective container. They are then referred to as micromounts.
A micromineral glued in place becomes a micromount (shown life-size).
Micromount boxes with black bottoms and clear, snap-on lids are purchased at mineral
supply stores, or you can use small plastic boxes with snap-on magnifier lids. I
especially love the advice offered by the Baltimore Mineral Society on “The Rules of
Micromounting.” To wit: “Rule number one is, There are no rules. Most
micromounters try to produce neat, clean specimens carefully mounted so that the cork
and glue underneath do not show, but some collectors stick their specimens in boxes with
stickum or even hot glue. Some collectors use various size boxes and some use only one
size. Some collectors photograph every specimen and catalog it carefully in a data base
and double entry card catalog. Others hardly keep any records at all. Do it your way.”
Examples of containers to store or display microminerals.
There are many sophisticated techniques for gluing microminerals onto tiny rods and
mounting them in display boxes. But for kids just beginning, it’s probably best to use
pedestals of tiny corks painted black. They can be handled more easily, both for gluing
on the specimen and for positioning and gluing the pedestal into the box. Trim down the
pedestal to keep the top of a mineral specimen just under the upper lip of the box so the

304
lid never comes in contact with the mineral. If possible, the pedestal should not be
visible beneath the mineral when viewed from above.
Have kids practice with less desirable specimens until they acquire patience and skill at
gluing and positioning with tweezers. For practice, they should start with larger
specimens with flat bottoms to glue to larger pedestals. Great attention is needed, with a
steady hand, to place and glue a micromineral to a pedestal. Also, work should be done
on a tray under good lighting so tiny specimens don’t get dropped on the floor and
forever lost.
Learning more about microminerals and micromounts.
Sauktown Sales (Mill Creek, Indiana) specializes in micromount specimens and supplies.
On their website www.sauktown.com, they provide not only supplies but much useful
information and links to nearly two dozen web sites related to micromounts. Another
great website is Chris’s Mineral Collecting Page, www.njminerals.org/. Although
focused on minerals of New Jersey, this site has two sections offering terrific comments
and advice on the art of collecting and curating microminerals.
Although pitched toward adults, a couple reference books and several club web sites
provide fine information for you to consult in working with kids on this activity.
Milton Speckels, The Complete Guide to Micromounts (1965, 1980; out of print?)
Quintin Wight, The Complete Book of Micromounting (1993). Available through the
Mineralogical Record, www.minrec.org
Baltimore Mineral Society has been home to some of the best micromounters in
America: www.baltimoremineralsociety.org/what-is-micromounting
Nelson Rock & Mineral Club of New Zealand offers a fine introduction to the hobby:
www.nelsonrmc.org/micromounts
The Micromounters of New England offers interesting articles and photos on their
site: www.micromountersofnewengland.org
Tom’s Mineralogy Info offers great info at a basic level and a number of helpful
links: http://cholla.mmto.org/minerals/micromounts/intro.html
Fine resources to consult for learning about microminerals and micromounts.
Note: Kids can use this activity to satisfy requirements toward earning the Collecting badge
simultaneously (Activity 5.1).

305
Back-up page 16.4: Collecting, preparing, and storing miniature fossils.
Collecting miniatures.
Kids will find miniature fossils as they seek other, larger fossils during your regular field
trips. In fact, a great many common invertebrate fossils fall within the size range of one-
to two-inches and are often found weathered free at an outcrop: sea urchins and small
sand dollars, small clams and snails, “Devil’s toenail” oysters, a great many brachiopods,
crinoid stem fragments, twiggy bryozoan, trilobites, horn corals, and more.
Miniature fossils fit within a 2-inch cube (show life-size).
Encourage kids to make trades with fellow collectors since they’ll often bring home
multiple examples of a fossil species. Encourage them to trade duplicate specimens from
their collections with duplicates in other kids’ collections to more quickly expand the
variety of their holdings at no cost—while at the same time making friends within the
hobby. Finally, they’ll discover true bargains at gems shows for fossils that fall within
the one- to two-inch size range, specimens that are a lot more affordable than big flashy
fish fossils from Wyoming or two-foot limestone slabs with whole crinoids from
Morocco.
Preparing miniatures.
Preparing miniatures involves trimming away as much unnecessary matrix as possible
without damaging the fossil. Basic supplies needed include hammers and small chisels
(along with eye protection), rock nippers and pliers and/or special vice-like rock trimmers
to snip away pieces of matrix, a small rock saw, and a regular hand magnifying glass or,
better, a bench magnifier that allows you to work with both hands free. With a miniature
fossil, you usually want to remove all the matrix, if possible, and Dremel-type bits and
brushes and dental picks can help in removing final specks of dirt or matrix from small
nooks and crannies. If the fossil has been silicified and is in a limestone matrix, soaking
in vinegar (acetic acid)—followed by a vigorous brushing—can also help dissolve,

306
loosen, and remove matrix. (Afterwards, soak the fossil in water and baking soda to
neutralize any remaining acid from the vinegar.)
If a specimen is delicate or can really only be exhibited in matrix, as much matrix as
practical should be removed. If a specimen is in hard limestone or shale, a small rock
saw or a hack saw fitted with a grit-edge or tungsten carbide blade rod is often used.
However, many collectors prefer a “natural” edge to the matrix rather than the flat edge
that a saw produces. One way to create a natural edge is to saw a groove from below and
then tap with a small chisel and lapidary hammer from above. When hammers and
chisels are being used to remove matrix that’s very close to a specimen, the rock should
be placed on a sand bag to cushion blows.
Storing miniatures.
Miniatures may be stored in egg cartons, small fold-up cardboard boxes, or in 2-inch
Perky boxes, named after their creator, Willard Perkins. These small plastic boxes,
available from mineral suppliers, usually have a black bottom lined with Styrofoam and a
clear plastic top. These Perky boxes, in turn, can be stored in soda flats or small cabinets.
Egg cartons are just the right size for storing miniature fossils!
Note: Kids can use this activity to satisfy requirements toward earning the Collecting badge
simultaneously (Activity 5.1).

307
Back-up page 16.5: Collecting, preparing, and storing thumbnail fossils.
Collecting thumbnail fossils.
Small thumbnail fossils might be found right on the surface of a fossil locality, having
weathered free and mixed in with surrounding soil. To increase the odds of finding
specimens, take screens to sift through such soil at the base of a fossil outcrop.
You’ll also find many thumbnail fossils embedded in limestone, sandstone, or shale.
Rather than trying to pop those fossils from hard matrix in the field, kids should bring
those specimens home as “hand samples” to work in a more controlled setting with an
assortment of tools at hand.
Preparing thumbnail fossils.
As with miniatures, preparing thumbnail fossils involves trimming away excess matrix.
Basic supplies needed include: rock- or lapidary hammers and small chisels (along with
eye protection); pliers or nippers to snip away pieces of matrix and/or special vice-like
rock trimmers; a small rock saw; a regular hand magnifying glass or, better, a bench
magnifier that allows you to work with both hands free; Dremel-type bits, saws, and
brushes; dental picks; tweezers; and glue. Don’t have kids rush out and buy all this at
once! Start with hammers, small chisels, and pliers and expand as needed—and if an
interest in collecting thumbnail fossils persists beyond an initial exposure.
Some small silicified fossils (fossils that have been replaced by agate/quartz) embedded
in limestone may be freed in acid baths using acetic acid, or plain vinegar. Sometimes,
though, it may take a stronger acid, such as muriatic acid (often sold with swimming pool
supplies). Before trying any acid, though, make sure the fossil has been replaced by a
mineral that is resistant to the acid being used. It would be a shame to see fossils
replaced by calcite literally bubble away to slush!
Caution: Working with acid should always be done by an adult exercising great
precautions with long rubber gloves and aprons, eye protection, and a high quality
respirator mask in well ventilated areas, with any open containers kept away from areas
where pets might be or where fumes might cause damage to paints, pipes, etc. I always
do such work outdoors on a high shelf. We do not recommend that kids work with acid of
any sort, and any adults electing to do so should first thoroughly familiarize themselves
with all procedures and precautions.
Storing and displaying thumbnail fossils.
Thumbnails are best stored in 1-inch Perky boxes, named after their creator, Willard
“Perky” Perkins. These small plastic boxes, available from mineral suppliers, usually
have a black bottom lined with Styrofoam and a clear plastic top. Specimens are often
pushed into the Styrofoam or attached to it with a dab of tack or putty. Instead of
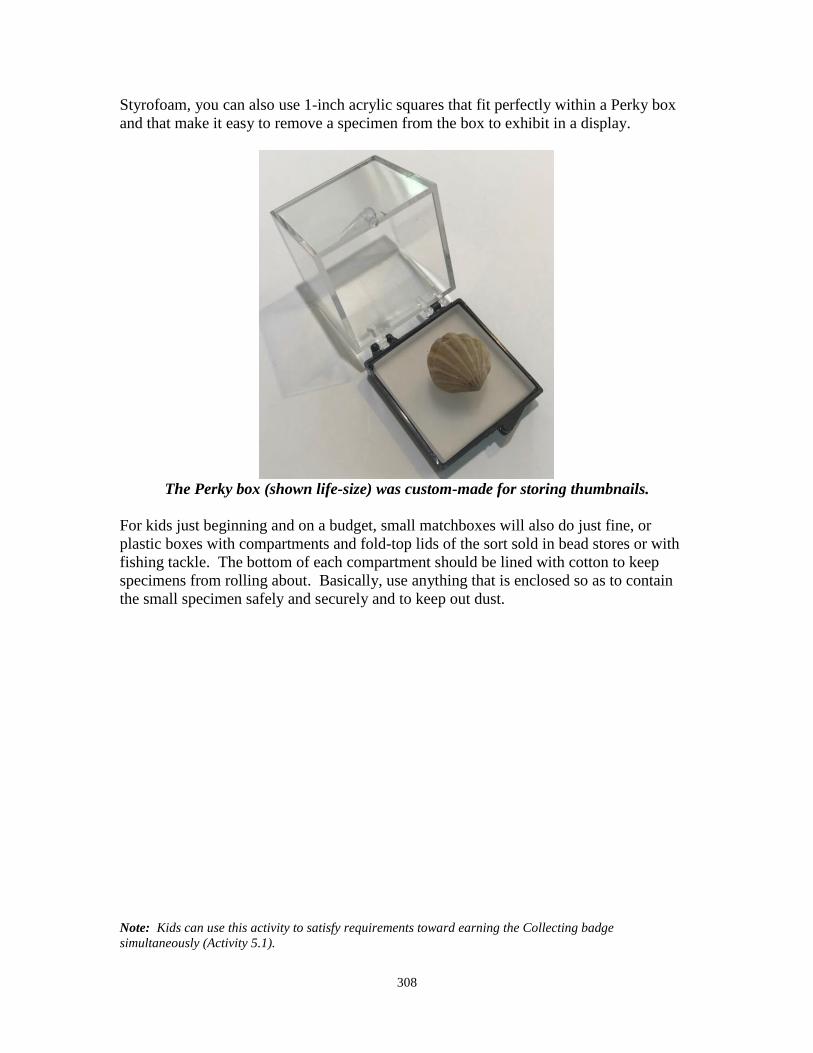
308
Styrofoam, you can also use 1-inch acrylic squares that fit perfectly within a Perky box
and that make it easy to remove a specimen from the box to exhibit in a display.
The Perky box (shown life-size) was custom-made for storing thumbnails.
For kids just beginning and on a budget, small matchboxes will also do just fine, or
plastic boxes with compartments and fold-top lids of the sort sold in bead stores or with
fishing tackle. The bottom of each compartment should be lined with cotton to keep
specimens from rolling about. Basically, use anything that is enclosed so as to contain
the small specimen safely and securely and to keep out dust.
Note: Kids can use this activity to satisfy requirements toward earning the Collecting badge
simultaneously (Activity 5.1).

309
Back-up page 16.6: Collecting, preparing, and storing microfossils.
Collecting microfossils.
In areas of recent marine deposits, microfossils might be mixed loose with soft sediments
(sand and mud), requiring only that you scoop up a sample and sift it through a screen.
Or microfossils might be embedded in limestone, sandstone, or shale. To check sediment
or rock samples, take a 10X or 20X loupe into the field.
If you detect small fossils in a sediment sample, take home a supply in zip-lock baggies;
if in matrix of hard rock, take several “hand samples” home. Use the same tools already
listed in Activities 16.4 and 16.5, but for microfossils found in soft, loose sediments, add
sifting screens of various mesh sizes. You can purchase stackable graduated screens
from geological supply houses such as Ward’s (see the round black screens in the photo
below), or you can do like I did as a kid and make your own with wooden frames and
screens of various sizes purchased from a hardware store, starting with quarter-inch down
to window screen and smaller (see the wood-framed screen, below, crafted decades ago
and which I still use). You can also use colanders and other screens from Mom’s kitchen.
(Just don’t tell Mom!)
Use screens of all sorts to sift sediment for microfossils.
Small trowels and hand rakes are handy for sifting through soft sediments and dirt
containing fossils that may have weathered out of a limestone, sandstone, or shale bank.
It’s always a good idea to sift through dirt surrounding such “hard rock” outcrops for the
surprising treasures it may hold!

310
Preparing microfossils.
For microfossils in soft sediment and for those that are weathered free in the dirt around
hard sediments, all that’s required is sifting away the sediment with a series of graduated
screens. You’ll also want a bench magnifier that allows for hands-free work or even
better, a binocular stereomicroscope, commonly called a dissecting microscope, along
with stick pins and tweezers. Work should be done on a tray under good lighting so tiny
specimens don’t get dropped and lost. (Microfossils embedded in limestone may be freed
in acid baths and those in shale can sometimes be freed by soaking samples in kerosene,
but those techniques are best reserved for adults exercising due precautions; see the
references listed below for specific techniques.)
Storing and displaying microfossils.
Microfossils can be prepared as “micromounts” in the same manner as microminerals
within small micromount boxes (see Activity 16.3). You can glue the microfossil atop a
pin that has been pushed into a cork or Styrofoam (painted black) to provide the perfect
little pedestal for display.
A microfossil glued atop a pin in a black container displayed next to a model.
Alternatively, professional geology supply houses, such as Ward’s, sell small slides made
especially to hold microfossils. These are made of two layers of cardboard, a glass top,
and an aluminum frame to hold the glass atop the cardboard. Specimens may be glued in
with a small dab of white glue or a droplet of gum tragacanth or gum arabic.

311
A micromount slide (shown life-size) holds an entire collection!
Although most reference books published about microfossils are pitched to an adult
audience, they provide fine reference for any adult working with kids on this activity:
Brasier’s Microfossils (1980). This one is detailed and technical!
MacFall & Wollin’s Fossils for Amateurs: A Handbook for Collectors (1972). Now
out of print, this was a longtime standard for amateurs and is in many libraries or used
book shops. Chapter 12 overviews microfossil collecting.
Margaret Kahrs (editor), Microfossils: M.A.P.S. Digest Expo XXI Edition (Mid-
America Paleontological Society, Vol. 22, No. 4, 1999).
Jim Brace-Thompson, “Microfossil Techniques: Tools & Methods for All Budgets,”
in Kathleen Morner (ed), Paleotechniques: M.A.P.S. Digest Expo XXVI Edition (Mid-
America Paleontological Society, Vol. 27, No. 2, 2004). (Email or call me for
reprints.)
Check the library of a college geology department for books on microfossil techniques.
Note: Kids can use this activity to satisfy requirements toward earning the Collecting badge
simultaneously (Activity 5.1).
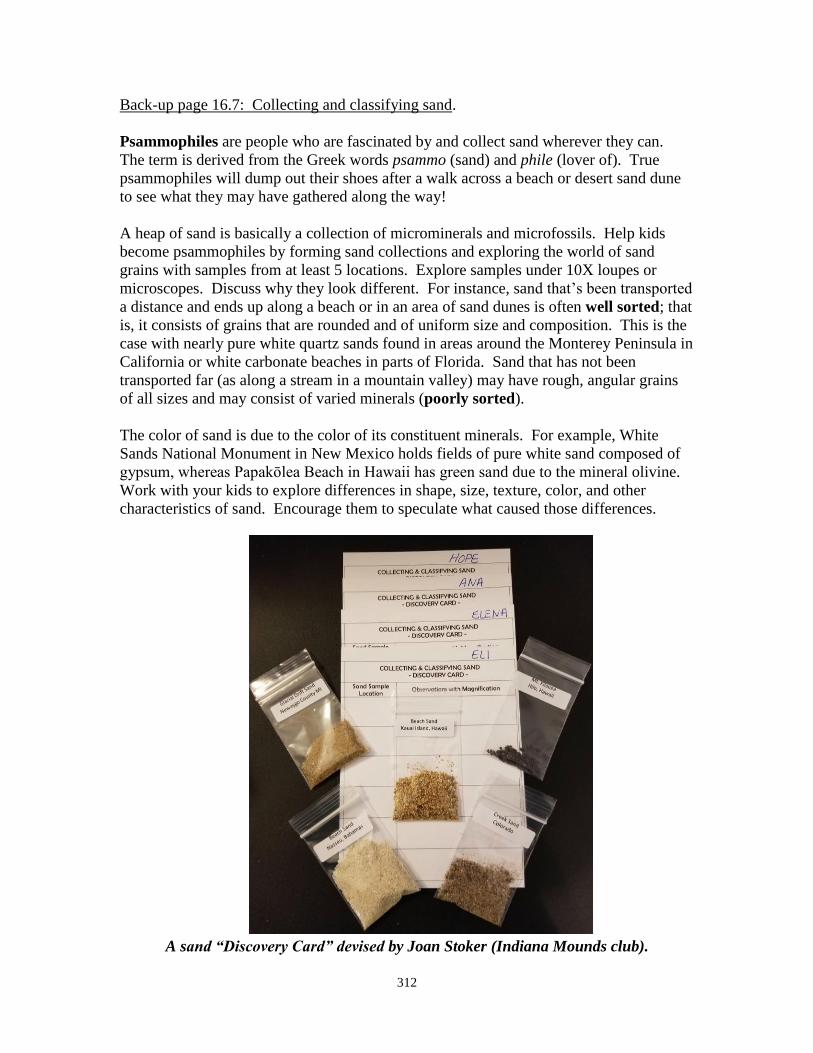
312
Back-up page 16.7: Collecting and classifying sand.
Psammophiles are people who are fascinated by and collect sand wherever they can.
The term is derived from the Greek words psammo (sand) and phile (lover of). True
psammophiles will dump out their shoes after a walk across a beach or desert sand dune
to see what they may have gathered along the way!
A heap of sand is basically a collection of microminerals and microfossils. Help kids
become psammophiles by forming sand collections and exploring the world of sand
grains with samples from at least 5 locations. Explore samples under 10X loupes or
microscopes. Discuss why they look different. For instance, sand that’s been transported
a distance and ends up along a beach or in an area of sand dunes is often well sorted; that
is, it consists of grains that are rounded and of uniform size and composition. This is the
case with nearly pure white quartz sands found in areas around the Monterey Peninsula in
California or white carbonate beaches in parts of Florida. Sand that has not been
transported far (as along a stream in a mountain valley) may have rough, angular grains
of all sizes and may consist of varied minerals (poorly sorted).
The color of sand is due to the color of its constituent minerals. For example, White
Sands National Monument in New Mexico holds fields of pure white sand composed of
gypsum, whereas Papakōlea Beach in Hawaii has green sand due to the mineral olivine.
Work with your kids to explore differences in shape, size, texture, color, and other
characteristics of sand. Encourage them to speculate what caused those differences.
A sand “Discovery Card” devised by Joan Stoker (Indiana Mounds club).
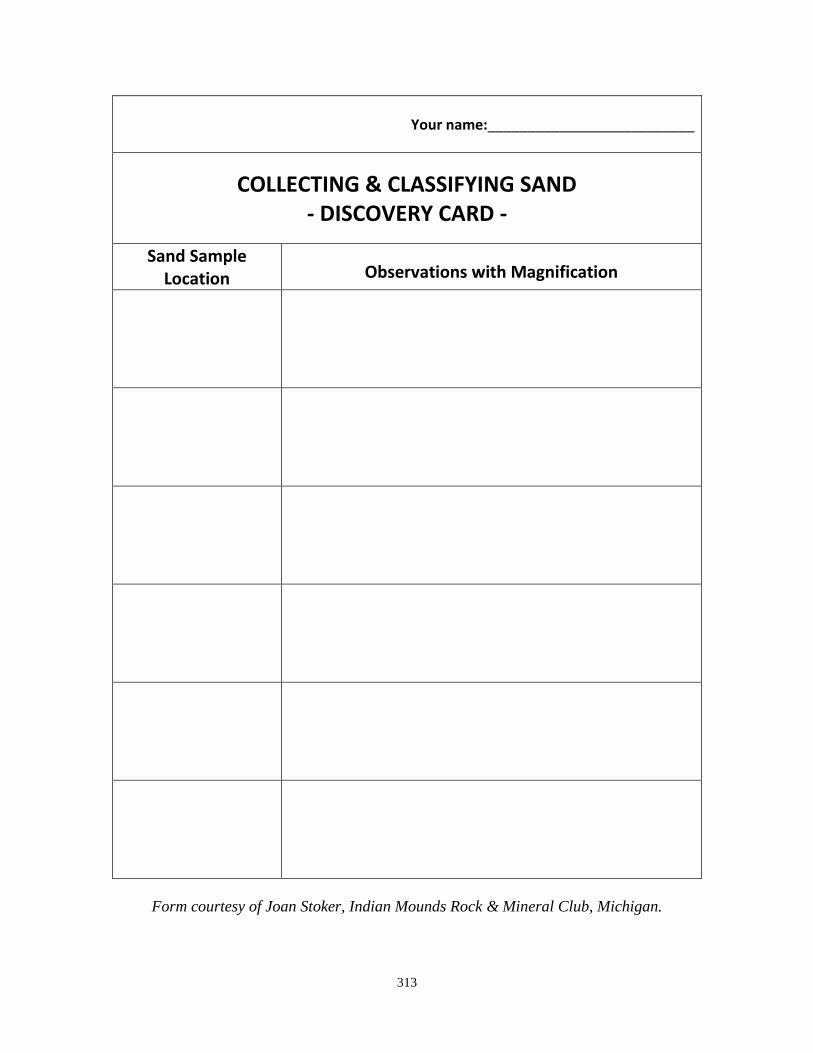
313
Your name:__________________________
COLLECTING & CLASSIFYING SAND - DISCOVERY CARD -
Sand Sample Location Observations with Magnification
Form courtesy of Joan Stoker, Indian Mounds Rock & Mineral Club, Michigan.

314
Sand samples are easily collected and stored, as you can see by the following example
from one psammophile’s collection:
There’s a lot more to sand than meets the eye!
In building sand collections, kids can conveniently store samples in small baggies, bottles
with lids, or stoppered test tubes, as shown above. This is one hobby involving little or
no expense. Many great books have been published all about sand. As a reference in
working on this activity, you may want to purchase these or see if your library has them.
They include the following.
Bagnold, The Physics of Blown Sand & Desert Dunes, 2005. A reprint of a classic
text first published in 1954, this advanced tome is for the true scientist among us.
Vince Beiser, The World in a Grain: The Story of Sand and How It Transformed
Civilization, 2018. You will never look at sand the same way again! Who knew it
was so vitally important to human life and development??
Gary Greenberg, A Grain of Sand: Nature’s Secret Wonder, 2008. This is both a font
of information about the diversity of sand and a gorgeous coffee table book filled
with wonderful close-up photos. My top choice for a book that inspires!
Gary Greenberg, et al., The Secrets of Sand, 2015. Greenberg teams up with
coauthors for another informative, fun, well-illustrated look at sand.
Ellen J. Prager (author) & Nancy Woodman (illustrator), Jump Into Science: Sand,
2006. This book, published by National Geographic, is aimed squarely at kids, with a
fun “sandpiper sleuth” seeking answers to what sand is, where it comes from, and
how it gets to the beach. My top choice for young readers.
Michael Welland, Sand: The Never-Ending Story, 2010. A university press book for
advanced readers, this is still a great read with interesting facts and surprises.
A few books all about sand that are well worth reading.

315
Anne Lowe-Salmon in Connecticut pointed me to the International Sand Collectors
Society (www.sandcollectors.org) that publishes a quarterly newsletter called The Sand
Paper. They’ve sold an educator’s kit for about $30 that included sand samples and a
CD of sand-related activities. Check them out! This is the best resource I’ve seen, with
great info telling all about sand, the hobby, and how to become a psammophile.
Note: Kids can use this activity to satisfy requirements toward earning the Collecting badge
simultaneously (Activity 5.1).

316
Back-up page 16.8: Drawing or photographing microminerals, microfossils, and sand.
Microminerals, microfossils, and sand are best appreciated under the lens of the
microscope, but we don’t always have a microscope to share the intricate details of our
tiny specimens with others. In order to share, help kids make drawings or take photos to
magnify their specimens for all to appreciate in glorious detail.
Photos or drawings help others better appreciate your tiny microfossils.
Illustrations and photos come in handy in displaying such tiny specimens. For instance,
at a club show, county fair, science fair, etc., it makes for an interesting display to have a
tiny specimen alongside a close-up drawing or photo, as shown above. Such illustrations
also can be used to accompany a club newsletter article about the specimen.
With sand samples, illustrations help vividly show the difference between well sorted and
poorly sorted sand samples (see the photo in Unit 16.7) or to highlight the beauty of the
foraminifera and coral fragments that make up some sands from tropical beaches.
Work with kids to make drawing of specimens observed under a microscope. Or, if you
have access to one, use a digital microscope such as a Dyno-Lite Digital Microscope
hooked up to a computer to capture close-up images of even the tiniest specimens.

317
Help kids draw or photograph micro-specimens they observe under a microscope.
You can connect the Dyno-Lite Digital Microscope to a computer to take photos.

318
If you don’t have a microscope, you can jerry-rig one using a loupe and a digital camera
or even a cell phone camera. It takes a little coordination, but it works great! I’ve taken
photos using a bit of duct tape to attach my 30X loupe to my iPhone. You also can
purchase a “macro lens” that clips onto a cell phone over the camera lens
Don’t have a microscope? Craft one from a cell phone camera and a loupe!
You can purchase a “macro lens” to attach to a cell phone camera for close-ups.
319
Of course, after I went to all the trouble to try both these methods (and after I dug out my
wallet to purchase a clip-on macro lens), a friend took my iPhone from my hands. He
clicked open the “Settings” icon, went down and opened “Accessibility.” He then
proceeded to show me how there is a “Magnifier” already built into my iPhone!
It figures.
That same friend once told me, “You know, Jim, our local community college sponsors
classes to help senior citizens use their cell phones.”
(Harrumph!)
Note: Kids who have their drawing or photographs published with a brief article or caption in a club
newsletter can use this activity to satisfy requirements toward earning the Communication badge
simultaneously (Activity 7.2).

320
Back-up page 16.9: WILD CARD: Do your own thing!!
While I’ve tried to provide a wide-ranging variety of activities to choose from, no one
manual can “do it all.” There are many other great ideas out there that clubs have found
to match their local interests and resources.
Plus, the Youth Leaders of some clubs have expressed concern that some activities
included in the manual may be beyond the abilities of their youngest members. Here’s
your chance to tailor-make activities for the youngest-among-us.
If you and your fellow club members have an idea for learning about the world in
miniature that isn’t included in this manual, go for it! When you send in your badge
request, just let me know what you did as a WILD CARD activity. Who knows? Maybe
your idea will be included in the next edition of the Badge Manual!

321
17. Special Effects
To earn this badge, you’ll need to learn about what causes certain “special effects” in
some rocks and minerals. For instance, what causes “cat’s eye” effect and what rocks or
minerals typically exhibit that effect? These are fun rocks to share with friends, so you
should also start a collection of these special minerals and maybe hold an Amazing
Mineral Magic Show! (See activity 17.8.)
Activity 17.1: Magnetism.
What is magnetism and what causes it? Name the two basic types of magnetism, and
name at least three magnetic minerals. Provide a hands-on demonstration of the effects
of magnetism.
Activity 17.2: Triboluminescence.
Learn to pronounce the long word “triboluminescence” and explain what it means.
Demonstrate triboluminescence in a darkened room with two quartz crystals and/or with
Wint-o-Green Life Savers candy.
Activity 17.3: Birefringence, or double refraction.
What is birefringence and what causes it? Name one common mineral that causes
birefringence, or double refraction, and provide a demonstration of it to your fellow club
members.
Activity 17.4: Chatoyancy: cat’s eye and asterism.
What causes chatoyancy? Explain it to your fellow club members and show them how it
works with a common spool of sewing thread under a bright light or the beam of a
flashlight. Name at least three minerals that are often cut into cabs exhibiting cat’s eye
and/or asterism.
Activity 17.5: Natural fiber optics, or “TV stone.”
A mineral called ulexite, when cut and polished on top and bottom, can magically lift
words from a page and display them on its surface. How does it do that? Amaze your
friends by demonstrating this for them.
Activity 17.6: Phantoms and inclusions.
Explain how phantoms and inclusions form. What is an enhydro? Show your fellow
club members an example of a crystal with a phantom or inclusion.
Activity 17.7: Other special effects.
Learn about other special effects not listed above. How many others can you name and
explain?
Activity 17.8: The amazing mineral magic show!
Either with fellow club members or on your own, host a “magic show” at one of your
meetings to highlight special effects of some of these amazing minerals.

322
Activity 17.9: WILD CARD: Do your own thing!
Do you have an idea for learning about special effects that isn’t included in this manual?
If so, do your own thing! When your Youth Leader sends in your badge request, let us
know what you did as a WILD CARD activity. Who knows? Maybe your idea will be
included in the next edition of the Badge Manual!

323
17. Special Effects
□ 17.1 Magnetism
□ 17.2 Triboluminescence
□ 17.3 Birefringence, or double refraction
□ 17.4 Chatoyancy: cat’s eye and asterism
□ 17.5 Natural fiber optics, or “TV stone”
□ 17.6 Phantoms and inclusions
□ 17.7 Other special effects
□ 17.8 The amazing mineral magic show!
□ 17.9 WILD CARD: Do your own thing!
To earn your Special Effects badge, you need to complete at least 3 of the 9 activities.
Check off all the activities you’ve completed. When you have earned your badge, sign
below and have your FRA leader sign and forward this sheet to the AFMS Juniors
Program chair.
___________________________________
Date completed
_________________________________ ___________________________________
My signature Youth leader’s signature
_______________________________________________________________________
Name of my club
Leader’s preferred mailing address for
receiving badge:
____________________________________
____________________________________
____________________________________

324
Back-up page 17.1: Magnetism.
We’ve all had fun with magnets: those little bars that stick to refrigerators and pick up
paperclips. Place one near an iron or steel surface, and it will literally jump out of your
hand and stick to the surface. They also attract and repel other magnets, letting you flip
and push one around with another. Magnets perform these fun stunts because they
produce a field of force—a magnetic field—caused by movement of electrons.
Some minerals react when placed near a magnetic field. Such minerals are referred to as
magnetic minerals. They have one common denominator: iron. A simple test will help
you identify a magnetic mineral. Pass it over a compass, and the compass needle will
move. Rub a needle with a magnetic mineral, and it will become a “compass needle” and
will point to the North if pushed within a piece of cork to float on water:
A magnetized steel needle will line up with the needle of a compass to point north.
Magnetic minerals come in two basic sorts. Most common are those attracted to a
magnet, either strongly or weakly. The most strongly magnetic is magnetite (iron oxide),
but there’s also pyrrhotite (iron sulfide), ilmenite (titanium-iron oxide), hematite (another
iron oxide), and franklinite (zinc-iron oxide). Some, such as limonite (hydrated iron
oxide) or siderite (iron carbonate), may become weakly magnetic if heated.
A second sort of magnetic mineral is one that is naturally magnetized. That is, it’s a
magnet itself, generating a magnetic field that will attract iron to it. There’s just one
mineral of this sort, a specific variety of magnetite called lodestone.

325
Magnetite (left) attracts a magnet while lodestone magnetite (right) is a magnet!
You can enjoy fun activities with kids seeing how lodestone picks up paperclips or how
magnets stick to magnetite and other magnetic minerals.
For another fun activity, fill a plastic tub with black sand (often found with placer
deposits while gold panning) and drop in a few strong magnets or embed a woofer from
an old stereo speaker. Magnetic minerals in the black sand will clump around the
magnets like frizzy hair on a bad hair day.
The magnet on a stereo speaker woofer makes for great fun with magnetic sand!

326
Magnetism has long fascinated people. For centuries, ships carried lodestones to
magnetize compass needles for navigation. Magnetism has helped prospectors
distinguish iron ore look-alikes; for instance, magnetite and chromite are outwardly
similar, but magnetite is much more strongly magnetic. In a more modern technological
application, so-called “maglev trains” use magnetism to hover above train tracks. The
word “maglev” is derived from magnet levitation. You can have fun demonstrating
levitation with ring magnets on a stick, as shown in the photo below.
Ring magnets on a stick levitate and bounce in defiance of gravity!
The word “magnet” is said to come from Magnesia, an area in Greece where lodestone
was discovered long ago. It was called magnítis líthos, or “magnesian stone.” According
to another, more interesting legend, a Greek shepherd boy named Magnes discovered
lodestone when iron nails in his shoes stuck to a rock. Sounds like a good excuse for
being late to school!

327
Back-up page 17.2: Triboluminescence.
Triboluminescence is quite a word! Kids (and adults!) may need help pronouncing it:
tri΄-bō-lu-mə-nə΄-səns. The tribo part comes from the Greek word meaning “to rub.”
Luminescence is derived from the Latin word for “light” and is defined as low-
temperature emission of light. Thus, triboluminescence is low-temperature light
produced between two materials rubbed together.
In a darkened room, triboluminescence can take the form of tiny spark-like flashes
observed in some minerals, like sphalerite or corundum, when a hard point is dragged
across the surface. It can also occur when a mineral (or other material, like hard sugar or
Wint-o-Green Life Savers) is crushed, ripped, scratched, or rubbed. Scientists still
haven’t fully explained this optical phenomenon, but they believe it to be caused by
separation and reunification of electrical charges at a molecular level when bonds are
broken by the rubbing or scratching. (Note that this is different from the high-
temperature sparks generated when rocks and minerals like flint or pyrite are struck.)
Triboluminescence has been observed by diamond cutters, who sometimes see a diamond
begin to glow while a facet is being ground. Since diamonds can be a little hard to come
by, you may want to demonstrate the effect by rubbing together two large quartz crystals
in a darkened room. This works best with pretty big, palm-sized specimens. You can
simply rub two faces together or, to produce more light, rub the prism edge of one crystal
back and forth along the prism face of the other crystal. (A prism face is one of the flat
sides of the quartz crystal; the prism edge is where two flat sides come together.)
Rub two large quartz crystals together in a dark room to exhibit triboluminescence.
Interestingly, flashes of light have sometimes been observed during earthquakes. Some
believe these “earthquake lights” may be related to triboluminescence when rocks high in
quartz content get rubbed and rendered apart during the quake.

328
Back-up page 17.3: Birefringence, or double refraction.
Birefringence is one long, fancy word! A simpler term is double refraction. Take a
piece of paper and draw a single line on it. Place a certain kind of clear crystal over the
line, gaze through the crystal, and you’ll see two lines!
Are you seeing double? Nope! Just birefringence…
How does this happen?? When we direct our eyes at a line on a piece of paper, light is
bouncing off the paper and into our eyes, allowing us to perceive the line on the paper.
When light travels through certain crystals, the structure of the crystal causes the light to
split into two rays traveling in slightly different velocities. When they bounce into our
eyes, we perceive a double image. What is actually a single line, when viewed through
the stone, appears as two lines as a sort of optical illusion.
Refraction, by the way, can occur in air when its density varies. You may have noticed
this when gazing down a roadway on a hot summer day or across the basin of a desert,
where hotter, less dense air radiates off the surface beneath somewhat cooler, denser air
above. Light is refracted. The result? A mirage! Or, something your eyes see, even
though your mind knows it’s not really there.
The mineral most commonly associated with double refraction is calcite, particularly
clear rhombohedral calcite crystals known as Iceland spar, as pictured above. Nice
specimens from Mexico are on sale at nearly every gem and mineral show and are also
often sold in museum gift shops. None other than Isaac Newton were intrigued by this
mineral phenomenon. During World War II, this mineral was incorporated into gun
sights used in anti-aircraft weapons and in the bomb sights of aircraft.

329
Back-up page 17.4: Chatoyancy: cat’s eye and asterism.
Cat lovers should enjoy chatoyancy. It’s from a French word, chatoyer, meaning to
shine like a cat’s eye. Chatoyancy is commonly called cat’s-eye effect. In bright light, a
cat’s pupil narrows to a vertical slit. When some gemstones are rounded and polished,
bright light will be reflected as a single thin ray, looking very much like a cat’s eye.
Chatoyancy is caused by inclusions, or minerals enclosed within another mineral. Light
entering the host mineral reflects off included minerals. When inclusions are fibrous and
run parallel to one another, they produce a single line of reflected light running
perpendicular to the direction of the fibers. You can illustrate this effect for kids using a
spool of sewing thread. Hold it under a light, and they’ll see a vertical line running
perpendicular to the wound thread. Chatoyancy is enhanced if the stone is rounded into a
cabochon or sphere, concentrating the light, just as with our rounded spool of thread.
A spool of thread illustrates the cause of “cat’s eye” effect in gemstones.
Chatoyancy can be produced by many minerals and inclusions. Yellow cymophane, or
chrysoberyl containing rutile or tube-like cavities, is highly valued. A golden cat’s-eye
quartz contains rutile, while a gray-green variety contains amphibole asbestos. A gray-
blue quartz containing partially silicified crocidolite (blue asbestos) is called hawk’s eye.
The popular tiger’s eye quartz forms when crocidolite fibers are replaced by silica along
with iron oxides, producing a silky golden color. Then there’s actinolite, apatite, beryl,
tourmaline, scapolite, moonstone, and more. You can even observe chatoyancy with
common, non-precious minerals such as satin-spar gypsum or ulexite.
Minerals producing a chatoyant effect are found worldwide, but some places are
especially famous: Sri Lanka and Brazil for cat’s-eye chrysoberyl and quartz; South
Africa and Australia for tiger’s eye; California, for cat’s-eye tourmaline. In addition to

330
appreciating the beauty of cat’s-eye gemstones, some cultures consider them good-luck
charms with the ability to counteract an “evil eye.”
Tiger’s eye is an easily obtained mineral exhibiting chatoyancy.
The Greek word aster means “star,” and asterism refers to a luminous star-like figure
appearing on the face of a gemstone as a result of reflected light. Asterism is similar to
cat’s eye. Like cat’s eye, it’s caused by included fibers that run parallel to one another,
producing a single line of reflected light. If bundles of such fibers are oriented in two
directions, they’ll produce two intersecting eyes, resulting in a four-rayed star. Oriented
in three directions at 120 degrees to each other, as may happen within hexagonal crystals
of corundum or quartz, rutile bundles will create three eyes, or a six-rayed star.
Asterism from light reflecting off a cabbed sapphire and a rose quartz sphere.
Cabbing focuses and concentrates light to produce the star effect, but much can go wrong
in the process. The gem cutter must orient the base of the stone parallel to the plane of
the inclusions, or the star may be off-centered. Another decision: how high to dome the
stone? A higher dome channels light more effectively, creating a sharper star. But if the
dome is too steep, rays get cut off and don’t wrap around the surface of the dome. A
dome cut too flat produces a fuzzy, ill-defined star. Gemstones most associated with
asterism are star rubies and sapphires. However, Idaho produces beautiful star garnets.
Quartz, diopside, and spinel can also exhibit asterism.

331
Back-up page 17.5: Natural fiber optics, or “TV stone.”
Near the town of Boron, California, is an immense open-pit mine where truckload after
huge truckload of borate minerals have been dug for generations for commercial
applications; for instance, to produce borax for laundry detergent. These minerals were
concentrated in a closed basin as ancient lakes dried up in the desert. One of those borate
minerals has been named ulexite for the German chemist who first discovered it in the
1800s, Georg L. Ulex.
Ulexite is composed of long, thin crystals that might grow as fluffy, cotton-like puffballs
or, more commonly, as compact, blocky masses of fibrous veins, with crystals tightly
aligned side-by-side. The parallel fibrous crystal bundles give blocky masses of white
ulexite a soft, satiny luster.
Ulexite often has closely packed crystal bundles running parallel to one another.
To demonstrate a truly neat special effect, use a rock saw to cut a chunk of ulexite
perpendicular to those crystal bundles at top and bottom. Then polish both top and
bottom. You can often find small specimens of ulexite online, in rock shops, or in
museum gift shops already cut and polished.
Now have your kids place that chunk onto the words in a book or atop a colorful drawing
on the comics page of the Sunday newspaper. The words or picture will seem to be
sucked up and will appear at the top surface of the ulexite, just like an image on a
television screen!

332
The fiber optic effect of ulexite is fun and amazing!
The individual crystals making up the block of ulexite act like fiber-optic cables. Each
transmits light from the bottom surface of the stone to the top surface, thus producing the
unique optical property that has earned ulexite its nickname of “TV stone.”
When ulexite is cabbed or crafted into a sphere, those same closely packed bundles of
crystal fibers produce a chatoyant cat’s eye effect, so you can use this mineral to
demonstrate both natural fiber optics in this unit and/or chatoyancy in unit 17.4.
This ulexite sphere exhibits cat’s eye effect.
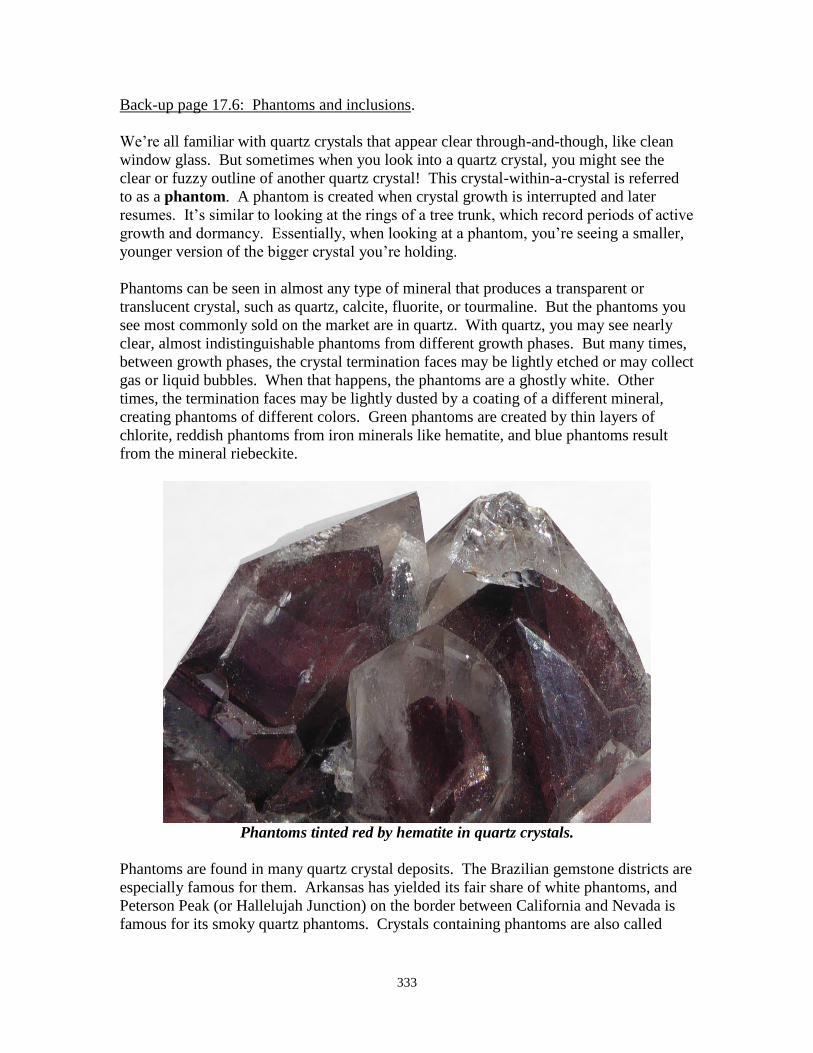
333
Back-up page 17.6: Phantoms and inclusions.
We’re all familiar with quartz crystals that appear clear through-and-though, like clean
window glass. But sometimes when you look into a quartz crystal, you might see the
clear or fuzzy outline of another quartz crystal! This crystal-within-a-crystal is referred
to as a phantom. A phantom is created when crystal growth is interrupted and later
resumes. It’s similar to looking at the rings of a tree trunk, which record periods of active
growth and dormancy. Essentially, when looking at a phantom, you’re seeing a smaller,
younger version of the bigger crystal you’re holding.
Phantoms can be seen in almost any type of mineral that produces a transparent or
translucent crystal, such as quartz, calcite, fluorite, or tourmaline. But the phantoms you
see most commonly sold on the market are in quartz. With quartz, you may see nearly
clear, almost indistinguishable phantoms from different growth phases. But many times,
between growth phases, the crystal termination faces may be lightly etched or may collect
gas or liquid bubbles. When that happens, the phantoms are a ghostly white. Other
times, the termination faces may be lightly dusted by a coating of a different mineral,
creating phantoms of different colors. Green phantoms are created by thin layers of
chlorite, reddish phantoms from iron minerals like hematite, and blue phantoms result
from the mineral riebeckite.
Phantoms tinted red by hematite in quartz crystals.
Phantoms are found in many quartz crystal deposits. The Brazilian gemstone districts are
especially famous for them. Arkansas has yielded its fair share of white phantoms, and
Peterson Peak (or Hallelujah Junction) on the border between California and Nevada is
famous for its smoky quartz phantoms. Crystals containing phantoms are also called

334
“shadow crystals,” “ghost crystals,” or “specter crystals.” While the names may sound
like something from a spooky nightmare, the effects are like a beautiful dream!
In addition to phantoms, you occasionally see inclusions in quartz crystals or other
mineral crystals. An inclusion may be any material—solid, liquid, or gaseous—found
inside a mineral. I mentioned light dustings of chlorite that might form in a quartz
phantom. Sometimes rather than just a light dusting, a larger mineral crystal will form
and will then get engulfed in the growing quartz crystal. In my collection, I have quartz
crystals containing tiny garnets and others containing tiny pyrite crystals. Clusters of
needlelike rutile crystals frequently appear as inclusions in minerals like quartz or
corundum. A variety of gypsum known as “hourglass selenite” from Oklahoma is well
known for inclusions of clay and sand in the form of an hourglass figure.
Inclusions in quartz crystals.
One really cool type of inclusion is when an air pocket forms within a crystal and
contains a little drop of water, oil, or other fluid. Tilt the crystal this way and that way,
and you’ll see the droplet move up and down, as with a carpenter’s level. Such a crystal
is referred to as an enhydro.
The black dot circled above is an enydro; tilt the crystal, and it moves!

335
Back-up page 17.7: Other special effects.
Here, in brief, are a few other special effects not already described that some of your
juniors may wish to explore. See if they can discover the reasons behind one or more of
these special effects:
Opalescence, fire-and-flash, or play-of-color. These terms all describe the vivid
multicolored dance you see in an opal as you twist and turn it under the light.
Opals exhibit fire and flash.
Adularescence. When turned in the light, minerals like labradorite and moonstone
feldspars exhibit a milky, bluish luster that’s been compared to the moon’s reflection
on water. This is also sometimes called “moonstone effect.”
Labradorite shimmers like the moon’s reflection on water.
Iris or rainbow effect. Some banded agates, when sliced especially thin and held to
the light, exhibit all the colors of the rainbow in a gorgeous, iridescent display.
The rainbow effect of an iris agate.
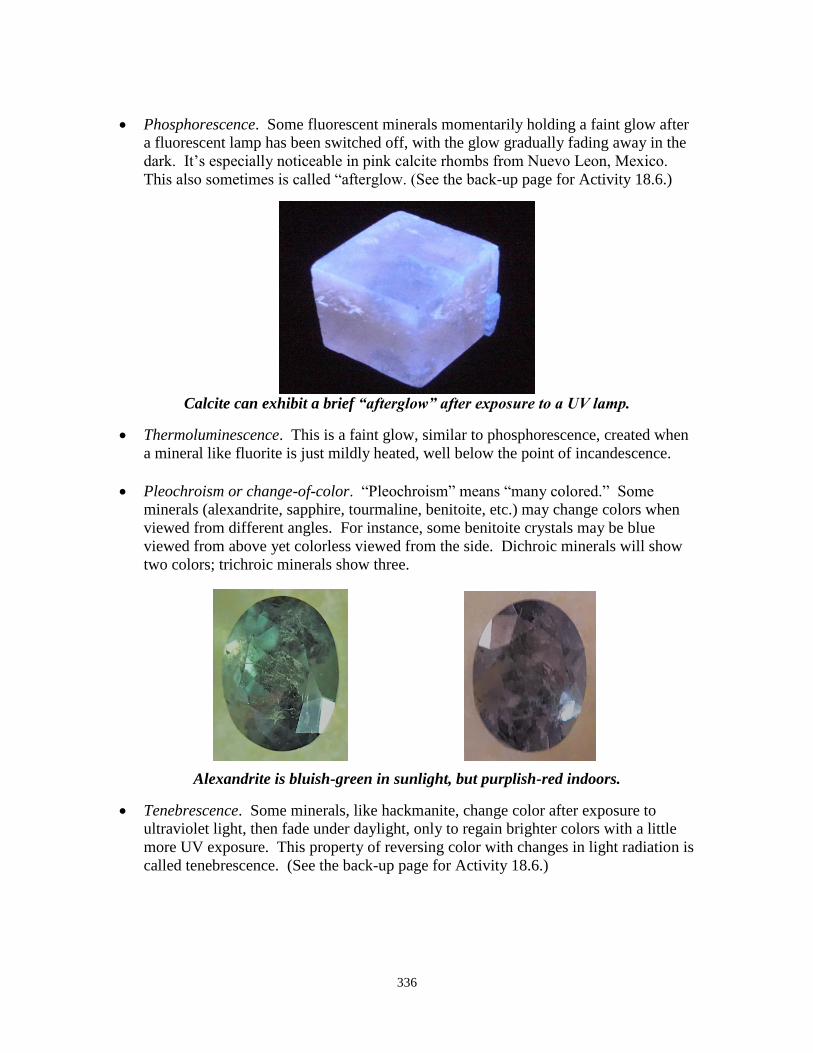
336
Phosphorescence. Some fluorescent minerals momentarily holding a faint glow after
a fluorescent lamp has been switched off, with the glow gradually fading away in the
dark. It’s especially noticeable in pink calcite rhombs from Nuevo Leon, Mexico.
This also sometimes is called “afterglow. (See the back-up page for Activity 18.6.)
Calcite can exhibit a brief “afterglow” after exposure to a UV lamp.
Thermoluminescence. This is a faint glow, similar to phosphorescence, created when
a mineral like fluorite is just mildly heated, well below the point of incandescence.
Pleochroism or change-of-color. “Pleochroism” means “many colored.” Some
minerals (alexandrite, sapphire, tourmaline, benitoite, etc.) may change colors when
viewed from different angles. For instance, some benitoite crystals may be blue
viewed from above yet colorless viewed from the side. Dichroic minerals will show
two colors; trichroic minerals show three.
Alexandrite is bluish-green in sunlight, but purplish-red indoors.
Tenebrescence. Some minerals, like hackmanite, change color after exposure to
ultraviolet light, then fade under daylight, only to regain brighter colors with a little
more UV exposure. This property of reversing color with changes in light radiation is
called tenebrescence. (See the back-up page for Activity 18.6.)
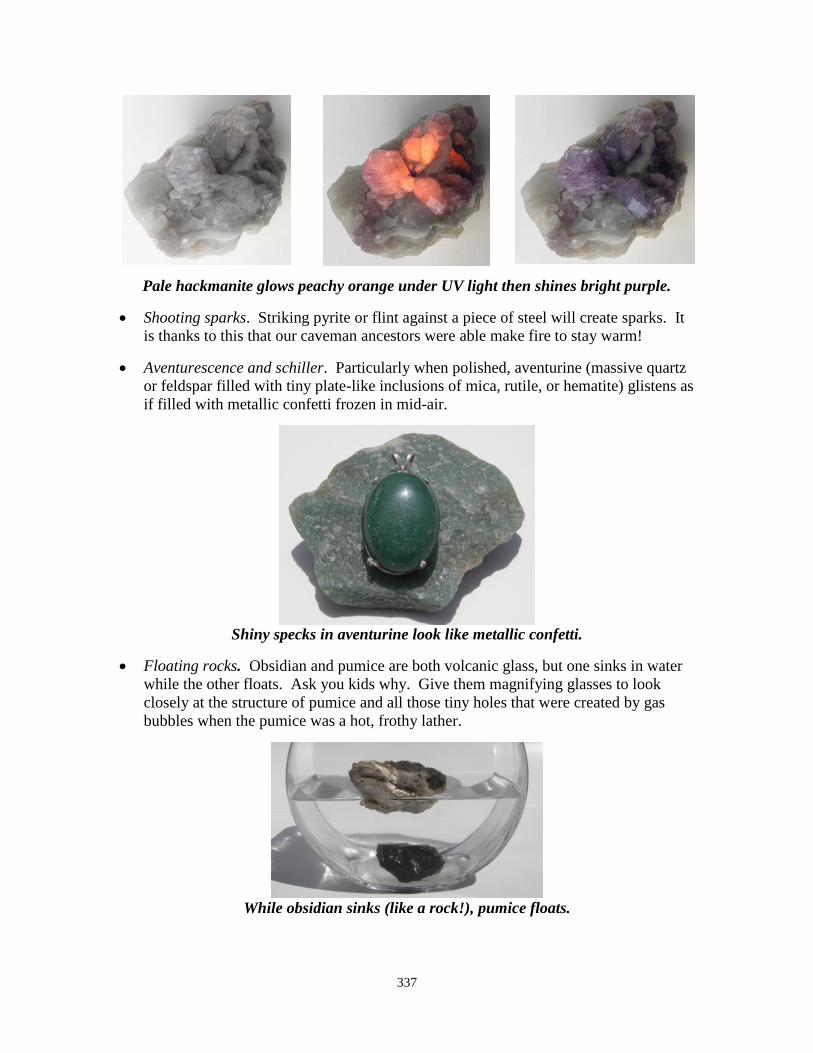
337
Pale hackmanite glows peachy orange under UV light then shines bright purple.
Shooting sparks. Striking pyrite or flint against a piece of steel will create sparks. It
is thanks to this that our caveman ancestors were able make fire to stay warm!
Aventurescence and schiller. Particularly when polished, aventurine (massive quartz
or feldspar filled with tiny plate-like inclusions of mica, rutile, or hematite) glistens as
if filled with metallic confetti frozen in mid-air.
Shiny specks in aventurine look like metallic confetti.
Floating rocks. Obsidian and pumice are both volcanic glass, but one sinks in water
while the other floats. Ask you kids why. Give them magnifying glasses to look
closely at the structure of pumice and all those tiny holes that were created by gas
bubbles when the pumice was a hot, frothy lather.
While obsidian sinks (like a rock!), pumice floats.

338
Singing rocks. Zeolite minerals have microscopic pore spaces. This makes them
highly effective for water filtration and purification and other industrial and medical
uses. It also makes them great singers! When placed in a bowl with a little water,
chunks of rocks containing certain zeolite minerals like clinoptilolite crackle, hum,
and soon begin to whine. If the pieces you use are small, you’ll need to hold the bowl
close to your ear. After a while, the rocks become waterlogged and need to be dried
to sing another day. Tiny pea-sized pebbles of clinoptilolite are sold with aquarium
supplies as an ammonia remover in fish tanks. I was also able to secure gravel-sized
pieces via eBay. These produced much better effects although I still needed to hold
the bowl close to my ear.
When dunked in water, “The Zeolites” make for one great musical group!
Fizzing & bubbling rocks. Carbonated beverages release bubbles of carbon dioxide.
Similarly, carbonate rocks like limestone (calcium carbonate) fizz and release carbon
dioxide when you put a drop of acetic acid (vinegar) on them. This is known as
effervescence. To help enhance the fizzing, scratch calcite or limestone with a nail to
create a little heap of dust before applying the acid.
Calcite effervesces (fizzes) when you apply a few drops of acetic acid (vinegar).

339
Expanding minerals. Vermiculite is a layered mica-like mineral. Water resides
between the layers and, when the mineral is heated, that water converts to steam and
vermiculite expands—just like popcorn. This is called exfoliation. You can find
vermiculite in a gardening store since it’s often used in hydroponics and as a soil
amendment to help retain moisture and improve aeration; however, the bag I bought
didn’t really produce good results. The vermiulate was chopped fine and it had
already been thoroughly dried. To be successful with this demo, you apparently need
to secure big “fresh” pieces.
Most popular guidebooks about rocks and minerals aimed at kids and adults have a
section or chapter devoted to special effects. For example, here are a few I know about:
Bonewitz, Smithsonian Rock & Gem, 2005.
Farndon, The Complete Guide to Rocks & Minerals, 2006. See the section “Mineral
Properties: Optical.”
Symes, Eyewitness Rocks & Minerals, 2004.
Ward, Phenomenal Gems, 2008. This great little book is filled with colorful photos
showing gems that glow, shimmer, and change color, along with explanations.
Steer kids to books like these and have them explore even more special effects above and
beyond those listed here.
340
Back-up page 17.8: The amazing mineral magic show!
For a presentation at one of your society’s monthly meetings, help your kids host “The
Amazing Mineral Magic Show!” They can demonstrate many of the effects described in
this unit, as well as others they might discover by reading on their own. For instance:
Lodestone magnetite can be used to show a rock that pushes magnets around, flips
them over, and picks up paperclips. When placed alongside “black sand” or iron
filings, you have a rock that suddenly grows “hair.” Put filings into a plastic pan,
hold your lodestone under the pan, and you can pull the filings all around.
Transform ugly, dull fluorescent rocks and minerals into ones that turn bright, vivid
colors and suddenly glow from within like garish neon lights when you turn out the
lights and turn on an ultraviolet lamp.
Turn out the lights, turn on a UV lamp over a piece of fluorescent calcite from
Mexico, then switch off the lamp to show a fluorescent mineral that holds a glow for
awhile, before gradually fading to black.
With the lights still out, show how two pieces of quartz can create spark-like flashes
of light when simply rubbed together.
Keep those lights out to show rocks that shoot real sparks by striking steal against
chunks of flint or pyrite.
Illustrate how ulexite is a “TV stone” that can “lift” images from printed pages.
Reveal how a calcite rhomb doubles an image by holding it over a piece of white
cardboard that has a single black line drawn down the middle.
With a slice of iris agate and a flashlight, show how a rock can capture a rainbow.
Show how a domed cab of Idaho garnet, rose quartz, ruby, or sapphire can capture a
star, or how domed tiger-eye quartz or satin-spar gypsum winks like a cat’s eye.
Drop a piece of volcanic glass (obsidian) into a clear container of water to show
how—as we all know—rocks are heavy and sink. Then, take a piece of volcanic
glass known as pumice and drop it in to show a rock that floats!
What other magic effects can your kids come up with? This can be a presentation that’s
great fun for the entire club. In fact, the kids might ask the adults to come prepared to
bring a “magical” rock or two of their own to join in the show. One club’s kids hosts a
booth at their annual show to demonstrate special effects to visitors throughout the day.
Note: Kids can use this activity to satisfy requirements toward earning the Communication badge
simultaneously (Activity 7.1).

341
Back-up page 17.9: WILD CARD: Do your own thing!!
While I’ve tried to provide a wide-ranging variety of activities to choose from, no one
manual can “do it all.” There are many other great ideas out there that clubs have found
to match their local interests and resources.
Plus, the Youth Leaders of some clubs have expressed concern that some of the activities
included in the manual may be a bit beyond the abilities of their youngest members.
Here’s your chance to tailor-make activities for the youngest among us.
If you and your fellow club members have an idea for learning about special effects that
isn’t included in this manual, go for it! When you send in your badge request, just let me
know what you did as a WILD CARD activity. Who knows? Maybe your idea will be
included in the next edition of the Badge Manual!
342
18. Fluorescent Minerals
In Unit 17, we learned about all sorts of special effects. In this unit, we’ll explore one
special effect more deeply. To earn your Fluorescent Minerals badge, you should be able
to define “fluorescence” and explain why some minerals fluoresce and then name some
common fluorescent minerals. You might also learn about famous localities for
fluorescent minerals, collect examples and create a fluorescent display case, and learn
about safety when it comes to working with ultraviolet lamps.
Activity 18.1: *What is “fluorescence” and why do some minerals fluoresce?*
Note: This activity is required to earn this badge.
Define “fluorescence” and explain why some minerals fluoresce.
Activity 18.2: Famous fluorescent mineral localities.
Some fluorescent mineral localities have become world famous. Name at least three
localities and some of the fluorescent minerals to be found at each.
Activity 18.3: Collecting fluorescent minerals.
Build a collection of 6 to 10 fluorescent minerals and make a list or table telling what
color they are under normal lighting, short-wave ultraviolet lighting, and long-wave
ultraviolet lighting. Be sure to follow the basics of good curation in building your
collection: label each specimen and keep a catalog with key information about what it is
and where it came from. (See Badge 5: Collecting.)
Activity 18.4: Creating a fluorescent display case and exhibiting your collection.
Building a fluorescent case requires more effort and parts than a normal mineral display
case. Build or buy your own and exhibit your collection at a gem show, county fair,
school science fair, in class at school, or elsewhere. (See Badge 6: Showmanship.)
Activity 18.5: *Safety with fluorescent lamps.*
Note: This activity is required to earn this badge.
Fluorescent lamps, particularly those emitting shortwave ultraviolet light, can “sunburn”
skin and eyes. Don’t look directly into a fluorescent lamp when it’s turned on, and limit
the time you spend working under ultraviolet lighting. Learn what other precautions you
should take when working with fluorescent lamps.
Activity 18.6: Special effects of some fluorescent minerals.
In addition to changing color and glowing, some minerals show other special effects
under fluorescent lighting. Name at least two other special effects and the minerals that
produce them.
Activity 18.7: Making fluorescent minerals with glow-in-the-dark paints.
Make your own simulated fluorescent minerals using ordinary non-fluorescent rocks and
dabbing them with paints that glow under a black light. Name actual fluorescent
minerals that glow the same colors as your simulated minerals.

343
Activity 18.8 Finding the fluorescent mineral in the “Magic Cave”
Use an ultraviolet lamp or ultraviolet flashlight to distinguish between rocks and minerals
that fluoresce and those that don’t in a “Magic Cave” created by your Youth Leader.
Activity 18.9: WILD CARD: Do your own thing!
Do you have an idea for learning about fluorescent minerals that isn’t included in this
manual? If so, do your own thing! When your Youth Leader sends in your badge
request, let us know what you did as a WILD CARD activity. Who knows? Maybe your
idea will be included in the next edition of the Badge Manual!
344
18. Fluorescent Minerals
□ 18.1 *What is “fluorescence” & why do some minerals fluoresce?*
(required to earn this badge)
□ 18.2 Famous fluorescent mineral localities
□ 18.3 Collecting fluorescent minerals
□ 18.4 Creating a fluorescent display case and exhibiting your collection
□ 18.5 *Safety with fluorescent lamps* (required to earn this badge)
□ 18.6 Special effects of some fluorescent minerals
□ 18.7 Making fluorescent minerals with glow-in-the-dark paints.
□ 18.8 Finding the fluorescent mineral in the “Magic Cave”
□ 18.9 WILD CARD: Do your own thing!
To earn your Fluorescent Minerals badge, you need to complete at least 3 of the 9
activities. (Please note that successfully completing Activities 18.1 and 18.5 are required
to earn this badge.) Check off all the activities you’ve completed. When you have
earned your badge, sign below and have your FRA leader sign and forward this sheet to
the AFMS Juniors Program chair.
___________________________________
Date completed
_________________________________ ___________________________________
My signature Youth leader’s signature
_______________________________________________________________________
Name of my club
Leader’s preferred mailing address for
receiving badge:
____________________________________
____________________________________
____________________________________

345
Back-up page 18.1: What is “fluorescence” and why do some minerals fluoresce?
Light moves in waves and comes in different forms depending on the wavelength. Some
of these forms are infrared, visible, and ultraviolet (UV). Human eyes are adapted to
see only a limited number of wavelengths. So-called “visible light” is the light we see all
around us and is divided into the colors of the rainbow as seen in this illustration of
normal visible light that has been diffracted into its component colors:
Again, these are the colors we see in the rainbow. But there are wavelengths we cannot
see on either side of the rainbow. Infrared light involves long waves to the left of the red
stripe, above. Ultraviolet light (also called UV or fluorescent light) is produced by very
short waves that veer to the right of our photo, off beyond the purple or violet range (thus
making them “ultraviolet”).
While we may not be able to see UV light, we can definitely feel its effects. If you stay
outdoors too long on a bright and sunny day, you will very likely suffer from “sun burn.”
That is caused by light in the ultraviolet end of the spectrum.
Ultraviolet light can also “stimulate” the electrons within the atoms of certain minerals,
and that stimulation makes the mineral shine out like a neon lightbulb, showing yet
another effect of the ultraviolet light that we cannot otherwise see directly. What appears
to be a drab gray rock in visible light may glow orange or green under UV light. Or a
mineral of one bright color under visible light may appear a different color under UV; for
instance, green fluorite may turn blue or purple. Still other minerals may stay the same
color but appear much more vivid, as with red ruby. In all these cases, under UV light
the minerals seem to glow from within.
The first person to describe this phenomenon was English scientist Sir George Stokes in
1852. He worked with fluorite, so he called the effect fluorescence. Some minerals
containing impurities called activators will absorb UV light, then emit longer, visible
light waves which we see as colors. At the atomic level, UV light causes electrons in
some molecules from the “activators” to jump to a higher energy level. In falling back to
their normal level, they give off the extra energy in the form of visible light.

346
You can use a Hoberman sphere as one fun way to demonstrate how electrons bounce up
to a higher orbit as they absorb energy from UV light and then bounce back to their
original orbit while releasing the energy in the form of visible light. A Hoberman sphere
is named after Chuck Hoberman, who patented this neat toy. It’s a small ball that you
can pop open to resemble a large geodesic dome. You can then pop it back down to its
original small size. Use it to represent an atom and to show how the electrons jump up to
higher orbits, then collapse back down to their original orbits. Hoberman spheres may be
found at toy stores, teacher supply stores, or online. Here’s what one looks like in its
collapsed and expanded shapes:
The Hoberman Sphere
What does all this look like with a fluorescent mineral? Under ordinary light, a chunk of
rock containing willemite and calcite is a dull gray rock speckled black-and-white. But
flick on a UV light, and what a difference! It glows orange, yellow, and green—until you
flick off the UV light, just like expanding and collapsing your Hoberman sphere.
UV light is usually divided into short wave (SW) and long wave (LW). Most
fluorescent minerals are sensitive to SW, so when I give demonstrations with fluorescent
minerals, I generally go with a SW lamp. Only about 10 percent of the fluorescent
minerals will glow under LW. Some will change color as you switch from LW to SW.
Fluorescent lamps, especially SW, are very expensive, but you can use a less expensive
alternative for LW with a black-light tube readily available at hardware stores—the kind
of light tubes gardeners use as grow-lamps for plants and that teenagers use to make
posters of their favorite rock stars glow.

347
At gem shows, I’ve found dealers selling small UV “flashlights.” Most are LW, and
most are not very reliable in the long run. The majority of such LW lights I’ve purchased
have ended up in the trash can. But I’ve also come across a SW one (the Convoy S2+)
that has been working great for many years.
As I begin talking about fluorescent minerals with kids, I pull out my Convoy S2+ and
call it my “sorcerer’s wand.” I proceed to show how, like magic, it can make shining
colors glow out of an otherwise drab gray rock as I utter a magic word or two, after
asking kids to suggest what magic words to use.
Just some of the many varieties of UV lamps and flashlights.
What I’ve provided above is an extremely brief and simplistic explanation of
fluorescence. Some great books for teaching kids more about fluorescence and
fluorescent minerals are:
Stuart Schneider, Collecting Fluorescent Minerals, 2004. Not only does this book
have great opening chapters about fluorescent minerals in general and collecting
them, it also serves up a feast for the eyes with a colorful photographic atlas of
fluorescent minerals from around the world filling most of the pages.
Stuart Schneider, The World of Fluorescent Minerals, 2006. Schneider picked up
from his earlier book with even more colorful photos in this follow-up volume.
Manuel Robbins, Fluorescence: Gems & Minerals under Ultraviolet Light, 1994.
Robbins describes fluorescence, overviews significant localities, and provides full
348
chapters devoted to individual minerals, as well as a chapter on the activators that
cause fluorescence of different colors. While not as colorful as the Schneider books
(it contains a small color insert), it’s still chock full of good information.
Harry Wain, The Story of Fluorescence, 1965. This little paperback has been around
for decades. The Raytech company manufactures fluorescent lamps and packages a
copy with each lamp they sell.
Finally, you can also get great information from the web site of the Fluorescent Mineral
Society, www.uvminerals.org, and from Nature’s Rainbow: A Fluorescent Mineral
SuperSite, www.naturesrainbows.com.

349
Back-up page 18.2: Famous fluorescent mineral localities.
The Schneider and Robbins books listed on Back-up page 18.1 provide information about
fluorescent mineral localities around the world. For this activity, I encourage you to
point kids toward those books or the web. Here are just a few famous spots:
The Franklin & Sterling Hill zinc mines of northern New Jersey are probably the
most famous localities in the U.S. with brilliant yellow-green willemite, calcite in shades
of pink and orange-red, pectolite that glows purple, and many more minerals and vivid
colors. Most fluorescent mineral collectors started with minerals from these areas.
St. Lawrence County in north-central New York once hosted major mines, many now
closed with the land being reclaimed, but you can occasionally still go on club-organized
trips to mine dumps for sphalerite, calcite, diopside, fluorapatite, norbergite, and more.
Arizona has more mines than can be succinctly listed that have been prime producers of
fluorescent minerals of all sorts.
The Terlingua area of Texas is home to mercury mines famous for “Terlingua calcite,”
which glows blue in SW and pink in LW UV, with a high degree of phosphorescence.
Sweetwater County, Wyoming, yields gray Sweetwater agates speckled with black dots.
While drab in regular lighting, they glow vivid apple-green under UV.
Mont Saint-Hilaire in the province of Quebec, Canada, is an important mining and
mineral locality where over 270 minerals have been collected. One authority has
catalogued over 60 fluorescent minerals from this region.
The Bancroft District of Ontario is another important Canadian mineral area, featuring
a mineral museum, an annual mineral show, and dig sites yielding such fluorescents as
feldspar, scapolite, calcite, zircon, sodalite, hackmanite, fluorite, scheelite, apatite, etc.
Mexican mines have produced some great fluorescent minerals from such places as
Mapimi in Durango County and Cerro del Mercado.
Durham, England, has mines with some of the most spectacularly fluorescent fluorite.
Greenland may be a bit out of the way for most of us but is making a name for itself as a
source of fluorescent minerals from what’s known as the Ilimaussaq Complex.
Afghanistan, particularly the Sar-e-Sang district along the Kokcha River in Badakhshan
Province, is well known for tenebrescent sodalite known as hackmanite, which shows up
at a lot of gem shows. It also has fluorescent fluorapatite, calcite, scapolite, etc.
Pakistan, particularly northern Pakistan, is a great source of fluorescent minerals, along
with a wonderful variety of gemstone minerals.
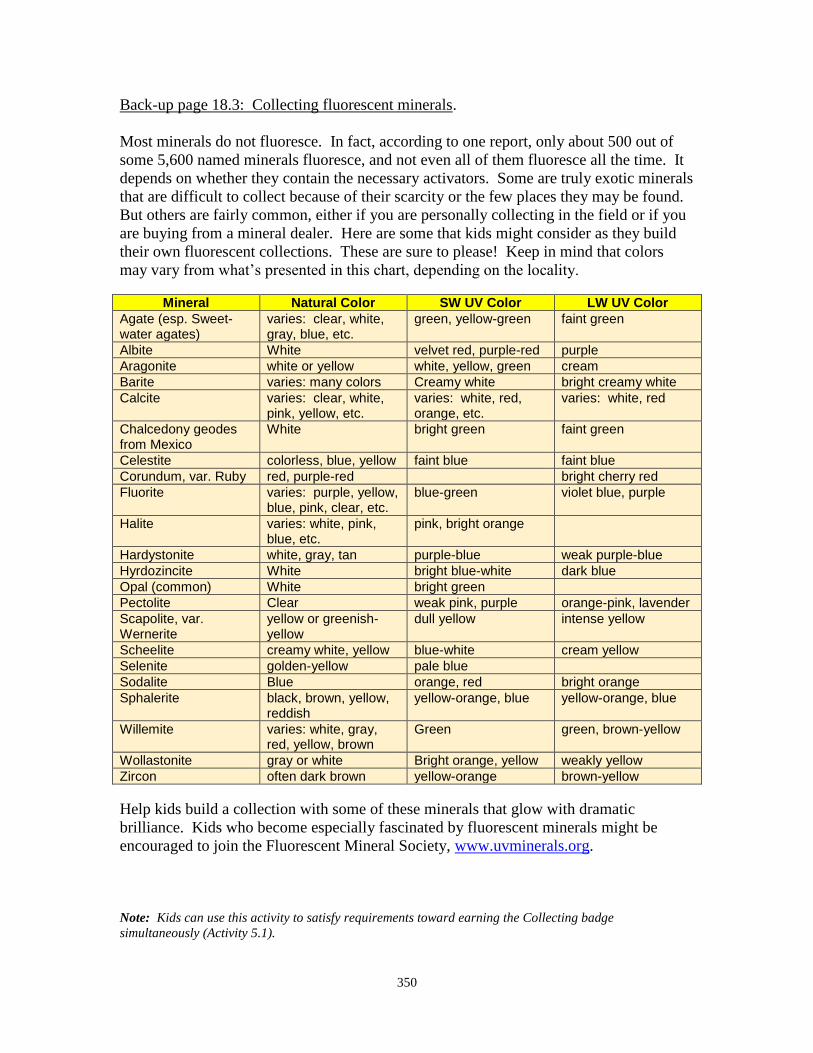
350
Back-up page 18.3: Collecting fluorescent minerals.
Most minerals do not fluoresce. In fact, according to one report, only about 500 out of
some 5,600 named minerals fluoresce, and not even all of them fluoresce all the time. It
depends on whether they contain the necessary activators. Some are truly exotic minerals
that are difficult to collect because of their scarcity or the few places they may be found.
But others are fairly common, either if you are personally collecting in the field or if you
are buying from a mineral dealer. Here are some that kids might consider as they build
their own fluorescent collections. These are sure to please! Keep in mind that colors
may vary from what’s presented in this chart, depending on the locality.
Mineral Natural Color SW UV Color LW UV Color Agate (esp. Sweet-water agates)
varies: clear, white, gray, blue, etc.
green, yellow-green faint green
Albite White velvet red, purple-red purple
Aragonite white or yellow white, yellow, green cream
Barite varies: many colors Creamy white bright creamy white
Calcite varies: clear, white, pink, yellow, etc.
varies: white, red, orange, etc.
varies: white, red
Chalcedony geodes from Mexico
White bright green faint green
Celestite colorless, blue, yellow faint blue faint blue
Corundum, var. Ruby red, purple-red bright cherry red
Fluorite varies: purple, yellow, blue, pink, clear, etc.
blue-green violet blue, purple
Halite varies: white, pink, blue, etc.
pink, bright orange
Hardystonite white, gray, tan purple-blue weak purple-blue
Hyrdozincite White bright blue-white dark blue
Opal (common) White bright green
Pectolite Clear weak pink, purple orange-pink, lavender
Scapolite, var. Wernerite
yellow or greenish-yellow
dull yellow intense yellow
Scheelite creamy white, yellow blue-white cream yellow
Selenite golden-yellow pale blue
Sodalite Blue orange, red bright orange
Sphalerite black, brown, yellow, reddish
yellow-orange, blue yellow-orange, blue
Willemite varies: white, gray, red, yellow, brown
Green green, brown-yellow
Wollastonite gray or white Bright orange, yellow weakly yellow
Zircon often dark brown yellow-orange brown-yellow
Help kids build a collection with some of these minerals that glow with dramatic
brilliance. Kids who become especially fascinated by fluorescent minerals might be
encouraged to join the Fluorescent Mineral Society, www.uvminerals.org.
Note: Kids can use this activity to satisfy requirements toward earning the Collecting badge
simultaneously (Activity 5.1).
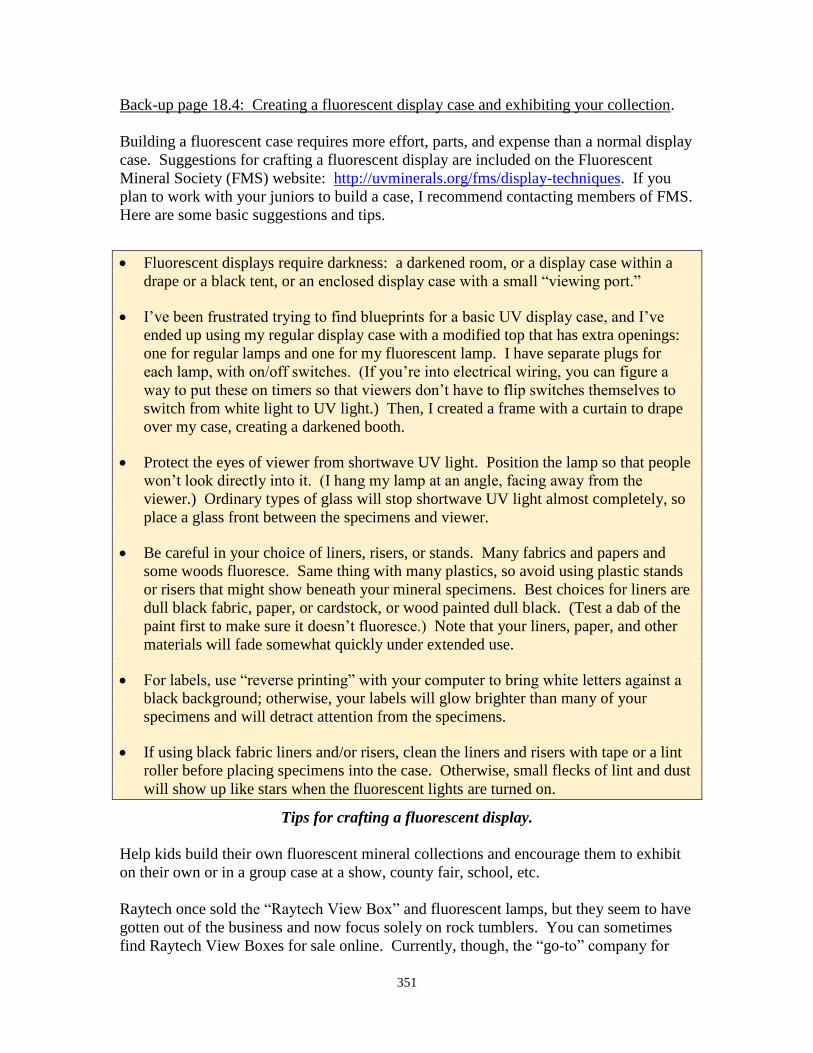
351
Back-up page 18.4: Creating a fluorescent display case and exhibiting your collection.
Building a fluorescent case requires more effort, parts, and expense than a normal display
case. Suggestions for crafting a fluorescent display are included on the Fluorescent
Mineral Society (FMS) website: http://uvminerals.org/fms/display-techniques. If you
plan to work with your juniors to build a case, I recommend contacting members of FMS.
Here are some basic suggestions and tips.
Fluorescent displays require darkness: a darkened room, or a display case within a
drape or a black tent, or an enclosed display case with a small “viewing port.”
I’ve been frustrated trying to find blueprints for a basic UV display case, and I’ve
ended up using my regular display case with a modified top that has extra openings:
one for regular lamps and one for my fluorescent lamp. I have separate plugs for
each lamp, with on/off switches. (If you’re into electrical wiring, you can figure a
way to put these on timers so that viewers don’t have to flip switches themselves to
switch from white light to UV light.) Then, I created a frame with a curtain to drape
over my case, creating a darkened booth.
Protect the eyes of viewer from shortwave UV light. Position the lamp so that people
won’t look directly into it. (I hang my lamp at an angle, facing away from the
viewer.) Ordinary types of glass will stop shortwave UV light almost completely, so
place a glass front between the specimens and viewer.
Be careful in your choice of liners, risers, or stands. Many fabrics and papers and
some woods fluoresce. Same thing with many plastics, so avoid using plastic stands
or risers that might show beneath your mineral specimens. Best choices for liners are
dull black fabric, paper, or cardstock, or wood painted dull black. (Test a dab of the
paint first to make sure it doesn’t fluoresce.) Note that your liners, paper, and other
materials will fade somewhat quickly under extended use.
For labels, use “reverse printing” with your computer to bring white letters against a
black background; otherwise, your labels will glow brighter than many of your
specimens and will detract attention from the specimens.
If using black fabric liners and/or risers, clean the liners and risers with tape or a lint
roller before placing specimens into the case. Otherwise, small flecks of lint and dust
will show up like stars when the fluorescent lights are turned on.
Tips for crafting a fluorescent display.
Help kids build their own fluorescent mineral collections and encourage them to exhibit
on their own or in a group case at a show, county fair, school, etc.
Raytech once sold the “Raytech View Box” and fluorescent lamps, but they seem to have
gotten out of the business and now focus solely on rock tumblers. You can sometimes
find Raytech View Boxes for sale online. Currently, though, the “go-to” company for

352
fluorescent lamps appears to be Way Too Cool, LLC, which sells a variety of custom-
made lamps and flashlights for fluorescent enthusiasts. Their website is:
www.fluorescents.com. You can also find lamps for sale at Ultraviolet Tools LLC
(http://www.ultraviolet-tools.com/)
Before investing in an expensive lamp, you ought to explore a website called Nature’s
Rainbows: A Fluorescent Mineral SuperSite, www.naturesrainbows.com. It is a
noncommercial site run by volunteers with a love of fluorescent minerals. It provides
wonderful overview sections all about fluorescent minerals and also has a section
providing wise words of advice in selecting the right fluorescent lamp for you.
Fluorescent displays truly glow! Help you club’s kids create such a wonderful exhibit.
Note: Kids who publicly exhibit a fluorescent collection can use this activity to satisfy requirements
toward earning the Showmanship badge simultaneously (Activity 6.4).

353
Back-up page 18.5: Safety with fluorescent lamps.
Note: This activity is required for kids to earn the Fluorescent Minerals badge.
No one should look directly into a fluorescent lamp when it is turned on. While long-
wave ultraviolet light (LW UV) is relatively harmless, short-wave ultraviolet light (SW
UV) can “sunburn” skin and eyes and cause irritation, especially for people with sensitive
skin. Although protective glasses can shield eyes from harm, kids should be advised to
limit time spent with UV light of any sort.
Teach kids to be safe, not sorry! They should learn to observe the following precautions
in working with fluorescent lighting.
To prevent “sunburn” on skin, limit exposure by limiting the time spent with
fluorescent lighting, particularly SW UV, and limit the amount of exposed skin by
wearing long-sleeved shirts, museum gloves, etc.
Never look directly into an ultraviolet lamp when it’s turned on, just as you should
never stare directly into any light source. Eye irritation and damage can result.
Always keep the light aimed away from your face.
Be aware that even if the lamp is pointed away from you, if it’s aimed at a reflective
surface, UV light can still be reflected back at you.
To further help prevent eye irritation when working with fluorescent lamps, wear
protective eyeglasses, such as regular laboratory-style safety glasses, goggles, or even
regular eyeglasses, and—again—limit time spent working with a fluorescent lamp
turned on. The best sorts of glasses to use are those offering 99.9% UV protection.
If building a fluorescent mineral display case, tuck or angle fluorescent lamps where
people can’t look directly into them.
Have a glass front between the lamp and the viewer in a fluorescent mineral display
case. Ordinary types of glass are usually effective at blocking some, but not all, SW
UV light.
Safety tips when using fluorescent lamps.

354
Back-up page 18.6: Special effects of some fluorescent minerals.
In addition to changing color and glowing as if lit from within, some fluorescent minerals
exhibit still more special effects. These include phosphorescence and tenebrescence.
Phosphorescence.
Kids today might not have experienced this, but folks from my generation will recall
turning off the television in a darkened room late at night and watching the screen slowly
fade to black. Some fluorescent minerals do the same thing, momentarily holding a faint
glow after a fluorescent lamp has been switched off, in a phenomenon known as
phosphorescence. It’s especially noticeable in pink calcite rhombohedrals from Nuevo
Leon, Mexico, often sold at gem and mineral shows. A large chunk makes a great
addition to Activity 17.8, The Amazing Mineral Magic Show. It is truly neat to watch as
the calcite continues glowing in the dark after fluorescent lights are switched off, with the
glow gradually fading away. Phosphorescence, or “afterglow,” is also observed in
scapolite, some celestine and barite, gypsum, hydrozincite, Terlingua calcite from Texas,
and other minerals.
Tenebrescence.
I learned about tenebrescence at one of those gem shows that take place in the rooms of a
big hotel. My wife and I entered Room 204, whereupon an elderly man from
Afghanistan waved a pale purple crystal in our faces and urged us to join him in the
bathroom. Our hesitation when he closed the door turned to alarm when he switched off
the lights to total darkness. Then, with a “click,” we saw his bright smile illuminated by
a fluorescent lamp and the crystal glowing bright apricot orange. I was ready to buy it
then and there, but the show wasn’t over. When we emerged back into the light of the
hotel room, I saw that the formerly pale crystal was now a vivid raspberry color! The
man’s smile grew even larger as I reached for my wallet. Later at home, we saw that the
color of our wonderful new acquisition had reverted back to pale purple when we left it
exposed to daylight. Thus, my first-hand lesson about tenebrescence, a property by
which a mineral can change color when exposed to UV light (particularly SW UV), then
fade under daylight, only to regain its brighter colors with a little more UV exposure.
This color reversal can be repeated indefinitely. The property of reversing color with
changes in light radiation has been called reversible photosensitivity or reversible
photochromism, or more commonly, tenebrescence. Hackmanite (a variety of sodalite) is
the mineral perhaps most well known for exhibiting this special effect. You can show the
same effect with “photosensitive eyeglasses” that self-darken into sunglasses on exposure
to strong sunlight and then turn clear again indoors. Other minerals that can exhibit
tenebrescence include tugtupite, spodumene, “chameleon diamonds,” and some barites.
For photographs of phosphorescence and tenebrescence, see Back-up page 17.7 (pages
336-337).
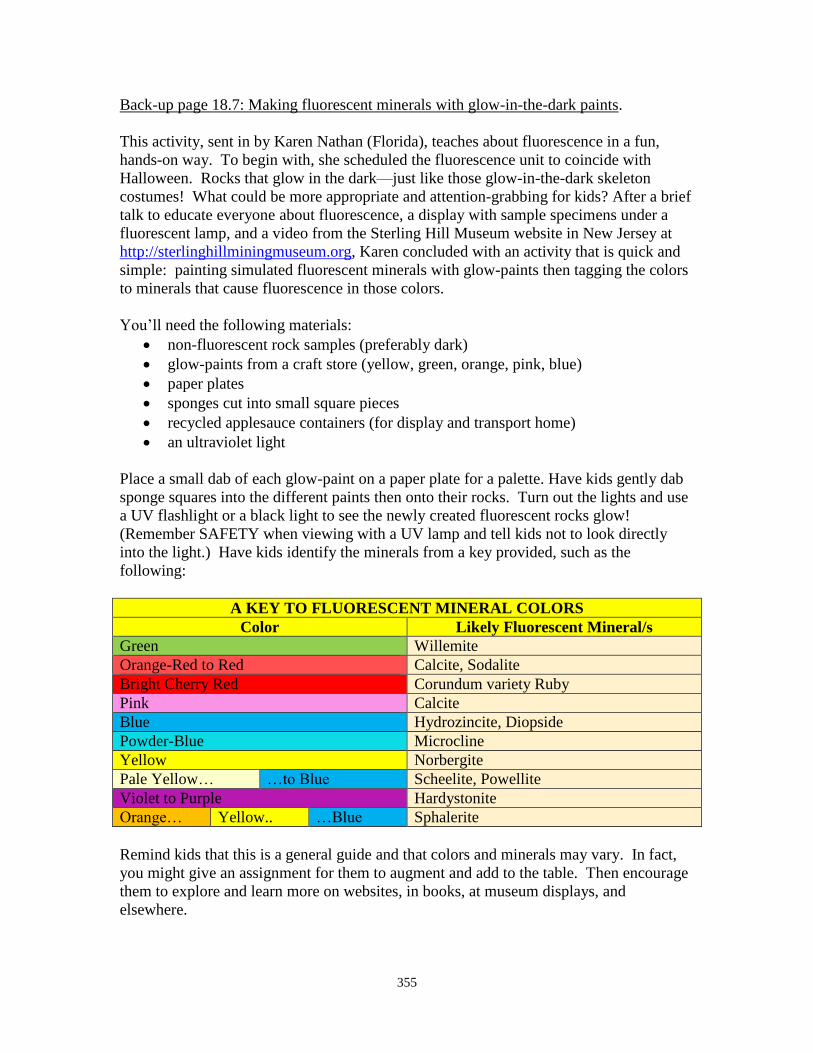
355
Back-up page 18.7: Making fluorescent minerals with glow-in-the-dark paints.
This activity, sent in by Karen Nathan (Florida), teaches about fluorescence in a fun,
hands-on way. To begin with, she scheduled the fluorescence unit to coincide with
Halloween. Rocks that glow in the dark—just like those glow-in-the-dark skeleton
costumes! What could be more appropriate and attention-grabbing for kids? After a brief
talk to educate everyone about fluorescence, a display with sample specimens under a
fluorescent lamp, and a video from the Sterling Hill Museum website in New Jersey at
http://sterlinghillminingmuseum.org, Karen concluded with an activity that is quick and
simple: painting simulated fluorescent minerals with glow-paints then tagging the colors
to minerals that cause fluorescence in those colors.
You’ll need the following materials:
non-fluorescent rock samples (preferably dark)
glow-paints from a craft store (yellow, green, orange, pink, blue)
paper plates
sponges cut into small square pieces
recycled applesauce containers (for display and transport home)
an ultraviolet light
Place a small dab of each glow-paint on a paper plate for a palette. Have kids gently dab
sponge squares into the different paints then onto their rocks. Turn out the lights and use
a UV flashlight or a black light to see the newly created fluorescent rocks glow!
(Remember SAFETY when viewing with a UV lamp and tell kids not to look directly
into the light.) Have kids identify the minerals from a key provided, such as the
following:
A KEY TO FLUORESCENT MINERAL COLORS
Color Likely Fluorescent Mineral/s
Green Willemite
Orange-Red to Red Calcite, Sodalite
Bright Cherry Red Corundum variety Ruby
Pink Calcite
Blue Hydrozincite, Diopside
Powder-Blue Microcline
Yellow Norbergite
Pale Yellow… …to Blue Scheelite, Powellite
Violet to Purple Hardystonite
Orange… Yellow.. …Blue Sphalerite
Remind kids that this is a general guide and that colors and minerals may vary. In fact,
you might give an assignment for them to augment and add to the table. Then encourage
them to explore and learn more on websites, in books, at museum displays, and
elsewhere.

356
Back-up page 18.8: Finding the fluorescent mineral in the “Magic Cave”
As a fun activity, create a “Magic Cave.” You can let you imagination fly and get as
elaborate and creative as you wish with this, but I’ve simply used a large cardboard box.
I’ve spray-painted the interior flat black. Or, in some instances, I’ve just inserted a tray
with a black bottom liner. After setting the box on its side on a table or counter, with the
opening facing me sideways, I fill it with an assortment of minerals, but only one
fluoresces. I then drape it with a heavy black cloth.
Kids are given either a hand-held ultraviolet lamp or an ultraviolet flashlight and are
encouraged to enter the cave (i.e., duck under the drape) to go on a search for the
fluorescent mineral.
To make it especially fun for the kids, let them keep what they’ve found as a glowing
prize. Chalcedony desert roses that glow lime green make for great—and inexpensive—
prizes. After each child exits the cave with his/her prize, plop in a new fluorescent
mineral for the next child in line.
You might use this activity as a jumping-off point to talk about how fluorescent minerals
are a very special, elite class of minerals. The vast majority of minerals do not fluoresce.
In fact, per some estimates, less than 10% to 15% of mineral species exhibit fluorescence
that is visible to the human eye. Per the website Mindat (www.mindat.org), there are
5,607 approved mineral species, but only some 500 fluoresce!

357
Back-up page 18.9: WILD CARD: Do your own thing!!
While I’ve tried to provide a wide-ranging variety of activities to choose from, no one
manual can “do it all.” There are many other great ideas out there that clubs have found
to match their local interests and resources.
Plus, the Youth Leaders of some clubs have expressed concern that some of the activities
included in the manual may be a bit beyond the abilities of their youngest members.
Here’s your chance to tailor-make activities for the youngest among us.
If you and your fellow club members have an idea for learning about fluorescent minerals
that isn’t included in this manual, go for it! When you send in your badge request, just let
me know what you did as a WILD CARD activity. Who knows? Maybe your idea will
be included in the next edition of the Badge Manual!

358
19. Reaching Across Generations
As a special note and acknowledgement, this badge and its activities were developed by a
pebble pup named Erica Nathan of the Coquina Kids of Florida after senior member John
Withey of their host club, the Tomoka Gem & Mineral Society, passed away.
Older members in your club may sometimes seem unapproachable, but if you get to
know them, you will find they are a wealth of knowledge, experience, and fun stories,
just as Erica discovered. To earn this badge, strike up a friendship with a senior member
in your club and get to know more about him or her by completing activities below.
Activity 19.1: *Spending six hours with a senior member.*
Note: This activity is required to earn this badge.
Along with your parents, spend at least six hours with a senior member. You might talk
about rocks or minerals. You might seek help identifying fossils in your collection.
Perhaps you could go on a club field trip. Maybe, providing they hold an officer
position, you could help do their position or ask them to tell you about it. For example,
you can assist the editor with the next issue of the society newsletter or the membership
chair in preparing and mailing a new member packet.
As a conclusion to this activity, you should write a thank-you note or create a card for the
time spent together.
Activity 19.2: Five things you learned from a senior member.
Make a list of the five most important things you believe your senior member taught you.
These might relate to mineral identification, lapidary arts, organizing your collection, etc.
Or, they might not relate to rocks at all. For instance, perhaps your senior member
imparted a lesson or two about patience or curiosity or friendship or responsibility.
Activity 19.3: The best time you spent with your senior member.
Write a paragraph about the best moment you had with your senior member. Share your
paragraph with your senior member before turning it in to your junior leader. With your
senior member’s permission, see if your newsletter editor will publish it.
Activity 19.4: Finding, taking, or drawing a picture of your senior member.
A picture is a great way to remember special times. Take a picture of your senior
member, or have your parents take a picture of the two of you together, or you might
draw a picture and present it to your senior member at the next club meeting. Does your
senior member have a picture of himself or herself as a child collecting rocks?
Activity 19.5: A specimen that is special to your senior member.
Find out about a specimen that is special to your senior member. Write a paragraph
describing the specimen and tell why it is special, or give a presentation about it at one of
your club meetings. You may want to take a picture of this specimen if you write about
it, or have your senior member bring it to the meeting if you talk about it.

359
Activity 19.6: Making a memory box.
Find a box or frame and decorate it with things related to rocks and minerals. You can
find logos for your club, regional federation, rockhounding, etc., online. Place anything
from your previous activities (19.1-19.5) in the box. Show the memory box to your
junior leader before gift-wrapping it to present to your senior member at a club meeting.
Activity 19.7: WILD CARD: Do your own thing!
Do you have an idea for reaching across generations that isn’t included in this manual? If
so, do your own thing! When your Youth Leader sends in your badge request, let us
know what you did as a WILD CARD activity. Who knows? Maybe your idea will be
included in the next edition of the Badge Manual!
Erica dedicates this badge to the
memory and honor of John Withey.

360
19. Reaching Across Generations
□ 19.1 *Spending six hours with a senior member*
(required to earn this badge)
□ 19.2 Five things you learned from a senior member
□ 19.3 The best time you spent with your senior member
□ 19.4 Finding, taking, or drawing a picture of your senior member
□ 19.5 A specimen that is special to your senior member
□ 19.6 Making a memory box
□ 19.7 WILD CARD: Do your own thing!
To earn your Reaching Across Generations badge, you need to complete at least 3 of the
7 activities. (Please note that successfully completing Activity 19.1 is required to earn
this badge.) Check off all the activities you’ve completed. When you have earned your
badge, sign below and have your FRA leader sign and forward this sheet to the AFMS
Juniors Program chair.
___________________________________
Date completed
_________________________________ ___________________________________
My signature Youth leader’s signature
_______________________________________________________________________
Name of my club
Leader’s preferred mailing address for
receiving badge:
____________________________________
____________________________________
____________________________________

361
General Back-up Page for Badge 19: Reaching Across Generations.
The vast majority of adults are moral, reliable, responsible, and eager to help as best they
can in efforts to educate and nurture our kids in a positive, wholesome environment.
Regrettably, though, as noted in the Introduction to this FRA Badge Program Manual,
one very unfortunate aspect of the world in which we live is that, sadly, there are some
adults who should not be left alone with kids. To repeat that section of the Introduction:
Safeguard children. Finally, I need to emphasize a point I wish we didn’t have to go
into, but it is absolutely vital to raise and to underscore, namely, having youth leaders
who are well known by all in the club for sound moral values and having multiple adults
on hand when working with kids. There are, unfortunately, some who would abuse the
natural trust of children. My home state of California has Megan’s Law, which requires
registration of sex offenders on a public web site with photos and information about
offenders. Some societies require background checks for any club members volunteering
to work with juniors, and this is a good policy to explore with your own club board.
Always have multiple adults working with the kids, and prevent any sort of abuse,
whether physical, sexual, mental, emotional, or verbal. In addition, safeguard children
from fellow children by making clear that any sort of hazing or bullying among kids is
wrong and is never permitted. The Houston Gem & Mineral Society has developed an
official “HGMS Policy on Children” that outlines policies, procedures, and expectations
on the parts of children, parents, and club members to ensure a safe, enjoyable
environment for children while engaged in any HGMS functions. Consider putting a
similar policy in writing for your society. For guidance on this issue, I recommend all
youth leaders within AFMS-affiliated societies read the excellent and thorough materials
entitled “Youth Protection” contained on the web site of the Boy Scouts of America:
http://scouting.org/Training/YouthProtection.aspx Although the Boy Scouts organization
has had a troubled record in this regard as widely reported in the media, their advice is
important and is well worth heading. The safety of our youth is paramount, and any
obvious or even suspected abuse should be reported and dealt with through proper
legal authorities.
Thus, as with all other activities recommended within this manual, kids should not be left
alone, one-on-one, with an individual adult. Parents should accompany their kids in
working on the activities for this and other badges.

362
Back-up page 19.1: *Spending six hours with a senior member.*
Note: This activity is required to earn the Reaching Across Generations badge.
One of the most memorable assignments I had in high school was when our American
History teacher had us each find and interview someone who had been our age during the
Great Depression of the 1930s. I remember very little else specifically about that class
and its assignments—other than that Mr. Bernota always tossed back and chewed on two
dry aspirins to kick off the daily lecture—but that one assignment has always stuck with
me, when Dad drove me across town and our interviewee poured out stories of growing
up and day-to-day incidents that mirrored some of my own. The dry textbook pages in
our history book were coming alive in ways I could directly relate to, and this “old
person” didn’t seem so very old and history didn’t seem so very remote anymore. (And
when I do the math, that person who seemed so “old” probably was younger than I am
today!)
Along with their parents, kids should spend at least six hours with a senior member,
either visiting them for a whole day, or spread out in one-, two-, or three-hour segments.
Try to match kids and senior members with similar interests, whether it be minerals,
fossils, field trips, fluorescent rocks, lapidary arts, natural history museums, gem shows,
or what have you.
Match kids to seniors by matching interests, such as soft-stone carving.
Encourage kids to decide in advance what they would most like to talk about, but don’t
be overly prescriptive. A lot of the best stories and advice arises naturally in the course
of everyday conversation. But to kick off that conversation and to prime the pump, so to
363
speak, it helps to have topics prepared and at hand that might be of mutual interest to the
kids and their “mentors.”
Or, even better, arrange for some specific activity, such as the junior member seeking the
senior member’s help identifying rocks or classifying fossils in the junior’s collection, or
help in cleaning and curating specimens, or a workshop and tips on crafting a cab or
faceting a gemstone, or providing display tips for preparing an exhibit at the next club
show or for a competitive exhibit at a federation show. Or turn the tables and have the
junior member assist a club officer in his or her club duties. For example, the junior
might assist the newsletter editor with the next issue of the society bulletin or the
membership chair in preparing and sending a new member packet. Another possibility is
for the junior and senior member to enjoy the next club field trip together, or for the
junior to assist the senior member at the next club show at the kids’ booth, snack bar,
admission and welcome table, raffle station, or silent auction.
Be sure that, as a conclusion to this activity, kids send a thank-you note or card for the
time spent together. Karen Nathan (mother of Erica, the junior member who created this
badge unit) has worked with the juniors of Coquina Kids to create hand-made cards
related to our hobby, with messages like “You’re a Gem!” or “You Rock!” along with
stick-on plastic rhinestones. Encourage your kids to craft similar handmade cards.
They’ll surely mean a whole lot more to the person receiving them!

364
Back-up page 19.2: Five things you learned from a senior member.
So that you’ll be sure kids really interact with their senior members, tell them in advance
that you’ll expect them to come back with a list of the five most important things their
senior member taught them. In fact, you might even give kids a numbered sheet, with
space for them to fill in, as shown on the next page.
And their list doesn’t have to be restricted to just things about rocks, fossils, or lapidary
arts. Perhaps the senior member taught patience, or a sense of responsibility, or
friendship and caring for others, or a sense of fun, humor, and curiosity.
It is hoped that kids will come away from this experience having learned not just stone-
cold facts, but values and interpersonal skills, as well.

365
What I learned from_______________________________________________ name of my senior member 1._______________________________________________________________ ________________________________________________________________ ________________________________________________________________ ________________________________________________________________ 2._______________________________________________________________ ________________________________________________________________ ________________________________________________________________ ________________________________________________________________ 3._______________________________________________________________ ________________________________________________________________ ________________________________________________________________ ________________________________________________________________ 4._______________________________________________________________ ________________________________________________________________ ________________________________________________________________ ________________________________________________________________ 5._______________________________________________________________ ________________________________________________________________ ________________________________________________________________ ________________________________________________________________

366
Back-up page 19.3: The best time you spent with your senior member.
Have kids write a paragraph about the best time they had with their senior members.
This could be a laugh over a special memory the senior member shared from his or her
own childhood or a special treat like cookies or cobbler that the senior member shared
from an old family recipe. It might be a story from the “old days” of the club. Or it may
be a special fossil or mineral discovery they made together on a club field trip.
Have junior members share their paragraphs with their senior members before turning it
in to the junior leader. With the senior member’s permission, the junior member might
see if the society newsletter editor will publish the paragraph to share the experience with
all the society members.
Note: Kids whose paragraphs are published in the society newsletter can use this activity to satisfy
requirements toward earning the Communication badge simultaneously (Activity 7.2).

367
Back-up page 19.4: Finding, taking, or drawing a picture of your senior member.
A picture is a great way to remember special times, so accompanying parents should be
sure to have a camera or cell phone camera handy when junior members and senior
members get together. Encourage junior members to take pictures of their senior
members, or have parents take photographs of the juniors and seniors together. Or
encourage junior members to draw pictures of their senior members and present the
drawings (framed, if possible) to the senior members at the next club meeting.
A senior and a junior member of the Indian Mounds club
in Michigan enjoy sharing and learning with one another.
Kids who complete activity 19.3 and submit their paragraph to the society newsletter
should also submit their picture to go along with the paragraph. If you do this, though, be
sure to get the senior’s permission to publish the picture if you include names with the
picture. If the picture includes the junior along with the junior’s name, you should have
signed permission from the junior’s parents before publishing in a newsletter.

368
Back-up page 19.5: A specimen that is special to your senior member.
In every senior’s collection is a specimen (or two or three or four) that is extra special to
him or her. It could be a specimen that a parent or grandparent gave to them when they
were kids, the very first rock or mineral they ever collected, a spectacular fossil they
discovered during a field trip, the first cabochon they crafted or the first pendant they
wire-wrapped themselves, a stone they found during an adventure to another country, or
perhaps a ring or necklace containing a precious gemstone that their spouse gave to them
on a special occasion.
For instance, I have an inkwell that is kind of beat up. It is adorned with different
minerals from Colorado (amazonite, pyrite, calcite, galena, etc.) that have been glued to
its sides. It is perpetually dusty, most of the minerals are dinged, and some are even
missing, but I keep it proudly out on display. Why?
Well, this rough and tawdry little thing was a gift from my grandfather, who received it
from his grandfather, who participated in the Colorado Gold Rush of the late 1850s,
exactly 100 years before my birth. In fact, it’s the only thing great-great grandpa brought
home from the gold rush. Such is the way of gold rushes.… I always saw it on display in
my grandparents’ home, and now it is always on display in my home.
What has special significance to your club senior?

369
Have junior members find out what specimens are extra special to their assigned senior
members. Then have them write a paragraph describing the specimen and telling why it
is so very special. Or have them give presentations about it at a club meeting.
If the junior members write about it, have them accompany their paragraphs with photos
or drawings of the specimens. If the junior members give oral presentations at one of
your club meetings, have the senior members bring those specimens to the meeting to
accompany the talks.
Note: Kids who give an oral presentation to the club or whose paragraphs and/or pictures are published
in the society newsletter can use this activity to satisfy requirements toward earning the Communication
badge simultaneously (Activities 7.1 and 7.2).

370
Back-up page 19.6: Making a memory box.
A memory box contains objects of special significance and sentimental value to serve as
private reminders of treasured moments. Memory is fickle, and while we may think we’ll
remember a particular moment forever, it’s surprising how quickly our frail brains forget
details. Memory boxes store things neurons might someday lose, so encourage juniors to
get a box and decorate it with things related to rocks and minerals and the moments spent
with their senior member from any of the previous activities in this badge unit.
Memory boxes can be as simple or complex as imagination and budget allow. At the
simplest level, it may consist of a shoe box containing pictures, letters, cards, and other
precious objects. Or you can progress all the way to fancy oak shadow boxes with
cubbies, shelves, and a glass front to hang on a wall. From shoebox to shadow box, here
are a few ideas:
A simple, unadorned shoe box storing pictures, letters, cards, or objects.
That same shoebox, but with the outside painted or covered with wrapping paper
that’s been glued on and decorated with ornaments like stickers or plastic stick-on
rhinestones. The top might be held shut with colored shoelaces, yarn, or ribbons.
A top-hinged box available from stores like Target. Some of these have little
compartments on the lid to slide in a photo or a label.
Top-hinged wooden boxes available from craft stores like Michaels or Ben Franklin.
The exterior might be painted with bright and colorful scenes or stained and
lacquered, and the interior might be lined with felt.
A printer’s tray from an antique store. However, these usually have very small and
shallow compartments, limiting what they can hold.
A shadow box with cubbies and a glass top. These can be mounted on a wall or
placed atop a shelf.
Here are a few ideas for materials to decorate the memory box:
Colorful markers and crayons.
Gift-wrapping paper.
Ribbons, yarn, and/or string.
Materials from the scrapbooking section of a craft store.
Rubber stamps and ink.
Rock, mineral, and/or fossil pictures cut from rock and gem magazines.
Logos downloaded from your club and federation websites.
Most importantly, items from time spent with the senior member, including photos,
any letters or notes exchanged, perhaps a mineral, crystal, or fossil the senior member
gave the junior member, etc.
Once the memory box is complete, kids should share it with their senior member and
junior leader, explaining why they’ve chosen to include what they have.
371
Back-up page 11.7: WILD CARD: Do your own thing!!
While I’ve tried to provide a wide-ranging variety of activities to choose from, no one
manual can “do it all.” There are many other great ideas out there that clubs have found
to match their local interests and resources.
Plus, the Youth Leaders of some clubs have expressed concern that some activities
included in the manual may be beyond the abilities of their youngest members. Here’s
your chance to tailor-make activities for the youngest-among-us.
If you and your fellow club members have an idea for learning about reaching across
generations that isn’t included in this manual, go for it! When you send in your badge
request, just let me know what you did as a WILD CARD activity. Who knows? Maybe
your idea will be included in the next edition of the Badge Manual!

372
20. Maps
Our world is a complex, three-dimensional sphere. Maps “translate” our three-
dimensional world into a simplified two-dimensional flat portrait. Different types of
maps have been created to help us understand different things about our complex world.
To earn this badge, you should demonstrate your knowledge of maps of different types,
what each type tells us, and how to use them. You might also go on to learn about
making a map, where maps may be found, compasses that help us orient North and South
on a map, and how to use electronic techniques involving GPS for finding your way
around this Earth of ours.
Activity 20.1: Learning about the different sorts of maps and how to read them.
Most of us think of maps in terms of taking us from Point A to Point B, but that’s only
one sort of many maps. Different sorts of maps tell different stories. There are
roadmaps, geographic maps, geologic maps, topographic maps, guidebook maps, weather
maps, and others. Buy a book or pick one up at the library to learn about different sorts
of maps and what each one tells us, or explore the Internet to learn about maps and
mapping. Make a chart of common sorts of maps and their characteristics.
Activity 20.2: Sources of paper maps.
Learn about the different places where maps of different sorts may be found, then go out
and get the map of your choice and demonstrate how to read and use it. Also, find out
what companies and agencies publish maps.
Activity 20.3: Making maps.
Make a map of your choice. This could be a simple street map of your neighborhood, a
roadmap showing how to get to a mineral or fossil site from your home, a topographic
map showing the hills and valleys of a nearby park, or even a map of a room in your own
home. How about a treasure map showing where you buried a can of crystals or tumbled
stones? In crafting your map, keep in mind such considerations as orientation, scale,
symbols, legend, and labels.
Activity 20.4: Navigating via Earth’s magnetic field and a compass.
We now have satellites circling Earth and sending back signals that help us navigate from
Point A to Point B. But in days of old (and not-so-old), we used paper maps and simple
hand-held compasses with magnetized needles to orient us to north and south. Learn how
to use a compass and how to craft a “floating compass” similar to those used on sailing
ships in days of yore.
Activity 20.5: Using GPS and geocaching.
What does “GPS” stand for? Find out, and learn how to use it. Then ask your youth
leader to take your group on a geocaching adventure using GPS!

373
Activity 20.6: Maps on the Web.
The World Wide Web has become a wonderful source for maps of all sorts, including
ones that allow you to change angles of view, zoom in or out, fly around the world, and
otherwise have fun in two and three dimensions. Some even give you the real-time
experience of viewing the surface of our Earth from space! Explore the Web and report
on what sorts of maps you can find there.
Activity 20.7: WILD CARD: Do your own thing!
Do you have an idea for learning about maps that isn’t included in this manual? If so, do
your own thing! When your Youth Leader sends in your badge request, let us know what
you did as a WILD CARD activity. Who knows? Maybe your idea will be included in
the next edition of the Badge Manual!

374
20. Maps
□ 20.1 Learning about different sorts of maps and how to read them
□ 20.2 Sources of paper maps
□ 20.3 Making maps
□ 20.4 Navigating via Earth’s magnetic field and a compass
□ 20.5 Using GPS and geocaching
□ 20.6 Maps on the Web
□ 20.7 WILD CARD: Do your own thing!
To earn your Maps badge, you need to complete at least 3 of the 7 activities. Check off
all the activities you’ve completed. When you have earned your badge, sign below and
have your FRA leader sign and forward this sheet to the AFMS Juniors Program chair.
___________________________________
Date completed
_________________________________ ___________________________________
My signature Youth leader’s signature
_______________________________________________________________________
Name of my club
Leader’s preferred mailing address for
receiving badge:
____________________________________
____________________________________
____________________________________

375
Back-up page 20.1: Learning about the different sorts of maps and how to read them.
Maps are two-dimensional representations of different aspects of our complex world.
Kids should learn about the different sorts of maps and what kind of information each
conveys. For instance, here are a few types of maps kids are likely to encounter:
Roadmaps show how to get from point A to point B on streets, roads, or highways.
These are what most folks think of when hearing the word “map.”
Political maps show borders of countries and states, locations of capital cities, etc.
Kids will see these in their political science, civics, and history textbooks.
Geographic and Atlas maps may show both natural features (rivers, mountains,
lakes) and manmade features (cities, roads, railroads), as well as artificial, political
features (borders between countries, states, counties, etc.).

376
Geologic maps show the underlying geology of a region, highlighting different types
of rocks and formations. These are very colorful for a very practical reason. The
colors are standardized to tell readers specific info about the type of rocks and their
ages. Geological time periods are further delineated by letter codes, for instance,
capital J for Jurassic, with lowercase letters indicating formations.
Topographic maps with concentric lines allow you to “read” the landscape. Each
line corresponds to a different elevation and once you become adept at reading these,
you can “see” the landscape in three dimensions. Many hiking maps are topographic
maps so that hikers will know just how steep the trail ahead will be. To help kids

377
appreciate what those lines on a topographic map mean, make a little landscape out of
plaster and draw lines to show elevation points, then compare this 3-D model to a flat,
two-dimensional topographic map. Or make a 3-D landscape with damp sand, insert
toothpicks at different elevations and connect toothpicks of the same elevation with
yarn.
A 3-D topographic map made of plaster. A printed topographic map.
Guidebook maps provide “quick-and-easy” instructions on how to get to a particular
destination. Often, they are not completely geographically accurate; for instance,
they may condense the mileage from one spot to another and may show only the most
significant highlights or landmarks.
Weather maps show weather patterns across geographic areas, with symbols
indicating wind patterns, storms, high pressure and low pressure systems and fronts.

378
Kids just need to tune into the local news report to see these, and they’re also often
seen on the back page of the newspaper.
Help kids learn more about maps by directing them to books about mapping and bring in
different sorts of maps to show how they vary. (Back-up page 20.2 has sources of maps.)
In order to “read” a map, teach kids about Legends or Keys. Legends help us read the
map we are looking at. Different maps use different symbols to indicate things such as
capital cities, different sorts of highways, etc. Often, you will find the legend or key as a
boxed feature located in a lower corner of the map, as seen above in the weather map.
Many good books are available to purchase or to borrow through the library. Some get
fairly technical, but you can also find age-appropriate books at stores that cater to school
teachers and sometimes at more general bookstores. Check with the store clerk to direct
you to books about geography. Following are some that I’ve found.
Barnes & Lisle’s Basic Geological Mapping, 2004.
Maltman, Geological Maps: An Introduction, 1990.
McClay, The Mapping of Geological Structures, Second Edition, 2003.
Mapping books pitched at an advanced, technical level.
Richard Panchyk, Charting the World: Geography & Maps from Cave Painting to
GPS with 21 Activities, 2011. (Ages 9-12.)
Tish Rabe, There’s a Map on My Lap! All About Maps, 2002. Cat in the Hat’s
Learning Library (Ages 4-8.)
Scott Ritchie, Follow That Map! A 1st Book of Mapping Skills, 2009. (Ages 4-8.)
Sharon Thompson, Map Skills, 2003. (Grade 5.)
Mapping books aimed at kids.
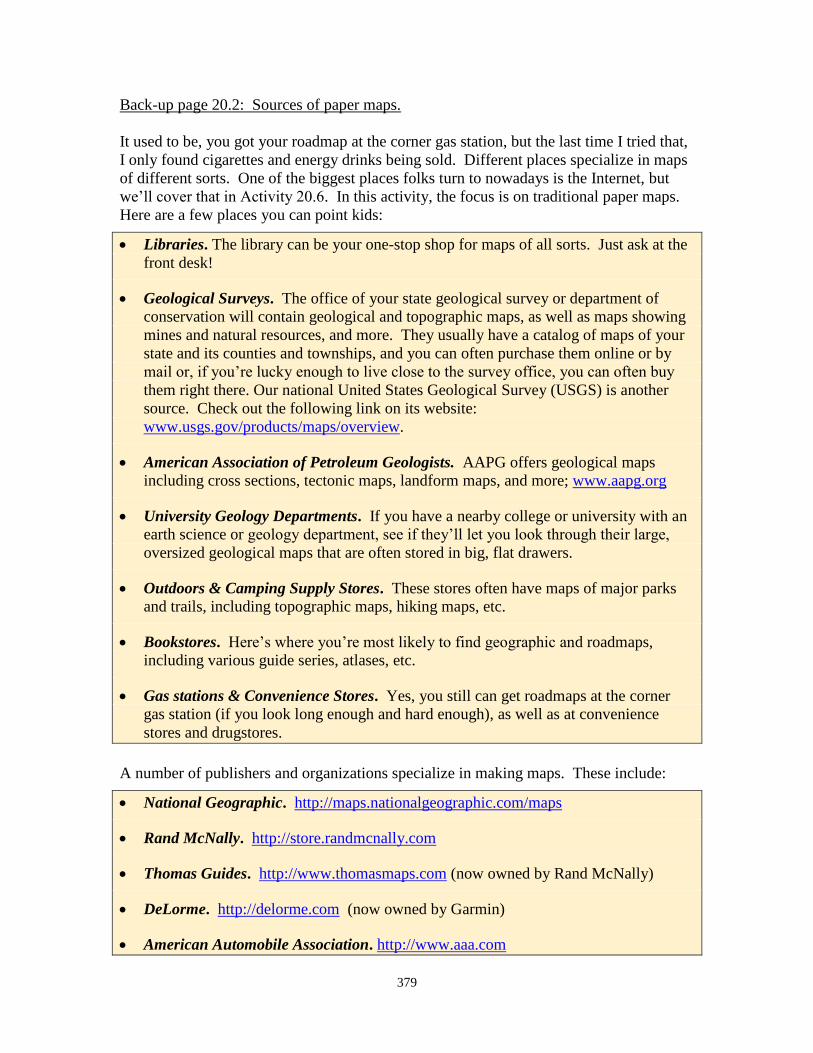
379
Back-up page 20.2: Sources of paper maps.
It used to be, you got your roadmap at the corner gas station, but the last time I tried that,
I only found cigarettes and energy drinks being sold. Different places specialize in maps
of different sorts. One of the biggest places folks turn to nowadays is the Internet, but
we’ll cover that in Activity 20.6. In this activity, the focus is on traditional paper maps.
Here are a few places you can point kids:
Libraries. The library can be your one-stop shop for maps of all sorts. Just ask at the
front desk!
Geological Surveys. The office of your state geological survey or department of
conservation will contain geological and topographic maps, as well as maps showing
mines and natural resources, and more. They usually have a catalog of maps of your
state and its counties and townships, and you can often purchase them online or by
mail or, if you’re lucky enough to live close to the survey office, you can often buy
them right there. Our national United States Geological Survey (USGS) is another
source. Check out the following link on its website:
www.usgs.gov/products/maps/overview.
American Association of Petroleum Geologists. AAPG offers geological maps
including cross sections, tectonic maps, landform maps, and more; www.aapg.org
University Geology Departments. If you have a nearby college or university with an
earth science or geology department, see if they’ll let you look through their large,
oversized geological maps that are often stored in big, flat drawers.
Outdoors & Camping Supply Stores. These stores often have maps of major parks
and trails, including topographic maps, hiking maps, etc.
Bookstores. Here’s where you’re most likely to find geographic and roadmaps,
including various guide series, atlases, etc.
Gas stations & Convenience Stores. Yes, you still can get roadmaps at the corner
gas station (if you look long enough and hard enough), as well as at convenience
stores and drugstores.
A number of publishers and organizations specialize in making maps. These include:
National Geographic. http://maps.nationalgeographic.com/maps
Rand McNally. http://store.randmcnally.com
Thomas Guides. http://www.thomasmaps.com (now owned by Rand McNally)
DeLorme. http://delorme.com (now owned by Garmin)
American Automobile Association. http://www.aaa.com
380
Back-up page 20.3: Making maps.
Host a map-making workshop with your juniors to make maps of different sorts. You
might start by asking them to sketch a simple map of the meeting room they are
currently in, as if they were on the ceiling of the room looking down. Sounds simple,
doesn’t it? But wait! Here are some questions to pose and to consider:
How do they want to orient the room on the map? Where will north be? What features
of the room do they wish to highlight? For instance, do they only want to highlight
permanent features, such as doors, windows, closets, etc., or also temporary, moveable
features, such as tables and chairs? What sort of scale do they want to use to convey the
size of the room to someone who might read their map? That is, will one foot of the
actual room be translated as one inch, a half inch, or a quarter inch on the map? Or, for
the true scientists among us, will one meter be translated as one centimeter? If including
things like chairs in the map, will they actually draw little chairs, or will they use a
symbol like this, Ħ, to represent each chair in the room? If so, they’ll need to craft a
legend to tell readers what each symbol stands for. At the bottom of that legend, they
also should indicate the scale used for the map; for instance, “Scale: 1 inch = 1 foot.”
Finally, they’ll need to consider labels, both a large label for the map as a whole to tell
readers what room this map represents and possibly small labels within the map
identifying major features of the room, like a closet or a fireplace. Begin familiarizing
kids with mapping terms like orientation, scale, symbols, legend, and labels.
From this exercise of mapping your meeting room, expand out. For instance, you might
lead kids in making a geographic map of their own neighborhoods highlighting various
features of particular interest to the kids (Timmy’s yard or apartment, McDonald’s, a
local playground, a neighborhood ice cream shop…). Or, as a group, make a roadmap
showing how you’ll be getting to your next field trip collecting locality.
Make a miniature hilly landscape out of moist sand in a large tub and insert rows of
toothpicks at different levels, with all the toothpicks of specific levels joined together by
different colored yarn or string to give kids an appreciation of what lines on topographic
maps help us visualize. Then have them sketch a 2-dimensional topographic map using
the toothpicks and strings on your miniature 3-dimensional landscape to guide them.
But don’t confine the kids’ imaginations. Let them determine the type of map they want
to make, be it a “treasure map” to a tin can filled with tumbled stones and coins buried in
the backyard, a roadmap showing how to get to a mineral or fossil site from their homes,
or a topographic map highlighting the hills and valleys of a nearby park.
The U.S. Geological Survey has neat, helpful sections all about maps and map making
that you may want to explore. Go to http://www.usgs.gov and click on the “Education”
link and start exploring the resources they have to offer for free!
Note: Kids who make a map to a collecting locality as part of planning for a field trip can use this activity
to satisfy requirements toward earning the Field Trips badge simultaneously (Activity 8.2).

381
Back-up page 20.4: Navigating via Earth’s magnetic field and a compass.
Earth’s magnetic field and compasses
Before we had satellites circling Earth and sending signals to help us navigate from Point
A to Point B via the Global Positioning System (see Activity 20.5), in days of old, we
used paper maps and hand-held compasses to orient us to north and south. How so?
Well, to start, a compass has a magnetized needle or arrow with two poles: north and
south. That little arrow lines up with magnetic poles inherent in Earth itself and thereby
shows us what direction to head with the help of a map.
A standard compass used by hikers and rockhounds to orient themselves
But it’s a little more complex than that…Our Earth has a geographic North Pole (“True
North”) and a magnetic North Pole. You might be surprised to learn that they are not the
same! The geographic North Pole is defined as the northernmost point on Earth and the
point where the Earth spins on its axis. All lines of longitude converge at the North (and
South) Pole, which is fairly stable despite slight wobbles in the Earth’s spin.
What with an outer core of liquid iron and what with all its spinning, Earth creates its
own magnetic field and is basically one enormous bar magnet. When we use a compass
to determine north and south, the compass needle (which is magnetic) lines up with the
magnetic North Pole, which actually lies a bit south of the geographic North Pole and
wanders around quite a bit over time. Were you to stand directly on the magnetic North
Pole with a compass, its needle would point straight down. But you would not be on the
geographic North Pole! (It is actually even more complex than this, what with the
Earth’s magnetic North Pole actually being a magnetic south pole, but I’m not going to
get into all that…)
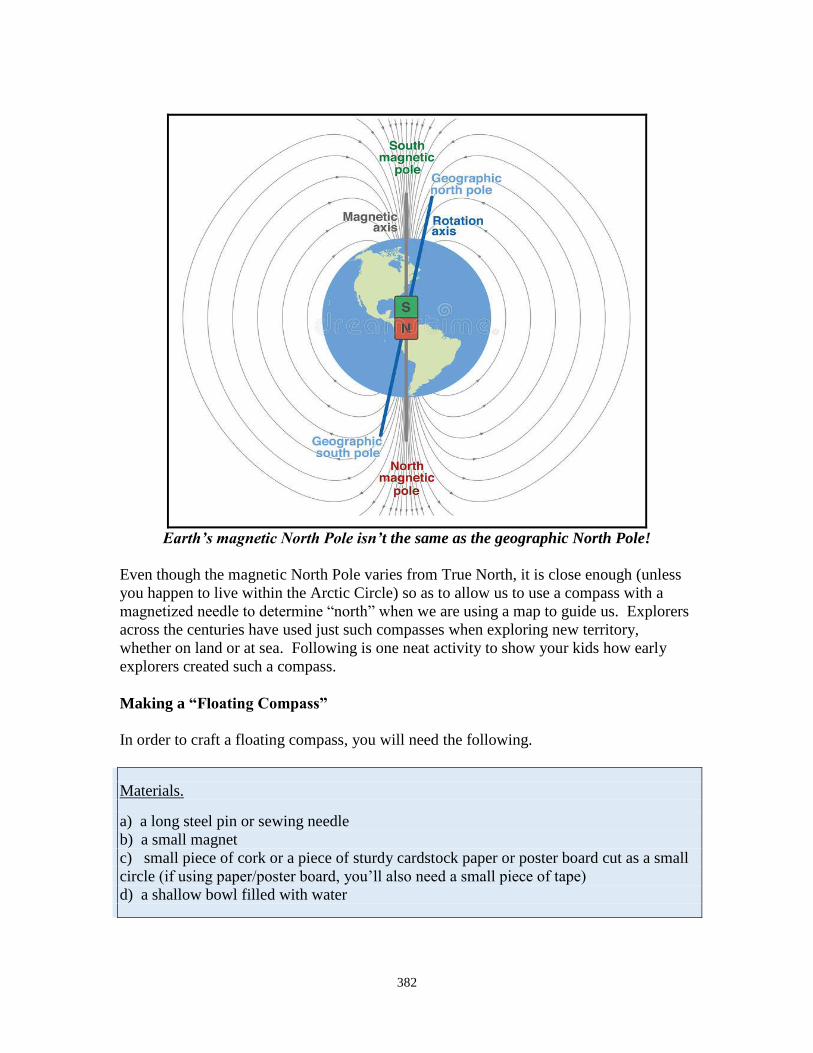
382
Earth’s magnetic North Pole isn’t the same as the geographic North Pole!
Even though the magnetic North Pole varies from True North, it is close enough (unless
you happen to live within the Arctic Circle) so as to allow us to use a compass with a
magnetized needle to determine “north” when we are using a map to guide us. Explorers
across the centuries have used just such compasses when exploring new territory,
whether on land or at sea. Following is one neat activity to show your kids how early
explorers created such a compass.
Making a “Floating Compass”
In order to craft a floating compass, you will need the following.
Materials.
a) a long steel pin or sewing needle
b) a small magnet
c) small piece of cork or a piece of sturdy cardstock paper or poster board cut as a small
circle (if using paper/poster board, you’ll also need a small piece of tape)
d) a shallow bowl filled with water

383
Start by magnetizing your pin or needle by rubbing your magnet along it 20 times in one
direction. Push the needle through your small piece of cork or tape it to your small circle
of poster board. This is your “compass.” Now float it atop the water in your bowl. It
may circle around a bit, but eventually, it should stop, with the needle pointing in one
direction. That direction should be magnetic North.
To see if you’ve been successful, place a compass alongside your homemade floating
compass. You can use a regular hand-held compass, like the one illustrated above, or you
can pull up a compass from the Utilities section of an iPhone, as shown below. The
needle of your floating compass should be lined up and pointing in the same direction
that your compass says is North.
The floating compass needle lines up with north (red dot) on an iPhone compass.
How does this work? Once magnetized, your pin or needle will want to naturally line up
with the Earth’s magnet field. Early explorers realized this, and they were able to
navigate quite well with the simple tool of just such a “floating compass.”

384
Back-up page 20.5: Using GPS and geocaching
The Global Positioning System, or GPS
“GPS” stands for “Global Positioning System,” a satellite-based navigation system
operated by the U.S. Department of Defense. It allows for determining accurate
positioning on the earth’s surface in latitude and longitude coordinates aided by two
dozen satellites in space.
Initially reserved for military and government use, a part of the GPS system known as the
Standard Positioning System, has become readily available for civilian use. It now
appears in navigation systems for car drivers, for general aviation pilots, for recreational
hikers and rockhounds, and others. You can use GPS to find your way around with a
handheld GPS receiver device or even a smartphone.
Learning to use GPS is an important skill in today’s world. In fact, most gem, mineral,
and fossil guidebooks now include GPS coordinates along with basic roadmaps. Some
books are entirely geared to GPS, such as David A. Kelty’s The GPS Guide to Western
Gem Trails.
Keep in mind, though, not all published coordinates are precise. I’ve also been warned
by Christina Morrissey of the Northwest Federation that there are three formats for
coordinates. That is, the numbers can be expressed in three different ways, and they do
not mean the same location. For instance, see coordinates of Delorme Gazetteers versus
Benchmark Maps. Every GPS unit can be set to express each of these three formats, but
the fact that they exist is rarely discussed.
Geocaching with GPS
One fun way to teach kids how to use GPS is geocaching, which has become an
increasingly popular pastime. It is basically a treasure hunt or a variation on hide-and-
go-seek. People all across the world (even Antarctica!) hide waterproof containers called
geocaches. They then post coordinates so that others can locate the hidden caches.
When players find a cache, they often will enter the date and their own “code” into a
logbook in the container. Sometimes the caches contain little trinkets for players to trade.
Players then share their experiences online.
Dennis Gertenbach, leader of the Junior Geologists of the Flatirons Mineral Club of
Colorado, recommended this activity to me. He has taken kids geocaching to an area
where he also demonstrates how to use a topographical map. We have since used this
activity successfully with the Pebble Pups of my own Ventura Gem & Mineral Society of
California after discovering several geocaches hidden right near our clubhouse with
directions easily accessed via iPhones. In fact, we’ve discovered that there are no less
than 2,927 geocaches hidden across our wider Ventura community!

385
Use your cell phone or computer to find geocaching sites near you!
For more information on geocaching, Dennis refers us to the following website:
http://www.geocaching.com. In addition, a great article entitled “GPS and Geocaching in
Education” provides a nice, clear overview and introduction to this fun activity, along
with some how-to video slide shows. Created by professors and graduate students at San
Diego State University, it used to be freely available on the web, but I was not able to
find it on my most recent search. Instead, there now seems to be a book by the same title
that may be purchased online.
In addition to exploring the free geocaching website noted above, you might encourage
kids to read Donald Cooke’s book, Fun with GPS (2005). Written specifically for kids
and illustrated with hundreds of pictures, it explains what GPS is and how they can use it.
It is also filled with fun activities for kids to gain hands-on experience. As one way of
fulfilling this badge unit, you might encourage them to try one of those activities.
Note: Kids can use this activity to satisfy requirements toward earning the Rocking on the Computer
badge simultaneously (Activity 15.5). If they go on a geocaching trip, they can apply that toward the Field
Trip badge (Activity 8.3).

386
Back-up page 20.6: Maps on the Web.
The World Wide Web has become a rich trove of increasingly sophisticated maps, from
MapQuest programs (www.mapquest.com) that give driving directions and roadmaps
(including estimated drive times between destinations provided in “real time” and alerts
about current traffic conditions and congestion), to Google Earth, and more.
MapQuest quickly provides driving directions with drive time.
For an activity, take your juniors to a computer to explore the possibilities afforded by
Google Earth at http://earth.google.com. This amazing tool combines the power of
Google Search with satellite imagery, maps, terrain, and 3D buildings. Among the range
of possibilities suggested on the web site: “fly” to one of your junior member’s homes by
typing in the address and pressing “search” to zoom right in. Get driving directions to a
park or natural history museum. Tilt and rotate the view on a Google Earth map to see
terrain and buildings in 3D. We have truly come a long, long way from the big and
cumbersome paper gas station roadmaps that I always found impossible to refold!
Another really neat website sponsored by the U.S. Geological Survey is EarthNow!
Visit it at http://earthnow.usgs.gov. It consists of real-time, bird’s-eye images of the
Earth’s surface being beamed down from Landsat satellites. You actually feel like you
are in a spaceship with the surface of the Earth revolving beneath you. To orient you,
city and town names appear in blue text.
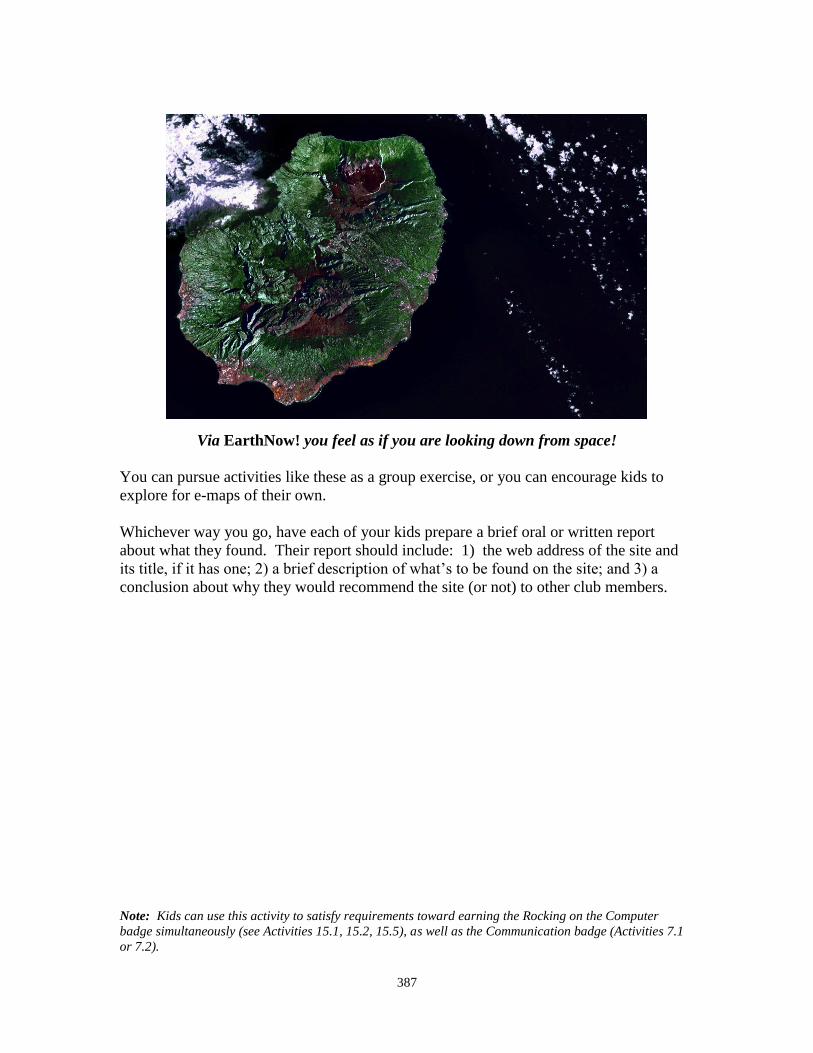
387
Via EarthNow! you feel as if you are looking down from space!
You can pursue activities like these as a group exercise, or you can encourage kids to
explore for e-maps of their own.
Whichever way you go, have each of your kids prepare a brief oral or written report
about what they found. Their report should include: 1) the web address of the site and
its title, if it has one; 2) a brief description of what’s to be found on the site; and 3) a
conclusion about why they would recommend the site (or not) to other club members.
Note: Kids can use this activity to satisfy requirements toward earning the Rocking on the Computer
badge simultaneously (see Activities 15.1, 15.2, 15.5), as well as the Communication badge (Activities 7.1
or 7.2).

388
Back-up page 20.7: WILD CARD: Do your own thing!!
While I’ve tried to provide a wide-ranging variety of activities to choose from, no one
manual can “do it all.” There are many other great ideas out there that clubs have found
to match their local interests and resources.
Plus, the Youth Leaders of some clubs have expressed concern that some of the activities
included in the manual may be a bit beyond the abilities of their youngest members.
Here’s your chance to tailor-make activities for the youngest among us.
If you and your fellow club members have an idea for learning about maps that isn’t
included in this manual, go for it! When you send in your badge request, just let me
know what you did as a WILD CARD activity. Who knows? Maybe your idea will be
included in the next edition of the Badge Manual!

389
Rockhound Badge
Once you’ve completed six or more of the twenty FRA badges, you will be eligible to
receive an official “Rockhound Badge.” This signifies your graduation from a Pebble
Pup or Junior Member to a true, blue Rockhound.
Send a copy of your Achievement Checklist, signed by you and your youth leader, to the
AFMS Juniors Chair, indicating the activities you’ve completed and the badges you’ve
earned. Your Rockhound Badge will then be processed and approved and forwarded to
your youth leader to award in a special ceremony. Plus, you name will be posted to an
“Honor Roll” list on the Kids Corner section of the AFMS web site.
If you wish to earn all twenty badges, by all means, please proceed! The more you learn,
the better. It will make you more fully versed in the hobby, and the more knowledge you
gain in life, in general, the better. Plus, there’s a special award should you earn all
twenty badges (see the next page).
In earning at least six of the twenty badges, you will have demonstrated a well-rounded
knowledge of the many facets of our hobby. We hope that, along the way, you will have
picked up knowledge and skills you will enjoy for the rest of your life—all while having
fun!
On behalf of the American Federation of Mineralogical Societies, congratulations!

390
Back-up Page: Rockhound Badge
Many clubs turn the honor of receiving a Rockhound Badge into a true event that
ceremonially marks the transition from a “Future” Rockhound of America into a true-
blue, certified Rockhound. They’ll hold a special ceremony at a monthly club meeting, at
an annual club picnic, or at an end-of-year Holiday Party. Some go so far as to design
and award a certificate to go along with the Rockhound Badge.
Make awarding of the Rockhound Badge a truly special event!
Ron Brooks of the Huachuca Mineral & Gem Club of Arizona reports how they’ve
offered a competition whereby the very first junior who obtains “Rockhound” status
within our Badge Program each year will win a bracelet-making class or other lapidary
lesson.
Consider ways to keep your kids interested and motivated for the long term by offering
similar rewards and incentives. Keep their “eyes on the prize,” so to speak, by offering
certificates, free classes, free rock or mineral or fossil prizes or other incentives to work
towards in addition to earning the Rockhound Badge.

391
AFMS Cloisonné Pin for Rock Stars
Once you’ve completed all twenty FRA activity badges, you will be eligible to receive an
official AFMS cloisonné pin and your name will be posted to a “Rock Stars” list on the
Kids Corner section of the AFMS web site.
Send a copy of your Achievement Checklist, signed by you and your youth leader, to the
AFMS Juniors Chair, indicating the activities you’ve completed and the badges you’ve
earned. Your Rock Star award will then be processed and approved and forwarded to
your youth leader to award in a special ceremony.
As with earning your Rockhound Badge, the American Federation of Mineralogical
Societies offers special congratulations upon entering the elite ranks of the Rock Stars!
392
Acknowledgements for Editions 1 through 4
Building this badge program has been a long but enjoyable labor of love, a labor made all
the more enjoyable by the help received along the way. I’d like to thank all prior AFMS
Juniors Program Chairs who blazed the trail and upon whose shoulders I’ve stood these
many years. I’d like to thank the youth leaders—along with two junior members—from
local clubs who have offered ideas for new activities and refinement of existing activities.
We saw many additions to the 2012 revision of the badge manual thanks to their fine
suggestions emerging from their work with kids. I acknowledge each within the revised
activities where I’ve incorporated their suggestions. They come from states East, West,
North, South, and all points in between—thank you, all! I’d like to thank the officers and
members of the California Federation of Mineralogical Societies who got me started on
my path in appointing me CFMS Junior Activities Chair in 1998. I’d like to thank the
officers and members of the American Federation of Mineralogical Societies who have
whole-heartedly supported the idea of this Badge Program from its inception in 2003 and
who have so generously funded it so that it can be provided completely free to all kids
within our affiliated clubs and societies. And I’d like to thank the good folks at AB
Emblem in Weaverville, North Carolina, who have manufactured the badges for the fun,
colorful rewards we offer to kids. I also thank Darryl “Diamond Dan” Powell for his
support and ideas through the years, and I thank Todd Maurer for assistance proofreading
the Third Edition of the manual and for his recommendations to underscore safeguarding
of children. Finally, we should all give thanks to those brave individuals who roll up
their sleeves and really make it all come together. A resource like this badge program is
just an inert tool, a collection of words on a page. It only achieves its true potential in the
hands of a dedicated person who takes it up and makes something inspirational happen
with a group of kids or even a single child. So here’s to all those who make it happen:
the youth leaders at all the local gem and mineral clubs and societies across America!
For the Fourth Edition, even more people stepped forward with great ideas! These
included Alice Kozanecki (Illinois) provided a nice link on mineral identification geared
to kids for our Badge 1 – Rocks & Minerals. Jesse and Jem Burch (California) provided
ideas for “The Elements” activities now incorporated as unit 1.8 for the Rocks &
Minerals badge. Jim Urbaniak (Oregon) also suggested ideas for “The Elements”
activities. In addition, Jim provided for an update on Oregon’s State Mineral and
suggested the “Rock Bucks” reward I include above in the Introduction. Thank you to
Beth Simmons (Colorado) who provided a suggestion for a contest that led to our new
“Name that Mineral” activity (1.9). Susie Harlow (California) gave me uses of the
mineral Trona for Badge 2 – Earth Resources. Terry McMillin (California) suggested
adding Latin and Greek roots in how dinosaurs and other fossils were named. That
suggestion, along with websites about dinosaur names and meanings listed by Merrill
Dickinson in his September 2015 President’s Message for the Eastern Federation, now
appear as our new unit 3.8 for the Fossils badge. Larry Knapton (California) provided
the matrix recipe for the activity on excavating a fossil as part of Activity 3.2 in Badge 3
– Fossils. Terry McMillin (California) suggested adding a beading unit, which is now
included in Badge 4 – Lapidary Arts. Louisa Carey (California) suggested adding
something on pearls. I’ve taken that idea and have created an entirely new activity on
393
gemstones (both inorganic and organic) for our Lapidary Arts badge. Pete Levinthal
(Washington) alerted me to a free software program for cataloging mineral collections
(Activity 5.2). Tina Lubin (California) recommended adding more on safety in Badge 8
– Field Trips. Mike Havstad (California) suggested a “Recruiter” patch for kids who
bring in new members; his idea has been incorporated into Badge 9 – Leadership. Jim
Urbaniak (Oregon) provided the link for making 3D paper models of landforms now
included with the Earth Processes (Badge 10). Marci Revelli (Washington) suggested
adding measuring out distances in the solar system using toilet paper for our Earth in
Space Activity 11.1. Jim Roberts (Mississippi) provided great suggestions, as well, on
adding to activities for Badge 11 – Earth in Space. David Skrupky (Wisconsin)
suggested the metal detecting activity now incorporated into Badge 12 – Gold Panning &
Prospecting. Brett Johnson (California) has helped with our listing of websites for our
Rocking on the Computer badge (Activity 15.2). Darryl “Diamond Dan” Powell also
provided great website suggestions in the Eastern Federation Newsletter of March 2012
that you’ll now see in the Rocking on the Computer unit. The Delaware Valley Earth
Science Society provided several mineral-related websites that I’ve included from their
“Websites of the Month” feature in their July 2015 newsletter. Dennis Gertenbach
(Colorado) suggested adding info on how kids can take digital photos through a Dyno-
Lite Digital Microscope for our World in Miniature unit (new Activity 16.8), and he
noted how they added “singing rocks” to the Special Effects unit (Activity 17.7). Marci
Revelli (Washington) also suggested adding to Special Effects by including effervescence
(Activity 17.7). Holly McNeil (Maryland) noted how her club’s kids put together a booth
at their annual club show to provide the “Amazing Mineral Magic Show” (Activity 17.8)
to show attendees throughout the day, so I’ve added that suggestion at the end of 17.8.
Karen Nathan (Florida) shared her hands-on project for creating fluorescent minerals
with paints for Badge 18 – Fluorescent Minerals. In all, this new edition is expanded to
255 pages (from 223 in the Third Edition), with 86 pages that are revised or totally new.


![[Prehistoric America] - ScienceViews.com](https://static.fdokumen.com/doc/165x107/6333b0f7a6138719eb0abae5/prehistoric-america-scienceviewscom.jpg)