FORMUFIT Small Dog Bed
21
www.formufit.com Small PVC Dog Bed a FORMUFIT PVC Plan
-
Upload
khangminh22 -
Category
Documents
-
view
0 -
download
0
Transcript of FORMUFIT Small Dog Bed

www.formufit.com
Small PVC Dog Beda FORMUFIT PVC Plan

Legal
WARNING Serious or fatal injuries can occur from using power tools when cutting PVC pipe. Be sure to read and understand the instructions that came with your power tools before using them.
PVC cement is a noxious chemical that should be used in a well ventilated area. If you become dizzy, light-headed or disoriented, move to fresh air.
Important information. Read carefully. Keep this information for further reference.
DISCLAIMER: The information provided within this manual is for informational purposes only. FORMUFIT accepts no responsibility, and is excluded from all liability for damage and/or loss which may be suffered by any other party as a result of using or in connection with such use or loss of use of this information, including but not limited to loss of profit, loss of opportunity, loss of business, indirect damages, incidental damages, special or consequential loss, injury or loss of life.
Additional InformationFor additional information on how to cut, prepare and assemble PVC, please review our FORMUFIT PVC Field Manuals available at:
http://www.formufit.com/guides
To order fittings, connectors, pipe or accessories for this project, visit FORMUFIT online at:
http://www.formufit.com
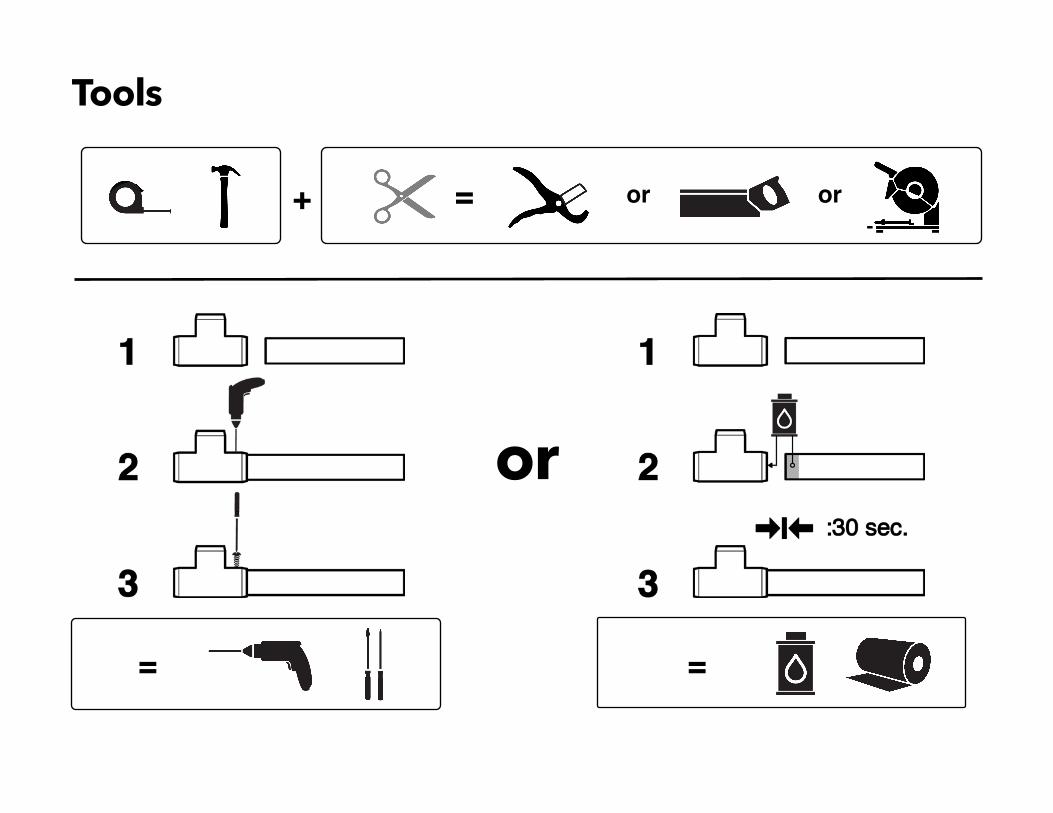
Tools
or or=
==
or
+

Parts
4x
1-1/4” 3-WAY F1143WE
4x
1-1/4” EXT CAP F114EEC
32x
1/2” ROUND WASHER HEAD SCREWS
1x
36”x29” SHEET NYLON

Pipe
2x
25.5”
2x
18.5”
4x
4”
= 10 ft. (1x 10’)= 1-1/4” (1.660 OD)
=

14x 2x
25.5”
= 2x

22x
18.5”

34x
4”

44x
5 1x
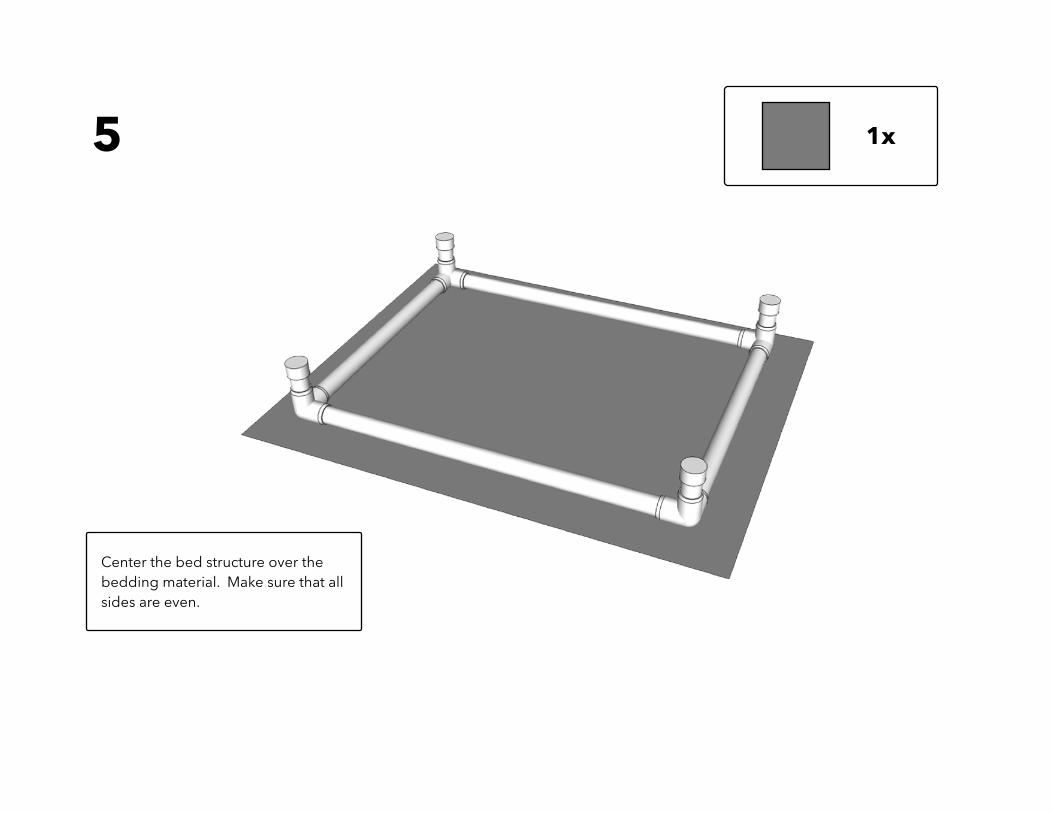
Center the bed structure over the bedding material. Make sure that all sides are even.

6
~7" ~7"
FOLD x4
Make a fold in each corner of the material under each 3-Way PVC Connector so that the folded edge is just under the middle of the 3-Way PVC Connector (approximately 7”), as shown.

7
½”
FOLD x4
Make a small one-half inch (1/2”) fold on each exposed end of the overlay flaps. This will add integrity to the connection point between the screws and the material.

8
ROLL
For the first side you attach, fold over the end of the recently folded overlay flap, across the PVC pipe and secure with a screw every four inches. Be sure to screw THROUGH the 1/2” folded end of the material.

9
Screw into fitting to secure pipe into fitting together.
Drive two screws into ends of the 3-Way PVC Connectors to secure the fittings to the pipe.

10
Screw into fitting to secure pipe into fitting together.
Drive two screws into ends of the 3-Way PVC Connectors to secure the fittings to the pipe.

11
Pull the material on the opposite side of the bed frame over and attach screws every four inches along the 1/2” fold.

12
Using a pair of large pliers, grab the PVC pipe on the side you just attached material to and rotate it inward until the material is taught. Then drive a screw into one end of 3-Way PVC Connector and the PVC pipe. Repeat the process on the opposite end, by rotating the pipe inward, and driving an additional screw into the other end of the pipe and fitting. This will tighten the material to support your pet.

13
Similar to how you attached the first two sides, repeat with the opposite two sides. Fold over the end of the recently folded overlay flap, across the PVC pipe and secure with a screw every four inches. Be sure to screw THROUGH the 1/2” folded end of the material.
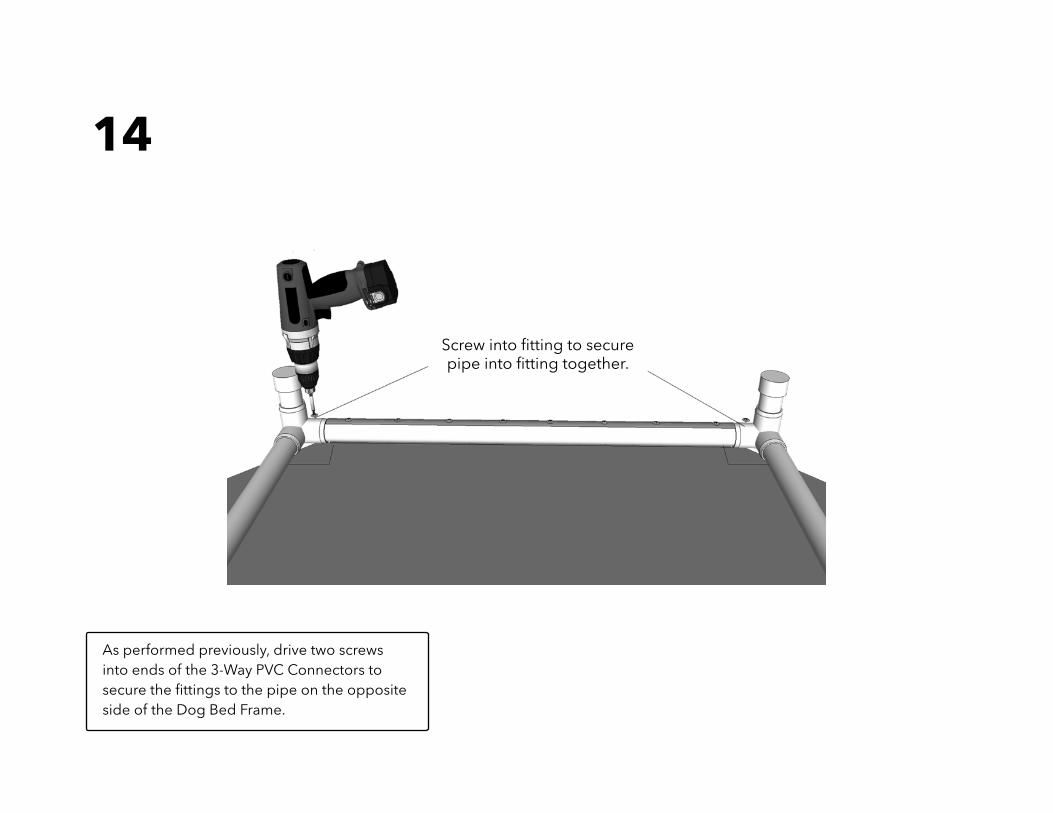
14
As performed previously, drive two screws into ends of the 3-Way PVC Connectors to secure the fittings to the pipe on the opposite side of the Dog Bed Frame.
Screw into fitting to secure pipe into fitting together.

15
As performed previously, use a pair of large pliers and grab the PVC pipe on the side you just attached material to and rotate it inward until the material is taught. Then drive a screw into one end of 3-Way PVC Connector and the PVC pipe. Repeat the process on the opposite end, by rotating the pipe inward, and driving an additional screw into the other end of the pipe and fitting.

16