FOOD PRESERVATION
24
A Compiled 4 LUCY A. CASE arid THOMAS ONSDORFF Extension Bulletin 642 Ame FOOD PRESERVATION CANNING SALTING Oregon State System of Higher Education Federal Cooperative Extension Service Oregon State College Corvallis October 1944
-
Upload
khangminh22 -
Category
Documents
-
view
0 -
download
0
Transcript of FOOD PRESERVATION

A
Compiled 4LUCY A. CASE aridTHOMAS ONSDORFF
Extension Bulletin 642
AmeFOOD PRESERVATION
CANNING SALTING
Oregon State System of Higher EducationFederal Cooperative Extension Service
Oregon State CollegeCorvallis
October 1944

PUBLICATIONS AVAILABLE ON SUBJECTS RELATED TOHOME FOOD PRESERVATION
Oregon State College Publications
Bottling Fruit JuicesMimeograph Circular HE 748Curing Meats and FishExtension Bulletin 600Food Preservation by FreezingExtension Bulletin 623Fruit Jellies, Preserves, Jams, Marmalades, Conserves, and ButtersMimeo-
graph Circular HE 498Home Fruit and Vegetable DehydrationStation Circular 149Homemade Pickles and RelishesMimeograph Circular HE 750Preserving Eggs in Water Glass Solution and LimewaterMimeograph Circu-
lar HE 784The Preservation of SeafoodsStation Circular 164Tomato RecipesMimeograph Circular HE 208Vegetable StorageExtension Bulletin 601
Farm and Home Vegetable GardenExtension Bulletin 614Growing Fall and Early Winter VegetablesExtension Bulletin 594Vegetable Garden Insect-Pest ControlExtension Bulletin 551
Construction and Operation of a Home Electric Food DehydratorStation Cir-cular 309
Homemade EvaporatorsMimeograph Circular HE 1754
U. S. Department of Agriculture Publications
Beef on the Farm, Slaughtering, Cutting, and CuringFarmers Bulletin 1415Drying Food for Victory MealsFarmers' Bulletin 1918Freezing Meat and Poultry Products for Home UseAWI-75Home Canning of Fruits and VegetablesAWI-93Homemade Jellies, Jams and PreservesFarmers' Bulletin 1800Home Storage of VegetablesFarmers' Bulletin 1939Lamb and Mutton on the FarmFarmers' Bulletin 1807Making Butter on the FarmFarmers' Bulletin 876Making Fermented PicklesFarmers' Bulletin 1438Making Vinegar in the Home and on the FarmFarmers' Bulletin 1424Pork on the FarmFarmers' Bulletin 1186Preparing Home Grown Vegetables and Fruits for FreezingAWI-63Preservation of Vegetables by Salting and BriningFarmers' Bulletin 1932
These publications and a list of other available bulletins on home economicssubjects can be obtained free of charge from your County Extension Agent orby writing the Home Economics Extension Service, Oregon State College, Cor-vallis, Oregon.

Ame FOOD PRESERVATION
CANNING SALTINGCompiled by LUCY A. CASE, Extension Nutritionist
and THOMAS ONSDORFF, Associate Professor of Food Industries
A. Canning
I. WHY DO CANNING?The preservation of surplus products at home for family use makes pos-
sible a variety in the diet, reduces the cost of living, and releases commercialfood products for Victory purposes Filling every glass jar at home will helpto releqse tin cans for war needs. Canning may wisely be limited to those foodsthat cannot be preserved successfully by less expensive and less laboriousmethods. Winter gardens, winter storage, and preservation by freezing involveless labor than canning. Salting, curing, and drying are less expensive methodsof preservation than canning Home canned goods however, have the advan-tage of being on hand, ready for use at short notice.
Good aims for canned products are (1) safety for use (2) freedomfrom spoilage; (3) retention of food values; (4) palatability and attractive-ness; (5) amounts and choice of foods carefully planned so that the family isassured enough for a year-round supply and also a well-balanced selection forgood nutrition.
II. TWO FUNDAMENTAL PRINCIPLES IN PRESERVATIONOF FOOD BY CANNING
Application of adequate heat. In the air, water, and soil and on foodand equipment are microscopic organisms that cause food to spoil. They mustbe destroyed by heat Every particle of food within the jar or can must bebrought to a sufficiently high temperature and held at that temperature a suf-ficiently long time to destroy the bacteria and other organisms that cause spoil-age. Processing is the term applied to this heating of food that brings aboutsterilization or conditions that prevent the growth of organisms Incompleteprocessing is a common cause of spoilage of canned goods.
Nonacid and low acid foods, such as meat fish, poultry, and all vegetablesexcept tomatoes, are canned safely only in a pressure cooker. Processing underpressure is necessary because the Clostridium botulinum, a deadly bacteriumfound in the soil in many states, has been known to withstand the temperatureof boiling water (212° F.) continuously for 6 hours at sea level. A tempera-ture of 240° F. or higher is required to process these foods safely in a reason-able tirne. The only way to get these high temperatures is by use of a pressurecooker.
Airtight seal. Jars must be sealed so tightly after processing that air,which carries micro-organisms, cannot enter. Lack of airtight seal is very fre-quently the cause of spoilage in jars and cans. Never open jars after process-ing to add more food or liquid.

EXTENSION BULLETIN 642
III. EQUIPMENT FOR CANNING1. CONTAINERS
Know your jars and how to seal them. The two main types of jar topsor closures are handled by opposite methods, as follows
The closure with a separate rubber ring seals when the top is screweddown tightly. Since glass jars might break if sealed before processing,the lid with this type of closure is screwed only partly down beforeprocessing. It is screwed completely down after processing. In thecase of jars with a rubber ring and 2 wire bails, the smaller bailis left up before processing and is pushed down after processing.
The other main type of closure is called the self seal It has a metallid edged with a sealing compound, held in place by a metal screw bandor clamp. This type of closure seals as it cools after processing.Screw the band firmly tight or apply the clamp before processing. Donot tighten after processing.
The term "mason" refers to any jar with threads at the top that is closedby screwing down a cap or band.
2. JARS WITH SEPARATE RUBBER RINGSTest jar for leakage before using by en-
closing hot water, sealing, and inverting.Using 2 rubbers on a jar is not recom-mended.
a. Standard mason jar with porcelainlined cap, usually of zinc, has a rubber ringthat fits shoulder and seals at the shoulder.Some of these jars have a broad flat topedge and can be sealed also at the top ofthe jar. Some have a narrow rounded topedge. Such jars may not seal except withthe type of closure that seals at the shoul-der. Lids that are slightly bent may often
Standard mason jar be bent back into shape by placing on thejar without rubber and pressing down with
pliers. This jar should be opened by pulling out the rubber with pliers. Or in-vert the jar in warm water to loosen the lid. Do not pry up the lid and dentthe edge.
0,--*..Porseloin--- linedscrew cop
ill=3*-Rubber
"Lightning" type jar.
Before processing, fit rubber downsmoothly on shoulder of empty jar withoutunnecessary stretching. Pack jar, thenscrew cap down firmly and turn it back 1itich, to assure a part seal.
After processing, complete the seal byscrewing the cap down tightly as soon asyou take the jar from the canner.
b. "Lightning" type jar has same sizerubber ring as standard mason, but the ringfits the ledge at the top of the jar. It hasa glass lid held in place by 2 wire bails, onefitting in a groove in the lid. If the lid istoo loose or too tight, remove the largerbail and bend it down or up in the middleuntil adjusted for a firmly tight seal

HOME FOOD PRESERVATION
Before processing, fit rubber ring on the ledge of the empty jar. Packjar, apply lid, push long bail into the groove on the top of the lid, and 'leave theshort wire bail up in a loose position.
After processing, complete the seal by pushing the short bail down againstthe jar as soon as you take it from the canner.
c. Three-piece glass-top closure has a special rubber ring of smallersize than the standard mason. Seals at the top of the jar, which has a fiat,smooth, broad surface for the glass lid. Has metal screw band to fit standardmason jar. Safest to use this glass lid onlyon jars with flat broad top edge. Use thisscrew band only with glass lids. Does notproduce seal with metal lids; is too deep.Do not use the screw band made for self-seal jar a. These bands are too shallow.Do not use standard mason jar cap for theselids.
Before processing, pack jar, fit rubber*ring onto glass lid and place lid on jar, rub-ber side down. Screw metal band downtight, then, using your thumb as a guide,turn band back almost a quarter turn. Cau-tion: if band is not turned back far enough Three pieceglass top closure.the jar may become sealed and may break orexplode.
After processing, screw the metal band down tight as soon as you take thejar from the canner.3. SELF-SEAL JARS
a. Self sealjar has metal lid edged with sealing compound. Seals at topedge of jar when it starts to cool after processing. Lid held in place by shallowmetal screw band that fits standard mason jars, Seal is assured only when lidis used on jars with flat, smooth, compara-tively broad top edge. Screw band is tooshallow to produce a seal when used overglass lids. Standard mason jar caps cannotbe used with this lid.
Wipe metal lids with clean damp clothbefore Using. Follow manufacturer's direc-tions for each brand. Some require boilingbefore using. Discs with sealing compoundshould be used only once.
Before processing, pack jar and set lidon jar with sealing composition next toglass. Screw metal band down firmly tight,but not so hard that you cut through thecompound. This lid has enough "give" tolet air escape during processing.
After processing, leave the jar as it is Do not tighten the screw band.To do so may disturb the softened sealing substance and may prevent a seal.This jar seals itself. (Occasionally the screw band becomes obviously loose.If so, hold the lid firmly in place and carefully turn the band down slightly.The lid should not move even slightly.) After 24 hours take off screw bandif you can without forcing. If it sticks, cover for a minute or two with a hotdamp cloth. Removing screw band allows seal to be tested and prevents dete-
Metalscrew bond
Gloss lid
Rubber
Seats here
Metal lid withsealing
- compound
Seals here
Metalscrew bond
Se seal a

rioration of band for reuse. Scrub insideof bands with brush and dry thoroughly toprevent rust.
b. Self-seal jar has special metal lidedged with sealing compound. Seals at topedge of jar when it starts to cool. Lid isheld in place by 1 metal clamp. Lid canbe used only on special jar for which it ismade. Jar can be used only with this speciallid. Lid can be used only once.
Before processing, pack jar and set lidon jar, being careful that it fits and is level.Place 1 clamp over center of lid. It shouldsnap into place.
After processing, leave the jar as it is.This jar seals itself. After 24 hours, re-move metal clamp.
Coffee or other commercial jars, according to the State NutritionCommittees recommendation, may be used only for such products as pickles,preserves, and relishes. Avoid use in pressure cooker or long hot water bath
cook, because of quality of glass.Top edges of these jars are usually nar-, Metal row and rounded and seal cannot be as-
screw cap sured. Many commercial jars are made for44--E---,.,,Metol lid with vacuum sealing and an airtight seal cannot
seating be made by home methods They are madecompound in a large number of sizes of tops and someSeals here seem to be sealed when they really are not
sealed. The "63" size coffee jars come withmetal screw cap. Self-sealing one-piece "63"lids can be purchased to fit these jars
Before processing, pack jar and set "63"lid on jar with sealing composition next toglass. Screw the band down tight. Be surethat food is very hot when jar is sealed.
After processing, leave jar as it is. It seals itself. To tighten the lidmight prevent a seal.
RUBBER RINGS
Jar rings purchased for a period following 1943, were made of reworkedand synthetic rubber and need special treatment in order to prevent off flavor ofthe food. Expose rings to open air for 20 to 24 hours. Shortly before using,boil one dozen rings in a solution of 1 quart of water and 1 tablespoon ofbaking soda for not less than 15 minutes Boil the rings in fresh water for anadditional 5 minutes just before using. Use a fresh soda solution for each lot.
Wartime rings should not be stretched or bent any more than necessary.Place hot wet rings on jars before filling jars.
PROCESSING EQUIPMENTThe use of the oven or steamer for canning is not recommended. Heat
distribution is uncertain and spoilage may result Oven canning has causedserious accidents to persons and property by violent breakage.
C.
Self seal b
11
Self seal c.
EXTENSION BULLETIN 642
clomp
lid dithsadlingcalriptd1110

HOME FOOD PRESERVATION
Meat, fish, and nonacid vegetables. A pressure cooker is the only safeprocessing equipment for nonacid foods which include meats poultry, fish, andvegetables except tomatoes.
Fruits and tomatoes. A hot water bath kettle or other tall kettle withrack is used for fruits and tomatoes. Any flat bottomed clean vessel of suf-ficient depth with a good lid may be used for a hot water bath. Height of vesselshould be at least 8 inches for pint jars and 10 inches for quart jars so thateater comes an inch or more over the top of the jars A rack with level sur-face is needed. It may be made of woven wire wooden slats or perforatedmetal. Wooden racks should be weighted to prevent upsetting jars. If pressurecooker is used as a hot water bath, be sure that petcock is wide open and lidis set on loosely.6. GENERAL EQUIPMENT
General equipment includes pans stainless steel knives fork, brush, cup,measuring cups, quart measure measuring spoons jar funnel, jar lifter, ladlelong handled spoon, clean towels or cloths hot dish holders Holders madefrom old inner tubes are convenient Special devices are available for paring,coring, pitting, shelling, slicing, cubing, grinding, and sieving food.
IV. DIRECTIONS FOR USING A PRESSURE COOKER1. THREE RULES FOR SAFE USE OF PRESSURE COOKER
Clean safety valve and petcock each day that the cooker is used Takeapart wash and dry parts Use care not to damage the area of thesafety valve where the ball sits by contact with metal instruments orharsh cleansers. Spring tension must not be changed. Be carefulthat washcloth does not become entangled in spring and stretch itHave 2 to 3 inches of water in bottom of cooker each time beforeusing, so that it will not boil dry and cause damage. If using cookerwith weight type of gauge use 3 quarts of water for 10 pounds pres-sure, and 4 quarts of water for 15 pounds pressure.At end of processing, allow pressure to return to zero before openingcooker.
2. STEPS IN USING THE PRESSURE COOKER WITH GLASS JARSPlace the rack in the bottom of the cooker.Pour water in the pressure cooker until it reaches a depth of at least2 inches each time used. Use hot water for hot jars. Use lukewarmwater for cold jars.Prepare jars as described, pages 4-6.Place filled jars on rack in cooker. Do not let them touch or tipover.Open steam cock.Fasten cover in position, according to type.Apply heat under cooker.Heat until steam escapes steadily and vigorously from the open cock.Let steam escape freely for 10 minutes if cooker is size that holds 7quart jars to insure that all air has been driven out of the cooker.Otherwise the pressure gauge may indicate air pressure, not steampressure within, and the temperature will be lower than the pressuregauge indicates Steam pressure, not air pressure, is required to pro-duce a high temperature.

EXTENSION BULLETIN 642
Close the petcock and continue heating until the desired pressure ortemperature is reached. Bringing the pressure up quickly improvesquality of the product. At altitudes of 2,000 feet or above, more pres-sure is needed. See Table 1 page 11.Begin to count cooking time when the gauge registers the correctpressure.When the correct pressure is reached, reduce the heat or move thecooker back on the stove. With electric stove, reduce heat slightlybefore proper pressure is reached. It is important that the pressureremain constant. Fluctuation of pressure draws juice from jars. Inusing a wood range, a mat or rack may be placed under the cookerto keep the heat even.When the cooking time is up, remove the cooker from the stove andlet it cool slowly until the gauge reaches zero. Do not try to rushthe cooling by fanning or pouring on cold water. To do so may crackthe cooker. Slow cooling of the cooker aids retention of juice in jarsat this stage of operation. When pressure returns to zero, wait aminute or two, then open the steam cock gradually. If steam comesout close it and wait until this does not occur. Do not confuse thehissing sound of air going into the cooker with the sound of steamcoming out. If steam cock is opened wide immediately, liquid may bedrawn from the jars.When the hissing has stopped, open the cooker, following directionsfor each type. Remove the cover, tilting the far side up so that thehot vapor escapes away from you. Remove jars as soon as violentbubbling within the jars stops, using a large dry cloth between youand jar, in case a defective jar should break. Avoid drafts when re-moving jars. Tighten the lids at once unless of self-seal type. Cooljars quickly, set apart, but avoid placing in drafts or on a cold wetsurface. Test the seal before storing. In case of leakage, reprocessthe full length of time, or use.
3. CARE OF PRESSURE COOKER
The dial type pressure gauge and safety valve should be tested each yearfor accuracy, also when first purchased and if dropped or out of order. (SeeCounty Extension Agent.) Remove gauge and safety valve with wrench.When replacing, plumber's paste may be used on threads to assure a tight seal.
A rack is necessary in the bottom of the cooker.Wash and dry the cooker after using, but do not place lid in water. Avoid
getting water or grease into the pressure gauge. Be sure that the edges of thelid and the cooker are clean at all times, in order to assure a steam tight seal.Avoid striking rim of cooker with any hard instrument. Clean the safety valveand petcock each day after using. If openings are not clean, clean with tooth-pick. Store cooker with lid upside down; tightly closed cookers may developan off-flavor. Before inverting the cover on the cooker, cover the top ofcooker with heavy paper to prevent marring or roughening the sealing surface.
If the cooker leaks steam at the edge of the lid, and the cooker has asealing ring or gasket, probably the gasket needs to be stretched and turnedover. Remove gasket. Stretch gently. Turn it upside down and replace care;fully. If stretched too much to fit, it will usually fit all right the next day.After replacing the sealing ring, press it with the fingers to a horizontal posi-tion. When putting lid on the cooker the next time, press the lid down withthe hand.

HOME FOOD PRESERVATION
New gaskets are obtainable from manufacturer of cooker for a smallcharge. To avoid delay, keep a spare on hand.
To remove discoloration from cooker, add water up to line of discoloration.Add 1 tablespoon cream of tartar per quart Raise pressure to 15 pounds. Letstand overnight Empty next morning and scour with a good cleaner thatdoes not contain alkali, potash, or lye.
4. PRECAUTIONS ABOUT VARIOUS TYPES OF PRESSURE COOKERS ANDACCESSORIES
Pressure cooker with lugs or clamp fasteners for lid. Be sure thatall clamps are securely in place. Tighten evenly clamps on oppositesides of cooker until they begin to catch Repeat with other oppositepairs of clamps until all have been turned part way down. Then turnall clamps tight without use of pliers. If cooker stands after pressurereturns to zero, the lid may be hard to get off. To loosen it place astick of wood against the lid and tap the other end of the stick Haveany defective clamps replaced before using the cooker.Pressure cooker with cover that slides into place. Be sure that cookeris properly closed. To do so find words "Closer and "Open" on toprim of cooker and turn this side toward you Place lid in such a posi-tion that the arrow on lid points to the word "Open" on rim ofcooker. Turn lid clockwise until arrow points to the middle of theword "Closed." Never develop pressure until cover of cooker is inthis exact position.1943 pressure cooker with weight type gauge. Write to manufacturerand obtain instruction book No 2. Destroy book No 1. Use 3 quartsof water in cooker for 10 pounds pressure and 4 quarts of water for15 pounds pressure. The weights need not spin. Pressure is up whena steady stream of steam hisses from opening near top of weights. Donot open cooker until the little pin at the top of the weights has goneentirely down. Remove weights before taking cover off cooker. Foraltitudes higher than 1,000 feet send to manufacturer for special at-tachments.1943 pressure cooker with fire fester type of gauge. As pressure risesin the cooker, a rod with figures for reading pressure, rises from thegauge. This rod, however, fails to go down steadily as the pressuregoes down. To read the pressure, push the rod down firmly with thethumb. Lift the thumb gently, allowing the rod to rise. Read pressurewhere the rod stops. The rod must be depressed each time a pressurereading is to be taken.
When available a thermometer can be installed on any cooker and is de-sirable equipment because it indicates the degree of heat within the cooker.The pressure gauge does not register temperature.
V. HOW TO PRESERVE FOOD VALUE WHEN CANNINGCan foods very soon after they are gathered. Handle them in small lots
at a time Proceed rapidly with every step of the canning process. Keep foodcool and ventilated before canning. Pxecook foods for a short time Packthem hot Process them in the containers rather than in the open kettle. Ex-pose them as little as possible to the air, especially after peeling or cutting.
Use the liquid in which they were precooked to fill the container. Use thisliquid when the can is opened. It is good food.
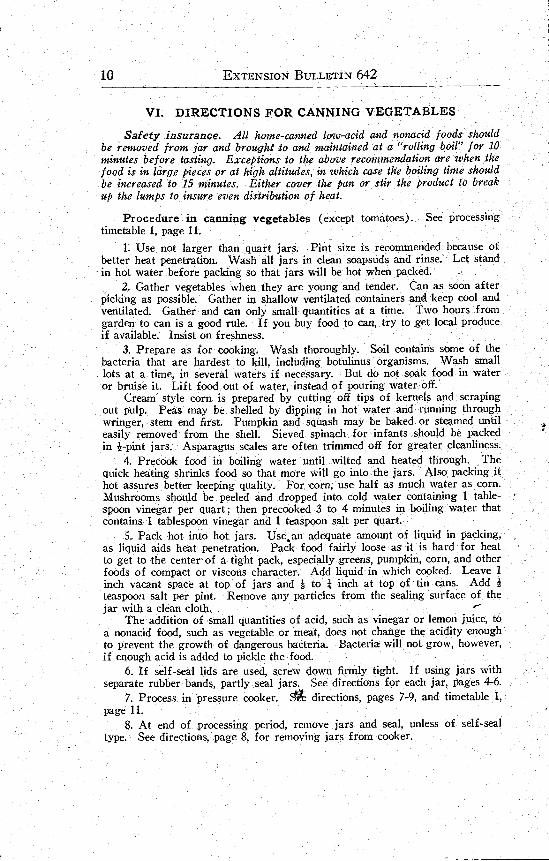
VI. DIRECTIONS FOR CANNING VEGETABLES
Safety insurance. All home canned low acid and nonacid foods shouldbe removed from jar and brought to and maintained at a "rolling boil for 10minutes before tasting. Exceptions to the above recommendation are when thefood is in large pieces or at high altitudes, in which case the boiling time shouldbe increased to 15 minutes. Either cover the pan or stir the product to breakup the lumps to insure even distribution of heat.
Procedure in canning vegetables (except tomatoes). See processingtimetable 1, page 11.
1. Use not larger than quart jars. Pint size is recommended because ofbetter heat penetration. Wash all jars in clean soapsuds and rinse. Let standin hot water before packing so that jars will be hot when packed.
1 Gather vegetables when they are young and tender. Can as soon afterpicking as possible. Gather in shallow ventilated containers and keep cool andventilated Gather and can only small quantities at a time Two hours fromgarden to can is a good rule. If you buy food to can try to get local produceif available. Insist on freshness.
Prepare as for cooking. Wash thoroughly. Soil contains sbme of thebacteria that are hardest to kill, including botulinus organisms. Wash smalllots at a time in several waters if necessary. But do not soak food in wateror bruise it Lift food out of water, instead of pouring water off.
Cream style corn is prepared by cutting off tips of kernels and scrapingout pulp. Peas may be shelled by dipping in hot water and running throughwringer, stem end first Pumpkin and squash may be baked or steamed untileasily removed from the shell. Sieved spinach for infants should be packedin i-pint jars. Asparagus scales are often trimmed off for greater cleanliness.
Precook food in boiling water until wilted and heated through. Thequick heating shrinks food so that more will go into the jars. Also packing ithot assures better keeping quality. For corn, use half as much water as corn.Mushrooms should be peeled and dropped into cold water containing 1 table-spoon vinegar per quart; then precooked 3 to 4 minutes in boiling water thatcontains 1 tablespoon vinegar and 1 teaspoon salt per quart
Pack hot into hot jars. Use an adequate amount of liquid in packing,as liquid aids heat penetration. Pack food fairly loose as it is hard for heatto get to the center of a tight pack, especially greens, pumpkin, corn, and otherfoods of compact or viscous character. Add liquid in which cooked Leave 1inch vacant space at top of jars and to inch at top of tin cans. Addteaspoon salt per pint Remove any particles from the sealing surface of thejar with a clean cloth.
The addition of small quantities of acid such as vinegar or lemon juice, toa nonacid food such as vegetable or meat does not change the acidity enoughto prevent the growth of dangerous bacteria. Bacteria will not grow, however,if enough acid is added to pickle the food.
If self seal lids are used screw down firmly tight If using jars withseparate rubber bands, partly seal jars. See directions for each jar, pages 4-6.
Process in pressure cooker. 4e directions, pages 7-9, and timetable 1,page 11.
At end of processing period remove jars and seal, unless of self sealtype. See directions, page 8, for removing jars from cooker.

Table 1. TIMETABLE FOR CANNING VEGETABLES.
See page 10 for canning vegetables.
CAUTION. All home canned low acid and nonacid foods should be removed from jar and brought to and maintained at a "rolling boil for 1.)minutes before tasting. Exceptions to the above recommendation are when the food is in large pieces or at high altitudes, in which case the boilingtime should be increased to 15 minutes, Either cover the pan or stir the product to break up the lumps to insure even distribution of heat Cannedfood showing any signs of spoilage should be burned, or mixed with 2 or 3 tablespoons of lye and buried. Avoid placing where animals can find it
Where 10 pounds pressure is indicated, temperature should be 240° F.; 15 pounds, 250° F.
Pressure cooker!.
* See Caution at head of table.t In using the pressure cooker above sea level, add 1 pound pressure for each 2,000 feet. Process for same length of time as given in the
table.* Containers larger than pint jars or No. 2 cans are not recommended.§ Fill corn very hot and process immediately. Whole grain corn schedule requires that corn be Washed after cutting to remove starch.
Otherwise use cream style schedule.
ProductPres-sure
Timepintjars
Timequartjars
TimeNo 2 cans,No 2i cans Product
Pres-sure
Timepintjars
Timemartjars
TimeNo 2 cans,No 2i cans
Minutes2540
7015
55
Asparagus ,*$ hotBeans, snap ,*t hotBeans, lima ,*$ hot .Beets, *$ baby, hotCarrots,* t baby, hot .Corn, whole grain,*$$ hot ....
Corn, cream style ,s1 hot -....Greens,** hot, includes spin-
ach, beet tops, chard, etc. -
Pounds101010101010
10
15
Min-utes353555404075
105
60
Min-utes404060454580
Minutes30SO5035SO70
(No. 2 can)100
55 (Na. 2)60 (No. 2)
Mushrooms 1: hotPeas ,*$ hotPumpkins and squash ,*$
hotSauerkraut,* hotSpinach, hot sieved for in.
fants*$ (See greens) .....Tomatoes (See timetable
for fruits.)
Pounds1010
1515
15
Min-utes3045
8515
60
Mitt.utes35....
...20
.. .

12 EXTENSION BULLETIN 642
VII. DIRECTIONS FOR CANNING MEAT AND POULTRYDIRECTIONS FOR CANNING MEAT
Meat is safely processed only in a pressure cooker.Wash jars and used lids thoroughly in warm soapsuds and rinse well.Cut meat into pieces of suitable size for serving and to fit the jar. Trim
off excess fat. Remove large bones. Allow about 11 pounds of meat for eachpint jar or No. 2 can.
Two methods of packing meat : hot and cold.A. Packing meat hot assures better heat penetration, shrinks the meat,
and results in fuller jars. The procedure is as follows:Make a broth by placing bones in cold water and simmering
hour. Place cut meat in broth and simmer until thoroughly heated through,about 12 to 20 minutes. Instead of simmering, meat may be seared, roasted,made into cakes or sausage and fried, stewed, or made into soup. Avoidstarchy coating.
Pack the hot precooked meat in clean hot jars. Pack loosely.Add hot broth to 1 inch from top of jars and to io 1 inch from top of tincans. In case of roasting or searing, add hot diluted pan drippings instead ofbroth. Run knife inside walls of jar to release air.
Add 1 teaspoon salt to each pint jar.Remove grease or other food from sealing surfaces. Partly
seal. (See directions for each jar, pages 4-6.)Place hot jars in hot pressure cooker. Follow pressure cooker
directions, pages 7-9. Follow processing timetable 2, page 13.Seal after processing, all types of closures except self-sealing.
B. Packing meat cold takes less time, but spoilage is more apt to occur.Place cut meat into clean cold jars to top of jar. Add salt in
middle of jar, 1 teaspoon salt per pint.Add no liquid. Partly seal. (See directions for each jar,
'pages 4-6.)Process in pressure cooker. Follow directions, pages 7-9. Fol-
low processing timetable 2, page 13.Seal jar after processing, all types of closures except self-
sealing.
DIRECTIONS FOR CANNING POULTRYWash jars and used tops-thoroughly in warm soapsuds and rinse well.Cut cleaned chicken into pieces as for frying. Remove flesh from breast,
back, and shoulders. Retain other bones. Use neck, wing tips, and breastbonesfor broth. Heart and gizzard may be canned with the rest, but not the liverand kidneys. The latter may be canned separately.
Chicken may be canned raw, Precooked 8 to 10 minutes, fried, orroasted. Pan drippings may be used. Avoid use of thickened gravies. Topack chicken, place a drumstick in a jar, then place the thigh next to the drum-stick, and two wings next to the thigh, fitting the elbow of one wing into theelbow of the other. Fit in remaining pieces to fill lower part of jar. Coverwith breast meat.
Follow directions for canning meat given above.The steam pressure cooker is the only method recommended for canning
poultry.

Table 2. TIMETABLE FOR CANNING MEATS, POULTRY, AND FISH.
See pages 12, 14 for canning meat, poultry, and fish.
The timetables given below for "packed hot" require that the jars and contents be hot, as near boiling as possible, when put into the pressurecooker.
CAUTION. All home-canned low-acid and nonacid foods should be removed from jar and brought to and maintained at a "rolling boil" for 10minutes before tasting. Exceptions to the above recommendation are when the food is in large pieces or at high altitudes, in which case the boilingtime should be increased to 15 minutes. Either cover the pan or stir the product to break up the lumps to insure even distribution of heat.Canned food showing any signs of spoilage should be burned, or mixed with 2 or 3 tablespoons of lye and buried. Avoid placing where animals canfind it.
- See Caution at head of table.t The following modification for a titude is recommended. For each 2,000 feet above sea level, add 1 pound pressure. Process the food for
the same length of time given in this table.t Containers larger than pint jars or No. 2 cans are not recorrunended.
See Station Circular 164, Preservation of Seafoods.
Product
Pressure cooked'
Pres-sure
Time,pintjars,.
Time,quartjars
Time,No. 2 cans,No. 28 cans Product
Pres-sure
Time,.pintjars
Time,quartjars
Time,No. 2 cans,
No. 28 cans
Min- Min- Man- Min..Pounds site: utes Minutes Pounds ate: site: Minutes
Beef, veal, lamb, mutton, I Fish and Seafood§venison, raw 15 110 130 110 (No. 2) Clams,n1 whole, cold 10 ' 80 70 No. 2
120 (No. 28) Minced, cold 10 100 90 No. 2Packed hot 15 85 120 85 (No. 2) Crabs** 10 125 120 No. 2
110 (No. 28) C - enamelChicken, with bone,*t raw __ 15 90 100 90 parchment
Packed hot 15 65 75 55 (No. 2) lining65 (No. 28) Oysters, cold . 10 90 85 No 2
Chicken, bonedn, hot orcold 15 100 110 100 (No. 2) Salmon", raw ------- 10 125 120 No. 2
Pork,* t raw .... . ..... 15 110 130 110 (No. 2) Smelt and trout, hot or cold.. 10 120 120 No. 2120 (No. 28) Tuna fish 10 125 120 No. 2
Packed hot ------------------15 85 120 85 (No. 2)Pork sausage, raw -----------15 110 130 110 (No. 2)
1
120 (No. 28)Packed hot -------------15 90 120 90 (No. 2)
115 (No. 21)Rabbit*$
(Same as chicken)

CAUTION
All home-canned low-acid and nonacid foods should be removed from jarand brought to and maintained at a "rolling boil for 10 minutes before tasting.Exceptions to the above recommendation are when the food is in large pieces orat high altitudes, in which case the boiling time should be increased to 15 nan-nies. Either cover the pan or stir the product to break up the lumps to insureeven distribution of heat.
Rabbit may be skinned and canned. Follow same directions as for meat,page 12.
VIII. DIRECTIONS FOR CANNING FISHWash jars and used tops thoroughly in warm soapsuds and rinse wellCan only absolutely fresh fish. Remove head, tail, scales entrails, and
any dark membrane. Better quality product results if salmon is eviscerated assoon as caught Scales may be loosened by pouring boiling water over themand scraping backwards Retain the skin and bones of salmon for flavor, color,and food value.. Tuna skin is usually discarded for better appearance. In com-mercial calming the fat of tuna is removed by baking or steaming 2 to 4 hoursuntil the natural oil has separated from the muscle. Tuna oil is discarded as itimparts a strong flavor. Cooking and cooling allows easy removal of bones.
Cut large fish into convenient sized pieces for serving and for packinginto jars. Pack raw or cooked to top of jar. Trout and smelt may be brownedin hot fat and packed in diluted pan drippings Pack small fish in an up-and-down direction.
Add salt in the middle of the jar, 1 teaspoon per pint If desired, add 2tablespoons salad oil or a piece of fat flesh from near neck of salmon to eachpint jar. Add no other liquid. Olive or high grade salad oil should be addedto precooked tuna, using 2 tablespoons per pint
Thoroughly clean sealing surfaces of jars Partly seal jars of all typesof closures except self-sealing. (See directions for each type of jar, pages 4-6.)
Process in pressure cooker. Follow directions for pressure cooker,pages 7-9. Follow processing table 2, page 13,
IX. DIRECTIONS FOR CANNING FRUIT AND TOMATOESFor equipment, see pages 4-7. Timetable 3 for different fruits is given on
pages 16-17.
1. PROCEDURE IN CANNING FRUIT
Use firm sound fruits that are well ripened. Freshness means improvedfood value, flavor, appearance, and keeping qualities. Tree ripened peachesand box ripenedpears are best To prevent crushing soft varieties such as ber-ries, gather in shallow containers. Soft but sound fruit may be set aside forjuice or jam.
Most fruit should be carefully washed. Prepare as for the table.Fruits that are peeled, such as pears, apples, and peaches, may be dipped ina weak salt solution after peeling to prevent discoloration at this stage, Useapproximately 4 level teaspoons of salt to 1 gallon of cold water. Addition of2 tablespoons of vinegar to this water may further aid in color retention.
Rinse in cold water before canning if desired.Fruits that shrink a great deal in the jar, such as apples and apricots may
be precooked about 5 minutes in sirup, packed hot and processed in hot water
14 EXTENSION BULLETIN 642

HOME FOOD PRESERVATION
bath for a shorter period. Each quart jar of fruit requires about 1 cup ofsirup.
Some fruits when heated yield enough juice of their own without addingliquid. Adding sugar before heating will draw out juice. Adding sirup madewith water produces a milder flavor.2. STEPS IN CANNING BY HOT WATER BATH METHOD
By this method food is cooked in the jar.Cooking in the jars results in less contact with air and conserves vitamins
better than the open kettle method. This method also results in less spoilagethan the open kettle method. Products tend to be firmer, more palatable, andmore attractive by the hot water bath method.
Fill hot water bath cooker with enough water to come 1 inch over tops
of jars. Start heating so that water will be boiling when jars arepacked.
Shortly before they are needed, thoroughly wash jars and used lids inclean soapy water and rinse well If jars have rubber rings prepareas described on page 6 and attach them. Let jars lie on a rack orperforated tin covers in hot water so that they will be hot when packed.
Prepare sirup.* Add sugar to water, stir to dissolve, and bring to aboil.Light sirup (25 per cent) : 1 cup of sugar to 3 cups of water.Medium sirup (33 per cent) : 1 cup of sugar to 2 cups of water.Heavy sirup (50 per cent) : 1 cup of sugar to 1 cup of water.
Table 3, pages 16-17, suggests type of sirup for each fruit Strength ofsirup may vary according to taste or circumstances In order to conservesugar, it is suggested that thinner sirups be used for sweet fruits such asapples ripe pears, and ripe peaches in order to allow thicker sirups in canningberries apricots rhubarb, and sour cherries Too much sugar tends to drawjuice from fruit causing more shrinking and floating in jar.
Honey may replace half of the sugar but may impart a strong honey
flavor. Corn sirup or corn sugar (dextrose) may replace one-third of thesugar (i in jams and jellies). Avoid brown sugar and sirups with strongflavors.
Sugar is not necessary to keep fruit from spoiling but it helps retain shape,color, and flavor of fruit Unsweetened fruit may be canned the same assweetened fruit adding water or fruit juice or 'heating slowly to form its ownjuice. It may be sweetened to taste when served, but is not as satisfactory aswhen canned with sugar.
Place fresh or precooked fruit in hot jar while jar is standing in hotwater. Jar may be jolted gently on a wooden surface or the palm ofhand to help make a full tight pack. Avoid mashing fruit Fill jarsto top with fruit Pour boiling hot sirup over fruit Allow 1 incheshead space for sirup with raw fruit and 1 inch head space with partlycooked fruit Allow k to 1 inch head space in tin cans. Run knifeinside walls of jar to release air. Remove any particles from sealingsurface of jar.
Place hot lids on jars If self seal type, screw lids down tight Ifwire clamp type, snap the larger clamp into place and leave the smallerclamp up, to seal jar partly. If using screw top with rubber ring,screw lid down, then back turn to seal jar partly. Process promptly.
*For further suggestions on wartime canning and a sirup table, see Circular HE 1687,Sugar Saving Methods of Canning and Freezing, available free of charge from CountyExtension offices, or Oregon State College, Corvallis.

Table 3. TIMETABLE FOR CANNING FRUITS AND TOMATOES IN HOT WATER BATH.Hot pack of fruits, or precooking a few minutes is recommended for better keeping qualities and for shrinking the fruit and producing fullercontainers than with the cold pack. Place hot jars in boiling water on rack. Water should come 1 inch over top of jars. Seal jars immediatelyafter processing, unless self-seal. Keep water boiling continuously the required time. For each 1,000 feet above sea level, add 1 minute to pro-cessing time given in table below, if time called for is 20 minutes or less. If table calls for more than 20 minutes, add 2 minutes for each 1,000feet. For half gallon jars, add 5 minutes.Situps: light--1 cup sugar, 3 cups water; medium-1 cup sugar, 2 cups water; heavy-1 cup sugar, 1 cup water.See pages 14-15, 18 for canning fruits and tomatoes, and open kettle cannin n
Fruit Preparation for Canning
Hot water bath(Boiling water,
212° F.)Pint or No. 2 orquart No. 2*jars tin cans
Thick-nessof
sirup
Kindoftincan
Apples .. .
ApricotsBerries, firm
BlueberriesBlackberriesGooseberriesLoganberries
Berries, softRed rasp-berries andothers
Cherries
Peaches
Pears
-
Wash, pare, core, or quarter (not more than 1 inch thick) into cold salt solution (4 teaspoonssalt to 1 gallon water). (See page 14.) Drain, boil 5 minutes in sirup, pack hot into hotjars, add boiling sirup to 1 inch from top of jar, or * to f inch from top of tin can.Or bake as for serving, pack hot.Or make into apple sauce, pack hot.Treat same as peaches. Or wipe with damp cloth, do not peel.Sort, stem, wash, and drain. Add * to i cup sugar per quart. Bring to a boil, Shake panor stir gently to prevent sticking. Pack hot, adding juice to * inch from top of jar or I toi inch from top of can. Add more sugar to gooseberries if desired. Fresh gooseberries maybe preserved raw in cold water. See last line under Rhubarb.
Or bring berries to boil in 1 cup sirup per quart, pack hot into hot jars to * inch from topof jar or * to * inch from top of can.Sort, wash, and drain. Pack raw into hot jars standing in hot water. Shake or jolt jarfor a fuller pack. Avoid mashing. Add boiling sirup to lf inches from top of jar or * toI inch from top of can. Place packed jars directly into boiling water if of modern standardglass.Wash, stem, pack, add boiling sirup to 1* inches from top of jar or * to e inch from topof tin can. Jolt down in jar for full pack when filling jars.Or remove pits, stir in sugar as desired, bring to boil, pack hotSelect tree-ripened peaches, cut in half on suture, remove pit, immerse in boiling water1 minute or until skins slip easily, plunge into cold water or spray for few seconds, peel.Slice if desired, simmer 4 to 8 minutes in sirup-, pack with pitted sides down in overlappinglayers, add boiling sirup M 1 inch from top of jar or * to I inch from top of tin can. Mayadd one cracked pit for flavor to each quart sirup. Strain before using.Or if juicy add f cup sugar per quart, heat gently, then boil 4 minutes. Pack hot into hotjars and add juice to 1 inch from top of jars or * to 1 inch from'top of cans.Or pack raw into hot jars standing in hot water. Add sirup to 1* inches from top of jarsor f to * inch from top of cans. Place filled jars directly into boiling water if of modernstandard glass.Or pack washed halves with skin raw into hot jars and proceed as directly above.Can pears when in good eating condition. Pare, cut into halves or quarters, core, drop iiii-inediately into cold salt bath (4 level teaspoons ,salt and 2 tablespoons vinegar to 1 gallonwater), wash. Cook 4 to 8 minutes in hot sirup, pack hot, add boiling sirup to 1 inch fromtop of jar or I to * inch from top of tin can.Or bake, pack hot, add hot sirup and process in jars.
Mtn-tees
10
1010
15
15
20
25
1015
20
25-35
25-3520
10
Min-Wes10
1010
15
15
20
20
1015
20
20-30
20-3020
10
Light
Heavy
Heavy
Heavy
Medium
MediumMedium
Medium
MediumLight
Light
Plain
PlainPlainPlainFruit
en.
Fruiten.
Fruiten.
Plain
Plain
Plain
PlainPlain
Plain

*Use fruit enamel cans for dark and red cherries. Use plain cans for light cherries.t Note: Before using berry juice, a good general rule is to first dilute to with cold water and add sugar to taste. Use 1 part of logan-
berry juice to 6 or 7 parts of cold water and add sugar to taste.
Fruit Preparation for Canning
Hot water(Boiling
212°Pint orquartjars
bathwater,F.)No. 2 orNo. n
tin cans
Thick-ness
ofsirup
Kindoftincan
Prunes orPlums ...... .
Rhubarb .
Sauerkraut .. ..
Strawberries
Tomatoes
Tomato juice .
Fruit juicet
Fruit purees
..
Wash, pack, cover with boiling medium sirup to lf inches from top of jar or to 3 inchfrom top of can. Pricking skins prevents bursting.Or add sugar or sirup as desired. Boil 3 to 5 minutes, pack hot.
Trim, wash carefully, cut into 3-inch lengths. Make excess quantity of medium sirup andbring to a boil. Place cut rhubarb in boiling sirup. After 1 minute, turn over with long-handled spoon. When rhubarb boils but is not broken, remove from heat. Dip solid fruitwith slatted spoon into hot jars to make a solid pack. Add sirup to 1 inch from top. Partly
in hot water bath 10 minutes. Use remaining sirup for next batch Atseal and process
Min-utes
20
10
10
10
....
25 pis30 qta
10
10
4520
30 ataim-rneringpoint
20
Min-utes15
10
10
10
15
10
10
3520
80 ataim-zneringpoint
20
Heavy
Heavy
Heavy
..
Heavy
Plain
Plain
Fruiten.
Fruiten.
Fruiten.
Plain
Plain
Fruilen.
Fruiten
end, can excess sirup for beverage purposes. This method produces full pack and helps keepshape of fruit.Or cut into 3-inch lengths, add i cup sugar for each quart rhubarb, bake in covered dishuntil tender. Pack hot.Or cut into 3-inch lengths, pack in sterilized jars, fill to overflowing with cold water, sealand store without processing, in a very cool place. Use this method only if rhubarb is veryfresh and not overripe. Cook after opening jars.Bring to simmering point, 190° F.-200° F. Pack hot into hot jars to 3 inch from top of jarand 3 to 3 inch from top of can.Wash, stem, place in preserving kettle with sugar, using 3 to i cup sugar to 1 quart rawberries. Boil 1 to 3 minutes and let stand overnight, at least 12 hours. Boil 1 minute, packin hot jars to I inch from top of jar or * to 3 inch from top of can. This method helps toprevent shrinkage, and usually to produce even distribution of berries in jar,Use firm, ripe tomatoes, wash, place in thin cloth or preferably wire basket, dip into boilingwater 1 minute or until skins slip easily, plunge into cold water for an instant, core (besure to remove all white core), peel, trim well, quarter. Bring to a boil. Pack hot into hotjars to i inch from top of jar or * to 3 inch from top of tin can. Add 1 teaspoon salt perquart if desired. Avoid all contact with iron.Or quarter and pack raw into hot jars. Add hot juice to li inches from top of jar or * to+ inch from top of can.Use sound, ripe tomatoes, wash well, remove stems, cut into sections. Simmer until softened,stirring occasionally to prevent burning, out through sieve, add 1 teaspoon salt to each quartif desired, bring to boil, pour into containers to * inch from top of jar or bottle, or * to 3inch from top of tin can. Avoid all contact with iron, which causes discoloration.Wash fruit, crush heat slowly to simmering point, about 190-200° F., strain through thick,clean cloth, add 3 cup sugar to each quart fruit juice, bring to simmering point, pour intocontainers to 3 inch from top of jar or 3 inch from top of tin can. Avoid all contact withiron,Proceed as for tomato juice, except add water. Avoid all contact with iron.

EXTENSION BULLETIN 642
Lower hot jars into boiling hot water with jar lifter or rack. Jarsshould be inch or more apart andrack underneath should raise themoff the bottom. Water level should be 1 inch or more above tops ofjars Cover cooker. Record time when water comes to a rolling boilagain.
Keep water boiling actively for required period, counting from timewater boils again. Add boiling water if needed to keep jar tops cov-ered. Add time for altitude of 1,000 feet and more. (See Table 3,pages 16-17.)
Remove jars from hot water bath at end of processing period and sealunless self seal type.
CANNING TOMATOES BY HOT WATER BATH METHODBlanch tomatoes in boiling water to loosen skins; then dip in cold water.
Peel and remove all of green and white core.Cut into quarters, heat just to boiling, and pack hot to 1 inch from top.
Add 1 teaspoon salt per quart Process in hot water bath. This method hasbeen recommended by the State Nutrition Conference.
Or cut into quarters and pack raw, making sure to press tomatoes firmlyinto hot jar to top. Fill jar with hot tomato juice to 1 inches from top. Add1 teaspoon salt per quart Lower hot jars into boiling water. Process accord-ing to Table 3, page 16-17.
CANNING TOMATO JUICE BY HOT WATER BATHWork with small batches at a time to save food value. Heat washed and
cut tomatoes enough to loosen juice (180° F.). Do not boil. Avoid use ofcopper, brass and iron utensils Sieve quickly to avoid undue exposure to airand consequent reduction of vitamin content Reheat only to boiling point.Immediately fill hot jars or bottles to inch from top. Add to 1 teaspoonsalt per quart. Process in hot water bath 20 minutes Seal unless self sealjars.
CANNING FRUIT BY THE OPEN KETTLE METHODBy the open kettle method, the food is cooked in an ordinary kettle, then
packed into sterilized jars and sealed. No other processing is done. Bacteria,molds and yeasts can get into the jars when they are being filled and maycause spoilage. For this reason the federal and state nutrition committeesrecommend that the open kettle method be used only for such products asjams jellies preserves and pickles
X. COOLING, TESTING SEAL, LABELING, AND STORINGCANNED FOODS
Set jars in upright position out of draft several inches apart to toolrapidly. Do not tighten lids after cooling; to do so may break the seal. Liftjar by the body, not the top. Avoid pressure against rubber or any part ofthe seal.
Remove screw bands from self-seal jars after 24 hours. Test seal bygently tapping lids with spoon. Sealed lids usually have a ringing sound.Test seal of any that sound dull, applying a slight pull up on the lid. Scrubinside of screw bands with brush. Dry thoroughly and use again. Any jarsnot sealed should be reprocessed for full time or the food used
Wipe good jars clean, label with name, date, type of processing, and periodof processing Store in cool, dark, dry, frostproof place with temperature of450 to 60° F. if possible.

HOME FOOD PRESERVATION 19
XL DISCOLORATION OF CANNED FOODSPink pears may be due to overcooking or to cooling too slowly due to
placing too close together or in too warm a room. Overripe pears and somevarieties pink more than others
Tan or brown color of peaches, pears, apples, and apricots may bedue to oxidation or too high temperature. Force the air out of these fruitsby boiling in sirup a few minutes before processing. Avoid pressure cookerand oven canning Underheating may also cause a dark color. As soon aspeeled, dip light colored fruits in cold brine. See page 14.
Cloudy peas or beans are often due to the presence of a few starchyoverripe specimens or to overcooking. (Bacteria may also cause cloudiness.)
Yellowish flakes or crystals in asparagus, turnip greens, and spinachare caused by natural ingredients in the vegetables and are harmless.
White sediment in tomatoes may be of two types, a harmless material,or bacteria causing spoilage.
Vegetables are sometimes discolored and toughened by the use of hardwater.
Dark color in corn or meat may be caused by contact with copper oriron utensils Corn is darkened sometimes by 15 pounds pressure cooking. Toomuch head space may cause oxidation and discoloration.
XII. ON GUARD AGAINST SPOILAGELook closely at every jar of canned food before opening and when opened.
Although food may be spoiled and give no indications, the following signs ofspoilage are usually readily apparent
Poor seal of jar. A leak.Off-odor of food or off-color of food.Change in texture of product : slippery, slimy, mushy, moldy.Presence of gas. Spurting of liquid on opening.Swelling or bulging jar tops and ends of tin cans.Cloudiness of liquid. Overmature peas and beans however, may be
cloudy although not spoiled.Off-flavor of food. Do not taste nonacid home-canned foods before
boiling them 10 to 13 minutes. See caution at top of pages 11 and 13.It is possible for canned food to contain the poison that causes botulism
without showing it Some foods that have this poison develop a bad odor whenboiled. Absence of odor does not necessarily indicate freedom from botulinuspoison.
When in doubt as to the wholesomeness of food, burn or bury it Beforeburying, stir several tablespoons of lye into a jar of spoiled canned food with astick and let it stand 24 hours out of reach of children or animals Then buryit deep,jar, cover, stick, and all.
Remember safety first Don't expose people, poultry, or other animals toeven one chance of tasting spoiled canned food.
Caution: All home canned low acid and nonacid foods should be re-moved from jar and brought to and maintained at a "rolling boil" for 10 min-utes Wore tasting. Exceptions to the above recommendations are when thefood is in large pieces or at high altitudes, in which case the boiling time shouldbe increased to 15 minutes. Either cover the pan. or stir the product to breakup the lumps to insure even distribution of heat,
Do not use galvanized container. Metal poisoning may result.

20 EXTENSION 'BULLETIN 642
XIII. COMMON DIFFICULTIES IN CANNING
Most spoilage of canned food can be traced either to lack of adequate heatin processing, or to lack of airtight seal. Sometimes the food has spoiled be-fore canning. The following precautions are emphasized:
Use sound fresh food of right maturity. Handle only enough for onecannerful at a time. Handle rapidly. Keep food cool and ventilated whilewaiting.
Examine jars before canning. Discard cracked jars and those withdefects on sealing ssurface. Test jars with separate rubber ring by enclosingwater and inverting. Thoroughly wash and rinse jars and tops
Use only standard jars for canning if possible. Limit packers or com-mercial jars to such things as preserves and relishes. See page 6.
Remove odor from new wartime rubbers. See page 6.Use the closure that was intended for each jar. See pages 4-6. Differ-
ent kinds of closures are handled very differently. In general, follow the direc-tions that come with each type of jar and each type of closure. Only partlyseal jars with separate rubber rings before processing and tighten after process-ing. Avoid tightening self seal jars after processing. Read and study direc-tions for all canning equipment
Have pressure cooker gauge and safety valve tested when new an-=ally, and at any time that they show any irregularity. Follow the safety rulesfor pressure cookers See page 7. Be sure that the lid is securely fastenedon pressure cooker before developing pressure. Allow adequate exhaust of airfrom pressure cooker. Stay in the kitchen when using the pressure cooker andkeep the pressure steady.
When operating a canner, write down the time for start and finish ofexhaust time and of processing time If the temperature is not maintained atthe specific point recommended in the tables for nonacid foods there is alwaysdanger of food poisoning from botulism Be sure to process for the full timeaccording to the table, or the food may spoil. At altitudes of 1,000 feet orhigher, add time to hot water bath schedules At altitudes of 2,000 feet andhigher, add pressure to pressure cooker schedules See pages 11 and 13.
Use pint jars for most nonacid foods in order to assure adequate heatpenetration. Use a loose wet pack for vegetables to help heat penetration.
Leave adequate headspace so the food will not boil onto the sealing sur-faces. Clean sealing surfaces well before closing jars
Do not open jars after processing to 611 them more completely. Avoidtightening lids after jars are cool. Cool jars in upright position.
IL Losses can often be prevented if the seals of jars are tested 24 hoursafter canning.
12. Know the operation and adjustment of tin can sealers if they are to beused. Test the seams frequently for airtight sea/.
XIV. CANNING IN TINTin cans and sealers are available during wartime for home canning.
Tin cans have several advantages over other types of containers The first costis lower, the tin permits foods to be heated and cooled quickly, producingbetter flavor, and there is no loss from breakage. On the other hand, canningin tin necessitates investment in a good sealer, and tin cans are used safelyonly once for canned fruits meats and vegetables The coating of tin oncans is thinner during wartime. Use food in tin before that preserved in glass.

1. KINDS OF TIN CANSTin cans are sold by hundred lots or thousand lots in standard sizes. Three
kinds of cans are obtainable as follows :
Plain. Safe for all purposes so far as food value is concerned butunsatisfactory for certain foods, especially the highly colored foods. Plaincans are satisfactory for tomatoes, meat, and all white, green, and yellowproduct.
Inside Enamel, (also called R-enamel, Regular, and Fruit enamel).Bright gold color. Preserves the color of such highly colored products as redberries, cherries, prunes, and beets. Use Inside Enamel cans for all fruits andvegetables of red, blue, or purple color except tomatoes. Re-enamel cans areInside Enamel cans with an extra layer of enamel.
C-Enamel. Dull gold color. Prevents discoloration of products contaming sulphur, such as corn, peas, succotash, hominy, crab .meat, clams, fish,and chicken. Never used for acid products.
2, CAN SIZESCommon sizes for home canning are No 2 and Na a (See table). The
sealer can be adjusted to different sizes. To make an airtight seam, very closeadjustment is necessary when changing sizes. It is best practice to use only onesize can on home sealers.
COMMON SIZES OF T/N CANS
TESTING THE TIN CAN SEALEROnce the sealer has been tested. and adjusted, a test should not be necessary
until several hundred cans have been sealed or until a readjustment has beenmade.to accommodate a can of a different size.
To test sealer, place 2 tablespoonfuls of cold water in an empty can andseal. Have on hand a pan of boiling water sufficient to cover the can Reduce.heat to stop boiling and immerse the can until it is entirely surrounded by thehot water. This heats the water in the can and creates pressure within the canCan ends will bulge. Keep the can under the surface for 5 minutes and if bythat time no bubbles arise from the can seam, the can has been sealed airtight.
If bubbles arise from the can, the seam is not sufficiently dght, and one orboth of the seaming rolls need adjusting. Leaks are most apt to be at the sideseam. Usually the second roll needs adjusting, To adjust, follow manufac-turer's directions.
STEPS IN USING THE PRESSURE COOKER WHEN CANNING IN TIN CANSClean and prepare product.Examine can. Straighten any cans that have dented rims. Dis-
card cans with torn side seams.
Standard canApproximate
weightApproximate
capacity
Ounces CupsNo. 1 11 1bNo. 1 (tall) 16 2No. 2 20 2bNo. 2b 28 3bNo 10 106 13
HOME FOOD PRESERVATION 21

22 Ex TENSION.BULLETIN 642
(c) Mark can with soft or china marking pencil, sharp instrument ortin can ink, with name, date, method, and processing batch.
(d) Pack product in the marked cans, Pack cold or hot according todirections given below under (e) and (1). Fruit, tomatoes,meat, and fish may be packed cold or hot. Nonacid vegetablesshould be packed hot,
(e) Cold Pack. May be used with fruit, tomatoes, meat, and fish.Fill the cans with food. Avoid a tight dry solid pack. Useplenty of sirup on fruits. Tomato juice may be added totomatoes.Add boiling sirup to fruits to within to inch of the topof the cans. Add only salt to fish and meat.Exhaust or preheat the can. To exhaust, heat the filled
cans in a pan of boiling water reaching to within 1 to 1iinches of the top of the cans, until the temperature of thecenter of the cans is approximately 180° F. Keep theexhausting .pan covered. The purpose of this preheatingis to expand the contents of the can so that expansionafter sealing will not be sufficient to strain the seams orbuckle the ends of the cans; also to expel the air fromthe product, and to prevent corrosion of_ the tin.
When the cans are sufficiently heated, or exhausted, sealthem promptly on the tin can sealer. Follow manufac-turer's directions with the sealer.
Process immediately after sealing. Process meat and fishin pressure cooker. Process fruit in hot water bath.
(f) Hot PackPack all nonacid vegetables boiling hot. Pack precookedweat hot. Fill cans to within to 1 inch of the top.Add boiling water in which they were cooked, to within A
to f inch of the top of the can Headspace should notexceed i inch. Excessive headspace may cause darkeningof some foods and corrosion of cans. Add salt in theproportion of teaspoon per pint of vegetables.
Seal each can directly after filling. Follow directions withsealer.
(g) When a batch of cans is sealed, place the cans in the pressurecooker immediately. Have the cooker ready with the hot water2 to 3 inches deep in cookers of 7-quart-jar capacity and dialgauge.
Heat penetration to center of can is aided by placing cansso that layers of food within the cans are vertical. Tin cans ofspinach should be laid on their sides ; cans of asparagus stalksand whole beans should stand upright.
(h) Place the cover On the cooker. Follow directions for each typeof cooker.
(i) As soon as the desired pressure is reached write down the timewhen the processing is to be finished. Process at the necessary
temperature for the required length of time. (See Tables 1and 2, pages 11 and 13 )
(j) When the cooking time is up, open the steam cock wide except" under the following three conditions when a sudden release of
pressure might result in buckling of the cans : (1) When

pumpkin, corn, or spinach is being cooked. (2) If cans arelarger than No. 2. (3) When the cans were sealed at too lowa temperature. Under the conditions indicated, lower the pres-sure gradually.
(k) When the gauge indicates zero, open the cooker and remove thecans.
(1) Cool the cans completely and quickly by placing them under coldrunning water. Watch for leakage from poor seams.
Observe cans for at least .2 weeks to see if bulges or leaks ap-pear. If any spoilage develops, examine all the cans that wereprocessed in the same batch
Label and store in the coolest place available, above freezing. Thestorage place should be dry enough to prevent rusting of cans.
B. Salting VegetablesPRESERVATION OF VEGETABLES BY SALTING*
Salt draws water from vegetables by the process of osmosis, forming abrine that inhibits the growth of spoilage organisms Vegetables may be saltedin two ways : with a small proportion of salt that allows desirable ferrnenta-tion, and with a larger proportion of salt that prevents fermentation. By eithermethod some food value is lost.
Salt equivalents, level measurement : 1 tablespoon + 2 teaspoons = 1ounce; j cup = 5 ounces; 1 cup = 10 ounces; 1 cups = approximately 1
pound.1. DRY SALTING WITH FERMENTATION
Cabbage, cucumbers, snap beans, beet tops, and turnip tops are the vege-tables most frequently preserved by dry salting with fermentation.
Sauerkraut. Equipment needed: (1) A stoneware crock, a hardwoodkeg free from undesirable flavors and odors or glass jars (2) A good gradeof dairy salt. (3) Scales (4) Knives or kraut cutter. Boards to cut on(5) Containers for weighing the cut cabbage. (6) A wooden head or roundpiece of hardwood board about 1 inch thick and just small enough to slip inand out of the keg easily. Allow for swelling. A plate of suitable size iseven better than a board. (7) Clean stones or bricks to weight the cabbagedown in the brine (not limestone). A 5-gallon keg of kraut requires approxi-mately a 10 pound weight. Increase weight with size of container. (8) Whitemuslin or several thicknesses of cheesecloth cut 6 inches larger than the crockor keg, to cover the cabbage after it is packed.
Procedure in making sauerkraut. Use only sound cabbage. Trim offany undesirable parts. Wash cabbage. Shred fine, retaining core if desired.Weigh shredded cabbage and weigh 2i to 3 per cent as much salt as cabbage.That is use from 2i to 3 pounds of salt to 100 pounds of shredded cabbage.Two and a half per cent of salt is the same as 1 pound of salt to 40 poundsof cabbage or four ounces of salt, a scant half cup, to 10 pounds of cabbage.The smaller amount of salt may be used with very clean cabbage, very cleanutensils, and the right temperature. The more salt, the less risk of spoilage.More than 3 per cent salt, however, will taste very salty.
*For other methods of preservation by salting ask Extension Service office forFarmer's Bulletin 1932, "Preservation of Vegetables by Salting and Brining."
HOME FOOD PRESERVATION 23

24 EXTENSION BULLETIN 642
Place a 3-inch layer of shredded cabbage in the container and pack downwith the hands or with a tamper. Sprinkle with some of the salt Add morecabbage, pack in firmly, and add more salt. Continue placing alternate layersof cabbage and salt and pack down each layer firmly, until container is f full.The weighed salt should be evenly distributed throughout the cabbage, but incase extra salt is left sprinkle it on the top layer. Several layers of largeouter cabbage leaves are desirable. This will later facilitate opening thecontainer without mixing the scum with any of the kraut Spread the clothover the mixture, tucking it down at the sides On the cloth place the board orplate and on the board place the Stone. The weight should be heavy enough tocause a brine to come up to the cover in a day or two Leave in a warm cleanplace, preferably at 65° to 75' F. until bubbling or fermentation stops Thetime needed for fermentation varies from 2 to 4 weeks. If scum or moldappears, remove it at about 2-day intervals, or it may completely spoil thekraut. Lift cloth carefully so that as much skurn as possible sticks to it. Skimtop of brine. Do not disturb leaves. Wash and replace cloth, cover, andweight After fermentation stops seal the kraut in one of various ways. Acommon method used is to move the container to a cool place, remove the clothand any scum or mold, adjust the amount of brine and weight so that the brinecomes up to but not over the cover, and pour very hot melted paraffin over thesurface of the brine that is exposed. Do not move the container after pouringin the paraffin. After kraut is taken from the container, cover soon again withparaffin. If the kraut is to keep a considerable length of time, scum and moldmust be prevented from forming.
Small amounts of sauerkraut may be conveniently made by thoroughlymixing 4 ounces of salt to 10 pounds of finely shredded cabbage in a dishpan.This may be tightly packed in fruit jars. Try to pack tight enough to bringjuice to the top or refill next day. Place lid but do not quite seal (loosenmason type jats about f turn). As fermentation (bubbling) proceeds gat willescape. When fermentation ceases seal the jars tight.
To preserve other vegetables than cabbage by dry salting with fermenta-tion, wash and trim them as for cooking and proceed by the same method de-scribed for sauerkraut.2. DRY SALTING WITHOUT FERMENTATION
Snap beans litna beans peas corn, dandelion greens beet tops, spinach,chard, and kale are preserved by salting without fermentation. Use one-fifth asmuch salt as vegetables by weight that it 1 pound of salt to 5 pounds of vege-table& This proportion of salt largely prevents fermentation and growth ofmolds. Although 20 per cent salt is ordinarily sufficient, some may prefer touse 25 per cent as an added precaution.
Boil corn 10 minutes, then cut from the cob. For best results blanch snapbeans, lima beans and peas in boiling water or in steam 5 minutes. Coolbefore salting.
Proceed by the method described under sauerkraut, except that layers ofvegetables should be not more than 1 inch thick. If a brine does not form in24 hours after application of the weight, add a saturated brine until it comesup to the cover. A brine of 1 pound of salt to 2 quarts of water may be used.
Using brined products Soak food preserved in salt without fermenta-tion several hours in cold water before cooking, changing the water severaltimes. Use 1 gallon of water per quart of vegetables. Cook and season as inpreparing fresh vegetables, except that salt is omitted.
Cooperative Extension Work in Agriculture and Home EconomicsWm. A. Schoenfeld, Director
Oregon State College and United States Department of Agriculture, CooperatingPrinted and distributed in furtherance of the Acts of Congress of May 8 and June 30, 1014