Eurex Repo F7
52
Eurex Repo F7 Release 3.6 F7 Connectivity Guide Version 3.6.2 Date 8 December 2021
-
Upload
khangminh22 -
Category
Documents
-
view
0 -
download
0
Transcript of Eurex Repo F7

Eurex Repo F7
Release 3.6
F7 Connectivity Guide
Version 3.6.2
Date 8 December 2021
Contents
1. Introduction 5
1.1 Graphical User Interface, F7 GUI 5
1.2 Participant Application Programming Interface, F7 API 6
1.3 F7 FIX Gateway 7
2. Network 8
2.1 Repo Connectivity 8
2.1.1 Leased Line 9
2.1.2 Internet 9
2.2 Connectivity security features 10
2.3 URLs and IP ranges 10
2.3.1 F7 GUI 11
2.3.2 F7 API 12
2.3.3 F7 FIX 13
3. Environments 14
3.1 Release update timeline 14
4. Member Section 16
5. Leased Line connectivity ordering 17
5.1 New connection 18
5.2 Location details 20
5.3 Connection type 20
5.4 Request summary 21
6. F7 API and F7 GUI – Client certificates 22
6.1 x.509 Certificate creation with Java keytool 23
6.1.1 Create keystore 23
6.1.2 Export certificate for upload 24
6.1.3 Import AMQP server certificate (F7 API only) 25
6.1.4 Client PKCS#12 certificate for installation into the F7 GUI user’s browser 26
6.2 x.509 Certificate creation with OpenSSL 27
6.2.1 Step 1: Download OpenSSL 27
6.2.2 Step 2: Create Private Key 27

F7 Eurex Repo
F7 Connectivity Guide V 3.6.2
3
6.2.3 Step 3: Create self-signed certificate 28
6.2.4 Step 4 create PKCS#12 file 30
6.3 Certificate validity period 31
6.4 Certificate upload 31
6.4.1 Account Configuration 32
6.4.2 Multiple certificates attached to one Account 33
6.4.3 Environment 34
6.4.4 Account Name 34
6.4.5 Comment 36
6.4.6 Certificate upload verification 37
6.5 Username and password authentication 37
6.6 Additional IP Address check (Internet access) 38
7. F7 FIX Gateway - Client certificates 39
7.1 Creating a new Repo F7 FIX technical account 39
7.2 Generating a New Certificate 42
7.3 Revoking and Deleting a Certificate 46
7.4 Additional IP Address Check (Internet Access) 48
7.5 Certificate Activation, Expiry and Renewal 48
8. Further information and contacts 50
9. Change Log 51

F7 Eurex Repo
F7 Connectivity Guide V 3.6.2
4
List of abbreviations
The following is a list of terms and abbreviations used in these release notes.
Abbreviation or
term
Description
AMQP Advanced Message Queuing Protocol
API Application Programming Interface
CA Certification Authority issues and validated digital
certificates. Usually commercial. Not needed for self-signed
certificates.
F7 API F7 Application Programming Interface is the open and
flexible interface for third party software products connecting
to F7.
FIX Financial Information eXchange protocol standard
GUI Graphical User Interface
Keystore A repository of security certificates (usually own certificates)
PKCS#12 Cryptographic archive file format. Here used to store digital
certificates to be imported into a web browser.
POA Participant owned application
RSA Rivest, Samir and Adleman – asymmetrical cryptographic
method
Truststore A repository of security certificates (usually trusted
certificates of others)
URL Uniform Resource Locator – reference to a resource (i.e.
broker)
x.509 Public key infrastructure for digital certificates

F7 Eurex Repo
F7 Connectivity Guide V 3.6.2
5
1. Introduction
Deutsche Börse is continuously extending its F7 product scope, functionality, and
markets to improve its services and to attract additional customer groups. With the
trading system F7, introduced in 2014, Deutsche Börse went a considerable step
further, embracing the requirements of a state-of-the-art trading environment.
The F7 trading system serves as a solid foundation for future growth and has been
designed to meet the highest demands.
Today’s global markets demand new standards of flexibility and performance. The 7
Market Technology series from Deutsche Börse Group offers a range of innovations
in trading, clearing, risk management and connectivity – advanced infrastructure that
lets you adapt to whatever the future brings.
This document describes the connectivity options and the ordering and setup
process for F7. It considers participants who are new to the order process at
Deutsche Börse but is also valid for participants, which already have Deutsche Börse
infrastructure (for example existing Eurex participants, which want to order additional
F7 connectivity).
1.1 Graphical User Interface, F7 GUI
The F7 trading GUI is browser based. Extensive software installation or update
processes are therefore no longer necessary. As a result, the F7 trading GUI is
completely operating system independent, if a supported browser is used.
While running in the browser the F7 trading GUI offers the full repo trading
functionality combining it with highest deployment flexibility.
A full online manual is available within the GUI. For a downloadable PDF of the GUI
manual please go to:
https://membersection.deutsche-boerse.com/
following this path:
Resources > Eurex Repo > System Documentation > Release 3.6 > Eurex Repo GUI
Solutions
The F7 trading GUI can be connected either via leased lines or via an Internet
connection. Chapter 2 of this document describes the differences and the bandwidth
requirements, while chapters 4 and 5 guide you through the ordering process.

F7 Eurex Repo
F7 Connectivity Guide V 3.6.2
6
In both cases the connections are secured by an individual certificate (x.509). Prior to
usage the certificate must be uploaded via the Eurex Repo’s F7 Member Section and
it must be installed into the user’s browser. Chapter 6 of this document describes the
steps which need to be performed to do this.
The F7 trading GUI runs with a wide range of recent browser software and operating
systems.
Several browser and operating system combinations are part of Deutsche Börse test
scenarios. These combinations are considered as ”supported“.
Untested combinations which have no issues reported are considered as “possible”,
while combinations known to have problems are classified as “not supported”.
To fully support all features of the latest F7 simulation and production software the
supported versions of Mozilla Firefox or Google Chrome can be found in the
“Release Notes” of the F7 release you want to connect to.
The SSL encryption requires all browsers to support TLS1.2. Older versions, TLS 1
and TLS1.1, are not supported.
1.2 Participant Application Programming Interface, F7 API
The F7 trading platform comes with a dedicated API (F7 API). The F7 API enables
message exchange (i.e., enter quote, enter IOI, etc.) in a proprietary XML based
message format. Message flow is implemented via AMQP message brokers.
The interface supports request/response communication (participant triggered) as
well as broadcast message flow (exchange triggered).
Any programming language can be used to develop applications connecting to this
interface. The programming interface is available on leased line connections and via
the Internet. Both types of connections require x.509 certificates for authentication.
For the full F7 API manual and accompanying XSD files please go to:
https://membersection.deutsche-boerse.com/
following this path:
Resources > Eurex Repo > System Documentation > Release 3.6 > Eurex Repo
Trading Interfaces
It is recommended to always use the latest version of the QPID C++ API and QPID
JMS libraries which can be found by following these URLs:
https://qpid.apache.org/components/messaging-api/index.html

F7 Eurex Repo
F7 Connectivity Guide V 3.6.2
7
https://qpid.apache.org/releases/
Please refer to the “Release Notes” of the F7 release you want to connect to for more
details on the supported library versions.
1.3 F7 FIX Gateway
Beginning with F7 release 3.6 an additional, optional interface is introduced to F7.
This F7 FIX Gateway provides services to connect Member applications to F7 and
supports a limited set on functions compared to the exiting API.
FIX protocol version 4.4 is supported (only).
The F7 FIX Gateway provides services to connect Member applications to F7 and
supports the following functionalities:
• RFQs/IOIs, including sending, receiving, responding with offers, and accepting
(or rejecting offers)
• Addressed Offers (AO), including pre-arranged offers (PAO).
• Countering addressed offers.
• Inquiring and cancelling PreTrades
• F7 initiated actions on PreTrades upon expiry or session hold
• Publishing of Own and Public Trades
• Approval of Trades by Select Finance Clearing Agents
• Inquiring, modifying, and completing trades
• Master data inquiry of securities, product terms, segments, Members, and
users.
The workflow for creating client certificates for the newly introduced Repo F7 FIX
Gateway differs from the workflow for creating F7 API or F7 GUI certificates.
Please see chapter 7 for a description of the client creation certificate workflow.

F7 Eurex Repo
F7 Connectivity Guide V 3.6.2
8
2. Network
To support the respective F7 services, Deutsche Börse Group has established an
efficient infrastructure representing a dedicated global IP network. Access from a
participant location to F7 must always be established via the Deutsche Börse Group's
IP network or alternatively via the Internet.
Any participant connection to the back-end systems must be established via Access
Points (AP). APs, to which leased lines connect, are located throughout the world in
major financial centers where participants are concentrated.
This concept allows Deutsche Börse to extend its private network up to the
demarcation point of the carrier at the participant’s site. Each AP is connected to the
respective hosts via redundant leased lines. Participants are connected to an AP via
dedicated leased lines and/or via the Internet.
2.1 Repo Connectivity
The F7 system minimizes the footprint on the participant’s infrastructure. F7 removes
the local Service Connector from the client and implements a browser-based GUI
solution, which requires zero maintenance by the participant.
F7 connectivity concept
The browser-based GUI, the F7 API and the F7 FIX interface can connect to F7
either via leased line or via Internet.
In either case a client authentication is done by using x.509 certificates. The
certificate is used to encrypt all data transmitted between the browser-based GUI or
any third-party application.

F7 Eurex Repo
F7 Connectivity Guide V 3.6.2
9
F7 connectivity options
2.1.1 Leased Line
All leased line connections must be ordered from Deutsche Börse – directly or via a
technical service provider. The Deutsche Börse network is a highly efficient network
focused on highest availability by simultaneously providing lowest latency.
F7 Trading participants who already have existing Deutsche Börse network
connectivity in place can order a dedicated channel, providing that sufficient
bandwidth is available.
As the F7 system connects each individual user directly to the trading platform,
bandwidth requirements are directly proportional to the number of active users.
Bandwidth consumption per active trader is expected to be around 0.420 Mbit/s.
Bandwidth options are offered in the following sizes:
Number of active users Bandwidth Option
Up to 2 1.0 Mbit/s
Up to 6 3.0 Mbit/s
Up to 12 5.0 Mbit/s
Up to 25 10.0 Mbit/s
F7 bandwidth options for leased lines
2.1.2 Internet
It is possible to use the F7 trading GUI, the F7 API as well as the F7 FIX interface via
the Internet. The previously used software VPN encryption is longer required as all
traffic is secured by use of x.509 certificates for basic authentication and connection
encryption.

F7 Eurex Repo
F7 Connectivity Guide V 3.6.2
10
As F7 connects each individual user of the F7 system directly to the trading platform,
bandwidth requirements are directly proportional to the number of active users. Users
connecting via Internet should expect:
0.420 Mbit/s bandwidth consumption per active trader
2.2 Connectivity security features
For the connection via Internet, the participant can choose one of the following options:
• Allow Internet access without restrictions (per default)
• Completely disable Internet access and restricting to leased line (x.509 upload
page)
• Allow Internet access for registered IP addresses
Details on configuring Internet access security features can be found in chapter 6.6.
Please note: any changes (adding or deleting of data) to these settings will take effect on the next business day.
For the connection via leased line, the incoming IP address is checked against the known network information for the corresponding participant. In case a participant has a Service Provider, the IP address is also checked against the known networks of the Service Provider.
On login via leased line, it is checked if the IP-address of the user is part of the
corresponding network.
2.3 URLs and IP ranges
All connections to F7 (GUI, API and FIX, Leased Line, and Internet) are secured by
SSL certificates. All host certificates, officially authenticating the F7 servers, are
associated with fully qualified DNS domain name of each service.
As a result, connection URIs need to use the fully qualified domain names for
certificate handshake. This holds true for GUI links or bookmarks, as well as API
connection URIs.
For security and compatibility reasons, all F7 users are advised to connect only using
the fqdn URIs below. IP addresses in the following chapters are listed for
completeness and for potential firewall configuration on the client side.
F7 Eurex Repo
F7 Connectivity Guide V 3.6.2
11
Depending on the browser (version) used for the GUI or the AMQP library used for
the API connection it may be possible to still connect with IP addresses in the URI,
but this type of access is no longer recommended.
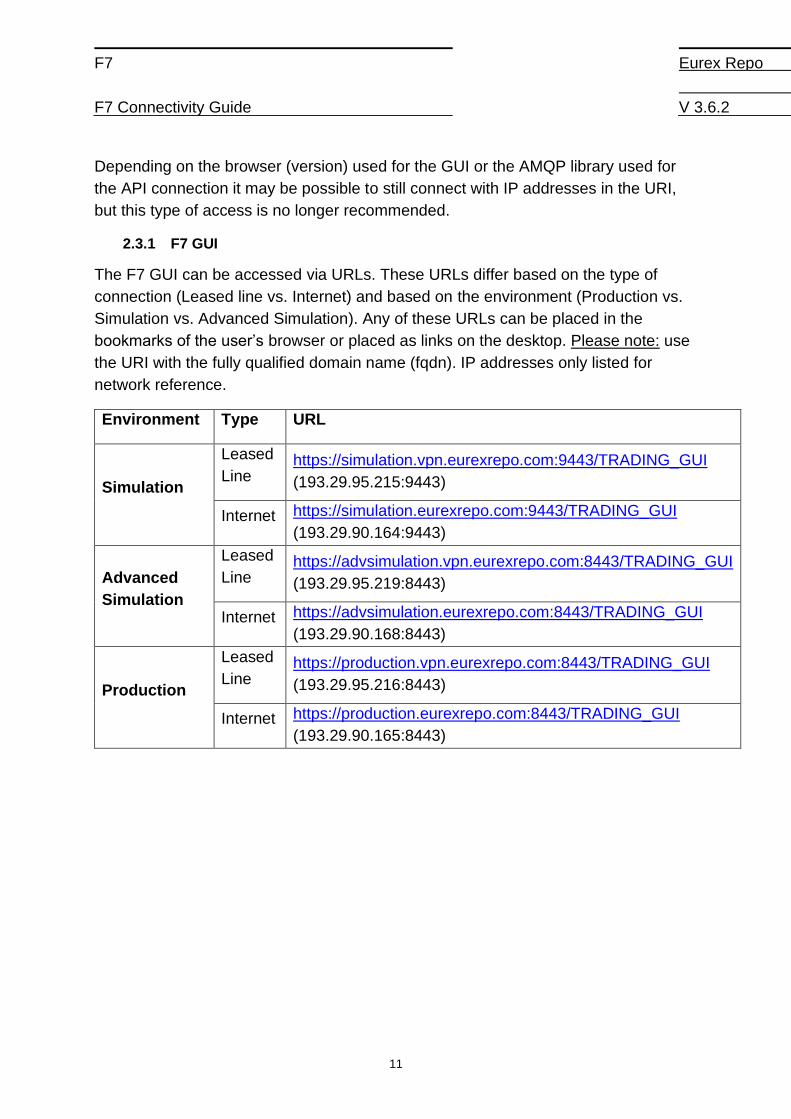
2.3.1 F7 GUI
The F7 GUI can be accessed via URLs. These URLs differ based on the type of
connection (Leased line vs. Internet) and based on the environment (Production vs.
Simulation vs. Advanced Simulation). Any of these URLs can be placed in the
bookmarks of the user’s browser or placed as links on the desktop. Please note: use
the URI with the fully qualified domain name (fqdn). IP addresses only listed for
network reference.
Environment Type URL
Simulation
Leased
Line https://simulation.vpn.eurexrepo.com:9443/TRADING_GUI
(193.29.95.215:9443)
Internet https://simulation.eurexrepo.com:9443/TRADING_GUI
(193.29.90.164:9443)
Advanced
Simulation
Leased
Line https://advsimulation.vpn.eurexrepo.com:8443/TRADING_GUI
(193.29.95.219:8443)
Internet https://advsimulation.eurexrepo.com:8443/TRADING_GUI
(193.29.90.168:8443)
Production
Leased
Line https://production.vpn.eurexrepo.com:8443/TRADING_GUI
(193.29.95.216:8443)
Internet https://production.eurexrepo.com:8443/TRADING_GUI
(193.29.90.165:8443)

F7 Eurex Repo
F7 Connectivity Guide V 3.6.2
12
2.3.2 F7 API
The F7 API connection gateways are accessed via AMQP URIs. These URIs differ
based on the type of connection (Leased line vs. Internet) and based on the
environment (Production vs. Simulation vs. Advanced Simulation). Please note: use
the URI with the fully qualified domain name (fqdn). IP addresses only listed for
network reference.
Environment Type IP Address Port
Simulation
Leased Line
amqps://simu-f7-api.vpn.eurexrepo.com
193.29.95.217 11575
Internet amqps://simu-f7-api.eurexrepo.com
193.29.90.166 11575
Advanced
Simulation
Leased Line
amqps://advsimu-f7-api.vpn.eurexrepo.com
193.29.95.220 11975
Internet amqps://advsimu-f7-api.eurexrepo.com
193.29.90.169 11975
Production
Leased Line
amqps://prod-f7-api.vpn.eurexrepo.com
193.29.95.218 11475
Internet amqps://prod-f7-api.eurexrepo.com
193.29.90.167 11475

F7 Eurex Repo
F7 Connectivity Guide V 3.6.2
13
2.3.3 F7 FIX
The F7 FIX gateways are accessed via AMQP URIs. These URIs differ based on the
type of connection (Leased line vs. Internet) and based on the environment
(Production vs. Simulation vs. Advanced Simulation). Please note: use the URI with
the fully qualified domain name (fqdn). IP addresses only listed for network
reference. To save IPv4 addresses the same IP address is re-used for all three
environments with a given access type (Internet or Leased).
Environment Type IP Address Port
Simulation
Leased Line
simu-f7-fix.vpn.eurexrepo.com
193.29.95.222 11577
Internet simu-f7-fix.eurexrepo.com
193.29.90.177 11577
Advanced
Simulation
Leased Line
advsimu-f7-fix.vpn.eurexrepo.com
193.29.95.222 11977
Internet advsimu-f7-fix.eurexrepo.com
193.29.90.177 11977
Production
Leased Line
prod-f7-fix.vpn.eurexrepo.com
193.29.95.222 11477
Internet prod-f7-fix.eurexrepo.com
193.29.90.177 11477

F7 Eurex Repo
F7 Connectivity Guide V 3.6.2
14
3. Environments
F7 offers the following dedicated environments for customer access:
• Production Production trading, full size resources, “real money”
• Simulation Simulation meant to get acquainted with new functionality.
Intended for GUI uses and software developers (API).
Less powerful resources compared to Production.
• Advanced Simulation Dedicated environment for software regression
testing. Intended for software developers (API).
Limited resources.
3.1 Release update timeline
When a new software version of F7 is being rolled out, it is installed in the Simulation
environment first.
Roughly six weeks later the Production environment is then updated to the new
version as well. During these six weeks the Simulation environment is used by
software vendors to adjust their software to the new F7 release. At the same time
traders can acquaint themselves with new features in the F7 trading GUI.
During these six weeks, while the Simulation environment is already on a new F7
release and the Production environment is still on the previous release, the
Advanced Simulation environment becomes a valuable resource for software
developers who need to develop or test software which runs on the current
production release.
The following diagram depicts a typical F7 release rollout over all three environments
for a fictious update from F7 release 99 to release 100:

F7 Eurex Repo
F7 Connectivity Guide V 3.6.2
15
Please note, while F7 Advanced Simulation has dedicated network addresses it
shares the client x.509 certificates (see chapter 6) with the regular Simulation
environment. Any x.509 certificate uploaded for F7 Simulation is automatically valid
for F7 Advanced Simulation too.
Initial member and user setup for Advanced Simulation is taken from the Simulation
environment. After this initial synchronization, both environments will remain
independent of each other and no further member / user synchronization will be
done.

F7 Eurex Repo
F7 Connectivity Guide V 3.6.2
16
4. Member Section
The Eurex Repo member section can be entered via this web address:
https://membersection.deutsche-boerse.com/
Once you have provided login credentials, this leads you to the welcome page of the member section.

F7 Eurex Repo
F7 Connectivity Guide V 3.6.2
17
5. Leased Line connectivity ordering
To start the order process press “Technical Connection” and select “Requests & Configuration” from the icons on the page.
Various request options are displayed. Use “Leased Line and Internet Connections” to order new connectivity for F7.

F7 Eurex Repo
F7 Connectivity Guide V 3.6.2
18
5.1 New connection
Select the tab “New Request” and then press “New Connection”
You have now entered the connectivity order frame. Select the type of connection to
be ordered first, select a member ID and click “Next”:
In the next step the connection is selected (i.e., 1x Leased Line or 2x Leased Line).
In the next step enter the location selection and the selection of the person who is the “Line Responsible”.

F7 Eurex Repo
F7 Connectivity Guide V 3.6.2
19

F7 Eurex Repo
F7 Connectivity Guide V 3.6.2
20
5.2 Location details
For the location, you can select an existing location or create a new location. The new location creation is self-explanatory.
5.3 Connection type
The next step is to select desired bandwidth and an existing or new “Installation” to add the new connection to.

F7 Eurex Repo
F7 Connectivity Guide V 3.6.2
21
5.4 Request summary
In the next step, an overview of the request is shown. By pressing “Add to Request
Overview for Approval” your request is then placed in the request overview.
Please review this page thoroughly and add the overall “Line Contact” for this request
(typically the person who also will perform the connection test).

F7 Eurex Repo
F7 Connectivity Guide V 3.6.2
22
6. F7 API and F7 GUI – Client certificates
To ensure the highest possible level of security and privacy against eavesdropping, a two-factor authentication is required for every participant. Both parts of the authentication process need to be completed successfully before access to the F7 GUI is granted or an F7 API application can connect.
The two-factor authentication process involves on the one hand the creation and usage of self-signed SSL certificates to establish and ensure an encrypted connection between the participant and F7.
Certificate authentication is required for both Internet and Leased Line access.
On the other hand, every single GUI or API user must be authenticated by means of the individual username and password to be able to log into the GUI or API.
Please note:
Certificates can have user or participant scope or some other participant specific scope (e.g., location, unit, market etc.). Every participant needs at least one certificate to access F7 but may use an unlimited number for various reasons. In any case, the uploaded certificate must match the PKCS#12 file installed in the browser.
For a successful upload to the portal, a self-signed SSL certificate (crt.-file) is required which needs to comply with the following parameters:
• RSA and DSA key algorithms and SHA-2 signature algorithms (e.g. SHA224,
SHA256, SHA384, SHA512) are supported
• Compliant with X.509v3 standard
• Key length needs to be between 1976 and 4096 bits
• Only letters and numbers (no special characters) are allowed
• Letters must be in upper case, i.e., no lower-case letters are to be accepted
• The total length must not be shorter than 15 and not longer than 22 characters
• The Common Name (CN) is also the complete account name and is
composed as follows:
o 5-digit participant ID followed by 3 digits “GUI” or “API” depending on
the application the certificate will be used for, thereafter a free user
defined string from 7 to 14 characters must be used for your internal
description
While the procedure described in the next chapter outlines the preferred way of creating certificates for GUI and API users with the Java keytool, chapter 6.2 describes an alternative way of GUI certificate creation with the tools provided by OpenSSL.
It is recommended to follow the procedure described in the chapters below as close as possible to create valid certificates. For technical reasons F7 connectivity only accepts self-signed certificates (as described in the procedures below). Certificates

F7 Eurex Repo
F7 Connectivity Guide V 3.6.2
23
signed by a third-party CA will not allow access to the F7 system. It is not recommended to use any kind of certificate extensions and add information like eMail addresses to the certificate.
Please note, that during the SSL handshake such additional information (i.e., eMail addresses added to the certificate) would be visible to all clients attempting an SSL connection.
F7 certificates have a validity of up to three years (1090 days) maximum. All examples below use a validity of one year (365 days).
6.1 x.509 Certificate creation with Java keytool
The following chapter outlines the procedure for creating a self-signed x.509 certificate, the creation of a keystore and a truststore, and finally the import of the F7 API broker certificate into the truststore, using the Java tool “keytool”.
Java keytool is part of the standard Java distribution. It is a key and certificate management utility, organizing certificates in keystores and truststores, which can then be accessed by Java applications.
This chapter describes the recommended procedure for F7 GUI and F7 API users. Chapter 6.1.4 describes how to extract a browser compatible certificate for GUI usage.
Please note, in the following examples the following is assumed:
• You have the keytool in your PATH.
• You are in a directory where you have write-permissions to create files.
Four files will be created:
• A keystore, containing your private key(s)
• A truststore, containing the public key(s) from other parties (i.e. F7)
• A public certificate for upload to the Eurex Repo Member section
• A private certificate for installation into the browser of a F7 GUI User
The following examples use a participant ID “INTER” – replace this with your own
participant ID.
The following examples always use a password “mypass”. Change this to a
password of your own choice.
All parameters, which should be changed according to your individual setup, are underlined.
6.1.1 Create keystore
The first step is to create a F7 certificate and a keystore to store the new certificate
in. The command line example below determines the parameters of the certificate
F7 Eurex Repo
F7 Connectivity Guide V 3.6.2
24
(RSA algorithm, key size 2048, one-year validity, SHA256 signature and a keystore
file name “INTER.ks” and a store password “mypass”):
keytool -genkey -keyalg RSA -keysize 2048 -validity 365 -sigalg SHA256withRSA
-alias inter -keystore INTER.ks -storepass mypass -keypass mypass -dname
CN=INTERAPITRDFR123
It is important that the entered Common Name (-dname CN=) always consists of the
own participant ID, in this example “INTER” followed by “GUI” or “API” depending on
the application the certificate will be used for and a free identifying string.
• The first 5 digits are your participant ID (“INTER” in this example)
• The next 3 digits identify the purpose of the certificate. If the certificate will be
used for GUI access “GUI” has to be entered. If the certificate is used to
connect to the API “API” must be entered.
• Thereafter a free user defined string from 7 to 14 characters must be used for
your internal description.
The Common Name must be identical to the free text field of the account name
provided during the upload of the self-signed certificate into the member section.
At this point, a keystore file “INTER.ks” has been created, containing one certificate
with an alias name “inter” for reference.
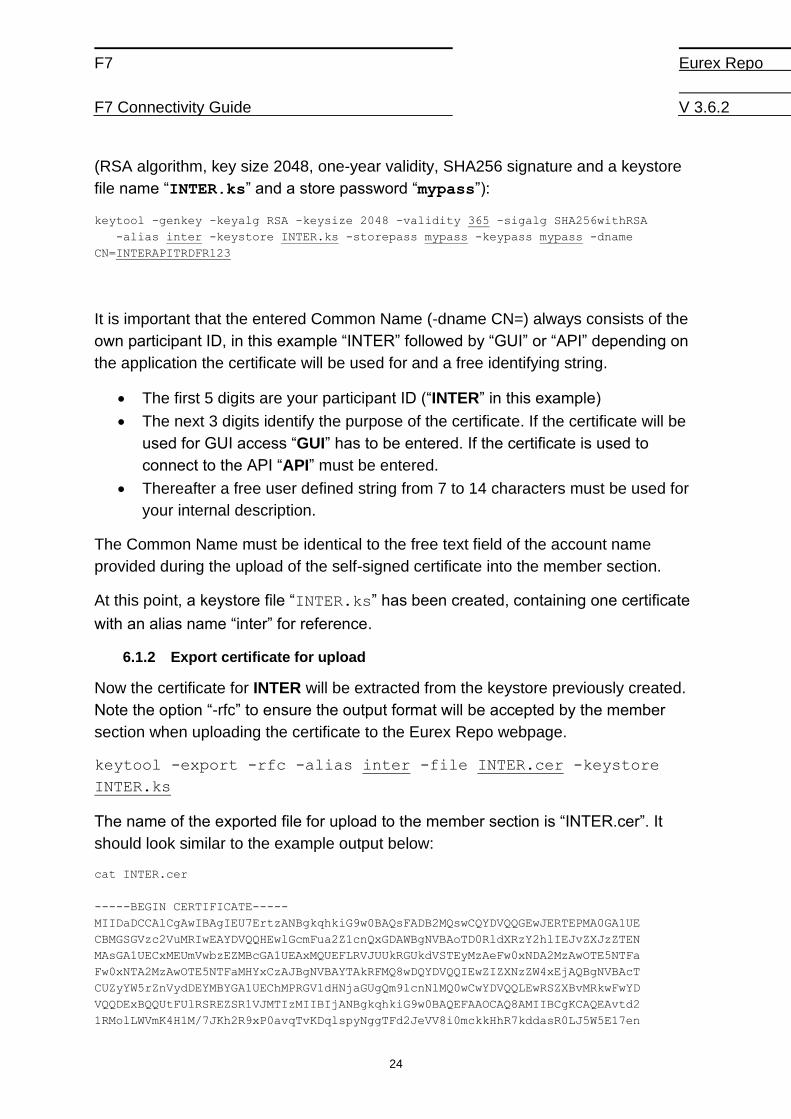
6.1.2 Export certificate for upload
Now the certificate for INTER will be extracted from the keystore previously created.
Note the option “-rfc” to ensure the output format will be accepted by the member
section when uploading the certificate to the Eurex Repo webpage.
keytool -export -rfc -alias inter -file INTER.cer -keystore
INTER.ks
The name of the exported file for upload to the member section is “INTER.cer”. It
should look similar to the example output below:
cat INTER.cer
-----BEGIN CERTIFICATE-----
MIIDaDCCAlCgAwIBAgIEU7ErtzANBgkqhkiG9w0BAQsFADB2MQswCQYDVQQGEwJERTEPMA0GA1UE
CBMGSGVzc2VuMRIwEAYDVQQHEwlGcmFua2Z1cnQxGDAWBgNVBAoTD0RldXRzY2hlIEJvZXJzZTEN
MAsGA1UECxMEUmVwbzEZMBcGA1UEAxMQUEFLRVJUUkRGUkdVSTEyMzAeFw0xNDA2MzAwOTE5NTFa
Fw0xNTA2MzAwOTE5NTFaMHYxCzAJBgNVBAYTAkRFMQ8wDQYDVQQIEwZIZXNzZW4xEjAQBgNVBAcT
CUZyYW5rZnVydDEYMBYGA1UEChMPRGV1dHNjaGUgQm9lcnNlMQ0wCwYDVQQLEwRSZXBvMRkwFwYD
VQQDExBQQUtFUlRSREZSR1VJMTIzMIIBIjANBgkqhkiG9w0BAQEFAAOCAQ8AMIIBCgKCAQEAvtd2
1RMolLWVmK4H1M/7JKh2R9xP0avqTvKDqlspyNggTFd2JeVV8i0mckkHhR7kddasR0LJ5W5E17en

F7 Eurex Repo
F7 Connectivity Guide V 3.6.2
25
EJ8/dGJFVy/NMZZJLcSIyaaB+7vfW7oaeF3Um502RnoIUFX+wni6qODN4Zz7WmdYGbXVu9HsFkYG
tceW5c6pdC3vpGnqsiTt1LrrulibDOEsGx4+YczEpwTrvX0uK7nLmyaudmL18RJfGqondJSsnDCB
arqhu7Wa9BAYzjTQjTpfej8Lar4lOW+C8XWxvNlAQOKL4EwYklQcNb4Q6kwr6m+EadkTLucsjnkm
mfm5NLaJpR1bXp5wDPY6pdzCtb2yYsBY4QIDAQABMA0GCSqGSIb3DQEBCwUAA4IBAQA9O2CoEzOZ
Zsih1sR21U54ne/xwqgBgY89nGdiv9J+H3iIO2+UDTXS+9X1pyK0QYRJ8LnrxzkgfexrzGlIwMCy
7PQNPJWWutglnE9+TiGzWgZOmR5FMwBHulMp9hMn7GBegsOpDL5Hd645S9hjj/P1X6CVZiLPuo03
cv2l+/KRhG7s9gfHR2L5Gas4i9a/2UWa4osOLJM5////vDR77b/p5Rxu0p2c8897wUgVFM4AP0wS
q5vXWv5Cfj375RzTDB3VjEEAsiC74GvITYJTJo1aS+WIHWLcHHV+E6PQsYUD7NAWd6GnIw/slau+
KwPrxm+1jyuPp2pdrKIqcqcM+Z
Upload the X.509v3 compliant .cer-file into the member section via Internet. See
chapter 6.4 for details.
6.1.3 Import AMQP server certificate (F7 API only)
In case the keystore / truststore is used for the F7 API the AMQP server/broker
certificates provided by F7 need to be imported into a truststore.
The server / broker certificate of F7 API can be downloaded in the Eurex Repo
Member Section > Repo Resources > Trading System F7 > System Documentation
> Network Access.
Please note, there are three ZIP files for download available. One for the F7
simulation environment, one for the F7 production environment and one for the F7
advanced simulation environment:
• Production F7 API broker/server certificates for Internet and leased line to import into your Truststore
• Simulation F7 API broker/server certificates for Internet and leased line to import into your Truststore
• AdvSimulation F7 API broker/server certificates for Internet and leased line to import into your Truststore
Please Note: The F7 server/broker certificates do expire periodically. Eurex Repo will
inform customers via Implementation News and technical info mail when the
server/broker updates are due for an update.
There are two certificates in each of the BrokerCerts.zip, one for leased line access
(contains “vpn” in the filename) and one for Internet access.
• simu-f7-api_eurexrepo_com_cert.crt (Internet Access, Simulation)
• simu-f7-api_vpn_eurexrepo_com_cert.cer (Leased line Access, Simulation)
• prod-f7-api_eurexrepo_com_cert.crt (Internet Access, Production)
• prod-f7-api_vpn_eurexrepo_com_cert.cer (Leased line Access, Production)
The following example uses the AMQP server/broker certificate by F7, which is
stored in a file “simu-f7-api_eurexrepo_com_cert.crt” (Internet Access, Simulation). It
has to be imported in a truststore (INTER.ts) by the following command:
keytool -import -file simu-f7-api_eurexrepo_com_cert.crt -keystore INTER.ts
-storepass mypass -alias f7apiserver
F7 Eurex Repo
F7 Connectivity Guide V 3.6.2
26
Or alternatively for leased line, Simulation with file “simu-f7-
api_eurexrepo_com_cert.crt”
keytool -import -file simu-f7-api_vpn_eurexrepo_com_cert.crt -keystore INTER.ts
-storepass mypass -alias f7apivpnserver
Both, leased line and internet server certificates can be imported into the same
truststore.
If no truststore “INTER.ts” existed before, it will be created automatically by importing
the first broker / server certificate.
The alias can be chosen freely. “f7apiserver” / “f7apivpnserver” are only used as an
example above.
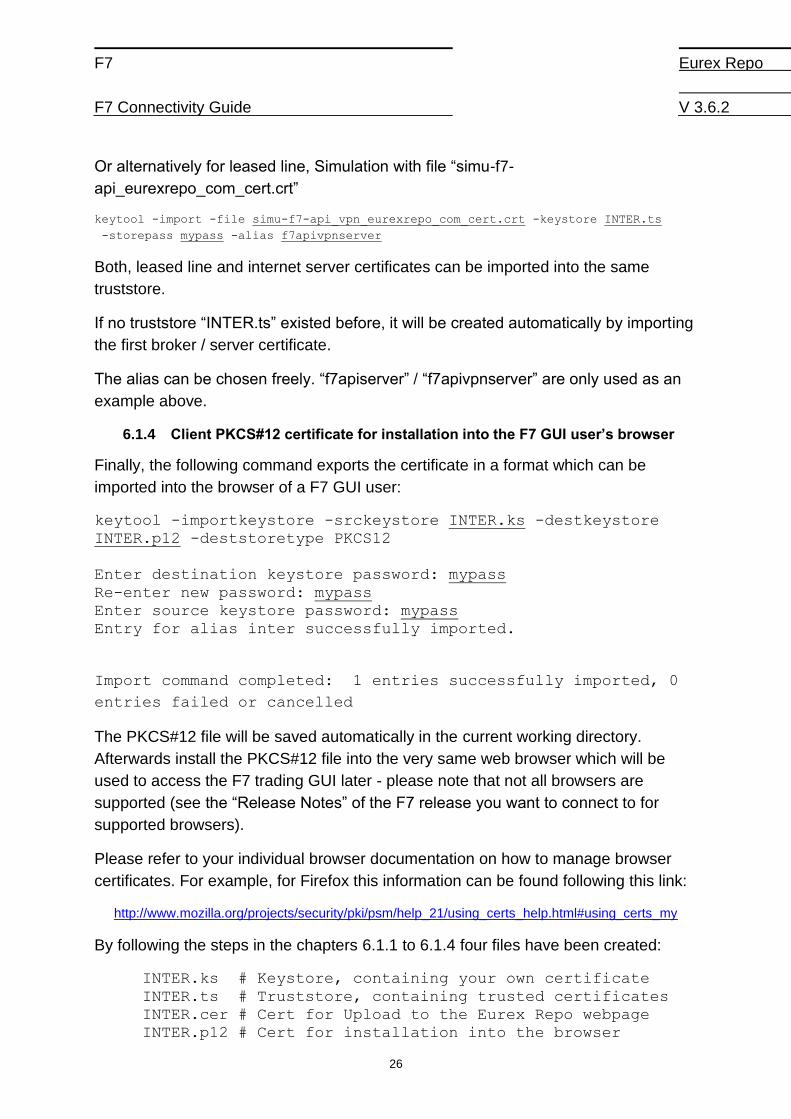
6.1.4 Client PKCS#12 certificate for installation into the F7 GUI user’s browser
Finally, the following command exports the certificate in a format which can be
imported into the browser of a F7 GUI user:
keytool -importkeystore -srckeystore INTER.ks -destkeystore
INTER.p12 -deststoretype PKCS12
Enter destination keystore password: mypass
Re-enter new password: mypass
Enter source keystore password: mypass
Entry for alias inter successfully imported.
Import command completed: 1 entries successfully imported, 0
entries failed or cancelled
The PKCS#12 file will be saved automatically in the current working directory.
Afterwards install the PKCS#12 file into the very same web browser which will be
used to access the F7 trading GUI later - please note that not all browsers are
supported (see the “Release Notes” of the F7 release you want to connect to for
supported browsers).
Please refer to your individual browser documentation on how to manage browser
certificates. For example, for Firefox this information can be found following this link:
http://www.mozilla.org/projects/security/pki/psm/help_21/using_certs_help.html#using_certs_my
By following the steps in the chapters 6.1.1 to 6.1.4 four files have been created:
INTER.ks # Keystore, containing your own certificate
INTER.ts # Truststore, containing trusted certificates
INTER.cer # Cert for Upload to the Eurex Repo webpage
INTER.p12 # Cert for installation into the browser

F7 Eurex Repo
F7 Connectivity Guide V 3.6.2
27
6.2 x.509 Certificate creation with OpenSSL
The following chapter outlines an alternative procedure for creating a self-signed x.509 certificate and a PKCS#12 file for installation into a F7 GUI user’s browser using the tool “OpenSSL”.
Please note, in the following examples the following is assumed:
• You have the OpenSSL binary in your PATH.
• You are in a directory where you have write-permissions to create files.
The following examples use a participant ID “INTER” – replace this with you own participant ID.
Three files will be created:
• A private key (INTER.key)
• A self-signed certificate for upload to the Eurex Repo Member section (INTER.crt)
• A private PKCS#12 certificate for installation into the browser of a F7 GUI User (INTER.p12)
The following examples use “mypass” where an individual passphrase needs to be entered. Change this to a passphrase of your own choice.
All parameters, which should be changed according to your individual setup, are underlined.
6.2.1 Step 1: Download OpenSSL
Download and install “OpenSSL” (recommended freeware tool) to create keys, self-signed certificates, and PKCS#12 certificate files (recommended source: www.openssl.org, version1.1.0g or 1.0.2n).
Avoid 1.0.1 versions up to and including 1.0.1f due to heartbleed blug
6.2.2 Step 2: Create Private Key
Create a private key by using OpenSSL (e.g. RSA private key, 2048 bit).
Example command line for the participant ID INTER:
openssl genrsa -des3 -out INTER.key 2048
This results in:
Generating RSA private key, 2048 bit long modulus
.......................................................+++
.......................................................+++
e is 65537 (0x10001)

F7 Eurex Repo
F7 Connectivity Guide V 3.6.2
28
Enter pass phrase for INTER.key:mypass
Verifying - Enter pass phrase for INTER.key: mypass
After entering the necessary information, the private key will be saved automatically in the current working directory.
6.2.3 Step 3: Create self-signed certificate
The participant must create a “self-signed certificate”.
A “self-signed certificate” can be created by using OpenSSL (.crt-file compliant with
X.509v3 standard and a validity of 365 days). For creation, the passphrase for the
private key created above is required.
Example command line for the participant ID INTER:
openssl req -new -x509 -sha256 -days 365 -key INTER.key -out
INTER.crt
This results in:
Enter pass phrase for INTER.key: mypass
The user is asked to enter the information that will be incorporated into his certificate request (the so-called Distinguished Name or a DN.)
There are quite a few fields to be filled in.
All fields except the Common Name should be left blank by entering “.”.
-----
Country Name (2 letter code) [GB]:.
State or Province Name (full name) [Berkshire]:.
Locality Name (eg, city) [Newbury]:.
Organization Name (eg, company) [My Company Ltd]:.
Organizational Unit Name (eg, section) []:.
Common Name (eg, your name or your server's hostname)
[]:INTERGUIFRTRD123
E-Mail Address []:.
It is important that the entered Common Name always consists of the own participant ID, in this example “INTER” followed by “GUI” or “API” depending on the application the certificate will be used for and a free identifying string.
The first 5 digits are your participant ID (“INTER” in this example)
The next 3 digits identify the purpose of the certificate. If the certificate will be used
for GUI access “GUI” has to be entered. If the certificate is used to connect to the API
“API” must be entered.

F7 Eurex Repo
F7 Connectivity Guide V 3.6.2
29
Thereafter a free user defined string from 7 to 14 characters must be used for your
internal description.
The Common Name must be identical to the free text field of the account name provided during the upload of the self-signed certificate into the member section.
After entering the necessary information, the self-signed certificate will be saved automatically in the current working directory.
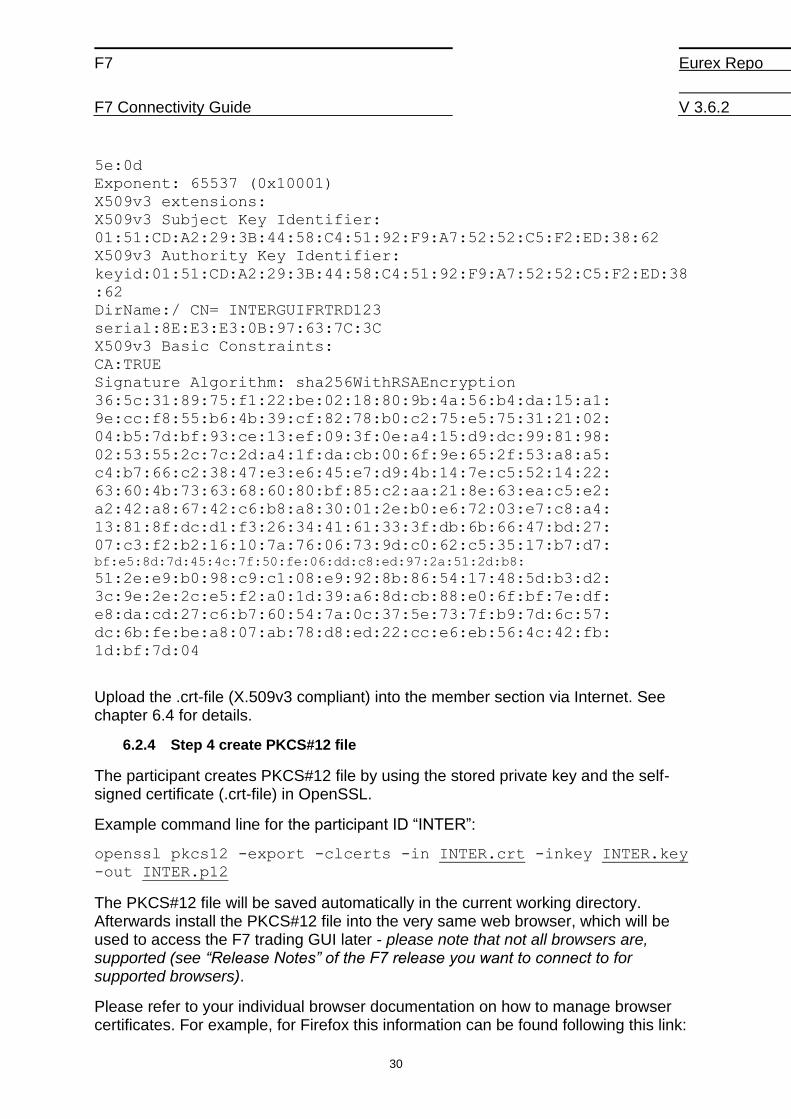
Participant may check the generated “self-signed certificate” by using OpenSSL.
Example command line for the participant ID INTER:
openssl x509 -text -in INTER.crt -noout
This results in:
Certificate:
Data:
Version: 3 (0x2)
Serial Number:
8e:e3:e3:0b:97:63:7c:3c
Signature Algorithm: sha256WithRSAEncryption
Issuer: CN=INTERGUIFRTRD123
Validity
Not Before: Nov 28 16:53:26 2011 GMT
Not After : Nov 27 16:53:26 2012 GMT
Subject: CN=INTERGUIFRTRD123
Subject Public Key Info:
Public Key Algorithm: rsaEncryption
RSA Public Key: (2048 bit)
Modulus (2048 bit):
00:d1:79:44:42:eb:60:26:55:4a:d0:9d:49:25:c3:
44:6f:ea:50:83:1c:91:f1:68:b3:65:01:bc:df:fc:
ab:ba:59:a9:ab:4e:82:46:e1:ce:d8:c4:c7:bb:13:
8f:bf:ec:10:16:13:77:96:2f:74:0a:74:83:77:d6:
b3:2e:67:e0:5b:9c:1c:69:4c:bf:c2:91:48:34:62:
60:ae:7c:67:63:bb:c8:45:0f:35:42:da:9e:90:a4:
fd:7c:5f:76:9d:e7:47:8b:2e:2d:4a:f2:12:f3:92:
04:17:eb:db:10:dd:bb:7c:b8:3b:8c:5c:f5:72:f6:
e2:37:ec:0f:9b:bd:45:25:31:1b:be:fa:1c:f0:80:
f0:b7:a2:11:f1:e0:20:81:62:d7:da:b5:9b:ab:ad:
61:9e:11:cd:7f:b2:8c:13:64:44:9f:60:dc:b4:0c:
a3:de:6a:21:25:7e:7a:b1:7b:4f:fa:e9:42:9c:af:
8a:2d:6e:c7:88:0a:bd:a3:ce:b0:c6:70:e8:7d:2d:
69:3b:93:84:96:26:70:5d:3d:04:50:e9:e2:27:ad:
3a:a3:32:d3:58:09:47:92:32:f2:32:8e:2f:f7:e4:
00:30:61:8c:59:de:a7:81:28:7f:83:17:19:61:2f:
14:d2:94:7c:00:4a:8c:1f:a6:29:52:01:c3:28:d0:
F7 Eurex Repo
F7 Connectivity Guide V 3.6.2
30
5e:0d
Exponent: 65537 (0x10001)
X509v3 extensions:
X509v3 Subject Key Identifier:
01:51:CD:A2:29:3B:44:58:C4:51:92:F9:A7:52:52:C5:F2:ED:38:62
X509v3 Authority Key Identifier:
keyid:01:51:CD:A2:29:3B:44:58:C4:51:92:F9:A7:52:52:C5:F2:ED:38
:62
DirName:/ CN= INTERGUIFRTRD123
serial:8E:E3:E3:0B:97:63:7C:3C
X509v3 Basic Constraints:
CA:TRUE
Signature Algorithm: sha256WithRSAEncryption
36:5c:31:89:75:f1:22:be:02:18:80:9b:4a:56:b4:da:15:a1:
9e:cc:f8:55:b6:4b:39:cf:82:78:b0:c2:75:e5:75:31:21:02:
04:b5:7d:bf:93:ce:13:ef:09:3f:0e:a4:15:d9:dc:99:81:98:
02:53:55:2c:7c:2d:a4:1f:da:cb:00:6f:9e:65:2f:53:a8:a5:
c4:b7:66:c2:38:47:e3:e6:45:e7:d9:4b:14:7e:c5:52:14:22:
63:60:4b:73:63:68:60:80:bf:85:c2:aa:21:8e:63:ea:c5:e2:
a2:42:a8:67:42:c6:b8:a8:30:01:2e:b0:e6:72:03:e7:c8:a4:
13:81:8f:dc:d1:f3:26:34:41:61:33:3f:db:6b:66:47:bd:27:
07:c3:f2:b2:16:10:7a:76:06:73:9d:c0:62:c5:35:17:b7:d7: bf:e5:8d:7d:45:4c:7f:50:fe:06:dd:c8:ed:97:2a:51:2d:b8:
51:2e:e9:b0:98:c9:c1:08:e9:92:8b:86:54:17:48:5d:b3:d2:
3c:9e:2e:2c:e5:f2:a0:1d:39:a6:8d:cb:88:e0:6f:bf:7e:df:
e8:da:cd:27:c6:b7:60:54:7a:0c:37:5e:73:7f:b9:7d:6c:57:
dc:6b:fe:be:a8:07:ab:78:d8:ed:22:cc:e6:eb:56:4c:42:fb:
1d:bf:7d:04
Upload the .crt-file (X.509v3 compliant) into the member section via Internet. See chapter 6.4 for details.
6.2.4 Step 4 create PKCS#12 file
The participant creates PKCS#12 file by using the stored private key and the self-signed certificate (.crt-file) in OpenSSL.
Example command line for the participant ID “INTER”:
openssl pkcs12 -export -clcerts -in INTER.crt -inkey INTER.key
-out INTER.p12
The PKCS#12 file will be saved automatically in the current working directory. Afterwards install the PKCS#12 file into the very same web browser, which will be used to access the F7 trading GUI later - please note that not all browsers are, supported (see “Release Notes” of the F7 release you want to connect to for supported browsers).
Please refer to your individual browser documentation on how to manage browser certificates. For example, for Firefox this information can be found following this link:

F7 Eurex Repo
F7 Connectivity Guide V 3.6.2
31
http://www.mozilla.org/projects/security/pki/psm/help_21/using_certs_help.html#using_certs_my
6.3 Certificate validity period
To ensure security we recommend a validity period of 365 days for certificates. The maximum validity accepted is three years (1090 days). The upload of a new certificate in good time prior to the end of the validity period is required.
Please note: Any uploaded certificate will become active on the following business day. The F7 system is not actively informing users about approaching certificate expiry dates. Please ensure to replace expiring certificates in due time.
6.4 Certificate upload
For a secure connection to the F7 GUI or API the participant has to upload a self-signed certificate file to the member section, while additionally installing the complementary browser certificate file (in the format ‘PKCS#12’) in his web-browser.
For uploading a certificate, navigate to the Deutsche Börse member section, select “Technical Connection”, then “Requests & Configuration” followed by “Self Service Certificates” to find “Repo F7 API/GUI Certificates”:

F7 Eurex Repo
F7 Connectivity Guide V 3.6.2
32
6.4.1 Account Configuration
To upload a certificate, it is required to create an account in the member section by clicking on “Create Account”.
The account created here must be identical to the Common Name (CN) used in the certificate about to be uploaded.
For example to upload a certificate with CN=”INTERAPITRD1234” a account “INTERAPITRD1234” needs to be created.
Please note that the member section is only used for the certificate handling for a participant.
All requests to personal user/trader logins need to be requested by submitting a ‘User Setup Form’ (“Händler Antrag” / “Info User Antrag”) to Eurex Repo.

F7 Eurex Repo
F7 Connectivity Guide V 3.6.2
33
6.4.2 Multiple certificates attached to one Account
Although technically possible, it is not recommended to add multiple certificates to the same account in the member portal.
When multiple certificates are added to the same account as shown in the screenshot above, only one of those certificates will be usable at any given time.
In situations where certificates expire and you want to upload a new certificate, it is rather recommended to create a new account in the portal and to create the new certificate with a new Common Name (CN).

F7 Eurex Repo
F7 Connectivity Guide V 3.6.2
34
6.4.3 Environment
Select the environment the new certificate will be used in (production or simulation).
Please note: as stated in chapter 3, certificates uploaded for the Simulation environment become automatically usable for the Advanced Simulation environment too.
6.4.4 Account Name
The Account Name consists of a drop-down list and a free text field.
In a first step the participant ID needs to be selected from the drop-down list. All participant IDs, for which an account can be setup, are selectable here (e.g., INTER).
Next the Interface (GUI or API) needs to be selected from another drop-down list.
In the free text field, a 7 to 14-digit uppercase alphanumeric value must be provided.
The participant ID (e.g., INTER or GDBER in the screenshots below) is not to be
entered here as it has been selected already in the drop-down.
• Thereafter a free user defined string from 7 to 14 characters must be used for
your internal description.

F7 Eurex Repo
F7 Connectivity Guide V 3.6.2
35
Please note: The information in both fields “Account Name” must match the Common Name of the certificate.
The complete Account Name should look like this:

F7 Eurex Repo
F7 Connectivity Guide V 3.6.2
36
To add a new certificate to an account, press the “+” sign right of the Certificates header. A new window will open.
Click on “Upload Certificate” to select a previously created certificate (see previous chapters) from the local filesystem.
The Common Name (CN) of the certificate must match the account name. For our example participant ID the name of certificate would look like this ‘INTERGUIEUREXREPOUSER’ or “INTERGUITRDFRI123” or “INTERAPITRDFR123” from the examples used earlier in this document.
Please note: If the Account Name and the Common Name of the certificate differ, it will not be possible to upload the certificate. The Account Name of the certificate must contain the string “GUI” or “API” after the 5-digit participant ID, else the certificate will be rejected by F7.
6.4.5 Comment
As the field ‘Description’ is a free text field any information can be provided. However, for a better overview it is recommended to provide some information regarding the certificate (e.g., technical information), the participant (e.g., participant ID) and the environment in which the certificate is being used.
Example for participant ‘INTER’:

F7 Eurex Repo
F7 Connectivity Guide V 3.6.2
37
6.4.6 Certificate upload verification
If a problem occurs during the upload process or if a mandatory field is empty, an error message will appear in the member section (see two examples below).
If no error message appears after clicking on ‘save’ the certificate has been uploaded successfully to the member section and the new account should be displayed in the overview screen, including ‘User ID’ and ‘Description’.
Uploaded certificates are transferred and activated nightly to the F7 trading system. Uploaded certificates will become usable on the next business day.
6.5 Username and password authentication
To login and use the F7 trading GUI or a third-party application the participant must complete the second part of the two-factor authentication process - username and password authentication.

F7 Eurex Repo
F7 Connectivity Guide V 3.6.2
38
6.6 Additional IP Address check (Internet access)
Default any user of the given participant is permitted to access the application from any IP address. If the participant wants to restrict the default access, a list of IP addresses can be entered in the member section in the “Network Configuration” tab (next to “Account Configuration”).
As a result, it will only be possible to access the application from these IP addresses. The following screenshot is an example where access is limited to originate from one IP address only:
Internet access for the given participant can be completely blocked by setting the corresponding radio-button.
Please note: any limitation of the Internet access affects all environments (Simulation, Advanced Simulation and Production) and all existing Accounts and certificates in the same way.
Information about IP address checks is transferred and activated nightly to the F7 trading system. Any changes (e.g., adding or deleting IP addresses) will become effective on the next business day.

F7 Eurex Repo
F7 Connectivity Guide V 3.6.2
39
7. F7 FIX Gateway - Client certificates
Beginning with F7 release 3.6 an additional, optional interface is introduced to F7.
This F7 FIX Gateway provides services to connect Member applications to F7 and
supports a limited set on functions compared to the exiting API.
To establish and ensure an encrypted connection between the participant and the
new F7 FIX Gateway via internet or leased line, the creation and usage of SSL
certificates signed by Deutsche Börse’s Certificate Authority (CA) is prerequisite. The
certificate standard is X.509v3 using the sha256RSA signature algorithm.
The client certificates for the F7 FIX Gateway follow a new workflow which differs
from the workflow used for the F7 API and F7 GUI so far (see chapter 6).
To obtain a client certificate for the F7 FIX Gateway the following steps need to be
carried out:
• Create a Repo F7 FIX technical account in the Member Portal
• Attach at least one certificate to the respective technical account using
Deutsche Börse’s Certificate Generator in the Member Portal.
• Download the certificate for use by the FIX client application.
The following section provides guidance on how to manage (create or delete) a Repo
F7 FIX technical account and how to manage (create, revoke, or delete) the
corresponding certificate(s) via the Member Portal.
7.1 Creating a new Repo F7 FIX technical account
Before a certificate can be generated and downloaded, it is necessary to first create
a new Repo F7 FIX technical account. This is done by logging into the Member
Section and navigating to the section
> Technical Connection > Requests & Configuration > Self Service Certificates >
Repo F7 FIX Certificates

F7 Eurex Repo
F7 Connectivity Guide V 3.6.2
40
Two tabs will be displayed: “Network Configuration” and “Account Configuration”:
Please navigate to the “Account Configuration” tab and click on “Create Account”:
The “Account Configuration” tab will be extended with the mandatory fields to be
filled in and a section for the certificate creation.
Please note that an account needs to be saved first before the certificate can be
generated and attached to the account.

F7 Eurex Repo
F7 Connectivity Guide V 3.6.2
41
The account name will be automatically created based on the information in the
mandatory fields and will also be used as Common Name (Friendly Name) for the
certificate. It will have the following structure:
<Member ID><FIX><S|P><I|L><Free Text> where
S = Simulation, P = Production,
I = Internet and L = Leased Line.
The following fields need to be filled in:
Select the required “Environment” from the drop-down menu (Production/Simulation).
Select the “Business ID” (all member IDs for the given business partner enabled for
Eurex Repo F7 will be displayed).

F7 Eurex Repo
F7 Connectivity Guide V 3.6.2
42
Enter a “Free Text” which helps identifying the account (up to 16 characters).
Select the “Connection Type” (Internet or Leased Line).
Select the “Interface” (currently only “FIX”).
Finally, click on “Save”.
In case the selected account name is identical to an existing one, the following error
message will appear:
If this error occurs, please change the “Free Text” field, and save the account again.
Please note: A valid admission as a Eurex Repo F7 member is required to create a
technical account and generate a certificate.
After the account has been successfully saved, the extended tab will be minimized
and the newly created technical account will now appear in the list of accounts with
the selected information Account Name, Interface, Connection Type, Market
(automatically set to “EUREX REPO”) and Environment:
7.2 Generating a New Certificate
To use a Repo F7 FIX technical account to access the Repo F7 FIX Gateway, at
least one valid certificate needs to be added to this account.
It is possible to attach several certificates to one Repo F7 FIX technical account and
use them in parallel. The uniqueness of a certificate is ensured via its individual serial
number.
Attaching several certificates to one account is especially useful if a certificate will
soon expire and participants want to extend the usage of an account.

F7 Eurex Repo
F7 Connectivity Guide V 3.6.2
43
To create or add a certificate to a specific account navigate to the section
> Technical Connection > Requests & Configuration > Self Service Certificates >
Repo F7 FIX certificates
and click on the tab “Account Configuration”.
Click on the respective account name for which a certificate should be created or
added.
The “Account Information” tab will then be extended:
Click on “+” sign on top of the “Certificates” list and the generator will open the
following new window:

F7 Eurex Repo
F7 Connectivity Guide V 3.6.2
44
Choose the validity of the certificate (1 year or 2 years). To ensure security we
recommend a validity period of 1 year for certificates. The maximum validity is two
years. The creation of a new certificate in good time prior to the end of the validity
period is required.
Technical User Administrators, Central Coordinators and the Member Portal user
who created the certificate are notified by email about the upcoming expiration.
Enter a passphrase to protect the certificate. It needs to have at least 8 characters.
Re-enter the passphrase.
Click on “Generate”.
When pressing the "Generate" button, the tool will generate the public and private
keypair, create the certificate, send the certificate signing request to the Deutsche
Börse CA, process the response and combine everything inside a PKCS#12-file.
After this successful step, the following status will appear:

F7 Eurex Repo
F7 Connectivity Guide V 3.6.2
45
At the same time the PKCS#12-file is offered for download or automatically
downloaded to the location pre-defined by the user.
The certificate will be automatically attached to the Account (independent of whether
the PKCS#12-file has been saved or not).
Please note: The PKCS#12-file will only be stored in the location selected by the
user. Only the Common Name and the serial number of the certificate will be stored
in the Member Section. In case the PKCS#12-file has not been downloaded or has
been deleted, the user will have to revoke the respective certificate and create a new
one.
To see the newly created and attached certificate, please click again on the
respective Account Name.
The Certificates section will show the details of the certificate such as validity (“Valid
from” and “Valid to”), the status of the certificate (“active” for newly created
certificates) and the name of the person who created the certificate (“Changed by”):

F7 Eurex Repo
F7 Connectivity Guide V 3.6.2
46
The unique serial number of the Certificate is displayed when a certificate is selected:
7.3 Revoking and Deleting a Certificate
In case a certificate should no longer be used (e.g., because a certificate has been
created by mistake or the PKCS#12-file has not been downloaded), it is mandatory
for participants to revoke this certificate via the Member Portal.
To revoke / delete the certificate, please navigate to the section

F7 Eurex Repo
F7 Connectivity Guide V 3.6.2
47
> Technical Connection > Requests & Configuration > Self Service Certificates >
Repo F7 FIX certificates
and click on the tab “Account Configuration”.
Click on the respective account name for which a certificate should be revoked.
The “Account Configuration” tab will then be extended with the certificate information
(“Valid from”, “Valid to”, “Status” and “Changed by”):
Click on the revoke icon and a pop-up will appear asking for confirmation of the
revocation
After clicking on “Yes” the revocation request will be sent to the Deutsche Börse CA
and the certificate is no longer valid.
The “Status” of the certificate shows “revoked” and the “Changed by” is updated with
the person who revoked the certificate:

F7 Eurex Repo
F7 Connectivity Guide V 3.6.2
48
Afterwards, the certificate can be deleted from the account by clicking on the
trashcan icon and then on “Save”.
Please note: A certificate can only be removed after it has been revoked. Also, a
technical account can only be deleted after all attached certificates have been
revoked or expired.
7.4 Additional IP Address Check (Internet Access)
By default, any user of the given participant is permitted to access the application
from any IP address. If the participant wants to restrict the default access, a list of IP
addresses can be entered in the Member Portal in the section
> Technical Connection > Requests & Configuration > Self Service Certificates >
Repo F7 FIX Certificates > Network Configuration
by clicking on “Add Row” and entering all relevant IPs:
As a result, it will only be possible to access the application from these IP addresses.
Please note: This setting will apply to all Member IDs and all Repo F7 FIX technical
accounts for the given participant.
Internet access for the given participant can be completely blocked by setting the
corresponding radio-button to “disabled”.
Information about IP address checks is transferred to the Repo F7 system and
activated regularly.
7.5 Certificate Activation, Expiry and Renewal
Newly created certificates are valid and can be used immediately after generation.

F7 Eurex Repo
F7 Connectivity Guide V 3.6.2
49
In case a certificate approaches expiration, Technical User Administrators, Central
Coordinators, and the Member Portal user who created the certificate are notified via
email about the upcoming expiration.
A new certificate must be created, saved under a different name, and attached to the
existing account. Both certificates can be used in parallel until the earlier one expires.

F7 Eurex Repo
F7 Connectivity Guide V 3.6.2
50
8. Further information and contacts
Eurex Repo‘s web page www.eurex.com is the central source for all relevant
information of Eurex Repo F7. General information and FAQs can be found at:
www.eurex.com > Support > F7 Trading System.
Further information will be available in the Eurex Repo Member Section:
Updated F7 system documentation is available at:
https://membersection.deutsche-boerse.com/
> Resources > Eurex Repo > System documentation > Release 3.6
To order connectivity or upload GUI and API certificates please refer to the Member
Section “Requests & Configuration”
https://membersection.deutsche-boerse.com/
> Technical Connection > Technical User Administration > Eurex Repo
Certificates
For most up-to-date information, please check our Implementation News at:
https://www.eurex.com/ex-en/technology/f7/implementation-news
> Support > F7 Trading System > Implementation News
Please do not hesitate to contact us in case of any questions.
Technical Support
Customer Technical Support
+49 (0) 69 2 11-1 08 77
Functional Support
Eurex Repo Trading Operations
+41 (0) 43 430 72 20
Eurex Repo Sales
Eurex Repo Sales
+49 (0) 69 2 11-1 40 40
Member Section Team
+49-(0) 69-2 11-1 78 88

F7 Eurex Repo
F7 Connectivity Guide V 3.6.2
51
9. Change Log
Version
Chapter,
page Date Changes
1.0 all 9-Aug-2014 Initial publication
1.5 1.2, 2.3.2 02-Nov-2015 Updated for F7 1.5. Added info about API
broker FQDNs and recommendations for
QPID client libraries.
2.0.0 5. 07-Jun-2016 Improved chapters describing x.509
certificate creation
3.0.0 All 25-Jul-2018 Updated for F7 3.0
3.0.1 7 26-Oct-2018 Added note about additional information
disclosed during SSL handshake.
3.2.0 2.1, 2.2 24-Sep-2019 Updated for F7 3.2, supported browsers
and AMQP client library versions
3.3.0 2,1, 2.2 11-Feb-2020 Updated for F7 3.3, supported browsers
and AMQP client library versions
3.4.0 2.1, 2.2 23-Sep-2020 Updated for F7 3.4, supported browsers
and AMQP client library versions
3.4.1 7.4, 8 19-Nov-2020 Updated contact emails, refreshed
Member section screenshots
3.5.0 All 31-Mar-2021 Updated for F7 3.5. New Member Section
and webpage changes. Updated layout
and design.
3.6.1 1.3, 2.3, 5,
7
18-Oct-2021 Added certificate workflow for new Repo
F7 FIX Interface.
3.6.2 6.4, 7 08-Dec-2021 Refreshed Member Section screenshots

F7 Eurex Repo
F7 Connectivity Guide V 3.6.2
52
© 2021 by Deutsche Börse AG
All intellectual property, proprietary and other rights and interests in this publication and the subject matter of this publication are owned by Deutsche Börse AG (“DBAG”),
other entities of Deutsche Börse Group or used under license from their respective owner. This includes, but is not limited to, registered designs and copyrights as well as
trademark and service mark rights. Methods and devices described in this publication may be subject to patents or patent applications by entities of Deutsche Börse
Group.
While reasonable care has been taken in the preparation of this publication to provide details that are accurate and not misleading at the time of publication neither DBAG,
nor any of DBAG’s affiliates or their respective servants and agents (a) make any representations or warranties regarding the information contained herein, whether
express or implied, including without limitation any implied warranty of merchantability or fitness for a particular purpose or any warranty with respect to the accuracy,
correctness, quality, completeness or timeliness of such information, and (b) shall be responsible or liable for any third party’s use of any information contained herein
under any circumstances, including, without limitation, in connection with actual trading or otherwise or for any errors or omissions contained in this publication.
This publication is published for information purposes only and shall not constitute investment advice respectively does not constitute an offer, solicitation or
recommendation
to acquire or dispose of any investment or to engage in any other transaction. This publication is not intended for solicitation purposes but only for use as general
information.
All descriptions, examples and calculations contained in this publication are for illustrative purposes only.
Eurex Frankfurt AG and Eurex Clearing AG offer services directly to members of the Eurex Exchange respectively to clearing members of Eurex Clearing AG. Those who
desire to trade any products available on the Eurex market or who desire to offer and sell any such products to others or who desire to possess a clearing license of Eurex
Clearing AG in order to participate in the clearing process provided by Eurex Clearing AG, should consider legal and regulatory requirements of those jurisdictions relevant
to them, as well as the risks associated with such products, before doing so.
Only Eurex derivatives that are CFTC-approved may be traded via direct access in the United States or by United States persons. A complete, up-to-date list of Eurex
derivatives that are CFTC-approved is available at: http://www.eurexchange.com/exchange-en/products/eurex-derivatives-us . In addition, Eurex representatives and
participants may familiarise U.S. Qualified Institutional Buyers (QIBs) and broker-dealers with certain eligible Eurex equity options and equity index options pursuant to the
terms of the SEC’s July 1, 2013 Class No-Action Relief. A complete, up-to-date list of Eurex options that are eligible under the SEC Class No-Action Relief is available at:
http://www.eurexchange.com/exchange-en/products/eurex-derivatives-us/eurex-options-in-the-us-for-eligible-customers . Lastly, U.S. QIBs and broker-dealers trading on
behalf of QIBs may trade certain single-security futures and narrow-based security index futures subject to terms and conditions of the SEC’s Exchange Act Release No.
60,194 (June 30, 2009), 74 Fed. Reg. 32,200 (July 7, 2009) and the CFTC’s Division of Clearing and Intermediary Oversight Adv isory Concerning the Offer and Sale of
Foreign Security Futures Products to Customers Located in the United States (June 8, 2010).
Trademarks and Service Marks
Buxl®, DAX®, DivDAX®, eb.rexx®, Eurex®, Eurex Repo®, Eurex Strategy WizardSM, Euro GC Pooling®, FDAX®, FWB®, GC Pooling®, GCPI®, MDAX®, ODAX®,
SDAX®, TecDAX®, USD GC Pooling®, VDAX®, VDAX-NEW®, Xetra® and XTF Exchange Traded Funds® are registered trademarks of DBAG or its affiliate companies.
All MSCI indexes are service marks and the exclusive property of MSCI Barra. ATX®, ATX® five, CECE® and RDX® is a registered trademark of Vienna Stock Exchange
AG. IPD® UK Annual All Property Index is a registered trademark of Investment Property Databank Ltd. and has been licensed for the use by Eurex for derivatives. SLI®,
SMI® and SMIM® are registered trademarks of SIX Swiss Exchange AG.
The STOXX® indexes, the data included therein, and the trademarks used in the index names are the intellectual property of STOXX Limited and/or its licensors. Eurex
derivatives based on the STOXX® indexes are in no way sponsored, endorsed, sold or promoted by STOXX and its licensors and neither STOXX nor its licensors shall
have any liability with respect thereto.
PCS® and Property Claim Services® are registered trademarks of ISO Services, Inc.
Korea Exchange, KRX, KOSPI and KOSPI 200 are registered trademarks of Korea Exchange Inc.
The names of other companies and third-party products may be trademarks or service marks of their respective owners.
Eurex Deutschland qualifies as manufacturer of packaged retail and insurance-based investment products (PRIIPs) under Regulation (EU) No 1286/2014 on key
information documents for packaged retail and insurance-based investment products (PRIIPs Regulation), and provides key information documents (KIDs) covering
PRIIPs traded on Eurex Deutschland on its website under the following link: http://www.eurexchange.com/exchange-en/resources/regulations/eu-regulations/priips-kids. In
addition, according to Art. 14(1) PRIIPs Regulation the person advising on, or selling, a PRIIP shall provide the KID to retail investors free of charge.