Multi-Media Solutions Digital Signage Platform NDiS 161 User ...
Upload
khangminh22Category
view
0download
0
1.800.952.1001 (NH/ME) | 1.800.633.8578 (PA) 1.877.959.4862 (MD) | 1.877.952.4863 (VA)
breezeline.com
DIGITAL PHONE USER GUIDE
USER GUIDE

2VISIT SUPPORT: breezeline.com/support/phone
USER GUIDE | DIGITAL PHONE
All Rights Reserved
The use, disclosure, modification, transfer or transmittal of this work for any purpose, in any form, or by any means, without the written permission from IDT/Net2Phone is strictly forbidden.
VLAS Version, October 20, 2016
Disclaimer
The content of this manual is subject to change without notice and should not be construed as a commitment by the distributor or IDT/Net2Phone. This manual is furnished for informational use only and IDT/Net2Phone assumes no responsibility or liability for any errors or inaccuracies that may appear herein.

3VISIT SUPPORT: breezeline.com/support/phone
USER GUIDE | DIGITAL PHONE
Table of Contents
Overview . . . . . . . . . . . . . . . . . 5 What’s in this Guide? ......................................5
Calling Features . . . . . . . . . . . . . . 6 Contacting Breezeline ..................................... 6
Using the Calling Features .............................. 6
Anonymous Call Rejection (*77/*87) .............. 7
Activating ACR ............................................... 7
Deactivating ACR .......................................... 7
Automatic Callback (*66) ............................... 7
Automatic Recall (*69) .................................... 7
Redialing the Last Incoming Call .......................8
Call Forwarding ............................................ 8
Call Forwarding All (*72/*73) ....................... 8
Call Forwarding No Answer (*42/*97) ........... 9
Call Forwarding on Busy (*40/*98) ............. 10
Remote Call Forwarding (*79/*39/*59) ...... 11
Selective Call Forwarding (*63/*83) ............ 13
Browsing the Numbers in the List ................... 13
Removing Numbers from the List .................... 14
Disabling Selective Call Forwarding ............... 14
Call Trace (*57) ........................................... 15
Tracing a Call ............................................. 15
Call Waiting ............................................... 15
Call Waiting Cancel (*70) ............................ 16
Call Waiting Block - Enable (*56) ...................16
Call Waiting Block - Disable (*58) ..................17
Caller ID ..................................................... 17
Caller ID Call Waiting ....................................17
Caller ID Name ............................................17
Caller ID Permanent Non-Blocking ...................18
Caller ID Temporary Blocking (*67) .................18
Caller ID Temporary Unblocking (*82) ............18
Caller ID Permanent Display Enable (*95) .......19
Caller ID Permanent Display Disable (*96) ......19
Setting Up Distinctive Ring (*61) .....................19
Changing a Phone Number’s Ring ...................20
Browsing Numbers in the Distinctive Ring List ....20
Disabling Distinctive Ring ................................20
Canceling Distinctive Ring (*81) ......................20
Do Not Disturb(*53/*54) ..............................21
Activating DND .............................................21
Deactivating DND ..........................................21
Selective Call Rejection (*60/*80) ..................22
Adding Phone Numbers to the Rejection List .....22
Browsing Numbers Previously Added ...............22
Removing Phone Numbers from the Rejection List ................................................. 22
Disabling Selective Call Rejection ................... 23
Speed Dialing – 1 or 2Digit(*74) ................... 23
Setting Up Speed Dialing Keys ........................23

4VISIT SUPPORT: breezeline.com/support/phone
USER GUIDE | DIGITAL PHONE
Browsing All Speed Dial Codes .......................24
Placing a Speed Dialing Call ..........................24
Removing a Speed Dial Code .........................24
Disabling the Speed Dial Feature .....................24
Placing a Speed Dialing Call ..........................25
Canceling Speed dialing Keys ........................25
Three-Way Calling .........................................25
Connecting the Third Party ..............................25
Disconnecting the Third Party ..........................26
Disabling Three-Way Calling...........................26
Voicemail ......................................................27
About Voicemail ............................................27
Voice Message Types .....................................27
Message Notification .....................................28
Mailbox Extensions ........................................28
Mailbox Limits ...............................................28
Accessing Voicemail ......................................29
Main Menu ...................................................30
Universal Keys ...............................................31
Retrieving Messages ......................................31
Playback Options ..........................................32
Changing the Message Folder ........................32
Sending Messages .........................................33
Mailbox Options ...........................................33
Managing Your Greetings ...............................34
Creating & Updating Your “Busy” or “No Answer” Greeting ....................34
Activating the System Greeting ........................35
Creating a Personal Greeting ..........................35
Creating an Extended Absence Greeting ..........36
Recording Your Name for the System Greeting ..37
Changing the Number of Rings .......................37
Managing Your PIN .......................................38
Changing Your PIN ........................................38
Turning the PIN On or Off ...............................38
Managing Voicemail Language .......................39
Suspending and Activating Your Mailbox .........39
Managing Email Notifications .........................39
Turning Notification On or Off ........................39
Setting Notification Priority ..............................40
Adding and Removing Message Attachment .....40
Managing Extensions .....................................40
About Extensions ...........................................41
Activating Extensions ......................................41
Deactivating Extensions ..................................41
Creating the Initial Multi-Extension Greeting ......42
Adding More Multi-Extension Greetings ...........42
Reviewing Multi-Extension Greetings ................43
Changing Your Multi-Extension Greetings .........43
Changing the Message Review Order ..............44
Changing the Auto-Save, Auto-Erase & Auto-Skip Settings .......................44
Changing the Envelope Setting ........................45
Appendix A Voice Mailbox Quick Reference . . . . . 46
Appendix B – Frequently Asked Questions . . . . . . . 50

5VISIT SUPPORT: breezeline.com/support/phone
USER GUIDE | DIGITAL PHONE
1. Overview
What’s in this Guide?
The following content is provided in this document:
Information on how Breezeline Digital Phone calling features work. Information on how voicemail works.A quick reference guide to the voicemail phone menu.Answers to frequently asked questions.

6VISIT SUPPORT: breezeline.com/support/phone
USER GUIDE | DIGITAL PHONE
2. Calling Features
Contacting Breezeline
You may call us using the phone number for your Breezeline location (see cover of this guide) or dial 611 from your Breezeline phone to report:
Billing problems
Service problems
New services
Using the Calling Features
The following features are supported:
Anonymous Call Rejection (*77/*87)
Automatic Callback (*66)
Automatic Recall (*69)
Call Forwarding All (*72/*73)
Call Forwarding – No Answer (*42/*97)
Call Forwarding on Busy (*40/*98)
Call Forwarding – Selective (*63/*83)
Call Trace (*57)
Call Waiting
Call Waiting – Cancel (*70)
Call Waiting – Permanent Enable/Cancel (*56/*58)
Caller ID
Caller ID – Temporary Non-blocking (*82)
Caller ID – Temporary Blocking (*67)
Caller ID – Permanent Display – Enable (*95)
Blocking Caller ID – Permanent Display – Disable (*96)
Distinctive Ring (*61/*81)
Do Not Disturb (*53/*54)
Selective Call Rejection (*60/*80)
Speed Dialing, 1-digit (*74/*84)
Speed Dialing, 2-digit (*75/*85)
Three-way Calling

7VISIT SUPPORT: breezeline.com/support/phone
USER GUIDE | DIGITAL PHONE
Anonymous Call Rejection (*77/*87)
Anonymous Call Rejection discards incoming calls that intentionally hide the caller’s number from appearing on your Caller ID unit. Your phone does not ring when these calls arrive – the caller is disconnected after hearing a short message stating why the call has been rejected.
Activating ACR1. Lift the receiver and listen for dial tone.
2. Dial *77 and listen for confirmation of successful activation.
3. Hang up.
Deactivating ACR1. Lift the receiver and listen for dial tone.
2. Dial *87 and listen for confirmation of successful deactivation.
3. Hang up.
Usage Notes
Anonymous Call Rejection specifically blocks calls from phones that have made the caller’s number private. It does not apply to calls coming from phones where the Caller ID service is not offered.
Automatic Callback (*66)
This feature allows you to dial the last 10-digit number you dialed.
1. Lift the receiver and listen for dial tone.
2. Dial *66. The system prompts you to press 1 to call the last number you dialed.
3. Press 1.
Automatic Recall (*69)
Automatic Recall dials the number of your most recent incoming call regardless of whether you actually answered the call. If you receive another incoming call prior to dialing *69, the previous incoming call can no longer be automatically redialed.

8VISIT SUPPORT: breezeline.com/support/phone
USER GUIDE | DIGITAL PHONE
REDIALING THE LAST INCOMING CALL1. Lift the receiver and listen for dial tone.
2. Dial *69 and wait for the voice prompt of the last inbound call OR you can immediately press 1 to dial the last caller.
Usage Notes
You can still make outgoing calls from your phone while using *69.
Automatic Recall may not work if the original caller used a number blocking feature.
Call Forwarding
This section describes the various “flavors” of Call Forwarding.
Usage Notes
Callers dialing your phone cannot detect that the call is being forwarded.
You can still make outgoing calls from your phone while Call Forwarding is active.
You can forward your phone to a local or non-local number; however, you will be billed for all calls forwarded to an international or premium number.
Activating Call Forwarding overrides voicemail in the processing of incoming calls – canceling Call Forwarding reinstates forwarding to voicemail.
Call Forwarding All (* 72/*73)
Call Forwarding All (CFA) allows you to redirect all incoming calls immediately to another phone number. The redirection remains in effect until you cancel the forwarding option.
Activating CFA1. Lift the receiver and listen for dial tone.
2. Dial *72 and wait for the system prompts.
3. Press 1 to forward calls to Voicemail, or
4. 2 to forward calls to another destination.
Dial the number to where calls are to be forwarded. Make sure that you include all the digits you would normally dial for that phone number.
Wait for the confirmation announcement and hang up the receiver.

9VISIT SUPPORT: breezeline.com/support/phone
USER GUIDE | DIGITAL PHONE
Deactivating CFNA1. Lift the receiver and listen for dial tone.
2. Dial *73, wait for the deactivation announcement and hangup.
Usage Notes Activating Call Forwarding All overrides any other enabled Call Forwarding feature. Canceling Call Forwarding All reinstates all other previously enabled Call Forwarding features.
CALL FORWARDING NO ANSWER (*42/*97)
Call Forwarding No Answer (CFNA) allows you to redirect incoming calls to another phone number when the phone is not answered within the first 4-6 rings. If you answer the phone within the first 4-6 rings, the call is not forwarded. The redirection on No Answer remains in effect until you cancel the forwarding option. When CFNA is canceled calls are forwarded to voicemail.
Activating CFNA1. Lift the receiver and listen for dial tone.
2. Dial *42 and wait for the system prompt.
3 Press 1 to forward calls to Voicemail, or
4. 2 to forward calls to another destination.
Dial the number to where calls are to be forwarded. Make sure that you include all the digits you would normally dial for that phone number.
Wait for the confirmation announcement and hang up the receiver.
Deactivating CFNA1. Lift the receiver and listen for dial tone.
2. Dial *97, wait for the deactivation announcement and hangup.
Usage Notes CFNA is ignored when Call Forwarding All is active. Activating Call Forwarding on Busy does not impact CFNA. When CFNA is canceled calls are directed to voicemail.

10VISIT SUPPORT: breezeline.com/support/phone
USER GUIDE | DIGITAL PHONE
CALL FORWARDING ON BUSY (*40/*98)
Call Forwarding on Busy (CFB) allows you to redirect incoming calls to another phone number when your phone line is busy to callers. If your phone is not in use (or Call Waiting responds with a ring tone) incoming calls are not redirected. The On Busy redirection remains in effect until you cancel the forwarding option.
Activating CFB1. Lift the receiver and listen for dial tone.
2. Dial *40 and wait for the system prompt.
3. Press 1 to forward calls to Voicemail, or
4. 2 to forward calls to another destination.
Dial the number to where calls are to be forwarded. Make sure that you include all the digits you would normally dial for that phone number.
Wait for the confirmation announcement and hang up the receiver.
Deactivating CFB1. Lift the receiver and listen for dial tone.
2. Dial *98, wait for the deactivation announcement and hang up.
Usage Notes CFB is ignored when Call Forwarding All is active. Enabling CFB has no impact on Call Forwarding No Answer. If you are on the phone and a 2nd call comes in and you do not answer it, this call receives
Call Forward No Answer treatment, not Call Forward Busy treatment. Activating CFB supplements Call Waiting processing for incoming calls where the call would have
otherwise received a busy signal. For example, when you pick up the phone to dial a number or two calls are already in progress on your phone line, CFB redirects the subsequent caller to the forwarding number. When only a single call is active on your line, standard Call Waiting beep tones are played allowing you to retrieve or ignore the call.
When CFB is canceled calls are directed to voicemail.

11VISIT SUPPORT: breezeline.com/support/phone
USER GUIDE | DIGITAL PHONE
REMOTE CALL FORWARDING (*79/*39/*59)
Remote Call Forwarding (RCF) allows you to call into the designated 11-digit access phone number from a phone other than your own to get to the remote call forward system prompts.
In order to activate this feature you must set up your PIN.
To Access Remote Call Forward:1. From your registered phone, lift the receiver and wait for dial tone.
• Dial*79
2. At the prompt the following choices are announced:
Press 1 for Call Forwarding All. Press 2 for Call Forwarding Busy. Press 3 for Call Forwarding No Answer. Press 4 to modify PIN Press 5 to turn Remote Call Forward Off Press 6 to turn Remote Call Forward On
In order to activate this feature you must set up your PIN.
To Set up your PIN:1. Select 4 to modify your PIN.
Once your PIN is set up you will be able to access all the Remote Call Feature from both your registered phone and any remote phone.
To activate Remote Call Forward:1. Lift the receiver from your registered phone and wait for dial tone.
Dial *39. The system plays an announcement to confirm that the feature is enabled.
To set a Call Forwarding Number:1. Select Call Forward Type
1 for Call Forward All, OR 2 for Call Forward Busy OR 3 for Call Forward No Answer.

12VISIT SUPPORT: breezeline.com/support/phone
USER GUIDE | DIGITAL PHONE
2. Enter a 10-digit Call Forward Number.
3. The system announces the phone number you entered.
4. Hang Up the phone.
To activate Remote Call Forward:1. Lift the receiver from your registered phone and wait for dial tone.
2. Dial*79.
Select 6 to activate Remote Call Forward. The system plays an announcement to confirm that the feature is enabled. Hang up the phone. OR
3. Lift the receiver from your registered phone and wait for dial tone.
Dial * 39. The system plays an announcement to confirm that the feature is enabled. Hang up the phone.
4. Once activated, all subsequent incoming calls are forwarded to the call forward number you entered.
Toggling CFB and CFNA off, will set Call forward to go to VM.
To access Remote Call Forward settings from a remote phone:1. Lift the receiver from your remote phone and wait for dial tone.
Dial the Remote Call Forward access number:1.844.432.4043. You will be asked to enter your phone number and PIN.
2. The access number provided by your service provider.
3. Dial your 10-digit registered phone. The system prompts you to enter your 4-digit PIN.
4. Enter your 4-digit PIN and follow the system prompts to forward calls.
To Disable Remote Call Forward:1. Lift the receiver from your registered phone and wait for dial tone.
2. Dial*79
3. Select 5 to disable the ability to dial in remotely.

13VISIT SUPPORT: breezeline.com/support/phone
USER GUIDE | DIGITAL PHONE
4. When you disable Remote Call Forward the call forward number is preserved.
5. A second option to disable Remote call Forward:
Lift the receiver from your registered phone and wait for dial tone. Dial *59
SELECTIVE CALL FORWARDING (*63/*83)
Selective Call Forwarding (SCF) allows you to forward calls to another phone number when the caller’s number matches a number on your Selective Call Forwarding list. Numbers not matching the list are not forwarded.
Adding Numbers to the List1. Lift the receiver and listen for dial tone.
2. Dial *63. The system prompts you to press one of the following:
2 to disable the feature. 3 to add a number 4 to remove a number. 5 to browse all forwarded numbers.
3. Press 3. The system prompts you to enter a number to be forwarded.
4. Enter the 10-digit number you wish to forward. The system prompts you to enter a number where the call is to be forwarded.
5. Enter the 10-digit number where you want to receive the call.
6. Hang up the receiver.
Browsing the Numbers in the List1. Lift the receiver and listen for dial tone.
2. Dial *63 and wait for the system prompt.
3. Press 5. The system plays the numbers in the selective call forward list.
4. Hang up the receiver.

14VISIT SUPPORT: breezeline.com/support/phone
USER GUIDE | DIGITAL PHONE
Removing Numbers from the List1. Lift the receiver and listen for dial tone.
2. Dial *63 and wait for the system prompt.
3. Press 4. The system prompts you for the number to be removed.
4. Enter the 10-digit phone number. The system confirms the removal.
5. Hang up the receiver.
Disabling Selective Call Forwarding1. Lift the receiver and listen for dial tone.
2. Dial *83 and then press 2 at the system prompt. The system plays a confirmation announcement.
Usage Notes The total number of incoming phone numbers that can be placed on the list is 12. Numbers on the forwarding list can be forwarded to the same or to different numbers. By default the list is empty. Once the number is added to the list, it continues to be forwarded until you remove it. Disabling the feature does not delete the numbers from the list – you must remove the numbers. Since one ring signal is sent to your cable phone for phone numbers on the forwarding list,
answering machines or fax machines connected to the cable phone should be set not to respond to incoming calls on the first two rings.
SCF overrides any other enabled Call Forwarding feature for incoming numbers that are added to the list. Removing the number from the list enables any previously set Call Forwarding features for that number.
If a phone number is added to the SCF list and the Selective Call Rejection list, Selective Call Rejection overrides the handling of the call.

15VISIT SUPPORT: breezeline.com/support/phone
USER GUIDE | DIGITAL PHONE
Call Trace (*57)
Call Trace provides you with a way to work with your provider and law enforcement to trace malicious calls. Your provider will work with law enforcement to follow up once you have traced a call. Contact your provider for exact procedures when tracing a call.
Tracing a Call1. Hang up the phone after the malicious or harassing call and leave the phone off-hook for
approximately ten seconds.
2. Lift the receiver and wait for dial tone. Do not proceed until dial tone exists.
3. Dial *57 and wait for the confirmation announcement from your provider. The announcement directs the customer to contact their local law enforcement.
Usage Notes Calls are not traceable if you have Anonymous Call Rejection activated. Call Forwarding (Busy, No Answer, All) takes precedence over Call Trace – if a trace is attempted
at the forwarded number, the redirected number is not identified but the calling number is identified.
Call Waiting
Call Waiting allows you to answer calls while you are on the phone. A special beeping tone notifies you that another caller is trying to reach you. If you do not want to answer the new call, continue talking.
When you hear the special beeping tone, you can do one of the following:
Switch between calls by:1. Press the switch hook briefly or the Flash button. The original call will be placed one hold
and you will be switched to the new caller.
2. Press the switch hook or Flash button again to return to the original call.
3. You can alternate between calls as often as you like by repeating step 2.
Discontinue the first call by:1. Hanging up the current call. The phone will ring.
2. Pick up the new call.

16VISIT SUPPORT: breezeline.com/support/phone
USER GUIDE | DIGITAL PHONE
Usage Notes Make sure you press the switch hook briefly when switching between calls – pressing the switch
hook too long may cause the current call to be cut off. Pressing the switch hook too short may cause the service to not work correctly.
If you are in the process of dialing a number, someone trying to reach you will receive a busy signal and you will not receive the special beep tone.
If you are alternating between two calls, any additional caller will receive a busy signal and you will not receive the special beep tone.
Activating Call Forward All overrides Call Waiting on incoming calls. Canceling Call Forward All reinstates Call Waiting.
If you do not answer the phone and you have voicemail, the call will forward to Voicemail.
CALL WAITING CANCEL (*70)
Call Waiting Cancel disables the Call Waiting feature for the duration of a single outgoing call. Once you hang up, the Call Waiting feature is activated.
To temporarily cancel Call Waiting:
1. Lift the receiver and listen for dial tone.
2. Dial *70 and enter the number to be dialed when prompted.
3. Dial the number you want to call. When you hang up, the temporary cancel is terminated.
Usage Notes Useful when you do not want to be interrupted during an important call or when you are sending
a fax and do not want any call to interrupt transmission. While dialing the number or speaking on a call, someone trying to reach you will receive a busy
signal – you will not receive the special beep tone.
If you have voicemail, callers will be redirected to voice mail instead of a busy tone.
CALL WAITING BLOCK - ENABLE (*56)
You can turn off call waiting by dialing *56. A confirmation tone is played and the feature is enabled. When Call Waiting Block is enabled the call waiting tone will not be played when you are on the phone and a call comes in.

17VISIT SUPPORT: breezeline.com/support/phone
USER GUIDE | DIGITAL PHONE
CALL WAITING BLOCK - DISABLE (*58)
You can disable Call Waiting block by dialing *58. A confirmation tone is played and Call Waiting Block is disabled. When Call Waiting Block is Disabled the call waiting tone will be played when you are on the phone and a call comes in.
Caller ID
Caller ID lets you see the date, time and telephone number of the person calling before you answer the phone if you have a phone with a Caller ID display.
Use the following table to help you understand other messages that may appear on the Caller ID display:
If Caller ID displays… Then…
P, Private, Blocked, Anonymous or No Date
The caller’s number was blocked by the caller or could not be delivered by the network.
E or Error The phone or Caller ID display cannot identify the caller’s number.
Out of Area The call is coming from an area that does not support Caller ID.
Usage Notes Caller ID can be used with most answering machines as long as the answering machine is set to
pick up calls after the second ring. Some phone numbers displayed cannot be called back because the originating numbers either do
not accept incoming calls or are the main telephone numbers and not the extension of the person calling you.
CALLER ID CALL WAITING
If your phone supports this feature, Caller ID Call Waiting allows you to see Caller ID while on the phone.
CALLER ID NAME
Caller ID name displays your name on the Caller ID display of phone numbers you call. The name is displayed in addition to the other Caller ID information (phone number, date, time). Temporarily blocking Caller ID (*67) or permanently blocking Caller ID blocks your name as well.

18VISIT SUPPORT: breezeline.com/support/phone
USER GUIDE | DIGITAL PHONE
CALLER ID PERMANENT NON-BLOCKING
Your Caller ID service is set to always make your phone number display on the Caller ID display of any number you call.
At your discretion, you can temporarily block your phone number from being displayed or you can permanently block your number.
Caller ID Temporary Blocking (*67)
If your phone is set to permanent non-blocking, you can temporarily block your phone number from appearing on the Caller ID display of the number you call on a single call basis.
Parties you call may refuse to accept your call when you temporarily block your caller ID information.
To temporarily block your Caller ID information:
1. Lift the receiver and listen for dial tone.
2. Dial *67 and follow the system prompts.
3. Dial the number of the person you are calling.
Any new calls you make will display your Caller ID information unless you use *67 for each new call.
Caller ID Temporary Unblocking (*82)
If your phone is set to permanent blocking, you can temporarily unblock your phone number on a single call basis and allow your Caller ID information to appear on the Caller ID display of the number you are calling.
To temporarily unblock Caller ID:
1. Lift the receiver and listen for dial tone.
2. Dial *82 and follow the system prompts.
3. Dial the number of the person you are calling.
Any new calls you make will not display your Caller ID information unless you use *82 for each new call.

19VISIT SUPPORT: breezeline.com/support/phone
USER GUIDE | DIGITAL PHONE
Caller ID Permanent Display Enable (*95)
If your phone is set to Permanent Display Disable, you can permanently display your phone number for all of your outgoing calls.
To permanently display your Caller ID:
1. Lift the receiver and listen for dial tone.
2. Dial *95 and wait for a confirmation prompt.
Caller ID Permanent Display Disable (*96)
If your phone is set to Permanent Display Enable, you can permanently block your phone number from appearing on the Caller ID display for all your outgoing calls.
Parties you call may refuse to accept your call when your caller ID is blocked. To permanently block your Caller ID information:
1. Lift the receiver and listen for dial tone.
2. Dial *96 and wait for prompt.
3. Dial 1 to confirm.
To permanently block your Caller ID information, you can also access your Phone Service Manager Web portal.
Distinctive Ring (*61/*81)
Distinctive Ring allows you to screen incoming calls based on the type of audible ring pattern or beep tones produced on your cable phone when the caller dials your number. You can assign up to four unique ring patterns.
All other incoming calls will produce the standard ring pattern or beep tone.
Setting Up Distinctive Ring (*61)
Assign a distinctive ring for each phone number as follows:
1. Lift the receiver and listen for dial tone.
2. Dial *61 and wait for the system prompts.
3. Press 3 to add a phone number for which you wish to assign a distinctive ring.

20VISIT SUPPORT: breezeline.com/support/phone
USER GUIDE | DIGITAL PHONE
4. Select one of the following:
Press 1 for a normal ring, 2 for long rings, 3 for short rings or 4 for a combination of long and short rings. 9 to return to the main menu.
The system confirms your ring assignment and prompts you to disable the feature, add another phone number, change a phone number or browse all phone numbers in the Distinctive Ring List.
Changing a Phone Number’s Ring1. Dial *61 and wait for the system prompts.
2. Press 4 to change an existing phone number and follow the system prompts.
3. Hang up the receiver.
Browsing Numbers in the Distinctive Ring List1. Dial *61 and wait for the system prompts.
2. Press 5 to browse all numbers in the list.
3. Hang up the receiver.
Disabling Distinctive Ring
Dial *81 and follow the system prompts. Remember, disabling the feature does not remove the numbers from the list – you must remove the numbers.
Canceling Distinctive Ring (*81)
To deactivate Distinctive Ring:
1. Lift the receiver and listen for dial tone.
2. Dial *81 and follow the system prompts.
3. Dial the 10-digit number to be removed from Distinctive Ring.
4. Wait for the confirmation announcement and hang up.

21VISIT SUPPORT: breezeline.com/support/phone
USER GUIDE | DIGITAL PHONE
Usage Notes Callers dialing your phone cannot detect that a distinctive ring is assigned to the call. The caller
always hears the standard ring. Up to 12 phone numbers can be assigned distinctive rings. If applicable, make sure your answering machine does not answer the call before the fourth ring
or some of the ring patterns will not complete.
Do Not Disturb (*53/*54)
Do Not Disturb (DND) allows you to totally block all incoming calls at any time. When activated, your phone no longer rings when callers attempt to reach you.
An announcement is played to callers that you are currently not accepting any incoming calls and forwards their calls to voicemail.
Activating DND1. Lift the receiver and listen for dial tone.
2. Dial*53.
3 Wait for the confirmation announcement and hang up.
Deactivating DND1. Lift the receiver and listen for dial tone.
2. Dial*54.
3. Wait for the confirmation announcement and hang up.
Usage Notes Since no ring signal is sent to your cable phone while the feature is active, answering machines or
fax machines connected to the cable phone will not be able to respond to incoming calls. You can continue to make outgoing calls and send faxes through your cable phone while DND is
active. DND overrides all Call Forwarding settings.

22VISIT SUPPORT: breezeline.com/support/phone
USER GUIDE | DIGITAL PHONE
Selective Call Rejection (*60/*80)
Selective Call Rejection (SCR) discards incoming calls from phone numbers you specify to be blocked. Your phone does not ring when these calls arrive and the caller is disconnected after hearing a short announcement stating you’re not accepting calls from the caller’s number.
Adding Phone Numbers to the Rejection List1. Lift the receiver and listen for dial tone.
2. Dial *60. The system prompts you to press one of the following:
2 to disable the feature. 3 to add a number. 4 to remove a number. 5 to browse all numbers in the rejection list.
3. Press 3. The system prompts you to enter a phone number.
4. Enter the 10-digit phone number you wish the system to reject. The system plays a confirmation announcement.
5. Hang up the receiver.
Browsing Numbers Previously Added1. Lift the receiver and listen for dial tone.
2. Dial *60 and wait for the system prompt.
3. Press 5. The system plays back all 10-digit numbers previously added to the list.
Removing Phone Numbers from the Rejection List1. Lift the receiver and listen for dial tone.
2. Dial *60 and wait for the system prompts.
3. Press 4. The system prompts you for the number you want to remove.
4. Enter the 10-digit number to be unblocked.
5. Wait for the confirmation announcement and hang up.
Repeat steps 1 through 4 for each 10-digit number you want unblocked.

23VISIT SUPPORT: breezeline.com/support/phone
USER GUIDE | DIGITAL PHONE
Disabling Selective Call Rejection1. Lift the receiver and listen for dial tone.
2. Dial *80 and press 2 at the system prompt. The system plays a confirmation announcement.
3. Hang up the phone.
Usage Notes Up to 12 phone numbers can be placed on the rejection list. By default, the rejection list is empty – no phone numbers are blocked. You can call those numbers
on the rejection list. Disabling the feature does not delete the numbers from the list – you must remove the numbers. Since no ring signal is sent to your cable phone for phone numbers on the list, answering
machines or fax machines connected to the cable phone will not respond to incoming calls from the rejected numbers.
Speed Dialing – 1 or 2 Digit (*74)
You may set up speed dialing using either 1 or 2-digit numbers by dialing *74
Setting Up Speed Dialing Keys1. Lift the receiver and listen for dial tone.
2. Dial *74. The system prompts you to:
Press 1 to enable speed dial. Press 2 to disable speed dial. Press 3 to add speed dial codes. Press 4 to remove speed dial codes. Press 5 to browse all speed dial codes.
3. Press 3. The system prompts you to enter a 1 or 2-digit code using numbers 2 through 9 and 20 through 49.
4. Enter the 1 or 2-digit code. The system prompts you to enter a 10-digit phone number.
5. Enter the 10-digit phone number to be called when the speed code is dialed. The system plays back the star code and the phone number to be dialed.

24VISIT SUPPORT: breezeline.com/support/phone
USER GUIDE | DIGITAL PHONE
6. Hang up the receiver.
Repeat steps 1 through 5 for each destination number. Make sure to use a different Speed Dialing key with each destination number.
Browsing All Speed Dial Codes1. Lift the receiver and listen for dial tone.
2. Dial *74 and then press 5 to listen to all speed dial codes entered along with their associated 10-digit telephone numbers.
3. Hang up the receiver.
Placing a Speed Dialing Call1. Lift the receiver and listen for dial tone.
2. Dial the appropriate Speed Dialing key followed by the #key.
Removing a Speed Dial Code1. Lift the receiver and listen for dial tone.
2. Dial *74 and then press 4 to remove the code. The system confirms the removal.
3. Hang up the receiver.
4. Repeat steps 1 through 4 for each Speed Dialing key you want to cancel.
Disabling the Speed Dial Feature1. Lift the receiver and listen for dial tone.
2. Dial *75 and then press 2 to disable the feature. The system plays a confirmation announcement.
Usage Notes Disabling the feature does not delete the codes from the speed dial list. You must remove the
codes from the list. Number keys 0 and 1 are reserved for special purposes and cannot be used for Speed Dialing. You can set up Speed Dialing for local, long distance and international destinations – remember
to include all the digits you regularly dial for that destination when you assign the phone number to a Speed Dialing key.

25VISIT SUPPORT: breezeline.com/support/phone
USER GUIDE | DIGITAL PHONE
Placing a Speed Dialing Call1. Lift the receiver and listen for dial tone.
2. Dial the appropriate Speed Dialing keys followed by the #key.
Canceling Speed dialing Keys1. Lift the receiver and listen for dial tone.
2. Dial *75 followed by the double-digit Speed Dialing keys you want to cancel.
3. Wait for the confirmation announcement and hang up.
4. Repeat steps 1 through 3 for each double digit Speed Dialing key you want to cancel.
Usage Notes
You can set up Speed dialing to local, long distance and international destinations - remember to include all the digits you regularly dial for that destination when you assign the phone number to a Speed Dialing key.
Three-Way Calling
Three-way Calling allows you to connect a third party to an existing phone call regardless of who initiated the call.
Connecting the Third Party1. While on an existing call with another caller, press the switch hook briefly or press the Flash
button to place the current call on hold.
2. Listen for dial tone and dial the third party’s phone number. Wait for the party to answer.
3. Press the switch hook or Flash button again to connect all three parties to the call.
Usage Notes If the third party’s line is busy or remains unanswered, press the switch hook or Flash button to
disconnect the call and return to the original party. Called third parties can be local, long distance or international; however, you will be charged for
any long distance or international calls that you initiate during the call – see your monthly service plan for details.
Participants can disconnect from the Three-way Call at any time; however, if you hang up, the call is terminated between all parties.

26VISIT SUPPORT: breezeline.com/support/phone
USER GUIDE | DIGITAL PHONE
Disconnecting the Third Party
Press the switch hook briefly or Flash button to remove the third party from the call. You will stay connected to the call with the second party.
Disabling Three-Way Calling
The Three-Way Calling feature can not be disabled.

27VISIT SUPPORT: breezeline.com/support/phone
USER GUIDE | DIGITAL PHONE
3. Voicemail
About Voicemail
Voicemail service is included free of charge in the service plan.
With voicemail service, you do not miss a call. When your phone is busy or you are away from your phone, calls are forwarded to your voice mailbox where the caller can leave a message. The message is stored for you to retrieve at your convenience.
The voicemail system offers the following mailbox features: Message review Save messages Send messages Create personal greetings Change the number of rings before voicemail picks up Change your PIN Suspend/Activate your voice mailbox Activate/Manage multiple mailboxes Manage email
notification
The voicemail system uses verbal prompts to instruct both you and the caller on the correct use of the voicemail system. When you are familiar with the mailbox menus, you can enter the menu choices immediately and bypass the verbal prompts.
If you have set up any of the Call Forwarding features, the Call Forwarding settings override voicemail when handling incoming calls.
Voice Message Types
Message types can be one of the following:
New – messages that have not been reviewed. If the message has been reviewed by you disconnected prior to deleting, skipping or saving the message, the message is considered new.
Urgent/Priority – new messages marked by the caller for urgent delivery. Urgent messages are the first messages played when new messages are accessed.
Private – new messages marked by the caller as private. Private messages cannot be forwarded to another mailbox or phone number.
Skipped – ignored messages that have been flagged as skipped.
Saved – messages that have been reviewed and saved.

28VISIT SUPPORT: breezeline.com/support/phone
USER GUIDE | DIGITAL PHONE
Deleted – messages marked for deletion during review. Messages can be undeleted until you return to the Main Menu or hang up. Returning to the Main Menu or hanging up deletes the marked messages.
Messages are automatically played in the following order: new, skipped, saved.
Message Notification
The voicemail system notifies you when you have new messages. The indicator depends on the type of telephone you use. When new messages arrive, you hear a stutter-tone when you lift the cable phone receiver. If your phone has a message waiting light, the message light is lit. If you are away from your cable phone and want to know whether messages exist, the voicemail system will inform you upon entering your voice mailbox.
You can also set up email notification to inform you through email when new messages arrive.
Mailbox Extensions
Depending on your voice service plan, you may have the option to activate multiple voice mailboxes (known as extensions) on the same phone number. Extensions offer the same feature-rich options available to the primary mailbox.
You can activate up to 8 extensions in addition to the primary mailbox. The primary mailbox is always the first mailbox and comes pre-activated.
Mailbox Limits
Stored messages of any type are limited to a combined total of 30 messages. When the mailbox is full, no new incoming messages can be recorded. New callers are informed that the mailbox is not accepting any more messages.
You must delete messages to free storage space for new messages.
Stored and saved messages are kept for a maximum of 45 days – messages older than 45 days are deleted.
Each incoming message is limited to 5 minutes.
Each personal greeting is limited to 2 minutes and does not detract from the mailbox size for incoming messages.
Depending on your voice service plan, you may be able to store up to 5 variations of each type of personal greeting.

29VISIT SUPPORT: breezeline.com/support/phone
USER GUIDE | DIGITAL PHONE
Accessing Voicemail
You must have the following information before you can access voicemail messages or modify mailbox settings:
Mailbox number (your cable 10-digit phone number).
Temporary mailbox Personal Identification Number (PIN) which is the last 4 digits of your phone number for the primary mailbox or the last 4 digits of your phone number plus the extension digits when accessing an extension mailbox. (Example: 3784/primary - mailbox 1, 37842/extension - mailbox 2).
After you access your voicemail for the first time, you can access your mailbox in one of two ways:
From your cable phone From a remote phone
Accessing Voicemail for the First Time
You must use the temporary PIN to dial in for the first time. You will be prompted immediately to change the temporary PIN and to select a language for mailbox prompts and the default greeting before reaching the mailbox Main Menu.
1. Dial *86 if you are accessing voicemail from your cable phone. Dial your phone number if you are accessing voicemail from a remote phone.
2. Listen to the recorded instructions for creating a new PIN. The PIN must be at least 4 and no more than 10 digits long.
3. When prompted, enter a unique PIN followed by the # key. If you have multiple extensions, each PIN must be unique.
4. When prompted, re-enter the new PIN followed by the #key.
5. When prompted, select your language for listening to mailbox instructions.
Accessing Voicemail from Your Cable Phone1. Dial*86.
2. Enter your mailbox PIN followed by the # key if your “password required” setting is on. If your “password required” setting is off, enter the # key when prompted.
If you are dialing into your extension, you will need the PIN for that extension.

30VISIT SUPPORT: breezeline.com/support/phone
USER GUIDE | DIGITAL PHONE
Accessing Voicemail from a Remote Phone1. Dial your phone number and wait for the voicemail greeting.
2. Press the appropriate extension number when prompted if you have setup multiple extensions.
3. If you are prompted for a mailbox number followed by the # key, enter your 10-digit phone number.
4. Press the # key when the mailbox greeting is played to bypass the greeting.
5. Enter your mailbox PIN followed by the # key when prompted.
Main Menu
The Main Menu is the entry point into the mailbox functions. If there is no extended absence greeting active, you are immediately taken to the Main Menu.
If you have an extended absence greeting active, you are first prompted to either keep or deactivate the greeting before proceeding to the Main Menu. The prompt choices are:
Extended Absence Prompts Key
Retain extended absence greeting 1
Disable extended absence greeting 2
Replay extended absence greeting 3
Upon entering the Main Menu, you are notified of:
The number of new, urgent, skipped and saved messages in your mailbox.The available mailbox functions include:
Main Menu Options Key
Listen to messages 1
Send messages 2
Mailbox options 4
Disconnect *

31VISIT SUPPORT: breezeline.com/support/phone
USER GUIDE | DIGITAL PHONE
Universal Keys
The following keys are universal for all mailbox menus:
Action Key
Skip, next, complete #
Help or replay current prompt 0
Previous menu or exit *
Retrieving Messages
To retrieve messages:
1. Dial into your mailbox.
2. Press 1 from the Main Menu.
Usage Notes If the Envelope option is on, each message is preceded with a statement of whether the message
is urgent and/or private, the date, the time, the length of the message (in seconds) and the phone number. If the phone number has an unusually long international number, only the first 18 digits are included in the envelope.
Messages are presented in the following order: urgent, new, skipped and saved. You are returned to the Main Menu after you have cycled through all the messages. Retrieving messages is done in the same way whether: You hear a stutter tone. The message indicator shows there is a new message. You want to listen to saved messages.

32VISIT SUPPORT: breezeline.com/support/phone
USER GUIDE | DIGITAL PHONE
Playback Options
The following options are available during message playback:
To… Press…
Replay the message 1
Save the message
Overrides any auto-save, auto-erase or auto-skip settings previously applied.
2
Delete/Undelete the messageOverrides any auto-save, auto-erase or auto-skip settings previously applied.
3
Rewind the messageMoves you back 10 seconds or to the start of the message when you are within 10 seconds of the message start.
7
Pause/Continue the message 8
Fast forward the messageMoves you ahead 10 seconds or to the message end when less than 10 seconds remain to the end of the message.
9
Skip and go to the next message #
Play the previous message 64
Play the Message Envelope 65
Change message folder 66
Mark the message as new 67
Changing the Message Folder
If you do not want to listen to all messages from each folder, you can select the specific folder from which you want to listen to messages during the message retrieval session.
1. Press *66.
2. Press one of the following keys:
Press 1 to listen to “New”messages.
Press 2 to listen to “Skipped” messages.
Press 3 to listen to “Saved” messages.

33VISIT SUPPORT: breezeline.com/support/phone
USER GUIDE | DIGITAL PHONE
Sending Messages
If you want to leave a message for another cable subscriber without actually calling him or her, you can use the voicemail send messages feature to directly access the mailbox and leave a voicemail message.
Using the send messages feature exits you from your mailbox and prompts you to re-enter your mailbox number and password when you want to return.
To leave a message in another subscriber’s voice mailbox:
1. Dial into your mailbox.
2. Press 2 from the Main Menu.
3. At the prompt, enter the subscriber’s mailbox number (10-digit phone number) followed by the # key.
4. Listen for the subscriber’s mailbox greeting and follow the verbal instructions for leaving a message.
Mailbox Options
The voicemail system offers the following mailbox options:
To… Press…
Manage greetings 1
Set the number of rings 2
Manage your password 3
Set your language 4
Turn voicemail on or off 5
More Options
Set email notification
Manage mailbox extensions (primary mailbox only, if service plan allows)
Change message order
Set Auto-Save/Erase/Skip
Turn envelope information on or off
Previous options
9
1
2
3
4
5
*

34VISIT SUPPORT: breezeline.com/support/phone
USER GUIDE | DIGITAL PHONE
Managing Your Greetings
The voicemail system is pre-configured with system greetings to respond to callers. You can create personalized greetings that are heard in place of the default greetings. You can also change your personalized greetings at any time or revert back to the system greetings.
You can create/update the following:
To create or update… Press…
Busy greeting 1
No answer greeting 2
Extended absence greeting 3
Your name 4
Usage Notes If you turn off the busy greeting, your “no answer greeting” is used in its place. Busy greeting is
turned off by default. The “no answer” greeting cannot be turned off.
Creating & Updating Your “Busy” or “No Answer” Greeting
Busy greetings are used to inform callers that you are currently on the phone and to leave a message. No Answer greetings are used to inform callers that you are unable to answer the phone and to leave a message.
To create or update your “Busy” or “No Answer” greeting:
1. Dial into your voice mailbox.
2. Press 411 for a “Busy” greeting or 412 for a “No Answer”greeting.
2. Select from one of the following options:
To create or update… Press…
Keep current greeting 1
Use personal/system greeting 2
Replay current active greeting 3
Record a new personal greeting – see usage notes 4
Review stored personal greetings – see usage notes 5
Disable the busy greeting – see usage notes 6
Go to the previous menu *
35VISIT SUPPORT: breezeline.com/support/phone
USER GUIDE | DIGITAL PHONE
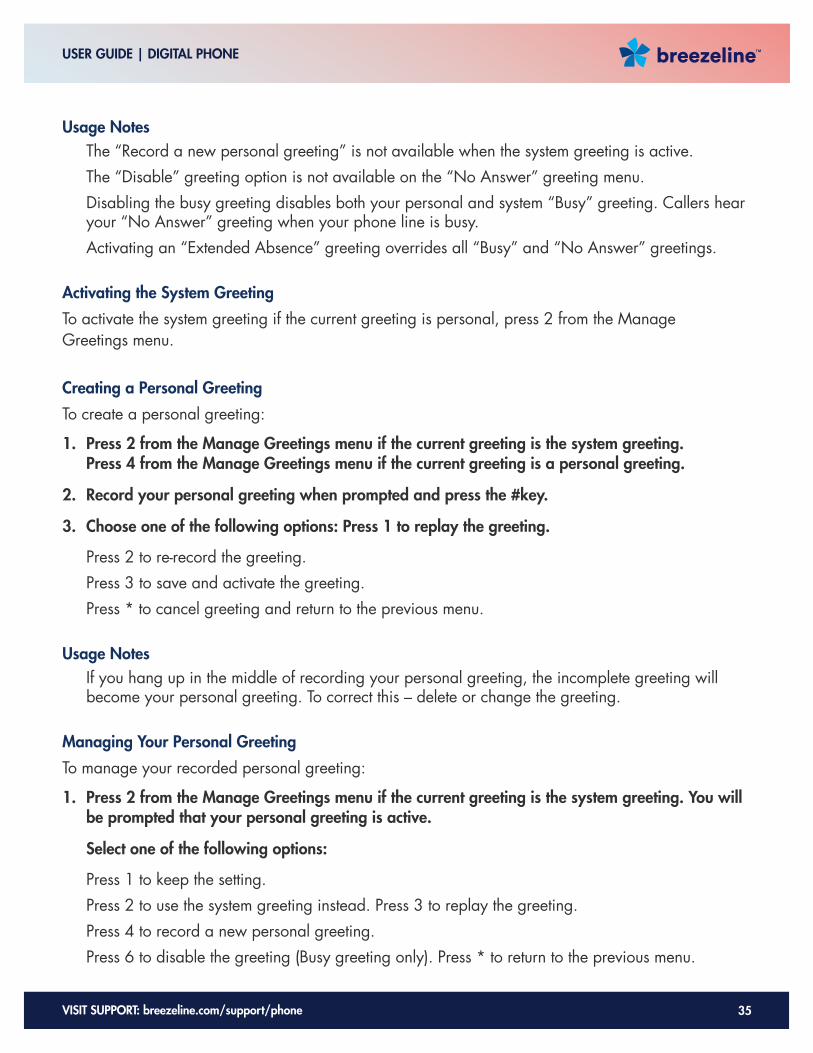
Usage Notes The “Record a new personal greeting” is not available when the system greeting is active. The “Disable” greeting option is not available on the “No Answer” greeting menu. Disabling the busy greeting disables both your personal and system “Busy” greeting. Callers hear
your “No Answer” greeting when your phone line is busy. Activating an “Extended Absence” greeting overrides all “Busy” and “No Answer” greetings.
Activating the System Greeting
To activate the system greeting if the current greeting is personal, press 2 from the Manage Greetings menu.
Creating a Personal Greeting
To create a personal greeting:
1. Press 2 from the Manage Greetings menu if the current greeting is the system greeting. Press 4 from the Manage Greetings menu if the current greeting is a personal greeting.
2. Record your personal greeting when prompted and press the #key.
3. Choose one of the following options: Press 1 to replay the greeting.
Press 2 to re-record the greeting. Press 3 to save and activate the greeting. Press * to cancel greeting and return to the previous menu.
Usage Notes If you hang up in the middle of recording your personal greeting, the incomplete greeting will
become your personal greeting. To correct this – delete or change the greeting.
Managing Your Personal Greeting
To manage your recorded personal greeting:
1. Press 2 from the Manage Greetings menu if the current greeting is the system greeting. You will be prompted that your personal greeting is active.
Select one of the following options:
Press 1 to keep the setting. Press 2 to use the system greeting instead. Press 3 to replay the greeting. Press 4 to record a new personal greeting. Press 6 to disable the greeting (Busy greeting only). Press * to return to the previous menu.
36VISIT SUPPORT: breezeline.com/support/phone
USER GUIDE | DIGITAL PHONE
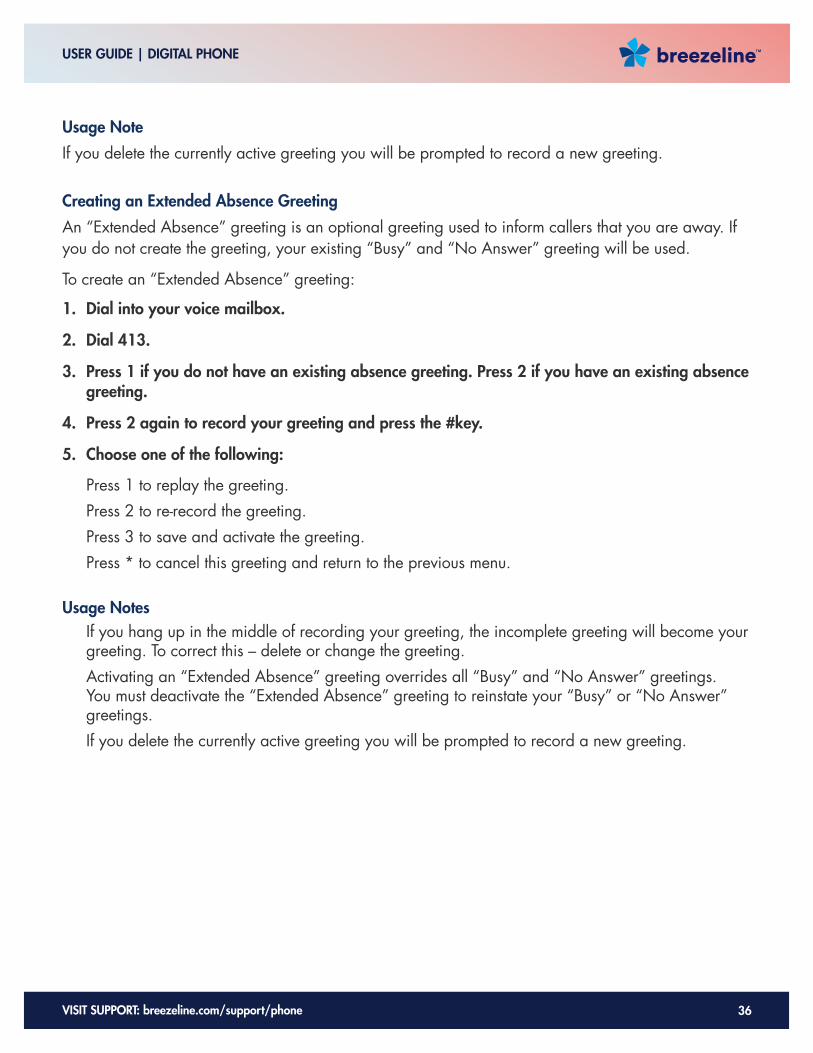
Usage Note
If you delete the currently active greeting you will be prompted to record a new greeting.
Creating an Extended Absence Greeting
An “Extended Absence” greeting is an optional greeting used to inform callers that you are away. If you do not create the greeting, your existing “Busy” and “No Answer” greeting will be used.
To create an “Extended Absence” greeting:
1. Dial into your voice mailbox.
2. Dial 413.
3. Press 1 if you do not have an existing absence greeting. Press 2 if you have an existing absence greeting.
4. Press 2 again to record your greeting and press the #key.
5. Choose one of the following:
Press 1 to replay the greeting. Press 2 to re-record the greeting. Press 3 to save and activate the greeting. Press * to cancel this greeting and return to the previous menu.
Usage Notes If you hang up in the middle of recording your greeting, the incomplete greeting will become your
greeting. To correct this – delete or change the greeting. Activating an “Extended Absence” greeting overrides all “Busy” and “No Answer” greetings.
You must deactivate the “Extended Absence” greeting to reinstate your “Busy” or “No Answer” greetings.
If you delete the currently active greeting you will be prompted to record a new greeting.

37VISIT SUPPORT: breezeline.com/support/phone
USER GUIDE | DIGITAL PHONE
Recording Your Name for the System Greeting
If you are using the default system greetings for “Busy” or “No Answer” instead of your own personal greetings, the system identifies you as “The party you called.” If you would prefer the system to identify your mailbox by announcing your name, you need to record your name in the voicemail system.
To record your name for the System greeting:
1. Dial into your mailbox.
2. Dial 414.
3. Record your name when prompted and press the #key.
4. Choose one of the following options:
Press 1 to re-record your name. Press 2 to save your name. Press * to cancel the recording and return to the previous menu.
Usage Note If you hang up in the middle of recording your name, the incomplete name will be used.
To correct this, either delete or change the recording. If you delete the currently active name, you will be prompted to record a new name.
Changing the Number of Rings
To change the number of rings before voicemail picks up:
1. Dial into your mailbox.
2. Dial 42.
3. Press 2 to change the number of rings.
4. Enter the number of rings when prompted. You can enter any value between 2 and 9.
The system plays a confirmation announcement and returns you to the Main menu.
Usage Notes Callers dialing your number may hear one or two rings more than the number you specify. If you are using a fax machine for incoming calls, set the number of rings high enough to make
sure the fax machine can respond to fax calls first. If you activate the Call Forward All, Call Forward on Busy or Call Forward No Answer feature
on your cable phone to another phone number, callers will not be forwarded to your mailbox. You must deactivate the features for voicemail to pick up calls when your phone is busy or you can not answer.

38VISIT SUPPORT: breezeline.com/support/phone
USER GUIDE | DIGITAL PHONE
Managing Your PIN
When you access your mailbox for the first time, the voicemail system requires you to create a personal password. You are not obligated to keep that password permanently. You can subsequently change the password whenever you like.
If you only have a single mailbox, you can remove the password requirement for those times that you dial in from your cable phone. If you activate multiple mailboxes (extensions), each mailbox must have a unique password that cannot be bypassed.
Contact the Customer Service department to reset your PIN if you forget – forgotten PINS are not recoverable.
Changing Your PIN
To change your PIN:
1. Dial into your mailbox.
2. Dial 431 for single mailboxes or 43 for multiple mailboxes.
3. Listen to the audio instructions for changing your PIN. The new PIN must be at least 4 but no more than 10 digits long.
4. Enter the new PIN followed by the #key.
5. Re-enter the new PIN when prompted.
Turning the PIN On or Off
If you have a single voice mailbox, you can control whether your PIN is required to access your mailbox through your cable phone. Access from any other phone always requires a PIN. By default, the requirement is set to On.
To turn the PIN off:
1. Dial into your mailbox.
2. Dial 43.
3. Press 2 to turn the requirement off. Press 3 to turn the requirement on (if it was previously turned off).

39VISIT SUPPORT: breezeline.com/support/phone
USER GUIDE | DIGITAL PHONE
Managing Voicemail Language
When you select a language, both you and your callers hear the voicemail prompts in the selected language.
To select the language:
1. Dial into your mailbox.
2. Dial 44 and press 1 for English or 2 for Spanish.
Suspending and Activating Your Mailbox
You can temporarily suspend the voicemail from answering incoming calls. You retain access to saved messages and can manage the system while the mailbox is suspended by calling into voicemail using your cable phone. Voicemail remains suspended until you reactivate the service.
If you suspend voicemail and cannot reactivate because you are away from home, contact the Customer Service department to request activation.
To suspend or activate your mailbox:
1. Dial into your mailbox. Remember – if you’ve suspended service, you must access voicemail from your cable phone.
2. Dial45.
3. Press 1 to reactivate your voicemail service or 2 to suspend your service.
Managing Email Notifications
The voicemail system provides email notification when voicemail messages arrive in your mailbox. To initially set up notification, you must use the Phone Service Web portal. After completing the set up, you can use your phone to customize email notifications.
Turning Notification On or Off1. Dial into your mailbox.
2. Dial 491 and press the 2 key.
3. Press 1 to turn notification on or 2 to turn notification off and wait for the confirmation message.

40VISIT SUPPORT: breezeline.com/support/phone
USER GUIDE | DIGITAL PHONE
Setting Notification Priority1. Dial into your mailbox.
2. Dial 491 and press the 3 key.
3. Press the 2 key to exclude or include non-urgent message notification and wait for the confirmation message.
Adding and Removing Message Attachment1. Dial into your mailbox.
2. Dial 491 and press the 4 key.
3. Press the 2 key to exclude or include the message attachment and wait for the confirmation message.
4. Note that for messages that are marked as Private the message audio file is not included as an attachment for email notification.
Managing Extensions
Depending on your voice service plan, you may have the option to activate multiple voice mailboxes (extensions) on the same phone number.
Each extension is password protected by a unique PIN that cannot be shared across extensions. The entered PIN guides the voicemail system to the correct mailbox.
The owner of the primary mailbox controls activation and deactivation of the extensions. The extension owner along controls access to the messages contained in the extension.
Up to 8 extensions may be activated but the primary (main) mailbox is always the first mailbox and comes pre-activated.
After activating an extension, an introductory, multi-extension greeting must be created to inform the caller of the correct key to press to reach the extension.
Separate “Busy” and “No Answer” greetings are provided by the voicemail system (or those defined by the extension owner) to assist the caller when reaching the extension.
Extension management includes:
Activating and deactivating an extension. Managing the multi-extension greeting.

41VISIT SUPPORT: breezeline.com/support/phone
USER GUIDE | DIGITAL PHONE
About Extensions
Once extensions and the multi-extension greeting are created, the primary mailbox owner must supply each extension mailbox owner with:
The mailbox phone number that will be shared across extensions. Assigned extensions.
The extension owners can then access their individual extensions and feature options by following the same dial-in procedure as the primary owner with one difference – the extension owner supplies a unique PIN to the extension. The voicemail system uses the PIN to identify the extension mailbox for access.
First time access requires changing the default PIN to a PIN of the mailbox owner’s choice. The default PIN for an extension is the last four digits of the mailbox phone number plus the extension digit. For example, the default PIN for the third mailbox of phone number 973.555.1212 would be 12123.
Activating Extensions
To activate a mailbox extension:
1. Dial into your mailbox.
2. Dial 492 and press 2 from the Extension Management menu.
3. Enter a single digit (from 2 through 9) to be used as the extension number for the new mailbox.
4. Re-enter the extension number when prompted to confirm the new extension and wait for the confirmation message.
Deactivating Extensions
To deactivate a mailbox extension:
1. Dial into your mailbox.
2. Dial 492 and press 3 from the Extension Management menu.
3. Enter the extension number to be deactivated when prompted.
4. Re-enter the extension number when prompted to confirm deactivation and wait for the confirmation message.

42VISIT SUPPORT: breezeline.com/support/phone
USER GUIDE | DIGITAL PHONE
Creating the Initial Multi-Extension Greeting
To create a multi-extension greeting when none exist:
1. Dial into your mailbox.
2. Dial 492.
3. Press 1 from the Extension Management menu.
4. Press 1 to record the greeting.
5. Record the greeting when prompted followed by the #key.
6. Choose one of the following options:
Press 1 to listen to the greeting. Press 2 to re-record the greeting. Press 3 to keep and activate the greeting. Press * to cancel this greeting and return to the previous menu.
Adding More Multi- Extension Greetings
To add more multi-extension greetings:
1. Dial into your mailbox.
2. Dial 492.
3. Press 1 from the Extension Management menu.
4. Press 4 to record a new greeting.
5. Record the greeting when prompted followed by the #key.
6. Choose one of the following options:
Press 1 to listen to the greeting. Press 2 to re-record the greeting. Press 3 to keep and activate the greeting. Press * to cancel this greeting and return to the previous menu.

43VISIT SUPPORT: breezeline.com/support/phone
USER GUIDE | DIGITAL PHONE
Reviewing Multi-Extension Greetings
To review your list of existing multi-extension greetings:
1. Dial into your mailbox.
2. Dial 492.
3. Press 1 from the Extension Management menu.
4. Press 2 to listen to the first greeting. If more greetings exist, press the# key.
Changing Your Multi- Extension Greetings
To change a multi-extension greeting:
1. Press 1 from the Extension Management menu.
2. Press 2 to listen to the greeting(s). If you have more than one greeting and you want to change one other than the first, press the # key to get to the recorded greeting.
3. When you get to the greeting you want to change, press 3 to re-record the greeting.
4. Record the greeting when prompted followed by the #key.
5. Choose one of the following options:
Press 1 to listen to the greeting. Press 2 to re-record the greeting. Press 3 to keep and activate the greeting. Press * to cancel the greeting and return to the previous menu.
Usage Note If you delete the currently active greeting, you will be prompted to review your greeting list to
allow you to select a new active greeting. If you delete the last greeting in the list, you will be prompted to record a new greeting.
44VISIT SUPPORT: breezeline.com/support/phone
USER GUIDE | DIGITAL PHONE
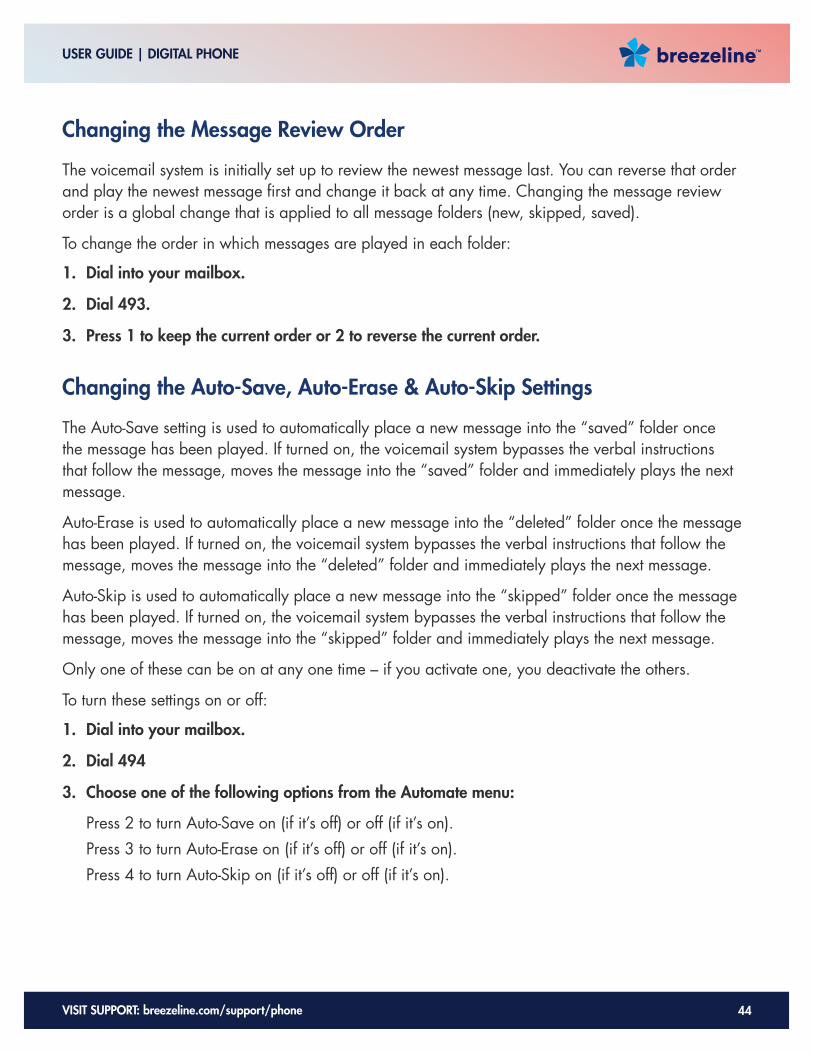
Changing the Message Review Order
The voicemail system is initially set up to review the newest message last. You can reverse that order and play the newest message first and change it back at any time. Changing the message review order is a global change that is applied to all message folders (new, skipped, saved).
To change the order in which messages are played in each folder:
1. Dial into your mailbox.
2. Dial 493.
3. Press 1 to keep the current order or 2 to reverse the current order.
Changing the Auto-Save, Auto-Erase & Auto-Skip Settings
The Auto-Save setting is used to automatically place a new message into the “saved” folder once the message has been played. If turned on, the voicemail system bypasses the verbal instructions that follow the message, moves the message into the “saved” folder and immediately plays the next message.
Auto-Erase is used to automatically place a new message into the “deleted” folder once the message has been played. If turned on, the voicemail system bypasses the verbal instructions that follow the message, moves the message into the “deleted” folder and immediately plays the next message.
Auto-Skip is used to automatically place a new message into the “skipped” folder once the message has been played. If turned on, the voicemail system bypasses the verbal instructions that follow the message, moves the message into the “skipped” folder and immediately plays the next message.
Only one of these can be on at any one time – if you activate one, you deactivate the others.
To turn these settings on or off:
1. Dial into your mailbox.
2. Dial 494
3. Choose one of the following options from the Automate menu:
Press 2 to turn Auto-Save on (if it’s off) or off (if it’s on). Press 3 to turn Auto-Erase on (if it’s off) or off (if it’s on). Press 4 to turn Auto-Skip on (if it’s off) or off (if it’s on).

45VISIT SUPPORT: breezeline.com/support/phone
USER GUIDE | DIGITAL PHONE
Changing the Envelope Setting
The voicemail system records the date, time, message length and phone number of each incoming voicemail message. If your incoming call is from an unusually long international phone number, only the first 18 numbers will be recorded.
When you retrieve messages, voicemail automatically plays the envelope information prior to playing the message.
To turn the envelope information on or off:
1. Dial into your mailbox.
2. Dial 495
You will hear an announcement stating the current state of your envelope. This will be defaulted to ON.
Press 1 to keep the envelope state as is. Press 2 to change the envelope ( off if it’s on or on if it’s off) and wait for the confirmation
announcement. If the envelope is ON or if you turn it on you will be given the choice of two envelope modes:
Brief (date/time) or Verbose (date/time, caller phone number and message length). You will hear the current envelope mode. Press 1 to keep the current envelope mode. Press 2 to change the envelope mode.

46VISIT SUPPORT: breezeline.com/support/phone
USER GUIDE | DIGITAL PHONE
Voice Mailbox Quick ReferenceAppendix A
If Extended Absence greeting is enabled: 1 – Retain extended absence greeting 2 – Disable extended absence greeting 3 – Replay extended absence greeting1 – Listen to messages 1 – –Replay 2 – –Save 3 – Delete/Undelete 7 – Rewind (during playback only) 8 – Pause/Continue (during playback only) 9 – Fast forward (during playback only) # - Next message * - Previous menu 64 – Previous message 65 – Play envelope 66 – Change folder 1 – New 2 – Skipped 3 – Saved 67 – Mark as new2 – Send messages Follow prompts4 – Manage Mailbox 1 – Manage greetings 1 – Busy, 2 – No Answer 1– Keep current greeting 2 – Use personal/system greeting 3 – Replay current greeting 4 – Record new greeting (only when personal greeting is active) 1 – Replay greeting 2 – Re-record greeting 3 – Save and activate greeting * - Previous menu

47VISIT SUPPORT: breezeline.com/support/phone
USER GUIDE | DIGITAL PHONE
6 – Disable greeting (busy only) * - Previous menu 3 – Extended Absence
Have no recorded greeting: 1 – Record new greeting 1 – Replay greeting 2 – Re-record greeting 3 – Save and activate greeting * - Previous menu Have a recorded greeting 1 – Keep current greeting 2 – Record new greeting 1 – Replay greeting 2 – Re-record greeting 3 – Save and activate greeting * - Previous menu 4 – Replay current greeting 5 – Disable greeting 4 – Name 1 – Play current name (if already recorded) 2 – Review stored names (if already recorded) 1– Use current name 2– Replay name 3– Re-record name 4– Delete name # - Next name * - Previous menu 3 – Keep current name (if already recorded) 4 – Record new name 1– Re-record name 2– Save name 5– Disable name greeting 2 – Manage Rings 1– Keep number 2– Change number 3 – Change PIN 1 – Change PIN 2 – PIN off (if PIN exists) 3 – PIN on (if PIN exists) 4 – Set language 1 – English 2 – Spanish

48VISIT SUPPORT: breezeline.com/support/phone
USER GUIDE | DIGITAL PHONE
5 – Activate/Suspend mailbox 1 – Activate mailbox 2 – Suspend mailbox 9 – More options 1 – Email notification 1 – Keep current setting 2 – Turn on/off notification If turning on: 1 – Continue 2 – Set priority 3– Add/remove attachments 3 – Set priority 1 – Keep current setting 2 – Exclude/Include non-urgent message notification 2 – Manage extensions (primary mailbox owner only) Have no recorded greeting: 1 – Record new greeting 1 – Replay greeting 2 – Re-record greeting 3 – Save and activate greeting * – Previous menu Have recorded greeting: 1 – Listen to greeting 2 – Review stored greetings 1 – Use this greeting 2 – Replay greeting 3 – Re-record greeting 4 – Delete greeting # – Next greeting * – Previous greeting 3 – Keep and activate greeting 4 – Record new greeting 1 – Listen to greeting 2 – Re-record greeting 3 – Keep and activate 3 – Change message order 1 – Keep current order 2 – Reverse current order 4 – Set auto/save/erase/skip 1 – Keep current setting 2 – Turn on/off auto-save 3 – Turn on/off auto-erase 4 – Turn on/off auto-skip

49VISIT SUPPORT: breezeline.com/support/phone
USER GUIDE | DIGITAL PHONE
5 – Envelope information and mode options 1 – Keep current setting 2 – Disable/enable envelope information * – Previous options

50VISIT SUPPORT: breezeline.com/support/phone
USER GUIDE | DIGITAL PHONE
Frequently Asked QuestionsAppendix B
Q: How do I use the Breezeline Digital Phone service?
You should hear a dial tone when you pick up your Breezeline phone to dial anywhere in the U.S. and Canada.
Q: Do I have to dial 1 before the number I want to dial?
Your dialing sequence has not changed. Phone numbers that previously required you to dial a 1 at the beginning of the phone number continue to require a 1.
Q: Can I make international calls?
Yes, provided you have a phone plan that permits international calling.
Q: Are there any places I can’t call?
You can make calls anywhere in the United States (including Alaska and Hawaii) and Canada; however, the following area codes and services are intentionally blocked and not available:
Calling to a “900” area code or “pay-per-call”number.
Calling a 3-digit service code other than 611 and 411 (911 is allowed).
Calling a number collect or receiving a collect call except when you use an 800 provider such as 1.800.Collect or 1.800.CALL.ATT. You can dial 800 provider collect calls but you can’t receive 800 provider calls.
Q: Can I make emergency 911 calls on my Breezeline phone?
Yes
Q: Can I make Directory Assistance 411 calls on my Breezeline phone?
Yes; however, there is a charge for Directory Assistance calls.

51VISIT SUPPORT: breezeline.com/support/phone
USER GUIDE | DIGITAL PHONE
Q: Can I dial 0 to reach an Operator on my Breezeline phone?
Yes; however, there is a charge for Operator services.
Q: Am I charged for 611 calls to Customer Service made from my Breezeline phone?
No. There is a no charge applied to 611 calls when dialed from your Breezeline phone.
Q: Will my voice service statement come on the same invoice as my Breezeline invoice?
Yes, but the detailed explanation of your Breezeline Voice service usage is accessible on the Phone Service Web portal.
Q: How do I pay for my Breezeline Voice service?
You may pay by mail, in person at a Breezeline office, via phone or online at breezeline.com.
Q: What response does a caller hear when I have no service on my Breezeline phone because I powered off my modem?
Callers receive a busy signal unless you phone is forwarded to another number or voicemail
Q: How long does it take for my phone service to become operational when I power on my modem?
You may need to wait up to 10 minutes before your cable phone is operational. If it is not operational after 10 minutes, contact our Customer Service department.
Q: What is Local Number Portability?
Local Number Portability (know as LNP) is the option to keep the same phone number when you switch phone service providers as long as there is proof of identity and written authorization. The process takes a while to complete and you must keep phone service active with the original provider until the transfer completes.
Porting your telephone number is subject to port eligibility requirements.
Copyright © 2022 FDOKUMEN