DESCRIPTION OF FUNCTIONS - AutoCD.ru
8
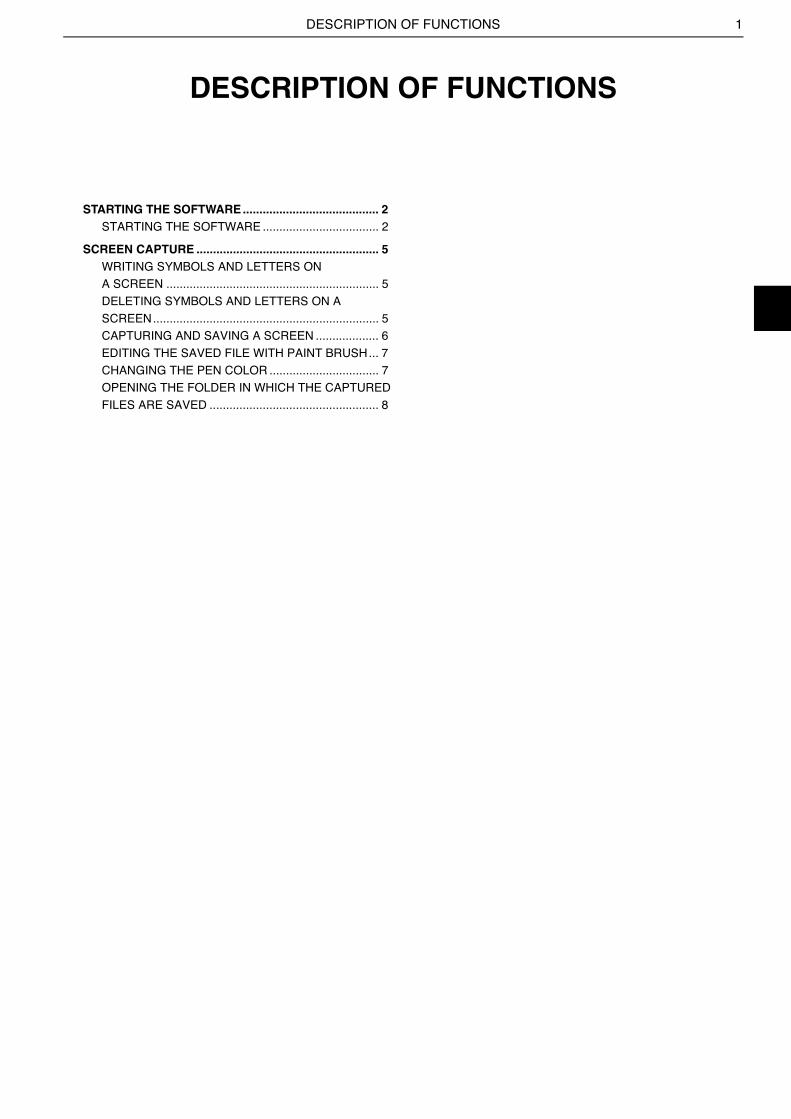
DESCRIPTION OF FUNCTIONS 1 DESCRIPTION OF FUNCTIONS 5 STARTING THE SOFTWARE ......................................... 2 STARTING THE SOFTWARE ................................... 2 SCREEN CAPTURE ....................................................... 5 WRITING SYMBOLS AND LETTERS ON A SCREEN ................................................................ 5 DELETING SYMBOLS AND LETTERS ON A SCREEN .................................................................... 5 CAPTURING AND SAVING A SCREEN ................... 6 EDITING THE SAVED FILE WITH PAINT BRUSH ... 7 CHANGING THE PEN COLOR ................................. 7 OPENING THE FOLDER IN WHICH THE CAPTURED FILES ARE SAVED ................................................... 8
-
Upload
khangminh22 -
Category
Documents
-
view
1 -
download
0
Transcript of DESCRIPTION OF FUNCTIONS - AutoCD.ru
DESCRIPTION OF FUNCTIONS 1
DESCRIPTION OF FUNCTIONS5
STARTING THE SOFTWARE......................................... 2STARTING THE SOFTWARE ................................... 2
SCREEN CAPTURE ....................................................... 5WRITING SYMBOLS AND LETTERS ON
A SCREEN ................................................................ 5
DELETING SYMBOLS AND LETTERS ON A
SCREEN.................................................................... 5
CAPTURING AND SAVING A SCREEN ................... 6
EDITING THE SAVED FILE WITH PAINT BRUSH... 7
CHANGING THE PEN COLOR ................................. 7
OPENING THE FOLDER IN WHICH THE CAPTURED
FILES ARE SAVED ................................................... 8

DESCRIPTION OF FUNCTIONS2
GENERAL INFORMATION
STARTING THE SOFTWARE
STARTING THE SOFTWAREEN01N80ZZZ050102001001
1. DOUBLE-CLICK THE SHORT CUT ICON FOR THE TROUBLE-SHOOTING SOFTWARE.(Windows desktop)
HINTOr, from the Windows' Start Menu, select [All Programs] - [HinoS-erviceApplications] - [Hino Diagnostic eXplorer 2].
2. ENTER YOUR USER ID AND PASSWORD.(Login screen)
HINTWhen you log in for the first time (after clean installation), connec-tion to the Internet is required.
CONNECTION TO THE INTERNET AT FIRST LOGIN
• For security enhancement, activation (personal authentication) isperformed through the Internet.Activation needs to be performed to prevent the use of stolendevices. You must connect to the Internet at the first login.
SHTS80ZZZ0500001
SHTS80ZZZ0500002
DESCRIPTION OF FUNCTIONS 3
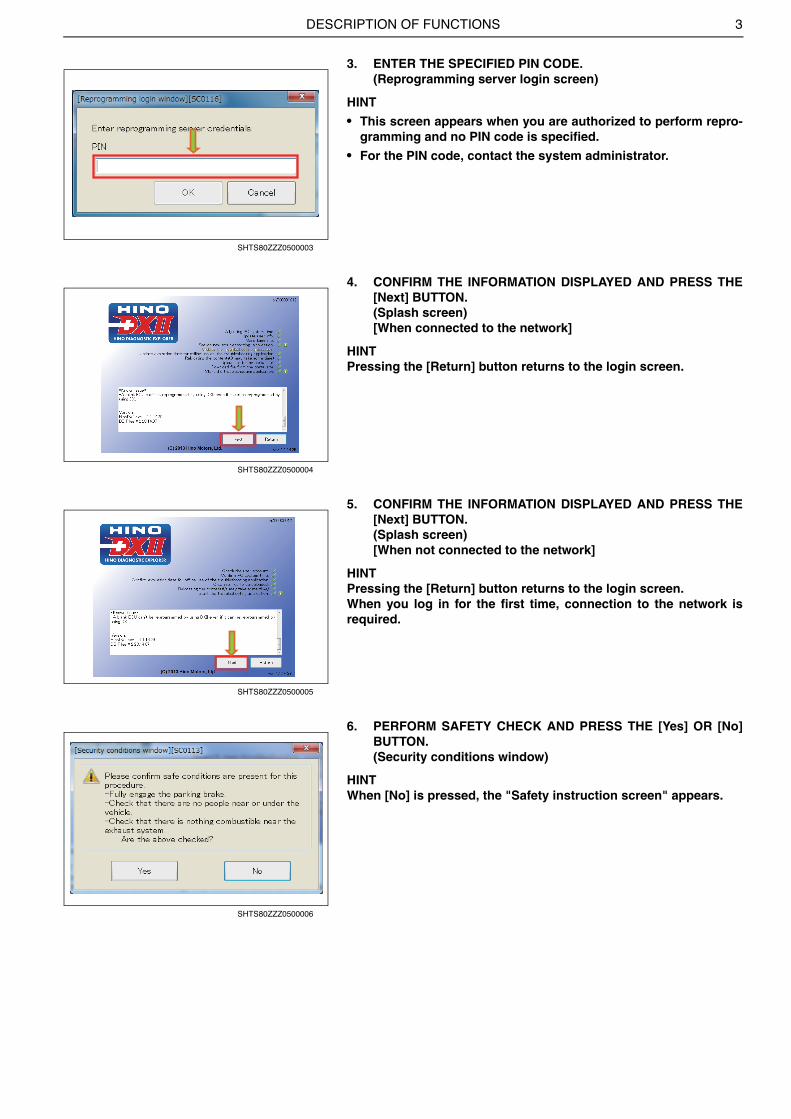
3. ENTER THE SPECIFIED PIN CODE.(Reprogramming server login screen)
HINT
• This screen appears when you are authorized to perform repro-gramming and no PIN code is specified.
• For the PIN code, contact the system administrator.
4. CONFIRM THE INFORMATION DISPLAYED AND PRESS THE[Next] BUTTON.(Splash screen)[When connected to the network]
HINTPressing the [Return] button returns to the login screen.
5. CONFIRM THE INFORMATION DISPLAYED AND PRESS THE[Next] BUTTON.(Splash screen)[When not connected to the network]
HINTPressing the [Return] button returns to the login screen.When you log in for the first time, connection to the network isrequired.
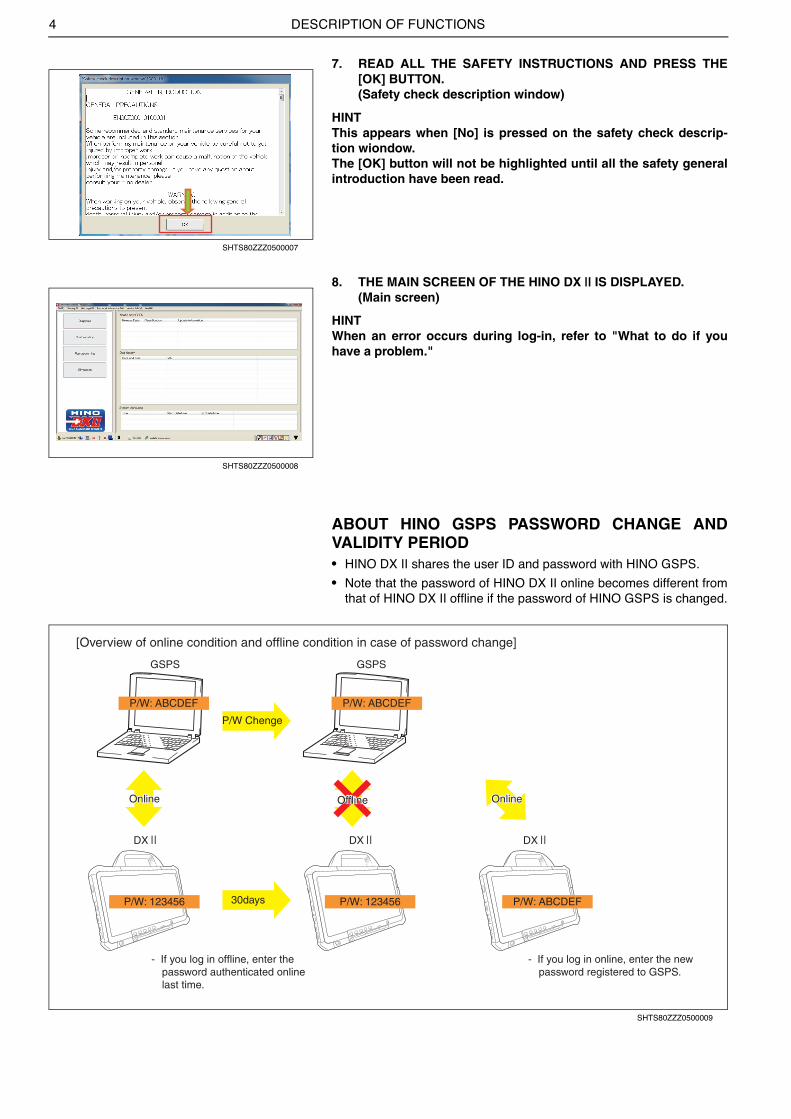
6. PERFORM SAFETY CHECK AND PRESS THE [Yes] OR [No]BUTTON.(Security conditions window)
HINTWhen [No] is pressed, the "Safety instruction screen" appears.
SHTS80ZZZ0500003
SHTS80ZZZ0500004
SHTS80ZZZ0500005
SHTS80ZZZ0500006
DESCRIPTION OF FUNCTIONS4
7. READ ALL THE SAFETY INSTRUCTIONS AND PRESS THE[OK] BUTTON.(Safety check description window)
HINTThis appears when [No] is pressed on the safety check descrip-tion wiondow.The [OK] button will not be highlighted until all the safety generalintroduction have been read.
8. THE MAIN SCREEN OF THE HINO DX Ⅱ IS DISPLAYED.(Main screen)
HINTWhen an error occurs during log-in, refer to "What to do if youhave a problem."
ABOUT HINO GSPS PASSWORD CHANGE ANDVALIDITY PERIOD• HINO DX Ⅱ shares the user ID and password with HINO GSPS.
• Note that the password of HINO DX Ⅱ online becomes different fromthat of HINO DX Ⅱ offline if the password of HINO GSPS is changed.
SHTS80ZZZ0500007
SHTS80ZZZ0500008
GSPS
[Overview of online condition and offline condition in case of password change]
P/W: ABCDEFP/W: ABCDEF
P/W: 123456 P/W: 123456 P/W: ABCDEF
GSPS
DX DX DX
- If you log in offline, enter the password authenticated online last time.
- If you log in online, enter the new password registered to GSPS.
OnlineOnlineOnlineOnline
P/W Chenge
30days
OfflineOffline
SHTS80ZZZ0500009
DESCRIPTION OF FUNCTIONS 5
SCREEN CAPTURE
WRITING SYMBOLS AND LETTERS ON A
SCREENEN01N80ZZZ050102002001
1. ENTER EDIT MODE.(Any screen)(1) Press the [Pen] icon on the screen capture bar.
2. WRITE SYMBOLS AND LETTERS ON A SCREEN.(1) Use the mouse to write symbols and letters.
HINTTo change the pen color, refer to "CHANGING THE PEN COLOR."
DELETING SYMBOLS AND LETTERS ON A
SCREENEN01N80ZZZ050102002002
1. ENTER DELETE MODE.(Any screen)(1) Press the [Eraser] icon on the screen capture bar.
SHTS80ZZZ0500010
SHTS80ZZZ0500011
SHTS80ZZZ0500012

DESCRIPTION OF FUNCTIONS6
2. DELETE THE ARBITRARY SYMBOLS AND LETTERS ON THESCREEN.(1) Use the mouse to delete arbitrary symbols and letters.
CAPTURING AND SAVING A SCREENEN01N80ZZZ050102002003
1. CAPTURING AND SAVING A SCREEN(Any screen)(1) Press the [Floppy] icon on the screen capture bar.
HINTYou can press this icon even while writing symbols and letters.In this case, the screen is captured and saved with the writtensymbols and letters.
2. When the screen is successfully saved, the message willappear.
SHTS80ZZZ0500013
SHTS80ZZZ0500014
SHTS80ZZZ0500015
DESCRIPTION OF FUNCTIONS 7
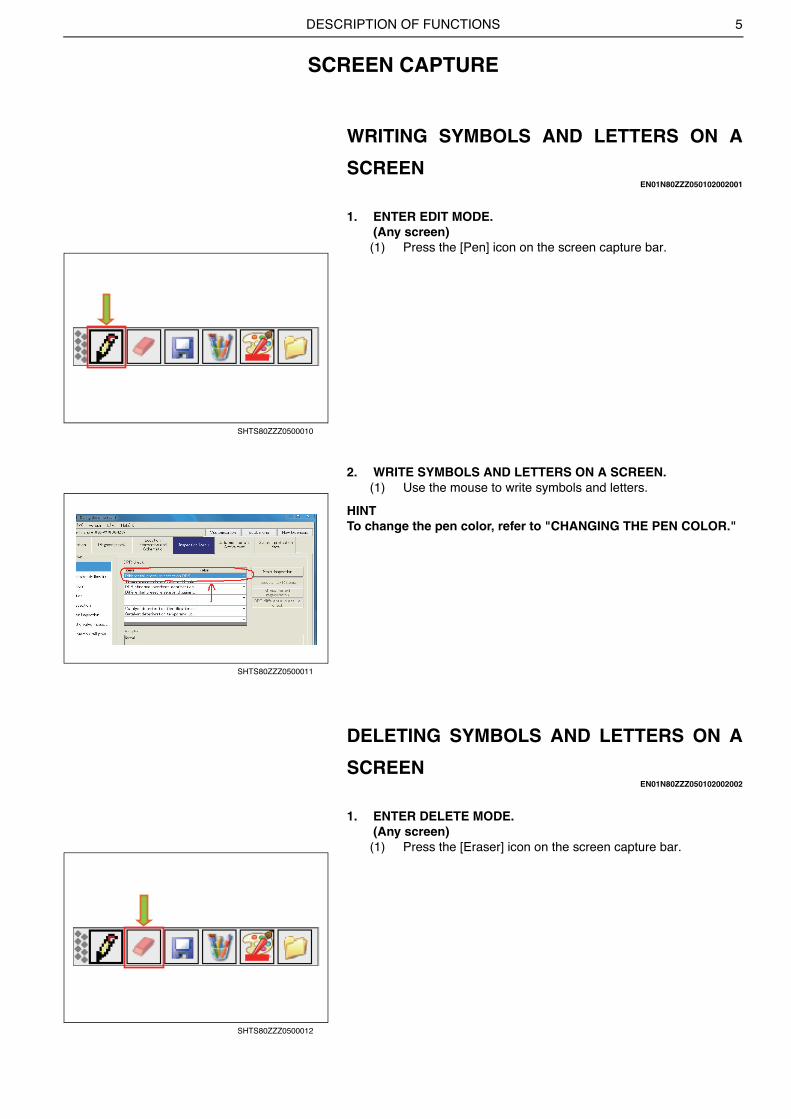
EDITING THE SAVED FILE WITH PAINT
BRUSHEN01N80ZZZ050102002004
1. EDIT THE LAST SAVED FILE WITH PAINT BRUSH.(Any screen)(1) Press the [Paint brush] icon on the screen capture bar.
2. THE LAST SAVED FILE IS LOADED AND THE PAINT BRUSHOPENS.
HINTThe last captured file automatically opens.
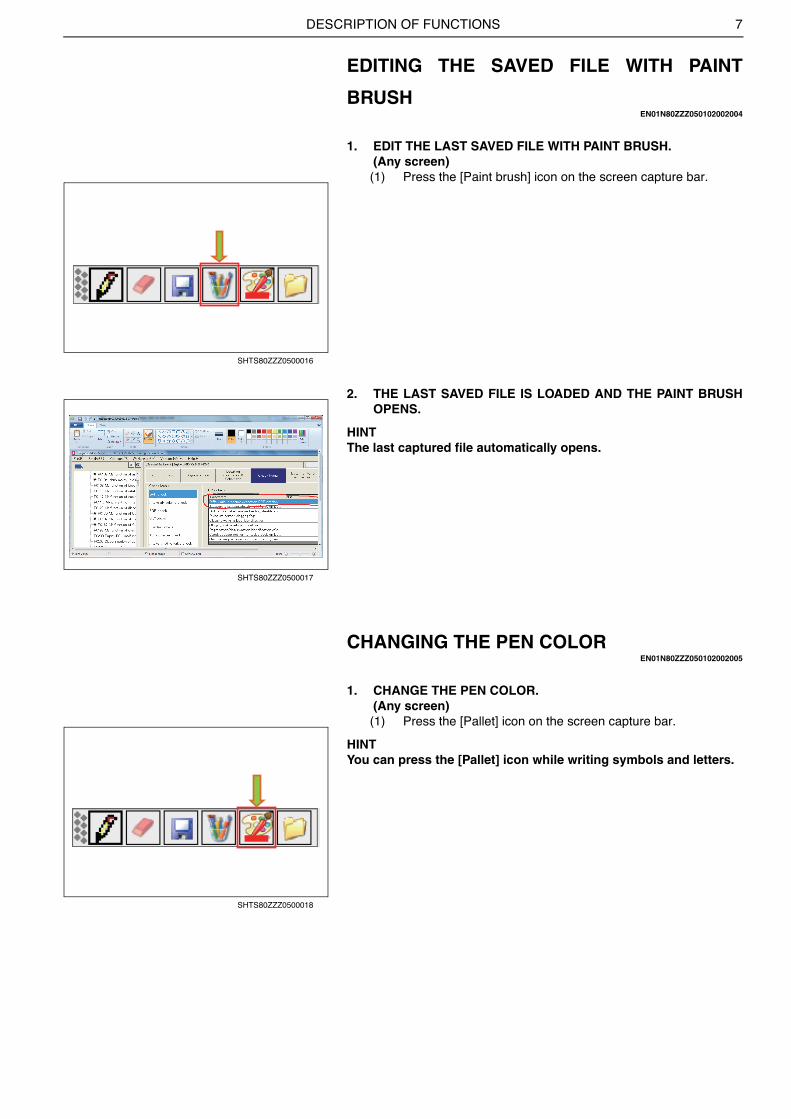
CHANGING THE PEN COLOREN01N80ZZZ050102002005
1. CHANGE THE PEN COLOR.(Any screen)(1) Press the [Pallet] icon on the screen capture bar.
HINTYou can press the [Pallet] icon while writing symbols and letters.
SHTS80ZZZ0500016
SHTS80ZZZ0500017
SHTS80ZZZ0500018
DESCRIPTION OF FUNCTIONS8
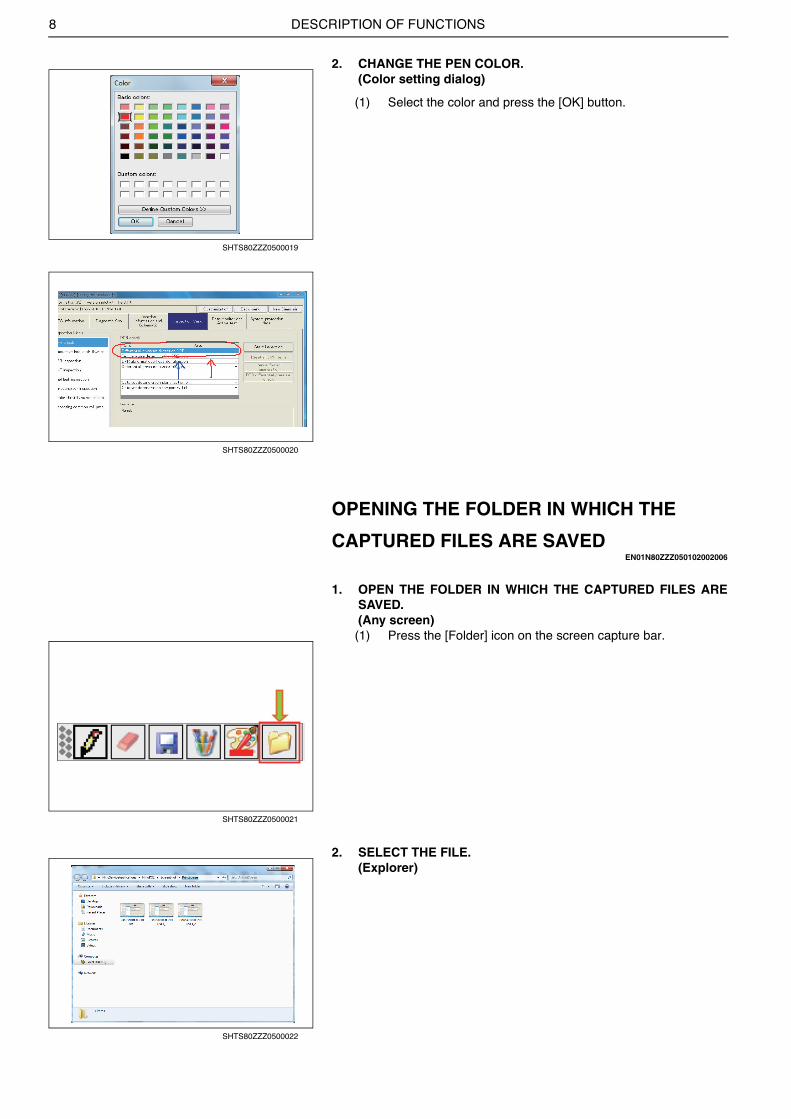
2. CHANGE THE PEN COLOR.(Color setting dialog)
(1) Select the color and press the [OK] button.
OPENING THE FOLDER IN WHICH THE
CAPTURED FILES ARE SAVEDEN01N80ZZZ050102002006
1. OPEN THE FOLDER IN WHICH THE CAPTURED FILES ARESAVED.(Any screen)(1) Press the [Folder] icon on the screen capture bar.
2. SELECT THE FILE.(Explorer)
SHTS80ZZZ0500019
SHTS80ZZZ0500020
SHTS80ZZZ0500021
SHTS80ZZZ0500022