Delegate and Approver User Training for the Concur Travel ...
185
Published by Articulate® Storyline www.articulate.com Delegate and Approver User Training for the Concur Travel System (as of 4.21.2021) 1. Introduction 1.1 Title Slide Script: Welcome to the Delegate and Approver User Training for the Concur Travel System. This training applies to anyone who has been assigned as a Delegate or Approver in the Concur system. This training is for review purposes only. Permanent employees seeking credit for this training should log into ConnectCarolina to complete this training. Also, this training contains audio. Please be sure the audio on your computer or device is working and the volume is turned up. To begin the training, click the Next button.
-
Upload
khangminh22 -
Category
Documents
-
view
7 -
download
0
Transcript of Delegate and Approver User Training for the Concur Travel ...

Published by Articulate® Storyline www.articulate.com
Delegate and Approver User Training for the Concur Travel
System (as of 4.21.2021)
1. Introduction
1.1 Title Slide
Script:
Welcome to the Delegate and Approver User Training for the Concur Travel System. This
training applies to anyone who has been assigned as a Delegate or Approver in the Concur
system.
This training is for review purposes only. Permanent employees seeking credit for this training
should log into ConnectCarolina to complete this training. Also, this training contains audio.
Please be sure the audio on your computer or device is working and the volume is turned up.
To begin the training, click the Next button.

Published by Articulate® Storyline www.articulate.com
1.2 Introduction
Script:
Hi, my name is John. You may remember me from other trainings, such as the Basic User
Training for the Concur Travel System. I will guide you through this training and provide you
with information on how to navigate the Concur System as a Delegate or an Approver.
Let’s begin this training with an overview of Delegates and Approvers.
Click the Next button to continue.

Published by Articulate® Storyline www.articulate.com
1.3 About Approvers
Script:
Approvers in the Concur system are the same Department Approvers as assigned in
ConnectCarolina. Two primary types of Approvers exist:
1. Designated Approver and
2. Business Office Approver.
These approvers are assigned based on the business unit and department and both types
approve requests and reports.
However, if you are a Designated Approver, you have the responsibility of approving the
purpose of the travel.
And, if you are a Business Office Approver you have the responsibility of reviewing and
approving the funding for the travel and ensuring the chartfield string is complete and accurate.
Also, all users will see they have an Approvals tab and Required Approvals tile. However, only
those with approval responsibilities have the ability to use approval functions.
In addition, as Approvers, there are a few things to keep in mind:

Published by Articulate® Storyline www.articulate.com
Approvers cannot approve travel requests from other departments unless this change is made in
ConnectCarolina.
And Approvers cannot approve their own travel requests or expense reports.
Click the Next button.
Published by Articulate® Storyline www.articulate.com
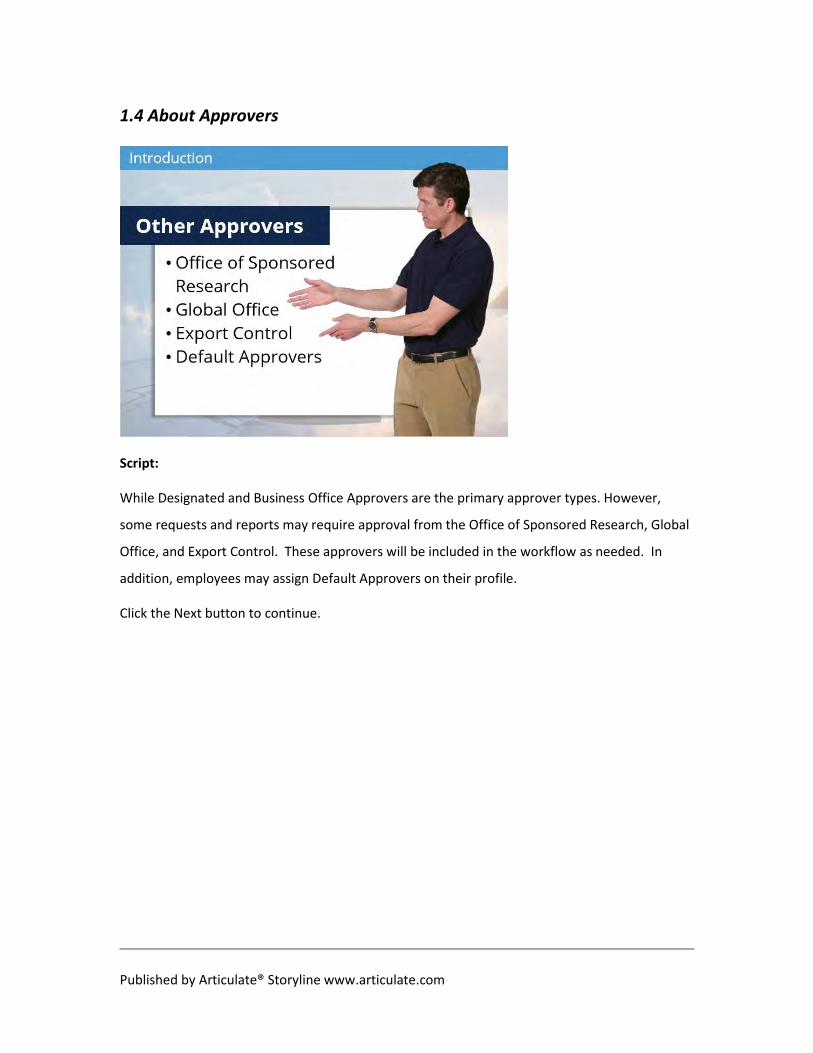
1.4 About Approvers
Script:
While Designated and Business Office Approvers are the primary approver types. However,
some requests and reports may require approval from the Office of Sponsored Research, Global
Office, and Export Control. These approvers will be included in the workflow as needed. In
addition, employees may assign Default Approvers on their profile.
Click the Next button to continue.

Published by Articulate® Storyline www.articulate.com
1.5 About Delegates
Script:
The Concur system allows you to create delegates who can act on your behalf. A delegate is a
user who is granted permission to act on behalf of another user to perform tasks such as
creating or approving requests and expense reports. Users can be assigned as an Approval
Delegate or a Personal Delegate. Click on the Approval and Personal Delegate buttons to learn
more about these roles. Then click the Next button to see how to act as a delegate in the
Concur system.

Published by Articulate® Storyline www.articulate.com
1.6 Acting as a Delegate
Script:
To act as a delegate, you must log in to the Concur system. Then click the Profile link.

Published by Articulate® Storyline www.articulate.com
1.7 Click
Script:
Under the Acting as other user, begin entering the name of the employee you want to act on
behalf of.
Published by Articulate® Storyline www.articulate.com
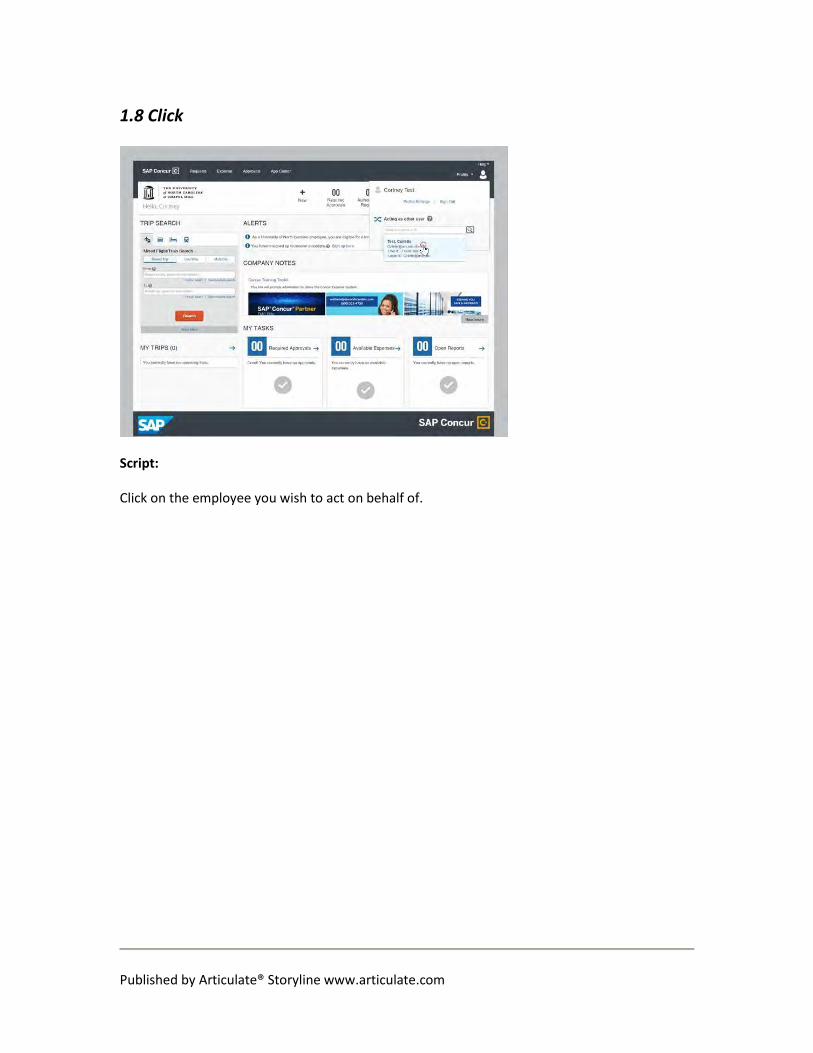
1.8 Click
Script:
Click on the employee you wish to act on behalf of.

Published by Articulate® Storyline www.articulate.com
1.9 Click
Script:
Then click the Start Session button.
Published by Articulate® Storyline www.articulate.com
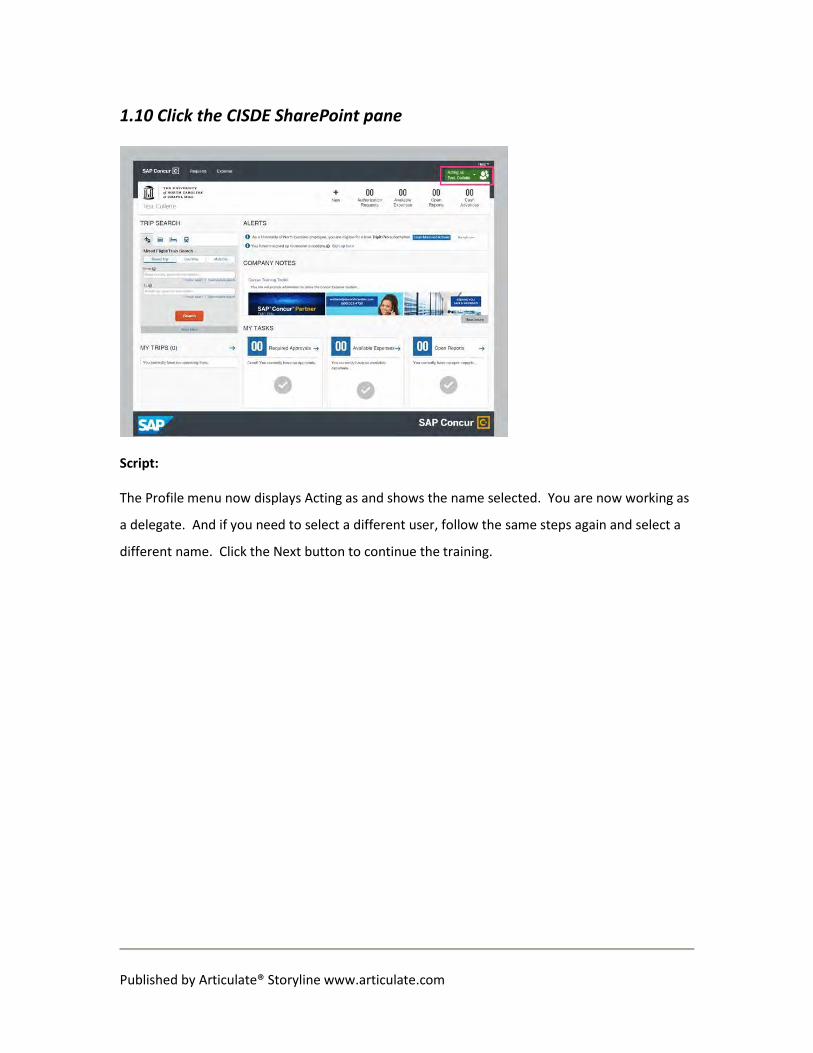
1.10 Click the CISDE SharePoint pane
Script:
The Profile menu now displays Acting as and shows the name selected. You are now working as
a delegate. And if you need to select a different user, follow the same steps again and select a
different name. Click the Next button to continue the training.

Published by Articulate® Storyline www.articulate.com
1.11 Removing Yourself as a Delegate
Script:
While a delegate cannot adjust their own permissions, you can remove yourself from an
assigned delegate role. To do this, click the Profile Setting. Select the Expense Delegates link.
Then click the Delegate For tab.
Here you will see a listing of individuals you have been designated as a delegate for.
Click the checkbox next to the individuals you want to remove yourself from as an assigned
delegate.
Click the Delete button.
Then confirm your request on the pop-up window that appears.
Click the Next button to continue.

Published by Articulate® Storyline www.articulate.com
1.12 Travel Path
Script:
Welcome to the main menu!
This training will provide learners with the foundational knowledge needed to navigate the
Concur Travel System as a Delegate or Approver successfully.
We have mapped this experience into three sections.
And by the end of this training you will know how to navigate the Concur system as a Delegate
or Approver and more!
At the end of the training, I will go over some resources that are available and then you will
reach your final destination on the map with the training being marked as completed.
Please, click the Next button to continue to Lesson two.

Published by Articulate® Storyline www.articulate.com
2. Working as a Personal Delegate
2.1 Creating a Travel Request as a Delegate
Script:
Personal Delegates can create Travel Requests for any user they have been assigned to.
Personal Delegates should create Travel Requests as they normally would, just as if they are the
traveler themselves. Click the Next button to continue.

Published by Articulate® Storyline www.articulate.com
2.2 Using the Notify Feature for Travel Requests
Script:
However, Personal Delegates are not able to submit Travel Requests. Instead, Personal
Delegates should use the Notify Feature to let the traveler know that the Travel Request is ready
for their review and can be submitted by the traveler.
Click the Next button to see how to use the Notify feature for a Travel Request.

Published by Articulate® Storyline www.articulate.com
2.3 Click
Script:
After logging in to the Concur system, select the user you are acting on their behalf as a delegate.

Published by Articulate® Storyline www.articulate.com
2.4 Click
Script:
Then click the Request button to create a new travel request or open an existing one.

Published by Articulate® Storyline www.articulate.com
2.5 Click
Script:
Click the Create New Request tile.

Published by Articulate® Storyline www.articulate.com
2.6 Click
Script:
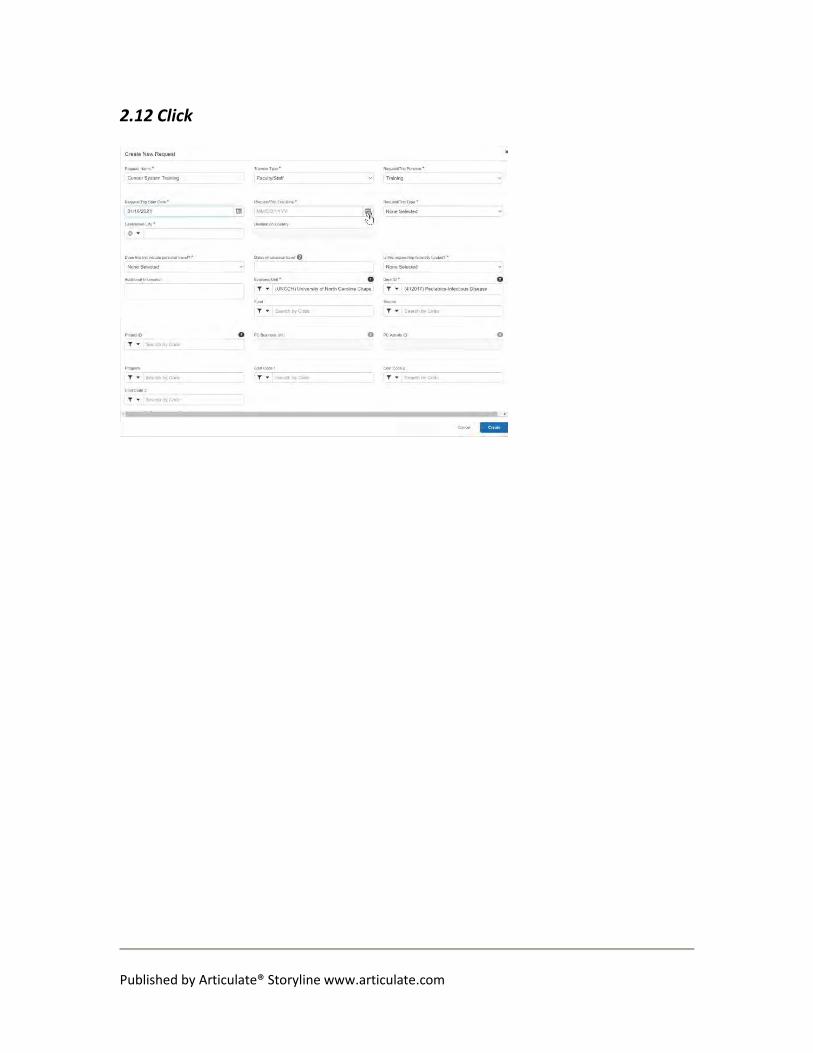
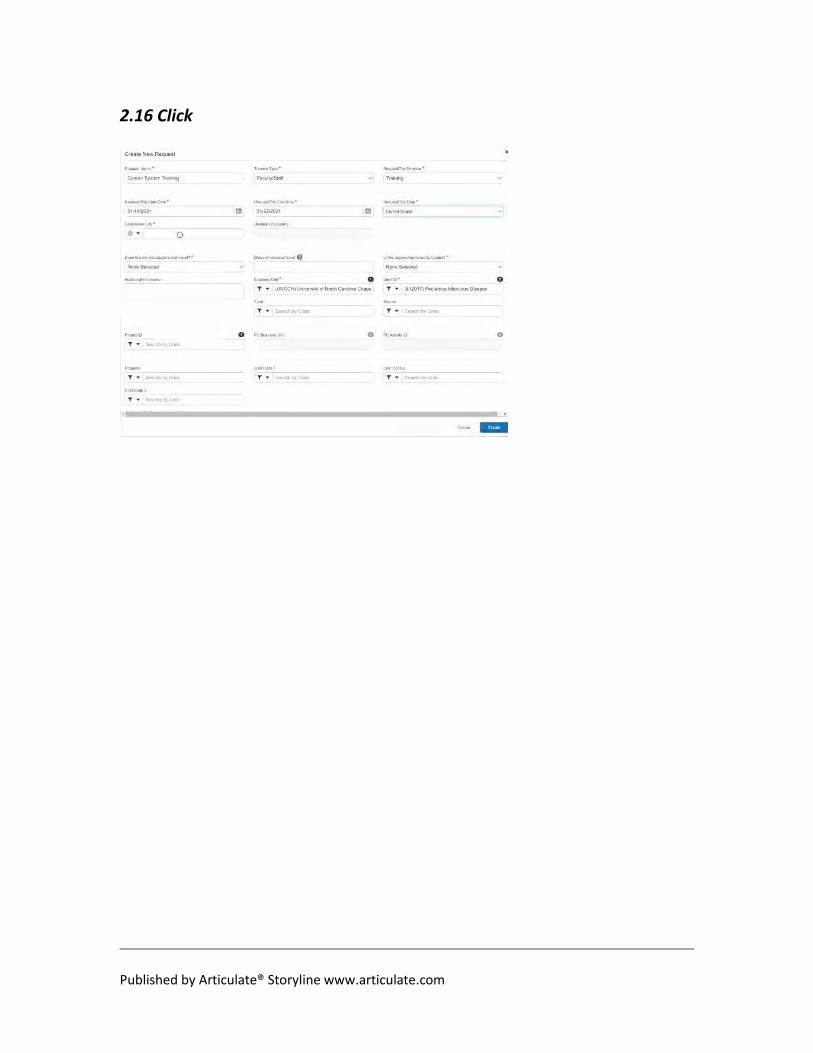
Complete all the necessary and required fields.

Published by Articulate® Storyline www.articulate.com
2.7 Type Concur System Training

Published by Articulate® Storyline www.articulate.com
2.8 Click

Published by Articulate® Storyline www.articulate.com
2.9 Click

Published by Articulate® Storyline www.articulate.com
2.10 Click

Published by Articulate® Storyline www.articulate.com
2.11 Click
Published by Articulate® Storyline www.articulate.com
2.12 Click

Published by Articulate® Storyline www.articulate.com
2.13 Click

Published by Articulate® Storyline www.articulate.com
2.14 Click

Published by Articulate® Storyline www.articulate.com
2.15 Click
Published by Articulate® Storyline www.articulate.com
2.16 Click

Published by Articulate® Storyline www.articulate.com
2.17 Type Orlando

Published by Articulate® Storyline www.articulate.com
2.18 Click

Published by Articulate® Storyline www.articulate.com
2.19 Click

Published by Articulate® Storyline www.articulate.com
2.20 Click

Published by Articulate® Storyline www.articulate.com
2.21 Click

Published by Articulate® Storyline www.articulate.com
2.22 Click

Published by Articulate® Storyline www.articulate.com
2.23 Click

Published by Articulate® Storyline www.articulate.com
2.24 Scroll the mouse wheel

Published by Articulate® Storyline www.articulate.com
2.25 Click

Published by Articulate® Storyline www.articulate.com
2.26 Scroll the mouse wheel

Published by Articulate® Storyline www.articulate.com
2.27 Click
Script:
Then click the Create button.

Published by Articulate® Storyline www.articulate.com
2.28 Click
Script:
As a result, you are returned to the Travel Request Expected Expenses page.

Published by Articulate® Storyline www.articulate.com
2.29 Click
Script:
Now, I will add anticipated expenses.

Published by Articulate® Storyline www.articulate.com
2.30 Scroll the mouse wheel

Published by Articulate® Storyline www.articulate.com
2.31 Click

Published by Articulate® Storyline www.articulate.com
2.32 Click

Published by Articulate® Storyline www.articulate.com
2.33 Type 1,000

Published by Articulate® Storyline www.articulate.com
2.34 Click

Published by Articulate® Storyline www.articulate.com
2.35 Click

Published by Articulate® Storyline www.articulate.com
2.36 Click
Script:
Then click the Save button.

Published by Articulate® Storyline www.articulate.com
2.37 Click
Script:
After adding the expense, I can now click the Notify Employee button.

Published by Articulate® Storyline www.articulate.com
2.38 Click
Script:
As a result, a notification email will be sent to the traveler.

Published by Articulate® Storyline www.articulate.com
2.39 Click
Script:
The Travel Request is now viewable to the traveler so they can review and submit the travel
request. Click the Next button to continue the training.

Published by Articulate® Storyline www.articulate.com
2.40 Submitting the Travel Request
Script:
As you see Personal Delegates can’t submit a Travel Request. However, after using the Notify
feature, the traveler will receive a notification; and at that time the traveler can log into Concur
to review and submit the Travel Request. Click the Next Button to see this process in action.

Published by Articulate® Storyline www.articulate.com
2.41 Click
Script:
When the traveler logs into the Concur system, they will notice that the Travel Request that
their Personal Delegate created will appear in their Open Requests.

Published by Articulate® Storyline www.articulate.com
2.42 Click
Script:
The traveler can click on the Open Requests to view it and any other pending Travel Requests.

Published by Articulate® Storyline www.articulate.com
2.43 Click

Published by Articulate® Storyline www.articulate.com
2.44 Click
Script:
The traveler can review the Travel Request and the anticipated expenses that the Personal
Delegate created. And then submit the request when they are ready.
Click the Next button to continue the training.
Published by Articulate® Storyline www.articulate.com
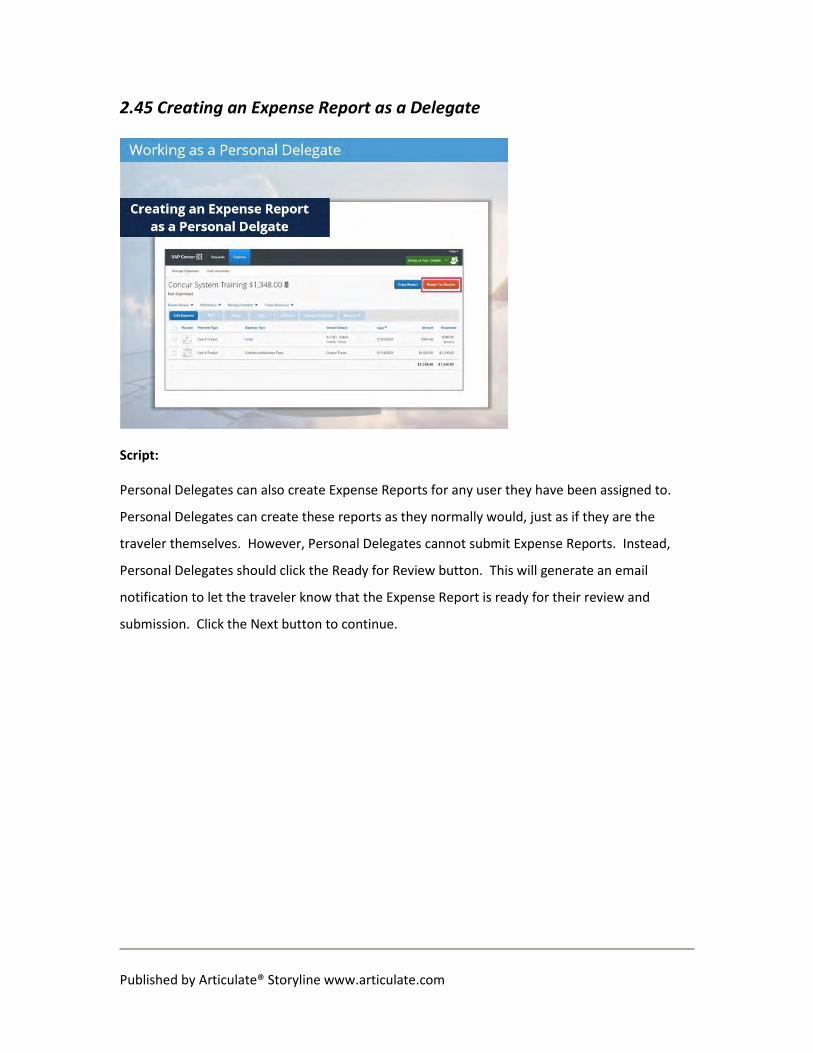
2.45 Creating an Expense Report as a Delegate
Script:
Personal Delegates can also create Expense Reports for any user they have been assigned to.
Personal Delegates can create these reports as they normally would, just as if they are the
traveler themselves. However, Personal Delegates cannot submit Expense Reports. Instead,
Personal Delegates should click the Ready for Review button. This will generate an email
notification to let the traveler know that the Expense Report is ready for their review and
submission. Click the Next button to continue.

Published by Articulate® Storyline www.articulate.com
2.46 Itemizing Transactions
Script:
Personal Delegates should also review receipts and transactions to identify any expense the
requires itemization. Click on the appropriate button to learn how to itemize particular
transactions as a Personal Delegate.
Then click the Next button to continue the training.
Published by Articulate® Storyline www.articulate.com
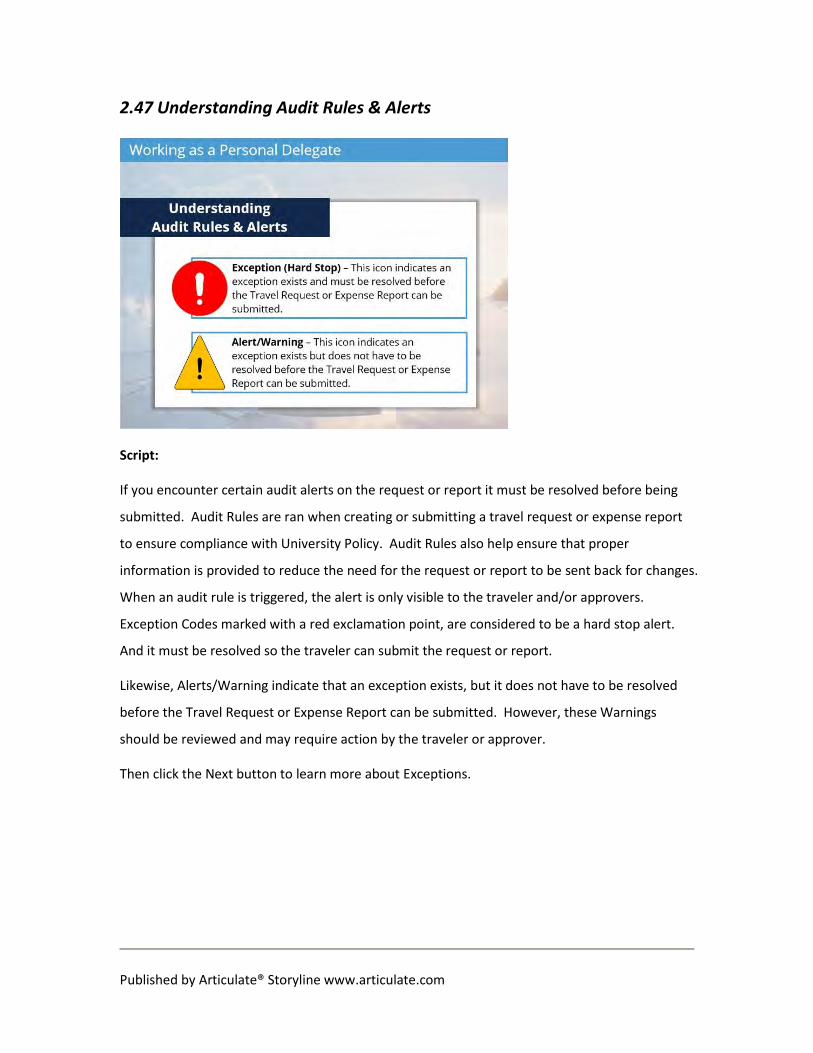
2.47 Understanding Audit Rules & Alerts
Script:
If you encounter certain audit alerts on the request or report it must be resolved before being
submitted. Audit Rules are ran when creating or submitting a travel request or expense report
to ensure compliance with University Policy. Audit Rules also help ensure that proper
information is provided to reduce the need for the request or report to be sent back for changes.
When an audit rule is triggered, the alert is only visible to the traveler and/or approvers.
Exception Codes marked with a red exclamation point, are considered to be a hard stop alert.
And it must be resolved so the traveler can submit the request or report.
Likewise, Alerts/Warning indicate that an exception exists, but it does not have to be resolved
before the Travel Request or Expense Report can be submitted. However, these Warnings
should be reviewed and may require action by the traveler or approver.
Then click the Next button to learn more about Exceptions.
Published by Articulate® Storyline www.articulate.com
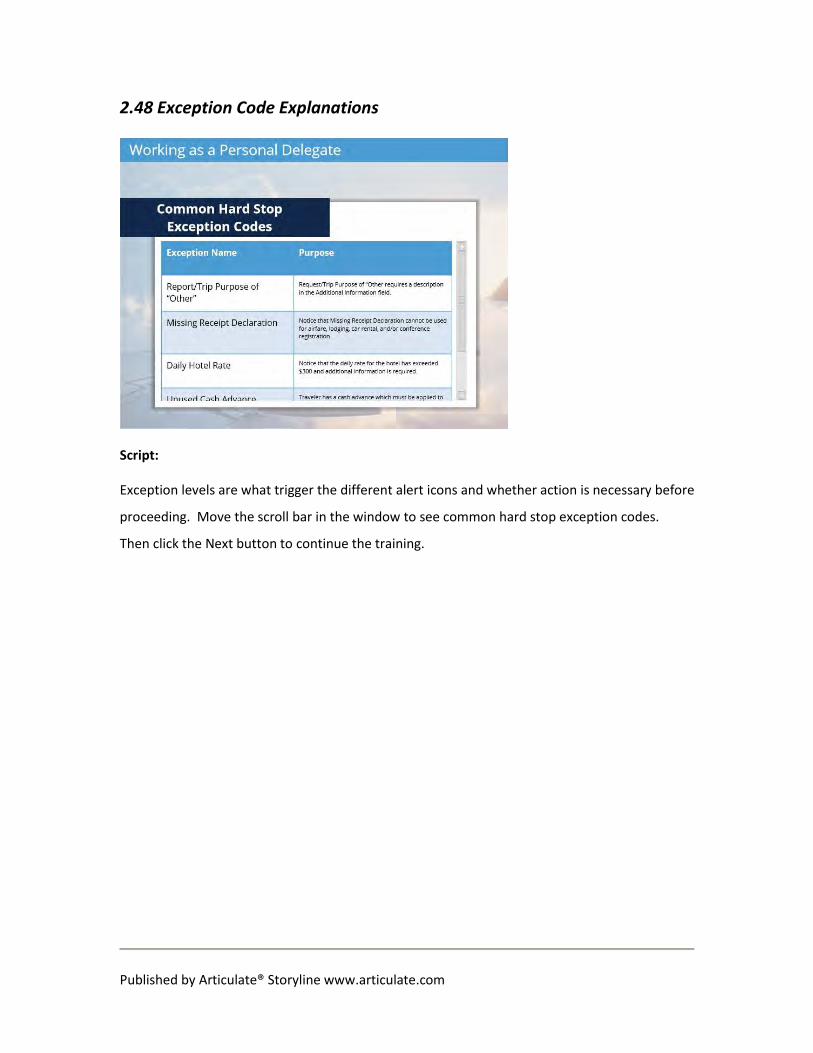
2.48 Exception Code Explanations
Script:
Exception levels are what trigger the different alert icons and whether action is necessary before
proceeding. Move the scroll bar in the window to see common hard stop exception codes.
Then click the Next button to continue the training.
Published by Articulate® Storyline www.articulate.com
2.49 Travel Path
Script:
You are well on your way! Click the Next button to continue.
Published by Articulate® Storyline www.articulate.com
3. Working as an Approver
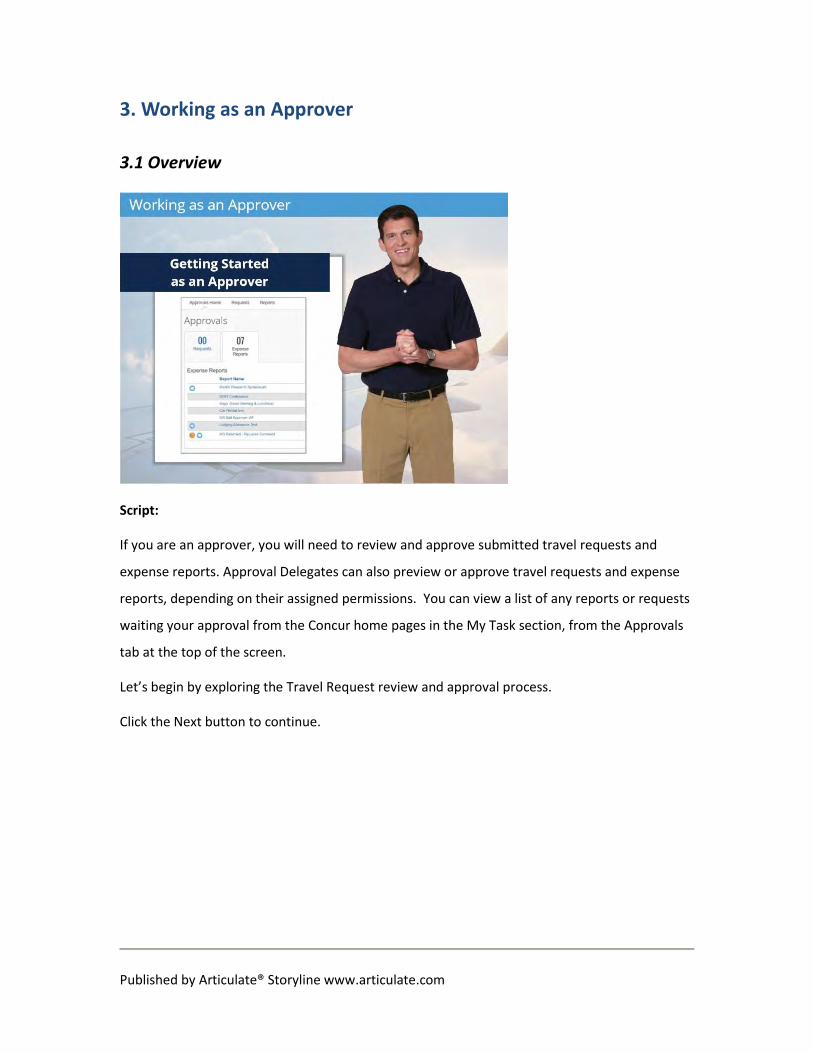
3.1 Overview
Script:
If you are an approver, you will need to review and approve submitted travel requests and
expense reports. Approval Delegates can also preview or approve travel requests and expense
reports, depending on their assigned permissions. You can view a list of any reports or requests
waiting your approval from the Concur home pages in the My Task section, from the Approvals
tab at the top of the screen.
Let’s begin by exploring the Travel Request review and approval process.
Click the Next button to continue.

Published by Articulate® Storyline www.articulate.com
3.2 Reviewing and Approving Travel Requests
Script:
When a Travel Request is ready for your review, Approvers will receive an email notification.
Approval delegates may also receive notifications and be able to preview or approve travel
requests, depending on their assigned permissions. To approve requests, you must log in to the
Concur system. Click the Next button to see a demonstration of how to review and approve a
travel request.

Published by Articulate® Storyline www.articulate.com
3.3 Click
Script:
After logging into the Concur System. Click the Approvals tab or the Required Approvals tile.

Published by Articulate® Storyline www.articulate.com
3.4 Click
Script:
Click on the Requests tab.

Published by Articulate® Storyline www.articulate.com
3.5 Click
Script:
Click the Request Name link to review the details of the travel request.

Published by Articulate® Storyline www.articulate.com
3.6 Click the Requests menu item
Script:
Approvers should review all elements of the Travel Request carefully. This includes cash
advances, third-party lodging requests, personal travel, etc. If you need to add another
Approver to the workflow or find that you need to return the request back to the user for
editing. Click the More Actions button.

Published by Articulate® Storyline www.articulate.com
3.7 Click the group
Script:
Then select the appropriate action.

Published by Articulate® Storyline www.articulate.com
3.8 Click the Expense menu item
Script:
Also, you will want to review and Alerts or Exceptions that appear on the screen.

Published by Articulate® Storyline www.articulate.com
3.9 Click the group
Script:
If you have reviewed all the necessary elements and are ready to signify your approval, click the
Approve button.

Published by Articulate® Storyline www.articulate.com
3.10 Click the group
Script:
Then click the Accept & Continue button on the pop-up message.

Published by Articulate® Storyline www.articulate.com
3.11 Click the This report has been resubmitted image
Script:
The Travel Request has now been approved and is no longer listed. The Travel Request will
continue its approval path. Click the Next button to review the approval workflow for a travel
request.

Published by Articulate® Storyline www.articulate.com
3.12 Travel Request Approval Workflows
Script:
Once a user submits a Travel Request for approval it then goes to the user’s designated
approver.
This is based on the Business Unit and Department and mirrors the approval workflow that is in
ConnectCarolina.
After the Designated Approver reviews and approves the submission it will then be sent to the
Business Office for review and approval.
Like the Designated Approvers it is based on the Business Unit and Department and mirrors the
approval workflow in ConnectCarolina.
If the submission includes a chartfield string associated with the Office of Sponsored Research
(OSR) it may also be reviewed for approval by OSR.
If the travel request, includes international travel it may be routed to the Export Control Office
for approval.
Likewise, if the submission includes international travel that is deemed high risk, it will also be
routed to the Global Office for review and approval.

Published by Articulate® Storyline www.articulate.com
Then, the Travel Team Processor will review the submission for approval if the request includes
a cash advance.
Once all of the required steps have obtained approval, the travel request is Approved.
Click the Next button to continue.

Published by Articulate® Storyline www.articulate.com
3.13 Reviewing and Approving Expense Reports
Script:
When a Expense Report is ready for your review, Approvers will receive an email notification.
Approval delegates may also receive email notifications and be able to preview or approve
reports, depending on their assigned permissions. To approve Expense Reports, you must log in
to the Concur system. Click the Next button to see a demonstration of how to review and
approve an Expense Report.

Published by Articulate® Storyline www.articulate.com
3.14 Click
Script:
After logging into the Concur System. Click the Approvals tab or the Required Approvals tile.

Published by Articulate® Storyline www.articulate.com
3.15 Click
Script:
By default you will land on the Expense Reports tab.
Published by Articulate® Storyline www.articulate.com
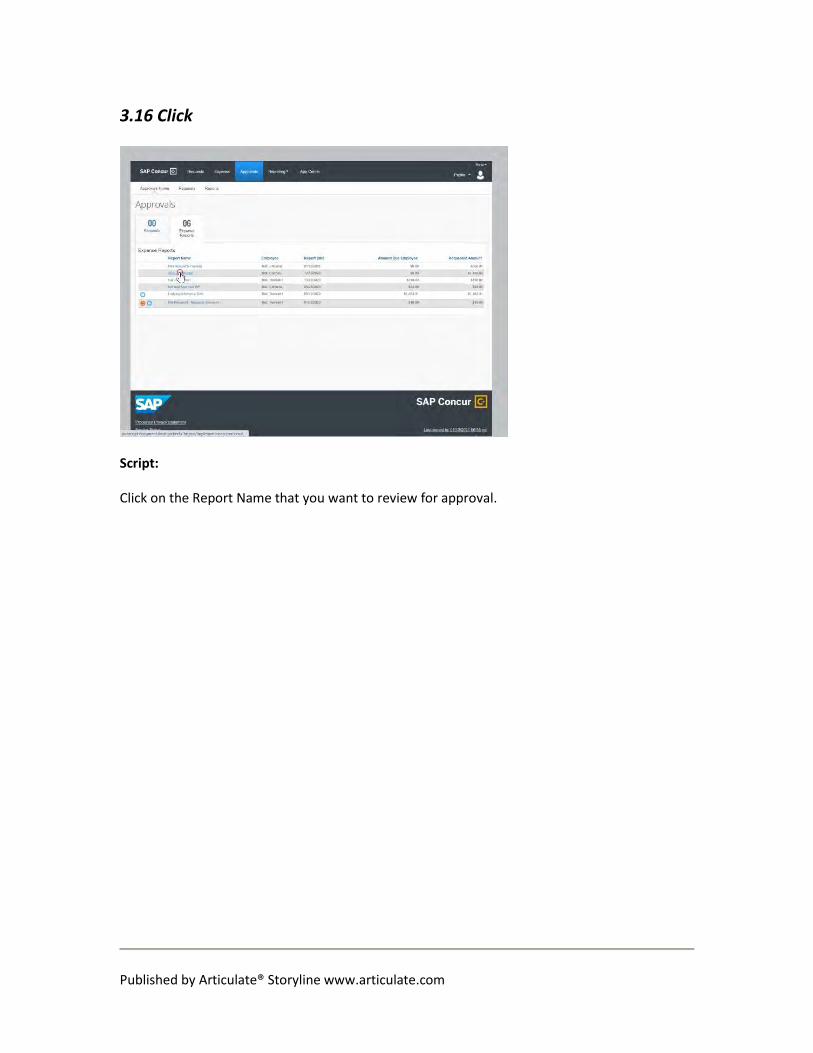
3.16 Click
Script:
Click on the Report Name that you want to review for approval.

Published by Articulate® Storyline www.articulate.com
3.17 Click
Script:
At the top you will see any exceptions that should be reviewed and/or resolved.
You will see a listing of Expenses.
Click on the line item to view additional information.
Also, if an expense was itemized, click on the arrow to view details of the itemization.
Published by Articulate® Storyline www.articulate.com
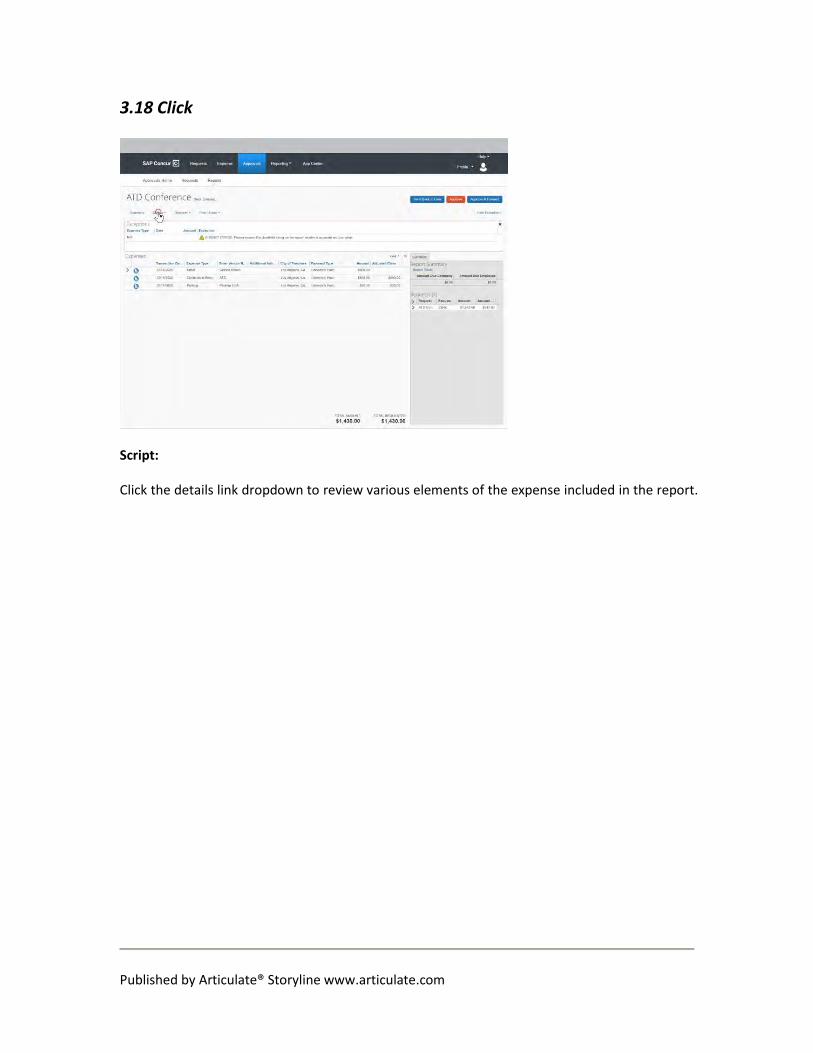
3.18 Click
Script:
Click the details link dropdown to review various elements of the expense included in the report.

Published by Articulate® Storyline www.articulate.com
3.19 Click
Script:
Click on the Receipts link dropdown to review the attached receipts and add receipts if
necessary.

Published by Articulate® Storyline www.articulate.com
3.20 Click

Published by Articulate® Storyline www.articulate.com
3.21 Click
Script:
If you need to print or email the expense report click the Print/Email link.

Published by Articulate® Storyline www.articulate.com
3.22 Click

Published by Articulate® Storyline www.articulate.com
3.23 Click
Script:
Once you are ready to signify your approval click the Approve button.

Published by Articulate® Storyline www.articulate.com
3.24 Click
Script:
Then click the Accept button on the Final Confirmation pop-up message.
Published by Articulate® Storyline www.articulate.com
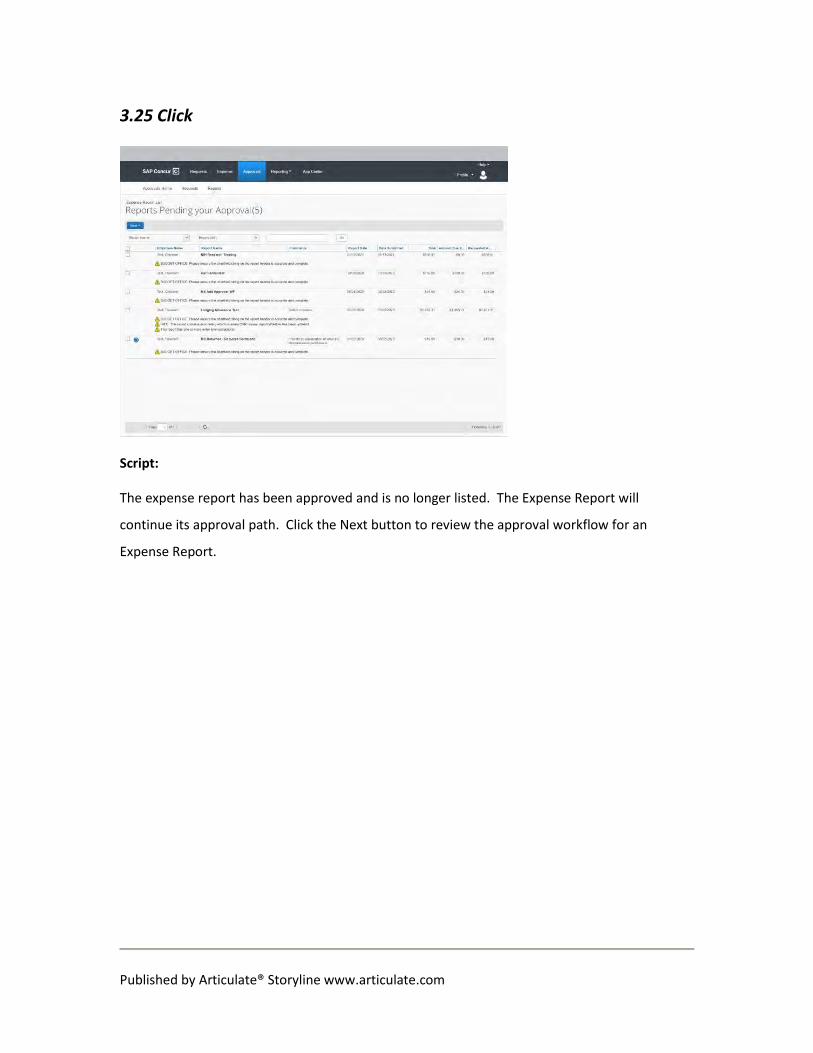
3.25 Click
Script:
The expense report has been approved and is no longer listed. The Expense Report will
continue its approval path. Click the Next button to review the approval workflow for an
Expense Report.

Published by Articulate® Storyline www.articulate.com
3.26 Expense Report Approval Workflows
Script:
When a user submits an Expense Report for Approval it goes to the user’s designated approver.
This is based on the Business Unit and Department and mirrors the approval workflow that is in
ConnectCarolina.
After the Designated Approver reviews and approves the submission it will then be sent to the
Business Office for review and approval.
Like the Designated Approvers it is based on the Business Unit and Department and mirrors the
approval workflow in ConnectCarolina.
If the submission includes a chartfield string associated with the Office of Sponsored Research
(OSR) it may also be reviewed for approval by OSR.
Then, the Travel Team Processor will review the submission for approval.
Once all of the required steps have obtained approval, the Expense Report is Approved.
You can also add Approvers to the workflow if necessary.
Click the Next button to continue the training.

Published by Articulate® Storyline www.articulate.com
3.27 Returning an Expense Report to a User
Script:
When reviewing and Expense Report you may find that you need to return the report to the
traveler for further edits. In the following example, the receipt shows a Satellite Radio expense
that should have been marked as a personal non-reimbursable expense. Click the Next button
to view the demonstration.

Published by Articulate® Storyline www.articulate.com
3.28 Click
Script:
When reviewing an expense report you can click on the icon to view the attached receipt.
Published by Articulate® Storyline www.articulate.com
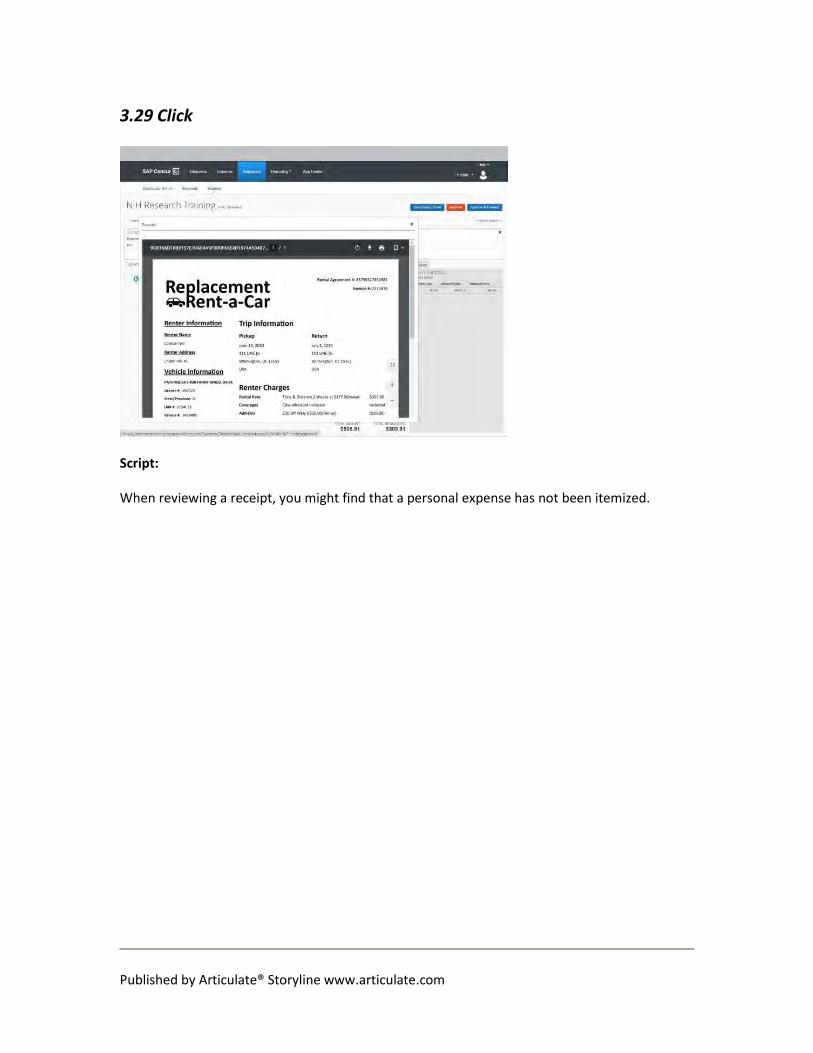
3.29 Click
Script:
When reviewing a receipt, you might find that a personal expense has not been itemized.

Published by Articulate® Storyline www.articulate.com
3.30 Scroll the mouse wheel

Published by Articulate® Storyline www.articulate.com
3.31 Click
Script:
In this example, the traveler added Satellite Radio to their car rental. This is considered to be a
personal expense that should be itemized and paid by the traveler.

Published by Articulate® Storyline www.articulate.com
3.32 Click

Published by Articulate® Storyline www.articulate.com
3.33 Click
Script:
In this instance, you will want to click the Send Back to User button.

Published by Articulate® Storyline www.articulate.com
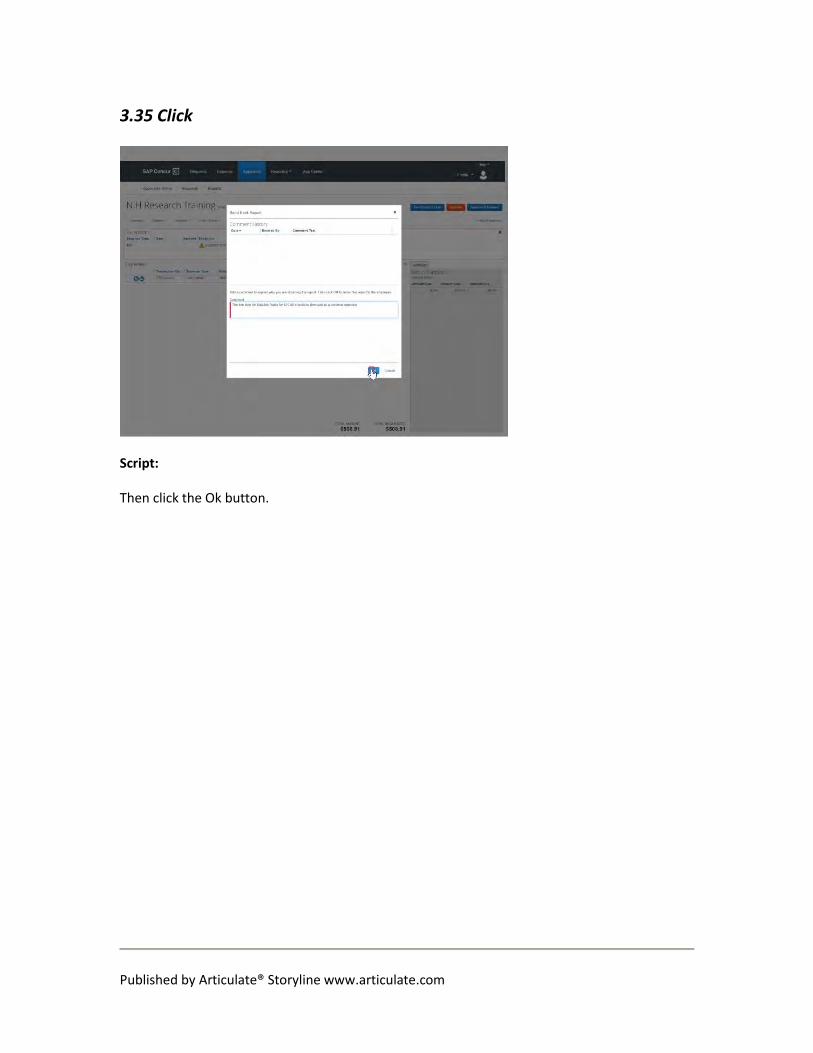
3.34 Type The line item for Satellite Radio for $10.00 should be itemized as
a personal expense.
Script:
Enter the reason or explanation of why the Expense Report is being sent back.
Published by Articulate® Storyline www.articulate.com
3.35 Click
Script:
Then click the Ok button.

Published by Articulate® Storyline www.articulate.com
3.36 Click
Script:
The Expense Report has been Returned to the traveler and the traveler or delegate can make
the appropriate edits to the Expense Report. Click the Next button to continue the training.

Published by Articulate® Storyline www.articulate.com
3.37 Using the Preview Feature as an Approval Delegate
Script:
As mentioned, some Approval Delegates may only have the ability to mark a Travel Request or
Report as Reviewed instead of Approved. Click the Next button to learn how the Preview
feature works.
Published by Articulate® Storyline www.articulate.com
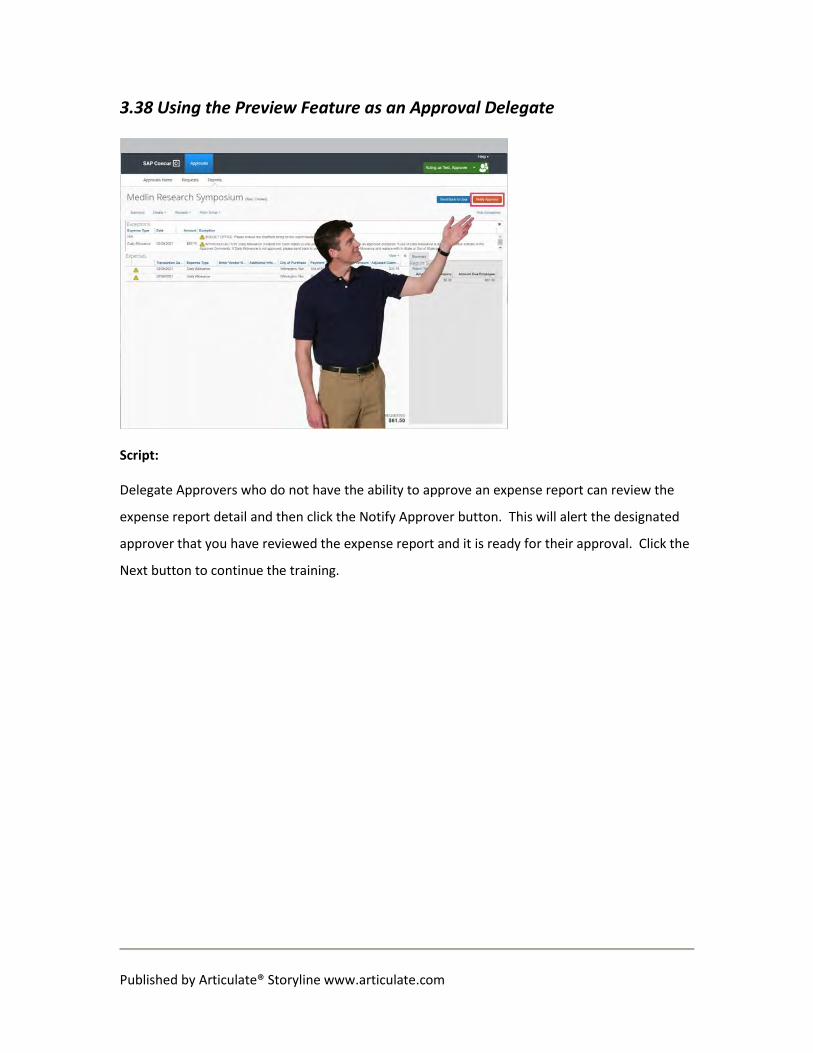
3.38 Using the Preview Feature as an Approval Delegate
Script:
Delegate Approvers who do not have the ability to approve an expense report can review the
expense report detail and then click the Notify Approver button. This will alert the designated
approver that you have reviewed the expense report and it is ready for their approval. Click the
Next button to continue the training.

Published by Articulate® Storyline www.articulate.com
3.39 Allocating Expenses
Script:
Approvers can also allocate line items on an Expense Report. However, navigating in the Concur
System to allocate an expense is different for Approvers. Click the Next button to continue.

Published by Articulate® Storyline www.articulate.com
3.40 Click
Script:
If an approver needs to allocate an expense line item, click the Details link.

Published by Articulate® Storyline www.articulate.com
3.41 Click
Script:
Then select Allocations from the dropdown.

Published by Articulate® Storyline www.articulate.com
3.42 Click
Script:
Here you can begin allocation of one or multiple expenses in the report.
Published by Articulate® Storyline www.articulate.com
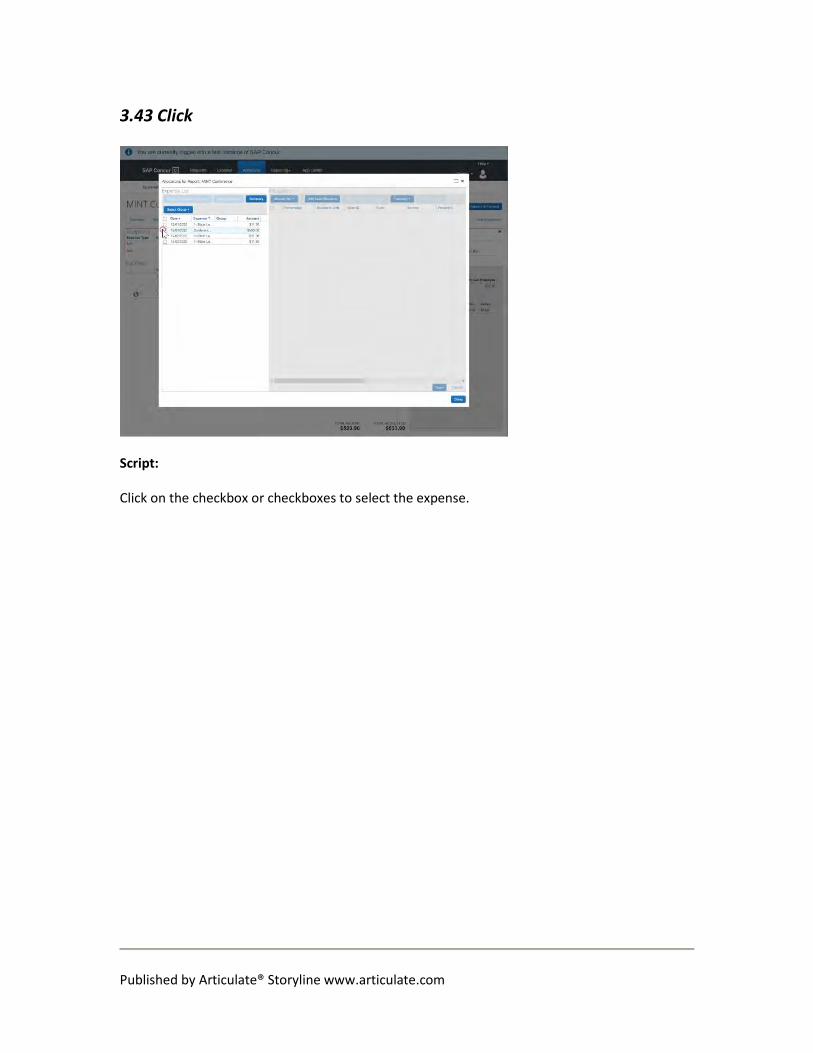
3.43 Click
Script:
Click on the checkbox or checkboxes to select the expense.

Published by Articulate® Storyline www.articulate.com
3.44 Click
Script:
Then click the Allocate Selected Expenses button.

Published by Articulate® Storyline www.articulate.com
3.45 Click
Script:
In the Allocations window, you will have the option to allocate by percent or amount.

Published by Articulate® Storyline www.articulate.com
3.46 Click
Script:
In this example, I will allocate the expense by percentage.

Published by Articulate® Storyline www.articulate.com
3.47 Click
Script:
To add additional distribution lines click the Add New Allocation button.

Published by Articulate® Storyline www.articulate.com
3.48 Click
Script:
Adjust the percentage/amount for each distribution line if necessary.

Published by Articulate® Storyline www.articulate.com
3.49 Type 75

Published by Articulate® Storyline www.articulate.com
3.50 Click

Published by Articulate® Storyline www.articulate.com
3.51 Type 25

Published by Articulate® Storyline www.articulate.com
3.52 Click
Script:
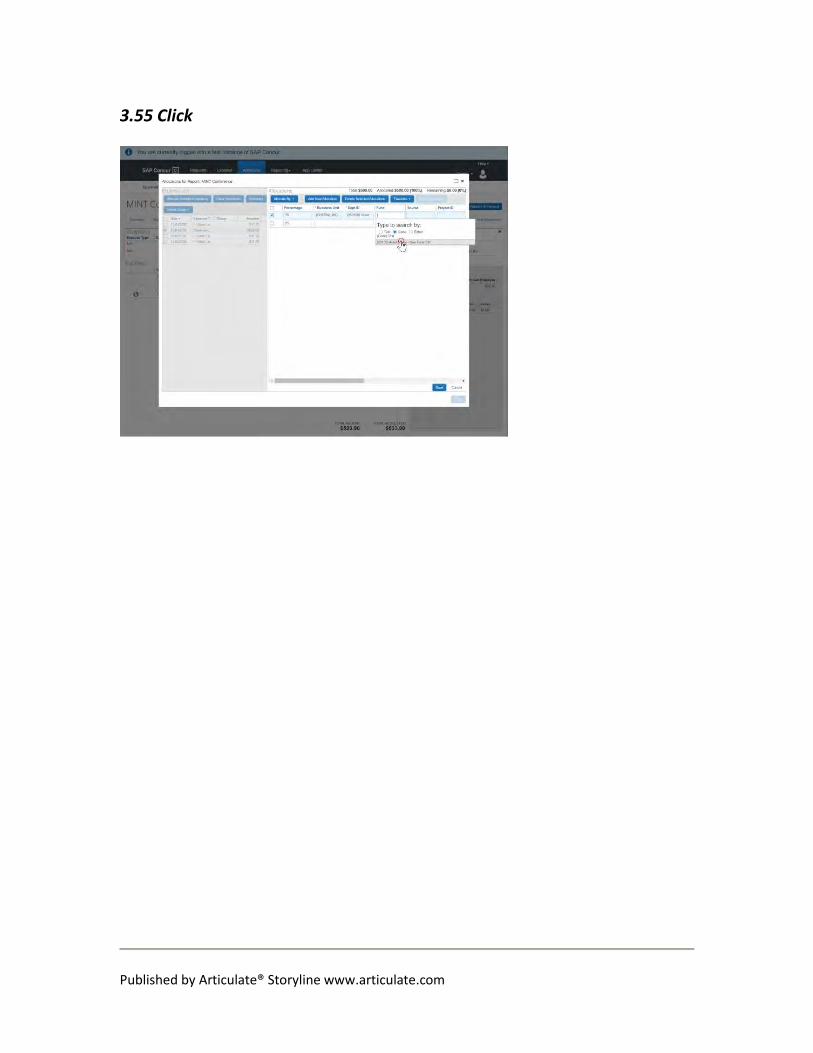
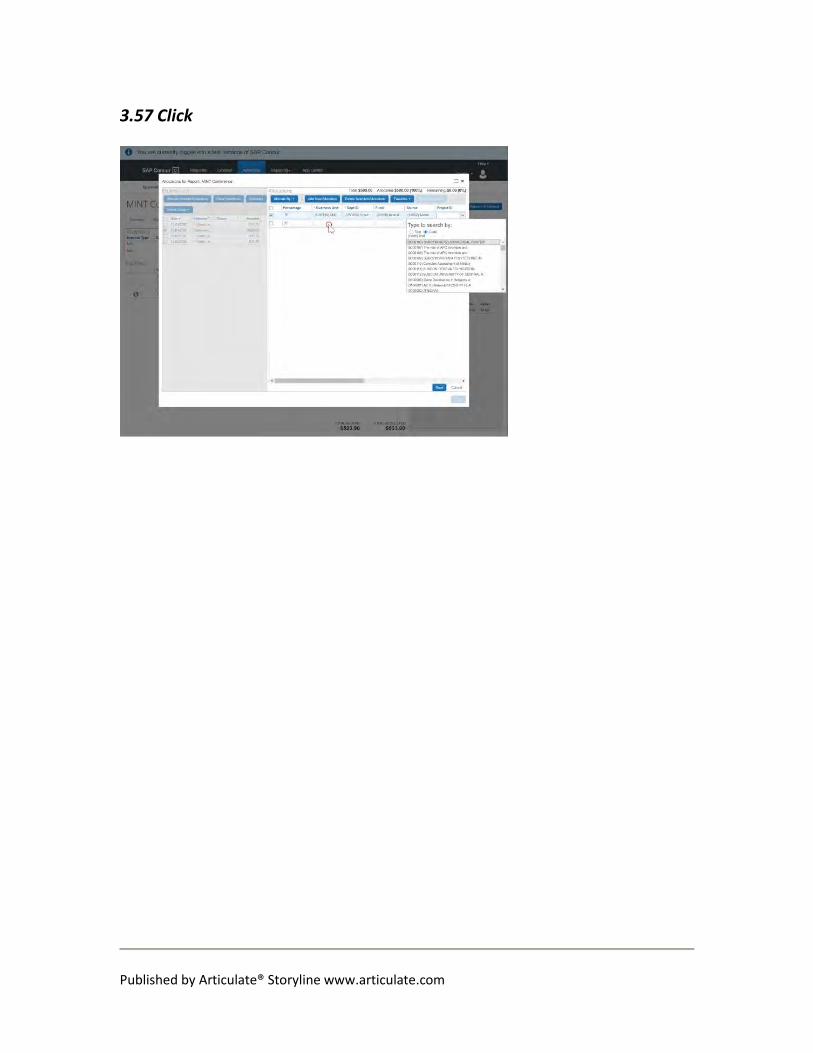
Then enter the appropriate chartfield strings.

Published by Articulate® Storyline www.articulate.com
3.53 Click

Published by Articulate® Storyline www.articulate.com
3.54 Click
Published by Articulate® Storyline www.articulate.com
3.55 Click

Published by Articulate® Storyline www.articulate.com
3.56 Click
Published by Articulate® Storyline www.articulate.com
3.57 Click

Published by Articulate® Storyline www.articulate.com
3.58 Click

Published by Articulate® Storyline www.articulate.com
3.59 Click

Published by Articulate® Storyline www.articulate.com
3.60 Click

Published by Articulate® Storyline www.articulate.com
3.61 Click

Published by Articulate® Storyline www.articulate.com
3.62 Click

Published by Articulate® Storyline www.articulate.com
3.63 Click
Script:
Then click the Save button.

Published by Articulate® Storyline www.articulate.com
3.64 Click
Script:
Click the Ok button on the pop-up message.

Published by Articulate® Storyline www.articulate.com
3.65 Click
Script:
Then click the Done button.

Published by Articulate® Storyline www.articulate.com
3.66 Click
Script:
The allocate icon now appears on the line showing that the expense has been allocated. Also, it
is important to note that changes to the chartfield string of the Report Header or within the
allocation may update the workflow.
Click the Next button to continue the training.
Published by Articulate® Storyline www.articulate.com
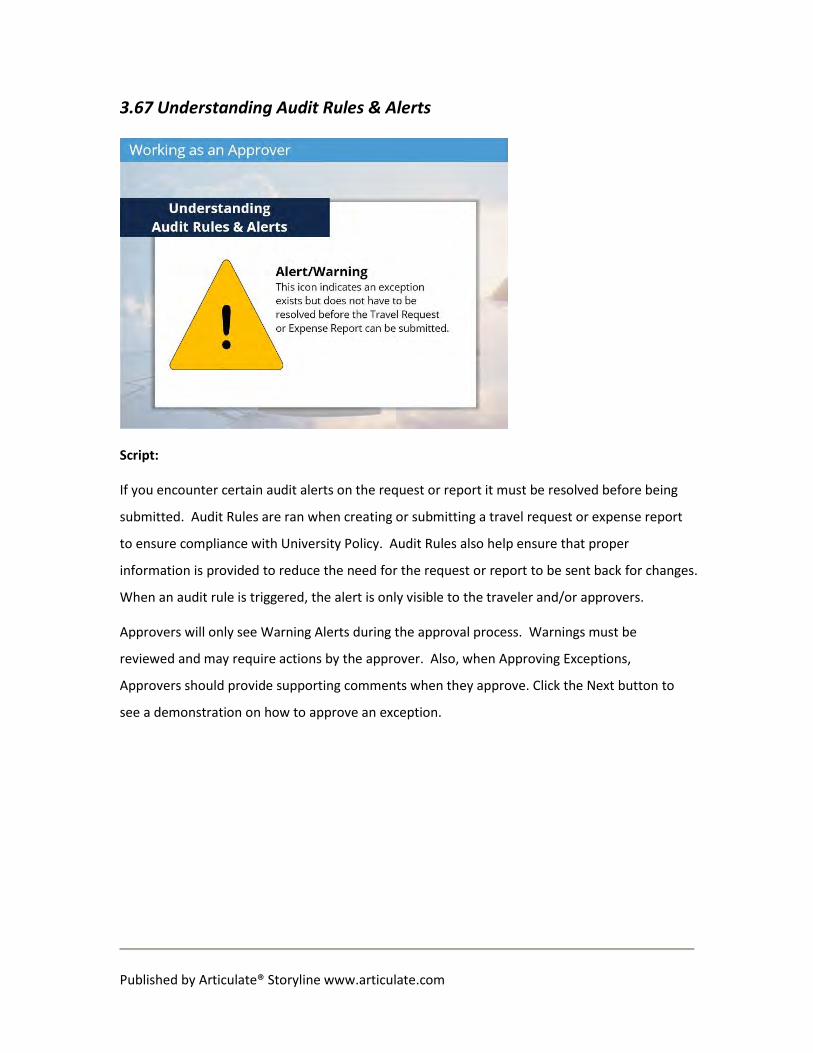
3.67 Understanding Audit Rules & Alerts
Script:
If you encounter certain audit alerts on the request or report it must be resolved before being
submitted. Audit Rules are ran when creating or submitting a travel request or expense report
to ensure compliance with University Policy. Audit Rules also help ensure that proper
information is provided to reduce the need for the request or report to be sent back for changes.
When an audit rule is triggered, the alert is only visible to the traveler and/or approvers.
Approvers will only see Warning Alerts during the approval process. Warnings must be
reviewed and may require actions by the approver. Also, when Approving Exceptions,
Approvers should provide supporting comments when they approve. Click the Next button to
see a demonstration on how to approve an exception.

Published by Articulate® Storyline www.articulate.com
3.68 Approving an Exception
Script:
In this example, a traveler is trying to use Federal Meal per diems instead of State of North
Carolina per diems. The alert the Approver will receive begins with Approver Action. The
system will request the Approver to indicate their approval of an exception in the Approver
Comments. In some instances, an alert with only require your review. However, other alerts
will require action from the Approver.
To resolve this, the Approver should click the Details button.

Published by Articulate® Storyline www.articulate.com
3.69 Click
Script:
Click the Comments option.

Published by Articulate® Storyline www.articulate.com
3.70 Click the group
Script:
Then in the Comments field, state that you approve the exception and enter any additional
information that may be helpful regarding your approval if necessary. Then click the Save
button.

Published by Articulate® Storyline www.articulate.com
3.71 Click the SAP Concur Home link
Script:
Once done, click the Approve button to complete the process.
Click the Next button to continue the training.
Published by Articulate® Storyline www.articulate.com
3.72 Travel Path
Script:
You have reached your final destination! Click the Next button to conclude the training.

Published by Articulate® Storyline www.articulate.com
4. Conclusion
4.1 Concur Travel Badge
Script:
You also have the opportunity to complete additional training. If you are seeking advanced
training on the Concur system, consider taking the Advance User Training for the Concur System.
Completion of all three Concur Travel System trainings will allow you to earn the Travel CREW
Badge! Earning your Travel CREW Badge tells everyone that you are a Concur Travel System
expert for the University. To obtain your Travel CREW Badge you must complete this training,
the Basic, and the Advance User Training for the Concur System.
Click the Next button to continue.

Published by Articulate® Storyline www.articulate.com
4.2 Training Completed
Script:
If you have additional questions, please feel free to contact the University Travel Office.
Thank you for completing the Delegate and Approver User Training for the Concur Travel
System!

Published by Articulate® Storyline www.articulate.com
5. Lightboxes
5.1 Personal Delegates
5.2 Approver Delegates

Published by Articulate® Storyline www.articulate.com
6. Itemizing Hotel Lodging Receipt Expenses as a Personal
Delegate
6.1 Click
Script:
You may also encounter a hotel/lodging receipt from a T & E Card that contains a personal
expense that the traveler may have forgotten to have removed. When this happens you must
itemize the receipt. First, you will want to create the expense by clicking the Add Expense
button on the report.

Published by Articulate® Storyline www.articulate.com
6.2 Scroll the mouse wheel
Script:
Select the expense from the listing of Available Expenses.

Published by Articulate® Storyline www.articulate.com
6.3 Click

Published by Articulate® Storyline www.articulate.com
6.4 Click
Script:
Click the Add to Report button.

Published by Articulate® Storyline www.articulate.com
6.5 Click
Script:
Then click on the expense line item.

Published by Articulate® Storyline www.articulate.com
6.6 Click
Script:
On the details tab, enter the Check-in Date. Notice that all of the other required and necessary
information has been transferred from the T & E card transaction to the Concur system.

Published by Articulate® Storyline www.articulate.com
6.7 Type 06/18/2020

Published by Articulate® Storyline www.articulate.com
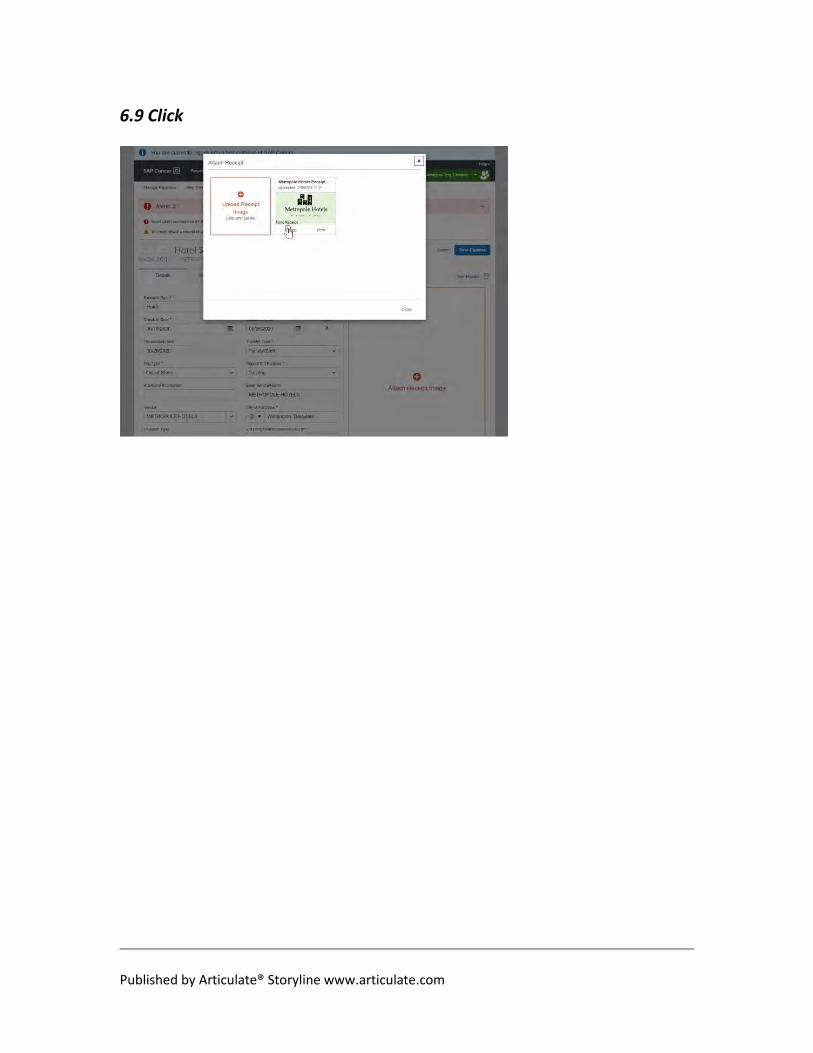
6.8 Click
Script:
Then attach the receipt.
Published by Articulate® Storyline www.articulate.com
6.9 Click

Published by Articulate® Storyline www.articulate.com
6.10 Click
Script:
Now I will create the itemization by clicking the Itemization tab.

Published by Articulate® Storyline www.articulate.com
6.11 Click
Script:
Click the Create Itemization button.

Published by Articulate® Storyline www.articulate.com
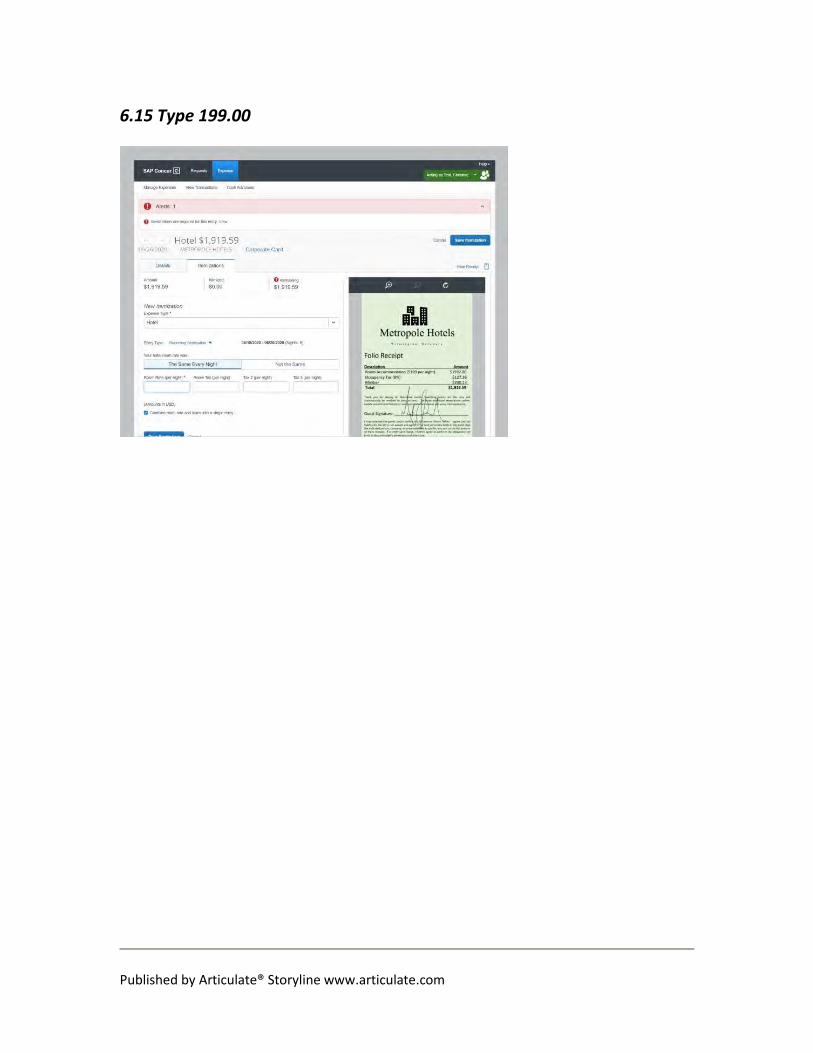
6.12 Click
Script:
Select the Hotel Expense Type and itemize the related line items on the receipt.

Published by Articulate® Storyline www.articulate.com
6.13 Click

Published by Articulate® Storyline www.articulate.com
6.14 Click
Published by Articulate® Storyline www.articulate.com
6.15 Type 199.00

Published by Articulate® Storyline www.articulate.com
6.16 Click

Published by Articulate® Storyline www.articulate.com
6.17 Type 15.92

Published by Articulate® Storyline www.articulate.com
6.18 Click
Script:
Then click the Save Itemization button.

Published by Articulate® Storyline www.articulate.com
6.19 Click
Script:
Now I will add the itemization for the personal expense shown on the receipt by clicking the
Create Itemization button.

Published by Articulate® Storyline www.articulate.com
6.20 Click
Script:
Select the Non-Reimbursable/Personal Expense option for the Expense Type.

Published by Articulate® Storyline www.articulate.com
6.21 Click

Published by Articulate® Storyline www.articulate.com
6.22 Click
Script:
Then enter the total amount of the expense.

Published by Articulate® Storyline www.articulate.com
6.23 Type 200.23

Published by Articulate® Storyline www.articulate.com
6.24 Click
Script:
Then click the Save Itemization button.

Published by Articulate® Storyline www.articulate.com
6.25 Click
Script:
The entire receipt has been itemized and the remaining balance for itemization is $0.00.

Published by Articulate® Storyline www.articulate.com
6.26 Click
Script:
Now I am ready to click the Save Expense button.

Published by Articulate® Storyline www.articulate.com
6.27 Click
Script:
The expense is now marked as itemized. Now, I can add additional expenses or click the Ready
for Review button to notify the traveler that the expense report is ready for their review and
submission.
Click the Next button to continue the training.
Published by Articulate® Storyline www.articulate.com
7. Itemizing T&E Transactions as a Personal Delegate
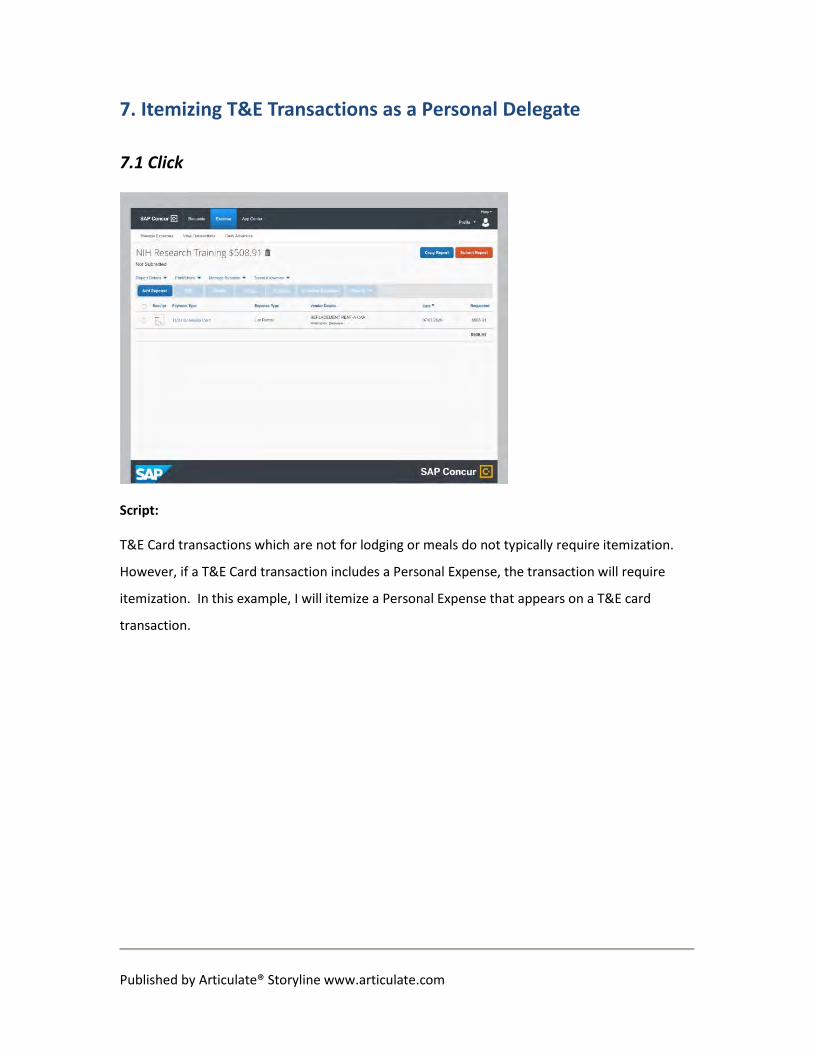
7.1 Click
Script:
T&E Card transactions which are not for lodging or meals do not typically require itemization.
However, if a T&E Card transaction includes a Personal Expense, the transaction will require
itemization. In this example, I will itemize a Personal Expense that appears on a T&E card
transaction.

Published by Articulate® Storyline www.articulate.com
7.2 Click
Script:
This begins by selecting the expense.

Published by Articulate® Storyline www.articulate.com
7.3 Click
Script:
Click the Itemizations tab.

Published by Articulate® Storyline www.articulate.com
7.4 Click
Script:
Click the Create Itemization button.

Published by Articulate® Storyline www.articulate.com
7.5 Click
Script:
Then select the Expense type based on the expense.

Published by Articulate® Storyline www.articulate.com
7.6 Click

Published by Articulate® Storyline www.articulate.com
7.7 Click
Script:
Enter the total amount of the transaction with the exception of the amount of the personal
expense.

Published by Articulate® Storyline www.articulate.com
7.8 Type 498.91

Published by Articulate® Storyline www.articulate.com
7.9 Click
Script:
Then click the Save Itemization button.

Published by Articulate® Storyline www.articulate.com
7.10 Click
Script:
Now I will itemize the personal expense by clicking the Create Itemization button.

Published by Articulate® Storyline www.articulate.com
7.11 Click
Script:
Next, select the Non-Reimbursable/Personal Expense from the Expense Type list.

Published by Articulate® Storyline www.articulate.com
7.12 Click

Published by Articulate® Storyline www.articulate.com
7.13 Click
Script:
And then enter the amount of the personal expense.

Published by Articulate® Storyline www.articulate.com
7.14 Type 10.00

Published by Articulate® Storyline www.articulate.com
7.15 Scroll the mouse wheel
Script:
I will make sure the checkbox is marked as this is a Personal Expense.

Published by Articulate® Storyline www.articulate.com
7.16 Click

Published by Articulate® Storyline www.articulate.com
7.17 Click
Script:
Once I click the Save Itemization button, the itemizations should show a remaining balance to be
$0.00.

Published by Articulate® Storyline www.articulate.com
7.18 Click

Published by Articulate® Storyline www.articulate.com
7.19 Click the ccinfo button
Script:
Then click the Save Expense button to save the expense.

Published by Articulate® Storyline www.articulate.com
7.20 Click
Script:
As a result, the T&E Card transaction has been itemized. Also, keep in mind, that if personal
expenses exceed the out-of-pocket reimbursement, the remaining amount will be deducted
from the employee’s paycheck.
Click the Next button to continue the training.