CIT653: Introduction to the Internet - NOUN
187
CIT653: Introduction to the Internet COURSE DEVELOPMENT Course Developer — Gbaje Ezra Shiloba ABU. Course Writer — Gbaje Ezra Shiloba ABU. Programme Leader — M. Oki NOUN. Course Coordinator — A. M. Balogun NOUN.
-
Upload
khangminh22 -
Category
Documents
-
view
5 -
download
0
Transcript of CIT653: Introduction to the Internet - NOUN

CIT653: Introduction to the Internet
COURSE DEVELOPMENT
Course Developer — Gbaje Ezra Shiloba
ABU.
Course Writer — Gbaje Ezra Shiloba ABU.
Programme Leader — M. Oki NOUN.
Course Coordinator — A. M. Balogun NOUN.

National Open University ofNigeria
14/16 Ahmadu Bello Way,
Victoria Island,
Lagos
Abuja Annex Office
245 Samuel Adesujo Ademulegun Street
Central Business District
Opposite Arewa Suites
Abuja.
E-mail: [email protected]
URL www.nou.edumg
©National Open University of Nigeria 2004
First Published 2004
ISBN 978-058-144-8
All Rights Reserved
Published by University Press PLC.* National Open University of Nigeria

CONTENTS
Page
Course Guide
Unit 1: Network and the Internet
6
Unit 2: History and Development of the Internet
12
Unit 3: The World Wide Web(WWW)
17
Unit 4: Internet E-mail
Unit 5: Newsgroups
29
Unit 6: Internet Explorer — Window and Buttons 34
Unit 7: Internet Explorer — Viewing Web Page 39
Unit 8: Internet Explorer — Management of Favorites and History
45
Unit 9: Internet Explorer — Saving and Downloading Files from the Web
51
Unit 10: Internet Explorer — Security 57
Unit 11: Netscape Browser — Introduction 63
Unit 12: Netscape Browser — Bookmark, History and Web Browsing 69
Unit 13: Outlook Express —Toolbars and Composing Messages 76
Unit 14: Outlook Express — Sending, Queuing Messages and Attachment 83
Unit 15: Outlook Express — Using the Address Book 91
Unit 16: Outlook Express — Managing E-Mail Accounts 97
Unit 17: FrontPage — Creating, Importing Web Page and Image Formatting 102
Unit 18: FrontPage — Image Fromatting 108
Unit 19: FrontPage — Tables 115
Unit 20: FrontPage — Theme, Marquee and Dynamic Html 122
Unit 21: Front Page —Adding Date and Time, Spell Check and Web Publishing 128
Unit 22: Html — File Format and Structure 134
Unit 23: Html — Tags 139
Unit 24: Html —Text Formatting Properties 144
Unit 25: Html — Creating Links to Other Pages 149
Unit 26: Html— Manipulating Images 154
Unit 27: Effective Internet Searching Techniques: Search Tools 160
Unit 28: Effective Internet Searching Techniques: Search Features 165
Unit 29: Data Transmission Systems, ISP And Virus 171
Unit 30: Protocols 178
in

CONTENTS
Page
Course Guide 1
Unit 1: Network and the Internet
6
Unit 2: History and Development of the Internet
12
Unit 3: The World Wide Web(WWW)
17
Unit 4: Internet E-mail
23
Unit 5: Newsgroups 29
Unit 6: Internet Explorer — Window and Buttons 34
Unit 7: Internet Explorer — Viewing Web Page 39
Unit 8: Internet Explorer — Management of Favorites and History 45
Unit 9: Internet Explorer—Saving and Downloading Files from the Web
51
Unit 10: Internet Explorer — Security 57
Unit 11: Netscape Browser — Introduction 63
Unit 12: Netscape Browser — Bookmark, History and Web Browsing 69
Unit 13: Outlook Express —Toolbars and Composing Messages 76
Unit 14: Outlook Express — Sending, Queuing Messages and Attachment
Unit 15: Outlook Express — Using the Address Book 91
Unit 16: Outlook Express — Managing E-Mail Accounts 97
Unit 17: FrontPage — Creating, Importing Web Page and Image Formatting 102
Unit 18: FrontPage — Image Fromatting 108
Unit 19: FrontPage — Tables 115
Unit 20: FrontPage — Theme, Marquee and Dynamic Html 122
Unit 21: Front Page — Adding Date and Time, Spell Check and Web Publishing 128
Unit 22: Html — File Format and Structure 134
Unit 23: Html — Tags 139
Unit 24: Html — Text Formatting Properties 144
Unit 25: Html — Creating Links to Other Pages 149
Unit 26: Html — Manipulating Images 154
Unit 27: Effective Internet Searching Techniques: Search Tools 160
Unit 28: Effective Internet Searching Techniques: Search Features 165
Unit 29: Data Transmission Systems, ISP And Virus 171
Unit 30: Protocols 178
iii


COURSE GUIDE
Introduction Introduction to Internet is a 100 level Post-Graduate Diploma in Information Technololgy. This course introduces
you to the most important new technology of recent history i.e. the Internet.
This course consists of 30 units, which not only explains how to participate in this internet world but also
enables you to develop the skills necessary to make your use of internet effective and efficient. At the end of
this course, you will be able to use, the components of the internet and discover further information through
the Internet to help you develop your skills.
The course is practical oriented and requires the use of the Internet, so you will need a computer and
have access to the internet. There are no compulsory pre-requisites to it, although you are expected to have
a basic knowledge of operating a computer and access to the Internet.
This Course Guide is the starting point for this course. It tells you briefly what the course is about, what
course materials you will be using and how you can work your way through these materials. It also gives you
some guidance on your tutor-marked assignments as well as describes what you need to do in order to pass
this course.
What You Will Learn in this Course The overall aim of introduction to internet is to show you how to participate in the Internet world. In the
course of your studying, you will learn about the various components of the Internet and how to use them.
Two most commonly used browsers, the Internet Explorer and Netscape Navigator will be taught, how to
develop and publish your own web page using two different programmes i.e. HTML and Microsoft Front
page will be explained. You will also be taught how to effectively search the Internet.
Using the Internet involves a large amount of file transfer. The speed at which you download and send
information is highly dependent on the data transmission system of your Internet Service Provider (ISP),
hence we will be discussing the various transmission systems.
Course Aims The aim of this course is to give you an understanding of the Internet, its use and application. This will be
achieved by aiming to:
Introduce you to what the internet is and what it consists oE
Explain to you the basic tools and technology underlying the internet;
Teach you how to use the Internet for information collection, distribution and retrieval;
Enable you understand the structure and content of the Internet;
Teach you how to use your browser and Outlook Express to manage your files on t he Internet;
Enable you understand the various data transmission Systems;
Teach you how to use HTML and Microsoft Front Page to design and publish your web page;
Explain to you how virus work and how to protect your computer;
Explain the Internet protocols.
Course Objectives To achieve the aims set out above, the course sets overall objectives. In addition, each unit also has specific
objectives. The unit objectives are always included at the beginning of a unit. You may want to refer to them
during the study to check on your progress.
1

Below are the wider objectives of the course as a whole. On successful completion of this course, you
should be able to:
Explain the main components of the Internet
Effectively use Internet Explorer and Netscape browser.
Read, organise and sort your mails using Outlook Express
Incorporate an image and attach a file to an e-mail
Contro l the downloading of f i les
Access your e -mai l f rom other systems
Design and publ ish your web page
Loca te in fo rmat ion on t he WWW
Choose an ISP that will provide you the best services
Identify the danger of virus and how to prevent them
Explain the Internet protocols
Working through this Course To complete this course, you are required to read the study units, and other related materials you find on the
Internet. You will also need to undertake practical exercises for which you need access to a computer
running Windows 98, 2000 or XP. Each unit contains self-assessment exercises, and at a point in the course,
you are required to submit assignments for assessment purposes. At the end of this course is a final examination.
The course should take you about 15 weeks in total to complete. Below, you wi ll find listed all the components
of the course, what you have to do and how you should allocate your time to each unit in order to complete the
course successfully on time.
Course Materials Major components of the course are:
1 . C o u r s e G u i d e
2 . S t u d y Un i t s
3 . Ass i gnmen t F i l e
This course material assumes that you have access to a suitable computer system, some experience with
using windows operating systems and access to the Internet.
Study Units There are thirty study units in this course, as follows:
Unit 1: Network and the Internet
Unit 2: History and Development of the Internet
Unit 3: The World Wide Web (WWW)
Unit 4: Internet E-mail
Unit 5: Newsgroups
Unit 6: Internet Explorer — Window and Buttons
Unit 7: Internet Explorer — Viewing Web Page
Unit 8: Internet Explorer — Management of Favorites and History
Unit 9: Internet Explorer — Saving and Downloading Files from the Web
Unit 10: Internet Explorer — Security
Unit II: Netscape Browser — Introduction
Unit 12: Netscape Browser — Bookmark, History and Web Browsing
2

Unit 13: Outlook Express — Toolbars and Composing Messages Unit 14: Outlook Express — Sending, Queuing Messages and Attachment
Unit 15: Outlook Express — Using the Address Book
Unit 16: Outlook Express — Managing E-Mail Accounts
Unit 17: FrontPage — Creating, Importing Web Page and Image Formatting
Unit 18: FrontPage — Image Fromatting
Unit 19: FrontPage — Tables
Unit 20: FrontPage — Theme, Marquee and Dynamic Html
Unit 21: FrontPage — Adding Date and Time, Spell Check and Web Publishing
Unit 22: Html — File Format and Structure
Unit 23: Html — Tags
Unit 24: Html — Text Formatting Properties
Unit 25: Html — Creating Links to Other Pages
Unit 26: Html — Manipulating Images
Unit 27: Effective Internet Searching Techniques: Search Tools
Unit 28: Effective Internet Searching Techniques: Search Feature
Unit 29: Data Transmission Systems, ISP and Virus
Unit 30: Protocols
The first five units concentrate on basic theory of the internet and its components. The next seven units
address the two most popular and widely used browsers. The next unit discusses an e-mail software while
the next units treat web page design and publishing. Effective Internet search was treated in the two units
and finally, the last two units treat the various data transmission and Internet Protocol.
Each study unit includes specific objectives, references for further reading and summaries of key issues
and ideas. The units direct you to work on exercises related to the required readings and to undertake
practical computer exercises where appropriate. Each unit contains a number of self-tests. In general, these
self-tests question you on the material you have just covered or require you to apply it in some way and
thereby help you to gauge your progress and to reinforce your understanding of the material. Together with
tutor-marked assignments, these exercises will assist you in achieving the stated learning objectives of the
individual units and of the course.
Textbooks There are no compulsory textbooks for this course.
Computer Software Though you will be expected to undertake a substantial number of practical exercises, no specific
software is compulsory but access to the Internet is compulsory.
Assignment File The Assignment File will be made available to you in due course. In this file, you will find all the details of the
work you must submit to your tutor for marking. The marks you obtain for these assignments will count
towards the final mark you obtain for this course.
Assessment There are two aspects to the assessment of this course. First is the tutor-marked assignment: second, is a
written examination.
3

Tutor-Marked Assignments (TMAs) Each unit has a TMA. You are expected to do four assignments Each assignment counts 10% towards your total course mark.
Assignment questions for the units in this course are contained in the Assignment File. You will be able to
complete your assignments from the information and materials contained in your reading and study units and the Internet.
When you complete each assignment, send it, together with a TMA form, to your tutor. Make sure that
each assignment reaches your tutor on or before the deadline given.
Final Examination and Grading
The final examinatioin for introduction to Internet will be three hours duration and have a value of 60% of the
total course grade. The examination will consist of questions which reflect the type of self -testing, practice
exercises and tutor-marked problems you have previously encountered. All areas of the course will be assessed.
You might find it useful to review your self-tests, tutor-marked assignments and comments on them
before the examination.
Course Marking Scheme The following table lays out how the actual course marking is broken down.
Assessment Marks
Assignments 1 -4 Four assignments, 10 marks each =
40% of the course marks
Final examination 60% of the overall course marks
Total 100% of course marks
How To Get The Most From This Course In distance learning, the study units replace the university lecturer. This is one of the great advantages of
distance learning; you can read and work through specific design study materials at your own pace, and at a
time and place that suit you best. Think of it as reading the lecture instead of listening to a lecturer. In the
same way that a lecturer might give you an in-class exercise, your study units provide exercises for you to do at appropriate points.
Each of the study units follows a common format. The first item is an introduction to the subject matter
of the unit. Next is a set of learning objectives. These objectives let you know what you should be able to do
by the time you have completed the unit. You should use these objectives to guide your study. When you have
finished the unit, you must go back and check whether you have achieved the objectives. If you make a habit
of doing this, you will significantly improve your chances of passing this course.
The main body of the unit guides you through the required reading. Some units require you to undertake
practical work on a computer. You will be directed when you need to use a computer and guided through the tasks you must do.
Self-tests are interspersed through the units, and answers are given at the end of units. Working through
these tests will help you to achieve the objectives of the unit and prepare you for the assignments and
examination. You should do each self-test as you come to it in the study unit. There will also be numerous examples given in the study units.
4

Tutors and Tutorials There are 30 hours of tutorials (ten 2 hour sessions and ten 1 hour practical sessions) provided in support of
this course. You will be notified of the dates, times and location of these tutorials, together with the name and
phone number of your tutor, as soon as you are allocated a tutorial group.
Your tutor will mark and comment on your assignments, keep a close watch on your progress and on any
difficulties you might encounter and provide assistance to you during the course. You must pass your tutor -
marked assignments to your tutor well before the due date. They will be marked by your tutor and returned
to you as soon as possible.
Do not hesitate to contact your tutor by telephone, e-mail, or discussion board if you need help. The
following might be circumstances in which you would find help necessary. Contact your tutor if;
You do not understand any part of the study units
You have diff iculty with the self -tests or exercises
You have a question or problem with an assignment, with your tutor's comments on an assignment or
with the grading of an assignment.
You should try your best to attend the tutorials. This is the only chance to have face to face contact with
your tutor and to ask questions which are answered instantly. You can raise any problem encountered in the
course of your study. To gain the maximum benefit from course tutorial, prepare question list before attending
them. You will learn a lot from participating in discussions actively.
Summary This course will introduce you to the Internet and how to participate in the Internet world. Upon completing
this course, you will be equipped with basic knowledge of the Internet. You will be able to answer these
questions.
What are the main components of the Internet? How can we use Internet Explorer and Netscape browser to browse the Internet?
How do you use Outlook Express to read, organise and sort your mail?
How can we incorporate an image and attach a file on an e -mail?
How can we download f i les f rom the Internet?
How can you access your e-mail from other systems?
How can you design and publish your web page?
How can we locate in fo rmat ion on the WWW?
How can we prevent virus f rom our computers?
Of course the list of questions that you can answer is not limited to the above list.
We wish you success with the course and hope that you will find it both interesting and useful and wish
you every success in your future.
5

UNIT 1: Network and the Internet
Table of Contents
Page 1.0 Introduction 7
2.0 Objectives 7
3.1 Background to the Internet 7
3.2 Networks Concepts 7
3.3 Types of Networks 9
3.4 Components of the Internet 9
3.4.1 World Wide Web 9
3.4.2 E-Mail 9
3.4.3 Telnet 10
3.4.4 FTP 10
3.4.5 E-Mail Discussion Groups 10
3.4.6 Usenet News 10
3.4.7 Chat and Instant Messaging 11
4.0 Conclusion 11
5.0 Summary 11
6.0 References and Suggestion for Further Reading 11
7.0 Tutor-Marked Assignment 11
6

1.0 Introduction
The Internet is an informal, global computer network connecting millions of computers across the
world. It is a voluntary network in which many computers connected have chosen to do so in order
to share and exchange information in a quick and effective manner. The Internet is one of the most
unifying powers known to man, and you are now a part of it.
In this unit, you will learn about key concepts of the Internet. In order to have a good understanding
of the Internet we will start by considering some network concepts.
2.0 Objectives At the end of this unit, you should be able to:
Explain the concept of the Internet; Understand the network concepts and it's advantages;
Identify the various components of the Internet.
3.1 Background to the Internet The Internet is a computer network made up of thousands of network worldwide. No one knows
exactly how many computers are connected to the Internet. It is certain, however, that this number
is in the millions and is increasing at a rapid rate. No one is in charge of the Internet. There are organisations which develop technical aspects of
this network and set standards for creating applications on it, but no governing body is in control.
Private companies own the Internet backbone, through which Internet traffic flows.
All computers on the Internet communicate with one another using the Transmission Control
Protocol/Internet Protocol suite, abbreviated to TCP/IP. Computers on the Internet use client/server
architecture. This means that the remote server machine provides files and services to the user's
local client machine. Software can be installed on a client's computer to take advantage of the latest
access technology. The Internet consists primarily of a variety of access protocols. Many of these protocols feature
programmes that allow users to search for and retrieve material made available by the protocol.
Exercise 1
Who owns the Internet?
3.2 Network Concepts A network is a set of autonomous computers or end users joined together with a communications
link. End users include:
P e o p l e
D e vi c e s
Applications
Networks can be divided into two parts:
The physical part is concerned both with the electricity which encodes and conveys information
and with all the associated wiring, transmission devices and media.
The logical part is concerned with the rules and formats for the exchange of information. The
logical part of voice networking is in understanding telephone numbers and the physical routing
options associated with a specific number. The logical part of data networking is in understanding
addressing schemes and data delivery.
7

3.2.1 Advantages of Network In the first place, data and resources (printers, CD-ROMs etc.) are shared. You can have access to
common laser printers, databases and a lot of applications not present on your own computer. You
can access many of these things as if they were at your desktop personal computer (PC), even if the
physical location is on a different computer system or at a long distance.
The second reason is the use of internet. This is a worldwide computer network where you can
find a lot of information and where you can communicate with other people all over the world. For
example, you can look for articles in other libraries from your PC, and you can communicate with
your fellow friends in other countries.
Communication and sharing data with other people is a lot easier. You can send and receive mail,
and you can have access to common workgroup files. This is very handy if you are working on the
same document with a team, or if the workgroup has a database some people are working on while
at the same time others make queries. This kind of things cannot be done without a network.
Exercise 2
What are the advantages of networking a group of computers?
3.2.2 Hardware Components of a Network Desktop PCs — These are the access points of users to the network.
Physical network— The function is bit transport. The physical network consists of cables and all
kinds of devices to send the data to different segments of the network.
One or more servers — Servers are the central points in a network. They provide the main
network services which can be files and applications, or in some cases take over computing
work. Servers can be specialized and don't give the same services. There are file servers, print
servers, mail servers, WWW servers for Internet services. FTP servers are for file transfer to
other systems, and so on. The available applications can differ per server. Sometimes a server is
called a host.
One or more network printers — Here the printing is done in a transparent way, as if the printer were local to the desktop PC.
Peripheral devices — Examples are: Scanners. CD-ROMs etc.
To communicate with the network, you need special software. It consists of three parts:
A driver to use the network interface card.
Protocol stacks to send the data over the cabling system in a form the receiving system can
handle. Fileserver and desktop PC must agree on a lot of details on how data are sent, for
example, how to set up a dialog, how to address the machine where the data must be delivered,
and how to transfer data to the application that needs them. All these things are specified in
different protocols. A protocol stack is a set of accompanying protocols which make up a total
specification of data transfer. Historically, each system has its own protocols. For example, a
NOVELL network uses other protocols than UNIX or Apple networks.
The network interface. This is needed to coordinate the operating system of the local desktop
PC with that of the network server. An example is the Netware shell which caputres the
networking commands that DOS does not understand and sends them to a Novell fileserver.
The network interface also provides coordination between the applications and the server.

Exercise 3 What do you understand by protocol?
3.3 Types of Networks There are three types of networks you will use:
LANs or Local Area Networks, which in most cases are confined to one building and have a size
of I km. Typically, there are a few different systems present. In most cases, the connection
between workstation and server is direct.
MANs or Metropolitan Area Networks which have a size of <1 - 100 km. A MAN connects the
networks of different locations.
WANs or Wide Area Networks is that which can span the whole earth. Internet is the best
known example. A WAN may be a complex conglomerate of many different systems which
connect many networks connected into a large Internet working. Here too, the connections
between desktop PC and server are indirect.
Fig.1.1: The Physical Components of the Internet
3.4 Components of the Internet
3.4.1 World Wide Web The World Wide Web (abbreviated as the Web or WWW) is a system of Internet servers that
supports hypertext to access several Internet protocols on a single interface. Almost every protocol
type available on the Internet is accessible on the Web. This includes e-mail, FTP, Telnet, and Usenet
News. In addition to these, the World Wide Web has its own protocol: HyperText Transfer Protocol
(HTTP).
3.4.2 E -Mail Electronic mail, or e-mail, allows computer users locally and worldwide to exchange messages.
Each user of e-mail has a mailbox address to which messages are sent. Messages sent through e-mail
can arrive within a matter of seconds.
9
3.4.3 Telnet
Telnet is a programme that allows you to log into computers on the Internet and use online databases,
library catalogs, chat services, and more. To Telnet to a computer, you must know its address. This
can consist of words (locrs.loc.gov) or numbers (140.147.254.3). Some services require you to
connect to a specific port on the remote computer.
Telnet is available on the World Wide Web. Probably the most common Web-based resources
available through Telnet are library catalogs. A link to a Telnet resource may look like any other link,
but it will launch a Telnet session to make the connection. A Telnet programme must be installed on
your local computer and configured to your Web browser in order to work.
3.4.4 File Transfer Protocol (FTP)
This is both a programme and the method used to transfer files between computers. Anonymous
FTP is an option that allows users to transfer files from thousands of host computers on the Internet
to their personal computer account. FTP sites contain books, articles, software, games, images,
sounds, multimedia, course work, data sets, and more.
3.4.5 E - Mai l Discuss ion Groups
One of the benefits of the Internet is the opportunity it offers to people worldwide to communicate
via e-mail. The Internet is home to a large community of individuals who carry out active discussions
organized around topic-oriented forums distributed by e-mail. Software programmes administer these.
Probably the most common programme is the listserve.
A great variety of topics are covered by I istserve, many of them academic in nature. When you
subscribe to a listserve, messages from other subscribers are automatically sent to your electronic
mailbox. You subscribe to a I istserve by sending an e-mail message to a computer programme called
a listserver. Listservers are located on computer networks throughout the world. This programme
handles subscription information and distributes messages to and from subscribers. You must have
an e-mail account to participate in a listserve discussion group.
3.4.6 Usenet News
Usenet News is a global electronic bulletin board system in which millions of computer users exchange
information on a vast range of topics. The major difference between Usenet News and e -mail
discussion groups is the fact that Usenet messages are stored on central computers, and users must
connect to these computers to read or download the messages posted to these groups. This is distinct
from e-mail distribution, in which messages arrive in the electronic mailboxes of each list member.
Usenet itself is a set of machines that exchanges messages, or articles, from Usenet discussion
forums, called newsgroups. Usenet administrators control their own sites, and decide which (if any)
newsgroups to sponsor and which remote newsgroups to allow into the system.
There are thousands of Usenet newsgroups in existence. While many are academic in nature,
numerous newsgroups are organized around recreational topics. Much serious computer -related
work takes place in Usenet discussions. A small number of e-mail discussion groups also exists as
Usenet newsgroups.
The Usenet newsfeed can be read by a variety of newsreader software programmes. For example,
the Netscape Communicator suite comes with a newsreader programme called Messenger.
Newsreaders are also available as standalone products.
ID

Exercise 4 Distinguish between Usenet News and E-Mail Discussion Groups.
Usenet messages are stored on central computers and users must connect to these computers to read or
download the messages posted to these groups while e-mail messages arrive in the electronic mail boxes of
each list member.
3.4.7 Chat and Instant Messaging Chat programmes allow users on the Internet to communicate with each other by typing in real time.
They are sometimes included as a feature of a Web site, where users can log into the "chat room" to
exchange comments and information about the topics addressed on the site. Chat may take other,
more wide-ranging forms. For example, America Online is well known for sponsoring a number of
topical chat rooms. Internet Relay Chat (1RC) is a service through which participants can communicate to each
other on hundreds of channels. These channels are usually based on specific topics. While many
topics are frivolous, substantive conversations are also taking place. To access 1RC, you must use
an IRC software programme.
A variation of chat is the phenomenon of instant messenging. With instant messenging, a user on
the Web can contact another user currently logged in and type a conversation. Most famous is
America Online's Instant Messenger. ICQ is another commonly-used chat programme.
4.0 Conclusion The Internet is a voluntary network in which many computers connected have chosen to do so in
order to share and exchange information in a quick and effective manner. An Internet user has
access to a wide variety of services: electronic mail, file transfer, vast information resources, interest
group membership, interactive collaboration, multimedia displays, real-time broadcasting. shopping
opportunities, breaking news, and much more.
5.0 Summary In this unit, we were able to identify that the Internet is a computer network made up of thousands of
network worldwide. The networking concept and its advantages were also considered as well as the
wide variety of services provided by the Internet.
6.0 References and Suggestion for Further Reading Open Content License (http:/www.opencontent.org/).
WWW Metrics (http:/www.wwwmetrics.com)
Med iametrix (http://www.inediametrix.com/data/thetop.jsp)
7.0 Tutor-Marked Assignment
Question Discuss any four services provided by the Internet.

UNIT 2: History and Development of the Internet
Table of Contents
Page
1.0 Introduction 13
2.0 Objectives 13
3.0 Definitions of Terms 13
3.1.1 Internet History 13
3.1.2 Network Development 13
3.1.3 Events that Led to the Development of Internet 14
3.1.4 Networking Protocol Development 14
3.2 Services Development 15
3.2.1 File Transfer Protocol (FTP) 15
3.22 Telnet 15
3.2.3 Gopher 15
3.2.4 Wide Area Information Serve (WAIS) 15
4.0 Conclusion 16
5.0 Summary 16
6.0 References and Suggestion for Further Reading 16
7.0 Tutor-Marked Assignment 16
12

1.0 Introduction The Internet originated out of a military research project and was initially used by the defence. The
university community became involved with the Internet in the 1980s. The Internet is a network of
networks (Local Area Networks, Metropolitan Area Networks and Wide Area Networks) across
the world.
This unit overviews Internet history and how some of the components were developed. In addition,
Internet size and growth statistics are discussed, along with information.
2.0 Objectives At the end of this unit, you will be able to; Discuss the history of the Internet; Discuss the major Internet development events;
State the services developed to make the network more useable.
3.1 Definitions of Terms In this unit and subsequent units, you will encounter the following terms:
Advance Network and Services, Inc. (ANS) - An organisation made up of Merit. IBM, and
MCI which was formed to manage the T-3, National Science Foundation backbone.
Advanced Research Projects Agency (ARPA) - The division of the United State Department
of Defence that sponsored the first efforts to develop a computer network.
American Society for Computer Information Interchange (ASCII) -An electronic text format.
Defence Advanced Research Projects Agency (DARPA) - The new name of the Advanced Research Projects Agency implemented in 1973.
E-mail - Electronic mail made possible by the packet-handling protocols which were developed
based on TCP/IP. They allow message sending and receipt, binary file attachment to e-mail messages,
and mass mailings to lists and listservers. File Transfer Protocol (FTP) -A specialized Internet tool that either places files on, or retrieves
files from a remote computer. HyperText Markup Language (IITML) - A simple tagging language used to create hypertext
links. HyperText Transfer Protocol (HTTP) - A protocol which provides links between related text
information. Protocol - A set of conventions that determines how data will be formatted and exchanged
between different computer programmes and/or computers.
Telnet - A tool used to log on to a remote computer and use its applications.
Transmission Control Protocol/Internet Protocol (TCP/IP) - A system of protocols
commonly used for wide area networking, which governs message transmission.
NVide Area Information Server (WATS) - An Internet tool that lets you access a special
information server that uses natural language qaueries.
3.1.1 Internet History The Internet was originally used to share information between researchers, defence contractors, and
members of the military. Internet early history covers the years from 1969 to the end of 1992.
3.1.2 Network Development In 1969, the Advanced Research Projects Agency (ARPA), a part of the Department of Defence
(DOD), awarded a contract to the firm of Bolt, Beranec, and Newman to construct a computer
13

network. The network was used to link researchers at universities with defence contractors, scientists,
and military contacts so that they could share information and resources. This network was called
ARPANET. Between 1969 and 1983, minicomputers, mainframes, and supercomputers made up the networks.
At first, the network provided log on to a remote computer from a terminal or a Teletype(r)
machine to run programmes. File transfer capabilities, electronic mail, and mailing lists were soon
added to keep interested parties informed. These uses later developed into networking protocols.
Exercise 1
Have you used a computer on a network? If you have, what do you think is the major advantage of working
on a network over a stand alone computer? If you have, then you would have noted that you can share your harddrive and printer with other people on the network.
3.1.2 Events that Led to the Development of Internet
In 1973, Advanced Research Projects Agency (ARPA) was changed to the Defence Advanced
Research Agency (DARPA) and the resulting network was changed to DARPANET. An important
task for this newly named agency was to begin a project called "The Intemetting Project," which
would start the process of linking different networks together.
The principal goals of The Internetting Project were to:
Move from Circuit Switching Network (ARPA) to Packet Switching Networks (DARPA)
Link these packet networks together
Overcome network specific protocols
Study ways to pass traffic from one network to another
Establish internet protocols and standards
Previous networking efforts used circuit switching which required two computers to be
continuously connected in order to network. It was like having a railroad track on which only a single train could be used.
The pack switching system allowed the creation of a data highway that could handle large
amounts of data including voice, text, video, etc. Each data packet was given the computer equivalent
of a map and a time stamp so that it could be sent to the right destination and the reveiwer would
know when the message started. At its destination, the message was reassembled from the packet
parts so either machine or human could read it.
3.1.3 Networking Protocol Development
A Protocol is a set of conventions that determines how data will be formatted and exchanged between
different computer programmes and/or computers.
Network protocols specify how to move messages and how to trap and handle errors. The
primary network protocol of the Internet, Transmission Control Protocol/Internet Protocol (TCP/IP)
was developed in 1974 by Robert Kahn, a Corporation for National Research Initiatives (CNRI).
TCP/IP is a system of Protocols commonly used for wide area networking. Its success contributed to the viability of the Internet.
Using network protocols helps create standards that are not dependent on a particular operating
system. These standards, once written, allow manufacturers to develop applications that conform to
the standards and allow interoperability between computers.
These application protocols such as HTTP, FTP, and others have worked in conjunction with
14

TCP/IP, contributing to the growth of the Internet. The advantages of adopting TCP/IP as a networking
standard are that from this time forward it would be possible to:
Add more Gateways
Connect more Networks
Allow the Core Networks to Stay Intact
Exercise 2 Why are protocols important?
3.2 Services Development Once packet-handling protocols were established, services could be developed to make the network
more useable. Among these were the File Transfer Protocol (FTP), Telnet, Gopher, Wide Area
Information Server (WAIS), and e-mail.
3.2.1 File Transfer Protocol (FT'P) FTP is the earliest Internet command and the first use of the network. FTP is a specialized Internet
service that either places files on, or retrieves files from, a remote computer. It is possible to log-on
to a computer without establishing an account and to retrieve information from its public file area.
This was one of the reasons for establishing anonymous log-on to these sites. The term anonymous
FTP was used to describe these sites.
3.2.2 Telnet Telnet was another early Internet service. Telnet is used to log on to a remote computer and use its
applications. Telnet lets you work on the remote computer as if you had your keyboard and monitor
hooked up to that machine. This tool has been a great benefit to the scientific community as it allows
researchers using personal computers or dumb terminals to operate supercomputers over the Internet.
3.2.3 Gopher Gopher is a service developed by the University of Minnesota. It permits you to find data that is
archieved on servers called Gopher sites. This search engine does not require you to know where the
data is stored or for what specific data you are searching. Using a browser that is menu driven, most
people find Gopher friendly and straight forward to use.
3.2.4 WAIS Wide Area Information Server (WAIS) is an Internet service that lets you access a special information
server that uses natural language queries. In this manner you can search a remote database for
words and phrases, not just keywords. The results are relevance ranked by percentage match with
your search terms. You can actually enter, 'I would like to find Computer hardware.' WAIS will
parse the input and find Computer hardware for you.
3.2.5 E -mail E-mail (spelled e-mail when it doesn't begin a sentence) was and is still a primary justification for
having Internet access. Packet-handling protocols were developed based on the TCP/IP that allow
message sending and receipt, binary file attachment to e-mail messages, and mass mailings to lists
and list servers. These uses will be discussed in the Internet components section later in this course.
15

Exercise 3 Which of these Internet services have you used before?
The most common service is the e-mail, which I guess you must have used. It is important to note that
whatever service you have used - e-mail, WAIS, Telnet or FTP - they are all part of the www.
4.0 Conclusion
In 1985, the National Science Foundation chose to link its six supercomputer centers together. These
centers, located all over the United States, became NSFNET, and a part of the larger scientific
community. NSFNET operated under TCP/IP. In 1986, NSFNET expanded into a backbone that
connected university and research networks to NSF supercomputers.
1985- NSFNET backbone consists of six 56-kilobits-per-second (Kbps) data circuits to connect the supercomputers.
1988 - NSFNET consisted of 13 nodes (1.5 Megabits-per-second).
1990 - NSFNET called upon three commercial companies to manage their backbone. These
companies, Merit, IBM, and MCI, formed an entity known as Advance Network and Services,
Inc. (ANS). ANS was allowed to maintain two networks. One was the continuation of the
NSF research activities. The other supported commercial use of the Internet using the NSF
backbone.Today ANS is not the only backbone in the United States for commercial traffic.
NSFNET has become our national research and education network with interlinks to other
government, private, science, and education networks.
5.0 Summary
In this unit, we were able to see how technological developments in the late 1960s and early 1970s
enabled researchers and government officials to create the Internet. Later, commercial service was
added. We were able to identify the timeline of the development of network computers into an
Internet. We also identified what led to the formation of the internet and discussed the services that were developed with the Internet.
6.0 References and Suggestion for Further Reading
Ascolta Training Company, L LC, (1997) Internet/Intranet Fundamentals Revision 2.0 1-1.
http://www.lib.berkely.ed/Teach ingLib/Guides/Internet/Whatis.html
Microsoft http://www.microsoft.com/.
http://monroe.k12.1a.us/mcs/district/cannon.html
7.0 Tutor-Marked Assignment
Question What needs led to the formation of the Internet? How did the Internet meet these needs?
16

UNIT 3: The World Wide Web
Table of Contents
Page
1.0 Introduction 18
2.0 Objectives 18
3.1 Background to World Wide Web (WWW) 18
3.2 Events Leading to World Wide Web Development 18
3.2.1 WWW Hyper Text 19
3.3 Factors Contributing to the Growth of World Wide Web 19
3.4 Pages On The Web 20
3.5 Retrieving Documents on the Web: Uniform Resource Locator (URL) 20
3.5.1 Anatomy of a URL 20
3.6 Web Browsers 21
4.0 Conclusion 21
5,0 Summary 21
6.0 References and Suggestion for Further Reading 22
7.0 Tutor-Marked Assignment 22
17

1.0 Introduction
The World Wide Web (WWW) is an invisible information network within the larger Internet network.
It is a dynamic collection of millions of documents that contain text, graphics, sounds, and movies.
The World Wide Web is often abbreviated as the Web or WWW. It is not a network of computers,
but a network of information linked together in the style of a web.
2.0 Objectives It is expected that by the end of this unit you will be able to:
Identify the goals of the World Wide Web;
Explain the importance of F lyperText;
Identify the factors that led to the fast growth of the World Wide Web;
State the historical development of the World Wide Web.
3.1 Background to World Wide Web (WWW) The goals of the developers of the Web were to create a seamless network from which any data
from any site could be accessed in a consistent fashion; to design a flexible system that allowed for
the use of existing data on the Internet; and to make the system so easy to use, that an average
person, not just a computer expert, could use it.
With these goals in mind, they created the HyperText Markup Language (HTML) as the coding
for Web documents. HyperText and hypermedia documents contain links to other documents or
sections within the same document. Links allow you to jump from one section of a document to
another or to a different Web site that contains related information. The Web is the ultimate in 'point
and click' access.
In order to access the information on the Web, a browser is needed. A browser is a software
programme that can access and view HTML documents. It is also referred to as a WWW client.
The World Wide Web (WWW) enables users to view a wide variety of information, including
magazines, archives, public and college library resources, and current world and business news. The
connections to different sources of computers, or servers, on the network are made automatically
without being seen by the users. The WWW was developed at the European Particle Physics Lab
(CERN) in Switzerland by Tim Berners-Lee in 1989 to allow information-sharing among internationally
dispersed teams of high-energy physics researcher. It's development spread beyond CERN, with a
rapid number of developers and users increasing. In addition to hypertext, the web began to incorporate
graphics, video, and sound. Today, the use of the web has reached global proportions.
The attractive thing about the Web is the ability of a user to access several other Internet
services (E-mail. FTP, Telnet, and Usenet News) through their protocol (SMTP, Telnet Protocol,
FTP, and NNTP) on a single interface. This is possible through the use of the web protocol: HyperText
Transfer Protocol (HTTP). This creates a convenient and user-friendly environment, which makes it
unnecessary for one to be conversant in the other protocols within separate, command level
environments. The web gathers these protocols into one single system. It is for this reason and the
web's ability to work with multimedia and advanced programming languages, which makes it the
fastest-growing component of the Internet.
3.2 Events Leading to World Wide Web Development In March 1989, a meeting was held by a group of European nuclear scientists at the 'Conseil European
pour la Recherch Nucleaire (CERN).' The purpose of this meeting was to design an infra -system to
18
aid the scientific community in research document dissemination. The need for a World-Wide Web
(WWW) was proposed by Tim Berners-Lee of CERN in late 1989.
The objectives of World Wide Web development were to:
Implement a simple browser for the user's workstation;
Allow the user to add new materia l; and
Uti lize several different servers of machine stored information at CERN.
3.2.1 VVVVVV HyperText The operation of the Web relies primarily on hypertext as its means of information retrieval. Hyper
Text is a document containing words that connect to other documents. These words are called links
and are selectable by the user. A single hypertext document can contain links to many documents.
In the context of the Web, words or graphics may serve as links to other documents, images, video,
and sounds. Links may or may not follow a logical path, as each connection is programmed by the
creator of the source document. Overall, the WWW contains a complex virtual web of connections
among a vast number of documents, graphics, videos, and sounds.
Interactive documents were created using a simple tagging language called HyperText Markup
Language (HTML). This language was in an electronic text format set up by the American Society
for Computer Information Interchange (ASCII) and could be generated with any text editor or word
processor. The nature of the World Wide Web from its inception provided a way to interconnect computers
running different operating systems. The transfer of HTML documents from machine to mach ine
was established by using the HyperText Transfer Protocol (HTTP). Documents could display
information created in a variety of media formats, including multimedia objects.
Because of the intuitive nature of HyperText, many inexperienced computer users were able to
connect to the network. Computers could now be used by non-technical users for information exchange.
HyperText provides a single user interface to:
r e p o r t s
n o t e s
d a t a b a s e s
computer documenta t i o n
on - l i n e he l p
Exercise 2 Clearly state the importance of the HyperText to the World Wide Web.
As listed above, the HyperText provides a single user interface to: reports, notes, database, computer
documentation and an on-line help on the www.
CERN's policies toward the World Wide Web encouraged its growth. As soon as the basic outline of the
www was completed and tested on the CERN servers, the source code was made public and available.
CEFtN encouraged collaboration by academic and commercial parties from the onset of the project, involving
millions of people in Web development. WWW users were encouraged to contribute to the expanding
database of documents by setting up Web Pages.
3.3 Factors Contributing to the Growth of World Wide Web Factors contributing to early www growth included:
Open architecture, de facto open standards and freely published structure and code;
Min ima l system requ i rements;
Administrators with limited funds could participate as information providers.
19

lnteroperability between different computer platforms which include:
Objec t Or i ented Inter f ace (001)
HyperTex t l i nk ing
Established Internet tools in the Imp such as File Transfer Protocol (FTP), Gopher, and Telnet
Utilize an interface that would serve both the computer novice and the computer power user
Address the needs of information storage and retrieval
The originators of the www wisely incorporated existing Internet formats for FTP, e-mail, and
gopher. Gopher in itself was developing additional powerful search engines and strategies.
Exercise 3 What are the factors that led to the general acceptability of the WWW?
The general acceptability of the www is due to the minimal systems requirements, its interoperabi I ity between different platforms and its open architecture.
3.4 Pages on The Web The World Wide Web consists of files, called pages or Web pages, containing information and links to
resources throughout the Internet. Web pages can be created by user activity. For example, if you
visit a Web search engine and enter keywords on the topic of your choice, a page will be created
containing the results of your search. In fact, an increasing amount of information found on the Web
today is served from databases, creating temporary Web pages 'on the fly' in response to user queries.
Access to Web pages may be accomplished by:
Entering an Internet address and retrieving a page directly;
Browsing through pages and selecting links to move from one page to another;
Searching through subject directories linked to organized collections of Web pages ; and
Entering a search statement at a search engine to retrieve pages on the topic of your
choice.
3.5 Retrieving Documents on The Web: URL UAL stands for Uniform Resource Locator. The URL specifies the Internet address of a file stored
on a host computer connected to the Internet. Every file on the Internet, no matter what its access
protocol, has a unique URL. Web software programmes use the UAL to retrieve the file from the
host computer and the directory in which it resides. This file is then displayed on the monitor connected
to the user's local machine.
URLs are translated into numeric addresses using the Internet Domain Name System (DNS).
The numeric address is actually the "real" URL. Since numeric strings are difficult for humans to
use, alphaneumeric addresses are employed by end users. Once the translation is made, the Web
server can send the requested page to the user's Web browser.
3.5.1 Anatomy of a URL
This is the format of the URL
protocol://host/path/filename
For example, this is a UAL on the home page of Widernet Organisation:
http://www.widernet.org
This URL is typical of addresses hosted in domains in the United States Structure of this URL:
Protoco l : http
20

Host computer name: www
Second- leve l domain name: widernet
T o p - l e v e l do m a in n am e: o r g Note how much information about the content of the file
is present in this well-constructed URL.
Other examples: telnet://opac.albany.edu the University at Albany library text-based catalog
lip://ftp.uu.net/graphics/picasso a file at an FTP site
3.6 Web Browsers To access the World Wide Web, you must use a Web browser. A browser is a software programme
that allows users to access and navigate the World Wide Web. There are two types of browsers:
I. Graphical: Text, images, audio, and video are retrievable through a graphical software programme
such as Netscape Navigator and Internet Explorer. These browsers are available for both
Windows-based and Macintosh computers. Navigation is accomplished by pointing and clicking
with a mouse on highlighted words and graphics.
You can install a graphical browser such as Netscape Navigator in your Windows-based
machine. Navigator is available for downloading on the Netscape Web site: http://home
netscape.com/. Microsoft's Internet Explorer is available from the Microsoft Web site: hap:!!
www.microsoft.com/. To use these programmes to access the Web, you need a connection to
the Internet. This is accomplished through such means as an ethernet connection, a dialup
connection known as a SLPP or PPP, or a cable modem.
2. Text: Lynx is a browser that provides access to the Web in text -only mode. Navigation is
accomplished by highlighting emphasized words in the screen with the arrow up and down keys,
and then pressing the forward arrow (or Enter) key to follow the link.
4.0 Conclusion The current foundation on which the WWW functions is Hypertext using HTML. This is what
provides highlighted links to other documents on the Web and it is this feature which is unique and
revolutionary about the Web. With the development of the HTTP, which makes it unnecessary for
one to be conversant in other protocols within separate, command level environments, users can
access several other Internet Services (E-mail, FTP, Telnet, and Usenet News) through their protocol
(SMTP, Telnet Protocol, FTP, and NNTP) on a single interface. Every file on the Internet, no matter
what its access protocol, has a unique URL. Web browser uses the URL to retrieve the file from the
host computer and the directory in which it resides. The browsers also allowed inline graphics to be
interspersed with body text. Now a report could be viewed, downloaded, or printed with its
accompanying charts, tables, illustrations and pictures.
5.0 Summary In this unit, we looked at the WWW which incorporates all of the Internet services through their
protocol. When you log on to the Internet using any browser, you are viewing documents on the
World Wide Web. The development of the HTTP and the web's ability to work with multimedia and
advanced programming languages, makes it the fastest-growing component of the Internet.
21

6.0 References and Suggestion for Further Reading Internet Guide
ktp://www.li b.berkely.ed/Teach ngLib/Gu ides/I ifternet/Whatis.html
Microsoft http://monroe.k I 2. la.us/mcs/d istrict/cannon .html
7.0 Tutor-Marked Assignment
Question
What are the factors that lead to the general acceptability of the WWW?
22

UNIT 4: Internet E-mail
Table of Contents
Page
I .0 Introduction 24
2.0 Objectives 24
3.1 E-mail Addresses 24
3.2 Standard E-mail Protocol 25
3.2.1 Simple Mail Transfer Protocol (SMTP) 25
3.2.2 Multipurpose Internet Mail Extension (MIME) 25
3.2.3 Post Office Protocol (POP) 25
3.2.4 Internet Mail Access Protocol ([MAP) 25
3.3 Advantages of Using E-mail 26
3.4 E-mail Privacy 26
3.4.1 Pretty Good Privacy (PGP) 26
3.4.2 Message Security Protocol (MSP) 26
3.4.3 Privacy Enhanced Mail (PEM) 26
3.4.4 MIME Object Security Services (MOSS) 26
3.4.5 Secure Multipurpose Internet Mail Extensions (S/MIME) 26
3.5 The Future of Internet E-mail 27
3.6 Internet E-mail Programmes 17
4.0 Conclusion 28
5.0 Summary 28
6.0 References and Suggestion for Further Reading 28
7.0 Tutor-Marked Assignment 28
23

1.0 Introduction
Electronic mail, or e-mail, is your personal one-to-one communication connection to the world o f the
Internet. Most of the millions of people around the world who use the Internet have their own e-mail
addresses. The basic concepts behind e-mail parallel those of regular mail, but e-mail has advantages
over regular mail. The most obvious is speed. Instead of several days, your message can reach the
other side of the world in hours, minutes, or maybe even seconds. E-mail is also convenient. You send
your messages when it's convenient for you and your recipients respond at their conveniences.
2.0 Objectives At the end of this unit you are expected to:
Have an understanding of e-mail addresses;
Identify the various e-mail Protocol;
Explain the advantages of using e-mail;
Explain the future of Internet e-Mai I;
Identify the Internet e-mail programmes.
3.1 E-mail Addresses
In order to use e-mail over the Internet effectively, users need a certain amount of knowledge about
addressing. All Internet e-mail addresses have a minimum of three parts: a user name (which may
or may not be the same as the person's real name); an 'at' sign (i.e., @); and a domain address,
(frequently the service provider's name). The domain name is followed by a period dot,' in Internet
parlance) and a domain type, which specifies a domain's institution type. Although there has been
much talk lately about adding domain types to prevent running out of Web addresses, so far these
types generally fall into one of seven categories:
com--business or commercial
edu--educational (e.g. a college or university)
mil--military
net --network resource
org--organisation (frequently nonprofit in nature)
it--international organisations (such as NATO or the United Nations)
If the address ends in one of these types, it generally means the domain is located in the United
States. However, since domains do not require a country specification in order to be registered, this
is not a hard and fast rule. Usually, countries other than the U.S. tack on a country code to the end
of the Internet address. Some of these codes are as fol
au--Austral ia c a - -C a na da
f r - - Fr a n c e
ie - - I re land
i s - - I s r ae l
i t - - I t a l y
nz--New Zealand
ru - -R uss i a
uk--England
us--United States
z a - - Z a i r e
24

Exercise 1 What is your e-mail address?
3.2 Standards E-mail Protocol As with every technology, e-mail has its own set of standards to ensure usability. Additionally, the
Internet requires standards as well, enabling such capabilities as multimedia file attachments around
the world.
3.2.1 Simple Mail Transfer Protocol (SMTP) First established in 1982, this standard allows for mail messages that contain a single 'human readable'
message, with several restrictions: the message must contain only ASCII characters; the message
may not contain any line longer than 1,000 characters; and the message must not exceed a certain length.
3.2.2 Multipurpose Internet Mail Extension (MIME) This standard for attaching non-text files to standard Internet mail messages extends the SMTP
format by defining new formats, such as those for data other than text. Developed by the Internet
Engineering Task Force with the purpose of handling new media types, it so far supports seven of
them: plain text of any length (without word processor formatting), audio, video, still images, pointers
to messages located elsewhere, multipart messages (even if each part consists of a different type),
and application-specific data.
Exercise 2 State the major differences between Simple Mail Transfer Protocol and Multipurpose Internet Mail Extension.
In SMTP your message must not exceed a certain length and you cannot add attacthment to the mail unlike
the MIME which you can attach not only text file but graphic images to your e-mail.
3.2.3 Post Office Protocol (POP) Now in its third iteration (POP3), this standard supports downloading mail from any location without
having to connect to a fixed server. In other words, it means that the server you connect to holds your
mail until you log on and retrieve it. It is the standard supported by most mail clients on the Internet,
but it is beginning to be superseded by IMAP.
3.2.4 Internet Mail Access Protocol (IMAP) A client/server protocol now in its fourth version, IMAP4 takes POP a step further. Instead of
requiring users to transfer a complete mail item to a client before beginning the message, IMAP lets
users selectively download portions of a message. For example, users can download a text portion but
retain the graphic file attachment on the server for later download. Additionally, it lets users pick up
messages on a remote server, edit them on- or offline, and otherwise manipulate server-based folders.
Exercise 3 Distinguish between Post Office Protocol and Internet Mail Access Protocol.
In POP the server you connect to holds your mail until you log on and retrieve it while IMAP takes POP
a step further by allowing the users selectively download portions of a message without transfering the
complete mail item to a client.
25

3.3 Advantages of Using E-mail Using Internet e-mail instead of conventional mail, overnight delivery services, the telephone, or a
fax can often lead to tremendous cost savings. For example, the cost of sending a 100-page document
to any part of the Lagos via e-mail (which, travelling at 28.8k bps, could arrive at its destination in
about a minute) costs less than N50.00. Compare this to the cost of using any Courier service,
N2000.00 or even regular postage, and the savings are clear. Furthermore, companies can save
money by attaching files to e-mail and eliminating the costs of rekeying.
3.4 E-mail Privacy Perhaps the biggest concern in sending Internet e-mail is the assurance that no one but the intended
recipient will read it. To this end, a variety of options exist for ensuring e-mail privacy, comprising
encryption algorithms and authentication methods. There are presently five separate encryption
protocols, and any and all of them have the potential to become standards as time goes on.
3.4.1 Pretty Good Privacy (PGP) Originally released as freeware in 1991 by its developer, Philip Zimmermann, this is widely used for
mail encryption on the Internet. It cannot, however, encrypt multimedia data, so another version,
called PGP/MIME, has recently been developed which will address this shortcoming.
3.4.2 Message Security Protocol (MSP) This protocol is used in the Defence Message System. It offers a signed receipt capability that
proves that a message got to its destination without modification. While its use so far is within the
military, such a feature can be just as important in commercial environments.
3.4.3 Privacy Enhanced Mail (PEM)
This standard for secure e-mail outlines necessary security services including encryption, authentication,
and certificate-based key management. Additionally, it defines the algorithms to be used. However,
unlike MSP. PEM does not provide authentication of the recipient. This standard was never accepted
widely and seems to have been replaced by MSP.
3.4.4 MIME Object Security Services (MOSS)
MOSS is actually derived from PEM and adds security services to MIME. It uses two cryptographic
tech n iques--d igital signatures and encryption--and provides the capability to authenticate a message's
origin, that it has not been altered on its way to its destination, and that only the intended recipients
can read it.
Exercise 4
Explain the major difference between Privacy Enhanced Mail (PM E) and MIME Object Security Services.
As discussed earlier on, PEM does not provide authentication of the recipient while MIME provides
additional security that authenticates a message's origin and only the intended recipient can read it.
3.4.5 Secure Multipurpose Internet Mail Extensions (S/MIME) This encryption scheme was developed by a consortium headed by RSA Data Security and supported
by Microsoft. It supports encryption of multimedia data types, as well as text, and a strong point is
that it guarantees interoperability between any two implementations. Since it is, however, patented
26

technology, there has been some speculations as to whether it should be considered for approval as
a standard. It is already part of both Netscape Navigator and Microsoft Internet Explorer.
3.5 The Future of Internet E-mail As Internet technologies grow and mature, the Internet will become more important in our lives in a
variety of ways. One of the ways will continue to be communications, and the primary method will
continue to be e-mail, with better methods of security evolved, along with the ability to download e-mail
from virtually any Internet-connected computer to meet the needs of a workforce that grows ever
more mobile.
Along with the current explosion of e-mail comes another explosion: many of us have multiple e-
mail addresses. Services now exist that will, for a fee, forward all of a user's e-mail to one 'universal'
address. Soon, however, such features will be part of e-mail services in general, and users will not
have to pay additional charges for these capabilities.
3.6 Internet E-Mail Programmes Although conventional LAN e-mail packages support Internet use through gateways, some
programmes are designed to directly support Internet protocols for sending and receiving e-mail
through the Net. While this is not a comprehensive listing, it provides basic information about the
most popular packages.
Programme Web Address Platform
Claris E-mailer http://www.claris.com Macintosh
Eudora Pro http://www.eudora.com Windows, Macintosh
Juno http://www.juno.com Windows
Outlook Express http:www.microsoft.com Windows
Messenger http://www.netscape.com Windows, Macintosh
Pegasus http://www.pegasus.usa.com Windows, OS/2
Pronto97 http://www.commtouch.com Windows
QuickMail http://www.cesoft.com Windows, Macintosh
Web-Based Free E-Mail
HotMail Hot mail, Inc.
http://www.hotmail.com
MailCity Who Where? Inc.
http://mailcity.com
MailExcite Excite, Inc.
http://mail.excite.com
NetAddress USA.NET, Inc.
http:netaddress.usa.net
RocketMai l Four II Corp.
http://www.rocketmail.com
27

4.0 Conclusion
With Internet e-mail, it is possible to send text messages across the street or across the world; to
attach files to messages that can contain formatted text, pictures, graphics, sound, or video; to attach
live hypertext links leading to Web sites, for example; to automatically send a message to a large
mailing list with the clicking of a button; and to subscribe to mailing lists that will automatically send
items of interest on a regular basis.
5.0 Summary In this unit, we considered the parts of all Internet e-mail addresses which have a minimum of three
parts: a user name; an 'at' sign i.e. @; and a domain address. A variety of options existing for
ensuring e-mail privacy, comprising encryption algorithms and authentication methods were considerei
and finally the future of e-mail was discussed.
6.0 References and Suggestion for Further Reading Ascolta Training Company, LLC, (1997) Internet/Intranet Fundamentals Revision 2.0 1-1.
http://www.lib.berkely.ed/TeachingLib/Guides/Internet/Whatis.html
Microsoft http://www.microsoft.com/
http://monroe.k12.1a.us/mcs/district/cannon.html
7.0 Tutor-Marked Assignment
Question
Discuss any four security protocols that ensure the privacy of e-mails.
28

UNIT 5: Newsgroups
Table of Contents
Page
1.0 Introduction 30
2.0 Objectives 30
3.1 Background to Newsgroups 30
3.2 Add an E-mail or Newsgroup Account 30
3.3 Find Newsgroups of Interest 31
3.4 To Subscribe to a Newsgroup 31
3.4.1 Cancel Your Subscription to a Newsgroup 31
3.5 Read Newsgroup Messages 31
3.6 Post a Message to a Newsgroup 32
3.6.1 Sending Message to Multiple Newsgroups on the Same News Server 32
3.7 Block Messages from a Sender or Domain 32
3.8 Lists and Listservs 33
4.0 Conclusion 33
5.0 Summary 33
6.0 References and Suggestion for Further Reading 33
7.0 Tutor-Marked Assignment 33
29

1.0 Introduction
Newsgroups are electronic bulletin boards with collections of messages which have a related theme.
You can read messages posted by members on a large variety of topics, or you can post messages of
your own. Newsgroup names start with one of a series of broad topic names. For example, newsgroups
beginning with 'comp' are about particular computer-related topics. Other examples include: 'biz' for
business, 'raise' for miscellaneous, 're& for games and recreation, `sci' for science, 'so& for social
groups, 'ale for controversial or unusual topics, and many others that are too numerous to list To
view a newsgroup, you must have a news viewer software programme installed on your computer.
2.0 Objectives At the end of this unit you will be able to:
Subscribe to a newsgroup;
Cancel your subscription to a newsgroup;
Send message to multiple newsgroups;
Block messages from a sender or Domain.
3.1 Background to Newsgroups
You can find newsgroups on practically any subject. Although some newsgroups are moderated,
most are not. Moderated newsgroups are "owned" by someone who reviews the postings, can
answer questions, delete inappropriate messages, and so forth. Anyone can post messages to a
newsgroup. Newsgroups do not require any kind of membership joining fees.
To use newsgroups in Microsoft (R) Outlook Express (R), your Internet Service Provider (ISP)
must offer links to one or more news servers. After you set up an account for each server you want in
Outlook Express, you can read and post messages in any of the newsgroups stored on that news server.
When you find a newsgroup you like, you can 'subscribe' to it so that it is displayed in your Outlook
Express Folders list. Subscribing provides easy access to your favourite newsgroups, eliminating the
need to scroll through the long list on the server each time you want to visit a favourite newsgroup.
Newsgroups can contain thousands of messages, which can be time-consuming to sort through.
Outlook Express has a variety of features that make it easier to find the information you want in
newsgroups.
You will need the following information from your Internet service provider (ISP) or local area network (LAN) administrator:
For e-mail accounts, you'll need to know the type of e-mail server you use (POP3, IMAP, or
HTTP), your account name and password, the name of the incoming e-mail server and, for
POP3 and IMAP. the name of an outgoing e-mail server.
For a newsgroup account, you'll need to know the name of the news server you want to connect
to and, if required, your account name and password.
Exercise I Explain why you will need to subscribe for newsgroup.
If you do not subscribe to a newsgroup you cannot have access to it.
3.2 Add an E-mail or Newsgroup Account On the Tools menu, click Accounts
In the Internet Accounts dialog box, click Add
30

Select either Mail or News to open the Internet Connection Wizard, and then follow the
instructions
to establish a connection with an e-mail or news server.
Each user can create multiple e-mail or newsgroup accounts by repeating the procedure above
for each account.
Exercise 2 List two major information you need before you can subscribe to a newsgroup and of what importance are
the information? The information you will need includes: Name of the news server you want to connect to and also the
type of e-mail. server you are using. This is to establish a communication link between your e-mail account
and the newsgroup server you are subscribing to.
3.3 Find Newsgroups of Interest To find newsgroups of interest to you, you can search through a news server to find specific words
in newsgroup names.
In the Folders list, click a server name, and then click Newsgroups
In the Display newsgroups which contain box, type the words you want to search for.
If you cannot find a specific newsgroup in the list, your news server might not carry that newsgroup.
3.4 To Subscribe to a Newsgroup The benefit of subscribing is that the newsgroup is included in your Folders list for easy access. You
can subscribe to a newsgroup in any of the following ways: When you add a news server, Outlook Express prompts you to subscribe to newsgroups on that
server. Click a news server name in your Folders list, and then click Newsgroups. Select the newsgroup
that you want to subscribe to and then click Subscribe. You can also unsubscribe here.
When you double-click a name in the Newsgroup list, a subscription is automatically generated.
Exercise 3 Do you need an e-mail account to subscribe to a newsgroup?
Sure that is the only way they can post News to you.
3.4.1 Cancel Your Subscription to a Newsgroup When you view a newsgroup without subscribing to it, its name appears in your Folders list.
Right-click the name and then click Subscribe.
To view a newsgroup you subscribe to, click its name in the Folders list.
To cancel your subscription to a newsgroup, click Newsgroups, click the Subscribed tab,
select the group you want, and then click Unsubscribe. You can also right-click the newsgroup
in your Folders list and then click Unsubscribe.
3.5 Read Newsgroup Messages Go to a newsgroup and look through the message list for a message you want to read (you may need
to scroll).
To view the message in the preview pane, click the message once.
To view the message in a separate window, double-click the message in the message list.
31

You may want to change the preview pane, by going to the View menu, click Layout, and then
in the Preview pane area, select the options you want.
3.6 Post a Message to a Newsgroup In the Folders list, select the newsgroup you want to post a message to.
On the toolbar, click New. Post.
Type the Subject of your message. Outlook Express cannot post a message that does not contain a subject.
Compose your message, and then click Send.
3.6.1 Sending message to Multiple Newsgroups on the same News Server
In the New Message dialog box, click the icon next to Newsgroups.
In the Pick Newsgroups dialog box, click one or more newsgroups from the list (hold down
the CTRL key to select multiple newsgroups), and then click Add.
You can choose from all newsgroups or only those you subscribe to by clicking Show Only Subscribed Newsgroups.
You can send a given message to more than one newsgroup at a time only if all the newsgroups
are on the same news server. To post a message to newsgroups on other news servers, create a
separate message for each news server.
You can cancel a message you have posted by selecting the message, clicking the Message
menu, and then selecting Cancel Message. Cancelling a message does not remove it from a
newsgroup user's computer if the user downloaded the message before it was cancelled. You can
cancel only messages you have posted; you cannot cancel another person's message.
Exercise 4 Is it possible to send a message to multiple newsgroups on different serves at the same time? Why.
As earlier on discussed above, it is not possible to send a message to multiple newsgroups on different
servers at the same time because they have different addresses.
3.7 Block Messages from a Sender or Domain
You can block messages from a particular sender or domain. The domain is the name following the @ symbol inane-mail address.
When you block a sender or domain, no e-mail or news message from that sender or domain will
arrive in your Inbox or in the news messages you read. E-mail from blocked senders goes directly
into your Delete folder. Newsgroup messages from blocked senders are not displayed.
From your e-mail Inbox or the list of messages in a newsgroup, select a message from a sender you want to block.
On the Message menu, click Block Sender.
Blocking a sender applies to standard POP e-mail only. It does not apply to HTTP e-mail or IMAP messages.
To remove a sender or domain from the blocked senders list, on the Tools menu, point to Message
Rules, and then click Blocked Senders List. Select the sender or domain, and then click Remove.
Exercise 5 What is the implication of removing a domain from your newsgroup?
32

If you remove a domain from your newsgroup, you will not be receiving any message from the newsgroup
server.
3.8 Lists and Listservs An Internet List is an interest group in which any member may send a message to all other members
of the list. List groups exist for a very large number of all types of topics. Messages exchanged can
be discussion letters, professional papers, resource listings, conference and job announcements,
technical queries and advice, etc. Joining a list is one way to keep up with happenings in a specific
field of interest to you. It also gives you a network of other individuals with the same interest.
A listserv is an automated mailing list distribution system. It is a software that allows members
of the list to communicate on the Internet.
Exercise 6 State one of the importance ofjoining a list group.
Joining a list group is one way to keep up with happenings in a specific field of interest to you.
4.0 Conclusion A newsgroup is a collection of messages posted by individuals to a news server (a computer that can
host thousands of newsgroups). When you find a newsgroup you like, you can 'subscribe' to it without
paying any amount. All you need do is provide information on your e-mail account and also you'll need
to know the name of the news server you are subscribing to. Listserv refers to both the software
and the computer which runs the software, which is essentially an automated e-mail programme.
5.0 Summary In this unit we looked at how you locate a newsgroup of your interest and subscribe and unsubscribe
for newsgroup. We also considered how you can send any given message to more than one newsgroup
at a time as well as block messages from a particular sender or domain.
6.0 References and Suggestion for Further Reading Open Content License (http://www.opencontentorg/),
Widernet Project, http//www.widernetorg
Microsoft Windows http//www.Microsoft.com
7.0 Tutor-Marked Assignment
Question State the procedure for finding and subscribing to a newsgroup.
33

UNIT 6: Internet Explorer — Window and Buttons
Table of Contents
Page
1.0 Introduction 35
2.0 Objectives 35
3.1 The Main Browser Window 35
3.2 The Main Explorer Toolbar 36
3.3 Beginning Basic Browsing 37
3.3.1 What is a Uniform Resource Locator (URL)? 37
4.0 Conclusion 38
5.0 Summary 38
6.0 References and Suggestion for Further Reading 38
7.0 Tutor-Marked Assignment 38
34
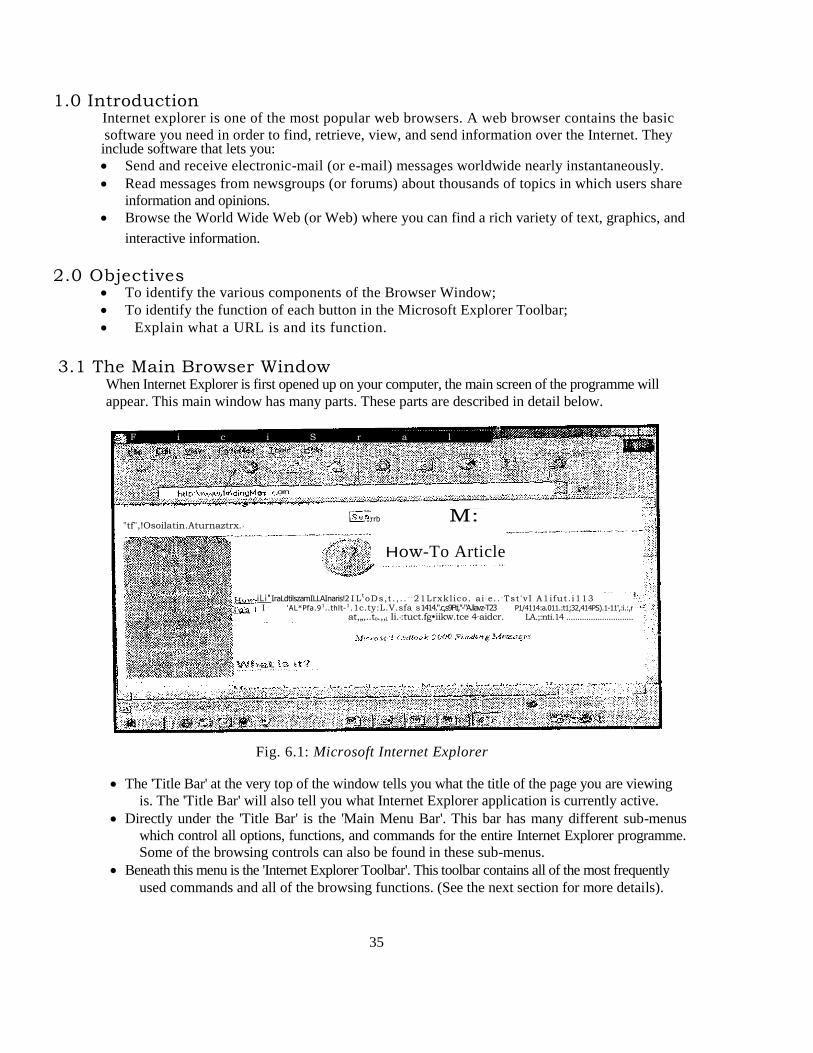
1.0 Introduction Internet explorer is one of the most popular web browsers. A web browser contains the basic
software you need in order to find, retrieve, view, and send information over the Internet. They include software that lets you:
Send and receive electronic-mail (or e-mail) messages worldwide nearly instantaneously.
Read messages from newsgroups (or forums) about thousands of topics in which users share
information and opinions.
Browse the World Wide Web (or Web) where you can find a rich variety of text, graphics, and
interactive information.
2.0 Objectives To identify the various components of the Browser Window;
To identify the function of each button in the Microsoft Explorer Toolbar;
Explain what a URL is and its function.
3.1 The Main Browser Window When Internet Explorer is first opened up on your computer, the main screen of the programme will
appear. This main window has many parts. These parts are described in detail below.
Fig. 6.1: Microsoft Internet Explorer
The 'Title Bar' at the very top of the window tells you what the title of the page you are viewing
is. The 'Title Bar' will also tell you what Internet Explorer application is currently active.
Directly under the 'Title Bar' is the 'Main Menu Bar'. This bar has many different sub-menus
which control all options, functions, and commands for the entire Internet Explorer programme.
Some of the browsing controls can also be found in these sub-menus.
Beneath this menu is the 'Internet Explorer Toolbar'. This toolbar contains all of the most frequently
used commands and all of the browsing functions. (See the next section for more details).
F i c i S r a l
orn
rrb M:
How-To Article
i L i " IraLdtilszamILLAInaris!2 I L toDs,t . , . . - -21Lrxklico . ai . e. . -Tst 'v I A1ifut . i113 I 'AL*Pfa.91..thlt-1.1c.ty:L.V.sfa s1414.".c,s9Fti,"-"A.liavz-T23 P1/4114:a.011.:t1;32,414PS).1-11',:i.:,r
at,„,..to.,,L Ii.,:tuct.fg•iikw.tce 4-aidcr. LA.;:nti.14 ..............................
"tf",!Osoilatin.Aturnaztrx.,
35

Under the toolbar is the 'Address bar'. This will tell you the exact HTTP/URL location of the
page you are currently viewing. You can also type a Web address directly into this bar and then
press enter to go to that site.
Below the 'Address bar' is the 'Link Bar'. These buttons will take you to pages at Microsoft's Main
home site where they have applications and information specifically designed for your easy use.
Underneath the 'Link Bar' is the 'Main Browser Window'. This window will display all of the
information that is located at the Web site you are currently located at. Any text, images, movies,
animation, links, or any other application files will be shown in this window. The scroll bars
located on the right side and on the bottom of this window allow you to continue viewing the page
you are located at even when the page is too large to fit into your screen.
The very bottom of the page is the 'Status Bar'. This bar tells you what the progress of the
browser is while it downloads files to the page, where links go to when you move over them,
whether or not a document is secure, and any other information that the programme feels is
necessary for you to know.
Activ i ty I
Click the internet explorer button and see if you can identify these various parts of the browser.
3.2 The Main Explorer Toolbar
The main toolbar is composed of eleven different buttons. Each of these buttons has a different
function and purpose in Internet Explorer. The individual buttons will each be discussed in the following
sections.
The Back Button: This button will take you back to whatever document you were previously
viewing. Pressing it immediately takes you back one document. If you have browsed many
pages, or are well into a multi-page document, pressing it repeatedly will continue to back you up
one page at a time. Once you reach your starting location, it will be greyed-out and unavailable.
The Forward Button: This button will take you forward to the next document if you have
previously browsed multiple documents and had then backed-up to the page you are currently
viewing. Of you have not backed up at all, the forward button will be greyed-out). Pressing it
repeatedly will continue to move you forward one page at a time. You can move forward until
you reach the last page that you had browsed, at which time the forward button will be greyed-
out.
The Stop Button: The stop button stops ANY current operations by Internet Explorer. It will
stop any type of file from loading. It can also be used to stop animations from continuing once a
page is loaded. If you press it before a page has finished loading, the page will display
everything it had finished loading before the stop button was pressed.
The Home Button: This button will return you to the page you have selected as the default
start-up page for Internet Explorer. It will not take you back to the beginning of your web
browsing, it will just return you to your home location from where you are. If you press back
after reaching your home page, you will go back to the page you left after you hit the Home button.
Exercise 1
What is the home page of your browser?
Except you have changed it, it should be that of your internet service provider.
The Search Button: This button will take you to the page you have selected as the default
Web
36

search page for Internet Explorer. If you have not selected a page, it will take you to Microsoft's
default search page. The Favorites Button: This button will open up the Favorites menu. You can choose a favorite that
you wish to go to from the list, add a favorite to the list, or organize your favorites from this menu.
The Print Button: The print button will bring up a Print dialog box. In the box you can decide if you
would like to print the contents of the page you are viewing, how many pages you will print, and also
how many copies you will print. Keep in mind that if you try to print a page that is graphics intensive,
you will need a printer that is capable of printing graphics. Also, the more graphics and pages a Web site has, the longer it will take to print.
The Front Button: Pressing this button causes Internet Explorer to cycle through the available font
sizes. This button is useful if the text is too small to be read, or too large to fit comfortably in the window.
The Main Button: This button will open into a drop down menu from which you can select to read
or send e-mail. You can also open up your newsgroups from this menu.
The Edit Button: This button will ONLY be on your toolbar if you have a Windows system Web
editor (such as Microsoft Frontpage or Microsoft Word) installed on your computer. If you press this
button, it will launch that editor and open the document you are currently viewing in it.
Exercise 2 Explain the use of Refresh button.
While viewing a web page and there is an error while downloading, the refresh button will reload the
current page you are viewing.
3.3 Beginning Basic Browsing You may have some difficulty the first time that you browse the web. Efficiently browsing the
Web is just like any other complex task in life, it takes practice to be good at it. Internet Explorer has
some built-in features which will help to make it easier for you to browse the web. The fastest way
to get to a place that you can search from, is to click on the 'Search' button on the Internet Explorer
main toolbar. This button will take you to a document within Microsoft's home site. On this
document you will find a choice of categories to look through and a list of Search Engines to use. A
Search Engine is application that will attempt to find any documents that contain the subject or
phrase that you enter into the search parameters. You can also browse through the categories of Web
sites that the search engines have already organized for you.
3.3.1 What is a Uniform Resource Locator (URL)? If you know the Web address of a site, usually called URL (or Uniform Resource Locator) you don't
need to use a search engine to find the page you wish to visit. Go up to the 'Address Bar' near the
top of the page, and click on it. Now you can type in the Web address of the site you want, and then
press enter. Internet Explorer will go to this site directly from whatever document you were currently
viewing. This is much faster than going to a search engine and trying to locate the site you want in
their directories, or searching for it with a query. (Address bar shown overleaf).
37

A URL (or uniform resource locator) is the address of an Internet file. Usually it consists of four parts:
Protocol, server (or domain), path, and filename. Sometimes there's no path or filename. Here's an example:
http:!/www.microsoft.conllwindows/default.asp
ht tp i s the p ro toco l
www.mic rosof t . com i s the server
windows/ i s th e pa th
defaul t .asp i s the f i lename
Exercise 3
State the importance of knowing the URL of a site.
Knowing the URL of a website enables you visit the site directly without having to use search engines to locate the address of the site.
4.0 Conclusion
Internet Explorer contains the basic software you need in order to find, retrieve, view, and send
information over the Internet. The explorer is made up of a main window that has many parts with
different buttons. Each of these buttons has a different function and purpose in Internet Explorer.
The web address (URL) enables you access a web site to type in the Web address of the site you want, and then press enter. Internet Explorer will go to this site directly from whatever document you were currently browsing.
5.0 Summary The different functions and purposes of the buttons of the Main Explorer Toolbar was intensively
discussed. The use of 'Address Bar' to type in the URL of a site was explained.
6.0 References and Suggestion for Further Reading
Widernet Project, http//www.widemet.org
Microsoft Windows http//www.Microsoft.com
7.0 Tutor-Marked Assignment
Question:
State when you will need to use these buttons:
The Stop Button
The Refresh Button
The Home Button The Back Button
38

UNIT 7: Internet Explorer — Viewing Web Page
Table of Contents
1.0 Introduction
Page
40
2.0 Objectives 40
3.1 Viewing Documents While not on the Web 40
3.2 Previewing a Web Page 40
3.2.1 To preview the appearance of a printed Web page 41
3.3 Printing Web Documents 41
3.4 Speeding up Your Browsing 42
3.5 View Web Pages in a Different Language 42
4.0 Conclusion 43
5.0 Summary 44
6.0 References and Suggestion for Further Reading 44
7.0 Tutor-Marked Assignment 44
39

1.0 Introduction Internet Explorer is capable of displaying HTML documents and images even if you are not connected
to the Internet. Documents containing images affect the speed at which the computer display the
document. But this speed can be improved in explorer. You can also instantly preview a Web page
so that you can see how the page will look when you print a hard copy. You can add languages to your
list of languages in Internet Explorer so that you can view these sites that are in different languages.
2.0 Objectives At the end of this unit, you will be able to:
Learn how to preview a Web page;
Learn how to use Print Preview commands to customize your page preview; Speed up browsing;
View Web pages in a different language.
3.1 Viewing Documents while not on the Web Internet Explorer is capable of displaying HTML documents and images even if you are not connected
to the Internet. Go to the file menu from the main menu bar. From this menu, select 'Open', the open
dialog box will appear. (You can also press CTRL-0 from the main Explorer window to access this
box). In this dialog box, you can type in a Web address to access a page on the Web. Since we are
not on the Web, click the 'Browse' button to look at files on the hard drive. Select the type of file you
want to open from the drop-down menu at the bottom of the box. After you have selected the file
type, go to the directory that contains this file. Select the file and then click 'Open'. The document,
image, movie, or sound file you have selected should now be viewable in Internet Explorer.
Exercise 1 Is it possible to view a web page off-line?
You can always save a web page on your hard drive and view it later off-line at a more convenient time.
3.2 Previewing a Web Page
You can click Print Preview to instantly see how a Web page will look when you print it. Then you
can use Print Preview commands to customize your page preview.
Fig. 7.1
IE Tutorial
40

3.2.1 To preview the appearance of a printed Web page 1. On the File menu, click Print Preview or If you added the Print Preview button to your
Internet Explorer toolbar, click the Print Preview
button. 2. Choose from the following commands to customize your page preview. When your mouse pointer
hovers on the Print Preview toolbar buttons, the command names and shortcut keys appear.
Click this button To do this
Shortcut key
Print document
Page Setup
First Page
Previous Page
Next Page
Last Page
Zoom Out
Zoom In
Zoom List Print Preview Help
Set printing options and print the page
Change paper, headers and footers,
orientation, and margins for this page
Display the first page to be printed
Type the number of the page
you want to display
Display the next page to be printed
Display the last page to be printed
Decrease the magnification
Increase the magnification
Display a list of zoom percentages
Read help topics about Print Preview
ALT+P
ALT+U
ALT+HOME
ALT+A ALT+RIGHT ARROW
ALT+END
ALT+MINUS
ALT+PLUS
ALT+Z
ALT+
H
3.3 Printing Web Documents If your computer is connected to a printer, you can print out any Web document that you wish
whether you are viewing it on the Web, or just viewing it from your hard disk. Go to the file menu
from the main menu bar. From this menu select 'Print', the Print dialog box will appear. (An easier way to
open this box is to simply click the 'Print' button on the main toolbar or to press CTRL-P). In this dialog
box you can decide how you would like to print the contents of the page you are viewing, how many
pages you will print, and how many copies you will print. Keep in mind that if you try to print a page
that is graphics intensive, you will need a printer that is capable of printing graphics. Also, the more
graphics and pages a Web document has, the longer it will take to print.
Fig. 7.2
41

Exercise 2 Do you really think you need hard copy of documents you find on the Internet? What is the reason for your
answer?
Hard copies are another way of looking at a web page off-line, because studying a document on-line is
expensive. You would need to print hard copies for reference and detail study at a more convenient time.
3.4 Speeding Up Your Browsing There are many ways to make the browsing process much quicker and easier. One of the main ways
that you can improve the speed of the computer when loading a document is to disable the automatic
loading of images. Go to the main menu of Internet Explorer, and from the View sub-menu, select
'Options'. From the Options dialog box, select the 'Advance' folder tab at the top of the box. In the
multimedia section you can select whether or not Internet Explorer loads an image, sound file, or
movie. If you want a type of file to be automatically loaded, place a check mark in the appropriate
box. If you want the images disabled, click to remove the check. Now whenever Internet Explorer
loads a document that has images, a small icon will appear where each image is located on the page.
If you wish to view the image at that location, right-click on the image area and then select 'View
Image' from the menu.
Fig. 7.3
3.5 View Web Pages in a Different Language
Some web sites offer their content in several languages. You can add languages to your list of
languages in Internet Explorer so that you can view these sites in your preferred language. To view
web pages written in a different language:
On the Tools menu in the browser, click Internet Options
On the General tab, c l ick Languages
C I i c k A dd Select the language you want to add.
Mweys expend ALT ted lot manes
o Move system caret vsh tocuchaechen changes Bunsass 01 Avows send URLs as VIF
Ahkelandly check To sane, E risks.i updates
a Ouse mused 'Was n Mystery she Fannies
a Dads tap debuggro
oDercSay e net. Inman ennui sway sad eea
Enable Install On Demand
I21 Enable offline gems lobe synchpartzed on a schedUe
a Enable moo be countes2 Enable page SanSPODM
a Launch browse/ medusa ala seesaw process
Nolty when downloads complete 0 Slow heady H TIP env menages
Show then* UAL,
Hope Vies Will Pass This On to AU Whom You consider As
We are never given dreams without also
being given the power to make
42

Exercise 3 Suppose you can speak another International language, what is the advantage of adding that language in your
preferred language of view? Adding another international language in your Internet Explorer allows you to view sites in that language.
• If you speak several languages, you can arrange them in order of priority. If a web site offers multiple
languages, it will supply content in the language with the highest priority.
Note that adding languages does not guarantee that you have a font that can display web pages in your
preferred languages. You may need to download a multilanguage support pack to display pages in these
languages.
Exercise 4 Does adding languages guarantee that you have a font that can display web pages in your preferred languages?
You may need to add a multilanguage support pack to display pages in these languages, so the answer is
No.
4.0 Conclusion Document, image, movies, or sound file can be viewed off line, while you can also use print preview
to view how the document will look like when you print them. Loading a document that has images
when image is disabled in your explorer will increase the speed at which the document is displayed.
If you wish to view the image at that location, right-click on the image area and then select 'View
Image' from the menu.
,
3 - 4 1 1 - r d s - i . l i t - r e i - 4 , -• •
./Vitfrt.A.cr' ,
;;Nai to, ", `rd..ID ;at cftr-141
,4 vultkl;Cuag”. ,
' chtcle Kral la;9:49.• Naett' l'aV.1.1N hilted n
Krim ard is"; td:Prt imp* dIdent.t
n E rc i t n l ad i [ a t l
IThriaYoulaMPies• I his Cu To 417 WNW' Villa CIMIS141.1
a ‘ 1 iindq
. . .
. 7.7"-:777941V177 -721:4-Erir-7,001--zr A skidirs2frrt7;t7tr.T4 ...-2.1c40,6-.1,)...lt,e;!.•/c.is Pre... -:-`_51-'>544:17,7Erd- i22,' PM
Fig. 7.4
43

5.0 Summary In this unit we discussed how you can preview your documents before printing. The importance of
disabling the automatic loading of images and finally how you can view documents in other language
were also discussed.
6.0 References and Suggestion for Further Reading Widemet Project, http//www.widernet.org
Microsfot Windows http//www.Microsoft.com
7.0 Tutor-Marked Assignment
Question
Suppose in the process of viewing your web page the pictures are not showing, how would you solve the
problem?
44

UNIT 8: Internet Explorer—Management of Favorites and History
Table of Contents
1.0 Introduction
Page
46
2.0 Objectives 46
3.1 Locating the Favorites Folder 46
3.2 Creating a New Favorites Folder 46
3.3 Adding to Favorites 47
3.4 Deleting Favorites 48
3.5 History Button 48
3.5.1 To find a page you've seen in the last few days 48
3.5.2 To specify how many pages are saved in the History list 49
4.0 Conclusion 49
5.0 Summary 49
6.0 References and Suggestion for Further Reading 50
7.0 Tutor-Marked Assignment 50
45

1.0 Introduction
Internet Explorer contains a system of marking frequently visited web sites, these are known as
Favorites. The settings for your Favorites are located on the main menu bar of Internet Explorer.
Apart from the use of Favorite, there are several ways to find web sites and pages you've viewed in
the last few days, hours, or minutes.
2.0 Objectives At the end of this unit you will be able to:
Create a new Favorites folder;
Manage your Favorites;
Use history button to locate sites visited.
3.1 Locating the Favorites Folder Select the 'Favorites' sub-menu with your mouse, or press 'ALT—A'
Now select 'Organize Favorites' from this menu. The Organize Favorites dialog box has now appeared.
The Move button allows you to move your Favorites to another directory. The Rename button
will let you change the name of the Favorite you selected. The Delete button will delete the Favorite you have selected.
Fig. 8.1
3.2 Creating a New Favorites Folder
As your list of Favorites grows, you can keep it organized by creating folders. You might want to
organize your pages by topic. For example, you could create a folder named Information Technology for storing information about Information Technology. This allows you to easily locate a Favorite page.
Organize Favorites
Favorites
0] Eastern Mow Untversity
Internet Edam TUICInal
ti Mann:0 !Memel E *wet
tl National Open UnNeentY
46

To create a new folder for your favorites, go to the Organize Favorites dialog box again by
clicking Favorites and then selecting "Organize Favorites".
In this box, a button is located in the upper-right that will allow you to create a new folder (This
button has been circled in red in the figure below). Click this button and a new folder will
appear.
The default name of this folder is "New Folder" . Change the name by typing a new name
when the "New Folder" text is highlighted. You can always change a file or folder name by
clicking on the file or folder one time. Then click the right mouse button and select Rename.
Exercise 1 What will necessitate your adding a website in your Favorite folder?
If you pay frequent visit to a particular site you can add it in your Favorite folder. This will give you easy
access to the site URL.
3.3 Adding To Favorites 1. When you are at a web site that you would like to add to your Favorites, go up to the "Favorites"
menu item and click on "Add To Favorites". This will bring up a dialog box in which you can
change the name of the Favorite.
2. Click "OK" and the Favorite is added to your current Favorites list. A shortcut to bring up the
dialog box is to press and hold "ALT" and then press and hold "A". Hold both until the Add To
Favorites dialog box appears.
Organize F
Favorites
re] Eastern Illinois University
0.3 Internet Explorer Tutorial
t] Microsoft Internet Explorer
#1 National Open University
Fig. 8.2
47

çj Favorites
_U Newfoidec
4 cumrolgiansvioxo
Nen./ Expiate; Tutoual
Y øJ Miaow Internet Explorer
dej National Open Univesity
Fig. 8.3
3.4 Deleting Favorites
With time the folder containing your Favorites will contain so many Favorites that locating a particular
one will take you quiet some time, hence once in a while, you will have to do some cleaning up by
deleting Favorites that you no longer need from your Favorite folder. Follow the steps below to delete Favorites from your computer.
From the Organize Favorites dialog box, select the Favorite that you wish to delete by clicking
once on it. Now three buttons have lit up just below the listing of your Favorites.
Click the Delete button and it will ask you to confirm whether or not you really want to delete it. Click Yes if you want to delete the Favorite you've selected.
Exercise 2
Why do you think it is important to delete some Favorites from your computer?
3.5 History Button
The History list shows where you've been — today, yesterday, or a few weeks ago. If you forget to
add web pages to your Favorites or Links bar, click the History button on the toolbar. Click a name
from the list to display the page. You can hide the History bar by clicking the History button again.
There are several ways to find web sites and pages you've viewed in the last few days, hours, or minutes.
3.5 .1 To find a page you've seen in the last few days
On the toolbar, click the History button.
The History bar appears, containing links for web sites and pages visited in previous days and weeks.
In the History bar, click a week or day, click a web site folder to display individual pages, and then click the page icon to display the web page.
To sort or search the History bar, click the arrow next to the View button at the top of the History bar.
48

Exercise How do you locate a web page you forgot to add to your Favorite?
You can change the number of days that pages are saved in the History list. The more days you
specify, the more disk space is used on your computer to save that information.
3.5.2 To specify how many pages are saved in the History list On the Tools menu in Internet Explorer, click Internet Options. Click the General tab
In the History area, change the number of days that the History list keeps track of your pages.
To empty the History folder, click Clear History. This will temporarily free up disk space on
your computer.
4.0 Conclusion Web page can be made available offline by adding it to your Favorites. You can add and remove
folders, sort your favorites, and do anything else needed to manage Favorites. History button is
used to sort sites visited by date visited, site name, number of visits, or order you visited today.
Smart sorting also gives you the option of having History listed alphabetically.
5.0 Summary In this unit, we have discussed how to organize your folder easily, create, move, rename, or delete
folders or files from Favorites with the Right-click. We also discussed how to use the History
button to sort sites visited.
a Learning to research on the web Microsoft Internet Explore . "
CAWINDOWSkDeskloolleenne jeseach on jhe_weeHm_
Learning to research on the web
Note: the links below take youfurther down on this page.
Cyberspace is not like your library--iwe blrarian's jokes wields aren't wry funny
a Len Week
MWednesday
a Today
PovserPcinl Presentation
4-6 PowerPori faspentation
e BOOKSHOP MANAGER h
Leaning10 research cn Li
Fig. 8.4
49

6.0 References and Suggestion for Further Reading Widernet Project, http//www.widernet.org
Microsoft Windows htt;//www. Microsoft.com
7.0 Tutor-Marked Assignment
Quest ion
State some reasons for using your History button in your Internet Explorer and state the procedure for finding a web page you browse a week before.
59

UNIT 9: Internet Explorer — Saving and Downloading Files from the Web
Table of Contents
Page
1.0 Introduction 52
2.0 Objectives 52
3.1 Saving Files after Viewing them 52
3.2 Downloading Files from Links 53
3.3 Customizing Preferences 53
3.3.1 Changing the Background and Text Colors 53
3.4 Changing the Link Colors 54
3.5 Setting Your Default Start-Up Page 55
4.0 Conclusion 55
5.0 Summary 56
6.0 References and Suggestion for Further Reading 56
7.0 Tutor-Marked Assignment 56
51

1.0 Introduction This Unit will show you how to effectively use, the many resources the web has to offer. Microsoft
Internet Explorer can download any type of file that you wish from a web site for use on your own
personal computer at your convenient time. You can also customize your background and text color
for your convenience.
2.0 Objectives
At the end of this unit you will be able to:
Save f i les af ter v iewing them;
Download f i l es f rom l inks;
Customize your preferences;
3.1 Saving Files after Viewing them
Frequently on a web page, you will find links that you can click on which will activate a selected file.
Other times, the appropriate plug-in will be engaged when you click an application file. Once you
have heard the sound, watched the video, or read the text, you may want to save the file on your
computer for use off-line in future. Using the file off-line reduces the cost of working on-line.
Most files available for viewing allow you to -Right-Click" on them which displays a menu box.
From this box select -Save As". "Save Picture As", or whatever happens to fit the type of file
you have just seen or heard.
Choose where on your computer the file will be saved and give it a name.
Click "Save" to begin saving the file. In the example below, the Eastern Illinois University logo
was viewed. A "Right-Click" on it brought up a menu box. Finally, it will be saved to the hard drive.
Exercise 1 Why do you think you would want to save a web page after viewing it?
Saving a web page after viewing it allows you to view it off-line in future.
Fig,. 9..1
11) My Documents
EUI97.jpg
JPEG Nog)
52

3.2 Downloading Files from Links Many web pages have links to files that you can view such things as Images, Sounds, or Movies.
Suppose that you don't want to look at them now, you can always download them directly from the
links and view them at a later time. I. "Right-Click" on the file that you want to download.
2. In the menu box that pops up, select "Save Target As". 3. A "Save As" dialog box will appear. You can select what name the file will have, and the location
to where it will be downloaded. A shortcut to get to the "Save As" box is to hold "Shift" and
"Left-Click" on the link you want to download. After you have selected the name and destination,
click "Save". In the example below, suppose you would like to download the wave file called
'Door wave". First, a "Right-Click" on the file name will bring up the menu box. Next, choose
"Save Target As" and select your desired location from the "Save As" dialog box. Finally click
"save" and download the wave file.
Exercise 2 Download a file from the internet and see how much time it takes.
If the file does not contain images and it is not large, I am sure about 2-3 minutes will do.
3.3 Customizing Preferences Explorer allows you to set the background color and text color for your browser for your convenience.
3.3.1 Changing the Background and Text Colors => From the Options dialog box, click on the "General" folder tab at the top of the box. You can set
the background color from here. (The colors section is outlined in red for your convenience). If
you want to set the background color at the windows default, click on the "Use windows Colors"
box.
=> To select a custom background color and/or a custom text color, click the "Use Windows Colors"
box so that it is NOT checked. Click on the colored box next to the box labelled "Text" or
"Background". Now you have opened the color dialog box. You can choose your custom color
from this palette by clicking on the desired color. When you are satisfied with your choice, click
the "OK" button at the bottom of the color box. If you are done choosing options, click "apply"
and then "OK" at the bottom of the Options box. See Fig. 9.2.
53

Fig. 9.2
3.3 Changing the Link Colors ir> From the Options dialog box, click on the "General" folder tab at the top of the box. You can set
the link colors from here. (The links section is outlined in red for your convenience).
To select a custom link colors click on the colored box next to the box labelled "Visited" or
"Unvisited". Now you have opened the color dialog box. You can choose your custom color from
this palette by clicking on the desired color. When you are satisfied with your choice, click the
"OK" button at the bottom of the color box. If you are done choosing options, click "apply" and
then "OK" at the bottom of the Options box.
Fig. 9.4
L I .C uTe nt I U. , 2 . / . 4 LLAt i a* I
t a l a C a l o P R A Y 1 l a . . . I l s i m n e P a g e I
iJi 5° "101 Oct. ' ," I C.rne ,"1 ,1 Pic t. .
Hon, Ps:e
YoJ tsen dun,. who', 2.0 Pu we F.1%. hotm "It
r.strini..cnewiners,ro,
P P41-10,-7-
1.19
.!
4acc-4•Wwsicr4vs
4s.n-n
G Ie. :6 LooM ;4914 r _
n.
Y M e c l : .
ULnasged:
F Use hover caLar -
—01
Qerne Custom Co•KH:
OK]
Golfer Ella
cons gEl
OK Cancel I
54

3.4 Setting Your Default Start-Up Page The "Start-Up" page is the Web site or document that Internet Explorer will open automatically
every time that you start the programme. These steps will show you how you can change this page to whatever location you prefer.
* From the Options dialog box, click on the "General" folder tab at the top of the box. You can
change the start-up page from here. Click on the Page drop-down box arrow to open a small
menu. * Click on the Address box. * Type the address of the page you would like Internet Explorer to open each time you start the
programme. If you are satisfied with your choice and are done setting options, click on "Apply"
then "OK" at the bottom of the Options box.
Fig. 9.2
Exercise 3 What would you like as your Start-Up Home Page? Why?
Sometimes your Favorite site can be set as your start-up home page so that you can visit the site before
visiting other sites.
4.0 Conclusion Once you have heard the sound, watched the video, or read the text, you can save the file on your
computer for future use. You can also download them directly from the links and view them at a later
time. The colors setting is for you to make settings that are convenient for your use. You can set your
web site as your "Start-Up" page so that Internet Explorer will open it automatically every time that
you start the programme.
55

5.0 Summary In this Unit, we looked at how you can save and download a web page of interest for future use of
viewing off-line. It is more continuance in terms of cost to save and use web page off-line. Internet
Explorer also provides you with facilities to customize your preference in terms of background and
text color.
6.0 Reference and Suggestion for Further Reading Widernet Project, http//www.widemet.org
Microsoft Windows http//www. Microsoft.com
7.0 Tutor-Marked Assignment
Question
Explain why you would want to download a web page and state the procedure for doing it.
56

UNIT 10: Internet Explorer: Security
Table of Contents
Page
1.0 Introduction 58
2.0 Objectives 58
3.1 Configuring Security Zones 58
3.1.1 To configure security zone settings using Explorer 58
3.2 Internet Zone 59
3.3 Local Intranet Zone 59
3.4 Trusted and Restricted Sites Zones 60
3.5 Domain Name Suffixes 60
3.6 Custom Level Settings 61
4.0 Conclusion 61
5.0 Summary 62
6.0 References and Suggestion for Further Reading 62
7.0 Tutor-Marked Assignment 62
57

1.0 Introduction You can use security zones to easily provide the appropriate level of security for the various types of
web content that you are likely to encounter. For example, because you can fully trust some sites,
you probably want users to be able to run all types of active content from this location. To provide this
capability, set the site zone to a low level of security. You might not feel as confident about some sites
on the Internet, so you can assign a higher level of security to the entire Internet zone. This higher
level prevents users from running active content and downloading code to their computers.
However, if there are specific sites you trust, you can place individual URLs or entire domains in the
Trusted sites zone. For other sites on the Internet that are known to be sources of potentially harmful
web content, you can select the highest restrictions.
2.0 Objectives At the end of this unit you will be able to:
Con f igu re Secu r i t y Zones;
Set Up the Interne t Zone;
Set Up the Trusted and Restricted Sites Zones;
Set Up the Custom Leve l Set t ings.
3.1 Configuring Security Zones The explorer provides you with a default security settings for each zone or yon can configure the
settings based on your needs and its users.
You can configure security zones by using the following methods:
In Internet Explorer, you can use the Security tab.
You can use the Internet Explorer Customization Wizard to create custom browser packages
that include security zone settings for your user groups. You can also lock down these settings to
prevent users from changing them.
After the browser is deployed, you can use the LEAK Profile. You can automatically push the
updated security zone settings to each user's desktop computer, enabling you to manage security
policy dynamically across all computers on the network.
Exercise 1 What is the default security settings of your computer?
Check and see or has someone adjusted it?
3.1.1 To configure security zone settings using Explorer On the Tools menu, c lick Internet Options, and then click the Security tab.
Click a security zone to select it and view its current settings. As necessary, change the following settings: Security level. To change the security level for the selected zone to High, Medium, Medium -
low, or low, move the slider. The on-screen description for each level can help you decide which
level to select.
Sites. To add or remove Web sites from the zone, click the sites button, and then click the Add
or Remove button to customize your list of sites for the selected zone.
Custom level. For more precise control of your security settings, click the Custom Level button,
and then select the options you want. At any time, you can click Default Level on the Security
tab to return to the original security level for the selected zone.
58

3.2 Internet zone
The Internet zone consists of all Web sites that are not included in the other zones. By default, the
Internet zone is set to the Medium security level. If you are concerned about possible security
problems when users browse the Internet, you might want to change the security level to High. If
you raise the security level, Internet Explorer prevents some Web pages from performing certain
potentially harmful operations. As a result, some pages might not function or be displayed properly.
Rather than use the High security level, you might want to choose the Custom level so that you can
control each individual security decision for the zone.
Exercise 2 What is the implication of raising the Setting Up of the Internet Zone to High?
Raising the security level of your internet zone to high will prevent some web pages from certain potentially
harmful operations. And some pages might not function or be displayed properly.
3.3 Local Intranet Zone To ensure a secure environment, you must set up the Local intranet zone in conjunction with your
proxy servers and firewall. All sites in this zone should be inside the firewall, and the proxy servers
should be configured so that an external Domain Name System (DNS) name cannot be resolved to
this zone. Configuring the Local intranet zone requires that you have a detailed knowledge of your
existing networks, proxy servers and firewalls.
By default, the Local intranet zone consists of local domain names in addition to any domain that
is specified to bypass the proxy server. You should confirm that these settings are secured for your
computer and adjust the settings as necessary. Follow the steps below to set up the Local Intranet
Zone. I. On the Tools menu, click Internet Options, and then click the Security tab.
2. Click the Local intranet zone.
3. Click Sites, and then select the following check boxes that apply.
Include all local (intranet) sites not listed in other zones.
Intranet sites, such as http//local, have names that do not include dots. In contrast, a site
name that does contain dots, such as http://www.microsoft.com, is not local. This site would
be assigned to the Internet zone. The intranet site name rule applies to File URLs as well as
HTTP URLs.
Include all sites that bypass the proxy server. Typical intranet configurations use a
proxy server to gain access to the Internet but have a direct connection to intranet servers.
The setting uses this kind of configuration information to distinguish intranet from Internet
content. If your proxy server is configured otherwise, you should clear this check box and
then use other means to designate the Local intranet zone membership. For systems
without a proxy server, this setting has no effect.
Include all network paths (UNCs). Network paths (for example, \ \ servername \
sharename \ file.txt) are typically used for local network content that should be included in the
Local intranet zone. If some of your network paths should not be in the Local intranet zone,
clear this check box and then use other means to designate the Local intranet zone membership.
In certain common Internet File system (CIF S) configurations, for example, it is possible
for a network path to reference Internet content. Click Advanced
Type the address of the site you want to include in this zone, and then click Add
To require that server verification be used, select the Required server verification (https:)
for all sites in this zone check box.
59

After the Local intranet zone is confirmed to be secured, consider changing the zone's security
level to Low so that users can perform a wider range of operations. You can also adjust individual
security settings by using the Custom level of security for this zone. If parts of your intranet are less
secured or otherwise not trustworthy, you can exclude the sites from this zone by assigning them to
the Restricted sites zones.
3.4 Trusted and Restricted Sites Zones You can add trusted and untrusted Web sites to the trusted sites and restricted sites security zones.
These two zones enable you to assign specific sites that you trust more or less than those in the
Internet zone or the Local intranet zone. By default, the Trusted sites zone is assigned the Low
security level. This zone is intended for highly trusted sites, such as the sites of trusted business
partners.
If you assign a site to the Trusted sites zone, the site will be allowed to perform a wider range of
operations. Also, Internet Explorer will prompt you to make fewer security decisions. You should
add a site to this zone only if you trust all of its content never to perform any harmful operations on your
computer. For the Trusted sites zone, Microsoft strongly recommends that you use the Hypertext
Transmission Protocol Secure (HTTPS) protocol or otherwise ensure that connections to the site are
completely secure.
By default, the Restricted sites zone is assigned the High security level. If you assign a site to the
Restricted sites zone, it will be allowed to perform only minimal, very safe operations. This zone is for
sites that you do not trust. Because of the need to ensure a high level of security for content that is
not trusted, pages assigned to this zone might not function or be displayed properly.
Exercise 3
Distinguish between trusted and untrusted Zones.
Sites in the trusted zones are allowed to perform a wider range of operations while sites from untrusted
zones are allowed to perform only minimal, and safe operations.
3.5 Domain Name Suffixes You can address Web content by using either the DNS name or the Internet Protocol (IP) address.
You should assign sites that use both types of addresses to the same zone. In some cases, the sites in
the Local intranet zone are identifiable either by their local names or by IP addresses in the proxy
bypass list. However, if you enter the DNS name but not the IP address for a site in the Trusted sites
or Restricted sites zone and the site is accessed by using the IP address that site might be treated as
part of the Internet zone.
To set up this capability, you must add the domain name suffix for TCP/IP properties to the
domain suffix search order.
To add the domain name suffix for TCP/IP properties to the domain suffix search order in
Microsofta Windows XPa and Windowsa 2000 In Microsoft windows XP or Windows 2000, right-click the My Network Places icon, and then
click Properties. Right-click the appropriate network connection, and then click Properties.
On the General tab (for a local area connection) or the Networking tab (for all other connections),
click Internet Protocol (TCP/IP), and then click Properties Click Obtain DNS server address automatically If it is not already selected. Click Advanced, and then click the DNS tab.
60

Cl ick Append these DNS suff ixes ( in o rder) , and then c l ick Add
Type the domain suff ix, and then cl ick Add
To add the domain name suffix for TCP/IP properties to the domain suffix search order in Windows
98.
In Microsofth windows 98d, right-click the Network Neighborhood desktop icon, and then
click Properties.
On the Conf igurat ion tab, c l ick TCP/IP, and then c l ick Propert ies.
Click the DNS Configuration tab, and then select Enable DNS if it is not already selected.
In the Domain Suff ix Search Order box, add the search order that you want.
It is important to set up security zones correctly for this capability. By default, the URL, without
dots (http://sample) is considered to be in the Local intranet zone, and the URL with dots (http://
sample sharon.com) is considered to be in the Internet zone. Therefore if you use this capability and
no proxy server bypass is available to clearly assign the content to the proper zone, you need to
change the zone settings.
Depending on whether the content accessed by the domain name suffix is considered intranet or
Internet content, you need to assign the ambiguous site URLs to the appropriate zones. To assign
URLs, such as http://sample to the Internet zone, clear the Include all local (intranet) sites not
listed in other zones, check box for the Local intranet zone, and include the site in the Internet
zone.
3.6 Custom Level Settings The Custom Level button on the Security tab gives you additional control over zone security. You
can enable or disable specific security options depending on your needs and its users.
The Custom level security options for Internet Explorer are grouped into the following categories.
Microsof ta Act ive ra contro ls and p lug - ins
D o w n l o a d s
M i c r o s o f t V M
M i s c e l l a n e o u s
S c r i p t i n g
Use r A u th en t i c a t i o n
Exercise 4 What is the advantage of using Custom Level Settings?
As discussed, the custom level setting allows you to make your own security settings depending on your
needs and use.
4.0 Conclusion When you set up the security zone, you can specify the URL categories in addition to specific sites
in the zone you trust. You can place individual URLs or entire domains in the Trusted sites zone. For
other sites on the Internet that are known to be sources of potentially harmful Web content, you can
select the highest restrictions.
61

5.0 Summary In this unit, we discussed how you can manage your security zone settings through the automatic
browser configuration feature of Internet Explorer. We also discussed how you can add trusted and untrusted Web sites in your security zone.
6.0 References and Suggestion for Further Reading
Widernet Project, http//www.widernet.org
Microsoft Windows, http//www. Microsoft.com
7.0 Tutor-Marked Assignment
Question
Explain why you would want to download a web page and state the procedure for it.
62
UNIT 11: Netscape Browser — Introduction
Table of Contents
1.0 Introduction
Page
64
2.0 Objectives 64
3.1 Netscape Communicator 64
3.2 How Web Browsers Work 64
3.3 Opening Web Pages 65
3.4 The Toolbar 65
3.5 Customizing the Toolbars 67
3.6 Clicking Links 67
4.0 Conclusion 68
5.0 Summary 68
6.0 References and Suggestion for Further Reading 68
7.0 Tutor-Marked Assignment 68
63

Netscape Browser
RI
Fig. 11.1
1.0 Introduction
Netscape browser is a software programme that allows users to access and navigate the World
Wide Web. Netscape browser enables you to find and view information published on the World Wide
Web. Netscape Navigator is available as part of the Netscape Communicator package of Internet
access tools or as a stand-alone application. Netscape Navigator translates the coded language of
the Web, HTML (Hyper Text Markup Language), into text, pictures, even sound and video.
2.0 Objectives At the end of this unit you will be able to:
Identify the different toolbar of Netscape Navigator
Explain the functions of the various buttons
Open a web page using Netscape Navigator
Move from one web page to the next using links
3.1 Netscape Communicator
Netscape Communicator is a software package that includes Navigator, a browser, Messenger, an
e-mail and newsgroup programme; and Composer, a web page publishing programme. In each part
of this tutorial, we'll refer to the component we're using. In this case, we're using Navigator, which is the programme you use to navigate the web.
3.2 How Web Browsers Work
Most of the information on the web is organized into linked pages located on different computers that are connected to the Internet. These networked computers that store and deliver information are called servers.
Exercise I Identify the kind of browser you have on your computer.
The two most popular browsers are Internet explorer and Netscape browser.
When you type in a URL or click a link, Navigator sends a request for that page over the Internet. This
*PcmerPoininresentation - Netwaspe
E Edit y EO gommunicator Help
1 3 Forward Reload Home Search Guide
Bookrnark 4 Location Ifile.11/Clikly Documents/Love:20Y°
Internet A Lookup A New&Cool jJ Netcom Support
Fig. 11.2
Security
files/y3Jocumenthtm
64

computer network uses the URL to find the server that has the page and ask it for a copy. That server
receives the request, finds the page, then sends a copy of the page over the Internet and back to your
computer. When the data arrives at your computer, Navigator shows the page and any images associated
with it in your browser window. Most of die time, th is happens in just a few moments.
3.3 Opening Web Pages When you first open Netscape Communicator, you will see the Netscape Navigator browser window.
Unless your default home page has been changed, when you launch Navigator, the first page you'll
see is the Netcenter home page, which is Netscape's portal — or point of entry — onto the web.
ILocation Ilile:/fiC Documentsilove documenthim .
Fig. 11.3
Near the top of the Navigator browser window you will see the Location field (a text box
preceded by the word Location or Netsite). The Location field displays the address of the page
you're viewing. This address is called a URL (Uniform Resource Locator). Every page on the web
has its own unique URL. It helps you locate a particular person. A URL tells Navigator where to
find a specific web page.
Although most web addresses begin with http://; you don't need to type that part of the URL.
Navigator will add it automatically. You can type home.netscape.com, for example rather than http:/
/home.netscape.com. Note that not all web addresses start with www!
URLs are case sensitive, which means when you type a web address into the Location field, you
must type the characters exactly as you see them, including uppercase and lowercase letters. Be
sure to include special characters, such as a tilde (—). And no matter how it appears in print, don't
type a period at the end of a URL.
When the word Netsite appears to the left of the Location field (rather than the word
Location), it means the page you're looking at is located on a computer that uses Netscape server
software.
Exercise 1 What is the main function of URL?
The URL is the unique address of a web site. It is used to access or locate a web site.
3.4 The Toolbar The toolbar consists of clickable buttons that either take you to predefined Web pages, or perform
functions for you such as finding text, loading graphics, or printing.
Menu bar: Offers menus containing commands for working with the programme. communicator Help
Title bar: Shows the title of the web page you're currently viewing.
S i t A n a
Navigation toolbar: Contains buttons to help you navigate from page to page. The following
are the functions of those buttons:
65

Fig. 11.3
Back
Forward
Reload
Home
Search
My Netscape
Images
Security
Stop
Takes you back to the last page you visited.
If you've gone backward, takes you forward to the next page.
Gets a new, fresh copy of a web page from its server on the Net.
Sends you to your home page.
Opens the Netscape Net Search page.
Takes you to channeLnetscape.com, where you can create a customized page.
If the Automatically Load Images preference is turned off, this button will load
images. (See more about tins in the "Speeding Up Web Browsing" section.)
Prints the web page you're viewing.
Opens a window containing security information about the page you're viewing:
Stops the current page from loading.
Location bar: Includes the Location field, where you type the web address of a page you want
to see, and the What's Related button (find out more about What's Related in the "Smart
Browsing" section). PC users will also see the bookmarks menu here, rather than as part of the
menu bar.
Bookmarks 4 Locati l imn/Cl/My Documants itove%2(thadia
Personal toolbar: A place for accessing and filing the bookmarks you want to use most often.
age 15 Int . LI Lookup ccj
Status bar: When a page is loading, download information, such as how much data has been
received, appears in the status bar. The status bar also contains a security icon, which you can
click to get security information about a page.
fen'ing data r
Fig. 11.4
Component toolbar: Contains a button for each Communicator component. (If you're using a
stand-alone vession of Navigator, you won't have a Component toolbar.)
66

Fig. 11.5
Activity 1
Use the Navigation Buttons and try the following after clicking the browser:
1. Type the URL www.jellybelly.com in the Location field.
2. Press the Enter (Return) key.
3. Watch the big N logo and/or the status bar to see when the page has finished downloading. (When it's
finished, the comets stop streaming and the word "Done" appears on the status bar.)
4. Click the Back button to return to the Netscape Netcenter home page.
5. Click the Forward button to return to the Jelly Belly home page.
6. Click the Home button to return to your home page (it doesn't matter what it is).
7. Click the Search button to go to Netscape Net Search.
3.5 Customizing the Toolbars You can move the Navigation. Location, and Personal toolbars around at the top of the Navigator
window, as well as you can shrink or hide those toolbars if you want to see more page less toolbar.
To move a toolbar, click its left edge and drag it above or below another toolbar.
To collapse or expand a toolbar, click the expander arrow at the left edge of the toolbar. (It looks
like a blue triangle.)
To view or hide a toolbar, select View, toolbar from the Communicator menu bar, where
toolbar is the name of the tool bar you want to view or hide.
3.6 Clicking Links To move from one web page to the next, you can type a URL into the Location field (as you did in the
"Opening a Web Page" section), or you can click the links you will find on most web pages to visit a
different page.
A link contains the URL of the page you want to sec. Most of the time you won't need to
know a page's URL because it is included as part of the link on the web page. On many pages, a blue
link represents a page you haven't viewed yet, and a purple link represents one that you have
visited.
67

Fig. 11.5
Activity 1
Use the Navigation Buttons and try the following after clicking the browser:
1. Type the URL www.jellybelly.com in the Location field.
2. Press the Enter (Return) key.
3. Watch the big N logo and/or the status bar to see when the page has finished downlbading. (When it's
finished, the comets stop streaming and the word "Done" appears on the status bar.)
4. Click the Back button to return to the Netscape Netcenter home page.
5. Click the Forward button to return to the Jelly Belly home page.
6. Click the Home button to return to your home page (it doesn't matter what it is).
7. Click the Search button to go to Netscape Net Search.
3.5 Customizing the Toolbars You can move the Navigation. Location, and Personal toolbars around at the top of the Navigator
window, as well as you can shrink or hide those toolbars if you want to see more page less toolbar.
To move a toolbar, click its left edge and drag it above or below another toolbar.
To collapse or expand a toolbar, click the expander arrow at the left edge of the toolbar. (It looks
like a blue triangle.)
To view or hide a toolbar, select View, toolbar from the Communicator menu bar, where toolbar
IS the name of the tool bar you want to view or hide.
3.6 Clicking Links To move from one web page to the next, you can type a URL into the Location field (as you did in the "Opening a Web Page" section), or you can click the links you will find on most web pages to visit a
different page.
A link contains the URL of the page you want to see. Most of the time you won't need to know
a page's URL because it is included as part of the link on the web page. On many pages, a blue link
represents a page you haven't viewed yet, and a purple link represents one that you have visited.
67

Fig. 11.5
Activity 1
Use the Navigation Buttons and try the following after clicking the browser:
1. Type the URL wvvw.jellybelly.com in the Location field.
2. Press the Enter (Return) key.
3. Watch the big N logo and/or the status bar to see when the page has finished downlbading. (When it's
finished, the comets stop streaming and the word "Done" appears on the status bar.)
4. Click the Back button to return to the Netscape Netcenter home page.
5. Click the Forward button to return to the Jelly Belly home page.
6. Click the Home button to return to your home page (it doesn't matter what it is).
7. Click the Search button to go to Netscape Net Search.
3.5 Customizing the Toolbars You can move the Navigation. Location, and Personal toolbars around at the top of the Navigator
window, as well as you can shrink or hide those toolbars if you want to see more page less toolbar.
To move a toolbar, click its left edge and drag it above or below another toolbar.
To collapse or expand a toolbar, click the expander arrow at the left edge of the toolbar. (It looks
like a blue triangle.)
To view or hide a toolbar, select View, toolbar from the Communicator menu bar, where toolbar
is the name of the tool bar you want to view or hide.
3.6 Clicking Links To move from one web page to the next, you can type a URL into the Location field (as you did in the
"Opening a Web Page" section), or you can click the links you will find on most web pages to visit a
different page.
A link contains the URL of the page you want to see. Most of the time you won't need to know
a page's URL because it is included as part of the link on the web page. On many pages, a blue link
represents a page you haven't viewed yet, and a purple link represents one that you have visited.
67

4.0 Conclusion Netscape is a software that you use to view information on the World Wide Web. Every page on the
web has its own unique URL which identifies its location on the Internet. The Toolbar consists of
clickable buttons that enable you Navigate through the web.
5.0 Summary
In this unit, we explored the Navigator window and its tools, and demonstrated the basic browsing
techniques, such as opening web sites using URLs and links to move to other web sites.
6.0 References and Suggestion for Further Reading http:/ WWW. m icroso ft . c o m /
http:/ home.netscape.com/.
7.0 Tutor-Marked Assignment
Question
Discuss the functions of a Browser and why you need to know the URL of web page.
68

UNIT 12: Netscape Browser — Bookmark, History and Web Browsing
Table of Contents
Page
1.0 Introduction 70
2.0 Objectives 70
3.1 Setting a Home Page 70
3.2 Using the History List 70
3.3 Boolanarldng Your Favourite Sites 71
3.3.1 Creating a Bookmark 72
3.3.2 Organizing Your Bookmarks 72
3.3.3 Organizing Your Bookmarks in the Bookmarks Window 72
3.4 Net Search 73
3.4.1 Search the Web Using Net Search 73
3.4.2 Browser Web Directory 74
3.5 Speeding Up Web Browsing 74
3.5.1 Turn Office Automatic Image Loading 74
4.0 Conclusion 75
5.0 Summary 75
6.0 References and Suggestion for Further Reading 75
69

1.0 Introduction
You can choose any page on the web to use as your home page which is the first page you see when
you start Netscape Navigator. The History window is helpful and detailed, but it tracks all the sites
you have typed in, not just the ones you like. Bookmarks and bookmark folders are arranged like
folders and files on your hard drive containing the location of your favorite web page. The Netcenter
home page contains a handy search box for locating information on the WWW.
2.0 Objectives At the end of this unit you should be able to use the Netscape browser to:
Set your home page
Use the History List
Create and manage your Bookmark
Use Netscape's Search Engine Speed Up Web Browsing
3.1 Setting a Home Page The first page you see when you start Netscape Navigator or Communicator is called the home
page. Your home page is probably Netscape's home page, your Internet service provider's home
page, or your company's home page. You can choose any page on the web to use as your home
page.
Go to the page you want to use as your home page.
From the Navigator menu bar, select Edit, Preferences. The Preferences dialog box will
appear.
In the Preferences dialog box, click Navigator in the Category list. That panel will move to the front.
In the Navigator panel, click the Use Current Pagebutton to set the page you just visited as the home page Or
Type (or paste) the page's URL into the Home Page Location text box.
1. Click OK to close the Preferences dialog box.
2. Click the Home button on the Navigation toolbar to load your new home page.
Fig. 12.1
3.2 Using the History List You can quickly return to the web pages you have visited since you opened and started using Navigator.
On Navigator's menu bar, click the Go menu to see a partial history list, which displays titles of the
70
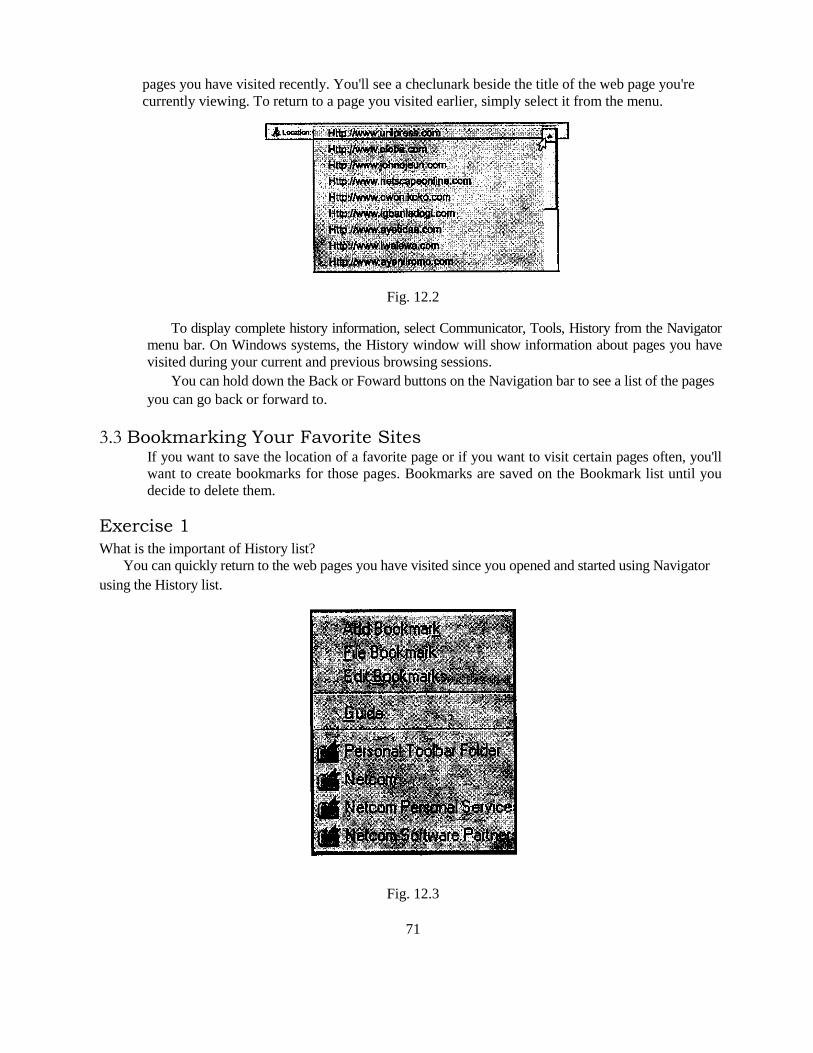
pages you have visited recently. You'll see a checlunark beside the title of the web page you're
currently viewing. To return to a page you visited earlier, simply select it from the menu.
Fig. 12.2
To display complete history information, select Communicator, Tools, History from the Navigator
menu bar. On Windows systems, the History window will show information about pages you have
visited during your current and previous browsing sessions.
You can hold down the Back or Foward buttons on the Navigation bar to see a list of the pages
you can go back or forward to.
3.3 Bookmarking Your Favorite Sites If you want to save the location of a favorite page or if you want to visit certain pages often, you'll
want to create bookmarks for those pages. Bookmarks are saved on the Bookmark list until you
decide to delete them.
Exercise 1
What is the important of History list?
You can quickly return to the web pages you have visited since you opened and started using Navigator
using the History list.
Fig. 12.3
71

The easiest way to access bookmarks is by using the Bookmarks menu.
Bookm Netsite
I Bookmark QuickFile'
Fig. 12.5
On Windows systems, hold down the Bookmarks button on the Location toolbar to view the list of bookmarks.
You can then select any bookmark from the list to visit that web page.
3.3.1 Creating a Bookmark
Go to the page you want to bookmark (for example, www.nasa.gov). You can bookmark a page
for which you typed the URL into the Location field, or you can bookmark a page you visited by clicking a link.
Hold down the Bookmarks button on the location toolbar and select Add Bookmark to add a
bookmark for the current page to the bottom of the Bookmarks menu.
Communicator comes with a set of handy, preinstalled bookmarks sorted into categories like
Entertainment, Shopping, and Sports. Explore these sites to learn your way around and web.
3.3.2 Organizing Your Bookmarks
You can organize your bookmarks using the handy Bookmarks window. Besides adding new
bookmarks, you can rename them, file them into folders, and delete them. When you use the Bookmarks
window to organize your bookmarks, Netscape Navigator updates the Bookmarks menu automatically.
3.3.3 Organizing Your Bookmarks in the Bookmarks Window
To create a new folder for bookmarks, select File, New Folder from the Bookmarks menu bar.
Fig. 12.6
72

Fig. 12.6
When the New Folder window appears, type a name for your folder in the Name text box and
c l ick OK.
To move a bookmark into a folder, click on it and drag it onto the folder where you want to store it.
To rename a bookmark, click the bookmark to select it. From the Bookmarks window menu bar,
select Edit, Bookmark Properties (Edit, Get Info on the Mac). A dialog box with the same name
as the bookmark will appear. Type a new name for the Bookmark in the Name text box.
To delete a bookmark, click the bookmark icon on the list and press the Backspace (Delete) key
on your keyboard.
3.4 Net Search Netscape's search engine is called Net Search. Net Search lets you choose between six different
search tools: Netscape Search, Alta Vista, Excite, Infoseek, LookSmart, and Lycos. All these tools
contain slightly different information, but each works much the same way.
3.4.1 Search the Web Using Net Search You can search for a piece of text on a particular web page. From the Navigator menu
bar,
select Edit, Find (or Find in Page). When the Find dialog box appears, type of word you're
looking for in the text box and click Find. The word will be highlighted in the Navigator window.
Or
Click the Search button on Navigator's Navigation toolbar. Navigator will load the Net Search page.
Type the words or phrase you are looking for into the text box.
Press Enter (Return) or c lick the Search button.
In a moment, Navigator will load a page that contains links to pages related to the words you
typed. When something looks interesting, click the link. You can always use the Back button or the
Go menu to return to the Search results page.
If you don't find what you're looking for, you can try your search again with a different search
tool. Just go back to the Search page and click the name of a different search engine. The words
you're searching for will appear in the new search tool automatically.
73

3.4.2 Browse Web Directory A directory is similar to a search engine in that it, too, stores information about the web in a database.
While search engines catalog every page they can find, a directory includes only the information
about pages that human beings have selected. These pages are sorted into categories. Most directories
let you choose between typing words in a search box and clicking the names of categories to browse
the information like a library.
Netscape's directory is called Web Director
The Netcenter home page functions much like a directory. You can click the name of a topic that
looks interesting to access news, related links, special offers, and handy tools related to that topic.
Exercise 2
I-low many search tools does net search provide you with?
As indicated above Net Search lets you choose between six different search tools, Netscape search,
Altavista, Excite, Infoseek, Looksmart and Lycos.
Click the No to visit Netcenter, then choose a search tool from the pull-down menu. Type in your phrase,
clic the button, and go!
3.5 Speeding Up Web Browsing You may have noticed that web pages load into your browser window at different speeds. The
speed of a page's download (or transfer) depends on several factors, including the speed of your
Internet connection or modem, the length of the page, and the number of images and sounds the page
contains.
If you have a slow Internet connection and want to speed up web page downloads, you can
instruct Netscape Navigator to replace the page's own images with small icons, called placeholders,
when it loads a page.
3.5.1 Turn Off Automatic Image Loading From the Communicator menu bar, select Edit, Preferences. The Preferences dialog box will appear.
Fig. 12.7
74

Click Advanced on the Category list. That panel will move to the front.
Windows: Uncheck Automatically Load Images. Macintosh: Uncheck Automatically Load Images
And Other Data Types.
Click OK to close the Preferences dialog box and return to the Navigator window.
The next time you access a web page, you'll see little placeholders instead of the images that
would normally load with the page, and your toolbar will have a new button called Images.
When you turn off automatic image loading, you can still decide to view images. If you have
auto image loading turned off, click the Images button on the navigation toolbar to load the images on
that page. To view a single image without loading other images, click the image's icon on the downloaded
web page.
Exercise 3
What effect will turning off your automatic image loading give?
Images on a general note slow down the downloading of a web page so turning it off will increase the
speed of loading the web page.
Fig. 12.8
4.0 Conclusion
Your home page is the first page you see when you start Netscape Navigator. The History window
allows you to quickly return to the web pages you have visited since you opened and started using
Navigator. While the Bookmarks will help you to organize your bookmarks and manage it. Images on
the web page can affect the speed at which it is downloaded which can be controlled with Netscape
Navigator.
5.0 Summary We've seen how you can keep track of sites you have visited using the history list and how to
manage and organize this site on your bookmarks for easy access subsequently. I have also explained
how to set your home page as the startup page anytime you start the Netscape Navigator.
6.0 References and Suggestion for Further Reading Widernet Project, (http//www) widernet.org
Microsoft Windows (http/Iwww) Microsoft.com
OpenContent License (http://www/opencontentorg/).
75

UNIT 13: Outlook Express — Toolbars and Composing Messages
Table of Contents
Page
1.0 Introduction 77
2.0 Objectives 77
3.1 Starting Outlook Express 77
3.2 The Outlook Express Main Window 78
3.2.1 The Folder List Pane 78
3.2.2 The Message Pane 78
3.2.3 The Preview Pane 78
3.3 Composing a New Message 79
3.3.1 New Message Window Toolbar 80
3.3.2 Writing a New Message 80
4.0 Conclusion 82
5.0 Su mmaly 82
6.0 References and Suggestion for Further Reading 82
7.0 Tutor-Marked Assignment 82
76

1.0 Introduction Outlook Express offers you the ability to communicate on line on your desktop, whether you want to
exchange e-mail with colleagues and friends or join newsgroups to trade ideas and information. In
this unit and subsequent units, you will learn how to use Outlook Express for these purposes.
2.0 Objectives At the end of this unit you will be able to:
Identify Outlook Express toolbar and its window panes
Compose a New Message
Identify the basic components of a message.
3.1 Starting Outlook Express In order to experience Outlook Express first-hand, we are going to open the programme. Do this
now by double-clicking on the Outlook Express icon under Programme as indicated in Fig. 13.1.
Fig. 13.1
A screen similar to Fig. 13.2 should appear.
77

Fig. 13.2: Main Window of MS Outlook Express
3.2 The Outlook Express Main Window The main Outlook Express window consists of the main toolbar and three smaller window panes.
They are the folder list pane, the message pane and the preview pane.
3.2.1 The Folder List Pane
The folder pane lists all the folders where you store your messages in. Some of the more common
folders are the Inbox, Outbox, Drafts, Sent Items and Deleted Items. The Inbox is where all
the new mails you receive are placed. The outbox is where the mail you have finished composing is
kept until they are sent. The Drafts store e-mail which you have not finished composing. The Sent
Items folder contains all the mails that have been sent. The Deleted Items folder contains e-mail
items that you have either composed or received that are deleted.
3.2.2 The Message Pane
The message pane shows all the messages contained in your folder. For each message you have, it
indicates the message priority (high, medium or low), whether it has an attachment, who sent the
message, the message subject and the date the message was received in your mailbox. In the From: field, there will be an envelope next to the sender's name. If the envelope is closed and the message
is bolded, it means that the message has not been read yet. An open envelope means that the
message has been read. If there is an arrow pointing to the left, it means that the message has been
replied to. An arrow pointing to the right on the envelope means that the message has been
forwarded to someone else. Messages with a paperclip means that there is a file attached with the
message. See Figure 13.2 for example. Clicking on a message will display the contents of the
message in Preview Pane,
3.2.3 The Preview Pane The preview pane shows the contents of a message from the message pane. From here, you can
also view and save your attachments.
141/4 bk=t1 4
78

Fig. 13.3
Miciosoft Outlook Express.. Welcome to Outlook Express 5 j abbe Greetings
6/30102 7:18 AM
1/15/04 4:59 PM
Exercise 1
State the main Outlook Express window and its components.
The main outlook express window consists of the main toolbar, the folder list pane, the message pane and
the preview pane.
3.3 Composing a New Message
Fig. 13.4
An outgoing message is a typed text you send to someone (i e. an e-mail message that you send).
There are two simple ways to create an outgoing message. You can either select file, new, Mail Message or select the New Mail icon. Once you make this selection, a new message window will
display. Note that the toolbar displayed in this window is different from the main toolbar in Outlook.
Fig. 13.5: New Message Window
79

3.3.1 New Message Window Toolbar
The New Message window has a different toolbar than Outlook's Main Toolbar. The buttons from
this toolbar that we will be using are:
Send Sends mail either to the queue in the Outbox folder or sends it to the sender imme-
diately, depending on how Outlook is configured.
Cut Cuts or deletes selected text
Copy Copies selected text.
Paste Inserts text that has been cut or copied.
Undo Undo the last change you made; does not work for everything though.
Check This button checks the e-mail address of the recipients of your e-mail against the addresses
in window's Address book. Spelling Spell checks your e-mail document using the language specified in the Options menu.
Attach Attaches a file to your e-mail.
Priority Clicking on this sets the e-mail priority from high, low and none.
Off-line Working off-line tells Outlook not to try to connect to the Internet to check for or send
mail. This is used mainly when you want to compose or check your mail on your hard
drive without connecting to the Internet.
The Sign button digitally signs any e-mail you send, thus allowing your recipients to be sure that
any e-mail you send is from you and not someone else pretending to be you on another computer.
The Encrypt button 'scrambles' or encrypts your message so that only your recipient can decode
and read the message. Both these features require additional software to be installed in order for it to
work.
3 .3 .2 Writ ing a New Message
The first thing you do when you write a message is type in the recipient's e-mail-address in the To:
field. If the message has more than one recipient, you can type additional e-mail addresses as well.
separating them with a semi-colon or comma (" or " .") or a combination of both. See example in Fig.
13.6.
Notice that the From: field is automatically filled in, bearing your name and address (or the
address that the e-mail package is configured to). This is the address that will notify the receiver who
the sender of the message is.
Before composing your message, it is important that you indicate what your message is about.
You can do this by moving your cursor to the Subject: field. To do this, you can press the Tab key or
use the mouse. In the Subject: field write a word or short sentence describing the essence of your
message.
Now that you have completed the basic components of your message, begin writing the message.
Place the cursor in the large white area. Write your message here. When you finish writing, the
composition window should look something like the following example.
Usually, after you are done composing your message, you click on the Send button which appears
on the top left hand side of your message window. But for now, just click on File, Send Later. We
will learn more about sending messages in the next section.
80

Fig. 5: New Message Header
Exercise 2 State the functions of each icon indicated below:
Use your mouse and point at each of these icons and you will see the functions they perform.
We've lust won a million dollars!
rcrirK?beflc,et,org (Internet drc.co)
[email protected]@magnum.linee®hotmailcom
ye lust
Halo All Read the subleclgIve me a call fa details!
Hope to hear from you al soon,
Roger
Joh Belbnets
Send on email to subscribe-Belioner.LOwisbelianetorg
Icons Function Icons Function
81

4.0 Conclusion Exchanging e-mail with friends or joining newsgroups to trade ideas and information is made easy
with Outlook Express. The main toolbar and three smaller window panes ( the folder list pane, the
message pane and the preview pane) have been examined with a view of understanding how to use
them. The New Message Window provides you with tools to compose and send your e -mails.
5.0 Summary
In this unit, we studied how to start your Outlook Express and identify the major components of the
toolbar and window panes. Preview pane which shows the contents of a message from the message
pane and how to compose a new message were carefully studied.
6.0 References and Suggestion for Further Reading Gildr. G. (1991) "The Information Hyperway" Oregon Quarterly
Open Content License (http://www.opencontent.org/).
WWW metrics (http://www.wwwmetrics.com)
Mediametrix (htttp://www.mediametrix.com/data/thetop.jsp)
Miscrosoft word Ofttp://www.microsoft.com
7.0 Tutor-Marked Assignment
Question
Compose a few messages using the steps explained. Write to the instructor, informing him that you have just
started the first unit on Outlook Express.
82
UNIT 14: Outlook Express — Sending, Queuing Messages and Attachment
Table of Contents
Page
1.0 Introduction 84
2.0 Objectives 84
3.1 Sending Messages Immediately/Later Option 84
3.2 Recommended Steps for Composing Messages 85
3.3 Receiving Messages 86
33.1 Opening a Message in Your Folder 86
3.3.2 Replying to and Forwarding Messages 86
3.3.3 Forwarding a Message 87
3.4 Attaching a Document 87
3.5 Receiving and Opening Attachments 88
3.6 Managing Your Messages 89
3.6.1 Sorting Messages in your Mailbox 89
3.6.2 Deleting Messages 89
3.7 Creating Mail Folders 89
3.7.1 Copying Messages to Another Folder 90
3.7.2 Renaming and Deleting Folders 90
3.8 Message Rules (Filters) 90
4.0 Conclusion 90
5.0 Summary 90
6.0 References and Suggestion for Further Reading 90
7.0 Tutor-Marked Assignment 90
83

1.0 Introduction
A term associated with composing all your messages and storing them in the Outbox before sending
them is called queuing a message. Queuing a message means to place a message you compose in
an outgoing area to be sent later. You can place several messages in the queue. This procedure helps
to reduce the amount of time that your computer uses in connecting to the Internet and in that
way, it is an efficient way of sending e-mail messages at a cheap cost. Two important words
associated with queuing and sending messages are on-line and off-line. On-line means that you are
connected to the Internet and off-line means you are not connected to the Internet. Unless you are
not billed for the amount of time you are connected, the most efficient method to compose your
messages is in off-line mode.
Normally, when you write an e-mail message, you can say everything you wish to say in the body
of the message. However, you might have additional information in a different format that you also
want to send. That information could be a report written with word processing software, a spreadsheet
file, a database file or even a small computer programme. You can send this information as an
attachment in your e-mail message.
2.0 Objectives
The objectives of this unit are as follow:
To identify the importance of queuing your message;
To state the recommended steps for composing messages;
To read your mai l ;
To state how to attach a document to your mail;
To receive, open and save attachments;
To sort and manage your mai l.
3.1 Sending Messages Immediately/Later Option By default, whenever you click on the Send button, Outlook Express tries to connect to the Internet
and send the message immediately. This can cause errors if your computer is not connected to the
Internet when you click on the button. Additionally, your Internet Service Provider (ISP) or telephone
company may bill you every time you connect to the Internet to send-e-mail. Thus, a recommended
way to send messages is to first compose all your messages as we have done in the previous section
before connecting to the Internet and sending your e-mail. Outlook Express can also be configured
such that when you click on the send button after composing a message, it is automatically placed in
your outgoing mail folder but not sent until you tell it to. To do this, go to Tools, Options. Select the
Send tab and uncheck the Send messages immediately opt ion.
84

Uncheck this box if you wish to compose all your messages before connecting to the internet
Fig. 14.1: Sending Messages Immediately/Later Option
3.2 Recommended Steps for Composing Messages In summary, the recommended steps for composing messages are:
1. Compose a message
2. Place the message in the Outbox by selecting file. Send Later or configuring Outlook to
automatically place the message in your Outbox without sending it when you click on the Send
button. Repeat steps 1 and 2 until you are done composing all your messages.
3. Connect to the Internet and send your queued messages. To send all of your queued messages,
select lools, send and Receive, Send and Receive All. Check your mailbox for incoming
mail. If you are not connected to the Internet Outlook it will automatically ask you if you want to
connect. Select Yes. In other cases, depending on how the programme is configured. Outlook
will automatically connect to the Internet.
4. Disconnect from the Internet 5. Read your new messages (if any)
6. Reply to messages or compose new messages. Go back to step 2.
Fig. 14.2: Sending Mail Status Window
85

Activity 1
Open your Inbox folder and see if you have a mail. Identify what is similar in each message. Now download
your mail by going to Tools, Send and Receive, Receive All.
3.3 Receiving Messages Mailboxes for electronic mail are housed on computer servers. The server, where your electronic
mail is stored, is often called a POP server. POP stands for Post Office Protocol and this is the
standard that allows you to retrieve your mail from a server.
To retrieve your mail from the server, simply click on the Send/Recv icon or select Tools, Send
and Receive, Send and Receive All.
Each time you open Outlook and check mail for the first time, you will need to enter a password
for your POP account. You can have Outlook store and use your password automatically (see
Configuring Outlook). However, if you do that, anyone who accesses your computer can also download
your e-mail.
After you have downloaded mail as described above, you can read it. One way to find out if you
have received new mail is from the icon displayed in your start up toolbar.
Fig. 14.3: New Mall Icon
Exercise 2 How can you tell that you receive messages?
Whenever Outlook Express icon is displayed in the start up toolbar, then you have a new message'.
3.3.1 Opening a Message in Your Folder The first step in reading your mail is to open a folder. Outlook Express stores your new mail messages
in a folder called Inbox.
You can access your new mail by clicking on your Inbox icon near the top left of the screen.
When you do this, the Messages pane (window pane on top right of screen) will show all the messages
in your Inbox. Unread messages are displayed in bold and read messages are shown in regular text.
Clicking on one of these messages will display the contents of the message in the Preview pane
below the Messages Pane. Double clicking an item in the message pane will display the contents
of the message in a new window.
3.3.2 Replying To and Forwarding Messages Many of the e-mail messages you send will be written as replies to someone. To reply to a message
you have opened and read, select Message, Reply to Sender or Message, Reply to All. Choosing
the second option sends a reply to the sender and all the other recipients of the original message.
Alternatively, you can select the Reply or Reply All icons on the toolbar. When you select the
reply
86

icon, Outlook displays a new message window. it will automatically place the original sender's
address in the To: field of the header. Replies also place the subject of the message you received on
the subject line adding Re; (regarding) before the subject. All of the sender's original text is quoted
in the message body. You should edit this text and only leave key phrases. You may also remove
all the quoted text. You will then add your additional text that replies to the incoming message.
3.3.3 Forwarding a Message There are times when you will receive an e-mail message that you would like to send or forward to
someone else. To forward the current open message, select the forward icon. A new message with
the original sender's text quoted in the message body will appear. After entering the intended recipient's
e-mail address in the To: field, queue the message in the normal manner and send it.
Fig. 14.5: Example of a Forwarded Message
3.4 Attaching a Document Additional information in a different format can be sent with your e-mail as an attachment. That
information could be a report written with word processing software, a spreadsheet file, a database
file or even a small computer programme. Sometimes, different software and different operating
systems experience difficulties talking to each other. As a result, people occasionally experience
problems accessing attachments.
Outlook Express displays a 'paper clip' icon in the message pane next to your message if you
have an attachment. On the top right of your preview pane, there will also be an icon with a paper clip. Clicking on this icon will show you the filename(s) of the attachment(s) and also give you the
lint test message MEW
al 'cle.t.
d t c o n i i
41•1 ,4‘, a l t i 1 7 I
thc. cArjon, Ion.va,0 repni lock: 111+,7 Nole I.e ae r-r:t
ane ip i ,Pr i I t th fr gan. rnseai is
87

option to save the file(s) in your hard drive. You can either save the file or click on the file name.
Clicking on the filename will launch the application that is associated with the file. The application
will, of course, only launch if you have the software application that the attachment was created in
and the sender has used the default extensions at the end of the document (ie 'doe' for Word and
`wpd' for WordPerfect). If your computer does not understanding the format of the attached
document. it will prompt you to identify the application.
To attach a file to an outgoing message, follow these steps:
1. Create a file using Notepad or a word processor. Save it.
2. Compose a new e-mail message as you would normally do.
3. To attach a file, select the Attach icon on the toolbar in the message composition window. The
Attach File dialog box will appear.
4. Select the file you have prepared.
5. Click on the Attach button to attach the document to the current message. Notice that there is
now an Attach field in your New Message Window with the file name you have selected.
6. When you are done composing your message, click Send.
Exercise 3
State one reason why you want to attach a document to your e-mail.
If you want a document to retain its formatting then you can send it as an attachment to your e -mail.
3.5 Receiving and Opening Attachments To save an attachment to your hard drive, click on File, Save Attachments or click on the paperclip
in the message window. Select the file that you want to save (if there is more than one) and click on
the Save button. Don't forget to note where you save the file! You can then open it using a word
processor, spreadsheet, etc.
Exercise 4 How do you identify that your mail is carrying an attachment?
A paperclip displayed on your message window indicates that the e-mail has an attachment.
Fig. 14.6: Files with Attachments
'AU
Click here to access tile with attachment ri
I Just finished revising the exec summary and intro....SO the case is pretty much finalized....could you please read it over and let me know whether any changes need to be made? all that's left to be done is the title page, table of contents and inserting page numbers..does anyone actually want to volunteer to print out the final copy of this report?
88

3.6 Managing Your Messages
3.6.1 Sorting messages in your Mailbox
On this page, we illustrate examples of messages. You may find that your mail folders are becoming very large and contain many unimportant messages. You can delete these messages, if you wish, by
simply clicking on each message you want deleted in the message pane and pressing delete.
Fig. Sorting Messages (sorted by date received)
3.6.2 Deleting Messages
After a few weeks of sending and receiving messages, you may find that your mail folders are
becoming very large and contain many unimportant messages. You can delete these messages, if you
wish, by simply clicking on each message you want deleted in the message pane and pressing delete.
To select many messages simultaneously, you can click on the message, hold down the MO key
and click on another message in your folder. All messages between the first and last message you click
on will be selected. If you press delete, all these messages will be deleted. If you want to select many
messages that are not in sequential order, you can hold down the Or/ key instead. This will select just
the messages you click on and again, pressing delete will delete the messages you have highlighted.
Deleted messages in Outlook get sent to your Deleted Items folder. To permanently delete
your messages, you simply open your Deleted Items folder, select Edit and Empty 'Deleted
Items' Folder.
It is also possible to set up Outlook to empty your Deleted Items folder automatically when you
exit the programme. To do this, go to Tools. Options... and select the Maintenance tab Place a
check mark in the 'Empty messages from the 'Deleted Items' folder on exit' box.
Be aware that there is no way to get your messages back after this. It is usually a good
procedure to leave deleted messages in your Deleted Items folder for a few weeks or months until
you are certain that you will no longer need them.
3.7 Creating Mail Folders You may find that, even after deleting unwanted messages, your mail folders seem unorganized and
complicated. One of the most useful actions you can take is to set up or create folders to sort and
store your e-mail messages. There are several ways to organize your folders. You can set up
folders for individual people, by project, by dates, activities, by organizations — or by any other criteria
or combination of criteria.
To create new mail folders, go to file, New, Folder ... A dialog box will appear asking you to
name the new folder. Simply type in the name and click OK.
jOloba Greetings
L)- Microsoft Outlook Express Welcome to Outlook Express 5
89

3.7.1 Copying Messages to Another Folder Instead of moving messages from one folder to another, you may want to copy them instead. This is
done in the same manner as moving messages, but instead of selecting 'Move to folder...'. Choose
'Copy to folder...'.
3.7.2 Renaming and Deleting Folders To rename a folder, simply right click on the folder in the folder pane. Select 'Rename...' and type
in the new name of your folder. To delete a folder, simply right click on the folder and select Delete.
Note that when you delete a folder, all your e-mail messages in that folder do not get sent to the
Deleted Demi-older but instead, are deleted right away. Delete folders with care!
Exercise 5 Explain why you need to create folders for your mails.
Folders are other ways you can sort out your mails. You can organize your mails using folders for easy access.
3.8 Message Rules (Filters) Message Rules in Outlook help to manage your mails — automatically. You can create the rules you
want to use. For example, all mails from an individual could be automatically placed in a mailbox
named after that person. The messages would be placed in that mailbox as it is downloaded to your
computer. You manage the rules using the Message Rules window.
To open the Message Rules window, select Tools, Message Rules, Mail... The New Mail Rule
window is displayed. From here, you can create rules on how you want to deal with specific e-mails.
You will need to select the conditions and actions for the rule. When you are done, click OK and a
list of all the rules created will be shown.
4.0 Conclusion You can place several messages in the queue. This procedure helps to reduce the amount of time
that your computer is connected to the Internet and in that way, it is an efficient way of sending e-mail
messages at a cheap cost. If you have several mail or news accounts, you can use them all from one
window. One of the most useful actions you can take is to set up or create folders to sort and store
your e-mail messages. You can place additional information with your e-mail as an attachment.
5.0 Summary In this unit we looked at how you can place several messages in the queue to be sent later. This
procedure helps to reduce the cost of sending e-mail messages. We also looked at how you can
attach additional information of different file format and send it with your e-mail as an attachment.
6.0 References and Suggestion for Further Reading OpenContent License (http://www.opencontentorg/),
WWWmetrics (htt://www.wwwmetrics.com)
Mediametrix (http://www.mediametrix.com/data/theop.jsp)
Microsoft word(http://www.microsoft.com)
7.0 Tutor-Marked Assignment
Question Describe the procedure for attaching a document to a mail you want to send to a friend.
90

UNIT 15: Outlook Express: Using the Address Book
Table of Contents
1.0 Introduction
2.0 Objectives
3.1 Adding an Entry to Your Address Book
Page
92
92
92 3.1.1 New Contact 92
3.1.2 New Group 93
3.1.3 Adding Contacts to Your Address Book Using Outlook Express 93
3.2 Selecting Recipients from the Address Book 94
3.3 To:, Cc: and Bcc: Fields 94
3.3 The Signature File 95
4.0 Conclusion 96
5.0 Summary 96
6.0 References and Suggestion for Further Reading 96
7.0 Tutor-Marked Assignment 96
91

1.0 Introduction In this unit, we will be looking at how to use the Outlook Express address book to store and retrieve
your e-mail addresses, as well as automatically address any messages you want by clicking the name
of the recipient.
2.0 Objectives At the end of this Unit, you should be able to:
Explain how to add address to your address book;
Explain how to send same mail to different people at same time;
How to use the To: , Cc: and Sec: buttons.;
How to use the s ignature picker.
3.1 Adding an Entry to Your Address Book When you click on the Addresses button in Outlook, it will open and show all your contacts and e -
mail addresses. If you have more than one folder, then the address book will display the other folders
as well. In this dialog box, you can create new address folders, rename existing ones and delete
folders you no longer require. You can also add new contacts and create groups of contacts.
Fig.15.1: The Address Book
To add an entry to your address book, select the Addresses icon. Next, if you have more than
one folder, select the one in which you would like to place the new entry. You can add new contacts,
groups or folders
31,1 New Contact When you select New Contact ..., a new dialog box appears which lets you fill out information about
that person. The necessary fields which should be filled in are First: name or Last: name. All other
fields are optional, although inputting the e-mail address will be very helpful if you are planning to use
the address book with Outlook.
EAbiodun Subaru
Adeola Term
tLJ Dupe Fasom
L=3 Foluso Abiona
iral Isola Akinsola taLlohn Ayoola CD Kola Dedeke
L'd U sman Suleiman
mrstainio@abeleicom
ogaise@skanneticorn
kakreeunipressicorn
olokada@hotmaili corn
92

3.1.2 New Group
A group is a list of e-mail addresses of at least one person. You may want to create a group if you
send e-mails to the same people all the time. For example, if you are working with 12 people on a
project, you may not want to type in all their e-mail addresses every time you compose a new
message. To create a new group, simply click on the New button on the toolbar in the address book,
select New Group... and give a name for this group of contacts. Next, select the contacts that you
want placed in this group and press Okay.
3.1.3 Adding Contacts to Your Address Book Using Outlook Express You can quickly add the contacts from your e-mails into the Address Book by right clicking on the
message in the message pane from the contact you want added and selecting Add Sender to
Address Book. This will automatically place the contact's e-mail address and name as it appears in
Outlook in the Address Book.
I have since been undergoing s Locomotive
Moscow. I hope everything will
Fig. 15.2: Adding the Sender to the Address Book Using Outlook
Adding an entry to your address Book involves typing in the necessary particulars in your address
book while add contact will automatically place the contacts e-mail address and the particulars as it
appeared in the e-mail.
Exercise 1 Distinguish between Adding an entry to Your Address Book and Adding Contacts to Your Address Book
using Outlook Express.
I arrived Moscow by noon of S Address Book
Good day and compliment of tt
93
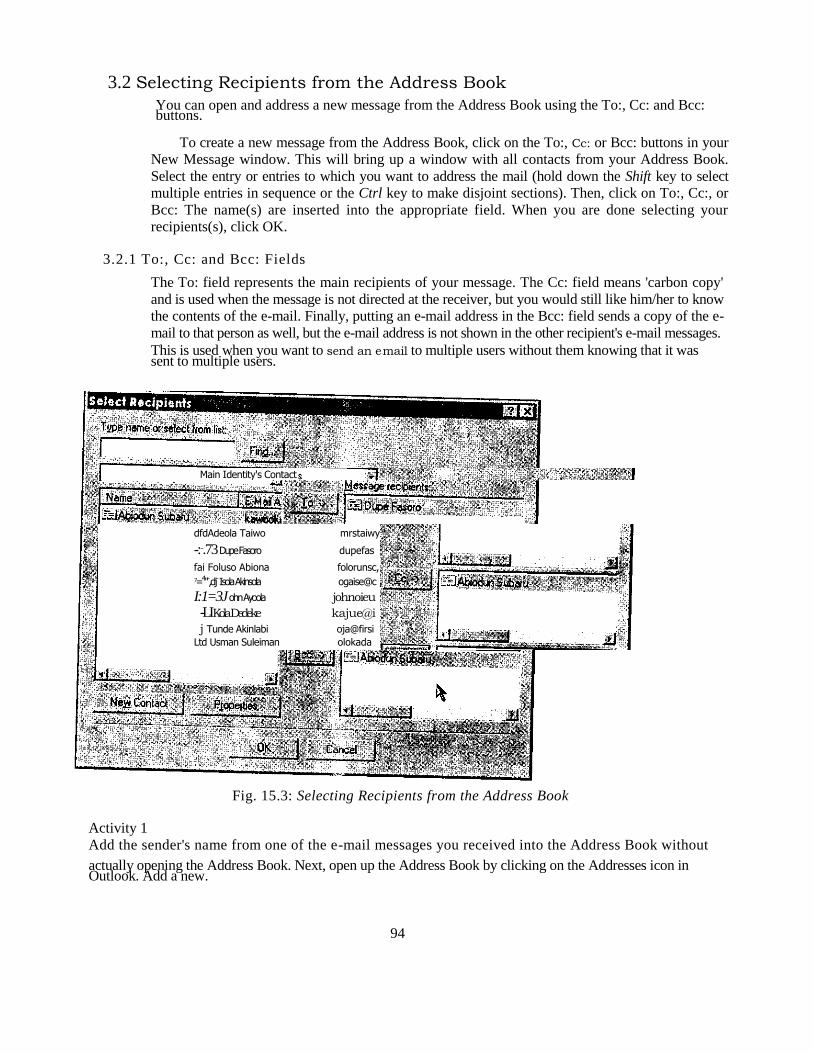
3.2 Selecting Recipients from the Address Book
You can open and address a new message from the Address Book using the To:, Cc: and Bcc: buttons.
To create a new message from the Address Book, click on the To:, Cc: or Bcc: buttons in your
New Message window. This will bring up a window with all contacts from your Address Book.
Select the entry or entries to which you want to address the mail (hold down the Shift key to select
multiple entries in sequence or the Ctrl key to make disjoint sections). Then, click on To:, Cc:, or
Bcc: The name(s) are inserted into the appropriate field. When you are done selecting your
recipients(s), click OK.
3.2.1 To:, Cc: and Bcc: Fields
The To: field represents the main recipients of your message. The Cc: field means 'carbon copy'
and is used when the message is not directed at the receiver, but you would still like him/her to know
the contents of the e-mail. Finally, putting an e-mail address in the Bcc: field sends a copy of the e-
mail to that person as well, but the e-mail address is not shown in the other recipient's e-mail messages.
This is used when you want to send an e-mail to multiple users without them knowing that it was sent to multiple users.
Fig. 15.3: Selecting Recipients from the Address Book
Activity 1
Add the sender's name from one of the e-mail messages you received into the Address Book without
actually opening the Address Book. Next, open up the Address Book by clicking on the Addresses icon in Outlook. Add a new.
Main Identity's Contact
dfdAdeola Taiwo mrstaiwy
-:-.73 Dupe Fasoro dupefas
fai Foluso Abiona folorunsc, 7=4"-,dj- Isola Akinsola ogaise@c
I:1=3J ohn Ayoola johnoieu
-LI Kola Dedeke kajue@i
j Tunde Akinlabi oja@firsi
Ltd Usman Suleiman olokada
94

3.3 The Signature File A signature file contains afew lines of text about your contact information that appears at the end of
your e-mails. Once set up, Outlook automatically adds your signature to the end of every outgoing
message. When people read your signature, they learn whom you are and how to contact you by
ways other than e-mail. Also, electronic mailing lists sometimes do not include the sender's e-mail
address in the sender information, so it is a good idea to place your e-mail address information in your
signature. If you do this, other people will be able to communicate with you directly instead of going
through the mailing list. Fig. 15.3 illustrates a signature in Outlook.
Ezra Shiloba Gbaje [email protected] Library and Information Science
Ahamadu Bello University.. Zaria
Nigeria — West Africa
Fig. 15.3: Example of a Signature File
To set up your signature file, go to Tools, Options ... Select the Signatures table and click on New.
Next, in the Edit Signature text box, type in the signature you want added to the end of your e-mails.
Click on Set as default, then Apply. At this point, you may also fill in the check boxes, depending on
whether you want to apply the signature to all outgoing messages and whether or not you want the
signature added to replies and forwards.
Exercise 2 State a reason why you will need to sign your mail.
Adding your signature in your mail will enable people to communicate with you through your e-mail
address directly.
Fig. 15.4: Example of a Signature File
'4o 4-1
N`e• Nye; MS:Wryer. F-?:nat 'Span; I .tc-ulti.J othek -, ,
,
Irt-frass1,114o7,%,
!Se."
zra,Blallo . ) , :•,,IlabeElre-ri:
-...,B.qtaa.
T:.lbkrusi pt.,1 112: zr nxcicr,
t h e r.r i u , t e e . I t o F J l j e L 5 I t y ,
V e r t /frac,
95

4.0 Conclusion You can see all your contacts and e-mail addresses using the Addresses icon and also create a new
groups of contacts. The address book can be used to create a new message by selecting the recipients
from the address book. To: Cc: and Bcc: fields are used to send e-mail to multiple users without them
knowing that it was sent to multiple users. You can insert essential information into outgoing messages
as part of your personal signature, and you can create multiple signatures to use for different purposes.
Adding a signature file will enable other people to communicate with you directly when they have to
contact you for one reason or the other.
5.0 Summary
We have discussed how you can save names and addresses in your Address Book, automatically by
simply replying to a message. We also discussed how you can send an e-mail to multiple users and
also how to add essential information into outgoing messages as part of your personal signature.
6.0 References and Suggestion for Further Reading
OpenContent License (http://www.opencontent orz/)
WWWmetrics (http://www.wwwmetrics.com)
Mediarnetrix (http://www.mediametrix.com/data/thetopjsp)
Microsoft word (hitp://www.miscrosoft corn
7.0 Tutor-Marked Assignment
Question
When do you think you need to create a new group in Address Book? State the procedure for doing so.
96

Page
UNIT 16: Outlook Express — Managing E-Mail Accounts
Table of Contents
1.0 Introduction 98
2.0 Objectives 98
3.1 Post Office Protocol (POP) and Simple Mail Transfer Protocol (SMTF) 98
3.2 Adding a New E-mail Account 98
3.3 Managing/Deleting Accounts 99
3.4 Configuring the Options Screen 100
4.0 Conclusion 101
5.0 Summary 101
6.0 References and Suggestion for Further Reading 101
7.0 Tutor-Marked Assignment 101
97

1.0 Introduction Outlook Express allows you to use and manage an unlimited amount of e-mail accounts. For example,
you can have a business e-mail account and a home e-mail account separate from each other.
2.0 Objectives At the end of this Unit you should be able to:
Manage your e-mail account to Outlook;
Explain the function of Post Office Protocol (POP) and (SMTF);
Customize Outlook to suit your Simple Mail Transfer Protocol tastes.
3.1 Post Office Protocol (POP) and Simple Mail Transfer Protocol (SMTF) To send and receive messages, you must have an account on a computer running a POP (Post
Office Protocol) server and access to a computer running.an SMTP (Simple Mail Transfer Protocol)
server. Both these protocols often run on the same server. Your incoming e-mail messages are
delivered to your POP account, where Outlook picks them up and transfers them to your PC. Your
outgoing messages are sent to the SMTP server, which delivers them to your recipients.
3.2 Adding a New E-mail Account
If you have a new installation of Outlook or if you are using a version that has not been set up for you
personally, you will need to configure it. When Outlook is configured properly, it connects to your
Internet Service Provider (1SP), uses your e-mail address and automatically includes your name with
e-mail messages you send. To add a new e-mail account, select Tools, Accounts ... and the Mail
tab. The box below displays the e-mail accounts you have registered with Outlook. To add an account,
click on Add, Mail ...
Fig. 16.1
*
Microsoft Exchange Server Microsoft LDAP Directory Microsoft Mail
MS Outlook support for Lotus cc:I...lad Outlook Address Book Personal Address Book
98

Exercise 1
State why you need more than one e-mail account.
Several e-mail accounts will enable you effectively manage your time and mails. The Post Office Protocol
handles all your incoming e-mails while all the outgoing messages are handled by the Simple Mail Transfer
Protocol.
Next, follow the on screen prompts to fill out your display name, e-mail address and your POP3 and
SMTP account names. Usually, it is your domain name preceded by "mail." For example, an e-mail address
of "[email protected]" will typically have a POP3 and SMTP server name of "mail.yahoo.com" (without
the quotations). Again, you will have to check with your ISP for the exact name. Next, you will have to fill in
your account name (usually your username) and your password. If you place a check mark in the "remember
password" box, you will not be prompted for the password every time Outlook checks for or sends e-mail.
Exercise 2 State the functions of the Post Office Protocol (POP) and Simple Mail Transfer Protocol (SMTP).
Fig. 16.2
When you are done, click Next, then Finish. If, at any point after this, you have to make changes to
these settings, simply go back to Tools. Accounts ... Highlight the e-mail account you wish to
configure and click on Properties.
3.3 Managing/Deleting Accounts To remove an account, select the account (by clicking 01) it) and click the Remove button. You will then
be asked if you would like to remove this service. If you would like to, click Yes and if notslick No.
If you would like to modify the settings for the account, select the account by clicking on it and
clicking the Properties button.
99

Fig. 16.3
3.4 Configuring the Options Screen
The Options screen lets you configure how often the programme checks for new e-mail, how it
displays the messages, your signature and security settings, among other things. Simply select Tools,
Options to access these configuration screens. The default settings are usually good enough but you
may want to customize Outlook to suit your tastes.
An option that you should be aware of is the Mail Sending Format. This option can be found
under the Send Tab in the Options Menu. The choices are HTML or Plain Text. Sending mail in
FITML form allows you to send more complex e-mails with varying fonts styles, sizes and background
pictures. Unfortunately, only other e-mail programmes with these features can see them; otherwise,
the recipients will see only garbled text as the content of their e-mail. Sending a plain text e-mail lets
you send an e-mail without background pictures and only with the default font; however, the e-mail
can be read by all e-mail programmes. In order to ensure compatibility, it is recommended that you
set the option to Plain text to ensure the e-mails you send are viewed properly by others, since many
people still use basic e-mail programmes.
100

Fig. 16.4:
4.0 Conclusion
You must provide basic information about your account, servers and network connection before you
can send and receive messages with Outlook Express. You can configure Outlook Express using
your e-mail address, so that it connects to your Internet Service Provider (ISP). If you have more
than one e-mail account, you have to add it to Outlook Express account. Outlook Express allows you
to configure how it checks for new e-mail, how it displays the messages, your signature and security
settings, among other things.
5.0 Summary
In this unit we were able to explain that to send and receive messages, you must have an account
on a computer running a POP server and access to a computer running an SMTP. We have looked
at how you can configure your Outlook Express to your taste and how to effectively manage your
numerous e-mail accounts.
6.0 References and Suggestion for Further Reading
OpenContent License (http://www.opencontentord/),
WWWmetrics (http://wwwwwwmetrics.com)
Med iametrix (http://www.mediametrix.com/data/thetopfip)
Microsoft word (http:/lwww.tnicrosoft corn)
7.0 Tutor-Marked Assignment Question
State why you would want to configure your screen option.
101

UNIT 17: Front Page-Creating, Importing Web Page and Image Formatting
Table of Contents
Page
1.0 Introduction 103
2.0 Objectives 103
3.1 Starting a New Web 103
32 Importing a Web 103
3.2.1 Inserting Clip Art 105
3.2.2 Inserting Images from File 106
3.3 Thumbnails 106
3.4 Resampling an Image 107
4.0 Conclusion 107
5.0 Summary 107
6.0 References and Suggestion for Further Reading 107
102

1.0 Introduction
Microsoft FrontPage is an application package that comes with the Microsoft office and it is very
users friendly. This unit and the subsequent ones provide you with a step by step procedure to
developing and importing web pages. Inserting clip art and images from a file will also be treated.
Formatting an image to improve the speed of loading is also explained.
2 0 Objectives It is expected that at the end of this unit you will be able to:
Design a new web page;
Insert graphics in your web page;
Insert clip art in your web page;
Import and edit other web pages;
Identify how you can reduce the speed of downloading a web page with image.
3.1 Starting a New Web You can quickly get started with a new web. To begin working on a new web, follow these steps:
Go to File on the menu bar and go down to New and click on Web.
Click on the one page web icon. Type in the location where you want your web to reside locally on your machine.
Click on next.
Your new web will open with a blank page if you were in page view when you created the web.
You can begin designing your new web.
Fig. 17.1
3.2 Importing A Web
You can take a web page that you have created in any other programme or one that you created
using HTML or even a web you want to import to learn how it was put together (as long as you have
permission to do this from the designer). Importing a web is very easy to do. This is a great feature
103

if you just start using FrontPage and you want to use your own existing web that was created
elsewhere. To import your web, follow these steps: Go to File on the menu bar and go down to New and click on Web.
The New dialog box will open. Click once on Import Web Wizard in the specified
location for your new web box type in the path where you want your web to reside locally (on
your computer).
C l i c k O K
Customer Discussion
Suppott Web Web \ Uinta C \ My Documents \ My Webs 's myweb
Fig. 17.2
Fig. 17.3
104
w.oswego.org/staffichamber/web/defauk.htrri

Type in the location of your web (URL/web address) if it is being taken from the Internet. Click on next.
Make your choices for download amounts in the next dialog box that opens. Click on Next. Make your choices for download amounts in the next dialog box that opens. Click on Next. Click on Finish.
The web page or pages you chose will be downloaded and placed in a new web in FrontPage.
You can save your web and continue to work on it.
Activity 1
From the given procedure above, import the web page with the following URL http://www.lib.berkely.edu
3.2.1 Inserting Clip Art
Adding Clip art to your FrontPage web is a simple task. Follow the steps below.
Go to Insert on the menu bar and go down to Picture and click on Clip Art.
The Insert Clip Art Gallery will open. Click on the category that you want to use. You can also
type a keyword in the search for clips box. Hit enter. Right click on the image you want to use and click on insert or click on the image you want to use
and click on the insert clip icon.
Your image will appear on your page. (Images in Front Page work a lot like text. You can align
them, put them in a table or click and drag them to a location). You can resize them by clicking on
the corner handle and moving out to enlarge and in to decrease the size. (You do not need to hold
the shift key down, it will keep the picture in proportion automatically).
171 Clip Art Gallery
Fig. 17.4
105
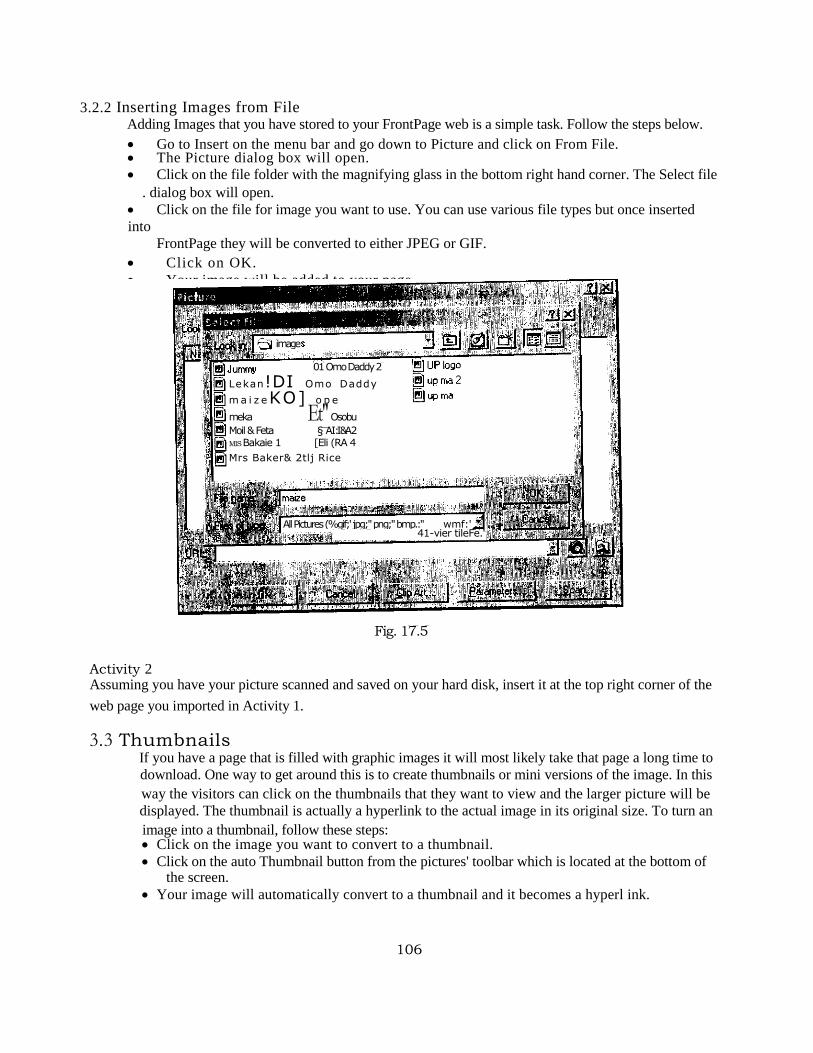
3.2.2 Inserting Images from File Adding Images that you have stored to your FrontPage web is a simple task. Follow the steps below.
Go to Insert on the menu bar and go down to Picture and click on From File. The Picture dialog box will open.
Click on the file folder with the magnifying glass in the bottom right hand corner. The Select file
. dialog box will open.
Click on the file for image you want to use. You can use various file types but once inserted
into
FrontPage they will be converted to either JPEG or GIF.
Click on OK.
Your image will be added to your page.
Activity 2 Assuming you have your picture scanned and saved on your hard disk, insert it at the top right corner of the
web page you imported in Activity 1.
3.3 Thumbnails If you have a page that is filled with graphic images it will most likely take that page a long time to
download. One way to get around this is to create thumbnails or mini versions of the image. In this
way the visitors can click on the thumbnails that they want to view and the larger picture will be
displayed. The thumbnail is actually a hyperlink to the actual image in its original size. To turn an
image into a thumbnail, follow these steps: Click on the image you want to convert to a thumbnail.
Click on the auto Thumbnail button from the pictures' toolbar which is located at the bottom of the screen.
Your image will automatically convert to a thumbnail and it becomes a hyperl ink.
image
01 Omo Daddy 2
Lekan!DI Omo Daddy
m a i z eKO] o p e
meka Et" Osobu
Moil & Feta §—A I :I &A 2 MIS Bakaie 1 [Eli (RA 4
Mrs Baker& 2tlj Rice
All Pictures (%gif;' jpg;" png;" bmp.:" wmf:' 41-vier tileFe.'.
Fig. 17.5
106

3.4 Resampling an Image
When you insert an image into FrontPage it will retain the original size of the image. If you resize the
image by clicking and dragging, it will appear smaller and the size of file will remain the same thus
affecting the download time of the page. If you resize an image smaller than its original size, you
need to use the resample button after resizing. This will reduce the file size of the actual image. To resample an image follow these steps:
Click on the image and click on a corner handle. Drag inward to make the image smaller. Click on the resample button. It is found on the Pictures toolbar on the buttom of the screen. Your image file size will now be reduced.
Exercise 1
Does resizing of an image affect the speed of downloading an image?
State the reasons for your answer.
Resizing an image does not affect the speed of downloading because resizing does not affect the size at the file.
4.0 Conclusion
In designing a web page, you can begin learning by looking at what other people have done by
importing any web page of your interest in the front page and looking at how it was created. Clip arts
are pictures files that come with Microsoft office you can insert and resize them. For images that are
either scanned or snapped using a digital camera, you have to use the Insert an image from file procedure to insert it in your web page. Images on a general note reduce the speed at which a web
page is downloaded. These can be solved by creating a Thumbnail or resampling the image.
5.0 Summary
We have succeeded in studying how to create a new web page, and import a web page into front
page. Procedures for inserting and formatting images were also discussed as well as increasing the speed of downloading your web page.
6.0 Reference and Suggestion for Further Reading
Open Content License (http://www.opencontentorg/),
WWW metrics (http://www.wwwmetries.com)
Mediametrix Ottp://www.mediametrix.com/data/the(opfsp)
Microsoft word (http://wwwmicrosofrcom)
7.0 Tutor-Marked Assignment
Question
Discuss the importance of turning an image into a thumbnail and state the procedure for doing it.
107

UNIT 18: Front Page-Image Formatting
Table of Contents
1.0 Introduction
Page
109
2.0 Objectives 109
3.1 Making an Image Transparent 109
3.2 Adding a Border to a Graphic 110
3.3 Cropping a Graphic 110
3.4 Adding Text on a Graphic 111
3.5 Adding a Hyperlink to Text or Images Ill
3.6 Adding an E-mail Hyperlink 112
3.7 Creating Bookmarks 113
4.0 Conclusion 114
5.0 Summary 114
6.0 References and Suggestion for Further Reading 114
7.0 Tutor-Marked Assignment 114
108

1.0 Introduction
The front page provides you with facilities to change the background of the image you've inserted to
reflect the design, and also to format an image to stand out distinct by putting border, cropping the
image and adding text to it. For length page bookmarks allow you to quickly jump to certain parts of
the page and every good website should have a contact name and an e-mail link if possible.
2.0 Objectives At the end of this unit you should be able to:
Make an image transparent;
Add text to an image;
Add border to an image;
Crop an image;
Add hyperl ink to an image;
Explain how to create bookmark;
Explain how to add an e-mail hyperl ink.
3.1 Making an Image Transparent There are times that you insert an image like clip art and if you have a coloured or textured background,
you get a white box around the image. You can make this transparent. You can also just make a
certain color within the image transparent. When you use the transparent tool that is built into
FrontPage, you will actually be converting the image to a GIF. This is a file format for graphic
images. Follow the directions below to make your image transparent.
Click on the image that you want transparent.
Click on the transparent icon found on the pictures' toolbar on the bottom of the screen.
Your mouse now has the transparent tool on it. It looks like a pen. Click on the area that you want
to make transparent. In Fig. 18.1, I clicked on the green background to make that transparent.
A dialog box will open, telling you that you will be converting the image to a GI F.
Click on Yes as shown in Fig. 18.1:
Image after using the transparency
Fig. 18.1
109

Exercise 1
Think of way in which you can get a picture into your computer.
One of the easiest ways is to have the picture saved on your hard disk or you can use a digital camera to
snap the picture and save it on your hard disk.
3.2 Adding a Border to a Graphic If you want your image that you added to your FrontPage web to stand out, you can easily add a
border to it. The border color will be black by default. To add the border follow these steps:
Click on the image that you want transparent.
Right click on the image that you want to add a border to and click on Picture Properties. Click on the appearance tab.
Click on the up arrow text to border thickness to choose a number other than zero. The larger the
number the thicker the border.
Fig 18.2
Activity 1
Insert or import an image into your web page and add a border to it.
3.3 Cropping a Graphic You can crop images so that you eliminate sections of the image that you do not want to display.
There is a cropping tool built right into FrontPage that allows you to do this. Follow these directions
for cropping an image.
Click on an image that you want to crop.
Click on the cropping tool icon from the Pictures' toolbar which can be found on the bottom of
your screen.
Your image will now have a dotted line with handles around it.
110

Click on the handles and drag them until the dotted lines are around just the portion of the image
that you want to display.
Click on the crop tool one more time to crop your image.
Fig. 18.3
Exercise 2 Why would you want to crop an image?
Cropping an image will eliminate some sections of the image that you do not want displayed.
3.4 Adding Text on a Graphic In FrontPage it is very easy to add text on top of an image. To do this, follow these steps:
Click on the image that you want to add text to. Click on the text icon from the Pictures' toolbar at the bottom of your screen.
A text box will appear on your image. Type the text you want to add. You can move the text and
format it like you would do to any text box.
Activity 2
Type the name of the image on the image you inserted.
3.5 Adding a Hyperlink to Text or Images Many times you may want to have an image that is linked, so that if someone clicks the image or text,
the person will be taken to another page.
You can add a hyperlink to both text and images. It is a simple task to do. Follow the steps below
to create a hyperlink.
Select the text or image that you want to add a hyperlink to.
Click on the Hyperlink icon on the standard toolbar.
The created hyperlink dialog box will open. Type in the URL that you want to link to in the URL
box.
Click on OK.
Your text or image will now be hyperlinked. When in the preview mode or after you publish, you
will see that when you click on the text or image, it will jump to the URL you typed in.
Ill
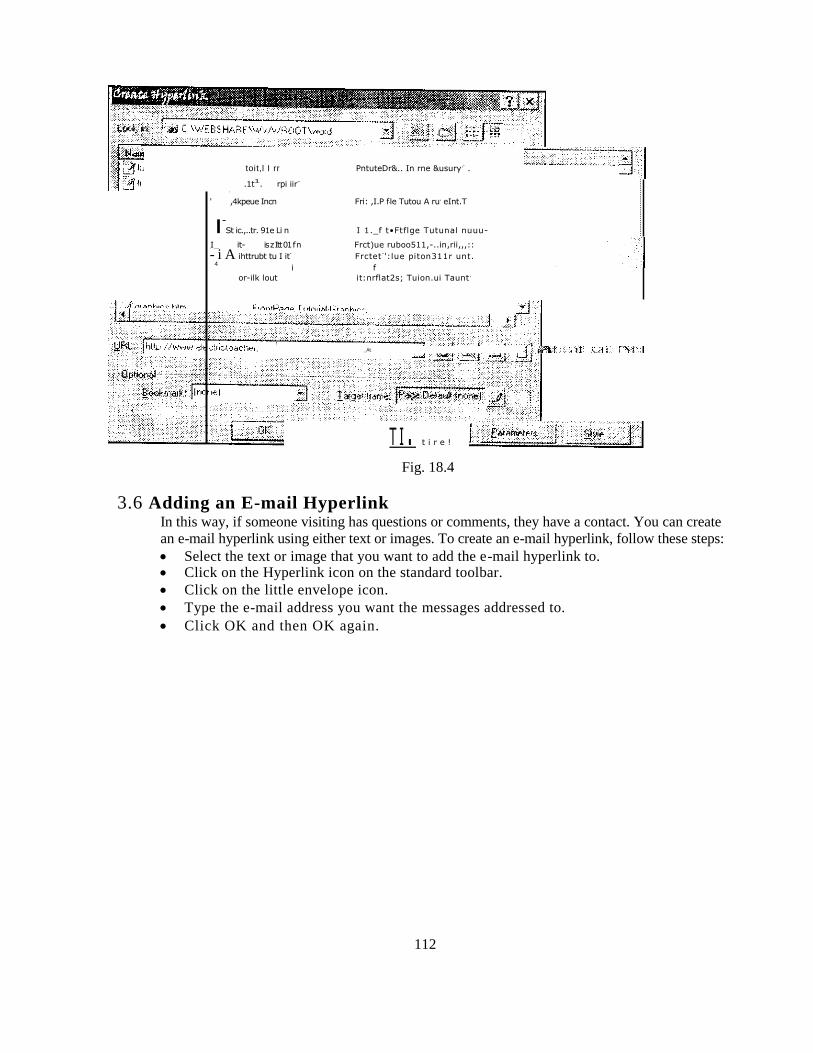
toit,l I rr PntuteDr&.. In rne &usury
,- .
.1t1. rpi iir
-
,
' ,4kpeue Incn Fri: ,I.P f‘le Tutou A ru, eInt.T
I-St ic.,..tr. 91e Li n I 1._f t•Ftflge Tutunal nuuu-
,,I..... it- is z Itt 01 f n Frct)ue ruboo511,-..in,rii,,,::
- i A ihttrubt tu I it- Frctet
-':lue piton311r unt.
4 i f
or-ilk lout it:nrflat2s; Tuion.ui Taunt,
3.6 Adding an E-mail Hyperlink In this way, if someone visiting has questions or comments, they have a contact. You can create
an e-mail hyperlink using either text or images. To create an e-mail hyperlink, follow these steps:
Select the text or image that you want to add the e-mail hyperlink to. Click on the Hyperlink icon on the standard toolbar.
Click on the little envelope icon.
Type the e-mail address you want the messages addressed to.
Click OK and then OK again.
_At
T I I t i r e !
Fig. 18.4
112

Exercise 3 What is the function of URL in hyperlink?
The URL is the address or location of the web page the hyperlink is referring to.
3.7 Creating Bookmarks If you have a page that is quite long in length you may want to create bookmarks which allow you to
quickly jump to certain parts of the page. Another name for bookmarks are anchors. To create a
bookmark follow these steps:
Select the text that you will want to jump to.
Go to Insert on the menu bar and click on Bookmark.
The bookmark, dialog box will open. The text that you selected will be placed in the bookmark
name. You can type your own name for this if you wish.
C l i c k O K .
When you get to the part of your page that you want to hyperlink to that bookmark, select it and click on the hyperlink icon from the standard toolbar.
Click on the down arrow next to bookmarks. Select the bookmark that you want to link to.
C l i c k o n O K .
gt to hare pour entail jwur w h Nite'?
HAREV,-/W,
,,i1d)CI1 ',word
Fig.18.5
113

4.0 Conclusion When you use the transparent tool that is built into FrontPage, you will actually be converting the
image to a GIF. This allows you to format the image. Adding a border to your image makes it to stand
out. Cropping an image eliminates sections of the image that you do not want to display. Links in
either image of text will take you to another web address indicated, while bookmarks are very handy
for navigation in a lengthy page.
5.0 Summary In this section, we were able to make an image transparent, add border and text to our image and
finally looked at how to add hyperl ink to your image and text. Using bookmark for navigating in your
web page was also discussed.
6.0 References and Suggestion for Further Reading Basic HTML (http://www.htmlgoodies.com)
Widernet Project. thttp//wwwwidernet.org)
Microsoft Windows (httpilwww.Microsqft.com)
Developing HTML (http://www.davesite.com/webstation/hunl/)
7.0 Tutor-Marked Assignment
Question
What happens when you click on the text or image that is hyperlinked in a web page published? State the
steps to take to add a hyperlink to Images.
Fig. 18.6
hitt)
0.1 h'rr
h t
ii o n i e blr
114

UNIT 19: Front Page — Tables
Table of Contents
1.0 Introduction
2.0 Objectives
3.1 Adding a Table
3.2 Adding a Border to Your Table
Page
116
116
116
117 3.2.1 Adding a Single Color Border 117
3.22 Adding a Double Color Border 118
3.2.3 No Border 119
3.3 Merging Table Cells 119
3.4 Aligning Your Tables 120
3.5 Adjusting Table Padding and Spacing 120
4.0 Conclusion 121
5.0 Summary 121
6.0 References and Suggestion for Further Reading 121
7.0 Tutor-Marked Assignment 121
115
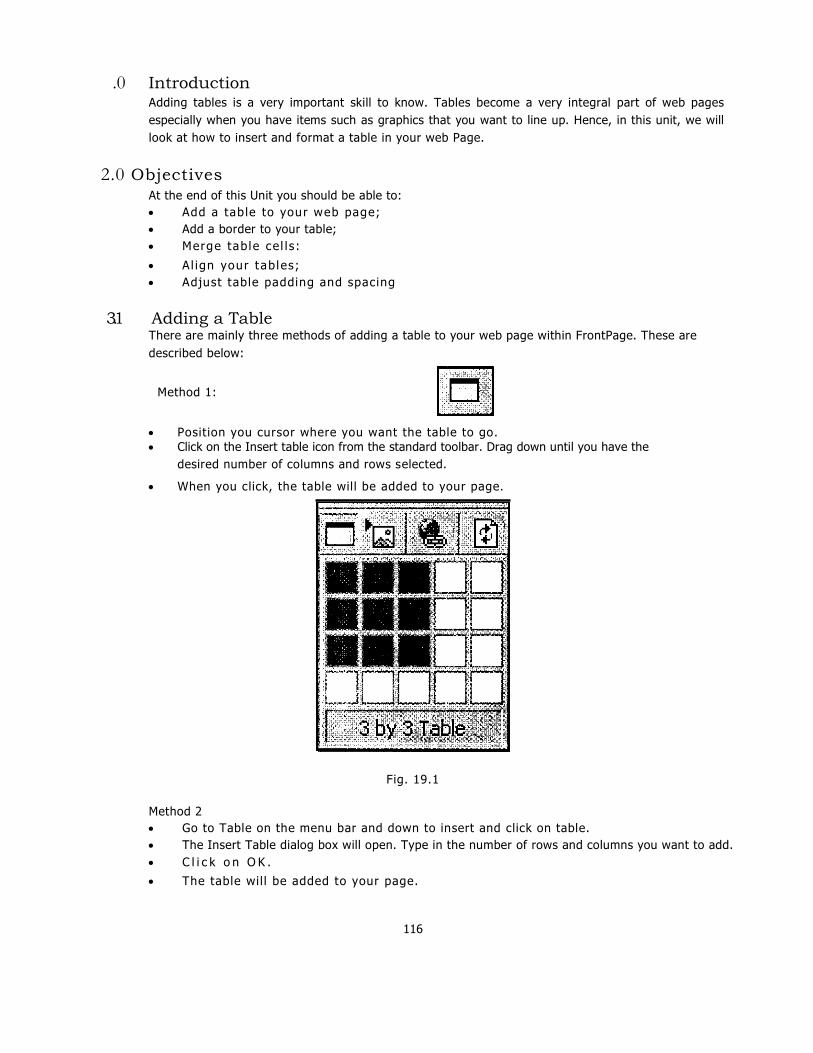
.0 Introduction
Adding tables is a very important skill to know. Tables become a very integral part of web pages
especially when you have items such as graphics that you want to line up. Hence, in this unit, we will
look at how to insert and format a table in your web Page.
2.0 Objectives At the end of this Unit you should be able to:
Add a tab le to your web page;
Add a border to your table;
Merge tab le ce l l s :
Al ign your tab les;
Adjust table padding and spacing
3.1 Adding a Table There are mainly three methods of adding a table to your web page within FrontPage. These are
described below:
Method 1:
Position you cursor where you want the table to go.
Click on the Insert table icon from the standard toolbar. Drag down until you have the
desired number of columns and rows selected.
When you click, the table will be added to your page.
Fig. 19.1
Method 2
Go to Table on the menu bar and down to insert and click on table.
The Insert Table dialog box will open. Type in the number of rows and columns you want to add.
C l i c k o n O K .
The table wil l be added to your page.
116

Method 3 Go to Table on the menu bar and click on draw table.
Your mouse wi l l turn into a penc i l .
Click and drag the outside frame of your table.
Continue using the pencil to add rows and columns.
3.2 Adding a Border to Your Table You can add a border to your table. It can be colored with a single color or you can use two colors.
You can also remove the border if you don't want it showing. This can especially come in handy
when you want to line up things on the page without having them appear as if they are in a table.
Follow the directions below to add either a single color, two color border or removing the border from
a table.
3.2.1 Adding a Single Color Border: Right click anywhere within your table and click on table properties.
Click on the up arrows next to border size to increase or decrease the table border's thickness.
Click on the down arrow next to color to choose the color for the border.
(By choosing this color, your table will show this color in both Netscape and Internet Explorer).
S - =
•
'Layout _______
Bordef ..•
. .
Cell padding::: .
Cell spacim: _
'
, Style, ;
Fig. 19.2
• •
117
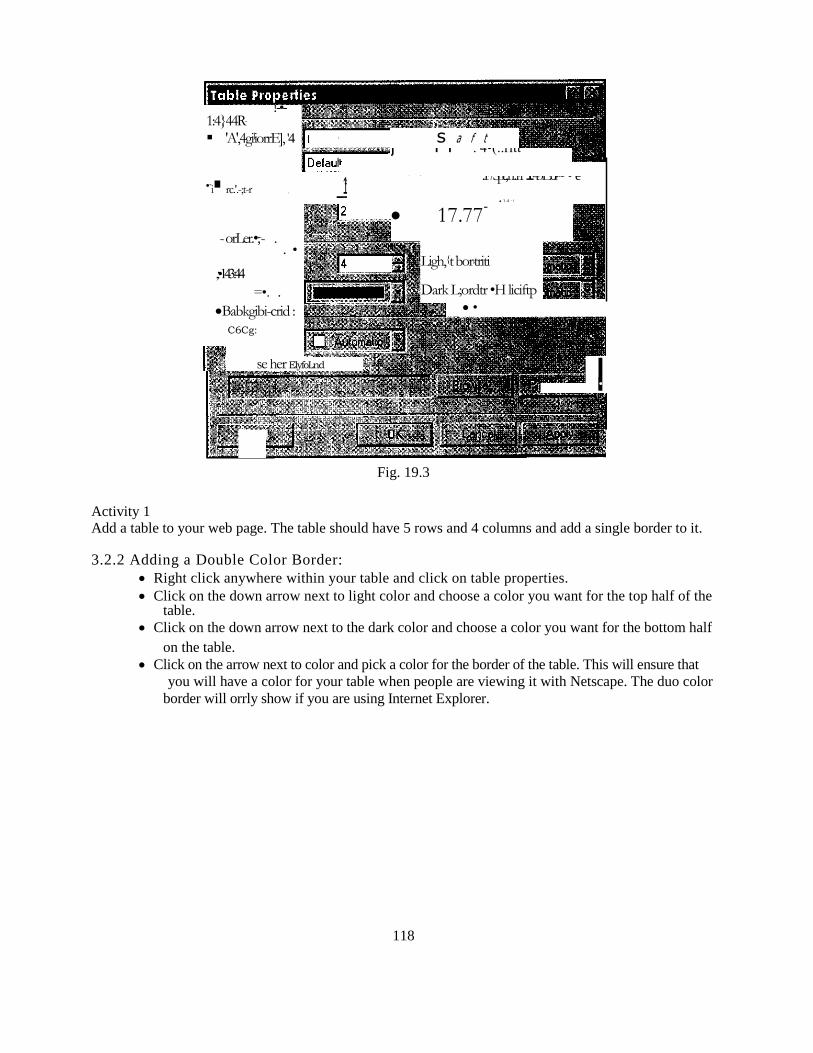
Activity 1 Add a table to your web page. The table should have 5 rows and 4 columns and add a single border to it.
3.2.2 Adding a Double Color Border:
Right click anywhere within your table and click on table properties.
Click on the down arrow next to light color and choose a color you want for the top half of the table.
Click on the down arrow next to the dark color and choose a color you want for the bottom half
on the table.
Click on the arrow next to color and pick a color for the border of the table. This will ensure that
you will have a color for your table when people are viewing it with Netscape. The duo color
border will orrly show if you are using Internet Explorer.
!-•- 1:4}44R. 'A',4giliorrE], '4
-i rc.'.-;t-r ,
- orLer.•;-- . . •
,:•143:44
= • . .
Babkgibi-crid :
C6Cg:
I
. ,
_ 141 _____________
1 4 ; {
17.77-
s a f t j - FT—c
. 4•(:.ritt
:177 Spe;11.1.111:43r Eleoli1;4171.-lc*
r4:•""
- e
Ligh,{t bor,triti
Dark L;ordtr •H liciftp •
se her ElyfoLnd
•
,
Fig. 19.3
118

3.2.3 No Border:
To get rid of the border from a table so that it won't display, right click inside of the table and
choose table properties.
Click on the down arrow next to border size box and set the number to zero. Click on OK. Your table border will be invisible.
3.3 Merging Table Cells Sometimes when you create a table, you may want to merge cells together. A good example of when
you might want to do this is when you want to add a title on the top row of your table. Follow the directions
below to merge cells in a table. Fig. 19.5 is a sample table with the top row having merged cells.
Select the rows that you want to merge from your table.
Click on the merge cell button from the tables toolbar.
Your cells will be merged.
Activity 2
Merge the first row of your table and type in a Heading for the table.
• List of Students Taking the course for the
Surname Othername Address
Gbaje Ezra Sluloba ...................,
ABU, Zaria Fig. 19.3
Fig. 19.4
ble Properties
119

3.4 Aligning Your Tables To align your table follow these steps:
Right click inside of the table and choose table properties.
Click on the down arrow next to al ignment.
Choose either default, left, right, center or justify.
C l i c k o n O K .
Fig. 19.6 Activity 3
Align the table at the center of your web page.
3.5 Adjusting Table Padding and Spacing The cell padding is the amount of space surrounding the text and or graphics inside of a cell. The cell
spacing is the amount of space between cells. To adjust these components follow these steps:
Right click within your table and choose table properties.
Use the up and down arrows to adjust the size of your cell spacing and cell padding.
Click on OK and your adjustments wi l l be made.
12E:01 fr: In pixels ,;: C H percenr
Layout
Alignment: !Center
Float: 1Detault
Cell padding: 14
Cell spacing: 12
Bordeis
Color: IN Background __
Color: El • Automatic A F Use background picture
Light border-.
Dark border: Automatic A
. A u t o m a t i c LI I ___________________ I.11- Automatic Li
Browse . eiopert
Apply Cancel Style... I OK ,
Table Properties
Specify width: .
lEpo
r lnjercrit
Specify heiht .
120

4.0 Conclusion Tables are used to line up things on the page neatly, you can also remove the border if you don't
want it showing or change the color of the border. The amount of space surrounding the text and
or graphics inside of a cell can also be adjusted to your desire.
4.0 Summary In this unit, we were able to look at how to add table and format it by either aligning it, merging the
cells, adjusting table padding and spacing.
6.0 References and Suggestion for Further Reading Basic HTML (http://www.htmlgoodies.com)
Widemet Project, (httpftwww.widernet org)
Microsoft Windows (http/Iwww.microsoft. corn)
Developing HTML (http://www.davesite.com/webstation/htm/)
7.0 Tutor-Marked Assignment
Question
Describe any two methods of adding a table to a web page.
.ayour —
!Alignment: ; I Center
,,:•: iDefauk
AC
It. -
Li kil:iI: : r Spechrs, ,
s-...2..___:t4;Angeh zi Li6ht
:Au'ornatio. • Ld flask bnder.11111a.
Errovozef,c;"!
'
Fig. 19.7 19.7
121
UNIT 20: Front Page — Theme, Marquee and Dynamic HTML
Table of Contents
Page
1.0 Introduction 123
2.0 Objectives 123
3.1 Adding a Theme 123
3.1.2 Deleting Themes
124
3.2 Adding a Marquee 124
3.3 Adding a Counter 125
3.4 Adding Dynamic HTML 125
35 Adding a Banner 126
4.0 Conclusion 127
5.0 Summary 127
6.0 References and Suggestion for Further Reading 127
7.0 Tutor-Marked Assignment 127
122

1.0 Introduction
One of the neatest features in FrontPage is the capability of adding a Theme and Marquee to your website or just a page of your web. It is important to note that this will only work in Internet Explorer. You will see the text Netscape but it will not be scrolling. We will also look at how to add Dynamic HTML to your web page. Dynamic HTML effects are active elements that you can add to pictures, text, buttons, etc.
2.0 Objectives It is expected that at the end of this unit, you will be able to: Add Theme and Marquee in your web page; Add Dynamic HTML; Add Counter to your web page.
3.1 Adding a Theme A theme is a collection of color, styles and images that you can add to your pages. The theme consists of bullets, background image, buttons, banners, hyperlink color, font colors and styles, table colors and horizontal lines. By adding a theme, you automate the process of using many of these components. FrontPage has many themes to choose from and there are sites on the Internet where you can purchase additional themes. To add a theme to your site, follow these steps: Go to Format on the menu bar and choose theme. The Themes dialog box will open.
Choose the theme you want to use by clicking on it in the left hand pane. A preview of the theme will be displayed in the right hand pane.
I usually put a check next to vivid color, active graphics and background picture. Click on OK. The theme will be added to your page.
Fig. 20.1
123

3.1.2 Deleting Themes
You can delete a theme by going to Format on the menu bar and click on Theme. Choose on theme
from the left hand pane and click on OK. Your theme will be removed.
3.2 Adding a Marquee Marquee will only work in Internet Explorer. You will see the text in Netscape but it will not be
scrolling. To add a marquee to you page follow these steps.
Click on the section of the page where you want to insert your marquee.
Go to Insert on the menu bar and go down to Component and click on Marquee.
The Marquee Properties' dialog box will open.
Type the text that you want displayed.
Click on the down arrow for background color and click on your color choice.
Click on the Style button Format, and then Font. Make the choices for the type of font you want as
well as size and color.
The marquee will not work in Netscape rather, text will only be displayed while it will work well on
Internet explorer.
Click on OK and OK again.
Make a choice for the type of marquee that you want to use. (Scroll, slide or Alternate). See Fig.
20.2.
If you ever want to make changes to your marquee, right click on it and choose marquee properties
Exercise 1 Will the marquee work in any browser?
Marquee Proper
Type your text in here! Text:
Speed Behavior
Delay: 90 • Scroll
Slide Amount;
Alternate
Direction
(••• Left
C Right
Size __________________________________________ Repeat
r Width Iluu r In pixels I W Continuously
n10 Height r In pixels
C in percent Background color:
I iii Automatic
Cancel I Style...
Fig. 20.2
1'1

3.3 Adding a Counter You can add a counter to view how many people have visited your page. Most times you can get this
information without a counter but a counter is nice if you would like your visitors to know how many
hits your page gets. FrontPage built in a counter feature. In order for the counters to work, the server
that you post your web page on must have the current versions of FrontPage extentions on them. If
your server doesn't have them then on the next [hit counter] will be displayed. To insert on your page
follow these steps:
Click on the part of your page where you want to insert your counter. Counters are usually found
at the bottom of a page.
Go to Insert on the menu bar and down to Component and click on Hit Counter.
The Hit Counter Properties' dialog box will be displayed.
Choose the type of counter you want by clicking on the radio button next to your choice. (You
can also use your own image by clicking on custom picture and navigating to the image you
want to use.)
You can reset your counter to any number by clicking in the box and typing in the number. You
can do the same for displaying your desired number of digits. Click OK.
Exercise 2
What is the importance of a Counter in a Web page?
The counter will enable you keep track of the number of people that visit your site.
3.4 Adding Dynamic HTML Dynamic HTML effects are active elements that you can add to pictures, text, buttons, etc. You can
have picture or text fly onto the page, have text turn bold when you rest your mouse on it, add a
Hit Counter Properties
Fig. 20.3
01234557
125

border around the next when you click on it. These are just to name a few. To add these effects to
your page follow these steps:
Select the item that you want to add the dynamic HTML effects to.
Go to Format on the menu bar and click on Dynamic HTML effects.
The DHTML effects toolbar will open.
Click on the down arrow where it says choose and event. This will determine how the effect will
start. You can choose between click, double click, mouse over, or page load.
Click on the down arrow next to choose an effect. You have eight effects to choose from.
Depending on the effect you choose, you might have a third drop down that you have to set
which is called choose settings.
Notice that on this page, the graphic (Special Components and the text Adding Dynamic HTML)
both have dynamic html added to them. Click the reload or rellesh button to see the event again.
Fig. 20. 4
Exercise 3
What is the main function of Dynamic HTML?
The Dynamic HTML adds active elements to your pictures and text.
3.5 Adding a Banner You can add a page banner to your page. This usually resides at the top of your page and includes the
text for the title of your page. If you are using a theme and you add a banner, it will automatically add
the graphic that is set for a banner that matches your theme and automatically hyperlinks to the
previous page. (The page the current page is linked from). To add a banner follow these steps.
Click where you want the banner to go.
Go to Insert on the menu bar and click on Page Banner.
You can choose picture if you are using a theme and a page banner, with a graphic image that
matches your page will be added.
Type in the text you want displayed for your banner.
C l ick O K.
Your page banner will be added.
Properties -
a Picture
Text
Page banner
Welcome to Mrs
s 6th erode Coss
OK Cancel I
Fig. 20. 5
126
4.0 Conclusion
By adding a theme you automate the process of using bullets, background image, buttons, banners.
hyperlink color, font colors and styles, table colors and horizontal lines. Marquee which can only
work in Internet Explorer can also be added to your web page. You can have picture or text fly onto
the page, have text turn bold when you rest your mouse on it by using the Dynamic HTM L effects.
If you are using a theme and you add a banner, it will automatically add the graphic that is set for
a banner that matches your theme.
5.0 Summary In this unit, we have considered the process of adding a theme, banner and marquee as well as the
process of adding a dynamic effect to your web page. How to add counter to keep count of the
number of people who visit you site was also discussed.
6.0 References and Suggestion for Further Reading Basic HTML (http://www.htmlgoodies.com)
Widernet Project, (Mtp//www.widernet.org)
Microsoft Windows (http//www.Microsoft.com)
Developing HTML (http://www.davesite.com/webstation/html/)
7.0 Tutor-Marked Assignment
Question What are the steps to be followed for adding a theme and a banners to your web page?
127

UNIT 21: Front Page—Adding Date and Time, Spell Check and Web Publishing
Table of Contents
Page
1.0 Introduction 129
2.0 Objectives 129
3.1 Adding Date and Time 129
3.2 Performing a Spell Check 130
3.3 Previewing Your Web Page 130
3.3.1 Using the Preview Tab 131
3.3.2 Using Preview in Browser 131
3.3.3 Typing in your URL 131
3.4 Publishing Your Web Page 132
4.0 Conclusion 132
5.0 Summary 133
6.0 References and Suggestion for Further Reading 133
7.0 Tutor-Marked Assignment 133
128
1.0 Introduction Visitors to your web site will always want to know when last you updated your web page hence we
will look at how to include date in your web page in this unit. Since your page will be available for the
world to view, you really need to take the time and spell check your pages using the spell check in
Frontpage. Having developed your web page and want to make your work public to the world, this
unit will discuss how you can publish it on a web server.
2.0 Objectives At the end of this unit you will be able to:
Add date to your web page;
Spe l l check your work;
Prev iew your web page;
Publish your web.
3.1 Adding Date and Time You can add the date that you last updated your page. This will show visitors if you had worked on
your page since the last time they visited, so they know when to expect some new editions. To add
the date the page was updated, follow these steps:
Click where you want your date and time to go. (I usually type something like: This page was last
updated on)
Go to Insert on the menu bar and click on Date and Time
Choose the Date and Time Properties you want displayed
C l i c k o n O K
The date will automatically be updated each time you edit your page.
Exercise 1 State the importance of adding a date to your web page.
By dating your website, visitors are able to know when last the web page was updated or how current your website is.
129

3.2 Performing a Spell Check Even after you run spell check, you should carefully look over all of your pages to check for errors.
You might even want a friend to double check your page for you before you are through with your
site. To run a spell check follow these steps. FrontPage only runs a spell check. There is not a
grammar check like in Microsoft Word. By default the spell check is turned on to work as you
type. If you misspell a word a red wavy line will be displayed under the incorrect word. To run a
spell check on your page follow these steps:
Go to Tools on the menu bar and click on Spelling. (You can also click on the ABC button from
the standard toolbar).
The spell check will run automatically.
3.3 Previewing Your Web Page
There are really three different ways to preview your web page. You can use the preview tab within
the FrontPage screen. Go to File Preview in Browser, or open up your browser and type in the URL for
your page and preview it there. If you use the preview tab, sometimes things appear incorrect but
when you really view them in your browser they are tine. I use Preview for a quick look. If I see a
problem Twill open up my browser to be sure the problem really exists. The File Preview in browser
component is great if you want to check to see what your page looks like in different browsers arid r
different resolutions. You can set what browser and resolution you want and that browser (as long as
you have it on your computer) will open, displaying the screen as a visitor would see it with that specific
resolution. It is important to do this because all browsers don't support the same code. Your page may
look very different in one browser to another. The resolution issue is important because you don't want
:5: Microsoft na
Fgmet lods TS* Etame,
j - tit; -1G1 4, .03 a .6. :It [tot lb fl 0 Normat (defatit font) • N o r m a l e i
DTP UNIT UNIVERSITY PRESS PLC
This page was last updated on:
01/16/04 Display.
6. Date this page was last edited
Date this page was lastItutereat
Date formal 101 /16/04
lime format. limpet
Norealktikij,CPrelej
').1 :,19f 31..94
'1401A7
IFTeksig
Fig. 21.1
Views
130

your visitors to horizontally scroll while viewing your pages. If you set your page for a certain resolution
you can type a line at the bottom of the page stating that it is best viewed in that particular resolution.
You can also type in the preferred browser if your site looks better in one than another. To preview your
page using the three different techniques, follow the appropriate directions below:
3.3.1 Using the Preview Tab g. Save your page.
g• Click on the Preview tab at the bottom of your FrontPage screen while in the Page View.
g> You can check out how your page will be displayed on the Internet.
3.3.2 Using Preview in Browser g> Save your page. K> Go to File on the menu bar and click on Preview in browser.
g> The Preview in Browser dialog box will open.
K. Choose the browser that you want to view it in and click on the resolution that you want to check,
g• Click OK.
g? That browser will open and the screen will be sized so you can view what a visitor with that
particular resolution would see when they come to your page.
Fig. 21.2
3.3.3 Typing in your URL g> Save your page
g) Publish your page
g. Open up your browser
g> Type in the URL for your site
g> Check to see how your site looks online.
Excercise 2 Which preview method will you use to see what your page looks like in different browsers?
The preview in the browser will naturally give you a good view of how your page will look like in
different browsers,
Preview in Browser
131

3.4 Publishing Your Web Page If you work directly on the web server then you only need to hit the save button and your page is
automatically published. If you are working on your own local machine and need to publish to your
web server, then you have to go through the publishing steps. Follow the directions below to publish
your pages:
After saving, go to File on the menu bar and click on Publish Web. Or you can click on the
Publish web icon from the standard toolbar.
The Publ ish Web dialog box wil l open.
Type in the FTP for the web server you will be posting to. You can get this information from your
administrator for the web server.
C l i c k o n O K .
Your page will be sent up to sour \seb server and published. You can then view your published pages online.
Fig. 21.3
4.0 Conclusion Putting dates on your web page will show the visitors how current your page is. By default the spell
check is turned on to work as you type. If you misspell a word a red wavy line will be displayed
under the incorrect word to enable you easily correct the spelling. The File Preview in Browser
component is great if you want to check to see what your page looks like in different browsers and
different resolutions. To make your web page available to the public, you will have to publish it on a web server.
132

5.0 Summary In this unit, we were able to look at three different ways to preview your web page and editing the
spell mistakes before publishing it on a web serve. How to include dates and time on your web page
was also discussed.
6.0 Tutor-Marked Assignment
Question:
Why do you need the web server address? And suppose you don't have a web server, what are the procedures
to follow to post your web page for publishing in a web server?
7.0 References and Suggestion for Further Reading Basic HTML http://www.htmlgoodies.com
Widernet Project, http//www.widernetorg
Microsoft Windows httpllvvww.Microsoft.com
Developing HTML http://www.davesite.com/webstation/html/
133

UNIT 22: HTML— File Format and Structure
Table of Contents
Page
1.0 Introduction 135
2.0 Objectives 135
3.1 What is HTML? 135
3.2 The Word Processor 135
3.2.1 How To Name Your Document 136
3.3 Opening the Document in the Browser 136
3.4 View Others' HTML Source Codes 137
3.5 Document Structure 137
4.0 Conclusion 138
5.0 Summary 138
6.0 References and Suggestion for Further Reading 138
7.0 Tutor-Marked Assignment 138
134

1.0 Introduct ion
This Module is made up of seven units in series that will introduce you to the very basics of HTML.
HTML files are just normal text files.., they usually have the extension of .htm or .html. It is used to
develop web pages. HTML documents are written on the word processor, or Notepad, WordPad, or
Simple Text. HTML documents must be text only. HTML works in a very simple, very logical,
format. It reads like you do. top to bottom, left to right. When you are finished creating the HTML
document, you'll then open the document in a browser, like Netscape Navigator. The browser will
interpret the HTML commands for you and display the Web page.
2.0 Objec t i ves
At the end of this unit you should be able to: Define HTML;
Save a document in word processor as AIME document; Open document in the browser;
View Source Code for other HTML.
3.1 What is HTML?
H-T-M-L are initials that stand for HyperText Mark up Language
Hyper is the opposite of linear. It used to be that computer programmes had to move in a linear
fashion. This before this, and so on. HTML does not hold to that pattern and allows the person
viewing the World Wide Web page to go anywhere, any time they want.
Text is what you will use.
Mark up is what you will do. You will write in plain English and then mark up what you write.
Language - but the language is plain English.
3.2 The Word Processor
When you write to the word processor you will need to follow a few steps:
Write the page as you would do to any other document.
When you go to save the document ALWAYS choose SAVE AS.
When the SAVE AS box pops up, you will need to save the page in a specific format. Look at the
SAVE AS dialogue box when it pops up: Usually at the bottom, you find where you will be able
to change the file format as ASCII TEXT DOS or just TEXT. Either one will work.
When you save your document in WORD, or some other word processor format other than text,
you are saving much more than just the letters on the page. You're saving the margin settings, the tab
settings, specific fonts, and a whole lot of other settings the page needs to be displayed correctly.
These are not needed in web page design.
NotePad. WordPad, and Simple Text are already saved in text-only format so if you use one of
them as your word processor, you'll get the correct format simply by saving your document.
Exercise 1
List any three word processors that you can use to write HTML.
Among the numerous word processors that you can use include:
Corel word perfect Microsoft word
Word perfect.
135

3.2.1 How To Name Your Document What you name your document is very important. You must first give your document a name and
then add a suffix to it. That's the way everything works in HTML. You give a name and then a suffix.
Follow this format to name your document:
Choose a name. Anything. If you have a PC not running Windows 95, you are limited to eight
letters.
Add a suffix. For all HTML documents, you will add either .htm or .html
Exercise 2 Does all HTML documents need to have the extension .htm or .html?
As a rule all HTML documents must have an extension .htm or html.
3.3 Opening the Document in the Browser Once you have your HTML document on the floppy disc or your hard drive, you'll need to open it up
in the browser to see exactly how it would appear.
Under the FILE menu at the very top left of this screen, you'll find OPEN, OPEN FILE, OPEN
DOCUMENT, or words to that effect.
Click on it. Some browsers give you the dialogue box that allows you to find your document right
away. Internet Explorer, and later versions of Netscape Navigator, require you to click on a
BROWSE button or OPEN FILE button to get the dialogue box. When the dialogue box opens
up, switch to the A: drive and open your document. If you saved the file to your hard drive,
get it from there.
You might have to then click an OK button. The browser will do the rest.
/myweb
cc] tyunDocuments i o b
.2J C \ Documents and SeltrigsAdministrator UPRES __ 4!)
4m01 hthIttpp//////tnounalwo lob - -
0) /Local Disk (C1
I the Future of Searching
-
ric on the clipire of Searching
Topic 49: Ruminations or the Future of Internet Searchin¢
Fig. 22.1
136
Type the Internet address of a dapment t f Internet ExplorervJ open /Lim you.

3.4 View Others' HTML Source Codes Let's say you run into a page that has a really neat layout, or a fancy text pattern, or a strange
grouping of pictures or if you see some landscaping you like, you're going to use the idea. You can
look at another page's HTML document using the browser, which is one of the best ways to learn
HTML. Here's how you look at an HTML document (known as the "source code"):
1. When you find a page you like, click on VIEW at the top of the screen.
2. Choose DOCUMENT SOURCE from the menu. Sometimes it only reads SOURCE.
3. The HTML document will appear on the screen.
3.5 Document Structure HTML documents have two (2) parts, the head and the body. The body is the larger part of the
document, as the body of a letter you would write to a friend would be. The head of the document
contains the document's title and similar information, and the body contains most everything else.
Example of basic HTML document Structure...
<him>
<head><title> Title goes here<title></head>
<body>Body goes here<body> </html>
DEEP CONTENTS
, Part II: Solutions and the Future of Searching
Topic 49: Ruminations on the Future of Internet Searching -
Fig. 22.2
BRIGH _
Text Size
Microsof t Internet Explorer - [Working Mine]
137

Exercise 3
Is there any difference between the structure of word document and HTML document?
As a rule, HTML document must have a beginning and a closing tag.
4.0 Conclusion
You can use a word processor to write HTML document but you must save it as text with the
extension .html or .htm, and nothing else. The browser is used to view the appearance of your web
page. You can use your browser to look at another page's HTML document and learn one or two
things from it.
5.0 Summary In this unit, we looked at what HTML is all about and how to create them using word processor. We
also considered viewing the source codes of other people's web pages with a view of learning one or
two things from their designs. The unit also considered how to view your web page in a browser.
6.0 References and Suggestion for Further Reading Basic HTML http://www.htmlgoodies.com
Developing HTML hup://www.davesite.com/webstation/html/
7.0 Tutor-Marked Assignment
Question
State the procedure for viewing source code of a web page. What is the importance of doing so?
138

UNIT 23: HTML — Tags
Table of Contents
Page
1.0 Introduction 140
2.0 Objectives 140
3.1 Tag Format 140
3.2 Open and Close Tags 140
3.3 Multiple Tags 140
3.4 Single Tags 141
3.5 Beginning and Ending Tags in a Page 141
3.6 Heading Commands 142
3.7 Horizontal Ruled Lines 142
4.0 Conclusion 143
5.0 Summary 143
6.0 References and Suggestion for Further Reading 143
7.0 Tutor-Marked Assignment 143
139
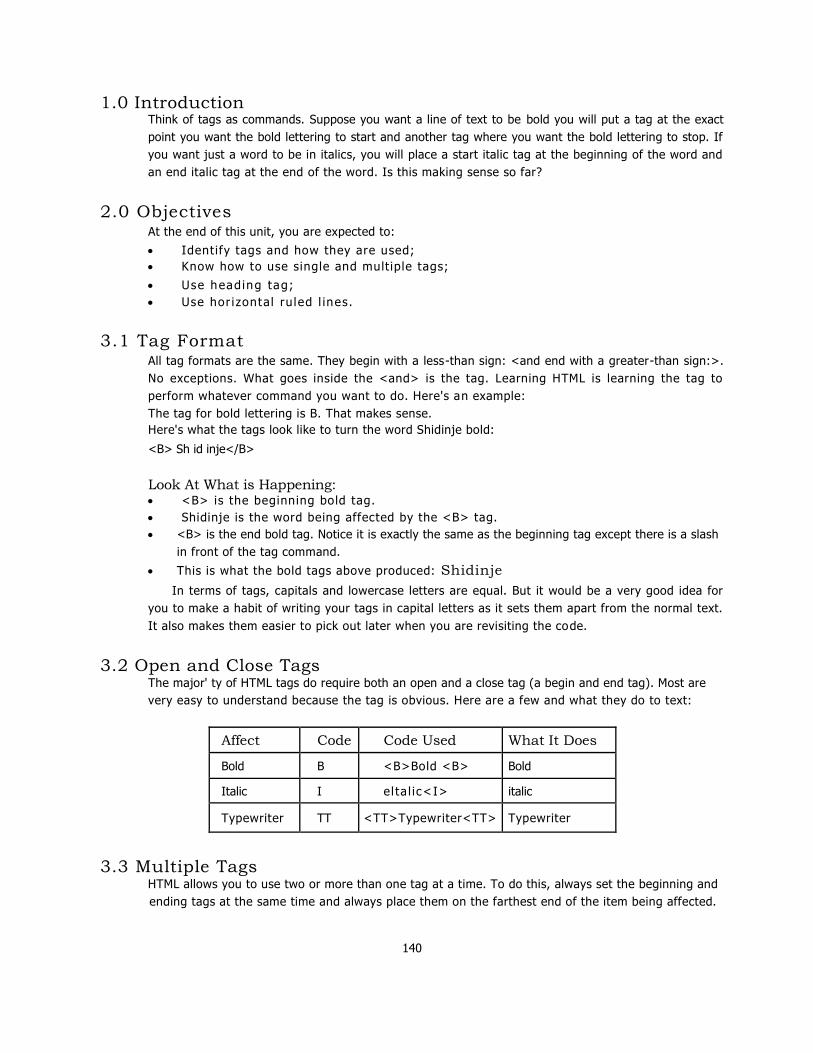
1.0 Introduction Think of tags as commands. Suppose you want a line of text to be bold you will put a tag at the exact
point you want the bold lettering to start and another tag where you want the bold lettering to stop. If
you want just a word to be in italics, you will place a start italic tag at the beginning of the word and
an end italic tag at the end of the word. Is this making sense so far?
2.0 Objectives At the end of this unit, you are expected to:
Identify tags and how they are used;
Know how to use single and mult iple tags;
Use heading tag;
Use hor i zontal ru led l ines.
3.1 Tag Format All tag formats are the same. They begin with a less-than sign: <and end with a greater-than sign:>.
No exceptions. What goes inside the <and> is the tag. Learning HTML is learning the tag to
perform whatever command you want to do. Here's an example:
The tag for bold lettering is B. That makes sense.
Here's what the tags look like to turn the word Shidinje bold:
<B> Sh id inje</B>
Look At What is Happening: <B> is the beginning bold tag.
Shidinje is the word being affected by the <B> tag.
<B> is the end bold tag. Notice it is exactly the same as the beginning tag except there is a slash
in front of the tag command.
This is what the bold tags above produced: Shidinje
In terms of tags, capitals and lowercase letters are equal. But it would be a very good idea for
you to make a habit of writing your tags in capital letters as it sets them apart from the normal text.
It also makes them easier to pick out later when you are revisiting the code.
3.2 Open and Close Tags The major' ty of HTML tags do require both an open and a close tag (a begin and end tag). Most are
very easy to understand because the tag is obvious. Here are a few and what they do to text:
Affect Code Code Used What It Does
Bold B <B>Bold <B> Bold
Italic I e l ta l ic<I> italic
Typewriter TT <TT>Typewriter<TT> Typewriter
3.3 Multiple Tags HTML allows you to use two or more than one tag at a time. To do this, always set the beginning and
ending tags at the same time and always place them on the farthest end of the item being affected.
140

For example:
<B><I>Bold and Italic <1><B> gives you Bold and Italic
If you do use multiple tags to alter text, make a point of not getting the end tags out of order.
Exercise 1
Look at this example below:
<B><I><TT> Text Text</TT></B><I>
In terms of format, the example above is not correct. The end tags are out of order in relation to the start tags.
You should rewrite this tag correctly.
If you have written it correctly your answer should look like this:
<B><I><TT> Text Text<TT><I></B>
3.4 Single Tags The open and close tags format dominates the majority of the available HTML tags, but there are
tags that stand alone. Here are three frequently used ones.
Tag What It Does
<HR> This command gives you a line across the page. (HR stands for Horizontal Reference.)
<BR> This breaks the text and starts it again on the next line. Remember you saved your
document as TEXT so where you hit ENTER to jump to the next line was not saved.
In an HTML document, you need to denote where you want every carriage return
with a <BR>
<P> This stands for Paragraph. It does the exact same thing as the <BR> above except
this tag skips a line. BR just jumps to the next line, P skips a line before starting the text
again.
Exercise 2 Do all HTML tags use a capital letter?
Tags are not case sensitive hence you can use either lower or upper case in writing tags.
3.5 Beginning and Ending Tag in a Page In writing HTML document you will start every page with this tag:
<HTML> You are denoting that this is an HTML document. Your next tags will always be these:
<TITLE> and <TITLE>
Whatever falls between the TITLE tags will be the title of the document When the page is
viewed it is usually found in the title bar at the top of the screen. (On Windows machines, this is to the
left of the maximize/minimize buttons at the very top of the window.)
You may NOT use other tags within the TITLE tags
Example:
You cannot have the code read: <title><b> title goes here <b></title>.
141

Finally, you'll end every page you write with this tag: <HTML> You started the page with HTML
and you will end the page with /HTML.
Activity 1
Try this code and view it in your browser
<HTML>
<TITLE> My first html page </TITLE>
<B> This is my first HTML pagel<B><P>
I can write in <I>Italic<I> or <B> Bold <B><BR>
<HR>
<B><I> Or I can write in both <I><B><BR>
<HR>
<TT> ..and that's all </TT>
<HTML>
3.6 Heading Commands
Headings are some of the most important tags within the BODY ofyour TITML document. You will
usually use a headirtg to tell what the following section of your page is-about The-opening tag for a
heading is <hy> and the closing tag is <Thy> with y being the size ofthe heading... from I to 6 (1 being
largest, and 6 being smallest).
Here are the relative sizes:
i
Shidinje s a lovely baby [H1] <hi> Shidinje is a lovely baby. fl-11]</h I>
Shidinje is a lovely baby.[H2] <h2> Bob fell over the chicken. fH2]<fh2>
Shidinje is a lovely baby. 11131
<h3> Bob fell over the chicken. [1131</h3>
Shidinje is a lovely baby. 11141
<h4> Bob fell over the chickien. [1-14]</h4>
Shidinje is a lovely baby. [H5]
<h5> Bob fell over the chicken. II-1514M>
Shidinje is a lovely baby. f H6] <116> Shidrine is a lovely baby [146]</h6>
Shidinje is a lovely baby [1 1-161
3.7 Horizontal Ruled Lines
Horizontal Ruled Lines are used to separate different areas of a web page. The tag for a horizontal
ruled line is <fir>. The horizontal ruled line DOES NOT have a closing tag. You may also add
certain attributes to the <hr> tag, such as WIDTI-1=n% (for fixed pixel width) or WIDTH=n% for a
certain percentage of the screen wide, SIZE = n to make the line a certain pixel amount thick, and
NOSHADE to turn the line's shading off. A plain <hr> with no attributes will make the line the full width of the screen.
142

Example of horizontal ruled lines_
<hr width=50>
<hr width=50%
<hr size=7>
<hr noshade>
You may also use several attributes within one tag...
<hr width=50% size=10 noshade>
Activity 2 Access your code in Activity 1 and add a heading and a line below the heading.
4.0 Conclusion • Tags are commands used in formatting HTML documents. Tags must have a begin anti an end tags.
HTML allows you to use two or more tags at a time. If you do use multiple tags on text, you must get
the end tags out in first in first out order. Also each page of HTML must start with <HTML> and you
will end the page with </HTML>. Heading commands are used extensively in HTML documents to
create headings.
5.0 Summary In this unit, we were able to identify what tags are and how you can use them in formatting your
HTML document. The use of heading tag and how to separate different areatitof a web page were
also considered.
6.0 References and Suggestion for Further Reading Basic HTML http://www.htmlgoodies.com
Developing HTML http://www.davesite.com/webstationd/html/
7.0 Tutor-Marked Assignment
Question: State any three tags that do not accept multiple tags and state the functions of the tags.
143

UNIT 24: HTML — Text Formatting Properties
Table of Contents
Page
1.0 Introduction 145
2.0 Objectives 145
3.1 Paragraphs 145
3.2 Font Size Commands 145
3.3 Text Color 146
3.4 Centering Text 147
3.5 Right Align and Left Align 147
3.6 The Line Break 148
4.0 Conclusion 148
5.0 Summary 148
6.0 References and Suggestion for Further Reading 148
7.0 Tutor-Marked Assignment 148
144

1.0 Introduction
If you had an entire web page without formatted text, it would look rather dull and boring. In this unit,
we will be looking at text formatting tags.
2.0 Objectives At the end of this unit you should be able to: Create a paragraph in your document;
Centralize and right align text in your dodument;
Change font size and font.
3.1 Paragraphs You will often use paragraphs in HTML, just as you do when you write stories. The opening tag for
a paragraph is <p>, and the closing tag is <p>. The closing tag for a paragraph is not always needed,
but I recommend using it anyway.
Example of a paragraph. Shidinje can stand on her own while holding something to support her. She will not want to try
standing without leaning on an object for fear of falling own.
Shidinje can stand on her own while holding something to support her She will not want
to try standing without leaning on an object for fear of falling own.
Exercise 1
Does the paragraph need a closing tag?
As mentioned above, the closing tag for a paragraph is not always needed.
3.2 Font Size Commands Maybe you'd like a little more control over your text size. The <FONT SIZE> commands. Heading
commands are great for right at the top of the page.
There are twelve (12) font size commands available to you: +6 through +1 and -1 through -6.
As you've probably guessed, +6 is the largest (it's huge); -6 is the smallest (it's a little too small).
Here are a few of them in action. There's no need to show all of them. You'll get the idea of their
relative sizes. Follow this pattern to place one on your page.
<FONT SIZE= "+3"> This is +3</FONT>
<FONT SIZE= "+1"> This is +1</FONT>
<FONT SIZE= "-1"> This is -1<FONT>
<FONT SIZE= "-6"> This is -6</FONT>
Notice that this first command, <FONT SIZE= "--"> is actually doing two things:
1. It's asking for a new font size...
2. Then offering a number to denote the font size.
This is what I like to call a command inside of a command. The technical HTML term is an
"attribute". When you have that, you denote the attribute with an equal sign and enclose it within
quotation marks. Look above. See the equal sign and the plus or minus number in quotes? That's
what I'm talking about.
145

Example of font tags...
Sharon is a Lovely baby isn't she?
<font size=+1> Sharon </font size:+2> is </font> <font size=+3> a </font> <font size=+2> lovely </
font> <font size=+1> baby </font> isn't <font size=-1> she? </font>
Also notice that the end command for a <FONT SIZE= "--"> tag only requires </FONT>.
Remember that an attribute is inside of a tag. When you use an end command, you are closing
the tag, not the attribute. So you only need the one end tag, like above.
Activity
Write a font tag for this text.
Shidini.! is a darling
The newest version of many browsers supports extended fonts, in which you can choose to have the
document fonts other than the normal one. This is accomplished by adding the FACE="font name"
attribute to the <FONT> tag. The most commonly supported fonts are Verdana, Anal, Helvetica,
Impact, Comic Sans MS, and a few others. It is not recommended to make your page font dependent,
because the older versions of many browsers don't yet support this feature.
Examples of Extended Fonts. . .
<font size=+2 face= "Verdana"> Verdana</font>
Verdana <font size=+2 face= "Adal">Arial</font>
Anal <font size=+2 face= "Helvetica"> Helvetica</font>
Helvetica <font size=+2 face-- "Impact"> Impact</font>
Impact <font size=+2 face= "Comic Sans MS"> Comic Sans MS</font>
Comic Sans MS
3.3 Text Color
You can change the color of the text by setting the COLOR ="font_color" attribute in the
<FONT> tag. The Color is usually set by using the hexadecimal system (#000000 black to
#FFFEFF white) but can also be set in newer browsers by using the simple word of the color. (Red for Red. Blue for Blue, etc.)
Example of Text Color. . .
<font color= "Blue"> Hey I'm Blue!</font>
146
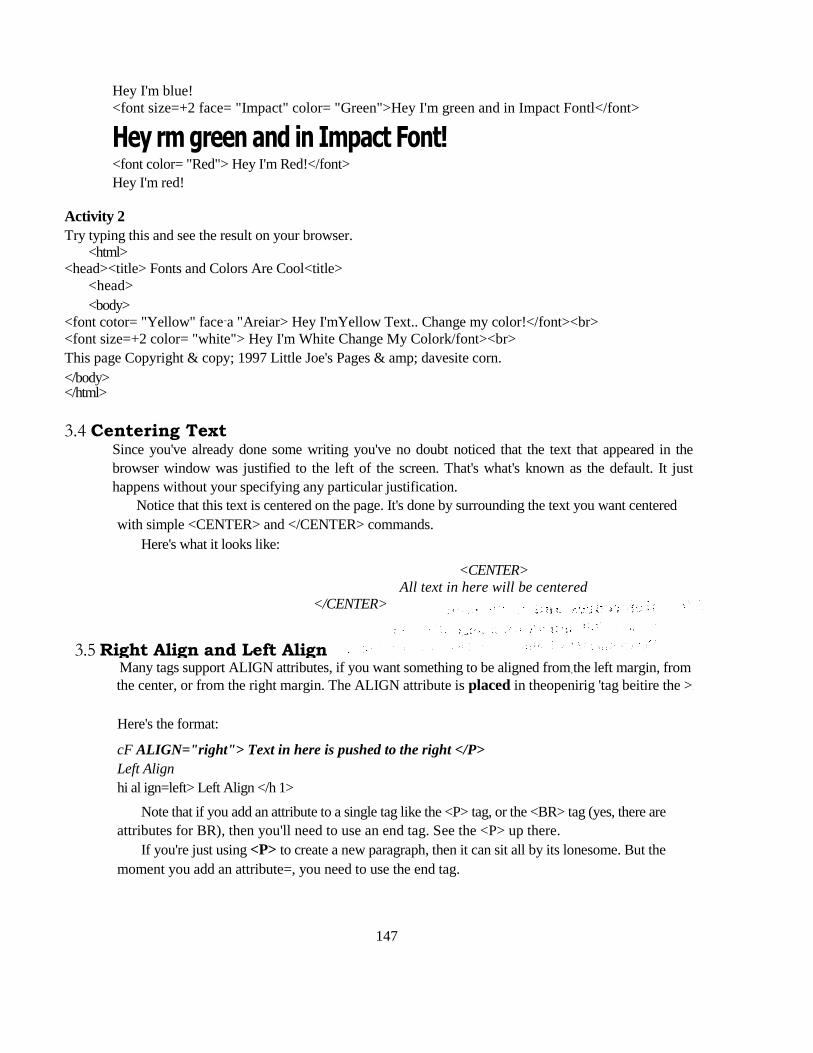
Hey I'm blue!
<font size=+2 face= "Impact" color= "Green">Hey I'm green and in Impact Fontl</font>
Hey rm green and in Impact Font! <font color= "Red"> Hey I'm Red!</font>
Hey I'm red!
Activity 2
Try typing this and see the result on your browser. <html>
<head><title> Fonts and Colors Are Cool<title>
<head>
<body>
<font cotor= "Yellow" face-a "Areiar> Hey I'mYellow Text.. Change my color!</font><br>
<font size=+2 color= "white"> Hey I'm White Change My Colork/font><br>
This page Copyright & copy; 1997 Little Joe's Pages & amp; davesite corn.
</body> </html>
3.4 Centering Text Since you've already done some writing you've no doubt noticed that the text that appeared in the
browser window was justified to the left of the screen. That's what's known as the default. It just
happens without your specifying any particular justification.
Notice that this text is centered on the page. It's done by surrounding the text you want centered
with simple <CENTER> and </CENTER> commands.
Here's what it looks like:
<CENTER>
All text in here will be centered
</CENTER>
3.5 Right Align and Left Align Many tags support ALIGN attributes, if you want something to be aligned from.the left margin, from
the center, or from the right margin. The ALIGN attribute is placed in theopenirig 'tag beitire the >.
Here's the format:
cF ALIGN="right"> Text in here is pushed to the right </P>
Left Align
hi al ign=left> Left Align </h 1>
Note that if you add an attribute to a single tag like the <P> tag, or the <BR> tag (yes, there are
attributes for BR), then you'll need to use an end tag. See the <P> up there.
If you're just using <P> to create a new paragraph, then it can sit all by its lonesome. But the
moment you add an attribute=, you need to use the end tag.
147

Exercise 2
Explain the function of the Align attribute.
The Align attribute is used to align something from the left margin, from the center or from the right margin.
3.6 The Line Break When your HTML document is viewed, normally the text will do a word-wrap at the end of a line. If
you want to have the text BREAK (go to another line) you will use the <br> tag. This tag has no closing tag.
Example WITHOUT line break...
Sentence One. Sentence Two. Sentence Three.
Example WITH line Break... Sentence One.
Sentence Two.
Sentence Three.
Sentence One. <br>
Sentence Two. <hr>
Sentence Three. <br>
4.0 Conclusion
If you had an entire web page without formatted text, it would look rather (lull and boring. This is
why we use text formatting tags. Some common text formatting tags are <b> and <b> for bold, <i> and <i> for italics. <u> and </u> for underlined, and <tt> and <ft> for typewriter. The <font
size—n> and </font> tags also come in handy.
5.0 Summary
In this unit, we looked at how you can have more control over your text size, color, text alignment and
set out your paragraph.
6.0 References and Suggestion for Further Reading
Basic HTML http://www.htmlgoodies.com
Developing HTML http://www.daves ite.com/webstation/htm I/
7.0 Tutor-Marked Assignment
Question
State the format for changing the color of a text and what happens if you add an attribute to a single tag.
148

UNIT 25: HTML - Creating Links to Other Pages
Table of Contents
Page
1.0 Introduction 150
2.0 Objectives 150
3.1 Creating a Hypertext Link 150
3.2 E-Mail Links from your Page 150
3.3 Placing an Image on your Page 151
3.3.1 Image Formats 152
3.3.2 Where Do I Get Images for My Page? 152
4.0 Conclusion 153
5.0 Summary 153
6.0 References and Suggestion for Further Reading 153
7.0 Tutor-Marked Assignment 153
149
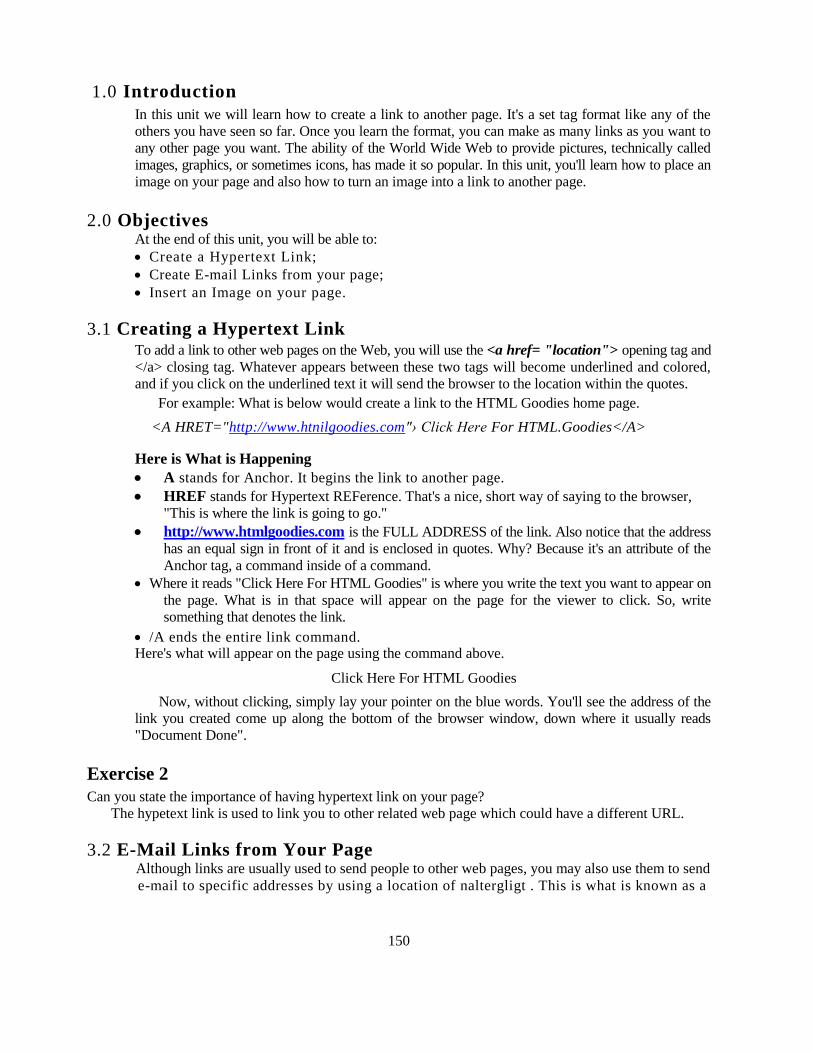
1.0 Introduction
In this unit we will learn how to create a link to another page. It's a set tag format like any of the
others you have seen so far. Once you learn the format, you can make as many links as you want to
any other page you want. The ability of the World Wide Web to provide pictures, technically called
images, graphics, or sometimes icons, has made it so popular. In this unit, you'll learn how to place an
image on your page and also how to turn an image into a link to another page.
2.0 Objectives At the end of this unit, you will be able to:
Create a Hypertext Link;
Create E-mail Links from your page;
Insert an Image on your page.
3.1 Creating a Hypertext Link To add a link to other web pages on the Web, you will use the <a href= "location"> opening tag and
</a> closing tag. Whatever appears between these two tags will become underlined and colored,
and if you click on the underlined text it will send the browser to the location within the quotes.
For example: What is below would create a link to the HTML Goodies home page.
<A HRET="http://www.htnilgoodies.com"› Click Here For HTML.Goodies</A>
Here is What is Happening
A stands for Anchor. It begins the link to another page.
HREF stands for Hypertext REFerence. That's a nice, short way of saying to the browser,
"This is where the link is going to go."
http://www.htmlgoodies.com is the FULL ADDRESS of the link. Also notice that the address
has an equal sign in front of it and is enclosed in quotes. Why? Because it's an attribute of the
Anchor tag, a command inside of a command.
Where it reads "Click Here For HTML Goodies" is where you write the text you want to appear on
the page. What is in that space will appear on the page for the viewer to click. So, write
something that denotes the link.
/A ends the entire link command. Here's what will appear on the page using the command above.
Click Here For HTML Goodies
Now, without clicking, simply lay your pointer on the blue words. You'll see the address of the
link you created come up along the bottom of the browser window, down where it usually reads
"Document Done".
Exercise 2
Can you state the importance of having hypertext link on your page?
The hypetext link is used to link you to other related web page which could have a different URL.
3.2 E-Mail Links from Your Page Although links are usually used to send people to other web pages, you may also use them to send
e-mail to specific addresses by using a location of naltergligt . This is what is known as a
150

mailto command. It follows the same coding scheme as the hypertext link above. What this format
does is place blue wording on the screen that people can click to send you a piece of e-mail.
Here's the pattern:
<A HREF= "mailio:[email protected]"> Click Here To write Me <IA>
Notice it is the same format as a link except in a link you write "mailto.” in place of the http://and your
e-mail address in place of the page address. Yes, you still need the </A> tag at the end. Please
notice there is NO SPACE between the colon and the e-mail address.
Here is what you get using the "mailto:" command above:
Click Here To Write Me
On clicking it, you'll get an e-mail dialogue box addressed to me. Then you can write if you want.
The same thing will work for you. Just place your e-mail address in place of mine following the
format above.
Exercise 2 What is the difference between Hypertext Link command and E-mail Links?
The Hypertext link command links you to other web pages on the web while the e-mail link is used to
send e-mail to a specific address
3.3 Placing an Image on Your Page The command to place an image is constant. You will use the same format every time. Now might
be a good time to talk about where to store everything because you're starting to call for additional
items to fill up your home page. Until now, all we did was put text on the page. Now you're going
to place an image.
It's a good idea for you to place whatever images you are going to use in the same place as your
web pages. That means place the image right on the same floppy disc, or in the same hard drive
directory, as the page that will call for it Here's the format for placing an image:
<IMG SRC = "image.gir>
By replacing "image gif' "with "oziohu.git, one of my own graphics, you get this
Fig. 25.1
151

Here is What is Happening
IMG stands for "image." It announces to the browser that an image will go here on the page.
Yes, the image will pop up right where you write in the image tag.
SRC stands for "source." This again is an attribute, a command inside a command. It is telling
the browser where to go to find the image. Again, it is best for you to place the images you want
to use in the same directory as the page. This way you can call for the image by name alone. If
you start to place your images all over the place, you'll have to start adding directories and sub-
directories to the SRC attribute. And at this point, it is too confusing. Just place the image in the
same place as the HTML document that will call for it and then call for the image by name alone.
You can get fancy later. Right now, let's just get it to work.
Image.gif is the name of the image. Notice it is f011owing the same type of format as your
HTML documents. There is a name (image) then a dot and then there is a suffix (gif).
3.3.1 Image Formats
There are three basic formats you will find on the World Wide Web. Each is denoted to the browser
by a different suffix (gif).
.gif This is pronounced "j if ' or "gir (hard "G") depending on whom you speak to. I have always
said `lir, like the peanut butter. This is an acronym for Graphics Interchange Format.
The format was invented by Compuserve and it is very popular. The reason is that it is a simple
format. It is a series of colored picture elements, or dots, known as pixels, that line up to make a
picture. Your television's picture is created much the same way. Browsers can handle this format
quite easily.
.jpeg or .jpg (pronounced "j-peg") There are two names to denote this format because of the
PC and MAC formats allowing 3 and 4 letters after the dot. JPEG is an acronym for Joint Photographic
Experts Group, the organisation that invented the format.
The format is unique in that it uses compression after it has been created. That's fancy computer
talk that means when the computer is not using a .jpeg image it folds it up and puts it away. For
example, if the picture is 10K bytes when displaced, it may be only 4K bytes when stored. Nice
trick, huh? It saves hard drive space, but also tends to require a bit of memory on your part to unfold
the image.
.bmp (pronounced bimp") This is a "bitmap." You will probably never place a bitmap as an
image, although now Internet Explorer browsers allow it. A bitmap is an image that a computer
produces and places for you.
Exercise 3
State the advantage of the .jpeg image format.
The .jpeg image format uses compression after it's been created. A picture at 10k bytes when displayed,
may be only 4k bytes hence save hard drive space.
3.3.2 Where Do I Get Images for My Page? They are literally everywhere. The IITML Goodies Images Page allows you access to over 500
place for free, and there are other sites out there that offer just as many. Plus, since you've been
surfing, you've seen hundreds of images already. If you see something on someone's page that you
really like to use it, don't just take it. That's not right and could be against copyright law. Ask. You'll
probably get the image.
152

4.0 Conclusion Without links, the World Wide Web wouldn't be a web at all. They are usually used to send people to
other web pages, you may also use it to send e-mail to a specific address. You may also add images
(pictures) to your web page, as long as the image is in the .gif or jpg (or jpeg) file formats. You will
not be able to use .bmp format files! The basic tag for in-line images in <imgsrc= "location">
5.0 Summary In this unit we were able to discuss how to use Links to send people to other web pages, and also
use it to send e-mail to a specific address and as well as how to insert images, graphics, or
sometimes icons.
6.0 References and Suggestion for Further Reading Basic HTML http://www.htmlgoodies.com
Developing HTML http:..www.davesite.com/webstation/htmal/
7.0 Tutor-Marked Assignment
Question Explain the main function of a link in your web page.
153

UNIT 26: HTML — Manipulating Images
Table of Contents
1.0 Introduction 155
2.0 Objectives 155
3.1 Combining Links and Images 155
3.2 Activating an Image 155
3.3 Placement on the Page 155
3.4 Aligning Text with Images 155
3.5 Changing Image Size 156
3.6 The BODY Attributes 158
4.0 Conclusion - 158
5.0 Summary 158
6.0 References and Suggestion for Further Reading 158
7.0 Tutor-Marked Assignment 158
Page
154

1.0 Introduction I have shown you how to create a hypertext link. What it did was to create blue words on your page
so that someone could click on them and then jump to another site, Well, here we'reloing to set it ____ g —
up so that an image becomes clickable or 'active.' The viewer wqIc1tofCtnitIge instead of on blue words, to make the hypertext link.
2.0 Objectives At the end of this unit you will be able to: Use images as link;
Position an image at an appropriate place on your page;
Change image size;
Identify and use the body attributes.
11 Combining Links and Images
11/44anY tinies you May want to have an image that is linked, so that if someone clicks the image, the
person will be th another page.: ThW IS Mille? 'sitnpid'cytailult need tOplaceiheINIG tag within
the A HRIF tag (ic/ *I= "lobs:Min:4 Iiiik".5<hhcigsre=.11adatithil of'irtioge"></a>). You
may also use the ALIGN tags With images!'
Example of a linked image
ahref= "http://www.davesits,capar <ling>
src = "hu:://www.dawesite.comlgrapIpt4piesmItsit". ali,gn=right>.</q>.
3.2 Activating. an ;Image Activating anirnage•Willallow the vieweptothcicon the image, instcad.of on,blue worcis,,to make the
hypertext link. For example:. , Here's the format:
<A HREF="hlip://www.goodies.com"> <IMG SRC = "homepage.gir align=right> </A>
.
33 Placennept 4:14 tbs rage „ First let's worry about placing the Image somewhere on the page. The default is justified to the left.
If you ;;Nijt,e, AP image :tag onra Mgr the imase will pop up m
P kiwi] le•Th , If you want to have an image pIaced tile cgarept the page, you might De ae to guess at this
point thatyou'cluse the ccCENTER> apa4CENTEg> commands described earlier on in this module.
By adding the'attribute ALIGN= "Lt. to the ..<P> command, We get the image to the right of the Here's the format:
"</itiG ALION= SEC='"ittttige.gr>
3:4.; Text .With Ithages 'Images don't alwaysStand Alm-ie.' You vill often Want text alongside theih. Ilete you Will -ALIGN="--"
attribute With one of these threm.'"tdp", "Middle", Cebotforti" • '-
Here are the formats'. r 1
<INIG ALIGN= "top" SAC= "Sally.gir> text text tei&
' • <IN/1G AL IGN=-"Middle" SRC' sally.gir> text texttext
<IMG ALIGN= "bottom" SRC = "sal ty:gir'› text teXt tea',
155

And here's what it all looks like:
This is text ALIGN="top" - - s a w •
— INNIONIOn 700/0; „ : . • • f t . . . . 2
• • •• 0 • I M MN I t O N 711.1.4 1 1111 11.,APIe ONNie0••••• Matio ele/n
tr:* e•rre“ , •
This is text ALIGN= "bottom"
You may notice that using the top, middle, and bottom attributes.only allows for one line of text and
then the rest jumps down below the image.
Here's the trick to solving that. Don't use the top, middle, or bottom attribute unless you only
want one line of text. If you want text to wrap around the image use ALIGN= "left" and ALIGN= "right".
Even if the image is already to the left, use the ALIGN= "left" attribute anyway. It allows the
text to wrap around the image fully. Try it, it's quite a clever little deal.
Exercise 1
What attribute will you use if you want text to wrap around the image?
The Align= "left" and Align= "right" is used to wrap text around an image.
But what if you want only one line of text to come out of the middle of the image, and you want the image
aligned to the right? Can you use two ALIGN= "--" attributes in the same image? No.
You set the text coming out of the middle using the ALIGN= "middle" attribute in the IMG tag. Then you
set the image and its text to the right by surrounding the two items with the <P ALIGN="righr> and <P>
commands.
3.5 Changing Image Size To begin this discussion, let me state that images on a computer are not like photographs. Computer
images are made up of a lot of little coloured dots. They're known as picture elements or "pixels" for
short. So, just remember that during this part of the unit, numbers refer to pixels rather than inches,
or centimeters, or whatever. When! say pixels, I'm talking about little coloured dots.
Every image is made up of pixels. The more pixels per inch the image has the better, and more
detailed, the image will appear. Of course, that also means the image will take up a whole lot more
bytes on your hard drive. You're going to find that most images on the web are 72 and 100 pixels per
iitch. Yes, there are other settings, but 72-100 is a good trade-off between loss of details and bytes
required.
This means that you can also denote an image by number of pixels. For example, the "oxiohu.gir
image is 97 pixels high by 64 pixels wide. How do I know that? I have an expensive graphics
programme that tells me so. How would you know? Without a specific programme, you wouldn't.
You'll have to play around with the numbers in these commands a little bit, but it's easy to do.
You might also want to open the image by itself in the Netscape Navigator browser window. Do
that by choosing OPEN FILE under the FILE menu. When the picture pops up, look at the title bar
along the very top. The height and width should be there.
This is text ALIGN="middle"
156
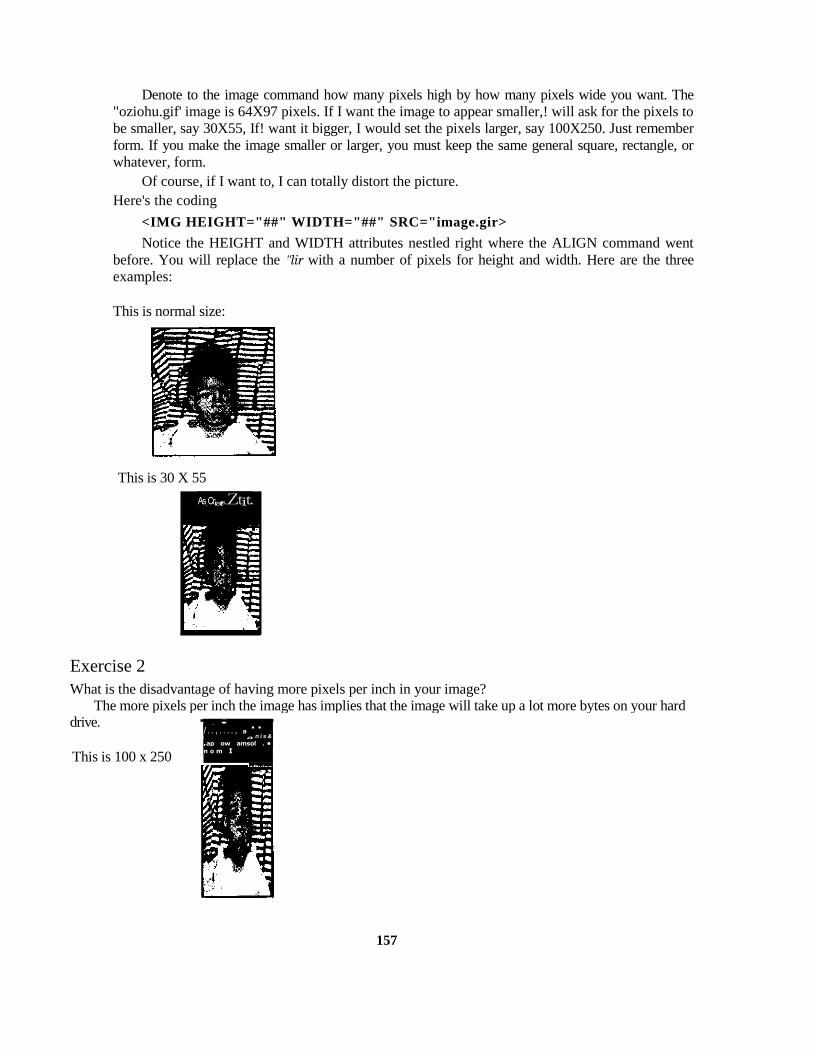
Denote to the image command how many pixels high by how many pixels wide you want. The
"oziohu.gif' image is 64X97 pixels. If I want the image to appear smaller,! will ask for the pixels to
be smaller, say 30X55, If! want it bigger, I would set the pixels larger, say 100X250. Just remember
form. If you make the image smaller or larger, you must keep the same general square, rectangle, or
whatever, form.
Of course, if I want to, I can totally distort the picture.
Here's the coding
<IMG HEIGHT="##" WIDTH="##" SRC="image.gir>
Notice the HEIGHT and WIDTH attributes nestled right where the ALIGN command went
before. You will replace the "lir with a number of pixels for height and width. Here are the three
examples:
This is normal size:
This is 30 X 55
Exercise 2
What is the disadvantage of having more pixels per inch in your image? The more pixels per inch the image has implies that the image will take up a lot more bytes on your hard
drive.
This is 100 x 250
As, Criate...;Ztit.
re •„,,.. / . . , . . . . , a
a n i s &
rap ow amsol . •
n o m I
•ftvisa
157

This is 100 x 23:
3.6 The BODY Attributes In first of this module you learned the BODY tag. The BODY tag has many attributes. Here are the
most useful ones;
BACKGROUND = "location_of image" - Background image for web page. Example: If you
have kittenjpg in the same directory as your HTML file, use <body background="kittenjpg"> to
load it as your background image.
BGCOLOR= "is/hexadecimal _here" - Hexadecimal Color Code for Background Color.
LINK="#hexadecimal here" - Hexadecimal Color Code for Links (if left blank, most browsers
default to blue).
VLINK= -#hexadecimal_here" - Hexadecimal Color Code for Links the user has already visited
(if left blank, most browsers default to purple).
TEXT= -fthexadec imal_here" - Hexadec imal Color Code for Text Color
4.0 Conclusion
It is recommended to add HEIGHT and WIDTH attributes to the IMG tag, which will allow the
image to take proper proportions on a browser that is not currently viewing images. It is also
recommended to use the ALT= -what picture is" to tell a person what a picture is in case it is still
loading or they are not viewing images. (The IMG tag has no closing tag!).
5.0 Summary In this unit we considered how an image can be used as a link. Positioning our images on the web
page was also taught as well setting the height and width of an image.
6.0 References and Suggestion for Further Reading Basic I-ITML http://www.htmlgoodies.com
Developing HTMLhtIp://www.davesite.com/webstation/html/
7.0 Tutor-Marked Assignment
Question Type in this in your word processor and print out the result from the browser and submit.
<htrnl>
<head><title> Title goes here</title></head>
<body >
align=right< Body goes here</h I> <hr.>
158

<h3 al ign=center> Headings are kewl! </h3>
<p><b> I can use text links... Visit <a href=ahref="http://www.davesite.comr> Dave's Site </a>!</b> <hr
width=50> and Image Links... <a href= "http://www.davesite.com/"><img src="http://www.davesite.com/graphx/
davesmll.gif'></a></p>
<body>
</html>
159

UNIT 27: Effective Internet Searching Techniques: Search Tools
Table of Contents
Page
1.0 Introduction 161
2.0 Objectives 161
3.1 Background to the Study 161
3.2 Search Tools and Methods 161
3.3 Search Tools 162
3.3.1 Types of Search Tools 162
4.0 Conclusion 164
5.0 Summary 164
6.0 References and Suggestion for Further Reading 164
7.0 Tutor-Marked Assignment 164
160

1.0 Introduction Conducting a search can be time consuming and frustrating for the non-expert. This is not surprising
given the enormous amount of information available on the World Wide Web and the different ways
it is stored and retrieved. The search process is made all the more difficult because of the large
number of search tools, their differing information content and the lack of industry standards. In this
unit and subsequent units on Effective Internet Search, we will be looking at how you can effectively
search the internet for information.
2.0 Objectives At the end of this unit we will be able to:
Explain why it is diff icult to locate information from the WWW;
Ident ify the var ious search tools;
State the advantage's and disadvantages of each search tool;
List some search tools web s i tes.
3.1 Background to the Study Before we can develop effective searching techniques for the Internet, we need to review some
pertinent facts about the Internet itself. There are currently over 11 million sites on the World Wide
Web. also known as WWW and are over 1 billion pages on the WWW in computers all over the
world. These specialized computers are linked to form part of a worldwide communication system
called the Internet. When you conduct a search, you direct your computer's browser to go to Web
sites where documents are stored and retrieve the requestd information for display on your screen.
Millions of new Web pages are being added each week, some existing pages are being updated
or altered in some significant ways, and some pages are being removed. Because the Web is so
large, it is not feasible for any search engine to search the entire Web. Instead, most search engines
generate a database of information derived from Web sites and pages. These databases cannot
include all Web pages: in fact, the largest databases (probably Alta Vista and Northern Light) contain
intbrmation on about 250 million Web pages. Other search engines claim to use a quality rather than
quantity approach and limit the size of their databases.
Most Internet search engines allow anyone to submit Web pages (there's usually a link labelled
'submit/add/suggest a page/site/URL'). Once the page is submitted, the search engine sends out a
computer-robot programme called a crawler (spiders, Web; get it). The crawler gathers the information
and returns it to the database.
Web crawlers also go out on their own looking for new sites and checking up on old ones. As a
result, it's very possible that your site might be added to an index even though you've taken no action.
3.2 Search Tools and Methods A search tool is a computer programme that performs searches. A search method is the way a
search tool requests and retrieves information from its Web site.
A search begins at a selected search tool's Web site, reached by means of its address or URL.
Each tool's Web site comprises a store of information called a database. This database has links to
other databases at other Web sites, and the other Web sites have links to still other Web sites, and so
on. Thus, each search tool has extended search capabiliti es by means of a worldwide system of
links.
161
Exercise 1
State 3 reasons why locating an information from the web is difficult.
3.3 Search Tools
A search tool employs a computer programme to access Web sites and retrieve information. Each
search tool is owned by a single entity, such as person, company or organisation, which operates it
from a master computer. When you use a search tool, your request travels to the tool's Web site.
There, it conducts a search of its database and directs the response back to your computer.
3.3.1 Types of Search Tools
There are essentially four types of search tools, each of which has its own search method. The
following describe these search tools and then suggest exercises for achieving a familiarity with their
use.
1. A directory search tool searches for information by subject matter. It is a hierarchical search
that starts with a general subject heading and follows with a succession of increasingly more
specific sub-headings. The search method it employs is known as a subject search. Choose a
subject search when you want general information on a subject or topic. Often, you can find
links in the references provided that will lead to specific information you want.
Advantage: It is easy to use. Also, information placed in its database is reviewed and
indexed first by skilled persons to ensure its value.
Disadvantage: Because directory reviews and indexing is so time consuming, the number
of reviews are limited. Thus, directory databases are comparatively small and their updating
frequency is relatively low. Also, descriptive information about each site is limited and general.
2. A search engine tool searches for information through use of keywords and responds with a i w
list of references or hits. The search method it employs is known as a keyword search. If you
wish to obtain specific information, choose a keyword search, since its extensive database is
likely to contain the information sought.
• Advantage: Its information content or database is substantially larger and more current than
that of a directory search tool.
Disadvantage: Not very exacting in the way it indexes and retrieves information in its
database, which makes finding relevant documents more difficult.
3 A directory with search engine uses both the subject and keyword search methods interactively
as described above. In the directory search part, the search follows the directory path through
increasingly more specific subject matter. At each stop along the path, a search engine option is
provided to enable the searcher to convert to a keyword search. The subject and keyword
search is thus said to be coordinated. The further down the path the keyword search is made,
the narrower is the search field and the fewer and more relevant the hits. You can use this
search tool when you are uncertain whether a subject or keyword search will provide the best
results.
Advantage: Ability to narrow the search field to obtain better results.
Disadvantages: This search method may not succeed for difficult searches.
Some search tools use search engine and directory searches independently. They are said
to be non-coordinated.
4. A multi-engine search tool (sometimes called a meta-search) utilizes a number of search
engines in parallel. The search is conducted via keywords employing commonly used operators
or plain language. It then lists the hits either by search engine employed or by integrating the
162
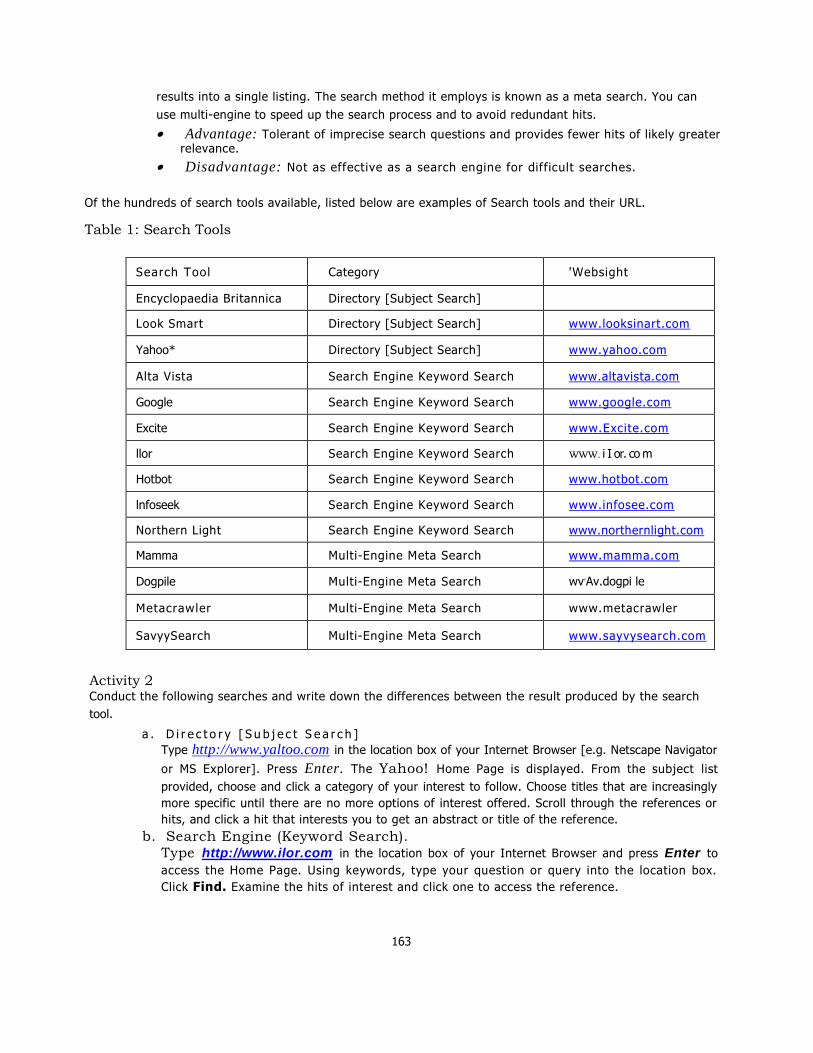
results into a single listing. The search method it employs is known as a meta search. You can
use multi-engine to speed up the search process and to avoid redundant hits.
Advantage: Tolerant of imprecise search questions and provides fewer hits of likely greater relevance.
Disadvantage: Not as effective as a search engine for difficult searches.
Of the hundreds of search tools available, listed below are examples of Search tools and their URL.
Table 1: Search Tools
Search Tool Category 'Websight
Encyclopaedia Britannica Directory [Subject Search]
Look Smart Directory [Subject Search] www.looksinart.com
Yahoo* Directory [Subject Search] www.yahoo.com
Alta Vista Search Engine Keyword Search www.altavista.com
Google Search Engine Keyword Search www.google.com
Excite Search Engine Keyword Search www.Excite.com
llor Search Engine Keyword Search WWW. i I or. co m
Hotbot Search Engine Keyword Search www.hotbot.com
lnfoseek Search Engine Keyword Search www.infosee.com
Northern Light Search Engine Keyword Search www.northernlight.com
Mamma Multi-Engine Meta Search www.mamma.com
Dogpile Multi-Engine Meta Search wv,Av.dogpi le
Metacrawler Multi-Engine Meta Search www.metacrawler
SavyySearch Multi-Engine Meta Search www.sayvysearch.com
Activity 2 Conduct the following searches and write down the differences between the result produced by the search
tool.
a . D i r e c t o r y [ S u b j e c t S e a r c h ]
Type http://www.yaltoo.com in the location box of your Internet Browser [e.g. Netscape Navigator
or MS Explorer]. Press Enter. The Yahoo! Home Page is displayed. From the subject list
provided, choose and click a category of your interest to follow. Choose titles that are increasingly
more specific until there are no more options of interest offered. Scroll through the references or
hits, and click a hit that interests you to get an abstract or title of the reference.
b. Search Engine (Keyword Search). Type http://www.ilor.com in the location box of your Internet Browser and press Enter to
access the Home Page. Using keywords, type your question or query into the location box.
Click Find. Examine the hits of interest and click one to access the reference.
163
4.0 Conclusion
The dynamic nature of the Web is one of its true strengths, but it is also problematic when it comes
time to finding something. To assist us, several search tools are available and new ones are coming
online on a regular basis. Each of these search tools has a unique way of doing some things but there
are some things they have in common. Hence in this unit we were able to look at some few search
tools and how they work as well as their advantages and disadvantages.
5.0 Summary
There are four basic types of search services: subject directories that classify websites, search
engines that perform keyword searches within websites, multi-engine search tool (sometimes
called a meta-search) that utilizes a number of search engines in parallel and a directory with search
engine that uses both the subject and keyword search methods interactively.
6.0 References and Suggestion for Further Reading
WWWmetrics (http://wvvw.wwwmetrics.com)
Mediametrix (http://www.mediametrix.com/data/thetop.jsp)
Greg Notes' Search Engine Showdown
http://www.notess.com/search/)
Search Tutorial: Guide to Effective Searching of the Internet, revised and update July 1999,
VisualMetrics Corporation, (http://www.thewebtools.comAutorialAutorial.htm)
Nua Internet Surveys (http://www.nua.ie)
Internetstats (http://www.intemetstats.com)
7.0 Tutor-Marked Assignment
Question
What are the main categories of the search tool? Also state the advantage and disadvantage of each search tool.
164

UNIT 28: Effective Internet Searching Techniques — Search Features
Table of Contents
Page
1.0 Introduction 166
2.0 Objectives 166
3.1 Keyword Search Operators 166
3.1.1 Boolean 166
3.1.2 Plus/Minus 167
3.1.3 Phrases 167
3.1.4 Stemming [Truncation] 167
3.15 Case Sensitive 168
3.2 Query Composition Guides 168
3.3 Searching by Subject 169
3.4 Guides to Effective Searching 169
4.0 Conclusion 170
5.0 Summary 170
6.0 References and Suggestion for Further Reading 170
7.0 Tutor-Marked Assignment 170
165

NOT excludes any document containing the term. NOT excludes even a single use of the term
in the document. It is most suitably employed to reduce a large number of irrelevant hits when
other measures have failed.
Example: "intranet NOT Internet's
When using these operators, remember to capitalize them as shown above.
Exercise 1
Write a query that will list web sites on networking and Intranet.
3.1.2 Plus/Minus
Employs [+] before a term to retrieve only the documents containing that term. It is similar to the
Boolean AND.
Employs [-] before a term to exclude that term from the search. It is similar to the Boolean NOT.
Do not leave a space between the operator and the term that follows.
Query Example 2: -hcomputer+network—internet
This query gives an enormous number of hits, because each term can be anywhere in the document
and is not necessarily related to any other. Nonetheless, because the hits are ranked, the highest-
ranking ones should contain all the terms and therefore likely to produce relevant documents.
Use [-] similarly to prohibit the use of a term. This technique is particularly useful when you
wish to exclude irrelevant subject matter.
Example 2 will produce a list of hits containing computer and networking and exclude anything web
site with internet.
Exercise 2 Write a query that will list web site on Library User Education excluding internet user education.
If you've written it correctly then it should look like this:
Library user education—internet user education
3.1.3 Phrases Words enclosed within double quote marks denote an exact phrase, or reasonably close to it. It is
sometimes similar to the Boolean NEAR. More often, it is treated like a single term and is usually
searched as such.
Query Example: "tutorial for beginners"
This example will produce a list of hits containing the phrase "tutorial for beginners" only.
Exercise 3
Write a query that will list web sites containing the phrase "component of the internet"
3.1.4. Stemming [Truncation]
The use of the stem or the main part of a word to search for variations of the word [e.g. the stem
"sing" searches sings, singer, singing and singalong]. Stemming can be automatic, or it may
require use of a wild card, symbolized by asterisk [s] to initiate.
167

Query Example: sing*
To include variations of a keyword, use the wild card symbol [*] after the stem of the word. This
broadens a search to retrieve documents that otherwise would be missed.
Query Example: sin*
3.1.5 Case Sensitive
Use lower case for query terms except for proper names.
Treat adjacent capitalized words as a single proper name, e.g. Gbaje Ezra.
Separate proper names from each other with a comma.
Query Example: Gbaje Ezra, Helen Gbaje
However. it is more definite to treat a multiple word name as a phrase, by enclosing it within double
quotes.
Example
"Gbaje Sharon Shidinje Oziohu"s
3.2 Query Composition Guides
Despite the differences in the way search engines select, index and retrieve documents, there are
common guides that you can use to help compose your query.
Be as specific and complete as you can in selecting your keywords; they are critical to the success of your search.
When possible, employ uncommon or unique terms, for they are less likely to be ignored or
filterd. Avoid adjectives and adverbs unless they are part of a phrase; alone they do not convey
much meaning.
Arrange your terms in a series from the most general to the most specific; it makes for a more effective search.
Avoid searching for obscure information not likely to be found without use of sophisticated
search methods. Once you become familiar with the use of operators, you can move towards the
more complex searches.
When you have located a good site about your topic, see- whether it has links to other sites.
Sometimes an important document is found this way. The site may also contain keywords that
can improve your query.
In keyword searches, start by working with no more than two or three search tools until you gain
some mastery over them. A search tool's help section usually describes its curren t keyword
search practices. From these learn how best to compose a query and focus the search.
Use the Refine drop-down lists when offered. They are a simple way to narrow your
search.
Avoid m is-spellings, redundant terms and complicated query structu re.
Table I is organized to help identify frequently used operators for our list of preferred search tools.
168

Table I: Preferred Keyword Search Tools and their Operators
Search Tool Operators
Boolean Marks
Plus/Minus Sensitive
Quote Stemming Case
Alta Vista x x x x
Dogpile x x o
Excite x x x o o
Google o x x o o
HotBot x x x x x
Infoseek o x x x x
LookSmart
MetaFind x x
Mamma x x x x
NorthernLight x x x x o
Yahoo x x x x
Table Symbols: [x means supports, [o] means excludes, [s] means a wild card capability.
3.3 Searching by Subject In comparison to keyword searches, subject searches are rather simple. Subject searches begin with
broad subject categories and proceed to subject matter that is increasingly more specific. To use a
subject search, follow the search path and at each stop, examine the hits that are provided.
The main advantage of directory searches is that they are of significantly higher quality and
relevance than those found through a search engine. This is because subject experts review all
documents submitted before they are accepted. Because of this time-consuming effort, directory
databases are much smaller than those of search engines.
With some exceptions, directories can take weeks, and sometimes months, to update their database
contents. In marked contrast, search engines collect and update web sites automatically, often within
one or two days. This is of particular value when being current is important.
Exercise 3 State the advantages of directory searches over keyword search.
3.4 Guides to Effective Searching Below are guides that can greatly help improve your search results.
If your subject is broad, start with a subject search such as Yahoo, LookSmart or Encyclopedia
Britann ica.
If your subject is narrow or specific, use a keyword search such as Ilor, Google, Infoseek, Excite
or Snap.
If you are not sure, try Yahoo and take advantage of its keyword option if needed. This option
narrows the search to the last subject title, but in a smaller field.
169

Try a meta engine such as Savvy or Dogpile. Meta engines produce fewer hits usually of higher
relevance.
Try a number of different search engines. You will find that the hits produced by the search
engines are significantly different, and therefore the chances of your getting the document you
want are much improved.
Should your search involve an obscure or difficult-to-find topic, use a search engine having a
large database such as Alta Vista, Ilor, Google, HotBot or NorthernLight.
4.0 Conclusion It can be disconcerting to a user to find that the number of hits obtained can range from none to over
a million, and their relevance or usefulness can vary from negligible to considerable.
Too many irrelevant hits are often due to too broad a query, because of an inadequate number of
defining terms. Too few hits are often caused by too restrictive a query. However, there are many
reasons for poor results.
5.0 Summary Search engines are used to assist us in searching the internet resources. While each search engine
has its own operators. some operators are used in common by a number of search engines. These
we studied in this unit. Similarly we looked at how to compose a good search query and how to use
directory search to search for information on WWW.
6.0 References and Suggestion for Further Reading WWWmetrics (http:www.wwwmetrics.com)
Mediametrix (http://www.mediametrix.com/data/thetop.jsp)
Greg Notes' Search Engine Showdown
(http://www.notes.com/search/)
Search Tutorial: Guide to Effective Searching of the Internet, revised and updated July 1999,
VisualMetrics Corporation,
(http://www.thewebtools.com/tutorial/tutorial.htm)
Nua Internet Surveys (http://www.ntia.ie)
lnternetstats (http://www.internetstats.com)
7.0 Tutor-Marked Assignment
Question Discuss any four keyword search operators and state the advantages and disadvantages of directory search
over keyword search
170

UNIT 29: Data Transmission Systems, Internet Service Providers (ISP) and Virus
Table of Contents
Page
1.0 Introduction 172
2.0 Objectives 172
3.1 Some Background 172
3.2 Dial-Up Modem 172
3.2.1 Cable Modems 173
3.2.3 Digital Subscriber Lines (DSL) 173
3.2.4 Satellite 174
3.3 Advantages and Disadvantages of the Various Data Transmission 174
3.4 Internet Service Provider (ISP) 175
3.4.1 Choosing an ISP 175
3.5 Viruses, Worms, and Trojans 176
4.0 Antivirus Software 176
5.0 Conclusion 177
6.0 Summary 177
7.0 References and Suggestion for Further Reading 177
8.0 Tutor-Marked Assignment 177
171
1.0 Introduction One of the most confusing issues for computer users is the excitement that is going on between
different Internet access providers. or ISPs as they are called. Dial-up modem, cable modem, digital
subscriber lines (DSL), and satellite access are all options available to the average consumer, but
which is the fastest of all these? In this unit, we'll look at each of these Internet access methods in
depth to show you the advantages and disadvantages of each.
2.0 Objectives At the end of this unit you will be able to:
Explain how modems work;
Identity the various data transmission system; Choose an ISP;
Identify the problems of virus and how to solve it.
3.1 Some Background
Internet access speeds are often referred to in k, or kps. KPS stands for kilobits per second, and
stands for a specific amount of data sent through a signal. In order to understand, you must first
know the basics of the computer language.
Computers use a language of O's and Ps. A bit is a single 0 or 1 in the computer language. When
you put 8 bits together, you get 1 byte. 1 byte is the equivalent of 1 character. For example, when you
type the letter. A, the computer sees the "A" as 1 byte of information.
When you talk about file storage, you talk in K, which is kilobyte. 1K is equal to 1024 bytes.
When you talk about data transfer like modems, you talk in kbps, or kilobit per second. lk is equal to
1024 bits, or 128 bytes. This is why a 100K file isn't downloaded in 2 seconds on a 56k modem. It
actually takes 8 times as long, because 100K is equal to 800k.
3.2 Dial-Up Modem
Since the earliest days of computers, the desire to hook up two systems over long distances was
always a challenge. In order to do this, a method of sending a signal over a normal telephone line
had to be found. This process is called MOdulation/DEMOdulaltion, short-form to modem.
Modulation and demodulation is required because telephone lines use analog signalling where
computers are digital. In order for a computer to talk across a phone line, it first had to change it's
signal into a format the phone could understand. This is called modulation. The process of converting
the signal back to digital is called demodulation.
Modems are serial connections. That means that they send one signal at a time over the telephone
line. In the early days of modems, you could actually talk on the same line to the person on the other
computer while the modem was sending. As modems became faster, they regimen more and more
space on the phone line to send signals, and ended this ability.
Exercise 1
State the main functions of a modem.
Modem is made up of modulator and demodulators. In order for a computer to talk across a phone
line, it first had to change it's signal into a format the phone could understand (modulation). And since the
computer signals are digital, the signals from the phone are connected back to digital (demodulation).
172

Most people use 56k modems to connect to the Internet, although older systems still have 33.6k or 28.8k
modems in them. The number (such as 56) is the fastest transfer speed that a modem can send and receive
information. A 56k modem can send 56 kilobits of information per second, or about 7Kilobytes per second.
Under the best circumstances with a 56k modem, you will get about 5.5Kbps transfer. This means a
100K file will take about 18 seconds. Noisy phone lines, bad switches, and cheap modems will decrease your
chances of attaining these speeds, and speed varies by intemet access provider.
32.1 Cable Modems When looking for faster data transfer, networking specialists found an easy method of using existing
technology to speed up access. This is called a cable modem, and uses the cable TV wire already in
your home. Since many networks already run on a cable very similar to cable TV wire, it was just a
matter of adapting the signal so the computer could understand.
Cable is considered broadband internet access, because everyone on the cable network sees the
signal to and from your computer. This varies from telephone signals that are only seen on your
phone line, called baseband transmissions. The advantage of broadband transmissions is that they
don't have to dedicate a wire to you and you alone; everyone on the network can share the same
wire. The other advantages of broadband is that it's always on, whether you are at your computer or
not.
Exercise 2
Explain the difference between broadband and baseband transmission.
In broadband transmission everyone on the cable network and the signal too are from your computer
while in the baseband transmission the signals are only seen on your telephone line.
Cable access is sold in many different ways. Most times, you buy it with a limitation on the amount of
bandwidth, or the amount of data per second, they allocate to you. This can range from 128kbps to 512bps.
Basically, you pay more for faster service.
The average cable plan offers about 256kbps transfer. Some will offer faster access at a premium price,
but as more and more people sign up, the data rates tend to fall to slower levels than the 512kbps packages
many providers offer. So for argument's sake, we're going to assume you get steady 256kps transfer. Our
100K file now takes only 3.1 seconds to download.
3.2.3 Digital Subscriber Lines (DSL) In the middle-90's. technicians at Bell Laboratories discovered a new way to use existing phone
line to transfer data at a faster rate. They used a combination of existing technologies with the fact
that analog phone line only use 2% of the bandwidth available to them. This technology is called
DSL.
What inventors did was essentially figure out a way to use the 95% of the bandwidth available on
your phone for data transfer. From our dial-up modem's sections, POTS (Plain Old Telephone Systems)
work on an analog signal. The wires that carry the signal work for both analog and digital signals. All
they had to do was find a way to transfer both at once.
DSL access works by separating the analog and digital signals at your house, allowing the digital
and analog signals to co-exist over the distance from your house to the phone company's office, and
vice versa. A packet sniffer separates data packets from analog signals. and routes the signals to the
proper equipment. This allows you to talk on the same phone line as you're using to access the
internet.
DSL comes in many varieties and many speeds. You may have heard of it as ADSL, VDSL,
HDSL or XDSL. Essentially they are the same technology with slirhtly different methods of
transferring 173

Exercise 6 State the two phases of a virus and the solution to these virus attacks.
As indicated above, virus have two specific phases which are, infection phase and active phase. The only
solution to a virus effect is the use of anti-virus software to clean the infected machine.
4.0 Conclusion In order for a computer to talk across a phone line, modem is required because telephone lines use
analog signalling, where computers are digital. DSL access works by separating the analog and
digital signals at your house, allowing the digital and analog signals to co-exist over the distance from
your house to the phone company's office, and vice versa. For those of us in areas that are not
serviced by cable and ADSL. Dial-up access will continue to be our only method of connection. Well,
until wireless services are available nationwide.
Half of the computers on the internet either have viruses, or are a prime target for one. Only you
can protect your computer, so take the time to install anti-virus software and keep your virus definition
file up to date.
5.0 Summary
In this unit, we considered the various methods of Internet access, with respect to the access speeds
with a view of choosing an ISP. The advantages and disadvantages of the methods were considered.
The effect of viruses, worms, and Trojans and how to protect our computers from them were
discussed.
6.0 References and Suggestion for Further Reading Computer Networking http://compnetworking.about.com
Widernet Project, http//www.widernet.org
Developing HTML http:www.davesite.com/webstation/html/
7.0 Tutor-Marked Assignment
Question
Discuss the four various systems of data transmission stating their advantages and disadvantages.
177
UNIT 30: Protocols
Table of Contents
Page
1.0 Introduction 179
2.0 Objectives 179
3.1 Internet Protocol Basic Addressing 179
32 Domain Naming and Registration 180
3.3 IPv4 and IPv6 180
3.4 Subnetting 181
3.4.1 Subnet Masks 181
3.4.2 Masking Rules 181
3.4.3 Subnetting in Practice 181
3.5 Private Networks 182
3.6 Network Numbering 182
3.7 Network Addresses 183
4.0 Conclusion 183
5.0 Summary 184
6.0 References and Suggestion for Further Reading 184
7.0 Tutor-Marked Assignment 184
178

1.0 Introduction The Internet Protocol (IP) had its origin in UNIX a networking as it developed in the 1970s. Today,
IP has become a standard mechanism for network operating systems (NOS) to communicate with
each other. In its simplest form, a protocol is an agreed upon set of rules. Protocols can be defined in
one of three ways; standard, public and private.
A standard protocol is defined as a protocol whose specification is published and known to the
public but controlled by a standard body. A public protocol is defined as a protocol whose
specification is published and known to the public but controlled by a private organisation. A private
protocol is defined as a protocol whose use and specification are controlled by a private
organisation.
2.0 Objectives At the end of this unit you should be able to:
Identify an IP address;
Identify the IP address sub-divisions;
Explain the use of Network numbering (address);
Explain Subnetting.
3.1 Internet Protocol Basic Addressing An IP address contains a full four bytes (32 bits) of data. For readability purposes, humans typically
work with IP addresses in a decimal notation that uses periods to separate each byte (also known as
an octet). For example, the IP address
00001010 00000000 00000000 00000001
often appears in the equivalent string representation:
10.0.0.1
IP addresses can be sub-divided into classes. The values of the leftmost four (4) bits of an
address determine its class. All "Class A" addresses, for example, have the leftmost bit set to zero,
but each of the remaining 31 bits may be set to either "0" or"!" independently (as represented by an
'X' in these bit positions):
Oxxxxxxx xxxxmx xxxxxxxx xxxxxx,vc
From this rule it follows that Class A addresses include all values in the range
-0.0.0.0" to "127.255.255.255".
Class B addresses must have the leftmost bit set to one, and the next bit set to zero, but all other bits
may vary:
10xxxxxxx xxxxxxxx xxxxxxxx xxxxxxxx
And so it follows that Class B addresses fall in the range from "128.0.0.0" to "191.255.255.255".
Similarly, Classes C. D. and E addresses set the second, third, and fourth bit (respectively) to one.
Table III summarizes the overall breakdown of all IP addresses into this class system.
179

Table III: Summary of Breakdown of all IF Address into class system.
Class Leftmost bits Start address Finish address
A Om 0.0.0.0 127.255.255.255
B 10)o( 128.0.0.0 191.255.255.255
C 110x 192.0.0.0 223.255.255.255
D 1110 224.0.0.0 239.255.255.255
E 1111 240.0.0.0 255.255.255.255
Exercise 1 List the subclass of an IP address and explain their differences.
Nearly all of the Class A and Class B IPv4 address domains have already been assigned to large
organisations. Addresses in the Classes D and E ranges have been reserved for special purposes by the IP
administrative authorities. (The terms "Class D" and "Class E." while technically correct, do not appear
much in practice). Effectively this leaves only Class C address range available for public consumption.
3.2 Domain Naming and Registration Names offer a more convenient, easily-remembered way to uniquely identify computers on the
network than IP addresses alone. The domain name system (DNS) used across the Internet assigns
names to individual IF addresses and performs the mapping (translation from name to address) on
demand as needed. The term domain naming refers to the structure of the naming system: names
and addresses are organized in a hierarchy and maintained in a distributed fashion across the Internet.
Activity 1
Next time you sit down at a computer, see if you can determine its IP address and domain name.
Names and adresses on the public Internet must be registered with an accredited registrar. For
nodes in the ".com," ".net," and ".org" domains, the Internet Corporation for Assigned Names and
Numbers (ICANN) oversees registrations. Registered names and addresses must be renewed
periodically, and should a dispute occur between two parties over ownership of a given name, such
as in trademarking, ICANN's Uniform Domain-Name Dispute-Resolution Policy (URDP) can be
invoked.
Exercise 2 What is the advantage of using domain names rather than IP address?
3.3 IPv4 and IPv6 The IP system in widespread use today is also known as IPv4 ("version four"). A newer system,
1Pv6 ("version six" -- version five was essentially skipped), exists now in small deployments and
should replace IPv4 in years to come. IPv6 improves the addressing system by supporting up to 128-
bit instead of 32-bit addresses, and it adds additional features for performance and privacy.
IPv4 can only represent a finite number of computers on the Internet - approximately 4,294,967,296,
or 2 raised to the 32nd power. At the time IP was conceived, this number was perfectly reasonable.
but with the explosive growth of the Web and networked computing generally, a time may come in
the not-too-distant future when the IPv4 address space will be exhausted. Thanks to technologies
180

like Network Address Translation (NAT), computers can use virtual addressing analogous to the
way network operating systems use virtual memory, but it remains unclear if these relatively recent
technology developments will adequately conserve IP space.
Exercise 3 Explain the limitation of Internet Protocol version four.
The Internet protocol version four has a limitation of being only able to represent a finite number of
computers on the internet.
3.4 Subnetting Subnets allow network traffic between hosts to be segregated based on the network's configuration.
In IP networking, traffic takes the form of packets. IP subnets improve network security and
performance to some degree by organizing hosts into logical groups.
3.4.1 Subnet Masks Probably the most easily recognizable aspect of subnetting is the "mask." Just je IP addresses,
subnet masks contain four bytes (32 bits) and usually appear in the same "dotte ecimal" notation.
For example, a very common subnet mask in its binary representation will usually be shown in the
equivalent, more human - readable form.
11111111111111111111111100000000
255.255.255.0
Exercise 4 Explain the importance of Subnetting.
As indicated above. subnetting allows network traffic between hosts to be segregated based on the
network configuration.
3.4.2 Masking Rules A subnet mask neither serves as an IP address nor does it exist independently from them. Instead,
subnet masks must be applied to IP addresses. Masking a full IP address has the effect of splitting
it into two parts -- an -extended network address" and a host address.
For a subnet mask to be valid, its leftmost bits must be set to one; a mask of all zeros
00000000 00000000 00000000 00000000
is invalid. In addition, its rightmost bits must be set to zero; the mask of all ones
11111111111111111111111111111111111
is likewise invalid. In other words, all valid subnet masks contain two parts: the all-ones left side (the
extended network portion) and the all-zeros right side (the host portion).
3.4.3 Subnetting in Practice An extended network address includes the basic network address as well as additional bits that
represent the "subnet number." Used in conjunction with a network address, a subnet number supports
a two-level, "extended" addressing scheme recognized in a standard way by implementations of IP.
181

Taken together, the extended network address with the host address actually produces a three-level scheme.
Consider the following real-world example. A small business plans to use the "192.168.1.0"
network for its internal (intranet) hosts. The human resources department wants their computers to
be on a controlled part of this network because they store payroll information and other sensitive
employee data. But because this is a Class C network, its default subnet mask of "255.255.255.0"
will allow all computers to be peers on the network by default.
The first four bits of 192.168.1.0 -- 1100 -- place this network in the Class C range and also fix
the length of the network address at 24 bits. To subnet this network, more than 24 bits must be set to
one on the left side of the subnet mask. For instance, the 25-bit mask "255.255.255.128" creates a
two-subnet network as follows.
Table IV: Two-Subnet Network
Network address
(24 bits)
Subnet number
(1 bit) Extended
Network
Host address
range
11000000 10101000 0 192.168.1.0
192.168.1.1-
00000001 192.168.1.127
11000000 10101000 1 192.168.1.128 192.168.1.129-
00000001 192.168.1.255
For every additioal bit set to one in the mask, another bit becomes available in the subnet number
to index additional subnets. A two-bit subnet number can support up to four subnets, a three-bit
number supports up to eight. and so on.
3.5 Private Networks The governing bodies that administer the Internet Protocol have identified certain networks as reserved
for internal use. In general, intranets that use these networks can reduce the difficulty in administering
their IP configuration and Internet access. These three networks, along with their default masks, are
listed below.
Table V: Three Networks w i th the i r Defau l t Marks
Network address Defau lt mask
10.0.0.0 255.0.0.0
172.16.0.0 255.240.0.0
192.168.0.0 255.255.0.0
3.6 Network Numbering Computer networks consist of individual segments of network cable. The electrical properties of
cabling limit the useful size of any given segment such that even a modestly-sized local-area network
(LAN) will require several of them. Gateway devices like routers and bridges connect these segments
together although not in a perfectly seamless way.
182

Besides partitioning through the use of cable, subdividing of the network can also be done at a
higher level. Subnets support "virtual" network segments that partition the traffic flowing through the
cable rather than the cables themselves. The subnet configuration often matches the segment layout
one-to-one, but subnets can also subdivide a given network segment.
3.7 Network Addresses Even without subnetting, hosts on the Internet (or any other IP network) are uniquely identified on a
network by something called the network number. (Multi-homed nodes, that contain multiple network
adapters, can belong to multiple networks). Network numbering allows a group of hosts (peers) to
communicate efficiently with each other; these may be computers located in the same facility or all
computers used by a workgroup, for example.
Network numbers look very much like IP addresses, but the two should not be confused. In the
absence of subnetting. some "default" networks can be derived immediately from host IP addressing
and its class structure. Consider the host IP address 10.0.0.1, for example, an address commonly
used on private networks. Because it is a Class A address, with no subnetting employed, its leftmost
by (eight bits) by default refer to the network address (10), and all other bits remain set at zero
(10.0.0.0). Thus, 10.0.0.0 is the network number corresponding to IP address 10.0.0.1.
In this scheme, the part of the IP address that does not refer to the network refers instead to the
host address (literally, the unique identifier of the host on that network). In this example, the host
address becomes "0.0.0.1" or simply "1". Also note that a network address becomes a reserved
address that should not be assigned to any actual host. Hosts like 10.0.0.1 may use the 10.0.0.0
address for special purposes, and having a live host at that location could cause conflicts.
The table below illustrates the numbering scheme for Classes A, B, and C networks. Although
the same scheme can apply to Classes D and E networks, those address ranges have been reserved
for other purposes and should be discussed separately.
Table VI: Numbering Scheme for Classes of Networks
Class Host address range Network address Default mask
A 0.0.0.0- 127.255.255.255 x.0.0.0 255.0.0.0
B 128.0.0.0 - 191.255.255.255 x.x.0.0 255.255.0.0
C 192.0.0.0 - 223.255.255.255 x.x.x.0 255.255.255.0
n general, a network address uses the leftmos byte of its hosts' addressing if the hosts fall within the
Class A range, the leftmost two bytes for hosts in Class B. and the leftmost three bytes for hosts in
Class C. This algorithm is applied in practice with the use of a network mask. The above table
shows the decimal representation of the default network masks that is commonly used by network
operating systems. The decimal value "255" corresponds to one byte that has all bits set to one
(11111111).
4.0 Conclusion Class A and Class B address domains have already been assigned to large organisations. While
Addresses in the Classes D and E ranges have been reserved for special purposes by the IP
administrative authorities, leaving only Class C address ranges available for public consumption.
183

Network addressing fundamentally organizes hosts into groups. This can improve security (by isolating
critical nodes) and can reduce network traffic (by preventing transmissions between nodes that do
not need to communicate with each other). Overall, network addressing becomes even more powerful
when introducing subnetting that allows network administrators some flexibility in defining relationships among network hosts.
5.0 Summary
In this unit, we explained the various sub-divisions of IP addresses, which is sub-divided into four
with only one reserved for internal use of any organization. We also discussed how to improve
security by the use of Network addressing and subnetting.
6.0 References and Suggestion for Further Reading
Computer Networking (http://compnetworking.about corn)
Widemet Project, (http//www.widernet.org)
Developing HTML (http://www/davesite.com/webstation/html()
7.0 Tutor-Marked Assignment
Question
List the default mask reserved for internal use and state the advantages of using this mask in a private network.
184