CA 2E Installation Guide - Broadcom Managed File Transfer
70
Installation Guide Release 8.7 CA 2E
-
Upload
khangminh22 -
Category
Documents
-
view
1 -
download
0
Transcript of CA 2E Installation Guide - Broadcom Managed File Transfer
Installation Guide Release 8.7
CA 2E

This Documentation, which includes embedded help systems and electronically distributed materials, (hereinafter referred to as the “Documentation”) is for your informational purposes only and is subject to change or withdrawal by CA at any time. This Documentation is proprietary information of CA and may not be copied, transferred, reproduced, disclosed, modified or duplicated, in whole or in part, without the prior written consent of CA.
If you are a licensed user of the software product(s) addressed in the Documentation, you may print or otherwise make available a reasonable number of copies of the Documentation for internal use by you and your employees in connection with that software, provided that all CA copyright notices and legends are affixed to each reproduced copy.
The right to print or otherwise make available copies of the Documentation is limited to the period during which the applicable license for such software remains in full force and effect. Should the license terminate for any reason, it is your responsibility to certify in writing to CA that all copies and partial copies of the Documentation have been returned to CA or destroyed.
TO THE EXTENT PERMITTED BY APPLICABLE LAW, CA PROVIDES THIS DOCUMENTATION “AS IS” WITHOUT WARRANTY OF ANY KIND, INCLUDING WITHOUT LIMITATION, ANY IMPLIED WARRANTIES OF MERCHANTABILITY, FITNESS FOR A PARTICULAR PURPOSE, OR NONINFRINGEMENT. IN NO EVENT WILL CA BE LIABLE TO YOU OR ANY THIRD PARTY FOR ANY LOSS OR DAMAGE, DIRECT OR INDIRECT, FROM THE USE OF THIS DOCUMENTATION, INCLUDING WITHOUT LIMITATION, LOST PROFITS, LOST INVESTMENT, BUSINESS INTERRUPTION, GOODWILL, OR LOST DATA, EVEN IF CA IS EXPRESSLY ADVISED IN ADVANCE OF THE POSSIBILITY OF SUCH LOSS OR DAMAGE.
The use of any software product referenced in the Documentation is governed by the applicable license agreement and such license agreement is not modified in any way by the terms of this notice.
The manufacturer of this Documentation is CA.
Provided with “Restricted Rights.” Use, duplication or disclosure by the United States Government is subject to the restrictions set forth in FAR Sections 12.212, 52.227-14, and 52.227-19(c)(1) - (2) and DFARS Section 252.227-7014(b)(3), as applicable, or their successors.
Copyright © 2014 CA. All rights reserved. All trademarks, trade names, service marks, and logos referenced herein belong to their respective companies.
Documentation Changes
The following documentation updates have been made since the last release of this documentation:
■ New toolkit data objects
■ Toolkit Data Objects (see page 49)
Contact CA Technologies
Contact CA Support
For your convenience, CA Technologies provides one site where you can access the information that you need for your Home Office, Small Business, and Enterprise CA Technologies products. At http://ca.com/support, you can access the following resources:
■ Online and telephone contact information for technical assistance and customer services
■ Information about user communities and forums
■ Product and documentation downloads
■ CA Support policies and guidelines
■ Other helpful resources appropriate for your product
Providing Feedback About Product Documentation
If you have comments or questions about CA Technologies product documentation, you can send a message to [email protected].
To provide feedback about CA Technologies product documentation, complete our short customer survey which is available on the CA Support website at http://ca.com/docs.
Install Changes Release 8.7
The following documentation updates have been made since the last release of this documentation:
Contents 5
Contents
Chapter 1: Installation Overview 9
Types of Installation ..................................................................................................................................................... 9
Prerequisites .............................................................................................................................................................. 10
National Language Support ........................................................................................................................................ 10
Product Authorization ................................................................................................................................................ 10
Authority Requirements for the Installation ....................................................................................................... 10
Chapter 2: Installing CA 2E 11
Before You Begin ........................................................................................................................................................ 11
Installing the Software ............................................................................................................................................... 11
Sign On with Correct Authority ........................................................................................................................... 12
Copy Files to the IBM i Server ............................................................................................................................. 12
Restore Product Libraries .................................................................................................................................... 13
Web Services Support ......................................................................................................................................... 13
Configure the Software ....................................................................................................................................... 14
Authorize the Product ......................................................................................................................................... 15
Setting Product Options ............................................................................................................................................. 18
More Information on Work Management .......................................................................................................... 18
CA 2E Toolkit Install Menu .................................................................................................................................. 18
CA 2E Install Menu .............................................................................................................................................. 21
Chapter 3: Upgrade Installations 25
Before You Begin ........................................................................................................................................................ 25
Upgrading the Software ............................................................................................................................................. 25
Signing On with Correct Authority ...................................................................................................................... 26
Moving Data and User Objects ........................................................................................................................... 26
Copying Files to the IBM i Server ........................................................................................................................ 27
Restoring Product Libraries ................................................................................................................................. 28
Configuring the Software .................................................................................................................................... 28
Authorizing the Product ...................................................................................................................................... 29
Upgrading Existing Design Models ............................................................................................................................. 33
Signing On with Correct Authority ...................................................................................................................... 33
Modifying Library Lists ........................................................................................................................................ 33
Running the Upgrade Utility ............................................................................................................................... 34
6 Installation Guide
Chapter 4: Parallel Installations 35
Before You Begin ........................................................................................................................................................ 35
Adding the Software in Parallel .................................................................................................................................. 36
Sign On with Correct Authority ........................................................................................................................... 36
Copy Files to the IBM i Server ............................................................................................................................. 36
Restore Product Libraries .................................................................................................................................... 37
Configure the Software ....................................................................................................................................... 38
Authorize the Product ......................................................................................................................................... 40
Upgrade Existing CA 2E Design Models ...................................................................................................................... 44
Signing On with Correct Authority ...................................................................................................................... 44
Modifying Library Lists ........................................................................................................................................ 45
Running the Upgrade Utility ............................................................................................................................... 46
Appendix A: Toolkit Data Objects 49
Toolkit Data Objects ................................................................................................................................................... 49
User-Created Design Objects ..................................................................................................................................... 50
Appendix B: Required Authorities 53
Authorities Table ........................................................................................................................................................ 53
Appendix C: Troubleshooting 55
Possible Problems ...................................................................................................................................................... 55
Appendix D: Installing from an IBM i DVD Drive 57
Using the CPYFRMSTMF Command ........................................................................................................................... 57
Appendix E: Upgrading from Releases Prior to Version 7.0 59
New Objects within the CA 2E Null Model ................................................................................................................. 59
New Internal SystemDefined Fields .................................................................................................................... 59
New Messages .................................................................................................................................................... 60
Changes to Program Status Data Structure Files ....................................................................................................... 60
Appendix F: Installation Worksheets 63
Product Libraries ........................................................................................................................................................ 63
Valid Merge Libraries .......................................................................................................................................... 64
National Language Support Libraries ......................................................................................................................... 64
Toolkit Developer National Languages ............................................................................................................... 64
CA 2E Developer National Languages ................................................................................................................. 65
Contents 7
Toolkit End User Environment National Languages ............................................................................................ 66
CA 2E End User Environment National Languages .............................................................................................. 67
Index 69

Chapter 1: Installation Overview 9
Chapter 1: Installation Overview
The first four chapters of this guide describe how to install the CA® 2E and CA 2E Toolkit products on your IBM i machine. These products were formerly known as the Advantage 2E and the Advantage Xtras Toolkit products, respectively. This guide refers to the two products collectively as either the CA 2E base products or the CA 2E products.
This section contains the following topics:
Types of Installation (see page 9) Prerequisites (see page 10) National Language Support (see page 10) Product Authorization (see page 10)
Types of Installation
There are three types of CA 2E product installations that you can perform:
■ First-time installation
Perform this type of installation if you are a new customer (or if you are re-installing the software). See the chapter “Installing CA 2E.”
■ Upgrade installation
Perform this type of installation if you want to upgrade existing products with the new product features in this release. See the chapter, “Upgrade Installations.”
■ Parallel installation
Perform this type of installation if you are currently a CA 2E user and you want to load the new release libraries under different names than your current CA 2E product library names. You might perform this type of installation if you are a Beta test site for a new release of the product and you do not want to disrupt your production environment during the Beta period. See the chapter, “Parallel Installations.”
It is recommended that you read the rest of this chapter and all sections pertaining to your specific type of installation before installing CA 2E or the CA 2E Toolkit products.
Regardless of the type of installation you choose, print and complete the worksheets in the Appendix, Installation Worksheets. These worksheets can assist you in determining the proper library names, and help you to track the progress of your installation.
Prerequisites
10 Installation Guide
Prerequisites
Prerequisites for a CA 2E product installation include:
■ For supported operating sustems refer to the System Requirements in the Readme
■ CA 2E authorization codes
Contact the CA Technical Support if you need a copy of your authorization code(s).
National Language Support
This guide includes instructions related to both the CA 2E Developer National Language libraries and the End User Environment National Language libraries.
These libraries are available on a separate DVD and are not included with the GA version of the English product. You must specifically order the language DVD to install these national language libraries.
Product Authorization
The CA 2E Toolkit and CA 2E product depend on an authorization library to control access to the product libraries.
The product DVD contains a template licensing library called YLUSLIB0. The licensing command YCRTLUSLIB uses the YLUSLIB0 template to create or update the licensing library (YLUSLIB).
After successful execution of the YCRTLUSLIB command, the YLUSLIB0 library no longer resides on your system and is replaced with the YLUSLIB licensing library. YLUSLIB is the library that controls the CA 2E Authorization Code for your IBM i server.
The specific authorization instructions for the installation type you select are located in the applicable chapter of this guide.
Authority Requirements for the Installation
We recommend that you sign on as QSECOFR (or with a user profile that has the *ALLOBJ, *SECADM, *SAVSYS and *JOBCTL special authorities).
The actual security level you use is dependent upon your environment. You should check with your System Administrator for the actual security profile to use.
Chapter 2: Installing CA 2E 11
Chapter 2: Installing CA 2E
This chapter describes how to install CA 2E if you do not have any prior releases of the product installed on your machine.
The instructions that follow assume that you will install the product by inserting the product installation DVD into a network-connected PC's DVD drive and transfer files to the IBM i server using FTP. If you want to install the product from an IBM i DVD drive, see the appendix, “Installing from an IBM i DVD Drive.”
This section contains the following topics:
Before You Begin (see page 11) Installing the Software (see page 11) Setting Product Options (see page 18)
Before You Begin
Before you begin the installation, note the following:
■ Print and complete the worksheets in the appendix “Installation Worksheets.” These worksheets can help you make decisions regarding library names and other information as you install the new release.
■ Ensure that you have the authorization codes for all of the CA 2E products you plan to install.
Contact the CA Technical Support if you need a copy of your authorization code(s).
■ If you are also upgrading to a new release of CA 2E Change Management Option, you need to contact MKS Support to get the required MKS Security codes for that release.
Installing the Software
Installing CA 2E involves the following tasks:
■ Sign on with correct authority
■ Copy files to the IBM i server
■ Restore product libraries
■ Configure the software
■ Authorize the product
Installing the Software
12 Installation Guide
Sign On with Correct Authority
Sign on with the QSECOFR user profile or equivalent (for details on required authority, see the chapter Installation Overview (see page 9).
Set your logging level as follows:
CHGJOB LOG(4 00 *SECLVL) LOGCLPGM(*YES)
Copy Files to the IBM i Server
This procedure describes how to use FTP to copy files from the network-connected PC to the IBM i server.
Note: If you are installing from the IBM i server's DVD drive, substitute the steps in the appendix, “Installing from an IBM i DVD Drive,” for this procedure.
1. Insert the CA 2E installation DVD into a network-connected PC's DVD drive.
2. Display the contents of the DVD to view the SAVF files you need to copy to the IBM i server as follows:
<drive>:\> DIR/P
3. Create a temporary library on the IBM i server to contain the SAVF files:
CRTLIB LIB(TEMP2E)
4. Open a DOS command prompt.
5. Use FTP to copy the save files from the installation DVD to the TEMP2E library using these commands:
FTP myIBM i (where myIBM i is the name of the target IBM i server)
myuserid (where myuserid is an IBM i user profile)
mypassword (where mypassword is an IBM i password)
bin
lcd <drive>:\
cd TEMP2E
QUOTE SITE NAMEFMT 1
PUT y1sy.savf
Use additional PUT commands to transfer all of the appropriate SAVF files to your IBM i server, using the completed worksheets in the appendix “Installation Worksheets” as a guide.
QUIT (The QUIT command closes the FTP session.)
EXIT (The EXIT command closes the DOS session.)
Installing the Software
Chapter 2: Installing CA 2E 13
Restore Product Libraries
Use this procedure to restore the CA 2E product libraries from the SAVF files copied from the installation DVD in the previous section.
1. Enter one Restore Library (RSTLIB) command for each of the SAVF files in the TEMP2E library.
Specify the Shipped Library Name for the SAVF parameter and the Library Name you have selected for the RSTLIB parameter. Refer to the following examples for more information:
■ To restore the Toolkit base product library to a library named Y1SY, enter the following:
RSTLIB SAVLIB(Y1SY) DEV(*SAVF) SAVF(TEMP2E/Y1SY) RSTLIB(Y1SY)
■ To restore the Toolkit developer environment national language library and merge it with the Toolkit base product library, enter the following:
RSTLIB SAVLIB(Y1SYVENG) DEV(*SAVF) SAVF(TEMP2E/Y1SYVENG) RSTLIB(Y1SY)
■ To submit the restore commands to run in batch, use the SBMJOB command:
SBMJOB CMD(RSTLIB SAVLIB(Y1SY) DEV(*SAVF) SAVF(TEMP2E/Y1SY
RSTLIB(Y1SY)) JOB(Y1SY) JOBQ(QBATCH) LOG(4 00 *SECLVL) LOGCLPGM(*YES)
SBMJOB CMD(RSTLIB SAVLIB(Y1SYVENG) DEV(*SAVF) SAVF(TEMP2E/Y1SYVENG)
RSTLIB(Y1SY)) JOB(Y1SYVENG) JOBQ(QBATCH) LOG(4 00 *SECLVL) LOGCLPGM(*YES)
2. Review the job logs to verify that all objects were restored successfully, and then save the job log using the command:
DSPJOBLOG OUTPUT(*PRINT)
Retain the resulting QPJOBLOG spool file. If you encounter errors, CA Technical Support may be able to use the job log to assist in resolving the problem.
Web Services Support
If you plan to use the Web Services support, you will need to download the YCA structure and install it to the IFS in the root directory. The product DVD contains a save file called YCA.savf.
Note: For CA r8.1 SP2 the YCA structure contained Advantage2EEJB and Advantage2EWSP. Because the EJB Option was withdrawn for r8.5, YGENEJB and YGENWSPXY commands are no longer available.
If YCA already exists in the IFS, you can rename it and then restore the new version of YCA, or you can just restore the new YCA to a different name and then copy in the new directories to your existing YCA folder. If you rename your existing version of YCA, you can then copy any data from there that you want to retain into your new YCA directory.
Installing the Software
14 Installation Guide
You must restore this directory from the save file shipped with the product. To do this, run the following command:
RST DEV('/qsys.lib/libname.lib/YCA.file') OBJ(('/YCA'))
libname
The library that contains the YCA save file
Remove the installation DVD from the PC's DVD drive.
Also the IBM Web Services Server and scripts must be installed—they are shipped with i6.1 and higher. See the chapter Web Service Creation in the Building Applications guide for the specific products and PTFs that you need.
Note: Regardless of release, we recommend that you obtain the latest i5/OS PTFs.
You must separately create and configure the IBM Web services server. See IBM's Web Administration Interface Guide for more information.
Configure the Software
Prior to starting the software, you must configure CA 2E for your development environment.
Note: If you have renamed or merged your product libraries, use the library name you selected in place of the product library named in the following steps. You can disregard instructions that specify product libraries that you did not install.
1. Sign on to the IBM i server as QSECOFR or equivalent, if you are not already signed on.
2. Set the logging level as follows:
CHGJOB LOG(4 00 *SECLVL) LOGCLPGM (*YES)
Configuring National Language Libraries
Use this procedure to set parameters for national language support.
1. Reset the default national language for the product, if you require a default national language other than English as follows:
CHGDTAARA DTAARA(Y1SY/YYLNSYA) VALUE (national-language-code)
This value is shipped as *ENG.
CHGDTAARA DTAARA(Y2SY/YPRDLNGSYA) VALUE (national-language-code)
This value is shipped as *ENG.
Installing the Software
Chapter 2: Installing CA 2E 15
National language codes are listed on the worksheets in the appendix, “Installation Worksheets.” The value in the data area must begin with an asterisk (*) and is followed immediately by the national language library code.
2. Reset the internal national language library name data area, if you merged a Developer Environment National Language library into Y2SY (for example, if you merged Y2SYVENG into Y2SY):
CHGDTAARA DTAARA(Y2SY/YLNGxxxSYA) VALUE(Y2SY)
where xxx is the national language library code listed on the worksheets in the appendix “Installation Worksheets.”
Authorize the Product
You need to perform the following tasks to authorize the product:
■ Add product libraries to the current library list.
■ Run the licensing routines and enter authorization codes.
Add to the Current Library List
Add your data objects library and the CA 2E product libraries to your current library list using the EDTLIBL command:
Note: QTEMP must be at the top of your library list.
■ QTEMP
■ Y1SYVxxx
■ Y1SY
■ Y2SYRPG
■ Y2SYCBL
■ Y2SYVxxx
■ Y2SY
■ QGPL
where xxx is the national language library code on the worksheets in the appendix, “Installation Worksheets.” If you have multiple national languages, position the English library below the other libraries.
For example, if you installed English only and restored Y1SYVENG into Y1SY and Y2SYVENG into Y2SY, your library list appears as follows:
■ QTEMP
■ Y1SY
Installing the Software
16 Installation Guide
■ Y2SYRPG
■ Y2SYCBL
■ Y2SY
■ QGPL
Run the Licensing Routines
Authorize CA 2E using the authorization code and the following instructions:
1. Verify that you restored the library YLUSLIB0 from your product DVD with the command:
WRKLIB YLUSLIB0
2. Execute the command YCRTLUSLIB to create the library YLUSLIB for a first time installation. If this is not a first-time installation, this command updates the existing YLUSLIB library.
3. Verify that the library YLUSLIB exists on your IBM i server:
WRKLIB YLUSLIB
4. Press the F4 key to prompt the YGRTLICAUT command so that you can key in the security code(s) you obtained from the Total License Care team or web site. Enter each set of four digit numbers into each field and then press the Enter key. This authorizes the product(s) on your server.
5. Use the Display Product Licenses command, YDSPLICPRD, to display the list of licensed products, the release level, expiration dates, and the maximum number of concurrent interactive jobs you are allowed.
6. Make a note of the expiration dates on the checklist.
7. Continue with the configuration activities.
Note: If you make an error while entering the authorization code, re-enter the code(s). If you receive an error message when you attempt to use the product, contact Technical Support.
Creating Data Objects
1. Create the CA 2E Toolkit data objects.
These objects can be placed either in the Toolkit base product library or in another non-CA 2E user library.
Note: Do not put the objects into QGPL.
YCRTY1DTA LIB(Y1SY) or
YCRTY1DTA LIB(new-data-objects-library)
Installing the Software
Chapter 2: Installing CA 2E 17
2. Authorize the Toolkit user profile and password extension functions:
YSETY1AUT
This command enables the Toolkit User Profile and Password Validation functions.
3. Save the job log using the command:
DSPJOBLOG OUTPUT(*PRINT)
Retain the resulting QPJOBLOG spool file. If you encounter errors, CA Technical Support may be able to use the job log to assist in resolving the problem.
4. Verify that no one is using the CA 2E Licensing Library using the Object Lock (WRKOBJLCK) command:
WRKOBJLCK OBJ(QSYS/YLUSLIB) OBJTYPE(*LIB)
WRKOBJLCK OBJ(YLUSLIB/YLICREGP) OBJTYPE(*FILE) MBR(*ALL)
5. Build the YSYS library list (you can later use this library list for building a CA 2E model):
YBLDLIBLST LIBLST(YSYS) CURLIB(*NOCHG)
For more information about Toolkit library lists, see the Toolkit Reference Guide.
Review 2E System Values
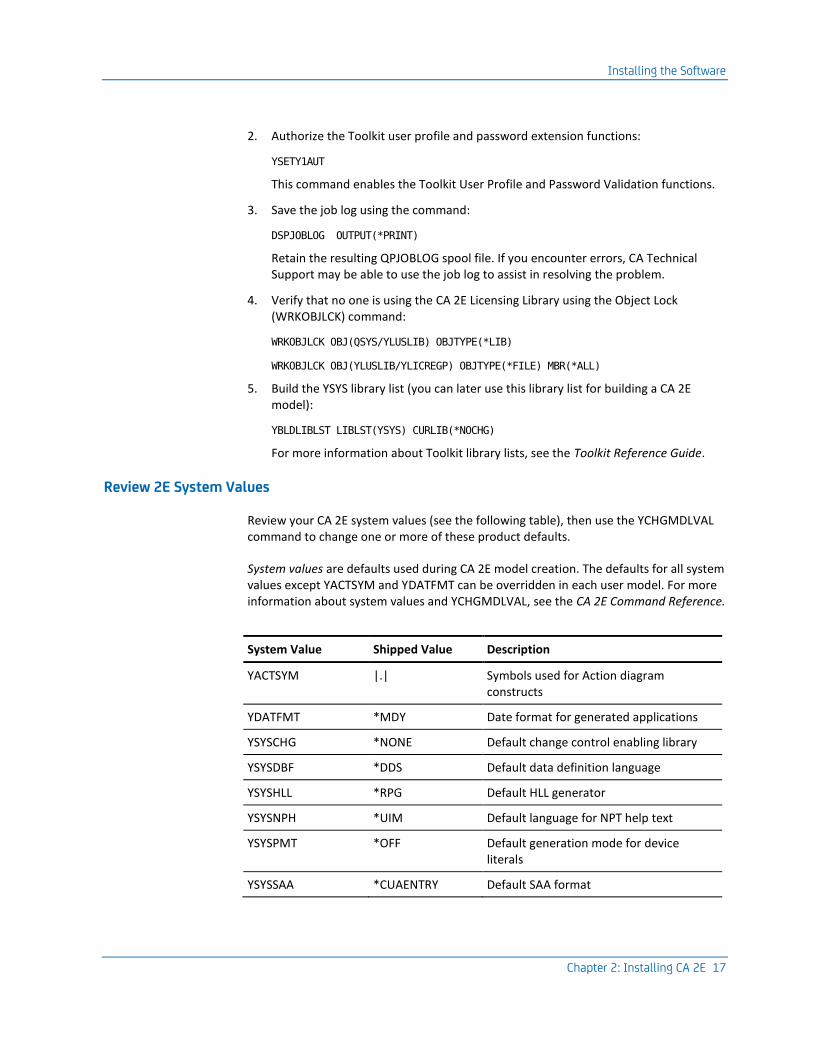
Review your CA 2E system values (see the following table), then use the YCHGMDLVAL command to change one or more of these product defaults.
System values are defaults used during CA 2E model creation. The defaults for all system values except YACTSYM and YDATFMT can be overridden in each user model. For more information about system values and YCHGMDLVAL, see the CA 2E Command Reference.
System Value Shipped Value Description
YACTSYM |.| Symbols used for Action diagram constructs
YDATFMT *MDY Date format for generated applications
YSYSCHG *NONE Default change control enabling library
YSYSDBF *DDS Default data definition language
YSYSHLL *RPG Default HLL generator
YSYSNPH *UIM Default language for NPT help text
YSYSPMT *OFF Default generation mode for device literals
YSYSSAA *CUAENTRY Default SAA format

Setting Product Options
18 Installation Guide
Setting Product Options
You need to set product options for both the CA 2E and the Toolkit prior to using the software as follows:
1. Display the Installation Master Menu using the command:
YGO MENU(*Y0)
The master menu contains two options:
■ CA 2E Toolkit install menu
■ CA 2E install menu
Each product installation menu contains a number of options grouped into required and optional sections.
2. Execute each of the required options in the order described in the following procedures; otherwise, the CA 2E product cannot function properly.
More Information on Work Management
If you are not the System Administrator, you may need more information about certain features, such as which subsystems will be used, or working with compiler pre-processors, for example.
The product options described in the sections that follow are part of the CA 2E's Work Management features. Before attempting to configure these options, see the manual Generating and Implementing Applications for more information.
CA 2E Toolkit Install Menu
You should already have completed the steps in the section, Authorize the Product, discussed earlier in this chapter. These actions complete items 1 and 2 on the menu. To continue configuring the software, select the appropriate option from the following menu options:

Setting Product Options
Chapter 2: Installing CA 2E 19
Install Menu
REQUIRED INSTALLATION STEPS 1. Display Licensed Product Information 2. Grant Product License Authority 3. Install compile pre-processor - menu 4. YSETY1AUT Enable Toolkit User Profiles OPTIONAL INSTALLATION STEPS 5. Menu of optional installation steps
Defining the Preprocessor Routing Entry
Defining the pre-processor routing entry is necessary to apply compiler overrides automatically and to check whether objects have been compiled successfully. The menu that displays when you select option 3 is shown following:
Compile Pre-processor Routing Menu
1. Check subsystem is not in use The subsystems specified for this option are those that will be used for compilations 2. End subsystem 3. Add routing entry for the compile pre-processor 4. Restart subsystem 5. Change routing data on existing job descriptions
Note: You can safely skip menu options 1, 2, and 4. You are no longer required to verify that subsystems are not in use, stop and then restart them before defining new routing entries.
Select option 3 to add a routing entry to the subsystem or subsystems that will be used for compilations. Option 3 has its own sub-menu.
Option 5 changes the relevant job descriptions to use the routing data specified. Each CA 2E data model contains a job description which is used to submit batch jobs. The name of the job description is specified by the YCRTJBD (JOBD to compile generated objects) model value. The job description controls the routing data that is used.
Note: The job descriptions in any new models created with the CA 2E Create Model Library (YCRTMDLLIB) command will take their initial values from the QBATCH job description in the CA 2E null model library (Y2SYMDL). You must modify this job description for your standards.

Setting Product Options
20 Installation Guide
Installing the Compile PreProcessor
As an optional procedure, you can use the compiler pre-processor in conjunction with the i OS programmers menu (QPGMMENU) or the Compile Option 14 on the PDM WRKMBRPDM panel. More information on this feature is available in the CA 2E Toolkit Concepts Guide, in the chapter “Programmer Aids.”
You must complete the following steps to ensure that jobs are submitted with the correct routing data. The installed software's system default for the Submit Job (SBMJOB) command is QCMDB (not *JOBD).
1. You can use either of the following methods listed to set up the pre-processor:
■ Modify the default value for the routing data (RTGDTA) parameter on the SBMJOB command in QSYS to be *JOBD rather than the shipped value of QCMDB:
CHGCMDDFT CMD(QSYS/SBMJOB) NEWDFT('RTGDTA(*JOBD)')
■ Create a copy of the command and modify it by entering these commands:
CRTLIB LIB(YSYS) TEXT(Alternative versions of system commands)
CRTDUPOBJ OBJ(QSYS/SBMJOB) OBJTYPE(*CMD) TOLIB(YSYS)
CHGCMDDFT CMD(YSYS/SBMJOB) NEWDFT('RTGDTA(*JOBD)')
2. Ensure that the library containing the modified version is positioned above the QSYS entry of the invoking job's library list when you use the programmer's menu.
Important! You must repeat these steps each time a new release of the operating system is installed on your machine. Failure to do this may result in your customized SBMJOB command not functioning after you install a new release of the operating system.
3. Add the alternative library (YSYS) to the system part of your library list as one of the following:
...temporarily:
CHGSYSLIBL LIB(YSYS)
... or permanently:
CHGSYSVAL SYSVAL(QSYSLIBL) VALUE(YSYS QSYS QHLPSYS QUSRSYS)
Authorizing User Profile and Password Extensions
Select option 4 from the CA 2E Toolkit Installation menu to authorize the user profile and password extension functions to adopt QSYS authority.
Note: no menu displays; however, you should see the following successful authorization message: “Adoption rights granted successfully to required Toolkit programs.”
Setting Product Options
Chapter 2: Installing CA 2E 21
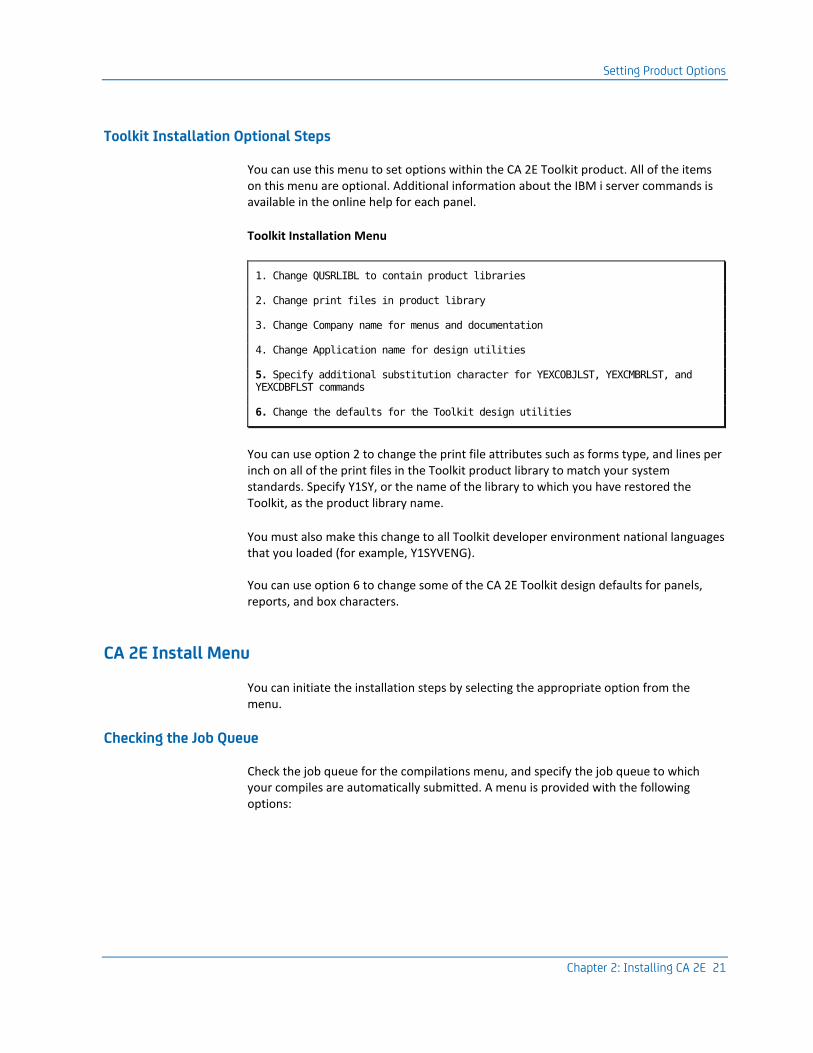
Toolkit Installation Optional Steps
You can use this menu to set options within the CA 2E Toolkit product. All of the items on this menu are optional. Additional information about the IBM i server commands is available in the online help for each panel.
Toolkit Installation Menu
1. Change QUSRLIBL to contain product libraries 2. Change print files in product library 3. Change Company name for menus and documentation 4. Change Application name for design utilities 5. Specify additional substitution character for YEXCOBJLST, YEXCMBRLST, and YEXCDBFLST commands 6. Change the defaults for the Toolkit design utilities
You can use option 2 to change the print file attributes such as forms type, and lines per inch on all of the print files in the Toolkit product library to match your system standards. Specify Y1SY, or the name of the library to which you have restored the Toolkit, as the product library name.
You must also make this change to all Toolkit developer environment national languages that you loaded (for example, Y1SYVENG).
You can use option 6 to change some of the CA 2E Toolkit design defaults for panels, reports, and box characters.
CA 2E Install Menu
You can initiate the installation steps by selecting the appropriate option from the menu.
Checking the Job Queue
Check the job queue for the compilations menu, and specify the job queue to which your compiles are automatically submitted. A menu is provided with the following options:
Setting Product Options
22 Installation Guide
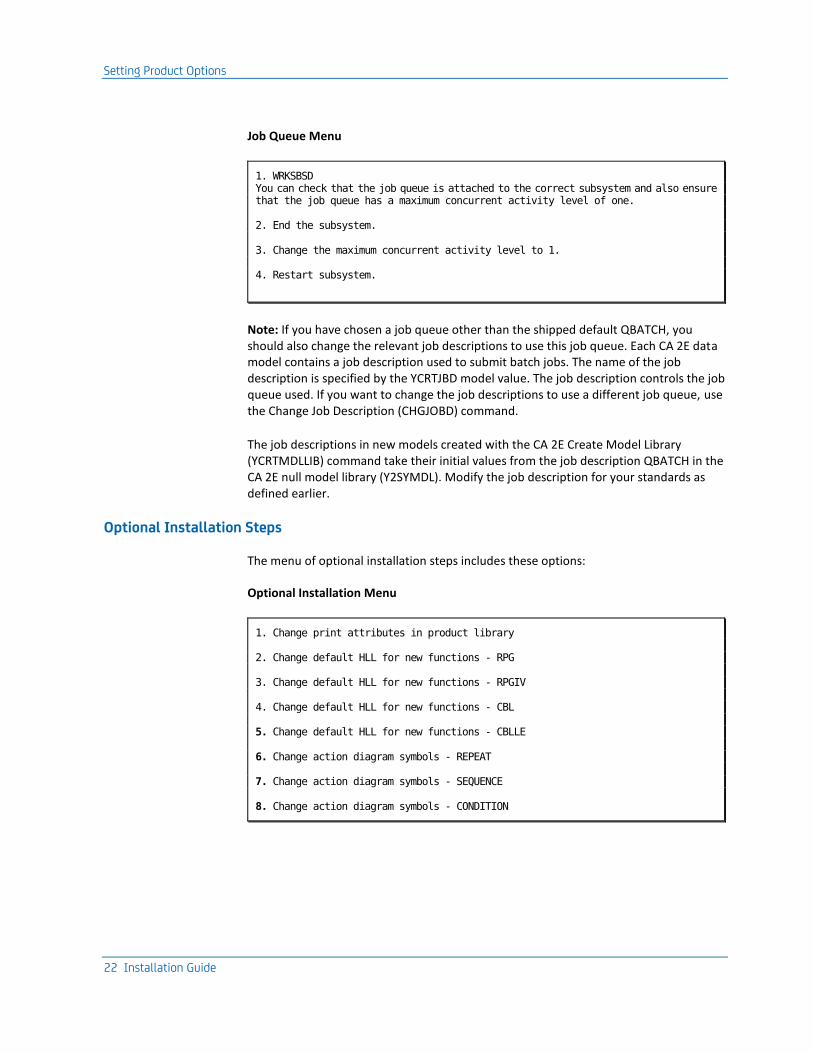
Job Queue Menu
1. WRKSBSD You can check that the job queue is attached to the correct subsystem and also ensure that the job queue has a maximum concurrent activity level of one. 2. End the subsystem. 3. Change the maximum concurrent activity level to 1. 4. Restart subsystem.
Note: If you have chosen a job queue other than the shipped default QBATCH, you should also change the relevant job descriptions to use this job queue. Each CA 2E data model contains a job description used to submit batch jobs. The name of the job description is specified by the YCRTJBD model value. The job description controls the job queue used. If you want to change the job descriptions to use a different job queue, use the Change Job Description (CHGJOBD) command.
The job descriptions in new models created with the CA 2E Create Model Library (YCRTMDLLIB) command take their initial values from the job description QBATCH in the CA 2E null model library (Y2SYMDL). Modify the job description for your standards as defined earlier.
Optional Installation Steps
The menu of optional installation steps includes these options:
Optional Installation Menu
1. Change print attributes in product library 2. Change default HLL for new functions - RPG 3. Change default HLL for new functions - RPGIV 4. Change default HLL for new functions - CBL 5. Change default HLL for new functions - CBLLE 6. Change action diagram symbols - REPEAT 7. Change action diagram symbols - SEQUENCE 8. Change action diagram symbols - CONDITION
Setting Product Options
Chapter 2: Installing CA 2E 23
You can use option 1 to change the print file attributes such as forms type and lines per inch on all the print files in the CA 2E product library to match your system standards. Specify Y2SY, or the name of the library to which you have restored the CA 2E programs as the product library name.
This change will also have to be made to all CA 2E developer environment national languages that you may have loaded (such as Y2SYVENG).


Chapter 3: Upgrade Installations 25
Chapter 3: Upgrade Installations
This chapter describes the type of installation to perform if you are an existing CA 2E user and want to upgrade your existing CA 2E products with the new features in this release.
The instructions that follow assume that you will install the product by inserting the product installation DVD into a networked-connected PC's DVD drive and transfer files to the IBM i server using FTP. If you want to install the product from an IBM i DVD drive, see the appendix, “Installing from an IBM i DVD Drive.”
This section contains the following topics:
Before You Begin (see page 25) Upgrading the Software (see page 25) Upgrading Existing Design Models (see page 33)
Before You Begin
Before you begin the installation, note the following:
■ Print and complete the worksheets in the appendix “Installation Worksheets.” These worksheets will help you make decisions regarding library names and other information as you install the new release.
■ Back-up all of your existing product libraries because they will be cleared during the upgrade process.
■ Ensure that you have the authorization codes for all of the CA 2E products you plan to install. Contact the CA Technical Support if you need a copy of your authorization code(s).
■ Ensure that no one is using any CA 2E product libraries during the installation. The CA 2E product libraries cannot be on the library list of any interactive sessions. Use the Work Object Lock (WRKOBJLCK) command to verify that there are no locks on the libraries.
Upgrading the Software
Upgrading existing CA 2E product libraries involves the following procedures:
■ Signing on with correct authority
■ Moving data and user objects
■ Copying files to the IBM i server
Upgrading the Software
26 Installation Guide
■ Restoring product libraries
■ Configuring the software
■ Authorizing the product
■ Upgrading existing design models and batch job descriptions
Signing On with Correct Authority
Sign on with the QSECOFR user profile. (See the chapter, “Installation Overview” for additional details on required authority levels.)
Set your logging level as follows:
CHGJOB LOG(4 00 *SECLVL) LOGCLPGM(*YES)
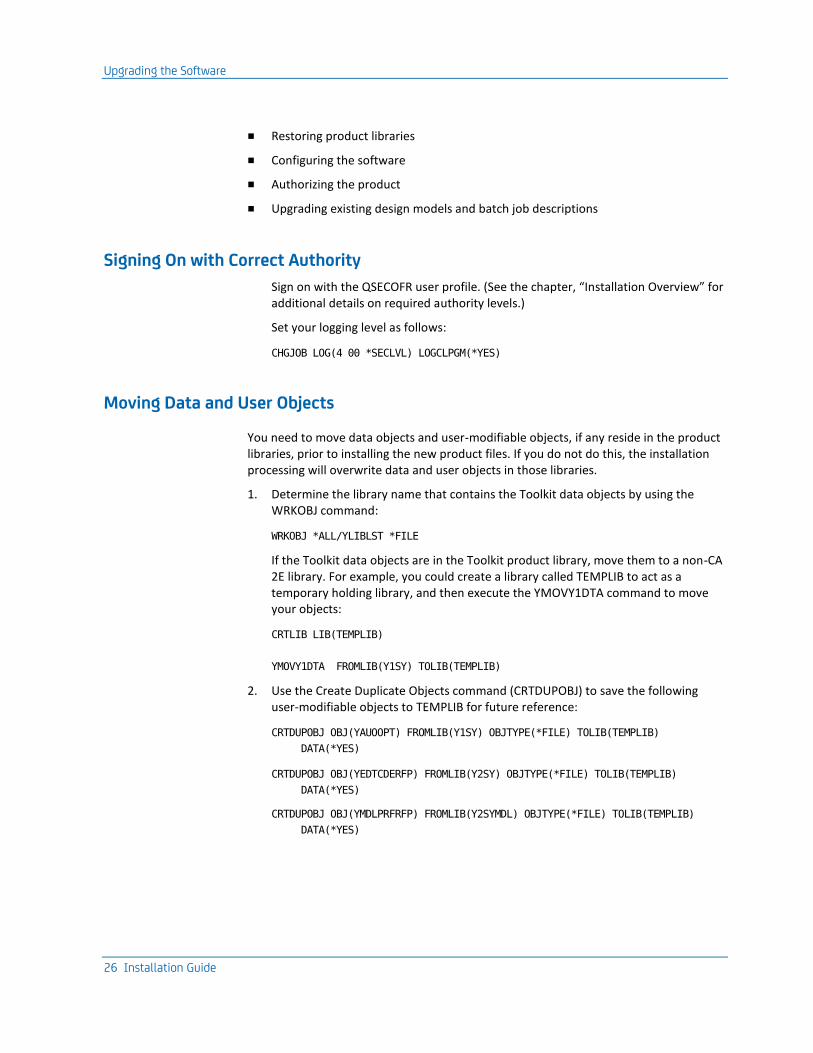
Moving Data and User Objects
You need to move data objects and user-modifiable objects, if any reside in the product libraries, prior to installing the new product files. If you do not do this, the installation processing will overwrite data and user objects in those libraries.
1. Determine the library name that contains the Toolkit data objects by using the WRKOBJ command:
WRKOBJ *ALL/YLIBLST *FILE
If the Toolkit data objects are in the Toolkit product library, move them to a non-CA 2E library. For example, you could create a library called TEMPLIB to act as a temporary holding library, and then execute the YMOVY1DTA command to move your objects:
CRTLIB LIB(TEMPLIB)
YMOVY1DTA FROMLIB(Y1SY) TOLIB(TEMPLIB)
2. Use the Create Duplicate Objects command (CRTDUPOBJ) to save the following user-modifiable objects to TEMPLIB for future reference:
CRTDUPOBJ OBJ(YAUOOPT) FROMLIB(Y1SY) OBJTYPE(*FILE) TOLIB(TEMPLIB)
DATA(*YES)
CRTDUPOBJ OBJ(YEDTCDERFP) FROMLIB(Y2SY) OBJTYPE(*FILE) TOLIB(TEMPLIB)
DATA(*YES)
CRTDUPOBJ OBJ(YMDLPRFRFP) FROMLIB(Y2SYMDL) OBJTYPE(*FILE) TOLIB(TEMPLIB)
DATA(*YES)
Upgrading the Software
Chapter 3: Upgrade Installations 27
3. Clear the existing product libraries using the worksheets that you completed earlier in the appendix “Installation Worksheets.” For example:
■ Clear the Toolkit base product library (with the default name Y1SY) with the command:
CLRLIB LIB(Y1SY)
■ Submit the clear commands to run as batch jobs, with the SBMJOB command:
SBMJOB CMD(CLRLIB LIB(Y1SY)) JOB(CLRY1SY) JOBQ(QBATCH)
LOG(4 00 *SECLVL) LOGCLPGM(*YES)
4. Clear the Y2PTF library, and any other previous PTF libraries, if any exist on your system.
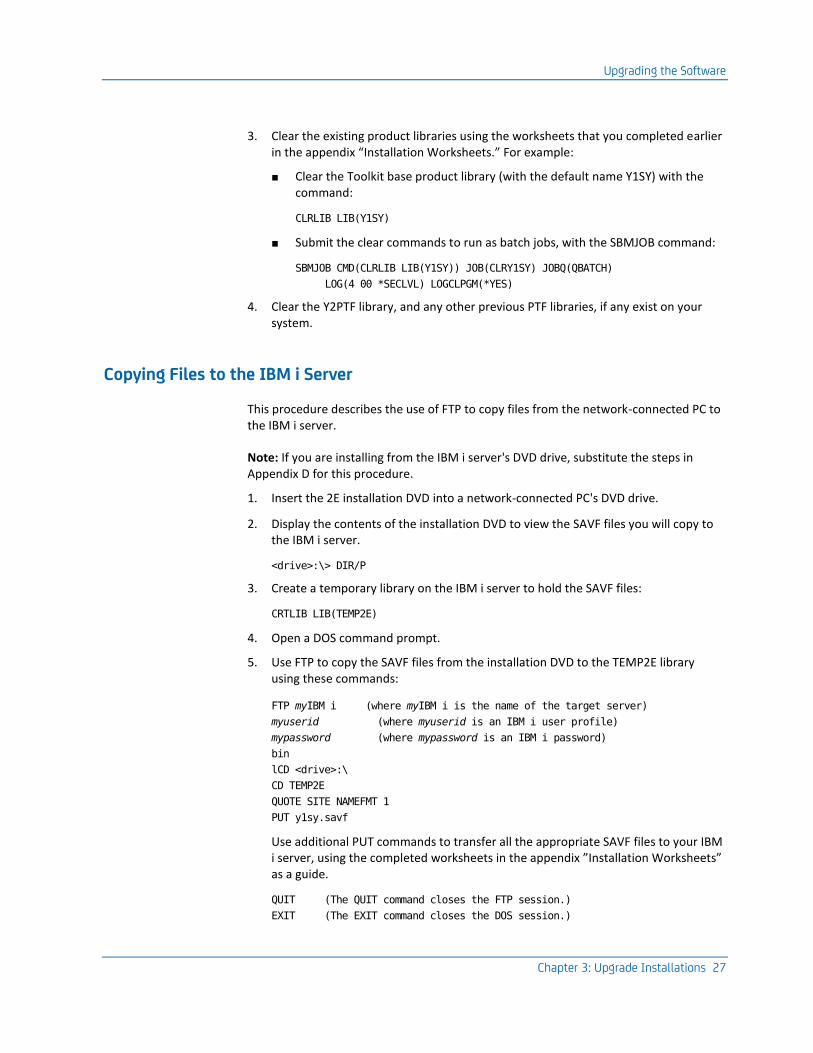
Copying Files to the IBM i Server
This procedure describes the use of FTP to copy files from the network-connected PC to the IBM i server.
Note: If you are installing from the IBM i server's DVD drive, substitute the steps in Appendix D for this procedure.
1. Insert the 2E installation DVD into a network-connected PC's DVD drive.
2. Display the contents of the installation DVD to view the SAVF files you will copy to the IBM i server.
<drive>:\> DIR/P
3. Create a temporary library on the IBM i server to hold the SAVF files:
CRTLIB LIB(TEMP2E)
4. Open a DOS command prompt.
5. Use FTP to copy the SAVF files from the installation DVD to the TEMP2E library using these commands:
FTP myIBM i (where myIBM i is the name of the target server)
myuserid (where myuserid is an IBM i user profile)
mypassword (where mypassword is an IBM i password)
bin
lCD <drive>:\
CD TEMP2E
QUOTE SITE NAMEFMT 1
PUT y1sy.savf
Use additional PUT commands to transfer all the appropriate SAVF files to your IBM i server, using the completed worksheets in the appendix ”Installation Worksheets” as a guide.
QUIT (The QUIT command closes the FTP session.)
EXIT (The EXIT command closes the DOS session.)
Upgrading the Software
28 Installation Guide
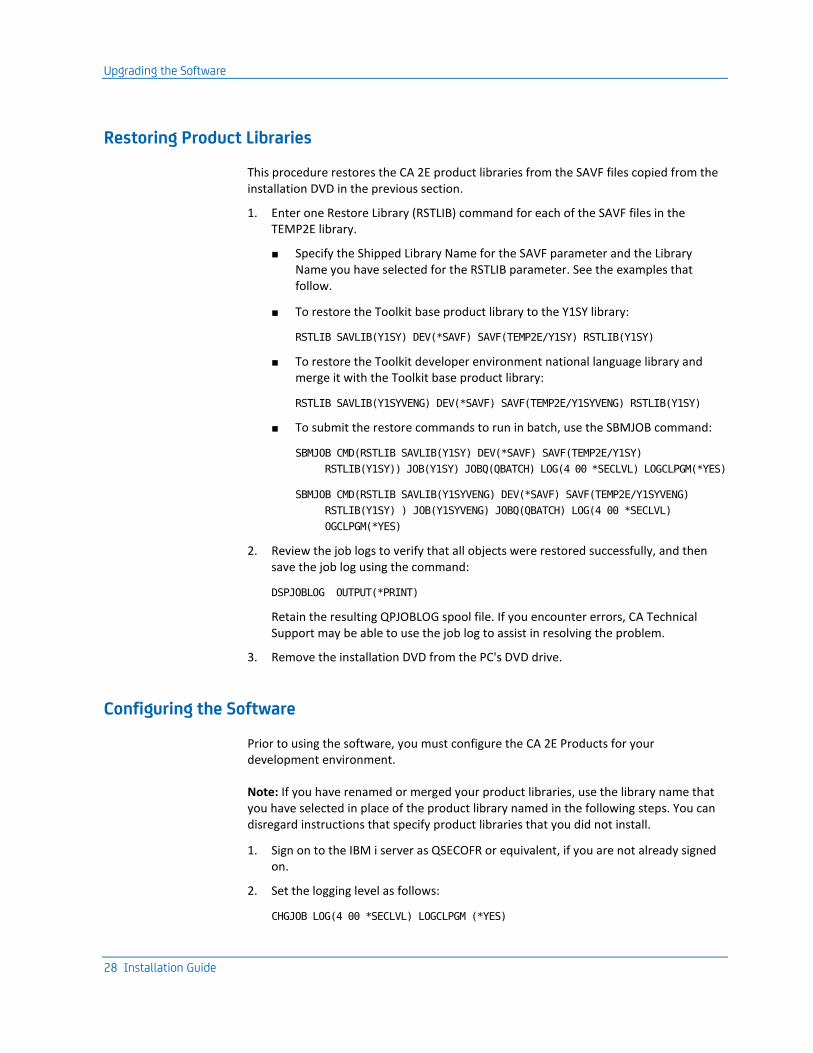
Restoring Product Libraries
This procedure restores the CA 2E product libraries from the SAVF files copied from the installation DVD in the previous section.
1. Enter one Restore Library (RSTLIB) command for each of the SAVF files in the TEMP2E library.
■ Specify the Shipped Library Name for the SAVF parameter and the Library Name you have selected for the RSTLIB parameter. See the examples that follow.
■ To restore the Toolkit base product library to the Y1SY library:
RSTLIB SAVLIB(Y1SY) DEV(*SAVF) SAVF(TEMP2E/Y1SY) RSTLIB(Y1SY)
■ To restore the Toolkit developer environment national language library and merge it with the Toolkit base product library:
RSTLIB SAVLIB(Y1SYVENG) DEV(*SAVF) SAVF(TEMP2E/Y1SYVENG) RSTLIB(Y1SY)
■ To submit the restore commands to run in batch, use the SBMJOB command:
SBMJOB CMD(RSTLIB SAVLIB(Y1SY) DEV(*SAVF) SAVF(TEMP2E/Y1SY)
RSTLIB(Y1SY)) JOB(Y1SY) JOBQ(QBATCH) LOG(4 00 *SECLVL) LOGCLPGM(*YES)
SBMJOB CMD(RSTLIB SAVLIB(Y1SYVENG) DEV(*SAVF) SAVF(TEMP2E/Y1SYVENG)
RSTLIB(Y1SY) ) JOB(Y1SYVENG) JOBQ(QBATCH) LOG(4 00 *SECLVL)
OGCLPGM(*YES)
2. Review the job logs to verify that all objects were restored successfully, and then save the job log using the command:
DSPJOBLOG OUTPUT(*PRINT)
Retain the resulting QPJOBLOG spool file. If you encounter errors, CA Technical Support may be able to use the job log to assist in resolving the problem.
3. Remove the installation DVD from the PC's DVD drive.
Configuring the Software
Prior to using the software, you must configure the CA 2E Products for your development environment.
Note: If you have renamed or merged your product libraries, use the library name that you have selected in place of the product library named in the following steps. You can disregard instructions that specify product libraries that you did not install.
1. Sign on to the IBM i server as QSECOFR or equivalent, if you are not already signed on.
2. Set the logging level as follows:
CHGJOB LOG(4 00 *SECLVL) LOGCLPGM (*YES)
Upgrading the Software
Chapter 3: Upgrade Installations 29
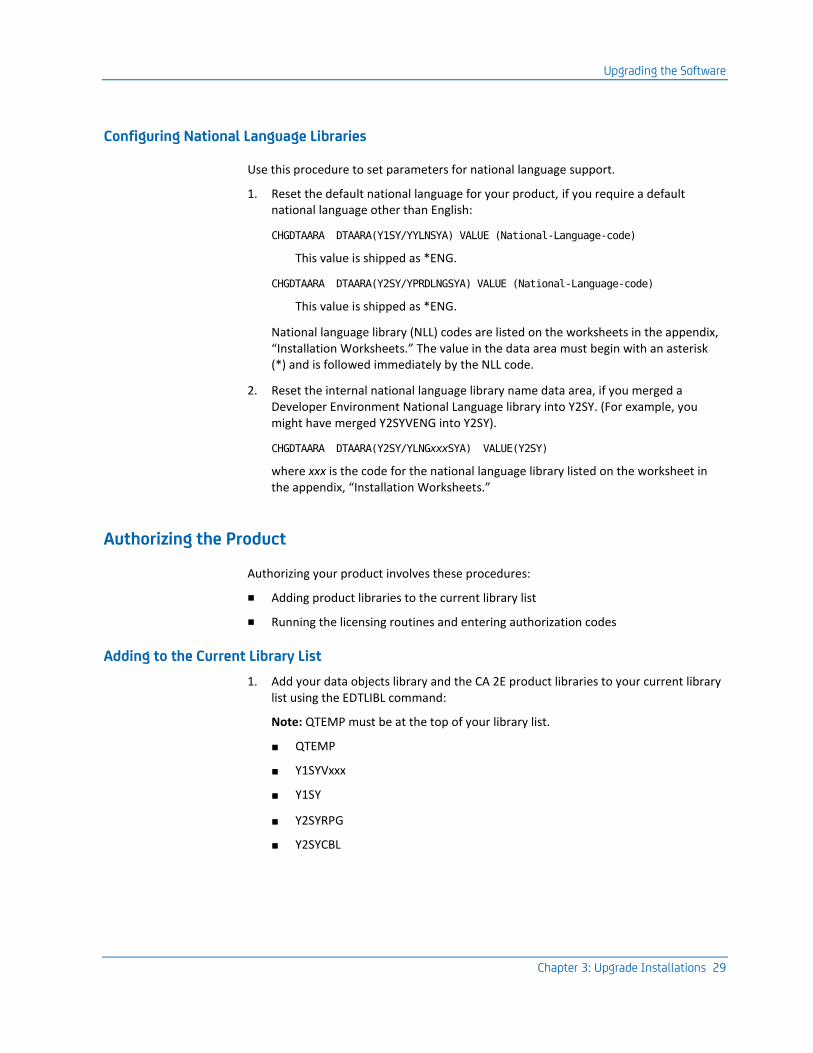
Configuring National Language Libraries
Use this procedure to set parameters for national language support.
1. Reset the default national language for your product, if you require a default national language other than English:
CHGDTAARA DTAARA(Y1SY/YYLNSYA) VALUE (National-Language-code)
This value is shipped as *ENG.
CHGDTAARA DTAARA(Y2SY/YPRDLNGSYA) VALUE (National-Language-code)
This value is shipped as *ENG.
National language library (NLL) codes are listed on the worksheets in the appendix, “Installation Worksheets.” The value in the data area must begin with an asterisk (*) and is followed immediately by the NLL code.
2. Reset the internal national language library name data area, if you merged a Developer Environment National Language library into Y2SY. (For example, you might have merged Y2SYVENG into Y2SY).
CHGDTAARA DTAARA(Y2SY/YLNGxxxSYA) VALUE(Y2SY)
where xxx is the code for the national language library listed on the worksheet in the appendix, “Installation Worksheets.”
Authorizing the Product
Authorizing your product involves these procedures:
■ Adding product libraries to the current library list
■ Running the licensing routines and entering authorization codes
Adding to the Current Library List
1. Add your data objects library and the CA 2E product libraries to your current library list using the EDTLIBL command:
Note: QTEMP must be at the top of your library list.
■ QTEMP
■ Y1SYVxxx
■ Y1SY
■ Y2SYRPG
■ Y2SYCBL
Upgrading the Software
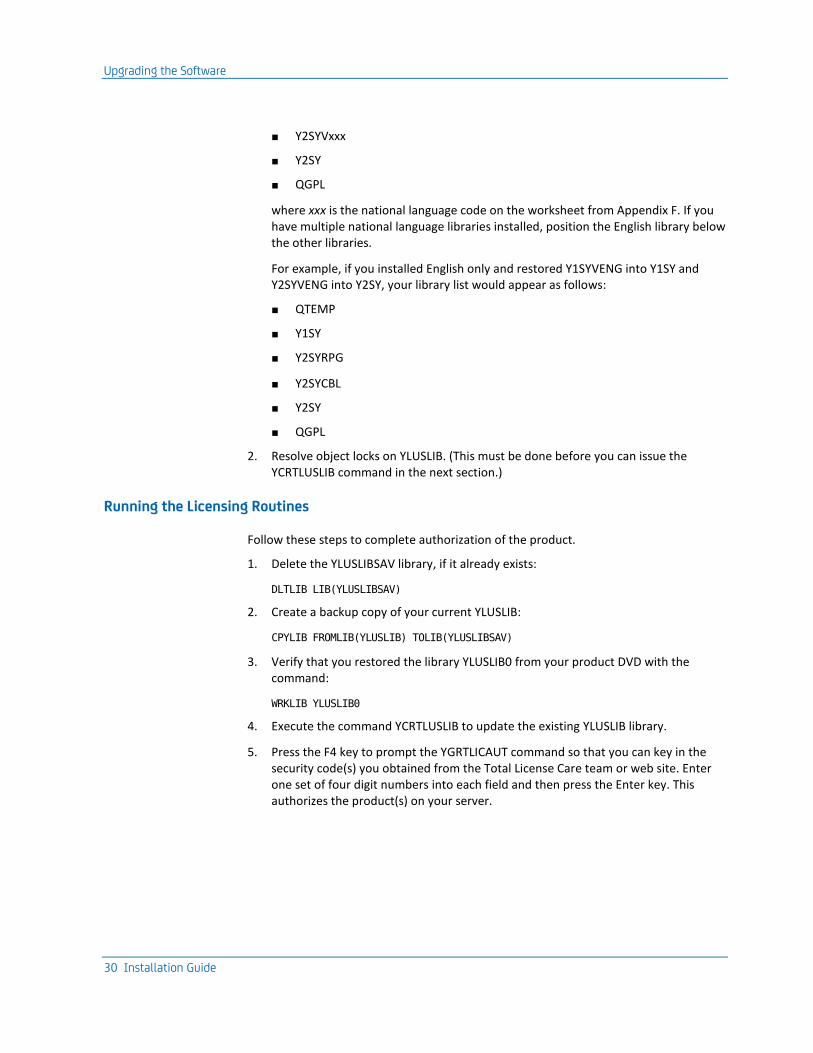
30 Installation Guide
■ Y2SYVxxx
■ Y2SY
■ QGPL
where xxx is the national language code on the worksheet from Appendix F. If you have multiple national language libraries installed, position the English library below the other libraries.
For example, if you installed English only and restored Y1SYVENG into Y1SY and Y2SYVENG into Y2SY, your library list would appear as follows:
■ QTEMP
■ Y1SY
■ Y2SYRPG
■ Y2SYCBL
■ Y2SY
■ QGPL
2. Resolve object locks on YLUSLIB. (This must be done before you can issue the YCRTLUSLIB command in the next section.)
Running the Licensing Routines
Follow these steps to complete authorization of the product.
1. Delete the YLUSLIBSAV library, if it already exists:
DLTLIB LIB(YLUSLIBSAV)
2. Create a backup copy of your current YLUSLIB:
CPYLIB FROMLIB(YLUSLIB) TOLIB(YLUSLIBSAV)
3. Verify that you restored the library YLUSLIB0 from your product DVD with the command:
WRKLIB YLUSLIB0
4. Execute the command YCRTLUSLIB to update the existing YLUSLIB library.
5. Press the F4 key to prompt the YGRTLICAUT command so that you can key in the security code(s) you obtained from the Total License Care team or web site. Enter one set of four digit numbers into each field and then press the Enter key. This authorizes the product(s) on your server.
Upgrading the Software
Chapter 3: Upgrade Installations 31
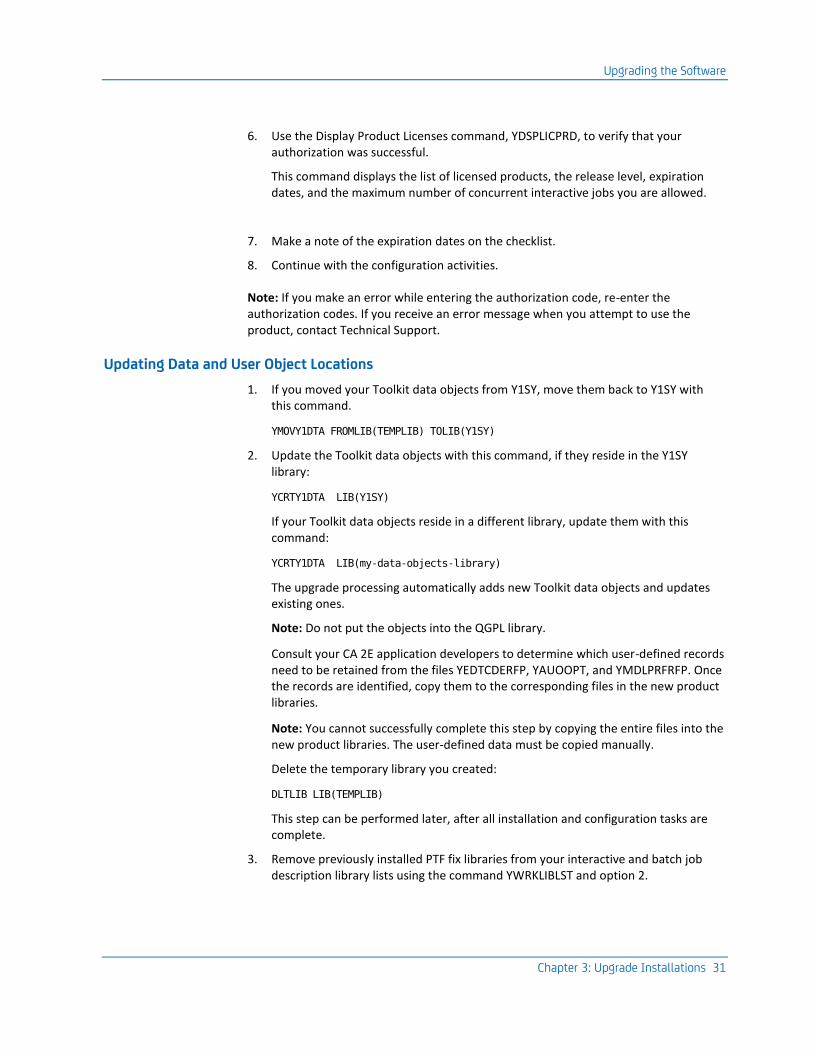
6. Use the Display Product Licenses command, YDSPLICPRD, to verify that your authorization was successful.
This command displays the list of licensed products, the release level, expiration dates, and the maximum number of concurrent interactive jobs you are allowed.
7. Make a note of the expiration dates on the checklist.
8. Continue with the configuration activities.
Note: If you make an error while entering the authorization code, re-enter the authorization codes. If you receive an error message when you attempt to use the product, contact Technical Support.
Updating Data and User Object Locations
1. If you moved your Toolkit data objects from Y1SY, move them back to Y1SY with this command.
YMOVY1DTA FROMLIB(TEMPLIB) TOLIB(Y1SY)
2. Update the Toolkit data objects with this command, if they reside in the Y1SY library:
YCRTY1DTA LIB(Y1SY)
If your Toolkit data objects reside in a different library, update them with this command:
YCRTY1DTA LIB(my-data-objects-library)
The upgrade processing automatically adds new Toolkit data objects and updates existing ones.
Note: Do not put the objects into the QGPL library.
Consult your CA 2E application developers to determine which user-defined records need to be retained from the files YEDTCDERFP, YAUOOPT, and YMDLPRFRFP. Once the records are identified, copy them to the corresponding files in the new product libraries.
Note: You cannot successfully complete this step by copying the entire files into the new product libraries. The user-defined data must be copied manually.
Delete the temporary library you created:
DLTLIB LIB(TEMPLIB)
This step can be performed later, after all installation and configuration tasks are complete.
3. Remove previously installed PTF fix libraries from your interactive and batch job description library lists using the command YWRKLIBLST and option 2.

Upgrading the Software
32 Installation Guide
Authorizing the Toolkit Product
1. Authorize the Toolkit user profile and password extension functions with the command:
YSETY1AUT
This command enables the Toolkit User Profile and Password Validation functions.
2. Save the job log file using the command:
DSPJOBLOG OUTPUT(*PRINT)
Retain the resulting QPJOBLOG spool file. If you encounter errors, CA Technical Support may be able to use the job log to assist in resolving the problem.
Review 2E System Values
Review your CA 2E system values (see the following table), then use the YCHGMDLVAL command to change one or more of these product defaults.
System values are defaults used during CA 2E model creation. The defaults for all system values except YACTSYM and YDATFMT can be overridden in each user model. For more information about system values and YCHGMDLVAL, see the CA 2E Command Reference.
System Value Shipped Value Description
YACTSYM |.| Symbols used for Action diagram constructs
YDATFMT *MDY Date format for generated applications
YSYSCHG *NONE Default change control enabling library
YSYSDBF *DDS Default data definition language
YSYSHLL *RPG Default HLL generator
YSYSNPH *UIM Default language for NPT help text
YSYSPMT *OFF Default generation mode for device literals
YSYSSAA *CUAENTRY Default SAA format
Upgrading Existing Design Models
Chapter 3: Upgrade Installations 33
Upgrading Existing Design Models
After installing an upgrade to an existing version of CA 2E, you need to run a conversion procedure to update your design models. Upgrading your design models involves the following procedures:
■ Signing on with correct authority
■ Modifying library lists
■ Running the upgrade utility
Signing On with Correct Authority
To upgrade a CA 2E design model:
1. Sign on to the IBM i server as QSECOFR or equivalent, if you are not already signed on.
2. Ensure that you have a current backup of your data model.
Note: When making a backup of your models, set the SAVLIB parameter for 'Save access paths' to *YES.
Modifying Library Lists
1. Ensure that the Null model data area contains the name of the CA 2E Null model library (Y2SYMDL).
DSPDTAARA DTAARA(Y2SY/YNLLMDLRFA)
Important! If this data area references a user-modified null model, it must be re-referenced to the null model supplied with the upgrade version or severe model corruption can occur.
CHGDTAARA DTAARA(Y2SY/YNLLMDLRFA) VALUE(Y2SYMDL)
2. Add the CA 2E Product libraries and any additional language and/or high-level language libraries that you may have installed to your library list using the Edit Library command (EDTLIBL).
In general, the following libraries are necessary to run the CA 2E products:
■ QTEMP
Y1SYVxxx
■ Y1SY
■ Y2SYRPG
■ Y2SYCBL
■ Y2SYVxxx
Upgrading Existing Design Models
34 Installation Guide
■ Y2SY
■ QGPL
where xxx is the national language code on the worksheet. If you have multiple national languages, position the English library below the other libraries.
If your Toolkit data objects are not in Y1SY, position your Toolkit data library after Y1SY.
Note: Only add the generator libraries that you have installed (Y2SYRPG and/or Y2SYCBL).
SBMJOB CMD(YAPYMDLCHG MDLLIB(model-library-name)) INLLIBL(*CURRENT)
LOG(4 00 *SECLVL) LOGCLPGM(*YES)
Running the Upgrade Utility
1. Remove all models from your library list.
2. Upgrade each model individually by submitting a separate batch job for each model. The batch jobs should execute one at a time in a single-threaded job queue:
SBMJOB CMD(YAPYMDLCHG MDLLIB(model-library-name)) INLLIBL(*CURRENT) +
LOG(4 00 *SECLVL) LOGCLPGM(*YES)
3. Verify that each model was successfully upgraded by checking its batch job log. The command should complete with an ending code of “0”. If it does not, contact Technical Support.
4. Execute the Duplicate Application Objects (YDUPAPPOBJ) command into the appropriate library or libraries.
You can find libraries that contain a set of CA 2E Application Objects with the command:
DSPOBJD OBJ(*ALLUSR/YGO) OBJTYPE (*CMD)
Important! You should not run YDUPAPPOBJ with Y1SY or any product libraries as the target.
For more information about the YDUPAPPOBJ command, see the CA 2E Command Reference Guide and Generating and Implementing Applications.
Chapter 4: Parallel Installations 35
Chapter 4: Parallel Installations
This chapter describes the type of installation to perform if you are an existing CA 2E user and want to load the new CA 2E product libraries under different names than your current product library names. For example, you might load the software in parallel if you are a Beta test site for a new version of a CA 2E product. By installing in parallel, you would not disrupt your production environment during the Beta testing.
The instructions that follow assume that you will install the product by inserting the product installation DVD into a networked-connected PC's DVD drive and transfer files to the IBM i server using FTP. If you want to install the product from an IBM i DVD drive, see the appendix, “Installing from an IBM i DVD Drive.”
This section contains the following topics:
Before You Begin (see page 35) Adding the Software in Parallel (see page 36) Upgrade Existing CA 2E Design Models (see page 44)
Before You Begin
Before you begin the installation, note the following:
■ Print and complete the worksheets in the appendix, “Installation Worksheets.” These worksheets will help you make decisions regarding library names and other information as you install the new release.
■ Ensure that you have the new authorization codes for all of the CA 2E products you plan to install.
Contact the CA Technical Support if you need a copy of your authorization code(s).
Note: CA recommends that when you rename your product libraries, you substitute only the first letter of each shipped library name, for example Y, with one other letter such as Z.
Important! Do not rename the YLUSLIBO library.
Adding the Software in Parallel
36 Installation Guide
Adding the Software in Parallel
Adding a parallel installation to the existing CA 2E product libraries involves these procedures:
■ Sign on with correct authority
■ Copy files to the IBM i server
■ Restore product libraries
■ Configure the software
■ Authorize the product
■ Upgrade existing design models and batch job descriptions
Sign On with Correct Authority
Sign on with the QSECOFR user profile. (See the chapter, “Installation Overview” for additional details on required authority levels.)
Set your logging level as follows:
CHGJOB LOG(4 00 *SECLVL) LOGCLPGM(*YES)
Copy Files to the IBM i Server
This procedure describes the use of FTP to copy files from the network-connected PC to the IBM i server.
Note: If you are installing from the IBM i server's DVD drive, substitute the steps in the appendix “Installing from an IBM i DVD Drive,” for this procedure.
1. Insert the CA 2E installation DVD into a network-connected PC's DVD drive.
2. Display the contents of the installation DVD to view the SAVF files you need to copy to the IBM i server.
<drive>:\> DIR/P
3. Create a temporary library on the IBM i server to contain the SAVF files:
CRTLIB LIB(TEMP2E)
4. Open a DOS command prompt.

Adding the Software in Parallel
Chapter 4: Parallel Installations 37
5. Use FTP to copy the SAVF files from the installation DVD to the TEMP2E library using these commands:
FTP myIBM i (where myIBM i is the name of the target IBM i server)
myuserid (where myuserid is an IBM i user profile)
mypassword (where mypassword is an IBM i password)
bin
lCD <drive>:\
CD TEMP2E
QUOTE SITE NAMEFMT 1
PUT y1sy.savf
Use additional PUT commands to transfer all the appropriate SAVF files to your IBM i server, using the completed worksheets in the appendix “Installation Worksheets” as a guide.
QUIT (The QUIT command closes the FTP session.)
EXIT (The EXIT command closes the DOS session.)
Restore Product Libraries
Use this procedure to restore the CA 2E product libraries from the SAVF files copied from the installation DVD in the previous section.
1. Enter one Restore Library (RSTLIB) command for each of the SAVF files in the TEMP2E library.
Specify the Shipped Library Name for the SAVF parameter and the Library Name you have selected for the RSTLIB parameter from the worksheets in the appendix “Installation Worksheets.” See the examples that follow.
■ To restore the Toolkit base product library to the Y1SY library, use the following:
RSTLIB SAVLIB(Y1SY) DEV(*SAVF) SAVF(TEMP2E/Y1SY) RSTLIB(Z1SY)
■ To restore the Toolkit developer environment national language library and merge it with the Toolkit base product library, use the following:
RSTLIB SAVLIB(Y1SYVENG) DEV(*SAVF) SAVF(TEMP2E/Y1SYVENG) RSTLIB(Z1SY)
■ To submit the restore commands to run in batch, use the SBMJOB command:
SBMJOB CMD(RSTLIB SAVLIB(Y1SY) DEV(*SAVF) SAVF(TEMP2E/Y1SY
RSTLIB(Z1SY)) JOB(Y1SY) JOBQ(QBATCH) LOG(4 00 *SECLVL)
LOGCLPGM(*YES)
SBMJOB CMD(RSTLIB SAVLIB(Y1SYVENG) DEV(*SAVF)
SAVF(TEMP2E/Y1SYVENG)
RSTLIB(Z1SY)) JOB(Y1SYVENG) JOBQ(QBATCH) LOG(4 00 *SECLVL)
LOGCLPGM(*YES)

Adding the Software in Parallel
38 Installation Guide
2. Review the job logs to verify that all objects were restored successfully, and then save the job log using the command:
DSPJOBLOG OUTPUT(*PRINT)
Retain the resulting QPJOBLOG spool file. If you encounter errors, CA Technical Support may be able to use the job log to assist in resolving the problem.
3. Remove the installation DVD from the PC's DVD drive.
Configure the Software
Prior to using the software, you must configure the CA 2E products for your development environment.
1. Sign on to the IBM i server as QSECOFR or equivalent, if you are not already signed on.
2. Set the logging level as follows:
CHGJOB LOG(4 00 *SECLVL) LOGCLPGM (*YES)
Note: Use the library name that you have selected in place of the product library named in all of the following steps. Disregard all commands that specify product libraries that you did not install. The examples will use the letter Z as the prefix for each library name.
Configuring National Language Libraries
Use this procedure to set parameters for national language support.
1. Reset the default national language for your product, if you require a default national language other than English:
CHGDTAARA DTAARA(Z1SY/YYLNSYA) VALUE (National-Language-code)
This value is shipped as *ENG.
CHGDTAARA DTAARA(Z2SY/YPRDLNGSYA) VALUE (National-Language-code)
This value is shipped as *ENG.
National language library (NLL) codes are listed on the worksheets in the appendix “Installation Worksheets.” The value in the data area must begin with an asterisk (*) and is followed immediately by the NLL code.

Adding the Software in Parallel
Chapter 4: Parallel Installations 39
Resetting Library Names
1. Reset the internal null model library name data areas as follows:
CHGDTAARA DTAARA(Z2SY/YNLLMDLRFA) VALUE(Z2SYMDL)
CHGDTAARA DTAARA(Z2SYMDL/YMDLLIBRFA) VALUE(Z2SYMDL)
2. Do one of the following to reset the National Language library name data areas:
■ If you restored Y2SYVENG into Z2SYVENG, use the following:
■ CHGDTAARA DTAARA (Z2SY/YLNGENGSYA) VALUE(Z2SYVENG)
■ If you restored Y2SYVENG into Z2SY, use the following:
CHGDTAARA DTAARA(Z2SY/YLNGENGSYA) VALUE(Z2SY)
3. If you have an additional national language, execute the command:
CHGDTAARA DTAARA(Z2SY/YLNGxxxSYA) VALUE(CA 2Exxx-lang-library)
where xxx is the national language library code listed on the worksheets in the appendix “Installation Worksheets.”
Adding to the Current Library List
1. Add your data objects library and the CA 2E product libraries to your current library list using the EDTLIBL command:
Note: QTEMP must be at the top of your library list.
■ QTEMP
■ Z1SYVxxx
■ Z1SY
■ Z2SY
■ QGPL
where xxx is the national language code on the worksheet. If you have multiple national language libraries, position the English library below the other libraries.
For example, if you installed English only and restored Y1SYVENG into Z1SY, your library list would appear as follows:
■ QTEMP
■ Z1SY
■ Z2SY
■ QGPL
Adding the Software in Parallel
40 Installation Guide
2. Before executing the YCRTLUSLIB command, verify that no one is using the CA 2E Licensing Library using the IBM Object Lock' (WRKOBJLCK) command:
WRKOBJLCK OBJ(QSYS/YLUSLIB) OBJTYPE(*LIB)
WRKOBJLCK OBJ(YLUSLIB/YLICREGP) OBJTYPE(*FILE) MBR(*ALL)
3. Resolve object locks on YLUSLIB. (This must be performed before you can issue the YCRTLUSLIB command in the next section.)
Authorize the Product
Authorize your CA 2E products using the authorization code and instructions.
1. If library YLUSLIBSAV already exists, delete it using this command:
2. DLTLIB LIB(YLUSLIBSAV)
3. Make a backup copy of your current YLUSLIB, using the command:
CPYLIB FROMLIB(YLUSLIB) TOLIB(YLUSLIBSAV)
4. Verify that you restored the library YLUSLIB0 from your product DVD with the command:
WRKLIB YLUSLIB0
5. Execute the command YCRTLUSLIB to update the existing YLUSLIB library.
6. Press the F4 key to prompt the YGRTLICAUT command so that you can key in the security code(s) you obtained from the Total License Care team or web site. Enter each set of four digit numbers into each field and then press the Enter key. This authorizes the product(s) on your server.
7. Use the Display Product Licenses command, YDSPLICPRD to verify that your authorization was successful. This command displays the list of licensed products, release level, expiration dates, and the maximum number of concurrent interactive jobs you are allowed.
8. Make a note of the expiration dates on the checklist.
9. Continue with the configuration activities.
Note: If you make an error while entering the authorization code, re-enter the code. If you receive an error message when you attempt to use the product, contact Technical Support.
Adding the Software in Parallel
Chapter 4: Parallel Installations 41
Setting Data and User Object Locations
1. Create the Toolkit data objects:
YCRTY1DTA LIB(Z1SY) or
YCRTY1DTA LIB(new-data-objects-library)
These objects can be placed either in the Toolkit base product library or in another non-CA 2E user library.
Note: Do not put the objects into the QGPL library.
2. If you want to use a duplicate set of Toolkit data objects such as library lists and user profile extensions with the new product, enter the following commands:
CRTLIB LIB(TEMPLIB)
YMOVY1DTA FROMLIB(new-data-objects-library) TOLIB(TEMPLIB)
YBLDOBJLST OBJ(TEMPLIB/*ALL)
YCHKLSTE CHKLIB(old-data-objects-library)
YCRTDUPOBJ OBJ(*O) FROMLIB(old-data-objects-library) OBJTYPE(*ALL)
TOLIB(TEMPLIB) DATA(*YES) CRTOPT(*ALL)
YMOVY1DTA FROMLIB(TEMPLIB) TOLIB(new-data-objects-library)
YAPYY1DCHG Y1DLIB (new-data-objects-library) Y1DTYPE(*ALL)
DLTLIB LIB(TEMPLIB)
Note: You will now have two sets of Toolkit data objects. You need to maintain both sets of data objects separately; namely, one for your production environment and one for your parallel environment.
3. Add your data objects library and the CA 2E product libraries to your current library list by using the EDTLIBL command:
■ QTEMP
■ Z1SYVxxx
■ Z1SY
■ Z2SYRPG
■ Z2SYCBL
■ Z2SYVxxx
■ Z2SY
■ QGPL
Adding the Software in Parallel
42 Installation Guide
where xxx is the national language code on the worksheet in the appendix “Installation Worksheets.” If you have multiple national languages, position the English library below the other libraries.
If you installed English only and restored Y1SYVENG into Z1SY and Y2SYVENG into Z2SY, your library list would appear as follows:
■ QTEMP
■ Z1SY
■ Z2SYRPG
■ Z2SYCBL
■ Z2SY
■ QGPL
Authorizing the Toolkit Product
1. Authorize the Toolkit user profile and password extension functions with the command:
YSETY1AUT
This command enables the Toolkit User Profile and Password Validation functions.
2. Save the job log using the command:
DSPJOBLOG OUTPUT(*PRINT)
Retain the resulting QPJOBLOG spool file. If you encounter errors, CA Technical Support may be able to use the job log to assist in resolving the problem.
3. Remove previously installed PTF fix libraries from your interactive and batch job description library lists using the command YWRKLIBLST and option 2.
You must modify your CA 2E model and batch job descriptions library lists before using this new release.
4. Copy the existing CA 2E design models that you want to use with the parallel installation and then upgrade them. Proceed to the instructions in the section, Upgrade Existing CA 2E Design Models later in this chapter.
Adding Routing Entries
Use this procedure to add a second routing entry to the subsystem you currently use for CA 2E jobs.
Note: You must have two different routing entries in the subsystem to which CA 2E jobs are submitted for the compile preprocessor program (YBRTPRC). For example, if you name the CA 2E Product libraries Z1SY, Z2SY, and so forth, you need to perform the following tasks:

Adding the Software in Parallel
Chapter 4: Parallel Installations 43
1. Add the following routing entry to your subsystem:
2.
Seq. Program Library Compare Value Start Pos.
1112 YBRTPRC Z1SY ZCRTOVR 1
Your subsystem will then contain these two routing entries for program YBRTPRC:
Seq. Program Library Compare Value Start Pos.
1111 YBRTPRC Y1SY YCRTOVR 1
1112 YBRTPRC Z1SY ZCRTOVR 1
Note: Ensure this routing entry has a lower value than the system-supplied *ANY routing entry in the subsystem you have chosen.
3. Change the model job description routing data to contain routing data ZCRTOVR for all models to be used by the parallel version of the product.
To identify your model job description name, perform these tasks:
a. Add your model library to your library list:
ADDLIBLE model-library-name
b. From a command line, enter:
YDSPMDLVAL
■ Select the Display Environment Values option.
■ Note the job description name under the heading Model Libraries.
4. Use the CHGJOBD command to change the model job description routing data:
CHGJOBD JOBD(job-description) RTGDTA(ZCRTOVR)
For more information about CA 2E Work Management, see the Generating and Implementing Applications manual.
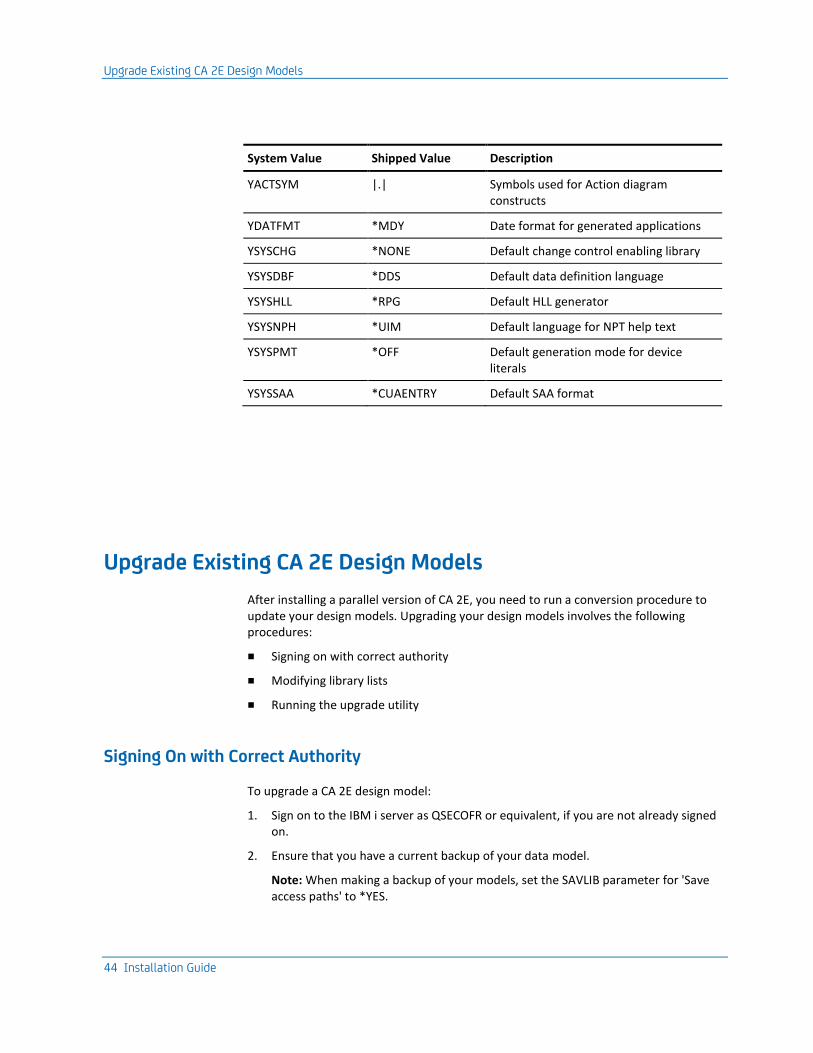
Review 2E System Values
Review your CA 2E system values (see the following table), then use the YCHGMDLVAL command to change one or more of these product defaults.
System values are defaults used during CA 2E model creation. The defaults for all system values except YACTSYM and YDATFMT can be overridden in each user model. For more information about system values and YCHGMDLVAL, see the CA 2E Command Reference.
Upgrade Existing CA 2E Design Models
44 Installation Guide
System Value Shipped Value Description
YACTSYM |.| Symbols used for Action diagram constructs
YDATFMT *MDY Date format for generated applications
YSYSCHG *NONE Default change control enabling library
YSYSDBF *DDS Default data definition language
YSYSHLL *RPG Default HLL generator
YSYSNPH *UIM Default language for NPT help text
YSYSPMT *OFF Default generation mode for device literals
YSYSSAA *CUAENTRY Default SAA format
Upgrade Existing CA 2E Design Models
After installing a parallel version of CA 2E, you need to run a conversion procedure to update your design models. Upgrading your design models involves the following procedures:
■ Signing on with correct authority
■ Modifying library lists
■ Running the upgrade utility
Signing On with Correct Authority
To upgrade a CA 2E design model:
1. Sign on to the IBM i server as QSECOFR or equivalent, if you are not already signed on.
2. Ensure that you have a current backup of your data model.
Note: When making a backup of your models, set the SAVLIB parameter for 'Save access paths' to *YES.
Upgrade Existing CA 2E Design Models
Chapter 4: Parallel Installations 45
Modifying Library Lists
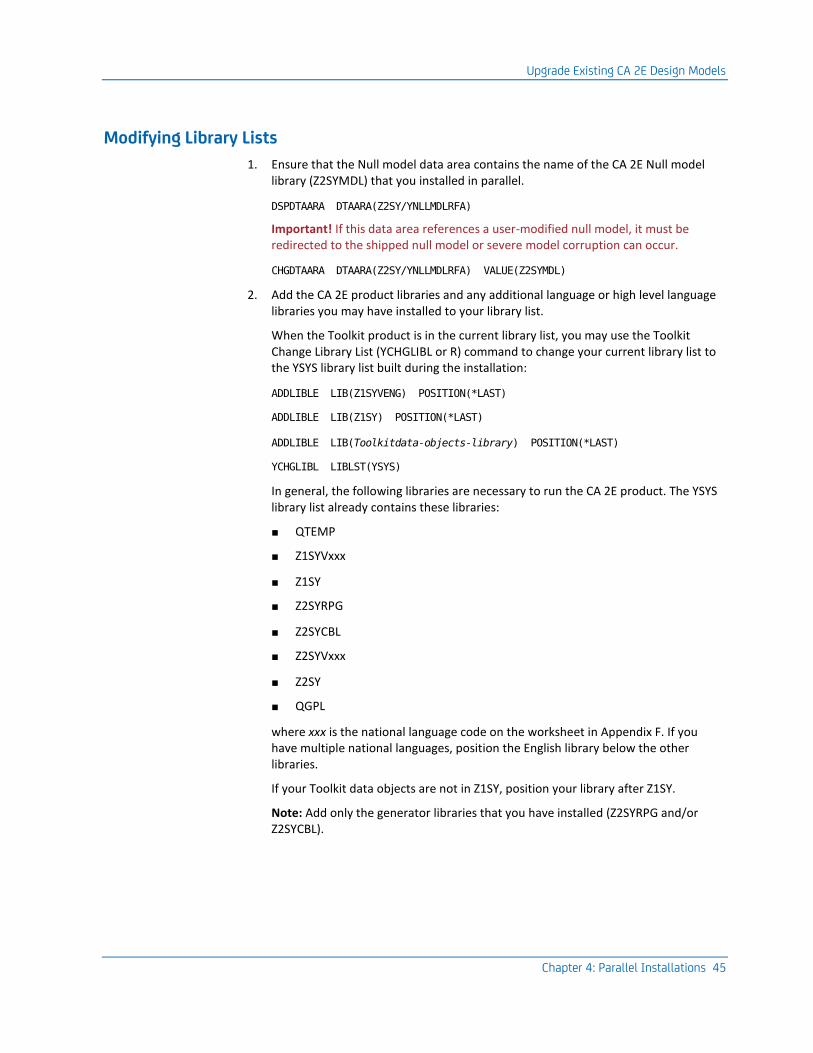
1. Ensure that the Null model data area contains the name of the CA 2E Null model library (Z2SYMDL) that you installed in parallel.
DSPDTAARA DTAARA(Z2SY/YNLLMDLRFA)
Important! If this data area references a user-modified null model, it must be redirected to the shipped null model or severe model corruption can occur.
CHGDTAARA DTAARA(Z2SY/YNLLMDLRFA) VALUE(Z2SYMDL)
2. Add the CA 2E product libraries and any additional language or high level language libraries you may have installed to your library list.
When the Toolkit product is in the current library list, you may use the Toolkit Change Library List (YCHGLIBL or R) command to change your current library list to the YSYS library list built during the installation:
ADDLIBLE LIB(Z1SYVENG) POSITION(*LAST)
ADDLIBLE LIB(Z1SY) POSITION(*LAST)
ADDLIBLE LIB(Toolkitdata-objects-library) POSITION(*LAST)
YCHGLIBL LIBLST(YSYS)
In general, the following libraries are necessary to run the CA 2E product. The YSYS library list already contains these libraries:
■ QTEMP
■ Z1SYVxxx
■ Z1SY
■ Z2SYRPG
■ Z2SYCBL
■ Z2SYVxxx
■ Z2SY
■ QGPL
where xxx is the national language code on the worksheet in Appendix F. If you have multiple national languages, position the English library below the other libraries.
If your Toolkit data objects are not in Z1SY, position your library after Z1SY.
Note: Add only the generator libraries that you have installed (Z2SYRPG and/or Z2SYCBL).
Upgrade Existing CA 2E Design Models
46 Installation Guide
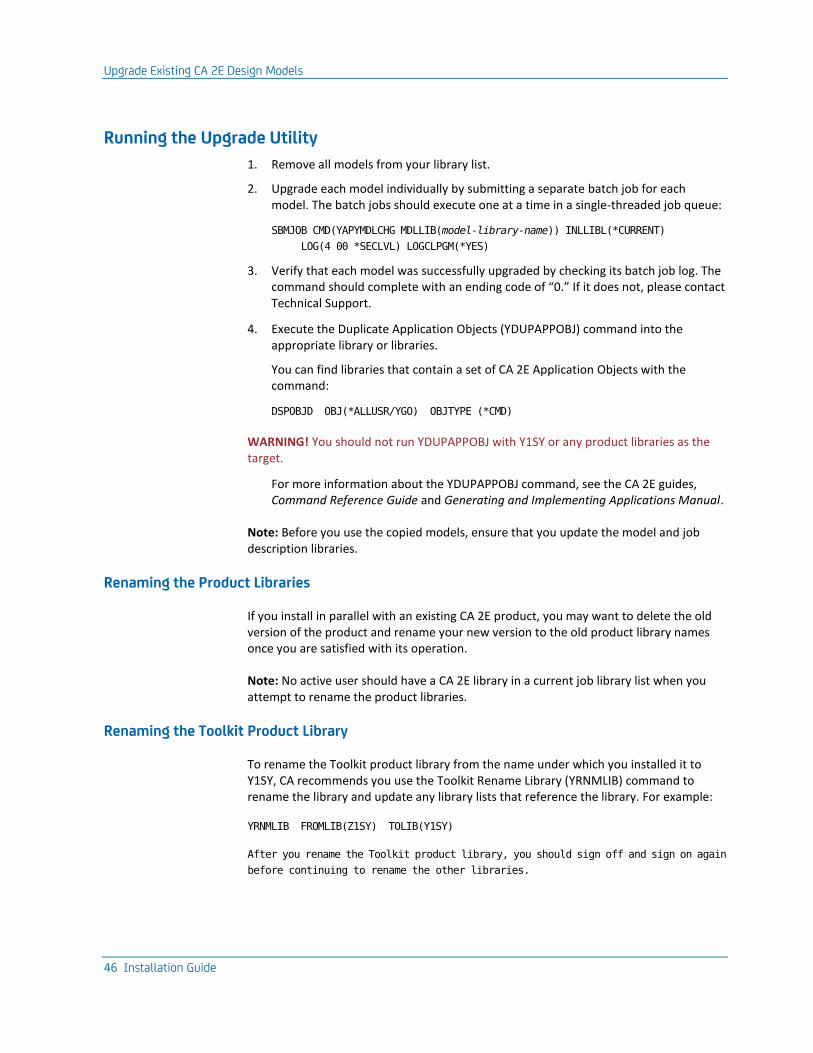
Running the Upgrade Utility
1. Remove all models from your library list.
2. Upgrade each model individually by submitting a separate batch job for each model. The batch jobs should execute one at a time in a single-threaded job queue:
SBMJOB CMD(YAPYMDLCHG MDLLIB(model-library-name)) INLLIBL(*CURRENT)
LOG(4 00 *SECLVL) LOGCLPGM(*YES)
3. Verify that each model was successfully upgraded by checking its batch job log. The command should complete with an ending code of “0.” If it does not, please contact Technical Support.
4. Execute the Duplicate Application Objects (YDUPAPPOBJ) command into the appropriate library or libraries.
You can find libraries that contain a set of CA 2E Application Objects with the command:
DSPOBJD OBJ(*ALLUSR/YGO) OBJTYPE (*CMD)
WARNING! You should not run YDUPAPPOBJ with Y1SY or any product libraries as the target.
For more information about the YDUPAPPOBJ command, see the CA 2E guides, Command Reference Guide and Generating and Implementing Applications Manual.
Note: Before you use the copied models, ensure that you update the model and job description libraries.
Renaming the Product Libraries
If you install in parallel with an existing CA 2E product, you may want to delete the old version of the product and rename your new version to the old product library names once you are satisfied with its operation.
Note: No active user should have a CA 2E library in a current job library list when you attempt to rename the product libraries.
Renaming the Toolkit Product Library
To rename the Toolkit product library from the name under which you installed it to Y1SY, CA recommends you use the Toolkit Rename Library (YRNMLIB) command to rename the library and update any library lists that reference the library. For example:
YRNMLIB FROMLIB(Z1SY) TOLIB(Y1SY)
After you rename the Toolkit product library, you should sign off and sign on again
before continuing to rename the other libraries.
Upgrade Existing CA 2E Design Models
Chapter 4: Parallel Installations 47
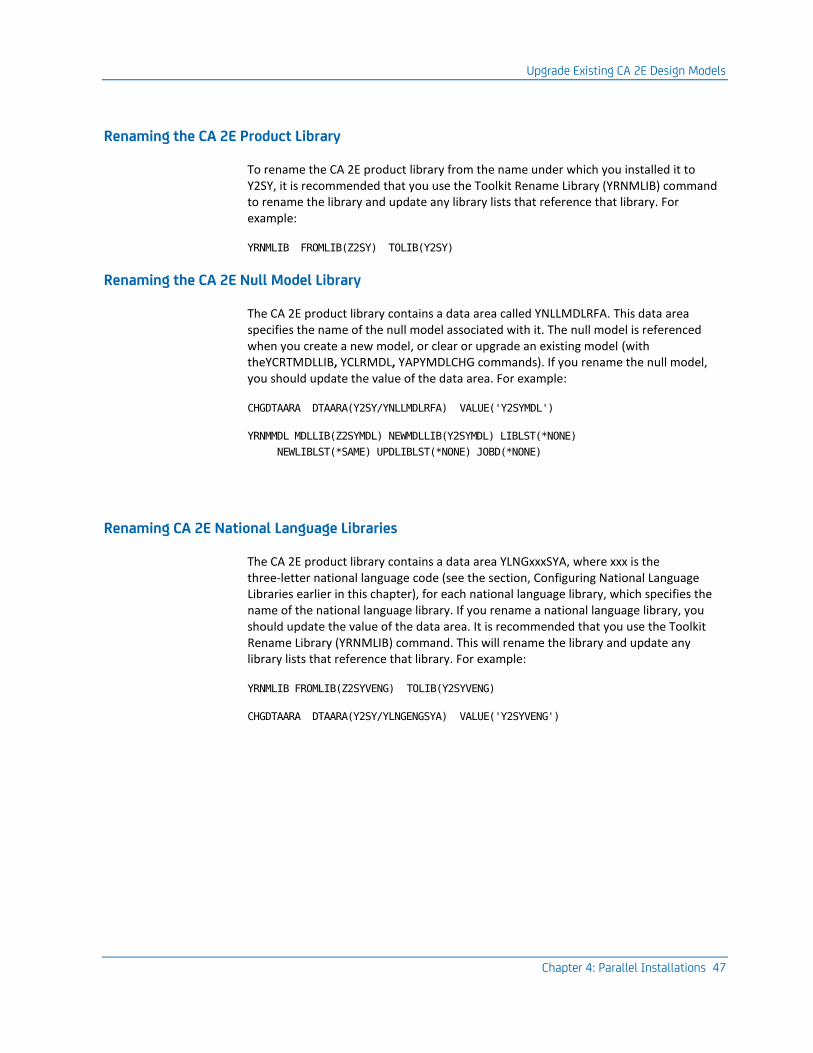
Renaming the CA 2E Product Library
To rename the CA 2E product library from the name under which you installed it to Y2SY, it is recommended that you use the Toolkit Rename Library (YRNMLIB) command to rename the library and update any library lists that reference that library. For example:
YRNMLIB FROMLIB(Z2SY) TOLIB(Y2SY)
Renaming the CA 2E Null Model Library
The CA 2E product library contains a data area called YNLLMDLRFA. This data area specifies the name of the null model associated with it. The null model is referenced when you create a new model, or clear or upgrade an existing model (with theYCRTMDLLIB, YCLRMDL, YAPYMDLCHG commands). If you rename the null model, you should update the value of the data area. For example:
CHGDTAARA DTAARA(Y2SY/YNLLMDLRFA) VALUE('Y2SYMDL')
YRNMMDL MDLLIB(Z2SYMDL) NEWMDLLIB(Y2SYMDL) LIBLST(*NONE)
NEWLIBLST(*SAME) UPDLIBLST(*NONE) JOBD(*NONE)
Renaming CA 2E National Language Libraries
The CA 2E product library contains a data area YLNGxxxSYA, where xxx is the three-letter national language code (see the section, Configuring National Language Libraries earlier in this chapter), for each national language library, which specifies the name of the national language library. If you rename a national language library, you should update the value of the data area. It is recommended that you use the Toolkit Rename Library (YRNMLIB) command. This will rename the library and update any library lists that reference that library. For example:
YRNMLIB FROMLIB(Z2SYVENG) TOLIB(Y2SYVENG)
CHGDTAARA DTAARA(Y2SY/YLNGENGSYA) VALUE('Y2SYVENG')
Upgrade Existing CA 2E Design Models
48 Installation Guide
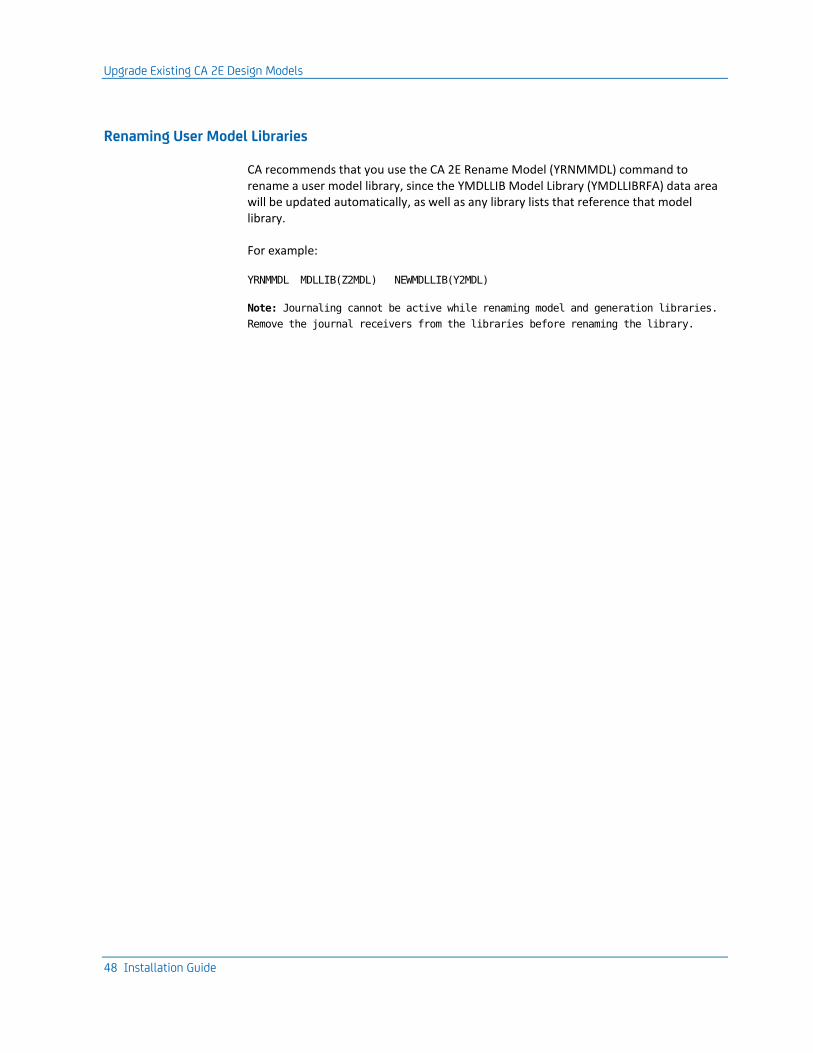
Renaming User Model Libraries
CA recommends that you use the CA 2E Rename Model (YRNMMDL) command to rename a user model library, since the YMDLLIB Model Library (YMDLLIBRFA) data area will be updated automatically, as well as any library lists that reference that model library.
For example:
YRNMMDL MDLLIB(Z2MDL) NEWMDLLIB(Y2MDL)
Note: Journaling cannot be active while renaming model and generation libraries.
Remove the journal receivers from the libraries before renaming the library.
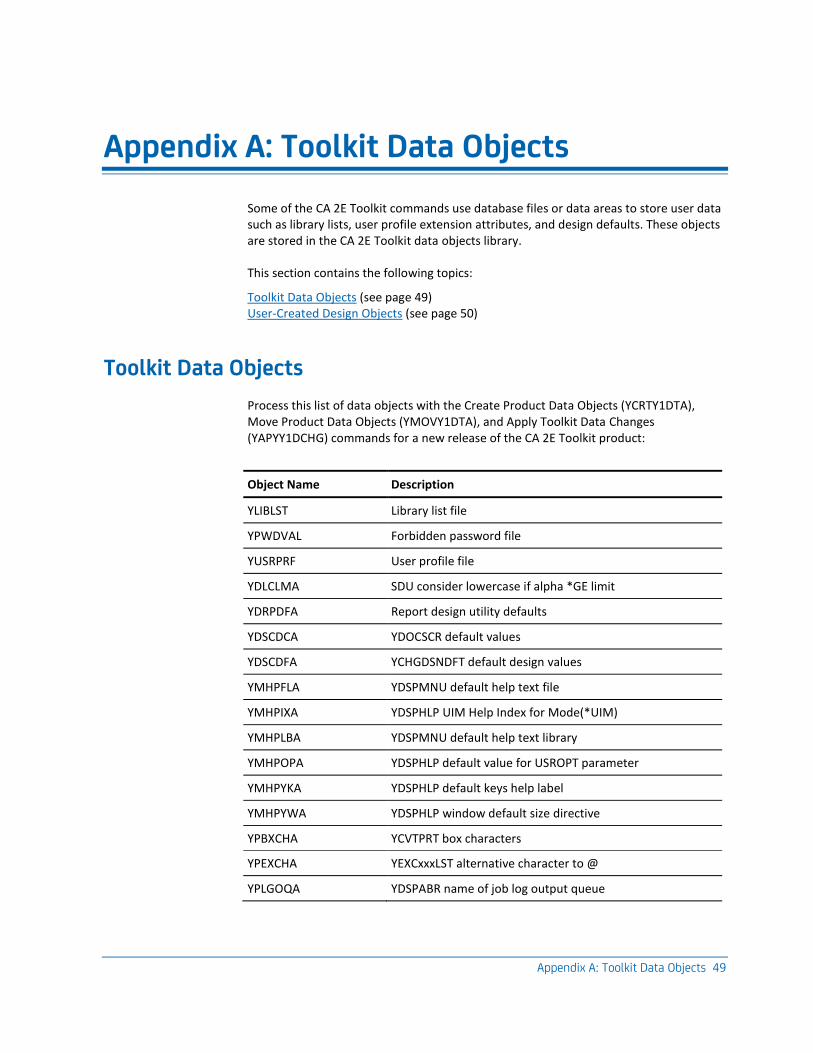
Appendix A: Toolkit Data Objects 49
Appendix A: Toolkit Data Objects
Some of the CA 2E Toolkit commands use database files or data areas to store user data such as library lists, user profile extension attributes, and design defaults. These objects are stored in the CA 2E Toolkit data objects library.
This section contains the following topics:
Toolkit Data Objects (see page 49) User-Created Design Objects (see page 50)
Toolkit Data Objects
Process this list of data objects with the Create Product Data Objects (YCRTY1DTA), Move Product Data Objects (YMOVY1DTA), and Apply Toolkit Data Changes (YAPYY1DCHG) commands for a new release of the CA 2E Toolkit product:
Object Name Description
YLIBLST Library list file
YPWDVAL Forbidden password file
YUSRPRF User profile file
YDLCLMA SDU consider lowercase if alpha *GE limit
YDRPDFA Report design utility defaults
YDSCDCA YDOCSCR default values
YDSCDFA YCHGDSNDFT default design values
YMHPFLA YDSPMNU default help text file
YMHPIXA YDSPHLP UIM Help Index for Mode(*UIM)
YMHPLBA YDSPMNU default help text library
YMHPOPA YDSPHLP default value for USROPT parameter
YMHPYKA YDSPHLP default keys help label
YMHPYWA YDSPHLP window default size directive
YPBXCHA YCVTPRT box characters
YPEXCHA YEXCxxxLST alternative character to @
YPLGOQA YDSPABR name of job log output queue

User-Created Design Objects
50 Installation Guide
YYCOTXA Company name text
YWWDBDA Window border defaults
YYPWCKA YCHKPWD control values
YYSYTXA Software system name
YCVTOPTP TCVTSPLF conversion options
YSPLRTRP Spooled router control file
YBRTPXA YCRTOVR Compile preprocessor default exit programs
YDBFCCS YCVTSPLF - Database coded character set identifier
YDMNAUDP Menu Audit File
YERRDFNP Error definition file (UK: errcde/errprc)
YMSGPFXP YAPPOBJ Message prefixes
YPDFSKL YCVTSPLF - PDF Skeleton
YSTMFCOD YCVTSPLF - Stream file code page
YSTRCONP String constants (UK: strid)
User-Created Design Objects
In addition, you can process these user-created design objects with the YAPYY1DCHG command.
Object Name Description
YDSNMNU Menu design file
YDSNPNL Panel design file
YDSNPNL1 Panel design file
YDSNPNLA Panel design file
YDSNPNLA0 Panel design file
YDSNPNLA1 Panel design file
YDSNPNLA2 Panel design file
YDSNPNL2 Panel design file
YDSNRPTA Report design file
YDSNRPTB Report design file
YDSNRPTC Report design file
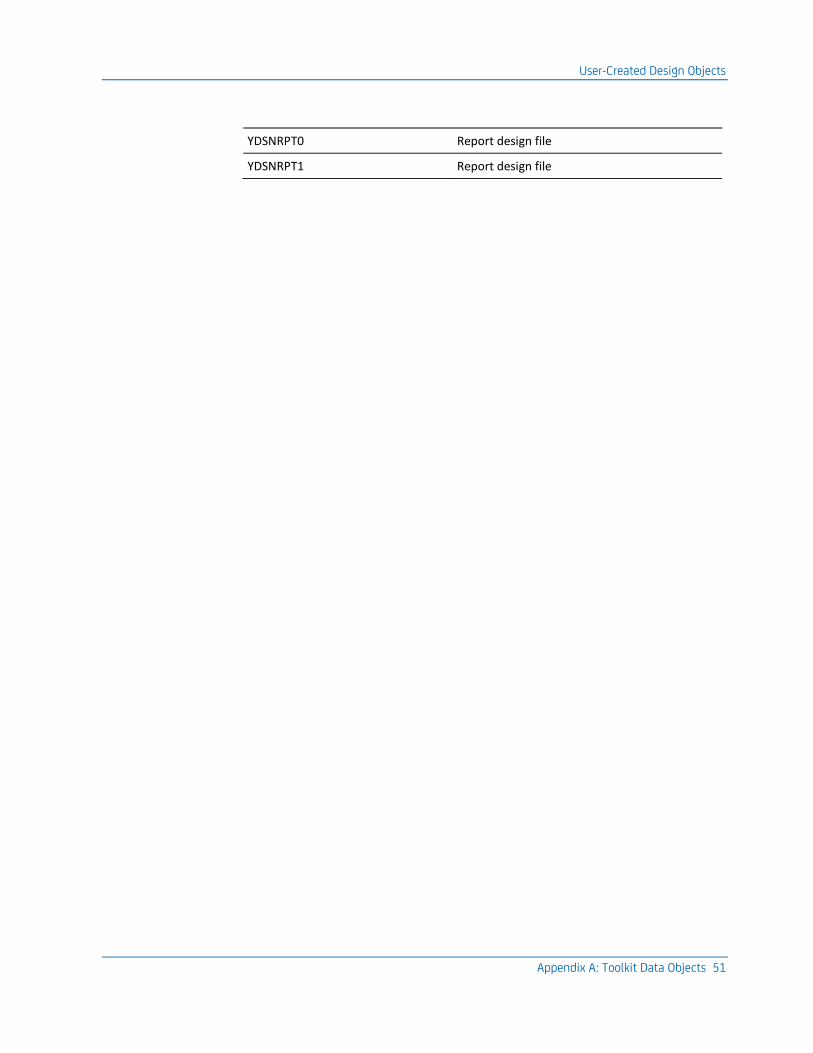
User-Created Design Objects
Appendix A: Toolkit Data Objects 51
YDSNRPT0 Report design file
YDSNRPT1 Report design file

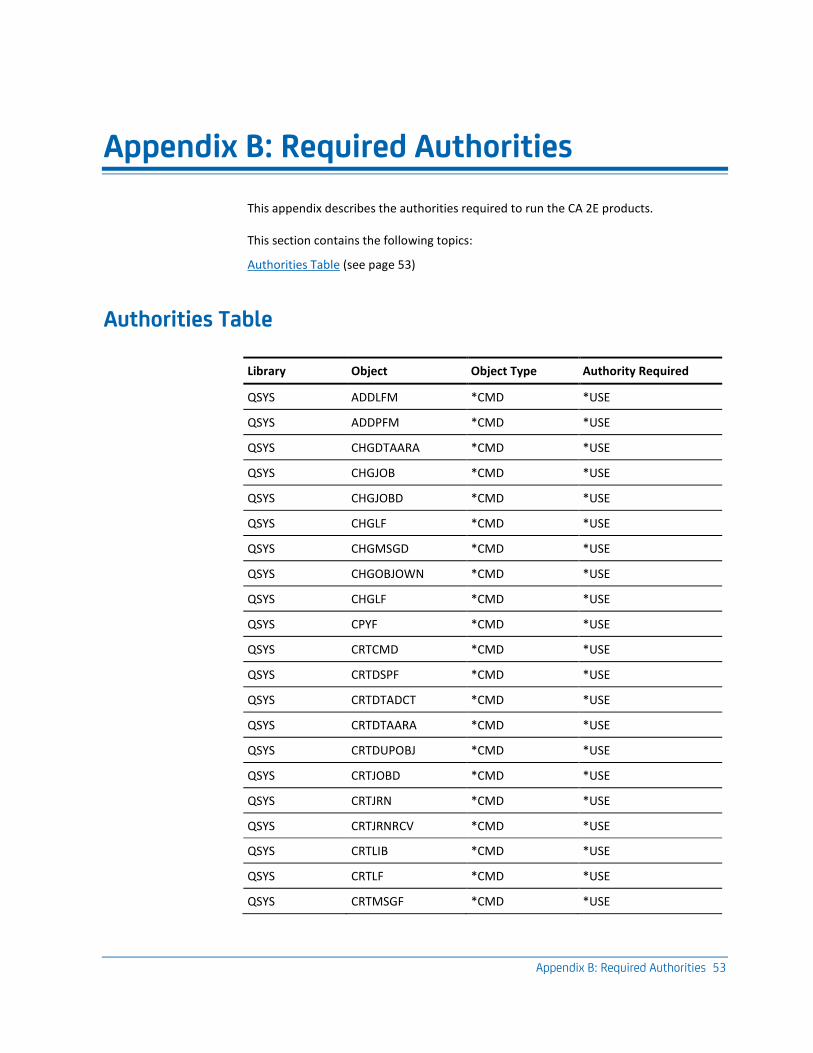
Appendix B: Required Authorities 53
Appendix B: Required Authorities
This appendix describes the authorities required to run the CA 2E products.
This section contains the following topics:
Authorities Table (see page 53)
Authorities Table
Library Object Object Type Authority Required
QSYS ADDLFM *CMD *USE
QSYS ADDPFM *CMD *USE
QSYS CHGDTAARA *CMD *USE
QSYS CHGJOB *CMD *USE
QSYS CHGJOBD *CMD *USE
QSYS CHGLF *CMD *USE
QSYS CHGMSGD *CMD *USE
QSYS CHGOBJOWN *CMD *USE
QSYS CHGLF *CMD *USE
QSYS CPYF *CMD *USE
QSYS CRTCMD *CMD *USE
QSYS CRTDSPF *CMD *USE
QSYS CRTDTADCT *CMD *USE
QSYS CRTDTAARA *CMD *USE
QSYS CRTDUPOBJ *CMD *USE
QSYS CRTJOBD *CMD *USE
QSYS CRTJRN *CMD *USE
QSYS CRTJRNRCV *CMD *USE
QSYS CRTLIB *CMD *USE
QSYS CRTLF *CMD *USE
QSYS CRTMSGF *CMD *USE
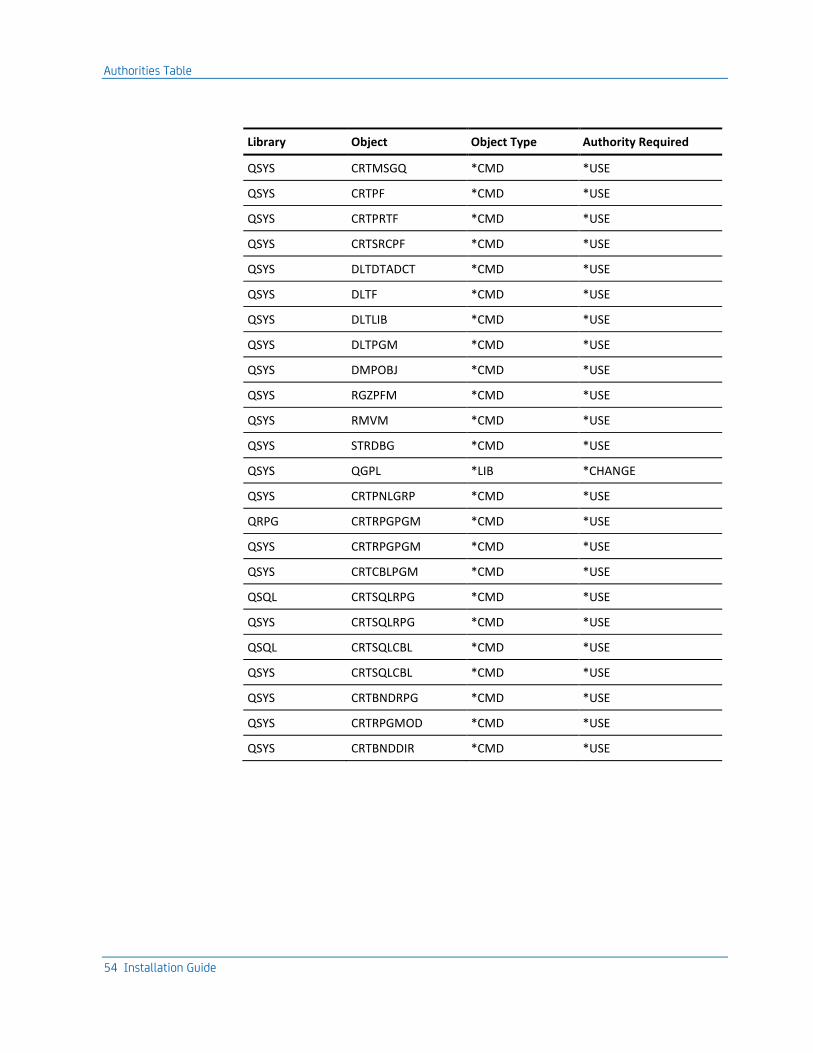
Authorities Table
54 Installation Guide
Library Object Object Type Authority Required
QSYS CRTMSGQ *CMD *USE
QSYS CRTPF *CMD *USE
QSYS CRTPRTF *CMD *USE
QSYS CRTSRCPF *CMD *USE
QSYS DLTDTADCT *CMD *USE
QSYS DLTF *CMD *USE
QSYS DLTLIB *CMD *USE
QSYS DLTPGM *CMD *USE
QSYS DMPOBJ *CMD *USE
QSYS RGZPFM *CMD *USE
QSYS RMVM *CMD *USE
QSYS STRDBG *CMD *USE
QSYS QGPL *LIB *CHANGE
QSYS CRTPNLGRP *CMD *USE
QRPG CRTRPGPGM *CMD *USE
QSYS CRTRPGPGM *CMD *USE
QSYS CRTCBLPGM *CMD *USE
QSQL CRTSQLRPG *CMD *USE
QSYS CRTSQLRPG *CMD *USE
QSQL CRTSQLCBL *CMD *USE
QSYS CRTSQLCBL *CMD *USE
QSYS CRTBNDRPG *CMD *USE
QSYS CRTRPGMOD *CMD *USE
QSYS CRTBNDDIR *CMD *USE
Appendix C: Troubleshooting 55
Appendix C: Troubleshooting
If an error occurs during the installation process, one or more messages is sent to the job running the installation.
If an error occurs, check the job log of the job that executed the command. If the job was submitted to batch, display the spooled job log. If the job was run interactively, either sign off with the *LIST option, or press F10 to see the low level messages on the screen. Alternatively, you can issue the command:
DSPJOBLOG OUTPUT(*PRINT)
Review the spool file of the job log.
This section contains the following topics:
Possible Problems (see page 55)
Possible Problems
The following is a list of possible cause for errors that can occur during the installation process:
■ Not enough authority
■ This would suggest that the user profile used to clear an existing product or to run the Post-load commands did not have QSECOFR authority. RECOVERY: Sign on with an authorized profile and retry the installation.
■ Media error
If the restore fails due to a media error it is recommended that you contact your product supplier.

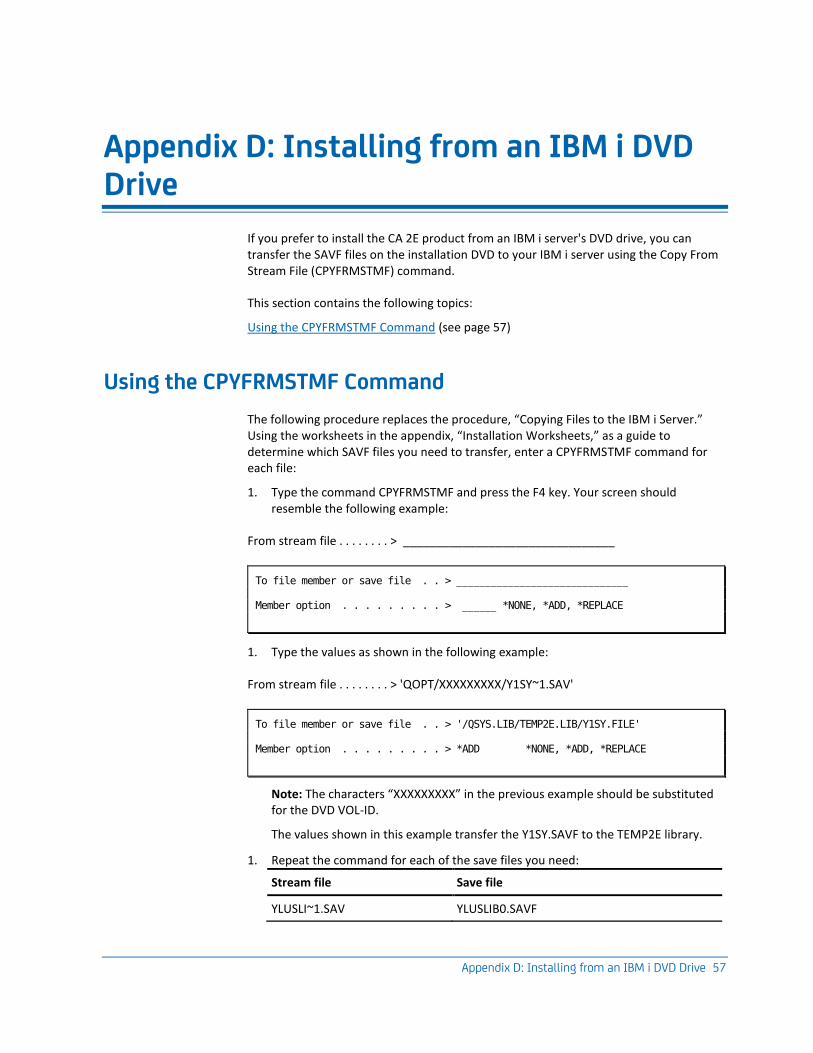
Appendix D: Installing from an IBM i DVD Drive 57
Appendix D: Installing from an IBM i DVD Drive
If you prefer to install the CA 2E product from an IBM i server's DVD drive, you can transfer the SAVF files on the installation DVD to your IBM i server using the Copy From Stream File (CPYFRMSTMF) command.
This section contains the following topics:
Using the CPYFRMSTMF Command (see page 57)
Using the CPYFRMSTMF Command
The following procedure replaces the procedure, “Copying Files to the IBM i Server.” Using the worksheets in the appendix, “Installation Worksheets,” as a guide to determine which SAVF files you need to transfer, enter a CPYFRMSTMF command for each file:
1. Type the command CPYFRMSTMF and press the F4 key. Your screen should resemble the following example:
From stream file . . . . . . . . > ________________________________
To file member or save file . . > ______________________________ Member option . . . . . . . . . > ______ *NONE, *ADD, *REPLACE
1. Type the values as shown in the following example:
From stream file . . . . . . . . > 'QOPT/XXXXXXXXX/Y1SY~1.SAV'
To file member or save file . . > '/QSYS.LIB/TEMP2E.LIB/Y1SY.FILE' Member option . . . . . . . . . > *ADD *NONE, *ADD, *REPLACE
Note: The characters “XXXXXXXXX” in the previous example should be substituted for the DVD VOL-ID.
The values shown in this example transfer the Y1SY.SAVF to the TEMP2E library.
1. Repeat the command for each of the save files you need:
Stream file Save file
YLUSLI~1.SAV YLUSLIB0.SAVF
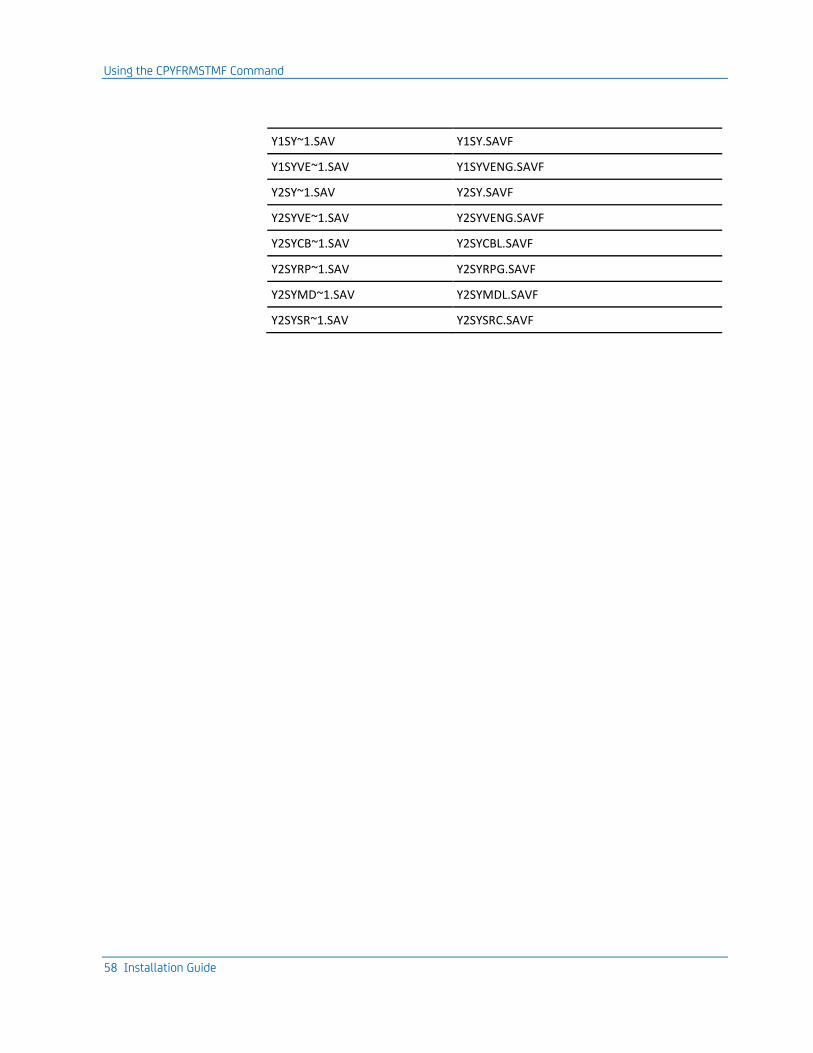
Using the CPYFRMSTMF Command
58 Installation Guide
Y1SY~1.SAV Y1SY.SAVF
Y1SYVE~1.SAV Y1SYVENG.SAVF
Y2SY~1.SAV Y2SY.SAVF
Y2SYVE~1.SAV Y2SYVENG.SAVF
Y2SYCB~1.SAV Y2SYCBL.SAVF
Y2SYRP~1.SAV Y2SYRPG.SAVF
Y2SYMD~1.SAV Y2SYMDL.SAVF
Y2SYSR~1.SAV Y2SYSRC.SAVF
Appendix E: Upgrading from Releases Prior to Version 7.0 59
Appendix E: Upgrading from Releases Prior to Version 7.0
This section describes changes to the CA 2E Null Model. Review the changes carefully before upgrading (to the latest release) any existing CA 2E models with a release prior to Version 7.0.
This section contains the following topics:
New Objects within the CA 2E Null Model (see page 59) Changes to Program Status Data Structure Files (see page 60)
New Objects within the CA 2E Null Model
The CA 2E Null Model for Version 7.0 included new internal system-defined fields and new messages as described in the following sections.
New Internal SystemDefined Fields
A number of new internal system-defined fields were created for CA 2E Version 7.0. These fields allow additional functionality (described in detail in the Release Summary document). All of the new fields, such as existing internal system fields like *Job date, have three-character internal DDS names and textual names that begin with an asterisk (*).
Important! Before you upgrade from a previous version of the CA 2E products to the latest release, you must ensure that user-defined fields do not duplicate the new field names shown in the table on the following page in this chapter.
If you have created fields in your model that have either the same textual name or the same DDS name as any of the fields shown in the table, you must rename your existing fields. If necessary, you must also regenerate and recompile any functions that use them prior to upgrading to the latest release.
Textual Name DDS Name Details
*ALLPARMS ALL Stand-alone field
*Relative record number RRN Stand-alone field
*Pgm STATUS STS Added to *Job data file
*Pgm Previous *STATUS PST Added to *Job data file
*Pgm *ROUTINE RVN Added to *Job data file
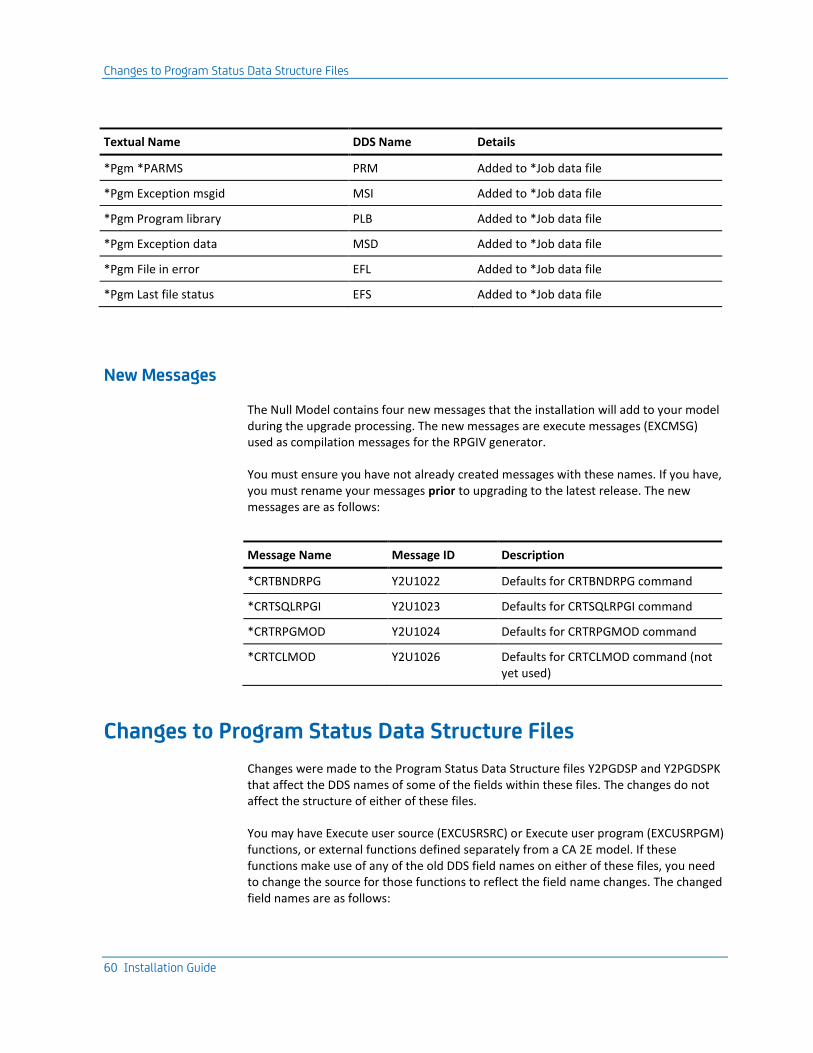
Changes to Program Status Data Structure Files
60 Installation Guide
Textual Name DDS Name Details
*Pgm *PARMS PRM Added to *Job data file
*Pgm Exception msgid MSI Added to *Job data file
*Pgm Program library PLB Added to *Job data file
*Pgm Exception data MSD Added to *Job data file
*Pgm File in error EFL Added to *Job data file
*Pgm Last file status EFS Added to *Job data file
New Messages
The Null Model contains four new messages that the installation will add to your model during the upgrade processing. The new messages are execute messages (EXCMSG) used as compilation messages for the RPGIV generator.
You must ensure you have not already created messages with these names. If you have, you must rename your messages prior to upgrading to the latest release. The new messages are as follows:
Message Name Message ID Description
*CRTBNDRPG Y2U1022 Defaults for CRTBNDRPG command
*CRTSQLRPGI Y2U1023 Defaults for CRTSQLRPGI command
*CRTRPGMOD Y2U1024 Defaults for CRTRPGMOD command
*CRTCLMOD Y2U1026 Defaults for CRTCLMOD command (not yet used)
Changes to Program Status Data Structure Files
Changes were made to the Program Status Data Structure files Y2PGDSP and Y2PGDSPK that affect the DDS names of some of the fields within these files. The changes do not affect the structure of either of these files.
You may have Execute user source (EXCUSRSRC) or Execute user program (EXCUSRPGM) functions, or external functions defined separately from a CA 2E model. If these functions make use of any of the old DDS field names on either of these files, you need to change the source for those functions to reflect the field name changes. The changed field names are as follows:
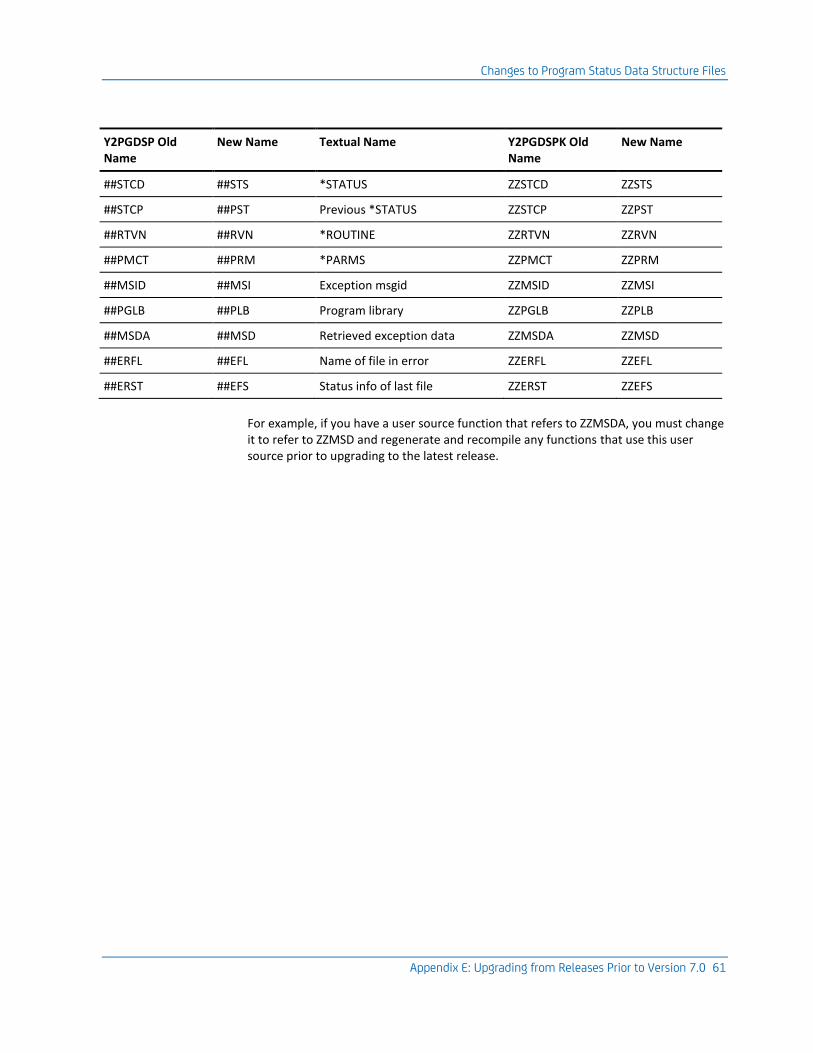
Changes to Program Status Data Structure Files
Appendix E: Upgrading from Releases Prior to Version 7.0 61
Y2PGDSP Old Name
New Name Textual Name Y2PGDSPK Old Name
New Name
##STCD ##STS *STATUS ZZSTCD ZZSTS
##STCP ##PST Previous *STATUS ZZSTCP ZZPST
##RTVN ##RVN *ROUTINE ZZRTVN ZZRVN
##PMCT ##PRM *PARMS ZZPMCT ZZPRM
##MSID ##MSI Exception msgid ZZMSID ZZMSI
##PGLB ##PLB Program library ZZPGLB ZZPLB
##MSDA ##MSD Retrieved exception data ZZMSDA ZZMSD
##ERFL ##EFL Name of file in error ZZERFL ZZEFL
##ERST ##EFS Status info of last file ZZERST ZZEFS
For example, if you have a user source function that refers to ZZMSDA, you must change it to refer to ZZMSD and regenerate and recompile any functions that use this user source prior to upgrading to the latest release.

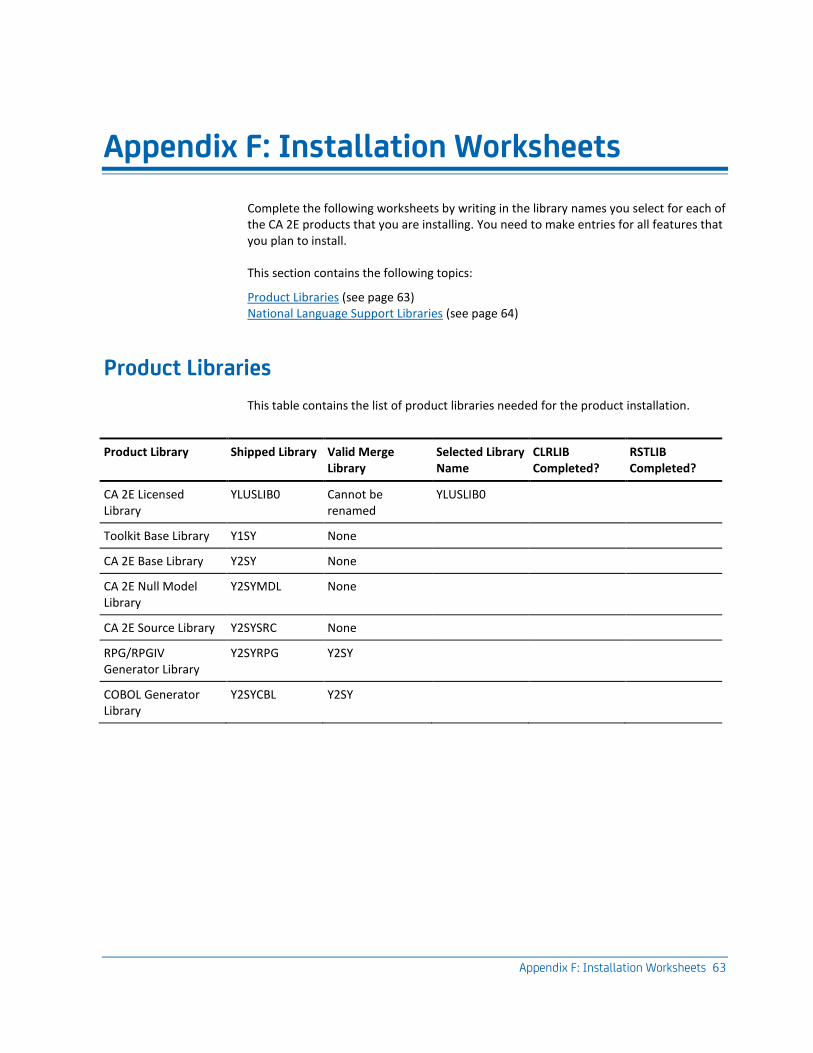
Appendix F: Installation Worksheets 63
Appendix F: Installation Worksheets
Complete the following worksheets by writing in the library names you select for each of the CA 2E products that you are installing. You need to make entries for all features that you plan to install.
This section contains the following topics:
Product Libraries (see page 63) National Language Support Libraries (see page 64)
Product Libraries
This table contains the list of product libraries needed for the product installation.
Product Library Shipped Library Valid Merge Library
Selected Library Name
CLRLIB Completed?
RSTLIB Completed?
CA 2E Licensed Library
YLUSLIB0 Cannot be renamed
YLUSLIB0
Toolkit Base Library Y1SY None
CA 2E Base Library Y2SY None
CA 2E Null Model Library
Y2SYMDL None
CA 2E Source Library Y2SYSRC None
RPG/RPGIV Generator Library
Y2SYRPG Y2SY
COBOL Generator Library
Y2SYCBL Y2SY
National Language Support Libraries
64 Installation Guide
Valid Merge Libraries
A Valid Merge Library can contain objects from more than one shipped library. Also, please note the following:
■ If the Valid Merge Library column contains the value “None” the library cannot be restored into another library.
■ If the Valid Merge Library column contains Y1SY, the shipped library can be restored into Y1SY.
■ If the Valid Merge Library column contains Y2SY, the shipped library can be restored into Y2SY.
All High Level Language (HLL) generator libraries can be merged. The Valid Merge Library column in the previous table indicates the valid target product library to merge HLL generator libraries. At least one High Level Language (HLL) generator must be installed.
If you are upgrading and are not sure what product libraries were previously merged, use the following commands to determine your current configuration:
WRKOBJ OBJ(*ALL/YFIXRPGRFA) OBJTYPE(*DTAARA)
If YFIXRPGRFA is found in Y2SY, then Y2SYRPG was merged into Y2SY. If it is found
in Y2SYRPG, then that library was not merged.
WRKOBJ OBJ(*ALL/YFIXCBLRFA) OBJTYPE(*DTAARA)
If YFIXCBLRFA is found in Y2SY, then Y2SYCBL was merged into Y2SY. If it is found in Y2SYCBL, then that library was not merged.
National Language Support Libraries
Toolkit Developer National Languages
At least one of the Toolkit Developer National Language libraries must be installed. If in doubt, display the contents of your National Language installation DVD.
For the 8.0 release, developer national languages other than English reside on a separate DVD and are not shipped unless specifically ordered.
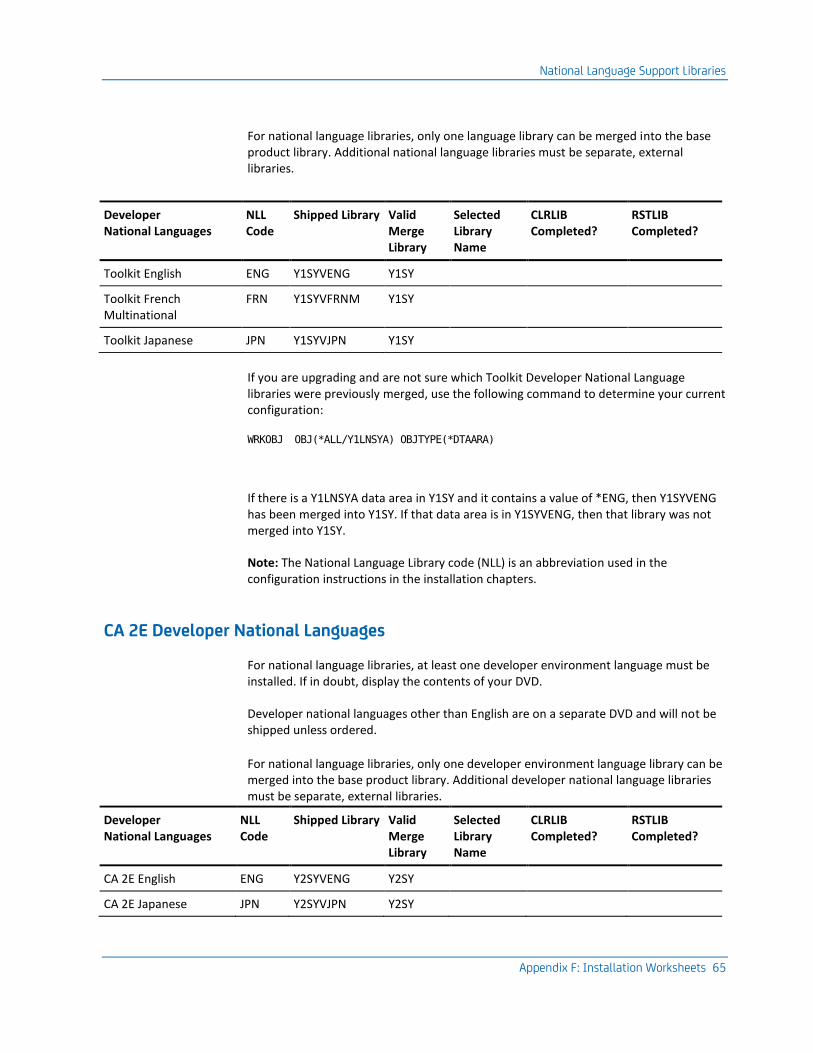
National Language Support Libraries
Appendix F: Installation Worksheets 65
For national language libraries, only one language library can be merged into the base product library. Additional national language libraries must be separate, external libraries.
Developer National Languages
NLL Code
Shipped Library Valid Merge Library
Selected Library Name
CLRLIB Completed?
RSTLIB Completed?
Toolkit English ENG Y1SYVENG Y1SY
Toolkit French Multinational
FRN Y1SYVFRNM Y1SY
Toolkit Japanese JPN Y1SYVJPN Y1SY
If you are upgrading and are not sure which Toolkit Developer National Language libraries were previously merged, use the following command to determine your current configuration:
WRKOBJ OBJ(*ALL/Y1LNSYA) OBJTYPE(*DTAARA)
If there is a Y1LNSYA data area in Y1SY and it contains a value of *ENG, then Y1SYVENG has been merged into Y1SY. If that data area is in Y1SYVENG, then that library was not merged into Y1SY.
Note: The National Language Library code (NLL) is an abbreviation used in the configuration instructions in the installation chapters.
CA 2E Developer National Languages
For national language libraries, at least one developer environment language must be installed. If in doubt, display the contents of your DVD.
Developer national languages other than English are on a separate DVD and will not be shipped unless ordered.
For national language libraries, only one developer environment language library can be merged into the base product library. Additional developer national language libraries must be separate, external libraries.
Developer National Languages
NLL Code
Shipped Library Valid Merge Library
Selected Library Name
CLRLIB Completed?
RSTLIB Completed?
CA 2E English ENG Y2SYVENG Y2SY
CA 2E Japanese JPN Y2SYVJPN Y2SY
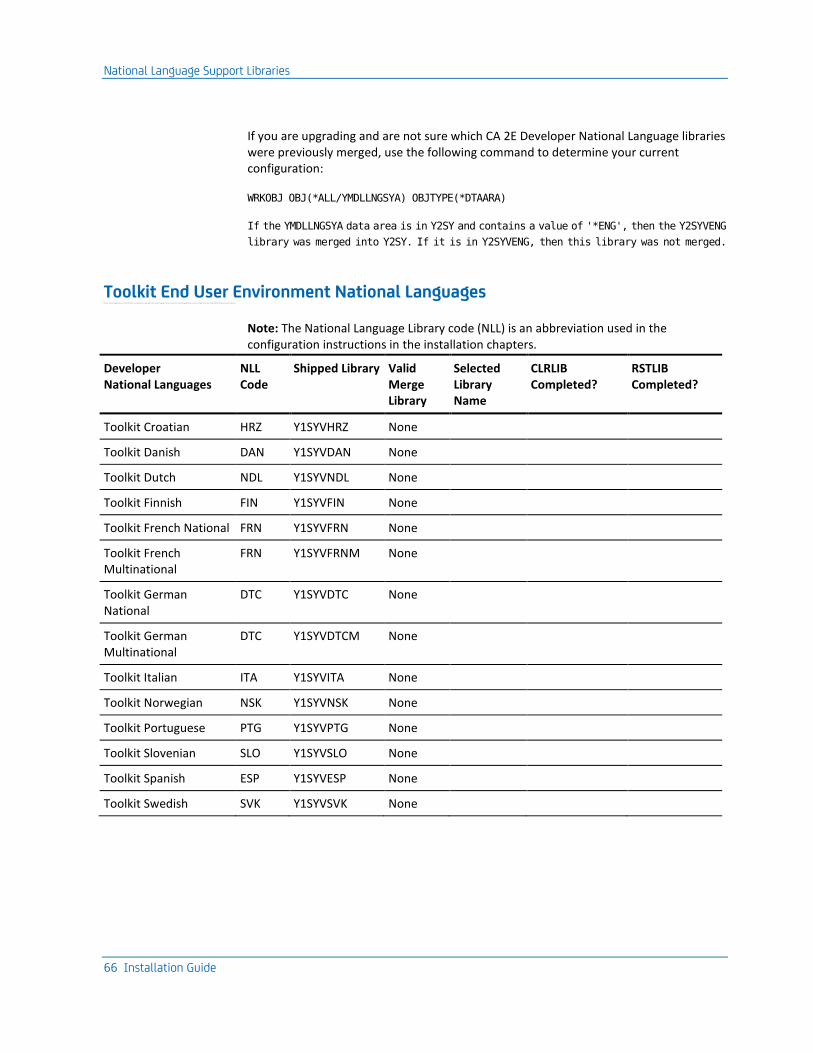
National Language Support Libraries
66 Installation Guide
If you are upgrading and are not sure which CA 2E Developer National Language libraries were previously merged, use the following command to determine your current configuration:
WRKOBJ OBJ(*ALL/YMDLLNGSYA) OBJTYPE(*DTAARA)
If the YMDLLNGSYA data area is in Y2SY and contains a value of '*ENG', then the Y2SYVENG
library was merged into Y2SY. If it is in Y2SYVENG, then this library was not merged.
Toolkit End User Environment National Languages End user national languag e libraries contain the obje cts needed to generate your appli cation in a nother lang uage. End user environment national language libraries cannot be merged into the base pr oduct library; they must be se parate libraries.
Note: The National Language Library code (NLL) is an abbreviation used in the configuration instructions in the installation chapters.
Developer National Languages
NLL Code
Shipped Library Valid Merge Library
Selected Library Name
CLRLIB Completed?
RSTLIB Completed?
Toolkit Croatian HRZ Y1SYVHRZ None
Toolkit Danish DAN Y1SYVDAN None
Toolkit Dutch NDL Y1SYVNDL None
Toolkit Finnish FIN Y1SYVFIN None
Toolkit French National FRN Y1SYVFRN None
Toolkit French Multinational
FRN Y1SYVFRNM None
Toolkit German National
DTC Y1SYVDTC None
Toolkit German Multinational
DTC Y1SYVDTCM None
Toolkit Italian ITA Y1SYVITA None
Toolkit Norwegian NSK Y1SYVNSK None
Toolkit Portuguese PTG Y1SYVPTG None
Toolkit Slovenian SLO Y1SYVSLO None
Toolkit Spanish ESP Y1SYVESP None
Toolkit Swedish SVK Y1SYVSVK None
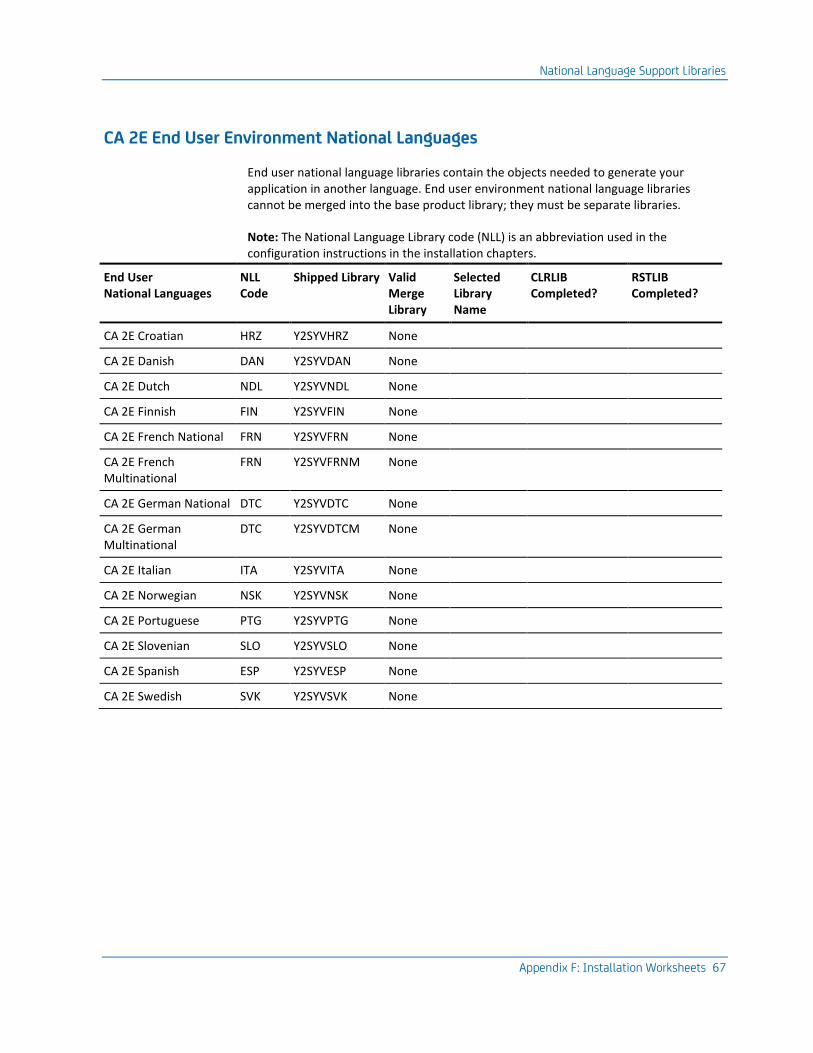
National Language Support Libraries
Appendix F: Installation Worksheets 67
CA 2E End User Environment National Languages
End user national language libraries contain the objects needed to generate your application in another language. End user environment national language libraries cannot be merged into the base product library; they must be separate libraries.
Note: The National Language Library code (NLL) is an abbreviation used in the configuration instructions in the installation chapters.
End User National Languages
NLL Code
Shipped Library Valid Merge Library
Selected Library Name
CLRLIB Completed?
RSTLIB Completed?
CA 2E Croatian HRZ Y2SYVHRZ None
CA 2E Danish DAN Y2SYVDAN None
CA 2E Dutch NDL Y2SYVNDL None
CA 2E Finnish FIN Y2SYVFIN None
CA 2E French National FRN Y2SYVFRN None
CA 2E French Multinational
FRN Y2SYVFRNM None
CA 2E German National DTC Y2SYVDTC None
CA 2E German Multinational
DTC Y2SYVDTCM None
CA 2E Italian ITA Y2SYVITA None
CA 2E Norwegian NSK Y2SYVNSK None
CA 2E Portuguese PTG Y2SYVPTG None
CA 2E Slovenian SLO Y2SYVSLO None
CA 2E Spanish ESP Y2SYVESP None
CA 2E Swedish SVK Y2SYVSVK None

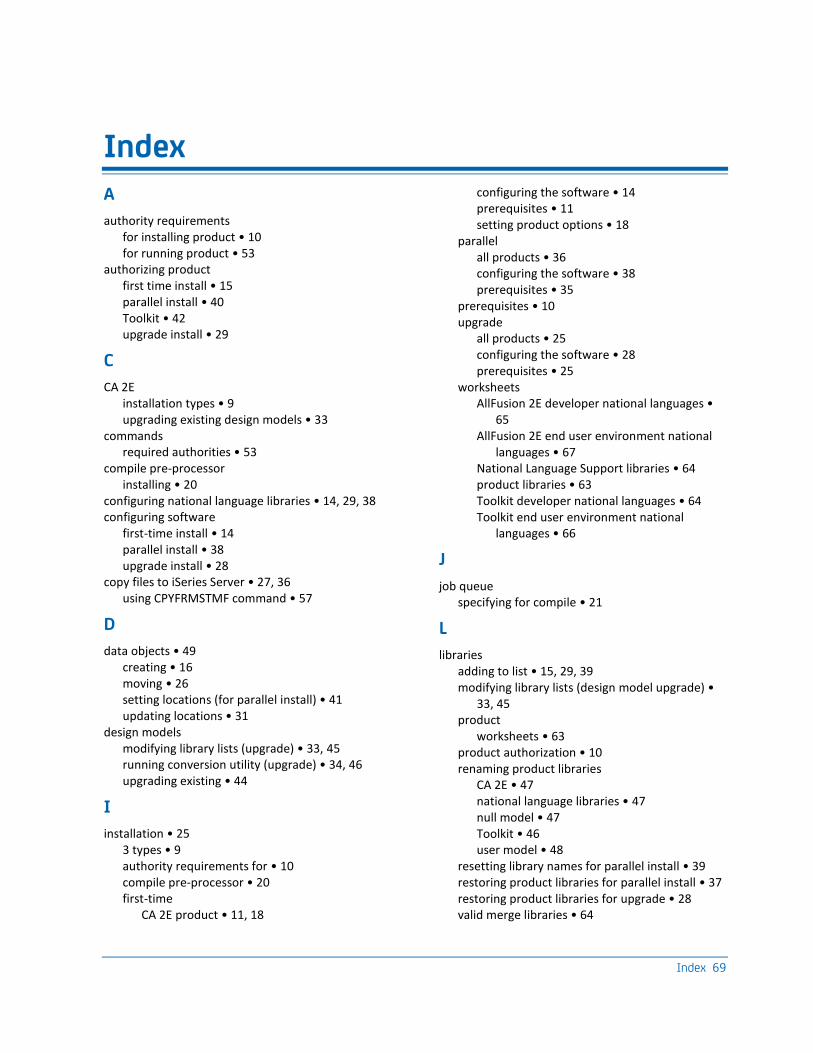
Index 69
Index
A
authority requirements for installing product • 10 for running product • 53
authorizing product first time install • 15 parallel install • 40 Toolkit • 42 upgrade install • 29
C
CA 2E installation types • 9 upgrading existing design models • 33
commands required authorities • 53
compile pre-processor installing • 20
configuring national language libraries • 14, 29, 38 configuring software
first-time install • 14 parallel install • 38 upgrade install • 28
copy files to iSeries Server • 27, 36 using CPYFRMSTMF command • 57
D
data objects • 49 creating • 16 moving • 26 setting locations (for parallel install) • 41 updating locations • 31
design models modifying library lists (upgrade) • 33, 45 running conversion utility (upgrade) • 34, 46 upgrading existing • 44
I
installation • 25 3 types • 9 authority requirements for • 10 compile pre-processor • 20 first-time
CA 2E product • 11, 18
configuring the software • 14 prerequisites • 11 setting product options • 18
parallel all products • 36 configuring the software • 38 prerequisites • 35
prerequisites • 10 upgrade
all products • 25 configuring the software • 28 prerequisites • 25
worksheets AllFusion 2E developer national languages •
65 AllFusion 2E end user environment national
languages • 67 National Language Support libraries • 64 product libraries • 63 Toolkit developer national languages • 64 Toolkit end user environment national
languages • 66
J
job queue specifying for compile • 21
L
libraries adding to list • 15, 29, 39 modifying library lists (design model upgrade) •
33, 45 product
worksheets • 63 product authorization • 10 renaming product libraries
CA 2E • 47 national language libraries • 47 null model • 47 Toolkit • 46 user model • 48
resetting library names for parallel install • 39 restoring product libraries for parallel install • 37 restoring product libraries for upgrade • 28 valid merge libraries • 64
70 Installation Guide
worksheets AllFusion 2E developer national languages •
65 AllFusion 2E end user environment national
languages • 67 National Language Support • 64 Toolkit end user environment national
languages • 66 Toolkit national language • 64
N
National Language Support • 10 configuring for first-time install • 14 configuring for parallel install • 38 configuring for upgrade install • 29 installation worksheets • 64
NLS, see National Language Support • 10
P
prerequisites first-time install • 11 installation,general • 10 parallel install • 35 upgrade install • 25
product authorization authority requirements • 10 first-time install • 15 first-time-install
user profile and password extensions • 20 library • 10 parallel install • 40 upgrade install • 29
R
resetting library names • 39 restoring product libraries • 28, 37 routing entries
adding for parallel install • 42 defining for pre-processor • 19
S
sign on QSECOFR authority • 10
system values, reviewing • 17, 32, 43
T
troubleshooting • 55
U
upgrade existing design models • 33 from release prior to CA 2E v7.0 • 59
user objects • 50 moving • 26 updating locations • 31
W
work management • 18


![2e^R_ZcSYRc 3YRcRe deZ^f]fd hZUV_VU - Daily Pioneer](https://static.fdokumen.com/doc/165x107/631f42fe63f0eba19606ca30/2erzcsyrc-3yrcre-dezffd-hzuvvu-daily-pioneer.jpg)