Building Your Own SAC System
13
Building Your Own SAC System (August 2010) By Bob Lentini www.SoftwareAudioConsole.com Building your own SAC system can be an exciting and amazing adventure. SAC systems can be created in all shapes and sizes and can be built for incredibly low cost. Of course, if budget allows, your SAC system can be the most expensive console ever constructed, the choice is yours. The systems are extremely scalable and can be any number of input and output channels up to 72 at the time of this writing. If you are not comfortable working with computers at the component level or are not skilled with your hands at assembling things, you may want to consider purchasing a turnkey system from one of the turnkey system integrators that are listed in the Links option on the website. This document will give you an example of assembling a SAC system from start to finish. Remember, there are unlimited variations in choices of hardware and assembly methods and this example is just one method that creates a very stable and high performance system. You may find some of the concepts and techniques presented in this document useful in your own SAC system construction journey. Let's get started. One of the first things I like to do at the start is to gather some of the basic elements I will be using during the various construction phases. An assortment of screws, tie wraps and clamps of various kinds can all play an important role in constructing a clean and solid system that can be transported to and from events without breaking down.
-
Upload
independent -
Category
Documents
-
view
3 -
download
0
Transcript of Building Your Own SAC System

Building Your Own SAC System
(August 2010)
By Bob Lentini
www.SoftwareAudioConsole.com
Building your own SAC system can be an exciting and amazing adventure. SAC systems can be created in all shapes and
sizes and can be built for incredibly low cost. Of course, if budget allows, your SAC system can be the most expensive
console ever constructed, the choice is yours.
The systems are extremely scalable and can be any number of input and output channels up to 72 at the time of this
writing.
If you are not comfortable working with computers at the component level or are not skilled with your hands at assembling
things, you may want to consider purchasing a turnkey system from one of the turnkey system integrators that are listed
in the Links option on the website.
This document will give you an example of assembling a SAC system from start to finish. Remember, there are unlimited
variations in choices of hardware and assembly methods and this example is just one method that creates a very stable
and high performance system.
You may find some of the concepts and techniques presented in this document useful in your own SAC system
construction journey.
Let's get started.
One of the first things I like to do at the
start is to gather some of the basic
elements I will be using during the various
construction phases. An assortment of
screws, tie wraps and clamps of various
kinds can all play an important role in
constructing a clean and solid system that
can be transported to and from events
without breaking down.
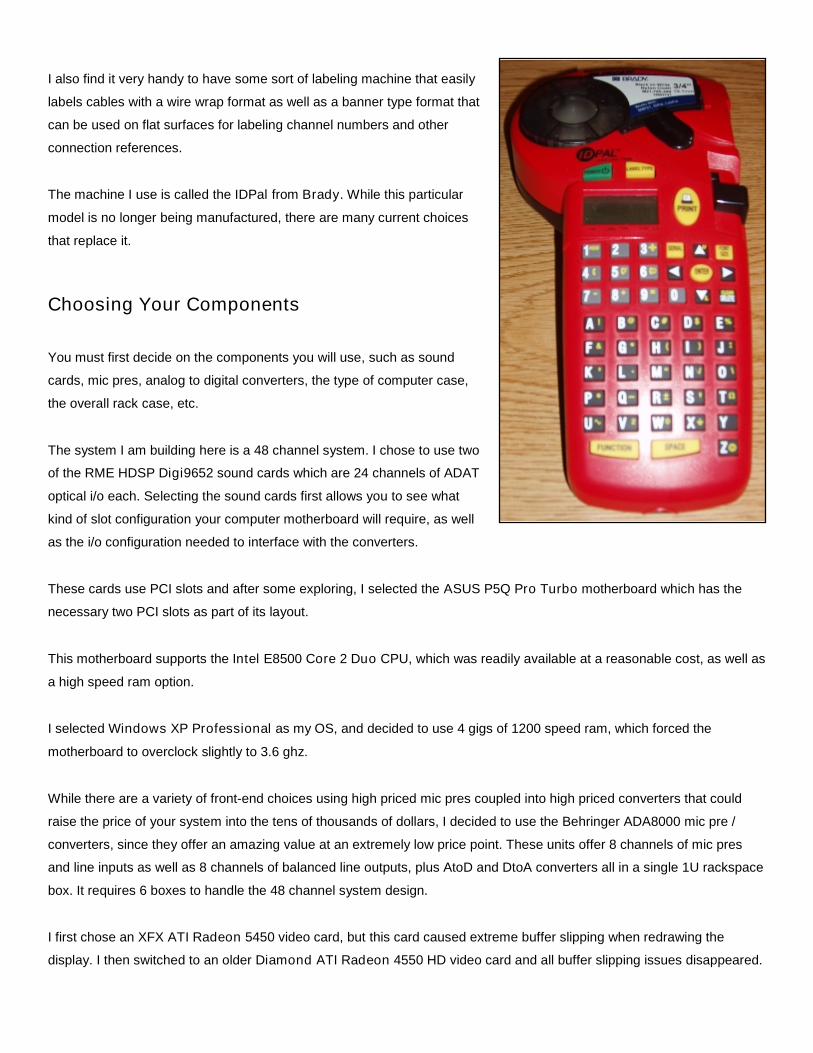
I also find it very handy to have some sort of labeling machine that easily
labels cables with a wire wrap format as well as a banner type format that
can be used on flat surfaces for labeling channel numbers and other
connection references.
The machine I use is called the IDPal from Brady. While this particular
model is no longer being manufactured, there are many current choices
that replace it.
Choosing Your Components
You must first decide on the components you will use, such as sound
cards, mic pres, analog to digital converters, the type of computer case,
the overall rack case, etc.
The system I am building here is a 48 channel system. I chose to use two
of the RME HDSP Digi9652 sound cards which are 24 channels of ADAT
optical i/o each. Selecting the sound cards first allows you to see what
kind of slot configuration your computer motherboard will require, as well
as the i/o configuration needed to interface with the converters.
These cards use PCI slots and after some exploring, I selected the ASUS P5Q Pro Turbo motherboard which has the
necessary two PCI slots as part of its layout.
This motherboard supports the Intel E8500 Core 2 Duo CPU, which was readily available at a reasonable cost, as well as
a high speed ram option.
I selected Windows XP Professional as my OS, and decided to use 4 gigs of 1200 speed ram, which forced the
motherboard to overclock slightly to 3.6 ghz.
While there are a variety of front-end choices using high priced mic pres coupled into high priced converters that could
raise the price of your system into the tens of thousands of dollars, I decided to use the Behringer ADA8000 mic pre /
converters, since they offer an amazing value at an extremely low price point. These units offer 8 channels of mic pres
and line inputs as well as 8 channels of balanced line outputs, plus AtoD and DtoA converters all in a single 1U rackspace
box. It requires 6 boxes to handle the 48 channel system design.
I first chose an XFX ATI Radeon 5450 video card, but this card caused extreme buffer slipping when redrawing the
display. I then switched to an older Diamond ATI Radeon 4550 HD video card and all buffer slipping issues disappeared.

A lesson to be learned here is that certain components can interact with motherboard chipsets and other components and
cause difficulties. Keep an open mind when exploring different component options if the system exhibits problems.
I decided to go with a custom built rack case on wheels, made of 1/2 in birch wood laminated with a durable rubberized
surface and configured as a shock mounted design. I like wood cases, instead of fiber or plastic cases, because I find it
easier to screw clamps and cable mounts inside to facilitate a neat and clean finished product.
Assembling the Computer
I chose a 3U computer rack case that is only about 15 inches deep. You can find a variety of these shallow depth cases in
3U and 4U styles on the web. I used a SATA boot drive mounted in a removable bay so swapping a system imaged drive
is fast and simple in case my Windows install ever gets corrupted.
You can see in this image, that I used 4
chassis cooling fans, two in front and two
smaller ones in back. This allows the
system to run 24/7 without
temperature issues.
I generally like to add a second physical
drive for all data. This allows my boot drive
to remain at a small (100 gb) size, so drive
imaging is easy to maintain, and can be
restored quickly without concern for
overwriting and loosing data.
This image shows the basic computer build
before the sound cards are installed. I like to
get Windows and all basic components
installed and tweaked before moving on to
the sound card drivers.

This close-up of the CPU shows that I like to use
one of the bolt-down CPU fan assemblies, rather
than the typical plastic push-lock default fan
units.
The push-lock units can easily pop off when the
system is jolted during transport and the bolt-
down units will take a lot more abuse.
There are many models of these bolt-down fan
assemblies from different manufacturers which
can be easily found on the web.
This image shows the finished
computer with the RME sound cards
installed.
When using multiple sound cards to
attain your desired channel count,
be certain that the sound cards you
select allow multiples on a single
driver.
Also, pay attention to clocking
issues. The cards and driver must
be able to allow proper slaving and sync to one master clock source. These RME cards allow me to set the first as the
master clock and then connect an internal sync cable between cards and tell the driver to sync the second card to the
first.
I will set the ADA units to sync to the incoming ADAT optical pipe clock.

Assembling The Rack
There are various options to address all the cable connection issues a system of this size needs to handle. Generally,
using 1U back plates with 8 male and 8 female xlr plugs per converter, connected with short jumper cables and mounted
on the rear rack rails creates a neat and clean setup, Or, multi pin snake connectors can be used along with custom made
back plates for a quick connect setup. Unfortunately, both of these options can add serious cost to the system.
In this case, since the Behringer units have the
mic inputs mounted in the front, and xlr outputs
mounted in the rear, I chose to use inexpensive
short 8 channel jumper snakes to keep the front
of the system neat and extend all input
connections to the rear of the rack on the floor.
By keeping all wiring in the rear of the rack tied
off to the sides, the xlr output plugs could easily
be reached directly, eliminating the need for
extenders of any kind for the outputs.
Even though the snakes were color
coded, I used my label machine to
neatly wire wrap channel numbers
on each cable connector to give me
a clear reading on the front of the
system of which channel is which.

Laying the rack on its back can make the
mounting of the gear much easier to handle.
I used a Furman power conditioner mounted
at the top of the rack as my master AC
control and also to simplify AC cable
installation.
I then began mounting the Behringer units
one by one with a small half rack space
between them. This space is used for two
things. First, it allows air flow between units,
which can be very important, because these
units tend to run hot. Second, it gives me the
opening I need to weave the small snake extenders between units and keep the input connections clean, neat and
manageable.
When mounting the units in this manner, I use
the bottom two screws for each unit, because
it holds the units more securely since gravity
forces the tops of the units tightly against the
rails even without the top screws.
This image shows the procedure I
followed as I continued mounting the
units into place.

Each snake is neatly positioned tight against the previous
unit and the next unit is mounted, holding that snake in
place.
This image shows all units in place, with the addition of a
Behringer HA4700 4 station headphone amplifier.
Next I mounted the computer case in the bottom of the
rack.

And here is a look at the front of the finished
assembly.
Next, I moved on to the rear assembly and the task
of connecting everything together.
This can be a daunting task as the amount of
cables and connections can quickly grow into a
tangled mess if you do not pay close attention to
detail as you go.

I started with the AC cables, neatly tying and
clamping them to the rack case and directing
them over to the left side where most of the
AC connections were found.
I continued along, labeling, and tying off each AC cable for
each piece of gear.
I tucked the bulk of the cable mass into the small space between
the rack case and the units themselves to keep them out of the
way and make room for what was still to come.
I also mounted a separate power strip, switched from the
Furman, to handle extra power needs.

Next, I began securing the snakes to the
rack case and neatly arranging them along
the right side.
Keeping the snakes tied
to the right side kept all
the output plugs open and
easily reachable.
Clamping the snakes in
this manner also takes all
the strain from the front
connectors and allows me
to easily manipulate them
behind the system.

Next, labeling the outputs makes for a
clear visual of which output is which.
I then cable tied the snakes together in groups,
making it easier to find the correct channels
when making final connections to large snake
tails or stage connection boxes.

Next, the optical connections were dealt with. I
chose to use a flexible optical cable from
Oculus. These cables are encased in rubber
and are much more manageable than the
typical plastic optical cables, and the cost was
not much higher.
Since these do not come cut to length, I used
the left side of the rack case to clamp and loop
them to take up the slack. Remember, you do
not want to crimp these cables, they must
remain smoothly coiled.
I then routed the optical cables neatly along the
rack bottom and into position snapping them into
the sound card connectors.
These cables snapped in fairly tight, but it is still
generally a good idea to carefully use a small
amount of clear rubber silicon to lock them
securely in place.

The final touches on the system added a rack mount fan assembly to
keep a constant flow of air thru the Behringer units.
And there we have it. Our very own SAC system,
complete with 1920 x 1080 monitor, mouse, keyboard
and 1 Behringer BCF2000 fader pack.
Who would have ever thought that you could build
your very own Midas, Yamaha, Digico, Venue, or
whatever your favorite console used to be, in your
own garage.
And what's more, you have not only replaced 1 of
those expensive consoles, but you now have FOH
and 24 more monitor consoles.
Welcome to the SAC Experience... there isn't
anything quite like it.
Have fun creating your own SAC System!