BHTL-018 PRACTICAL BLOCK-1.pdf - eGyanKosh
164
BHTL-018 Skills for Home Health Assistance Block PRACTICAL MANUAL UNIT 1 Communication and Counselling Skills 5 UNIT 2 Physical Assessment Skills 22 UNIT 3 Personal Hygiene and Grooming Skills 50 UNIT 4 Nutritional Elimination and Medication Needs 75 UNIT 5 House Keeping Skills 99 UNIT 6 Care of Bed Ridden Individuals 114 UNIT 7 Care for Differently Abled Persons 133 UNIT 8 Observational Visits 150 1 Indira Gandhi National Open University School of Health Sciences
-
Upload
khangminh22 -
Category
Documents
-
view
1 -
download
0
Transcript of BHTL-018 PRACTICAL BLOCK-1.pdf - eGyanKosh

BHTL-018
Skills for HomeHealth Assistance
Block
PRACTICAL MANUAL
UNIT 1Communication and Counselling Skills 5
UNIT 2Physical Assessment Skills 22
UNIT 3Personal Hygiene and Grooming Skills 50
UNIT 4Nutritional Elimination and Medication Needs 75
UNIT 5House Keeping Skills 99
UNIT 6Care of Bed Ridden Individuals 114
UNIT 7Care for Differently Abled Persons 133
UNIT 8Observational Visits 150
1
Indira GandhiNational Open UniversitySchool of Health Sciences

CURRICULUM DESIGN COMMITTEE
BLOCK PREPARATION TEAM
EDITORIALTEAM
Prof. T. K. JenaProject DirectorSkill Training Cell,SOHS, IGNOU
Dr. A. K. SoodSenior Consultant,Skill Training Cell,SOHS, IGNOU
Dr. D. C. JainSenior Consultant,Skill Training Cell,SOHS, IGNOU
CO-ORDINATION Course Coordinator
Prof. T. K. JenaProject DirectorSkill Training Cell, , SOHS, IGNOU
Dr. Reeta DeviAsst. Prof. (Sr. Scale)Course Coordinator, ,SOHS, IGNOU
MATERIAL PRODUCTIONSh. Ajit Kumar
Section Officer (Publication)
School of Health Sciences, IGNOU
We acknowledge the reference of material and figures from CHBHC Programme, unit-6, 7, 10 of SOHS,IGNOU.
The curriculum has been adapted from the “Short term Training Curriculum Handbook for HomeHealth Assistance” prepared by MoHFW, 2017, whose Standards are based on National SkillsQualifications Framework (NSQF), Ministry of Skill Development and Entrepreneurship (MSDE).
July, 2019
© Indira Gandhi National Open University, 2019
ISBN : 978-93-89200-92-8All rights reserved. No part of this work may be reproduced in any form, by mimeographor any other means, without permission in writing from the Indira Gandhi National OpenUniversity.Further information on the Indira Gandhi National Open University courses may be obtainedfrom the University’s office at Maidan Garhi, New Delhi-110 068 or the website of IGNOUwww.ignou.ac.inPrinted and Published on behalf of the Indira Gandhi National Open University, New Delhi,by Director, School of Health Sciences, IGNOU.LaserTypeset by : Rajshree Computers, V-166A, Bhagwati Vihar, (Near Sector 2, Dwarka),Uttam Nagar, New Delhi-110059
Prof. T. K. JenaProject DirectorSkill Training Cell, SOHS,IGNOU
Dr. Reeta DeviAsst. Prof. (Sr. Scale) &Course Coordinator,SOHS, IGNOU
Dr. Pradeep KumarGandhi nagar, Gujrat
Mrs. Madhavi VermaPrincipal, College of NursingILBS, New Delhi
Dr. Neelam MakhijaAssistant ProfessorAhilya Bai College ofNursing, New Delhi
Dr. Rubi BansalHOD Preventive Health,Yashoda Super SpecialityHospital, Kaushambi,Ghaziabad
Dr. Sneh Lata ManochaFormer Associate ProfessorAhilya Bai College of NursingNew Delhi
In-House FacultyProf. T. K. JenaProject Director, Skill Training Cell,SOHS, IGNOU
Dr. Reeta DeviAsst. Prof. (Sr. Scale)Course Coordinator, SOHS, IGNOU
Dr. Biplab JamatiaAsst. Prof. (Sr. Scale), SOHS, IGNOU
Dr. Neerja SoodAsst. Prof. (Sr. Scale), SOHS, IGNOU
Mrs. LaxmiAsst. Prof. (Sr. Scale), SOHS, IGNOU
Dr. Anu GaubaConsultant,Skill Training Cell,SOHS, IGNOU
WritersUnit 1Dr. Princy KuriakoseAssociate Professor,Flat No. 603, West EndApartment, Vidya Vihar,Nehrunagar West DrugChhattisgarh- 690020
Unit 2Dr. Sneh Lata ManochaFormer Associate ProfessorAhilya Bai College of Nursing
Dr. Reeta DeviAsst. Prof. (Sr. Scale)Course Coordinator,SOHS, IGNOU
Unit 3Dr. Neelam MakhijaFaculty Ahilya Bai College ofNursing, New Delhi-2
Unit 4 & 6Dr. Reeta DeviAsst. Prof. (Sr. Scale) &Course Coordinator,SOHS, IGNOU
Unit 5Mrs. LaxmiAsst. Prof. (Sr. Scale) ,SOHS, IGNOU
Unit 7Dr. Tanu Anand GroverAsst. Professor, CommunityMedicine, NDMC,Medical College, Delhi
Unit 8Dr. Ritesh SinghAssociate Progessor, CommunityMedicine, College of Medicine andJNM Hospital, WBUHS,Kalyani, Kolkata
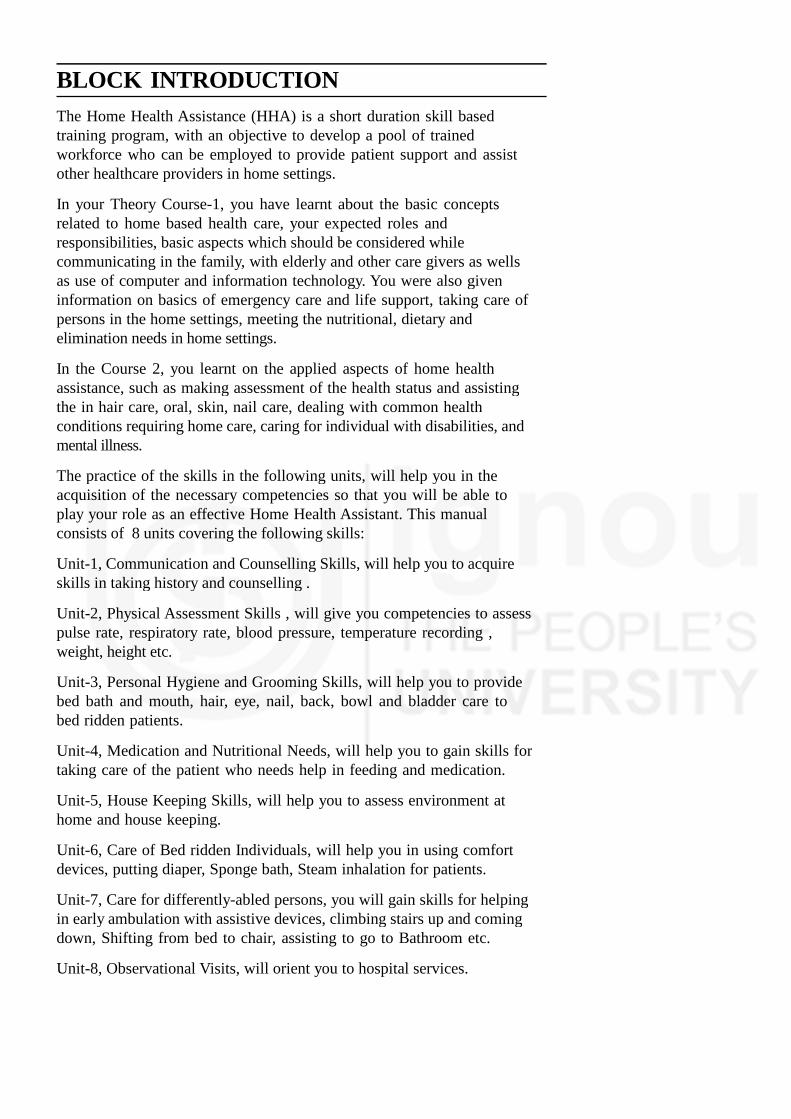
BLOCK INTRODUCTION
The Home Health Assistance (HHA) is a short duration skill basedtraining program, with an objective to develop a pool of trainedworkforce who can be employed to provide patient support and assistother healthcare providers in home settings.
In your Theory Course-1, you have learnt about the basic conceptsrelated to home based health care, your expected roles andresponsibilities, basic aspects which should be considered whilecommunicating in the family, with elderly and other care givers as wellsas use of computer and information technology. You were also giveninformation on basics of emergency care and life support, taking care ofpersons in the home settings, meeting the nutritional, dietary andelimination needs in home settings.
In the Course 2, you learnt on the applied aspects of home healthassistance, such as making assessment of the health status and assistingthe in hair care, oral, skin, nail care, dealing with common healthconditions requiring home care, caring for individual with disabilities, andmental illness.
The practice of the skills in the following units, will help you in theacquisition of the necessary competencies so that you will be able toplay your role as an effective Home Health Assistant. This manualconsists of 8 units covering the following skills:
Unit-1, Communication and Counselling Skills, will help you to acquireskills in taking history and counselling .
Unit-2, Physical Assessment Skills , will give you competencies to assesspulse rate, respiratory rate, blood pressure, temperature recording ,weight, height etc.
Unit-3, Personal Hygiene and Grooming Skills, will help you to providebed bath and mouth, hair, eye, nail, back, bowl and bladder care tobed ridden patients.
Unit-4, Medication and Nutritional Needs, will help you to gain skills fortaking care of the patient who needs help in feeding and medication.
Unit-5, House Keeping Skills, will help you to assess environment athome and house keeping.
Unit-6, Care of Bed ridden Individuals, will help you in using comfortdevices, putting diaper, Sponge bath, Steam inhalation for patients.
Unit-7, Care for differently-abled persons, you will gain skills for helpingin early ambulation with assistive devices, climbing stairs up and comingdown, Shifting from bed to chair, assisting to go to Bathroom etc.
Unit-8, Observational Visits, will orient you to hospital services.

Practical Manual
4
5
UNIT 1 COMMUNICATION ANDCOUNSELLING SKILLS
Structure
1.0 Objectives
1.1 Introduction
1.2 History Taking
1.2.1 Purposes of History Taking
1.2.2 Steps of History Taking
1.3 Sources and Techniques of Information
1.4 Collection of Information
1.5 Reporting and Recording
1.6 Format for History Taking
1.7 Counselling Skills
1.7.1 Purposes of Counselling
1.7.2 Process of Counselling
1.7.3 Sample Counselling
1.8 Let Us Sum Up
1.9 Key Words
1.10 Activities
1.0 OBJECTIVES
After studying this practical, you will be able to:
explain the various techniques of history taking;
collect and record information as per guideline;
explain the steps of counseling; and
collect and record information following the principles of counseling.
1.1 INTRODUCTION
You have learnt in theory course about various important lessons on HomeBased Care. In this skill you will be learning the most important areas ofassessment which will provide information about the patient’s health profilei.e. the history of the patient. History taking is the first contact with thepatient. The areas on which you need to collect the history of patient areidentification data, present complaints of the patient and past medicalhistory, family history, personal & social history etc.
You have learnt in theory course about various important lessons on HomeBased Care. In this skill you will be learning the most important areas of

Practical Manual
6
assessment and intervention which will provide not only information buthelp to guide them ie counseling the patient. Counselling is a plannedconversation between one trained person and a client.
1.2 HISTORY TAKING
Let us learn the purposes and steps to take history of illness.
1.2.1 Purposes of History Taking
The purposes of history taking are to:
introduce each other
establish good interpersonal relationship
obtain the information required for contacting him/her if the needarises.
allow the patient to describe his/her own problems and expectations.
identify the patient’s feelings about his symptoms, e.g., the patient mayshow fear, guilt, self protective in his first statement.
identify any change in the patient’s normal pattern of living that mayor may not be due to illness.
collect and record information that may be helpful in making diagnosisand caring for the patient/client
Fig.1.1: Proper identification is needed to provide patient care.
1.2.2 The Steps of History Taking
History of the patient is an account of the illness and is usually the mostimportant part of assessment. There are three main stages. The first stageis the introductory phase, the second is the principal phase i.e. the storyof current illness, and third stage is the interrogation phase.
7
Step 1 The Introduction of the patient and self
In this stage you should greet and introduce yourself in a friendly way
and remember your patient’s name (Fig. 1.1). An introductory chat about
personal matters in general will help the patient to adjust with the
stranger. For example, conversation about the patient, patient’s family etc.
can often initiate good rapport. It is important for you to observe the
patient’s appearance, and the environment and appreciate where and
when required.
Step 2 The patient’s account of the current illness
Once you have introduced yourself and know the patient’s name, youshould enquire about the problems. You listen to these problemscarefully, make your own observations accordingly, give positiveresponse and assure help and guidance. This will help to establish goodrelationship and also in getting the information. Some patients are unableto give a history because they are too acutely ill or unconscious. Insuch situation, information should be obtained as much as possible fromany of the family members (caregiver).
Step 3 Questioning
When the patient has completed his account of the current illness, thenext step is to clarify the description by specific questioning to knowabout the illness from the first symptom to the date of interview.Questions should be put in such a way so as to encourage the patientto tell his/her own illness/problems. Questions should be simple. Oncethe patient’s history has been expanded by you, enquiry should then bemade about other symptoms, drugs, allergies, previous illness and aboutthe family and social background.
Activity - 1 Some one in your family/neighborhood has fallensick. You talk to the person keeping in mind steps of historytaking and collect past, present history of illness. Refer historytaking format.
1.3 SOURCES AND TECHNIQUES OFINFORMATION
The patient’s problem may be physical, emotional or social but each onewould affect the patient as a whole. Information need to be collected byasking the patient to report about his/her problems, by doing head to toeexamination, observation and going through records and lab reports. Thereare two ways to collect information:
Subjective information - From the patient by asking questions, likehow are you? what are your problems?
Objective information - Going through records and reports, e.g. notingthe temperature, pulse and respiration rate, urine report, blood report.
Communication &Counselling Skills
Practical Manual
8
Technique of information — How to collect the information:
The subjective and objective information can be collected by the followingthree
techniques:
Interview,
Observation.
Examinations
A) Interview
You might be familiar with the term interview. There are two persons whotalk to each other and share information. The purpose of the interview isto encourage an interchange of information between the patient and you(home care provider).
The points to kept in mind while conducting interview
Conduct interview in a quite place, see that patient is comfortable andprovide privacy.
Greet the patient. Introduce each other by asking name and otherrelevant information.
Observe the environment, patient condition. Take necessary actionsaccording to the situation. This will help in developing confidence andgood interpersonal relationship.
Ask the patient if he/she requires any help. Some patients will say‘No’ to your offer of help. Simple conversation works best in gainingconfidence even if the patient says ‘No’ to you.
Be sure that facial expressions, body movement and tone of voice arepleasant, unhurried so that they convey the attitude of a sensitivelistener and the patient also feels free to express his thoughts andfeelings.
Re-assure the patient with caution.
B) Observation
Observation includes:
Head-to-toe observation in general, to identify any abnormality.
Checking vital signs i.e. TPR and B.P.
C) Examination
The purpose of the physical examination is to observe any findings notreported in the history. It helps to obtain objective information about theindividual’s health state.
Sources of information:
Patient’s relatives
Observations by you
9
Health records
Laboratory results
Activity 2 - Interview five patients in your locality and collectsubjective and objective information and make summary so that itcan be recorded for future use.
1.4 COLLECTION OF INFORMATION
Identification data refer to the information about the person and his/herpersonal aspects.
Main Complaints: It is the expression of the patient of his/her currentproblems. Data is obtained directly from the patient (Patients version).Sometimes patient may not be able to express his problems (Informantvision). In that case relative should be contacted to get the information tohave the complete history.
It should be written in client’s own words – Client verbalized as eg‘After the declaration of school result, I cried a lot and couldn’t facemy father and mother”.
Informant’s version should be in their terms – Her father said, ‘Shecouldn’t score as per her expectation and since that date she wastensed, not talking with us and remained at her room alone’. Youshould mention the duration of each symptom.
A) History of Present illness
History of present illness is mainly referred to as signs and symptomspresented by the patient in the present episode for which s/he is gettingtreatment. So detailed account of the present illness should be taken onthe following aspects: e.g., When are symptoms first noticed?
Are the changes in the patient sudden or gradual i.e., onset is acuteor insidious?
Is there any change in patient’s attitude, interest, habit, and healthstatus? e.g., appetite increase or decrease,
change in sleep pattern,
change in maintaining personal hygiene,
change in level of consciousness,
general behaviour of the individual like agitated, anxious, memoryimpairment?
B) Past History of illness
In medical illness you should collect the history on the following aspects:
Has the patient suffered any medical problems earlier like diabetesmellitus, fever, hypertension?
Communication &Counselling Skills

Practical Manual
10
was the patient given any treatment at home or he/she washospitalized and is alright after the treatment?
Was there any history of drug allergies?
Has the patient suffered from any infectious diseases e.g., measles,mumps, chicken pox etc..
C) Family History
Who all are the members of family? Is it a nuclear or joint family? Isthere any history of physical or psychiatric illness in the family? Is thereany use of alcohol or drugs in the family. The causative factors of manydiseases are frequently inherited. The patient’s early relationship with theparents and siblings are also fundamental factors in the psychologicalassessment.
D) Personal History
It is also important to collect personal history from the patient. It includesprenatal history, infancy, childhood, adolescence, adulthood and maturity. Ifthe patient is in early adulthood, then the history may be asked up toadulthood. Though it is difficult to collect the history chronologically, butyou must get the information you desire to get.
E) Social History
An individual’s reaction to his occupational and social environment mayhave great impact on his health. Enquiries should be made about home,occupation, leisure interests including physical recreation and habits of theuse of alcohol and tobacco.
1.5 REPORTING AND RECORDING
Definition: Reports are either written or verbal accounts of patient’scondition which are given from time to time to the patient or the familymembers or to the attending physician (Fig. 1.2).
Fig. 1.2: Recording of the History

11
General rules of reporting:
It should be written neatly, no overwriting.
Accuracy is necessary. e.g. be sure of the name of the patient.
Use correct language and spelling.
Date and time
Be specific in writing description, “Pain in the hand” is a vaguestatement, whereas “pain in the left upper arm” is definite and ofvalue. At the end of the report put your signature.
Hence after completion of taking history of your patient, you need toreport verbally about the patient’s condition to the relatives/informant, orwrite the information you have collected using the history guideline formatby following the above rules so that proper line of communication can bemaintained.
1.6 FORMAT FOR HISTORY TAKING
1) Identification Data:
Name : ______________________________________________
Age/Sex : _____________________________________________
Marital Status : Married/Unmarried
No. of family members
Education : Undergraduate/Graduate/Post Graduate
Occupation : Working/Non Working
Address : _____________________________________________
_____________________________________________
_____________________________________________
Income : _____________________________________________
Religion :
Any Habits : Alcoholic/Smoking
Dietary Habits : Vagetarian/Non Vegetarian
Chief complaints of the patient:
____________________________________________________________________________________________________________________________________________________________________________________________________________________________________________________________
____________________________________________________________________________________________________________________________________________________________________________________________________________________________________________________________
History of present illness:___________________________________________________________________________________________________________________
____________________________________________________________________________________________________________________________________________________________________________________________________________________________________________________________
____________________________________________________________________________________________________________________________________________________________________________________________________________________________________________________________
Communication &Counselling Skills

Practical Manual
12
Duration of illness : Weeks __________________
: Months __________________
: Years ___________________
Past history of illness:
Major illnesses if any — heart disease/blood sugar.
Injuries if any such as fracture, paralysis, surgery/amputation.
Medicine taken in the past
Side effects :
Allergies :
Any infectious disease :
Family History of any disease :
Social History:
Interaction with family, friends and relations/neighbours. Yes/No
Visiting the temple for prayers Yes/No
Any other social get together Yes/No
Any other social interests Yes/No
Religion, whether practicing or not, culture, beliefs and taboos. Yes/No
Usual recreational activities such as reading, writing, listening music.
Problems with ambulation Yes/No
Fatigue Yes/No
Comfort, rest, sleep:
Usual sleep patterns Regular/Irregular
Any help required to promote sleep Yes/No
If yes (specify)
Presence of pain or discomfort while sleep Yes/No
Nutrition:
Foods generally avoided
Likes, dislikes
Vitamin or mineral supplements taken
Problems with eating, tastes or smell
Dentures
Recent changes in food-fluid intakes
Initial weight Changes in weight (recent, long-term).

13
Elimination:
Problems with urination
Bowel problems
Constipation Yes/No
Diarrhoea Yes/No
Incontinence Yes/No
Perception and coping:
Present concerns related to health or life events Yes/No
Expected changes in life-style because of present healthproblem Yes/No
Recent changes in feelings about self or body image Yes/No
If yes, specify
Spiritual practices or beliefs found helpful at present Yes/No
Availability of significant others as supportive persons Yes/No
Signature of history taker
1.7 COUNSELLING SKILLS
The counseling process is a planned, structured dialogue betweena counselor and a client. That is between you and a patient or his relativewith an aim to identify their problem, concerns and or help them to findsolution for it.
1.7.1 Purposes of Counselling
The purposes of counselling are to:
Identify the sources of difficulties or concerns he/she is experiencing.
Allow the patient to describe his/her expectations.
Help to identify alternate solutions for difficulties to choose the best
Help to understand his potentialities and explore his inner skills
Helps the client avoid some undesired outcomes
1.7.2 The Counselling Process
Counseling is a process in which the counselor, or therapist, helps theclient understand the causes for problems and guides the person throughthe process of learning to make good life decisions. The counselor’s roleis to guide the client through the process and not tell what the clientshould do. The clients are helped to help themselves.
Let us now look at the processes in the counseling process and they are:
Identify the need for counseling.
Communication &Counselling Skills
Practical Manual
14
Prepare for counseling.
Conduct counseling.
Follow up.
i) Identify the need for counseling
Through own observation you can analyze the need for counseling.Common situation which requires counseling are
At the time of diagnosis of illness
First hospital admission
Repeated admission
Difficulty to cope with disease
For compliance with treatment regimen
When life style modification is required like dietary change ordisabilities
Terminally ill patients
Sudden dependency like paralysis, fracture etc
ii) Preparation for Counseling
Successful counseling requires preparation. To prepare for counseling, thefollowing needs to be done:
Select a suitable place.
Schedule the time.
Notify the client well in advance.
Organize information.
Outline the counseling session components.
Plan the counseling strategy.
Establish the right atmosphere
iii) Conduct counseling
1. Establish Relationship
Counseling is a relationship. It is further defined as a helping relationship.Therefore, the counselor must take the initiative in the initial interview toestablish a climate built on trust, mutual respect, free and opencommunication, and understanding in general of what the counselingprocess involves. The goals of the initial counseling process are as follows:
1) Establish a comfortable and positive relationship.
2) Explain the counseling process and mutual responsibilities to the client.
3) Facilitate communications.
15
4) Identify and verify the clients concerns that brought her or him toseek counseling assistance.
5) Plan, with the client, to obtain assessment data needed to proceedwith the counseling process.
2. Problem Identification and Exploration
Once an adequate relationship has been established, clients will be morereceptive to the in depth discussion and exploration of their concerns. Atthis stage, clients must assume more responsibility.
3. Plan for Problem Solving
Once the counselor has determined that all relevant information regardingthe client’s concern is available and understood, and once the client hasaccepted the need for doing something about a specific problem, plan tosolve or remediate the concern of the client. In this stage there are somesteps in viewing the processes involved. 1) Define the problem 2) Identifyand list all possible solutions 3) Explore the consequences of the suggestedsolutions. 4) Prioritize the solutions on the basis of priority needs.
4. Solution Application and Termination
In this final stage, the responsibilities are clear cut. The client has theresponsibility for applying the determined solution, and the counselor has aresponsibility to encourage the client’s acting on his or her determinedproblem solution. Once it has been determined that the counselor andclient have dealt with the client’s issue to the extent possible and practical,the process should be terminated.
iv) Follow up
Counseling is time taking process, continuous contact help to developconfidence in counselor and to explore the problem and find out theresources. Therefore one session may not be sufficient. Follow up shouldbe planned and followed.
Communication &Counselling Skills
Practical Manual
16
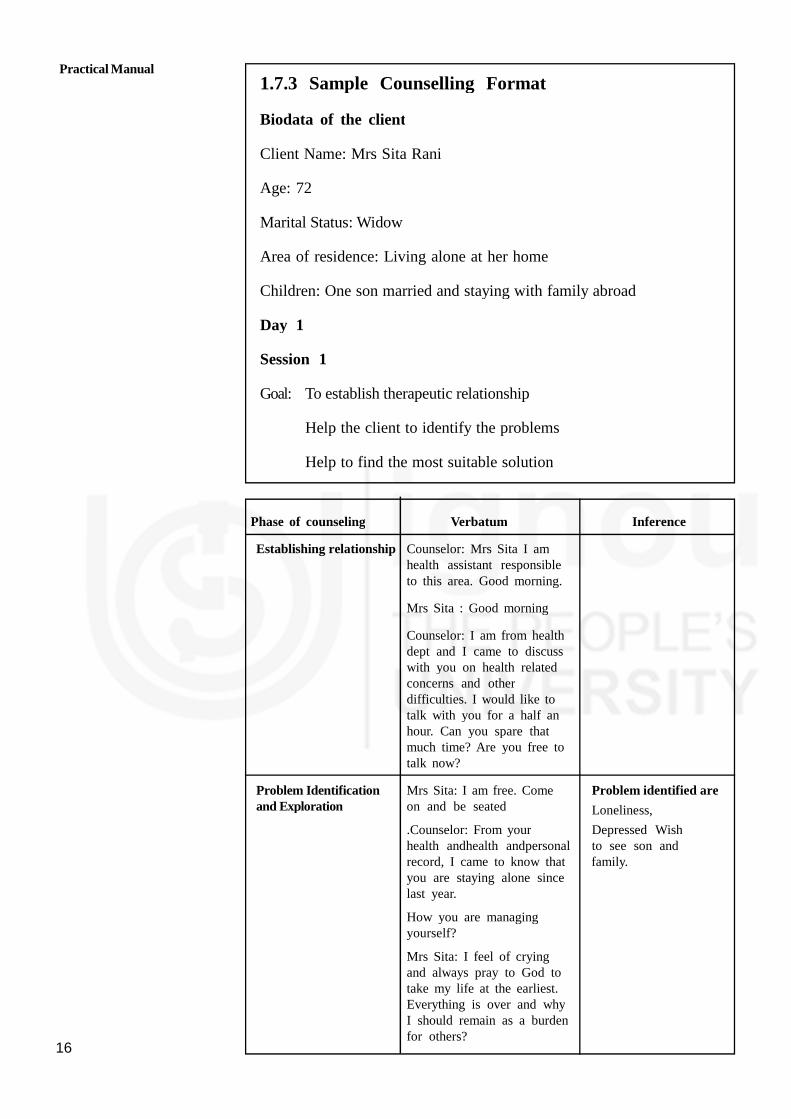
1.7.3 Sample Counselling Format
Biodata of the client
Client Name: Mrs Sita Rani
Age: 72
Marital Status: Widow
Area of residence: Living alone at her home
Children: One son married and staying with family abroad
Day 1
Session 1
Goal: To establish therapeutic relationship
Help the client to identify the problems
Help to find the most suitable solution
Phase of counseling Verbatum Inference
Establishing relationship Counselor: Mrs Sita I amhealth assistant responsibleto this area. Good morning.
Mrs Sita : Good morning
Counselor: I am from healthdept and I came to discusswith you on health relatedconcerns and otherdifficulties. I would like totalk with you for a half anhour. Can you spare thatmuch time? Are you free totalk now?
Problem Identification Mrs Sita: I am free. Come Problem identified areand Exploration on and be seated Loneliness,
.Counselor: From your Depressed Wishhealth andhealth andpersonal to see son andrecord, I came to know that family.you are staying alone sincelast year.
How you are managingyourself?
Mrs Sita: I feel of cryingand always pray to God totake my life at the earliest.Everything is over and whyI should remain as a burdenfor others?

17
Plan for problem solving Counseling: You feelloneliness and depressed?
Mrs Sita: Haa. Feeldepressed. Its long timeabout 1 year to see my sonand family.Counselor: Oh 1year is passed after theirlast visit? What about thenature of his work? and howmany children they have?
Mrs Sita: He has recentlymoved to a new job and isin probation. Leaves are notpermitted in this year.
Counselor: Oh that is thereason by which he cannotcome this year.
Termination You want to see him and Identified the bestgrand children and talk solutionfreely isn’t? Daily conversation
Mrs Sita: Yes through video call
Counsellor: Do you have
mobile
Day 7
Session 2
Goal: To have follow up
To analyse the extent to which the identified problem is solved
To help to find other concerns
Phase of counseling Verbatum Inference
Maintaining relationship Counselor: Are you gettingready to go anywhere?
Mrs Sita: No, returning backfrom walk, come on.
Counselor: Had talk withyour children?
Mrs Sita: Haa daily in theevening. It’s a pleasure totalk with them. Have youseen my kitchen garden? Iused to work there inmorning hours. In myyounger years I lovedKitchen garden. Now againI started.
Counselor: I had noticedwhen I enter into it. Itsvery mind blowing.
After gardening, you shouldtake care of your feet.
Follow up of previousproblems identified
Looking happy
Started gardeningas leisure activity
Reduce loneliness
Communication &Counselling Skills
Identified alternatesolutions1.Plan forvisit. Make herUnderstood that dueto job related andschool related problemhe can’t visit now.Due to climaticunsuitability she alsocan’t go there2. Be intouch with themregularlu. Plan forDaily conversationthrough Land Phone
Utilise mobile forvideo calls
Phase of counseling Verbatum Inference

Practical Manual
18
Problem Identification Clean it, wipe with clotheand Exploration and protect from
development of ulcer.MrsJohn: Yaa I am Diabetic andinfection can occur isn’t?How it will be if I wearshoes during gardening,?
Potential for foot ulcer
Plan for problem solving Counselor: It’s a wonderfulidea, But be careful to weargood filling one and keep itin sunlight after each useto avoid moisture.
Mrs Sita: Thanks a lot andyou will visit again in thenext week?
Termination Counselor: Surely, Have a
good day Bye
Day 14
Session 3
Goal
Follow up of previous visit
Help to identify a leisure activity
Day 21
Session 4
Goal
To follow up/ review the previous counseling
To identify any problem
Phase of counseling Verbatum Inference
Maintaining relationship MrsSita: I was waitingfor you since yesterday
Counsellor: What is thematter? You are lookingworried!
Problem Identification Mrs Sita: As you hadand Exploration said, I have noticed a
small ulcer between mytoes. I have no pain;What shall I do?
Counsellor: Ulcer?
Anticipatory Problemidentified
Identifying solutions
Problems identified
Worried aboutulcer on foot

19
Plan for problem solving Control blood sugar –by reducing carbohydratefood, oats, extra leafyvegetables, exerciseregular medicine intakeand all. Mrs Sita: I doreduced all carbohydratefood itemsCounselor: ItsgreatBut go for healthcheck up in clinictomorrow. Physicianshelp to guide you better.
Termination Mrs Sita: Ok, I willsurely do. Tomorrowyou will be inclinic?Counselor: Yes,should show me yourresults. Ok see youtomorrow.
Day 35
Session 5
Goal
To follow up
To help them to choose the best action
Phase of counseling Verbatum Inference
Maintaining relationship In the clinic
Mrs Sita: Good morning
Counselor: Good morning,its nice that you had cometo clinic today itself.
Problem Identification But you are lookingand Exploration nervous. What happened/
We shall go to the roomand discuss
Mrs Sita: Haa (seated hercomfortably)
Counselor: Tell me whathappened? How is theblood result?
Mrs Sita: Blood sugar isvery high. I am restrictingfood as per doctor’s advice.Even then it is high.
Counselor: Don’t be upset.
Choosing bestoption
Communication &Counselling SkillsAlternative
solutions identified
Control blood sugarby diet, exercise ormedicine
Problems identified
Uncontrolled bloodsugar

Practical Manual
20
Plan for problem solving Blood sugar may becomeun controllable by infection.tension etc. When theserisk factors get controlledyour blood sugar may comedown. Treat the infectionand get relaxed bybreathing exercise, laughtherapy, diversional therapyetc, choose the bestpossible for you.
Mr Sita: I will do deepbreathing exercise. And willtake the medicines veryregularly.
Counsellor: It’s a good idea.Should continue and doagain blood check up in thenext week.Mrs John: Thankyou for the help.
Termination Counsellor: Thank you, ifneeded you can contact.
Thanks
Summary
Summary of the counselling sessions conducted may be briefed as givenbelow:
Mrs Sita, 72 years living alone was feeling depressed and loneliness. TheCounselor helped her to identify the available resources and promoted touse modern technology. In subsequent visit, herself along with counseloridentified other means of being engaged and helped her to bring outhidden interest like gardening. Counselor also guided to choose the safestmethod of gardening and reefer to clinic when they identified complication.In hospital counselor helped to come out of crisis also counselor usedvarious techniques of communication like rephrasing, open ended questions.Listening, Clarification, restating etc
1.8 LET US SUM UP
In this skill an attempt has been made to introduce you to the keyfeatures of hjistory taking. The patient’s history is a very important aspectof assessment. It gives a full health profile of the patient’s chief complaints,history of present, past illness, personal and family history and psycho-social history. A guideline has been provided for your ready reference tolearn the skill of history taking. Rules for reporting and recordingdocument are also mentioned at the end of the unit.
In this skill an attempt has been made to introduce you to the keyfeatures of counseling techniques.. A guideline has been provided for yourready reference to learn the skill of counseling.
Alternative solutions
Controlling infection
Exercise
Relaxation techniques
Regular check up

21
1.9 KEY WORDS
Ailment : Any minor disorder of the body.
Ambulation : Having the capacity to walk.
Deteriorating : Worsening.
Dyspnoea : Difficulty in breathing.
Fatigue : A condition of being very tired.
Fluctuating : Move up and down.
Gait : Manner of walking.
Giddiness : Feeling of turning round.
Objective Information : When patient is examined by going through records
and lab reports.
Subjective Information: When information is received by the patient,relatives or any others, neighbors
Elderly : Any one male/female more than 60years
Counselor : A trained person who does planned talk for withan aim of helping him.
1.10 ACTIVITIES
Activity 1 Interview two patients in your locality and collectsubjective and objective information and summariseit in diary.
Activity 2 Select two parients and take their history. Recordas per the format keeping in mind general rules asper guideliness.
Activity 3 Counsel an elderly as per need at least one ptfive interactions at different days/time
Activity 4 Do counseling for your neighbour who is sufferingfrom long term illness and document it.
Communication &Counselling Skills

Practical Manual
22
UNIT 2 PHYSICAL ASSESSMENTSKILLS
Structure
2.0 Objectives
2.1 Introduction
2.2 Checking Vitals
2.2.1 Temperature
2.2.2 Pulse
2.2.3 Respiration
2.2.4 Blood Pressure
2.3 Anthropometric Measurements
2.3.1 Weight
2.3.2 Height
2.3.3 Circumference (Head, Chest, Abdomen, Mid-arm,Waist and Hip)
2.3.4 Calculating Body Mass Index (BMI)
2.4 Collection of Sample
2.4.1 Urine
2.4.2 Stool
2.4.3 Sputum
2.5 Monitoring Blood Glucose with Glucometer
2.6 Let Us Sum Up
2.7 Activity
2.0 OBJECTIVES
After studying this unit , you will be able to develop skills in
identifying the sites for taking temperature and pulse;
recording the temperature, pulse, respiration and blood pressureaccurately;
measuring the head, chest, abdominal and mid-arm circumferenceaccurately;
collection of samples of urine, stool and sputum withoutcontamination to client or self; and
checking blood glucose levels of diabetic clients using glucometer.
23
2.1 INTRODUCTION
This unit deals with certain skills required to be learnt for carrying outphysical examination of the clients. The skills needed for thorough physicalassessment include checking vital signs (which includes temperature, pulse,respiration and blood pressure), taking anthropometric measurements(Height, Weight, Circumferences, BMI Calculation) and Blood Sugar Testwith Glucometer. In this chapter you will learn about the above skills andpractice them in your clinical area to gain competencies.
2.2 CHECKING VITALS
Checking vital signs is the procedure that includes temperature, pulse,respiration and blood pressure. If any abnormality occurs in the body, vitalsigns change immediately.
Purpose
1. To assess the client’s condition
2. To determine the baseline values for future comparisons
3. To detect changes and abnormalities in the condition of the client
Articles required:
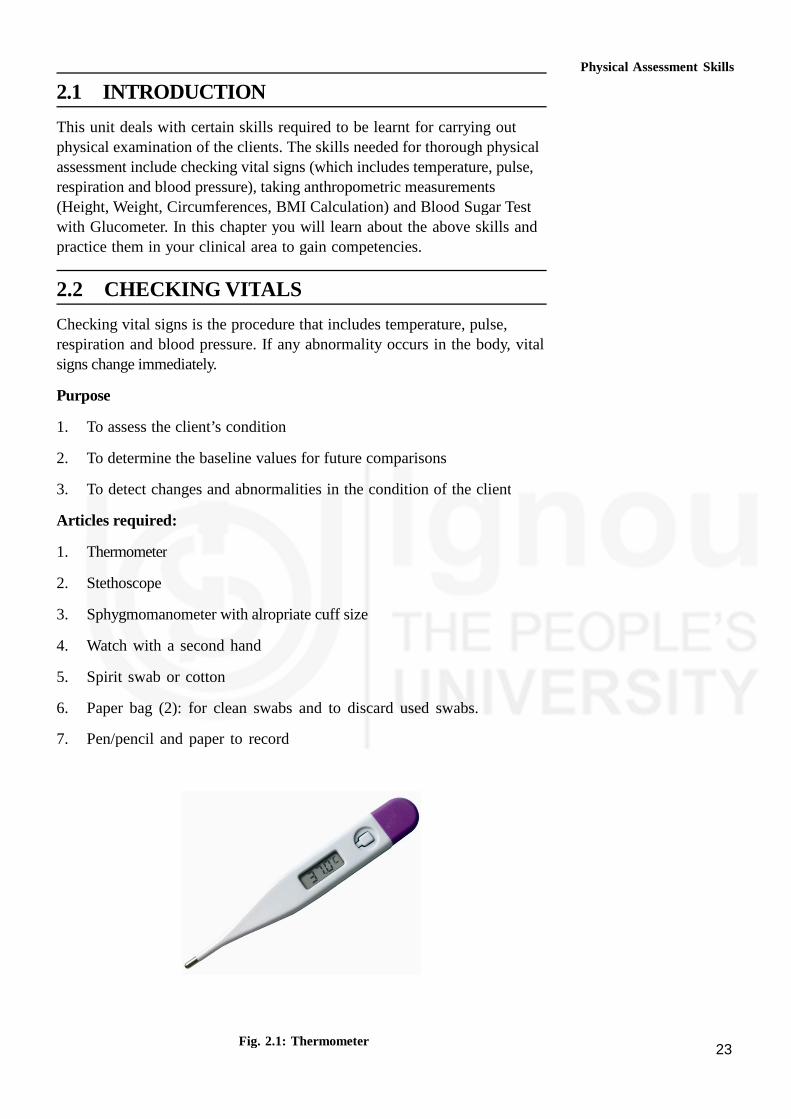
1. Thermometer
2. Stethoscope
3. Sphygmomanometer with alropriate cuff size
4. Watch with a second hand
5. Spirit swab or cotton
6. Paper bag (2): for clean swabs and to discard used swabs.
7. Pen/pencil and paper to record
Fig. 2.1: Thermometer
Physical Assessment Skills

Practical Manual
24
Before using stethoscope, Let us know the parts as gives in Fig. 2.2, 2.3,2.4, 2.5.
A stethoscope consists of ear pieces, tubing, two heads such as the belland the diaphragm.
Fig. 2.2: Stethoscope
Used to hear low frequency sounds such as fetal heart rate
Fig. 2.3: The bell of stethoscope
Used to hear high frequency sound such as breath and bowel sounds
Fig. 2.4: The diaphragm of stethoscope
Aneroid sphygmomanometer. Sphygmomanometer consistsof: an inflatablebladder,attached to a bulb enclosed in a cuff, with a deflating mechanism
Fig. 2.5: Aneroid Manometer

25
2.2.1 Temperature Checking by Digital Thermometer
Measuring/ monitoring patient’s body temperature using digital thermometer.
Purposes:
1. To determine body temperature
2. To assist in diagnosis
3. To evaluate patient’s recovery from illness
4. To determine if immediate measures should be implemented to reducedangerously elevated body temperature or converse body heat whenbody temperature is dangerous low
5. To evaluate patient’s response once heat conserving or heal reducingmeasures have been implemented
Step of Procedure checking temperature
Steps Rationale
1. Wash your hands. Hand washing prevents the spread ofinfection
2. Prepare all required equipment Organization facilitates accurate skillperformance.
3. Check the client’s identification. Confirm the necessity
4. Explain the purpose and the Providing information fasters cooperation
procedure to the client. and understanding
5. Close doors and/or use a Maintains client’s privacy and minimize
screen. embarrassment.
6. Assist the client to a supine To provide easy access to axilla.
or sitting position.
7. Move clothing away from To expose axilla for correct thermometer
shoulder and arm bulb placement
8. Be sure the client’s axilla is Moisture will alter the reading. Under
dry. If it is moist, pat it dry condition moistening, temperature is
gently before inserting the generally measured lower than the real.
thermometer (Fig.2.6)
9. Place the bulb of thermometer To maintain proper position of bulb
in hollow of axilla. against blood vessels in axilla.
10. Keep the arm flexed across Close contact of the bulb of the
the chest, close to the side thermometer with the superficial blood
of the body (Fig.2.7) vessels in the axilla ensures a more accuratetemperature registration.
11. Leave the thermometer probe To ensure an accurate reading
in place until audible signals
occur (beep Sound)
12. Remove and read thetemperature. Clean thethermometer with an alcoholswab and replace it in the cover

Practical Manual
26
Temperature Checking by Digital Thermometer
Measuring/ monitoring patient’s body temperature using digital thermometer.
Purposes:
1. To determine body temperature
2. To assist in diagnosis
3. To evaluate patient’s recovery from illness
4. To determine if immediate measures should be implemented to reducedangerously elevated body temperature or converse body heat whenbody temperature is dangerous low
Steps
1. Wash your hands.
2. Prepare all required equipment
3. Check the client’s identification.
4. Explain the purpose and theprocedure to the client.
5. Close doors and/or use a screen.
6. Assist the client to a supine orsitting position.
7. Move clothing away from shoulderand arm
8. Be sure the client’s axilla is dry. If itis moist, pat it dry gently beforeinserting the thermometer (Fig.2.6)
9. Place the bulb of thermometer inhollow of axilla.
10. Keep the arm flexed across the chest,close to the side of the body(Fig.2.7)
11. Leave the thermometer probe inplace until audible signals occur(beep Sound)
12. Remove and read the temperature.Clean the thermometer with analcohol swab and replace it in thecover
13. Explain the result and instruct him/her if he/she has fever orhypothermia.
14. Dispose of the alchohal swab inpaper bag. Wash your hands.
15. Replace all equipment in proper place.
16. Record in the client’s Temperature
17. Report an abnormal reading
Rationale
Hand washing prevents the spread ofinfection
Organization facilitates accurate skillperformance.
Confirm the necessity
Providing information fasterscooperation and understanding
Maintains client’s privacy and minimizeembarrassment.
To provide easy access to axilla.
To expose axilla for correct thermometerbulb placement
Moisture will alter the reading. Underthe condition moistening, temperature isgenerally measured lower than the real.
To maintain proper position of bulbagainst blood vessels in axilla.
Close contact of the bulb of thethermometer with the superficial bloodvessels in the axilla ensures a moreaccurate temperature registration.
To ensure an accurate reading
To share his/her data and provide careneeded immediately
To prevent the spread of infection
Axillary temperature readings usuallyare lower than oral readings Givingsignature maintains accountability
Documentation provides ongoing datacollection

27
5. To evaluate patient’s response once heat conserving or heal reducingmeasures have been implemented
Step of Procedure checking temperature.:
Fig. 2.6 : Placing the thermometer Fig. 2.7 : Placing the forearm
in the Axilla across the chest
In home situation where the clients have their individual thermometer youmay take oral temperature. The procedure remains the same except forthe placement of the thermometer in the mouth under the tongue as shownin Fig. 2.8.
Fig. 2.8 : Taking Oral temperature
Ask for cold/hot food taken by patient before putting threr mometerin the mouth. It may give wrong reading.
Not to hold thermometer by teeth.
Hold thermo meter by pressing lips.
Digital thermometer give beep sound which indicate that removethermometer and take reading.
2.2.2 Measuring a Radial Pulse
Checking presence, rate, rhythm and volume of throbbing of artery(Fig. 2.9 to Fig. 2.12).
Purpose:
1. To determine number of heart beats occurring per minute( rate)
2. To strength of pulse
3. To assess blood circulation status of limbs.
Physical Assessment Skills

Practical Manual
28
Fig. 2.9 : Placing the client’s forearm straight of acrossupper abdomen and putting the fingertips over the
radial pulse
Fig. 2.10 : Placing the client’s forearm straight alongsidebody and putting the fingertips over the radial pulse
.
Fig. 2.11 : Placing the client’s forearm on the armrest ofchair and putting your fingertips over the radial pulse
Fig. 2.12 : Supporting the client’s forearm by HHA’s palm

29
Physical Assessment Skills2.2.3 Counting Respiration
Definition: Monitoring the involuntary process of inspiration and expirationin a patient.
Taking of breath in and expelling out which mouse chest in wards and outwards. Chest movements are counted for one minute to know respiratoryrate.
Purposes:
CareAction
1. Close the door and/or use screen.
2. Make the client’s position comfortable,preferably sitting or lying with the headof the elevated 45 to 60 degrees.
3. Prepare count respirations by keepingyour fingertips on the client’s pulse.
4. Counting respiration:
1) Observe the rise and fall of theclient’s (one inspiration and oneexpiration).
2) Count respirations for one fullminute.
3) Examine the depth, rhythm, facialexpression, cyanosis, cough andmovement of accessory muscles.
5. Replace bed linens if necessary.Record the rate on the client’s chart.Sign the chart
6. Perform hand hygiene
7. Report any irregular findings.
Rationale
To maintain privacy
To ensure clear view of chest wall andabdominal movements. If necessary,move the bed linen.
A client who knows are countingrespirations may not breathe naturally.
• One full cycle consists of aninspiration and an expiration.
• Allow sufficient time to assessrespirations, especially when therate is with an irregular
• Children normally have anirregular, more rapid rate. Adultswith an irregular rate require morecareful assessment includingdepth and rhythm of respirations.
• Documentation provides ongoingdata collection.
• Giving signature maintainsprofessional accountability
To prevent the spread of infection
To provide continuity of care
2.2.4 Measuring Blood Pressure
Monitoring blood pressure using palpation and/or sphygmomanometer,(Fig. 2.13 to Fig. 2.15).
Purpose:
1. To obtain baseline data for diagnosis and treatment
2. To compare with subsequent changes that may occur during care ofpatient
3. To evaluate patient’s response to changes in physical condition as aresult of treatment with fluids or medications

Practical Manual
30
CareAction
1. Wash your hands.
2. Gather all equipment. Cleanse thestethoscope ‘s ear pieces anddiaphragm with a spirit swab wipe.
3. Explain the purpose andprocedure to the client.
4. Have the client rest at least 5minutes before measurement.
5. Determine the previous baselineblood pressure, if available, fromthe client’s record.
6. Identify factors likely to interferewhich accuracy of blood pressuremeasurement : exercise, coffee andsmoking
7. Setting the position:
1) Assist the client to acomfortable position. Be sureroom is warm, quiet andrelaxing.
2) Support the selected arm.Turn the palm upward.
3) Remove any constrictiveclothing (Fig.2.13)
Rationale
Handwashing prevents the spread ofinfection
• Organization facilitates performance ofthe skill.
• Cleansing the stethoscope preventsspread of infection.
Providing information fosters theclient’s cooperation andunderstanding.
Allow the client to relax and helps toavoid falsely elevate readings.
To avoid misreading of the client’sblood pressure and find any changeshis/her blood pressure from the usual
Exercise and smoking can cause falseelevations in blood pressure.
• The client’s perceptions that thephysical or interpersonal environmentis stressful affect the blood pressuremeasurement.
• Ideally, the arm is at heart level foraccurate measurement. Rotate the armso the brachial pulse is easilyaccessible.
Do not use an arm where circulation iscompromised in any way.
CareAction
8. Checking brachial artery and wrappingthe cuff:
1) Palpate brachial artery.2) Center the cuff’s bladder approximately
2.5 cm (1 inch) above the site where youpalpated the brachial pulse
3) Wrap the cuff snugly around the client’sarm and secure the end approximately(Fig. 2.14)
4) Check the manometer whether if it is atlevel with the client’s heart
Rationale
• Center the bladder to ensureeven cuff inflation over thebrachial artery
• Loose-fitting cuff causes falsehigh readings. Appropriate wayto wrap is that you can put only2 fingers between the arm andcuff.
Procedure by palpation and aneroid manometer:
Fig. 2.13 : Placing the selected arm on the bedand turn the palm upward
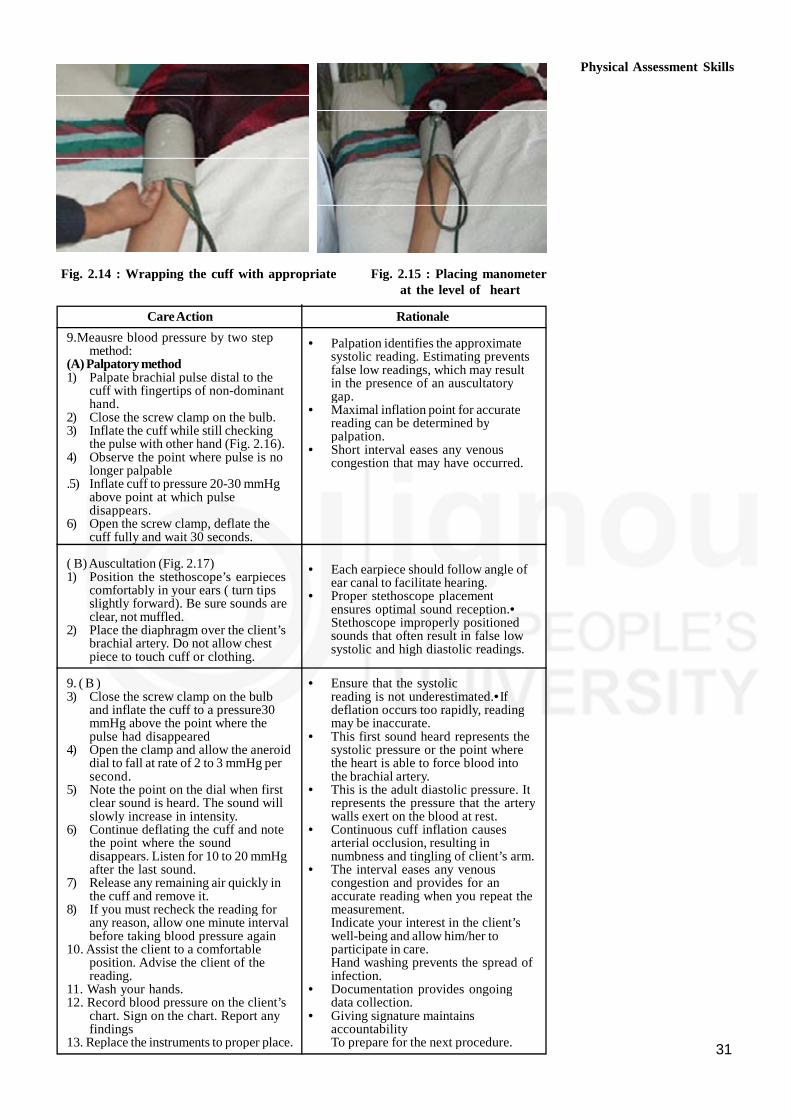
31
Fig. 2.14 : Wrapping the cuff with appropriate Fig. 2.15 : Placing manometerat the level of heart
CareAction
9.Meausre blood pressure by two stepmethod:
(A) Palpatory method1) Palpate brachial pulse distal to the
cuff with fingertips of non-dominanthand.
2) Close the screw clamp on the bulb.3) Inflate the cuff while still checking
the pulse with other hand (Fig. 2.16).4) Observe the point where pulse is no
longer palpable.5) Inflate cuff to pressure 20-30 mmHg
above point at which pulsedisappears.
6) Open the screw clamp, deflate thecuff fully and wait 30 seconds.
( B)Auscultation (Fig. 2.17)1) Position the stethoscope’s earpieces
comfortably in your ears ( turn tipsslightly forward). Be sure sounds areclear, not muffled.
2) Place the diaphragm over the client’sbrachial artery. Do not allow chestpiece to touch cuff or clothing.
9. ( B )3) Close the screw clamp on the bulb
and inflate the cuff to a pressure30mmHg above the point where thepulse had disappeared
4) Open the clamp and allow the aneroiddial to fall at rate of 2 to 3 mmHg persecond.
5) Note the point on the dial when firstclear sound is heard. The sound willslowly increase in intensity.
6) Continue deflating the cuff and notethe point where the sounddisappears. Listen for 10 to 20 mmHgafter the last sound.
7) Release any remaining air quickly inthe cuff and remove it.
8) If you must recheck the reading forany reason, allow one minute intervalbefore taking blood pressure again
10. Assist the client to a comfortableposition. Advise the client of thereading.
11. Wash your hands.12. Record blood pressure on the client’s
chart. Sign on the chart. Report anyfindings
13. Replace the instruments to proper place.
Rationale
• Palpation identifies the approximatesystolic reading. Estimating preventsfalse low readings, which may resultin the presence of an auscultatorygap.
• Maximal inflation point for accuratereading can be determined bypalpation.
• Short interval eases any venouscongestion that may have occurred.
• Each earpiece should follow angle ofear canal to facilitate hearing.
• Proper stethoscope placementensures optimal sound reception.•Stethoscope improperly positionedsounds that often result in false lowsystolic and high diastolic readings.
• Ensure that the systolicreading is not underestimated.•Ifdeflation occurs too rapidly, readingmay be inaccurate.
• This first sound heard represents thesystolic pressure or the point wherethe heart is able to force blood intothe brachial artery.
• This is the adult diastolic pressure. Itrepresents the pressure that the arterywalls exert on the blood at rest.
• Continuous cuff inflation causesarterial occlusion, resulting innumbness and tingling of client’s arm.
• The interval eases any venouscongestion and provides for anaccurate reading when you repeat themeasurement.Indicate your interest in the client’swell-being and allow him/her toparticipate in care.Hand washing prevents the spread ofinfection.
• Documentation provides ongoingdata collection.
• Giving signature maintainsaccountabilityTo prepare for the next procedure.
Physical Assessment Skills
Practical Manual
32
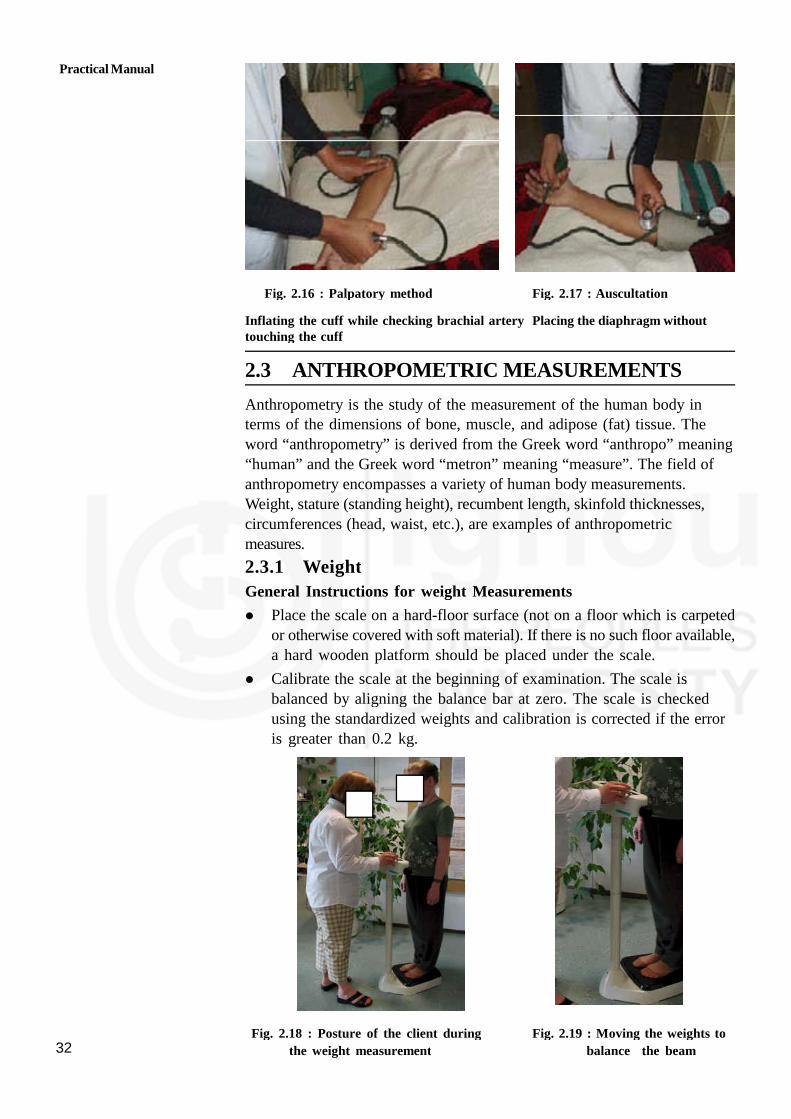
Fig. 2.16 : Palpatory method Fig. 2.17 : Auscultation
Inflating the cuff while checking brachial artery Placing the diaphragm withouttouching the cuff
2.3 ANTHROPOMETRIC MEASUREMENTS
Anthropometry is the study of the measurement of the human body interms of the dimensions of bone, muscle, and adipose (fat) tissue. Theword “anthropometry” is derived from the Greek word “anthropo” meaning“human” and the Greek word “metron” meaning “measure”. The field ofanthropometry encompasses a variety of human body measurements.Weight, stature (standing height), recumbent length, skinfold thicknesses,circumferences (head, waist, etc.), are examples of anthropometricmeasures.
2.3.1 Weight
General Instructions for weight Measurements
Place the scale on a hard-floor surface (not on a floor which is carpetedor otherwise covered with soft material). If there is no such floor available,a hard wooden platform should be placed under the scale.
Calibrate the scale at the beginning of examination. The scale isbalanced by aligning the balance bar at zero. The scale is checkedusing the standardized weights and calibration is corrected if the erroris greater than 0.2 kg.
Fig. 2.18 : Posture of the client during Fig. 2.19 : Moving the weights to
the weight measurement balance the beam

33
Normal weighing procedure
CareAction
1. Explain the procedure
2. Ask client areasked to removetheirheavy outer garments(jacket, coat,throusers, skirts, etc.) and shoes. Ifsubjects refuse to remove trousersor skirt, at least makethememptytheir pocketsand record thefact inthedatacollectionform.
3 Instruct theclient to stand in thecentreof theplatform, weightdistributed evenly to both feet.(Fig.2.18to2.19)
4. Record theweight to theresolutionof thescale(thenearest 0.1kgor 0.2kg)
5. Document theprocedure in thedesignated place.
Rationale
Providing information fosters his/hercooperation
• To take accurate measurement.
Standing off-centre may affectmeasurement
To avoid duplication Documentation provides
coordination of care
If the participant is heavily overweight, i.e. weighs more than the ulerlimit of the scale, this fact should be noted in the data collectionform, together with the uler limit of the scale
Self-reported weights are not acceptable, even if the participant isimmobile or refuses to be weighed.
Note: Infants and toddlers who cannot stand alone on the scale will beweighed with the assistance of an adult. Either the guardian or the parentwill stand alone on the scale and the weight of the parent/guardian isrecorded. The child is then handed to the adult on the scale. The weightof the child along with the adult is recorded. Now the weight of theparent/guardian previously recorded is deducted from this weight. Theobtained weight is the weight of the child.
2.3.2 Height Measurement
Height can be measured in all the clients, except wheelchair boundindividuals, persons who have difficulty standing steady or straight, andclients with hairstyle or head dress (e.g. turban) that prevents proper useof the height measuring equipment (Fig. 2.20 to Fig. 2.23).
General Instructions
If the height is measured with the measuring rod attached to thebalanced beam scale no further set-up procedures are required, if thescale has been placed properly for weighing. However, it should beverified that the user part of the measuring rod is straight and vertical(i.e. not bend or curved).
If the height is measured by stadiometer, the height rule is tapedvertically to the hard flat wall surface with the base at floor level.
The floor surface next to the height rule must be hard. If no suchfloor is available, a hard wooden platform should be placed under thebase of the height rule.
Physical Assessment Skills

Practical Manual
34
At the beginning of each examination the HHA must calibrate the heightrule by checking it with standardized rods and correct the error if any.
If a client is excluded from height measurement, the reason should berecorded in the data collection form
If the client is taller than the scale of the height rule, no heightmeasurement should be made and this fact, together with the uler limitof the height rule, should be documented
Self-reported height is not acceptable, even if the client is immobile orrefuses to have his/her height measured.
Normal height measurement procedure
CareAction
1. Explain the procedure
2. Ask client are asked to remove their heavyouter garments, (jacket, coat etc.) hairornaments, jewelry, buns, or braids fromthe top of the head and shoes.
3. Instruct the client to stand with his/her backto the height rule. The back of the head,back, buttocks, calves and heels should betouching the upright, feet together. The topof the external auditory meatus (ear canal)should be at the level of the inferior marginof the bony orbit (cheek bone). The client isasked to look straight. See Fig. 2.20
4. Lower the head piece of the stadiometer orthe sliding part of the measuring rod so thatthe hair (if present) is pressed flat. See fig:2.21
5. Record the height is to the resolution of theheight rule (i.e. nearest millimetre/half acentimetre). If the client is taller than theHHA, the HHA should stand on a platformso that he/she can properly read the heightrule.fig: 2.22
4. Document the procedure in the designatedplace.
Rationale
Providing information fosters his/hercooperation
• To take accurate measurement.
For Accurate recording
To prevent erroneous measurement
To avoid errors in measurement
To avoid duplication
Documentation providescoordination of care
Fig. 2.20: Position of the subject during the height measurement

35
Fig. 2.21 : Lowering of head piece of Fig. 2.22: Use of platform whenmeasuring tape measuring tall person
Fig. 2.23 : Standing height position
Physical Assessment Skills

Practical Manual
36
Measuring height in children
Length for all children less than 4 years of age (birth to 47 months) ismeasured using an infantometer with a fixed head piece and horizontalbackboard, and an adjustable foot piece.
Procedure:
Instruct the parent or guardian to remove the child’s clothes exceptfor the diaper or underpants.
Lay the child on the infantometer with the feet toward the foot pieceand the head against the fixed head piece.
Ask the parent or guardian to stand with the HHA, make eyecontact, and talk to the child throughout the procedure
Support the child’s head while positioning the feet and ensuresthat the head lies in the horizontal plane. Ally gentle traction to bringthe top of the head in contact with the fixed headpiece. Align thechild’s legs by placing one hand gently but with mild pressure overthe knees. With the other hand, slide the foot piece to rest firmly atthe child’s heels Fig. 2.24 and 2.25.
Record the measurement and Release the child’s feet as you hold thefoot piece in position.
Instruct the parent or guardian remove the child from the infantometer.
Now document the length of the Infant
Fig. 2.24 : Recumbent length head position
37
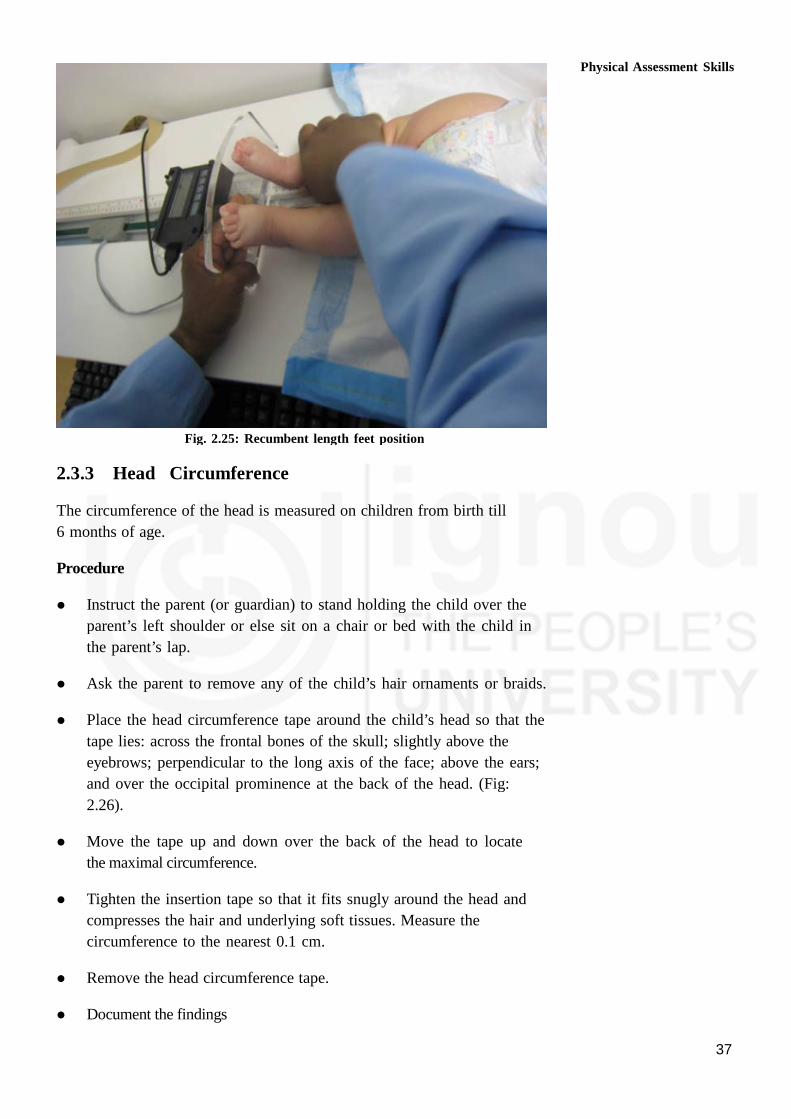
Fig. 2.25: Recumbent length feet position
2.3.3 Head Circumference
The circumference of the head is measured on children from birth till
6 months of age.
Procedure
Instruct the parent (or guardian) to stand holding the child over the
parent’s left shoulder or else sit on a chair or bed with the child in
the parent’s lap.
Ask the parent to remove any of the child’s hair ornaments or braids.
Place the head circumference tape around the child’s head so that the
tape lies: across the frontal bones of the skull; slightly above the
eyebrows; perpendicular to the long axis of the face; above the ears;
and over the occipital prominence at the back of the head. (Fig:
2.26).
Move the tape up and down over the back of the head to locate
the maximal circumference.
Tighten the insertion tape so that it fits snugly around the head and
compresses the hair and underlying soft tissues. Measure the
circumference to the nearest 0.1 cm.
Remove the head circumference tape.
Document the findings
Physical Assessment Skills
Practical Manual
38
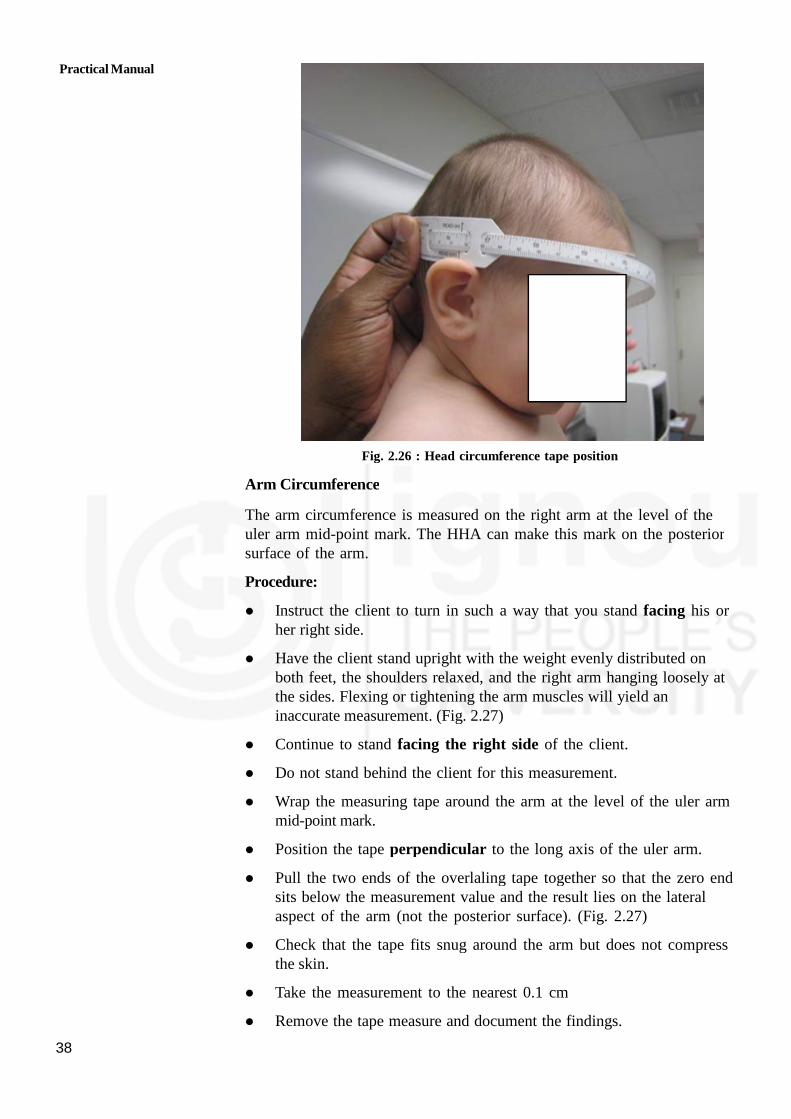
Fig. 2.26 : Head circumference tape position
Arm Circumference
The arm circumference is measured on the right arm at the level of theuler arm mid-point mark. The HHA can make this mark on the posteriorsurface of the arm.
Procedure:
Instruct the client to turn in such a way that you stand facing his orher right side.
Have the client stand upright with the weight evenly distributed onboth feet, the shoulders relaxed, and the right arm hanging loosely atthe sides. Flexing or tightening the arm muscles will yield aninaccurate measurement. (Fig. 2.27)
Continue to stand facing the right side of the client.
Do not stand behind the client for this measurement.
Wrap the measuring tape around the arm at the level of the uler armmid-point mark.
Position the tape perpendicular to the long axis of the uler arm.
Pull the two ends of the overlaling tape together so that the zero endsits below the measurement value and the result lies on the lateralaspect of the arm (not the posterior surface). (Fig. 2.27)
Check that the tape fits snug around the arm but does not compressthe skin.
Take the measurement to the nearest 0.1 cm
Remove the tape measure and document the findings.

39
Fig. 2.27 : Adult arm circumference
Fig. 2.28 : Infant arm circumference
Waist circumference measurement
General Instructions:
Check the length of the measuring tape with the calibrated length rod(usually the 150 cm one) at least once per month. If the measuringtape is stretched it should be replaced.
Waist circumference should be measured at a level midway betweenthe lower rib margin and iliac crest with the tape all around the bodyin horizontal position. Fig. 2.29
If the client is immobile or refuses to have his/her waist circumferencemeasured, this fact should be documented. Self-reported waistcircumference is not acceptable.
If the waist circumference exceeds the length of the tape, this factshould be documented together with the maximum length of the tape
Physical Assessment Skills

Practical Manual
40
Care Action
1. Explain the procedure
2. Instruct the client to remove his/herclothes, except for light underwear. Ifthis is not possible, for example due tocultural reasons, the alternative is tomeasure the circumference of the clientwithout heavy outer garments anddocument this fact. Tight clothing,including the belt, should be loosenedand the pockets emptied.
3 Instruct the client to stand with theirfeet fairly close together (about 12-15cm) with their weight equally distributedto each leg.
4 Ask the client to breathe normally; thereading of the measurement should betaken at the end of gentle exhaling.
5. Hold the measuring tape firmly,ensuring its horizontal position. Thetape should be loose enough to allowthe HHA to place one finger betweenthe tape and the client’s body. Fig: 2.29
6. Measurements are recorded to theresolution of the tape (nearest millimeter/half centimeter)
7. Document the procedure in thedesignated place.
Rationale
To take accurate measurement.
For Accurate recording
This will prevent clients fromcontracting their abdominal musclesor from holding their breath.
To avoid errors in measurement
To provide accurate data.
To avoid duplication
Documentation providescoordination of care
Providing information fosters his/her cooperation
Waist circumference measurement procedure
Hip circumference measurement
Hip circumference should be measured as the maximal circumference overthe buttocks(Fig.2.29). Hip circumference measurement procedure is sameas the procedure of waist circumference, except for tape position.
If the client is immobile or refuses to have his/her hip circumferencemeasured, this fact should be documented. His/her self-reported hipcircumference should not be accepted.
If the hip circumference exceeds the length of the tape, this facttogether with the maximum length of the tape should be documented.
2.3.4 Body Mass Index (BMI)
Body mass index, or BMI, is a measure of body size. It combines aperson’s weight with their height. The results of a BMI measurement cangive an idea about whether a person has the correct weight for theirheight.
BMI is a screening tool that is used to assess whether a person isunderweight, normal weight, overweight, or obese. If a person’s BMI isoutside of the healthy range, their health risks may increase significantly.

41
Fig. 2.29 : The position of measuring tape and
placement of one finger between the tape and the subject’s body
Overweight can lead to health conditions, such as type 2 diabetes, highblood pressure, and heart problems.A person with low weight can be atincreased risk of malnutrition, osteoporosis, and anemia.
BMI does not measure body fat directly, and it does not account for age,sex, ethnicity, or muscle mass in adults.However, it uses standard weightstatus categories that helps to track weight status across populations andidentify potential issues in individuals.
The formula is BMI = kg/m2 where kg is a person’s weight in kilogramsand m2 is their height in metres squared.
A BMI of 25.0 or more is overweight, while the healthy range is 18.5 to24.9.
BMI reference Chart
BMI Weight status
Below 18.5Underweight
18.5-24.9 Healthy
25.0-29.9 Overweight
30.0 and above Obese
Waist to Hip ratio (WHR)
The WHR has been used as an indicator or measure of health, and therisk of developing serious health conditions.
The waist-hip ratio or waist-to-hip ratio (WHR) isthe dimensionless ratio of the circumference of the waist to that of the hips.This is calculated as waist measurement divided by hip measurement(W ÷ H). For example, a person with a 303 (76 cm) waist and 383(97 cm) hips has a waist-hip ratio of about 0.78. (Fig. 2.30)
Physical Assessment Skills
Practical Manual
42
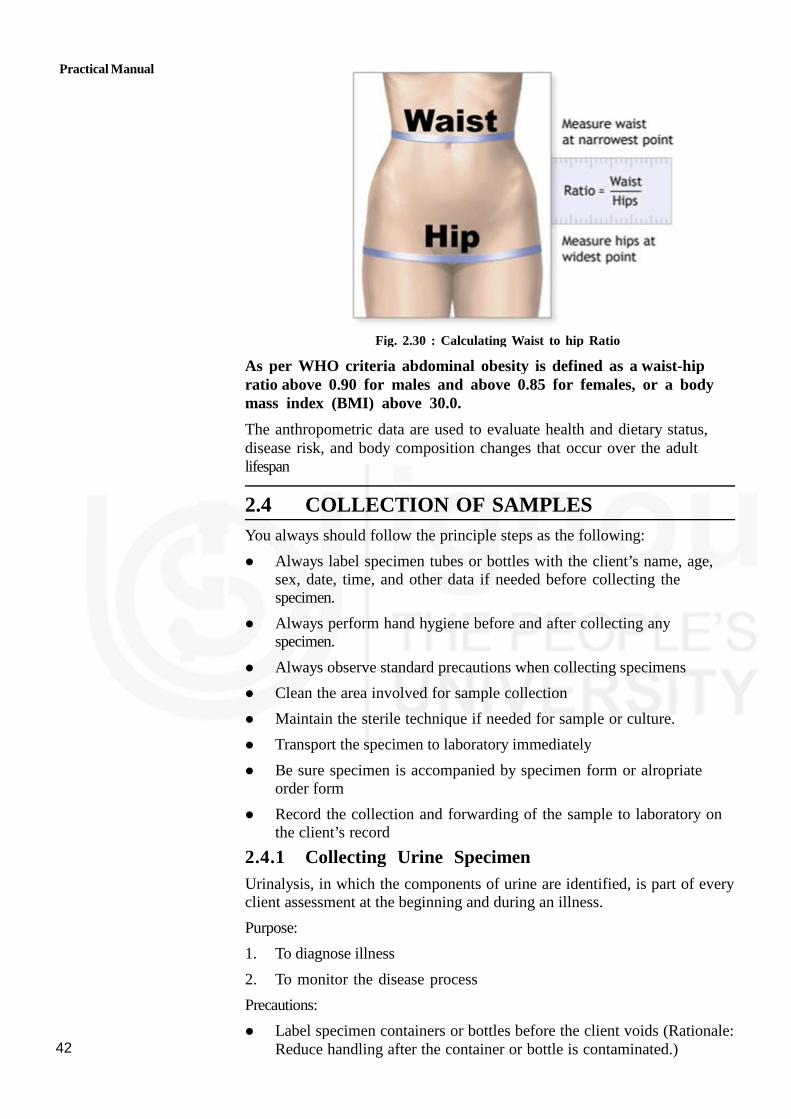
Fig. 2.30 : Calculating Waist to hip Ratio
As per WHO criteria abdominal obesity is defined as a waist-hipratio above 0.90 for males and above 0.85 for females, or a bodymass index (BMI) above 30.0.
The anthropometric data are used to evaluate health and dietary status,disease risk, and body composition changes that occur over the adultlifespan
2.4 COLLECTION OF SAMPLES
You always should follow the principle steps as the following:
Always label specimen tubes or bottles with the client’s name, age,sex, date, time, and other data if needed before collecting thespecimen.
Always perform hand hygiene before and after collecting anyspecimen.
Always observe standard precautions when collecting specimens
Clean the area involved for sample collection
Maintain the sterile technique if needed for sample or culture.
Transport the specimen to laboratory immediately
Be sure specimen is accompanied by specimen form or alropriateorder form
Record the collection and forwarding of the sample to laboratory onthe client’s record
2.4.1 Collecting Urine Specimen
Urinalysis, in which the components of urine are identified, is part of everyclient assessment at the beginning and during an illness.
Purpose:
1. To diagnose illness
2. To monitor the disease process
Precautions:
Label specimen containers or bottles before the client voids (Rationale:Reduce handling after the container or bottle is contaminated.)

43
Note on the specimen label if the female client is menstruating at thattime (Rationale: One of the tests routinely performed is a test forblood in the urine. If the female client is menstruating at the time aurine specimen is taken, a false-positive reading for blood will beobtained. )
To avoid contamination and necessity of collecting another specimen,soap and water cleansing of the genitals immediately preceding thecollection of the specimen is sulorted.(Rationale: Bacteria are normallypresent on the labia or penis and the perineum and in the anal area.)
Maintain body substances precautions when collecting all types ofurine specimen (Rationale: To maintain safety.)
Wake a client in the morning to obtain a routine specimen(Rationale:If all specimen are collected at the same time, the laboratory canestablish a baseline. And also this voided specimen usually representsthat was collecting in the bladder all night.)
Be sure to document the procedure in the designated place
Collecting a single voided specimen
Procedure:
CareAction
1. Explain the procedure
2. Assemble equipments and check thespecimen form with client’s name,date and content of urinalysis
3. Label the bottle or container withthe date, client’s name, departmentidentification, and Dr’s name.
4. Perform hand hygiene and put ongloves
5. Instruct the client to void in a cleancontainer.
6. Remove the specimen immediatelyafter the client has voided
7. Pour about 10-20 mL of urine intothe labeled specimen bottle orcontainer and cover the bottle orcontainer
8. Dispose of used equipment or cleanthem. Remove gloves and performhand hygiene.
9. Send the specimen bottle orcontainer to the laboratoryimmediately with the specimen form.
10. Document the procedure in thedesignated place.
Rationale
• Providing information fosters his/hercooperation
• Organizationfacilitates accurate skillperformance
• Ensure that the specimen collecting iscorrect
• Ensure correct identification andavoid mistakes
• To prevent the spread of infection
• To prevent cross-contamination
• Substances in urine decompose whenexposed to air. Decomposition mayalter the test results
• Ensure the client voids enough amountof the urine for the required tests
• Covering the bottle retardsdecomposition and it prevents addedcontamination.
• To prevent the spread of infection
• Organisms grow quickly at roomtemperature
• To avoid duplication•Documentationprovides coordination of care
Physical Assessment Skills

Practical Manual
44
Collecting 24 hour urine specimen
Collection of a 24-hour urine specimen is the collection of all the urinevoided in 24 hours, without any spillage or wastage.
Purpose:
1. To detect kidney and cardiac diseases or conditions
2. To measure total urine component
Procedure:
CareAction
1. Explain the procedure
2. Assemble equipment and check thespecimen form with client’s name, date andcontent of urinalysis
3. Label the bottle or container with the date,client’s name and other identification,
4. Instruct the client:
1) Before beginning a 24 hour urinecollection, ask the client to voidcompletely.
2) Document the starting time of a-24 hoururine collection on the specimen formand your own record.
3) Instruct the client to collect all the urineinto a large container for the next 24hours.
4) In the exact 24 hours later, ask the clientto void and pour into the largecontainer, The time of start collecting if6.00am than it will be ending 6.00 am ofthe next day.
5) Measure total amount of urine andrecord it on the specimen form andclient’s record.
6) Document the time when finished thecollection
5. Sending the specimen:1) Perform hand hygiene and put on
gloves if available.2) Mix the urine thoroughly3) Collect some urine as required or all the
urine in a clean bottle with lid.4) Transfer it to the laboratory with the
specimen form immediately.
6. Dispose of used equipment or clean them.Remove gloves and perform hand hygiene.
7. Document the procedure in the designatedplace.
Rationale
Providing information fosters his/her cooperation
• Organization facilitatesaccurate skill performance
• Ensure that the specimencollecting is correct
Ensure correct identification andavoid mistakes
To measure urinal component andassess the function of kidney andcardiac function accuracy
The entire collected urine shouldbe stored in a covered container ina cool place.
• To prevent the contamination
• Ensure the client voids enoughamount of the urine for therequired tests
• Covering the bottle retardsdecomposition and it preventsadded contamination.
• Substances in urine decomposewhen exposed to air.Decomposition may alter the testresults
To prevent the spread of infection
• To avoid duplication• Documentation provides
coordination of care

45
Collecting Urine for Culture
Collecting a urine culture is a process that it obtain specimen urine withsterile technique
Purpose:
1. To collect uncontaminated urine specimen for culture and sensitivity test
2. To detect the microorganisms causes urinary tract infection ( UTI)
3. To diagnose and treat with specific antibiotic
CareAction
1. Assemble equipment and check thespecimen form with client’s name,date and content of urinalysis
2. Label the bottle or container with thedate, client’s name, departmentidentification, and Dr’s name.
3. Explain the procedure to the client
4. Instruct the client:1) Instruct the client to clean
perineum with soap and water2) Open sterilized container and
leave the cover facing inside up3) Instruct the client to void into
sterile kidney tray or sterilizedcontainer with wide mouth
4) If the client is needed bed-restand needs to pass urine more, putbed pan after you collectedsufficient amount of sterilespecimen
5. Remove the specimen immediatelyafter the client has voided. Obtain 30-50 mL at midstream point of voiding
7. Close the container securely withouttouching inside of cover or cap.
8. Dispose of used equipment or cleanthem. Remove gloves and performhand hygiene.
9. Send the specimen bottle or containerto the laboratory immediately with thespecimen form.
10. Document the procedure in thedesignated place
Rationale
• Organization facilitatesaccurate skill performance•Ensure that the specimen collecting iscorrect
• Ensure correct identification andavoid mistakes
• Providing information fosters his/hercooperation
• To prevent the contamination ofspecimen from perineum area
• The cover should be kept the statesterilized
• To secure the specimen kept insterilized container surely
• Substances in urine decompose whenexposed to air. Decomposition mayalter the test results
• Ensure the client voids enoughamount of the urine for the requiredtests
• Emphasize first and last portions ofvoiding to be discarded
Covering the bottle retardsdecomposition and it prevents addedcontamination.
To prevent the spread of infection
Organisms grow quickly at roomtemperature
• To avoid duplication• Documentation provides coordination
of care
Physical Assessment Skills
Practical Manual
46
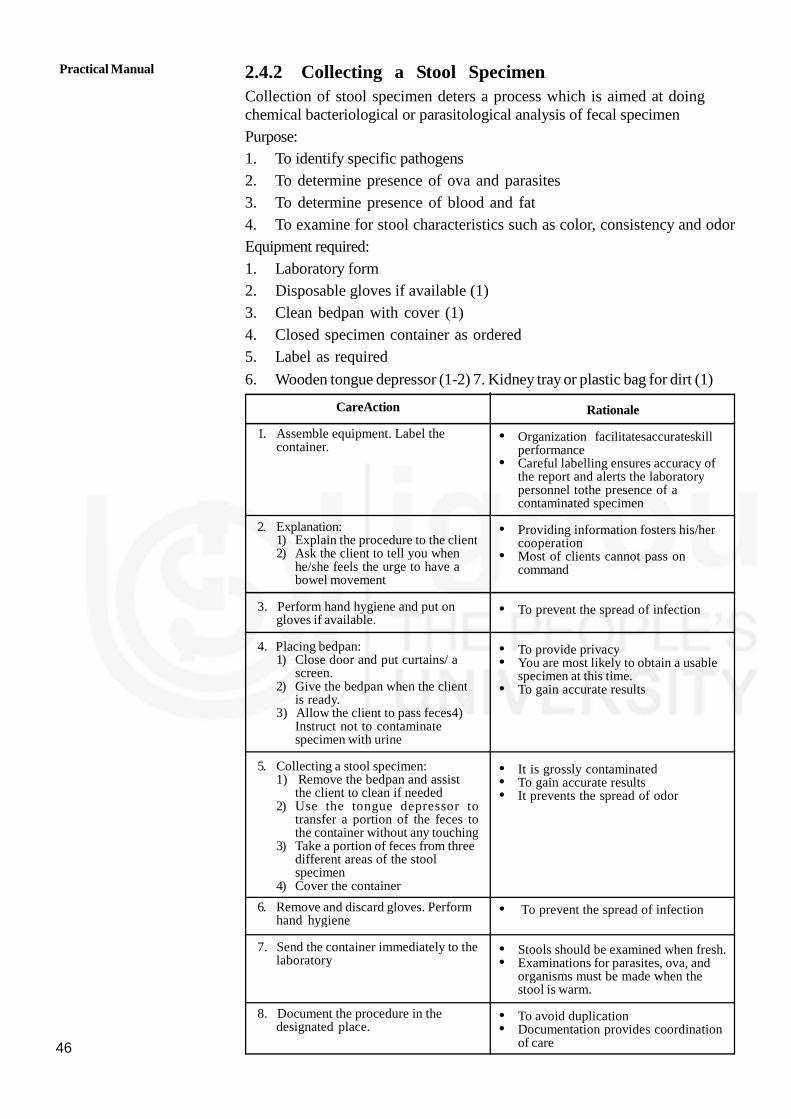
2.4.2 Collecting a Stool SpecimenCollection of stool specimen deters a process which is aimed at doingchemical bacteriological or parasitological analysis of fecal specimen
Purpose:
1. To identify specific pathogens
2. To determine presence of ova and parasites
3. To determine presence of blood and fat
4. To examine for stool characteristics such as color, consistency and odor
Equipment required:
1. Laboratory form
2. Disposable gloves if available (1)
3. Clean bedpan with cover (1)
4. Closed specimen container as ordered
5. Label as required
6. Wooden tongue depressor (1-2) 7. Kidney tray or plastic bag for dirt (1)
CareAction
1. Assemble equipment. Label thecontainer.
2. Explanation:1) Explain the procedure to the client2) Ask the client to tell you when
he/she feels the urge to have abowel movement
3. Perform hand hygiene and put ongloves if available.
4. Placing bedpan:1) Close door and put curtains/ a
screen.2) Give the bedpan when the client
is ready.3) Allow the client to pass feces4)
Instruct not to contaminatespecimen with urine
5. Collecting a stool specimen:1) Remove the bedpan and assist
the client to clean if needed2) Use the tongue depressor to
transfer a portion of the feces tothe container without any touching
3) Take a portion of feces from threedifferent areas of the stoolspecimen
4) Cover the container
6. Remove and discard gloves. Performhand hygiene
7. Send the container immediately to thelaboratory
8. Document the procedure in thedesignated place.
Rationale
• Organization facilitatesaccurateskillperformance
• Careful labelling ensures accuracy ofthe report and alerts the laboratorypersonnel tothe presence of acontaminated specimen
• Providing information fosters his/hercooperation
• Most of clients cannot pass oncommand
• To prevent the spread of infection
• To provide privacy• You are most likely to obtain a usable
specimen at this time.• To gain accurate results
• It is grossly contaminated• To gain accurate results• It prevents the spread of odor
• To prevent the spread of infection
• Stools should be examined when fresh.• Examinations for parasites, ova, and
organisms must be made when thestool is warm.
• To avoid duplication• Documentation provides coordination
of care
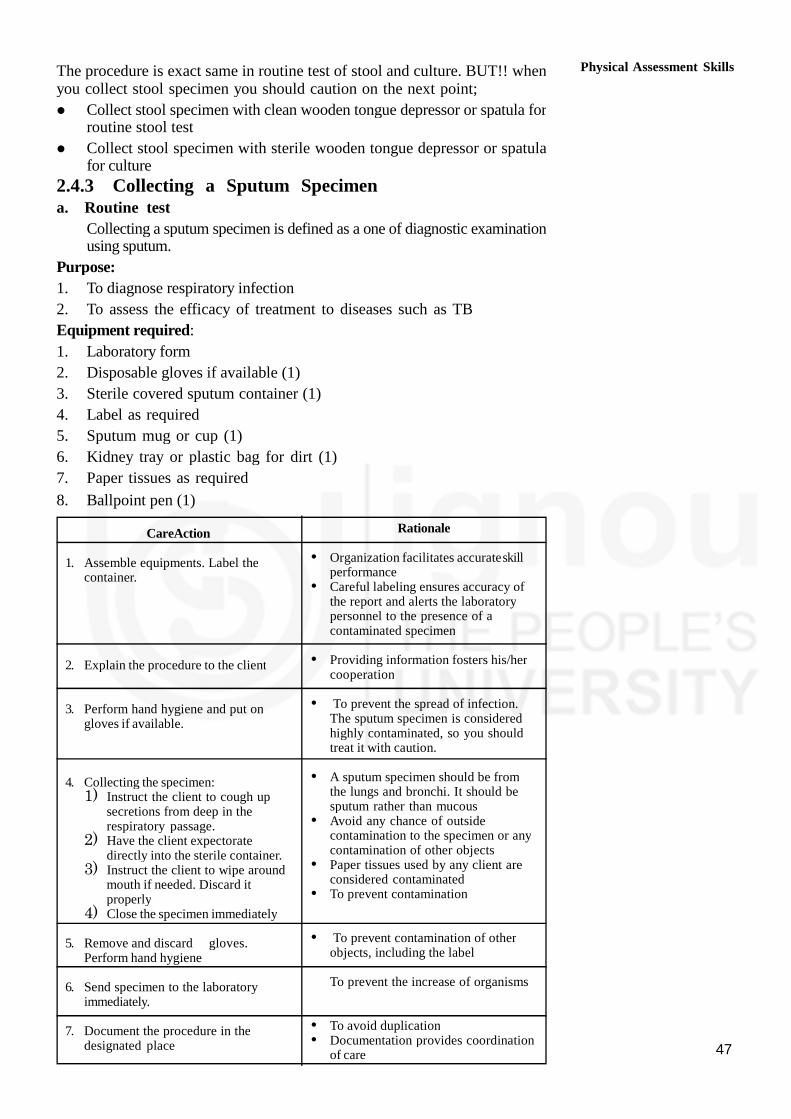
47
The procedure is exact same in routine test of stool and culture. BUT!! whenyou collect stool specimen you should caution on the next point;
Collect stool specimen with clean wooden tongue depressor or spatula forroutine stool test
Collect stool specimen with sterile wooden tongue depressor or spatulafor culture
2.4.3 Collecting a Sputum Specimena. Routine test
Collecting a sputum specimen is defined as a one of diagnostic examinationusing sputum.
Purpose:
1. To diagnose respiratory infection
2. To assess the efficacy of treatment to diseases such as TB
Equipment required:
1. Laboratory form
2. Disposable gloves if available (1)
3. Sterile covered sputum container (1)
4. Label as required
5. Sputum mug or cup (1)
6. Kidney tray or plastic bag for dirt (1)
7. Paper tissues as required
8. Ballpoint pen (1)
CareAction
1. Assemble equipments. Label thecontainer.
2. Explain the procedure to the client
3. Perform hand hygiene and put ongloves if available.
4. Collecting the specimen:1) Instruct the client to cough up
secretions from deep in therespiratory passage.
2) Have the client expectoratedirectly into the sterile container.
3) Instruct the client to wipe aroundmouth if needed. Discard itproperly
4) Close the specimen immediately
5. Remove and discard gloves.Perform hand hygiene
6. Send specimen to the laboratoryimmediately.
7. Document the procedure in thedesignated place
Rationale
• Organization facilitates accurateskillperformance
• Careful labeling ensures accuracy ofthe report and alerts the laboratorypersonnel to the presence of acontaminated specimen
• Providing information fosters his/hercooperation
• To prevent the spread of infection.The sputum specimen is consideredhighly contaminated, so you shouldtreat it with caution.
• A sputum specimen should be fromthe lungs and bronchi. It should besputum rather than mucous
• Avoid any chance of outsidecontamination to the specimen or anycontamination of other objects
• Paper tissues used by any client areconsidered contaminated
• To prevent contamination
• To prevent contamination of otherobjects, including the label
To prevent the increase of organisms
• To avoid duplication• Documentation provides coordination
of care
Physical Assessment Skills
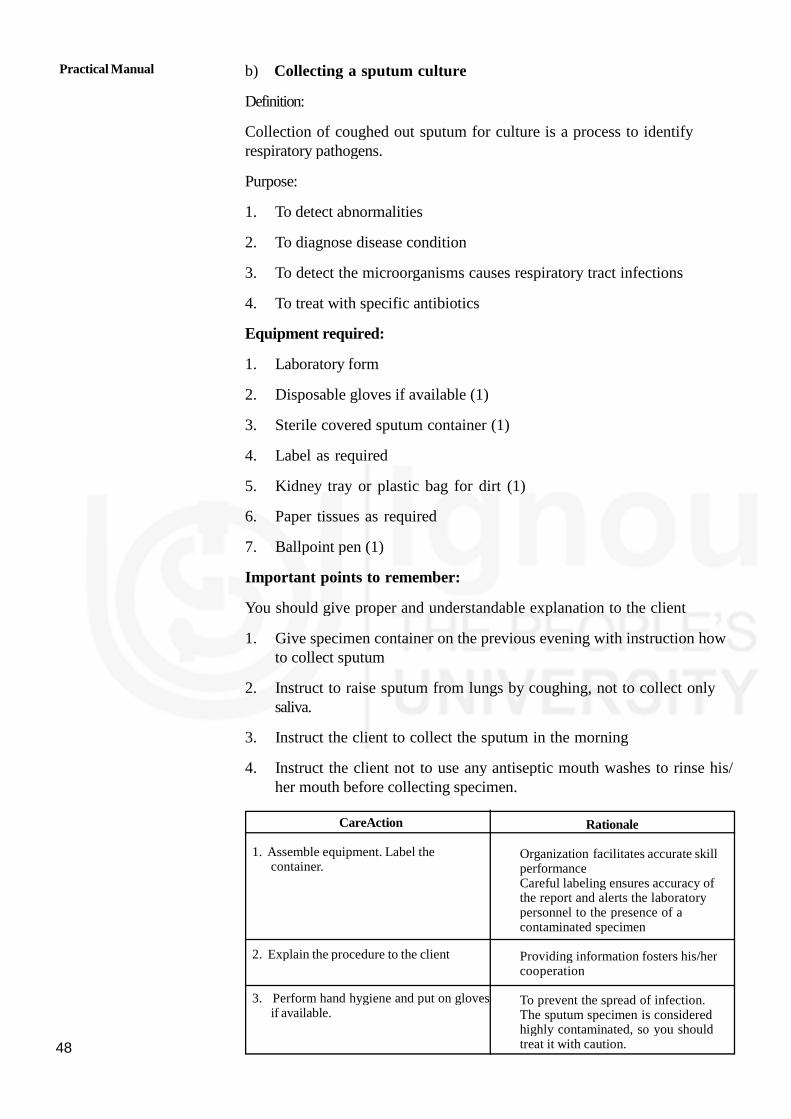
Practical Manual
48
b) Collecting a sputum culture
Definition:
Collection of coughed out sputum for culture is a process to identifyrespiratory pathogens.
Purpose:
1. To detect abnormalities
2. To diagnose disease condition
3. To detect the microorganisms causes respiratory tract infections
4. To treat with specific antibiotics
Equipment required:
1. Laboratory form
2. Disposable gloves if available (1)
3. Sterile covered sputum container (1)
4. Label as required
5. Kidney tray or plastic bag for dirt (1)
6. Paper tissues as required
7. Ballpoint pen (1)
Important points to remember:
You should give proper and understandable explanation to the client
1. Give specimen container on the previous evening with instruction howto collect sputum
2. Instruct to raise sputum from lungs by coughing, not to collect onlysaliva.
3. Instruct the client to collect the sputum in the morning
4. Instruct the client not to use any antiseptic mouth washes to rinse his/her mouth before collecting specimen.
CareAction
1. Assemble equipment. Label thecontainer.
2. Explain the procedure to the client
3. Perform hand hygiene and put on glovesif available.
Rationale
Organization facilitates accurate skillperformanceCareful labeling ensures accuracy ofthe report and alerts the laboratorypersonnel to the presence of acontaminated specimen
Providing information fosters his/hercooperation
To prevent the spread of infection.The sputum specimen is consideredhighly contaminated, so you shouldtreat it with caution.
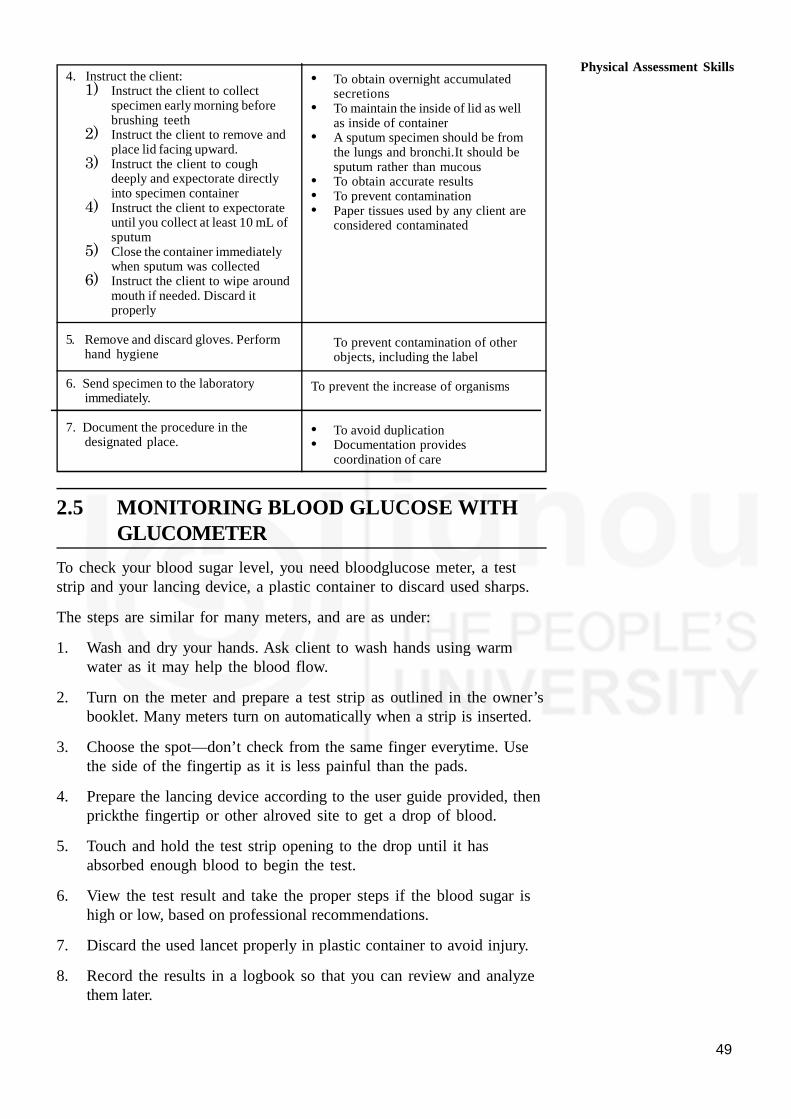
49
4. Instruct the client:1) Instruct the client to collect
specimen early morning beforebrushing teeth
2) Instruct the client to remove andplace lid facing upward.
3) Instruct the client to coughdeeply and expectorate directlyinto specimen container
4) Instruct the client to expectorateuntil you collect at least 10 mL ofsputum
5) Close the container immediatelywhen sputum was collected
6) Instruct the client to wipe aroundmouth if needed. Discard itproperly
5. Remove and discard gloves. Performhand hygiene
6. Send specimen to the laboratoryimmediately.
7. Document the procedure in thedesignated place.
• To obtain overnight accumulatedsecretions
• To maintain the inside of lid as wellas inside of container
• A sputum specimen should be fromthe lungs and bronchi.It should besputum rather than mucous
• To obtain accurate results• To prevent contamination• Paper tissues used by any client are
considered contaminated
To prevent contamination of otherobjects, including the label
To prevent the increase of organisms
• To avoid duplication• Documentation provides
coordination of care
2.5 MONITORING BLOOD GLUCOSE WITHGLUCOMETER
To check your blood sugar level, you need bloodglucose meter, a teststrip and your lancing device, a plastic container to discard used sharps.
The steps are similar for many meters, and are as under:
1. Wash and dry your hands. Ask client to wash hands using warmwater as it may help the blood flow.
2. Turn on the meter and prepare a test strip as outlined in the owner’sbooklet. Many meters turn on automatically when a strip is inserted.
3. Choose the spot—don’t check from the same finger everytime. Usethe side of the fingertip as it is less painful than the pads.
4. Prepare the lancing device according to the user guide provided, thenprickthe fingertip or other alroved site to get a drop of blood.
5. Touch and hold the test strip opening to the drop until it hasabsorbed enough blood to begin the test.
6. View the test result and take the proper steps if the blood sugar ishigh or low, based on professional recommendations.
7. Discard the used lancet properly in plastic container to avoid injury.
8. Record the results in a logbook so that you can review and analyzethem later.
Physical Assessment Skills

Practical Manual
50
2.6 LET US SUM UP
It is important for a HHA to learn the skills required for carrying outphysical assessment of their clients. The skills of checking vitals, takinganthropometric measurements, collecting various specimens i.e. urine, stooland sputum are mandatory part of assessment of clients. The unit hasdealt with the purposes, steps of procedures and precautions whilecollecting samples thus preventing contamination. Assessment of bloodglucose levels of client diabetic or otherwise using glucometer is alsodescribed in steps. Gaining competencies in these skills will go a long wayin reducing the burden disease thus containing the cost.
2.7 ACTIVITIES
Activity-1 Take vitals of five clients and record it under supervision.
Activity-2 Take head circumference of an infant and document it undersupervision
Activity-3 Calculate BMI of five adults and assess their risk status.
Activity-4 Calculate WHR of five adults and categorise them as perWHO criteria.

51
UNIT 3 PERSONAL HYGIENE ANDGROOMING SKILLS
Structure
3.0 Objectives
3.1 Introduction
3.2 Bed Bath
3.2.1 Purposes
3.2.2 Procedure of Bed Bath
3.3 Mouth Care
3.3.1 Purposes
3.3.2 Mouth Care of a Conscious Patient
3.3.3 Mouth Care of an Unconscious Patient
3.3.4 Care of Dentures
3.4 Care of Hair
3.4.1 Purpose
3.4.2 Procedures of Hair Wash
3.4.3 Brushing and Combing
3.4.4 Pediculosis Treatment
3.5 Back Care
3.5.1 Purposes
3.5.2 Procedure of Back Care
3.6 Eye Care
3.7 Foot Care and Nail Care
3.8 Care of Bowel and Bladder
3.9 Bed Making
3.10 Care by Dressing with use of Appropriate Clothing
3.11 Let Us Sum Up
3.12 Activities
3.0 OBJECTIVES
After going through this skill, you will be able to:
identify patients whose personal hygienic needs are to be met; and
demonstrate skills in meeting needs of the patient pertaining to hispersonal hygiene.
3.1 INTRODUCTION
Normal healthy people are capable of meeting their own hygienic needswhile ill, elderly or physically challenged people may require help to carryout routine hygienic activities. As care givers, you have to find out a

Practical Manual
52
patient’s ability to perform these daily self care activities and provideassistance according to his/her needs and abilities. In unit 1 of block 3you have already studied the theory related to hygienic care. In this skillwe are going to discuss how to carry out various procedures to meethygienic needs of the patient.
3.2 BED BATH
Bed bath means the procedure of giving bath to a patient who cannot getout of bed, and is not physically or mentally capable of self-care. We aregoing to describe bed bath.
3.2.1 Purposes
The purposes of bed bath are to:
clean the body
make the patient comfortable and fresh
Observe skin for bedsores, redness, injuries, swelling, rashes etc.
Increase blood circulation in the body.
3.2.2 Procedure of Bed Bath
While doing the procedures of bed bath there are certain points to bekept in mind, these are as follows:
Draw curtains, close doors and windows to maintain privacy and toprevent crossing of air.
Keep a gap of 2 hours between meals and bath.
Temperature of the water should be according to patient’s comfort.
Only a small portion of the body should be exposed and bathed at atime.
Clean properly the pressure points or bony points, skin creases andfolds.
A) Preparation of articles
You can think what all articles are required when taking a bath and checktheir availability at home and collect them at one convenient placeaccording to order of use so that during the procedure you do not haveto run here and there to get them leaving the patient behind. Here is alist of articles required for a bed bath:
Articles Purpose
Bath basin or small tub or bucket To take water for bath
Sponge cloths-2 (small towel) One to apply soap on skin and the secondto clean the skin of soap
Small bowl-1 To keep the soapy sponge cloth
Soap with soap dish To clean the skin
Bath towel-1 To dry the body
Face towel To dry the face

53
Bedsheet- 1 To cover the patient
Spirit or oil and powder To apply over the bony points
Nail-cutter To cut the nails
Comb and oil To take care of hair
A paper bag or waste bin To collect the waste
Jugs-2 To keep hot and cold water
Bucket-1 To discard the waste water
A set of clothes To change patient’s clothes
Laundry bag To discard the soiled clothes, towels, linenetc.
Gloves-1 pair To prevent spread of infection
B) Preparation of patient
Explain the procedure to the patient.
Bring the patient to the edge of the bed near you.
Draw curtains, close doors and windows.
Remove extra pillows and blankets.
Put a bed sheet or bath sheet over the patient to cover him.
Remove top bed sheet and clothes of the patient from under the bedsheet.
C) Steps of procedure
After you have prepared the patient as just described, wash yourhands and wear a pair of gloves (necessary if the patient is sufferingfrom infections).
Mix hot and cold water in a bath basin or a small tub or bucket.
Check the temperature of the water for tolerance by placing elbow orback of the hand in the water. The patient can also be made to dothis, if his condition permits
Place the bath towel over the chest under the chin.
Fold sponge cloth (small towel as shown in Fig. 3.1) around fingersof your hands. Immerse this in water and squeeze thoroughly.
Fig. 3.1: Folding of sponge cloth
Personal Hygiene andGrooming Skills

Practical Manual
54
Wash patient’s eyes with plain warm water. Soak eyelids with dampsponge cloth for 2-3 minutes to remove dry crusts on eye and thendry eyes thoroughly but gently.
Ask patient if he/she wants to use soap on face. Using wet spongecloth, clean and dry well forehead, cheeks, nose, neck and ears. Menmay wish to shave at this point.
Place the bath towel lengthwise under the farthest arm. Wrap spongecloth in your hand, wet it, apply soap on it and clean the arm withit, followed by wet sponge cloth to remove the soap off skin.
Cleaning should be done from the hand to axilla, using long strokes.
You can place the basin on bed and immerse the patients’ hand inwater for 3-5 minutes. Clean between fingers and nails.
Dry the arm, axilla with bath towel and repeat the same on otherarm.
Cover the patient’s chest and abdomen with bath towel and fold thebed sheet to umbilicus in abdomen.
Clean chest thoroughly with soapy and wet sponge cloth lifting theedge of the bath towel away from the chest.
Clean skin folds under breasts in female patients. Dry well. Keep thechest covered between washing and rinsing.
With towel remaining on the chest and abdomen, fold back the bathsheet down to the pubic region and clean the abdomen under thebath towel with soapy and wet sponge cloth. Dry well. Remove thebath towel and cover the patient with the bath sheet again.
You can change the water in the basin at this point of time.
Turn the patient to abdomen or side lying position.
Place the towel lengthwise along the patients’ back.
Expose back and clean with soapy and wet sponge cloth using longand firm strokes. Clean the buttocks and anus also.
Dry the back and massage the back with spirit or oil and powder inlong circular movements.
You can dress the patient in upper garments and cover with bathsheet.
Expose the farthest legs, spread bath towel under the leg. Bend theknee and clean with soap and water using long and film strokes fromankle to knee and from knee to thighs. Dry well.
Foot can be soaked in water for 3-5 minutes by placing the basinon the bed and then cleaned and dried paying attention between thetoes and nails. (Fig. 3.2).

55
Fig. 3.2: Soaking the feet
Do the same on other leg.
Expose genitalia (private part) and clean the perineum the same way.The patient can do it himself if he is able to do so.
Put on the lower garments, comb hair, cut nails.
Remove bath sheet and cover with blanket or top sheet.
Remove, clean, and replace articles.
Leave patient comfortable.
Wash your hands.
3.3 MOUTH CARE
Patients who are bed ridden and helpless need regular mouth care. In thissection, we are going to discuss mouth care for a conscious patient,unconscious patient and denture care.
3.3.1 Purposes
Purposes of mouth care are to:
Clean teeth, gums, mouth.
Prevent bad smell from mouth.
Prevent infection in teeth, gums and mouth.
3.3.2 Mouth Care of a Conscious Patient
Sometimes the patient is conscious but his physical condition is such thathe/she cannot walk to the bathroom to do mouth care. Such patients cando mouth care in bed with some help. As a home based care provider,you should keep some points in mind while doing mouth care. These areas follows:
A) Points to be kept in mind
Check the patient’s ability for self-care.
Use suitable cleaning agent like tooth powder, toothpaste withtoothbrush, salt, sodium bicarbonate.
Personal Hygiene andGrooming Skills

Practical Manual
56
You can also use mouthwash solutions like potassium permanganate,hydrogen peroxide, salt solution or normal saline.
On lips, vaseline, glycerin, cream, butter can be applied.
Draw curtains, close doors and windows.
B) Preparation of articles
Articles Purpose
A rubber sheet with a towel To protect the bed and clothes
A glass with plain water To rinse the mouth
A glass or cup with potassium To use as antiseptic mouth washpermanganate solution (one crystalin a glass full of water)
Toothpaste and toothbrush To clean the mouth
A bowl To receive waste water
Waste bin or paper bag To collect the waste
Cotton buds To apply cream, glycerine
Extra pillows To make patient sit in bed
C) Preparation of patient
Explain the procedure to the patient.
Make the patient sit in bed by giving pillow support to the back.
Place a rubber sheet with towel across the chest of the patient.
D) Steps of procedure
Wash your hands and help the patient to rinse his mouth with water.Use a bowl to collect waste water.
Wet the toothbrush, apply toothpaste and give it to the patient.
Tell the patient to brush all sides of teeth, i.e. outer side, inner side,front teeth, sides of teeth, chewing surface. Brushing should be donefrom gum to enamel of teeth.
When brushing is done, wash the brush and keep it.
Help the patient to rinse his mouth. Mouth wash solutions (asdescribed earlier) or plain water can be used.
Ask the patient to massage the gums with fingers.
Help the patient to wash his face and teeth and wipe with a towel.
With a cotton bud, apply glycerin or oil or cream on lips.
Make the patient comfortable.
Remove, clean and replace articles and wash your hands.
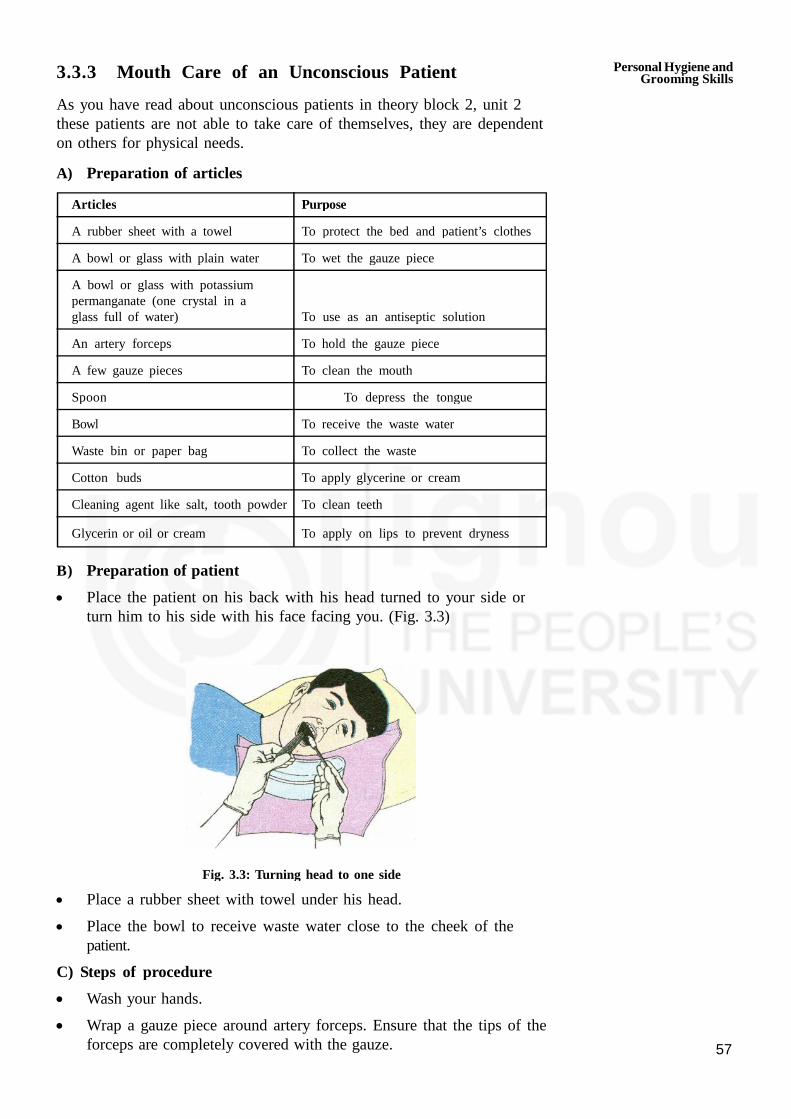
57
3.3.3 Mouth Care of an Unconscious Patient
As you have read about unconscious patients in theory block 2, unit 2these patients are not able to take care of themselves, they are dependenton others for physical needs.
A) Preparation of articles
Articles Purpose
A rubber sheet with a towel To protect the bed and patient’s clothes
A bowl or glass with plain water To wet the gauze piece
A bowl or glass with potassiumpermanganate (one crystal in aglass full of water) To use as an antiseptic solution
An artery forceps To hold the gauze piece
A few gauze pieces To clean the mouth
Spoon To depress the tongue
Bowl To receive the waste water
Waste bin or paper bag To collect the waste
Cotton buds To apply glycerine or cream
Cleaning agent like salt, tooth powder To clean teeth
Glycerin or oil or cream To apply on lips to prevent dryness
B) Preparation of patient
Place the patient on his back with his head turned to your side orturn him to his side with his face facing you. (Fig. 3.3)
Fig. 3.3: Turning head to one side
Place a rubber sheet with towel under his head.
Place the bowl to receive waste water close to the cheek of thepatient.
C) Steps of procedure
Wash your hands.
Wrap a gauze piece around artery forceps. Ensure that the tips of theforceps are completely covered with the gauze.
Personal Hygiene andGrooming Skills

Practical Manual
58
Wet the gauze and dip it in a cleaning agent and clean all thesurfaces of the teeth.
You can use as many gauze as required to clean the teeth.
Take a spoon and depress the tongue with it and clean the inner andchewing surfaces of the teeth using the cleaning agent.
Wet the gauze with mouthwash solutipn and plain water and clean thetongue and mouth thoroughly. Do not pour water into patient’smouth.
Apply glycerin or cream or oil on lips with cotton bud.
Leave the patient comfortable.
Remove, clean and replace articles. Wash your hands.
3.3.4 Care of Dentures
Some patients may be using dentures or artificial teeth. For such patients,you need to take care of dentures.
Steps of cleaning the dentures
Brush all surfaces of dentures with toothpaste and a soft toothbrushunder running cool water just like you brush natural teeth. (Fig. 3.4)
Fig. 3.4: Care of dentures
Dentures should be removed before going to bed and kept in waterwhen they are not worn.
Dentures are to be cleaned as frequently as natural teeth, ideally aftereach meal.
3.4 CARE OF HAIR
Combing, washing and keeping the hair clean and tidy are some of theactivities that we all do routinely. However, you may see that somepatients need help in performing these functions. So in this section we aregoing to describe how we can care for the hair of ill or helpless patientsi.e. hair wash, brushing and combing of hair, you would also learn aboutthe pediculosis for the patients who develop lice.
3.4.1 Purposes
Purposes of care of hair are to:
Keep the hair clean and healthy.
Prevent problems like itching, infection, tangles, lice in hair and hair fall.

59
3.4.2 Procedure of Hair Wash
Let us know learn some of the points to be kept in mind while doinghair wash.
A) Points to be kept in mind
Hair should be washed at least twice a week.
Hair should be combed twice daily.
During washing and combing, observe the hair for infection, lice,dandruff and injury or cuts etc.
B) Preparation of articles
Articles Purpose
Bath towels-2 One to protect the pillow and one to dry the hair.
Face towel To keep over the eyes
Bed sheet To cover the patient
Rubber sheets-2 One to direct water into bucket and one toprotect the bed clothes
Cotton balls To put in ears
Oil To apply on hair
Shampoo To clean the hair
Hair comb To comb the hair
Paper bag/waste bin To collect loose hair and cotton plugs
Bucket or basin-1 To take water
Mug-1 To pour water
Bucket-1 To collect dirty water
Jugs-2 One for hot and one for cold water
Newspaper To make a trough
C) Preparation of patient
Explain the procedure to the patient.
Collect all articles near the bed of the patient.
Close doors, windows, draw curtains to provide privacy and toprevent crossing of air.
Remove the blanket or top sheet of the patient and cover him withbed sheet or bath sheet.
Remove pillows under the head, back etc.
Place the patient on his back and bring his head and shoulders tothe edge of the bed, placing him diagonal on the bed. Place thepillow under the shoulders so that head is slightly tilted back. Coverthe pillow with rubber sheet.
Personal Hygiene andGrooming Skills

Practical Manual
60
Take a newspaper, roll it into a horse shoe shape and place therubber sheet flat on it. Roll the edge of the rubber sheet over theroll of the newspaper to form a rim. This device is placed under thehead of the patient and the open flat end of the rubber sheet isreceived into the bucket so that flow of water poured over the haircan be directed into the bucket to receive dirty water.
Plug ears with cotton balls and cover the eyes with a folded facetowel.
D) Steps of procedure
Wash hands and loosen and comb the hair.
Mix hot and cold water in bucket or basin.
Wet the hair by pouring water over the hair and scalp.
Apply shampoo and make lather. Clean the hair and massage thescalp with fmgertips. Clean properly from front hairline to the back ofthe head (Fig. 3.5).
Care of hair)
Rinse thoroughly with water to remove shampoo. Squeeze off waterfrom the hair.
Wrap the head in a bath towel. Dry face, neck etc. Dry hair and scalp.
Remove the rubber sheet, cotton plugs from the ears.
Make the patient comfortable. Put on blankets or top sheet etc. afterremoving the bath sheet.
Orwe the hair is dry, comb the hair, tie or arrange neatly.
Wash and replace articles and wash hands
Fig. 3.5: Care of hair (Hair wash)
3.4.3 Brushing and Combing
The hair can get easily tangled for patients who remain lying on the bed.Therefore, frequent brushing and combing and braiding (for long hair)should be done for all patients who cannot do it themselves.
Steps of Brushing and Combing
Part the hair into sections and then separate each section into twomore sections.
61
o Brush/comb from scalp to the hair ends.
Use fingers to separate tangled hair, but prevent painfully pulling offscalp.
You can apply oil if patient wishes so.
o Braid the hair into two, one on each side of the head.
o Discard the loose hair and wash your hands.
3.4.4 Pediculosis Treatment
If hair is not cleaned properly, pediculosis or lice can grow in hair. Thepurposes of pedculosis treatment are to destroy lice and nits and preventtheir spread to others.
Let us know the steps of procedures to be carried out for treating thelice in head.
A) Preparation of Articles
Articles Purpose
Bath towels-2 One to protect the pillow and the otherto protect shoulders and garments
Rubber sheet-1 To protect the pillow and bed sheets
Face towel-1 To protect the eyes
A scarf To cover the head after application of lice.
A bowl To keep comb in cleaning solution likecarbolic lotion
A hair comb To comb the hair
Waste bin or paper bag To collect loose hair
A bucket with carbolic lotion To clean or disinfect the towels andclothes after the treatment
Lycil Anti-lice shampoo To kill the lice
An apron, mask, gloves To protect the care giver
Cotton balls To apply D.D.T.
B) Preparation of Patient
Explain the procedure to the patient.
Arrange all the articles at the bedside.
Put the patient diagonally on bed with one pillow under the head.
Protect the pillow and bed with rubber sheet and towel. The othertowel is put on the shoulders to protect the garments.
Fold a face towel and keep over the eyes.
Loosen hair and comb them.
Personal Hygiene andGrooming Skills

Practical Manual
62
C) Steps of procedure
Wash hands. Put on apron, mask and gloves.
After parting the hair, apply lycel with cotton ball on scalp and wholelength of hair.
Roll up and tie hair on top of the head and cover with a scarf.
Leave on hair overnight and wash the hair the next morning.
If you are using anti-lice shampoo like Mediker, then you need notleave it on for overnight. You can read the ‘instructions for use’ onthe bottle or pack.
Keep the comb and all the articles/clothes that have come in contactwith the hair in a disinfectant like carbolic lotion.
Leave the patient comfortable and wash your hands.
You may need to repeat the procedure till it is ensured that all nitsand lice are destroyed.
3.5 BACK CARE
Back care means cleaning and massaging of the back. In Block 3, Unit 1,you must have read about pressure points or bony points in the bodywhere pressure sores can develop.if special care of back and bonyprominences is not taken. In this section, we are going to explain backcare.
3.5.1 Purposes
The purposes of back care are to:
Prevent pressure sores.
Increase blood circulation to back.
Detect pressure sores at an early stage.
3.5.2 Procedure of Back Care
As you have already read in block 3 Unit 1 regarding back care, herewe would be developing your skill of doing back care. There are certainpoints to be kept in mind while doing back care.
Points to be kept in mind
Every 2 hourly, the position of the patient should be changed, that is,turn the patient to his/her back, abdomen, left and right side.
Observe back and other bony points of body for early detection ofpressure sores.
Always keep patient clean and dry.

63
A) Preparation of articles
Articles Purpose
Rubber sheet lined with cloth To prevent wetting of bed
A small tub or bath basin To take warm water
Sponge cloth-2 One to apply soap on the skin andother to wash the soap off the skin
Soap dish with soap To clean the skin
Spirit/oil To massage the back
Powder To smoothen the skin and preventfriction
A towel To dry the skin
A bath sheet To provide privacy
B) Preparation of patient
Identify the need for back care in patient.
Explain the procedure to the patient.
Draw curtains, close doors and windows.
Put the patient on his abdomen or on his side and bring him to theedge of the bed near you.
Put a bath sheet on the patient. Remove blankets etc.
Expose the patient’s back from shoulders till buttocks.
Spread rubber sheet lined with cloth alongside the patient’s side.
C) Steps of procedure
After you have prepared the patient as just described, wash yourhands in warm water so that you don’t touch the patient with coldhands.
Wash back with mild soap using soapy sponge cloth, followed bywashing off the soap with wet sponge cloth, from shoulders tobuttocks using long circular movements. (Fig. 3.6)
Fig. 3.6: Back Care
Personal Hygiene andGrooming Skills

Practical Manual
64
Dry the back.
Take spirit in palm and apply it all over the back in circular motionuntil it evaporates. Massaging can be done with oil also. Massagewell at the bony points. Apply talcum powder on the back.
Oil is usually used in winter season for massage, however procedureremains same.
Remove the rubber sheet and dress the patient. Leave the patient dry,clean and comfortable.
Remove, wash and replace articles. Wash your hands.
3.6 EYE CARE
Cleaning the eye using non-touch technique or aseptic technique is calledeye care.
Purposes of eye care
The purposes of eye care are to:
Clean the eye.
Prevent infection in the eye.
Prevent dryness of the eye in unconscious patient.
Procedure of Eye Care
Eyes are the most sensitive organs in the body while doing eye care youhave to be very gentle in touching the eyes. Let us know the points tobe kept in mind while taking care of eyes of the patient.
A) Points to be kept in mind
The eye is cleaned from the inner (near the nose) to outer side (nearthe temple) of the eye.
First clean the clean or less infected eye and then the unclean ormore infected eye.
Do not touch the portions of the cotton ball that come in contactwith the eye.
For each stroke use separate cotton balls and do not use samecotton ball to clean both the eyes.
B) Preparation of articles
Articles Purpose
A rubber sheet with a towel To protect the pillow and bed linen
Cotton balls which are boiled in a To clean the eyesbowl for 10-20 minutes and thencooled.
A face towel To dry the eyes
Dustbin or paper bag To throw waste cotton balls
A boiled spoon along with cotton balls. To pick up cotton balls
A bowl or a katori To put extra water squeezed from cottonballs

65
C) Preparation of patient
Explain the procedure to the patient.
Keep the patient on his back with a pillow under his back.
Cover the pillow with rubber sheet and towel and keep the emptybowl on it
D) Steps of procedure
Wash hands always before and after the procedure.
Pick up one cotton ball with a boiled spoon.
Squeeze off the water from the ball by pressing it against the innerside of the bowl.
Take the cotton ball between your thumb and forefinger withouttouching the spoon.
Taking care that area of the cotton ball touched by the fingers donot come in contact with eyes, clean the eye from inside to outsideangle of the eye.
Throw the ball in dustbin/paper bag. Use one cotton ball for cleaningonce.
Continue cleaning using more cotton balls till eye is clean.
If dry crusts are on the eye, keep a wet cotton ball on the closedeye until the crust becomes soft.
Repeat the same for the other eye.
Wipe the face with a face towel.
Remove articles from bedside.
Make the patient comfortable.
Wash your hands with soap and water and dry them.
3.7 FOOT CARE AND NAIL CARE
The feet and nails require care, especially in patients who are old, ill andbed ridden. Here, we are going to describe feet and nail care in generaland especially of diabetic patients.
Purposes
The purposes of foot and nail care are:
Prevent infection to feet and nails of fingers and toes.
Prevent bad smell and injury to tissues.
Procedure of Foot and Nail Care
Let us learn about various points to be kept in mind while doing foot andnail care.
Personal Hygiene andGrooming Skills

Practical Manual
66
A) Preparation of articles
Articles Purpose
A rubber sheet with a towel To protect the clothes
Towel To dry the skin
Vaseline or cream To apply on the skin
A small bowl with warm water To soak the hands
A big bowl or tub with warm water To dip the feet of the patient
A nail cutter and a nail filer To cut and shape the nails
Waste bin or paper bag To throw waste
Newspaper To keep below the big bowl or the tub
Bed sheet To change if the bed sheet gets wet
B) Steps of procedure
Spread the rubber sheet with towel on the bed or patient’s lap.
Wash your hands and arrange the articles at bedside.
If possible, make the patient sit on a chair or bed.
Keep the basin with warm water in it. The temperature of watershould be checked by touching it with the back of the hand. Thepatient can also be made to do so.
Dip the fingers of the hand of the patient in the water for 10-20minutes.
Now take a big bowl or tub of warm water. Check it’s temperaturethe same way.
Keep this big bowl or tub on floor lined with newspaper and ask thepatient to dip his feet in it for 10-20 minutes.
After 10-20 minutes, remove both the bowls and dry the fingers andthe feet thoroughly.
Cut the finger and toe nails and shape them with a file.
Apply vaseline or cream to the hands and feet.
Make the patient comfortable.
Remove, clean and replace articles and wash your hands.
C) Special care of feet and nails of diabetic patients
The diabetic patients’ feet need special care because even a small cut orinfection can become serious in this case. So, here we are listing downsome important points in care of feet and nails in diabetic patients.
Wash feet daily with soap and warm water, but do not use hotwater to wash feet. Do not use heater or hot water bottles on feet.

67
Wear clean socks and comfortable shoes daily.
Check shoes everyday to ensure that they do not have any nails,stones etc. inside them.
Keep feet dry especially between the toes. Use powder if necessary.
Keep feet soft by applying lotion on feet.
Get feet checked by doctor periodically.
3.8 CARE OF BOWEL AND BLADDER
Sometimes the patient is completely bed ridden and can’t even go to thetoilet to pass urine and stool. Such patients are to be offered urinals (formen, for passing urine) and bedpan (for men and women) on bed.
A) Points to be kept in mind while giving bed pan
Provide privacy; draw curtains and close doors and windows.
Urinal and bedpan should be clean always.
If bedpan is made up of metal, then before keeping it under thepatient’s buttocks, it (the part of the bed pan which goes under thebuttocks) should be padded or lined with cloth so that it doesn’t feelcold and doesn’t hurt.
Avoid pushing or pulling the bedpan under the patient as it can hurtthe patient. Clean the perineum from up to down, i.e., from urethralopening to anal opening. So first clean the area around the urethraand then the anus
Once you’ve cleaned from up to down with a cotton ball, throw it,don’t use it again.
Do not hurry the patient when he/she is on bedpan.
B) Articles required
Rubber sheet to protect the bed sheet.
Jug of water — 2 (Hot and cold) to clean the private parts.
Cotton balls to clean (wipe) the private parts.
In case of female patient bed pan to pass stool and as well as urine.
In case of male patient urinal is given to pass urine and bed pan isused for passing stool.
C) Procedure of giving bed pan and urinal
Explain the procedure to the patient.
For male patients, offer urinal on bed when he wishes to pass urine.
Personal Hygiene andGrooming Skills

Practical Manual
68
Bedpan can be offered to both men and women patients.
Gently lift up the buttocks of the patient and place the bedpan.Rubber sheet can be spread on the bed before keeping the bedpan.
Leave the patient for some time so that he can pass urine and stool,but do not leave the patient if he is very weak or ill.
To wash perineum while the bedpan is underneath, pour water overthe perineum. (In winter, warm water should be used. Temperatureshould be checked using back of our hand.)
Use as many cotton balls as required until cleaning is complete.
Remove the bedpan by lifting the buttocks of the patient and not bypulling
Make patient comfortable. Change bed sheet if it has become wet.
Clean the urinal and the bedpan. Empty their contents into the toilet.Then rinse with water and detergent soap, using a brush. They canbe immersed in antiseptic lotion for half an hour. Wash and dry well.
Wash other articles and your own hands.
3.9 BED MAKING
Patient, whether elderly or ill, needs a comfortable bed. So it is importantto make a bed that is clean and comfortable. There are mainly twoconditions while making a bed: one, when patient can get out of bed andother, when the patient is bed ridden. Here, we are going to learn makinga bed in these two conditions.
Purposes of bed making
The purposes of bed making are to:
Provide a clean and comfortable bed to the patient.
Provide rest and sleep to the patient.
Prevent pressure sores.
Procedure: While changing bed sheet of the patient/person remembercertain points to be kept in mind.
A) Points to be kept in mind
Patient should not sleep on a rubber sheet. It should be lined with acloth.
Do not mix clean sheets with soiled ones.
Shake and fold dirty sheets away from your body. (Fig. 3.7)
Bed should be smooth, firm and without creases

69
Fig. 3.7: Folding dirty sheet
B) Preparation of article
Articles Purpose
Damp duster and dry duster To clean metal bed and mattress
Mattress with cover To give comfort
Bed sheets-2 One will go under the patient andone will go on top
Rubber sheet lined with cloth To protect bed linen
Pillow To provide comfort
Pillow cover To protect the pillow
Blanket (if required) To provide warmth
Laundry bag To collect dirty sheets
C) Making a bed when the patient can get out of bed. Steps ofprocedures
are:
Collect all articles from the bedside and help the patient to get out ofbed and sit on a chair.
Un-tuck the bed sheets, rubber sheets etc. and throw them in thelaundry bag. Remove pillows and keep them on a chair. Rubber sheetcan be later washed using soap and then dried.
Dust the mattress, up and down surface with dry duster and bed andbed railing with wet duster.
Personal Hygiene andGrooming Skills

Practical Manual
70
Spread a clean bed sheet, followed by cloth lined rubber sheet andtuck them under the mattress from all four sides.
Put the pillows back with clean cover.
Help the patient to get in bed and spread top sheet over him,followed by blanket, if necessary. Blanket should not directly touchthe patient.
Leave the patient comfortable.
D) Making a bed when the patient is in bed.
The steps of procedure are (Fig. 3.8).
Explain the procedure to the patient.
Un-tuck sheets from all sides. Remove pillows and keep on chair.
With top sheet covering him, turn the patient to the side away fromyou and let someone hold him in that position.
Roll the soiled bottom sheet, rubber sheets etc. lengthwise againstpatient’s body.
Collect all articles at bed side and one person can be called to helpturn the patient in bed.
Fig. 3.8: Changing sheet when the patient is in bed
Dust this part of mattress and bed.
After dusting this side, spread a fresh bed sheet, cloth lined rubbersheet lengthwise against patient’s body.
Then go to the other side of the bed and turn the patient on his sideaway from you. Let the helper hold the patient in that position.
Remove the soiled sheets and put them in the laundry bag.
Pull the fresh bottom sheet and rubber sheet etc. on this side andtuck them under the mattress.
Place the patient on his back.
Place a clean top sheet over the patient and remove the soiled one.Give a blanket, if required.
71
Put the pillows back with clean cover and leave the patientcomfortable.
Arrange the things around the patient’s bed neatly and wash yourhands.
Leave the patient comfortable.
3.10 CARE BY DRESSING WITH USE OFAPPROPRIATE CLOTHING
Let us discuss the principles to be kept in mind while helping patient inneed for wear of clothes with your help.
Clothes normally worn by a person in day - to - day life aredifferent from those worn by a patient at home. These clothes arespecifically designed for the comfort of the patient and to facilitateprocedures.
In many situations, patients are too weak to change clothes bythemselves. In such cases, you should assist the patient in clothingrather than dressing them up yourself. By doing this, the patient willgain confidence in going about their daily activities and this will helpin the speedy recovery of the patient.
While changing the clothes of the patient, it is important for you tomaintain the privacy and dignity of the patient. Once the soiledclothes are removed, they should be cleared from the room and sentfor cleaning.
Principles of Clothing
One of the most important principles of clothing is to prevent anyinjury or discomfort to the patient while clothing him or her.
Check the type of clothing that needs to be worn by a patient.
Always instruct the patient before you actually dress him or her up.Before you start to change the clothes of a patient, describe theprocess that would be followed and explain what needs to be donewhile changing their clothes.
For patients who have suffered a stroke, one side of the body maybe weak. Instruct such patients to undress the weak part first. Whileputting on a dress, it should be put on from the strong side first.
You will need to put a sweater on the patient too to keep warm aspoor blood circulation could make the patient cold.
Put the patient’s shoes or slippers on. Make sure the sole of thefootwear is non slippery.
Try and make the patients wear their clothes themselves. This willhelp them manage their activities on their own.
Personal Hygiene andGrooming Skills

Practical Manual
72
You need to gather the patient’s clothes. Make sure you get all the undergarments such as underwear, vests, briefs and socks.
If patients are able to, then let them choose what they would like towear. If they cannot choose for themselves then, you need to pick clothesthat are free of holes, and those with proper buttons and zippers. Youmay dress the patient in the restroom.
Even close the bathroom door when the patient is inside thebathroom. This is to maintain the patient’s dignity.
Many a times, you may have to dress the patient while they are onbed, or sitting on the bed. Before you start to dress the patient,make sure to maintain privacy. If the patient wears an adult brief,make sure you put this on first.
Put on the socks or stockings on the patient, then the vests and thenput on the top layer of clothes.
Make sure you dress the patient the same way you would dressyourself.
Managing Personal Clothing and Needs of the Patient
You must always give the patient a choice on the clothes they like towear. Help them in making a choice to wear the right kind of clothessuitable to their condition.
Always ask the patient about the comfort of the clothes. If thepatient is feeling too warm or too cold, ensure that you cover thepatient with the sheets or cover the patient with a sweater.
If a specialized type of a gown is being used to dress up a patient,check with the patient for the comfort. If the patient is uncomfortablechange the clothing.
Adaptive clothing consists of garments and footwear that has beenspecially designed to meet the needs of the patients who may be unableto wear standard clothes (Fig. 3.9).
Adaptive clothing designed for these people features elastic waistbands,Velcro closures, magnetic closures, etc. (Fig. 3.10).
Fig. 3.9:Adaptive clothing
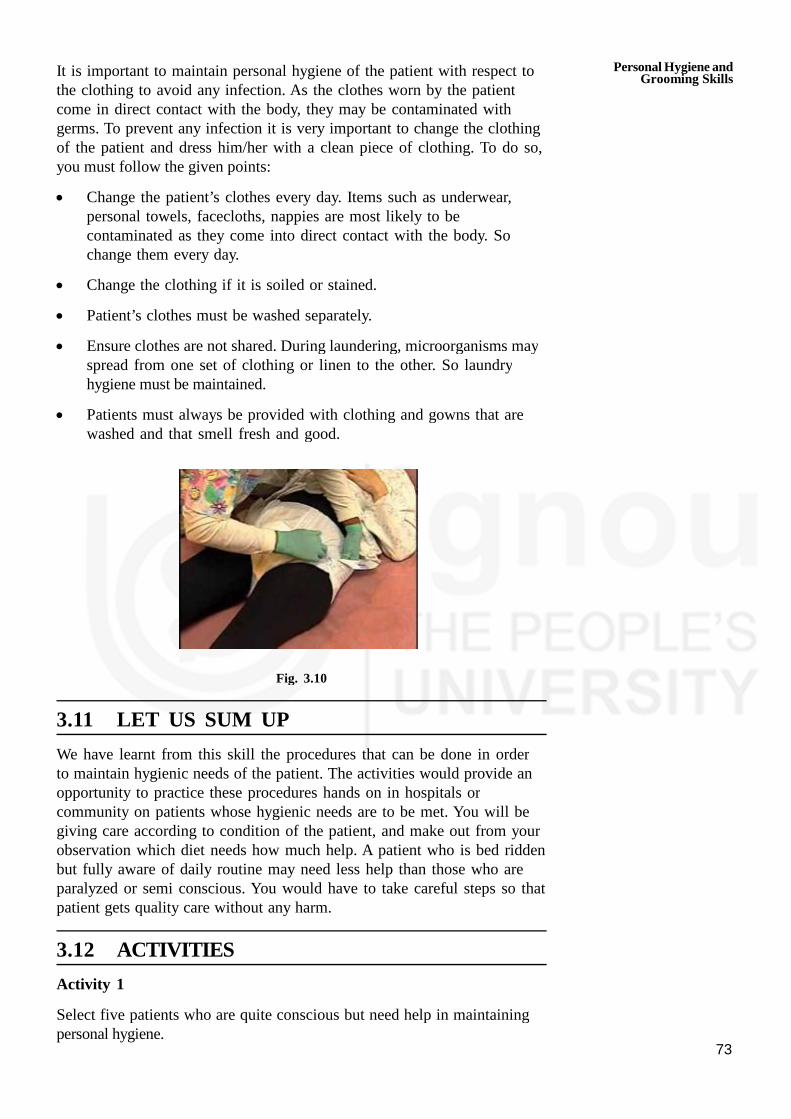
73
It is important to maintain personal hygiene of the patient with respect tothe clothing to avoid any infection. As the clothes worn by the patientcome in direct contact with the body, they may be contaminated withgerms. To prevent any infection it is very important to change the clothingof the patient and dress him/her with a clean piece of clothing. To do so,you must follow the given points:
Change the patient’s clothes every day. Items such as underwear,personal towels, facecloths, nappies are most likely to becontaminated as they come into direct contact with the body. Sochange them every day.
Change the clothing if it is soiled or stained.
Patient’s clothes must be washed separately.
Ensure clothes are not shared. During laundering, microorganisms mayspread from one set of clothing or linen to the other. So laundryhygiene must be maintained.
Patients must always be provided with clothing and gowns that arewashed and that smell fresh and good.
Fig. 3.10
3.11 LET US SUM UP
We have learnt from this skill the procedures that can be done in orderto maintain hygienic needs of the patient. The activities would provide anopportunity to practice these procedures hands on in hospitals orcommunity on patients whose hygienic needs are to be met. You will begiving care according to condition of the patient, and make out from yourobservation which diet needs how much help. A patient who is bed riddenbut fully aware of daily routine may need less help than those who areparalyzed or semi conscious. You would have to take careful steps so thatpatient gets quality care without any harm.
3.12 ACTIVITIES
Activity 1
Select five patients who are quite conscious but need help in maintainingpersonal hygiene.
Personal Hygiene andGrooming Skills
Practical Manual
74
Give the following care as per guidelines.
Mouth care
Denture care
Hair wash and hair care on bed
Care for lice in hair and give Pediculosis Treatment
Activity 2
Identify a diabetic/helpless/handicap patient and give foot care, nail care asper guidelines.
Activity 3
Select one bed ridden/dependant patient and give the following care asper guidelines given in your practical manual
Mouth care
Hair care
Back Care
Bed Bath
Eye Care
Care of bowl and bladder
Bed Making
Many patients at home struggle with normal daily tasks like dressing andundressing. These challenges make it harder to maintain their independenceand retain a sense of dignity.
Adaptive clothing consists of garments and footwear that has beenspecially designed to meet the needs of the patients who may be unableto wear standard clothes.
Adaptive clothing designed for these people features elastic waistbands,Velcro closures, magnetic closures, etc. Some adaptive clothes are madewith extra.
75
UNIT 4 NUTRITIONAL,ELIMINATION ANDMEDICATION NEEDS
Structure
4.0 Objectives
4.1 Introduction
4.2 Feeding Helpless Patient
4.3 Feed through Ryle’s Tube
4.4 Gastrostomy Feeding
4.5 Preparation of ORS
4.6 Meeting Elimination Needs
4.6.1 Urinary Catheter Care
4.6.2 Applying Suppository
4.6.3 Giving Enema
4.6.4 Collection of Urine/Stool Samples
4.6.5 Intake and Output Record
4.7 Giving Medicines
4.7.1 General Points to Remember
4.7.2 Steps of giving Liquid Medicines
4.7.3 Steps of giving Tablets
4.7.4 Recording and Reporting
4.8 Care of Intravenous Injection Site
4.9 Insulin Injection Administration
4.10 Let Us Sum Up
4.11 Activities
4.12 References
4.0 OBJECTIVES
After going through this practical, you should be able to:
develop skill in feeding helpless patient;
strengthen skill in administration of feeding the patient through Ryle’stube;
practice giving Gastrostomy tube feeding;
built skills in preparation of home made oral rehydrating solution;
record intake and output chart;
explain the purposes of catheter care;

Practical Manual
76
insert suppositories;
give enema;
describe the steps of catheter care;
give medicines to the patient by various routes;
identify various sites of giving insulin injection;
give insulin injection at various sites; and
record and report the necessary observation after the procedure.
4.1 INTRODUCTION
In the previous skill, you have learnt about taking care of personal hygieneand glooming of the patient. As you know that feeding food to the patientas one of the most important requirements to maintain and restore health.As a health assistant, you need to take care for feeding and serving thefood in an attractive manner, as per need of every individual/ patient. Thepatient may require normal diet or modified diet such as liquid, semi soliddiets. Often patient would like to eat him/her self, but some patients needhelp and there are some who can not eat him/her self at all also, you willhave to keep in mind, that usually patient eat by mouth, but due tovarious disease conditions, patient might have to be given food by variousother methods such as through nose, via nasogastric tube or throughstomach via opening on the stomach, which will be discussed in this unit.
It is essential to eliminate the waste products regularly for maintainingnormal body functions. If there is any change in the pattern of elimination,it affects the body. When the person is sick, sickness tends to alter theperson’s elimination habits. You being a care giver need to assist thepatient for maintaining normal elimination habit, the care of patient withurinary catheter too. You will also learn about how to apply suppositoryand give enema.
Safe and accurate giving of medicine is very important for recovery of anindividual/patient. If an individual has to take the medicines him/herself aproper education would be given to him/her. Medicines are given byvarious routes e.g. by mouth, under the tongue, rubbing the medicines onthe skin, instilling the liquid in the body cavity like eyes, ear, nose, rectumand vagina and injection as discussed in theory Block 3, unit 3.
4.2 FEEDING A HELPLESS PATIENT
Assisting a patient who is helpless to take food and fluids orally. Thepurpose is to assist patient to meet his/her nutritional needs.
Articles required
A tray containing prepared/desired feed.
Mackintosh.
Towel, napkin.
A glass of water.
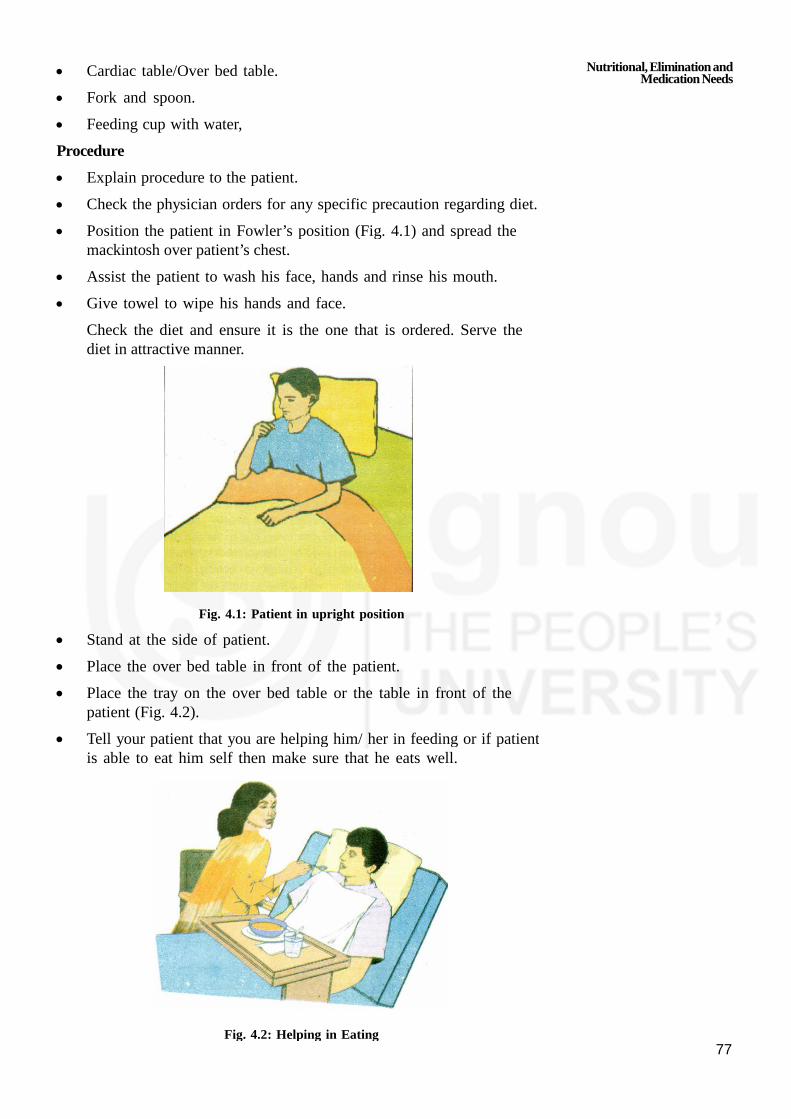
77
Cardiac table/Over bed table.
Fork and spoon.
Feeding cup with water,
Procedure
Explain procedure to the patient.
Check the physician orders for any specific precaution regarding diet.
Position the patient in Fowler’s position (Fig. 4.1) and spread themackintosh over patient’s chest.
Assist the patient to wash his face, hands and rinse his mouth.
Give towel to wipe his hands and face.
Check the diet and ensure it is the one that is ordered. Serve thediet in attractive manner.
Fig. 4.1: Patient in upright position
Stand at the side of patient.
Place the over bed table in front of the patient.
Place the tray on the over bed table or the table in front of thepatient (Fig. 4.2).
Tell your patient that you are helping him/ her in feeding or if patientis able to eat him self then make sure that he eats well.
Fig. 4.2: Helping in Eating
Nutritional,EliminationandMedicationNeeds
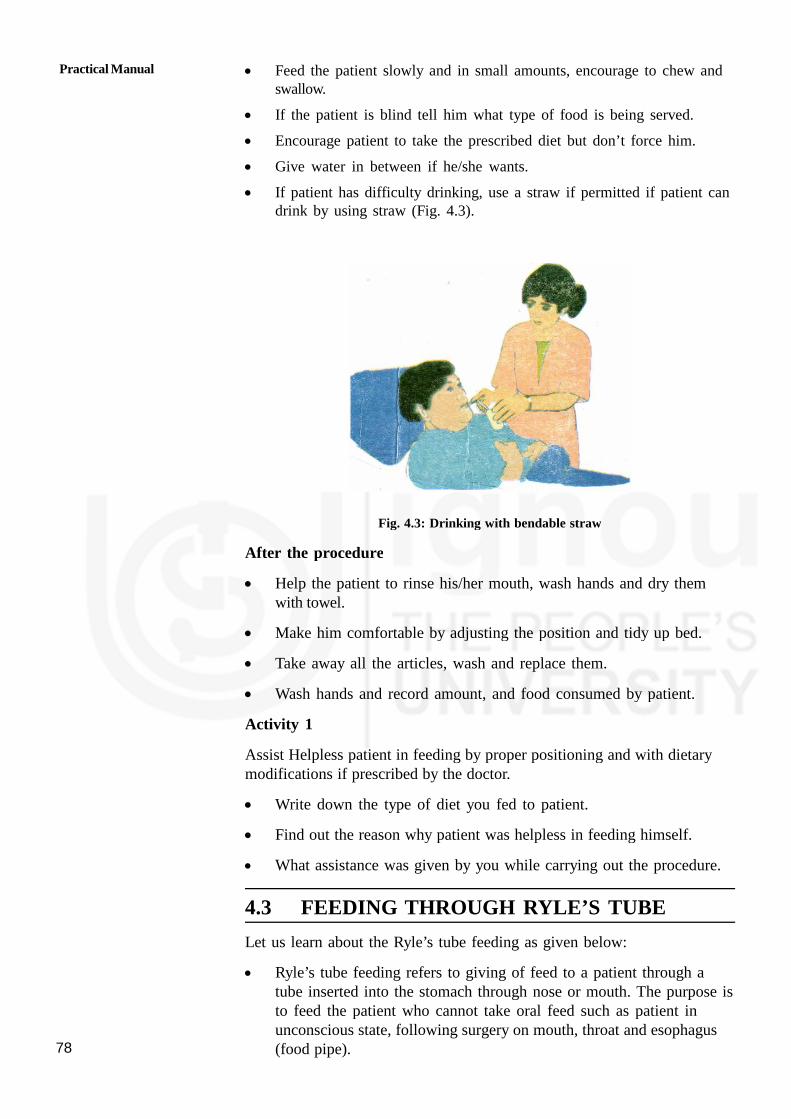
Practical Manual
78
Feed the patient slowly and in small amounts, encourage to chew andswallow.
If the patient is blind tell him what type of food is being served.
Encourage patient to take the prescribed diet but don’t force him.
Give water in between if he/she wants.
If patient has difficulty drinking, use a straw if permitted if patient candrink by using straw (Fig. 4.3).
Fig. 4.3: Drinking with bendable straw
After the procedure
Help the patient to rinse his/her mouth, wash hands and dry themwith towel.
Make him comfortable by adjusting the position and tidy up bed.
Take away all the articles, wash and replace them.
Wash hands and record amount, and food consumed by patient.
Activity 1
Assist Helpless patient in feeding by proper positioning and with dietarymodifications if prescribed by the doctor.
Write down the type of diet you fed to patient.
Find out the reason why patient was helpless in feeding himself.
What assistance was given by you while carrying out the procedure.
4.3 FEEDING THROUGH RYLE’S TUBE
Let us learn about the Ryle’s tube feeding as given below:
Ryle’s tube feeding refers to giving of feed to a patient through atube inserted into the stomach through nose or mouth. The purpose isto feed the patient who cannot take oral feed such as patient inunconscious state, following surgery on mouth, throat and esophagus(food pipe).

79
Articles required
Swab sticks and a small bowel with water — to clean the nostrils.
Mackintosh with cover — to prevent soiling of patient’s linen.
Kidney tray and paper bag to collect soiled swabs and gastriccontent.
Liquid paraffin in small container.
Feed in a container kept in warm water.
20 to 50 ml syringe.
Container with feed and glass.
Drinking water
Procedure of Ryle’s tube feeding
Explain the procedure to the patient.
Bring the collected articles to bedside.
Put the patient in fowler’s position or sitting position.
Spread mackintosh and towel over the patient’s chest / we could usea water proof apron.
Clean the nostrils with wet swab sticks.
Wash hands with soap and water and put or gloves.
Take Out the gastric content with syringe, discard it in kidney tray.
Remove the piston by pinching tube near the point of attachment ofsyringe so that air does not enter into the tube.
Pour the feed into the barrel of syringe, let it flow freely, refill thesyringes before it gets empty (Fig. 4.4).
Fig. 4.4: Patient receiving Ryle’s tube feeding
Nutritional,EliminationandMedicationNeeds
Practical Manual
80
You can give 200 m1 feed at a time i.e. 1 approximately glass.
After the feed, give 10-20 m1 water to flush out the tube to keep itclean.
Clamp the tube and make the patient comfortable. Keep the head ofbed elevated for 30—60 minutes after the feed.
Remove the mackintosh/ towel or apron which was used.
Wash hands and record the time, amount and type of feed given.
Clean and replace all articles.
Get the Ryle’s tube changed after every 7 days.
Activity 2
Practice feeding of patients with Ryle’s tube in hospital / homesetting.
4.4 GASTROSTOMY FEEDING
Administration of food in liquid form through a tube which is placed in asurgical opening into the stomach for the patients who is unable to ingest,chew or sallow food, has had surgery of the mouth, throat andoesophagus has paralysis of face and throat fracture of jaw, terminalmalignancy etc. The purpose is to maintain nutritional status of a patient.Liquid or semisolid food e.g. milk, dal, soup, fruit, juice and dalia can begiven through opening.
Articles required
A funnel, rubber tubing, glass connection, screw and a clamp a glassof drinking water.
desired type and amount of feed.
Mackintosh and a towel a napping.
20-50 ml syringed.
Sterile dressings, artery forceps in a dressing set.
Timeoxide ointment.
Procedure
Explain the procedure to the patient.
Place mackintosh and towel under the patient’s back.
Wash hands.
Unscrew the clamp from the gastrostomy tube, attach the syringe andaspirate the gantrie contents and empty it in a kidney tray.
Remove the syringe, attach the glass adapter, tubing and fix the funnelto the tube.
Pour feed into the funnel slowly; don’t allow air into the tubing duringthe feed.
81
Pour some water into the funnel to flush the tube.
If medicines are due, give them after the feed.
Clean the opening and apply sterile dressing and apply abdominalbinder.
Document the type and amount of food given, and condition ofwound for any infection.
Precaution
Never force the feed & allow the feed to flow by gravity.
If patient has nausea and/or vomiting, withhold the feed and notify tophysician.
If the tube is loose get it changed.
In case of diarrhoea preferably give butter milk or curd instead of milk.
Activity 3
Practice feeding of patient with gastrostomy
4.5 PREPARATION OF ORS
ORS is a simple solution and can be prepared any time at home. Weshall talk articles and then focus on steps for preparation of ORS solutionusing ORS packet.
Articles
Measuring bottle (1 liter capacity).
ORS packet (1litre preparation).
Clean spoon a big container with lid.
Clean water.
Vessel (in case water has to be boiled).
Napkin.
Katori.
Procedure
Wash hands before preparing ORS solution with soap and water.
Collect all the above listed articles.
Use clean container for preparing and storing ORS solution.
Use correct measurement for 1 litter of water.
Keep ORS solution for not more than 24 hours after preparation.Throw away the unused solution.
Nutritional,EliminationandMedicationNeeds

Practical Manual
82
Dissolve a new ORS packet each day.
Use fresh home made ORS for giving to the child.
Measure 1 litter of clean water. It is best to boil and cool the water.
Pour the water into the container in which ORS has been poured. Mixwell until the powder is completely dissolved.
4.6 MEETING ELIMINATION NEEDS
Let us now discuss care of patient with urinary catheter
4.6.1 Urinary Catheter Care
Catheter care is given for patients with retention .i.e. not able to passurine normally and who are bed ridden. The areas around catheter suchas urethral meatus (opening), skin surrounding the catheter insertion siteand perineum need to be cleaned to prevent infection.
Purpose
The purposes of this procedure are to:
prevent or reduce chances of developing urinary tract infection.
provide emotional and physical comfort.
secure the catheter well, to enable the patient to move freely on thebed.
Articles Required at Home
Keep the following articles ready for giving catheter care at home. A cleantray containing
Clean towels -2 in number.
Warm water and soap.
Antiseptic lotion.
Mackintosh and bed sheet.
Antiseptic ointment
Disposable gloves.
Plaster and scissors.
Procedure
Arrange the articles at the bedside.
Explain the procedure to the patient.
Position the patient with the knees flexed.
Avoid unnecessary exposure.
Clean the perineal area by using clean cotton, soap and water. Makesure to clean each side and dry well again. Make sure that soap isfully removed.

83
Reassess urethral meatus for any discharge.
Change the gloves and clean the perineal area by using sterile cottonswabs dipped in antiseptic solution. From center to periphery instraight strokes from front to back, using one cotton ball for eachstroke.
Use each swab only once.
Repeat the same using cotton swabs soaked in sterile (boiled andcooled) water.
Apply antiseptic ointment at urethral meatus and 2.5 cm of catheter.Fix catheter tubing to the inner thigh with a strip of plaster properlyto allow free movement in the bed.
Place the patient in a comfortable position.
Remove gloves, dispose the contaminated items, wash hands.
Points to Keep in Mind
Follow hand washing technique.
Clean the cleanest area to the less clean surface.
Do not allow the drainage urine bag to touch the contaminated area.
If the drainage tube becomes disconnected, do not touch the end ofthe catheter or tube, wipe with an antiseptic solution, beforereconnecting.
Empty the drainage bag at least every eight hours.
Recording and Reporting
Record your observations and the procedure. If the urine was drainedfrom the drainage bag during catheter care, record the time, amountand characteristics of urine.
4.6.2 Applying Suppository
Suppository is a solid medical preparation in a conical/cylindrical shapedesigned to dissolve after insertion into the rectum.
Purpose
The purposes of this procedure are to:
stimulate peristalsis (movement of intestine).
promote defecation (passing of stool)
relieve abdominal distension.
act as pain reliever.
Articles Required at Home
Rectal suppository.
A mackintosh and a towel.
Nutritional,EliminationandMedicationNeeds

Practical Manual
84
Lubricating jelly.
Disposable gloves.
Tissue paper (or) clean cloth.
Kidney tray (or) paper bag.
Procedure
Talk to the patient in general to enquire about the bowel pattern.
Check the general condition of the patient.
Keep the required articles near bedside.
Provide privacy by closing the door at the room (or) pulling thecurtain
Avoid unnecessary exposure.
Place a mackintosh with a towel under the patient’s buttocks toprotect the bed.
Wash your hands thoroughly before and after the procedure.
Assist patient in assuming left side lying position with upper leg flexed.
Wear gloves.
Remove suppository from its package and lubricate the rounded endwith jelly. Lubricate your gloved index finger with jelly.
Ask patient to take slow deep breath through mouth and to relaxanal sphincter.
Separate the buttocks with the left hand and insert the suppositoryinto the anus.
Once it has gone inside the anus, push it further (at least 10 cm inadults & 5 cm in children) with the lubricant gloved index finger.
Withdraw finger and wipe patient’s anal area with tissue paper (or)clean cloth.
Discard gloves turning them inside out.
Ask patient to remain flat or on the side for 5 minutes.
Make sure that the suppository is in place.
Instruct the patient to retain the suppository as long as it is possibleand comfortable(at least for 20-30 minutes)
Help the patient to go to the toilet if s/he wants to pass stool or askabout relieve in pain.
Replace the articles after cleaning them.
Keep the bed pan close by if the patient is not able to move out ofthe bed.
Ensure comfort and safety of the patient.

85
Points to Keep in Mind
Suppository must be kept in the refrigerator as they melt at roomtemperature and insertion becomes difficult.
Suppository to be inserted shortly before the patient’s usual time ofdefection or immediately after a meal.
Observation, Recording and Reporting
Observe and record the result of the suppository insertion. Record thetime of insertion, duration of its retention .i.e. for how long patient kept itinside the body, result and any other observation.
4.6.3 Giving Enema
It is an introduction of solution into the large intestine for removing faecesand cleansing the bowel.
Purpose
The purposes of this procedure are to:
Stimulate defecation.
Treat constipation or fecal impaction.
Help to establish regular bowel function.
Relieve gaseous distension by stimulating the peristalsis.
Cleanse the bowel before surgery .
Stimulate uterine contractions and to speed up the child birth.
Articles Required at Home for Giving an Enema
Disposable gloves.
Packet of enema.
Toilet tissues (or)
Soap and water.
Kidney tray.
Mackintosh.
Bath sheet (or) bed sheet.
Lubricant jelly.
Bed Pan with cover in case of bed ridden patient.
Procedure
Assess the status of patient (last bowel movement, normal bowelpattern, abdominal pain and piles etc)
Explain the procedure to the patient to get his cooperation.
Provide privacy by closing the door (or) pullir q he curtain.
Nutritional,EliminationandMedicationNeeds

Practical Manual
86
Keep all articles near the bedside.
Wash hands and wear gloves to prevent (or) reduce infection.
Place the mackintosh under the patients hip.
Position the patient in left side - lying with right knee flexed.
Cover the patient with a bath sheet (or) bed sheet exposing only analarea.
Keep the bed pan in an easily accessible position.
Remove plastic cap from the tip of an enema pocket.
Lubricate the tip with jelly if needed. The tip is already lubricated.
Gently separate the buttocks and locate anus as done while insertingrectal thermometer also.
Ask patient to relax by breathing through mouth.
Insert tip of an enema pocket gently in to the rectum. Approximately7.5 to 10 cm to be inserted if the patient is adult, in case of child 5to 7.5 cm to be inserted.
Squeeze the pocket until all the solution has entered in to the rectumand colon.
Explain that the feeling of distension is normal.
Instruct the patient to retain solution until an urge to defecate occurs.It occurs usually in 5 to 10 minutes.
Place toilet tissue (or) cloth piece around the tube at anus andwithdraw the tube.
Discard the disposable items in proper container.
Assist patient to go to the toilet (or) help to position on bed pan.
Observe the fecal matter and expelled solution.
Remove gloves and discard. Wash hands.
Assess the condition of patient.
Points to Keep in Mind
Listen to the complaint of the patient. You should not ignore anydiscomfort, however small it may be.
Patients with hemorrhoids (Piles) may experience discomfort / bleedingwhen enema is administered. Extra care should be taken to uselubricating jelly and while inserting the catheter.
Warm sitz bath can be given to relieve discomfort after theprocedure.
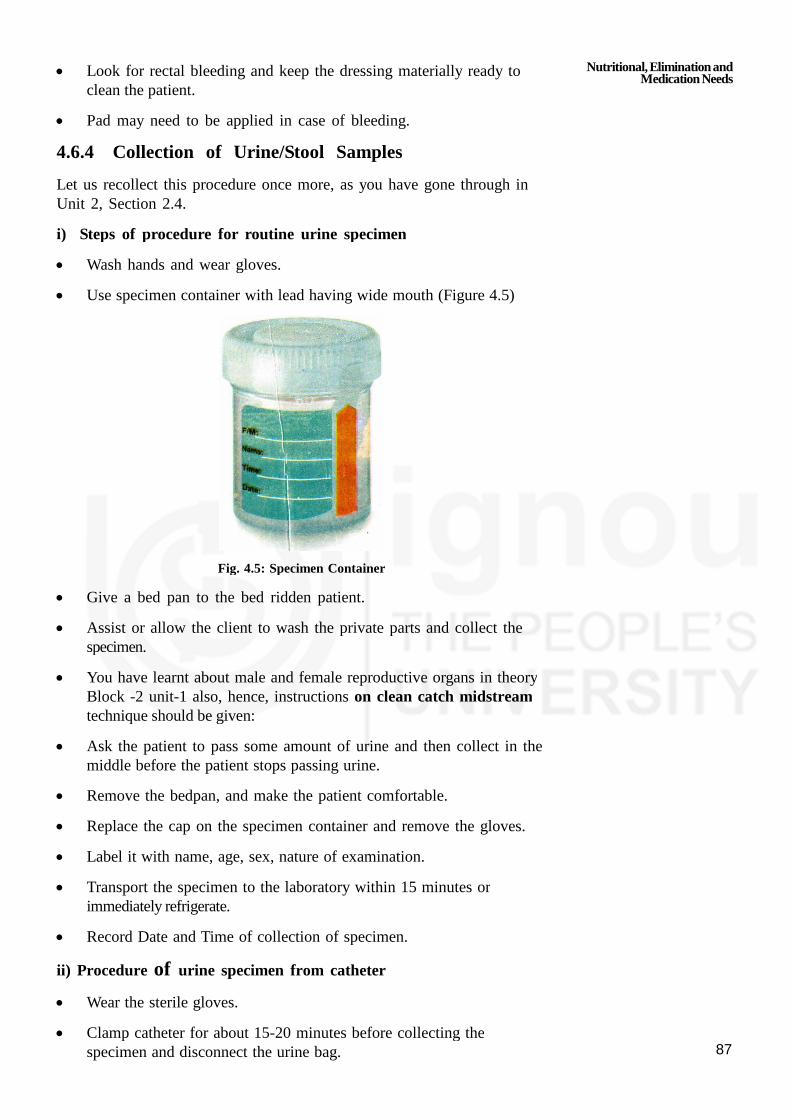
87
Look for rectal bleeding and keep the dressing materially ready toclean the patient.
Pad may need to be applied in case of bleeding.
4.6.4 Collection of Urine/Stool Samples
Let us recollect this procedure once more, as you have gone through inUnit 2, Section 2.4.
i) Steps of procedure for routine urine specimen
Wash hands and wear gloves.
Use specimen container with lead having wide mouth (Figure 4.5)
Fig. 4.5: Specimen Container
Give a bed pan to the bed ridden patient.
Assist or allow the client to wash the private parts and collect thespecimen.
You have learnt about male and female reproductive organs in theoryBlock -2 unit-1 also, hence, instructions on clean catch midstreamtechnique should be given:
Ask the patient to pass some amount of urine and then collect in themiddle before the patient stops passing urine.
Remove the bedpan, and make the patient comfortable.
Replace the cap on the specimen container and remove the gloves.
Label it with name, age, sex, nature of examination.
Transport the specimen to the laboratory within 15 minutes orimmediately refrigerate.
Record Date and Time of collection of specimen.
ii) Procedure of urine specimen from catheter
Wear the sterile gloves.
Clamp catheter for about 15-20 minutes before collecting thespecimen and disconnect the urine bag.
Nutritional,EliminationandMedicationNeeds

Practical Manual
88
Wipe the end of the catheter with an antiseptic swab.
Hold the specimen container near the end of the catheter, unclampthe catheter and let urine fall into the sterile container.
Label the container and send it to the laboratory.
iii) Procedure of 24 hour urine specimen
For a 24- hour urine specimen, all urine voided in 24-hour period iscollected.
The collection is started at a specific time, which is noted and theclient is asked to empty his bladder at that time. For examplemorning 6 a.m to next day morning 6 a.m.
The collection container is labeled before the start of the collection.
Send a specimen to the laboratory immediately.
Stool specimen
Collection of stool specimen for specific or routine tests Preparation ofArticles
Articles Rationale/Reason
Appropriate specimen container For collecting specimen
Spatula at hospital/ice-cream stick at home To lift the faces from bedpan
Gloves to Protect hands
Bedpan To pass the stool
Procedure
Explain the procedure.
Ask the client to pass stool.
Instruct the client to defecate into clean dry bed pan.
Wear gloves.
With a clean wooden spatula lift up a portion of the stool from thecenter of the mass and place it into the labeled container.
Remove the gloves.
Wrap spatula in waste paper and discard properly.
Send the specimen to the laboratory immediately.
Make the client comfortable.
Replace equipments after cleaning.
Wash hands with soap and water.

89
4.6.5 Intake and Output Recording
Urinary elimination is a normal voluntary process where by urine isexpelled from the urinary bladder,. As a home based care providers youwill have to monitor how much urine is passed by the patient in a day/24hrs so that you are able to maintain intake also to prevent imbalance inintake and output (Fig. 4.6).
Purposes
To keep the record of intake and output.
To maintain balance of intake and output.
To replace the fluid which is lost from body.
To prevent shock and collapse of patient.
Utencils available at home as following measurements as shown here.
Items Measurement
One glass 200m1 to 250 ml.
One cup 150 ml.
One katori 100 ml.
One table 15 gm.
One tea spoon 5gm.
Fig. 4.6(a): Glass of water is equal to 200m1 to 250 ml.
Fig. 4.6(b): One cup is equal to 150 ml
Nutritional,EliminationandMedicationNeeds
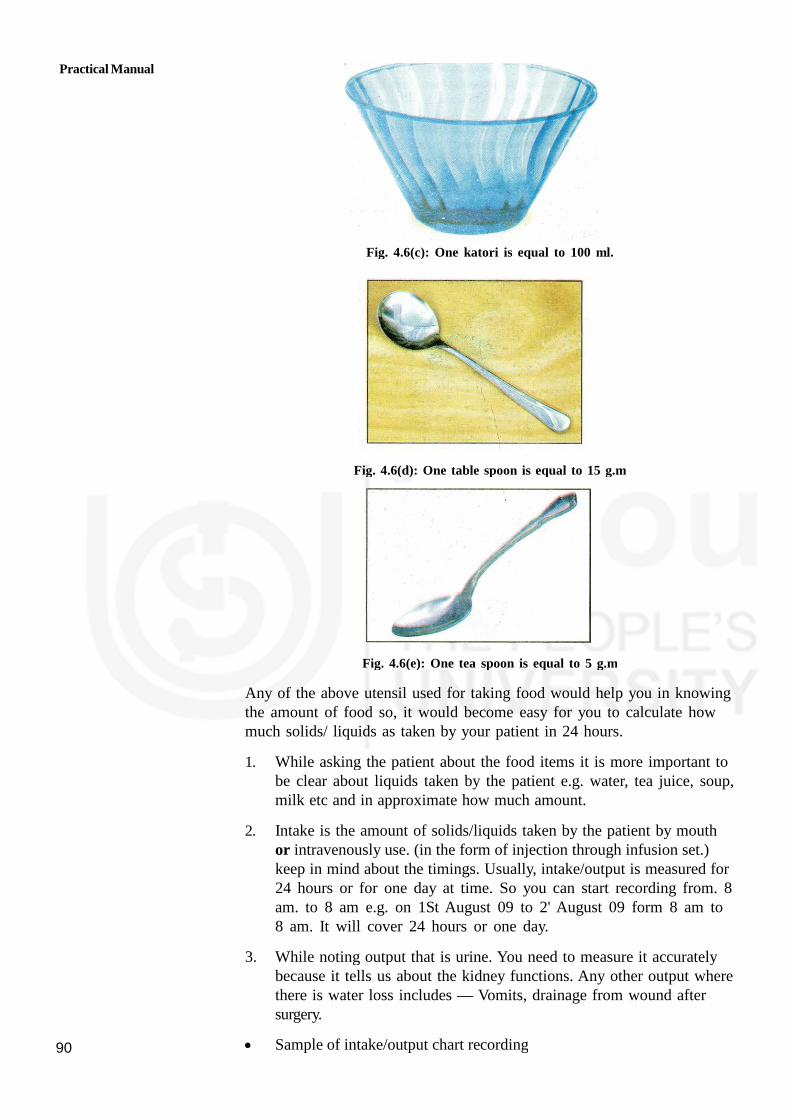
Practical Manual
90
Fig. 4.6(c): One katori is equal to 100 ml.
Fig. 4.6(d): One table spoon is equal to 15 g.m
Fig. 4.6(e): One tea spoon is equal to 5 g.m
Any of the above utensil used for taking food would help you in knowingthe amount of food so, it would become easy for you to calculate howmuch solids/ liquids as taken by your patient in 24 hours.
1. While asking the patient about the food items it is more important tobe clear about liquids taken by the patient e.g. water, tea juice, soup,milk etc and in approximate how much amount.
2. Intake is the amount of solids/liquids taken by the patient by mouthor intravenously use. (in the form of injection through infusion set.)keep in mind about the timings. Usually, intake/output is measured for24 hours or for one day at time. So you can start recording from. 8am. to 8 am e.g. on 1St August 09 to 2' August 09 form 8 am to8 am. It will cover 24 hours or one day.
3. While noting output that is urine. You need to measure it accuratelybecause it tells us about the kidney functions. Any other output wherethere is water loss includes — Vomits, drainage from wound aftersurgery.
Sample of intake/output chart recording
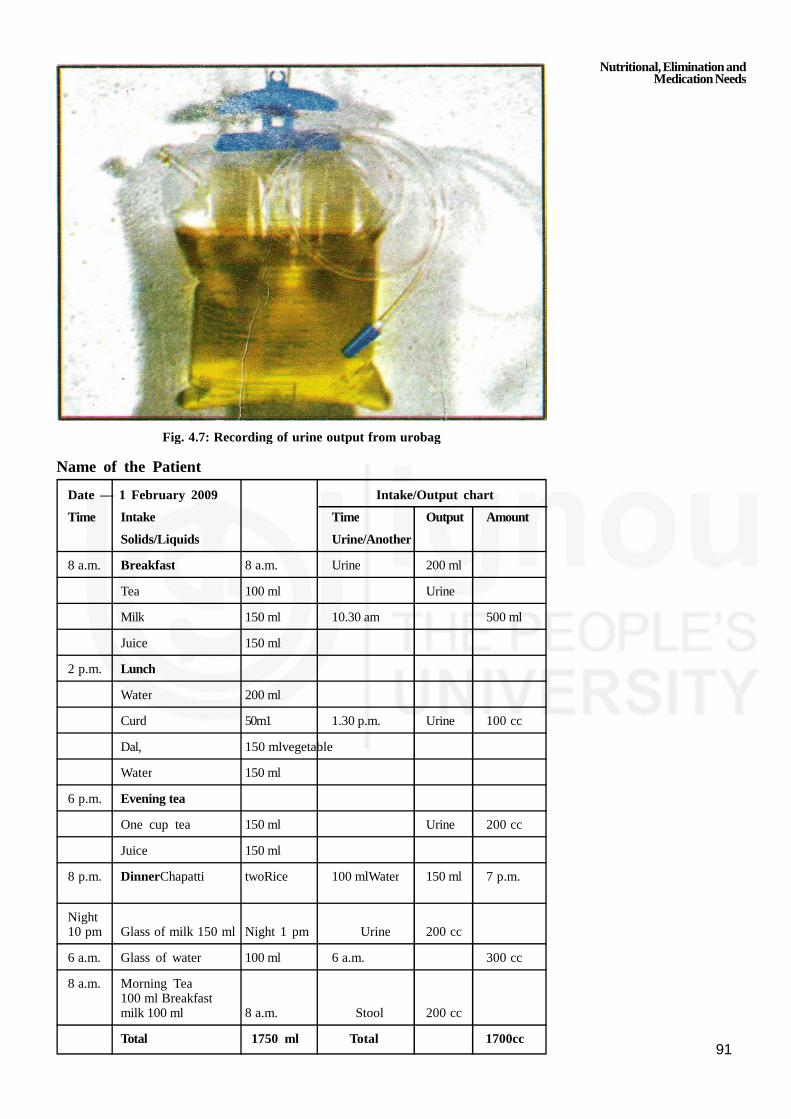
91
Fig. 4.7: Recording of urine output from urobag
Name of the Patient
Date — 1 February 2009 Intake/Output chart
Time Intake Time Output Amount
Solids/Liquids Urine/Another
8 a.m. Breakfast 8 a.m. Urine 200 ml
Tea 100 ml Urine
Milk 150 ml 10.30 am 500 ml
Juice 150 ml
2 p.m. Lunch
Water 200 ml
Curd 50m1 1.30 p.m. Urine 100 cc
Dal, 150 mlvegetable
Water 150 ml
6 p.m. Evening tea
One cup tea 150 ml Urine 200 cc
Juice 150 ml
8 p.m. DinnerChapatti twoRice 100 mlWater 150 ml 7 p.m.
Night10 pm Glass of milk 150 ml Night 1 pm Urine 200 cc
6 a.m. Glass of water 100 ml 6 a.m. 300 cc
8 a.m. Morning Tea100 ml Breakfastmilk 100 ml 8 a.m. Stool 200 cc
Total 1750 ml Total 1700cc
Nutritional,EliminationandMedicationNeeds
Practical Manual
92
4.7 GIVING MEDICINES
It is oral route which is commonly used for giving medicine at home. Inthis unit you will be taught administration of medicines namely oral,subcutaneous and care for intravenous site at home set up also. As a caregiver you will be required to give medicines.
4.7.1 General Points to Remember
Keep 5 R’s in mind:
1) Right patient,
2) Right medicine,
3) Right dose,
4) Right time,
5) Right route (through mouth or injection).
Wash your hands before preparing medicines
Give only medicines which are advised by the physician (Safe practiceis to see the written prescription)
Give full attention when you are preparing medicines
Read the label of medicine three times:
1) While removing from the place where it is kept
2) Before keeping in the bottle back at place from where youpicked up
3) While keeping the bottle of medicine back
Know the amount (dosage) to be given
Know the purpose of the drug to be given and expected out come(result)
Ask the name of a patient before giving medicine (right patient)
Always maintain timing at giving medicine.
Articles Required at Home
Medicine glass (Ounce Glass) to measure liquid medicine
Tea spoon to give medicine
Glass of drinking water
A clean cloth or towel to prevent spilling of medicine or water onpatient
Written advise by the Doctor
Some sweets or condiments (elaichi/sauf) to eat after medicine.
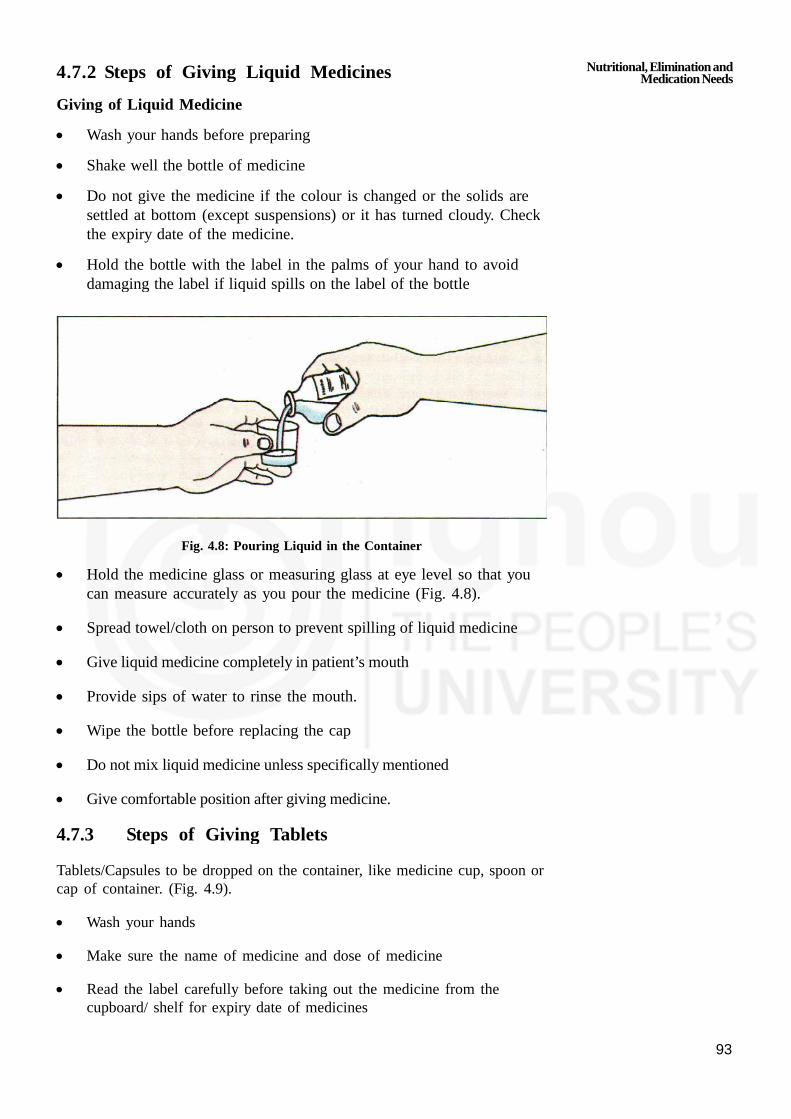
93
4.7.2 Steps of Giving Liquid Medicines
Giving of Liquid Medicine
Wash your hands before preparing
Shake well the bottle of medicine
Do not give the medicine if the colour is changed or the solids aresettled at bottom (except suspensions) or it has turned cloudy. Checkthe expiry date of the medicine.
Hold the bottle with the label in the palms of your hand to avoiddamaging the label if liquid spills on the label of the bottle
Fig. 4.8: Pouring Liquid in the Container
Hold the medicine glass or measuring glass at eye level so that youcan measure accurately as you pour the medicine (Fig. 4.8).
Spread towel/cloth on person to prevent spilling of liquid medicine
Give liquid medicine completely in patient’s mouth
Provide sips of water to rinse the mouth.
Wipe the bottle before replacing the cap
Do not mix liquid medicine unless specifically mentioned
Give comfortable position after giving medicine.
4.7.3 Steps of Giving Tablets
Tablets/Capsules to be dropped on the container, like medicine cup, spoon orcap of container. (Fig. 4.9).
Wash your hands
Make sure the name of medicine and dose of medicine
Read the label carefully before taking out the medicine from thecupboard/ shelf for expiry date of medicines
Nutritional,EliminationandMedicationNeeds
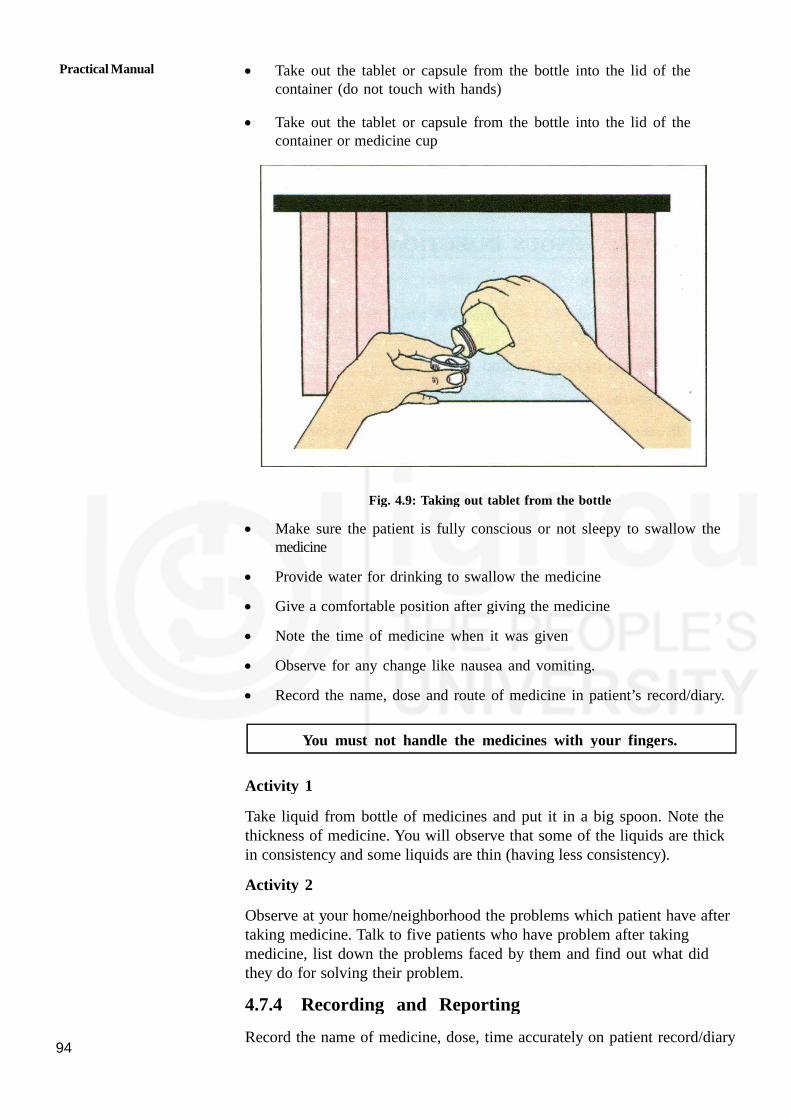
Practical Manual
94
Take out the tablet or capsule from the bottle into the lid of thecontainer (do not touch with hands)
Take out the tablet or capsule from the bottle into the lid of thecontainer or medicine cup
Fig. 4.9: Taking out tablet from the bottle
Make sure the patient is fully conscious or not sleepy to swallow themedicine
Provide water for drinking to swallow the medicine
Give a comfortable position after giving the medicine
Note the time of medicine when it was given
Observe for any change like nausea and vomiting.
Record the name, dose and route of medicine in patient’s record/diary.
You must not handle the medicines with your fingers.
Activity 1
Take liquid from bottle of medicines and put it in a big spoon. Note thethickness of medicine. You will observe that some of the liquids are thickin consistency and some liquids are thin (having less consistency).
Activity 2
Observe at your home/neighborhood the problems which patient have aftertaking medicine. Talk to five patients who have problem after takingmedicine, list down the problems faced by them and find out what didthey do for solving their problem.
4.7.4 Recording and Reporting
Record the name of medicine, dose, time accurately on patient record/diary

95
Look for any problems after giving medicines like spitting/vomitingwhich should also to be recorded.
Report to the doctor if there is any side effect.
4.8 CARE OF INTRAVENOUS INJECTION SITE
When the glucose, other fluid given through the blood vessels in vein iscalled intravenous infusion (IV).
Points to Keep in Mind
Wash hands before touching any tubing.
Maintain the rate of flow of I.V. as prescribed by the doctor (No. ofdrops per minute)
Check glucose bottle for expiry date, color and sediments/particles orhazy/ cloudy appearance. Glucose should be clear without anyparticles.
Never use the solution if the expiry date is over or any colur changeor particles in the bottle.
Make sure that the rubber set is sterilized before it is used.
Make sure that the bottle is not empty completely.
Bottle should be changed before it empties.
Keep the patient warm and comfortable.
Immobilize the part so that needle is in place by putting hardcupboard or
wooden place to support the joint.
Check the site for any swelling (indication needle is not in the vain) ifso.
Watch the patient for any redness, swelling, shivering, chills and fever.
4.9 INSULIN INJECTION ADMINISTRATION
Giving injection into subcutaneous tissues of body in an individual. You go
through theory course-1, block 3, unit 11 for more details.
Sites of Insulin Injection
The best sites for giving insulin injection are:
outer aspect of upper arm
abdomen
below the costal margin
the anterior aspect of thigh as shown in fig. 4.10.
Nutritional,EliminationandMedicationNeeds

Practical Manual
96
Fig. 4.10: Insulin Injection Sites
Steps of Giving Insulin Injection
Check doctor’s written prescription for name, dose and route ofinjection.
Explain the procedure to the patient
Wash hand before preparation of injection
Use disposable sterile insulin syringe (this syringe which is marked inunits) and needle (26 no.)
Withdraw the required dose of injection into syringe
Subcutaneous 45° angle
Fig. 4.11: Angles for injection of syringe
Epidemis
Dermis Layer
Subcutaneous Layer
97
Select the site carefully as given in Fig. 4.10
The injection site should be free of any injury, infection, abscess
Give proper position to the patient
Hold the syringe correctly between thumb and fingers at 45° angle toskin as shown in Fig. 4.11.
For average build patient spread skin tightly or grasp the skinsurrounding the infection site
Insert the needle quickly at correct site and push the medicine slowly
Take out needle completely after injecting the medicine, the amount ofmedicine should not be more than 2m1.
Do not massage the area after injection
Assist patient to assure comfortable position
Discard the needle and syringe in appropriate container.
Rotate the site of insulin injection
Recording and Reporting
Record name, dose, route and time of insulin injection.
Look for any side effects like redness, pain, swelling, discharge at siteof injection and report to doctor immediately.
Activity 3
Identify and draw a labeled diagram of different sites of insulininjection.
Practice giving subcutaneous injection to at least 10 patients.
4.10 LET US SUM UP
In this practical we have discussed important aspects of meeting nutritionalneeds of the patient, its purposes.
We have also learnt about the skill of giving Ryle’s tube feed andgastrostomy feed and preparation of home made ORS (Oral RehydrationSolution). We also discussed about care of patient with urinary catheter,purposes , points to be kept in mind while doing the procedure. Assistingthe patient for elimination care reduces his/her stress. Understanding theneed of the patient and helping him or her to accept, and adjust with thechanges in the body and take care of self or with the assistance whereverneeded is the important task of the home health assistance. In lastsubsection we have discussed in about giving of medicine through mouth,and in sub cutaneous tissues. While giving medicines what all articles arerequired and procedure to be carried out at home is also discussed. It isvery important to keep the record of what you are doing so recording and
Nutritional,EliminationandMedicationNeeds

Practical Manual
98
reporting should be accurate. After going through this skill you should beable to identify the sites of giving insulin injection. While taking care ofintravenous site remember to change the bottle in time and look fordisplacement of needle site if any and report immediately. You need tolearn these procedures one by one at the same time, practice again andagain. As you know that practice makes a man perfect.
4.11 ACTIVITIES
Activity 1 Select one patient each who needs help in finding andpractice giving the following feeds as per guidelines.
Ryle’s tube Feed
Gastrostomy Feed
Record the following
the type of diet you fed to patient
reason why patient was helpless in feeding himself
I/O Chart assistance given by you while canying outthe procedure.
Activity 2 Prepare ORS at home as per guidelines.
Activity 3 Select patient (One each Male/Femalea) who has urinarycatheter and practice the procedures in home/hospitalsetting.
Activity 4 Identify a patient who is in need of suppository advised bythe doctor and apply supposirory. Record the outcome.
Activity 5 Select a patient who is in need of enema and give anemaat home/hospital setup. Record the outcome.
Activity 6 Select two patients/persons who are on oral medicines andgive medicines. Record the procedure as per guidelines.
Activity 7 Select a patient who is on Intravenous (I/V) fluids. Givecare on the Intravenous site as per guidelines.
Activity 8 Select two patients who are on Insulin and givesubcutaneous insulin injuction in the presence of teacher asper guidelines at least 10 times.

99
UNIT 5 HOUSE KEEPING SKILLS
Structure
5.0 Objectives
5.1 Introduction
5.2 House Keeping
5.2.1 Meaning
5.2.2 Selection and Maintenance of Patient’s Room
5.2.3 The Checklist to Assess the Patient Care Room at Home
5.2.4 Role of Home Based Care Provider in Maintaining Room of Patient
5.2.5 Cleanliness and Maintenance of Equipment, Linen and Furniture
5.3 Skills for Control of Infection
5.3.1 Hand Washing
5.3.2 Handling of Used Items and their Safe Disposal
5.3.3 Barrier Care
5.3.4 Preparation of First Aid Kit
5.4 Let Us Sum Up
5.5 Key Words
5.6 Activities
5.0 OBJECTIVES
After studying this skill, you will be able to develop skills in:
maintaining patient’s room at home;
practicing house keeping skills;
taking care of equipment, linen and furniture skillfully; and
practicing the control of infections at variours places.
5.1 INTRODUCTION
It is said cleanliness is Godliness and that is what we are going toillustrate. In previous skill you have learnt about the history taking ofdifferent patients suffering from various illnesses. As we know that cleanenvironment is safe and enhances the well being of patient and familymembers. It is very important to maintain a clean and safe patientenvironment at home. In this skill you will learn about house keeping skillsto maintain safe patient care environment/room at home. You will be takingcare of patient at home and patient should not get other infection (crossinfection) along with his/her present illness just due to poor personal andenvironmental hygiene. We will emphasize on different measures to preventand control infections.

Practical Manual
100
5.2 HOUSE KEEPING
Let us now learn the meaning of house keeping.
5.2.1 Meaning
The house keeping is the work involved in looking after a house. Neatand clean room will reduce the feeling of sickness and enhance the senseof well being. You will have to help the patient to feel well by keeping
his/her surroundings neat, comfortable and free from infection.
5.2.2 Selection and Maintenance of Patient’s Room
When person is chronically ill (sick since long time due to any illness),family member may keep the patient in a separate room and may alsoconsider the factors which are essential to her/his well being. These factorsare as follows:
Adequate lighting during the day and night
Comfortable room temperature
Sufficient air movement/Cross ventilation
Provision for disposal of refuse and excreta
House should be free from insects, animals, pests, fire hazards,mechanical injuries, electrical shock and poison
Free from dust, injurious chemical and pathogenic bacteria
Free from unpleasant odour and noises
Provision of privacy
Aesthetic factors which give soothing effects to eyes and mind, likehaving some indoor and outdoor plants and some wall hangings.
5.2.3 The Checklist to Assess the Patient Care Roomat Home
Whether adequate/inadequate facilities for the patient. Check list is a listhaving description of factors at one side and remarks on the other side.You can read the items, if found adequate/inadequate — tick mark (3)
accordingly.
S. No. Description of factors Remarks
1. Room temperature Adequate/Inadequate
Too cool that patient is feeling chill
Too warm that patient is sweating
Comfortable with respect to weather
2. Humidity/Moisture
It is too humid
It is too dry
It is neither too humid nor too dry

101
3. Air Movement
Presence of doors and windows which can Adequate/
open (to allow fresh air to come in the room) Inadequate
Presence of ventilators
4. Lighting
Natural light by sun (Windows to allow sun
light to come in) Yes/No
Artificial light only (Bulb or tube light) Yes/No
Both Yes/No
5. Noise
Physical objects present in surrounding e.g.
jet pump, generator etc. Yes/No
The family members playing TV, loud music Yes/No
6. Maintenance of room
Light coloured walls Yes/No
Dark coloured walls Yes/No
Room is cleaned daily and daily dusting Yes/No
Floor kept dry Yes/No
Free from any kind of strong odour/smell Yes/No
7. Aesthetic factors (Environment becomes attractiveif it appeals to senses)
Presence of flower vase or showpieces Yes/No
Physical organization of the room is proper Yes/No
No over crowding in the room Yes/No
8. Comfortable bed
Placed near the window Yes/No
Placed away from the door Yes/No
You can move around both the sides of the bed
Side railing to protect the patient from fall speciallyfor disoriented paralytic patients/ if no side railsat home, you can put the pillows on both sidesfor extra support and keep patient in the centreof the bed. Yes/No
9. Linen and clothing
Personal clothes are changed daily Yes/No
Seasonal clothings are used Yes/No
Bed linen are changed twice a week or as required Yes/No
5.2.4 Role of Home Health Assistance in MaintainingRoom of Patient
You have to see the patient should not feel cold/sweating
Maintain 40 to 60% humidity in the room, if you feel that weather inroom is dry then keep boiled water in room or release whistle ofpressure cooker for additional steam in the room.
House Keeping Skills
Practical Manual
102
You may keep air in motion by opening the windows and doors andby use of fans and air conditioner as air in motion increases theradiation of heat from the skin and improves circulation andrespiration.
Avoid direct contact of light on face and eyes.
As noise produces irritability, restlessness, fatigue and exhaustion insick patient and interferes with sleep. On the other hand, melodiousmusic induce pleasure, so tell family members to control the volumeof radio, television, loud talk, laughing and heavy walking with shoeswithin the hearing of ill person.
Ask the family members to avoid whispering (speaking in mouth) as ittends to cause apprehension/fear in patient.
Guide family members to remove unpleasant odour by using phenyland room fresheners, spray or odonil etc.
Make sure that cleaning of floor is being done daily with addingantiseptic liquid in water e.g. lyzol and phenyl etc.
Make sure that floor should not be slippery.
Make your self and family members aware about the need oftenderness and affection for patient.
If available, keep the flower vase, picture and curtains which will add
to pleasant atmosphere of the room.
5.2.5 Cleanliness and Maintenance of Equipment,Linen and Furniture
Clean room, clean linen, clean floors and walls are relatively free frompathogenic organisms. Nothing will more quickly lower the confidence ofthe family members in home than the lack of cleanliness in the room ofpatient. Therefore you must know principles of good housekeeping and thebest method for caring the equipment and physical environment of thepatient including the floors, furnishings, painted surface and sinks.
Purposes
The purposes of cleaning equipment, linen and furniture are to:
leave the clean polished surface where possible.
remove all dust, dirt and breeding places of micro-organisms.
prolong the life of articles
maintain aesthetic factors.
Care and maintenance of equipment
You may use various equipment for carrying out certain procedures forpatient e.g. steam inhalation, back care, hair wash etc. The equipmentused are of rubber as well as glass items. So you need to clean andmaintain these.

103
a) Rubber items
Cleaning and maintaining different rubber items used for care of patient athome are as follows:
a) Mackintosh
b) Hot water bottles, Ice caps, Air Cushions
c) Gloves
d) Pillows — air and water mattress
Points to remember for care of rubber items
Rubber articles get destroyed with heat so always dry in shade.
Do not use hot water.
Do not dry it in sun light.
Do not fold rubber sheets instead roll them with paper or thin clothlining in between.
Before rolling the rubber sheet, put powder in the folds.
a) Care of Mackintosh
Spread the mackintosh on a flat surface and wet it by pouring wateron it.
Use piece of clean cloth or a plastic scrubber to apply soap andwash away the soap using water.
Repeat the above process on the other side.
Dry it in shade on a dry flat surface by exposing both the surfacesto air.
After drying, powder it lightly with dusting powder and roll it withpaper lining on it.
b) Hot water bottles, Ice caps, Air cushions
Remove the outer cloth cover
Empty the contents of bags
Deflate the air cushion
Clean the outer surface with soap and water as it may be soiled withurine and stool
Wipe the outer surface by using clean wet and squeezed cloth
Hang them upside down for drip drying
Blow the air in each of rubber item and close the cap
Check for leakage before and after the use
Store in a cool and dry place.
House Keeping Skills

Practical Manual
104
c) Gloves
Use disposable gloves if patient can afford
For re-usable gloves wash the gloves with soap and water first fromout side surface then the in side surface by reversing them
Fill each glove with water to identify any tears and holes and discardif found leaking
Hang gloves for drying first the inside surface then the outside surfacein shade
Once dry, put powder in side the gloves and keep in clean newspaper.
d) Air mattress, water mattress and pillows
Remove the cloth covet If soiled de-contaminate the cover withdisinfectant solution e.g. savlon
Deflate the air/water mattress/pillows by opening ihe cork to releasethe air or water
Clean the mattress with clean damp cloth piece
Wash with soap and water on a flat surface
Dry it in shade on a dry flat surface by exposing both the surface toair.
2) Care and Maintenance of Linen
The washing of linen can be manual by dhobis or mechanical by washingmachine. Special care is necessary when washing is done by dhobies. Thelinen by the patients may be clean or contaminated when gets dirty withblood/pus/urine/stool or any other body fluids.
The contaminated linen must be disinfected before giving to laundries forwashing. The disinfection can be done by chemical disinfectant or byboiling. The following linen at home is need to be taken care of :
Bed sheets
Pillows, mattresses and blanket and its covers.
Towels
Patient’s clothes
After washing linen at home it should be dried in sunlight but keep inmind that it should not be exposed to dust.
All mattresses should be covered with waterproof synthetic material likeplastic. Washing can be done manually.
Purposes
The purposes of care of linen are to:
give a good aesthetic sense to the patient.
105
keep the patient clean, dry and comfortable.
prevent the spread of infection.
prevent soiling of bed.
remove stains.
prevent infestation with bugs e.g. bed bug - khatmal.
increase life of items
Points to remember for care of linens
Linen used for patient care is likely to get stained by the following liquids,hence take care according to the needs as follows:
Tea, cocoa and coffee: first spread the cloth over a hole and pourboiling water House Keeping Skills from a reasonable height.
Rub lemon, boric powder over the stain and the put in the sunlight.Wash with soap and water.
Milk and sodium carbonate can also be used to remove stains andthen the cloth can be washed with soap and water.
Vegetable stains: apply salt over the stain and pour hot water from aheight or else apply ammonia (NH
3) or hydrogen peroxide (H
20
2)
solution to remove stains.
Medicine stain: apply clear alcohol and wash as usual (with wetsqueezed cloth).
Perspiration: put a few drops of ammonia over the stained area andwash as usual.
3) Care and maintenance of furniture
Follow the cleaning and disinfecting procedures for different furniture itemsas given below:
Bed and side table
Table trolley, back rest and footstool
Wooden/iron furniture
Points to remember for care of furniture
Clean with dry duster followed by damp duster everyday.
Weekly cleaning with disinfectant
Polishing and painting annually
Use oil and grease for wheels of chair and trolley whenevernecessary.
Remember:
Avoid contact of body fluids on cuts of skin, if any cut isthere then always cover it with band aid.
House Keeping Skills
Practical Manual
106
5.3 SKILLS FOR CONTROL OF INFECTION
The skills which you need to develop to prevent and control infection areas follows:
5.3.1 Hand Washing
Hand washing is the most effective method for preventing the spread ofinfection between health care personnel and patient. The most importantand essential skill
before touching/caring for patient is hand washing.
Remember:
Hand washing can prevent many infections in our day today life. Always wash hands before and after doing anyprocedure on the patient
There are various methods of washing hands. These methods are asfollows:
1) Social hand washing with plain soap and water, which removes mostof the germs from dirty hands. It is required in the followingsituations.
Before handling food, eating, and feeding the patient.
After visiting the toilet.
Before and after caring of the patient (e.g. bathing, bedmaking).
Whenever hands are dirty.
Points to remember
Remove all jewellery and watch.
Wet your hands under running water.
Apply sufficient soap on your hands and wrist, rub your hands toform good lather.
Interlace the fingers and rub them thoroughly.
Rub the thumbs of both the hands.
Rub the palm surface and palm graves.
Thoroughly wash and rinse the hands and wrist under running water.
Keep your hands in a upward direction so that water dribbles down.
Dry hands and arms thoroughly with clean towel or under the fan.
Steps of Procedure: Social hand washing
In social hand-washing, vigorous and mechanical friction is applied toall surfaces of hands using soap and water for at least 10 seconds.
The hands are rinsed under a stream of water and dried with towel.In the absence of running water, a clean bowl of water should beused for hand-washing purposes.

107
It should be remembered that the same towel should not be used forother common uses.
2) Hygienic hand-washing is a procedure where an antiseptic detergentis used for washing of hands or is disinfected with alcohol. It isrequired in the following situations:
Before doing dressing e.g. Bed sore, Tracheostomy care, Wound care.
After contact with blood secretions and situation in whichcontamination is likely to occur.
Steps of Procedure: Hygienic hand washing
Detergent solutions e.g. dettol.
Wet hands with clean (running) water or, if not available, from waterin a bowl, apply cleanser and thoroughly lather with soap.
Wash the hands for 10-15 seconds applying soap all over handsurfaces shown in figure 5.1. Drying of hands Fig 5.2 and Fig.5.3showing areas commonly missed during hand washing
Step 1 wash palms and fingers Step 2 wash back of hands
Step 3 : Wash fingers and knuckles Step 4: Wash thumbs
Step 5 : Wash finger tips Step 6 : Interlacing of hands
Step 7 : Wash wrists
Fig. 5.1: Steps of hand washing
House Keeping Skills

Practical Manual
108
Activity I
Practice hygienic hand washing as per the steps given in Section 5.3.1
5.3.2 Handling of Used Items and Safe Disposal
As home based care provider you come across various kinds of dirty/contaminated waste material while caring for the patient. As patient isgiven insulin injection you are coming in contact with needle and syringe.
A) Guidelines for Safe handling of needles and syringes.
Now a days disposable syrings are available in the market. After useit needs to be disposed off.
Fig. 5.2
Fig. 5.3: Areas commonly missed during hand washing
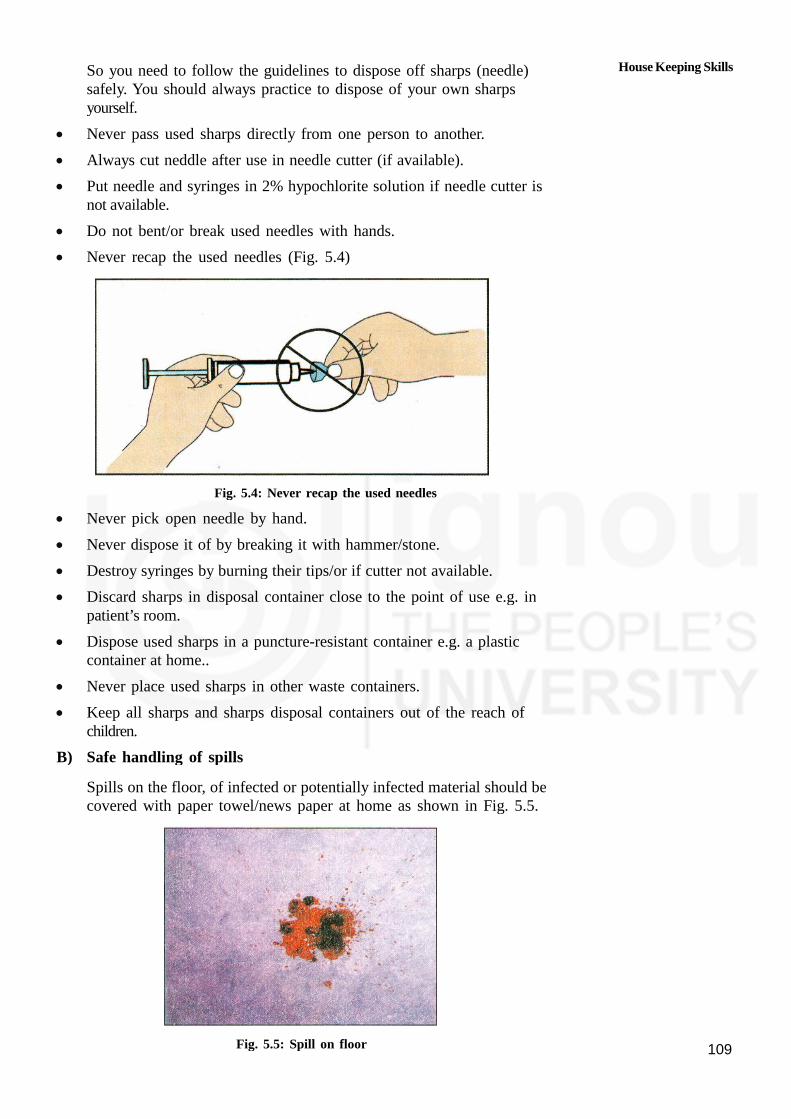
109
So you need to follow the guidelines to dispose off sharps (needle)safely. You should always practice to dispose of your own sharpsyourself.
Never pass used sharps directly from one person to another.
Always cut neddle after use in needle cutter (if available).
Put needle and syringes in 2% hypochlorite solution if needle cutter isnot available.
Do not bent/or break used needles with hands.
Never recap the used needles (Fig. 5.4)
Fig. 5.4: Never recap the used needles
Never pick open needle by hand.
Never dispose it of by breaking it with hammer/stone.
Destroy syringes by burning their tips/or if cutter not available.
Discard sharps in disposal container close to the point of use e.g. inpatient’s room.
Dispose used sharps in a puncture-resistant container e.g. a plasticcontainer at home..
Never place used sharps in other waste containers.
Keep all sharps and sharps disposal containers out of the reach ofchildren.
B) Safe handling of spills
Spills on the floor, of infected or potentially infected material should becovered with paper towel/news paper at home as shown in Fig. 5.5.
Fig. 5.5: Spill on floor
House Keeping Skills
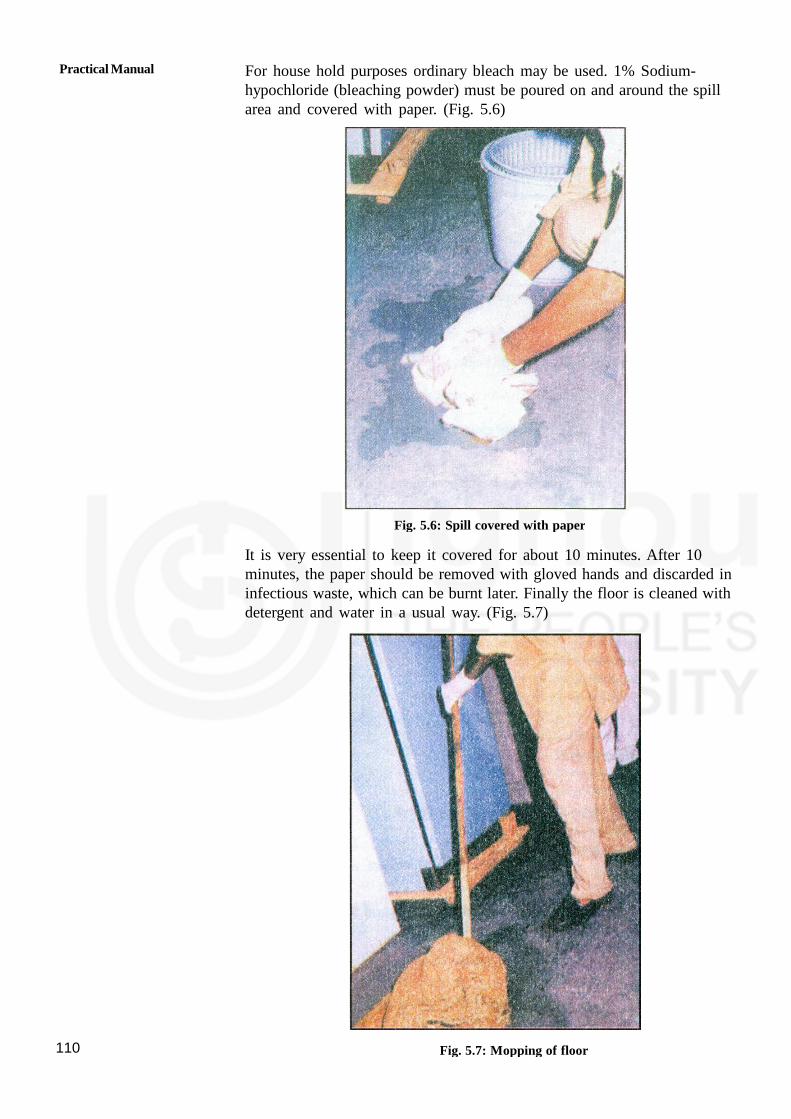
Practical Manual
110
For house hold purposes ordinary bleach may be used. 1% Sodium-hypochloride (bleaching powder) must be poured on and around the spillarea and covered with paper. (Fig. 5.6)
Fig. 5.6: Spill covered with paper
It is very essential to keep it covered for about 10 minutes. After 10minutes, the paper should be removed with gloved hands and discarded ininfectious waste, which can be burnt later. Finally the floor is cleaned withdetergent and water in a usual way. (Fig. 5.7)
Fig. 5.7: Mopping of floor

111
C) Sputum — Different methods used are:
Collect sputum in a covered container having a solution of phenol/detol /bleaching powder and dispose it off by boiling and throwingunder drainage/ running water or dumping in the soil. This is the bestmethod of discarding sputum.
OR
Ask the patient to collect the sputum on a paper or on a piece ofcloth. Dispose it off by burning.(ff patient is not able to discard bythe above method)
OR
Collect sputum in a covered container having wet sand and dispose itoff by burning.
D) Stool and Urine:
Collect in a bedpan, mud pot or other covered container provided bythe family.
Cover and mix the stool with lime and allow it to stand for one hourbefore pouring it into the water closet.
When a septic tank system is used for disposal of excreta, the stoolshould not be disinfected because the disinfectant will affect thenatural biological action which is the principal of the septic tank.
In a village where there is no proper latrine, the stool must bedisinfected with lime and buried in a hole in the ground at least 20feet below.
The stool must be covered as soon as it is deposited in the hole toprevent flies and scavengers from spreading the disease.
E) Dishes
Use banana leaves or other leaves to serve the food to the patient.
Dispose if off by burning.
Keep the dishes in patient’s room.
Wash with soap and water after use.
Collect left over food in a paper and burn it.
5.3.3 Barrier Care
Care given to prevent spread of infection to the patient, to yourself andto other members in the family is known as barrier care. It is importantto know about disinfection and methods of disinfection.
Disinfection
Disinfection is necessary to prevent cross infection from skin, equipmentand surfaces used for patient care.
House Keeping Skills

Practical Manual
112
Disinfection is used to reduce the number of microorganisms on an objector surface to destroy them. The decontamination makes an article safe forhandling.
Disinfection is done by two methods:
1) Heat sterilization
This is the cheapest, safest and most effective method of sterilization.It could be by dry heat such as flame or by wet heat such asboiling at home.
After patient gets well advise the family members to get the roomfumigated/ disinfected along with articles and furniture used by thepatient.
2) Chemical disinfection
This method should only be used on heat sensitive items of equipmentfor safety of the instruments.
Rules for the use of disinfection:
Always wash and clean articles before disinfection.
Check the expiry date of the solution.
After cleaning and disinfection, keep various items dry. e.g. bed pans-wash with hot water and keep dry.
Points to remember while doing barrier care:
Keep the patient either in separate room. If separate room is notthere select any quite place and partition it with curtains.
Keep all the necessary articles to be used by the patient in thatroom e.g. bed sheet, utensils, thermometer etc. These should not beused by other members.
Put on mask to cover mouth and nose so that patient is protectedfrom airborne infection.
Use gloves and apron.
Wash your hands before and after giving care to the patient.
Use separate slipper for patient room.
Disinfect all articles which can be used again by the patient.
Disinfect and dispose off properly all the disposable articles likeneedles, gloves, syringes etc.
Avoid entry of children and visitors from outside.
Get the patient room cleaned daily using disinfectant.
Dispose off all the waste material properly after disinfection.
5.3.4 Preparation of First Aid Kit
The first aid kit preparation is given in details of theory Course 1,Unit 13. Please refer Unit 13 and prepare kit for first aid treatment.
113
5.4 LET UP SUM UP
In this skill you have learnt about house keeping and your role inmaintaining conducive environment for the patient. We have also discussedabout maintenance of equipment linen and furniture used by the patient.You got acquainted with the skills related to hand washing to preventinfection, to reduce the complications of sickness in home setting. Whiletaking care of patient you will have to use different measures for controlof infection and practice these skills again and again to be efficientprovider of care.
5.5 KEY WORDS
Cleaning: It is the process that physically removes all visibleblood, body fluids or any the foreign material such asdust, dirt from skin/inanimate objects.
Contaminated: Soiled and infected material.
Infection: The entry and development or multiplication of a diseaseproducing agent from one living body to another.
Isolation: It is separation of infected person from a non-infectedperson for the period of communicability under conditions.This will prevent the transmission of infection to others.
Resistance: Power to fight against disease
5.6 ACTIVITIES
Activity 1 Make observations of the environment of at least twopatients at home as per checklist
Activity 2 Practice social and hygienic washing as per guidelines.
Activity 3 Practice preparation of First Aid Kit.
Activity 4 Select and prepare one patients room at home/hospital setupwith necessary items and dispose off the used items as perguidelines.
House Keeping Skills

Practical Manual
114
UNIT 6 CARE OF BED RIDDENINDIVIDUAL
Structure
6.0 Objectives
6.1 Introduction
6.2 Hot Application
6.2.1 Purposes and Rules
6.2.2 Types of Hot Applications
6.3 Cold Application
6.3.1 Purposes and Rules
6.3.2 Types of Cold Applications
6.4 Steam Inhalation
6.5 Nebulization
6.6 Dressing of Wound
6.6.1 Purposes
6.6.2 Articles Required at Home
6.6.3 Points to be Kept in Mind
6.6.3 Steps of Procedure
6.6.3 What to Look For
6.7 Let Us Sum Up
6.8 Activities
6.0 OBJECTIVES
After reading this practical you should be able to:
develop skill in giving hot application to the patient;
explain the types of hot applications;
describe the types of cold applications and develop skill in giving coldapplications to the patient;
explain the steps of nebulisation;
develop skill in giving steam inhalation to patient; and
change the dressing of different types of wound
6.1 INTRODUCTION
In this unit, we will be dicussing care of patient using procedures forhot and cold application, promote comfort to the patient. Bed riddenpatients are in need of all procedures as discussed in this unit.
Often we suffer from respiratory disorders such as inflammation of pharynx,larynx, bronchus, bronchioles etc. In such conditions we usually require

115
application of moist heat to relieve inflammation, to soften thick mucus etc.
In this skill you will learn to give nebulisation and steam inhalation, thesteps of procedure and special points to remember while taking care ofpatient who is undergoing these procedures.
After going through hot and cold applications, patient may develop woundhence, you should know how to take care of the wound so that patientgets timely help and further spread of infections can be avoided with timelyassistance.
6.2 HOT APPLICATION
Let us now learn the definition of hot application
Application of heat (moist/dry) means the use an agent warm than theskin.
6.2.1 Purpose and Rules
The purposes of hot applications are to:
to stimulate ( increase) circulation.
to relieve pain and swelling.
to give wainith and comfort.
to help in healing.
While doing hot and cold applications you should follow rules for safetyof the patient:-
Know how to use the articles for procedure.
Measures the temperature of moist heat applications by putting at theback of your palm.
Do not apply very hot application, because patient will get burns.
Ask the patient about the temperature of the application. Lowertemperature is used for those at risk, if it is too hot for the patientadd cold water.
Cover dry heat applications with cloth/ towel before applying them.
Be sure that you are applying at the right location.
Observe the skin for any problem, discontinue immediately.
Pain, numbness or burning.
Excessive redness.
Blisters.
Pale, white or gray skin.
Blue Patch.
Shivering.
Do not let the person increase the temperature of the application
CareofBedRiddenIndividuals

Practical Manual
116
Carefully watch the time. Heat should not be applied for more than15-20 minutes.
Follow the rules of electrical safety when using electrical appliances toapply heat
Expose only the body part where the heat is to be applied.
6.2.2 Type of Hot Applications
There are two types of hot applications as given below:
i) Dry heat
1) Hot water bottle: - Hot water bottle is made of rubber like materialand is filled with hot water.
a) Articles required:
Hot water bag.
Kettle with cover.
Jug to pour water.
Hot water bag cover/small towel to cover.
Vaseline/any oil for applying on the skin in case there is redness.
b) Steps of giving hot water bottle
Keep water Wiling in a kettle with cover.
Pour some hot water-in a bottle and empty it.
Pour water to fill the 1/z to 2/3of the capacity of hot water bottle.
Expel the air by placing the bag over a flat surface. Cork it tightly.
Dry the outside of the bottle and hold the bottle upside down forchecking leakage.
Cover the hot water bottle with towel and apply the hot water bottleto the affected area. Fig. 6.1(a) and (b)
Keep the bottle in place for about 20 — 30 minutes; change itsposition as necessary.
Inspect the area occasionally for redness, pain and swelling.
After the procedure empty the bottle and hang upside down.
Once it is dried fill it with air and keep safely.
Fig. 6.1: (a) Hot water bottle (b): covered by towel

117
2) a) Heating pads : Heating pad contains electric wires that produceheat; you plug them as shown in Fig. 6.2
b) Hot packs: Disposable hot packs are dry heat applications. Thepacks contain chemicals. The package instructions tell how touse the pack. Some packs have outer protective coverings. Ifnot, the pack is placed in a flannel/ cotton cover. The pack isused once and then discarded.
a) Articles required
Collect the following articles.
Disposable hot packs.
Flannel cover/ cotton cloth/ Towel.
Ties, tape, rolled gauze.
b) Steps of procedure
Explain the procedure.
Wash your hands.
Cover the pack with flannel/ cotton towel.
Apply the hot pack to the part.
Secure it in place with ties, tape, or rolled gauze. Note the time.
Place the call bell within reach.
Check the skin every 5 minutes.
Check for redness and for complaints of pain, discomfort, ornumbness.
Remove the pack if any of the above things happen.
Otherwise remove the pack after 20 minutes.
Discard the pack and clean other items.
Fig. 6.2:(a) Heating pads and (b) hot packs
CareofBedRiddenIndividuals
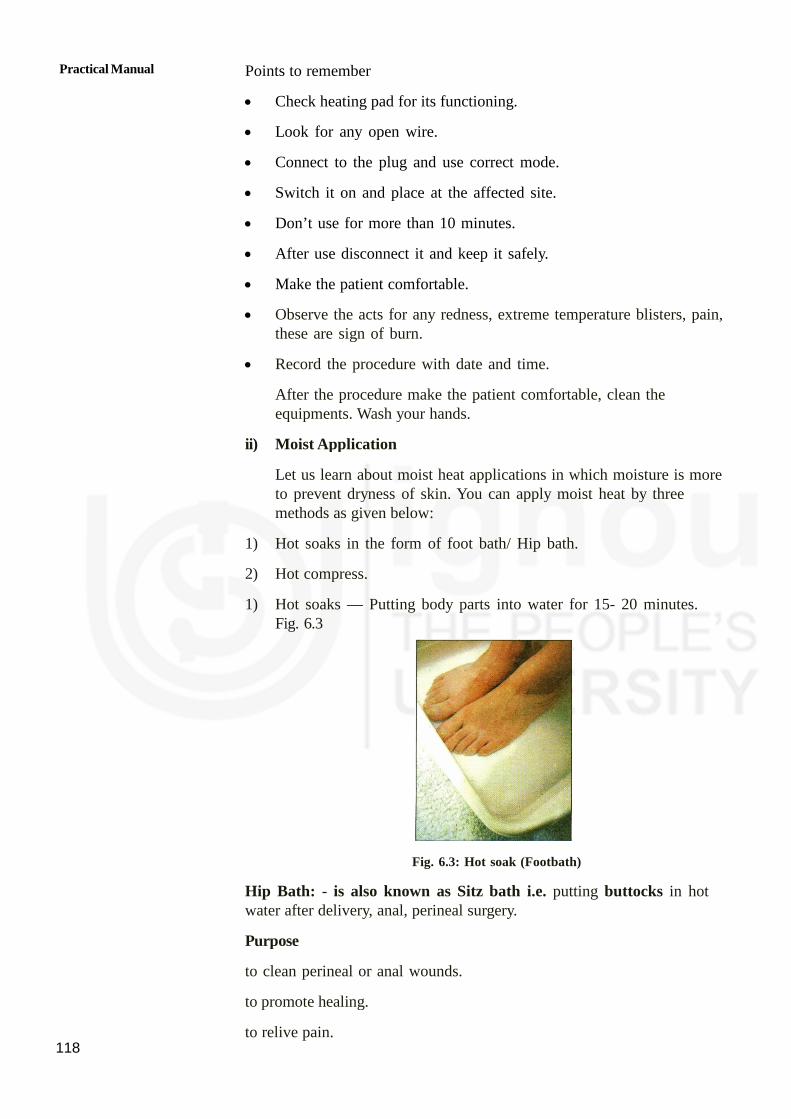
Practical Manual
118
Points to remember
Check heating pad for its functioning.
Look for any open wire.
Connect to the plug and use correct mode.
Switch it on and place at the affected site.
Don’t use for more than 10 minutes.
After use disconnect it and keep it safely.
Make the patient comfortable.
Observe the acts for any redness, extreme temperature blisters, pain,these are sign of burn.
Record the procedure with date and time.
After the procedure make the patient comfortable, clean theequipments. Wash your hands.
ii) Moist Application
Let us learn about moist heat applications in which moisture is moreto prevent dryness of skin. You can apply moist heat by threemethods as given below:
1) Hot soaks in the form of foot bath/ Hip bath.
2) Hot compress.
1) Hot soaks — Putting body parts into water for 15- 20 minutes.Fig. 6.3
Fig. 6.3: Hot soak (Footbath)
Hip Bath: - is also known as Sitz bath i.e. putting buttocks in hotwater after delivery, anal, perineal surgery.
Purpose
to clean perineal or anal wounds.
to promote healing.
to relive pain.

119
Points to remember (Fig. 6.4)
Person sits on the seat that is filled with water.
Protect the person from injury or burn by checking frequently.
Keeping call bell within easy reach so that patient can call.
Let the patient sit for 15-20 minutes.
Fig. 6.4: Sitz bath
2) Hot Compresses:-The compress or pack is placed in a basin of hotwater. After it is wrung out, it is applied to the body part. (Fig. 6.5)
a) Articles required
Basin or tub.
Small towel.
Bath towel.
Ties, tape, or rolled gauze.
Waterproof plastic sheet.
b) Steps of procedure
Explain the procedure to the person.
Wash your hands
Identify the person.
Provide for privacy.
Place the plastic sheet under the body part.
Fill the basin one-half to two — thirds full with hot water.
Check the water is not too hot.
Place the compress in the water.
Squeeze out the compress.
CareofBedRiddenIndividuals

Practical Manual
120
Apply the compress quickly till it is warm.
Fig. 6.5: Hot Compress
Make sure the person is comfortable.
Clean equipment. Discard disposable items.
Place the call bell within reach so that person can call you incasecompress is too hot.
Check the area every 5 minutes. Check for redness and complaintsof pain, discomfort, or numbness. Remove the compress if any occur.
Change the compress if cooling occurs
Remove the compress after 20 minutes
Pat on dry the area.
Wash your hand.
Record the following
The time, site, and length of the application.
Observations of the skin.
The person’s response.
6.3 COLD APPLICATION
Cold applications are often used in the treatment of sprains and fractures.These are common sports injuries. They also occur from falls and otheraccidents.
6.3.1 Purpose and Rules
To reduce pain.
To prevent swelling.
To decrease circulation and swelling.
To cool the body in case of fever.
There are some rules to be followed while you apply cold to the patientas given below:-
121
Measure the temperature of moist cold applications. It should not befreezing cold.
Very cold applications can damage tissue.
Be sure about the exact location for the cold application. Cover drycold application with cotton/ flannel cloth before applying them.
Check for the following complaints of numbness, pain, or burning
Blisters.
Bums.
Pale, white, or gray skin.
Cyanosis ( blue skin).
Shivering.
Cold is never applied longer than 30 minutes.
Expose only the part where the cold is to be applied.
Place the call bell within the person’s reach.
6.3.2 Types of Cold Application
Dry cold applications are done by the following two methods:
1) Ice Bags and Ice Collars
2) Cold packs
Ice Bags and Ice Collars are dry cold applications. Ice collars are appliedto the neck. The bag or collar is filled with crushed ice, (Fig. 6.6).
a) Articles required
Ice bags or ice collar.
Crushed ice.
Towel/ cotton cloth.
b) Points to remember while doing cold application
Crushed ice is better than the ice cubes.
Cover the ice bag with cotton or towel.
If the cover becomes moist it is removed and a dry towel is applied.
Ice bags and ice collars are not applied for more than 30 minutes.
c) Steps of procedure
Explain the procedure to the person.
Wash your hands.
Identify the person.
Provide for privacy.
CareofBedRiddenIndividuals
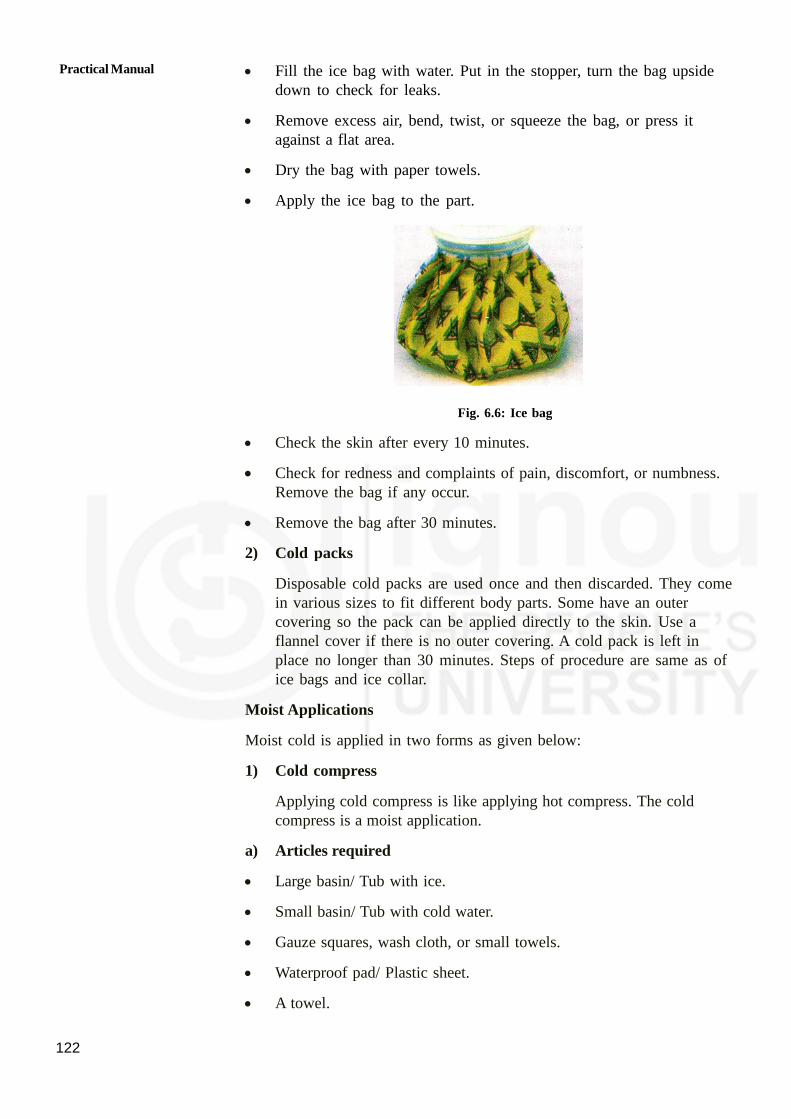
Practical Manual
122
Fill the ice bag with water. Put in the stopper, turn the bag upsidedown to check for leaks.
Remove excess air, bend, twist, or squeeze the bag, or press itagainst a flat area.
Dry the bag with paper towels.
Apply the ice bag to the part.
Fig. 6.6: Ice bag
Check the skin after every 10 minutes.
Check for redness and complaints of pain, discomfort, or numbness.Remove the bag if any occur.
Remove the bag after 30 minutes.
2) Cold packs
Disposable cold packs are used once and then discarded. They comein various sizes to fit different body parts. Some have an outercovering so the pack can be applied directly to the skin. Use aflannel cover if there is no outer covering. A cold pack is left inplace no longer than 30 minutes. Steps of procedure are same as ofice bags and ice collar.
Moist Applications
Moist cold is applied in two forms as given below:
1) Cold compress
Applying cold compress is like applying hot compress. The coldcompress is a moist application.
a) Articles required
Large basin/ Tub with ice.
Small basin/ Tub with cold water.
Gauze squares, wash cloth, or small towels.
Waterproof pad/ Plastic sheet.
A towel.

123
b) Steps of procedure
Explain the procedure to the person.
Wash your hands.
Place the small basin with cold water into the large basin with ice.
Place the compress/cloth/gauze into the cold water.
Place the bed protector under the affected body part. Expose thearea.
Squeeze out a compress so water is not dripping.
Apply the compress to the part. Note the time.
Check for redness and complaints of pain, discomfort, or numbness.Remove the compress.
Change the compress when it warms. Usually compress is changedevery 5 minutes.
Remove the compress after 20 minutes.
Pat dry the area with towel.
2) Cool Sponge bath
The cool sponge bath (tap water sponge bath) is used to reduce bodytemperature when there is a high fever. (Fig. 6.7)
a) Articles required
Basin or Tub.
Sheet to cover.
Two or more towels.
Small towel.
Thermometer.
B P Apparatus.
b) Points to remember
Vital signs are taken before, during, and after the procedure.
They are taken every 15 minutes during the procedure.
Ice bags or moist cold compress may be used to help lower bodytemperature.
Cold compress is applied to the forehead, axilla (underarms), andgroin.
CareofBedRiddenIndividuals

Practical Manual
124
c) Steps of procedure
Explain the procedure to the person.
Wash your hands.
Measure and record vital signs. Note the time.
Cover the person with a sheet. Remove top linen.
Prepare the ice bags or packs for application. Place them in theflannel covers.
Apply the ice bags or packs to the forehead, axillae, and groin.
Fig. 6.7: Cold sponge bath
Fill the basin two- third full with cool water. Water temperatureshould be about 98°F (37°C) or tap water. Add ice chips to coolthe water if necessary.
Place the washcloths in the water. Alternate washcloth during theprocedure. Make sure no ice chips stick to cloth.
Sponge the arm for 5 minutes with long, slow, gentle strokes. Patdry; do not rub to dry.
Repeat steps on the other arm. Record oral temperature.
Place the bath towel lengthwise over the chest and abdomen.
Sponge the chest and abdomen for 3-5 minutes, pat dry, cover theperson with the sheet and remove the towel.
Sponge the leg with long, slow, gentle strokes for 5 minutes. Pat theleg dry, cover, and remove the sheet.
Do the same for other leg.
Measure and record vital signs. Note the time.
Help the person turn away from you.
Place a towel on the bed along the length of the person’s back andbuttocks.
Sponge the back and buttocks (hips) with long, slow, gentle strokesfor 5 minutes. Pat dry and remove the towel.
Remove the ice packs.
Measure and record vital signs .Note the time.
125
Put a clean cloth on the person. Make the bed. Change damp orsoiled bed sheet.
Wash your hands.
Record the vital signs and time of giving sponge bath
6.4 STEAM INHALATION
Steam inhalation is an application of moist heat either plain or medicatedto the respiratory passages (Fig. 6.8).
Purposes
1. To relieve inflammation of various parts of respiratory tract andprovide relief.
2. To soften thick mucous and to relieve cough.
3. To relieve congestion.
Articles Required
Steam inhaler (kettle, a jug/lota, electric inhaler)
Back rest.
Two to three pillows.
A cardiac table.
A blanket or bed sheet.
Graduated jug.
Boiling water.
Medication (vicks as indicated).
Tea spoon to measure.
Spirit and swab sticks.
Gauze pieces, cotton swabs.
Big bowl for keeping the inhaler.
Towel.
Inhaler cover.
Sputum mug with antiseptic solution (Savlon/Dettol).
Procedure
Wash hands
Collect articles required
Prepare the steam inhaler
Take cold water in its capacity
CareofBedRiddenIndividuals

Practical Manual
126
Warm the inhaler with little hot water by rinsing it with hot water
Put vicks in the inhaler or plain water stream can also be used.
Pour boiling water up to the lower level of the spout
Cover the mouth pieces with a piece of gauze, put the cork. Plugthe spout with a cotton swab
Cover the inhaler with inhaler cover or with the big towel and placein a bowl
Take it to the patients bed side
Explain the procedure to the patient
Put patient in a comfortable sitting position, and place the inhaler onthe cardiac table in a way the spout points away from the patient.Remove cotton plug.
Cover the patient’s head, shoulders and inhaler with the blanket andask the patient to inhale through the mouth piece for 15-20 minutes.Remove inhaler after the prescribed time
Leave the cotton swabs, sputum mug and face towel within reach ofthe patient.
.
Fig. 6.8: Steam Inhalation
After inhalation keep the patient well covered for fifteen minutes. Donot expose suddenly to the atmosphere to prevent chills.
Make the patient comfortable.
Ask the patient to cough and bring out sputum (chest physiotherapymay be given if needed).
Wash inhaler and mouth piece. Boil the mouth- piece for 3 minutes.
Clean the tea spoon with spirit.
Replace all articles.

127
Record the duration and effect of the procedure on the patient’srecord.
Wash hands.
Note: Switch off the fans, close the window before procedure.
Special Points to Remember during Steam Inhalation
1. You can ask the patient to pass urine before steam inhalation.
2. During procedure if patient starts coughing or expectorating sputum,the spout may be closed with cotton balls to prevent escape ofsteam.
3. Never leave the patient alone during the procedure, inhaler may tiltand patient may get burns.
4. The level of water should remain below the spout to prevent burns.
5. Keep the patient warm before, during and after inhalation to preventdroughts and chilling.
6. Instruct the patient to close the eyes when any drug is used forinhalation.
Activities
1. Identify patients having cough and practice giving steam inhalation asper the procedure in the unit
6.5 NEBULIZATION
Nebulization is a process of adding medications or moisture to inspiredair by mixing particles of various sizes with air. Adding moisture to therespiratory system through nebuli7ation may improve clearance ofpulmonary secretions. Medications such as bronchodilators, mucolytics andcorticosteroids are often administered by nebulization.
Nebulizers are used to treat
Asthma
Chronic Obstructive Pulmonary Disease (COPD), and
Other conditions where inhaled medicines are indicated.
Steps of using a nebuliser
Add prescribed medication to nebulizer.
Make sure that he does not take more than two to three puffs everyfour hours, if required more consult the doctor.
As orderedadminister the humidified oxygen by nasal cannula to easebreathing teach the patient and his family about diaphragmaticbreathing pursed lip breathing
CareofBedRiddenIndividuals
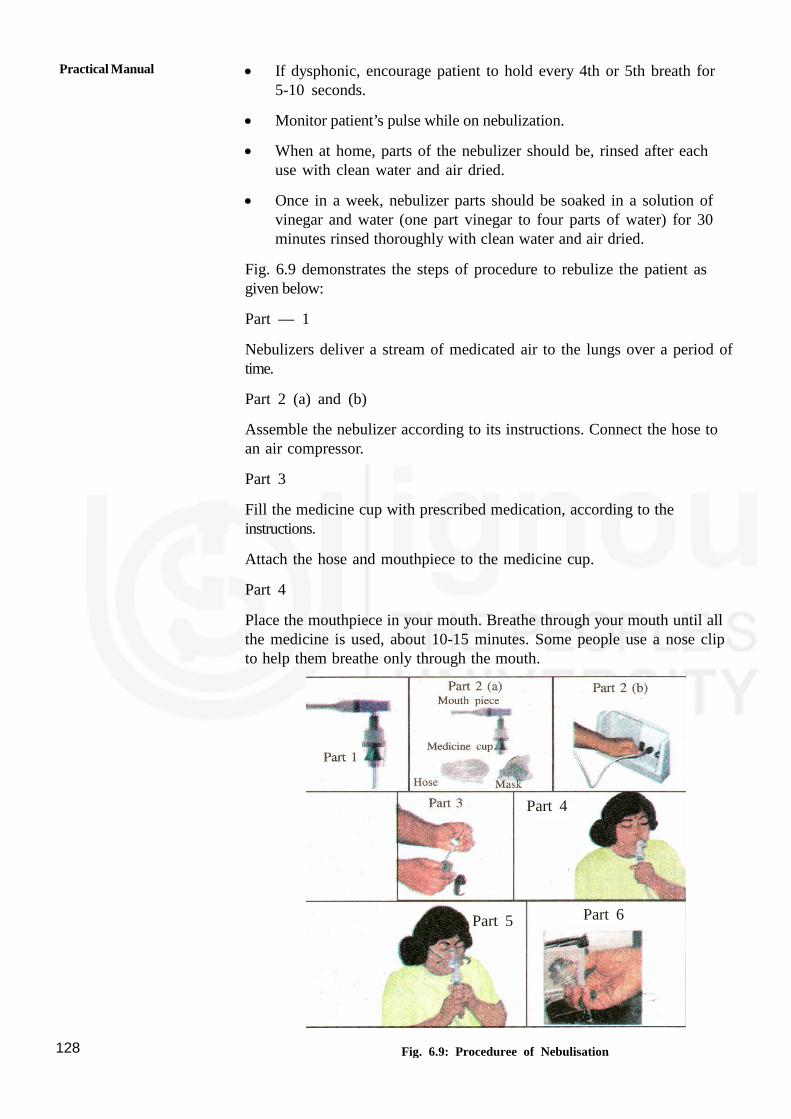
Practical Manual
128
If dysphonic, encourage patient to hold every 4th or 5th breath for5-10 seconds.
Monitor patient’s pulse while on nebulization.
When at home, parts of the nebulizer should be, rinsed after eachuse with clean water and air dried.
Once in a week, nebulizer parts should be soaked in a solution ofvinegar and water (one part vinegar to four parts of water) for 30minutes rinsed thoroughly with clean water and air dried.
Fig. 6.9 demonstrates the steps of procedure to rebulize the patient asgiven below:
Part — 1
Nebulizers deliver a stream of medicated air to the lungs over a period oftime.
Part 2 (a) and (b)
Assemble the nebulizer according to its instructions. Connect the hose toan air compressor.
Part 3
Fill the medicine cup with prescribed medication, according to theinstructions.
Attach the hose and mouthpiece to the medicine cup.
Part 4
Place the mouthpiece in your mouth. Breathe through your mouth until allthe medicine is used, about 10-15 minutes. Some people use a nose clipto help them breathe only through the mouth.
Fig. 6.9: Proceduree of Nebulisation
Part 4
Part 5 Part 6

129
Part 5
Some people prefer to use a mask
Part 6
Wash the medicine cup and mouthpiece with water, and air-dry until yournext treatment.
6.6 DRESSING OF WOUND
Dressing is cleaning of wound, application of ointment or medicines orpowder and covering it with sterile or clean dressing material.
Dressing: is a procedure which is aimed at prevention of infection andpromotion of healing of wound.
Conditions requiring dressing:
Surgical - incision after operation
Tracheostomy - wound on the trachea for airway management
Bed sore - wound due to lying on the bed for long period. Refer Block3 Unit I
Diabetic wound - specially found among the patient’s who are sufferingfrom diabetes, common site is foot ulcer.
6.6.1 Purposes
To protect a wound from injury or any other added infection.
To absorb drainage from wound.
To hold the application of ointments, antiseptics or other medicine inplace.
6.6.2 Articles Required at Home (Fig. 6.10)
Fig. 6.10: Tray for dressing of wound
Cotton balls
Medicine
Gloves
Adhesive/bandage
CareofBedRiddenIndividuals

Practical Manual
130
Hand washing articles - soap and water.
Protection of bedmackintosh or rubber sheet/plastic sheet andnewspaper towel
Wound care - gauze pieces, cotton, scissors, adhesive/ bandage , apair of
gloves, small bowl/ Katori, Normal Saline, mask if necessary.
Bowl with cotton swabe.
Bowl /katori to put normal saline/spirit.
Bottle with spirit.
Bottle with normal saline. (You can get it from chemist).
Adhesive Tape.
Bandage.
Scissors.
Rubber sheet with towel/Newspaper.
Paper bag to throw dirty dressing.
Gloves (Sterile/boiled and dried).
Mask.
6.6.3 Points to be Kept in Mind
Hand washing before and after procedure.
Strict aseptic technique. (Don’t touch the wound or area with dirtyhands)
Wear gloves during procedure.
6.6.4 Steps of Procedure
Wash hand thoroughly with soap and water.
Prepare the articles before the procedures.
You may get surgical dressing from the chemist or boil the clean thincotton cloth (which can soak the discharge from the wound) and dryit with hot iron for small dressing at home.
Protect bed and linen with rubber sheet and towel.
Explain the procedure to the individual.
Bring the articles near the patient and make the patient in acomfortable position.
Wash hands thoroughly again.
Do not speak on the wound while dressing and use mask if available.

131
Remove the soiled dressing with clean forceps or gloves and discard
both in a paper bag.
Clean the outer side of the wound with cotton/gauze, then inside of the
wound with normal saline.
Apply medicine as ordered and cover the wound with sterile gauze.
Apply bandage or adhesive to hold the dressing in position.
Remove and wash bowl/ katori with detergent powder & water and
dry it, wash gloves with soap solution and rinse and dry it in shade.
6.6.5 What to Look For
The area of the wound.
The color of the wound like reddish, blackish red, white.
The depth of the wound, whether it is superficial, deep layer orinvolvement of bony structure.
Deposition of any dead tissue/skin.
Smell like offensive, fishy foul.
The color and amount of discharge like watery, pale/ white (it could bepus which is sign of infection)
6.7 LET US SUM UP
In this skill we have discussed about the meaning, purposes, articlesrequired and steps of the procedure of hot and cold applications. Thereare two types of hot and two types of cold applications. Theseapplications are very effective to relieve pain, to promote healing of thewound, to reduce swelling at the affected part. As a home health assistant,it is the most important procedure for you to learn because even if thereis no pain killer medicine available in the house, you can carry out thisprocedure till the medical help arrives. In this skill we have discussedabout dressing, care of wound, change of dressing by putting steriledressing. All these measures are required look the comfort of the patient.Hence, you are required to take a lead and come forward to learn anddemonstrate, re-demonstrate these procedures again and again, as youknow that practice makes a man perfect. Do practice and get a skilledperson to give quality patient car.
6.8 ACTIVITIES
Activity 1 Collect the articles for hot water bottle and fill it upto thelevel mentioned in the procedure as per guidelines.
Activity 2 Select patient with the help of teacher and apply dry heat(hot water bottle, heating pads/hot packs) and moist heat(hot soaks, sitz bath hot compress) as per need.
Activity 3 Collect the articles for dry cold (Ice bags, Ice collar, coldpacks) and moist cold (cold compress, cool sponge bath)
CareofBedRiddenIndividuals

Practical Manual
132
applications, and practice giving cold applications tofive.persons as mentioned. .
Activity 4 Select two patients who are in need of Nebulisation andnebulise as per written order of Doctor as per guidelines.
Activity 5 Select two patients who are in need of Steam Inhalationand give steam as per guidelines.
Activity 6 Prepare a tray for dressing of wound
Activity 7 Select five persons/patitent from the ward who have woundand do the dressing as per guidelines.

133
UNIT 7 CARING FORDIFFERENTLY ABLEDPERSONS
Structure
7.0 Objectives
7.1 Introduction
7.2 Techniques of Bed Making
7.2.1 Purpose of Bed Making
7.2.2 Types of Beds
7.2.3 Technique of Bed Making
7.3 Common Positions
7.3.1 Supine/Dorsal Position
7.3.2 Semi Supine/Semi Dorsal Position
7.3.3 Fowlers (Semi-Sitting) Position
7.3.4 Cardiac (Sitting) Position
7.3.5 Side Lying (Lateral) Position
7.3.6 Prone (Lying on Abdomen) Position
7.4 Procedures for Positioning the Patient
7.5 Ambulation of Patient
7.6 Transfer of Patient
7.6.1 Bed to Wheelchair
7.6.2 Wheelchair to Bed
7.7 Walking with Walker or Crutch
7.7.1 Walking with Walker
7.7.2 Crutch Walking
7.8 Use of Gait Belt
7.9 Let Us Sum Up
7.10 Activities
7.0 OBJECTIVES
The learner will be able to:
describe the purpose and define various types of bed;
demonstrate the technique of bed making;
state the purpose of positioning and use of comfort devices;
describe and demonstrate common positions that can be given todifferently abled persons;

Practical Manual
134
demonstrate the use of special equipment for ambulation;
develop skill in transferring the patient from the bed to wheelchair andwheelchair to bed; and
describe procedure and help patient to use walker and crutches;
Demonstrate the technique of basic life support.
7.1 INTRODUCTION
As a care provider, one has to learn the skills to provide assistance todifferently abled individuals for accomplishment of activity of daily living.The unit will discuss about some basic skills need to be acquired by thehealth assistant to provide effective home assistance to the disabled. Someof these pertain to bed making, positioning and ambulation of patient.Support in use of assistive devices and intake of medications also holdimportance in restoration of health and rehabilitation of such individuals.
7.2 TECHNIQUES OF BED MAKING
Bed making is the technique of preparing different types of beds inmaking patient or clients comfortable or his/her position suitable forparticular condition. It is an art and it adopts scientific principles of nursing
7.2.1 Purpose of Bed Making
The purpose of bed making is:
To provide the client with a safe & comfortable bed to take rest &sleep
To keep the living space neat and tidy
To adapt to the needs of the client and to be ready for anyemergency or critical condition of illness
To economize time, material and effort
To prevent bedsores and cross infection
7.2.2 Types of Beds
There are two types of beds as described below
1. Simple Beds:
a. Closed bed
b. Open bed
c. Occupied bed
2. Special Beds:
a. Operation bed
b. Cardiac bed
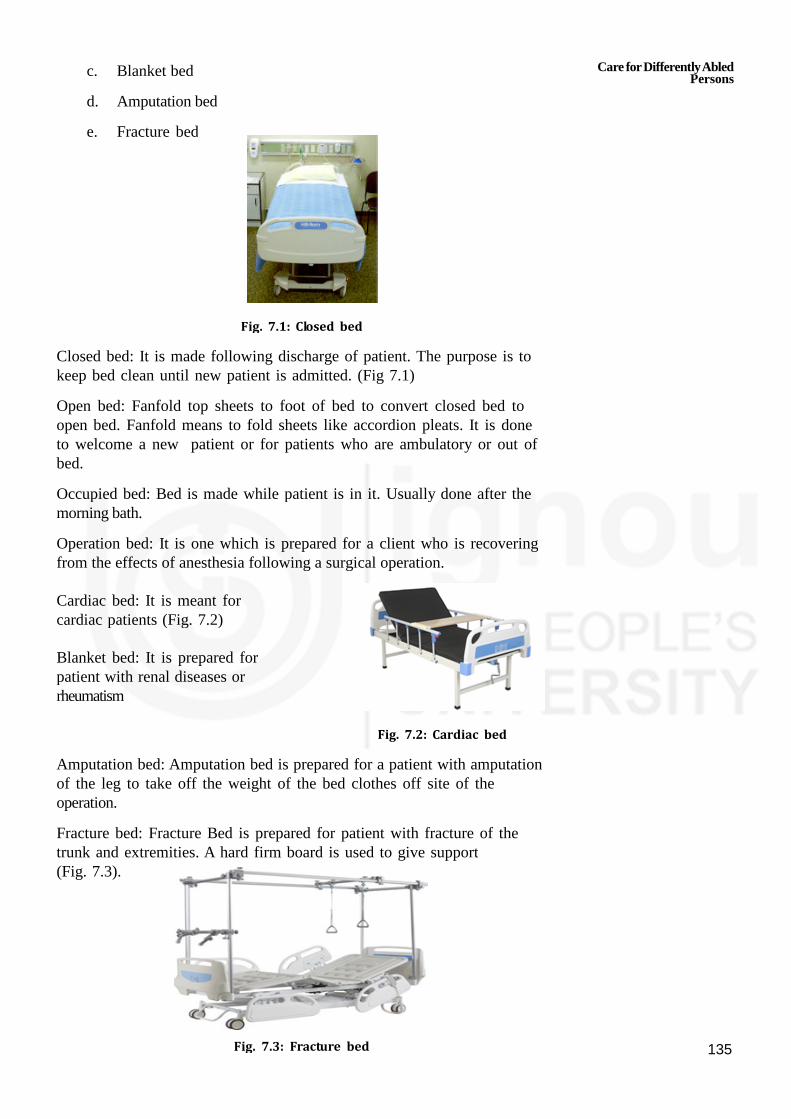
135
c. Blanket bed
d. Amputation bed
e. Fracture bed
Fig. 7.1: Closed bed
Closed bed: It is made following discharge of patient. The purpose is tokeep bed clean until new patient is admitted. (Fig 7.1)
Open bed: Fanfold top sheets to foot of bed to convert closed bed toopen bed. Fanfold means to fold sheets like accordion pleats. It is doneto welcome a new patient or for patients who are ambulatory or out ofbed.
Occupied bed: Bed is made while patient is in it. Usually done after themorning bath.
Operation bed: It is one which is prepared for a client who is recoveringfrom the effects of anesthesia following a surgical operation.
Cardiac bed: It is meant forcardiac patients (Fig. 7.2)
Blanket bed: It is prepared forpatient with renal diseases orrheumatism
Fig. 7.2: Cardiac bed
Amputation bed: Amputation bed is prepared for a patient with amputationof the leg to take off the weight of the bed clothes off site of theoperation.
Fracture bed: Fracture Bed is prepared for patient with fracture of thetrunk and extremities. A hard firm board is used to give support(Fig. 7.3).
Fig. 7.3: Fracture bed
Care forDifferentlyAbledPersons
Practical Manual
136
7.2.3 Technique of Bed Making
Place clean linens near the bed
Strip the bed gently to avoid spreading pathogens into the air. Foldblanket(s) and place nearby. Place linens to be washed in a plasticbag or hamper.
Open the sheet gently. Do not shake
Put the fitted sheet or flat sheet at the head of the bed workingtowards the bottom. Only work on one side at a time to save timeand energy.
Square off the corners and tuck the sheet under mattress.
Place the top sheet over the clean bottom sheet wrong side up withthe top edge of the hem even with top edge of the mattress.
Place any blanket(s) on the bed with top edge of blanket(s) about12 inches from the top of mattress.
Tuck both the top sheet and blanket(s) under the mattress.
Repeat the procedure on other side of the bed.
Place blanket with top at bed head and extend to foot
Remove surface wrinkles
Fold excess top sheet over top of blanket and cover with spread ifdesired.
Put clean pillow cases on pillows. Arrange side by side on top offolded top sheet.
Take soiled linen to laundry or bathroom.
Always wash hands before and after bed making
7.3 COMMON POSITIONS
Patients are provided certain positions for their comfort or for treatment.The purposes of positions are as follows:
To provide comfort and safety.
To prevent pressure sores/bed sores
To promote drainage
To ease breathing
To prevent muscles stretch and stain.
Let us learn about the common positions which can be given to the patientat home keeping in mind the condition and comfort of the patient
7.3.1 Supine/Dorsal Position
In this position the patient is made to lie on his/her back with their armsand legs straight on the sides on a flat bed. The patient is supported withpillows/cotton rings/air cushions etc. to make them comfortable and stay incorrect position (Fig.7.4).

137
Fig. 7.4: Supine/Dorsal Position
7.3.2 Semi Supine/Semi Dorsal Position
In this position patient is made to lie on his back with two or morepillows under the head and shoulder. This position is comfortable forpatients who are recovering or bed ridden or patients with minorrespiratory illness. Other comfort devices can be used as in supinepositions (Fig. 7.5).
Fig. 7.5: Semi Supine/Semi Dorsal Position
7.3.3 Fowler’s (Semi-sitting) Position
In this position the patient is in semi-sitting position with the support ofback rest and pillows. The patient’s knees are slightly elevated with thehelp of small pillows or rolled towel under the knees to prevent pressureon the back of the legs. Additional comfort devices such as air cushion,elbow rings, pillows under the arm, foot rest etc. can be used to providecomfort. This position is used when the patient wants to eat, read orwatch television (Fowler Position) (Fig. 7.6).
Fig. 7.6: Fowler’s (Semi-Sitting) Position
Care forDifferentlyAbledPersons

Practical Manual
138
7.3.4 Cardiac (Sitting) Position
In this position the patient is in sitting position. A small over bed table witha small pillow is placed in front of the patient to bent over. This positionhelps in easy breathing.
Fig. 7.7: Cardiac (Sitting) Position
7.3.5 Side Lying (Lateral) Position
In this position the patient is made to lie on (right or left) with both theknees slightly bent towards the abdomen but the upper knee is bentmore than the lower knee. A pillow is kept between the knees toprevent rubbing the legs and to release pressure on lower leg from theupper leg. Pillows can be placed underthe head, back and on the sidesfor providing support (Fig. 7.8).
Fig. 7.8: Side lying (Lateral) Position
7.3.6 Prone (lying on abdomen) Position
In this position the patient is made to lie on his/her abdomen on a flat bed.Place one pillow under the waist and one under the ankle to release theweight of the toes (Fig. 7.9).
Fig. 7.9: Prone (lying on abdomen) Position

139
7.4 PROCEDURES FOR POSITIONING THEPATIENT
After learning about common positions, let us learn about how can you helpa patient in giving these positions keeping in mind the articles required tosupirt the patient in correct position.
A) Articles required: Pillows, Cushions, Back rest, Food board, Air rings,Elbow rings
B) Start the procedure with following steps: Collect the requiredarticles, Wash hands with soap and water, Tell the patient what youare going to do and maintain privacy.
Position Methods
Supine/Dorsal Position If it is a hospital bed, lower thehead end of the bed so that it isflat.
Let the patient lie flat on his back.
Support head and shoulder by pillowor rolled towel.
Keep the upper arm straight with thebody and support fore arm with asmall pillow or rolled towel.
Keep an air cushion under thesacrum and small padded ring toprevent pressure over the bony area.Use a foot board to maintain feet inproper position.
Semi Supine/Semi Help the patient lie on his back withDorsal Position two or more pillows arranged in arm
chair fashion.
Support head and shoulder withpillows.
Keep an air cushion under thesacrum and small padded rings toprevent pressure over the bony areas.
Use a foot board to maintain feet inproper position.
Fowlers (Semi-Sitting) Help the patient to sit in the bed inPosition semi-sitting position.
Support the head, shoulder and backwith back rest and pillows.
Support the fore arm with pillows orrolled towel.
Care forDifferentlyAbledPersons

Practical Manual
140
Raise the knees and support it withsmall pillow or folded towel.
Support the sacrum with air cushions,and heels with small padded rings.
Cardiac (Sitting) Position Help the patient in sitting position.
Keep a small table with pillow acrossthe upper legs.
Let the patient rest his/her head andarms on the table as h/she feelscomfortable.
Side lying (Lateral) Position Help the patient roll smoothly eitheron right or left side as the casemay be.
Bend both of the patient’s knees andplace a pillow or folded towel fromthe knees to the feet to preventpressure. Upper leg is bent morethan the lower.
Position the lower arm in such a waythat the patient is not lying on thearm. Position the upper arm over thepillow.
Make sure the pillow under the headis smooth and the ear is flat.
Prone (Lying on abdomen) Help the patient roll smoothly fromPosition supine
Position to his/her abdomen at thecentre of the bed.
Place a small pillow under patient’shead and turn on one side.
Make sure the pillow under head issmooth and ear flat.
Position the arms at shoulder levelwith the elbows bent and palms flaton the bed.
Place a pillow under the lower legfrom the knees to the feet.

141
7.5 AMBULATION OF PATIENT
Ambulation of patient is important to make them independent and to use
their capabilities to the maximum. Family plays very important role duringthis phase. Itis important to motivate, encourage and help him/herself.Encourage use of aidsto daily living will help in prevention of handicaps anduse of full potential and capabilities of patient to live independently.
We should keep some points in mind while patient is sitting in a chair for
longer time, to prevent from complications and chronic sitting. As a homebased care provider you would take care of the patient while on a chair,bed, or making patient sleep in various positions, keep safety of the patientin mind.
IN A CHAIR
Shift weight from side to side at least once an hour-every 15 minutes.
Pads and cushions can be given to reduce pressure on the skin.
Lightly cushion the back and buttocks.
Lightly pad the footrest on a wheelchair.
IN BED - While patient is in bed for longer time, you needs to, keepfollowing points in mind
Change positions every 2 hours.
Use lightweight sheets and blankets to reduce pressure from above.
Provide special mattresses that spread pressure over a larger area ofthe body.
When lying on back, put pillows under the lower halves and ankles.Keep the elbows slightly bent. Generally the patient will adapt theposition that gives comfort.
When lying on side, put pillows behind the back, between the legs, andbetween the ankles. Keep elbows and knees slightly bent.
Safe Sleeping (Fig. 7.10)
Provide firm mattress.
Position that keeps the back comfortable.
Fill gaps between body and the mattress with pillows.
Fig. 7.10: Safe sleeping
Support upper body and top leg with pillows.
Care forDifferentlyAbledPersons
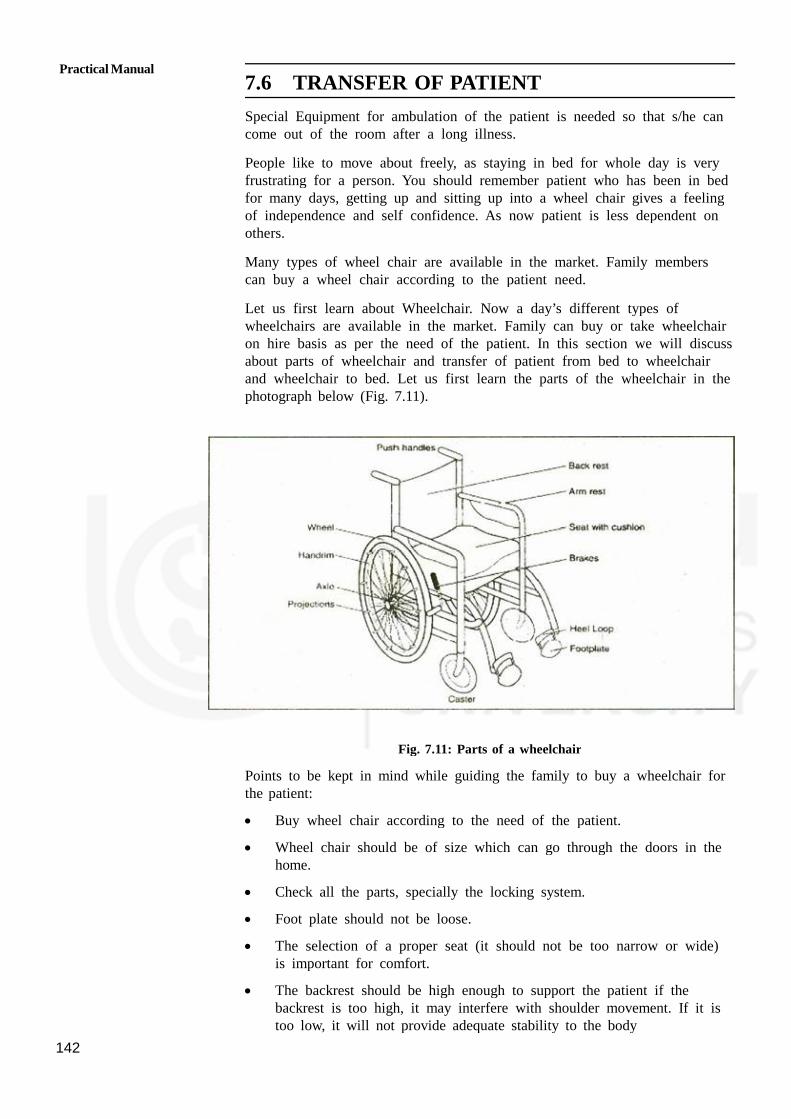
Practical Manual
142
7.6 TRANSFER OF PATIENT
Special Equipment for ambulation of the patient is needed so that s/he cancome out of the room after a long illness.
People like to move about freely, as staying in bed for whole day is veryfrustrating for a person. You should remember patient who has been in bedfor many days, getting up and sitting up into a wheel chair gives a feelingof independence and self confidence. As now patient is less dependent onothers.
Many types of wheel chair are available in the market. Family memberscan buy a wheel chair according to the patient need.
Let us first learn about Wheelchair. Now a day’s different types ofwheelchairs are available in the market. Family can buy or take wheelchairon hire basis as per the need of the patient. In this section we will discussabout parts of wheelchair and transfer of patient from bed to wheelchairand wheelchair to bed. Let us first learn the parts of the wheelchair in thephotograph below (Fig. 7.11).
Fig. 7.11: Parts of a wheelchair
Points to be kept in mind while guiding the family to buy a wheelchair forthe patient:
Buy wheel chair according to the need of the patient.
Wheel chair should be of size which can go through the doors in thehome.
Check all the parts, specially the locking system.
Foot plate should not be loose.
The selection of a proper seat (it should not be too narrow or wide)is important for comfort.
The backrest should be high enough to support the patient if thebackrest is too high, it may interfere with shoulder movement. If it istoo low, it will not provide adequate stability to the body

143
You have to help the family to adjust with the patient who is onwheelchair and may need some adjustments arrangement of things in home.
If possible patient living place to be:
— On ground floor
— Near toilet
Ramp can be built so that it is easy for a patient to go out andcome in.
If a housewife is on a wheel chair the cooking place can be shiftedor adjusted accordingly.
Floor should not be slippery or dirty.
Rename the carpets.
Adjust the furniture to provide place for a patient to move in a
wheel chair and enjoy the company of family members.
7.6.1 Transfer of Patient from Bed to Wheelchair
A wheelchair transfer means getting in or out of wheel chair. It isimportant to teach patient to transfer themselves or with the help of familymember or health worker. It is important that patient change positionswhen using a wheel chair. This is necessary because joints and muscles donot become stiff. Changing positions can decrease the risk of gettingpressure sores.
Patient safety is often the main concern when moving patients from bed.But remember not to lift at the expense of your own back. This transferoften requires patient’s help, so explain the procedure to the patient notconfirms it by asking question. If they can’t help much, you may needtwo people to move the person from bed to wheel chair and back to thebed.
Steps of transferring patient from bed to wheel chair
Bring the wheel chair near the bed and lock it.
Turn the arm rest and foot plate.
Make the patient sit on bed by putting your arm under the neck withhand supporting the shoulder and other hand under the knees.
Bring the patient on the edge of the bed.
Support the patient by putting your arms around the patients chestand close hands behind the back.
Support patient’s legs between your legs and lift the patient. Makesure patients back is towards wheel chair seat. If needed familymember can provide support.
Bend your knees and lower the patient into the wheel chair sea
Take Care of Your Back whenever shifting the patient by keepingfollowing points in mind.
Lifting a patient can be hard on your back or put pressure on you back.
Care forDifferentlyAbledPersons

Practical Manual
144
To reduce the risk of a back injury, remember to do the following:
Recall all steps of stiffing before you shift a patient.
Explain the steps to the patient.
Keep your knees bent and your back straight.
Get help when you need it.
Practice under supervision.
7.6.2 Transfer of Patient from Wheelchair to Bed
After patient has moved out. On wheel chair may feel tired or want tosleep and wants to come on bed. Now it is important to learn transferringa patient to bed. Steps of transferring patient from wheel chair to bed:-
Bring the wheel chair near the bed and lock it.
Stand near/close to the patient and be stable.
Grip and support the patient with your arms. And support the legswith your knees.
Bring the patient to the edge of the wheel chair.
Lift the patient back towards the bed.
Lower the patient gently to the bed.
In this section you learned regarding parts of wheelchair, transferring thepatient from bed to wheelchair, wheelchair to bed. It is important to teachfamily members also how to transfer the patient. And encourage thepatient use full strength and energy so that gradually patient is independentand can use the wheelchair to move around. Maintenance of wheelchair isessential to keep it in a good working condition. Check the lock, brakes,axle, and wheels regularly for the safety of a patient.
7.7 WALKING WITH A WALKER OR CRUTCH
A walker is often used for walking after or any leg problem e.g. injuries. Awalkergives more stability than crutches. Walker should be fitted carefully asit helps the patient to walk smoothly and patient is safe. All the legs of thewalker should be on level.
Now a days many types of walkers are available in the market. Family canselect a walker according to need of the patient. It is important to keepsome points in mind
If walker does not have wheels, it should have nonskid rubber tips toprevent slipping. Change tips that look worn.
If using a folding walker, be sure patient know how to open its lock.Check that lock is open before use.
Keep all legs of the walker at the same length.
Patient should be straight. Shouldn’t hunch over the walker.

145
Floor should not be slippery or dirty.
Adjust the furniture to provide place for the patient to walk.
Remove things like electric wires, rugs/carpet etc. as they may causefall.
Keep patients day to day things handy.
7.7.1 Walking with Walker
To use walker, patient need to learn new ways to get around in the homeand other places patient needs to go. If patient have to use stairs, try tohave someone below to guard to stop falling if patient lose balance.
Using a Walker on Stairs (Fig. 7.12)
Fig. 7.12
Using Walker to Go Upstairs
Turn the walker sideways so the crossbar is next to the patient.
Put the front 2 legs of the walker on the step above.
Hold the walker with one hand and the handrail with the other.
Step up with the good leg.
Next, bring the injured leg up.
Then move the walker up to the next step
Using Walker to Go Downstairs
Turn the walker sideways so the crossbar is next to the patient.
Put the back 2 legs of the walker on the step beside.
Hold the walker with one hand and the handrail with the other.
Step down with the bad (injured) leg.
Slowly bring good leg down.
Then move the walker down to the next step.
7.7.2 Crutch Walking
Crutches are used by patients for short duration or for long time ordependent on crutches permanently. It is important for you make the
Care forDifferentlyAbledPersons

Practical Manual
146
patient and family understands how to use crutches while walking, sitdown and get up from a chair, to walk up and down the stairs. Thereare many types of crutches and these are fitted according to the need ofthe patient. It is important to have safe environmentfor the patient to walkwith crutches because fall can cause injury and patient loose confidence inself.
Points to keep in mind:
Let us first see the photograph of the crutch it has crutch pad, hand grip,hand grip adjustment and crutch tip. Let us now go through the points tobe kept in mind.
Make sure all the pads and grips are firmly in place.
Make sure all the success are tightened.
Check weekly for tightening of screw as, these will loosen over time.
Clean the tips of the crutches from any stones e.g. dirt.
If the tips are worn out, replace them.
Remove all loose rugs from the room to prevent falls.
Association of part and ankle physicians website.
Now let us learn about technique of getting up from a chair, sit down ina chair, going up the stairs and going down the stairs with a crutch.
To get up from a chair:
Hold both crutches on the weak side.
Slide patient body to the edge of the chair.
Stand up. Check the balance of the patient.
Put one crutch under each arm. Once stable start walking.
To sit down in a chair:
More patient back. Stop once patient feel the chair against the backof the legs.
Both crutches are placed in the hand of the weak side.
Reach back for the chair with the other hand.
Slowly and carefully, lower the patient to the chair.
Important Rides for Safety and Comfort while walking with a crutch
Don’t look down. Look straight when walk with a crutch
Don’t use crutches if feel drowsy.
Don’t walk on slippery surfaces.
Don’t put any weight on. If used foot if doctor has so advised.
Do make sure crutches have rubber tips.
Do wear well-fitting, heel shoes.

147
Do position the crutch handgrips correctly.
Do keep the crutch pads 11/2" to 2" below your armpits.
Use a portable telephone so patient can keep it within easy reach.
Bedroom if possible on ground floor.
Make sure rooms are well lighted.
Keep items use often in easy reach.
Remove rugs, wires etc. to avoid falls.
Arrange furniture to make it safer and easier to get around.
Sit down to dress. This helps prevent falls.
7.8 USE OF GAIT BELT
A gait belt, sometimes called transfer belt, provides the health assistantwith a secure point to hold while assisting persons in walking and transferactivities.
Ensure the person can safely wear a gait belt. You may not be able touse a belt for:
Persons with recent surgery or incisions (within the last 6-8 weeks) inthe torso area.
Individuals with ostomy (e.g. a colostomy), G-tube, hernias, severeCOPD, post- surgical incisions, monitoring equipment, tubes or linesthat could become compromised by the pressure.
A pregnant person. Applying a gait belt to a pregnant woman couldcause injury to the unborn child.
a) Description of the procedure
1. Tell the person what you are going to do.
2. Position the person to make application of the belt easier. The personneeds to move forward and sit on the edge of the chair.
3. Place the gait belt around the person’s waist, above the pelvic boneand below the rib cage. Always place the gait belt on top ofclothing, and for females make sure breast tissue is above the belt.
4. Pass the metal tip of the belt end through the teeth of the bucklefirst and then through the other side of the buckle.
5. Adjust it so it is snug, but not uncomfortable for the person. Youshould be able to slip your open flat hand between the belt and theperson.
6. Tuck the excess end of the belt through the waist band.
7. The strap should lay flat across the buckle.
Care forDifferentlyAbledPersons
Practical Manual
148
8. ALWAYS verify proper closure before use.
9. ALWAYS grasp the transfer belt from underneath.
10. Remove the gait belt when not in use, or loosen it.
Practical Tips:
It is important that you ask permission before applying a gait beltbecause you are about to invade the person’s personal space.Maintain person’s rights by informing him/her of all procedures priorto actions.
Gait belts come in various lengths; use an appropriate size for theperson.
Belts with padded handles are easier to grip and increase securityand control.
Use a rocking and pulling motion rather than lifting when using a belt.
One should walk slightly behind the person with a hand under thebottom of the belt.
On some gait belts, the seam and label will be on the outside, onother belts it is on the inside. Don’t assume that the manufacturer’slabel is on the inside – be sure to start putting the end of the beltthrough the teeth first. Don’t forget!
Apply gait belt over clothing, NEVER apply to bare skin.
Check female persons to assure no breast tissue is caught in belt.
Use good body mechanics when transferring a person with a gait
belt.
b) Key points in Basic Life Support
Call for help/medical assistance as soon as u recognize signs ofcardiac arrest.
Maintain the ratio of 30:2 in CPR.
Change the compressor after 5 cycles of CPR.
Use defibrillator as soon as it is available
After 5 cycles of CPR, analyze the rhythm with AED and delivershock as advisedProvide Quality CPR by:
a) Compress chest @ 100-120/min
b) Compress the chest at leat 5 cm.
c) Allow the chest to recoil after each compression.
d) Minimize the interruption in compressions.
e) Look for chest rise during delivering breaths.
149
Do not press both carotid pulse at one time to check for pulse.
If ventilation is not possible for any reason outside the hospital setting,then go for chest compressions only.
Don’t stop the CPR till the patient has pulse and respiration or tillpatient is shifted for definite care management.
7.9 LET US SUM UP
In this unit we have discussed about the types of bed, purpose of bedmaking and the technique of bed making. This is important to ensurecomfort for the patient. The common positions, purposes and steps ofprocedures to give various positions to the patient have also beenelaborated in the unit. We have also discussed about use of devices whichare helpful for the comfort of the patient and things require are availableat home most of the time. All the above positions are very important forproviding ease to the patient.
We have also learned about rehabilitation of a patient. Parts of thewheelchair points to keep in mind while buying it. Transfer of patient frombed to wheelchair and of wheelchair to bed. Walking with walker, goingupstairs, going downstairs, opening the doors, push the crutch waling,getting up and sitting down with the help of a crutch.
In the last we have discussed about proper use of gait belt which isimportant for transferring the patient and ensuring gait support.
7.10 ACTIVITIES
Activity 1 Demonstrate the technique of bed making
Activity 2 Demonstrate the positioning of a patient a. Who hasamputation recently and has risk of developing bed sores
Activity 3 Visit a patient at home and plan advices to be given topatient/family for use of wheelchair as per guidelines.
Activity 4 Practice basic life support (BLS).
Activity 5 Help the patient to walk with walker when climbing stairsand coming down as per guidelines.
Activity 6 Help the patient in walking with crutches
Activity 7 Help the patient to use gait belt,
Care forDifferentlyAbledPersons

Practical Manual
150
UNIT 8 OBSERVATIONAL VISITS
Structure
8.0 Introduction
8.1 Objectives
8.2 Check List
8.2.1 Use of Check List in Health Care
8.2.2 Format of Check List
8.3 Hospital
8.3.1 Different Departments in Hospital
8.3.2 Check List of Hospital
8.4 Kitchen
8.4.1 Basic Structure and Function of Kitchen
8.4.2 Check List of Kitchens
8.5 Laboratories
8.5.1 Types of Laboratories
8.5.2 Check list of Laboratories
8.6 Occupational Therapy Unit
8.6.1 Basic Structure and Function of Occupational Therapy Unit
8.7 Home Health Care Devices
8.7.1 Categories of Medical Devices
8.7.2 What is Home Health Care Equipment?
8.7.3 Common Home Health Care Equipment
8.8 Special school
8.8.1 Checklist of Special School
8.9 Let Us Sum Up
8.10 Key Words
8.11 Activity
8.0 INTRODUCTION
You have read enough, now is the time to look. As a home health careassistant, you should have fair knowledge about the hospitals, homes andcommunity as your work encompasses all. You may be working in thehome of the patients but will do the work of the hospital staff inside thehome of the patients. You may be dealing with various equipment likemedical devices so you should have a basic idea about the availability ofthese devices. In this unit you will learn about the things you should keepin mind while visiting a hospital, laboratory, kitchen, occupational therapyunit, special school and community. You will have opportunity to judgethose facilities based upon check-lists.

151
8.1 OBJECTIVES
After the completion of this unit, you will be able to:
Describe the principles of preparing check-list;
List the various things to look in the hospital and other places;
Judge the adequacy of hospital etc. by check-list;
Suggest the gaps in the relevant places; and
Provide guidance to make kitchen etc. more adequate, safe andcomplete.
8.2 CHECK LIST
The simplest definition of check – list is ‘a list of things to be checked ordone’. It is a helpful tool for anyone who is on visit to a place formonitoring. One cannot memorize everything and thus has to depend uponcheck-list to check things are in proper order. It helps to ensureconsistency and completeness in carrying out a task. It is an objectivetool. You see what it is in the check list and mark it. There is nosubjective bias.
8.2.1 Use of Check List in Health Care
Checklists have been used in healthcare practice to ensure that clinicalpractice guidelines are followed. An example is the ‘Surgical SafetyChecklist’ developed for the World Health Organization and found to havea large effect on improving patient safety. There are many examples ofcheck-list in health care field. It helps in standardizing the care.
8.2.2 Format of Check List
Checklists are often presented as lists with small checkboxes on the right-hand side of the page. A small tick or checkmark is drawn in the boxafter the item has been completed. Other formats are also sometimesused. Aviation checklists generally consist of a system and an actiondivided by a dashed line, and lacks a checkbox as they are often readaloud and are usually intended to be reused.
8.3 HOSPITAL
A hospital is a busy place. The hospital may be small or big. It maycater to a certain category of patient or it may be a multi-specialityhospital admitting all sorts of patients. Some hospitals are called nursinghome also and some clinic.
8.3.1 Different Departments in Hospital
There are many hospital departments, staffed by a wide variety ofhealthcare professionals, with some crossover between departments. Forexample, physiotherapists often work in different departments and doctorsoften do the same, working on a general medical ward as well as anintensive or coronary care unit.
Observational Visits
Practical Manual
152
Below is a list of the main departments you’ll come across when you visita hospital. Some of these units work very closely together and may evenbe combined into one larger department.
Each department tends to be overseen by consultants in that specialitywith a team of junior medical staff under them who are also interested inthat speciality.
Emergency
In this department (sometimes called Casualty) first aid care is givento someone who approaches it. It’s also here all accident cases arebrought. These departments operate 24 hours a day, every day andare staffed and equipped to deal with all emergencies. Patients areassessed and seen in order of need.
Anaesthetics
Doctors in this department give anaesthetic drugs to patients foroperations. They are also responsible for the provision of acute andchronic pain services. They provide critical care services too.
Cardiology
This department provides medical care to patients who have problemswith their heart or circulation. It treats people on an inpatient andoutpatient basis. Typical procedures performed include:electrocardiogram (ECG) and exercise tests to measure heart function,echocardiograms (ultrasound scan of the heart), scans of the carotidartery in neck to determine stroke risk, 24-hour blood pressure tests,insertion of pacemakers, cardiac catheterisation (coronary angiography)to see if there are any blocks in arteries.
Critical care
Sometimes called intensive care, this unit is for the most seriously illpatients. It has a relatively small number of beds and is manned byspecialist doctors and nurses, as well as by consultant anaesthetists,physiotherapists and dieticians. Patients requiring intensive care areoften transferred from other hospitals or from other departments in thesame hospital.
Diagnostic imaging
Also known as X-ray, this department provides a full range ofdiagnostic imaging services including: general radiography (X-rayscans), scans for emergency patients, mammography (breast scans),ultrasound scans, angiography (X-ray of blood vessels), interventionalradiology (minimally invasive procedures to treat narrowed arteries),CT scanning (scans that show cross sections of the body), MRIscanning (3D scans using magnetic and radio waves).
Ear nose and throat (ENT)
The ENT department provides care for patients with a variety ofproblems, including: general ear, nose and throat diseases, neck lumps,
153
cancers of the head and neck area, tear duct problems, balance andhearing disorders, snoring and sleep apnoea, ENT allergy problems,salivary gland diseases and voice disorders.
Geriatrics department
Led by consultant physicians specialising in geriatric medicine, thisdepartment looks after a wide range of problems associated with theelderly. This includes: stroke medicine, gastroenterology, diabetes,locomotor (movement) problems, continence problems, syncope(fainting), bone disease. It provides a range of services such as homevisits, day hospitals and outpatient clinics. The department often hasclose links with other community services for the elderly.
Gastroenterology
In this department diseases of stomach and gastro-intestinal tract istreated. Nowadays most of the procedures are performed byendoscopy. Endoscopy involves a small thin tube with a camera on
the end. This is guided down the throat to investigate problems in theoesophagus and digestive system. Small surgical instruments can beguided down in the same way, meaning it can be used for diagnosisand treatment.
General surgery
The general surgery ward covers a wide range of surgery andincludes: day surgery, thyroid surgery, kidney transplants, colon surgery,laparoscopic cholecystectomy (gallbladder removal), and endoscopyand hernia surgery.
Obstetrics and Gynaecology
These departments investigate and treat problems of the female urinarytract and reproductive organs, such as endometritis, infertility andincontinence. They also provide a range of care for cervical smearscreening and post-menopausal bleeding checks. Maternity wardsprovide antenatal care, care during childbirth and postnatal support.Antenatal clinics provide monitoring for both routine and complicatedpregnancies.
Haematology
Haematology services work closely with the hospital laboratory. Thesedoctors treat blood diseases and malignancies linked to the blood.
Microbiology
The microbiology department looks at all aspects of microbiology,such as bacterial and viral infections. They have become increasingly
Observational Visits

Practical Manual
154
high profile following the rise of hospital-acquired infections. A headmicrobiology consultant and team of microbiologists’ test patientsamples sent to them by medical staff from the hospital.
Neonatal unit
Neonatal units have several cots that are used for intensive, high-dependency and special care for new-born babies. It always maintainsclose links with the hospital maternity department, in the interest ofbabies and their families. Neonatal units work on the principle that,whenever possible, mother and baby should be together.
Nephrology
This department monitors and assesses patients with kidney (renal)problems. Nephrologists (kidney specialists) will liaise with thetransplant team in cases of kidney transplants. They also supervise thedialysis day unit for people who are waiting for a kidney transplantor who are unable to have a transplant for any reason.
Neurology
This unit deals with disorders of the nervous system, including thebrain and spinal cord. It’s run by doctors who specialise in this area(neurologists) and their staff.
Nutrition and dietetics
Trained dieticians and nutritionists provide specialist advice on diet forhospital wards and outpatient clinics, forming part of a multidisciplinaryteam. The department works across a wide range of specialities suchas:diabetes, cancer, kidney problems, paediatrics, elderly care, surgeryand critical care and gastroenterology. They also provide groupeducation to patients with diabetes, heart disease and osteoarthritis,and work closely with weight management groups.
Occupational therapy
This profession helps people who are physically or mentally impaired,including temporary disability after medical treatment. It practices inthe fields of both healthcare and social care. The aim of occupationaltherapy is to restore physical and mental functioning to help peopleparticipate in life to the fullest. Occupational therapy assessments oftenguide hospital discharge planning, with the majority of patients given ahome assessment to understand their support needs. Staffs alsoarrange provision of essential equipment and adaptations that areessential for discharge from hospital.
Oncology
This department provides radiotherapy and a full range ofchemotherapy treatments for cancerous tumours and blood disorders.Staffed by specialist doctors and nurses trained in oncology (cancercare), it has close links with surgical and medical teams in otherdepartments.
155
Ophthalmology
Eye departments provide a range of ophthalmic services for adultsand children, including: general eye clinic appointments, lasertreatments, optometry (sight testing), orthotics (non-surgical treatments,e.g. for squints), prosthetic eye services, ophthalmic imaging (eyescans). It may be attached to an eye bank where eyes fromdeceased are stored for future transplant.
Orthopaedics
Orthopaedic departments treat problems that affect musculoskeletalsystem (muscles, joints, bones, ligaments, tendons and nerves).Thedoctors and nurses who run this department deal with everything fromsetting bone fractures to carrying out surgery to correct problems suchas torn ligaments and hip replacements. Orthopaedic trauma includesfractures and dislocations as well as musculoskeletal injuries to softtissues.
Pain management clinics
Usually run by consultant anaesthetists, these clinics aim to help treatpatients with severe long-term pain that appears resistant to normaltreatments. Depending on the hospital, a wide range of options areavailable, such as acupuncture, nerve blocks and drug treatment.
Pharmacy
The hospital pharmacy is run by pharmacists, pharmacy techniciansand attached staff. It is responsible for drug-based services in thehospital, including: purchasing, supply and distribution of medicationand pharmaceuticals, inpatient and outpatient dispensing, clinical andward pharmacy and the use of drugs.
Physiotherapy
Physiotherapists promote body healing, for example after surgery,through therapies such as exercise and manipulation. This means theyassess, treat and advise patients with a wide range of medicalconditions. They also provide health education to patients and staff onhow to do things more easily. Their services are provided to patientson the wards, in the physiotherapy department itself and inrehabilitation units. Physiotherapists often work closely with orthopaedicteams.
Radiotherapy
Run by a combination of consultant doctors and specially trainedradiotherapists, this department provides radiotherapy treatment forconditions such as malignant tumours and cancer.
Rheumatology
Specialist doctors called rheumatologists run the unit and are expertsin the field of musculoskeletal disorders (bones, joints, ligaments,tendons, muscles and nerves).Their role is to diagnose conditions and
Observational Visits

Practical Manual
156
recommend appropriate treatment, if necessary, from the orthopaedicdepartment.
Sexual health (genitourinary medicine)
This department provides confidential service offering: advice, testingand treatment for all sexually transmitted infections (STIs), familyplanning care (including emergency contraception and free condoms),pregnancy testing and advice. It also provides care and support forother sexual and genital problems. This department may not bepresent in all big hospitals.
Urology
The urology department is run by consultant urology surgeons andtheir surgical teams. It investigates all areas linked to kidney andbladder-based problems. The department performs: flexible cystoscopybladder checks, urodynamic studies (e.g. for incontinence), prostateassessments and biopsies and shockwave lithotripsy to break upkidney stones.
8.3.2 Check List of Hospital
A. Internal Medicine
S. No. Department Available/Not available
1 General medicine
2 Paediatrics
3 Cardiology
4 Pulmonology
5 Neurology
6 Endocrinology
7 Haematology
8 Gastroenterology
9 Dermatology
10 Burns unit
11 Physiotherapy
12 Psychiatry/psychology
B. Surgery
13 General surgery
14 Obstetrics and gynaecology
15 Orthopaedics and traumatology
16 Urology
17 Otolaryngology
18 Ophthalmology
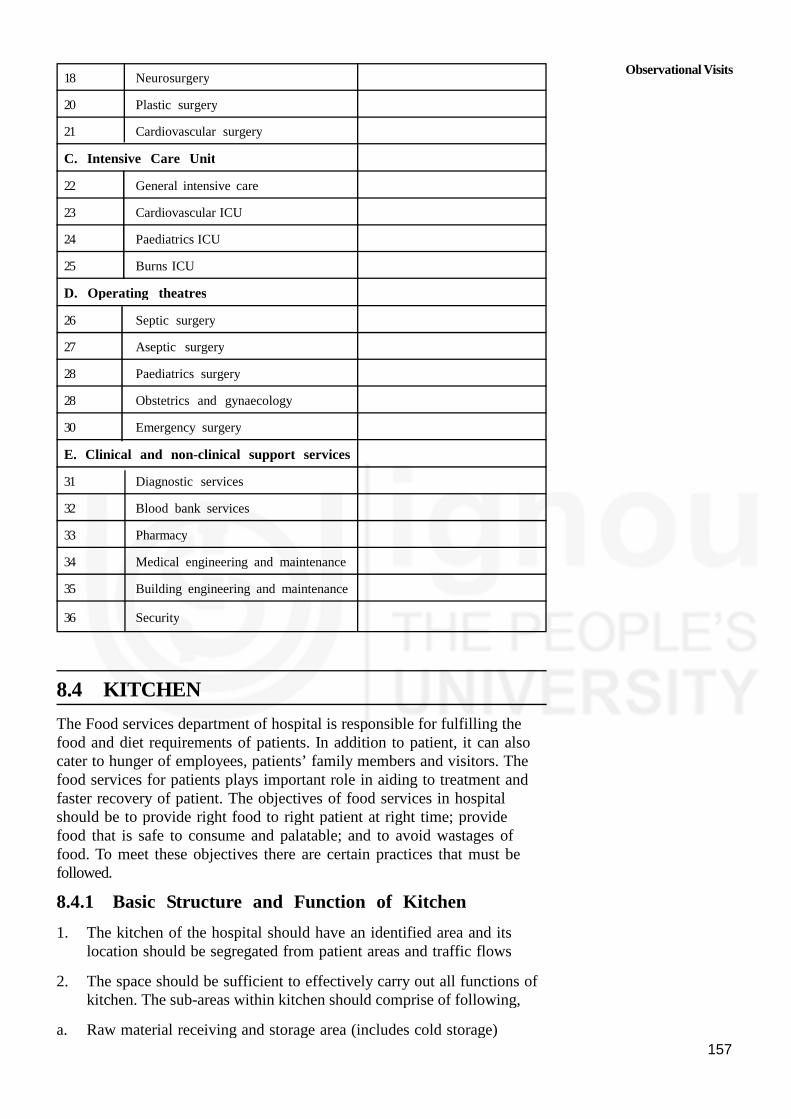
157
18 Neurosurgery
20 Plastic surgery
21 Cardiovascular surgery
C. Intensive Care Unit
22 General intensive care
23 Cardiovascular ICU
24 Paediatrics ICU
25 Burns ICU
D. Operating theatres
26 Septic surgery
27 Aseptic surgery
28 Paediatrics surgery
28 Obstetrics and gynaecology
30 Emergency surgery
E. Clinical and non-clinical support services
31 Diagnostic services
32 Blood bank services
33 Pharmacy
34 Medical engineering and maintenance
35 Building engineering and maintenance
36 Security
8.4 KITCHEN
The Food services department of hospital is responsible for fulfilling thefood and diet requirements of patients. In addition to patient, it can alsocater to hunger of employees, patients’ family members and visitors. Thefood services for patients plays important role in aiding to treatment andfaster recovery of patient. The objectives of food services in hospitalshould be to provide right food to right patient at right time; providefood that is safe to consume and palatable; and to avoid wastages offood. To meet these objectives there are certain practices that must befollowed.
8.4.1 Basic Structure and Function of Kitchen
1. The kitchen of the hospital should have an identified area and itslocation should be segregated from patient areas and traffic flows
2. The space should be sufficient to effectively carry out all functions ofkitchen. The sub-areas within kitchen should comprise of following,
a. Raw material receiving and storage area (includes cold storage)
Observational Visits

Practical Manual
158
b. Preparation area – for preparing raw materials (peeling, cutting, slicingetc.) before cooking
c. Cooking area – where the actual cooking takes place
d. Special diet area – here special diets such as soft diet, diabetic dietetc. are prepared
e. Servicing area – here the plates are prepared with food and laid ontables
f. Washing area – for pots, cutleries and trolleys
g. Garbage collection area
h. Administrative areas
3. The kitchen should have access to fire fighting measures, either fireextinguishers or fire hose points
4. An emergency exit should be available for immediate evacuation
5. The walls and ceilings should not have problem of seepages or fungus
6. Engineering measures like electricity supply, water supply (including hotwater supply) and good drainage must be ensured
7. Entry in inside kitchen should be restricted
8. Things like nets on windows, fly catchers, no holes etc. should beinstalled to prevent entry of insects and rodents inside kitchen
8.4.2 Check List of Kitchens
A. Preparation/cooking area
S.No. Standard criteria Yes/no
1 All areas are clean and tidy, adequate lighting, and not close
to garbage receptacle or waste water treatment system
2 Wall and ceiling are durable, smooth, non-absorbent,clean and washable surfaces of a light colour
3 Cooking table and wall surrounded stove is made fromdurable, non-absorbent and easily cleanable materials.(i.e., stainless steel or tile).
4 The area is free from flies by using wire screen or air-condition.
5 Adequate ventilation is there above cooking area with
exhausted hood, ducts, fan and filters, which shouldalways be clean
B. Food, drinking water, and beverages
6 Canned food and beverage have a registered FSSAI number
7 Fresh food is washed and cleaned before cooking and storing.
8 Canned food and beverage are in good conditions (no
swelling, rust or leak),stored at least 30 cm. above the floor.
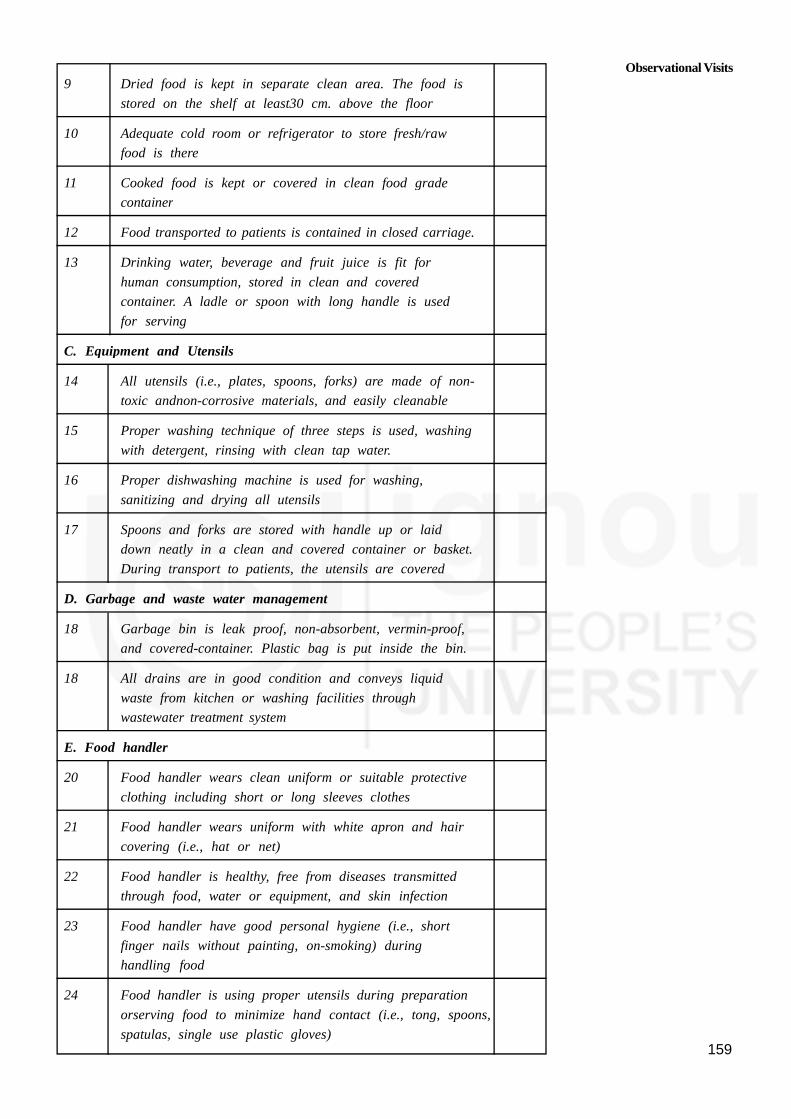
159
9 Dried food is kept in separate clean area. The food is
stored on the shelf at least30 cm. above the floor
10 Adequate cold room or refrigerator to store fresh/raw
food is there
11 Cooked food is kept or covered in clean food grade
container
12 Food transported to patients is contained in closed carriage.
13 Drinking water, beverage and fruit juice is fit for
human consumption, stored in clean and covered
container. A ladle or spoon with long handle is used
for serving
C. Equipment and Utensils
14 All utensils (i.e., plates, spoons, forks) are made of non-
toxic andnon-corrosive materials, and easily cleanable
15 Proper washing technique of three steps is used, washing
with detergent, rinsing with clean tap water.
16 Proper dishwashing machine is used for washing,
sanitizing and drying all utensils
17 Spoons and forks are stored with handle up or laid
down neatly in a clean and covered container or basket.
During transport to patients, the utensils are covered
D. Garbage and waste water management
18 Garbage bin is leak proof, non-absorbent, vermin-proof,
and covered-container. Plastic bag is put inside the bin.
18 All drains are in good condition and conveys liquid
waste from kitchen or washing facilities through
wastewater treatment system
E. Food handler
20 Food handler wears clean uniform or suitable protective
clothing including short or long sleeves clothes
21 Food handler wears uniform with white apron and hair
covering (i.e., hat or net)
22 Food handler is healthy, free from diseases transmitted
through food, water or equipment, and skin infection
23 Food handler have good personal hygiene (i.e., short
finger nails without painting, on-smoking) during
handling food
24 Food handler is using proper utensils during preparation
orserving food to minimize hand contact (i.e., tong, spoons,
spatulas, single use plastic gloves)
Observational Visits

Practical Manual
160
8.5 LABORATORIES
Laboratory services are an essential and fundamental part of all healthsystems. Reliable and timely laboratory tests are at the centre of theefficient treatment of patients. Moreover, prevention and management ofinfectious and non-communicable diseases requires accurate laboratorydiagnostic information. Many therapeutic decisions rely heavily on data fromhealth. laboratories and, at the time of disease outbreaks or other publichealth events, laboratories are at the very heart of the public healthinvestigation and response mechanisms. Today’s world cannot affordunreliable laboratory results, wasting precious time, precious samples, andtoo often, precious lives.
Laboratories offer their services to many clients: patients, physicians, orpublic health programmes for evidence-based decisions. Many medicalhospital, public health, and academic
Laboratories — be they public or private — contribute through theirdiagnostic activities to health
Care and public health improvement.
8.5.1 Types of Laboratories
A clinical or medical laboratory is a laboratory for the biological,microbiological, immunological, chemical, immunohaematological,hematological, biophysical, cytological, pathological or other examination ofmaterials derived from the human body for the purpose of providinginformation for the diagnosis, prevention and treatment of disease in, orassessment of the health of, human beings, and which may provide aconsultant advisory service covering all aspects of laboratory investigationincluding the interpretation of results and advice on further appropriateinvestigation.
Laboratory services comprise a set of activities performed by a numberof laboratories whose results are used towards various purpose(s) suchas clinical care, or disease surveillance. It may be assumed that in mostcountries one can find laboratory services organized into variousadministrative or geographical entities. Each entity can have a specificfocus, for example: 1) group of hospital and clinical laboratoriescentralized under a single administration to ensure patient care; 2) publichealth laboratories comprising local, provincial and national laboratoriesfor disease surveillance and control; 3) animal health laboratories, 4)environmental health laboratories, including water safety laboratories; 5)food safety laboratories; 6) blood banking laboratories.

161
8.5.2 Check List of Laboratories
A. Organization and Management
S.No. Standard criteria Yes/no
A. Standard criteria
1 Laboratory have the organizational and managementstructure and its relationship to any other organizationwith which it is associated
2 A quality manual describing the quality managementsystem and the structure of the documentation usedincluding or making reference procedures includingtechnical procedures is there
3 Adequate training, specified responsibility, authority, andinterrelationships of all personnel is there
B. General Safety and Hygiene
4 Work areas are clean and free of spilled materials
5 Are there odors in the lab indicating an unhealthycondition
6 Exits properly marked
7 Staff wearing eye protection
8 Staff wearing proper PPE (gloves, coat/apron, faceshields, shoes)
8 Needles, syringes, sharps properly handled
10 Hazardous waste handled properly
11 Appropriate signs (Radiation, Biohazard, Hazardous Waste)
C. Laboratory equipment
12 Laboratory is furnished with all items of equipmentrequired for the provision of services
13 Equipment are capable of achieving the performancerequired and complies with specifications relevant to theexaminations concerned
14 Regular monitoring and demonstration of proper calibrationand function of instruments, reagents and analyticalsystem is done
15 Laboratory have list of manufacturer and manufacturer’contact person
16 Equipment are operated by authorized personnel only
17 Laboratory have a manual for use and maintenance of
equipment
Observational Visits

Practical Manual
162
8.6 OCCUPATIONAL THERAPY UNIT
The purpose of occupational therapy is to facilitate human functioning in anattempt to improve functional independence and quality life and allowpatient to be actively involved in their lives despite their disabilities.
The team provides solutions for patients suffering from a wide variety ofailments: neurological defects, rheumatic diseases, orthopedic injuries, motor,sensory and cognitive defects, and patients with internal diseases resultingin functional deterioration.
Occupational therapy intervention focuses on various areas function:activities of daily living (ADL), such as dressing, washing, eating. Moreadvanced daily activities, such as preparing meals, housecleaning, shopping,leisure and employment - facilitating employment and use of leisure time.
8.6.1 Basic Structure and Function of OccupationalTherapy Unit
Function enhancement is carried out by the Unit and includes variousfunctional components:
1. Motor skills - mobility, transitions, upper limb functioning andcoordination. Sensory abilities - superficial sensory abilities, deepsensory abilities, temperature and pain sensitivity.
2. Cognitive abilities - memory, attention, orientation, perception, judgmentand cognitive processes.
Intervention may be performed on an individual basis or in a groupsetting. In addition, the unit may provide instruction to families.
8.7 HOME HEALTH CARE DEVICES
Medical devices are required for prevention, diagnosis, treatment andrehabilitation of diseases. Medical devices range from simple tosophisticated and there more than 10 000 types of medical devicesavailable making proper selection appropriate to the needs of thepopulation.
8.7.1 Categories of Medical Devices
The Global Harmonization Task Force has categorized the medical devicesinto these categories:
Appliance: a large instrument for a particular purpose or use withassociated console, accessories, attachment and consumables
Instrument: a mechanical tool or implement, for example surgicalinstrument
Implant: a device used for repairing or replacing part of the body,including medication or radioactive material inserted into tissue forsustained therapy
163
Prosthesis: a device, either external or implanted, that substitutes foror supplements missing or defective part of the body
Material: an inert substance used for repairing or replacing part of thebody)
Apparatus: a group or combination of instruments, machinery, tools,materials, etc., having a particular function or intended for a specificuse);
In vitro diagnostic: a medical device intended to perform tests out ofthe body for diagnostic purposes
8.7.2 What is Home Healthcare Equipment?
The term “home healthcare equipment “is generally applied to a widerange of devices intended for use in the home or other non- medicalfacility by nonprofessional caregivers, family members, or patientsthemselves. The scope typically includes medical electric equipment, suchas digital blood-glucosemeters, blood pressure monitors, pulseoximeters andpeak flow meters. In some cases, these devices are available in bothhospital and home-use models, with varying features and capabilitiesdifferentiating the models. However, the term home healthcare equipment isalso frequently applied to products such as nebulizers, breast pumps, andartificial limbs and other prosthetic devices. Sometimes, the use of the termextends to personal hygiene products, including electric toothbrushes anddenture cleaners. Even mechanical assist devices, such as wheelchairs,walkers and seat lifts, can be branded asa type of home healthcareequipment.
8.7.3 Common Home Health Care Equipment
There are many medical devices which can be used at home with littletraining. Some of the common devices are:
Apnea monitors
Aspirators
Blood Gas/pH/Chemistry Point of Care Analyzer
Defibrillator, External, Automated; Semi automated
Glucose Analyzer
Peritoneal Dialysis Unit
Pulmonary function analyzer
Portable ventilator
8.8 SPECIAL SCHOOL
A special need is a challenge that interferes with one’s learning. It requiressupport that goes beyond the norm.There are different types of specialneeds and challenges. For instance, there are learning, developmental,behavioural, and physical challenges. Moreover, these challenges can differin their severity, or in how much they impair learning.
Observational Visits

Practical Manual
164
Special needs schools and programs are for kids who have challenges ordisabilities that interfere with learning. They provide support that’s notnormally provided in general education programs. These schools andprograms tailor learning to address each child’s unique combination ofneeds. Adaptations are made to allow kids to meet age-appropriateeducational goals.
They offer a wide range of approaches and services. This may includesmaller classes, individualized learning, one-on-one support, self-containedclassrooms, resource rooms, and learning aids.
8.8.1 Checklist of Special School
S. No. Services Available/not available
1 Individualized education
2 Small classes
3 Low teacher-to-student ratios
4 Specially trained teachers
5 Self-contained classrooms
6 Tutoring programs
7 Academic and psychological counseling
8 Learning aids
8 Resource rooms
8.9 LET US SUM UP
After reading in the books it is time now to observe. Seeing somethingthrough our own eyes makes a permanent impression in our mind. It willhelp you in taking care of your patients in a more holistic andcomprehensive way. By visiting important places, you will understand the
working, infrastructure and functions of those places.
8.10 KEY WORDS
Activities of daily living: basic tasks that must be accomplishedevery day for an individual to thrive
Inpatient: hospital visit that requires at least one night’s stay on award
Outpatient:short visit to hospital that lasts no more than a day
8.11 ACTIVITY
See the facilities available in a secondary hospital and check it withthe check-list provided in the unit