Bench-Top Vacuum Oven with 28 segments programmable ...
12
DZF Vacuum Oven MTI Corporation | www.mtixtl.com 1 Bench-Top Vacuum Oven with 28 segments programmable controller DZF-6000F Series Vacuum Oven
-
Upload
khangminh22 -
Category
Documents
-
view
0 -
download
0
Transcript of Bench-Top Vacuum Oven with 28 segments programmable ...

DZF Vacuum Oven
MTI Corporation | www.mtixtl.com 1
Bench-Top Vacuum Oven with 28 segments programmable controller
DZF-6000F Series Vacuum Oven
DZF Vacuum Oven
MTI Corporation | www.mtixtl.com 2
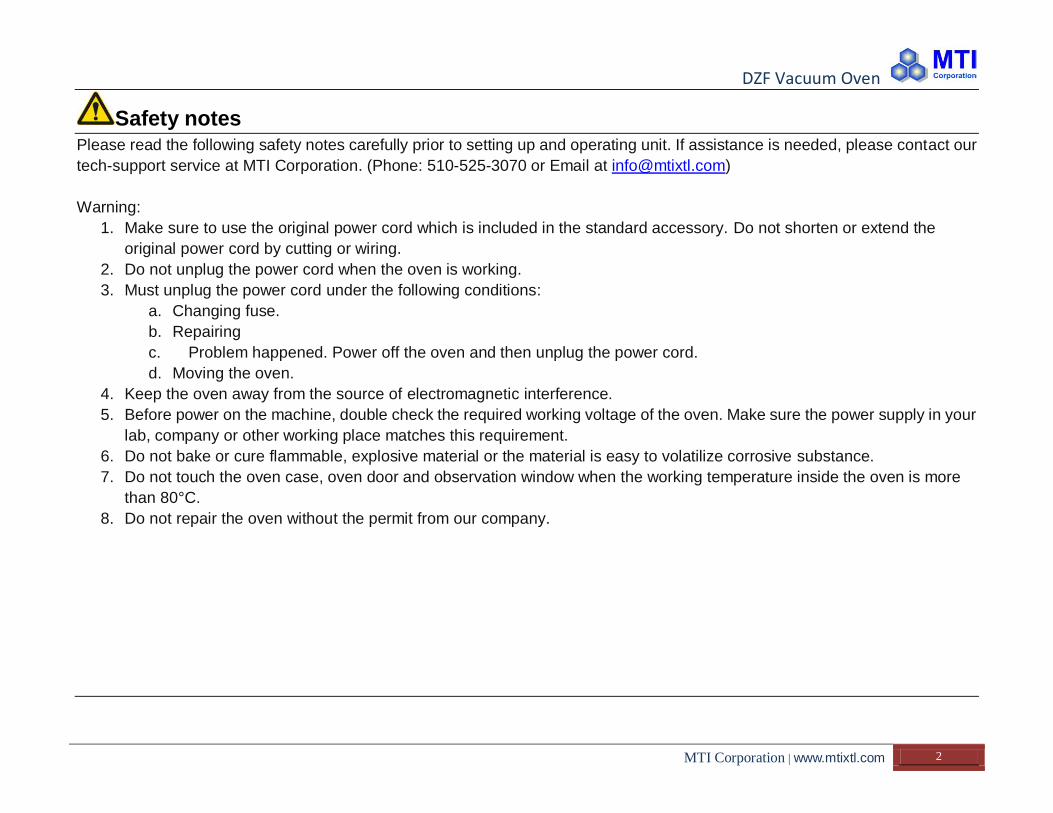
Safety notes Please read the following safety notes carefully prior to setting up and operating unit. If assistance is needed, please contact our
tech-support service at MTI Corporation. (Phone: 510-525-3070 or Email at [email protected])
Warning:
1. Make sure to use the original power cord which is included in the standard accessory. Do not shorten or extend the
original power cord by cutting or wiring.
2. Do not unplug the power cord when the oven is working.
3. Must unplug the power cord under the following conditions:
a. Changing fuse.
b. Repairing
c. Problem happened. Power off the oven and then unplug the power cord.
d. Moving the oven.
4. Keep the oven away from the source of electromagnetic interference.
5. Before power on the machine, double check the required working voltage of the oven. Make sure the power supply in your
lab, company or other working place matches this requirement.
6. Do not bake or cure flammable, explosive material or the material is easy to volatilize corrosive substance.
7. Do not touch the oven case, oven door and observation window when the working temperature inside the oven is more
than 80°C.
8. Do not repair the oven without the permit from our company.

DZF Vacuum Oven
MTI Corporation | www.mtixtl.com 3
Specification
Model 6020F-110 6020F-220 6050F-110 6050F-220
Voltage AC 110V AC 2200V 50/60Hz AC 110V AC 2200V 50/60Hz
Power 1000W 1000W ﹤1500W ﹤1500W
Controller 28 segments programmable digital temperature controller
Temp. range 50~300℃
Temp. Accu. ±1℃
Vacuum ﹤133Pa
Dimension Chamber: 300 mm x 300 mm x 275 mm
Outside dimension: 590 x 490 x 450 mm
Chamber: 415 mm x 345 mm x 370 mm
Outside dimension: 710 x 560 x 550 mm
DZF Vacuum Oven
MTI Corporation | www.mtixtl.com 4
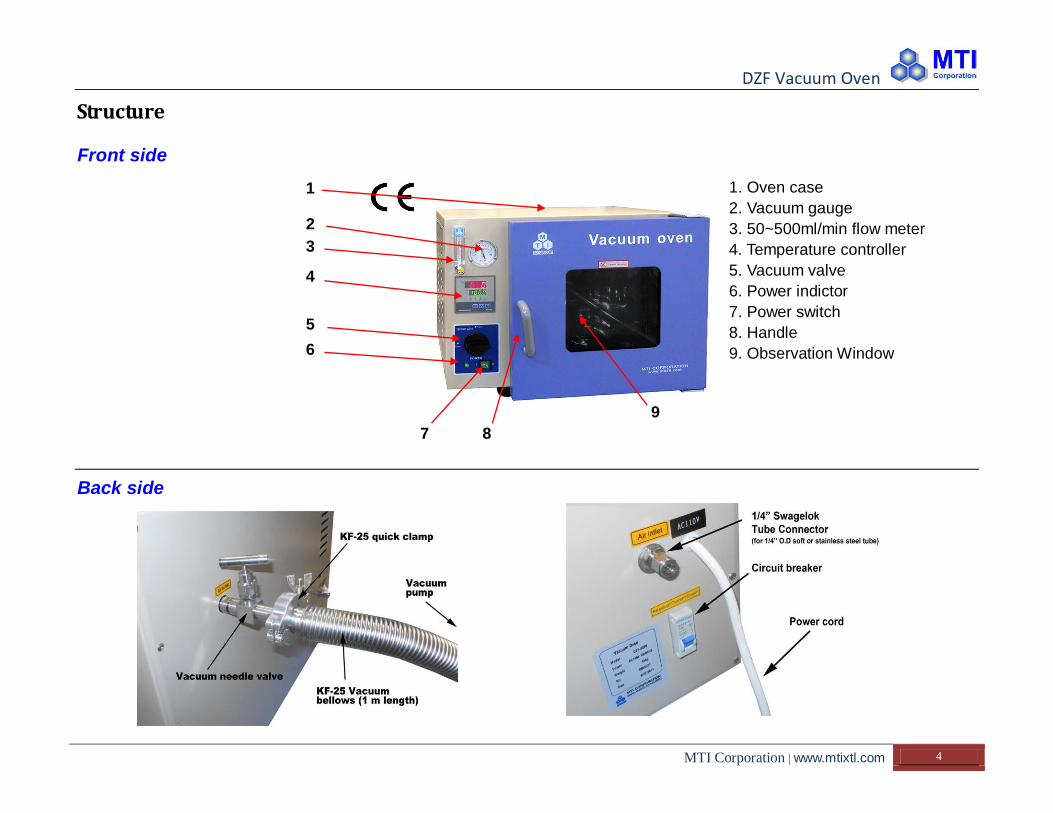
Structure
Front side
1
2
3
4
5
6
7
8
9
1. Oven case
2. Vacuum gauge
3. 50~500ml/min flow meter
4. Temperature controller
5. Vacuum valve
6. Power indictor
7. Power switch
8. Handle
9. Observation Window
Back side

DZF Vacuum Oven
MTI Corporation | www.mtixtl.com 5
Specification
Temperature control
Controller interface
1
2
3
4
1. PV (present value)
2. SV (setting value)
3. Status indicator
- OUT (output)
- AT (auto-tune)
- COOL (cooling)
- ALM (alarm)
4. “Set” button (abbr. SET)
5. Decrease/Auto-tune (abbr. ▼)
6. Increase/time record(abbr. ▲)
6 5
● Voltage
● Temp range
● Temp fluctuation
● Inner chamber size
● Outside size
● Vacuum
AC 220V
50~300°C (250°C for continuous, 300°C for less than 8hrs)
±1°C
300 mm x 300 mm x 275 mm ( 12 x 12 x 11", 25 Liter )
590 x 490 x 450 mm (24" x 20" x 18")
<133Pa

DZF Vacuum Oven
MTI Corporation | www.mtixtl.com 6
Parameter Set Up
● Press and release the SET button one time. The controller will enter the user defined menu. Press and release the SET
button to change the parameter option and then press ▲ or ▼ to modify the value of corresponding parameter.
● Press and hold button for 5 seconds. The controller will enter the system menu. The method to modify system parameters
is in the same way.
Parameters
Param. Name Setting Range Description Default
PPXX Segment Set 1-28 Total 28 segments can be set by user.
If the PP is set to be “1”, there is only one segment. The oven will
shut down when the time is up (if time is set).
If the PP is set to be “2” or more. The oven follows the sequence
from the first segment (PP01) to the next segment (PP02) and
then the next next.
User defined
SOXX Set value 0~300°C The target temperature of “XX” segment User defined
TIXX Dwell Time 0~999minutes The “TI” function will start once the present value (PV) reaches the
set value (SV).
If the TI is set to be “0”, the timer function will be deactivated. The
oven will keep dwelling at the temperature according to the
current set value (SV) until manually shut down.
User defined
PoXX Power output 0~100 The value of “Po” represents the percentage of the power output.
Adjusting the “Po” can limit the power output and change the
temperature heat-up rate.
User defined
SHP Temp. Alarm 0~300 The value of “SHP” represents the tolerance range of the
temperature deviation between the PV and SV.
If the actual deviation is more than the value of “SHP”, the power
will be cut off and the “ALM” light will be on until the temperature is
return into the required range.
2
P Proportional 0~9999 Larger the value of “P”, lower the system-gain 42

DZF Vacuum Oven
MTI Corporation | www.mtixtl.com 7
I Integral 0~9999 Larger the value of “I’, weaker the integral effect.
d Differential 0~9999 Larger the value of “d”, stronger the differential effect. And this can
decrease the possibility of overshoot.
T Control cycle 1~99 seconds “T” represents the specific control method of the relay.
Sc1 Zero Correction -99.9~+99.9°C “Sc1” represents the 0 point correction for the error caused by the
thermal couple compensating wire.
Sc2 Full Scale
Correction
-99.9~+99.9°C “Sc2” represents the full scale point correction for the error caused
by the thermal couple compensating wire.
Lok lock 0-2 Set to be “0”, all the parameter can be modified freely.
Set to be “1”, only the user defined parameters can be modified.
Set to be “2”, none of the parameters can be modified.
0
Temperature Setting Method
1. Power on the oven. Wait for a few seconds for the self-test and then the controller enters the temperature displaying
interface. PV window is showing the real temperature in the oven chamber. SV window is showing the set value of the
temperature. (The oven will start heating several seconds after turning on the power automatically.)
2. Press and release SET one time. Then the PV window indicates “PP”. SV window indicates “1” which means the 1st
segment. (Now if press and release SET for more times, the PV window will show more parameters in sequence as So1, TI1 and
Po1. And finally return to “PP”. The corresponding values will be showing in SV window. Please remember when the value of “PP” is
set to be “N” (“N” could be 1 to 28), then all the parameters will determine the Nth segment only.)
3. Press and release SET again. PV window shows “So01”. Now use ▲ or ▼ to set the required temperature. And then
accordingly, set the other parameters for the 1st segment. (TI1 and Po1) (If there is no specific need, please set the “Po” to 100
as default.)
4. Change the value of “PP” to 2~28. And set values for each segment in the same way.
5. Please make sure the values of “SO” and “TI” in the unnecessary segments are “0”.
6. Finally press and hold SET for 5 seconds to return to normal state.
983
245
3
0

DZF Vacuum Oven
MTI Corporation | www.mtixtl.com 8
Heat-up Process
In order to prevent the temperature overshooting as well as extend the service life of door gasket, please do the multi-step heat-up process as follows to increase
temperature:
Prompt Input Data Description
So01 X Target temperature of the first heatup stage
TI01 10 Hold 10 min at X degree C before reaching the
target temp.
So02 T Target temperature of the second heatup stage
TI02 9999 Holding time at your target temperature
T-50=X
T is your final target temperature.
X is your target temperature of the first stage (the temperature should be hold before reach the final target temperature)
PID Parameters
PID consists of three parameters: P (proportional), I (integral) and d (differential). They are associated with each other. The
correct combination of these three parameters can improve the performance of the oven to a large extent.
o Auto-tune
Auto-tune is the function which can automatically adjust the PID parameters in order to optimizing the temperature control.
When the temperature control is not stable, please do the auto-tune for the oven as following procedure:
1. Set up the temperature to 70 – 80°C.
2. Press and hold the ▼ button for 5 seconds until the “AT” light is on (yellow) which indicates the oven is doing
auto-tune.
3. The auto-tune will finish after two periods of fluctuation and the “AT” light turns off. The new PID parameters will be
automatically stored.
o Manual adjustment
DZF Vacuum Oven
MTI Corporation | www.mtixtl.com 9
1. P (proportional): If there is a large overshoot temperature, please increase value of “P”. If you want to raise the
temperature faster, lower the P value.
2. I (integral): If the temperature fluctuation is too large, increase I or contrarily.
3. d (differential): The value is generally between 1/5 ~1/4 of parameter I.
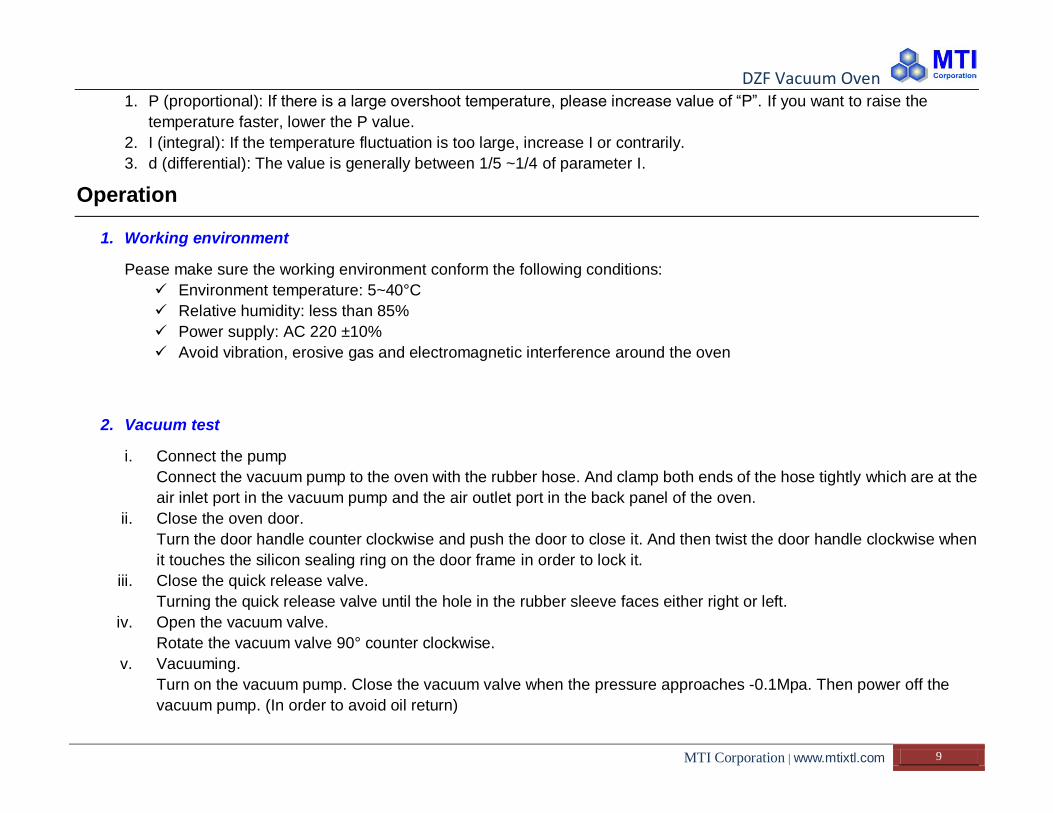
Operation
1. Working environment
Pease make sure the working environment conform the following conditions:
Environment temperature: 5~40°C
Relative humidity: less than 85%
Power supply: AC 220 ±10%
Avoid vibration, erosive gas and electromagnetic interference around the oven
2. Vacuum test
i. Connect the pump
Connect the vacuum pump to the oven with the rubber hose. And clamp both ends of the hose tightly which are at the
air inlet port in the vacuum pump and the air outlet port in the back panel of the oven.
ii. Close the oven door.
Turn the door handle counter clockwise and push the door to close it. And then twist the door handle clockwise when
it touches the silicon sealing ring on the door frame in order to lock it.
iii. Close the quick release valve.
Turning the quick release valve until the hole in the rubber sleeve faces either right or left.
iv. Open the vacuum valve.
Rotate the vacuum valve 90° counter clockwise.
v. Vacuuming.
Turn on the vacuum pump. Close the vacuum valve when the pressure approaches -0.1Mpa. Then power off the
vacuum pump. (In order to avoid oil return)

DZF Vacuum Oven
MTI Corporation | www.mtixtl.com 10
3. Temperature setting test
i. Power on the oven. The “power indicator light turns on. After self-test the “OUT” light is on and the oven is heating up.
ii. Set up the temperature parameters in the controller. (The target temperature, dwelling time, the number of segments,
etc)
iii. Press and release the “SET” until the controller return to the temperature display interface.
iv. Now the “OUT” light is turning on-and-off which represents the current heating step is controlled by the PID
adjustment. And the oven is working normally.
v. It is normal that a temperature fluctuation occurs after the PV reached the SV. Please wait for 30~60min and the
oven will enter the constant temperature period.
Please wear the refractory gloves when operate during hot.
If the sample releases vapor under baking, please add a dryer between the vacuum pump and the oven. The vapor may
damage the vacuum pump.

DZF Vacuum Oven
MTI Corporation | www.mtixtl.com 11
Maintenance
1. The oven should be kept clean. The door glass should be rubbed with soft cloth or cotton. Do not use chemical solution
which could react with the glass.
2. If the oven is not used for a long time, the oven should be put in a dry room with good ventilation and dust proof. Put
grease on the plating parts.
Trouble shooting
Problem Reason Solution
1. No power no power supply Check the power supply
Broken power cord or Loose plug Change to a new power cord
Broken fuse Change to a new fuse
PV window is displaying
“HHHH”
Broken pt100 thermal couple Change to a new thermal couple
Loose wiring at thermal couple connector Wiring again and make sure it is steady
Fail to heat up Setting time out Modify the set time and restart the oven.
Low setting temperature The set temperature should be ≥ 50°C
Loose wiring at the controller output connector Wiring again and make sure it is steady
Broken controller Change to a new controller
Broken heating element Change to a new set of heating element
Temperature control fail Parameter error Reset the parameter as default
Loose contact at pt-100 thermal couple Eliminate the contact resistance

DZF Vacuum Oven
MTI Corporation | www.mtixtl.com 12
Broken controller Change to a new controller
Large temperature
difference between PV
value and actual value
No vacuum Do vacuuming
Parameter error Reset the parameter as default
Sensor of thermometer has been placed at incorrect place. Place the sensor on the stacking self
MTI has no responsibility for any misuse or damage caused by customer; if you have any technical problems please feel free to
contact us at [email protected]; the engineer will help you out within 24 hours.