AgreeYa Recovery Manager for SharePoint 5.1 - User Guide
64
AgreeYa™ Recovery Manager for SharePoint® 5.1 User Guide
-
Upload
khangminh22 -
Category
Documents
-
view
7 -
download
0
Transcript of AgreeYa Recovery Manager for SharePoint 5.1 - User Guide

AgreeYa™ Recovery Manager forSharePoint® 5.1User Guide

© 2019 AgreeYa Solutions, Inc. All rights reserved.
This product is protected by U.S. and international copyright and intellectual property laws. AgreeYa™ andthe AgreeYa logo are trademarks of AgreeYa Solutions, Inc. in the United States and/or other jurisdictions. Allother marks and names mentioned herein may be trademarks of their respective companies.
Contents
Welcome to AgreeYa Recovery Manager for SharePoint 7
Getting Started 7
Add SharePoint Farm 7
Protect SharePoint Data 8
Discover Backups 8
Analyze Backup 8
Search and Restore 9
Role Separation 10
Roles and Level of Access 10
Business Users/Self Service 10
Help Desk Personnel 11
SharePoint Administrators 11
SQL Server Database Administrators (DBA) 11
Infrastructure Administrators/Backup Operators 12
How it Works 12
Supported Platforms 13
Microsoft SharePoint 13
Microsoft SQL Server 13
Supported Backup Formats 14
Key Features 15
Backup Storage Efficiency 15
Granular and Flexible Restore 16
Recovery with Zero Data Loss 16
Quick Recovery 16
Emergency Access to Critical Data in SharePoint 17
SharePoint Farm Backup and Recovery 18
Simple, Unified and Repeatable Recovery Process 18
Recovery after Installing Patches/Updates 18
Premier Edition 19
Architecture Overview 20
MMC Extension Snap-in 20
RMSP Discovery Task 20
Recovery Manager for SharePoint Service 20
Recovery Manager for SharePoint Logger Service 21
Recovery Manager for SharePoint 5.1User Guide
3

Recovery Manager Engine 21
Recovery Manager Backup Reader / Quest LiteSpeed 21
Backup Discovery 21
Backup Analysis 21
Backup Restore 22
Using a Staging Location 22
System Requirements 24
Required Permissions 26
Recovery Manager for SharePoint Service Account 26
Recovery Manager for SharePoint Agent Service Account 27
Interactive Account 27
SharePoint Back-End SQL Server Service Account 27
SQL Server hosting the Management Console for SharePoint (or Site Administrator)Database Service Account 27
SQL Server hosting the Recovery Manager Temporary Database Account 28
Setting Required Permissions 28
Setting Permissions on SQL Databases 28
Setting Permissions on Stored Procedures 29
Granting Local Administrator Rights 29
Deployment and Administration 30
Installation and Upgrade 30
New Installation 30
Installing Management Console for SharePoint 30
Installing Recovery Manager for SharePoint 30
Recovery Manager Backup Reader 31
Adding SharePoint Farms to Recovery Manager 31
Installing Recovery Manager on Site Administrator 32
Running Recovery Manager after Installation 32
Upgrade 32
Recovery Manager for SharePoint Agent 32
Restore through the Supported SharePoint API 32
Integration with Storage Maximizer 33
Working with Cache and Temporary Database 34
Original Server 34
Dedicated Server 34
Modifying Dedicated Staging Server Settings 35
Modifying Temporary Database Location 35
Maintaining RMSP Temporary Database Availability 36
Recovery Manager for SharePoint 5.1User Guide
4

Disaster Recovery of SharePoint Farms/Web Applications 37
Preview 37
Farm List 37
Creating Backup 38
Creating Backup Schedule 38
Restoring Farm 38
Working with Backups 39
Discovering Backups 39
Backup Discovery Schedule 39
Creating Backup Discovery Schedule 39
Initializing Discovery 40
Filtering Backups to Be Automatically Discovered 40
Backup Auto Analysis 41
Backup Discovery Window 41
Working with SQL Alias 41
Analyzing Backups 42
Adding a Backup File 42
Different Backup Types 43
Working with DPM Backups 43
Working with HP Data Protector 43
Configuration 43
Additional Information 44
Microsoft SQL Server clients 44
Working with LiteSpeed Backups on TSM 44
Backup Discovery and the Original Mode 44
Dedicated Mode and Restore to Alternate Location 45
Working with MDF Files 46
Working with Symantec Backup Exec 46
Working with Quest NetVault Backup (NVBU) 48
Working with Symantec NetBackups 48
Dedicated Mode and Restore to Alternate Location 49
Working with Tivoli Backups 49
Setting Password for TSM 50
Working in Cluster Environment 50
Dedicated Mode and Restore to Alternate Location 50
Server Configuration 51
Working with vRanger Backup and Replication 52
Working with AppAssure Snapshots 52
Recovery Manager for SharePoint 5.1User Guide
5

Searching for Items 54
How It Works 54
Searching Items Within a Backup 54
Searching Items Across Backups 54
Restoring Backup Content 56
Restoring Files from the Search Results List 56
Restoring a Modified File 56
Restoring a Deleted File 57
Restoring Content to Alternate Location 57
Permissions 58
User Information 58
Auditing Operations 58
Saving Backup and Recycle Bin Objects to Disk 59
Web Access 60
Administration Page 60
Adding Users 60
Removing Users 60
Configuring E-mail Notification 61
Search Page (Search Privileges) 61
Searching for Documents 61
Posting a Restore Request 61
Viewing Restore Requests 61
Search Page (search and restore privileges) 62
Searching for Documents 62
Restoring Items 62
Viewing Restores 62
About AgreeYa 64
Contacting AgreeYa 64
Technical support resources 64
Recovery Manager for SharePoint 5.1User Guide
6

Welcome to AgreeYa Recovery Managerfor SharePoint
AgreeYa™ Recovery Manager for SharePoint® is an easy to use, innovative solution that helps IT administratorsquickly locate deleted or modified SharePoint documents and other items and then restore them with anylevel of granularity from a content database backup.
Topics:
Getting Started
Getting StartedIn this section:
l Add SharePoint Farm
l Protect SharePoint Data
l Discover Backups
l Analyze Backup
l Search and Restore
Add SharePoint FarmTo start managing a farm with Recovery Manager you first need to add it. Right-click the Enterprise SharePointnode under Management Console to start the Add Farm Wizard.
Figure 1: Add Farm
Recovery Manager for SharePoint 5.1User Guide
7
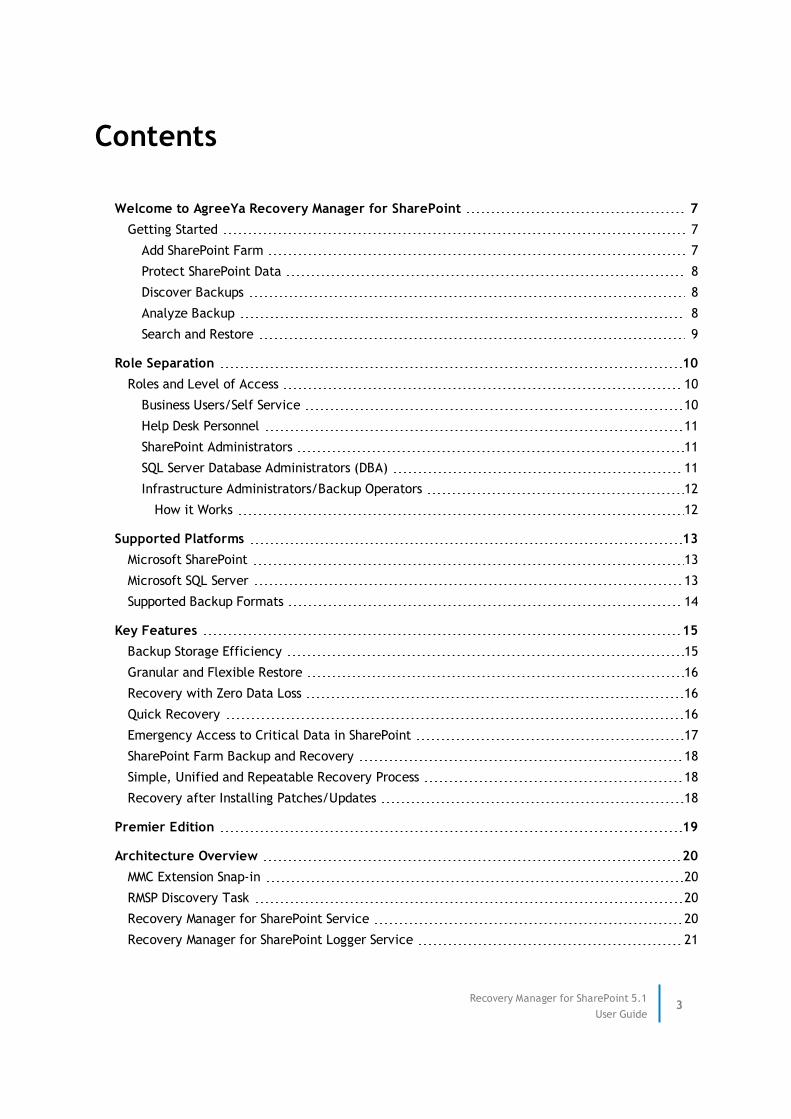
Protect SharePoint DataRecovery Manager does not require any additional item-level backups to be created and can granularly restorea single item from a solid database backup. Use SharePoint Central Administration to create farm backup or seeRecovery Manager documentation for the full list of supported backup formats.
Figure 2: Creating Backup
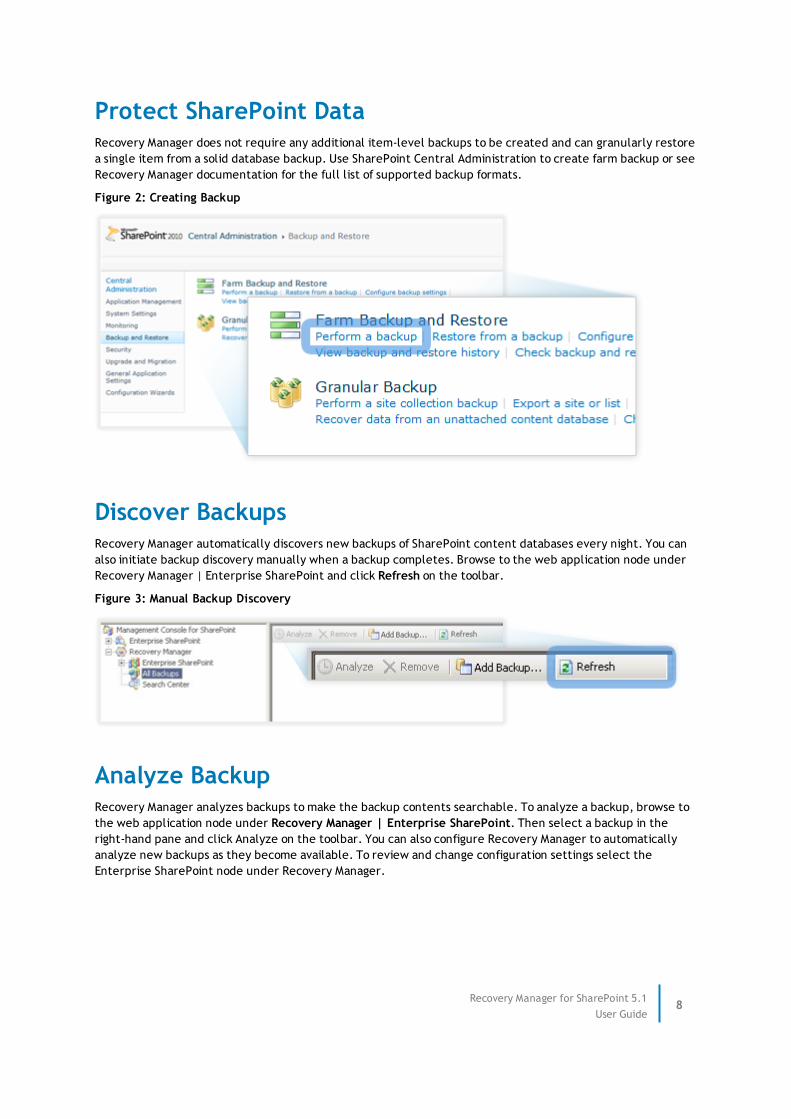
Discover BackupsRecovery Manager automatically discovers new backups of SharePoint content databases every night. You canalso initiate backup discovery manually when a backup completes. Browse to the web application node underRecovery Manager | Enterprise SharePoint and click Refresh on the toolbar.
Figure 3: Manual Backup Discovery
Analyze BackupRecovery Manager analyzes backups to make the backup contents searchable. To analyze a backup, browse tothe web application node under Recovery Manager | Enterprise SharePoint. Then select a backup in theright-hand pane and click Analyze on the toolbar. You can also configure Recovery Manager to automaticallyanalyze new backups as they become available. To review and change configuration settings select theEnterprise SharePoint node under Recovery Manager.
Recovery Manager for SharePoint 5.1User Guide
8

Figure 4: Analyzing Backup
Search and RestoreUse the Search node under Recovery Manager to quickly find the data that should be restored. A single searchquery can span multiple backups and live SharePoint recycle bins. Alternatively you can navigate to a backupfor a specific SharePoint web application under Recovery Manager | Enterprise SharePoint. Once you locatethe content, choose one of the available recovery options for the located content. Recovery Manager allowsyou to restore data back to its original location, to a different location in SharePoint, or save files and folders tothe file system.
Figure 5: Restoring Backup
Recovery Manager for SharePoint 5.1User Guide
9

Role Separation
Recovery Manager for SharePoint is designed to fit into an organization's backup infrastructure and processes. Itsupports a wide range of different deployments and organizational structures. This section explains howRecovery Manager can ensure the most efficient granular SharePoint content restore process by supporting theexisting delineation of duties between different groups within IT.
Roles and Level of AccessRecovery Manager integrates with SharePoint's Recycle Bin as well as a variety of SQL backup technologies andleverages the organization's existing infrastructure, processes and roles. This ensures flexibility in deploymentand execution for each organization. Different levels of recovery functionality can be made available tobusiness users and IT personnel.
NOTE: Although Recovery Manager can work in an environment where all or some of these roles exit,the product does not require special configuration for different combinations.
Business Users/Self ServiceBusiness users can restore mistakenly deleted or modified documents and items using the built-in SharePointfeatures, such as Recycle Bin and versions. Both are natively available in Microsoft Windows SharePoint Services3.0 and Microsoft Office SharePoint Server 2007.
Although the Recycle Bin can prevent a large number of calls to the help desk, it does not addresssome scenarios:
l Recycle Bin is both site-specific and user-specific. It does not allow you see documents and itemsdeleted by someone else, nor does it allow searching across multiple SharePoint sites and sitecollections.
l Recycle Bin only displays the object that has been deleted. When a folder or library is deleted, you willnot see the document you're looking for in the Recycle Bin.
l Recycle Bin only keeps data for specified time (30 days in each of the two stages by default) and makesit impossible to restore something from the end of last quarter. After expiration in Recycle Bin, this datais only available in backups.
l Finally, Recycle Bin is of little use when a site is deleted and needs to be restored.
All this inevitably results in calls to the help desk or restoration requests submitted to SharePointadministrators.
Recovery Manager for SharePoint 5.1User Guide
10

Help Desk PersonnelThe help desk is the front-line that takes calls from business users who need content restored. Help deskoperators typically do not have permissions to access the backups or SharePoint content, but they can helpnarrow down the issue and route it to the appropriate IT group.
To make this process more efficient, Recovery Manager Web Access allows a 'search-only' level of access forhelp desk or junior IT operators. Users with this level of permissions do not get or need any rights to theproduction SharePoint or corresponding backups. They can log on to Recovery Manager to perform thefollowing actions:
l Search across multiple backups and SharePoint Recycle Bins with a single query.
l Identify the content requested by the user and the location of the most relevant copy based on theuser's needs. This can be found in the latest backup or the Recycle Bin.
l Submit the restoration request on behalf of the business user, including all details of the contentneeding restoration and an optional comment.
Receive e-mail confirmation when the restore is approved and completed by SharePoint administrator.
NOTE: Recovery Manager does not allow help desk personnel to actually retrieve any data from RecycleBin or backups. It only displays title and location of the content in the search results.
SharePoint AdministratorsSharePoint administrators who use Recovery Manager enjoy the same search functionality described above.
They can search across multiple backups and Recycle Bins, even across different SharePoint farms, and identifydata that needs to be restored even when a user who requested it does not know the exact name or location.Data can be restored back to its original location in SharePoint or to a different SharePoint site; documents andlibraries can also be exported to the file system.
Recovery Manager Web Access automatically sends e-mail notifications to the SharePoint administrators when anew restoration request is submitted by the help desk. Administrators can review and approve the requestsright away or choose to perform larger restorations (for example large lists or sites) later in off-peak hours.
SharePoint administrators do not need to have access to the production SharePoint data or backup files touse Recovery Manager. The product proxies administrator access to the data and allows securerestoration. Whenever data is retrieved from backups, all administrator actions are tracked in theRecovery Manager audit log.
SQL Server Database Administrators (DBA)SharePoint administrators often work closely with the SQL DBA team. Delineation of duties between these twoIT groups is common in many environments. Recovery Manager fully supports this role separation:
l Recovery Manager automatically discovers new backups of SharePoint content databases in SQL andmakes them searchable for help desk and SharePoint administrators without SQL DBA involvement.
l Recovery Manager proxies access to the backup files, so only a single service account needs this level ofpermission. Because of this multiple users aren't required to have access to the SQL Server backups.
l Recovery Manager automates the restore process to avoid unnecessary involvement of the SQL DBAteam in routine SharePoint operations.
Recovery Manager for SharePoint 5.1User Guide
11

l Finally, the product integrates with various SQL backup solutions to fit into any backup infrastructure.There is no requirement to change the SQL Server maintenance or backup processes to supportgranular SharePoint content restores with Recovery Manager.
Infrastructure Administrators/Backup OperatorsOrganizations that rely on enterprise wide cross-platform backup software such as Microsoft DataProtection Manager, Tivoli Storage Manager or Symantec NetBackup often have a designated backupoperations group within IT.
With Recovery Manager, SharePoint administrators can perform granular content restores from backupshandled by this group. Help desk or SharePoint administrators who use Recovery Manager do not need to haveaccess to the backup infrastructure or backup files.
Recovery Manager can search the contents of backup files even if they have been moved offline. When arestore is required from such backup, Recovery Manager provides full information about the backup (file name,backup time and expected location). This allows for efficient communications across different IT groups: theSharePoint administrator can create accurate requests to the backup operators who make the specific fileavailable online, without wasting time on looking through multiple backups. Once the restore is complete, thebackup can be moved back offline.
How it WorksRecovery Manager has various features that allow flexibility in deployment and use:
l Recovery Manager Web Access provides two tiers of delegation, search-only for help desk and fullaccess for SharePoint administrators.
l Recycle Bin integration allows admins to locate the most up-to-date content that for some reasoncould not be found by business users. Since Recycle Bin is available online within the same productionSharePoint, this also simplifies restore and makes it faster.
l Automatic discovery and analysis of backups enables search in the most recent SharePoint contentdatabase backups as soon as they become available. This process is configured once and happensautomatically even for new content databases that are added to a SharePoint farm managed withRecovery Manager.
l Support for different backup formats allows companies to use Recovery Manager with the existinginfrastructure with little or no change required to the existing backup processes.
l Recovery Manager service proxies all user access to the backup files and to production SharePoint andSQL servers. This allows only the necessary limited number of accounts to have administrative accessto the data.
l Audit log keeps track of all restore actions, with details on who retrieved which data from backups, andwhen and where the data was restored to. The audit trail is stored in the Windows event log on theserver where the Recovery Manager service is running.
Recovery Manager for SharePoint 5.1User Guide
12
Supported Platforms
l Microsoft SharePoint
l Microsoft SQL Server
l Supported Backup Formats
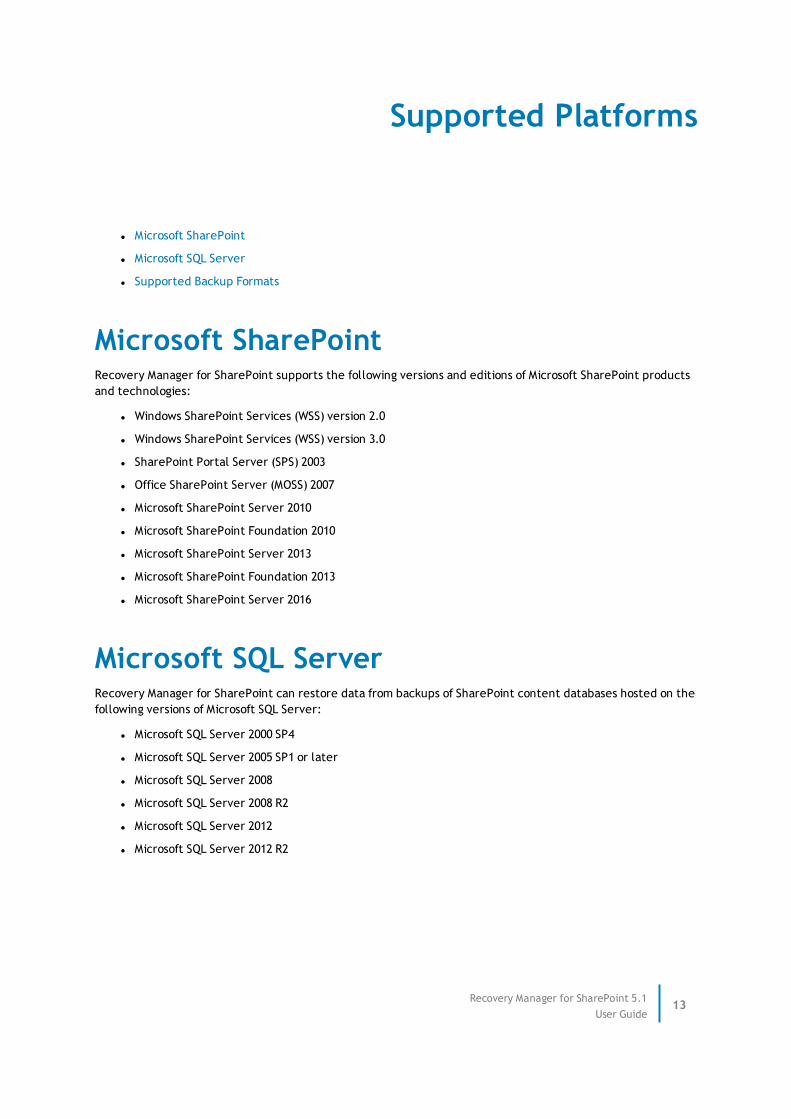
Microsoft SharePointRecovery Manager for SharePoint supports the following versions and editions of Microsoft SharePoint productsand technologies:
l Windows SharePoint Services (WSS) version 2.0
l Windows SharePoint Services (WSS) version 3.0
l SharePoint Portal Server (SPS) 2003
l Office SharePoint Server (MOSS) 2007
l Microsoft SharePoint Server 2010
l Microsoft SharePoint Foundation 2010
l Microsoft SharePoint Server 2013
l Microsoft SharePoint Foundation 2013
l Microsoft SharePoint Server 2016
Microsoft SQL ServerRecovery Manager for SharePoint can restore data from backups of SharePoint content databases hosted on thefollowing versions of Microsoft SQL Server:
l Microsoft SQL Server 2000 SP4
l Microsoft SQL Server 2005 SP1 or later
l Microsoft SQL Server 2008
l Microsoft SQL Server 2008 R2
l Microsoft SQL Server 2012
l Microsoft SQL Server 2012 R2
Recovery Manager for SharePoint 5.1User Guide
13

Supported Backup FormatsRecovery Manager for SharePoint can analyze and restore data from the following backup formats:
l SQL Server Native Backups including SQL Server 2008 and 2012 compressed and/or encrypted backups
l SharePoint 2007 Backups performed from SharePoint Central Administration, or catastrophicSTSADM.exe backups created using the following command line stsadm -o backup -directory <UNC pathor local drive> -backupmethod <full or differential>
l SPSBackup Utility backups of WSS 2.0 and SPS 2003 farms
l Microsoft Systems Center Data Protection Manager (DPM) 2007, 2010, 2012 and 2012 R2 snapshotsof WSS 3.0, MOSS 2007, SharePoint Foundation 2010 and SharePoint Server 2010 environments
l IBM Tivoli Storage Manager (TSM) for Databases also known as Tivoli Data Protection (TDP) for SQL. Bothfull and differential backups created by TSM for Databases are supported
l Symantec NetBackup for Microsoft SQL Server
l Symantec Backup Exec agent for Microsoft SQL Server
l Hewlett-Packard Data Protector full, differential and transaction log SQL VDI backups and full or copySQL files VSS backups
l BakBone NetVault Backup APM for SQL Server and Quest NetVault Backup Plug-in for SQL Serverfull and differential VDI and full VSS backups
l LiteSpeed for SQL Server including recovery from encrypted LiteSpeed backups and from LiteSpeedbackups stored in Tivoli Storage Manager as TSM backups, TSM archives or TSM striped backups
l Quest vRanger Backups of VMWare ESX/ESXi virtual machines stored in vRanger repositories
l Quest AppAssure snapshots
l Unattached Database Files (.mdf) can also be added into Recovery Manager and appear as a searchablebackup. Import of unattached database files can even be automated via the command line to build anad hoc integration with a SQL Server backup solution used in the environment
Recovery Manager for SharePoint 5.1User Guide
14

Key Features
Use of SharePoint grows quickly and so does the amount of data stored in SharePoint. Businesses requirebackup and restore solutions that use storage space efficiently, and do not require unnecessary duplicatebackups to be created and maintained. Recovery Manager for SharePoint allows for granular data recovery fromfull or differential backups of the complete SharePoint content database.
Recovery Manager integrates with industry leading backup technologies and can restore the data from backupscreated with any of the following backup solutions:
l Native SQL and SharePoint backups
l Microsoft Systems Center Data Protection Manager
l Quest AppAssure Backup, Recovery and Replication
l LiteSpeed for SQL Server
l Quest vRanger Backup and Replication
l IBM Tivoli Storage Manager for Databases
l Symantec NetBackup for Microsoft SQL Server
l Symantec Backup Exec Agent for Microsoft SQL Server
l Hewlett-Packard Data Protector
l BakBone NetVault Backup APM for SQL Server and Quest NetVault Backup Plug-in for SQL Server
The key features that allow Recovery Manager to address both IT and business requirements for SharePointcontent restore solution are:
l Backup Storage Efficiency
l Granular and Flexible Restore
l Recovery with Zero Data Loss
l Quick Recovery
l Emergency Access to Critical Data in SharePoint
l SharePoint Farm Backup and Recovery
l Simple, Unified and Repeatable Recovery Process
l Recovery after Installing Patches/Updates
Backup Storage EfficiencyUse of SharePoint grows quickly and so does the amount of data stored in SharePoint. Businesses requirebackup and restore solutions that use storage space efficiently, and do not require unnecessary duplicatebackups to be created and maintained. Recovery Manager for SharePoint allows for granular data recovery fromfull or differential backups of the complete SharePoint content database.
Recovery Manager for SharePoint 5.1User Guide
15
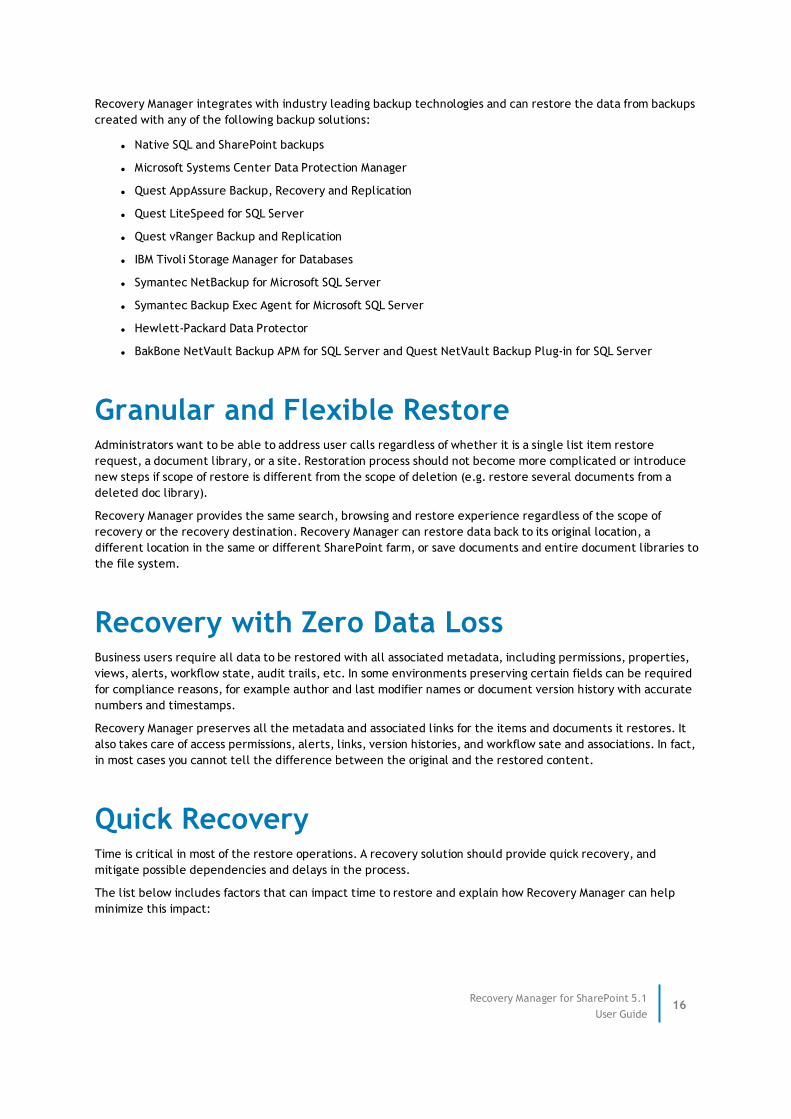
Recovery Manager integrates with industry leading backup technologies and can restore the data from backupscreated with any of the following backup solutions:
l Native SQL and SharePoint backups
l Microsoft Systems Center Data Protection Manager
l Quest AppAssure Backup, Recovery and Replication
l Quest LiteSpeed for SQL Server
l Quest vRanger Backup and Replication
l IBM Tivoli Storage Manager for Databases
l Symantec NetBackup for Microsoft SQL Server
l Symantec Backup Exec Agent for Microsoft SQL Server
l Hewlett-Packard Data Protector
l BakBone NetVault Backup APM for SQL Server and Quest NetVault Backup Plug-in for SQL Server
Granular and Flexible RestoreAdministrators want to be able to address user calls regardless of whether it is a single list item restorerequest, a document library, or a site. Restoration process should not become more complicated or introducenew steps if scope of restore is different from the scope of deletion (e.g. restore several documents from adeleted doc library).
Recovery Manager provides the same search, browsing and restore experience regardless of the scope ofrecovery or the recovery destination. Recovery Manager can restore data back to its original location, adifferent location in the same or different SharePoint farm, or save documents and entire document libraries tothe file system.
Recovery with Zero Data LossBusiness users require all data to be restored with all associated metadata, including permissions, properties,views, alerts, workflow state, audit trails, etc. In some environments preserving certain fields can be requiredfor compliance reasons, for example author and last modifier names or document version history with accuratenumbers and timestamps.
Recovery Manager preserves all the metadata and associated links for the items and documents it restores. Italso takes care of access permissions, alerts, links, version histories, and workflow sate and associations. In fact,in most cases you cannot tell the difference between the original and the restored content.
Quick RecoveryTime is critical in most of the restore operations. A recovery solution should provide quick recovery, andmitigate possible dependencies and delays in the process.
The list below includes factors that can impact time to restore and explain how Recovery Manager can helpminimize this impact:
Recovery Manager for SharePoint 5.1User Guide
16

1. Time it takes for an administrator to start working on the user restore requests.
Often, administrators who are in charge of recoveries have lots of other responsibilities and may beworking on higher priority tasks. Recovery Manager Web Access allows administrators to delegate thetime-consuming task of locating a required object to Helpdesk or junior members of the IT admin team.They can then review and approve the restoration requests submitted via Web Access.
2. Time to find and locate the requested data.
Users who call for a recovery may not have complete and accurate information about when the contentthey need was deleted, where it had been located prior to deletion, or even not remember the exactdocument name.
Recovery Manager allows searching for content across multiple backups and SharePoint recycle binsat the same time, making it easy to locate the necessary data and the exact backup file where themost recent version of this content is available even when complete information is submitted bybusiness users.
3. Cross-team communications if recovery involves SQL DBAs or Backup Operators to retrieve the necessarytape(if backup file already moved to tape) and mount the backup copy of the SQL database to stagingenvironment.
Recovery Manager seamlessly integrates with the backup solutions, automatically locates and analyzesnew backups as they become available, and provides full information about the backup file in the searchresults. It also restores data from any of the supported backup formats, completely automating theprocess so that there is no need to involve SQL DBA or Backup Operator.
Recovery Manager proxies all administrator actions with the backup software, so that SharePointadministrator who performs granular recovery from a database backup does not need any access toSymantec or IBM or SQL Management Studio consoles, whichever tool is used for creating backups.
4. Time to write the data back to SharePoint.
Recovery Manager allows you to significantly reduce the time it takes to write the data back toSharePoint environments. When paired with Quest LiteSpeed for SQL Server, Recovery Manager readsdata directly from backups to rapidly restore the data from content database backups bypassing anyinterim steps that may take additional time.
Emergency Access to Critical Data inSharePointGranular content recovery can also be a part of the disaster recovery exercise, when a particular site needs tobe up and running or specific documents are required back as soon as possible, while the rest of theunavailable SharePoint farm can have lower time to restore expectations.
Recovery Manager allows you to quickly browse backup content and retrieve only the data you need, evenwhen the original SharePoint site is no longer available. You can get business-critical documents or even sitesback online before the entire server farm is back up and running.
Recovery Manager for SharePoint 5.1User Guide
17
SharePoint Farm Backup and RecoveryReliable strategy of data recovery is a matter of significance for most SharePoint farms. IT administrators needprocesses and products in place to ensure any SharePoint data can be restored, whether it be a singledocument or the entire SharePoint farm.
Recovery Manager for SharePoint provides a quick way to create farm backups and restore all data, services andconfigurations in case of a disaster recovery.
With Recovery Manager, you can effortlessly perform restore from Central Administration Backups - justdownload Recovery Manager and it will guide you through the process and actually make the restore happen.
Simple, Unified and Repeatable RecoveryProcessRegardless of the scope of restoration requests, IT administrators want the same, simple and repeatableprocess for recovery. It should require minimum or no training for Helpdesk or junior IT personnel with basicknowledge of SharePoint. It should require minimum or no involvement of other groups within the IT (such asSQL DBA, Backup Operators).
Recovery Manager's intuitive Management Console and Web Access interfaces require no special skills exceptbasic SharePoint knowledge to locate and restore the data. Seamless integration with SharePoint recycle binsand the backup software means that the person using Recovery Manager does not need to be involved in thebackup process or even know which tools are used for backing up SharePoint content databases.
Recovery after Installing Patches/UpdatesIT administrators require that data in backups remains valid and usable after hotfixes, update rollup andservice packs are installed for WSS and SharePoint Server. End users often request to restore deleted data atleast few days after deletion. Installation of an update should not prevent IT from being able to restore data.Recovery Manager can restore the data from a backup created prior to the hotfix or Service Pack installed, soall your backups remain valid.
NOTE: Recovery Manager cannot restore data across WSS versions; data from backup created for a WSSv2 farm cannot be restored to WSS v3 or MOSS 2007.
Recovery Manager for SharePoint 5.1User Guide
18
Premier Edition
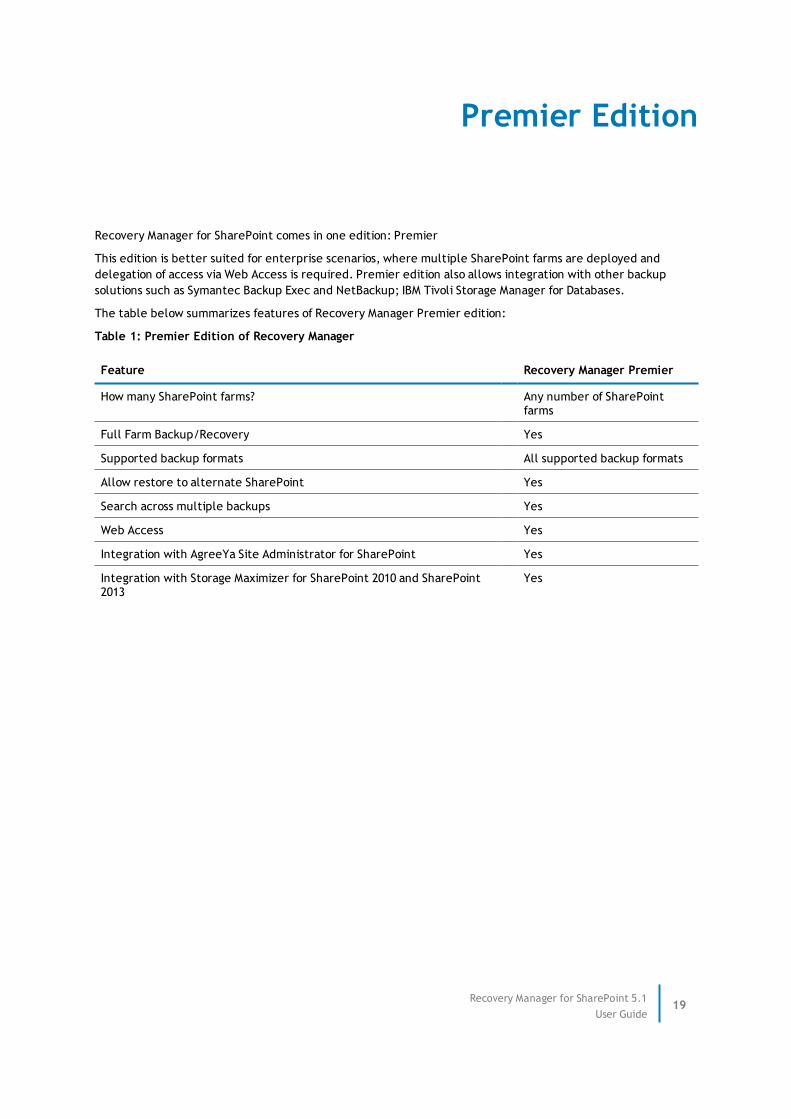
Recovery Manager for SharePoint comes in one edition: Premier
This edition is better suited for enterprise scenarios, where multiple SharePoint farms are deployed anddelegation of access via Web Access is required. Premier edition also allows integration with other backupsolutions such as Symantec Backup Exec and NetBackup; IBM Tivoli Storage Manager for Databases.
The table below summarizes features of Recovery Manager Premier edition:
Table 1: Premier Edition of Recovery Manager
Feature Recovery Manager Premier
How many SharePoint farms? Any number of SharePointfarms
Full Farm Backup/Recovery Yes
Supported backup formats All supported backup formats
Allow restore to alternate SharePoint Yes
Search across multiple backups Yes
Web Access Yes
Integration with AgreeYa Site Administrator for SharePoint Yes
Integration with Storage Maximizer for SharePoint 2010 and SharePoint2013
Yes
Recovery Manager for SharePoint 5.1User Guide
19

Architecture Overview
Recovery Manager for SharePoint works with Management Console for SharePoint and Site Administrator forSharePoint, allowing you to easily manage your SharePoint infrastructure.
Recovery Manager for SharePoint consists of the following components:
l MMC Extension Snap-in
l RMSP Discovery Task
l Recovery Manager for SharePoint Service
l Recovery Manager for SharePoint Logger Service
l Recovery Manager Engine
l Recovery Manager Backup Reader / Quest LiteSpeed
l Backup Discovery
l Backup Analysis
l Backup Restore
l Using a Staging Location
MMC Extension Snap-inRecovery Manager snap-in extends the Management Console for SharePoint or Site Administrator for SharePointmanagement console with the Recovery Manager UI controls.
RMSP Discovery TaskThis automatically created task is responsible for detecting backups of the SharePoint content databases addedto the scope of the Management Console for SharePoint or managed by Site Administrator for SharePoint. Itspecifies the backup discovery time and by default is set for 2 AM daily.
Recovery Manager for SharePoint ServiceThis Windows service is responsible for performing analysis of backups of the SharePoint content databasesadded to the scope of the Management Console for SharePoint or managed by Site Administrator for SharePoint.
Recovery Manager for SharePoint 5.1User Guide
20

Recovery Manager for SharePoint LoggerServiceThis service is responsible for maintaining the Recovery Manager log files.
Recovery Manager EngineRecovery Manager Engine analyzes backups, compares differences in SharePoint hierarchy, and transfers thedata from the backups to a matched SharePoint Web application or the location you choose.
Recovery Manager Backup Reader / QuestLiteSpeedWith Recovery Manager Backup Reader or Quest LiteSpeed 5.2 or higher installed, you can benefit from rapidanalysis and recovery with low disk space requirements for SQL native and LiteSpeed backups, as RecoveryManager no longer creates temporary databases in the staging location.
Backup DiscoveryRecovery Manager reads the list of managed SharePoint web applications from Site Administrator forSharePoint. It also leverages the information collected by Site Administrator about the SharePoint contentdatabases used by each web application.
For each SQL server where SharePoint databases reside, the Recovery Manager for SharePoint serviceperiodically pulls the backup history information from SQL Server system databases. The discovery time isspecified by RMSP Discovery task and is set to 2 am by default, the discovery interval is 24 hours and RecoveryManager allows the users to customize these.
You can also add backup files to Recovery Manager manually. This can help when you need to retrieve certaindata from a backup of SharePoint server that has been decommissioned.
Backup AnalysisThe backup analysis process creates the cache of the backup file contents. It is possible to enable automaticbackup analysis or to start the analysis manually. The backup cache includes information about the SharePointhierarchy and metadata for documents and items. This cache is used when you browse the backup content orsearch among backups in the Recovery Manager console. The analysis process includes the following steps:
1. When a new backup is discovered by the Recovery Manager for SharePoint service or added manually, itis queued for analysis.
Recovery Manager for SharePoint 5.1User Guide
21

2. Depending on which backup software is used, Recovery Manager for SharePoint service will:
a. LiteSpeed for SQL Server 5.2 or later: read the necessary metadata and hierarchy informationdirectly from backup file.
b. SQL native or SharePoint native backup: if the LiteSpeed or Recovery Manager Backup Readercomponent is installed on the SQL server, the service will read metadata and hierarchyinformation from backup file. Otherwise, it will extract the backup file contents to the staginglocation and read it from there.
c. Other backup formats: the Recovery Manager service will extract the backup file content to atemporary database on staging location. The staging location can be specified as a different SQLServer instance or as a different drive on the same SQL instance as the original SharePointcontent database.
3. The service then builds the cache based on the information it read from the backup file or from thetemporary database.
Once a backup is analyzed, its content is exposed in Recovery Manager for browsing and searching. After theanalysis is complete, the temporary database can safely be deleted from the staging location. See the Using aStaging Location section below for details.
Backup RestoreWhen a user initiates a restore of SharePoint data (such as documents, list items, libraries, or sites), from SQLServer native backups, SharePoint native or LiteSpeed backups, Recovery Manager simply extracts the datathat needs to be restored directly from the backup file. It then restores this data directly to the liveSharePoint environment.
If Recovery Manager is used together with other 3rd party backup software, it performs the following steps torestore SharePoint data:
1. Recovery Manager checks whether the temporary database already exists for the backup on thestaging location. Whenever possible, it will read data for a restore operation from the existingtemporary database.
2. If needed, Recovery Manager extracts the backup content to the temporary database.
3. Recovery Manager reads the needed data from the temporary database and restores it to the liveSharePoint environment.
This approach allows IT administrators locate the needed data and the associated backup file before actuallyretrieving anything from backup.
Using a Staging LocationThe staging location is used by Recovery Manager to temporarily extract the SQL database from a backupcreated with backup software other than Quest LiteSpeed for SQL, and native SQL or SharePoint backup tools.There is no requirement to have the staging location to restore data from these backups if either LiteSpeed 5.2(or later) or Recovery Manager Backup Reader component is installed on the SQL server.
For backups created with Microsoft Data Protection Manager, Symantec or Tivoli tools, the staging location isused for analysis and granular restore of SharePoint contents. When the temporary database is available on thestaging location, restore operations take literally seconds.
Recovery Manager for SharePoint 5.1User Guide
22

You have two options to configure the location of the temporary database - you can use the original content SQLserver as a staging location, i.e. the same server where the backup was made (the default setting), or you canuse SQL server that hosts the Site Administrator repository database as a staging location.
Recovery Manager for SharePoint 5.1User Guide
23

System Requirements
Before installing AgreeYa Recovery Manager for SharePoint make sure the following systemrequirements are met:
Requirement Description
Platform Intel Pentium 1 GHz processor (x86, x64)
Memory Minimum 512MB on the SharePoint Back-End servers. 6 GB of RAM are recommended.
NOTE: Performance of processing large backup files depends greatly on the memory sizeavailable on SharePoint Back-End servers.
OperatingSystem
One of the following:
l Microsoft Windows XP SP2 or later
l Microsoft Windows Server 2003 SP1 or later
l Microsoft Windows Server 2008
l Microsoft Windows Server 2008 R2
l Microsoft Windows Server 2012
l Microsoft Windows 7
WebBrowsers
One of the following:
l Microsoft Windows Internet Explorer 9 or higher
l Google Chrome - the latest version
l Mozilla Firefox - the latest version
AdditionalSoftware
l Microsoft .NET Framework 4.0
l LiteSpeed 6.1.0 or higher (required for enhanced backup analysis)
One of the following:
l Microsoft SQL Server 2000 SP4
l Microsoft SQL Server 2005 SP1 or later SPs
l Microsoft SQL Server 2005 Express SP1 or later SPs
l Microsoft SQL Server 2008
l Microsoft SQL Server 2008 R2
l Microsoft SQL Server 2012
l Microsoft SQL Server 2012 R2
l Microsoft SQL Server 2014
Recovery Manager for SharePoint 5.1User Guide
24

Requirement Description
One of the following:
l Windows SharePoint Services (WSS) version 2.0
l Windows SharePoint Services (WSS) version 3.0
l SharePoint Portal Server (SPS) 2003
l Office SharePoint Server (MOSS) 2007
l Microsoft SharePoint Server 2010
l Microsoft SharePoint Foundation 2010
l Microsoft SharePoint Server 2013
l Microsoft SharePoint Foundation 2013
l Microsoft SharePoint Server 2016
NOTE: By default, Recovery Manager may not support backups made from SharePoint serverswith certain hotfixes and patches installed. If you have applied any SharePoint updates andcannot work with backup files made from the patched servers, contact Online Support forfurther instructions.
NOTE:You can also make use of a SQL Server alias for installing Recovery Manager forSharePoint. For more information, please refer to https://docs.microsoft.com/en-us/sql/database-engine/configure-windows/create-or-delete-a-server-alias-for-use-by-a-client.
Recovery Manager for SharePoint 5.1User Guide
25

Required Permissions
Before installing Recovery Manager for SharePoint, make sure the following permissions are granted to theaccounts listed below:
Recovery Manager for SharePoint Service Accountl db_owner role for the Recovery Manager for SharePoint repository database
To discover SharePoint content database backups:
l db_datareader permission for configuration database of each SharePoint farm within the scope of SiteAdministrator for SharePoint or Management Console for SharePoint
l db_datareader permission for the msdb database on every SharePoint Back-End SQL server within thescope of Site Administrator for SharePoint or Management Console for SharePoint
To work with the staging location in the Original Server Mode:
l SQL server role sysadmin for every SharePoint Back-End SQL server that you want to work with.
NOTE: If the Recovery Manager for SharePoint Service account is a db_owner for the SharePoint contentdatabase, the system administrator role is not required. In this case the account needs the db_ownerrole and dbcreator server role.
To work with the staging location in the Dedicated Server Mode:
l SQL server role sysadmin on the dedicated server
To restore content to its original or alternate location:
l db_owner role for the content and configuration databases.
For Enhanced Backup Analysis and Restore:
Execute permissions for the following stored procedures on the SharePoint Back-End SQL servers:
l - xp_restore_filelistonly
l - xp_restore_headeronly
l - xp_restore_setinfo
l - xp_sqllitespeed_version
l - xp_objectrecovery_executeselect
l - xp_objectrecovery_viewcontents
To work with LiteSpeed backups:
Execute permissions for the following stored procedures on the SharePoint Back-End SQL servers:
l - xp_restore_database
l - xp_restore_filelistonly
Recovery Manager for SharePoint 5.1User Guide
26

l - xp_restore_headeronly
l - xp_restore_setinfo
l - xp_sqllitespeed_version
Recovery Manager for SharePoint Agent Service Accountl db_owner role for the Recovery Manager for SharePoint repository database
To restore data from SharePoint backups in the Content Migration API mode:
l SharePoint Farm Administrator group membership
To restore preview and Save to Disk documents from SharePoint 2013 and SharePoint 2016 backups:
l SharePoint Farm Administrator group membership
Interactive Accountl db_owner role for the Management Console for SharePoint (or Site Administrator for SharePoint)
repository database
l db_owner role for the Recovery Manager cache database
l dbcreator server role on the SQL Server where the Management Console for SharePoint (or SiteAdministrator for SharePoint) repository database is located to add the backups manually. This appliesto SQL Server 2008 and SQL Server 2012 only, for more information please refer tohttp://msdn.microsoft.com/en-us/library/ms178569.aspx
l db_datareader permission for configuration database of each SharePoint farm within the scope of SiteAdministrator for SharePoint or Management Console for SharePoint
To add LiteSpeed backups manually:
Execute permissions for the following stored procedures for the Management Console for SharePoint (or SiteAdministrator for SharePoint) repository server:
l - xp_restore_filelistonly
l - xp_restore_headeronly
l - xp_restore_setinfo
l - xp_sqllitespeed_version
SharePoint Back-End SQL Server Service Accountl Read permission for the backup files that were created on this SQL server
SQL Server hosting the Management Console for SharePoint(or Site Administrator) Database Service Account
l Read permission for the unmatched and manually added backups
Recovery Manager for SharePoint 5.1User Guide
27

SQL Server hosting the Recovery Manager TemporaryDatabase Account
l Read, Write permission for the folder where Recovery Manager temporary database is stored.
Setting Required PermissionsYou can install Recovery Manager for SharePoint as a standalone application. In this case it is installed with theintegrated Management Console (MC).
You can also install or upgrade Recovery Manager on an existing installation of Site Administrator (SA).
In case of the new installation of Recovery Manager, you first need to grant appropriate permissions toManagement Console for SharePoint or Site Administrator for SharePoint. Please refer to the User Guide of theMC or SA for detailed information on setting the permissions required for these products.
Recovery Manager works with the repository database of MC or SA, MSDB databases of Back-End SQL serverswithin the scope of MC or SA, and the SQL server used as a staging location.
Setting Permissions on SQL DatabasesCreate a login for the user who will install Recovery Manager for SharePoint to be able to login tothe SQL server.
1. Open MS SQL Server Manager Studio.
2. Expand your SQL instance node.
3. Open the Security node and select the Logins node.
4. Right-click the Logins and select the New Login option. In the new login window enter the user namein the domain\user format.
5. Click OK. The login appears in the list of the Logins node.
6. Locate the login in the list and right-click it. The Login Properties page is displayed.
7. Select the database in the upper pane and set the permissions for the database in the lower pane.
8. Click OK.
Alternatively, you can set permissions for a database as follows:
1. Expand your SQL instance node.
2. Expand the Databases node. Locate the required database.
3. Go to Security.
4. Right-click the Users node and select a new user. The Database User-Newwindow is displayed.
5. Specify the login name and find it in the AD.
6. Select the appropriate permission in the Database role membership pane.
7. Click OK.
Repeat these steps to grant permissions to the Recovery Manager account for the content and configurationSharePoint databases.
Recovery Manager for SharePoint 5.1User Guide
28

Setting Permissions on Stored ProceduresYou need the Execute permissions for the stored procedures specified in the Required Permissions section.Perform the following to set the permissions on the stored procedures:
1. Expand your SQL instance node.
2. Expand the Databases node. Locate the required database.
3. Go to Programmability | Stored Procedures.
4. Right-click the required procedure and select Properties from the menu.
5. Select the appropriate permissions.
6. Click OK.
Granting Local Administrator RightsOn every computer where Recovery Manager is installed, perform the following:
1. Right-click My Computer and select Manage from the short-cut menu. The Computer Managementwindow appears.
2. Go to System Tools | Local Users and Groups | Groups.
3. In the left pane select Administrators. The Administrators Properties window appears.
4. Click Add. The Select Users, Computers, or Groups dialog appears.
5. Enter the user name you want to grant administrators rights to and click OK.
Alternatively, you can grant local administrator rights as follows:
1. Go to Start | Control Panel.
2. In the Control Panel window, select User Accounts. The User Accounts window appears.
3. In the User Accounts window select the Add... button. The Add New User window appears.
4. Enter the domain and name of a user you want to grant permissions. Click Next.
5. Select the Other radio button and then Administrators from the drop-down list.
6. Click Finish.
Recovery Manager for SharePoint 5.1User Guide
29

Deployment and Administration
In this section:
l Installation and Upgrade
l Recovery Manager for SharePoint Agent
l Working with Cache and Temporary Database
Installation and UpgradeThere are several options to deploy the new version of Recovery Manager for SharePoint depending on theSharePoint products installed in your environment:
l New installation
l Installation on Site Administrator for SharePoint
l Running Recovery Manager after Installation
l Upgrade
New InstallationTo install Recovery Manager for SharePoint, run the setup.
The Management Console Setup wizard starts, which installs the common components and configuration forSharePoint products.
Installing Management Console for SharePointPerform the following steps:
1. On the Welcome screen, click Next.
2. On the Configuration Database page, specify the database name to be used as Management Console forSharePoint configuration database. Click Next.
3. On the Ready to Install the Application page, click Next to begin installation.
4. Click Finish.
After Management Console is installed, Recovery Manager for SharePoint Setup wizard starts automatically.
Installing Recovery Manager for SharePointFollow the Recovery Manager for SharePoint installation wizard steps:
Recovery Manager for SharePoint 5.1User Guide
30
1. On the Welcome page, read and accept the license agreement and click Next.
2. On the Account credentials page, specify the name in the domain\user format and password forthe Recovery Manager Service account and click Next. The installation begins and the setupprogress is displayed.
3. Once installation is complete, click Finish to exit the wizard and start the application console.
The default installation directory is C:\Program Files\AgreeYa\Recovery Manager forSharePoint. To modify the installation directory, run the msiexec /i qrm4sp.msiINSTALLDIR=c:\RMSP console command.
Recovery Manager Backup ReaderCustomers who use LiteSpeed and SQL Server or SQL and SharePoint native tools to create database backupscan leverage the enhanced analysis and recovery.
To ensure faster backup analysis and recovery switch to Original Server Mode and install Recovery ManagerBackup Reader component from the installation CD package on the following servers:
SQL servers where the original SharePoint content databases are hosted to perform backup analysis and datarestoration to the same location
SQL servers where the target SharePoint content databases are hosted to perform data restoration toalternate location
SQL server hosting AgreeYa Repository Database to add LiteSpeed backups manually.
If you have Quest LiteSpeed 5.2 or higher installed on the SQL server Recovery Manager Backup Readerinstallation is not required.
The service account should be granted execute permissions for the following extended stored procedures:
l - xp_restore_filelistonly
l - xp_restore_headeronly
l - xp_restore_setinfo
l - xp_sqllitespeed_version
l - xp_objectrecovery_executeselect
l - xp_objectrecovery_viewcontents
Adding SharePoint Farms to Recovery ManagerAfter Recovery Manager for SharePoint is installed, you should add SharePoint farms to the product scope.
To add SharePoint farms, open the Recovery Manager console, click the Enterprise SharePoint node and selectAdd Server Farm from the short-cut menu. The Add Server Farm Wizard starts.
Complete the wizard as follows:
1. On the Welcome page, click Next.
2. On the Specify SharePoint Front-End Server page, specify one of the front-end servers in theSharePoint server farm you want to add. Click Next.
3. After the scanning server farm process completes, click Next and Finish to exit the wizard.
Recovery Manager for SharePoint 5.1User Guide
31

Installing Recovery Manager on Site AdministratorWhen installed on an existing instance of Site Administrator for SharePoint, Recovery Manager integrates withits management console and reuses Site Administrator repository database. Management Console will not beinstalled in this case.
To install Recovery Manager for SharePoint on the computer hosting Site Administrator, run the setup.
Follow the steps described in the Installing Recovery Manager for SharePoint subsection of New Installationsection above.
Running Recovery Manager after InstallationWhen Recovery Manager for SharePoint has been installed, you can run it from Start | Programs | AgreeYa| Management Console.
Select the Admin or Search shortcut to start the Web Access component for Recovery Manager for SharePoint.
UpgradeUpgrade from earlier versions of Recovery Manager for SharePoint is supported. To upgrade the version, runthe new Recovery Manager for SharePoint setup.
NOTE: Automatic upgrade from earlier versions of Recovery Manager for SharePoint to version 4.0.5 isnot supported. To upgrade the version, uninstall the older version and install the Recovery Manager forSharePoint.
Make sure you upgrade the Recovery Manager Agents (SharePoint, Tivoli, NetBackup) when installing a newerversion of the product.
NOTE: Tivoli and NetBackup backups support is integrated in the Recovery Manager for SharePointAgent version 4.0.5 and later. To upgrade your Recovery Manager Tivoli Agent or Recovery ManagerSymantec NetBackup Agent, uninstall it and install Recovery Manager for SharePoint Agent 4.0.5.
Recovery Manager for SharePoint AgentRecovery Manager for SharePoint Agent (Agent) allows you to work through the supported SharePoint API,perform a disaster recovery of SharePoint Farms/Web Applications, perform recovery of SharePoint dataexternalized by Storage Maximizer, and work with 3-rd party backup solutions (Tivoli, NetBackup, NVBU).
The agent uses port 9001 used for communication between Recovery Manager for SharePoint (RMSP)and the Agent.
Restore through the Supported SharePoint APINOTE: You need to install the Agent in each SharePoint farm managed by this RMSP installation. Itmeans that you need to install Agent on one of the SharePoint front end servers in each farm.
Exporting Settings
Recovery Manager for SharePoint 5.1User Guide
32

By default Recovery Manager for SharePoint Agent uses the INSTALLDIR\SharePointAgent\EXPORTS folderto stage the recovery data while restoration. You can override this value in the settings.py configuration filelocated in INSTALLDIR\SharePointAgent.
Please, take the following information into consideration when communicating with the agent:
l Install Agent - RMSP tries to connect to each front end server (FE) in the farm until the agent is found.The No agent was found on the SharePoint Farm front-end serversmessage is displayed if no agentwas located
l Enable Firewall port 9001 on the Agent’s side machine – You will get the No agent was found onthe SharePoint Farm front-end serversmessage if the agent is installed but the connection could notbe established for some reasons
l Grant the owner permissions to the QMC_Repository database for agent’s service account – You willget the Login failed for user DOMAIN\user.message, if the agent service account does not havesufficient rights to the QMC_Repository database.
Integration with Storage MaximizerRecovery Manager integrates with Dell Storage Maximizer for SharePoint, which enables organizations toimprove SharePoint performance by reducing the storage burden on SQL server, while maintaining theintegrity of SharePoint users’ data. With Storage Maximizer, you can move large, old or unused SharePoint datafrom SQL server storage to a more efficient external storage. The tool helps to reduce the complexity ofbacking up and restoring externalized SharePoint data, and gives administrators complete control overexternalized data in order to improve SharePoint performance and reduce costs.
With Recovery Manager for SharePoint you can restore SharePoint data externalized by Storage Maximizer frombackups, including compressed and encrypted data.
NOTE: Encrypted data can be restored only to the same location.
NOTE: For Recovery Manager to be able to work with Storage Maximizer, you need to install andconfigure the Recovery Manager for SharePoint Agent on one of the SharePoint front end servers in eachfarm.
To successfully restore SharePoint data backed up on systems with enabled Storage Maximizer (SMAX), youshould specify the path (paths) to the repository of the SMAX storage targets (destination for externalized data)backed up at the moment of your SQL Server backup. Recovery Manager will use this repository to search forthe SharePoint data missing in a SQL Server backup.
NOTE: The SharePoint content database and the SMAX storage targets should be backed up separately.The storage target backup should occur as close as possible to the end of the content database backup.
Configure the INSTALLDIR\SharePointAgent\Settings.py file to specify the path to the SMAX storagetargets as follows:
BackupPaths=r"C:\SMaxBackupFolder1; C:\SMaxBackupFolder2"
NOTE: Recovery Manager can successfully restore externalized data even if Storage Maximizer istemporarily unavailable in your SharePoint farm.
Recovery Manager for SharePoint 5.1User Guide
33

Working with Cache and TemporaryDatabaseRecovery Manager for SharePoint uses a location on the SQL server to stage temporary copies of databases foranalysis and restoration. When a backup of SharePoint content database is being analyzed or content is beingrestored, Recovery Manager stages a temporary copy of the content database from the backup at theconfigurable location on the SQL and performs analysis and recovery using this database.
Each time Recovery Manager analyzes a new backup, the previously created databases are deleted.
The Settings page offers two options to configure the location of the cache and temporary database: theOriginal Server mode or the Dedicated Server mode.
NOTE: If you have Backup Reader installed on the Original or Target SQL server, no temporary databasesare created on the SQL servers. In this case this setting defines only the location of the RecoveryManager cache.
Original ServerBy default, Recovery Manager uses the original content SQL server as a staging location to analyze and restorecontent from a backup of a SharePoint content database.
The backup analysis and backup content restore are performed in a distributed manner, i.e. all backupoperations are performed on the same server where the backup was made.
This mode is optimum for the backup operations from the performance point of view.
NOTE: In this mode the Recovery Manager for SharePoint Backup Analyzer Service account must havethe following permissions:
l SQL server role sysadmin for every SharePoint Back-End SQL server that you want to work with
l If the Recovery Manager for SharePoint Service account is a db_owner, the system administratorrole is not required. In this case the account needs the db_owner and db_creator roles
Dedicated ServerThis mode is used in case you have restricted permissions on the backend SharePoint servers (e.g. when theSQL production environment is controlled by database administrators and you have access to SharePointdatabases on these servers only).
In this mode Recovery Manager uses the SQL server that hosts the Site Administrator repository database as astaging location to analyze or restore content from any SharePoint database backup. Recovery Manager onlycreates temporary operational databases on this dedicated server. If this mode is enabled, you can performbackup operations even the production server is unavailable.
When you are using this mode, make sure the RecoveryManagerTemp database is available on the productionserver. If this database is unavailable, the Recovery Manager account will attempt to create it on theproduction server.
NOTE: Your dedicated SQL server must be configured for delegation if it is not running on the computerwhere Recovery Manager is installed. For more information please refer tohttp://msdn.microsoft.com/en-us/library/ms189580.aspx.
Recovery Manager for SharePoint 5.1User Guide
34

NOTE: The dedicated SQL server version must be equal or higher than the SharePoint content SQLserver version.
NOTE: In this mode the following permissions are required:
l the Recovery Manager for SharePoint service account must have the SQL server role sysadminon the dedicated server
l the Recovery Manager account must have the db_owner role for the content and configurationdatabases to restore content to its original or alternate location
l the Recovery Manager account must have the db_owner role for the RecoveryManagerTempdatabase on the production server
Modifying Dedicated Staging Server SettingsYou can override the default dedicated staging server settings in the product configuration.
To do it, create a record in the RM_Settings table of the Management Console for SharePoint (or SiteAdministrator for SharePoint) repository database.
Set Name to "StagingLocationServer", Value to the dedicated staging server name and MachineName tothe repository machine name.
Modifying Temporary Database LocationRecovery Manager creates its temporary databases in the SQL server default database location. To modify thetemporary database location, perform the following:
1. Run cmd.exe.
2. Change directory to INSTALLDIR\Utils, and then perform either of the following:
l To specify a new server to be used as the staging location, runStagingLocationManagement.cmd Add <Server> <DataFilesLocation><LogFilesLocation>
l To delete the staging location for the server, run StagingLocationManagement.cmdDel <Server>
l To modify the staging location, run StagingLocationManagement.cmd Change <Server><NewDataFilesLocation> <NewLogFilesLocation>
l To clear the staging location, run StagingLocationManagement.cmd Clear
Alternatively, you can change the staging location for the content server instance by going to the repositorydatabase and adding the information to the RM_DataBaseFileLocation table, specifying ServerName,DatabaseFileLocation, and LogFileLocation.
NOTE: Make sure the folders specified already exist.
NOTE: If you have Backup Reader installed on the Original or Dedicated SQL server, you do not need toconfigure the location of the temporary database.
Recovery Manager for SharePoint 5.1User Guide
35

Maintaining RMSP Temporary Database AvailabilityTo ensure rapid recovery in minutes is always available for the latest backups of the most important SharePointcontent databases, Recovery Manager should always keep the RM_TEMP_CONTENT database copy for the mostrecent backups for the specified list of content databases.
If other database backups are added for analysis/restore, these temporary databases should not be deleted.When a new backup becomes available for a content database from this list, the temporary database will beoverwritten with the copy from the newer backup.
To change the list of SharePoint databases for which the temporary database will always be maintained online,uncomment the lines in the sql script below which is located in the DatabaseRestoreManagerRules.xml file:
<!--Recovery Manager will always keep a database copy from the most recent backup (RM_TEMP_CONTENT database) for each SharePoint content database listed below.-->
<DropAllTempDatabases>
<connection type="work">
<command name="GetPreservedDatabasesList " connection="work" table="master"type="select">
<script>
declare @limiter nvarchar(MAX)
set @limiter = ''''''
select @limiter = @limiter + ',''rm_temp_content_b71bb5da_' + cast(id as nvarchar(20)) + ''''
from (select Id from RM_AnalyseStateTable where StateEnum = 4
--union select TOP 1 Id from RM_AnalyseStateTable where DatabaseName = 'WSS_Content'ORDER By BackupFinishDate DESC
--union select TOP 1 Id from RM_AnalyseStateTable where DatabaseName = 'WSS_Content_82' ORDER By BackupFinishDate DESC
--union select TOP 1 Id from RM_AnalyseStateTable where DatabaseName = 'WSS_Content_83' ORDER By BackupFinishDate DESC
--union select BackupId AS Id from RM_RecoveryJobs where [Percent] != 100) ASBackupIds
SELECT @limiter AS PreservedDatabasesList
</script>
</command>
</connection>
To add a SharePoint content database to this list, copy the entire line and type in the database name.
To remove a database from the list, simply delete or comment the entire line containing this database's name.
Recovery Manager for SharePoint 5.1User Guide
36

Disaster Recovery of SharePointFarms/Web Applications
Recovery Manager for SharePoint allows you to perform disaster recovery of SharePoint farms and Webapplications from backups created using Recovery Manager for SharePoint Farm Backup or SharePoint CentralAdministration.
NOTE: To ensure rapid restore, check that you have Recovery Manager Backup Reader or QuestLiteSpeed installed on the SQL server where the AgreeYa repository database is located and make sureRecovery Manager agent is installed on each SharePoint server within your SharePoint environment.
NOTE: The account running the Recovery Manager for SharePoint Agent must have the db_ownerpermissions for the AgreeYa repository database.
Recovery Manager for SharePoint enables you to perform MOSS 2007, SharePoint 2010, SharePoint 2013 andSharePoint 2016 farm backup or recovery operations.
The new user-friendly interface makes it easy to benefit from this feature.
PreviewWith Preview On, you get the information on how backup/restore would affect your environment. RecoveryManager displays the information without applying changes to your production. Turn Preview off to performfarm backup or restore.
Farm ListEither select a SharePoint Farm or restore a farm from a Central Administration Backup you have made before.By default, the list of all available farm backups is displayed on the right. To view the backups for a particularfarm, click on the farm name.
Recovery Manager for SharePoint 5.1User Guide
37

Creating BackupFigure 6: Creating Backup
The dialogue asking you for a backup path and method (full or differential) appears on the right. Specify theinformation required and submit information or cancel your operation.
Creating Backup ScheduleFigure 7: Creating Backup Schedule
You can either modify the default template manually, or use the Scheduled Tasks Manager. If you already havea schedule defined, Recovery Manager will display it. The schedule is displayed in the right part of the screen.
Restoring FarmFigure 8: Restoring Farm
The process of farm recovery starts. The detailed step description is displayed in the right part of the screen.
Recovery Manager for SharePoint 5.1User Guide
38
Working with Backups
In this section:
l Discovering Backups
l Analyzing Backups
l Adding a Backup File
Discovering BackupsThe Recovery Manager settings page allows you to schedule backup discovery and enable/disable automaticanalysis of backups.
Backup Discovery ScheduleWhen Recovery Manager is installed, the RMSP-Discovery task specifying the backup discovery time isautomatically created in the Control Panel | Scheduled Tasks in Windows. The default backup discovery isscheduled for 2 AM daily.
To modify the backup discovery settings, go to Control Panel | Scheduled Tasks | RMSP-Discovery on theconsole machine and modify the schedule. Click OK.
You can view the settings in the Backup Discovery Schedule section of the settings page.
NOTE: Backup discovery is not performed automatically during the product installation. To see theavailable SharePoint backups in the Recovery Manager Console immediately after installation, click theRefresh button on the backup page.
Creating Backup Discovery ScheduleIn case the RMSP-Discovery task has been deleted, run the createDiscoveryTask.cmd file from the[INSTALLDIR]\Utils\. The console window is displayed. You will be prompted to enter the password of thecurrently logged on user. Supply the password and click Enter. The console window disappears and the Backupdiscovery schedule is set to 2 AM daily (the default setting).
NOTE: If you want to create the RMSP-Discovery task specifying the backup discovery time under adifferent account, go to Control panel | Scheduled tasks, select the RM-Discovery task, right-click thetask and select Properties from the context menu. Specify the user account in the Run as field.
Recovery Manager for SharePoint 5.1User Guide
39

Initializing DiscoveryBefore recovering data from a backup, Recovery Manager must analyze the structure and content ofthe backup.
Take the following steps to initiate backup discovery:
1. Run the Recovery Manager for SharePoint Management Console.
2. Select a SharePoint server node under Recovery Manager > Enterprise SharePoint. The backup creationdate and time tabs and the list of the backups below will be displayed in the upper right pane. If thelist of backups is not available, click the Refresh button to update the backup list.
3. Select a backup date tab. The hourly periods of backup creation time tabs will be displayed.
4. Select a backup time tab. The list of the backups created during the hour specified will be displayed.
For each backup the following information is available:
l Backup status
l Creation time
l SQL server name
l Content database name
l SharePoint farm
l Web application
l Storage path
5. By default, Recovery Manager does not analyze backups automatically unless it is set by the user.
Filtering Backups to Be Automatically DiscoveredNot all content databases in the environment contain valuable data that needs to be available for recovery. Tosimplify work with Recovery Manager and avoid "noise" backups listed in Recovery Manager Console, you canconfigure Recovery Manager to automatically discover new backups for selected SharePoint content databasesonly. Backups from other databases can be added manually if needed. To change the list of SharePointdatabases for which backups will be discovered automatically, modify the following lines in theFileBasedBackupsSupportRules.xml file:
<!--Discover backups for all SharePoint content databases:-->
<!--<prop_set name="contentDatabases" type="global"> = @DatabaseName </prop_set>-->
<!--Discover backups only for the listed SharePoint content databases:-->
<prop_set name="contentDatabases" type="global"> in ('WSS_Content', 'WSS_Content_82','WSS_Content_83')
</prop_set>
You can add databases to or remove databases from the list. Once the changes are saved, new backups willonly be discovered for the specified content databases only.
Recovery Manager for SharePoint 5.1User Guide
40

Backup Auto AnalysisBy default, Recovery Manager does not analyze backups automatically unless it is set by the user. Check theAutomatically analyze new backups when they become available box on the settings page to enableautomatic analysis of backups.
If the backup auto analysis is enabled, the most recent backup will be analyzed automatically. If the autoanalysis is not enabled or if you wish to process a different backup, select the backup and click either theAnalyze button at the top of the upper right pane, or the Start Analysis Process link in the lower right pane.
Backup Discovery WindowThe Backup Discovery Window setting allows you to specify the time period for which Recovery Manager shoulddiscover backups. By default, only the backups created within the last fifty weeks are added to RecoveryManager. The information for the older backups is automatically deleted from the Recovery Manager Repositoryand Cache databases.
NOTE: It is important to know that this setting influences the backup search: if you set the smallerperiod of time in the window for the backups to be discovered (e.g. 1 week), all the backups that havebeen previously analyzed will be out of scope and you will not be able to search them. If you shouldneed the information from these backups, you will have to add them again to the Recovery Managerscope.
Working with SQL AliasIf SharePoint is configured to use SQL alias to connect to Back-End SQL Servers, the following additionalconfiguration is required:
l On the machine, where the Recovery Manager for SharePoint console is installed:
l Add the SQL aliases used to access the configuration and content SQL servers (use the SQL clientconfiguration utility (cliconfg) or the registry entry) for 32 and 64 bit versions
l Set the "SQLRedirection = True" option in the {%RMSP_INSTALLDIR%}\RMSPconfig.py file toenable SQL alias use
l On the SharePoint front-end server where Recovery Manager for SharePoint Agent is installed (in casethe SharePoint API mode is used for recovery, and the Recovery Manager for SharePoint console is notinstalled on the front-end server):
l Set the "SQLRedirection = True" option in the {%RMSP_INSTALLDIR%}\RMSPconfig.py file toenable SQL alias use
l Set the "StorageMachineName=r'stmn'" option in the {%RMSP_INSTALLDIR%}\RMSPconfig.py filewhere "stmn" is the SQL server, hosting the Recovery Manager repository database
l Set the "StorageName=r'QMC_Repository'" option in the {%RMSP_INSTALLDIR%}\RMSPconfig.py filewhere "QMC_Repository" is the repository database name
Recovery Manager for SharePoint 5.1User Guide
41
Analyzing BackupsIf the backup auto analysis is enabled, the most recent backup will be analyzed automatically. If the autoanalysis is not enabled or if you wish to process a different backup, select the backup and click either theAnalyze button at the top of the upper right pane, or the Start Analysis Process link in the lower right pane.
For each backup the following information is available:
l Backup status
l Creation time
l SQL server name
l Content database name
l SharePoint farm
l Web application
l Storage path
Once the backup file is analyzed
Adding a Backup FileIf you want to use a backup file that has not been matched with any of the discovered SharePoint Webapplications, simply add it to the Recovery Manager scope, as follows:
1. Run the Recovery Manager for SharePoint Management Console.
2. In the navigation pane select the Recovery Manager | All Backups node. The date-based list of allavailable backups is displayed.
3. In the upper right pane click Add Backup.
4. Browse for the backup file and click Open.
After a backup is added, the user is automatically transferred to this backup in the backup list.
Recovery Manager for SharePoint 5.1User Guide
42
Different Backup Types
Working with DPM BackupsRecovery Manager restores the data from the snapshots created using Microsoft System Center DataProtection Manager 2007, 2010, 2012 and 2012 R2. For the Recovery Manager to work with DPM snapshots,perform the following:
l Install DPM Management Shell on the machine hosting Recovery Manager for SharePoint.
l Run the DPM Management Shell and set PowerShell execution policy using Set-ExecutionPolicycommandlet with Bypass value (Unrestricted value for PowerShell 1.0)
l Specify the DPM server name in the INSTALLDIR\bin\BackupDiscovery.exe.config file.
To see the snapshots in the list of the available backups, click the Refresh button.
NOTE: If you apply latest updates to the DPM server (DPM Service pack 1 for example), make sure youapply the updates to the DPM management shell on the computer where the Recovery Manager isinstalled. You can test the connection to DPM server by running the DPM Management Shell Connect-DPMServer {serverName} commandlet to make sure that all updates are correctly installed and theserver is accessible.
NOTE: The Recovery Manager Service account should have permissions to perform the data recoveryoperation on the DPM server.
NOTE: If you restore data to the alternate location or work in dedicated server mode make sure that theDPM protection agent is installed on the alternate/dedicated server machine.
NOTE: It is strongly recommended to modify the default path on the SQL server hosting RecoveryManager temporary database before you start working with DPM snapshots. For detailed information,refer to the Modifying Temporary Database Location subsection in Dedicated Server section.
Working with HP Data ProtectorRecovery Manager supports backup discovery, analysis and data restoration from HP Data Protector (HPDP) full,differential and transaction log SQL VDI backups and full or copy SQL files VSS backups.
ConfigurationThe HPDP User Interface component should be installed on the Recovery Manager machine.
Recovery Manager for SharePoint 5.1User Guide
43

The HPDP MS SQL Integration component should be installed on the original SharePoint backend server for thesame location recovery, on the target SharePoint backend server for alternate server restoration and on theRecovery Manager repository database server to work in the Dedicated server mode.
Additional InformationInstallation and licensing guide for HPDP is the following:http://h20000.www2.hp.com/bc/docs/support/SupportManual/c01631236/c01631236.pdf.
There is the following information about setting up SQL Server client:
Microsoft SQL Server clientsIt is assumed that your Microsoft SQL Server is up and running.
To be able to back up the Microsoft SQL Server database, you need to select the MS SQL Integration componentduring the installation procedure.
On Microsoft SQL Server 2005 systems, a specific package is required to enable normal operation of the DataProtector integration. The package must be installed before the MS SQL Server Integration component. You caninstall the package using either of the following actions:
l In the Microsoft SQL Server 2005 Setup Wizard, in the Feature Selection window, expand ClientComponents and select Legacy Components. Follow the Setup Wizard to complete installation.
l Download the package Microsoft SQL Server 2005 Backward Compatibility Components from the Microsoftweb site http://www.microsoft.com/downloads/details.aspx?familyid=D09C1D60-A13C-4479-9B91-9E8B9D835CDC&DisplayLang=en, and install it.
Working with LiteSpeed Backups on TSMRecovery Manager works with LiteSpeed backups stored in Tivoli Storage Manager (TSM) Server as a TSMbackup, TSM archive or a striped backup. Both full and differential backups are supported. For RecoveryManager for SharePoint to work with LiteSpeed backups on TSM, the path to the Dsm.opt file should bespecified in the TivoliStorageManagerConfig.xml file located in INSTALLDIR\XML.
NOTE: The passwordaccess generate option should be set in the Dsm.opt file. For more information onthe option, please, refer to the previous section.
Please refer to the section below for detailed information regarding the discovery of LiteSpeed backups onTSM and working with these backups in the Original and Dedicated Server modes as well as restoring toalternate location.
Backup Discovery and the Original ModeTo discover the backups and/or work in the Original Server mode:
1. Specify the local path to the Dsm.opt file in the TivoliStorageManagerConfig.xml configuration file. It isrecommended to set the value to 'C:\Program Files\Tivoli\TSM\baclient\RM_dsm.opt' (in single quotes):
<prop_set name="TivoliConfigurationFile" type="global">
Recovery Manager for SharePoint 5.1User Guide
44
'C:\Program Files\Tivoli\TSM\baclient\RM_dsm.opt'
</prop_set>
2. Create a file with the same name on every machine that has a SQL server with LiteSpeed for TSMinstalled. The Dsm.opt file should contain the source node name (this parameter may be omitted if thenode name is the same as the machine NetBIOS name), the PASSWORDACCESS GENERATE option and theTSM server address:
nodename {sourceNodeName}
PASSWORDACCESS GENERATE
TCPSERVERADDRESS {tsmServer}
For example:
nodename lstsmclient
PASSWORDACCESS GENERATE
TCPSERVERADDRESS 10.30.37.153
Dedicated Mode and Restore to Alternate LocationTo work in the Dedicated Server mode or/and to perform restore to alternate location, perform the following:
1. Specify the local path to the Dsm.opt file on the dedicated or alternate server machine in theTivoliStorageManagerConfig.xml configuration file. It is recommended to set the value to 'C:\ProgramFiles\Tivoli\TSM\baclient\RM_dsm.opt' (in single quotes):
<prop_set name="TivoliConfigurationFile" type="global">
``'C:\Program Files\Tivoli\TSM\baclient\RM_dsm.opt'
</prop_set>
2. The Dsm.opt file should contain the source node name, the PASSWORDACCESS GENERATE option and theTSM server address:
nodename {sourceNodeName}
PASSWORDACCESS GENERATE
TCPSERVERADDRESS {tsmServer}
For example:
nodename lstsmclient
PASSWORDACCESS GENERATE
TCPSERVERADDRESS 10.30.37.153
3. Generate encrypted TSM registry password on the dedicated or alternate server machine by runningthe dsmcutil console command and specify the source node name and the source node passwordparameters:
dsmcutil updatepw /node:{sourceNodeName} /password: {sourceNodePassword}/optfile:"C:\Program Files\Tivoli\TSM\baclient\dsm.opt"
For example:
Recovery Manager for SharePoint 5.1User Guide
45

dsmcutil updatepw /node:lstsmclient /password:1 /optfile:"C:\ProgramFiles\Tivoli\TSM\baclient\dsm.opt"
Working with MDF FilesWith the MDF file support feature you can manage the unattached SQL database files. This is helpful if you aremaking complete snapshots of disk volumes rather than making a backup for a particular content database.
To add MDF file to the Recovery Manager scope, use Recovery Manager Command LineAPI as follows:
1. Run cmd.exe.
2. Change directory to [INSTALLDIR]\\MDFSupport.
3. Start addMDF.cmd <SQL SERVER> <PATH TO MDF>, where <SQL SERVER> is the SQL to which the MDFfile will be attached and which has access to the <PATH TO MDF>. The added MDF file will beautomatically analyzed.Example:There is a local server named dbserver on which SQL Server is installed, and the MDF file is located atC:\mdf\abc.mdf on this server. Then, you can attach this MDF file to the SQL Server using the followingcommand: addMDF.cmd dbserver C:\mdf\abc.mdf
NOTE: The MDF file must reside on one of the following devices: the local server on which SQL Server isinstalled, a Storage Area Network [SAN], or an iSCSI-based network. The universal naming convention(UNC) path is not supported for the MDF file. For more details, please refer the following Microsoft KBarticle https://msdn.microsoft.com/en-us/library/ms176061.aspx.
Recovery Manager will try to find all related database files (.NDF, .LDF) in the directory where the MDFfile is located.
If the related database files are in a different directory, specify additional directories to be searched bymodifying the [INSTALLDIR]\MDFSupport\SearchPath.py file.
Recovery Manager will try to match this MDF file to an existing SharePoint Web Application.
Working with Symantec Backup ExecRecovery Manager can analyze and restore SharePoint objects to the original and alternate location from fullbackups created by Symantec Backup Exec.
Recovery Manager uses Backup Exec Command Line Applet (bemcmd.exe). The following files have to be copiedto the INSTALLDIR\bin from the Backup Exec for Windows Servers folder:
l bemcmd.exe
l beclass.dll
l becluster.dll
l BECrypto.dll
l besocket.dll
l bestdutl.dll
Recovery Manager for SharePoint 5.1User Guide
46

l serdll.dll
l libvxSigComp2.dll
l vxcrypto.dll
l msvcr71.dll
l msvcp71.dll
NOTE: The following files should be copied as well if you are using BackupExec 2010:
l vxicuuc24.dll
l vxicudt24l.dll
l beclass_mini.dll
This can be done by running the INSTALLDIR\bin\InstallClient.bat utility. The Backup Exec forWindows Servers folder where the files are located should be provided as an argument.
NOTE: The Backup Exec Remote Agent for Windows Systems should be installed on every backendserver where the temporary database is restored.
The Recovery Manager for SharePoint service account must have the following permissions:
l the permissions to perform query and recovery operations on the Backup Exec media server
l db_owner role for the Backup Exec media server repository database (BEDB)
NOTE: The Recovery Manager for SharePoint service account should be added to logon accounts list onthe Backup Exec media server, otherwise recovery operations will be performed using predefined"System Logon Account".
To discover and analyze the backups, the Backup Exec server options should be specified in theINSTALLDIR\BackupExec\Settings.py file.
The options to be specified are the following:
l MediaServer - Backup Exec media server name
l MediaServerSQLInstance - SQL server, where BackupExec media server repository database is located
l MediaServerSQLDatabase - Backup Exec media server repository database name
For example:
MediaServer='BackupExecSvr'
MediaServerSQLInstance='BackupExecSvr\BKUPEXEC'
MediaServerSQLDatabase='BEDB'
NOTE: Microsoft SharePoint Server Farm backups are not supported. It is recommended that you use theBackup Exec SQL backup.
Recovery Manager for SharePoint 5.1User Guide
47

Working with Quest NetVault Backup(NVBU)Recovery Manager can analyze and restore SharePoint objects to the original and an alternate location fromfull and differential VDI and full VSS backups created by BakBone NetVault Backup APM for SQL Server or QuestNetVault Backup Plug-in for SQL Server.
NOTE: The SQL Server Failover Cluster configuration is not supported.
The NVBU Server should be specified in the RMSPconfig.py file located in the Recovery Manager for SharePointinstallation directory. Add the NVBUServer=r"NVBUServerName" record, where the "NVBUServerName" is theNetBios name of the NVBU Server machine.
NOTE: The SQL Server APM Plugin should be installed on the original SharePoint backend server for thesame location recovery, on the target SharePoint backend server for alternate server restoration andon the Recovery Manager repository database server to work in the Dedicated server mode.
Recovery Manager for SharePoint Agent must be installed on the NVBU Server.
To install Recovery Manager for SharePoint Agent, run the setup.exe file from the Recovery Manager forSharePoint Agent folder.
NOTE: Recovery Manager for SharePoint Agent is installed automatically on the machine whereRecovery Manager for SharePoint is installed.
The account running Recovery Manager for SharePoint Agent must have the following permissions:
l the permissions to run NVBU console command line
l the permissions to read from the registry
l the permissions to restore database from NVBU storage to the target SQL Server
l the permissions to access the Recovery Manager for SharePoint repository database
TCP Port 9001 should be available for proper communication between Recovery Manager and Recovery Managerfor SharePoint Agent.
Working with Symantec NetBackupsRecovery Manager can analyze and restore SharePoint objects to the original and alternate location from fulland differential backups created by Symantec Veritas NetBackup.
The Recovery Manager for SharePoint Agent and "NetBackup MS SQL Client" must be installed on all SharePointbackend SQL servers (including the dedicated server if applicable).
To install Recovery Manager for SharePoint Agent, run the setup.exe file from the Recovery Manager forSharePoint Agent folder.
NOTE: Recovery Manager for SharePoint Agent is installed automatically on the machine where theRecovery Manager for SharePoint is installed.
The account running the Recovery Manager for SharePoint Agent must have the following permissions:
Recovery Manager for SharePoint 5.1User Guide
48

l the permissions to run NetBackup console command line
l the permissions to read from the registry
l the permissions to restore database from NetBackup storage to the target SQL Server
l the permissions to access the Recovery Manager for SharePoint repository database
TCP Port 9001 should be available for proper communication between the Recovery Manager and RecoveryManager for SharePoint Agent.
NOTE: Microsoft SharePoint Server Farm backups are not supported. It is recommended that you use theNetBackup SQL backup.
Dedicated Mode and Restore to Alternate LocationNOTE: Recovery Manager for SharePoint Agent should be installed on the dedicated/alternate servermachine.
To restore objects to an alternate location/to work with the dedicated server, the Netbackup client (HostB)installed on this server requires access to backups created by a different Netbackup client (HostA). Fordetailed information, please, refer to NetBackup Administrator Guide for SQL.
To grant the access, perform either of the following on the master server:
l Create a file called install_path\NetBackup\db\altnames\No.Restrictions, to allow unrestrictedredirected restore privileges
NOTE:This configuration allows all clients of the master to access any other client's data that wasbacked up on the master For notes indented one level.
l Create a file called install_path\NetBackup\db\altnames\HostB, to allow HostB to restore HostA's data.
NOTE: This configuration allows the client named HostB to access HostA's data on the master as well asany other client's data that was backed up on the master.
Working with Tivoli BackupsRecovery Manager works with IBM Tivoli Storage Manager for Databases also known as Tivoli Data Protection forSQL. Full and differential backups created with the IBM Tivoli Storage Manager for Databases in Legacy backupmode are supported.
The Recovery Manager for SharePoint Agent and "Tivoli Storage Manager for Databases" must be installed on allSharePoint backend SQL servers (including the dedicated server if applicable).
To install Recovery Manager for SharePoint Agent, run the setup.exe file from the Recovery Manager forSharePoint Agent folder.
NOTE: Recovery Manager for SharePoint Agent is installed automatically on the machine where theRecovery Manager for SharePoint is installed.
The account running the Recovery Manager for SharePoint Agent service must have the following permissions:
l the permissions to run Tivoli Storage Manager for Databases console command line
l the permissions to read from the registry
Recovery Manager for SharePoint 5.1User Guide
49

l SQL server role sysadmin for every SharePoint Back-End SQL server that you want to work with
l db_owner role for the Recovery Manager for SharePoint repository database
TCP Port 9001 should be available for proper communication between the Recovery Manager and RecoveryManager for SharePoint Agent.
Setting Password for TSMTivoli Storage Manager for Databases requires a password. To ensure that the backup discovery, analysis orrestore never fails because of a password, configure the Dsm.opt file usually located in the ProgramFiles\Tivoli\TSM\TDPSql folder to store the password as follows:
1. Add the PASSWORDACCESS GENERATE string.
2. Set the password (e.g. 12345) by running the tdpsqlc.exe query TSM /TSMPASSWORD="12345"console command.
3. Check that the password is stored by running the tdpsqlc.exe query TSM console command. Thepassword should no longer
Working in Cluster EnvironmentRecovery Manager supports backup discovery, analysis and data restoration from Tivoli backups produced byVirtual TSM nodes located on one Cluster Node. Recovery Manager for SharePoint Agent should be installed oneach cluster node.
If several Virtual TSM nodes are located on one cluster node, the mapping between the server name and theTSM node configuration file should be specified in the INSTALLDIR\Tivoli\Settings.py file:
ServerConfiguration = { r"SERVER1" : r"C:\ProgramFiles\Tivoli\TSM\TDPSql\Server1.opt", r"SERVER2" : r"C:\ProgramFiles\Tivoli\TSM\TDPSql\Server2.opt",.....}
For more information, please see the Server Configuration section below.
Example:
There is a failover Database cluster in active/passive configuration installed to protect the SharePointenvironment. Two Cluster resource groups are configured on a cluster node:
l Active Group A consisting of a D1P\PROD01 sql server instance protected by d1p virtual TSM node
l Active Group B comprising D2P\PROD02 sql server instance protected by d2p virtual TSM node.
Settings.py has the following mapping specified:
ServerConfiguration = { r"D1P\PROD01" : r"C:\Program Files\Tivoli\TSM\TDPSql\d1p.opt",r"D2P\PROD02" : r"C:\Program Files\Tivoli\TSM\TDPSql\d2p.opt"}
The backup analysis and restore works file for D1P\PROD01 and D2P\PROD02 servers.
Dedicated Mode and Restore to Alternate LocationTo work in the Dedicated Server mode or/and to perform restore to alternate location, perform the following:
Recovery Manager for SharePoint 5.1User Guide
50

1. Install Recovery Manager for SharePoint Agent on the dedicated/alternate server machine.
2. Copy the configuration opt file from the SQL server whose backups you want to work with to thededicated/alternate server machine (e.g. to C:\ProgramFiles\Tivoli\TSM\TDPSql\SourceDsm.opt).
3. Make sure that the SourceDsm.opt file contains the source node name, the PASSWORDACCESSGENERATE option and the TSM server address:
nodename {sourceNodeName}
PASSWORDACCESS GENERATE
TCPSERVERADDRESS {tsmServer}
For example:
nodename tsmclient
PASSWORDACCESS GENERATE
TCPSERVERADDRESS 10.30.37.153
4. Register the source node password by running the following command on the dedicated/alternateserver machine: QUERY TSM /TSMPassword={sourceNodePassword} /tsmoptfile="{sourceOptFileLocation}".
5. Specify the mapping between the source SQL Server name and the source node configuration file in theINSTALLDIR\Tivoli\Settings.py file of the dedicated/alternate server agent.
e.g. QUERY TSM /TSMPassword=1 /tsmoptfile="C:\ProgramFiles\Tivoli\TSM\TDPSql\SourceDsm.opt"
e.g. ServerConfiguration = { r"SOURCESQLSERVER" : r"C:\ProgramFiles\Tivoli\TSM\TDPSql\TSMSourceDsm.opt"}
For more information, please see the Server Configuration section below.
Server ConfigurationThe server configuration defines the mapping between the SQL Server name and the TSM configuration filethat is being used to handle backups of this SQL Server. The configuration can be updated in the Settings.pyfile located in the Tivoli agent installation directory.
Several mappings should to be separated by commas. Each mapping has the following format:r"SERVERNAME":r"optFilePath". The server name should be in upper case.
If the configuration file is not specified for a server the default configuration file is used.
e.g.:
ServerConfiguration = { r"SERVER1" : r"C:\ProgramFiles\Tivoli\TSM\TDPSql\Server1.opt"}
ServerConfiguration = { r"SERVER1" : r"C:\ProgramFiles\Tivoli\TSM\TDPSql\Server1.opt", r"SERVER2" : r"C:\ProgramFiles\Tivoli\TSM\TDPSql\Server2.opt"}
Recovery Manager for SharePoint 5.1User Guide
51
Working with vRanger Backup andReplicationRecovery Manager can analyze and restore SharePoint objects to the original and an alternate location fromvRanger virtual machine backups.
NOTE: The savepoint should contain the SharePoint content database data and log files.
The vRanger Server should be specified in the RMSPconfig.py file located in the Recovery Manager forSharePoint installation directory. Add the vRangerServer=r"vRangerServerName" record, where the"vRangerServerName" is the NetBios name of the vRanger Server machine.
The Recovery Manager for SharePoint Agent used for vRanger backups management should be installed on themachine where vRanger is installed. The Recovery Manager for SharePoint console should be installed in theSharePoint environment. TCP Port 9001 should be available for proper communication between RecoveryManager and Recovery Manager for SharePoint Agent.
To install Recovery Manager for SharePoint Agent, run the setup.exe file from the Recovery Manager forSharePoint Agent folder.
NOTE: Recovery Manager for SharePoint Agent is installed automatically on the machine whereRecovery Manager for SharePoint is installed.
The account running Recovery Manager for SharePoint Agent must have the following permissions:
l the permissions to create directories in the staging area of the target SQL server
l the permissions to copy files to the staging area of the target SQL server
The PowerShell execution policy should be configured on the vRanger server to run Recovery Managerintegration. Start the PowerShell and set execution policy using Set-ExecutionPolicy commandlet with"Bypass" value ("Unrestricted" value for PowerShell 1.0)
NOTE: The vRanger API should be initialized before it can be used by Recovery Manager. Run thevRanger console and wait for the Cmdlet list and command line prompt being displayed. The windowcan be closed and the API is ready for being used.
The vRanger repository password should be specified before running the backup analysis and recoveryoperations. To provide the password for the repository used to store SharePoint content backups, run theRepoPass.bat tool located in the vRange folder of the Recovery Manager for SharePoint agent installationdirectory. Provide the repository name and repository password. The password will be stored as a secure string.
NOTE: In case the virtual machine computer name does not match virtual machine inventory name, themapping should be specified in the Settings.ps1 file located in the vRanger folder of the RecoveryManager for SharePoint agent installation directory. Several mappings should be separated bysemicolon. Each mapping has the following format: "machinename" = "vmname". Both values should be inthe upper case.
Working with AppAssure SnapshotsRecovery Manager can analyze and restore SharePoint objects to the original and an alternate location fromQuest AppAssure disk snapshots.
Recovery Manager for SharePoint 5.1User Guide
52
NOTE: The snapshot should contain the SharePoint content database data and log files.
The AppAssure Core Server should be specified in the RMSPconfig.py file located in the Recovery Manager forSharePoint installation directory. Add the AppAssureCoreServer =r"AppAssureCoreName" record, wherethe "AppAssureCoreName" is the NetBios name of the AppAssure Core Server machine.
The Recovery Manager for SharePoint Agent used for AppAssure backups management should be installed onthe machine where AppAssure Core Server is installed. The Recovery Manager for SharePoint console should beinstalled in the SharePoint environment. TCP Port 9001 should be available for proper communication betweenRecovery Manager and Recovery Manager for SharePoint Agent.
To install Recovery Manager for SharePoint Agent, run the setup.exe file from the Recovery Manager forSharePoint Agent folder.
NOTE: Recovery Manager for SharePoint Agent is installed automatically on the machine whereRecovery Manager for SharePoint is installed.
The account running Recovery Manager for SharePoint Agent must have the following permissions:
l the permissions to create directories in the staging area of the target SQL server
l the permissions to copy files to the staging area of the target SQL server
The PowerShell execution policy should be configured on the AppAssure Core Server to run Recovery Managerintegration. Start the PowerShell and set execution policy using Set-ExecutionPolicy commandlet with"Bypass" value ("Unrestricted" value for PowerShell 1.0).
Recovery Manager for SharePoint 5.1User Guide
53
Searching for Items
In this section:
l How It Works
l Searching Items Within a Backup
l Searching Items Across Backups
How It WorksDuring the backup analysis Recovery Manager caches information about corresponding SharePoint hierarchy.Later, this information is used to display the hierarchy and search the backup for documents.
You can restore, save or preview an item, using Recovery Manager. A linked object, such as Web-part list, isrestored to its former state, including all the related objects.
Searching Items Within a BackupAgreeYa Recovery Manager for SharePoint offers you two ways of locating files you need to restore within aparticular backup:
l Browsing for items
This strategy is useful if you do not remember the exact name of the file you want to restore, but you doremember where it was located, so you can browse for the file.
l Filtering in the plain list of all files
This strategy is useful if you know the name of the file you want to restore, so you can use the Look forfunction to narrow the list of files to choose from.
Searching Items Across BackupsRecovery Manager provides advanced search capabilities to look for a particular SharePoint content across allanalyzed backups. Take the following steps:
1. Run the Recovery Manager for SharePoint Management Console.
2. In the navigation pane select the Recovery Manager node.
3. In the right pane type keywords and/or wildcard characters in the Look for field to narrow the searchscope. The search results will be listed below. You can restrict your search by filtering the variety ofanalyzed backups by the time period when the backups were made and the virtual server(s) where the
Recovery Manager for SharePoint 5.1User Guide
54

backups are stored. Uncheck the Search in Recycle Bin option if you want to exclude the SharePointRecycle Bin contents from the search scope.
4. To locate the desired object in the SharePoint hierarchy tree, click Locate. You will be carried to theproper object location.
Recovery Manager for SharePoint 5.1User Guide
55

Restoring Backup Content
When you have found the required content, you can proceed to restoring it.
Restoring Files from the Search Results ListTo restore the items from the search results list:
1. Go to the search results list.
2. Browse the results to locate the file.
3. To make sure you are going to restore the right file select the desired file and click the Preview button.Make sure you have selected the right file and close it.
4. Click the check box next to the file and select either of the following actions:
l If you want to restore the desired object to its original location, click Restore.
l If you want to restore the desired object to the alternate location, click Restore to. In the SelectTarget SharePoint dialog that appears, browse the tree and select a different location to recoverdesired files. The description of the selected target location will be displayed below. Click OK to closethe dialog window and start restoration process
l If you want to save it to the file system, select the Save As button and specify the desired location inthe dialog that appears.
NOTE:When choosing the Preview or Save As option, a warning message about the time required forthe backup restoration to a temporary database is displayed.
The progress bar will be displayed to indicate the restoration process and statistics. After the file is restoredthe progress bar disappears.
The Save As option is not available for lists and documents with content stored on the file system.
The Preview option is not available for the items found in the SharePoint Recycle Bins.
The items found in the SharePoint Recycle Bins can be restored to their original location only.
Restoring a Modified FileTo restore the original version of a modified file:
1. In the lower right pane, go to the Backup Content tab.
2. Browse the tree to locate the file.
3. Click the check box next to the file and select either of the following actions:
Recovery Manager for SharePoint 5.1User Guide
56
l If you want to restore the desired object to its original location, click Restore.
l If you want to restore the desired object to the alternate location, click Restore to. In the SelectTarget SharePoint dialog that appears, browse the tree and select a different location to recoverdesired files. The description of the selected target location will be displayed below. Click OK to closethe dialog window and start restoration process.
l If you want to save it to the file system, select the Save As button and specify the desired location inthe dialog that appears. You can select multiple objects (folders, document libraries, documents) andsave them to the file system, preserving their hierarchy.
NOTE:When choosing the Save As option, a warning message about the time required for the backuprestoration to a temporary database is displayed.
The progress bar will be displayed to indicate the progress of the restoration process and statistics. After thefile is restored the progress bar disappears.
Restoring a Deleted FileTo recover a deleted file:
1. In the Management Console, select the desired backup and go to the Search tab.
2. Select Show Deleted from the drop-down list on the toolbar. If many deleted files are listed, typethe name of the file in the Look for field to narrow the search scope. The search results will belisted below.
3. To make sure you are going to restore the right file select the desired file and click the Preview button.Make sure you have selected the right file and close it.
4. Click the check box next to the file and choose either of the following actions:
l If you want to restore the desired object to its original location, click Restore.
l If you want to restore the desired object to the alternate location, click Restore to. In theSelect Target SharePoint dialog that appears, browse the tree and select a different location torecover desired files. The description of the selected target location will be displayed below.Click OK to close the dialog window and start restoration process.
l If you want to save it to the file system, select the Save As button and specify the desiredlocation in the dialog that appears. You can select multiple objects (folders, document libraries,documents) and save them to the file system, preserving their hierarchy.
NOTE:When choosing the Save As option, a warning message about the time required for the backuprestoration to a temporary database is displayed.
The progress bar will be displayed to indicate the progress of the restoration process and statistics. After thefile is restored the progress bar disappears.
Restoring Content to Alternate LocationThe Restore to option enables users to restore SharePoint content to an alternate location.
Recovery Manager for SharePoint 5.1User Guide
57

PermissionsWhen a site collection as a whole is restored to an alternate location, all the objects of the site collection arerestored with the original permissions.
When restoring sub-sites, lists, document libraries, folders, documents, items to an alternate location (a newlycreated site collection), their permissions are not restored.
User InformationWhen a site collection as a whole is restored to an alternate location, all the user information is preserved.
When restoring sub-sites, lists, document libraries, folders, documents, items to an alternate location (a newlycreated site collection), the creator/modifier information is reset to System Account, and other user-relatedinformation (e.g. Assigned To in the task list, etc.) may be omitted because users and groups are the objects ofa Site Collection (belong to a Collection) and are restored only when a Site Collection is recreated as a whole.
Auditing OperationsRecovery Manager for SharePoint saves the information on Preview, Save As and Restore operations to theEvent Log, allowing users to audit the application operations.
This feature helps monitoring internal threats to the enterprise and tightening its security policies.
To view the Recovery Manager Event Log, open Event Viewer by selecting Start | Control Panel |Performance and Maintenance | Administrative Tools, and then double-clicking Event Viewer or open theMMC console and select Event Viewer from it.
Select the Recovery Manager for SharePoint log to view the information on the application operations.
NOTE:When an item from a recycled container is recovered, Recovery Manager restores the containerwith all its content. Restoring an item located in a recycled container is logged as a container restore.
Recovery Manager for SharePoint 5.1User Guide
58

Saving Backup and Recycle Bin Objectsto Disk
The Save As functionality is provided for objects (documents and discussion) from backups and recycle bins.The objects are saved to the file system preserving the hierarchy:
E.g.: The Web has several document libraries and discussion boards. Saving the web content to the folder onthe disk results in creating a web name based folder and a number of subfolders in the target directory namedaccording to the original containers (document libraries and discussion boards).
You can view the progress of saving objects to the disk. The progress window displays the current and totalnumber of objects being saved, current and total content size and overall progress percentage.
NOTE: Please note that saving documents to disk is not supported for SharePoint 2013 and SharePoint2016.
Recovery Manager for SharePoint 5.1User Guide
59

Web Access
Recovery Manager for SharePoint Web Access is web interface allowing users to search for documents acrossbackups and post requests to restore a particular document in a particular backup file.
The tasks of restoration and searching are now divided between the Administrator and lower level users(Helpdesk, for example).
The administrator, responsible for the product installation, backup discovery, analysis and restore, candelegate the time-consuming task of locating a required object to other users.
To activate the Web Access Search or Administration component, select the Search or Admin shortcut fromStart | Programs | AgreeYa | Recovery Manager for SharePoint.
The Administration component (the Admin shortcut) allows you to add users to Web Access for RecoveryManager for SharePoint and configure e-mail notification.
The Search component (the Search shortcut) opens the Search Page allowing users to search for documentsand post restore requests.
Administration PageThe administration page allows you to add users to the Web Access and to grant them either search only orsearch and restore privileges.
By default, only the user who installed Web Access for Recovery Manager for SharePoint is given access to theuser administration page.
To modify the access permissions, please refer to Location '/admin' section in the httpd.conf file located inthe installation directory (by default C:\Program Files\AgreeYa\Recovery Manager for SharePointWeb Access\conf).
For more information, please refer to http://httpd.apache.org/docs/2.0/mod/core.html#require
Adding UsersType the user name in the Add new user: field and click Add. You can also specify the name of the ActiveDirectory Security Group here to grant access to all the group members.
Check the Can Restore box to enable the user(s) to restore the content requested by them as well as theother users.
Removing UsersClick the button to remove the user.
Recovery Manager for SharePoint 5.1User Guide
60

Configuring E-mail NotificationRecovery Manager for SharePoint Web Access can notify you on the status of your restore requests via e-mail.
To receive e-mail notifications on the status of your restore requests, specify the SMTP server and the portnumber on the Admin page and save your settings.
If the settings are correct, you should receive an e-mail alert within minutes. If you do not receive an e-mail,please, check your settings.
The notification message templates can be customized (e.g. translated).
Search Page (Search Privileges)The Search shortcut from Start | Programs | AgreeYa | Recovery Manager for SharePoint opens the SearchPage allowing you to search for documents and post restore requests. It is also displayed when you select theSearch link in the left part of the search screen.
Searching for Documents1. Specify the full title or a part of the site, document or item title.
2. Select the object(s) want to search for from the drop-down list.
3. Specify whether you want to search for objects across all Web Applications or limit the search scope to aparticular set of Web Applications.
4. Check the appropriate box(es) to specify whether you want to search in Backups or/and in Recycle Bins.
5. Click Search. After the search is completed, you can post a restore request.
Posting a Restore RequestIf you have the search only privileges, you can send the request to restore the object(s).
1. Select the checkbox next to the object(s) you wish to restore.
2. Type in an optional comment in the field above the search results list (e.g. who requires the restore,the importance of the restore, etc.)
3. Click Send Request. The details of your request are displayed.
Viewing Restore RequestsThe Restore Requests link in the left part of the screen displays all your recovery requests.
To easily locate the requests you need, Recovery Manager for SharePoint Web Access provides thefollowing views:
l Pending – displays all recovery requests in a pending state
l In Progress – displays all recovery requests that are currently in progress
l Done – displays all recovery requests that have been completed
Recovery Manager for SharePoint 5.1User Guide
61

Each view displays the following information for the requests available:
l When Created – the date when the request was created
l Comments – if available
l Request Status – current status of the request
l Details link – clicking the link displays the detailed information on the request
Request Details include:
l When Created – the date when the request was created
l Comments – if available
The icon, indicating whether the object is located in a backup or recycle bin.
l Title – the name of the object
l Location – the path to the item
l Date Modified – the date when the request was changed
l Item Status – current status of the request
Search Page (search and restore privileges)The Search shortcut from Start | Programs | AgreeYa | Recovery Manager for SharePoint opens the SearchPage allowing you to search for documents and view the restore requests posted by all users and to create therestore jobs for their requests if you have the required privileges. The page is also displayed when you selectthe Search link in the left part of the search screen.
Searching for Documents1. Specify the full title or a part of the site, document or item title.
2. Select the object(s) want to search for from the drop-down list.
3. Specify whether you want to search for objects across all Web Applications or limit the search scope to aparticular set of Web Applications.
4. Check the appropriate box(es) to specify whether you want to search in Backups or/and in Recycle Bins.
5. Click Search. After the search is completed, you can proceed to restoring items.
Restoring Items1. Select the checkbox next to the object(s) you wish to restore.
2. Click Restore. The recovery process is initiated. The details of your restore are displayed.
Viewing RestoresThe Restores link in the left part of the screen displays all available recovery jobs.
Recovery Manager for SharePoint 5.1User Guide
62

To easily locate the recovery jobs you need, Recovery Manager for SharePoint Web Access provides thefollowing views:
l In Progress - displays all recovery jobs that are currently in progress
l Done - displays all recovery jobs that have been completed
l Failed - displays all recovery jobs that have failed to complete
For each recovery job the following information is displayed:
l Backup Path - location of the document.
l Backup Date - the date when the backup was created.
l Restore Job Created - the date and time when the recovery job was created.
l Restore Duration - the job execution time.
l Restore Job Completed - the date and time when the recovery job was finished.
l Result of Restore - comments on the recovery performed.
l The Requests link - clicking the link displays restore related recovery requests, including theinformation on the user who created the request, the date and time if was created, comments ifavailable, request status and Details.
You can also view the requests by selecting the Restore Requests link in the left part of the screen.
Recovery Manager for SharePoint 5.1User Guide
63

About AgreeYa
AgreeYa listens to customers and delivers worldwide innovative technology, business solutions and servicesthey trust and value. For more information, visit http://agreeya.com/.
Contacting AgreeYaFor sales or other inquiries, visit http://agreeya.com/contact.html or call (800) AGREEYA.
Technical support resourcesTechnical support is available to customers who have purchased AgreeYa software with a valid maintenancecontract and to customers who have trial versions. To access the Support Portal, go tohttp://recoverymanager.agreeya.com.
The Support Portal provides self-help tools you can use to solve problems quickly and independently, 24 hoursa day, 365 days a year. In addition, the portal provides direct access to product support engineers through anonline Service Request system.
The site enables you to:
l Create, update, and manage Service Requests (cases)
l View Knowledge Base articles
l Obtain product notifications
l Download software. For trial software, go to Trial Downloads.
l View how-to videos
l Engage in community discussions
l Chat with a support engineer
Recovery Manager for SharePoint 5.1User Guide
64