
Administering Oracle Blockchain Platform
54
Oracle® Database Administering Oracle Blockchain Platform F20800-09 September 2021
-
Upload
khangminh22 -
Category
Documents
-
view
0 -
download
0
Transcript of Administering Oracle Blockchain Platform

Oracle® DatabaseAdministering Oracle Blockchain Platform
F20800-09September 2021
Oracle Database Administering Oracle Blockchain Platform,
F20800-09
Copyright © 2019, 2021, Oracle and/or its affiliates.
Primary Author: Kate Price
This software and related documentation are provided under a license agreement containing restrictions onuse and disclosure and are protected by intellectual property laws. Except as expressly permitted in yourlicense agreement or allowed by law, you may not use, copy, reproduce, translate, broadcast, modify, license,transmit, distribute, exhibit, perform, publish, or display any part, in any form, or by any means. Reverseengineering, disassembly, or decompilation of this software, unless required by law for interoperability, isprohibited.
The information contained herein is subject to change without notice and is not warranted to be error-free. Ifyou find any errors, please report them to us in writing.
If this is software or related documentation that is delivered to the U.S. Government or anyone licensing it onbehalf of the U.S. Government, then the following notice is applicable:
U.S. GOVERNMENT END USERS: Oracle programs (including any operating system, integrated software,any programs embedded, installed or activated on delivered hardware, and modifications of such programs)and Oracle computer documentation or other Oracle data delivered to or accessed by U.S. Government endusers are "commercial computer software" or "commercial computer software documentation" pursuant to theapplicable Federal Acquisition Regulation and agency-specific supplemental regulations. As such, the use,reproduction, duplication, release, display, disclosure, modification, preparation of derivative works, and/oradaptation of i) Oracle programs (including any operating system, integrated software, any programsembedded, installed or activated on delivered hardware, and modifications of such programs), ii) Oraclecomputer documentation and/or iii) other Oracle data, is subject to the rights and limitations specified in thelicense contained in the applicable contract. The terms governing the U.S. Government’s use of Oracle cloudservices are defined by the applicable contract for such services. No other rights are granted to the U.S.Government.
This software or hardware is developed for general use in a variety of information management applications.It is not developed or intended for use in any inherently dangerous applications, including applications thatmay create a risk of personal injury. If you use this software or hardware in dangerous applications, then youshall be responsible to take all appropriate fail-safe, backup, redundancy, and other measures to ensure itssafe use. Oracle Corporation and its affiliates disclaim any liability for any damages caused by use of thissoftware or hardware in dangerous applications.
Oracle, Java, and MySQL are registered trademarks of Oracle and/or its affiliates. Other names may betrademarks of their respective owners.
Intel and Intel Inside are trademarks or registered trademarks of Intel Corporation. All SPARC trademarks areused under license and are trademarks or registered trademarks of SPARC International, Inc. AMD, Epyc,and the AMD logo are trademarks or registered trademarks of Advanced Micro Devices. UNIX is a registeredtrademark of The Open Group.
This software or hardware and documentation may provide access to or information about content, products,and services from third parties. Oracle Corporation and its affiliates are not responsible for and expresslydisclaim all warranties of any kind with respect to third-party content, products, and services unless otherwiseset forth in an applicable agreement between you and Oracle. Oracle Corporation and its affiliates will not beresponsible for any loss, costs, or damages incurred due to your access to or use of third-party content,products, or services, except as set forth in an applicable agreement between you and Oracle.
Contents
Preface
Audience v
Documentation Accessibility v
Related Documents v
Conventions v
1 A Service Administrator's Roadmap to Oracle Blockchain Platform
Oracle Blockchain Platform Enterprise Edition Overview 1-1
Security, Authentication, and Authorization 1-2
Workflow for Administering Oracle Blockchain Platform 1-6
2 Design Your Oracle Blockchain Platform Configuration
Prerequisites 2-1
Supported Topologies 2-2
3 Install Your Oracle Blockchain Platform Instance
Deploy Your Virtual Machine 3-1
Log on to Oracle Blockchain Platform for the First Time 3-3
Configure a Hardware Security Module Client 3-4
Install the Client for SafeNet Luna Network HSM Devices 3-4
Manually Install the Client for SafeNet Luna Network HSM Devices 3-5
Install the Client for SafeNet Luna HSM on Demand 3-6
4 Upgrade to Version 21
Enable Transport Layer Security 4-1
Patch to v19.3.6 4-1
Check Available Disk Space 4-2
Upgrade Instances to Version 21 4-2
Update External Load Balancer Port Mapping 4-3
iii
Configure Raft Consensus Protocol 4-4
5 User Management
Configure an Authentication Server 5-1
Configure the Built-In LDAP Server 5-1
Add Users to Your LDAP Server Using a Script 5-3
Add Users to Your LDAP Server Using Blockchain Platform Manager 5-3
Configure an External OpenLDAP, Oracle Unified Directory, or Oracle InternetDirectory LDAP Server 5-4
Add Users to an External LDAP Server 5-5
Configure an External Microsoft Active Directory Authentication Server 5-6
User Groups and Roles 5-8
6 Provision an Instance
Before You Create an Oracle Blockchain Platform Instance 6-1
Provision an Instance using the Blockchain Platform Manager 6-2
Provision an Instance Using REST APIs 6-5
Postrequisites When Using an External Load Balancer 6-7
7 Manage Oracle Blockchain Platform
View Instance Details 7-1
View Instance Activity 7-1
Start or Stop an Instance 7-2
Update an Instance 7-2
Delete an Instance 7-2
Scale an Instance In or Out 7-2
Patch an Instance to v19.3.4 7-4
Patch an Instance to v19.3.5 or Later 7-5
8 Monitor and Troubleshoot Your Instance
Logging 8-1
A Accessibility Features and Tips for Oracle Blockchain Platform
iv
Preface
Administering Oracle Blockchain Platform explains how to provision and maintain OracleBlockchain Platform instances.
Topics:
• Audience
• Documentation Accessibility
• Related Documents
• Conventions
AudienceThis guide is intended for service administrators responsible for provisioning and maintainingOracle Blockchain Platform .
Documentation AccessibilityFor information about Oracle's commitment to accessibility, visit the Oracle AccessibilityProgram website at http://www.oracle.com/pls/topic/lookup?ctx=acc&id=docacc.
Access to Oracle Support
Oracle customers that have purchased support have access to electronic support through MyOracle Support. For information, visit http://www.oracle.com/pls/topic/lookup?ctx=acc&id=info or visit http://www.oracle.com/pls/topic/lookup?ctx=acc&id=trs if youare hearing impaired.
Related DocumentsFor more information, see these Oracle resources:
• Using Oracle Blockchain Platform
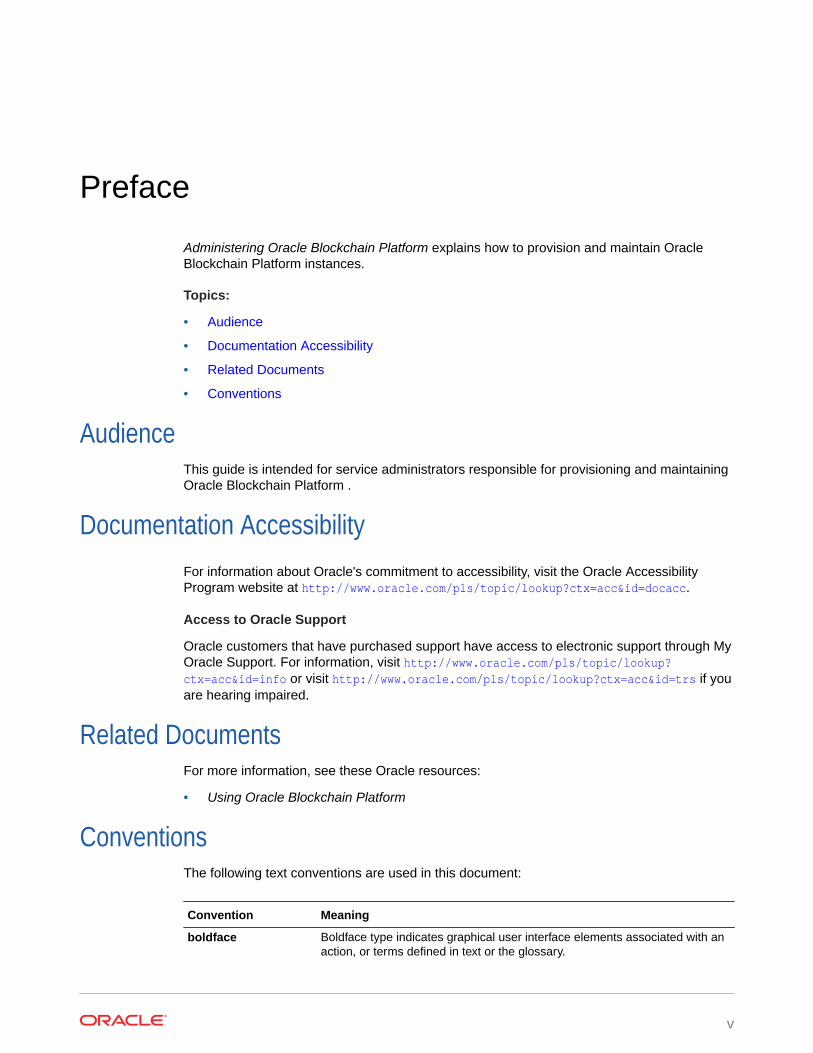
ConventionsThe following text conventions are used in this document:
Convention Meaning
boldface Boldface type indicates graphical user interface elements associated with anaction, or terms defined in text or the glossary.
v

Convention Meaning
italic Italic type indicates book titles, emphasis, or placeholder variables for whichyou supply particular values.
monospace Monospace type indicates commands within a paragraph, URLs, code inexamples, text that appears on the screen, or text that you enter.
Preface
vi

1A Service Administrator's Roadmap to OracleBlockchain Platform
Topics
• Oracle Blockchain Platform Enterprise Edition Overview
• Security, Authentication, and Authorization
Oracle Blockchain Platform Enterprise Edition OverviewOracle Blockchain Platform gives you a pre-assembled platform for building and runningsmart contracts and maintaining a tamper-proof distributed ledger.
Oracle Blockchain Platform is a network consisting of validating nodes (peers) that updatethe ledger and respond to queries by executing smart contract code—the business logic thatruns on the blockchain. External applications invoke transactions or run queries through clientSDKs or REST API calls, which prompts selected peers to run the smart contracts. Multiplepeers endorse (digitally sign) the results, which are then verified and sent to the orderingservice. After consensus is reached on the transaction order, transaction results are groupedinto cryptographically secured, tamper-proof data blocks and sent to peer nodes to bevalidated and appended to the ledger. Platform administrators can use the BlockchainPlatform Manager to create and manage platform instances, while network administratorscan use the Oracle Blockchain Platform console to configure the blockchain and monitor itsoperation.
Oracle Blockchain Platform Enterprise Edition provides an independently-installable versionof Oracle Blockchain Platform built on Docker containers and delivered as a pre-built VMimage for multiple virtualization options. The VM is delivered in an Open VirtualizationAppliance (ova) format and can be imported and started using VMWare ESXi, OracleVirtualBox, and Oracle Linux Virtualization Manager. Once the VM is running, the BlockchainPlatform Manager is used for configuration, provisioning, and patching multiple BlockchainPlatform instances, which can be deployed over multiple VMs to distribute the Dockercontainers running Oracle Blockchain Platform nodes. Similarly to the cloud PaaS, thisedition is fully pre-assembled and can create new complete blockchain instances in minutes.
In addition to flexible virtualization options, the enterprise edition enables dynamic scalabilityto handle the evolving workloads by increasing the resources in the current VMs or scalingout to more VMs to run the additional nodes (e.g., peers, orderers.) Additional VMs andnodes can be deployed in other datacenters across a WAN for disaster recovery (DR.) Unliketypical applications, Oracle Blockchain Platform's distributed ledger and the distributedmetadata database handle data replication out-of-the-box.
Feature parity with the cloud version ensures that customers can deploy chaincode and usethe same chaincode APIs and extensive REST APIs across both versions. Oracleinnovations in using Berkeley DB for world state with SQL-based queries, built-in transactionsynchronization to off-chain rich history database, intuitive and comprehensive console withpowerful operations and monitoring tools, and all the other unique enterprise-grade featuresare shared across the cloud and on-premise versions.
1-1
Security, Authentication, and AuthorizationIntroduction to Oracle Blockchain Platform Enterprise Edition Security
Oracle Blockchain Platform Enterprise Edition deals with security on several levels. Atthe top level is the security related to the Oracle Blockchain Platform virtual machines(VMs). Next is the security associated with Blockchain Platform Manager that is usedto manage the life cycle on Oracle Blockchain Platform instances. Blockchain PlatformManager (the control plane) users are able to create, scale out, scale in, patch, andother life cycle operations. For each instance there are users authorized for managing,monitoring, and administering an instance. Finally there are users of the instance thataccess an instance either via the Fabric SDK or the Oracle Blockchain Platform RESTProxy.
All user information including their roles and passwords are stored in yourauthentication server. A default LDAP server is provided as part of the VM and is onlyintended for development purposes. It is expected that you will connect to yourcorporate authentication server in production.
Managing Security
Creating Oracle Blockchain Platform VMs
Oracle Blockchain Platform uses a cluster of VMs based upon the VM image provided.The first step that needs to be taken in configuring Oracle Blockchain Platform VMs isto import them into whatever hypervisor is being used. Supported hypervisors include:
• Oracle VirtualBox – Primarily intended for development and testing
• Oracle Linux Virtualization Manager
• VMWare Workstation
• VMWare ESXi
Securing Data at Rest
At the time of importing the OVA file or sometime later users may want to enable diskencryption in their hypervisor to protect data at rest. This may also require that the VMbe encrypted, which would also be handled by hypervisor settings.
Blockchain Platform Manager VM and Instance Clusters
A particular VM instance should be reserved for the Oracle Blockchain PlatformBlockchain Platform Manager. This VM will run the provisioning server that is used tocontrol the life cycle operations of Oracle Blockchain Platform instances within aspecific Oracle Blockchain Platform platform. It is possible to deploy multiple OracleBlockchain Platform platforms, each with its own Blockchain Platform Manager VMand clusters of instance (data plane) VMs. Each cluster of instance VMs only supportsa single Oracle Blockchain Platform instance.
Chapter 1Security, Authentication, and Authorization
1-2
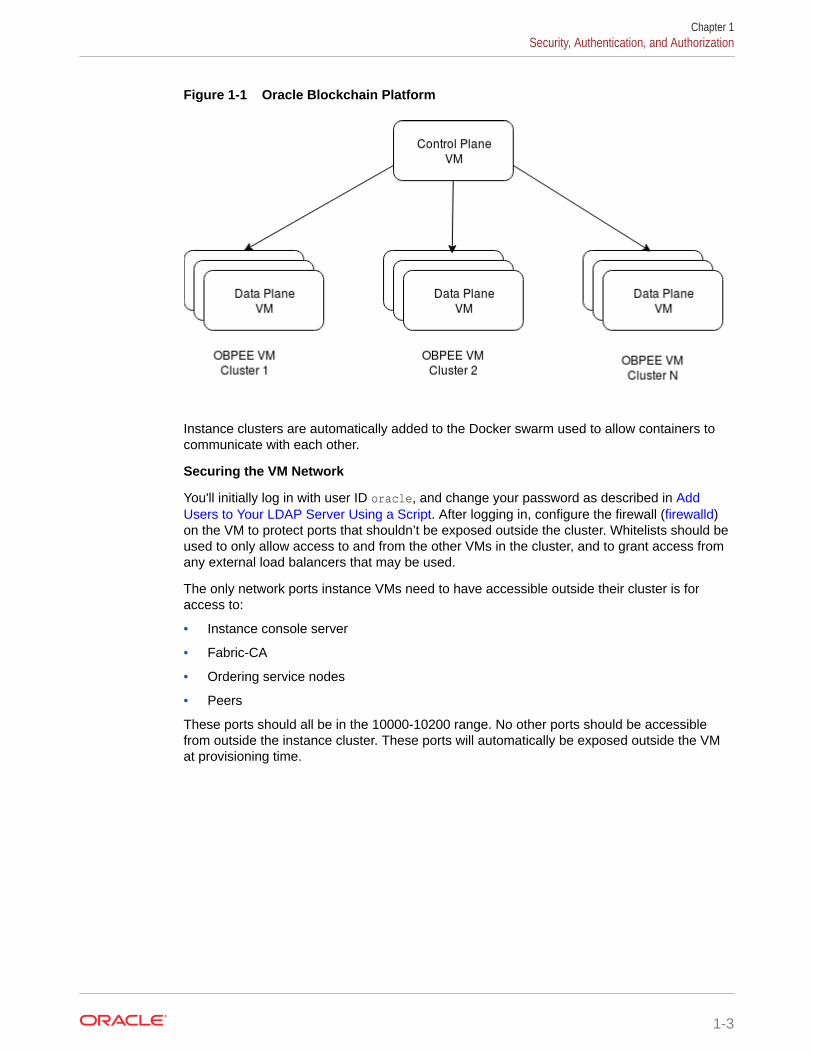
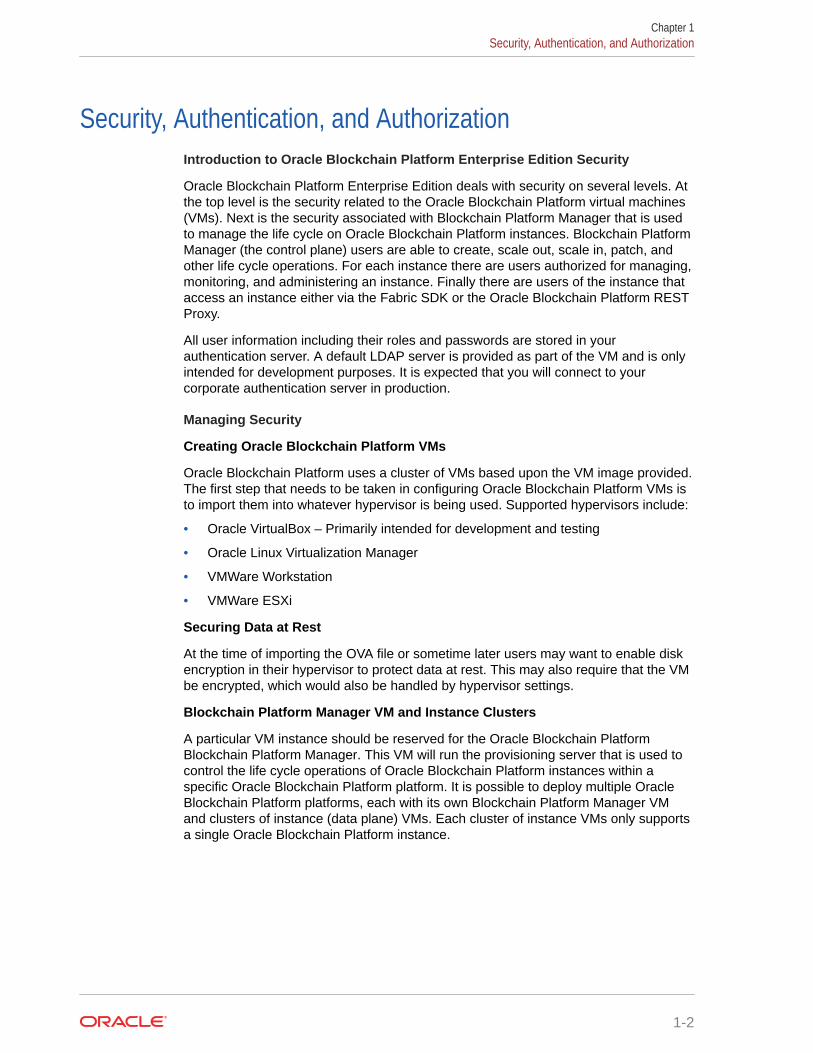
Figure 1-1 Oracle Blockchain Platform
Instance clusters are automatically added to the Docker swarm used to allow containers tocommunicate with each other.
Securing the VM Network
You'll initially log in with user ID oracle, and change your password as described in AddUsers to Your LDAP Server Using a Script. After logging in, configure the firewall (firewalld)on the VM to protect ports that shouldn’t be exposed outside the cluster. Whitelists should beused to only allow access to and from the other VMs in the cluster, and to grant access fromany external load balancers that may be used.
The only network ports instance VMs need to have accessible outside their cluster is foraccess to:
• Instance console server
• Fabric-CA
• Ordering service nodes
• Peers
These ports should all be in the 10000-10200 range. No other ports should be accessiblefrom outside the instance cluster. These ports will automatically be exposed outside the VMat provisioning time.
Chapter 1Security, Authentication, and Authorization
1-3
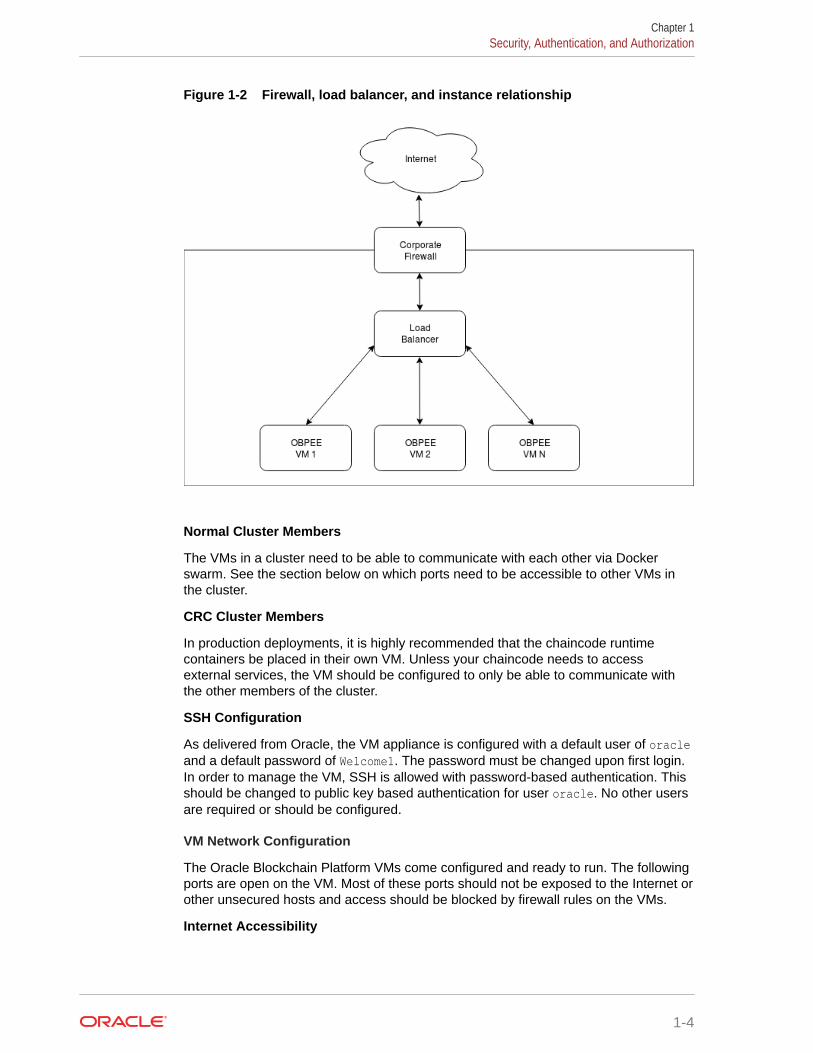
Figure 1-2 Firewall, load balancer, and instance relationship
Normal Cluster Members
The VMs in a cluster need to be able to communicate with each other via Dockerswarm. See the section below on which ports need to be accessible to other VMs inthe cluster.
CRC Cluster Members
In production deployments, it is highly recommended that the chaincode runtimecontainers be placed in their own VM. Unless your chaincode needs to accessexternal services, the VM should be configured to only be able to communicate withthe other members of the cluster.
SSH Configuration
As delivered from Oracle, the VM appliance is configured with a default user of oracleand a default password of Welcome1. The password must be changed upon first login.In order to manage the VM, SSH is allowed with password-based authentication. Thisshould be changed to public key based authentication for user oracle. No other usersare required or should be configured.
VM Network Configuration
The Oracle Blockchain Platform VMs come configured and ready to run. The followingports are open on the VM. Most of these ports should not be exposed to the Internet orother unsecured hosts and access should be blocked by firewall rules on the VMs.
Internet Accessibility
Chapter 1Security, Authentication, and Authorization
1-4
Some ports may need to be accessible outside the corporate network. In particular, to haveother Oracle Blockchain Platform or Fabric instances running outside the corporate networkconnect to an instance inside the corporate network, certain ports associated with theordering service and peers will need to be accessible.
Corporate Network Accessibility
It is recommended that console UI ports associated with the provisioning console andinstance console be restricted to at most access from inside the corporate network. Ideallythey would be restricted to even a subset of that, only machines used for networkmanagement and operations.
Port Accessibility Guide
Port Use or purpose Internetaccessible
Corporatenetworkaccessible
Accessible byother VMs inOBPEE cluster
22 SSH N N[1] N
443 Docker Registry N N Y
636 Local LDAP serverfor developmentpurposes
N N Y
2375 Docker Daemon N N Y
2376 TLS Endpoint forDocker Daemon
N N Y
2377 Docker Swarm N N Y
7443[2] BlockchainPlatform ManagerUI and REST(https)– Applicationconnector
N Y[3] N
7946 Docker Swarm N N Y
8080 Componentmanager
N N Y
10000-10200 Ports assigned tothe load balancerfor the variousinstance containerssuch as peer,orderer, etc.
Y Y[4] Y
[1] SSH is only required if the VM console isn’t accessible
[2] Note that if you're migrating from an earlier version of the product that port 7070 for httpconnection is no longer supported
[3] UI ports should be only accessible by machines needed for provisioning and configuringinstances
[4] See the section on load balancer configuration
Load Balancer Configuration
If using an external load balancer, it will need to be configured to perform TLS terminationand pass the ports as listed in the provisioning console to the appropriate VM host and port.Below is an example of the necessary port mappings as reported by the provisioning console:
Chapter 1Security, Authentication, and Authorization
1-5
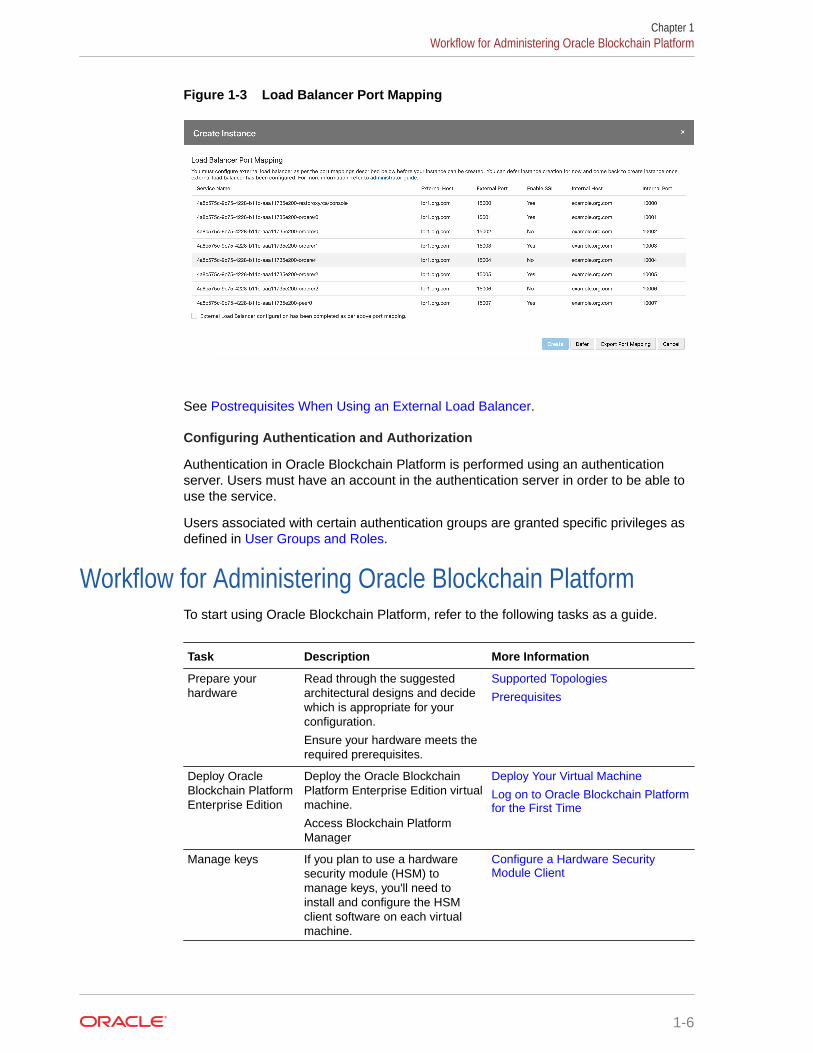
Figure 1-3 Load Balancer Port Mapping
See Postrequisites When Using an External Load Balancer.
Configuring Authentication and Authorization
Authentication in Oracle Blockchain Platform is performed using an authenticationserver. Users must have an account in the authentication server in order to be able touse the service.
Users associated with certain authentication groups are granted specific privileges asdefined in User Groups and Roles.
Workflow for Administering Oracle Blockchain PlatformTo start using Oracle Blockchain Platform, refer to the following tasks as a guide.
Task Description More Information
Prepare yourhardware
Read through the suggestedarchitectural designs and decidewhich is appropriate for yourconfiguration.
Ensure your hardware meets therequired prerequisites.
Supported Topologies
Prerequisites
Deploy OracleBlockchain PlatformEnterprise Edition
Deploy the Oracle BlockchainPlatform Enterprise Edition virtualmachine.
Access Blockchain PlatformManager
Deploy Your Virtual Machine
Log on to Oracle Blockchain Platformfor the First Time
Manage keys If you plan to use a hardwaresecurity module (HSM) tomanage keys, you'll need toinstall and configure the HSMclient software on each virtualmachine.
Configure a Hardware SecurityModule Client
Chapter 1Workflow for Administering Oracle Blockchain Platform
1-6

Task Description More Information
Add and manageusers and roles
A rudimentary LDAP server isprovided with Oracle BlockchainPlatform Enterprise Edition,however you'll need to use a third-party tool to add users and roles.
Configure an Authentication Server
User Groups and Roles
Provision a serviceinstance
Use the Create Instance wizard inBlockchain Platform Manager tocreate a service instance.
Provision an Instance using theBlockchain Platform Manager
Configure yourblockchain network
Once your instance is created,you can use the BlockchainPlatform Console to configure thenetwork.
What's the Console?
After you’ve created your instance and any required users, you can begin to use OracleBlockchain Platform as described in What's the Console?
Chapter 1Workflow for Administering Oracle Blockchain Platform
1-7
2Design Your Oracle Blockchain PlatformConfiguration
Topics
• Prerequisites
• Supported Topologies
Prerequisites
Hardware
The host machine for a single Oracle Blockchain Platform VM should meet the followingminimum requirements:
• 16 GB memory
• 500 GB available storage
• 4 CPUs
Virtual Machine Hosting Software
The following hypervisors are supported:
• Oracle VirtualBox v5.x or v6.0 or later
• Oracle Linux Virtualization Manager v4.2.8.2-1.0.8.el7 or later
• VMWare Workstation
• VMWare ESXi v6.7 or later
Additionally:
• VMs must be DNS-resolvable
• Date and time on the VMs and the client hosts for running a browser for BlockchainPlatform Console and Blockchain Platform Manager must be synchronized.
• If your hypervisor is running on Microsoft Windows, you should disable Hyper-V. Hyper-Vis a Windows-native hypervisor and may cause interoperability issues when anotherhypervisor is installed with it. For more information, see the Microsoft support article: Virtualization applications do not work together with Hyper-V
Load Balancer
A lightweight load balancer is provided with Oracle Blockchain Platform for prototyping anddevelopment needs. It is not recommended for production use as it runs as part of theblockchain cluster.
2-1
An external load balancer capable of supporting TCP pass-through (and not just HTTPpath mapping) can be provided, such as a dedicated NGINX 1.9.3+ server or F5.
Authentication Servers
An LDAP server is provided for prototyping and development purposes, as managingblockchain instances and the blockchain network itself requires an identitymanagement system.
This server isn't recommended for production use. We recommended you configureone of the following authentication servers for production:
• OpenLDAP 2.4.44 or later
• Oracle Internet Directory 12.2.1.4.0 or later
• Oracle Unified Directory 12.2.1.4.0 or later
• Microsoft Active Directory Windows Server 2016 or later with a single domain
Hardware Security Modules
Oracle Blockchain Platform supports using a hardware security module (HSM) to storeand manage keys. If you use an HSM, typically you configure one for eachorganization. To use an HSM, you must have access to one of the following devices orservices:
• SafeNet Luna Network HSM
• SafeNet Luna HSM on Demand
Web Browsers
All administrative tools included with Oracle Blockchain Platform can be accessedthrough these browsers:
• Mozilla Firefox
• Microsoft Edge
• Google Chrome
• Apple Safari
Supported TopologiesIn addition to creating a topology in which both the founder and participant are onOracle Blockchain Platform Enterprise Edition, the following interoperability scenariosare supported:
• Oracle Blockchain Platform Enterprise Edition Founder, Oracle BlockchainPlatform Cloud Participant
• Oracle Blockchain Platform Enterprise Edition Founder, Hyperledger FabricParticipant
• Oracle Blockchain Platform Cloud Founder, Oracle Blockchain Platform EnterpriseEdition participant
• Hyperledger Fabric founder, Oracle Blockchain Platform Enterprise Editionparticipant
Chapter 2Supported Topologies
2-2

3Install Your Oracle Blockchain PlatformInstance
Topics
• Deploy Your Virtual Machine
• Log on to Oracle Blockchain Platform for the First Time
• Configure a Hardware Security Module Client
Deploy Your Virtual MachineLoad Oracle Blockchain Platform Enterprise Edition on your Virtual Machine HostingSoftware
1. On the Oracle Blockchain Platform Enterprise Edition page, click Download and followthe steps to download the Oracle Blockchain Platform Enterprise Edition package.Extract the OVA image, obpee_21_1_2.ova, from the downloaded archive file.
2. Import the VM into your virtual machine hosting software. For example, on OracleVirtualBox, complete the following steps. For information about using VMWare ESXi, see Load Oracle Blockchain Platform Enterprise Edition on VMWare ESXi.
a. Select File then Import Appliance, and browse to the directory where the OVA hasbeen extracted.
b. On the Appliance settings page, you may check Reinitialize the MAC address ofall network cards if you plan on running more than 1 VM in your setup. You cancreate multiple VMs by either importing the appliance multiple times, or cloning theVM immediately after it's imported. Click Import.
3. After a few minutes, the VM will be displayed in the list of machines in VirtualBoxManager. Right-click on the VM and select Settings:
a. Under System on the Motherboard tab, select Hardware Clock in UTC Time toensure the guest VM and the host's clocks are consistent in terms of timezones.
b. Under Network on the Adapter tab connected to the network you want the VM to beon, ensure Enable Network Adapter is selected, and select Bridged Adapter.
The VM is now ready to be used.
Load Oracle Blockchain Platform Enterprise Edition on VMWare ESXi
1. In the VMWare ESXi navigator, select the Virtual Machines page, and then clickCreate / Register VM.
2. Under Select creation type, select Deploy a virtual machine from an OVF or OVA fileand then click Next.
3. Enter a name for the virtual machine and select the blockchain package (OVA file) thatyou downloaded and then click Next.
3-1
4. Accept the default values and click Next for the remaining pages.
5. Click Finish, and then wait for the VM to be provisioned.
6. Once the VM is running, open a console to the VM and log in using the defaultuser name oracle and the default password Welcome1. You'll be prompted tochange the password. After you change the password, log in again using the newpassword.
7. To enable DHCP to obtain an IP address, use the sudo command to change tothe root account and then complete the following steps:
a. Copy the file /etc/sysconfig/network-scripts/ifcfg-enp0s3 to anew file in the same directory called ifcfg-ens160.
b. Edit the ifcfg-ens160 file to change the adapter name from enp0s3 toens160.
c. Power off the VM.
d. Change the network adapter type from E1000 to VMXNET 3.
8. Power on the VM.
The VM is now ready to be used.
Expand the Available Space for the Ledger
Because the ledger and logs for Oracle Blockchain Platform are persistent, you needto expand the root volume to ensure you don't run out of space.
1. Add a hard disk for the SCSI controller. In VirtualBox click Settings then selectStorage. Add a new hard disk. The recommended file type is VHD (Virtual HardDisk); select either fixed or extensible mode.
2. Create the logical volume partition:
sudo fdisk -c -u /dev/sdb
Enter the following subcommands sequentially:
n Create new partition Press p Choose primary partition use p1 Choose 1 for the primary partitionafter this press return key twice for max allocationt Change the type8e Change the partition type to Linux LVMp Print the partitionw write the changes
3. Create the new physical volume:
sudo pvcreate /dev/sdb1
4. Restart the system.
5. Verify the physical volume:
sudo pvsPV VG Fmt Attr PSize PFree
Chapter 3Deploy Your Virtual Machine
3-2
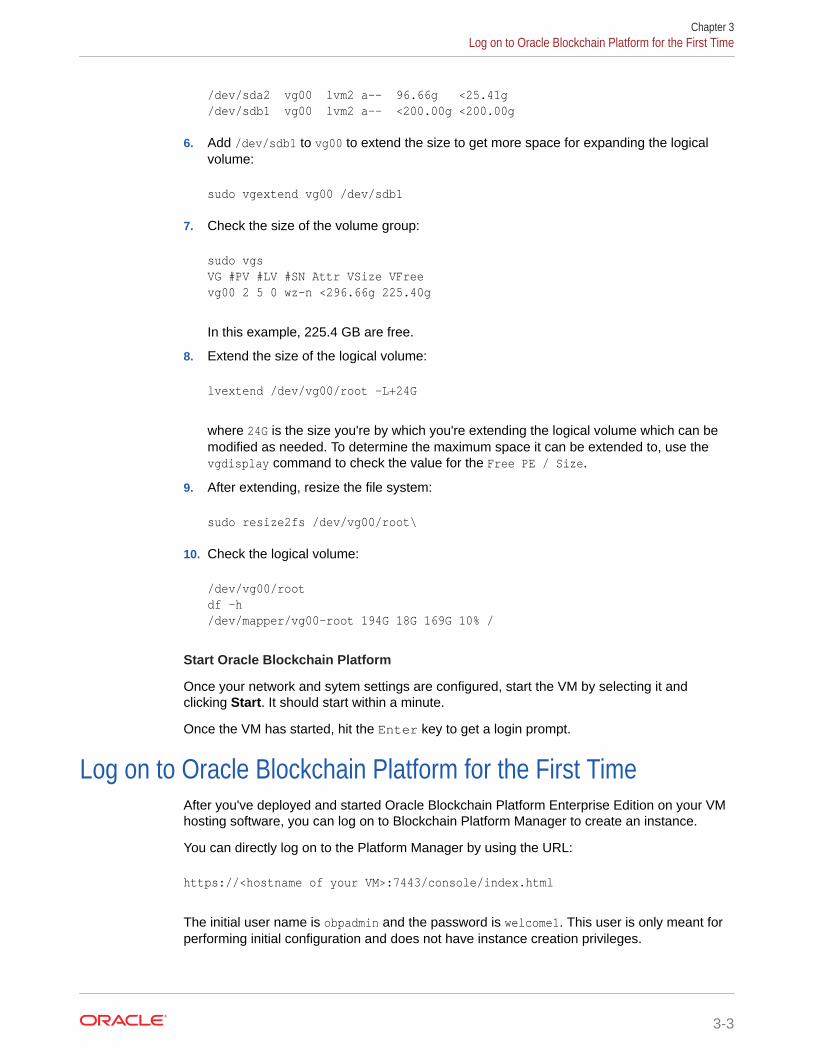
/dev/sda2 vg00 lvm2 a-- 96.66g <25.41g/dev/sdb1 vg00 lvm2 a-- <200.00g <200.00g
6. Add /dev/sdb1 to vg00 to extend the size to get more space for expanding the logicalvolume:
sudo vgextend vg00 /dev/sdb1
7. Check the size of the volume group:
sudo vgsVG #PV #LV #SN Attr VSize VFreevg00 2 5 0 wz-n <296.66g 225.40g
In this example, 225.4 GB are free.
8. Extend the size of the logical volume:
lvextend /dev/vg00/root -L+24G
where 24G is the size you're by which you're extending the logical volume which can bemodified as needed. To determine the maximum space it can be extended to, use thevgdisplay command to check the value for the Free PE / Size.
9. After extending, resize the file system:
sudo resize2fs /dev/vg00/root\
10. Check the logical volume:
/dev/vg00/rootdf -h/dev/mapper/vg00-root 194G 18G 169G 10% /
Start Oracle Blockchain Platform
Once your network and sytem settings are configured, start the VM by selecting it andclicking Start. It should start within a minute.
Once the VM has started, hit the Enter key to get a login prompt.
Log on to Oracle Blockchain Platform for the First TimeAfter you've deployed and started Oracle Blockchain Platform Enterprise Edition on your VMhosting software, you can log on to Blockchain Platform Manager to create an instance.
You can directly log on to the Platform Manager by using the URL:
https://<hostname of your VM>:7443/console/index.html
The initial user name is obpadmin and the password is welcome1. This user is only meant forperforming initial configuration and does not have instance creation privileges.
Chapter 3Log on to Oracle Blockchain Platform for the First Time
3-3

In order to use the internal LDAP server, the admin password must first be changed.Blockchain Platform Manager will not allow you to use an internal LDAP configurationwith the default password.
Set the Blockchain Platform Manager Name
On the Configuration page Platform Settings tab of Blockchain Platform Manager,you can set a name for the Platform Manager.
Note:
Once the name for the Platform Manager has been set, any users added tothe LDAP server will be associated with this name. If you change the nameafter adding users, those users will lose access to Blockchain PlatformManager and any Oracle Blockchain Platform instances.
Set the Notification and Console Idle Timeouts
On the Configuration page Platform Settings tab of Blockchain Platform Manager,you can set the timeouts for notifications and the console.
• Console Idle Timeout: in minutes, how long the console can be idle before it logsout the current user.
• Notification Timeout: in seconds, how long notifications will remain visible on thebrowser. Select -1 if you want notifications to remain visible until you close them.
Configure a Hardware Security Module ClientOracle Blockchain Platform Enterprise Edition support using a hardware securitymodule (HSM) to manage keys. You can use an HSM server on your network or a dataprotection on-demand (DPoD) service.
To use an HSM, you must install client software on each virtual machine (VM).Currently SafeNet Luna HSMs are supported.
You can configure an instance to use a HSM only when the instance is created. Youcannot add HSM capabilities to existing instance.
• Install the Client for SafeNet Luna Network HSM Devices
• Manually Install the Client for SafeNet Luna Network HSM Devices
• Install the Client for SafeNet Luna HSM on Demand
Install the Client for SafeNet Luna Network HSM DevicesA script is provided in the virtual machine (VM) to assist with installing and configuringthe SafeNet Luna Client for use with a hardware security module (HSM).
Prerequisites
• The script supports version 10.2 and later of the SafeNet Luna Client.
• The script is for use with SafeNet Luna Network HSM devices, not the SafeNetLuna HSM on Demand service.
Chapter 3Configure a Hardware Security Module Client
3-4
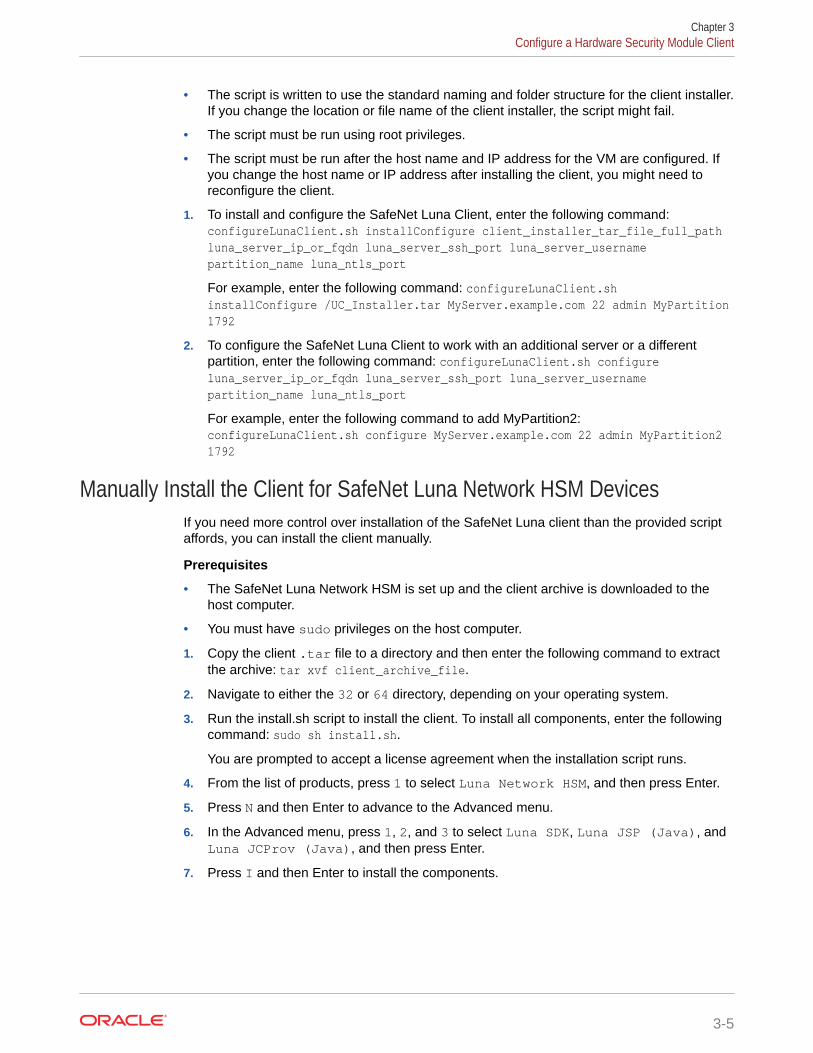
• The script is written to use the standard naming and folder structure for the client installer.If you change the location or file name of the client installer, the script might fail.
• The script must be run using root privileges.
• The script must be run after the host name and IP address for the VM are configured. Ifyou change the host name or IP address after installing the client, you might need toreconfigure the client.
1. To install and configure the SafeNet Luna Client, enter the following command:configureLunaClient.sh installConfigure client_installer_tar_file_full_pathluna_server_ip_or_fqdn luna_server_ssh_port luna_server_usernamepartition_name luna_ntls_port
For example, enter the following command: configureLunaClient.shinstallConfigure /UC_Installer.tar MyServer.example.com 22 admin MyPartition1792
2. To configure the SafeNet Luna Client to work with an additional server or a differentpartition, enter the following command: configureLunaClient.sh configureluna_server_ip_or_fqdn luna_server_ssh_port luna_server_usernamepartition_name luna_ntls_port
For example, enter the following command to add MyPartition2:configureLunaClient.sh configure MyServer.example.com 22 admin MyPartition21792
Manually Install the Client for SafeNet Luna Network HSM DevicesIf you need more control over installation of the SafeNet Luna client than the provided scriptaffords, you can install the client manually.
Prerequisites
• The SafeNet Luna Network HSM is set up and the client archive is downloaded to thehost computer.
• You must have sudo privileges on the host computer.
1. Copy the client .tar file to a directory and then enter the following command to extractthe archive: tar xvf client_archive_file.
2. Navigate to either the 32 or 64 directory, depending on your operating system.
3. Run the install.sh script to install the client. To install all components, enter the followingcommand: sudo sh install.sh.
You are prompted to accept a license agreement when the installation script runs.
4. From the list of products, press 1 to select Luna Network HSM, and then press Enter.
5. Press N and then Enter to advance to the Advanced menu.
6. In the Advanced menu, press 1, 2, and 3 to select Luna SDK, Luna JSP (Java), andLuna JCProv (Java), and then press Enter.
7. Press I and then Enter to install the components.
Chapter 3Configure a Hardware Security Module Client
3-5

8. To add the SafeNet Luna client to the system path, add the following lines to thesystem's .bash_profile file:
export PATH="$PATH:/usr/safenet/lunaclient/bin"export PATH="$PATH:/usr/safenet/lunaclient/sbin"
After you install and configure the SafeNet Luna client on each VM, run the followingcommands from the LunaCM command prompt, one time only to initialize the partitionand to set up roles. In the following sequence of commands, you are prompted for thepartition domain name, and you are prompted to set and change the passwords for thePartition SO (security officer), Crypto Officer, and Crypto User roles.
partition init -label fabricrole login -name Partition SOrole init -name Crypto Officerrole logoutrole login -name Crypto Officerrole changepw -name Crypto Officerrole init -name Crypto Userrole logoutrole login -name Crypto Userrole changepw -name Crypto User
Install the Client for SafeNet Luna HSM on DemandTo use the SafeNet Luna HSM on Demand service to manage keys, you download apre-configured SafeNet Luna client archive and extract it on each virtual machine (VM)in the instance.
Prerequisites
• The SafeNet Luna HSM on Demand service is set up and the client archive isdownloaded to the host computer.
• The client installation directory must be under the /etc/hyperledger/fabricpath.
• You must have sudo privileges on the host computer.
1. Enter the following command to create the installation directory: sudo mkdir -p /etc/hyperledger/fabric/dpod/fabric.
2. Extract the setup-fabric.zip archive file to the /etc/hyperledger/fabric/dpod/fabric directory.
3. In the /etc/hyperledger/fabric/dpod/fabric directory, enter the followingcommand to extract the cvclient-min.tar file: tar xvf cvclient-min.tar.
4. Enter the following command to create a configuration file: source ./setenv.
If the command does not run because of a permissions issue, change the folderpermissions to 777 and then retry the command.
5. Enter the following command to set the ChrystokiConfigurationPathenvironment variable to the location of the configuration file: exportChrystokiConfigurationPath=/etc/hyperledger/fabric/dpod/fabric.
Chapter 3Configure a Hardware Security Module Client
3-6

6. In the REST section of the file, add the following line: ClientProxy =restproxy.example.com:80; where restproxy.example.com is the host name of theREST proxy.
7. Enter the following commands to start the Luna client:
sudo bashsource ./setenvexport LC_ALL=C; unset LANGUAGE./bin/64/lunacm
The LunaCM command prompt is displayed.
8. Complete the previous steps for all VMs in the instance where you plan to use theSafeNet Luna HSM on Demand service.
After you install and configure the SafeNet Luna client on each VM, run the followingcommands from the LunaCM command prompt, one time only to initialize the partition and toset up roles. In the following sequence of commands, you are prompted for the partitiondomain name, and you are prompted to set and change the passwords for the Partition SO(security officer), Crypto Officer, and Crypto User roles.
partition init -label fabricrole login -name Partition SOrole init -name Crypto Officerrole logoutrole login -name Crypto Officerrole changepw -name Crypto Officerrole init -name Crypto Userrole logoutrole login -name Crypto Userrole changepw -name Crypto User
Chapter 3Configure a Hardware Security Module Client
3-7

4Upgrade to Version 21
Before you begin the upgrade process, take a snapshot of the current state of the virtualmachine (VM). Rollback from version 21.1.2 is not supported.
Topics
• Enable Transport Layer Security
• Patch to v19.3.6
• Check Available Disk Space
• Upgrade Instances to Version 21
• Update External Load Balancer Port Mapping
• Configure Raft Consensus Protocol
Enable Transport Layer SecurityThe built-in LDAP server that is bundled with Oracle Blockchain Platform Enterprise EditionVersion 21 supports only Transport Layer Security (TLS) connections on port 636.
Note:
If you currently use the built-in LDAP server with TLS disabled, you must completethe following steps to enable TLS before attempting to upgrade to Version 21.
1. Open the Configuration tab.
2. Under Authentication Servers, select Default and set TLS Enabled to True.
3. Click Test Configuration to ensure that the settings work.
4. Click Save, then click Set Active.
5. Open the Instances tab.
6. For each instance that uses the built-in LDAP server, click the instance name to open theInstance Details page. From the Actions menu, use the Update option, select UpdateAuth Server Configuration, and then complete the update.
Patch to v19.3.6Patch the instance to version 19.3.6.
You must complete the intermediate step of patching Blockchain Platform Manager and allfounder and participant instances to version 19.3.6 before you upgrade to Version 21. Formore information, see Patch an Instance to v19.3.5 or Later.
4-1
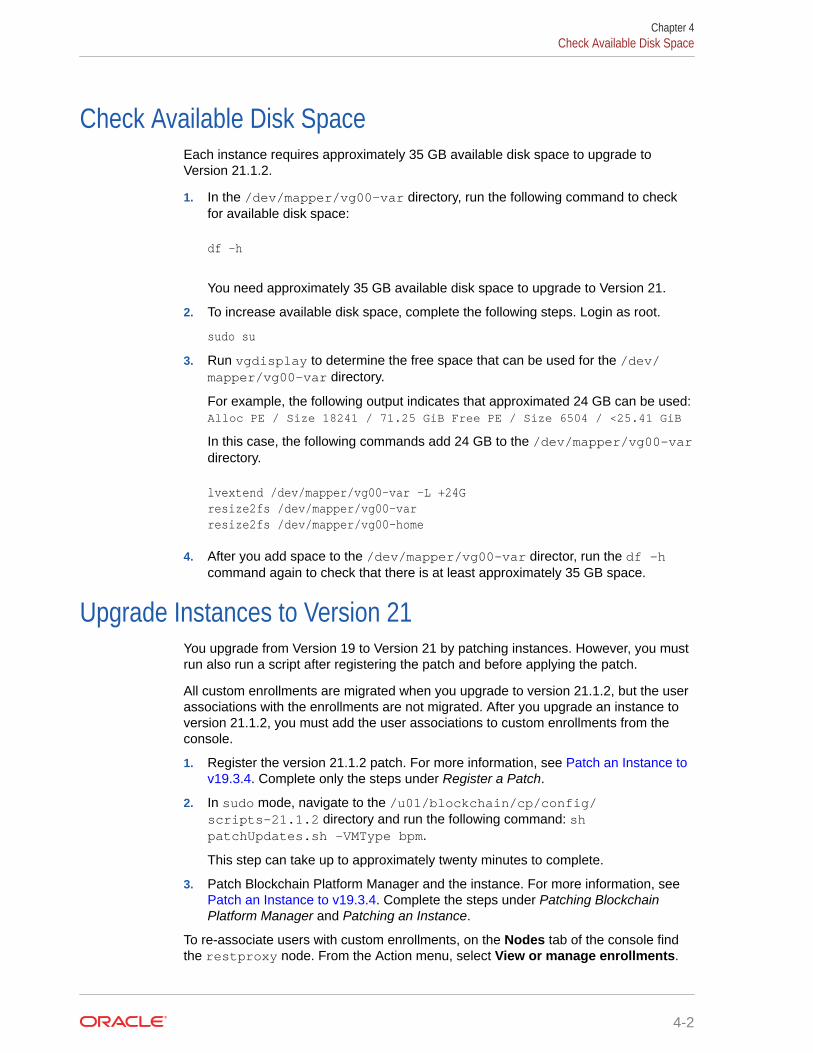
Check Available Disk SpaceEach instance requires approximately 35 GB available disk space to upgrade toVersion 21.1.2.
1. In the /dev/mapper/vg00-var directory, run the following command to checkfor available disk space:
df -h
You need approximately 35 GB available disk space to upgrade to Version 21.
2. To increase available disk space, complete the following steps. Login as root.
sudo su
3. Run vgdisplay to determine the free space that can be used for the /dev/mapper/vg00-var directory.
For example, the following output indicates that approximated 24 GB can be used:Alloc PE / Size 18241 / 71.25 GiB Free PE / Size 6504 / <25.41 GiB
In this case, the following commands add 24 GB to the /dev/mapper/vg00-vardirectory.
lvextend /dev/mapper/vg00-var -L +24Gresize2fs /dev/mapper/vg00-varresize2fs /dev/mapper/vg00-home
4. After you add space to the /dev/mapper/vg00-var director, run the df -hcommand again to check that there is at least approximately 35 GB space.
Upgrade Instances to Version 21You upgrade from Version 19 to Version 21 by patching instances. However, you mustrun also run a script after registering the patch and before applying the patch.
All custom enrollments are migrated when you upgrade to version 21.1.2, but the userassociations with the enrollments are not migrated. After you upgrade an instance toversion 21.1.2, you must add the user associations to custom enrollments from theconsole.
1. Register the version 21.1.2 patch. For more information, see Patch an Instance tov19.3.4. Complete only the steps under Register a Patch.
2. In sudo mode, navigate to the /u01/blockchain/cp/config/scripts-21.1.2 directory and run the following command: shpatchUpdates.sh -VMType bpm.
This step can take up to approximately twenty minutes to complete.
3. Patch Blockchain Platform Manager and the instance. For more information, see Patch an Instance to v19.3.4. Complete the steps under Patching BlockchainPlatform Manager and Patching an Instance.
To re-associate users with custom enrollments, on the Nodes tab of the console findthe restproxy node. From the Action menu, select View or manage enrollments.
Chapter 4Check Available Disk Space
4-2

On the Enrollment Management page, select the enrollment under Enrollment ID and thenadd users to the enrollment by expanding Associate New Users and entering the user IDs.After you add all of the users, click Associate.
Update External Load Balancer Port MappingAll instances that use an external load balancer must be reconfigured after upgrading toVersion 21.
In Version 21, the CA and REST proxy share the same port as the console, so the portmappings for the CA and REST proxy as well as for Prometheus are no longer needed. Also,the orderer Raft port is the same as the orderer query port in Version 19, but the Raft port isnot enabled for TLS. If you use an external load balancer, you must update the configurationto account for these changes.
1. Remove the CA, REST proxy, and Prometheus sections from the external load balancerconfiguration in the nginx.conf file.
For example, remove the following sections from the nginx.conf file.
upstream server_server1_restproxy_47201 { server server1.example.com:10001; } server { listen *:47201 ssl; proxy_pass server_server1_restproxy_47201; ssl_certificate /etc/nginx/certs/cert.pem; ssl_certificate_key /etc/nginx/certs/key.pem; } upstream server_server1_ca_47202 { server server1.example.com:10002; } server { listen *:47202 ssl; proxy_pass server_server1_ca_47202; ssl_certificate /etc/nginx/certs/cert.pem; ssl_certificate_key /etc/nginx/certs/key.pem; } upstream server_server1_prometheus_47203 { server server1.example.com:10003; } server { listen *:47203 ssl; proxy_pass server_server1_prometheus_47203; ssl_certificate /etc/nginx/certs/cert.pem; ssl_certificate_key /etc/nginx/certs/key.pem; }
2. Ensure that the second (Raft) port on every orderer in the network does not use SSL.
In the following example, the second port no longer uses SSL.
upstream server_server1_orderer0_47204 { server server1.example.com:10004; } server {
Chapter 4Update External Load Balancer Port Mapping
4-3

listen *:47204 ssl; proxy_pass server_server1_orderer0_47204; ssl_certificate /etc/nginx/certs/cert.pem; ssl_certificate_key /etc/nginx/certs/key.pem; } upstream server_server1_orderer0_47205 { server server1.example.com:10005; } server { listen *:47205; proxy_pass server_server1_orderer0_47205; ssl_certificate /etc/nginx/certs/cert.pem; ssl_certificate_key /etc/nginx/certs/key.pem; }
3. Restart nginx.
Configure Raft Consensus ProtocolVersion 21 of the product uses Raft-based ordering instead of Kafka-based ordering.You change the consensus type from Kafka to Raft by collecting channel and instanceinformation and running scripts.
Complete the following steps only after all founder and participant instances areupgraded to version 21.1.2.
1. In the Blockchain Platform Manager virtual machine (VM) and in all instance VMs,navigate to the /u01/blockchain/cp/config/scripts-21.1.2 directory,then from the root account run the config-obplog.sh script to redirect logsfrom /var/log/messages to /u01/obp-logs/.
2. In all instance VMs, complete the following steps.
a. Use ssh to log in and then run the following command to open a commandprompt in the Docker container: docker exec -it bcscm bash.
b. Run the following command to create the /cm/instances directory:mkdir /cm/instances.
c. On the founder instance, in the /cm/instances directory, create a JSON filefor the channel names and names of participant organizations.
For example, if the founder instance has channels named default andchannel1 and participant organizations named partner1 and partner2,create a JSON file similar to the following text. The testchainid channel isthe default system channel and must be included in the file. If there are noparticipant organizations, include an empty participants array. If there areparticipant organizations that are no longer active or have left the network,move any channels that were created by those organizations to the discardsarray. Also move any channels where less than 50 percent of theorganizations are active to the discards array.
{"channels": ["testchainid","default","channel1"
Chapter 4Configure Raft Consensus Protocol
4-4

],"discards": [],"participants": ["partner1","partner2"]}
d. On each participant instance, generate an msp directory archive by running thegetParticipantAdminCerts.sh script in the /u01/blockchain/cp/config/scripts-21.1.2 directory, with the participant instance name as a parameter.
For example, getParticipantAdminCerts.sh participant_instance_name.
The script creates the participant_instance_name.msp.tar.gz file.
e. On each participant instance, run the following command to extract the msp directoryarchive: tar -xvf instance_name.msp.tar.gz.
f. Copy the msp directory from each participant organization to the /cm/instancesdirectory on the founder instance. Specify the name of the participant organization asthe subdirectory name.
For example, if the name of the participant organization is partner1, copy the mspdirectory from partner one to /cm/instances/partner1.
g. On the founder instance, navigate to the /cm/script directory, and then run thefollowing command to change the consensus type from Kafka to Raft. If the name ofthe JSON file that you created previously is channels.json, run the followingcommand: ./kafka2raft.sh -c /cm/instances/channels.json -a /cm/instances
After the script completes, the instance is active and no Kafka containers are running.
h. On all participant instances, navigate to the /cm/script directory, and then run thefollowing command to change the consensus type from Kafka to Raft: ./kafka2raft.sh
3. On all participant instances, import the ordering service settings from the founderinstance.
a. In the founder console, on the Network tab find the founder organization. Select theAction menu for the founder organization and then select Export Orderer Settings.
This generates a JSON file with the settings and saves the file.
b. In each participant console, open the Network tab. Click Orderer Settings and thenImport. A window opens prompting you for the location of the JSON file provided bythe founder. Select to upload the file and click Add.
4. On each data plane VM, navigate to the /u01/blockchain/cp/config/scripts-21.1.2, and in sudo mode run the following command: shpatchUpdates.sh -VMType instance.
5. Open the Instances tab in Blockchain Platform Manager and then, for each instance thatyou upgraded, click the instance name to open the Instance Details page.
By default, Developer instances in version 19 included only two orderers. After you completethe upgrade to version 21.1.2 and the change to Raft consensus protocol, add anotherorderer so that at least three are available. For more information, see Scale an Instance In orOut.
Chapter 4Configure Raft Consensus Protocol
4-5
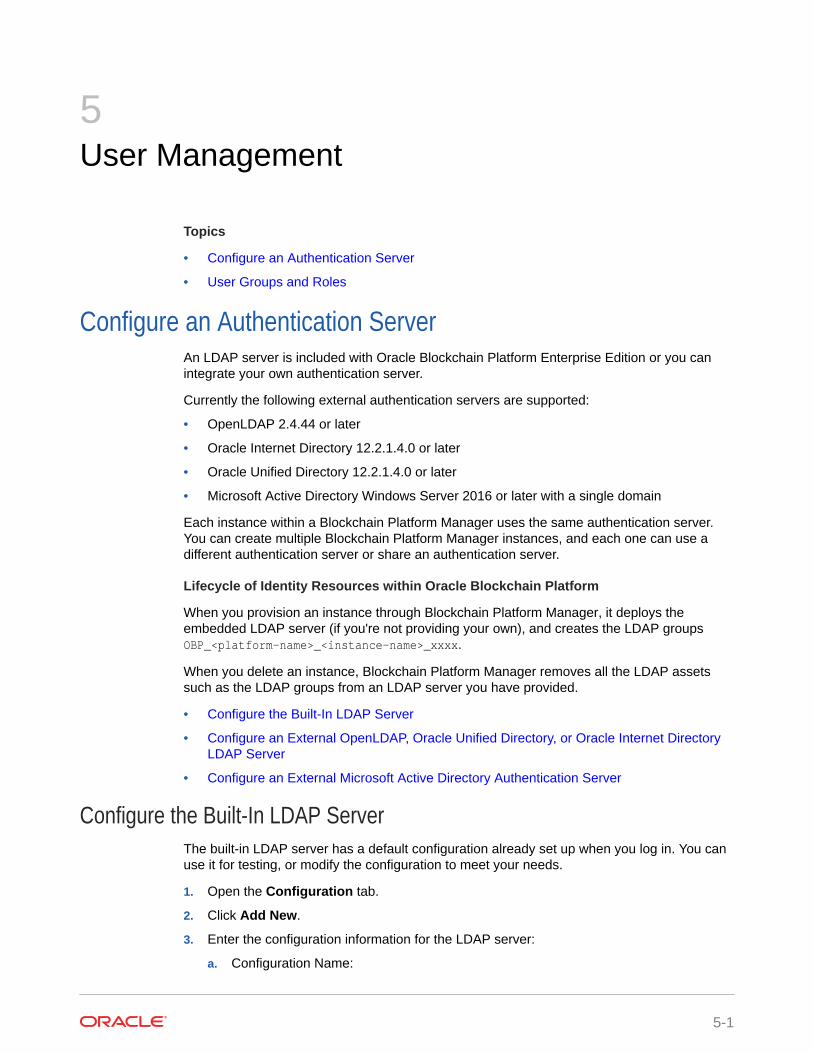
5User Management
Topics
• Configure an Authentication Server
• User Groups and Roles
Configure an Authentication ServerAn LDAP server is included with Oracle Blockchain Platform Enterprise Edition or you canintegrate your own authentication server.
Currently the following external authentication servers are supported:
• OpenLDAP 2.4.44 or later
• Oracle Internet Directory 12.2.1.4.0 or later
• Oracle Unified Directory 12.2.1.4.0 or later
• Microsoft Active Directory Windows Server 2016 or later with a single domain
Each instance within a Blockchain Platform Manager uses the same authentication server.You can create multiple Blockchain Platform Manager instances, and each one can use adifferent authentication server or share an authentication server.
Lifecycle of Identity Resources within Oracle Blockchain Platform
When you provision an instance through Blockchain Platform Manager, it deploys theembedded LDAP server (if you're not providing your own), and creates the LDAP groupsOBP_<platform-name>_<instance-name>_xxxx.
When you delete an instance, Blockchain Platform Manager removes all the LDAP assetssuch as the LDAP groups from an LDAP server you have provided.
• Configure the Built-In LDAP Server
• Configure an External OpenLDAP, Oracle Unified Directory, or Oracle Internet DirectoryLDAP Server
• Configure an External Microsoft Active Directory Authentication Server
Configure the Built-In LDAP ServerThe built-in LDAP server has a default configuration already set up when you log in. You canuse it for testing, or modify the configuration to meet your needs.
1. Open the Configuration tab.
2. Click Add New.
3. Enter the configuration information for the LDAP server:
a. Configuration Name:
5-1

Name must contain only ASCII alphanumerics and underscores.
b. Authentication Server Type:
Select OpenLDAP/OID.
c. Host:
Enter the fully-qualified host name of the directory server.
d. Port:
Enter the port number of the directory server.
e. TLS Enabled:
Setting this to True means you will connect to the directory server using a username and password via SSL.
f. Connect Timeout:
In milliseconds.
g. Base DN:
Enter the base distinguished name of the directory you want to connect to. Itshould be in the form: ou=organizationunit,dc=mycompany,dc=com
h. Root CA Certificate for Auth Server:
If you're using a third-party TLS certificate or self-signed certificate, upload it ina .crt file.
i. Bind User DN:
The distinguished name of your administrative user account.
j. Bind User Password:
The password for the account.
k. UserName Attribute:
This is the filter used when searching to convert a login user name to adistinguished name.
l. User Class Name:
The attribute value to a user object in the directory.
m. GroupName Attribute:
This is the filter used when searching to convert a group name to adistinguished name.
n. Group Membership Attribute:
The membership attribute name of the group.
o. Group Class Name:
The ObjectClass attribute value for a group object in the directory.
4. Click Test Configuration to ensure your settings work. The test results show if theconfiguration was successful.
5. Click Save. Your configuration is now available to be used by any instances youprovision.
Chapter 5Configure an Authentication Server
5-2
Once you've selected your LDAP configuration by selecting it in the Active LDAPConfiguration field, you need to log out of Blockchain Platform Manager with youradministrative ID, and log in with a user ID that exists in the LDAP server as described in AddUsers to Your LDAP Server Using a Script or Add Users to Your LDAP Server UsingBlockchain Platform Manager.
Once you've successfully logged into Blockchain Platform Manager with this user ID andprovisioned an instance, you may want to disable the default user ID (obpadmin) for securityreasons. This can be done from the Configuration page Platform Settings tab.
Add Users to Your LDAP Server Using a ScriptOnce you've configured your LDAP server in Blockchain Platform Manager, you need to addusers to the LDAP server to create an instance.
The following steps describe how to add the initial user to the built-in LDAP server using aprovided script:
1. Log into the VM instance as a Unix user. The initial user name and password are oracleand Welcome1. You'll be prompted to change the password immediately.
2. Change directories to /u01/blockchain/ldap/environment and run the adduser.shscript:
a. cd /u01/blockchain/ldap/environment/
b. ./adduser.sh user_name platform_name
where platform_name is the Platform Manager Name set on the Configuration pagePlatform Settings tab of Blockchain Platform Manager.
c. You will be prompted to enter a password for the new user, as well as a password forthe administrator who will authenticate user and group addition requests.
d. The script will add a new user to the group OBP_<platform name>_CP_ADMIN whichwill have administrative access to Blockchain Platform Manager in order to createand modify instances.
Ensure that you've logged out of Blockchain Platform Manager, and then log in using thisuser ID and password. You can now provision a Oracle Blockchain Platform instance.
Once you've successfully logged into Blockchain Platform Manager with this user ID andprovisioned an instance, you may want to disable the default user ID (obpadmin) for securityreasons. This can be done from the Configuration page Platform Settings tab.
Add Users to Your LDAP Server Using Blockchain Platform ManagerOnce you've configured your LDAP server in Blockchain Platform Manager, you need to addusers to the LDAP server, and then log back into Blockchain Platform Manager with one ofthese users to create an instance.
Once you've create your LDAP configuration, you need to add your initial user to the LDAPserver. On the Authentication Server Configuration page of Blockchain Platform Manager,click Add User. Once you've entered the user name and password, this user will be added tothe LDAP server as an administrative user. You can now log out of Blockchain PlatformManager with your administrative ID, and log in with this user ID to create an instance.
Ensure that you've logged out of Blockchain Platform Manager, and then log in using thisuser ID and password. You can now provision a Oracle Blockchain Platform instance.
Chapter 5Configure an Authentication Server
5-3
Once you've successfully logged into Blockchain Platform Manager with this user IDand provisioned an instance, you may want to disable the default user ID (obpadmin)for security reasons. This can be done from the Configuration page PlatformSettings tab.
Configure an External OpenLDAP, Oracle Unified Directory, or OracleInternet Directory LDAP Server
If you don't want to use the LDAP server provided with the product, you must haveinstalled your ownOpenLDAP, Oracle Unified Directory, or Oracle Internet Directoryserver 12.2.1.4.0 or later before completing this configuration step.
• An external LDAP server should be installed for any production environment. Itshould be protected by TLS certificates - self-signed certificates should be used forinternal testing only. If you are using self-signed certificates, complete these stepsbefore configuring the LDAP server through Blockchain Platform Manager:
1. Generate a root CA key/certificate pair.
2. Generate a server key/certificate pair signed using the root CA pair.
• When configuring the server in Blockchain Platform Manager you will need toupload the root CA certificate.
• You can specify up to two backup directory servers, which are used if the primaryserver does not respond. If you specify backup directory servers, you mustconfigure data replication yourself. Blockchain Platform Manager does notconfigure data replication between the primary directory server and the backupdirectory servers.
1. Open the Configuration tab.
2. Click Add New.
3. Enter the configuration information for the LDAP server:
a. Configuration Name:
Name must contain only ASCII alphanumerics and underscores.
b. Authentication Server Type:
Select OpenLDAP/OID.
c. Host:
Enter the fully-qualified host name of the directory server.
d. Backup OpenLDAP/OID Servers:
Optional: Enter the fully-qualified host name of up to two backup directoryservers. If Blockchain Platform Manager is unable to connect to the firstbackup it will attempt to connect to the second one automatically.
e. Port:
Enter the port number of the directory server.
f. TLS Enabled:
Setting this to True means you will connect to the directory server using a username and password via SSL.
g. Connect Timeout:
Chapter 5Configure an Authentication Server
5-4
In milliseconds.
h. Base DN:
Enter the base distinguished name of the directory you want to connect to. It shouldbe in the form: ou=organizationunit,dc=mycompany,dc=com
i. Root CA Certificate for Auth Server:
If you're using a third-party TLS certificate or self-signed certificate, upload it in a .crtfile.
j. Bind User DN:
The distinguished name of your administrative user account.
k. Bind User Password:
The password for the account.
l. UserName Attribute:
This is the filter used when searching to convert a login user name to a distinguishedname.
m. User Class Name:
The attribute value to a user object in the directory.
n. GroupName Attribute:
This is the filter used when searching to convert a group name to a distinguishedname.
o. Group Membership Attribute:
The membership attribute name of the group.
p. Group Class Name:
The ObjectClass attribute value for a group object in the directory.
4. Click Test Configuration to ensure your settings work. The test results show if theconfiguration was successful.
5. Click Save. Your configuration is now available to be used by any instances youprovision. Click Set Active when you're ready to activate the configuration.
After you've selected your LDAP configuration by selecting it in the Authentication Serversfield, you need to log out of Blockchain Platform Manager with your administrative ID, and login with a user ID that exists in the LDAP server as described in Add Users to an ExternalLDAP Server.
Add Users to an External LDAP ServerOnce you've configured your LDAP server in Blockchain Platform Manager, you need to addusers to the LDAP server to create an instance.
The following steps describe how to add the initial user to your separately-installed LDAPserver:
1. Create your administrative user if one doesn't already exist.
2. Create the OBP_<platform name>_CP_ADMIN group if it doesn't exist.
3. Add the user as a member of the OBP_<platform name>_CP_ADMIN group.
Chapter 5Configure an Authentication Server
5-5
Ensure that you've logged out of Blockchain Platform Manager, and then log in usingthis user ID and password. You can now provision a Oracle Blockchain Platforminstance.
Once you've successfully logged into Blockchain Platform Manager with this user IDand provisioned an instance, you may want to disable the default user ID (obpadmin)for security reasons. This can be done from the Configuration page PlatformSettings tab.
Configure an External Microsoft Active Directory Authentication ServerIf you don't want to use the LDAP server provided with the product, you must haveinstalled your own Microsoft Active Directory Windows Server 2016 or later with asingle domain before completing this configuration step.
• An external authentication server should be installed for any productionenvironment. It should be protected by CA certificates - self-signed certificatesshould be used for internal testing only. If you are using self-signed certificates,complete these steps before configuring the authentication server throughBlockchain Platform Manager:
1. Generate a root CA key/certificate pair.
2. Generate a server key/certificate pair signed using the root CA pair.
When configuring the server in Blockchain Platform Manager you will need toupload the root CA certificate.
• All necessary user groups should be created in Microsoft Active Directory beforeconfiguring it as the authentication server for Blockchain Platform. During theconfiguration process you will map these groups to pre-existing BlockchainPlatform groups in order to control user access and capabilities. For a completelist of Blockchain Platform groups and their roles see: User Groups and Roles.
1. Open the Configuration tab.
2. Click Add New.
3. Enter the configuration information for the authentication server:
a. Configuration Name:
Name must contain only ASCII alphanumerics and underscores.
b. Authentication Server Type:
Select Active Directory.
c. Primary Domain Controller:
Enter the domain controller for the Active Directory server.
d. Backup Domain Controller:
Optional: Enter the backup domain controllers for the Active Directory server.You can add a maximum of two. If Blockchain Platform Manager is unable toconnect to the first backup it will attempt to connect to the second oneautomatically.
e. Port:
Enter the port number of the directory server.
f. TLS Enabled:
Chapter 5Configure an Authentication Server
5-6
Setting this to True means you will connect to the directory server using a user nameand password via SSL.
g. Base DN:
Enter the base distinguished name of the directory you want to connect to. It shouldbe in the form: ou=organizationunit,dc=mycompany,dc=com
h. Root CA Certificate for Auth Server:
Upload the root CA certificate for the authorization server in a .crt file.
i. User name:
Enter the user name of your user account. Any user account with read-capability issufficient.
j. Password:
The password for the account.
k. UserName Attribute:
This is the filter used when searching to convert a login user name to a distinguishedname.
l. User Class Name:
The attribute value to a user object in the directory.
m. GroupName Attribute:
This is the filter used when searching to convert a group name to a distinguishedname.
n. Group Membership Attribute:
The membership attribute name of the group.
o. Group Class Name:
The ObjectClass attribute value for a group object in the directory.
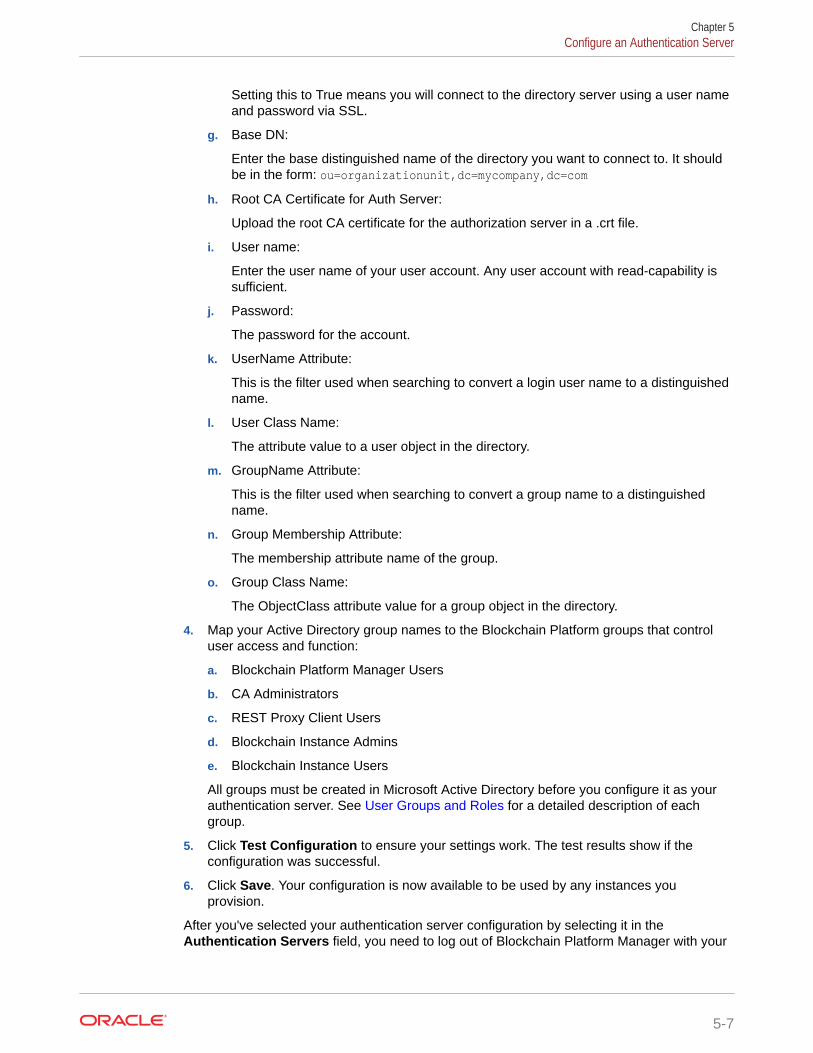
4. Map your Active Directory group names to the Blockchain Platform groups that controluser access and function:
a. Blockchain Platform Manager Users
b. CA Administrators
c. REST Proxy Client Users
d. Blockchain Instance Admins
e. Blockchain Instance Users
All groups must be created in Microsoft Active Directory before you configure it as yourauthentication server. See User Groups and Roles for a detailed description of eachgroup.
5. Click Test Configuration to ensure your settings work. The test results show if theconfiguration was successful.
6. Click Save. Your configuration is now available to be used by any instances youprovision.
After you've selected your authentication server configuration by selecting it in theAuthentication Servers field, you need to log out of Blockchain Platform Manager with your
Chapter 5Configure an Authentication Server
5-7
administrative ID, and log in with a user ID that exists in Active Directory withmembership in the Blockchain Platform Manager Users group.
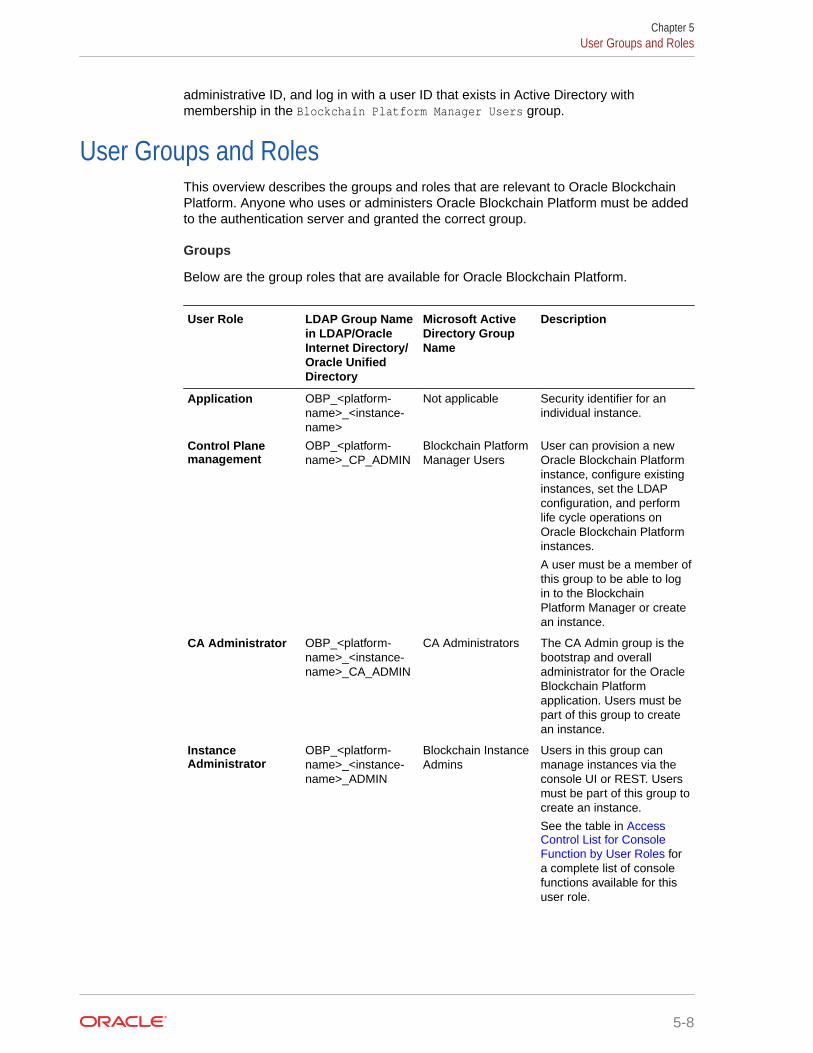
User Groups and RolesThis overview describes the groups and roles that are relevant to Oracle BlockchainPlatform. Anyone who uses or administers Oracle Blockchain Platform must be addedto the authentication server and granted the correct group.
Groups
Below are the group roles that are available for Oracle Blockchain Platform.
User Role LDAP Group Namein LDAP/OracleInternet Directory/Oracle UnifiedDirectory
Microsoft ActiveDirectory GroupName
Description
Application OBP_<platform-name>_<instance-name>
Not applicable Security identifier for anindividual instance.
Control Planemanagement
OBP_<platform-name>_CP_ADMIN
Blockchain PlatformManager Users
User can provision a newOracle Blockchain Platforminstance, configure existinginstances, set the LDAPconfiguration, and performlife cycle operations onOracle Blockchain Platforminstances.
A user must be a member ofthis group to be able to login to the BlockchainPlatform Manager or createan instance.
CA Administrator OBP_<platform-name>_<instance-name>_CA_ADMIN
CA Administrators The CA Admin group is thebootstrap and overalladministrator for the OracleBlockchain Platformapplication. Users must bepart of this group to createan instance.
InstanceAdministrator
OBP_<platform-name>_<instance-name>_ADMIN
Blockchain InstanceAdmins
Users in this group canmanage instances via theconsole UI or REST. Usersmust be part of this group tocreate an instance.
See the table in AccessControl List for ConsoleFunction by User Roles fora complete list of consolefunctions available for thisuser role.
Chapter 5User Groups and Roles
5-8
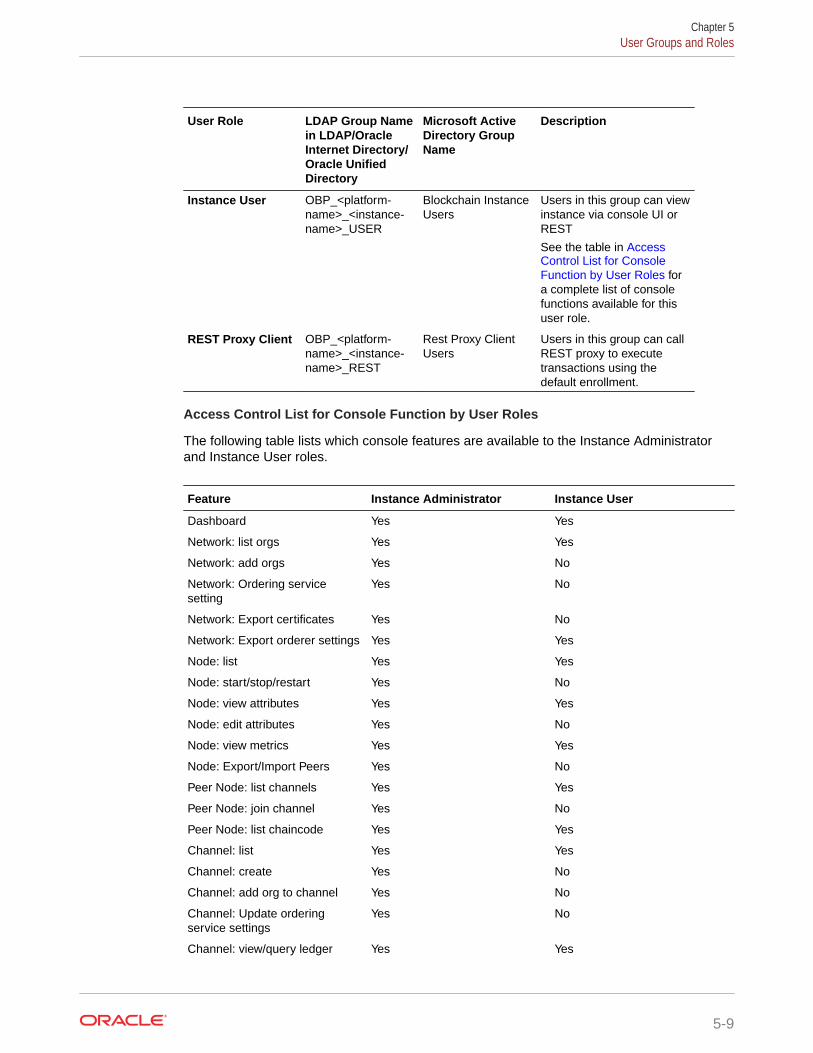
User Role LDAP Group Namein LDAP/OracleInternet Directory/Oracle UnifiedDirectory
Microsoft ActiveDirectory GroupName
Description
Instance User OBP_<platform-name>_<instance-name>_USER
Blockchain InstanceUsers
Users in this group can viewinstance via console UI orREST
See the table in AccessControl List for ConsoleFunction by User Roles fora complete list of consolefunctions available for thisuser role.
REST Proxy Client OBP_<platform-name>_<instance-name>_REST
Rest Proxy ClientUsers
Users in this group can callREST proxy to executetransactions using thedefault enrollment.
Access Control List for Console Function by User Roles
The following table lists which console features are available to the Instance Administratorand Instance User roles.
Feature Instance Administrator Instance User
Dashboard Yes Yes
Network: list orgs Yes Yes
Network: add orgs Yes No
Network: Ordering servicesetting
Yes No
Network: Export certificates Yes No
Network: Export orderer settings Yes Yes
Node: list Yes Yes
Node: start/stop/restart Yes No
Node: view attributes Yes Yes
Node: edit attributes Yes No
Node: view metrics Yes Yes
Node: Export/Import Peers Yes No
Peer Node: list channels Yes Yes
Peer Node: join channel Yes No
Peer Node: list chaincode Yes Yes
Channel: list Yes Yes
Channel: create Yes No
Channel: add org to channel Yes No
Channel: Update orderingservice settings
Yes No
Channel: view/query ledger Yes Yes
Chapter 5User Groups and Roles
5-9

Feature Instance Administrator Instance User
Channel: list instantiatedchaincode
Yes Yes
Channel: list joined peers Yes Yes
Channel: set anchor peer Yes No
Channel: upgrade chaincode Yes No
Chaincode: list Yes Yes
Chaincode: install Yes No
Chaincode: instantiate Yes No
Sample chaincode: install Yes No
Sample chaincode: instantiate Yes No
Sample chaincode: invoke Yes Yes
CRL Yes No
Chapter 5User Groups and Roles
5-10
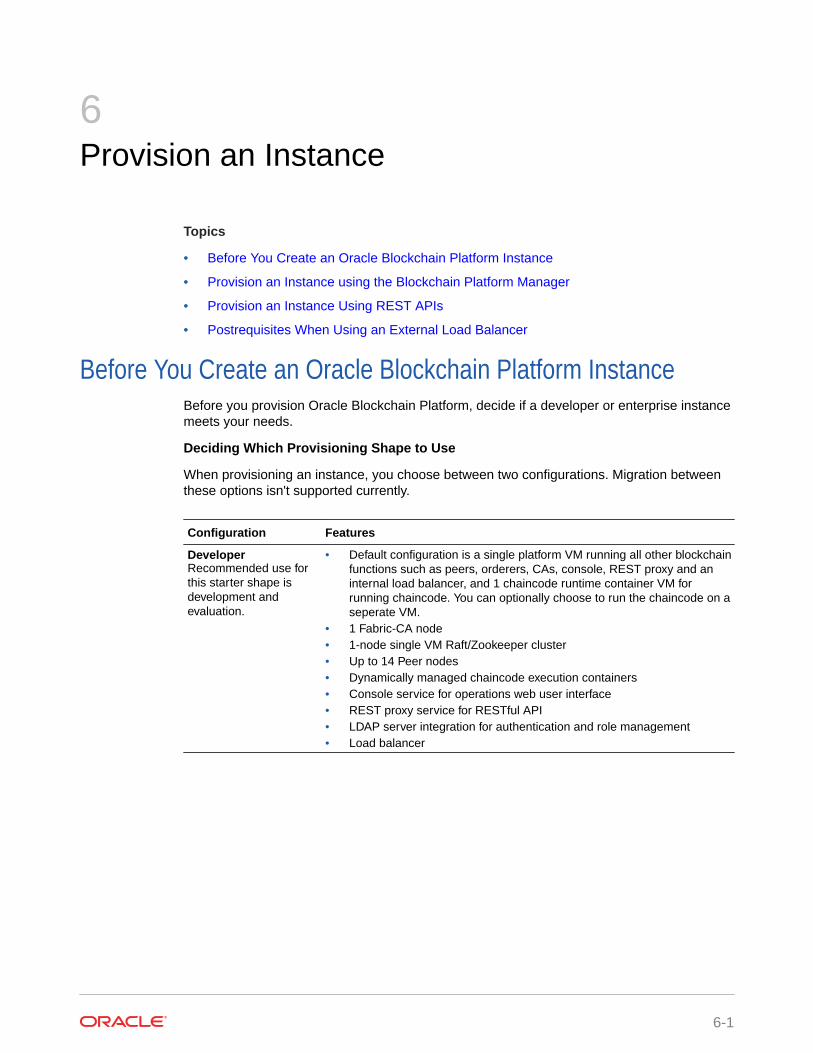
6Provision an Instance
Topics
• Before You Create an Oracle Blockchain Platform Instance
• Provision an Instance using the Blockchain Platform Manager
• Provision an Instance Using REST APIs
• Postrequisites When Using an External Load Balancer
Before You Create an Oracle Blockchain Platform InstanceBefore you provision Oracle Blockchain Platform, decide if a developer or enterprise instancemeets your needs.
Deciding Which Provisioning Shape to Use
When provisioning an instance, you choose between two configurations. Migration betweenthese options isn't supported currently.
Configuration Features
DeveloperRecommended use forthis starter shape isdevelopment andevaluation.
• Default configuration is a single platform VM running all other blockchainfunctions such as peers, orderers, CAs, console, REST proxy and aninternal load balancer, and 1 chaincode runtime container VM forrunning chaincode. You can optionally choose to run the chaincode on aseperate VM.
• 1 Fabric-CA node• 1-node single VM Raft/Zookeeper cluster• Up to 14 Peer nodes• Dynamically managed chaincode execution containers• Console service for operations web user interface• REST proxy service for RESTful API• LDAP server integration for authentication and role management• Load balancer
6-1
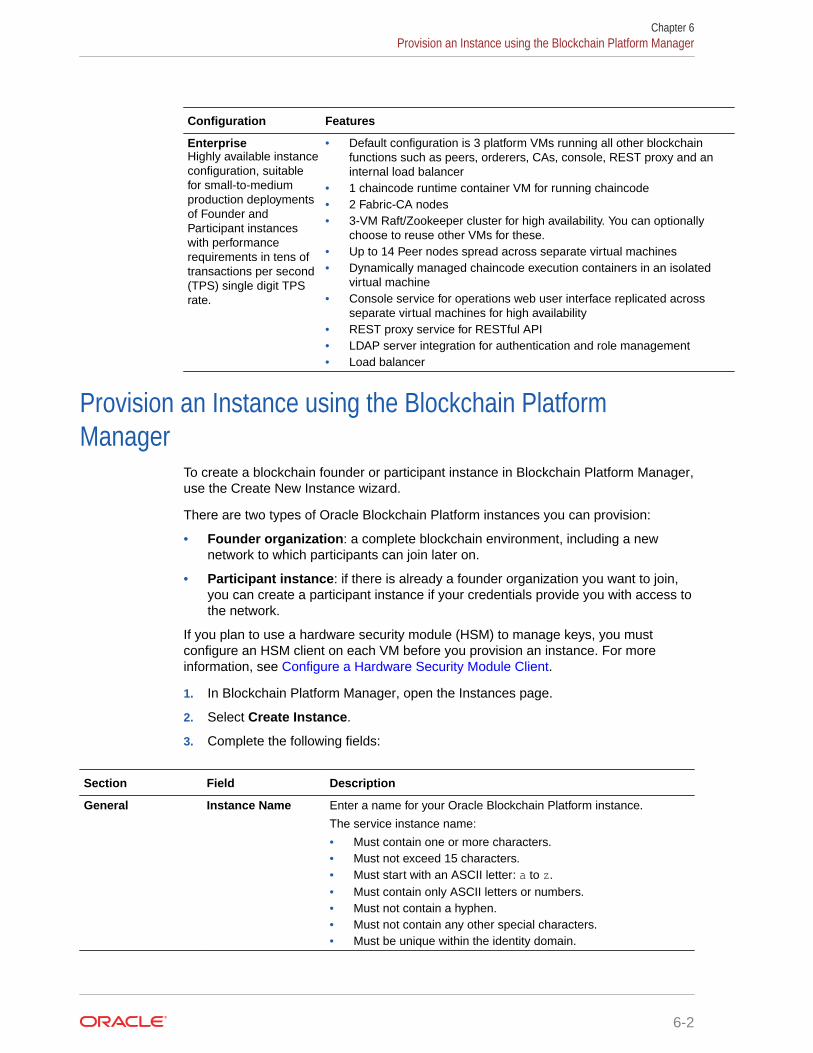
Configuration Features
EnterpriseHighly available instanceconfiguration, suitablefor small-to-mediumproduction deploymentsof Founder andParticipant instanceswith performancerequirements in tens oftransactions per second(TPS) single digit TPSrate.
• Default configuration is 3 platform VMs running all other blockchainfunctions such as peers, orderers, CAs, console, REST proxy and aninternal load balancer
• 1 chaincode runtime container VM for running chaincode• 2 Fabric-CA nodes• 3-VM Raft/Zookeeper cluster for high availability. You can optionally
choose to reuse other VMs for these.• Up to 14 Peer nodes spread across separate virtual machines• Dynamically managed chaincode execution containers in an isolated
virtual machine• Console service for operations web user interface replicated across
separate virtual machines for high availability• REST proxy service for RESTful API• LDAP server integration for authentication and role management• Load balancer
Provision an Instance using the Blockchain PlatformManager
To create a blockchain founder or participant instance in Blockchain Platform Manager,use the Create New Instance wizard.
There are two types of Oracle Blockchain Platform instances you can provision:
• Founder organization: a complete blockchain environment, including a newnetwork to which participants can join later on.
• Participant instance: if there is already a founder organization you want to join,you can create a participant instance if your credentials provide you with access tothe network.
If you plan to use a hardware security module (HSM) to manage keys, you mustconfigure an HSM client on each VM before you provision an instance. For moreinformation, see Configure a Hardware Security Module Client.
1. In Blockchain Platform Manager, open the Instances page.
2. Select Create Instance.
3. Complete the following fields:
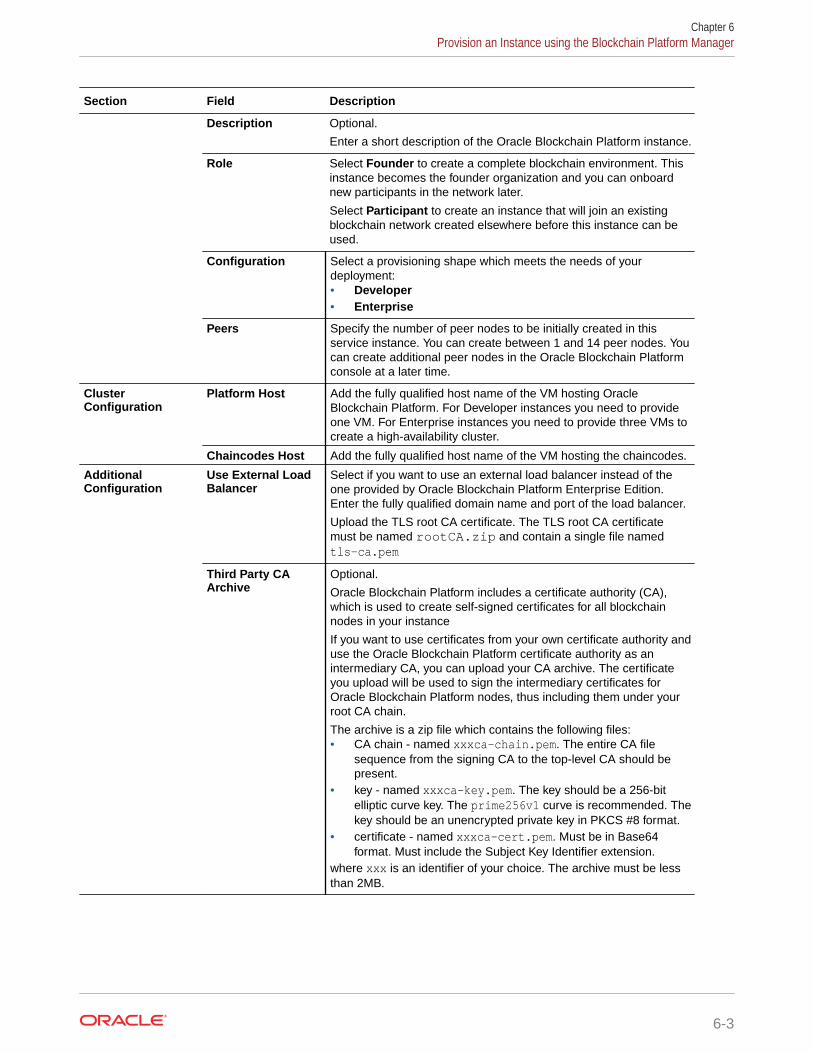
Section Field Description
General Instance Name Enter a name for your Oracle Blockchain Platform instance.
The service instance name:
• Must contain one or more characters.• Must not exceed 15 characters.• Must start with an ASCII letter: a to z.• Must contain only ASCII letters or numbers.• Must not contain a hyphen.• Must not contain any other special characters.• Must be unique within the identity domain.
Chapter 6Provision an Instance using the Blockchain Platform Manager
6-2
Section Field Description
Description Optional.
Enter a short description of the Oracle Blockchain Platform instance.
Role Select Founder to create a complete blockchain environment. Thisinstance becomes the founder organization and you can onboardnew participants in the network later.
Select Participant to create an instance that will join an existingblockchain network created elsewhere before this instance can beused.
Configuration Select a provisioning shape which meets the needs of yourdeployment:• Developer• Enterprise
Peers Specify the number of peer nodes to be initially created in thisservice instance. You can create between 1 and 14 peer nodes. Youcan create additional peer nodes in the Oracle Blockchain Platformconsole at a later time.
ClusterConfiguration
Platform Host Add the fully qualified host name of the VM hosting OracleBlockchain Platform. For Developer instances you need to provideone VM. For Enterprise instances you need to provide three VMs tocreate a high-availability cluster.
Chaincodes Host Add the fully qualified host name of the VM hosting the chaincodes.
AdditionalConfiguration
Use External LoadBalancer
Select if you want to use an external load balancer instead of theone provided by Oracle Blockchain Platform Enterprise Edition.Enter the fully qualified domain name and port of the load balancer.
Upload the TLS root CA certificate. The TLS root CA certificatemust be named rootCA.zip and contain a single file namedtls-ca.pem
Third Party CAArchive
Optional.
Oracle Blockchain Platform includes a certificate authority (CA),which is used to create self-signed certificates for all blockchainnodes in your instance
If you want to use certificates from your own certificate authority anduse the Oracle Blockchain Platform certificate authority as anintermediary CA, you can upload your CA archive. The certificateyou upload will be used to sign the intermediary certificates forOracle Blockchain Platform nodes, thus including them under yourroot CA chain.
The archive is a zip file which contains the following files:• CA chain - named xxxca-chain.pem. The entire CA file
sequence from the signing CA to the top-level CA should bepresent.
• key - named xxxca-key.pem. The key should be a 256-bitelliptic curve key. The prime256v1 curve is recommended. Thekey should be an unencrypted private key in PKCS #8 format.
• certificate - named xxxca-cert.pem. Must be in Base64format. Must include the Subject Key Identifier extension.
where xxx is an identifier of your choice. The archive must be lessthan 2MB.
Chapter 6Provision an Instance using the Blockchain Platform Manager
6-3
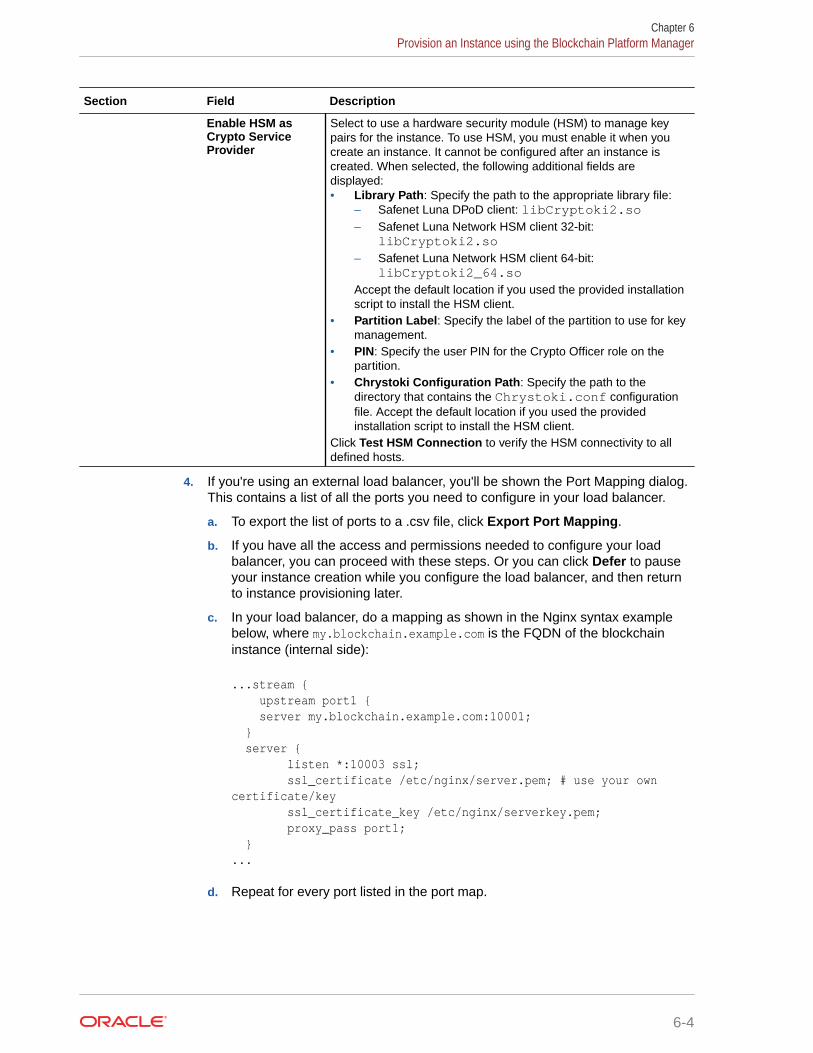
Section Field Description
Enable HSM asCrypto ServiceProvider
Select to use a hardware security module (HSM) to manage keypairs for the instance. To use HSM, you must enable it when youcreate an instance. It cannot be configured after an instance iscreated. When selected, the following additional fields aredisplayed:• Library Path: Specify the path to the appropriate library file:
– Safenet Luna DPoD client: libCryptoki2.so– Safenet Luna Network HSM client 32-bit:
libCryptoki2.so– Safenet Luna Network HSM client 64-bit:
libCryptoki2_64.soAccept the default location if you used the provided installationscript to install the HSM client.
• Partition Label: Specify the label of the partition to use for keymanagement.
• PIN: Specify the user PIN for the Crypto Officer role on thepartition.
• Chrystoki Configuration Path: Specify the path to thedirectory that contains the Chrystoki.conf configurationfile. Accept the default location if you used the providedinstallation script to install the HSM client.
Click Test HSM Connection to verify the HSM connectivity to alldefined hosts.
4. If you're using an external load balancer, you'll be shown the Port Mapping dialog.This contains a list of all the ports you need to configure in your load balancer.
a. To export the list of ports to a .csv file, click Export Port Mapping.
b. If you have all the access and permissions needed to configure your loadbalancer, you can proceed with these steps. Or you can click Defer to pauseyour instance creation while you configure the load balancer, and then returnto instance provisioning later.
c. In your load balancer, do a mapping as shown in the Nginx syntax examplebelow, where my.blockchain.example.com is the FQDN of the blockchaininstance (internal side):
...stream { upstream port1 { server my.blockchain.example.com:10001; } server { listen *:10003 ssl; ssl_certificate /etc/nginx/server.pem; # use your own certificate/key ssl_certificate_key /etc/nginx/serverkey.pem; proxy_pass port1; }...
d. Repeat for every port listed in the port map.
Chapter 6Provision an Instance using the Blockchain Platform Manager
6-4

Note:
If at some point in the future you scale out your instance by adding newpeers, remember to map those new peers using the steps above.
5. When your load balancer configuration is complete, check the checkbox confirming it hasbeen configured and click Create Instance.
Once your instance has been created and is listed in the Instances list, you can launch theservice console from the menu next to the instance name. Use the console to configure yournetwork as described in Using Oracle Blockchain Platform.
Provision an Instance Using REST APIsYou can provision an Oracle Blockchain Platform instance using a REST API.
The following example shows how to create an Oracle Blockchain Platform instance thatuses a hardware security module (HSM) by using the REST API. For instances that do notuse HSM, set useHSM to false and do not specify the hsmConfiguration object.
For instances that use HSM, verify connectivity to the HSM from all hosts before youprovision the instance. For more information, see Test HSM Connectivity.
curl -X POST \ -u <username>:<password> \ https://localhost:7443/api/v1/blockchainPlatforms/instances \-H "Content-Type: multipart/form-data; boundary=----WebKitFormBoundary7MA4YWxkTrZu0gW' \ -F 'payload={"name": "obpinstance1","desc": "test instance","platformRole": "founder","configuration": "Developer","peer": 4,"cluster": {"platformHosts": ["10.182.73.23","10.182.73.20"],"crcHosts": ["10.182.73.23","10.182.73.20"]},"additionalConfiguration": {"instanceFQDN": "domain.host.com""startPort": 0,"enableTLS": true,"useHSM": true,"hsmConfiguration": {"library": "/etc/hyperledger/fabric/dpod/fabric/libs/64/libCryptoki2.so","label": "fabric","pin": "password","chrystokiConf": "/etc/hyperledger/fabric/dpod/fabric"
Chapter 6Provision an Instance Using REST APIs
6-5

}}}'
• name
– Must contain one or more characters.
– Must not exceed 15 characters.
– Must start with an ASCII letter: a to z.
– Must contain only ASCII letters or numbers.
– Must not contain a hyphen.
– Must not contain any other special characters.
– Must be unique within the identity domain.
• desc
– Optional: Enter a description of the instance
• platformRole
– Must be set to developer or founder
• configuration
– Developer: 3 Raft orderers and 3 OCPU total in 1 VM
– Enterprise: A 3 node Raft cluster and 3 X VM
• peer
– Specify the number of peer nodes that will be initially created in this serviceinstance.
– 1 to 14 peer nodes can be created.
• cluster
– Enter the information for your cluster:
* platformHosts: the VMs hosting your platform cluster
* crcHosts: the VMs hosting the chaincode
• additionalConfiguration
– Enter additional information to support load balancers or hardware securitymodules.
* instanceFQDN: The fully qualified domain name of your external loadbalancer. This is used exclusively for external load balancers - if you're notusing an external load balancer, you don't need to specify this parameter.
* startPort
* enableTLS
* useHSM: Set to true to use a hardware security module to manage keys.
* hsmconfiguration: Specify the library (the path to thelibCryptoki2.so or libCryptoki2_64.so file), label (the partitionlabel to use for key management), pin (the Crypto Officer PIN), andchrystokiConf (the directory that contains the Chrystoki.conf file).
Chapter 6Provision an Instance Using REST APIs
6-6
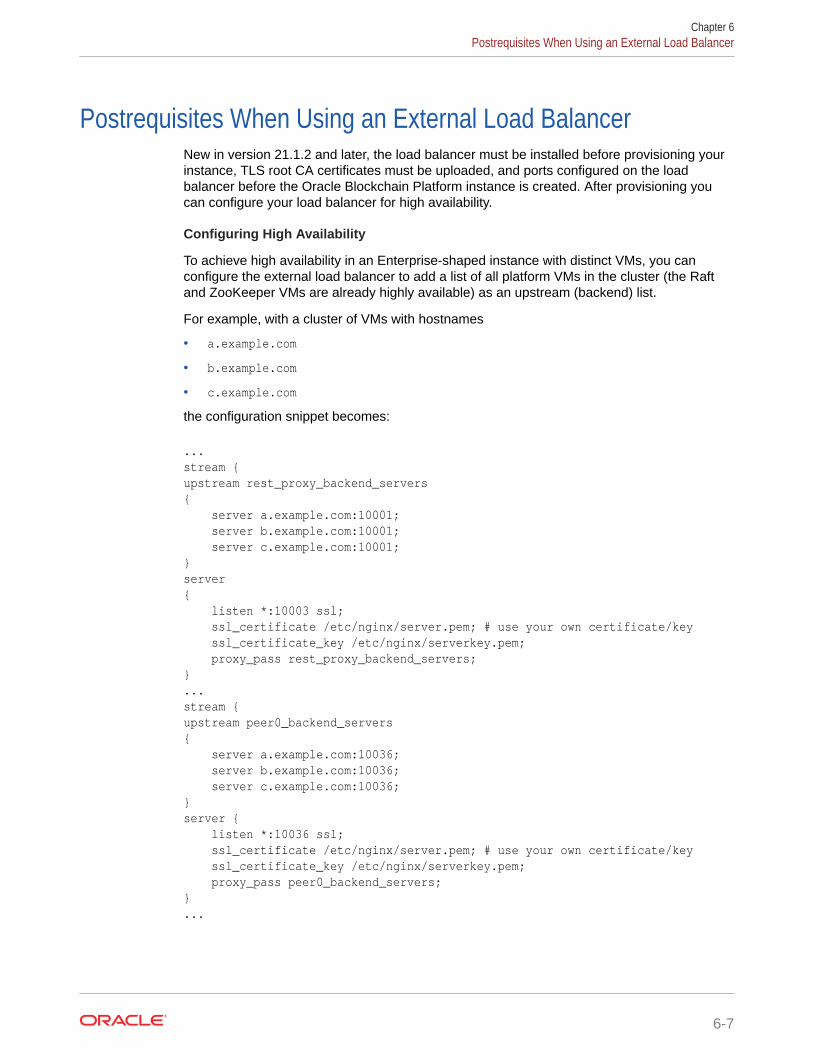
Postrequisites When Using an External Load BalancerNew in version 21.1.2 and later, the load balancer must be installed before provisioning yourinstance, TLS root CA certificates must be uploaded, and ports configured on the loadbalancer before the Oracle Blockchain Platform instance is created. After provisioning youcan configure your load balancer for high availability.
Configuring High Availability
To achieve high availability in an Enterprise-shaped instance with distinct VMs, you canconfigure the external load balancer to add a list of all platform VMs in the cluster (the Raftand ZooKeeper VMs are already highly available) as an upstream (backend) list.
For example, with a cluster of VMs with hostnames
• a.example.com
• b.example.com
• c.example.com
the configuration snippet becomes:
...stream {upstream rest_proxy_backend_servers{ server a.example.com:10001; server b.example.com:10001; server c.example.com:10001; }server{ listen *:10003 ssl; ssl_certificate /etc/nginx/server.pem; # use your own certificate/key ssl_certificate_key /etc/nginx/serverkey.pem; proxy_pass rest_proxy_backend_servers; }...stream { upstream peer0_backend_servers{ server a.example.com:10036; server b.example.com:10036; server c.example.com:10036;} server { listen *:10036 ssl; ssl_certificate /etc/nginx/server.pem; # use your own certificate/key ssl_certificate_key /etc/nginx/serverkey.pem; proxy_pass peer0_backend_servers; }...
Chapter 6Postrequisites When Using an External Load Balancer
6-7

Each externally available port in the instance cluster is published on each VM androutes to the proper service automatically (console, membership/CA, orderers, peers,REST proxy).
Ensure that all ports listed via the LBR Port Map button are routed in this way.
After provisioning a 3 VM cluster, run the following commands on the swarm manager(which should be the first machine in the cluster), where the control plane andcomponent manager run:
$ docker node ls
This will return the list of nodes in the cluster. For example:
[oracle@dhcp-10-144-63-180 ~]$ docker node lsID HOSTNAME STATUS AVAILABILITY MANAGER STATUS ENGINE VERSIONfz1ksoxysyorz754x0hswnird dhcp-10-144-62-149.usdhcp.oraclecorp.com Ready Active 18.09.1-olrayhna7vdiup5p7tkmxxepyex * dhcp-10-144-63-180.usdhcp.oraclecorp.com Ready Active Leader 18.09.1-ol
For each node that has no manager status, promote the nodes using a commandsimilar to the following example:
$ docker node promote dhcp-10-144-62-149.usdhcp.oraclecorp.com
Ensure that a minimum of three nodes are promoted in this manner.
Chapter 6Postrequisites When Using an External Load Balancer
6-8
7Manage Oracle Blockchain Platform
Once you've provisioned your instance, you can manage it in Blockchain Platform Manager.
Topics
• View Instance Details
• View Instance Activity
• Start or Stop an Instance
• Delete an Instance
• Scale an Instance In or Out
• Patch an Instance to v19.3.4
• Patch an Instance to v19.3.5 or Later
View Instance DetailsClicking on your instance name in Blockchain Platform Manager opens the Instances tabdisplaying details about the instance.
The Instance Details page lists information such as the location of the logs and ledger, aswell as the health of the instance. You can also see all the VMs and their status.
The Patching page lists all the patches that have been applied to the instance, as well asany available patches that haven't been applied.
You can manage the instance from the Actions menu, or launch the Oracle BlockchainPlatform Service Console to manage your blockchain network.
Open the Configuration tab to access the LDAP and platform configuration tabs. You canupdate your LDAP or platform configuration if needed. You may want to disable the defaultuser (obpadmin) once you've created your user in LDAP and successfully logged in with thatuser ID.
View Instance ActivityThe Activity pages shows the status of operations that have been performed on yourinstances.
To see the activity of an instance, select your instance name and on the Instances page clickActivity.
This tab lists any operations that have been performed on your instance such as starting,stopping, and updating, as well as whether or not it was successful, the time of the operation,and the user ID who initiated the operation.
You can see and filter the activity of all instances managed by Blockchain Platform Manageron the Activities page. The Activities page can be used to see the history of operations
7-1
performed on any instances, including deleted instances. These activities can befiltered by different search criteria such as instance name, operation types, and daterange.
Start or Stop an InstanceYou can start or stop an instance in the Blockchain Platform Manager.
To start or stop an instance:
1. In Blockchain Platform Manager, find your instance and select the menu beside it.
2. Select Start or Stop. You'll be prompted to confirm your selection.
Update an InstanceYou can update the LDAP configuration or HSM details of an instance.
1. On the Instance Details page, select Update from the Actions menu.
2. Select to update the LDAP configuration or the HSM details:
• For LDAP, select Update Auth Server Configuration. This updates theinstance with the active LDAP configuration.
• For HSM, select Update HSM Details. Enter the updated partition label andthe Crypto Officer PIN.
Note that these options only display if the instance has an existing configurationfor that option.
3. Click Submit.
Delete an InstanceYou can delete your instance in Blockchain Platform Manager.
To delete your instance:
1. Open Blockchain Platform Manager and find your instance.
2. From the menu beside your instance, select Terminate.
3. You'll be prompted to confirm you action. Click Confirm.
Scale an Instance In or OutYou can scale an instance in or out in Blockchain Platform Manager.
Scale Out
You can scale out your instance by creating new VMs, replicas, or peers:
1. In Blockchain Platform Manager open the menu beside your instance name andclick Scale Out.
2. You can scale out using any of these methods:
• New VMs: adds a new VM to the cluster with the specified role of platformhost, chaincode host, or ZooKeeper/Raft host.
Chapter 7Start or Stop an Instance
7-2
• New Replicas: adds additional nodes; REST proxy or CA.
• New Peers: adds one additional peer at a time.
• New Orderers: adds additional orderers.
Scale Out a Peer When Using an External Load Balancer
When using an external load balancer, you need to remap the ports to the new peer:
1. In Blockchain Platform Manager open the menu beside your instance name and clickScale Out.
2. Select New Peers, and enter the information for the peer. The port mapping informationfor the peer will be listed. You must add these port mappings to your load balancer beforeadding the new peer.
3. In your load balancer, do a mapping as shown in the Nginx syntax example below, wheremy.blockchain.example.com is the FQDN of the blockchain instance (internal side):
...stream { upstream port1 { server my.blockchain.example.com:10001; } server { listen *:10003 ssl; ssl_certificate /etc/nginx/server.pem; # use your own certificate/key ssl_certificate_key /etc/nginx/serverkey.pem; proxy_pass port1; }...
Repeat for every port listed in the port map.
4. In the Blockchain Platform Manager Scale Out wizard, confirm that you have updatedyour load balancer configuration, and click Submit.
Scale In
You can scale in your instance by deleting peers.
Before scaling in an instance, you should transfer all this peer's responsibilities to otherrunning peers, and then remove all the responsibilities this peer has.
• Check all other peers' gossip bootstrap address lists, remove the peer address, and addanother running peer's address if needed. After peer configuration change, restart thepeer.
• Check all channels' anchor peer lists, remove the peer from the anchor peer lists, andadd another running peer to the anchor peer list if needed.
• If a channel or chaincode is only joined or instantiated in this peer, you should considerusing another running peer to join the same channel and instantiate the same chaincode.
1. In Blockchain Platform Manager open the menu beside your instance name and clickScale In.
2. Enter the hostname or IP address of the peer you want to delete. To delete more thanone peer, click Add Peer and enter the information for the additional peer.
Chapter 7Scale an Instance In or Out
7-3

Patch an Instance to v19.3.4You can patch Blockchain Platform Manager and your instance from within BlockchainPlatform Manager.
The process for patching to v19.3.4 or earlier version is different from the process forpatching to v19.3.5 or later. See Patch an Instance to v19.3.5 or Later.
Register a Patch
1. Download any desired patches from support.oracle.com.
2. Open the Patches tab.
3. Click Register Patch and select the patch you've downloaded.
Patching Blockchain Platform Manager
When a Blockchain Platform Manager patch is available, you must apply it beforepatching your instance. Otherwise when you are trying to do the data plane patching awarning message will be shown to remind you patch the control plane first.
1. When a Blockchain Platform Manager patch is available, an Upgrade button willbe shown in the About dialog which you can open from the User menu in the top-right corner.
2. The Blockchain Platform Manager patching process will reboot BlockchainPlatform Manager automatically. After the reboot, you need to clean up cachedimages and files in the browser, then log in to the Blockchain Platform Manageragain.
Any new instances created after the patch will be at the upgraded level. Any existinginstances must be patched as described in Patching an Instance.
Patching an Instance
You must have patched Blockchain Platform Manager before you patch you instance.
A patch package includes:
• A metadata file
• One or more scripts to be run during patching
• Docker images for different components
Blockchain Platform Manager extracts the patch package, pushes the componentdocker images to the docker registry, and stores the metadata file and scripts in localdatabase.
The patch package is a rolling patch; a newer patch is always a superset of an olderpatch within the same release.
1. Open the Patches page. Select the registered patch you want to apply and clickApply. Select all the instances you want to apply the patch to, click Next and thenSubmit.
2. Patching is an asynchronous operation. In the instance's Activity pane, clickRefresh to check the operation's status periodically and wait until the statuschanges to Successful.
Chapter 7Patch an Instance to v19.3.4
7-4
To Roll Back a Patch
In Blockchain Platform Manager:
1. On the Instances tab, select your instance to open the Instance Details page and selectthe Patches tab.
2. Select the patch to be rolled back, and click Rollback.
Post-Patching Steps
After you patch your instance, the Blockchain Platform Manager UI may not be updated.Clear your browser cache and reload the Blockchain Platform Manager to see the updatedpages.
For information on how to configure logging for a patched instance, see Migrated InstanceLogs
Patch an Instance to v19.3.5 or LaterWhen a Blockchain Platform Manager patch is available, it will be shown in the About dialogwhich you can open from the User menu in the top-right corner.
The Blockchain Platform Manager patching process will reboot Blockchain Platform Managerautomatically. After the reboot, you need to clean up cached images and files in the browser,then log in to the Blockchain Platform Manager again.
Any new instances created after the patch will be at the upgraded level. Any existinginstances must be patched as described in
1. Download any desired patches from support.oracle.com.
2. Open the Patches tab.
3. Click Register Patch and select the patch you've downloaded. The patch will now belisted in the available patches.
4. Click Upgrade Platform Manager to upgrade Blockchain Platform Manager.
5. Once you've upgraded the platform manager, you can select the Action menu and clickUpgrade Instances to upgrade your existing instances.
After you patch your instance, the Blockchain Platform Manager UI may not be updated.Clear your browser cache and reload the Blockchain Platform Manager to see the updatedpages.
Chapter 7Patch an Instance to v19.3.5 or Later
7-5
8Monitor and Troubleshoot Your Instance
Topics
• Logging
Logging• v19.3.2 Instance Logs
• v19.3.3 - 19.3.5 Instance Logs
• v19.3.2 to v19.3.3 Migrated Instance Logs
• v21.1.2 Instance Logs
• Blockchain Platform Manager Logs
• Set the Log Level for Component Manager
• Set the Log Level for the Instance Service
v19.3.2 Instance Logs
After Oracle Blockchain Platform has started successfully, a container log will be writtento /u01/obp-logs when its size reaches 10MB.You can check the current logs in thedocker containers using docker commands.
Upon failure of provisioning, in most cases you would want to use a docker command tocheck the container status and logs, such as docker ps, docker inspect, docker servicels, and docker service ps. Logs will not be found under /u01/obp-logs because eitherthe container creation failed in the middle of the docker daemon preparing the container,control has not been transferred to ENTRYPOINT command, or the container has exited due toerror condition before the log reached 10MB.
v19.3.3 - 19.3.5 Instance Logs
When an instance is created in Oracle Blockchain Platform Enterprise Edition v19.3.3,v19.3.4 or v19.3.5, all service logs are output to your local VM syslog; the defaultis /var/log/messages. To configure the logging, as root go to /u01/blockchain/tools. The config-syslog.sh script is used to:
• define the syslog server
• define the server log location if you don't want to use /var/log/messages
• define the log rotation cycle
$ ./config-syslog.sh -h Syslog config: main entry Usage: ./config-syslog.sh -s logserveraddr [-d logserverdir] [-f syslogfacility] [-r logrotateday]
8-1

• logserveraddr is the remote rsyslog server address. Its value should be theoutput of <platformhost.com>
• logserverdir is the log output directory on logserver. Default is /u01/obp-logs.
• syslogfacility is the syslog facility value. Default is local6.
• logrotateday(numeric) is the log rotation days before expired data could beremoved. Default is 7.
Example:
./config-syslog.sh -s syslog.server.example.com -d /u01/obp-logs -r 10
v19.3.2 to v19.3.3 Migrated Instance Logs
Because log collection was introduced in v19.3.3, instances created in 19.3.2 andpatched to 19.3.3 are still using docker container logs; the default locationis /var/lib/docker/containers/<CID>/<CID>-json.log
If you want to configure log collection, as root go to /u01/blockchain/tools andrun config-patch.sh. This script is used to:
• define the syslog server
• define the server log location if you don't want to use /var/log/messages
• define the log rotation cycle
$ ./config-patch.sh -h Patch config: main entry Usage: ./config-patch.sh -s logserveraddr [-d logserverdir] [-f syslogfacility] [-r logrotateday]
• logserveraddr is the remote rsyslog server address. Its value should be theoutput of <platformhost.com>
• logserverdir is the log output directory on logserver. Default is /u01/obp-logs.
• syslogfacility is the syslog facility value. Default is local6.
• logrotateday(numeric) is the log rotation days before expired data could beremoved. Default is 7.
Example:
./config-patch.sh -s syslog.server.example.com -d /u01/obp-logs -r 10
v21.1.2 Instance Logs
The default location of the logs in this release is /u01/obp-logs.
For instances upgraded from earlier versions, this is configured as described in Configure Raft Consensus Protocol.
Blockchain Platform Manager Logs
The following logs are available in /u01/blockchain/cp/logs/:
Chapter 8Logging
8-2
• access.log: This log provides Blockchain Platform Manager access information for auditpurposes. This log shows access information for all the REST resources (APIs) that havebeen accessed by a user while performing various activities. The user information isavailable only for the activities that are performed using the Blockchain Platform ManagerConsole.
Default location: /var/log/messages
But they can run script sudo /u01/blockchain/tools/config-syslog.sh -s `hostname` andinstance log are output to default file /u01/obp-logs/obp.log
Set the Log Level for Component Manager
To set the log level for Component Manager:
1. Log in to your virtual machine
2. Open /home/oracle/startcm.sh in an editor.
3. Add the following line next to the line starting with docker run:
-e "BCS_LOG_LEVEL=DEBUG" \
where the supported log levels are ERROR, WARNING, INFO, and DEBUG.
4. Restart the component manager:
sudo systemctl restart compmanager.service
For component manager on the VM, you can use the environment variable BCS_LOG_LEVEL toset the log level.
Set the Log Level for the Instance Service
To set the log level for the node manager:
1. Find your node manager service name:
docker service ls
2. Use the following Docker command:
docker service update --env-add BCS_LOG_LEVEL=DEBUG <NM_service_name>
where the supported log levels are ERROR, WARNING, INFO, and DEBUG.
For node manager on the VM, you can use the environment variable BCS_LOG_LEVEL to setthe log level.
Chapter 8Logging
8-3

AAccessibility Features and Tips for OracleBlockchain Platform
This topic describes accessibility features and information for Oracle Blockchain Platform.
Table A-1 Keyboard Shortcuts for Blockchain Platform Manager
Task Keyboard Shortcut
Create an Oracle Blockchain Platforminstance.
Windows: Alt+Shift+C
Mac: Shift+Option+C
Navigate to the Patch page.
Note that the instance name must be infocus before using the shortcut.
Windows: Alt+Shift+P
Mac: Shift+Option+P
Refresh the Instance Summary page. Windows: Alt+Shift+R
Mac: Shift+Option+R
A-1