


Bahasa
Halaman
Hukum


pygame
#pygame

Table of Contents
About 1
Chapter 1: Getting started with pygame 2
Remarks 2
Versions 2
Examples 2
A simple 'game' 2
Import and initialize 2
Create necessities 3
The game loop 3
Complete code 4
Slightly improved game mechanics 5
Installing pygame 6
On windows 6
On linux 7
On macOS 7
Importing pygame and drawing on a display 8
Getting Started 8
Setting up a window name 8
About the screen 8
Updating the Screen 8
Colors 8
Drawing 9
Setting everything into a loop 9
Drawing a rectangle on pygame window (code) 9
Chapter 2: Adding background music and sound effects 11
Remarks 11
Examples 11
Example to add music in pygame 11
Example to add music playlist in pygame 11
Chapter 3: Creating a pygame window 12

Remarks 12
Examples 12
Creating the pygame window 12
Chapter 4: Creating a simple pygame window 13
Examples 13
The complete code 13
Chapter 5: Creating a window in pygame - pygame.display.set_mode() 16
Syntax 16
Parameters 16
Remarks 16
Examples 17
Create a pygame window 17
Chapter 6: Drawing on the screen 18
Examples 18
drawing shapes, text and images on the screen with a small animation 18
the entire code: 18
drawing the white background: 19
drawing the polygon: 19
drawing the lines: 19
drawing the circle: 20
drawing the ellipse: 20
drawing the rectangle: 20
defining the text: 20
drawing the text: 21
defining the image: 21
animating the image: 21
checking if you quit the program: 22
updating the display: 22
defining the frames per second: 22
Chapter 7: Drawing on the screen 23

Syntax 23
Parameters 23
Examples 24
Drawing with the draw module 24
How to use the module 24
Example 24
Rect 25
Polygon 25
Circle 25
Ellipse 25
Arc 26
Line 26
Lines 26
Antialiased line 26
Antialiased lines 27
Try it out 27
Surfaces 27
Create a Surface 28
Load an image 28
Blitting 28
Transparency 29
Colorkeys 29
Surface alphas 29
Per-pixel alpha 29
Combine colorkey and Surface alpha 30
Full code 30
Chapter 8: Event handling 32
Examples 32
Event loop 32
Example 32
Keyboard events 33

Example 33
Modifiers 33
Example 34
Mouse events 34
Example 34
State checking 35
Keyboard events 36
Mouse events 36
Chapter 9: The essentials 38
Examples 38
Drawing and a basic animation 38
the complete code: 38
setting up pygame and the window: 39
drawing the white background: 39
drawing the green polygon: 39
drawing the blue lines: 40
drawing the blue circle: 40
drawing the ellipse: 40
drawing the rectangle: 40
defining the text: 40
drawing the text: 41
defining the image: 41
animating the image: 41
checking for quit: 42
updating the screen: 42
FPS setting: 42
Using with PIL 42
Credits 44

About
You can share this PDF with anyone you feel could benefit from it, downloaded the latest version from: pygame
It is an unofficial and free pygame ebook created for educational purposes. All the content is extracted from Stack Overflow Documentation, which is written by many hardworking individuals at Stack Overflow. It is neither affiliated with Stack Overflow nor official pygame.
The content is released under Creative Commons BY-SA, and the list of contributors to each chapter are provided in the credits section at the end of this book. Images may be copyright of their respective owners unless otherwise specified. All trademarks and registered trademarks are the property of their respective company owners.
Use the content presented in this book at your own risk; it is not guaranteed to be correct nor accurate, please send your feedback and corrections to [email protected]
https://riptutorial.com/ 1
Chapter 1: Getting started with pygame
Remarks
Pygame is a Python wrapper for SDL – a cross-platform C library for controlling multimedia –, written by Pete Shinners. This means, using pygame, you can write video games or other multimedia applications in Python that will run unaltered on any of SDL’s supported platforms (Windows, Unix, Mac, beOS and others).
This section provides an overview of what pygame is, and why a developer might want to use it.
It should also mention any large subjects within pygame, and link out to the related topics. Since the Documentation for pygame is new, you may need to create initial versions of those related topics.
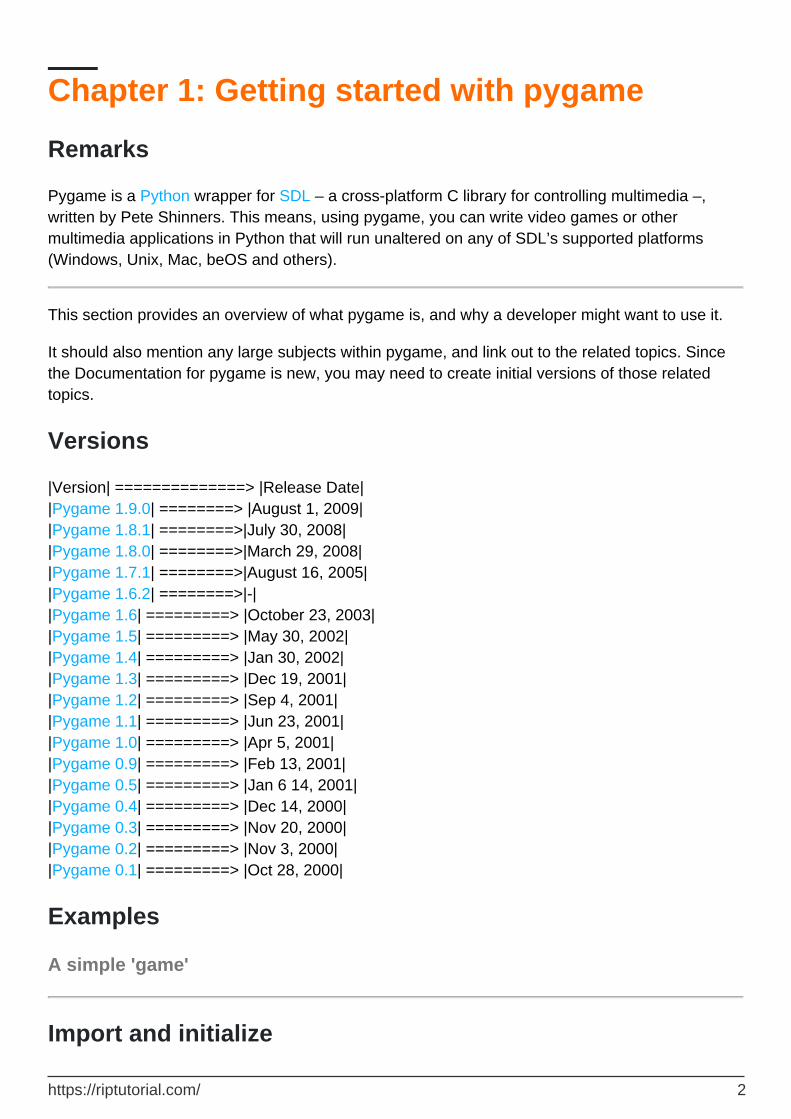
Versions
|Version| ==============> |Release Date| |Pygame 1.9.0| ========> |August 1, 2009| |Pygame 1.8.1| ========>|July 30, 2008| |Pygame 1.8.0| ========>|March 29, 2008| |Pygame 1.7.1| ========>|August 16, 2005| |Pygame 1.6.2| ========>|-| |Pygame 1.6| =========> |October 23, 2003| |Pygame 1.5| =========> |May 30, 2002| |Pygame 1.4| =========> |Jan 30, 2002| |Pygame 1.3| =========> |Dec 19, 2001| |Pygame 1.2| =========> |Sep 4, 2001| |Pygame 1.1| =========> |Jun 23, 2001| |Pygame 1.0| =========> |Apr 5, 2001| |Pygame 0.9| =========> |Feb 13, 2001| |Pygame 0.5| =========> |Jan 6 14, 2001| |Pygame 0.4| =========> |Dec 14, 2000| |Pygame 0.3| =========> |Nov 20, 2000| |Pygame 0.2| =========> |Nov 3, 2000| |Pygame 0.1| =========> |Oct 28, 2000|
Examples
A simple 'game'
Import and initialize
https://riptutorial.com/ 2

Every module needs to be imported and pygame is no exception. Although we need to call the function pygame.init() for all imported modules in pygame to be initialized properly. If we forget this some modules won't work. The function also returns a tuple of all successfully and failed initializations (it won't raise an error if a module fails to initialize).
import pygame successes, failures = pygame.init() print("{0} successes and {1} failures".format(successes, failures))
Create necessities
We also need to create a display. Pygame have already created a (hidden) display, so all we need to do is to set the mode of the display (in this example we only set the resolution). It's also a good idea to create a clock to make sure our program updates at a fixed speed (otherwise it would run at different speed depending on how fast the computer is).
screen = pygame.display.set_mode((720, 480)) # Notice the tuple! It's not 2 arguments. clock = pygame.time.Clock() FPS = 60 # This variable will define how many frames we update per second.
For a bit of readability later in our code we'll create two color constants, which represent a tuple of Red, Green and Blue (RGB). The values goes from 0 (no light) to 255 (full light).
BLACK = (0, 0, 0) WHITE = (255, 255, 255)
In pygame we usually use a Surface to represent the appearance of an object, and a Rect (rectangle) to represent the position of an object. A Surface is like a blank sheet of paper which contain colors or images. If you're making a class you should name the attributes image and rect since many functions will look for and use those attributes. Such classes would benefit by inherit the pygame.sprite.Sprite class for reasons you can read up on here.
rect = pygame.Rect((0, 0), (32, 32)) # First tuple is position, second is size. image = pygame.Surface((32, 32)) # The tuple represent size. image.fill(WHITE) # We fill our surface with a nice white color (by default black).
The game loop
Now we have everything set for our game loop. This is a loop that will run for the entire game, where we handle events and updates the screen and positions of our objects.
First we'll make sure our loop executes at a given FPS. We defined the FPS and created our clock in the beginning of the program. The following code will make sure our program sleeps enough time to make our loop repeat the amount we defined our FPS to be. In this example, 60 times per second.
https://riptutorial.com/ 3
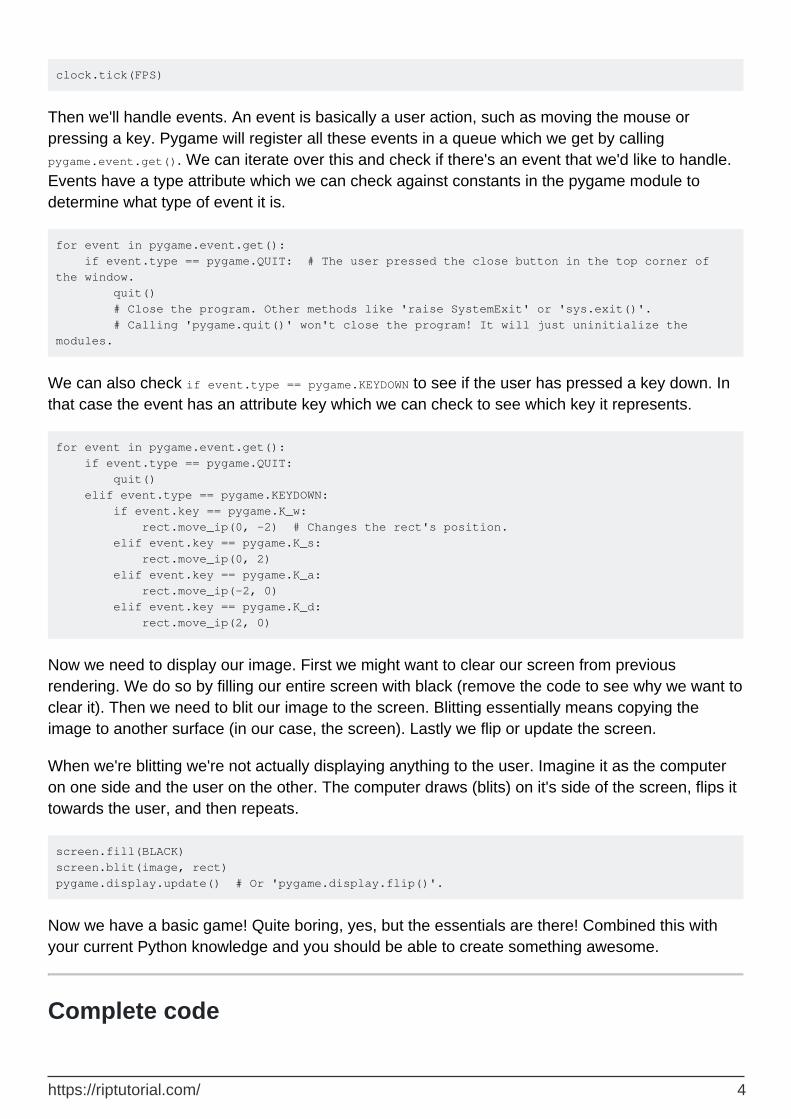
clock.tick(FPS)
Then we'll handle events. An event is basically a user action, such as moving the mouse or pressing a key. Pygame will register all these events in a queue which we get by calling pygame.event.get(). We can iterate over this and check if there's an event that we'd like to handle. Events have a type attribute which we can check against constants in the pygame module to determine what type of event it is.
for event in pygame.event.get(): if event.type == pygame.QUIT: # The user pressed the close button in the top corner of the window. quit() # Close the program. Other methods like 'raise SystemExit' or 'sys.exit()'. # Calling 'pygame.quit()' won't close the program! It will just uninitialize the modules.
We can also check if event.type == pygame.KEYDOWN to see if the user has pressed a key down. In that case the event has an attribute key which we can check to see which key it represents.
for event in pygame.event.get(): if event.type == pygame.QUIT: quit() elif event.type == pygame.KEYDOWN: if event.key == pygame.K_w: rect.move_ip(0, -2) # Changes the rect's position. elif event.key == pygame.K_s: rect.move_ip(0, 2) elif event.key == pygame.K_a: rect.move_ip(-2, 0) elif event.key == pygame.K_d: rect.move_ip(2, 0)
Now we need to display our image. First we might want to clear our screen from previous rendering. We do so by filling our entire screen with black (remove the code to see why we want to clear it). Then we need to blit our image to the screen. Blitting essentially means copying the image to another surface (in our case, the screen). Lastly we flip or update the screen.
When we're blitting we're not actually displaying anything to the user. Imagine it as the computer on one side and the user on the other. The computer draws (blits) on it's side of the screen, flips it towards the user, and then repeats.
screen.fill(BLACK) screen.blit(image, rect) pygame.display.update() # Or 'pygame.display.flip()'.
Now we have a basic game! Quite boring, yes, but the essentials are there! Combined this with your current Python knowledge and you should be able to create something awesome.
Complete code
https://riptutorial.com/ 4
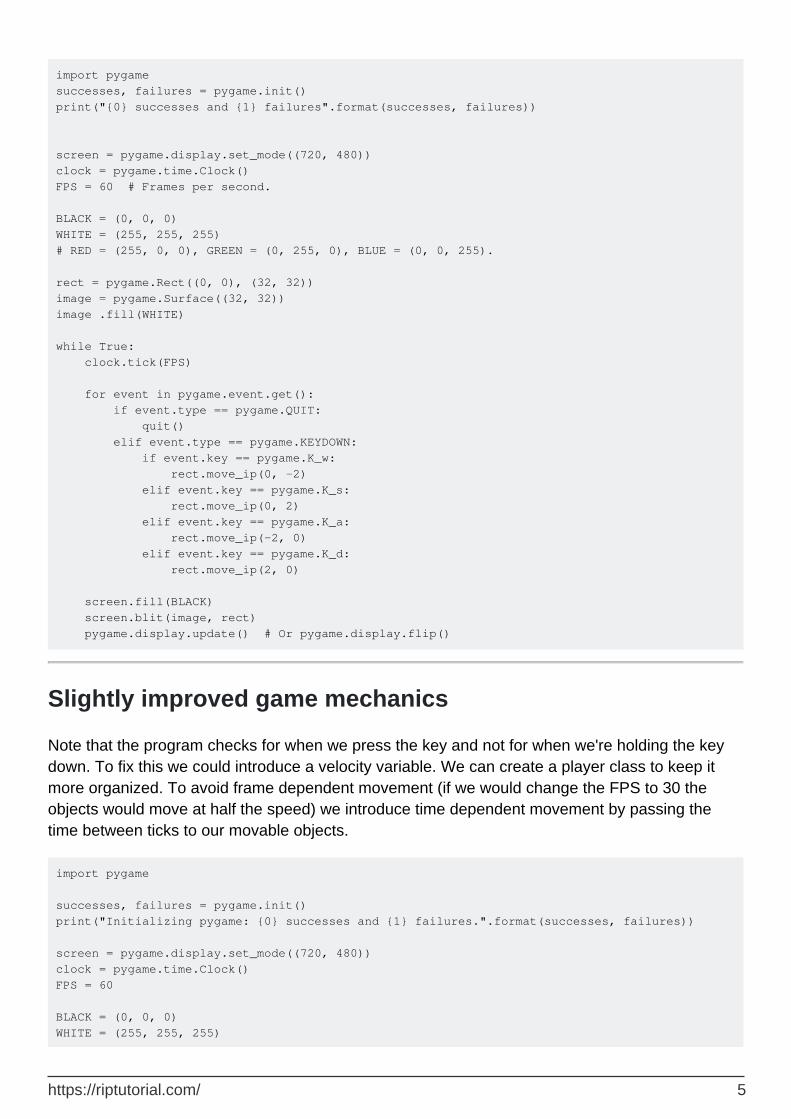
import pygame successes, failures = pygame.init() print("{0} successes and {1} failures".format(successes, failures)) screen = pygame.display.set_mode((720, 480)) clock = pygame.time.Clock() FPS = 60 # Frames per second. BLACK = (0, 0, 0) WHITE = (255, 255, 255) # RED = (255, 0, 0), GREEN = (0, 255, 0), BLUE = (0, 0, 255). rect = pygame.Rect((0, 0), (32, 32)) image = pygame.Surface((32, 32)) image .fill(WHITE) while True: clock.tick(FPS) for event in pygame.event.get(): if event.type == pygame.QUIT: quit() elif event.type == pygame.KEYDOWN: if event.key == pygame.K_w: rect.move_ip(0, -2) elif event.key == pygame.K_s: rect.move_ip(0, 2) elif event.key == pygame.K_a: rect.move_ip(-2, 0) elif event.key == pygame.K_d: rect.move_ip(2, 0) screen.fill(BLACK) screen.blit(image, rect) pygame.display.update() # Or pygame.display.flip()
Slightly improved game mechanics
Note that the program checks for when we press the key and not for when we're holding the key down. To fix this we could introduce a velocity variable. We can create a player class to keep it more organized. To avoid frame dependent movement (if we would change the FPS to 30 the objects would move at half the speed) we introduce time dependent movement by passing the time between ticks to our movable objects.
import pygame successes, failures = pygame.init() print("Initializing pygame: {0} successes and {1} failures.".format(successes, failures)) screen = pygame.display.set_mode((720, 480)) clock = pygame.time.Clock() FPS = 60 BLACK = (0, 0, 0) WHITE = (255, 255, 255)
https://riptutorial.com/ 5

class Player(pygame.sprite.Sprite): def __init__(self): super().__init__() self.image = pygame.Surface((32, 32)) self.image.fill(WHITE) self.rect = self.image.get_rect() # Get rect of some size as 'image'. self.velocity = [0, 0] def update(self): self.rect.move_ip(*self.velocity) player = Player() running = True while running: dt = clock.tick(FPS) / 1000 # Returns milliseconds between each call to 'tick'. The convert time to seconds. screen.fill(BLACK) # Fill the screen with background color. for event in pygame.event.get(): if event.type == pygame.QUIT: running = False elif event.type == pygame.KEYDOWN: if event.key == pygame.K_w: player.velocity[1] = -200 * dt # 200 pixels per second elif event.key == pygame.K_s: player.velocity[1] = 200 * dt elif event.key == pygame.K_a: player.velocity[0] = -200 * dt elif event.key == pygame.K_d: player.velocity[0] = 200 * dt elif event.type == pygame.KEYUP: if event.key == pygame.K_w or event.key == pygame.K_s: player.velocity[1] = 0 elif event.key == pygame.K_a or event.key == pygame.K_d: player.velocity[0] = 0 player.update() screen.blit(player.image, player.rect) pygame.display.update() # Or pygame.display.flip() print("Exited the game loop. Game will quit...") quit() # Not actually necessary since the script will exit anyway.
There are still many things that should be improved about this code. I'd recommend you to read the pygame tutorial and this talk by Richard Jones for more in depth.
Installing pygame
On windows
Navigate to http://www.lfd.uci.edu/~gohlke/pythonlibs/#pygame – an unofficial site providing windows binaries of open-source python packages for the official CPython distribution by Christoph Gohlke.
1.
https://riptutorial.com/ 6
Download the appropriate pygame .whl file according to your installed python version. (The file is named something like pygame -<pygame version> - <python version>- win32.whl)
2.
Run
pip install your-pygame-package.whl
inside your terminal, bash or consol. Note: if pip is not found in PATH try to run python -m pip install your-pygame-package.whl
3.
Check if you can import pygame as a python module
import pygame
If you do not get an error, you have correctly installed pygame on your computer :)
4.
On linux
Open your terminal and run
sudo apt-get install python-pygame
Note: This will install pygame for python2
1.
Try to import pygame inside
import pygame
If you do not get an error, you have correctly installed pygame on your linux system :)
2.
On macOS
There are two ways to install it on mac:
Method 1
Go to the Pygame downloads page and download the mac installer. Run it, and it should install Pygame on your Mac.
Method 2
Install Homebrew:
/usr/bin/ruby -e "$(curl -fsSL https://raw.githubusercontent.com/Homebrew/install/master/install)"
Then use Homebrew to install Python 2.7.12 and Pygame:
https://riptutorial.com/ 7
brew install python; brew install homebrew/python/pygame
Now run Python in your terminal and try import pygame. If it does not say anything, it's installed successfully.
Importing pygame and drawing on a display
Getting Started
You must do the following to get started with Pygame:
import pygame
This opens a window of size 640,480, and stores it in a variable called screen.
Setting up a window name
Setting up a name for the pygame window requires the following syntax:
pygame.display.set_caption('Name')
About the screen
The point (0,0) is at the upper left hand corner of the screen.•x coordinates increase from left to right, y coordinates increase from top to bottom.That is the right side coordinates on the Cartesian plane is positive and left side is negative.However , the upper side coordinates on the Cartesian plane is negative on top and positive on bottom.(Note: This is considered if the points are taken from the origin.)
•
Updating the Screen
Changes you make to the screen—e.g. filling it with color, or drawing on it, do not show up immediately! So how to do it? You have to call this function:
pygame.display.update()
Colors
The coloring in pygame works on RGB mode. The code for coloring is:
https://riptutorial.com/ 8
color_Name = (r,g,b)
R stands for red.•G stands for green•B stands for blue.•All three should be integers between 0 and 255, with 255 being brightest, and 0 being darkest
•
Drawing
To draw lines
pygame.draw.lines(screen, color, closed, pointlist, thickness)
1.
To draw rectangle
pygame.draw.rect(screen, color, (x,y,width,height), thickness)
2.
To draw circle
pygame.draw.circle(screen, color, (x,y), radius, thickness)
3.
Setting everything into a loop
To make a loop use the following code:
running = True while running: for event in pygame.event.get(): if event.type == pygame.QUIT: running = False pygame.quit()
Drawing a rectangle on pygame window (code)
import pygame background_colour = (255,255,255) # White color (width, height) = (300, 200) # Screen size color=(0,0,0) #For retangle screen = pygame.display.set_mode((width, height)) #Setting Screen pygame.display.set_caption('Drawing') #Window Name screen.fill(background_colour)#Fills white to screen pygame.draw.rect(screen, color, (100,50,30,40), 1) #Drawing the rectangle pygame.display.update()
https://riptutorial.com/ 9

#Loop running = True while running: for event in pygame.event.get(): if event.type == pygame.QUIT: running = False pygame.quit()
Read Getting started with pygame online: https://riptutorial.com/pygame/topic/3959/getting-started-with-pygame
https://riptutorial.com/ 10
Chapter 2: Adding background music and sound effects
Remarks
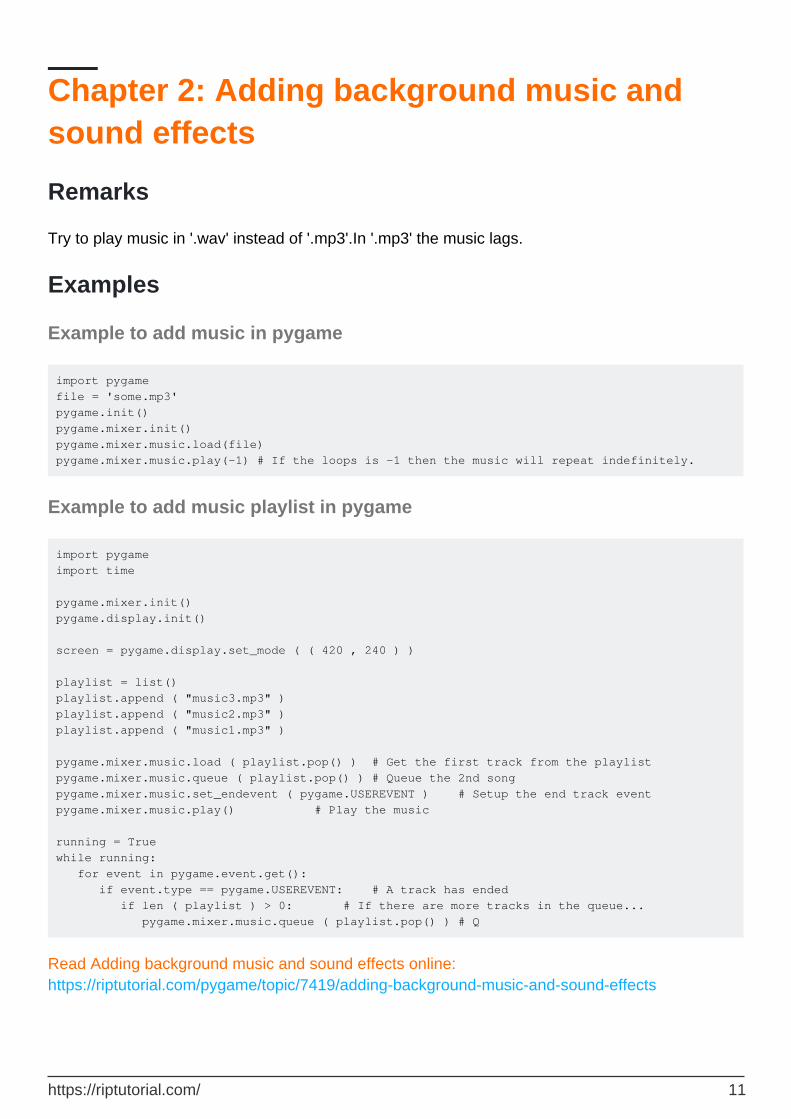
Try to play music in '.wav' instead of '.mp3'.In '.mp3' the music lags.
Examples
Example to add music in pygame
import pygame file = 'some.mp3' pygame.init() pygame.mixer.init() pygame.mixer.music.load(file) pygame.mixer.music.play(-1) # If the loops is -1 then the music will repeat indefinitely.
Example to add music playlist in pygame
import pygame import time pygame.mixer.init() pygame.display.init() screen = pygame.display.set_mode ( ( 420 , 240 ) ) playlist = list() playlist.append ( "music3.mp3" ) playlist.append ( "music2.mp3" ) playlist.append ( "music1.mp3" ) pygame.mixer.music.load ( playlist.pop() ) # Get the first track from the playlist pygame.mixer.music.queue ( playlist.pop() ) # Queue the 2nd song pygame.mixer.music.set_endevent ( pygame.USEREVENT ) # Setup the end track event pygame.mixer.music.play() # Play the music running = True while running: for event in pygame.event.get(): if event.type == pygame.USEREVENT: # A track has ended if len ( playlist ) > 0: # If there are more tracks in the queue... pygame.mixer.music.queue ( playlist.pop() ) # Q
Read Adding background music and sound effects online: https://riptutorial.com/pygame/topic/7419/adding-background-music-and-sound-effects
https://riptutorial.com/ 11
Chapter 3: Creating a pygame window
Remarks
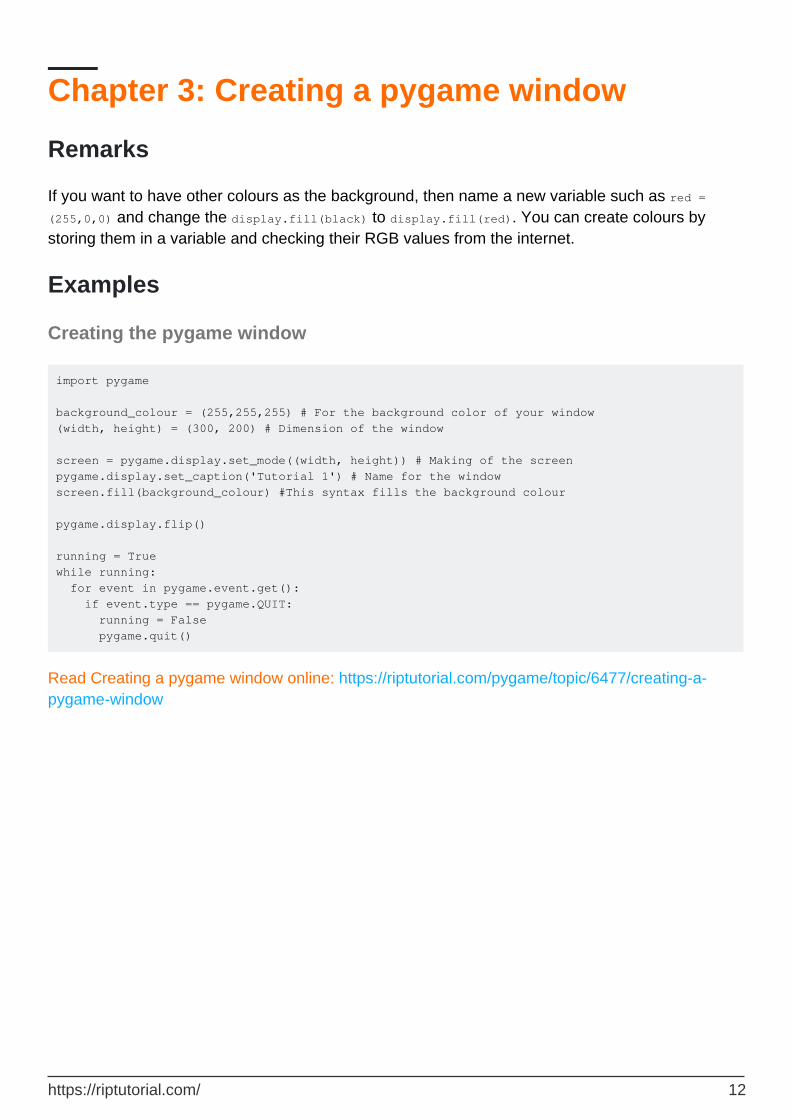
If you want to have other colours as the background, then name a new variable such as red = (255,0,0) and change the display.fill(black) to display.fill(red). You can create colours by storing them in a variable and checking their RGB values from the internet.
Examples
Creating the pygame window
import pygame background_colour = (255,255,255) # For the background color of your window (width, height) = (300, 200) # Dimension of the window screen = pygame.display.set_mode((width, height)) # Making of the screen pygame.display.set_caption('Tutorial 1') # Name for the window screen.fill(background_colour) #This syntax fills the background colour pygame.display.flip() running = True while running: for event in pygame.event.get(): if event.type == pygame.QUIT: running = False pygame.quit()
Read Creating a pygame window online: https://riptutorial.com/pygame/topic/6477/creating-a-pygame-window
https://riptutorial.com/ 12
Chapter 4: Creating a simple pygame window
Examples
The complete code
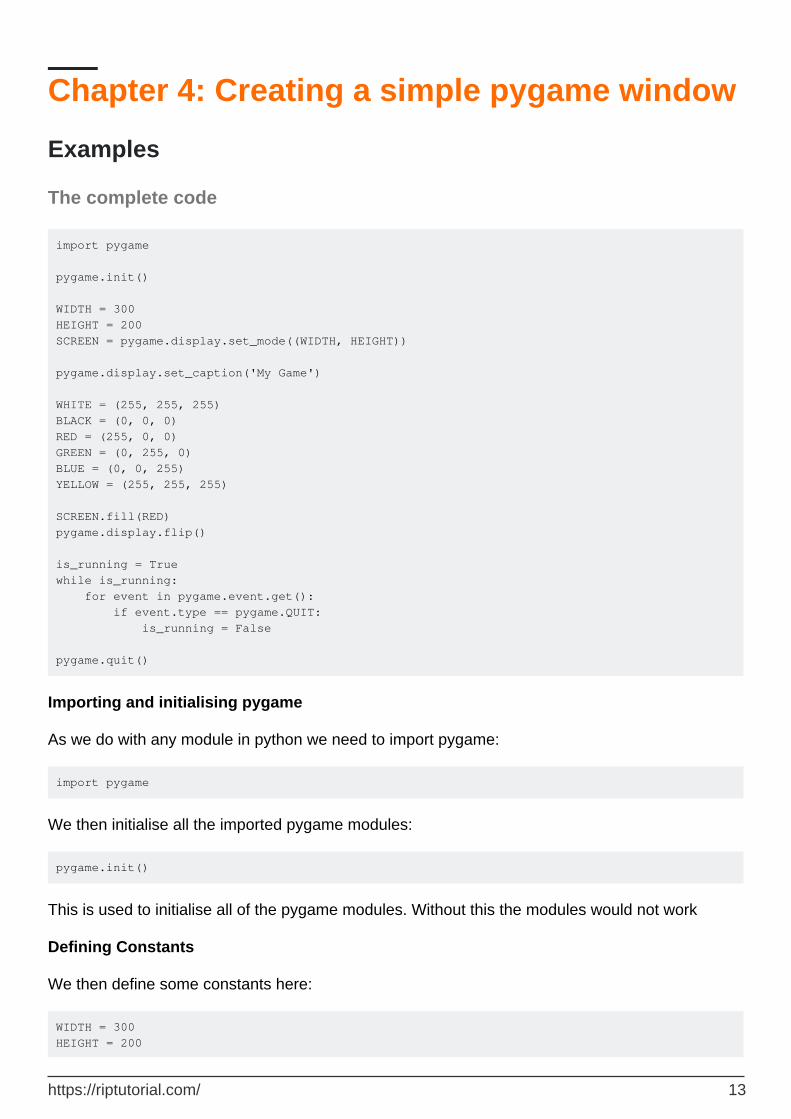
import pygame pygame.init() WIDTH = 300 HEIGHT = 200 SCREEN = pygame.display.set_mode((WIDTH, HEIGHT)) pygame.display.set_caption('My Game') WHITE = (255, 255, 255) BLACK = (0, 0, 0) RED = (255, 0, 0) GREEN = (0, 255, 0) BLUE = (0, 0, 255) YELLOW = (255, 255, 255) SCREEN.fill(RED) pygame.display.flip() is_running = True while is_running: for event in pygame.event.get(): if event.type == pygame.QUIT: is_running = False pygame.quit()
Importing and initialising pygame
As we do with any module in python we need to import pygame:
import pygame
We then initialise all the imported pygame modules:
pygame.init()
This is used to initialise all of the pygame modules. Without this the modules would not work
Defining Constants
We then define some constants here:
WIDTH = 300 HEIGHT = 200
https://riptutorial.com/ 13

SCREEN = pygame.display.set_mode((WIDTH, HEIGHT))
The WIDTH and HEIGHT constants are used to create a window, which would have a width of 300 pixels and a height of 200 pixels. The function used in SCREEN, pygame.display.set_mode((WIDTH, HEIGHT)), will set the mode of the display and return a Surface object. Note how the parameters for this function are the WIDTH and HEIGHT constants defined earlier.
Setting the name of the window
We then use this function to change the name of the window to My Game:
pygame.display.set_caption('My Game')
Defining colours
Afterwards we define 6 colours that can be used in our window:
WHITE = (255, 255, 255) BLACK = (0, 0, 0) RED = (255, 0, 0) GREEN = (0, 255, 0) BLUE = (0, 0, 255) YELLOW = (255, 255, 255)
When defining colours we put in 3 values that range between 0 and 255. The pygame.Color class normally goes by this format:
COLOUR = (r, g, b, a)
Where the r parameter sets the red value of the colour, the g parameter sets the green value of the colour and the b parameter sets the blue value of the colour. The a parameter sets the alpha value of the colour.
We then give this command:
SCREEN.fill(RED)
This is a pygame.Surface.fill function which fills the Surface object, our screen, with the colour red.
Using pygame.display.flip()
We then use this function
pygame.display.flip()
This basically makes everything we have drawn on the screen Surface become visible and updates the contents of the entire display. Without this line, the user wouldn't see anything on their pygame screen.
https://riptutorial.com/ 14

The game loop
The next few lines are what's called a "game loop".
To start this off we make a variable and make it True:
is_running = True
So that we can start off our while loop:
while is_running:
which will be running throughout the whole game.
In it's most basic form, pygame has "events" which takes user input, for example a button press or mouse click. Pygame handles these events through an event queue. We can get these events from the event queue with this for loop:
for event in pygame.event.get():
Which basically goes through a list of events, our event queue. These are the next 2 lines:
if event.type == pygame.QUIT: is_running = False
This will make it so that when the user presses the exit button in the top corner, the event with the type pygame.QUIT occurs.
This then ends the while loop, as is_running is now False and the script moves on to the final line:
pygame.quit()
Which uninitialises the pygame modules.
Read Creating a simple pygame window online: https://riptutorial.com/pygame/topic/6597/creating-a-simple-pygame-window
https://riptutorial.com/ 15

Chapter 5: Creating a window in pygame - pygame.display.set_mode()
Syntax
pygame.display.set_mode(resolution=(0,0), flags=0, depth=0) # Returns a pygame.Surface representing the window on screen
•
flags = pygame.FULLSCREEN | pygame.OPENGL # Flags can be combined using the "|" (bitwise OR or "pipe") character.
•
Parameters
parameter explaination
resolution a pair of numbers representing the width and height of the window
flagsadditional options that change the type of window - see "Remarks" for avaliable flags
depth amount of bits used for color
Remarks
Possible values for the flag arguments are:•
flag description
pygame.FULLSCREEN window is fullscreen
pygame.RESIZABLE window is resizeable
pygame.NOFRAME window has no border or controls
pygame.DOUBLEBUF use double buffer - recommended for HWSURFACE or OPENGL
pygame.HWSURFACE window is hardware accelerated, only possible in combination with FULLSCREEN
pygame.OPENGL window is renderable by OpenGL
Other remarks:
Pygame can currently only handle one single window at a time. Creating a second window by calling pygame.display.set_mode((x,y)) a second time will close the first window.
•
https://riptutorial.com/ 16

Changing the depths argument is almost never required - pygame will select the best one by itself. In case a depth that is not supported by the system is set, pygame will emulate this depth, which can be very slow.
•
Things that are drawn onto the surface returned by pygame.display.set_mode() are not immediately visible on screen - the display first has to be flipped using pygame.display.update() or pygame.display.flip().
•
Examples
Create a pygame window
This creates a window in fullscreen with size 500x500 pixels:
pygame.init() screen = pygame.display.set_mode((500, 500), pygame.FULLSCREEN)
screen represents from now on the window on screen; it is a pygame.Surface object. Anything that should be come visible to the user has to be drawn onto it using screen.blit.
Read Creating a window in pygame - pygame.display.set_mode() online: https://riptutorial.com/pygame/topic/6442/creating-a-window-in-pygame---pygame-display-set-mode--
https://riptutorial.com/ 17

Chapter 6: Drawing on the screen
Examples
drawing shapes, text and images on the screen with a small animation
This program will draw some shapes on the display, draw "hello world!" in the middle of the screen and let an image go to every corner of the window. You can use every image you want, but you will need to place the image file in the same directory as your program.
the entire code:
import pygame, sys from pygame.locals import * pygame.init() FPS = 30 #frames per second setting fpsClock = pygame.time.Clock() #set up the window screen = pygame.display.set_mode((400, 300), 0, 32) pygame.display.set_caption('animation') #set up the colors white = (255, 255, 255) black = ( 0, 0, 0) green = (0, 255, 0) blue = (0, 0, 180) red = (255, 0, 0) image = pygame.image.load('image.png') imagex = 360 imagey = 260 direction = 'left' # text setting font_obj = pygame.font.Font('freesansbold.ttf', 32) text_surface_obj = font_obj.render('Hello World!', True, GREEN, BLUE) text_rect_obj = text_surface_obj.get_rect() text_rectObj.center = (200, 150) while True: # the main game loop screen.fill(WHITE) # draw a green polygon onto the surface pygame.draw.polygon(screen, green, ((146, 0), (291, 106), (236, 277), (56, 277), (0, 106))) # draw some blue lines onto the surface pygame.draw.line(screen, blue, (60, 60), (120, 60), 4) pygame.draw.line(screen, blue, (120, 60), (60, 120)) pygame.draw.line(screen, blue, (60, 120), (120, 120), 4)
https://riptutorial.com/ 18

# draw a blue circle onto the surface pygame.draw.circle(screen, blue, (300, 50), 20, 0) # draw a red ellipse onto the surface pygame.draw.ellipse(screen, red, (100, 150, 40,80), 1) # draw a red rectangle onto the surface pygame.draw.rect(screen,red, (200, 150, 100, 50)) # draw the text onto the surface screen.blit(text_surface_obj, text_rect_obj) #the animation of the image if direction == 'right': imagex += 5 if imagex == 360: direction = 'down' elif direction == 'down': imagey += 5 if imagey == 260: direction = 'left' elif direction == 'left': imagex -= 5 if imagex == 20: direction = 'up' elif direction == 'up': imagey -= 5 if imagey == 20: direction = 'right' screen.blit(image, (imagex, imagey)) for event in pygame.event.get(): if event.type == QUIT: pygame.quit() sys.exit() pygame.display.update() fpsClock.tick(FPS)
drawing the white background:
screen.fill(white)
drawing the polygon:
In this function you define display surface, the color and the position of every corner of the polygon, you can do that clockwise and counterclockwise.
pygame.draw.polygon(screen, green, ((146, 0), (291, 106), (236, 277), (56, 277), (0, 106)))
https://riptutorial.com/ 19

drawing the lines:
Here you define the display surface, the color, the first and the last point and the width of the line.
pygame.draw.line(screen, blue, (60, 60), (120, 60), 4) pygame.draw.line(screen, blue, (120, 60), (60, 120)) pygame.draw.line(screen, blue, (60, 120), (120, 120), 4)
drawing the circle:
In this function you define the display surface, the color, the position, the radius and the width of the circle (0 gives a plain circle).
pygame.draw.circle(screen, blue, (300, 50), 20, 0)
drawing the ellipse:
In this function you define the display surface, the color, the position, the horizontal size, the vertical size and the width of the ellipse
pygame.draw.ellipse(screen, red, (100, 150, 40,80), 1)
drawing the rectangle:
In this function you define the display surface, the color, the position and the vertical and the horizontal size of the rectangle.
pygame.draw.rect(screen,red, (200, 150, 100, 50))
defining the text:
First you define the type and the size of your text, I use a basic font that you get with pygame.
font_obj = pygame.font.Font('freesansbold.ttf', 32)
Then you define the actual text, if you want it bold or not (True/False), the color of the text and, if you want to mark your text, a color of the marking.
text_surface_obj = font_obj.render('Hello World!', True, green, blue)
https://riptutorial.com/ 20

If you want to mark your text or want to define the center of your text, you have to tell pygame that with this function:
text_rect_obj = text_surface_obj.get_rect()
And after that, you can define the center of your text with this function:
text_rect_obj.center = (200, 150)
drawing the text:
If you marked your text or defined the center, you have to draw the text this way:
screen.blit(text_surface_obj, text_rectObj)
Otherwise you draw your text, but you need to define the position, so you do that this way:
DISPLAYSURF.blit(textSurfaceObj, (100,50))
defining the image:
Here you define the image you want to use, the start position (x and y coordinates), and the direction of the image.
image = pygame.image.load('image.png') imagex = 360 imagey = 260 direction = 'left'
animating the image:
Here you check the direction of the image, if it reached a corner, if so change the direction, if not, move it 5 pixels in the same direction and draw the image again. That's what we do with this part of the code:
if direction == 'right': imagex += 5 if imagex == 360: direction = 'down' elif direction == 'down': imagey += 5 if imagey == 260: direction = 'left' elif direction == 'left': imagex -= 5
https://riptutorial.com/ 21

if imagex == 20: direction = 'up' elif direction == 'up': imagey -= 5 if imagey == 20: direction = 'right' screen.blit(image, (imagex, imagey))
note: my image is 20 by 20 pixels, I used if imagex == 360 and if imagey == 260: because then my image is 20 pixels from the edge, if your image has a different size, you will have to change the numbers.
checking if you quit the program:
Here we check if you closed the window of your program.
for event in pygame.event.get(): if event.type == QUIT: pygame.quit() sys.exit()
updating the display:
Here you tell pygame to update the display so everything you have drawn appears on the screen.
pygame.display.update()
defining the frames per second:
Here you tell pygame to sleep enough so the frames per second setting is respected.
fpsClock.tick(FPS)
Read Drawing on the screen online: https://riptutorial.com/pygame/topic/6287/drawing-on-the-screen
https://riptutorial.com/ 22
Chapter 7: Drawing on the screen
Syntax
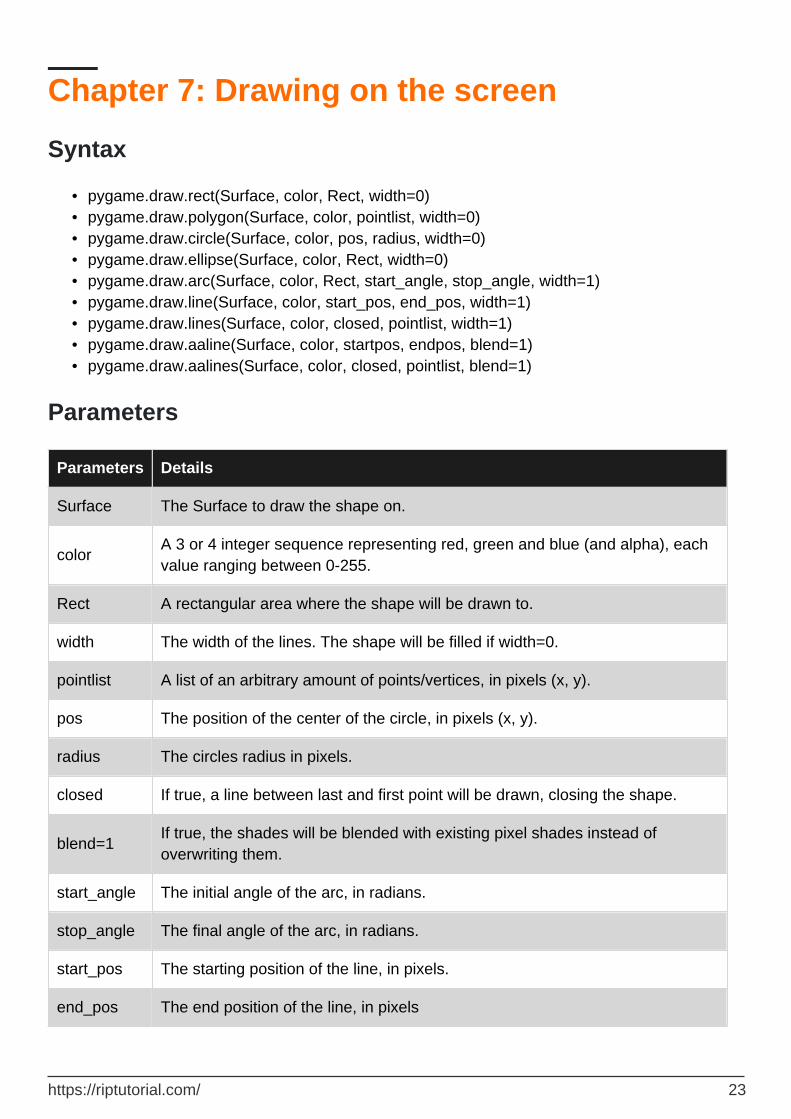
pygame.draw.rect(Surface, color, Rect, width=0)•pygame.draw.polygon(Surface, color, pointlist, width=0)•pygame.draw.circle(Surface, color, pos, radius, width=0)•pygame.draw.ellipse(Surface, color, Rect, width=0)•pygame.draw.arc(Surface, color, Rect, start_angle, stop_angle, width=1)•pygame.draw.line(Surface, color, start_pos, end_pos, width=1)•pygame.draw.lines(Surface, color, closed, pointlist, width=1)•pygame.draw.aaline(Surface, color, startpos, endpos, blend=1)•pygame.draw.aalines(Surface, color, closed, pointlist, blend=1)•
Parameters
Parameters Details
Surface The Surface to draw the shape on.
colorA 3 or 4 integer sequence representing red, green and blue (and alpha), each value ranging between 0-255.
Rect A rectangular area where the shape will be drawn to.
width The width of the lines. The shape will be filled if width=0.
pointlist A list of an arbitrary amount of points/vertices, in pixels (x, y).
pos The position of the center of the circle, in pixels (x, y).
radius The circles radius in pixels.
closed If true, a line between last and first point will be drawn, closing the shape.
blend=1If true, the shades will be blended with existing pixel shades instead of overwriting them.
start_angle The initial angle of the arc, in radians.
stop_angle The final angle of the arc, in radians.
start_pos The starting position of the line, in pixels.
end_pos The end position of the line, in pixels
https://riptutorial.com/ 23
Examples
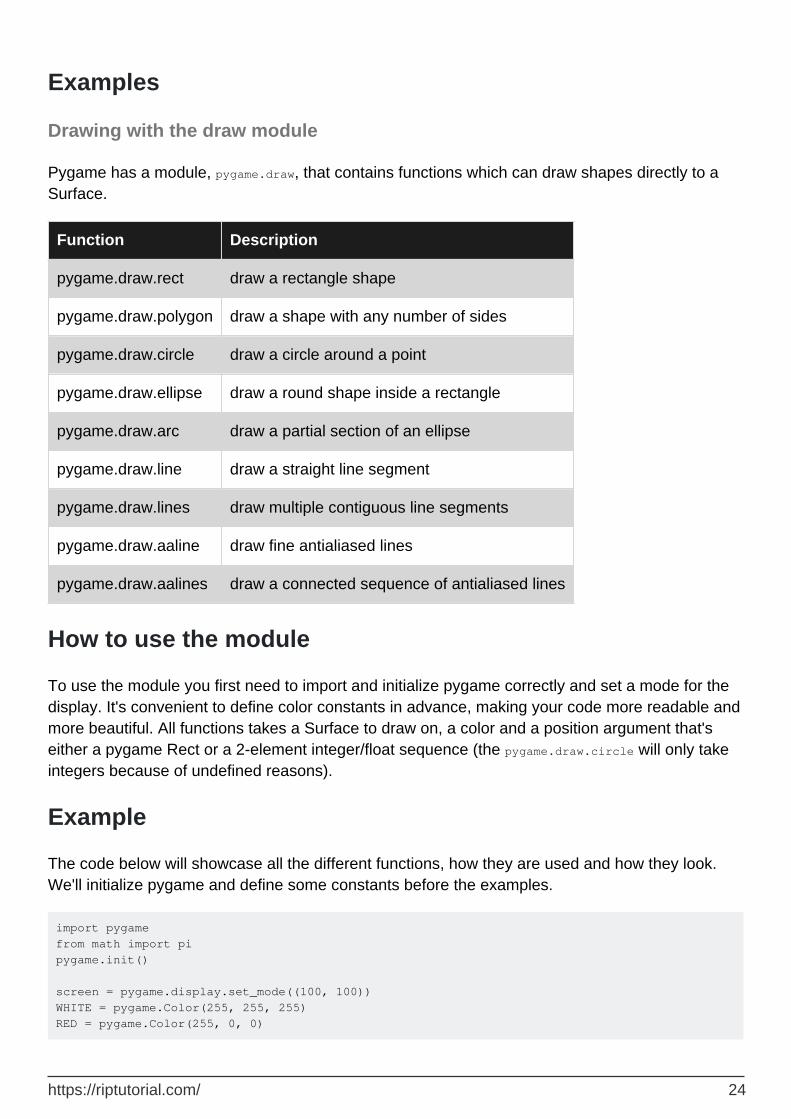
Drawing with the draw module
Pygame has a module, pygame.draw, that contains functions which can draw shapes directly to a Surface.
Function Description
pygame.draw.rect draw a rectangle shape
pygame.draw.polygon draw a shape with any number of sides
pygame.draw.circle draw a circle around a point
pygame.draw.ellipse draw a round shape inside a rectangle
pygame.draw.arc draw a partial section of an ellipse
pygame.draw.line draw a straight line segment
pygame.draw.lines draw multiple contiguous line segments
pygame.draw.aaline draw fine antialiased lines
pygame.draw.aalines draw a connected sequence of antialiased lines
How to use the module
To use the module you first need to import and initialize pygame correctly and set a mode for the display. It's convenient to define color constants in advance, making your code more readable and more beautiful. All functions takes a Surface to draw on, a color and a position argument that's either a pygame Rect or a 2-element integer/float sequence (the pygame.draw.circle will only take integers because of undefined reasons).
Example
The code below will showcase all the different functions, how they are used and how they look. We'll initialize pygame and define some constants before the examples.
import pygame from math import pi pygame.init() screen = pygame.display.set_mode((100, 100)) WHITE = pygame.Color(255, 255, 255) RED = pygame.Color(255, 0, 0)
https://riptutorial.com/ 24

The black color is the Surface default color and represents the part of the Surface that hasn't been drawn onto. The parameters of each function is explained down below at Parameters .
Rect
size = (50, 50) rect_border = pygame.Surface(size) # Create a Surface to draw on. pygame.draw.rect(rect_border, RED, rect_border.get_rect(), 10) # Draw on it. rect_filled = pygame.Surface(size) pygame.draw.rect(rect_filled, RED, rect_filled.get_rect())
Polygon
size = (50, 50) points = [(25, 0), (50, 25), (25, 50), (0, 25)] # The corner points of the polygon. polygon = pygame.Surface(size) pygame.draw.polygon(polygon, RED, points, 10) polygon_filled = pygame.Surface(size) pygame.draw.polygon(polygon_filled, RED, points)
Circle
size = (50, 50) radius = 25 circle = pygame.Surface(size) pygame.draw.circle(circle, RED, (radius, radius), radius, 10) # Position is the center of the circle. circle_filled = pygame.Surface(size) pygame.draw.circle(circle_filled, RED, (radius, radius), radius)
The holes is a unfortunate consequence of pygame's drawing algorithm.
Ellipse
https://riptutorial.com/ 25
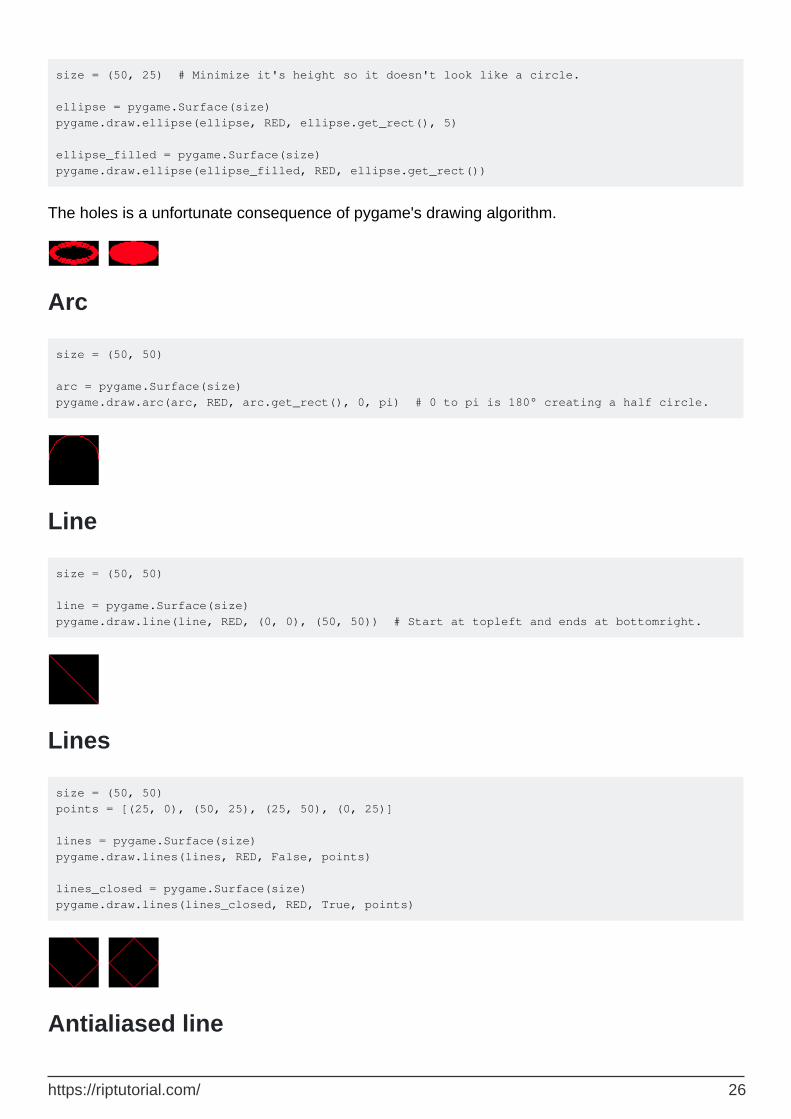
size = (50, 25) # Minimize it's height so it doesn't look like a circle. ellipse = pygame.Surface(size) pygame.draw.ellipse(ellipse, RED, ellipse.get_rect(), 5) ellipse_filled = pygame.Surface(size) pygame.draw.ellipse(ellipse_filled, RED, ellipse.get_rect())
The holes is a unfortunate consequence of pygame's drawing algorithm.
Arc
size = (50, 50) arc = pygame.Surface(size) pygame.draw.arc(arc, RED, arc.get_rect(), 0, pi) # 0 to pi is 180° creating a half circle.
Line
size = (50, 50) line = pygame.Surface(size) pygame.draw.line(line, RED, (0, 0), (50, 50)) # Start at topleft and ends at bottomright.
Lines
size = (50, 50) points = [(25, 0), (50, 25), (25, 50), (0, 25)] lines = pygame.Surface(size) pygame.draw.lines(lines, RED, False, points) lines_closed = pygame.Surface(size) pygame.draw.lines(lines_closed, RED, True, points)
Antialiased line
https://riptutorial.com/ 26
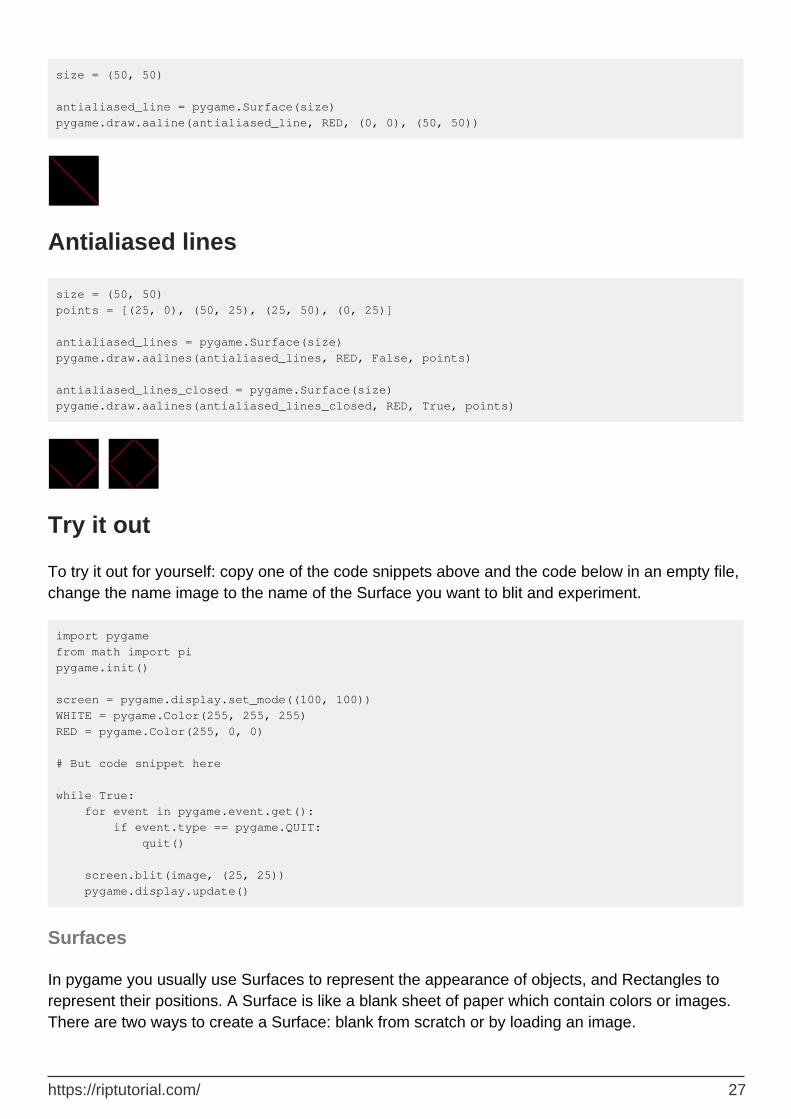
size = (50, 50) antialiased_line = pygame.Surface(size) pygame.draw.aaline(antialiased_line, RED, (0, 0), (50, 50))
Antialiased lines
size = (50, 50) points = [(25, 0), (50, 25), (25, 50), (0, 25)] antialiased_lines = pygame.Surface(size) pygame.draw.aalines(antialiased_lines, RED, False, points) antialiased_lines_closed = pygame.Surface(size) pygame.draw.aalines(antialiased_lines_closed, RED, True, points)
Try it out
To try it out for yourself: copy one of the code snippets above and the code below in an empty file, change the name image to the name of the Surface you want to blit and experiment.
import pygame from math import pi pygame.init() screen = pygame.display.set_mode((100, 100)) WHITE = pygame.Color(255, 255, 255) RED = pygame.Color(255, 0, 0) # But code snippet here while True: for event in pygame.event.get(): if event.type == pygame.QUIT: quit() screen.blit(image, (25, 25)) pygame.display.update()
Surfaces
In pygame you usually use Surfaces to represent the appearance of objects, and Rectangles to represent their positions. A Surface is like a blank sheet of paper which contain colors or images. There are two ways to create a Surface: blank from scratch or by loading an image.
https://riptutorial.com/ 27

Create a Surface
To create a Surface you need at minimum it's size, which is a 2-element integer sequence of width and height, representing the size in pixels.
You can also pass additional arguments when creating a Surface to control bit depth, masks and additional features as per-pixel alpha and/or create the image in video memory. This is outside the scope of this example though.
size = width, height = (32, 32) empty_surface = pygame.Surface(size)
You can use the pygame.draw module to draw shapes on the Surface, or fill it with a color by calling the Surface method fill(color). The argument color is a 3 or 4-element integer sequence or a pygame.Color object.
Load an image
More often than not you'd like to use your own images in a game (called sprites). Creating a Surface with your image on is as easy as:
my_image = pygame.image.load(path_to_image)
The path to the image can be relative or absolute. To improve performance it's usually wise to convert your image to the same pixel format as the screen. This can be done by calling the Surface method convert(), like so:
my_image = pygame.image.load(path_to_image).convert()
If your image contains transparency (alpha values) you just call the method convert_alpha() instead:
my_image = pygame.image.load(path_to_image).convert_alpha()
Blitting
Surfaces needs to be blit to the screen in order to be able to display them. Blitting essentially means copying pixels from one Surface to another (the screen is a Surface as well). You also need to pass the position of the Surface, which should be a 2-element integer sequence or a Rect object. The topleft of the Surface will be placed at the position.
screen.blit(my_image, (0, 0)) pygame.display.update() # or pygame.display.flip()
It's possible to blit to other Surfaces than the screen. To display what's been blitted to the screen
https://riptutorial.com/ 28

you need to call pygame.display.update() or pygame.display.flip().
Transparency
There are kinds 3 of transparency supported in pygame: colorkeys, Surface alphas, and per-pixel alphas.
Colorkeys
Makes a color fully transparent, or more accurately, making a color simply not be blit. If you have an image with a black rect inside you could set a colorkey to prevent the black color from being blit.
BLACK = (0, 0, 0) my_image.set_colorkey(BLACK) # Black colors will not be blit.
A Surface can only have one colorkey. Setting another colorkey will overwrite the previous. Colorkeys cannot have different alpha values, it can only make a color not visible.
Surface alphas
Makes the whole Surface transparent by an alpha value. With this method you can have different alpha values but it will affect the whole Surface.
my_image.set_alpha(100) # 0 is fully transparent and 255 fully opaque.
Per-pixel alpha
Makes every pixel in the Surface transparent by a individual alpha value. This gives you the most freedom and flexibility but is also the slowest method. This method also requires the Surface to be created as a per-pixel alpha Surface, and the color arguments needs to contain a fourth alpha integer.
size = width, height = (32, 32) my_image = pygame.Surface(size, pygame.SRCALPHA) # Creates an empty per-pixel alpha Surface.
The Surface will now draw transparency if the color contains the fourth alpha value.
BLUE = (0, 0, 255, 255)
https://riptutorial.com/ 29
pygame.draw.rect(my_image, BLUE, my_image.get_rect(), 10)
Unlike the other Surfaces, this Surface default color won't be black but transparent. That's why the black rectangle in the middle disappear.
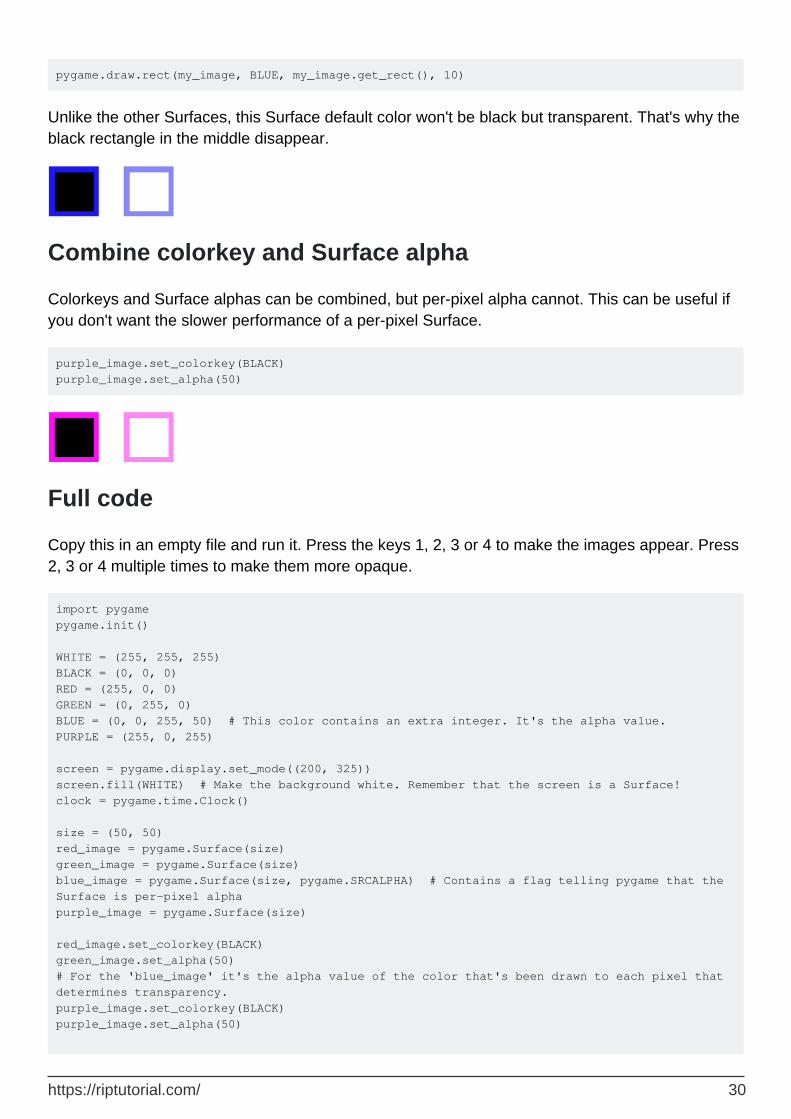
Combine colorkey and Surface alpha
Colorkeys and Surface alphas can be combined, but per-pixel alpha cannot. This can be useful if you don't want the slower performance of a per-pixel Surface.
purple_image.set_colorkey(BLACK) purple_image.set_alpha(50)
Full code
Copy this in an empty file and run it. Press the keys 1, 2, 3 or 4 to make the images appear. Press 2, 3 or 4 multiple times to make them more opaque.
import pygame pygame.init() WHITE = (255, 255, 255) BLACK = (0, 0, 0) RED = (255, 0, 0) GREEN = (0, 255, 0) BLUE = (0, 0, 255, 50) # This color contains an extra integer. It's the alpha value. PURPLE = (255, 0, 255) screen = pygame.display.set_mode((200, 325)) screen.fill(WHITE) # Make the background white. Remember that the screen is a Surface! clock = pygame.time.Clock() size = (50, 50) red_image = pygame.Surface(size) green_image = pygame.Surface(size) blue_image = pygame.Surface(size, pygame.SRCALPHA) # Contains a flag telling pygame that the Surface is per-pixel alpha purple_image = pygame.Surface(size) red_image.set_colorkey(BLACK) green_image.set_alpha(50) # For the 'blue_image' it's the alpha value of the color that's been drawn to each pixel that determines transparency. purple_image.set_colorkey(BLACK) purple_image.set_alpha(50)
https://riptutorial.com/ 30

pygame.draw.rect(red_image, RED, red_image.get_rect(), 10) pygame.draw.rect(green_image, GREEN, green_image.get_rect(), 10) pygame.draw.rect(blue_image, BLUE, blue_image.get_rect(), 10) pygame.draw.rect(purple_image, PURPLE, purple_image.get_rect(), 10) while True: clock.tick(60) for event in pygame.event.get(): if event.type == pygame.QUIT: quit() elif event.type == pygame.KEYDOWN: if event.key == pygame.K_1: screen.blit(red_image, (75, 25)) elif event.key == pygame.K_2: screen.blit(green_image, (75, 100)) elif event.key == pygame.K_3: screen.blit(blue_image, (75, 175)) elif event.key == pygame.K_4: screen.blit(purple_image, (75, 250)) pygame.display.update()
Read Drawing on the screen online: https://riptutorial.com/pygame/topic/7079/drawing-on-the-screen
https://riptutorial.com/ 31
Chapter 8: Event handling
Examples
Event loop
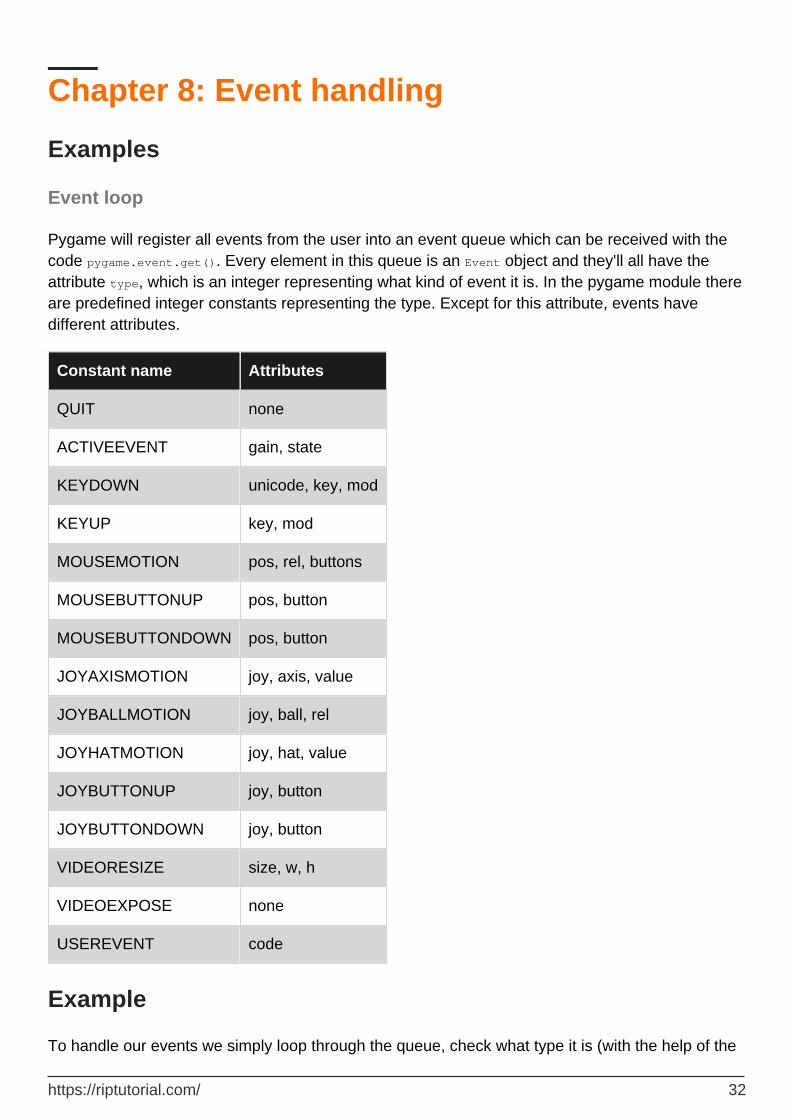
Pygame will register all events from the user into an event queue which can be received with the code pygame.event.get(). Every element in this queue is an Event object and they'll all have the attribute type, which is an integer representing what kind of event it is. In the pygame module there are predefined integer constants representing the type. Except for this attribute, events have different attributes.
Constant name Attributes
QUIT none
ACTIVEEVENT gain, state
KEYDOWN unicode, key, mod
KEYUP key, mod
MOUSEMOTION pos, rel, buttons
MOUSEBUTTONUP pos, button
MOUSEBUTTONDOWN pos, button
JOYAXISMOTION joy, axis, value
JOYBALLMOTION joy, ball, rel
JOYHATMOTION joy, hat, value
JOYBUTTONUP joy, button
JOYBUTTONDOWN joy, button
VIDEORESIZE size, w, h
VIDEOEXPOSE none
USEREVENT code
Example
To handle our events we simply loop through the queue, check what type it is (with the help of the
https://riptutorial.com/ 32

predefined constants in the pygame module) and then perform some action. This code will check if the user has pressed the close button on the top corner of the display, and if so terminate the program.
for event in pygame.event.get(): if event.type == pygame.QUIT: # Close the program any way you want, or troll users who want to close your program. raise SystemExit
ATTENTION: You have to call the event queue regularly when using pygame! Apart from fetching the available events, calling the event queue is also the way of pygame to interact with the operating system internally. If the event queue isn't called regularly, your operating system will assume that your program doesn't work correctly anymore and possibly make it look like the program crashed (in Windows the window becomes white). If you don't want to do anything with the events you should call pygame.event.pump() every game loop to make pygame process the events internally.
Keyboard events
There are two types of key events in pygame: KEYDOWN and KEYUP. These events have an attribute key which is an integer representing a key on the keyboard. The pygame module has predefined integer constants representing all the common keys. The constants are named with a capital K, an underscore and the name of the key. For example, <- is named K_BACKSPACE, a is named K_a and F4 is namned K_F4.
Example
This code will check if the user has pressed w, a, s or d.
for event in pygame.event.get(): if event.type == pygame.QUIT: # Usually wise to be able to close your program. raise SystemExit elif event.type == pygame.KEYDOWN: if event.key == pygame.K_w: print("Player moved up!") elif event.key == pygame.K_a: print("Player moved left!") elif event.key == pygame.K_s: print("Player moved down!") elif event.key == pygame.K_d: print("Player moved right!")
Modifiers
There is no integer constant for capital letters. Instead, key events have another attribute called mod, which is the modifiers (shift, ctrl, alt etc.) being pressed simultaneously as the key. The mod attribute is an integer representing the modifier being pressed. Each modifier's integer value are
https://riptutorial.com/ 33

stored in the pygame module under the name of KMOD_ and their name. For example, Left shift is named KMOD_LSHIFT, Tab is named KMOD_TAB and Ctrl is named KMOD_CTRL.
Example
This code will check wether the user pressed a, Left shift + a or Caps + a.
for event in pygame.event.get(): if event.type == pygame.QUIT: # It's still wise to be able to close your program. raise SystemExit elif event.type == pygame.KEYDOWN: if event.key == pygame.K_a: if event.mod == 0: # No modifier. print("You pressed 'a'") elif event.mod == pygame.KMOD_LSHIFT or event.mod == pygame.KMOD_CAPS: print("You pressed 'A'") else: print("You pressed 'a' with another modifier than right shift or caps.")
Mouse events
There are three types of mouse events in pygame MOUSEMOTION, MOUSEBUTTONDOWN and MOUSEBUTTONUP. Pygame will register these events when a display mode has been set.
MOUSEMOTION is received when the user moves his or her mouse in the display. It has the attributes buttons, pos and rel.
buttons is a tuple representing if the mouse buttons (left, mouse-wheel, right) are being pressed or not.
•
pos is the absolute position (x, y) of the cursor in pixels.•rel is the position relative to the previous position (rel_x, rel_y) in pixels.•
MOUSEBUTTONDOWN and MOUSEBUTTONUP is received when the user presses or releases a mouse button. They have the attributes button and pos.
button is an integer representing the button being pressed. 1 for left button, 2 for mouse-wheel and 3 for right button.
•
pos is the absolute position of the mouse (x, y) when the user pressed the mouse button.•
Example
Here's a short example using some of the attributes of each mouse event:
for event in pygame.event.get(): if event.type == pygame.QUIT: # Close your program if the user wants to quit. raise SystemExit elif event.type == pygame.MOUSEMOTION: if event.rel[0] > 0: # 'rel' is a tuple (x, y). 'rel[0]' is the x-value.
https://riptutorial.com/ 34
print("You're moving the mouse to the right") elif event.rel[1] > 0: # pygame start y=0 at the top of the display, so higher y-values are further down. print("You're moving the mouse down") elif event.type == pygame.MOUSEBUTTONDOWN: if event.button == 1: print("You pressed the left mouse button") elif event.button == 3: print("You pressed the right mouse button") elif event.type == pygame.MOUSEBUTTONUP: print("You released the mouse button")
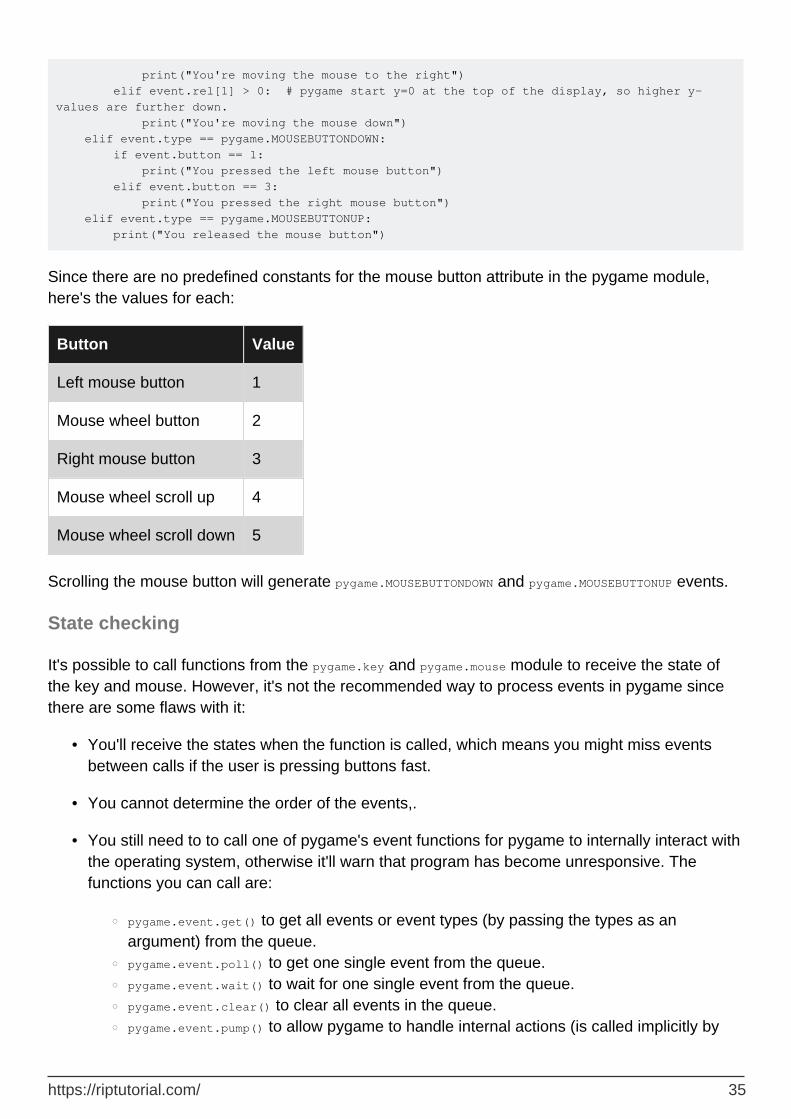
Since there are no predefined constants for the mouse button attribute in the pygame module, here's the values for each:
Button Value
Left mouse button 1
Mouse wheel button 2
Right mouse button 3
Mouse wheel scroll up 4
Mouse wheel scroll down 5
Scrolling the mouse button will generate pygame.MOUSEBUTTONDOWN and pygame.MOUSEBUTTONUP events.
State checking
It's possible to call functions from the pygame.key and pygame.mouse module to receive the state of the key and mouse. However, it's not the recommended way to process events in pygame since there are some flaws with it:
You'll receive the states when the function is called, which means you might miss events between calls if the user is pressing buttons fast.
•
You cannot determine the order of the events,.•
You still need to to call one of pygame's event functions for pygame to internally interact with the operating system, otherwise it'll warn that program has become unresponsive. The functions you can call are:
pygame.event.get() to get all events or event types (by passing the types as an argument) from the queue.
○
pygame.event.poll() to get one single event from the queue.○
pygame.event.wait() to wait for one single event from the queue.○
pygame.event.clear() to clear all events in the queue.○
pygame.event.pump() to allow pygame to handle internal actions (is called implicitly by ○
•
https://riptutorial.com/ 35

the functions above).
Keyboard events
The key module has a function pygame.key.get_pressed() which returns a list of the state of all keys. The list contains 0 for all the keys which are not pressed and 1 for all keys that are pressed. Its index in the list is defined by constants in the pygame module, all prefixed with K_ and the key name.
pygame.event.pump() # Allow pygame to handle internal actions. key = pygame.key.get_pressed() if key[pygame.K_a]: print("You pressed 'a'") if key[pygame.K_F1]: print("You pressed 'F1'") if key[pygame.K_LSHIFT]: print("You pressed 'left shift'") if key[pygame.K_q]: # Press 'q' to exit the program quit()
If you want to check for a single key press instead of if the key is held down, you can store the previous state of all keys in a temporary variable and check if the value changes:
pygame.event.pump() # Allow pygame to handle internal actions. key = pygame.key.get_pressed() if key[pygame.K_q] and not previous_key[pygame.K_q]: print("You pressed 'q'") if key[pygame.K_p] and not previous_key[pygame.K_p]: print("You pressed 'p'") previous_key = key
The statement evaluates to true only when the current key is pressed down and the previous key isn't pressed down. To check whether the user released the key you only have to switch the not keyword (if not key[pygame.K_q] and previous_key[pygame.K_q]). For this to work properly, you have to set the variable previous_key = pygame.key.get_pressed() before the game loop, otherwise you'll receive a NameError.
Mouse events
The mouse module has functions that lets us check and set the position of the mouse as well as check the buttons pressed. The function pygame.mouse.get_pressed() returns a tuple tuple representing if the mouse buttons (left, mouse-wheel, right) is being pressed or not.
pygame.event.pump() # Allow pygame to handle internal actions. mouse_pos = pygame.mouse.get_pos() mouse_buttons = pygame.mouse.get_pressed() if mouse_pos[0] > 100: pygame.mouse.set_pos(10, mouse_pos[1]) # Reset the mouse's x-position to 10.
https://riptutorial.com/ 36
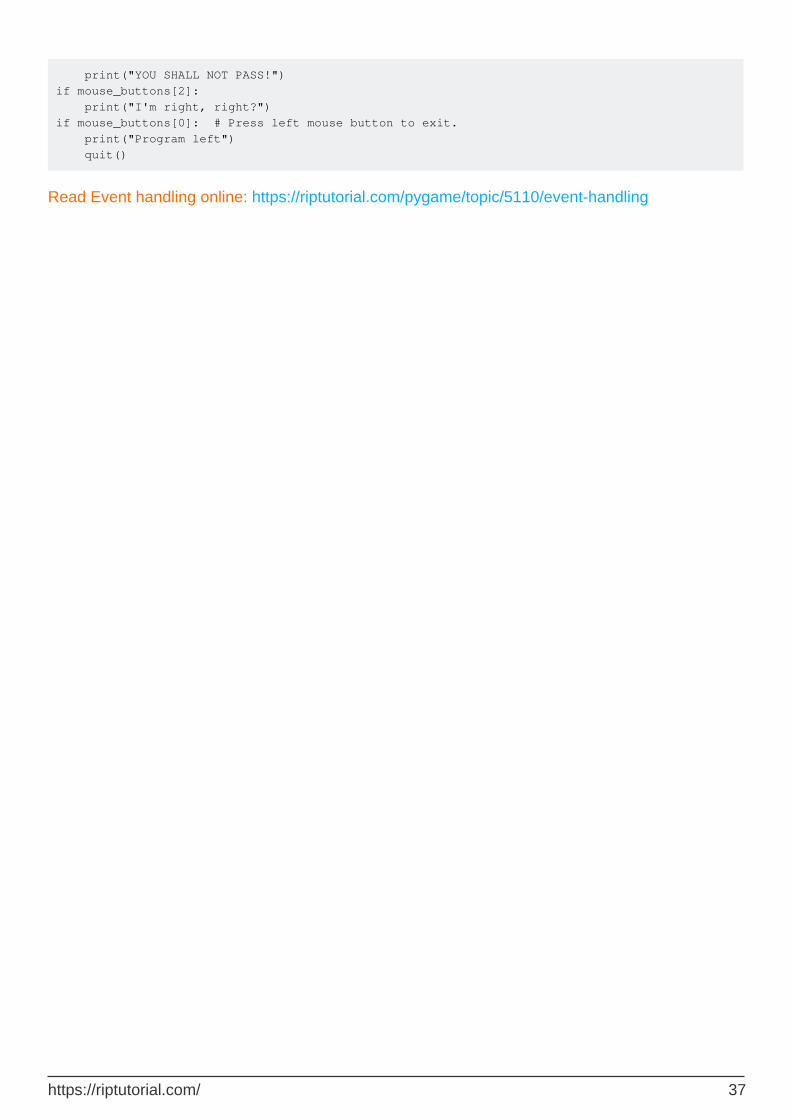
print("YOU SHALL NOT PASS!") if mouse_buttons[2]: print("I'm right, right?") if mouse_buttons[0]: # Press left mouse button to exit. print("Program left") quit()
Read Event handling online: https://riptutorial.com/pygame/topic/5110/event-handling
https://riptutorial.com/ 37
Chapter 9: The essentials
Examples
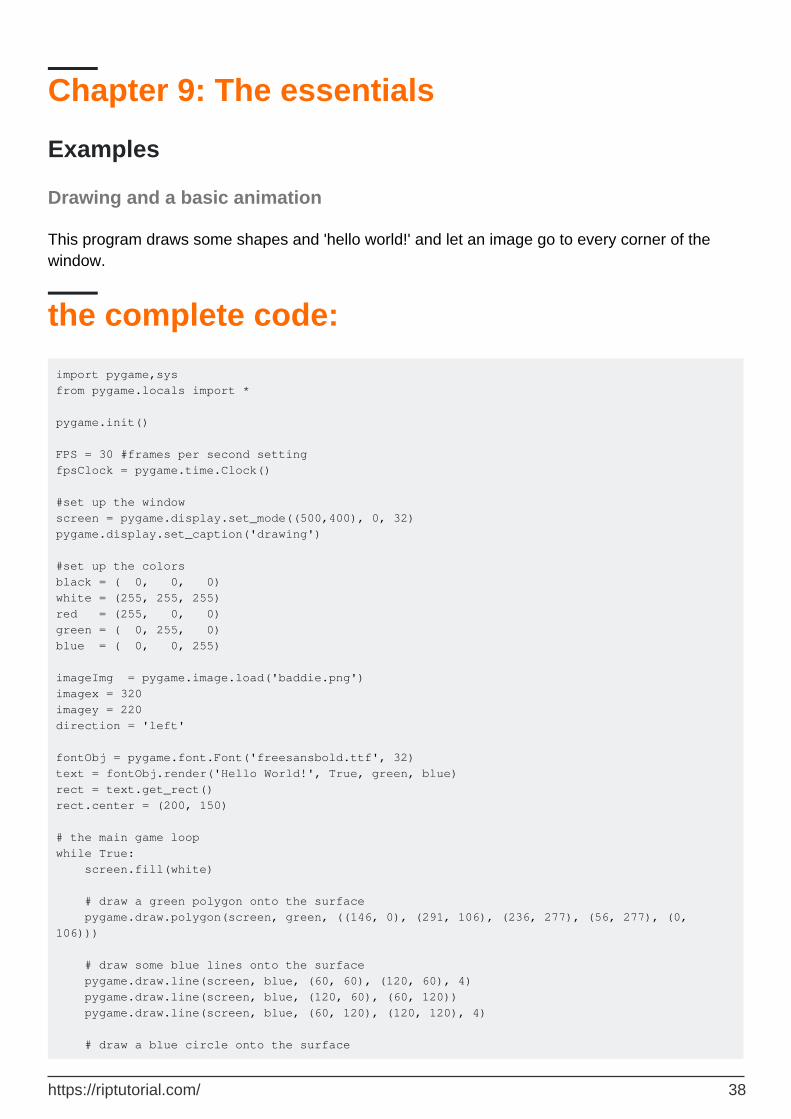
Drawing and a basic animation
This program draws some shapes and 'hello world!' and let an image go to every corner of the window.
the complete code:
import pygame,sys from pygame.locals import * pygame.init() FPS = 30 #frames per second setting fpsClock = pygame.time.Clock() #set up the window screen = pygame.display.set_mode((500,400), 0, 32) pygame.display.set_caption('drawing') #set up the colors black = ( 0, 0, 0) white = (255, 255, 255) red = (255, 0, 0) green = ( 0, 255, 0) blue = ( 0, 0, 255) imageImg = pygame.image.load('baddie.png') imagex = 320 imagey = 220 direction = 'left' fontObj = pygame.font.Font('freesansbold.ttf', 32) text = fontObj.render('Hello World!', True, green, blue) rect = text.get_rect() rect.center = (200, 150) # the main game loop while True: screen.fill(white) # draw a green polygon onto the surface pygame.draw.polygon(screen, green, ((146, 0), (291, 106), (236, 277), (56, 277), (0, 106))) # draw some blue lines onto the surface pygame.draw.line(screen, blue, (60, 60), (120, 60), 4) pygame.draw.line(screen, blue, (120, 60), (60, 120)) pygame.draw.line(screen, blue, (60, 120), (120, 120), 4) # draw a blue circle onto the surface
https://riptutorial.com/ 38
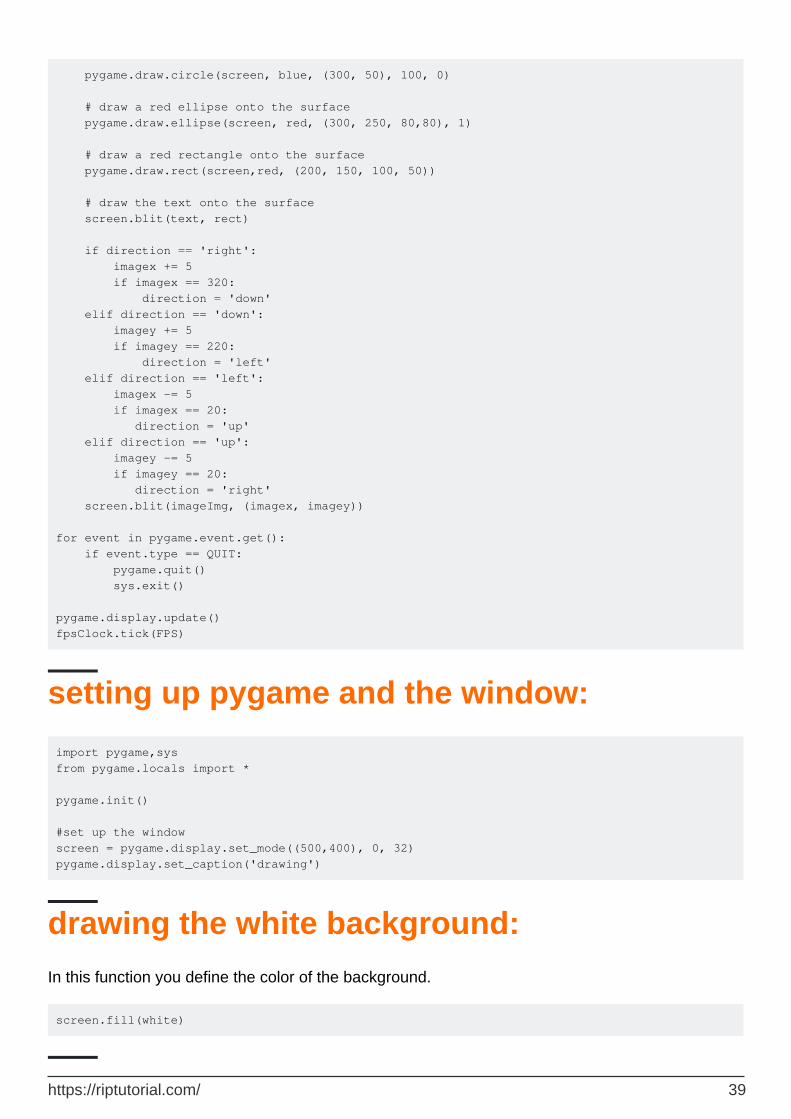
pygame.draw.circle(screen, blue, (300, 50), 100, 0) # draw a red ellipse onto the surface pygame.draw.ellipse(screen, red, (300, 250, 80,80), 1) # draw a red rectangle onto the surface pygame.draw.rect(screen,red, (200, 150, 100, 50)) # draw the text onto the surface screen.blit(text, rect) if direction == 'right': imagex += 5 if imagex == 320: direction = 'down' elif direction == 'down': imagey += 5 if imagey == 220: direction = 'left' elif direction == 'left': imagex -= 5 if imagex == 20: direction = 'up' elif direction == 'up': imagey -= 5 if imagey == 20: direction = 'right' screen.blit(imageImg, (imagex, imagey)) for event in pygame.event.get(): if event.type == QUIT: pygame.quit() sys.exit() pygame.display.update() fpsClock.tick(FPS)
setting up pygame and the window:
import pygame,sys from pygame.locals import * pygame.init() #set up the window screen = pygame.display.set_mode((500,400), 0, 32) pygame.display.set_caption('drawing')
drawing the white background:
In this function you define the color of the background.
screen.fill(white)
https://riptutorial.com/ 39
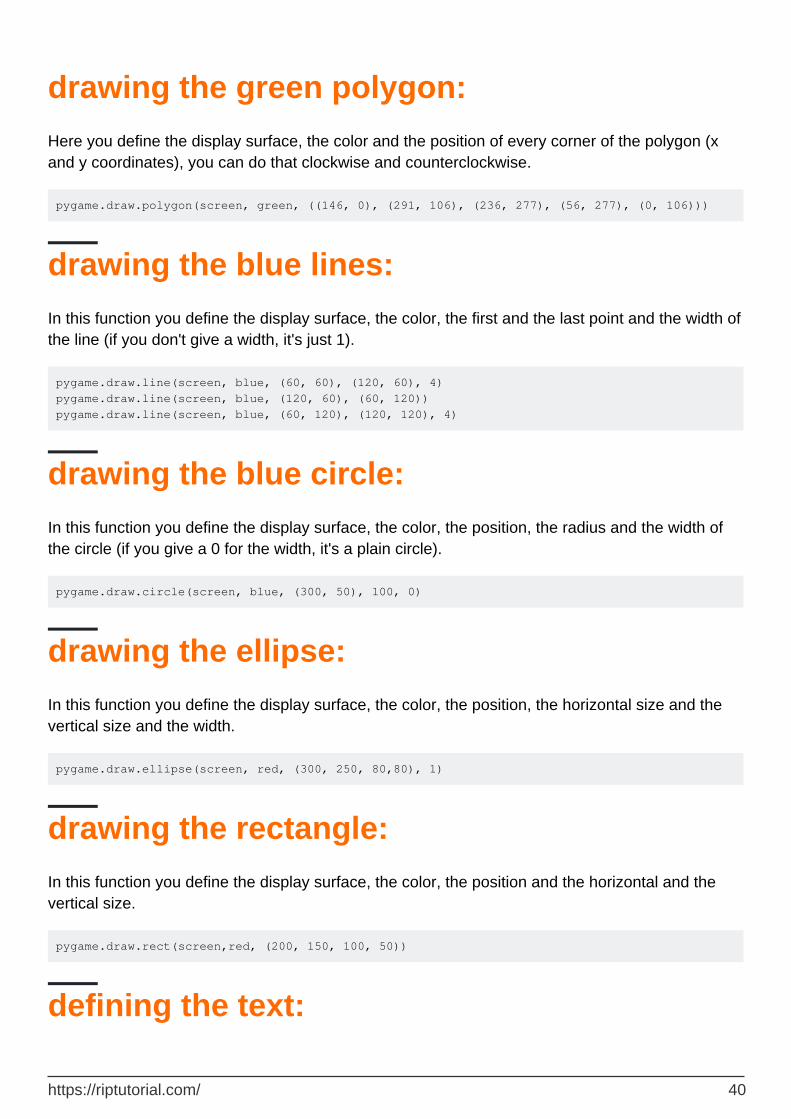
drawing the green polygon:
Here you define the display surface, the color and the position of every corner of the polygon (x and y coordinates), you can do that clockwise and counterclockwise.
pygame.draw.polygon(screen, green, ((146, 0), (291, 106), (236, 277), (56, 277), (0, 106)))
drawing the blue lines:
In this function you define the display surface, the color, the first and the last point and the width of the line (if you don't give a width, it's just 1).
pygame.draw.line(screen, blue, (60, 60), (120, 60), 4) pygame.draw.line(screen, blue, (120, 60), (60, 120)) pygame.draw.line(screen, blue, (60, 120), (120, 120), 4)
drawing the blue circle:
In this function you define the display surface, the color, the position, the radius and the width of the circle (if you give a 0 for the width, it's a plain circle).
pygame.draw.circle(screen, blue, (300, 50), 100, 0)
drawing the ellipse:
In this function you define the display surface, the color, the position, the horizontal size and the vertical size and the width.
pygame.draw.ellipse(screen, red, (300, 250, 80,80), 1)
drawing the rectangle:
In this function you define the display surface, the color, the position and the horizontal and the vertical size.
pygame.draw.rect(screen,red, (200, 150, 100, 50))
defining the text:
https://riptutorial.com/ 40

First you define the type and the size of your text with this function:
fontObj = pygame.font.Font('freesansbold.ttf', 32)
Then you define the actual text, if the text is bold, the color and, if you want, the color of the marking. You can do that with this function:
text = fontObj.render('Hello World!', True, green, blue)
If you want to mark your text, you have to tell pygame that with this function:
rect = text.get_rect()
And if you want to define the position of the center of the text you can do that with this function:
rect.center = (200, 150)
drawing the text:
If you defined a marking and/or the center:
screen.blit(text, rect)
Otherwise you have to define the position of the text so draw the text this way:
screen.blit(text, (100,50))
defining the image:
Here you define which image you want to use (if you do it this way, the image file has to be in the same directory as your program file), the start position (x and y) and the direction of the image.
image = pygame.image.load('image.png') baddiex = 320 baddiey = 220 direction = 'left'
animating the image:
With this part of the code we check the direction of the image, if it reached a corner, if so, change the direction, if not, draw the image 5 pixels further in the same direction.
if direction == 'right':
https://riptutorial.com/ 41

imagex += 5 if imagex == 360: direction = 'down' elif direction == 'down': imagey += 5 if imagey == 260: direction = 'left' elif direction == 'left': imagex -= 5 if imagex == 20: direction = 'up' elif direction == 'up': imagey -= 5 if imagey == 20: direction = 'right' screen.blit(imageImg, (imagex, imagey))
note: My image is 20x20 pixels, I use if imagex == 360: and if imagey == 260: because then my image is 20 pixels from the edge of the window, just like the other 2 corners. If your image has a different size, you'll probably have to change those numbers.
checking for quit:
Here we check if you closed the pygame window, and if so, close the window, if you don't write this somewhere in your program, you probably won't be able to close the window.
for event in pygame.event.get(): if event.type == QUIT: pygame.quit() sys.exit()
updating the screen:
With this function you update the screen so everything you have drawn becomes visible.
pygame.display.update()
FPS setting:
With this function you tell pygame to sleep enough so your FPS setting is respected.
fpsClock.tick(FPS)
Using with PIL
When you have to use both PIL and Pygame because missing functionalities in both of them, you need a way to convert between Pygame Surfaces and PIL Images, preferably without writing them
https://riptutorial.com/ 42
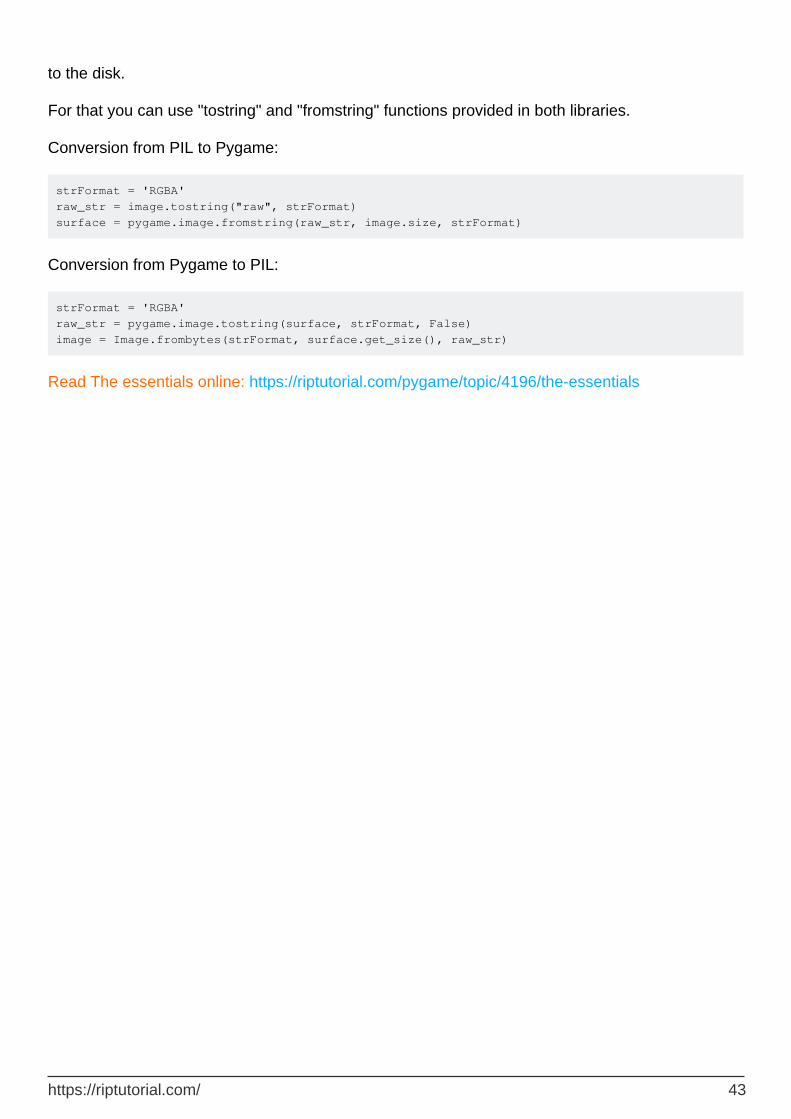
to the disk.
For that you can use "tostring" and "fromstring" functions provided in both libraries.
Conversion from PIL to Pygame:
strFormat = 'RGBA' raw_str = image.tostring("raw", strFormat) surface = pygame.image.fromstring(raw_str, image.size, strFormat)
Conversion from Pygame to PIL:
strFormat = 'RGBA' raw_str = pygame.image.tostring(surface, strFormat, False) image = Image.frombytes(strFormat, surface.get_size(), raw_str)
Read The essentials online: https://riptutorial.com/pygame/topic/4196/the-essentials
https://riptutorial.com/ 43

Credits
S. No
Chapters Contributors
1Getting started with pygame
Community, elegent, Inazuma, Nearoo, Ni., numbermaniac, svs, Ted Klein Bergman, White Shadow
2Adding background music and sound effects
Hikaryu, White Shadow
3 Creating a pygame window Rishi Malhotra, White Shadow
4Creating a simple pygame window
ModoUnreal
5Creating a window in pygame - pygame.display.set_mode()
Nearoo
6 Drawing on the screen svs
7 Event handling elegent, Mikhail V, Nearoo, Ted Klein Bergman
8 The essentials Ni., numbermaniac, svs, Ted Klein Bergman
https://riptutorial.com/ 44
Copyright © 2022 FDOKUMEN

