


Bahasa
Halaman
Hukum

What readers are saying about Hello, Android
This is a most excellent book: very well written, easy to read, and fun.
In addition, any of Android’s quirks are explained along with just the
right amount of detail to ensure quality programming principles are
followed.
Anthony Stevens
Founder and CTO, PocketJourney and Top 20 Winner of
Google Android Competition
Ed Burnette covers an impressive amount of ground in a nicely com-
pact book while retaining the popular Pragmatic style. For the mate-
rial on 2D and 3D graphics alone, this is worthy of a spot in any
Android developer’s library.
Mark Murphy
Founder, CommonsWare
I remember when I first started to work with Android; it was like a
huge maze. With this book, the introduction would have been much
less painful. I am convinced that by reading this book new Android
programmers will have an easier start.
Gabor Paller
Senior Software Architect, OnRelay, Ltd.

Hello, AndroidIntroducing Google’s
Mobile Development Platform
Ed Burnette
The Pragmatic BookshelfRaleigh, North Carolina Dallas, Texas

Many of the designations used by manufacturers and sellers to distinguish their prod-
ucts are claimed as trademarks. Where those designations appear in this book, and The
Pragmatic Programmers, LLC was aware of a trademark claim, the designations have
been printed in initial capital letters or in all capitals. The Pragmatic Starter Kit, The
Pragmatic Programmer, Pragmatic Programming, Pragmatic Bookshelf and the linking g
device are trademarks of The Pragmatic Programmers, LLC.
Portions of the book’s cover are reproduced from work created and shared by Google and
used according to terms described in the Creative Commons 2.5 Attribution License. See
http://code.google.com/policies.html#restrictions for details.
Every precaution was taken in the preparation of this book. However, the publisher
assumes no responsibility for errors or omissions, or for damages that may result from
the use of information (including program listings) contained herein.
Our Pragmatic courses, workshops, and other products can help you and your team
create better software and have more fun. For more information, as well as the latest
Pragmatic titles, please visit us at
http://www.pragprog.com
Copyright © 2008 Ed Burnette.
All rights reserved.
No part of this publication may be reproduced, stored in a retrieval system, or transmit-
ted, in any form, or by any means, electronic, mechanical, photocopying, recording, or
otherwise, without the prior consent of the publisher.
Printed in the United States of America.
ISBN-10: 1-934356-17-4
ISBN-13: 978-1-934356-17-3

ContentsAcknowledgments 10
Changes (Cupcake Updates) 11
P1.5—July 21 . . . . . . . . . . . . . . . . . . . . . . . . . . . . 11
P1.4—July 6 . . . . . . . . . . . . . . . . . . . . . . . . . . . . . 11
P1.3—June 22 . . . . . . . . . . . . . . . . . . . . . . . . . . . . 12
P1.2—June 9 . . . . . . . . . . . . . . . . . . . . . . . . . . . . 12
P1.1—May 26 . . . . . . . . . . . . . . . . . . . . . . . . . . . . 12
TODO in future releases . . . . . . . . . . . . . . . . . . . . . . 13
Preface 14
What Makes Android Special? . . . . . . . . . . . . . . . . . . . 14
Who Should Read This Book? . . . . . . . . . . . . . . . . . . . 15
What’s in This Book? . . . . . . . . . . . . . . . . . . . . . . . . 16
What’s New for Cupcake? . . . . . . . . . . . . . . . . . . . . . 16
Online Resources . . . . . . . . . . . . . . . . . . . . . . . . . . 17
Fast-Forward >> . . . . . . . . . . . . . . . . . . . . . . . . . . . 17
I Introducing Android 19
1 Quick Start 20
1.1 Installing the Tools . . . . . . . . . . . . . . . . . . . . . 20
1.2 Creating Your First Program . . . . . . . . . . . . . . . . 24
1.3 Running on the Emulator . . . . . . . . . . . . . . . . . 24
1.4 Running on a Real Phone . . . . . . . . . . . . . . . . . 29
1.5 Fast-Forward >> . . . . . . . . . . . . . . . . . . . . . . . 29
2 Key Concepts 30
2.1 The Big Picture . . . . . . . . . . . . . . . . . . . . . . . 30
2.2 It’s Alive! . . . . . . . . . . . . . . . . . . . . . . . . . . . 35
2.3 Building Blocks . . . . . . . . . . . . . . . . . . . . . . . 39
2.4 Using Resources . . . . . . . . . . . . . . . . . . . . . . . 40

CONTENTS 6
2.5 Safe and Secure . . . . . . . . . . . . . . . . . . . . . . . 41
2.6 Fast-Forward >> . . . . . . . . . . . . . . . . . . . . . . . 42

CONTENTS 7
II Android Basics 43
3 Designing the User Interface 44
3.1 Introducing the Sudoku Example . . . . . . . . . . . . . 44
3.2 Designing by Declaration . . . . . . . . . . . . . . . . . . 45
3.3 Creating the Opening Screen . . . . . . . . . . . . . . . 46
3.4 Using Alternate Resources . . . . . . . . . . . . . . . . . 54
3.5 Implementing an About Box . . . . . . . . . . . . . . . . 58
3.6 Applying a Theme . . . . . . . . . . . . . . . . . . . . . . 62
3.7 Adding a Menu . . . . . . . . . . . . . . . . . . . . . . . 63
3.8 Adding Settings . . . . . . . . . . . . . . . . . . . . . . . 66
3.9 Starting a New Game . . . . . . . . . . . . . . . . . . . . 68
3.10 Debugging with Log Messages . . . . . . . . . . . . . . . 70
3.11 Debugging with the Debugger . . . . . . . . . . . . . . . 71
3.12 Exiting the Game . . . . . . . . . . . . . . . . . . . . . . 71
3.13 Fast-Forward >> . . . . . . . . . . . . . . . . . . . . . . . 72
4 Exploring 2D Graphics 73
4.1 Learning the Basics . . . . . . . . . . . . . . . . . . . . . 73
4.2 Adding Graphics to Sudoku . . . . . . . . . . . . . . . . 78
4.3 Handling Input . . . . . . . . . . . . . . . . . . . . . . . 87
4.4 The Rest of the Story . . . . . . . . . . . . . . . . . . . . 93
4.5 Making More Improvements . . . . . . . . . . . . . . . . 102
4.6 Fast-Forward >> . . . . . . . . . . . . . . . . . . . . . . . 103
5 Multimedia 104
5.1 Playing Audio . . . . . . . . . . . . . . . . . . . . . . . . 104
5.2 Playing Video . . . . . . . . . . . . . . . . . . . . . . . . . 110
5.3 Adding Sounds to Sudoku . . . . . . . . . . . . . . . . . 115
5.4 Fast-Forward >> . . . . . . . . . . . . . . . . . . . . . . . 118
6 Storing Local Data 119
6.1 Adding Options to Sudoku . . . . . . . . . . . . . . . . . 119
6.2 Continuing an Old Game . . . . . . . . . . . . . . . . . . 121
6.3 Remembering the Current Position . . . . . . . . . . . . 123
6.4 Accessing the Internal File System . . . . . . . . . . . . 125
6.5 Accessing SD Cards . . . . . . . . . . . . . . . . . . . . . 126
6.6 Fast-Forward >> . . . . . . . . . . . . . . . . . . . . . . . 127

CONTENTS 8
III Beyond the Basics 128
7 The Connected World 129
7.1 Browsing by Intent . . . . . . . . . . . . . . . . . . . . . 130
7.2 Web with a View . . . . . . . . . . . . . . . . . . . . . . . 134
7.3 From JavaScript to Java and Back . . . . . . . . . . . . 139
7.4 Using Web Services . . . . . . . . . . . . . . . . . . . . . 146
7.5 Fast-Forward >> . . . . . . . . . . . . . . . . . . . . . . . 156
8 Locating and Sensing 158
8.1 Location, Location, Location . . . . . . . . . . . . . . . . 158
8.2 Set Sensors to Maximum . . . . . . . . . . . . . . . . . . 164
8.3 Bird’s-Eye View . . . . . . . . . . . . . . . . . . . . . . . 168
8.4 Fast-Forward >> . . . . . . . . . . . . . . . . . . . . . . . 173
9 Putting SQL to Work 175
9.1 Introducing SQLite . . . . . . . . . . . . . . . . . . . . . 175
9.2 SQL 101 . . . . . . . . . . . . . . . . . . . . . . . . . . . 176
9.3 Hello, Database . . . . . . . . . . . . . . . . . . . . . . . 178
9.4 Data Binding . . . . . . . . . . . . . . . . . . . . . . . . . 186
9.5 Using a ContentProvider . . . . . . . . . . . . . . . . . . 189
9.6 Implementing a ContentProvider . . . . . . . . . . . . . 192
9.7 Fast-Forward >> . . . . . . . . . . . . . . . . . . . . . . . 193
10 3D Graphics in OpenGL 195
10.1 Understanding 3D Graphics . . . . . . . . . . . . . . . . 195
10.2 Introducing OpenGL . . . . . . . . . . . . . . . . . . . . 196
10.3 Building an OpenGL Program . . . . . . . . . . . . . . . 197
10.4 Managing Threads . . . . . . . . . . . . . . . . . . . . . 199
10.5 Building a Model . . . . . . . . . . . . . . . . . . . . . . 205
10.6 Lights, Camera, ... . . . . . . . . . . . . . . . . . . . . . . 208
10.7 Action! . . . . . . . . . . . . . . . . . . . . . . . . . . . . 210
10.8 Applying Texture . . . . . . . . . . . . . . . . . . . . . . 213
10.9 Peekaboo . . . . . . . . . . . . . . . . . . . . . . . . . . . 216
10.10 Fast-Forward >> . . . . . . . . . . . . . . . . . . . . . . . 217
CONTENTS 9
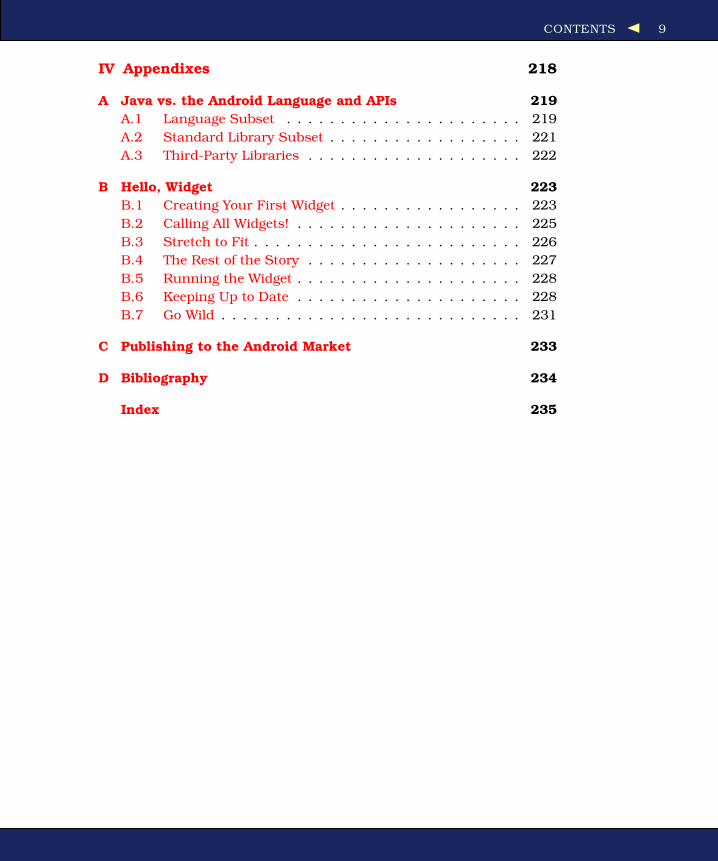
IV Appendixes 218
A Java vs. the Android Language and APIs 219
A.1 Language Subset . . . . . . . . . . . . . . . . . . . . . . 219
A.2 Standard Library Subset . . . . . . . . . . . . . . . . . . 221
A.3 Third-Party Libraries . . . . . . . . . . . . . . . . . . . . 222
B Hello, Widget 223
B.1 Creating Your First Widget . . . . . . . . . . . . . . . . . 223
B.2 Calling All Widgets! . . . . . . . . . . . . . . . . . . . . . 225
B.3 Stretch to Fit . . . . . . . . . . . . . . . . . . . . . . . . . 226
B.4 The Rest of the Story . . . . . . . . . . . . . . . . . . . . 227
B.5 Running the Widget . . . . . . . . . . . . . . . . . . . . . 228
B.6 Keeping Up to Date . . . . . . . . . . . . . . . . . . . . . 228
B.7 Go Wild . . . . . . . . . . . . . . . . . . . . . . . . . . . . 231
C Publishing to the Android Market 233
D Bibliography 234
Index 235
AcknowledgmentsI’d like to thank the many people who made this book possible, includ-
ing my reviewers Anthony Stevens, Gabor Paller, Fred Burke, Dianne
Hackborn, and Laurent Pontier for their attention to detail; my editor
Susannah Pfalzer for her great suggestions and good cheer in the face
of impossible deadlines; and especially my family for their patience in
putting up with all the long hours.

Changes (Cupcake Updates)Android 1.5, also known as Cupcake, was released this spring. Cup-
cake contains a number of user- and programmer-facing changes that
broke examples in this book, and rendered some sections obsolete. This
series of updates will address these changes, and add new sections and
appendixes based on the Cupcake release.
All changes since the original printing will be flagged with an orange
color, like this text.
Please give us your feedback on the new and updated material by post-
ing in the forum1 or by submitting errata.
P1.5—July 21
This update contains the following changes:
• Chapter 7, The Connected World, on page 129: Added better sup-
port for the Android 1.5 soft keyboard.
• Chapter 8, Locating and Sensing, on page 158: Updated the Sen-
sorTest sample to use the new Sensors API, and the MyMap sample
to use the new setBuiltInZoomControls( ) method.
• Chapter 9, Putting SQL to Work, on page 175: Added missing imports
and string resources to the Events example.
P1.4—July 6
This update contains the following changes:
1. http://forums.pragprog.com/forums/67
P1.3—JUNE 22 12
• Appendix B, on page 223: New appendix on how to create simple
Home screen app widgets. Readers: please look over this carefully
because it is all new material.
• Appendix A, on page 219: Updated for Cupcake. Moved java.beans
from the unsupported to the supported list.
P1.3—June 22
This update contains the following changes:
• Chapter 4, Exploring 2D Graphics, on page 73: Tried to clarify a
few parts that were confusing people.
• Chapter 5, Multimedia, on page 104: Updated for Cupcake. Changed
the recommended video format from MPEG-4 to H.263.
• Chapter 6, Storing Local Data, on page 119: Updated for Cupcake.
It is no longer necessary to use the mksdcard command.
P1.2—June 9
This update contains the following changes:
• Chapter 2, Key Concepts, on page 30: Updated for Cupcake. Added
a short explanation of widgets and a mention of upcoming native
development support. Took new screenshots with 1.5_r2 and ADT
0.9.1v200905011822-1621. Redid the architecture diagram to include
widgets.
• Chapter 3, Designing the User Interface, on page 44: Updated for
Cupcake. Took lots of new screenshots.
P1.1—May 26
This update contains the following changes:
• Chapter , Changes (Cupcake Updates), on the preceding page: New
section (you’re reading it now) that will detail the changes made in
each release.
• Chapter , Preface, on page 14: Updated for Cupcake.
TODO IN FUTURE RELEASES 13
• Chapter 1, Quick Start, on page 20: Updated for Cupcake. Added
new material on Android Virtual Devices (AVDs). Took new screen-
shots with 1.5_r1 and ADT 0.9.1v200905011822-1621.
• Appendix B, on page 223: New appendix on writing widgets (just
a placeholder for now).
• Appendix C, on page 233: New appendix on signing and publishing
(just a placeholder for now).
• Updated all sample source code files2 so they build and run with
1.5. I haven’t updated the text that describes the samples.
• Tested all samples on 1.5 firmware on a real phone except for
MyMap.
• Various: Cleared up all outstanding errata.3
• Various: Fixed URLs that Google broke since the first printing.
TODO in future releases
Here are the items I’m working on next.
• Update Chapter 10, 3D Graphics in OpenGL, on page 195. Update
the OpenGL sample to use new API.
• Create Appendix C, on page 233.
2. http://www.pragprog.com/titles/eband/source_code
3. http://www.pragprog.com/titles/eband/errata
PrefaceAndroid is a new open source software toolkit for mobile phones that
was created by Google and the Open Handset Alliance. In a few years,
it’s expected to be found in millions of cell phones and other mobile
devices, making Android a major platform for application developers.
Whether you’re a hobbyist or a professional programmer, whether you
are doing it for fun or for profit, it’s time to learn more about developing
for Android. This book will help you get started.
What Makes Android Special?
There are already many mobile platforms on the market today, includ-
ing Symbian, iPhone, Windows Mobile, BlackBerry, Java Mobile Edi-
tion, Linux Mobile (LiMo), and more. When I tell people about Android,
their first question is often, Why do we need another mobile standard?
Where’s the “wow”?
Although some of its features have appeared before, Android is the first
environment that combines the following:
• A truly open, free development platform based on Linux and open
source: Handset makers like it because they can use and cus-
tomize the platform without paying a royalty. Developers like it
because they know that the platform “has legs” and is not locked
into any one vendor that may go under or be acquired.
• A component-based architecture inspired by Internet mashups:
Parts of one application can be used in another in ways not orig-
inally envisioned by the developer. You can even replace built-in
components with your own improved versions. This will unleash a
new round of creativity in the mobile space.
• Tons of built-in services out of the box: Location-based services use
GPS or cell tower triangulation to let you customize the user expe-
rience depending on where you are. A full-powered SQL database

WHO SHOULD READ THIS BOOK? 15
lets you harness the power of local storage for occasionally con-
nected computing and synchronization. Browser and map views
can be embedded directly in your applications. All these built-in
capabilities help raise the bar on functionality while lowering your
development costs.
• Automatic management of the application life cycle: Programs are
isolated from each other by multiple layers of security, which will
provide a level of system stability not seen before in smart phones.
The end user will no longer have to worry about what applications
are active or close some programs so that others can run. Android
is optimized for low-power, low-memory devices in a fundamental
way that no previous platform has attempted.
• High-quality graphics and sound: Smooth, antialiased 2D vector
graphics and animation inspired by Flash are melded with 3D
accelerated OpenGL graphics to enable new kinds of games and
business applications. Codecs for the most common industry-
standard audio and video formats are built right in, including
H.264 (AVC), MP3, and AAC.
• Portability across a wide range of current and future hardware:
All your programs are written in Java and executed by Android’s
Dalvik virtual machine, so your code will be portable across
ARM, x86, and other architectures. Support for a variety of input
methods is included such as keyboard, touch, and trackball.
User interfaces can be customized for any screen resolution and
orientation.
Android offers a fresh take on the way mobile applications interact with
users, along with the technical underpinnings to make it possible. But
the best part of Android is the software that you are going to write for
it. This book will help you get off to a great start.
Who Should Read This Book?
The only requirement is a basic understanding of programming in Java
or a similar object-oriented language (C# will do in a pinch). You don’t
need any prior experience developing software for mobile devices. In
fact, if you do, it’s probably best if you try to forget that experience.
Android is so different that it’s good to start with an open mind.

WHAT’S IN THIS BOOK? 16
What’s in This Book?
Hello, Android is divided into three parts. Roughly speaking, the book
progresses from less advanced to more advanced topics, or from more
common to less common aspects of Android.
Several chapters share a common example: an Android Sudoku game.
By gradually adding features to the game, you’ll learn about many
aspects of Android programming including user interfaces, multime-
dia, and the Android life cycle.
In Part I, we’ll start with an introduction to Android. This is where you’ll
learn how to install the Android emulator and how to use an integrated
development environment (IDE) to write your first program. Then we’ll
introduce a few key concepts like the Android life cycle. Programming
in Android is a little different from what you’re probably used to, so
make sure you get these concepts before moving on.
Part II talks about Android’s user interface, two-dimensional graphics,
multimedia components, and simple data access. These features will be
used in most programs you write.
Part III digs deeper into the Android platform. Here you’ll learn about
connecting to the outside world, location-based services, the built-in
SQLite database, and three-dimensional graphics.
At the end of the book, you’ll find appendices that cover the differences
between Android and Java Standard Edition (SE), how to create a wid-
get, and publishing your application.
What’s New for Cupcake?
Android 1.5 (Cupcake) introduced a number of enhancements to the
Android platform including support for soft (on-screen) keyboards, video
recording, and application widgets. Under the covers, there were over
1,000 changes to the Android API between 1.1 and 1.5.4
To accommodate the new version, every page and example in this book
has been reviewed and updated so it will work with 1.5. Most of the
changes were small but a few sections needed major revisions. If you’ve
read this book before then be sure to check out these updated chapters:
4. http://developer.android.com/sdk/1.5_r2/upgrading.html
ONLINE RESOURCES 17
• Chapter 1, Quick Start, on page 20 includes instructions on using
target SDKs and Android Virtual Devices (AVDs).
• Chapter 8, Locating and Sensing, on page 158 now uses the new
SensorManager APIs.
• Chapter 10, 3D Graphics in OpenGL, on page 195 has been greatly
simplified thanks to the new GLSurfaceView class.
In addition, by popular demand we’ve added two new appendices:
• Appendix B, on page 223 shows you how to create a Widget for the
Home screen. This is a new feature of Cupcake.
• Appendix C, on page 233 guides you through the steps of mak-
ing your application available for sale or for free on the Android
Market.
By the time you read this, Android 1.5 (or later) will be available for
all shipping Android devices. All new devices will have it installed, and
Google expects existing Android users to quickly upgrade. Therefore
this printing of the book will not cover version 1.1 or earlier.
Online Resources
At the website for this book, http://pragprog.com/titles/eband, you’ll find
the following:
• The full source code for all the sample programs used in this book
• An errata page, listing any mistakes in the current edition (let’s
hope that will be empty!)
• A discussion forum where you can communicate directly with the
author and other Android developers (let’s hope that will be full!)
You are free to use the source code in your own applications as you see
fit. Note: If you’re reading the PDF version of this book, you can also
click the little gray rectangle before the code listings to download that
source file directly.
Fast-Forward >>
Although most authors expect you to read every word in their books, I
know you’re not going to do that. You want to read just enough to let
you get something done, and then maybe you’ll come back later and

FAST -FORWARD >> 18
read something else to let you get another piece done. So, I’ve tried to
provide you with a little help so you won’t get lost.
Each chapter in this book ends with a “Fast-Forward >> section.” These
sections will provide some guidance for where you should go next when
you need to read the book out of order. You’ll also find pointers to other
resources such as books and online documentation here in case you
want to learn more about the subject.
So, what are you waiting for? The next chapter—Chapter 1, Quick Start,
on page 20—drops you right into the deep end with your first Android
program. Chapter 2, Key Concepts, on page 30 takes a step back and
introduces you to the basic concepts and philosophy of Android, and
Chapter 3, Designing the User Interface, on page 44 digs into the user
interface, which will be the most important part of most Android
programs.
Part I
Introducing Android
19

Chapter 1
Quick StartAndroid combines the ubiquity of cell phones, the excitement of open
source software, and the corporate backing of Google and other Open
Handset Alliance members like Intel, TI, T-Mobile, and NTT DoCoMo.
The result is a mobile platform you can’t afford not to learn.
Luckily, getting started developing with Android is easy. You don’t even
need access to an Android phone—just a computer where you can
install the Android SDK and phone emulator.
In this chapter, I’ll show you how to get all the development tools
installed, and then we’ll jump right in and create a working applica-
tion: Android’s version of “Hello, World.”
1.1 Installing the Tools
The Android software development kit (SDK) works on Windows, Linux,
and Mac OS X. The applications you create, of course, can be deployed
on any Android devices.
Before you start coding, you need to install Java, an IDE, and the
Android SDK.
Java 5.0+
First you need a copy of Java. All the Android development tools require
it, and programs you write will be using the Java language. JDK 5 or 6
is required.
It’s not enough to just have a runtime environment (JRE); you need
the full development kit. I recommend getting the latest Sun JDK 6.0
INSTALLING THE TOOLS 21
update from the Sun download site.1 Mac OS X users should get the
latest version of Mac OS X and the JDK from the Apple website.
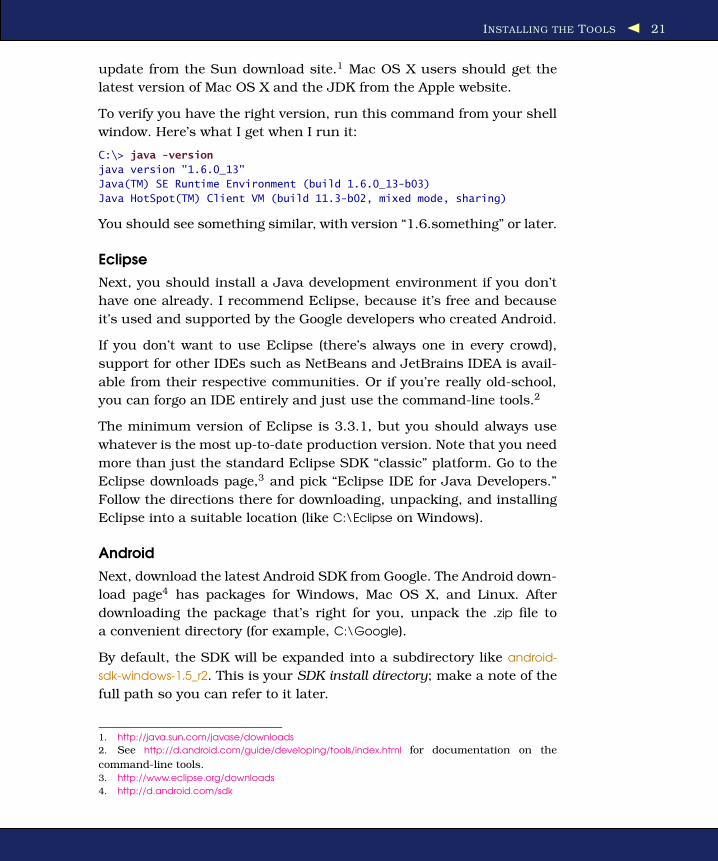
To verify you have the right version, run this command from your shell
window. Here’s what I get when I run it:
C:\> java -version
java version "1.6.0_13"
Java(TM) SE Runtime Environment (build 1.6.0_13-b03)
Java HotSpot(TM) Client VM (build 11.3-b02, mixed mode, sharing)
You should see something similar, with version “1.6.something” or later.
Eclipse
Next, you should install a Java development environment if you don’t
have one already. I recommend Eclipse, because it’s free and because
it’s used and supported by the Google developers who created Android.
If you don’t want to use Eclipse (there’s always one in every crowd),
support for other IDEs such as NetBeans and JetBrains IDEA is avail-
able from their respective communities. Or if you’re really old-school,
you can forgo an IDE entirely and just use the command-line tools.2
The minimum version of Eclipse is 3.3.1, but you should always use
whatever is the most up-to-date production version. Note that you need
more than just the standard Eclipse SDK “classic” platform. Go to the
Eclipse downloads page,3 and pick “Eclipse IDE for Java Developers.”
Follow the directions there for downloading, unpacking, and installing
Eclipse into a suitable location (like C:\Eclipse on Windows).
Android
Next, download the latest Android SDK from Google. The Android down-
load page4 has packages for Windows, Mac OS X, and Linux. After
downloading the package that’s right for you, unpack the .zip file to
a convenient directory (for example, C:\Google).
By default, the SDK will be expanded into a subdirectory like android-
sdk-windows-1.5_r2. This is your SDK install directory; make a note of the
full path so you can refer to it later.
1. http://java.sun.com/javase/downloads
2. See http://d.android.com/guide/developing/tools/index.html for documentation on the
command-line tools.3. http://www.eclipse.org/downloads
4. http://d.android.com/sdk
INSTALLING THE TOOLS 22
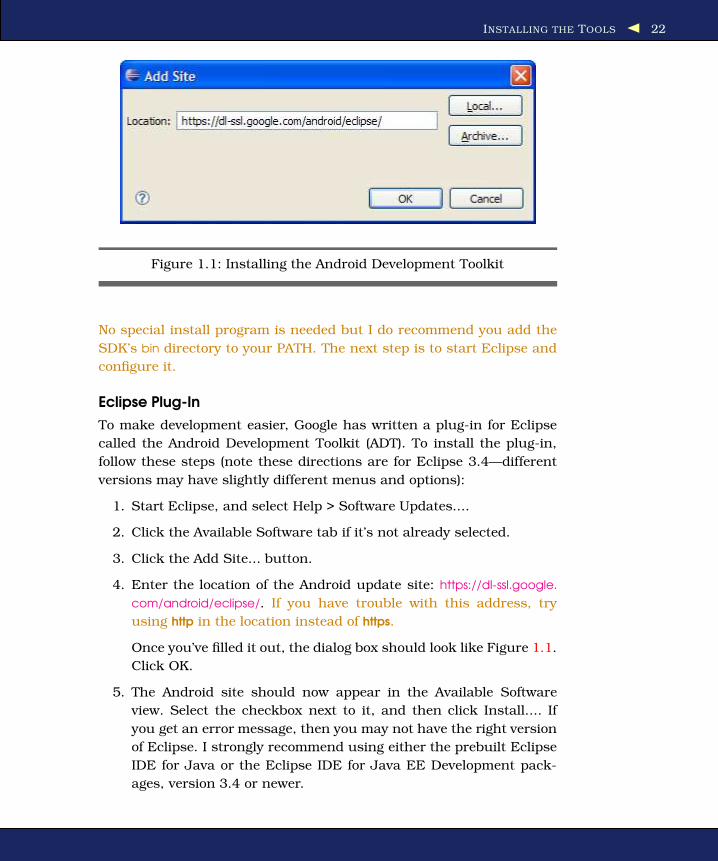
Figure 1.1: Installing the Android Development Toolkit
No special install program is needed but I do recommend you add the
SDK’s bin directory to your PATH. The next step is to start Eclipse and
configure it.
Eclipse Plug-In
To make development easier, Google has written a plug-in for Eclipse
called the Android Development Toolkit (ADT). To install the plug-in,
follow these steps (note these directions are for Eclipse 3.4—different
versions may have slightly different menus and options):
1. Start Eclipse, and select Help > Software Updates....
2. Click the Available Software tab if it’s not already selected.
3. Click the Add Site... button.
4. Enter the location of the Android update site: https://dl-ssl.google.
com/android/eclipse/. If you have trouble with this address, try
using http in the location instead of https.
Once you’ve filled it out, the dialog box should look like Figure 1.1.
Click OK.
5. The Android site should now appear in the Available Software
view. Select the checkbox next to it, and then click Install.... If
you get an error message, then you may not have the right version
of Eclipse. I strongly recommend using either the prebuilt Eclipse
IDE for Java or the Eclipse IDE for Java EE Development pack-
ages, version 3.4 or newer.
INSTALLING THE TOOLS 23
Joe Asks. . .
It Says “Connection Error,” So Now What?
If you get a connection error, the most likely cause is some kindof firewall erected by your system administrators. To get outsidethe firewall, you’ll need to configure Eclipse with the addressof your proxy server. This is the same proxy server you use foryour web browser, but unfortunately Eclipse isn’t smart enoughto pick up the setting from there.
To tell Eclipse about the proxy, select Preferences > NetworkConnections, turn on the option for Manual proxy configura-tion, enter the server name and port number, and click OK. Ifyou don’t see the option, you may be running an older ver-sion of Eclipse. Try looking under Preferences > Install/Update,or search the preferences for the word proxy.
If you have a custom install of Eclipse, then to use the Android
editors you will also need to install the Web Standard Tools (WST)
plug-in and all its prerequisites.
See the Web Tools platform home page5 for more details and down-
load links. These are already built into the recommended packages
mentioned earlier.
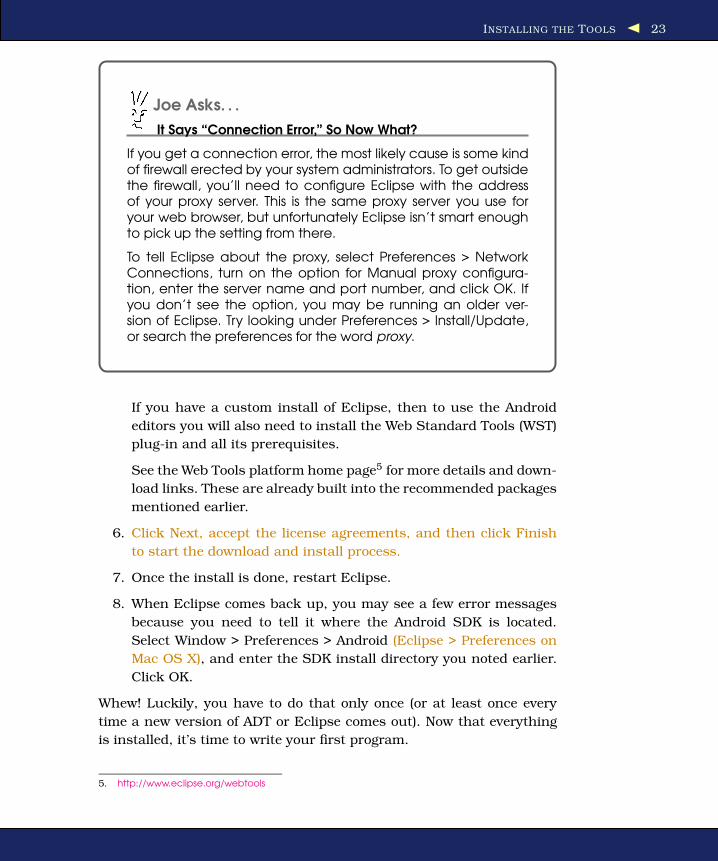
6. Click Next, accept the license agreements, and then click Finish
to start the download and install process.
7. Once the install is done, restart Eclipse.
8. When Eclipse comes back up, you may see a few error messages
because you need to tell it where the Android SDK is located.
Select Window > Preferences > Android (Eclipse > Preferences on
Mac OS X), and enter the SDK install directory you noted earlier.
Click OK.
Whew! Luckily, you have to do that only once (or at least once every
time a new version of ADT or Eclipse comes out). Now that everything
is installed, it’s time to write your first program.
5. http://www.eclipse.org/webtools

CREATING YOUR FIRST PROGRAM 24
1.2 Creating Your First Program
ADT comes with a built-in example program, or template, that we’re
going to use to create a simple “Hello, Android” program in just a few
seconds. Get your stopwatch ready. Ready? Set? Go!
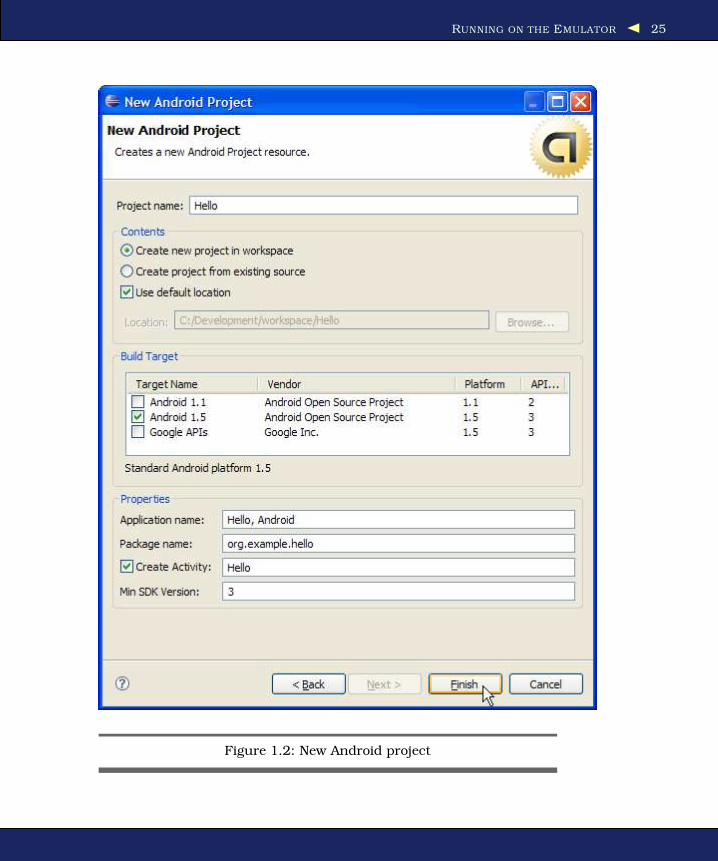
Select File > New > Project... to open the New Project dialog box. Then
select Android > Android Project, and click Next.
Enter the following information:
Project name: HelloAndroid
Build Target: Android 1.5
Application name: Hello, Android
Package name: org.example.hello
Create Activity: Hello
When you’re done, it should look something like Figure 1.2, on the
following page.
Click Finish. The Android plug-in will create the project and fill it in
with some default files. Eclipse will build it and package it up so it will
be ready to execute. If you get an error about missing source folders,
select Project > Clean to fix it.
OK, that takes care of writing the program; now all that’s left is to try
running it. First we’ll run it under the Android Emulator.
1.3 Running on the Emulator
To run your Android program, go to the Package Explorer window,
right-click the HelloAndroid project, and select Run As > Android Appli-
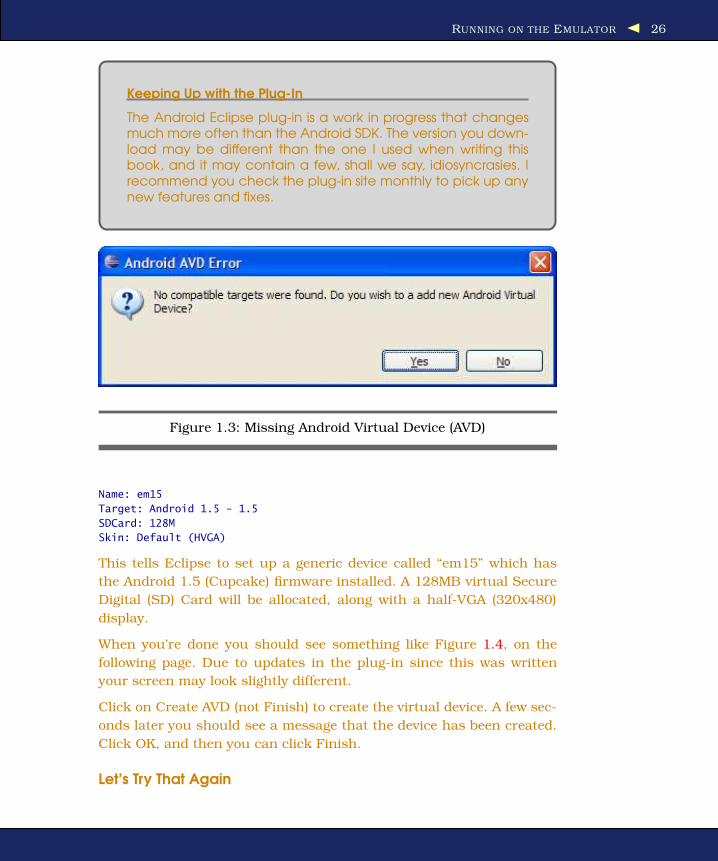
cation. If you’re following along in Eclipse you may see an error dialog
like the one in Figure 1.3, on page 26. This indicates we haven’t told
the Emulator what kind of phone to emulate.
Creating an AVD
To do this, you need to create an Android Virtual Device (AVD), using
either Eclipse or the android avd command.6 It’s easier to use Eclipse,
so select Yes in the AVD Error dialog to open the AVD Manager. You
can open the manager again later by selecting Window > Android AVD
Manager.
In the AVD Manager dialog, fill out the fields for the new AVD as follows:
6. http://d.android.com/guide/developing/tools/avd.html
RUNNING ON THE EMULATOR 25
Figure 1.2: New Android project
RUNNING ON THE EMULATOR 26
Keeping Up with the Plug-In
The Android Eclipse plug-in is a work in progress that changesmuch more often than the Android SDK. The version you down-load may be different than the one I used when writing thisbook, and it may contain a few, shall we say, idiosyncrasies. Irecommend you check the plug-in site monthly to pick up anynew features and fixes.
Figure 1.3: Missing Android Virtual Device (AVD)
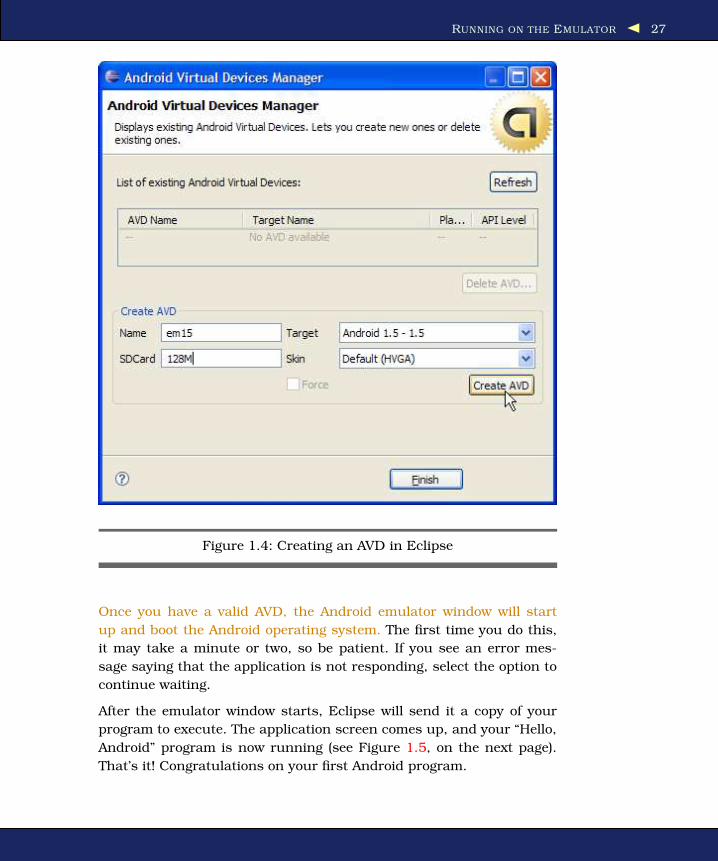
Name: em15
Target: Android 1.5 - 1.5
SDCard: 128M
Skin: Default (HVGA)
This tells Eclipse to set up a generic device called “em15” which has
the Android 1.5 (Cupcake) firmware installed. A 128MB virtual Secure
Digital (SD) Card will be allocated, along with a half-VGA (320x480)
display.
When you’re done you should see something like Figure 1.4, on the
following page. Due to updates in the plug-in since this was written
your screen may look slightly different.
Click on Create AVD (not Finish) to create the virtual device. A few sec-
onds later you should see a message that the device has been created.
Click OK, and then you can click Finish.
Let’s Try That Again
RUNNING ON THE EMULATOR 27
Figure 1.4: Creating an AVD in Eclipse
Once you have a valid AVD, the Android emulator window will start
up and boot the Android operating system. The first time you do this,
it may take a minute or two, so be patient. If you see an error mes-
sage saying that the application is not responding, select the option to
continue waiting.
After the emulator window starts, Eclipse will send it a copy of your
program to execute. The application screen comes up, and your “Hello,
Android” program is now running (see Figure 1.5, on the next page).
That’s it! Congratulations on your first Android program.

RUNNING ON THE EMULATOR 28
Figure 1.5: Running the “Hello, Android” program
Shortening the Turnaround
Starting the emulator is expensive. Think about it this way—when you first turn on your phone, it needs to boot up just likeany computer system. Closing the emulator is just like turning offthe phone or pulling the batteries out. So, don’t turn it off!
Leave the emulator window running as long as Eclipse is run-ning. The next time you start an Android program, Eclipse willnotice the emulator is already there and will just send it the newprogram to run.
RUNNING ON A REAL PHONE 29
1.4 Running on a Real Phone
Running an Android program on a physical device such as the T-Mobile
G1 during development is almost identical to running it on the emula-
tor. All you need to do is connect your phone to the computer with a
USB cable and install a special device driver.7 Close the emulator win-
dow if it’s already open. As long as the phone is plugged in, applications
will be loaded and run there instead.
When you’re ready to publish your application for others to use, there
are a few more steps you’ll need to take. Appendix C, on page 233 will
cover that in more detail.
1.5 Fast-Forward >>
Thanks to the Eclipse plug-in, creating a skeletal Android program
takes only a few seconds. In Chapter 3, Designing the User Interface, on
page 44, we’ll begin to flesh out that skeleton with a real application—a
Sudoku game. This sample will be used in several chapters to demon-
strate Android’s API.
But before delving into that, you should take a few minutes to read
Chapter 2, Key Concepts, on the following page. Once you grasp the
basic concepts such as activities and life cycles, the rest will be much
easier to understand.
Although the use of Eclipse to develop Android programs is optional,
I highly recommend it. If you’ve never used Eclipse before, you may
want to invest in a quick reference such as the Eclipse IDE Pocket
Guide [Bur05].
7. You can find the device driver and installation instructions at
http://d.android.com/guide/developing/device.html.

Chapter 2
Key ConceptsNow that you have an idea of what Android is, let’s take a look at how it
works. Some parts of Android may be familiar, such as the Linux ker-
nel, OpenGL, and the SQL database. Others will be completely foreign,
such as Android’s idea of the application life cycle.
You’ll need a good understanding of these key concepts in order to write
well-behaved Android applications, so if you read only one chapter in
this book, read this one.
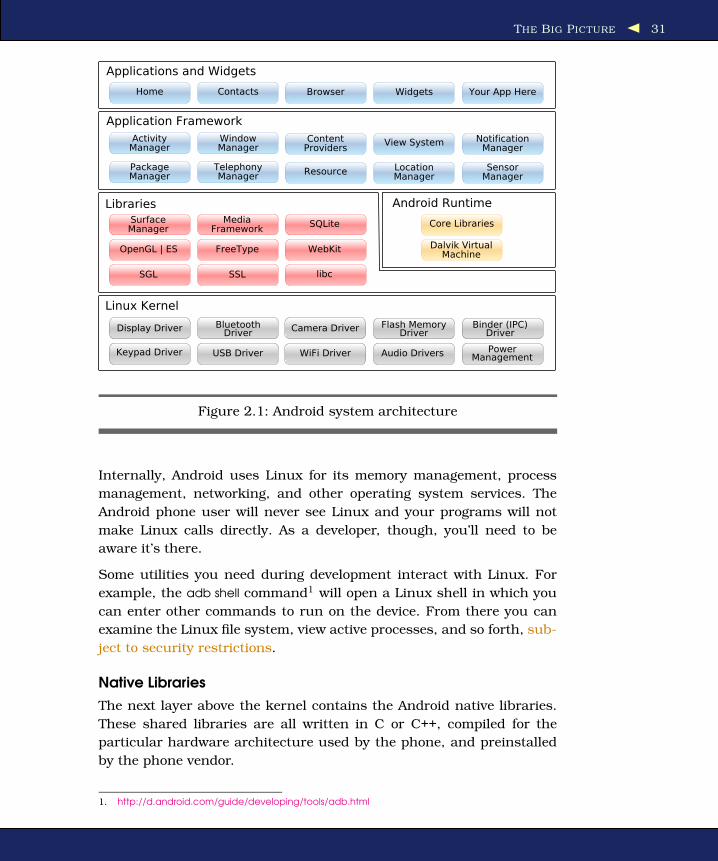
2.1 The Big Picture
Let’s start by taking a look at the overall system architecture—the key
layers and components that make up the Android open source software
stack. In Figure 2.1, on the next page, you can see the “20,000-foot”
view of Android. Study it closely—there will be a test tomorrow.
Each layer uses the services provided by the layers below it. Starting
from the bottom, the following sections highlight the layers provided by
Android.
Linux Kernel
Android is built on top of a solid and proven foundation: the Linux
kernel. Created by Linus Torvalds in 1991 while he was a student at
the University of Helsinki, Linux can be found today in everything from
wristwatches to supercomputers. Linux provides the hardware abstrac-
tion layer for Android, allowing Android to be ported to a wide variety
of platforms in the future.
THE BIG PICTURE 31
Figure 2.1: Android system architecture
Internally, Android uses Linux for its memory management, process
management, networking, and other operating system services. The
Android phone user will never see Linux and your programs will not
make Linux calls directly. As a developer, though, you’ll need to be
aware it’s there.
Some utilities you need during development interact with Linux. For
example, the adb shell command1 will open a Linux shell in which you
can enter other commands to run on the device. From there you can
examine the Linux file system, view active processes, and so forth, sub-
ject to security restrictions.
Native Libraries
The next layer above the kernel contains the Android native libraries.
These shared libraries are all written in C or C++, compiled for the
particular hardware architecture used by the phone, and preinstalled
by the phone vendor.
1. http://d.android.com/guide/developing/tools/adb.html

THE BIG PICTURE 32
Some of the most important native libraries include the following:
• Surface Manager: Android uses a compositing window manager
similar to Vista or Compiz, but it’s much simpler. Instead of draw-
ing directly to the screen buffer, your drawing commands go into
offscreen bitmaps that are then combined with other bitmaps to
form the display the user sees. This lets the system create all
sorts of interesting effects such as see-through windows and fancy
transitions.
• 2D and 3D graphics: Two- and three-dimensional elements can be
combined in a single user interface with Android. The library will
use 3D hardware if the device has it or a fast software renderer if
it doesn’t. See Chapter 4, Exploring 2D Graphics, on page 73 and
Chapter 10, 3D Graphics in OpenGL, on page 195.
• Media codecs: Android can play video and record and play back
audio in a variety of formats including AAC, AVC (H.264), H.263,
MP3, and MPEG-4. See Chapter 5, Multimedia, on page 104 for an
example.
• SQL database: Android includes the lightweight SQLite database
engine,2 the same database used in Firefox and the Apple iPhone.
You can use this for persistent storage in your application. See
Chapter 9, Putting SQL to Work, on page 175 for an example.
• Browser engine: For the fast display of HTML content, Android
uses the WebKit library.3 This is the same engine used in the
Google Chrome browser, Apple’s Safari browser, the Apple iPhone,
and Nokia’s S60 platform. See Chapter 7, The Connected World,
on page 129 for an example.
These libraries are not applications that stand by themselves. They
exist only to be called by higher level programs. In a future version of
Android (code named “Donut”), you’ll be able to write and deploy your
own native libraries using the Native Development Toolkit (NDK).
Android Runtime
Also sitting on top of the kernel is the Android runtime, including the
Dalvik virtual machine and the core Java libraries.
2. http://www.sqlite.org
3. http://www.webkit.org

THE BIG PICTURE 33
Joe Asks. . .
What’s a Dalvik?
Dalvik is a virtual machine (VM) designed and written by DanBornstein at Google. Your code gets compiled into machine-independent instructions called bytecodes, which are thenexecuted by the Dalvik VM on the mobile device.
Although the bytecode formats are a little different, Dalvik isessentially a Java virtual machine optimized for low memoryrequirements. It allows multiple VM instances to run at once andtakes advantage of the underlying operating system (Linux) forsecurity and process isolation.
Bornstein named Dalvik after a fishing village in Iceland wheresome of his ancestors lived.
The Dalvik VM is Google’s implementation of Java, optimized for mobile
devices. All the code you write for Android will be written in Java and
run within the VM.
Dalvik differs from traditional Java in two important ways:
• The Dalvik VM runs .dex files, which are converted at compile time
from standard .class and .jar files. .dex files are more compact and
efficient than class files, an important consideration for the limited
memory and battery-powered devices that Android targets.
• The core Java libraries that come with Android are different from
both the Java Standard Edition (Java SE) libraries and the Java
Mobile Edition (Java ME) libraries. There is a substantial amount
of overlap, however. In Appendix A, on page 219, you’ll find a com-
parison of Android and standard Java libraries.
Application Framework
Sitting above the native libraries and runtime, you’ll find the Applica-
tion Framework layer. This layer provides the high-level building blocks
you will use to create your applications. The framework comes prein-
stalled with Android, but you can also extend it with your own compo-
nents as needed.
The most important parts of the framework are as follows:
THE BIG PICTURE 34
• Activity manager: This controls the life cycle of applications (see
Section 2.2, It’s Alive!, on the following page) and maintains a
common “backstack” for user navigation.
• Content providers: These objects encapsulate data that needs to be
shared between applications, such as contacts. See Section 2.3,
Content Providers, on page 40.
• Resource manager: Resources are anything that goes with your
program that is not code. See Section 2.4, Using Resources, on
page 40.
• Location manager: An Android phone always knows where it is.
See Chapter 8, Locating and Sensing, on page 158.
• Notification manager: Events such as arriving messages, appoint-
ments, proximity alerts, alien invasions, and more can be pre-
sented in an unobtrusive fashion to the user.
Applications and Widgets
The highest layer in the Android architecture diagram is the Applica-
tions and Widgets layer. Think of this as the tip of the Android iceberg.
End users will see only these programs, blissfully unaware of all the
action going on below the waterline. As an Android developer, however,
you know better.
Applications are programs that can take over the whole screen and
interact with the user. On the other hand, Widgets (sometimes called
gadgets), only operate in a small rectangle of the Home screen applica-
tion.
The majority of this book will cover application development, because
that’s what most of you will be writing. Widget development is covered
in Appendix B, on page 223.
When someone buys an Android phone, it will come prepackaged with
a number of standard system applications, including the following:
• Phone dialer
• Contacts
• Web browser
• Android Market

IT’S ALIVE! 35
Embrace and Extend
One of the unique and powerful qualities of Android is that allapplications have a level playing field. What I mean is that thesystem applications have to go through the same public APIthat you use. You can even tell Android to make your applica-tion replace the standard applications if you want.
Using the Android Market, the user will be able to download new pro-
grams to run on their phone. That’s where you come in. By the time
you finish this book, you’ll be able to write your own killer applications
for Android.
Now let’s take a closer look at the life cycle of an Android application.
It’s a little different from what you’re used to seeing.
2.2 It’s Alive!
On your standard Linux or Windows desktop, you can have many appli-
cations running and visible at once in different windows. One of the
windows has keyboard focus, but otherwise all the programs are equal.
You can easily switch between them, but it’s your responsibility as the
user to move the windows around so you can see what you’re doing and
close programs you don’t need anymore.
Android doesn’t work that way.
In Android, there is one foreground application, which typically takes
over the whole display except for the status line. When the user turns
on their phone, the first application they see is the Home application
(see Figure 2.2, on the next page).This program typically shows a back-
ground image, a search or clock widget, and a scrollable list of other
applications the user can invoke.
When the user runs an application, Android starts it and brings it to the
foreground. From that application, the user might invoke another appli-
cation, or another screen in the same application, and then another and
another. All these programs and screens are recorded on the applica-
tion stack by the system’s Activity Manager. At any time, the user can
press the Back button to return to the previous screen on the stack.
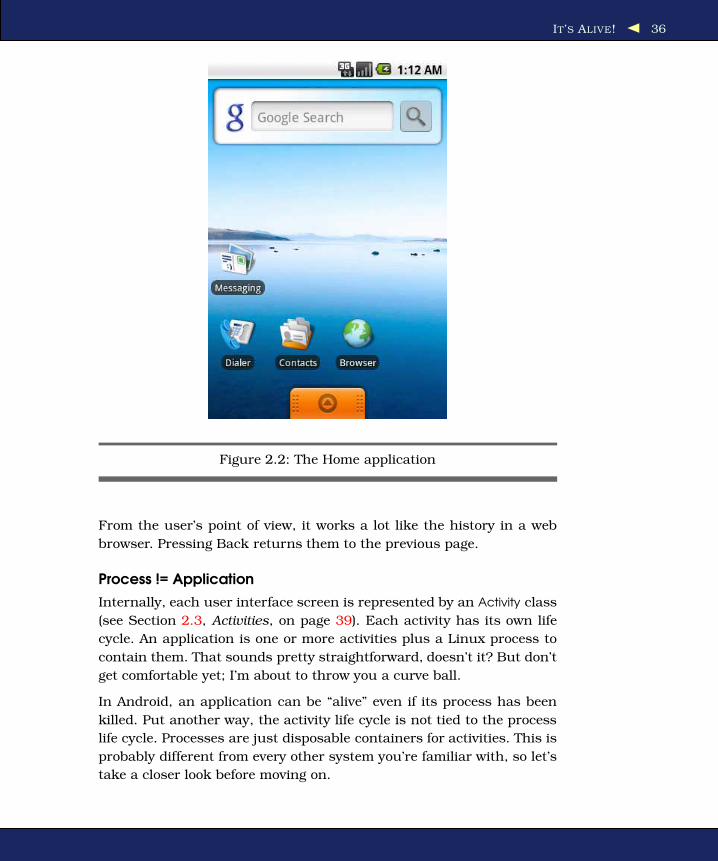
IT’S ALIVE! 36
Figure 2.2: The Home application
From the user’s point of view, it works a lot like the history in a web
browser. Pressing Back returns them to the previous page.
Process != Application
Internally, each user interface screen is represented by an Activity class
(see Section 2.3, Activities, on page 39). Each activity has its own life
cycle. An application is one or more activities plus a Linux process to
contain them. That sounds pretty straightforward, doesn’t it? But don’t
get comfortable yet; I’m about to throw you a curve ball.
In Android, an application can be “alive” even if its process has been
killed. Put another way, the activity life cycle is not tied to the process
life cycle. Processes are just disposable containers for activities. This is
probably different from every other system you’re familiar with, so let’s
take a closer look before moving on.

IT’S ALIVE! 37
Figure 2.3: Life cycle of an Android activity
Life Cycles of the Rich and Famous
During its lifetime, each activity of an Android program can be in one of
several states, as shown in Figure 2.3. You, the developer, do not have
control over what state your program is in. That’s all managed by the
system. However, you do get notified when the state is about to change
through the onXX () method calls.
You override these methods in your Activity class, and Android will call
them at the appropriate time:
• onCreate(Bundle): This is called when the activity first starts up.
You can use it to perform one-time initialization such as creating
the user interface. onCreate( ) takes one parameter that is either
null or some state information previously saved by the onSaveIn-
stanceState( ) method.
• onStart( ): This indicates the activity is about to be displayed to the
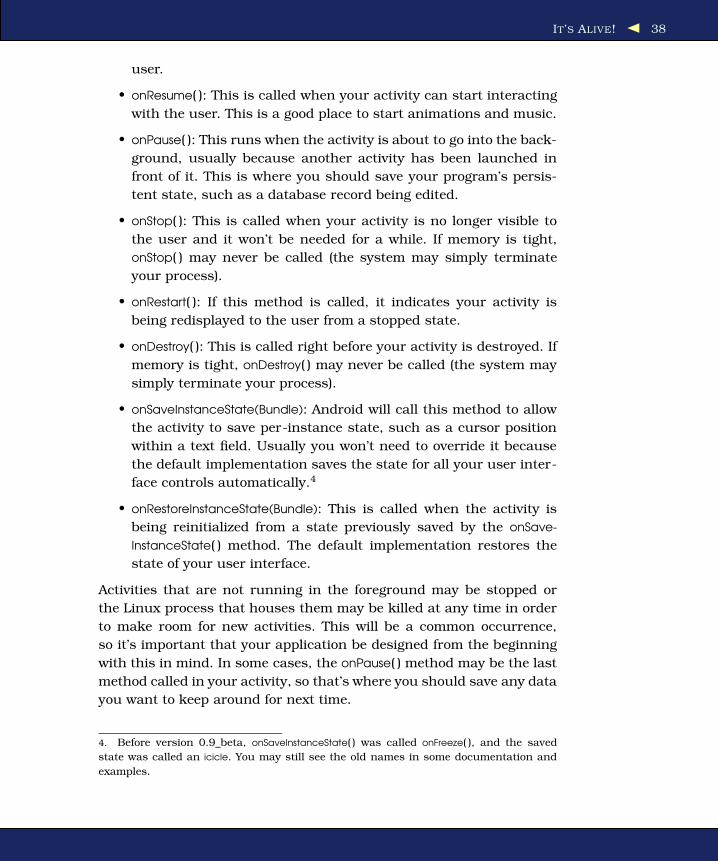
IT’S ALIVE! 38
user.
• onResume( ): This is called when your activity can start interacting
with the user. This is a good place to start animations and music.
• onPause( ): This runs when the activity is about to go into the back-
ground, usually because another activity has been launched in
front of it. This is where you should save your program’s persis-
tent state, such as a database record being edited.
• onStop( ): This is called when your activity is no longer visible to
the user and it won’t be needed for a while. If memory is tight,
onStop( ) may never be called (the system may simply terminate
your process).
• onRestart( ): If this method is called, it indicates your activity is
being redisplayed to the user from a stopped state.
• onDestroy( ): This is called right before your activity is destroyed. If
memory is tight, onDestroy( ) may never be called (the system may
simply terminate your process).
• onSaveInstanceState(Bundle): Android will call this method to allow
the activity to save per-instance state, such as a cursor position
within a text field. Usually you won’t need to override it because
the default implementation saves the state for all your user inter-
face controls automatically.4
• onRestoreInstanceState(Bundle): This is called when the activity is
being reinitialized from a state previously saved by the onSave-
InstanceState( ) method. The default implementation restores the
state of your user interface.
Activities that are not running in the foreground may be stopped or
the Linux process that houses them may be killed at any time in order
to make room for new activities. This will be a common occurrence,
so it’s important that your application be designed from the beginning
with this in mind. In some cases, the onPause( ) method may be the last
method called in your activity, so that’s where you should save any data
you want to keep around for next time.
4. Before version 0.9_beta, onSaveInstanceState( ) was called onFreeze( ), and the saved
state was called an icicle. You may still see the old names in some documentation and
examples.

BUILDING BLOCKS 39
Flipping the Lid
Here’s a quick way to test that your state-saving code is workingcorrectly. In current versions of Android, an orientation change(between portrait and landscape modes) will cause the systemto go through the process of saving instance state, pausing,stopping, destroying, and then creating a new instance of theactivity with the saved state. On the T-Mobile G1 phone, forexample, flipping the lid on the keyboard will trigger this, andon the Android emulator pressing Ctrl+F11 or the 7 or 9 keyon the keypad will do it.
In addition to managing your program’s life cycle, the Android frame-
work provides a number of building blocks that you use to create your
applications. Let’s take a look at those next.
2.3 Building Blocks
A few objects are defined in the Android SDK that every developer needs
to be familiar with. The most important ones are activities, intents,
services, and content providers. You’ll see several examples of them in
the rest of the book, so I’d like to briefly introduce them now.
Activities
An activity is a user interface screen. Applications can define one or
more activities to handle different phases of the program. As discussed
in Section 2.2, It’s Alive!, on page 35, each activity is responsible for
saving its own state so that it can be restored later as part of the
application life cycle. See Section 3.3, Creating the Opening Screen, on
page 46 for an example.
Intents
An intent is a mechanism for describing a specific action, such as “pick
a photo,” “phone home,” or “open the pod bay doors.” In Android, just
about everything goes through intents, so you have plenty of opportu-
nities to replace or reuse components. See Section 3.5, Implementing
an About Box, on page 58 for an example of an intent.

USING RESOURCES 40
For example, there is an intent for “send an email.” If your application
needs to send mail, you can invoke that intent. Or if you’re writing a
new email application, you can register an activity to handle that intent
and replace the standard mail program. The next time somebody tries
to send an email, they’ll get the option to use your program instead of
the standard one.
Services
A service is a task that runs in the background without the user’s direct
interaction, similar to a Unix daemon. For example, consider a music
player. The music may be started by an activity, but you want it to
keep playing even when the user has moved on to a different program.
So, the code that does the actual playing should be in a service. Later,
another activity may bind to that service and tell it to switch tracks
or stop playing. Android comes with many services built in, along with
convenient APIs to access them.
Content Providers
A content provider is a set of data wrapped up in a custom API to read
and write it. This is the best way to share global data between appli-
cations. For example, Google provides a content provider for contacts.
All the information there—names, addresses, phone numbers, and so
forth—can be shared by any application that wants to use it. See Sec-
tion 9.5, Using a ContentProvider, on page 189 for an example.
2.4 Using Resources
A resource is a localized text string, bitmap, or other small piece of
noncode information that your program needs. At build time all your
resources get compiled into your application.
You will create and store your resources in the res directory inside your
project. The Android resource compiler (aapt)5 processes resources
according to which subfolder they are in and the format of the file. For
example, PNG and JPG format bitmaps should go in the res/drawable
directory, and XML files that describe screen layouts should go in the
res/layout directory.
5. http://d.android.com/guide/developing/tools/aapt.html
SAFE AND SECURE 41
The resource compiler compresses and packs your resources and then
generates a class named R that contains identifiers you use to reference
those resources in your program. This is a little different from standard
Java resources, which are referenced by key strings. Doing it this way
allows Android to make sure all your references are valid and saves
space by not having to store all those resource keys. Eclipse uses a
similar method to store and reference the resources in Eclipse plug-ins.
We’ll see an example of the code to access a resource in Chapter 3,
Designing the User Interface, on page 44.
2.5 Safe and Secure
As mentioned earlier, every application runs in its own Linux process.
The hardware forbids one process from accessing another process’s
memory. Furthermore, every application is assigned a specific user ID.
Any files it creates cannot be read or written by other applications.
In addition, access to certain critical operations are restricted, and you
must specifically ask for permission to use them in a file named Android-
Manifest.xml. When the application is installed, the Package Manager
either grants or doesn’t grant the permissions based on certificates
and, if necessary, user prompts. Here are some of the most common
permissions you will need:
• INTERNET: Access the Internet.
• READ_CONTACTS: Read (but don’t write) the user’s contacts data.
• WRITE_CONTACTS: Write (but don’t read) the user’s contacts data.
• RECEIVE_SMS: Monitor incoming SMS (text) messages.
• ACCESS_COARSE_LOCATION: Use a coarse location provider such as
cell towers or wifi.
• ACCESS_FINE_LOCATION: Use a more accurate location provider such
as GPS.
For example, to monitor incoming SMS messages, you would specify
this in the manifest file:
<manifest xmlns:android="http://schemas.android.com/apk/res/android"
package="com.google.android.app.myapp" >
<uses-permission android:name="android.permission.RECEIVE_SMS" />
</manifest>
FAST -FORWARD >> 42
Android can even restrict access to entire parts of the system. Using
XML tags in AndroidManifest.xml, you can restrict who can start an activ-
ity, start or bind to a service, broadcast intents to a receiver, or access
the data in a content provider. This kind of control is beyond the scope
of this book, but if you want to learn more, read the online help for the
Android security model.6
2.6 Fast-Forward >>
The rest of this book will use all the concepts introduced in this chap-
ter. In Chapter 3, Designing the User Interface, on page 44, we’ll use
activities and life-cycle methods to define a sample application. Chap-
ter 4, Exploring 2D Graphics, on page 73 will use some of the graphics
classes in the Android native libraries. Media codecs will be explored
in Chapter 5, Multimedia, on page 104, and content providers will be
covered in Chapter 9, Putting SQL to Work, on page 175.
6. http://d.android.com/guide/topics/security/security.html

Part II
Android Basics
43

Chapter 3
Designing the User InterfaceIn Chapter 1, Quick Start, on page 20, we used the Android Eclipse
plug-in to put together a simple “Hello, Android” program in a few min-
utes. In Part II, we’ll create a more substantial example: a Sudoku
game. By gradually adding features to the game, you’ll learn about
many aspects of Android programming. We’ll start with the user inter-
face.
You can find all the sample code used in this book at http://pragprog.
com/titles/eband. If you’re reading the PDF version of this book, you can
click the little gray rectangle before the code listings to download that
file directly.
3.1 Introducing the Sudoku Example
Sudoku makes a great sample program for Android because the game
itself is so simple. You have a grid of eighty-one tiles (nine across and
nine down), and you try to fill them in with numbers so that each col-
umn, each row, and each of the three-by-three boxes contains the num-
bers 1 through 9 only once. When the game starts, some of the numbers
(the givens) are already filled in. All the player has to do is supply the
rest. A true Sudoku puzzle has only one unique solution.
Sudoku is usually played with pencil and paper, but computerized ver-
sions are quite popular too. With the paper version, it’s easy to make
a mistake early on, and when that happens, you have to go back and
erase most of your work. In the Android version, you can change the
tiles as often as you like without having to brush away all those pesky
eraser shavings.

DESIGNING BY DECLARATION 45
Sudoku Trivia
Most people think Sudoku is some kind of ancient Japanesegame, but it’s not. Although similar puzzles can be tracedto 19th-century French magazines, most experts credit retiredAmerican architect Howard Garns with the invention of mod-ern Sudoku. Number Place, as it was known at the time, wasfirst published in the United States in 1979 by Dell Magazines.
Android Sudoku (see Figure 3.1, on the following page) will also offer a
few hints to take some of the grunt work out of puzzle solving. At one
extreme, it could just solve the puzzle for you, but that wouldn’t be any
fun, would it? So, we have to balance the hints against the challenge
and not make it too easy.
3.2 Designing by Declaration
User interfaces can be designed using one of two methods: procedural
and declarative. Procedural simply means in code. For example, when
you’re programming a Swing application, you write Java code to cre-
ate and manipulate all the user interface objects such as JFrame and
JButton. Thus, Swing is procedural.
Declarative design, on the other hand, does not involve any code. When
you’re designing a simple web page, you use HTML, a markup language
based on XML that describes what you want to see on the page, not how
you want to do it. HTML is declarative.
Android tries to straddle the gap between the procedural and declar-
ative worlds by letting you create user interfaces in either style. You
can stay almost entirely in Java code, or you can stay almost entirely
in XML descriptors. If you look up the documentation for any Android
user interface component, you’ll see both the Java APIs and the corre-
sponding declarative XML attributes that do the same thing.
Which should you use? Either way is valid, but Google’s advice is to use
declarative XML as much as possible. The XML code is often shorter
and easier to understand than the corresponding Java code, and it’s
less likely to change in future versions.

CREATING THE OPENING SCREEN 46
Figure 3.1: The Sudoku example program for Android
Now let’s see how we can use this information to create the Sudoku
opening screen.
3.3 Creating the Opening Screen
We’ll start with a skeleton Android program created by the Eclipse plug-
in. Just as you did in Section 1.2, Creating Your First Program, on
page 24, create a new “Hello, Android” project, but this time use the
following values:
Project name: Sudoku
Build Target: Android 1.5
Application name: Sudoku
Package name: org.example.sudoku
Create Activity: Sudoku
In a real program, of course, you would use your own names here. The
package name is particularly important. Each application in the system

CREATING THE OPENING SCREEN 47
must have a unique package name. Once you choose a package name,
it’s a little tricky to change it because it’s used in so many places.
I like to keep the Android emulator window up all the time and run the
program after every change, since it takes only a few seconds. If you
do that and run the program now, you’ll see a blank screen that just
contains the words “Hello World, Sudoku.” The first order of business is
to change that into an opening screen for the game, with buttons to let
the player start a new game, continue a previous one, get information
about the game, or exit. So, what do we have to change to do that?
As discussed in Chapter 2, Key Concepts, on page 30, Android applica-
tions are a loose collection of activities, each of which define a user
interface screen. When you create the Sudoku project, the Android
plug-in makes a single activity for you in Sudoku.java:
Download Sudokuv0/src/org/example/sudoku/Sudoku.java
package org.example.sudoku;
import android.app.Activity;
import android.os.Bundle;
public class Sudoku extends Activity {
/** Called when the activity is first created. */
@Override
public void onCreate(Bundle savedInstanceState) {
super.onCreate(savedInstanceState);
setContentView(R.layout.main);
}
}
Android calls the onCreate( ) method of your activity to initialize it. The
call to setContentView( ) fills in the contents of the activity’s screen with
an Android view widget.
We could have used several lines of Java code, and possibly another
class or two, to define the user interface procedurally. But instead,
the plug-in chose the declarative route, and we’ll continue along those
lines. In the previous code, R.layout.main is a resource identifier that
refers to the main.xml file in the res/layout directory (see Figure 3.2, on
the next page). main.xml declares the user interface in XML, so that’s
the file we need to modify. At runtime, Android parses and instanti-
ates (inflates) the resource defined there and sets it as the view for the
current activity.
It’s important to note that the R class is managed automatically by the
Android Eclipse plug-in. When you put a file anywhere in the res direc-
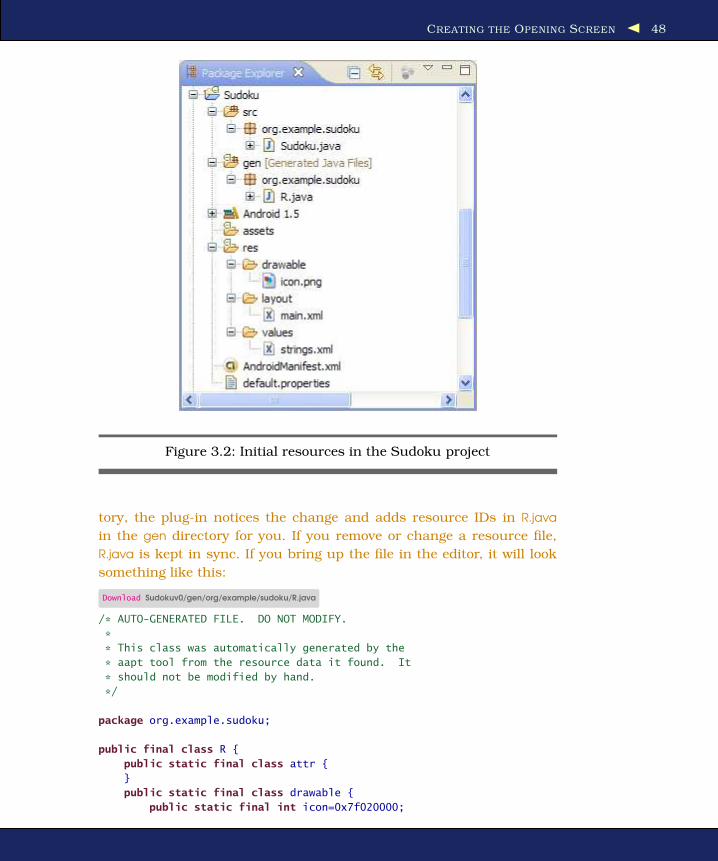
CREATING THE OPENING SCREEN 48
Figure 3.2: Initial resources in the Sudoku project
tory, the plug-in notices the change and adds resource IDs in R.java
in the gen directory for you. If you remove or change a resource file,
R.java is kept in sync. If you bring up the file in the editor, it will look
something like this:
Download Sudokuv0/gen/org/example/sudoku/R.java
/* AUTO-GENERATED FILE. DO NOT MODIFY.
*
* This class was automatically generated by the
* aapt tool from the resource data it found. It
* should not be modified by hand.
*/
package org.example.sudoku;
public final class R {
public static final class attr {
}
public static final class drawable {
public static final int icon=0x7f020000;
CREATING THE OPENING SCREEN 49
Joe Asks. . .
Why Does Android Use XML? Isn’t That Inefficient?
Android is optimized for mobile devices with limited memoryand horsepower, so you may find it strange that it uses XML sopervasively. After all, XML is a verbose, human-readable formatnot known for its brevity or efficiency, right?
Although you see XML when writing your program, the Eclipseplug-in invokes the Android resource compiler, aapt, to prepro-cess the XML into a compressed binary format. It is this format,not the original XML text, that is stored on the device.
}
public static final class layout {
public static final int main=0x7f030000;
}
public static final class string {
public static final int app_name=0x7f040001;
public static final int hello=0x7f040000;
}
}
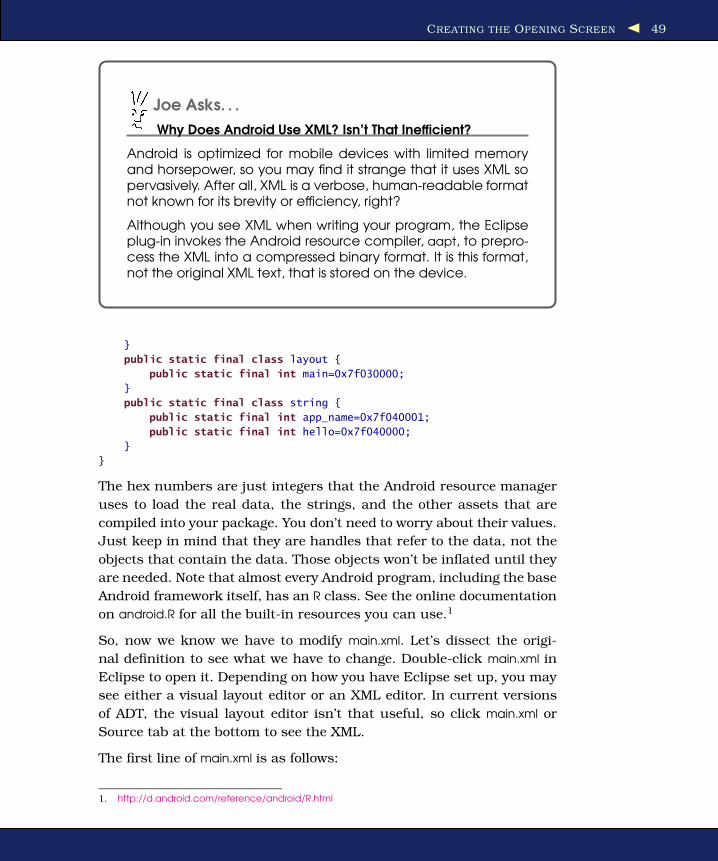
The hex numbers are just integers that the Android resource manager
uses to load the real data, the strings, and the other assets that are
compiled into your package. You don’t need to worry about their values.
Just keep in mind that they are handles that refer to the data, not the
objects that contain the data. Those objects won’t be inflated until they
are needed. Note that almost every Android program, including the base
Android framework itself, has an R class. See the online documentation
on android.R for all the built-in resources you can use.1
So, now we know we have to modify main.xml. Let’s dissect the origi-
nal definition to see what we have to change. Double-click main.xml in
Eclipse to open it. Depending on how you have Eclipse set up, you may
see either a visual layout editor or an XML editor. In current versions
of ADT, the visual layout editor isn’t that useful, so click main.xml or
Source tab at the bottom to see the XML.
The first line of main.xml is as follows:
1. http://d.android.com/reference/android/R.html
CREATING THE OPENING SCREEN 50
<?xml version="1.0" encoding="utf-8"?>
All Android XML files start with this line. It just tells the compiler that
the file is XML format, in UTF-8 encoding. UTF-8 is almost exactly like
regular ASCII text, except it has escape codes for non-ASCII characters
such as Japanese glyphs.
Next we see a reference to <LinearLayout>:
<LinearLayout
xmlns:android="http://schemas.android.com/apk/res/android"
android:orientation="vertical"
android:layout_width="fill_parent"
android:layout_height="fill_parent">
<!-- ... -->
</LinearLayout>
A layout is a container for one or more child objects and a behavior to
position them on the screen within the rectangle of the parent object.
Here is a list of the most common layouts provided by Android:
• FrameLayout: Arranges its children so they all start at the top left
of the screen. This is used for tabbed views and image switchers.
• LinearLayout: Arranges its children in a single column or row. This
is the most common layout you will use.
• RelativeLayout: Arranges its children in relation to each other or to
the parent. This is often used in forms.
• TableLayout: Arranges its children in rows and columns, similar to
an HTML table.
Some parameters are common to all layouts:
xmlns:android="http://schemas.android.com/apk/res/android"
Defines the XML namespace for Android. You should define this
once, on the first XML tag in the file.
android:layout_width="fill_parent", android:layout_height="fill_parent"
Takes up the entire width and height of the parent (in this case,
the window). Possible values are fill_parent and wrap_content.
Inside the <LinearLayout> tag you’ll find one child widget:
<TextView
android:layout_width="fill_parent"
android:layout_height="wrap_content"
android:text="@string/hello" />
This defines a simple text label. Let’s replace that with some different
text and a few buttons. Here’s our first attempt:
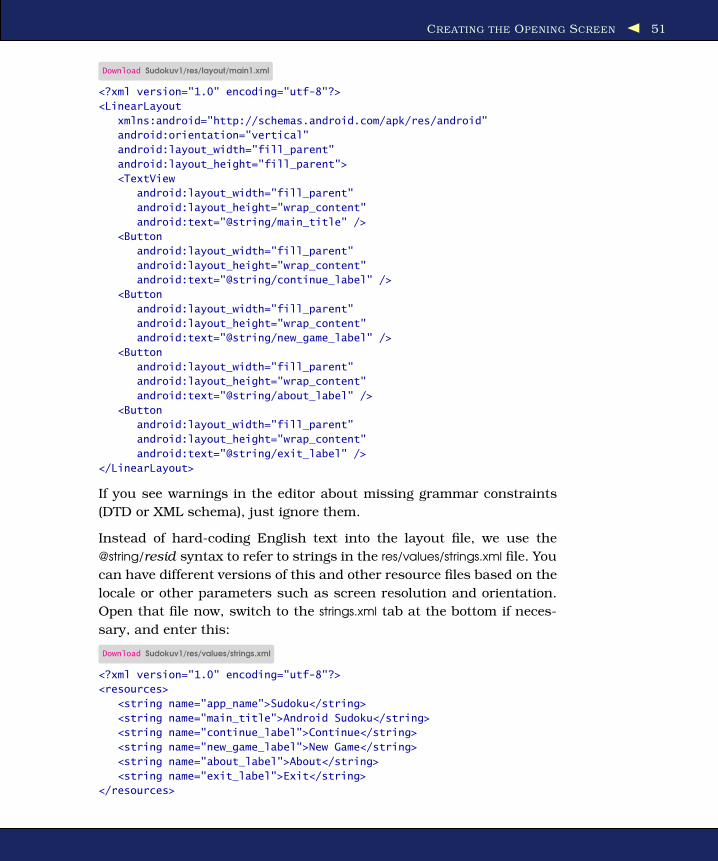
CREATING THE OPENING SCREEN 51
Download Sudokuv1/res/layout/main1.xml
<?xml version="1.0" encoding="utf-8"?>
<LinearLayout
xmlns:android="http://schemas.android.com/apk/res/android"
android:orientation="vertical"
android:layout_width="fill_parent"
android:layout_height="fill_parent">
<TextView
android:layout_width="fill_parent"
android:layout_height="wrap_content"
android:text="@string/main_title" />
<Button
android:layout_width="fill_parent"
android:layout_height="wrap_content"
android:text="@string/continue_label" />
<Button
android:layout_width="fill_parent"
android:layout_height="wrap_content"
android:text="@string/new_game_label" />
<Button
android:layout_width="fill_parent"
android:layout_height="wrap_content"
android:text="@string/about_label" />
<Button
android:layout_width="fill_parent"
android:layout_height="wrap_content"
android:text="@string/exit_label" />
</LinearLayout>
If you see warnings in the editor about missing grammar constraints
(DTD or XML schema), just ignore them.
Instead of hard-coding English text into the layout file, we use the
@string/resid syntax to refer to strings in the res/values/strings.xml file. You
can have different versions of this and other resource files based on the
locale or other parameters such as screen resolution and orientation.
Open that file now, switch to the strings.xml tab at the bottom if neces-
sary, and enter this:
Download Sudokuv1/res/values/strings.xml
<?xml version="1.0" encoding="utf-8"?>
<resources>
<string name="app_name">Sudoku</string>
<string name="main_title">Android Sudoku</string>
<string name="continue_label">Continue</string>
<string name="new_game_label">New Game</string>
<string name="about_label">About</string>
<string name="exit_label">Exit</string>
</resources>
CREATING THE OPENING SCREEN 52
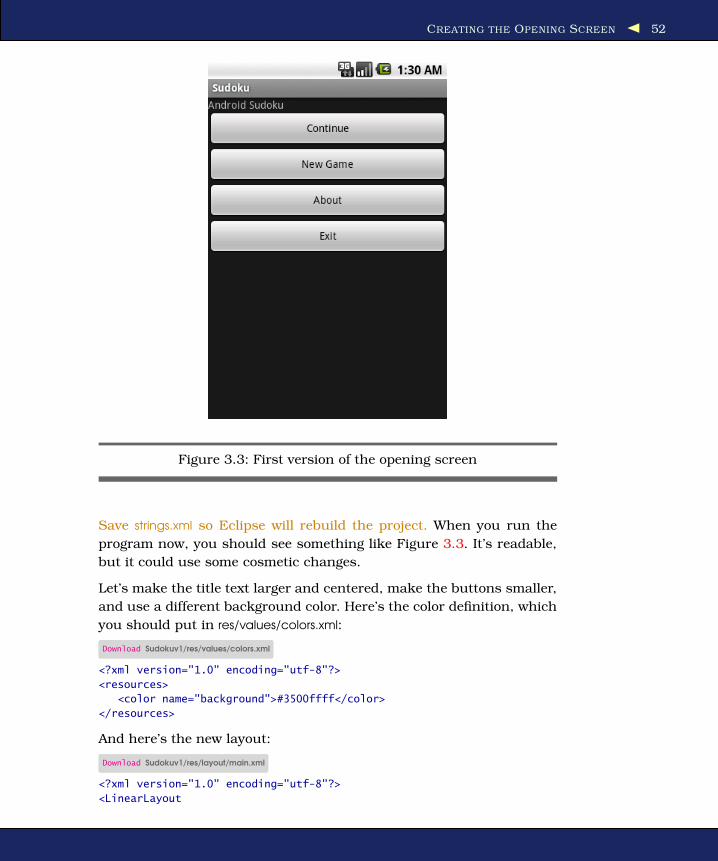
Figure 3.3: First version of the opening screen
Save strings.xml so Eclipse will rebuild the project. When you run the
program now, you should see something like Figure 3.3. It’s readable,
but it could use some cosmetic changes.
Let’s make the title text larger and centered, make the buttons smaller,
and use a different background color. Here’s the color definition, which
you should put in res/values/colors.xml:
Download Sudokuv1/res/values/colors.xml
<?xml version="1.0" encoding="utf-8"?>
<resources>
<color name="background">#3500ffff</color>
</resources>
And here’s the new layout:
Download Sudokuv1/res/layout/main.xml
<?xml version="1.0" encoding="utf-8"?>
<LinearLayout
CREATING THE OPENING SCREEN 53
xmlns:android="http://schemas.android.com/apk/res/android"
android:background="@color/background"
android:layout_height="fill_parent"
android:layout_width="fill_parent"
android:padding="30dip"
android:orientation="horizontal">
<LinearLayout
android:orientation="vertical"
android:layout_height="wrap_content"
android:layout_width="fill_parent"
android:layout_gravity="center">
<TextView
android:text="@string/main_title"
android:layout_height="wrap_content"
android:layout_width="wrap_content"
android:layout_gravity="center"
android:layout_marginBottom="25dip"
android:textSize="24.5sp" />
<Button
android:id="@+id/continue_button"
android:layout_width="fill_parent"
android:layout_height="wrap_content"
android:text="@string/continue_label" />
<Button
android:id="@+id/new_button"
android:layout_width="fill_parent"
android:layout_height="wrap_content"
android:text="@string/new_game_label" />
<Button
android:id="@+id/about_button"
android:layout_width="fill_parent"
android:layout_height="wrap_content"
android:text="@string/about_label" />
<Button
android:id="@+id/exit_button"
android:layout_width="fill_parent"
android:layout_height="wrap_content"
android:text="@string/exit_label" />
</LinearLayout>
</LinearLayout>
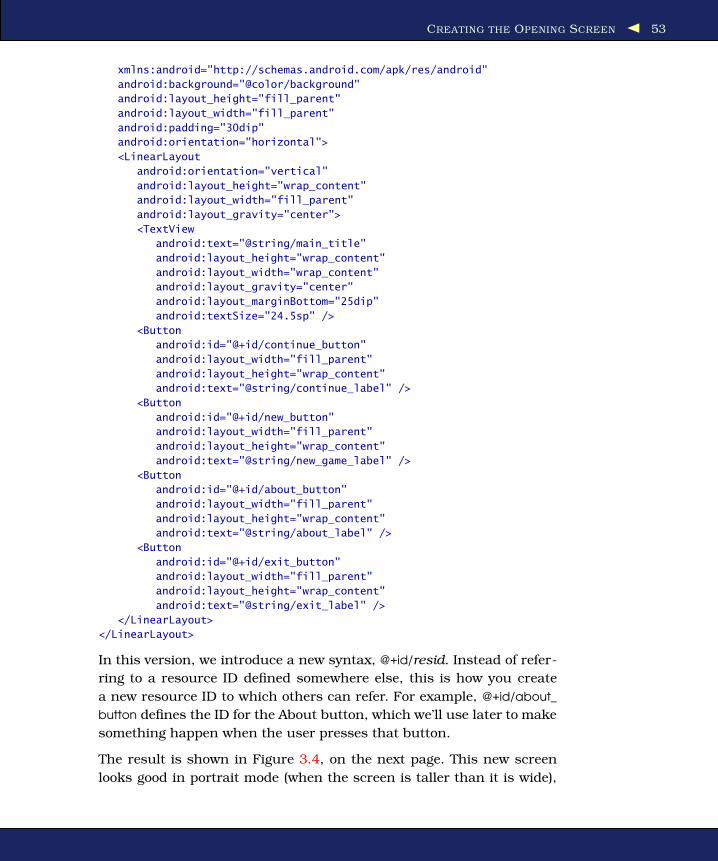
In this version, we introduce a new syntax, @+id/resid. Instead of refer-
ring to a resource ID defined somewhere else, this is how you create
a new resource ID to which others can refer. For example, @+id/about_
button defines the ID for the About button, which we’ll use later to make
something happen when the user presses that button.
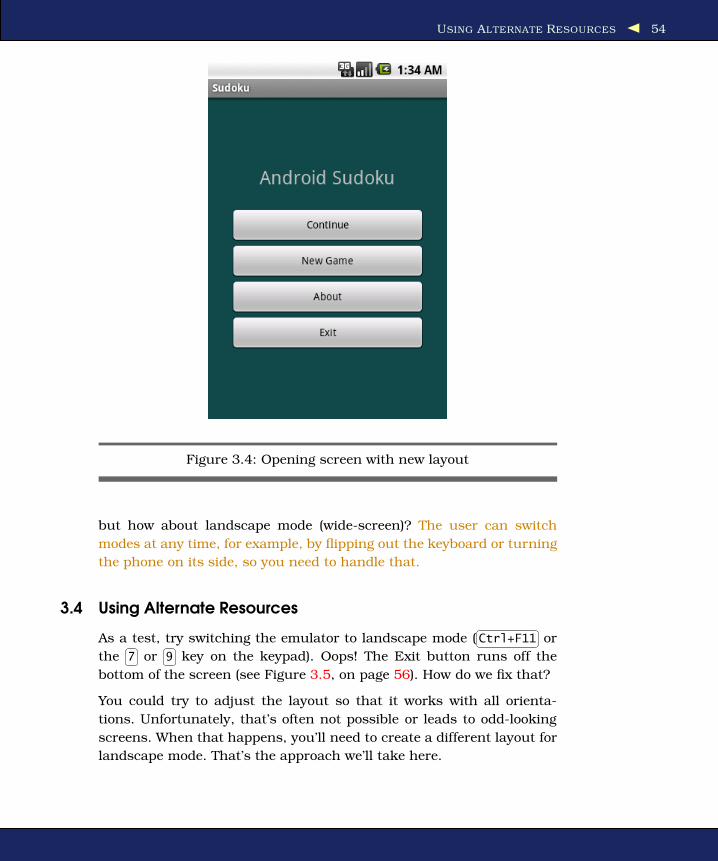
The result is shown in Figure 3.4, on the next page. This new screen
looks good in portrait mode (when the screen is taller than it is wide),
USING ALTERNATE RESOURCES 54
Figure 3.4: Opening screen with new layout
but how about landscape mode (wide-screen)? The user can switch
modes at any time, for example, by flipping out the keyboard or turning
the phone on its side, so you need to handle that.
3.4 Using Alternate Resources
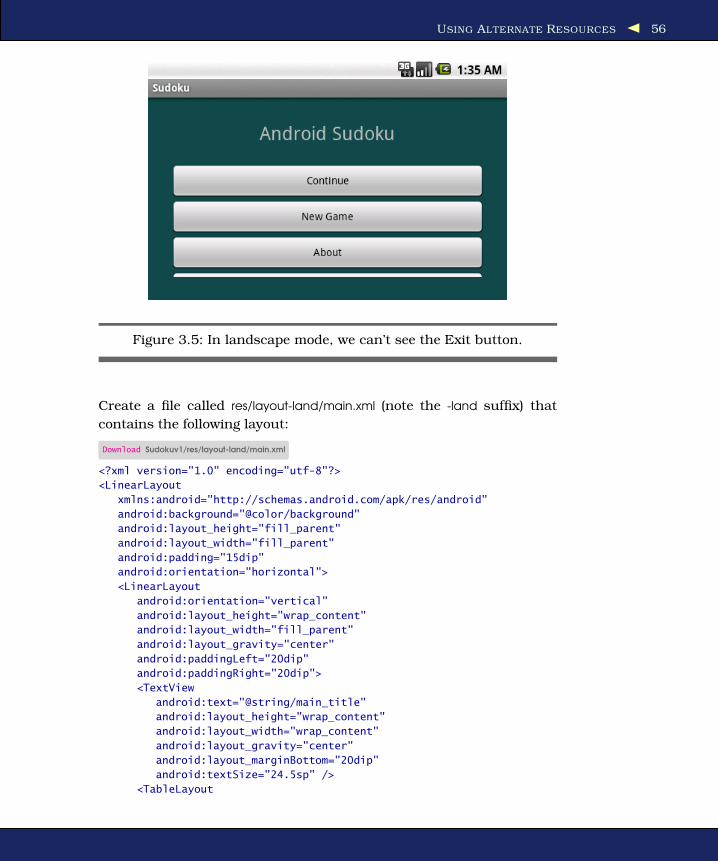
As a test, try switching the emulator to landscape mode ( Ctrl+F11 or
the 7 or 9 key on the keypad). Oops! The Exit button runs off the
bottom of the screen (see Figure 3.5, on page 56). How do we fix that?
You could try to adjust the layout so that it works with all orienta-
tions. Unfortunately, that’s often not possible or leads to odd-looking
screens. When that happens, you’ll need to create a different layout for
landscape mode. That’s the approach we’ll take here.
USING ALTERNATE RESOURCES 55
Joe Asks. . .
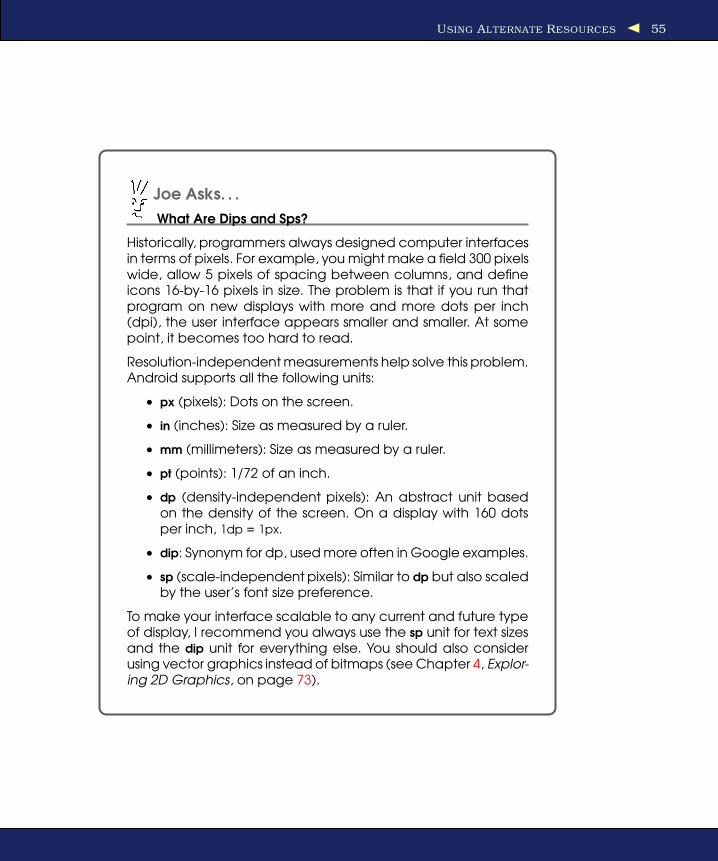
What Are Dips and Sps?
Historically, programmers always designed computer interfacesin terms of pixels. For example, you might make a field 300 pixelswide, allow 5 pixels of spacing between columns, and defineicons 16-by-16 pixels in size. The problem is that if you run thatprogram on new displays with more and more dots per inch(dpi), the user interface appears smaller and smaller. At somepoint, it becomes too hard to read.
Resolution-independent measurements help solve this problem.Android supports all the following units:
• px (pixels): Dots on the screen.
• in (inches): Size as measured by a ruler.
• mm (millimeters): Size as measured by a ruler.
• pt (points): 1/72 of an inch.
• dp (density-independent pixels): An abstract unit basedon the density of the screen. On a display with 160 dotsper inch, 1dp = 1px.
• dip: Synonym for dp, used more often in Google examples.
• sp (scale-independent pixels): Similar to dp but also scaledby the user’s font size preference.
To make your interface scalable to any current and future typeof display, I recommend you always use the sp unit for text sizesand the dip unit for everything else. You should also considerusing vector graphics instead of bitmaps (see Chapter 4, Explor-ing 2D Graphics, on page 73).
USING ALTERNATE RESOURCES 56
Figure 3.5: In landscape mode, we can’t see the Exit button.
Create a file called res/layout-land/main.xml (note the -land suffix) that
contains the following layout:
Download Sudokuv1/res/layout-land/main.xml
<?xml version="1.0" encoding="utf-8"?>
<LinearLayout
xmlns:android="http://schemas.android.com/apk/res/android"
android:background="@color/background"
android:layout_height="fill_parent"
android:layout_width="fill_parent"
android:padding="15dip"
android:orientation="horizontal">
<LinearLayout
android:orientation="vertical"
android:layout_height="wrap_content"
android:layout_width="fill_parent"
android:layout_gravity="center"
android:paddingLeft="20dip"
android:paddingRight="20dip">
<TextView
android:text="@string/main_title"
android:layout_height="wrap_content"
android:layout_width="wrap_content"
android:layout_gravity="center"
android:layout_marginBottom="20dip"
android:textSize="24.5sp" />
<TableLayout

USING ALTERNATE RESOURCES 57
Figure 3.6: Using a landscape-specific layout lets us see all the buttons.
android:layout_height="wrap_content"
android:layout_width="wrap_content"
android:layout_gravity="center"
android:stretchColumns="*">
<TableRow>
<Button
android:id="@+id/continue_button"
android:text="@string/continue_label" />
<Button
android:id="@+id/new_button"
android:text="@string/new_game_label" />
</TableRow>
<TableRow>
<Button
android:id="@+id/about_button"
android:text="@string/about_label" />
<Button
android:id="@+id/exit_button"
android:text="@string/exit_label" />
</TableRow>
</TableLayout>
</LinearLayout>
</LinearLayout>
This uses a TableLayout to create two columns of buttons. Now run the
program again (see Figure 3.6). Even in landscape mode, all the buttons
are visible.
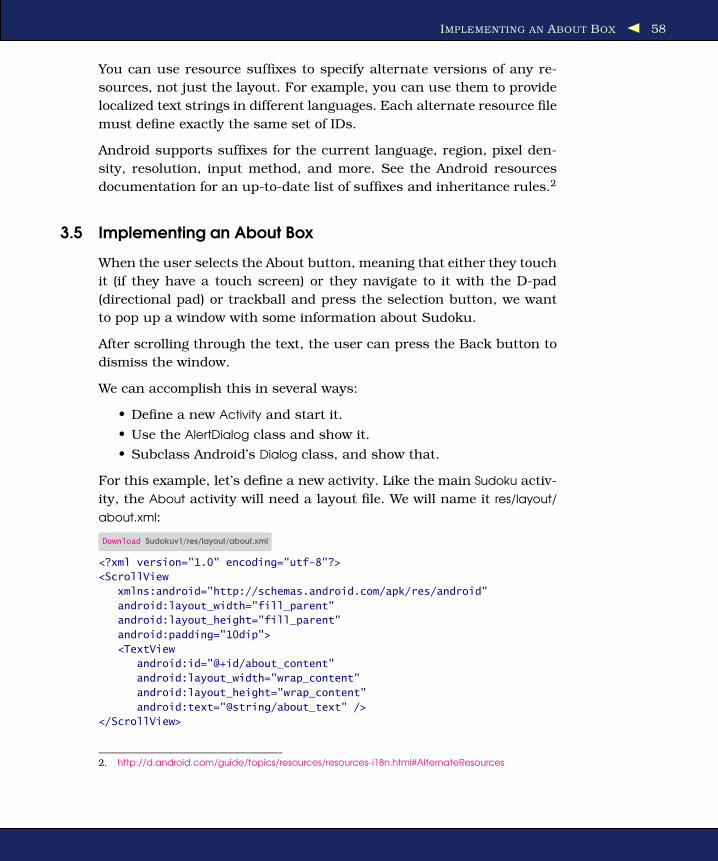
IMPLEMENTING AN ABOUT BOX 58
You can use resource suffixes to specify alternate versions of any re-
sources, not just the layout. For example, you can use them to provide
localized text strings in different languages. Each alternate resource file
must define exactly the same set of IDs.
Android supports suffixes for the current language, region, pixel den-
sity, resolution, input method, and more. See the Android resources
documentation for an up-to-date list of suffixes and inheritance rules.2
3.5 Implementing an About Box
When the user selects the About button, meaning that either they touch
it (if they have a touch screen) or they navigate to it with the D-pad
(directional pad) or trackball and press the selection button, we want
to pop up a window with some information about Sudoku.
After scrolling through the text, the user can press the Back button to
dismiss the window.
We can accomplish this in several ways:
• Define a new Activity and start it.
• Use the AlertDialog class and show it.
• Subclass Android’s Dialog class, and show that.
For this example, let’s define a new activity. Like the main Sudoku activ-
ity, the About activity will need a layout file. We will name it res/layout/
about.xml:
Download Sudokuv1/res/layout/about.xml
<?xml version="1.0" encoding="utf-8"?>
<ScrollView
xmlns:android="http://schemas.android.com/apk/res/android"
android:layout_width="fill_parent"
android:layout_height="fill_parent"
android:padding="10dip">
<TextView
android:id="@+id/about_content"
android:layout_width="wrap_content"
android:layout_height="wrap_content"
android:text="@string/about_text" />
</ScrollView>
2. http://d.android.com/guide/topics/resources/resources-i18n.html#AlternateResources
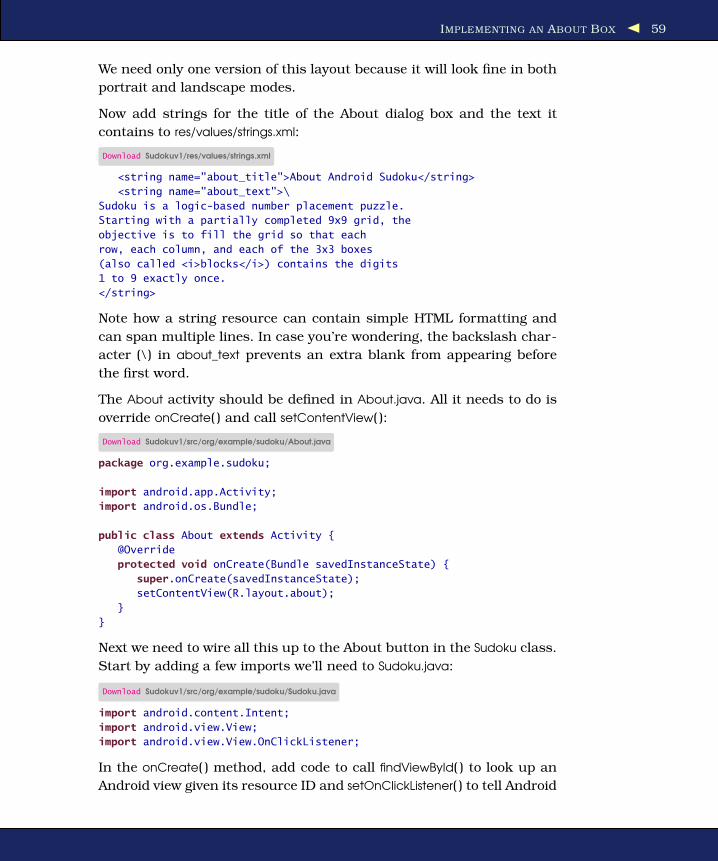
IMPLEMENTING AN ABOUT BOX 59
We need only one version of this layout because it will look fine in both
portrait and landscape modes.
Now add strings for the title of the About dialog box and the text it
contains to res/values/strings.xml:
Download Sudokuv1/res/values/strings.xml
<string name="about_title">About Android Sudoku</string>
<string name="about_text">\
Sudoku is a logic-based number placement puzzle.
Starting with a partially completed 9x9 grid, the
objective is to fill the grid so that each
row, each column, and each of the 3x3 boxes
(also called <i>blocks</i>) contains the digits
1 to 9 exactly once.
</string>
Note how a string resource can contain simple HTML formatting and
can span multiple lines. In case you’re wondering, the backslash char-
acter (\) in about_text prevents an extra blank from appearing before
the first word.
The About activity should be defined in About.java. All it needs to do is
override onCreate( ) and call setContentView( ):
Download Sudokuv1/src/org/example/sudoku/About.java
package org.example.sudoku;
import android.app.Activity;
import android.os.Bundle;
public class About extends Activity {
@Override
protected void onCreate(Bundle savedInstanceState) {
super.onCreate(savedInstanceState);
setContentView(R.layout.about);
}
}
Next we need to wire all this up to the About button in the Sudoku class.
Start by adding a few imports we’ll need to Sudoku.java:
Download Sudokuv1/src/org/example/sudoku/Sudoku.java
import android.content.Intent;
import android.view.View;
import android.view.View.OnClickListener;
In the onCreate( ) method, add code to call findViewById( ) to look up an
Android view given its resource ID and setOnClickListener( ) to tell Android

IMPLEMENTING AN ABOUT BOX 60
which object to tickle when the user touches or clicks the view:
Download Sudokuv1/src/org/example/sudoku/Sudoku.java
/** Called when the activity is first created. */
@Override
public void onCreate(Bundle savedInstanceState) {
super.onCreate(savedInstanceState);
setContentView(R.layout.main);
// Set up click listeners for all the buttons
View continueButton = findViewById(R.id.continue_button);
continueButton.setOnClickListener(this);
View newButton = findViewById(R.id.new_button);
newButton.setOnClickListener(this);
View aboutButton = findViewById(R.id.about_button);
aboutButton.setOnClickListener(this);
View exitButton = findViewById(R.id.exit_button);
exitButton.setOnClickListener(this);
}
While we’re in here, we do the same for all the buttons. Recall that
constants like R.id.about_button are created by the Eclipse plug-in in
R.java when it sees @+id/about_button in res/layout/main.xml.
The code uses this as the receiver, so the Sudoku class needs to imple-
ment the OnClickListener interface and define a method called onClick:3
Download Sudokuv1/src/org/example/sudoku/Sudoku.java
public class Sudoku extends Activity implements OnClickListener {
// ...
public void onClick(View v) {
switch (v.getId()) {
case R.id.about_button:
Intent i = new Intent(this, About.class);
startActivity(i);
break;
// More buttons go here (if any) ...
}
}
}
To start an activity in Android, we first need to create an instance of
the Intent class. There are two kinds of intents: public (named) intents
that are registered with the system and can be called from any appli-
cation and private (anonymous) intents that are used within a single
application. For this example, we just need the latter kind.
3. We could have used an anonymous inner class to handle clicks, but according to the
Android developers, every new inner class takes up an extra 1KB of memory.

IMPLEMENTING AN ABOUT BOX 61
Figure 3.7: Mountain View, we have a problem
If you run the program and select the About button now, you will get
an error (see Figure 3.7). What happened?
We forgot one important step: every activity needs to be declared in
AndroidManifest.xml. To do that, double-click the file to open it, switch
to XML mode if necessary by selecting the AndroidManifest.xml tab at the
bottom, and add a new <activity> tag after the closing tag of the first
one:
Download Sudokuv1/AndroidManifest.first.xml
<activity android:name=".About"
android:label="@string/about_title">
</activity>
Now if you save the manifest, run the program again, and select the
About button, you should see something like Figure 3.8, on the fol-
lowing page. Press the Back button ( Esc on the emulator) when you’re
done.
That looks OK, but wouldn’t it be nice if we could see the initial screen
behind the About text?
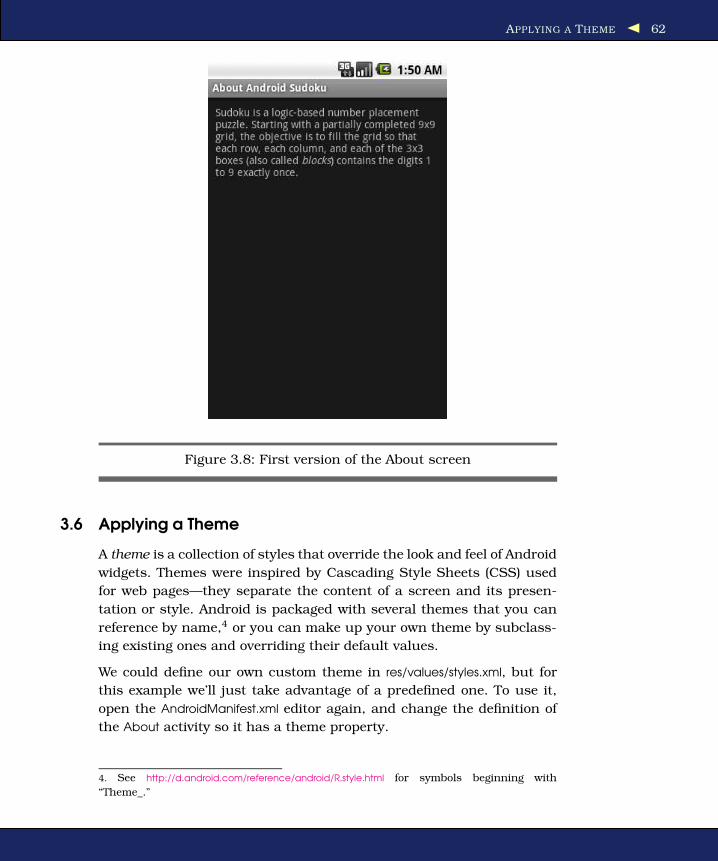
APPLYING A THEME 62
Figure 3.8: First version of the About screen
3.6 Applying a Theme
A theme is a collection of styles that override the look and feel of Android
widgets. Themes were inspired by Cascading Style Sheets (CSS) used
for web pages—they separate the content of a screen and its presen-
tation or style. Android is packaged with several themes that you can
reference by name,4 or you can make up your own theme by subclass-
ing existing ones and overriding their default values.
We could define our own custom theme in res/values/styles.xml, but for
this example we’ll just take advantage of a predefined one. To use it,
open the AndroidManifest.xml editor again, and change the definition of
the About activity so it has a theme property.
4. See http://d.android.com/reference/android/R.style.html for symbols beginning with
“Theme_.”

ADDING A MENU 63
Figure 3.9: About screen after applying the dialog box theme
Download Sudokuv1/AndroidManifest.xml
<activity android:name=".About"
android:label="@string/about_title"
android:theme="@android:style/Theme.Dialog">
</activity>
The @android: prefix in front of the style name means this is a refer-
ence to a resource defined by Android, not one that is defined in your
program.
Running the program again, the About box now looks like Figure 3.9.
Many programs need menus and options, so the next two sections will
show you how to define them.
3.7 Adding a Menu
Android supports two kinds of menus. First, there is the menu you get
when you press the physical Menu button. Second, there is a context
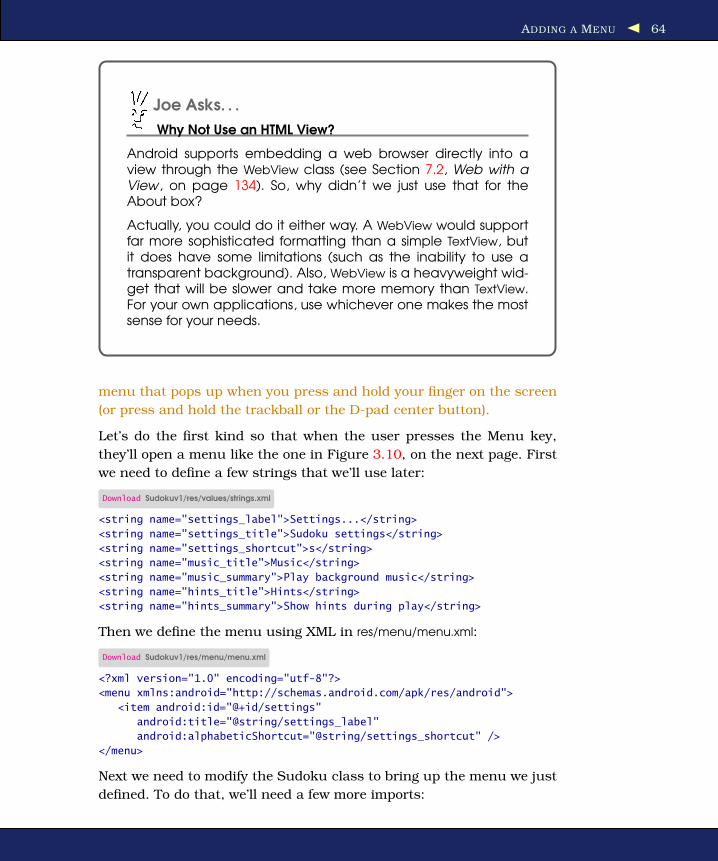
ADDING A MENU 64
Joe Asks. . .
Why Not Use an HTML View?
Android supports embedding a web browser directly into aview through the WebView class (see Section 7.2, Web with aView , on page 134). So, why didn’t we just use that for theAbout box?
Actually, you could do it either way. A WebView would supportfar more sophisticated formatting than a simple TextView, butit does have some limitations (such as the inability to use atransparent background). Also, WebView is a heavyweight wid-get that will be slower and take more memory than TextView.For your own applications, use whichever one makes the mostsense for your needs.
menu that pops up when you press and hold your finger on the screen
(or press and hold the trackball or the D-pad center button).
Let’s do the first kind so that when the user presses the Menu key,
they’ll open a menu like the one in Figure 3.10, on the next page. First
we need to define a few strings that we’ll use later:
Download Sudokuv1/res/values/strings.xml
<string name="settings_label">Settings...</string>
<string name="settings_title">Sudoku settings</string>
<string name="settings_shortcut">s</string>
<string name="music_title">Music</string>
<string name="music_summary">Play background music</string>
<string name="hints_title">Hints</string>
<string name="hints_summary">Show hints during play</string>
Then we define the menu using XML in res/menu/menu.xml:
Download Sudokuv1/res/menu/menu.xml
<?xml version="1.0" encoding="utf-8"?>
<menu xmlns:android="http://schemas.android.com/apk/res/android">
<item android:id="@+id/settings"
android:title="@string/settings_label"
android:alphabeticShortcut="@string/settings_shortcut" />
</menu>
Next we need to modify the Sudoku class to bring up the menu we just
defined. To do that, we’ll need a few more imports:

ADDING A MENU 65
Figure 3.10: Press the Menu button to open the menu.
Download Sudokuv1/src/org/example/sudoku/Sudoku.java
import android.view.Menu;
import android.view.MenuInflater;
import android.view.MenuItem;
Then we override the Sudoku.onCreateOptionsMenu( ) method:
Download Sudokuv1/src/org/example/sudoku/Sudoku.java
@Override
public boolean onCreateOptionsMenu(Menu menu) {
super.onCreateOptionsMenu(menu);
MenuInflater inflater = getMenuInflater();
inflater.inflate(R.menu.menu, menu);
return true;
}
getMenuInflater( ) returns an instance of MenuInflater that we use to read
the menu definition from XML and turns it into a real view.
When the user selects any menu item, onOptionsItemSelected( ) will be
called. Here’s the definition for that method:
Download Sudokuv1/src/org/example/sudoku/Sudoku.java
@Override
public boolean onOptionsItemSelected(MenuItem item) {
switch (item.getItemId()) {
case R.id.settings:
startActivity(new Intent(this, Settings.class));
return true;
// More items go here (if any) ...
}
return false;
}
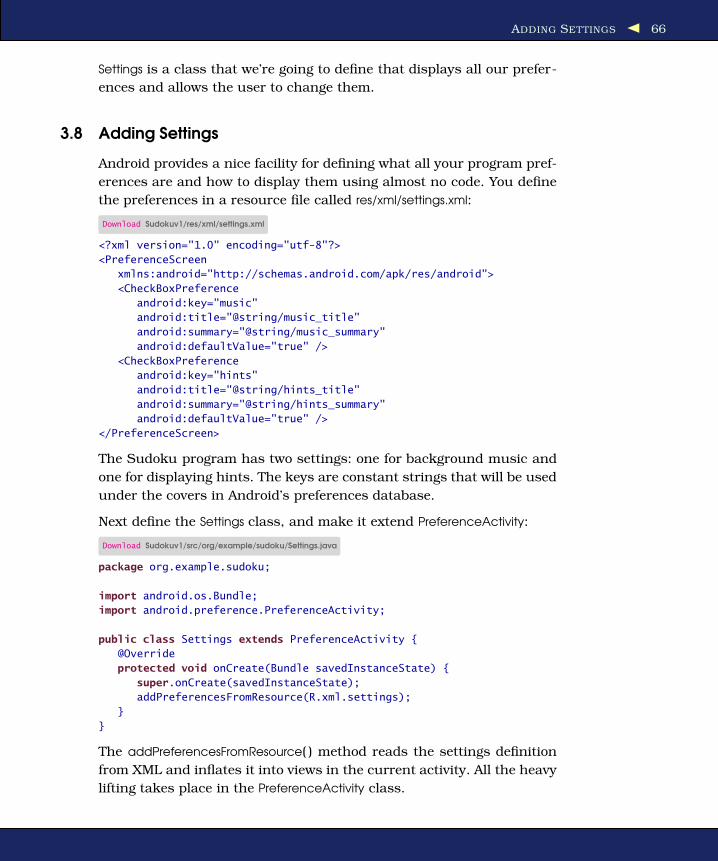
ADDING SETTINGS 66
Settings is a class that we’re going to define that displays all our prefer-
ences and allows the user to change them.
3.8 Adding Settings
Android provides a nice facility for defining what all your program pref-
erences are and how to display them using almost no code. You define
the preferences in a resource file called res/xml/settings.xml:
Download Sudokuv1/res/xml/settings.xml
<?xml version="1.0" encoding="utf-8"?>
<PreferenceScreen
xmlns:android="http://schemas.android.com/apk/res/android">
<CheckBoxPreference
android:key="music"
android:title="@string/music_title"
android:summary="@string/music_summary"
android:defaultValue="true" />
<CheckBoxPreference
android:key="hints"
android:title="@string/hints_title"
android:summary="@string/hints_summary"
android:defaultValue="true" />
</PreferenceScreen>
The Sudoku program has two settings: one for background music and
one for displaying hints. The keys are constant strings that will be used
under the covers in Android’s preferences database.
Next define the Settings class, and make it extend PreferenceActivity:
Download Sudokuv1/src/org/example/sudoku/Settings.java
package org.example.sudoku;
import android.os.Bundle;
import android.preference.PreferenceActivity;
public class Settings extends PreferenceActivity {
@Override
protected void onCreate(Bundle savedInstanceState) {
super.onCreate(savedInstanceState);
addPreferencesFromResource(R.xml.settings);
}
}
The addPreferencesFromResource( ) method reads the settings definition
from XML and inflates it into views in the current activity. All the heavy
lifting takes place in the PreferenceActivity class.
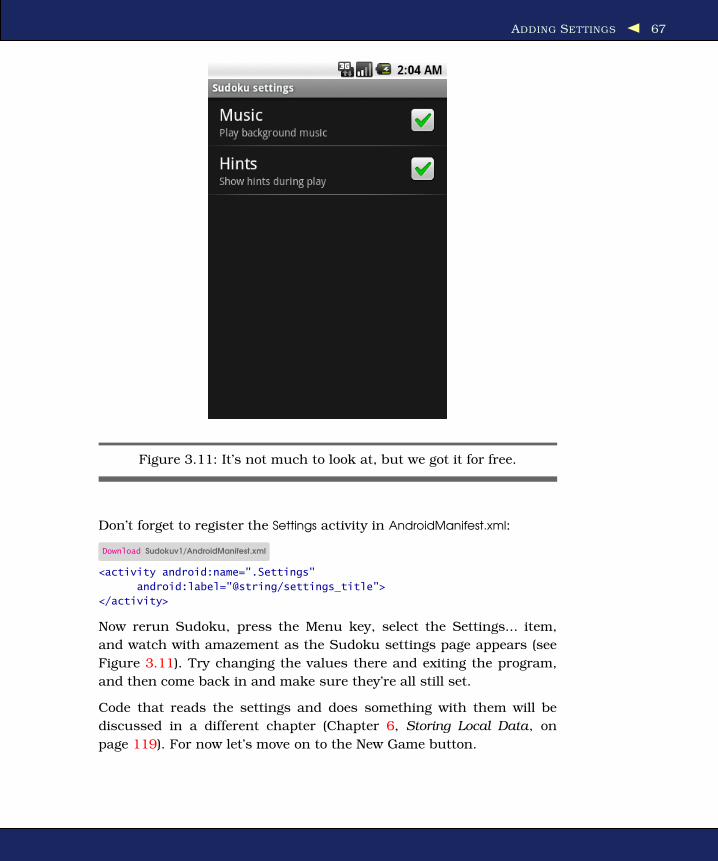
ADDING SETTINGS 67
Figure 3.11: It’s not much to look at, but we got it for free.
Don’t forget to register the Settings activity in AndroidManifest.xml:
Download Sudokuv1/AndroidManifest.xml
<activity android:name=".Settings"
android:label="@string/settings_title">
</activity>
Now rerun Sudoku, press the Menu key, select the Settings... item,
and watch with amazement as the Sudoku settings page appears (see
Figure 3.11). Try changing the values there and exiting the program,
and then come back in and make sure they’re all still set.
Code that reads the settings and does something with them will be
discussed in a different chapter (Chapter 6, Storing Local Data, on
page 119). For now let’s move on to the New Game button.

STARTING A NEW GAME 68
3.9 Starting a New Game
If you’ve played any Sudoku games, you know that some are easy and
some are maddeningly hard. So when the user selects New Game, we
want to pop up a dialog box asking them to select between three diffi-
culty levels. Selecting from a list of things is easy to do in Android. First
we’ll need a few more strings in res/values/strings.xml:
Download Sudokuv1/res/values/strings.xml
<string name="new_game_title">Difficulty</string>
<string name="easy_label">Easy</string>
<string name="medium_label">Medium</string>
<string name="hard_label">Hard</string>
Create the list of difficulties as an array resource in res/values/arrays.xml:
Download Sudokuv1/res/values/arrays.xml
<?xml version="1.0" encoding="utf-8"?>
<resources>
<array name="difficulty">
<item>@string/easy_label</item>
<item>@string/medium_label</item>
<item>@string/hard_label</item>
</array>
</resources>
We’ll need a few more imports in the Sudoku class:
Download Sudokuv1/src/org/example/sudoku/Sudoku.java
import android.app.AlertDialog;
import android.content.DialogInterface;
import android.util.Log;
Add code in the switch statement of the onClick( ) method to handle a
click on the New Game button:
Download Sudokuv1/src/org/example/sudoku/Sudoku.java
case R.id.new_button:
openNewGameDialog();
break;
The openNewGameDialog( ) method takes care of creating the user inter-
face for the difficulty list.
Download Sudokuv1/src/org/example/sudoku/Sudoku.java
private static final String TAG = "Sudoku";
/** Ask the user what difficulty level they want */
private void openNewGameDialog() {
new AlertDialog.Builder(this)

STARTING A NEW GAME 69
Figure 3.12: Difficulty selection dialog box
.setTitle(R.string.new_game_title)
.setItems(R.array.difficulty,
new DialogInterface.OnClickListener() {
public void onClick(DialogInterface dialoginterface,
int i) {
startGame(i);
}
})
.show();
}
/** Start a new game with the given difficulty level */
private void startGame(int i) {
Log.d(TAG, "clicked on " + i);
// Start game here...
}
The setItems( ) method takes two parameters: the resource ID of the item
list and a listener that will be called when one of the items is selected.
When you run the program now and press New Game, you’ll get the
dialog box in Figure 3.12.
We’re not actually going to start the game yet, so instead when you

DEBUGGING WITH LOG MESSAGES 70
Figure 3.13: Debugging output in the LogCat view
select a difficulty level, we just print a debug message using the Log.d( )
method, passing it a tag string and a message to print.
3.10 Debugging with Log Messages
The Log class provides several static methods to print messages of var-
ious severity levels to the Android system log:
• Log.e( ): Errors
• Log.w( ): Warnings
• Log.i( ): Information
• Log.d( ): Debugging
• Log.v( ): Verbose
Users will never see this log, but as a developer you can view it in a
couple ways. In Eclipse, open the LogCat view by selecting Window >
Show View > Other... > Android > LogCat (see Figure 3.13). The view
can be filtered by severity or by the tag you specified on the method
call.
DEBUGGING WITH THE DEBUGGER 71
If you’re not using Eclipse, you can see the same output by running
the adb logcat command.5 I recommend you start this command in a
separate window and leave it running all the time that the emulator is
running. It won’t interfere with any other monitors.
I can’t stress enough how useful the Android log will be during devel-
opment. Remember that error we saw earlier with the About box (Fig-
ure 3.7, on page 61)? If you had opened the LogCat view at that point,
you would have seen this message: “ActivityNotFoundException: Un-
able to find explicit activity class...have you declared this activity in
your AndroidManifest.xml?” It doesn’t get any plainer than that.
3.11 Debugging with the Debugger
In addition to log messages, you can use the Eclipse debugger to set
breakpoints, single step, and view the state of your program. First, en-
able your project for debugging by adding the android:debuggable="true"
option in your AndroidManifest.xml file:6
Download Sudokuv1/AndroidManifest.xml
<application android:icon="@drawable/icon"
android:label="@string/app_name"
android:debuggable="true">
Then, simply right-click the project, and select Debug As > Android
Application.
3.12 Exiting the Game
This game doesn’t really need an Exit button, because the user can just
press the Back key or the Home key to do something else. But I wanted
to add one to show you how to terminate an activity. Add this to the
switch statement in the onClick( ) method:
Download Sudokuv1/src/org/example/sudoku/Sudoku.java
case R.id.exit_button:
finish();
break;
5. http://d.android.com/guide/developing/tools/adb.html
6. This is optional if you’re using the emulator but required on a real device. Just
remember to remove the option before releasing your code to the public.
FAST -FORWARD >> 72
When the Exit button is selected, we call the finish( ) method. This shuts
down the activity and returns control to the next activity on the Android
application stack (usually the Home screen).
3.13 Fast-Forward >>
Whew, that was a lot to cover in one chapter! Starting from scratch, you
learned how to use layout files to organize your user interface and how
to use Android resources for text, colors, and more. You added controls
such as buttons and text fields, applied themes to change the program’s
appearance, and even added menus and preferences for good measure.
Android is a complex system, but you don’t have to know all of it to
get started. When you need help, the hundreds of pages of reference
material online go into more depth on all the classes and methods used
here.7Another great source for tips and tricks is the Android Devel-
oper’s Blog.8 And of course, if you get stuck you can always drop by the
discussion forum for this book.9 The other readers and I will be happy
to help you out.
In Chapter 4, Exploring 2D Graphics, on the next page, we’ll use Android’s
graphics API to draw the tiles for the Sudoku game.
7. To view the online documentation, open documentation.html from your Android SDK
install location, or point your browser to http://d.android.com/guide/index.html.8. http://android-developers.blogspot.com
9. http://forums.pragprog.com/forums/67
Chapter 4
Exploring 2D GraphicsSo far, we’ve covered the basic concepts and philosophy of Android and
how to create a simple user interface with a few buttons and a dialog
box. You’re really starting to get the hang of this Android thing. But
something is missing...what is it? Oh yeah, the fun!
Good graphics can add a bit of fun and excitement to any application.
Android puts one of the most powerful graphics libraries available on a
mobile device at your fingertips. Actually, it puts two of them there: one
for two-dimensional graphics and one for three-dimensional graphics.1
In this chapter, we will cover 2D graphics and apply that knowledge
to implement the game part of our Sudoku example. Chapter 10, 3D
Graphics in OpenGL, on page 195 will cover 3D graphics using the
OpenGL ES library.
4.1 Learning the Basics
Android provides a complete native two-dimensional graphics library
in its android.graphics package. With a basic understanding of classes
such as Color and Canvas, you’ll be up and drawing in no time.
Color
Android colors are represented with four numbers, one each for alpha,
red, green, and blue (ARGB). Each component can have 256 possible
values, or 8 bits, so a color is typically packed into a 32-bit integer. For
1. Functionality for four-dimensional graphics was considered for Android, but it was
dropped because of a lack of time.
LEARNING THE BASICS 74
efficiency, Android code uses an integer instead of an instance of the
Color class.
Red, green, and blue are self-explanatory, but alpha might not be.
Alpha is a measure of transparency. The lowest value, 0, indicates the
color is completely transparent. It doesn’t really matter what the val-
ues for RGB are, if A is 0. The highest value, 255, indicates the color
is completely opaque. Values in the middle are used for translucent, or
semitransparent, colors. They let you see some of what is underneath
the object being drawn in the foreground.
To create a color, you can use one of the static constants on the Color
class, like this:
int color = Color.BLUE; // solid blue
or if you know the alpha, red, green, and blue numbers, you can use
one of the static factory methods such as the following:
// Translucent purple
color = Color.argb(127, 255, 0, 255);
If possible, though, you’re usually better off defining all your colors in
an XML resource file. This lets you change them easily in one place
later:
<?xml version="1.0" encoding="utf-8"?>
<resources>
<color name="mycolor">#7fff00ff</color>
</resources>
You can reference colors by name in other XML files, as we did in Chap-
ter 3, or you can use them in Java code like this:
color = getResources().getColor(R.color.mycolor);
The getResources( ) method returns the ResourceManager class for the
current activity, and getColor( ) asks the manager to look up a color
given a resource ID.
Paint
One of the Android native graphics library’s most important classes is
the Paint class. It holds the style, color, and other information needed
to draw any graphics including bitmaps, text, and geometric shapes.
Normally when you paint something on the screen, you want to draw it
in a solid color. You set that color with the Paint.setColor( ) method.
For example:
LEARNING THE BASICS 75
cPaint.setColor(Color.LTGRAY);
This uses the predefined color value for light gray.
Canvas
The Canvas class represents a surface on which you draw. Initially can-
vases start off devoid of any content, like blank transparencies for an
overhead projector. Methods on the Canvas class let you draw lines,
rectangles, circles, or other arbitrary graphics on the surface.
In Android, the display screen is taken up by an Activity, which hosts a
View, which in turn hosts a Canvas. You get an opportunity to draw on
that canvas by overriding the View.onDraw( ) method. The only parameter
to onDraw( ) is a canvas on which you can draw.
Here’s an example activity called Graphics, which contains a view called
GraphicsView:
public class Graphics extends Activity {
@Override
public void onCreate(Bundle savedInstanceState) {
super.onCreate(savedInstanceState);
setContentView(new GraphicsView(this));
}
static public class GraphicsView extends View {
public GraphicsView(Context context) {
super(context);
}
@Override
protected void onDraw(Canvas canvas) {
// Drawing commands go here
}
}
We’re going to put some drawing commands into the onDraw( ) method
in the next section.
Path
The Path class holds a set of vector-drawing commands such as lines,
rectangles, and curves. Here’s an example that defines a circular path:
circle = new Path();
circle.addCircle(150, 150, 100, Direction.CW);
This defines a circle at position x=150, y=150, with a radius of 100
pixels. Now that we’ve defined the path, let’s use it to draw the circle’s
outline plus some text around the inside:

LEARNING THE BASICS 76
Figure 4.1: Drawing text around a circle
private static final String QUOTE = "Now is the time for all " +
"good men to come to the aid of their country.";
canvas.drawPath(circle, cPaint);
canvas.drawTextOnPath(QUOTE, circle, 0, 20, tPaint);
You can see the result in Figure 4.1. Since the circle was drawn in the
clockwise direction (Direction.CW), the text is also drawn that way.
If you want to get really fancy, Android provides a number of PathEffect
classes that let you do things such as apply a random permutation to a
path, cause all the line segments along a path to be smoothed out with
curves or broken up into segments, and create other effects.
Drawable
In Android, a Drawable class is used for a visual element like a bitmap or
solid color that is intended for display only. You can combine drawables
with other graphics, or you can use them in user interface widgets (for
example, as the background for a button or view).
Drawables can take a variety of forms:
LEARNING THE BASICS 77
• Bitmap: A PNG or JPEG image.
• NinePatch: A stretchable PNG image, so named because originally
it divided the image into nine sections. These are used for the
background of resizable bitmap buttons.
• Shape: Vector-drawing commands, based on Path. This is sort of a
poor man’s SVG.
• Layers: A container for child drawables that draw on top of each
other in a certain z-order.
• States: A container that shows one of its child drawables based on
its state (a bit mask). One use is to set various selection and focus
states for buttons.
• Levels: A container that shows only one of its child drawables
based on its level (a range of integers). This could be used for a
battery or signal strength gauge.
• Scale: A container for one child drawable that modifies its size
based on the current level. One use might be a zoomable picture
viewer.
Drawables are almost always defined in XML. Here’s a common exam-
ple where a drawable is defined to be a gradient from one color to
another (in this case, white to gray). The angle specifies the direction of
the gradient (270 degrees means top to bottom). This will be used for
the background of a view:
<?xml version="1.0" encoding="utf-8"?>
<shape xmlns:android="http://schemas.android.com/apk/res/android">
<gradient
android:startColor="#FFFFFF"
android:endColor="#808080"
android:angle="270" />
</shape>
To use it, we could either refer to it in XML with the android:background=
attribute or call the Canvas.setBackgroundResource( ) method in the view’s
onCreate( ) method like this:
setBackgroundResource(R.drawable.background);
This gives our GraphicsView example a nice gradient background, as
shown in Figure 4.2, on the following page.
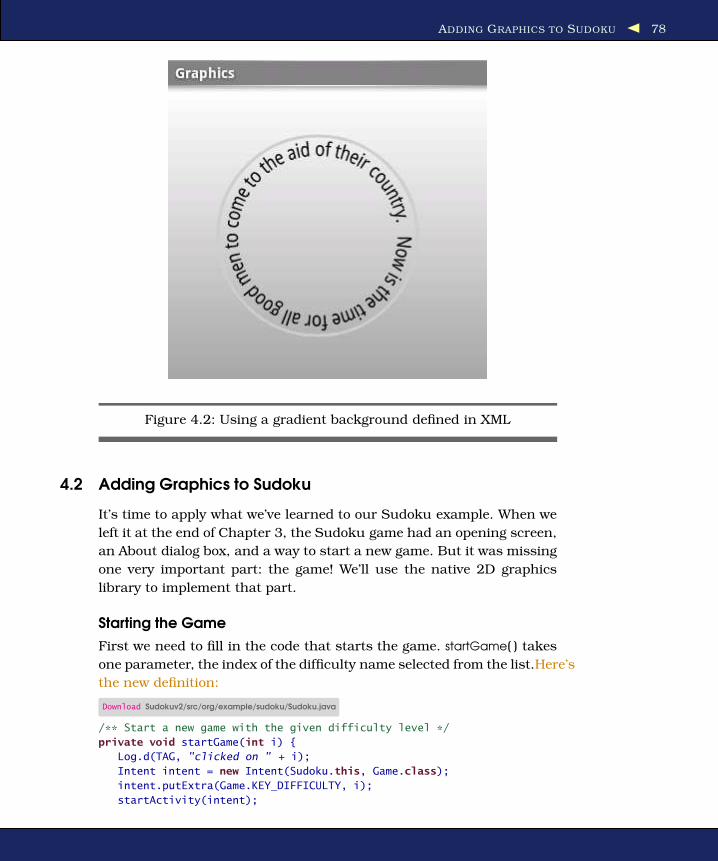
ADDING GRAPHICS TO SUDOKU 78
Figure 4.2: Using a gradient background defined in XML
4.2 Adding Graphics to Sudoku
It’s time to apply what we’ve learned to our Sudoku example. When we
left it at the end of Chapter 3, the Sudoku game had an opening screen,
an About dialog box, and a way to start a new game. But it was missing
one very important part: the game! We’ll use the native 2D graphics
library to implement that part.
Starting the Game
First we need to fill in the code that starts the game. startGame( ) takes
one parameter, the index of the difficulty name selected from the list.Here’s
the new definition:
Download Sudokuv2/src/org/example/sudoku/Sudoku.java
/** Start a new game with the given difficulty level */
private void startGame(int i) {
Log.d(TAG, "clicked on " + i);
Intent intent = new Intent(Sudoku.this, Game.class);
intent.putExtra(Game.KEY_DIFFICULTY, i);
startActivity(intent);

ADDING GRAPHICS TO SUDOKU 79
Sudoku Trivia
A few years after it was published in the United States, Num-ber Place was picked up by the Japanese publisher Nikoli, whogave it the much cooler-sounding name Sudoku (which means“single number” in Japanese). From there it was exportedaround the world, and the rest is history. Sadly, Garns died in1989 before getting a chance to see his creation become aworldwide sensation.
}
The game part of Sudoku will be another activity called Game, so we
create a new intent to kick it off. We place the difficulty number in an
extraData area provided in the intent, and then we call the startActivity( )
method to launch the new activity.
The extraData area is a map of key/value pairs that will be passed along
to the intent. The keys are strings, and the values can be any primitive
type, array of primitives, Bundle, or a subclass of Serializable or Parce-
lable.
Defining the Game Class
Here’s the outline of the Game activity:
Download Sudokuv2/src/org/example/sudoku/Game.java
package org.example.sudoku;
import android.app.Activity;
import android.app.Dialog;
import android.os.Bundle;
import android.util.Log;
import android.view.Gravity;
import android.widget.Toast;
public class Game extends Activity {
private static final String TAG = "Sudoku";
public static final String KEY_DIFFICULTY =
"org.example.sudoku.difficulty";
public static final int DIFFICULTY_EASY = 0;
public static final int DIFFICULTY_MEDIUM = 1;
public static final int DIFFICULTY_HARD = 2;
private int puzzle[] = new int[9 * 9];

ADDING GRAPHICS TO SUDOKU 80
private PuzzleView puzzleView;
@Override
protected void onCreate(Bundle savedInstanceState) {
super.onCreate(savedInstanceState);
Log.d(TAG, "onCreate");
int diff = getIntent().getIntExtra(KEY_DIFFICULTY,
DIFFICULTY_EASY);
puzzle = getPuzzle(diff);
calculateUsedTiles();
puzzleView = new PuzzleView(this);
setContentView(puzzleView);
puzzleView.requestFocus();
}
// ...
}
The onCreate( ) method fetches the difficulty number from the intent
and selects a puzzle to play. Then it creates an instance of the PuzzleView
class, setting the PuzzleView as the new contents of the view. Since this
is a fully customized view, it was easier to do this in code than in XML.
The calculateUsedTiles( ) method, which is defined in Section 4.4, The
Rest of the Story, on page 93, uses the rules of Sudoku to figure out, for
each tile in the nine-by-nine grid, which numbers are not valid for the
tile because they appear elsewhere in the horizontal or vertical direction
or in the three-by-three subgrid.
This is an activity, so we need to register it in AndroidManifest.xml:
Download Sudokuv2/AndroidManifest.xml
<activity android:name=".Game"
android:label="@string/game_title"/>
We also need to add a few more string resources to res/values/strings.xml:
Download Sudokuv2/res/values/strings.xml
<string name="game_title">Game</string>
<string name="no_moves_label">No moves</string>
<string name="keypad_title">Keypad</string>
Defining the PuzzleView Class
Next we need to define the PuzzleView class. Instead of using an XML
layout, this time let’s do it entirely in Java.
Here’s the outline:

ADDING GRAPHICS TO SUDOKU 81
What Size Is It Anyway?
A common mistake made by new Android developers is to usethe width and height of a view inside its constructor. Whena view’s constructor is called, Android doesn’t know yet howbig the view will be, so the sizes are set to zero. The real sizesare calculated during the layout stage, which occurs afterconstruction but before anything is drawn. You can use theonSizeChanged( ) method to be notified of the values when theyare known, or you can use the getWidth( ) and getHeight( ) meth-ods later, such as in the onDraw( ) method.
Download Sudokuv2/src/org/example/sudoku/PuzzleView.java
package org.example.sudoku;
import android.content.Context;
import android.graphics.Canvas;
import android.graphics.Paint;
import android.graphics.Rect;
import android.graphics.Paint.FontMetrics;
import android.graphics.Paint.Style;
import android.util.Log;
import android.view.KeyEvent;
import android.view.MotionEvent;
import android.view.View;
import android.view.animation.AnimationUtils;
public class PuzzleView extends View {
private static final String TAG = "Sudoku";
private final Game game;
public PuzzleView(Context context) {
super(context);
this.game = (Game) context;
setFocusable(true);
setFocusableInTouchMode(true);
}
// ...
}
In the constructor we keep a reference to the Game class and set the
option to allow user input in the view. Inside PuzzleView, we need to
implement the onSizeChanged( ) method. This is called after the view is
created and Android knows how big everything is.

ADDING GRAPHICS TO SUDOKU 82
Download Sudokuv2/src/org/example/sudoku/PuzzleView.java
private float width; // width of one tile
private float height; // height of one tile
private int selX; // X index of selection
private int selY; // Y index of selection
private final Rect selRect = new Rect();
@Override
protected void onSizeChanged(int w, int h, int oldw, int oldh) {
width = w / 9f;
height = h / 9f;
getRect(selX, selY, selRect);
Log.d(TAG, "onSizeChanged: width " + width + ", height "
+ height);
super.onSizeChanged(w, h, oldw, oldh);
}
private void getRect(int x, int y, Rect rect) {
rect.set((int) (x * width), (int) (y * height), (int) (x
* width + width), (int) (y * height + height));
}
We use onSizeChanged( ) to calculate the size of each tile on the screen
(1/9th of the total view width and height). Note this is a floating-point
number, so it’s possible that we could end up with a fractional num-
ber of pixels. selRect is a rectangle we’ll use later to keep track of the
selection cursor.
At this point we’ve created a view for the puzzle, and we know how big
it is. The next step is to draw the grid lines that separate the tiles on
the board.
Drawing the Board
Android calls a view’s onDraw( ) method every time any part of the view
needs to be updated. To simplify things, onDraw( ) pretends that you’re
re-creating the entire screen from scratch. In reality, you may be draw-
ing only a small portion of the view as defined by the canvas’s clip
rectangle. Android takes care of doing the clipping for you.
Start by defining a few new colors to play with in res/values/colors.xml:
Download Sudokuv2/res/values/colors.xml
<color name="puzzle_background">#ffe6f0ff</color>
<color name="puzzle_hilite">#ffffffff</color>
<color name="puzzle_light">#64c6d4ef</color>
<color name="puzzle_dark">#6456648f</color>
<color name="puzzle_foreground">#ff000000</color>
<color name="puzzle_hint_0">#64ff0000</color>

ADDING GRAPHICS TO SUDOKU 83
Other Ways to Do It
When I was writing this example, I tried several differentapproaches such as using a button for each tile or declaring agrid of ImageView classes in XML. After many false starts, I foundthat the approach of having one view for the entire puzzle anddrawing lines and numbers inside that proved to be the fastestand easiest way for this application.
It does have its drawbacks, though, such as the need to drawthe selection and explicitly handle keyboard and touch events.When designing your own program, I recommend trying stan-dard widgets and views first and then falling back to customdrawing only if that doesn’t work for you.
<color name="puzzle_hint_1">#6400ff80</color>
<color name="puzzle_hint_2">#2000ff80</color>
<color name="puzzle_selected">#64ff8000</color>
Here’s the basic outline for onDraw( ):
Download Sudokuv2/src/org/example/sudoku/PuzzleView.java
@Override
protected void onDraw(Canvas canvas) {
// Draw the background...
Paint background = new Paint();
background.setColor(getResources().getColor(
R.color.puzzle_background));
canvas.drawRect(0, 0, getWidth(), getHeight(), background);
// Draw the board...
// Draw the numbers...
// Draw the hints...
// Draw the selection...
}
The first parameter is the Canvas on which to draw. In this code, we’re
just drawing a background for the puzzle using the puzzle_background
color.
Now let’s add the code to draw the grid lines for the board:
Download Sudokuv2/src/org/example/sudoku/PuzzleView.java
// Draw the board...
// Define colors for the grid lines
Paint dark = new Paint();
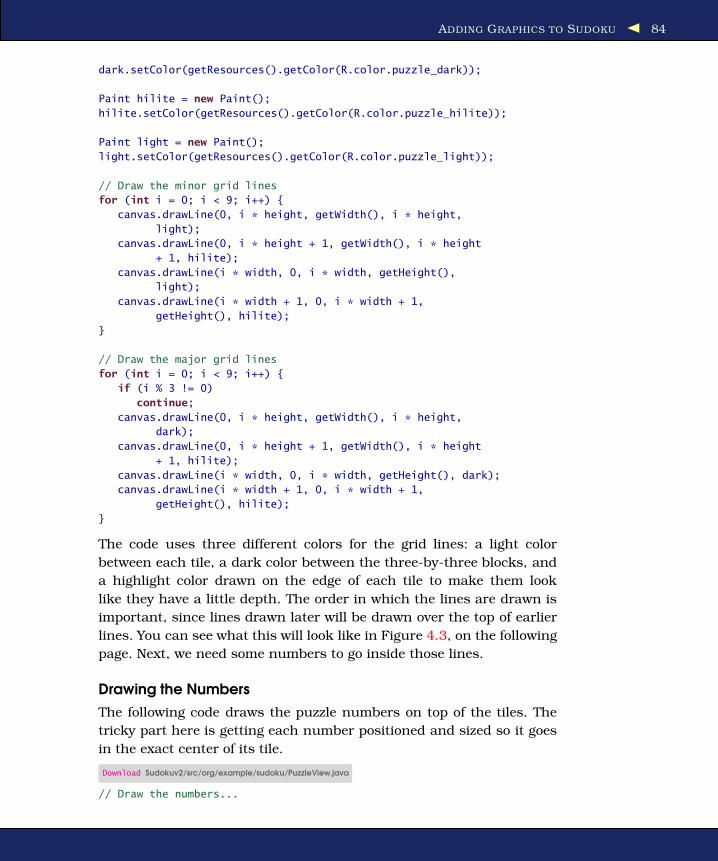
ADDING GRAPHICS TO SUDOKU 84
dark.setColor(getResources().getColor(R.color.puzzle_dark));
Paint hilite = new Paint();
hilite.setColor(getResources().getColor(R.color.puzzle_hilite));
Paint light = new Paint();
light.setColor(getResources().getColor(R.color.puzzle_light));
// Draw the minor grid lines
for (int i = 0; i < 9; i++) {
canvas.drawLine(0, i * height, getWidth(), i * height,
light);
canvas.drawLine(0, i * height + 1, getWidth(), i * height
+ 1, hilite);
canvas.drawLine(i * width, 0, i * width, getHeight(),
light);
canvas.drawLine(i * width + 1, 0, i * width + 1,
getHeight(), hilite);
}
// Draw the major grid lines
for (int i = 0; i < 9; i++) {
if (i % 3 != 0)
continue;
canvas.drawLine(0, i * height, getWidth(), i * height,
dark);
canvas.drawLine(0, i * height + 1, getWidth(), i * height
+ 1, hilite);
canvas.drawLine(i * width, 0, i * width, getHeight(), dark);
canvas.drawLine(i * width + 1, 0, i * width + 1,
getHeight(), hilite);
}
The code uses three different colors for the grid lines: a light color
between each tile, a dark color between the three-by-three blocks, and
a highlight color drawn on the edge of each tile to make them look
like they have a little depth. The order in which the lines are drawn is
important, since lines drawn later will be drawn over the top of earlier
lines. You can see what this will look like in Figure 4.3, on the following
page. Next, we need some numbers to go inside those lines.
Drawing the Numbers
The following code draws the puzzle numbers on top of the tiles. The
tricky part here is getting each number positioned and sized so it goes
in the exact center of its tile.
Download Sudokuv2/src/org/example/sudoku/PuzzleView.java
// Draw the numbers...

ADDING GRAPHICS TO SUDOKU 85
Figure 4.3: Drawing the grid lines with three colors for effect
// Define color and style for numbers
Paint foreground = new Paint(Paint.ANTI_ALIAS_FLAG);
foreground.setColor(getResources().getColor(
R.color.puzzle_foreground));
foreground.setStyle(Style.FILL);
foreground.setTextSize(height * 0.75f);
foreground.setTextScaleX(width / height);
foreground.setTextAlign(Paint.Align.CENTER);
// Draw the number in the center of the tile
FontMetrics fm = foreground.getFontMetrics();
// Centering in X: use alignment (and X at midpoint)
float x = width / 2;
// Centering in Y: measure ascent/descent first
float y = height / 2 - (fm.ascent + fm.descent) / 2;
for (int i = 0; i < 9; i++) {
for (int j = 0; j < 9; j++) {
canvas.drawText(this.game.getTileString(i, j), i
* width + x, j * height + y, foreground);
}

ADDING GRAPHICS TO SUDOKU 86
Figure 4.4: Centering the numbers inside the tiles
}
We call the getTileString( ) method (defined in Section 4.4, The Rest of the
Story, on page 93) to find out what numbers to display. To calculate the
size of the numbers, we set the font height to three-fourths the height
of the tile, and we set the aspect ratio to be the same as the tile’s aspect
ratio. We can’t use absolute pixel or point sizes because we want the
program to work at any resolution.
To determine the position of each number, we center it in both the x
and y dimensions. The x direction is easy—just divide the tile width
by 2. But for the y direction, we have to adjust the starting position
downward a little so that the midpoint of the tile will be the midpoint
of the number instead of its baseline. We use the graphics library’s
FontMetrics class to tell how much vertical space the letter will take in
total, and then we divide that in half to get the adjustment. You can see
the results in Figure 4.4.
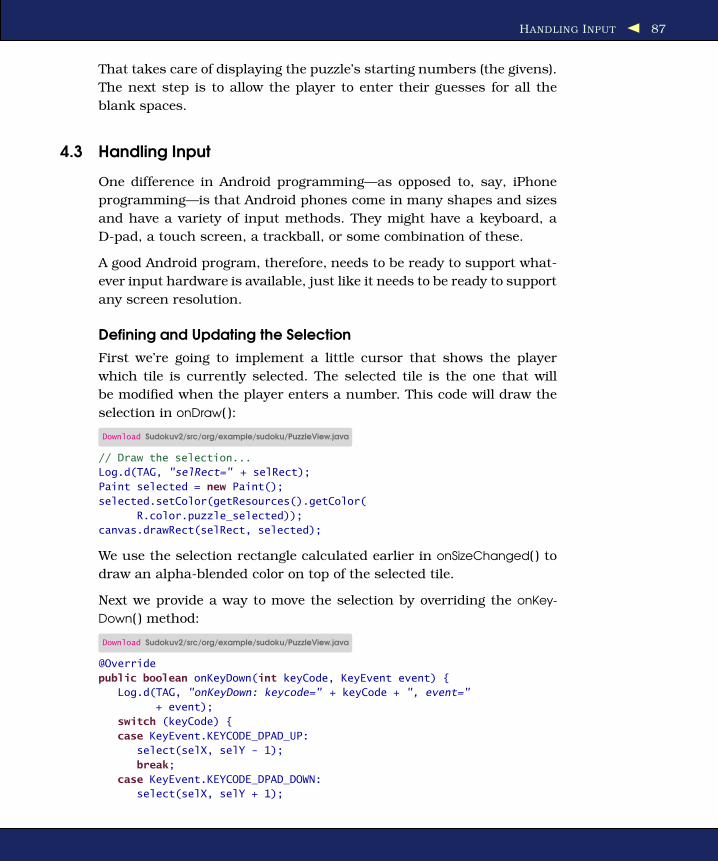
HANDLING INPUT 87
That takes care of displaying the puzzle’s starting numbers (the givens).
The next step is to allow the player to enter their guesses for all the
blank spaces.
4.3 Handling Input
One difference in Android programming—as opposed to, say, iPhone
programming—is that Android phones come in many shapes and sizes
and have a variety of input methods. They might have a keyboard, a
D-pad, a touch screen, a trackball, or some combination of these.
A good Android program, therefore, needs to be ready to support what-
ever input hardware is available, just like it needs to be ready to support
any screen resolution.
Defining and Updating the Selection
First we’re going to implement a little cursor that shows the player
which tile is currently selected. The selected tile is the one that will
be modified when the player enters a number. This code will draw the
selection in onDraw( ):
Download Sudokuv2/src/org/example/sudoku/PuzzleView.java
// Draw the selection...
Log.d(TAG, "selRect=" + selRect);
Paint selected = new Paint();
selected.setColor(getResources().getColor(
R.color.puzzle_selected));
canvas.drawRect(selRect, selected);
We use the selection rectangle calculated earlier in onSizeChanged( ) to
draw an alpha-blended color on top of the selected tile.
Next we provide a way to move the selection by overriding the onKey-
Down( ) method:
Download Sudokuv2/src/org/example/sudoku/PuzzleView.java
@Override
public boolean onKeyDown(int keyCode, KeyEvent event) {
Log.d(TAG, "onKeyDown: keycode=" + keyCode + ", event="
+ event);
switch (keyCode) {
case KeyEvent.KEYCODE_DPAD_UP:
select(selX, selY - 1);
break;
case KeyEvent.KEYCODE_DPAD_DOWN:
select(selX, selY + 1);

HANDLING INPUT 88
Figure 4.5: Drawing and moving the selection
break;
case KeyEvent.KEYCODE_DPAD_LEFT:
select(selX - 1, selY);
break;
case KeyEvent.KEYCODE_DPAD_RIGHT:
select(selX + 1, selY);
break;
default:
return super.onKeyDown(keyCode, event);
}
return true;
}
If the user has a directional pad (D-pad) and they press the up, down,
left, or right button, we call select( ) to move the selection cursor in that
direction.
How about a trackball? We could override the onTrackballEvent( ) method,
but it turns out that if you don’t handle trackball events, Android will
translate them into D-pad events automatically. Therefore, we can leave
it out for this example.
Inside the select( ) method, we calculate the new x and y coordinate of
the selection and then use getRect( ) again to calculate the new selection
rectangle:
Download Sudokuv2/src/org/example/sudoku/PuzzleView.java
private void select(int x, int y) {

HANDLING INPUT 89
invalidate(selRect);
selX = Math.min(Math.max(x, 0), 8);
selY = Math.min(Math.max(y, 0), 8);
getRect(selX, selY, selRect);
invalidate(selRect);
}
Notice the two calls to invalidate( ). The first one tells Android that the
area covered by the old selection rectangle (on the left of Figure 4.5,
on the previous page) needs to be redrawn. The second invalidate( ) call
says that the new selection area (on the right of the figure) needs to be
redrawn too. We don’t actually draw anything here.
This is an important point: never call any drawing functions except in
the onDraw( ) method. Instead, you use the invalidate( ) method to mark
rectangles as dirty. The window manager will combine all the dirty rect-
angles at some point in the future and call onDraw( ) again for you. The
dirty rectangles become the clip region, so screen updates are optimized
to only those areas that change.
Now let’s provide a way for the player to enter a new number on the
selected tile.
Entering Numbers
To handle keyboard input, we just add a few more cases to the onKey-
Down( ) method for the numbers 0 through 9 (0 or space means erase
the number).
Download Sudokuv2/src/org/example/sudoku/PuzzleView.java
case KeyEvent.KEYCODE_0:
case KeyEvent.KEYCODE_SPACE: setSelectedTile(0); break;
case KeyEvent.KEYCODE_1: setSelectedTile(1); break;
case KeyEvent.KEYCODE_2: setSelectedTile(2); break;
case KeyEvent.KEYCODE_3: setSelectedTile(3); break;
case KeyEvent.KEYCODE_4: setSelectedTile(4); break;
case KeyEvent.KEYCODE_5: setSelectedTile(5); break;
case KeyEvent.KEYCODE_6: setSelectedTile(6); break;
case KeyEvent.KEYCODE_7: setSelectedTile(7); break;
case KeyEvent.KEYCODE_8: setSelectedTile(8); break;
case KeyEvent.KEYCODE_9: setSelectedTile(9); break;
case KeyEvent.KEYCODE_ENTER:
case KeyEvent.KEYCODE_DPAD_CENTER:
game.showKeypadOrError(selX, selY);
break;
To support the D-pad, we check for the Enter or center D-pad button
in onKeyDown( ) and have it pop up a keypad that lets the user select
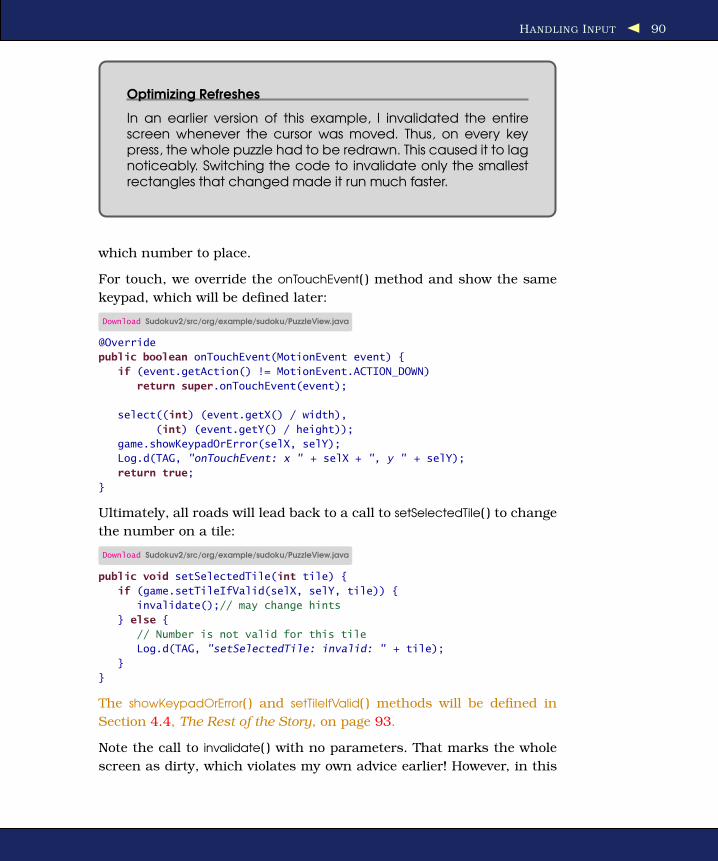
HANDLING INPUT 90
Optimizing Refreshes
In an earlier version of this example, I invalidated the entirescreen whenever the cursor was moved. Thus, on every keypress, the whole puzzle had to be redrawn. This caused it to lagnoticeably. Switching the code to invalidate only the smallestrectangles that changed made it run much faster.
which number to place.
For touch, we override the onTouchEvent( ) method and show the same
keypad, which will be defined later:
Download Sudokuv2/src/org/example/sudoku/PuzzleView.java
@Override
public boolean onTouchEvent(MotionEvent event) {
if (event.getAction() != MotionEvent.ACTION_DOWN)
return super.onTouchEvent(event);
select((int) (event.getX() / width),
(int) (event.getY() / height));
game.showKeypadOrError(selX, selY);
Log.d(TAG, "onTouchEvent: x " + selX + ", y " + selY);
return true;
}
Ultimately, all roads will lead back to a call to setSelectedTile( ) to change
the number on a tile:
Download Sudokuv2/src/org/example/sudoku/PuzzleView.java
public void setSelectedTile(int tile) {
if (game.setTileIfValid(selX, selY, tile)) {
invalidate();// may change hints
} else {
// Number is not valid for this tile
Log.d(TAG, "setSelectedTile: invalid: " + tile);
}
}
The showKeypadOrError( ) and setTileIfValid( ) methods will be defined in
Section 4.4, The Rest of the Story, on page 93.
Note the call to invalidate( ) with no parameters. That marks the whole
screen as dirty, which violates my own advice earlier! However, in this

HANDLING INPUT 91
case, it’s necessary because any new numbers added or removed might
change the hints that we are about to implement in the next section.
Adding Hints
How can we help the player out a little without solving the whole puzzle
for them? How about if we draw the background of each tile differently
depending on how many possible moves it has. Add this to onDraw( )
before drawing the selection:
Download Sudokuv2/src/org/example/sudoku/PuzzleView.java
// Draw the hints...
// Pick a hint color based on #moves left
Paint hint = new Paint();
int c[] = { getResources().getColor(R.color.puzzle_hint_0),
getResources().getColor(R.color.puzzle_hint_1),
getResources().getColor(R.color.puzzle_hint_2), };
Rect r = new Rect();
for (int i = 0; i < 9; i++) {
for (int j = 0; j < 9; j++) {
int movesleft = 9 - game.getUsedTiles(i, j).length;
if (movesleft < c.length) {
getRect(i, j, r);
hint.setColor(c[movesleft]);
canvas.drawRect(r, hint);
}
}
}
We use three states for zero, one, and two possible moves. If there
are zero moves, that means the player has done something wrong and
needs to backtrack.
The result will look like Figure 4.6, on the next page. Can you spot the
mistake(s) made by the player?2
Shaking Things Up
What if the user tries to enter an obviously invalid number, such as a
number that already appears in the three-by-three block? Just for fun,
let’s make the screen wiggle back and forth when they do that. First we
add a call to the invalid number case in setSelectedTile( ):
Download Sudokuv2/src/org/example/sudoku/PuzzleView.java
// Number is not valid for this tile
Log.d(TAG, "setSelectedTile: invalid: " + tile);
2. The two numbers on the bottom row, middle block, are wrong.
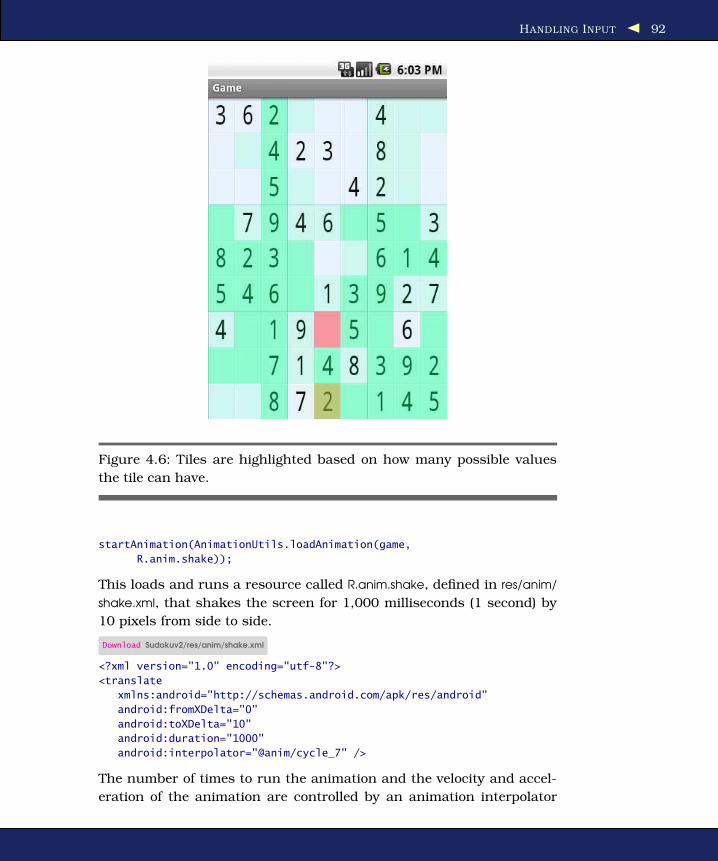
HANDLING INPUT 92
Figure 4.6: Tiles are highlighted based on how many possible values
the tile can have.
startAnimation(AnimationUtils.loadAnimation(game,
R.anim.shake));
This loads and runs a resource called R.anim.shake, defined in res/anim/
shake.xml, that shakes the screen for 1,000 milliseconds (1 second) by
10 pixels from side to side.
Download Sudokuv2/res/anim/shake.xml
<?xml version="1.0" encoding="utf-8"?>
<translate
xmlns:android="http://schemas.android.com/apk/res/android"
android:fromXDelta="0"
android:toXDelta="10"
android:duration="1000"
android:interpolator="@anim/cycle_7" />
The number of times to run the animation and the velocity and accel-
eration of the animation are controlled by an animation interpolator

THE REST OF THE STORY 93
defined in XML.
Download Sudokuv2/res/anim/cycle_7.xml
<?xml version="1.0" encoding="utf-8"?>
<cycleInterpolator
xmlns:android="http://schemas.android.com/apk/res/android"
android:cycles="7" />
This particular one will cause the animation to be repeated seven times.
4.4 The Rest of the Story
Now let’s go back and tie up a few loose ends, starting with the Key-
pad class. These pieces are necessary for the program to compile and
operate but have nothing to do with graphics. Feel free to skip ahead to
Section 4.5, Making More Improvements, on page 102 if you like.
Creating the Keypad
The keypad is handy for phones that don’t have keyboards. It displays
a grid of the numbers 1 through 9 in an activity that appears on top of
the puzzle. The whole purpose of the keypad dialog box is to return a
number selected by the player.
Here’s the user interface layout from res/layout/keypad.xml:
Download Sudokuv2/res/layout/keypad.xml
<?xml version="1.0" encoding="utf-8"?>
<TableLayout
xmlns:android="http://schemas.android.com/apk/res/android"
android:id="@+id/keypad"
android:orientation="vertical"
android:layout_width="wrap_content"
android:layout_height="wrap_content"
android:stretchColumns="*">
<TableRow>
<Button android:id="@+id/keypad_1"
android:text="1">
</Button>
<Button android:id="@+id/keypad_2"
android:text="2">
</Button>
<Button android:id="@+id/keypad_3"
android:text="3">
</Button>
</TableRow>
<TableRow>
<Button android:id="@+id/keypad_4"

THE REST OF THE STORY 94
android:text="4">
</Button>
<Button android:id="@+id/keypad_5"
android:text="5">
</Button>
<Button android:id="@+id/keypad_6"
android:text="6">
</Button>
</TableRow>
<TableRow>
<Button android:id="@+id/keypad_7"
android:text="7">
</Button>
<Button android:id="@+id/keypad_8"
android:text="8">
</Button>
<Button android:id="@+id/keypad_9"
android:text="9">
</Button>
</TableRow>
</TableLayout>
Next let’s define the Keypad class. Here’s the outline:
Download Sudokuv2/src/org/example/sudoku/Keypad.java
package org.example.sudoku;
import android.app.Dialog;
import android.content.Context;
import android.os.Bundle;
import android.view.KeyEvent;
import android.view.View;
public class Keypad extends Dialog {
protected static final String TAG = "Sudoku";
private final View keys[] = new View[9];
private View keypad;
private final int useds[];
private final PuzzleView puzzleView;
public Keypad(Context context, int useds[], PuzzleView puzzleView) {
super(context);
this.useds = useds;
this.puzzleView = puzzleView;
}
@Override
protected void onCreate(Bundle savedInstanceState) {

THE REST OF THE STORY 95
Figure 4.7: Invalid values are hidden in the keypad view.
super.onCreate(savedInstanceState);
setTitle(R.string.keypad_title);
setContentView(R.layout.keypad);
findViews();
for (int element : useds) {
if (element != 0)
keys[element - 1].setVisibility(View.INVISIBLE);
}
setListeners();
}
// ...
}
If a particular number is not valid (for example, the same number
already appears in that row), then we make the number invisible in
the grid so the player can’t select it (see Figure 4.7).

THE REST OF THE STORY 96
The findViews( ) method fetches and saves the views for all the keypad
keys and the main keypad window:
Download Sudokuv2/src/org/example/sudoku/Keypad.java
private void findViews() {
keypad = findViewById(R.id.keypad);
keys[0] = findViewById(R.id.keypad_1);
keys[1] = findViewById(R.id.keypad_2);
keys[2] = findViewById(R.id.keypad_3);
keys[3] = findViewById(R.id.keypad_4);
keys[4] = findViewById(R.id.keypad_5);
keys[5] = findViewById(R.id.keypad_6);
keys[6] = findViewById(R.id.keypad_7);
keys[7] = findViewById(R.id.keypad_8);
keys[8] = findViewById(R.id.keypad_9);
}
setListeners( ) loops through all the keypad keys and sets a listener for
each one. It also sets a listener for the main keypad window:
Download Sudokuv2/src/org/example/sudoku/Keypad.java
private void setListeners() {
for (int i = 0; i < keys.length; i++) {
final int t = i + 1;
keys[i].setOnClickListener(new View.OnClickListener(){
public void onClick(View v) {
returnResult(t);
}});
}
keypad.setOnClickListener(new View.OnClickListener(){
public void onClick(View v) {
returnResult(0);
}});
}
When the player selects one of the buttons on the keypad, it calls
the returnResult( ) method with the number for that button. If the player
selects a place that doesn’t have a button, then returnResult( ) is called
with a zero, indicating the tile should be erased.
onKeyDown( ) is called when the player uses the keyboard to enter a
number:
Download Sudokuv2/src/org/example/sudoku/Keypad.java
@Override
public boolean onKeyDown(int keyCode, KeyEvent event) {
int tile = 0;
switch (keyCode) {
case KeyEvent.KEYCODE_0:
case KeyEvent.KEYCODE_SPACE: tile = 0; break;

THE REST OF THE STORY 97
case KeyEvent.KEYCODE_1: tile = 1; break;
case KeyEvent.KEYCODE_2: tile = 2; break;
case KeyEvent.KEYCODE_3: tile = 3; break;
case KeyEvent.KEYCODE_4: tile = 4; break;
case KeyEvent.KEYCODE_5: tile = 5; break;
case KeyEvent.KEYCODE_6: tile = 6; break;
case KeyEvent.KEYCODE_7: tile = 7; break;
case KeyEvent.KEYCODE_8: tile = 8; break;
case KeyEvent.KEYCODE_9: tile = 9; break;
default:
return super.onKeyDown(keyCode, event);
}
if (isValid(tile)) {
returnResult(tile);
}
return true;
}
If the number is valid for the current tile, then it calls returnResult( );
otherwise, the keystroke is ignored.
The isValid( ) method checks to see whether the given number is valid for
the current position:
Download Sudokuv2/src/org/example/sudoku/Keypad.java
private boolean isValid(int tile) {
for (int t : useds) {
if (tile == t)
return false;
}
return true;
}
If it appears in the used array, then it’s not valid because the same
number is already used in the current row, column, or block.
The returnResult( ) method is called to return the number selected to the
calling activity:
Download Sudokuv2/src/org/example/sudoku/Keypad.java
/** Return the chosen tile to the caller */
private void returnResult(int tile) {
puzzleView.setSelectedTile(tile);
dismiss();
}
We call the PuzzleView.setSelectedTile method to change the puzzle’s cur-
rent tile. The dismiss call terminates the Keypad dialog box.

THE REST OF THE STORY 98
Now that we have the activity, let’s call it in the Game class and retrieve
the result:
Download Sudokuv2/src/org/example/sudoku/Game.java
/** Open the keypad if there are any valid moves */
protected void showKeypadOrError(int x, int y) {
int tiles[] = getUsedTiles(x, y);
if (tiles.length == 9) {
Toast toast = Toast.makeText(this,
R.string.no_moves_label, Toast.LENGTH_SHORT);
toast.setGravity(Gravity.CENTER, 0, 0);
toast.show();
} else {
Log.d(TAG, "showKeypad: used=" + toPuzzleString(tiles));
Dialog v = new Keypad(this, tiles, puzzleView);
v.show();
}
}
To decide which numbers are possible, we pass the Keypad a string in
the extraData area containing all the numbers that have already been
used.
Implementing the Game Logic
The rest of the code in Game.java concerns itself with the logic of the
game, in particular with determining which are and aren’t valid moves
according to the rules. The setTileIfValid( ) method is a key part of that.
Given an x and y position and the new value of a tile, it changes the tile
only if the value provided is valid.
Download Sudokuv2/src/org/example/sudoku/Game.java
/** Change the tile only if it's a valid move */
protected boolean setTileIfValid(int x, int y, int value) {
int tiles[] = getUsedTiles(x, y);
if (value != 0) {
for (int tile : tiles) {
if (tile == value)
return false;
}
}
setTile(x, y, value);
calculateUsedTiles();
return true;
}
To detect valid moves, we create an array for every tile in the grid. For
each position, it keeps a list of filled-in tiles that are currently visible
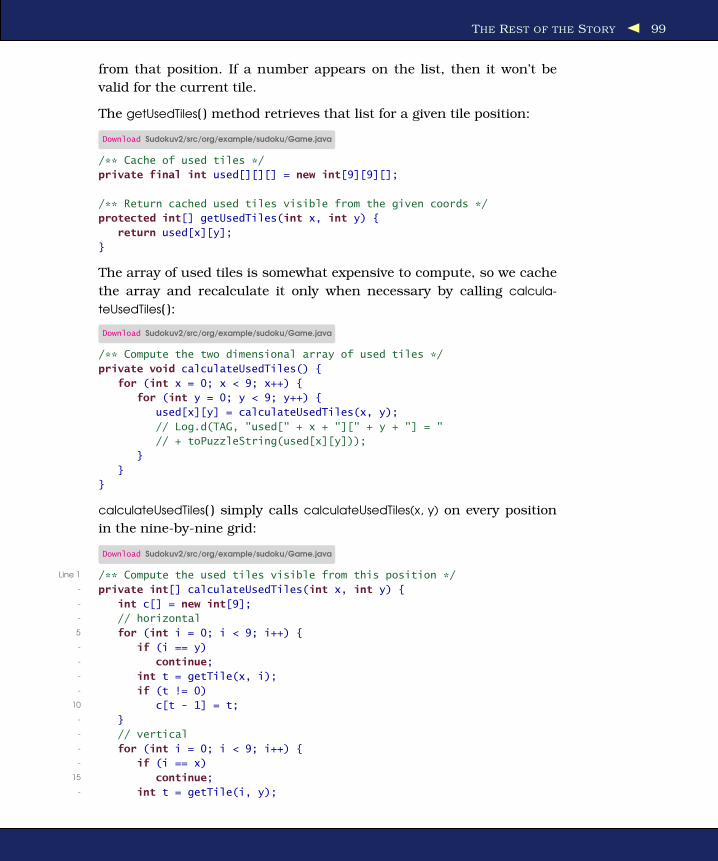
THE REST OF THE STORY 99
from that position. If a number appears on the list, then it won’t be
valid for the current tile.
The getUsedTiles( ) method retrieves that list for a given tile position:
Download Sudokuv2/src/org/example/sudoku/Game.java
/** Cache of used tiles */
private final int used[][][] = new int[9][9][];
/** Return cached used tiles visible from the given coords */
protected int[] getUsedTiles(int x, int y) {
return used[x][y];
}
The array of used tiles is somewhat expensive to compute, so we cache
the array and recalculate it only when necessary by calling calcula-
teUsedTiles( ):
Download Sudokuv2/src/org/example/sudoku/Game.java
/** Compute the two dimensional array of used tiles */
private void calculateUsedTiles() {
for (int x = 0; x < 9; x++) {
for (int y = 0; y < 9; y++) {
used[x][y] = calculateUsedTiles(x, y);
// Log.d(TAG, "used[" + x + "][" + y + "] = "
// + toPuzzleString(used[x][y]));
}
}
}
calculateUsedTiles( ) simply calls calculateUsedTiles(x, y) on every position
in the nine-by-nine grid:
Download Sudokuv2/src/org/example/sudoku/Game.java
Line 1 /** Compute the used tiles visible from this position */- private int[] calculateUsedTiles(int x, int y) {- int c[] = new int[9];- // horizontal5 for (int i = 0; i < 9; i++) {- if (i == y)- continue;- int t = getTile(x, i);- if (t != 0)
10 c[t - 1] = t;- }- // vertical- for (int i = 0; i < 9; i++) {- if (i == x)
15 continue;- int t = getTile(i, y);

THE REST OF THE STORY 100
- if (t != 0)- c[t - 1] = t;- }
20 // same cell block- int startx = (x / 3) * 3;- int starty = (y / 3) * 3;- for (int i = startx; i < startx + 3; i++) {- for (int j = starty; j < starty + 3; j++) {
25 if (i == x && j == y)- continue;- int t = getTile(i, j);- if (t != 0)- c[t - 1] = t;
30 }- }- // compress- int nused = 0;- for (int t : c) {
35 if (t != 0)- nused++;- }- int c1[] = new int[nused];- nused = 0;
40 for (int t : c) {- if (t != 0)- c1[nused++] = t;- }- return c1;
45 }
We start with an array of nine zeros. On line 5, we check all the tiles on
the same horizontal row as the current tile, and if a tile is occupied, we
stuff its number into the array:
On line 13, we do the same thing for all the tiles on the same vertical
column, and on line 21, we do the same for tiles in the three-by-three
block.
The last step, starting at line 33, is to compress the zeros out of the
array before we return it. We do this so that array.length can be used to
quickly tell how many used tiles are visible from the current position.
Miscellaneous
Here are a few other utility functions and variables that round out the
implementation. easyPuzzle, mediumPuzzle, and hardPuzzle are our hard-
coded Sudoku puzzles for easy, medium, and hard difficulty levels,
respectively.
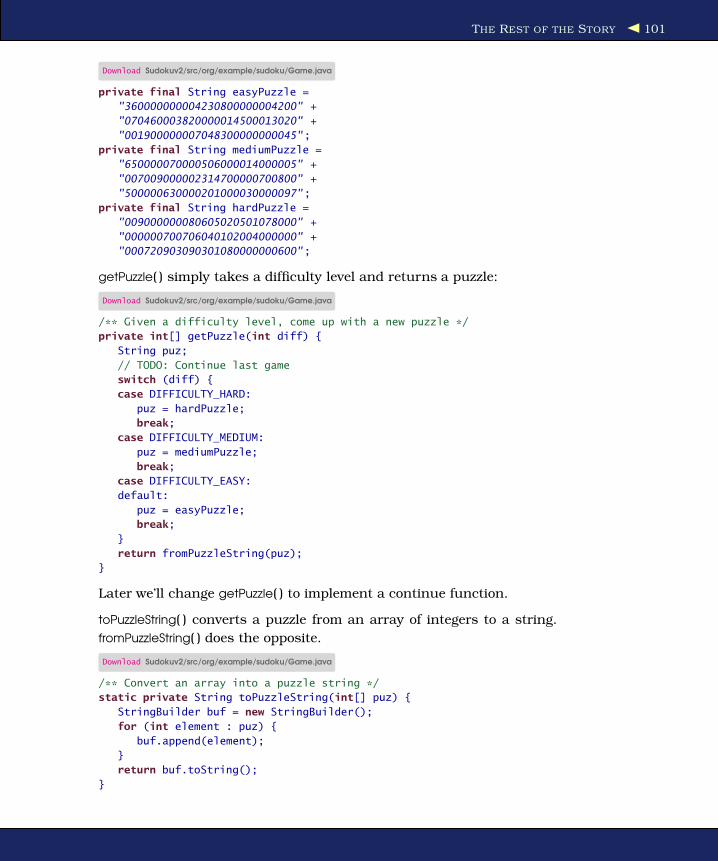
THE REST OF THE STORY 101
Download Sudokuv2/src/org/example/sudoku/Game.java
private final String easyPuzzle =
"360000000004230800000004200" +
"070460003820000014500013020" +
"001900000007048300000000045";
private final String mediumPuzzle =
"650000070000506000014000005" +
"007009000002314700000700800" +
"500000630000201000030000097";
private final String hardPuzzle =
"009000000080605020501078000" +
"000000700706040102004000000" +
"000720903090301080000000600";
getPuzzle( ) simply takes a difficulty level and returns a puzzle:
Download Sudokuv2/src/org/example/sudoku/Game.java
/** Given a difficulty level, come up with a new puzzle */
private int[] getPuzzle(int diff) {
String puz;
// TODO: Continue last game
switch (diff) {
case DIFFICULTY_HARD:
puz = hardPuzzle;
break;
case DIFFICULTY_MEDIUM:
puz = mediumPuzzle;
break;
case DIFFICULTY_EASY:
default:
puz = easyPuzzle;
break;
}
return fromPuzzleString(puz);
}
Later we’ll change getPuzzle( ) to implement a continue function.
toPuzzleString( ) converts a puzzle from an array of integers to a string.
fromPuzzleString( ) does the opposite.
Download Sudokuv2/src/org/example/sudoku/Game.java
/** Convert an array into a puzzle string */
static private String toPuzzleString(int[] puz) {
StringBuilder buf = new StringBuilder();
for (int element : puz) {
buf.append(element);
}
return buf.toString();
}

MAKING MORE IMPROVEMENTS 102
/** Convert a puzzle string into an array */
static protected int[] fromPuzzleString(String string) {
int[] puz = new int[string.length()];
for (int i = 0; i < puz.length; i++) {
puz[i] = string.charAt(i) - '0';
}
return puz;
}
The getTile( ) method takes x and y positions and returns the number
currently occupying that tile. If it’s zero, that means the tile is blank.
Download Sudokuv2/src/org/example/sudoku/Game.java
/** Return the tile at the given coordinates */
private int getTile(int x, int y) {
return puzzle[y * 9 + x];
}
/** Change the tile at the given coordinates */
private void setTile(int x, int y, int value) {
puzzle[y * 9 + x] = value;
}
getTileString( ) is used when displaying a tile. It will return either a string
with the value of the tile or an empty string if the tile is blank.
Download Sudokuv2/src/org/example/sudoku/Game.java
/** Return a string for the tile at the given coordinates */
protected String getTileString(int x, int y) {
int v = getTile(x, y);
if (v == 0)
return "";
else
return String.valueOf(v);
}
Once all these pieces are in place, you should have a playable Sudoku
game. Give it a try to verify it works. As with any code, though, there is
room for improvement.
4.5 Making More Improvements
Although the code presented in this chapter performs acceptably for
a Sudoku game, more complex programs will likely need to be more
carefully written in order to squeeze the last drop of performance out
of the device. In particular, the onDraw( ) method is a very performance-
critical piece of code, so it’s best to do as little as possible there.

FAST -FORWARD >> 103
Here are some ideas for speeding up this method:
• If possible, avoid doing any object allocations in the method
onDraw( ).
• Prefetch things such as color constants elsewhere (for example, in
the view’s constructor).
• Create your Paint objects up front, and just use existing instances
in onDraw( ).
• For values used multiple times, such as the width returned by
getWidth( ), retrieve the value at the beginning of the method and
then access it from your local copy.
As a further exercise for the reader, I encourage you to think about how
you could make the Sudoku game graphically richer. For example, you
could add some fireworks when the player solves the puzzle or make the
tiles spin around like Vanna White does. A moving background behind
the puzzle might be interesting. Let your imagination go wild. If you
want to make a top-notch product, touches like this can add pizzazz to
an otherwise ordinary offering.
In Chapter 5, Multimedia, on the following page, we’ll enhance the pro-
gram with a little mood music, and in Chapter 6, Storing Local Data,
on page 119, we’ll see how to remember the puzzle state and finally
implement that Continue button.
4.6 Fast-Forward >>
In this chapter, we just scratched the surface of Android’s graphics
capabilities. The native 2D library is quite large, so as you’re actually
writing your programs, be sure to take advantage of the tooltips, auto-
completion, and Javadoc provided by the Android Eclipse plug-in. The
online documentation for the android.graphics3 package goes into much
more detail if you need it.
If your program needs more advanced graphics, you may want to look
ahead a bit and read Chapter 10, 3D Graphics in OpenGL, on page 195.
There you’ll find information on how to use Android’s 3D graphics
library, which is based on the OpenGL ES standard. Otherwise, turn to
the next chapter for an introduction to the wonderful world of Android
audio and video.
3. http://d.android.com/reference/android/graphics/package-summary.html

Chapter 5
MultimediaRemember those Apple television ads with the silhouette people danc-
ing wildly to the beat of their iPods? That’s the kind of excitement
you want your products to generate.1 Music, sound effects, and video
can make your programs more immersive and engaging than text and
graphics alone.
This chapter will show you how to add multimedia to your Android
application. You may not have your users cavorting in the aisles, but if
you do it properly, you can at least put smiles on their faces.
5.1 Playing Audio
It was a dark and stormy night.... There goes the starting shot, and
they’re off.... The crowd goes wild as State sinks a three-pointer with
one second remaining....
Audio cues permeate the environment and set the tempo for our emo-
tions. Think of sound as another way to get into your user’s head. Just
like you use graphics on the display to convey some information to the
user, you can use audio to back that up and reinforce it.
Android supports sound and music output through the MediaPlayer
class in the android.media package.2 Let’s try it with a simple example
that plays sounds when you press a key on the keyboard or D-pad.
1. Of course, normal people older than the age of 8 can’t dance like that. Except perhaps
that time when my kids put a lizard in my...but I digress.2. http://d.android.com/guide/topics/media/index.html

PLAYING AUDIO 105
Figure 5.1: Save sound effects in a compressed format that Android can
play.
We’ll start by creating a “Hello, Android” project, using the following
parameters in the New Android Project dialog box:
Project name: Audio
Build Target: Android 1.5
Application name: Audio
Package name: org.example.audio
Create Activity: Audio
Next we’ll need a few sounds to play. For this example, I created my own
with the Windows Sound Recorder program (Start > Programs > Acces-
sories > Entertainment > Sound Recorder on Windows XP) and an inex-
pensive headset. After getting the sound levels right, I recorded each
sound, selected File > Save As... from the menu, clicked the Change...
button, and selected a format Android can recognize (see Figure 5.1).
You can find all the sound files and source code for these examples on
the book’s website.
Copy the sound files into the res/raw directory of your project. As you
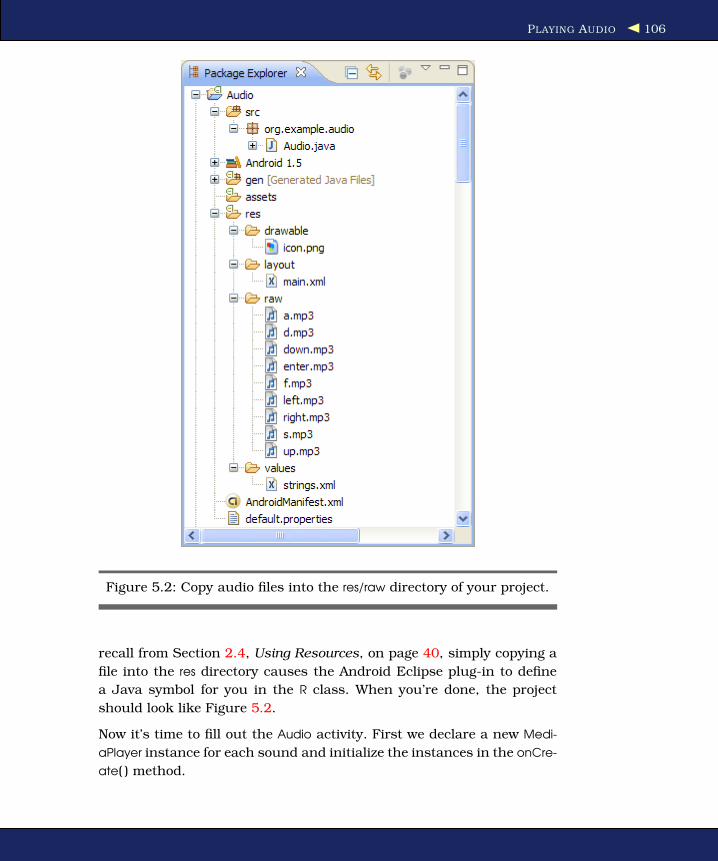
PLAYING AUDIO 106
Figure 5.2: Copy audio files into the res/raw directory of your project.
recall from Section 2.4, Using Resources, on page 40, simply copying a
file into the res directory causes the Android Eclipse plug-in to define
a Java symbol for you in the R class. When you’re done, the project
should look like Figure 5.2.
Now it’s time to fill out the Audio activity. First we declare a new Medi-
aPlayer instance for each sound and initialize the instances in the onCre-
ate( ) method.

PLAYING AUDIO 107
Joe Asks. . .
What Audio Formats Does Android Support?
Well, there’s support on paper, there’s support in the emulator,and there’s support on the actual devices. On paper, Androidsupports the following file types (this is subject to change withnew releases):
• WAV (PCM uncompressed)
• AAC (Apple iPod format, unprotected)
• MP3 (MPEG-3)
• WMA (Windows media audio)
• AMR (Speech codec)
• OGG (Ogg Vorbis)∗
• MIDI (Instruments)
In reality, I’ve found that only the OGG, WAV, and MP3 formatswork well in the emulator, and thus those are the only onesthat I can recommend for application development. Android’snative audio format appears to be 44.1kHz 16-bit stereo. How-ever, since WAV files at that rate are huge, you should just stickto OGG or MP3 files (mono for voice or stereo for music). OGGfiles seem to work best for short clips like game sound effects.
Stay away from unusual rates like 8kHz because the resam-pling artifacts make those rates sound terrible. Use 11kHz, 22kHz,or 44.1kHz sampling rates for the best results. Remember thatalthough the phone may have a tiny speaker, many of yourusers are going to be plugging in headphones (like an iPod), soyou want your audio to be high quality.
∗. http://www.vorbis.com

PLAYING AUDIO 108
Download Audio/src/org/example/audio/Audio.java
package org.example.audio;
import android.app.Activity;
import android.media.MediaPlayer;
import android.os.Bundle;
import android.view.KeyEvent;
public class Audio extends Activity {
private MediaPlayer up, down, left, right, enter;
private MediaPlayer a, s, d, f;
@Override
public void onCreate(Bundle savedInstanceState) {
super.onCreate(savedInstanceState);
setContentView(R.layout.main);
// Native rate is 44.1kHz 16 bit stereo, but
// to save space we just use MPEG-3 22kHz mono
up = MediaPlayer.create(this, R.raw.up);
down = MediaPlayer.create(this, R.raw.down);
left = MediaPlayer.create(this, R.raw.left);
right = MediaPlayer.create(this, R.raw.right);
enter = MediaPlayer.create(this, R.raw.enter);
a = MediaPlayer.create(this, R.raw.a);
s = MediaPlayer.create(this, R.raw.s);
d = MediaPlayer.create(this, R.raw.d);
f = MediaPlayer.create(this, R.raw.f);
}
}
There are other ways to do this; for example, you could declare one
MediaPlayer and keep reusing it. This would prevent sounds from over-
lapping, though, which may or may not be the effect you want.
Another method you may be tempted to try is to create a new Medi-
aPlayer whenever you want to make a sound. However, this doesn’t work
in practice. For one thing, it slows the program down a little. Worse, in
my testing it has a tendency to crash after playing just a few sounds.
Therefore, I recommend you stick with the tried-and-true method of
setting up your players ahead of time and playing them when needed.
Now that we have our sounds loaded up and ready to go, we just need
to intercept the key presses and play the right sounds. We do that by
overriding the Activity.onKeyDown( ) method.
Download Audio/src/org/example/audio/Audio.java
Line 1 @Override- public boolean onKeyDown(int keyCode, KeyEvent event) {

PLAYING AUDIO 109
- MediaPlayer mp;- switch (keyCode) {5 case KeyEvent.KEYCODE_DPAD_UP:- mp = up;- break;- case KeyEvent.KEYCODE_DPAD_DOWN:- mp = down;
10 break;- case KeyEvent.KEYCODE_DPAD_LEFT:- mp = left;- break;- case KeyEvent.KEYCODE_DPAD_RIGHT:
15 mp = right;- break;- case KeyEvent.KEYCODE_DPAD_CENTER:- case KeyEvent.KEYCODE_ENTER:- mp = enter;
20 break;- case KeyEvent.KEYCODE_A:- mp = a;- break;- case KeyEvent.KEYCODE_S:
25 mp = s;- break;- case KeyEvent.KEYCODE_D:- mp = d;- break;
30 case KeyEvent.KEYCODE_F:- mp = f;- break;- default:- return super.onKeyDown(keyCode, event);
35 }- mp.seekTo(0);- mp.start();- return true;- }
The first part of the method selects a media player based on which key
you pressed. Then on line 36, we call the seekTo( ) method to rewind
the sound and the start( ) method to begin playing it. The start( ) method
is asynchronous, so it returns immediately regardless of how long the
sound lasts. If you like, you can use setOnCompletionListener( ) to be noti-
fied when the clip is finished.
If you run the program now and then press one of the keys (for example,
the Enter key or the center D-pad key), you should hear a sound. If you
don’t hear anything, check your volume control (don’t laugh), or look at

PLAYING VIDEO 110
When Things Go Wrong
If you do much multimedia programming, you’ll soon discoverthat Android’s MediaPlayer can be a fickle beast.The version inAndroid 1.5 is much improved over its predecessors but it canstill crash at the slightest provocation. One reason this happensis that MediaPlayer is mostly a native application with a thin layerof Java on top of it. The native player code is optimized forperformance, and it doesn’t seem to do much error checking.
Fortunately, Android’s strong Linux process protections preventany harm from being done if a crash occurs. The emulator (orthe phone if you’re running on a real device) and other appli-cations will continue to run normally. The user would just see theapplication go away, possibly with a dialog box containing anerror message.
During development, though, you can get considerably morediagnostic information to help you determine what wentwrong. Messages and tracebacks will be printed to the Androidsystem log, which you can view with the LogCat view in Eclipseor the adb logcat command (see Section 3.10, Debugging withLog Messages, on page 70).
the debugging messages in the LogCat view.3
For our next trick, we’ll play a movie using only one line of code.
5.2 Playing Video
Video is more than just a bunch of pictures shown one right after
another. It’s sound as well, and the sound has to be closely synchro-
nized with the images.
Android’s MediaPlayer class works with video the same way it does with
plain audio. The only difference is that you need to create a Surface for
the player to use to draw the images. You can use the start( ) and stop( )
methods to control playback.
3. Audio output may be choppy or delayed in some cases. Try different formats (such
as OGG instead of MP3) and lower bit rates. You may also want to investigate using the
SoundPool class, which explicitly supports simultaneous streams. It was buggy and poorly
documented in the 1.0 release, but as of 1.5 it appears to be stable.

PLAYING VIDEO 111
Joe Asks. . .
What Kind of Video Can You Watch on Android?
Here’s what is officially supported:
• MP4 (MPEG-4 low bit rate)
• H.263 (3GP)
• H.264 (AVC)
As of Android 1.5, H.263 is the recommended video formatbecause every hardware platform supports it and it’s relativelyefficient to encode and decode. It is also compatible withother devices such as the iPhone. You can use a program likeQuickTime Pro∗ to convert video from one format to another.Use the lowest resolution and bit rate that you can in order tosave space, but don’t set it so low that you sacrifice quality.
∗. http://www.apple.com/quicktime/pro
I’m not going to show you another MediaPlayer example, however, be-
cause there is a simpler way to embed videos in your application: the
VideoView class. To demonstrate it, create a new Android project called
Video using these parameters:
Project name: Video
Build Target: Android 1.5
Application name: Video
Package name: org.example.video
Create Activity: Video
Change the layout (res/layout/main.xml) to this:
Download Videov1/res/layout/main.xml
<?xml version="1.0" encoding="utf-8"?>
<FrameLayout
xmlns:android="http://schemas.android.com/apk/res/android"
android:layout_width="fill_parent"
android:layout_height="fill_parent">
<VideoView
android:id="@+id/video"
android:layout_height="wrap_content"
android:layout_width="wrap_content"
android:layout_gravity="center" />
</FrameLayout>

PLAYING VIDEO 112
Figure 5.3: Embedding a video is easy with VideoView.
Open Video.java, and change the onCreate( ) method as follows:
Download Videov1/src/org/example/video/Video.java
package org.example.video;
import android.app.Activity;
import android.os.Bundle;
import android.widget.VideoView;
public class Video extends Activity {
@Override
public void onCreate(Bundle savedInstanceState) {
super.onCreate(savedInstanceState);
// Fill view from resource
setContentView(R.layout.main);
VideoView video = (VideoView) findViewById(R.id.video);
// Load and start the movie
video.setVideoPath("/data/samplevideo.3gp");
video.start();
}
}
The setVideoPath( ) method opens the file, sizes it to its container while
preserving the aspect ratio, and begins playing it.
Now you need to upload something to play. To do that, run the following

PLAYING VIDEO 113
command:
C:\> adb push c:\code\samplevideo.3gp /data/samplevideo.3gp
1649 KB/s (369870 bytes in 0.219s)
You can find samplevideo.3gp in the download package for this book, or
you can create one of your own. The directory used here (/data) is just
for illustrative purposes and should not really be used for media files.
It will only work on the emulator because that directory is protected on
real devices.
Note that Android doesn’t seem to care what extension you give the
file. You can also upload and download files in Eclipse with the File
Explorer view in the Android perspective, but I find the command line
to be easier for simple things like this.
There’s one more thing: we’d like the video to take over the whole screen
including the title bar and status bar. To do that, all you need to do is
specify the right theme in AndroidManifest.xml:
Download Videov1/AndroidManifest.xml
<?xml version="1.0" encoding="utf-8"?>
<manifest xmlns:android="http://schemas.android.com/apk/res/android"
package="org.example.video"
android:versionCode="1"
android:versionName="1.0">
<application android:icon="@drawable/icon"
android:label="@string/app_name">
<activity android:name=".Video"
android:label="@string/app_name"
android:theme="@android:style/Theme.NoTitleBar.Fullscreen">
<intent-filter>
<action android:name="android.intent.action.MAIN" />
<category android:name="android.intent.category.LAUNCHER" />
</intent-filter>
</activity>
</application>
<uses-sdk android:minSdkVersion="3" />
</manifest>
Once all that is done, when you run the program, you should see and
hear the movie clip (see Figure 5.3, on the previous page). Try rotating
the display to verify it works in both portrait and landscape modes.
Voila! Instant video goodness.
Now let’s polish up the Sudoku sample with a little mood music.
PLAYING VIDEO 114
Joe Asks. . .
Why Does It Restart the Video When I Rotate the Display?
Android assumes by default that your program knows nothingabout screen rotations. To pick up possible resource changes,Android destroys and re-creates your activity from scratch. Thatmeans onCreate( ) is called again, which means the video isstarted again (as this example is currently written).
This behavior will be fine for 90 percent of all applications,so most developers will not have to worry about it. It’s evena useful way to test your application life-cycle and state-saving/restoring code (see Section 2.2, It’s Alive!, on page 35).However, there are a couple of ways to be smarter and opti-mize the transition.
The simplest way is to implement onRetainNonConfigurationIn-
stance( ) in your activity to save some data that will be keptacross the calls to onDestroy( ) and onCreate( ). When youcome back, you use getLastNonConfigurationInstance( ) in thenew instance of your activity to recover that information. Youcan keep anything, even references to your current intent andrunning threads.
The more complicated way is to use the android:configChanges=
property in AndroidManifest.xml to inform Android whichchanges you can handle. For example, if you set it tokeyboardHidden|orientation, then Android will not destroy andre-create your activity when the user flips the keyboard.Instead, it will call onConfigurationChanged(Configuration) andassume you know what you’re doing.∗
∗. For more details, see http://d.android.com/reference/android/app/Activity.html#ConfigurationChanges.
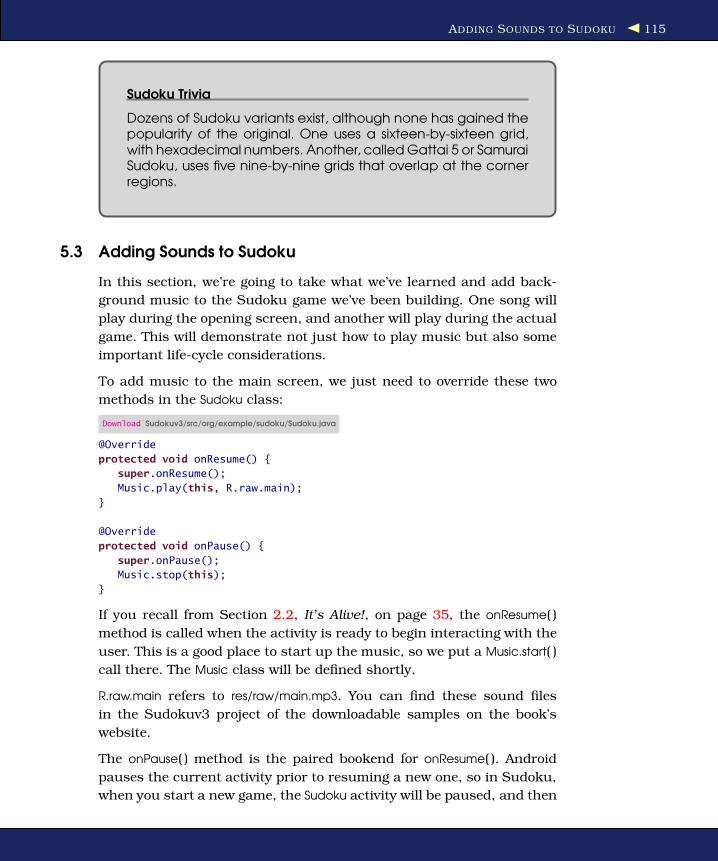
ADDING SOUNDS TO SUDOKU 115
Sudoku Trivia
Dozens of Sudoku variants exist, although none has gained thepopularity of the original. One uses a sixteen-by-sixteen grid,with hexadecimal numbers. Another, called Gattai 5 or SamuraiSudoku, uses five nine-by-nine grids that overlap at the cornerregions.
5.3 Adding Sounds to Sudoku
In this section, we’re going to take what we’ve learned and add back-
ground music to the Sudoku game we’ve been building. One song will
play during the opening screen, and another will play during the actual
game. This will demonstrate not just how to play music but also some
important life-cycle considerations.
To add music to the main screen, we just need to override these two
methods in the Sudoku class:
Download Sudokuv3/src/org/example/sudoku/Sudoku.java
@Override
protected void onResume() {
super.onResume();
Music.play(this, R.raw.main);
}
@Override
protected void onPause() {
super.onPause();
Music.stop(this);
}
If you recall from Section 2.2, It’s Alive!, on page 35, the onResume( )
method is called when the activity is ready to begin interacting with the
user. This is a good place to start up the music, so we put a Music.start( )
call there. The Music class will be defined shortly.
R.raw.main refers to res/raw/main.mp3. You can find these sound files
in the Sudokuv3 project of the downloadable samples on the book’s
website.
The onPause( ) method is the paired bookend for onResume( ). Android
pauses the current activity prior to resuming a new one, so in Sudoku,
when you start a new game, the Sudoku activity will be paused, and then

ADDING SOUNDS TO SUDOKU 116
Joe Asks. . .
Shouldn’t We Use a Background Service for Music?
We haven’t said much about the Android Service class, but youmay have seen it used in some music-playing examples on theWeb. Basically, a Service is a way to start a background pro-cess that can run even after your current activity finishes. Ser-vices are similar to, but not quite the same as, Linux daemons.If you’re writing a general-purpose music player and want themusic to continue while you’re reading mail or browsing theWeb, then, yes, a Service would be appropriate. In most cases,though, you want the music to end when your program ends,so you don’t need to use the Service class.
the Game activity will be started. onPause( ) will also be called when the
user presses the Back or Home key. These are all places where we want
our title music to stop, so we call Music.stop( ) in onPause( ).
Now let’s do something similar for the music on the Game activity:
Download Sudokuv3/src/org/example/sudoku/Game.java
@Override
protected void onResume() {
super.onResume();
Music.play(this, R.raw.game);
}
@Override
protected void onPause() {
super.onPause();
Music.stop(this);
}
If you compare this to what we did to the Sudoku class, you’ll notice
that we’re referencing a different sound resource, R.raw.game (res/raw/
game.mp3).
The final piece of the musical puzzle is the Music class, which will man-
age the MediaPlayer class used to play the current music:
Download Sudokuv3/src/org/example/sudoku/Music.java
Line 1 package org.example.sudoku;-
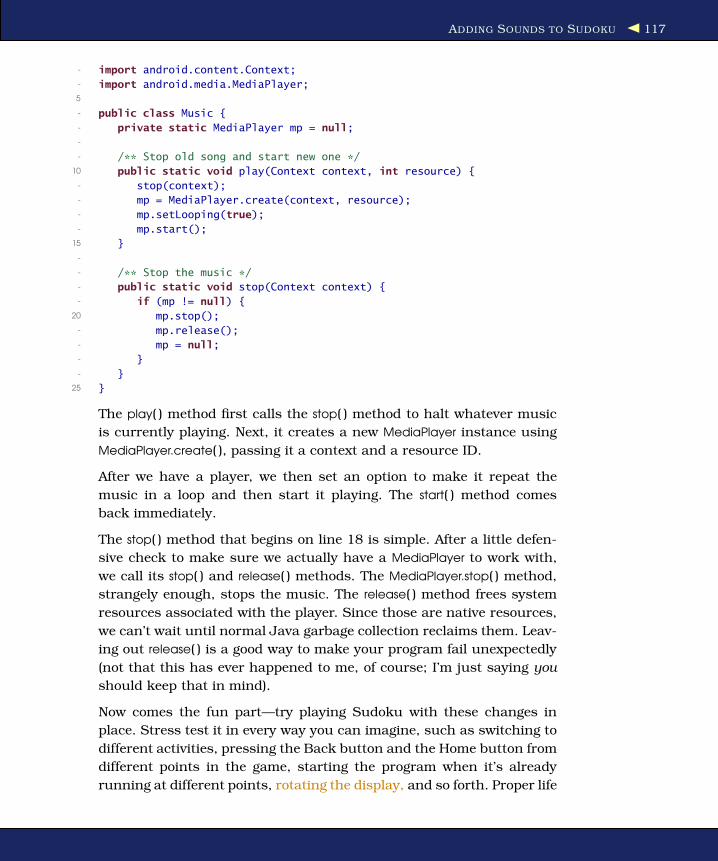
ADDING SOUNDS TO SUDOKU 117
- import android.content.Context;- import android.media.MediaPlayer;5
- public class Music {- private static MediaPlayer mp = null;-
- /** Stop old song and start new one */10 public static void play(Context context, int resource) {
- stop(context);- mp = MediaPlayer.create(context, resource);- mp.setLooping(true);- mp.start();
15 }-
- /** Stop the music */- public static void stop(Context context) {- if (mp != null) {
20 mp.stop();- mp.release();- mp = null;- }- }
25 }
The play( ) method first calls the stop( ) method to halt whatever music
is currently playing. Next, it creates a new MediaPlayer instance using
MediaPlayer.create( ), passing it a context and a resource ID.
After we have a player, we then set an option to make it repeat the
music in a loop and then start it playing. The start( ) method comes
back immediately.
The stop( ) method that begins on line 18 is simple. After a little defen-
sive check to make sure we actually have a MediaPlayer to work with,
we call its stop( ) and release( ) methods. The MediaPlayer.stop( ) method,
strangely enough, stops the music. The release( ) method frees system
resources associated with the player. Since those are native resources,
we can’t wait until normal Java garbage collection reclaims them. Leav-
ing out release( ) is a good way to make your program fail unexpectedly
(not that this has ever happened to me, of course; I’m just saying you
should keep that in mind).
Now comes the fun part—try playing Sudoku with these changes in
place. Stress test it in every way you can imagine, such as switching to
different activities, pressing the Back button and the Home button from
different points in the game, starting the program when it’s already
running at different points, rotating the display, and so forth. Proper life
FAST -FORWARD >> 118
cycle management is a pain sometimes, but your users will appreciate
the effort.
5.4 Fast-Forward >>
In this chapter, we covered playing audio and video clips using the
Android SDK. We didn’t discuss recording because most programs will
not need to do that, but if you happen to be the exception, then look up
the MediaRecorder class in the online documentation.4
In Chapter 6, Storing Local Data, on the following page, you’ll learn
about some simple ways Android programs can store data between
invocations. If you don’t need to do that, then you can skip ahead to
Chapter 7, The Connected World, on page 129 and learn about network
access.
4. http://d.android.com/reference/android/media/MediaRecorder.html
Chapter 6
Storing Local DataSo far, we’ve concentrated on writing applications that don’t need to
keep data around when they exit. They start up, run, and go away,
leaving no trace that they were ever there. However, most real programs
need persistent state, whether it’s a simple font size setting, an embar-
rassing photo from your last office party, or next week’s meal plan.
Whatever it is, Android lets you permanently store it on your mobile
device for later use and protects it from accidental or malicious access
by other programs.
Your application can store data using several different techniques de-
pending on the size of the data, its structure, its lifetime, and whether it
will be shared with other programs. In this chapter, we’ll take a look at
three simple methods to keep local data: the preferences API, instance
state bundles, and flash memory files. In Chapter 9, Putting SQL to
Work, on page 175, we’ll delve into more advanced techniques using
the built-in SQLite database engine.
6.1 Adding Options to Sudoku
In Section 3.7, Adding a Menu, on page 63, we used the onCreateOp-
tionsMenu( ) method to add a menu containing one item to the main
Sudoku screen. When the user presses the Menu key and selects the
Settings... item, the code starts the Settings activity, which lets the user
change the options for the game. Because Settings extends PreferenceAc-
tivity, the values for the settings are stored in the program’s preferences
area, but originally we didn’t do anything with them. Now we’re going
to implement them.

ADDING OPTIONS TO SUDOKU 120
Sudoku Trivia
There are 6,670,903,752,021,072,936,960 possible classic Sudokusolution grids. If you eliminate duplicates that are just rotations,reflections, or relabelings of each other, you’re left with “only”5,472,730,538 solutions.
First let’s modify the Settings class to add a couple of getter methods that
retrieve the current values of our two options. Here’s the new definition:
Download Sudokuv4/src/org/example/sudoku/Settings.java
package org.example.sudoku;
import android.content.Context;
import android.os.Bundle;
import android.preference.PreferenceActivity;
import android.preference.PreferenceManager;
public class Settings extends PreferenceActivity {
// Option names and default values
private static final String OPT_MUSIC = "music";
private static final boolean OPT_MUSIC_DEF = true;
private static final String OPT_HINTS = "hints";
private static final boolean OPT_HINTS_DEF = true;
@Override
protected void onCreate(Bundle savedInstanceState) {
super.onCreate(savedInstanceState);
addPreferencesFromResource(R.xml.settings);
}
/** Get the current value of the music option */
public static boolean getMusic(Context context) {
return PreferenceManager.getDefaultSharedPreferences(context)
.getBoolean(OPT_MUSIC, OPT_MUSIC_DEF);
}
/** Get the current value of the hints option */
public static boolean getHints(Context context) {
return PreferenceManager.getDefaultSharedPreferences(context)
.getBoolean(OPT_HINTS, OPT_HINTS_DEF);
}
}
Be careful that the option keys (music and hints) match the keys used
in res/xml/settings.xml.
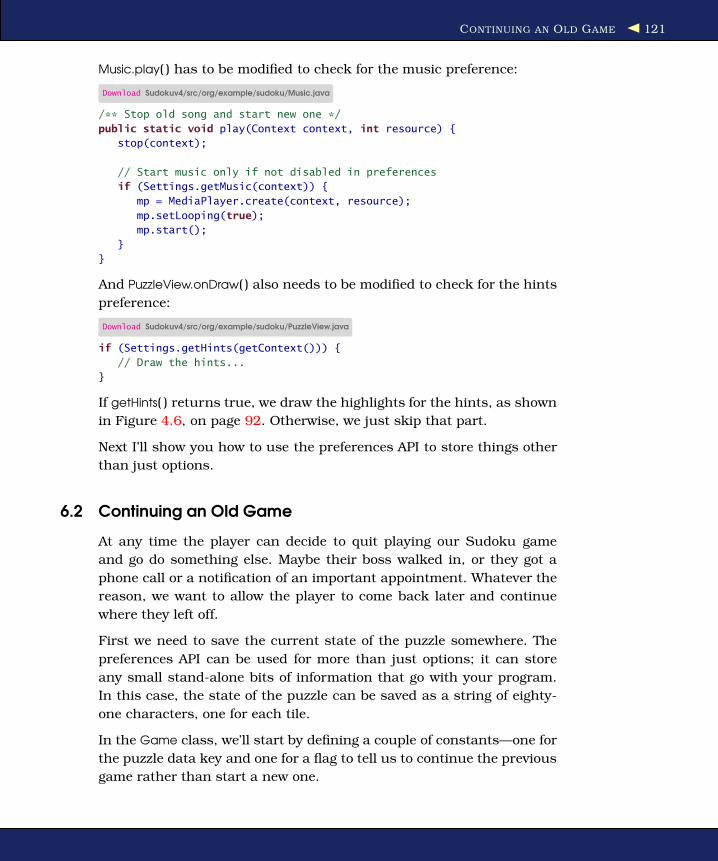
CONTINUING AN OLD GAME 121
Music.play( ) has to be modified to check for the music preference:
Download Sudokuv4/src/org/example/sudoku/Music.java
/** Stop old song and start new one */
public static void play(Context context, int resource) {
stop(context);
// Start music only if not disabled in preferences
if (Settings.getMusic(context)) {
mp = MediaPlayer.create(context, resource);
mp.setLooping(true);
mp.start();
}
}
And PuzzleView.onDraw( ) also needs to be modified to check for the hints
preference:
Download Sudokuv4/src/org/example/sudoku/PuzzleView.java
if (Settings.getHints(getContext())) {
// Draw the hints...
}
If getHints( ) returns true, we draw the highlights for the hints, as shown
in Figure 4.6, on page 92. Otherwise, we just skip that part.
Next I’ll show you how to use the preferences API to store things other
than just options.
6.2 Continuing an Old Game
At any time the player can decide to quit playing our Sudoku game
and go do something else. Maybe their boss walked in, or they got a
phone call or a notification of an important appointment. Whatever the
reason, we want to allow the player to come back later and continue
where they left off.
First we need to save the current state of the puzzle somewhere. The
preferences API can be used for more than just options; it can store
any small stand-alone bits of information that go with your program.
In this case, the state of the puzzle can be saved as a string of eighty-
one characters, one for each tile.
In the Game class, we’ll start by defining a couple of constants—one for
the puzzle data key and one for a flag to tell us to continue the previous
game rather than start a new one.

CONTINUING AN OLD GAME 122
Download Sudokuv4/src/org/example/sudoku/Game.java
private static final String PREF_PUZZLE = "puzzle" ;
protected static final int DIFFICULTY_CONTINUE = -1;
Next we need to save the current puzzle whenever the game is paused.
See Section 2.2, It’s Alive!, on page 35 for a description of onPause( ) and
the other life-cycle methods.
Download Sudokuv4/src/org/example/sudoku/Game.java
@Override
protected void onPause() {
super.onPause();
Log.d(TAG, "onPause");
Music.stop(this);
// Save the current puzzle
getPreferences(MODE_PRIVATE).edit().putString(PREF_PUZZLE,
toPuzzleString(puzzle)).commit();
}
Now the puzzle is saved, but how do we read the saved data? Remember
that when the game is started, the getPuzzle( ) method is called, and the
difficulty level is passed in. We’ll use that for continuing as well.
Download Sudokuv4/src/org/example/sudoku/Game.java
/** Given a difficulty level, come up with a new puzzle */
private int[] getPuzzle(int diff) {
String puz;
switch (diff) {
case DIFFICULTY_CONTINUE:
puz = getPreferences(MODE_PRIVATE).getString(PREF_PUZZLE,
easyPuzzle);
break;
// ...
}
return fromPuzzleString(puz);
}
All we need to do is add a check for DIFFICULTY_CONTINUE. If that is set,
then instead of starting with a fresh puzzle, we read the one we stuffed
into the preferences.
Next, we need to make the Continue button on the main screen (see
Figure 3.4, on page 54) actually do something. Here is where we set
that up.
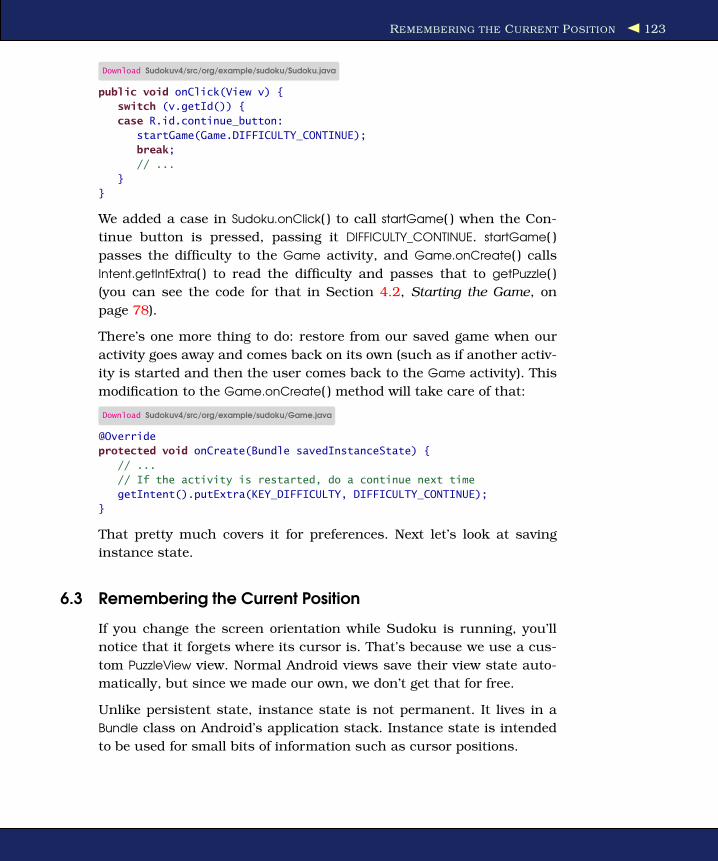
REMEMBERING THE CURRENT POSITION 123
Download Sudokuv4/src/org/example/sudoku/Sudoku.java
public void onClick(View v) {
switch (v.getId()) {
case R.id.continue_button:
startGame(Game.DIFFICULTY_CONTINUE);
break;
// ...
}
}
We added a case in Sudoku.onClick( ) to call startGame( ) when the Con-
tinue button is pressed, passing it DIFFICULTY_CONTINUE. startGame( )
passes the difficulty to the Game activity, and Game.onCreate( ) calls
Intent.getIntExtra( ) to read the difficulty and passes that to getPuzzle( )
(you can see the code for that in Section 4.2, Starting the Game, on
page 78).
There’s one more thing to do: restore from our saved game when our
activity goes away and comes back on its own (such as if another activ-
ity is started and then the user comes back to the Game activity). This
modification to the Game.onCreate( ) method will take care of that:
Download Sudokuv4/src/org/example/sudoku/Game.java
@Override
protected void onCreate(Bundle savedInstanceState) {
// ...
// If the activity is restarted, do a continue next time
getIntent().putExtra(KEY_DIFFICULTY, DIFFICULTY_CONTINUE);
}
That pretty much covers it for preferences. Next let’s look at saving
instance state.
6.3 Remembering the Current Position
If you change the screen orientation while Sudoku is running, you’ll
notice that it forgets where its cursor is. That’s because we use a cus-
tom PuzzleView view. Normal Android views save their view state auto-
matically, but since we made our own, we don’t get that for free.
Unlike persistent state, instance state is not permanent. It lives in a
Bundle class on Android’s application stack. Instance state is intended
to be used for small bits of information such as cursor positions.

REMEMBERING THE CURRENT POSITION 124
Here’s what we have to do to implement it:
Download Sudokuv4/src/org/example/sudoku/PuzzleView.java
Line 1 import android.os.Bundle;- import android.os.Parcelable;-
- public class PuzzleView extends View {5 private static final String SELX = "selX";- private static final String SELY = "selY";- private static final String VIEW_STATE = "viewState";- private static final int ID = 42;-
10 public PuzzleView(Context context) {- // ...- setId(ID);- }-
15 @Override- protected Parcelable onSaveInstanceState() {- Parcelable p = super.onSaveInstanceState();- Log.d(TAG, "onSaveInstanceState");- Bundle bundle = new Bundle();
20 bundle.putInt(SELX, selX);- bundle.putInt(SELY, selY);- bundle.putParcelable(VIEW_STATE, p);- return bundle;- }
25 @Override- protected void onRestoreInstanceState(Parcelable state) {- Log.d(TAG, "onRestoreInstanceState");- Bundle bundle = (Bundle) state;- select(bundle.getInt(SELX), bundle.getInt(SELY));
30 super.onRestoreInstanceState(bundle.getParcelable(VIEW_STATE));- return;- }- // ...- }
On line 5, we define some constants for keys to save and restore the
cursor position. We need to save both our own x and y positions, plus
any state needed by the underlying View class.
As part of Activity.onSaveInstanceState( ) processing, Android will walk
down the view hierarchy and call View.onSaveInstanceState( ) on every
view it finds that has an ID. The same thing happens for onRestoreIn-
stanceState( ). Normally, this ID would come from XML, but since Puzzle-
View was created in code, we need to set it ourselves. We make up an
arbitrary number on line 8 (any value will do as long as it’s positive)
and then use the setId( ) method to assign it on line 12.

ACCESSING THE INTERNAL FILE SYSTEM 125
The onSaveInstanceState( ) method is defined on line 16. We call the
superclass to get its state, and then we save ours and theirs in a Bundle.
Failing to call the superclass will result in a runtime error.
Later, onRestoreInstanceState( ) (line 26) will be called to tease out the
information we saved. We get our own x and y positions from the Bundle,
and then we call the superclass to let it get whatever it needs. After
making these changes, the cursor will be remembered by PuzzleView,
just like any other Android view.
Next let’s look at keeping data in plain old files.
6.4 Accessing the Internal File System
Android runs Linux under the covers, so there’s a real file system
mounted in there with a root directory and everything. The files are
stored on nonvolatile flash memory built into the device, so they are
not lost when the phone is turned off.
All of the usual Java file I/O routines from the java.io package are avail-
able for your program to use, with the caveat that your process has
limited permissions so it can’t mess up any other application’s data. In
fact, the main thing it can access is a package private directory created
at install time (/data/data/packagename).
A few helper methods are provided on the Context class (and thus on
the Activity class extended by each of your activities) to let you read and
write data there. Here are the ones you’re most likely to need:
deleteFile( ) Delete a private file. Returns true if it worked, false
otherwise.
fileList( ) Return a list of all files in the application’s private
area in a String array.
openFileInput( ) Open a private file for reading. Returns a
java.io.FileInputStream.
openFileOutput( ) Open a private file for writing. Returns a
java.io.FileOutputStream.
However, since this internal memory is limited, I recommend you keep
the size of any data you put there low, say a megabyte or two at the
most, and carefully handle I/O errors when writing in case the space
runs out.
Luckily, internal memory isn’t the only storage that you have to work
with.

ACCESSING SD CARDS 126
All in the Family
If you recall from Section 2.5, Safe and Secure, on page 41,each application normally gets its own user ID at install time.That user ID is the only one that is allowed to read and write fromthe application’s private directory. However, if two applica-tions are signed∗ by the same digital certificate, then Androidassumes they are from the same developer and gives them thesame user ID.
On the one hand, that allows them to share all sorts of data witheach other if they so choose. But on the other, it also meansthey’ll need to take special care to stay out of each other’sway.
∗. http://d.android.com/guide/topics/security/security.html#signing
6.5 Accessing SD Cards
Some Android devices will include a slot for additional flash memory to
be plugged in, typically a Secure Digital (SD) card. These memory cards,
if present, are much larger than the built-in memory, and thus they’re
ideal for storing multimegabyte music and video files. They cannot be
used for code, and every application can read and write files there.
In Section 5.2, Playing Video, on page 110, we uploaded a sample video
file to the /data directory of the emulated device. This is the wrong
place for it, since we’re not supposed to put large files on the internal
file system. So, now I’m going to show you a better way.
The first step is to create and format a virtual SD card that we can “plug
in” to the emulator. Luckily we’ve already done this—if you recall, in
Section 1.3, Creating an AVD, on page 24 when we created the “em15”
virtual device, we gave it a 128MB virtual SD card as well. You can
make it any size you like, but if you make it too small, it may cause
the emulator to crash; if you make it too big, you’ll just waste space on
your computer’s disk drive.
Next, let’s copy the sample video to the SD card:
C:\> adb push c:\code\samplevideo.3gp /sdcard/samplevideo.3gp
1468 KB/s (369870 bytes in 0.246s)

FAST -FORWARD >> 127
Then we need to modify the onCreate( ) method of the Video class to play
the movie from the SD card instead of the /data directory:
Download Videov2/src/org/example/video/Video.java
// Load and start the movie
video.setVideoPath("/sdcard/samplevideo.3gp");
video.start();
Now try to run the program. The video should play normally.
6.6 Fast-Forward >>
In this chapter, we covered a couple of basic ways to store local data on
the Android platform. That should be enough to get you started, but for
structured data such as phone lists and recipes, you’ll need something
more advanced. See Chapter 9, Putting SQL to Work, on page 175 for
directions on how to use Android’s built-in SQLite database and how to
share information between applications using content providers.
This brings us to the end of Part II. With the help of the Sudoku exam-
ple, you’ve learned all the basics of Android programming, including
user interfaces, 2D graphics, audio, video, and simple data storage.
Now it’s time to leave Sudoku behind and move beyond the basics.

Part III
Beyond the Basics
128

Chapter 7
The Connected WorldOver the next few chapters, we’ll cover more advanced topics such as
network access and location-based services. You can write many useful
applications without these features, but going beyond the basic fea-
tures of Android will really help you add value to your programs, giving
them much more functionality with a minimum of effort.
What do you use your mobile phone for? Aside from making calls, more
and more people are using their phones as mobile Internet devices.
Analysts predict that in a few years mobile phones will surpass desktop
computers as the number-one way to connect to the Internet.1 This
point has already been reached in some parts of the world.2
Android phones are well equipped for the new connected world of the
mobile Internet. First, Android provides a full-featured web browser
based on the WebKit open source project.3 This is the same engine you
will find in Google Chrome, the Apple iPhone, and the Safari desktop
browser but with a twist. Android lets you use the browser as a compo-
nent right inside your application.
Second, Android gives your programs access to standard network ser-
vices like TCP/IP sockets. This lets you consume web services from
Google, Yahoo, Amazon, and many other sources on the Internet.
1. http://www.idc.com/getdoc.jsp?containerId=prUS21303808
2. http://www.comscore.com/press/release.asp?press=1742
3. http://webkit.org

BROWSING BY INTENT 130
Figure 7.1: Opening a browser using an Android intent
In this chapter, you’ll learn how to take advantage of all these features
and more through four example programs:
• BrowserIntent: Demonstrates opening an external web browser
using an Android intent
• BrowserView: Shows you how to embed a browser directly into
your application
• LocalBrowser: Explains how JavaScript in an embedded WebView
and Java code in your Android program can talk to each other
• Translate: Uses data binding, threading, and web services for an
amusing purpose
7.1 Browsing by Intent
The simplest thing you can do with Android’s networking API is to open
a browser on a web page of your choice. You might want to do this to
provide a link to your home page from your program or to access some
server-based application such as an ordering system. In Android all it
takes is three lines of code.
To demonstrate, let’s write a new example called BrowserIntent, which
will have an edit field where you can enter a URL and a Go button you
press to open the browser on that URL (see Figure 7.1).
Start by creating a new “Hello, Android” project with the following val-
ues in the New Project wizard:
Project name: BrowserIntent
Build Target: Android 1.5
Application name: BrowserIntent
Package name: org.example.browserintent

BROWSING BY INTENT 131
Create Activity: BrowserIntent
Once you have a the basic program, change the layout file (res/layout/
main.xml) so it looks like this:
Download BrowserIntent/res/layout/main.xml
<?xml version="1.0" encoding="utf-8"?>
<LinearLayout
xmlns:android="http://schemas.android.com/apk/res/android"
android:orientation="horizontal"
android:layout_width="fill_parent"
android:layout_height="fill_parent">
<EditText
android:id="@+id/url_field"
android:layout_width="wrap_content"
android:layout_height="wrap_content"
android:layout_weight="1.0"
android:lines="1"
android:inputType="textUri"
android:imeOptions="actionGo" />
<Button
android:id="@+id/go_button"
android:layout_width="wrap_content"
android:layout_height="wrap_content"
android:text="@string/go_button" />
</LinearLayout>
This defines our two controls, an EditText control and a Button.
On EditText, we set android:layout_weight="1.0" to make the text area fill
up all the horizontal space to the left of the button, and we also set
android:lines="1" to limit the height of the control to one vertical line.
Note that this has no effect on the amount of text the user can enter
here, just the way it is displayed.
Android 1.5 introduced support for soft keyboards and other alternate
input methods. The options for android:inputType="textUri" and
android:imeOptions="actionGo" are hints for how the soft keyboard should
appear. They tell Android to replace the standard keyboard with one
that has convenient buttons for “.com” and “/” for entering web addresses
and a “Go” button that opens the web page.4
As always, human-readable text should be put in a resource file, res/
values/strings.xml:
4. See http://d.android.com/reference/android/widget/TextView.html and
http://android-developers.blogspot.com/2009/04/updating-applications-for-on-screen.html for
more information on input options.
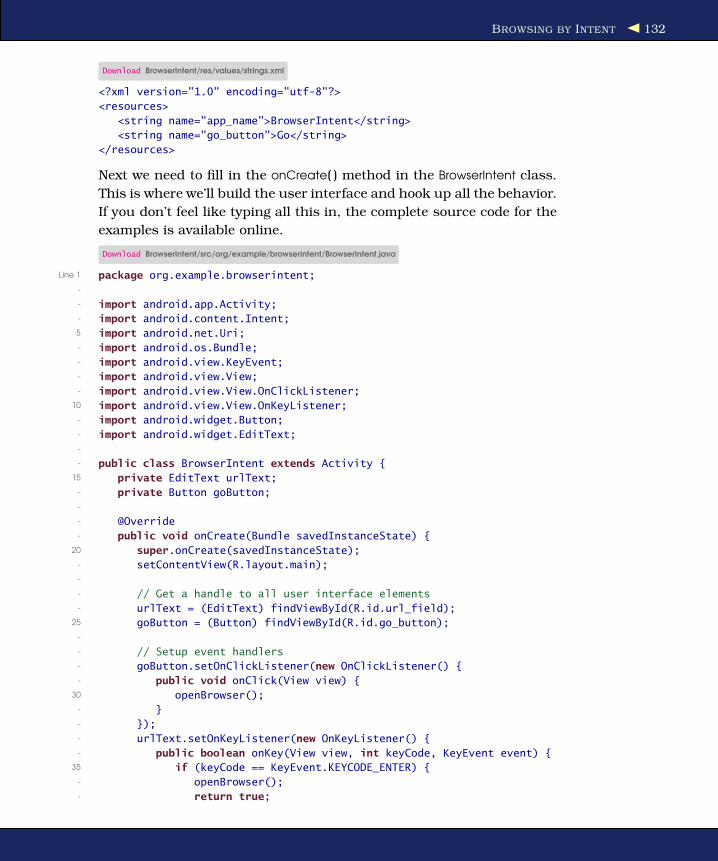
BROWSING BY INTENT 132
Download BrowserIntent/res/values/strings.xml
<?xml version="1.0" encoding="utf-8"?>
<resources>
<string name="app_name">BrowserIntent</string>
<string name="go_button">Go</string>
</resources>
Next we need to fill in the onCreate( ) method in the BrowserIntent class.
This is where we’ll build the user interface and hook up all the behavior.
If you don’t feel like typing all this in, the complete source code for the
examples is available online.
Download BrowserIntent/src/org/example/browserintent/BrowserIntent.java
Line 1 package org.example.browserintent;-
- import android.app.Activity;- import android.content.Intent;5 import android.net.Uri;- import android.os.Bundle;- import android.view.KeyEvent;- import android.view.View;- import android.view.View.OnClickListener;
10 import android.view.View.OnKeyListener;- import android.widget.Button;- import android.widget.EditText;-
- public class BrowserIntent extends Activity {15 private EditText urlText;
- private Button goButton;-
- @Override- public void onCreate(Bundle savedInstanceState) {
20 super.onCreate(savedInstanceState);- setContentView(R.layout.main);-
- // Get a handle to all user interface elements- urlText = (EditText) findViewById(R.id.url_field);
25 goButton = (Button) findViewById(R.id.go_button);-
- // Setup event handlers- goButton.setOnClickListener(new OnClickListener() {- public void onClick(View view) {
30 openBrowser();- }- });- urlText.setOnKeyListener(new OnKeyListener() {- public boolean onKey(View view, int keyCode, KeyEvent event) {
35 if (keyCode == KeyEvent.KEYCODE_ENTER) {- openBrowser();- return true;
BROWSING BY INTENT 133
- }- return false;
40 }- });- }- }
Inside onCreate( ), we call setContentView( ) on line 21 to load the view
from its definition in the layout resource, and then we call findViewById( )
on line 24 to get a handle to our two user interface controls.
Line 28 tells Android to run some code when the user selects the Go
button, either by touching it or by navigating to it and pressing the
center D-pad button. When that happens, we call the openBrowser( )
method, which will be defined in a moment.
As a convenience, if the user types an address and hits the Enter key
(if their phone has one), we want the browser to open just like they
had clicked Go. To do this, we define a listener starting on line 33 that
will be called every time the user types a keystroke into the edit field.
If it’s the enter key, then we call the openBrowser( ) method to open the
browser; otherwise, we return false to let the text control handle the key
normally.
Now comes the part you’ve been waiting for: the openBrowser( ) method.
As promised, it’s three lines long:
Download BrowserIntent/src/org/example/browserintent/BrowserIntent.java
/** Open a browser on the URL specified in the text box */
private void openBrowser() {
Uri uri = Uri.parse(urlText.getText().toString());
Intent intent = new Intent(Intent.ACTION_VIEW, uri);
startActivity(intent);
}
The first line retrieves the address of the web page as a string (for exam-
ple, “http://www.android.com”) and converts it to a uniform resource
identifier (URI). The next line creates a new Intent class with an action
of VIEW_ACTION, passing it the Uri class just created as the object we
want to view. Finally, we call the startActivity( ) method to request that
this action be performed.
When the Browser activity starts, it will create its own view (see Fig-
ure 7.2, on the next page), and your program will be paused. If the user
presses the Back key at that point, the browser window will go away,
and your application will continue. But what if you want to see some of

WEB WITH A VIEW 134
Figure 7.2: Viewing a web page with the default browser
your user interface and a web page at the same time? Android allows
you to do that by using the WebView class.
7.2 Web with a View
On your desktop computer, a web browser is a large, complicated,
memory-gobbling program with all sorts of features like bookmarks,
plug-ins, Flash animations, tabs, scroll bars, printing, and so forth.
When I was working on the Eclipse project and someone suggested
replacing some common text views with embedded web browsers, I
thought they were crazy. Wouldn’t it make more sense, I argued, to
simply enhance the text viewer to do italics or tables or whatever it was
that was missing?
It turns out they weren’t crazy because:
WEB WITH A VIEW 135
• A web browser can be (relatively) lean and mean if you strip out
everything but the basic rendering engine.
• If you enhance a text view to add more and more things that a
browser engine can do, you end up with either an overly compli-
cated, bloated text viewer or an underpowered browser.
Android provides a wrapper around the WebKit browser engine called
WebView that you can use to get the real power of a browser with as little
as 1MB of overhead. Although 1MB is still significant on an embedded
device, there are many cases where using a WebView is appropriate.
WebView works pretty much like any other Android view except that it
has a few extra methods specific to the browser. I’m going to show you
how it works by doing an embedded version of the previous example.
This one will be called BrowserView instead of BrowserIntent, since it
uses an embedded View instead of an Intent.
Start by creating a new “Hello, Android” project using these settings:
Project name: BrowserView
Build Target: Android 1.5
Application name: BrowserView
Package name: org.example.browserview
Create Activity: BrowserView
The layout file for BrowserView is similar to the one in BrowserIntent,
except we’ve added a WebView at the bottom:
Download BrowserView/res/layout/main.xml
<?xml version="1.0" encoding="utf-8"?>
<LinearLayout
xmlns:android="http://schemas.android.com/apk/res/android"
android:orientation="vertical"
android:layout_width="fill_parent"
android:layout_height="fill_parent">
<LinearLayout
android:orientation="horizontal"
android:layout_width="fill_parent"
android:layout_height="wrap_content">
<EditText
android:id="@+id/url_field"
android:layout_width="wrap_content"
android:layout_height="wrap_content"
android:layout_weight="1.0"
android:lines="1"
android:inputType="textUri"
android:imeOptions="actionGo" />
<Button
android:id="@+id/go_button"

WEB WITH A VIEW 136
android:layout_width="wrap_content"
android:layout_height="wrap_content"
android:text="@string/go_button" />
</LinearLayout>
<WebView
android:id="@+id/web_view"
android:layout_width="fill_parent"
android:layout_height="wrap_content"
android:layout_weight="1.0" />
</LinearLayout>
We use two LinearLayout controls to make everything appear in the right
place. The outermost control divides the screen into top and bottom
regions; the top has the text area and button, and the bottom has the
WebView. The innermost LinearLayout is the same as before; it just makes
the text area go on the left and the button on the right.
The onCreate( ) method for BrowserView is exactly the same as before,
except that now there is one extra view to look up:
Download BrowserView/src/org/example/browserview/BrowserView.java
import android.webkit.WebView;
// ...
public class BrowserView extends Activity {
private WebView webView;
// ...
@Override
public void onCreate(Bundle savedInstanceState) {
// ...
webView = (WebView) findViewById(R.id.web_view);
// ...
}
}
The openBrowser( ) method, however, is different:
Download BrowserView/src/org/example/browserview/BrowserView.java
/** Open a browser on the URL specified in the text box */
private void openBrowser() {
webView.getSettings().setJavaScriptEnabled(true);
webView.loadUrl(urlText.getText().toString());
}
The loadUrl( ) method causes the browser engine to begin loading and
displaying a web page at the given address. It returns immediately even
though the actual loading may take some time (if it finishes at all).
Don’t forget to update the string resources:
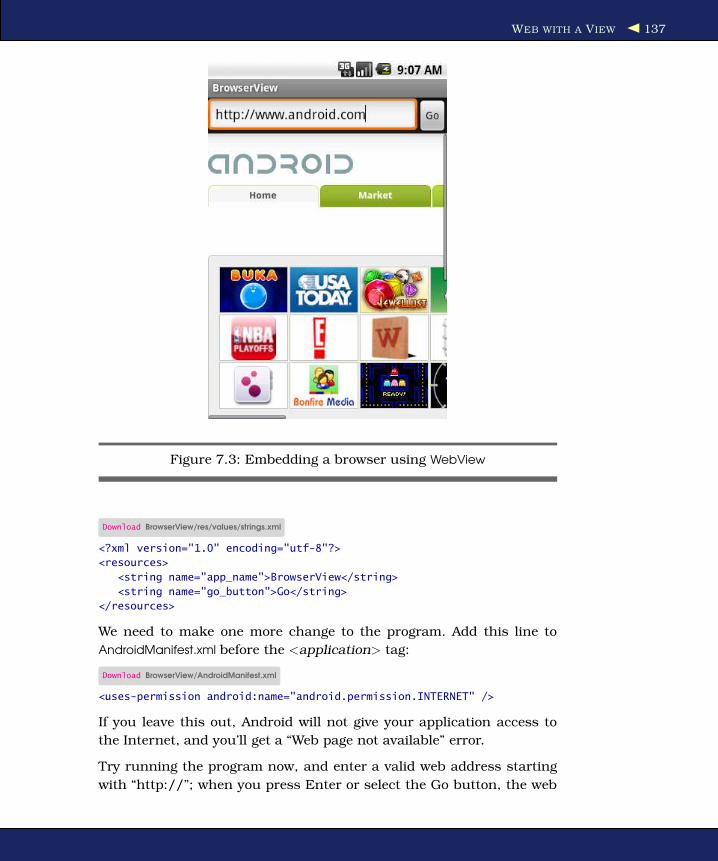
WEB WITH A VIEW 137
Figure 7.3: Embedding a browser using WebView
Download BrowserView/res/values/strings.xml
<?xml version="1.0" encoding="utf-8"?>
<resources>
<string name="app_name">BrowserView</string>
<string name="go_button">Go</string>
</resources>
We need to make one more change to the program. Add this line to
AndroidManifest.xml before the <application> tag:
Download BrowserView/AndroidManifest.xml
<uses-permission android:name="android.permission.INTERNET" />
If you leave this out, Android will not give your application access to
the Internet, and you’ll get a “Web page not available” error.
Try running the program now, and enter a valid web address starting
with “http://”; when you press Enter or select the Go button, the web

WEB WITH A VIEW 138
Joe Asks. . .
Why Didn’t BrowserIntent Need <uses-permission>?
The previous example, BrowserIntent, simply fired off an intent torequest that some other application view the web page. Thatother application (the browser) is the one that needs to ask forInternet permissions in its own AndroidManifest.xml.
page should appear (see Figure 7.3, on the preceding page).
WebView has dozens of other methods you can use to control what is
being displayed or get notifications on state changes.
You can find a complete list in the online documentation for WebView,
but here are the methods you are most likely to need:
• addJavascriptInterface( ): Allows a Java object to be accessed from
JavaScript (more on this one in the next section)
• createSnapshot( ): Creates a screenshot of the current page
• getSettings( ): Returns a WebSettings object used to control the
settings
• loadData( ): Loads the given string data into the browser
• loadDataWithBaseURL( ): Loads the given data using a base URL
• loadUrl( ): Loads a web page from the given URL
• setDownloadListener( ): Registers callbacks for download events,
such as when the user downloads a .zip or .apk file
• setWebChromeClient( ): Registers callbacks for events that need to
be done outside the WebView rectangle, such as updating the title
or progress bar or opening a JavaScript dialog box
• setWebViewClient( ): Lets the application set hooks in the browser to
intercept events such as resource loads, key presses, and autho-
rization requests
• stopLoading( ): Stops the current page from loading
One of the most powerful things you can do with the WebView control
is to talk back and forth between it and the Android application that
contains it. Let’s take a closer look at this feature now.

FROM JAVASCRIPT TO JAVA AND BACK 139
Joe Asks. . .
Is Allowing JavaScript to Call Java Dangerous?
Whenever you allow a web page to access local resources orcall functions outside the browser sandbox, you need to con-sider the security implications very carefully. For example, youwouldn’t want to create a method to allow JavaScript to readdata from any arbitrary path name because that might exposesome private data to a malicious site that knew about yourmethod and your filenames.
Here are a few things to keep in mind. First, don’t rely onsecurity by obscurity. Enforce limits on the pages that can useyour methods and on the things those methods can do. Andremember the golden rule of security: don’t rule things out;rule them in. In other words, don’t try to check for all thebad things that someone can ask you to do (for example,invalid characters in a query). You’re bound to miss something.Instead, disallow everything, and pass only the good things youknow are safe.
7.3 From JavaScript to Java and Back
Your Android device can do a number of cool things such as store local
data, draw graphics, play music, make calls, and determine its location.
Wouldn’t it be nice if you could access that functionality from a web
page? With an embedded WebView control, you can.
The key is the addJavascriptInterface( ) method in the WebView class.
You can use it to extend the Document Object Model (DOM) inside the
embedded browser and to define a new object that JavaScript code can
access. When the JavaScript code invokes methods on that object, it
will actually be invoking methods in your Android program.
You can call JavaScript methods from your Android program too. All
you have to do is call the loadUrl( ) method, passing it a URL of the form
javascript:code-to-execute. Instead of going to a new page, the browser
will execute the given JavaScript expression inside the current page.
You can call a method, change JavaScript variables, modify the browser
document—anything you need.
To demonstrate calls between JavaScript in the WebView and Java in

FROM JAVASCRIPT TO JAVA AND BACK 140
Figure 7.4: Communicating between Android and an embedded Web-
View
the Android program, let us now build a program that is half HTML/
JavaScript and half Android (see Figure 7.4). The top part of the appli-
cation window is a WebView control, and the bottom part is a TextView
and Button from the Android user interface. When you click the buttons
and links, it makes calls between the two environments.
Start by creating a “Hello, Android” program using these parameters:
Project name: LocalBrowser
Build Target: Android 1.5
Application name: LocalBrowser
Package name: org.example.localbrowser
Create Activity: LocalBrowser
The user interface for this program will be split into two parts. The first
part is defined in the Android layout file, res/layout/main.xml:

FROM JAVASCRIPT TO JAVA AND BACK 141
Download LocalBrowser/res/layout/main.xml
<?xml version="1.0" encoding="utf-8"?>
<LinearLayout
xmlns:android="http://schemas.android.com/apk/res/android"
android:orientation="vertical"
android:layout_width="fill_parent"
android:layout_height="fill_parent">
<WebView
android:id="@+id/web_view"
android:layout_width="fill_parent"
android:layout_height="fill_parent"
android:layout_weight="1.0" />
<LinearLayout
android:orientation="vertical"
android:layout_width="fill_parent"
android:layout_height="fill_parent"
android:layout_weight="1.0"
android:padding="5sp">
<TextView
android:layout_width="fill_parent"
android:layout_height="wrap_content"
android:textSize="24sp"
android:text="TextView" />
<Button
android:id="@+id/button"
android:text="@string/call_javascript_from_android"
android:layout_width="wrap_content"
android:layout_height="wrap_content"
android:textSize="18sp" />
<TextView
android:id="@+id/text_view"
android:layout_width="fill_parent"
android:layout_height="wrap_content"
android:textSize="18sp" />
</LinearLayout>
</LinearLayout>
The second part is the index.html file that will be loaded into the Web-
View. This file goes in the assets directory, not the res directory, because
it’s not a compiled resource. Anything in the assets directory is copied
verbatim onto local storage when your program is installed. The direc-
tory is intended to be used for local copies of HTML, images, and scripts
that the browser can view without being connected to the network.
Download LocalBrowser/assets/index.html
Line 1 <html>- <head>- <script language="JavaScript">- function callJS(arg) {

FROM JAVASCRIPT TO JAVA AND BACK 142
5 document.getElementById('replaceme').innerHTML = arg;- }- </script>- </head>- <body>
10 <h1>WebView</h1>- <p>- <a href="#" onclick="window.alert('Alert from JavaScript')">- Display JavaScript alert</a>- </p>
15 <p>- <a href="#" onclick="window.android.callAndroid('Hello from Browser')">- Call Android from JavaScript</a>- </p>- <p id="replaceme">
20 </p>- </body>- </html>
Line 4 of index.html defines the callJS( ) function that our Android pro-
gram will be calling later. It takes a string argument and inserts it at
the replaceme tag, which is at line 19.
In Figure 7.4, on page 140, you see two HTML links that are defined
starting at line 12. The first one just calls a standard window.alert( ) func-
tion to open a window displaying a short message. The second link, at
line 16, calls the callAndroid( ) method on the window.an-
droid object. If you loaded this page into a normal web browser, win-
dow.android would be undefined. But since we’re embedding a browser
into an Android application, we can define the object ourselves so the
page can use it.
Next we turn to the Android code in the LocalBrowser class. Here’s the
basic outline, including all the imports we’ll need later:
Download LocalBrowser/src/org/example/localbrowser/LocalBrowser.java
Line 1 package org.example.localbrowser;-
- import android.app.Activity;- import android.os.Bundle;5 import android.os.Handler;- import android.util.Log;- import android.view.View;- import android.view.View.OnClickListener;- import android.webkit.JsResult;
10 import android.webkit.WebChromeClient;- import android.webkit.WebView;- import android.widget.Button;- import android.widget.TextView;

FROM JAVASCRIPT TO JAVA AND BACK 143
- import android.widget.Toast;15
- public class LocalBrowser extends Activity {- private static final String TAG = "LocalBrowser";- private final Handler handler = new Handler();- private WebView webView;
20 private TextView textView;- private Button button;-
- @Override- public void onCreate(Bundle savedInstanceState) {
25 super.onCreate(savedInstanceState);- setContentView(R.layout.main);-
- // Find the Android controls on the screen- webView = (WebView) findViewById(R.id.web_view);
30 textView = (TextView) findViewById(R.id.text_view);- button = (Button) findViewById(R.id.button);- // Rest of onCreate follows...- }- }
Note the initialization of a Handler object at line 18. JavaScript calls
come in on a special thread dedicated to the browser, but Android user
interface calls can be made only from the main (GUI) thread. We’ll use
the Handler class to make the transition.
To call Android Java code from JavaScript, you need to define a plain
old Java object with one or more methods, like this:
Download LocalBrowser/src/org/example/localbrowser/LocalBrowser.java
/** Object exposed to JavaScript */
private class AndroidBridge {
public void callAndroid(final String arg) { // must be final
handler.post(new Runnable() {
public void run() {
Log.d(TAG, "callAndroid(" + arg + ")");
textView.setText(arg);
}
});
}
}
When JavaScript calls the callAndroid( ) method, the application creates
a new Runnable object and post it on the running queue of the main
thread using Handler.post( ). As soon as the main thread gets a chance,
it will invoke the run( ) method, which will call setText( ) to change the text
on the TextView object.
Now it’s time to tie everything together in the onCreate( ) method. First
FROM JAVASCRIPT TO JAVA AND BACK 144
we turn on JavaScript (it’s off by default) and register our bridge to
JavaScript:
Download LocalBrowser/src/org/example/localbrowser/LocalBrowser.java
// Turn on JavaScript in the embedded browser
webView.getSettings().setJavaScriptEnabled(true);
// Expose a Java object to JavaScript in the browser
webView.addJavascriptInterface(new AndroidBridge(),
"android");
Then we create an anonymous WebChromeClient object and register it
with the setWebChromeClient( ) method.
Download LocalBrowser/src/org/example/localbrowser/LocalBrowser.java
// Set up a function to be called when JavaScript tries
// to open an alert window
webView.setWebChromeClient(new WebChromeClient() {
@Override
public boolean onJsAlert(final WebView view,
final String url, final String message,
JsResult result) {
Log.d(TAG, "onJsAlert(" + view + ", " + url + ", "
+ message + ", " + result + ")");
Toast.makeText(LocalBrowser.this, message, 3000).show();
result.confirm();
return true; // I handled it
}
});
The term chrome here refers to all the trimmings around a browser
window. If this were a full-blown browser client, we’d need to handle
navigation, bookmarks, menus, and so forth. In this case, all we want
to do is change what happens with JavaScript code when the browser
tries to open a JavaScript alert (using window.alert( )). Inside onJsAlert( )
we use the Android Toast class to create a message window that will
appear for a short amount of time (in this case, 3000 milliseconds, or 3
seconds).
Once we finish configuring the WebView, we can use loadUrl( ) to load the
local web page:
Download LocalBrowser/src/org/example/localbrowser/LocalBrowser.java
// Load the web page from a local asset
webView.loadUrl("file:///android_asset/index.html");
URLs of the form “file:///android_asset/filename” (note the three for-
ward slashes) have a special meaning to Android’s browser engine. As

FROM JAVASCRIPT TO JAVA AND BACK 145
you might have guessed, they refer to files in the assets directory. In this
case, we’re loading the index.html file defined earlier.
Here is the res/values/strings.xml file for the LocalBrowser example:
Download LocalBrowser/res/values/strings.xml
<?xml version="1.0" encoding="utf-8"?>
<resources>
<string name="app_name">LocalBrowser</string>
<string name="call_javascript_from_android">
Call JavaScript from Android
</string>
</resources>
The last thing we have to do is wire up the button at the bottom of the
screen so it will make a JavaScript call (a call from Java to JavaScript).
Download LocalBrowser/src/org/example/localbrowser/LocalBrowser.java
// This function will be called when the user presses the
// button on the Android side
button.setOnClickListener(new OnClickListener() {
public void onClick(View view) {
Log.d(TAG, "onClick(" + view + ")");
webView.loadUrl("javascript:callJS('Hello from Android')");
}
});
To do that, we set a listener for button clicks using setOnClickListener( ).
When the button is pressed, onClick( ) is called, which turns around and
calls WebView.loadUrl( ), passing it a JavaScript expression to evaluate in
the browser. The expression is a call to the callJS( ) function defined in
index.html.
Run the program now, and try it. When you click “Display JavaScript
alert,” an Android message window will appear. When you click “Call
Android from JavaScript,” the string “Hello from Browser” will be dis-
played in an Android text control. And finally, when you press the “Call
JavaScript from Android” button, the string “Hello from Android” is sent
to the browser and inserted in the HTML where it will be displayed at
the end of the web page.
Sometimes you don’t need to display a web page, but you just need to
access some kind of web service or other server-side resource. In the
next section, I’ll show you how to do this.

USING WEB SERVICES 146
7.4 Using Web Services
Android provides a full set of Java-standard networking APIs, such as
the java.net.HttpURLConnection package, that you can use in your pro-
grams. The tricky part is to make the calls asynchronously so that your
program’s user interface will be responsive at all times.
Consider what would happen if you just make a blocking network call
in your main (GUI) thread. Until that call returns (and it might never
return), your application cannot respond to any user interface events
such as keystrokes or button presses. It will appear hung to the user.
Obviously, that’s something you’ll have to avoid.
The java.util.concurrent package is perfect for this kind of work. First cre-
ated by Doug Lea as a stand-alone library and later incorporated into
Java 5, this package supports concurrent programming at a higher
level than the regular Java Thread class. The ExecutorService class man-
ages one or more threads for you, and all you have to do is submit
tasks (instances of Runnable or Callable) to the executor to have them
run. An instance of the Future class is returned, which is a reference to
some as-yet-unknown future value that will be returned by your task
(if any). You can limit the number of threads that are created, and you
can interrupt running tasks if necessary.
To illustrate these concepts, let’s create a fun little program that calls
the Google Translation API.5 Have you ever laughed at strange trans-
lations to and from foreign languages, especially computer-generated
translations? This program will let the user enter a phrase in one lan-
guage, ask Google to translate to a second language, and then ask
Google to translate it back into the first language. Ideally, you’d end
up with the same words you started with, but this is not always the
case, as you can see in Figure 7.5, on the next page.
To use this program, simply select the starting and target languages,
and then start typing a phrase. As you type, the program will use the
Google Translation web service to translate your text into and out of
the target language.
To create this application, start with a “Hello, Android” application
using these parameters:
Project name: Translate
5. http://code.google.com/apis/ajaxlanguage

USING WEB SERVICES 147
Figure 7.5: Machine translation is still a work in progress.
Lost in Translation
When I first thought of this example, I imagined that it would beeasy to get some hilarious results. Unfortunately (or fortunately,depending on your point of view), the Google service doesa pretty good job with most languages. If you find any espe-cially funny cases where the translator really flubs up, pleasepost them on the discussion forum at the book’s website (http://
pragprog.com/titles/eband) for others to enjoy.

USING WEB SERVICES 148
Build Target: Android 1.5
Application name: Translate
Package name: org.example.translate
Create Activity: Translate
Since this example will access the Internet to make a web service call,
we will need to tell Android to grant us permission. Add this line to
AndroidManifest.xml before the <application> XML tag:
Download Translate/AndroidManifest.xml
<uses-permission android:name="android.permission.INTERNET" />
The layout for this example is a little more complicated than usual, so
we’ll use the TableLayout view. TableLayout lets you arrange your views
into rows and columns, taking care of alignment and stretching the
columns to fit the content. It’s similar to using <table> and <tr> tags
in HTML.
Download Translate/res/layout/main.xml
<?xml version="1.0" encoding="utf-8"?>
<ScrollView
xmlns:android="http://schemas.android.com/apk/res/android"
android:layout_width="fill_parent"
android:layout_height="fill_parent">
<TableLayout
android:layout_width="fill_parent"
android:layout_height="fill_parent"
android:stretchColumns="1"
android:padding="10dip">
<TableRow>
<TextView android:text="@string/from_text" />
<Spinner android:id="@+id/from_language" />
</TableRow>
<EditText
android:id="@+id/original_text"
android:hint="@string/original_hint"
android:padding="10dip"
android:textSize="18sp" />
<TableRow>
<TextView android:text="@string/to_text" />
<Spinner android:id="@+id/to_language" />
</TableRow>
<TextView
android:id="@+id/translated_text"
android:padding="10dip"
android:textSize="18sp" />
<TextView android:text="@string/back_text" />
<TextView
android:id="@+id/retranslated_text"
android:padding="10dip"
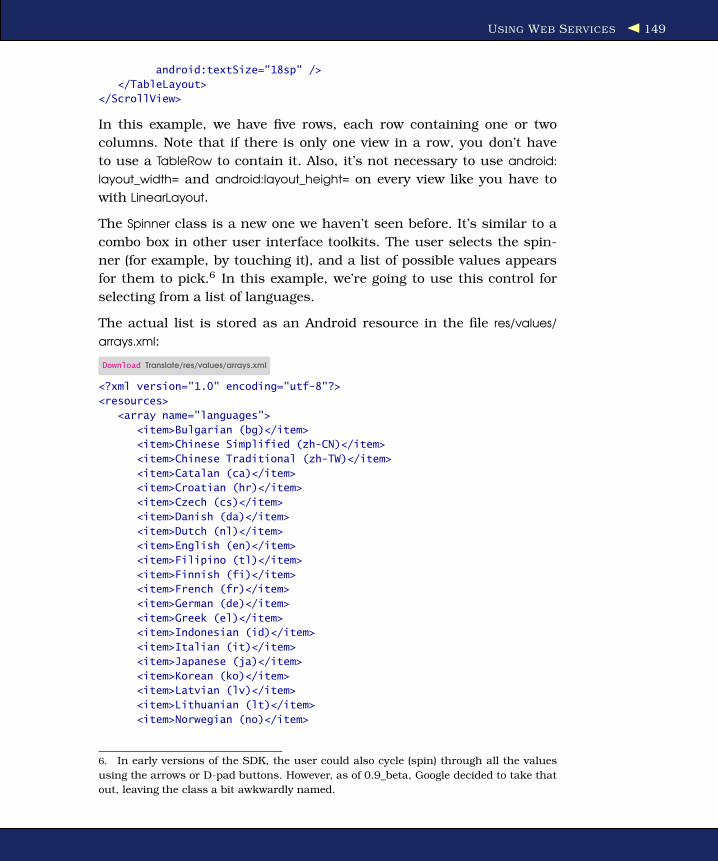
USING WEB SERVICES 149
android:textSize="18sp" />
</TableLayout>
</ScrollView>
In this example, we have five rows, each row containing one or two
columns. Note that if there is only one view in a row, you don’t have
to use a TableRow to contain it. Also, it’s not necessary to use android:
layout_width= and android:layout_height= on every view like you have to
with LinearLayout.
The Spinner class is a new one we haven’t seen before. It’s similar to a
combo box in other user interface toolkits. The user selects the spin-
ner (for example, by touching it), and a list of possible values appears
for them to pick.6 In this example, we’re going to use this control for
selecting from a list of languages.
The actual list is stored as an Android resource in the file res/values/
arrays.xml:
Download Translate/res/values/arrays.xml
<?xml version="1.0" encoding="utf-8"?>
<resources>
<array name="languages">
<item>Bulgarian (bg)</item>
<item>Chinese Simplified (zh-CN)</item>
<item>Chinese Traditional (zh-TW)</item>
<item>Catalan (ca)</item>
<item>Croatian (hr)</item>
<item>Czech (cs)</item>
<item>Danish (da)</item>
<item>Dutch (nl)</item>
<item>English (en)</item>
<item>Filipino (tl)</item>
<item>Finnish (fi)</item>
<item>French (fr)</item>
<item>German (de)</item>
<item>Greek (el)</item>
<item>Indonesian (id)</item>
<item>Italian (it)</item>
<item>Japanese (ja)</item>
<item>Korean (ko)</item>
<item>Latvian (lv)</item>
<item>Lithuanian (lt)</item>
<item>Norwegian (no)</item>
6. In early versions of the SDK, the user could also cycle (spin) through all the values
using the arrows or D-pad buttons. However, as of 0.9_beta, Google decided to take that
out, leaving the class a bit awkwardly named.

USING WEB SERVICES 150
<item>Polish (pl)</item>
<item>Portuguese (pt-PT)</item>
<item>Romanian (ro)</item>
<item>Russian (ru)</item>
<item>Spanish (es)</item>
<item>Serbian (sr)</item>
<item>Slovak (sk)</item>
<item>Slovenian (sl)</item>
<item>Swedish (sv)</item>
<item>Ukrainian (uk)</item>
</array>
</resources>
This defines a list called languages that contains most of the languages
recognized by the Google Translation API. Note that each value has a
long name (for example, Spanish) and a short name (for example, es).
We’ll use the short name when passing the language to the translator.
Now let’s start modifying the Translate class. Here’s the basic outline:
Download Translate/src/org/example/translate/Translate.java
Line 1 package org.example.translate;-
- import java.util.concurrent.ExecutorService;- import java.util.concurrent.Executors;5 import java.util.concurrent.Future;- import java.util.concurrent.RejectedExecutionException;-
- import android.app.Activity;- import android.os.Bundle;
10 import android.os.Handler;- import android.text.Editable;- import android.text.TextWatcher;- import android.view.View;- import android.widget.AdapterView;
15 import android.widget.ArrayAdapter;- import android.widget.EditText;- import android.widget.Spinner;- import android.widget.TextView;- import android.widget.AdapterView.OnItemSelectedListener;
20
- public class Translate extends Activity {- private Spinner fromSpinner;- private Spinner toSpinner;- private EditText origText;
25 private TextView transText;- private TextView retransText;-
- private TextWatcher textWatcher;- private OnItemSelectedListener itemListener;

USING WEB SERVICES 151
30
- private Handler guiThread;- private ExecutorService transThread;- private Runnable updateTask;- private Future transPending;
35
- @Override- public void onCreate(Bundle savedInstanceState) {- super.onCreate(savedInstanceState);-
40 setContentView(R.layout.main);- initThreading();- findViews();- setAdapters();- setListeners();
45 }- }
After declaring a few variables, we define the onCreate( ) method starting
at line 37 to initialize the threading and user interface. Don’t worry,
we’ll fill out all those other methods it calls as we go.
The findViews( ) method, called from line 42, just gets a handle to all the
user interface elements defined in the layout file:
Download Translate/src/org/example/translate/Translate.java
/** Get a handle to all user interface elements */
private void findViews() {
fromSpinner = (Spinner) findViewById(R.id.from_language);
toSpinner = (Spinner) findViewById(R.id.to_language);
origText = (EditText) findViewById(R.id.original_text);
transText = (TextView) findViewById(R.id.translated_text);
retransText = (TextView) findViewById(R.id.retranslated_text);
}
The setAdapters( ) method, called from onCreate( ) on line 43, defines a
data source for the spinners:
Download Translate/src/org/example/translate/Translate.java
/** Define data source for the spinners */
private void setAdapters() {
// Spinner list comes from a resource,
// Spinner user interface uses standard layouts
ArrayAdapter<CharSequence> adapter = ArrayAdapter.createFromResource(
this, R.array.languages,
android.R.layout.simple_spinner_item);
adapter.setDropDownViewResource(
android.R.layout.simple_spinner_dropdown_item);
fromSpinner.setAdapter(adapter);
toSpinner.setAdapter(adapter);

USING WEB SERVICES 152
Joe Asks. . .
Is All This Delay and Threading Stuff Really Necessary?
One reason you need to do it this way is to avoid making toomany calls to the external web service. Imagine what happensas the user enters the word scissors. The program sees the wordtyped in a character at a time, first s, then c, then i, and soon, possibly with backspaces because nobody can remem-ber how to spell scissors. Do you really want to make a webservice request for every character? Not really. Besides puttingunnecessary load on the server, it would be wasteful in termsof power. Each request requires the device’s radio to transmitand receive several data packets, which uses up a bit of bat-tery power. You want to wait until the user finishes typing beforesending the request, but how do you tell they are done?
The algorithm used here is that as soon as the user types a let-ter, a delayed request is started. If they don’t type another let-ter before the one-second delay is up, then the request goesthrough. Otherwise, the first request is removed from the requestqueue before it goes out. If the request is already in progress,we try to interrupt it. The same goes for language changes,except we use a smaller delay. The good news is that now thatI’ve done it once for you, you can use the same pattern in yourown asynchronous programs.
// Automatically select two spinner items
fromSpinner.setSelection(8); // English (en)
toSpinner.setSelection(11); // French (fr)
}
In Android, an Adapter is a class that binds a data source (in this case,
the languages array defined in arrays.xml) to a user interface control (in
this case, a spinner). We use the standard layouts provided by Android
for individual items in the list and for the drop-down box you see when
you select the spinner.
Next we set up the user interface handlers in the setListeners( ) routine
(called from line 44 of onCreate( )):
Download Translate/src/org/example/translate/Translate.java
/** Setup user interface event handlers */
private void setListeners() {
// Define event listeners

USING WEB SERVICES 153
textWatcher = new TextWatcher() {
public void beforeTextChanged(CharSequence s, int start,
int count, int after) {
/* Do nothing */
}
public void onTextChanged(CharSequence s, int start,
int before, int count) {
queueUpdate(1000 /* milliseconds */);
}
public void afterTextChanged(Editable s) {
/* Do nothing */
}
};
itemListener = new OnItemSelectedListener() {
public void onItemSelected(AdapterView parent, View v,
int position, long id) {
queueUpdate(200 /* milliseconds */);
}
public void onNothingSelected(AdapterView parent) {
/* Do nothing */
}
};
// Set listeners on graphical user interface widgets
origText.addTextChangedListener(textWatcher);
fromSpinner.setOnItemSelectedListener(itemListener);
toSpinner.setOnItemSelectedListener(itemListener);
}
We define two listeners: one that is called when the text to translate is
changed and one that is called when the language is changed. queue-
Update( ) puts a delayed update request on the main thread’s to-do list
using a Handler. We arbitrarily use a 1,000-millisecond delay for text
changes and a 200-millisecond delay for language changes.
The update request is defined inside the initThreading( ) method:
Download Translate/src/org/example/translate/Translate.java
Line 1 /**- * Initialize multi-threading. There are two threads: 1) The main- * graphical user interface thread already started by Android,- * and 2) The translate thread, which we start using an executor.5 */- private void initThreading() {- guiThread = new Handler();- transThread = Executors.newSingleThreadExecutor();-
10 // This task does a translation and updates the screen- updateTask = new Runnable() {- public void run() {

USING WEB SERVICES 154
- // Get text to translate- String original = origText.getText().toString().trim();
15
- // Cancel previous translation if there was one- if (transPending != null)- transPending.cancel(true);-
20 // Take care of the easy case- if (original.length() == 0) {- transText.setText(R.string.empty);- retransText.setText(R.string.empty);- } else {
25 // Let user know we're doing something- transText.setText(R.string.translating);- retransText.setText(R.string.translating);-
- // Begin translation now but don't wait for it30 try {
- TranslateTask translateTask = new TranslateTask(- Translate.this, // reference to activity- original, // original text- getLang(fromSpinner), // from language
35 getLang(toSpinner) // to language- );- transPending = transThread.submit(translateTask);- } catch (RejectedExecutionException e) {- // Unable to start new task
40 transText.setText(R.string.translation_error);- retransText.setText(R.string.translation_error);- }- }- }
45 };- }
We have two threads: the main Android thread used for the user inter-
face and a translate thread that we’ll create for running the actual
translation job. We represent the first one with an Android Handler and
the second with Java’s ExecutorService.
Line 11 defines the update task, which will be scheduled by the queue-
Update( ) method. When it gets to run, it first fetches the current text to
translate and then prepares to send a translation job to the translate
thread. It cancels any translation that is already in progress (on line
18), takes care of the case where there is no text to translate (line 22),
and fills in the two text controls where translated text will appear with
the string “Translating...” (line 26). That text will be replaced later by
the actual translated text.
Finally, on line 31, we create an instance of TranslateTask, giving it a
reference to the Translate activity so it can call back to change the text,

USING WEB SERVICES 155
a string containing the original text, and the short names of the two
languages selected in the spinners. Line 37 submits the new task to the
translation thread, returning a reference to the Future return value. In
this case, we don’t really have a return value since TranslateTask changes
the GUI directly, but we use the Future reference back on line 18 to
cancel the translation if necessary.
To finish up the Translate class, here are a few utility functions used in
other places:
Download Translate/src/org/example/translate/Translate.java
/** Extract the language code from the current spinner item */
private String getLang(Spinner spinner) {
String result = spinner.getSelectedItem().toString();
int lparen = result.indexOf('(');
int rparen = result.indexOf(')');
result = result.substring(lparen + 1, rparen);
return result;
}
/** Request an update to start after a short delay */
private void queueUpdate(long delayMillis) {
// Cancel previous update if it hasn't started yet
guiThread.removeCallbacks(updateTask);
// Start an update if nothing happens after a few milliseconds
guiThread.postDelayed(updateTask, delayMillis);
}
/** Modify text on the screen (called from another thread) */
public void setTranslated(String text) {
guiSetText(transText, text);
}
/** Modify text on the screen (called from another thread) */
public void setRetranslated(String text) {
guiSetText(retransText, text);
}
/** All changes to the GUI must be done in the GUI thread */
private void guiSetText(final TextView view, final String text) {
guiThread.post(new Runnable() {
public void run() {
view.setText(text);
}
});
}
The getLang( ) method figures out which item is currently selected in a
spinner, gets the string for that item, and parses out the short language

FAST -FORWARD >> 156
code needed by the Translation API.
queueUpdate( ) puts an update request on the main thread’s request
queue but tells it to wait a little while before actually running it. If there
was already a request on the queue, it’s removed.
The setTranslated( ) and setRetranslated( ) methods will be used by Trans-
lateTask to update the user interface when translated results come back
from the web service. They both call a private function called guiSet-
Text( ).
guiSetText( ) uses the Handler.post( ) method to ask the main GUI thread
to update the text on a TextView control. This extra step is necessary
because you can’t call user interface functions from non-user-interface
threads, and guiSetText( ) will be called by the translate thread.
Here is the res/values/strings.xml file for the Translate example:
Download Translate/res/values/strings.xml
<?xml version="1.0" encoding="utf-8"?>
<resources>
<string name="app_name">Translate</string>
<string name="from_text">From:</string>
<string name="to_text">To:</string>
<string name="back_text">And back again:</string>
<string name="original_hint">Enter text to translate</string>
<string name="empty"></string>
<string name="translating">Translating...</string>
<string name="translation_error">(Translation error)</string>
<string name="translation_interrupted">(Translation
interrupted)</string>
</resources>
I’m not going to include the source to the TranslateTask class here because
it’s rather long and contains nothing Android specific except for a few
debugging messages. If you’d like to see a nice example of calling a
RESTful web service using HttpURLConnection, parsing results in Java-
Script Object Notation (JSON) format, and handling all sorts of net-
work errors and requests for interruptions, then you can download the
source from the book’s website.
7.5 Fast-Forward >>
In this chapter, we covered a lot of ground, from opening a simple web
page to using an asynchronous web service. HTML/JavaScript pro-
gramming is beyond the scope of this book, but there are several good
FAST -FORWARD >> 157
references available. If you’re going to do much concurrent program-
ming with classes such as ExecutorService, I recommend Java Concur-
rency in Practice [Goe06] by Brian Goetz.
The next chapter will explore a new level of interactivity through loca-
tion and sensor services. If you’re anxious to learn more about data
sources and data binding, you can skip ahead to Chapter 9, Putting
SQL to Work, on page 175.

Chapter 8
Locating and SensingThe Android platform uses many different technologies. Some of them
are new, and some have been seen before in other settings. What’s
unique about Android is how these technologies work together. In this
chapter, we’ll consider the following:
• Location awareness, through inexpensive GPS devices
• Handheld accelerometers, such as those found on the Nintendo
Wii remote
• Mashups, often combining maps with other information
Several popular Android programs use these concepts to create a more
compelling and relevant experience for the user. For example, the Locale
application1 can adapt the settings on your phone based on where you
are. Are you always forgetting to set your ringer to vibrate when you’re
at work or the movies? Locale can take care of that using the Android
Location API described here.
8.1 Location, Location, Location
Right now there are 31 satellites zipping around the world with noth-
ing better to do than help you find your way to the grocery store. The
Global Positioning System (GPS), originally developed by the military
but then converted to civilian use, beams highly precise time signals
to Earth-based receivers such as the one in your Android phone. With
1. http://www.androidlocale.com
LOCATION, LOCATION, LOCATION 159
Joe Asks. . .
Does GPS Let Anyone Snoop on My Location?
No. GPS receivers are just that—receivers. The GPS chip, andthus any program running in your Android device, knows whereit is. But unless one of those programs deliberately transmits thatinformation, nobody can use it to find you.
good reception and a little math, the GPS chip can figure out your posi-
tion to within 50 feet.2
In addition to GPS, Android also supports calculating your position
using information from nearby cell phone towers, and if you’re con-
nected to a wifi hotspot, it can use that too. Keep in mind that all these
location providers are unreliable to some extent. When you walk inside
a building, for example, GPS signals can’t reach you.
To demonstrate Android’s location services, let’s write a test program
that simply displays your current position and keeps updating it on the
screen as you move around. You can see the program in Figure 8.1, on
the next page.
Where Am I?
Start by creating a “Hello, Android” application using these parameters
in the New Project wizard:
Project name: LocationTest
Build Target: Android 1.5
Application name: LocationTest
Package name: org.example.locationtest
Create Activity: LocationTest
Access to location information is protected by Android permissions. To
gain access, you’ll need to add these lines in the AndroidManifest.xml file
before the <application> tag:
Download LocationTest/AndroidManifest.xml
<uses-permission android:name="android.permission.ACCESS_COARSE_LOCATION" />
2. You don’t have to know how GPS works to use it, but if you’re curious, see
http://adventure.howstuffworks.com/gps.htm.
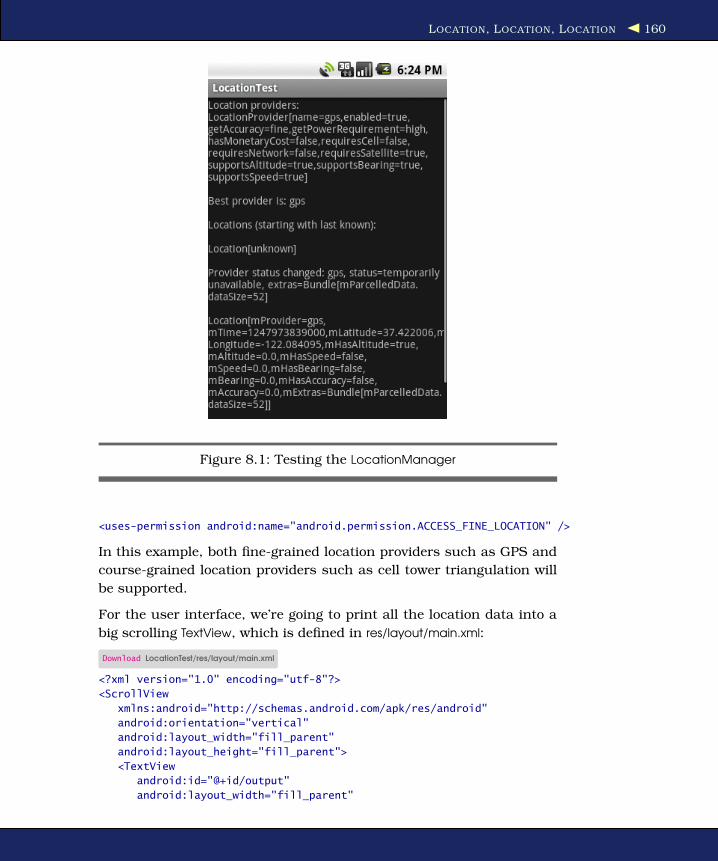
LOCATION, LOCATION, LOCATION 160
Figure 8.1: Testing the LocationManager
<uses-permission android:name="android.permission.ACCESS_FINE_LOCATION" />
In this example, both fine-grained location providers such as GPS and
course-grained location providers such as cell tower triangulation will
be supported.
For the user interface, we’re going to print all the location data into a
big scrolling TextView, which is defined in res/layout/main.xml:
Download LocationTest/res/layout/main.xml
<?xml version="1.0" encoding="utf-8"?>
<ScrollView
xmlns:android="http://schemas.android.com/apk/res/android"
android:orientation="vertical"
android:layout_width="fill_parent"
android:layout_height="fill_parent">
<TextView
android:id="@+id/output"
android:layout_width="fill_parent"
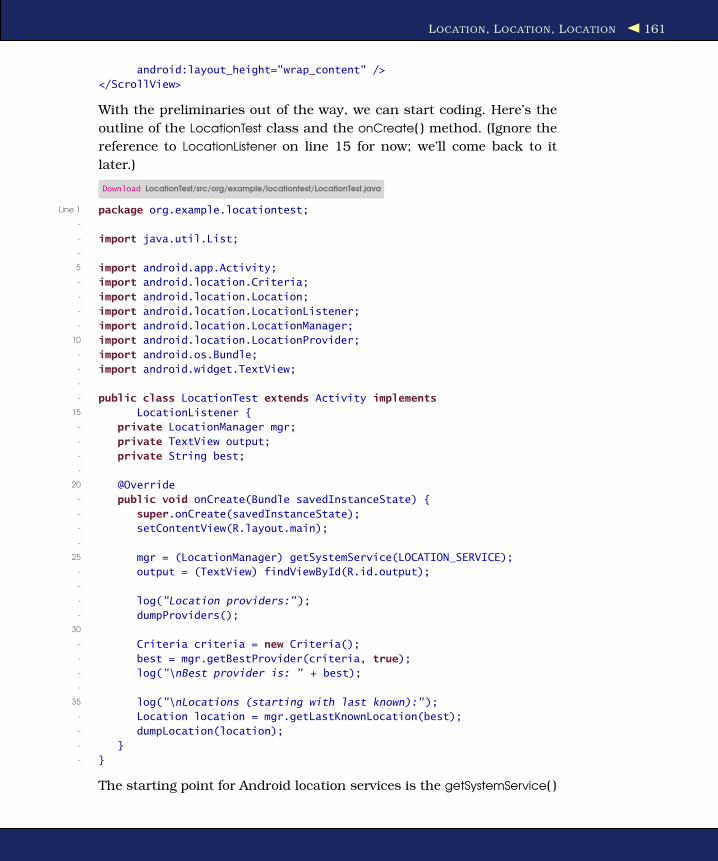
LOCATION, LOCATION, LOCATION 161
android:layout_height="wrap_content" />
</ScrollView>
With the preliminaries out of the way, we can start coding. Here’s the
outline of the LocationTest class and the onCreate( ) method. (Ignore the
reference to LocationListener on line 15 for now; we’ll come back to it
later.)
Download LocationTest/src/org/example/locationtest/LocationTest.java
Line 1 package org.example.locationtest;-
- import java.util.List;-
5 import android.app.Activity;- import android.location.Criteria;- import android.location.Location;- import android.location.LocationListener;- import android.location.LocationManager;
10 import android.location.LocationProvider;- import android.os.Bundle;- import android.widget.TextView;-
- public class LocationTest extends Activity implements
15 LocationListener {- private LocationManager mgr;- private TextView output;- private String best;-
20 @Override- public void onCreate(Bundle savedInstanceState) {- super.onCreate(savedInstanceState);- setContentView(R.layout.main);-
25 mgr = (LocationManager) getSystemService(LOCATION_SERVICE);- output = (TextView) findViewById(R.id.output);-
- log("Location providers:");- dumpProviders();
30
- Criteria criteria = new Criteria();- best = mgr.getBestProvider(criteria, true);- log("\nBest provider is: " + best);-
35 log("\nLocations (starting with last known):");- Location location = mgr.getLastKnownLocation(best);- dumpLocation(location);- }- }
The starting point for Android location services is the getSystemService( )

LOCATION, LOCATION, LOCATION 162
call on line 25. It returns a LocationManager class that we save into a
field for later use.
On line 29, we call our dumpProviders( ) method to print a list of all the
location providers in the system.
Next we need to pick one of the possible providers to use. I’ve seen
some examples that simply pick the first available one, but I recom-
mend using the getBestProvider( ) method, as shown here. Android will
pick the best provider according to a Criteria that you provide (see line
31). If you have any restrictions on cost, power, accuracy, and so on,
this is where you put them. In this example, there are no restrictions.
Depending on the provider, it may take some time for the device to
figure out your current location. This could be a few seconds, a minute,
or more. However, Android remembers the last position it returned, so
we can query and print that immediately on line 36. This location could
be out of date—for example, if the device was turned off and moved—
but it’s usually better than nothing.
Knowing where we were is only half the fun. Where are we going next?
Updating the Location
To have Android notify you about location changes, call the requestLo-
cationUpdates( ) method on the LocationManager object. To save battery
power, we want updates only when the program is in the foreground.
Therefore, we need to hook into the Android activity life-cycle methods
by overriding onResume( ) and onPause( ):
Download LocationTest/src/org/example/locationtest/LocationTest.java
@Override
protected void onResume() {
super.onResume();
// Start updates (doc recommends delay >= 60000 ms)
mgr.requestLocationUpdates(best, 15000, 1, this);
}
@Override
protected void onPause() {
super.onPause();
// Stop updates to save power while app paused
mgr.removeUpdates(this);
}
When the application resumes, we call requestLocationUpdates( ) to start
the update process. It takes four parameters: the provider name, a

LOCATION, LOCATION, LOCATION 163
delay (so you don’t get updates too often), a minimum distance (changes
less than this are ignored), and a LocationListener object.
When the application pauses, we call removeUpdates( ) to stop getting
updates. The location provider will be powered down if it’s not needed
for a while.
Now you know why LocationTest implements LocationListener, so we could
just pass a reference to the activity instead of making a new listener
object. That will save us about 1KB of memory at runtime.
Here’s the definition of the four methods required by that interface:
Download LocationTest/src/org/example/locationtest/LocationTest.java
public void onLocationChanged(Location location) {
dumpLocation(location);
}
public void onProviderDisabled(String provider) {
log("\nProvider disabled: " + provider);
}
public void onProviderEnabled(String provider) {
log("\nProvider enabled: " + provider);
}
public void onStatusChanged(String provider, int status,
Bundle extras) {
log("\nProvider status changed: " + provider + ", status="
+ S[status] + ", extras=" + extras);
}
The most important method in the bunch is onLocationChanged( ).
As the name suggests, it’s called every time the provider notices that
the device’s location has changed. The onProviderDisabled( ), onProviderEn-
abled( ), and onStatusChanged( ) methods can be used to switch to other
providers in case your first choice becomes unavailable.
The code for the remaining methods of LocationTest—log( ), dumpProvi-
ders( ), and dumpLocation( )—is not very interesting, so I won’t bore you
with it here. You can find it all in the downloadable samples on the
book’s website.
Emulation Notes
If you run the LocationTest example on a real device, it will show your
current position as you walk around. On the emulator, it uses a fake
SET SENSORS TO MAXIMUM 164
GPS provider that always returns the same position unless you change
it. Let’s do that now.
In Eclipse you can change your simulated location using the Emulator
Control view (Window > Show View > Other... > Android > Emulator
Control). Scroll down to the bottom, and you’ll find a place to enter
the longitude and latitude manually. When you click the Send button,
Eclipse will send the new position to the emulated device, and you’ll see
it displayed in any programs that are watching for it.
You can also run the DDMS program outside of Eclipse and send fake
position changes in that way. In addition to manual, position-at-a-time
updates, you can use a recorded path read from an external file. See
the DDMS documentation for more information.3
With Android location providers, you can find out where you are in a
broad, global sense. If you want more local information such as tilt and
temperature, you have to use a different API. That’s the subject of the
next section.
8.2 Set Sensors to Maximum
Let’s say you’re writing a racing game so you need to give the player a
way to steer their car on the screen. One way would be to use buttons,
like driving games on a Sony Playstation or the Nintendo DS. Press right
to steer right, press left to steer left, and hold down another button for
the gas. It works, but it’s not very natural.
Have you ever watched somebody play one of those games? Uncon-
sciously, they sway from side to side when making a hairpin curve,
jerk the controller when bumping into another car, lean forward when
speeding up, and pull back when putting on the breaks. Wouldn’t it be
cool if those motions actually had some effect on the game play? Now
they can.
Engaging Sensors
The Android SDK supports many different types of sensor devices:
• TYPE_ACCELEROMETER: Measures acceleration in the x, y, and z axes
• TYPE_LIGHT: Tells you how bright your surrounding area is
3. http://d.android.com/guide/developing/tools/ddms.html
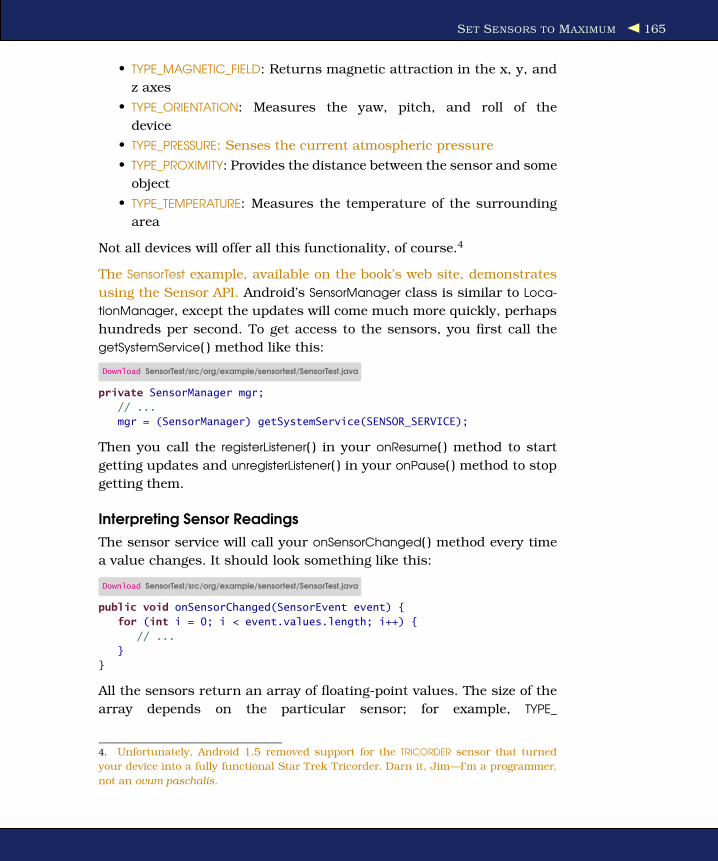
SET SENSORS TO MAXIMUM 165
• TYPE_MAGNETIC_FIELD: Returns magnetic attraction in the x, y, and
z axes
• TYPE_ORIENTATION: Measures the yaw, pitch, and roll of the
device
• TYPE_PRESSURE: Senses the current atmospheric pressure
• TYPE_PROXIMITY: Provides the distance between the sensor and some
object
• TYPE_TEMPERATURE: Measures the temperature of the surrounding
area
Not all devices will offer all this functionality, of course.4
The SensorTest example, available on the book’s web site, demonstrates
using the Sensor API. Android’s SensorManager class is similar to Loca-
tionManager, except the updates will come much more quickly, perhaps
hundreds per second. To get access to the sensors, you first call the
getSystemService( ) method like this:
Download SensorTest/src/org/example/sensortest/SensorTest.java
private SensorManager mgr;
// ...
mgr = (SensorManager) getSystemService(SENSOR_SERVICE);
Then you call the registerListener( ) in your onResume( ) method to start
getting updates and unregisterListener( ) in your onPause( ) method to stop
getting them.
Interpreting Sensor Readings
The sensor service will call your onSensorChanged( ) method every time
a value changes. It should look something like this:
Download SensorTest/src/org/example/sensortest/SensorTest.java
public void onSensorChanged(SensorEvent event) {
for (int i = 0; i < event.values.length; i++) {
// ...
}
}
All the sensors return an array of floating-point values. The size of the
array depends on the particular sensor; for example, TYPE_
4. Unfortunately, Android 1.5 removed support for the TRICORDER sensor that turned
your device into a fully functional Star Trek Tricorder. Darn it, Jim—I’m a programmer,
not an ovum paschalis.

SET SENSORS TO MAXIMUM 166
TEMPERATURE returns only one value, the temperature in degrees Cel-
sius. You may not even need to use all the numbers returned. For
instance, if you just need a compass heading, you can use the first
number returned from the TYPE_ORIENTATION sensor.
Turning the sensor readings (especially from the accelerometer) into
meaningful information is something of a black art. Here are a few tips
to keep in mind:
• Accelerometer readings are extremely jittery. You’ll need to smooth
out the data using some kind of weighted averaging, but you have
to be careful not to smooth it too much, or your interface will feel
laggy and soft.
• Sensor numbers will come in at random times. You may get several
in a row, then have a short pause, and then receive a bunch more.
Don’t assume a nice even rate.
• Try to get ahead of the user by predicting what they’re going to do
next. Let’s say the last three readings show the start of a roll to
the right, with each one a little faster than the last. You can guess
with some degree of accuracy what the next reading is going to be
and start reacting based on your prediction.
The most challenging use of sensors is an action game that requires
a one-to-one connection between how the player moves the device and
what happens on the screen. Unfortunately, the emulator isn’t going to
be much use for this kind of thing.
Emulation Notes
According to Google, it is not possible to test the sensors using the
emulator at all. Most computers don’t have a light sensor, a GPS chip,
or a compass built into them. Sure enough, if you run the SensorTest
program in the emulator, it will display no results at all. However, a
project called OpenIntents5 provides an alternate sensor’s API that you
can call just for testing purposes.
The way it works is that you connect the emulator to another applica-
tion running on your desktop computer called the Sensor Simulator.
The simulator shows a picture of a virtual phone and lets you move it
around on the screen with the mouse (see Figure 8.2, on the follow-
ing page), and then it feeds those movements to your Android program
5. http://www.openintents.org
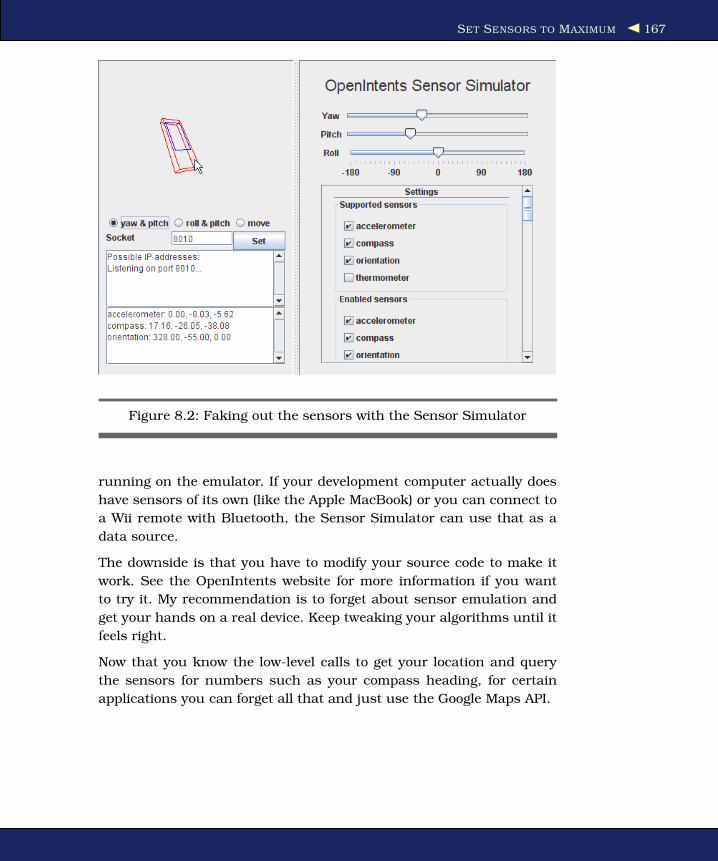
SET SENSORS TO MAXIMUM 167
Figure 8.2: Faking out the sensors with the Sensor Simulator
running on the emulator. If your development computer actually does
have sensors of its own (like the Apple MacBook) or you can connect to
a Wii remote with Bluetooth, the Sensor Simulator can use that as a
data source.
The downside is that you have to modify your source code to make it
work. See the OpenIntents website for more information if you want
to try it. My recommendation is to forget about sensor emulation and
get your hands on a real device. Keep tweaking your algorithms until it
feels right.
Now that you know the low-level calls to get your location and query
the sensors for numbers such as your compass heading, for certain
applications you can forget all that and just use the Google Maps API.

BIRD’S-EYE VIEW 168
8.3 Bird’s-Eye View
One of the first “killer apps” for Ajax was Google Maps.6 Using Java-
Script and the XmlHttpRequest object, Google engineers created a drag-
gable, zoomable, silky-smooth map viewer that ran in any modern web
browser without a plug-in. The idea was quickly copied by other ven-
dors such as Microsoft and Yahoo, but the Google version is arguably
still the best.
You can use these web-based maps in Android, perhaps with an embed-
ded WebView control as discussed in Section 7.2, Web with a View, on
page 134. But the architecture of your application would be overly con-
voluted. That’s why Google created the MapView control.
Embedding a MapView
A MapView can be embedded directly in your Android application with
just a few lines of code. Most of the functionality of Google Maps, plus
hooks for adding your own touches, is provided (see Figure 8.3, on the
following page).
The MapView class can also tie into your location and sensor providers.
It can show your current location on the map and even display a com-
pass showing what direction you’re heading. Let’s create a sample pro-
gram to demonstrate a few of its capabilities.
First create a “Hello, Android” application using these values in the
wizard:
Project name: MyMap
Build Target: Google APIs
Application name: MyMap
Package name: org.example.mymap
Create Activity: MyMap
Note that we’re using the “Google APIs” build target instead of the
“Android 1.5” target. That’s because the Google Map APIs are not part
of the normal Android distribution.
Edit the layout file, and replace it with a MapView that takes over the
whole screen:
Download MyMap/res/layout/main.xml
<?xml version="1.0" encoding="utf-8"?>
<LinearLayout
6. http://maps.google.com

BIRD’S-EYE VIEW 169
Figure 8.3: Embedded map showing your current location
xmlns:android="http://schemas.android.com/apk/res/android"
android:id="@+id/frame"
android:orientation="vertical"
android:layout_width="fill_parent"
android:layout_height="fill_parent">
<com.google.android.maps.MapView
android:id="@+id/map"
android:apiKey="MapAPIKey"
android:layout_width="fill_parent"
android:layout_height="fill_parent"
android:clickable="true" />
</LinearLayout>
Substitute MapAPIKey with a Google Maps API key that you get from
Google.7
Note that we have to use the fully qualified name (com.google.android.
7. http://code.google.com/android/maps-api-signup.html
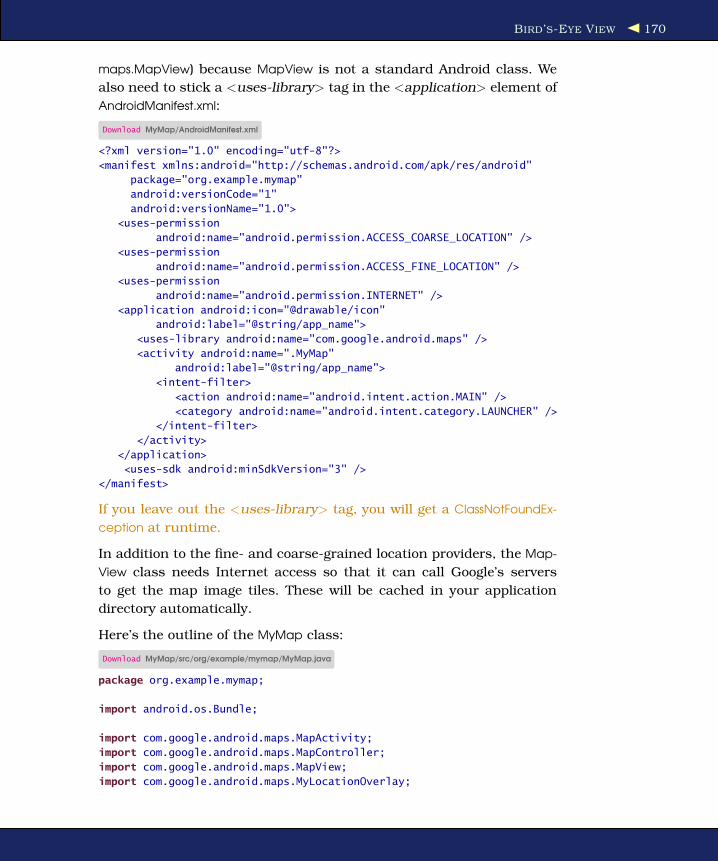
BIRD’S-EYE VIEW 170
maps.MapView) because MapView is not a standard Android class. We
also need to stick a <uses-library> tag in the <application> element of
AndroidManifest.xml:
Download MyMap/AndroidManifest.xml
<?xml version="1.0" encoding="utf-8"?>
<manifest xmlns:android="http://schemas.android.com/apk/res/android"
package="org.example.mymap"
android:versionCode="1"
android:versionName="1.0">
<uses-permission
android:name="android.permission.ACCESS_COARSE_LOCATION" />
<uses-permission
android:name="android.permission.ACCESS_FINE_LOCATION" />
<uses-permission
android:name="android.permission.INTERNET" />
<application android:icon="@drawable/icon"
android:label="@string/app_name">
<uses-library android:name="com.google.android.maps" />
<activity android:name=".MyMap"
android:label="@string/app_name">
<intent-filter>
<action android:name="android.intent.action.MAIN" />
<category android:name="android.intent.category.LAUNCHER" />
</intent-filter>
</activity>
</application>
<uses-sdk android:minSdkVersion="3" />
</manifest>
If you leave out the <uses-library> tag, you will get a ClassNotFoundEx-
ception at runtime.
In addition to the fine- and coarse-grained location providers, the Map-
View class needs Internet access so that it can call Google’s servers
to get the map image tiles. These will be cached in your application
directory automatically.
Here’s the outline of the MyMap class:
Download MyMap/src/org/example/mymap/MyMap.java
package org.example.mymap;
import android.os.Bundle;
import com.google.android.maps.MapActivity;
import com.google.android.maps.MapController;
import com.google.android.maps.MapView;
import com.google.android.maps.MyLocationOverlay;
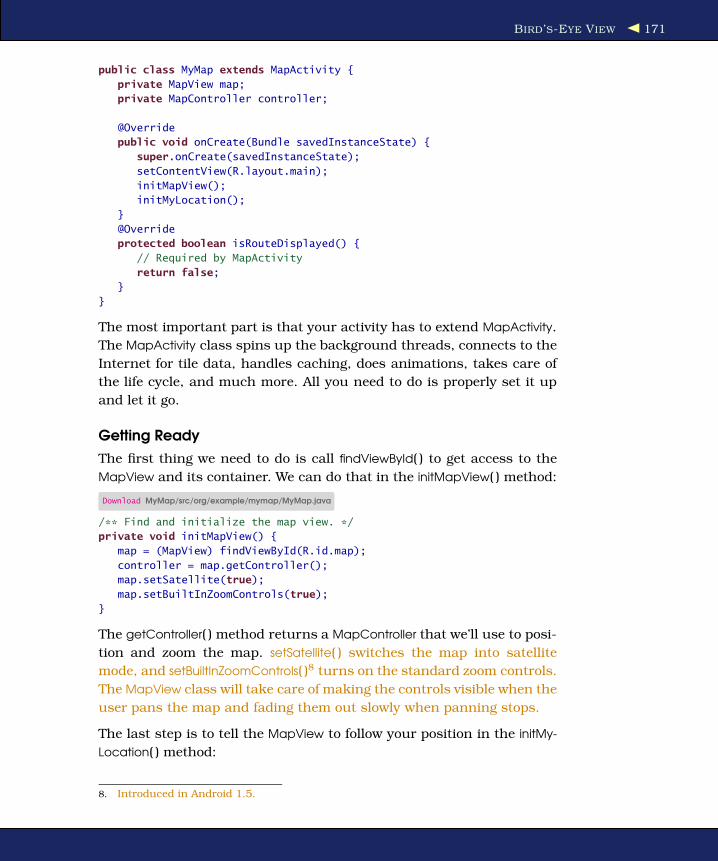
BIRD’S-EYE VIEW 171
public class MyMap extends MapActivity {
private MapView map;
private MapController controller;
@Override
public void onCreate(Bundle savedInstanceState) {
super.onCreate(savedInstanceState);
setContentView(R.layout.main);
initMapView();
initMyLocation();
}
@Override
protected boolean isRouteDisplayed() {
// Required by MapActivity
return false;
}
}
The most important part is that your activity has to extend MapActivity.
The MapActivity class spins up the background threads, connects to the
Internet for tile data, handles caching, does animations, takes care of
the life cycle, and much more. All you need to do is properly set it up
and let it go.
Getting Ready
The first thing we need to do is call findViewById( ) to get access to the
MapView and its container. We can do that in the initMapView( ) method:
Download MyMap/src/org/example/mymap/MyMap.java
/** Find and initialize the map view. */
private void initMapView() {
map = (MapView) findViewById(R.id.map);
controller = map.getController();
map.setSatellite(true);
map.setBuiltInZoomControls(true);
}
The getController( ) method returns a MapController that we’ll use to posi-
tion and zoom the map. setSatellite( ) switches the map into satellite
mode, and setBuiltInZoomControls( )8 turns on the standard zoom controls.
The MapView class will take care of making the controls visible when the
user pans the map and fading them out slowly when panning stops.
The last step is to tell the MapView to follow your position in the initMy-
Location( ) method:
8. Introduced in Android 1.5.

BIRD’S-EYE VIEW 172
Joe Asks. . .
Why Is MapView in the com.google.android.maps Pack-age and Not android.maps?
Any code in the android.* packages is part of the Android core.It’s open source and available on every Android device. Bycontrast, maps are proprietary to Google and to the dataproviders that Google paid for the geological information andimagery. Google provides the API free of charge as long asyou agree to certain conditions.∗ If you’re not happy with therestrictions, you can roll your own views and find your own datasources, but it’s not going to be easy or cheap.
∗. http://code.google.com/apis/maps/terms.html
Download MyMap/src/org/example/mymap/MyMap.java
/** Start tracking the position on the map. */
private void initMyLocation() {
final MyLocationOverlay overlay = new MyLocationOverlay(this, map);
overlay.enableMyLocation();
//overlay.enableCompass(); // does not work in emulator
overlay.runOnFirstFix(new Runnable() {
public void run() {
// Zoom in to current location
controller.setZoom(8);
controller.animateTo(overlay.getMyLocation());
}
});
map.getOverlays().add(overlay);
}
Android provides a MyLocationOverlay class that does most of the heavy
lifting. An overlay is just something that is drawn on top of the map,
which in this case is a pulsing dot showing your current location. You
call enableMyLocation( ) to tell the overlay to start listening to location
updates and enableCompass( ) to tell it to start listening to updates from
the compass.
The runOnFirstFix( ) method tells the overlay what to do the first time it
gets a position reading from the location provider. In this case, we set
the zoom level and then start an animation that moves the map from
wherever it’s pointing now to where you are located.

FAST -FORWARD >> 173
If you run the program now, you should see something like Figure 8.3,
on page 169. Touch and drag the screen to move around the map,
and use the zoom buttons to get a closer look. When you walk around
carrying the phone, the dot on the map should follow you.
Emulation Notes
The first time you run the MyMap program on the emulator you may get
an Android AVD Error. Follow the directions in Section 1.3, Creating an
AVD, on page 24 to create a new AVD for the “Google APIs” build target
called “em15google.”
On the emulator, you’ll initially see a zoomed-out map of the world and
no dot for your current location. As before, use the Emulator Control
view in Eclipse (or in the stand-alone DDMS program) to feed fake GPS
data to the sample application.
When running in the emulator, the compass inset will not be shown
because the compass sensor is not emulated.
8.4 Fast-Forward >>
This chapter introduced you to the exciting new world of location- and
environmental-aware mobile computing. These technologies, in combi-
nation with trends such as the adoption of broadband mobile Inter-
net and the exponential growth of computing power and storage, are
going to revolutionize the way we interact with computers and with
each other.
Another way to perceive the world is by looking and listening. Android
provides the Camera class9 for taking photographs using the built-in
camera (if there is one), but you can also use it to do other things like
make a bar-code reader. The MediaRecorder class10 allows you to record
and store audio clips. These are beyond the scope of this book, but if
you need them for your program, consult the online documentation.
Speaking of storage, the next chapter will show you how to use SQL
to store structured information (for example, a travel log of locations,
photographs, and notes) locally on your mobile phone. If that’s not your
area of interest, you can skip ahead to Chapter 10, 3D Graphics in
9. http://d.android.com/reference/android/hardware/Camera.html
10. http://d.android.com/reference/android/media/MediaRecorder.html

FAST -FORWARD >> 174
OpenGL, on page 195 and learn how to unlock Android’s hidden 3D
graphics potential.

Chapter 9
Putting SQL to WorkIn Chapter 6, Storing Local Data, on page 119, we explored keeping
data around in Preferences and in plain files. That works fine when the
amount of data is small or when the data is all one type (such as a
picture or an audio file). However, there is a better way to store large
amounts of structured data: a relational database.
For the past 30 years, databases have been a staple of enterprise appli-
cation development, but until recently they were too expensive and
unwieldy for smaller-scale use. That is changing with small embedded
engines such as the one included with the Android platform.
This chapter will show you how to use Android’s embedded database
engine, SQLite. You’ll also learn how to use Android’s data binding to
connect your data sources to your user interface. Finally, you’ll look
at the ContentProvider class, which allows two applications to share the
same data.
9.1 Introducing SQLite
SQLite1 is a tiny yet powerful database engine created by Dr. Richard
Hipp in 2000. It is arguably the most widely deployed SQL database
engine in the world. Besides Android, SQLite can be found in the Apple
iPhone, Symbian phones, Mozilla Firefox, Skype, PHP, Adobe AIR, Mac
OS X, Solaris, and many other places.
There are three reasons why it is so popular:
1. http://www.sqlite.org

SQL 101 176
SQLite License
The SQLite source code contains no license because it is in thepublic domain. Instead of a license, the source offers you thisblessing:
May you do good and not evil.
May you find forgiveness for yourself and forgive others.
May you share freely, never taking more than you give.
• It’s free. The authors have placed it in the public domain and don’t
charge for its use.
• It’s small. The current version is about 150KB, well within the
memory budget of an Android phone.
• It requires no setup or administration. There is no server, no config
file, and no need for a database administrator.
A SQLite database is just a file. You can take that file, move it around,
and even copy it to another system (for example, from your phone
to your workstation), and it will work fine. Android stores the file in
the /data/data/packagename/databases directory (see Figure 9.1, on the
next page). You can use the adb command or the File Explorer view in
Eclipse (Window > Show View > Other... > Android > File Explorer) to
view, move, or delete it.
Instead of calling Java I/O routines to access this file from your pro-
gram, you run Structured Query Language (SQL) statements. Through
its helper classes and convenience methods, Android hides some of the
syntax from you, but you still need to know a bit of SQL to use it.
9.2 SQL 101
If you’ve used Oracle, SQL Server, MySQL, DB2, or other database
engines, then SQL should be old hat to you. You can skip this sec-
tion and go to Section 9.3, Hello, Database, on page 178. For the rest
of you, here’s a quick refresher.
To use a SQL database, you submit SQL statements and get back
results. There are three main types of SQL statements: DDL, Modifi-
cation, and Query.
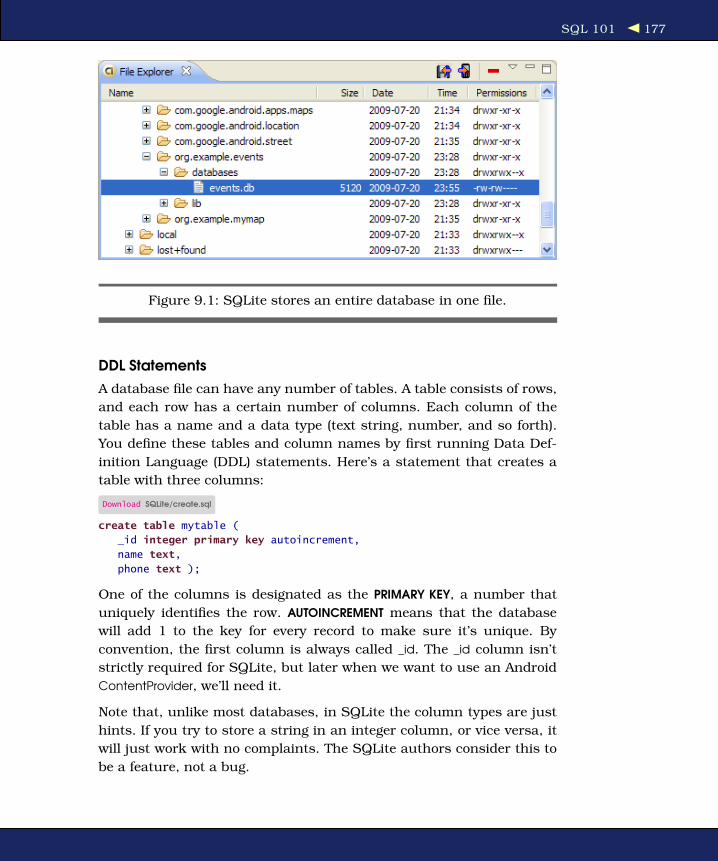
SQL 101 177
Figure 9.1: SQLite stores an entire database in one file.
DDL Statements
A database file can have any number of tables. A table consists of rows,
and each row has a certain number of columns. Each column of the
table has a name and a data type (text string, number, and so forth).
You define these tables and column names by first running Data Def-
inition Language (DDL) statements. Here’s a statement that creates a
table with three columns:
Download SQLite/create.sql
create table mytable (
_id integer primary key autoincrement,
name text,
phone text );
One of the columns is designated as the PRIMARY KEY, a number that
uniquely identifies the row. AUTOINCREMENT means that the database
will add 1 to the key for every record to make sure it’s unique. By
convention, the first column is always called _id. The _id column isn’t
strictly required for SQLite, but later when we want to use an Android
ContentProvider, we’ll need it.
Note that, unlike most databases, in SQLite the column types are just
hints. If you try to store a string in an integer column, or vice versa, it
will just work with no complaints. The SQLite authors consider this to
be a feature, not a bug.

HELLO, DATABASE 178
Modification Statements
SQL provides a number of statements that let you insert, delete, and
update records in the database. For example, to add a few phone num-
bers, you could use this:
Download SQLite/insert.sql
insert into mytable values(null, 'Steven King', '555-1212');
insert into mytable values(null, 'John Smith', '555-2345');
insert into mytable values(null, 'Fred Smitheizen', '555-4321');
The values are specified in the same order you used in the CREATE TABLE
statement. We specify NULL for _id because SQLite will figure that value
out for us.
Query Statements
Once data has been loaded into a table, you run queries against the
table using a SELECT statement. For example, if you wanted to get the
third entry, you could do this:
Download SQLite/selectid.sql
select * from mytable where(_id=3);
It’s more likely you’d want to do a look up a person’s phone number by
name. Here’s how you’d find all the records containing “Smith” in the
name:
Download SQLite/selectwhere.sql
select name, phone from mytable where(name like "%smith%");
Keep in mind that SQL is case insensitive. Keywords, column names,
and even search strings can be specified in either uppercase or lower-
case.
Now you know just enough about SQL to be dangerous. Let’s see how
to put that knowledge to work in a simple program.
9.3 Hello, Database
To demonstrate SQLite, let’s create a little application called Events
that stores records in a database and displays them later. We’re going
to start simple and build up from there. Open a new “Hello, Android”
program using these values in the project wizard:
Project name: Events
Build Target: Android 1.5
Application name: Events

HELLO, DATABASE 179
Package name: org.example.events
Create Activity: Events
As always, you can download the complete source code from the book’s
website.
We need somewhere to hold a few constants describing the database,
so let’s create a Constants interface:
Download Eventsv1/src/org/example/events/Constants.java
package org.example.events;
import android.provider.BaseColumns;
public interface Constants extends BaseColumns {
public static final String TABLE_NAME = "events";
// Columns in the Events database
public static final String TIME = "time";
public static final String TITLE = "title";
}
Each event will be stored as a row in the events table. Each row will
have an _id, time, and title column. _id is the primary key, declared in
the BaseColumns interface that we extend. time and title will be used for
a time stamp and event title, respectively.
Using SQLiteOpenHelper
Next we create a helper class called EventsData to represent the database
itself. This class extends the Android SQLiteOpenHelper class, which
manages database creation and versions. All you need to do is provide
a constructor and override two methods.
Download Eventsv1/src/org/example/events/EventsData.java
Line 1 package org.example.events;-
- import static android.provider.BaseColumns._ID;- import static org.example.events.Constants.TABLE_NAME;5 import static org.example.events.Constants.TIME;- import static org.example.events.Constants.TITLE;- import android.content.Context;- import android.database.sqlite.SQLiteDatabase;- import android.database.sqlite.SQLiteOpenHelper;
10
- public class EventsData extends SQLiteOpenHelper {- private static final String DATABASE_NAME = "events.db";- private static final int DATABASE_VERSION = 1;-

HELLO, DATABASE 180
Joe Asks. . .
Why Is Constants an Interface?
It’s a Java thing. I don’t know about you, but I dislike having torepeat the class name every time I use a constant. For exam-ple, I want to just type TIME and not Constants.TIME. Traditionally,the way to do that in Java is use interfaces. Classes can inheritfrom the Constants interface and then leave out the interfacename when referencing any fields. If you look at the BaseC-
olumns interface, you’ll see the Android programmers used thesame trick.
Starting with Java 5, however, there’s a better way: staticimports. That’s the method I’ll use in EventsData and otherclasses in this chapter. Since Constants is an interface, you canuse it the old way or the new way as you prefer.
Unfortunately, as of this writing, Eclipse’s support for staticimports is a little spotty, so if you use static imports in your ownprograms, Eclipse may not insert the import statements for youautomatically. Here’s a little trick for Eclipse users: type a wild-card static import after the package statement (for example,import static org.example.events.Constants.*;) to make things com-pile. Later, you can use Source > Organize Imports to expandthe wildcard and sort the import statements. Let’s hope this willbe more intuitive in future versions of Eclipse.
15 /** Create a helper object for the Events database */- public EventsData(Context ctx) {- super(ctx, DATABASE_NAME, null, DATABASE_VERSION);- }-
20 @Override- public void onCreate(SQLiteDatabase db) {- db.execSQL("CREATE TABLE " + TABLE_NAME + " (" + _ID- + " INTEGER PRIMARY KEY AUTOINCREMENT, " + TIME- + " INTEGER," + TITLE + " TEXT NOT NULL);");
25 }-
- @Override- public void onUpgrade(SQLiteDatabase db, int oldVersion,- int newVersion) {
30 db.execSQL("DROP TABLE IF EXISTS " + TABLE_NAME);- onCreate(db);
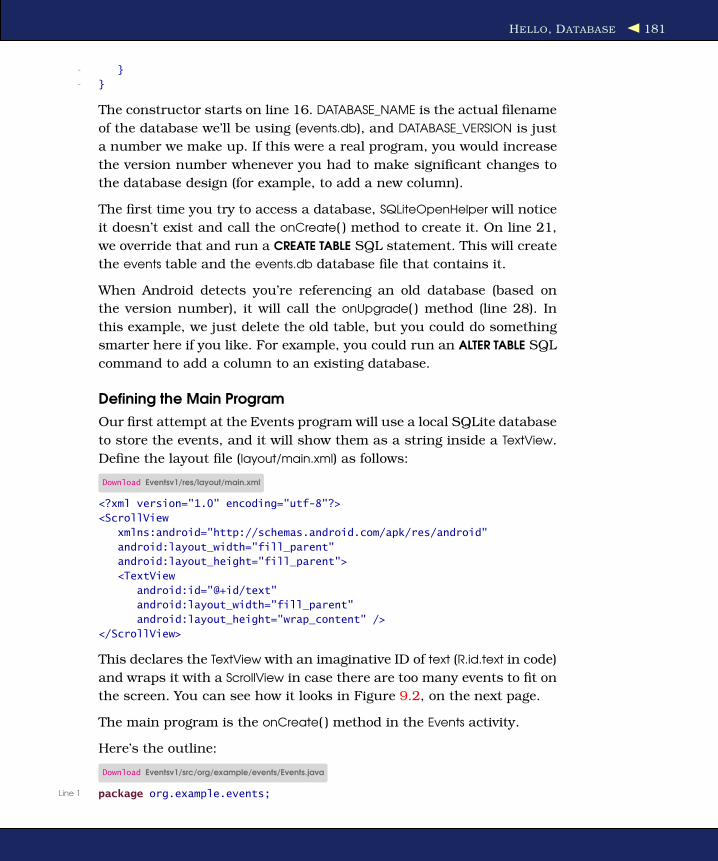
HELLO, DATABASE 181
- }- }
The constructor starts on line 16. DATABASE_NAME is the actual filename
of the database we’ll be using (events.db), and DATABASE_VERSION is just
a number we make up. If this were a real program, you would increase
the version number whenever you had to make significant changes to
the database design (for example, to add a new column).
The first time you try to access a database, SQLiteOpenHelper will notice
it doesn’t exist and call the onCreate( ) method to create it. On line 21,
we override that and run a CREATE TABLE SQL statement. This will create
the events table and the events.db database file that contains it.
When Android detects you’re referencing an old database (based on
the version number), it will call the onUpgrade( ) method (line 28). In
this example, we just delete the old table, but you could do something
smarter here if you like. For example, you could run an ALTER TABLE SQL
command to add a column to an existing database.
Defining the Main Program
Our first attempt at the Events program will use a local SQLite database
to store the events, and it will show them as a string inside a TextView.
Define the layout file (layout/main.xml) as follows:
Download Eventsv1/res/layout/main.xml
<?xml version="1.0" encoding="utf-8"?>
<ScrollView
xmlns:android="http://schemas.android.com/apk/res/android"
android:layout_width="fill_parent"
android:layout_height="fill_parent">
<TextView
android:id="@+id/text"
android:layout_width="fill_parent"
android:layout_height="wrap_content" />
</ScrollView>
This declares the TextView with an imaginative ID of text (R.id.text in code)
and wraps it with a ScrollView in case there are too many events to fit on
the screen. You can see how it looks in Figure 9.2, on the next page.
The main program is the onCreate( ) method in the Events activity.
Here’s the outline:
Download Eventsv1/src/org/example/events/Events.java
Line 1 package org.example.events;
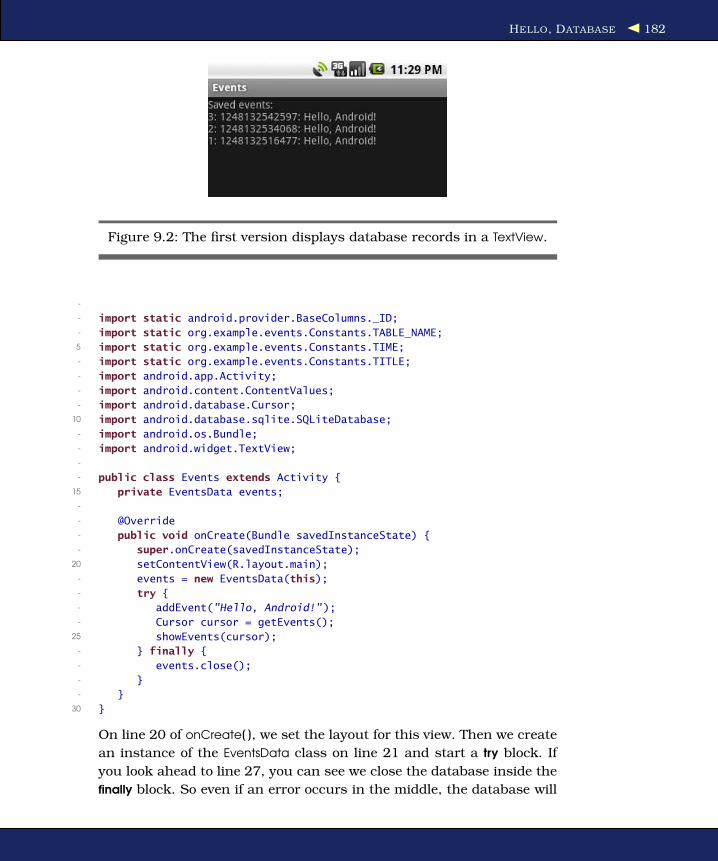
HELLO, DATABASE 182
Figure 9.2: The first version displays database records in a TextView.
-
- import static android.provider.BaseColumns._ID;- import static org.example.events.Constants.TABLE_NAME;5 import static org.example.events.Constants.TIME;- import static org.example.events.Constants.TITLE;- import android.app.Activity;- import android.content.ContentValues;- import android.database.Cursor;
10 import android.database.sqlite.SQLiteDatabase;- import android.os.Bundle;- import android.widget.TextView;-
- public class Events extends Activity {15 private EventsData events;
-
- @Override- public void onCreate(Bundle savedInstanceState) {- super.onCreate(savedInstanceState);
20 setContentView(R.layout.main);- events = new EventsData(this);- try {- addEvent("Hello, Android!");- Cursor cursor = getEvents();
25 showEvents(cursor);- } finally {- events.close();- }- }
30 }
On line 20 of onCreate( ), we set the layout for this view. Then we create
an instance of the EventsData class on line 21 and start a try block. If
you look ahead to line 27, you can see we close the database inside the
finally block. So even if an error occurs in the middle, the database will

HELLO, DATABASE 183
still be closed.
The events table wouldn’t be very interesting if there weren’t any events,
so on line 23 we call the addEvent( ) method to add an event to it. Every
time you run this program, you’ll get a new event. You could add menus
or gestures or keystrokes to generate other events if you like, but I’ll
leave that as an exercise to the reader.
On line 24, we call the getEvents( ) method to get the list of events, and
finally on line 25, we call the showEvents( ) method to display the list to
the user.
Pretty easy, eh? Now let’s define those new methods we just used.
Adding a Row
The addEvent( ) method cuts a new record in the database using the
string provided as the event title.
Download Eventsv1/src/org/example/events/Events.java
private void addEvent(String string) {
// Insert a new record into the Events data source.
// You would do something similar for delete and update.
SQLiteDatabase db = events.getWritableDatabase();
ContentValues values = new ContentValues();
values.put(TIME, System.currentTimeMillis());
values.put(TITLE, string);
db.insertOrThrow(TABLE_NAME, null, values);
}
Since we need to modify the data, we call getWritableDatabase( ) to get
a read/write handle to the events database. The database handle is
cached, so you can call this method as many times as you like.
Next we fill in a ContentValues object with the current time and the event
title and pass that to the insertOrThrow( ) method to do the actual INSERT
SQL statement. You don’t need to pass in the record ID because SQLite
will make one up and return it from the method call.
As the name implies, insertOrThrow( ) can throw an exception (of type
SQLException) if it fails. It doesn’t have to be declared with a throws key-
word because it’s a RuntimeException and not a checked exception. How-
ever, if you want to, you can still handle it in a try/catch block like any
other exception. If you don’t handle it and there is an error, the program
will terminate, and a traceback will be dumped to the Android log.
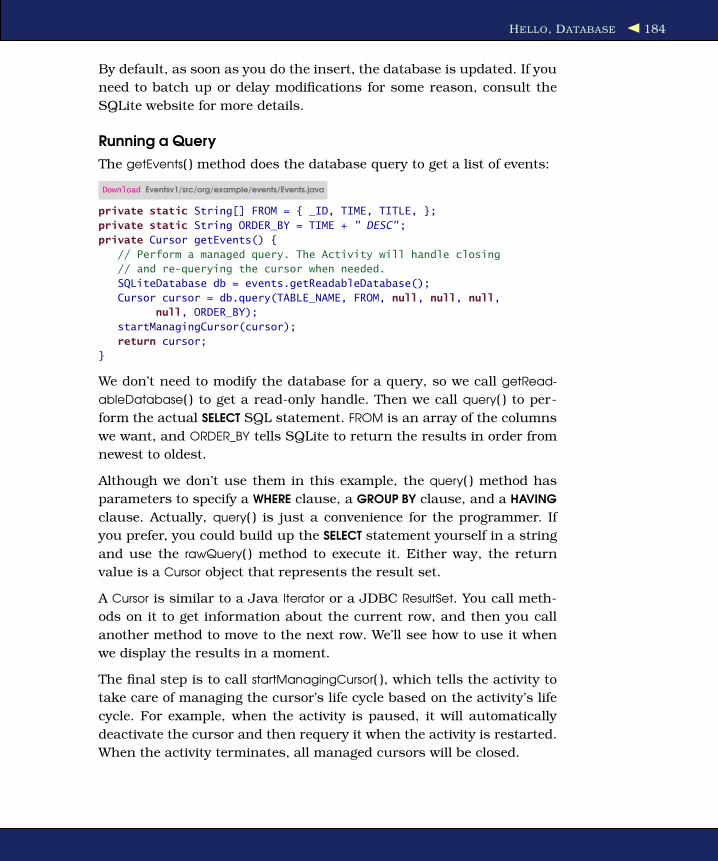
HELLO, DATABASE 184
By default, as soon as you do the insert, the database is updated. If you
need to batch up or delay modifications for some reason, consult the
SQLite website for more details.
Running a Query
The getEvents( ) method does the database query to get a list of events:
Download Eventsv1/src/org/example/events/Events.java
private static String[] FROM = { _ID, TIME, TITLE, };
private static String ORDER_BY = TIME + " DESC";
private Cursor getEvents() {
// Perform a managed query. The Activity will handle closing
// and re-querying the cursor when needed.
SQLiteDatabase db = events.getReadableDatabase();
Cursor cursor = db.query(TABLE_NAME, FROM, null, null, null,
null, ORDER_BY);
startManagingCursor(cursor);
return cursor;
}
We don’t need to modify the database for a query, so we call getRead-
ableDatabase( ) to get a read-only handle. Then we call query( ) to per-
form the actual SELECT SQL statement. FROM is an array of the columns
we want, and ORDER_BY tells SQLite to return the results in order from
newest to oldest.
Although we don’t use them in this example, the query( ) method has
parameters to specify a WHERE clause, a GROUP BY clause, and a HAVING
clause. Actually, query( ) is just a convenience for the programmer. If
you prefer, you could build up the SELECT statement yourself in a string
and use the rawQuery( ) method to execute it. Either way, the return
value is a Cursor object that represents the result set.
A Cursor is similar to a Java Iterator or a JDBC ResultSet. You call meth-
ods on it to get information about the current row, and then you call
another method to move to the next row. We’ll see how to use it when
we display the results in a moment.
The final step is to call startManagingCursor( ), which tells the activity to
take care of managing the cursor’s life cycle based on the activity’s life
cycle. For example, when the activity is paused, it will automatically
deactivate the cursor and then requery it when the activity is restarted.
When the activity terminates, all managed cursors will be closed.

HELLO, DATABASE 185
Displaying the Query Results
The last method we need to define is showEvents( ). This function takes a
Cursor as input and formats the output so the user can read it.
Download Eventsv1/src/org/example/events/Events.java
Line 1 private void showEvents(Cursor cursor) {- // Stuff them all into a big string- StringBuilder builder = new StringBuilder(- "Saved events:\n");5 while (cursor.moveToNext()) {- // Could use getColumnIndexOrThrow() to get indexes- long id = cursor.getLong(0);- long time = cursor.getLong(1);- String title = cursor.getString(2);
10 builder.append(id).append(": ");- builder.append(time).append(": ");- builder.append(title).append("\n");- }- // Display on the screen
15 TextView text = (TextView) findViewById(R.id.text);- text.setText(builder);- }
In this version of Events, we’re just going to create a big string (see line
3) to hold all the events items, separated by newlines. This is not the
recommended way to do things, but it’ll work for now.
Line 5 calls the Cursor.moveToNext( ) method to advance to the next row
in the data set. When you first get a Cursor, it is positioned before the
first record, so calling moveToNext( ) gets you to the first record. We keep
looping until moveToNext( ) returns false, which indicates there are no
more rows.
Inside the loop (line 7), we call getLong( ) and getString( ) to fetch data
from the columns of interest, and then we append the values to the
string (line 10). There is another method on Cursor, getColumnIndex-
OrThrow( ), that we could have used to get the column index numbers
(the values 0, 1, and 2 passed to getLong( ) and getString( )). However, it’s
a little slow, so if you need it, you should call it outside the loop and
remember the indexes yourself.
Once all the rows have been processed, we look up the TextView from
layout/main.xml and stuff the big string into it (line 15).
If you run the example now, you should see something like Figure 9.2,
on page 182. Congratulations on your first Android database program!
There is plenty of room for improvement, though.
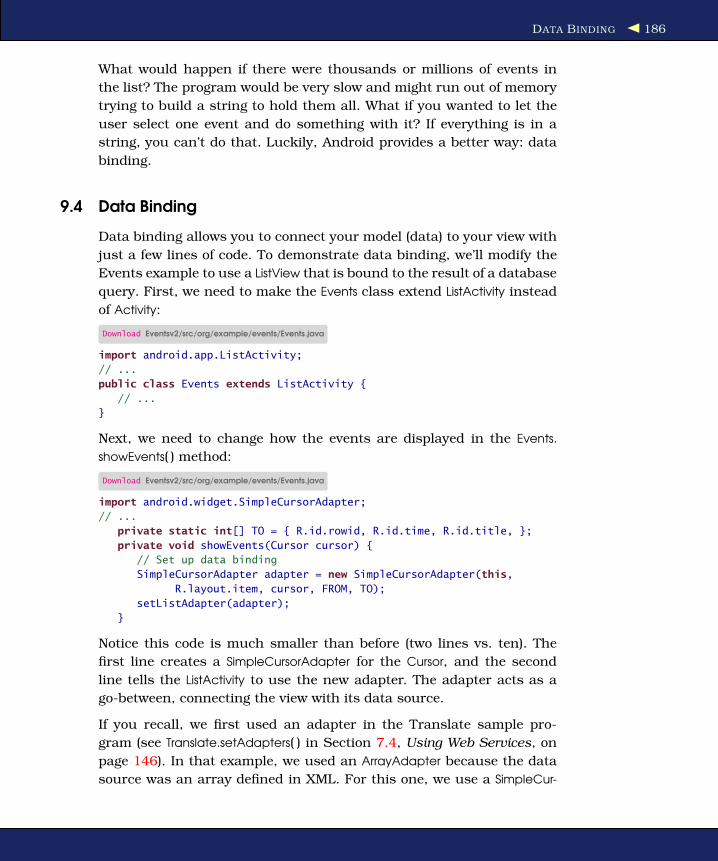
DATA BINDING 186
What would happen if there were thousands or millions of events in
the list? The program would be very slow and might run out of memory
trying to build a string to hold them all. What if you wanted to let the
user select one event and do something with it? If everything is in a
string, you can’t do that. Luckily, Android provides a better way: data
binding.
9.4 Data Binding
Data binding allows you to connect your model (data) to your view with
just a few lines of code. To demonstrate data binding, we’ll modify the
Events example to use a ListView that is bound to the result of a database
query. First, we need to make the Events class extend ListActivity instead
of Activity:
Download Eventsv2/src/org/example/events/Events.java
import android.app.ListActivity;
// ...
public class Events extends ListActivity {
// ...
}
Next, we need to change how the events are displayed in the Events.
showEvents( ) method:
Download Eventsv2/src/org/example/events/Events.java
import android.widget.SimpleCursorAdapter;
// ...
private static int[] TO = { R.id.rowid, R.id.time, R.id.title, };
private void showEvents(Cursor cursor) {
// Set up data binding
SimpleCursorAdapter adapter = new SimpleCursorAdapter(this,
R.layout.item, cursor, FROM, TO);
setListAdapter(adapter);
}
Notice this code is much smaller than before (two lines vs. ten). The
first line creates a SimpleCursorAdapter for the Cursor, and the second
line tells the ListActivity to use the new adapter. The adapter acts as a
go-between, connecting the view with its data source.
If you recall, we first used an adapter in the Translate sample pro-
gram (see Translate.setAdapters( ) in Section 7.4, Using Web Services, on
page 146). In that example, we used an ArrayAdapter because the data
source was an array defined in XML. For this one, we use a SimpleCur-
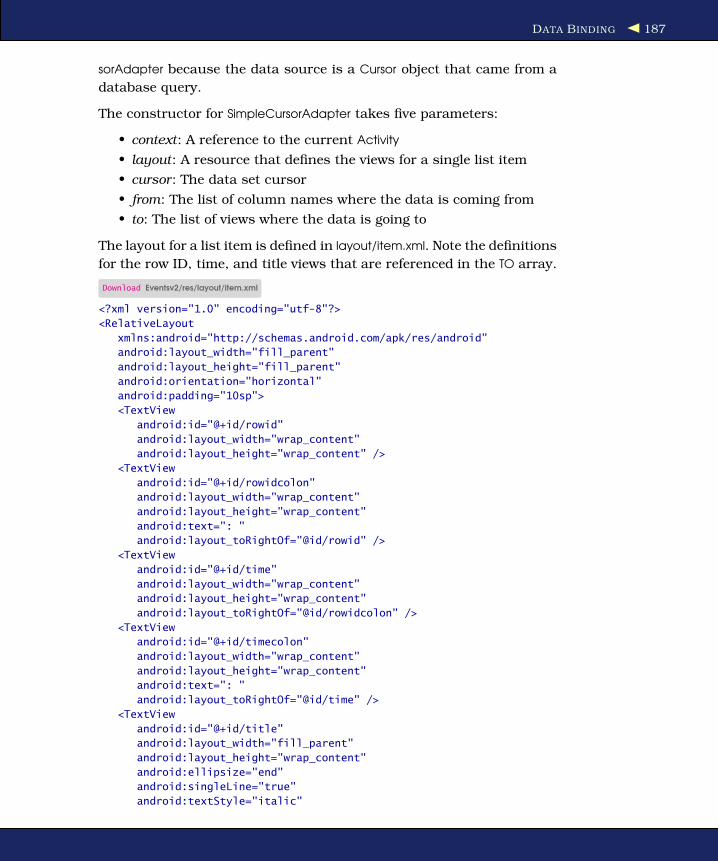
DATA BINDING 187
sorAdapter because the data source is a Cursor object that came from a
database query.
The constructor for SimpleCursorAdapter takes five parameters:
• context: A reference to the current Activity
• layout: A resource that defines the views for a single list item
• cursor: The data set cursor
• from: The list of column names where the data is coming from
• to: The list of views where the data is going to
The layout for a list item is defined in layout/item.xml. Note the definitions
for the row ID, time, and title views that are referenced in the TO array.
Download Eventsv2/res/layout/item.xml
<?xml version="1.0" encoding="utf-8"?>
<RelativeLayout
xmlns:android="http://schemas.android.com/apk/res/android"
android:layout_width="fill_parent"
android:layout_height="fill_parent"
android:orientation="horizontal"
android:padding="10sp">
<TextView
android:id="@+id/rowid"
android:layout_width="wrap_content"
android:layout_height="wrap_content" />
<TextView
android:id="@+id/rowidcolon"
android:layout_width="wrap_content"
android:layout_height="wrap_content"
android:text=": "
android:layout_toRightOf="@id/rowid" />
<TextView
android:id="@+id/time"
android:layout_width="wrap_content"
android:layout_height="wrap_content"
android:layout_toRightOf="@id/rowidcolon" />
<TextView
android:id="@+id/timecolon"
android:layout_width="wrap_content"
android:layout_height="wrap_content"
android:text=": "
android:layout_toRightOf="@id/time" />
<TextView
android:id="@+id/title"
android:layout_width="fill_parent"
android:layout_height="wrap_content"
android:ellipsize="end"
android:singleLine="true"
android:textStyle="italic"

DATA BINDING 188
android:layout_toRightOf="@id/timecolon" />
</RelativeLayout>
This looks more complicated than it is. All we’re doing is putting the ID,
time, and title on one line with colons in between the fields. I added a
little padding and formatting to make it look nice.
Finally, we need to change the layout for the activity itself in layout/
main.xml. Here’s the new version:
Download Eventsv2/res/layout/main.xml
<?xml version="1.0" encoding="utf-8"?>
<LinearLayout
xmlns:android="http://schemas.android.com/apk/res/android"
android:layout_width="fill_parent"
android:layout_height="fill_parent">
<!-- Note built-in ids for 'list' and 'empty' -->
<ListView
android:id="@android:id/list"
android:layout_width="wrap_content"
android:layout_height="wrap_content"/>
<TextView
android:id="@android:id/empty"
android:layout_width="wrap_content"
android:layout_height="wrap_content"
android:text="@string/empty" />
</LinearLayout>
Because the activity extends ListActivity, Android looks for two special
IDs in the layout file. If the list has items in it, the android:id/list view
will be displayed; otherwise, the android:id/empty view will be displayed.
So if there are no items, instead of a blank screen the user will see the
message “No events!”
Here are the string resources we need:
Download Eventsv2/res/values/strings.xml
<?xml version="1.0" encoding="utf-8"?>
<resources>
<string name="app_name">Events</string>
<string name="empty">No events!</string>
</resources>
For the final result, see Figure 9.3, on the following page. As an exercise
for the reader, think about how you could enhance this application now
that you have a real list to play with. For example, when the user selects
an event, you could open a detail viewer, mail the event to technical
support, or perhaps delete the selected event and all the ones below it
from the database.
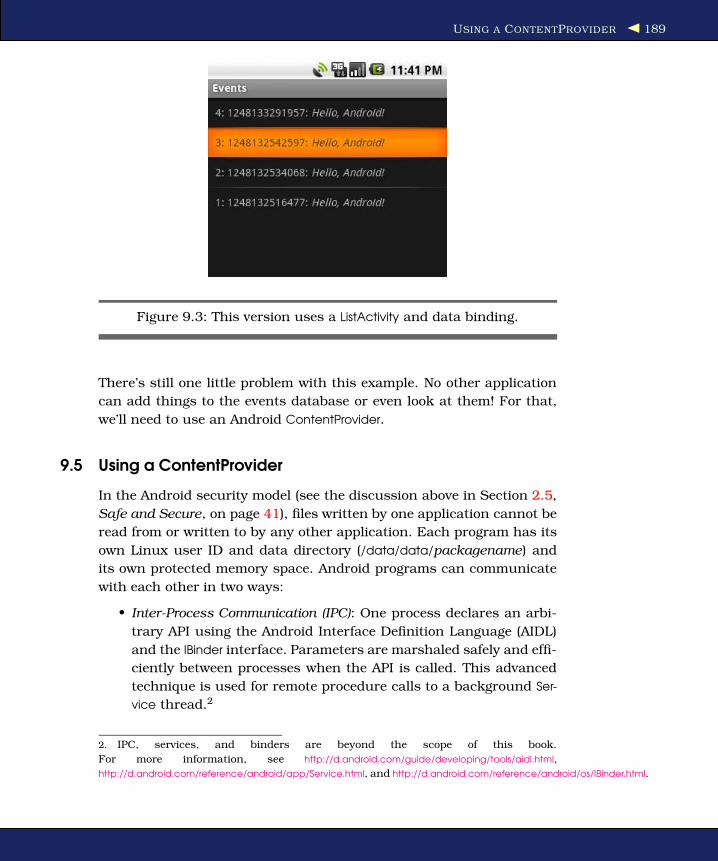
USING A CONTENTPROVIDER 189
Figure 9.3: This version uses a ListActivity and data binding.
There’s still one little problem with this example. No other application
can add things to the events database or even look at them! For that,
we’ll need to use an Android ContentProvider.
9.5 Using a ContentProvider
In the Android security model (see the discussion above in Section 2.5,
Safe and Secure, on page 41), files written by one application cannot be
read from or written to by any other application. Each program has its
own Linux user ID and data directory (/data/data/packagename) and
its own protected memory space. Android programs can communicate
with each other in two ways:
• Inter-Process Communication (IPC): One process declares an arbi-
trary API using the Android Interface Definition Language (AIDL)
and the IBinder interface. Parameters are marshaled safely and effi-
ciently between processes when the API is called. This advanced
technique is used for remote procedure calls to a background Ser-
vice thread.2
2. IPC, services, and binders are beyond the scope of this book.
For more information, see http://d.android.com/guide/developing/tools/aidl.html,
http://d.android.com/reference/android/app/Service.html, and http://d.android.com/reference/android/os/IBinder.html.

USING A CONTENTPROVIDER 190
• ContentProvider: Processes register themselves to the system as
providers of certain kinds of data. When that information is re-
quested, they are called by Android through a fixed API to query
or modify the content in whatever way they see fit. This is the
technique we’re going to use for the Events sample.
Any piece of information managed by a ContentProvider is addressed
through a URI that looks like this:
content://authority/path/id
where:
• content:// is the standard required prefix.
• authority is the name of the provider. Using your fully qualified
package name is recommended to prevent name collisions.
• path is a virtual directory within the provider that identifies the
kind of data being requested.
• id is the primary key of a specific record being requested. To
request all records of a particular type, omit this and the trailing
slash.
Android comes with several providers already built in, including the
following:3
• content://browser
• content://contacts
• content://media
• content://settings
To demonstrate using a ContentProvider, let’s convert the Events exam-
ple to use one. For our Events provider, these will be valid URIs:
content://org.example.events/events/3 -- single event with _id=3
content://org.example.events/events -- all events
First we need to add a two more constants to Constants.java:
Download Eventsv3/src/org/example/events/Constants.java
import android.net.Uri;
// ...
public static final String AUTHORITY = "org.example.events";
3. For an up-to-date list, see http://d.android.com/reference/android/provider/package-summary.html.
Instead of using the strings here, use the documented constants such as
Browser.BOOKMARKS_URI. Note that access to some providers requires additional per-
missions to be requested in your manifest file.

USING A CONTENTPROVIDER 191
public static final Uri CONTENT_URI = Uri.parse("content://"
+ AUTHORITY + "/" + TABLE_NAME);
The layout files (main.xml and item.xml) don’t need to be changed, so the
next step is to make a few minor changes to the Events class.
Changing the Main Program
The main program (the Events.onCreate( ) method) actually gets a little
simpler because there is no database object to keep track of:
Download Eventsv3/src/org/example/events/Events.java
@Override
public void onCreate(Bundle savedInstanceState) {
super.onCreate(savedInstanceState);
setContentView(R.layout.main);
addEvent("Hello, Android!");
Cursor cursor = getEvents();
showEvents(cursor);
}
We don’t need the try/finally block, and we can remove references to
EventData.
Adding a Row
Two lines change in addEvent( ). Here’s the new version:
Download Eventsv3/src/org/example/events/Events.java
import static org.example.events.Constants.CONTENT_URI;
private void addEvent(String string) {
// Insert a new record into the Events data source.
// You would do something similar for delete and update.
ContentValues values = new ContentValues();
values.put(TIME, System.currentTimeMillis());
values.put(TITLE, string);
getContentResolver().insert(CONTENT_URI, values);
}
The call to getWritableDatabase( ) is gone, and the call to insertOrThrow( )
is replaced by getContentResolver( ).insert( ). Instead of a database handle,
we use a content URI.
Running a Query
The getEvents( ) method is also simplified when using a ContentProvider:
Download Eventsv3/src/org/example/events/Events.java
private Cursor getEvents() {
// Perform a managed query. The Activity will handle closing
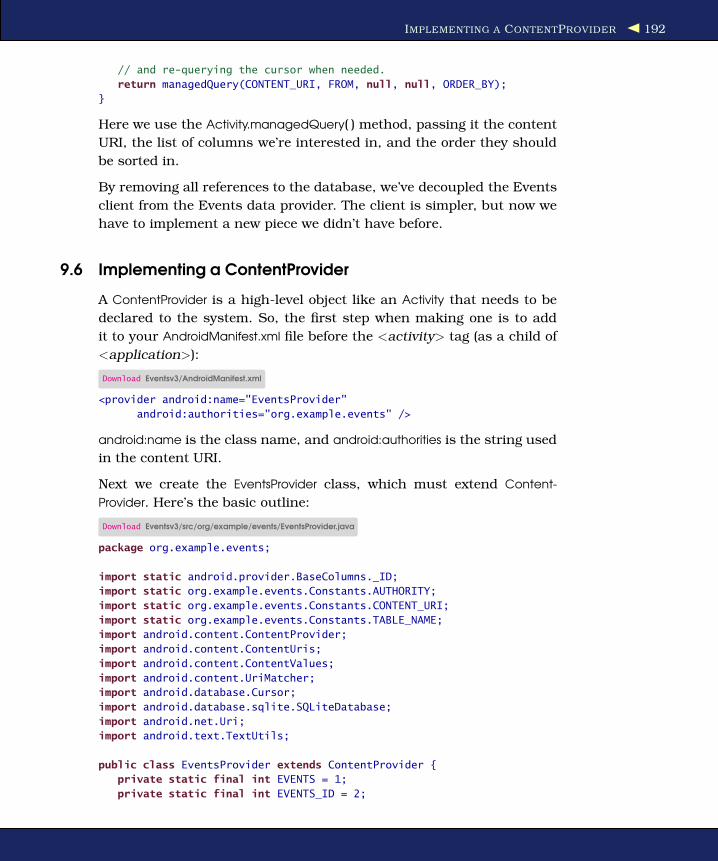
IMPLEMENTING A CONTENTPROVIDER 192
// and re-querying the cursor when needed.
return managedQuery(CONTENT_URI, FROM, null, null, ORDER_BY);
}
Here we use the Activity.managedQuery( ) method, passing it the content
URI, the list of columns we’re interested in, and the order they should
be sorted in.
By removing all references to the database, we’ve decoupled the Events
client from the Events data provider. The client is simpler, but now we
have to implement a new piece we didn’t have before.
9.6 Implementing a ContentProvider
A ContentProvider is a high-level object like an Activity that needs to be
declared to the system. So, the first step when making one is to add
it to your AndroidManifest.xml file before the <activity> tag (as a child of
<application>):
Download Eventsv3/AndroidManifest.xml
<provider android:name="EventsProvider"
android:authorities="org.example.events" />
android:name is the class name, and android:authorities is the string used
in the content URI.
Next we create the EventsProvider class, which must extend Content-
Provider. Here’s the basic outline:
Download Eventsv3/src/org/example/events/EventsProvider.java
package org.example.events;
import static android.provider.BaseColumns._ID;
import static org.example.events.Constants.AUTHORITY;
import static org.example.events.Constants.CONTENT_URI;
import static org.example.events.Constants.TABLE_NAME;
import android.content.ContentProvider;
import android.content.ContentUris;
import android.content.ContentValues;
import android.content.UriMatcher;
import android.database.Cursor;
import android.database.sqlite.SQLiteDatabase;
import android.net.Uri;
import android.text.TextUtils;
public class EventsProvider extends ContentProvider {
private static final int EVENTS = 1;
private static final int EVENTS_ID = 2;
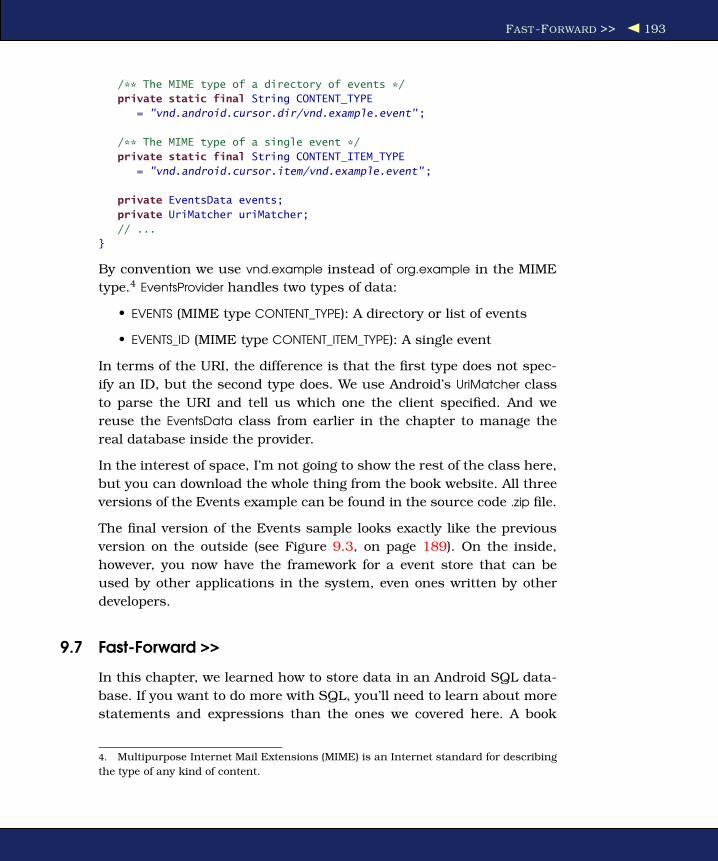
FAST -FORWARD >> 193
/** The MIME type of a directory of events */
private static final String CONTENT_TYPE
= "vnd.android.cursor.dir/vnd.example.event";
/** The MIME type of a single event */
private static final String CONTENT_ITEM_TYPE
= "vnd.android.cursor.item/vnd.example.event";
private EventsData events;
private UriMatcher uriMatcher;
// ...
}
By convention we use vnd.example instead of org.example in the MIME
type.4 EventsProvider handles two types of data:
• EVENTS (MIME type CONTENT_TYPE): A directory or list of events
• EVENTS_ID (MIME type CONTENT_ITEM_TYPE): A single event
In terms of the URI, the difference is that the first type does not spec-
ify an ID, but the second type does. We use Android’s UriMatcher class
to parse the URI and tell us which one the client specified. And we
reuse the EventsData class from earlier in the chapter to manage the
real database inside the provider.
In the interest of space, I’m not going to show the rest of the class here,
but you can download the whole thing from the book website. All three
versions of the Events example can be found in the source code .zip file.
The final version of the Events sample looks exactly like the previous
version on the outside (see Figure 9.3, on page 189). On the inside,
however, you now have the framework for a event store that can be
used by other applications in the system, even ones written by other
developers.
9.7 Fast-Forward >>
In this chapter, we learned how to store data in an Android SQL data-
base. If you want to do more with SQL, you’ll need to learn about more
statements and expressions than the ones we covered here. A book
4. Multipurpose Internet Mail Extensions (MIME) is an Internet standard for describing
the type of any kind of content.

FAST -FORWARD >> 194
such as SQL Pocket Guide [Gen06] by Jonathan Gennick or The Defini-
tive Guide to SQLite [Owe06] by Mike Owens would be a good invest-
ment, but keep in mind that the SQL syntax and functions vary slightly
from database to database.
Another option for data storage on Android is db4o.5 This library is
larger than SQLite and uses a different license (GNU Public License),
but it’s free and may be easier for you to use, especially if you don’t
know SQL.
The SimpleCursorAdapter introduced in this chapter can be customized to
show more than just text. For example, you could display rating stars or
sparklines or other views based on data in the Cursor. Look for ViewBinder
in the SimpleCursorAdapter documentation for more information.6
And now for something completely different...the next chapter will cover
3D graphics with OpenGL.
5. http://www.db4o.com/android
6. http://d.android.com/reference/android/widget/SimpleCursorAdapter.html

Chapter 10
3D Graphics in OpenGLTwo-dimensional graphics are great for most programs, but sometimes
you need an extra level of depth, interactivity, or realism that isn’t
possible in 2D. For these times, Android provides a three-dimensional
graphics library based on the OpenGL ES standard. In this chapter,
we’ll explore 3D concepts and build up a sample program that uses
OpenGL.
10.1 Understanding 3D Graphics
The world is three-dimensional, yet we routinely view it in two dimen-
sions. When you watch television or look at a picture in a book, the 3D
images are flattened out, or projected, onto a 2D surface (the TV panel
or book page).
Try this simple experiment: cover one eye and look out the window.
What do you see? Light from the sun bounces off objects outside,
passes through the window, and travels to your eye so you can per-
ceive it. In graphics terms, the scene outside is projected onto the win-
dow (or viewport). If someone replaced your window with a high-quality
photograph, it would look the same until you moved.
Based on how close your eye is to the window and how big the window
is, you can see a limited amount of the world outside. This is called
your field of view. If you draw a line from your eye to the four corners
of the window and beyond, you would get the pyramid in Figure 10.1,
on the next page. This is called the view frustum (Latin for a “piece
broken off”). For performance reasons, the frustum is usually bounded
by near and far clipping planes as well. You can see everything inside
the frustum but nothing outside of it.

INTRODUCING OPENGL 196
Figure 10.1: Viewing a three-dimensional scene
In 3D computer graphics, your computer screen acts as the viewport.
Your job is to fool the user into thinking it’s a window into another
world just on the other side of the glass. The OpenGL graphics library
is the API you use to accomplish that.
10.2 Introducing OpenGL
OpenGL1 was developed by Silicon Graphics in 1992. It provides a uni-
fied interface for programmers to take advantage of hardware from any
manufacturer. At its core, OpenGL implements familiar concepts such
as viewports and lighting and tries to hide most of the hardware layer
from the developer.
Because it was designed for workstations, OpenGL is too large to fit
on a mobile device. So, Android implements a subset of OpenGL called
1. http://www.opengl.org

BUILDING AN OPENGL PROGRAM 197
Thank You, John Carmack
OpenGL has proven to be very successful, but it almost wasn’t.In 1995, Microsoft introduced a competitor called Direct3D.Owing to Microsoft’s dominant market position and significantR&D investments, for a while it looked like Direct3D was going totake over as a de facto industry standard for gaming. However,one man, John Carmack, cofounder of id Software, refusedto comply. His wildly popular Doom and Quake games almostsingle-handedly forced hardware manufacturers to keep theirOpenGL device drivers up-to-date on the PC. Today’s Linux,Mac OS X, and mobile device users can thank John and idSoftware for helping to keep the OpenGL standard relevant.
OpenGL for Embedded Systems (OpenGL ES).2 This standard was cre-
ated by the Khronos Group, an industry consortium of companies such
as Intel, AMD, Nvidia, Nokia, Samsung, and Sony. The same library
(with minor differences) is now available on major mobile platforms
including Android, Symbian, and iPhone.
Every language has its own language bindings for OpenGL ES, and
Java is no exception. Java’s language binding was defined by a Java
Specification Request (JSR) 239.3 Android implements this standard
as closely as possible, so you can refer to a variety of books and doc-
umentation on JSR 239 and OpenGL ES for a full description of all its
classes and methods.
Now let’s take a look at how to create a simple OpenGL program in
Android.
10.3 Building an OpenGL Program
Begin by creating a new “Hello, Android” project as in Section 1.2, Cre-
ating Your First Program, on page 24, but this time supply the following
parameters in the New Android Project dialog box:
Project name: OpenGL
Build Target: Android 1.5
Application name: OpenGL
Package name: org.example.opengl
2. http://www.khronos.org/opengles
3. http://jcp.org/en/jsr/detail?id=239
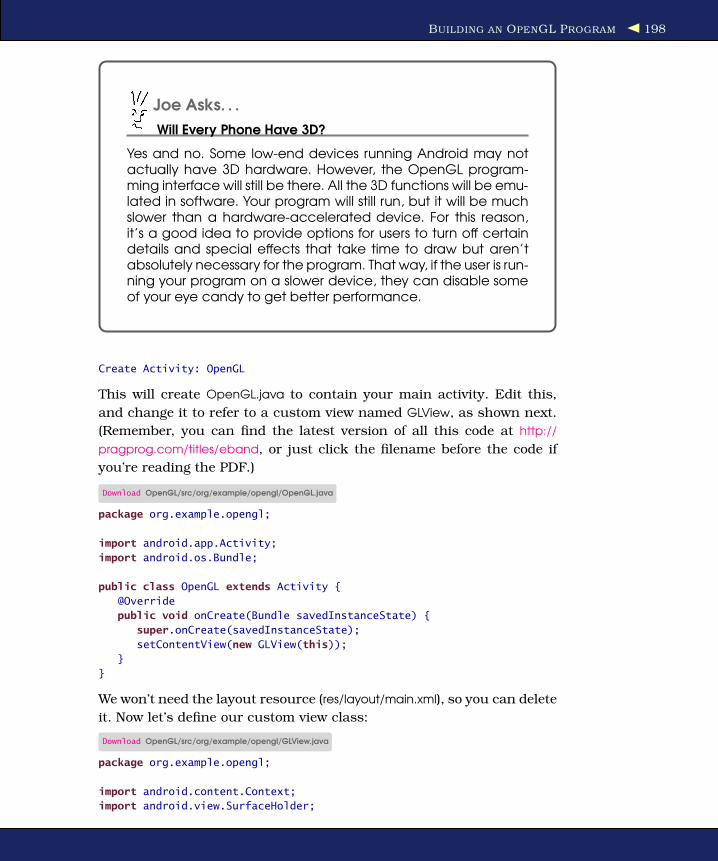
BUILDING AN OPENGL PROGRAM 198
Joe Asks. . .
Will Every Phone Have 3D?
Yes and no. Some low-end devices running Android may notactually have 3D hardware. However, the OpenGL program-ming interface will still be there. All the 3D functions will be emu-lated in software. Your program will still run, but it will be muchslower than a hardware-accelerated device. For this reason,it’s a good idea to provide options for users to turn off certaindetails and special effects that take time to draw but aren’tabsolutely necessary for the program. That way, if the user is run-ning your program on a slower device, they can disable someof your eye candy to get better performance.
Create Activity: OpenGL
This will create OpenGL.java to contain your main activity. Edit this,
and change it to refer to a custom view named GLView, as shown next.
(Remember, you can find the latest version of all this code at http://
pragprog.com/titles/eband, or just click the filename before the code if
you’re reading the PDF.)
Download OpenGL/src/org/example/opengl/OpenGL.java
package org.example.opengl;
import android.app.Activity;
import android.os.Bundle;
public class OpenGL extends Activity {
@Override
public void onCreate(Bundle savedInstanceState) {
super.onCreate(savedInstanceState);
setContentView(new GLView(this));
}
}
We won’t need the layout resource (res/layout/main.xml), so you can delete
it. Now let’s define our custom view class:
Download OpenGL/src/org/example/opengl/GLView.java
package org.example.opengl;
import android.content.Context;
import android.view.SurfaceHolder;
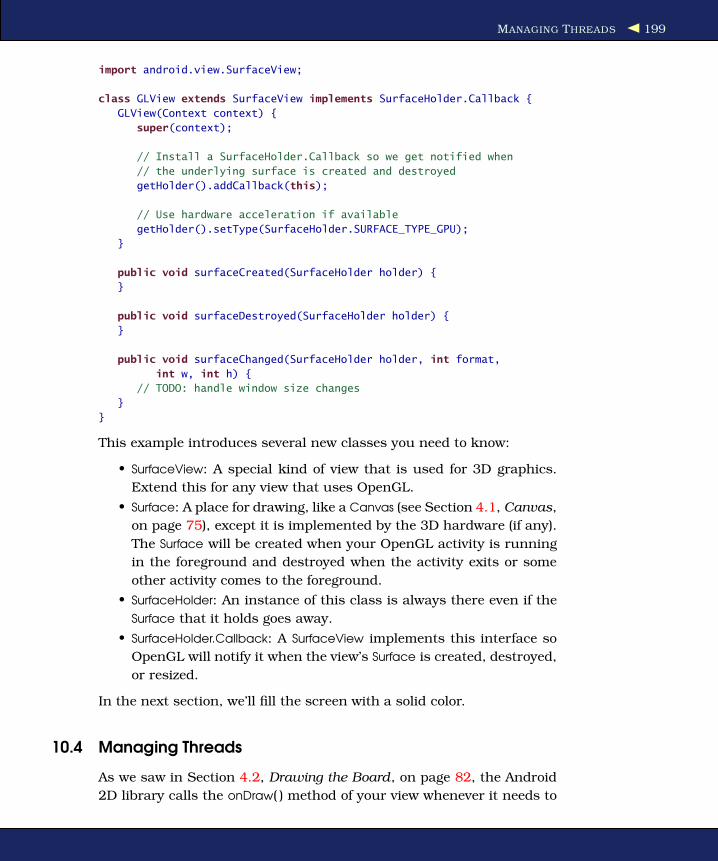
MANAGING THREADS 199
import android.view.SurfaceView;
class GLView extends SurfaceView implements SurfaceHolder.Callback {
GLView(Context context) {
super(context);
// Install a SurfaceHolder.Callback so we get notified when
// the underlying surface is created and destroyed
getHolder().addCallback(this);
// Use hardware acceleration if available
getHolder().setType(SurfaceHolder.SURFACE_TYPE_GPU);
}
public void surfaceCreated(SurfaceHolder holder) {
}
public void surfaceDestroyed(SurfaceHolder holder) {
}
public void surfaceChanged(SurfaceHolder holder, int format,
int w, int h) {
// TODO: handle window size changes
}
}
This example introduces several new classes you need to know:
• SurfaceView: A special kind of view that is used for 3D graphics.
Extend this for any view that uses OpenGL.
• Surface: A place for drawing, like a Canvas (see Section 4.1, Canvas,
on page 75), except it is implemented by the 3D hardware (if any).
The Surface will be created when your OpenGL activity is running
in the foreground and destroyed when the activity exits or some
other activity comes to the foreground.
• SurfaceHolder: An instance of this class is always there even if the
Surface that it holds goes away.
• SurfaceHolder.Callback: A SurfaceView implements this interface so
OpenGL will notify it when the view’s Surface is created, destroyed,
or resized.
In the next section, we’ll fill the screen with a solid color.
10.4 Managing Threads
As we saw in Section 4.2, Drawing the Board, on page 82, the Android
2D library calls the onDraw( ) method of your view whenever it needs to
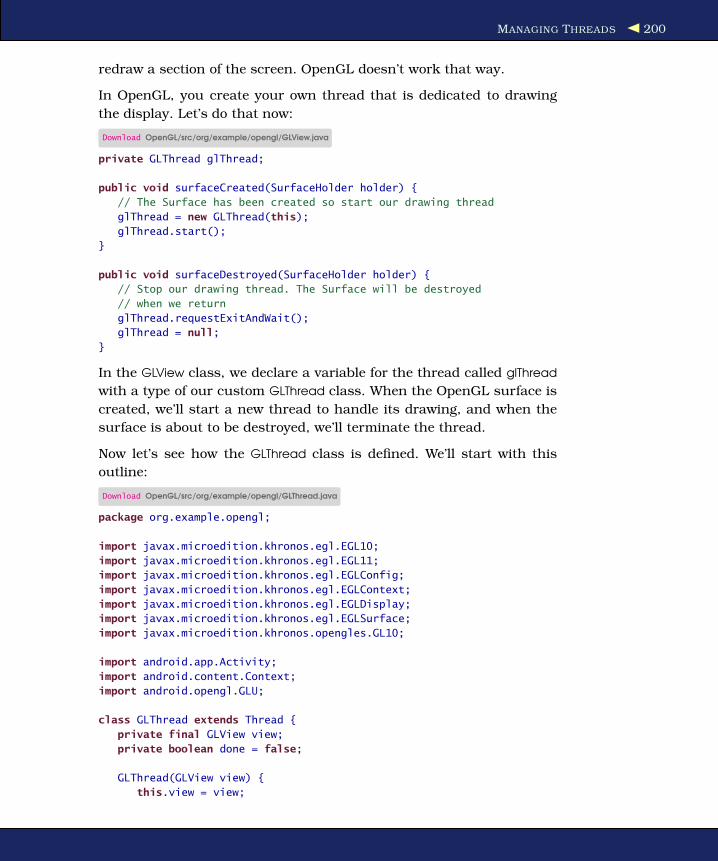
MANAGING THREADS 200
redraw a section of the screen. OpenGL doesn’t work that way.
In OpenGL, you create your own thread that is dedicated to drawing
the display. Let’s do that now:
Download OpenGL/src/org/example/opengl/GLView.java
private GLThread glThread;
public void surfaceCreated(SurfaceHolder holder) {
// The Surface has been created so start our drawing thread
glThread = new GLThread(this);
glThread.start();
}
public void surfaceDestroyed(SurfaceHolder holder) {
// Stop our drawing thread. The Surface will be destroyed
// when we return
glThread.requestExitAndWait();
glThread = null;
}
In the GLView class, we declare a variable for the thread called glThread
with a type of our custom GLThread class. When the OpenGL surface is
created, we’ll start a new thread to handle its drawing, and when the
surface is about to be destroyed, we’ll terminate the thread.
Now let’s see how the GLThread class is defined. We’ll start with this
outline:
Download OpenGL/src/org/example/opengl/GLThread.java
package org.example.opengl;
import javax.microedition.khronos.egl.EGL10;
import javax.microedition.khronos.egl.EGL11;
import javax.microedition.khronos.egl.EGLConfig;
import javax.microedition.khronos.egl.EGLContext;
import javax.microedition.khronos.egl.EGLDisplay;
import javax.microedition.khronos.egl.EGLSurface;
import javax.microedition.khronos.opengles.GL10;
import android.app.Activity;
import android.content.Context;
import android.opengl.GLU;
class GLThread extends Thread {
private final GLView view;
private boolean done = false;
GLThread(GLView view) {
this.view = view;

MANAGING THREADS 201
}
@Override
public void run() {
// Initialize OpenGL...
// Loop until asked to quit
while (!done) {
// Draw a single frame here...
}
}
public void requestExitAndWait() {
// Tell the thread to quit
done = true;
try {
join();
} catch (InterruptedException ex) {
// Ignore
}
}
}
This is regular Java thread coding—nothing special here. The requestEx-
itAndWait( ) method is called when the surface is destroyed. Instead of
trying to destroy the thread itself (which is not safe in Java), it simply
sets a flag and waits for the thread to notice and shut itself down. That
shouldn’t take more than a fraction of a second.
Now let’s fill out the run( ) method:
Download OpenGL/src/org/example/opengl/GLThread.java
Line 1 @Override- public void run() {- // Initialize OpenGL...- EGL10 egl = (EGL10) EGLContext.getEGL();5 EGLDisplay display = egl.eglGetDisplay(EGL10.EGL_DEFAULT_DISPLAY);-
- int[] version = new int[2];- egl.eglInitialize(display, version);-
10 int[] configSpec = { EGL10.EGL_RED_SIZE, 5,- EGL10.EGL_GREEN_SIZE, 6, EGL10.EGL_BLUE_SIZE, 5,- EGL10.EGL_DEPTH_SIZE, 16, EGL10.EGL_NONE };-
- EGLConfig[] configs = new EGLConfig[1];15 int[] numConfig = new int[1];
- egl.eglChooseConfig(display, configSpec, configs, 1,- numConfig);- EGLConfig config = configs[0];-
20 EGLContext glc = egl.eglCreateContext(display, config,

MANAGING THREADS 202
- EGL10.EGL_NO_CONTEXT, null);-
- EGLSurface surface = egl.eglCreateWindowSurface(display,- config, view.getHolder(), null);
25 egl.eglMakeCurrent(display, surface, surface, glc);-
- GL10 gl = (GL10) (glc.getGL());- init(gl);-
30 // Loop until asked to quit- while (!done) {- // Draw a single frame here...- drawFrame(gl);- egl.eglSwapBuffers(display, surface);
35
- // Error handling- if (egl.eglGetError() == EGL11.EGL_CONTEXT_LOST) {- Context c = view.getContext();- if (c instanceof Activity) {
40 ((Activity) c).finish();- }- }- }-
45 // Free OpenGL resources- egl.eglMakeCurrent(display, EGL10.EGL_NO_SURFACE,- EGL10.EGL_NO_SURFACE, EGL10.EGL_NO_CONTEXT);- egl.eglDestroySurface(display, surface);- egl.eglDestroyContext(display, glc);
50 egl.eglTerminate(display);- }
The first thing it needs to do is get a handle to the EGL10 object on line 4.
Then we get a Display handle (line 5) and initialize it (line 8), and then we
ask OpenGL to find a configuration that matches our particular color
depth needs (line 10). I arbitrarily asked for 16-bit color with 5 bits of
red, 6 of green, and 5 of blue, but your own application may have other
requirements.4
With the configuration in hand, we can create the OpenGL context on
line 20, create a surface on line 23, and set the current values for
display, surface, and context on line 25.
On line 27, we use the getGL( ) function to return the actual OpenGL
interface. We cast it to GL10 so we can call the OpenGL ES 1.0 methods.
4. The Android calls to initialize OpenGL got a lot more complicated in version 0.9_beta.
Let’s hope in a future version Google will provide some helper functions to simplify it
again, but for now just hold your nose and copy the code.
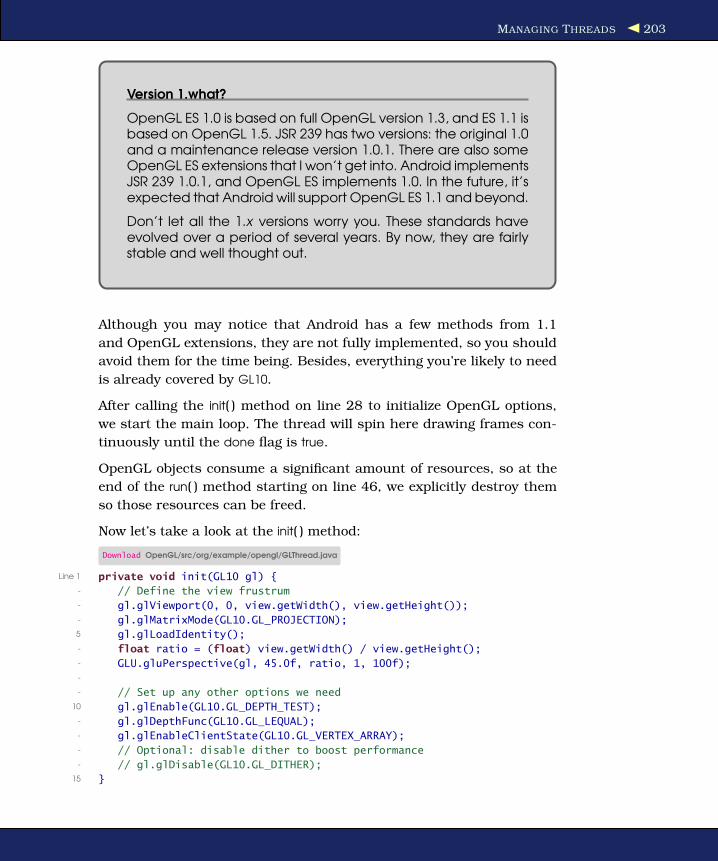
MANAGING THREADS 203
Version 1.what?
OpenGL ES 1.0 is based on full OpenGL version 1.3, and ES 1.1 isbased on OpenGL 1.5. JSR 239 has two versions: the original 1.0and a maintenance release version 1.0.1. There are also someOpenGL ES extensions that I won’t get into. Android implementsJSR 239 1.0.1, and OpenGL ES implements 1.0. In the future, it’sexpected that Android will support OpenGL ES 1.1 and beyond.
Don’t let all the 1.x versions worry you. These standards haveevolved over a period of several years. By now, they are fairlystable and well thought out.
Although you may notice that Android has a few methods from 1.1
and OpenGL extensions, they are not fully implemented, so you should
avoid them for the time being. Besides, everything you’re likely to need
is already covered by GL10.
After calling the init( ) method on line 28 to initialize OpenGL options,
we start the main loop. The thread will spin here drawing frames con-
tinuously until the done flag is true.
OpenGL objects consume a significant amount of resources, so at the
end of the run( ) method starting on line 46, we explicitly destroy them
so those resources can be freed.
Now let’s take a look at the init( ) method:
Download OpenGL/src/org/example/opengl/GLThread.java
Line 1 private void init(GL10 gl) {- // Define the view frustrum- gl.glViewport(0, 0, view.getWidth(), view.getHeight());- gl.glMatrixMode(GL10.GL_PROJECTION);5 gl.glLoadIdentity();- float ratio = (float) view.getWidth() / view.getHeight();- GLU.gluPerspective(gl, 45.0f, ratio, 1, 100f);-
- // Set up any other options we need10 gl.glEnable(GL10.GL_DEPTH_TEST);
- gl.glDepthFunc(GL10.GL_LEQUAL);- gl.glEnableClientState(GL10.GL_VERTEX_ARRAY);- // Optional: disable dither to boost performance- // gl.glDisable(GL10.GL_DITHER);
15 }

MANAGING THREADS 204
The init( ) method takes care of setting up our view frustum and a few
OpenGL options. Note the call to the GLU.gluPerspective( ) helper function
on line 7. The last two arguments are the distance from the eye to the
near and far clipping planes (see Figure 10.1, on page 196).
On line 10, we set a couple of OpenGL options. OpenGL has dozens of
options that can be enabled or disabled with glEnable( ) and glDisable( ).
The most commonly used ones include the following:
Option Description
GL_BLEND Blend the incoming color values with the values
already in the color buffer.
GL_CULL_FACE Ignore polygons based on their winding (clockwise
or counterclockwise) in window coordinates. This is
a cheap way to eliminate back faces.
GL_DEPTH_TEST Do depth comparisons, and update the depth
buffer. Pixels farther away than those already
drawn will be ignored.
GL_LIGHTi Include light number i when figuring out an object’s
brightness and color.
GL_LIGHTING Turn on lighting and material calculations.
GL_LINE_SMOOTH Draw antialiased lines (lines without jaggies).
GL_MULTISAMPLE Perform multisampling for antialiasing and other
effects.
GL_POINT_SMOOTH Draw antialiased points.
GL_TEXTURE_2D Use textures to draw surfaces.
All options are off by default except for GL_DITHER and GL_MULTISAMPLE.
Note that everything you enable has some cost in performance.
It’s time to draw something. The drawFrame( ) method is called every
time around in the main loop.
Download OpenGL/src/org/example/opengl/GLThread.java
private void drawFrame(GL10 gl) {
// Clear the screen to black
gl.glClear(GL10.GL_COLOR_BUFFER_BIT
| GL10.GL_DEPTH_BUFFER_BIT);
// Position model so we can see it
gl.glMatrixMode(GL10.GL_MODELVIEW);
gl.glLoadIdentity();
gl.glTranslatef(0, 0, -3.0f);
// Other drawing commands go here...
}

BUILDING A MODEL 205
Figure 10.2: That was a lot of trouble to get a black screen.
All we do for now is set the screen to black. We clear both the color and
depth buffers. Always remember to clear both, or you’ll get some very
strange results left over from the depth information for the previous
frame.
If you run the program now, you get Figure 10.2. If you’re thinking
that it’s silly to draw the same black screen over and over again in a
loop, you’re right. However, we’ll need the loop later when we talk about
animation, so just bear with me for now.
Let’s move on and draw something a little more interesting. But first we
need to define exactly what we’re drawing (the model).
10.5 Building a Model
Depending on the complexity of the objects you want to draw, you will
typically create them using a graphical design tool and import them
into your program. For the purposes of this example, we’ll just define a
simple model in code: a cube.

BUILDING A MODEL 206
Download OpenGL/src/org/example/opengl/GLCube.java
Line 1 package org.example.opengl;-
- import java.nio.ByteBuffer;- import java.nio.ByteOrder;5 import java.nio.IntBuffer;-
- import javax.microedition.khronos.opengles.GL10;-
- import android.content.Context;10 import android.graphics.Bitmap;
- import android.graphics.BitmapFactory;-
- class GLCube {- private final IntBuffer mVertexBuffer;
15 public GLCube() {- int one = 65536;- int half = one / 2;- int vertices[] = {- // FRONT
20 -half, -half, half, half, -half, half,- -half, half, half, half, half, half,- // BACK- -half, -half, -half, -half, half, -half,- half, -half, -half, half, half, -half,
25 // LEFT- -half, -half, half, -half, half, half,- -half, -half, -half, -half, half, -half,- // RIGHT- half, -half, -half, half, half, -half,
30 half, -half, half, half, half, half,- // TOP- -half, half, half, half, half, half,- -half, half, -half, half, half, -half,- // BOTTOM
35 -half, -half, half, -half, -half, -half,- half, -half, half, half, -half, -half, };- // Buffers to be passed to gl*Pointer() functions must be- // direct, i.e., they must be placed on the native heap- // where the garbage collector cannot move them.
40 //- // Buffers with multi-byte data types (e.g., short, int,- // float) must have their byte order set to native order- ByteBuffer vbb = ByteBuffer.allocateDirect(vertices.length * 4);- vbb.order(ByteOrder.nativeOrder());
45 mVertexBuffer = vbb.asIntBuffer();- mVertexBuffer.put(vertices);- mVertexBuffer.position(0);- }-
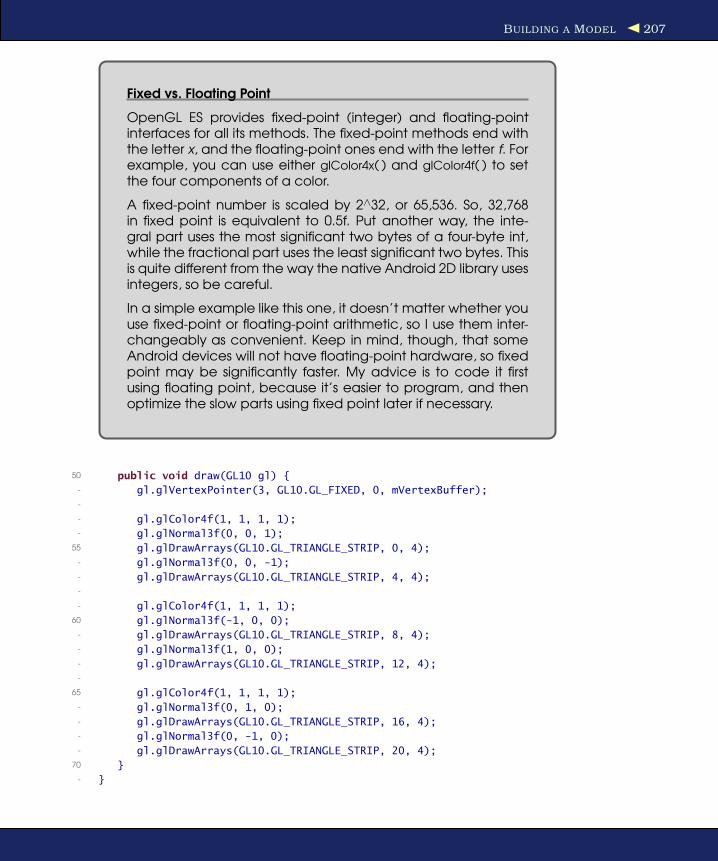
BUILDING A MODEL 207
Fixed vs. Floating Point
OpenGL ES provides fixed-point (integer) and floating-pointinterfaces for all its methods. The fixed-point methods end withthe letter x, and the floating-point ones end with the letter f. Forexample, you can use either glColor4x( ) and glColor4f( ) to setthe four components of a color.
A fixed-point number is scaled by 2∧32, or 65,536. So, 32,768in fixed point is equivalent to 0.5f. Put another way, the inte-gral part uses the most significant two bytes of a four-byte int,while the fractional part uses the least significant two bytes. Thisis quite different from the way the native Android 2D library usesintegers, so be careful.
In a simple example like this one, it doesn’t matter whether youuse fixed-point or floating-point arithmetic, so I use them inter-changeably as convenient. Keep in mind, though, that someAndroid devices will not have floating-point hardware, so fixedpoint may be significantly faster. My advice is to code it firstusing floating point, because it’s easier to program, and thenoptimize the slow parts using fixed point later if necessary.
50 public void draw(GL10 gl) {- gl.glVertexPointer(3, GL10.GL_FIXED, 0, mVertexBuffer);-
- gl.glColor4f(1, 1, 1, 1);- gl.glNormal3f(0, 0, 1);
55 gl.glDrawArrays(GL10.GL_TRIANGLE_STRIP, 0, 4);- gl.glNormal3f(0, 0, -1);- gl.glDrawArrays(GL10.GL_TRIANGLE_STRIP, 4, 4);-
- gl.glColor4f(1, 1, 1, 1);60 gl.glNormal3f(-1, 0, 0);
- gl.glDrawArrays(GL10.GL_TRIANGLE_STRIP, 8, 4);- gl.glNormal3f(1, 0, 0);- gl.glDrawArrays(GL10.GL_TRIANGLE_STRIP, 12, 4);-
65 gl.glColor4f(1, 1, 1, 1);- gl.glNormal3f(0, 1, 0);- gl.glDrawArrays(GL10.GL_TRIANGLE_STRIP, 16, 4);- gl.glNormal3f(0, -1, 0);- gl.glDrawArrays(GL10.GL_TRIANGLE_STRIP, 20, 4);
70 }- }

LIGHTS, CAMERA, ... 208
The vertices array on line 18 defines the corners of the cube in fixed-
point model coordinates (see the “Fixed vs. Floating Point” sidebar).
Each face of a cube is a square, which consists of two triangles. We use
a common OpenGL drawing mode called triangle strips. In this mode,
we specify two starting points, and then after that every subsequent
point defines a triangle with the previous two points. It’s a quick way to
get a lot of geometry pumped out to the graphics hardware in a hurry.
Note that each point has three coordinates (x, y, and z). The x and y
axes point to the right and up, respectively, and the z axis points out of
the screen toward the eye point.
In the draw method (line 50), we use the vertex buffer created in the
constructor and draw six different runs of triangles (for the six sides
of the cube). In a real program, you would want to combine the calls
into one or two strips, because the fewer number of OpenGL calls you
make, the faster your program will go.
Now let’s use our new class in GLThread:
Download OpenGL/src/org/example/opengl/GLThread.java
private final GLCube cube = new GLCube();
private void drawFrame(GL10 gl) {
// ... Draw the model
cube.draw(gl);
}
Now if you run the program, you’ll see the exciting image in Figure 10.3,
on the next page. Well, it’s more exciting than black.
10.6 Lights, Camera, ...
In real life you have light sources such as the sun, headlights, torches,
or glowing lava pools. OpenGL lets you define up to eight light sources
in your scene. There are two parts to lighting—a light and something to
shine it on. Let’s start with the light.
All 3D graphics libraries support three types of lighting:
• Ambient: A general glow that the light contributes to the entire
scene, even to objects facing away from the light. It’s important to
have a little ambient light so you can pick out details even in the
shadows.
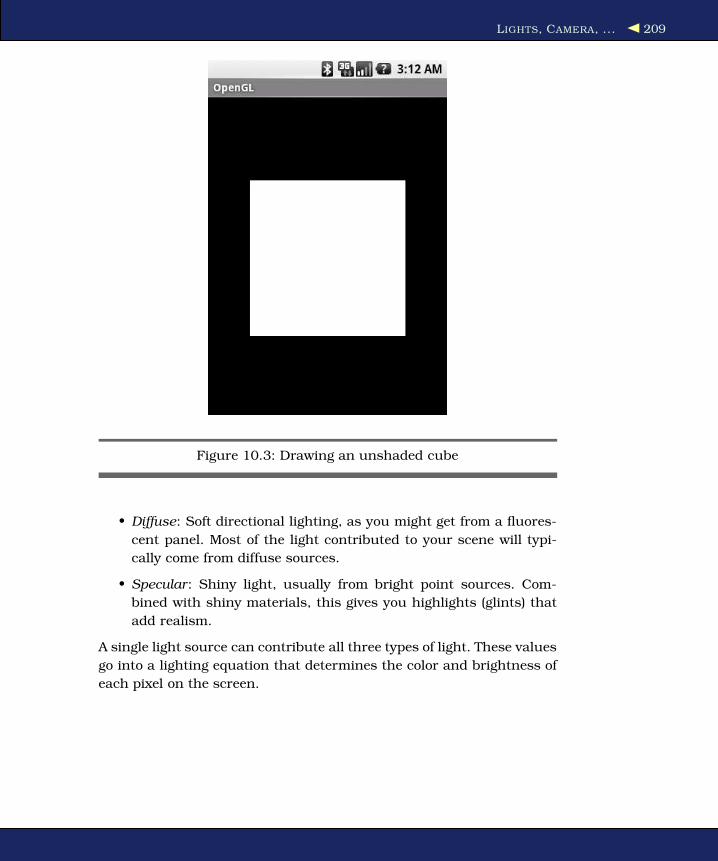
LIGHTS, CAMERA, ... 209
Figure 10.3: Drawing an unshaded cube
• Diffuse: Soft directional lighting, as you might get from a fluores-
cent panel. Most of the light contributed to your scene will typi-
cally come from diffuse sources.
• Specular: Shiny light, usually from bright point sources. Com-
bined with shiny materials, this gives you highlights (glints) that
add realism.
A single light source can contribute all three types of light. These values
go into a lighting equation that determines the color and brightness of
each pixel on the screen.

ACTION! 210
The lighting is defined in the GLThread.init( ) method:
Download OpenGL/src/org/example/opengl/GLThread.java
// Define the lighting
float lightAmbient[] = new float[] { 0.2f, 0.2f, 0.2f, 1 };
float lightDiffuse[] = new float[] { 1, 1, 1, 1 };
float[] lightPos = new float[] { 1, 1, 1, 1 };
gl.glEnable(GL10.GL_LIGHTING);
gl.glEnable(GL10.GL_LIGHT0);
gl.glLightfv(GL10.GL_LIGHT0, GL10.GL_AMBIENT, lightAmbient, 0);
gl.glLightfv(GL10.GL_LIGHT0, GL10.GL_DIFFUSE, lightDiffuse, 0);
gl.glLightfv(GL10.GL_LIGHT0, GL10.GL_POSITION, lightPos, 0);
In our code we define one light source at position (1, 1, 1). It’s a white
omnidirectional light that has a bright diffuse component and a dim
ambient component. In this example, we’re not using specular lighting.
Next, we need to tell OpenGL about the materials our cube is made of.
Light reflects differently off different materials, such as metal, plastic,
or paper. To simulate this in OpenGL, add this code in init( ) to define
how the material reacts with the three types of light: ambient, diffuse,
and specular:
Download OpenGL/src/org/example/opengl/GLThread.java
// What is the cube made of?
float matAmbient[] = new float[] { 1, 1, 1, 1 };
float matDiffuse[] = new float[] { 1, 1, 1, 1 };
gl.glMaterialfv(GL10.GL_FRONT_AND_BACK, GL10.GL_AMBIENT,
matAmbient, 0);
gl.glMaterialfv(GL10.GL_FRONT_AND_BACK, GL10.GL_DIFFUSE,
matDiffuse, 0);
The object will appear to have a dull finish, as if it were made out of
paper (see Figure 10.4, on the following page). The top-right corner of
the cube is closer to the light, so it appears brighter.
10.7 Action!
Up to now the cube has just been sitting there without moving. That’s
pretty boring, so let’s make it move. To do that, we need to make a
couple of changes to our init( ) and drawFrame( ) methods in GLThread.

ACTION! 211
Figure 10.4: Lighting the scene
Download OpenGL/src/org/example/opengl/GLThread.java
private long startTime;
private void init(GL10 gl) {
startTime = System.currentTimeMillis();
}
private void drawFrame(GL10 gl) {
// ... Set rotation angle based on the time
long elapsed = System.currentTimeMillis() - startTime;
gl.glRotatef(elapsed * (30f / 1000f), 0, 1, 0);
gl.glRotatef(elapsed * (15f / 1000f), 1, 0, 0);
}
This code rotates the cube a little bit every time through the main loop.
Specifically, every second it rotates 30 degrees around the x axis and 15
degrees around the y axis. The result will be a nice, smooth, spinning
cube (see Figure 10.5, on the next page).

ACTION! 212
Figure 10.5: Rotating the cube
Time-Based Animation
The first version of this example kept track of the current rotationangle and simply incremented it each time through the loop.Can you think of a reason why that was a bad idea?
Since Android can run on a variety of different devices, youcan’t predict how long it will take to draw a single frame. Itmight take half a second or 1/100th of a second. If you movedan object a fixed amount every frame, then on slow devicesthe object would move too slowly, and on fast devices it wouldmove too fast. By tying the amount of movement to how muchtime has elapsed, you can achieve predictable movementon any device. Faster hardware will draw the animation moresmoothly, but objects will get from A to B in the same amountof time.

APPLYING TEXTURE 213
10.8 Applying Texture
Although the scene is starting to look more interesting, nobody would
mistake it for real life. Everyday objects have textures, like the rough
surface of a brick wall or the gravel on a garden path. Do you own a
laminated table? A wood laminate is just a photograph of wood grain
that is glued on the surface of a less expensive material like plastic or
particle board.
We’re going to do the same thing to our cube using a picture. Unfor-
tunately, the code to do this is fairly long. Don’t worry if you don’t
understand it all right away.
Download OpenGL/src/org/example/opengl/GLCube.java
Line 1 private final IntBuffer mTextureBuffer;-
- public GLCube() {- int texCoords[] = {5 // FRONT- 0, one, one, one, 0, 0, one, 0,- // BACK- one, one, one, 0, 0, one, 0, 0,- // LEFT
10 one, one, one, 0, 0, one, 0, 0,- // RIGHT- one, one, one, 0, 0, one, 0, 0,- // TOP- one, 0, 0, 0, one, one, 0, one,
15 // BOTTOM- 0, 0, 0, one, one, 0, one, one, };- // ...- ByteBuffer tbb = ByteBuffer.allocateDirect(texCoords.length * 4);- tbb.order(ByteOrder.nativeOrder());
20 mTextureBuffer = tbb.asIntBuffer();- mTextureBuffer.put(texCoords);- mTextureBuffer.position(0);- }-
25 static void loadTexture(GL10 gl, Context context, int resource) {- Bitmap bmp = BitmapFactory.decodeResource(- context.getResources(), resource);-
- ByteBuffer bb = extract(bmp);30
- load(gl, bb, bmp.getWidth(), bmp.getHeight());- }-

APPLYING TEXTURE 214
- private static ByteBuffer extract(Bitmap bmp) {35 ByteBuffer bb = ByteBuffer.allocateDirect(bmp.getHeight()
- * bmp.getWidth() * 4);- bb.order(ByteOrder.BIG_ENDIAN);- IntBuffer ib = bb.asIntBuffer();-
40 // Convert ARGB -> RGBA- for (int y = bmp.getHeight() - 1; y > -1; y--)- for (int x = 0; x < bmp.getWidth(); x++) {- int pix = bmp.getPixel(x, bmp.getHeight() - y - 1);- // int alpha = ((pix >> 24) & 0xFF);
45 int red = ((pix >> 16) & 0xFF);- int green = ((pix >> 8) & 0xFF);- int blue = ((pix) & 0xFF);-
- // Make up alpha for interesting effect50 ib.put(red << 24 | green << 16 | blue << 8
- | ((red + blue + green) / 3));- }- bb.position(0);- return bb;
55 }-
- private static void load(GL10 gl, ByteBuffer bb,- int width, int height) {- // Get a new texture name
60 int[] tmp_tex = new int[1];- gl.glGenTextures(1, tmp_tex, 0);- int tex = tmp_tex[0];-
- // Load it up65 gl.glBindTexture(GL10.GL_TEXTURE_2D, tex);
- gl.glTexImage2D(GL10.GL_TEXTURE_2D, 0, GL10.GL_RGBA,- width, height, 0, GL10.GL_RGBA,- GL10.GL_UNSIGNED_BYTE, bb);- gl.glTexParameterx(GL10.GL_TEXTURE_2D,
70 GL10.GL_TEXTURE_MIN_FILTER, GL10.GL_LINEAR);- gl.glTexParameterx(GL10.GL_TEXTURE_2D,- GL10.GL_TEXTURE_MAG_FILTER, GL10.GL_LINEAR);- }- }
Most of the complexity comes from the need to convert a texture from
an Android format (a Portable Network Graphics file) to a format that
OpenGL can understand (packed integers with red, green, blue, and
alpha values in that order). The extract( ) method (line 34) takes an
Android Bitmap that we decoded using BitmapFactor.decodeResource( )
and copies it into a Java NIO ByteBuffer, doing the color conversion as it
goes. The load( ) method (line 57) passes the buffer to OpenGL, which
loads it onto a texture and prepares it for drawing.

APPLYING TEXTURE 215
Figure 10.6: Applying a texture
Next we need to tell OpenGL to use the texture coordinates. Add this
line to the draw( ) method:
Download OpenGL/src/org/example/opengl/GLCube.java
gl.glTexCoordPointer(2, GL10.GL_FIXED, 0, mTextureBuffer);
And finally we need to call the loadTexture( ) method in GLThread.init( ):
Download OpenGL/src/org/example/opengl/GLThread.java
gl.glEnableClientState(GL10.GL_TEXTURE_COORD_ARRAY);
gl.glEnable(GL10.GL_TEXTURE_2D);
GLCube.loadTexture(gl, view.getContext(), R.drawable.android);
This code enables textures and texture coordinates and then calls our
loadTexture( ) method, passing it the Activity context and resource ID so
it can load the texture image.
PEEKABOO 216
R.drawable.android is a PNG file scaled down to 128 pixels square that I
copied to res/drawable/android.png. You can find it in the downloadable
code package that accompanies this book. Note the number 128 doesn’t
appear anywhere in the code, so you substitute a larger or smaller
image easily. You want to keep it small, however, because the extract( )
method is painfully slow. Let’s hope in a future release of Android that
Google will provide an easier and faster way to do this.
You can see our progress so far in Figure 10.6, on the preceding page.
10.9 Peekaboo
Just for fun, let’s make the cube partially transparent. Add this to
GLThread.init( ):
Download OpenGL/src/org/example/opengl/GLThread.java
boolean SEE_THRU = true;
// ...
if (SEE_THRU) {
gl.glDisable(GL10.GL_DEPTH_TEST);
gl.glEnable(GL10.GL_BLEND);
gl.glBlendFunc(GL10.GL_SRC_ALPHA, GL10.GL_ONE);
}
This turns off depth testing, because we want to see obscured objects
as well as foreground ones. It also turns on a blending mode that lets
the opacity of objects be based on their alpha channel. In GLCube, we
defined the alpha channel as the average of the red, green, and blue
values in the texture, which is a very rough way to calculate how bright
the color is.5 The net effect is that the back faces of the cube will appear
through the darker parts of the front faces. For the final result, see
Figure 10.7, on the next page.
I’ll leave it to you to implement an option to turn that on and off. Try
playing around with different blend modes to get cool effects.
5. Purists cringe at the sight of math like this, but these kinds of tricks are par for the
course in 3D graphics. Most physical effects are too expensive to implement exactly, so
estimates and shortcuts are common. Anyway, why limit yourself to what is possible in
the physical world?

FAST -FORWARD >> 217
Figure 10.7: The final version: a see-through cube
10.10 Fast-Forward >>
In this chapter, you learned how to use Android’s 3D graphics library.
Because Android uses the industry-standard OpenGL ES API, a wide
variety of additional information is available if you want to learn more.
In particular, I recommend the Javadoc for the JSR 239 API specifica-
tion.6
What’s next? Well, that’s entirely up to you. You have all the tools you
need, so go make something great!
6. http://java.sun.com/javame/reference/apis/jsr239

Part IV
Appendixes
218

Appendix A
Java vs. the AndroidLanguage and APIs
For the most part, Android programs are written in the Java language,
and they use the Java 5 Standard Edition (SE) library APIs. I say “for the
most part” because there are a few differences. This appendix highlights
the differences between regular Java and what you’ll find in Android. If
you’re already proficient in Java development on other platforms, you
should take a close look to see what things you need to “unlearn.”
A.1 Language Subset
Android uses a standard Java compiler to compile your source code
into regular bytecodes and then translates those bytecodes into Dalvik
instructions. Therefore, the entire Java language is supported, not just
a subset. Compare this to the Google Web Toolkit (GWT), which has
its own Java to JavaScript translator. By using the stock compiler and
bytecodes, you don’t even need to have the source code for libraries
that you want to use in your applications.
Language Level
Android supports code compatible with Java Standard Edition 5 or ear-
lier. Java 6 and 7 class formats and features are not yet supported but
could be added in future releases.

LANGUAGE SUBSET 220
Intrinsic Types
All Java intrinsic types including byte, char, short, int, long, float, dou-
ble, Object, String, and arrays are supported. However, on current hard-
ware commonly found in mobile devices, floating point is emulated.
That means it’s performed in software instead of hardware, making it
much slower than normal. Simple operations on real numbers could
take a millisecond to complete. Although occasional use is fine, do not
use float or double in performance-critical code.
Multithreading and Synchronization
Multiple threads are supported by time slicing: giving each thread a
few milliseconds to run and then performing a context switch to let
another thread have a turn. Although Android will support any num-
ber of threads, in general you should use only one or two. One thread
is dedicated for the main user interface (if you have one), and another
thread is used for long-running operations such as calculations or net-
work I/O.
The Dalvik VM implements the synchronized keyword and synchroni-
zation-related library methods such as Object.wait( ), Object.notify( ), and
Object.notifyAll( ). It also supports the java.util.concurrent package for more
sophisticated algorithms. Use them as you would in any Java program
to keep multiple threads from interfering with each other.
Reflection
Although the Android platform supports Java reflection, as a general
rule you should not use it. The reason is simple performance: reflection
is slow. Consider alternatives such as compile-time tools and prepro-
cessors instead.
Finalization
The Dalvik VM supports object finalization during garbage collection
just like regular Java VMs. However, most Java experts advise you not
to rely on finalizers because you cannot predict when (or if) they will
run. Instead of finalizers, use explicit close( ) or terminate( )
methods. Android is targeted toward resource-constrained hardware,
so it’s important that you release all resources as soon as you no longer
need them.

STANDARD LIBRARY SUBSET 221
A.2 Standard Library Subset
Android supports a relatively large subset of the Java Standard Edition
5.0 library. Some things were left out because they simply didn’t make
sense (such as printing), and others were omitted because better APIs
are available that are specific to Android (such as user interfaces).
Supported
The following standard packages are supported in Android. Consult the
Java 2 Platform Standard Edition 5.0 API documentation1 for informa-
tion on how to use them:
• java.awt.font: A few constants for Unicode and fonts
• java.beans: A few classes and interfaces for JavaBeans property
changes
• java.io: File and stream I/O
• java.lang (except java.lang.management): Language and exception
support
• java.math: Big numbers, rounding, precision
• java.net: Network I/O, URLs, sockets
• java.nio: File and channel I/O
• java.security: Authorization, certificates, public keys
• java.sql: Database interfaces
• java.text: Formatting, natural language, collation
• java.util (including java.util.concurrent): Lists, maps, sets, arrays,
collections
• javax.crypto: Ciphers, public keys
• javax.microedition.khronos: OpenGL graphics (from Java Micro Edition)
• javax.net: Socket factories, SSL
• javax.security (except javax.security.auth.kerberos, javax.security.auth.spi,
and javax.security.sasl)
• javax.sql (except javax.sql.rowset): More database interfaces
• javax.xml.parsers: XML parsing
• org.w3c.dom (but not subpackages): DOM nodes and elements
• org.xml.sax: Simple API for XML
Note that although the regular Java SQL database APIs (JDBC) are
included, you don’t use them to access local SQLite databases. Use the
1. http://java.sun.com/j2se/1.5.0/docs/api
THIRD-PARTY LIBRARIES 222
android.database APIs instead (see Chapter 9, Putting SQL to Work, on
page 175).
Not Supported
These packages, normally part of the Java 2 Platform Standard Edition,
are not supported by Android:
• java.applet
• java.awt
• java.lang.management
• java.rmi
• javax.accessibility
• javax.activity
• javax.imageio
• javax.management
• javax.naming
• javax.print
• javax.rmi
• javax.security.auth.kerberos
• javax.security.auth.spi
• javax.security.sasl
• javax.sound
• javax.swing
• javax.transaction
• javax.xml (except javax.xml.parsers)
• org.ietf.*
• org.omg.*
• org.w3c.dom.* (subpackages)
A.3 Third-Party Libraries
In addition to the standard libraries listed earlier, the Android SDK
comes with a number of third-party libraries for your convenience:
• org.apache.http: HTTP authentication, cookies, methods, and
protocol
• org.json: JavaScript Object Notation
• org.xml.sax: XML parsing
• org.xmlpull.v1: XML parsing
Appendix B
Hello, WidgetIntroduced in Android 1.5 (Cupcake), app widgets are miniature appli-
cation views that can be embedded in the Home screen. A few widgets
are provided with Android including an analog clock, a music controller,
and one that just shows a picture. Many developers have created inter-
esting widgets to display the weather, news headlines, horoscopes, and
more, and you can too. This appendix will show you how.
Note: This entire chapter is new for Cupcake but I’m too lazy to flag
every single paragraph. Just take my word for it.
B.1 Creating Your First Widget
Currently there is no special Eclipse wizard to create an Android Widget
so we’re going to create a regular “Hello, Android” application like we
did in Section 1.2, Creating Your First Program, on page 24, and then
tweak it a little. Select File > New > Project... to open the New Project
dialog box. Then select Android > Android Project, and click Next. Enter
the following information:
Project name: Widget
Build Target: Android 1.5
Application name: Widget
Package name: org.example.widget
Instead of entering a name for the Activity, leave that field blank and
turn off the check mark next to Create Activity. When you’re done, it
should look something like Figure B.1, on the following page.
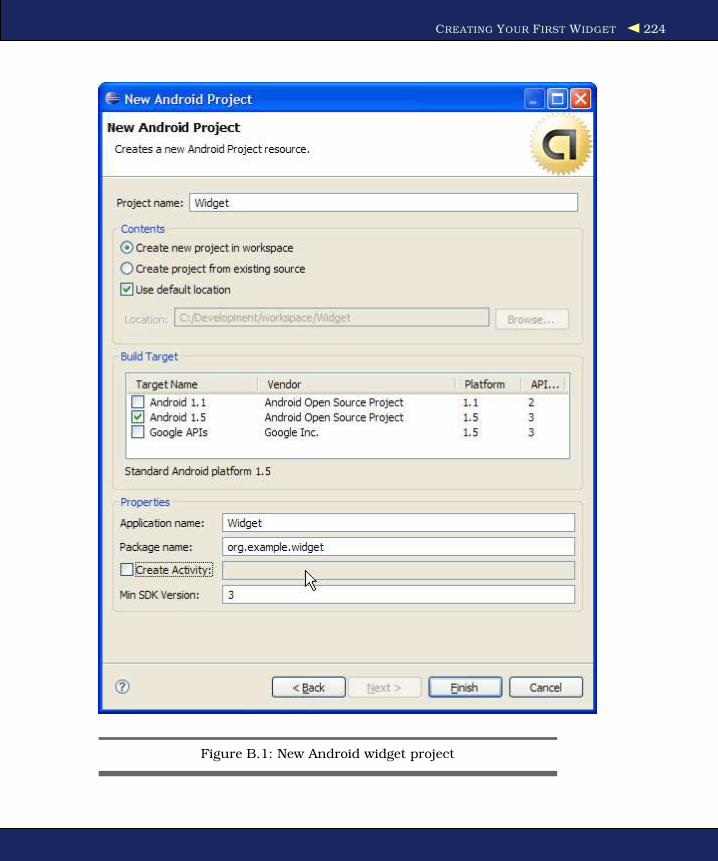
CREATING YOUR FIRST WIDGET 224
Figure B.1: New Android widget project

CALLING ALL WIDGETS! 225
Click Finish. The Android plug-in will create the project and fill it in
with some default files. The files will not be correct for a widget project
so let’s fix them up now.
B.2 Calling All Widgets!
Our first stop is the AndroidManifest.xml file. While it’s technically possi-
ble (and common) to put widgets and activities in the same application,
this example will only have a widget. We don’t need an <activity> tag
but we do need to add a <receiver> to define the widget. Here is the
revised manifest file:
Download Widget/AndroidManifest.xml
<?xml version="1.0" encoding="utf-8"?>
<manifest xmlns:android="http://schemas.android.com/apk/res/android"
package="org.example.widget"
android:versionCode="1"
android:versionName="1.0">
<application android:icon="@drawable/icon"
android:label="@string/app_name">
<!-- Broadcast Receiver that will process AppWidget updates -->
<receiver android:name=".Widget"
android:label="@string/widget_name">
<intent-filter>
<action android:name=
"android.appwidget.action.APPWIDGET_UPDATE" />
</intent-filter>
<meta-data android:name="android.appwidget.provider"
android:resource="@xml/widget" />
</receiver>
</application>
<uses-sdk android:minSdkVersion="3" />
</manifest>
The <meta-data> tag tells Android it can find the widget definition in
res/xml/widget.xml. Here’s the definition:
Download Widget/res/xml/widget.xml
<?xml version="1.0" encoding="utf-8"?>
<appwidget-provider xmlns:android="http://schemas.android.com/apk/res/android"
android:minWidth="146dip"
android:minHeight="72dip"
android:updatePeriodMillis="60000"
android:initialLayout="@layout/main"
/>
This specifies a minimum size for the widget, how often it should be
updated (more on that later), and a reference to its starting layout. The

STRETCH TO FIT 226
layout is defined in res/layout/main.xml:
Download Widget/res/layout/main.xml
<?xml version="1.0" encoding="utf-8"?>
<LinearLayout xmlns:android="http://schemas.android.com/apk/res/android"
android:orientation="vertical"
android:layout_width="fill_parent"
android:layout_height="fill_parent"
android:background="@drawable/widget_bg"
>
<TextView android:id="@+id/text"
android:layout_width="fill_parent"
android:layout_height="fill_parent"
android:text="@string/hello"
android:gravity="center"
android:textColor="@android:color/black"
/>
</LinearLayout>
You may have noticed that this layout is almost the same as the one we
used for the “Hello, Android” example except that this version specifies
centered black text and a background image.
B.3 Stretch to Fit
For the background we could have used any Android Drawable, such as
a solid color or a bitmap (see Section 4.1, Drawable, on page 76). We
could have even left it off to get a completely transparent background.
But for this example I wanted to show you how to use a NinePatch image.
A NinePatch image is a stretchable PNG image often used for the back-
ground of resizable buttons. You use the Draw 9-patch tool1 included
with the SDK to create one, as shown in Figure B.2, on the following
page.
A one-pixel border around the real image contains additional informa-
tion about how to stretch the image and insert padded content. Lines
on the bottom and right edge tell Android where content should go. If
the content doesn’t fit in that area (which is usually the case) then the
lines on the left and top edge tell Android which pixel rows and columns
should be duplicated in order to stretch the image.
The resulting file must use the extension .9.png and be placed in the
project’s res/drawable directory.
1. http://d.android.com/guide/developing/tools/draw9patch.html
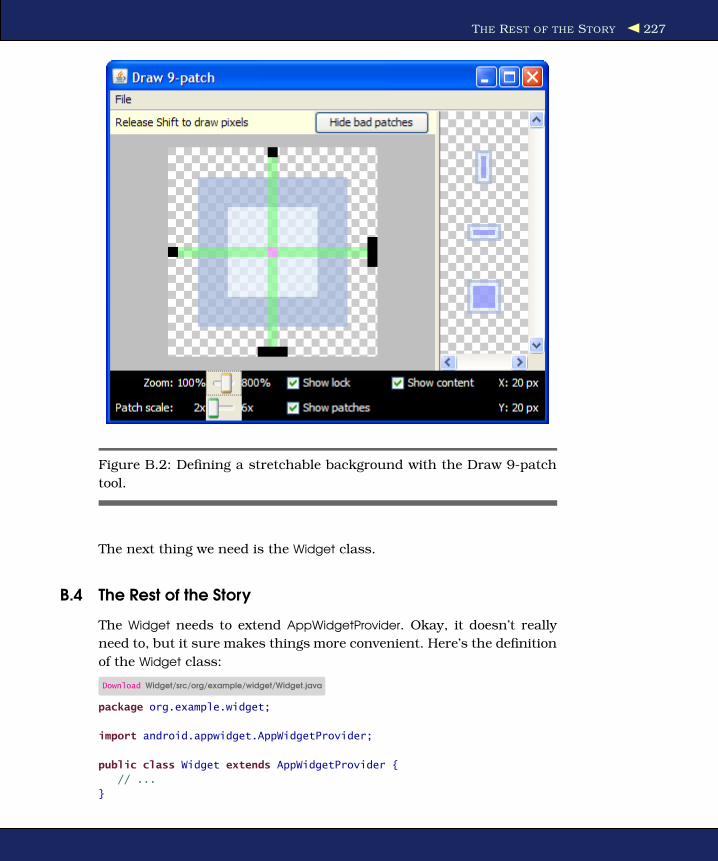
THE REST OF THE STORY 227
Figure B.2: Defining a stretchable background with the Draw 9-patch
tool.
The next thing we need is the Widget class.
B.4 The Rest of the Story
The Widget needs to extend AppWidgetProvider. Okay, it doesn’t really
need to, but it sure makes things more convenient. Here’s the definition
of the Widget class:
Download Widget/src/org/example/widget/Widget.java
package org.example.widget;
import android.appwidget.AppWidgetProvider;
public class Widget extends AppWidgetProvider {
// ...
}
RUNNING THE WIDGET 228
We’ll come back to fill in this class in a moment but for now we can just
use the default behavior provided by AppWidgetProvider.
Finally, let’s get rid of a few pesky error message by defining a few string
values:
Download Widget/res/values/strings.xml
<?xml version="1.0" encoding="utf-8"?>
<resources>
<string name="hello">Hello World!</string>
<string name="app_name">Widget</string>
<string name="widget_name">Widget</string>
</resources>
All that’s left now is to run it.
B.5 Running the Widget
To run your new widget, go to the Package Explorer window, right-click
the Widget project, and select Run As > Android Application. Nothing
much will appear to happen as Eclipse builds and installs the widget
on your emulator or device.
To see the new widget, bring up the Home screen’s context menu (press
and hold your finger (or mouse) on the Home screen. A menu will
appear with options listing all the types of things you can add (see
Figure B.3, on the next page).
Select Widgets from the menu, and then select the widget named Widget
(clever, huh?). At last, your widget should appear (see Figure B.4, on
page 230).
Try moving it around by pressing and holding your finger on the widget.
Rotate the display to see how the widget automatically resizes itself. To
remove it, drag it to the trash can icon at the bottom of the screen.
As exciting as that was, let’s do it one better by displaying the current
date and time inside our widget.
B.6 Keeping Up to Date
In Android 1.5, widget hosts (programs like the Home screen that can
contain widgets) send a message to all their little widget kids whenever
the widgets should display something. The Android way to send a mes-

KEEPING UP TO DATE 229
Figure B.3: Customizing your Home screen with widgets.
sage is to broadcast an intent. In this case, the intent is
android.appwidget.action.APPWIDGET_UPDATE.
Back when we set up the AndroidManifest.xml file, we told Android that
we could receive that intent and do something interesting with it. Now
it’s time to fill out the Widget class to do just that:
Download Widget/src/org/example/widget/Widget.java
Line 1 package org.example.widget;-
- import java.text.SimpleDateFormat;- import java.util.Date;5
- import android.appwidget.AppWidgetManager;- import android.appwidget.AppWidgetProvider;- import android.content.Context;- import android.widget.RemoteViews;
10
- public class Widget extends AppWidgetProvider {

KEEPING UP TO DATE 230
Figure B.4: Hello, Widget
- // ...- // Define the format string for the date and time- private SimpleDateFormat formatter = new SimpleDateFormat(
15 "EEE, d MMM yyyy\nHH:mm:ss.SSS");-
- @Override- public void onUpdate(Context context,- AppWidgetManager appWidgetManager, int[] appWidgetIds) {
20 // Retrieve and format the current date and time- String now = formatter.format(new Date());-
- // Change the text in the widget- RemoteViews updateViews = new RemoteViews(
25 context.getPackageName(), R.layout.main);- updateViews.setTextViewText(R.id.text, now);- appWidgetManager.updateAppWidget(appWidgetIds, updateViews);-
- // Not really necessary, just a habit30 super.onUpdate(context, appWidgetManager, appWidgetIds);
- }

GO WILD 231
- }
Whenever the APPWIDGET_UPDATE intent comes in, Android will call our
onUpdate( ) method. On line 21, we format the current date using a
SimpleDateFormat created on line 14. This will show the day of the
week, day of the month, month name, and year on the first row of the
widget, and then the hour, minute, second, and milliseconds on the
second row.
Next, on line 24 we create a RemoteViews instance for the new view
layout that the widget will display. It just so happens that this example
uses the same layout, R.layout.main, when updating as it did when it
was started. Line 26 replaces the original “Hello, World” text with the
current date and time.
Finally, on line 27 we send our updated view to replace the current
contents of the widget. The call to super.onUpdate( ) on line 30 is just
there for code hygiene.
Remove the widget from your Home screen and re-install it from Eclipse.
When you add it back to the Home screen, you should see something
like Figure B.5, on the next page.
The frequency of updates is controlled by the android:updatePeriodMillis=
parameter in res/xml/widget.xml. A value of 60000 represents 60 sec-
onds, so our widget will be updated once a minute. Note that this is
only an approximate number. The actual update event may be delayed
(possibly a long time) because of other things happening on the phone.
Google recommends you set widgets to update infrequently, for example
once a day or once an hour, in order to conserve battery power. But just
for fun, try setting the update period to a low number like 1000 or even
100ms to see what happens.
B.7 Go Wild
Now that you know the basics of widget building, there’s no end to the
interesting do-dads you can create. If you need more advanced features
such as responding to events, background processing, and specifying
an initial activity for configuration, consult the online documentation.2
Try to keep your widgets simple and useful, though. By cleverly using
2. http://d.android.com/guide/topics/appwidgets/index.html
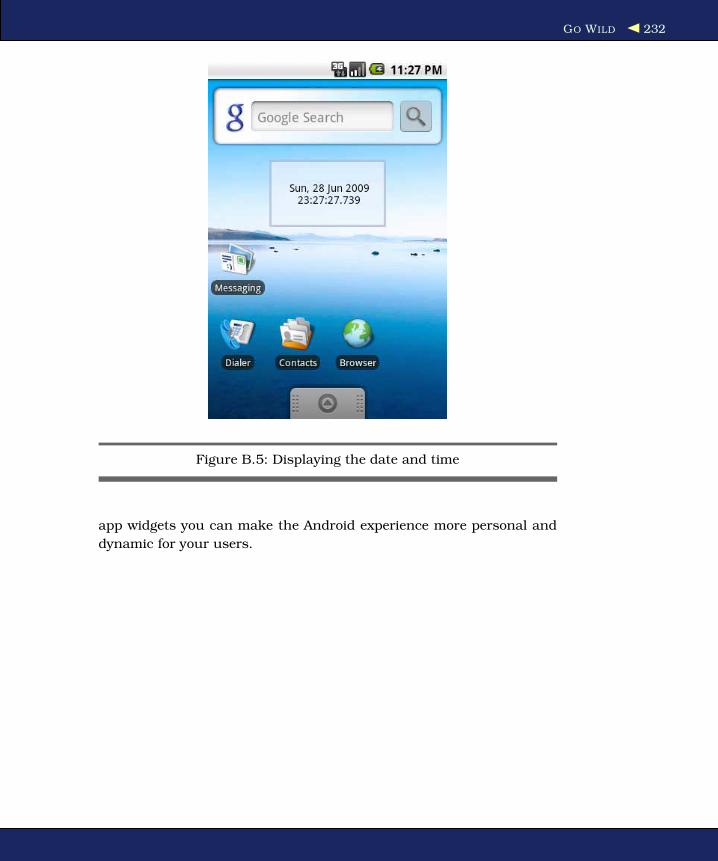
GO WILD 232
Figure B.5: Displaying the date and time
app widgets you can make the Android experience more personal and
dynamic for your users.

Appendix C
Publishing to the Android MarketThis is a beta version. This chapter is not yet complete.

Appendix D
Bibliography
[Bur05] Ed Burnette. Eclipse IDE Pocket Guide. O’Reilly & Asso-
ciates, Inc, Sebastopol, CA, 2005.
[Gen06] Jonathan Gennick. SQL Pocket Guide. O’Reilly Media, Inc.,
Sebastopol, CA, second edition, 2006.
[Goe06] Brian Goetz. Java Concurrency in Practice. Addison-Wesley,
Reading, MA, 2006.
[Owe06] Mike Owens. The Definitive Guide to SQLite. Apress, Berke-
ley, CA, 2006.

IndexAAbout box, 61f, 58–61, 62f
Accelerometer readings, 166
Activity, 36, 37f, 39
declaring, 61
defining, new, 58
Activity manager, 34
addEvent(), 183
addJavaScriptInterface(), 138–145
alert(), 142, 144
Alpha, 74
Ambient light, 208
Android
activity in, 36, 37f
architecture of, 31f, 30–35
audio formats supported by, 107
benefits of, 20, 129
content providers, 190
Emulator, 24
installation, 21, 22f
Java library support, 221
language, vs. Java, 219
libraries, 31–32
objects, 39–40
OpenGL and, 196
on a phone, 29
platforms, 20
project, basic, 24, 25f
resources, 40
screen rotations, 114
sensors, support for, 164
third-party libraries for, 222
threads in, 220
updates for, 22
user ID, 126
video formats supported by, 111
windows in, 36f, 35–39
Android Eclipse plug-in, 103
Android Location API, 160f, 158–164
sensors and, 167f, 164–167
Android Market, 35
Android runtime, 32
Android Virtual Device, 24
creating, 27f
undefined, 26f
AndroidManifest.xml, 61
Animation, OpenGL, 212f, 210–212
Application Framework, 33
Application stack, 35
Applications, 34
Applications and Widgets layer, 34
Architecture, 31f, 30–35
Application Framework, 33
Applications and Widgets layer, 34
Linux kernel, 30
native libraries, 31
ARGB, 73
Audio, 105f, 106f, 104–110
BBackground gradient, 78f
Background music, 115–118
Bitmap, 77
Bitmaps, 55
Bornstein, Dan, 33
BrowserIntent, 130f, 134f, 130–134
BrowserView, 130
CcalculateUsedTiles(), 99
callAndroid(), 142
callJS(), 142, 145
Canvas, 75
Carmack, John, 197
Color, 74
Connection error, 23
Constants, as interface, 180
Content provider, 34, 40

236 GRAPHICS
ContentProvider, 189–193
createSnapshot(), 138
Cube model, 205–208, 209f, 212f, 216,
217f
DDalvik virtual machine (VM), 32
Data binding, 189f, 186–189
Data definition language (DDL)
statements, 177
Data storage, 119–127
current screen position, 123–125
internal files, accessing, 125
options, adding, 119–121
pausing game, 121–123
secure digital (SD), 126–127
SQLite, 175–194
about, 175–176, 177f
basic application, 182f, 178–186
ContentProvider, 189–193
data binding, 189f, 186–189
overview of, 176–178
DDL statements, 177
Debugging, 70f, 70, 71
Declarative design, 45
The Definitive Guide to SQLite (Owens),
194
Delayed requests, 152
Density-independent pixels, 55
Difficulty selection, 69f
Diffuse light, 209
Digital certificate, 126
Dips, 55
Drawable graphics, 76, 77
drawFrame(), 210
Drawing functions, 89
dumpProviders(), 162
EEclipse, 21, 71, 164
Eclipse IDE Pocket Guide (Burnette), 29
Eclipse plug-in, 22, 41, 46
Emulator, 24
GPS and, 164
landscape mode, 54
MapView and, 173
secure digital card, 126
sensors and, 166
sound formats and, 107
speed and, 28
Errors
activities, declaring, 61
connection, 23
MediaPlayer and, 110
release(), 117
Exit button, 71
extract(), 216
extraData, 79
FField of view, 195
Finalization, 220
findViews(), 96, 151
finish(), 72
Fixed-point interface, 207
Flash memory card, 126–127
Floating-point interface, 207
frompuzzleString(), 101
GGame class, defining, 79
Game logic, 98
Games, sensors for, 164
Garns, Howard, 45, 79
Gennick, Jonathan, 194
getBestProviders(), 162
getColor(), 74
getEvents(), 184, 191
getGL(), 202
getHeight(), 81
getHints(), 121
getLang(), 156
getLastNonConfigurationInstance(), 114
getPuzzle(), 101, 123
getRect(), 88
getResources(), 74
getSettings(), 138
getSystemService(), 162, 165
getTile(), 102
getTileString(), 102
getUsedTiles(), 99
getWidth(), 81
Global Positioning System (GPS), 160f,
158–164
Goetz, Brian, 157
Google Maps, 169f, 168–173
Google Translation API, 146
Google Web Toolkit (GWT), 219
Gradient background, 78f
Graphics, 73–103, 195–216
animation, 212f, 210–212
canvas, 75
237 LOGCAT VIEW
color, 74
cube model, 205–208, 209f
drawable, 76, 77
gradient background, 78f
Hello, Android and, 197–199
input, 88f, 92f, 87–93
library, 86
lighting, 208–210, 211f
OpenGL and, 196–197
paint, 74
path, circular, 75, 76f
Sudoku example, 85f, 86f, 78–87
texture, 215f, 213–216
threads, 205f, 200–205
three-dimensional, 196f, 195–196
transparency, 216, 217f
Grid lines, Sudoku, 85f
guiSetText(), 156
HHello, Android
audio and, 105
browser view and, 135
browsing by intent, 130
Emulator, running in, 28f
first project, 24, 25f
JavaScript and, 140
location test, 159
MapView, 168
OpenGL and, 197–199
SQLite and, 178
translation program, 146
Hints, 91, 121
Hipp, Richard, 175
Home application, 35, 36f
HTML views, 64
Iinit(), 203
initThreading(), 153
Inner class, 60
Input, 88f, 92f, 87–93
insertOrThrow(), 183
Installation
Android, 21, 22f
Eclipse, 21
Eclipse plug-in, 22
Java 5.0+, 20
Web Standard Tools, 23
Intents, 39, 60
Inter-Process Communication (IPC),
189
Internal files, accessing, 125
Internet
browsing by intent, 130f, 134f,
130–134
JavaScript and, 140f, 139–145
web services and, 147f, 146–156
web view, 137f, 134–138
invalidate(), 89
isValid(), 97
JJava, 20
constants (as interface), 180
Dalvik and, 33
intrinsic language types, 220
JavaScript and, 139
language subset and, 219
libraries, support for, 221
reflection, support for, 220
time slicing, multiple threads, 220
web services, 147f, 146–156
Java Concurrency in Practice (Goetz),
157
JavaScript, 140f, 139–145
KKeypads, 93, 95f
LLandscape mode, 54, 56f
Layers, 77
Lea, Doug, 146
Levels, 77
Libraries, 31–32
Lighting, OpenGL, 208–210, 211f
Linux kernel, 30
loadData(), 138
loadDataWithBaseURL(), 138
loadTexture(), 215
loadUrl(), 138
LocalBrowser, 130
Locale, 160f, 158–164
sensors, 167f, 164–167
Location manager, 34
Location updates, 163
LocationManager, 160f
Log messages, 70
LogCat view, 70f

238 QUEUEUPDATE()
MMapView, 168–173
embedding, 168
Hello, Android, 168
location of, 172
Media codes, 32
MediaPlayer, 110, 116
Menus, adding, 65f, 64–66
Modification statements, 178
moveToNext(), 185
Movies, 112f, 110–113
Multimedia, 104–118
audio, 105f, 106f, 104–110
background music, Sudoku,
115–118
video, 112f, 110–113
Multithreading, 220
NNative libraries, 31–32
New game button, 69f, 68–70
Nikoli, 79
NinePatch, 77
Notification manager, 34
OObject finalization, 220
Objects, 39–40
onClick(), 68
onConfigurationChanged(), 114
onCreate(), 37, 77, 80, 112, 127, 161
onCreateOptionsMenu(), 119
onDestroy(), 38, 114
onDraw(), 75, 81, 82, 87, 89, 103, 200
onJsAlert(), 144
onKeyDown(), 87, 89
onLocationChanged(), 163
onPause(), 38, 115, 162
onProviderDisabled(), 163
onProviderEnabled(), 163
onRestart(), 38
onRestoreInstanceState(), 38
onResume(), 38, 115, 162
onRetainNonConfigurationInstance(), 114
onSaveInstanceState(), 38, 125
onSensorChanged(), 165
onSizeChanged(), 81, 82
onStart(), 38
onStatusChanged(), 163
onStop(), 38
onTouchEvent(), 90
onTrackballEvent(), 88
openBrowser(), 133, 136
OpenGL, 195–216
animation, 212f, 210–212
classes, 199
cube model, 205–208, 209f
fixed- vs. floating-point interface,
207
Hello, Android, 197–199
lighting, 208–210, 211f
options, disabling/enabling, 204
overview of, 196–197
texture, 215f, 213–216
threads in, 205f, 200–205
three-dimensional graphics and,
196f, 195–196
transparency, 216, 217f
versions, 203
OpenIntents, 166
Owens, Mike, 194
PPackage names, 47
Paint, 74
Path, 75, 76f
Performance, 28, 41, 111
Permissions, 41, 138, 159
Phone
3D hardware and, 198
installation, 29
keypads, 93, 95f
prepackaged systems, 34
uses for, 129
Pixels, 55
Platform, 20
Playback, 110
post(), 143
Private intents, 60
Procedural design, 45
Processes vs. activities, 36
Proxy, 23
Public intents, 60
PuzzleView class, 80
QQueries, running, 184
Query statements, 178
queueUpdate(), 153, 154, 156

239 SUDOKU PROGRAM
RReflection, 220
Refresh, 90
registerListener(), 165
release(), 117
removeUpdates(), 163
requestExitAndWait(), 201
requestLocationUpdates(), 162
Resolution, 86, 87
Resolution-independent
measurements, 55
Resource compiler, 40
Resource manager, 34
Resources, 40
returnResult(), 97
Rows, adding, 183, 191
run(), 201
Runtime, 32
SScale, 77
Scale-independent pixels, 55
Screen layouts, 56, 57f
Screen position, 123–125
Screen resolution, 55
Screen rotations, 114
Secure Digital (SD) card, 126–127
Security
JavaScript and, 139
permissions, 41
seekTo(), 109
select(), 88
Selecting tiles, 87
Sensors, 164–167
Emulator and, 166
readings, interpreting, 165
simulator, 167f
Service class, 116
Services, 40
setAdapters(), 151
setColor(), 74
setContentView(), 133
setDownloadListener(), 138
setId(), 124
setListeners(), 152
setOnClickListener(), 145
setOnCompletionListener(), 109
setText(), 143
Settings, adding, 67f, 67
setTranslated(), 156
setVideoPath(), 112
setWebChromeClient(), 138, 144
setWebViewClient(), 138
Shape, 77
showEvents(), 185
Silicon Graphics, 196
Size, 81, 86
Sound effects, 105f, 106f, 104–110
Spectacular light, 209
Speed, 28, 41
Sps, 55
SQL Pocket Guide (Gennick), 194
SQLite, 175–194
about, 175–176, 177f
application basics, 182f, 178–186
blessing (license), 176
ContentProvider, 189–193
data binding, 189f, 186–189
DDL statements, 177
modification statements, 178
overview of, 176–178
queries, running, 184
query statements, 178
rows, adding, 183, 191
SQLite database, 32
SQLiteOpenHelper, 179
start(), 109, 115
startGame(), 78, 123
State-saving code, 39
States, 77
stop(), 116, 117
stopLoading(), 138
String resource, 59
Sudoku history, 45, 79, 115, 120
Sudoku program, 46f, 44–72
About box, 61f, 58–61, 62f
debugging, 70f, 70, 71
defined, 44
exit button, 71
game board, 82
game class for, 79
game logic, 98
graphics for, 85f, 86f, 78–87
hints, 91, 121
input and graphics, 88f, 92f, 87–93
interface design, 45–46
menus, 65f, 64–66
multimedia, 104–118
audio, 105f, 106f, 104–110
background music for, 115–118
video, 112f, 110–113
new game button, 69f, 68–70

240 WINDOWS
opening screen, 48f, 52f, 54f, 46–55
pausing, 121
PuzzleView class, 80
screen layouts, 56f, 57f, 54–58
settings, 67f, 67
starting game (code), 78
themes, 63f, 62–63
Surface Manager, 32
Synchronization, 220
TTesting, state-saving code, 39
Texture, OpenGL, 215f, 213–216
TextView, 64
Themes, 63f, 62–63
Threads
multiple, 220
OpenGL, 205f, 200–205
Tile selection, 87
Time slicing, 220
Time-based animation, 212
Torvalds, Linus, 30
Trackball, 88
Translate, 130
Translator, 146, 147f
Transparency, 216, 217f
Triangle strips, 208
2D and 3D graphics, 32
UUniform Resource Identifier (URI), 190
unregisterListener(), 165
User ID, 126
User interface design, 44–72
About box, 61f, 58–61, 62f
debugging, 70f, 70, 71
exit button, 71
menus, 65f, 64–66
new game button, 69f, 68–70
opening screen, 48f, 52f, 54f, 46–55
screen layouts, 56f, 57f, 54–58
settings, 67f, 67
Sudoku overview, 44, 46f
themes, 63f, 62–63
types of, 45–46
VVector graphics, 55
Video, 112f, 110–113
View frustrum, 195
View size, 81
WWeb services, 147f, 146–156
Web Standard Tools (WST), 23
WebKit library, 32
WebView, 137f, 134–138
WebView, 64
Widgets, 34
Windows, in Android, 36f, 35–39

Web 2.0Welcome to the Web, version 2.0. You need some help to tame the wild technologies out
there. Start with Prototype and script.aculo.us, a book about two libraries that will make
your JavaScript life much easier.
See how to reach the largest possible web audience with The Accessible Web.
Prototype and script.aculo.usTired of getting swamped in the nitty-gritty of
cross-browser, Web 2.0–grade JavaScript? Get back
in the game with Prototype and script.aculo.us, two
extremely popular JavaScript libraries that make it
a walk in the park. Be it Ajax, drag and drop,
autocompletion, advanced visual effects, or many
other great features, all you need is to write one or
two lines of script that look so good they could
almost pass for Ruby code!
Prototype and script.aculo.us: You Never Knew
JavaScript Could Do This!
Christophe Porteneuve
(330 pages) ISBN: 1-934356-01-8. $34.95
http://pragprog.com/titles/cppsu
Design Accessible Web SitesThe 2000 U.S. Census revealed that 12% of the
population is severely disabled. Sometime in the
next two decades, one in five Americans will be
older than 65. Section 508 of the Americans with
Disabilities Act requires your website to provide
equivalent access to all potential users. But beyond
the law, it is both good manners and good business
to make your site accessible to everyone. This book
shows you how to design sites that excel for all
audiences.
Design Accessible Web Sites: 36 Keys to
Creating Content for All Audiences and
Platforms
Jeremy Sydik
(304 pages) ISBN: 978-1-9343560-2-9. $34.95
http://pragprog.com/titles/jsaccess

Getting It DoneStart with the habits of an agile developer and use the team practices of successful agile
teams, and your project will fly over the finish line.
Practices of an Agile DeveloperAgility is all about using feedback to respond to
change. Learn how to • apply the principles of
agility throughout the software development
process • establish and maintain an agile working
environment • deliver what users really want
• use personal agile techniques for better coding
and debugging • use effective collaborative
techniques for better teamwork • move to an agile
approach
Practices of an Agile Developer:
Working in the Real World
Venkat Subramaniam and Andy Hunt
(189 pages) ISBN: 0-9745140-8-X. $29.95
http://pragprog.com/titles/pad
Ship It!Page after page of solid advice, all tried and tested
in the real world. This book offers a collection of
tips that show you what tools a successful team
has to use, and how to use them well. You’ll get
quick, easy-to-follow advice on modern techniques
and when they should be applied. You need this
book if: • you’re frustrated at lack of progress on
your project. • you want to make yourself and your
team more valuable. • you’ve looked at
methodologies such as Extreme Programming (XP)
and felt they were too, well, extreme. • you’ve
looked at the Rational Unified Process (RUP) or
CMM/I methods and cringed at the learning curve
and costs. • you need to get software out the
door without excuses.
Ship It! A Practical Guide to Successful Software
Projects
Jared Richardson and Will Gwaltney
(200 pages) ISBN: 0-9745140-4-7. $29.95
http://pragprog.com/titles/prj

Get GroovyExpand your horizons with Groovy, and tame the wild Java VM.
Programming GroovyProgramming Groovy will help you learn the
necessary fundamentals of programming in Groovy.
You’ll see how to use Groovy to do advanced
programming techniques, including meta
programming, builders, unit testing with mock
objects, processing XML, working with databases
and creating your own domain-specific languages
(DSLs).
Programming Groovy: Dynamic Productivity for
the Java Developer
Venkat Subramaniam
(320 pages) ISBN: 978-1-9343560-9-8. $34.95
http://pragprog.com/titles/vslg
Groovy RecipesSee how to speed up nearly every aspect of the
development process using Groovy Recipes. Groovy
makes mundane file management tasks like
copying and renaming files trivial. Reading and
writing XML has never been easier with XmlParsers
and XmlBuilders. Breathe new life into arrays,
maps, and lists with a number of convenience
methods. Learn all about Grails, and go beyond
HTML into the world of Web Services: REST, JSON,
Atom, Podcasting, and much, much more.
Groovy Recipes: Greasing the Wheels of Java
Scott Davis
(264 pages) ISBN: 978-0-9787392-9-4. $34.95
http://pragprog.com/titles/sdgrvr

The Pragmatic BookshelfAvailable in paperback and DRM-free PDF, our titles are here to help you stay on top of
your game. The following are in print as of July 2009; be sure to check our website at
pragprog.com for newer titles.
Title Year ISBN Pages
Advanced Rails Recipes: 84 New Ways to Build
Stunning Rails Apps
2008 9780978739225 464
Agile Retrospectives: Making Good Teams Great 2006 9780977616640 200
Agile Web Development with Rails, Third Edition 2009 9781934356166 784
Augmented Reality: A Practical Guide 2008 9781934356036 328
Behind Closed Doors: Secrets of Great
Management
2005 9780976694021 192
Best of Ruby Quiz 2006 9780976694076 304
Core Animation for Mac OS X and the iPhone:
Creating Compelling Dynamic User Interfaces
2008 9781934356104 200
Data Crunching: Solve Everyday Problems
using Java, Python, and More
2005 9780974514079 208
Deploying Rails Applications: A Step-by-Step
Guide
2008 9780978739201 280
Design Accessible Web Sites: 36 Keys to
Creating Content for All Audiences and
Platforms
2007 9781934356029 336
Desktop GIS: Mapping the Planet with Open
Source Tools
2008 9781934356067 368
Developing Facebook Platform Applications with
Rails
2008 9781934356128 200
Enterprise Integration with Ruby 2006 9780976694069 360
Enterprise Recipes with Ruby and Rails 2008 9781934356234 416
Everyday Scripting with Ruby: for Teams,
Testers, and You
2007 9780977616619 320
FXRuby: Create Lean and Mean GUIs with Ruby 2008 9781934356074 240
From Java To Ruby: Things Every Manager
Should Know
2006 9780976694090 160
GIS for Web Developers: Adding Where to Your
Web Applications
2007 9780974514093 275
Google Maps API, V2: Adding Where to Your
Applications
2006 PDF-Only 83
Groovy Recipes: Greasing the Wheels of Java 2008 9780978739294 264
Hello, Android: Introducing Google’s Mobile
Development Platform
2008 9781934356173 200
Interface Oriented Design 2006 9780976694052 240
Land the Tech Job You Love 2009 9781934356265 280
Learn to Program, 2nd Edition 2009 9781934356364 230
Continued on next page

Title Year ISBN Pages
Manage It! Your Guide to Modern Pragmatic
Project Management
2007 9780978739249 360
Mastering Dojo: JavaScript and Ajax Tools for
Great Web Experiences
2008 9781934356111 568
Modular Java: Creating Flexible Applications
with OSGi and Spring
2009 9781934356401 260
No Fluff Just Stuff 2006 Anthology 2006 9780977616664 240
No Fluff Just Stuff 2007 Anthology 2007 9780978739287 320
Practical Programming: An Introduction to
Computer Science Using Python
2009 9781934356272 350
Practices of an Agile Developer 2006 9780974514086 208
Pragmatic Project Automation: How to Build,
Deploy, and Monitor Java Applications
2004 9780974514031 176
Pragmatic Thinking and Learning: Refactor Your
Wetware
2008 9781934356050 288
Pragmatic Unit Testing in C# with NUnit 2007 9780977616671 176
Pragmatic Unit Testing in Java with JUnit 2003 9780974514017 160
Pragmatic Version Control Using Git 2008 9781934356159 200
Pragmatic Version Control using CVS 2003 9780974514000 176
Pragmatic Version Control using Subversion 2006 9780977616657 248
Programming Clojure 2009 9781934356333 304
Programming Erlang: Software for a Concurrent
World
2007 9781934356005 536
Programming Groovy: Dynamic Productivity for
the Java Developer
2008 9781934356098 320
Programming Ruby: The Pragmatic
Programmers’ Guide, Second Edition
2004 9780974514055 864
Programming Ruby 1.9: The Pragmatic
Programmers’ Guide
2009 9781934356081 960
Programming Scala: Tackle Multi-Core
Complexity on the Java Virtual Machine
2009 9781934356319 250
Prototype and script.aculo.us: You Never Knew
JavaScript Could Do This!
2007 9781934356012 448
Rails Recipes 2006 9780977616602 350
Rails for .NET Developers 2008 9781934356203 300
Rails for Java Developers 2007 9780977616695 336
Rails for PHP Developers 2008 9781934356043 432
Rapid GUI Development with QtRuby 2005 PDF-Only 83
Release It! Design and Deploy Production-Ready
Software
2007 9780978739218 368
Scripted GUI Testing with Ruby 2008 9781934356180 192
Ship it! A Practical Guide to Successful Software
Projects
2005 9780974514048 224
Continued on next page

246 WINDOWS
Title Year ISBN Pages
Stripes ...and Java Web Development Is Fun
Again
2008 9781934356210 375
TextMate: Power Editing for the Mac 2007 9780978739232 208
The Definitive ANTLR Reference: Building
Domain-Specific Languages
2007 9780978739256 384
The Passionate Programmer: Creating a
Remarkable Career in Software Development
2009 9781934356340 200
ThoughtWorks Anthology 2008 9781934356142 240
Ubuntu Kung Fu: Tips, Tricks, Hints, and Hacks 2008 9781934356227 400

The Pragmatic BookshelfThe Pragmatic Bookshelf features books written by developers for developers. The titles
continue the well-known Pragmatic Programmer style and continue to garner awards and
rave reviews. As development gets more and more difficult, the Pragmatic Programmers
will be there with more titles and products to help you stay on top of your game.
Visit Us OnlineHello Android’s Home Page
http://pragprog.com/titles/eband
Source code from this book, errata, and other resources. Come give us feedback, too!
Register for Updates
http://pragprog.com/updates
Be notified when updates and new books become available.
Join the Community
http://pragprog.com/community
Read our weblogs, join our online discussions, participate in our mailing list, interact
with our wiki, and benefit from the experience of other Pragmatic Programmers.
New and Noteworthy
http://pragprog.com/news
Check out the latest pragmatic developments in the news.
Buy the BookIf you liked this PDF, perhaps you’d like to have a paper copy of the book. It’s available
for purchase at our store: pragprog.com/titles/eband.
Contact UsPhone Orders: 1-800-699-PROG (+1 919 847 3884)
Online Orders: www.pragprog.com/catalog
Customer Service: [email protected]
Non-English Versions: [email protected]
Pragmatic Teaching: [email protected]
Author Proposals: [email protected]
Copyright © 2022 FDOKUMEN

