ThinkPad X260 User Guide - CNET Content Solutions
182
ThinkPad X260 User Guide
-
Upload
khangminh22 -
Category
Documents
-
view
0 -
download
0
Transcript of ThinkPad X260 User Guide - CNET Content Solutions

ThinkPad X260 User Guide

Note: Before using this information and the product it supports, be sure to read and understand the following:
• Safety, Warranty, and Setup Guide
• Regulatory Notice
• “Important safety information” on page vi
• Appendix F “Notices” on page 163
The latest Safety, Warranty, and Setup Guide and the Regulatory Notice are available on the Lenovo®
Support Web site at:http://www.lenovo.com/UserManuals
Fourth Edition (May 2016)
© Copyright Lenovo 2015, 2016.
LIMITED AND RESTRICTED RIGHTS NOTICE: If data or software is delivered pursuant to a General ServicesAdministration “GSA” contract, use, reproduction, or disclosure is subject to restrictions set forth in Contract No.GS-35F-05925.

Contents
Read this first . . . . . . . . . . . . . . vImportant safety information . . . . . . . . . . vi
Conditions that require immediate action . . viiService and upgrades . . . . . . . . . . viiPower cords and power adapters . . . . . viiiExtension cords and related devices . . . . . ixPlugs and outlets . . . . . . . . . . . . . ixPower supply statement . . . . . . . . . . ixExternal devices . . . . . . . . . . . . . xGeneral battery notice . . . . . . . . . . . xNotice for removable rechargeable battery . . . xNotice for built-in rechargeable battery . . . . xiNotice for non-rechargeable coin-cell battery . . xiHeat and product ventilation . . . . . . . . xiElectrical current safety information . . . . xiiLiquid crystal display (LCD) notice . . . . . xiiiUsing headphones or earphones. . . . . . xiiiAdditional safety information . . . . . . . xiv
Chapter 1. Product overview . . . . . . 1Locating computer controls, connectors, andindicators. . . . . . . . . . . . . . . . . . 1
Front view. . . . . . . . . . . . . . . . 1Right-side view. . . . . . . . . . . . . . 2Left-side view . . . . . . . . . . . . . . 5Bottom view . . . . . . . . . . . . . . . 6Status indicators . . . . . . . . . . . . . 6
Locating important product information . . . . . . 8Machine type and model information . . . . . 8FCC ID and IC Certification information . . . . 8Labels for the Windows operating systems. . . 9
Computer features . . . . . . . . . . . . . 10Computer specifications . . . . . . . . . . . 11Operating environment . . . . . . . . . . . 11Lenovo programs . . . . . . . . . . . . . 12
Accessing Lenovo programs . . . . . . . 12An introduction to Lenovo programs . . . . 12
Chapter 2. Using your computer . . . 15Registering your computer . . . . . . . . . . 15Frequently asked questions . . . . . . . . . 15Getting help about the Windows operatingsystem. . . . . . . . . . . . . . . . . . 16Special keys . . . . . . . . . . . . . . . 17
Function keys and key combinations . . . . 17Windows key . . . . . . . . . . . . . 19
ThinkPad pointing device . . . . . . . . . . 19
TrackPoint pointing device . . . . . . . . 20Trackpad . . . . . . . . . . . . . . . 20Trackpad touch gestures . . . . . . . . . 21Replacing the cap of the pointing stick . . . 22Customizing the ThinkPad pointing device . . 23
Power management . . . . . . . . . . . . 23Using the ac power . . . . . . . . . . . 23Checking the battery status . . . . . . . . 24Charging the batteries . . . . . . . . . . 24Managing the battery power . . . . . . . 24Power-saving modes . . . . . . . . . . 24Handling the battery. . . . . . . . . . . 25
Connecting to the network . . . . . . . . . . 26Ethernet connections . . . . . . . . . . 27Wireless connections . . . . . . . . . . 27
Using an external display . . . . . . . . . . 30Connecting an external display . . . . . . 30Choosing a display mode . . . . . . . . 31Changing display settings . . . . . . . . 31
Using audio features . . . . . . . . . . . . 31Using the camera . . . . . . . . . . . . . 32Using a flash media card or a smart card . . . . 33
Chapter 3. Enhancing yourcomputer . . . . . . . . . . . . . . . 35Finding ThinkPad options . . . . . . . . . . 35ThinkPad docking stations . . . . . . . . . . 35
ThinkPad Basic Dock, ThinkPad Pro Dock,and ThinkPad Ultra Dock . . . . . . . . . 35ThinkPad WiGig Dock . . . . . . . . . . 44
Chapter 4. You and your computer . . 49Accessibility and comfort . . . . . . . . . . 49
Ergonomic information. . . . . . . . . . 49Comfort . . . . . . . . . . . . . . . 50Accessibility information . . . . . . . . . 50
Traveling with your computer . . . . . . . . . 53Travel tips . . . . . . . . . . . . . . . 53Travel accessories . . . . . . . . . . . 53
Chapter 5. Security . . . . . . . . . . 55Using passwords. . . . . . . . . . . . . . 55
Typing passwords . . . . . . . . . . . 55Power-on password . . . . . . . . . . . 55Supervisor password . . . . . . . . . . 56Hard disk passwords . . . . . . . . . . 57
Hard disk security . . . . . . . . . . . . . 59
© Copyright Lenovo 2015, 2016 i

Setting the security chip . . . . . . . . . . . 60Using the fingerprint reader. . . . . . . . . . 61Notice on deleting data from your internal storagedrive. . . . . . . . . . . . . . . . . . . 64Using firewalls . . . . . . . . . . . . . . . 65Protecting data against viruses . . . . . . . . 65
Chapter 6. Advanced configuration . . 67Installing a new operating system . . . . . . . 67
Installing the Windows 7 operating system . . 67Installing the Windows 10 operating system . 68
Installing device drivers . . . . . . . . . . . 69Using the ThinkPad Setup program . . . . . . 69
Main menu . . . . . . . . . . . . . . 70Config menu. . . . . . . . . . . . . . 70Date and Time menu . . . . . . . . . . 75Security menu . . . . . . . . . . . . . 75Startup menu . . . . . . . . . . . . . 80Restart menu . . . . . . . . . . . . . 81Updating the UEFI BIOS . . . . . . . . . 82
Using system management. . . . . . . . . . 82Setting management features . . . . . . . 83
Chapter 7. Preventing problems . . . 85General tips for preventing problems . . . . . . 85Making sure device drivers are up-to-date . . . . 86Taking care of your computer . . . . . . . . . 87
Cleaning the cover of your computer . . . . 88
Chapter 8. Troubleshooting computerproblems . . . . . . . . . . . . . . . 91Diagnosing problems . . . . . . . . . . . . 91Troubleshooting . . . . . . . . . . . . . . 91
Computer stops responding . . . . . . . 91Spills on the keyboard . . . . . . . . . . 92Error messages . . . . . . . . . . . . 92Beep errors . . . . . . . . . . . . . . 94Memory module problems . . . . . . . . 94Networking problems . . . . . . . . . . 94Problems with the keyboard and other pointingdevices . . . . . . . . . . . . . . . . 96Problems with the display and multimediadevices . . . . . . . . . . . . . . . . 97Fingerprint reader problems. . . . . . . . 102Battery and power problems . . . . . . . 103Problems with drives and other storagedevices . . . . . . . . . . . . . . . . 105A software problem . . . . . . . . . . . 106Problems with ports and connectors . . . . 106
Chapter 9. Recovery overview . . . 109
Recovery overview for the Windows 7 operatingsystem. . . . . . . . . . . . . . . . . . 109
Creating and using a recovery media . . . . 109Performing backup and recoveryoperations . . . . . . . . . . . . . . 110Using the Rescue and Recoveryworkspace . . . . . . . . . . . . . . 111Creating and using a rescue medium . . . . 112Reinstalling preinstalled programs and devicedrivers . . . . . . . . . . . . . . . . 113Solving recovery problems . . . . . . . . 114
Recovery overview for the Windows 10 operatingsystem. . . . . . . . . . . . . . . . . . 114
Resetting your computer . . . . . . . . . 114Using advanced startup options . . . . . . 114Recovering your operating system if Windows10 fails to start . . . . . . . . . . . . . 115Creating and using a recovery USB drive . . 115
Chapter 10. Replacing devices . . . 117Static electricity prevention. . . . . . . . . . 117Disabling the built-in battery . . . . . . . . . 117Installing or replacing the micro SIM card . . . . 118Replacing the removable battery . . . . . . . 119Replacing the base cover assembly . . . . . . 122Replacing the internal storage drive . . . . . . 124Replacing the internal-storage-drive cable andcable bracket . . . . . . . . . . . . . . . 128Replacing a memory module . . . . . . . . . 133Replacing an M.2 wireless-WAN card. . . . . . 135
Chapter 11. Getting support . . . . 139Before you contact Lenovo . . . . . . . . . . 139Getting help and service . . . . . . . . . . . 139
Using diagnostic programs . . . . . . . . 140Lenovo Support Web site. . . . . . . . . 140Calling Lenovo . . . . . . . . . . . . . 140
Purchasing additional services . . . . . . . . 141
Appendix A. Supplementalinformation about the Ubuntuoperating system . . . . . . . . . . 143
Appendix B. RegulatoryInformation . . . . . . . . . . . . . 147Locating the UltraConnect™ wireless antennas . . 147Wireless related information . . . . . . . . . 148
Wireless-radio compliance information . . . 149Locating wireless regulatory notices . . . . 149
Certification related information . . . . . . . . 149Export classification notice . . . . . . . . . . 150Electronic emission notices. . . . . . . . . . 150
ii ThinkPad X260 User Guide

Federal Communications CommissionDeclaration of Conformity . . . . . . . . 150Industry Canada Class B emission compliancestatement . . . . . . . . . . . . . . . 150European Union - Compliance to theElectromagnetic Compatibility (EMC) Directiveor Radio Equipment Directive . . . . . . . 151German Class B compliance statement . . . 151Korea Class B compliance statement . . . . 152Japan VCCI Class B compliance statement . . 152Japan compliance statement for productswhich connect to the power mains withrated current less than or equal to 20 A perphase . . . . . . . . . . . . . . . . 152Japan notice for ac power cord . . . . . . 152Lenovo product service information forTaiwan . . . . . . . . . . . . . . . . 152
Eurasian compliance mark . . . . . . . . . . 152Brazil audio notice . . . . . . . . . . . . . 152
Appendix C.WEEE and recyclingstatements . . . . . . . . . . . . . 153Important WEEE information . . . . . . . . . 153Recycling information for China . . . . . . . . 154
Recycling information for Japan . . . . . . . . 154Recycling information for Brazil . . . . . . . . 155Battery recycling information for Taiwan. . . . . 155Battery recycling information for the EuropeanUnion . . . . . . . . . . . . . . . . . . 155Battery recycling information for the United Statesand Canada. . . . . . . . . . . . . . . . 156
Appendix D. Restriction of HazardousSubstances (RoHS) Directive . . . . 157European Union RoHS . . . . . . . . . . . 157Turkish RoHS . . . . . . . . . . . . . . . 157Ukraine RoHS . . . . . . . . . . . . . . . 157India RoHS . . . . . . . . . . . . . . . . 157China RoHS. . . . . . . . . . . . . . . . 158Taiwan RoHS . . . . . . . . . . . . . . . 159
Appendix E. ENERGY STAR modelinformation . . . . . . . . . . . . . 161
Appendix F. Notices . . . . . . . . . 163Trademarks . . . . . . . . . . . . . . . . 164
© Copyright Lenovo 2015, 2016 iii

iv ThinkPad X260 User Guide

Read this first
Be sure to follow the important tips given here to get the most use and enjoyment out of your computer.Failure to do so might lead to discomfort or injury, or cause your computer to fail.
Protect yourself from the heat that your computer generates.
When your computer is turned on or the battery is charging, the base, the palmrest, and some other parts may become hot. The temperature they reachdepends on the amount of system activity and the level of charge in the battery.
Extended contact with your body, even through clothing, could causediscomfort or even a skin burn.
• Avoid keeping your hands, your lap, or any other part of your body incontact with a hot section of the computer for any extended time.
• Periodically take hands from using the keyboard by lifting your hands fromthe palm rest.
Protect yourself from the heat generated by the ac power adapter.
When the ac power adapter is connected to an electrical outlet and yourcomputer, it generates heat.
Extended contact with your body, even through clothing, may cause a skinburn.
• Do not place the ac power adapter in contact with any part of your bodywhile it is in use.
• Never use it to warm your body.
Prevent your computer from getting wet.
To avoid spills and the danger of electrical shock, keep liquids away from yourcomputer.
Protect the cables from being damaged.
Applying strong force to cables may damage or break them.
Route communication lines, or the cables of an ac power adapter, a mouse, akeyboard, a printer, or any other electronic device, so that they cannot be walkedon, tripped over, pinched by your computer or other objects, or in any waysubjected to treatment that could interfere with the operation of your computer.
© Copyright Lenovo 2015, 2016 v

Protect your computer and data when moving it.
Before moving a computer equipped with an internal storage drive (such as harddisk drive, solid-state drive, or hybrid drive), do one of the following:
• Turn it off.
• Put it in sleep mode.
• Put it in hibernation mode.
This will help to prevent damage to the computer, and possible loss of data.
Handle your computer gently.
Do not drop, bump, scratch, twist, hit, vibrate, push, or place heavy objects onyour computer, display, or external devices.
Carry your computer carefully.
• Use a quality carrying case that provides adequate cushioning and protection.
• Do not pack your computer in a tightly packed suitcase or bag.
• Before putting your computer in a carrying case, make sure that it is off, in sleepmode, or in hibernation mode. Do not put a computer in a carrying case while itis turned on.
Important safety informationNote: Read the important safety information first.
This information can help you safely use your notebook computer. Follow and retain all information includedwith your computer. The information in this document does not alter the terms of your purchase agreementor the Lenovo Limited Warranty. For more information, see “Warranty Information” in the Safety, Warranty,and Setup Guide that comes with your computer.
Customer safety is important. Our products are developed to be safe and effective. However, personalcomputers are electronic devices. Power cords, power adapters, and other features can create potentialsafety risks that can result in physical injury or property damage, especially if misused. To reduce theserisks, follow the instructions included with your product, observe all warnings on the product and in theoperating instructions, and review the information included in this document carefully. By carefully followingthe information contained in this document and provided with your product, you can help protect yourselffrom hazards and create a safer computer work environment.
Note: This information includes references to power adapters and batteries. In addition to notebookcomputers, some products (such as speakers and monitors) ship with external power adapters. If you havesuch a product, this information applies to your product. In addition, computer products contain a coin-sizedinternal battery that provides power to the system clock even when the computer is unplugged, so thebattery safety information applies to all computer products.
vi ThinkPad X260 User Guide

Conditions that require immediate actionProducts can become damaged due to misuse or neglect. Some product damage is serious enoughthat the product should not be used again until it has been inspected and, if necessary, repaired byan authorized servicer.
As with any electronic device, pay close attention to the product when it is turned on. On very rareoccasions, you might notice an odor or see a puff of smoke or sparks vent from your product. Or youmight hear sounds like popping, cracking, or hissing. These conditions might merely mean that aninternal electronic component has failed in a safe and controlled manner. Or, they might indicatea potential safety issue. However, do not take risks or attempt to diagnose the situation yourself.Contact the Customer Support Center for further guidance. For a list of Service and Support phonenumbers, see the following Web site:
http://www.lenovo.com/support/phone
Frequently inspect your computer and its components for damage or wear or signs of danger.If you have any question about the condition of a component, do not use the product. Contactthe Customer Support Center or the product manufacturer for instructions on how to inspect theproduct and have it repaired, if necessary.
In the unlikely event that you notice any of the following conditions, or if you have any safetyconcerns with your product, stop using the product and unplug it from the power source andtelecommunication lines until you can speak to the Customer Support Center for further guidance.
• Power cords, plugs, power adapters, extension cords, surge protectors, or power supplies that arecracked, broken, or damaged.
• Signs of overheating, smoke, sparks, or fire.
• Damage to a battery (such as cracks, dents, or creases), discharge from a battery, or a buildup of foreignsubstances on the battery.
• A cracking, hissing, or popping sound, or strong odor that comes from the product.
• Signs that liquid has been spilled or an object has fallen onto the computer product, the power cord, orpower adapter.
• The computer product, power cord, or power adapter has been exposed to water.
• The product has been dropped or damaged in any way.
• The product does not operate normally when you follow the operating instructions.
Note: If you notice these conditions with a product (such as an extension cord) that is not manufactured foror by Lenovo, stop using that product until you can contact the product manufacturer for further instructions,or until you get a suitable replacement.
Service and upgradesDo not attempt to service a product yourself unless instructed to do so by the Customer Support Center oryour documentation. Only use a Service Provider who is approved to repair your particular product.
Note: Some computer parts can be upgraded or replaced by the customer. Upgrades typically arereferred to as options. Replacement parts approved for customer installation are referred to as CustomerReplaceable Units, or CRUs. Lenovo provides documentation with instructions when it is appropriate forcustomers to install options or replace CRUs. You must closely follow all instructions when installing orreplacing parts. The Off state of a power indicator does not necessarily mean that voltage levels inside aproduct are zero. Before you remove the covers from a product equipped with a power cord, always makesure that the power is turned off and that the product is unplugged from any power source. If you haveany questions or concerns, contact the Customer Support Center.
© Copyright Lenovo 2015, 2016 vii

Although there are no moving parts in your computer after the power cord has been disconnected, thefollowing warnings are required for your safety.
CAUTION:Hazardous moving parts. Keep fingers and other body parts away.
CAUTION:
Before you open the computer cover, turn off the computer and wait several minutes until thecomputer is cool.
Power cords and power adapters
DANGER
Use only the power cords and power adapters supplied by the product manufacturer.
The power cords shall be safety approved. For Germany, it shall be H05VV-F, 3G, 0.75 mm2, orbetter. For other countries, the suitable types shall be used accordingly.
Never wrap a power cord around a power adapter or other object. Doing so can stress the cord inways that can cause the cord to fray, crack, or crimp. This can present a safety hazard.
Always route power cords so that they will not be walked on, tripped over, or pinched by objects.
Protect power cords and power adapters from liquids. For instance, do not leave your power cordor power adapter near sinks, tubs, toilets, or on floors that are cleaned with liquid cleansers.Liquids can cause a short circuit, particularly if the power cord or power adapter has been stressedby misuse. Liquids also can cause gradual corrosion of power cord terminals and/or the connectorterminals on a power adapter, which can eventually result in overheating.
Always connect power cords and signal cables in the correct order and ensure that all power cordconnectors are securely and completely plugged into receptacles.
Do not use any power adapter that shows corrosion at the ac input pins or shows signs ofoverheating (such as deformed plastic) at the ac input pins or anywhere on the power adapter.
Do not use any power cords where the electrical contacts on either end show signs of corrosion oroverheating or where the power cord appears to have been damaged in any way.
To prevent possible overheating, do not cover the power adapter with clothing or other objectswhen the power adapter is plugged into an electrical outlet.
viii ThinkPad X260 User Guide

Extension cords and related devicesEnsure that extension cords, surge protectors, uninterruptible power supplies, and power strips that you useare rated to handle the electrical requirements of the product. Never overload these devices. If power stripsare used, the load should not exceed the power strip input rating. Consult an electrician for more informationif you have questions about power loads, power requirements, and input ratings.
Plugs and outlets
DANGER
If a receptacle (power outlet) that you intend to use with your computer equipment appears to bedamaged or corroded, do not use the outlet until it is replaced by a qualified electrician.
Do not bend or modify the plug. If the plug is damaged, contact the manufacturer to obtaina replacement.
Do not share an electrical outlet with other home or commercial appliances that draw large amountsof electricity; otherwise, unstable voltage might damage your computer, data, or attached devices.
Some products are equipped with a three-pronged plug. This plug fits only into a groundedelectrical outlet. This is a safety feature. Do not defeat this safety feature by trying to insert it intoa non-grounded outlet. If you cannot insert the plug into the outlet, contact an electrician for anapproved outlet adapter or to replace the outlet with one that enables this safety feature. Neveroverload an electrical outlet. The overall system load should not exceed 80 percent of the branchcircuit rating. Consult an electrician for more information if you have questions about power loadsand branch circuit ratings.
Be sure that the power outlet you are using is properly wired, easily accessible, and located closeto the equipment. Do not fully extend power cords in a way that will stress the cords.
Be sure that the power outlet provides the correct voltage and current for the product you areinstalling.
Carefully connect and disconnect the equipment from the electrical outlet.
Power supply statement
DANGER
Never remove the cover on a power supply or any part that has the following label attached.
Hazardous voltage, current, and energy levels are present inside any component that has this labelattached. There are no serviceable parts inside these components. If you suspect a problem withone of these parts, contact a service technician.
© Copyright Lenovo 2015, 2016 ix

External devicesCAUTION:Do not connect or disconnect any external device cables other than USB cables while the computerpower is on; otherwise, you might damage your computer. To avoid possible damage to attacheddevices, wait at least five seconds after the computer is shut down to disconnect external devices.
General battery notice
DANGER
Batteries supplied by Lenovo for use with your product have been tested for compatibility andshould only be replaced with approved parts. A battery other than the one specified by Lenovo, or adisassembled or modified battery is not covered by the warranty.
Battery abuse or mishandling can cause overheat, liquid leakage, or an explosion. To avoid possibleinjury, do the following:
• Do not open, dissemble, or service any battery.
• Do not crush or puncture the battery.
• Do not short-circuit the battery, or expose it to water or other liquids.
• Keep the battery away from children
• Keep the battery away from fire.
Stop using the battery if it is damaged, or if you notice any discharge or the buildup of foreignmaterials on the battery leads.
Store the rechargeable batteries or products containing the rechargeable batteries at roomtemperature, charged to approximately 30 to 50% of capacity. We recommend that the batteries becharged about once per year to prevent overdischarge.
Do not put the battery in trash that is disposed of in landfills. When disposing of the battery, complywith local ordinances or regulations.
Notice for removable rechargeable battery
DANGER
Only recharge the battery strictly according to instructions included in the product documentation.
If the battery is incorrectly replaced, there is danger of an explosion. The battery contains a smallamount of harmful substance.
x ThinkPad X260 User Guide

Notice for built-in rechargeable battery
DANGER
Do not attempt to replace the built-in rechargeable battery. Replacement of the battery must bedone by a Lenovo-authorized repair facility or technician.
Only recharge the battery strictly according to instructions included in the product documentation.
The Lenovo-authorized repair facilities or technicians recycle Lenovo batteries according to locallaws and regulations.
Notice for non-rechargeable coin-cell battery
DANGER
Do not attempt to replace the non-rechargeable coin-cell battery. Replacement of the battery mustbe done by a Lenovo-authorized repair facility or technician.
The Lenovo-authorized repair facilities or technicians recycle Lenovo batteries according to locallaws and regulations.
The following statement applies to users in the state of California, U.S.A.
California Perchlorate Information:
Products containing manganese dioxide lithium coin-cell batteries may contain perchlorate.
Perchlorate Material - special handling may apply, Seewww.dtsc.ca.gov/hazardouswaste/perchlorate
Heat and product ventilation
DANGER
Computers, ac power adapters, and many accessories can generate heat when turned on and whenbatteries are charging. Notebook computers can generate a significant amount of heat due to theircompact size. Always follow these basic precautions:
• When your computer is turned on or the battery is charging, the base, the palm rest, and someother parts may become hot. Avoid keeping your hands, your lap, or any other part of yourbody in contact with a hot section of the computer for any extended length of time. When youuse the keyboard, avoid keeping your palms on the palm rest for a prolonged period of time.Your computer generates some heat during normal operation. The amount of heat depends onthe amount of system activity and the battery charge level. Extended contact with your body,even through clothing, could cause discomfort or even a skin burn. Periodically take breaksfrom using the keyboard by lifting your hands from the palm rest; and be careful not to usethe keyboard for any extended length of time.
• Do not operate your computer or charge the battery near flammable materials or in explosiveenvironments.
© Copyright Lenovo 2015, 2016 xi

• Ventilation slots, fans and/or heat sinks are provided with the product for safety, comfort, andreliable operation. These features might inadvertently become blocked by placing the product ona bed, sofa, carpet, or other flexible surface. Never block, cover, or disable these features.
• When the ac power adapter is connected to an electrical outlet and your computer, it generatesheat. Do not place the adapter in contact with any part of your body while using it. Never use theac power adapter to warm your body. Extended contact with your body, even through clothing,may cause a skin burn.
For your safety, always follow these basic precautions with your computer:
• Keep the cover closed whenever the computer is plugged in.
• Regularly inspect the outside of the computer for dust accumulation.
• Remove dust from vents and any perforations in the bezel. More frequent cleanings might berequired for computers in dusty or high-traffic areas.
• Do not restrict or block any ventilation openings.
• Do not operate your computer inside furniture, as this might increase the risk of overheating.
• Airflow temperatures into the computer should not exceed 35°C (95°F).
Electrical current safety information
DANGER
Electric current from power, telephone, and communication cables is hazardous.
To avoid a shock hazard:
• Do not use your computer during a lightning storm.
• Do not connect or disconnect any cables or perform installation, maintenance, or reconfigurationof this product during an electrical storm.
• Connect all power cords to a properly wired and grounded electrical outlet.
• Connect to properly wired outlets any equipment that will be attached to this product.
• Whenever possible, use one hand only to connect or disconnect signal cables.
• Never turn on any equipment when there is evidence of fire, water, or structural damage.
• Do not use your computer until all internal parts enclosures are fastened into place. Never usethe computer when internal parts and circuits are exposed.
DANGER
Connect and disconnect cables as described in the following procedures when installing, moving,or opening covers on this product or attached devices.
To connect:
1. Turn everything OFF.
2. First, attach all cables to devices.
3. Attach signal cables to connectors.
4. Attach power cords to outlets.
5. Turn devices ON.
To disconnect:
1. Turn everything OFF.
2. First, remove power cords from outlets.
3. Remove signal cables from connectors.
4. Remove all cables from devices.
xii ThinkPad X260 User Guide

The power cord must be disconnected from the wall outlet or receptacle before installing all otherelectrical cables connected to the computer.
The power cord may be reconnected to the wall outlet or receptacle only after all other electricalcables have been connected to the computer.
DANGER
During electrical storms, do not perform any replacement and do not connect the telephone cableto or disconnect it from the telephone outlet on the wall.
Liquid crystal display (LCD) noticeCAUTION:The liquid crystal display (LCD) is made of glass, and rough handling or dropping the computer cancause the LCD to break. If the LCD breaks and the internal fluid gets into your eyes or on yourhands, immediately wash the affected areas with water for at least 15 minutes; if any symptoms arepresent after washing, get medical care.
Note: For products with mercury-containing fluorescent lamps (for example, non-LED), the fluorescent lampin the liquid crystal display (LCD) contains mercury; dispose of according to local, state, or federal laws.
Using headphones or earphonesIf your computer has both a headphone connector and an audio-out connector, always use the headphoneconnector for headphones (also called a headset) or earphones.
CAUTION:Excessive sound pressure from earphones and headphones can cause hearing loss. Adjustment ofthe equalizer to maximum increases the earphone and headphone output voltage and the soundpressure level. Therefore, to protect your hearing, adjust the equalizer to an appropriate level.
Excessive use of headphones or earphones for a long period of time at high volume can be dangerous if theoutput of the headphone or earphone connectors do not comply with specifications of EN 50332-2. Theheadphone output connector of your computer complies with EN 50332-2 Sub clause 7. This specificationlimits the computer’s maximum wide band true RMS output voltage to 150 mV. To help protect againsthearing loss, ensure that the headphones or earphones you use also comply with EN 50332-2 (Clause 7limits) for a wide band characteristic voltage of 75 mV. Using headphones that do not comply with EN50332-2 can be dangerous due to excessive sound pressure levels.
If your Lenovo computer came with headphones or earphones in the package, as a set, the combination ofthe headphones or earphones and the computer already complies with the specifications of EN 50332-1.If different headphones or earphones are used, ensure that they comply with EN 50332-1 (Clause 6.5Limitation Values). Using headphones that do not comply with EN 50332-1 can be dangerous due toexcessive sound pressure levels.
© Copyright Lenovo 2015, 2016 xiii

Additional safety information
Plastic bag notice
DANGER
Plastic bags can be dangerous. Keep plastic bags away from babies and children to avoid dangerof suffocation.
Glass parts notice
CAUTION:Some parts of your product may be made of glass. This glass could break if the product is droppedon a hard surface or receives a substantial impact. If glass breaks, do not touch or attempt to removeit. Stop using your product until the glass is replaced by trained service personnel.
Save these instructions.
xiv ThinkPad X260 User Guide

Chapter 1. Product overview
This chapter contains the following topics:
• “Locating computer controls, connectors, and indicators” on page 1
• “Locating important product information” on page 8
• “Computer features” on page 10
• “Computer specifications” on page 11
• “Operating environment” on page 11
• “Lenovo programs” on page 12
Locating computer controls, connectors, and indicatorsThis section introduces the computer hardware features to give you the basic information you need tostart using the computer.
Front viewNote: Depending on the model, your computer might look different from the following illustration.
1 Camera (available on some models) 2 Microphones (available on some models)
3 Power button 4 Fingerprint reader (available on some models)
5 TrackPoint® pointing stick 6 TrackPoint buttons
7 Trackpad 8 Screen
1 Camera (available on some models)
Use the camera to take pictures or hold a video conference. For more information, see “Using the camera”on page 32.
© Copyright Lenovo 2015, 2016 1

2 Microphones (available on some models)
The microphones capture sound and voice when used with a program capable of handling audio.
3 Power button
Press the power button to turn on the computer or put the computer into sleep mode. For information abouthow to turn off the computer, see “Frequently asked questions” on page 15.
If your computer is unresponsive, you can turn off the computer by pressing and holding the power buttonfor four or more seconds. If the computer cannot be turned off, see “Computer stops responding” onpage 91 for more information.
You also can define what the power button does. For example, by pressing the power button, you can turnoff the computer or put the computer into sleep or hibernation mode. To change what the power buttondoes, do the following:
1. Go to Control Panel, and then change the view of Control Panel from Category to Large icons or Smallicons.
2. Click Power Options ➙ Choose what the power buttons do.
3. Follow the instructions on the screen.
4 Fingerprint reader (available on some models)
Fingerprint authentication technology provides simple and secure user access by associating your fingerprintwith passwords. For more information, see “Using the fingerprint reader” on page 61.
ThinkPad® pointing device
5 TrackPoint pointing stick6 TrackPoint buttons7 TrackpadThe keyboard contains the Lenovo-unique ThinkPad pointing device. Pointing, selecting, and dragging areall part of a single process that you can perform without moving your fingers from a typing position. Formore information, see “ThinkPad pointing device” on page 19.
8 Screen
Your computer has a 317.5-mm (12.5-inch) display with the thin-film transistor (TFT) technology.
Right-side viewNote: Depending on the model, your computer might look different from the following illustration.
1 Audio connector 2 Always On USB 3.0 connector
3 Media-card slot 4 Micro-SIM-card tray (available on some models)
5 Ethernet connector 6 Security-lock slot
1 Audio connector
Connect headphones or a headset that has a 3.5-mm (0.14-inch), 4-pole plug to the audio connector tolisten to the sound from the computer.
2 ThinkPad X260 User Guide

Notes:
• If you are using a headset with a function switch, such as a headset for an iPhone mobile digital device,do not press this switch while using the headset. If you press the switch, the headset microphone will bedisabled, and the integrated microphones on the computer will be enabled instead.
• The audio connector does not support a conventional microphone. For more information, see “Usingaudio features” on page 31.
2 Always On USB 3.0 connector
By default, the Always On Universal Serial Bus (USB) 3.0 connector enables you to charge some mobiledigital devices and smartphones in the following situations:
• When your computer is on or in sleep mode
• When your computer is in hibernation mode or is turned off, but connected to ac power
To charge these devices when the computer is in hibernation mode or turned off, and the computer is notconnected to ac power, do the following:
• For Windows® 7: Start the Power Manager program, click the Global Power Settings tab, and thenfollow the instructions on the screen.
• For Windows 10: Start the Lenovo Settings program, click POWER, and then follow the instructions onthe screen.
For instructions on how to start the programs, see “Accessing Lenovo programs” on page 12.
Attention: When you attach a USB cable to this connector, ensure that the USB mark is facing upward.Otherwise the connector might get damaged.
3 Media-card slot
Your computer has a media-card slot. Insert your flash media card into this slot to read the data on the card.For more information about the supported cards, see “Using a flash media card or a smart card” on page 33.
4 Micro-SIM-card tray (available on some models)
If your computer has a wireless wide area network (WAN) feature, a micro subscriber identification module(SIM) card might be required to establish wireless-WAN connections. Depending on the country or region ofdelivery, a micro SIM card might be already installed in the micro-SIM-card tray. For more information, see“Installing or replacing the micro SIM card” on page 118.
Note: Ensure that you use a micro SIM card. Do not use a standard-sized SIM card. The standard-sizedSIM card is not compatible.
To install or replace the micro SIM card, see “Installing or replacing the micro SIM card” on page 118.
5 Ethernet connector
Connect the computer to a local area network (LAN) with the Ethernet connector.
DANGER
To avoid the risk of electrical shock, do not connect the telephone cable to the Ethernet connector.You can only connect an Ethernet cable to this connector.
The Ethernet connector has two network status indicators. When the green indicator is on, the computer isconnected to a LAN. When the yellow indicator blinks, data is being transmitted.
Chapter 1. Product overview 3

Note: If the computer is connected to a docking station, use the Ethernet connector on the docking stationinstead of the one on the computer.
6 Security-lock slot
To protect your computer from theft, purchase a security cable lock that fits the security-lock slot to lock thecomputer to a stationary object.
Note: You are responsible for evaluating, selecting, and implementing the locking device and securityfeature. Lenovo makes no comments, judgments, or warranties about the function, quality, or performanceof the locking device and security feature.
4 ThinkPad X260 User Guide

Left-side viewNote: Depending on the model, your computer might look different from the following illustration.
1 Power connector 2 Fan louvers
3 HDMI™ connector 4 Mini DisplayPort® connector
5 USB 3.0 connectors 6 Smart-card slot (available on some models)
1 Power connector
Connect the ac power adapter to the power connector to provide ac power to the computer and chargethe batteries.
2 Fan louvers
The fan louvers and internal fan enable air to circulate in the computer to ensure proper cooling, especiallythe cooling of the microprocessor.
Note: To ensure proper airflow, do not place any obstacles in front of the fan louvers.
3 HDMI connector
The High-Definition Multimedia Interface (HDMI) connector is a digital audio and video interface that canconnect a compatible digital audio device or video monitor, such as a DVD player or a high-definitiondigital television (HDTV).
4 Mini DisplayPort connector
Use the mini DisplayPort connector to connect your computer to a compatible projector, external display, orHDTV. The mini DisplayPort connector of your computer supports audio as well as video streaming. Thiscompact connector enables a plug-and-play setup and supports adapters that can plug into Digital VisualInterface (DVI), Video Graphics Array (VGA), or HDMI connectors. For more information, see “Using anexternal display” on page 30.
5 USB 3.0 connectors
The USB 3.0 connectors are used for connecting USB-compatible devices, such as a USB keyboard, a USBmouse, a USB storage device, or a USB printer.
Attention: When you attach a USB cable to the USB 3.0 connector, ensure that the USB mark is facingupward. Otherwise the connector might get damaged.
6 Smart-card slot (available on some models)
Your computer might have a smart-card slot. For more information, see “Using a flash media card or asmart card” on page 33.
Chapter 1. Product overview 5

Bottom view
1 Emergency-reset hole 2 Removable battery
3 Docking station connector 4 Speakers
1 Emergency-reset hole
If the computer stops responding and you cannot turn it off by pressing the power button, remove theac power adapter first. Then insert a straightened paper clip into the emergency-reset hole to reset thecomputer.
2 Removable battery
Use the computer with the battery power whenever ac power is unavailable.
3 Docking station connector
You can use the connector to connect the computer to a supported docking station to extend the computercapabilities when you are at the office or at home. For more information about the supported dockingstations, see “ThinkPad docking stations” on page 35.
4 Speakers
Your computer is equipped with a pair of stereo speakers.
Status indicatorsThis topic helps you locate and identify the various status indicators on your computer.
Note: Depending on the model, your computer might look different from the following illustrations.
6 ThinkPad X260 User Guide

1 Speaker-mute indicator
When the speaker-mute indicator is on, the speakers are muted.
2 Microphone-mute indicator
When the microphone-mute indicator is on, the microphones are muted.
3 Camera-status indicator
When the camera-status indicator is on, the camera is in use.
4 6 System-status indicators
The indicator in the ThinkPad logo on the lid and the indicator in the center of the power button show thesystem status of the computer.
• Blinks for three times: The computer is initially connected to power.
• On: The computer is on (in normal mode).
• Blinks fast: The computer is entering sleep or hibernation mode.
• Blinks slowly: The computer is in sleep mode.
• Off: The computer is off or in hibernation mode.
Chapter 1. Product overview 7

5 Fn Lock indicator
The Fn Lock indicator shows the status of Fn Lock function. For more information, see “Special keys”on page 17.
Locating important product informationThis section provides information to help you locate the machine type and model label, the FederalCommunications Commission (FCC) ID and IC Certification label, the Windows Certificate of Authenticitylabel, and the Genuine Microsoft® label.
Machine type and model informationThe machine type and model label identifies your computer. When you contact Lenovo for help, the machinetype and model information helps support technicians to identify your computer and provide faster service.
Depending on the computer model, the machine type and model label might be located on the computercover, under the battery, or on the power adapter. The following illustration shows the location of themachine type and model of your computer:
FCC ID and IC Certification informationThe FCC and IC Certification information is identified by a label located on the computer base cover asshown in the following illustration.
8 ThinkPad X260 User Guide

The content of this label differs depending on the wireless modules that come with your computer:
• For a preinstalled wireless module, this label identifies the actual FCC ID and IC certification number forthe wireless module installed by Lenovo.
Note: Do not remove or replace a preinstalled wireless module by yourself. For module replacement, youmust contact Lenovo Service first. Lenovo is not responsible for any damage caused by unauthorizedreplacement.
• For a user-replaceable wireless WAN module, this label directs you to consult this user guide for the actualFCC ID and IC certification number.
The FCC ID and IC Certification number label for the user-replaceable wireless WAN module is affixed to thewireless module 1 (available on some models) installed in your computer.
Note: For the user-replaceable wireless module, ensure that you use only Lenovo-authorized wirelessmodules for the computer. Otherwise, an error message will be displayed and the computer will beepwhen you turn on the computer.
Labels for the Windows operating systemsWindows 7 Certificate of Authenticity: Computer models preinstalled with the Windows 7 operatingsystem have a Certificate of Authenticity label affixed to the computer cover or inside the batterycompartment. The Certificate of Authenticity is your indication that the computer is licensed for a Windows 7product and is preinstalled with a Windows 7 genuine version. In some cases, an earlier Windows versionmight be preinstalled under the terms of the Windows 7 Professional license downgrade rights. Printed onthe Certificate of Authenticity is the Windows 7 version for which the computer is licensed and the ProductID. The Product ID is important in case you need to reinstall the Windows 7 operating system from a sourceother than a Lenovo product recovery disc set.
Windows 10 Genuine Microsoft label: Depending on your geographic location, the date when yourcomputer was manufactured, and the version of Windows 10 that is preinstalled, your computer might have aGenuine Microsoft label affixed to its cover. See http://www.microsoft.com/en-us/howtotell/Hardware.aspxfor illustrations of the various types of Genuine Microsoft labels.
• In the People’s Republic of China, the Genuine Microsoft label is required on all computer modelspreinstalled with any version of Windows 10.
• In other countries and regions, the Genuine Microsoft label is required only on computer models licensedfor Windows 10 Pro.
Chapter 1. Product overview 9

The absence of a Genuine Microsoft label does not indicate that the preinstalled Windows version is notgenuine. For details on how to tell whether your preinstalled Windows product is genuine, refer to theinformation provided by Microsoft at http://www.microsoft.com/en-us/howtotell/default.aspx.
Unlike Windows 7 products, there are no external, visual indicators of the Product ID or Windows version forwhich the computer is licensed. Instead, the Product ID is recorded in the computer firmware. Whenevera Windows 10 product is installed, the installation program checks the computer firmware for a valid,matching Product ID to complete the activation.
In some cases, an earlier Windows version might be preinstalled under the terms of the Windows 10 Prolicense downgrade rights.
Computer featuresThe computer features introduced in this section cover various models. For your specific model, somefeatures might vary or not apply.
Microprocessor
• To view the microprocessor information of your computer, do the following:
– For Windows 7: Open the Start menu, right-click Computer, and then click Properties.
– For Windows 10: Do one of the following:
– Open the Start menu and then click Settings. If Settings is not displayed, click All apps to displayall programs, and then click Settings ➙ System ➙ About.
– Right-click the Start button and select System.
Memory
• Double data rate 4 (DDR4) synchronous dynamic (SD) random access memory (RAM)
Storage device
Depending on the model:
• 2.5-inch form factor, 7-mm (0.28-inch) height hard disk drive
• 2.5-inch form factor, 9.5-mm (0.37-inch) height hard disk drive
• 2.5-inch form factor, 7-mm (0.28-inch) height solid-state drive
• 2.5-inch form factor, 7-mm (0.28-inch) height hybrid drive
Display
• Color display with the TFT technology
• Display size: 317.5 mm (12.5 inches)
• Display resolution: 1366 x 768 pixels or 1920 x 1080 pixels, depending on the model
• Brightness control
• Integrated camera and microphones on the computer display (available on some models)
Keyboard
• Six-row keyboard (with backlight function available on some models)
• Function keys
• TrackPoint pointing device and trackpad
10 ThinkPad X260 User Guide

Interface
• 4-in-1 digital media card reader
• Audio connector
• HDMI connector
• Mini DisplayPort connector
• Always On USB 3.0 connector
• Two USB 3.0 connectors
• RJ45 Ethernet connector
• Smart-card reader (available on some models)
• Docking station connector (available on some models)
GPS and wireless features
• Global Positioning System (GPS) satellite receiver (available on models with wireless WAN)
• Integrated Bluetooth
• Integrated wireless LAN
• Integrated wireless WAN (available on some models)
• Wireless Gigabit (WiGig) (available on some models)
Security feature
• Fingerprint reader (available on some models)
Computer specificationsSize
• Width: 305.5 mm (12 inches)
• Depth: 208.5 mm (8.2 inches)
• Height: 20.3 mm (0.8 inch)
Heat output
• 45 W (154 Btu/hr) maximum
Power source (ac power adapter)
• Sine-wave input at 50 to 60 Hz
• Input rating of the ac power adapter: 100 to 240 V ac, 50 to 60 Hz
Operating environmentAltitude without pressurization
• 3048 m (10 000 ft) maximum
Temperature
• At altitudes up to 2438 m (8000 ft)
– Operating: 5.0°C to 35.0°C (41°F to 95°F)
– Storage: 5.0°C to 43.0°C (41°F to 109°F)
Chapter 1. Product overview 11

• At altitudes above 2438 m (8000 ft)
Maximum temperature when operating under the unpressurized condition: 31.3°C (88°F)
Note: When you charge the battery, the battery temperature must be at least 10°C (50°F).
Relative humidity
• Operating: 8% to 95% at wet bulb: 23℃ (73℉)
• Storage: 5% to 95% at wet bulb: 27℃ (81℉)
If possible, place your computer in a well-ventilated and dry area without direct exposure to sunshine.
Attention: Keep electrical appliances electric fans, radio, high-powered speakers, air conditioners, andmicrowave ovens away from your computer. The strong magnetic fields generated by electrical appliancescan damage the motor and data on the storage drive.
Do not place any beverages on top of or beside the computer or other attached devices. If liquid is spilled onor in the computer or an attached device, a short circuit or other damage might occur.
Do not eat or smoke over your keyboard. Particles that fall into your keyboard can cause damage.
Lenovo programsYour computer comes with Lenovo programs to help you work easily and securely.
Note: The available programs are subject to change without notice.
To learn more about the programs and other computing solutions offered by Lenovo, go to:http://www.lenovo.com/support
Accessing Lenovo programsTo access Lenovo programs on your computer, do the following:
1. Click the Start button to open the Start menu. Locate a program by the program name.
2. If the program is not displayed on the Start menu, click All programs (Windows 7) or All apps (Windows10) to display all programs.
3. If you still do not find the program in the program list, search for the program in the search box.
Note: If you are using the Windows 7 operating system, some Lenovo programs are ready to be installed.You cannot find these programs through the above methods unless you have installed them first. To installthese Lenovo programs, access the Lenovo PC Experience program, click Lenovo Tools, and then followthe instructions on the screen.
An introduction to Lenovo programsThis topic provides a brief introduction to Lenovo programs. Depending on your computer model, some ofthe programs might not be available.
12 ThinkPad X260 User Guide

Access Connections™
(Windows 7)
The Access Connections program is a connectivity assistant program forcreating and managing location profiles. Each location profile stores all thenetwork and Internet configuration settings needed for connecting to a networkinfrastructure from a specific location such as a home or an office.
By switching between location profiles as you move your computer from placeto place, you can quickly and easily connect to a network with no need tomanually reconfigure your settings and restart the computer each time.
Active Protection System™
(Windows 7 and Windows 10)
The Active Protection System program protects your internal storage drive (suchas hard disk drive) when the shock sensor inside your computer detects acondition that could damage the drive, such as system tilt, excessive vibration,or shock.
The internal storage drive is less vulnerable to damage when it is not operating.This is because when the internal storage drive is not operating, the systemstops it from spinning, and might also move the read and write heads of thedrive to areas that do not contain data.
As soon as the shock sensor senses that the environment is stable again(minimal change in system tilt, vibration, or shock), it turns on the internalstorage drive.
Auto Scroll Utility
(Windows 7)
This program enhances your experience with window operation. The windowposition of a foreground application is automatically adjusted. The scroll bar ona user interface is also automatically adjusted.
Communications Utility
(Windows 7)
The Communications Utility program enables you to configure settings for theintegrated camera and audio devices.
Fingerprint Manager Pro,Lenovo Fingerprint Manager, orTouch Fingerprint Manager
(Windows 7)
If your computer comes with a fingerprint reader, the Fingerprint Manager Proprogram, Lenovo Fingerprint Manager program, or Touch Fingerprint Managerprogram enables you to enroll your fingerprint and associate it with yourpasswords. As a result, fingerprint authentication can replace your passwordsand enable simple and secure user access.
Hotkey Features Integration
(Windows 7 and Windows 10)
Hotkey Features Integration is a utility package that enables you to select andinstall utility programs specifically for the special keys and buttons on yourcomputer. The special keys and buttons are designed to meet accessibility andusability requirements. Installing related utility programs enables full functionalityof the special keys and buttons.
Lenovo Companion
(Windows 10)
Your system’s best features should be easy to access and understand. WithLenovo Companion, they are.
Use Lenovo Companion to do the following:
• Optimize your computer’s performance, monitor your computer’s health,and manage updates.
• Access your user guide, check warranty status, and view accessoriescustomized for your computer.
• Read how-to articles, explore Lenovo forums, and stay up-to-date ontechnology news with articles and blogs from trusted sources.
Lenovo Companion is filled with exclusive Lenovo content to help you learnabout what you can do with your computer.
Chapter 1. Product overview 13

Lenovo ID
(Windows 10)
The Lenovo ID program enables you to create and manage your Lenovo ID. Witha Lenovo ID, you can connect to everything Lenovo through a single account.Use your Lenovo ID for quick and simple authentication and then enjoy thevarious services provided by Lenovo. Such services include online shopping,app download, personalized device support, special promotional offers, Lenovoforums, and so on.
Lenovo PC Experience
(Windows 7 and Windows 10)
The Lenovo PC Experience program helps you work more easily and securely byproviding easy access to various programs, such as Active Protection Systemand Lenovo Solution Center.Note: On the Windows 10 operating system, this program cannot be found fromthe all program list or search box. To access this program, go to Control Panel.View Control Panel by Category, click Hardware and Sound ➙ Devices andPrinters, and then double-click the device with your computer name.
Lenovo Settings
(Windows 10)
The Lenovo Settings program enables you to enhance your computingexperience by turning your computer into a portable hotspot, configuringcamera and audio settings, optimizing your power settings, and creating andmanaging multiple network profiles.
Lenovo Solution Center
(Windows 7 and Windows 10)
The Lenovo Solution Center program enables you to troubleshoot and resolvecomputer problems. It combines diagnostic tests, system information collection,security status, and support information, along with hints and tips for optimalsystem performance.
Mobile Broadband Connect
(Windows 7 and Windows 10)
The Mobile Broadband Connect program enables you to connect the computerto the mobile broadband network through a supported wireless WAN card.
Message Center Plus
(Windows 7)
The Message Center Plus program automatically displays messages to informyou about important notices from Lenovo, such as alerts on system updatesand alerts on conditions that require your attention.
Password Manager
(Windows 7)
The Password Manager program automatically captures and fills inauthentication information for Windows programs and Web sites.
Power Manager
(Windows 7)
The Power Manager program provides convenient, flexible, and complete powermanagement for the computer. It enables you to adjust your computer powersettings to achieve the best balance between performance and power saving.
Recovery Media
(Windows 7 and Windows 10)
The Recovery Media program enables you to restore the contents of the harddisk drive to the factory default settings.
Rescue and Recovery®
(Windows 7)
The Rescue and Recovery program is a one-button recovery and restoresolution. It includes a set of self-recovery tools to help you diagnose computerproblems, get help, and recover from system crashes, even if you cannot startthe Windows operating system.
System Update
(Windows 7)
The System Update program enables you to keep the software on the computerup-to-date by downloading and installing software packages, including devicedrivers, Unified Extensible Firmware Interface (UEFI) basic input/output system(BIOS) updates, and other third-party programs.
WRITEit
(Windows 10)
WRITEit gives you instant handwriting input wherever you need it. You can writedirectly in any app and text field, edit text in real time, see your full screen, andconvert your handwriting into digital text.
14 ThinkPad X260 User Guide

Chapter 2. Using your computer
This chapter contains the following topics:
• “Registering your computer” on page 15
• “Frequently asked questions” on page 15
• “Getting help about the Windows operating system” on page 16
• “Special keys” on page 17
• “ThinkPad pointing device” on page 19
• “Power management” on page 23
• “Connecting to the network” on page 26
• “Using an external display” on page 30
• “Using audio features” on page 31
• “Using the camera” on page 32
• “Using a flash media card or a smart card” on page 33
Registering your computerWhen you register your computer, information is entered into a database, which enables Lenovo to contactyou in case of a recall or other severe problem. In addition, some locations offer extended privileges andservices to registered users.
When you register your computer with Lenovo, you also will receive the following benefits:
• Quicker service when you call Lenovo for help
• Automatic notification of free software and special promotional offers
To register your computer with Lenovo, go to http://www.lenovo.com/register and follow the instructions onthe screen.
If you are using a Windows 7 operating system, you also can register your computer through the preinstalledLenovo Product Registration program. The program launches automatically after you have used yourcomputer for a period of time. Follow the instructions on the screen to register your computer.
Frequently asked questionsThis topic provides a few tips that help you optimize the use of your ThinkPad notebook computer.
To ensure that you receive the best performance from your computer, browse the following Web page to findinformation such as aids for troubleshooting and answers to frequently asked questions:http://www.lenovo.com/support/faq
Can I get my user guide in another language?
To download the user guide in another language, go to http://www.lenovo.com/support. Then follow theinstructions on the screen.
How to turn off my computer?
• For Windows 7: Open the Start menu and click Shut down.
© Copyright Lenovo 2015, 2016 15

• For Windows 10: Open the Start menu, click Power, and then click Shut down.
How do I access Control Panel?
• For Windows 7: Open the Start menu and click Control Panel.
• For Windows 10: Right-click the Start button, and then click Control Panel.
How do I use battery power more effectively when I am on the go?
• To conserve power, or to suspend operation without exiting programs or saving files, see “Power-savingmodes” on page 24.
• To achieve the best balance between performance and power saving, change power plan settings.See “Managing the battery power” on page 24.
• If your computer will be turned off for an extended period of time, remove the removable battery andfollow the instructions in “Disabling the built-in battery” on page 117 to disable the built-in battery so as toprevent battery power from draining.
How do I securely dispose of data stored on the storage drive?
• Study Chapter 5 “Security” on page 55 to find out how you can protect your computer from theft andunauthorized use.
• Before you dispose of the data on the storage drive, be sure to read the topic “Notice on deleting datafrom your internal storage drive” on page 64.
How do I give presentations or attach an external display?
• Ensure that you follow the procedure in the topic “Connecting an external display” on page 30.
• With the Extend desktop function, you can display output on both the computer display and the externaldisplay. See “Choosing a display mode” on page 31.
I have been using the computer for some time already, and it is getting slower. What should I do?
• Follow the “General tips for preventing problems” on page 85.
• Diagnose problems yourself by using the preinstalled diagnostic software. See “Diagnosing problems”on page 91.
• Check for recovery solutions in Chapter 9 “Recovery overview” on page 109.
Print the following sections and keep them with your computer in case you are unable to access thisonline help when necessary.
• “Installing a new operating system” on page 67
• “Computer stops responding” on page 91
• “Power problems” on page 104
Getting help about the Windows operating systemThe Windows help information system provides you with detailed information about using the Windowsoperating system to help you get the most of your computer. To access the Windows help informationsystem, do one of the following:
• For Windows 7: Open the Start menu and click Help and Support.
• For Windows 10: Open the Start menu and click Get started. Additionally, you can search from thetaskbar to find help, apps, files, settings, and so on.
16 ThinkPad X260 User Guide

Special keysYour computer has several special keys to help you work easily and effectively.
Function keys and key combinationsNote: Depending on the model, your computer might look different from the following illustration.
The keyboard contains an Fn key 1 and a row of function keys 2 .
You can configure the Fn key and function keys in the Keyboard Properties window by doing the following:
1. Go to Control Panel, and then change the view of Control Panel from Category to Large icons or Smallicons.
2. Click Keyboard. In the Keyboard Properties window, click the Fn and function keys tab.
3. Select the options of your preference.
• + Enables or disables the Fn Lock function.
When the Fn Lock function is enabled: The Fn Lock indicator is on. To input F1–F12, press the functionkeys directly. To initiate the special function printed as an icon on each key, press the Fn key and thecorresponding function key.
When the Fn Lock function is disabled: The Fn Lock indicator is off. To initiate the special functionprinted as an icon on each key, press the function key directly. To input F1–F12, press the Fn key and thecorresponding function key.
• Mutes or unmutes the speakers. When the speakers are muted, the indicator on the key is on.
If you mute the sound and turn off your computer, the sound will remain muted when you turn on your
computer again. To turn on the sound, press or .
• Decreases the speaker volume.
• Increases the speaker volume.
Chapter 2. Using your computer 17

• Mutes or unmutes the microphones. When the microphones are muted, the indicator on thekey is on.
• Darkens the computer display.
• Brightens the computer display.
• Manages the external displays.
• Enables or disables the wireless features.
•
– Windows 7: Opens Control Panel.
– Windows 10: Opens the Settings window.
•
– Windows 7: Opens Windows Search.
– Windows 10: Opens the Cortana® search box.
• Views all the programs that you have opened.
•
– Windows 7: Opens Computer.
– Windows 10: Views all the programs.
• Fn+Spacebar: Controls the keyboard backlight.
There are three modes for the keyboard backlight: Off, Low, and High. Press Fn+Spacebar to changethe mode of the keyboard backlight.
• Fn+4: Puts the computer into sleep mode. To return to normal operation, press the Fn key or powerbutton.
• Fn+End: Has the same function as the Insert key on a conventional keyboard.
• Fn+B: Has the same function as the Break key on a conventional keyboard.
• Fn+K: Has the same function as the ScrLK key on the conventional keyboard.
• Fn+P: Has the same function as the Pause key on the conventional keyboard.
• Fn+S: Has the same function as the SysRq key on the conventional keyboard.
18 ThinkPad X260 User Guide

Windows keyNote: Depending on the model, your computer might look different from the following illustration.
Press the Windows key 1 to open the Start menu.
You also can use the Windows key together with another key to achieve other functions. For details, refer tothe help information system of the Windows operating system.
ThinkPad pointing deviceThe ThinkPad pointing device enables you to perform all the functions of a traditional mouse, such aspointing, clicking, and scrolling. With the ThinkPad pointing device, you also can perform various touchgestures, such as rotating and zooming in or out.
The ThinkPad pointing device consists of the following two devices:
1 TrackPoint pointing device2 Trackpad
By default, both the TrackPoint pointing device and the trackpad are active with the touch gestures enabled.To change the settings, see “Customizing the ThinkPad pointing device” on page 23.
Chapter 2. Using your computer 19

TrackPoint pointing deviceThe TrackPoint pointing device enables you to perform all the functions of a traditional mouse, such aspointing, clicking, and scrolling.
The TrackPoint pointing device consists of the following four components:
1 Pointing stick2 Left-click button (primary-click button)3 Right-click button (secondary-click button)4 Scroll bar
To use the TrackPoint pointing device, refer to the following instructions:
Note: Place your hands in the typing position and use your index finger or middle finger to apply pressure tothe pointing-stick nonslip cap. Use either thumb to press the left-click button or right-click button.
• PointUse the pointing stick 1 to move the pointer on the screen. To use the pointing stick, apply pressure tothe pointing-stick nonslip cap in any direction parallel to the keyboard. The pointer moves accordinglybut the pointing stick itself does not move. The speed at which the pointer moves depends on theamount of pressure you apply to the pointing stick.
• Left-clickPress the left-click button 2 to select or open an item.
• Right-clickPress the right-click button 3 to display a shortcut menu.
• ScrollPress and hold the dotted scroll bar 4 while applying pressure to the pointing stick in the vertical orhorizontal direction. Then you can scroll through the document, Web site, or apps.
TrackpadThe entire trackpad surface is sensitive to finger touch and movement. You can use the trackpad to performall the pointing, clicking, and scrolling functions of a traditional mouse.
20 ThinkPad X260 User Guide

The trackpad can be divided into two zones by its function:
1 Left-click zone (primary-click zone)2 Right-click zone (secondary-click zone)
To use the trackpad, refer to the following instructions:
• PointSlide one finger across the surface of the trackpad to move the pointer accordingly.
• Left-clickPress the left-click zone 1 to select or open an item.You also can tap anywhere on the surface of the trackpad with one finger to perform the left-click action.
• Right-clickPress the right-click zone 2 to display a shortcut menu.You also can tap anywhere on the surface of the trackpad with two fingers to perform the right-click action.
• ScrollPut two fingers on the trackpad and move them in the vertical or horizontal direction. This action enablesyou to scroll through the document, Web site, or apps. Ensure that you position your two fingers slightlyapart from each other.
With the trackpad, you also can perform various touch gestures. For information about using the touchgestures, see “Trackpad touch gestures” on page 21.
Trackpad touch gesturesThe following section introduces some frequently used touch gestures such as tapping, dragging, andscrolling. For more gestures, see the help information system of the ThinkPad pointing device.
Notes:• When using two or more fingers, ensure that you position your fingers slightly apart.• Some gestures are not available if the last action was done from the TrackPoint pointing device.• Some gestures are only available when you are using certain apps.
Chapter 2. Using your computer 21

TapTap anywhere on the trackpadwith one finger to select or openan item.
Two-finger tapTap anywhere on the trackpad withtwo fingers to display a shortcutmenu.
Two-finger scrollPut two fingers on the trackpadand move them in the vertical orhorizontal direction. This actionenables you to scroll through thedocument, Web site, or apps.
Two-finger zoom outPut two fingers on the trackpad andmove them closer together to zoomout.
Two-finger zoom inPut two fingers on the trackpadand move them farther apart tozoom in.
The following section introduces some touch gestures on the Windows 10 operating system.
Swipe three fingers upPut three fingers on the trackpadand move them up to open thetask view to see all your openwindows.
Swipe three fingers downPut three fingers on the trackpadand move them down to show thedesktop.
Replacing the cap of the pointing stickThe cap 1 on the end of the pointing stick is removable. After you use the cap for a period of time, youmight consider replacing the cap with a new one. To get a new cap, contact Lenovo Customer SupportCenter. See “Calling Lenovo” on page 140.
Note: Ensure that you use a cap with grooves a as shown in the following illustration.
22 ThinkPad X260 User Guide

Customizing the ThinkPad pointing deviceYou can customize the ThinkPad pointing device so you can use it more comfortably and efficiently. Forexample, you can choose to enable the TrackPoint pointing device, the trackpad, or both. You also candisable or enable the touch gestures.
To customize the ThinkPad pointing device, do the following:
1. Go to Control Panel.
2. Click Hardware and Sound ➙ Mouse. The Mouse Properties window is displayed.
3. In the Mouse Properties window, follow the instructions on the screen to complete the customization.
Power managementWhen you need to use your computer away from electrical outlets, you depend on battery power to keepyour computer running. Different computer components consume power at different rates. The more youuse the power-intensive components, the faster your computer consumes battery power.
Spend more time unplugged with ThinkPad batteries. Mobility has revolutionized business by enablingyou to take your work wherever you go. With ThinkPad batteries, you will be able to work longer withoutbeing tied to an electrical outlet.
Using the ac powerThe power to run your computer can come either from the removable battery, the built-in battery, or from acpower through the ac power adapter. While you use ac power, the batteries charge automatically.
Connecting the ac power adapter
To connect the ac power adapter, do the following:
Attention: Using an improper power cord might severely damage the computer.
Note: Ensure that you perform the actions in the order in which they are listed.
1. Connect the power cord to the ac power adapter.
2. Connect the ac power adapter to the power connector of the computer.
3. Connect the power cord to an electrical outlet.
Tips for using the ac power adapter
• When the ac power adapter is not in use, disconnect it from the electrical outlet.
• Do not bind the power cord tightly around the ac power adapter transformer pack when it is connected tothe transformer.
• Before you charge the batteries, make sure that the battery temperature is at least 10°C (50°F).
• You can charge the batteries when the ac power adapter is connected to the computer. You need tocharge the batteries in any of the following situations:
– When the battery icon in the Windows notification area shows a low percentage of battery powerremaining
– When the batteries have not been used for a long time
Chapter 2. Using your computer 23

Checking the battery statusMove your pointer to the battery-status icon in the Windows notification area to check the battery status.The battery-status icon displays the percentage of battery power remaining and how long you can useyour computer before you must charge the battery.
The rate at which you use battery power determines how long you can use the batteries of your computerbetween charges. Because of different user habits and needs, it is difficult to predict how long a batterycharge will last. There are two main factors:
• How much energy is stored in the battery when you begin to work.
• The way you use your computer. For example:
– How often you access the storage drive
– How bright you make the computer display
– How often you use the wireless features
Charging the batteriesIt is recommended that you charge the battery or replace it with a charged battery when the battery powerremaining is low. For example:
• When you find that the percentage of the remaining power is low
• When the power alarm alerts you
If an ac outlet is convenient, plug the ac power adapter into it, and then insert the connector into thecomputer. The batteries will be fully charged in about two to three hours. The charging time is affected bythe battery size and the physical environment. You can check the battery charging status at any time throughthe battery-status icon in the Windows notification area.
Note: To maximize the life of the battery, the computer does not start recharging the battery if the remainingpower is greater than 95%.
Managing the battery powerTo achieve the best balance between performance and power saving, adjust your power plan settings.To adjust power plan settings, do the following:
1. Go to Control Panel, and then change the view of Control Panel from Category to Large icons or Smallicons.
2. Click Power Options.
3. Follow the instructions on the screen.
Power-saving modesThere are several modes that you can use to conserve power according to your situation and computingneeds. This section introduces each mode and gives tips on the effective use of battery power.
• Screen blank mode (for Windows 7 only)The computer display requires considerable battery power. To turn off the power to the display and makethe computer enter screen blank mode, right-click the battery-gauge icon in the windows notification areaand select Power off display.
• Sleep modeIn sleep mode, your work is saved to memory, and then the storage drive and the computer display areturned off. When your computer wakes up, your work is restored within seconds.
24 ThinkPad X260 User Guide

To put your computer into sleep mode, press Fn+4.
You also can put the computer into sleep mode by doing the following:
– For Windows 7: Open the Start menu, click the arrow next to the Shut down button, and then clickSleep from the menu displayed.
– For Windows 10: Open the Start menu, click Power, and then click Sleep.
Hibernation modeBy using this mode, you can turn off your computer completely without saving files or exiting anyprograms that are running. When the computer enters hibernation mode, all open programs, folders, andfiles are saved to the storage devices, and then the computer turns off.
To put the computer into hibernation mode, do the following:
– For Windows 7: Open the Start menu, click the arrow next to the Shut down button, and then clickHibernate from the menu displayed.
– For Windows 10: Define what the power button does first, and then press the power button to put thecomputer into hibernation mode. For more information, see “Front view” on page 1.
If you put your computer into hibernation mode with the wake-up function disabled, the computer doesnot consume any power. The wake-up function is disabled by default. If you put your computer intohibernation mode with the wake-up function enabled, the computer consumes a small amount of power.
To enable the wake-up function, do the following:
1. Go to Control Panel and click System and Security.
2. Click Administrative Tools.
3. Click Task Scheduler. If you are prompted for an administrator password or confirmation, type thepassword or provide confirmation.
4. From the left pane, select the task folder for which you want to enable the wake-up function. Thescheduled tasks are displayed.
5. Click a scheduled task, and then click the Conditions tab.
6. Under Power, select the check box for Wake the computer to run this task.
• Wireless offWhen you are not using the wireless features, such as Bluetooth or wireless LAN, turn them off. This helps
conserve power. To turn off the wireless features, press the wireless-radios control key .
Handling the batteryThis system supports only batteries specially designed for this specific system and manufactured by Lenovoor an authorized builder. The system does not support unauthorized batteries or batteries designed for othersystems. If an unauthorized battery or a battery designed for another system is installed, the system willnot charge.
Attention: Lenovo has no responsibility for the performance or safety of unauthorized batteries, andprovides no warranties for failures or damage arising out of their use.
DANGER
Do not attempt to disassemble or modify the battery pack.
Attempting to do so can cause an explosion, or liquid leakage from the battery pack.
A battery pack other than the one specified by Lenovo, or a disassembled or modified batterypack is not covered by the warranty.
Chapter 2. Using your computer 25
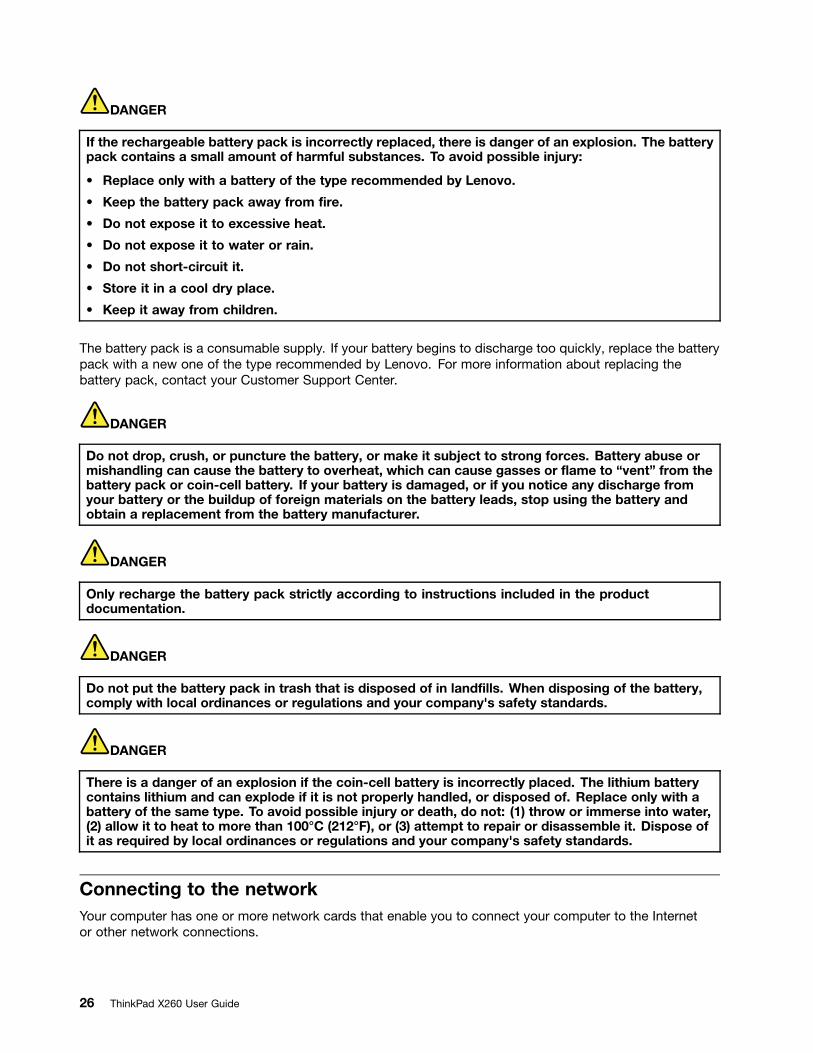
DANGER
If the rechargeable battery pack is incorrectly replaced, there is danger of an explosion. The batterypack contains a small amount of harmful substances. To avoid possible injury:
• Replace only with a battery of the type recommended by Lenovo.
• Keep the battery pack away from fire.
• Do not expose it to excessive heat.
• Do not expose it to water or rain.
• Do not short-circuit it.
• Store it in a cool dry place.
• Keep it away from children.
The battery pack is a consumable supply. If your battery begins to discharge too quickly, replace the batterypack with a new one of the type recommended by Lenovo. For more information about replacing thebattery pack, contact your Customer Support Center.
DANGER
Do not drop, crush, or puncture the battery, or make it subject to strong forces. Battery abuse ormishandling can cause the battery to overheat, which can cause gasses or flame to “vent” from thebattery pack or coin-cell battery. If your battery is damaged, or if you notice any discharge fromyour battery or the buildup of foreign materials on the battery leads, stop using the battery andobtain a replacement from the battery manufacturer.
DANGER
Only recharge the battery pack strictly according to instructions included in the productdocumentation.
DANGER
Do not put the battery pack in trash that is disposed of in landfills. When disposing of the battery,comply with local ordinances or regulations and your company's safety standards.
DANGER
There is a danger of an explosion if the coin-cell battery is incorrectly placed. The lithium batterycontains lithium and can explode if it is not properly handled, or disposed of. Replace only with abattery of the same type. To avoid possible injury or death, do not: (1) throw or immerse into water,(2) allow it to heat to more than 100°C (212°F), or (3) attempt to repair or disassemble it. Dispose ofit as required by local ordinances or regulations and your company's safety standards.
Connecting to the networkYour computer has one or more network cards that enable you to connect your computer to the Internetor other network connections.
26 ThinkPad X260 User Guide

Ethernet connectionsYou can connect your computer to a local network or a broadband connection by using the built-in Ethernetfeature of the computer.
DANGER
Your computer has an Ethernet connector. To avoid the risk of electrical shock, do not connectthe telephone cable to the Ethernet connector.
Wireless connectionsWireless connection is the transfer of data without the use of cables but by means of radio waves only.
In the Airplane mode, all wireless features are disabled. To disable the Airplane mode on the Windows 10operating system, open the Start menu and click Settings. If Settings is not displayed, click All appsto display all programs, and click Settings ➙ Network & Internet ➙ Airplane mode. Then turn off theAirplane mode.
Depending on the wireless devices installed on your computer, you might be able to use the followingwireless networks:
• Wireless-LAN connection
• Wireless-WAN connection
• Bluetooth connection
Using the wireless-LAN connectionA wireless local area network (LAN) covers a relatively small geographic area, such as an office building or ahouse. Devices based on the 802.11 standards can connect to this type of network.
Your computer comes with a built-in wireless network card and a configuration utility to help you establishwireless connections and monitor the connection status. This enables you to stay connected to your networkwhile you are at the office, in a meeting room, or at home, with no need for a wired connection.
To establish a wireless-LAN connection, do the following:
1. Click the wireless-network-connection-status icon in the Windows notification area. A list of availablewireless networks is displayed.
2. Double-click a network to connect to it. Provide required information if needed.
The computer automatically connects to an available wireless network when the location changes. For moreinformation, refer to the Windows help information system.
Tips for using the wireless-LAN feature
To achieve the best connection, use the following guidelines:
• Place your computer so that there are as few obstacles as possible between the wireless-LAN accesspoint and the computer.
• Open your computer lid to an angle of slightly more than 90 degrees.
• If you use the wireless feature (the 802.11 standards) of your computer simultaneously with a Bluetoothoption, the data transmission speed can be delayed and the performance of the wireless feature can bedegraded.
Chapter 2. Using your computer 27

Checking the wireless-LAN connection status
You can check the wireless-LAN connection status through the wireless-network-connection-status icon inthe Windows notification area. The more bars encompassed, the better the signal is.
For the Windows 7 operating system, you also can check the Access Connections gauge, the AccessConnections status icon, or the Access Connections wireless status icon in the Windows notification area.
Access Connections gauge:
• Power to the wireless radio is off or no signal.
• Power to the wireless radio is on. The signal strength of the wireless connection is poor. Toimprove signal strength, move your computer closer to the wireless access point.
• Power to the wireless radio is on. The signal strength of the wireless connectionis marginal.
• Power to the wireless radio is on. The signal strength of the wireless connectionis excellent.
Access Connections status icon:
• No location profile is active or none exists.
• Current location profile is disconnected.
• Current location profile is connected.
Access Connections wireless status icon:
• Power to the wireless radio is off.
• Power to the wireless radio is on. No association.
• Power to the wireless radio is on. No signal.
• Power to the wireless radio is on. The signal strength of the wireless connection is excellent.
• Power to the wireless radio is on. The signal strength of the wireless connection is marginal.
• Power to the wireless radio is on. The signal strength of the wireless connection is poor. To improvesignal strength, move your computer closer to the wireless access point.
Using the wireless WAN connectionWireless Wide Area Network (wireless WAN) which uses cellular networks for data transmission, enablesyou to establish wireless connections over remote public or private networks. These connections can bemaintained over a large geographical area, such as a city or an entire country, by use of multiple antennasites or satellite systems maintained by wireless service providers.
Some ThinkPad notebook computers come with a built-in wireless WAN card integrated with some wirelessWAN technologies, such as 1xEV-DO, HSPA, 3G, GPRS, or LTE. By using the built-in wireless WAN card andthe configuration utility that comes with your computer, you can establish wireless WAN connections andmonitor the connection status.
Note: The wireless WAN service is provided by authorized service providers in some countries.
Tips for using the wireless WAN feature
To achieve the best connection, use the following guidelines:
• Keep your computer away from your body.
28 ThinkPad X260 User Guide

• Place your computer on a flat surface and open your computer lid to an angle of slightly more than90 degrees.
• Place your computer away from concrete or brick walls that might dampen cellular signals.
• Best reception will be available near windows and other locations where cellular phone reception is thestrongest.
Checking the wireless WAN connection status
You can check the wireless WAN connection status through the wireless network connection status icon inthe Windows notification area. The more bars encompassed, the better the signal is.
For the Windows 7 operating system, you also can check the Access Connections gauge, the AccessConnections status icon, or the Access Connections wireless status icon in the Windows notification area.
Access Connections gauge status:
• No signal
• Weak signal
• Medium signal
• Strong signal
Access Connections icon status:
• No location profile is active or none exists.
• Current location profile is disconnected.
• Current location profile is connected.
Wireless status icon status:
• Power to the WAN radio is off
• No association
• No signal
• Weak signal
• Medium signal
• Strong signal
Using the Bluetooth connectionBluetooth can connect devices that are a short distance from one another. It is commonly used forconnecting peripheral devices to a computer, transferring data between hand-held devices and a personalcomputer, or remotely controlling and communicating with devices such as mobile phones.
Depending on the model, your computer might support the Bluetooth feature. To transfer data throughthe Bluetooth feature, do the following:
Note: If you use the wireless feature (the 802.11 standards) of your computer simultaneously with aBluetooth option, the data transmission speed can be delayed and the performance of the wireless featurecan be degraded.
1. Ensure that the Bluetooth feature is enabled.
• For Windows 7: Press the wireless-radios control key and turn on the Bluetooth feature.
Chapter 2. Using your computer 29

• For Windows 10: Do one of the following:
– Open the Start menu and then click Settings. If Settings is not displayed, click All apps to displayall programs, and then click Settings ➙ Devices ➙ Bluetooth. Turn on the Bluetooth feature.
– Open the Start menu and then click Settings. If Settings is not displayed, click All apps todisplay all programs, and then click Settings ➙ Network & Internet ➙ Airplane mode. Turn onthe Bluetooth feature.
2. Right-click the data that you want to send.
3. Select Send To ➙ Bluetooth Devices.
4. Select a Bluetooth device, and then follow the instructions on the screen.
For more information, refer to the Windows help information system and the Bluetooth help informationsystem.
Using an external displayYou can use an external display such as a projector or a monitor to give presentations or to expand yourworkspace. This topic introduces how to connect an external display, choose display modes, and changedisplay settings.
When you connect an external display, a video interface cable with a ferrite core is required. Your computercan support the following video resolution, if the external display also supports that resolution:
• Up to 4096 x 2160, with an external display connected to the HDMI connector of your computer.
• Up to 2560 x 1600, with an external display connected to the mini DisplayPort connector of your computer.
For more information about the external display, refer to the manuals provided with it.
Connecting an external displayYou can use either a wired display or a wireless display. The wired display can be connected to theHDMI or mini DisplayPort connector by a cable. The wireless display can be added through the Wi-Di orMiracast function.
• Connecting a wired display
Note: When you connect an external display, a video interface cable with a ferrite core is required.
1. Connect the external display to an appropriate video connector on your computer, such as themini DisplayPort connector or HDMI connector.
2. Connect the external display to an electrical outlet.
3. Turn on the external display.
If your computer cannot detect the external display, do the following:
– For Windows 7: Right-click on the desktop, and then click Screen resolution ➙ Detect.
– For Windows 10: Right-click on the desktop, and then click Display settings ➙ Detect.
• Connecting a wireless display
Note: To use a wireless display, ensure that both your computer and the external display support theWi-Di or Miracast feature.
– For Windows 7: Start the Intel® Wi-Di program. Select the desired wireless display in the list andfollow the instructions on the screen.
30 ThinkPad X260 User Guide

– For Windows 10: Do one of the following:
– Open the Start menu and then click Settings. If Settings is not displayed, click All apps to displayall programs, and then click Settings ➙ Devices ➙ Connected devices ➙ Add a device.
– Click the action center icon in the Windows notification area. Click Connect. Select the desiredwireless display and follow the instructions on the screen.
For more information, refer to the Windows help information system.
Choosing a display modeYou can display your desktop and apps on the computer display, the external display, or both. To choose
how to display the video output, press the display-mode switching key and then select a displaymode you prefer.
There are four display modes:
• Disconnect: Displays the video output only on your computer screen.
Note: Depending on the situation, you might see Disconnect, PC screen only, Computer only, orDisconnect projector.
• Duplicate: Displays the same video output on both your computer screen and an external display.
• Extend: Extends the video output from your computer display to an external display. You can drag andmove items between the two displays.
• Projector only: Shows the video output only on an external display.
Note: Depending on the situation, you might see Projector only or Second screen only.
Note: If you show DOS or programs using DirectDraw or Direct3D® in full-screen mode, only the maindisplay shows the video output.
Changing display settingsYou can change the settings for both the computer display and the external display. For example, youcan define which one is the main display and which one is the secondary display. You also can changethe resolution and orientation.
To change display settings, do the following:
1. Right-click on the desktop and select Screen resolution or Display settings.
2. Select the display that you want to configure.
3. Change display settings as you want.
Note: If you set a higher resolution for the computer display than the external display, only part of the screencan be shown on the external display.
Using audio featuresYour computer is equipped with the following items:
• Microphones
• Speakers
• Audio connector, 3.5 mm (0.14 inch) in diameter
Chapter 2. Using your computer 31

Your computer also has an audio chip that enables you to enjoy various multimedia audio features, suchas the following:
• Playback of MIDI and MP3 files
• Recording and playback of PCM and WAV files
• Recording from various sound sources, such as a headset attached
The following table shows which functions of the audio devices attached to the connector on your computeror docking station are supported.
Table 1. Audio feature list
Connector Headset with a 3.5 mm(0.14–inch), 4-pole plug
Conventional headphone Conventional microphone
Audio connector Headphone andmicrophone functionssupported
Headphone functionsupported
Not supported
To configure the microphone for optimal sound recording, use the Realtek HD Audio Manager program. Tostart the program, go to Control Panel and click Hardware and Sound ➙ Realtek HD Audio Manager.
Using the cameraIf your computer has a camera, you can use the camera to preview your video image and take a snapshotof your current image.
To start the camera, do the following:
• For Windows 7: Start the Communications Utility program. See “Accessing Lenovo programs” onpage 12.
• For Windows 10: Open the Start menu and click Camera from the all apps list.
When the camera is started, the green camera-in-use indicator turns on.
You also can use the integrated camera with other programs that provide features such as photographing,video capturing, and video conferencing. To use the integrated camera with other programs, open one of theprograms and start the photographing, video capturing, or video conferencing function. Then, the camerawill start automatically and the green camera-in-use indicator will turn on. For more information about usingthe camera with a program, refer to the help information system of the program.
Configuring camera settings
You can configure the camera settings to meet your needs, such as adjusting the quality of the video output.
To configure the camera settings, do the following:
• For Windows 7: Start the Communications Utility program and configure the camera settings as desired.
• For Windows 10: Do one of the following:
– Open the Camera app and click the settings icon in the upper-right corner. Follow the instructions onthe screen to configure the camera settings as desired.
– Click Lenovo Settings from the Start menu. Then click Camera. Follow the instructions on thescreen to configure the camera settings as desired.
32 ThinkPad X260 User Guide

Using a flash media card or a smart cardYour computer has a media-card-reader slot. It supports the following cards:
• MultiMediaCard (MMC)
• Secure Digital eXtended-Capacity (SDXC) card
• Secure Digital (SD) card
• Secure Digital High-Capacity (SDHC) card
Note: Your computer does not support the content protection for recordable media (CPRM) featurefor the SD card.
The smart card reader on your computer only supports the smart card of the following specifications:
• Length: 85.60 mm (3.37 inches)
• Width: 53.98 mm (2.13 inches)
• Thickness: 0.76 mm (0.03 inch)
Do not insert smart cards with slits into your computer. Otherwise, the smart card reader might get damaged.
Attention: While transferring data to or from a flash media card, or a smart card, do not put your computerinto sleep or hibernation mode before the data transfer is completed; otherwise, your data could getdamaged.
Installing a flash media card or a smart card
Attention: Before you start installing a card, touch a metal table or a grounded metal object. This actionreduces any static electricity from your body. The static electricity could damage the card.
To install a card, do the following:
1. Ensure that the card is correctly oriented.
2. Insert the card firmly into the 4-in-1 media card reader slot or smart card reader slot.
If the plug-and-play feature is not enabled for the installed flash media card, do the following to enablethe feature:
1. Go to Control Panel.
2. Click Hardware and Sound.
3. Click Device Manager. If you are prompted for an administrator password or confirmation, type thepassword or provide confirmation.
Chapter 2. Using your computer 33

4. From the Action menu, select Add legacy hardware. The Add Hardware Wizard starts.
5. Follow the instructions on the screen.
Removing a flash media card or a smart card
Attention:
• Before removing a card, stop the card first. Otherwise, data on the card might get damaged or lost.
• Do not remove a card while the computer is in sleep mode or hibernation mode. Otherwise, the systemmight not respond when you try to resume operation.
To remove a flash media card or a smart card, do the following:
1. Click the triangular icon in the Windows notification area to show hidden icons. Then, right-click theSafely Remove Hardware and Eject Media icon.
2. Select the item you want to remove to stop the card.
3. Press the card to eject it from your computer.
4. Remove the card and store it safely for future use.
Note: If you do not remove the card from your computer after you eject the card from the Windowsoperating system, the card can no longer be accessed. To access the card, you must remove it first,and then insert it again.
34 ThinkPad X260 User Guide

Chapter 3. Enhancing your computer
This chapter contains the following topics:
• “Finding ThinkPad options” on page 35
• “ThinkPad docking stations” on page 35
Finding ThinkPad optionsIf you want to expand the capabilities of your computer, Lenovo has a number of hardware accessoriesand upgrades to meet your needs. Options include memory modules, storage devices, network cards, portreplicators or docking stations, batteries, power adapters, printers, scanners, keyboards, mice, and more.
You can shop at Lenovo 24 hours a day, 7 days a week directly over the World Wide Web. All you need is anInternet connection and a credit card.
To shop at Lenovo, go to http://www.lenovo.com/essentials.
ThinkPad docking stationsYou can attach your computer to a supported docking station to expand working capability. Depending onthe model, your computer might support the following docking stations:
• ThinkPad Basic Dock
• ThinkPad Basic USB 3.0 Dock
• ThinkPad Pro Dock
• ThinkPad Ultra Dock
• ThinkPad USB 3.0 Dock
• ThinkPad USB 3.0 Ultra/Pro Dock
• ThinkPad WiGig Dock
For more information about ThinkPad USB 3.0 Dock, ThinkPad Basic USB 3.0 Dock, and ThinkPad USB 3.0Ultra/Pro Dock, refer to the manuals that come with the dock.
ThinkPad Basic Dock, ThinkPad Pro Dock, and ThinkPad Ultra DockThis section introduces how to use the ThinkPad Basic Dock, ThinkPad Pro Dock, and ThinkPad Ultra Dock.
CAUTION:When the computer is attached to a docking station, never pick up the assembly by taking hold of thecomputer alone. Always hold the whole assembly.
Locating controls and connectorsThis section introduces the locations of controls and connectors on the docking stations.
ThinkPad Basic DockFront view
© Copyright Lenovo 2015, 2016 35

1 Power button: Press the power button to turn on or turn off the computer.
2 Eject button: Press the eject button to release the computer from the docking station.
3 Sliding adjuster: Use the sliding adjuster as a guide to align the docking station connector on yourcomputer when you attach the docking station.
4 Docking station connector: Used to attach your computer.
Rear view
1 Always On USB connector: Used to connect devices that are compatible with USB 2.0 or charge somemobile digital devices and smartphones when your computer is in sleep or hibernation mode.
2 USB 2.0 connectors: Used to connect devices that are compatible with USB 2.0.
3 USB 3.0 connector: Used to connect devices that are compatible with USB 3.0.
4 Ethernet connector: Used to connect the docking station to an Ethernet LAN.
36 ThinkPad X260 User Guide

Note: If you need to use an Ethernet connector or an external display connector when your computer isattached to a docking station, use the Ethernet connector or the external display connector on the dockingstation, instead of the one on the computer.
5 ac power connector: Used to connect the ac power adapter.
6 VGA connector: Used to connect the computer to a VGA-compatible video device, such as a VGAmonitor.
ThinkPad Pro DockFront view
1 Power button: Press the power button to turn on or turn off the computer.
2 Key-lock indicator: This indicator turns on when the system lock key is in the locked position.
3 Docking-status indicator: This indicator turns on when your computer is docked.
4 Eject button: Press the eject button to release the computer from the docking station.
5 Sliding adjuster: Use the sliding adjuster as a guide to align the docking station connector on yourcomputer when you attach the docking station.
6 Docking station connector: Used to attach your computer.
7 System lock: Use the system lock key to lock the eject button. When the system lock key is in the lockedposition, the eject button of the docking station is locked; you cannot attach or remove your computer.
Chapter 3. Enhancing your computer 37

Rear view
1 Always On USB connector: Used to connect devices that are compatible with USB 2.0 or charge somemobile digital devices and smartphones when your computer is in sleep or hibernation mode.
2 USB 2.0 connectors: Used to connect devices that are compatible with USB 2.0.
3 USB 3.0 connectors: Used to connect devices that are compatible with USB 3.0.
4 Ethernet connector: Used to connect the docking station to an Ethernet LAN.
Note: If you need to use an Ethernet connector or an external display connector when your computer isattached to a docking station, use the Ethernet connector or the external display connector on the dockingstation, instead of the one on the computer.
5 ac power connector: Used to connect the ac power adapter.
6 DisplayPort connector: Used to attach a high-performance monitor, a direct-drive monitor, or otherdevices that use a DisplayPort connector.
7 DVI connector: Used to connect a monitor that supports Digital Visual Interface (DVI) connection.
Note: The DVI connector provides a digital interface only. This connector can only be used with a computerthat supports DVI connection.
To connect a DVI monitor, do the following:
1. Turn off the computer.
2. Connect the DVI monitor to the DVI connector. Then connect the monitor to an electrical outlet.
3. Turn on the DVI monitor and then the computer.
8 VGA connector: Used to connect the computer to a VGA-compatible video device, such as a VGAmonitor.
9 Audio connector: Used to connect headphones or a headset that has a 3.5-mm (0.14-inch), 4-pole plugto the audio connector to listen to the sound from the computer.
38 ThinkPad X260 User Guide

10 Security-lock slot: To protect your docking station from theft, you can use a security cable lock, suchas a Kensington-style cable lock, that fits this security-lock slot to lock your docking station to a desk,table, or other non-permanent fixture.
ThinkPad Ultra DockFront view
1 Power button: Press the power button to turn on or turn off the computer.
2 Key lock indicator: This indicator turns on when the system lock key is in the locked position.
3 Docking-status indicator: This indicator turns on when your computer is docked.
4 Eject button: Press the eject button to release the computer from the docking station.
5 Sliding adjuster: Use the sliding adjuster as a guide to align the docking station connector on yourcomputer when you attach the docking station.
6 Docking station connector: Used to attach your computer.
7 System lock: Use the system lock key to lock the eject button. When the system lock key is in the lockedposition, the eject button of the docking station is locked; you cannot attach or remove your computer.
Chapter 3. Enhancing your computer 39

Rear view
1 Always On USB connector: Used to connect devices that are compatible with USB 2.0 or charge somemobile digital devices and smartphones when your computer is in sleep or hibernation mode.
2 USB 2.0 connectors: Used to connect devices that are compatible with USB 2.0.
3 USB 3.0 connectors: Used to connect devices that are compatible with USB 3.0.
4 Ethernet connector: Used to connect the docking station to an Ethernet LAN.
Note: If you need to use an Ethernet connector or an external display connector when your computer isattached to a docking station, use the Ethernet connector or the external display connector on the dockingstation, instead of the one on the computer.
5 ac power connector: Used to connect the ac power adapter.
6 DisplayPort connectors: Used to attach a high-performance monitor, a direct-drive monitor, or otherdevices that use a DisplayPort connector.
7 HDMI connector: Used to connect a high-definition television.
8 DVI connector: Used to connect a monitor that supports Digital Visual Interface (DVI) connection.
Note: The DVI connector provides a digital interface only. This connector can only be used with a computerthat supports DVI connection.
To connect a DVI monitor, do the following:
• Turn off the computer.
• Connect the DVI monitor to the DVI connector. Then connect the monitor to an electrical outlet.
• Turn on the DVI monitor and then the computer.
9 VGA connector: Used to connect the computer to a VGA-compatible video device, such as a VGAmonitor.
10 Audio connector: Used to connect headphones or a headset that has a 3.5-mm (0.14-inch), 4-poleplug to the audio connector to listen to the sound from the computer.
40 ThinkPad X260 User Guide

11 Security-lock slot: To protect your docking station from theft, you can use a security cable lock, suchas a Kensington-style cable lock, that fits this security-lock slot to lock your docking station to a desk,table, or other non-permanent fixture.
Attaching a ThinkPad docking stationTo attach your computer to a supported ThinkPad docking station, do the following:
Note: The ThinkPad Basic Dock does not have the system lock.
1. Disconnect all cables and devices from the computer.
2. Ensure that the system lock key is turned to the unlocked position (horizontal).
3. Align the top-left corner of the computer with the position mark of the docking station. Insert yourcomputer into the docking station vertically until you hear a click 1 . The computer is attached to thedocking station. Then turn the system lock key to the locked position 2 .
4. Check the docking-status indicator. If the docking-status indicator is not turned on, it indicates that yourcomputer is not correctly attached to the docking station. Check the ac power adapter of the dockingstation, or disconnect and reattach the ac power adapter.
Note: If you attach your computer to a docking station, but not connect the ac power adapter of thedocking station to the ac power connector, your computer will enter battery mode.
Chapter 3. Enhancing your computer 41

Detaching a ThinkPad docking stationTo detach your computer from a ThinkPad docking station, do the following:
Note: The ThinkPad Basic Dock does not have the system lock.
1. Disconnect all cables and devices from the computer.
2. Ensure that the system lock key is turned to the unlocked position (horizontal).
3. Press the eject button until the computer moves up. Then, grasp both sides of the computer to remove it.
Guidelines on connecting multiple external displays to a docking stationYou can connect multiple external displays to a supported ThinkPad docking station. To ensure that themultiple displays work correctly, observe the following guidelines and connect the displays to appropriateconnectors.
• Do not use the connector combinations as shown in the following illustrations for connecting multipledisplays. Otherwise, one of the displays will not work.
42 ThinkPad X260 User Guide

– ThinkPad Pro Dock
– ThinkPad Ultra Dock
• For the ThinkPad Ultra Dock, a maximum of three displays (including your computer display) can work atthe same time. As a result, if you connect three external displays to the ThinkPad Ultra Dock, the displayconnected to the VGA connector will not work when your computer display is on.
– When the computer display is off:
– When the computer display is on:
Chapter 3. Enhancing your computer 43

Security featuresThe system lock key has two positions as shown in the drawing.
The security feature is different when the key is in different positions:
• When the key is in position 1, the eject button of the docking station is locked, and you cannot removeyour computer. The key-lock indicator is on when the eject button is locked. The security cable is locked.
• When the key is in position 2, the eject button of the docking station is unlocked, and you can remove yourcomputer. The key-lock indicator is off when the eject button is unlocked. The security cable is locked.
ThinkPad WiGig DockThe WiGig technology enables wireless communications between nearby devices at multi-gigabit speeds.Some computer models have a wireless LAN card with built-in WiGig feature. These computer models canwork with the ThinkPad WiGig Dock wirelessly to expand computing capabilities.
Locating controls, connectors, and indicatorsThis section introduces the hardware features of the ThinkPad WiGig Dock to give you the basic informationyou need to start using the dock.
Front view
1 Status indicator: The indicator in the ThinkPad logo shows the status of the dock. The indicator is solidon when the dock is on (in normal mode).
44 ThinkPad X260 User Guide

Side view
1 2 USB 2.0 connectors: Connect devices that are compatible with USB 2.0, such as a USB keyboardor a USB mouse.
3 Audio connector: Connect headphones or a headset that has a 3.5-mm (0.14-inch) 4-pole plug to theaudio connector to listen to the sound from the computer.
4 Power/Connection button: Turn on or turn off the dock. You can also press the button to confirmconnection.
5 USB 3.0 connector: Connect USB compatible devices, such as a USB keyboard, USB mouse, orUSB storage device. For faster and optimal data transfer, ensure that you connect a USB 3.0 device tothe USB 3.0 connector.
6 8 Always On USB 3.0 connectors: Connect USB compatible devices or charge some mobile digitaldevices and smartphones when your computer is in sleep or hibernation mode.
7 Security-lock slot: To protect your dock from theft, purchase a security cable lock that fits thissecurity-lock slot to lock your dock to a stationary object.
9 ac power connector: Connect the ac power adapter.
10 HDMI connector: Connect a high-definition television.
11 DisplayPort connector: Connect a high-performance monitor, a direct-drive monitor, or other devicesthat use a DisplayPort connector.
12 Ethernet connector: Connect the dock to an Ethernet LAN.
Chapter 3. Enhancing your computer 45

Bottom view
1 Emergency-reset hole: If your dock stops responding, hold down the power button for several secondsto turn off the dock. If the dock still cannot be turned off, remove the ac power adapter first. Then insert astraightened paper clip into the emergency-reset hole to reset the dock.
Setting up the ThinkPad WiGig DockTo set up your ThinkPad WiGig Dock, do the following:
1. Connect the power cord to the ac power adapter.
2. Connect the ac power adapter to the power connector of the dock.
3. Connect the power cord to an electrical outlet.
4. Turn on the dock by pressing the power button.
5. If an external display is available, connect the external display to the appropriate connector (HDMI orDisplayPort connector) on the dock. The external display shows some wireless pairing instructions whenyou connect your computer to the WiGig dock.
46 ThinkPad X260 User Guide

6. Position your computer close to the ThinkPad WiGig Dock, within 0.9 m (3 ft). The dock also must bewithin a 120-degree sector region relatively to the rear of the computer display. Ensure that no objectsare between the dock and the computer.
Using the ThinkPad WiGig DockThis section introduces how to use and manage the dock.
Connecting to the ThinkPad WiGig Dock
To connect your computer to the ThinkPad WiGig dock, do the following:
1. After the setup and preparation, turn on your computer and the dock. Then do the following:
• For Windows 7: Click the Start button to open the Start menu, and then click All programs ➙ Intel➙ Intel Wireless Dock Manager to start the Wireless Dock Manager program.
• For Windows 10: Click the action center icon on the taskbar. Click Connect.
2. Select your dock from the list of available devices.
3. When prompted, press the power/connection button on the dock to confirm the pairing.
Chapter 3. Enhancing your computer 47

4. Follow the instructions on the screen to finish the connection.
After establishing the initial connection, you can make configurations so that whenever the computer comeswithin the required range, it automatically gets connected to the dock.
Disconnecting from the ThinkPad WiGig Dock
To disconnect your computer from the ThinkPad WiGig Dock, do the following:
1. Do the following:
• For Windows 7: Click the Start button to open the Start menu, and then click All programs ➙ Intel➙ Intel Wireless Dock Manager to start the Wireless Dock Manager program.
• For Windows 10: Click the action center icon on the taskbar. Click Connect to open thedevice list.
2. Locate the ThinkPad WiGig Dock and click Disconnect.
3. Hold down the power button on the dock for several seconds until the dock is turned off.
Managing the ThinkPad WiGig Dock
The Wireless Dock Manager program enables you to manage the dock. You can change the name of thedock, change the radio channel to optimize the signal strength, and set a password to manage the docksettings.
To manage the ThinkPad WiGig Dock, do the following:
1. Click the Start button to open the Start menu. Then click All programs (Windows 7) or All apps(Windows 10) to display all programs.
2. Click Intel ➙ Intel Wireless Dock Manager to start the Wireless Dock Manager program.
3. Click Dock Management.
4. Follow the instructions on the screen to configure the settings as desired.
For more information, refer to the manuals that come with the dock and the help information system ofthe Wireless Dock Manager program.
48 ThinkPad X260 User Guide

Chapter 4. You and your computer
This chapter contains the following topics:
• “Accessibility and comfort” on page 49
• “Traveling with your computer” on page 53
Accessibility and comfortGood ergonomic practice is important to get the most from your personal computer and to avoid discomfort.Arrange your workplace and the equipment you use to suit your individual needs and the kind of workthat you perform. In addition, use healthy work habits to maximize your performance and comfort whileusing your computer.
The following topics provide information about arranging your work area, setting up your computerequipment, and establishing healthy work habits.
Lenovo is committed to providing the latest information and technology to our customers with disabilities.Refer to our accessibility information which outlines our efforts in this area. See “Accessibility information”on page 50.
Ergonomic informationWorking in the virtual office might mean adapting to frequent changes in your environment. For example,adapting to the surrounding light sources, proper seating, and the placement of your computer hardware,can help you improve your performance and achieve greater comfort.
The following example shows someone in a conventional setting. Even when not in such a setting, you canfollow many of these tips. Develop good habits, and they will serve you well.
General posture: Make minor modifications in your working posture to deter the onset of discomfortcaused by long periods of working in the same position. Frequent, short breaks from your work also helpto prevent minor discomfort associated with your working posture.
Display: Position the display to maintain a comfortable viewing distance of 510-760 mm (20-30 inches).Avoid glare or reflections on the display from overhead lighting or outside sources of light. Keep the displayscreen clean and set the brightness to levels that enable you to see the screen clearly. Press the brightness
control keys or to adjust display brightness.
Head position: Keep your head and neck in a comfortable and neutral (vertical, or upright) position.
Chair: Use a chair that gives you good back support and seat height adjustment. Use chair adjustments tobest suit your desired posture.
© Copyright Lenovo 2015, 2016 49

Arm and hand position: Keep your forearms, wrists, and hands in a relaxed and neutral (horizontal) position.Type with a soft touch without pounding the keys.
Leg position: Keep your thighs parallel to the floor and your feet flat on the floor or on a footrest.
What if you are traveling?
It might not be possible to observe the best ergonomic practices when you are using your computer whileon the move or in a casual setting. Regardless of the setting, try to observe as many of these tips aspossible. Sitting properly and using adequate lighting, for example, will help you maintain desirable levelsof comfort and performance.
Questions about vision?
The visual display screens of ThinkPad notebook computers are designed to meet the highest standardsand to provide you with clear, crisp images and large, bright displays that are easy to see, yet easy on theeyes. Of course, any concentrated and sustained visual activity can be tiring. If you have questions on eyefatigue or visual discomfort, consult a vision care specialist for advice.
ComfortObserve the following guidelines to achieve greater comfort and improve performance.
Active sitting and rest breaks: The longer you sit and work with your computer, the more important it is toobserve your working posture. Follow “Ergonomic information” on page 49 and practice “active sitting” toavoid discomfort associated with your working postures. Making minor voluntary postural changes andtaking short frequent work breaks are the key ingredients for healthy computing. Your computer is light andmobile; you can easily reposition your working surface to accommodate many posture modifications.
Work area setup options: Familiarize yourself with all of your office furniture so that you know how to adjustyour work surface, seat, and other work tools to accommodate your preferences for comfort. If your workarea is not in an office setting, be sure to take special note of employing active sitting and taking workbreaks. Many ThinkPad product solutions are available to help you modify and expand your computer tobest suit your needs. You can find some of these options at http://www.lenovo.com/essentials. Explore youroptions for docking solutions and external products that provide the adjustability and features that you want.
Accessibility informationLenovo is committed to providing users who have hearing, vision, and mobility limitations with greateraccess to information and technology. This section provides information about the ways these users can getthe most out of their computer experience. You also can get the most up-to-date accessibility informationfrom the following Web site:http://www.lenovo.com/accessibility
Keyboard shortcuts
The following table contains keyboard shortcuts that can help make your computer easier to use.
Note: Depending on your keyboard, some of the following keyboard shortcuts might not be available.
Keyboard shortcut Function
Windows logo key + U Open Ease of Access Center
Right Shift for eight seconds Turn on or turn off Filter Keys
Shift five times Turn on or turn off Sticky Keys
50 ThinkPad X260 User Guide

Keyboard shortcut Function
Num Lock for five seconds Turn on or turn off Toggle Keys
Left Alt+Left Shift+Num Lock Turn on or turn off Mouse Keys
Left Alt+Left Shift+PrtScn (or PrtSc) Turn on or turn off High Contrast
For more information, go to http://windows.microsoft.com/, and then perform a search using any of thefollowing keywords: keyboard shortcuts, key combinations, shortcut keys.
Ease of Access Center
Ease of Access Center on the Windows operating system enables users to configure their computers tosuit their physical and cognitive needs.
To use Ease of Access Center, do the following:
1. Go to Control Panel, and ensure that you view Control Panel by Category.
2. Click Ease of Access ➙ Ease of Access Center.
3. Choose the appropriate tool by following the instructions on the screen.
Ease of Access Center mainly includes the following tools:
• Magnifier
Magnifier is a useful utility that enlarges the entire screen or part of the screen so that you can seethe items better.
• Narrator
Narrator is a screen reader that reads what is displayed on the screen aloud and describes events such aserror messages.
• On-Screen Keyboard
If you prefer to type or enter data into your computer using a mouse, joystick, or other pointing deviceinstead of a physical keyboard, you can use On-Screen Keyboard. On-Screen Keyboard displays a visualkeyboard with all the standard keys. You can select keys using the mouse or another pointing device, oryou can tap to select the keys if your computer supports multi-touch screen.
• High Contrast
High Contrast is a feature that heightens the color contrast of some text and images on your screen. As aresult, those items are more distinct and easier to identify.
• Personalized keyboard
Adjust keyboard settings to make your keyboard easier to use. For example, you can use your keyboardto control the pointer and make the keyboard easier to type certain key combinations.
• Personalized mouse
Adjust mouse settings to make your mouse easier to use. For example, you can change the pointerappearance and make your mouse easier to manage windows.
Speech Recognition
Speech Recognition enables you to control your computer by voice.
Using only your voice, you can start programs, open menus, click objects on the screen, dictate text intodocuments, and write and send e-mails. Everything you do with the keyboard and mouse can be done withonly your voice.
Chapter 4. You and your computer 51

To use Speech Recognition, do the following:
1. Go to Control Panel, and ensure that you view Control Panel by Category.
2. Click Ease of Access ➙ Speech Recognition.
3. Follow the instructions on the screen.
Screen-reader technologies
Screen-reader technologies are primarily focused on software program interfaces, help information systems,and various online documents. For additional information about screen readers, see the following:
• Using PDFs with screen readers:http://www.adobe.com/accessibility.html?promoid=DJGVE
• Using the JAWS screen reader:http://www.freedomscientific.com/jaws-hq.asp
• Using the NVDA screen reader:http://www.nvaccess.org/
Screen resolution
You can make the text and images on your screen easier to read by adjusting the screen resolution of yourcomputer.
To adjust the screen resolution, do the following:
1. Right-click an empty area of the desktop and select Screen resolution.
2. Follow the instructions on the screen.
Note: Setting a resolution too low might prevent some items from fitting on the screen.
Customizable item size
You can make the items on your screen easier to read by changing the item size.
• To change the item size temporarily, use the Magnifier tool in Ease of Access Center. See “Ease ofAccess Center” on page 51.
• To change the item size permanently, do the following:
– Change the size of all the items on your screen.
1. Go to Control Panel, and ensure that you view Control Panel by Category.
2. Click Appearance and Personalization ➙ Display.
3. Change the item size by following the instructions on the screen.
4. Click Apply. This change will take effect the next time you log in to the operating system.
– Change the size of the items on a Web page.
Press and hold Ctrl, and then press the plus-sign key (+) to enlarge or the minus-sign key (-) toreduce the text size.
– Change the size of the items on the desktop or a window.
Note: This function might not work on some windows.
If your mouse has a wheel, press and hold Ctrl, and then scroll the wheel to change the item size.
Industry-standard connectors
Your computer provides industry-standard connectors that enable you to connect assistive devices.
52 ThinkPad X260 User Guide

For more information about the location and function of the connectors, see “Locating computer controls,connectors, and indicators” on page 1.
Documentation in accessible formats
Lenovo provides electronic documentation in accessible formats, such as properly tagged PDF files orHyperText Markup Language (HTML) files. Lenovo electronic documentation is developed to ensurethat visually impaired users can read the documentation through a screen reader. Each image in thedocumentation also includes adequate alternative text so that visually impaired users can understand theimage when they use a screen reader.
Traveling with your computerThis topic provides information to help you work with your computer when you are traveling.
Travel tipsUse the following travel tips to travel more confidently and efficiently with your computer.
• Although it is safe to allow your computer to go through the x-ray machines at airport security stations, itis important to keep your eyes on the computer at all times to prevent theft.
• Consider bringing an electrical adapter for use in an airplane or automobile.
• If you carry an ac power adapter, detach the ac cord from it to avoid damaging the cord.
Travel tips on airplanes
If you carry your computer into an airplane, take note of the following tips:
• If you intend to use your computer or wireless services (such as Internet and Bluetooth), check with theairline for restrictions and availability of services before boarding the airplane. If there are restrictionson the use of computers with wireless features on the airplane, you must abide by those restrictions. Ifnecessary, enable the Airplane mode before boarding. In the Airplane mode, all wireless features aredisabled. To enable the Airplane mode on the Windows 10 operating system, open the Start menu andclick Settings. If Settings is not displayed, click All apps to display all programs, and click Settings ➙Network & Internet ➙ Airplane mode. Then turn on the Airplane mode.
• Be careful about the seat in front of you on airplanes. Angle your computer display so that it does not getcaught when the person in front of you leans back.
• When taking off, remember to turn off your computer or put it into hibernation mode.
Travel accessoriesThe following is a checklist of items to consider packing when you are going to travel:
• ThinkPad ac power adapter
• Mini DisplayPort to HDMI adapter
• External mouse, if you are accustomed to using one
• Ethernet cable
• A quality carrying case that provides adequate cushion and protection
• External storage device
If you are traveling to another country, you might want to consider an ac power adapter for the country towhich you are traveling.
To purchase travel accessories, go to http://www.lenovo.com/accessories.
Chapter 4. You and your computer 53

54 ThinkPad X260 User Guide

Chapter 5. Security
This chapter contains the following topics:
• “Using passwords” on page 55
• “Hard disk security” on page 59
• “Setting the security chip” on page 60
• “Using the fingerprint reader” on page 61
• “Notice on deleting data from your internal storage drive” on page 64
• “Using firewalls” on page 65
• “Protecting data against viruses” on page 65
Using passwordsYou can help prevent your computer from unauthorized use by using passwords. Once you set a password,a prompt is displayed on the screen each time you turn on the computer. Enter your password at the prompt.You cannot use the computer unless you type the correct password.
If you have set a power-on password, a supervisor password, or a hard disk password, it unlocksautomatically when the computer resumes from sleep mode.
Note: If a Windows password has been set, you will be prompted to enter it.
Typing passwords
When this icon is displayed, type a power-on password or a supervisor password.
When this icon is displayed, type a user hard disk password. To type a master hard disk password,
press F1. When the icon changes to , type the master hard disk password
Note: To return to the icon , press F1 again.
Power-on passwordYou can set a power-on password to help protect your computer against access by unauthorized users.
If you set a power-on password, the password prompt is displayed on the screen whenever you turn on thecomputer. You must enter the correct password to start using the computer.
Setting, changing, or removing a power-on password
Before you start, print these instructions.
To set, change, or remove a power-on password, do the following:
1. Restart the computer. When the logo screen is displayed, press F1 to start the ThinkPad Setup program.
2. Select Security ➙ Password ➙ Power-on Password by using the directional keys.
3. Depending on your need, do one of the following:
© Copyright Lenovo 2015, 2016 55

• To set a password, do the following:
a. In the Enter New Password field, type a desired password and press Enter.
b. In the Confirm New Password field, retype the password and press Enter.
• To change a password, do the following:
a. In the Enter Current Password field, type the current power-on password and press Enter.
b. In the Enter New Password field, type the new power-on password and press Enter; then retypethe password in the Confirm New Password field and Press Enter.
• To remove a password, do the following:
a. In the Enter Current Password field, type the current power-on password and press Enter.
b. Leave the Enter New Password and Confirm New Password fields blank. Press Enter twice.
4. A Setup Notice window is displayed. Press Enter to continue.
5. Press F10. A Setup Confirmation window is displayed. Select Yes to save the configuration changesand exit.
Note: You might want to record your password and store it in a safe place. Otherwise, if you forget thepassword, you have to take your computer to a Lenovo reseller or a marketing representative to havethe password canceled.
Supervisor passwordThe supervisor password protects the system information stored in the ThinkPad Setup program. If you haveset a supervisor password, no one can change the configuration of the computer without the password. Itprovides the following security features:
• If only a supervisor password is set, a password prompt is displayed when you try to start the ThinkPadSetup program. Unauthorized users cannot access the ThinkPad Setup program without the password.
• The system administrator can use the supervisor password to access a computer even if the user of thatcomputer has set a power-on password. The supervisor password overrides the power-on password.
• If both a supervisor password and a power-on password are set, you can do the following only if youhave the supervisor password:
– Changing or deleting the power-on password
– Changing or deleting the supervisor password
– Changing date and time
– Specifying the minimum length for power-on password and hard disk password
– Changing the setting for the security chip
– Changing the setting for the Virtualization
– Changing the setting for the I/O port access
– Changing the setting for the Anti-Theft
– Changing the setting for the Secure Boot
– Erasing the fingerprint data
– Enabling or disabling the following features:
– Lock UEFI BIOS Settings
– Password at unattended boot
– Boot Device List F12 Option
– Boot Order Lock
– Flash BIOS Updating by End-Users
56 ThinkPad X260 User Guide

– Secure RollBack Prevention
– Execution Prevention
– Security mode
– Fingerprint-reader priority
Notes:
• The system administrator can set the same supervisor password on many ThinkPad notebook computersto make administration easier.
• When Lock UEFI BIOS Settings option is enabled, all BIOS settings cannot be changed. To changethe settings, a supervisor password is required.
Setting, changing, or removing a supervisor password
Before you start, print these instructions.
Only a system administrator can set, change, or remove a supervisor password. To set, change, or remove asupervisor password, do the following:
1. Restart the computer. When the logo screen is displayed, press F1 to start the ThinkPad Setup program.
2. Select Security ➙ Password ➙ Supervisor Password by using the directional keys.
3. Depending on your needs, do one of the following:
• To set a password, do the following:
a. In the Enter New Password field, type a desired password and press Enter.
b. In the Confirm New Password field, retype the password and press Enter.
• To change a password, do the following:
a. In the Enter Current Password field, type the current supervisor password and press Enter.
b. In the Enter New Password field, type the new supervisor password and press Enter; then retypethe password in the Confirm New Password field and press Enter.
• To remove a password, do the following:
a. In the Enter Current Password field, type the current supervisor password and press Enter.
b. Leave the Enter New Password and Confirm New Password fields blank. Press Enter twice.
4. A Setup Notice window is displayed. Press Enter to continue.
5. Press F10. A Setup Confirmation window is displayed. Select Yes to save the configuration changesand exit.
Note: You might want to record your password and store it in a safe place. The next time you open theThinkPad Setup program, you will be prompted to type your supervisor password to proceed. If you forgetyour supervisor password, Lenovo cannot reset your password. You must take your computer to a Lenovoreseller or a Lenovo marketing representative to have the system board replaced. Proof of purchase isrequired, and a fee will be charged for parts and service.
Hard disk passwordsThe following two types of hard disk passwords can help protect the information stored on the hard disk drive:
• User hard disk password
If a user hard disk password has been set, but no master hard disk password has been, the user mustenter the user hard disk password to access files and applications on the hard disk drive.
Chapter 5. Security 57

• Master hard disk password
The master hard disk password also requires a user hard disk password. The master hard disk passwordis usually set and used by a system administrator. It enables the administrator to access any hard diskdrive in a system like a master key. The administrator sets the master password; then assigns a userpassword for each computer in the network. The user can then change the user password as desired, butthe administrator still can get access by using the master password.
When a master hard disk password is set, only the administrator can remove the user hard disk password.
Setting a hard disk password
Before you start, print these instructions.
To set a hard disk password, do the following:
1. Restart the computer. When the logo screen is displayed, press F1 to start the ThinkPad Setup program.
2. Select Security ➙ Password ➙ Hard disk 1 Password by using the directional keys.
3. A password window is displayed. You are prompted to select User or User + Master. Select User ifyou want to set only one hard disk password. Select User + Master if you want to set a user hard diskpassword and a master hard disk password, for example if you are an administrator or a supervisor.
• If you select User, do the following:
a. When a window for typing the new password opens, type your new password in the Enter NewPassword field and press Enter.
b. In the Confirm New Password field, retype the password you just entered and press Enter.
• If you select User + Master, do the following:
a. First, set a user hard disk password. When a message window prompts you to set the user harddisk password, press Enter to continue. Type your new user hard disk password in the EnterNew Password field and press Enter. Retype the password in the Confirm New Passwordfield and press Enter.
b. Then, set a master hard disk password. When a message window prompts you to set the masterhard disk password. Press Enter to continue. Type your new master hard disk password in theEnter New Password field and press Enter. Retype the password in the Confirm New Passwordfield and press Enter.
4. A Setup Notice window is displayed. Press Enter to continue.
5. Press F10. A Setup Confirmation window is displayed. Select Yes to save the configuration changesand exit.
The next time you turn on your computer, type the user or master hard disk password to start your computerand access the operating system.
Changing or removing a hard disk password
To change or remove the hard disk password, do the following:
• If you are in User + Master hard disk mode, you can select either User HDP or Master HDP to changethe password, depending on your needs.
– If you select User HDP mode, follow the following steps to change the user hard disk password:
1. Type the current user hard disk password in the Enter Current Password field and press Enter.
2. Type the new password in the Enter New Password field and press Enter; then retype thepassword in the Confirm New Password field and press Enter.
3. A Setup Notice window is displayed. Press Enter again to continue. The user hard disk passwordis changed.
58 ThinkPad X260 User Guide

Note: The hard disk password cannot be removed in User HDP mode.
– If you select Master HDP mode, follow the following steps to change the master hard disk password:
1. Type the current master hard disk password in the Enter Current Password field and press Enter.
2. Type the new master hard disk password in the Enter New Password field and press Enter; thenretype the new password you just entered in the Confirm New Password field and press Enter.
3. A Setup Notice window is displayed. Press Enter to continue. The master hard disk password ischanged.
Note: If you leave the Enter New Password and Confirm New Password fields blank and press Entertwice, both the user and master hard disk passwords are removed.
• If you are in User hard disk mode, follow the following steps to change the user hard disk password:
1. Follow steps 1 through 7 in “Setting a hard disk password” on page 58, typing your password tostart the ThinkPad Setup program.
2. Type the current user hard disk password in the Enter Current Password field and press Enter.
3. Type the new password in the Enter New Password field and press Enter; then retype the newpassword in the Confirm New Password field and press Enter.
4. A Setup Notice window is displayed. Press Enter again to continue. The user hard disk password ischanged.
Note: If you leave the Enter New Password and Confirm New Password fields blank and press Entertwice, the user hard disk password is removed.
Tips on using the hard disk passwords
• You can set the minimum length of a hard disk password through the Security menu.
• If you set a hard disk password of over seven characters, the hard disk drive can be used only with acomputer that can recognize a hard disk password of over seven characters. If you then install thehard disk drive in a computer that cannot recognize a hard disk password that contains more thanseven characters, you cannot access the drive.
• Record your password and store it in a safe place. If you forget the user hard disk password, or both userand master hard disk passwords, Lenovo cannot reset your passwords or recover data from the hard diskdrive. You must take your computer to a Lenovo reseller or a marketing representative to have the harddisk drive replaced. Proof of purchase is required, and a fee will be charged for parts and service.
Notes: The eDrive storage drives or Trusted Computing Group (TCG) Opal-compliant storage drives provideself-encryption capabilities to secure your data.
• If a TCG Opal-compliant storage drive and a TCG Opal management software program are installed, andthe TCG Opal management software program is activated, the hard disk password is not available.
• If an eDrive storage drive is installed in your computer, and your computer is preinstalled with theWindows 10 operating system, the hard disk password is not available.
Hard disk securityTo protect passwords from unauthorized security attacks, refer to the following tips to maximize security:
• Set a power-on password as well as a hard disk password for your internal storage drive. Refer to theprocedures in “Power-on password” on page 55 and “Hard disk passwords” on page 57. For security,a longer password is recommended.
• Use the security chip to provide reliable security for the UEFI BIOS. Refer to “Setting the security chip”on page 60.
Chapter 5. Security 59

• If a Disk Encryption storage drive is installed in your computer, be sure to protect the contents of yourcomputer memory from unauthorized accesses by use of drive encryption software, such as MicrosoftWindows BitLocker® Drive Encryption. See “Using Windows BitLocker Drive Encryption” on page 60.
• Before you dispose of, sell, or hand over your computer, delete data stored on it. For more information,refer to “Notice on deleting data from your internal storage drive” on page 64.
The storage drive built into your computer can be protected by the UEFI BIOS.
Using Windows BitLocker Drive Encryption
To help protect your computer against unauthorized access, use the drive encryption software, such asWindows BitLocker Drive Encryption.
Windows BitLocker Drive Encryption is an integral security feature of some editions of the Windowsoperating system. It can help you protect the operating system and data stored on your computer, evenif your computer is lost or stolen. BitLocker works by encrypting all user and system files, including theswap and hibernation files.
BitLocker uses a Trusted Platform Module to provide enhanced protection for your data and to ensure earlyboot component integrity. A compatible TPM is defined as a V1.2 TPM.
To check the BitLocker status, go to Control Panel, and click System and Security ➙ BitLocker DriveEncryption.
For more information about Windows BitLocker Drive Encryption, see the help information system of theWindows operating system, or search for “Microsoft Windows BitLocker Drive Encryption Step-by-StepGuide” on the Microsoft Web site.
Disk Encryption storage drive
Some models contain the Disk Encryption storage drive. This feature helps to protect your computer againstsecurity attacks on media, NAND flash, or device controllers by use of a hardware encryption chip. For theefficient use of the encryption feature, set a hard disk password for the internal storage device.
Setting the security chipStrict security requirements are imposed on network client computers that transfer confidential informationelectronically. Depending on the options you ordered, your computer might have an embedded securitychip, a cryptographic microprocessor. With the security chip, you can do the following:
• Protect your data and system
• Strengthen access controls
• Secure communications
Before you start, print these instructions.
To set an item on the Security Chip submenu, do the following:
1. Turn off your computer. Wait for about five seconds, and then turn on your computer again.
2. When the logo screen is displayed, press F1 to start the ThinkPad Setup program.
3. Select Security ➙ Security Chip by using the directional keys.
4. Press Enter. The Security Chip submenu opens.
5. Move to an item you want to set by using the directional keys. When the item is highlighted, press Enter.
6. Set other items that you want to set.
60 ThinkPad X260 User Guide

7. Press F10. A Setup Confirmation window is displayed. Select Yes to save the configuration changesand exit.
Notes:
• Ensure that the supervisor password has been set in ThinkPad Setup. Otherwise anyone can change thesettings for the security chip.
• If the security chip is inactive or disabled, the Clear Security Chip option will not be displayed.
• When you clear the security chip, turn off your computer and then turn it on again after you set thesecurity chip to Active. Otherwise, the Clear Security Chip option is not displayed.
Using the fingerprint readerDepending on the model, your computer might have a fingerprint reader. Fingerprint authentication canreplace your passwords, such as the Windows password, power-on password, and hard disk password. Inthis way, you can log in to your computer simply and securely.
To enable fingerprint authentication, enroll your fingerprints first. During the enrollment, the fingerprints areassociated with the Windows password automatically. To associate your fingerprints with your power-onpassword and hard disk password, manually create a connection.
Enrolling your fingerprints
It is recommended that you enroll more than one fingerprint in case of any injuries to your fingers. Toenroll your fingerprints, do the following:
• For Windows 7:
1. Start the Fingerprint Manager Pro program. For instructions on how to start the Fingerprint ManagerPro program, see “Lenovo programs” on page 12.
2. Enter the Windows password as required.
3. Click the icon for the finger that you want to enroll, and constantly swipe your corresponding fingeracross the fingerprint reader until the enrollment completes.
4. Click Finish. Your fingerprint is enrolled successfully.
For more information about how to use the fingerprint reader, refer to the help system of the FingerprintManager Pro program.
• For Windows 10:
1. Open the Start menu and then click Settings. If Settings is not displayed, click All apps to display allprograms, and then click Settings ➙ Accounts ➙ Sign-in options.
2. Follow the instructions on the screen to finish the enrollment.
Swiping your finger over the fingerprint reader
To swipe your finger over the fingerprint reader, do the following:
Chapter 5. Security 61

1. Place the top joint of your finger on the sensor.
2. Apply light pressure and swipe your finger toward you across the reader in one smooth motion. Do notlift your finger when you are swiping it.
62 ThinkPad X260 User Guide

Indicator behavior of the fingerprint reader
Indicator behavior Description
Green The fingerprint reader is ready for swiping.
Amber The fingerprint cannot be authenticated.
Associating your fingerprints with your power-on password and hard disk password
To associate your fingerprints with your power-on password and hard disk password, do the following:
1. Turn off and then turn on the computer.
2. When prompted, swipe your finger over the fingerprint reader.
3. Enter your power-on password, hard disk password, or both as required. The connection is created.
When you start the computer again, you can use your fingerprints to log in to the computer with no need toenter your Windows password, power-on password, and hard disk password.
Attention: If you always use your fingerprint to log in to the computer, you might forget your passwords.Write down your passwords, and keep them in a safe place. If you forget your power-on password,you must take your computer to a Lenovo authorized servicer or a marketing representative to have thepassword canceled. If you forget your hard disk password, Lenovo cannot reset your password or recoverdata from the storage drive. You must take your computer to a Lenovo authorized servicer or a marketingrepresentative to have the storage drive replaced. Proof of purchase is required, and a fee will be chargedfor parts and service.
Setting the fingerprint reader
You can set the fingerprint reader in the Fingerprint Manager Pro program if available. You also can changesome advanced settings in the ThinkPad Setup program.
To change the settings in the Fingerprint Manager Pro program, click Settings on the program main interface.To change the settings in the ThinkPad Setup program, see “Using the ThinkPad Setup program” on page 69.
You can set the following configurations in the ThinkPad Setup program:
• Predesktop Authentication: Enables or disables fingerprint authentication before the operating systemis loaded.
• Reader Priority: Defines the priority for the fingerprint readers if an external fingerprint reader is attached.
Chapter 5. Security 63

• Security Mode: Specifies the settings of the security mode.
• Password Authentication: Enables or disables the password authentication.
Note: This item is displayed only if High security mode is enabled.
• Reset Fingerprint Data: Select this item to erase all of the fingerprint data stored in either the internalor external fingerprint reader.
Maintaining the fingerprint reader
The following actions could damage the fingerprint reader or cause it not to work properly:
• Scratching the surface of the reader with a hard, pointed object.
• Scraping the surface of the reader with your fingernail or anything hard.
• Using or touching the reader with a dirty finger.
If you notice any of the following conditions, gently clean the surface of the reader with a dry, soft, lint-freecloth:
• The surface of the reader is dirty or stained.
• The surface of the reader is wet.
• The reader often fails to enroll or authenticate your fingerprint.
If your finger has any of the following conditions, you might not be able to register or authenticate it:
• Your finger is wrinkled.
• Your finger is rough, dry, or injured.
• Your finger is stained with dirt, mud, or oil.
• The surface of your finger is different from when you enrolled your fingerprint.
• Your finger is wet.
• A finger is used that has not been enrolled.
To improve the situation, try the following:
• Clean or wipe your hands to remove any excess dirt or moisture from the fingers.
• Enroll and use a different finger for authentication.
• If your hands are dry, apply lotion to them.
Notice on deleting data from your internal storage driveSome of the data stored on the internal storage drive might be sensitive. Handing your computer over tosomeone else without deleting the loaded software, such as operating systems and application software,might even violate license agreements. Be sure to delete data stored on the storage drive before youdispose of, sell, or hand over your computer.
You can use the following methods to delete data from the storage drive:
• Move the data to the Recycle Bin, and then empty the Recycle Bin.
• Delete the data.
• Format your storage drive, using the software for initializing it.
• Use the recovery program provided by Lenovo to bring the storage drive back to the factory defaultsettings.
64 ThinkPad X260 User Guide

These operations, however, only change the file location of the data; they do not delete the data itself. Inother words, the data retrieval processing is disabled under an operating system such as Windows. Thedata is still there, even though it seems to be lost. Thus, it is sometimes possible to read the data by use ofspecial software for data recovery. There is a risk that people of bad faith might read and misuse the criticaldata on storage drive for unexpected purposes.
To prevent leakage of data, it is important that you delete all the data from the storage drive when youdispose of, sell, or hand over your computer. You can destroy the data physically by smashing the storagedrive with a hammer, or magnetically by means of strong magnetic power, thus making the data unreadable.But it is recommended that you use the software (payware) or service (pay service) developed for thatpurpose. The process might take several hours.
For disposing of data on the solid-state drive, Lenovo provides the Drive Erase Utility for Resetting theCryptographic Key and Erasing the Solid State Drive tool. For disposing of data on the hard disk drive, Lenovoprovides the Secure Data Disposal™ tool. Go to http://www.lenovo.com/support to download the tool.
If an Encryption storage drive is supported and installed in your computer, you can logically dispose of all thedata on the drive in a short time by erasing the cryptographic key. The data encrypted with the old key isnot physically erased but remains on the drive; however, it cannot be decrypted without the old key. Thisfeature is also available with the Drive Erase Utility for Resetting the Cryptographic Key and Erasing theSolid State Drive tool.
Using firewallsIf your system is preinstalled with a firewall program, it protects against computer Internet security threats,unauthorized accesses, intrusions, and Internet attacks. It also protects your privacy.
For more information about how to use the firewall program, refer to the help information system thatcomes with the program.
Protecting data against virusesYour computer is preinstalled with an antivirus program so you can detect and eliminate viruses. Theantivirus program is designed to help you detect and eliminate viruses.
Lenovo provides a full version of antivirus software on your computer with a free 30-day subscription. After30 days, you must renew the license to continue receiving the antivirus software updates.
For more information about how to use your antivirus software, refer to the help information system ofyour antivirus software.
Chapter 5. Security 65

66 ThinkPad X260 User Guide

Chapter 6. Advanced configuration
This chapter contains the following topics:
• “Installing a new operating system” on page 67
• “Installing device drivers” on page 69
• “Using the ThinkPad Setup program” on page 69
• “Using system management” on page 82
Installing a new operating systemIn some situations, you might need to install a new operating system. This topic provides instructions onhow to install a new operating system.
Installing the Windows 7 operating systemBefore you start, print these instructions.
Attention: The process of installing a new operating system deletes all the data on your hard disk drive orsolid-state drive, including the data stored in a hidden folder.
To install the Windows 7 operating system, do the following:
1. Copy all the subdirectories and files in the C:\SWTOOLS directory to a removable storage device.
• The supplement files for the Windows 7 operating system are in the C:\SWTOOLS\OSFIXES directory.
• The device drivers are in the C:\SWTOOLS\DRIVERS directory.
• The preinstalled programs are in the C:\SWTOOLS\APPS directory.
2. Start the ThinkPad Setup program. See “Using the ThinkPad Setup program” on page 69.
3. Select Startup ➙ Boot to display the Boot Priority Order submenu.
4. Select the drive that contains the operating system installation program, for example, USB HDD.Then press Esc.
5. Select Startup ➙ UEFI/Legacy Boot. Then do one of the following:
• To install the Windows 7 (32-bit) operating system, select Legacy Only or Both.
• To install the Windows 7 (64-bit) operating system in Legacy mode, select Legacy Only.
• To install the Windows 7 (64-bit) operating system in UEFI mode, select UEFI Only.
Note: For computers with a non-volatile memory (NVM) Express drive, you can install the Windows7 operating system onto the drive only in UEFI mode. In this case, ensure that you always selectUEFI Only.
6. Press the F10 key to exit the ThinkPad Setup program.
7. Insert the Windows 7 operating system installation DVD into the optical drive, and restart the computer.
Notes:
• If you are starting the installation DVD image from an external USB device or if your computer has anNVM Express drive installed, do additional configurations before you start. For more information, goto: http://www.lenovo.com/support/installwin7viausb3.
• If an NVM Express drive is installed, additional drivers also are required. For more information, go tohttps://support.microsoft.com/en-us/kb/2990941.
© Copyright Lenovo 2015, 2016 67

8. Restore the C:\SWTOOLS directory that you backed up before installing the Windows 7 operating system.
9. Install the device drivers. See “Installing device drivers” on page 69.
10. Install the Windows 7 fix modules. You can find the Windows 7 fix modules in the C:\SWTOOLS\OSFIXES\directory. For more information, go to the Microsoft Knowledge Base home page at:http://support.microsoft.com/
11. Install the registry patches, for example the Enabling Wake on LAN from Standby for ENERGY STARpatch. To download and install the registry patches, go to the Lenovo Support Web site at:http://www.lenovo.com/support
Note: After installing the operating system, do not change the initial UEFI/Legacy Boot setting in theThinkPad Setup program. Otherwise the operating system will not start correctly.
When you install the Windows 7 operating system, you might need one of the following country or regioncodes:
Country or region Code Country or region Code
China SC Netherlands NL
Denmark DK Norway NO
Finland FI Spain SP
France FR Sweden SV
Germany GR Taiwan and Hong Kong TC
Italy IT United States US
Japan JP
Installing the Windows 10 operating systemBefore you start, print these instructions.
Attention: The process of installing a new operating system deletes all the data on your internal storagedrive, including the data that were stored in a hidden folder.
To install the Windows 10 operating system, do the following:
1. Connect the drive that contains the operating system installation program to the computer.
2. Start the ThinkPad Setup program. See “Using the ThinkPad Setup program” on page 69.
3. Select Startup ➙ Boot to display the Boot Priority Order submenu.
4. Select the drive that contains the operating system installation program, for example, USB HDD.Then press Esc.
5. Select Restart and ensure that OS Optimized Defaults is enabled. Then press F10 to save the settingsand exit the ThinkPad Setup program.
6. Follow the on-screen instructions to install the device drivers and necessary programs. See “Installingdevice drivers” on page 69.
7. After installing the device drivers, apply Windows Update to get the latest modules, for example thesecurity patches.
8. Depending on your preference, install Lenovo programs. For information about Lenovo programs,see “Lenovo programs” on page 12.
Note: After installing the operating system, do not change the initial UEFI/Legacy Boot setting in theThinkPad Setup program. Otherwise, the operating system will not start correctly.
68 ThinkPad X260 User Guide

When you install the Windows 10 operating system, you might need one of the following country or regioncodes:
Country or region Code Country or region Code
China SC Netherlands NL
Denmark DK Norway NO
Finland FI Spain SP
France FR Sweden SV
Germany GR Taiwan and Hong Kong TC
Italy IT United States US
Japan JP
Installing device driversDevice driver is the program that operates a particular hardware device of the computer. If a device doesnot perform well or you install a new device, you need to install or update the corresponding device driver.For example, if you use the Windows 7 operating system, to use the USB 3.0 connector, you need todownload and install the USB 3.0 driver.
To download the latest device drivers, do the following:
1. Go to http://www.lenovo.com/ThinkPadDrivers.
2. Select your product name to view all the device drivers for your computer.
3. Select the device drivers you that you need, and follow the instructions on the screen.
If you use the Windows 7 operating system, you also can find the device drivers in the C:\SWTOOLS\DRIVERSdirectory on your internal storage drive. For more information, see “Reinstalling preinstalled programs anddevice drivers” on page 113.
Using the ThinkPad Setup programThe ThinkPad Setup program enables you to select various setup configurations for your computer throughconfiguring the BIOS.
To configure the BIOS of your computer, do the following:
1. Restart the computer. When the ThinkPad logo is displayed, press F1. The ThinkPad Setup programstarts.
Note: If you are required to enter the supervisor password, enter the correct password. You also canpress Enter to skip the password prompt and start the ThinkPad Setup program. If you do not enter thepassword, you cannot change the configurations that are protected by the supervisor password. Formore information, refer to “Using passwords” on page 55.
2. Use the cursor keys to select a tab; or use the cursor keys to locate an item and press Enter to select it.Then a submenu is displayed.
Note: Some menu items are displayed only if the computer supports the corresponding features.
3. Set the value of an item by doing one of the following:
• Press the F6 key to change to a higher value.
• Press the F5 key to change to a lower value.
Note: Default values are in boldface.
Chapter 6. Advanced configuration 69

4. To change other configurations, press the Esc key to exit the submenu and return to the parent menu.
5. When you complete the configuration, press the F10 key to save and exit. You also can select theRestart tab on the ThinkPad Setup menu, and restart your computer with one of the provided options.
Note: You can press the F9 key to restore to the default settings.
Main menuWhen you enter the ThinkPad Setup program, you will first see the Main menu as follows:
• UEFI BIOS Version
• UEFI BIOS Date (Year-Month-Date)
• Embedded Controller Version
• ME Firmware Version
• Machine Type Model
• System-unit serial number
• System board serial number
• Asset Tag
• CPU Type
• CPU Speed
• Installed Memory
• UUID
• MAC Address (Internal LAN)
• Preinstalled OS License
• UEFI Secure Boot
• OA3 ID
• OA2
Config menuTo change the configuration of your computer, select the Config tab from the ThinkPad Setup menu.
The following table lists the Config menu items. Default values are in boldface. The menu items mightchange without notice. Depending on the model, the default value might vary.
Attention: The default configurations are already optimized for you. Improper change of the configurationsmight cause unexpected results.
Table 2. Config menu items
Menu item Submenu item Value Comments
Wake On LAN • Disabled
• AC only
• AC and Battery
Enable the computer to power on whenthe Ethernet controller receives a magicpacket (a special network message).
If you select AC Only, Wake on LAN isenabled only when the ac power adapteris attached.
If you select AC and Battery, Wake onLAN is enabled with any power sources.
Network
70 ThinkPad X260 User Guide

Table 2. Config menu items (continued)
Menu item Submenu item Value Comments
Notes:
• The magic packet type Wake on LANrequires ac power.
• The Wake on LAN function does notwork when a hard disk password isset.
Ethernet LAN OptionROM
(for Legacy Only bootmode or Both withLegacy first)
• Disabled
• Enabled
Load the Ethernet LAN Option ROMto enable startup from an integratednetwork device.
UEFI IPv4 NetworkStack
(for UEFI Only bootmode or Both withUEFI first)
• Disabled
• Enabled
Enable or disable Internet ProtocolVersion 4 (IPv4) network stack for UEFIenvironment.
UEFI IPv6 NetworkStack
(for UEFI Only bootmode or Both withUEFI first)
• Disabled
• Enabled
Enable or disable Internet ProtocolVersion 6 (IPv6) network stack for UEFIenvironment.
UEFI PXE Boot Priority
(for UEFI Only bootmode or Both withUEFI first for bootcapability and IPv6 andIPv4 stacks are bothenabled.)
• IPv6 First
• IPv4 First
Select network stack priority for UEFIPXE boot.
Wake by WiGig Dock • Disabled
• Enabled
Enable or disable the wake feature fromlow power state with WiGig Dock. If youselect Enabled, the battery life duringlow power state may become shorter.
USB UEFI BIOSSupport
• Disabled
• Enabled
Enable or disable boot support for USBstorage devices.
Always On USB • Disabled
• Enabled
If you select Enabled, the external USBdevices can be charged through USBconnectors even when the computer isin low-power mode (sleep, hibernate, orpower-off).
Note: If you select Enabled, USB wakeup function is not supported on AlwaysOn USB connector.
USB
– Charge in BatteryMode
• Disabled
• Enabled
If you select Enabled, the external USBdevices can be charged through USBconnectors even when system is in
Chapter 6. Advanced configuration 71

Table 2. Config menu items (continued)
Menu item Submenu item Value Comments
hibernation or power-off mode and inbattery mode.
TrackPoint • Disabled
• Enabled
Enable or disable the built-in TrackPointpointing device.
Note: If you want to use an externalmouse, select Disabled.
Trackpad • Disabled
• Enabled
Enable or disable the built-in trackpad.
Note: If you want to use an externalmouse, select Disabled.
Fn and Ctrl Key swap • Disabled
• Enabled
Enable exchanges of Fn and Ctrl keyaction at the bottom-left of the keyboard.
Disabled: Fn key and Ctrl key behavioris as printed on the keyboard.
Enabled: Fn key works as Ctrl key. Ctrlkey works as Fn key.
F1–F12 as primaryfunction
• Disabled
• Enabled
Enable the F1-F12 function or the specialfunction printed as an icon on each keyas the primary function.
Enabled: Executes the F1-F12 function.
Disabled: Executes the special function.
To temporarily switch the above twooptions, press Fn+Esc to enable FnLock.The FnLock indicator is on when FnLockis enabled.
Keyboard/Mouse
Fn Sticky key • Disabled
• Enabled
When the option is enabled, you canpress the Fn key to keep it in a pressedcondition; then press the desiredfunction key. The action is equivalent topressing the required key simultaneouslywith the Fn key. When you press the Fnkey twice, the state is locked until youpress the Fn key again.
Boot Display Device • ThinkPad LCD
• Analog (VGA)
• Digital onThinkPad
• Display on dock
Select the display device that is to beactivated at boot time. This selectionis effective for boot time, passwordprompt, and ThinkPad Setup.
Digital on ThinkPad is the MiniDisplayPort on your computer.
Display on dock is DisplayPort, DVI orVGA connectors on a docking station.
Display
72 ThinkPad X260 User Guide

Table 2. Config menu items (continued)
Menu item Submenu item Value Comments
Shared Display Priority • HDMI or WiGig
• Display on dock
Select the priority between shareddisplay outputs.
HDMI, WiGig, and Dock displays sharea single display output. This optionchooses which one is prioritized.
If your computer supports the WiGigdisplay, its priority is next to HDMI.
Total Graphics Memory • 256 MB
• 512 MB
Allocate the total memory which Intelinternal graphics shares.
Note: If you select 512 MB, themaximum usable memory might bereduced on 32–bit operating system.
Boot Time Extension • Disabled
• 1 second
• 2 seconds
• 3 seconds
• 5 seconds
• 10 seconds
This option defines the amount of time toextend the boot process, in seconds.
The system cannot detect some externalmonitors during boot because they needa few seconds to be ready. Try thisoption if the monitor being used doesnot display the boot screen.
Intel SpeedStep®
technology
(Intel SpeedStepmounted models only)
• Disabled
• Enabled
Mode for AC
• MaximumPerformance
• BatteryOptimized
Mode for Battery
• MaximumPerformance
• BatteryOptimized
Select the mode of Intel SpeedSteptechnology at runtime.
Maximum Performance: Alwayshighest speed.
Battery Optimized: Always lowestspeed.
Disabled: No runtime support, highestspeed.
Adaptive ThermalManagement
Scheme for AC
• MaximizePerformance
• Balanced
Scheme for Battery
• MaximizePerformance
• Balanced
Select a thermal management schemeto use.
Maximize Performance: Reducemicroprocessor throttling.
Balanced: Balance sound, temperature,and performance.
Note: Each scheme affects fan sound,temperature, and performance.
CPU PowerManagement
• Disabled
• Enabled
Enable or disable the power-savingfeature that stops the microprocessorclock automatically when there are nosystem activities. Normally, it is notnecessary to change the setting.
Power
Chapter 6. Advanced configuration 73

Table 2. Config menu items (continued)
Menu item Submenu item Value Comments
Power On with ACAttach
• Disabled
• Enabled
Enable or disable a feature that powerson the system when the ac poweradapter is attached.
If you select Enabled, the system ispowered on when the ac power adapteris attached. When the system is inhibernate state, the system resumes.
If you select Disabled, the system is notpowered on nor resumed when the acpower adapter is attached.
Disable Built-in Battery • Yes
• No
Temporarily disable the internal built-inbattery for servicing the system. Afterselecting this item, the system will beautomatically powered off. The systemis then ready to be serviced.
Note: The battery will be automaticallyre-enabled when the ac power adapteris reconnected to the system.
Password Beep • Disabled
• Enabled
Enable this option to have a beepsound when the system is waiting fora power-on, hard disk, or supervisorpassword. Different beeps will soundwhen the entered password matchesor does not match the configuredpassword.
Beep and Alarm
Keyboard Beep • Enabled
• Disabled
Enable or disable keyboard beep whenunmanageable key combinations arepressed.
Intel AMT Control • Disabled
• Enabled
• PermanentlyDisabled
If you select Enabled, Intel AMT (ActiveManagement Technology) is configuredand additional setup items are providedin MEBx (Management Engine BIOSExtension) Setup.
If you select Permanently Disabled,you will never be able to enable it again.Be cautious when you want to use thisoption.
Note: You can enter the MEBx Setupmenu by pressing the Ctrl+P keycombination in the Startup InterruptMenu window. To display the StartupInterrupt Menu window, press the blackbutton or Enter key during the power-onself-test (POST).
CIRA Timeout 0-255
Note: The defaultvalue is 60seconds.
Set the timeout option for CIRAconnection to be established. Selectablesecond values are from 1 to 254.
If you select 0, use 60 seconds as thedefault timeout value.
Intel AMT
74 ThinkPad X260 User Guide

Table 2. Config menu items (continued)
Menu item Submenu item Value Comments
If you select 255, the waiting time forestablishing a connection is unlimited.
Console Type • PC ANSI
• VT100+
• PC-ANSI
• VT-UTF8
Select the console type for AMT.
Note: This console type should matchthe Intel AMT remote console.
Date and Time menuTo change the date or time of your computer, select the Date/Time tab from the ThinkPad Setup menu.Then do the following:
1. Use the cursor keys to select System Date or System Time.
2. Type a date or time.
Security menuTo change the security settings of your computer, select the Security tab from the ThinkPad Setup menu.
The following table lists the Security menu items. Default values are in boldface. The menu items mightchange without notice. Depending on the model, the default value might vary.
Attention: The default configurations are already optimized for you. Improper change of the configurationsmight cause unexpected results.
Table 3. Security menu items
Menu item Submenu item Value Comments
SupervisorPassword
• Disabled
• Enabled
See “Supervisor password” on page 56.
Lock UEFI BIOSSettings
• Disabled
• Enabled
Enable or disable the function that protectsitems in ThinkPad Setup from being changedby a user who does not have the supervisorpassword. By default, this is set to Disabled.If you set the supervisor password and enablethis function, no one but you can change anyitems in ThinkPad Setup.
Password atUnattended Boot
• Disabled
• Enabled
If you select and enable Password atunattended boot, a password prompt isdisplayed when the computer is turned on, fromeither a power-off state or hibernation state, byan unattended event such as a Wake on LANattempt. If you select Disabled, no passwordprompt is displayed; the computer goes aheadand loads the operating system. To preventunauthorized access, set the user authenticationon the operating system.
Password at Restart • Disabled
• Enabled
If you select and enable Password at restart,a password prompt is displayed when yourestart the computer. If you select Disabled, nopassword prompt is displayed; the computergoes ahead and loads the operating system.
Password
Chapter 6. Advanced configuration 75

Table 3. Security menu items (continued)
Menu item Submenu item Value Comments
To prevent unauthorized access, set the userauthentication on the operating system.
Password at BootDevice List
• Disabled
• Enabled
If the Security password is set, this option isused to specify whether the Security passwordmust be entered to display the F12 boot devicelist.
Select Enabled to prompt for the Securitypassword. Select Disabled to proceed withoutany user action required.
Password CountExceeded Error
• Disabled
• Enabled
Select Enabled to show the POST 0199 errorand prompt for the Security password. SelectDisabled to hide the POST 0199 error andproceed without any user action needed.
Set Minimum Length • Disabled
• x characters(4≤x≤12)
Specify a minimum length for power-onpasswords and hard disk passwords. If youset the supervisor password and specify aminimum length for passwords, no one but youcan change the length.
Power-On Password • Disabled
• Enabled
See “Power-on password” on page 55.
Hard Disk 1Password
• Disabled
• Enabled
See “Hard disk passwords” on page 57.
Note: Hard Disk 1 means the hard disk drivebuilt into your computer.
PredesktopAuthentication
• Disabled
• Enabled
Enable or disable fingerprint authenticationbefore the operating system is loaded.
Reader Priority • External ➙Internal
• Internal Only
If External ➙ Internal is selected, an externalfingerprint reader is used if attached. Otherwise,an internal fingerprint reader is used. If InternalOnly is selected, an internal fingerprint readeris used.
Security Mode • Normal
• High
If fingerprint authentication fails, you still canstart the computer by entering a password. Ifyou have selected Normal, enter a power-onpassword or a supervisor password; if you haveselected High, enter a supervisor password.
PasswordAuthentication
• Disabled
• Enabled
Enable or disable password authentication.This item is displayed only if you have selectedHigh for the Security Mode option.
Note: This item is displayed when SecurityMode is set to High.
Fingerprint
Reset FingerprintData
• Enter This option is used to erase all fingerprint datastored in the fingerprint reader and reset settingsto the factory state. As a result, any power-onsecurity features previously enabled will not beable to work until they are re-enabled in thefingerprint software.
76 ThinkPad X260 User Guide

Table 3. Security menu items (continued)
Menu item Submenu item Value Comments
Security ChipSelection
• Discrete TPM
• Intel PTT
If you select Discrete TPM, you can use adiscrete TPM chip with TPM 1.2 mode. If youselect Intel PTT, you can use Intel PlatformTrusted technology (PTT) with TPM 2.0 mode.
If you change from Intel PTT to Discrete TPM,a message pops up that all encryption keys willbe cleared in the security chip. If you want tocontinue, select Yes.
If you change from Discrete TPM to Intel PTT, amessage pops up that all encryption keys will becleared in the security chip. Intel AMT and IntelTXT are disabled when the security chip is setto Intel PTT. If you want to continue, select Yes.
Note: Intel PTT can be used with the Windows8 or later operating system.
• Active
• Inactive
• Disabled
If you select Active, the security chip isfunctional. If you select Inactive, the securitychip is visible, but it is not functional. If youselect Disabled, the security chip is hidden andit is not functional.
Note: This item is displayed when Security ChipSelection is set to Discrete TPM.
Security Chip
• Enabled
• Disabled
If you select Enabled, the security chip isfunctional. If you select Disabled, the securitychip is hidden and it is not functional.
Note: This item is displayed when Security ChipSelection is set to Intel PTT.
Clear Security Chip • Enter Clear the encryption key.
Note: This item is displayed only if you haveselected Active or Enabled for the SecurityChip option.
Intel TXT Feature* Unselectable whenIntel PTT is enabled.
• Disabled
• Enabled
Enable or disable Intel Trusted ExecutionTechnology.
Notes:
• This item is displayed only if you haveselected Active or Enabled for the SecurityChip option.
• This is set to disabled when Intel PTT isenabled.
Physical Presencefor Provisioning
• Disabled
• Enabled
This option enables or disables the confirmationmessage when you change the settings of thesecurity chip.
Security Chip
Physical Presencefor Clear
• Disabled
• Enabled
This option enables or disables the confirmationmessage when you clear the security chip.
Chapter 6. Advanced configuration 77

Table 3. Security menu items (continued)
Menu item Submenu item Value Comments
Flash BIOS Updatingby End-Users
• Disabled
• Enabled
If you select Enabled, all users can update theUEFI BIOS. If you select Disabled, only theperson who knows the supervisor password canupdate the UEFI BIOS.
UEFI BIOS UpdateOption
Secure RollBackPrevention
• Disabled
• Enabled
If you select Disabled, you can flash to anearlier version of the UEFI BIOS.
If you select Enabled, you cannot flash to anearlier version of the UEFI BIOS.
Note: This item is set as Disabled by defaultwhen the OS Optimized Defaults on theRestart menu is set as Disabled. This itemis set as Enabled by default when the OSOptimized Defaults is set as Enabled.
Memory Protection ExecutionPrevention
• Disabled
• Enabled
Some computer viruses and worms causememory buffers to overflow. By selectingEnabled you can protect your computer againstattacks by such viruses and worms. If afterchoosing Enabled you find that a program doesnot run correctly, select Disabled and reset thesetting.
Intel VirtualizationTechnology
• Disabled
• Enabled
If you select Enabled, a Virtual Machine Monitor(VMM) can utilize the additional hardwarecapabilities provided by Intel VirtualizationTechnology.
Virtualization
Intel VT-d Feature • Disabled
• Enabled
Intel VT-d stands for Intel VirtualizationTechnology for Directed I/O. When enabled, aVMM can utilize the platform infrastructure forI/O virtualization.
Ethernet LAN • Disabled
• Enabled
If you select Enabled, you can use the EthernetLAN device.
Wireless LAN • Disabled
• Enabled
If you select Enabled, you can use theWireless-LAN connection.
Wireless WAN • Disabled
• Enabled
If you select Enabled, you can use thewireless-WAN device.
Bluetooth • Disabled
• Enabled
If you select Enabled, you can use Bluetoothdevices.
USB Port • Disabled
• Enabled
If you select Enabled, you can use the USBconnectors.
Memory Card Slot • Disabled
• Enabled
If you select Enabled, you can use the memorycard slots.
Smart Card Slot • Disabled
• Enabled
If you select Enabled, you can use the smartcard reader slot.
Integrated Camera • Disabled
• Enabled
If you select Enabled, you can use the integratedcamera.
I/O Port Access
78 ThinkPad X260 User Guide

Table 3. Security menu items (continued)
Menu item Submenu item Value Comments
Microphone • Disabled
• Enabled
If you select Enabled, you can use themicrophones (internal, external, or line-in).
Fingerprint Reader • Disabled
• Enabled
If you select Enabled, you can use thefingerprint reader.
WiGig • Disabled
• Enabled
If you select Enabled, you can use the WiGigfeature.
Bottom CoverTamper Detection
• Disabled
• Enabled
Enable or disable the tamper detection. Iftamper is detected, Supervisor Password isrequired to boot the system. Bottom CoverTamper Detection will not take effect unlessSupervisor Password is enabled.
Internal DeviceAccess
Internal StorageTamper Detection
• Disabled
• Enabled
If you select Enabled, removing any internalstorage device when your computer is in sleepmode will be detected. If you remove the internalstorage device while the computer is in sleepmode, the computer will shut down when youwake it up, and any unsaved data will be lost.
Anti-Theft Computrace ModuleActivation
• Disabled
• Enabled
• PermanentlyDisabled
Enable or disable the UEFI BIOS interface toactivate the computrace module. Computraceis an optional monitoring service from AbsoluteSoftware.
Note: If you set the computrace moduleactivation to Permanently Disabled, you will beunable to enable this setting again.
Secure Boot • Disabled
• Enabled
Enable or disable the UEFI Secure Boot feature.Select Enable to prevent unauthorized operatingsystems from running at boot time. SelectDisabled to allow any operating systems to runat boot time.
Platform Mode • Setup Mode
• User Mode
Specify the system operating mode.
Secure Boot Mode • Standard Mode
• Custom Mode
Specify the Secure Boot mode.
Reset to SetupMode This option is used to clear the current platformkey and put the system into Setup Mode. Youcan install your own platform key and customizethe Secure Boot signature databases in SetupMode.
Secure Boot mode will be set to Custom Mode.
Restore FactoryKeys
This option is used to restore all keys andcertificates in Secure Boot databases to factorydefaults. Any customized Secure Boot settingswill be erased, and the default platform keywill be re-established along with the originalsignature databases including certificate for theWindows 10 operating system.
Secure Boot
Chapter 6. Advanced configuration 79

Table 3. Security menu items (continued)
Menu item Submenu item Value Comments
Clear All SecureBoot Keys
This option is used to clear all keys andcertificates in Secure Boot databases. Youcan install your own keys and certificates afterselecting this option.
Intel SGX Control • Disabled
• Enabled
• SoftwareControlled
Enable or disable the Intel Software GuardExtensions (SGX) function.If Software Controlled is selected, SGX will becontrolled by the SGX application for UEFI bootOS.
Intel SGX
Owner EPOCHChange
Change Owner EPOCH to a new random value.This option is used to clear user data of SGX.
Device Guard Device Guard • Disabled
• Enabled
This option is used to support Microsoft DeviceGuard.
When this option is enabled, Intel VirtualizationTechnology, Intel VT-d Feature, Secure Boot,and OS Optimized Defaults are automaticallyenabled. Boot order is not selectable.
To complete the configuration of Device Guard,you have to set a supervisor password.
When this option is disabled, the setup optionsare configurable and you can choose any bootoptions to start the computer.
Startup menuTo change the startup settings of your computer, select the Startup tab from the ThinkPad Setup menu.
Attention:
• After you change the startup sequence, ensure that you select a correct device during a copy, a save, or aformat operation. Otherwise your data might be erased or overwritten.
• If you are using the BitLocker drive encryption, do not change the startup sequence. BitLocker driveencryption locks the computer from starting once detects the change of startup sequence.
To change the startup sequence temporarily so that the computer starts from a desired drive, do the following:
1. Turn off the computer.
2. Turn on the computer. When the ThinkPad logo is displayed, press the F12 key.
3. Select the device that you want the computer to start from.
Note: The Boot menu will be displayed if the computer cannot start from any devices or the operatingsystem cannot be found.
The following table lists the Startup menu items. Default values are in boldface. The menu items mightchange without notice. Depending on the model, the default value might vary.
Note: Some items are displayed on the menu only if the computer supports the corresponding features.
80 ThinkPad X260 User Guide

Table 4. Startup menu items
Menu item Value Comments
Boot Select the boot device when youpress the power button to turn on thecomputer.
Network Boot Select the boot device when the systemwakes from LAN. If Wake On LAN isenabled, the network administrator canturn on all of the computers in a LANremotely by use of network managementsoftware.
UEFI/Legacy Boot • Both
– UEFI/Legacy Boot Priority
– UEFI First
– Legacy First
• UEFI Only
• Legacy Only
CSM Support (for UEFI Only)
• Yes
• No
Select system boot capability.
• Both: Select priority of boot optionsbetween UEFI and Legacy.
• UEFI Only: The system will boot fromthe UEFI enabled operating system.
• Legacy Only: The system will bootfrom any operating system other thanthe UEFI enabled one.
Note: If you select UEFI Only, thesystem cannot boot from the bootabledevices that do not have the UEFIenabled operating system.
Compatibility Support Module (CSM) isrequired for booting the legacy operatingsystem. If you select UEFI Only, CSMSupport is selectable. For Both orLegacy Onlymode, CSM Support is notselectable.
Boot Mode • Quick
• Diagnostics
Screen during the POST:
• Quick: The ThinkPad Logo screen isdisplayed.
• Diagnostics: Text messages aredisplayed.
Note: You also can enter Diagnosticmode by pressing Esc during the POST.
Option Key Display • Disabled
• Enabled
If you select Disabled, the “To interruptnormal startup, press Enter.” message isnot displayed during the POST.
Boot Device List F12 Option • Disabled
• Enabled
If you select Enabled, the F12 key isrecognized and the Boot Menu windowis displayed.
Boot Order Lock • Disabled
• Enabled
If you select Enabled, the boot priorityorder is locked for your future use.
Restart menuTo exit the ThinkPad Setup program and restart the computer, select Restart from the ThinkPad Setup menu.
The following submenu items are displayed:
Chapter 6. Advanced configuration 81

• Exit Saving Changes: Save the changes and restart the computer.
• Exit Discarding Changes: Discard the changes and restart the computer.
• Load Setup Defaults: Restore to the factory default settings.
Note: Enable OS Optimized Defaults to meet the Windows 10 certification requirement. When youchange this setting, some other settings are changed automatically, such as CSM Support, UEFI/LegacyBoot, Secure Boot, and Secure RollBack Prevention.
• Discard Changes: Discard the changes.
• Save Changes: Save the changes.
Updating the UEFI BIOSThe UEFI BIOS is the first program that the computer runs when the computer is turned on. The UEFI BIOSinitializes the hardware components, and loads the operating system and other programs.
You can update the UEFI BIOS by starting your computer from a flash update optical disc or a flash updateprogram running in the Windows environment. When you install a new program, a device driver, or hardware,you might be informed to update the UEFI BIOS.
For instructions on how to update the UEFI BIOS, go to:http://www.lenovo.com/ThinkPadDrivers
Using system managementThis topic is primarily intended for the network administrators.
Your computer is designed for manageability, so that you can redirect more resources to better meetyour business objectives.
This manageability, known as Total Cost of Ownership (TCO), enables you to remotely operate clientcomputers in the same way as you operate your own computer, such as turning on a client computer,formatting a hard disk drive, and installing a program.
Once the computer is configured and operational, you can manage it by using the software and themanageability features that are already integrated into the client computer and the network.
Desktop Management Interface
The UEFI BIOS of your computer supports an interface called System Management BIOS (SMBIOS)Reference Specification, version 2.7.1. SMBIOS provides information about the hardware components ofyour computer. It is the responsibility of the UEFI BIOS to provide information about itself and the devices onthe system board. This specification documents the standards for getting access to this BIOS information.
Preboot eXecution Environment
The Preboot eXecution Environment (PXE) technology makes the computer more manageable by enablingthe computer to start from a server. Your computer supports the personal computer functions that PXErequires. For example, with the appropriate LAN card, your computer can be started from the PXE server.
Note: The Remote Initial Program Load (RIPL or RPL) function cannot be used with your computer.
Wake on LAN
The network administrator can turn on a computer from a management console by using the Wake onLAN feature.
82 ThinkPad X260 User Guide

When the Wake on LAN feature is enabled, many operations, such as data transfer, software updates, andFlash updates of the UEFI BIOS, can be done remotely without remote attendance. The updating processcan perform after normal working hours and on weekends, so that the users are not interrupted during work,and the LAN traffic is kept to a minimum. It saves time and increases productivity.
Note: If the computer is turned on through Wake on LAN, the computer starts follow the Network Bootsequence.
Asset ID EEPROM
The Asset ID Electrically Erasable Programmable Read-Only Memory (EEPROM) contains information aboutthe computer configuration and the serial numbers of the key components. It also includes a number ofblank fields where you can record information about the end users in your network.
Setting management featuresTo enable a network administrator to remotely control your computer, set the following system-managementfeatures in the ThinkPad Setup program:
• Wake on LAN
• Network Boot sequence
• Flash update
Note: If a supervisor password has been set, you will be required to enter the supervisor password whenyou start the ThinkPad Setup program.
Enabling or disabling the Wake on LAN feature
When the Wake on LAN feature is enabled and the computer is connected to a LAN, the network administratorcan start the computer remotely from a management console, using a remote network-management program.
To enable or disable the Wake on LAN feature, do the following:
1. Start the ThinkPad Setup program. See “Using the ThinkPad Setup program” on page 69.
2. Select Config ➙ Network. The Network submenu is displayed.
3. Select a corresponding option for the Wake on LAN feature.
4. Press the F10 key to save and exit.
Defining a Network Boot sequence
When the computer wakes on LAN, the computer boots from the device as specified on the Network Bootmenu, and then follow the boot order list on the Boot menu.
To define a Network Boot sequence, do the following:
1. Start the ThinkPad Setup program. See “Using the ThinkPad Setup program” on page 69.
2. Select Startup ➙ Network Boot. The boot device list is displayed.
3. Select a boot device to make it as the top boot priority.
4. Press the F10 key to save and exit.
Note: You can press the F9 key to restore to the factory default settings.
Checking the requirements for flash updates
A network administrator can update the programs on your computer from a management console, if thefollowing requirements are met:
Chapter 6. Advanced configuration 83

• The computer must be started over LAN.
• The computer must be engaged in the Preboot eXecution Environment (PXE).
• A network-management program must be installed on the computer of the network administrator.
84 ThinkPad X260 User Guide

Chapter 7. Preventing problems
This chapter contains the following topics:
• “General tips for preventing problems” on page 85
• “Making sure device drivers are up-to-date” on page 86
• “Taking care of your computer” on page 87
General tips for preventing problemsThis topic provides the following tips to help you prevent computing problems:
• Check the capacity of your storage drive from time to time. If the storage drive gets too full, the Windowsoperating system will slow down and might produce errors.
To check the storage drive capacity, do the following:
– Windows 7: Open the Start menu and click Computer.
– Windows 10: Open the File Explorer and click This PC.
• Empty your recycle bin on a regular basis.
• Use disk defragment tool regularly on your storage drive to improve data seek and read times.
• To free up disk space, uninstall unused programs.
Note: You also might want to look for program duplication or overlapping versions.
• Clean out your Inbox, Sent, and Trash folders from your e-mail client program.
• Back up your data at least once a week. If critical data is present, it is a good idea to perform a dailybackup operation. Lenovo has many backup options available for your computer. Rewritable opticaldrives are available for most machines and are easily installed.
• Schedule system restore operations to take a system snapshot periodically. For more information aboutsystem restore, see Chapter 9 “Recovery overview” on page 109.
• Update device drivers and UEFI BIOS when needed.
• Profile your machine at http://www.lenovo.com/support to keep up to date with current drivers andrevisions.
• Keep up to date for device drivers on other non-Lenovo hardware. You might want to read the devicedriver information release notes prior to updating for compatibility or known issues.
• Keep a log book. Entries might include major hardware or software changes, driver updates, minor issuesyou have experienced, and how you resolved the minor issues.
• If you ever need to run a recovery on your computer to return the preinstalled contents onto the machine,the following tips might help along the way:
– Remove all external devices such as the printer, keyboard, and so on.
– Make sure that your batteries are charged and your computer has the ac power connected.
– Access ThinkPad Setup and load the default settings.
– Restart the computer and start the recovery operation.
– If your computer uses discs as the recovery media, do not remove the disc from the drive untilprompted to do so.
• For suspected storage drive issues, refer to “Diagnosing problems” on page 91 and run a diagnostic testfor the drive before you call the Customer Support Center. If your computer does not start up, download
© Copyright Lenovo 2015, 2016 85

the files to create a bootable self-test medium from http://www.lenovo.com/hddtest. Run the test andrecord any messages or error codes. If the test returns any failing error codes or messages, call theCustomer Support Center with the codes or messages and the computer in front of you. A technicianwill assist you further.
• If required, you can find the contact information about the Customer Support Center for your countryor region at http://www.lenovo.com/support/phone. When calling the Customer Support Center, makesure that you have your machine model type, serial number, and the computer in front of you. Also, if thecomputer is producing error codes, it is helpful to have the error screen on or the messages written down.
Making sure device drivers are up-to-dateDevice drivers are programs that contain instructions for the operating system about how to operate or“drive” a certain piece of hardware. Each hardware component on your computer has its own specific driver.If you add a new component, the operating system needs to be instructed on how to operate that pieceof hardware. After you install the driver, the operating system can recognize the hardware componentand understand how to use it.
Note: Because drivers are programs, like any other file on your computer, they are susceptible to corruptionand might not perform correctly if corruption occurs.
It is not always necessary to download the latest drivers. However, you should download the latest driverfor a component if you notice poor performance from that component or if you added a new component.This might eliminate the driver as the potential cause of a problem.
Getting the latest drivers from the Web site
You can download and install updated device drivers from the Lenovo Web site by doing the following:
1. Go to http://www.lenovo.com/ThinkPadDrivers.
2. Select the entry for your computer and then follow the instructions on the screen to download andinstall necessary software.
Getting the latest drivers using System Update
The System Update program helps you keep the software on your computer up-to-date. Update packagesare stored on Lenovo servers and can be downloaded from the Lenovo Support Web site. Update packagescan contain applications, device drivers, UEFI BIOS flashes, or software updates. When the System Updateprogram connects to the Lenovo Support Web site, the System Update program automatically recognizesthe machine type and model of your computer, the installed operating system, and the language of theoperating system to determine what updates are available for your computer. The System Update programthen displays a list of update packages and categorizes each update as critical, recommended, or optional tohelp you understand the importance. You have complete control of which updates to download and install.After you select the update packages you want, the System Update program automatically downloads andinstalls the updates without any further intervention from you.
The System Update program is preinstalled on your computer and is ready to run. The only prerequisite isan active Internet connection. You can start the program manually, or you can use the schedule featureto enable the program to search for updates automatically at specified intervals. You also can predefinescheduled updates to search by severity (critical updates, critical and recommended updates, or all updates)so the list you choose from contains only those update types that are of interest to you.
For more information about how to use the System Update program, refer to the help information systemof the program.
86 ThinkPad X260 User Guide

Taking care of your computerAlthough your computer is designed to function reliably in normal work environments, you need to usecommon sense in handling it. By following the important tips in this topic, you will get the most use andenjoyment out of your computer.
Be careful about where and how you work
• Store packing materials safely out of the reach of children to prevent the risk of suffocation from plasticbags.
• Keep your computer away from magnets, activated cellular phones, electrical appliances, or speakers(more than 13 cm or 5 inches).
• Avoid subjecting your computer to extreme temperatures (below 5°C/41°F or above 35°C/95°F).
• Some appliances, such as certain portable desktop fans or air purifiers, can produce negative ions. If acomputer is close to such an appliance, and is exposed for an extended time to air containing negativeions, it might become electrostatically charged. Such a charge might be discharged through your handswhen you touch the keyboard or other parts of the computer, or through connectors on I/O devicesconnected to the computer. Even though this kind of electrostatic discharge (ESD) is the opposite of adischarge from your body or clothing to the computer, it poses the same risk of a computer malfunction.
Your computer is designed and manufactured to minimize any effects of electrostatic charge. An electrostaticcharge above a certain limit, however, can increase the risk of ESD. Therefore, when using the computerclose to an appliance that can produce negative ions, give special attention to the following:
• Avoid directly exposing your computer to the air from an appliance that can produce negative ions.
• Keep your computer and peripherals as far as possible from such an appliance.
• Wherever possible, ground your computer to facilitate safe electrostatic discharge.
Note: Not all such appliances cause a significant electrostatic charge.
Be gentle with your computer
• Avoid placing any objects (including paper) between the display and the keyboard or the palm rest.
• Your computer display is designed to be opened and used at an angle slightly greater than 90 degrees.Do not open the display beyond 180 degrees, as this might damage the computer hinge.
• Do not turn your computer over while the ac power adapter is plugged in. This could break the adapterplug.
Carry your computer properly
• Before moving your computer, be sure to remove any media, turn off attached devices, and disconnectcords and cables.
• When picking up your open computer, hold it by the bottom. Do not pick up or hold your computer bythe display.
Handle storage media and drives properly
• When installing the internal storage drive, follow the instructions shipped with your hardware, and applypressure only where needed on the device.
• Turn off your computer before you replace the internal storage drive.
• After you replace the primary storage drive, reattach the cover of the drive slot.
• Store your external and removable hard disk drive or optical drives in the appropriate containers orpackaging when they are not being used.
Chapter 7. Preventing problems 87

• Before you install a memory card such as an SD card, SDHC card, SDXC card, and a MultiMediaCard,touch a metal table or a grounded metal object. This action reduces any static electricity from yourbody. Static electricity could damage the device.
• While transferring data to or from a flash media card, such as an SD card, do not put your computer intosleep or hibernation mode before the data transfer is complete; otherwise, your data could becomedamaged.
Take care in setting passwords
• Remember your passwords. If you forget a supervisor or hard disk password, Lenovo will not reset it, andyou might have to replace your system board, or internal storage drive.
Taking care of the fingerprint reader
The following actions could damage the fingerprint reader or cause it not to work properly:
• Scratching the surface of the fingerprint reader with a hard, pointed object.
• Scraping the surface of the fingerprint reader with your fingernail or anything hard.
• Using or touching the fingerprint reader with a dirty finger.
If you notice any of the following conditions, gently clean the surface of the fingerprint reader with a dry,soft, lint-free cloth:
• The surface of the fingerprint reader is dirty or stained.
• The surface of the fingerprint reader is wet.
• The fingerprint reader often fails to enroll or authenticate your fingerprint.
Register your computer
• Register your ThinkPad computer with Lenovo at http://www.lenovo.com/register. For more information,see “Registering your computer” on page 15.
Be sure not to modify your computer
• Only an authorized ThinkPad repair technician should disassemble and repair your computer.
• Do not modify or tape the latches to keep the display open or closed.
Cleaning the cover of your computerOccasionally clean your computer by doing the following:
1. Prepare a mixture of a gentle kitchen-use detergent. The detergent must not contain abrasive powder orstrong chemicals such as acid or alkaline. Use five parts water to one part detergent.
2. Absorb the diluted detergent into a sponge.
3. Squeeze excess liquid from the sponge.
4. Wipe the cover with the sponge, using a circular motion and taking care not to let any excess liquid drip.
5. Wipe the surface to remove the detergent.
6. Rinse the sponge with clean running water.
7. Wipe the cover with the clean sponge.
8. Wipe the surface again with a dry, soft, lint-free cloth.
9. Wait for the surface to dry completely and remove any fibers from the cloth.
Cleaning your computer keyboard
To clean the computer keyboard, do the following:
88 ThinkPad X260 User Guide

1. Apply some isopropyl rubbing alcohol to a soft, dust-free cloth.
Note: Avoid spraying cleaner directly onto the keyboard.
2. Wipe each keytop surface with the cloth. Wipe the keys one by one; if you wipe several keys at a time,the cloth might hook onto an adjacent key and possibly damage it. Make sure that no liquid drips ontoor between the keys.
3. Allow to dry.
4. To remove any crumbs or dust from beneath the keys, you can use a camera blower with a brushor cool air from a hair dryer.
Cleaning your computer display
To clean the computer display, do the following:
1. Gently wipe the display with a dry, soft lint-free cloth. If you see a scratchlike mark on your display, itmight be a stain transferred from the keyboard or the TrackPoint pointing stick when the cover waspressed from the outside.
2. Wipe or dust the stain gently with a soft, dry cloth.
3. If the stain remains, moisten a soft, lint-free cloth with water or a 50-50 mixture of isopropyl alcohol andwater that does not contain impurities.
Note: Avoid spraying cleaner directly onto the keyboard.
4. Wring out as much of the liquid as you can.
5. Wipe the display again; do not let any liquid drip into the computer.
6. Be sure to dry the display before closing it.
Chapter 7. Preventing problems 89

90 ThinkPad X260 User Guide

Chapter 8. Troubleshooting computer problems
This chapter contains the following topics:
• “Diagnosing problems” on page 91
• “Troubleshooting” on page 91
Diagnosing problemsIf you experience problems with your computer, use the Lenovo Solution Center program as a startingpoint for solving them.
The Lenovo Solution Center program enables you to troubleshoot and resolve computer problems. Itcombines diagnostic tests, system information collection, security status, and support information, alongwith hints and tips for maximum system performance.
Notes:
• The Lenovo Solution Center program also is available for downloaded at:http://www.lenovo.com/diags.
• If you are using a Windows operating system other than Windows 7 or Windows 10, you can find thelatest information about diagnostics for your computer at:http://www.lenovo.com/diagnose
When you are setting up your computer, the Lenovo Solution Center program prompts you to create recoverymedia, which you can use to restore the storage drive to the factory default state. For more information, see“Performing backup and recovery operations” on page 110.
To run the Lenovo Solution Center program, see “Lenovo programs” on page 12.
For additional information, refer to the Lenovo Solution Center help system.
Note: If you are unable to isolate and repair the problem yourself after running Lenovo Solution Centerprogram, save and print the log files created by the program. You will need the log files when you speak to aLenovo technical support representative.
TroubleshootingIf your computer has an error, it typically displays a message or an error code, or a beep sounds whenyou turn it on. When you experience a problem, refer to the corresponding sections in this topic to try tosolve the problem by yourself.
Computer stops respondingPrint these instructions now and keep the instructions with your computer for reference later.
If your computer is unresponsive (you cannot use the TrackPoint pointing device or the keyboard), dothe following:
1. Press and hold the power button for four seconds or more to turn off the computer.
• If the computer is turned off, restart the computer. If the computer does not turn on, continue withstep 2.
© Copyright Lenovo 2015, 2016 91

• If you cannot turn off your computer by pressing and holding the power button, remove the ac poweradapter and reset the system by inserting a straightened paper clip into the emergency-reset hole.To locate the reset hole, refer to “Bottom view” on page 6. After the computer is off, restart thecomputer. If the computer does not turn on, continue with step 2.
2. While the computer is off, remove all sources of power from the computer (the removable battery and theac power adapter) and reset the system by inserting a straightened paper clip into the emergency-resethole. Reattach the ac power adapter but do not install the removable battery. Restart the computer. Ifthe computer does not turn back on, continue with step 3.
Note: If the computer starts up and enters the Windows environment, use the proper shutdownprocedure to turn off the computer. Once the computer is off, install the removable battery andrestart the computer. If the computer does not start with the removable battery installed, remove theremovable battery again and repeat step 2. If the computer starts with ac power, call the CustomerSupport Center for support.
3. Remove all external devices that are attached to your computer (keyboard, mouse, printer, scanner,and so on). Repeat step 2. If the operation is unsuccessful, call the Customer Support Center anda Customer Support Specialist will assist you.
Spills on the keyboardWith a mobile computer, there are increased chances of spilling liquids on the keyboard. Because mostliquids conduct electricity, liquid spilled on the keyboard could create numerous short circuits, potentiallycausing irreparable damage to your computer.
If you spill something on your computer:
Attention: Be sure that no liquid creates a short circuit between you and the ac power adapter (if in use).Although you might lose some data or work by turning off the computer immediately, leaving the computeron might make your computer unusable.
1. Carefully unplug the ac power adapter immediately.
2. Turn off the computer immediately. If the computer does not turn off, reset the system by inserting oneend of a needle or a straightened paper clip into the emergency-reset hole. To locate the reset hole,refer to “Bottom view” on page 6. The more quickly you stop the current from passing through thecomputer the more likely you will reduce damage from short circuits.
3. Wait until you are certain that all the liquid is dry before turning on your computer.
Note: If you want to replace your keyboard, you can purchase a new one.
Error messages• Message: 0177: Bad SVP data, stop POST task.
Solution: Checksum of the supervisor password in the EEPROM is not correct. The system boardmust be replaced. Have the computer serviced.
• Message: 0183: Bad CRC of Security Settings in EFI Variable. Enter ThinkPad Setup.
Solution: Checksum of the Security settings in the EFI Variable is not correct. Enter ThinkPad Setupto check security settings. Press F10 and then press Enter to restart the system. If your computerstill has a problem, have your computer serviced.
• Message: 0187: EAIA data access error
Solution: The access to EEPROM is failed. Have the computer serviced.
• Message: 0188: Invalid RFID Serialization Information Area
Solution: The EEPROM checksum is not correct (block # 0 and 1). The system board must be replaced,and the box serial number needs to be reinstalled. Have the computer serviced.
92 ThinkPad X260 User Guide

• Message: 0189: Invalid RFID configuration information area
Solution: The EEPROM checksum is not correct (block # 4 and 5). The system board must be replaced,and the universally unique identifier (UUID) must be reinstalled. Have the computer serviced.
• Message: 0190: Critical low-battery error
Solution: The computer turned off, because the battery power is low. Connect the ac power adapter tothe computer and charge the batteries.
• Message: 0191: System Security - Invalid remote change requested
Solution: The system configuration change has failed. Confirm the operation and try again. To clear theerror, enter ThinkPad Setup.
• Message: 0199: System Security - Security password retry count exceeded.
Solution: This message is displayed if you enter a wrong supervisor password more than three times.Confirm the supervisor password and try again. To clear the error, enter ThinkPad Setup.
• Message: 0270: Real Time Clock Error.
Solution: System Real Time Clock is not functional. Have the computer serviced.
• Message: 0271: Check Date and Time settings.
Solution: Neither the date nor the time is set in the computer. Set the date and time in ThinkPad Setup.
• Message: 1802: Unauthorized network card is plugged in - Power off and remove the network card.
Solution: The wireless network card is not supported on this computer. Remove it.
• Message: 1820: More than one external fingerprint reader is attached.
Solution: Power off and remove all but the reader that you set up within your main operating system.
• Message: 2100: Detection error on HDD0 (Main HDD)
Solution: The hard disk is not working. Have the hard disk serviced.
• Message: 2110: Read error on HDD0 (Main HDD)
Solution: The hard disk is not working. Have the hard disk serviced.
• Message: 2200: Machine Type and Serial Number are invalid.
Solution: Machine Type and Serial Number are invalid. Have the computer serviced.
• Message: 2201: Machine UUID is invalid.
Solution: Machine UUID is invalid. Have the computer serviced.
• Message: Fan error
Solution: Cooling fan has failed. Shut down the computer immediately and have the computer serviced.
• Message: Thermal sensing error
Solution: The thermal sensor has a problem. Shut down the computer immediately and have thecomputer serviced.
• Message: Error: The System UEFI Variable Storage is nearly full.
Note: This error indicates that the operating system or applications cannot create, modify, or delete datain the non-volatile system UEFI variable storage due to insufficient storage space after the POST.
The non-volatile system UEFI variable storage is used by the UEFI BIOS and by the operating system orapplications. This error occurs when the operating system or applications store large amounts of datain the variable storage. All data needed for POST, such as BIOS setup settings, chipset, or platformconfiguration data, are stored in a separate UEFI variable storage.
Solution: Press F1 to enter ThinkPad Setup after the error message is displayed. A dialog asks the userfor confirmation to clean up the storage. If the user selects Yes, all data that was created by the operatingsystem or applications is deleted except global variables defined by the Unified Extensible Firmware
Chapter 8. Troubleshooting computer problems 93

Interface Specification. If the user selects No, all data is kept, but the operating system or applicationswill not be able to create, modify, or delete data in the storage.
If this error happens at a service center, Lenovo-authorized service personnel will clean up the non-volatilesystem UEFI variable storage using the above solution.
Beep errorsTable 5. Beep errors
Beeps Solution
One short beep, pause, three short beeps, pause, threemore short beeps, pause, and one short beep (1-3-3-1beeps)
Memory problem. Shut down the computer immediatelyand have the computer serviced.
One long and two short beeps Video problem. Shut down the computer immediately andhave the computer serviced.
Three short beeps, pause, one short beep, pause, oneshort beep, pause, and three more short beeps (3-1-1-3beeps)
PCI resource problem. Shut down the computerimmediately and have the computer serviced.
Four cycles of four short beeps TCG*-compliant functionality-related problem (might bethe TPM initialization failure). Shut down the computerimmediately and have the computer serviced.* TCG is the abbreviation for Trusted Computing Group.
Five short beeps System board problem. Shut down the computerimmediately and have the computer serviced.
Five short beeps, pause, five more short beeps, andpause
TCG-compliant functionality-related problem (mightbe the BIOS code validation failure). Shut down thecomputer immediately and have the computer serviced.
Memory module problemsPrint these instructions now and keep the instructions with your computer for reference later.
If your memory module is not operating properly, check the following items:
1. Verify that the memory module is installed and seated correctly in your computer.
It might be necessary to remove all added memory modules to test the computer with only thefactory-installed memory modules, and then reinstall the memory module one at a time to ensurea proper connection.
2. Check for error messages during startup.
Follow the appropriate corrective actions for power-on self-test (POST). See “Error messages” onpage 92.
3. Verify that the latest UEFI for your model has been installed.
4. Verify the proper memory configuration and compatibility including the maximum memory size and thememory speed.
5. Run diagnostic programs. See “Diagnosing problems” on page 91.
Networking problemsThe following are the most common networking problems.
Ethernet problems• Problem: The computer cannot connect to the network.
94 ThinkPad X260 User Guide

Solution: Make sure that:
– The cable is installed correctly.
The network cable must be securely connected both to the Ethernet connector of your computer andto the RJ45 connector of the hub. The maximum allowable distance from the computer to hub is100 meters. If the cable is connected and the distance is within acceptable limits but the problempersists, try a different cable.
– You are using the correct device driver. To install the correct driver, do the following:
1. Go to Control Panel and click Hardware and Sound ➙ Device Manager. If you are prompted foran administrator password or confirmation, type the password or provide confirmation.
2. If the exclamation mark ! is displayed next to the adapter name under Network adapters, youmight not be using the correct driver or the driver might have been disabled. To update the driver,right-click the highlighted adapter.
3. Click Update Driver Software, and then follow the instructions on the screen.
– The switch port and the adapter have the same duplex setting.
If you configured the adapter for full duplex, make sure that the switch port also is configured for fullduplex. Setting wrong duplex mode can degrade performance, cause data loss, or result in lostconnections.
– You have installed all networking software that is necessary for your network environment.
Check with your LAN administrator for the necessary networking software.
• Problem: The adapter stops working for no apparent reason.
Solution: The network driver files might be corrupt or missing. Update the driver by referring to theprevious solution for the procedure to make sure that the correct device driver is installed.
• Problem: My computer is a Gigabit Ethernet model and I use a speed of 1000 Mbps, but the connectionfails or errors occur.
Solution:
– Use Category 5 wiring and make sure that the network cable is securely connected.
– Connect to a 1000 BASE-T hub/switch (not 1000 BASE-X).
• Problem: The Wake On LAN feature is not working.
Solution: Ensure that Wake On LAN is enabled in ThinkPad Setup. If it is, check with your LANadministrator for the necessary settings.
• Problem: My computer is a Gigabit Ethernet model, but the computer cannot connect to the network at1000 Mbps. Instead, it connects at 100 Mbps.
Solution:
– Try another cable.
– Make sure that the link partner is set to auto-negotiate.
– Make sure that the switch is 802.3ab-compliant (gigabit over copper).
A wireless-LAN problemProblem: I cannot connect to the network using the built-in wireless network card.
Solution: Make sure that:
• The Airplane mode is off.
• Your wireless-LAN driver is the latest version.
Chapter 8. Troubleshooting computer problems 95

• Your computer is within range of a wireless access point.
• The wireless radio is enabled.
Note: If you are using the Windows 7 operating system, click Show hidden icons on the taskbar. TheAccess Connections icon is displayed. For more information about the icon, refer to the Access Connectionshelp information system.
For the Windows 7 operating system, check the Network Name (SSID) and your encryption information. Usethe Access Connections program to verify this case-sensitive information.
A wireless-WAN problemProblem: A message is displayed indicating that an unauthorized WAN card is installed.
Solution: The WAN card is not supported on this computer. Remove the WAN card.
Note: Some models do not have a wireless-WAN card.
Bluetooth problemsNote: Check your connection anytime and make sure that no other Bluetooth-enabled device is searching forthe device to which you want to connect. Simultaneous searching is not allowed in the Bluetooth connection.
• Problem: Sound does not come from the Bluetooth headset/headphone but comes from the localspeaker even though the Bluetooth headset/headphone is connected using a Headset profile or AV profile.
Solution: Do the following:
1. Exit the application that uses the sound device (for example, Windows Media Player).
2. Go to Control Panel and click Hardware and Sound ➙ Sound ➙ Playback.
3. If you are using a Headset profile, select Bluetooth Hands-free Audio and click the Set Defaultbutton. If you are using an AV profile, select Stereo Audio and click the Set Default button.
4. Click OK to close the Sound window.
• Problem: PIM items sent from the Windows 7 operating systems cannot be received correctly into theaddress book of any other Bluetooth-enabled device.
Solution: The Windows 7 operating system sends PIM items in XML format, but most Bluetooth-enableddevices handle PIM items in vCard format. If another Bluetooth-enabled device can receive a file throughBluetooth, a PIM item sent from the Windows 7 might be saved as a file with the extension .contact.
Problems with the keyboard and other pointing devicesThe following are the most common problems with keyboards and other pointing devices.
TrackPoint pointing device problems• Problem: The pointer drifts when the computer is turned on or after it resumes normal operation.
Solution: The pointer might drift when you are not using the TrackPoint pointing device during normaloperation. This is a normal characteristic of the TrackPoint pointing device and is not a defect. Pointerdrifting might occur for several seconds under the following conditions:
– When the computer is turned on
– When the computer resumes normal operation
– When the TrackPoint pointing device is kept pressed for a long time
– When the temperature changes
• Problem: The TrackPoint pointing device or trackpad does not work.
96 ThinkPad X260 User Guide

Solution: Ensure that the TrackPoint pointing device or trackpad is enabled in the Mouse Propertieswindow.
Keyboard problems• Problem: All or some keys on the keyboard do not work.
Solution: If an external numeric keypad is connected:
1. Turn off the computer.
2. Remove the external numeric keypad.
3. Turn on the computer and try using the keyboard again.
If the keyboard problem is resolved, carefully reconnect the external numeric keypad and the externalkeyboard. Make sure that you have seated the connectors correctly.
If the problem persists, make sure that the correct device driver is installed by doing the following:
1. Go to Control Panel. Change the view of Control Panel from Category to Large icons or Small icons.
2. Click Keyboard.
3. Select the Hardware tab. In the Device Properties pane, make sure that you see this message:Device Status: This device is working properly.
If keys on the keyboard still do not work, have the computer serviced.
• Problem: All or some keys on the external numeric keypad do not work.
Solution: Make sure that the external numeric keypad is correctly connected to the computer.
Problems with the display and multimedia devicesThis topic includes the most common problems with displays and multimedia devices, including thecomputer display, the external display, audio devices, and the optical drive.
Computer screen problems• Problem: My screen keeps blanking when I do not want it to.
Solution: If your computer is preinstalled with the Windows 7 operating system, you can disable anysystem timers, such as the LCD turn-off timer or the blank timer by doing the following:
1. Start Power Manager.
2. Click the Power plan tab, and then select Maximum Performance from the predefined power plans.
If your computer is preinstalled with the Windows 10 operating system, do the following:
1. Go to Control Panel, and ensure that you view Control Panel by Category.
2. Click Hardware and Sound ➙ Power Options ➙ High performance.
3. Show the additional plans, and then choose High performance.
• Problem: When I turn on the computer, nothing is displayed on the screen and the computer does notbeep while starting up.
Note: If you are not sure whether you heard any beeps, turn off the computer by pressing and holding thepower button for four seconds or more. Then turn on the computer and listen again.
Solution: Make sure that:
– The ac power adapter is connected to the computer and the power cord is plugged into a workingelectrical outlet.
– The computer is turned on. (Press the power button again for confirmation.)
– The brightness level of the screen is appropriately set.
Chapter 8. Troubleshooting computer problems 97

If a power-on password is set, press any key to display the prompt for the power-on password andthen type the correct password and press Enter.
If these items are correctly set, and the screen remains blank, have the computer serviced.
• Problem: When I turn on the computer, only a white cursor is displayed on a blank screen.
Solution: If you have modified a partition on your storage drive by using partition software, informationabout that partition, or the master boot record might have been destroyed.
Do the following to try to solve the problem:
1. Turn off the computer, and then turn it on again.
2. If you still see only the cursor on the screen, do the following:
– If you have used partition software, examine the partition on the storage drive by using thesoftware, and recover the partition if required.
– Use the recovery solutions to restore the system to the factory default state.
If the problem persists, have the computer serviced.
• Problem: My screen goes blank while the computer is on.
Solution: Your screen saver or power management might have been enabled. Do one of the following:
– Touch the TrackPoint pointing device or the trackpad, or press a key to exit the screen saver.
– Press the power button to resume the computer from sleep or hibernation mode.
• Problem: The screen is blank.
Solution: Do the following:
– Press the display-mode switching key to bring up the image.
– If you are using the ac power adapter, or using the batteries and the battery-status icon shows that the
batteries are not depleted, press the brightness-up key to make the screen brighter.
– If your computer is in sleep mode, press power button to resume from the sleep mode.
– If the problem persists, follow the solution for the following problem.
• Problem: The screen is unreadable or distorted.
Solution: Make sure that:
– The display device driver is installed correctly.
– The screen resolution and color quality are correctly set.
– The monitor type is correct.
To check these settings, do the following:
1. Connect the external display to your computer, and then connect the external display to an electricaloutlet.
2. Turn on the external display.
3. Right-click on the desktop, and do the following:
– For Windows 7: Click Screen resolution.
– For Windows 10: Click Display settings ➙ Advanced display settings.
Note: If your computer cannot detect the external display, click the Detect button.
4. Select the external display and set Resolution.
5. Do the following:
– For Windows 7: Click Advanced settings.
98 ThinkPad X260 User Guide

– For Windows 10: Click Display adapter properties.
6. Click the Monitor tab. Check the monitor information to make sure that the monitor type is correct.
If the monitor type is correct, click OK to close the window; otherwise proceed with the following steps.
1. If more than two monitor types are displayed, select Generic PnP Monitor or Generic Non-PnPMonitor.
2. Click Properties. If you are prompted for an administrator password or confirmation, type thepassword or provide confirmation.
3. Click the Driver tab.
4. Click Update Driver.
5. Click Browse my computer for driver software, and then click Let me pick from a list of devicedrivers on my computer.
6. Clear the Show compatible hardware check box.
7. Select the correct manufacturer and model for the external monitor. If you cannot find your monitoron the list, stop the installation of this driver and use the driver shipped with your monitor.
8. After updating the driver, click Close.
9. For the Windows 7 operating system, to change the color settings, right-click on the desktop, andclick Screen resolution. Click Advanced settings, select the Monitor tab, and then set Colors.
10. Click OK.
• Problem: Incorrect characters are displayed on the screen.
Solution: Did you install the operating system or program correctly? If they are installed and configuredcorrectly, have the computer serviced.
• Problem: The screen stays on even after you turn off your computer.
Solution: Press and hold the power button for four seconds or more to turn off your computer; thenturn it on again.
• Problem: Missing, discolored, or bright dots appear on the screen every time you turn on your computer.
Solution: This is an intrinsic characteristic of the TFT technology. Your computer display containsmultiple thin-film transistors (TFTs). A small number of missing, discolored, or bright dots on the screenmight exist all the time.
External display problems• Problem: The external display is blank.
Solution: To bring up the image, press the display-mode switching key and select the desiredmonitor. If the problem persists, do the following:
1. Connect the external display to another computer to make sure that it works.
2. Reconnect the external display to your computer.
3. Refer to the manual shipped with the external display to check the resolutions and refresh rates thatare supported.
– If the external display supports the same resolution as the computer display or a higher resolution,view output on the external display or on both the external display and the computer display.
– If the external display supports a lower resolution than the computer display, view output on theexternal display only. (If you view output on both the computer display and the external display,the external display screen will be blank or distorted.)
• Problem: You cannot set a higher resolution than the present one on your external display.
Solution: Make sure that the monitor type and other information is correct by doing the following:
Chapter 8. Troubleshooting computer problems 99

1. Connect the external display to the monitor connector, and then connect the monitor to an electricaloutlet.
2. Turn on the external display and the computer.
3. Right-click on the desktop, and do the following:
– For Windows 7: Click Screen resolution.
– For Windows 10: Click Display settings ➙ Advanced display settings.
Note: If your computer cannot detect the external display, click the Detect button.
4. Click the icon for the desired monitor (the Monitor-2 icon is for the external display).
5. Do the following:
– For Windows 7: Click Advanced settings.
– For Windows 10: Click Display adapter properties.
6. Click the Monitor tab. Check the monitor information to make sure that the monitor type is correct. Ifit is, click OK to close the window; otherwise proceed with the following steps.
7. If more than two monitor types are displayed, select Generic PnP Monitor or Generic Non-PnPMonitor.
Note: If the problem still is not solved, continue the following steps to update the monitor driver.
8. Click Properties. If you are prompted for an administrator password or confirmation, type thepassword or provide confirmation.
9. Click the Driver tab, and then click Update driver.
10. Click Browse my computer for driver software, and then click Let me pick from a list of devicedrivers on my computer.
11. Clear the Show compatible hardware check box.
12. Select the correct manufacturer and model for the external display. If you cannot find your monitor onthe list, stop the installation of this driver and use the driver shipped with your monitor.
13. After updating the driver, click Close.
• Problem: The screen is unreadable or distorted.
Solution: Make sure that:
– The monitor information is correct and the appropriate monitor type is selected. Refer to the solutionto the above problem.
– Make sure that an appropriate refresh rate is selected by doing the following:
1. Connect the external display to the monitor connector, and then connect the monitor to anelectrical outlet.
2. Turn on the external display and the computer.
3. Right-click on the desktop, and do the following:
– For Windows 7: Click Screen resolution.
– For Windows 10: Click Display settings ➙ Advanced display settings.
Note: If your computer cannot detect the external display, click the Detect button.
4. Click the icon for the desired monitor (the Monitor-2 icon is for the external display).
5. Do the following:
– For Windows 7: Click Advanced settings.
– For Windows 10: Click Display adapter properties.
100 ThinkPad X260 User Guide

6. Click the Monitor tab.
7. Select the correct screen refresh rate.
• Problem: Wrong characters are displayed on the screen.
Solution: Did you follow the correct procedure when installing the operating system or program? If youdid, have the external display serviced.
• Problem: The Extend desktop function does not work.
Solution: Press the display-mode switching key to select the Extend desktop function.
• Problem: If you use the Extend desktop function, you cannot set a higher resolution or higher refreshrate on the secondary display.
Solution: Change the resolution and the color depth to lower settings for the primary display.
• Problem: Display switching does not work.
Solution: If you use the Extend desktop function, disable it, and change the display output location. Ifa DVD movie or a video clip is playing, stop the playback, close the program, and then change thedisplay output location.
• Problem: The screen position on the external display is incorrect when that monitor is set for a highresolution.
Solution: Sometimes, when you use a high resolution such as 1600x1200, the image is shifted to left orright on the screen. To correct this, first make sure that your external display supports the display mode(the resolution and the refresh rate) that you have set. If it does not, set a display mode that the monitorsupports. If it does support the display mode you have set, go to the setup menu for the monitor itselfand adjust the settings there. Usually the external display has buttons for access to the setup menu. Fordetails, see the documentation that comes with the monitor.
• Problem: DVI monitor cannot be recognized.
Solution: Ensure that you connect the DVI monitor to the supported docking station first, and then turnon the DVI monitor before you turn on the computer.
• Problem: The option for enabling the DVI monitor in the Display Properties window is not displayed.
Solution: Try closing the Display Properties window and open it again. If the option still is not displayed,make sure that the connector of the DVI monitor is attached firmly, and repeat the procedure forconnecting the monitor.
Audio problems• Problem: Wave or MIDI sound does not play correctly.
Solution: Make sure that the built-in audio device is configured correctly.
1. Go to Control Panel.
2. Click Hardware and Sound.
3. Click Device Manager. If you are prompted for an administrator password or confirmation, type thepassword or provide confirmation.
4. Double-click Sound, video and game controllers.
5. Make sure that the Realtek HD Audio driver is enabled and configured correctly.
• Problem: Sound does not come from a headphone or a speaker, or your computer cannot record sounds.
Solution: To switch from one device to another (for example, from a speaker to a headphone, or from anexternal microphone to a microphone), do the following:
1. Go to Control Panel and click Hardware and Sound.
2. Click the Realtek HD Manager icon.
3. Make sure that you are in MULTI-STREAM mode in the Device advanced settings window.
Chapter 8. Troubleshooting computer problems 101

4. In the Volume Mixer window, select the device you want-for example, speakers.
5. Play any sound via a music program (for example, Windows Media Player). Make sure that soundcomes from speakers now.
6. Then, if you would like to switch to a headphone, close the music program.
7. Go to the Volume Mixer window. Then select another device, which is now the headphone.
8. Play any sound via the music program. Make sure that sound comes from a headphone attacheddirectly to the system.
For more information, refer to the help information system of Realtek HD Manager.
Note: In the Volume Mixer window of Realtek HD Manager, a check mark by the entry for a device,such as speakers for a playback device, or a microphone for a recording device, shows that the devicehas been selected.
• Problem: Recordings made using the microphone input are not loud enough.
Solution: Make sure that the Microphone Boost function is turned on and set by doing the following:
1. Go to Control Panel and click Hardware and Sound.
2. Click Sound.
3. Click the Recording tab in the Sound window.
4. Select Microphone, and click the Properties button.
5. Click the Levels tab, and move the Microphone Boost slider upwards.
6. Click OK.
Note: For details about controlling volume, refer to your Windows online help.
• Problem: A volume or balance slider cannot be moved.
Solution: The slider might be grayed out. This means that its position is fixed by the hardware andcannot be changed.
• Problem: The volume sliders do not stay in place when some audio programs are used.
Solution: It is normal for the sliders to change position when certain sound programs are used. Theprograms are aware of the settings in the Volume Mixer window and are allowed to change the settingsthemselves. An example is the Windows Media Player. Usually the program has sliders available tocontrol the sound from within the program.
• Problem: The balance slider cannot completely mute one channel.
Solution: The control is designed to compensate for minor differences in balance and does notcompletely mute either channel.
• Problem: The sound cannot be turned off completely even if you set the Master volume control atminimum.
Solution: You still can hear some sound even though you have set the Volume Mixer control at minimum.To turn off the sound completely, press the speaker mute button.
• Problem: When you connect a headphone to your computer while playing sound, a speaker does notproduce sound.
Solution: Once the headphone is attached, the streaming is automatically redirected to it. If you want tolisten to sound from the speakers again, be sure to set those speakers as the default device. For details,refer to the help information system for Realtek HD Audio.
Fingerprint reader problems• Problem: The surface of the reader is dirty, stained, or wet.
Solution: Gently clean the surface of the reader with a dry, soft, lint-free cloth.
102 ThinkPad X260 User Guide

• Problem: The reader often fails to enroll or authenticate your fingerprint.
Solution: If the surface of the reader is dirty, stained, or wet, gently clean the surface of the readerwith a dry, soft, lint-free cloth.
For tips on how to maintain the fingerprint reader, see “Using the fingerprint reader” on page 61.
Battery and power problemsThis topic contains instructions on troubleshooting battery and power problems.
Battery problems• Problem: The batteries cannot be fully charged in the standard charge time when the computer is
powered off.
Solution: The batteries might be over-discharged. Do the following:
1. Turn off the computer.
2. Connect the ac power adapter to the computer and let it charge.
If a quick charger is available, use it to charge the over-discharged batteries.
If the batteries cannot be fully charged in 24 hours, call Lenovo Customer Service Center.
• Problem: Your computer shuts down before the battery-status icon in the Windows notification areashows empty, or your computer operates after the battery-status icon in the Windows notification areashows empty.
Solution: Discharge and recharge the batteries.
• Problem: The operating time for fully charged batteries is short.
Solution: Discharge and recharge the batteries. If your battery operating time is still short, call LenovoCustomer Service Center.
• Problem: The computer does not operate with fully charged batteries.
Solution: The surge protector in the battery might be active. Turn off the computer for one minute to resetthe protector; then turn on the computer again.
• Problem: The batteries cannot be charged.
Solution: You cannot charge a battery when it is too hot. Turn off the computer and allow it to coolto room temperature. After it cools, recharge the batteries. If the batteries still cannot be charged,call Lenovo Customer Service Center.
This system supports only batteries specially designed for this specific system and manufacturedby Lenovo or an authorized builder. The system does not support unauthorized batteries or batteriesdesigned for other systems. If an unauthorized battery or a battery designed for another system isinstalled, the system will not charge.
Attention: Lenovo has no responsibility for the performance or safety of unauthorized batteries, andprovides no warranties for failures or damage arising out of their use.
An ac power adapter problemProblem: The ac power adapter is connected to the computer and the working electrical outlet, but thepower adapter (power plug) icon is not displayed in the Windows notification area.
Solution: Do the following:
1. Make sure that the connection of the ac power adapter is correct. For instructions on connecting the acpower adapter, see Safety, Warranty, and Setup Guide that comes with your computer.
2. If the connection of the ac power adapter is correct, turn off the computer, and then disconnect the acpower adapter.
Chapter 8. Troubleshooting computer problems 103

3. Reconnect the ac power adapter, and then turn on the computer.
4. If the power adapter icon still is not displayed in the Windows notification area, have the ac poweradapter and your computer serviced.
Power problemsPrint these instructions now and keep it with your computer for reference later.
If your computer is getting no power at all, check the following items:
1. Verify the power button. Refer to “Status indicators” on page 6. The power button is illuminatedwhenever the computer is on.
2. Check all power connections. Remove any power strips and surge protectors to connect the ac poweradapter directly to the ac power outlet.
3. Inspect the ac power adapter. Check for any physical damage, and ensure that the power cable is firmlyattached to the adapter brick and the computer.
4. Verify the ac power source is working by attaching another device to the outlet.
If your computer does not run on battery power, check the following items:
1. If the batteries run out of power, attach ac power adapter to recharge the batteries.
2. If the batteries are charged but the computer does not run, call Lenovo Customer Service Center.
A power button problemProblem: The system does not respond, and you cannot turn off the computer.
Solution: Turn off the computer by pressing and holding the power button for four seconds or more. If thesystem is still not reset, remove the ac power adapter and reset the system by inserting one end of a needleor a straightened paper clip into the emergency-reset hole. To locate the emergency-reset hole, referto “Bottom view” on page 6.
Boot problemsPrint these instructions now and keep them with your computer for reference later.
If you receive an error message before the operating system loads, follow the appropriate corrective actionsfor power-on self-test (POST) error messages. See “Error messages” on page 92.
If you receive an error message while the operating system is loading the desktop configuration after thePOST is completed, check the following items:
1. Go to the Lenovo Support Web site at http://www.lenovo.com/support and search for the error message.
2. Go to the Microsoft Knowledge Base home page at http://support.microsoft.com/ and search for theerror message.
Sleep and hibernation problems• Problem: The computer enters sleep mode unexpectedly.
Solution: If the microprocessor overheats, the computer automatically enters sleep mode to allow thecomputer to cool and to protect the microprocessor and other internal components. Check the settingsfor sleep mode.
• Problem: The computer enters sleep mode immediately after the power-on self-test.
Solution: Ensure that:
– The batteries are charged.
104 ThinkPad X260 User Guide

– The operating temperature is within the acceptable range. Refer to “Operating environment” on page11.
If the batteries are charged and the temperature is within range, have the computer serviced.
• Problem: A critical low-battery error occurs, and the computer immediately turns off.
Solution: The battery power is getting low. Connect the ac power adapter to the computer and plug itinto an electrical outlet.
• Problem: The computer display remains blank after you press Fn to return from sleep mode.
Solution: Check whether an external display was disconnected or turned off while the computer wasin sleep mode. If you disconnected or turned off the external display, connect it or turn it on beforeresuming the computer from the sleep mode. When resuming the computer from the sleep modewithout attaching the external display or turning it on, and the computer display remains blank, pressF6 to bring up the computer display.
• Problem: The computer does not return from sleep mode, or the system-status indicator (illuminatedThinkPad logo) blinks slowly and the computer does not work.
Solution: If the system does not return from sleep mode, it might have entered sleep or hibernationmode automatically because the battery is depleted. Check the system-status indicator (illuminatedThinkPad logo).
– If the system-status indicator (illuminated ThinkPad logo) blinks slowly, your computer is in sleep mode.Connect the ac power adapter to the computer; then press Fn.
– If the system-status indicator (illuminated ThinkPad logo) is off, your computer is in power-off state orin hibernation mode. Connect the ac power adapter to the computer; then press the power buttonto resume operation.
If the system still does not return from sleep mode, your system might stop responding and you might notbe able to turn off the computer. In this case, you need to reset the computer. If you have not savedyour data, it might be lost. To reset the computer, press and hold the power button for four seconds ormore. If the system is still not reset, remove the ac power adapter and reset the system by inserting astraightened paper clip into the emergency-reset hole. To locate the emergency-reset hole, refer to“Bottom view” on page 6.
• Problem: Your computer does not enter sleep or hibernation mode.
Solution: Check whether any option has been selected to disable your computer from entering sleepor hibernation mode.
If your computer tries to enter sleep mode but the request is rejected, the device attached to the USBconnector might have been disabled. If this occurs, do a hot-unplug-and-plug operation for the USBdevice.
• Problem: The battery discharges slightly while the computer is in hibernation mode.
Solution: If the wakeup function is enabled, the computer consumes small amount of power. This is nota defect. For details, refer to “Power-saving modes” on page 24.
Problems with drives and other storage devicesThis section includes storage drive problems.
Hard disk drive or hybrid drive problems• Problem: The hard disk drive or hybrid drive makes a rattling noise intermittently.
Solution: The rattling noise might be heard:
– When the hard disk drive or hybrid drive begins or finishes getting access to data
– When you carry the hard disk drive or hybrid drive
– When you carry your computer
Chapter 8. Troubleshooting computer problems 105

This is a normal characteristic of a hard disk drive or hybrid drive and is not a defect.
• Problem: The hard disk drive or hybrid drive does not work.
Solution: On the Startup menu of ThinkPad Setup, make sure that the hard disk drive or hybrid drive ison the Boot priority order list. If it is on the Excluded from boot order list, it is disabled. Select the entryfor it on the list and press Shift+1 to move it back to the Boot priority order list.
• Problem: After setting a hard disk password on the hard disk drive of the computer, you moved the driveto another computer. Now you cannot unlock the hard disk password.
Solution: Your computer supports an enhanced password algorithm. Computers older than yours mightnot support such a security function.
A solid-state drive problemProblem: When you compress files or folders by use of the data compression function in Windows, andthen decompress them, the process of writing to or reading from the files or folders is slow.
Solution: Apply the disk defragmentation tool in Windows for faster access to the data.
A software problemProblem: An application does not run correctly.
Solution: Make sure that the problem is not being caused by the application.
Check that your computer has the minimum required memory to run the application. Refer to the manualssupplied with the application.
Check the following:
• The application is designed to operate with your operating system.
• Other applications run correctly on your computer.
• The necessary device drivers are installed.
• The application works when it is run on some other computer.
If an error message is displayed while you are using the application program, refer to the manuals suppliedwith the application.
If the application still does not run correctly, contact your place of purchase or a service representativefor help.
Problems with ports and connectorsThe following are the most common problems with ports and connectors.
A USB problemProblem: A device connected to the USB connector does not work.
Solution: Open the Device Manager window. Make sure that the USB device setup is correct, and that theassignment of computer resource and the installation of the device driver are correct. To open the DeviceManager window, go to Control Panel and click Hardware and Sound ➙ Device Manager. If you areprompted for an administrator password or confirmation, type the password or provide confirmation.
Refer to “Diagnosing problems” on page 91 and run a diagnostic test of the USB connector.
106 ThinkPad X260 User Guide

A docking station problemProblem: The computer does not start when you try to turn it on, and does not respond when you try toresume operation.
Solution: Make sure that:
• The ac power adapter is connected to the docking station.
• The computer is securely attached to the docking station.
Chapter 8. Troubleshooting computer problems 107

108 ThinkPad X260 User Guide

Chapter 9. Recovery overview
This chapter contains the following topics:
• “Recovery overview for the Windows 7 operating system” on page 109
• “Recovery overview for the Windows 10 operating system” on page 114
Recovery overview for the Windows 7 operating systemThis section provides information about the recovery solutions provided by Lenovo on the Windows 7operating system.
Notes:
• There are a variety of methods to choose from when considering how to recover in the event of asoftware-related or hardware-related problem. Some methods vary depending on the type of youroperating system.
• The product on the recovery media might be used only for the following purposes:
– Restore the product preinstalled on your computer
– Reinstall the product
– Modify the product using the Additional Files
To prevent potential performance risks or unexpected behavior that might be caused by the new hard diskdrive technology, it is recommended that you use one of the following back-up software programs:
• Rescue and Recovery version 4.52 or later
• Acronis True Image 2010 or later
• Paragon Backup & Recovery 10 Suite or later, Paragon Backup & Recovery 10 Home or later
Creating and using a recovery mediaYou can use recovery media to restore the hard disk drive or hybrid drive to the factory default settings.Recovery media are useful if you transfer the computer to another area, sell the computer, recycle thecomputer, or put the computer in an operational state after all other methods of recovery have failed. As aprecautionary measure, it is important to create recovery media as early as possible.
Note: The recovery operations you can perform using recovery media vary depending on the operatingsystem from which the recovery media were created. The recovery media might contain a boot mediumand a data medium. Your Microsoft Windows license permits you to create only one data medium, so it isimportant that you store the recovery media in a safe place after you have made them.
Creating recovery media
This section provides instructions on how to create recovery media.
You can create recovery media using discs or external USB storage devices. To create recovery media,you need a disc or USB storage drive with at least 16 GB of storage. The required disc or USB capacitydepends on the size of the recovery image.
Attention: Creating recovery media will delete anything stored on the disc or USB storage drive. To avoiddata loss, make a backup copy of all the data that you want to keep.
© Copyright Lenovo 2015, 2016 109

To create recovery media, click Start ➙ All Programs ➙ Lenovo PC Experience ➙ Lenovo Tools ➙Factory Recovery Disks. Then, follow the instructions on the screen.
Using recovery media
You can use recovery media to restore the computer to the factory default settings only. You can userecovery media to put the computer in an operational state after all other methods of recovery have failed.
Attention: When you use recovery media to restore the computer to the factory default settings, all the filescurrently on the hard disk drive or hybrid drive will be deleted and replaced by the factory default settings.
To use recovery media, do the following:
1. Depending on the type of your recovery media, connect the boot medium (memory key or other USBstorage device) to the computer, or insert the boot disc into an external optical drive.
2. Repeatedly press and release the F12 key when turning on the computer. When the Boot Menu windowopens, release the F12 key.
3. Select the desired startup device and press Enter. The restore process begins.
4. Follow the instructions on the screen to complete the operation.
Notes:
1. After restoring your computer to the factory default settings, you might have to reinstall device driversfor some devices. See “Reinstalling preinstalled programs and device drivers” on page 113.
2. Some computers come with Microsoft Office preinstalled. If you need to recover or reinstall yourMicrosoft Office program, you must use the Microsoft Office CD. This disc is provided only withcomputers preinstalled with Microsoft Office.
Performing backup and recovery operationsThe Rescue and Recovery program enables you to back up all your storage drive contents including theoperating system, data files, software programs, and personal settings. You can designate where theRescue and Recovery program stores the backup:
• In a protected area of your storage drive
• On the secondary hard disk drive if a secondary hard disk drive is installed in your computer
• On an attached external USB hard disk drive
• On a network drive
• On recordable discs (a recordable optical drive is required for this option)
After you have backed up the contents on the storage drive, you can restore the complete contents of thestorage drive, restore only the selected files, or restore only the Windows operating system and programs.
Performing a backup operation
To perform a backup operation using the Rescue and Recovery program on the Windows 7 operatingsystem, do the following:
1. From the Windows desktop, click Start ➙ All Programs ➙ Lenovo PC Experience ➙ Lenovo Tools ➙Enhanced Backup and Restore. The Rescue and Recovery program opens.
2. In the Rescue and Recovery main window, click the Launch advanced Rescue and Recovery arrow.
3. Click Back up your hard drive and select backup operation options. Then, follow the instructions onthe screen to complete the backup operation.
110 ThinkPad X260 User Guide

Performing a recovery operation
To perform a recovery operation using the Rescue and Recovery program on the Windows 7 operatingsystem, do the following:
1. From the Windows desktop, click Start ➙ All Programs ➙ Lenovo PC Experience ➙ Lenovo Tools ➙Enhanced Backup and Restore. The Rescue and Recovery program opens.
2. In the Rescue and Recovery main window, click the Launch advanced Rescue and Recovery arrow.
3. Click the Restore your system from a backup icon.
4. Follow the instructions on the screen to complete the recovery operation.
For more information about performing a recovery operation from the Rescue and Recovery workspace, see“Using the Rescue and Recovery workspace” on page 111.
Using the Rescue and Recovery workspaceThe Rescue and Recovery workspace resides in a protected, hidden area of your storage drive that operatesindependently from the Windows operating system. It enables you to perform recovery operations even ifyou cannot start the Windows operating system. You can perform the following recovery operations fromthe Rescue and Recovery workspace:
• Rescue files from your storage drive from a backup
The Rescue and Recovery workspace enables you to locate files on your storage drive and transferthem to a network drive or other recordable media, such as a USB device or a disc. This solution isavailable even if you did not back up your files or if changes were made to the files since your last backupoperation. You also can rescue individual files from a Rescue and Recovery backup located on your localhard disk drive, a USB device, or a network drive.
• Restore your storage drive from a Rescue and Recovery backup
If you have backed up your storage drive using the Rescue and Recovery program, you can restore thestorage drive from a Rescue and Recovery backup, even if you cannot start the Windows operatingsystem.
• Restore your storage drive to the factory default settings
The Rescue and Recovery workspace enables you to restore the complete contents of your storage driveto the factory default settings. If you have multiple partitions on your storage drive, you have the option torestore the factory default settings to the C: partition and leave the other partitions intact. Because theRescue and Recovery workspace operates independently from the Windows operating system, you canrestore the factory default settings even if you cannot start the Windows operating system.
Attention: If you restore the storage drive from a Rescue and Recovery backup or restore the storagedrive to the factory default settings, all files on the primary storage drive partition (usually drive C:) will bedeleted in the recovery process. If possible, make copies of important files. If you are unable to start theWindows operating system, you can use the rescue files feature of the Rescue and Recovery workspace tocopy files from your storage drive to other media.
To start the Rescue and Recovery workspace, do the following:
1. Make sure that the computer is turned off.
2. Repeatedly press and release the F11 key when turning on the computer. When you hear beeps orsee a logo screen, release the F11 key.
3. If you have set a Rescue and Recovery password, type your password when prompted. The Rescueand Recovery workspace opens after a short delay.
Note: If the Rescue and Recovery workspace fails to open, see “Solving recovery problems” onpage 114.
Chapter 9. Recovery overview 111

4. Do one of the following:
• To rescue files from your storage drive, or from a backup, click Rescue files and follow theinstructions on the screen.
• To restore your storage drive from a Rescue and Recovery backup or to restore your storage drive tothe factory default settings, click Restore your system and follow the instructions on the screen.
For more information about the features of the Rescue and Recovery workspace, click Help.
Notes:
1. After restoring your storage to the factory default settings, you might have to reinstall device drivers forsome devices. See “Reinstalling preinstalled programs and device drivers” on page 113.
2. Some computers come with Microsoft Office preinstalled. If you need to recover or reinstall yourMicrosoft Office program, you must use the Microsoft Office CD. This disc is provided only withcomputers preinstalled with Microsoft Office.
Creating and using a rescue mediumWith a rescue medium, such as a disc or a USB hard disk drive, you can recover the computer from failuresthat prevent you from gaining access to the Rescue and Recovery workspace on your storage drive.
Notes:
1. The recovery operations you can perform using a rescue medium vary depending on the operatingsystem.
2. The rescue disc can be started in all types of optical drives.
Creating a rescue medium
To create a rescue medium on the Windows 7 operating system, do the following:
1. From the Windows desktop, click Start ➙ All Programs ➙ Lenovo PC Experience ➙ Lenovo Tools ➙Enhanced Backup and Restore. The Rescue and Recovery program opens.
2. In the Rescue and Recovery main window, click the Launch advanced Rescue and Recovery arrow.
3. Click the Create Rescue Media icon. The Create Rescue and Recovery Media window opens.
4. In the Rescue Media area, select the type of the rescue medium you want to create. You can create arescue medium using a disc, a USB hard disk drive, or a secondary internal hard disk drive.
5. Click OK and follow the instructions on the screen to create a rescue medium.
Using a rescue medium
This section provides instructions on how to use the rescue medium you have created.
• If you have created a rescue medium using a disc, use the following instructions to use the rescue medium:
1. Turn off your computer.
2. Repeatedly press and release the F12 key when turning on the computer. When the Boot Menuwindow is displayed, release the F12 key.
3. In the Boot Menu window, select the desired optical drive as the first boot device. Then, insert therescue disc into the optical drive and press Enter. The rescue medium starts.
• If you have created a rescue medium using a USB hard disk drive, use the following instructions touse the rescue medium:
1. Attach the USB hard disk drive to one of the USB connectors on your computer.
2. Repeatedly press and release the F12 key when turning on the computer. When the Boot Menuwindow opens, release the F12 key.
112 ThinkPad X260 User Guide

3. In the Boot Menu window, select the USB hard disk drive as the first boot device and press Enter.The rescue medium starts.
• If you have created a rescue medium using the secondary internal hard disk drive, set the secondaryinternal hard disk drive as the first boot device in the startup device sequence to start the rescue medium.
When the rescue medium starts, the Rescue and Recovery workspace opens. The help information foreach feature is available from the Rescue and Recovery workspace. Follow the instructions to completethe recovery process.
Reinstalling preinstalled programs and device driversYour computer has provisions that enable you to reinstall selected factory-installed programs and devicedrivers.
Reinstalling preinstalled programs
To reinstall selected programs, do the following:
1. Turn on your computer.
2. Go to the C:\SWTOOLS directory.
3. Open the APPS folder. The folder contains several subfolders named for the various preinstalledapplications.
4. Open the subfolder for the program you are reinstalling.
5. Double-click Setup, and then follow the on-screen steps to reinstall the program.
Reinstalling preinstalled device drivers
Attention: When you reinstall device drivers, you are changing the current configuration of your computer.Reinstall device drivers only when it is necessary to correct a problem with your computer.
To reinstall a device driver for a factory-installed device, do the following:
1. Turn on your computer.
2. Go to the C:\SWTOOLS directory.
3. Open the DRIVERS folder. The folder contains several subfolders named for the various devicesinstalled in your computer (for example, AUDIO and VIDEO).
4. Open the subfolder for the device.
5. Reinstall the device driver by one of the following methods:
• In the subfolder for the device, look for a text file (a file with the extension .txt). The text file containsinformation about how to reinstall that device driver.
• If the subfolder for the device contains a file of setup information (a file with the extension .inf), youcan use the Add New Hardware program (in the Windows Control Panel) to reinstall the device driver.Not all device drivers can be reinstalled by use of this program. In the Add New Hardware program,when prompted for the device driver you want to install, click Have Disk and Browse. Then selectthe device driver file from the device subfolder.
• In the subfolder for the device, look for the executable file (a file with the extension .exe). Double-clickthe file, and follow the instructions on the screen.
Attention: If you need updated device drivers for your computer, do not download them from the WindowsUpdate Web site. Obtain them from Lenovo. For more information, see “Making sure device drivers areup-to-date” on page 86.
Chapter 9. Recovery overview 113

Solving recovery problemsIf you are unable to access the Rescue and Recovery workspace or the Windows environment, do oneof the following:
• Use a rescue medium to start the Rescue and Recovery workspace. See “Creating and using a rescuemedium” on page 112.
• Use recovery media if all other methods of recovery have failed and you need to restore the storage driveto the factory default settings. See “Performing backup and recovery operations” on page 110.
Note: If you are unable to access the Rescue and Recovery workspace or the Windows environment froma rescue medium or recovery media, you might not have the rescue device (an internal hard disk drive, adisc, a USB hard disk drive, or other external devices) set as the first boot device in the startup devicesequence. You must first make sure that your rescue device is set as the first boot device in the startupdevice sequence in the Setup Utility program. See “Startup menu” on page 80 for detailed information abouttemporarily or permanently changing the startup device sequence. For more information about the SetupUtility program, see “Using the ThinkPad Setup program” on page 69.
It is important to create a rescue medium and a set of recovery media as early as possible and store themin a safe place for future use.
Recovery overview for the Windows 10 operating systemThe Windows recovery programs enable you to reset your computer or use advanced startup options.
It is recommended that you create a recovery USB drive as early as possible. Store the recovery USB driveas a backup or replacement for the Windows recovery programs.
For more information, see “Creating and using a recovery USB drive” on page 115.
Resetting your computerIf your computer does not perform well, you might consider resetting your computer. In the resetting process,you can choose to keep your files or remove them, and then reinstall the Windows operating system.
To reset your computer, do the following:
Note: The graphical user interface (GUI) items of the operating system might change without notice.
1. Open the Start menu and then click Settings. If Settings is not displayed, click All apps to display allprograms, and then click Settings ➙ Update & security ➙ Recovery.
2. In the Reset this PC section, click Get started.
3. Follow the instructions on the screen to reset your computer.
Using advanced startup optionsWith advanced startup options, you can change the firmware settings of the computer, change the startupsettings of the Windows operating system, start the computer from an external device, or restore theWindows operating system from a system image.
To use advanced startup options, do the following:
Note: The GUI items of the operating system might change without notice.
1. Open the Start menu and then click Settings. If Settings is not displayed, click All apps to display allprograms, and then click Settings ➙ Update & security ➙ Recovery.
2. In the Advanced startup section, click Restart now ➙ Troubleshoot ➙ Advanced options.
114 ThinkPad X260 User Guide

3. Select a desired startup option, and then follow the instructions on the screen.
Recovering your operating system if Windows 10 fails to startThe Windows recovery environment on your computer is capable of operating independently from theWindows 10 operating system. This enables you to recover or repair the operating system even if theWindows 10 operating system fails to start.
After two consecutive failed boot attempts, the Windows recovery environment starts automatically. Thenyou can choose repair and recovery options by following the instructions on the screen.
Note: Ensure that your computer is connected to ac power during the recovery process.
Creating and using a recovery USB driveYou can create a recovery USB drive as a backup for the Windows recovery programs. With the recoveryUSB drive, you can troubleshoot and fix the problems even if the preinstalled Windows recovery programsare damaged.
Creating a recovery USB drive
The USB drive that you use to create the recovery USB drive must be at least 16 GB of storage. The actualUSB capacity that is required depends on the size of the recovery image.
Attention: The creation process deletes anything stored on the USB drive. To avoid data loss, make abackup copy of all the data that you want to keep.
To create a recovery USB drive, do the following:
Note: Ensure that your computer is connected to ac power during the following process.
1. Connect a proper USB drive (at least 16 GB of storage).
2. Type recovery in the search box on the taskbar. Then click Create a recovery drive.
3. Click Yes in the User Account Control window to allow the Recovery Media Creator program to start.
4. In the Recovery Drive window, follow the on-screen instructions to create a recovery USB drive.
Using the recovery USB drive
If you cannot start your computer, refer to the corresponding information in the topic “Troubleshooting” onpage 91 to try to solve the problem by yourself. If you still cannot start your computer, use the recoveryUSB drive to recover your computer.
To use a recovery USB drive, do the following:
Note: Ensure that your computer is connected to ac power.
1. Connect the recovery USB drive to the computer.
2. Turn on or restart the computer. Before the Windows operating system starts, repeatedly press the F12key. The Boot Menu window opens.
3. Select the recovery USB drive as the boot device.
4. Select a preferred keyboard layout.
5. Click Troubleshoot to display the optional recovery solutions.
6. Select a corresponding recovery solution according to your situation. Then follow the instructions onthe screen to complete the process.
Chapter 9. Recovery overview 115

116 ThinkPad X260 User Guide

Chapter 10. Replacing devices
This chapter contains the following topics:
• “Static electricity prevention” on page 117
• “Disabling the built-in battery” on page 117
• “Installing or replacing the micro SIM card” on page 118
• “Replacing the removable battery” on page 119
• “Replacing the internal storage drive” on page 124
• “Replacing the internal-storage-drive cable and cable bracket” on page 128
• “Replacing a memory module” on page 133
• “Replacing an M.2 wireless-WAN card” on page 135
Static electricity preventionStatic electricity, although harmless to you, can seriously damage computer components and options.Improper handling of static-sensitive parts can damage the part. When you unpack an option or a CRU,do not open the static-protective package that contains the part until the instructions direct you to installthe part.
When you handle options or CRUs, or perform any work inside the computer, take the following precautionsto avoid static-electricity damage:
• Limit your movement. Movement can cause static electricity to build up around you.
• Always handle components carefully. Handle adapters, memory modules, and other circuit boards by theedges. Never touch exposed circuitry.
• Prevent others from touching components.
• When you install a static-sensitive option or CRU, touch the static-protective package that contains thepart to a metal expansion-slot cover or other unpainted metal surface on the computer for at least twoseconds. This reduces static electricity in the package and your body.
• When possible, remove the static-sensitive part from the static-protective package and install the partwithout setting it down. When this is not possible, place the static-protective package on a smooth,level surface and place the part on the package.
• Do not place the part on the computer cover or other metal surface.
Disabling the built-in batteryBefore replacing any hardware component, ensure that you have disabled the built-in battery by doingthe following:
For Windows 10, disable Fast Startup before disabling the built-in battery.
To disable Fast Startup for Windows 10, do the following:
1. From the desktop, type Power in the search box on the taskbar, and select Power Options.
2. Click Change what the power buttons do on the left pane.
3. Click Change settings that are currently unavailable at the top.
4. If prompted by User Account Control (UAC), click Yes.
© Copyright Lenovo 2015, 2016 117

5. Clear the Turn on fast startup check box, and then click Save changes.
To disable the built-in battery, do the following:
1. Turn off your computer and disconnect the ac power adapter and all cables from the computer.
2. Turn on your computer. When the logo screen is displayed, immediately press F1 to enter ThinkPadSetup.
3. Select Config ➙ Power. The Power submenu is displayed.
4. Select Disable built-in battery and press Enter.
5. Select Yes in the Setup Confirmation window. The built-in battery is disabled and the computer turns offautomatically. Wait three to five minutes to let the computer cool.
Installing or replacing the micro SIM cardBefore you start, print these instructions. Read the important safety information first. See “Importantsafety information” on page vi.
Micro SIM card is a small plastic card with an Integrated Circuit (IC) chip mounted on one side of the card.
If your computer supports wireless-WAN connections, your computer might require a micro SIM card toestablish wireless-WAN connections. Some computer models might be shipped with a micro SIM card,either installed in the computer or as part of the shipping contents. If your computer does not come with amicro SIM card, you can purchase one from the local service provider.
To install or replace the micro SIM card, do the following:
1. Turn off the computer and disconnect the ac power adapter and all cables from the computer.
2. Locate the micro-SIM-card tray at the right side of the computer.
3. Insert a straightened paper clip into the hole in the micro-SIM-card tray 1 . The micro-SIM-card trayejects. Then, slide the micro-SIM-card tray out of the computer 2 .
118 ThinkPad X260 User Guide

4. To install a micro SIM card, go to step 5. If you are replacing a micro SIM card, gently take the oldmicro SIM card out of the tray.
5. Install a new micro SIM card into the tray in the exact orientation as shown.
Note: Ensure that you use a micro SIM card. Do not use a standard-sized SIM card. The standard-sizedSIM card is not compatible.
6. Insert the tray into the computer.
7. Reconnect the ac power adapter and all cables.
Replacing the removable batteryBefore you start, print these instructions. Read the important safety information first. See “Importantsafety information” on page vi.
Chapter 10. Replacing devices 119

This system supports only batteries specially designed for this specific system and manufactured by Lenovoor an authorized builder. The system does not support unauthorized batteries or batteries designed for othersystems. If an unauthorized battery or a battery designed for another system is installed, the system willnot charge.
Attention: Lenovo has no responsibility for the performance or safety of unauthorized batteries, andprovides no warranties for failures or damage arising out of their use.
Note: If an unauthorized battery is installed, the following message will be displayed:“The battery installed is not supported by this system and will not charge. Please replace the batterywith the correct Lenovo battery for this system.”
DANGER
If the rechargeable battery is incorrectly replaced, there is danger of an explosion. The batterycontains a small amount of harmful substances. To avoid possible injury:
• Replace only with a battery of the type recommended by Lenovo.
• Keep the battery away from fire.
• Do not expose it to excessive heat.
• Do not expose it to water or rain.
• Do not short-circuit it.
• Do not drop, crush, or puncture the battery, or make it subject to strong forces. Battery abuseor mishandling can cause the battery to overheat, which can cause gasses or flame to “vent”from the battery or coin-cell battery.
To replace the removable battery, do the following:
1. Turn off the computer and disconnect the ac power adapter and all cables from the computer.
2. Close the computer display and turn the computer over.
3. Slide the battery latch 1 to the unlocked position, and detach the battery 2 from the base coveron the left.
120 ThinkPad X260 User Guide

4. Slide the other battery latch 1 to the unlocked position, and detach the battery 2 from the basecover on the right.
5. Remove the battery.
Chapter 10. Replacing devices 121

6. Insert a new battery until it clicks into place. Ensure that the battery latches are in the locked positions.
7. Turn the computer over again. Connect the ac power adapter to the computer.
Replacing the base cover assemblyBefore you start, print these instructions. Read the important safety information first. See “Importantsafety information” on page vi.
To replace the base cover assembly, do the following:
1. Disable the built-in battery. See “Disabling the built-in battery” on page 117.
2. Turn off the computer and disconnect the ac power adapter and all cables from the computer.
3. Close the computer display and turn the computer over.
4. Remove the battery pack. See “Replacing the removable battery” on page 119.
5. Loosen the screws that secure the base cover assembly.
122 ThinkPad X260 User Guide

6. Pry up the latches and then remove the base cover assembly.
7. Install the new base cover assembly in place.
8. Tighten the screws to secure the base cover assembly.
Chapter 10. Replacing devices 123

9. Reinstall the battery pack and turn the computer over again. Connect the ac power adapter and allcables.
Replacing the internal storage driveBefore you start, print these instructions. Read the important safety information first. See “Importantsafety information” on page vi.
Attention: The internal storage drive, such as hard disk drive, solid-state drive, or hybrid drive, is sensitive.Incorrect handling can cause damage and permanent loss of data. Observe the following guidelines:
• Replace the internal storage drive only if you upgrade it or have it repaired. The connectors and slot of thestorage drive are not designed for frequent changes, or replacement.
• Do not drop the storage drive or subject it to physical shocks. Put the storage drive on a material, suchas soft cloth, that absorbs any physical shocks.
• Do not apply pressure to the cover of the storage drive.
• Do not touch the connector.
• Before removing the storage drive, make a backup copy of all the information on it, and then turn off thecomputer.
• Never remove the storage drive while the computer is operating, in sleep mode, or in hibernation mode.
To replace the internal storage drive, do the following:
Note: Depending on the computer model, the internal storage drive and drive cable that come with yourcomputer might look different from the illustrations in this topic.
1. Disable the built-in battery. See “Disabling the built-in battery” on page 117.
2. Turn off the computer and disconnect the ac power adapter and all cables from the computer.
3. Close the computer display and turn the computer over.
4. Remove the removable battery. See “Replacing the removable battery” on page 119.
5. Loosen the screws that secure the base cover assembly 1 . Then remove the base cover assembly 2 .
124 ThinkPad X260 User Guide

6. Remove the screw that secures the storage drive.
7. Slightly lift the storage drive.
8. Disconnect the drive cable from the storage drive.
Chapter 10. Replacing devices 125

9. Detach the bracket of the storage drive.
10. Attach the bracket to the new storage drive.
11. Connect the drive cable to the new storage drive.
Note: Your computer might come with a Serial Advanced Technology Attachment (SATA) or PeripheralComponent Interconnect Express (PCIe) drive. Ensure that the new storage drive is of the same typewith the removed one. Otherwise, the new storage drive might not adapt to the drive cable.
126 ThinkPad X260 User Guide

12. Insert the new storage drive 1 and pivot it downward 2 . Ensure that the new storage drive is seatedinto place.
13. Ensure that the cable is routed under the speaker hook a . Install the screw to secure the storage drive.
Chapter 10. Replacing devices 127

14. Reinstall the base cover assembly 1 and tighten the screws 2 .
15. Reinstall the removable battery. See “Replacing the removable battery” on page 119.
16. Turn the computer over again. Connect the ac power adapter and all cables to the computer.
Replacing the internal-storage-drive cable and cable bracketBefore you start, print these instructions. Read the important safety information first. See “Importantsafety information” on page vi.
To replace the internal-storage-drive cable and cable bracket, do the following:
Note: Depending on the computer model, the internal storage drive and drive cable that come with yourcomputer might look different from the illustrations in this topic.
1. Disable the built-in battery. See “Disabling the built-in battery” on page 117.
2. Turn off the computer and disconnect the ac power adapter and all cables from the computer.
3. Close the computer display and turn the computer over.
4. Remove the removable battery. See “Replacing the removable battery” on page 119.
5. Loosen the screws that secure the base cover assembly 1 . Then remove the base cover assembly 2 .
128 ThinkPad X260 User Guide

6. Remove the screw that secures the storage drive.
7. Slightly lift the storage drive.
8. Disconnect the drive cable from the storage drive.
Chapter 10. Replacing devices 129

9. Remove the screw that secures the cable bracket.
10. Remove the cable bracket.
11. Detach the connector of the drive cable.
130 ThinkPad X260 User Guide

12. Attach the connector of the new drive cable.
13. Install the new cable bracket.
14. Install the screw to secure the new cable bracket.
Chapter 10. Replacing devices 131

15. Connect the new drive cable to the storage drive.
Note: Your computer might come with a SATA or PCIe drive. Ensure that the new drive cable is of thesame type with the removed one. Otherwise, the new drive cable might not adapt to the storage drive.
16. Insert the storage drive 1 and pivot it downward 2 . Ensure that the storage drive is seated into place.
132 ThinkPad X260 User Guide

17. Ensure that the cable is routed under the speaker hook a . Install the screw to secure the storage drive.
18. Reinstall the base cover assembly 1 and tighten the screws 2 .
19. Reinstall the removable battery. See “Replacing the removable battery” on page 119.
20. Turn the computer over again. Connect the ac power adapter and all cables to the computer.
Replacing a memory moduleBefore you start, print these instructions. Read the important safety information first. See “Importantsafety information” on page vi.
Increasing memory capacity is an effective way to make programs run faster. You can increase memorycapacity by replacing or adding a memory module.
Note: The operating speed of the memory module has dependency on the system configuration. In someconditions, the memory module in your computer might not be able to operate at the maximum speed.
Chapter 10. Replacing devices 133

Attention: Before you start installing a memory module, touch a metal table or a grounded metal object. Thisaction reduces any static electricity from your body. Static electricity could damage the memory module.
To replace a memory module, do the following:
1. Disable the built-in battery. See “Disabling the built-in battery” on page 117.
2. Turn off the computer and disconnect the ac power adapter and all cables from the computer.
3. Close the computer display and turn the computer over.
4. Remove the removable battery. See “Replacing the removable battery” on page 119.
5. Loosen the screws that secure the base cover assembly 1 . Then remove the base cover assembly 2 .
6. Open the latches on both sides of the memory slot at the same time 1 , and then remove the memorymodule 2 .
134 ThinkPad X260 User Guide

7. Place the notched end of the new memory module toward the contact edge side of the memory slot.Then insert the memory module into the slot at an angle of about 20 degrees 1 . Pivot the memorymodule downward until it snaps into place 2 . Ensure that the memory module is firmly installed inthe slot and cannot be moved easily.
Attention: Do not touch the contact edge of the memory module. Otherwise the memory modulemight get damaged.
8. Reinstall the base cover assembly 1 and tighten the screws 2 .
9. Reinstall the removable battery. See “Replacing the removable battery” on page 119.
10. Turn the computer over again. Connect the ac power adapter and all cables.
Replacing an M.2 wireless-WAN cardBefore you start, print these instructions. Read the important safety information first. See “Importantsafety information” on page vi.
Notes:
• The following information is only for user-installable modules.
• Depending on the model, your computer might look differently from the illustrations in this topic.
Attention: Before you start installing an M.2 wireless-WAN card, touch a metal table or a grounded metalobject. This action reduces any static electricity from your body. Static electricity could damage the card.
Chapter 10. Replacing devices 135

Some computers might come with an M.2 wireless-WAN card. To replace the wireless-WAN card, dothe following:
1. Disable the built-in battery. See “Disabling the built-in battery” on page 117.
2. Turn off the computer and disconnect the ac power adapter and all cables from the computer.
3. Close the computer display and turn the computer over.
4. Remove the removable battery. See “Replacing the removable battery” on page 119.
5. Loosen the screws that secure the base cover assembly 1 . Then remove the base cover assembly 2 .
6. If a tool is provided with the new card to help you disconnect cables, use the tool to disconnect thecables from the old card. If no such a tool is provided, hold the cable connector with your fingers andgently disconnect each cable from the old card.
136 ThinkPad X260 User Guide

7. Remove the screw 1 . The card is released from the secured position and pivots upward 2 .
8. Carefully remove the wireless-WAN card out of the slot.
9. Align the notched edge of the new wireless-WAN card with the key in the slot. Then carefully insertthe card into the slot.
Chapter 10. Replacing devices 137

10. Pivot the new wireless-WAN card downward 1 and then install the screw to secure the card in place 2 .
11. Connect the antenna cables to the new wireless-WAN card. Ensure that you connect the red cable tothe main connector on the card, and the blue cable to the auxiliary connector on the card.
12. Reinstall the base cover assembly 1 and tighten the screws 2 .
13. Reinstall the removable battery. See “Replacing the removable battery” on page 119.
14. Turn the computer over again. Connect the ac power adapter and all cables.
138 ThinkPad X260 User Guide

Chapter 11. Getting support
This chapter contains the following topics:
• “Before you contact Lenovo” on page 139
• “Getting help and service” on page 139
• “Purchasing additional services” on page 141
Before you contact LenovoOften, you can solve your computer problems by referring to the information in the explanations of errorcodes, running diagnostic programs, or by consulting the Lenovo Web site.
Registering your computer
Register your computer with Lenovo. For more information, see “Registering your computer” on page 15.
Downloading system updates
Downloading updated software might resolve problems you experience with your computer.
To download updated software, go to the following Web site and follow the instructions on the screen:http://www.lenovo.com/support
Recording information
Before you talk to a Lenovo representative, record the following important information about your computer.
Recording problem symptoms and details
Collect the answers to the questions below before you call for help. Then, you will be able to get helpas quickly as possible.
• What is the problem? Is it continuous or intermittent?
• Is there an error message? What is the error code, if any?
• What operating system are you using? Which version?
• Which software programs were running at the time of the problem?
• Can the problem be reproduced? If so, how?
Recording system information
The serial number label is on the bottom of your computer. Record the machine type and the serial number.
• What is the name of your Lenovo product?
• What is the machine type?
• What is the serial number?
Getting help and serviceIf you need help, service, technical assistance, or just want more information about Lenovo products, youwill find a wide variety of sources available from Lenovo to assist you. This section contains informationabout where to go for additional information about Lenovo and our products, what to do if you experience aproblem with your computer, and whom to call for service should it be necessary.
© Copyright Lenovo 2015, 2016 139

Information about your computer and preinstalled software, if any, is available in the documentation thatcomes with your computer. That documentation includes printed books, online books, readme files, andhelp files. In addition, information about Lenovo products is available on the World Wide Web.
Microsoft Service Packs are the latest software source for Windows product updates. They are availablethrough Web download (connection charges might apply) or through disc. For more specific information andlinks, go to http://www.microsoft.com. Lenovo offers technical assistance with installation of, or questionsrelated to, Service Packs for your Lenovo-preloaded Microsoft Windows product. For information, contactthe Customer Support Center.
Using diagnostic programsMany computer problems can be solved without outside assistance. If you experience a problem with yourcomputer, the first place to start is the troubleshooting information of your computer documentation. If yoususpect a software problem, see the documentation, including readme files and help information systems,that comes with the operating system or application program.
ThinkPad notebook computers come with a set of diagnostic programs that you can use to help you identifyhardware problems. See “Diagnosing problems” on page 91 for instructions on using the diagnosticprograms.
The troubleshooting information or the diagnostic programs might tell you that you need additional orupdated device drivers or other software. You can get the latest technical information and download devicedrivers and updates from the Lenovo Web site at http://www.lenovo.com/support.
Lenovo Support Web siteTechnical support information is available on the Lenovo Support Web site at:http://www.lenovo.com/support
This Web site is updated with the latest support information such as the following:
• Drivers and software
• Diagnostic solutions
• Product and service warranty
• Product and parts details
• User guides and manuals
• Knowledge base and frequently asked questions
Calling LenovoIf you have tried to correct the problem yourself and still need help, during the warranty period, you canget help and information by telephone through the Customer Support Center. The following services areavailable during the warranty period:
• Problem determination - Trained personnel are available to assist you with determining if you have ahardware problem and deciding what action is necessary to fix the problem.
• Lenovo hardware repair - If the problem is determined to be caused by Lenovo hardware under warranty,trained service personnel are available to provide the applicable level of service.
• Engineering change management - Occasionally, there might be changes that are required after a producthas been sold. Lenovo or your reseller, if authorized by Lenovo, will make selected Engineering Changes(ECs) that apply to your hardware available.
140 ThinkPad X260 User Guide

The following items are not covered:• Replacement or use of parts not manufactured for or by Lenovo or nonwarranted parts• Identification of software problem sources• Configuration of the UEFI BIOS as part of an installation or upgrade• Changes, modifications, or upgrades to device drivers• Installation and maintenance of network operating systems (NOS)• Installation and maintenance of application programs
For the terms and conditions of the Lenovo Limited Warranty that applies to your Lenovo hardware product,see “Warranty information” in the Safety, Warranty, and Setup Guide that comes with your computer.
If possible, be near your computer when you make your call in case the technical assistance representativeneeds to help you resolve a computer problem. Ensure that you have downloaded the most current driversand system updates, run diagnostics, and recorded information before you call. When calling for technicalassistance, have the following information available:• Machine type and model• Serial numbers of your computer, monitor, and other components, or your proof of purchase• Description of the problem• Exact wording of any error messages• Hardware and software configuration information for your system
Telephone numbers
For a list of the Lenovo Support phone numbers for your country or region, go tohttp://www.lenovo.com/support/phone or refer to the Safety, Warranty, and Setup Guide that comes withyour computer.
Note: Phone numbers are subject to change without notice. The latest phone numbers are available athttp://www.lenovo.com/support/phone. If the number for your country or region is not provided, contactyour Lenovo reseller or Lenovo marketing representative.
Purchasing additional servicesDuring and after the warranty period, you can purchase additional services, such as support for Lenovoand non-Lenovo hardware, operating systems, and application programs; network setup and configurationservices; upgraded or extended hardware repair services; and custom installations services. Serviceavailability and service name might vary by country.
For more information about these services, go to:http://www.lenovo.com/essentials
Chapter 11. Getting support 141

142 ThinkPad X260 User Guide

Appendix A. Supplemental information about the Ubuntuoperating system
In limited countries or regions, Lenovo offers customers an option to order computers with the preinstalledUbuntu® operating system.
If the Ubuntu operating system is available on your computer, read the following information before you usethe computer. Ignore any information related to Windows-based programs, utilities, and Lenovo preinstalledapplications in this documentation.
Accessing the Lenovo Limited Warranty
This product is covered by the terms of the Lenovo Limited Warranty (LLW), version L505-0010-02 08/2011.You can view the LLW in a number of languages from this Web site. Read the Lenovo Limited Warranty at:http://www.lenovo.com/warranty/llw_02
The LLW also is preinstalled on the computer. To access the LLW, go to the following directory:/usr/share/doc/lenovo-doc
If you cannot view the LLW either from the Web site or from your computer, contact your local Lenovo officeor reseller to obtain a printed version of the LLW.
Accessing the Ubuntu help system
The Ubuntu help system provides information about how to use the Ubuntu operating system. To access thehelp system from the Unity, move your cursor to the Launch bar, and then click the Help icon. If you cannotfind the Help icon from the Launch bar, click the Search icon, and type Help to search it.
To learn more about the Ubuntu operating system, go to:http://www.ubuntu.com
Supporting information
If you need help, service, technical assistance, or more information about the Ubuntu operating system orother applications, contact the provider of the Ubuntu operating system or the provider of the application. Ifyou need the service and support for hardware components shipped with your computer, contact Lenovo.For more information about how to contact Lenovo, refer to the User Guide and Safety and Warranty Guide.
To access the latest User Guide and Safety and Warranty Guide, go to:http://www.lenovo.com/support
The following list provides information about components and features fully supported by Lenovo.
Notes: Depending on the model, some of the components and features might not be available on yourcomputer.
• Basic Input/Output System (BIOS)
– Legacy BIOS
– Unified Extensible Firmware Interface (UEFI) BIOS with non-secure boot
• Storage device
– Hard disk drive
– Solid-state drive
© Copyright Lenovo 2015, 2016 143

– Hybrid drive
• Computer display
– Color display
– Integrated camera
– Integrated microphones
• Interface
– Audio connector
– Ethernet connector
– External monitor connectors
– High Definition Multimedia Interface (HDMITM) connector
– Mini DisplayPort connector
– HDMI audio 2 channel
– Media card reader
– Secure Digital (SD)
– Secure Digital High-Capacity (SDHC)
– MultiMediaCard (MMC)
– USB 3.0 connector
– Always On USB 3.0 connector
• Keyboard
– Six-row keyboard
– Trackpad
– TrackPoint
– TrackPoint buttons
• Wireless feature
– Integrated wireless local area network (LAN)
The following list provides information about components and features partly supported by Lenovo.
Note: Depending on the model, some of the components and features might not be available on yourcomputer.
• Bluetooth audio profiles
• Display
– 3D graphics
– Multiple display
• Keyboard
– Function keys
• Trackpad
– Horizontal scrolling
– Vertical scrolling
• Micro SIM card
The following list provides information about components and features that are not supported by Lenovo.
144 ThinkPad X260 User Guide

Note: Depending on the model, some of the components and features might not be available on yourcomputer.
• Accelerometer
• Docking station connector
• Fingerprint reader
• HDMI 5.1 channel
• Hybrid Graphic card
• Integrated wireless Wide Area Network (WAN)
• Modems
• Surround audio
• Smart card reader
• WiGig feature
Appendix A. Supplemental information about the Ubuntu operating system 145

146 ThinkPad X260 User Guide

Appendix B. Regulatory Information
The latest compliance information is available at http://www.lenovo.com/compliance.
Locating the UltraConnect™ wireless antennasThinkPad models feature a diversified antenna system built into the display for optimal reception, whichenables wireless communication wherever you are.
For computer models with wireless LAN feature or wireless LAN/WAN feature:
1 Wireless-LAN antenna (auxiliary)2 Wireless-WAN antenna (auxiliary, available on some models)3 Wireless-WAN antenna (main, available on some models)4 Wireless-LAN antenna (main)
For computer models with wireless LAN feature and WiGig feature:
1 Wireless-LAN antenna (auxiliary)
© Copyright Lenovo 2015, 2016 147

2 WiGig antenna3 Wireless-LAN antenna (main)
Wireless related informationWireless interoperability
The M.2 wireless-LAN card is designed to be interoperable with any wireless-LAN product that is basedon Direct Sequence Spread Spectrum (DSSS), Complementary Code Keying (CCK), and/or OrthogonalFrequency Division Multiplexing (OFDM) radio technology, and is compliant to:
• The 802.11b/g Standard, 802.11a/b/g or 802.11n, or 802.11ac on Wireless LANs, as defined andapproved by the Institute of Electrical and Electronics Engineers.
• The Wireless Fidelity (WiFi) certification as defined by the Wi-Fi Alliance.
Your Bluetooth card is compliant with Bluetooth Specification 4.0 as defined by the Bluetooth SpecialInterest Group SIG. It supports the following profiles:
Note: Depending on the Bluetooth card and the operating system you use, some profiles might notbe available.
• Advanced Audio Distribution Profile (A2DP)
• Audio/Video Control Transport Protocol (AVCTP)
• Audio/Video Distribution Transport Protocol (AVDTP)
• A/V Remote Control Profile (AVRCP)
• Basic Imaging Profile (BIP)
• Basic Printing Profile (BPP)
• Dial-Up Networking Profile (DUN)
• File Transfer Profile (FTP)
• Generic Access Profile (GAP)
• Generic A/V Distribution Profile (GAVDP)
• Hardcopy Cable Replacement Profile (HCRP)
• Headset Profile (HSP)
• Hands-Free Profile (HFP)
• Human Interface Device Profile (HID)
• Message Access Profile (MAP)
• Object Exchange Protocol (OBEX)
• Object Push Profile (OPP)
• Personal Area Networking Profile (PAN)
• Phone Book Access Profile (PBAP)
• Service Discovery Protocol (SDP)
• Synchronization Profile (SYNC)
• Video Distribution Profile (VDP)
• Generic Attribute Profile (GATT)
• Proximity Profile
• Find Me Profile
• Immediate Alert Profile
148 ThinkPad X260 User Guide
• Battery Status Profile
Usage environment and your health
This computer contains integrated wireless cards that operate within the guidelines identified by radiofrequency (RF) safety standards and recommendations; therefore, Lenovo believes this product is safe foruse by consumers. These standards and recommendations reflect the consensus of the worldwide scientificcommunity, and result from deliberations of panels and committees of scientists, who continually review andinterpret the extensive research literature.
In some situations or environments, the use of wireless devices might be restricted by the proprietor of abuilding or responsible representatives of an organization. For example, these situations and areas mightinclude the following:
• On board of airplanes, in hospitals or near petrol stations, blasting areas (with electro-explosive devices),medical implants or body-worn electronic medical devices, such as pace makers.
• In any other environment where the risk of interference to other devices or services is perceived oridentified as harmful.
If you are uncertain of the policy that applies to the use of wireless devices in a specific area (such as anairport or hospital), you are encouraged to ask for authorization to use a wireless device prior to turningon the computer.
Wireless-radio compliance informationComputer models equipped with wireless communications comply with the radio frequency and safetystandards of any country or region in which it has been approved for wireless use.
Brazil wireless-radio compliance information
Este equipamento opera em caráter secundário, isto é, não tem direito a proteção contra interferênciaprejudicial, mesmo de estações do mesmo tipo, e não pode causar interferência a sistemas operando emcaráter primário.
This equipment is a secondary type device, that is, it is not protected against harmful interference, evenif the interference is caused by a device of the same type, and it also cannot cause any interference toprimary type devices.
Mexico wireless-radio compliance information
Advertencia: En Mexico la operación de este equipo estásujeta a las siguientes dos condiciones: (1) esposible que este equipo o dispositivo no cause interferencia perjudicial y (2) este equipo o dispositivo debeaceptar cualquier interferencia, incluyendo la que pueda causar su operación no deseada.
Locating wireless regulatory noticesFor more information about the wireless regulatory notices, refer to the Regulatory Notice shipped with thecomputer.
If the computer is shipped without the Regulatory Notice, you can find it on the Web site at:http://www.lenovo.com/UserManuals
Certification related informationThe following table contains information of the product name, compliance ID, and machine types.
Appendix B. Regulatory Information 149

Product name Compliance ID Machine types
ThinkPad X260 TP00075A 20F5 and 20F6
Export classification noticeThis product is subject to the United States Export Administration Regulations (EAR) and has an ExportClassification Control Number (ECCN) of 5A992.c. It can be re-exported except to any of the embargoedcountries in the EAR E1 country list.
Electronic emission notices
Federal Communications Commission Declaration of ConformityThe following information refers to the ThinkPad X260 computer, machine types 20F5 and 20F6.
This equipment has been tested and found to comply with the limits for a Class B digital device, pursuantto Part 15 of the FCC Rules. These limits are designed to provide reasonable protection against harmfulinterference in a residential installation. This equipment generates, uses, and can radiate radio frequencyenergy and, if not installed and used in accordance with the instructions, may cause harmful interferenceto radio communications. However, there is no guarantee that interference will not occur in a particularinstallation. If this equipment does cause harmful interference to radio or television reception, which can bedetermined by turning the equipment off and on, the user is encouraged to try to correct the interference byone or more of the following measures:• Reorient or relocate the receiving antenna.• Increase the separation between the equipment and receiver.• Connect the equipment into an outlet on a circuit different from that to which the receiver is connected.• Consult an authorized dealer or service representative for help.
Lenovo is not responsible for any radio or television interference caused by using other than specified orrecommended cables and connectors or by unauthorized changes or modifications to this equipment.Unauthorized changes or modifications could void the user's authority to operate the equipment.
This device complies with Part 15 of the FCC Rules. Operation is subject to the following two conditions: (1)this device may not cause harmful interference, and (2) this device must accept any interference received,including interference that may cause undesired operation.
Responsible Party:Lenovo (United States) Incorporated1009 Think Place - Building OneMorrisville, NC 27560Phone Number: 919-294-5900
Industry Canada Class B emission compliance statementCAN ICES-3(B)/NMB-3(B)
150 ThinkPad X260 User Guide

European Union - Compliance to the Electromagnetic Compatibility(EMC) Directive or Radio Equipment DirectiveModels without a radio device: This product is in conformity with the protection requirements of EUCouncil Directive 2004/108/EC (until 19 April, 2016) and Council Directive 2014/30/EU (from 20 April, 2016)on the approximation of the laws of the Member States relating to electromagnetic compatibility.
Models with a radio device: This product is in conformity with all the requirements and essential normsthat apply to EU Council R&TTE Directive 1999/5/EC on the approximation of the laws of the MemberStates relating to radio equipment.
Lenovo cannot accept responsibility for any failure to satisfy the protection requirements resulting froma non-recommended modification of the product, including the installation of option cards from othermanufacturers. This product has been tested and found to comply with the limits for Class B equipmentaccording to European Standards harmonized in the Directives in compliance. The limits for Class Bequipment were derived for typical residential environments to provide reasonable protection againstinterference with licensed communication devices.
Lenovo, Einsteinova 21, 851 01 Bratislava, Slovakia
German Class B compliance statementDeutschsprachiger EU Hinweis:
Hinweis für Geräte der Klasse B EU-Richtlinie zur Elektromagnetischen Verträglichkeit
Dieses Produkt entspricht den Schutzanforderungen der EU-Richtlinie 2014/30/EU (früher 2004/108/EC) zurAngleichung der Rechtsvorschriften über die elektromagnetische Verträglichkeit in den EU-Mitgliedsstaatenund hält die Grenzwerte der Klasse B der Norm gemäß Richtlinie.
Um dieses sicherzustellen, sind die Geräte wie in den Handbüchern beschrieben zu installieren und zubetreiben. Des Weiteren dürfen auch nur von der Lenovo empfohlene Kabel angeschlossen werden.Lenovo übernimmt keine Verantwortung für die Einhaltung der Schutzanforderungen, wenn das Produktohne Zustimmung der Lenovo verändert bzw. wenn Erweiterungskomponenten von Fremdherstellern ohneEmpfehlung der Lenovo gesteckt/eingebaut werden.
Deutschland:
Einhaltung des Gesetzes über die elektromagnetische Verträglichkeit von BetriebsmittelnDieses Produkt entspricht dem „Gesetz über die elektromagnetische Verträglichkeit von Betriebsmitteln“EMVG (früher „Gesetz über die elektromagnetische Verträglichkeit von Geräten“). Dies ist die Umsetzung derEMV EU-Richtlinie 2014/30/EU (früher 2004/108/EWG) in der Bundesrepublik Deutschland.
Zulassungsbescheinigung laut dem Deutschen Gesetz über die elektromagnetische Verträglichkeitvon Betriebsmitteln, EMVG vom 20. Juli 2007 (früher Gesetz über die elektromagnetischeVerträglichkeit von Geräten), bzw. der EMV EU Richtlinie 2014/30/EU (früher 2004/108/EC), fürGeräte der Klasse B.
Dieses Gerät ist berechtigt, in Übereinstimmung mit dem Deutschen EMVG das EG-Konformitätszeichen- CE - zu führen. Verantwortlich für die Konformitätserklärung nach Paragraf 5 des EMVG ist die Lenovo(Deutschland) GmbH, Meitnerstr. 9, D-70563 Stuttgart.
Appendix B. Regulatory Information 151

Informationen in Hinsicht EMVG Paragraf 4 Abs. (1) 4:
Das Gerät erfüllt die Schutzanforderungen nach EN 55024 und EN 55022 Klasse B.
Korea Class B compliance statement
Japan VCCI Class B compliance statement
Japan compliance statement for products which connect to the powermains with rated current less than or equal to 20 A per phase
Japan notice for ac power cordThe ac power cord shipped with your product can be used only for this specific product. Do not use the acpower cord for other devices.
Lenovo product service information for Taiwan
Eurasian compliance mark
Brazil audio noticeOuvir sons com mais de 85 decibéis por longos períodos pode provocar danos ao sistema auditivo.
152 ThinkPad X260 User Guide

Appendix C. WEEE and recycling statements
Lenovo encourages owners of information technology (IT) equipment to responsibly recycle theirequipment when it is no longer needed. Lenovo offers a variety of programs and services to assistequipment owners in recycling their IT products. For information about recycling Lenovo products, go tohttp://www.lenovo.com/recycling. The latest environmental information about our products is available athttp://www.lenovo.com/ecodeclaration.
Important WEEE information
The WEEE marking on Lenovo products applies to countries with WEEE and e-waste regulations (forexample, the European WEEE Directive, India E-Waste Management & Handling Rules, 2011). Appliances arelabeled in accordance with local regulations concerning waste electrical and electronic equipment (WEEE).These regulations determine the framework for the return and recycling of used appliances as applicablewithin each geography. This label is applied to various products to indicate that the product is not to bethrown away, but rather put in the established collection systems for reclaiming these end of life products.
Users of electrical and electronic equipment (EEE) with the WEEE marking must not dispose of end of lifeEEE as unsorted municipal waste, but use the collection framework available to them for the return, recycle,and recovery of WEEE and to minimize any potential effects of EEE on the environment and human healthdue to the presence of hazardous substances. Lenovo electrical and electronic equipment (EEE) may containparts and components, which at end-of-life might qualify as hazardous waste.
EEE and waste electrical and electronic equipment (WEEE) can be delivered free of charge to the place ofsale or any distributor that sells electrical and electronic equipment of the same nature and function asthe used EEE or WEEE.
For additional WEEE information, go to:http://www.lenovo.com/recycling
WEEE information for Hungary
Lenovo, as a producer, bears the cost incurred in connection with the fulfillment of Lenovo’s obligationsunder Hungary Law No. 197/2014 (VIII.1.) subsections (1)-(5) of section 12.
© Copyright Lenovo 2015, 2016 153

Recycling information for China
http://support.lenovo.com.cn/activity/551.htm
Recycling information for Japan
Collecting and recycling a disused Lenovo computer or monitor
If you are a company employee and need to dispose of a Lenovo computer or monitor that is the propertyof the company, you must do so in accordance with the Law for Promotion of Effective Utilization ofResources. Computers and monitors are categorized as industrial waste and should be properly disposedof by an industrial waste disposal contractor certified by a local government. In accordance with the Lawfor Promotion of Effective Utilization of Resources, Lenovo Japan provides, through its PC Collecting andRecycling Services, for the collecting, reuse, and recycling of disused computers and monitors. For details,visit the Lenovo Web site at http://www.lenovo.com/recycling/japan.
Pursuant to the Law for Promotion of Effective Utilization of Resources, the collecting and recycling ofhome-used computers and monitors by the manufacturer was begun on October 1, 2003. This serviceis provided free of charge for home-used computers sold after October 1, 2003. For details, go tohttp://www.lenovo.com/recycling/japan.
Disposing of Lenovo computer components
Some Lenovo computer products sold in Japan may have components that contain heavy metals or otherenvironmental sensitive substances. To properly dispose of disused components, such as a printed circuitboard or drive, use the methods described above for collecting and recycling a disused computer or monitor.
Disposing of disused lithium batteries from Lenovo computers
A button-shaped lithium battery is installed inside your Lenovo computer to provide power to the computerclock while the computer is off or disconnected from the main power source. If you need to replace it with anew one, contact your place of purchase or contact Lenovo for service. If you need to dispose of a disusedlithium battery, insulate it with vinyl tape, contact your place of purchase or an industrial-waste-disposaloperator, and follow their instructions.
Disposal of a lithium battery must comply with local ordinances and regulations.
Disposing of a disused battery from Lenovo notebook computers
Your Lenovo notebook computer has a lithium ion battery or a nickel metal hydride battery. If you are acompany employee who uses a Lenovo notebook computer and need to dispose of a battery, contact theproper person in Lenovo sales, service, or marketing, and follow that person's instructions. You also canrefer to the instructions at http://www.lenovo.com/jp/ja/environment/recycle/battery/.
If you use a Lenovo notebook computer at home and need to dispose of a battery, youmust comply with local ordinances and regulations. You also can refer to the instructions athttp://www.lenovo.com/jp/ja/environment/recycle/battery/.
154 ThinkPad X260 User Guide

Recycling information for Brazil
Declarações de Reciclagem no Brasil
Descarte de um Produto Lenovo Fora de Uso
Equipamentos elétricos e eletrônicos não devem ser descartados em lixo comum, mas enviados à pontos decoleta, autorizados pelo fabricante do produto para que sejam encaminhados e processados por empresasespecializadas no manuseio de resíduos industriais, devidamente certificadas pelos orgãos ambientais, deacordo com a legislação local.
A Lenovo possui um canal específico para auxiliá-lo no descarte desses produtos. Caso você possuaum produto Lenovo em situação de descarte, ligue para o nosso SAC ou encaminhe um e-mail para:[email protected], informando o modelo, número de série e cidade, a fim de enviarmos as instruçõespara o correto descarte do seu produto Lenovo.
Battery recycling information for Taiwan
Battery recycling information for the European Union
Notice: This mark applies only to countries within the European Union (EU).
Batteries or packaging for batteries are labeled in accordance with European Directive 2006/66/ECconcerning batteries and accumulators and waste batteries and accumulators. The Directive determines theframework for the return and recycling of used batteries and accumulators as applicable throughout theEuropean Union. This label is applied to various batteries to indicate that the battery is not to be thrownaway, but rather reclaimed upon end of life per this Directive.
In accordance with the European Directive 2006/66/EC, batteries and accumulators are labeled to indicatethat they are to be collected separately and recycled at end of life. The label on the battery may alsoinclude a chemical symbol for the metal concerned in the battery (Pb for lead, Hg for mercury, and Cd forcadmium). Users of batteries and accumulators must not dispose of batteries and accumulators as unsortedmunicipal waste, but use the collection framework available to customers for the return, recycling, andtreatment of batteries and accumulators. Customer participation is important to minimize any potentialeffects of batteries and accumulators on the environment and human health due to the potential presence ofhazardous substances.
Appendix C. WEEE and recycling statements 155

Before placing electrical and electronic equipment (EEE) in the waste collection stream or in waste collectionfacilities, the end user of equipment containing batteries and/or accumulators must remove those batteriesand accumulators for separate collection.
Disposing of lithium batteries and battery packs from Lenovo products
A coin-cell type lithium battery might be installed inside your Lenovo product. You can find details about thebattery in the product documentation. If the battery needs to be replaced, contact your place of purchase orcontact Lenovo for service. If you need to dispose of a lithium battery, insulate it with vinyl tape, contactyour place of purchase or a waste-disposal operator, and follow their instructions.
Disposing of battery packs from Lenovo products
Your Lenovo device might contain a lithium-ion battery pack or a nickel metal hydride battery pack. You canfind details on the battery pack in the product documentation. If you need to dispose of a battery pack,insulate it with vinyl tape, contact Lenovo sales, service, or your place of purchase, or a waste-disposaloperator, and follow their instructions. You also can refer to the instructions provided in the user guidefor your product.
For proper collection and treatment, go to:http://www.lenovo.com/lenovo/environment
Battery recycling information for the United States and Canada
156 ThinkPad X260 User Guide

Appendix D. Restriction of Hazardous Substances (RoHS)Directive
The latest environmental information is available at http://www.lenovo.com/ecodeclaration.
European Union RoHSThis Lenovo product, with included parts (cables, cords, and so on) meets the requirements of Directive2011/65/EU on the restriction of the use of certain hazardous substances in electrical and electronicequipment (“RoHS recast” or “RoHS 2”).
For more information about Lenovo worldwide compliance on RoHS, go to:http://www.lenovo.com/social_responsibility/us/en/RoHS_Communication.pdf
Turkish RoHSThe Lenovo product meets the requirements of the Republic of Turkey Directive on the Restriction of the Useof Certain Hazardous Substances in Waste Electrical and Electronic Equipment (WEEE).
Ukraine RoHS
India RoHSRoHS compliant as per E-Waste (Management & Handling) Rules, 2011.
© Copyright Lenovo 2015, 2016 157

China RoHS
158 ThinkPad X260 User Guide

Taiwan RoHS設備名稱:筆記型電腦 型號 (型式):TP00075A, 20F5, 20F6
Equipment name Type designation (Type)
Appendix D. Restriction of Hazardous Substances (RoHS) Directive 159

160 ThinkPad X260 User Guide

Appendix E. ENERGY STAR model information
ENERGY STAR® is a joint program of the U.S. Environmental Protection Agency and the U.S. Departmentof Energy aimed at saving money and protecting the environment through energy efficient products andpractices.
Lenovo is proud to offer our customers products with the ENERGY STAR qualified designation. You mightfind an ENERGY STAR mark affixed on the computer or displayed on the power settings interface. Lenovocomputers of the following machine types, if carry an ENERGY STAR mark, have been designed and testedto conform to the ENERGY STAR program requirements for computers.
20F5 and 20F6
By using ENERGY STAR qualified products and taking advantage of the power-management featuresof the computer, you can help reduce the consumption of electricity. Reduced electrical consumptioncan contribute to potential financial savings, a cleaner environment, and the reduction of greenhouse gasemissions.
For more information about ENERGY STAR, go to:http://www.energystar.gov
Lenovo encourages you to make efficient use of energy an integral part of your day-to-day operations. Tohelp in this endeavor, Lenovo has preset the following power-management features to take effect when thecomputer has been inactive for a specified length of time:
Power plan: default (when plugged into ac power)
• Turn off the display: After 10 minutes
• Put the computer to sleep: After 30 minutes
To awaken the computer from sleep mode, press the power button. For more information about thesesettings, see the Windows help information on the computer.
The Wake on LAN function is enabled when your Lenovo computer is shipped from the factory, and thesetting remains valid even when the computer is in sleep mode. If you do not need to have Wake on LANenabled while the computer is in sleep mode, you can reduce the power consumption and prolong the timein sleep mode, by disabling the setting of Wake on LAN for sleep mode.
To disable the setting of Wake on LAN for sleep mode, do the following:
1. Go to Control Panel and click Hardware and Sound ➙ Device Manager.
2. In the Device Manager window, expand Network adapters.
3. Right-click your network adapter device, and click Properties.
4. Click the Power Management tab.
© Copyright Lenovo 2015, 2016 161

5. Clear the Allow this device to wake the computer check box.
6. Click OK.
162 ThinkPad X260 User Guide

Appendix F. Notices
Lenovo may not offer the products, services, or features discussed in this document in all countries. Consultyour local Lenovo representative for information on the products and services currently available in yourarea. Any reference to a Lenovo product, program, or service is not intended to state or imply that only thatLenovo product, program, or service may be used. Any functionally equivalent product, program, or servicethat does not infringe any Lenovo intellectual property right may be used instead. However, it is the user'sresponsibility to evaluate and verify the operation of any other product, program, or service.
Lenovo may have patents or pending patent applications covering subject matter described in thisdocument. The furnishing of this document does not give you any license to these patents. You can sendlicense inquiries, in writing, to:
Lenovo (United States), Inc.1009 Think Place - Building OneMorrisville, NC 27560U.S.A.Attention: Lenovo Director of Licensing
LENOVO PROVIDES THIS PUBLICATION “AS IS” WITHOUT WARRANTY OF ANY KIND, EITHER EXPRESSOR IMPLIED, INCLUDING, BUT NOT LIMITED TO, THE IMPLIED WARRANTIES OF NON-INFRINGEMENT,MERCHANTABILITY OR FITNESS FOR A PARTICULAR PURPOSE. Some jurisdictions do not allowdisclaimer of express or implied warranties in certain transactions, therefore, this statement may not applyto you.
This information could include technical inaccuracies or typographical errors. Changes are periodicallymade to the information herein; these changes will be incorporated in new editions of the publication.Lenovo may make improvements and/or changes in the product(s) and/or the program(s) described in thispublication at any time without notice.
The products described in this document are not intended for use in implantation or other life supportapplications where malfunction may result in injury or death to persons. The information contained in thisdocument does not affect or change Lenovo product specifications or warranties. Nothing in this documentshall operate as an express or implied license or indemnity under the intellectual property rights of Lenovoor third parties. All information contained in this document was obtained in specific environments and ispresented as an illustration. The result obtained in other operating environments may vary.
Lenovo may use or distribute any of the information you supply in any way it believes appropriate withoutincurring any obligation to you.
Any references in this publication to non-Lenovo Web sites are provided for convenience only and do not inany manner serve as an endorsement of those Web sites. The materials at those Web sites are not part ofthe materials for this Lenovo product, and use of those Web sites is at your own risk.
Any performance data contained herein was determined in a controlled environment. Therefore, the resultobtained in other operating environments may vary significantly. Some measurements may have beenmade on development-level systems and there is no guarantee that these measurements will be the sameon generally available systems. Furthermore, some measurements may have been estimated throughextrapolation. Actual results may vary. Users of this document should verify the applicable data for theirspecific environment.
© Copyright Lenovo 2015, 2016 163

This document is copyrighted by Lenovo and is not covered by any open source license, including anyLinux agreement(s) which may accompany software included with this product. Lenovo may update thisdocument at any time without notice.
To obtain the most up-to-date documentation for your computer, go to:http://www.lenovo.com/support
TrademarksThe following terms are trademarks of Lenovo in the United States, other countries, or both:
Access ConnectionsActive Protection SystemLenovoLenovo logoRescue and RecoverySecure Data DisposalThinkPadThinkPad logoTrackPointUltraConnect
Intel and Intel SpeedStep are trademarks of Intel Corporation or its subsidiaries in the U.S. and/or othercountries.
BitLocker, Cortana, Direct3D, Microsoft, and Windows are trademarks of the Microsoft group of companies.
Mini DisplayPort (mDP) is a trademark of the Video Electronics Standards Association.
The terms HDMI and HDMI High-Definition Multimedia Interface are trademarks or registered trademarks ofHDMI Licensing LLC in the United States and other countries.
Other company, product, and service names may be trademarks or service marks of others.
164 ThinkPad X260 User Guide