The Pioneer Woman Cooks: Recipes From an Accidental Country Girl
242
-
Upload
khangminh22 -
Category
Documents
-
view
0 -
download
0
Transcript of The Pioneer Woman Cooks: Recipes From an Accidental Country Girl


The Pioneer Woman Cooks
Recipes from an Accidental Country Girl
Ree Drummond

THIS COOKBOOK IS DEDICATED TO MARLBORO MAN, who rescued me years ago from a certain futureof black pumps, weekly pedicures, take-out Thai food, and stop-start traffic. Thank you for turning my life intosomething I never imagined and for showing me a side of the world I never thought would apply to me. Thank youfor loving me through my daily foibles as I continue to plow through life in the country, and for never making mefeel like a misfit…even though I am.
Thank you for giving me our weird and wonderful children, and for involving them so wholly in the day-to-daywork on the ranch. Thank you for teaching them how to work cattle and haul hay so I can stay home and act busy.Thank you for giving them a childhood so different from my own, and for not scoffing if I want to take them to amusical in the big city every couple of years.
Finally, thank you not only for tolerating the kitchen hurricane this labor-of-love cookbook caused, but forhelping me wash a pot or two.
You surprise me daily.
And I love your Wranglers.

Contents
Introduction
The Cast of Characters
Starters
In the Morning
Dinner(Translation: Lunch)
Sunday Dinner
Supper(Translation: Dinner)
Cowgirl Dinner Party
Sweets
Keepin’ It Real
Acknowledgments
Searchable Terms
The End
About the Author
Credits
Copyright
About the Publisher


INTRODUCTION
I grew up on the seventh fairway of an idyllic golf course in a corporate town of 35,000. As the daughter of anorthopedic surgeon, my childhood was defined by summers at the pool, vacations on Hilton Head Island, SouthCarolina, and Broadway trips to New York with my mom. I was the archetypal town girl, firmly attached to all thewonderful conveniences of a suburban existence: landscaped lawns, manicures, pedicures, facials, take-out food…and lots of shopping. I had no idea any other kind of life existed.
Still, I decided my experiences needed a little broadening. I blazed straight to Los Angeles for college, attendedUSC, and drank in all the wonderfulness of the city. I lived large, vowing never, ever to live away from a large cityfor the rest of my life. I loved the energy, the people, the pace. I adored the freaks on Venice Beach.
circa 1986
Then, after living and working in L.A. post-college, I took another leap of independence by choosing not tofollow my longtime college love to San Francisco and instead, to briefly move back to my hometown. I sold myfuton and my Rollerblades, waved goodbye to the ocean, and headed back home. It’ll just be a brief pit stop, I toldmyself. A pit stop on the way to the rest of my life. I had no idea how prophetic that would be.
Once home, I immediately began making plans to move to Chicago, where I decided I’d work while applyingto area law schools. Then, late one night during the Christmas holiday, I met a group of childhood friends for drinksat a local dive. That’s when I saw him—the cowboy—across the smoky room. We exchanged several glances, a fewnervous stares. Soon we found ourselves talking into the night, my knees growing weaker by the minute, my gazefixed on his icy-blue eyes. He was like no one I’d ever met before—serious, sexy, quiet. Certainly nothing like thegolf-crazed, Izod-wearing boys I’d grown up with—and definitely nothing like the surfers of Southern California.We parted ways that night, and my plans for Chicago plowed forward. But his image was burned into my psyche.
Two weeks before my move to Chicago, the cowboy, the Marlboro Man–esque character I’d met in the smokybar, called and asked me to dinner. That date turned into a second, which before too long was a fifth, then a sixth.By the seventh date, I’d canceled my move to Chicago, and before I knew it we were married and having babies onhis isolated cattle ranch fifty miles from my hometown—and a million miles away from anything I’d everenvisioned for my life. I had no idea how I’d gotten there.
More than a decade and four kids later, I’m still adapting to life as a ranch wife. I have cows in my yard daily,piles of horse manure on my porch, and a dusty pile of clothes that reaches the ceiling. I still can’t saddle a horse. Ifreak out during tornadoes. And I haven’t eaten sushi in ages. My life in the country has been one long transition.
Food has been a huge part of it.A former vegetarian and food snob, I’d spent my years in Los Angeles sampling all of the diverse culinary
options the city had to offer: Italian food, Thai food, Indian and Greek food. Every meal was an adventure for me—alife experience. Culinary boredom was never a problem.
Once married and living in the country, it was a rude awakening to find out that cowboys don’t eat Ahi tuna.They don’t eat ginger-sesame noodles. They wouldn’t touch sushi with a ten-foot pole. Cowboys eat meat—lots ofmeat—with an occasional potato thrown in for balanced nutrition. What have I done? I asked myself, as I whiskedmy first skillet of sausage gravy. I can’t cook like this. I can’t live like this!
I spent a month mourning my old life. And then I decided if I couldn’t beat ’em, I’d join ’em. And I set out tocreate delicious food—food that would allow me to tickle my cooking fancy, but still make the cowboys’ hearts gopitter pat. These are the recipes I share in this book.
My food is flavorful, simple, and abundant—that’s the style of cooking that works in my life. It’s decidedly notnoncaloric—cowboys work too hard to warrant that. And it’s always, always crowd pleasing—the recipes I’msharing with you are tried and true, and have made many a person’s taste buds sing.
I love cooking. I love raising a family. And I love country life. It isn’t worry free or cushy. It isn’t seamless,easy, or without challenges. But it’s perfect for me. As someone who grew up smack dab in the middle of modernsociety, it’s a daily reminder of a simpler time—a time when folks worked the land, when take-out food was theexception, not the rule; and when decency, kindness, and hard work were the measure of a person’s success…. andwhen Starbucks didn’t exist on every corner.
(Not that I’d mind a Starbucks in our north pasture.)I hope you get a kick out of this book of mine. It’s not overly polished or glossy…but then again, neither is my
life on the ranch. I didn’t have a staff of assistants to help me; I took all my own photos for this book, and usednothing but the natural light in my kitchen. I had friends do the illustrations, and used clip art I’ve collected throughthe years. It’s nothing fancy. But it comes straight from my heart. Thank you for allowing me to share my worldwith you.
I’m still waiting for that staff of assistants to fall out of the sky, by the way. I’ve been holding my breath foryears, and I still like to think they’re coming.

—Pioneer Woman
NEWS FLASH: ISOLATED RANCH WIFE ENTERS THE DIGITAL AGE
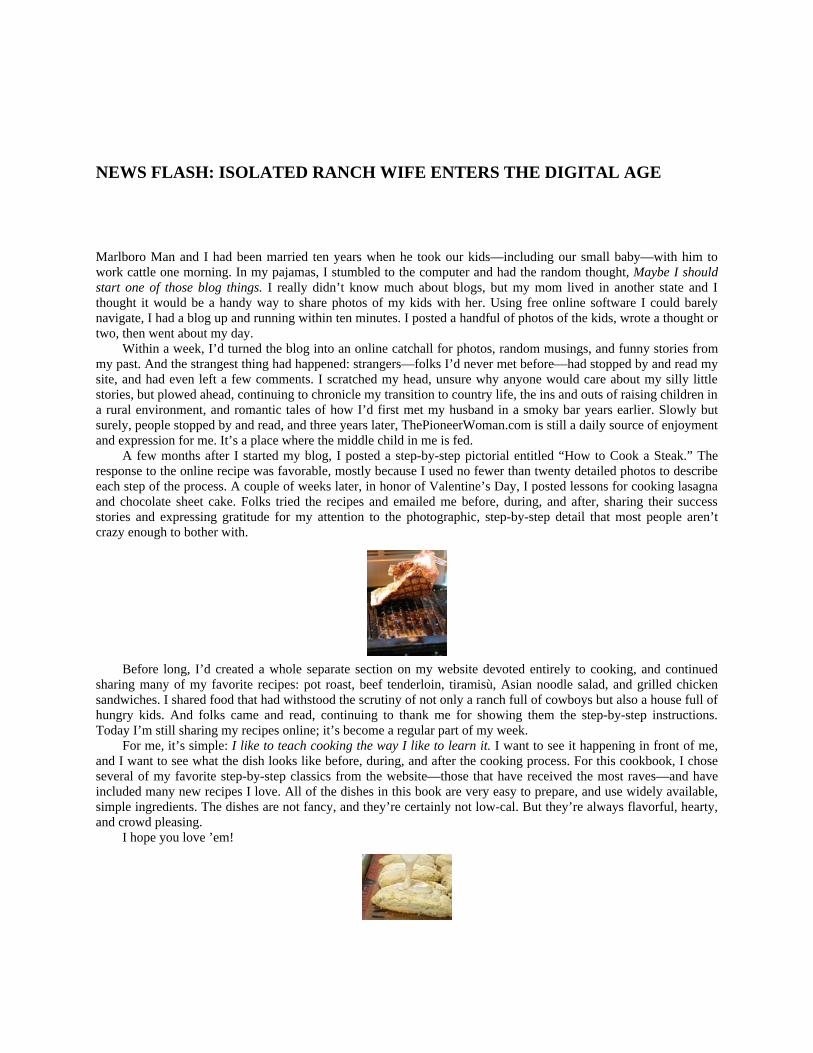
Marlboro Man and I had been married ten years when he took our kids—including our small baby—with him towork cattle one morning. In my pajamas, I stumbled to the computer and had the random thought, Maybe I shouldstart one of those blog things. I really didn’t know much about blogs, but my mom lived in another state and Ithought it would be a handy way to share photos of my kids with her. Using free online software I could barelynavigate, I had a blog up and running within ten minutes. I posted a handful of photos of the kids, wrote a thought ortwo, then went about my day.
Within a week, I’d turned the blog into an online catchall for photos, random musings, and funny stories frommy past. And the strangest thing had happened: strangers—folks I’d never met before—had stopped by and read mysite, and had even left a few comments. I scratched my head, unsure why anyone would care about my silly littlestories, but plowed ahead, continuing to chronicle my transition to country life, the ins and outs of raising children ina rural environment, and romantic tales of how I’d first met my husband in a smoky bar years earlier. Slowly butsurely, people stopped by and read, and three years later, ThePioneerWoman.com is still a daily source of enjoymentand expression for me. It’s a place where the middle child in me is fed.
A few months after I started my blog, I posted a step-by-step pictorial entitled “How to Cook a Steak.” Theresponse to the online recipe was favorable, mostly because I used no fewer than twenty detailed photos to describeeach step of the process. A couple of weeks later, in honor of Valentine’s Day, I posted lessons for cooking lasagnaand chocolate sheet cake. Folks tried the recipes and emailed me before, during, and after, sharing their successstories and expressing gratitude for my attention to the photographic, step-by-step detail that most people aren’tcrazy enough to bother with.
Before long, I’d created a whole separate section on my website devoted entirely to cooking, and continuedsharing many of my favorite recipes: pot roast, beef tenderloin, tiramisù, Asian noodle salad, and grilled chickensandwiches. I shared food that had withstood the scrutiny of not only a ranch full of cowboys but also a house full ofhungry kids. And folks came and read, continuing to thank me for showing them the step-by-step instructions.Today I’m still sharing my recipes online; it’s become a regular part of my week.
For me, it’s simple: I like to teach cooking the way I like to learn it. I want to see it happening in front of me,and I want to see what the dish looks like before, during, and after the cooking process. For this cookbook, I choseseveral of my favorite step-by-step classics from the website—those that have received the most raves—and haveincluded many new recipes I love. All of the dishes in this book are very easy to prepare, and use widely available,simple ingredients. The dishes are not fancy, and they’re certainly not low-cal. But they’re always flavorful, hearty,and crowd pleasing.
I hope you love ’em!


THE CAST OF CHARACTERS
AROUND THE HOMESTEAD
Pioneer Woman: Misplaced domestic ranch wife and mother of four who still believes the sun rises and sets on aplatter of sushi. Loves: Marlboro Man, the children, basset hounds, the smell of horses, black pumps, coffee icecream, and Gone With the Wind. And Starbucks. And Broadway show tunes. And Peonies!
Marlboro Man: Pioneer Woman’s husband and father of her four whippersnappers, who believes the sun rises andsets on a steak and baked potato dinner. Loves: the kids, college football, basset hounds, Louis L’Amour books,Marvel Comics, chocolate sheet cake, and ranching. And Pioneer Woman. (She told him to say that.)
The Children: Country kids through and through, they began riding horses while they were still in the womb andcould saddle a horse by the time they could talk. Love: their horses, their dogs, candy, ice cream, cookies, cake,pie…and candy. And Daddy. And Mommy. And basset hounds.
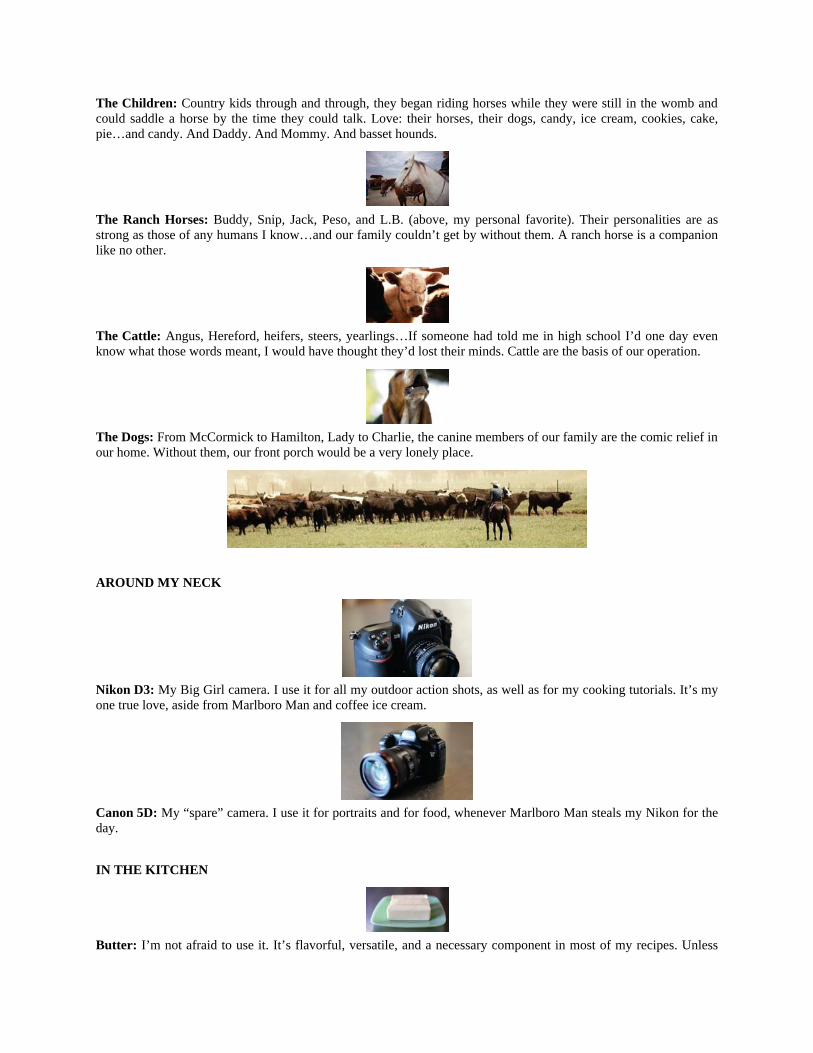
The Ranch Horses: Buddy, Snip, Jack, Peso, and L.B. (above, my personal favorite). Their personalities are asstrong as those of any humans I know…and our family couldn’t get by without them. A ranch horse is a companionlike no other.
The Cattle: Angus, Hereford, heifers, steers, yearlings…If someone had told me in high school I’d one day evenknow what those words meant, I would have thought they’d lost their minds. Cattle are the basis of our operation.
The Dogs: From McCormick to Hamilton, Lady to Charlie, the canine members of our family are the comic relief inour home. Without them, our front porch would be a very lonely place.
AROUND MY NECK
Nikon D3: My Big Girl camera. I use it for all my outdoor action shots, as well as for my cooking tutorials. It’s myone true love, aside from Marlboro Man and coffee ice cream.
Canon 5D: My “spare” camera. I use it for portraits and for food, whenever Marlboro Man steals my Nikon for theday.
IN THE KITCHEN
Butter: I’m not afraid to use it. It’s flavorful, versatile, and a necessary component in most of my recipes. Unless

otherwise specified, I use regular (salted) butter in everything.
Iron skillet: If properly seasoned, an iron skillet will become not only your best friend in the kitchen, but also youruncle, cousin, grandmother, and brother. Iron skillets get nice and hot, perfect for searing a juicy rib-eye steak.
A good mixer: I’ve had my mixer for thirteen years, and it’s never sputtered, puttered, or complained. I use mymixer for making cake batter, cookie dough, and meringue; for mixing meat for meatballs; and, of course, forwhipping cream.
Kosher salt: Available in most supermarkets these days, kosher salt has large flakes that adhere more easily to thesurface of meats and vegetables. Kosher salt is also more forgiving, so it’s harder to oversalt things.
Dutch oven: Whether enameled cast iron or stainless steel, a heavy, wide-mouth, medium-height pot with a lid iswhat you need for roasts, stews, soups, sauces…and deep-frying doughnuts.
Commercial baking sheets: My family considered an intervention this year, because I collect these 18 x 12-inchbabies the way some women collect Marie Osmond dolls. They’re the perfect size for my Chocolate Sheet Cake(Sweets) and hold more cookies than the average cookie sheet. They’re just right for roasting new potatoes or otherveggies. And they’re rimmed, which means juices and mess won’t drip all over your oven.
Seasoned salt: A much maligned salt and seasoning combination, seasoned salt is nothing to scoff at. It gives dishesa certain je ne sais quoi. Don’t be embarrassed; seasoned salt is cool.
Stainless slotted spoons: The most versatile cooking utensil there is. Stir the pot, remove fried okra from oil, and soon.
ABOUT THE RANCH

We’re a family ranching operation consisting of both cows and calves (mama cows and their calves) and yearlings(cattle between 500 and 800 pounds). Cattle have been the basis of the ranch since Marlboro Man’s great-grandfather bought his first steer; it’s what we do best.
In addition to our cattle operation, however, we also use our land to house and care for wild mustangs. Thehorses run free on the ranch and remain largely undisturbed except for the cold, winter months, when we providehay and feed for their sustenance. After nearly one hundred years of cattle exclusively roaming the range, the landhad to get used to the spirit and energy of these magnificent equine creatures.
A Family Ranch
As members of a working family ranch, we live and work on the land ourselves. We aren’t “weekend ranchers” whomoonlight as attorneys or doctors or accountants or Hollywood actors (no offense to Tom Selleck. I think he actuallymight be a real rancher, too. Hi, Tom! Love your ‘stache).
The thing about a working family ranch is this: if there’s work to be done, we know it won’t get done if wedon’t roll up our sleeves and do it ourselves. When it comes to rounding up and working cattle, we’ll take all thehelp we can get: kids, grandparents, cowboys, visiting relatives. No one gets a pass when it comes to ranch work.


STARTERS

BBQ JALAPEÑO POPPERS
Makes 36 Poppers
There are many different versions of these delightful pop-in-your-mouth jalapeños. My sister-in-law Missy makes amore basic version, stuffing jalapeño halves with plain cream cheese, wrapping them with bacon, and baking themslowly for half an hour or so. When she’s feeling particularly mischievous, Missy cooks them on the grill. Eitherway, they’re a real treat. Here’s my spin on the old classic.
IMPORTANT: Wear gloves when working with fresh jalapeños or you’ll curse the ground on which I walkbecause you’ll wake up in the middle of the night with throbbing fingertips. And that’s nothing compared to whathappens if you accidentally scratch your eye—or worse, something else.
18 fresh jalapeñosOne 8-ounce package cream cheese½ cup grated cheddar cheese1 green onion, sliced18 slices thin bacon, cut into halvesBottled barbecue sauceToothpicksRubber gloves (or plastic bags) for working with jalapeños
1. Preheat the oven to 275ºF.
2. Begin by cutting jalapeños in half lengthwise (see warning in headnote). Try to keep the stems intact. They lookprettier that way.
3. With a spoon, scrape out the seeds and light-colored membranes. Remember: The heat comes from the seeds andmembranes, so if you can handle the sizzle, leave some of them intact.

4. Now, in a bowl, combine the cream cheese, cheddar cheese, and chopped green onion. Mix the ingredientstogether gently. And don’t feel you have to use an electric mixer. I do because I’m lazy and don’t like to exertmyself. Ever.
(Too much scrubbing clothes on the washboard, I suppose.)
5. Next, stuff each hollowed jalapeño half with the cheese mixture.
6. Wrap bacon slices around each half, covering as much of the surface as you can. Be careful not to stretch thebacon too tightly around the jalapeño, as the bacon will contract as it cooks.
7. Brush the surface of the bacon with your favorite barbecue sauce. Chutney or apricot jelly works well, too!
8. Secure the jalapeños with toothpicks and pop them in the oven for 1 hour, or until the bacon is sizzling.9. Serve hot or at room temperature, and watch them disappear within seconds. I’ve seriously caught guests stuffingthese into their purses. Sometimes I have to call law enforcement.HELPFUL HINTS: Make three times more than you think you’ll need. (You’ll just have to trust me.)
Poppers can be assembled up to a day ahead of time and kept in the fridge before cooking. Or, they can be fullycooked and frozen in plastic bags until you need them. Just thaw and warm up in the oven before serving.
Unless you’re prepared to become instantly addicted, do not place two of these on your hamburger. I mean it. Don’t.There’ll be no turning back after that.
Variations
For a simpler version, omit the cheddar and green onion from the cream cheese.
Cut sliced peaches or pineapple into small bits and press them into the cream cheese before wrapping thejalapeños in bacon.
Use Pepper Jack cheese in place of the cheddar cheese

PICO DE GALLO
Pico de gallo should be sainted. The freshness of tomatoes, the clean flavor of cilantro, the cool, crisp wonderfulnessof it all. I just couldn’t get by without it.
I used to have trouble making pico de gallo. For the longest time I mistakenly assumed that tomatoes were itschief ingredient, and the rest of the elements—onions, jalapeños, and cilantro—were just there to inject subtleflavor. Whenever I’d try to make pico de gallo, it usually went something like this: Chop a whole bunch of tomato.Add a tiny bit of onion, a couple of spoons of chopped cilantro, a teeny-tiny spoonful of fresh jalapeño, a bunch oflime juice, and a ton of salt. And it wasn’t good. Ever. And I’d cry over my tortilla chips. Oh, how I’d cry over mytortilla chips.
Fortunately, I met Ana. Oh, is Ana ever divine. She lets me practice my horrendous Spanish on her and shegiggles at everything I say. Most important, she makes the most wickedly delicious Mexican food I’ve ever had, notthe least of which is absolutely perfect pico de gallo.
Here’s the most important thing I learned from Ana: tomatoes are only one aspect of pico de gallo. Thejalapeños, cilantro, and onions all require equal billing with the tomatoes to make pico de gallo work. Once I learnedthis important truth, I hit the ground running and haven’t stopped making pico de gallo since. It has replaced ketchupas the most popular condiment on the ranch.
I make up a couple of big bowls of pico de gallo every week, and I never run out of uses for it. On hot summerdays when Marlboro Man returns from working cattle, sometimes a bowl of pico de gallo and tortilla chips is all hewants. It’s cool and satisfying, and usually tides him over till dinner. In addition, I use pico de gallo in any numberof dishes I cook: with tacos, inside quesadillas, atop grilled chicken or a bowl of pinto beans—its versatility isendless, and it gives me a great excuse to plant way too many tomatoes every year.
Yellow or red onions JalapeñosRoma tomatoes (slightly underripe is fine) LimeCilantro Salt
1. Dice up the onions. I like to keep things pretty fine so the pico de gallo will be more palatable to folks who don’tlike large chunks of onion and tomato.
2. Next, dice up an amount of tomatoes equal in quantity to the onions.
3. And grab a bunch of cilantro equal in quantity to the tomatoes and chop it up pretty finely.
4. Now, slice 1 or 2 jalapeños in half (see warning about jalapeños in the headnote on Starters). With a spoon, scrapeout the seeds. (If you like things spicy, leave in some of the white membranes.)

5. Dice the jalapeño very finely; you want a hint of heat and jalapeño flavor, but you don’t want to cause any fires.
6. Now dump the four ingredients into a bowl. Notice that there’s an equal quantity of onion, tomato, and cilantro.This is the secret of perfect pico de gallo!
7. Slice a lime in half and squeeze the juice from half a lime into the bowl.
8. Sprinkle with salt, and stir together until combined. Be sure to taste the pico de gallo and adjust the seasonings,adding salt or more diced jalapeño if needed. (I always taste it with chips so the salt quantity is factored in.)
Then, do what I do: Repeat this process every day. Soon, you’ll wonder how you ever lived without it.
Pico de gallo won’t keep very long in the fridge—probably 24 hours or so. After that, the sugars start to break downand it turns into a soupy mess. So it’s best to make it the same day you’ll want to serve it, though you certainlycould do so several hours before.
’MATERS
The best thing ever to happen to my vegetable garden has been my two boys, who approach harvesting and pickingwith all the intensity and gusto they use to take apart the lawn mower: they don’t stop until it’s all done. And so,toward the end of the summer I’m gifted every few days with a large box of ripe tomatoes…or jalapeños…or greenpeppers…or whatever vegetable has reached its peak. I haven’t picked a vegetable myself in ages. My fingernailsare cleaner than they’ve been in years.
Surprisingly, it didn’t take much training to get my youngsters to understand that you actually have to leave thefruit on the vine longer than two days for it to be of use to anybody. And aside from the occasional inch-longzucchini and a few handfuls of green tomatoes the size of peas, they practice an unexpected amount of patience.
THE GREAT TEARDROP TOMATO CATASTROPHE
A few years ago, my tomato garden ambition had reached an all-time high. I had a few years of semi-successful

vegetable gardening under my belt, and was ready to take it all the way. I envisioned rows and rows of hugebeefsteak tomatoes, enormous heirlooms, flavorful cherry tomatoes, and of course, Roma tomatoes for an endlesssupply of pico de gallo. I’d be the envy of all my neighbors, if I had neighbors, and I’d be the ranch lady who wasalways bringing baskets of tomatoes to her friends…if I had friends.
I primed my garden late that spring and set off to buy my tomato plants at my favorite local nursery. By lateafternoon I returned home with no fewer than thirty tomato plants representing eight different varieties. I couldn’twait for my bounty to bear fruit.
It would bear fruit, all right—tiny, yellow teardrop-shaped fruit. Evidently, due to a massive error at theregional supplier, an entire truckload of tomato plants had been mis-marked. The result was a garden full of tomatoplants bearing nothing but small yellow teardrop tomatoes. I watched in horror every day as more and more yellowteardrops appeared. And it figured that these particular plants would wind up being the healthiest, most prolific onesI’d ever seen. I went to bed at night and dreamed of drowning in teardrop tomatoes. I wouldn’t see a single redtomato all season.
From that day forward, I learned to spread myself out more, collecting different tomato plants from a handfulof different nurseries. A girl can only think of so many uses for yellow tomatoes the size of grapes.
GUACAMOLE
Makes ½ cup per avocado used
If you have my favorite condiment, pico de gallo, lying around, all you need is an avocado and you have themakings of my second favorite condiment: guacamole.
Don’t tell anyone what I’m about to tell you: for the longest time, when I made pico de gallo (Starters) andguacamole, I treated them as two entirely separate dishes, meaning I’d chop all the tomatoes, onions, and cilantro forthe pico de gallo. Then I’d turn around and do the same thing for the guacamole. And then the lights went on.
Sometimes it takes me a while.One day I had the brilliant idea to mash up several avocados and sprinkle them with salt, then simply dump on
a big mound of freshly made pico de gallo and mix it in. It was a culinary revelation of epic proportions, and I’vemade it that way ever since. And you can make it as smooth or as lumpy—as plain or as chunky—as you like. Ihappen to like my guacamole loaded—with lots and lots of bites of tomato and onion, and big cilantro flavor.
Begin with as many avocados as you’d like. Because I’m an avocado freak, I like to allow three-quarters to onewhole avocado per person. But I’m a little excessive that way.

1. Halve the avocados lengthwise. Remove the pit and scoop out all the deliciousness onto a large plate.
2. Next, sprinkle on some salt and mash away with a fork until you get the avocado to the consistency you want.Don’t be afraid to leave lots of lumps and chunks; nobody wants perfectly smooth guacamole. At least, nobody thisside of the Mississippi.
3. Now throw on a big pile of pico de gallo.
4. And stir together gently.
5. Always test guacamole with tortilla chips so you’ll get a more accurate gauge of the salt content. Adjust theseasonings to taste. Serve with tortilla chips, atop quesadillas, spooned over grilled chicken, over taco salad, or onMexican pizza. Or, if you’re like me, just eat it by the spoonful. I promise I won’t tell anyone.HELPFUL HINT: To avoid browning, gently press plastic wrap against the surface of the guacamole until serving.Guacamole will keep in the fridge less than 24 hours.

PW’S POTATO SKINS
Makes 16 potato skins
Who doesn’t love crispy, baked potato skins stuffed with all the goodness of life? That goodness, of course, ischeese, bacon, and sour cream. Stuff I want to eat in heaven. These classic appetizers, circa 1982, are incrediblyeasy and always a crowd pleaser. Most circa 1982 appetizers are!
8 slices thick-cut bacon8 russet potatoes, scrubbed cleanCanola oilKosher salt1½ cups sharp cheddar cheese1 cup sour cream4 green onions, sliced

1. Preheat the oven to 400°F.
2. Let’s start things off right: let’s fry up the bacon. Bacon makes everything right.
3. Next, wash the potatoes and rub the skin liberally with canola oil. Place on a baking pan and bake for 45 minutesto 1 hour, until the potatoes are fork-tender.
4. Slice the potatoes in half lengthwise.
5. With a cookie scoop or spoon, scrape out the inner flesh of the potatoes, leaving a small margin of potato in theskins.
6. Brush both sides of the potato skins with canola oil. Salt both sides liberally.
7. Place the skins cut side down on the pan and return to the oven.
8. Bake for 7 minutes, then flip the skins to the other side.
9. Bake for 7 minutes more, or until the skins are crispy. If you’re starving, dip one skin in sour cream and haveyourself a snack. Repeat as needed.

10. Now, grate the cheddar.
11. Chop the bacon into bits.
12. Sprinkle cheese into each potato skin…
13. Then sprinkle with bacon and return to the oven just until the cheese melts.
14. Just before serving, spoon 1 tablespoon of sour cream on each skin and sprinkle with sliced green onions.
15. Then simply place them on a platter, walk toward your guests, and discover what it feels like to be the mostpopular person in the room. Field marriage proposals as needed.

“Mmmm…num…harum…chomp…slurp…I just love wildflowers.”

KATIE’S ROASTED CORN SALAD
Makes 6 cups
Marlboro Man’s cousin Katie has an infectious laugh and an insatiable desire to one-up her father-in-law when itcomes to cooking. I’m happy to be the recipient of their competitive-ness with this delicious corn salad, which canbe served with chips, spooned on top of steak, or added to toasted crostini for a late summer bruschetta. Feel free toadd or substitute other vegetables from your garden.
VEGETABLESOlive oil8 fresh corn ears1 red onion, quartered2 yellow squash, halved lengthwise1 red bell pepper2 medium tomatoes
DRESSING½ cup olive oil1/3 cup balsamic vinegar12 basil leaves, cut into chiffonade (stack the leaves on top of one another, roll tightly, and sliceacross)1 teaspoon kosher salt2 garlic cloves, chopped

1. Begin by heating a grill pan (or outdoor grill). Drizzle the grill with olive oil. Place the corn on the grill anddrizzle liberally with olive oil.
I love drizzling olive oil. It’s my life.
2. Grill for 5 to 8 minutes, until the corn is beginning to brown.
3. Drizzle the onion with olive oil and grill just until it starts to become tender. Do not allow to overcook, as you’llwant the onion to remain somewhat firm.
4. Repeat with halved summer squash and red bell pepper. Allow vegetables to cool slightly after grilling.
5. Roughly chop the onion, squash, and pepper. With a sharp knife, scrape the corn kernels from the cob. Dice thetomatoes and add them to the mix.
6. To make the dressing, in a separate bowl, pour the olive oil and balsamic vinegar and whisk together untilcombined.
7. Finally, add the basil, a dash of salt, and garlic and whisk together.

8. Place the vegetables in a large mixing bowl and pour the dressing over the top. Stir to combine.
9. Serve with tortilla chips and crackers, or spoon on top of grilled chicken. Delicious!
Country kids are tough kids. Don’t mess with them, or they’ll crush you.
Aww…just kidding. They’re nothin’ but a bunch of fun-loving teddy bears! (Unless they’re hungry. Then LOOKOUT.)

HOT ARTICHOKE DIP
Makes 4 cups
Mmmm. When you arrive, ravenous and cranky, at someone’s house for dinner, there’s nothing more satisfying thanseeing a nice, inviting dish of hot artichoke dip. It really does a hungry—and cranky—body good.
I like to whip up a somewhat smooth base of mayonnaise, cream cheese, cayenne pepper, green onions,Parmesan, and artichokes, then go back and add larger chunks of artichokes at the end. This results in a hearty,textured, and more interesting dip. While some versions call for adding eggs to the mix, I find this interferes with thecreamy quality and can sometimes result in a poufy soufflé-type texture. Who needs that?
Two 14-ounce cans artichoke hearts, drainedOne 8-ounce block cream cheese1 cup real mayonnaise Cayenne pepper2 green onions, chopped1 cup grated Parmesan cheeseDash of saltFreshly ground black pepper

1. To begin, preheat the oven to 350ºF.Add one can of the artichokes, the cream cheese, and the mayonnaise to the bowl of a food processor. (If you
don’t have a food processor, do smaller batches in the blender, or simply chop and stir together.)
2. Sprinkle in cayenne pepper to taste. I like my artichoke dip spicy, but consider the tongues of your guests. Addthe green onions to the bowl as well.
3. Pulse the mixture 6 or 7 times. You don’t want to liquefy it; just get the artichokes all chopped up and mixed withthe other ingredients.
Mix in the Parmesan and salt and pepper to taste, and set aside.
4. Now, roughly chop the artichokes from the remaining can. Get them down to bite-size pieces so Artie won’tchoke.
5. Add the artichoke pieces to the dip and stir together gently.
6. Pour the mixture into an oven-safe dish and bake for 15 to 20 minutes, until heated through and bubbly. Servewith blue tortilla chips, crackers, or white button mushrooms. Or a spoon.HELPFUL HINT: If you have any artichoke dip left the next day, use it as a sandwich or panini spread. Delicious!
OUR COWGIRL

Her default state is serious.
She’s always analytical and deliberate.
But she enjoys her work.
And more than anything, she loves being a cowgirl.


IN THE MORNING
I LOVE EARLY MORNINGS ON THE RANCH

CINNAMON ROLLS
Makes 40 to 50 cinnamon rolls
This is without a doubt one of my most treasured recipes—something I’ve been enjoying my entire life, thanks tomy mom, who became legendary in our hometown for delivering these disturbingly delicious cinnamon rolls tofolks at Christmastime. I became spoiled on these heavenly treats at a very early age, and as a result, no cinnamonroll anywhere has ever measured up.
I find that, generally speaking, cinnamon rolls—especially those bought in bakeries or stores—are way toobready, with way too little gooey topping. These rolls of my mother’s are the perfect antidote: they’re almost equalparts bread and icing, which is poured liberally over the warm, just-baked rolls. The rolls are perfect eatenimmediately or later in the day, after they’ve been allowed to cool and settle into their almost obscene gooeyness.
If you begin making these for your friends and family during the holidays, I promise you this: you’ll becomefamous. And, on a less positive note, people will forget everything else you’ve ever accomplished in your life. Fromthat moment on, you’ll be known—and loved—only for your cinnamon rolls.
But don’t worry. You’ll get used to it!The dough is very easy to make; you simply scald milk, add oil, sugar, yeast, and the dry ingredients in
alternating batches, then allow the dough to rise until you’re ready to make the rolls. I’ve been known to make thedough a couple of days in advance and allow it to stay covered in the fridge. Of course, I sometimes forget to punchit down, which makes for an interesting sight in the morning when I open the fridge to retrieve the orange juice. Butthat’s a story for another time.
I often use seven disposable aluminum pie plates so that I can deliver them to friends, but you may also useglass or ceramic pie plates, rectangular baking dishes, or rimmed baking sheets.
DOUGH1 quart whole milk1 cup vegetable oil1 cup sugar2 packages (4½ teaspoons) active dry yeast9 cups all-purpose flour1 heaping teaspoon baking powder1 scant teaspoon baking soda1 tablespoon salt
FILLING2 cups melted butter, plus more as needed¼ cup ground cinnamon for sprinkling2 cups sugar, plus more as needed
MAPLE ICING2 pounds powdered sugar½ cup whole milk6 tablespoons (¾ stick) butter, melted¼ cup strongly brewed coffeeDash of salt1 tablespoon maple flavoring or maple extract

1. For the dough, heat the milk, vegetable oil, and sugar in a medium saucepan over medium heat; do not allow themixture to boil. Set aside and cool to lukewarm.
2. Sprinkle the yeast on top and let it sit on the milk for 1 minute.
3. Add 8 cups of the flour. Stir until just combined, cover with a clean kitchen towel, and set aside in a relativelywarm place for 1 hour.
4. Remove the towel and add the baking powder, baking soda, salt, and the remaining 1 cup flour. Stir thoroughly tocombine.
Use the dough right away, or place in a mixing bowl and refrigerate for up to 3 days, punching down the doughif it rises to the top of the bowl.
5. To assemble the rolls, remove half the dough from the pan. On a floured baking surface, roll the dough into alarge rectangle, about 30 x 10 inches.
6. To make the filling, pour 1 cup of the melted butter over the surface of the dough. Use your fingers to spread thebutter evenly.
7. Generously sprinkle half of the ground cinnamon and 1 cup of the sugar over the butter.Don’t be afraid to drizzle on more butter or more sugar! Because the way I see it, if a little butter and sugar is
good, more is better. That’s my motto in pretty much all areas of my life.
8. Now, beginning at the end farthest from you, roll the rectangle tightly toward you. Use both hands and workslowly, being careful to keep the roll tight.
Don’t worry if the filling oozes as you work; that just means the rolls are going to be divine.
9. When you reach the end, pinch the seam together.

When you’re finished, you’ll wind up with one long buttery, cinnamony, sugary, gooey log.
10. Transfer to a cutting board and with a sharp knife, make 1½-inch slices. One log will produce 20 to 25 rolls.
11. Pour a couple of tablespoons of melted butter into the desired pie pans or baking dishes and swirl to coat.
12. Place the sliced rolls in the pans, being careful not to over-crowd.
13. Repeat the rolling/sugar/ butter process with the other half of the dough and more pans.Preheat the oven to 375°F. Cover the pans with a kitchen towel and set aside to rise on the countertop for at
least 20 minutes before baking. Remove the towel and bake for 13 to 17 minutes, until golden brown. Don’t allowthe rolls to become overly brown.
While the rolls are baking, make the maple icing!
14. In a large bowl, whisk together the powdered sugar, milk, butter, coffee, and salt.
15. Splash in the maple flavoring.
16. Whisk until very smooth. Taste and add in more maple, sugar, butter, or other ingredients as needed until theicing reaches the desired consistency. The icing should be thick but still pourable.
17. When the rolls come out of the oven, notice the gooey filling inside. Mmmm. At this point, your kitchen is by farthe best-smelling place on earth. You could sell tickets.

18. While the rolls are still warm, generously drizzle icing over the top. Be sure to get it all around the edges andover the top.
19. As they sit, the rolls will absorb some of the icing’s moisture and flavor. They only get better with time…notthat they last for more than a few seconds!
Make them for a friend today! It’ll seal the relationship for life. I promise.
Variations
Add finely chopped pecans to the rolls after sprinkling on the cinnamon and sugar.
Substitute 8 tablespoons of orange marmalade and 1 cup brown sugar (per half batch of dough) for thecinnamon and white sugar, then substitute orange juice for the maple and coffee in the icing.
HELPFUL HINTS: Cinnamon rolls can be frozen in the pan, unbaked. Just cover them tightly with foil after you placethem in the pan but before they rise. Then, when you’re ready to bake, allow them to thaw and rise before baking.Ice as directed.
An easier method is simply to freeze the baked, iced cinnamon rolls after they’ve cooled slightly. Then just pullthem out of the freezer and warm them in a 250ºF oven for 15 minutes. I stock up my freezer with cinnamon rollsbefore the holidays begin, and I’m always so glad I do.

INY’S PRUNE CAKE WITH BUTTERMILK ICING
Makes one 9 x 13-inch cake
I was fortunate enough to happen upon my great-grandmother Iny’s prune cake recipe a couple of years ago. It waswritten by her frail, small hands, and I rushed out to buy the ingredients the same day. Marlboro Man will never eatthis, I thought later that day, as I mashed up the cooked prunes according to Iny’s instructions. Anything with theword prune in it, I reasoned, would be instantly marked off the list.
Claire Kennedy
Marlboro Man returned from working cattle a little while later and noticed the warm cake sitting on the kitchencounter. Before I had a chance to tell him what it was, he’d cut himself a big piece and gobbled it up. Then hegobbled up another piece. Then he had more for dessert that night.
Since then, I’ve made this cake more than a dozen times, and have never let my dear husband in on theingredients. And today, I’m tired of living that lie.
Honey, it’s me. That delicious, gooey coffee cake I make for you so often? The one you gobble up in seconds?It’s called Prune Cake. Please forgive me. Love, your wife
Ahhh. I feel so much better now.
CAKE1 cup prunes1½ cups all-purpose flour, sifted1 teaspoon baking soda1 teaspoon nutmeg1 teaspoon cinnamon1 teaspoon allspice1 cup sugar3 eggs1 cup canola oil1 teaspoon vanilla extract1 cup buttermilk (if you don’t have any, add 1 tablespoon distilled white vinegar to just under 1 cuplow-fat milk and stir together)
ICING1 cup sugar½ cup buttermilk (see above)4 tablespoons (½ stick) butter½ teaspoon baking soda1 tablespoon light corn syrup½ teaspoon vanilla extract
1. Preheat the oven to 300ºF and butter a 9 x 13-inch baking pan.

2. Place the prunes in a small saucepan.
3. Cover them with water. Bring to a low boil and cook until soft and mashable, about 8 minutes.
4. Drain the water and mash the prunes on a plate. It’s okay to leave little chunks behind. Gives the cake somecharacter! I just love cakes with character.
5. Set the prunes aside and make the cake. Sift together the flour, baking soda, nutmeg, cinnamon, and allspice.Mmmm…smells like the holidays.
6. In a separate bowl, mix together the sugar, eggs, oil, and vanilla.
7. Combine the wet and dry ingredients and splash in the buttermilk. Stir until just combined. The mixture will beslightly lumpy.
8. Now throw in the mashed prunes. And if your honey walks in as you’re completing this step, shield the bowl withyour body and stir quickly. What he doesn’t know won’t hurt him.
9. Pour into a buttered baking pan and bake at 300ºF (a low temperature) for 35 to 40 minutes. Grandma Iny wasadamant: do not overbake the cake. You want it to be nice and moist.
10. When the cake has about 5 minutes left to bake, make the icing: combine the sugar, buttermilk, butter, bakingsoda, corn syrup, and vanilla in a medium saucepan. Stir to combine.

11. Bring to a slow boil over medium-high heat. No need to stir.
12. Continue boiling until the icing turns a light caramel color, 5 to 7 minutes. Important: The icing should be thecolor of caramel, but not yet firm and sticky. It needs to be pourable.
13. Pull the cake out of the oven. Try not to faint, as it smells absolutely divine.
14. While the cake is very warm, pour the icing evenly over the top. Work fast, as it will quickly start to soak intothe cake.
15. Spread to coat evenly…then please, do yourself a favor: lick the spatula. It’ll make you smile.
Serve immediately, or feel free to let the cake sit on the counter for a while before serving. It only gets betterwith age.
I just loved my Grandma Iny. Aside from being a dear lady, she’s brought many a culinary joy into my life—not theleast of which is this magnificent creation. Enjoy!
HELPFUL HINT: Serve without revealing the fact that the cake contains prunes.

Our creek at sunrise

BUTTERMILK BISCUITS
Makes 18 to 24 biscuits
Biscuits are tricky, and everyone has a different idea of what makes a good one. My grandmother used to make dropbiscuits, which were lumpy and varied in shape. My mom made biscuits that were small but very light and airy.Marlboro Man prefers biscuits from a can.
I prefer a biscuit that’s relatively light, but not skyscraper-tall. I like to be able to taste the outer, crispy surfaceof the biscuit. Of course, you’ll have some degree of control over the thickness of your biscuits by how thick youroll out the dough. Keep that in mind and experiment to find your own special biscuit thickness.
These biscuits are perfect with softened butter and homemade strawberry jam, served with butter and honeyalongside Fried Chicken (Supper), or with Chicken-Fried Steak and gravy (Supper) as an alternative to mashedpotatoes. The biscuits are also basic enough to be halved and topped with syrupy strawberries and sweetenedwhipped cream for a quick strawberry shortcake.
4 cups all-purpose flour1½ teaspoons salt2½ teaspoons baking soda1½ teaspoons baking powder1/3 cup shortening1/3 cup cold butter (51/3 tablespoons), cut into pieces1¼ cups buttermilk (if you don’t have any, see In the Morning)
1. Preheat the oven to 450ºF.
2. In a large bowl, combine all the dry ingredients. Stir together.
3. Add the shortening and cold butter pieces.
4. With a pastry blender or two knives, cut in the shortening and butter until the mixture resembles coarse crumbs.
5. Pour in the buttermilk and mix gently with a fork until just combined.

6. The biscuit dough will be sticky, not overly dry or crumbly.
7. Lightly flour a clean surface. Turn the dough out of the bowl and roll to a 1/3-to ¾-inch thickness, depending onhow thick you’d like your biscuits to be.
8. Cut rounds with a biscuit cutter and place them in a baking dish or on a cookie sheet. (If you use an old, beat-upbiscuit cutter, your biscuits will taste much better. That’s what I like to tell myself.)9. Bake for 11 to 14 minutes, until golden brown; do not underbake or the biscuits will be doughy.

EGG-IN-THE-HOLE
As many as you want!
Sometimes it’s the simplest things that taste the best. Before I married Marlboro Man, I had to learn to make thesedelicious little numbers or he wouldn’t go through with the wedding. They’re called “egg-in-the-holes” by hispaternal grandmother, who made them for him all during his childhood, and through the years I’ve learned not onlyto love them…but to need them. They define comfort food, are painfully easy to make, and will turn any stressful,hectic morning into something entirely different. I’m not saying egg-in-the-holes will change the world…but theywill change your spirit. Maybe.
Before I get on with this simple recipe, I must acknowledge that it goes by as many different names as thehuman beings who eat it. While I insist the proper, official name is “eggin-the-hole,” here are the differentincarnations that have cropped up since:
Egg-in-a-Basket
Chicken-in-a-Basket (flawed logic, but just wait for the next one)
Frog-in-a-Hole (what gives here? Frog? It’s an egg, sirs)
Toad-in-a-Hole (ever hear of warts?)
Egg Basket
Bird’s Nest Egg
Toad Hole
Egg Hole
Pop Eyes
Egg Toast
Private Eyes •
Bird’s Nest Egg-in-a-Hole Basket Toad Chicken Frog
And the list goes on and on. But really? It doesn’t matter what you call it. Just make it! Then eat it! And youtoo shall know the allure of probably the simplest breakfast dish next to oatmeal.
Sliced bread (such as white, whole wheat, sourdough)ButterLarge eggsSaltBlack pepper

1. Begin with a simple piece of sandwich bread: white, wheat, rye, pumpernickel, or homemade. Anything will do!With a biscuit cutter or drinking glass, cut a hole in the center of the bread.
2. Heat 2 to 3 tablespoons butter in a skillet over medium-low heat, then place the bread in the skillet and allow it tosoak up the butter.
3. After 1 minute, crack a large egg into the hole. Hence the name “egg-in-the-hole.” I just love it when things in mylife make sense!
4. Sprinkle with salt and pepper and cook for another minute. Throw another tablespoon of butter into the pan, justfor kicks.
5. With a spatula, flip to the other side. Move the bread around in the skillet a bit, allowing it to soak in the butter.
6. Sprinkle with salt and pepper and cook on the second side until the egg is the desired doneness. I love the outeredges of the yolk to be barely set, with the center runny.
The beauty of the egg-in-a-hole is that it’s a self-contained meal. No longer do you have to have the egg on oneside of the plate and the toast on the other. It’s united into one being.
And that’s a very good thing.

BASIC BREAKFAST POTATOES
Makes 8 servings
This is one of those basic, unadorned, cowboy-friendly staples of my cooking repertoire that’s so utterly versatile, Ijust can’t help but love it. Called Breakfast Potatoes by some, Skillet Potatoes by others, they can be enjoyed in theirsimplest form or dressed up in any number of ways to suit whatever you’re doing. And they’re perfect for breakfast,lunch, and dinner—equally at home beside bacon and eggs or a juicy, grilled rib-eye steak. And they’re totallycustomizable in terms of seasoning and adornments: add in some garlic if you’re feeling adventurous, or onions andpeppers, or even some chopped jalapeños if you’re really looking for trouble. These basic potatoes open up a wholeworld of possibilities. I just love it when potatoes do that.
One thing I love to do is make up a whole slew of breakfast burritos, adding in these potatoes with the eggs andsausage and cheese and salsa. Gives ’em a real stick-to-your-ribs quality. And sometimes I’ll spoon a nice helping ofpotatoes into small, individual iron skillets, then top them with a couple of fried eggs—watch a cowboy dig into thatsometime. Still other times, I just keep ’em simple, adding in only chopped onion and serving them with bacon,burgers, or steak. And then I sit back and watch them disappear. It usually doesn’t take long.
4 to 5 red or other potatoes1 large onion, cut into large, rough diceVegetable oil for frying Bacon fat (optional)SaltBlack pepper
1. Place the potatoes on a baking sheet and bake in a 375°F oven for 45 minutes, or until fork-tender.

2. Place the hot potatoes on a cutting board and dice them into 1-inch-ish pieces.Inch-ish. Say that five times fast. Just for kicks.My goal in life is to tack “ish” onto as many words as possible. Possible-ish.
3. Heat a skillet over medium-low to medium heat.Next, put a little vegetable oil in the pan. A tablespoon is good.
4. Scrape the pan you used to make bacon earlier this morning. You all made bacon this morning…right?
5. Then, because I usually straddle the fence between ridiculousness and utter foolishness, I add a tablespoon ofbacon fat to the skillet.
’Cause it tastes goooooood, that’s why.
6. Go ahead and make peace with yourself, then add the onion.
7. Sauté until it starts to turn brown.
8. Next, throw in the cooked, diced potatoes. Now, sometimes I’ll remove the onions first and wait to add them backin when the potatoes are brown. But I happen to like the onions to get all dark and burny, so I’m going to leavethem.
9. Salt and pepper the potatoes, then stir them around, then slightly press/pack them in the skillet. Cook withoutstirring for several minutes. You want to make sure the pan is hot enough to crisp the potatoes, but not hot enough tochar the poor dears.NOTE: Sometimes, to make an interesting crust, I’ll sprinkle a couple of tablespoons of flour over the top of thepotatoes while the underside is cooking. That way, when you flip them they’ll get a little crispy. In addition, a nicecoating of paprika can give the potatoes a great depth of color.

10. After several minutes, use a spatula to flip the potatoes over to the other side.11. Be sure to thoroughly salt and pepper the potatoes. Because no matter how you slice it, potatoes must haveseasoning. Lots and lots of seasoning.Enjoy them! Spoon them into your breakfast burritos or place a fried egg on top…or serve them alongside eggsBenedict if you’re feeling especially saucy.

PW BREAKFAST BURRITOS
Makes 12 burritos
Disclaimer: These breakfast burritos are not fancy. y These breakfast burritos are not gourmet. These breakfastburritos are not haute Tex-Mex cuisine. These breakfast burritos are exactly that: breakfast burritos, and I oftenmake them for my husband and kids when they’re at the pens working cattle at breakfast time. They’re as simple asit gets…and you know what? So am I! Well, sorta…“simple” is a subjective term.
My point is, if you’re looking for fancy chipotle-asiago-chorizopoblano-fancy-o breakfast burritos, you’vecome to the wrong wife and mother. And I’ve tried that route; believe me, I’ve tried it. The problem is, my family—my husband and four children—just don’t like chipotle-asiago-chorizo-poblano-fancy-o stuff. They want it straightup and Middle-Americano, without a lot of adornment. But the great thing about this recipe is, it’s basic. And youcan use the basic method to create whatever degree of amped-up breakfast burrito you’re in the mood for. As therecipe proceeds, I’ll let you know the things I’d add to the mix if I were living in a tiny apartment in Chicago bymyself, just to give you some more ideas.
Let’s hurry this along—Marlboro Man and the crew have got to be horseback by dawn!
1 pound breakfast sausageBasic Breakfast Potatoes (In the Morning; or use frozen hash brown potatoes)2 red bell peppers, seeded and roughly chopped10 eggs1 teaspoon seasoned salt, such as Lawry’sBlack pepper to taste¼ cup half-and-half2 tablespoons chopped fresh chives2 cups grated Monterey Jack cheese12 flour tortillasPicante sauce
1. Begin by browning the breakfast sausage over medium heat. Drain off the grease and reduce the heat to low.
2. Next, add the Basic Breakfast Potatoes and bell peppers and stir to combine. Cook over low heat for 5 minutes,stirring occasionally. (If I were living in a tiny apartment in Chicago by myself, I’d add in a whole bunch of choppedmushrooms. But my family doesn’t do mushrooms.)

3. Crack the eggs into a bowl. Add the seasoned salt, pepper, and half-and-half and whisk to beat the eggs lightly. (IfI didn’t have four children under the age of twelve, I’d sprinkle in some cayenne pepper and dry mustard. Yum.)
4. Add the chives and Monterey Jack and stir to combine. (Cotija cheese, a hard Mexican cheese, adds a delightfulsharpness. If I were in Chicago, I’d skip on down to my local market and pick up a chunk.)
5. With the heat still on low, pour the egg mixture over the sausage/potato mixture.
6. Now, with a spoon or spatula, very gently stir the mixture. The potatoes will break apart if you stir too much, sogo easy.
7. Continue lightly cooking over low heat until the eggs are set.
8. Now taste and adjust the seasonings, adding more seasoned salt, pepper, or cheese if desired.
9. To assemble, warm the stack of tortillas on a paper towel in a microwave for about 30 seconds. Place a heapingspoonful of egg mixture onto the middle of a warm tortilla. Because I’m a cheese fanatic, I’d go ahead and sprinkleon some more cheese.
10. Tuck in the sides, then roll the tortilla until closed.

11. Wrap in foil sheets and keep warm until ready to serve. Serve with picante sauce to a cattle pen full of hungrychildren and cowboys. They’ll love you for it.
MORNING SILHOUETTES: MY FAMILY AND THE SUNRISE
Watching from afar, it’s fun to watch the group huddle together to formulate their plan.
All I can see are kids, horses, and cowboys—dark figures against an increasingly brilliant sky.
Invariably, before too long, I’ll see Marlboro Man’s arm point authoritatively in this direction or that.

I just have to chuckle as I watch, because everyone always looks straight at him when he speaks. They listen to him.
And I just know that Marlboro Man, as the youngest of three boys in a ranching family, finally feels like he’sarrived.

BREAKFAST BOWLS
Makes 8 servings
These single-serving bowls of eggs, sausage, potatoes, and other yummy ingredients are a fun way to serve a crowdfor breakfast. I’ll often use them as an opportunity to rid my fridge of various leftovers that have accumulated duringthe week: extra bacon (if there is such a thing), leftover sausage, or small quantities of grated cheese I didn’t use fordinner the night before. The bowls are great fun for kids to assemble, and are easy to make in large quantities. Makethem your own—no ingredient is unwelcome…except maybe pickled herring.
1 tablespoon butter, plus extra for the bowls½ large onion, diced2 russet potatoes (peel on), baked and cut into ½-inch cubes (or use leftover Basic BreakfastPotatoes, In the Morning)Salt and black pepper to taste8 eggs, beaten¾ cup half-and-half6 finely diced plum tomatoes4 green onions, chopped8 basil leaves, chopped1 pound breakfast sausage, browned and crumbled4 strips thick-cut bacon, fried and crumbled1 cup grated Monterey Jack cheese1 cup grated sharp cheddar cheese
1. Butter 8 ovenproof bowls or ramekins. Preheat the oven to 325ºF.
2. In a skillet over medium heat, melt the butter. Add the onion and potatoes.
3. Season with salt and pepper and cook, stirring occasionally, until the onion is soft, about 5 minutes. Remove fromthe heat and set aside.
4. In a bowl, lightly beat the eggs and half-and-half. Season with salt and pepper. Set aside.

5. In a mixing bowl, combine the tomatoes, green onions, and basil. Stir together and set aside.
6. To assemble, divide all the ingredients evenly among oven-safe bowls or ramekins in the following order:
Potato-onion mixture, sausage…
Bacon, Monterey Jack…
Egg mixture…
Tomato/green onion/basil mixture…
And finally, a sprinkling of grated cheddar.7. Place the bowls on a rimmed baking sheet and bake for 10 to 15 minutes, until the eggs are just set. Keep an eyeon the bowls to make sure the eggs don’t brown. It’s better for the eggs to come out of the oven slightly runny, asthey’ll continue to set after they’re removed from the oven.
8. Serve in a basket with pretty napkins and eight spoons.
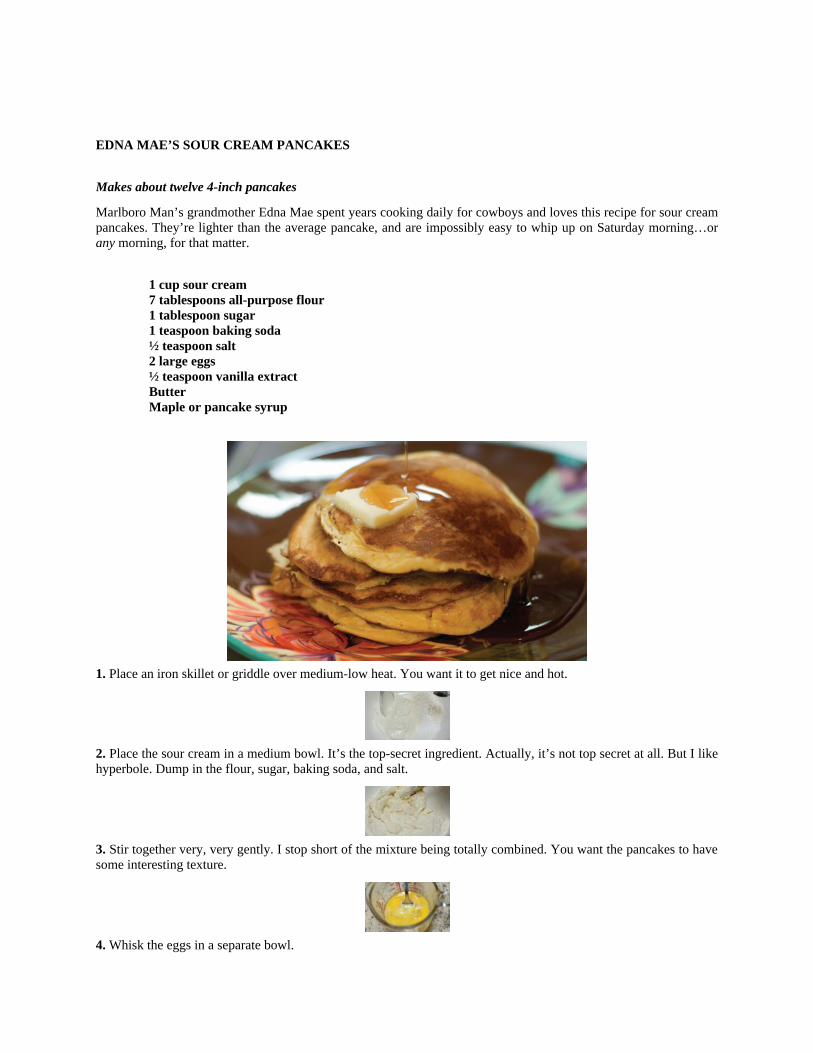
MARMALADE MUFFINS
Makes 24 mini muffins
I call them “marmalade” muffins not because they contain marmalade, but because they’re flavored with lots ofdelicious orange zest. The muffin batter is moist and delicious, but it’s the brown sugar–orange juice glaze thatreally sets these beauties apart. The brown sugar in the glaze retains its grainy quality and settles onto the very top ofeach muffin, providing an unexpected texture to these bite-size wonders.
These beautiful muffins need to be eaten warm. They’re the perfect accompaniment for scrambled eggs andbacon in the morning, or they’re delicious on their own for a midmorning coffee break or a late-night munchieattack…or pretty much any other occasion you can come up with. For another twist, my mom and I once servedthem at a baby shower with small slivers of country ham inside. The expectant mother sang for joy!
Warning: the muffins disappear quickly, so be sure to make double the quantity you think you’ll need.
2 oranges½ pound (2 sticks) butter, softened1 cup granulated sugar2 large eggs2 cups all-purpose flour1 cup buttermilk(if you don’t have any, see In the Morning)1 teaspoon baking soda1 cup firmly packed brown sugar
1. Preheat the oven to 375ºF.
2. Begin by grating the zest from the oranges. If you don’t have a microplane zester, please rush out to the nearestcooking supply store and purchase one. Thank you.
3. Cream the butter and sugar together in a mixing bowl.

4. Crack in the eggs and mix until well combined.
5. Sift the flour onto a sheet of waxed paper.
6. Add it to the bowl.
7. Gently stir the mixture using as few strokes as possible, so that the muffins aren’t tough.
8. In a small measuring cup or bowl, combine the buttermilk and baking soda.
9. Add the buttermilk mixture to the muffin batter and mix until just combined.
10. Add the orange zest. Mix just until combined, being careful not to overmix. If you get some batter on yourfingers, just lick it off. Then moan with delight.
11. Grease 24 mini muffin tins and fill each two-thirds full with muffin batter.I like to use a small cookie scoop to put the muffin batter in the tins.
12. Bake for 12 to 17 minutes, until light brown. Watch to make sure they don’t get too brown.
13. Now, while the muffins are baking, prepare the glaze: Juice the 2 oranges whose zest you just stole…

14. Add the orange juice and brown sugar to a medium bowl and stir together just until combined, but don’t worryabout dissolving the brown sugar completely. You want the glaze to be grainy and textured.
15. As soon as the muffins are done, drizzle the glaze all over the top. Be sure to thoroughly coat each muffin.
16. Don’t worry if the glaze drips all over the pan. That means more for you to lick up later.17. Serve the muffins warm on a beautiful platter. Watch your guests’ eyes roll back into their heads as they savoreach bite.

MIGAS
Makes 6 servings
Unless you’ve visited or lived in the Southwest, you probably haven’t heard of migas, an exceedingly flavorfulscrambled egg dish made fabulous with the addition of bell peppers, jalapeños, onions, cheese, and—my favoritepart—f corn tortillas. I first tried migas when I visited my little sister, Betsy, after she moved to Austin, Texas, withher husband a few years ago. I fell instantly in love with the one-skillet meal, and felt a little cheated at the time thatin all my years of loving food, I’d never even heard of it. And all I knew was, I never wanted to be without it again.
1 medium onion1 red bell pepper1 green bell pepper4 tomatoes1 or 2 jalapeños10 to 12 large eggs¼ cup half-and-halfSalt and black pepper to taste4 corn tortillasCanola oil for frying1 tablespoon olive oil1 tablespoon butter2 cups grated Mexican Cotija, Monterey Jack, or Pepper Jack cheese¼ to ½ cup chopped cilantro, depending on your taste¼ cup sour creamOrange slices for garnish
1. Begin by roughly chopping the onion, bell peppers, and tomatoes. Finely dice a fresh jalapeño, removing thewhite membranes and seeds. (See warning on Starters.)
2. In a bowl, lightly beat the eggs and half-and-half. Lightly season with salt and pepper.
3. Finally, in a small skillet, fry the corn tortillas in canola oil until just barely crisp. Don’t overbrown.
4. Just fry them until they’re no longer floppy.

5. Drain the fried tortillas on a paper towel, then place on a cutting board. With a sharp knife, cut the tortillas intostrips.
6. Then turn them in the other direction and cut into large squares. Set aside.
7. In a skillet over medium-high heat, cook the onion and bell peppers in the olive oil and butter until they develop alittle color.
8. You want the veggies to have some brown and black areas, but not be soggy or soft.
9. Next, throw the tomatoes in the skillet and cook for 1 minute.
10. Then throw in the tortilla chips and the jalapeños. Stir the mixture and reduce the heat to low.
11. When the skillet has cooled slightly, pour in the egg mixture.

12. With a spatula, very gently fold the mixture together, allowing the eggs to cook slowly. Do not stir the mixture;just turn it lightly.
13. When the eggs are cooked, throw in the cheese and plenty of chopped cilantro. Taste to check the seasoning,adding more salt, pepper, or cheese as needed. I always add more cheese. It’s a habit of mine.
14. Top with a dollop of sour cream and serve on a plate with orange slices or other fresh fruit.Some days I’m not sure what the difference is between a mother hen and me.
WHEAT PASTURE
In addition to our working cattle ranch in northern Oklahoma, we have a wheat farm in the southern part of the state.But rather than harvest the wheat, we use it to graze young cattle during the winter months.
The bright green wheat grass is nutritious and fattening, and cattle on wheat are among the happiest creatureson earth. I’m continually amazed at its thickness and density and saturated color—if you looked up “green” in thedictionary, it would say “wheat grass.”


FRENCH BREAKFAST PUFFS
Makes 12 muffins
I first learned to make these in my Introductory French class in ninth grade, where I was referred to as “Sylvie” andnever learned anything beyond bonjour! But if I never learn another word of French the rest of my life, I’ll beforever grateful that I gained this beautiful recipe. The muffins are light and moist, and are coated in melted butterand cinnamon sugar straight out of the oven. Kids love ’em, cowboys love ’em…and pioneer women love ’em, too.
PUFFS3 cups all-purpose flour3 teaspoons baking powder1 teaspoon salt½ teaspoon ground nutmeg1 cup sugar2/3 cup shortening2 eggs1 cup milk
COATING½ pound (2 sticks) butter1½ cups sugar3 teaspoons ground cinnamon
1. Preheat the oven to 350°F. Lightly grease 12 muffin cups.
2. In a large bowl, stir together the flour, baking powder, salt, and nutmeg. Set aside.
3. In a separate large bowl, cream together the sugar and shortening.
4. Add the eggs and mix again.

5. Alternate adding one-third of the flour mixture and one-third of the milk to the creamed mixture, beating wellafter each addition.
6. Fill the muffin cups two-thirds full.
7. Bake for 20 to 25 minutes, until golden. Remove the muffins from the pan and set aside.
8. To make the coating, melt the butter in a bowl or glass pan. In a separate container, combine the sugar andcinnamon.
9. Dip the warm muffins in the butter, coating thoroughly…
10. Then roll in the cinnamon-sugar mixture. Don’t be afraid to really coat ’em up.Let the kids help!
11. Cinnamony-sweet perfection! The deliciousness of these beauties is not to be underestimated.
HELPFUL HINT: After cooling completely, puffs can be frozen in plastic bags and reheated later. They’re in the“reheats beautifully” section of my life.

MAPLE PECAN SCONES
Makes 8 scones
I love scones…but only if they’re coated with a thick, creamy icing. Don’t tell the English! This recipe is one of myfavorites, and uses the delicious maple icing from my world-famous (okay, county-famous) cinnamon rolls. Andthey love to be dipped in coffee.
SCONES3 cups all-purpose flour1/3 cup sugar5 teaspoons baking powder1 teaspoon salt½ pound (2 sticks) unsalted butter, chilled¼ cup pecans, plus more for sprinkling if desired1 large egg¾ cup heavy cream
MAPLE ICING1 pound powdered sugar¼ cup whole milk4 tablespoons (½ stick) butter, meltedSplash of strongly brewed coffeeDash of salt2 teaspoons maple flavoring or maple extract
1. Preheat the oven to 350ºF.2. In a large bowl, stir together the flour, sugar, baking powder, and salt.
3. Cut the cold butter into small pieces. Cut the butter into the fl
4. Until the mixture resembles crumbs.
5. Now finely chop the pecans…

6. And stir them into the flour mixture.
7. Mix the egg and cream together. Add the mixture to the bowl.
8. Stir together until just combined.
9. Turn the mixture onto a cutting board. The dough will be very crumbly, but do not let your heart be troubled.With your hands, push the mixture together into a large ball. Do not knead or press too much; you want to leave
that gluten alone!
10. With a rolling pin, very gently roll the dough into a 10-inch round about ¾ inch thick.
11. With a sharp knife, cut the round into eight equal-size wedges. To do this, first cut an X…
12. Followed by a +. See? Eight equal-size wedges! And it only took me thirty-nine years to figure out this trick.
13. Transfer the wedges to a baking sheet lined with a Silpat baking mat. (Or just spray the pan with nonstickcooking spray; either one will work!)
Bake the scones for 22 to 26 minutes, until they’re just barely starting to brown. Do not allow the edges tobecome dark or the Red Coats will come and get you.
14. Allow the scones to cool completely before icing.

15. In a medium mixing bowl, stir the icing ingredients until smooth. Pour generously over the scones.
16. Allow the icing to set before serving. Serve with yummy coffee.
OPTIONAL: Sprinkle chopped pecans over the icing before it sets.

HUEVOS HYACINTH
Make as many as you need!
My good friend Hyacinth and I like to cook together and try to figure out new and interesting ways to get food intoour mouths. Plus, she does all the dishes, which makes me love her all the more. One day right after Easter, Ilamented that I’d up and forgotten to dye Easter eggs with my children, after having bought three dozen eggs. Nicemothering, eh? Anyway, after scolding me for an hour or so, Hyacinth suddenly remembered an egg dish she’denjoyed while visiting a bed and breakfast with her husband, our district court judge, whom I have a really hard timeaddressing as “your honor,” but I still try.
After a little experimentation, we came up with Huevos Hyacinth, a single-serving dish prepared in individualramekins. The basic recipe can be used as a launching pad for your own interpretations: instead of sliced ham, usesmoked turkey or salmon. Instead of goat cheese, use Pepper Jack, Mexican Cotija, or even Boursin, if you’refeeling especially French that day. However you prepare it, Huevos Hyacinth is perfect for one or several guests.
Butter for the ramekinsThinly sliced ham, turkey, or any deli meatTomato slices or picante sauceLarge eggsSalt and black pepper to tasteCrumbled or grated Monterey Jack, Mexican Cotija, goat cheese, or other cheese
Thank you for doing my dishes, Hyacinth!
1. Butter individual ramekins, and in each one place a piece of thinly sliced ham. Top the ham with tomato slices.
2. Or, if you’re feeling spicy, a couple of tablespoons of picante sauce instead.
3. Gently crack an egg over the top of each ramekin. Sprinkle lightly with salt and pepper.

4. Top each ramekin with ¼ cup grated cheese. Monterey Jack works nicely…
But crumbly cheeses such as Cotija or goat cheese are my personal faves.
5. Broil for 2 to 4 minutes, removing when the yellow of the egg is still soft but not overly runny.
6. If you have people in your house who are averse to runny yolks, just leave ’em under the broiler for an extraminute.
Serve with fresh fruit and breakfast potatoes (In the Morning).
I Love Hyacinth!
MISS MUSTANG
It’s time for the Miss Mustang Beauty Pageant!
Welcome to our show, ladies and gentlemen.The girls have been primping for weeks, bathing in pure, unfiltered creek water, taking daily mud baths, and
conditioning their hides with other substances we’d prefer not to discuss here at Miss Mustang International. We’vegot some familiar faces this year, along with some brand-new ones, and the buzz is that we’ve never had a morebeautiful group of contestants.
Judges, get your scorecards ready!

This is Bernadette, our Miss Nevada. Her favorite food is oatmeal, and she believes strongly in world peace andsustained harmony between equine and man. Nice to have you with us, Bernadette!
This beauty is Stacey, Miss Arizona! Stacey’s favorite color is turquoise, and she enjoys eating native grasses fromher host family’s flower garden. If she wins the crown tonight, she hopes to use her exposure to further the cause of
women’s rights, both in the equine kingdom and beyond. Welcome, Stacey!
Showing us her breathtaking profile is Rebecca, our contestant from Utah! Rebecca loves knitting, scrapbooking,needlecrafts, and scratching her itchy back on fence posts. Oh, and Rebecca really loves people. She wants you all to

know that.
Another contestant eager to show her best side is Mimi, our contestant from Washington State. Though Mimi hasdabbled in modeling and struggles with unusually high self-esteem, she would really prefer being appreciated for her
mind. If she wins the crown, Mimi plans to improve her vocabulary so she can sound real, real smart. Oh, and shewants world peace and all that stuff.
Here’s Ginger, our beautiful mustang from the state of Wyoming! Despite her country girl roots, Ginger enjoyscontemplating her existence and reading Dostoyevsky and Nietzsche in her spare time. Following her run as Miss
Mustang, Ginger intends to return to school to receive her Ph.D. in Equine Cultures. (Oh. And don’t call herGingie.)
This is our youngest contestant in the pageant. Please welcome Amy! Amy comes from a small town in Alabama,and really, she’s just thrilled to be here!
“I’m sorry, y’all…but I’m just a li’l bit shy.”

This is Nadine, our mustang from New York. Don’t mess with her. She’ll trample you. We’re happy to have herstrength and grit—welcome, Nadine!
And finally, here’s Isabella. She fights for the rights of homeless and displaced horses all over the world, but herstriking beauty and standoffish demeanor have caused a bit of animus between her and her fellow contestants. Let’s
give Isabella a warm welcome, shall we?
Who’ll win the crown? You decide.(But I’m pulling for Ginger…)
EDNA MAE’S SOUR CREAM PANCAKES
Makes about twelve 4-inch pancakes
Marlboro Man’s grandmother Edna Mae spent years cooking daily for cowboys and loves this recipe for sour creampancakes. They’re lighter than the average pancake, and are impossibly easy to whip up on Saturday morning…orany morning, for that matter.
1 cup sour cream7 tablespoons all-purpose flour1 tablespoon sugar1 teaspoon baking soda½ teaspoon salt2 large eggs½ teaspoon vanilla extractButterMaple or pancake syrup
1. Place an iron skillet or griddle over medium-low heat. You want it to get nice and hot.
2. Place the sour cream in a medium bowl. It’s the top-secret ingredient. Actually, it’s not top secret at all. But I likehyperbole. Dump in the flour, sugar, baking soda, and salt.
3. Stir together very, very gently. I stop short of the mixture being totally combined. You want the pancakes to havesome interesting texture.
4. Whisk the eggs in a separate bowl.

5. Add the vanilla and stir to combine.
6. Pour the egg mixture into the sour cream/flour mixture.
7. Stir together gently. Don’t worry about the mixture being totally combined; a little white and yellow swirling isfine!
8. Melt about a tablespoon of butter in the skillet.Pour the batter into the skillet ¼ cup at a time.
9. Cook for 1 to 1½ minutes, then flip the pancakes over. Cook for another 45 seconds and remove to a plate. Repeatwith the remaining batter.
10. Stack the pancakes as high on a plate as your appetite dictates. See how high you can go—take it on as apersonal challenge!11. Top with plenty of butter and maple syrup and eat to your heart’s desire.
WORKING CALVES IS FUN!
When we work calves, there are kids, cowboys, and cattle everywhere. And nobody stays still longer than a fewseconds.
Except the old-timers, who’ve earned the right to hang back and watch.

The calves just sit and wait, hoping if they stay still enough, they’ll go unnoticed.
But eventually, they all get their turn. We don’t want anyone to feel left out.


DINNER
(TRANSLATION: LUNCH)

SIMPLE, PERFECT CHILI
Makes 6 servings
This is my go-to chili recipe for everything from Frito pies to chili fries. It can be left very basic or made moreinteresting with additions like chopped onion, kidney and pinto beans, and cans of diced tomatoes and chilies. Butwhatever the eventual use, I never make chili without adding a mixture of masa (used in Mexican cooking) andwater. While acting as a thickener for the chili, masa also lends a distinctive corn flavor, which gives the chili awonderful dimension. Make this in huge quantities and freeze smaller portions—I love having chili in the freezer!
2 garlic cloves, chopped1 teaspoon ground oregano1 tablespoon ground cumin¼ teaspoon cayenne pepper (optional)2 tablespoons chili powder2 pounds ground beefOne 8-ounce can tomato sauce1 teaspoon salt¼ cup masa (corn flour, found in the Mexican food section of many supermarkets)
OPTIONAL INGREDIENTS1 can pinto beans, drained1 can kidney beans, drained1 jalapeño, seeded and finely diced1 can diced tomatoes and chilies (I use the Rotel brand)
FOR SERVINGShredded cheddar cheeseChopped onionFritos
1. Begin by measuring the spices: chopped garlic, oregano, cumin, cayenne and chili powder
2. Place the ground beef in a large pot and throw in the garlic.

3. Cook the beef until brown…
4. And unless you want to tick off your cardiologist, drain off the excess fat.
5. Pour in the tomato sauce…
6. Followed by the spices and the salt.
7. Stir together well, cover, and reduce the heat to low. Cover the pot and simmer for 1 hour, stirring occasionally. Ifthe mixture becomes overly dry, add in ½ cup water at a time as needed.
8. After an hour, place the masa in a small bowl. Add ½ cup water and stir together with a fork.
9. Dump the masa mixture into the chili…
10. Stir together well. Taste, adjust the seasonings, and add more masa paste and/or water to get the chili to yourpreferred consistency, or to add more corn flavor. Add the beans, jalapeño, and tomatoes if desired. Simmer for 10minutes.11. Serve with shredded cheddar, chopped onion, and Fritos.
HELPFUL HINT: To freeze the chili, allow it to cool completely, then place it in 1-cup portions in freezer bags. Flattenthe bags for easy storage in the freezer.

MARLBORO MAN: The Cowboy Who Stole My Heart
Forget this, I thought, as I lay sprawled on the bed in which I grew up. Home from L.A. on a self-imposed pit stop, Iwas drowning in a papery sea of study guides, marked-up drafts of my resume, and printouts of available Chicagoapartments. I’d been at it all week—studying, searching, editing—and I was worn out, my eyes watery from reading,my middle finger pruny from licking and flipping through pages, my socks dingy and rank from being on my feetfor two days straight. I needed a break.
I decided to head down to the J-Bar, a local dive where I knew some old friends were meeting for a drink. I’dbegged out earlier because of the monumental tasks on my list, but by now that glass of wine seemed not onlyappealing but necessary. But I was a mess, the downside of not leaving one’s bedroom for over forty-eight hours.Not that I had anyone to impress. It was my hometown, after all, the place that had raised me, and though relativelypicturesque and affluent, it wasn’t exactly the kind of town that required getting dressed to the nines to go out fordrinks.
With this in mind, I washed my face, threw on some black mascara—an absolute must for any fair-skinnedredhead with light eyes—and released my hair from its tired ponytail. I threw on a faded light-blue turtleneck andmy favorite holey jeans, dabbed some Carmex on my lips, and blew out the door. Fifteen minutes later, I was in thecompany of both my friends and a glass of wine, feeling the kind of mellow buzz that comes not only from your firstsip of the night but from the contentment of being with people who’ve known you forever.
That’s when I saw him across the room. He was tall, strong, and quiet, sipping bottled beer and wearing jeansand, most notably, cowboy boots. And his hair. It was not only very short, but very, very gray—much too gray forthe youthfulness of his face but just gray enough to send me through the roof. Gracious, he was a vision, thisMarlboro Man–esque person across the room. I inhaled deeply. I needed to see his hands.
I casually meandered to the section of the bar where he stood, and not wanting to appear obvious, I grabbedfour cherries from the sectioned condiment tray. I glanced at his hands; they were big and strong. Before I knew it,we were talking.
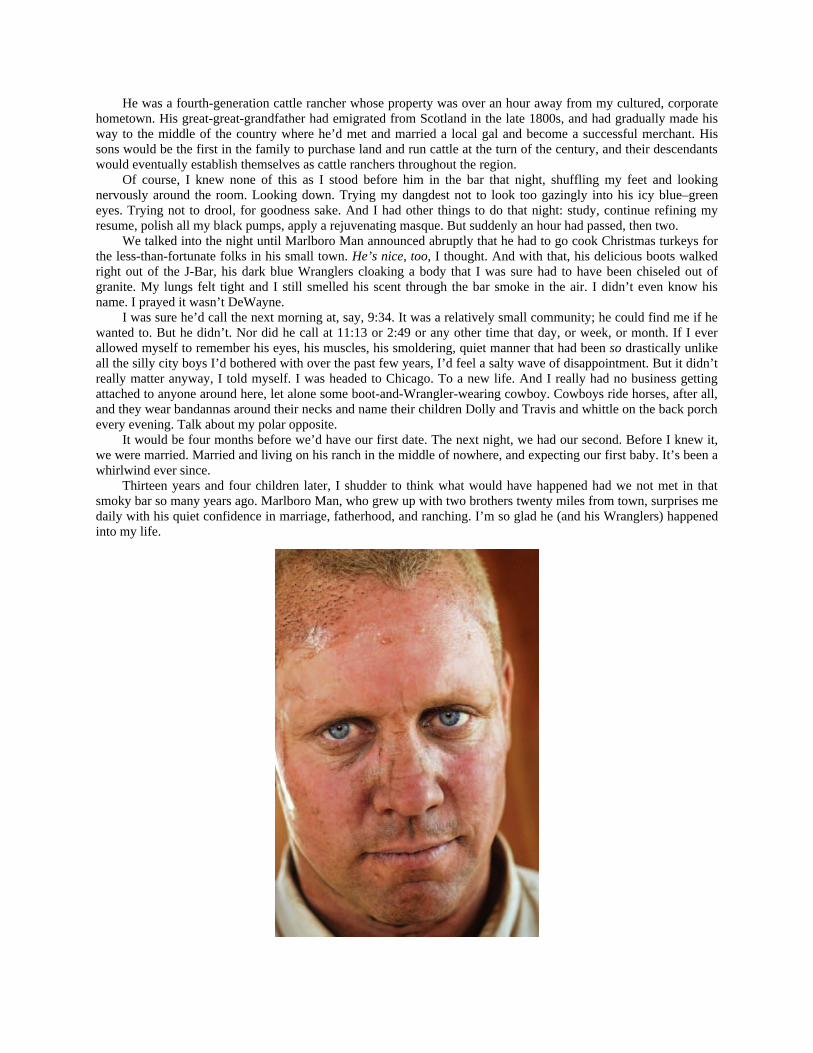
He was a fourth-generation cattle rancher whose property was over an hour away from my cultured, corporatehometown. His great-great-grandfather had emigrated from Scotland in the late 1800s, and had gradually made hisway to the middle of the country where he’d met and married a local gal and become a successful merchant. Hissons would be the first in the family to purchase land and run cattle at the turn of the century, and their descendantswould eventually establish themselves as cattle ranchers throughout the region.
Of course, I knew none of this as I stood before him in the bar that night, shuffling my feet and lookingnervously around the room. Looking down. Trying my dangdest not to look too gazingly into his icy blue–greeneyes. Trying not to drool, for goodness sake. And I had other things to do that night: study, continue refining myresume, polish all my black pumps, apply a rejuvenating masque. But suddenly an hour had passed, then two.
We talked into the night until Marlboro Man announced abruptly that he had to go cook Christmas turkeys forthe less-than-fortunate folks in his small town. He’s nice, too, I thought. And with that, his delicious boots walkedright out of the J-Bar, his dark blue Wranglers cloaking a body that I was sure had to have been chiseled out ofgranite. My lungs felt tight and I still smelled his scent through the bar smoke in the air. I didn’t even know hisname. I prayed it wasn’t DeWayne.
I was sure he’d call the next morning at, say, 9:34. It was a relatively small community; he could find me if hewanted to. But he didn’t. Nor did he call at 11:13 or 2:49 or any other time that day, or week, or month. If I everallowed myself to remember his eyes, his muscles, his smoldering, quiet manner that had been so drastically unlikeall the silly city boys I’d bothered with over the past few years, I’d feel a salty wave of disappointment. But it didn’treally matter anyway, I told myself. I was headed to Chicago. To a new life. And I really had no business gettingattached to anyone around here, let alone some boot-and-Wrangler-wearing cowboy. Cowboys ride horses, after all,and they wear bandannas around their necks and name their children Dolly and Travis and whittle on the back porchevery evening. Talk about my polar opposite.
It would be four months before we’d have our first date. The next night, we had our second. Before I knew it,we were married. Married and living on his ranch in the middle of nowhere, and expecting our first baby. It’s been awhirlwind ever since.
Thirteen years and four children later, I shudder to think what would have happened had we not met in thatsmoky bar so many years ago. Marlboro Man, who grew up with two brothers twenty miles from town, surprises medaily with his quiet confidence in marriage, fatherhood, and ranching. I’m so glad he (and his Wranglers) happenedinto my life.

MARLBORO MAN’S FAVORITE SANDWICH
Makes 4 sandwiches
Marlboro Man loves this sandwich. He invented it (well, I helped a little), and I make it for heads of state,dignitaries, kings, queens, and world leaders whenever they stop by our homestead on their way to a rodeo.Cowboys, too—they love it.
(Just kidding about the whole heads-of-state thing—none of those numbskulls could ever find our little houseanyway!)
The point is, every man I know, with the exception of strict vegans (and even some of those have comearound), loves this sandwich. It uses very simple ingredients and is so incredibly rich and satisfying that a man willforgo food for weeks (okay, hours) if he knows one is on the horizon. Just try it out—make it for a group of hungryguys and you’ll see what I mean. Eyes will roll back in heads. Engagement rings will be thrown your way. You’ll becarried on a litter the rest of your life. Love songs will be composed. Sonnets written.
1 large onion or 2 small/ medium onionsButter, lots of it2 or 3 pounds cube steakSeasoned salt, preferably Lawry’sLemon pepperBlack pepperWorcestershire sauceTabasco4 French or deli rolls
1. Start by slicing the onion.

2. Next, melt ¼ stick butter in a skillet over medium heat. This is not the last you’ll see of the butter, mark mywords.
3. Add the onion and cook over medium-low heat, stirring occasionally, until it is soft and light brown, 5 to 7minutes.
4. Remove the onion from the pan and set aside.
5. This is known as cube steak. Cube steak is tenderized round steak that’s been extra tenderized by the butcher.
6. Cut each piece against the grain into 1-inch strips.
7. Now season the meat with a nice sprinkling of seasoned salt, lemon pepper, and black pepper.
8. Add 2 tablespoons butter to the same skillet in which you cooked the onion. Turn the heat to high. Let the butterbegin to turn brown, about 2 minutes. You’ll want the skillet to be hot.
9. Now add enough meat to the hot skillet to form a single layer. Do not stir. Let it sit for about a minute, or longenough for one side to turn brown. Then, using a spatula, flip the meat over. Cook for another minute, then removeto a plate.
10. Repeat until all the meat is cooked.
11. Return all the meat to the skillet and add the cooked onion. Pour in Worcestershire sauce, several dashes ofTabasco (according to taste), and an additional 2 tablespoons of butter. Simmer the mixture over low heat for about

5 minutes to thoroughly warm.
12. Cut each roll in half lengthwise. Spread generously with butter, then brown on a griddle or skillet.
13. Place the rolls face up on a plate, then place the meat mixture on the bottom half.Spoon 2 or 3 tablespoons of the pan juices over the top. This will keep the meat moist and seep into the bread,
which makes for an utterly decadent sandwich. It also will require you to walk 132 miles to burn all the calories.
14. Top with the other half of the roll and serve with a crunchy green salad. You’re about to make someone reallyhappy.
VARIATIONS: If I weren’t married to a straight-up-meat-and-potatoes rancher, I would probably cook a bunch ofsliced mushrooms with the onions. I’d add a little sherry to the meat mixture. And I’d melt a little sliced mozzarellaon the top. But that’s just me. Truth is, you could play around with this sandwich as much as you’d like: differentveggies, different seasonings (thyme, fresh garlic, and so on), or different cheeses. Go play!
Oh. One more thing. If you’re looking to shrink your waistline, you might want to steer clear of this sandwich.
Boys will be boys!

ONION STRINGS
Makes 2 serving
I know they don’t look it, but these teeny tiny, thinly sliced fried onions are so pleasantly flavorful and crisp, andsuch an utterly perfect accompaniment for so many different main courses, that they really need to be placed onsome list of Side Dishes of All Time. Yes, sir. Right next to sweet lime pickles and tiramisù.
No, I’m not pregnant. But thank you for asking.Making these fried onions is so simple, but there are three crucial steps. First, you must slice the onions very
thinly, which requires either a sharp knife or mandoline. Second, you must soak the onions in buttermilk for at leastan hour before frying. Third, you must ensure the oil is 375ºF before throwing in the onions. I won’t go into thescientific reasons behind these requirements, because that would take away from your onion strings eatin’ time—solet’s get cracking!
1 large onion2 cups buttermilk (if you don’t have any in the fridge, see In the Morning)2 cups all-purpose flour1 scant tablespoon saltPlenty of black pepper¼ to ½ teaspoon cayenne pepperCanola oil for frying
1. Begin by peeling the onion and slicing very thinly.
2. Separate the onion slices and place them in a shallow dish. Pour buttermilk over the top.
3. Press the onions down so they’re submerged as much as possible and let them soak on the counter for at least anhour. If necessary, stir them around a bit halfway through the soaking process.

4. In a bowl, combine the flour, salt, black pepper, and cayenne.
5. Pour 1 to 2 quarts canola oil in a pot or Dutch oven. Heat to 375ºF, or until a pinch of flour sizzles when sprinkledover the pan.
6. Using tongs, remove a handful of onions from the buttermilk and immediately dunk into the flour mixture. Coatthe onions in the flour mixture, then tap them on the inside of the bowl to shake off the excess.
7. Plunge the onions into the hot oil.
8. With a spoon, fiddle with them a bit just to break them up. And watch them! They’ll be ready to remove from theoil in no time flat.
9. When they’re golden brown (this should take under a minute), remove them from the oil and place on a papertowel–lined plate.
10. Repeat with the remaining onion slices and serve immediately.Pile these on top of a juicy grilled hamburger—to die for!

SPICY PULLED PORK
Makes 8 servings
Oh my goodness, am I ever in love with pork shoulder. Please don’t tell the cattle ranchers.This recipe comes from my sister Betsy’s good friend Cynthia, who makes this delicious shredded pork for get-
togethers with hip Austinites. And it’s not that I’m ever at these said get-togethers with all the other hip Austinites.For one thing, I don’t live anywhere near Austin, so I’m never invited. For another, I probably wouldn’t go anywaybecause I don’t like to leave my house. It’s a good thing I have my sister to fill me in on all the fun.
I’ve made this pork over and over, and I’m always amazed at its versatility. The final shredded product can beserved immediately or in different dishes over the next few days, and the flavors are deliciously…delicious. Serve itwith warm flour tortillas, lime wedges, and a combo of pico de gallo, sour cream, guacamole…whatever you havelying around.
One 5-to 7-pound pork shoulder1 whole onion, cut into quarters1 tablespoon chili powder½ cup brown sugar4 garlic cloves, peeled1 teaspoon dried oregano2 teaspoons ground cumin1 to 2 tablespoons salt, to tasteFreshly ground black pepper3 tablespoons olive oil2 tablespoons white wine vinegarLime wedgesFlour tortillas
1. Preheat the oven to 300ºF.
2. This is a pork shoulder roast. Make friends with it, because it’s a fabulously versatile piece of meat. Go ahead andgive it a rinse. I’ll wait.
3. In a food processor, combine the onion, chili powder, brown sugar, garlic, oregano, cumin, salt, pepper, olive oil,and vinegar. Pulse until totally combined.
4. Pour the mixture over the pork. Rub it into every nook and cranny of the meat, tucking it under folds and increvices. Let no stone go unturned.

5. Place the pork into a roasting pan or Dutch oven and add 2 cups water. Cover tightly and roast for 6 or 7 hours,turning once every hour.
6. Check to make sure it’s fork-tender. Increase the heat to 425ºF and roast uncovered for 20 minutes, or until theskin gets crispy. Remove from the oven and allow the pork to rest for 15 minutes.
7. Shred the meat, using two forks to pull it apart. Place the shredded meat on a large platter lined with lime wedges.
8. Pour the pan juices over the shredded meat. This will ensure that the meat stays extra tender.
9. Serve with warm tortillas.
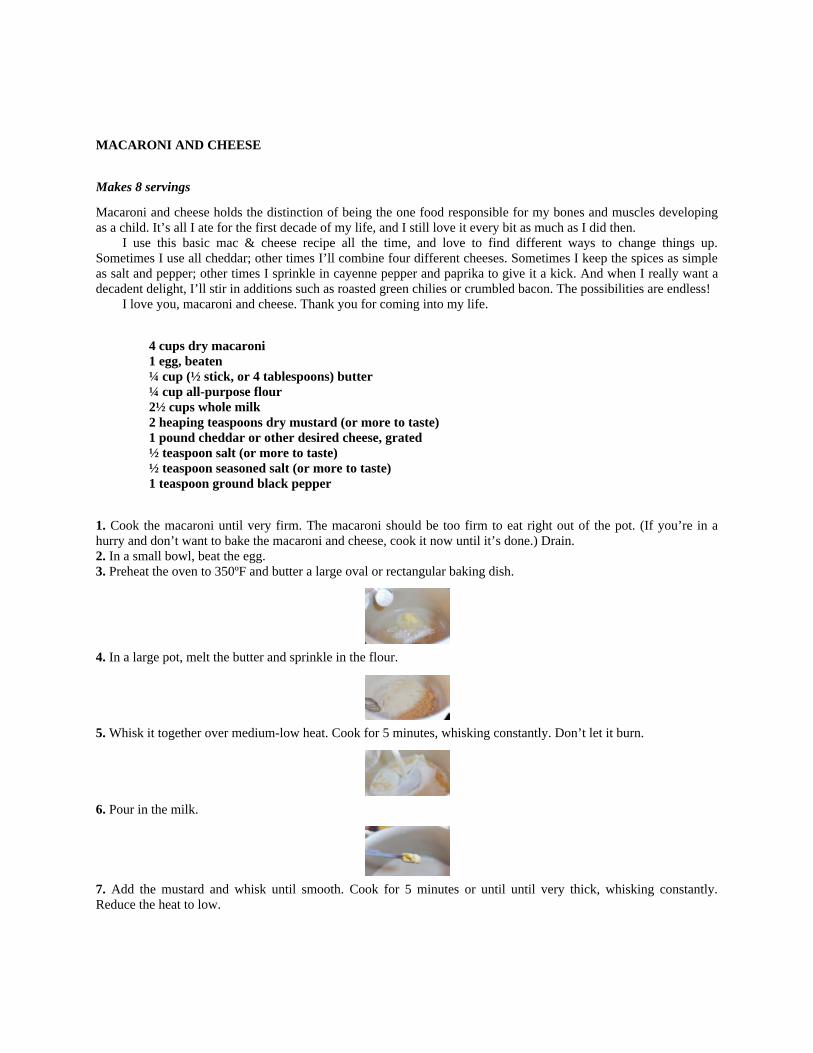
MACARONI AND CHEESE
Makes 8 servings
Macaroni and cheese holds the distinction of being the one food responsible for my bones and muscles developingas a child. It’s all I ate for the first decade of my life, and I still love it every bit as much as I did then.
I use this basic mac & cheese recipe all the time, and love to find different ways to change things up.Sometimes I use all cheddar; other times I’ll combine four different cheeses. Sometimes I keep the spices as simpleas salt and pepper; other times I sprinkle in cayenne pepper and paprika to give it a kick. And when I really want adecadent delight, I’ll stir in additions such as roasted green chilies or crumbled bacon. The possibilities are endless!
I love you, macaroni and cheese. Thank you for coming into my life.
4 cups dry macaroni1 egg, beaten¼ cup (½ stick, or 4 tablespoons) butter¼ cup all-purpose flour2½ cups whole milk2 heaping teaspoons dry mustard (or more to taste)1 pound cheddar or other desired cheese, grated½ teaspoon salt (or more to taste)½ teaspoon seasoned salt (or more to taste)1 teaspoon ground black pepper
1. Cook the macaroni until very firm. The macaroni should be too firm to eat right out of the pot. (If you’re in ahurry and don’t want to bake the macaroni and cheese, cook it now until it’s done.) Drain.2. In a small bowl, beat the egg.3. Preheat the oven to 350ºF and butter a large oval or rectangular baking dish.
4. In a large pot, melt the butter and sprinkle in the flour.
5. Whisk it together over medium-low heat. Cook for 5 minutes, whisking constantly. Don’t let it burn.
6. Pour in the milk.
7. Add the mustard and whisk until smooth. Cook for 5 minutes or until until very thick, whisking constantly.Reduce the heat to low.

8. To temper the eggs, slowly pour ¼ cup of the sauce into the beaten egg, whisking constantly to avoid cooking theegg. Whisk until smooth.
9. Pour the egg mixture into the sauce, whisking until smooth.
10. Add in all but ½ cup of the cheese and stir until melted.
11. Add the seasonings. Taste the sauce and add more salt and seasoned salt as needed. Do not undersalt or you’llregret it the rest of your life!
12. Pour in the cooked, drained macaroni and stir to combine.
13. Serve immediately or pour into the baking dish and top with the remaining cheese.
14. Bake for 20 to 25 minutes, or until bubbly and golden on top.15. Serve to hungry humans.
Variations
SPICES Add any of the following to the cheese sauce:
cayenne pepper
paprika
ground thyme
ADDITIONS Stir in any or all of the following:
Caramelized onions
Roasted, chopped green chilies
Cooked, crumbled bacon

Diced, sautéed ham
Diced fresh tomatoes
THANK GOD FOR CHARLIE
He always provides us with plenty of entertainment during long, quiet days in the country.
Not that he always enjoys his work.But this is the plight of basset hounds. Work isn’t their primary goal in life.

BEANS AND CORNBREAD
Makes 8 to 12 servings
Do you ever allow yourself to experience the wonderful simplicity of a big ol’ pot of beans? Honestly, there are fewthings more fundamental than placing dried beans in a pot of water, cooking them, and serving them to hungrysouls. If life ever gets to be too hectic—if the twenty-first century ever starts to infringe upon my peace—I justthrow a pot of beans on the stove and all my cares and concerns instantly melt away. Beans are magical like that.
You can do so much with a pot of cooked pinto beans: make refried beans for burritos (so much better than thecanned stuff), add them to a pot of homemade chili, or adorn a big platter of nachos.
BEANS
4 cups dried pinto beans 4 slices thick-cut bacon, cut into1-inch slices (or you can use salt pork, ham hock, or diced ham instead)1 teaspoon salt2 teaspoons black pepperOPTIONAL SEASONINGSchili powdercayenne peppergarlic powderoreganoOPTIONAL GARNISHESsour creamfresh cilantrochopped red oniongrated cheesePico de Gallo (Starters)
1. Rinse the beans thoroughly, then place them in a large pot with the bacon. Pour water over the top.
2. Use enough water to cover the beans by 1 or 2 inches. Bring to a boil over medium-high heat, then reduce the heatto low and cover. Simmer for 2 to 3 hours.
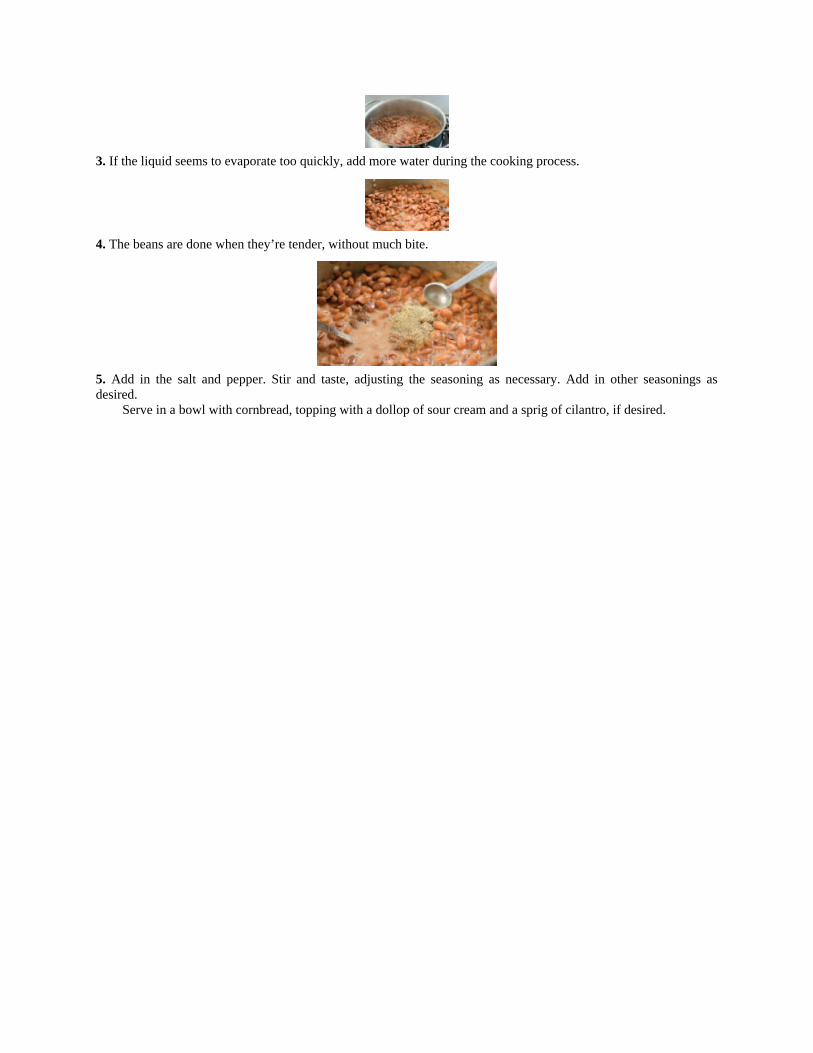
3. If the liquid seems to evaporate too quickly, add more water during the cooking process.
4. The beans are done when they’re tender, without much bite.
5. Add in the salt and pepper. Stir and taste, adjusting the seasoning as necessary. Add in other seasonings asdesired.
Serve in a bowl with cornbread, topping with a dollop of sour cream and a sprig of cilantro, if desired.

SKILLET CORNBREAD
1 cup yellow cornmeal½ cup all-purpose flour1 teaspoon salt1 tablespoon baking powder1 cup buttermilk (if you don’t have any, see In the Morning)½ cup milk1 egg½ teaspoon baking soda¼ cup plus 2 tablespoons shortening
1. Preheat the oven to 450°F. In a bowl, combine the cornmeal, flour, salt, and baking powder and stir together.
2. Measure the buttermilk and milk in a measuring cup and add the egg. Stir together with a fork.
3. Add the baking soda and stir.
4. Pour the milk mixture into the dry ingredients.
5. Stir with a fork until just combined. Do not overstir.
6. In a small bowl, melt ¼ cup of the shortening in the microwave.
7. Slowly add the melted shortening to the batter, stirring constantly until just combined.
8. In an iron skillet over high heat, melt the remaining 2 tablespoons shortening. Pour the batter into the hot skillet

and spread to even out the surface.Cook on the stovetop for 1 minute, then bake for 20 to 25 minutes, until golden brown. The edges should be
crispy.
9. Slice into squares and serve with the beans.Cowboys will smile.
VARIATION: Stir 1 small can diced green chilies or 1 diced fresh jalapeño into the cornbread batter before pouring itinto the skillet.

SHERRIED TOMATO SOUP
Makes 8 servings
My friend Cathy makes a version of this soup, and any time I’ve eaten it my eyes have closed and I’ve sighedwith a deep, deep sense of solemnity and peace. It’s a basic creamy tomato soup, but it uses simple pantryingredients (as well as a couple of fresh ones), and it’s made extra special by an addition of sherry, which gives thesoup a wonderful flavor. And it’s one of those soups that can be altered to become uniquely yours: just stand overthe stove and stir, tasting occasionally and adding a little bit of this, a little bit of that, until the taste is just right foryou. This tomato soup accepts all people. Just like me.
For alcohol-sensitive persons and kiddoes, the sherry can be omitted. The soup is still delicious without it.Let’s make it, baby! (And I mean that respectfully, of course.)
1 medium white or yellow onion6 tablespoons (¾ stick) butterTwo 14.5-ounce cans diced tomatoesOne 46-ounce bottle or can tomato juice3 to 6 tablespoons sugar1 or 2 tablespoons chicken base, or 3 chicken bouillon cubesFreshly ground black pepper1 cup sherry (optional)1½ cups heavy cream¼ cup chopped flat leaf parsley ¼ cup chopped basil
1. To begin, dice the onion.
2. Melt the butter in a large pot or Dutch oven.

3. Throw in the on until translucent.
4. Now dump in the diced tomatoes and stir to combine.
5. Add the tomato juice. I used organic juice because I wanted people to think, She’s cool because she uses organic.
6. Next—and this is important—in order to combat the acidity of the tomatoes, add 3 to 6 tablespoons sugar. Now,you’ll want to start on the low side, then taste and add more as needed. Some tomatoes and juice have more of anacidic bite than others.
(For what it’s worth, and I realize it’s not worth much, I use 6 tablespoons of sugar. But I like a little sweetnessto my tomato soup. So don’t listen to me.)
7. Next, add 1 or 2 tablespoons chicken base to the pot. I added 3, and it wound up being a little too much. But it’s amiddle child thing…I’m always adding more, more, more!
8. Now you can add lots of freshly ground black pepper. Stir to combine, then heat almost to a boil. Then turn offthe heat.
9. Now! Here’s the nice little flavor that sets this soup apart. Add in the sherry, if desired. It’ll keep you honest—Ipromise!
10. And now, people. It’s time to get serious. And it’s time to examine yourselves, and I mean that figuratively, forPete’s sake: when it comes to heavy cream, are you a man or a mouse? I need an answer now, because we’re aboutto add 1½ cups of the stuff into our soup.
And mmm…stir it together.

11. Now chop up a handful of flatleaf parsley.And really, I’m not opposed to the curly parsley. And actually, blind taste tests have shown that there’s really
not much difference in taste. But flatleaf is a little more texturally palatable, so if you can find it, it’s best.“Texturally palatable.” You know, I just throw these phrases out into the atmosphere and I have no idea where
they come from. Or where they’re going. Or where they’ve been.
12. Next, chop up a few leaves of fresh basil. (Well, “chiffonade” is the proper term…but that’s way toocomplicated a topic to inject into this simple tomato soup.)
13. Now go ahead and throw in the parsley and the basil, and stir together. Next, take a whiff of this heavenlydelight. Then faint. Then pick yourself up off the ground and grab your pepper mill again.
14. I always set it to fine for this soup, and I really let ’er loose.I love freshly ground black pepper.
15. Keep the soup warm and serve it on a cold day to people you love. The flavor will knock your socks off.
SMOKIN’ IN THE GIRLS’ ROOM

Did you know the number one cause of health problems in the bovine population is smoking?
It’s true. It’s one of the little known secrets of agriculture.

PIZZA CRUST
Makes 2 pizza crusts
I love this pizza crust and have used it for years for everything from pizza to calzone. It lends itself well to beingrolled thin, and always produces a slightly crisp, slightly chewy crust. Don’t be afraid to store it in the fridge for acouple of days before using, as this delicious dough seems to get better with age!
1 teaspoon or ½ packet active dry yeast4 cups all-purpose flour1 teaspoon kosher salt1/3 cup extra virgin olive oil, plus more for drizzling
1. Pour 1½ cups warm water into a bowl. Sprinkle the yeast over the water.
2. Combine the flour and salt in a mixing bowl.
3. With an electric mixer on low speed, drizzle in the olive oil until just incorporated.
4. In a separate bowl, gently stir the yeast/water mixture…
5. And drizzle it into the flour/ oil mixture; mix until the dough forms a ball. (You can also mix by hand until thedough comes together.)
6. Drizzle a little olive oil into a clean bowl. Toss the ball of dough in the bowl and turn over to coat in oil.

7. Cover the bowl with a moist kitchen towel and set in a warm place for 1 to 2 hours, or cover with plastic wrap andstore in the fridge for up to 2 days.
8. To prepare the pizza, preheat the oven to 500ºF.
9. Divide the dough in half. Lightly drizzle olive oil on a pizza pan or rimmed baking sheet.
10. Using your hands, stretch the dough to the desired shape, pressing the dough into the pan with your fingers. Thethinner the better!
The surface of the dough should be lumpy from finger marks. All the better to receive and hold toppings, mydear.
11. Lay the desired toppings over the dough and bake the pizza for 8 to 10 minutes, until the edges of the crust aregolden brown.
The other half of the dough may be wrapped tightly in plastic wrap and refrigerated up to 3 days before use, orfrozen for up to 6 months.

POTATO-LEEK PIZZA
Makes 1 pizza
This is my favorite pizza on earth, hands down. It’s flavorful, textural, and girlie…the leeks set it apart from thefray, and it contains both goat cheese and bacon. What could be wrong?
Though it isn’t available everywhere, fresh mozzarella—more soft and bright white than the mass-producedstuff—makes this pizza extra wonderful. My local grocery store doesn’t carry it, so I always keep at least three orfour packages in my freezer to have on hand when it’s pizza-making time. I’m sure this breaks a few rules of caringfor artisan cheeses, but it’s the best I can do in this life I’ve been given.
If you can’t find fresh mozzarella, though, supermarket mozzarella will work just fine. Buy a block and slice itby hand. I like this much better than using the pre-grated variety.
½ recipe Pizza Crust (Dinner)Extra virgin olive oilKosher salt6 slices thick-cut bacon, cut into 1-inch pieces3 leeks, rinsed well to remove grit and thinly sliced5 small red or Yukon Gold potatoes, sliced paper thin1 pound fresh mozzarella cheese, sliced thin4 ounces goat cheese, crumbledGrated Parmesan cheeseFreshly ground black pepper
1. Preheat the oven to 500ºF.
2. Prepare the pizza crust and drizzle lightly with olive oil. Sprinkle lightly with salt.
3. Begin by placing the bacon in a skillet over medium heat. Fry the bacon until cooked but not crisp.
4. Remove the bacon from the pan and set aside.
5. Pour off most of the grease. Do not clean the skillet. Return the skillet to the stove and turn the heat to medium-

low.
6. Add the leeks to the pan and sauté over medium-low heat until soft, about 3 minutes. Remove from the heat andset aside.
7. Using a sharp knife or mandoline, slice the potatoes very thin. You’ll need to do this just before you need them, asthe potatoes will brown very quickly.
8. Arrange the potatoes in a single layer all over the crust, slightly overlapping the edges.Potatoes make a surprisingly delicious pizza topping! I was in my thirties before I discovered this. I missed out
on so much!
9. Sprinkle the potatoes lightly with salt, then lay the mozzarella slices in a single layer on top of the potatoes. I lovefresh mozzarella and will drive a hundred miles to get it.
10. Place the leeks on top of the cheese. The flavor of leeks sautéed in bacon grease is not to be believed.
11. I usually lay on the leeks pretty thick.
12. Next, sprinkle the fried bacon pieces over the top…
13. Followed by a generous addition of crumbled goat cheese, grated Parmesan, and a sprinkle of freshly groundblack pepper.

14. Bake for 8 to 11 minutes, until the edges of the crust are golden brown and the cheese is melted and bubbly. Cutinto wedges or squares and serve immediately.

Variation
TOMATO-BASIL PIZZA
1. Prepare the pizza crust, then spread the prepared pesto over the crust. Sprinkle lightly with salt.
2. Place a layer of sliced mozzarella over the pesto.
3. Place sliced Roma tomatoes on top of the cheese.
4. Top with more mozzarella, and sprinkle generously with Parmesan cheese.Bake for 8 to 11 minutes, until the cheese is melted and the crust is golden brown.
OTHER PIZZA TOPPING IDEASCaramelized onionsSliced sautéed mushroomsShredded chicken with BBQ sauceRoasted garlicGrilled zucchiniGrilled red onions
MY PESKY BROTHER-IN-LAW, TIM
He’s a pest. He throws things at me. He teases the kids incessantly. But I guess we like him okay.He’s a rancher. And he’s good at what he does.He’s rugged and outdoorsy. He once gave me a .22 handgun for Christmas. To this day, it’s the nicest thing
he’s ever done for me.But he also has his moments. He’s a gentleman. And he’s kind. And he loves the animals he cares for.He also has a great sense of humor. Unless he hasn’t eaten breakfast—then he’s pretty darn cranky. Seriously—
if Tim hasn’t eaten, you need to steer clear.But all in all, he’s pretty easy to take. As far as brothers-in-law go, I got pretty lucky.Unless he hasn’t eaten. But I guess I’ve already said that.


COWBOY CALZONE
Makes 8 calzone
Cowboys love calzone because they’re easy to grab and eat on their way out the door. I created this cowboy-friendlytwist on the original.
½ pound hot breakfast sausage1 pound ground beef½ onion, finely dicedOne 10-ounce can tomatoes and chilies (I use Rotel brand)8 ounces whole milk ricotta cheese½ cup grated mozzarella cheese½ cup grated Monterey Jack cheese1 egg, beatenSalt and black pepper1 recipe Pizza Crust (Dinner)Olive oil for brushing
1. Preheat the oven to 450°F.In a large skillet, combine the sausage and hamburger with the onion.
2. Brown over medium heat. Drain the excess grease.
3. Pour in the tomatoes and chilies.

4. Stir to combine, and cook for 2 minutes.Remove from the heat and allow to cool slightly.
5. In a bowl, combine the ricotta, mozzarella, Monterey Jack, and egg. Add a dash of salt and pepper.
6. Add the cooled meat mixture to the cheese mixture and stir gently to combine.
7. Divide the pizza dough into 8 equal-size balls. With a rolling pin on a floured surface, roll each ball into a 6-inchcircle.
8. Place one-eighth of the meat/cheese mixture in the middle of each circle.
9. Fold half of the circle over the other half, gently pressing to slightly spread and flatten the filling inside. Press afork along the edge to seal closed, then transfer the calzone to a greased baking sheet. Repeat with the remainingdough and filling. Brush the calzone with olive oil.10. Bake for 12 to 15 minutes, until golden brown. Transfer the calzone to a basket or wrap individually in foil.
Feed to hungry cowboys on their way out the door.
Thatcher
Pete

Josh
COWBOYS
“Cowboy…” There’s just something about that name. It means history…toughness…grit. It means chivalry…quietcharm…chaps. It means hard work, athleticism, Wranglers, the smell of leather…and most of all, commitment toland, animals, and the natural resources that comprise their environment.
I always had a romantic notion of cowboys—from literature, movies, and legend. And after spending the pastseveral years living among the dying breed, I can attest that most every stereotype about cowboys holds true.
I’m so glad my world is filled with them.
Cowboy Tim

Cody
Matthew

Pa-Pa

SUNDAY DINNER
There’s just something about Sunday dinner (also known as Sunday lunch to those of you who don’t live in ruralAmerica) in my house. We’ve just survived not only the rush of getting ready for church (and all the frantic shoe-searching and hair-combing that entails), but also making the journey to and from town for church itself. By the timewe get home, we’re starving—absolutely starving. If I started from scratch and prepared a feast when we got home,it’d be late afternoon before we got to eat. So for Sunday dinner, I try to have something special all ready to go whenwe walk through the door.
But I still want it to be special. Sure, we could pick up fried chicken at the grocery store in town, but it’s muchnicer to return home to the aroma of a delicious pot roast in the oven…or the promise of a savory chicken casserolethat’s all ready to bake. And I’m not afraid to break out my nicer china for Sunday dinner. It makes the kids sit up alittle straighter.
Sunday around the ranch is exactly what it should be: a time to recharge. No other day during the week wouldpermit a busy ranching family to forsake all fence fixing and cattle working in favor of a leisurely, warm meal withfamily…and a ridiculously long nap on the couch. Before I married a rancher and moved to the country, I alwaystook for granted the importance of Sunday as a time for rest and renewal. Now I’m convinced it’s as vital to oursurvival as anything else.

PERFECT POT ROAST
Makes 6 servings
Okay, so that’s an unofficial designation, but people—I want you to embrace the pot roast. I had to, after all. Imoved to the country after having had seven glorious years of sushi, Thai food, Gelson’s, and every grocery item Icould ever hope for. Then I married a beautiful, strong, brave cowboy whom I love more than life itself but whodoesn’t eat anything fun. And then I had four children who don’t eat diddly, either. So I’ve had to learn. I’ve had tolearn to embrace the pot roast. And if I can do it…you can, too.
I had to kiss a lot of frogs before I found my prince. And I had to make a lot of really bad pot roasts to finallyfigure the whole dadgum thing out…and figure it out I did, thank the Lord above. And the verdict? Pot roast, whenmade according to a few fundamental rules, can be a savory, delicious addition to your repertoire. There are lots ofdifferent but equally delicious ways to make pot roast.
The meat you use is important. My favorite is the chuck roast; it has wonderful marbling throughout the meat,and when given an ample amount of time to cook, chuck roast winds up being tender and melt-in-your-mouthdelicious. To understand the importance of adequate cooking time, you must understand that these tougher pieces ofmeat have lots of connective tissue that will only soften when cooked at a lower temperature for a long period oftime. You can’t rush a pot roast; you’ll be disappointed with the result if you try. But if you reach deep down intoyour soul and find your patience—at least, the patience that was given to you by your Maker regarding the beef-related circumstances in your life—you won’t be disappointed.
2 or 3 tablespoons olive oilKosher saltOne 3- to 5-pound chuck roast2 onions6 to 8 carrotsPepper2 to 2½ cups beef stock3 or 4 fresh rosemary sprigs2 or 3 fresh thyme sprigs
1. Preheat the oven to 275ºF.
2. Heat a large pot or Dutch oven over medium-high heat. Add the olive oil and let it get really hot. While it heats,prepare the other ingredients.

3. Generously salt the chuck roast on both sides. I like kosher salt because it adheres more readily to the meat.
4. Cut a couple of onions in half from root to tip…
5. Then cut off the tops and bottoms and peel off the papery skin.
6. When the pot is very hot, place the onions in the oil and brown on both sides, about a minute per side. Removethe onions to a plate.
7. Next, thoroughly wash—but don’t peel—the carrots. Cut them roughly into 2-inch slices.
8. Throw the carrots into the same (very hot) pot. Toss them around until slightly brown, about a minute or so. Thepoint here is to get a nice color started on the outside of the vegetables, not to cook them.
9. Remove the carrots from the pot and allow the pot to get really hot again. Add another tablespoon of oil to thepan.
10. Pepper the meat to taste, then place the meat in the pot and sear it, about a minute per side. Remove to a plate.
11. Now, with the burner on high, deglaze the pot by adding 1 cup of the beef stock, whisking constantly. The pointof deglazing is to loosen all the burned, flavorful bits from the bottom of the pot.

12. When most of the bits are loosened, place the meat back in the pot…
13. Followed by the carrots and onions. Pour enough beef stock into the pot to cover the meat halfway.
14. Next, put in the fresh rosemary and thyme sprigs. The fresh herbs absolutely make this dish. Tuck them into thejuice to ensure that the flavors are distributed throughout the pot.15. Now, just cover the pot and roast for 3 to 5 hours, depending on the size of your roast.
For a 3-pound roast, allow for 3 to 3½ hours. For a 5-pound roast, allow for a 4- to 5-hour cooking time. Don’tdisrupt the roast during the cooking process.
When the cooking time is over, check the roast for doneness; a fork should go in easily and the meat should bevery tender. Remove the meat to a cutting board and slice against the grain.
Place on a plate with vegetables and PW’s Creamy Mashed Potatoes (Supper). And of course, spoon plenty ofpan juices over the top. If you looked up “rib-sticking meal” in the dictionary, you’d see this photo. You’ll love it!
ON BEING RESPONSIBLE FOR OTHERS
One of the hardest things about becoming a mother for the first time was the stark realization that I was absolutely,wholly responsible for another human being’s survival. I mean, pregnancy was okay. As the daughter of a physicianand an amateur doctor myself, I could wrap my brain around pregnancy.
But then I got home from the hospital. And all the hours and days and weeks I’d wasted reading What to ExpectWhen You’re Expecting suddenly turned into useless dust. I had this baby, this human baby, in my little house in thecountry and it woke up in the middle of the night. Like, after I went to sleep! It wanted to eat, it seemed. I justcouldn’t believe it. And I obliged, too—I fed the human baby. Night after night, I staggered to its crib with my eyesglued shut and sat on the rocker in its room and dutifully attached its mouth to my throbbing, engorged breast andallowed it to root around and drink the milk, real milk, from my bosom. And I cried. I cried a lot.
Slowly, though, during the course of the coming days and weeks, I began coming to terms with the fact thatthere was no getting around it: without me, this child would not survive. If I didn’t feed it, nobody would. Well, I’msure Marlboro Man would have if I’d asked him to, but in all my postpartum desperation, I wasn’t about to deal withwashing bottles on top of everything else.
I eventually accepted the fact that as mothers, we care for our young. So I fed that first human baby until itgrew and grew. Then I even did it three more times, losing thousands of hours of sleep in the process. And what Irealize now is, there’s always been a higher purpose to my all-night breastfeeding. I realize now that it prepared mefor and cemented in my mind the fact that we also have thousands upon thousands of animals on our ranch whosewell-being depends solely on our feeding them. Without us, especially in the cold, harsh winter, many of themwouldn’t survive.

When the ground is covered with winter snow, we have to feed the horses. Otherwise, they get skinny and crankyand start to go downhill fast.
There’s always a pretty one in the group. Hello, beautiful!
Here’s Marlboro Man driving his feed truck. The feeder on the back is loaded with protein cubes made of cottonseedmeal and wheat mids, which are the by-product of flour production, and the back of the truck is loaded withnutritious and delicious alfalfa hay…“delicious” being a relative term.
Here’s the creek that runs through our house. Well, it doesn’t run through our house. If it did, my floors would beclean. No, it runs near our house. Anyway, we have to cross it to feed some of our horses.
It’s so fun to watch the horses eat. I could do it all day, or at least for six minutes. After that, I start shiveringviolently and return to the house, where I curl up with hot chocolate and wait for everyone to get home.
And despite the never-ending work, it really is fun to be responsible for the animals’ well-being. It gives me areassuring sense of pride.
And as much work as it is, at least it doesn’t involve my getting up eight times in the night and singing themlullabies.

Engorged.

CHICKEN POT PIE
Makes one 9-inch pie
Whoever doesn’t love chicken pot pie hasn’t tasted good chicken pot pie. This one is just the way I like it, with acreamy, savory filling and an abundant, flaky crust. It’s earned a permanent spot in my Comfort Food Hall of Fame.
3 celery stalks3 medium carrots, peeled1 large yellow onion4 tablespoons (½ stick) butter½ cup frozen peas2 cups cooked chicken, see Dinner (dark and light), cut into bite-size pieces¼ cup all-purpose flour2 cups low-sodium chicken broth1 chicken bouillon cube¼ cup white wine (optional)1 cup heavy cream1 teaspoon ground thyme1 teaspoon kosher salt, or more to tasteBlack pepper to taste½ recipe Perfect Pie Crust (Dinner)
1. Preheat the oven to 400°F.
2. Begin by finely dicing the vegetables. Slice the celery stalks into narrow strips, then slice in the other direction tocreate a fidi
3. Repeat this process with the carrots…

4. And the onion.HELPFUL HINT: Prepare the filling and pie crust ahead of time. Just keep them separate in the fridge until you’reready to assemble and bake. Or, fully assemble, cover tightly, and freeze, unbaked, until ready.
5. Melt the butter in a large pot or Dutch oven over medium heat. Add the onion, carrots, celery and peas. Sauté untilthe vegetables start to turn translucent, a couple of minutes.
6. Add the chicken and stir to combine. Sprinkle the flour evenly over the vegetables and chicken and stir tocombine. Cook for a couple of minutes, stirring gently.
7. Pour in the chicken broth, stirring constantly. Stir in the bouillon cube and wine, if using.The flour will combine with the chicken to create a delicious gravy.
8. Pour in the cream and stir.Allow the mixture to cook over low heat, thickening gradually, about 4 minutes. Season with the thyme, salt,
and pepper. Remove from the heat. Taste and adjust the seasonings as needed. Be sure it’s adequately salted!
9. Pour the chicken mixture into a deep pie pan or small casserole dish.
10. Roll out the crust so that it’s 1 inch larger than the pan. Place the crust on top of the chicken mixture and cutsmall slits in the top. Press the crust gently into the sides of the dish to seal. I don’t worry about making a perfectedge on my chicken pot pie because a) it looks more rustic and b) I’m lazy and hungry, and I want to eat.
11. Bake for 30 minutes, or until the crust is golden brown and the filling is bubbly. Cool for 10 minutes beforeserving.

12. Use a large spoon to serve.Mmmm. This is what I’m talkin’ about.

PERFECT PIE CRUST
Makes two to three 9-inch pie crusts
This recipe was sent to me by Sylvia Lamon of Jenkins Farm and has lived up to its claim of being the flakiest piecrust in existence. The recipe uses the same basic ingredients as my mom’s old standby recipe, but this pie crust ismade ahead of time and frozen as a way of enhancing the flakiness factor.
It has replaced all pie crust recipes in my arsenal.
3 cups all-purpose flour1 teaspoon salt1½ cups vegetable shortening1 egg5 tablespoons cold water1 tablespoon distilled white vinegar
1. Combine the flour and salt in a large bowl.
2. Add in the shortening. Using a pastry cutter, gradually work the shortening into the flour until the mixtureresembles tiny pebbles.
3. This step should take 3 or 4 minutes.
4. Lightly beat the egg with a fork, then add it to the mixture Next, add in the cold water and vinegar…
5. Stir the mixture together until it’s just combined, then remove half of the dough from the bowl.
6. Place in a large plastic bag (do not seal) and slightly flatten with a rolling pin. This makes it much easier to rollout the crust later. After flattening, seal the bag tightly.

7. Repeat with the other half of the dough and place the plastic bags in the freezer. I like to make several batches ofpie crust at a time so I always have a crust ready to go.
NOTE: Dividing the dough in half results in two pretty generous pie crusts. If you desire a thinner crust, you maydivide the dough into three crusts.
8. When you’re ready to use a crust, remove one from the freezer and allow it to sit on the counter to thaw slightly,about 20 minutes. Remove from the bag and place on a lightly floured surface.
With a rolling pin, begin rolling the dough from the center, outward. Be gentle and patient; it’ll take a little timeto get the dough completely rolled out.
9. If you think the bottom is really sticking to the surface below, use a nice, sharp spatula to loosen it and sprinklesome extra flour on top.
10. Then flip it over to finish rolling. Remember to roll from the center in single, outward strokes; no back-and-forthrolling.
11. Again with a spatula, loosen and lift the pie crust and carefully lay it over a pie pan. Using your hand, lightlyform the crust so that it fits inside the pan and overlaps the edges.
12. Because it’s quick and easy, I just tuck the excess dough under itself above the rim.
13. Then you can apply whatever decorative effects that you like to the edge. Or you can leave it plain if you’d like!Just tell yourself it’s more rustic that way!14. Fill the pie crust with filling and bake according to the pie recipe’s directions. Or, for a prebaked crust, fill withpie weights (or pinto beans placed on aluminum foil) and bake at 400ºF for 10 minutes, or until golden.
Pie crust can be used for Chicken Pot Pie (Dinner), Flat Apple Pie (Sweets), fruit cobblers, or fun tarts for your kids!

CHICKEN SPAGHETTI
Makes 6 to 8 servings
This really is a fabulous casserole, and the only one in existence that Marlboro Man, our cowboys, and my childrenwill eat. It’s officially called Chicken Spaghetti, but because of my addition of cayenne pepper, Marlboro Man tookto calling it Mexican Chicken, which isn’t its proper name at all, but what’s a woman to do? But it doesn’t reallymatter what anyone calls it, because it doesn’t last long enough to matter.
There’s a lot of “stuff” in this casserole, but the way I ensure widespread acceptance and bliss by those I serveit to is to keep everything diced very small and to season it adequately. I love making an extra casserole and poppingit in the freezer for a later date; it’s comforting to know it’s there!
1 cut-up fryer chicken1 pound thin spaghetti, broken into 2-inch piecesOne 4-ounce jar diced pimientos, drained1 small onion¼ cup finely diced green bell pepper2 cans cream of mushroom soup2½ cups grated cheddar cheese1 teaspoon seasoned salt, such as Lawry’sFreshly ground black pepper to taste1/8 to ¼ teaspoon cayenne pepper to taste
1. Preheat the oven to 350°F.
2. Add the chicken to a stock pot. Cover with water and bring to a boil. Reduce the heat to medium and simmer untilthe chicken is cooked, about 25 minutes.
3. Remove the chicken from the water using tongs or a slotted spoon and set it aside on a plate to cool.
4. Remove 2 cups of broth from the pot and set aside.
5. Bring the remaining broth back to a boil and add the spaghetti. Cook it al dente.
6. Drain the spaghetti, discarding the cooking liquid. Set aside.

With two forks (or your fingers), remove the chicken from the bones. Shred or cut the meat into bite-sizechunks.
Drain the pimientos.
7. Then dice the vegetables:Finely dice the onion.
8. Cut the green pepper into julienne strips…
9. Then slice them in the other direction to create dice.
10. Place the cooked spaghetti in a large bowl. Add the cream of mushroom soup.Add 2 cups of the cheddar cheese…
11. Then add the onion, green pepper, and pimiento.Add the seasoned salt, black pepper, and cayenne pepper. Take it easy on the cayenne if you can’t handle the
heat. But if you can, it sure adds some interest to the final dish.
12. Finally, add the chicken and broth.
13. Stir together well, then taste to check the seasonings.
14. Pour the mixture into a large baking pan, and top with the remaining ½ cup cheddar cheese. Bake for 35 to 45minutes, until bubbly.

RAINBOW ON THE RANCH
One of the great things about living in a wide open space is that you can see both the beginning and end of arainbow.
I suppose the golf course where I grew up could also, by today’s standards, be considered a “wide open space”…
But I don’t remember ever seeing one of these rainbows during my childhood. I was too busy painting my toenailsand watching reruns of Gilligan’s Island.
I wouldn’t have guessed it, but a full rainbow is the perfect inspiration for practicing my ballet stretches.I have a lot of time on my hands.

AND I DO MEAN “WILD”
Wild horses are nothing like our tame, well-bred ranch horses. Instinct causes them to react erratically and suddenlyat the slightest unexpected sound: an airplane flying by, a car horn…or the sneeze of a photographer sitting on theground, trying to mind her own business.
Wild horses don’t understand human sneezes!Now if you’ll excuse me, I think I hear my mommy calling.


SUPPER
(TRANSLATION: DINNER)

THE DIFFERENCE BETWEEN CHAPS AND CHINKS
I’m all about getting to the bottom of things. I’m all about getting the straight scoop, getting the info out to thepeople who need it, and maintaining my high standard of up-to-the-minute reporting and analysis.
In continuation of that journalistic legacy, I’d like to expose the true purpose of chaps and examine thedifferences between chaps (below left, on Cowboy Josh) and chinks (below right, on Marlboro Man). “Chaps,” ofcourse, is the accepted, generic term of the piece of leather garb a cowboy commonly wears over his jeans. “Chaps”is also the name of a popular Ralph Lauren cologne from the eighties—a cologne many a pimply-faced, hormonalboy in my junior high school bathed in. Even today, when I smell Chaps cologne, I think of Huey Lewis and theNews, Pontiac Fieros, Rubik’s Cubes, and Topsider knockoffs. But that’s outside the scope of this topic.
So why do cowboys choose to wear chaps (or chinks) over their jeans in the first place? To look cool? To playthe part of a cowboy? To make women swoon? I once thought so. But what I’ve found in the course of my reportingis that there are actually many, very practical reasons for a cowboy to wear chaps.
First, the tough leather serves as a substantial layer of protection while riding horseback through brushy (read:stickerbush-heavy) areas of the ranch. Second, in the cattle pen, when it comes to wrestling energetic calves to theground, it’s nice to have a thick piece of leather between the calves’ kicking legs and your leg, as denim jeans don’tserve as much of a buffer. Third, in cold, windy weather, the leather from the chaps serves as an added layer ofwarmth.
Another reason to wear chaps is to protect your jeans from excessive filth.You’ll see that Cowboy Lynn, right, is wearing chaps. Marlboro Man, left, is not wearing chaps. Cowboy
Lynn’s wife will kiss him when he walks in the door. Marlboro Man’s wife (that’s me) will begin weeping. Thenshe’ll kiss her container of Tide. And her front-loading washing machine.

Now, the decision of whether to wear chaps or chinks usually boils down to personal preference. Chaps run theentire length of the leg—from hip to ankle—which can make them considerably more constricting. Chinks, on theother hand, stop at or below the knee, allowing for freer movement. Chaps, in colder weather, provide more warmththan chinks; chinks, in warm weather, stay cooler than their full-length counterparts.
Here, Marlboro Man and my brother-in-law Tim are both wearing chinks.Now for the untold story. Aside from assisting a cowboy in his work by providing warmth, protection, and
durability, chaps and chinks do have another, relatively unrecognized benefit…
This. This. This is what chaps are all about. And don’t let anyone try to tell you otherwise.
When Marlboro Man’s fringe goes a flyin’…look out.
Chaps: While practical, functional, and durable, they really do a number on any female within a 100-yard radius.Present company included.
Present company oh, so very much included.

CHICKEN-FRIED STEAK
Makes 6 servings
Chicken-fried steak, mashed potatoes, and gravy. I can say with authority that after conducting a long, exhaustivesearch, there is nothing on earth that says “Cowboy Cuisine” more than this.
When I make this for the cowboys for lunch, they moan and groan as if they’ve finally come home. When Imake it for Marlboro Man for dinner, he moans and groans…because he is home. Then he proposes to me seventeentimes. And we’re already married!
The best meat to use for chicken-fried steak is known ’round these parts as “cube steak,” which is tenderizedround steak that’s been extra tenderized. If your local store sells “tenderized round steak,” you’ll probably want topound it some more.
I’ll be showing you two different approaches for the meat itself. One involves a more classic egg-and-flourbreading approach, while the other is a slightly “lighter” twist. And keep in mind that the word lighter, when itcomes to anything having to do with chicken-fried steak, is a very relative term.
3 pounds cube steak2 large eggs1½ cups milk, plus 2 cups for the gravy3 cups all-purpose flour, plus about 1/3 cup for the gravy2 teaspoons seasoned salt, such as Lawry’s¾ teaspoon paprika¼ teaspoon cayenne pepper (more if you can handle it)1½ teaspoons black pepper½ cup canola or vegetable oil for frying
1. Begin with an assembly line of dishes for the meat, milk-egg mixture, and flour mixture…with a clean plate at theend to receive the breaded meat.
2. Here’s the cube steak.

3. Here are the eggs and 1 cup milk. Beat them with a fork.
4. Here’s the flour mixed with the seasoned salt, paprika, cayenne, and black pepper. Stir it together gently.
5. Here’s an empty plate. But you didn’t need me to tell you that.
6. Lightly season a piece of meat with salt and pepper, then dip it into the egg-milk mixture. Flip to the other side tocoat.
7. Next, place the meat on the plate of seasoned flour. Turn over to coat thoroughly.
8. Now, place the meat back in the egg/milk mixture, turning to coat.
9. And finally, dredge in flour one more time. This repetition will create a nice, thick crust—the signature quality ofchicken-fried steak. And if you do it correctly, your hands will be a mess.
10. Place the breaded meat on the empty plate until ready to fry and repeat the process with the remaining pieces ofmeat.
11. Heat the oil in a large skillet over medium-high heat. When the oil is sufficiently heated (I drop in a fewsprinkles of flour; if it sizzles, it’s ready!), fry 3 pieces of meat at a time. Cook on one side until the edges start tolook golden brown, about 2½ minutes.

12. Turn over and cook for 2 or 3 minutes, until the other side is golden.
13. Remove to a paper towel–lined plate and keep warm. Repeat until all the meat is cooked.Now it’s time to make the gravy! If you’ve been intimidated by gravy your whole life, your life is about to change.Please, my friends, do not be afraid of the gravy.
14. After frying all the meat, pour off the grease into a heat-proof bowl. Without cleaning the pan, return it to thestove over medium-low heat. Add ¼ cup grease back to the pan. Allow the grease to heat up.
15. Sprinkle 1/3 cup flour evenly over the grease.
16. Using a whisk, mix the flour with grease, creating a golden brown paste. This is known as a “roux,” and youwant the roux to attain a deep, rich color. If the paste seems more oily than pasty, sprinkle in another tablespoon offlour. Whisk again and check the consistency.
17. After a couple of minutes, the paste will start to turn golden brown. That’s when it’s ready.
18. Whisking constantly, pour in 2 cups milk.
19. Whisk to combine, then let the gravy come to a slow boil. The gravy will thicken gradually, but if it seems toothick at first, add splashes of milk as needed, whisking to combine. As you cook and thicken the gravy, be preparedto splash in more milk if it becomes overly thick. The total cooking process should take 5 to 10 minutes. Generouslyseason with salt and pepper, tasting to ensure that it’s seasoned adequately. Underseasoned gravy is one of life’sgreat sacrileges.
20. Place the warm meat on a plate with a heaping pile of mashed potatoes (Supper). Cowboys love the wordheaping.

21. Drizzle with a little gravy…
22. Or a lot—whatever suits your fancy. Serve this to a hungry cowboy and you’ll earn a friend for life.
Variation
FRIED CUBE STEAK
Sometimes, for simplicity’s sake, I like to dredge pieces of cube steak in seasoned flour and fry it up. The result is athinner “crust” that’s better for lighter appetites. This method of fried round steak is also perfect for steaksandwiches—place a piece of it between two slices of white bread and you’ve got the perfect comfort food.
1. Lightly season the meat with salt and pepper.
2. Dredge it in seasoned flour…
3. And fry in canola oil over medium-high heat. Cook until the edges start to turn brown, 2 to 3 minutes.Then flip to the other side and continue cooking until brown, about 2 minutes.Remove from the pan and drain on a paper towel–lined plate.
4. Treat it as you would chicken-fried steak, layer it in a sandwich, or eat it plain with roasted corn. It’s a simple,yummy way to prepare cube steak.

PW’S CREAMY MASHED POTATOES
Makes 8 servings
Mashed potatoes have only one downside: between the potato peeling, cooking, and mashing, they’re a time-consuming dish. The wonderful thing about these mashed potatoes is that they can be made ahead of time and keptin the refrigerator, then warmed in the oven when you’re ready to eat. No more last-minute mashing!
The other wonderful thing about these mashed potatoes is that they’re about as creamy and decadent as it gets.You’ll see what I mean in a moment.
5 pounds russet or Yukon Gold potatoes12 tablespoons (1½ sticks) butter, softened, additional 4 tablespoons (½ stick) butter (optional)One 8-ounce package cream cheese½ to ¾ cup half-and-half½ teaspoon seasoned salt, such as Lawry’sSalt to tasteBlack pepper to taste
1. Bring a large pot of water to a slow boil over medium-high heat.
2. Using a sharp knife or vegetable peeler, peel the potatoes and rinse in cold water.Chop the potatoes in halves and/or fourths. This helps the potatoes cook more quickly and evenly.
3. Add the potatoes to the pot.Increase the heat to high and bring to a full boil. Cook for 20 to 30 minutes.
4. The potatoes are ready when they pass the ol’ fork check: a fork should easily slide into the potatoes with noresistance, and the potatoes should almost—but not completely—fall apart.
Important: If the fork meets with much resistance, that means the potatoes aren’t done, and the mashed potatoeswill be lumpy!
5. Drain the potatoes in a large colander. Give yourself a nice steam facial while you’re at it.
6. Return the potatoes to the pot and turn the heat on low. With a potato masher, mash the potatoes over low heat to

allow much of the steam to escape. Continue mashing until all lumps are gone, about 2 minutes. Turn off the heat.
7. Add the butter. Feel really guilty.
8. Add the cream cheese. Feel even more guilty.
9. Next, add the half-and-half and stir together.And let go of your guilt. Food is to be enjoyed!(At least that’s what I tell myself.)
10. Add the seasonings. Stir together until well combined. Taste and adjust the seasonings as needed—be sure not tounderseason!
11. Spread the mashed potatoes in a 2-quart baking dish, evening out the surface with a knife or spatula.
12. Finally, if you’re worried the potatoes aren’t decadent enough, you can dot the top with butter. This just screamsrebellion, don’t you think?
At this point, you can cover the dish tightly with foil and refrigerate for up to 2 days before baking.
13. When you’re ready, preheat the oven to 350ºF, cover the potatoes with foil or a lid, and bake for 25 to 30

minutes, until warmed through.
14. Serve piping hot with Chicken-Fried Steak (Supper), Fried Chicken (Supper), or Roasted Beef Tenderloin(Supper).
1908?
Or 2008?
Aside from the ringing of the cowboys’ cell phones, it’s sometimes difficult to tell.

MEATLOAF
Makes 8 servings
What is wrong with meatloaf? Where did it get such a bad rap? Is it the word loaf? The words meat and loaftogether? Memories of disheveled seventies rock singers? I can’t figure out why more people don’t love the stuff.
I love the stuff. I love it flavorful, tender, encrusted in bacon, and coated—generously coated—with a sweet redsauce, which can also be served on the side. I love it by itself, with mashed potatoes, or left over and smashedbetween two pieces of toasted homemade bread. I love it in the day and in the night.
Have I mentioned I love meatloaf? I do. And now I’d like to spread that love to you.
1 cup milk6 bread slices2 pounds ground beef1 cup grated Parmesan cheese1 teaspoon salt¼ teaspoon seasoned salt, such as Lawry’sFreshly ground black pepper¼ to ½ cup minced flatleaf parsley4 eggs, beaten8 to 12 thin bacon slices
TOMATO GRAVY1½ cups ketchup6 tablespoons brown sugar1 teaspoon dry mustardDash or two of hot sauce—more if you like heat
1. Preheat the oven to 350ºF.
2. Pour the milk over the bread and allow it to soak in for several minutes.
3. Place the ground beef, milk-soaked bread, Parmesan cheese, salt, seasoned salt, black pepper, and parsley in alarge mixing bowl. Pour in the eggs.
4. With clean hands, mix the ingredients until well combined.

5. Form the mixture into a loaf shape on a broiler pan, which will allow the fat from the meat to drain. I always linethe bottom of the broiler pan with aluminum foil to avoid having to scrub later.
6. Lay bacon slices over the top, tucking them underneath the meatloaf.
7. Next, make the tomato gravy:Pour the ketchup into a small mixing bowl. Add the brown sugar and dry mustard, and splash in the hot sauce.
I’m pretty generous with it because I like a little spice.
8. Stir the mixture until well combined.
9. Pour one-third of the tomato gravy over the top of the meatloaf.
10. Bake for 45 minutes, then pour another one-third of the remaining tomato gravy over the meatloaf. Bake for anadditional 15 minutes.11. Serve with the remaining tomato gravy on the side as a dipping sauce.
Serve the meatloaf with PW’s Creamy Mashed Potatoes (Supper) or Olive Cheese Bread (Supper). Delicious!

TWICE-BAKED POTATOES
Makes 16 twice-baked potato halves
If you have a tableful of guests banging the table with their forks and knives, chanting, “We wanna eat! We wannaeat!” there are few things that can quiet them down more quickly than a huge platter of piping hot twice-bakedpotatoes. Whether it’s for Fourth of July or Christmas dinner, I love whipping these up in bulk. The gleeful smileson my guests’ faces are worth every step.
Twice-baked potatoes would be in the “Freezes Beautifully” section of this cookbook…if this cookbookactually had a “Freezes Beautifully” section, which it doesn’t. If I know I’m going to freeze the potatoes, I usuallyomit the green onions from the mix, as freezing can cause a strange chemical reaction in green onions; if you’veever taken a bite when that has happened, you know exactly what I mean.
But let’s not dwell on that nonsense. Let’s make twice-baked potatoes! Just listen: the utensils are alreadybanging the table.
8 baking potatoes, scrubbed cleanCanola oil8 slices thick-cut bacon, fried½ pound (2 sticks) butter, cut into slices1 cup sour cream½ cup milk¼ to ½ teaspoon seasoned salt, such as Lawry’s½ teaspoon black pepper2 cups grated sharp cheddar cheese2 green onions, sliced
1. Preheat the oven to 400ºF.
2. With a paper towel, rub the outside of the potatoes with canola oil.
3. Place the potatoes on a baking sheet and bake for 45 minutes, or until the potatoes are cooked inside and the skinsare slightly crisp. Turn the oven down to 300ºF.
4. Dice the fried bacon into bits.
5. Throw the butter, sour cream, bacon, milk, seasoned salt, and pepper into a large bowl.

6. While the potatoes are still hot, hold each potato in a towel and cut in half lengthwise. 7. With a large spoon,scrape out the insides into the bowl with the other ingredients.
8. Repeat until all the potatoes have been scraped. Reserve the potato shells on a large baking sheet.
9. Use a potato masher to mix the ingredients together.
10. Stir in 1 cup of the grated cheese.
11. Slice the green onions…
12. And add them to the bowl. Stir, taste, and adjust the seasonings as necessary.
13. Fill each potato half with the potato mixture and return to the baking sheet.
14. Top with the remaining 1 cup grated cheese.Bake for 10 to 15 minutes, until the cheese is melted and the potatoes are hot.
Serve with Braised Beef Brisket (Sweets), Rib-Eye Steak with Whiskey Cream Sauce (Supper), or MarlboroMan’s Favorite Sandwich (Dinner).

How now, brown cow?

FRIED CHICKEN
Makes 8 servings
Fried chicken, while universally adored, may very well be one of the hardest things to learn to cook. At least it wasfor me. The trickiest part of the process of frying chicken is getting the chicken adequately cooked without alsoburning the breading on the outside. Another tricky part is the breading on the outside. Do you simply dredge thechicken in flour? Do a complicated egg bath? Soak the chicken in a brine solution? Stand on your head? Walk atightrope? Sometimes, take-out chicken just sounds easier.
Problem is, I live in the country. So I learned early on that if anyone was ever going to eat fried chicken, I hadto make friends with it—but fast.
This relatively simple recipe calls for frying the chicken first, then finishing off the cooking process in theoven, where the breading won’t be in danger of burning as readily.
Note: In case the appetites in your household aren’t as enormous as those in mine, this recipe can easily behalved.
2 cut-up fryer chickens1 quart plus ¼ cup buttermilk (if you don’t have any, see In the Morning)5 cups all-purpose flour3 tablespoons seasoned salt, such as Lawry’s2 teaspoons black pepper2 teaspoons dried thyme2 teaspoons paprika1 teaspoon cayenne pepper, or to taste (optional)¼ cup milkCanola or vegetable oil for frying
1. Thoroughly rinse the chicken, then cover all the pieces with the quart of buttermilk and soak in the fridgeovernight, or up to 24 hours. My mom always did it this way.
When you’re ready to fry the chicken, remove the bowl from the fridge and let it sit on the counter for 30minutes, just to take off the chill.

2. In the meantime, preheat the oven to 350°F and mix up the breading:Place the flour, seasoned salt, pepper, thyme, paprika, and cayenne (extra cayenne if you like heat) in a very largebowl. Stir together well.
3. In a small bowl, combine the ¼ cup buttermilk and the milk. Pour the milk mixture into the flour and, with apastry cutter or fork, gradually mix until there are little lumps throughout. This will adhere to the chicken and makefor a crispier breading. If necessary, add a little more flour or milk to the bowl in order to make it slightly lumpy.
4. Heat 1½ inches of oil in a deep skillet or Dutch oven over medium-high heat until a thermometer reaches 365ºF.Lower the heat slightly, if necessary, to keep the oil from getting hotter.
5. Working in batches, thoroughly coat each buttermilk-soaked chicken piece with the breading, pressing extrabreading onto the chicken if necessary. Place the breaded pieces on a plate.
6. Add the chicken to the oil 3 or 4 pieces at a time. Make sure they aren’t sticking together, then cover the pan andfry for 5 to 7 minutes, checking occasionally to make sure the chicken isn’t getting too brown. Turn the pieces over,cover again, and cook 3 to 5 minutes more. All the while, monitor the temperature of the oil to make sure thechicken doesn’t burn. Keep in mind that we’ll finish cooking the chicken in the oven, and it will continue to brown.
7. Place the chicken on a baking sheet and continue frying the rest of the chicken. When all the chicken has beenfried, bake the chicken for 15 minutes, to finish the cooking process. Sometimes I’ll cut into the thicker part of oneof the larger pieces, just to make sure the chicken is cooked through. If any pink (juice or meat) is visible, thechicken needs to continue cooking in the oven.
8. Mmmm. Crispy, golden, and flavorful.

I like to serve fried chicken with Buttermilk Biscuits (In the Morning) and a spread of butter and honey:
1. Begin with ¼ cup honey.
2. Add an equal amount of softened butter.
3. Mix together with a fork.
4. Serve in a small bowl alongside the biscuits.
IDENTICAL TWINS: CHARLIE AND SUZIE
Charlie is droopy, floppy, lazy, and fat.

Suzie is tight, firm, energetic, and thin. Sometimes I can hardly tell them apart!

BRAISED BEEF BRISKET
Makes 12 servings
Beef brisket is a cut of meat from the chest of a bovine animal. There are different ways to cook brisket: the“Southern way” usually involves smoking the meat very slowly over several hours and serving with barbecue sauce.This is yummy, of course, in a barbecue sauce kind of way, but I much prefer the brisket my mom always made:instead of cooking in an enclosed smoker, it cooks slowly in a pan in the oven, braising in a delicious liquidconsisting of beef consommé, soy sauce, and other ultra-savory ingredients.
Brisket must be cooked slowly over many, many hours. The scientific explanation is that it takes hours of lowheat to dissolve the very tough connective tissues found throughout the meat; if it’s not cooked long enough, brisketwill be unpleasantly tough and difficult to chew. On the other hand, if you go overboard and cook it too long, theconnective tissue will disintegrate altogether and the resulting meat will be dry. In my experience, however, it’smuch easier to salvage brisket that’s a little overcooked—the cooking juice can rescue it nicely—than it is to eatbrisket that hasn’t been cooked long enough. So allow for plenty of cooking time. And be patient. The fall-apartgoodness of this delicious meat is worth every hour.
This brisket is delicious served with mashed potatoes, with the juice spooned over both. It’s also fabulous ontoasted sandwich rolls with cheese melted on top. And it’s great for a crowd. So…let’s dissolve those connectivetissues, shall we?
Two 10.5-ounce cans beef consommé (not beef broth)1½ cups low-sodium soy sauceJuice of 2 lemons5 garlic cloves, chopped1 tablespoon liquid smoke (optional!)One 7- to 10-pound beef brisket, untrimmed
1. I like to marinate and cook my brisket in a large reusable aluminum foil pan. Makes life easy.
2. In the roasting pan, combine the beef consommé and soy sauce.
3. Halve the lemons, juice them…

4. And add the juice to the pan.
5. Next, chop the cloves of garlic and add to the mix. If you’re a garlic lover, add more if you like; I won’t tellanyone. If you’re using liquid smoke, add it now, too. Some people find the aroma and flavor of liquid smoke to bea little overwhelming, but in my experience, a tablespoon isn’t too tough to take. It’ll give the brisket just a slightsmoky flavor reminiscent of barbecue.
6. Place the brisket in the pan, fat side up. Ladle some of the liquid on top, just to get the marinating process going.
7. Next, cover tightly with foil and place in the fridge to marinate for 24 to 48 hours.When you’re ready, pop the brisket—still covered in foil—into a 300ºF oven and cook for about 40 minutes per
pound. This 8-pound monster was done in 6 hours.
8. When the cooking time has passed, peel back the foil and check to see if the brisket is fork-ten-der: stick twoforks into the meat and pull them in opposite directions. The meat should come apart fairly easily. If you meet muchresistance, cover with foil and return to the oven for 20 minutes.
9. When the meat is fork-tender, place it on a cutting board. With a sharp knife, cut away the large slab of fat fromthe top of the meat.
As you cut, try not to take any meat with you. The meat just under the fat is some mighty good eatin’.
10. Just keep going until most of the fat is trimmed.
11. With a large serrated knife, slice it against the grain. When the brisket is truly in fall-apart mode, this is what itlooks like.

12. Now, here’s the kicker: scoop up the sliced meat with a spatula and return it to the pan, juice and all. This’llmake it extra yummy and moist. Cover with foil and place in the oven to warm up, if necessary.
13. Serve the brisket with mashed potatoes, on toasted rolls, or whatever suits you. It’s a major-league crowdpleaser.
LEFTOVER IDEA: Use shredded leftover brisket for nachos, burritos, or tacos!
We Love L.B.
Meet L.B., the most wonderful, beautiful, gentle ranch horse of all time.We all absolutely love L.B.

CHEESE GRITS
Makes 12 servings
Did you know that depending on your geographical location, the word grits can be either one, two, or threesyllables? It’s true! For instance, if you’re from, say, Iowa, it’s a simple one-syllable word: grits. If you venturedown into Texas, it morphs into two syllables: gree-yuts. Get over into the thick accents of Alabama or Georgia?We’re talkin’ three whoppin’ syllables, folks: guh-ree-yuts. I’m still holding out hope that someone, somewhere,will come up with a way to add another syllable. And when they do, I’ll giggle.
These are grits, sometimes known as hominy grits. They’re sold in the cereal aisle of the grocery store, nearthe oatmeal.
For a dish that many folks have never even tried, it doesn’t get any better than delicious, creamy cheese grits.They’re perfect as a breakfast side dish, or jazzed up with green chilies and jalapeños or even a can of Rotel(tomatoes and green chilies).
All I am saying: give cheese grits a chance.
½ teaspoon salt2 cups uncooked quick or regular grits4 eggs12 tablespoons (1½ sticks) butter, cut into tablespoons3 cups grated sharp cheddar cheese (or other cheese)4 garlic cloves, finely chopped½ teaspoon cayenne pepper
1. Preheat the oven to 350°F. Add ½ teaspoon salt to 9 cups of water in a large saucepan, bring the water to a boilover medium heat, and pour in the grits. Stir to combine.
2. Cover and finish cooking according to the package directions. Quick grits take less than 5 minutes, while regulargrits take about 15 minutes.
3. Turn off the heat when the grits are done.

4. In a small bowl, whisk the eggs.
5. To temper the eggs before adding them to the hot grits, throw a couple of spoonfuls of hot grits into the eggs.
6. Begin stirring immediately and continue stirring until the mixture is well combined.
7. Pour the egg mixture into the grits.
8. Stir constantly to incorporate the eggs into the grits.
9. Add the butter and stir until melted.
10. Next, add the cheese. Use whatever variety of cheese you like: cheddar, Pepper Jack, Mexican Cotija. Even goatcheese (chèvre) is sublime in grits.
11. Stir until the cheese is melted.
12. Add the garlic and cayenne…13. Stir well to combine. Taste and adjust the seasonings, adding more salt or cayenne if necessary. You could alsoadd more cheese if you think that will bring happiness to your life, but keep in mind that some cheeses increase thesalt content more than others.14. Pour the grits into a well-buttered baking dish. Bake for 30 to 35 minutes until the grits are hot and bubbly. Letstand for 10 minutes before serving. Grits will become firmer as they cool.
Serve with Perfect Pot Roast (Dinner), Roasted Beef Tenderloin (Supper), Braised Beef Brisket (Supper), orFried Chicken (Supper). Absolutely, positively yummy.


RIB-EYE STEAK WITH WHISKEY CREAM SAUCE
Makes 2 servings
While Marlboro Man and the cowboys generally prefer their steaks unadorned, I love mine with flavorful sauces andsavory toppings. I’m always searching for delicious new ways to decorate my steak, and this sauce—an extra richcombination of whiskey and cream—is one of my all-time favorites. With a side of simple roasted potato wedges,this is about as good as it gets.
5 tablespoons butter3 tablespoons diced onion¼ cup whiskey¼ cup beef stock or brothDash of saltFreshly ground black pepper¼ cup light cream2 rib-eye steaks
1. Begin by melting 2 tablespoons of the butter over medium heat in a small skillet. Add the onion and cook untilbrown, about 4 minutes.
2. When the onion is brown, turn off the burner temporarily so you won’t ignite your kitchen or yourself.
3. Pour in the whiskey.
4. As soon as the whiskey evaporates, turn the burner on medium and pour in the beef stock or broth.
5. Add salt and freshly ground black pepper.
6. Now, whisk in another tablespoon of butter.

7. Allow the mixture to bubble for 30 seconds, then reduce the heat to low.
8. Over low heat, pour in the cream.
9. Whisk, adding more cream if the mixture looks too brothy.
10. Allow to simmer on very low heat while you prepare the steaks. Stir occasionally.
11. Melt the remaining 2 tablespoons butter in a large skillet over medium-high heat. Generously salt and pepper thesteak on both sides, then add it to the hot skillet.
12. For medium rare, cook for 2 minutes on each side for a thin steak, or 3 to 4 minutes on each side for a thicksteak. Place the steak on a plate and keep warm. Repeat with the other steak.
(Feel free to cook both steaks at once in the same skillet, if you prefer.)
13. Spoon the sauce over the steak…and don’t skimp! You want to taste the deliciousness.
14. Mmmmm. It doesn’t get much better than this.

I’d be lying if I said I didn’t eat the leftover sauce by the spoonful.I’m just being honest here.

HOMEMADE RANCH WITH ICEBERG WEDGE
Makes 8 servings
Which came first? Do cowboys and country kids love ranch dressing because it’s called “ranch dressing”? Or didthe name arise from the fact that cowboys and country kids love it? This is a question I shall ponder till the end ofmy days.
I’m not above making ranch dressing from the classic powdered mix packet. But a few years ago, stranded atour home on the ranch with a flat tire and fresh out of packets, I was forced to make do with ingredients I had in mypantry…and my herb garden. I love this homemade version of the classic salad dressing—it’s tangy, slightly spicy,and oh so good.
¼ teaspoon kosher salt1 garlic clove, chopped1 cup real mayonnaise½ cup sour cream¼ to ½ cup milk or buttermilk, depending on how thick you want the dressing¼ cup chopped flatleaf parsley1 tablespoon chopped fresh chives2 tablespoons chopped fresh dill½ teaspoon distilled white vinegar½ teaspoon Worcestershire sauce1/8 teaspoon cayenne pepper¼ teaspoon paprika½ teaspoon black pepperDash of hot sauce (optional)2 heads iceberg lettuce
1. Sprinkle the salt over the garlic.

2. With a fork, mash the garlic and salt together to make a paste. The finer the better, as the garlic is very strong inthe finished dressing.
3. Add all the dressing ingredients to a bowl.
4. Stir together gently, adjusting the seasonings as needed. Make the ranch dressing all yours—add in more of whatyou like.
Chill the dressing for at least 2 hours before serving. Thin with milk if needed.
5. Wash and dry the iceberg lettuce and cut into wedges. Arrange the wedges on a platter and drizzle the ranchdressing over the top.
6. Be generous with the dressing, since it needs to reach all the lettuce in the wedge.HELPFUL HINTS: Other uses for homemade ranch dressing:
Serve as a dip for carrot and celery sticks.
Mix in crumbled blue cheese and serve with Buffalo wings.
Drizzle on a submarine sandwich.
Pour into a hollowed-out red cabbage and serve on a fancy crudité platter.
Mmmmm…salad.It does a body good!

Real Cowboys
Let’s hear it for being comfortable with one’s masculinity!
WEAR PINK!
(Marlboro Man says it’s a red shirt that faded in the wash.)


COMFORT MEATBALLS
Makes 6 to 8 servings
Once upon a time I had a baby. Then I had another baby. Then I had a third baby, a boy. After my third baby, a boy,was born, I found myself back on the ranch with two young daughters and yet another suckling infant, and I wasstarving all the time. If I wasn’t eating sugar cereal by the truckload, I was gnawing on a box of Krispy Kremedoughnuts my father-in-law picked up in the big city.
It all helped my milk production. But still, I was starving.And then, one dark and stormy night, my good friend Beth (a ranching neighbor of ours) and her mother, Diane
(also a longtime rancher), knocked on my door and brought me…dinner.They brought me these meatballs.These delicious meatballs are not in the same category of regular Italian meatballs that would go in spaghetti
and meatballs—those have more of a breadcrumb/parsley/Parmesan flair. These are more in the comfortfood/meatloaf category. If you’d like to serve them with pasta, regular egg noodles tossed in a tiny bit of meltedbutter would be divine.
MEATBALLS1½ pounds ground beef¾ cup quick oats1 cup milk3 tablespoons very finely minced onion1½ teaspoons saltPlenty of ground black pepper4 tablespoons canola oil½ cup flour
SAUCE1 cup ketchup2 tablespoons sugar3 tablespoons distilled white vinegar2 tablespoons Worcestershire sauce4 to 6 tablespoons minced onionDash of Tabasco
1. In a bowl, combine the ground beef and oats.

2. Pour in the milk, then add the diced onion and salt.
3. Add the black pepper, then stir to combine.
4. Roll the mixture into tablespoon-size balls and refrigerate them for 30 to 45 minutes to firm.5. Preheat the oven to 350°F. Heat the canola oil in a large skillet over medium heat.
6. Dredge the meatballs in the flour.
7. Brown the meatballs in batches until light brown.
8. As they brown, place them into a rectangular baking dish.
9. Stir together the sauce ingredients and drizzle the sauce evenly on the meatballs.
10. Bake for about 45 minutes, or until bubbly and hot.11. Serve to ravenous nursing mothers…or any other hungry human in your life. Delicious!
SHIPPING CATTLE IN THE MUD
When you’re shipping cattle, sometimes the weather doesn’t cooperate. Unfortunately, when you have twentycattle trucks lined up down the road, the show must go on.

It’s at times like these that I actually consider throwing away the clothes and convincing myself they never existed.Mud and manure can actually drive a ranch wife insane. It’s been clinically proven.

SIMPLE, PERFECT ENCHILADAS
Makes 8 servings
Let’s make enchiladas!Did you know that I had a real live Mexican great-uncle? It’s true! And so what if it was only by marriage, and
so what if I have absolutely no interesting ethnicity in my blood-stream? See, my dad’s dad, who died before I wasborn, rest his soul, had a sister named Fleda Mae, rest her soul, and Fleda Mae was married to a Mexican mannamed Luchan, rest his soul. I remember both Fleda Mae and Luchan fondly, but besides their friendly, lovingnature and the fact that they lived in Bakersfield, California, I don’t remember too much about them. I do rememberFleda Mae’s high-pitched and very sweet voice. And I definitely remember Luchan’s enchiladas.
My mom has made these enchiladas for decades, after Luchan showed her the way, the truth, and the life, andthat no one can come to the enchilada except through him. Once my mother became a believer, she passed thatbelief on to me and my other siblings, and I feel I have been commissioned to pass the love on to you.
So c’mon—let’s get rrrready to rrrrrrumble!Before we begin, let me explain that there are three separate components to these enchiladas: THE SAUCE,
THE MEAT, And THE REST.
THE SAUCE1 tablespoon canola oil2 tablespoons all-purpose flour1 large (28-ounce) can enchilada or Mexican red sauce2 cups chicken broth½ teaspoon salt½ teaspoon black pepper
THE MEAT1 pound ground beef1 medium onionTwo 4-ounce cans diced green chilies½ teaspoon salt
THE REST10 to 14 corn tortillasCanola oil for frying½ cup chopped black olives1 cup chopped green onions3 cups grated sharp cheddar cheeseCilantro2 tablespoons chopped cilantro, plus extra for serving

1. First, let’s make the sauce:In a saucepan over medium-low heat, combine the canola oil and flour.
2. Whisk together and allow to bubble for 1 minute.
3. Pour in the red sauce, chicken broth, salt, and pepper. Bring to a boil.
4. Reduce the heat and simmer while you prepare the other ingredients.
5. While the sauce is simmering, prepare the meat:Finely chop the onion…
6. In a large skillet over medium-high heat, brown the ground beef with the onion. Drain the fat, then add the greenchilies. Add the salt and stir to combine. Turn off the heat and set aside.
7. In a small skillet over medium heat, lightly fry the tortillas in canola oil just until soft. Do not crisp. Drain on apaper towel–lined plate. Repeat until all the tortillas have been fried.
Now that all the elements are ready, let’s assemble!8. Preheat the oven to 350ºF. Spread ½ cup of the sauce in the bottom of a 9 x 13-inch baking dish.
9. Next, dip each tortilla into the sauce.
10. Set the sauce-soaked tortillas on a cookie sheet. Onto each tortilla, place some of the meat mixture, black olives,and green onions.

11. Top with a generous portion of grated cheddar.
12. Roll up the tortilla to contain the filling inside.
13. Place the tortilla seam side down in the baking dish. Repeat with the rest of the tortillas.Stir the cilantro into the sauce, and pour the remaining sauce over the top.
14. End with a generous sprinkling of cheese.
15. Bake the enchiladas for 20 minutes, or until bubbly. Sprinkle extra chopped cilantro over the top.Serve with beans, rice, and margaritas…(if you’re into that sort of thing).

LINGUINE WITH CLAM SAUCE
Makes 6 servings
For one of our first dates, Marlboro Man invited me to his house on the ranch. We were clearly on a roll, having hitit off royally over the previous three weeks or so, and he wanted me to see where he lived. Who was I to say no?Since I knew he lived out in the country and likely didn’t have many restaurants nearby, I offered to bring groceriesand cook him dinner.
In preparation for the date, I agonized for hours over what I could cook for this strapping new man in my life—this man whose voice made my knees go weak and whose strong, sweet kisses finally showed me why God inventedlips. I knew one thing: I had to pull out all the stops for this meal. Clearly, no mediocre cuisine would do. I reviewedall the dishes in my sophisticated, city-girl arsenal, most of which I’d picked up during my years in Los Angeles,and finally settled on the obvious winner: Linguine with Clam Sauce. I was utterly confident it would be a hit.
The problem was, I had no idea at the time whom I was dealing with. I had no idea that Marlboro Man, afourth-generation cattle rancher, doesn’t eat fish, let alone minced-up little clams, let alone minced-up little clamsbathed in wine and cream, let alone minced-up little clams bathed in wine and cream and mixed up with a bunch oflong noodles that are way too complicated to negotiate. To say Linguine with Clam Sauce is near the very bottom ofthe list of dishes Marlboro Man would ever elect to touch with a ten-foot pole would be an understatement of epicproportions.
But here’s the romantic part: He ate it. Well, he ate most of it, seemingly enjoying it at the time but, I realizenow, refraining from throwing out too many effusive compliments, probably out of fear I’d cook it again sometime.But he did eat it. And lucky for him, his phone rang when he was more than halfway through our meal together.He’d been expecting an important call, he said, and excused himself for a good ten minutes. I didn’t want him to goaway hungry, though, so when I sensed he was close to getting off the phone, I took his plate to the stove, heapedanother steaming pile of Linguine with Clam Sauce on his plate, and returned to the table. The new object of myaffection smiled politely, sat down, and polished off over half of his second helping before finally pushing awayfrom the table and announcing, “Boy, am I stuffed!” He later told me he hoped a prairie fire would break out so he’dhave an excuse to leave.
Knowing what I know now about the breadth of my husband’s culinary repertoire—one consisting primarily ofmeat, potatoes, salad, bread, and Dr Pepper—and his complete in-ability to consume anything he remotely considersgross, the memory of him systematically forcing each bite of Linguine with Clam Sauce down his throat over tenyears ago still makes my heart go pitter-pat. And through the years, if I’ve ever, even for a moment, doubted theextent of Marlboro Man’s affections for me, I’ve had only to remember the simple words Linguine with Clam Sauce,and a warm, contented smile immediately floods my face.
1 pound linguine1 tablespoon olive oil2 tablespoons butter3 garlic cloves, mincedTwo 10-ounce cans chopped clams, drained, juice reserved¾ cup white wineJuice of ½ lemon, plus lemon slices for garnish

2 tablespoons flatleaf parsley, chopped¾ cup heavy creamSalt and freshly ground black pepper to tasteGrated Parmesan cheese, for garnish
1. Cook the linguine according to the package directions, being careful not to overcook. Pasta should have plenty of“bite” to it.
2. In a large skillet over medium-high heat, add the olive oil and 1 tablespoon butter. Using both olive oil and butterallows you to heat the mixture at a higher heat before it starts to brown.
3. Add the garlic and clams and stir together. Cook for 3 minutes.
4. Pour in the white wine, scraping the bottom of the pan with the spoon. Cook for 3 to 4 minutes, until the sauce isreduced and less watery. Add in 1 more tablespoon butter and stir to melt.
5. Reduce the heat and squeeze in the lemon juice.
6. Sprinkle in the parsley and pour in the cream. This is a very decadent dish.
7. Add salt and freshly ground black pepper. Stir well and taste for seasonings, adding a splash of clam juice if thesauce needs thinning.
Cook over low heat for 3 minutes more, or until heated through.
8. Pour the pasta in a heated serving bowl.
9. Pour on the sauce straight from the skillet, including all the luscious juice.

10. Toss to combine. At this point, your kitchen smells like Heaven.
11. Top with freshly grated Parmesan cheese and garnish with lemon slices.
WARNING: Don’t serve to cowboys. You’ll be run right off the ranch.
Burning ground in the spring is important for the long-term health of ranch land. Aside from ridding the ground ofthe old, dead grass so that the new, nutritive growth can burst forth, prairie fires also help in the germination ofdifferent grass species and promote steady, even growth.
Of course, prairie fire is nothing to be taken lightly. And as much as man thinks he can control it and use it as atool, it has an uncanny way of coming back and asserting its dominance.

LASAGNA
Makes 8 generous servings
This is a slight variation of the delicious lasagna I’ve made for years. While not necessarily authentically Italian inits use of ingredients (cottage cheese, anyone?), it receives a surprisingly high number of thumbs-ups from hungryranch hands, ravenous children, and visiting guests. It’s seriously delicious.
1 tablespoon olive oilSalt10 ounces lasagna noodles1 pound mozzarella cheese1½ pounds hamburger1 pound hot breakfast sausage4 garlic cloves, finely choppedTwo 14.5-ounce cans whole tomatoesTwo 6-ounce cans tomato pasteFreshly ground black pepper10 to 12 basil leaves¼ cup chopped flatleaf parsley3 cups low-fat cottage cheese2 eggs, beaten1 cup grated Parmesan cheese
1. Preheat the oven to 350ºF.2. Bring a large pot of water to a boil. Add the olive oil and a dash of salt. Cook the lasagna noodles according to thepackage directions until al dente. Drain the noodles and lay them flat on a piece of aluminum foil.3. Grate the mozzarella cheese. Set aside.
4. In a large skillet over medium-high heat, sauté the hamburger, sausage, and garlic until brown.Drain off the excess fat.
5. Add the tomatoes with their juice, tomato paste, ½ teaspoon salt, and freshly ground black pepper.

6. Stir together well. Simmer over low heat, uncovered, for 45 minutes, stirring occasionally.
7. Retrieve fresh basil and flatleaf parsley from your garden, herb pots, or local grocery. I’ve been known to do allthree, depending on what time of year it is and whether or not the moon is in the seventh house.
8. Cut the basil into a chiffonade by stacking leaves on top of one another and rolling them tightly, then cuttingacross.
9. Finely chop the parsley. Add half the herbs to the meat mixture and stir together.
10. In a medium bowl, combine the cottage cheese, eggs, ½ cup of the Parmesan cheese, and the other half of theherbs.
11. Stir together well.Now let’s assemble the lasagna!
12. Begin by laying 4 lasagna noodles in the bottom of a deep rectangular baking pan. The noodles should slightlyoverlap.
13. Spoon half the cottage cheese mixture onto the noodles. Spread to distribute evenly.

14. Sprinkle half the mozzarella on top of the cottage cheese mixture.
15. Spoon just under half the meat mixture on top of the mozzarella. Spread evenly, being careful not to disrupt thelayers below.
16. Now repeat the process, beginning with a layer of lasagna noodles…
17. Followed by the cottage cheese mixture…
18. Followed by the mozzarella…

19. Ending with a thick layer of meat mixture.
20. Sprinkle the remaining ½ cup Parmesan over the top.Bake for 35 to 45 minutes, until the lasagna is hot and bubbly. Allow to stand 10 minutes before cutting into
squares.Serve with crusty French bread.
Marlboro Man has often said that if it weren’t for my beautiful bronze skin and calf roping skills, he would havemarried me for my lasagna.
In other words, he married me for my lasagna.
HELPFUL HINT: Lasagna can be fully assembled and frozen, unbaked!

PENNE ALLA BETSY
Makes 4 to 6 servings
Betsy is my little sister, confidante, best friend, and project—just ask her. Whether it’s about breastfeeding her newbaby or passing along job advice, I’ve never been afraid to open my mouth and try to lead her through life. It’s agood thing she has me; there’s no telling where she’d be by now!
It’s an even better thing that I have her, because she cooks this delicious tomato-cream pasta dish for mewhenever she visits. It’s become a sister favorite, a tradition, and it’s one of a handful of dishes I would choose toeat on the last day of my life.
1 pound penne pasta1 pound large shrimp2 tablespoons butter2 tablespoons olive oil1 small onion, finely chopped2 garlic cloves, finely chopped½ cup dry white wine (optional)One 14.5-ounce can tomato sauce1 cup heavy creamMilk for thinning¼ cup chopped flatleaf parsley6 basil leaves, cut in chiffonade (see Supper)SaltFreshly ground black pepper
1. Bring a pot of lightly salted water to a boil. Cook the penne until al dente (firm yet tender). Drain and set aside.
2. Begin by peeling and deveining the shrimp and rinsing them under cold water.
3. In a small skillet over medium-high heat, add 1 tablespoon of the butter and 1 tablespoon of the olive oil.

4. When the pan is hot, add the shrimp. Stir and cook on both sides until it is just starting to turn opaque, about 2minutes.
5. Remove to a plate and allow to cool slightly.
6. Next, finely chop the onion.
7. In a large skillet over medium heat, add the remaining 1 tablespoon butter and 1 tablespoon olive oil.
8. Add the garlic and onion. Stir to combine and cook, stirring occasionally, until the onion is translucent, about 3minutes.
9. Next, take a sip of wine, if you’re into that sort of thing.
10. Pour the rest of the wine into the pan. Stir and allow it to evaporate, about 45 seconds.
11. Pour in the tomato sauce and stir to combine. Reduce the heat to low.
12. Pour in the cream. Mmmm. It doesn’t get any better than this.
13. Stir well to combine; reduce the heat to simmer.

14. And now for the fun part: remove the tails from the shrimp, chop the shrimp into medium-size pieces, and addthem to the sauce. Stir gently to combine.
15. Next, dump in the herbs and stir.
16. Add the cooked, drained pasta.
17. Stir gently to coat. If the sauce is too thick, splash in a little milk to get it to the right consistency. Add salt andfreshly ground black pepper. Be sure to taste the seasonings at the end, adjusting if necessary.
18. Serve directly out of the skillet, or pour the contents of the skillet into a pretty serving bowl.
Serve with crusty French bread…and more wine.This is a cowgirl’s paradise.
MAMAS AND BABIES
While we work calves, the mama cows stand on the other side of the fence and wait.Sometimes it’s a little tough for me to take, as I’ve felt that uncomfortable tug of being away from your nursing
infant.(Just one of hundreds of scenarios in which I feel at one with cows.)


COWGIRL DINNER PARTY
It’s important for country women to get together from time to time and remind one another that agriculture isn’t justa man’s world. I love having cowgirl dinner parties at my house. We girls spend the evening drinking sangría,laughing, letting loose…and cooking all the food we love.
And gravy is never, ever on the menu.
SANGRÍA
Makes about 3 liters
Mmmm. Sangría. What could be better than the sight of a beautiful vat of colorful wine-soaked fruit? Well, how’bout sipping on a beautiful vat of colorful wine-soaked fruit? I love making sangría for any get-together involvingfemales, but only if designated drivers are on the scene. The delicious fruit can really mask the “flammability” ofthis drink!
Feel free to make your sangría all your own: use all white wine, half white, half blush, or all red. Add inflavored liquor, too. There are no rules! Just maintain some combination of wine and fruit and you’re good to go.
(Just don’t drive when you go.)
2 Granny Smith apples, cored and cut into cubes1 cup green seedless grapes1 cup red seedless grapes2 cups pineapple chunks1 small unpeeled orange, thinly sliced2 unpeeled lemons, thinly sliced2 unpeeled limes, thinly sliced1.5 liter red wine (such as Cabernet Sauvignon, Merlot, or Pinot Noir), chilled1.5 liter dry white wine (such as Chardonnay, Sauvignon Blanc, or Pinot Grigio), chilled1 cup orange-flavored rum1 cup orange-flavored vodka1 cup sugar
1. Chop up all the fruit you’d like: apples, grapes, pineapple, orange, lemons, limes. Any fruit is permissible, exceptmaybe tomatoes.
Tricked you, didn’t I?

2. Place the fruit in a large container.
3. Next, start pouring in the liquids. Here’s the red wine.
4. And, generally, if you’re pouring wine into a container with a spigot, it helps to close the spigot first.
5. (Just forget you ever saw that.)
6. Now comes the chilled white wine…
7. See how lovely it is already!

8. I also like to pour in citrus-flavored rum…
9. And citrus-flavored vodka. I’m bad.
10. Finally, to add a subtle sweetness, dissolve the sugar in 1 cup water and add it to the mix.Stir well, then cover and refrigerate for several hours, giving the fruit and liquids time to meld. Serve in glasses
over ice, and have tongs nearby so guests can help themselves to the fruit, which is a hugely delicious treat.

ROASTED BEEF TENDERLOIN
Makes 8 to 10 servings
Tenderloin, as its name suggests, is the most tender cut of beef there is, and holds the distinction of being one of theonly cuts of beef that can be cut with a fork. Lean and flavorful, tenderloin is also very pricey, making it moreappropriate for special-occasion gatherings than for a typical weeknight dinner. I usually whip it out for cowgirlgatherings, since the men around here usually prefer rib-eye steaks on the grill.
Not that tenderloin is beneath the guys. Whether they have their own steaks or not, they’ll invariably wanderover toward the platter of sliced tenderloin, stealing pieces here and there until us womenfolk slap their hands.Tenderloin is totally irresistible.
If you have any left over at the end of the evening, roasted tenderloin keeps in the fridge for a couple of days.And let me tell you, cold tenderloin straight out of the fridge is one of life’s great delicacies.
One 6- to 7-pound whole beef tenderloin or two 3-pound beef tenderloin butts2 tablespoons kosher salt3 teaspoons freshly ground black pepper1 tablespoon sugar1/3 cup plus 1 tablespoon olive oil 2 tablespoons bacon grease (everyone in the South has a jar in thefridge—make that a New Year’s resolution, right along with “get more exercise”)1 tablespoon butter
1. Preheat the oven to 450ºF.
2. First, we need to trim the tough fat from the surface of the tenderloin. I use a very sharp knife and gently pull thefat away from the meat as I cut.
3. Sometimes you have to cut in between the meat layers to remove the larger pieces.
4. Mostly, you want to focus on removing the silvery membrane on the top of the meat.
5. Don’t worry about removing every last bit of fat; some fat contributes to the overall flavor. Just get the largerchunks and you’ll be fine.
Discard the fat, or feed it to your dog if you want a friend for life.

6. Now, in a medium bowl, combine the salt and pepper. Add the sugar, which provides a good depth andcounterbalance to the other savory ingredients.
7. Next, drizzle in the 1/3 cup olive oil.
8. Finally, add the bacon grease. I’d love to tell you this ingredient is optional, but that would be wrong! The bacongrease adds a deliciousness that can’t be duplicated.
Stir the mixture and set it aside.
9. Heat a heavy skillet over very high heat. Add the butter and the remaining 1 tablespoon olive oil.When the pan is very hot, place the tenderloin in it. Sear both sides for 1 to 1½ minutes, until the sides start to
turn brown.
10. Place the meat on a baking pan fitted with a roasting rack and pour the seasoning/ bacon grease mixture over thetop. Rub the seasoning mixture into the meat with your fingers, making sure it coats evenly.
Insert a meat thermometer sideways into the thickest part of the meat and roast for 15 to 20 minutes, until thethermometer registers 120 to 125ºF. Do not overcook! The meat will continue cooking for a few minutes after itcomes out of the oven.
11. Remove the meat from the oven and allow it to rest on a cutting board for 10 minutes before slicing.This piece is very rare (note the purplish tint), which is great for guys and/or wolves. But it does allow for somewiggle room for reheating later.

This is medium-rare, the perfect doneness for a tenderloin. And to prove it, I’ll now tell you that this platter lastedabout 4 minutes.
My sister-in-law, Missy, is the designated slicer around here.(I love the necklace, Missy!)
NO COWBOYS ALLOWED!
My mother-in-law is so much fun. After growing up on an isolated ranch, going to college for four years, thenmarrying a rancher and raising three sons, she’s always ready for some quality girl time.

My sister-in-law Missy always breaks out her gross elbow trick.
Sally grew up on a working cattle ranch. Then she married a rancher and had three sons. She’s always up for a nightwith the girls.
My friend Jane grew up in this rural area, but now lives in the big city. But her heart belongs to her small town.
My friend Beth, another ranch wife, is also a former city girl. She and I swap stories of our days back in civilization.
Edna Mae, Marlboro Man’s grandmother, lived on an isolated ranch for years. It’s so nice to have her around.

BURGUNDY MUSHROOMS
Makes 8 to 10 servings
My dear mother-in-law has made these wine-and-butter-soaked mushrooms for years, and every time I eat them Igroan, sigh, and promise myself I’ll never go more than a month without having them on my plate. Slow-cookedover many, many hours, these mushrooms aren’t for last-minute meals! But they’ll make your house smell sodelicious, you’ll hardly believe it. Seriously, guests have fainted before.
When fully cooked, these mushrooms taste more like meat than anything else, and with a green salad and bakedpotato could be a meal in themselves. But note: if you’re not a fan of wine, steer clear of these, as they use a wholeliter of Burgundy!
4 pounds white button mushrooms½ pound (2 sticks) butter1½ teaspoons Worcestershire sauce1 liter Burgundy wine (other dry red wines will work)1 teaspoon freshly ground black pepper2 cups boiling water4 chicken bouillon cubes4 beef bouillon cubes1 teaspoon dill seed1 teaspoon garlic powder2 teaspoons salt (optional)
1. Thoroughly wash the mushrooms and throw them into a large stockpot.
2. Add all the remaining ingredients except the salt. Stir to combine.
3. Bring the mixture to a boil over medium-high heat.

4. Reduce the heat to low and simmer, covered, for 6 hours.
5. Remove the lid, then continue cooking, uncovered, for 3 hours.
6. Add salt to taste at the end if desired. The mushrooms will be dark in color. They can sit in the pan until ready toserve.
7. Serve straight from the pot or spoon the mushrooms and cooking liquid into a serving bowl.Have crusty bread nearby to soak up the deliciousness.

CREAMY ROSEMARY POTATOES
Makes 9 servings
This is the most amped-up version of potatoes au gratin in existence, made extra decadent with butter, cream cheese,half-and-half…and cream. It’s so good, I have to go to confession after my last bite.
And I’m not even Catholic.
4 tablespoons (½ stick) butter1 cup half-and-half1 cup heavy cream5 or 6 medium russet potatoes, sliced thin4 garlic cloves, finely chopped1 medium onion, finely dicedOne 8-ounce package cream cheese, at room temperature½ to 1 teaspoon salt, to tasteFreshly ground black pepper to taste2 tablespoons minced rosemary leaves3 green onions, light green and medium green parts, thinly sliced1 cup grated Parmesan cheese3 tablespoons minced chives
1. Preheat the oven to 350ºF. Rub the bottom of a 9 x 13-inch baking dish with softened butter. Combine the half-and-half and the cream in a large measuring cup.
2. Using a mandoline or a very sharp knife, slice the potatoes very thinly. They’ll cook better that way.
3. Place the potatoes in a large bowl. Drizzle with half of the half-and-half/cream mixture and set aside.
4. In a large skillet over medium-low heat, melt the butter. Add the garlic and onion and cook until translucent,stirring occasionally, about 4 minutes.
5. Cut the bar of cream cheese in half and add the halves to the skillet, stirring constantly.

6. Continue stirring until the mixture is smooth and combined, about 3 minutes.
7. Pour in the remaining half-and-half/cream mixture and stir to combine.
8. Add salt and pepper and stir. Taste and adjust the seasonings as necessary. Do not undersalt!
9. Add the rosemary and green onions and stir to combine.
10. Finally, add ½ cup of the grated Parmesan and stir to combine.
11. Pour the cream-soaked potatoes into the baking dish.
12. Pour the cream cheese mixture over the top. Scrape out the skillet to get every last drop.
13. Sprinkle the remaining ½ cup grated Parmesan generously over the top and bake for at least 1 hour, or untilgolden brown and bubbly.

14. Remove from the oven and let stand for 10 minutes. Sprinkle with the chives, then cut into squares to serve.

OLIVE CHEESE BREAD
Makes 8 servings
Oh, how I love this cheesy, flavorful bread, which I whip up several times a year. It’s not only a crowd pleaser, it’sexceedingly easy to make and can be prepared and frozen several days before your dinner. Sliced into big chunks, itcan accompany a salad for a nice, filling lunch, and it’s perfect alongside lasagna, spaghetti, or any meat dish.
I once made this cheesy bread for hundreds of cattlewomen at an annual luncheon. Though I’d prepared roastedbeef tenderloin, tomato-basil pasta salad, and grilled asparagus as well, it was the olive cheese bread that went thefastest. Cattlewomen from far and wide called in the coming weeks, asking for the recipe. I told them all to take ahike.
Just kidding. Here’s the recipe I gave ’em:
One 14.5-ounce can black olives, drainedOne 6-ounce jar pimiento-stuffed green olives, drained2 green onions¼ pound (1 stick) butter, softened½ cup mayonnaise (real mayo, no substitutions)1 pound Monterey Jack cheese, grated1 loaf crusty French bread
1. Preheat the oven to 325ºF.
2. Place the black olives on a cutting board.
3. Chop them roughly until most of the large pieces are broken up.
4. Place the green olives on the cutting board.

5. And give ’em a rough chop.
6. Slice the green onions, then chop them up roughly.
7. In a large bowl, combine the butter, mayonnaise, Monterey Jack cheese, chopped olives, and green onions.
8. Stir until thoroughly combined. At this point, grab the nearest cracker and take a taste. Repeat as needed.
9. Slice the French bread loaf in half lengthwise. Spread the olive-cheese mixture in an even layer on each half.
10. Bake for 20 to 25 minutes, until the cheese mixture is thoroughly melted and beginning to turn light brown andbubbly. Cut into diagonal slices and serve immediately.HELPFUL HINTSHere are some make-ahead tips:
Prepare the olive/cheese mixture up to two days ahead of time. Store tightly covered in the fridge.
Or, spread the olive/cheese mixture on the bread and freeze, tightly wrapped, up to six months. Thaw beforebaking.
The cheese topping also makes a delicious spread for crackers!
Variation
Substitute drained, chopped artichoke hearts and grated Parmesan cheese for the black olives and Monterey Jackcheese. Yum!

CRÈME BRÛLÉE
Makes 6 servings
You’re looking at my favorite dessert of all time—the light, the creamy, the slightly crunchy-on-top crème brûlée,which I’m convinced is on the menu in Heaven…I just know it. It doesn’t get any better than this.
Crème brûlée can be intimidating to the home cook, but if you have one essential tool—a small butane kitchentorch—it’s really not that difficult. (To justify the purchase, just know you can also use the torch to light candles orkeep poisonous asps at bay! Talk about an essential tool!) The torch is used to burn a sugar crust on the top of thecool custard; this is the signature quality of the dish. I’ve tried unsuccessfully to use the broiler in lieu of the torch,but the oven simply gets too hot and winds up disrupting the texture of the custard below, which should be veryvelvety smooth and soft—not firm and eggy.
The rest of the recipe is a breeze, though; it just takes a little upper-arm endurance. And the results are soimpressive, your guests will never host a dinner party in their houses again. They’ll just make you do it. On secondthought, maybe crème brûlée isn’t such a good idea after all.
1 quart heavy cream1 vanilla bean, split or 1 teaspoon pure vanilla extract10 egg yolks¾ cup plus 6 tablespoons superfine sugar
1. Preheat the oven to 325°F.
2. First, pour the cream into a saucepan over medium-low heat. Add the vanilla bean or vanilla extract. Bring almostto a boil, then turn off the heat.
3. Place the egg yolks in a large bowl and add the ¾ cup sugar. With a whisk, mix the eggs and sugar together. Now,break out your elbow grease and take a deep breath. You’re going to need to whisk the mixture like crazy for a good3 or 4 minutes, until it’s very light yellow in color. This kills my arm every time, and I usually have to stop and takea few breathers along the way. Consider this your exercise for the day.
4. Place a fine-mesh strainer over a large bowl. Pour the hot cream into the bowl through the strainer. This will filter

out the tiny bits of vanilla bean.
5. To temper the egg mixture, very slowly drizzle 1 cup of the hot cream into the egg/sugar mixture, whiskingconstantly and vigorously to prevent the eggs from cooking. Continue adding the rest of the hot cream to the bowlvery slowly, whisking constantly. You can add the cream a little more rap-idly as the mixture warms.
6. Place 6 ramekins on a rimmed baking sheet and ladle in the custard until the ramekins are three-quarters full.Place the pan inside the oven, then pour water into the baking sheet until it reaches halfway up the ramekins.
7. Bake for 35 to 40 minutes, until the custard is set but not brown. Watch carefully to avoid browning!
8. Remove the ramekins from the pan and allow to cool. Refrigerate the custards, covered, for at least 2 hours orovernight.
9. When you’re ready to serve dessert, sprinkle the top of each custard generously with 1 tablespoon superfine sugar.Use a kitchen torch to burn the sugar to a crisp, working quickly to avoid cooking the custard below.
Serve immediately with spoons. Prepare yourself for moans and groans.
Variation
Top with berries and whipped cream for extra decadence!


SWEETS
MY FAVORITE PART

PATSY’S BLACKBERRY COBBLER
Makes 8 servings
Everyone has his own interpretation of cobbler. Some folks like a flat pie crust on top of the fruit. Others spoon abiscuit-like topping on the top. Still others use a bottom and top crust and try to convince themselves they’re noteating pie, which has always kind of confused me. But I’m not going to judge them.
What I am going to do is show you my favorite kind of cobbler. Though I doubt it would win any blue ribbonsfor Cobbler Recipe That Most Resembles the Original, I happen to think it’s the most delicious. (Thank you, Patsy!)
¼ pound (1 stick) butter, melted1¼ cups plus 2 tablespoons sugar1 cup self-rising flour1 cup milk2 cups fresh (or frozen) blackberries (or blueberries, peaches, raspberries, and so on)
1. Preheat the oven to 350ºF. Grease a 3-quart baking dish with butter.
2. Place the stick of butter in a microwave-safe dish. Heat in a microwave for 30 to 45 seconds, until melted.
3. In a medium bowl, whisk 1 cup of the sugar with the flour and milk.
4. Whisk in the melted butter.
5. Rinse the blackberries and pat them dry.
6. Pour the batter into the baking dish. Sprinkle the blackberries evenly over the top of the batter.
7. Sprinkle ¼ cup sugar over the blackberries.
8. Bake for 1 hour, or until golden brown and bubbly. When 10 minutes of cooking time remain, sprinkle theremaining 2 tablespoons sugar over the top.
9. Just look at the golden, crispy deliciousness! I love this kind of cobbler.Serve it by the spoonful. Top with whipped cream or ice cream…or both. Live a little!
COUNTRY KIDS LOVE HAY BALES!


FLAT APPLE PIE
Makes 2 pies
This is my husband’s favorite way to eat apple pie, because he can cut it like a pizza and grab a slice on his way outthe door. Aside from that, because it’s thinner than a typical slice of pie, it makes it easier to somehow convinceyourself that you’re eating less!
I love that quality in a dessert.
5 peeled and sliced Granny Smith apples2 tablespoons all-purpose flourJuice of ½ lemon½ cup granulated sugar½ cup firmly packed brown sugar¼ teaspoon salt1 recipe Perfect Pie Crust (Dinner; makes 2 crusts)6 tablespoons (½ stick) butter
1. Preheat the oven to 375ºF.In a large bowl, stir together the apples, flour, lemon juice, granulated sugar, brown sugar, and salt. Set aside
and see how long you can keep from sneaking a slice of apple.2. Roll out two pie crusts into large circles. Place the circles on large baking sheets.
3. Place half the apple mixture on one crust and the other half on the other crust.
4. Fold over the edge of each crust so that it covers 2 to 3 inches of the apple mixture. No need to be artistic—themore rustic the better.
5. Dot the tops of the pies with chunks of butter.

6. Bake for 30 to 40 minutes, until the filling is golden and bubbly. If the crust appears to brown too quickly, coverthe edges with aluminum foil for the remaining baking time.
NOTE: If you have two ovens, it’s best to bake the pies separately. If not, just allow enough room between racksso the heat can circulate properly.
7. Allow to cool slightly, then slice into wedges with a pizza cutter. Eat ’em on the go!
Variation
For extra sweetness, drizzle on jarred caramel topping after removing the pie from the oven.

CHOCOLATE SHEET CAKE
Makes one 18 x 12-inch cake
This is absolutely, without a doubt, the best chocolate sheet cake. Ever. It’s moist beyond imagination, chocolateyand rich like no one’s business, and 100 percent of the time, it causes moans and groans from anyone who takes abite.
It’s made from very basic ingredients—perfect for us Pioneer Women who live out in the country and nowherenear Dutch-processed cocoa, Madagascar vanilla extract, or crème fraîche. All you need for this wonderful cake issugar, flour, salt, butter, cocoa, baking soda, buttermilk, eggs, vanilla, powdered sugar, milk, and pecans.
Are you ready? Let’s go dance with the devil!
CAKE2 cups all-purpose flour2 cups sugar¼ teaspoon salt½ cup buttermilk (if you don’t have any, see In the Morning)2 large eggs1 teaspoon vanilla extract1 teaspoon baking soda½ pound (2 sticks) butter4 heaping tablespoons cocoa powder
ICING1¾ sticks butter4 heaping tablespoons cocoa powder6 tablespoons milk1 teaspoon vanilla extract1 pound powdered sugar½ cup finely chopped pecans (optional)
1. Preheat the oven to 350ºF.
2. In a large bowl, combine the flour, sugar, and salt. Stir together and set aside.
3. In another bowl, mix the buttermilk, eggs, vanilla, and baking soda. Mix with a fork and set aside.
4. In a medium saucepan, melt the butter and add the cocoa.

5. Whisk together to combine. Meanwhile, bring 1 cup water to a boil.
6. When the butter is melted, pour the boiling water in the pan. Allow to bubble for a moment, then turn off the heat.
7. Pour the chocolate mixture into the flour mixture.
8. Stir together for a moment to cool the chocolate, then pour in the egg mixture.
9. Stir together until smooth, then pour into an ungreased jelly roll pan (or rimmed baking sheet) and bake for 20minutes.
10. While the cake is baking, make the icing:Melt the butter in a saucepan over medium-low heat. (I just wash out the same one I used for the cake. Makes
me feel responsible and productive.)
11. Add the cocoa powder and stir until smooth.
12. Add the milk and vanilla…

13. And powdered sugar. Stir together.
14. Dump in the chopped pecans and stir until well combined.
15. Immediately after removing the cake from the oven, pour the warm icing over the top. You’ll want to avoiddoing much spreading, so try to distribute it evenly as you pour.
Please make this cake today. I don’t want you to live another day without it.
VARIATIONS: For a child’s birthday, omit pecans in the icing. Serve the cake with a large bowl of M&M’s and allowkids to decorate it themselves.
This recipe can also be made into cupcakes: Just fill muffin tins a little less full with the batter than you normallywould so the baked cupcakes remain below the upper rim. That way, the thin icing can be poured right into each tin.

MOCHA BROWNIES
Makes 16 brownies
Brownies, brownies, brownies. There are so many different recipes for brownies, it makes my head spin around, fallonto the floor, and roll down the street. Do you like your brownies fudgy? Cakey? Moist? Crackly? Crumbly? Doyou use any ol’ baking chocolate, or do you break out the big guns and buy the top-of-the-line stuff from San Fran?Or do you use cocoa powder instead? Or do you just throw up your hands and buy a box mix?
Me? I don’t like to overthink it. I just want some brownies, okay? These from-scratch brownies are delicious—even more so when you top them with Mae’s Mocha Icing and chill them before serving.
And call me excessive, but I like to really lay the icing on thick so that it’s almost as thick as the browniesthemselves. I apologize to all mankind!
BROWNIESFour 1-ounce squares unsweetened chocolate½ pound (2 sticks) butter2 cups sugar4 large eggs3 teaspoons pure vanilla extract1¼ cups all-purpose flour
MAE’S MOCHA ICING½ pound (2 sticks) butter, softened5 cups powdered sugar¼ cup cocoa powder¼ teaspoon salt3 teaspoons pure vanilla extract½ to ¾ cup brewed coffee, cooled to room temperature
1. Preheat the oven to 325ºF. Spray an 8-inch square baking pan with nonstick baking spray.
2. To make the brownie batter, place the chocolate in a microwave-safe bowl.
3. Melt the chocolate in the microwave in 30- second increments, being careful not to let it burn. Set it aside to coolslightly.
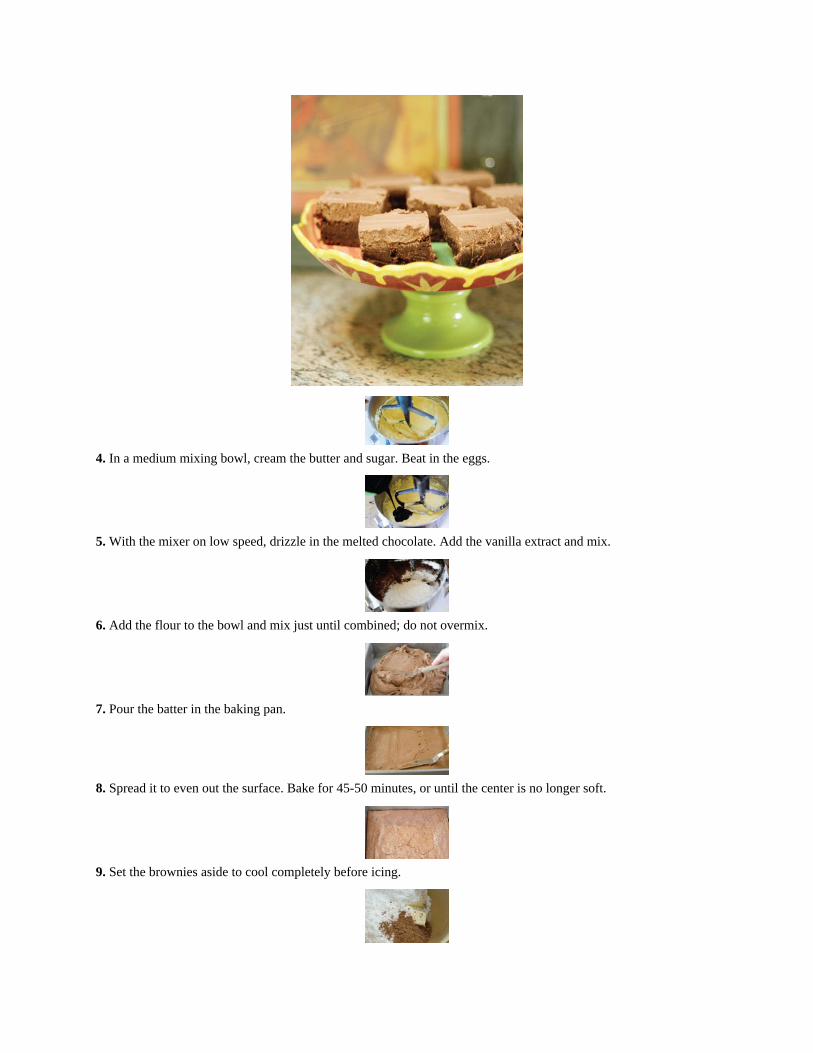
4. In a medium mixing bowl, cream the butter and sugar. Beat in the eggs.
5. With the mixer on low speed, drizzle in the melted chocolate. Add the vanilla extract and mix.
6. Add the flour to the bowl and mix just until combined; do not overmix.
7. Pour the batter in the baking pan.
8. Spread it to even out the surface. Bake for 45-50 minutes, or until the center is no longer soft.
9. Set the brownies aside to cool completely before icing.

10. To make the icing, in a large mixing bowl, combine the butter, powdered sugar, cocoa powder, salt, and vanilla.
11. Mix until slightly combined, then add ½ cup of the coffee.
12. Whip until the icing is the desired consistency. If the icing is overly thick, add ¼ cup more coffee.
13. It should be very light and fluffy.
14. Ice the cooled brownies, spreading the icing on thick. Refrigerate until the icing is firm, then slice the browniesinto squares.
Variation
Serve in a bowl topped with coffee ice cream and drizzle with hot fudge sauce. Sinful!
SPEAKING OF SWEET…
Marlboro Man believes in involving the kids in the work of the ranch as early as possible. As soon as our babies areweaned, he takes them with him.

Sometimes they’re a little fearful, but he talks them through it.Because he knows that the earlier they start, the earlier they’ll become proficient.
…And the earlier he’ll be able to retire. Ranchers are always planning ahead.

OATMEAL CRISPIES
Makes 24 cookies
These are Marlboro Man’s favorite cookies. They’re simple, wholesome, and perfectly delicious!
½ cup pecan halves1 cup shortening1 cup packed dark or light brown sugar1 cup granulated sugar2 large eggs1 teaspoon vanilla extract1½ cups all-purpose flour1 teaspoon salt1 teaspoon baking soda3 cups rolled oats
1. Finely chop the pecans, using a rocking motion with the knife. Set aside.
2. In a large mixing bowl, combine the shortening and sugars. Beat together until combined. I use a hand or standmixer, but if you’ve got the muscles, feel free to do it yourself!
3. Lightly beat the eggs and vanilla in a medium bowl.
4. Add the egg mixture to the sugar/shortening mixture, and beat to thoroughly combine.
5. In a separate bowl, combine the flour, salt, and baking soda. Stir to combine.
6. Add the flour mixture to the egg/sugar mixture and stir until combined.

7. Dump in the oats and pecans and stir to combine.
8. Divide the dough in half. Place each half on a sheet of waxed paper and form a roll 1½ inches in diameter,wrapping the waxed paper tightly around the roll.
9. Chill the rolls until ready to use, up to one week. (The rolls may be frozen for up to 3 months.)
10. When you’re ready to bake the cookies, preheat the oven to 350ºF. Unwrap the dough from the waxed paper andslice it into rounds about ½ inch thick. If the dough is frozen, no need to thaw; just increase the baking time by 1 to2 minutes.
11. Place the rounds on a cookie sheet and bake for 10 minutes, or until light golden brown. Using a spatula, removethe cookies from the sheet immediately.
I usually keep three or four rolls of dough in my freezer at all times. These cookies go fast.
Variations
Add dried cranberries and white chocolate chips to the dough before shaping into a roll.
Add chocolate chips to the dough.
Press a small scoop of cinnamon ice cream between two cooled cookies and store in the freezer for a deliciousice cream/cookie sandwich.
That made me really hungry.

PINEAPPLE UPSIDE-DOWN CAKE (IN AN IRON SKILLET)
Makes one 10- to 12-inch cake
I love making this traditional, no-frills upside-down cake in an iron skillet. It makes me feel like a rebel.
2½ cups all-purpose flour3 teaspoons baking powder1 teaspoon salt2 cups granulated sugar¼ pound (1 stick) butter¼ cup shortening1½ cups milk2 large eggs2 teaspoons pure vanilla extractOne 20-ounce can sliced pineapple, 2 tablespoons juice reserved (drink the rest)11/3 cups packed brown sugarMaraschino cherries (optional)
1. Preheat the oven to 350ºF.
2. To make the cake batter, in a large mixing bowl place the flour, baking powder, salt, sugar, ½ stick of the butter,the shortening, milk, eggs, vanilla, and reserved pineapple juice.
3. Mix until well combined. Set aside.
4. Melt the remaining ½ stick butter in a 10- or 12-inch iron skillet over medium heat. Swirl to thoroughly coat theskillet.
5. Sprinkle the brown sugar over the butter, making sure it’s evenly distributed.
6. You want the entire surface of the butter to be covered in brown sugar. Do not stir.

7. As soon as the sugar dissolves, place a layer of pineapple slices over the top.
8. If desired, place maraschino cherries in the center of the pineapple slices. I love using cherries in pineappleupside-down cake. I think they’re kitschy.
9. Pour the batter evenly over the pineapple slices.
10. Evenly distribute it over the surface of the pineapple. Gently spread to even out the surface.
11. Bake the cake for 30 to 40 minutes, until a toothpick inserted in the center comes out clean. The cake will beslightly uneven on top, but don’t worry…the top will soon be upside down.
Get it?
12. Immediately run a knife around the edge of the cake…
13. Then place a cake plate upside down on top of the skillet.
14. Very carefully invert the skillet so that the cake is turned upside down onto the cake plate.
15. Because of the butter, it should come out pretty easily; if a little bit of the cake sticks to the pan, just use a smallknife to patch it back together. The cake is on the rustic/imperfect side anyway, so it’ll look just fine.

Allow it to cool slightly before cutting into wedges with a serrated knife.
Best when served warm.

PEACH CRISP WITH MAPLE CREAM SAUCE
Makes one 8 x12-inch crisp
Chilled maple cream sauce makes this peachy dessert utterly decadent.
MAPLE CREAM SAUCE1½ cups heavy cream5 tablespoons pure maple syrup3 tablespoons light corn syrupPEACH CRISP1 cup all-purpose flour½ cup granulated sugar½ cup packed light brown sugar½ teaspoon ground cinnamonDash of nutmeg¼ teaspoon salt¼ pound (1 stick) cold butter5 or 6 cups peeled and sliced fresh peaches (about 6 peaches should do the trick)Grated zest and juice of ½ lemon2 tablespoons pure maple syrup
1. Begin by making the Maple Cream Sauce. It needs to chill before serving.Pour the cream into a heavy saucepan.
2. Add the maple syrup and corn syrup.
3. Cook over moderate heat, stirring constantly, until the sauce is thickened and reduced by a third, about 20minutes. Chill for at least an hour before serving over warm peach crisp.4. To prepare the peach crisp, preheat the oven to 350ºF.
5. Start with the crumb mixture. In a medium bowl, combine the flour, granulated sugar, brown sugar, cinnamon,nutmeg, and salt.
6. Cut the cold butter into pieces.

7. Add the butter to the bowl and use a fork or pastry blender to cut it into the flour mixture.
8. The mixture should resemble a moist, coarse meal.
9. Place the peaches in a bowl.
10. Add the lemon zest to the peaches.
11. Mix in the lemon juice and maple syrup and gently stir the peaches to combine.
12. Pour the peaches into a 9-inch square or 8 x 12-inch baking dish.
13. Top with the crumb mixture, evening out the surface with a fork.
14. Cover tightly with foil and bake for about 15 minutes.

15. Remove the foil and bake 30 minutes more, or until the topping is crisp and golden brown. If the topping appearsunderdone, continue baking in 10-minute increments until it’s done.
16. Spoon the warm crisp onto a plate, and drizzle the chilled maple cream sauce over the top. Mmmm. This is oneof the great ones, folks.
HELPFUL HINT: Drink any remaining maple cream sauce with a straw. Then fall into a deep sleep and wake up in aweek, after your guilt subsides.

RED VELVET CAKE
Makes one 10-inch layer cake
Let’s face it: the best thing about red velvet cake is just how darn pretty it is. But luckily, the second best thing, andit runs a close second, is the cake itself. The cream cheese icing is rich, creamy, and the perfect match for the mildlyflavored cake. I adore red velvet cake.
This is a real treat for girl get-togethers. The manic giggling always stops long enough for everyone to let out afew ooohs and aaahs.
And as a middle child, I just love it when that happens.
RED VELVET CAKE1 cup shortening1¾ cups sugar2½ cups cake flour1¼ teaspoons salt2 large eggs1 cup buttermilk (if you don’t have any, see In the Morning)1 teaspoon vanilla extract1 teaspoon baking soda1½ teaspoons vinegar1 ounce red food coloring (use 2 ounces if you desire a deeper red color)1½ teaspoons cocoa powder
CREAM CHEESE ICING1½ 8-ounce packages cream cheese, at room temperature¾ cup (1½ sticks) unsalted butter, softened1½ pounds powdered sugar¼ teaspoon salt2 teaspoons pure vanilla extract
1. Preheat the oven to 350ºF. Spray two round 10-inch cake pans (2 inches deep) with nonstick baking spray.
2. Blend together the shortening and sugar in a mixing bowl, using an electric mixer. Set aside.

3. Sift together the flour and salt. Set aside.
4. Mix the eggs, buttermilk, vanilla, baking soda, and vinegar in a separate bowl.
5. Alternate adding the flour mixture and the buttermilk mixture to the shortening mixture in the mixing bowl,mixing after each addition.
6. In a small bowl, mix the red food coloring and cocoa powder.
7. Pour into the mixing bowl.
8. Mix until just combined. Don’t overbeat.
9. Pour the batter evenly into the cake pans and bake for 25 minutes, or until a toothpick comes out clean.Allow to cool in the pan for 20 minutes before removing the cakes from the pans. Cool completely before icing.
10. Now, make the icing.Place the cream cheese and butter in a mixing bowl and whip until smooth. Sift the powdered sugar and add it
to the bowl. Add the salt and mix.
11. Add the vanilla and mix until smooth.
12. Place one layer face down on a cake plate or pedestal. Note the cocoa swirling throughout the cake!
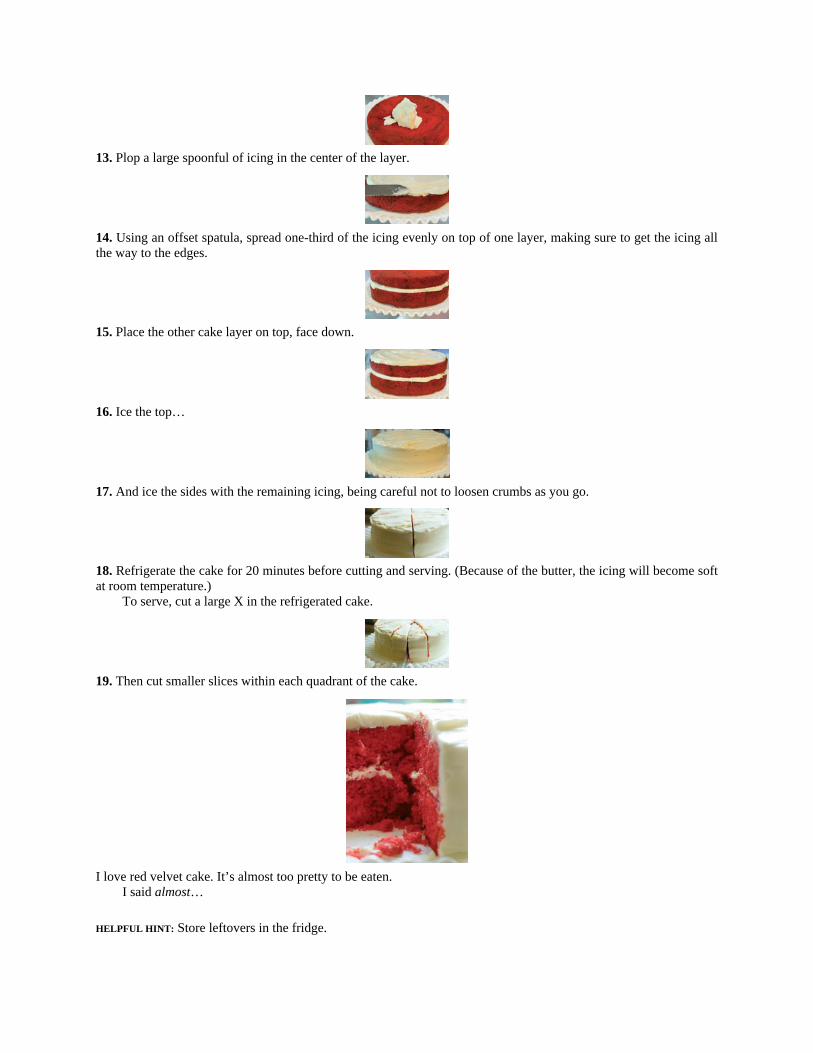
13. Plop a large spoonful of icing in the center of the layer.
14. Using an offset spatula, spread one-third of the icing evenly on top of one layer, making sure to get the icing allthe way to the edges.
15. Place the other cake layer on top, face down.
16. Ice the top…
17. And ice the sides with the remaining icing, being careful not to loosen crumbs as you go.
18. Refrigerate the cake for 20 minutes before cutting and serving. (Because of the butter, the icing will become softat room temperature.)
To serve, cut a large X in the refrigerated cake.
19. Then cut smaller slices within each quadrant of the cake.
I love red velvet cake. It’s almost too pretty to be eaten.I said almost…
HELPFUL HINT: Store leftovers in the fridge.

ANGEL SUGAR COOKIES
Makes 18 cookies
Don’t tell anyone, but Marlboro Man loves sugar cookies made from store-bought refrigerator dough. He can’t helpit—it’s a comfort food a cowboy’s wife used to make for him when he was a little boy and he can’t shake the sweet,chewy memories.
Me? I love the dough. And I never object when Marlboro Man has a craving for those sugar cookies because Ialways shave off a good hunk or two of the raw dough and have myself a snack.
For homemade sugar cookies, I don’t attempt to compete with those incredibly consistent pre-fab wonders. So Igo a different direction, making this sugar cookie that’s light, crisp, and melt-in-your-mouth.
2 large eggs1 cup canola oil½ pound (2 sticks) butter, softened1 cup granulated sugar, plus extra for the tops of the cookies1 cup powdered sugar1 teaspoon pure vanilla extract4 cups plus 2 tablespoons all-purpose flour1 teaspoon salt1 teaspoon baking soda1 teaspoon cream of tartar
1. Preheat the oven to 350ºF.
2. To make the dough, in a large mixing bowl, cream together the eggs, oil, butter, granulated sugar, powderedsugar, and vanilla.

3. Add the rest of the ingredients and mix well. Refrigerate the dough for 1 hour.
4. Using a cookie scoop or spoon, drop the balls of dough onto an ungreased cookie sheet.
5. Smear a dab of butter on the bottom of a glass, then dip it in granulated sugar.
6. Use the glass to flatten the balls of dough, dipping again into the sugar each time.
7. Repeat until all are flattened.Bake for 9 to 11 minutes until the cookies are just barely turning brown around the edges.
Allow to cool before eating.
BEWARE: Cookies are ultra-light and crumbly and don’t travel well. They’re meant to be eaten at home!

KEEPIN’ IT REAL
Not everything in my kitchen is smooth sailing.Never has been…never will be.And I’ve got the pictures to prove it.
Where ’s my staff of assistants?
I’m still waiting…


ACKNOWLEDGMENTS
I loved writing this cookbook. It made me happy. And chubby.I could not/would not have finished this project without a handful of significant influences.Thank you to:
My husband and children, who told me what was yummy…and what tasted really, really gross.
My most wonderful friend Hyacinth, who lost so much sleep over whether I’d meet my cookbook deadline thatshe came to my house once a week and forced me to cook until I was finished. I love type A friends. I love you,Hyacinth.
My editor, Cassie Jones. It’s so clichéd to acknowledge your editor at the end of a book, isn’t it? But I can’thelp it. She’s the perfect combination of professional, talented, intuitive, and weird. Boy, did I ever luck out.
My mom Gerre and my grandmother Ga-Ga, who together ensured that a healthy measure of sunshine andproper grammar would wind up in my genes.
My mother-in-law Nan, whose understated grace and elegant, abundant style of food inspires me.
My sister-in-law Missy, the real cowgirl around here. Thank you for being my good buddy and for making suremy girls are outfitted in the latest fashions.
My sister and best friend on earth, Betsy, with whom I can talk on the phone for hours about what we ate forlunch that day. She makes my obsession with food okay, and makes me feel so thankful my girls have a sister.
Since this might be the last time I ever get the chance to drop their names in a printed volume: Chuck, Beccus,Tim, Betty, Lela, Connell, Edna Mae, Haley,
Grandma Helen, Patsy, Doug, Mike, Heather, Ana, Carol Sue, Nancy, Helen, Jeff,
Uncle John, Jonathan, Julie, and everyone I’ve ever loved or given hives.
My dad. For everything.

Our girl is the perfect cowgirl: tough, tender, energetic…and sweeter than ice cream on a blackberry cobbler.

SEARCHABLE TERMS
Note: Entries in this index, carried over verbatim from the print edition of this title, are unlikely to correspond to thepagination of any given e-book reader. However, entries in this index, and other terms, may be easily located byusing the search feature of your e-book reader.
A
Angel Sugar Cookies, 236–37Apple(s)
Pie, Flat, 216–17Sangría, 216–17
Artichoke(s)adding to Cheese Bread, 207Dip, Hot, 30–31
AvocadosGuacamole, 20–21
B
Baconadding to Macaroni and Cheese, 97BBQ Jalapeño Poppers, 14–15Breakfast Bowls, 56–57Potato-Leek Pizza, 110–12PW’s Potato Skins, 22–24Twice-Baked Potatoes, 152–53
Baking sheets, 8Basic Breakfast Potatoes, 48–50Basil-Tomato Pizza, 112BBQ Jalapeño Poppers, 14–15Beans and Cornbread, 100–102Beef
Brisket, Braised, 160–62Chicken-Fried Steak, 142–45Comfort Meatballs, 172–73Cowboy Calzone, 114–15Fried Cube Steak, 145Lasagna, 184–87Marlboro Man’s Favorite Sandwich, 88–90Meatloaf, 150–51Perfect Pot Roast, 120–22Rib-Eye Steak with Whiskey Cream Sauce, 166–67Simple, Perfect Chili, 82–83Simple, Perfect Enchiladas, 176–78Tenderloin, Roasted, 196–98
BerriesPatsy’s Blackberry Cobbler, 212–13

topping Crème Brûlée with, 209Biscuits, Buttermilk, 44–45Blackberry Cobbler, Patsy’s, 212–13Braised Beef Brisket, 160–62Breads
Buttermilk Biscuits, 44–45Cinnamon Rolls, 36–39French Breakfast Puffs, 66–67Maple Pecan Scones, 68–69Marmalade Muffins, 58–60Olive Cheese, 206–7Skillet Cornbread, 102
BreakfastBasic Breakfast Potatoes, 48–50Breakfast Bowls, 56–57Buttermilk Biscuits, 44–45Cinnamon Rolls, 36–39Edna Mae’s Sour Cream Pancakes, 76–77Egg-in-the-Hole, 46–47French Breakfast Puffs, 66–67Huevos Hyacinth, 70–71Iny’s Prune Cake with Buttermilk Icing, 40–42Maple Pecan Scones, 68–69Marmalade Muffins, 58–60Migas, 61–63PW’s Breakfast Burritos, 51–53
Brisket, Beef, Braised, 160–62Brownies, Mocha, 221–23Burgundy Mushrooms, 202–3Burritos, PW’s Breakfast, 51–53Butter, for recipes, 8Buttermilk
Biscuits, 44–45Icing, Iny’s Prune Cake with, 40–42milk and vinegar substitute for, 40
C
CakesChocolate Sheet, 218–20Pineapple Upside-Down (In an Iron Skillet), 228–29Prune, Iny’s, with Buttermilk Icing, 40–42Red Velvet, 233–35
Calzone, Cowboy, 114–15Cast-iron skillets, 8Cheddar cheese
BBQ Jalapeño Poppers, 14–15Breakfast Bowls, 56–57Cheese Grits, 164–65Chicken Spaghetti, 130–31Macaroni and Cheese, 96–97PW’s Potato Skins, 22–24Simple, Perfect Enchiladas, 176–78Twice-Baked Potatoes, 152–53
Cheeseadding to steak sandwich, 90BBQ Jalapeño Poppers, 14–15

Bread, Olive, 206–7Breakfast Bowls, 56–57Chicken Spaghetti, 130–31Cowboy Calzone, 114–15Cream Cheese Icing, 233–35Creamy Rosemary Potatoes, 204–5Grits, 164–65Hot Artichoke Dip, 30–31Huevos Hyacinth, 70–71Lasagna, 184–87Macaroni and, 96–97Migas, 61–63Potato-Leek Pizza, 110–12PW’s Breakfast Burritos, 51–53PW’s Creamy Mashed Potatoes, 146–48PW’s Potato Skins, 22–24Simple, Perfect Enchiladas, 176–78Tomato-Basil Pizza, 112Twice-Baked Potatoes, 152–53
ChickenFried, 155–57Pot Pie, 126–27Spaghetti, 130–31topping pizza with, 112
Chicken-Fried Steak, 142–45Chile peppers
adding to Macaroni and Cheese, 97adding to Skillet Cornbread, 102BBQ Jalapeño Poppers, 14–15Migas, 61–63Pico de Gallo, 16–17Simple, Perfect Enchiladas, 176–78
Chili, Simple, Perfect, 82–83Chocolate
adding to Oatmeal Crispies, 227Icing, 218–20Mocha Brownies, 221–23Sheet Cake, 218–20
CilantroGuacamole, 20–21Migas, 61–63Pico de Gallo, 16–17Simple, Perfect Enchiladas, 176–78
Cinnamon Rolls, 36–39Clam Sauce, Linguine with, 179–81Cobbler, Patsy’s Blackberry, 212–13Coffee
Maple Icing, 37–39Mocha Brownies, 221–23
Comfort Meatballs, 172–73Commercial baking sheets, 8Cookies and bars
Angel Sugar Cookies, 236–37Mocha Brownies, 221–23Oatmeal Crispies, 226–27
Corn, Roasted, Salad, Katie’s, 26–27

Cornbread, Skillet, 102Cornmeal
Skillet Cornbread, 102Cowboy Calzone, 114–15Cowgirl dinner party
Burgundy Mushrooms, 202–3Creamy Rosemary Potatoes, 204–5Olive Cheese Bread, 206–7Roasted Beef Tenderloin, 196–98Sangría, 194–95
Cream CheeseBBQ Jalapeño Poppers, 14–15Creamy Rosemary Potatoes, 204–5Hot Artichoke Dip, 30–31Icing, 233–35PW’s Creamy Mashed Potatoes, 146–48
Creamy Rosemary Potatoes, 204–5Crème Brûlée, 208–9
D
DessertsAngel Sugar Cookies, 236–37Chocolate Sheet Cake, 218–20Crème Brûlée, 208–9Flat Apple Pie, 216–17Mocha Brownies, 221–23Oatmeal Crispies, 226–27Patsy’s Blackberry Cobbler, 212–13Peach Crisp with Maple Cream Sauce, 230–32Pineapple Upside-Down Cake (In an Iron Skillet), 228–29Red Velvet Cake, 233–35
Dinner (lunch)Beans and Cornbread, 100–102Cowboy Calzone, 114–15Macaroni and Cheese, 96–97Marlboro Man’s Favorite Sandwich, 88–90Onion Strings, 92–93Pizza Crust, 108–9Potato-Leek Pizza, 110–12Sherried Tomato Soup, 103–5Simple, Perfect Chili, 82–83Spicy Pulled Pork, 94–95Tomato-Basil Pizza, 112
Dinner (Sunday lunch)Chicken Pot Pie, 126–27Chicken Spaghetti, 130–31Perfect Pot Roast, 120–22
DipsGuacamole, 20–21Hot Artichoke, 30–31Katie’s Roasted Corn Salad, 26–27Pico de Gallo, 16–17
Drinks. See SangríaDutch oven, 8
E

Edna Mae’s Sour Cream Pancakes, 76–77Eggs
Breakfast Bowls, 56–57Egg-in-the-Hole, 46–47Huevos Hyacinth, 70–71Migas, 61–63PW’s Breakfast Burritos, 51–53
Enchiladas, Simple, Perfect, 176–78Equipment
commercial baking sheets, 8Dutch oven, 8iron skillets, 8stainless slotted spoons, 8stand mixers, 8
F
Flat Apple Pie, 216–17French Breakfast Puffs, 66–67Fried Chicken, 155–57Fried Cube Steak, 145Fruit. See also specific fruits
Flat Apple Pie, 216–17Patsy’s Blackberry Cobbler, 212–13Peach Crisp with Maple Cream Sauce, 230–32Pineapple Upside-Down Cake (In an Iron Skillet), 228–29Sangría, 194–95
G
Garlic, topping pizza with, 112Goat cheese
Huevos Hyacinth, 70–71Potato-Leek Pizza, 110–12
Grits, Cheese, 164–65Guacamole, 20–21
H
Hamadding to Macaroni and Cheese, 97Huevos Hyacinth, 70–71
Homemade Ranch with Iceberg Wedge, 168–69Hot Artichoke Dip, 30–31Huevos Hyacinth, 70–71
I
Iceberg Wedge, Homemade Ranch with, 168–69Icings
Chocolate, 218–20Cream Cheese, 233–35Maple, 37–39Mocha, Mae’s, 221–23
Ingredientsbutter, 8kosher salt, 8seasoned salt, 8
Iny’s Prune Cake with Buttermilk

Icing, 40–42Iron skillets, 8
J
Jalapeño(s)adding to Skillet Cornbread, 102Migas, 61–63Pico de Gallo, 16–17Poppers, BBQ, 14–15
K
Katie’s Roasted Corn Salad, 26–27
L
Lasagna, 184–87Leek-Potato Pizza, 110–12Lettuce
Homemade Ranch with Iceberg Wedge, 168–69Linguine with Clam Sauce, 179–81
M
Macaroni and Cheese, 96–97Mae’s Mocha Icing, 221–23Main dishes
Beans and Cornbread, 100–102Braised Beef Brisket, 160–62Chicken-Fried Steak, 142–45Chicken Pot Pie, 126–27Chicken Spaghetti, 130–31Comfort Meatballs, 172–73Cowboy Calzone, 114–15Fried Chicken, 155–57Fried Cube Steak, 145Lasagna, 184–87Linguine with Clam Sauce, 179–81Macaroni and Cheese, 96–97Marlboro Man’s Favorite Sandwich, 88–90Meatloaf, 150–51Penne alla Betsy, 188–90Perfect Pot Roast, 120–22Potato-Leek Pizza, 110–12Rib-Eye Steak with Whiskey Cream Sauce, 166–67Roasted Beef Tenderloin, 196–98Simple, Perfect Chili, 82–83Simple, Perfect Enchiladas, 176–78Spicy Pulled Pork, 94–95Tomato-Basil Pizza, 112
MapleCream Sauce, Peach Crisp with, 230–32Icing, 37–39Pecan Scones, 68–69
Marlboro Man’s Favorite Sandwich, 88–90Marmalade
adding to Cinnamon Rolls, 39Muffins, 58–60

Meat. See also Beef; PorkHuevos Hyacinth, 70–71
Meatballs, Comfort, 172–73Meatloaf, 150–51Migas, 61–63Mixers, electric, 8Mocha Brownies, 221–23Mocha Icing, Mae’s, 221–23Monterey Jack cheese
Breakfast Bowls, 56–57Cowboy Calzone, 114–15Huevos Hyacinth, 70–71Migas, 61–63Olive Cheese Bread, 206–7PW’s Breakfast Burritos, 51–53
Mozzarella cheeseadding to steak sandwich, 90Cowboy Calzone, 114–15Lasagna, 184–87Potato-Leek Pizza, 110–12Tomato-Basil Pizza, 112
MuffinsFrench Breakfast Puffs, 66–67Marmalade, 58–60
Mushroomsadding to steak sandwich, 90Burgundy, 202–3topping pizza with, 112
N
Nutsadding to Cinnamon Rolls, 39Chocolate Sheet Cake, 218–20Maple Pecan Scones, 68–69Oatmeal Crispies, 226–27
O
Oatmeal Crispies, 226–27Olive(s)Cheese Bread, 206–7Simple, Perfect Enchiladas, 176–78Onion(s)
adding to Macaroni and Cheese, 97Marlboro Man’s Favorite Sandwich, 88–90Strings, 92–93topping pizza with, 112
Orange(s)marmalade, adding to Cinnamon Rolls, 39Marmalade Muffins, 58–60
P
Pancakes, Edna Mae’s Sour Cream, 76–77Parmesan cheese
adding to Cheese Bread, 207Creamy Rosemary Potatoes, 204–5

Hot Artichoke Dip, 30–31Pasta
Chicken Spaghetti, 130–31Lasagna, 184–87Linguine with Clam Sauce, 179–81Macaroni and Cheese, 96–97Penne alla Betsy, 188–90Patsy’s Blackberry Cobbler, 212–13
Peach(es)adding to Jalapeño Poppers, 15Crisp with Maple Cream Sauce, 230–32
Pecan(s)adding to Cinnamon Rolls, 39Chocolate Sheet Cake, 218–20Maple Scones, 68–69Oatmeal Crispies, 226–27Penne alla Betsy, 188–90Peppersadding to Macaroni and Cheese, 97adding to Skillet Cornbread, 102BBQ Jalapeño Poppers, 14–15Migas, 61–63Pico de Gallo, 16–17PW’s Breakfast Burritos, 51–53Simple, Perfect Enchiladas, 176–78
Perfect Pot Roast, 120–22Pico de Gallo, 16–17Pie, Flat Apple, 216–17Pie Crust, Perfect, 128–29Pineapple
adding to Jalapeño Poppers, 15Sangría, 216–17
Pineapple Upside-Down Cake (In an Iron Skillet), 228–29Pizza
Crust, 108–9Potato-Leek, 110–12Tomato-Basil, 112Pork. See also Bacon; Ham; SausagesHuevos Hyacinth, 70–71Spicy Pulled, 94–95
Potato(es)Basic Breakfast, 48–50Breakfast Bowls, 56–57Creamy Mashed, PW’s, 146–48Creamy Rosemary, 204–5-Leek Pizza, 110–12PW’s Breakfast Burritos, 51–53Skins, PW’s, 22–24Twice-Baked, 152–53
Pot Pie, Chicken, 126–27Pot Roast, Perfect, 120–22Poultry. See ChickenPrune Cake, Iny’s, with Buttermilk Icing, 40–42PW’s Breakfast Burritos, 51–53PW’s Creamy Mashed Potatoes, 146–48PW’s Potato Skins, 22–24

R
Ranch Dressing, 168–69Red Velvet Cake, 233–35Rib-Eye Steak with Whiskey Cream Sauce, 166–67Roasted Beef Tenderloin, 196–98Rolls, Cinnamon, 36–39Rosemary Potatoes, Creamy, 204–5
S
SaladsHomemade Ranch with Iceberg Wedge, 168–69Roasted Corn, Katie’s, 26–27
Salt, kosher, 8Salt, seasoned, 8Sandwich, Marlboro Man’s Favorite, 88–90Sangría, 194–95Sauce, Maple Cream, 230Sausages
Breakfast Bowls, 56–57Cowboy Calzone, 114–15
S
SaladsHomemade Ranch with Iceberg Wedge, 168–69Roasted Corn, Katie’s, 26–27
Salt, kosher, 8Salt, seasoned, 8Sandwich, Marlboro Man’s Favorite, 88–90Sangría, 194–95Sauce, Maple Cream, 230 Sausages
Breakfast Bowls, 56–57Cowboy Calzone, 114–15Lasagna, 184–87PW’s Breakfast Burritos, 51–53
Scones, Maple Pecan, 68–69Seafood
Linguine with Clam Sauce, 179–81Penne alla Betsy, 188–90
Sherried Tomato Soup, 103–5Shrimp
Penne alla Betsy, 188–90Side dishes
Burgundy Mushrooms, 202–3Cheese Grits, 164–65Creamy Rosemary Potatoes, 204–5Homemade Ranch with Iceberg Wedge, 168–69Macaroni and Cheese, 96–97Olive Cheese Bread, 206–7Onion Strings, 92–93PW’s Creamy Mashed Potatoes, 146–48Twice-Baked Potatoes, 152–53
Simple, Perfect Chili, 82–83Simple, Perfect Enchiladas, 176–78Skillet Cornbread, 102Skillets, cast-iron, 8

Soup, Sherried Tomato, 103–5Sour Cream Pancakes, Edna Mae’s, 76–77Spaghetti, Chicken, 130–31Spicy Pulled Pork, 94–95Spoons, stainless slotted, 8Stainless slotted spoons, 8Stand mixers, 8Starters
BBQ Jalapeño Poppers, 14–15Guacamole, 20–21Hot Artichoke Dip, 30–31Katie’s Roasted Corn Salad, 26–27Pico de Gallo, 16–17PW’s Potato Skins, 22–24
SteakChicken-Fried, 142–45Cube, Fried, 145Marlboro Man’s Favorite Sandwich, 88–90Rib-Eye, with Whiskey Cream Sauce, 166–67
Sugar Cookies, Angel, 236–37Sunday dinner (lunch)
Chicken Pot Pie, 126–27Chicken Spaghetti, 130–31Perfect Pot Roast, 120–22
Supper (dinner)Braised Beef Brisket, 160–62Burgundy Mushrooms, 202–3Cheese Grits, 164–65Chicken-Fried Steak, 142–45Comfort Meatballs, 172–73Creamy Rosemary Potatoes, 204–5Fried Chicken, 155–57Fried Cube Steak, 145Homemade Ranch with Iceberg Wedge, 168–69Lasagna, 184–87Linguine with Clam Sauce, 179–81Meatloaf, 150–51Olive Cheese Bread, 206–7Penne alla Betsy, 188–90PW’s Creamy Mashed Potatoes, 146–48Rib-Eye Steak with Whiskey Cream Sauce, 166–67Roasted Beef Tenderloin, 196–98Simple, Perfect Enchiladas, 176–78Twice-Baked Potatoes, 152–53
T
Tomato(es) adding to Macaroni and Cheese, 97-Basil Pizza, 112Breakfast Bowls, 56–57Cowboy Calzone, 114–15Guacamole, 20–21Huevos Hyacinth, 70–71Katie’s Roasted Corn Salad, 26–27Lasagna, 184–87Migas, 61–63Pico de Gallo, 16–17

Soup, Sherried, 103–5Tortillas
Migas, 61–63PW’s Breakfast Burritos, 51–53Simple, Perfect Enchiladas, 176–78Spicy Pulled Pork, 94–95
Twice-Baked Potatoes, 152–53
V
Vegetables. See also Potato(es); Tomato(es); specific vegetablesBurgundy Mushrooms, 202–3Homemade Ranch with Iceberg Wedge, 168–69Katie’s Roasted Corn Salad, 26–27Onion Strings, 92–93Pico de Gallo, 16–17
W
Whiskey Cream Sauce, Rib-Eye Steaks with, 166–67Wine
Burgundy Mushrooms, 202–3Sangría, 194–95

The End

About the Author
REE DRUMMOND began blogging in 2006 and has built www.ThePioneerWoman.com into an award-winningwebsite, where she shares recipes, showcases her photography, and documents her hilarious transition from city lifeto ranch wife. Ree lives on a working cattle ranch near Pawhuska, Oklahoma, with her husband, Ladd, and their fourranch hands.
Visit www.AuthorTracker.com for exclusive information on your favorite HarperCollins author.

Credits
Jacket design and Photography by Ree Drummond

Copyright
Photographs courtesy of Ree Drummond, Ace Cuervo, Winston’s Photography, and Bill Nygard. Illustrationscourtesy of Maia Chavez Larkin, Claire Kennedy, and Dover Publications (www.doverpublications.com).
THE PIONEER WOMAN COOKS. Copyright © 2009 by Ree Drummond. All rights reserved under International and Pan-American Copyright Conventions. By payment of the required fees, you have been granted the non-exclusive, non-transferable right to access and read the text of this e-book on-screen. No part of this text may be reproduced,transmitted, downloaded, decompiled, reverse engineered, or stored in or introduced into any information storageand retrieval system, in any form or by any means, whether electronic or mechanical, now known or hereinafterinvented, without the express written permission of HarperCollins e-books.
Adobe Digital Edition October 2009 ISBN 978-0-06-195982-0
10 9 8 7 6 5 4 3 2 1

About the Publisher
AustraliaHarperCollins Publishers (Australia) Pty. Ltd.25 Ryde Road (PO Box 321)Pymble, NSW 2073, Australiahttp://www.harpercollinsebooks.com.au
CanadaHarperCollins Publishers Ltd.55 Avenue Road, Suite 2900Toronto, ON, M5R, 3L2, Canadahttp://www.harpercollinsebooks.ca
New ZealandHarperCollinsPublishers (New Zealand) LimitedP.O. Box 1Auckland, New Zealandhttp://www.harpercollins.co.nz
United KingdomHarperCollins Publishers Ltd.77-85 Fulham Palace RoadLondon, W6 8JB, UKhttp://www.harpercollinsebooks.co.uk
United StatesHarperCollins Publishers Inc.10 East 53rd StreetNew York, NY 10022http://www.harpercollinsebooks.com