TH/350 - Came
128
Cronotermostato programmabile TH/350 MANUALE DI INSTALLAZIONE ED USO IT Italiano EN English FR Français DE Deutsch FB01002M04
-
Upload
khangminh22 -
Category
Documents
-
view
0 -
download
0
Transcript of TH/350 - Came

Cronotermostato programmabile
TH/350MANUALE DI INSTALLAZIONE ED USO
IT Italiano
EN English
FR Français
DE Deutsch
FB01002M04

Pag.
2 -
Man
uale
FB0
1002
-IT -
ver.
1 - 1
1/20
17 -
© C
AME
S.p.
A. -
I con
tenu
ti de
l man
uale
son
o da
rite
ners
i sus
cetti
bili d
i mod
ifica
in q
ualsi
asi m
omen
to s
enza
obb
ligo
di p
reav
viso.
Avvertenze generali• Leggere attentamente le istruzioni prima di iniziare l’installazione ed eseguire gli inter-
venti come specificato dal costruttore.• L’installazione, la programmazione, la messa in servizio e la manutenzione del prodotto
devono essere effettuate soltanto da personale tecnico qualificato ed opportunamente addestrato nel rispetto delle normative vigenti ivi comprese le osservanze sulla preven-zione infortuni e lo smaltimento imballaggi.
• L’installatore deve assicurarsi che le informazioni per l’utente, dove previste, siano presenti e vengano consegnate.
• Prima di effettuare qualunque operazione di pulizia o di manutenzione, togliere l’ali-mentazione ai dispositivi.
• Gli apparecchi dovranno essere destinati unicamente all’uso per il quali sono stati espressamente concepiti.
• Il costruttore non può comunque essere considerato responsabile per eventuali danni derivanti da usi impropri, erronei ed irragionevoli.
• Attenzione: pericolo d’esplosione se le batterie vengono sostituite con altre di tipo errato.• Le batterie, una volta esaurito il loro ciclo di vita, non devono essere gettate con i rifiuti
indifferenziati, ma raccolte separatamente ed avviate a corretto recupero.
SMALTIMENTO - Assicurarsi che il materiale d’imballaggio non venga disperso nell’am-biente, ma smaltito seguendo le norme vigenti nel paese di utilizzo del prodotto.Alla fine del ciclo di vita dell’apparecchio evitare che lo stesso venga disperso nell’am-biente. Lo smaltimento dell’apparecchiatura deve essere effettuato rispettando le norme vigenti e privilegiando il riciclaggio delle sue parti costituenti. Sui componenti, per cui è previsto lo smaltimento con riciclaggio, sono riportati il simbolo e la sigla del materiale.Riferimenti normativi - Il prodotto è conforme alle direttive di riferimento vigenti.

A B C D E a b
A B C D E a b
Pag.
3 -
Man
uale
FB0
1002
-IT -
ver.
1 - 1
1/20
17 -
© C
AME
S.p.
A. -
I con
tenu
ti de
l man
uale
son
o da
rite
ners
i sus
cetti
bili d
i mod
ifica
in q
ualsi
asi m
omen
to s
enza
obb
ligo
di p
reav
viso.
Installazione
Contenuto della confezione
Corpo principale Viti per fissaggioTelaioAdattatori copriforo
Controtelai
NOTA: Sono disponibili come componenti opzionali, cover e adattatori copriforo grigio antracite e grigio alluminio.
I controtelai e gli adattatori copriforo opportunamente abbinati, permettono di adattare il dispositivo alle maggior parte delle serie civili in commercio seguendo le indicazioni delle pagine seguenti.
NOTA:I marchi System, Playbus, Playbus Young, Chorus, sono di proprietà di GEWISS S.p.AI marchi Light, Light Tech, Living International, Axolute, Luna, Livinglight Quadre, Matix, Livinglight Tonde, Livinglight AIR, Axolute Air, sono di proprietà di BTICINO S.p.A;I marchi Plana, Eikon, Idea, Idea Rondò, Arché, Eikon Evo, sono di proprietà di VIMAR S.p.A;I marchi Vela Quadra, Vela Tonda, Serie Cross, sono di proprietà di LEGRAND S.p.AI marchi Banquise, Sistema 45, Serie 44, sono di proprietà di AVE S.p.AIl marchio Elos è di proprietà di ABB S.p.A

A
A
a
a
A
b
b
Pag.
4 -
Man
uale
FB0
1002
-IT -
ver.
1 - 1
1/20
17 -
© C
AME
S.p.
A. -
I con
tenu
ti de
l man
uale
son
o da
rite
ners
i sus
cetti
bili d
i mod
ifica
in q
ualsi
asi m
omen
to s
enza
obb
ligo
di p
reav
viso.
GEWISS - Playbus, Playbus Young.
BTICINO - Matix.
BTICINO - Light, Light Tech, Living International.
VIMAR - Plana, Eikon.
LEGRAND - Vela Quadra, Vela Tonda, Serie Cross.
Come abbinare/adattare i controtelai alle serie civili

B
a
a
B
a
a
B
a
a
Pag.
5 -
Man
uale
FB0
1002
-IT -
ver.
1 - 1
1/20
17 -
© C
AME
S.p.
A. -
I con
tenu
ti de
l man
uale
son
o da
rite
ners
i sus
cetti
bili d
i mod
ifica
in q
ualsi
asi m
omen
to s
enza
obb
ligo
di p
reav
viso.
VIMAR - Idea, Idea Rondò.
ABB - Elos.
AVE - Banquise, Sistema 45.

C
C
B
Pag.
6 -
Man
uale
FB0
1002
-IT -
ver.
1 - 1
1/20
17 -
© C
AME
S.p.
A. -
I con
tenu
ti de
l man
uale
son
o da
rite
ners
i sus
cetti
bili d
i mod
ifica
in q
ualsi
asi m
omen
to s
enza
obb
ligo
di p
reav
viso.
BTICINO - Livinglight Qua-dre.VIMAR - Arché
BTICINO - Livinglight Ton-de.GEWISS - Chorus.
GEWISS - System.BTICINO - Axolute, Luna.

E
E
D
Pag.
7 -
Man
uale
FB0
1002
-IT -
ver.
1 - 1
1/20
17 -
© C
AME
S.p.
A. -
I con
tenu
ti de
l man
uale
son
o da
rite
ners
i sus
cetti
bili d
i mod
ifica
in q
ualsi
asi m
omen
to s
enza
obb
ligo
di p
reav
viso.
AVE - Serie 44. BTICINO - Livinglight AIR.
VIMAR - Eikon Evo.
BTICINO - Axolute Air.

L
1
L
1
A
B
C
D
Pag.
8 -
Man
uale
FB0
1002
-IT -
ver.
1 - 1
1/20
17 -
© C
AME
S.p.
A. -
I con
tenu
ti de
l man
uale
son
o da
rite
ners
i sus
cetti
bili d
i mod
ifica
in q
ualsi
asi m
omen
to s
enza
obb
ligo
di p
reav
viso.
Installare l’apparecchio in posizione idonea a rilevare correttamente la temperatura dell’ambiente, possibilmente in una parete interna, evitando l’installazione in nicchie, dietro a porte, a tende o vicino a sorgenti di calore.
Estrarre la linguetta L e quindi il corpo dell’apparecchio dal telaio fino all’arresto B.
Premere sulle alette laterali in corri-spondenza del simbolo per estrarre completamente il corpo dell'apparecchio dal telaio C.
Inserire n. 3 pile alcaline LR03 tipo mini stilo AAA da 1,5V nell’apposita sede rispettando le polarità indicate sul fondo dell’alloggiamento D.

NCNA C12
U1
LN
TH350
NCNA C12
LN
TH350
U2
M
E
F
G
1 2 NA NC1 2
Pag.
9 -
Man
uale
FB0
1002
-IT -
ver.
1 - 1
1/20
17 -
© C
AME
S.p.
A. -
I con
tenu
ti de
l man
uale
son
o da
rite
ners
i sus
cetti
bili d
i mod
ifica
in q
ualsi
asi m
omen
to s
enza
obb
ligo
di p
reav
viso.
I collegamenti vanno effettuati in funzione del tipo di apparecchiatura comandata dal cronotermostato.
LEGENDAConduttori di alimentazione da reteN = neutroL = fase
Contatti del reléC = comuneNA = contatto normalmente apertoNC = contatto normalmente chiuso
CarichiU1 = bruciatore, pompa di circolazione, elettrovalvola, ecc.U2 = valvola motorizzata
Ingressi per comando remoto1 ingresso2 ingresso
NOTA. Per il collegamento fare riferimento alla documentazione tecnica del dispositivo da comandare.
Collegamenti elettrici
Collegamentoper attivazioneda remoto
Collegamentoper contattomagnetico

H
Pag.
10
- Man
uale
FB0
1002
-IT -
ver.
1 - 1
1/20
17 -
© C
AME
S.p.
A. -
I con
tenu
ti de
l man
uale
son
o da
rite
ners
i sus
cetti
bili d
i mod
ifica
in q
ualsi
asi m
omen
to s
enza
obb
ligo
di p
reav
viso.
Una volta assemblati telaio e controtelaio scelti ed avere eseguito i collegamenti elettrici, assemblare il cronotermostato come mostrato in figura H.
Installazione

⑰
① ② ③ ④ ⑤ ⑥ ⑦ ⑧ ⑨
T1T2T3
⑩
⑪⑫⑮ ⑭ ⑬⑪
⑯
Pag.
11
- Man
uale
FB0
1002
-IT -
ver.
1 - 1
1/20
17 -
© C
AME
S.p.
A. -
I con
tenu
ti de
l man
uale
son
o da
rite
ners
i sus
cetti
bili d
i mod
ifica
in q
ualsi
asi m
omen
to s
enza
obb
ligo
di p
reav
viso.
① Stato di carica della batteria.
② Zona termica esclusa dal controllo.
③ Zona termica in modalità Jolly.
④ Ritardo programmato.
⑤ Zona termica in modalità Manuale.
⑥ Attivazione da remoto.
⑦ Protezione antigelo attiva.
⑧Modalità raffrescamento attiva. Icona animata = raffrescamento in corso.
⑨Modalità riscaldamento attiva.Icona animata = riscaldamento in corso.
⑩ Temperatura rilevata.
⑪ Pulsanti per la variazione dei valori.
⑫Pulsante per la selezione della modalità MANUALE/AUTOMATICO.
⑬ Linguetta per l'estrazione del cronotermostato dal telaio.
⑭ Sensore di temperatura.
⑮Pulsante per l'attivazione del programma JOLLY o MAUNALE TEMPORIZZATO.
⑯ Diagramma ore/temperature T1, T2, T3
⑰Giorni della settimana con evidenziato il giorno visualizzato sul diagramma
Descrizione dispositivo
Descrizione delle icone sul display e funzione dei pulsanti frontali

⑱ ⑲ ⑳ ㉑ ㉓ ㉔㉒
Pag.
12
- Man
uale
FB0
1002
-IT -
ver.
1 - 1
1/20
17 -
© C
AME
S.p.
A. -
I con
tenu
ti de
l man
uale
son
o da
rite
ners
i sus
cetti
bili d
i mod
ifica
in q
ualsi
asi m
omen
to s
enza
obb
ligo
di p
reav
viso.
ATTENZIONE!La prima pressione di un qualsiasi pulsante attiva SOLO l'illuminazione del display il quale rimane acceso per 15 secondi dopo l’ultima pressione.La pulizia del dispositivo va effettuata usando solamente un panno morbido inumidito con acqua.
⑱ Pulsante di reset.
⑲ Impostazione dell’orologio e del tempo di ritardo nell’accensione o spegnimento.
⑳ Programmazione della temperatura delle 3 fasce T1, T2, T3.Impostazione parametri di funzionamento.
㉑ Selezione della modalità di funzionamento del dispositivo.RAFFRESCAMENTO - RISCALDAMENTO - OFF
㉒ Pulsanti per la selezione dell'ora desiderata sul grafico della programmazione giornaliera.
㉓ Pulsante per la selezione del giorno vedi ⑰.
㉔ Pulsante per la copia della programmazione giornaliera.
Funzione dei pulsanti interniPer accedere ai pulsanti di comando interni estrarre la linguetta ⑬ e quindi il corpo dell’apparecchio dal telaio.

A
B
C
D
Pag.
13
- Man
uale
FB0
1002
-IT -
ver.
1 - 1
1/20
17 -
© C
AME
S.p.
A. -
I con
tenu
ti de
l man
uale
son
o da
rite
ners
i sus
cetti
bili d
i mod
ifica
in q
ualsi
asi m
omen
to s
enza
obb
ligo
di p
reav
viso.
Estrarre il corpo dell’apparecchio.
Premere e mantenere premuto il pulsante A.
Le cifre dei minuti lampeggiano.
Programmazione e uso del dispositivo
Impostazione dell’orologio
Usare i pulsanti per imposta-re il valore esatto dei minuti B.
Premere il pulsante C.
Le cifre delle ore lampeggiano.
Usare i pulsanti per imposta-re l’ora esatta D.

F
G
E
Pag.
14
- Man
uale
FB0
1002
-IT -
ver.
1 - 1
1/20
17 -
© C
AME
S.p.
A. -
I con
tenu
ti de
l man
uale
son
o da
rite
ners
i sus
cetti
bili d
i mod
ifica
in q
ualsi
asi m
omen
to s
enza
obb
ligo
di p
reav
viso.
Premere il pulsante E.
L’indicatore dei giorni della setti-mana lampeggia.
Usare i pulsanti per imposta-re il giorno in corso F.
Premere il pulsante per termi-nare la procedura di impostazione ora e giorno G.
I due punti fra ore e minuti lam-peggeranno confermando la conclusione dell’operazione.
Nota. Dopo 15 secondi di inattività, l’apparecchio esce autonomamente dalla procedura memorizzando gli ultimi dati impostati.Nota. Ad ogni pressione sui pulsanti le cifre sul display diminuiscono o aumentano di una unità; mantenendoli premuti, le cifre sul display si susseguono lentamente per i primi 5 secondi, poi più velocemente.

A
B
C
Pag.
15
- Man
uale
FB0
1002
-IT -
ver.
1 - 1
1/20
17 -
© C
AME
S.p.
A. -
I con
tenu
ti de
l man
uale
son
o da
rite
ners
i sus
cetti
bili d
i mod
ifica
in q
ualsi
asi m
omen
to s
enza
obb
ligo
di p
reav
viso.
Modalità AntigeloDalla modalità OFF , premere su uno dei pulsanti .L'accensione contemporanea delle icone e conferma l'attivazione della modalità an-tigelo C.
Premere il pulsante A per scegliere la modalità di funziona-mento della zona termica.
Riscaldamento.
Raffrescamento.
Off.
Antigelo.
Impostazione della modalità di funzionamento
Per un utilizzo più agevole del dispositivo sono stati pre-memorizzato due programmi per il funzionamento AUTOMATICO; uno per il riscaldamento ed uno per il raffrescamento dove i livelli di temperatura fissati sono:
Riscaldamento RaffrescamentoFascia T1 16 °CFascia T2 18 °CFascia T3 20 °C
Fascia T1 24 °CFascia T2 26 °CFascia T3 28 °C
Se i programmi pre-memorizzati corrispondono alle Vostre esigenze, il dispositivo non necessita di ulteriori istruzioni ed è pronto per funzionare immediatamente e puntualmente.
Modalità OFFL’accensione dell’icona con-ferma l’esclusione della zona ter-mica dal controllo dell’impianto.
Per 5 secondi scompare l’indi-cazione della temperatura am-biente B.

E
D
A
AB
Pag.
16
- Man
uale
FB0
1002
-IT -
ver.
1 - 1
1/20
17 -
© C
AME
S.p.
A. -
I con
tenu
ti de
l man
uale
son
o da
rite
ners
i sus
cetti
bili d
i mod
ifica
in q
ualsi
asi m
omen
to s
enza
obb
ligo
di p
reav
viso.
I pulsanti permettono di impostare la temperatura am-bientale minima tollerata per la zona termica.
Nota. Temperatura antigelo pro-grammabile minima 3.0°C - mas-sima 16.0°C.
Premere nuovamente il pulsante per ripristinare il programma
di riscaldamento/raffresacmento E.
Estrarre il corpo dell’apparecchio.
Tramite il pulsante 1÷7 portare l’indicatore del giorno in posizione 1 (Lunedì) A.
Lampeggia la parentesi relativa al giorno prescelto.
Personalizzazione del programma giornaliero delle temperature
Tramite i pulsanti 0÷23 spo-stare l’indicatore lampeggiante alle ore 0 sul grafico del program-ma giornaliero B.

C
D
E
F
Pag.
17
- Man
uale
FB0
1002
-IT -
ver.
1 - 1
1/20
17 -
© C
AME
S.p.
A. -
I con
tenu
ti de
l man
uale
son
o da
rite
ners
i sus
cetti
bili d
i mod
ifica
in q
ualsi
asi m
omen
to s
enza
obb
ligo
di p
reav
viso.
Mediante i pulsanti C selezionare la fascia di tempera-tura desiderata; premere quindi il pulsante 0÷23 per passare all’ora successiva e selezionare ugualmente la temperatura de-siderata D.
Continuare allo stesso modo sino ad arrivare alle ore 23.
Per la giornata di lunedì, la pro-grammazione è terminata.
Per copiare il programma impo-stato in altri giorni della settima-na, premere il pulsante C E.
Continuando a premere il pulsan-te C programma viene incollato sui i giorni via via indicati dal segmento lampeggiante.
Per programmare diversamente i giorni successivi, far avanzare il giorno tramite il pulsante 1÷7 e ripetere la procedura preceden-temente illustrata F.
Nota. In fase di programmazione, l’orologio segna l’ora indicata dal segmento lampeg-giante, i punti fra ore e minuti non lampeggiano e l’indicazione della temperatura assume il valore del livello selezionato.

G
A
B
Pag.
18
- Man
uale
FB0
1002
-IT -
ver.
1 - 1
1/20
17 -
© C
AME
S.p.
A. -
I con
tenu
ti de
l man
uale
son
o da
rite
ners
i sus
cetti
bili d
i mod
ifica
in q
ualsi
asi m
omen
to s
enza
obb
ligo
di p
reav
viso.
Estrarre il corpo dell’apparecchio.
Impostare la modalità di funzio-namento AUTOMATICO. Premere il pulsante 1÷7 A per selezionare il giorno della setti-mana nel quale si vuole inserire il ritardo.
Premere il pulsante 0÷23 B per selezionare l'ora del giorno scelto nella quale si vuole inserire il ritardo.
Premere il pulsante G per terminare la programmazione.
La procedura termina automa-ticamente dopo 10 secondi di inattività.
Aggiungere un ritardo ad una attivazione programmata
La funzione è stata pensata per poter ritardare l'attivazione programmata per una data ora. Se si desidera, per esempio, avere una temperatura di comfort alle ore 7:00 è possibile fare in modo che l’impianto si attivi alle 6:30. Per raggiungere questo obiettivo program-mare per le ore 6:00 la temperatura desiderata ed impostare un ritardo di 30 minuti; il dispositivo azionerà l'impianto alle 6:30 . L’indicazione del ritardo inserito viene visualizzata sul display nel corso dell'ora nella quale il ritardo è stato programmato.
Nota. Il tempo di ritardo può essere programmato per più ore nella stessa giornata e per più giorni della settimana.

C
A
B
C
Pag.
19
- Man
uale
FB0
1002
-IT -
ver.
1 - 1
1/20
17 -
© C
AME
S.p.
A. -
I con
tenu
ti de
l man
uale
son
o da
rite
ners
i sus
cetti
bili d
i mod
ifica
in q
ualsi
asi m
omen
to s
enza
obb
ligo
di p
reav
viso.
Premere ripetutamente il pulsante C per variare ciclicamente il
tempo di ritardo inserito tra 15, 30, 45, 0 minuti.
La procedura termina automa-ticamente dopo 10 secondi di inattività.
Nota. L'impostazione viene sal-vata nella memoria permanente del dispositivo.
Usare i pulsanti per imposta-re il valore desiderato per T1 C.
Personalizzazione dei valori di temperatura T1, T2, T3
Estrarre il corpo dell’apparecchio.
Impostare la modalità di funzio-namento AUTOMATICO.
Premere il pulsante per scegliere se si vogliono impostare i valori T1, T2, T3 per il grafico riscaldamento ( ) o per il grafico raffrescamento ( ) A.
Premere il pulsante P.
Viene visualizzato il valore di temperatura assegnato alla fascia T1 B.

D
A
Pag.
20
- Man
uale
FB0
1002
-IT -
ver.
1 - 1
1/20
17 -
© C
AME
S.p.
A. -
I con
tenu
ti de
l man
uale
son
o da
rite
ners
i sus
cetti
bili d
i mod
ifica
in q
ualsi
asi m
omen
to s
enza
obb
ligo
di p
reav
viso.
La ricomparsa dell’intero grafico del programma giornaliero sul display conferma la conclusione della programmazione delle fascie di temperatura.
In ogni caso dopo 10 secondi dall’ultima manovra l’apparecchio esce dalla procedura prendendo per validi i dati impostati sino a quel momento.
Reinserire il corpo dell’apparecchio.
Nota. Il valore che si può assegnare ad ogni fascia di temperatura è limitato dai valori della fascia immediatamente superiore e inferiore.Se, per esempio, la fascia T3 è regolata a 20 °C e la fascia T1 è regolata a 16 °C, il valore della fascia T2 potrà variare fra 16,1 °C e 19,9 °C; se T2 viene regolata a 21 °C la T3 viene portata automaticamente a 21,1 °C.
Estrarre il corpo dell’apparecchio.
Impostare la modalità di funzio-namento AUTOMATICO.
Premere il pulsante A.
La comparsa dell'icona con-ferma che il programma è stato attivato.
Uso del programma Jolly
L’apparecchio dispone di un programma JOLLY (da usare, per esempio, durante feste infrasettimanali, ferie, ecc.), che può essere avviato in qualsiasi momento del giorno in corso e rimanere attivo fino alle 24:00, oppure può essere prenotato per uno qualsiasi dei giorni della settimana.
Le impostazioni di fabbrica prevedono che il programma jolly abbia lo stesso profilo di quello previsto per la domenica (7), ma può essere personalizzato.
Per attivare questo programma nel giorno corrente procedere come segue:
Premere il pulsante P per confer-mare il valore della temperatura visualizzata sul display e per passare al livello di temperatura successivo D.
Procedere come descritto per impostare tutte le fasce di tem-peratura come desiderato.

B
C
D
Pag.
21
- Man
uale
FB0
1002
-IT -
ver.
1 - 1
1/20
17 -
© C
AME
S.p.
A. -
I con
tenu
ti de
l man
uale
son
o da
rite
ners
i sus
cetti
bili d
i mod
ifica
in q
ualsi
asi m
omen
to s
enza
obb
ligo
di p
reav
viso.
Il programma può essere personalizzato (vedi "Personalizzazione del programma gior-naliero delle temperature" a pagina 16). Allo scadere della mezzanotte il dispositivo torna a funzionare in modalità di funzionamento AUTOMATICO.
Per uscire immediatamente dal programma JOLLY e riportare l’apparecchio in funziona-mento AUTOMATICO premere nuovamente il pulsante oppure .
Prenotare il programma Jolly per un giorno stabilito
Premere il pulsante C.
La comparsa dell'icona sul display, conferma l’assegnazione del programma per il giorno scel-to. Alle ore 0.00 del giorno scelto il programma verrà eseguito.
Il programma può essere perso-nalizzato (vedi "Personalizzazione del programma giornaliero delle temperature" a pagina 16).
Premere il pulsante o attendere 10 secondi per riportare l’appa-recchio in modalità di funziona-mento AUTOMATICO.
Cancellare la prenotazione del programma Jolly
Usando il pulsante 1÷7, riportare l’indicatore in corrispondenza del giorno per il quale è stato prenotato il programma jolly; Premere il pulsante ; la prenotazione è annullata.
Premere il pulsante o attendere 10 secondi per riportare l’apparecchio in modalità di funzionamento AUTOMATICO.
Estrarre il corpo dell’apparecchio.
Impostare la modalità di funzio-namento AUTOMATICO.
Mediante il pulsante 1÷7 portare l’indicatore in corrispondenza del giorno prescelto per l'attiva-zione B.

A
B
A
Pag.
22
- Man
uale
FB0
1002
-IT -
ver.
1 - 1
1/20
17 -
© C
AME
S.p.
A. -
I con
tenu
ti de
l man
uale
son
o da
rite
ners
i sus
cetti
bili d
i mod
ifica
in q
ualsi
asi m
omen
to s
enza
obb
ligo
di p
reav
viso.
Nel caso si desideri disattivare momentaneamente il controllo automatico della temperatura, è possibile passare al funziona-mento MANUALE premendo il pulsante A.
Modalità di funzionamento manuale
Sul display, oltre all'ora corrente viene mostrata il setup di tem-peratura manuale preimpostato (20°C).
Usare i pulsanti per imposta-re il valore desiderato B.
La temperatura impostata verrà mantenuta costante fino all'inserimento di nuove rego-lazioni o alla selezione di un diverso modo di funzionamento.Premere nuovamente il pulsante per tornare al funzionamento AUTOMATICO.
Modalità di funzionamento manuale temporizzato
Nel caso si desideri mantenere una temperatura fissa per alcune ore o alcuni giorni (ad esempio per mantenere più a lungo una temperatura confortevole durante visite non previste o una temperatura d’economia durante assenze prolungate) è possibile attivare il programma MANUALE TEMPORIZZATO.
Attivare la modalità di funziona-mento MANUALE.
Usare i pulsanti per impo-stare il valore di temperatura desiderato A.

B
C
A
Pag.
23
- Man
uale
FB0
1002
-IT -
ver.
1 - 1
1/20
17 -
© C
AME
S.p.
A. -
I con
tenu
ti de
l man
uale
son
o da
rite
ners
i sus
cetti
bili d
i mod
ifica
in q
ualsi
asi m
omen
to s
enza
obb
ligo
di p
reav
viso.
dispositivo torna a funzionare nella modalità precedente all'attivazione del programma manuale a tempo.
Per tornate al funzionamento AUTOMATICO prima dello scadere del tempo programmato premere il pulsante .
Premere nuovamente il pulsante ed utilizzare i pulsanti per
impostare i giorni di attivazione desiderati C.
Il programma così composto si attiva immediatamente e rimane attivo fino all'esaurimento del tempo impostato; in seguito il
Premere il pulsante ed utiliz-zare i pulsanti per impostare le ore di attivazione desiderate B.
Modificare la calibrazione della sonda di rilevamento della temperaturaSe la collocazione del dispositivo non consente una corretta rilevazione della temperatura è possibile modificare la temperatura rilevata di ±3 °C con incrementi di un decimo di grado.
Estrarre il corpo dell’apparecchio.
Attivare la modalità di funziona-mento MANUALE.
Premere il pulsante P A.

B
A
Pag.
24
- Man
uale
FB0
1002
-IT -
ver.
1 - 1
1/20
17 -
© C
AME
S.p.
A. -
I con
tenu
ti de
l man
uale
son
o da
rite
ners
i sus
cetti
bili d
i mod
ifica
in q
ualsi
asi m
omen
to s
enza
obb
ligo
di p
reav
viso.
Utilizzare i pulsanti per impostare il valore di correzione desiderato.
Nota. L'impostazione viene sal-vata nella memoria permanente del dispositivo.
Abilitare / disabilitare l'anticipo automaticoQuesta funzione (attiva solo in modalòità riscaldamento) permette al dispositivo di auto-adattare l'istante di accensione dell'impianto per avere la temperatura desiderata all’ora impostata. L'anticipo viene calcolato in funzione della differenza tra la temperatura misurata e quella impostata, potendo arrivare sino ad un massimo di tre ore di anticipo rispetto all’ora in cui è stata impostata la temperatura da raggiungere.
Esempio di funzionamentoSe il dispositivo viene programmato per avere una temperatura di 20 °C alle ore 7.00 e l'anticipo automatico non è attivo, alle ore 7.00 l'impianto verrà acceso, senza comunque garantire 20 °C alle ore 7.00.Se l'anticipo automatico è attivo il cronotermostato anticiperà l'accensione dell'impianto per cercare di ottenere 20 °C alle ore 7.00; grazie al meccanismo di auto-apprendimento, il cronotermostato memorizza i parametri termici dell’ambiente al fine di essere più preciso, nei giorni successivi, nel raggiungimento dell'obbiettivo termico impostato.
Estrarre il corpo dell’apparecchio.
Attivare la modalità di funziona-mento MANUALE.
Premere il pulsante P fino alla comparsa sul display dell'indica-zione A.

A
B
ON ON
OFF
1 h
B
Pag.
25
- Man
uale
FB0
1002
-IT -
ver.
1 - 1
1/20
17 -
© C
AME
S.p.
A. -
I con
tenu
ti de
l man
uale
son
o da
rite
ners
i sus
cetti
bili d
i mod
ifica
in q
ualsi
asi m
omen
to s
enza
obb
ligo
di p
reav
viso.
Impostare il tipo di algoritmo di gestione termicaIl dispositivo permette di scegliere il tipo di algoritmo da applicare per la gestione dell'im-pianto tra: differenziale e proporzionale Integrale.
Attivazione e configurazione dell'algoritmo differenzialeQuesto sistema di regolazione è consigliato in impianti partico-larmente difficili da controllare con variazioni estreme della temperatura esterna.
Estrarre il corpo dell’apparecchio.
Attivare la modalità di funziona-mento MANUALE.
Premere il pulsante P fino alla comparsa sul display dell'indica-zione A.
Usare i pulsanti per attivare/disattivare l'algoritmo differen-ziale B.
= Attivo.
= Non attivo.
Tem
pera
tura
Set-point + differenziale
Set-point – differenziale
Set-point
Tempo
Usare i pulsanti per attivare/disattivare l'anticipo automatico B.
= Non Attivo. = Attivo.
Nota. L'impostazione viene sal-vata nella memoria permanente del dispositivo.

C
D
E
Pag.
26
- Man
uale
FB0
1002
-IT -
ver.
1 - 1
1/20
17 -
© C
AME
S.p.
A. -
I con
tenu
ti de
l man
uale
son
o da
rite
ners
i sus
cetti
bili d
i mod
ifica
in q
ualsi
asi m
omen
to s
enza
obb
ligo
di p
reav
viso.
C o n d i f f e r e n z i a l e a t t i v o ( ) , premendo i l pulsante P sullo schermo si può leggere il valore del differenziale termico impostato C.
Usare i pulsanti per impo-stare il valore differenziale ad un valore compreso tra 0 °C e 0,9 °C D.
Impostando il differenziale a 0 °C, durante il funzionamento viene rispettato un tempo minimo di accensione/spegnimento pari ad 1 minuto indipendentemente dalla temperatura rilevata in ambiente.
Premere il pulsante P per uscire dalla programmazione.
Attivazione e configurazione dell'algoritmo proporzionale integraleQuesto algoritmo permette al cronotermostato di ridurre i cicli di accensione della caldaia man mano che la temperatura ambiente si avvicina alla temperatura impostata ottenendo così una notevole riduzione dei consumi pur mantenendo un grado di comfort ottimale.Sono disponibili tre programmi preimpostati adatti alle diverse tipologie di impianti (P1, P2 e P3) oppure un programma completamente manuale (P4).
Con differenziale non attivo ( ) B, premendo il pulsante P si accede alla sezione nella quale è possibile selezionare uno dei programmi proporzionali integrali disponibili E.

F
G
H
I
Pag.
27
- Man
uale
FB0
1002
-IT -
ver.
1 - 1
1/20
17 -
© C
AME
S.p.
A. -
I con
tenu
ti de
l man
uale
son
o da
rite
ners
i sus
cetti
bili d
i mod
ifica
in q
ualsi
asi m
omen
to s
enza
obb
ligo
di p
reav
viso.
Usare i pulsanti per scegliere il programma desiderato tra: P1, P2, P3 F (vedi grafico e tabella L); premere il pulsante P per confermare la propria scelta e terminare la programmazione.
Il primo parametro riguarda la durata dei cicli di accensione G.
Usare i pulsanti per scegliere la durata di ciclo tra 5, 10, 15, 20, 25, 30, 35 o 40 minuti H.
Premere il pulsante P I per confermare il tempo di ciclo im-postato e passare alla regolazione del tempo minimo di ON.
Usare i pulsanti per scegliere il tempo minimo di ON tra 1 e 5 minuti.
Se si è scelto il programma P4 la pressione del pulsante P permette di accedere alla programmazione dei singoli parametri che compongono il programma P4 manuale

J
K
ON ON
OFF
1 h
Pag.
28
- Man
uale
FB0
1002
-IT -
ver.
1 - 1
1/20
17 -
© C
AME
S.p.
A. -
I con
tenu
ti de
l man
uale
son
o da
rite
ners
i sus
cetti
bili d
i mod
ifica
in q
ualsi
asi m
omen
to s
enza
obb
ligo
di p
reav
viso.
Premere il pulsante P J per confermare il tempo minimo di ON impostato e passare alla regola-zione della banda proporzionale.
Usare i pulsanti per regolare il valore della banda proporzio-nale in un valore compreso fra 1 e 3 °C.
Il grafico e la tabella K possono aiutare a decidere il tipo di programma o il valore dei parametri da inserire.
Premere il pulsante P per uscire dalla programmazione.
Nota. Tutti i parametri relativi alla configurazione del il tipo di algoritmo di gestione termica, vengono salvati nella memoria permanente del dispositivo.
Tem
pera
tura
Tempo
Set-point
Prog. Durata ciclo (minuti)
Tempo minimo di ON (minuti)
Banda Proporzionale Tipo di impianto
P1 10 1 1,5 °C Base per bruciatore a gas, ventilconvetto-ri, valvole di zona, termosifoni in alluminio
P2 5 1 1,5 °C Termosifoni elettrici
P3 20 2 1,5 °C Impianti radianti o a pavimento, raffre-scamento
P4 da 5 a 40 da 1 a 5 da 1 °C a 3 °C
Pag.
29
- Man
uale
FB0
1002
-IT -
ver.
1 - 1
1/20
17 -
© C
AME
S.p.
A. -
I con
tenu
ti de
l man
uale
son
o da
rite
ners
i sus
cetti
bili d
i mod
ifica
in q
ualsi
asi m
omen
to s
enza
obb
ligo
di p
reav
viso.
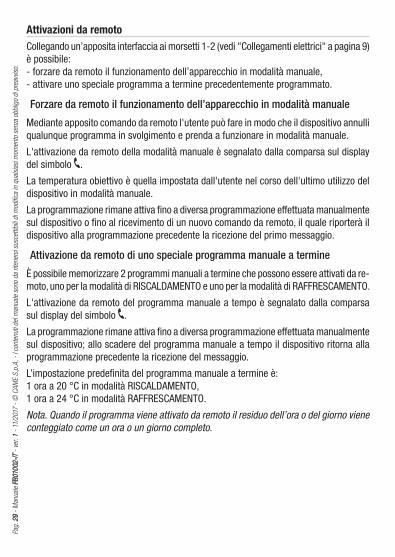
Attivazioni da remotoCollegando un’apposita interfaccia ai morsetti 1-2 (vedi "Collegamenti elettrici" a pagina 9) è possibile:- forzare da remoto il funzionamento dell’apparecchio in modalità manuale,- attivare uno speciale programma a termine precedentemente programmato.
Forzare da remoto il funzionamento dell’apparecchio in modalità manuale
Mediante apposito comando da remoto l'utente può fare in modo che il dispositivo annulli qualunque programma in svolgimento e prenda a funzionare in modalità manuale.
L'attivazione da remoto della modalità manuale è segnalato dalla comparsa sul display del simbolo .
La temperatura obiettivo è quella impostata dall'utente nel corso dell'ultimo utilizzo del dispositivo in modalità manuale.
La programmazione rimane attiva fino a diversa programmazione effettuata manualmente sul dispositivo o fino al ricevimento di un nuovo comando da remoto, il quale riporterà il dispositivo alla programmazione precedente la ricezione del primo messaggio.
Attivazione da remoto di uno speciale programma manuale a termine
È possibile memorizzare 2 programmi manuali a termine che possono essere attivati da re-moto, uno per la modalità di RISCALDAMENTO e uno per la modalità di RAFFRESCAMENTO.
L'attivazione da remoto del programma manuale a tempo è segnalato dalla comparsa sul display del simbolo .
La programmazione rimane attiva fino a diversa programmazione effettuata manualmente sul dispositivo; allo scadere del programma manuale a tempo il dispositivo ritorna alla programmazione precedente la ricezione del messaggio.
L’impostazione predefinita del programma manuale a termine è:1 ora a 20 °C in modalità RISCALDAMENTO,1 ora a 24 °C in modalità RAFFRESCAMENTO.
Nota. Quando il programma viene attivato da remoto il residuo dell’ora o del giorno viene conteggiato come un ora o un giorno completo.

B
C
D
A
Pag.
30
- Man
uale
FB0
1002
-IT -
ver.
1 - 1
1/20
17 -
© C
AME
S.p.
A. -
I con
tenu
ti de
l man
uale
son
o da
rite
ners
i sus
cetti
bili d
i mod
ifica
in q
ualsi
asi m
omen
to s
enza
obb
ligo
di p
reav
viso.
Generare un programma manuale a termine per attivazione da remotoEstrarre il corpo dell’apparecchio. Attivare la modalità di funzionamento MANUALE.Selezionare la modalità di funzionamento per la quale si sta creando il programma (RISCALDAMENTO o RAFFRESCAMENTO).
Usare i pulsanti per regolare il valore di temperatura deside-rato A.
Premere il pulsante B.
Usare i pulsanti per imposta-re il numero di ore di attivazione.
Premere il pulsante C.
Usare i pulsanti per im-postare il numero di giorni di attivazione (da 1 a 99).
Premere il pulsante D per salvare il programma impostato come programma attivabile da remoto.

A
C
B
Pag.
31
- Man
uale
FB0
1002
-IT -
ver.
1 - 1
1/20
17 -
© C
AME
S.p.
A. -
I con
tenu
ti de
l man
uale
son
o da
rite
ners
i sus
cetti
bili d
i mod
ifica
in q
ualsi
asi m
omen
to s
enza
obb
ligo
di p
reav
viso.
Conteggio ore di funzionamento
Reset dispositivo
Estrarre il corpo dell’apparecchio.
Attivare la modalità di funziona-mento MANUALE A.
Anomalie di funzionamento, in-terventi e altre ragioni tecni-che possono richiedere il reset dell’apparecchio.
Estrarre il corpo dell’apparecchio.
Premere il pulsante R C.
Premere il pulsante C B.
Sul display compare, per 5 se-condi, il tempo di funzionamento.
Per azzerare il contatore, premere il pulsante mentre il dato è visibile.
Questa operazione NON comporta la cancellazione di eventuali programmi personalizzati che saranno ripristinati, assieme agli altri dati, al riavvio dell’apparecchio (vedi tabella).
Ripristino impostazioni di fabbricaPer ripristinare tutte le impostazioni di fabbrica premere contemporaneamente i pulsanti
+ + 1÷7 e successivamente il pulsante R.

CAME S.p.A.Via Martiri Della Libertà, 15 31030 Dosson di Casier - Treviso - Italytel. (+39) 0422 4940 - fax. (+39) 0422 4941
Pag.
32
- Man
uale
FB01
002-IT
- ve
r. 1
- 11/
2017
- ©
CAM
E S.
p.A.
- I c
onte
nuti
del m
anua
le s
ono
da ri
tene
rsi s
usce
ttibi
li di
mod
ifica
in q
uals
iasi
mom
ento
sen
za o
bblig
o di
pre
avvis
o.
Sostituzione delle pile
L’indicazione lampeggiante sul display indica che le pile devono essere sostituite entro 1 mese circa. Quando sul display compare l’indicazione insieme al simbolo
, l’apparecchio non è più operativo la zona termica non è più controllata. Una volta rimosse le pile esauste si hanno a disposizione 2 minuti per inserire le nuove pile (3 pile alcaline LR03 tipo mini stilo AAA da 1,5V); superato il tempo limite il dispositivo verrà resettato alle impostazioni di fabbrica.
ATTENZIONE!.La mancata sostituzione in tempo utile delle batterie può causare danni al sistema di riscaldamento (non è più garantita la protezione antigelo).L’errato posizionamento delle pile può danneggiare l’apparecchio. L’utilizzo di pile esaurite può causare anomalie di funzionamento.
Caratteristiche tecniche
- Apparecchio per uso domestico.- Dispositivo elettronico a montaggio
indipendente.- Display grafico LCD retroilluminato.- Alimentazione: 3 pile mini stilo alcaline
LR03 tipo AAA da 1,5V.- Autonomia: maggiore di 1 anno.- Caratteristiche del relè: tensione mas-
sima 250V, corrente massima 5A con carico resistivo, 2A con carico induttivo.
- Tipo d’azione: 1B-U.- Contatti disponibili: 1 contatto di scam-
bio NA-NC.
- Intervallo di rilevamento della tempera-tura ambiente: 15 secondi.
- Risoluzione di lettura: 0,1 °C.- Precisione: ≤ ±0,3 °C.- Software di classe A.- Grado d’inquinamento: 2.- Tensione impulsiva: 4 kV.- Temperatura massima della testa di
comando: 40 °C.- Grado di protezione: IP30.- Isolamento elettrico classe II.- Temperatura di funzionamento: da 0 °C
a +40 °C.

Programmable thermostat
TH/350INSTALLATION AND USE MANUAL EN English
FB01002-EN

Page
2 -
Man
ual F
B010
02-E
N - v
er. 1
- 11
/201
7 - ©
CAM
E S.
p.A.
- Th
e co
nten
ts o
f thi
s m
anua
l are
sub
ject
to c
hang
e at
any
tim
e w
ithou
t prio
r not
ice.
General warnings• Read the instructions carefully before starting installation and proceed as specified by
the manufacturer.• Installation, programming, commissioning and maintenance of the product must only
be performed by qualified technicians who have been properly trained in compliance with current standards, including health and safety and packaging disposal regulations.
• The installer must check that the information for users, where applicable, is present and handed over.
• Before performing any cleaning or maintenance operation, disconnect the power supply to the devices.
• The units must only be used for the purpose for which they were explicitly designed.• The manufacturer declines all liability for any damage as a result of improper, incorrect
or unreasonable use.• Caution: risk of explosion if the batteries are replaced with others of an incorrect type.• Once flat, the batteries must not be thrown away with household waste but separated
and recycled correctly.
DISPOSAL - Make sure the packaging is disposed of according to the regulations in force in the country where the product is used.Dispose of the device properly at the end of its life cycle. The equipment must be disposed of in compliance with the regulations in force, recycling its component parts wherever possible. Components that qualify as recyclable waste bear the relevant symbol and the material’s abbreviation.Regulatory references - The product complies with the applicable reference directives.

A B C D E a b
A B C D E a b
Page
3 -
Man
ual F
B010
02-E
N - v
er. 1
- 11
/201
7 - ©
CAM
E S.
p.A.
- Th
e co
nten
ts o
f thi
s m
anua
l are
sub
ject
to c
hang
e at
any
tim
e w
ithou
t prio
r not
ice.
Installation
Package contents
Main body Frame
Subframes
Hole cover adapter Fixing screws
The subframes and appropriately paired hole cover adapters allow the device to be adapted to most wiring systems available, following the instructions on the following pages.
N.B.The System, Playbus, Playbus Young, Chorus brands are owned by GEWISS S.p.A.The Light, Light Tech, Living International, Axolute, Luna, Livinglight Quadre, Matix, Livinglight Tonde, Livinglight AIR, Axolute Air brands are owned by BTICINO S.p.A.The Plana, Eikon, Idea, Idea Rondò, Arché, Eikon Evo brands are owned by VIMAR S.p.A.The Vela Quadra, Vela Tonda, Serie Cross brands are owned by LEGRAND S.p.A.The Banquise, Sistema 45, Serie 44 brands are owned by AVE S.p.A.The Elos brand is owned by ABB S.p.A.
N.B. Covers and hole cover adapters in anthracite grey and aluminium grey are available as optional components.

A
A
a
a
A
b
b
Page
4 -
Man
ual F
B010
02-E
N - v
er. 1
- 11
/201
7 - ©
CAM
E S.
p.A.
- Th
e co
nten
ts o
f thi
s m
anua
l are
sub
ject
to c
hang
e at
any
tim
e w
ithou
t prio
r not
ice.
How to pair/adapt the subframes to the wiring systems
GEWISS - Playbus, Playbus Young.
BTICINO - Matix.
BTICINO - Light, Light Tech, Living International.
VIMAR - Plana, Eikon.
LEGRAND - Vela Quadra, Vela Tonda, Serie Cross.

B
a
a
B
a
a
B
a
a
Page
5 -
Man
ual F
B010
02-E
N - v
er. 1
- 11
/201
7 - ©
CAM
E S.
p.A.
- Th
e co
nten
ts o
f thi
s m
anua
l are
sub
ject
to c
hang
e at
any
tim
e w
ithou
t prio
r not
ice.
VIMAR - Idea, Idea Rondò.
ABB - Elos.
AVE - Banquise, Sistema 45.

C
C
B
Page
6 -
Man
ual F
B010
02-E
N - v
er. 1
- 11
/201
7 - ©
CAM
E S.
p.A.
- Th
e co
nten
ts o
f thi
s m
anua
l are
sub
ject
to c
hang
e at
any
tim
e w
ithou
t prio
r not
ice.
BTICINO - Livinglight Qua-dre.VIMAR - Arché
BTICINO - Livinglight Ton-de.GEWISS - Chorus.
GEWISS - System.BTICINO - Axolute, Luna.

E
E
D
Page
7 -
Man
ual F
B010
02-E
N - v
er. 1
- 11
/201
7 - ©
CAM
E S.
p.A.
- Th
e co
nten
ts o
f thi
s m
anua
l are
sub
ject
to c
hang
e at
any
tim
e w
ithou
t prio
r not
ice.
AVE - Serie 44. BTICINO - Livinglight AIR.
VIMAR - Eikon Evo.
BTICINO - Axolute Air.

L
1
L
1
A
B
C
D
Page
8 -
Man
ual F
B010
02-E
N - v
er. 1
- 11
/201
7 - ©
CAM
E S.
p.A.
- Th
e co
nten
ts o
f thi
s m
anua
l are
sub
ject
to c
hang
e at
any
tim
e w
ithou
t prio
r not
ice.
Install the unit in a suitable position to correctly detect the temperature, possibly in an internal wall, avoiding installation in niches, behind doors, curtains or near heat sources.
Pull out the tab L and then pull the unit body out from the frame as far as it will go B.
Press on the side flaps next to the symbol to completely remove the unit body
from the frame C.
Insert 3 x alkaline LR03 AAA 1.5 V batteries in position, respecting the polarity shown on the bottom of the casing D.

NCNA C12
U1
LN
TH350
NCNA C12
LN
TH350
U2
M
E
F
G
1 2 NA NC1 2
Page
9 -
Man
ual F
B010
02-E
N - v
er. 1
- 11
/201
7 - ©
CAM
E S.
p.A.
- Th
e co
nten
ts o
f thi
s m
anua
l are
sub
ject
to c
hang
e at
any
tim
e w
ithou
t prio
r not
ice.
The connections are made depending on the type of equipment controlled by the programmable thermostat.
KEYMains power supply wiresN = neutralL = phase
Relay contactsC = commonNO = normally open contactNC = normally closed contact
LoadsU1 = burner, circulation pump, solenoid valve etc.U2 = motorised valve
Inputs for remote control1 input2 input
N.B. For connection, refer to the techni-cal documentation of the device to be controlled.
Wiring
Connectionfor remoteactivation
Connectionfor magneticcontact

H
Page
10
- Man
ual F
B010
02-E
N - v
er. 1
- 11
/201
7 - ©
CAM
E S.
p.A.
- Th
e co
nten
ts o
f thi
s m
anua
l are
sub
ject
to c
hang
e at
any
tim
e w
ithou
t prio
r not
ice.
Once the chosen frame and subframe have been assembled and wiring has taken place, assemble the programmable thermostat as shown in the figure H.
Installation

⑰
① ② ③ ④ ⑤ ⑥ ⑦ ⑧ ⑨
T1T2T3
⑩
⑪⑫⑮ ⑭ ⑬⑪
⑯
Page
11
- Man
ual F
B010
02-E
N - v
er. 1
- 11
/201
7 - ©
CAM
E S.
p.A.
- Th
e co
nten
ts o
f thi
s m
anua
l are
sub
ject
to c
hang
e at
any
tim
e w
ithou
t prio
r not
ice.
① Battery charge status.
② Thermal zone excluded from control.
③ Thermal zone in Wildcard mode.
④ Programmed delay.
⑤ Thermal zone in Manual mode.
⑥ Remote activation.
⑦ Frost protection active.
⑧ Cooling mode active. Animated icon = cooling in progress.
⑨Heating mode active.Animated icon = heating in progress.
⑩ Temperature detected.
⑪ Buttons to vary the values.
⑫ Button for selecting MANUAL/AUTOMATIC mode.
⑬ Tab for removing the programmable thermostat from the frame.
⑭ Temperature sensor.
⑮Button for activating the WILDCARD or TIMED MANUAL program.
⑯ Time/temperature diagram T1, T2, T3
⑰ Days of the week highlighting the day shown on the diagram
Device description
Description of the icons on the display and function of the front buttons

⑱ ⑲ ⑳ ㉑ ㉓ ㉔㉒
Page
12
- Man
ual F
B010
02-E
N - v
er. 1
- 11
/201
7 - ©
CAM
E S.
p.A.
- Th
e co
nten
ts o
f thi
s m
anua
l are
sub
ject
to c
hang
e at
any
tim
e w
ithou
t prio
r not
ice.
CAUTION!The first time any button is pressed, this ONLY lights up the display, which remains on for 15 seconds after the last time a button is pressed.The device should only be cleaned using a soft cloth dampened with water.
⑱ Reset button.
⑲ Setting the clock and power-on or power-off delay time.
⑳ Programming the three temperature bands T1, T2, T3.Setting operating parameters.
㉑ Selecting the device operating mode.COOLING - HEATING - OFF
㉒ Buttons for selecting the desired time on the daily programming graph.
㉓ Button for selecting the day - see ⑰.
㉔ Button for copying the daily programming.
Function of internal buttonsTo access the internal command buttons, pull out the tab ⑬ and then the unit body from the frame.

A
B
C
D
Page
13
- Man
ual F
B010
02-E
N - v
er. 1
- 11
/201
7 - ©
CAM
E S.
p.A.
- Th
e co
nten
ts o
f thi
s m
anua
l are
sub
ject
to c
hang
e at
any
tim
e w
ithou
t prio
r not
ice.
Pull out the unit body.
Press and hold the A button
The minute digits flash.
Programming and using the device
Setting the clock
Use the buttons to set the exact minute value B.
Press the button C.
The hour digits flash.
Use the buttons to set the exact hour value B.

F
G
E
Page
14
- Man
ual F
B010
02-E
N - v
er. 1
- 11
/201
7 - ©
CAM
E S.
p.A.
- Th
e co
nten
ts o
f thi
s m
anua
l are
sub
ject
to c
hang
e at
any
tim
e w
ithou
t prio
r not
ice.
Press the button E.
The days of the week indicator flashes.
Use the buttons to set the current day F.
Press the button to finish the time and day setting procedure G.
The colon between the hours and minutes will flash confirming the operation has been completed.
N.B. After 15 seconds of inactivity, the unit automatically exits the procedure, storing the last data set.N.B. Each time the buttons are pressed, the digits on the display decrease or increase by one unit. If they are held down, the digits on the display move slowly for the first five seconds, then faster.

A
B
C
Page
15
- Man
ual F
B010
02-E
N - v
er. 1
- 11
/201
7 - ©
CAM
E S.
p.A.
- Th
e co
nten
ts o
f thi
s m
anua
l are
sub
ject
to c
hang
e at
any
tim
e w
ithou
t prio
r not
ice.
Frost protection modeFrom OFF mode , press one of the buttons.If the and icons light up together, this confirms that frost protection mode C has been activated.
Press the button A to choose the operating mode for the thermal zone.
Heating.
Cooling.
Off.
Frost protection.
Setting the operating mode
For easier device use, two programs have been pre-stored for AUTOMATIC operation; one for heating and one for cooling where the temperature levels set are:
Heating CoolingT1 band 16 °CT2 band 18 °CT3 band 20 °C
T1 band 24 °CT2 band 26 °CT3 band 28 °C
If the pre-stored programs correspond to your needs, the device requires no further instructions and is ready to work immediately and punctually.
OFF modeThe icon lighting up confirms that the thermal zone has been excluded from system control.
For 5 seconds, the room tempera-ture indication B disappears.

E
D
A
AB
Page
16
- Man
ual F
B010
02-E
N - v
er. 1
- 11
/201
7 - ©
CAM
E S.
p.A.
- Th
e co
nten
ts o
f thi
s m
anua
l are
sub
ject
to c
hang
e at
any
tim
e w
ithou
t prio
r not
ice.
The buttons can be used to set the minimum tolerated room temperature for the thermal zone.
N.B. Minimum programmable frost protection temperatures 3.0 °C - maximum 16.0 °C.
Press again to go back to the heating/cooling program E.
Pull out the unit body.
Using the 1÷7 button, move the day indicator to position 1 (Monday) A.
The brackets relative to the cho-sen day flash.
Customising the daily temperature program
Using the 0÷23 buttons, move the flashing indicator to 00:00 on the daily program graph B.

C
D
E
F
Page
17
- Man
ual F
B010
02-E
N - v
er. 1
- 11
/201
7 - ©
CAM
E S.
p.A.
- Th
e co
nten
ts o
f thi
s m
anua
l are
sub
ject
to c
hang
e at
any
tim
e w
ithou
t prio
r not
ice.
Using the C buttons, select the desired temperature band; then press the 0÷23 button to move to the next hour and select the desired temperature D.
Continue the same way until reaching 23:00.
Programming is complete for Monday.
To copy the set program to other days of the week, press C E.
If you continue to press C , the program is copied to the days indicated in turn by the flashing segment.
To program the subsequent days
in a different way, move the day forward using the 1÷7 button and repeat the procedure described above F.
N.B. During programming, the clock shows the time indicated by the flashing segment. The colon between the hours and minutes does not flash and the temperature indication shows the value of the selected level.

G
A
B
Page
18
- Man
ual F
B010
02-E
N - v
er. 1
- 11
/201
7 - ©
CAM
E S.
p.A.
- Th
e co
nten
ts o
f thi
s m
anua
l are
sub
ject
to c
hang
e at
any
tim
e w
ithou
t prio
r not
ice.
Pull out the unit body.
Set AUTOMATIC operating mode. Press the 1÷7 button A to select the day of the week on which to add the delay.
Press the 0÷23 button B to select the time on the chosen day at which to add the delay.
Press G to end programming.
The procedure will automatically end after 10 seconds of inactivity.
Adding a delay to a programmed activation
This feature is designed to delay the activation programmed for a specific time. If, for example, you want a comfort temperature at 07:00, it is possible to make sure that the system comes on at 06:30. To reach this objective, program the desired temperature for 06:00 and set a delay of 30 minutes. The device will activate the system at 06:30. The indication of the added delay is shown on the display during the hour in which the delay has been programmed.
N.B. The delay time can be programmed for several hours in the same day and for several days a week.

C
A
B
C
Page
19
- Man
ual F
B010
02-E
N - v
er. 1
- 11
/201
7 - ©
CAM
E S.
p.A.
- Th
e co
nten
ts o
f thi
s m
anua
l are
sub
ject
to c
hang
e at
any
tim
e w
ithou
t prio
r not
ice.
Press C repeatedly to choose the delay time - 15, 30, 45, 0 minutes (cyclically).
The procedure will automatically end after 10 seconds of inactivity.
N.B. The setting is saved in the permanent device memory.
Use the buttons to set the desired value for T1 C.
Customising the T1, T2, T3 temperature values
Pull out the unit body.
Set AUTOMATIC operating mode.
Press to choose whether you want to set the T1, T2 or T3 values for the heating graph ( ) or for the cooling graph ( ) A.
Press button P.
The temperature value assigned to the T1 band is displayed B.

D
A
Page
20
- Man
ual F
B010
02-E
N - v
er. 1
- 11
/201
7 - ©
CAM
E S.
p.A.
- Th
e co
nten
ts o
f thi
s m
anua
l are
sub
ject
to c
hang
e at
any
tim
e w
ithou
t prio
r not
ice.play confirms the conclusion of the temperature band programming.
In any case, 10 seconds after the last operation, the unit exits the procedure, considering the data set until that moment as valid.
Replace the unit body.
N.B. The value you can assign to each temperature band is limited by the values of the band immediately higher and lower.If, for example, the T3 band is set to 20 °C and the T1 band is set to 16 °C, the value of the T2 band can vary between 16.1 °C and 19.9 °C. If T2 is set to 21 °C, T3 is automati-cally moved to 21.1 °C.
Set AUTOMATIC operating mode.
Press the button A.
The appearance of the icon confirms that the program has been activated.
The program can be custom-ised (see "Customising the daily
Using the Wildcard program
The device has a WILDCARD program (to be used, for example, during midweek holidays, vacations etc.), that can be started at any time of the current day and remains active until 24:00, or can be reserved for any of the days of the week.
The factory settings envisage the wildcard program having the same profile as the Sunday profile (7), but it can be customised.
To activate this program for the current day, proceed as follows:
Pull out the unit body.
Press button P to confirm the value of the temperature shown on the display and move on to the next temperature level D.
Proceed as described to set all the temperature bands as desired.
The reappearance of the entire daily program graph on the dis-

B
C
D
Page
21
- Man
ual F
B010
02-E
N - v
er. 1
- 11
/201
7 - ©
CAM
E S.
p.A.
- Th
e co
nten
ts o
f thi
s m
anua
l are
sub
ject
to c
hang
e at
any
tim
e w
ithou
t prio
r not
ice.
temperature program" on page 15). At midnight, the device goes back to operating in AUTOMATIC mode.
To exit the WILDCARD program immediately and return to AUTOMATIC operation, press or again.
Reserving the Wildcard program for a set day
Press the button C.
The appearance of the icon on the display confirms the allocation of the program for the chosen day. The program will be run at 00:00 on the chosen day.
The program can be customised (see "Customising the daily tem-perature program" on page 15).
Press or wait 10 seconds to return the unit to AUTOMATIC operating mode.
Cancelling the WILDCARD program reservation
Using the 1÷7 button, move the indicator onto the day on which the wildcard program has been reserved. Press . The reservation is cancelled.
Press or wait 10 seconds to return the unit to AUTOMATIC operating mode.
Pull out the unit body.
Set AUTOMATIC operating mode.
Using the 1÷7 button, move the indicator onto the chosen activa-tion day B.

A
B
A
Page
22
- Man
ual F
B010
02-E
N - v
er. 1
- 11
/201
7 - ©
CAM
E S.
p.A.
- Th
e co
nten
ts o
f thi
s m
anua
l are
sub
ject
to c
hang
e at
any
tim
e w
ithou
t prio
r not
ice.
If you wish to temporarily disable automatic temperature control, you can switch to MANUAL opera-tion by pressing A.
Manual operating mode
In addition to the current time, the display also shows the default manual temperature (20 °C).
Use the buttons to set the desired value B.
The set temperature will be kept constant until new adjustments are made or a new operating mode is selected.Press again to go back to AUTOMATIC operating mode.
Timed manual operating mode
If you wish to maintain a set temperature for a few hours or a few days (for example to keep a comfortable temperature for longer during visits or an economy temperature during prolonged absences) you can activate the TIMED MANUAL program.Activate MANUAL operating mode.
Use the buttons to set the desired temperature value A.

B
C
A
Page
23
- Man
ual F
B010
02-E
N - v
er. 1
- 11
/201
7 - ©
CAM
E S.
p.A.
- Th
e co
nten
ts o
f thi
s m
anua
l are
sub
ject
to c
hang
e at
any
tim
e w
ithou
t prio
r not
ice.
The program composed in this way is activated immediately and remains active until the set time runs out. The device then goes back to operating in the mode it was in before the activation of the timed manual program.
To go back to AUTOMATIC operation before the end of the programmed time, press .
Press again and use the buttons to set the desired activa-tion days C.
Press and use the but-tons to set the desired activation times B.
Changing the temperature sensor calibrationIf the device is in a position that means that it is difficult for it to detect the correct temperature, it is possible to modify the temperature detected by ± 3 °C in increments of a tenth of a degree.
Pull out the unit body.
Activate MANUAL operating mode.
Press button P A.

B
A
Page
24
- Man
ual F
B010
02-E
N - v
er. 1
- 11
/201
7 - ©
CAM
E S.
p.A.
- Th
e co
nten
ts o
f thi
s m
anua
l are
sub
ject
to c
hang
e at
any
tim
e w
ithou
t prio
r not
ice.
Use the buttons to set the desired compensation value.
N.B. The setting is saved in the permanent device memory.
Enabling/disabling automatic advanceThis function (only active in heating mode) enables the device to automatically adapt the exact moment when the system comes on in order to ensure the desired temperature at the set time. The advance is calculated according to the difference between the measured temperature and the set temperature, and can reach up to a maximum of three hours prior to the time at which the temperature to be reached is set.
Example of operationIf the device is programmed to be at a temperature of 20 °C at 7 am and the automatic advance feature has not been activated, the system will come on at 7 am but will not guarantee a temperature of 20 °C at 7 am.If the automatic advance feature has been activated the programmable thermostat will turn the system on in advance in an attempt to reach 20 °C at 7 am. Thanks to a self-learning mechanism, the programmable thermostat stores the room’s temperature parameters in order to be more precise, in subsequent days, in achieving the set temperature objective.
Pull out the unit body.
Activate MANUAL operating mode.
Press button P until the indi-cation appears on the display A.

A
B
ON ON
OFF
1 h
B
Page
25
- Man
ual F
B010
02-E
N - v
er. 1
- 11
/201
7 - ©
CAM
E S.
p.A.
- Th
e co
nten
ts o
f thi
s m
anua
l are
sub
ject
to c
hang
e at
any
tim
e w
ithou
t prio
r not
ice. Setting the type of temperature management algorithm
The device allows you to choose the type of algorithm to be applied for system manage-ment from differential and integral proportional.
Activating and configuring a differential algorithmThis control system is recom-mended in systems that are particularly difficult to control with extreme variations of the external temperature.
Pull out the unit body.
Activate MANUAL operating mode.
P ress bu t t on P un t i l t he indication appears
on the display A.
Use the buttons to activate/deactivate the differential algo-rithm B.
= Active.
= Not active.
Tem
pera
ture
Setpoint + differential
Setpoint - differential
Setpoint
Time
Use the buttons to activate/deactivate the automatic ad-vance B.
= Not active. = Active.
N.B. The setting is saved in the permanent device memory.

C
D
E
Page
26
- Man
ual F
B010
02-E
N - v
er. 1
- 11
/201
7 - ©
CAM
E S.
p.A.
- Th
e co
nten
ts o
f thi
s m
anua
l are
sub
ject
to c
hang
e at
any
tim
e w
ithou
t prio
r not
ice.
When the differential is active ( ), press button P on the screen to read the value of the temperature differential setting C.
Use the buttons to set the differential value at a value be-tween 0 °C and 0.9 °C D.
By setting the differential to 0 °C, during operation, a minimum switching on/off time of 1 minute is respected, regardless of the detected room temperature.
Press button P to exit programming.
Activating and configuring an integral proportional algorithmThis algorithm enables the programmable thermostat to reduce boiler power on cycles as the ambient temperature approaches the set temperature, thus obtaining a considerable reduction in consumption, maintaining the ideal level of comfort.Three preset programs are available, suitable for different types of installations (P1, P2 and P3), or there is a completely manual program (P4).
When the differential is not active ( ) B, press button P to access the section in which it is possible to select one of the integral proportional programs available E.

F
G
H
I
Page
27
- Man
ual F
B010
02-E
N - v
er. 1
- 11
/201
7 - ©
CAM
E S.
p.A.
- Th
e co
nten
ts o
f thi
s m
anua
l are
sub
ject
to c
hang
e at
any
tim
e w
ithou
t prio
r not
ice.
Use the buttons to choose the desired program from: P1, P2, P3, F (see graph and table L); press button P to confirm your choice and end programming.
The first parameter concerns the duration of the power-on cycles G.
Use the buttons to choose the duration of the cycle - 5, 10, 15, 20, 25, 30, 35 or 40 minutes H.
Press button P Ito confirm the set cycle time and switch to adjusting the minimum ON time.
Use the buttons to choose the minimum ON time between 1 and 5 minutes.
If you have chosen the P4 program, pressing button P gives access to the programming of the individual parameters that make up the manual P4 program.

J
K
ON ON
OFF
1 h
Page
28
- Man
ual F
B010
02-E
N - v
er. 1
- 11
/201
7 - ©
CAM
E S.
p.A.
- Th
e co
nten
ts o
f thi
s m
anua
l are
sub
ject
to c
hang
e at
any
tim
e w
ithou
t prio
r not
ice.
Press button P Jto confirm the minimum ON time and switch to adjusting the proportional band.
Use the buttons to adjust the value of the proportional band to between 1 and 3 °C.
The graph and table K can help you decide on the type of program or value of the parameter to be added.
Press button P to exit programming.
N.B. All parameters related to the configuration of the type of temperature management algorithm are saved in the permanent memory of the device.
Tem
pera
ture
Time
Setpoint
Prog. Cycle length (minutes)
Minimum ON time (minutes)
Proportional band Type of system
P1 10 1 1.5 °C Base for gas burner, fan coils, zone valves, aluminium radiators
P2 5 1 1.5 °C Electric radiatorsP3 20 2 1.5 °C Radiant or underfloor systems, coolingP4 from 5 to 40 from 1 to 5 from 1 °C to 3 °C

Page
29
- Man
ual F
B010
02-E
N - v
er. 1
- 11
/201
7 - ©
CAM
E S.
p.A.
- Th
e co
nten
ts o
f thi
s m
anua
l are
sub
ject
to c
hang
e at
any
tim
e w
ithou
t prio
r not
ice.
Remote activationBy connecting a special interface to terminals 1-2 (see "Wiring" on page 8), it is possible to:- force unit operation in manual mode remotely,- activate a special fixed-period program configured in advance.
Forcing unit operation in manual mode remotely
Using a special remote command, users can make the device cancel any program in progress and operate in manual mode.
Remote activation of manual mode is indicated by the appearance of the symbol on the display.
The target temperature is set by the user during the last use of the device in manual mode.
The program remains active until different programming is done manually on the device or until a new remote command is received, which will return the device to the program in place prior to receiving the first message.
Remotely activating a special manual fixed-period program
It is possible to memorise 2 manual fixed-period programs that can be activated remotely, one for HEATING mode and one for COOLING mode.
The remote activation of the timed manual program is indicated by the appearance of the symbol on the display.
The program remains active until different programming is done manually on the device . Upon completion of the manual fixed-period program, the device will return to the program in place prior to receiving the first message.
The default setting of the manual fixed-period program is:1 hour at 20 °C in HEATING mode,1 hour at 24 °C in COOLING mode.
N.B. When the program is activated remotely, the remainder of the hour or day is counted as a complete hour or day.

B
C
D
A
Page
30
- Man
ual F
B010
02-E
N - v
er. 1
- 11
/201
7 - ©
CAM
E S.
p.A.
- Th
e co
nten
ts o
f thi
s m
anua
l are
sub
ject
to c
hang
e at
any
tim
e w
ithou
t prio
r not
ice.
Generating a manual fixed-period program for remote activationPull out the unit body. Activate MANUAL operating mode.Select the operating mode for which you are creating the program (HEATING or COOLING).
Use the buttons to adjust the desired temperature value A.
Press the button B.
Use the buttons to set the number of activation hours.
Press the button C.
Use the buttons to set the number of activation days (from 1 to 99).
Press D to save the program set as a program that can be activated remotely.

A
C
B
Page
31
- Man
ual F
B010
02-E
N - v
er. 1
- 11
/201
7 - ©
CAM
E S.
p.A.
- Th
e co
nten
ts o
f thi
s m
anua
l are
sub
ject
to c
hang
e at
any
tim
e w
ithou
t prio
r not
ice.
Counting operating hours
Resetting the device
Pull out the unit body.
Activate MANUAL operating mode A.
Malfunctioning, interventions and other technical reasons may require the device to be reset.
Pull out the unit body.
Press button R C.
Press button C B.
The display shows the operating time for 5 seconds.
To reset the counter, press the button while the figure is visible.
This operation does NOT erase any customised programs, which will be restored, along with the other data, when the device is restarted (see table).
Factory resetTo restore all the factory settings, press the + + 1÷7 buttons at the same time and then press button R.

CAME S.p.A.Via Martiri Della Libertà, 15 31030 Dosson di Casier - Treviso - Italytel. (+39) 0422 4940 - fax. (+39) 0422 4941
Page
32
- Man
ual c
ode
FB01
002-
EN -
Ed. 1
- 11
/201
7 - ©
Cam
e S.
p.A.
- Th
e co
nten
ts of
this
man
ual a
re to
be
cons
idere
d as
subje
ct to
cha
nge
at a
ny ti
me
and
with
out t
he n
eed
for a
ny a
dvan
ce w
arnin
g.
Replacing the batteries
The flashing indication on the display indicates that the batteries must be replaced within approximately one month. When appears on the display along with the symbol, the unit is no longer operational and the thermal zone is no longer controlled. After removing the old batteries, you will have 2 minutes to insert the new batteries (3 x alkaline LR03 AAA 1.5 V batteries). If this time limit is exceeded, the device will be undergo a factory reset.
CAUTION!Failure to replace the batteries promptly may cause damage to the heating system (frost protection is no longer guaranteed).Incorrect positioning of the batteries may damage the unit. Using depleted batteries may cause malfunctions.
Technical features
- Unit for domestic use.- Independently-assembled electronic
device.- Backlit graphic LCD.- Power supply: 3 x alkaline LR03 AAA 1.5
V batteries.- Autonomy: more than 1 year.- Relay features: maximum voltage 250
V, maximum current 5 A with resistive load, 2 A with inductive load.
- Type of action: 1B-U.- Contacts available: 1 x NO-NC
changeover contact.
- Room temperature detection interval: 15 seconds.
- Reading resolution: 0.1 °C- Accuracy: ≤ ±0.3 °C.- Class A software.- Pollution rating: 2.- Pulse voltage: 4 kV.- Maximum control head temperature: 40
°C- Protection rating IP30.- Class II electrical insulation.- Operating temperature: from 0 °C to
+40 °C.

Thermostat programmable
TH/350MANUEL D'INSTALLATION ET D'UTILISATION FR Français
FB01002-FR

Page
2 -
Man
uel F
B010
02-F
R - v
ers.
1 -
11/2
017
- © C
AME
S.p.
A. -
Le c
onte
nu d
u m
anue
l est
sus
cept
ible
de
subi
r des
mod
ifica
tions
à to
ut m
omen
t et s
ans
aucu
n pr
éavis
.
Instructions générales• Lire attentivement les instructions avant toute opération d'installation et effectuer les
interventions comme indiqué par le fabricant.• L’installation, la programmation, la mise en service et la manutention du produit ne
doivent être effectuées que par des techniciens qualifiés et dans le strict respect des normes en vigueur, y compris des règles sur la prévention des accidents et l'élimination des emballages.
• L’installateur doit s'assurer de la présence des éventuelles informations destinées à l'utilisateur et contrôler que celui-ci les a bien reçues.
• Avant toute opération de nettoyage ou d'entretien, mettre les dispositifs hors tension.• Les appareils ne devront être destinés qu'à l'utilisation pour laquelle ils ont été expres-
sément conçus.• Le fabricant décline toute responsabilité en cas d'éventuels dommages provoqués par
des utilisations impropres, incorrectes et déraisonnables.• Attention : ne remplacer les piles usagées que par des piles compatibles afin d'éviter
tout risque d'explosion.• Ne pas jeter les piles à la poubelle au terme de leur cycle de vie, mais les collecter
séparément en vue d'un recyclage correct.
ÉLIMINATION - S'assurer que le matériel d'emballage n'est pas jeté dans la nature mais qu'il est bien éliminé selon les normes en vigueur dans le pays où le produit est utilisé.Éviter que l'appareil, au terme de son cycle de vie, ne soit jeté dans la nature. L'élimination de l'appareil doit être effectuée conformément aux normes en vigueur en privilégiant le recyclage de ses composants. Le symbole et le sigle du matériau figurent sur les composants à recycler.Références normatives - Le produit est conforme aux directives de référence en vigueur.

A B C D E a b
A B C D E a b
Page
3 -
Man
uel F
B010
02-F
R - v
ers.
1 -
11/2
017
- © C
AME
S.p.
A. -
Le c
onte
nu d
u m
anue
l est
sus
cept
ible
de
subi
r des
mod
ifica
tions
à to
ut m
omen
t et s
ans
aucu
n pr
éavis
.
Installation
Contenu de l'emballage
Corps principal Châssis
Précadres
Vis de fixationAdaptateur cache-trou
REMARQUE : les cadres et les adaptateurs cache-trou gris anthracite et gris aluminium sont disponibles comme composants en option.
Les précadres et les adaptateurs cache-trou opportunément combinés permettent d'adapter le dispositif à la plupart des séries domestiques disponibles sur le marché en suivant les indications fournies ci-après.
REMARQUE :Les marques System, Playbus, Playbus Young, Chorus, sont la propriété de GEWISS S.p.A.Les marques Light, Light Tech, Living International, Axolute, Luna, Livinglight Quadre, Matix, Livinglight Tonde, Livinglight AIR, Axolute Air, sont la propriété de BTICINO S.p.A.Les marques Plana, Eikon, Idea, Idea Rondò, Arché, Eikon Evo, sont la propriété de VIMAR S.p.A.Les marques Vela Quadra, Vela Tonda, Serie Cross, sont la propriété de LEGRAND S.p.A.Les marques Banquise, Sistema 45, Serie 44, sont la propriété d'AVE S.p.A.La marque Elos est la propriété d'ABB S.p.A.

A
A
a
a
A
b
b
Page
4 -
Man
uel F
B010
02-F
R - v
ers.
1 -
11/2
017
- © C
AME
S.p.
A. -
Le c
onte
nu d
u m
anue
l est
sus
cept
ible
de
subi
r des
mod
ifica
tions
à to
ut m
omen
t et s
ans
aucu
n pr
éavis
.
Comment combiner/adapter les précadres aux séries domestiques
GEWISS - Playbus, Playbus Young.
BTICINO - Matix.
BTICINO - Light, Light Tech, Living International.
VIMAR - Plana, Eikon.
LEGRAND - Vela Quadra, Vela Tonda, Serie Cross.

B
a
a
B
a
a
B
a
a
Page
5 -
Man
uel F
B010
02-F
R - v
ers.
1 -
11/2
017
- © C
AME
S.p.
A. -
Le c
onte
nu d
u m
anue
l est
sus
cept
ible
de
subi
r des
mod
ifica
tions
à to
ut m
omen
t et s
ans
aucu
n pr
éavis
.
VIMAR - Idea, Idea Rondò.
ABB - Elos.
AVE - Banquise, Sistema 45.

C
C
B
Page
6 -
Man
uel F
B010
02-F
R - v
ers.
1 -
11/2
017
- © C
AME
S.p.
A. -
Le c
onte
nu d
u m
anue
l est
sus
cept
ible
de
subi
r des
mod
ifica
tions
à to
ut m
omen
t et s
ans
aucu
n pr
éavis
.
BTICINO - Livinglight Qua-dre.VIMAR - Arché
BTICINO - Livinglight Ton-de.GEWISS - Chorus.
GEWISS - System.BTICINO - Axolute, Luna.

E
E
D
Page
7 -
Man
uel F
B010
02-F
R - v
ers.
1 -
11/2
017
- © C
AME
S.p.
A. -
Le c
onte
nu d
u m
anue
l est
sus
cept
ible
de
subi
r des
mod
ifica
tions
à to
ut m
omen
t et s
ans
aucu
n pr
éavis
.
AVE - Serie 44. BTICINO - Livinglight AIR.
VIMAR - Eikon Evo.
BTICINO - Axolute Air.

L
1
L
1
A
B
C
D
Page
8 -
Man
uel F
B010
02-F
R - v
ers.
1 -
11/2
017
- © C
AME
S.p.
A. -
Le c
onte
nu d
u m
anue
l est
sus
cept
ible
de
subi
r des
mod
ifica
tions
à to
ut m
omen
t et s
ans
aucu
n pr
éavis
.
Installer l'appareil dans une position lui permettant de détecter correctement la température ambiante, si possible dans un mur interne, en évitant l'installation dans des ouvertures, derrière des portes, des rideaux ou près de sources de chaleur.
Extraire du cadre la languette L puis le corps de l'appareil jusqu'à la butée B.
Appuyer sur les ailettes latérales près du symbole pour extraire complètement du cadre le corps de l'appareil C.
Introduire 3 piles alcalines LR03 AAA d'1,5 V dans le logement prévu à cet effet en respectant les polarités indiquées sur le fond D.

NCNA C12
U1
LN
TH350
NCNA C12
LN
TH350
U2
M
E
F
G
1 2 NA NC1 2
Page
9 -
Man
uel F
B010
02-F
R - v
ers.
1 -
11/2
017
- © C
AME
S.p.
A. -
Le c
onte
nu d
u m
anue
l est
sus
cept
ible
de
subi
r des
mod
ifica
tions
à to
ut m
omen
t et s
ans
aucu
n pr
éavis
.
Les connexions doivent être effectuées en fonction du type d'équipement commandé par le thermostat programmable.
LÉGENDEConducteurs d'alimentation réseauN = neutreL = phase
Contacts du relaisC = communNO = contact normalement ouvertNF = contact normalement fermé
ChargesU1 = brûleur, pompe de circulation, élec-trovanne, etc.U2 = vanne motorisée
Entrées pour commande à distance1 entrée2 entrée
REMARQUE. Pour la connexion, consulter la documentation technique du dispositif à commander.
Branchements électriques
Connexionpour activationà distance
Connexionpour contactmagnétique

H
Page
10
- Man
uel F
B010
02-F
R - v
ers.
1 -
11/2
017
- © C
AME
S.p.
A. -
Le c
onte
nu d
u m
anue
l est
sus
cept
ible
de
subi
r des
mod
ifica
tions
à to
ut m
omen
t et s
ans
aucu
n pr
éavis
.
Après avoir assemblé le cadre et le précadre choisis et effectué les branchements électriques, assembler le thermostat programmable comme indiqué sur la figure H.
Installation

⑰
① ② ③ ④ ⑤ ⑥ ⑦ ⑧ ⑨
T1T2T3
⑩
⑪⑫⑮ ⑭ ⑬⑪
⑯
Page
11
- Man
uel F
B010
02-F
R - v
ers.
1 -
11/2
017
- © C
AME
S.p.
A. -
Le c
onte
nu d
u m
anue
l est
sus
cept
ible
de
subi
r des
mod
ifica
tions
à to
ut m
omen
t et s
ans
aucu
n pr
éavis
.
① État de charge de la pile.
② Zone thermique exclue du contrôle.
③ Zone thermique en mode Jolly.
④ Retard programmé.
⑤ Zone thermique en mode Manuel.
⑥ Activation à distance.
⑦ Protection antigel activée.
⑧Modalité rafraîchissement activée. Icône animée = rafraîchissement en cours.
⑨Modalité chauffage activée.Icône animée = chauffage en cours.
⑩ Température détectée.
⑪ Boutons pour la modification des valeurs.
⑫ Bouton pour la sélection du mode MANUEL/AUTOMATIQUE.
⑬ Languette pour l'extraction du thermostat programmable du cadre.
⑭ Capteur de température.
⑮Bouton pour l'activation du programme JOLLY ou MANUEL TEMPORISÉ.
⑯ Diagramme heures/températures T1, T2, T3.
⑰ Jours de la semaine avec indication du jour visualisé sur le diagramme.
Description dispositif
Description des icônes sur l'afficheur et fonction des boutons du bandeau

⑱ ⑲ ⑳ ㉑ ㉓ ㉔㉒
Page
12
- Man
uel F
B010
02-F
R - v
ers.
1 -
11/2
017
- © C
AME
S.p.
A. -
Le c
onte
nu d
u m
anue
l est
sus
cept
ible
de
subi
r des
mod
ifica
tions
à to
ut m
omen
t et s
ans
aucu
n pr
éavis
.
ATTENTION !Le premier enfoncement d'un bouton quelconque active UNIQUEMENT l'éclairage de l'afficheur qui reste allumé pendant 15 secondes après le dernier enfoncement.Nettoyer le dispositif uniquement avec un chiffon doux humidifié d'eau.
⑱ Bouton RàZ.
⑲ Configuration de l'horloge et du temps de retard à l'allumage ou à l'extinction.
⑳ Programmation de la température des 3 plages T1, T2, T3.Configuration des paramètres de fonctionnement.
㉑ Sélection du mode de fonctionnement du dispositif.RAFRAÎCHISSEMENT - CHAUFFAGE - OFF
㉒ Boutons pour la sélection de l'heure souhaitée sur le graphique de la programmation journalière.
㉓ Bouton pour la sélection du jour, voir ⑰.
㉔ Bouton pour la copie de la programmation journalière.
Fonction des boutons internesPour accéder aux boutons de commande internes, extraire la languette ⑬ puis le corps de l'appareil du cadre.

A
B
C
D
Page
13
- Man
uel F
B010
02-F
R - v
ers.
1 -
11/2
017
- © C
AME
S.p.
A. -
Le c
onte
nu d
u m
anue
l est
sus
cept
ible
de
subi
r des
mod
ifica
tions
à to
ut m
omen
t et s
ans
aucu
n pr
éavis
. Extraire le corps de l'appareil.
Maintenir enfoncé le bouton A.
Les chiffres des minutes cli-gnotent.
Programmation et utilisation du dispositif
Configuration de l'horloge
Se servir des boutons pour configurer la valeur exacte des minutes B.
Appuyer sur le bouton C.
Les chiffres des heures clignotent.
Se servir des boutons pour configurer l'heure exacte D.

F
G
E
Page
14
- Man
uel F
B010
02-F
R - v
ers.
1 -
11/2
017
- © C
AME
S.p.
A. -
Le c
onte
nu d
u m
anue
l est
sus
cept
ible
de
subi
r des
mod
ifica
tions
à to
ut m
omen
t et s
ans
aucu
n pr
éavis
.
Appuyer sur le bouton E.
L'indicateur des jours de la se-maine clignote.
Se servir des boutons pour configurer le jour en cours F.
Appuyer sur le bouton pour terminer la procédure de confi-guration de l'heure et du jour G.
Les deux points entre les heures et les minutes clignoteront pour confirmer la fin de l'opération.
Remarque. Au bout de 15 secondes d'inactivité, l'appareil sort de façon autonome de la procédure en mémorisant les dernières données configurées.Remarque. À chaque enfoncement des boutons les chiffres affichés à l'écran diminuent ou augmentent d'une unité ; en maintenant ces mêmes boutons enfoncés, les chiffres à l'écran se succèdent lentement les 5 premières secondes puis plus rapidement.

A
B
C
Page
15
- Man
uel F
B010
02-F
R - v
ers.
1 -
11/2
017
- © C
AME
S.p.
A. -
Le c
onte
nu d
u m
anue
l est
sus
cept
ible
de
subi
r des
mod
ifica
tions
à to
ut m
omen
t et s
ans
aucu
n pr
éavis
.
Modalité AntigelEn mode OFF , appuyer sur l'un des boutons .L'allumage simultané des icônes
et confirme l'activation de la modalité antigel C.
Appuyer sur le bouton A pour choisir la modalité de fonc-tionnement de la zone thermique.
Chauffage.
Rafraîchissement.
Off.
Antigel.
Configuration de la modalité de fonctionnement
Pour faciliter l'utilisation du dispositif, deux programmes pour le fonctionnement AUTO-MATIQUE ont été pré-mémorisés ; un pour le chauffage et l'autre pour le rafraîchissement avec les niveaux de température suivants :
Chauffage RafraîchissementPlage T1 16°CPlage T2 18°CPlage T3 20°C
Plage T1 24°CPlage T2 26°CPlage T3 28°C
Si les programmes pré-mémorisés correspondent à vos exigences, le dispositif ne requiert aucune autre instruction et peut immédiatement fonctionner.
Modalité OFFL'allumage de l'icône confirme la désactivation de la zone ther-mique du contrôle de l'installation.
L'indication de la température ambiante disparaît pendant 5 secondes B.

E
D
A
AB
Page
16
- Man
uel F
B010
02-F
R - v
ers.
1 -
11/2
017
- © C
AME
S.p.
A. -
Le c
onte
nu d
u m
anue
l est
sus
cept
ible
de
subi
r des
mod
ifica
tions
à to
ut m
omen
t et s
ans
aucu
n pr
éavis
.
Les boutons permettent de configurer la température ambiante minimum tolérée pour la zone thermique.
Remarque. Température antigel programmable minimum 3,0°C - maximum 16,0°C.
Appuyer de nouveau sur le bou-ton pour réinitialiser le programme de chauffage/rafraî-chissement E.
Extraire le corps de l'appareil.
À l'aide du bouton 1÷7 ame-ner l'indicateur du jour sur 1 (Lundi) A.
La parenthèse correspondant au jour choisi clignote.
Personnalisation du programme journalier des températures
À l'aide des boutons 0÷23 déplacer l'indicateur clignotant sur 0 sur le graphique du pro-gramme journalier B.

C
D
E
F
Page
17
- Man
uel F
B010
02-F
R - v
ers.
1 -
11/2
017
- © C
AME
S.p.
A. -
Le c
onte
nu d
u m
anue
l est
sus
cept
ible
de
subi
r des
mod
ifica
tions
à to
ut m
omen
t et s
ans
aucu
n pr
éavis
.
À l'aide des boutons C sélectionner la plage de tempéra-ture souhaitée ; appuyer ensuite sur le bouton 0÷23 pour passer à l'heure suivante et sélectionner quand même la température souhaitée D.
Poursuivre de la même manière jusqu'à arriver à 23 h 00.
Pour la journée de lundi, la pro-grammation est terminée.
Pour copier le programme confi-guré dans d'autres jours de la semaine, appuyer sur le bouton C E.
Appuyer de nouveau sur le bouton C pour coller le programme sur les jours indiqués au fur et à mesure par le segment clignotant.
Pour programmer différemment les jours suivants, faire avancer le jour à l'aide du bouton 1÷7 et répéter la procédure précédem-ment illustrée F.
Remarque. En phase de programmation, l'horloge indique l'heure signalée par le segment clignotant, les deux points entre les heures et les minutes ne clignotent pas et l'indication de la température prend la valeur du niveau sélectionné.

G
A
B
Page
18
- Man
uel F
B010
02-F
R - v
ers.
1 -
11/2
017
- © C
AME
S.p.
A. -
Le c
onte
nu d
u m
anue
l est
sus
cept
ible
de
subi
r des
mod
ifica
tions
à to
ut m
omen
t et s
ans
aucu
n pr
éavis
.
Extraire le corps de l'appareil.
Configurer le mode de fonction-nement AUTOMATIQUE. Appuyer sur le bouton 1÷7 A pour sélectionner le jour de la semaine auquel configurer le retard.
Appuyer sur le bouton 0÷23 B pour sélectionner l'heure du jour choisi à laquelle configurer le retard.
Appuyer sur le bouton G pour terminer la programmation.
La procédure prend fin automati-quement au bout de 10 secondes d'inactivité.
Ajouter un retard à une activation programmée
Cette fonction a été conçue pour retarder l'activation programmée à une heure bien précise. Pour obtenir par exemple une température confortable à 7 h 00, il est possible de faire en sorte que l'installation s'active à 6 h 30. Pour ce faire, programmer à 6 h 00 la température souhaitée et configurer un retard de 30 minutes ; le dispositif actionnera l'installation à 6 h 30. L'indication du retard programmé s'affiche à l'écran pendant l'heure à laquelle il a été programmé.
Remarque. Il est possible de programmer un temps de retard sur plusieurs heures dans une même journée et sur plusieurs jours de la semaine.

C
A
B
C
Page
19
- Man
uel F
B010
02-F
R - v
ers.
1 -
11/2
017
- © C
AME
S.p.
A. -
Le c
onte
nu d
u m
anue
l est
sus
cept
ible
de
subi
r des
mod
ifica
tions
à to
ut m
omen
t et s
ans
aucu
n pr
éavis
.
Appuyer plusieurs fois sur le bouton C pour modifier cycli-quement le temps de retard entre 15, 30, 45, 0 minutes.
La procédure prend fin automati-quement au bout de 10 secondes d'inactivité.
Remarque. La configuration est sauvegardée dans la mémoire permanente du dispositif.
Se servir des boutons pour configurer la valeur souhaitée pour T1 C.
Personnalisation des valeurs de température T1, T2, T3
Extraire le corps de l'appareil.
Configurer le mode de fonction-nement AUTOMATIQUE.
Appuyer sur le bouton pour décider de configurer ou non les valeurs T1, T2, T3 pour le graphique chauffage ( ) ou le gra-phique rafraîchissement ( ) A.
Appuyer sur le bouton P.
L'écran affiche la valeur de tem-pérature attribuée à la plage T1 B.

D
A
Page
20
- Man
uel F
B010
02-F
R - v
ers.
1 -
11/2
017
- © C
AME
S.p.
A. -
Le c
onte
nu d
u m
anue
l est
sus
cept
ible
de
subi
r des
mod
ifica
tions
à to
ut m
omen
t et s
ans
aucu
n pr
éavis
.
La réapparition de tout le graphique du programme journalier à l'écran confirme la fin de la programmation des plages de température.
Au bout de 10 secondes à compter de la dernière manœuvre, l'appareil sort quoi qu'il en soit de la procédure en considérant comme valables les données jusqu'alors configurées.
Réintroduire le corps de l'appareil.
Remarque. La valeur attribuable à chaque plage de température est limitée par les valeurs de la plage immédiatement supérieure et inférieure.Si, par exemple, la plage T3 est réglée sur 20°C et que la plage T1 l'est sur 16°C, la valeur de la plage T2 pourra varier entre 16,1°C et 19,9°C ; si T2 est réglée sur 21°C, la plage T3 est automatiquement amenée à 21,1°C.
Extraire le corps de l'appareil.
Configurer le mode de fonction-nement AUTOMATIQUE.
Appuyer sur le bouton A.
La visualisation de l'icône confirme que le programme a bien été activé.
Utilisation du programme Jolly
L’appareil dispose d'un programme JOLLY (à utiliser, par exemple, durant des fêtes en milieu de semaine, des congés, etc.) activable à tout moment durant la journée en cours et activé jusqu'à 24 h 00. Ce programme peut également être utilisé pour un des jours de la semaine.
Les configurations d'usine prévoient pour le programme Jolly le même profil que celui prévu pour le dimanche (7) ainsi que la possibilité de le personnaliser.
Pour activer ce programme dans la journée en cours, procéder comme suit :
Appuyer sur le bouton P pour confirmer la valeur de la tempé-rature visualisée à l'écran et pour passer au niveau de température suivant D.
Suivre les indications pour confi-gurer toutes les plages de tempé-rature comme souhaité.

B
C
D
Page
21
- Man
uel F
B010
02-F
R - v
ers.
1 -
11/2
017
- © C
AME
S.p.
A. -
Le c
onte
nu d
u m
anue
l est
sus
cept
ible
de
subi
r des
mod
ifica
tions
à to
ut m
omen
t et s
ans
aucu
n pr
éavis
.
Le programme peut être personnalisé (voir « Personnalisation du programme journalier des températures » page 15). À minuit pile le dispositif fonctionne à nouveau en mode AUTOMATIQUE.
Pour sortir immédiatement du programme JOLLY et ramener l'appareil au mode de fonctionnement AUTOMATIQUE, appuyer de nouveau sur le bouton ou sur .
Réserver le programme Jolly pour une journée bien précise
La visualisation de l'icône à l'écran confirme l'attribution du programme pour le jour sélection-né. Le programme sera exécuté à 0 h 00 durant le jour choisi.
Il est possible de personnaliser le programme (voir « Personnalisa-tion du programme journalier des températures » page 15).
Appuyer sur le bouton ou at-tendre 10 secondes pour ramener l'appareil en mode de fonctionne-ment AUTOMATIQUE.
Supprimer la réservation du programme Jolly
À l'aide du bouton 1÷7, ramener l'indicateur près du jour pour lequel le programme Jolly a été réservé ; appuyer sur le bouton ; la réservation est annulée.
Appuyer sur le bouton ou attendre 10 secondes pour ramener l'appareil en mode de fonctionnement AUTOMATIQUE.
Extraire le corps de l'appareil.
Configurer le mode de fonction-nement AUTOMATIQUE.
À l'aide du bouton 1÷7, amener l'indicateur près du jour choisi pour l'activation B.
Appuyer sur le bouton C.

A
B
A
Page
22
- Man
uel F
B010
02-F
R - v
ers.
1 -
11/2
017
- © C
AME
S.p.
A. -
Le c
onte
nu d
u m
anue
l est
sus
cept
ible
de
subi
r des
mod
ifica
tions
à to
ut m
omen
t et s
ans
aucu
n pr
éavis
.
Pour désactiver momentané-ment le contrôle automatique de la température, il est possible de passer au fonctionnement MANUEL en appuyant sur le bouton A.
Mode de fonctionnement manuel
L'écran affiche aussi bien l'heure courante que la valeur de tem-pérature manuelle préconfigurée (20°C).
Se servir des boutons pour configurer la valeur souhaitée B.
La température configurée reste constante jusqu'à l'introduction de nouveaux réglages ou la sélection d'un mode de fonctionnement différent.Appuyer de nouveau sur le bouton pour revenir au fonctionnement AUTOMATIQUE.
Mode de fonctionnement manuel temporisé
Afin de maintenir une température fixe pendant quelques heures ou quelques jours (ex. : pour maintenir plus longtemps une température confortable durant des visites imprévues ou une température économique durant des absences prolongées), il est possible d'activer le programme MANUEL TEMPORISÉ.
Activer le mode de fonctionne-ment MANUEL.
Se servir des boutons pour configurer la valeur de tempéra-ture souhaitée A.

B
C
A
Page
23
- Man
uel F
B010
02-F
R - v
ers.
1 -
11/2
017
- © C
AME
S.p.
A. -
Le c
onte
nu d
u m
anue
l est
sus
cept
ible
de
subi
r des
mod
ifica
tions
à to
ut m
omen
t et s
ans
aucu
n pr
éavis
.
Le programme ainsi composé s'active immédiatement et reste activé jusqu'à l'écoulement du temps configuré ; le dispositif reprend ensuite le mode de fonctionnement adopté avant l'activation du programme manuel temporisé.
Pour revenir au fonctionnement AUTOMATIQUE avant l'écoulement du temps programmé, appuyer sur le bouton .
Appuyer de nouveau sur le bouton et utiliser les boutons
pour configurer les jours d'acti-vation souhaités C.
Appuyer sur le bouton et utiliser les boutons pour configurer les heures d'activation souhaitées B.
Modifier le calibrage de la sonde de détection de la températureSi le positionnement du dispositif ne lui permet pas de détecter correctement la tem-pérature, il est possible de modifier cette dernière de ±3°C par des incréments d'un dixième de degré.
Extraire le corps de l'appareil.
Activer le mode de fonctionne-ment MANUEL.
Appuyer sur le bouton P A.

B
A
Page
24
- Man
uel F
B010
02-F
R - v
ers.
1 -
11/2
017
- © C
AME
S.p.
A. -
Le c
onte
nu d
u m
anue
l est
sus
cept
ible
de
subi
r des
mod
ifica
tions
à to
ut m
omen
t et s
ans
aucu
n pr
éavis
.
Utiliser les boutons pour configurer la valeur de correction souhaitée.
Remarque. La configuration est sauvegardée dans la mémoire permanente du dispositif.
Activer / désactiver l'anticipation automatiqueCette fonction (uniquement activée en mode chauffage) permet au dispositif d'adapter automatiquement l'instant d'allumage de l'installation pour obtenir la température souhaitée à l'heure configurée. L'anticipation, calculée en fonction de la différence entre la température effective et celle configurée, peut être au maximum de trois heures par rapport à l'heure à laquelle la température à atteindre a été configurée.
Exemple de fonctionnementSi le dispositif est programmé pour obtenir une température de 20°C à 7 h 00 et que l'anti-cipation automatique n'est pas activée, l'installation sera allumée à 7 h 00 sans toutefois garantir une température de 20°C à cette même heure.Si l'anticipation automatique est activée, le thermostat programmable anticipera l'allumage de l'installation pour obtenir une température de 20°C à 7 h 00 ; grâce au mécanisme d'auto-apprentissage, le thermostat programmable mémorise les paramètres thermiques de la pièce pour obtenir avec plus de précision, les jours suivants, la température configurée.
Extraire le corps de l'appareil.
Activer le mode de fonctionne-ment MANUEL.
Appuyer sur le bouton P jusqu'à ce que l'écran affiche l'indication
A.

A
B
ON ON
OFF
1 h
B
Page
25
- Man
uel F
B010
02-F
R - v
ers.
1 -
11/2
017
- © C
AME
S.p.
A. -
Le c
onte
nu d
u m
anue
l est
sus
cept
ible
de
subi
r des
mod
ifica
tions
à to
ut m
omen
t et s
ans
aucu
n pr
éavis
.
Configurer le type d'algorithme de gestion thermiqueLe dispositif permet de choisir le type d'algorithme à appliquer pour la gestion de l'ins-tallation entre : différentiel et proportionnel intégral.
Activation et configuration de l'algorithme différentielCe système de réglage est conseillé sur des installations par-ticulièrement difficiles à contrôler avec des variations extrêmes de la température extérieure.
Extraire le corps de l'appareil.
Activer le mode de fonctionne-ment MANUEL.
Appuyer sur le bouton P jusqu'à ce que l'écran affiche l'indication
A.
Se servir des boutons pour activer/désactiver l'algorithme différentiel B.
= Activé.
= Désactivé.
Tem
péra
ture
Point de consigne + différentiel
Point de consigne – différentiel
Point de consigne
Temps
Se servir des boutons pour activer/désactiver l'anticipation automatique B.
= Désactivée. = Activée.
Remarque. La configuration est sauvegardée dans la mémoire permanente du dispositif.

C
D
E
Page
26
- Man
uel F
B010
02-F
R - v
ers.
1 -
11/2
017
- © C
AME
S.p.
A. -
Le c
onte
nu d
u m
anue
l est
sus
cept
ible
de
subi
r des
mod
ifica
tions
à to
ut m
omen
t et s
ans
aucu
n pr
éavis
.
A v e c d i f f é r e n t i e l a c t i v é ( ), appuyer sur le bouton P à l'écran pour pouvoir lire la valeur du différentiel ther-mique configuré C.
Se servir des boutons pour configurer la valeur du différentiel entre 0°C et 0,9°C D.
En cas de configuration du différentiel sur 0°C, un délai minimum d'allumage/extinction d'1 minute sera respecté durant le fonctionnement indépendamment de la température ambiante détectée.
Appuyer sur le bouton P pour sortir de la programmation.
Activation et configuration de l'algorithme proportionnel intégralCet algorithme permet au thermostat programmable de réduire les cycles d'allumage de la chaudière au fur et à mesure que la température ambiante avoisine celle configurée, en obtenant ainsi une forte réduction des consommations avec un degré de confort optimal.Il existe trois programmes préconfigurés adaptés aux différents types d'installations (P1, P2 et P3) ou bien un programme totalement manuel (P4).
Avec différentiel désactivé ( ) B, appuyer sur le bouton P pour accéder à la sec-tion permettant de sélectionner un des programmes proportion-nels intégraux disponibles E.

F
G
H
I
Page
27
- Man
uel F
B010
02-F
R - v
ers.
1 -
11/2
017
- © C
AME
S.p.
A. -
Le c
onte
nu d
u m
anue
l est
sus
cept
ible
de
subi
r des
mod
ifica
tions
à to
ut m
omen
t et s
ans
aucu
n pr
éavis
.
Se servir des boutons pour choisir le programme souhaité entre : P1, P2, P3 F (voir gra-phique et tableau L) ; appuyer sur le bouton P pour confirmer la sélection et terminer la pro-grammation.
Le premier paramètre concerne la durée des cycles d'allumage G.
Se servir des boutons pour choisir la durée du cycle entre 5, 10, 15, 20, 25, 30, 35 ou 40 minutes H.
Appuyer sur le bouton P I pour confirmer la durée du cycle configurée et passer au réglage du temps minimum de ON.
Se servir des boutons pour choisir le temps minimum de ON entre 1 et 5 minutes.
En cas de sélection du programme P4, l'enfoncement du bouton P permet d'accéder à la programmation de chaque paramètre de composition du programme manuel P4.

J
K
ON ON
OFF
1 h
Page
28
- Man
uel F
B010
02-F
R - v
ers.
1 -
11/2
017
- © C
AME
S.p.
A. -
Le c
onte
nu d
u m
anue
l est
sus
cept
ible
de
subi
r des
mod
ifica
tions
à to
ut m
omen
t et s
ans
aucu
n pr
éavis
.
Appuyer sur le bouton P J pour confirmer le temps minimum de ON configuré et passer au réglage de la bande proportionnelle.
Se servir des boutons pour régler la valeur de la bande proportionnelle à une valeur comprise entre 1 et 3°C.
Le graphique et le tableau K peuvent faciliter le choix du type de programme ou de la valeur des paramètres à saisir.
Appuyer sur le bouton P pour sortir de la programmation.
Remarque. Tous les paramètres relatifs à la configuration du type d'algorithme de gestion thermique sont sauvegardés dans la mémoire permanente du dispositif.
Tem
péra
ture
Temps
Point de consigne
Prog. Durée cycle (minutes)
Temps minimum de ON (minutes)
Bande proportionnelle Type d'installation
P1 10 1 1,5°CBase pour brûleur à gaz, ventilo-convecteurs, vannes de zone, radiateurs en aluminium
P2 5 1 1,5°C Radiateurs électriques
P3 20 2 1,5°C Installations rayonnantes ou au sol, rafraîchissement
P4 de 5 à 40 de 1 à 5 de 1°C à 3°C

Page
29
- Man
uel F
B010
02-F
R - v
ers.
1 -
11/2
017
- © C
AME
S.p.
A. -
Le c
onte
nu d
u m
anue
l est
sus
cept
ible
de
subi
r des
mod
ifica
tions
à to
ut m
omen
t et s
ans
aucu
n pr
éavis
.
Activations à distanceLa connexion d'une interface spécifique aux bornes 1-2 (voir « Branchements électriques » page 8) permet de/d' :- forcer à distance le fonctionnement de l'appareil en mode manuel,- activer un programme temporisé spécial précédemment programmé.
Forcer à distance le fonctionnement de l'appareil en mode manuel
À l'aide d'une commande spécifique à distance, l'utilisateur peut faire en sorte que le dispositif annule tout programme en cours d'exécution et se mette à fonctionner en mode manuel.
L'activation à distance de la modalité manuelle est signalée par l'affichage du symbole .
La température cible est celle configurée par l'utilisateur au cours de la dernière utilisation du dispositif en mode manuel.
La programmation reste activée jusqu'à toute nouvelle programmation effectuée manuel-lement sur le dispositif ou jusqu'à la réception d'une nouvelle commande à distance, qui ramènera le dispositif à la programmation précédant la réception du premier message.
Activation à distance d'un programme manuel temporisé spécial
Il est possible de mémoriser 2 programmes manuels temporisés pouvant être activés à distance, à savoir un pour la modalité de CHAUFFAGE et un autre pour la modalité de RAFRAÎCHISSEMENT.
L'activation à distance du programme manuel temporisé est signalée par l'affichage du symbole .
La programmation reste activée jusqu'à toute nouvelle programmation effectuée manuel-lement sur le dispositif ; au terme du programme manuel temporisé, le dispositif reprend la programmation précédant la réception du message.
La configuration prédéfinie du programme manuel temporisé est :1 heure à 20°C en mode CHAUFFAGE,1 heure à 24°C en mode RAFRAÎCHISSEMENT.
Remarque. Quand le programme est activé à distance, le reste de l'heure ou du jour est considéré comme une heure entière ou un jour entier.

B
C
D
A
Page
30
- Man
uel F
B010
02-F
R - v
ers.
1 -
11/2
017
- © C
AME
S.p.
A. -
Le c
onte
nu d
u m
anue
l est
sus
cept
ible
de
subi
r des
mod
ifica
tions
à to
ut m
omen
t et s
ans
aucu
n pr
éavis
.
Générer un programme manuel temporisé pour l'activation à distanceExtraire le corps de l'appareil. Activer le mode de fonctionnement MANUEL.Sélectionner le mode de fonctionnement pour lequel créer le programme (CHAUFFAGE ou RAFRAÎCHISSEMENT).
Se servir des boutons pour régler la valeur de température souhaitée A.
Appuyer sur le bouton B.
Se servir des boutons pour configurer le nombre d'heures d'activation.
Appuyer sur le bouton C.
Se servir des boutons pour configurer le nombre de jours d'activation (de 1 à 99).
Appuyer sur le bouton D pour sauvegarder le programme configuré comme programme activable à distance.

A
C
B
Page
31
- Man
uel F
B010
02-F
R - v
ers.
1 -
11/2
017
- © C
AME
S.p.
A. -
Le c
onte
nu d
u m
anue
l est
sus
cept
ible
de
subi
r des
mod
ifica
tions
à to
ut m
omen
t et s
ans
aucu
n pr
éavis
.
Calcul des heures de fonctionnement
Remise à zéro du dispositif
Extraire le corps de l'appareil.
Activer le mode de fonctionne-ment MANUEL A.
En cas d'anomalies de fonc-tionnement, d'interventions et d'autres raisons techniques, l'appareil peut avoir besoin d'être remis à zéro.
Extraire le corps de l'appareil.
Appuyer sur le bouton R C.
Appuyer sur le bouton C B.
L'écran visualise pendant 5 secondes le temps de fonction-nement.
Pour remettre le compteur à zéro, appuyer sur le bouton avant que la donnée ne soit plus visualisée.
Cette opération NE comporte PAS l'élimination d'éventuels programmes personnalisés qui seront réinitialisés, avec les autres données, au redémarrage de l'appareil (voir tableau).
Restauration des configurations d'usinePour réinitialiser toutes les configurations d'usine, appuyer en même temps sur les boutons
+ + 1÷7 puis sur le bouton R.

CAME S.p.A.Via Martiri Della Libertà, 15 31030 Dosson di Casier - Treviso - Italytel. (+39) 0422 4940 - fax. (+39) 0422 4941
Page
32
- Man
uel F
B010
02-F
R - v
ers.
1 -
11/2
017
- © C
AME
S.p.
A. -
Le c
onte
nu d
e ce
man
uel e
st s
usce
ptib
le d
e su
bir d
es m
odifi
catio
ns à
tout
mom
ent e
t san
s au
cun
préa
vis.
Remplacement des piles
Le symbole clignotant à l'écran indique que les piles doivent être remplacées d'ici 1 mois environ. Lorsque l'écran affiche l'indication et le symbole , l’appareil ne fonctionne plus et la zone thermique n'est plus contrôlée. Après avoir enlevé les piles usagées, il est nécessaire d'introduire les nouvelles piles (3 piles alcalines LR03 AAA d'1,5 V) dans les 2 minutes qui suivent ; après écoulement du temps limite, le dispositif sera réinitialisé aux configurations d'usine.
ATTENTION !Si les piles ne sont pas remplacées à temps, le système de chauffage pourrait se détériorer (la protection antigel n'est plus garantie).Le positionnement incorrect des piles peut endommager l'appareil. L’utilisation de piles épuisées peut provoquer des anomalies de fonctionnement.
Caractéristiques techniques
- Appareil à usage domestique.- Dispositif électronique à montage
indépendant.- Afficheur graphique LCD rétroéclairé.- Alimentation : 3 piles alcalines LR03 AAA
d'1,5 V.- Autonomie : au-delà d'1 an.- Caractéristiques du relais : tension
maximum 250 V, courant maximum 5 A avec charge résistive, 2 A avec charge inductive.
- Type d'action : 1B-U.- Contacts disponibles : 1 contact à
permutation NO-NF.
- Intervalle de détection de la tempéra-ture ambiante : 15 secondes.
- Résolution de lecture : 0,1°C.- Précision : ≤ ±0,3°C.- Logiciel classe A.- Degré de pollution : 2.- Tension d'impulsion : 4 kV.- Température maximum de la tête de
commande : 40°C.- Degré de protection : IP30.- Isolation électrique classe II.- Température de fonctionnement : de
0°C à +40°C.

Programmierbare Thermostatsteuerung
TH/350MONTAGE- UND BETRIEBSANLEITUNG DE Deutsch
FB01002-DE

S. 2
- An
leitu
ng F
B010
02-D
E - V
er. 1
- 11
/201
7 - ©
CAM
E S.
p.A.
- De
r Inh
alt d
er A
nlei
tung
kan
n je
derz
eit o
hne
Vora
nkün
digu
ng g
eänd
ert w
erde
n.
Allgemeine Hinweise• Lesen Sie die Anweisungen vor dem Einbau genau durch und führen Sie die vom Her-
steller genannten Arbeiten aus.• Die Installation, Programmierung, Inbetriebnahme und Wartung des Produktes müssen
ausschließlich von qualifiziertem und entsprechend geschultem Fachpersonal unter Einhaltung der geltenden Normen, einschließlich der Unfallverhütungs- und Abfallent-sorgungsvorschriften, durchgeführt werden.
• Der Installateur muss sich vergewissern, dass die benutzerrelevanten Angaben, sofern vorgesehen, vorhanden sind und diesem ausgehändigt werden.
• Vor Reinigungs- und Wartungsarbeiten jeglicher Art, zunächst die Geräte von der Stromversorgung trennen.
• Die Geräte dürfen ausschließlich für den Zweck verwendet werden, für den sie aus-drücklich bestimmt sind.
• Der Hersteller haftet nicht für Schäden, die durch unsachgemäßen, falschen oder unvernünftigen Gebrauch verursacht werden.
• Achtung: Explosionsgefahr, wenn falsche Ersatzbatterien verwendet werden.• Am Ende ihres Lebenszyklusses die Batterien nicht mit dem Hausmüll entsorgen, bitte
getrennt sammeln und korrekt entsorgen.
ENTSORGUNG - Sicherstellen, dass das Verpackungsmaterial nicht in die Umwelt gelangt und gemäß den im Verwendungsland gültigen Vorschriften entsorgt wird.Das nicht mehr benutzbare Gerät muss umweltgerecht entsorgt werden und darf nicht in die Umwelt gelangen. Das Gerät muss gemäß den geltenden Vorschriften entsorgt werden, dabei muss das Recycling der Bestandteile des Geräts bevorzugt werden. Die wiederverwertbaren Bestandteile des Geräts, sind mit einem Symbol und dem Material-Kürzel gekennzeichnet.Bezugsnormen - Das Produkt entspricht den geltenden Richtlinien.

A B C D E a b
A B C D E a b
S. 3
- An
leitu
ng F
B010
02-D
E - V
er. 1
- 11
/201
7 - ©
CAM
E S.
p.A.
- De
r Inh
alt d
er A
nlei
tung
kan
n je
derz
eit o
hne
Vora
nkün
digu
ng g
eänd
ert w
erde
n.
Montage
Inhalt der Verpackung
Hauptaggregat Tragrahmen
Hilfsrahmen
SchraubenAbdeckung/Adapter
Durch die Kombination verschiedener Hilfsrahmen und Abdeckungen kann das Gerät, wie auf den nächsten Seiten beschrieben, in die meisten handelsüblichen Unterputzdosen eingesetzt werden.
HINWEIS:Die Marken System, Playbus, Playbus Young, Chorus, sind Eigentum der GEWISS S.p.A.Die Marken Light, Light Tech, Living International, Axolute, Luna, Livinglight Quadre, Matix, Livinglight Tonde, Livinglight AIR, Axolute Air, sind Eigentum der BTICINO S.p.A.Die Marken Plana, Eikon, Idea, Idea Rondò, Arché, Eikon Evo, sind Eigentum der VIMAR S.p.A.Die Marken Vela Quadra, Vela Tonda, Serie Cross, sind Eigentum der LEGRAND S.p.A.Die Marken Banquise, Sistema 45, Serie 44, sind Eigentum der AVE S.p.A.Die Marke Elos ist Eigentum der ABB S.p.A.
HINWEIS: Optional sind Blenden und Abdeckungen in den Farben anthrazit und aluminium erhältlich.

A
A
a
a
A
b
b
S. 4
- An
leitu
ng F
B010
02-D
E - V
er. 1
- 11
/201
7 - ©
CAM
E S.
p.A.
- De
r Inh
alt d
er A
nlei
tung
kan
n je
derz
eit o
hne
Vora
nkün
digu
ng g
eänd
ert w
erde
n.
Kombination/Anpassung der Hilfsrahmen an übliche Rahmen
GEWISS - Playbus, Playbus Young.
BTICINO - Matix.
BTICINO - Light, Light Tech, Living International.
VIMAR - Plana, Eikon.
LEGRAND - Vela Quadra, Vela Tonda, Serie Cross.

B
a
a
B
a
a
B
a
a
S. 5
- An
leitu
ng F
B010
02-D
E - V
er. 1
- 11
/201
7 - ©
CAM
E S.
p.A.
- De
r Inh
alt d
er A
nlei
tung
kan
n je
derz
eit o
hne
Vora
nkün
digu
ng g
eänd
ert w
erde
n.
VIMAR - Idea, Idea Rondò.
ABB - Elos.
AVE - Banquise, Sistema 45.

C
C
B
S. 6
- An
leitu
ng F
B010
02-D
E - V
er. 1
- 11
/201
7 - ©
CAM
E S.
p.A.
- De
r Inh
alt d
er A
nlei
tung
kan
n je
derz
eit o
hne
Vora
nkün
digu
ng g
eänd
ert w
erde
n.
BTICINO - Livinglight Qua-dre.VIMAR - Arché
BTICINO - Livinglight Ton-de.GEWISS - Chorus.
GEWISS - System.BTICINO - Axolute, Luna.

E
E
D
S. 7
- An
leitu
ng F
B010
02-D
E - V
er. 1
- 11
/201
7 - ©
CAM
E S.
p.A.
- De
r Inh
alt d
er A
nlei
tung
kan
n je
derz
eit o
hne
Vora
nkün
digu
ng g
eänd
ert w
erde
n.
AVE - Serie 44. BTICINO - Livinglight AIR.
VIMAR - Eikon Evo.
BTICINO - Axolute Air.

L
1
L
1
A
B
C
D
S. 8
- An
leitu
ng F
B010
02-D
E - V
er. 1
- 11
/201
7 - ©
CAM
E S.
p.A.
- De
r Inh
alt d
er A
nlei
tung
kan
n je
derz
eit o
hne
Vora
nkün
digu
ng g
eänd
ert w
erde
n.
Das Gerät an einer für die Temperaturer-fassung geeigneten Stelle montieren (möglichst an einer Innenwand, nicht in Nischen, hinter Türen oder Gardinen oder in der Nähe von Wärmequellen anbringen).
Die Lasche L und anschließend das Gerät herausziehen, bis es nicht mehr weiter hinausgeht B.
Die seitlichen Laschen, in der Nähe des Symbols drücken, um das Gerät vollständig herauszuziehen C.
3 Alkali-Mangan-Batterien LR03 AAA zu 1,5V in das Batteriefach einlegen, die Polangaben beachten D.

NCNA C12
U1
LN
TH350
NCNA C12
LN
TH350
U2
M
E
F
G
1 2 NA NC1 2
S. 9
- An
leitu
ng F
B010
02-D
E - V
er. 1
- 11
/201
7 - ©
CAM
E S.
p.A.
- De
r Inh
alt d
er A
nlei
tung
kan
n je
derz
eit o
hne
Vora
nkün
digu
ng g
eänd
ert w
erde
n.
Die Anschlussweise hängt von den vom programmierbaren Thermostat gesteuerten Geräten ab.
ZEICHENERKLÄRUNGNetzstromleiterN = NeutralleiterL = Leiter
RelaiskontakteC = allgemeinerNO = normalerweise offener KontaktNC = normalerweise geschlossener Kontakt
StromverbraucherU1 = Brenner, Umwälzpumpe, Magnet-ventil, usw.U2 = motorisiertes Ventil
Eingangskontakte für Fernsteuerung1. Eingang2. Eingang
HINWEIS. Beim Anschließen die Anleitun-gen des zu steuernden Geräts beachten.
Elektrische Anschlüsse
AnschlussFernsteuerung
AnschlussMagnetkontakt

H
S. 1
0 - A
nlei
tung
FB0
1002
-DE
- Ver
. 1 -
11/2
017
- © C
AME
S.p.
A. -
Der I
nhal
t der
Anl
eitu
ng k
ann
jede
rzei
t ohn
e Vo
rank
ündi
gung
geä
nder
t wer
den.
Zunächst den gewählten Rahmen und den Hilfsrahmen zusammenbauen und die Anschlüsse vornehmen, danach den programmierbaren Thermostat wie dargestellt zusammenbauen, siehe Abb. H.
Montage

⑰
① ② ③ ④ ⑤ ⑥ ⑦ ⑧ ⑨
T1T2T3
⑩
⑪⑫⑮ ⑭ ⑬⑪
⑯
S. 1
1 - A
nlei
tung
FB0
1002
-DE
- Ver
. 1 -
11/2
017
- © C
AME
S.p.
A. -
Der I
nhal
t der
Anl
eitu
ng k
ann
jede
rzei
t ohn
e Vo
rank
ündi
gung
geä
nder
t wer
den.
① Ladestand der Batterie.
② Nicht gesteuerte Temperaturzone
③ Temperaturzone im Jolly-Betrieb.
④ Programmierte Verzögerung.
⑤ Temperaturzone im manuellen Betrieb.
⑥ Fernsteuerung.
⑦ Frostschutz aktiviert.
⑧Kühlbetrieb eingeschaltet. Animiertes Symbol = Kühlung läuft.
⑨Heizbetrieb eingeschaltet.Animiertes Symbol = Heizung läuft.
⑩ Ist-Temperatur.
⑪ Taster, mit denen die Werte verändert werden.
⑫ Auswahl MANUELLER/AUTOMATISCHER Betrieb.
⑬Lasche, mit der man den programmierbaren Thermostat herausziehen kann.
⑭ Temperaturfühler.
⑮ Aktivierung des JOLLY- bzw. des MANUELLEN ZEITPROGRAMMS.
⑯ Stunden-/Temperatur-Diagramm T1, T2, T3
⑰ Wochentage, der auf dem Diagramm angezeigte Tag ist gekennzeichnet.
Beschreibung
Beschreibung der Symbole auf dem Display und der vorderen Taster

⑱ ⑲ ⑳ ㉑ ㉓ ㉔㉒
S. 1
2 - A
nlei
tung
FB0
1002
-DE
- Ver
. 1 -
11/2
017
- © C
AME
S.p.
A. -
Der I
nhal
t der
Anl
eitu
ng k
ann
jede
rzei
t ohn
e Vo
rank
ündi
gung
geä
nder
t wer
den.
ACHTUNG!Nach dem ersten Druck auf einen beliebigen Taster geht nur die Display-Beleuchtung an, die 15 Sekunden nach dem letzten Tasterdruck ausgeht.Für die Reinigung nur leicht mit Wasser angefeuchtete, weiche Tücher verwenden.
⑱ Reset-Taster
⑲ Uhrzeit und Ein-/Ausschaltverzögerung einstellen.
⑳ Temperatureinstellung der 3 Bereiche T1, T2, T3.Betriebsparameter einstellen.
㉑ Betriebsart des Geräts auswählen.KÜHLEN - HEIZEN - OFF
㉒ Taster für die Auswahl der gewünschten Uhrzeit auf dem Diagramm des Tagesplaners.
㉓ Taster für die Auswahl des Tags, siehe ⑰.
㉔ Taster mit dem der Tagesplan dupliziert wird.
Funktion der InnentasterUm auf die Innentaster zuzugreifen, die Lasche ⑬ und anschließend das Gerät her-ausziehen.

A
B
C
D
S. 1
3 - A
nlei
tung
FB0
1002
-DE
- Ver
. 1 -
11/2
017
- © C
AME
S.p.
A. -
Der I
nhal
t der
Anl
eitu
ng k
ann
jede
rzei
t ohn
e Vo
rank
ündi
gung
geä
nder
t wer
den.
Das Gerät herausziehen.
Den Taster ständig drücken A.
Die Minuten blinken.
Programmierung und Verwendung des Geräts
Uhrzeit einstellen
Mit den Tastern die genaue Minutenzahl eingeben B.
Auf den Taster drücken C.
Die Stunden blinken.
Mit den Tastern die genaue Stundenzahl eingeben D.

F
G
E
S. 1
4 - A
nlei
tung
FB0
1002
-DE
- Ver
. 1 -
11/2
017
- © C
AME
S.p.
A. -
Der I
nhal
t der
Anl
eitu
ng k
ann
jede
rzei
t ohn
e Vo
rank
ündi
gung
geä
nder
t wer
den.
Auf den Taster drücken E.
Die Wochentagsanzeige blinkt nun.
Mit den Tastern den aktuel-len Wochentag eingeben F.
Auf den Taster drücken, um die Einstellung der Uhrzeit und des Datums zu beenden G.
Nach Beendigung der Einstel-lung blinken die beiden Punk-te zwischen der Stunden- und Minutenanzeige.
Hinweis. Wenn das Gerät 15 Sek. lang nicht betätigt wird, beendet das Gerät den Vorgang automatisch und speichert die zuletzt eingegebenen Daten.Hinweis. Nach jedem Druck auf die Taster verringert/erhöht sich die Zahl auf dem Display um eine Eineit; durch ständigen Druck wechseln die Zahlen auf dem Display 5 Sekunden lang langsam und anschließend schneller.

A
B
C
S. 1
5 - A
nlei
tung
FB0
1002
-DE
- Ver
. 1 -
11/2
017
- © C
AME
S.p.
A. -
Der I
nhal
t der
Anl
eitu
ng k
ann
jede
rzei
t ohn
e Vo
rank
ündi
gung
geä
nder
t wer
den.
Frostschutz-BetriebIm OFF-Betrieb einen der Taster drücken.Wenn die beiden Symbole
und gleichzeitig angehen, ist der Frostschutz-Betrieb ein-geschaltet C.
Auf den Taster A drücken, um die Betriebsart der Tempe-raturzone zu wählen.
Heizen.
Kühlen.
Off.
Frostschutz.
Betriebsart einstellen
Für eine einfachere Verwendung wurden zwei AUTOMATISCHE Programme vorprogram-miert; eines zum Heizen und eines zum Kühlen, die festgelegten Temperaturen sind:
Heizen KühlenT1 16 °CT2 18 °CT3 20 °C
T1 24 °CT2 26 °CT3 28 °C
Wenn die vorprogrammierten Programme Ihren Anforderungen entsprechen, sind keine weiteren Einstellungen notwendig und das Gerät ist sofort betriebsbereit.
Betriebsart OFFWenn die Ikone leuchtet, wird die Temperaturzone nicht von der Anlage gesteuert.
Die Raumtemperaturanzeige ist 5 Sekunden lang nicht mehr sichtbar B.

E
D
A
AB
S. 1
6 - A
nlei
tung
FB0
1002
-DE
- Ver
. 1 -
11/2
017
- © C
AME
S.p.
A. -
Der I
nhal
t der
Anl
eitu
ng k
ann
jede
rzei
t ohn
e Vo
rank
ündi
gung
geä
nder
t wer
den.
Mit den Tastern wird die niedrigste tolerierte Temperatur für die Temperaturzone einge-stellt.
Hinweis. Programmierbar sind als niedrigste tolerierte Temperatur 3,0°C und als höchste 16.0°C.
Erneut auf den Taster drü-cken und das Heiz-/Kühlpro-gramm wieder zurücksetzen E.
Das Gerät herausziehen.
Mit dem Taster 1÷7 die Tages-anzeige auf den 1. Tag (Montag) verschieben A.
Die Klammer des gewählten Tags blinkt.
Individuelle Einstellung des Temperatur-Tagesplans
Mit den Tastern 0÷23 den blinkenden Zeiger auf dem Dia-gramm des Tagesplans auf 0 Uhr schieben B.

C
D
E
F
S. 1
7 - A
nlei
tung
FB0
1002
-DE
- Ver
. 1 -
11/2
017
- © C
AME
S.p.
A. -
Der I
nhal
t der
Anl
eitu
ng k
ann
jede
rzei
t ohn
e Vo
rank
ündi
gung
geä
nder
t wer
den.
Mit den Tastern den ge-wünschten Temperaturbereich wählen C; danach den Taster 0÷23 drücken, um auf die nächste Stunde zu wechseln und ebenfalls die Soll-Temperatur wählen D.
Bis zur Uhrzeit 23:00 ebenso vorgehen.
Die Programmierung ist nun für den ersten Tag (Montag) abge-schlossen.
Um das eingestellte Programm für die anderen Wochentage zu dupli-zieren, den Taster C drücken E.
Wenn man weiter auf C drückt, wird das Programm in die durch Blinken gekennzeichneten Tage eingefügt.
Um die nächsten Tage anders einzustellen, den Tag mit dem Taster 1÷7 verschieben und die oben beschriebene Prozedur wiederholen F.
Hinweis. Während der Einstellung blinkt die Uhrzeit, der Doppelpunkt zwischen den Stunden und Minuten blinkt nicht und es wird die Soll-Temperatur angezeigt.

G
A
B
S. 1
8 - A
nlei
tung
FB0
1002
-DE
- Ver
. 1 -
11/2
017
- © C
AME
S.p.
A. -
Der I
nhal
t der
Anl
eitu
ng k
ann
jede
rzei
t ohn
e Vo
rank
ündi
gung
geä
nder
t wer
den.
Das Gerät herausziehen.
Den AUTOMATISCHEN Betrieb einstellen. Den Taster 1÷7 drücken A und den Wochentag, an dem die Verzögerung eingestellt werden soll, wählen.
Auf den Taster 0÷23 drücken B und die Uhrzeit, zu der die Verzögerung eingestellt werden soll, wählen.
Durch Druck auf die Program-mierung beenden G.
Wenn das Gerät 10 Sekunden lang nicht betätigt wird, wird der Vorgang automatisch beendet.
Einer programmierten Betriebsart eine Zeitverzögerung hinzufügen
Mit dieser Funktion kann die Aktivierung der eingestellten Betriebsart um eine bestimmte Zeitspanne verzögert werden. Wenn man z.B. um 7:00 Uhr eine Wohlfühltemperatur wünscht, kann man auf diese Weise die Anlage um 6:30 einschalten. Zu diesem Zweck die Soll-Temperatur für 6:00 Uhr programmieren und eine Verzögerung von 30 Minuten einstellen; der Thermostat schaltet die Anlage um 6:30 Uhr ein. Die eingestellte Verzögerung wird in der Stunde, für die sie programmiert wurde, auf dem Display angezeigt.
Hinweis. Die Verzögerung kann mehrmals am Tag und mehrere Tage in der Woche programmiert werden.

C
A
B
C
S. 1
9 - A
nlei
tung
FB0
1002
-DE
- Ver
. 1 -
11/2
017
- © C
AME
S.p.
A. -
Der I
nhal
t der
Anl
eitu
ng k
ann
jede
rzei
t ohn
e Vo
rank
ündi
gung
geä
nder
t wer
den.
Mehrmals auf den Taster drücken C und die Verzögerung zyklisch auf 15, 30, 45 oder 0 Minuten einstellen.
Wenn das Gerät 10 Sekunden lang nicht betätigt wird, wird der Vorgang automatisch beendet.
Hinweis. Die Einstellung wird im Permanentspeicher des Geräts gespeichert.
Mit den Tastern die ge-wünschte T1 Temperatur ein-stellen C.
Individuelle Einstellung der Temperaturen T1, T2, T3
Das Gerät herausziehen.
Den AUTOMATISCHEN Betrieb einstellen.
Mit dem Taster wählen, ob T1, T2, T3 für das Heizdiagramm ( ) oder für das Kühldiagramm ( ) eingestellt werden soll A.
Den Taster P drücken.
Die für T1 eingestellte Temperatur wird angezeigt B.

D
A
S. 2
0 - A
nlei
tung
FB0
1002
-DE
- Ver
. 1 -
11/2
017
- © C
AME
S.p.
A. -
Der I
nhal
t der
Anl
eitu
ng k
ann
jede
rzei
t ohn
e Vo
rank
ündi
gung
geä
nder
t wer
den.
Wenn das Diagramm des Tagesplaners auf dem Display erscheint, ist die Einstellung der Temperaturbereiche abgeschlossen.
In jedem Fall beendet das Gerät die Programmierung 10 Sekunden nach der letzten Einstellung und übernimmt die bis dahin eingestellten Werte.
Das Gerät wieder in den Rahmen stecken.
Hinweis. Der Wert, der für jeden Temperaturbereich eingestellt werden kann, wird durch den nächsthöheren, nächstgeringeren Temperaturbereich begrenzt.Wenn T3 auf 20°C und T1 auf 16°C eingestellt sind, kann der Wert von T2 zwischen 16,1°C und 19,9°C eingestellt werden; wenn T2 auf 21°C eingestellt wird, wechselt T3 automatisch auf 21,1°C.
Den AUTOMATISCHEN Betrieb einstellen.
Auf den Taster drücken A.
Das Symbol bestätigt die Aktivierung des Programms.
Das Programm kann individuell eingestellt werden (siehe "Indi-
Jolly-Programm
Das JOLLY-Programm (wird an Feiertagen, im Urlaub usw. verwendet) kann am laufenden Tag jederzeit gestartet werden und bleibt bis 24:00 Uhr eingeschaltet. Es kann auch für einen beliebigen Wochentag eingestellt werden.
In der Werkseinstellung hat das Jolly-Programm das für den Sonntag (7) verwendete Profil, es kann auch individuell eingestellt werden.
Um dieses Programm für den laufenden Tag einzuschalten, wie folgt vorgehen:
Das Gerät herausziehen.
Mit dem Taster P die auf dem Display angezeigte Temperatur bestätigen und zum nächsten Temperaturniveau wechseln D.
Wie oben beschrieben alle Tem-peraturbereiche beliebig ein-stellen.

B
C
D
S. 2
1 - A
nlei
tung
FB0
1002
-DE
- Ver
. 1 -
11/2
017
- © C
AME
S.p.
A. -
Der I
nhal
t der
Anl
eitu
ng k
ann
jede
rzei
t ohn
e Vo
rank
ündi
gung
geä
nder
t wer
den.
viduelle Einstellung des Temperatur-Tagesplans" auf Seite 15). Um Mitternacht schaltet das Gerät wieder auf AUTOMATISCHEN Betrieb um.
Um das JOLLY-Programm sofort zu beenden und wieder auf AUTOMATISCHEN Betrieb umzuschalten, erneut den Taster oder drücken.
Das Jolly-Programm für einen bestimmten Tag einstellen
Den Taster drücken C.
Das Symbol auf dem Display bestätigt, dass das Programm für den gewählten Tag eingestellt wurde. Das Programm wird am gewählten Tag um 0:00 Uhr ausgeführt.
Das Programm kann individuell eingestellt werden (siehe "Indi-viduelle Einstellung des Tempe-ratur-Tagesplans" auf Seite 15).
Den Taster drücken oder 10 Sekunden warten, um wieder auf AUTOMATISCHEN Betrieb umzuschalten.
Die programmierte Einstellung des Jolly-Programms löschen
Mit dem Taster 1÷7 den Zeiger wieder bis zum Tag, an dem das Jolly-Programm eingestellt wurde, verschieben; Auf den Taster drücken; die Einstellung ist gelöscht.
Auf den Taster drücken oder 10 Sekunden warten, um wieder auf AUTOMATISCHEN Betrieb umzuschalten.
Das Gerät herausziehen.
Den AUTOMATISCHEN Betrieb einstellen.
Mit dem Taster 1÷7 den Zeiger bis zum gewählten Tag verschie-ben B.

A
B
A
S. 2
2 - A
nlei
tung
FB0
1002
-DE
- Ver
. 1 -
11/2
017
- © C
AME
S.p.
A. -
Der I
nhal
t der
Anl
eitu
ng k
ann
jede
rzei
t ohn
e Vo
rank
ündi
gung
geä
nder
t wer
den.
Wenn die automatische Tem-peratursteuerung momentan deaktiviert werden soll, kann man mit dem Taster auf MANUELLEN Betrieb umschalten A.
Manueller Betrieb
Auf dem Display wird neben der aktuellen Uhrzeit die voreinge-stellte manuelle Soll-Temperatur (20°C) angezeigt.
Mit den Tastern den ge-wünschten Wert einstellen B.
Die eingestellte Raumtemperatur bleibt konstant, bis neue Einstellungen vorgenommen werden oder eine andere Betriebsart gewählt wird.Erneut auf drücken, um wieder auf AUTOMATISCHEN Betrieb zu schalten.
Zeitgeschalteter manueller Betrieb
Wenn man einige Stunden oder Tage lang eine bestimmte Temperatur einstellen möchte (z.B. Wohlfühltemperatur im Fall von Besuch oder Öko-Temperatur bei längerer Abwesen-heit) kann man auf ZEITGESCHALTETEN MANUELLEN BETRIEB umschalten.
Den MANUELLEN Betrieb ak-tivieren.
Mit den Tastern die Soll-Tem-peratur einstellen A.

B
C
A
S. 2
3 - A
nlei
tung
FB0
1002
-DE
- Ver
. 1 -
11/2
017
- © C
AME
S.p.
A. -
Der I
nhal
t der
Anl
eitu
ng k
ann
jede
rzei
t ohn
e Vo
rank
ündi
gung
geä
nder
t wer
den.
Das Programm ist sofort aktiv und bleibt bis Ablauf der eingestellten Zeit eingeschaltet; danach funktioniert das Gerät wieder in der vor dem zeiteingestellten manuellen Betrieb gewählten Betriebsweise.
Um vor Ablauf der eingestellten Zeitspanne wieder auf AUTOMATISCHEN Betrieb umzu-schalten, den Taster drücken.
Erneut auf den Taster drücken und mit den Tastern die Tage der Aktivierung einstellen C.
Auf den Taster drücken und mit den Tastern die Dauer der Aktivierung in Stunden ein-stellen B.
Kalibrierung des Temperaturfühlers ändernWenn aufgrund des Standorts des Gerätes die korrekte Temperaturerfassung nicht möglich sein sollte, kann die Ist-Temperatur in Zehntelgraden bis ±3 °C geändert werden.
Das Gerät herausziehen.
Auf MANUELLEN Betrieb um-schalten.
Den Taster P drücken A.

B
A
S. 2
4 - A
nlei
tung
FB0
1002
-DE
- Ver
. 1 -
11/2
017
- © C
AME
S.p.
A. -
Der I
nhal
t der
Anl
eitu
ng k
ann
jede
rzei
t ohn
e Vo
rank
ündi
gung
geä
nder
t wer
den.
Mit den Tastern den ge-wünschten Korrekturwert ein-stellen.
Hinweis. Die Einstellung wird im Permanentspeicher des Geräts gespeichert.
Die automatisch vorgezogene Aktivierung ein-/ausschaltenDiese (nur im Heizbetrieb aktivierte) Funktion ermöglicht die automatische Anpassung der Einschalt-Uhrzeit, damit zur eingestellten Uhrzeit die programmierte Soll-Temperatur erreicht wird. Anhand der Ist-Temperatur und der Soll-Temperatur wird der vorgezogene Einschaltzeitpunkt berechnet (max. 3 Stunden früher, als die Uhrzeit zu der die Soll-Tem-peratur erreicht werden soll).
BeispielWenn das Gerät so eingestellt wurde, dass die Ist-Temperatur um 7:00 Uhr 20°C be-tragen soll und die automatisch vorgezogene Aktivierung nicht eingeschaltet wurde, geht die Anlage um 7:00 Uhr an, ohne zu diesem Zeitpunkt eine Temperatur von 20°C zu gewährleisten.Wenn die automatisch vorgezogene Aktivierung eingeschaltet wurde , zieht der pro-grammierbare Thermostat die Aktivierung vor, damit die Temperatur von 20°C um 7:00 erreicht wird; mit der Selbstlernfunktion speichert der programmierbare Thermostat die Raumtemperaturwerte, um an den Folgetagen die eingestellte Soll-Temperatur genauer einzuhalten.
Das Gerät herausziehen.
Den MANUELLEN Betrieb ak-tivieren.
Den Taster P drücken, bis auf dem Display die Angabe erscheint
A.

A
B
ON ON
OFF
1 h
B
S. 2
5 - A
nlei
tung
FB0
1002
-DE
- Ver
. 1 -
11/2
017
- © C
AME
S.p.
A. -
Der I
nhal
t der
Anl
eitu
ng k
ann
jede
rzei
t ohn
e Vo
rank
ündi
gung
geä
nder
t wer
den.
Den Temperatur-Regler festlegenMan kann zwei Reglertypen wählen: D-Regler und PI-Regler (d.h. Differential- bzw. Proportional-Integral-Regler).
D-Regler aktivieren und konfigurierenDieses System eignet sich bei schwer zu regelnden Anlagen und extremen Schwankungen der Außentemperatur.
Das Gerät herausziehen.
Den MANUELLEN Betrieb ak-tivieren.
Den Taster P drücken, bis auf dem Display die Angabe erscheint A.
Mit den Tastern den D-Regler ein-/ausschalten B.
= Aktiviert.
= Nicht aktiviert.
Tem
pera
tur
Set-point + Differential
Set-point - Differential
Set-point
Dauer
Mit den Tastern die auto-matisch vorgezogene Aktivierung ein-/ausschalten B.
= Nicht aktiviert. = Aktiviert.
Hinweis. Die Einstellung wird im Permanentspeicher des Geräts gespeichert.

C
D
E
S. 2
6 - A
nlei
tung
FB0
1002
-DE
- Ver
. 1 -
11/2
017
- © C
AME
S.p.
A. -
Der I
nhal
t der
Anl
eitu
ng k
ann
jede
rzei
t ohn
e Vo
rank
ündi
gung
geä
nder
t wer
den.
Bei eingeschaltetem D-Regler ( ), kann man durch Druck auf den P-Taster auf dem Bildschirm das eingestellte Tem-peraturdifferential ablesen C.
Mit den Tastern das Tempe-raturdifferential zwischen 0 °C und 0,9 °C einstellen D.
Bei auf 0°C gestelltem Diffenrential wird während des Betriebs, unabhängig von der Ist-Temperatur eine Mindestein-/ausschaltzeit von 1 Minute eingehalten.
Mit dem Taster P die Programmierung beenden.
PI-Regler aktivieren und konfigurierenMit diesem Regelalgorhitmus verringert der programmierbare Thermostat die Einschaltzyklen des Heizkessels bei sich dem Sollwert annähernder Ist-Temperatur. Auf diese Weise wird der Verbrauch verringert und ein optimales Wohlfühlklima gewährleistet.Es sind drei vorprogrammierte Temperaturprogramme (P1, P2 und P3), die sich für alle Anlagen eignen sowie ein vollständig manuelles Programm (P4) vorhanden.
Bei ausgeschaltetem Differen-tialregler ( ) B kann man durch Druck auf den Taster P die Menüseite öffnen, in der die verfügbaren PI-Programme ausgewählt werden können E.

F
G
H
I
S. 2
7 - A
nlei
tung
FB0
1002
-DE
- Ver
. 1 -
11/2
017
- © C
AME
S.p.
A. -
Der I
nhal
t der
Anl
eitu
ng k
ann
jede
rzei
t ohn
e Vo
rank
ündi
gung
geä
nder
t wer
den.
Mit den Tastern eines der Programme (P1, P2, P3) wählen F (siehe Diagramm und die Tabelle L); mit P die Wahl be-stätigen und die Programmierung beenden.
Der erste Parameter betrifft die Dauer der Einschaltyzklen G.
Mit den Tastern kann man eine Einschaltdauer von 5, 10, 15, 20, 25, 30, 35 O 40 Minuten wählen H.
Durch Druck auf P I die einge-stellte Einschaltdauer bestätigen und auf die Einstellung der Min-dest-ON-Dauer wechseln.
Mit den Tastern die Min-dest-ON-Dauer von 1 oder 5 Minuten wählen.
Wenn P4 gewählt wurde, öffnet sich durch Druck auf P die Programmierseite, auf der die Parameter des Programms P4 manuell eingestellt werden können.

J
K
ON ON
OFF
1 h
S. 2
8 - A
nlei
tung
FB0
1002
-DE
- Ver
. 1 -
11/2
017
- © C
AME
S.p.
A. -
Der I
nhal
t der
Anl
eitu
ng k
ann
jede
rzei
t ohn
e Vo
rank
ündi
gung
geä
nder
t wer
den.
Durch Druck auf P J die ein-gestellte Mindest-ON-Dauer be-stätigen und zum Menüpunkt Einstellung Proportionalband wechseln.
Mit den Tastern das Propor-tionalband einstellen, der Wert muss zwischen 1 und 3 °C liegen.
Das Diagramm und die Tabelle K sind bei der Wahl des einzustellenden Programms bzw. Werts nützlich.
Mit dem Taster P die Programmierung beenden.
Hinweis. Alle die Einstellung des Temperaturreglers betreffenden Parameter werden im Permanentspeicher des Geräts gespeichert.
Tem
pera
tur
Dauer
Set-point
Prog. Zyklusdauer (Minuten)
Mindest-ON-Dauer (Minuten)
Proportional-band Anlagentyp
P1 10 1 1,5 °C Gasbrenner, Heizlüfter, Zonen-Ven-tile, Heizkörper aus Aluminium
P2 5 1 1,5 °C Elektro-Heizkörper
P3 20 2 1,5 °C Strahlungs- oder Fußbodenhei-zung, Klimaanlagen
P4 von 5 bis 40 von 1 bis 5 von 1°C bis 3°C

S. 2
9 - A
nlei
tung
FB0
1002
-DE
- Ver
. 1 -
11/2
017
- © C
AME
S.p.
A. -
Der I
nhal
t der
Anl
eitu
ng k
ann
jede
rzei
t ohn
e Vo
rank
ündi
gung
geä
nder
t wer
den.
Aktivierung über FernsteuerungDurch Anschluss einer entsprechenden Schnittstelle an den Klemmen 1-2 (siehe "Elektrische Anschlüsse" auf Seite 8) kann man:- die Aktivierung der Anlage in manuellem Betrieb über Fernsteuerung erzwingen,- einen bestimmten, zuvor programmierten Zeitplan aktivieren.
Die Aktivierung der Anlage in manuellem Betrieb über Fernsteuerung erzwingen
Mithilfe entsprechender Fernschaltbefehle kann der Benutzer alle laufenden Program-mierungen unterbrechen und die Anlage auf manuellen Betrieb schalten.
Auf dem Display wird die ferngesteuerte Aktivierung des manuellen Betriebs mit dem Symbol angezeigt.
Die Soll-Temperatur ist die vom Benutzer während der letzten Verwendung des Geräts in manuellem Betrieb eingestellte Temperatur.
Die Programmierung ist aktiv, bis von Hand eine weitere Programmierung am Gerät vorgenommen oder bis ein neuer Fernschaltbefehl, nach dem das Gerät wieder auf das vor der Übertragung des ersten Fernschaltbefehls laufende Programm umschaltet, empfangen wird.
Ferngesteuerte Aktivierung eines bestimmten zeitgeschalteten Programms in manuellem Betrieb
Man kann 2 manuelle Zeitprogramme, die ferngesteuert werden, einspeichern - eines zum HEIZEN und eines zum KÜHLEN.
Die Fernaktivierung des manuellen Zeitprogramms wird auf dem Display durch das Symbol angezeigt .
Die Programmierung bleibt aktiviert, bis das Gerät manuell neu programmiert wird; nach Ablauf des manuellen Zeitprogramms schaltet das Gerät wieder auf das vor der Übertragung des Fernschaltbefehls laufende Programm.
In der Werkseinstellung ist das folgende manuelle Zeitprogramm eingestellt:1 Stunde/20°C bei HEIZUNG,1 Stunde/24°C bei KÜHLUNG.
Hinweis. Wenn ein Programm ferngeschaltet wird, zählen angefangene Stunden/Tage als ganze Stunden/Tage.

B
C
D
A
S. 3
0 - A
nlei
tung
FB0
1002
-DE
- Ver
. 1 -
11/2
017
- © C
AME
S.p.
A. -
Der I
nhal
t der
Anl
eitu
ng k
ann
jede
rzei
t ohn
e Vo
rank
ündi
gung
geä
nder
t wer
den.
Erstellung eines manuellen Zeitprogramms zur FernaktivierungDas Gerät herausziehen. Den MANUELLEN Betrieb aktivieren.Die Betriebsart, für die das Programm erstellt wird, wählen (HEIZUNG oder KÜHLUNG).
Mit den Tastern die ge-wünschte Soll-Temperatur ein-stellen A.
Den Taster drücken B.
Mit den Tastern die Aktivie-rungsdauer in Stunden eingeben.
Auf den Taster drücken C.
Mit den Tastern die Anzahl der Aktivierungstage (von 1 bis 99) eingeben.
Mit dem Taster D das einge-stellte Programm als fernschalt-bares Programm speichern.

A
C
B
S. 3
1 - A
nlei
tung
FB0
1002
-DE
- Ver
. 1 -
11/2
017
- © C
AME
S.p.
A. -
Der I
nhal
t der
Anl
eitu
ng k
ann
jede
rzei
t ohn
e Vo
rank
ündi
gung
geä
nder
t wer
den.
Zählwerk Betriebsstunden
Geräte-Reset
Das Gerät herausziehen.
Den MANUELLEN Betrieb akti-vieren A.
Nach Störungen, Eingriffen oder aus anderen technischen Grün-den kann ein Reset erforderlich sein.
Das Gerät herausziehen.
Auf den Taster R drücken C.
Den Taster C drücken B.
Auf dem Display wird die Be-triebsdauer 5 Sekunden lang angezeigt
Wenn man bei sichtbarer Anzeige auf den Taster drückt, wird das Zählwerk auf Null gestellt.
Durch das Reset werden individuelle Programme NICHT gelöscht. Diese werden nach dem Neustart des Geräts mit den anderen Daten wieder hergestellt siehe Tabelle).
Werkseinstellung zurücksetzenUm die Werkseinstellungen zurückzusetzen, gleichzeitig die Taster + + 1÷7 und anschließend den Taster R drücken.

CAME S.p.A.Via Martiri Della Libertà, 15 31030 Dosson di Casier - Treviso - Italytel. (+39) 0422 4940 - fax. (+39) 0422 4941
S. 3
2 - A
nlei
tung
FB0
1002
-DE
- Ver
. 1- 1
1/20
17 -
© C
AME
S.p.
A. -
Der I
nhal
t die
ser A
nlei
tung
kan
n je
derz
eit o
hne
Vora
nkün
digu
ng g
eänd
ert w
erde
n.
Batterien wechseln
Wenn das Zeichen auf dem Display blinkt, müssen die Batterien innerhalb von ca. einem Monat gewechselt werden. Wenn auf dem Bildschirm die Angabe neben dem Zeichen erscheint, funktioniert das Gerät nicht mehr und die Temperaturzone wird nicht mehr gesteuert. Man hat nach dem Entfernen der leeren Batterien 2 Minuten lang Zeit, um die neuen Batterien (3 Alkali-Mangan-Batterien LR03 AAA zu 1,5 V) einzulegen; danach werden die Werkseinstellungen zurückgesetzt.
ACHTUNG!Wenn die Batterien nicht rechtzeitig gewechselt werden, kann dies Schäden des Heizungs-systems zur Folge haben (der Frostschutz ist nicht mehr gewährleistet).Falsches Einlegen der Batterien kann Schäden verursachen. Die Verwendung von leeren Batterien kann Störungen verursachen.
Technische Daten
- Heimendgerät.- Unabhängig montiertes elektronisches
Gerät.- LCD-Grafikdisplay mit
Hintergrundbeleuchtung.- Spannungsversorgung: 3 Alkali-Mangan-
Batterien LR03 AAA zu 1,5V.- Lebensdauer: > 1 Jahr.- Besonderheiten des Relais:
Höchstspannung 250V, ohmsche Höchstlast 5A induktive Höchstlast 2A.
- Aktionstyp: 1B-U.- Verfügbare Kontakte: 1 NO-NC
Wechselkontakt.
- Erfassungsintervall Raumtemperatur: 15 Sekunden.
- Lese-Auflösung: 0,1 °C.- Messgenauigkeit: ≤ ±0,3 °C.- Software Klasse A.- Verschmutzungsgrad: 2.- Impulsspannung: 4 kV.- Höchsttemperatur Steuerkopf: 40 °C.- Schutzart: IP30.- Schutzklasse II.- Betriebstemperatur: 0 °C bis +40 °C.