
Table of Contents using PhET in High School Chemistry Trish ...
208
Table of Contents using PhET in High School Chemistry Trish Loeblein 7/7/13 The purpose of this contribution is to demonstrate how I use PhET in my course. The activities can also be found in the PhET Teaching Ideas in Microsoft office format if you would like to edit them- go to the PhET Teaching Ideas pages at http://phet.colorado.edu/teacher_ideas/index.php - search for the sim and my name. You are welcome to use or edit my activities for your course. All of my activities are posted under the Creative Commons - Attribution license, so please acknowledge that they were developed by Trish Loeblein and provide a link back to the main PhET website: http://phet.colorado.edu/ Table of Contents Plans for using PhET for entire school year …………………………………………………………..2 Introduction to Atoms, Molecules and Ions: Build an Atom ………………………………………………………….……………………….3-10 Salts & Solubility 1………………………………………………………….…………………..11-17 Isotopes…………………………………………………………. ……………………………...18-23 States of Matter- KMT Review …………………………………………………………………24-30 Formulas, Composition, Measuring chemicals, Stoichiometry Reactions and Rates 1………………………………………………………….………………..31-39 Balancing Chemical Reactions………………………………………………………………….40-43 Reactants, Products, and Leftovers- 1 and 2 activities…………………………………………..44-55 Chemical Reactions and Solution Stoichiometry Salts & Solubility 2………………………………………………………….…………………..56-61 Sugar and Salts …………………………………………………………….……………………62-66 Molarity……………..……………………..………………..……………………………………67-71 Concentration and Beer’s Law (no activities written) Gases Gas Properties (advanced)……………………………………………………….………………72-102 Gas Laws…………………………………………………………………………………………103-106 Thermochemistry Introduction Reactions and Rates 2…………………………….……………………………………………..107-114 Atomic structure, Periodicity and General Bonding Build an Atom…………………………….…………………………….……………………….115-122 Models of Hydrogen Atom…………………………….…………………………….………….123-127 Build a Molecule…………………………….…………………………….…………………….128-132 Molecule Shapes………..……………………………………………..…………………………133-136 Molecule Polarity.……………………………………………………...………………………..137-140 Molecules and Light………………….…………………………….……………………………141-142 Greenhouse Gases………………….…………………………….………………………………143-144 Liquids and Solids Density……………………………………………………………………………………………145-148 States of Matter Basics ……………….…………………………….……………………………149-152 States of Matter ……………….…………………………….……………………………………153-156 Chemical Kinetics and Equilibrium Reaction and Rates 3: …………………………….……………………………………………...157-164 Reaction and Rates 4 (also uses Salts & Solubility, States of Matter) …………………………..165-172 Acids, Bases and Electrolytes pH Scale…………………………….…………………………….……………………………... 173-178 Acid Base Solutions…………………………….…………………………….…………………..179-184 Salts &Solubility 3…………………………….…………………………….……………………185-190 Sugar and Salt Solutions Demo (just reuse clicker question slides) Nuclear Alpha Decay…………………………….…………………………….………………………….191-195 Beta Decay…………………………….…………………………….………………………...….196-199 Radioactive Dating Game …………….…………………………….………………………...….200-201 Nuclear Fission by Chasteen …………….…………………………….…………………….......202-206
-
Upload
khangminh22 -
Category
Documents
-
view
1 -
download
0
Transcript of Table of Contents using PhET in High School Chemistry Trish ...
Table of Contents using PhET in High School Chemistry Trish Loeblein
7/7/13
The purpose of this contribution is to demonstrate how I use PhET in my course. The activities can also be found in the PhET
Teaching Ideas in Microsoft office format if you would like to edit them- go to the PhET Teaching Ideas pages at
http://phet.colorado.edu/teacher_ideas/index.php - search for the sim and my name. You are welcome to use or edit my activities for
your course. All of my activities are posted under the Creative Commons - Attribution license, so please acknowledge that they were
developed by Trish Loeblein and provide a link back to the main PhET website: http://phet.colorado.edu/
Table of Contents
Plans for using PhET for entire school year …………………………………………………………..2
Introduction to Atoms, Molecules and Ions:
Build an Atom ………………………………………………………….……………………….3-10
Salts & Solubility 1………………………………………………………….…………………..11-17
Isotopes…………………………………………………………. ……………………………...18-23
States of Matter- KMT Review …………………………………………………………………24-30
Formulas, Composition, Measuring chemicals, Stoichiometry
Reactions and Rates 1………………………………………………………….………………..31-39
Balancing Chemical Reactions………………………………………………………………….40-43
Reactants, Products, and Leftovers- 1 and 2 activities…………………………………………..44-55
Chemical Reactions and Solution Stoichiometry
Salts & Solubility 2………………………………………………………….…………………..56-61
Sugar and Salts …………………………………………………………….……………………62-66
Molarity……………..……………………..………………..……………………………………67-71
Concentration and Beer’s Law (no activities written)
Gases
Gas Properties (advanced)……………………………………………………….………………72-102
Gas Laws…………………………………………………………………………………………103-106
Thermochemistry Introduction
Reactions and Rates 2…………………………….……………………………………………..107-114
Atomic structure, Periodicity and General Bonding
Build an Atom…………………………….…………………………….……………………….115-122
Models of Hydrogen Atom…………………………….…………………………….………….123-127
Build a Molecule…………………………….…………………………….…………………….128-132
Molecule Shapes………..……………………………………………..…………………………133-136
Molecule Polarity.……………………………………………………...………………………..137-140
Molecules and Light………………….…………………………….……………………………141-142
Greenhouse Gases………………….…………………………….………………………………143-144
Liquids and Solids
Density……………………………………………………………………………………………145-148
States of Matter Basics ……………….…………………………….……………………………149-152
States of Matter ……………….…………………………….……………………………………153-156
Chemical Kinetics and Equilibrium
Reaction and Rates 3: …………………………….……………………………………………...157-164
Reaction and Rates 4 (also uses Salts & Solubility, States of Matter) …………………………..165-172
Acids, Bases and Electrolytes
pH Scale…………………………….…………………………….……………………………... 173-178
Acid Base Solutions…………………………….…………………………….…………………..179-184
Salts &Solubility 3…………………………….…………………………….……………………185-190
Sugar and Salt Solutions Demo (just reuse clicker question slides) Nuclear
Alpha Decay…………………………….…………………………….………………………….191-195
Beta Decay…………………………….…………………………….………………………...….196-199
Radioactive Dating Game …………….…………………………….………………………...….200-201
Nuclear Fission by Chasteen …………….…………………………….…………………….......202-206
Plans for using PhET simulation activities in Loeblein’s High School Chemistry This is a list of lessons that can be found in the Teaching Ideas section of the PhET website
Feb 2013 The pdf of all my lessons are available at https://phet.colorado.edu/en/contributions/view/3459
IC In Class Activity; CQ clicker questions; HW homework ; Demo: teacher centered group discussion
Introduction to Atoms, Molecules and Ions:
Build an Atom: IC/CQ
Salts & Solubility 1: IC/CQ
Isotopes: IC/CQ
States of Matter: demo/IC/CQ
Models of Hydrogen Atom: IC/Demo includes Neon lights and Discharge Lamps
Formulas, Composition, Measuring chemicals, Chemical Reactions, Stoichiometry
Reactions and Rates 1: Demo/IC/CQ
Balancing Chemical Reactions: IC/CQ
Reactants, Products, and Leftovers: 2 activities HW/CQ
Solutions
Salts & Solubility 2: IC/HW
Sugar and Salts: IC/HW/CQ
Molarity: IC/CQ
Concentration (activity still in draft)
Beer’s Law (activity still in draft)
Gases
Gas Properties & Balloons and Buoyancy: Demo/IC/HW/CQ
Gas Properties – Gas Laws IC/HW
Thermochemistry Introduction
Reactions and Rates 2: IC/CQ
Atomic structure, Periodicity and General Bonding
Build an Atom: IC/CQ
Build a Molecule: IC or HW/CQ
Molecule Polarity: IC or HW /CQ
Molecular Shapes: IC or HW /CQ
Molecules and Light: IC
Greenhouse Gases: IC
Liquids and Solids
Density:IC/CQ
States of Matter and States of Matter Basics: IC/CQ
Atomic Interactions: Demo or HW (activity still in draft)
Chemical Kinetics and Equilibrium
Reaction and Rates 3: IC/CQ
Reaction and Rates 4 (also uses Salts & Solubility, States of Matter): IC/CQ
Acids, Bases and Electrolytes
pH Scale: IC/CQ
Acid Base Solutions: IC/CQ
Salts &Solubility 3: IC/CQ
Sugar and Salt Solutions Demo Nuclear sims:
Beta Decay IC
Alpha Decay IC/CQ
Radioactive Dating Game IC/HW
Nuclear Fission IC (authored with Chasteen)
Rutherford: (activity still in draft)
Lesson plan for Build an Atom : Introduction http://phet.colorado.edu
High school version
6/18/2011 Loeblein/Perkins http://phet.colorado.edu
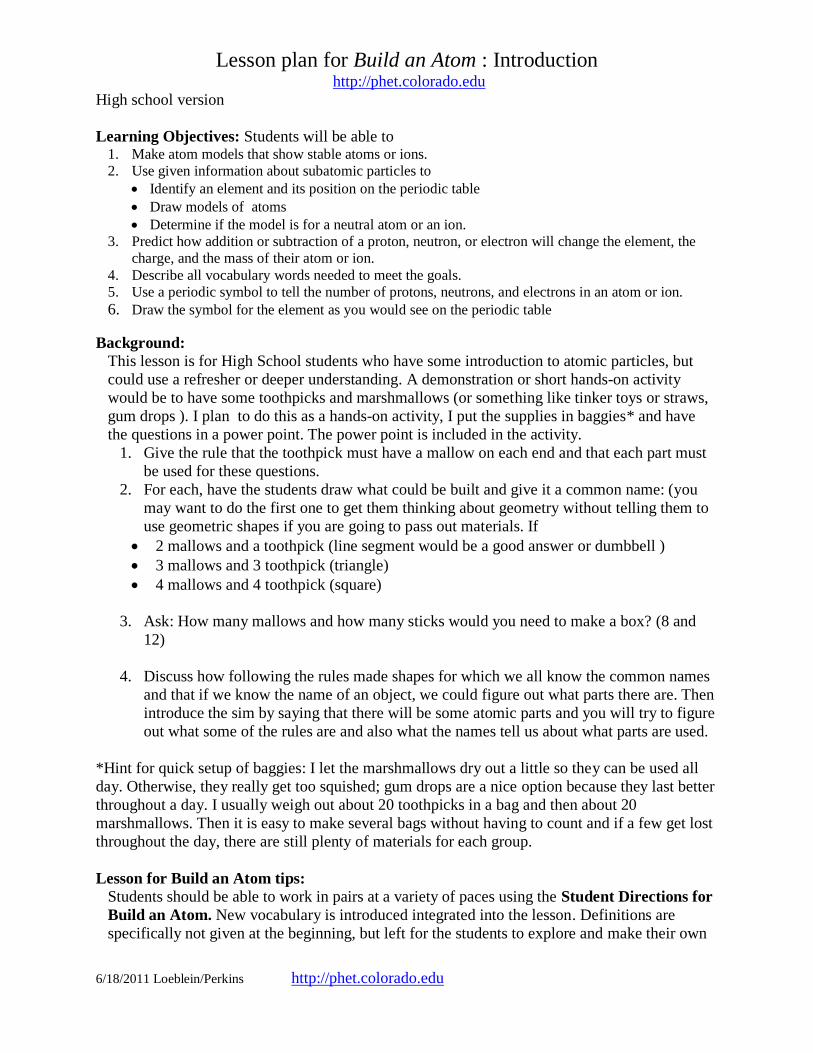
Learning Objectives: Students will be able to 1. Make atom models that show stable atoms or ions.
2. Use given information about subatomic particles to
Identify an element and its position on the periodic table
Draw models of atoms
Determine if the model is for a neutral atom or an ion.
3. Predict how addition or subtraction of a proton, neutron, or electron will change the element, the
charge, and the mass of their atom or ion.
4. Describe all vocabulary words needed to meet the goals.
5. Use a periodic symbol to tell the number of protons, neutrons, and electrons in an atom or ion.
6. Draw the symbol for the element as you would see on the periodic table
Background:
This lesson is for High School students who have some introduction to atomic particles, but
could use a refresher or deeper understanding. A demonstration or short hands-on activity
would be to have some toothpicks and marshmallows (or something like tinker toys or straws,
gum drops ). I plan to do this as a hands-on activity, I put the supplies in baggies* and have
the questions in a power point. The power point is included in the activity.
1. Give the rule that the toothpick must have a mallow on each end and that each part must
be used for these questions.
2. For each, have the students draw what could be built and give it a common name: (you
may want to do the first one to get them thinking about geometry without telling them to
use geometric shapes if you are going to pass out materials. If
2 mallows and a toothpick (line segment would be a good answer or dumbbell )
3 mallows and 3 toothpick (triangle)
4 mallows and 4 toothpick (square)
3. Ask: How many mallows and how many sticks would you need to make a box? (8 and
12)
4. Discuss how following the rules made shapes for which we all know the common names
and that if we know the name of an object, we could figure out what parts there are. Then
introduce the sim by saying that there will be some atomic parts and you will try to figure
out what some of the rules are and also what the names tell us about what parts are used.
*Hint for quick setup of baggies: I let the marshmallows dry out a little so they can be used all
day. Otherwise, they really get too squished; gum drops are a nice option because they last better
throughout a day. I usually weigh out about 20 toothpicks in a bag and then about 20
marshmallows. Then it is easy to make several bags without having to count and if a few get lost
throughout the day, there are still plenty of materials for each group.
Lesson for Build an Atom tips:
Students should be able to work in pairs at a variety of paces using the Student Directions for
Build an Atom. New vocabulary is introduced integrated into the lesson. Definitions are
specifically not given at the beginning, but left for the students to explore and make their own
Lesson plan for Build an Atom : Introduction http://phet.colorado.edu
High school version
6/18/2011 Loeblein/Perkins http://phet.colorado.edu
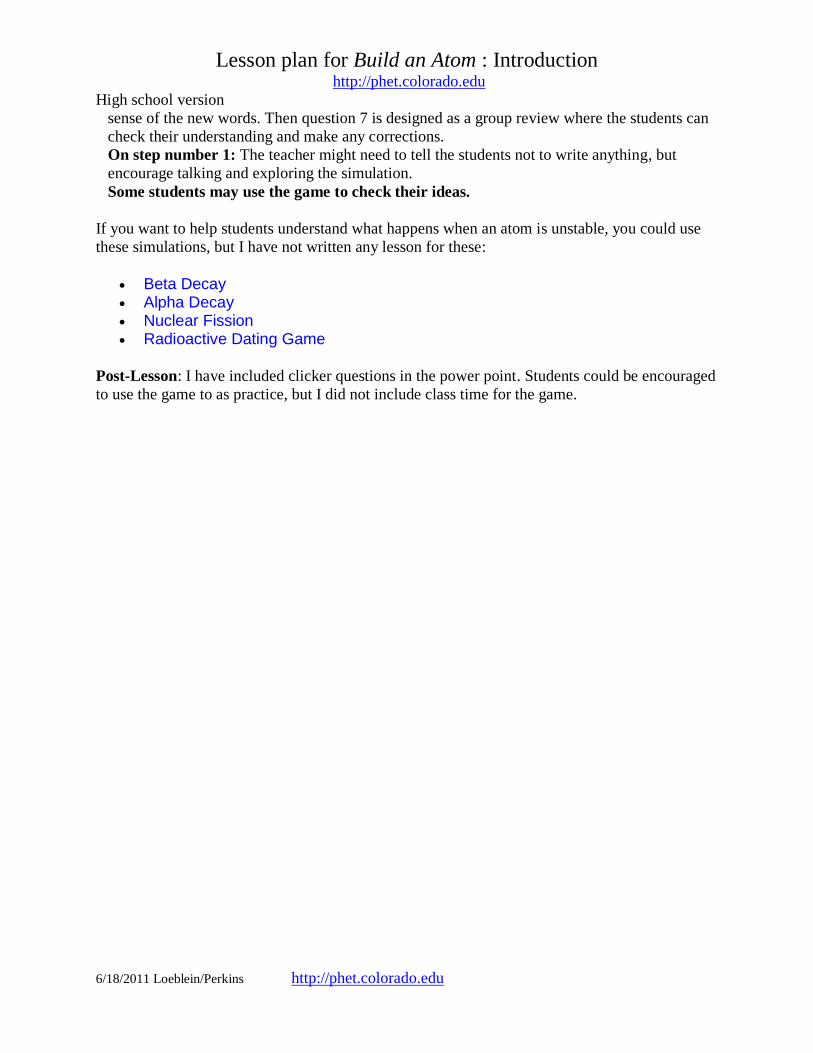
sense of the new words. Then question 7 is designed as a group review where the students can
check their understanding and make any corrections.
On step number 1: The teacher might need to tell the students not to write anything, but
encourage talking and exploring the simulation.
Some students may use the game to check their ideas.
If you want to help students understand what happens when an atom is unstable, you could use
these simulations, but I have not written any lesson for these:
Beta Decay Alpha Decay Nuclear Fission Radioactive Dating Game
Post-Lesson: I have included clicker questions in the power point. Students could be encouraged
to use the game to as practice, but I did not include class time for the game.
Student directions Build an Atom activity
6/18/2011 Loeblein/Perkins http://phet.colorado.edu Page 1
Learning Goals: Students will be able to
1. Make atom models that show stable atoms or ions.
2. Use given information about subatomic particles to
Identify an element and its position on the periodic table
Draw models of atoms
Determine if the model is for a neutral atom or an ion.
3. Predict how addition or subtraction of a proton, neutron, or electron will change the element, the charge,
and the mass of their atom or ion.
4. Describe all vocabulary words needed to meet the goals.
5. Use a periodic symbol to tell the number of protons, neutrons, and electrons in an atom or ion.
6. Draw the symbol for the element as you would see on the periodic table
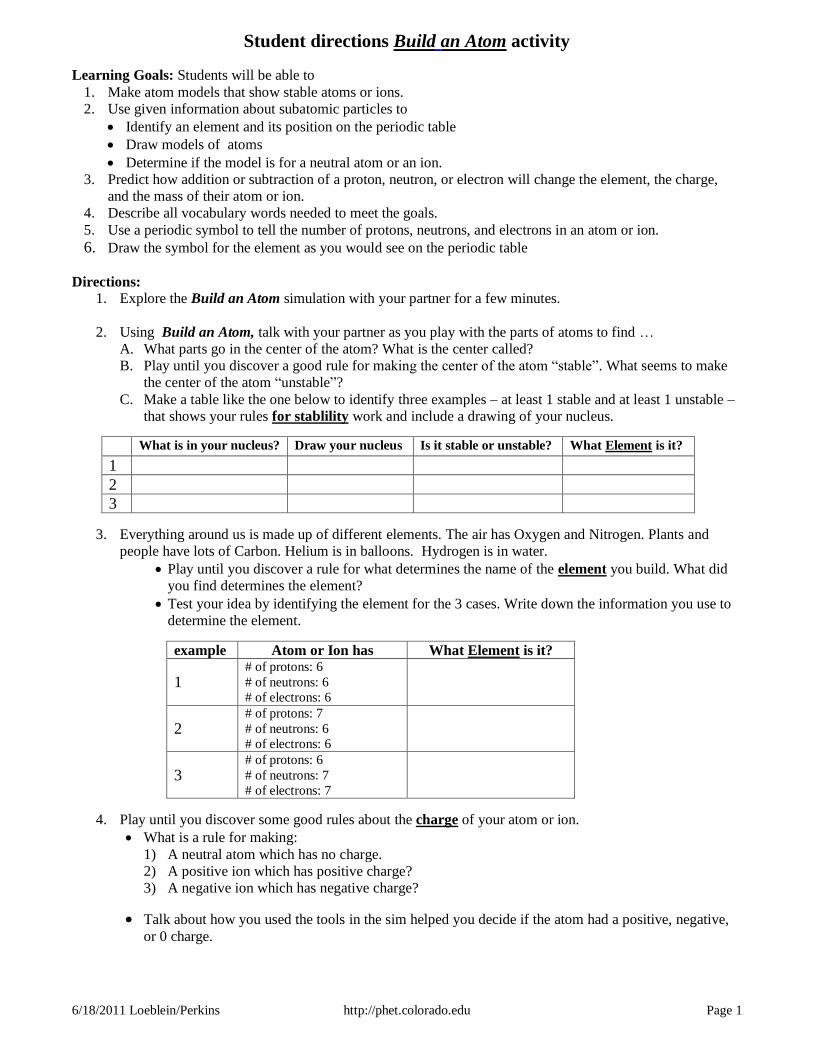
Directions:
1. Explore the Build an Atom simulation with your partner for a few minutes.
2. Using Build an Atom, talk with your partner as you play with the parts of atoms to find …
A. What parts go in the center of the atom? What is the center called?
B. Play until you discover a good rule for making the center of the atom “stable”. What seems to make
the center of the atom “unstable”?
C. Make a table like the one below to identify three examples – at least 1 stable and at least 1 unstable –
that shows your rules for stablility work and include a drawing of your nucleus.
What is in your nucleus? Draw your nucleus Is it stable or unstable? What Element is it?
1
2
3
3. Everything around us is made up of different elements. The air has Oxygen and Nitrogen. Plants and
people have lots of Carbon. Helium is in balloons. Hydrogen is in water.
Play until you discover a rule for what determines the name of the element you build. What did
you find determines the element?
Test your idea by identifying the element for the 3 cases. Write down the information you use to
determine the element.
example Atom or Ion has What Element is it?
1 # of protons: 6
# of neutrons: 6
# of electrons: 6
2 # of protons: 7
# of neutrons: 6
# of electrons: 6
3 # of protons: 6
# of neutrons: 7
# of electrons: 7
4. Play until you discover some good rules about the charge of your atom or ion.
What is a rule for making:
1) A neutral atom which has no charge.
2) A positive ion which has positive charge?
3) A negative ion which has negative charge?
Talk about how you used the tools in the sim helped you decide if the atom had a positive, negative,
or 0 charge.

Student directions Build an Atom activity
6/18/2011 Loeblein/Perkins http://phet.colorado.edu Page 2
Make a table like the one below to identify three examples of atoms and ions (1 neutral with 0 extra
charges, 1 with a positive charge, and 1 with a negative charge) that show your rules for charge work
and include a drawing of your atom. (All of your examples should also have a stable nucleus.)
What is in your
atom or ions?
Draw your
atom or ion
What is
the
charge?
Is it a neutral atom,
positive ion,
or negative ion?
1
# of protons:
# of neutrons:
# of electrons:
2
# of protons:
# of neutrons:
# of electrons:
3
# of protons:
# of neutrons:
# of electrons:
5. Play until you discover some good rules about the mass of your atom or ion.
What is a rule for determining the mass?
6. Using all of your rules, figure out what changes for each of these changes to an atom or ion. Copy this
table and make predictions, then test your ideas with the simulation. If you have new ideas, rewrite your
rules.
7. Design challenges: Try these with your partner. There is nothing you need to record.
Design a positive ion with a charge of +2 Design neutral, stable atom with a mass of 8
include a drawing: include a drawing:
What element is your ion? _______________ What element is your atom? _______________
What mass is your ion? _________________ What is the charge of you atom?____________
Is the nucleus of your ion stable or unstable?
8. What does the tool called Symbol tell you about what parts are in an atom or ion?
What rules can you use to tell how many protons, neutrons and electrons make
up an atom or ion?
Check your ideas and write down two examples that show your rules work and include a drawing for
each.
9. Partner Discussion. Make sure you know working definitions for:
nucleus, proton, neutron, electron, atom, ion, charge, neutral, atomic mass, and element.
Make the change: What changes also? Element name, charge, mass?
Add a proton
Remove a neutron
Remove an electron
Add an electron
Number of protons __ Number of neutrons__
Number of electrons__
Number of protons __
Number of neutrons__
Number of electrons__

6/18/2011
1
Build an Atom Demos for pre-lesson and clicker questions for post-lesson
Trish Loeblein 6/14/2011 http://phet.colorado.edu/
Learning Goals- Students will be able to: • Make atom models that show stable atoms or ions. • Use given information about subatomic particles to • Identify an element and its position on the periodic table • Draw models of atoms • Determine if the model is for a neutral atom or an ion. • Predict how addition or subtraction of a proton, neutron, or
electron will change the element, the charge, and the mass of their atom or ion.
• Describe all vocabulary words needed to meet the goals. • Use a periodic symbol to tell the number of protons, neutrons,
and electrons in an atom or ion. • Draw the symbol for the element as you would see on the
periodic table
1. The toothpick must have a marshmallow on each end
2. Each part must be used.
Rules
1. What can you make with 2 marshmallows and one toothpick ?
1a. What would you call this?
2. What can you make with 3 marshmallows and 3 toothpicks ?
2a. What would you call this?

6/18/2011
2
3. What can you make with 4 marshmallows and 4 toothpicks ?
3a.What would you call this?
4. How many marshmallows and how many toothpicks would you need to
make a box?
4a. 8 marshmallows and 12 sticks
Clicker questions for Post-Lesson 1. What can you make with 4 protons and 4 neutrons?
A. Oxygen atom B. Oxygen ion C. Beryllium atom D. Beryllium ion E. 2 of these
6/18/2011
3
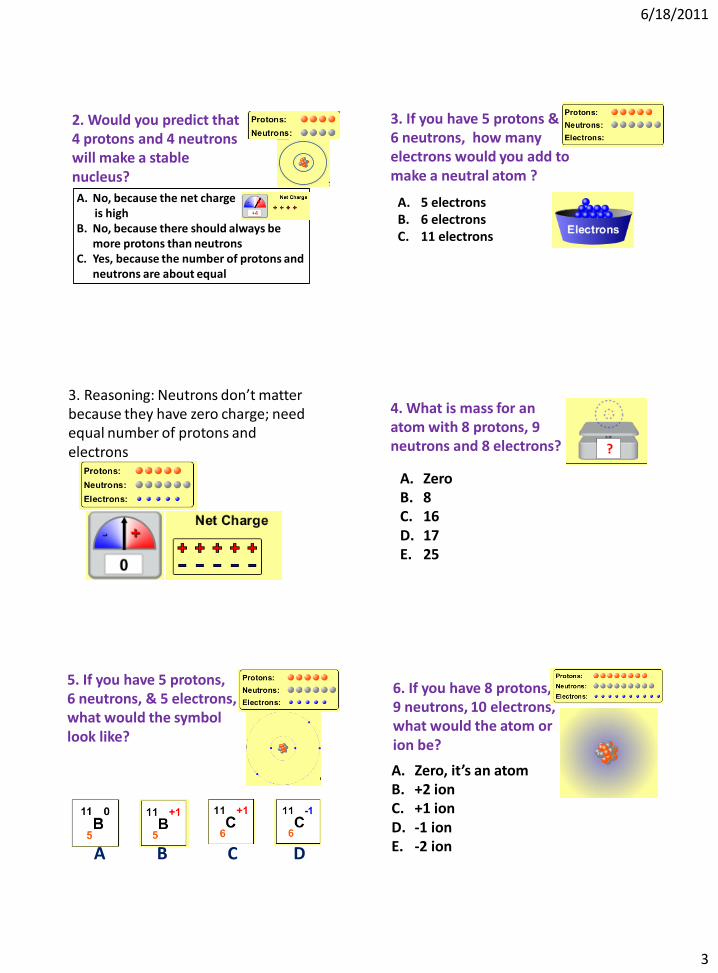
2. Would you predict that 4 protons and 4 neutrons will make a stable nucleus?
A. No, because the net charge is high
B. No, because there should always be more protons than neutrons
C. Yes, because the number of protons and neutrons are about equal
3. If you have 5 protons & 6 neutrons, how many electrons would you add to make a neutral atom ?
A. 5 electrons B. 6 electrons C. 11 electrons
3. Reasoning: Neutrons don’t matter because they have zero charge; need equal number of protons and electrons
4. What is mass for an atom with 8 protons, 9 neutrons and 8 electrons? ?
A. Zero B. 8 C. 16 D. 17 E. 25
5. If you have 5 protons, 6 neutrons, & 5 electrons, what would the symbol look like?
A B C D
6. If you have 8 protons, 9 neutrons, 10 electrons, what would the atom or ion be?
A. Zero, it’s an atom B. +2 ion C. +1 ion D. -1 ion E. -2 ion
6/18/2011
4
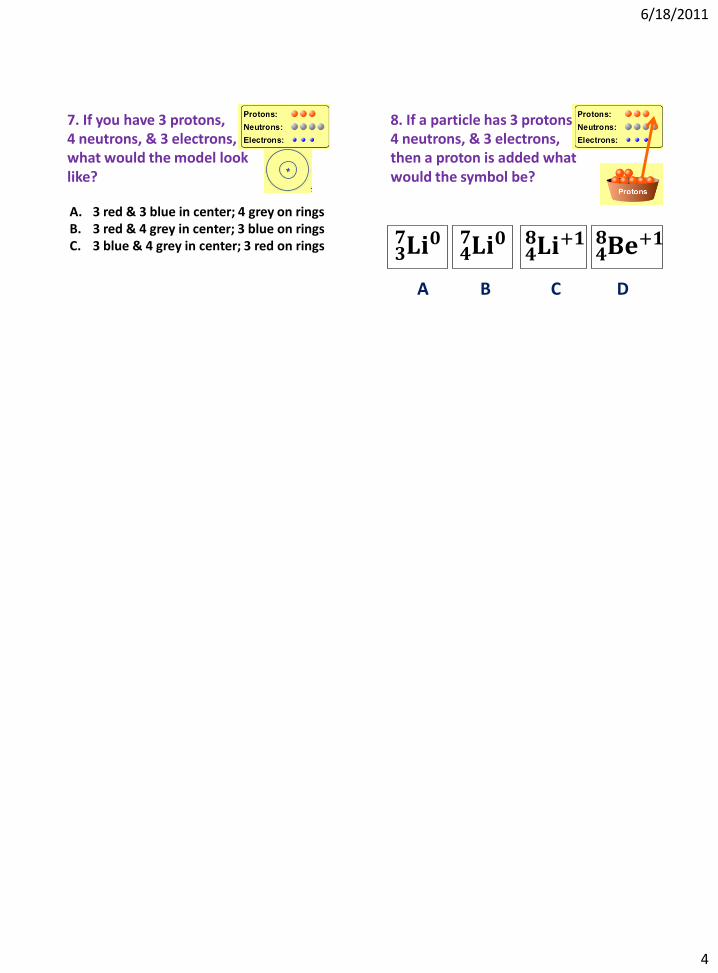
7. If you have 3 protons, 4 neutrons, & 3 electrons, what would the model look like?
A. 3 red & 3 blue in center; 4 grey on rings B. 3 red & 4 grey in center; 3 blue on rings C. 3 blue & 4 grey in center; 3 red on rings
8. If a particle has 3 protons, 4 neutrons, & 3 electrons, then a proton is added what would the symbol be?
A B C D
𝐋𝐢𝟑𝟕 𝟎
𝐋𝐢𝟒𝟕 𝟎
𝐋𝐢𝟒𝟖 +𝟏
𝐁𝐞𝟒𝟖 +𝟏
Lesson plan for Soluble Salts 1: Introduction to Salts-Understanding ionic formulas http://phet.colorado.edu
4/17/2009 Loeblein
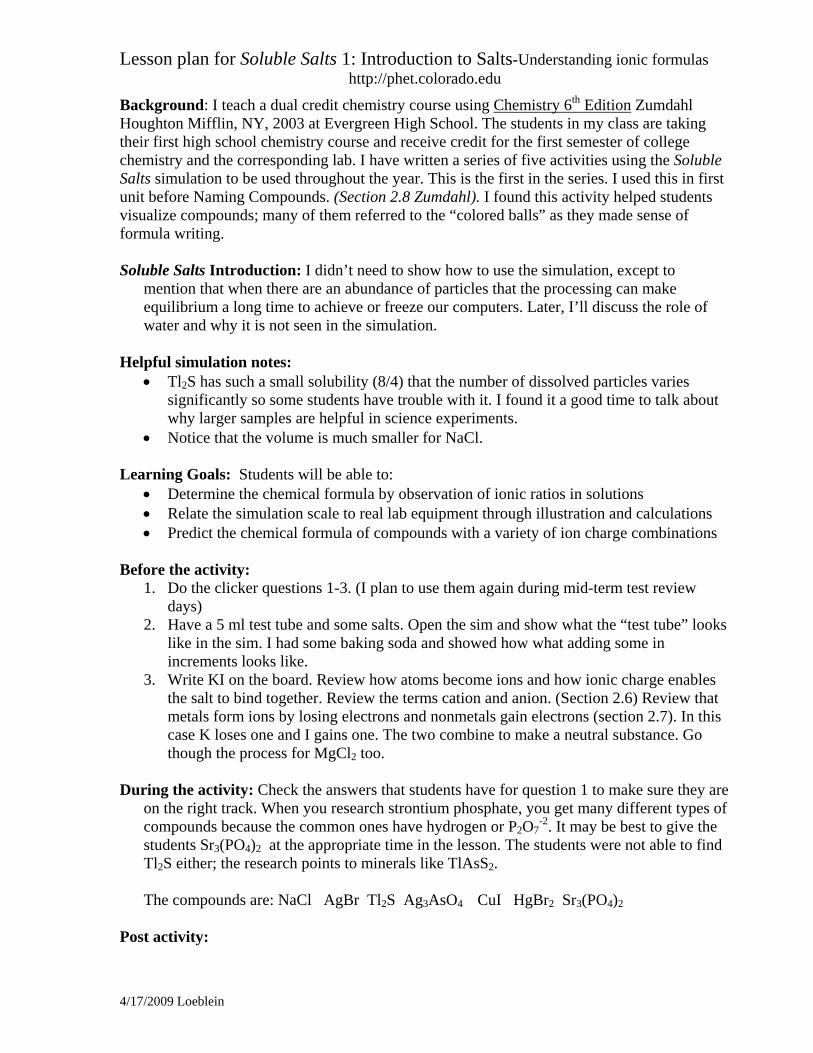
Background: I teach a dual credit chemistry course using Chemistry 6th Edition Zumdahl Houghton Mifflin, NY, 2003 at Evergreen High School. The students in my class are taking their first high school chemistry course and receive credit for the first semester of college chemistry and the corresponding lab. I have written a series of five activities using the Soluble Salts simulation to be used throughout the year. This is the first in the series. I used this in first unit before Naming Compounds. (Section 2.8 Zumdahl). I found this activity helped students visualize compounds; many of them referred to the “colored balls” as they made sense of formula writing. Soluble Salts Introduction: I didn’t need to show how to use the simulation, except to
mention that when there are an abundance of particles that the processing can make equilibrium a long time to achieve or freeze our computers. Later, I’ll discuss the role of water and why it is not seen in the simulation.
Helpful simulation notes:
• Tl2S has such a small solubility (8/4) that the number of dissolved particles varies significantly so some students have trouble with it. I found it a good time to talk about why larger samples are helpful in science experiments.
• Notice that the volume is much smaller for NaCl. Learning Goals: Students will be able to:
• Determine the chemical formula by observation of ionic ratios in solutions • Relate the simulation scale to real lab equipment through illustration and calculations • Predict the chemical formula of compounds with a variety of ion charge combinations
Before the activity:
1. Do the clicker questions 1-3. (I plan to use them again during mid-term test review days)
2. Have a 5 ml test tube and some salts. Open the sim and show what the “test tube” looks like in the sim. I had some baking soda and showed how what adding some in increments looks like.
3. Write KI on the board. Review how atoms become ions and how ionic charge enables the salt to bind together. Review the terms cation and anion. (Section 2.6) Review that metals form ions by losing electrons and nonmetals gain electrons (section 2.7). In this case K loses one and I gains one. The two combine to make a neutral substance. Go though the process for MgCl2 too.
During the activity: Check the answers that students have for question 1 to make sure they are
on the right track. When you research strontium phosphate, you get many different types of compounds because the common ones have hydrogen or P2O7
-2. It may be best to give the students Sr3(PO4)2 at the appropriate time in the lesson. The students were not able to find Tl2S either; the research points to minerals like TlAsS2.
The compounds are: NaCl AgBr Tl2S Ag3AsO4 CuI HgBr2 Sr3(PO4)2
Post activity:

Lesson plan for Soluble Salts 1: Introduction to Salts-Understanding ionic formulas http://phet.colorado.edu
4/17/2009 Loeblein
1. Use the Reflection handout to gather information about using the sim or the clicker question version (questions 4-8). I wanted to see what the kids drew the first two years, so I used the handout version. The clicker questions include misconceptions that I saw in my students’ answers.
2. After the lecture using 2.8, have them draw microscopic models for lead (II) hydroxide versus lead (IV) hydroxide. Then, launch the sim to show the use of the roman numerals and discuss.
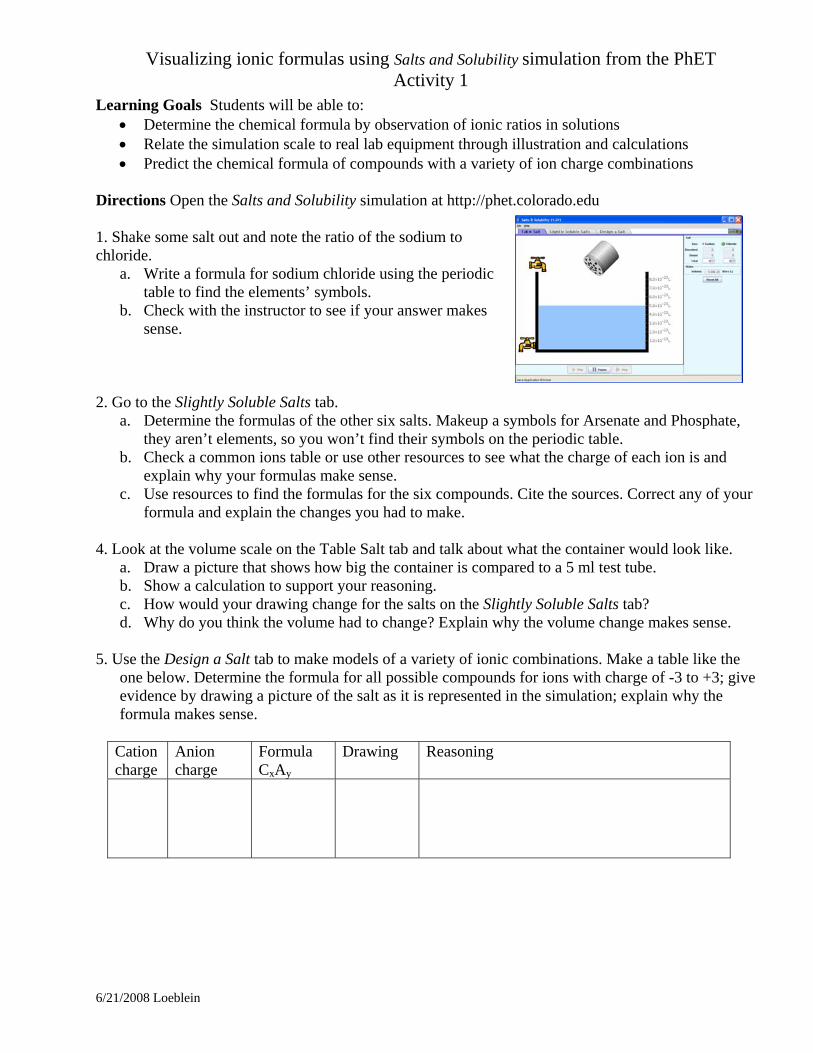
Visualizing ionic formulas using Salts and Solubility simulation from the PhET Activity 1
Learning Goals Students will be able to: • Determine the chemical formula by observation of ionic ratios in solutions • Relate the simulation scale to real lab equipment through illustration and calculations • Predict the chemical formula of compounds with a variety of ion charge combinations
Directions Open the Salts and Solubility simulation at http://phet.colorado.edu 1. Shake some salt out and note the ratio of the sodium to chloride.
a. Write a formula for sodium chloride using the periodic table to find the elements’ symbols.
b. Check with the instructor to see if your answer makes sense.
2. Go to the Slightly Soluble Salts tab.
a. Determine the formulas of the other six salts. Makeup a symbols for Arsenate and Phosphate, they aren’t elements, so you won’t find their symbols on the periodic table.
b. Check a common ions table or use other resources to see what the charge of each ion is and explain why your formulas make sense.
c. Use resources to find the formulas for the six compounds. Cite the sources. Correct any of your formula and explain the changes you had to make.
4. Look at the volume scale on the Table Salt tab and talk about what the container would look like.
a. Draw a picture that shows how big the container is compared to a 5 ml test tube. b. Show a calculation to support your reasoning. c. How would your drawing change for the salts on the Slightly Soluble Salts tab? d. Why do you think the volume had to change? Explain why the volume change makes sense.
5. Use the Design a Salt tab to make models of a variety of ionic combinations. Make a table like the
one below. Determine the formula for all possible compounds for ions with charge of -3 to +3; give evidence by drawing a picture of the salt as it is represented in the simulation; explain why the formula makes sense.
Cation charge
Anion charge
Formula CxAy
Drawing Reasoning
6/21/2008 Loeblein
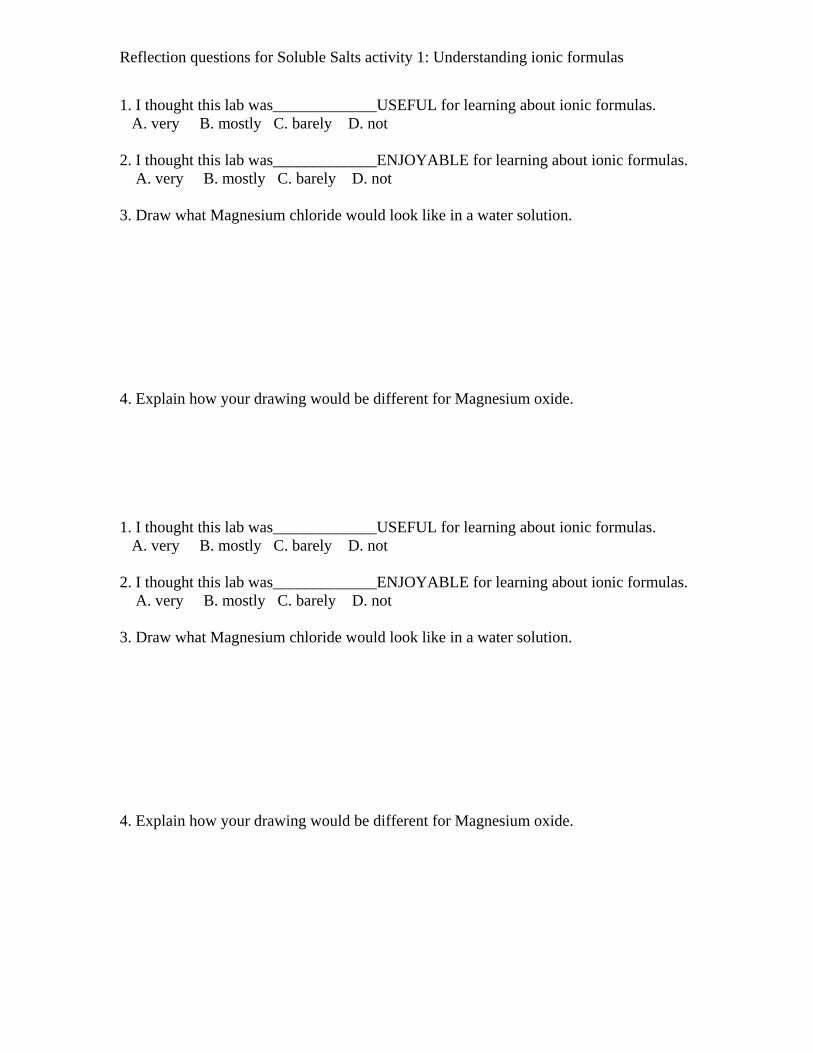
Reflection questions for Soluble Salts activity 1: Understanding ionic formulas
1. I thought this lab was_____________USEFUL for learning about ionic formulas. A. very B. mostly C. barely D. not 2. I thought this lab was_____________ENJOYABLE for learning about ionic formulas. A. very B. mostly C. barely D. not 3. Draw what Magnesium chloride would look like in a water solution. 4. Explain how your drawing would be different for Magnesium oxide. 1. I thought this lab was_____________USEFUL for learning about ionic formulas. A. very B. mostly C. barely D. not 2. I thought this lab was_____________ENJOYABLE for learning about ionic formulas. A. very B. mostly C. barely D. not 3. Draw what Magnesium chloride would look like in a water solution. 4. Explain how your drawing would be different for Magnesium oxide.
Salts and Solubility Activity1Learning Goals Students will be able to: •Determine the chemical formula by observation of ionic ratios in solutions•Relate the simulation scale to real lab equipment through illustration and calculations •Predict the chemical formula of compounds with a variety of ion charge combinations
Trish Loeblein July 2008 Questions 1-3 are a pretest. 4-8 are reflective

1
Salts and Solubility Activity1 Learning Goals Students will be able to:
•Determine the chemical formula by observation
of ionic ratios in solutions
•Relate the simulation scale to real lab equipment
through illustration and calculations
•Predict the chemical formula of compounds with
a variety of ion charge combinations
Trish Loeblein July 2008 Questions 1-3 are a pretest. 4-8 are reflective
1. Which is the formula for the
compound made from
M+1 and N-2
A. MN2
B. M2 N
C. MN
D. M2 N2
2. Which is the formula for the
compound made from
M+3 and N-1
A. MN3
B. M3 N
C. MN
D. M3 N3
3. Which is the formula for the
compound made from
M+3 and N-2
A. MN
B. M3 N2
C. M2 N3
D. M6 N6
4. I thought this lab was _________
USEFUL for learning about ionic
formulas.
A. very
B. mostly
C. barely
D. not
5. I thought this lab was _________
ENJOYABLE for learning about ionic
formulas.
A. very
B. mostly
C. barely
D. not
2
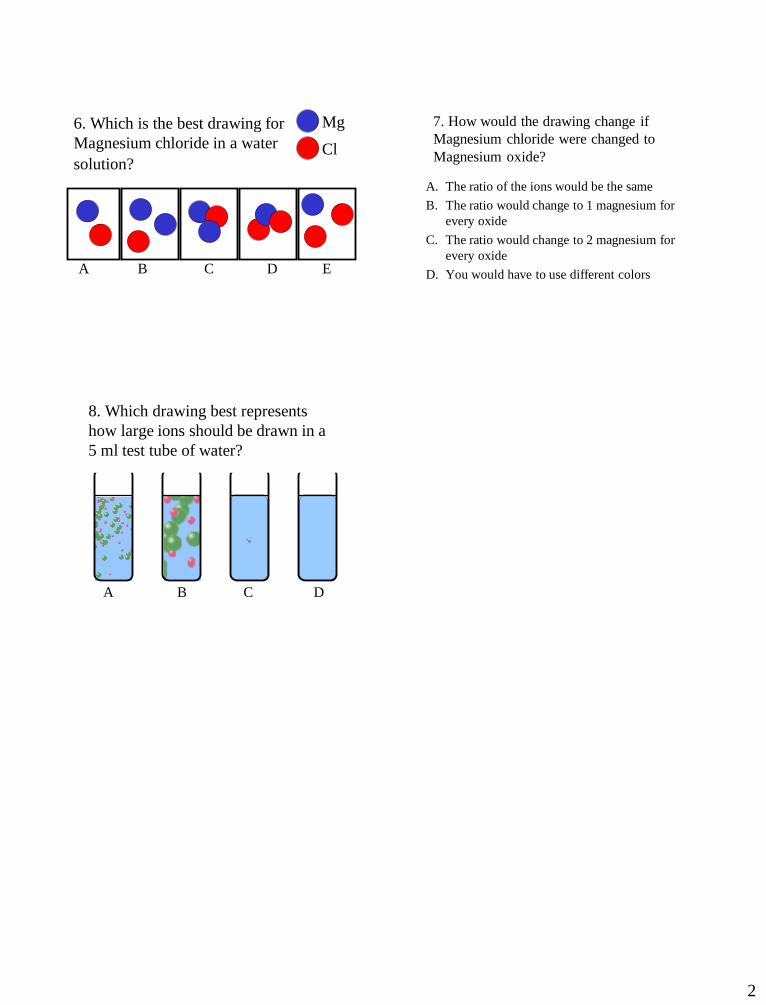
6. Which is the best drawing for
Magnesium chloride in a water
solution?
Mg
Cl
A B C D E
7. How would the drawing change if
Magnesium chloride were changed to
Magnesium oxide?
A. The ratio of the ions would be the same
B. The ratio would change to 1 magnesium for
every oxide
C. The ratio would change to 2 magnesium for
every oxide
D. You would have to use different colors
8. Which drawing best represents
how large ions should be drawn in a
5 ml test tube of water?
A B C D
Lesson plan for Isotopes and Atomic Mass:
What is an isotope? What does the mass on the periodic table mean? http://phet.colorado.edu
6/5/2011 Loeblein http://phet.colorado.edu
Learning Goals:
Students will be able to:
Define “isotope” using mass number, atomic number, number of protons, neutrons and electrons
Compare and contrast: element, atom, isotope
Given the number of protons, neutrons and electrons, find the mass and name of an isotope
Given the name of an element and the number of neutrons, find the mass of an isotope
Give evidence to support or dispute: “In nature, the chance of finding one isotope of an element is the same for all elements.”
Find the average atomic mass of an element given the abundance and mass of its isotopes
Background: This activity is inquiry based and in my class would follow using the Build an
Atom sim. I have not written a HS lesson yet, but it will be based on the MS lesson that the
PhET team developed, Build an Atom Introduction
Isotope and Atomic Mass Introduction:
Students should not need an introduction to this sim, but there are some things from the
Teaching Tips that might be useful.
Pre-Lesson: (I have included some slides that could be used in a Power Point presentation)
Have white eggs of different grades (or apples or something that is called by the same noun and
has similar characteristics, but has variation in mass). I like eggs because all eggs are chemically
and physically the same, but if you want to do this as a hands-on activity, you might want to
think of something that wouldn’t have the potential for a mess. I use nuts and bolts for a hands-
on lab about molecular mass from Merrill Chemistry Robert C. Smoot , Richard G. Smith , Jack
Price McGraw-Hill/Glencoe 1998. p 807 earlier in the unit to help students understand that
substances can be made up of basic parts combined differently.
1. As a demo, put several different in a container and mass; don’t use all the eggs, save
some for #3. Count the number of eggs and ask students working in pairs or table groups
(depends on the room arrangement) to collaborate to calculate the average mass of the
eggs. I would ask a student to come to the front to show their work.
2. Then, mass one of each egg type and have a class discussion about the difference
between: “Individual” versus “Average” Mass.
3. Calculate, before the activity, an average mass that is achievable with the eggs you have
different from #1. Challenge the student groups to design a mixture of eggs that will give
the average you provide. (I have not done this activity yet, but I hope that I can design
this so there is more than one solution.) I also think I will have a variety of masses and
assign different groups different masses. I have seniors in HS, so I think this will be
good.
4. Have groups take turns trying their proposals by coming up to the front of the room. If
this is a course in which you have already addressed “precision”, this is a good
opportunity to review, because the eggs will have some variation even if they have the
Lesson plan for Isotopes and Atomic Mass:
What is an isotope? What does the mass on the periodic table mean? http://phet.colorado.edu
6/5/2011 Loeblein http://phet.colorado.edu
same grade. If you want to keep it simple, just make sure you record the mass with less
precision.
Lesson: Have the students work in pairs or at home to complete the Student Directions.
Post-Lesson: Use the clicker questions to facilitate class discussion. (see the Power Point
that is included with this activity)
7
Student directions Isotopes and Atomic Mass:
What is an isotope? What does the mass on the periodic table mean? http://phet.colorado.edu
6/5/2011 Loeblein http://phet.colorado.edu
Learning Goals: Students will be able to:
A. Define “isotope” using mass number, atomic number, number of protons, neutrons and
electrons.
B. Compare and contrast: element, atom, isotope
C. Given the number of protons, neutrons and electrons, find the mass and name of an
isotope
D. Given the name of an element and the number of neutrons, find the mass of an isotope
E. Give evidence to support or dispute: “In nature, the chance of finding one isotope of an
element is the same for all elements.”
F. Find the average atomic mass of an element given the abundance and mass of its isotopes
Directions: 1. Use the sim and your text to develop your own ideas about the learning goals A-D. You may
want to practice with a partner by writing quiz questions to test each other.
2. For goal E, use the sim and cite references to write a paragraph for your argument.
3. You and your friend, Bill, are given a rock that you know has some Silicon. You just learned that
there are 3 common isotopes of silicon- Silicon-28, Silicon-29, and Silicon-30. Bill suggests that
the rock might have equal parts of each isotope. What would be the average mass of Silicon in the
rock? How could you check to see if your ideas are correct?
4. Iron has many isotopes but only 4 are found in significant amounts in naturally found
mixtures. The amounts by mass percent are: 5.845% of 54
Fe (53.9396 amu) 91.754% of
56Fe (55.9349 amu), 2.119% of
57Fe (56.9354 amu) and 0.282% of
58Fe (57.9333 amu).
What would you determine the average mass of iron to be? How do your results compare
to the information on the periodic table in your text?
6/5/2011
1
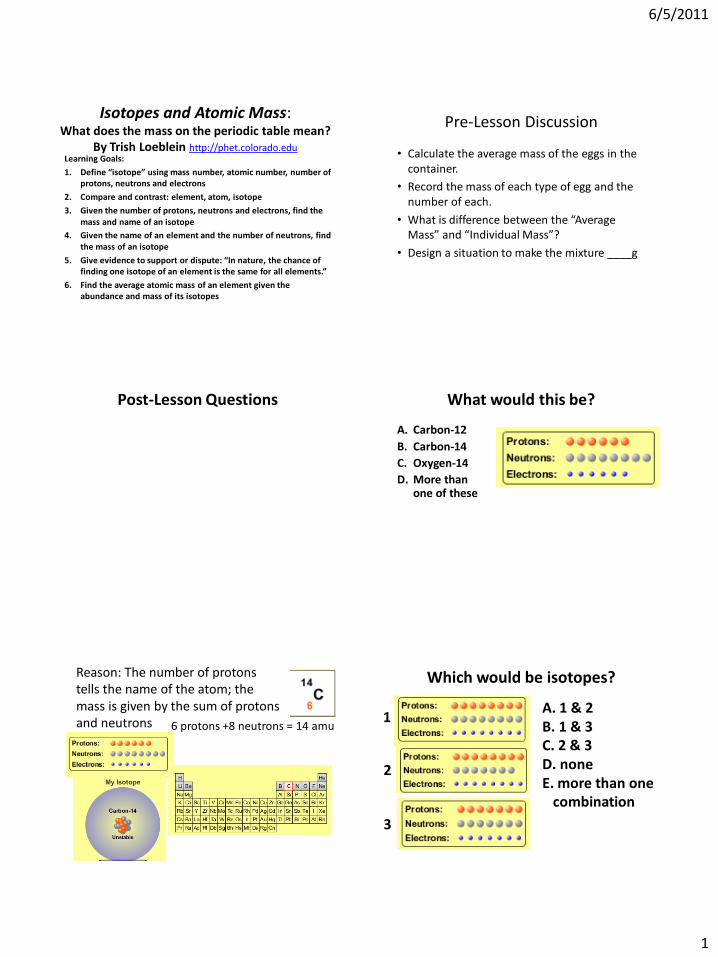
Isotopes and Atomic Mass: What does the mass on the periodic table mean?
By Trish Loeblein http://phet.colorado.edu Learning Goals:
1. Define “isotope” using mass number, atomic number, number of protons, neutrons and electrons
2. Compare and contrast: element, atom, isotope
3. Given the number of protons, neutrons and electrons, find the mass and name of an isotope
4. Given the name of an element and the number of neutrons, find the mass of an isotope
5. Give evidence to support or dispute: “In nature, the chance of finding one isotope of an element is the same for all elements.”
6. Find the average atomic mass of an element given the abundance and mass of its isotopes
Pre-Lesson Discussion
• Calculate the average mass of the eggs in the container.
• Record the mass of each type of egg and the number of each.
• What is difference between the “Average Mass” and “Individual Mass”?
• Design a situation to make the mixture ____g
Post-Lesson Questions What would this be?
A. Carbon-12
B. Carbon-14
C. Oxygen-14
D. More than one of these
Reason: The number of protons tells the name of the atom; the mass is given by the sum of protons and neutrons 6 protons +8 neutrons = 14 amu
Which would be isotopes?
1
2
3
A. 1 & 2 B. 1 & 3 C. 2 & 3 D. none E. more than one
combination
6/5/2011
2
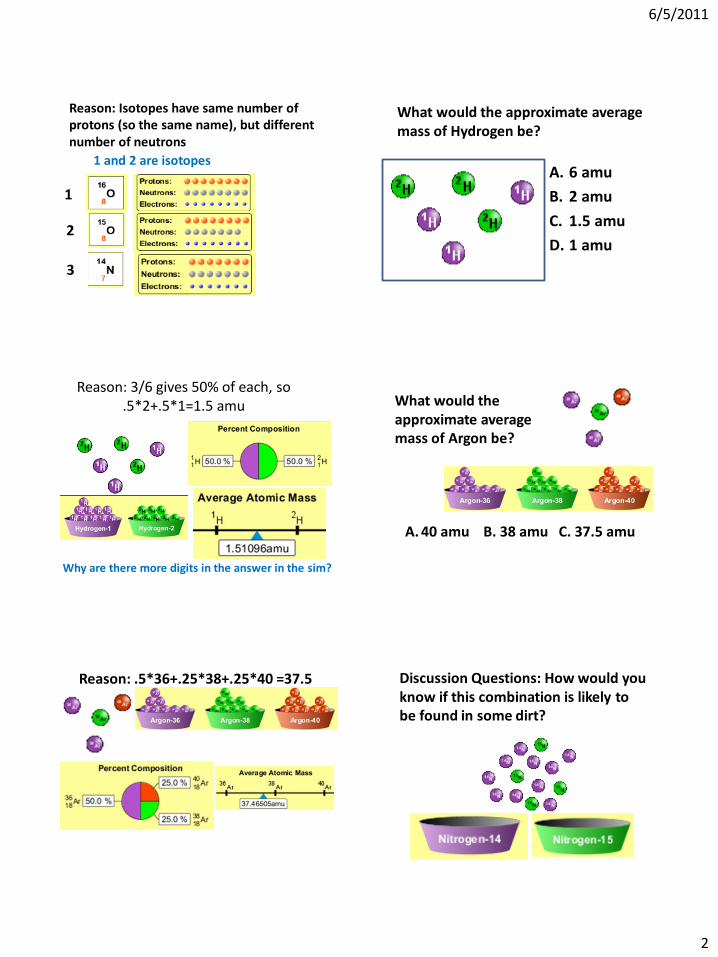
Reason: Isotopes have same number of protons (so the same name), but different number of neutrons
1 and 2 are isotopes
1
2
3
What would the approximate average mass of Hydrogen be?
A. 6 amu
B. 2 amu
C. 1.5 amu
D. 1 amu
Reason: 3/6 gives 50% of each, so .5*2+.5*1=1.5 amu
Why are there more digits in the answer in the sim?
What would the approximate average mass of Argon be?
A. 40 amu B. 38 amu C. 37.5 amu
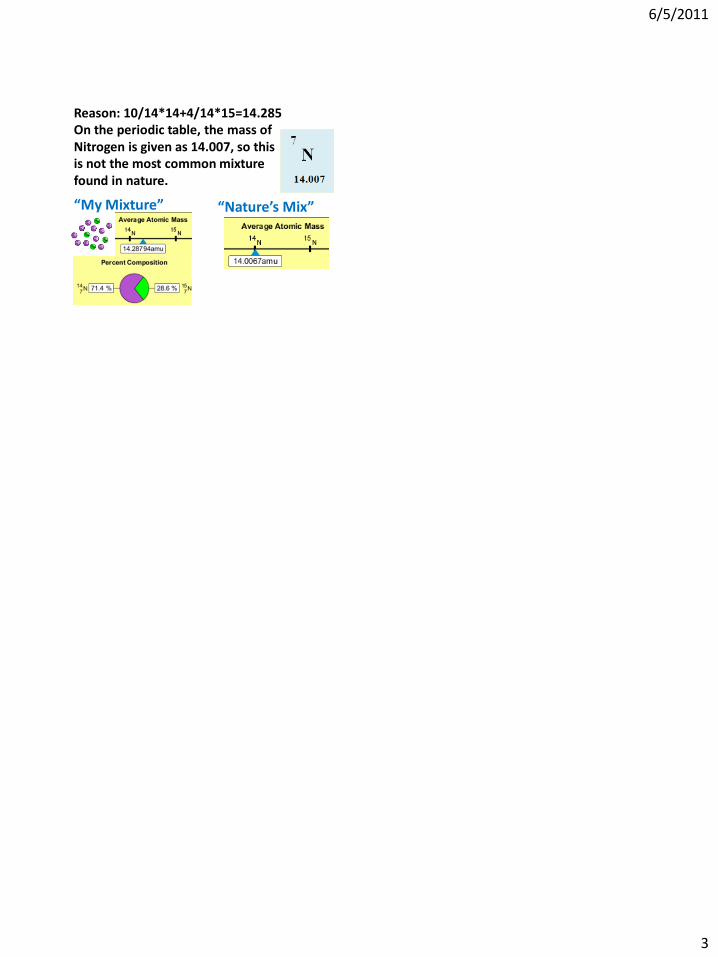
Reason: .5*36+.25*38+.25*40 =37.5 Discussion Questions: How would you know if this combination is likely to be found in some dirt?
6/5/2011
3
Reason: 10/14*14+4/14*15=14.285 On the periodic table, the mass of Nitrogen is given as 14.007, so this is not the most common mixture found in nature.
“My Mixture” “Nature’s Mix”
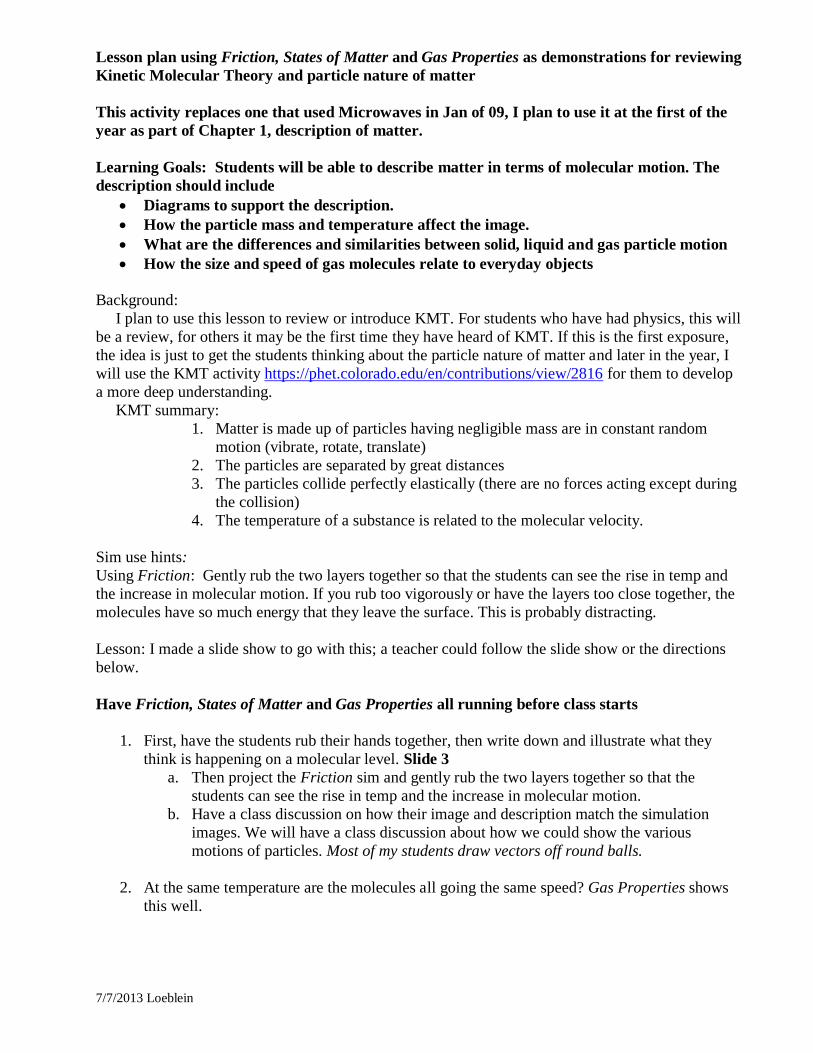
Lesson plan using Friction, States of Matter and Gas Properties as demonstrations for reviewing
Kinetic Molecular Theory and particle nature of matter
7/7/2013 Loeblein
This activity replaces one that used Microwaves in Jan of 09, I plan to use it at the first of the
year as part of Chapter 1, description of matter.
Learning Goals: Students will be able to describe matter in terms of molecular motion. The
description should include
Diagrams to support the description.
How the particle mass and temperature affect the image.
What are the differences and similarities between solid, liquid and gas particle motion
How the size and speed of gas molecules relate to everyday objects
Background:
I plan to use this lesson to review or introduce KMT. For students who have had physics, this will
be a review, for others it may be the first time they have heard of KMT. If this is the first exposure,
the idea is just to get the students thinking about the particle nature of matter and later in the year, I
will use the KMT activity https://phet.colorado.edu/en/contributions/view/2816 for them to develop
a more deep understanding.
KMT summary:
1. Matter is made up of particles having negligible mass are in constant random
motion (vibrate, rotate, translate)
2. The particles are separated by great distances
3. The particles collide perfectly elastically (there are no forces acting except during
the collision)
4. The temperature of a substance is related to the molecular velocity.
Sim use hints:
Using Friction: Gently rub the two layers together so that the students can see the rise in temp and
the increase in molecular motion. If you rub too vigorously or have the layers too close together, the
molecules have so much energy that they leave the surface. This is probably distracting.
Lesson: I made a slide show to go with this; a teacher could follow the slide show or the directions
below.
Have Friction, States of Matter and Gas Properties all running before class starts
1. First, have the students rub their hands together, then write down and illustrate what they
think is happening on a molecular level. Slide 3
a. Then project the Friction sim and gently rub the two layers together so that the
students can see the rise in temp and the increase in molecular motion.
b. Have a class discussion on how their image and description match the simulation
images. We will have a class discussion about how we could show the various
motions of particles. Most of my students draw vectors off round balls.
2. At the same temperature are the molecules all going the same speed? Gas Properties shows
this well.
Lesson plan using Friction, States of Matter and Gas Properties as demonstrations for reviewing
Kinetic Molecular Theory and particle nature of matter
7/7/2013 Loeblein
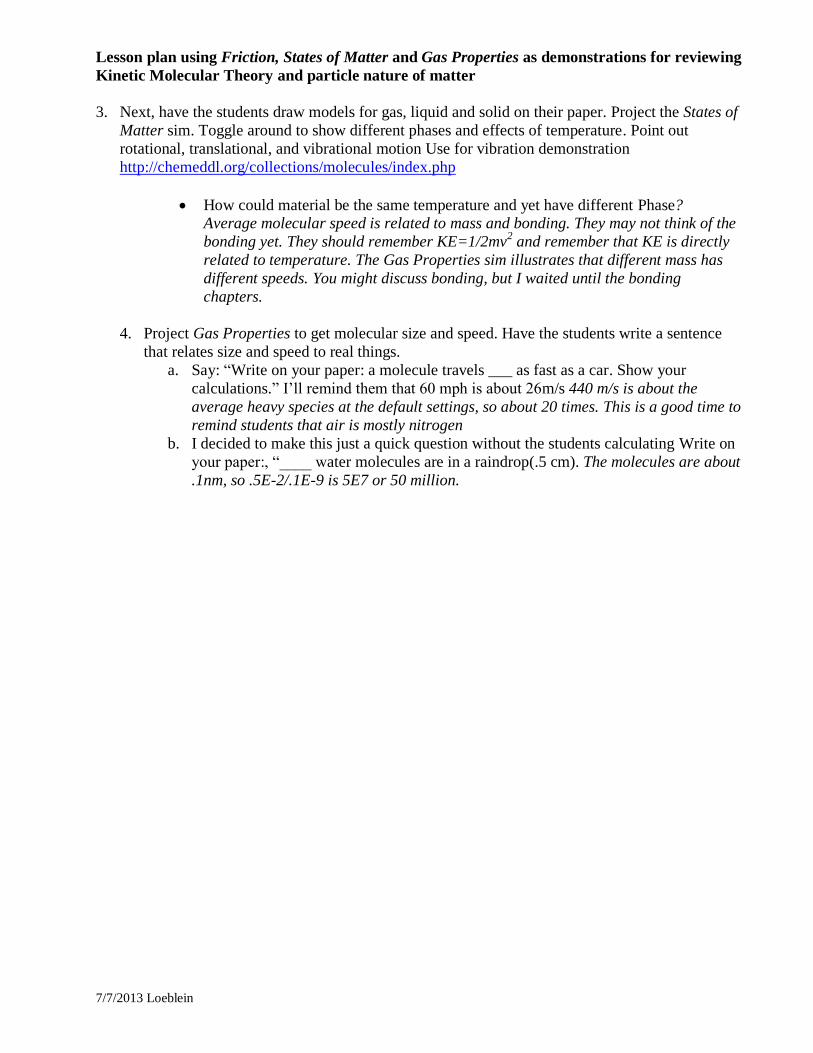
3. Next, have the students draw models for gas, liquid and solid on their paper. Project the States of
Matter sim. Toggle around to show different phases and effects of temperature. Point out
rotational, translational, and vibrational motion Use for vibration demonstration
http://chemeddl.org/collections/molecules/index.php
How could material be the same temperature and yet have different Phase? Average molecular speed is related to mass and bonding. They may not think of the
bonding yet. They should remember KE=1/2mv2 and remember that KE is directly
related to temperature. The Gas Properties sim illustrates that different mass has
different speeds. You might discuss bonding, but I waited until the bonding
chapters.
4. Project Gas Properties to get molecular size and speed. Have the students write a sentence
that relates size and speed to real things.
a. Say: “Write on your paper: a molecule travels ___ as fast as a car. Show your
calculations.” I’ll remind them that 60 mph is about 26m/s 440 m/s is about the
average heavy species at the default settings, so about 20 times. This is a good time to
remind students that air is mostly nitrogen
b. I decided to make this just a quick question without the students calculating Write on
your paper:, “____ water molecules are in a raindrop(.5 cm). The molecules are about
.1nm, so .5E-2/.1E-9 is 5E7 or 50 million.
Review of KMT
PhET sims: Friction, States of
Matter and Gas Properties
This is for College Chemistry for students who have already taken
Physics and completed the KMT inquiry lesson http://phet.colorado.edu/en/contributions/view/2816
Or this activity can be used as an introduction to the particle nature of
matter. The learning goals are lesson
Also uses Molecules 360 by Chem Ed DL
Have Friction, States of Matter and Gas Properties and Molecules 360 all
running before class starts
Learning Goals:
• Students will be able to describe matter in terms of molecular motion. The description should include
• Diagrams to support the description.
• How the particle mass and temperature affect the image.
• What are the differences and similarities between solid, liquid and gas particle motion
• How the size and speed of gas molecules relate to everyday objects
7/7/2013
1
Review of KMT
PhET sims: Friction, States of
Matter and Gas Properties
This is for College Chemistry for students who have already taken
Physics and completed the KMT inquiry lesson http://phet.colorado.edu/en/contributions/view/2816
Or this activity can be used as an introduction to the particle nature of
matter. The learning goals are lesson
Also uses Molecules 360 by Chem Ed DL
Have Friction, States of Matter and Gas Properties and Molecules 360 all
running before class starts
Learning Goals:
• Students will be able to describe matter in terms of molecular motion. The description should include
• Diagrams to support the description.
• How the particle mass and temperature affect the image.
• What are the differences and similarities between solid, liquid and gas particle motion
• How the size and speed of gas molecules relate to everyday objects
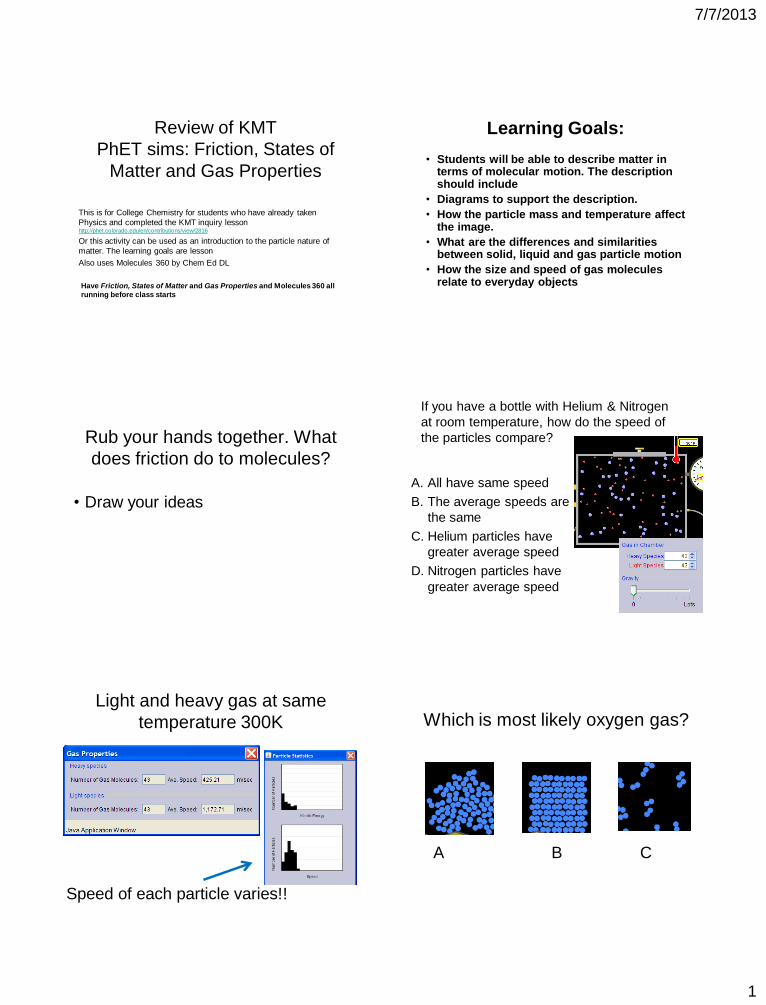
Rub your hands together. What
does friction do to molecules?
• Draw your ideas
If you have a bottle with Helium & Nitrogen
at room temperature, how do the speed of
the particles compare?
A. All have same speed
B. The average speeds are
the same
C. Helium particles have
greater average speed
D. Nitrogen particles have
greater average speed
Light and heavy gas at same
temperature 300K
Speed of each particle varies!!
Which is most likely oxygen gas?
A B C
7/7/2013
2
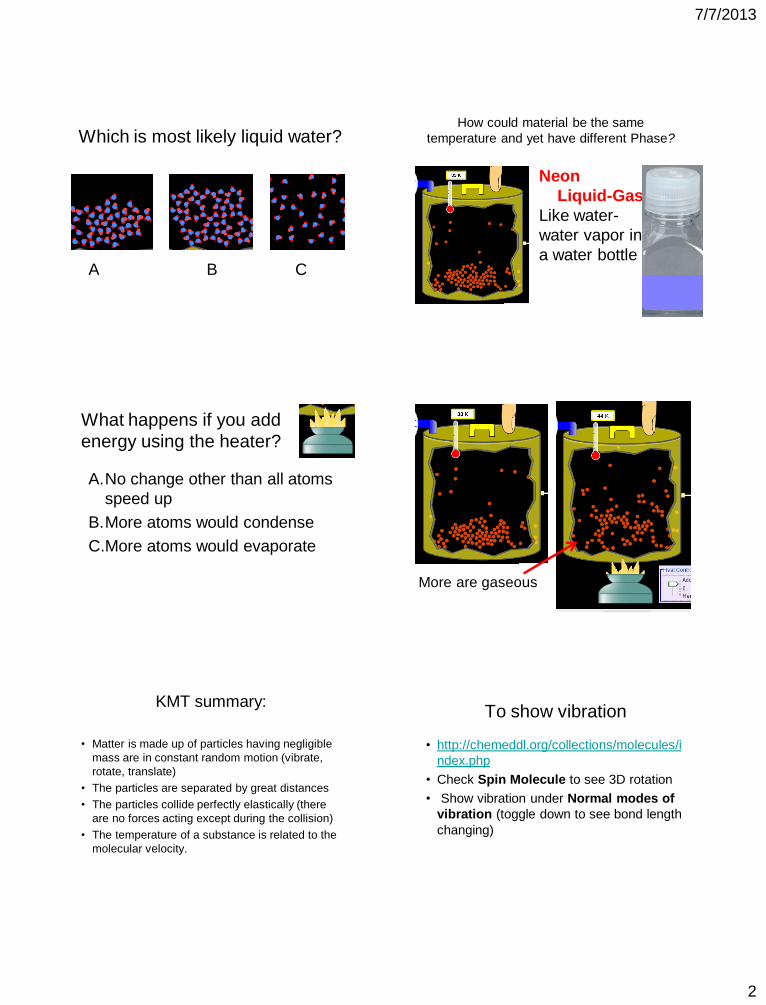
Which is most likely liquid water?
A B C
How could material be the same
temperature and yet have different Phase?
Neon
Liquid-Gas
Like water-
water vapor in
a water bottle
What happens if you add
energy using the heater?
A.No change other than all atoms
speed up
B.More atoms would condense
C.More atoms would evaporate
More are gaseous
KMT summary:
• Matter is made up of particles having negligible
mass are in constant random motion (vibrate,
rotate, translate)
• The particles are separated by great distances
• The particles collide perfectly elastically (there
are no forces acting except during the collision)
• The temperature of a substance is related to the
molecular velocity.
To show vibration
• http://chemeddl.org/collections/molecules/i
ndex.php
• Check Spin Molecule to see 3D rotation
• Show vibration under Normal modes of
vibration (toggle down to see bond length
changing)
7/7/2013
3
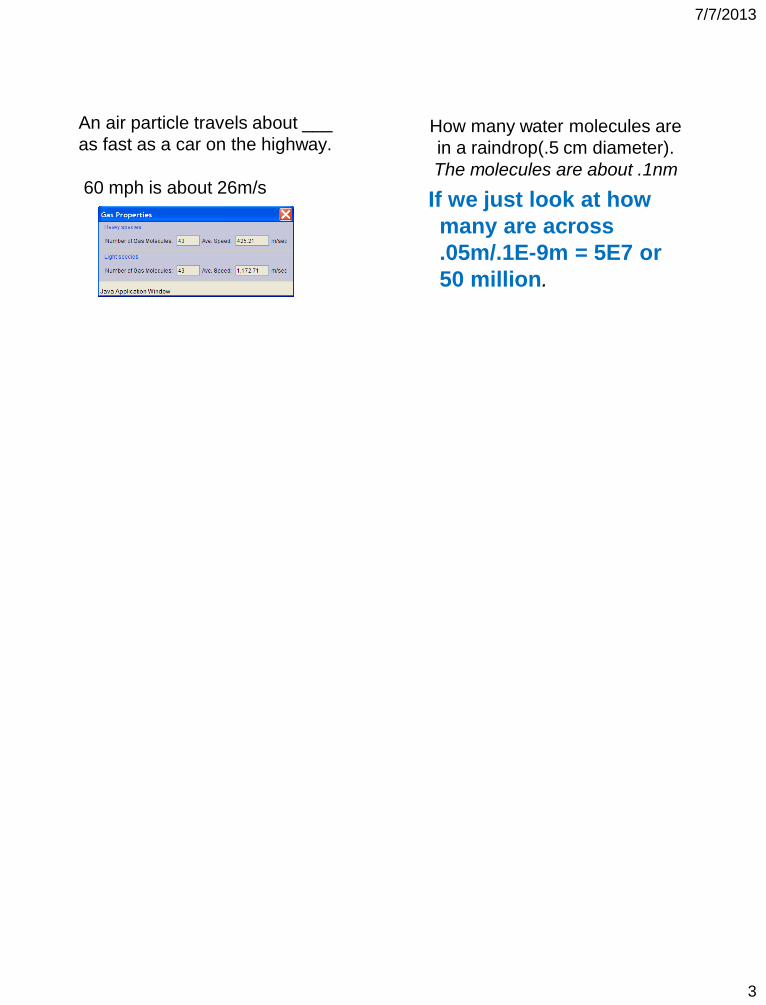
An air particle travels about ___
as fast as a car on the highway.
60 mph is about 26m/s
How many water molecules are
in a raindrop(.5 cm diameter).
The molecules are about .1nm
If we just look at how
many are across
.05m/.1E-9m = 5E7 or
50 million.
Lesson plan for Reactions and Rates 1: Introduction to reactions
2 50 minute periods
7/7/2013 Loeblein http://phet.colorado.edu
Learning Goals: I have put notes in italics after the learning goals to explain my thinking and
also describe what might be included in an acceptable answer.
Students will be able to:
1. Describe reactions in terms of a simple molecular model. For this goal, I want the
students to use the model presented on the Simple Collision tab. This is not a model that
is presented in texts, but the PhET team thought that a 1D model might help students
focus on just a few things: not all collisions result in a new substance and reactions are
reversible. Reactions are the result of collisions and the products may collide and react
to give reactants (This tab can be used to help simplify the relationships between
reactions and the energy diagrams, but this is not a learning goal for this activity)
2. Describe reactions in terms of molecular models with illustrations. The description
should include: A chemical reaction given in the form A+BC AB+ C or AB+CD AD +CB represents a large number of particles colliding and reorganizing to make new
substances; Not every collisions results in a reaction; reactions are reversible.
3. Differentiate between dissolving and reacting. The Salts simulation doesn’t show
water, so the students will not see the agent or process for dissolving. I have not tested
this goal, so I’ll see if they can use the simulations to differentiate. The difference is that
the substance is unchanged; the ions can organize into groups (crystals) or break apart
(hydrate). In reactions, the particles combine with different particles to make different
substances.
4. Use the molecular model to explain why reactions are not instantaneous. Reactions
are the result of collisions and that takes time. They may observe that rates vary, but
since I don’t plan to have them open the Reaction coordinate, they would not have an
explanation for the observations.
5. Use the molecular model to explain why reactions have less than 100% yields. Since
reactions are reversible, even though products are being formed, they are reacting to
make reactants, so there may not be 100% yield. We will have done a lab where they
make rice crispy bars and I want to make sure that their explanations include more than
a physical explanation that some reactants may stick to the container and not be able to
collide. They may observe that rates vary, but since I don’t plan to have them open the
Reaction coordinate, they would not have an explanation for the observations.
Background: We will have used Salts and Solubility simulation in the activity titled: Activity 1 Introduction to Salts-Understanding ionic formulas. Therefore my students will be a little
familiar with molecular illustrations; also my students used the Kinetic Molecular theory in
physics the preceding year. My students have not had a chemistry course previously. I plan to
use this activity before using the introduction to chemical reactions in the text. This in introduced
in Chemistry 6th
edition by Zumdahl Balancing equations (3.6 & 3.7).
Teaching note: This is a complex simulation and I have other activities that use this simulation
for Rates and Thermodynamics.
Lesson:
This lesson starts with a demonstration of iron chloride and potassium thiocyanate and
uses the simulation and a power point presentation projected to facilitate a class discussion. I do
Lesson plan for Reactions and Rates 1: Introduction to reactions
2 50 minute periods
7/7/2013 Loeblein http://phet.colorado.edu
not plan to give them the reaction, but just say chemical 1 mixes with chemical 2. I am not
concerned that this is a complicated reaction; I just wanted to use one that had only color change.
I would have enough prepared to repeat the experiment; I usually mix them at least twice. Large
test tubes work nicely for a vessel in my classroom, which has only 30 students.
Then the students will use the simulation in an inquiry activity to complete the learning
goals. My students use a computer lab and work in pairs. On #1 of the directions, I will ask them
to make their drawings by hand because I have found that if they use the computer, the step takes
too much class time.
Postlesson: I plan to use Magnesium reacting with hydrochloric acid as another demonstration
of a reaction and this time use a proper balanced equation. I will also have some salts, white and
colored, in solid form and in solution to mix with water. One thing that my students have
difficulty with is recognizing dilution color change vs chemical color change. There are some
slides included for the post-lesson.
7/7/2013
1
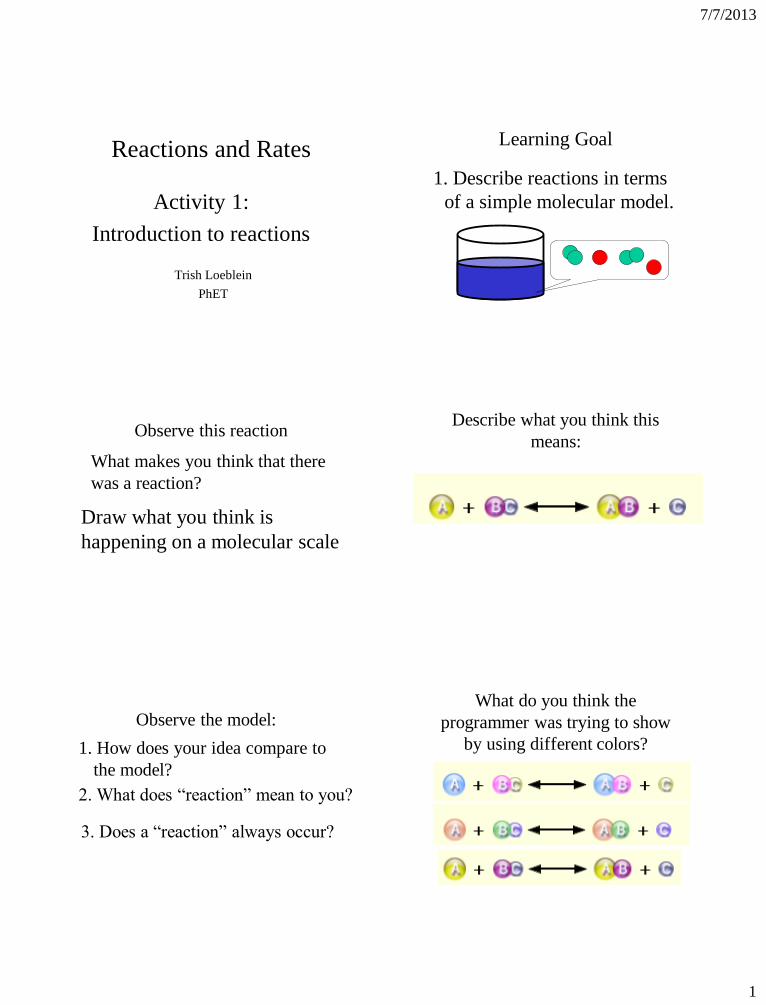
Reactions and Rates
Activity 1:
Introduction to reactions
Trish Loeblein
PhET
Learning Goal
1. Describe reactions in terms
of a simple molecular model.
Observe this reaction
What makes you think that there
was a reaction?
Draw what you think is
happening on a molecular scale
Describe what you think this
means:
Observe the model:
1. How does your idea compare to
the model?
2. What does “reaction” mean to you?
3. Does a “reaction” always occur?
What do you think the
programmer was trying to show
by using different colors?
7/7/2013
2
Use the Many Collisions tab of Reactions and Rates
Students will be able to:
2. Describe reactions in terms of molecular models with illustrations.
3. Differentiate between dissolving and reacting
4. Use the molecular model to explain why reactions are not instantaneous.
5. Use the molecular model to explain why reactions have less than 100% yields.
Post lesson slides follow
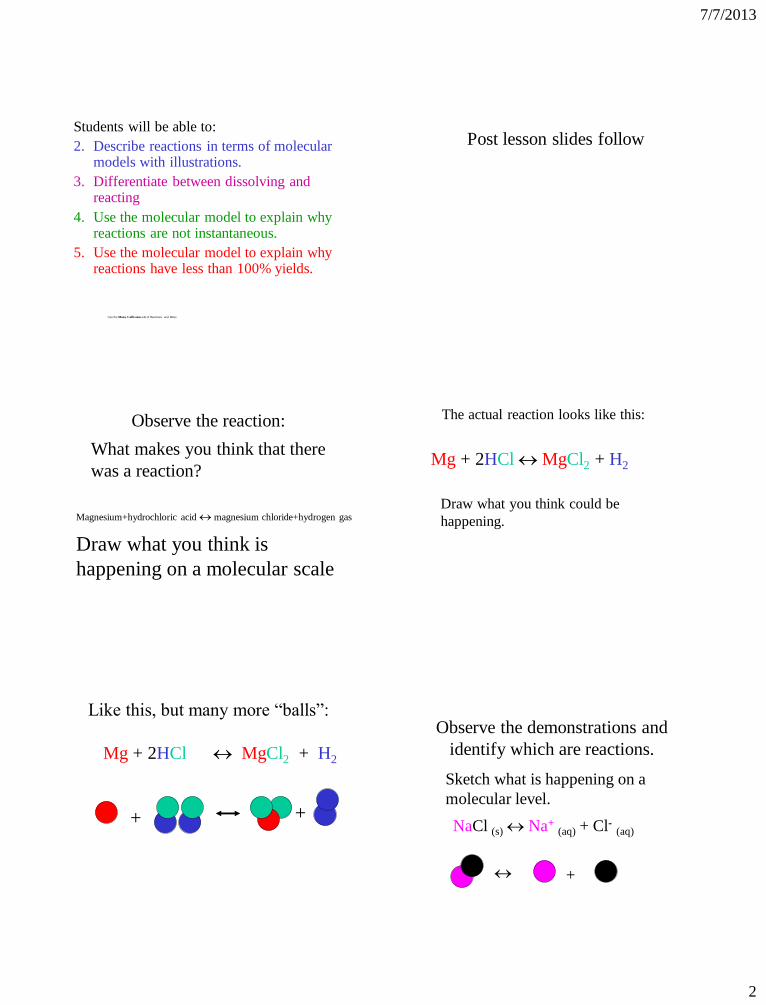
Observe the reaction:
What makes you think that there
was a reaction?
Magnesium+hydrochloric acid magnesium chloride+hydrogen gas
Draw what you think is
happening on a molecular scale
Draw what you think could be
happening.
Mg + 2HCl MgCl2 + H2
The actual reaction looks like this:
Like this, but many more “balls”:
Mg + 2HCl MgCl2 + H2
+ +
Observe the demonstrations and
identify which are reactions.
Sketch what is happening on a
molecular level.
NaCl (s) Na+ (aq) + Cl- (aq)
+

7/7/2013
3
Compare models
NaCl (s) Na+ (aq) + Cl- (aq)
+
Mg + 2HCl MgCl2 + H2
+ +
Student directions Reactions and Rates activity 1: Introduction to reactions
Learning Goals: Students will be able to: • Describe reactions in terms of a simple molecular model. • Describe reactions in terms of molecular models with illustrations. • Differentiate between dissolving and reacting • Use the molecular model to explain why reactions are not instantaneous • Use the molecular model to explain why reactions have less than 100% yields.
1. Use the Many Collisions tab to test ideas you might have about reactions on a molecular level.
After your tests, type a summary. Add illustrations by drawing on a separate sheet with labels; include references to these drawings in your summary.
2. Explore the Salts and Solubility simulation again. (It is about dissolving not chemical reactions.)
Check that your summary differentiates between dissolving and reacting. Make changes to your summary or drawings and then print.
3. Form a review committee by getting with a group that you do not sit near. Compare your
summary and drawings and hand-write additions or changes as necessary. Have your “reviewers” sign your paper.
4. Talk about how you could the simulation to figure out “why reactions are not instantaneous”.
Run tests and summarize your findings.
5. Talk about what “reactions have less than 100% yields” means. When we did the Carbohydrate Chewies lab, some ingredients were lost during the process, now we want to ignore loss of materials to surroundings. Use the simulation to help you understand on a molecular level, then write a description with illustrations.
2/27/2008 Loeblein http://phet.colorado.edu
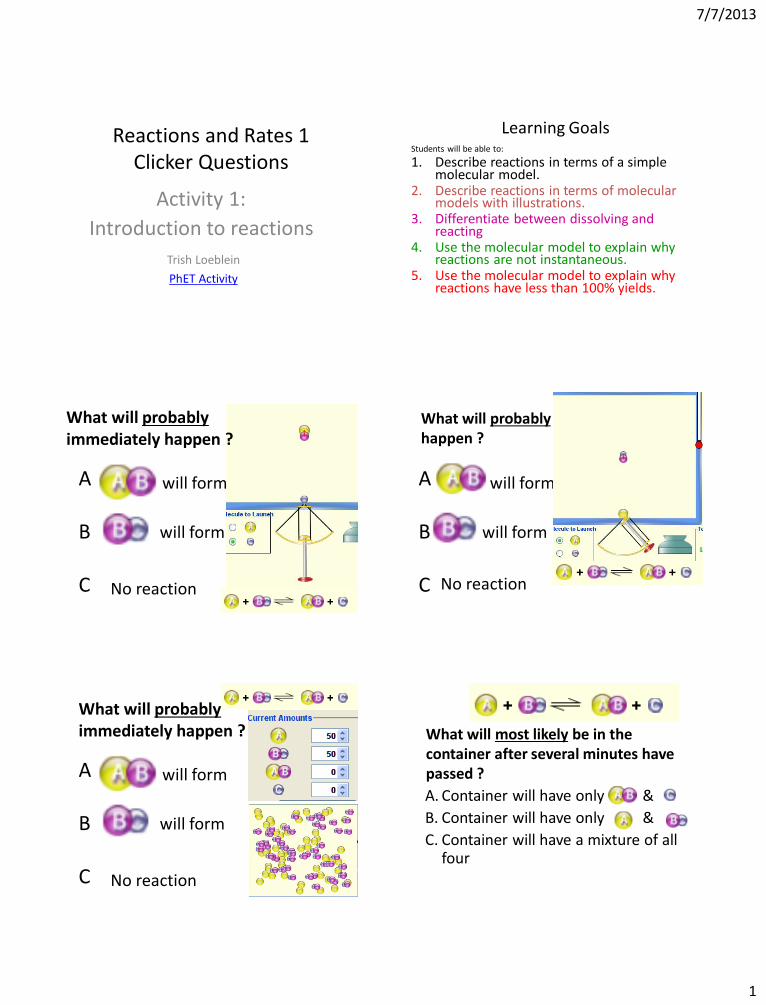
Reactions and Rates 1 Clicker Questions
Activity 1:
Introduction to reactions
Trish Loeblein
PhET Activity
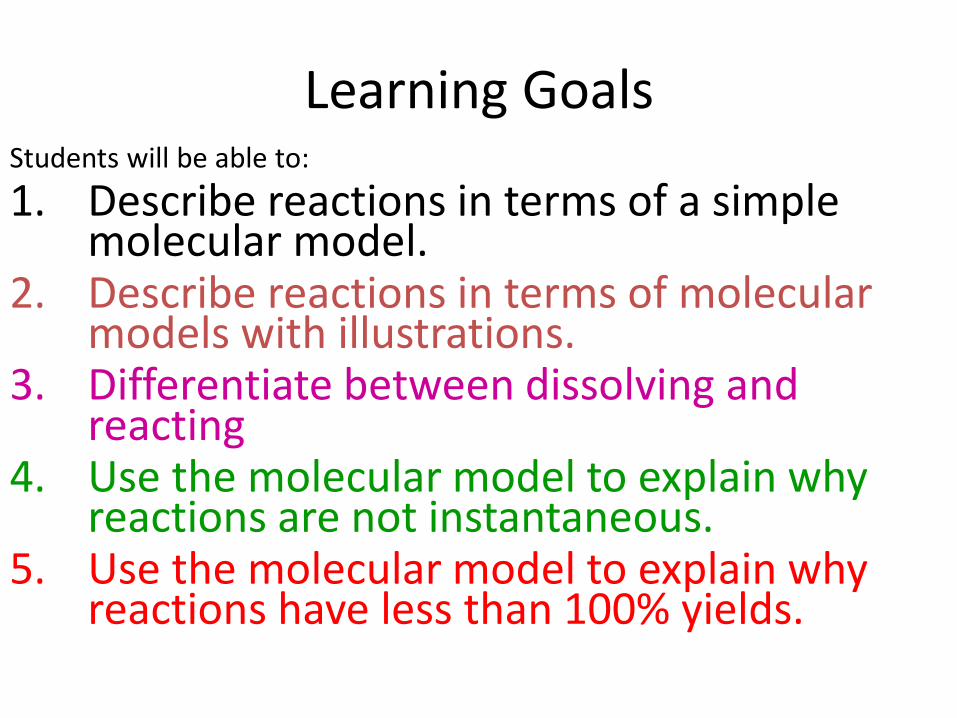
Students will be able to:
1. Describe reactions in terms of a simple molecular model.
2. Describe reactions in terms of molecular models with illustrations.
3. Differentiate between dissolving and reacting
4. Use the molecular model to explain why reactions are not instantaneous.
5. Use the molecular model to explain why reactions have less than 100% yields.
Learning Goals
7/7/2013
1
Reactions and Rates 1 Clicker Questions
Activity 1:
Introduction to reactions
Trish Loeblein
PhET Activity
Students will be able to:
1. Describe reactions in terms of a simple molecular model.
2. Describe reactions in terms of molecular models with illustrations.
3. Differentiate between dissolving and reacting
4. Use the molecular model to explain why reactions are not instantaneous.
5. Use the molecular model to explain why reactions have less than 100% yields.
Learning Goals
A B C No reaction
will form
will form
What will probably immediately happen ?
A B C No reaction
will form
will form
What will probably happen ?
What will probably immediately happen ?
A B C No reaction
will form
will form
What will most likely be in the container after several minutes have passed ?
A. Container will have only &
B. Container will have only &
C. Container will have a mixture of all four
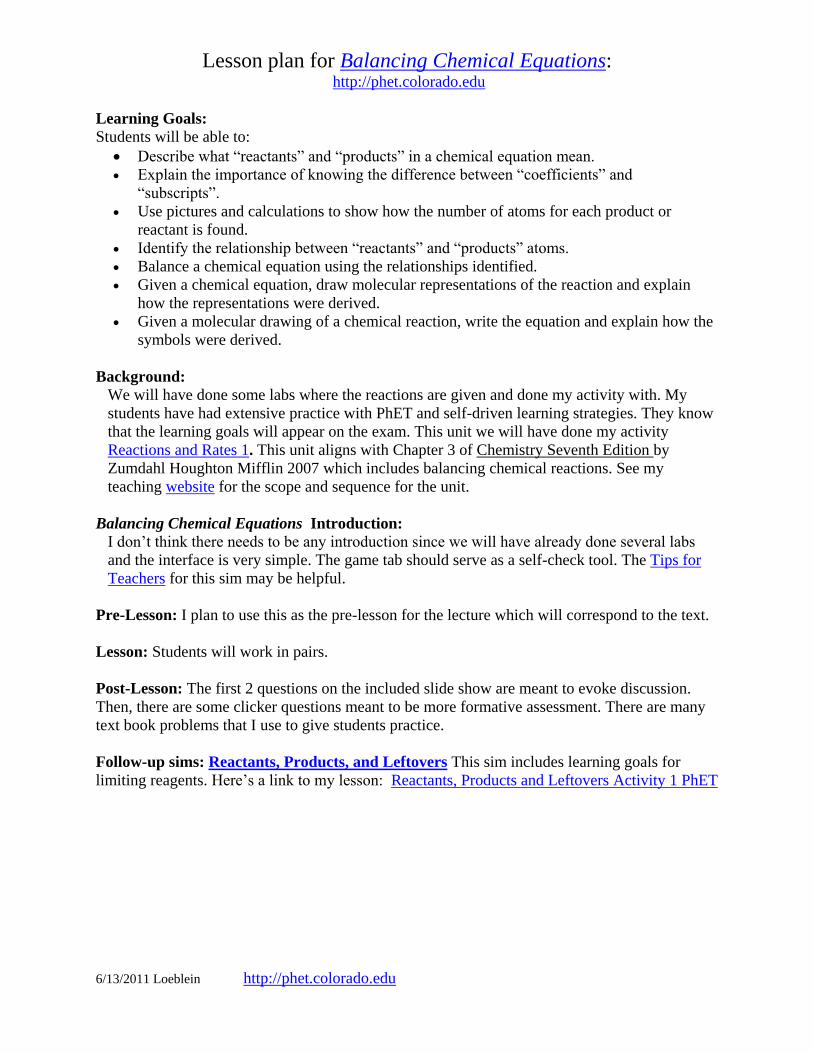
Lesson plan for Balancing Chemical Equations: http://phet.colorado.edu
6/13/2011 Loeblein http://phet.colorado.edu
Learning Goals:
Students will be able to:
Describe what “reactants” and “products” in a chemical equation mean.
Explain the importance of knowing the difference between “coefficients” and
“subscripts”.
Use pictures and calculations to show how the number of atoms for each product or
reactant is found.
Identify the relationship between “reactants” and “products” atoms.
Balance a chemical equation using the relationships identified.
Given a chemical equation, draw molecular representations of the reaction and explain
how the representations were derived.
Given a molecular drawing of a chemical reaction, write the equation and explain how the
symbols were derived.
Background:
We will have done some labs where the reactions are given and done my activity with. My
students have had extensive practice with PhET and self-driven learning strategies. They know
that the learning goals will appear on the exam. This unit we will have done my activity
Reactions and Rates 1. This unit aligns with Chapter 3 of Chemistry Seventh Edition by
Zumdahl Houghton Mifflin 2007 which includes balancing chemical reactions. See my
teaching website for the scope and sequence for the unit.
Balancing Chemical Equations Introduction:
I don’t think there needs to be any introduction since we will have already done several labs
and the interface is very simple. The game tab should serve as a self-check tool. The Tips for
Teachers for this sim may be helpful.
Pre-Lesson: I plan to use this as the pre-lesson for the lecture which will correspond to the text.
Lesson: Students will work in pairs.
Post-Lesson: The first 2 questions on the included slide show are meant to evoke discussion.
Then, there are some clicker questions meant to be more formative assessment. There are many
text book problems that I use to give students practice.
Follow-up sims: Reactants, Products, and Leftovers This sim includes learning goals for
limiting reagents. Here’s a link to my lesson: Reactants, Products and Leftovers Activity 1 PhET
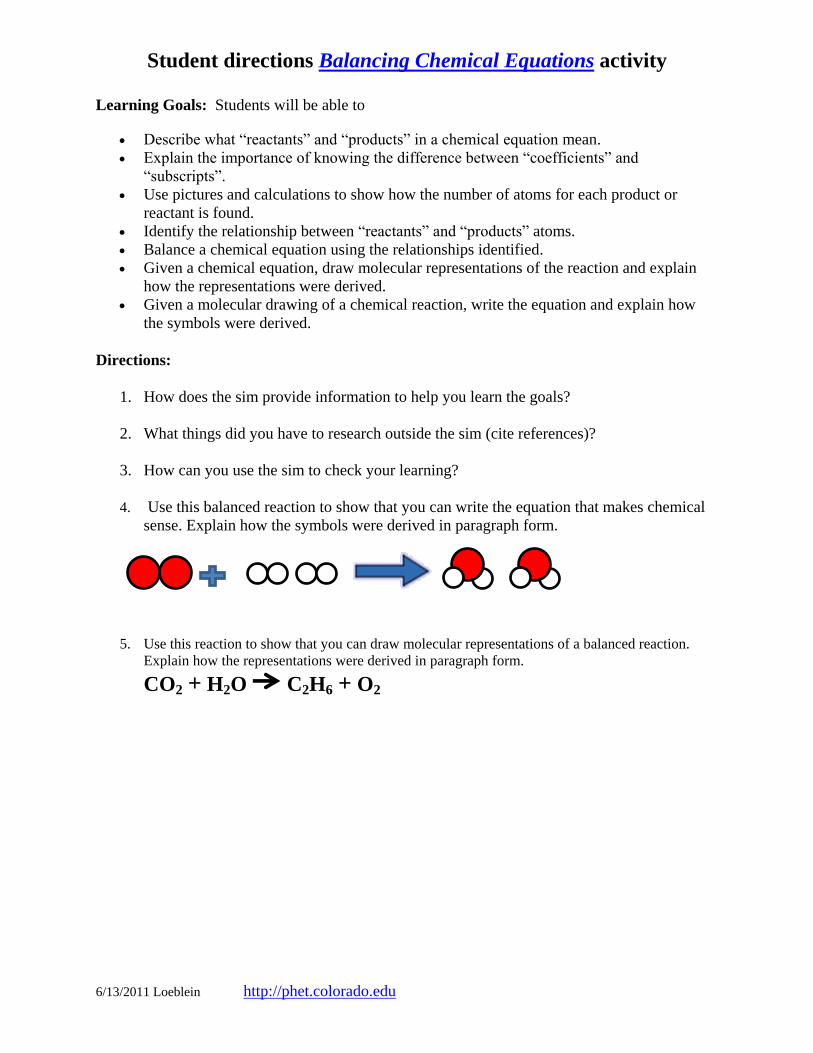
Student directions Balancing Chemical Equations activity
6/13/2011 Loeblein http://phet.colorado.edu
Learning Goals: Students will be able to
Describe what “reactants” and “products” in a chemical equation mean.
Explain the importance of knowing the difference between “coefficients” and
“subscripts”.
Use pictures and calculations to show how the number of atoms for each product or
reactant is found.
Identify the relationship between “reactants” and “products” atoms.
Balance a chemical equation using the relationships identified.
Given a chemical equation, draw molecular representations of the reaction and explain
how the representations were derived.
Given a molecular drawing of a chemical reaction, write the equation and explain how
the symbols were derived.
Directions:
1. How does the sim provide information to help you learn the goals?
2. What things did you have to research outside the sim (cite references)?
3. How can you use the sim to check your learning?
4. Use this balanced reaction to show that you can write the equation that makes chemical
sense. Explain how the symbols were derived in paragraph form.
5. Use this reaction to show that you can draw molecular representations of a balanced reaction.
Explain how the representations were derived in paragraph form.
CO2 + H2O C2H6 + O2
6/13/2011
1
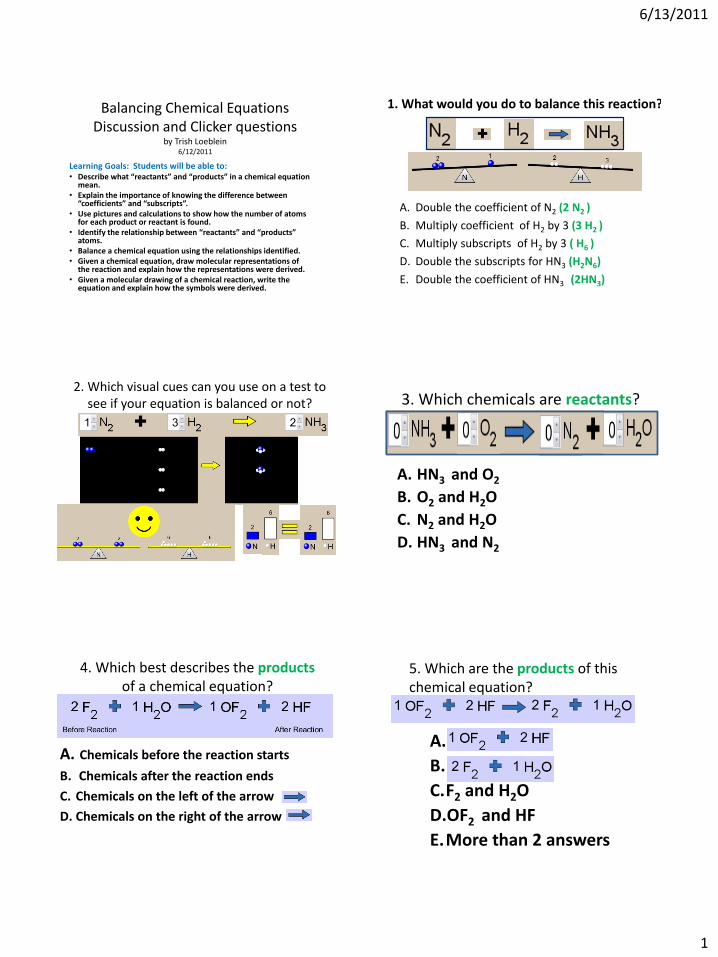
Balancing Chemical Equations Discussion and Clicker questions
by Trish Loeblein 6/12/2011
Learning Goals: Students will be able to: • Describe what “reactants” and “products” in a chemical equation
mean. • Explain the importance of knowing the difference between
“coefficients” and “subscripts”. • Use pictures and calculations to show how the number of atoms
for each product or reactant is found. • Identify the relationship between “reactants” and “products”
atoms. • Balance a chemical equation using the relationships identified. • Given a chemical equation, draw molecular representations of
the reaction and explain how the representations were derived. • Given a molecular drawing of a chemical reaction, write the
equation and explain how the symbols were derived.
1. What would you do to balance this reaction?
A. Double the coefficient of N2 (2 N2 )
B. Multiply coefficient of H2 by 3 (3 H2 )
C. Multiply subscripts of H2 by 3 ( H6 )
D. Double the subscripts for HN3 (H2N6)
E. Double the coefficient of HN3 (2HN3)
2. Which visual cues can you use on a test to see if your equation is balanced or not? 3. Which chemicals are reactants?
A. HN3 and O2
B. O2 and H2O
C. N2 and H2O
D. HN3 and N2
4. Which best describes the products of a chemical equation?
A. Chemicals before the reaction starts
B. Chemicals after the reaction ends
C. Chemicals on the left of the arrow
D. Chemicals on the right of the arrow
5. Which are the products of this chemical equation?
A.a
B. b
C.F2 and H2O
D.OF2 and HF
E.More than 2 answers

6/13/2011
2
Which best describes the products of a chemical equation?
An author of a test or text may chose to write this reaction:
Lesson learned: Don’t try to memorize reactions, analyze each one that is given.
6. Is this reaction balanced?
A. Yes B. No, there needs to be fewer red on the
reactant side. C. No, there needs to be more red on the
product side. D. No, for another reason.
Lesson plan for Reactants, Products, and Leftovers Activity 1:
Introduction to Chemical reactions http://phet.colorado.edu
Time for activity
9/17/2010 Loeblein http://phet.colorado.edu
Learning Goals:
Students will be able to:
Relate the real-world example of making sandwiches to chemical reactions
Describe what “limiting reactant” means using examples of sandwiches and chemicals (at
a particle level.) [I decided to leave out the “particle level” in the student directions since
this activity would be done before the idea of moles is introduced. If you do this after the
students are using mole amounts, then you might want to include this phrase]
Identify the limiting reactant in a chemical reaction
Use your own words to explain the Law of Conservation of Particles means using
examples of sandwiches and chemical reaction
Background:
My students will have done a lab called Carbohydrate Chewies which I have included, so
they will have had an introduction to how cooking can be used as an analogy for chemical
reactions. We discuss that real chemists do not necessarily get to make their own ratios, but that
those are often fixed as in the second tab of this simulation.
Reactants, Products, and Leftovers Introduction: This sim shouldn’t require any introduction.
Check the Teaching Tips from the design team for some helpful information.
Lesson: I gave this as a homework following Reactions and Rates 1
http://phet.colorado.edu/en/contributions/view/2984
Loeblein last updated 2010
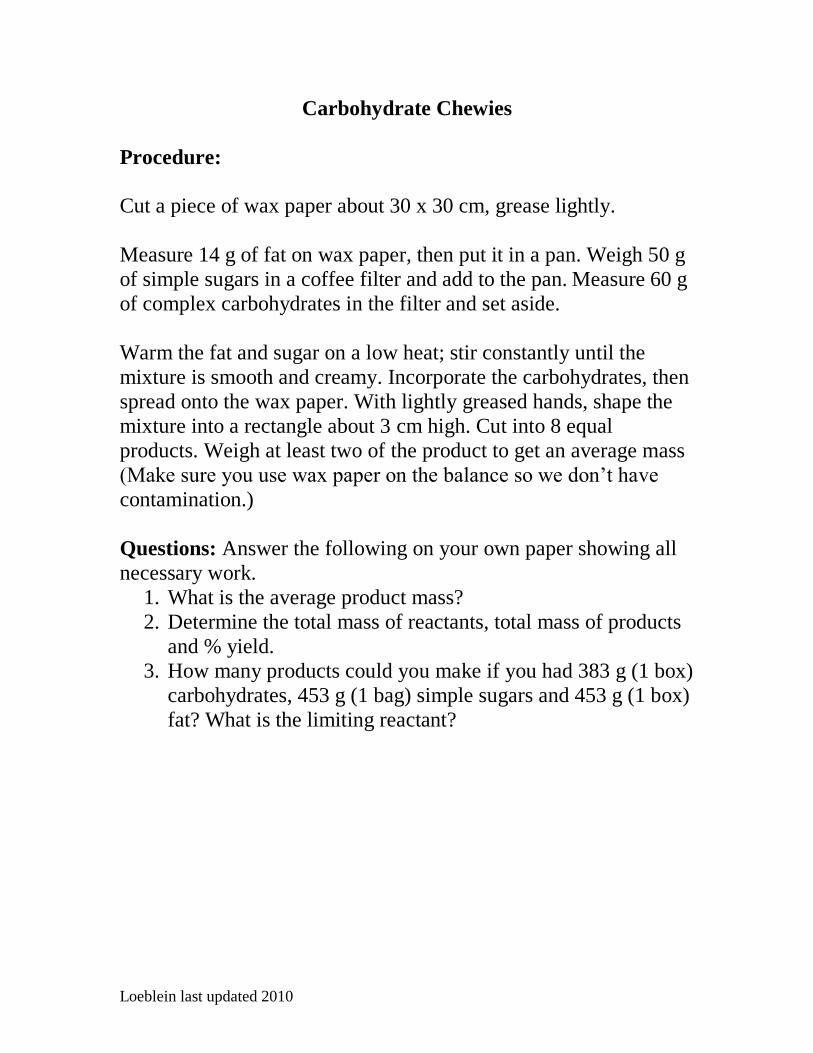
Carbohydrate Chewies
Procedure:
Cut a piece of wax paper about 30 x 30 cm, grease lightly.
Measure 14 g of fat on wax paper, then put it in a pan. Weigh 50 g
of simple sugars in a coffee filter and add to the pan. Measure 60 g
of complex carbohydrates in the filter and set aside.
Warm the fat and sugar on a low heat; stir constantly until the
mixture is smooth and creamy. Incorporate the carbohydrates, then
spread onto the wax paper. With lightly greased hands, shape the
mixture into a rectangle about 3 cm high. Cut into 8 equal
products. Weigh at least two of the product to get an average mass
(Make sure you use wax paper on the balance so we don’t have
contamination.)
Questions: Answer the following on your own paper showing all
necessary work.
1. What is the average product mass?
2. Determine the total mass of reactants, total mass of products
and % yield.
3. How many products could you make if you had 383 g (1 box)
carbohydrates, 453 g (1 bag) simple sugars and 453 g (1 box)
fat? What is the limiting reactant?
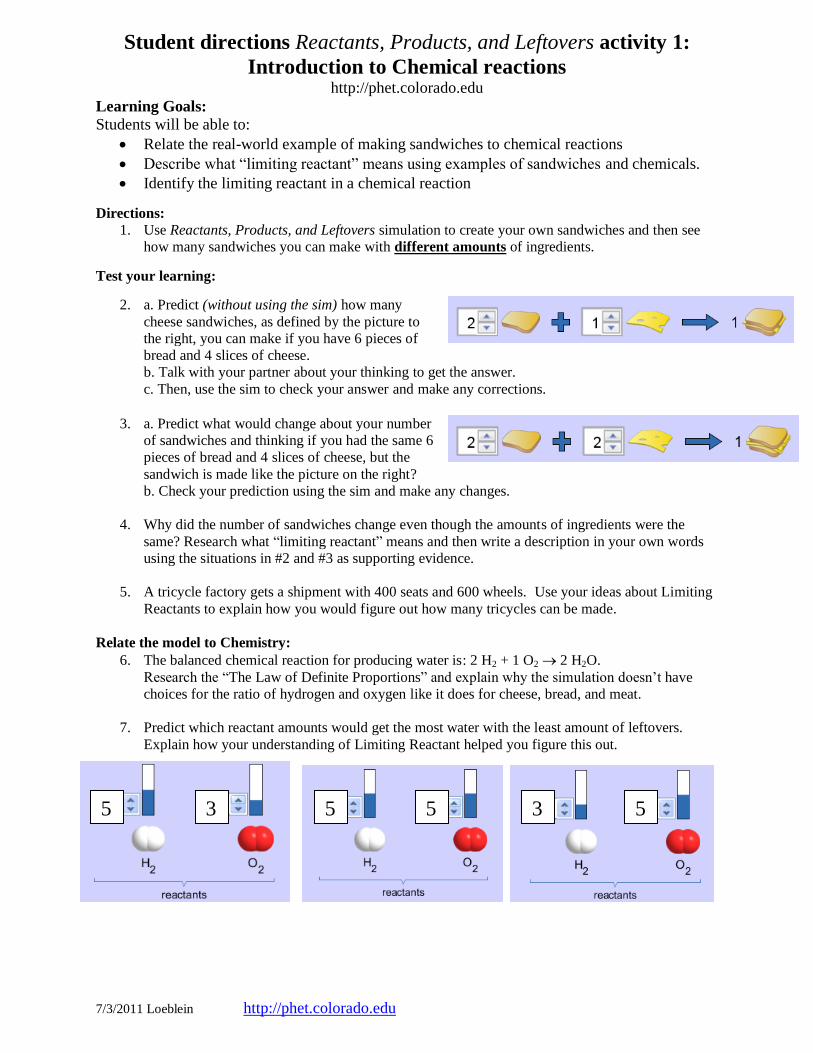
Student directions Reactants, Products, and Leftovers activity 1:
Introduction to Chemical reactions http://phet.colorado.edu
7/3/2011 Loeblein http://phet.colorado.edu
Learning Goals: Students will be able to:
Relate the real-world example of making sandwiches to chemical reactions
Describe what “limiting reactant” means using examples of sandwiches and chemicals.
Identify the limiting reactant in a chemical reaction
Directions:
1. Use Reactants, Products, and Leftovers simulation to create your own sandwiches and then see
how many sandwiches you can make with different amounts of ingredients.
Test your learning:
2. a. Predict (without using the sim) how many
cheese sandwiches, as defined by the picture to
the right, you can make if you have 6 pieces of
bread and 4 slices of cheese.
b. Talk with your partner about your thinking to get the answer.
c. Then, use the sim to check your answer and make any corrections.
3. a. Predict what would change about your number
of sandwiches and thinking if you had the same 6
pieces of bread and 4 slices of cheese, but the
sandwich is made like the picture on the right?
b. Check your prediction using the sim and make any changes.
4. Why did the number of sandwiches change even though the amounts of ingredients were the
same? Research what “limiting reactant” means and then write a description in your own words
using the situations in #2 and #3 as supporting evidence.
5. A tricycle factory gets a shipment with 400 seats and 600 wheels. Use your ideas about Limiting
Reactants to explain how you would figure out how many tricycles can be made.
Relate the model to Chemistry:
6. The balanced chemical reaction for producing water is: 2 H2 + 1 O2 2 H2O.
Research the “The Law of Definite Proportions” and explain why the simulation doesn’t have
choices for the ratio of hydrogen and oxygen like it does for cheese, bread, and meat.
7. Predict which reactant amounts would get the most water with the least amount of leftovers.
Explain how your understanding of Limiting Reactant helped you figure this out.
3 3 5 5 5 5

7/3/2011
1
Reactants, Products, and Leftovers Activity 1: Introduction to Chemical reactions
by Trish Loeblein http://phet.colorado.edu
Learning Goals:
Students will be able to:
• Relate the real-world example of making sandwiches to chemical reactions
• Describe what “limiting reactant” means using examples of sandwiches and chemicals at a particle level.
• Identify the limiting reactant in a chemical reaction
• Use your own words to explain the Law of Conservation of Particles means using examples of sandwiches and chemical reaction
1. Making a cheese sandwich can be represented by the chemical equation: 2 Bd + Ch → Bd2Ch What would you expect a sandwich to look like?
A B C D
2. Making a cheese sandwich can be represented by the chemical equation: Bd2 + 2Ch → 2BdCh What would you expect a sandwich to look like?
A B C D
3. Making a cheese sandwich can be represented by the chemical equation: 2 Bd + Ch → Bd2Ch What does the “2” on the left side of the chemical equation represent?
A. 2 pieces of bread stuck together
B. 2 separate pieces of bread
C. 2 loaves of bread
4. Making a cheese sandwich can be represented by the chemical equation: Bd2 + 2Ch → 2BdCh What does the “2” on the left side of the chemical equation represent?
A. 2 pieces of bread stuck together
B. 2 separate pieces of bread
C. 2 loaves of bread
5. A menu at the Chemistry Café shows a sandwich: BdM2Ch What would you expect a sandwich to have?
A. 2 pieces of bread, 2 pieces of meat, 1 piece
of cheese
B. 1 piece of bread, 2 pieces of meat, 1 piece of cheese
C. 2 loaves of bread
7/3/2011
2
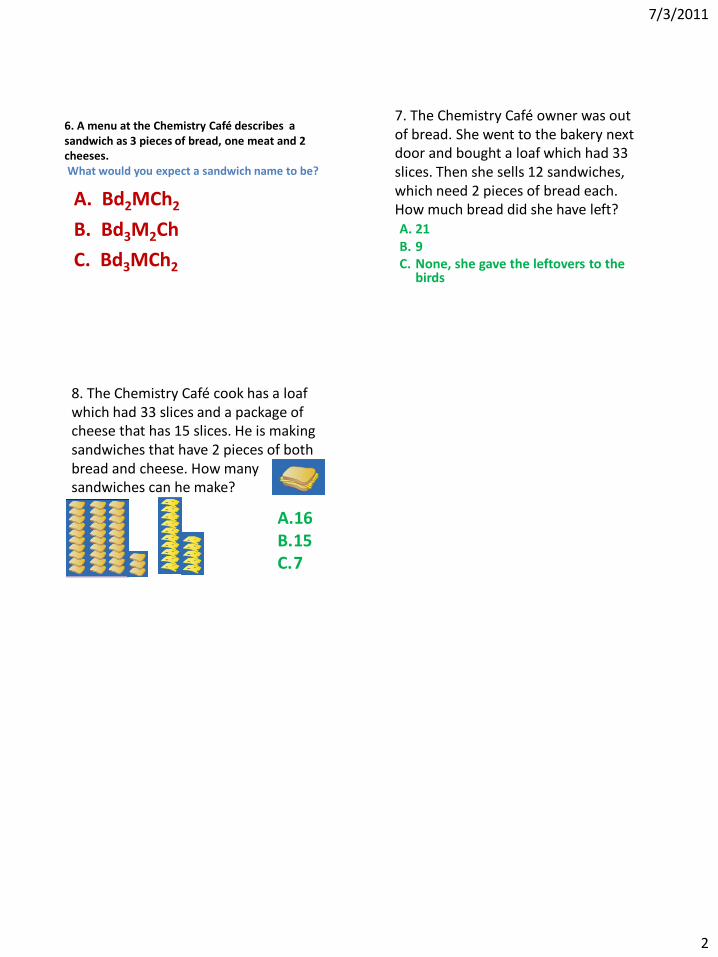
6. A menu at the Chemistry Café describes a sandwich as 3 pieces of bread, one meat and 2 cheeses. What would you expect a sandwich name to be?
A. Bd2MCh2
B. Bd3M2Ch
C. Bd3MCh2
7. The Chemistry Café owner was out of bread. She went to the bakery next door and bought a loaf which had 33 slices. Then she sells 12 sandwiches, which need 2 pieces of bread each. How much bread did she have left? A. 21 B. 9 C. None, she gave the leftovers to the
birds
8. The Chemistry Café cook has a loaf which had 33 slices and a package of cheese that has 15 slices. He is making sandwiches that have 2 pieces of both bread and cheese. How many sandwiches can he make?
A.16 B.15 C.7
Lesson plan for Reactants, Products, and Leftovers Activity 2:
Limiting Reactants in Chemical Reactions http://phet.colorado.edu
7/4/2011 Loeblein http://phet.colorado.edu
Learning Goals:
Students will be able to:
Explain how subscripts and coefficients are used to solve limiting reactant problems.
Predict the amounts of products and leftovers after reaction using the concept of limiting
reactant
Predict the initial amounts of reactants given the amount of products and leftovers using the concept of limiting reactant
Translate from symbolic (chemical formula) to molecular (pictorial) representations of matter
Background: This activity will be part of the stoichiometry unit. Also, I will do a lab where the
students make Smore’s Lab to help reinforce this important concept (I have included my version
of the lab with the activity). I will have done the activity linked below as an introduction to
limiting reactions. Also we will have used Balancing Chemical Reactions-Inquiry Based
Introduction . In addition, in physics, my students use particle models in second semester, so this
activity is meant to expand their thinking on a molecular level about macroscopic phenomena.
See my course syllabus for more information about integration of PhET sims.
Learning goals from Reactants, Products, and Leftovers Activity 1: (which we did in
September)
Relate the real-world example of making sandwiches to chemical reactions
Describe what “limiting reactant” means using examples of sandwiches and
chemicals at a particle level.
Identify the limiting reactant in a chemical reaction
Reactants, Products, and Leftovers Introduction:
This sim shouldn’t require any introduction. Check the Teaching Tips from the design team for
some helpful information.
Lesson: My students use this as homework or in class depending on availability of computers.
Post lesson: I will the clicker questions on my website for students to use or we may use them as
a class activity.
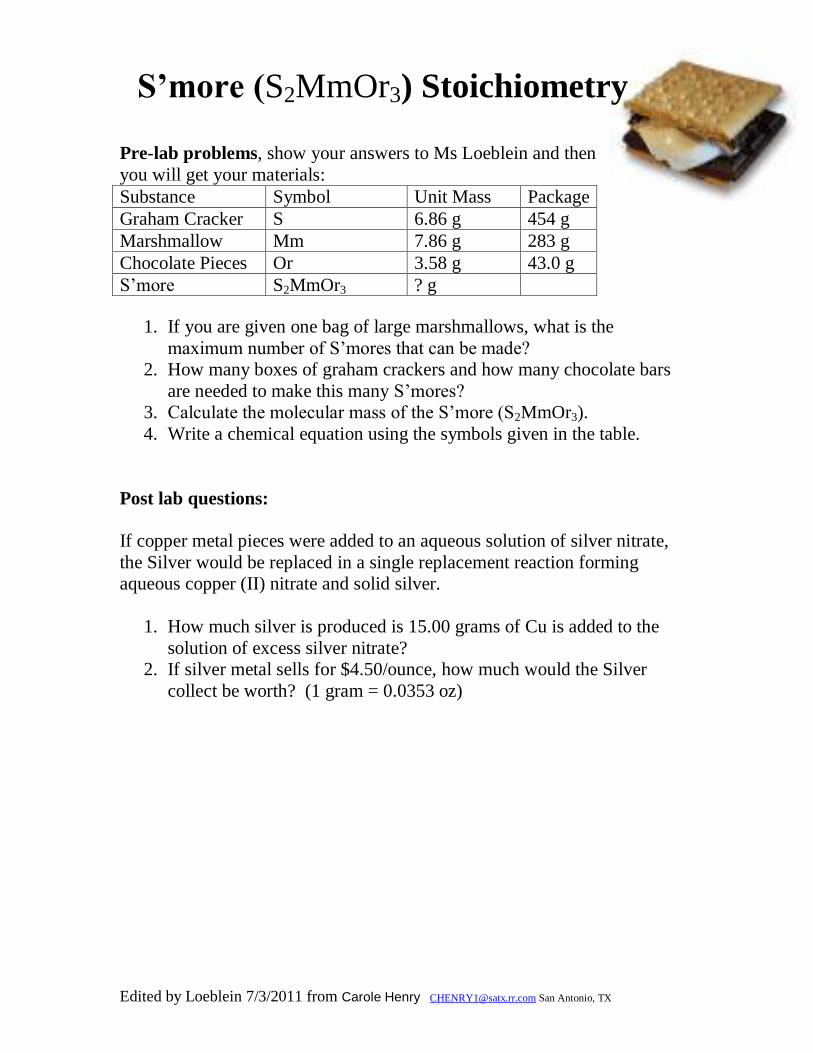
S’more (S2MmOr3) Stoichiometry
Edited by Loeblein 7/3/2011 from Carole Henry [email protected] San Antonio, TX
Pre-lab problems, show your answers to Ms Loeblein and then
you will get your materials:
Substance Symbol Unit Mass Package
Graham Cracker S 6.86 g 454 g
Marshmallow Mm 7.86 g 283 g
Chocolate Pieces Or 3.58 g 43.0 g
S’more S2MmOr3 ? g
1. If you are given one bag of large marshmallows, what is the
maximum number of S’mores that can be made?
2. How many boxes of graham crackers and how many chocolate bars
are needed to make this many S’mores?
3. Calculate the molecular mass of the S’more (S2MmOr3).
4. Write a chemical equation using the symbols given in the table.
Post lab questions:
If copper metal pieces were added to an aqueous solution of silver nitrate,
the Silver would be replaced in a single replacement reaction forming
aqueous copper (II) nitrate and solid silver.
1. How much silver is produced is 15.00 grams of Cu is added to the
solution of excess silver nitrate?
2. If silver metal sells for $4.50/ounce, how much would the Silver
collect be worth? (1 gram = 0.0353 oz)
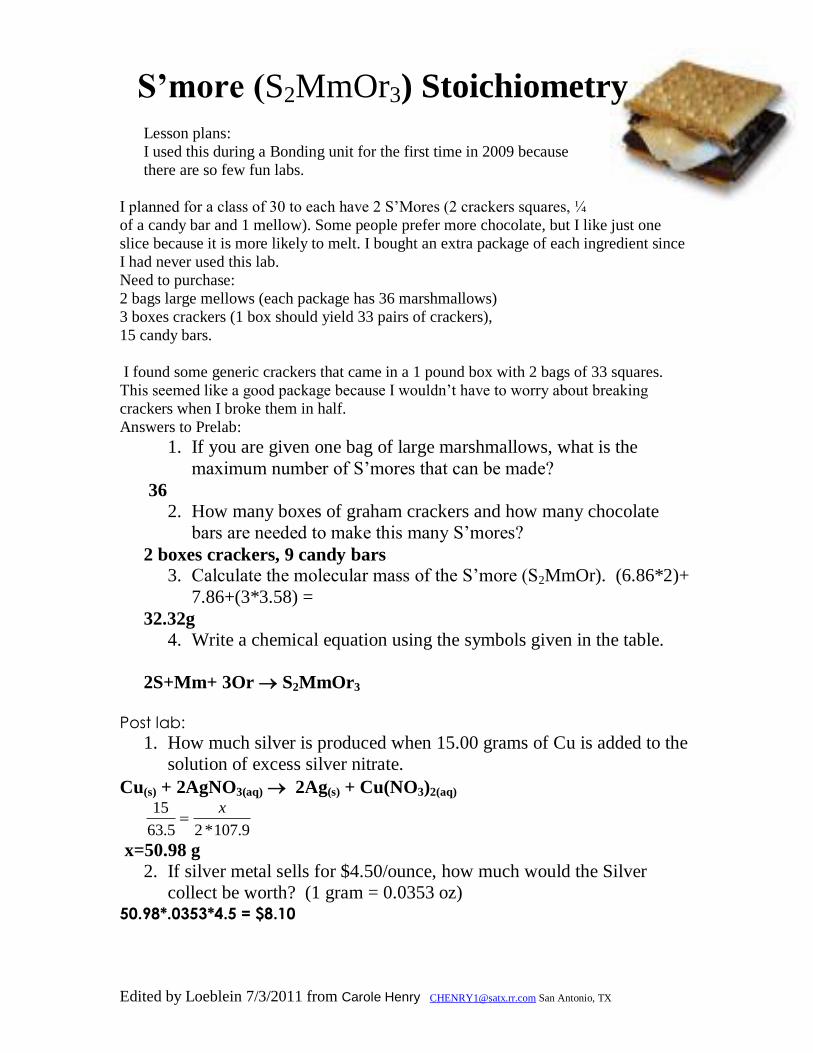
S’more (S2MmOr3) Stoichiometry
Edited by Loeblein 7/3/2011 from Carole Henry [email protected] San Antonio, TX
Lesson plans:
I used this during a Bonding unit for the first time in 2009 because
there are so few fun labs.
I planned for a class of 30 to each have 2 S’Mores (2 crackers squares, ¼
of a candy bar and 1 mellow). Some people prefer more chocolate, but I like just one
slice because it is more likely to melt. I bought an extra package of each ingredient since
I had never used this lab.
Need to purchase:
2 bags large mellows (each package has 36 marshmallows)
3 boxes crackers (1 box should yield 33 pairs of crackers),
15 candy bars.
I found some generic crackers that came in a 1 pound box with 2 bags of 33 squares.
This seemed like a good package because I wouldn’t have to worry about breaking
crackers when I broke them in half.
Answers to Prelab:
1. If you are given one bag of large marshmallows, what is the
maximum number of S’mores that can be made?
36 2. How many boxes of graham crackers and how many chocolate
bars are needed to make this many S’mores?
2 boxes crackers, 9 candy bars 3. Calculate the molecular mass of the S’more (S2MmOr). (6.86*2)+
7.86+(3*3.58) =
32.32g 4. Write a chemical equation using the symbols given in the table.
2S+Mm+ 3Or S2MmOr3
Post lab:
1. How much silver is produced when 15.00 grams of Cu is added to the
solution of excess silver nitrate.
Cu(s) + 2AgNO3(aq) 2Ag(s) + Cu(NO3)2(aq)
9.107*25.63
15 x
x=50.98 g 2. If silver metal sells for $4.50/ounce, how much would the Silver
collect be worth? (1 gram = 0.0353 oz) 50.98*.0353*4.5 = $8.10
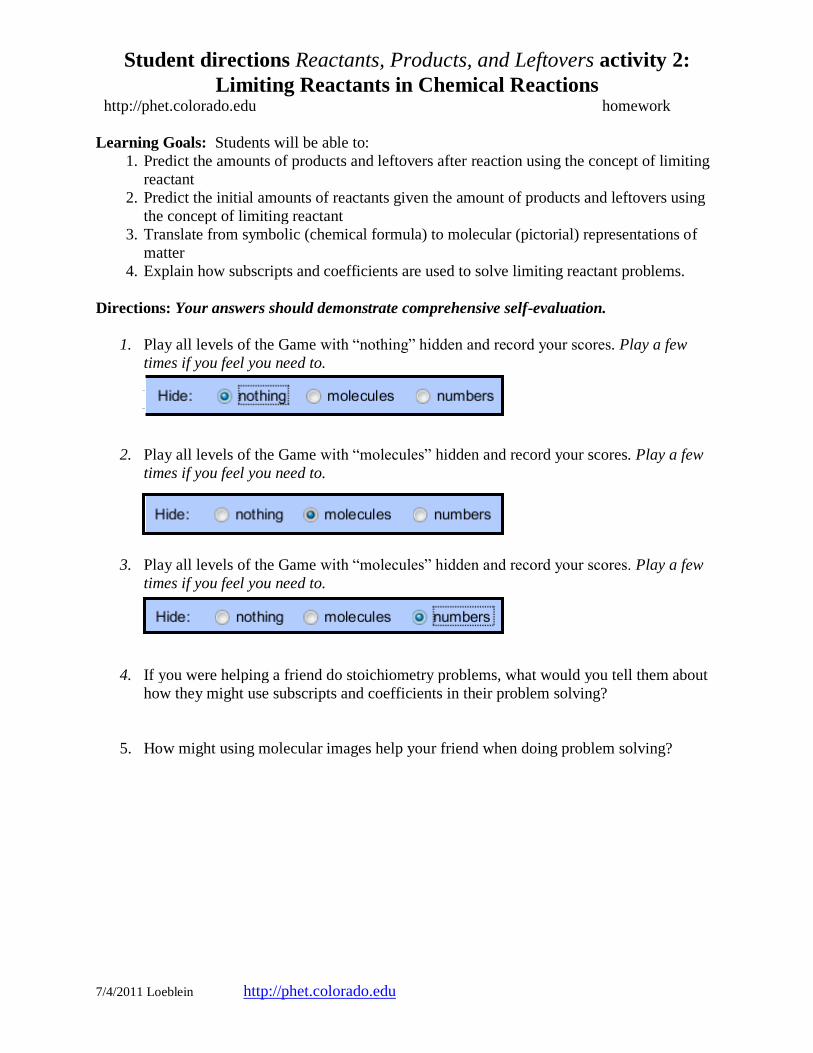
Student directions Reactants, Products, and Leftovers activity 2:
Limiting Reactants in Chemical Reactions http://phet.colorado.edu homework
7/4/2011 Loeblein http://phet.colorado.edu
Learning Goals: Students will be able to:
1. Predict the amounts of products and leftovers after reaction using the concept of limiting
reactant
2. Predict the initial amounts of reactants given the amount of products and leftovers using
the concept of limiting reactant
3. Translate from symbolic (chemical formula) to molecular (pictorial) representations of
matter
4. Explain how subscripts and coefficients are used to solve limiting reactant problems.
Directions: Your answers should demonstrate comprehensive self-evaluation.
1. Play all levels of the Game with “nothing” hidden and record your scores. Play a few
times if you feel you need to.
2. Play all levels of the Game with “molecules” hidden and record your scores. Play a few
times if you feel you need to.
3. Play all levels of the Game with “molecules” hidden and record your scores. Play a few
times if you feel you need to.
4. If you were helping a friend do stoichiometry problems, what would you tell them about
how they might use subscripts and coefficients in their problem solving?
5. How might using molecular images help your friend when doing problem solving?
7/4/2011
1
Reactants, Products, and Leftovers Activity 2: Limiting Reactants in Chemical reactions
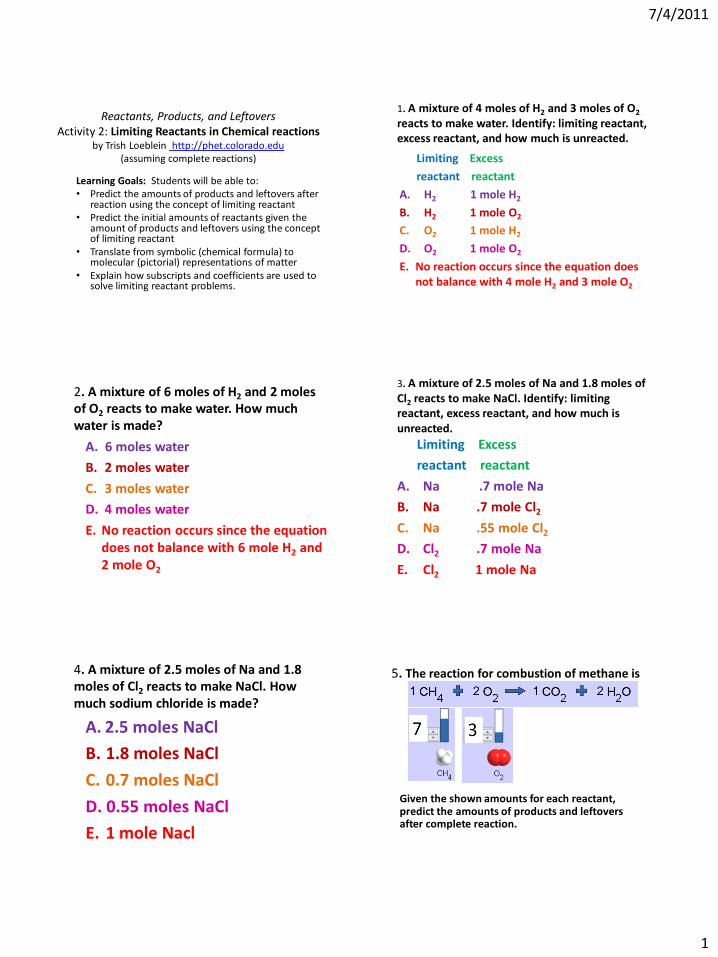
by Trish Loeblein http://phet.colorado.edu (assuming complete reactions)
Learning Goals: Students will be able to: • Predict the amounts of products and leftovers after
reaction using the concept of limiting reactant • Predict the initial amounts of reactants given the
amount of products and leftovers using the concept of limiting reactant
• Translate from symbolic (chemical formula) to molecular (pictorial) representations of matter
• Explain how subscripts and coefficients are used to solve limiting reactant problems.
1. A mixture of 4 moles of H2 and 3 moles of O2 reacts to make water. Identify: limiting reactant, excess reactant, and how much is unreacted. Limiting Excess
reactant reactant
A. H2 1 mole H2
B. H2 1 mole O2
C. O2 1 mole H2
D. O2 1 mole O2
E. No reaction occurs since the equation does not balance with 4 mole H2 and 3 mole O2
2. A mixture of 6 moles of H2 and 2 moles of O2 reacts to make water. How much water is made?
A. 6 moles water
B. 2 moles water
C. 3 moles water
D. 4 moles water
E. No reaction occurs since the equation does not balance with 6 mole H2 and 2 mole O2
3. A mixture of 2.5 moles of Na and 1.8 moles of Cl2 reacts to make NaCl. Identify: limiting reactant, excess reactant, and how much is unreacted. Limiting Excess
reactant reactant
A. Na .7 mole Na
B. Na .7 mole Cl2
C. Na .55 mole Cl2
D. Cl2 .7 mole Na
E. Cl2 1 mole Na
4. A mixture of 2.5 moles of Na and 1.8 moles of Cl2 reacts to make NaCl. How much sodium chloride is made?
A. 2.5 moles NaCl
B. 1.8 moles NaCl
C. 0.7 moles NaCl
D. 0.55 moles NaCl
E. 1 mole Nacl
5. The reaction for combustion of methane is
Given the shown amounts for each reactant, predict the amounts of products and leftovers after complete reaction.

7/4/2011
2
5. What are the amounts after the reaction?
A. 6 1 1 2
B. 1 6 1 2
C. 1 0 6 12
D. 4 0 4 8
Initial:
7 CH4 and 3 O2
After:
6. Given the shown amounts for the products and leftovers after a complete reaction, predict the initial reactants.
6. What are the amounts before the reaction?
A. 4 7
B. 9 7
C. 10 7
D. 4 0
After:
5 NH3 0 O2 4 NO2 6 H2O
Before:
7. Given the shown amounts for the products and leftovers after a complete reaction, predict the initial reactants.
7. What are the amounts before the reaction?
A. 2 10
B. 12 10
C. 10 9
D. 8 4
After:
8 C2H2 4 O2 4 CO2 2 H2O
Before:
8. A mixture of S atoms ( ) and O2 molecules ( ) in a closed container is represented by the diagrams:
Which equation best describes this reaction?
A. 3X + 8Y X3Y8
B. X3 + Y8 3XY2 + 2Y
C. X + 2Y XY2
D. 3X + 8Y 3XY2 + 2Y
E. X3 + Y8 3XY2 + Y2
From Lancaster/Perkins activity
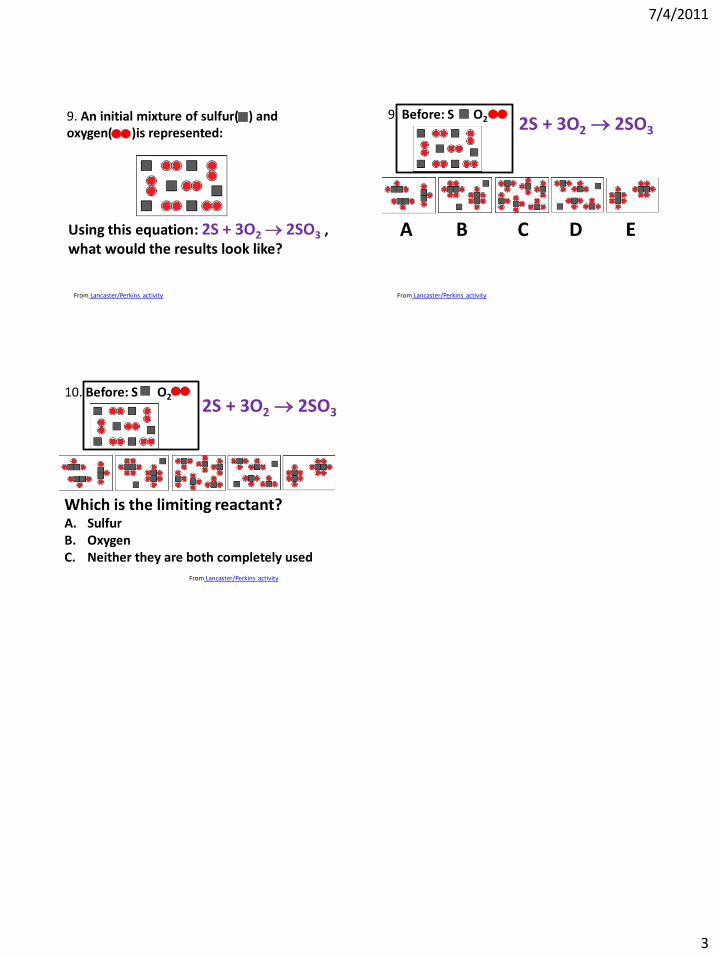
7/4/2011
3
9. An initial mixture of sulfur( ) and oxygen( )is represented:
From Lancaster/Perkins activity
Using this equation: 2S + 3O2 2SO3 , what would the results look like?
9. Before: S O2
From Lancaster/Perkins activity
2S + 3O2 2SO3
A B C D E
10. Before: S O2
From Lancaster/Perkins activity
2S + 3O2 2SO3
Which is the limiting reactant? A. Sulfur B. Oxygen C. Neither they are both completely used
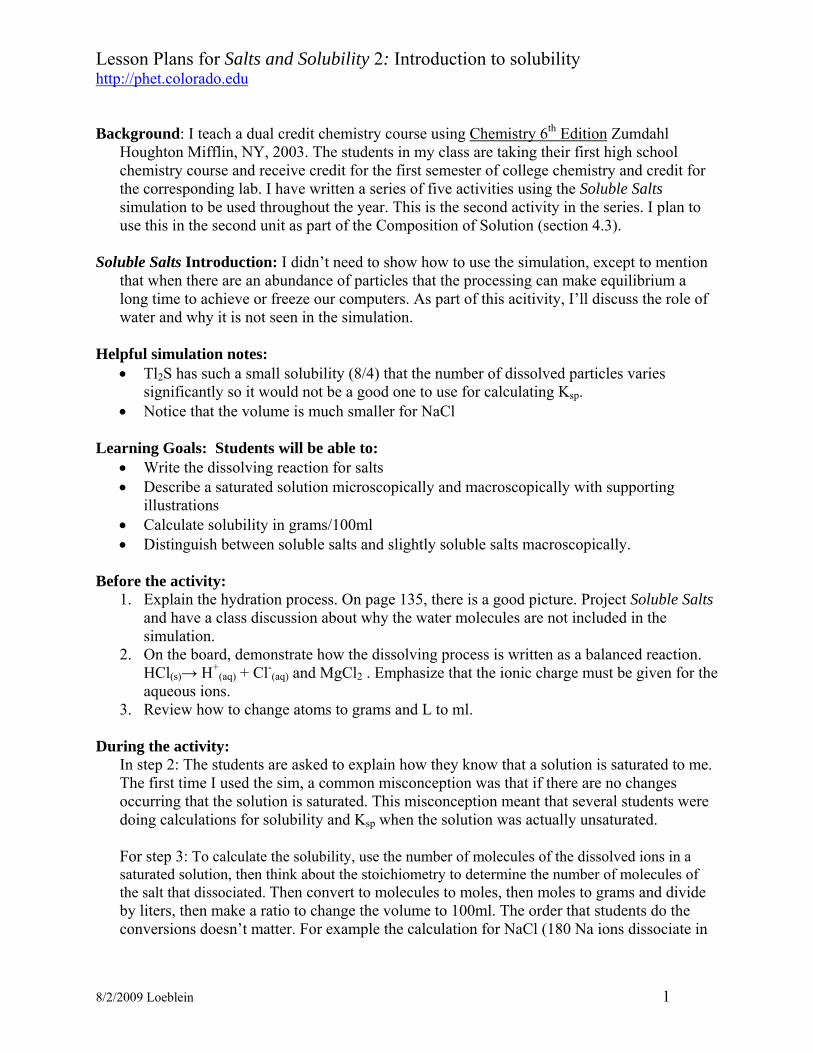
Lesson Plans for Salts and Solubility 2: Introduction to solubility http://phet.colorado.edu
8/2/2009 Loeblein 1
Background: I teach a dual credit chemistry course using Chemistry 6th Edition Zumdahl
Houghton Mifflin, NY, 2003. The students in my class are taking their first high school chemistry course and receive credit for the first semester of college chemistry and credit for the corresponding lab. I have written a series of five activities using the Soluble Salts simulation to be used throughout the year. This is the second activity in the series. I plan to use this in the second unit as part of the Composition of Solution (section 4.3).
Soluble Salts Introduction: I didn’t need to show how to use the simulation, except to mention
that when there are an abundance of particles that the processing can make equilibrium a long time to achieve or freeze our computers. As part of this acitivity, I’ll discuss the role of water and why it is not seen in the simulation.
Helpful simulation notes:
• Tl2S has such a small solubility (8/4) that the number of dissolved particles varies significantly so it would not be a good one to use for calculating Ksp.
• Notice that the volume is much smaller for NaCl Learning Goals: Students will be able to:
• Write the dissolving reaction for salts • Describe a saturated solution microscopically and macroscopically with supporting
illustrations • Calculate solubility in grams/100ml • Distinguish between soluble salts and slightly soluble salts macroscopically.
Before the activity:
1. Explain the hydration process. On page 135, there is a good picture. Project Soluble Salts and have a class discussion about why the water molecules are not included in the simulation.
2. On the board, demonstrate how the dissolving process is written as a balanced reaction. HCl(s)→ H+
(aq) + Cl-(aq) and MgCl2 . Emphasize that the ionic charge must be given for the
aqueous ions. 3. Review how to change atoms to grams and L to ml.
During the activity:
In step 2: The students are asked to explain how they know that a solution is saturated to me. The first time I used the sim, a common misconception was that if there are no changes occurring that the solution is saturated. This misconception meant that several students were doing calculations for solubility and Ksp when the solution was actually unsaturated. For step 3: To calculate the solubility, use the number of molecules of the dissolved ions in a saturated solution, then think about the stoichiometry to determine the number of molecules of the salt that dissociated. Then convert to molecules to moles, then moles to grams and divide by liters, then make a ratio to change the volume to 100ml. The order that students do the conversions doesn’t matter. For example the calculation for NaCl (180 Na ions dissociate in
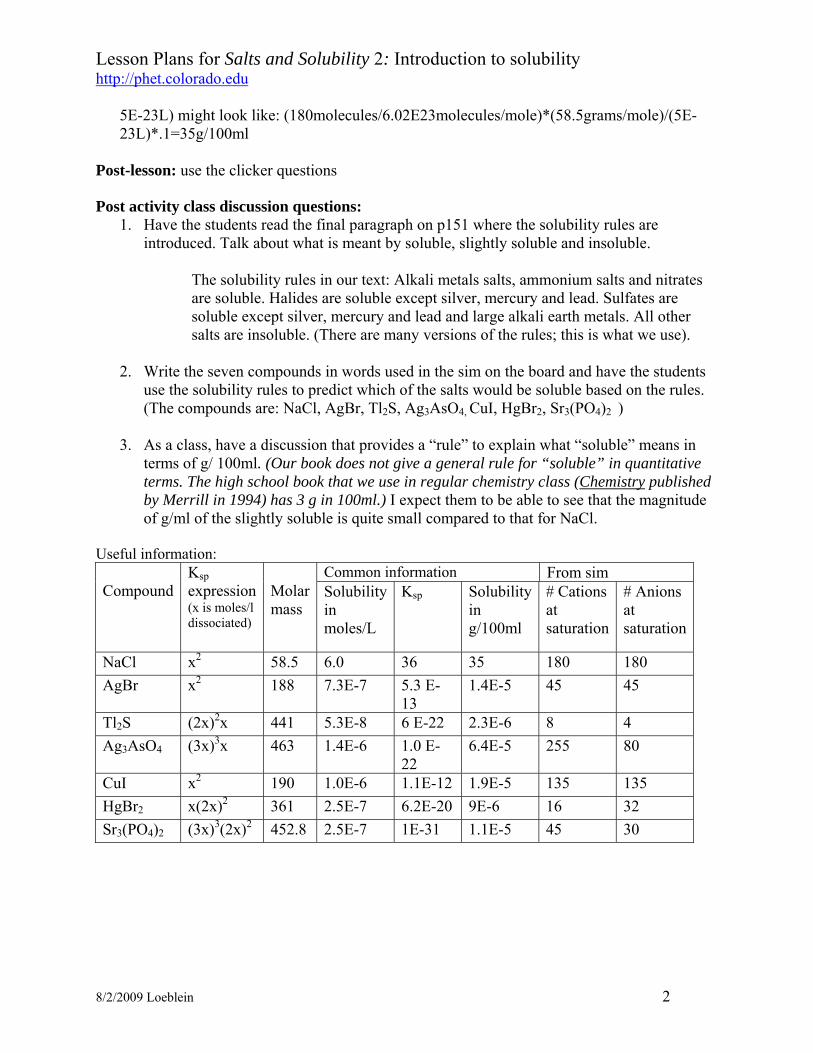
Lesson Plans for Salts and Solubility 2: Introduction to solubility http://phet.colorado.edu
8/2/2009 Loeblein 2
5E-23L) might look like: (180molecules/6.02E23molecules/mole)*(58.5grams/mole)/(5E-23L)*.1=35g/100ml
Post-lesson: use the clicker questions Post activity class discussion questions:
1. Have the students read the final paragraph on p151 where the solubility rules are introduced. Talk about what is meant by soluble, slightly soluble and insoluble.
The solubility rules in our text: Alkali metals salts, ammonium salts and nitrates are soluble. Halides are soluble except silver, mercury and lead. Sulfates are soluble except silver, mercury and lead and large alkali earth metals. All other salts are insoluble. (There are many versions of the rules; this is what we use).
2. Write the seven compounds in words used in the sim on the board and have the students
use the solubility rules to predict which of the salts would be soluble based on the rules. (The compounds are: NaCl, AgBr, Tl2S, Ag3AsO4, CuI, HgBr2, Sr3(PO4)2 )
3. As a class, have a discussion that provides a “rule” to explain what “soluble” means in
terms of g/ 100ml. (Our book does not give a general rule for “soluble” in quantitative terms. The high school book that we use in regular chemistry class (Chemistry published by Merrill in 1994) has 3 g in 100ml.) I expect them to be able to see that the magnitude of g/ml of the slightly soluble is quite small compared to that for NaCl.
Useful information: Compound
Ksp expression (x is moles/l dissociated)
Molar mass
Common information From sim Solubility in moles/L
Ksp Solubility in g/100ml
# Cations at saturation
# Anions at saturation
NaCl x2 58.5 6.0 36 35 180 180 AgBr x2 188 7.3E-7 5.3 E-
13 1.4E-5 45 45
Tl2S (2x)2x 441 5.3E-8 6 E-22 2.3E-6 8 4 Ag3AsO4 (3x)3x 463 1.4E-6 1.0 E-
22 6.4E-5 255 80
CuI x2 190 1.0E-6 1.1E-12 1.9E-5 135 135 HgBr2 x(2x)2 361 2.5E-7 6.2E-20 9E-6 16 32 Sr3(PO4)2 (3x)3(2x)2 452.8 2.5E-7 1E-31 1.1E-5 45 30
Student Directions for Slightly Soluble Salts 2: Introduction to solubility http://phet.colorado.edu
8/2/2009 Loeblein
Learning Goals: Students will be able to:
• Write the dissolving reaction for salts • Describe a saturated solution microscopically and macroscopically with supporting illustrations • Calculate solubility in grams/100ml • Distinguish between soluble salts and slightly soluble salts macroscopically.
1. Write the dissolving reaction for sodium chloride and predict what you should see when you add the salt to the water in the simulation.
• Use Slightly Soluble Salts to test your ideas about the dissolving process. • Write a summary of how dissolving can be modeled and include illustrations. • Test your ideas with the other 6 salts in the simulations, and then write the dissolving reactions.
2. A general definition of a saturated solution is: A solution in which the maximum amount of substance has been dissolved in another substance.
• If you were dissolving table salt in a beaker of water, what would a saturated solution look like? • Use the simulation to see what a saturated solution looks like on a microscopic level. Talk about
how you know the solution is saturated and check with Ms. Loeblein to see if your reasoning is correct.
• Write a description of a saturated salt solution microscopically and macroscopically, and support your ideas with drawings.
3. The ratio of the maximum amount of the substance per volume of solvent at saturation is the solubility. For example, the solubility of sugar is 203g/100ml of water at 20°C.
• Design an experiment using Slightly Soluble Salts to determine the solubility in g/100ml that includes varying the water volume.
• Use your design to find the solubility of the seven salts. Make a data table with results and show samples for the necessary calculations.
• Which salt gave you the best data? Explain why you think the data is “best” and why you think that salt gave good results.
• Which salt gave you the poorest data? What makes the results poor and explain why the results may be poor
4. Sodium chloride is considered soluble and the other salts are slightly soluble.
• Draw a beaker with 100 ml of water. Then draw how much a soluble salt like sodium chloride would dissolve. Explain the reasoning you used to decide how much salt to draw.
• Draw another beaker with 100 ml of water and draw how much a slightly soluble salt like silver bromide would dissolve. Explain the reasoning you used to decide how much salt to draw.
Salts and Solubility Activity 2Learning Goals: Students will be able to: • Write the dissolving reaction for salts• Describe a saturated solution microscopically
and macroscopically with supporting illustrations
• Calculate solubility in grams/100ml• Distinguish between soluble salts and slightly
soluble salts macroscopically.
Trish Loeblein July 2008
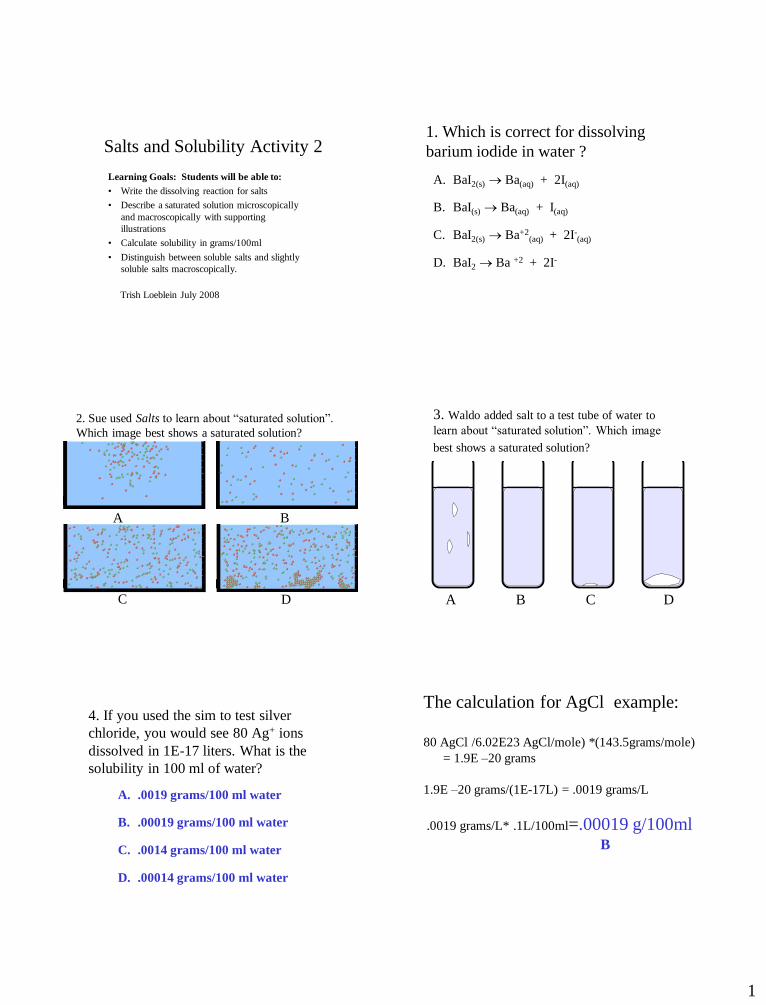
1
Salts and Solubility Activity 2
Learning Goals: Students will be able to:
• Write the dissolving reaction for salts
• Describe a saturated solution microscopically
and macroscopically with supporting
illustrations
• Calculate solubility in grams/100ml
• Distinguish between soluble salts and slightly
soluble salts macroscopically.
Trish Loeblein July 2008
1. Which is correct for dissolving
barium iodide in water ?
A. BaI2(s) Ba(aq) + 2I(aq)
B. BaI(s) Ba(aq) + I(aq)
C. BaI2(s) Ba+2(aq) + 2I-
(aq)
D. BaI2 Ba +2 + 2I-
2. Sue used Salts to learn about “saturated solution”.
Which image best shows a saturated solution?
A
C D
B
A B C D
3. Waldo added salt to a test tube of water to
learn about “saturated solution”. Which image
best shows a saturated solution?
4. If you used the sim to test silver
chloride, you would see 80 Ag+ ions
dissolved in 1E-17 liters. What is the
solubility in 100 ml of water?
A. .0019 grams/100 ml water
B. .00019 grams/100 ml water
C. .0014 grams/100 ml water
D. .00014 grams/100 ml water
The calculation for AgCl example:
80 AgCl /6.02E23 AgCl/mole) *(143.5grams/mole)
= 1.9E –20 grams
1.9E –20 grams/(1E-17L) = .0019 grams/L
.0019 grams/L* .1L/100ml=.00019 g/100ml
B

2
5. You knew a salt was either sodium
chloride or silver chloride.
If you put 1 gram in 10 ml of water
in a test tube, and it looked like this
A. Sodium chloride
B. Silver Chloride
C. This is not an identifying test
Which is it?
Lesson plan for Sugar and Salts: http://phet.colorado.edu
10/12/2011 Loeblein http://phet.colorado.edu
Learning Goals: Students will be able to:
Identify if a compound is a salt or sugar by macroscopic observations or microscopic
representations.
Explain how using combinations of solutes changes solution characteristics or not.
Use observations to explain ways concentration of a solute can change.
Describe ways the formula, macroscopic observations, or microscopic representations of a
compound indicates if the bonding is ionic or covalent.
Background:
Most of the college prep chemistry students will have experience with molecular representations of
moving particles in physics, but not all of the students took physics. In honors chemistry, students will
have used molecular representations in their text book, physics and chemistry lessons using PhET. In
regular chemistry, during a lab about salts, I put out some sugar, salt, and acid solutions and provided a
conductivity tester. The honors students should have experience with conductivity from physics. At this
point in the course, we will not have talked about anhydrides, so the students would not predict
molecular compounds like CO2 to conduct in water. I have avoided the issue in the clicker questions.
Sugar and Salt Introduction:
Students may have difficulty with the scale of the Micro tab since the water is not depicted. The number
of water particles is really quite small, so the representation is an over simplification of the actual
hydration process. The third tab is meant to help with this, but there is no way to exclude the water
particles, so during the post-lab or during class, I plan to demonstrate that the third tab is a “super
microscopic” version of the second tab. Tips for Teachers are provided by the PhET team.
Lesson: In college prep chemistry, the students will work in pairs during class. I noticed that students did
not realize that there were 5 different solutes and many only were answering the questions for “salt” and
“sugar”; I began checking groups and guiding them to use the other salt and sugars. I changed the
directions to include the number of chemicals available hoping this helps. My honors chemistry students
will do this activity for homework because they have already had an introduction to molecular
representations of solutes using Salts and Solubility Activity 1.
Post-Lesson: I plan to use clicker questions included in this activity. For some of the questions, if I saw
that the distribution of answers was great, I demonstrated the sim to help students after the first clicker
response before I made any comments. Then I would have a “revote”. This stimulated lots of discussion
between votes.
I included an alcohol in the lab and it seemed that most students made appropriate predictions because
“it was made up of the same elements as sugar that it would not dissociate”. I included a clicker question
to help them see the difference between acids and alcohols because my texts both integrate acids and
alcohols early in the sequence, but just as classification introduction, not function. I also specifically
included aluminum because some students think it is a metalloid; the texts both mention this irregularity
on the periodic table, so I wanted to reinforce the metal nature of Al. Having HCl in the questions also
provides an opportunity to remind students that Hydrogen is not a metal even though it is on the metal
side of the periodic table in the versions that they use.
Student directions Sugar and Salts activity
10/12/2011 Loeblein http://phet.colorado.edu
Learning Goals: Students will be able to:
Identify if a compound is a salt or sugar by macroscopic observations or microscopic
representations.
Explain how using combinations of solutes changes solution characteristics or not.
Use observations to explain ways concentration of a solute can change.
Describe ways the formula, macroscopic observations, or microscopic representations of a
compound indicates if the bonding is ionic or covalent.
Directions:
1. Describe:
a. Solute, solvent, and solution.
b. What solvent is used in the sim? Why do you think it was chosen? What types of solutes
are used? What representations or tools did you use to help you decide?
c. List each of the 5 chemicals in the simulation and identify the general type of solute to
which each belongs. Give at least one piece of evidence for each.
d. Which the Micro tab solute combinations are more complex than others? Explain.
2. What is the “concentration” specifically indicating? Make sure to include the differences between
the Macro and Micro tabs.
3. Find all the ways you can change the concentration of a solute. Describe what you would do in a
real lab to increase or decrease the concentration of a solution.
4. Using your text or cite other resources to describe the difference between an “ionic” and a
“covalent” compound. Why is the periodic table given as an optional display? How could you use
your periodic table to predict conductivity of a solution?
5. Draw pictures that would show what the following chemicals would look like on a microscopic
scale if dissolved in water-
a. LiF b. KNO3 c. C2H5OH d. MgF2
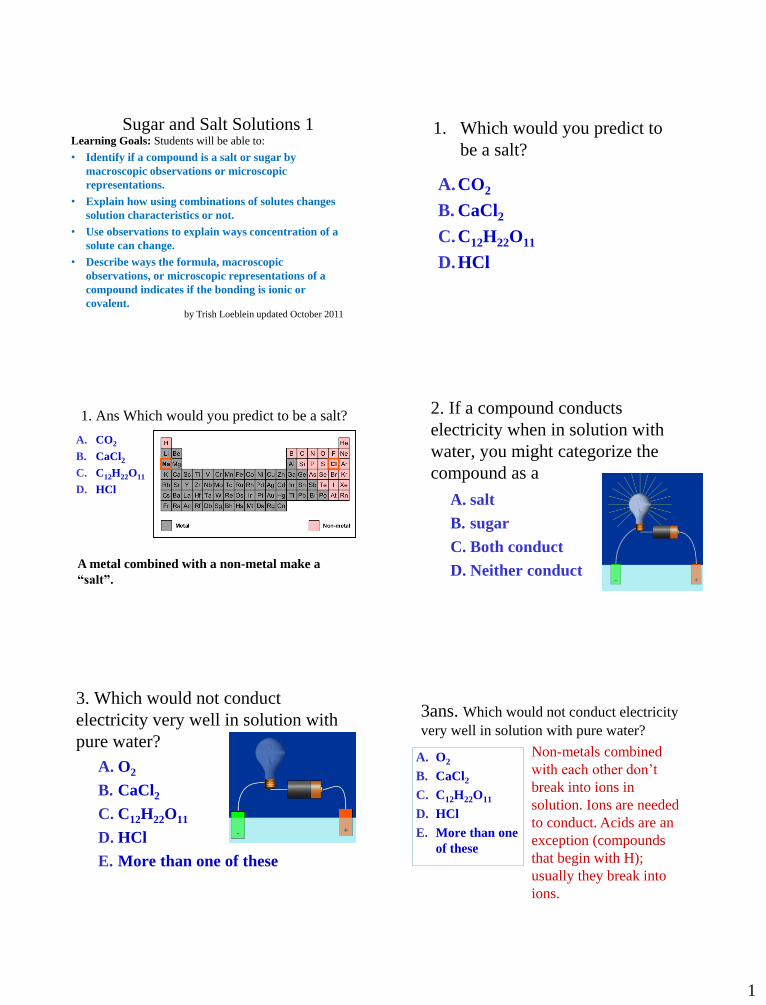
1
Sugar and Salt Solutions 1 Learning Goals: Students will be able to:
• Identify if a compound is a salt or sugar by
macroscopic observations or microscopic
representations.
• Explain how using combinations of solutes changes
solution characteristics or not.
• Use observations to explain ways concentration of a
solute can change.
• Describe ways the formula, macroscopic
observations, or microscopic representations of a
compound indicates if the bonding is ionic or
covalent. by Trish Loeblein updated October 2011
1. Which would you predict to
be a salt?
A.CO2
B. CaCl2
C.C12H22O11
D.HCl
1. Ans Which would you predict to be a salt?
A. CO2
B. CaCl2
C. C12H22O11
D. HCl
A metal combined with a non-metal make a
“salt”.
2. If a compound conducts
electricity when in solution with
water, you might categorize the
compound as a
A. salt
B. sugar
C. Both conduct
D. Neither conduct
3. Which would not conduct
electricity very well in solution with
pure water?
A. O2
B. CaCl2
C. C12H22O11
D. HCl
E. More than one of these
3ans. Which would not conduct electricity
very well in solution with pure water?
A. O2
B. CaCl2
C. C12H22O11
D. HCl
E. More than one
of these
Non-metals combined
with each other don’t
break into ions in
solution. Ions are needed
to conduct. Acids are an
exception (compounds
that begin with H);
usually they break into
ions.
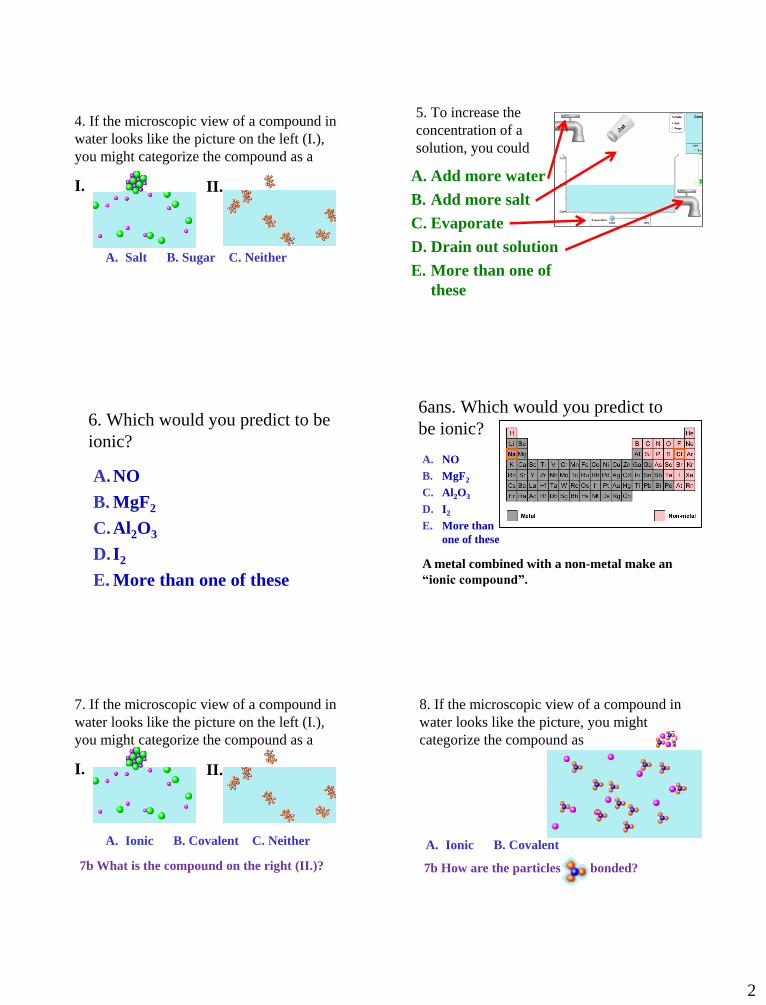
2
4. If the microscopic view of a compound in
water looks like the picture on the left (I.),
you might categorize the compound as a
A. Salt B. Sugar C. Neither
II. I.
5. To increase the
concentration of a
solution, you could
A. Add more water
B. Add more salt
C. Evaporate
D. Drain out solution
E. More than one of
these
6. Which would you predict to be
ionic?
A.NO
B. MgF2
C.Al2O3
D.I2
E. More than one of these
6ans. Which would you predict to
be ionic?
A. NO
B. MgF2
C. Al2O3
D. I2
E. More than
one of these
A metal combined with a non-metal make an
“ionic compound”.
7. If the microscopic view of a compound in
water looks like the picture on the left (I.),
you might categorize the compound as a
A. Ionic B. Covalent C. Neither
II. I.
7b What is the compound on the right (II.)?
8. If the microscopic view of a compound in
water looks like the picture, you might
categorize the compound as
A. Ionic B. Covalent
7b How are the particles bonded?
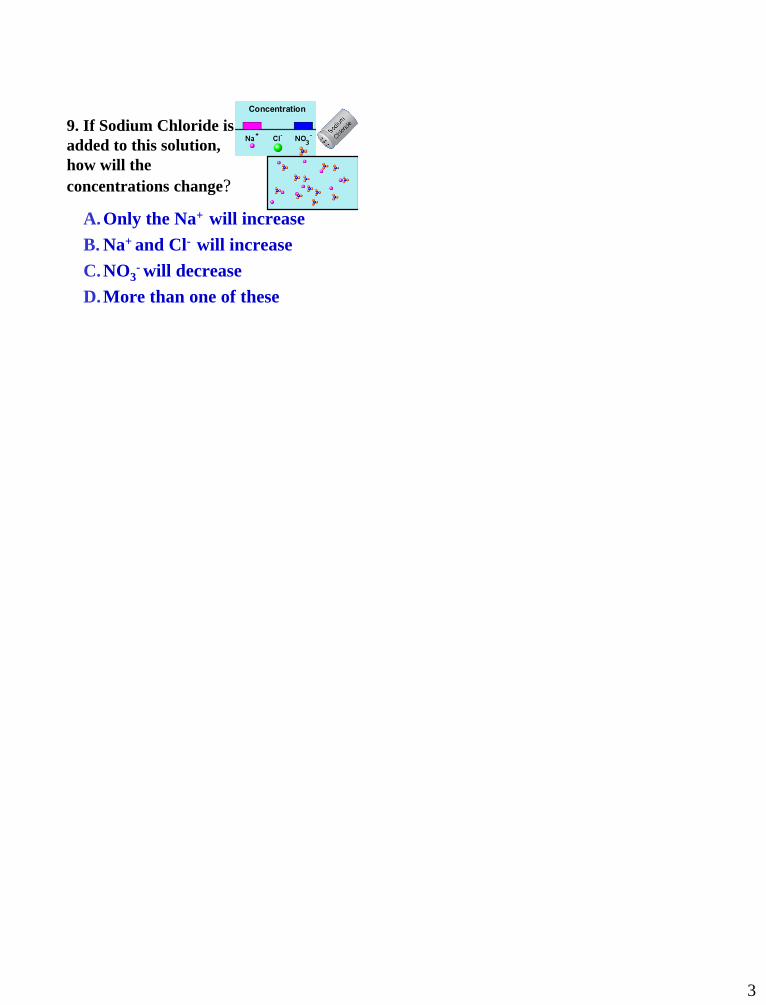
3
9. If Sodium Chloride is
added to this solution,
how will the
concentrations change?
A.Only the Na+ will increase
B. Na+ and Cl- will increase
C.NO3- will decrease
D.More than one of these

Lesson plan for Molarity: Quantitative Relationships http://phet.colorado.edu
Time for activity
2/20/2012 Loeblein http://phet.colorado.edu
Learning Goals: Students will be able to
A. Determine the solubility for some solutes and explain why the solubility cannot be determined for
others given experimental constraints.
B. Identify the relationships for measurable variables by designing quantitative experiments,
collecting data, graphing, and using appropriate trend lines.
Background: My students will have used Salts and Solutions and Sugar and Salts, so they are
familiar with macroscopic and microscopic views of solutions. Additionally, we have used many
PhET sims like States of Matter and Gas Properties. In our Gas Laws unit, I discovered that the
students needed more practice selecting appropriate curves for fit. We use Excel and TI graphing
calculators pervasively in our school, so I was surprised that the seniors were poor at selecting
appropriate curves when data had reasonable variations. So I had them do a lab with sugar and
salts (file attached in this activity). We had more discussion about curve choice and then did this
activity.
Molarity Introduction:
I did not show anything about the sim. The Tips have good information about the assumptions
made in this sim.
Lesson:
The students took about 2 -40 minute periods to complete this activity.
Post-Lesson: I have not written any clicker questions. We did a lab I wrote called Molarity and
Dilution. I chose the nickel salt because I had a large supply and it has a nice color. I did not
worry that it might not totally dissolve, but just wanted to make sure it was colored and that
dilution would look very different. You could use any number of chemical and perhaps one that
is more soluble. My jar was full and had not been used in 15 years, so it seemed a good use. We
have chemical traps, so I don’t have to worry about disposal.
Sample unit plans – Homogenous Solutions
Day 1 Sugar and Salts PhET
Homework: textbook reading
Day 2 Lecture – Polar vs non-polar solvents sample text concept questions
Lab: Solubility of salt and sugar
Homework: textbook reading and problems
Day 3 PhET Molarity
Day 4 Lecture- , Concentrations of solutions calculations- molarity and dilutions, Percent solutions
Lab: Small scale molarity lab
Homework: textbook reading and problems
Day 5 Lab: Solubility of salt and sugar class time to write with computers
Day 6 Review worksheet, clicker questions Sugar and Salts PhET
Day 7 TEST
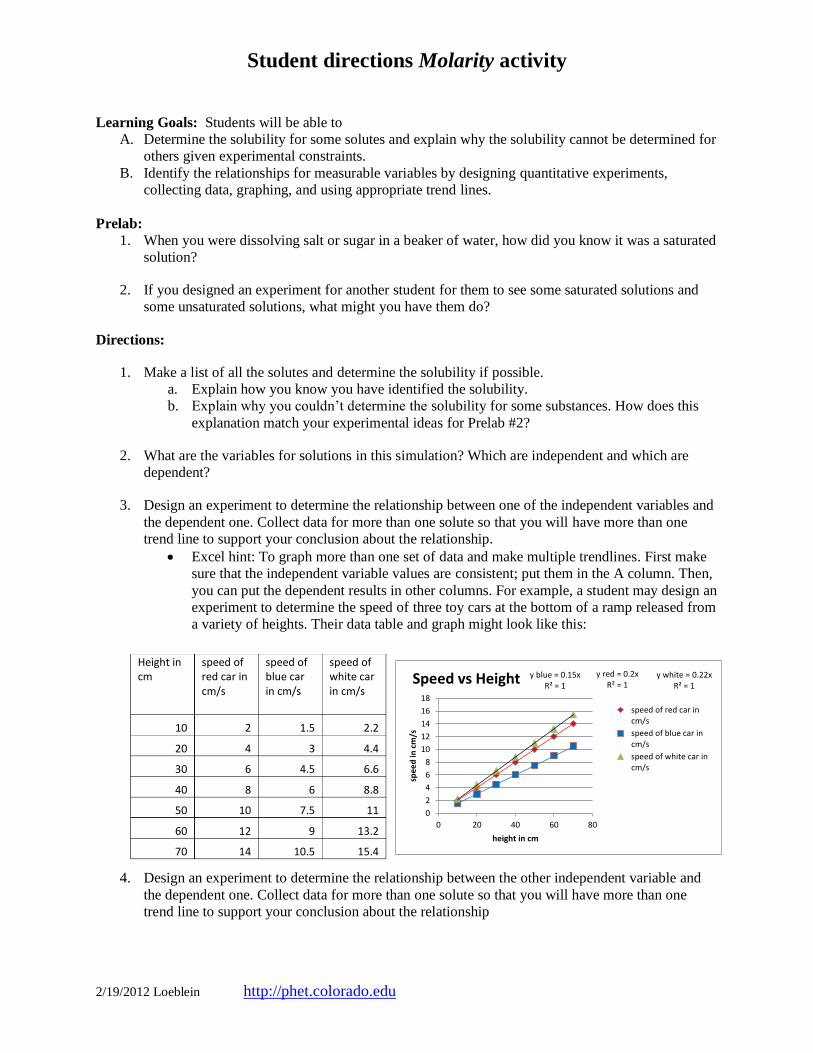
Student directions Molarity activity
2/19/2012 Loeblein http://phet.colorado.edu
Height in cm
speed of red car in cm/s
speed of blue car in cm/s
speed of white car in cm/s
10 2 1.5 2.2
20 4 3 4.4
30 6 4.5 6.6
40 8 6 8.8
50 10 7.5 11
60 12 9 13.2
70 14 10.5 15.4
y red = 0.2xR² = 1
y blue = 0.15xR² = 1
y white = 0.22xR² = 1
0
2
4
6
8
10
12
14
16
18
0 20 40 60 80
spe
ed
in c
m/s
height in cm
Speed vs Height
speed of red car incm/s
speed of blue car incm/s
speed of white car incm/s
Learning Goals: Students will be able to
A. Determine the solubility for some solutes and explain why the solubility cannot be determined for
others given experimental constraints.
B. Identify the relationships for measurable variables by designing quantitative experiments,
collecting data, graphing, and using appropriate trend lines.
Prelab:
1. When you were dissolving salt or sugar in a beaker of water, how did you know it was a saturated
solution?
2. If you designed an experiment for another student for them to see some saturated solutions and
some unsaturated solutions, what might you have them do?
Directions:
1. Make a list of all the solutes and determine the solubility if possible.
a. Explain how you know you have identified the solubility.
b. Explain why you couldn’t determine the solubility for some substances. How does this
explanation match your experimental ideas for Prelab #2?
2. What are the variables for solutions in this simulation? Which are independent and which are
dependent?
3. Design an experiment to determine the relationship between one of the independent variables and
the dependent one. Collect data for more than one solute so that you will have more than one
trend line to support your conclusion about the relationship.
Excel hint: To graph more than one set of data and make multiple trendlines. First make
sure that the independent variable values are consistent; put them in the A column. Then,
you can put the dependent results in other columns. For example, a student may design an
experiment to determine the speed of three toy cars at the bottom of a ramp released from
a variety of heights. Their data table and graph might look like this:
4. Design an experiment to determine the relationship between the other independent variable and
the dependent one. Collect data for more than one solute so that you will have more than one
trend line to support your conclusion about the relationship
Molarity and Dilution
Loeblein 2/19/2012
Students will be able to:
Determine the amount of grams of solute to make a given volume of specified molarity.
After dilution, determine the molarity of a solution.
Directions:
Part A: Make 100 ml of a 0.08 M solution of NiNH4SO4
1. Calculate how many grams of NiNH4SO4 you will need.
2. Show your calculation to your teacher for approval.
3. Get a clean 150 ml beaker and put in about 25 ml distilled water.
4. Use a small piece of wax paper to measure your NiNH4SO4.
5. Carefully add your NiNH4SO4 to the beaker and use the wash bottle to get all of
the particles off the paper. Then stir.
6. Pour your solution into a 100ml volumetric flask. Wash all of the solution out of
the beaker into the flask using your wash bottle.
7. Fill the flask to the line using the wash bottle.
Part B: Dilute your solution
1. Pour your solution back into your 150 ml beaker.
2. Measure 10ml of the solution and put it in the 100ml flask.
3. Carefully fill the flask to the 100 ml mark. Put on the lid and gently rotate to stir. 4. Show your calculation to determine the concentration of the Part B solution.
5. Show your teacher both of the solutions and the work for PartB #4 for credit.
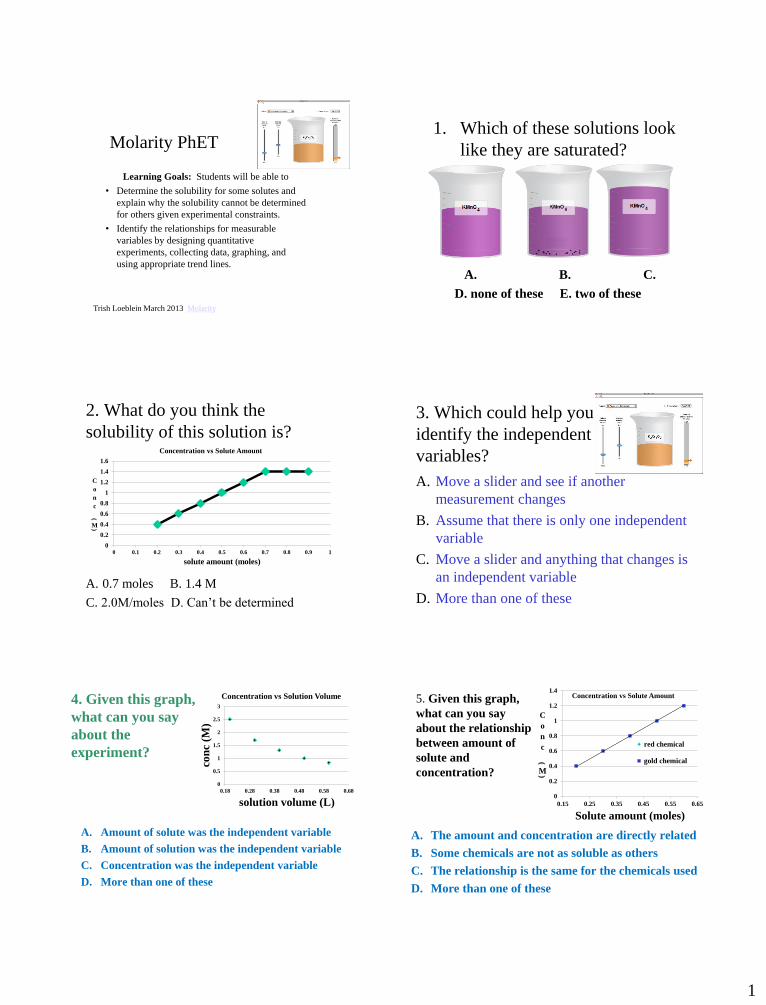
1
Molarity PhET
Learning Goals: Students will be able to
• Determine the solubility for some solutes and
explain why the solubility cannot be determined
for others given experimental constraints.
• Identify the relationships for measurable
variables by designing quantitative
experiments, collecting data, graphing, and
using appropriate trend lines.
Trish Loeblein March 2013 Molarity
1. Which of these solutions look
like they are saturated?
A. B. C.
D. none of these E. two of these
2. What do you think the
solubility of this solution is?
A. 0.7 moles B. 1.4 M
C. 2.0M/moles D. Can’t be determined
0
0.2
0.4
0.6
0.8
1
1.2
1.4
1.6
0 0.1 0.2 0.3 0.4 0.5 0.6 0.7 0.8 0.9 1
C
o
n
c
(
M)
solute amount (moles)
Concentration vs Solute Amount
3. Which could help you
identify the independent
variables?
A. Move a slider and see if another
measurement changes
B. Assume that there is only one independent
variable
C. Move a slider and anything that changes is
an independent variable
D. More than one of these
4. Given this graph,
what can you say
about the
experiment?
A. Amount of solute was the independent variable
B. Amount of solution was the independent variable
C. Concentration was the independent variable
D. More than one of these
0
0.5
1
1.5
2
2.5
3
0.18 0.28 0.38 0.48 0.58 0.68
con
c (M
)
solution volume (L)
Concentration vs Solution Volume 5. Given this graph,
what can you say
about the relationship
between amount of
solute and
concentration?
A. The amount and concentration are directly related
B. Some chemicals are not as soluble as others
C. The relationship is the same for the chemicals used
D. More than one of these
0
0.2
0.4
0.6
0.8
1
1.2
1.4
0.15 0.25 0.35 0.45 0.55 0.65
C
o
n
c
(
M)
Solute amount (moles)
Concentration vs Solute Amount
red chemical
gold chemical
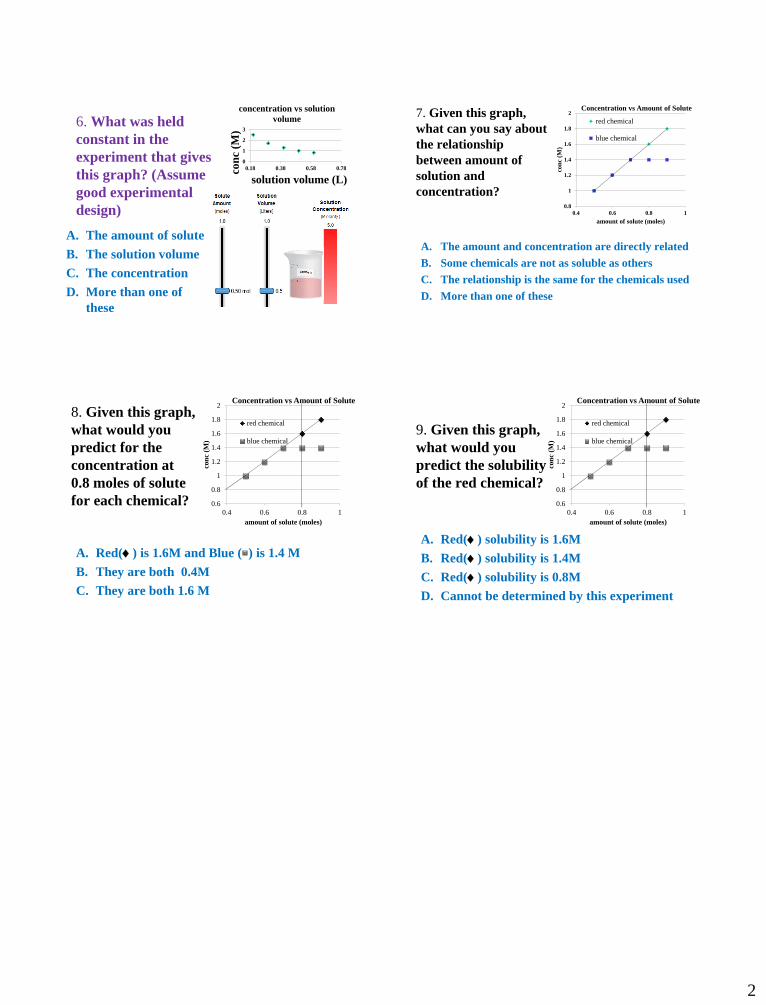
2
6. What was held
constant in the
experiment that gives
this graph? (Assume
good experimental
design)
A. The amount of solute
B. The solution volume
C. The concentration
D. More than one of
these
0
1
2
3
0.18 0.38 0.58 0.78con
c (M
)
solution volume (L)
concentration vs solution
volume 7. Given this graph,
what can you say about
the relationship
between amount of
solution and
concentration?
A. The amount and concentration are directly related
B. Some chemicals are not as soluble as others
C. The relationship is the same for the chemicals used
D. More than one of these
0.8
1
1.2
1.4
1.6
1.8
2
0.4 0.6 0.8 1
con
c (M
)
amount of solute (moles)
Concentration vs Amount of Solute
red chemical
blue chemical
8. Given this graph,
what would you
predict for the
concentration at
0.8 moles of solute
for each chemical?
A. Red() is 1.6M and Blue ( ) is 1.4 M
B. They are both 0.4M
C. They are both 1.6 M
0.6
0.8
1
1.2
1.4
1.6
1.8
2
0.4 0.6 0.8 1
con
c (M
)
amount of solute (moles)
Concentration vs Amount of Solute
red chemical
blue chemical
9. Given this graph,
what would you
predict the solubility
of the red chemical?
A. Red() solubility is 1.6M
B. Red() solubility is 1.4M
C. Red() solubility is 0.8M
D. Cannot be determined by this experiment
0.6
0.8
1
1.2
1.4
1.6
1.8
2
0.4 0.6 0.8 1
con
c (
M)
amount of solute (moles)
Concentration vs Amount of Solute
red chemical
blue chemical
Lesson Plan for Revised Gas Properties Activities (Advanced Chemistry Courses) Revised for Loeblein’s students who took College Physics because the students used Gas Properties, State
of Matter & Balloons and Buoyancy for physics activities
Loeblein 7/7/2013
Learning Goals: Students will be able to:
Describe a molecular model of gas pressure.
Describe what happens to the measurable quantities if changes to a gas
system are made. Changes can be adding/removing molecules or heat,
increasing/decreasing volume or pressure.
Make sense of the measurable quantities of gases by analyzing examples of
macroscopic (visible) things that are similar.
Explain using physics what is happening on a molecular level when changes
are made to a gas system. I want them to think about N,V,P,T and force
Lesson: This is for an advanced chemistry course. I divided this lesson into 2 periods.
The first was 50 minutes and we did the pre-lesson activities. I used this in the Gas unit
1. Display clicker questions, explain that they are about checking for present
understanding.
2. Review pressure is force/area. P=F/A. The pressure of a gas is due to the force
resulting from the change is momentum of the gas molecules that collide with the wall.
F=p/t =mv/t. The sum of the instantaneous normal components of the collisions
forces gives rise to the average pressure on the wall. Also mention that the physics notes
page may be helpful.
3. I’ll have a balloon to blow up (elastic, constant pressure container). We’ll talk about
adding and removing molecules. I have a pressure ball to demonstrate a fixed volume and
to show them what a pressure gauge looks like. We’ll talk about car/bike tires and I’ll use
a Ziploc stuffed lightly with tissues to demonstrate a flexible but constant volume
container. I’ll also have a glass container (fixed volume, non-flexible) and a balloon full
of tissues.
4. I’ll project Gas Properties on a large screen. Add one pump full of molecules. 200
molecules gives about 1 atm at room temperature with None for Constant Parameter.
Then I am going to display question on the overhead: Look at the animation of the
particles bouncing around in the volume. Describe what visual information you can use to
get a sense of the pressure that the gas particles are exerting on the walls. I have the
questions enlarged on the next page to make an overhead.
Project question 2 and 3 : Why does the pressure reading vary with time? Get student
ideas. What visual cues are associated with an increase in pressure? (Set temperature constant and add more molecules )
Lesson: The students will now work in pairs to complete the activity. As they are
working on number 1 “Make a list of things that you think might affect pressure”. Make
sure they try
Set T constant and decrease the volume.
Lesson Plan for Revised Gas Properties Activities (Advanced Chemistry Courses) Revised for Loeblein’s students who took College Physics because the students used Gas Properties, State
of Matter & Balloons and Buoyancy for physics activities
Loeblein 7/7/2013
Make sure to try the light molecules so they get that equal # have equal pressure if V and T constant (Avogadro)
Change temp
Second Day of lesson:
1. There are some clicker questions.
2. Also, for discussion, I went back over the first three questions asking how the answer
changed if the container is soft. You could use the Balloons and Buoyancy sim to
demonstrate this more clearly.
On the day after the lesson:
Other good discussion questions:
If you are in a building fire, you are supposed to lie on the ground. Why?
If you are hiking in the mountains and find yourself short of breath, do you
think if you lie on the ground you could breathe easier?
Notes to myself about how to verify using sim for the student questions
1. Set P constant, open the top T and V both decrease
2. V constant, push on pump to add molecules P and T both increase
3. Set None constant, push the side of the container so the volume goes down (P&T
will rise)I was assuming the air pocket is elastic
4. Set V constant, add heat ( Pressure is F/A so more P means more F required)
5. Set None constant, lower P by increasing V Students will have to think about that
the balloon’s pressure equals the atmosphere’s and that the balloon has a
maximum size. I expect them to describe the whole event as they go up the
mountain the outside pressure decreases and the balloon stretches until it reaches
a max. The temperature does not change. Also, other users might need to know
that Denver is at about 5500 ft and Evergreen about 7800 ft.
OR You can use the Balloons and Buoyancy simulation to answer this question.
7. I tried to simulate this by having V constant, and I put in molecules to make the
pressure about 2.3 and adjusted the temperature to 275. Then I changed T from 275 to
300. I saw the pressure change very little, so the students would decide there had
been a leak. 30+14.7=45(3atm)
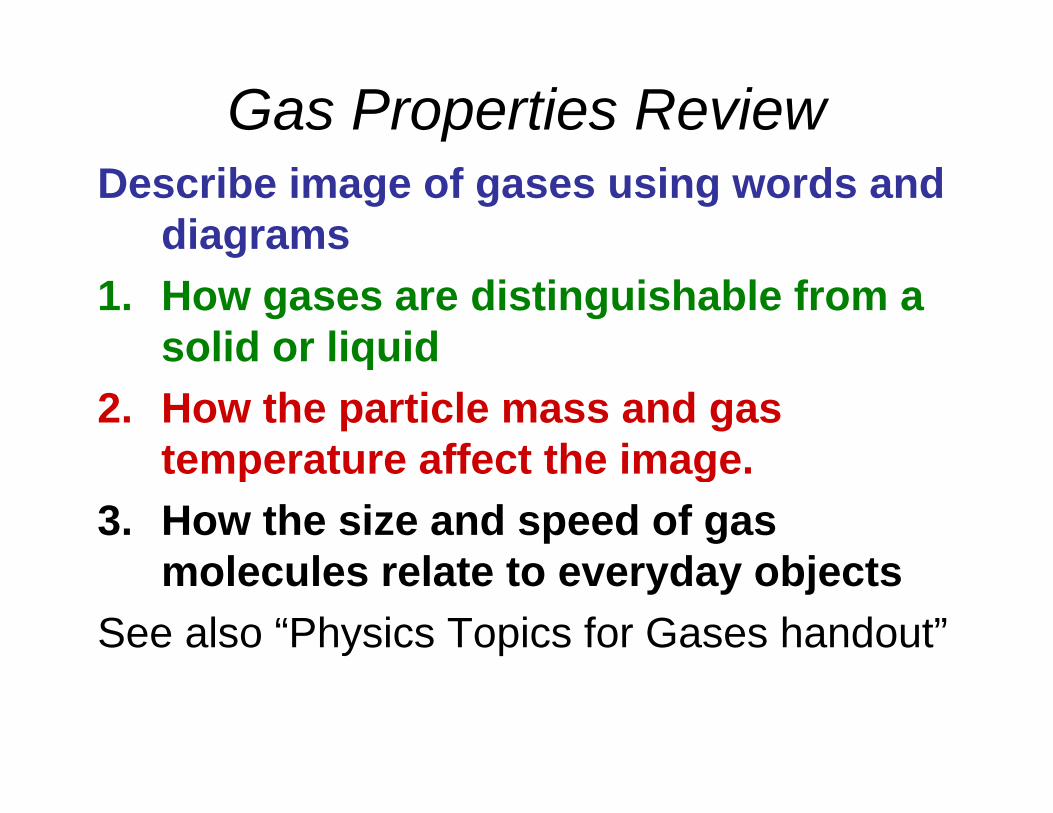
Gas Properties ReviewDescribe image of gases using words and
diagramsg1. How gases are distinguishable from a
solid or liquidsolid or liquid2. How the particle mass and gas
temperature affect the imagetemperature affect the image.3. How the size and speed of gas
l l l t t d bj tmolecules relate to everyday objectsSee also “Physics Topics for Gases handout”
Gas Properties: Understanding gas modelUnderstanding gas model
Goals: Describe a molecular fmodel of gas pressure.

1 There are 2 balloons in a room They1. There are 2 balloons in a room. They are identical in size and material. One b ll i fill d ith i d th thballoon is filled with air and the other balloon is filled with Helium. How does the pressure of the air balloon compare to the pressure of the Helium balloon. pThe pressure in the air balloon is
A. less B. equal C. greater
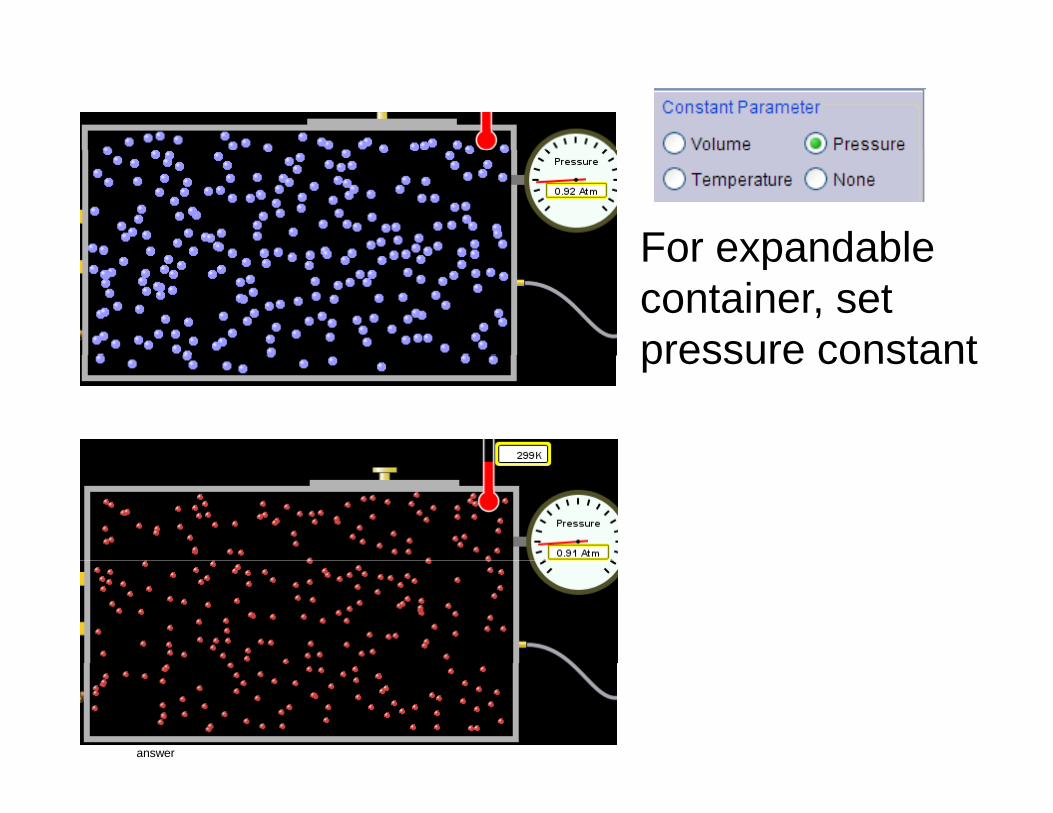
For expandableFor expandable container, set pressure constantpressure constant
answer
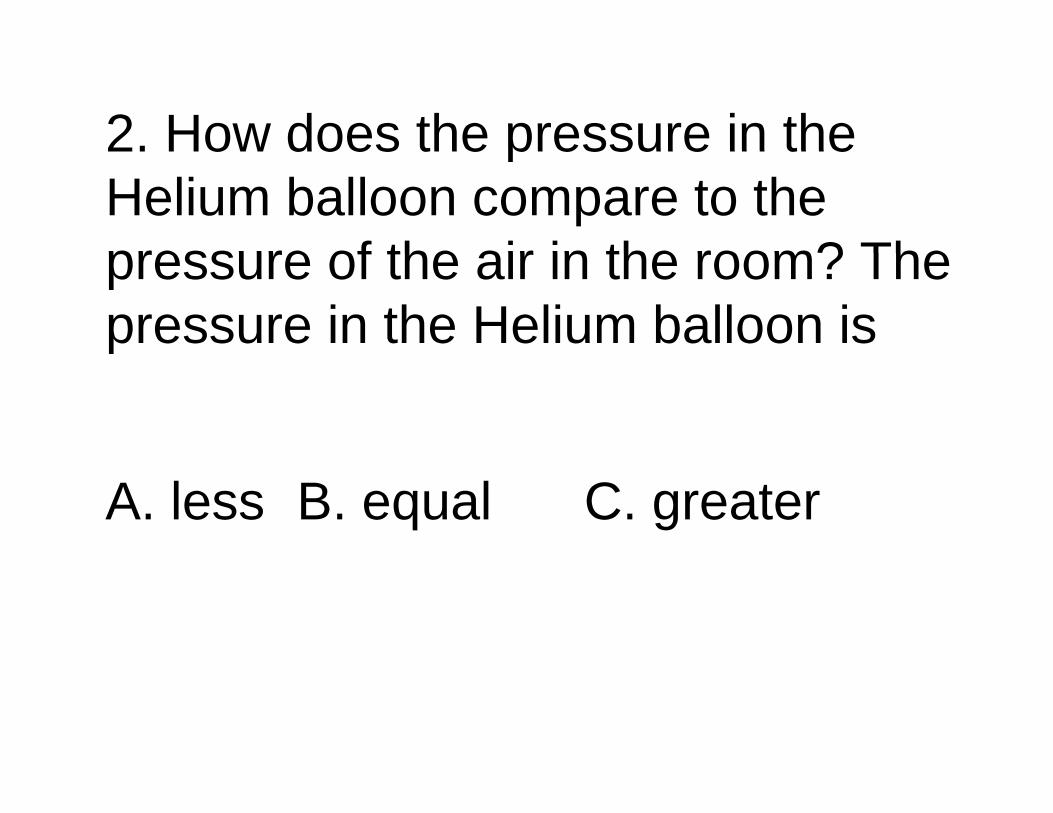
2. How does the pressure in the2. How does the pressure in the Helium balloon compare to the pressure of the air in the room? Thepressure of the air in the room? The pressure in the Helium balloon is
A. less B. equal C. greater
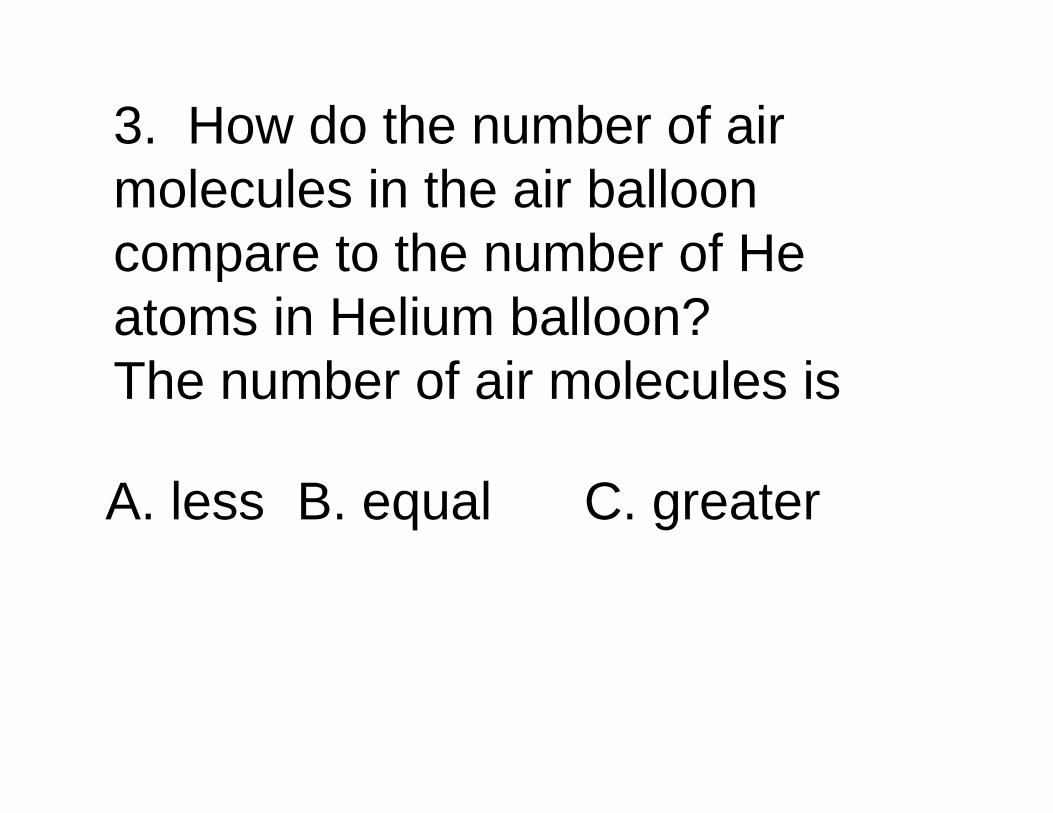
3. How do the number of air molecules in the air balloon compare to the number of Hecompare to the number of He atoms in Helium balloon? The number of air molecules is
A. less B. equal C. greater

For expandableFor expandable container, set pressure constantpressure constant
answer
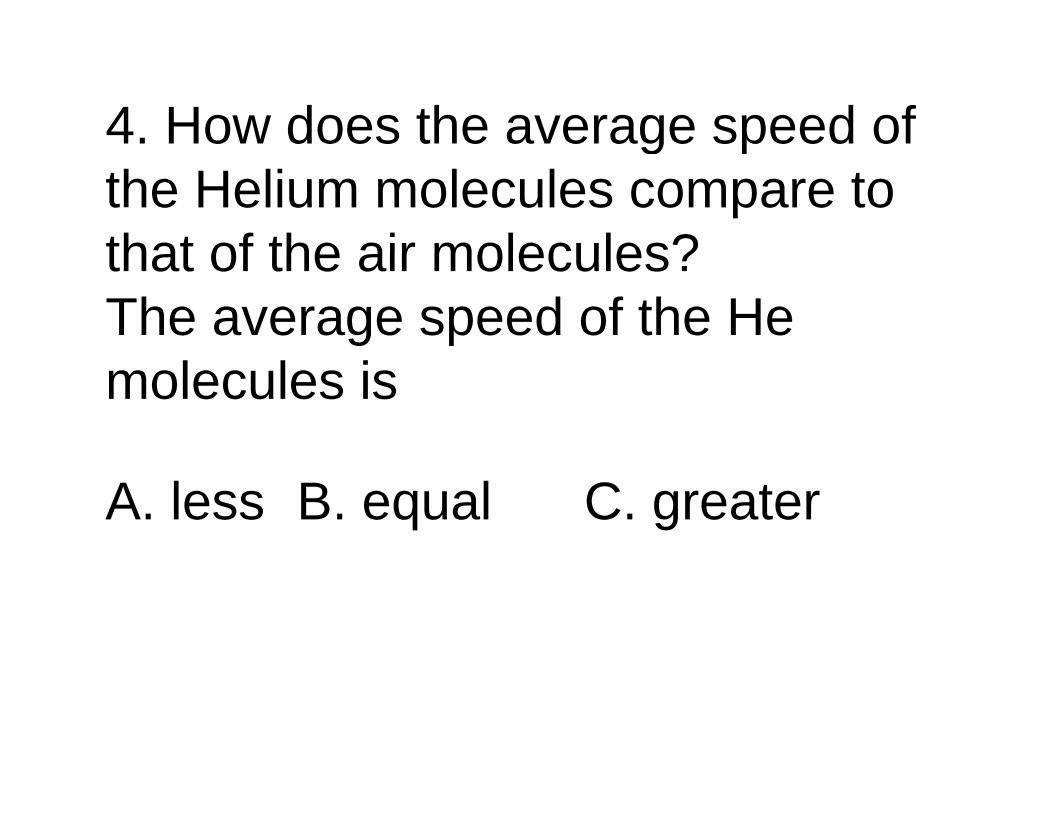
4. How does the average speed of g pthe Helium molecules compare to that of the air molecules?that of the air molecules? The average speed of the He molecules is
A. less B. equal C. greater
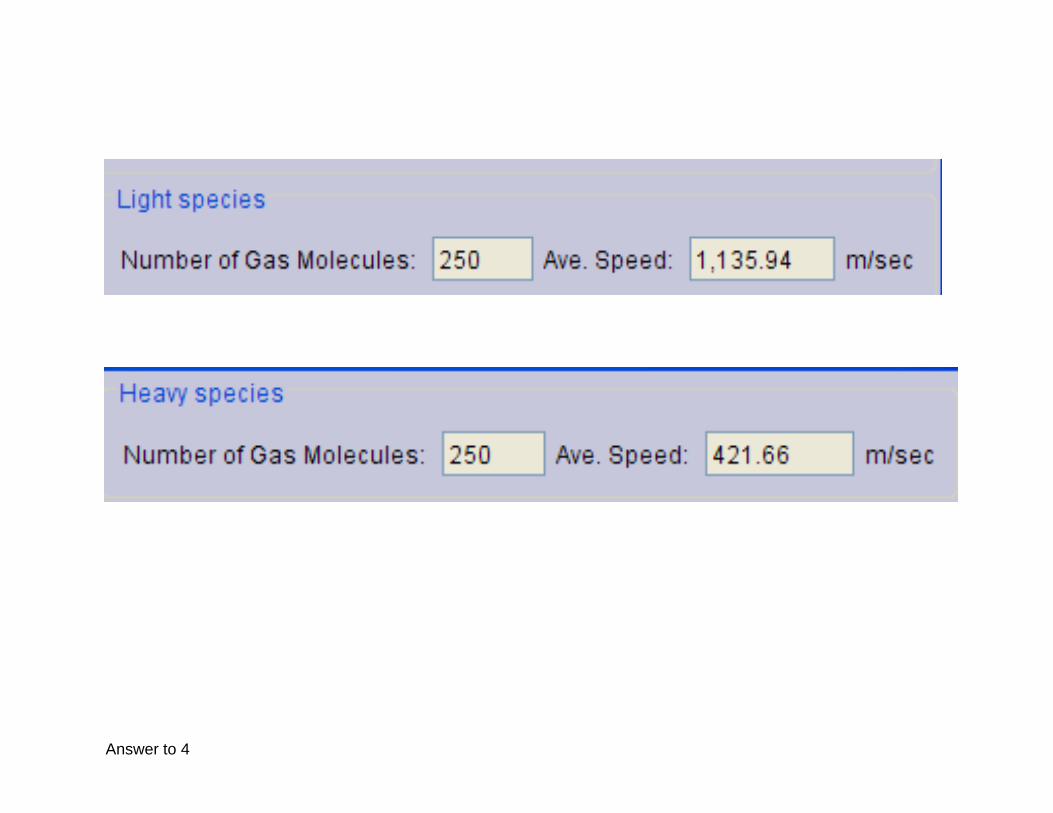
Answer to 4

Look at the animation of the particles bouncing around in theparticles bouncing around in the volume. Describe what visual i f ti t tinformation you can use to get a sense of the pressure that the gas p gparticles are exerting on the walls.
Why does the pressureWhy does the pressure reading vary with time?reading vary with time?
What visual cues are associated with anassociated with an increase in pressure?increase in pressure?
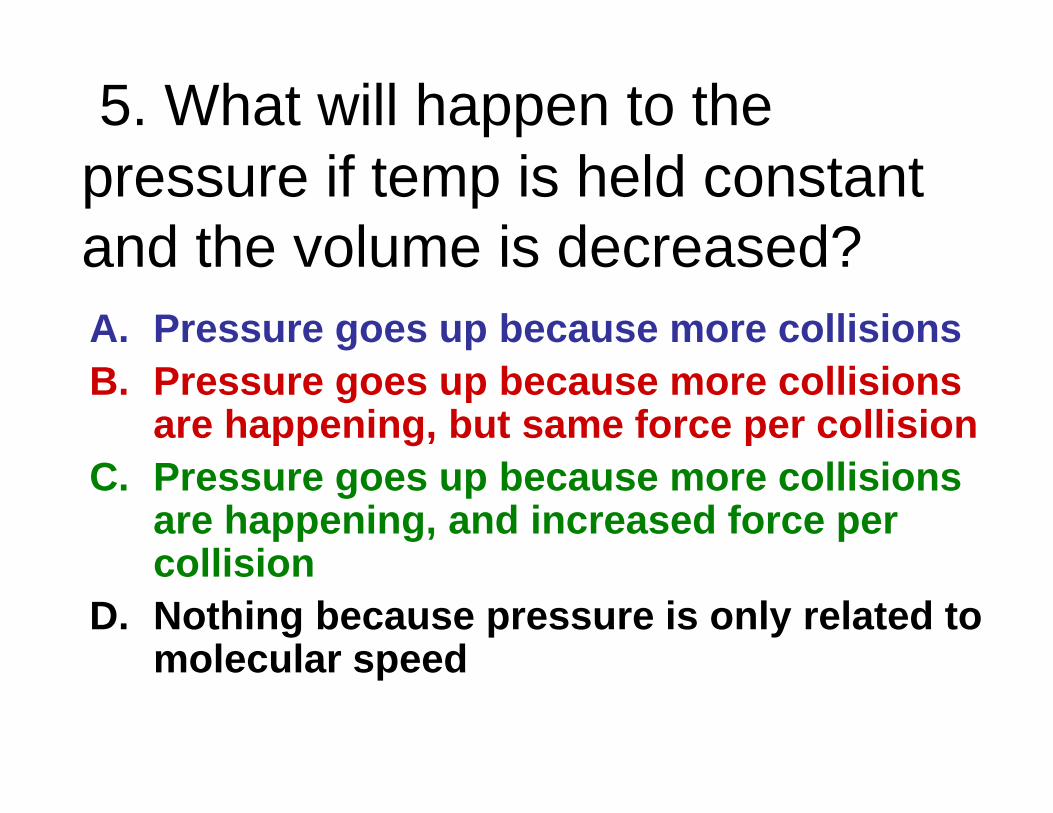
5. What will happen to the pressure if temp is held constant and the volume is decreased?and the volume is decreased?A. Pressure goes up because more collisionsB. Pressure goes up because more collisions
are happening, but same force per collisionC. Pressure goes up because more collisions
are happening, and increased force per collisioncollision
D. Nothing because pressure is only related to molecular speedmolecular speed
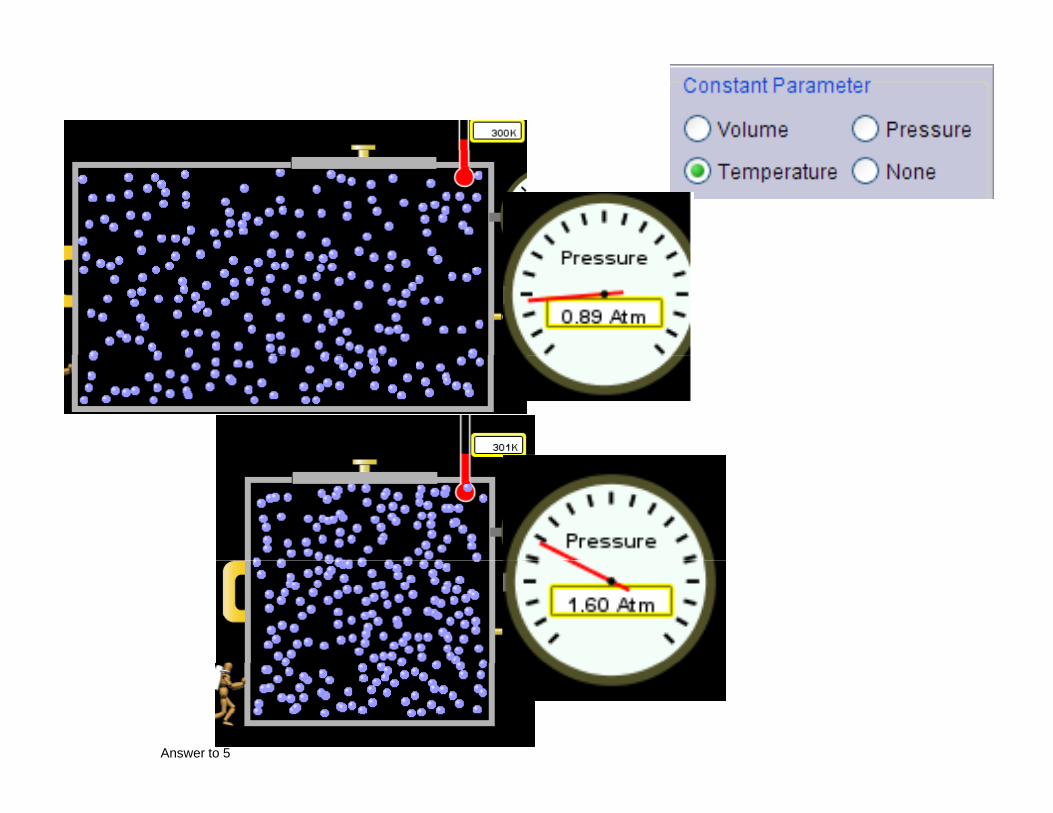
Answer to 5

14.7psi=1atm
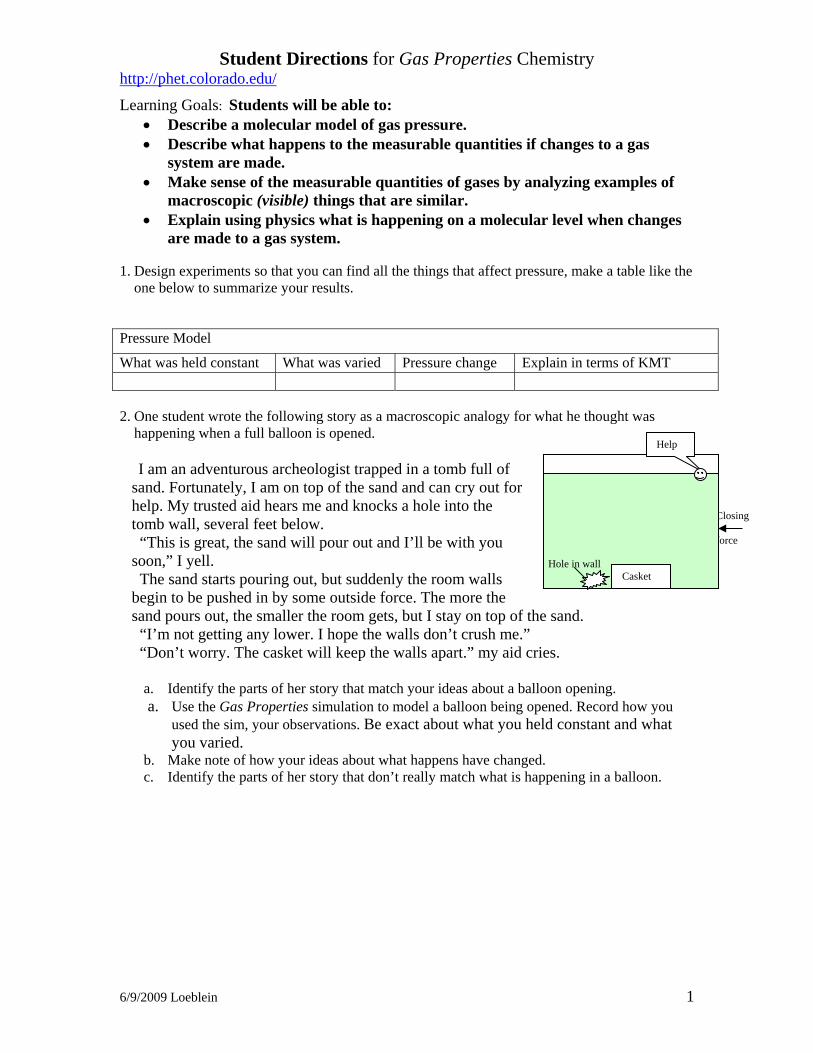
Student Directions for Gas Properties Chemistry http://phet.colorado.edu/
6/9/2009 Loeblein 1
Closing force
Casket
Help
Hole in wall
Learning Goals: Students will be able to: • Describe a molecular model of gas pressure. • Describe what happens to the measurable quantities if changes to a gas
system are made. • Make sense of the measurable quantities of gases by analyzing examples of
macroscopic (visible) things that are similar. • Explain using physics what is happening on a molecular level when changes
are made to a gas system. 1. Design experiments so that you can find all the things that affect pressure, make a table like the
one below to summarize your results.
2. One student wrote the following story as a macroscopic analogy for what he thought was
happening when a full balloon is opened.
I am an adventurous archeologist trapped in a tomb full of sand. Fortunately, I am on top of the sand and can cry out for help. My trusted aid hears me and knocks a hole into the tomb wall, several feet below. “This is great, the sand will pour out and I’ll be with you soon,” I yell. The sand starts pouring out, but suddenly the room walls begin to be pushed in by some outside force. The more the sand pours out, the smaller the room gets, but I stay on top of the sand. “I’m not getting any lower. I hope the walls don’t crush me.” “Don’t worry. The casket will keep the walls apart.” my aid cries.
a. Identify the parts of her story that match your ideas about a balloon opening. a. Use the Gas Properties simulation to model a balloon being opened. Record how you
used the sim, your observations. Be exact about what you held constant and what you varied.
b. Make note of how your ideas about what happens have changed. c. Identify the parts of her story that don’t really match what is happening in a balloon.
Pressure Model
What was held constant What was varied Pressure change Explain in terms of KMT
Student Directions for Gas Properties Chemistry http://phet.colorado.edu/
6/9/2009 Loeblein 2
Trish, a chemistry student, wrote this to explain how she used the sim to model a balloon
opening and the physics behind the process: a. I modeled the initial conditions by putting in a pump full of molecules with None
selected for Constant Parameters. Physics Explanation: “The gas molecules are moving around with high translational motion colliding with the container. The temperature of the gas is directly related to the average velocity of the molecules. Furthermore the average kinetic energy of the air molecules inside and outside is the same because the temperature of both is the same. Since the container is elastic, the average force/area (pressure) from the molecules colliding with the container from the air in the container equals that from the air molecules outside the container”
b. Next, leave None selected and open the container, hit Pause after about a second. Physics Explanation: “Some molecules escape when the container is opened which does work (Fd) on the environment so the internal energy of the air in the balloon decreases as stated in the second law. The internal energy of an ideal gas is in the form of kinetic energy, so the KE decreases. The KE is directly related to the temperature of the gas, so the temp decreases. The pressure inside decreases because there are fewer molecules, going slower, colliding with the container.”
c. Last, make the Pressure a constant because balloons are elastic and press play. Physics Explanation: “Since the rate of collisions on the inside is less than the rate on the outside, the environment does work (PV) on the balloon (elastic container). The volume decreases until the internal and external pressures are equal. The elasticity of the balloon is such that it doesn’t totally collapse.”
d. The final conditions are not demonstrated by the sim, but the temperature would eventually equalize as stated in the second law. “This happens through molecular collisions where momentum is transferred until the average speed of the molecules equals those of the environment.”
For 3-6, Read the scenario and use the simulation to help you understand what is happening. Record how you used the sim and your observations. Be exact about what you held constant and what you varied, and then write your physics explanations. 3. You add air to your car tire. It is reasonable to assume that once tires have air, they are flexible but not stretchy, so they do not change volume if more gas is added. 4. You jump down on your Nike air shoes (an elastic, closed air pocket is in the heel) 5. On a hot day, you find that it is harder than normal to open your gas tank. 6. You buy a bouquet of helium balloons for a friend’s birthday in Denver, but some pop on the drive up to Evergreen.
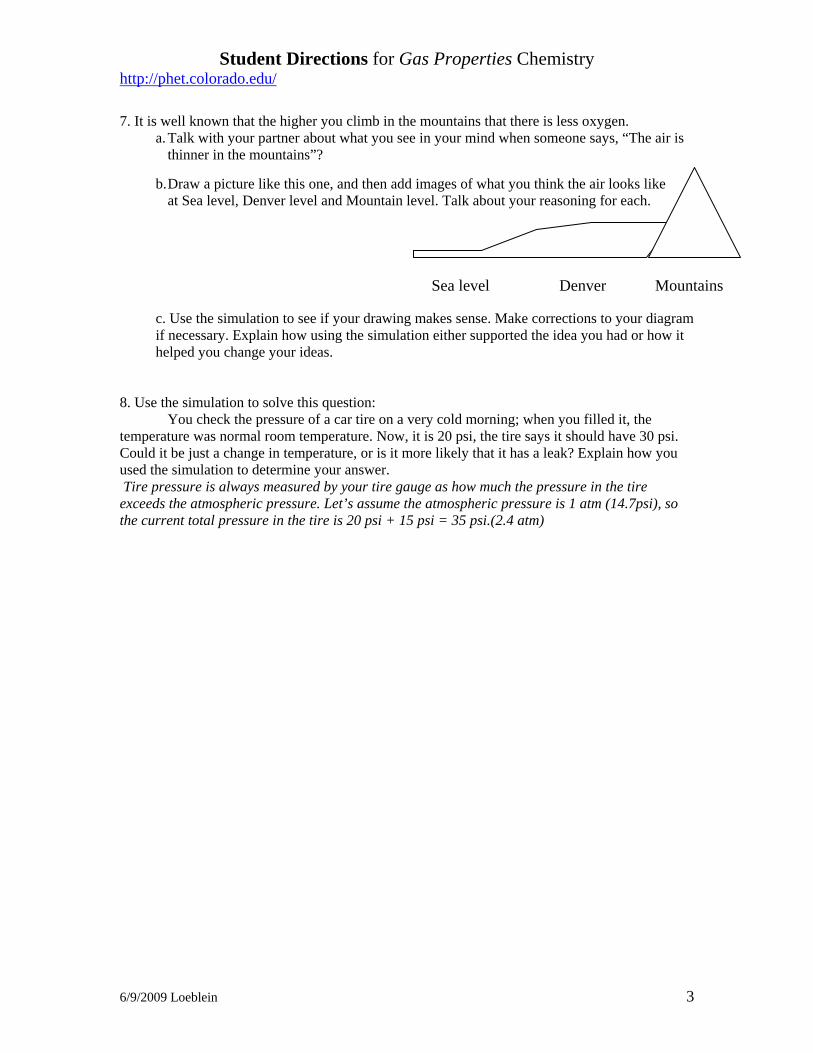
Student Directions for Gas Properties Chemistry http://phet.colorado.edu/
6/9/2009 Loeblein 3
Sea level Denver Mountains
7. It is well known that the higher you climb in the mountains that there is less oxygen.
a. Talk with your partner about what you see in your mind when someone says, “The air is thinner in the mountains”?
b. Draw a picture like this one, and then add images of what you think the air looks like
at Sea level, Denver level and Mountain level. Talk about your reasoning for each.
c. Use the simulation to see if your drawing makes sense. Make corrections to your diagram if necessary. Explain how using the simulation either supported the idea you had or how it helped you change your ideas.
8. Use the simulation to solve this question:
You check the pressure of a car tire on a very cold morning; when you filled it, the temperature was normal room temperature. Now, it is 20 psi, the tire says it should have 30 psi. Could it be just a change in temperature, or is it more likely that it has a leak? Explain how you used the simulation to determine your answer. Tire pressure is always measured by your tire gauge as how much the pressure in the tire exceeds the atmospheric pressure. Let’s assume the atmospheric pressure is 1 atm (14.7psi), so the current total pressure in the tire is 20 psi + 15 psi = 35 psi.(2.4 atm)
The next slides follow the activity
Understanding physical change of gases continues
Learning Goals: g
•Describe a molecular model of gas pressure
•Describe what happens to the measurable quantities if changes•Describe what happens to the measurable quantities if changes to the gas system are made.
•Make sense of the measurable quantities of gases by analyzingMake sense of the measurable quantities of gases by analyzing examples of macroscopic things that are similar
•Explain using physics what is happening on a molecular level p g p y pp gwhen changes are made to a gas system.
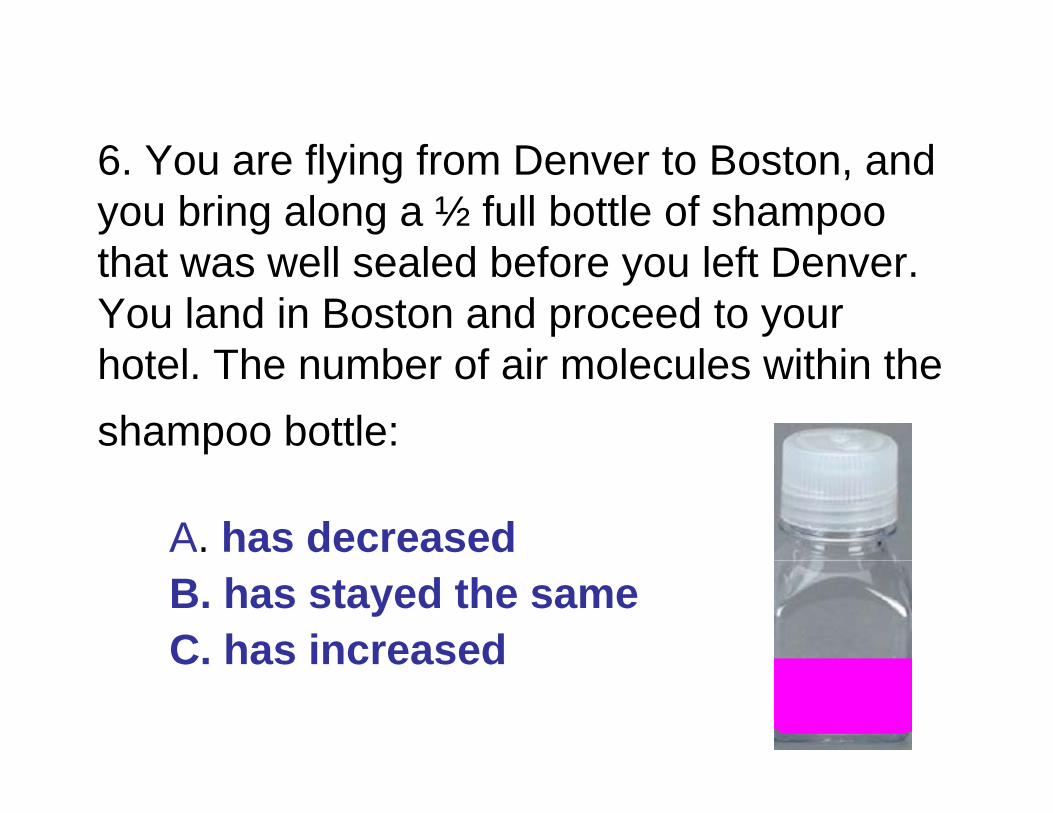
6 Y fl i f D t B t d6. You are flying from Denver to Boston, and you bring along a ½ full bottle of shampoo th t ll l d b f l ft Dthat was well sealed before you left Denver. You land in Boston and proceed to your h t l Th b f i l l ithi thhotel. The number of air molecules within the shampoo bottle:
A. has decreased B. has stayed the same C. has increasedC. has increased
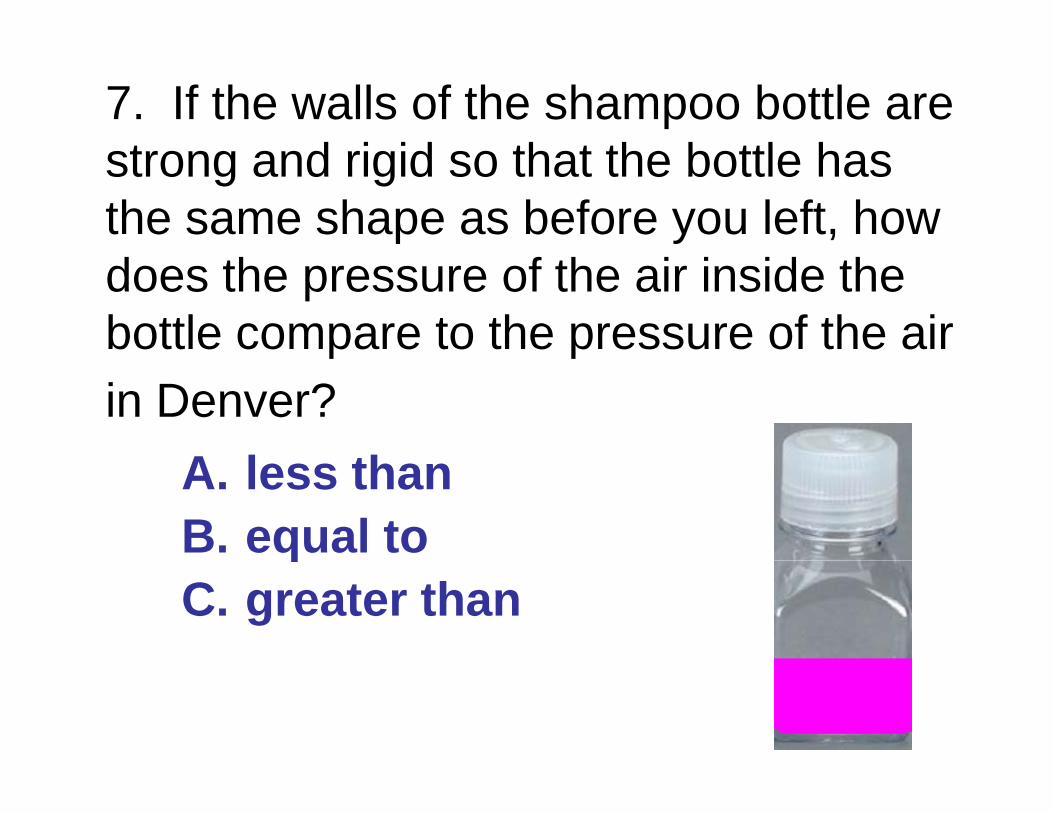
7. If the walls of the shampoo bottle are t d i id th t th b ttl hstrong and rigid so that the bottle has
the same shape as before you left, how does the pressure of the air inside the bottle compare to the pressure of the air p pin Denver?
A l thA. less thanB. equal to qC. greater than
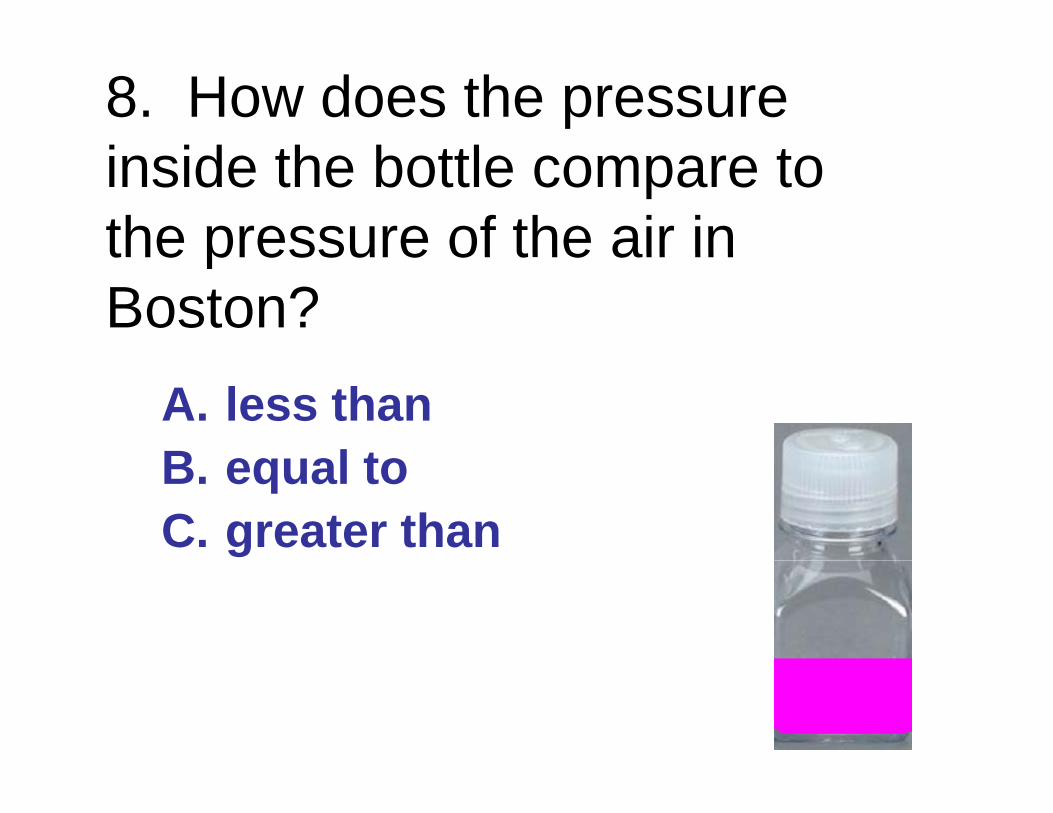
8. How does the pressure i id th b ttl tinside the bottle compare to the pressure of the air inthe pressure of the air in Boston?
A. less thanB l tB. equal to C. greater than
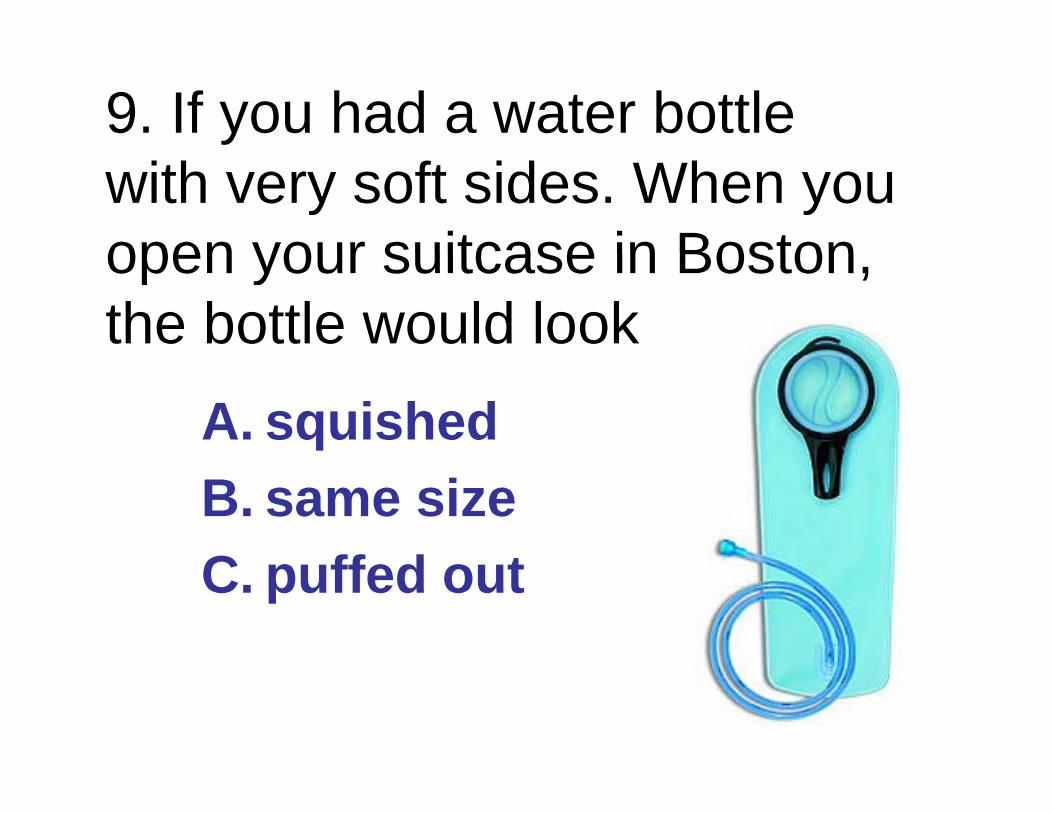
9. If you had a water bottle with very soft sides. When you open your suitcase in Bostonopen your suitcase in Boston, the bottle would look
A. squishedB. same sizeC ff d tC. puffed out

What effects pressure forWhat effects pressure for ideal gases?g• Temperature
N b f ti l• Number of particles• Volume• Mass of particles doesn’t effect pressure
(Avogadro’s Principle)( g p )

Slides for next daySlides for next day
P l h li b th t ll tPeople who climb the tallest mountains in the world oftenmountains in the world often use oxygen tanks to help them breathe. If a mountain climber asked you to explain theasked you to explain the physics behind the “thin air”, what would you say to him?
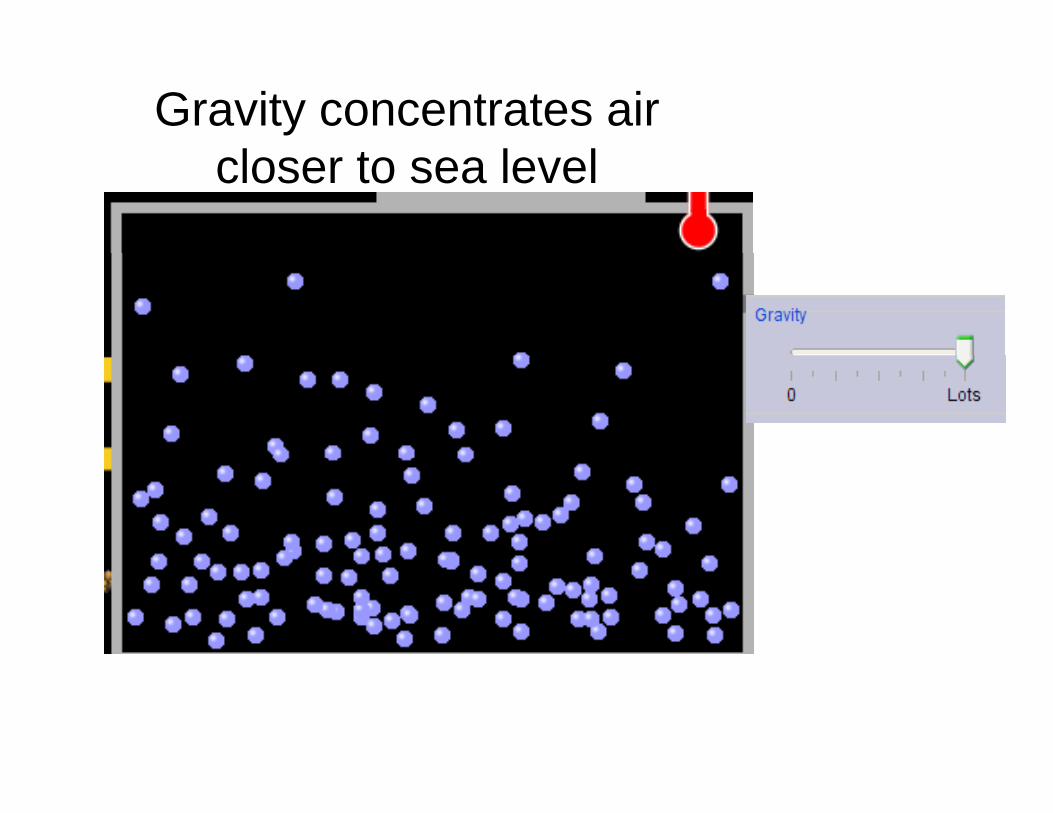
Gravity concentrates air l t l lcloser to sea level
If you are in a building fire, you are supposed to lie on the ground Why?the ground. Why?

If you are hiking in the mountains and find yourselfmountains and find yourself short of breath, do you think if you lie on the ground you could breathe easier?could breathe easier?

Lesson plan for Gas Properties Chemistry: Gas Laws http://phet.colorado.edu
1/24/2012 Loeblein Thanks to Sarah Borenstein’s lesson on PhET Teacher’s Activity Database
Learning Goals:
Design experiments to measure the relationships between pressure, volume, and temperature.
Create graphs based on predictions and observations.
Make qualitative statements about the relationships between pressure, volume and temperature.
Background:
My students for the most part have had physics where we used this simulation for Kinetic
Molecular Theory and some for Buoyancy and Pressure. A few days before this activity, we
used States of Matter Basics activity. We will use this for an introduction to Gas Laws and
then do a lab where they use Alka-Seltzer and water in balloons to get a gross understanding of
stoichiometric application of gas laws; the lab does not give very quantitative data and doing
many variations is expensive, so we use the lab just for a qualitative application. This activity
was designed to push towards quantitative relationships and serve as an introduction before
lecturing on the Gas Laws.
Gas Properties Introduction:
I did not demonstrate the sim, but I reminded students that they need at least 6 points to get a
trend and that using zero is never a good idea. The hint I put in the directions is important; if
students set a parameter to be constant, they can make a change, but must wait for the
parameter to return to the set value.
Lesson: My students did this in class in pairs, but it is suitable for homework after students have
done at least the first 2 experiments or have good experimental design and analysis skills. My
students used the idea that measuring the width (the Ruler is under Measurement Tools) of the
container could be used to find the trends for volume because they assumed that height and
depth would not vary. This worked well and the trend lines demonstrated the laws well. For
example, they used volume as the independent variable and pressure as the dependent variable.
Students started the experiment with no constants selected, put in some particles, let the
pressure come to a constant and then check “constant Temperature”. If they use the little guy to
change the volume some and then let the temperature return to 300, the plot of PV gave a
power trend with an exponent of -1 as expected and those students who were careful also had
nearly 1 for r-squared.
The Tips for Teachers written by the PhET team for this sim could be useful. For example, this
sim would not be useful for determining constants since the volume is not truly represented.
Reflection comments from my experience with this activity: I used this lab in a regular
chemistry course where the students have not had much quantitative design experience
although they do many inquiry labs where they are looking for general trends. The students
who had poor r-squared values often had a very small range for width, very few particles, did
not wait for the temperature to equilibrate, or changed the volume so dramatically that PV
work affected their results. Many students had forgotten how to evaluate good lab practice and
struggled with deciding which variable to be independent and also how to manipulate the sim
to properly hold other variables constant. My students commented that it really made them

Lesson plan for Gas Properties Chemistry: Gas Laws http://phet.colorado.edu
1/24/2012 Loeblein Thanks to Sarah Borenstein’s lesson on PhET Teacher’s Activity Database
think about experimental design and they also were glad to use Excel because many had
forgotten how to properly fit trend lines and use r-squared to help them.
Post-Lesson: I have not written clicker questions for this activity. My text has very good
questions that will invite class discussion. I will probably develop some questions addressing
experimental design and appropriate trend lines.
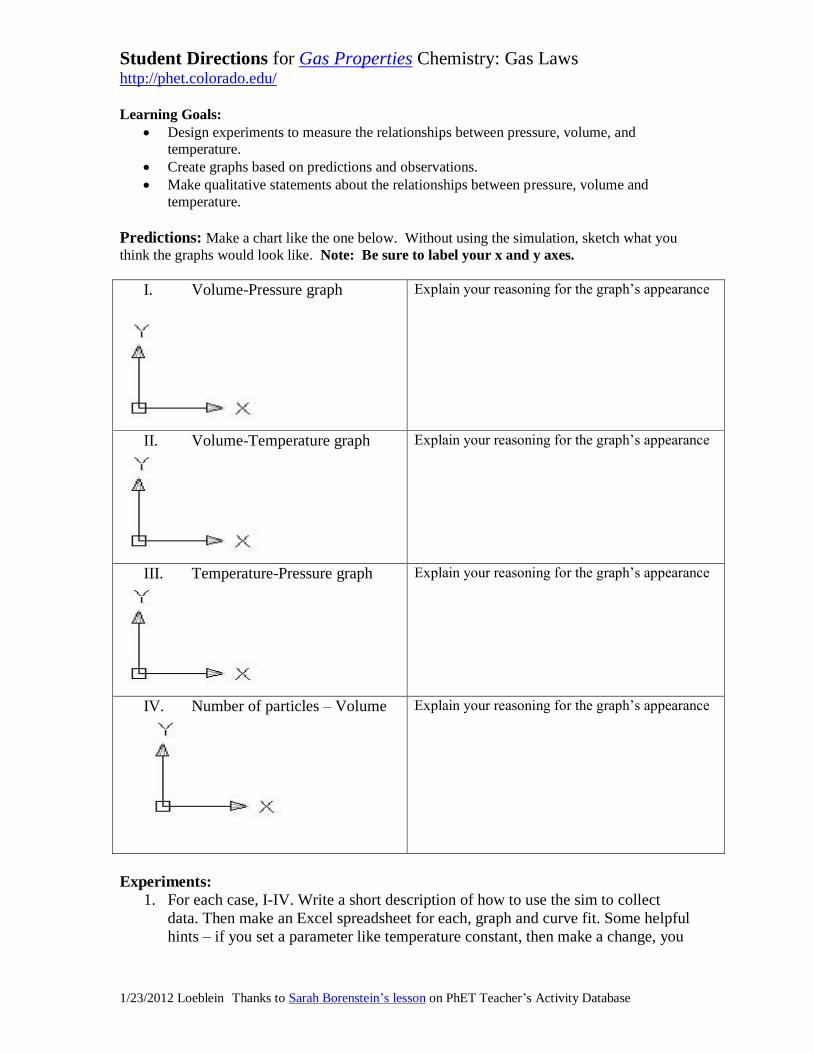
Student Directions for Gas Properties Chemistry: Gas Laws http://phet.colorado.edu/
1/23/2012 Loeblein Thanks to Sarah Borenstein’s lesson on PhET Teacher’s Activity Database
Learning Goals:
Design experiments to measure the relationships between pressure, volume, and
temperature.
Create graphs based on predictions and observations.
Make qualitative statements about the relationships between pressure, volume and
temperature.
Predictions: Make a chart like the one below. Without using the simulation, sketch what you
think the graphs would look like. Note: Be sure to label your x and y axes.
I. Volume-Pressure graph
Explain your reasoning for the graph’s appearance
II. Volume-Temperature graph
Explain your reasoning for the graph’s appearance
III. Temperature-Pressure graph
Explain your reasoning for the graph’s appearance
IV. Number of particles – Volume
Explain your reasoning for the graph’s appearance
Experiments:
1. For each case, I-IV. Write a short description of how to use the sim to collect
data. Then make an Excel spreadsheet for each, graph and curve fit. Some helpful
hints – if you set a parameter like temperature constant, then make a change, you
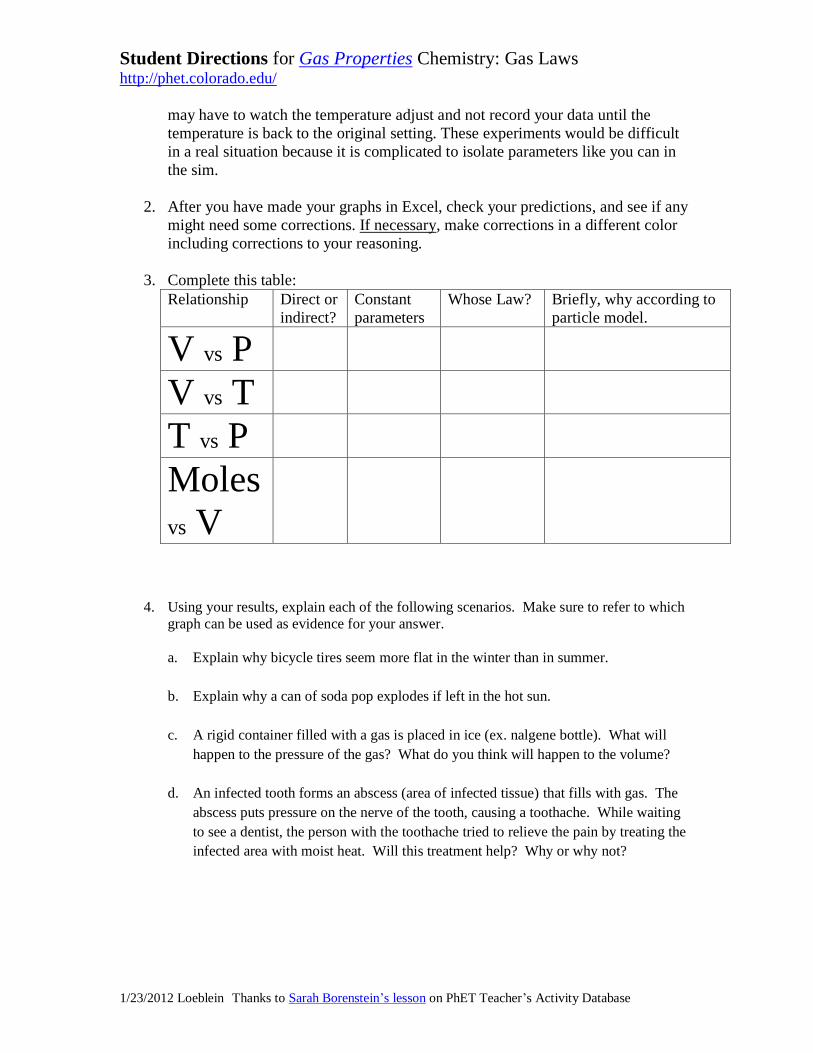
Student Directions for Gas Properties Chemistry: Gas Laws http://phet.colorado.edu/
1/23/2012 Loeblein Thanks to Sarah Borenstein’s lesson on PhET Teacher’s Activity Database
may have to watch the temperature adjust and not record your data until the
temperature is back to the original setting. These experiments would be difficult
in a real situation because it is complicated to isolate parameters like you can in
the sim.
2. After you have made your graphs in Excel, check your predictions, and see if any
might need some corrections. If necessary, make corrections in a different color
including corrections to your reasoning.
3. Complete this table:
Relationship Direct or
indirect?
Constant
parameters
Whose Law? Briefly, why according to
particle model.
V vs P
V vs T
T vs P
Moles
vs V
4. Using your results, explain each of the following scenarios. Make sure to refer to which
graph can be used as evidence for your answer.
a. Explain why bicycle tires seem more flat in the winter than in summer.
b. Explain why a can of soda pop explodes if left in the hot sun.
c. A rigid container filled with a gas is placed in ice (ex. nalgene bottle). What will
happen to the pressure of the gas? What do you think will happen to the volume?
d. An infected tooth forms an abscess (area of infected tissue) that fills with gas. The
abscess puts pressure on the nerve of the tooth, causing a toothache. While waiting
to see a dentist, the person with the toothache tried to relieve the pain by treating the
infected area with moist heat. Will this treatment help? Why or why not?
Lesson plan for Reactions and Rates 2: Introduction to Reaction Kinetics with Single Collisions Revised for College Chemistry
12/9/2008 Loeblein http://phet.colorado.edu
Background: I teach a dual credit chemistry course using Chemistry 6th Edition Zumdahl Houghton Mifflin, NY, 2003. The students in my class are taking their first high school chemistry course and receive credit for the first semester of college chemistry and credit for the corresponding lab. I used this lesson as part of introduction to spontaneity. Originally, this was 2 lessons, but I discovered that the students learned more from the first activity than I expected, so I took out some steps. I have written another activity ( still called # 4) using the Reactions and Rates simulation to be used in the Kinetics unit second semester along with two Soluble Salt activities (3 and 4 in the series of 5). Learning Goals for activity 2 Introduction to reaction kinetics with Single collisions: Students will be able to:
• Describe how the reaction coordinate can be used to predict whether a reaction will proceed including how the potential energy of the system changes.
• Describe what affects the potential energy of the particles and how that relates to the energy graph. Answer: distance and type of particle
• Describe how the reaction coordinate can be used to predict whether a reaction will proceed slowly, quickly or not at all.
• Use the potential energy diagram to determine: o The approximate activation energy for the forward and reverse reactions. o The sign difference in energy between reactants and products.
• Draw a potential energy diagram from the energies of reactants and products and activation energy.
Reactions and Rates Introduction: I did have to remind many students to select “view” to display the graphs on the right side which they need to fully meet the goals. Lesson for Activity 2: Demonstration: Mix solutions of iron (III) nitrate and sodium thiocyanide. This is nice because it forms a complex instead of a precipitate My students work in pairs and use the lab sheet for guidance. I predict that it will be important to check that the students discover that the shooter can be used to get low energy and they may have trouble understanding the difference between potential and total energy. The activity took most of my college chemistry students one 50 minute period, but some had to finish outside of classtime. First panel, Single Collision 1. Students will describe on a microscopic level, what contributes to a successful reaction.
(Include illustrations)
• Make sure your students pull the shooter a variety of distances and change the angle • Reactions are the result of collisions between molecules. Whether a collision leads to
products or not is determined by both the speed (energy) and angle of the collision. It may be difficult for the students to see the effect of the angle, but if you have the
Lesson plan for Reactions and Rates 2: Introduction to Reaction Kinetics with Single Collisions Revised for College Chemistry
12/9/2008 Loeblein http://phet.colorado.edu
shooter on an angle and pull it out so that the Total energy is above the activation energy, the collisions produce a reactant only if the angle is appropriate.
• Reactions are reversible and they can experiment forward and reverse by selecting a different species to shoot.
• Students may describe things they discover about the reaction coordinate here too. See the note in #3
2. Describe how the reaction coordinate can be used to predict whether a reaction will proceed
including how the potential energy of the system changes.
• Based on the reaction coordinate and the energy of the reactants, students should be able to predict if a collision with a given energy will lead to products.
• For reactants that do not have enough energy to react, students should be able to propose how they could make the reaction happen through changes in temperature or use of a catalyst. They can’t add anything that looks like a catalyst, but they can change the activation energy by selecting Design your Own. Alternately, in order to stop a reaction from happening, they could propose how they could slow down or stop the reaction through changes in temperature or use of a catalyst.
• Reactions can proceed at lower temperatures if the activation energy is lowered. In a real reaction, this is done with catalyst.
• For the reaction to occur, reactant molecules must have sufficient energy to overcome the activation energy. Heating and cooling molecules will change their energy, and as a result will change the probability of successful collisions.
3. Students will use the potential energy diagram to determine 1. The activation energy for the forward and reverse reactions, 2. The difference in energy between reactants and products. 3. The relative potential energies of the molecules at different positions on a reaction
coordinate • Number 1 and 2 are traditionally in texts and there are usually practice problems. For
number 3, students can observe how the distance between the molecules relates to the reaction coordinate. As the particles get close together, the energy increases. This is usually illustrated in texts as well.
5. Students will draw a potential energy diagram from the energies of reactants and products and activation energy.
• The reaction coordinate shows how potential energy changes with the separation of reactants and products.
• The reaction coordinate shows the relative potential energies of the reactants, products, and the transition state.
• Different chemical reactions will have different reaction coordinates.
Student directions Reactions and Rates : Introduction to reaction kinetics Revised for College Chemistry November 2008
12/9/2008 Loeblein http://phet.colorado.edu
Learning Goals: Students will be able to: • Describe how the reaction coordinate can be used to predict whether a reaction will proceed
including how the potential energy of the system changes. • Describe what affects the potential energy of the particles and how that relates to the energy
graph. • Describe how the reaction coordinate can be used to predict whether a reaction will proceed
slowly, quickly or not at all. • Use the potential energy diagram to determine:
o The approximate activation energy for the forward and reverse reactions. o The sign difference in energy between reactants and products.
• Draw a potential energy diagram from the energies of reactants and products and activation energy.
Directions:
1. Talk with your partner about what you think is happening on a microscopic level when the iron (III) nitrate and sodium thiocyanide mix. a. Draw pictures that would help you describe the process. b. Make a list of what things that might make the color change happen faster and explain your
reasoning. c. Make a list of what things might make more of the colored complex form and explain your
reasoning. 2. Run experiments using Single Collisions to determine on a simplest level what contributes to a
successful reaction. Make sure that you use the Energy view and Separation view to help you explain how the energy changes in a reaction can help you make predictions. a. Explain the difference between total energy and potential energy. Describe how each can be
changed. b. How does the Separation view help you? c. Make sketches of energy graphs to help describe how the energy diagram can be used to
predict if the reaction will occur or not.
3. Run experiments using Many Collisions to determine what contributes to a successful reaction and what affects the speed of the reaction. a. Describe how this model relates to the single collision model. b. Make a table to demonstrate that you have thoroughly used all the simulation features.
4. Sketch the energy graph could look like for the forward reaction to be an exothermic reaction.
a. What would the sign for ΔH be for the forward reaction? and reverse reaction? b. Select the Design Your Own Reaction to make your own exothermic reaction.
c. Run tests to see if your ideas for number 3 still work. Make changes if necessary. d. Explain how the Activation energy for the forward and the one for the reverse reaction are
similar and how they differ.
5. Sketch the energy graph could look like for the forward reaction to be an endothermic reaction. a. What would the sign for ΔH be for the forward reaction? and reverse reaction? b. Select the Design Your Own Reaction to make your own exothermic reaction.
c. Run tests to see if your ideas for number 3 still work. Make changes if necessary. d. Explain how the Activation energy for the forward and the one for the reverse reaction are
similar and how they differ.

Student directions Reactions and Rates : Introduction to reaction kinetics Revised for College Chemistry November 2008
12/9/2008 Loeblein http://phet.colorado.edu
For practice: 6. Sketch the energy graphs for the following situations.
a. The reactants have a lower potential energy than the products. b. The activation energy of the reverse reaction is greater than the forward reaction c. The products have a lower potential energy than the reactants. d. The forward reaction has a positive ΔH. e. The reverse reaction has a negative ΔH.
Reactions and Rates 2 Clicker Questions
Activity 2: Introduction to reaction kinetics
Trish Loeblein
PhET
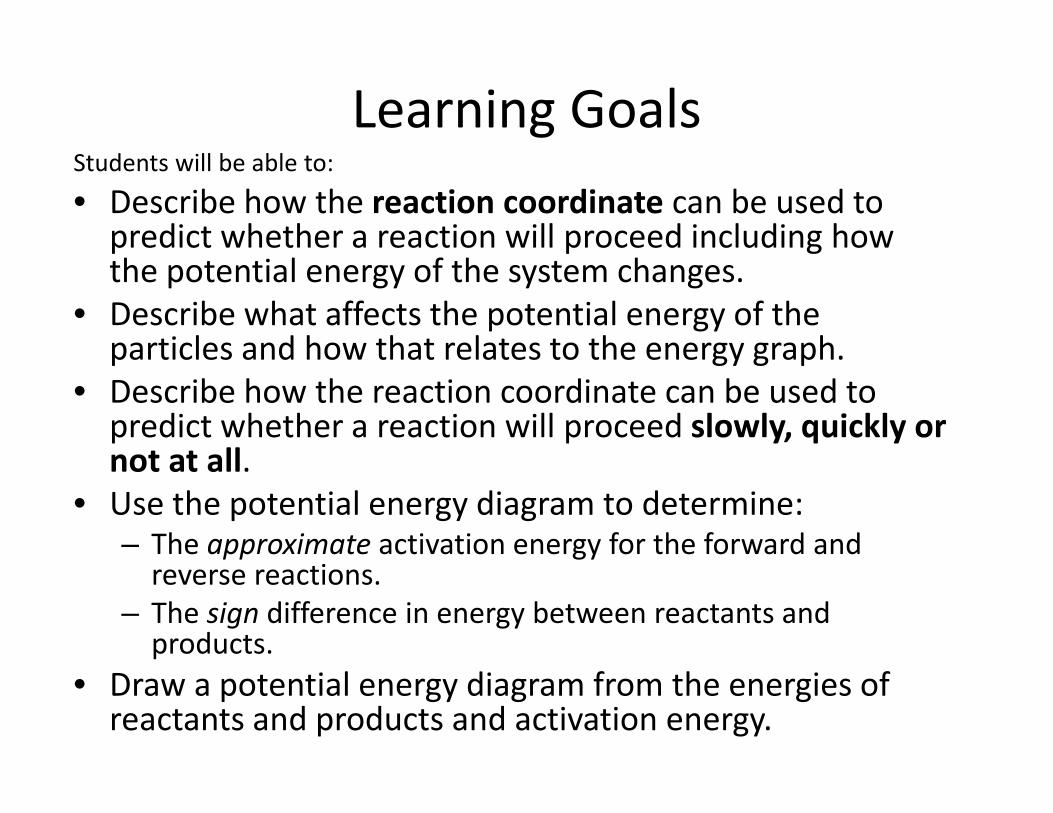
Learning GoalsStudents will be able to:
• Describe how the reaction coordinate can be used to predict whether a reaction will proceed including how p p gthe potential energy of the system changes.
• Describe what affects the potential energy of the particles and how that relates to the energy graphparticles and how that relates to the energy graph.
• Describe how the reaction coordinate can be used to predict whether a reaction will proceed slowly, quickly or not at allnot at all.
• Use the potential energy diagram to determine: – The approximate activation energy for the forward and reverse reactions.
– The sign difference in energy between reactants and products.
• Draw a potential energy diagram from the energies of reactants and products and activation energy.
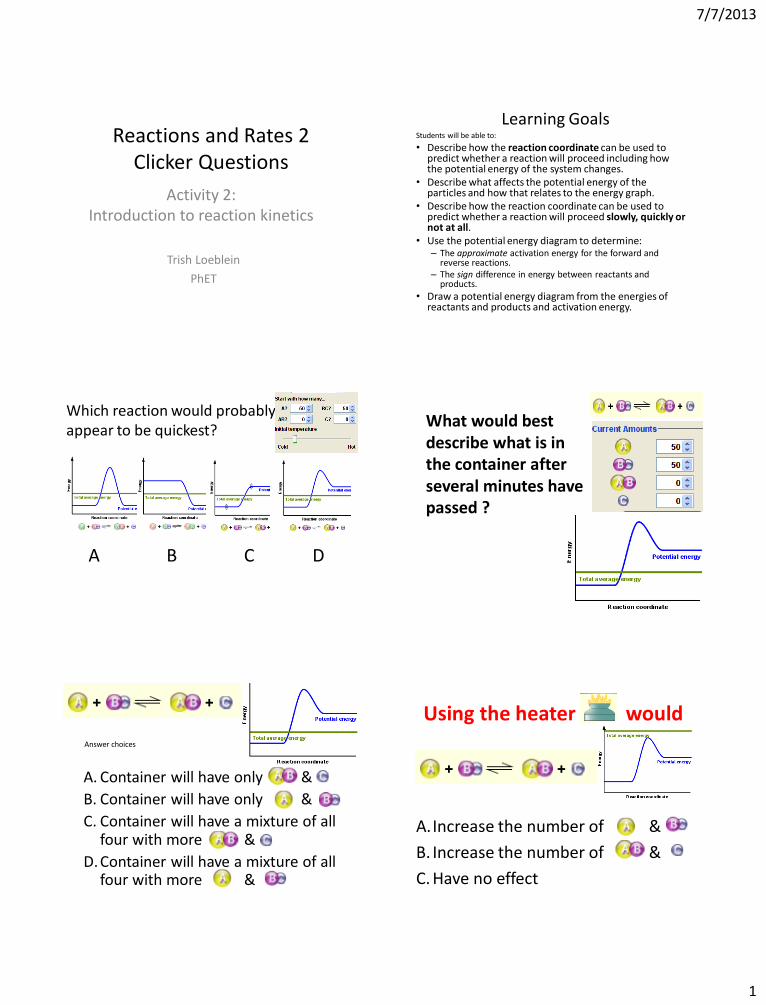
7/7/2013
1
Reactions and Rates 2 Clicker Questions
Activity 2: Introduction to reaction kinetics
Trish Loeblein
PhET
Students will be able to: • Describe how the reaction coordinate can be used to
predict whether a reaction will proceed including how the potential energy of the system changes.
• Describe what affects the potential energy of the particles and how that relates to the energy graph.
• Describe how the reaction coordinate can be used to predict whether a reaction will proceed slowly, quickly or not at all.
• Use the potential energy diagram to determine: – The approximate activation energy for the forward and
reverse reactions. – The sign difference in energy between reactants and
products.
• Draw a potential energy diagram from the energies of reactants and products and activation energy.
Learning Goals
Which reaction would probably appear to be quickest?
A B C D
What would best describe what is in the container after several minutes have passed ?
Answer choices
A. Container will have only &
B. Container will have only &
C. Container will have a mixture of all four with more &
D. Container will have a mixture of all four with more &
A.Increase the number of &
B. Increase the number of &
C. Have no effect
Using the heater would
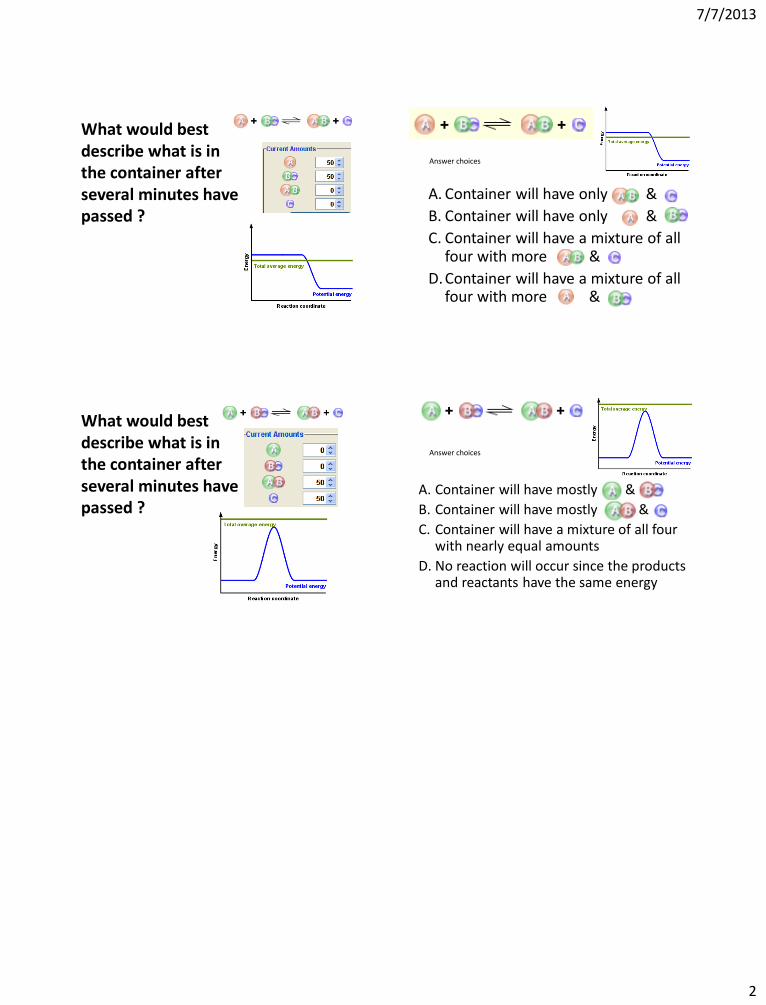
7/7/2013
2
What would best describe what is in the container after several minutes have passed ?
A. Container will have only &
B. Container will have only &
C. Container will have a mixture of all four with more &
D. Container will have a mixture of all four with more &
Answer choices
What would best describe what is in the container after several minutes have passed ?
Answer choices
A. Container will have mostly &
B. Container will have mostly &
C. Container will have a mixture of all four with nearly equal amounts
D. No reaction will occur since the products and reactants have the same energy

Lesson plan for Build an Atom : Introduction http://phet.colorado.edu
High school version
7/7/2013 Loeblein/Perkins http://phet.colorado.edu
Learning Objectives: Students will be able to 1. Make atom models that show stable atoms or ions.
2. Use given information about subatomic particles to
Identify an element and its position on the periodic table
Draw models of atoms
Determine if the model is for a neutral atom or an ion.
3. Predict how addition or subtraction of a proton, neutron, or electron will change the element, the
charge, and the mass of their atom or ion.
4. Describe all vocabulary words needed to meet the goals.
5. Use a periodic symbol to tell the number of protons, neutrons, and electrons in an atom or ion.
6. Draw the symbol for the element as you would see on the periodic table
Background:
This lesson is for High School students who have some introduction to atomic particles, but
could use a refresher or deeper understanding. A demonstration or short hands-on activity
would be to have some toothpicks and marshmallows (or something like tinker toys or straws,
gum drops ). I plan to do this as a hands-on activity, I put the supplies in baggies* and have
the questions in a power point. The power point is included in the activity.
1. Give the rule that the toothpick must have a mallow on each end and that each part must
be used for these questions.
2. For each, have the students draw what could be built and give it a common name: (you
may want to do the first one to get them thinking about geometry without telling them to
use geometric shapes if you are going to pass out materials. If
2 mallows and a toothpick (line segment would be a good answer or dumbbell )
3 mallows and 3 toothpick (triangle)
4 mallows and 4 toothpick (square)
3. Ask: How many mallows and how many sticks would you need to make a box? (8 and
12)
4. Discuss how following the rules made shapes for which we all know the common names
and that if we know the name of an object, we could figure out what parts there are. Then
introduce the sim by saying that there will be some atomic parts and you will try to figure
out what some of the rules are and also what the names tell us about what parts are used.
*Hint for quick setup of baggies: I let the marshmallows dry out a little so they can be used all
day. Otherwise, they really get too squished; gum drops are a nice option because they last better
throughout a day. I usually weigh out about 20 toothpicks in a bag and then about 20
marshmallows. Then it is easy to make several bags without having to count and if a few get lost
throughout the day, there are still plenty of materials for each group.
Lesson for Build an Atom tips:
Students should be able to work in pairs at a variety of paces using the Student Directions for
Build an Atom. New vocabulary is introduced integrated into the lesson. Definitions are
specifically not given at the beginning, but left for the students to explore and make their own
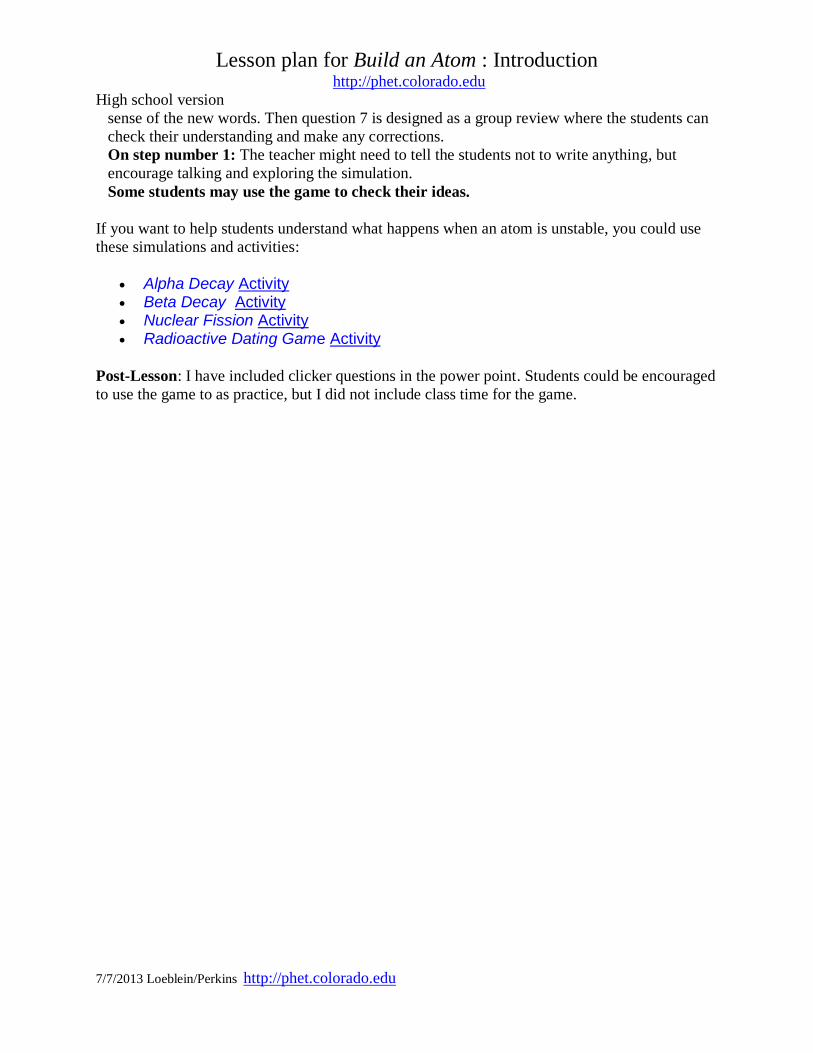
Lesson plan for Build an Atom : Introduction http://phet.colorado.edu
High school version
7/7/2013 Loeblein/Perkins http://phet.colorado.edu
sense of the new words. Then question 7 is designed as a group review where the students can
check their understanding and make any corrections.
On step number 1: The teacher might need to tell the students not to write anything, but
encourage talking and exploring the simulation.
Some students may use the game to check their ideas.
If you want to help students understand what happens when an atom is unstable, you could use
these simulations and activities:
Alpha Decay Activity Beta Decay Activity Nuclear Fission Activity Radioactive Dating Game Activity
Post-Lesson: I have included clicker questions in the power point. Students could be encouraged
to use the game to as practice, but I did not include class time for the game.
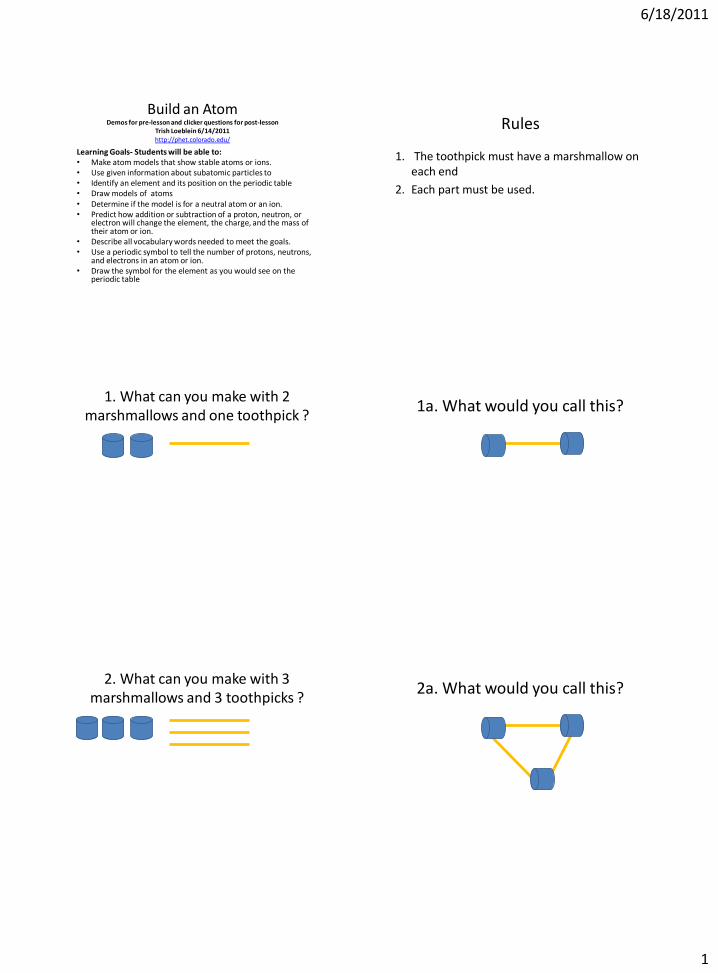
6/18/2011
1
Build an Atom Demos for pre-lesson and clicker questions for post-lesson
Trish Loeblein 6/14/2011 http://phet.colorado.edu/
Learning Goals- Students will be able to: • Make atom models that show stable atoms or ions. • Use given information about subatomic particles to • Identify an element and its position on the periodic table • Draw models of atoms • Determine if the model is for a neutral atom or an ion. • Predict how addition or subtraction of a proton, neutron, or
electron will change the element, the charge, and the mass of their atom or ion.
• Describe all vocabulary words needed to meet the goals. • Use a periodic symbol to tell the number of protons, neutrons,
and electrons in an atom or ion. • Draw the symbol for the element as you would see on the
periodic table
1. The toothpick must have a marshmallow on each end
2. Each part must be used.
Rules
1. What can you make with 2 marshmallows and one toothpick ?
1a. What would you call this?
2. What can you make with 3 marshmallows and 3 toothpicks ?
2a. What would you call this?
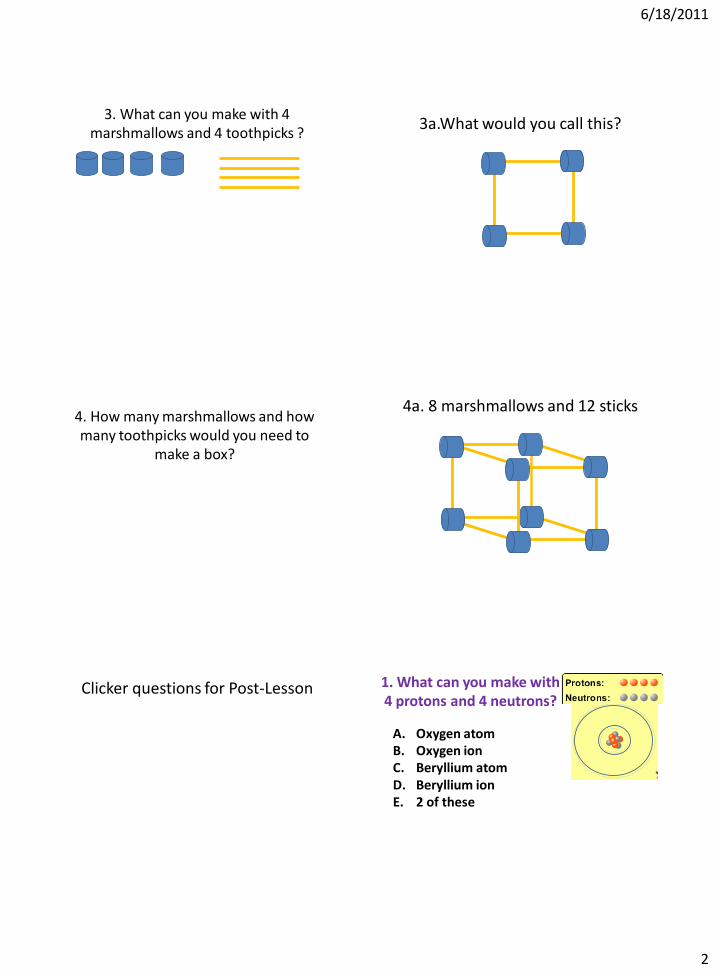
6/18/2011
2
3. What can you make with 4 marshmallows and 4 toothpicks ?
3a.What would you call this?
4. How many marshmallows and how many toothpicks would you need to
make a box?
4a. 8 marshmallows and 12 sticks
Clicker questions for Post-Lesson 1. What can you make with 4 protons and 4 neutrons?
A. Oxygen atom B. Oxygen ion C. Beryllium atom D. Beryllium ion E. 2 of these

Student directions Build an Atom activity
6/18/2011 Loeblein/Perkins http://phet.colorado.edu Page 1
Learning Goals: Students will be able to
1. Make atom models that show stable atoms or ions.
2. Use given information about subatomic particles to
Identify an element and its position on the periodic table
Draw models of atoms
Determine if the model is for a neutral atom or an ion.
3. Predict how addition or subtraction of a proton, neutron, or electron will change the element, the charge,
and the mass of their atom or ion.
4. Describe all vocabulary words needed to meet the goals.
5. Use a periodic symbol to tell the number of protons, neutrons, and electrons in an atom or ion.
6. Draw the symbol for the element as you would see on the periodic table
Directions:
1. Explore the Build an Atom simulation with your partner for a few minutes.
2. Using Build an Atom, talk with your partner as you play with the parts of atoms to find …
A. What parts go in the center of the atom? What is the center called?
B. Play until you discover a good rule for making the center of the atom “stable”. What seems to make
the center of the atom “unstable”?
C. Make a table like the one below to identify three examples – at least 1 stable and at least 1 unstable –
that shows your rules for stablility work and include a drawing of your nucleus.
What is in your nucleus? Draw your nucleus Is it stable or unstable? What Element is it?
1
2
3
3. Everything around us is made up of different elements. The air has Oxygen and Nitrogen. Plants and
people have lots of Carbon. Helium is in balloons. Hydrogen is in water.
Play until you discover a rule for what determines the name of the element you build. What did
you find determines the element?
Test your idea by identifying the element for the 3 cases. Write down the information you use to
determine the element.
example Atom or Ion has What Element is it?
1 # of protons: 6
# of neutrons: 6
# of electrons: 6
2 # of protons: 7
# of neutrons: 6
# of electrons: 6
3 # of protons: 6
# of neutrons: 7
# of electrons: 7
4. Play until you discover some good rules about the charge of your atom or ion.
What is a rule for making:
1) A neutral atom which has no charge.
2) A positive ion which has positive charge?
3) A negative ion which has negative charge?
Talk about how you used the tools in the sim helped you decide if the atom had a positive, negative,
or 0 charge.
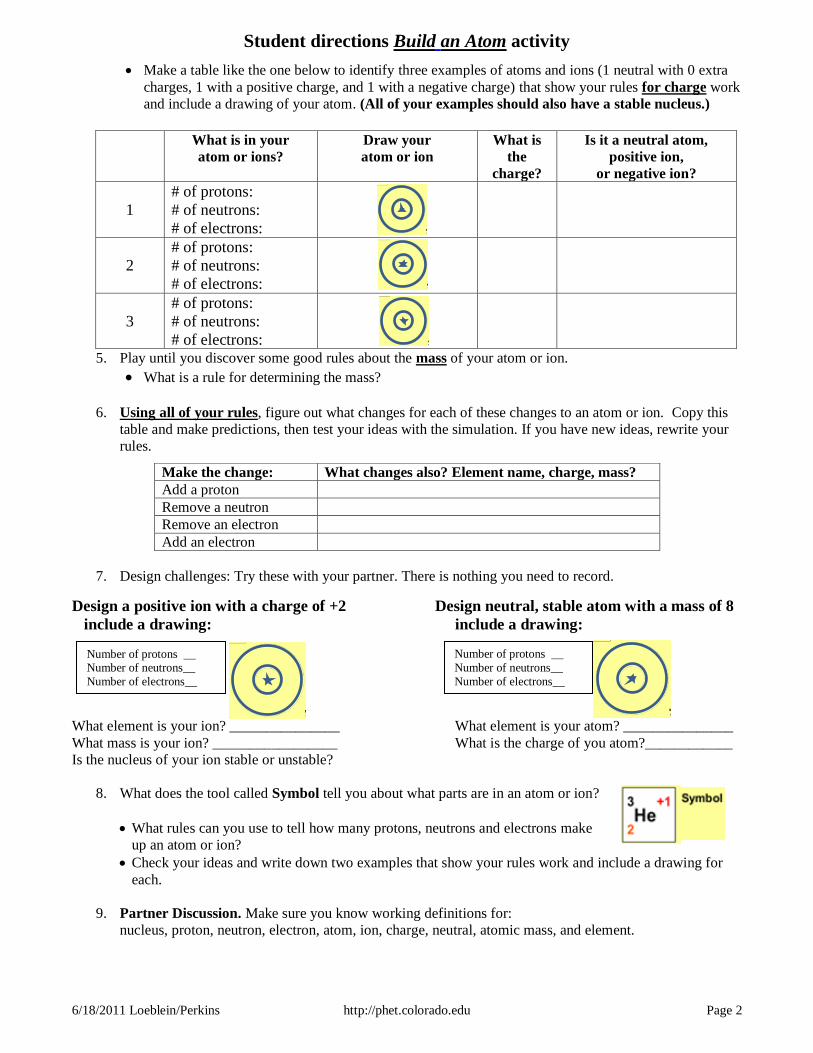
Student directions Build an Atom activity
6/18/2011 Loeblein/Perkins http://phet.colorado.edu Page 2
Make a table like the one below to identify three examples of atoms and ions (1 neutral with 0 extra
charges, 1 with a positive charge, and 1 with a negative charge) that show your rules for charge work
and include a drawing of your atom. (All of your examples should also have a stable nucleus.)
What is in your
atom or ions?
Draw your
atom or ion
What is
the
charge?
Is it a neutral atom,
positive ion,
or negative ion?
1
# of protons:
# of neutrons:
# of electrons:
2
# of protons:
# of neutrons:
# of electrons:
3
# of protons:
# of neutrons:
# of electrons:
5. Play until you discover some good rules about the mass of your atom or ion.
What is a rule for determining the mass?
6. Using all of your rules, figure out what changes for each of these changes to an atom or ion. Copy this
table and make predictions, then test your ideas with the simulation. If you have new ideas, rewrite your
rules.
7. Design challenges: Try these with your partner. There is nothing you need to record.
Design a positive ion with a charge of +2 Design neutral, stable atom with a mass of 8
include a drawing: include a drawing:
What element is your ion? _______________ What element is your atom? _______________
What mass is your ion? _________________ What is the charge of you atom?____________
Is the nucleus of your ion stable or unstable?
8. What does the tool called Symbol tell you about what parts are in an atom or ion?
What rules can you use to tell how many protons, neutrons and electrons make
up an atom or ion?
Check your ideas and write down two examples that show your rules work and include a drawing for
each.
9. Partner Discussion. Make sure you know working definitions for:
nucleus, proton, neutron, electron, atom, ion, charge, neutral, atomic mass, and element.
Make the change: What changes also? Element name, charge, mass?
Add a proton
Remove a neutron
Remove an electron
Add an electron
Number of protons __ Number of neutrons__
Number of electrons__
Number of protons __
Number of neutrons__
Number of electrons__

6/18/2011
3
2. Would you predict that 4 protons and 4 neutrons will make a stable nucleus?
A. No, because the net charge is high
B. No, because there should always be more protons than neutrons
C. Yes, because the number of protons and neutrons are about equal
3. If you have 5 protons & 6 neutrons, how many electrons would you add to make a neutral atom ?
A. 5 electrons B. 6 electrons C. 11 electrons
3. Reasoning: Neutrons don’t matter because they have zero charge; need equal number of protons and electrons
4. What is mass for an atom with 8 protons, 9 neutrons and 8 electrons? ?
A. Zero B. 8 C. 16 D. 17 E. 25
5. If you have 5 protons, 6 neutrons, & 5 electrons, what would the symbol look like?
A B C D
6. If you have 8 protons, 9 neutrons, 10 electrons, what would the atom or ion be?
A. Zero, it’s an atom B. +2 ion C. +1 ion D. -1 ion E. -2 ion

6/18/2011
4
7. If you have 3 protons, 4 neutrons, & 3 electrons, what would the model look like?
A. 3 red & 3 blue in center; 4 grey on rings B. 3 red & 4 grey in center; 3 blue on rings C. 3 blue & 4 grey in center; 3 red on rings
8. If a particle has 3 protons, 4 neutrons, & 3 electrons, then a proton is added what would the symbol be?
A B C D
𝐋𝐢𝟑𝟕 𝟎
𝐋𝐢𝟒𝟕 𝟎
𝐋𝐢𝟒𝟖 +𝟏
𝐁𝐞𝟒𝟖 +𝟏
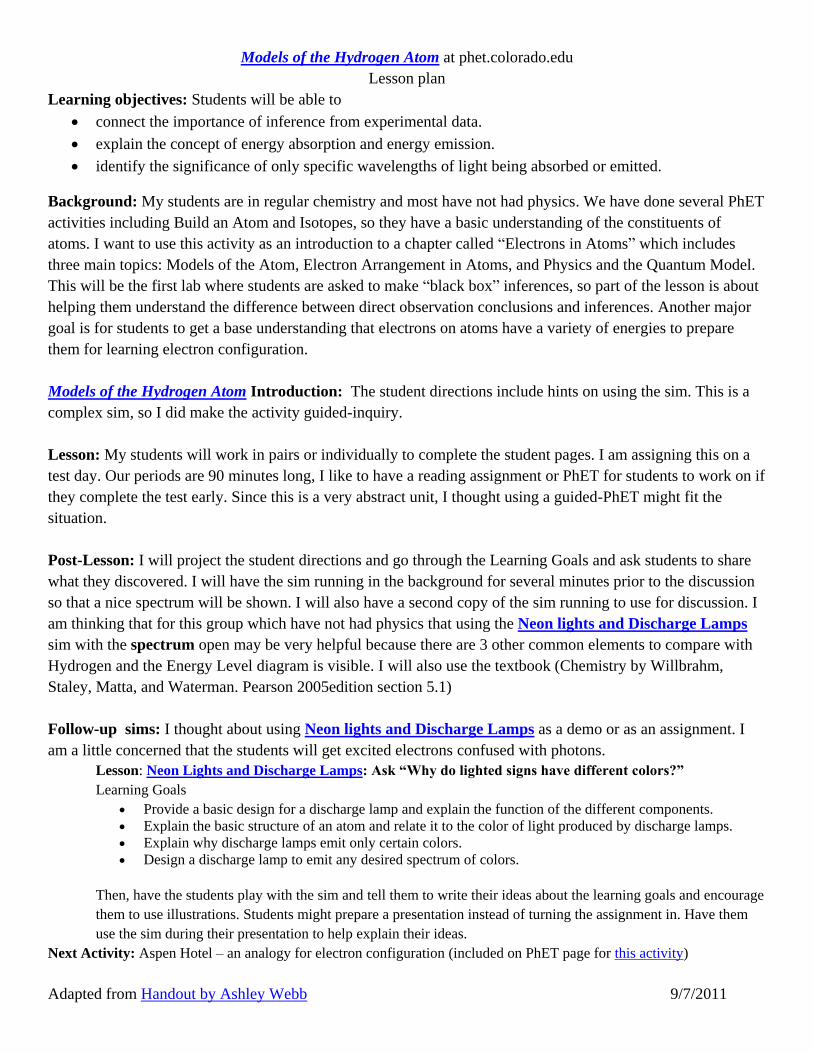
Models of the Hydrogen Atom at phet.colorado.edu
Lesson plan
Adapted from Handout by Ashley Webb 9/7/2011
Learning objectives: Students will be able to
connect the importance of inference from experimental data.
explain the concept of energy absorption and energy emission.
identify the significance of only specific wavelengths of light being absorbed or emitted.
Background: My students are in regular chemistry and most have not had physics. We have done several PhET
activities including Build an Atom and Isotopes, so they have a basic understanding of the constituents of
atoms. I want to use this activity as an introduction to a chapter called “Electrons in Atoms” which includes
three main topics: Models of the Atom, Electron Arrangement in Atoms, and Physics and the Quantum Model.
This will be the first lab where students are asked to make “black box” inferences, so part of the lesson is about
helping them understand the difference between direct observation conclusions and inferences. Another major
goal is for students to get a base understanding that electrons on atoms have a variety of energies to prepare
them for learning electron configuration.
Models of the Hydrogen Atom Introduction: The student directions include hints on using the sim. This is a
complex sim, so I did make the activity guided-inquiry.
Lesson: My students will work in pairs or individually to complete the student pages. I am assigning this on a
test day. Our periods are 90 minutes long, I like to have a reading assignment or PhET for students to work on if
they complete the test early. Since this is a very abstract unit, I thought using a guided-PhET might fit the
situation.
Post-Lesson: I will project the student directions and go through the Learning Goals and ask students to share
what they discovered. I will have the sim running in the background for several minutes prior to the discussion
so that a nice spectrum will be shown. I will also have a second copy of the sim running to use for discussion. I
am thinking that for this group which have not had physics that using the Neon lights and Discharge Lamps
sim with the spectrum open may be very helpful because there are 3 other common elements to compare with
Hydrogen and the Energy Level diagram is visible. I will also use the textbook (Chemistry by Willbrahm,
Staley, Matta, and Waterman. Pearson 2005edition section 5.1)
Follow-up sims: I thought about using Neon lights and Discharge Lamps as a demo or as an assignment. I
am a little concerned that the students will get excited electrons confused with photons.
Lesson: Neon Lights and Discharge Lamps: Ask “Why do lighted signs have different colors?”
Learning Goals
Provide a basic design for a discharge lamp and explain the function of the different components.
Explain the basic structure of an atom and relate it to the color of light produced by discharge lamps.
Explain why discharge lamps emit only certain colors.
Design a discharge lamp to emit any desired spectrum of colors.
Then, have the students play with the sim and tell them to write their ideas about the learning goals and encourage
them to use illustrations. Students might prepare a presentation instead of turning the assignment in. Have them
use the sim during their presentation to help explain their ideas.
Next Activity: Aspen Hotel – an analogy for electron configuration (included on PhET page for this activity)

Models of the Hydrogen Atom at phet.colorado.edu
Lesson plan
Adapted from Handout by Ashley Webb 9/7/2011
Post-Lesson: Have a class discussion and perhaps assign the students to investigate Photoelectric Effect or
Neon Light and Discharge Lamps and do a writing assignment or oral presentations about the learning goals in
it.
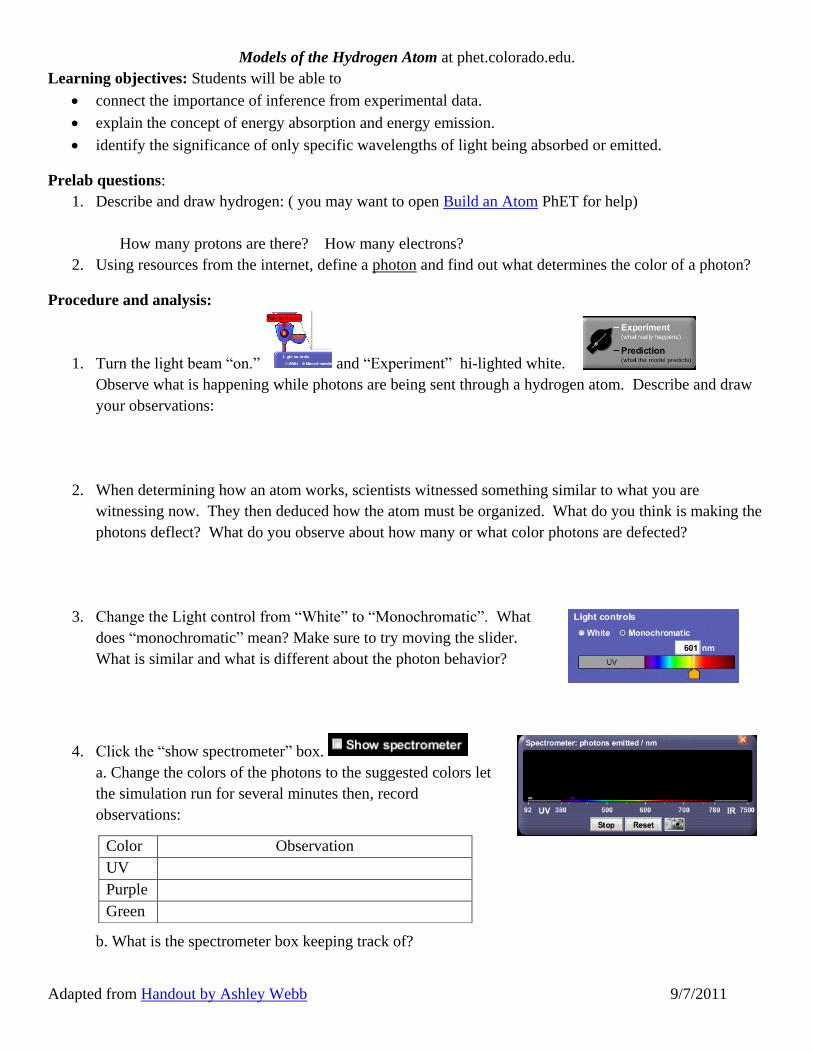
Models of the Hydrogen Atom at phet.colorado.edu.
Adapted from Handout by Ashley Webb 9/7/2011
Learning objectives: Students will be able to
connect the importance of inference from experimental data.
explain the concept of energy absorption and energy emission.
identify the significance of only specific wavelengths of light being absorbed or emitted.
Prelab questions:
1. Describe and draw hydrogen: ( you may want to open Build an Atom PhET for help)
How many protons are there? How many electrons?
2. Using resources from the internet, define a photon and find out what determines the color of a photon?
Procedure and analysis:
1. Turn the light beam “on.” and “Experiment” hi-lighted white.
Observe what is happening while photons are being sent through a hydrogen atom. Describe and draw
your observations:
2. When determining how an atom works, scientists witnessed something similar to what you are
witnessing now. They then deduced how the atom must be organized. What do you think is making the
photons deflect? What do you observe about how many or what color photons are defected?
3. Change the Light control from “White” to “Monochromatic”. What
does “monochromatic” mean? Make sure to try moving the slider.
What is similar and what is different about the photon behavior?
4. Click the “show spectrometer” box.
a. Change the colors of the photons to the suggested colors let
the simulation run for several minutes then, record
observations:
b. What is the spectrometer box keeping track of?
Color Observation
UV
Purple
Green
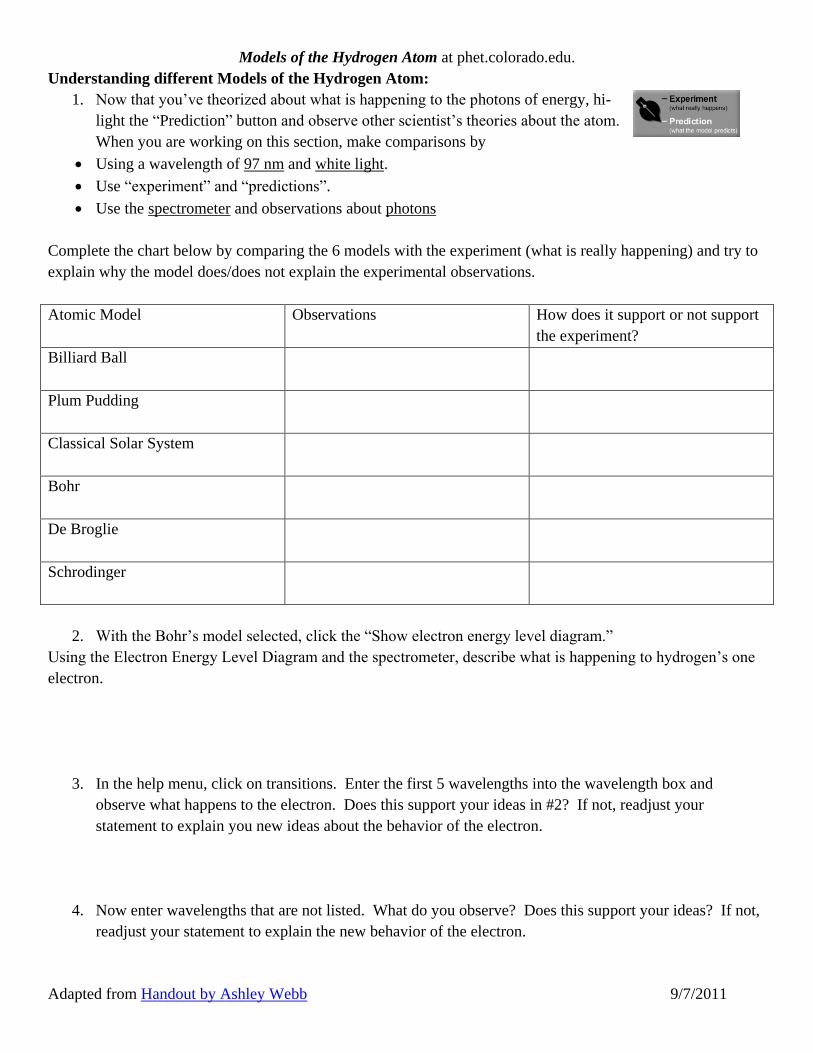
Models of the Hydrogen Atom at phet.colorado.edu.
Adapted from Handout by Ashley Webb 9/7/2011
Understanding different Models of the Hydrogen Atom:
1. Now that you’ve theorized about what is happening to the photons of energy, hi-
light the “Prediction” button and observe other scientist’s theories about the atom.
When you are working on this section, make comparisons by
Using a wavelength of 97 nm and white light.
Use “experiment” and “predictions”.
Use the spectrometer and observations about photons
Complete the chart below by comparing the 6 models with the experiment (what is really happening) and try to
explain why the model does/does not explain the experimental observations.
Atomic Model Observations How does it support or not support
the experiment?
Billiard Ball
Plum Pudding
Classical Solar System
Bohr
De Broglie
Schrodinger
2. With the Bohr’s model selected, click the “Show electron energy level diagram.”
Using the Electron Energy Level Diagram and the spectrometer, describe what is happening to hydrogen’s one
electron.
3. In the help menu, click on transitions. Enter the first 5 wavelengths into the wavelength box and
observe what happens to the electron. Does this support your ideas in #2? If not, readjust your
statement to explain you new ideas about the behavior of the electron.
4. Now enter wavelengths that are not listed. What do you observe? Does this support your ideas? If not,
readjust your statement to explain the new behavior of the electron.
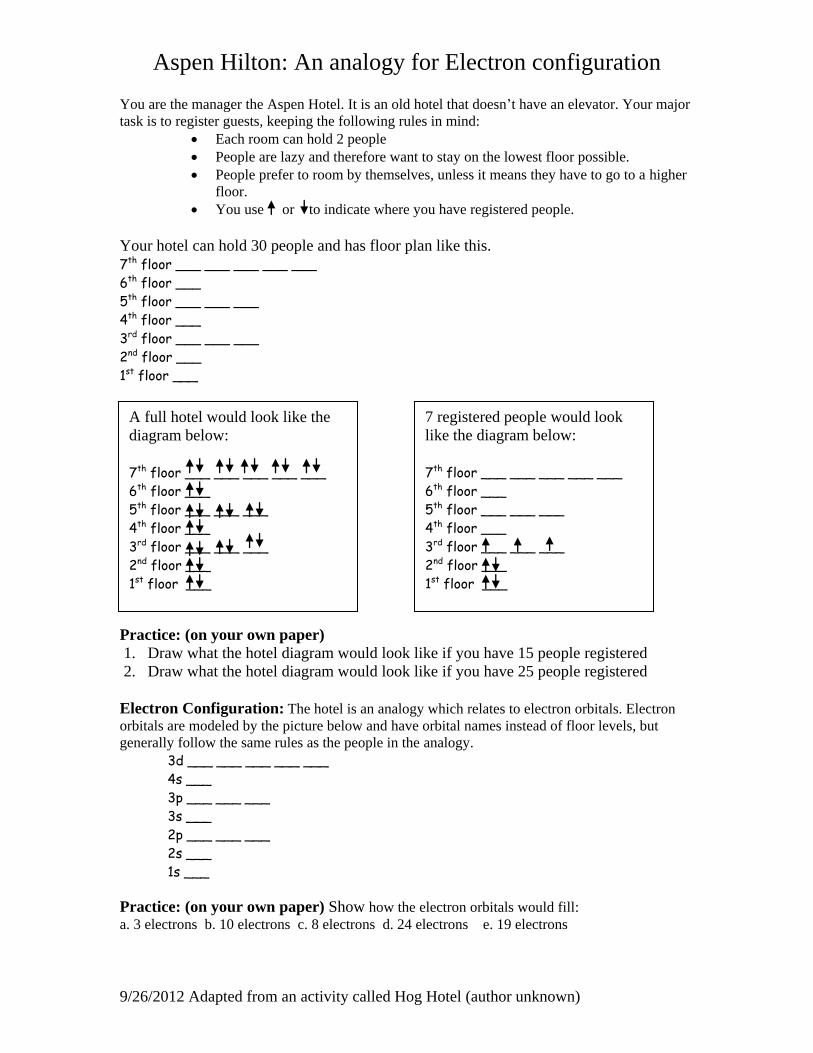
Aspen Hilton: An analogy for Electron configuration
9/26/2012 Adapted from an activity called Hog Hotel (author unknown)
7 registered people would look
like the diagram below:
7th floor ___ ___ ___ ___ ___
6th floor ___
5th floor ___ ___ ___
4th floor ___
3rd floor ___ ___ ___
2nd floor ___
1st floor ___
You are the manager the Aspen Hotel. It is an old hotel that doesn’t have an elevator. Your major
task is to register guests, keeping the following rules in mind:
Each room can hold 2 people
People are lazy and therefore want to stay on the lowest floor possible.
People prefer to room by themselves, unless it means they have to go to a higher
floor.
You use or to indicate where you have registered people.
Your hotel can hold 30 people and has floor plan like this.
7th floor ___ ___ ___ ___ ___
6th floor ___
5th floor ___ ___ ___
4th floor ___
3rd floor ___ ___ ___
2nd floor ___
1st floor ___
Practice: (on your own paper)
1. Draw what the hotel diagram would look like if you have 15 people registered
2. Draw what the hotel diagram would look like if you have 25 people registered
Electron Configuration: The hotel is an analogy which relates to electron orbitals. Electron
orbitals are modeled by the picture below and have orbital names instead of floor levels, but
generally follow the same rules as the people in the analogy.
3d ___ ___ ___ ___ ___
4s ___
3p ___ ___ ___
3s ___
2p ___ ___ ___
2s ___
1s ___
Practice: (on your own paper) Show how the electron orbitals would fill: a. 3 electrons b. 10 electrons c. 8 electrons d. 24 electrons e. 19 electrons
A full hotel would look like the
diagram below:
7th floor ___ ___ ___ ___ ___
6th floor ___
5th floor ___ ___ ___
4th floor ___
3rd floor ___ ___ ___
2nd floor ___
1st floor ___
Lesson plan for Build a Molecule: http://phet.colorado.edu
8/8/2011 Loeblein http://phet.colorado.edu
Learning Goals: Students will be able to: Review:
Describe the differences between an atom and a molecule.
Describe what the subscripts and coefficients indicate in chemistry notation.
Use proper chemistry nomenclature.
New:
Construct simple molecules from atoms.
Write rules for how atoms are arranged given formulas for some common molecules
Draw, name, and write formulas for some common molecules.
Background: I will use this in my unit on “Atomic structure, Periodicity and General Concepts
of Bonding” which comes later in the year. I will have used Build an Atom and Isotopes and
Atomic Mass in an early unit “Atoms, Molecules Ions and Chemical Foundations”. My students
will have done a lab that I adapted from several labs over the years in which students build
molecules with kits and marshmallows/toothpicks and use Lewis Dot structures along with
VESPR models to make sense of shapes. I will add the lab and references to them when I get
back to school in the fall.
This is a very helpful site: VSEPR method by Gérard Dupuis and Nicole Berland Lycée
Faidherbe - LILLE
Build a Molecule Introduction:
The students interviewed during the development of this sim were in middle school and seemed
to understand all the tools. The Tips for Teachers of this lesson plan may be helpful for assisting
students in their explorations.
Pre-Lesson: See background for my particular use, but I believe this sim could also be used as
an introduction to molecules without Lewis and VSPER content.
Lesson: My students will be working in pairs in a computer lab, but they could complete the
activity outside of class. I have included clicker questions on my website to allow the student to
check each other, but I will not be using them as a whole class discussion unless I see a need.
Post-Lesson: clicker questions (not planning on using for class time)
Follow-up sims: I am hopeful that a “Polarity” PhET sim will be done by the time I do this unit
and I have made plans to use it.
Tips for Teachers for Build a Molecule:
Tips for controls: Try all the different tabs at the top of the simulation. The tabs are designed to help teachers scaffold
lessons or make lessons age appropriate by using only some tabs.
There is an option to allow the entire tab to be reset. This may be useful if
you want the class to start with the same kit for a discussion, but note that
the students’ collections are cleared.
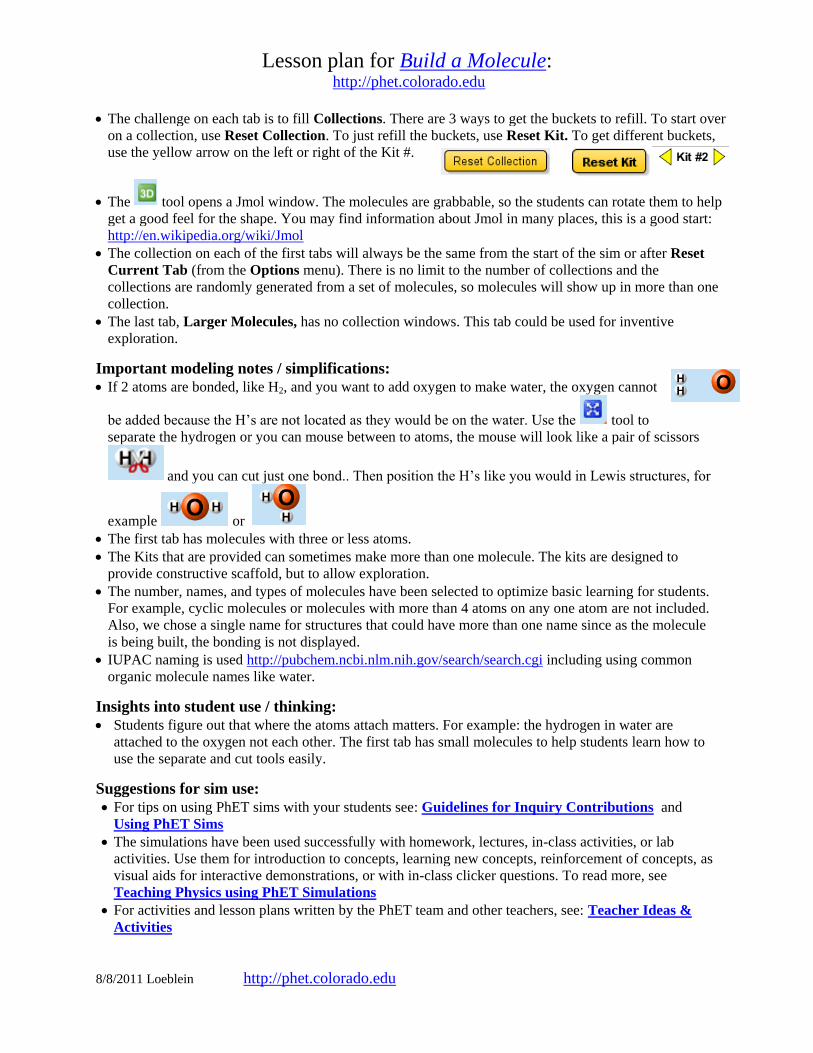
Lesson plan for Build a Molecule: http://phet.colorado.edu
8/8/2011 Loeblein http://phet.colorado.edu
The challenge on each tab is to fill Collections. There are 3 ways to get the buckets to refill. To start over
on a collection, use Reset Collection. To just refill the buckets, use Reset Kit. To get different buckets,
use the yellow arrow on the left or right of the Kit #.
The tool opens a Jmol window. The molecules are grabbable, so the students can rotate them to help
get a good feel for the shape. You may find information about Jmol in many places, this is a good start:
http://en.wikipedia.org/wiki/Jmol
The collection on each of the first tabs will always be the same from the start of the sim or after Reset
Current Tab (from the Options menu). There is no limit to the number of collections and the
collections are randomly generated from a set of molecules, so molecules will show up in more than one
collection.
The last tab, Larger Molecules, has no collection windows. This tab could be used for inventive
exploration.
Important modeling notes / simplifications: If 2 atoms are bonded, like H2, and you want to add oxygen to make water, the oxygen cannot
be added because the H’s are not located as they would be on the water. Use the tool to
separate the hydrogen or you can mouse between to atoms, the mouse will look like a pair of scissors
and you can cut just one bond.. Then position the H’s like you would in Lewis structures, for
example or
The first tab has molecules with three or less atoms.
The Kits that are provided can sometimes make more than one molecule. The kits are designed to
provide constructive scaffold, but to allow exploration.
The number, names, and types of molecules have been selected to optimize basic learning for students.
For example, cyclic molecules or molecules with more than 4 atoms on any one atom are not included.
Also, we chose a single name for structures that could have more than one name since as the molecule
is being built, the bonding is not displayed.
IUPAC naming is used http://pubchem.ncbi.nlm.nih.gov/search/search.cgi including using common
organic molecule names like water.
Insights into student use / thinking: Students figure out that where the atoms attach matters. For example: the hydrogen in water are
attached to the oxygen not each other. The first tab has small molecules to help students learn how to
use the separate and cut tools easily.
Suggestions for sim use: For tips on using PhET sims with your students see: Guidelines for Inquiry Contributions and
Using PhET Sims
The simulations have been used successfully with homework, lectures, in-class activities, or lab
activities. Use them for introduction to concepts, learning new concepts, reinforcement of concepts, as
visual aids for interactive demonstrations, or with in-class clicker questions. To read more, see
Teaching Physics using PhET Simulations
For activities and lesson plans written by the PhET team and other teachers, see: Teacher Ideas &
Activities

Student directions Build a Molecule activity
7/2/2011 Loeblein http://phet.colorado.edu
Learning Goals: Students will be able to: Review:
Describe the differences between an atom and a molecule.
Describe what the subscripts and coefficients indicate in chemistry notation.
Use proper chemistry nomenclature.
New:
Construct simple molecules from atoms.
Write rules for how atoms are arranged given formulas for some common molecules
Draw, name, and write formulas for some common molecules.
Directions: 1. Check with your partner that the “Review” goals could be demonstrated on the test. You may
need to use Build a Molecule to help you check your knowledge.
2. Use Build a Molecule to practice constructing molecules and then write rules that you can use to
construct common molecules given the formula.
3. Prepare for the test by doing the clicker questions with your partner or alone and compare ideas.
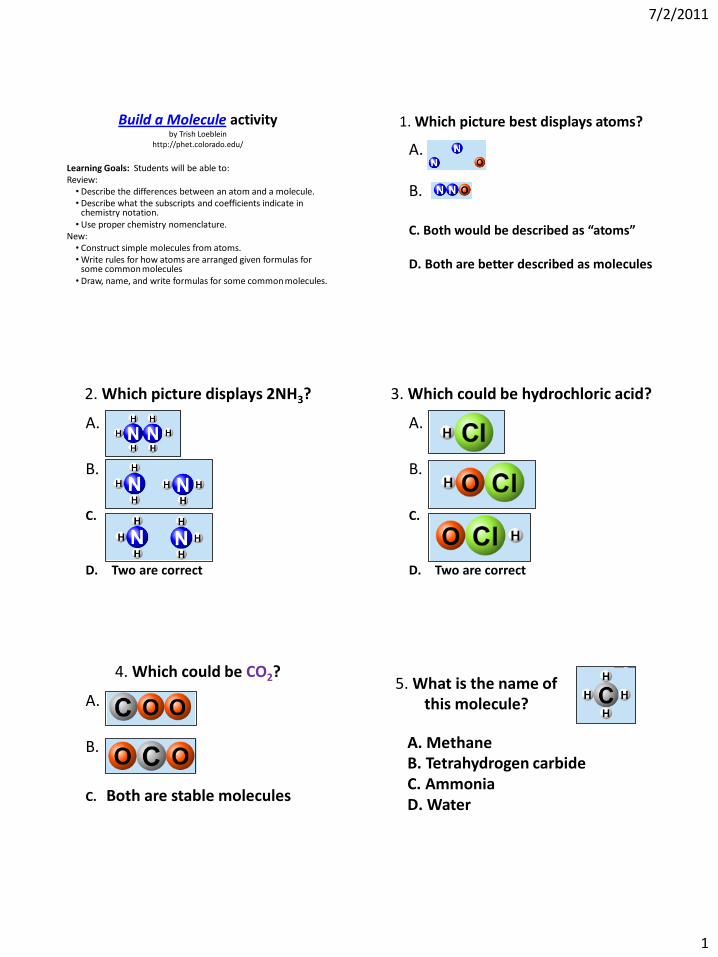
7/2/2011
1
Build a Molecule activity by Trish Loeblein
http://phet.colorado.edu/
Learning Goals: Students will be able to: Review: • Describe the differences between an atom and a molecule. • Describe what the subscripts and coefficients indicate in
chemistry notation. •Use proper chemistry nomenclature.
New: • Construct simple molecules from atoms. •Write rules for how atoms are arranged given formulas for
some common molecules • Draw, name, and write formulas for some common molecules.
A. . B.
C. Both would be described as “atoms”
D. Both are better described as molecules
1. Which picture best displays atoms?
A. .
B.
C. .
D. Two are correct
2. Which picture displays 2NH3?
A. .
B.
C. .
D. Two are correct
3. Which could be hydrochloric acid?
A. .
B.
C. Both are stable molecules
4. Which could be CO2?
A. Methane B. Tetrahydrogen carbide C. Ammonia D. Water
5. What is the name of this molecule?

7/2/2011
2
A. Dihydrogen oxide B. Carbon dioxide C. Ammonia D. Water
6. What is the name of this molecule?
A. Dichloride B. Dichlorine C. Chlorine D. This is not a stable molecule
7. What is the name of this molecule?
Lesson plan for Molecule Shapes: Introduction http://phet.colorado.edu
10/23/2011 Loeblein http://phet.colorado.edu
Learning Goals: Students will be able to: (information in italics is for teachers only and is not included
on the student directions.)
Identify substances to which “Molecular geometry” applies (ie not ionic or metallic substances or
elements, but covalently bonded molecules with one central atom )
Name molecule and electron geometries for basic molecules (basic means- maximum six electron
groups surrounding a central atom.)
Explain the model being used to predict molecule geometry (repulsions between electron pairs or
nuclei of bonded atoms –VSPER; electrons are not included in the molecular shape).
Predict common molecular geometry from the number of electron pairs and bonded atoms around
a central atom of basic compounds. (geometry includes bond angles, exclusion of lone pairs)
Background:
Students will have done Build a Molecule 1 PhET. Before doing the activity, the students will have read
some in their texts about molecules, will have done Lewis diagrams, and been introduced to a few
compounds that have multiple bonds.
Molecular Shapes Introduction:
Remind students what the central atom is. Also, tell them to read the directions carefully because they
need to understand that the sim allows “attached groups” which mean lone pairs, single, double, or
triple bonds. I will make sure to explain that the sim allows building molecules that we will not be
learning about, but do exist.
The design team decided to allow many types of molecules because there are complex inorganic
molecules for which this sim could be used. The maximum allowed is 6 “groups” of electrons where a
lone pair, single, double, or triple bond counts as a group. That means that students will be able to build
molecules that are generally not in HS or Gen chemistry texts.
Post-Lesson: I plan to use clicker questions included in this activity. For some of the questions, if I see
that the distribution of answers was great, I demonstrated the sim to help students after the first clicker
response before I made any comments. Then I would have a “revote”. This stimulated lots of discussion
between votes.
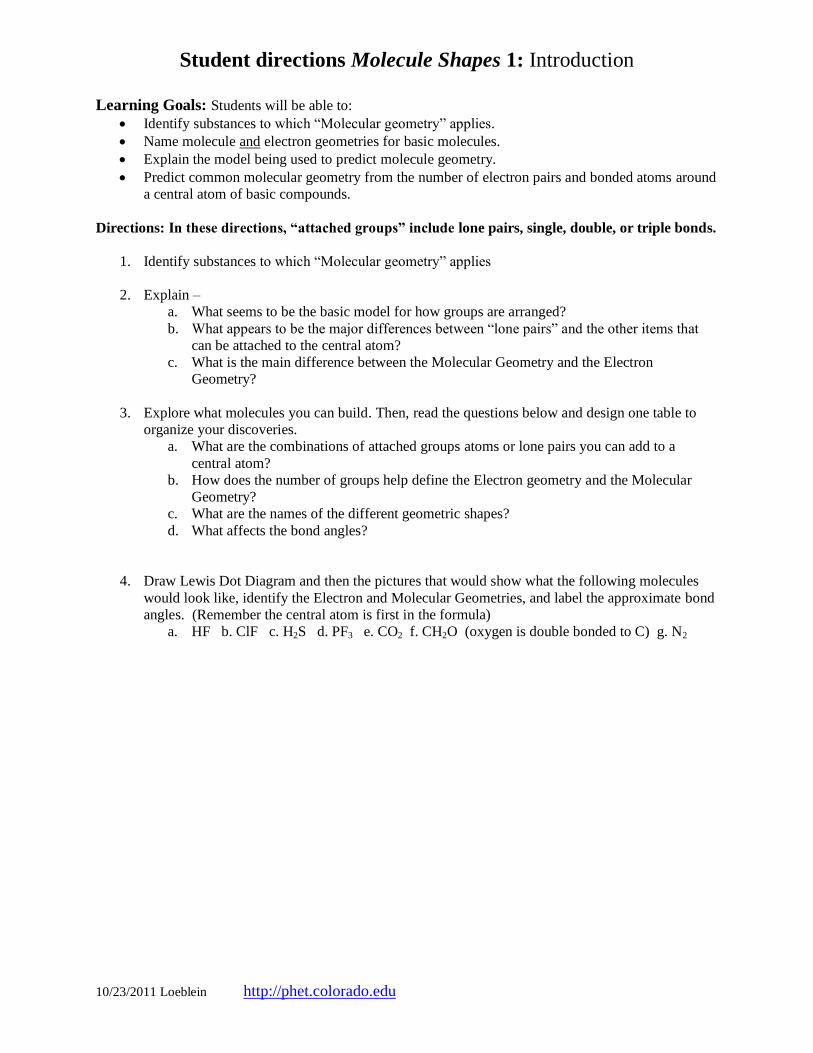
Student directions Molecule Shapes 1: Introduction
10/23/2011 Loeblein http://phet.colorado.edu
Learning Goals: Students will be able to:
Identify substances to which “Molecular geometry” applies.
Name molecule and electron geometries for basic molecules.
Explain the model being used to predict molecule geometry.
Predict common molecular geometry from the number of electron pairs and bonded atoms around
a central atom of basic compounds.
Directions: In these directions, “attached groups” include lone pairs, single, double, or triple bonds.
1. Identify substances to which “Molecular geometry” applies
2. Explain –
a. What seems to be the basic model for how groups are arranged?
b. What appears to be the major differences between “lone pairs” and the other items that
can be attached to the central atom?
c. What is the main difference between the Molecular Geometry and the Electron
Geometry?
3. Explore what molecules you can build. Then, read the questions below and design one table to
organize your discoveries.
a. What are the combinations of attached groups atoms or lone pairs you can add to a
central atom?
b. How does the number of groups help define the Electron geometry and the Molecular
Geometry?
c. What are the names of the different geometric shapes?
d. What affects the bond angles?
4. Draw Lewis Dot Diagram and then the pictures that would show what the following molecules
would look like, identify the Electron and Molecular Geometries, and label the approximate bond
angles. (Remember the central atom is first in the formula)
a. HF b. ClF c. H2S d. PF3 e. CO2 f. CH2O (oxygen is double bonded to C) g. N2
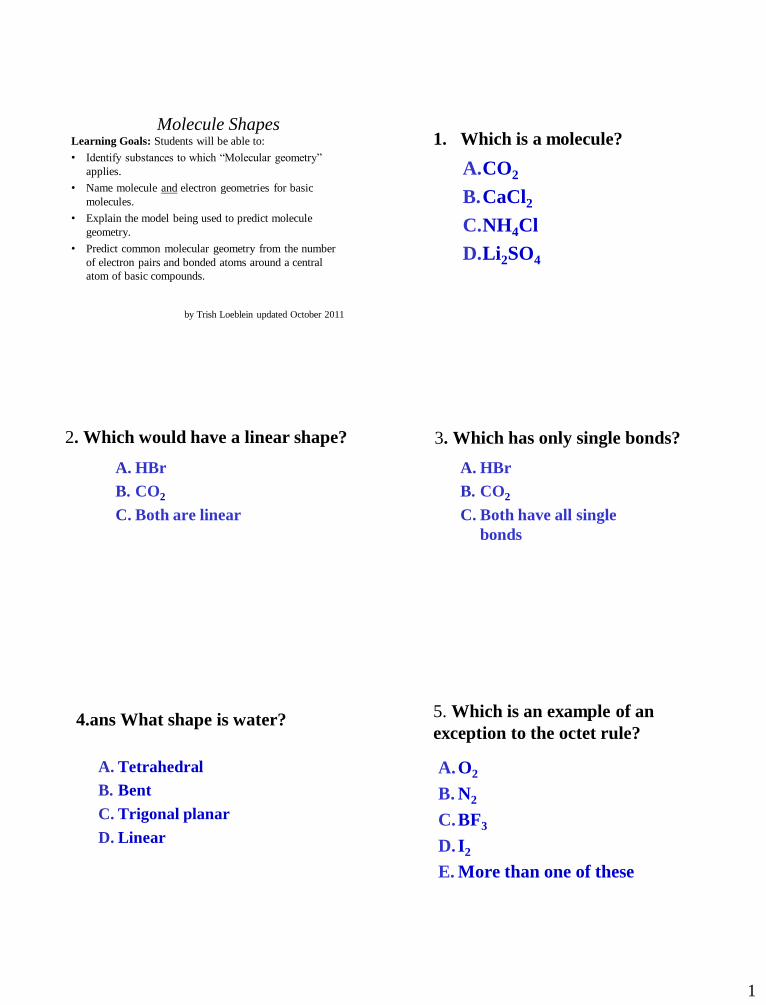
1
Molecule Shapes Learning Goals: Students will be able to:
• Identify substances to which “Molecular geometry”
applies.
• Name molecule and electron geometries for basic
molecules.
• Explain the model being used to predict molecule
geometry.
• Predict common molecular geometry from the number
of electron pairs and bonded atoms around a central
atom of basic compounds.
by Trish Loeblein updated October 2011
1. Which is a molecule?
A.CO2
B.CaCl2
C.NH4Cl
D.Li2SO4
2. Which would have a linear shape?
A. HBr
B. CO2
C. Both are linear
3. Which has only single bonds?
A. HBr
B. CO2
C. Both have all single
bonds
4.ans What shape is water?
A. Tetrahedral
B. Bent
C. Trigonal planar
D. Linear
5. Which is an example of an
exception to the octet rule?
A.O2
B. N2
C.BF3
D.I2
E. More than one of these
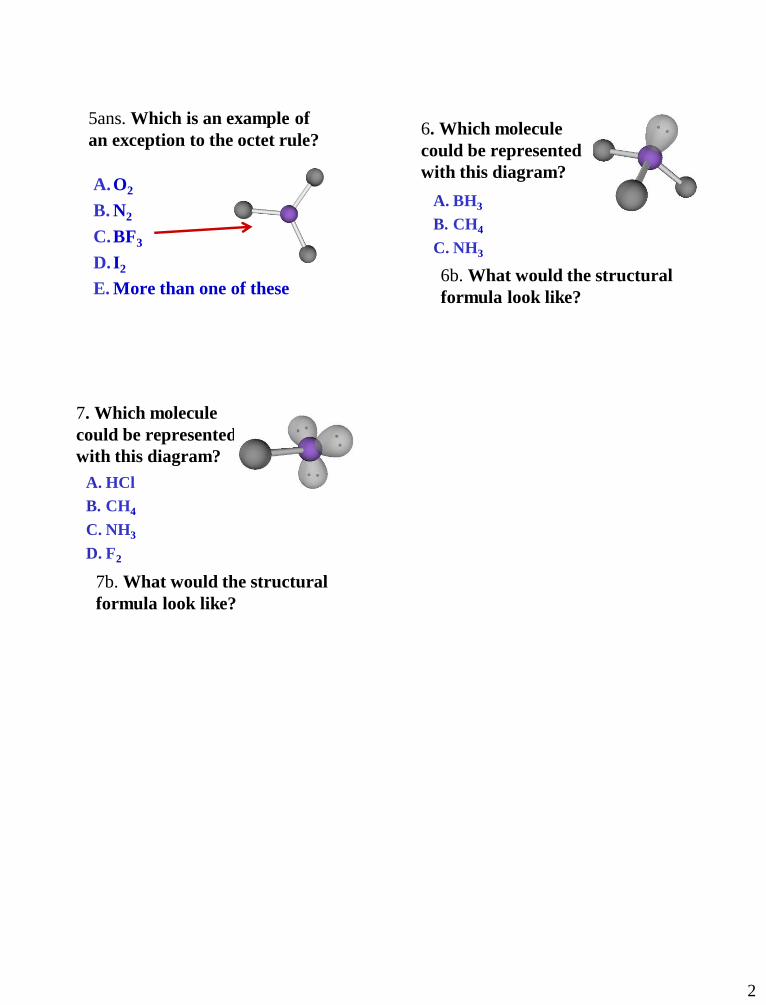
2
5ans. Which is an example of
an exception to the octet rule?
A.O2
B. N2
C.BF3
D.I2
E. More than one of these
6. Which molecule
could be represented
with this diagram?
A. BH3
B. CH4
C. NH3
6b. What would the structural
formula look like?
7. Which molecule
could be represented
with this diagram?
A. HCl
B. CH4
C. NH3
D. F2
7b. What would the structural
formula look like?
Lesson plan for Molecule Polarity: http://phet.colorado.edu
10/23/2011 Loeblein http://phet.colorado.edu
Learning Goals: Students will be able to:
Define bond polarity and molecular polarity
Explain the relationships between bond polarity and molecular polarity
Identify tools/representations to approximate bond and molecular polarity (the periodic table,
electronegativity, molecular shape, lone pairs, Lewis diagram, Ionic/covalent character)
o Use these common tools to approximate and compare polarity
Use standard notation to indicate polarity
Identify the bonds between atoms as nonpolar covalent, moderately polar covalent, very polar
covalent, or ionic. The simulation uses “ionic character” for “very polar”. Students may need help
with this; see the introduction below.
Background:
Students will have done Build a Molecule 1 PhET and Molecular Shapes 1 PhET.
Molecular Polarity Introduction:
I will talk about the fact that the sim uses “Ionic Character” as a label for “very polar covalent”.; many
college texts use the “ionic character” notation. I will remind students that this sim deals only with
molecules, not ionic compounds. Tips for Teachers are provided by the PhET team.
Lesson: In college prep chemistry, the students will work in pairs during class or as homework.
Post-Lesson: I plan to use clicker questions included in this activity. For some of the questions, if I saw
that the distribution of answers was great, I demonstrated the sim to help students after the first clicker
response before I made any comments. Then I would have a “re-vote”. This stimulated lots of discussion
between votes.
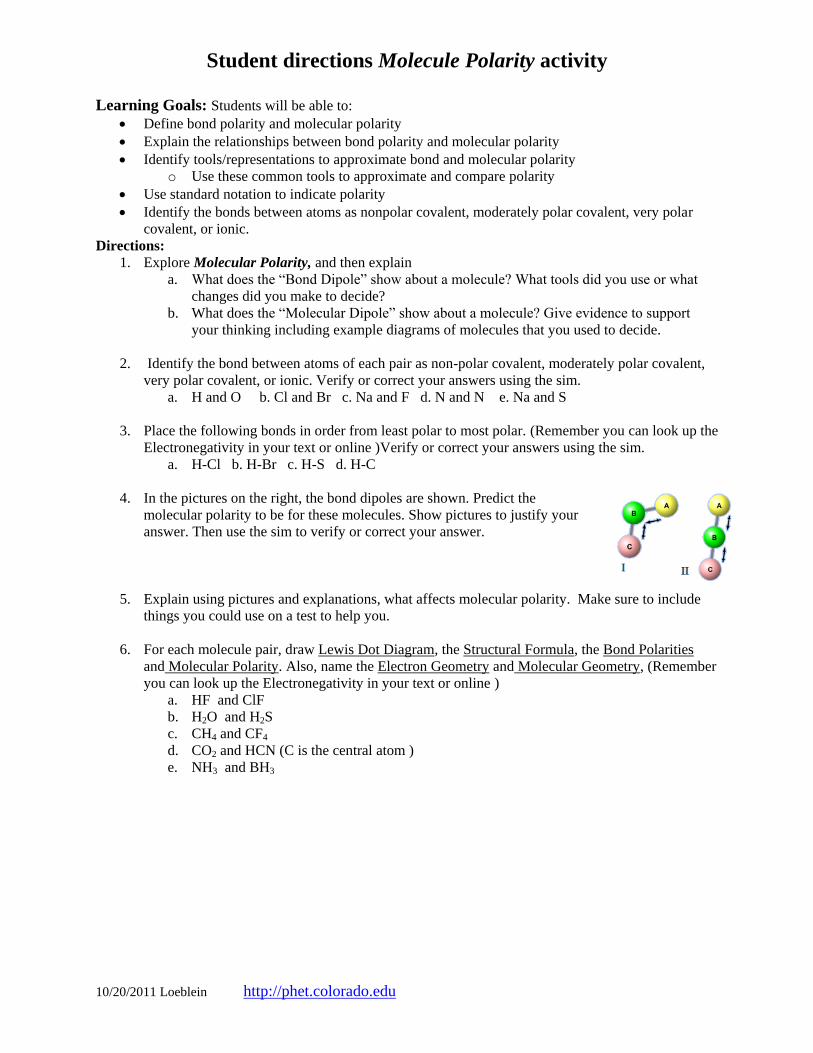
Student directions Molecule Polarity activity
10/20/2011 Loeblein http://phet.colorado.edu
Learning Goals: Students will be able to:
Define bond polarity and molecular polarity
Explain the relationships between bond polarity and molecular polarity
Identify tools/representations to approximate bond and molecular polarity
o Use these common tools to approximate and compare polarity
Use standard notation to indicate polarity
Identify the bonds between atoms as nonpolar covalent, moderately polar covalent, very polar
covalent, or ionic.
Directions:
1. Explore Molecular Polarity, and then explain
a. What does the “Bond Dipole” show about a molecule? What tools did you use or what
changes did you make to decide?
b. What does the “Molecular Dipole” show about a molecule? Give evidence to support
your thinking including example diagrams of molecules that you used to decide.
2. Identify the bond between atoms of each pair as non-polar covalent, moderately polar covalent,
very polar covalent, or ionic. Verify or correct your answers using the sim.
a. H and O b. Cl and Br c. Na and F d. N and N e. Na and S
3. Place the following bonds in order from least polar to most polar. (Remember you can look up the
Electronegativity in your text or online )Verify or correct your answers using the sim.
a. H-Cl b. H-Br c. H-S d. H-C
4. In the pictures on the right, the bond dipoles are shown. Predict the
molecular polarity to be for these molecules. Show pictures to justify your
answer. Then use the sim to verify or correct your answer.
5. Explain using pictures and explanations, what affects molecular polarity. Make sure to include
things you could use on a test to help you.
6. For each molecule pair, draw Lewis Dot Diagram, the Structural Formula, the Bond Polarities
and Molecular Polarity. Also, name the Electron Geometry and Molecular Geometry, (Remember
you can look up the Electronegativity in your text or online )
a. HF and ClF
b. H2O and H2S
c. CH4 and CF4
d. CO2 and HCN (C is the central atom )
e. NH3 and BH3
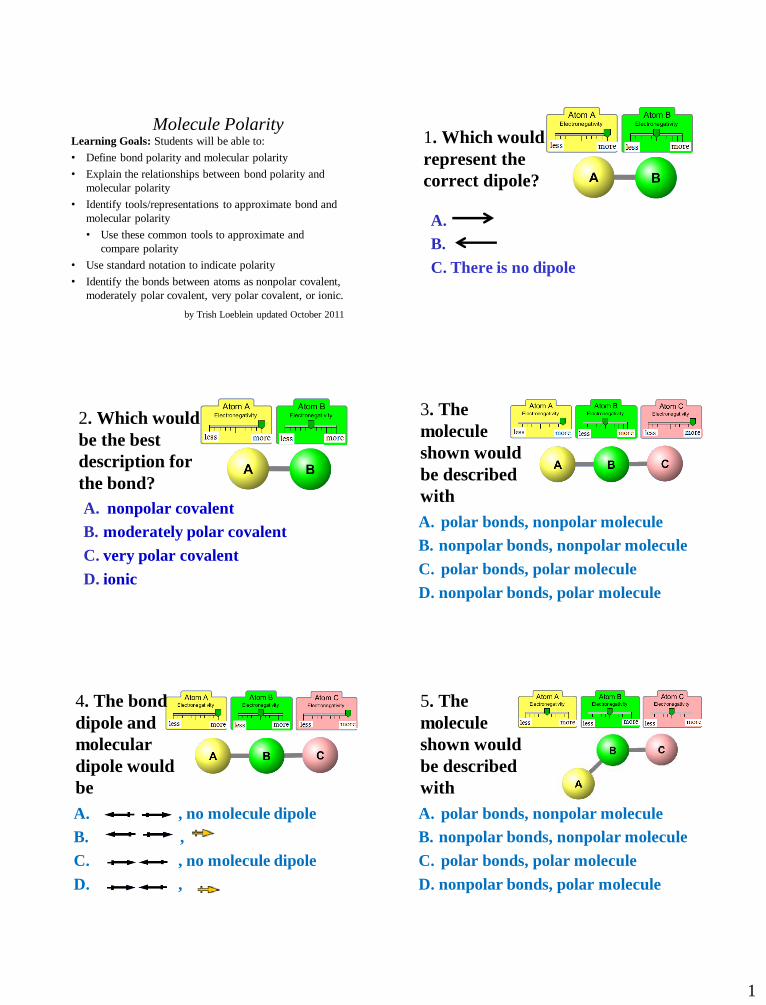
1
Molecule Polarity Learning Goals: Students will be able to:
• Define bond polarity and molecular polarity
• Explain the relationships between bond polarity and
molecular polarity
• Identify tools/representations to approximate bond and
molecular polarity
• Use these common tools to approximate and
compare polarity
• Use standard notation to indicate polarity
• Identify the bonds between atoms as nonpolar covalent,
moderately polar covalent, very polar covalent, or ionic.
by Trish Loeblein updated October 2011
1. Which would
represent the
correct dipole?
A.
B.
C. There is no dipole
2. Which would
be the best
description for
the bond?
A. nonpolar covalent
B. moderately polar covalent
C. very polar covalent
D. ionic
3. The
molecule
shown would
be described
with
A. polar bonds, nonpolar molecule
B. nonpolar bonds, nonpolar molecule
C. polar bonds, polar molecule
D. nonpolar bonds, polar molecule
4. The bond
dipole and
molecular
dipole would
be
A. , no molecule dipole
B. ,
C. , no molecule dipole
D. ,
5. The
molecule
shown would
be described
with
A. polar bonds, nonpolar molecule
B. nonpolar bonds, nonpolar molecule
C. polar bonds, polar molecule
D. nonpolar bonds, polar molecule
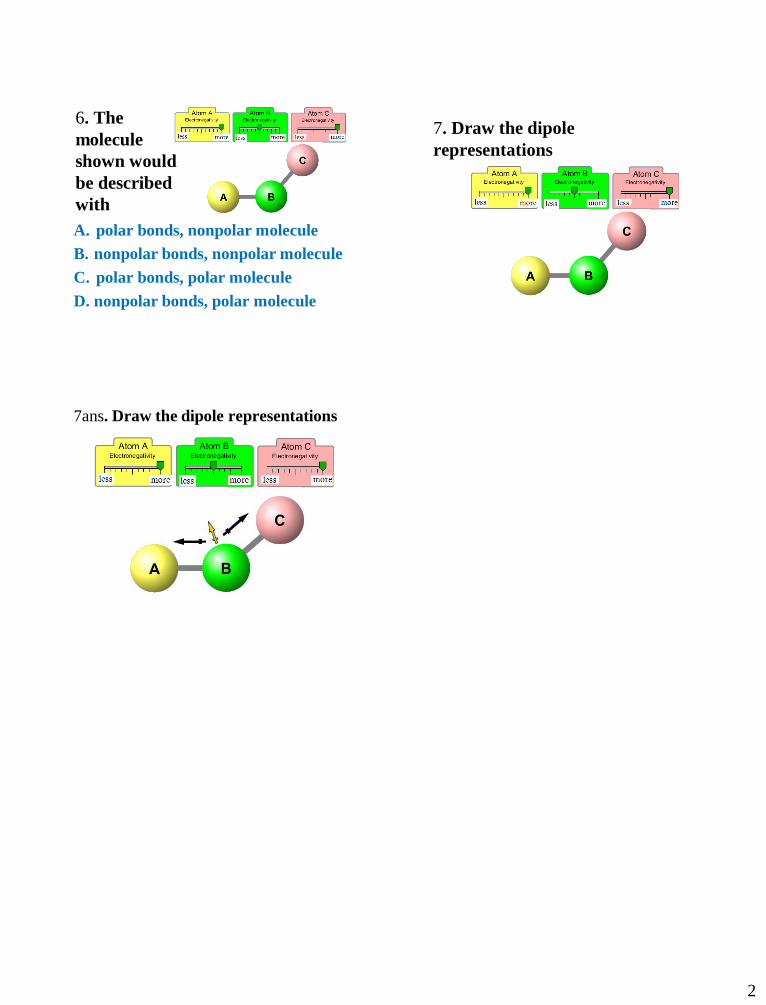
2
6. The
molecule
shown would
be described
with
A. polar bonds, nonpolar molecule
B. nonpolar bonds, nonpolar molecule
C. polar bonds, polar molecule
D. nonpolar bonds, polar molecule
7. Draw the dipole
representations
7ans. Draw the dipole representations
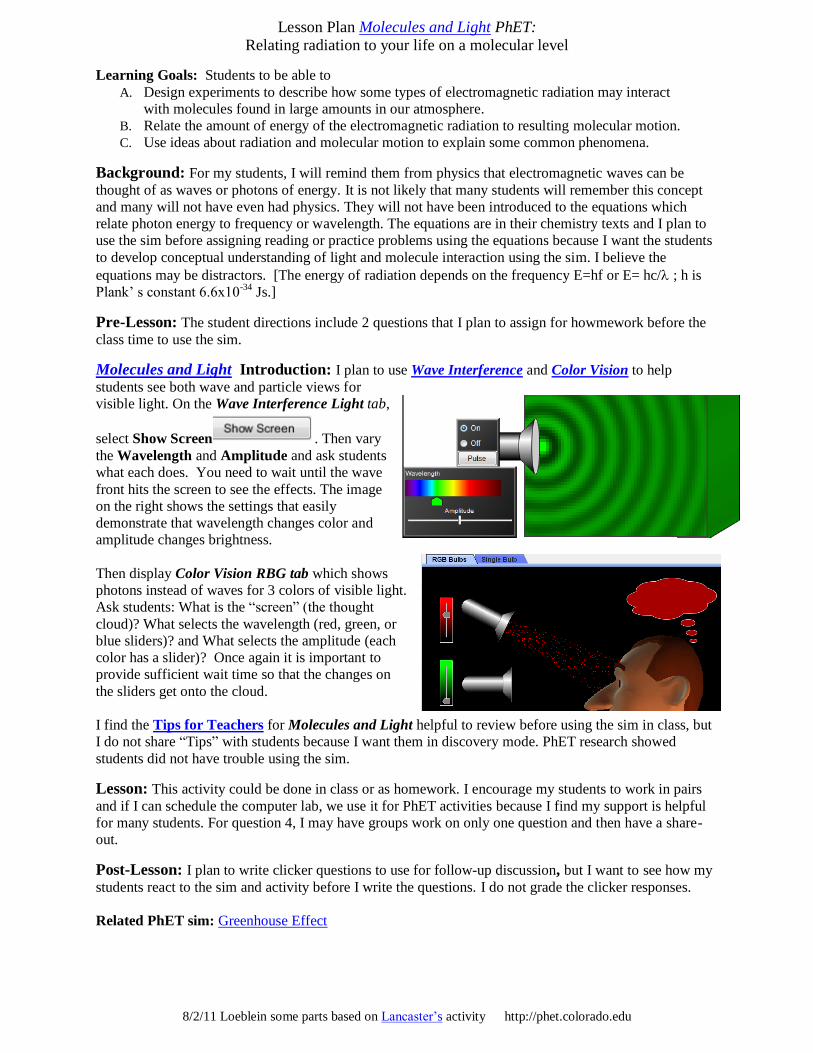
Lesson Plan Molecules and Light PhET: Relating radiation to your life on a molecular level
8/2/11 Loeblein some parts based on Lancaster’s activity http://phet.colorado.edu
Learning Goals: Students to be able to
A. Design experiments to describe how some types of electromagnetic radiation may interact
with molecules found in large amounts in our atmosphere.
B. Relate the amount of energy of the electromagnetic radiation to resulting molecular motion.
C. Use ideas about radiation and molecular motion to explain some common phenomena.
Background: For my students, I will remind them from physics that electromagnetic waves can be
thought of as waves or photons of energy. It is not likely that many students will remember this concept
and many will not have even had physics. They will not have been introduced to the equations which
relate photon energy to frequency or wavelength. The equations are in their chemistry texts and I plan to
use the sim before assigning reading or practice problems using the equations because I want the students
to develop conceptual understanding of light and molecule interaction using the sim. I believe the
equations may be distractors. [The energy of radiation depends on the frequency E=hf or E= hc/ ; h is
Plank’ s constant 6.6x10⁻³⁴
Js.]
Pre-Lesson: The student directions include 2 questions that I plan to assign for howmework before the
class time to use the sim.
Molecules and Light Introduction: I plan to use Wave Interference and Color Vision to help
students see both wave and particle views for
visible light. On the Wave Interference Light tab,
select Show Screen . Then vary
the Wavelength and Amplitude and ask students
what each does. You need to wait until the wave
front hits the screen to see the effects. The image
on the right shows the settings that easily
demonstrate that wavelength changes color and
amplitude changes brightness.
Then display Color Vision RBG tab which shows
photons instead of waves for 3 colors of visible light.
Ask students: What is the “screen” (the thought
cloud)? What selects the wavelength (red, green, or
blue sliders)? and What selects the amplitude (each
color has a slider)? Once again it is important to
provide sufficient wait time so that the changes on
the sliders get onto the cloud.
I find the Tips for Teachers for Molecules and Light helpful to review before using the sim in class, but
I do not share “Tips” with students because I want them in discovery mode. PhET research showed
students did not have trouble using the sim.
Lesson: This activity could be done in class or as homework. I encourage my students to work in pairs
and if I can schedule the computer lab, we use it for PhET activities because I find my support is helpful
for many students. For question 4, I may have groups work on only one question and then have a share-
out.
Post-Lesson: I plan to write clicker questions to use for follow-up discussion, but I want to see how my
students react to the sim and activity before I write the questions. I do not grade the clicker responses.
Related PhET sim: Greenhouse Effect

Student Directions Molecules and Light PhET:
Relating radiation to your life on a molecular level
8/2/11 Loeblein, some parts based on Lancaster’s activity
Learning Goals: Students to be able to
A. Design experiments to describe how some types of electromagnetic radiation may interact
with molecules found in large amounts in our atmosphere.
B. Relate the amount of energy of the electromagnetic radiation to resulting molecular motion.
C. Use ideas about radiation and molecular motion to explain some common phenomena.
Pre-lab homework: 1. Using prior knowledge or research (cite references if used):
a) Describe the differences/similarities between the four types of radiation in Molecules and
Light. Include terms like frequency, wavelength, energy, speed, etc
b) For all 4 types, give at least one example of how the radiation is relevant to your life.
2. For the 7 gases used in the simulation:
a) What do you notice about the differences/similarities between the gas molecules?
b) How is each relevant to your everyday life? (cite references if used)
Directions using Molecules and Light : 1. Below are scenes, in sequence, that you might see when infrared light is focused on a water molecule.
Experiment with the sim to make similar “movie” scenes.
a) Describe what you did to make the movie.
b) Write what you think is causing the changes that occur from scene to scene. (You may
change your thinking after more experimentation).
2. Design experiments and data table(s) to determine and clearly describe what happens for each
molecule with each type of radiation. Make sure to vary light brightness as well as wavelength.
3. Examine your data table(s)
a) What patterns can you identify from your experiments?
b) What ideas do you have about relationships between radiation and molecular motion?
c) Did your ideas from 1b change? If so, explain.
4. Use your understanding about radiation and gas molecules to answer these questions
a. How do you think microwaves ovens heat up food? Using your data, give some
evidence to support your answer.
b. Which of the gases would be considered “greenhouse gases”? Using your data,
give some evidence to support your answer.
c. Many people argue that the ozone layer is important. Using your data, give some
evidence to support your answer.
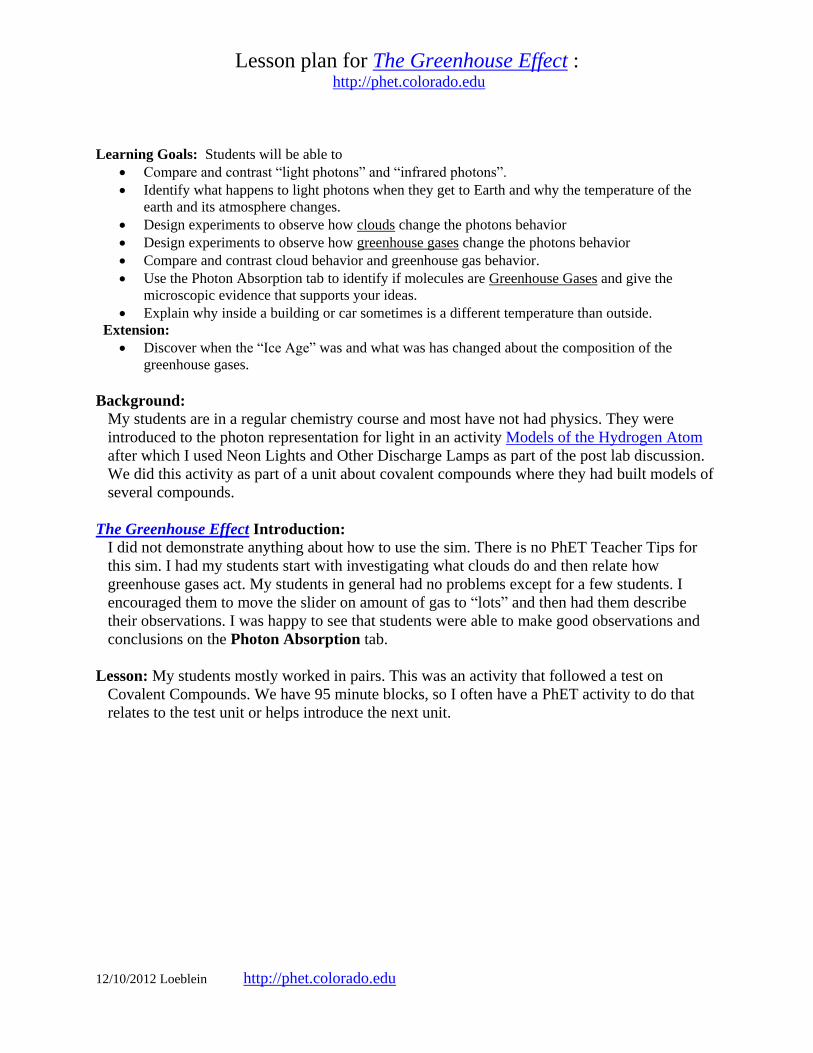
Lesson plan for The Greenhouse Effect : http://phet.colorado.edu
12/10/2012 Loeblein http://phet.colorado.edu
Learning Goals: Students will be able to
Compare and contrast “light photons” and “infrared photons”.
Identify what happens to light photons when they get to Earth and why the temperature of the
earth and its atmosphere changes.
Design experiments to observe how clouds change the photons behavior
Design experiments to observe how greenhouse gases change the photons behavior
Compare and contrast cloud behavior and greenhouse gas behavior.
Use the Photon Absorption tab to identify if molecules are Greenhouse Gases and give the
microscopic evidence that supports your ideas.
Explain why inside a building or car sometimes is a different temperature than outside.
Extension:
Discover when the “Ice Age” was and what was has changed about the composition of the
greenhouse gases.
Background:
My students are in a regular chemistry course and most have not had physics. They were
introduced to the photon representation for light in an activity Models of the Hydrogen Atom
after which I used Neon Lights and Other Discharge Lamps as part of the post lab discussion.
We did this activity as part of a unit about covalent compounds where they had built models of
several compounds.
The Greenhouse Effect Introduction:
I did not demonstrate anything about how to use the sim. There is no PhET Teacher Tips for
this sim. I had my students start with investigating what clouds do and then relate how
greenhouse gases act. My students in general had no problems except for a few students. I
encouraged them to move the slider on amount of gas to “lots” and then had them describe
their observations. I was happy to see that students were able to make good observations and
conclusions on the Photon Absorption tab.
Lesson: My students mostly worked in pairs. This was an activity that followed a test on
Covalent Compounds. We have 95 minute blocks, so I often have a PhET activity to do that
relates to the test unit or helps introduce the next unit.

Student directions The Greenhouse Effect activity phet.colorado.edu
12/10/2012 Loeblein http://phet.colorado.edu
Learning Goals: Students will be able to
Compare and contrast “light photons” and “infrared photons”.
Identify what happens to light photons when they get to Earth and why the temperature of the
earth and its atmosphere changes.
Design experiments to observe how clouds change the photons behavior
Design experiments to observe how greenhouse gases change the photons behavior
Compare and contrast cloud behavior and greenhouse gas behavior.
Use the Photon Absorption tab to identify if molecules are Greenhouse Gases and give the
microscopic evidence that supports your ideas.
Explain why inside a building or car sometimes is a different temperature than outside.
Extension:
Discover when the “Ice Age” was and what was has changed about the composition of the
greenhouse gases.
Important simulation information:
When you start The Greenhouse Effect or use ,the earth temperature is reset to cold
and light photons start coming from the sun.
You might want to use the speed , pause , and step tools to help you watch
the photon and temperature changes.
Directions:
1. Define “light photons” and “infrared photons”
a. How are they represented in the simulation?
b. If you were talking to a friend about what you observe, how would you explain what is
happening with the energy from the sun and the energy from the Earth?
2. In the winter, weather reporters often day “It will be a very cold night because there are no
clouds.”
a. Use the sim to see if you can understand why this could be true.
b. Describe your observations.
c. If you were a weather person, how might you use what you understand about clouds and
the effect on temperature to predict night-time weather for a summer month like June?
3. How can you make the greenhouse gases act similar to clouds?
a. Explain what you did.
b. Give the evidence to prove you made them act alike in a few different situations.
4. What do you notice about greenhouse gas effect on photons that is different from clouds? Give
examples from situations that you made in the sim to support your ideas.
5. Use the Photon Absorption tab to identify which of the molecules provided in the sims are
Greenhouse Gases. State microscopic evidence that supports your ideas.
6. Why do you think the inside of a car feels so much warmer than its surroundings on sunny days?
a. How can you use the sim to test your ideas?
b. Describe your experiment and state some evidence that explain the different temperatures
on a microscopic level using photons.
Extension: Discover when the “Ice Age” was and what was has changed about the composition of the
greenhouse gases. Include cites for your answers. How did the sim developers used research information
in the sim design?
Lesson plan for Density: How Does Density Relate to Mass &Volume
and an Objects Interaction with Water? http://phet.colorado.edu
8/23/2012 Loeblein http://phet.colorado.edu
Learning Goals:
Students will be able to use macroscopic evidence to:
1. Measure the volume of an object by observing the amount of fluid it displaces or can
displace.
2. Provide evidence and reasoning for how objects of similar:
a. mass can have differing volume
b. volume can have differing mass.
3. Identify the unknown materials by calculating density using displacement of fluid
techniques and reference tables provided in the simulation.
Background:
My students are in Honors Physics, a first year junior-level high school course with a pre-
requisite of B or better in math and science and minimum math concurrent enrollment in Algebra
II. They took Physical Science as 8th
graders, so this lesson is meant to be a refresher for density
and to help them think about what they already know about density and apply their ideas to how
density affects how objects act/interact when placed in water.
Density Introduction:
I did not give any demonstration of the sim.
Tips for Teachers Guide for this simulation is at http://phet.colorado.edu/files/teachers-
guide/density-guide.pdf. These seem to be very useful teacher hints:
Tips for controls:
You can put the blocks in the water. If an object floats, you can hold it under water to
measure its volume.
Use the scale and the volume of water displaced to calculate the density of the mystery
objects.
Use the table to determine the identity of the mystery objects.
In addition, I think that my students may struggle with the behavior of the water block as is
noted in the Insights into student use, so I decided to address this specifically in the lesson. I
am expecting them to determine that in the "Same Mass" mode, the block will stay wherever
the student puts it because the density of the blue block is the same as that of water.
Lesson:
I plan to use this as an introductory lesson to Buoyancy and followed by my activity for Balloons
and Buoyancy. I have included a lab called Accuracy and Precision that could be used for a
hands-on intro. There is one version that is all sim and B version of sim directions with a lab
component after using the sim.
Student Directions Density: How Does Density Relate to Mass &Volume
and an Objects Interaction with Water? Version B includes real equipment
http://phet.colorado.edu
7/7/2013 Loeblein http://phet.colorado.edu
Learning Goals:
Students will be able to use macroscopic evidence to:
1. Measure the volume of an object by observing the amount of fluid it displaces or can
displace.
2. Provide evidence and reasoning for how objects of similar:
a. mass can have differing volume
b. volume can have differing mass.
3. Identify the unknown materials by calculating density using displacement of fluid
techniques and reference tables provided in the simulation.
Directions:
1. Explain how you use the simulation to measure the volume that an object can displace.
Also:
a. What is similar or different from the volume that the blocks displace naturally?
How might a scientist explain the behavior?
b. Explain why you think the blue block on the “Same Mass” setting can be placed
anywhere in the water.
2. Design experiments to demonstrate the learning goal #2. Provide tables for evidence and
use specific examples from your data to provide the reasoning.
3. Design an experiment to identify the 5 Mystery blocks using the Table in the simulation.
a. Write your procedure in paragraph form.
b. Identify each block using specific evidence to support your conclusions.
4. Design an experiment and data table to find the density of a real object. a. Do several trials, calculating density for each trial.
b. Calculate the deviation for each trial from the average like you did in the Precision
and Accuracy Lab. (hint: find the absolute value of (observed density – average density).
c. Does your data show precision? Explain
d. Does your data show accuracy? Explain
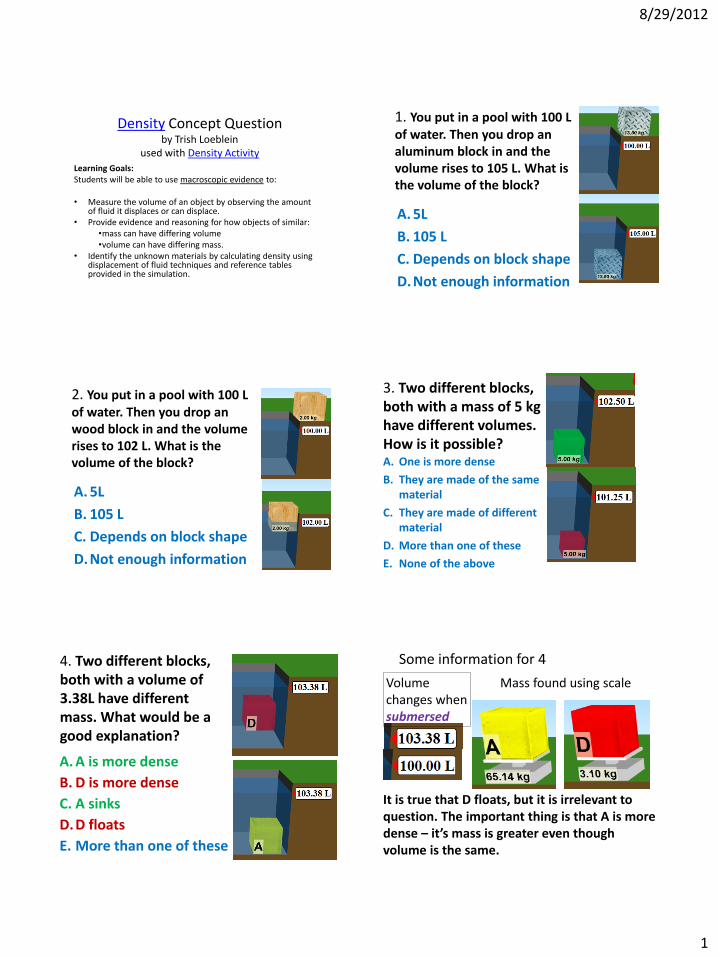
8/29/2012
1
Density Concept Question by Trish Loeblein
used with Density Activity
Learning Goals: Students will be able to use macroscopic evidence to: • Measure the volume of an object by observing the amount
of fluid it displaces or can displace. • Provide evidence and reasoning for how objects of similar:
•mass can have differing volume •volume can have differing mass.
• Identify the unknown materials by calculating density using displacement of fluid techniques and reference tables provided in the simulation.
1. You put in a pool with 100 L of water. Then you drop an aluminum block in and the volume rises to 105 L. What is the volume of the block?
A. 5L
B. 105 L
C. Depends on block shape
D.Not enough information
2. You put in a pool with 100 L of water. Then you drop an wood block in and the volume rises to 102 L. What is the volume of the block?
A. 5L
B. 105 L
C. Depends on block shape
D.Not enough information
3. Two different blocks, both with a mass of 5 kg have different volumes. How is it possible? A. One is more dense
B. They are made of the same material
C. They are made of different material
D. More than one of these
E. None of the above
4. Two different blocks, both with a volume of 3.38L have different mass. What would be a good explanation?
A. A is more dense
B. D is more dense
C. A sinks
D.D floats
E. More than one of these
Some information for 4
It is true that D floats, but it is irrelevant to question. The important thing is that A is more dense – it’s mass is greater even though volume is the same.
Volume changes when submersed
Mass found using scale
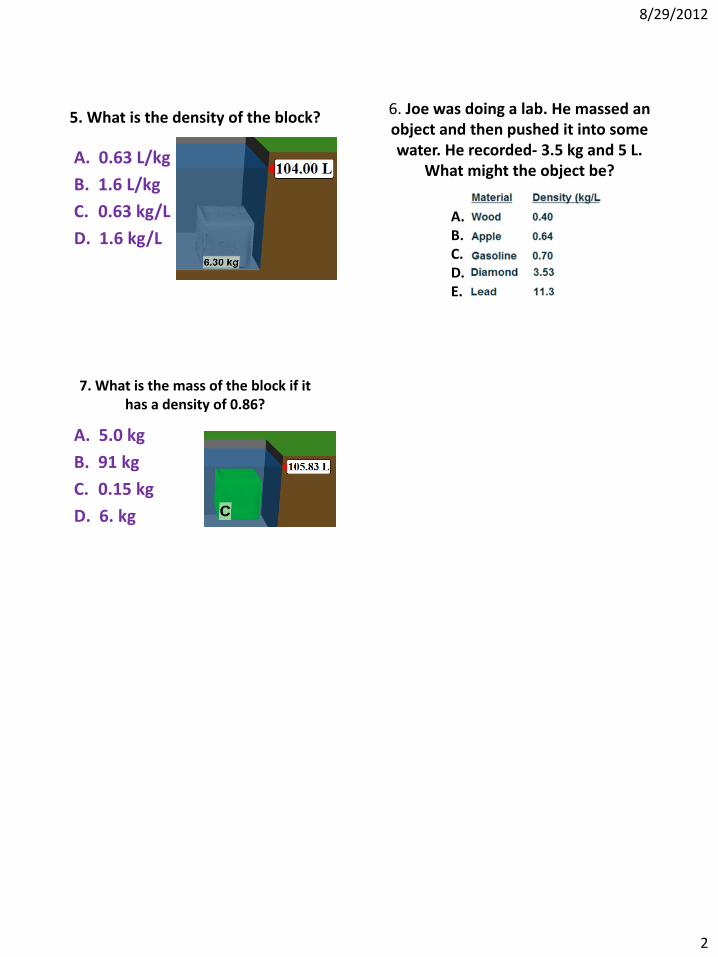
8/29/2012
2
5. What is the density of the block?
A. 0.63 L/kg
B. 1.6 L/kg
C. 0.63 kg/L
D. 1.6 kg/L
6. Joe was doing a lab. He massed an object and then pushed it into some water. He recorded- 3.5 kg and 5 L.
What might the object be?
A. B. C. D. E.
7. What is the mass of the block if it has a density of 0.86?
A. 5.0 kg
B. 91 kg
C. 0.15 kg
D. 6. kg
Lesson plan for States of Matter Basics:
2/28/2012 Loeblein http://phet.colorado.edu
Learning Goals: Students will be able to: 1. Describe differences and similarities between solids, liquids and gases on a molecular level.
2. Explain gas pressure using the Kinetic Theory.
3. Determine processes you could use to make solids, liquids and gases change phases.
4. Compare and contrast the behavior of the 4 substances in the simulation and use your
understanding about molecules to explain your observations.
Background:
Most chemistry students did activities and saw demos using Gas Properties and States of Matter
last year in Physics (see activity https://phet.colorado.edu/en/contributions/view/2816) to help
them construct and understanding of KMT, but not much about pressure. We also studied
Thermodynamics. In chemistry, we have already had an introduction to bonding but not about its
application to macroscopic behavior. This lesson focuses on introducing the effect of pressure
and also comparing materials that have Van der Waals bonding and polar bonding. I would be
surprised if the students use the proper explanations for the varying affects from their
investigations and plan to use the Clicker questions to help them especially with goals 3 and 4. I
also plan to discuss Phase diagrams in the post discussion. Other simulations that could be used
as extension exploration for this topic: States of Matter and Atomic Interactions .
States of Matter Basics Teaching tips: The sim has Ne Ar O2 and H2O (the other version also
has a Custom particle that you can adjust the inter-particle attraction and a tab to study particle
attraction). Basically, the students should be able to see that the larger Ar has more Dispersion
forces and that O2 has even more. Then they can explore varying the force of attraction which
varies from very low London Dispersion (Van Der Waals) to just below the strength of the water
dipole force.
Lesson: My students work in pairs at computers or at home on their own depending on computer
availability. If we are working in class, I check on their progress by looking at some answers
and I am available for questions. Few of my students use the proper explanations for the varying
affects from their investigations and plan to use the Clicker questions to help them especially
with goals 3 and 4. I also plan to discuss Phase diagrams in the post discussion.
Post lesson:
Other simulations for this topic: States of Matter and Atomic Interactions .
Sample slides to use for the post-lesson: (all of the slides may be downloaded in Powerpoint or
Acrobat Reader from http://phet.colorado.edu/en/contributions/view/3496 )
Student directions States of Matter Basics:
1/13/2012 Loeblein http://phet.colorado.edu
Learning Goals: Students will be able to:
1. Describe differences and similarities between solids, liquids and gases on a molecular level.
2. Explain gas pressure using the Kinetic Theory.
3. Determine processes you could use to make solids, liquids and gases change phases.
4. Compare and contrast the behavior of the 4 substances in the simulation and use your
understanding about molecules to explain your observations.
Directions: 1. Experiment with States of Matter Basics and then write a summary including illustrations that
describes “differences and similarities between solids, liquids and gases on a molecular level”.
2. When you check up your tires, you read on the side that the tire needs something like “35psi”.
a. What does “ 35 psi” mean in words?
b. What tool do you use to measure the tire pressure and how do you think it works? include
illustrations
c. Use the simulation to see if your ideas of “gas pressure” match the molecular
representation in the simulation. List any changes you would make to your explanation
of how a tire gauge works. (You may want to check your text or an online resource if
you feel like you need more information).
3. Using the simulation, try to change the phase of one of the substances. For example, change
liquid water to solid or gas.
a. Write a summary of your results.
b. See if you can use similar procedures on all the materials. Make a data table that shows
the tests and results to demonstrate that you have enough evidence to support ideas you
have about how to make a substance change phase. Edit #3a if your experiments support
some changes to your ideas.
4. As you observed the 4 different substances, what specific similarities and differences did you
see?
a. Make a table to show your observations
b. Think about explanations that might be possible using your understanding of chemistry
and physics.
c. Write your ideas and be prepared to share in a class discussion.

2/28/2012
1
States of Matter Basics
Trish Loeblein
High School Chemistry lesson
January 2012
(this uses the simulation “Basics”, but the full version could be used)
For some questions, I turned on the Teacher menu item “ White
background” because it works better with my projector.
Learning Goals:
Students will be able to:
• Describe differences and similarities between
solids, liquids and gases on a molecular level.
• Explain gas pressure using the Kinetic Theory.
• Determine processes you could use to make
solids, liquids and gases change phases.
• Compare and contrast the behavior of the 4
substances in the simulation and use your
understanding about molecules to explain your
observations.
1. Which is most likely oxygen gas?
A B C
2. Which is most likely liquid water?
A B C
3. How could there be 2 phases of oxygen at
one temperature?
Oxygen
Liquid-Gas
Like water-
water vapor in
a water bottle
4. What happens
if you add energy
using the heater?
A. No change other than
all atoms speed up
B.More atoms would
condense
C.More atoms would
vaporize
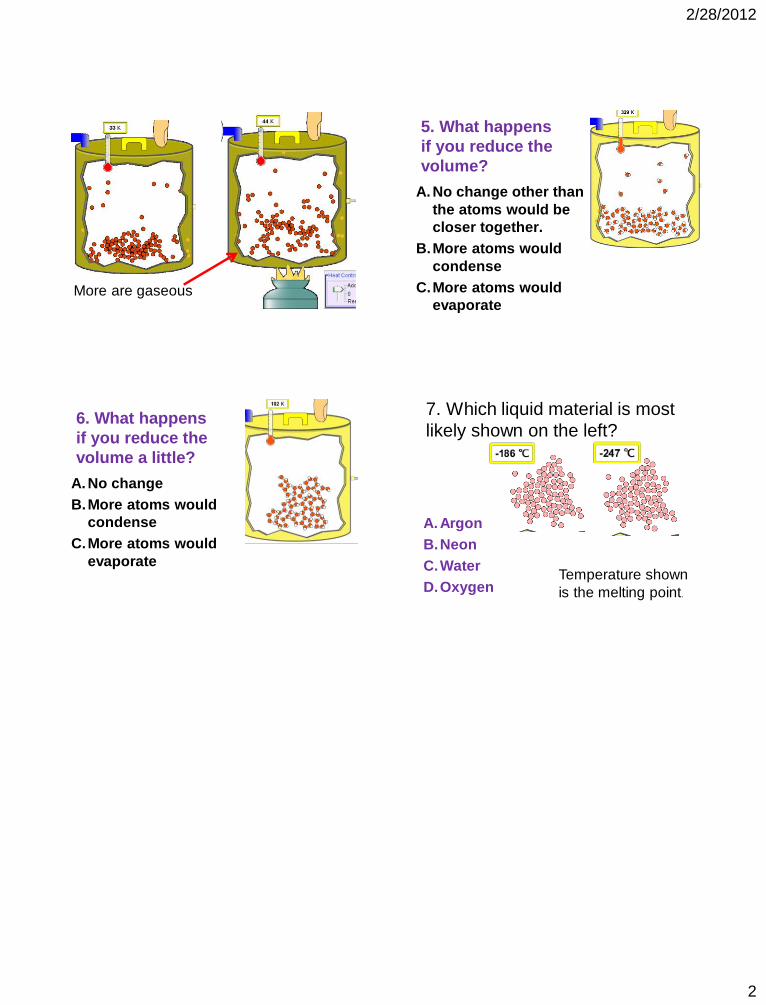
2/28/2012
2
More are gaseous
5. What happens
if you reduce the
volume?
A. No change other than
the atoms would be
closer together.
B.More atoms would
condense
C.More atoms would
evaporate
6. What happens
if you reduce the
volume a little?
A. No change
B.More atoms would
condense
C.More atoms would
evaporate
7. Which liquid material is most
likely shown on the left?
A. Argon
B.Neon
C.Water
D.Oxygen Temperature shown
is the melting point.
Lesson plan for States of Matter : Phase Changes and Diagrams Time for activity 60 minutes Also could use Atomic Interactions a sim that was posted in 2009
2/8/2010 Loeblein http://phet.colorado.edu
Learning Goals: Students will be able to: (2 levels of goals listed)
A. Identifying and Describing Particle behavior as it relates to phase.
1. Describe differences and similarities between monatomic, diatomic, and polyatomic particle
behavior.
2. Describe how the vapor pressure of a liquid or solid is measured.
3. Describe how changing the pressure or temperature can change the state of matter.
4. Given the position on a phase diagram from which the labels are all removed, identify the
phase present and determine the microscopic behavior of molecules. And vice versa.
B. Explaining behavior using Bonding
5. Develop ideas about why there is variation in inter-particle forces (other references will be
needed)
6. Differentiate between non-polar and polar molecular behavior as it relates to phase
7. Relate changes in the strength of the inter-particle bonding to changes in the phase diagram,
vapor pressure, and transition temperatures.
Background:
My students did an activity using Gas Properties and Microwaves last year in Physics to help
them construct and understanding of KMT. We have also studied Thermodynamics, so the
students have already demonstrated several of the learning goals that you would find listed under
the first tab.
States of Matter Introduction:
This is the first time that my students have used the sim, but I did not demonstrate anything.
States of Matter Teaching tips: The sim has Ne Ar O2 and H2O and a Custom particle that you
can adjust the inter-particle attraction. Basically, the students should be able to see that the larger
Ar has more Dispersion forces and that O2 has even more. Then they can explore varying the
force of attraction which varies from very low London Dispersion (Van Der Waals) to just below
the strength of the water dipole force.
Lesson:
Have the students use the lab sheet for guidance. The activity took my College chemistry
students about 60 minutes. I encouraged some groups to try looking at heteronuclear molecules
using the Atomic Interactions sim, but I did not have this in the written directions and will
probably revisit this activity before next year.
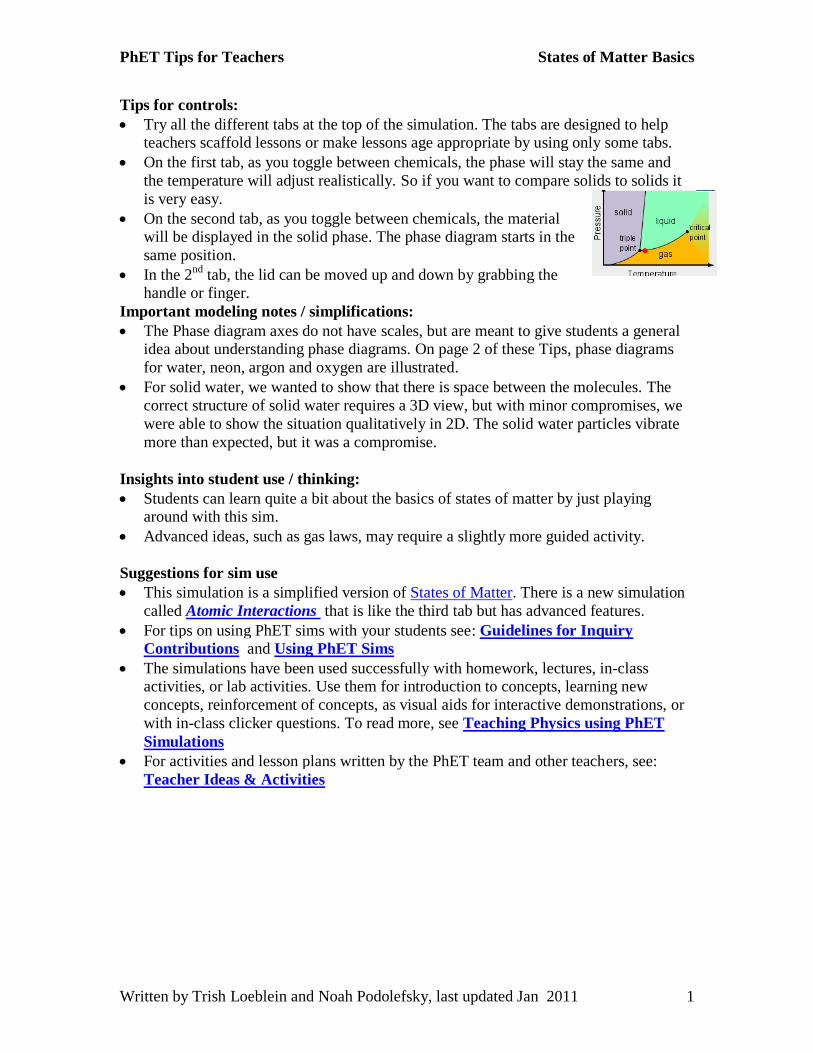
PhET Tips for Teachers States of Matter Basics
Written by Trish Loeblein and Noah Podolefsky, last updated Jan 2011 1
Tips for controls:
Try all the different tabs at the top of the simulation. The tabs are designed to help teachers scaffold lessons or make lessons age appropriate by using only some tabs.
On the first tab, as you toggle between chemicals, the phase will stay the same and
the temperature will adjust realistically. So if you want to compare solids to solids it
is very easy.
On the second tab, as you toggle between chemicals, the material will be displayed in the solid phase. The phase diagram starts in the
same position.
In the 2nd
tab, the lid can be moved up and down by grabbing the handle or finger.
Important modeling notes / simplifications:
The Phase diagram axes do not have scales, but are meant to give students a general idea about understanding phase diagrams. On page 2 of these Tips, phase diagrams
for water, neon, argon and oxygen are illustrated.
For solid water, we wanted to show that there is space between the molecules. The
correct structure of solid water requires a 3D view, but with minor compromises, we
were able to show the situation qualitatively in 2D. The solid water particles vibrate
more than expected, but it was a compromise.
Insights into student use / thinking:
Students can learn quite a bit about the basics of states of matter by just playing around with this sim.
Advanced ideas, such as gas laws, may require a slightly more guided activity.
Suggestions for sim use
This simulation is a simplified version of States of Matter. There is a new simulation
called Atomic Interactions that is like the third tab but has advanced features.
For tips on using PhET sims with your students see: Guidelines for Inquiry
Contributions and Using PhET Sims
The simulations have been used successfully with homework, lectures, in-class activities, or lab activities. Use them for introduction to concepts, learning new
concepts, reinforcement of concepts, as visual aids for interactive demonstrations, or
with in-class clicker questions. To read more, see Teaching Physics using PhET
Simulations
For activities and lesson plans written by the PhET team and other teachers, see:
Teacher Ideas & Activities
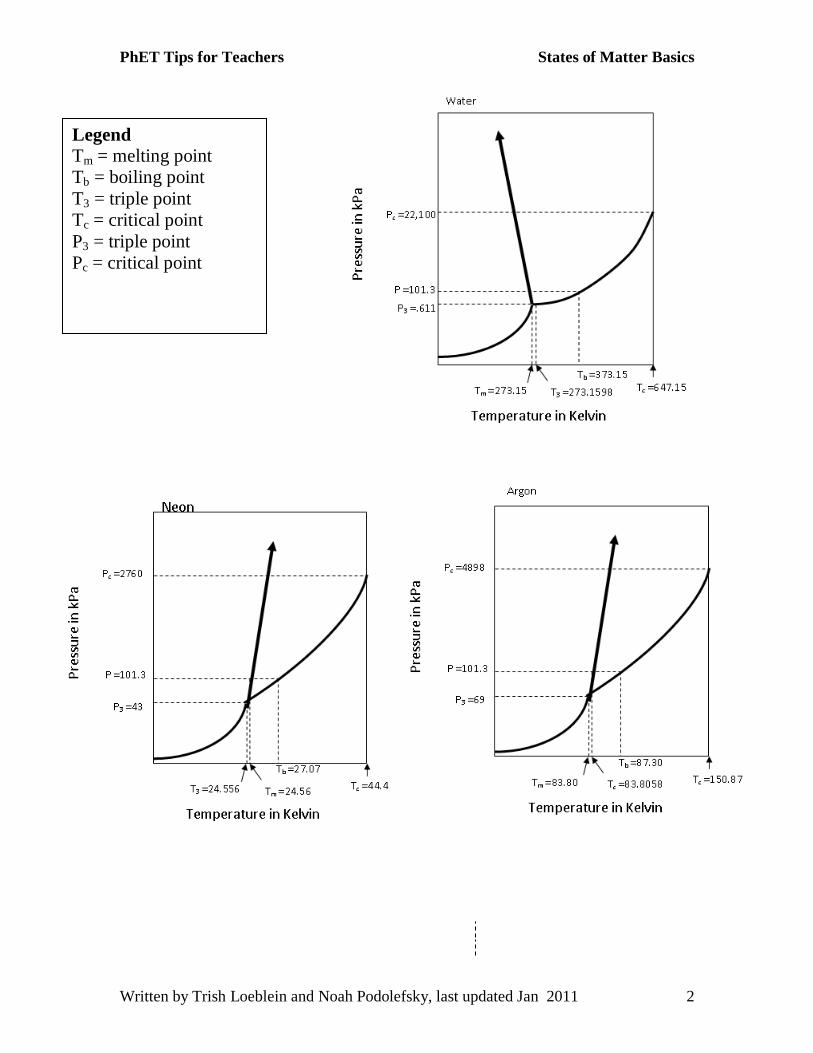
PhET Tips for Teachers States of Matter Basics
Written by Trish Loeblein and Noah Podolefsky, last updated Jan 2011 2
Legend
Tm = melting point
Tb = boiling point
T3 = triple point
Tc = critical point
P3 = triple point
Pc = critical point
Student directions States of Matter: Phase Changes and Diagrams
Also could use Atomic Interactions 60 minutes
2/8/2010 Loeblein http://phet.colorado.edu
Learning Goals: Students will be able to: (2 levels of goals listed)
A. Identifying and Describing Particle behavior as it relates to phase.
1. Describe differences and similarities between monatomic, diatomic, and polyatomic particle
behavior.
2. Describe how the vapor pressure of a liquid or solid is measured.
3. Describe how changing the pressure or temperature can change the state of matter.
4. Given the position on a phase diagram from which the labels are all removed, identify the
phase present and determine the microscopic behavior of molecules. And vice versa.
B. Explaining behavior using Bonding
5. Develop ideas about why there is variation in inter-particle forces (other references will be
needed).
6. Differentiate between non-polar and polar molecular behavior as it relates to phase.
7. Relate changes in the strength of the inter-particle bonding to changes in the phase diagram,
vapor pressure, and transition temperatures.
Directions: 1. For the learning goals in Section A, design experiments to learn 1-4. For your paper, you should
write the learning goal #, a description of the tests that you used, and an explanation of the results
that demonstrate your learning. You may use a set of experiments to learn multiple goals - just
make sure that it is clear. For example you might state: “ For goals 2 and 3, we ..(description of
experiment)..”. Then include diagrams and descriptions that demonstrate that you can do goals.
2. For Section B #6, use your text or other resources to
a. Define Dipole-Dipole force and London dispersion forces.
b. Explain which is stronger and why.
c. Describe how the inter-particle forces (strength) of each could vary.
d. Identify which type of bonding each of the example (Ne, Ar, O2, H20) particles has.
3. For Section B #5-7, design and describe experiments. Then demonstrate your goal proficiency.
You may want to use the simulation Atomic Interactions to help with this section.
Lesson plan for Reactions and Rates 3: Equilibrium Introduction (Macroscopic Description, Q, Temperature, and Reaction Coordinate) Time for activity: 90 minutes of class and some homework
7/28/2009 Loeblein http://phet.colorado.edu
Learning Goals: Students will be able to: • Use a physical experiment to model chemical equilibrium • Sketch how the number of reactants and products will change as a reaction proceeds • Predict how changing the initial conditions will affect the equilibrium amounts of
reactants and products. (Amounts of chemicals, temperature which also effects K) • Predict how the shape of the reaction coordinate will affect the equilibrium amounts of
reactants and products. Background:
Reactions and Rates activity 1 was done in September, #2 was done in December, 3 and 4 will be done in the same unit in March.
I used Amy Jordan’s activity http://phet.colorado.edu/teacher_ideas/view-contribution.php?contribution_id=475 in 2009 and decided to make some changes based on my students’ comments. One thing that my students said are that they wished they had more time to explore with the water exchange equilibrium and that they felt that they could do the PhET part for homework, so I put the water experiments first. This version is a combination of Amy’s lab and my changes to the PhET directions. Amy Jordan wrote to me after she used her activity: “I think it was successful in working through the students' misconceptions about equilibrium, and how temperature affects equilibrium position. For one thing, almost all students predicted that when temperature was raised to above the activation energy bump, there would be all product and no reactants left---then they learned that temperature does affect equilibrium position, but not in the way they thought!”
Reactions and Rates Introduction: My students had used the simulation and did not need help
figuring out how to use the third panel. They commented that the PhET part could be done outside of class. The simulation is meant for qualitative concept development. There is much variation in values because of the small number of particles. I experimented with just using different amounts of reactants only and only 2 temperatures (the default and a value that would be just above the activation energy). The results give qualitative data that supports literature expectations. If you want to get quantitative values for the equilibrium constant, K, use the simulation called Salts and Solubility; the data for Ksp are easily verified in solubility tables.
Lesson:
There is an experiment that precedes the use of the simulation. After Part A Step 4, I think it would be helpful to talk to students about whether they think this situation represents a new type of reaction or just new initial conditions. I think that some students thought that the new conditions represented a new reaction coordinate partly because they used the sim before they did the lab. I have not decided how to best address question 8, but I think we should at least have a class discussion about that there could be a way to optimize the initial conditions. For Part B, question 2, I will assign groups different reactions (one reaction per group) and we will share our results on another day. I hope to arrange for this to happen in class if I can get the computer lab.
Post-Lesson: There are some clicker questions.
Student Directions for Reactions and Rates 3: Introduction to Equilibrium
6/29/2009 Loeblein derived from Amy Jordan activity 1
Learning Goals: Students will be able to:
• Use a physical experiment to model chemical equilibrium • Sketch how the number of reactants and products will change as a reaction
proceeds • Predict how changing the initial conditions will affect the equilibrium amounts of
reactants and products. • Predict how the shape of the reaction coordinate will affect the equilibrium
amounts of reactants and products. PART 1: Done in pairs in class Materials: 4 beakers: 100 mL and 50 mL and two 1000 mL beakers, Directions: Read a-e, make an appropriate data table, and then begin.
a) Label the 1000 ml beakers A and B b) Put about 700 ml water in the large beaker “A”. Leave the other beaker “B”
empty. c) Record the volume of water in the beakers in your table. d) Transfer water between the large beakers using the following “rules”
• Use the 100 mL beaker to transfer water from A to B; • Use the 50 mL beaker transfer water from B to A. • Fill the small beakers as full as possible without tipping the large beakers in
any way. • One cycle consists of one A B transfer and one B A transfer. • For each cycle, record the volume of water in beakers A and B.
e) Continue cycles and recording the volumes, until the level of water in beakers A and B are unchanging.
Analysis: 1. Graph the volumes of water in beakers A and B per cycle. 2. Describe in your own words how this experiment relates to chemical reaction
equilibrium. 3. What is the ratio of the volume in Beaker B to Beaker A at equilibrium? _____When
we work with chemical experiments, what do we calculate that is similar? 4. What do you think would be different and same if the water transfers were repeated
with the beaker A initially half full? 5. Repeat the directions to test your ideas. Use a table, graph, and ratio of B to A to
show your results. Explain how your ideas were supported or need to be corrected.
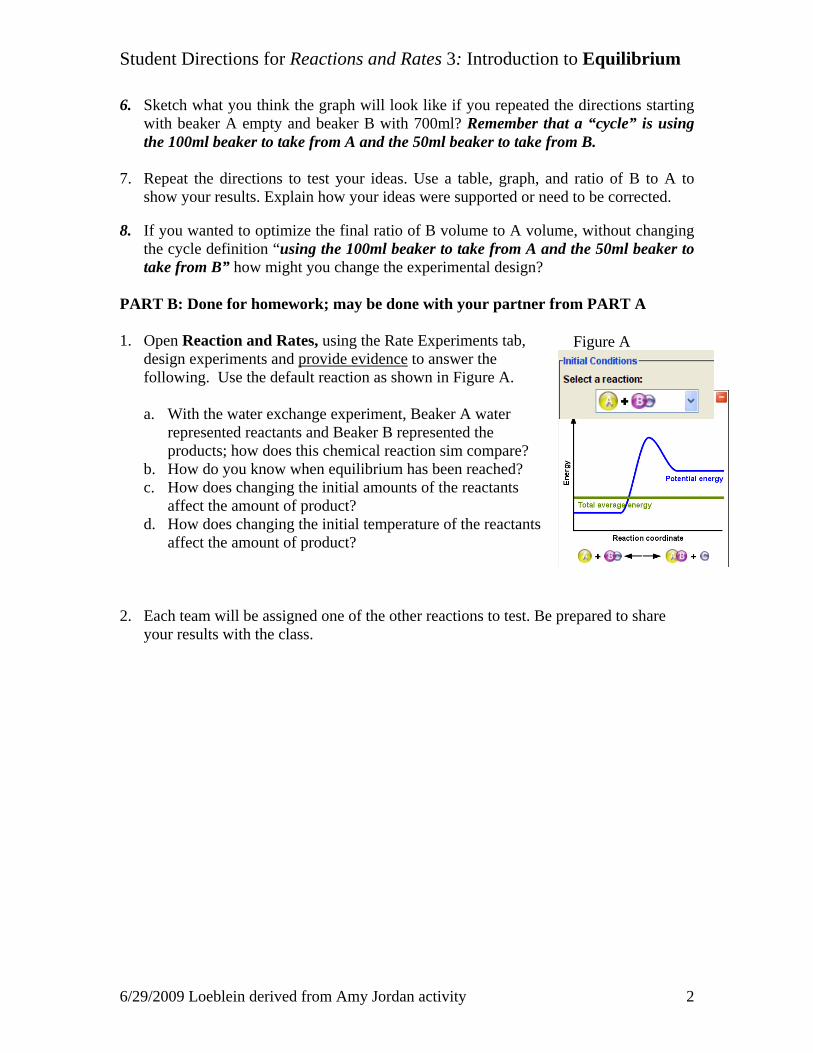
Student Directions for Reactions and Rates 3: Introduction to Equilibrium
6/29/2009 Loeblein derived from Amy Jordan activity 2
Figure A
6. Sketch what you think the graph will look like if you repeated the directions starting with beaker A empty and beaker B with 700ml? Remember that a “cycle” is using the 100ml beaker to take from A and the 50ml beaker to take from B.
7. Repeat the directions to test your ideas. Use a table, graph, and ratio of B to A to
show your results. Explain how your ideas were supported or need to be corrected.
8. If you wanted to optimize the final ratio of B volume to A volume, without changing the cycle definition “using the 100ml beaker to take from A and the 50ml beaker to take from B” how might you change the experimental design?
PART B: Done for homework; may be done with your partner from PART A 1. Open Reaction and Rates, using the Rate Experiments tab,
design experiments and provide evidence to answer the following. Use the default reaction as shown in Figure A.
a. With the water exchange experiment, Beaker A water
represented reactants and Beaker B represented the products; how does this chemical reaction sim compare?
b. How do you know when equilibrium has been reached? c. How does changing the initial amounts of the reactants
affect the amount of product? d. How does changing the initial temperature of the reactants
affect the amount of product?
2. Each team will be assigned one of the other reactions to test. Be prepared to share your results with the class.
Reactions and Rates 3 Clicker Questions
Activity 3:
Introduction to Equilibrium
Trish Loeblein
PhET

Students will be able to:
• Use a physical experiment to model chemical equilibrium
• Sketch how the number of reactants and products will change as a reaction proceeds
• Predict how changing the initial conditions will affect the equilibrium amounts of reactants and products.
• Predict how the shape of the reaction coordinate will affect the equilibrium amounts of reactants and products.
Learning Goals
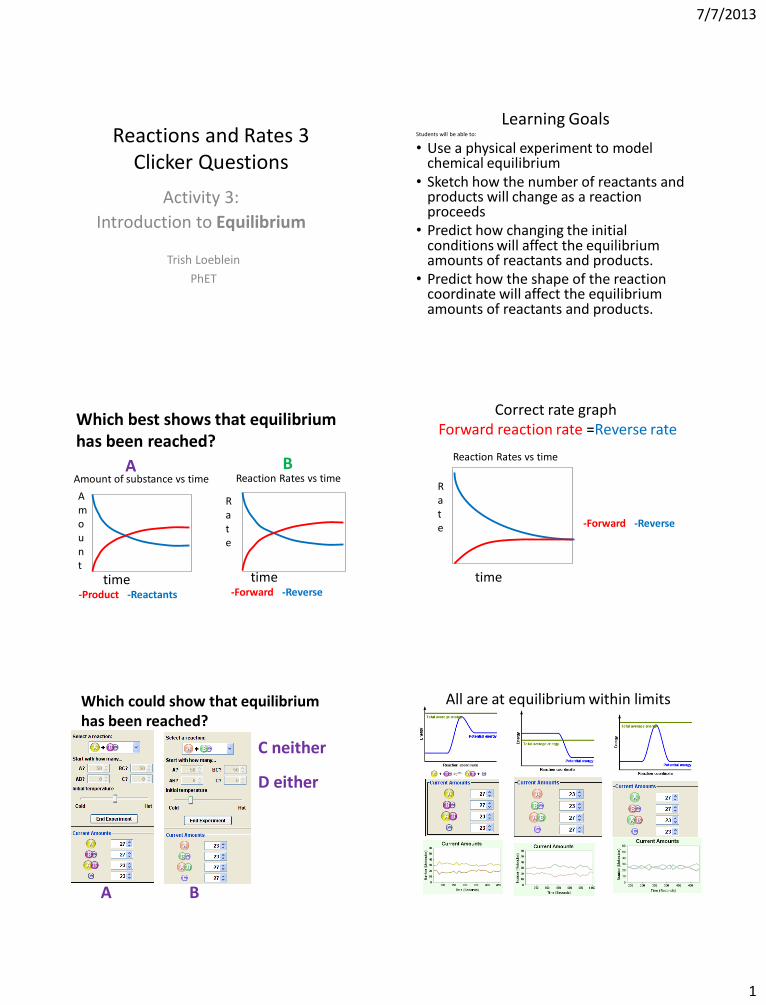
7/7/2013
1
Reactions and Rates 3 Clicker Questions
Activity 3:
Introduction to Equilibrium
Trish Loeblein
PhET
Students will be able to:
• Use a physical experiment to model chemical equilibrium
• Sketch how the number of reactants and products will change as a reaction proceeds
• Predict how changing the initial conditions will affect the equilibrium amounts of reactants and products.
• Predict how the shape of the reaction coordinate will affect the equilibrium amounts of reactants and products.
Learning Goals
Which best shows that equilibrium has been reached?
time
Amount
Rate
Amount of substance vs time Reaction Rates vs time
-Forward -Reverse -Product -Reactants
time
A B
Correct rate graph Forward reaction rate =Reverse rate
time
Rate -Forward -Reverse
Reaction Rates vs time
Which could show that equilibrium has been reached?
A B
C neither
D either
All are at equilibrium within limits
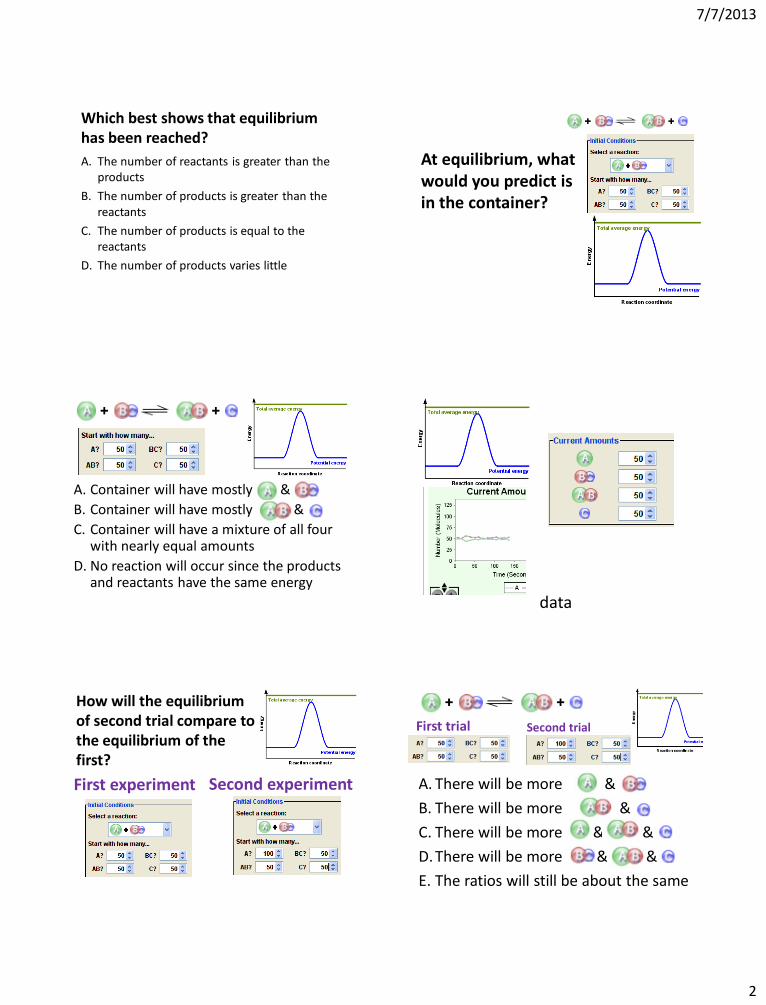
7/7/2013
2
Which best shows that equilibrium has been reached?
A. The number of reactants is greater than the products
B. The number of products is greater than the reactants
C. The number of products is equal to the reactants
D. The number of products varies little
At equilibrium, what would you predict is in the container?
Answer choices
A. Container will have mostly &
B. Container will have mostly &
C. Container will have a mixture of all four with nearly equal amounts
D. No reaction will occur since the products and reactants have the same energy
data
How will the equilibrium of second trial compare to the equilibrium of the first?
First experiment Second experiment A. There will be more &
B. There will be more &
C. There will be more & &
D. There will be more & &
E. The ratios will still be about the same
Answer choices
First trial Second trial
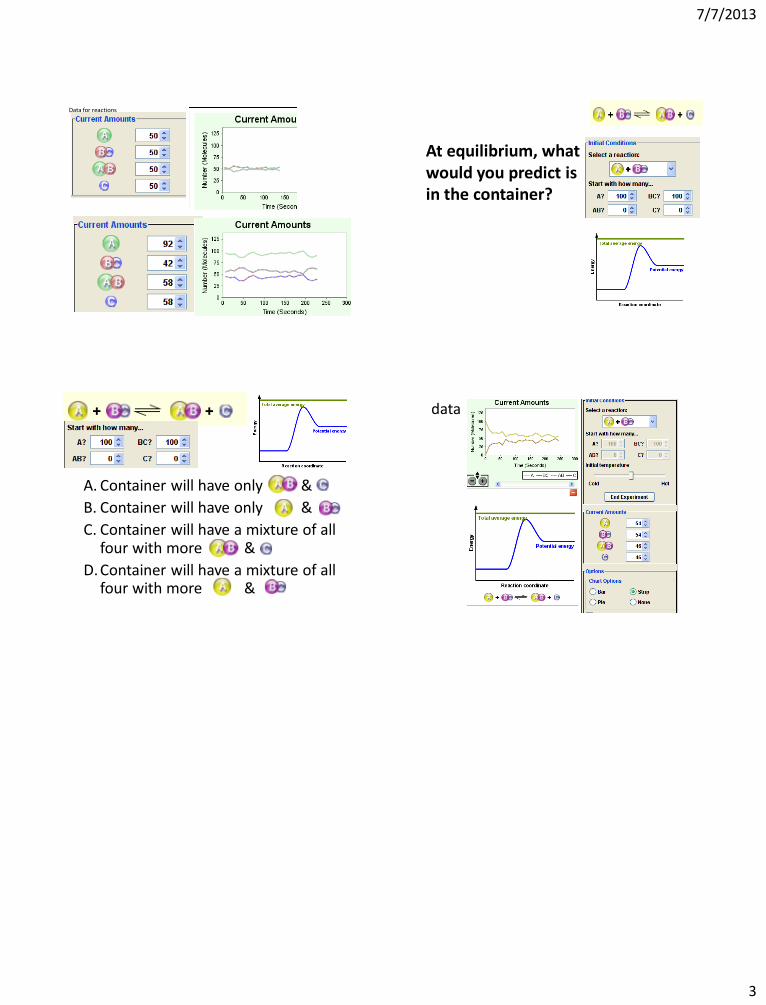
7/7/2013
3
Data for reactions
At equilibrium, what would you predict is in the container?
Answer choices
A. Container will have only &
B. Container will have only &
C. Container will have a mixture of all four with more &
D. Container will have a mixture of all four with more &
data

Lesson plan for Reactions and Rates 4: Equilibrium LeChatlier Includes the use of Salts and Solubility and Phases of Matter
This was adapted from an activity by Amy Jordan http://phet.colorado.edu/teacher_ideas/view-contribution.php?contribution_id=673
Time for activity: I plan to use this as a homework
7/11/2009 Loeblein http://phet.colorado.edu
Learning Goals: Students will be able to:
• Explain how to make an equilibrium system change and predict what changes will happen. I have included guiding questions so that the students will have to use both macroscopic and molecular ideas. I use that wording often in the learning goals, and I don’t want them to become too repetitive, so I left it off the student directions.
• Compare and contrast salt-solution, phase, and chemical equilibriums. Teaching notes: The basic goal of this activity is for students to build their own understanding of how to use LeChatelier’s Principle to predict equilibrium changes caused by concentration and temperature, but I tried to write the goals and questions in “student language”. They can explore concentration effects with Salts and Solubility and Reactions and Rates. I decided to constrain the salt solution equilibrium to the amount of water, because I wanted to make the assignment a reasonable length and not too redundant. Students can see temperature effects using States of Matter and different energy curves in Reactions and Rates, (but not with Salts and Solubility). I was hoping to use States of Matter, to investigate the effects of pressure, but it didn’t work out because the temperature rise as work is being done is difficult to counteract. I think a good lab that could be done to help with understanding about how temperature effects salt solution equilibrium would include using a salt that has an endothermic dissolving process and one that is exothermic. My plan is to have a class discussion as opposed to doing a lab. Background: I plan to use this activity in combination with labs. You can see my unit schedule on my website. I wrote this activity in the summer of 2009, so the schedule may not show its use until fall 09. http://jeffcoweb.jeffco.k12.co.us/high/evergreen/science/loeblein/chem_syl/syllabus_c.html My students will have done the following activities which are linked to the location on the PhET site: the first two Salts and Solubility, the first three Reactions and Rates, and States of Matter- phase change and diagrams They will have done Reactions and Rates #3 just days before. Lesson: I will have a test tube, some salt and water available and do a demo by just putting enough salt in the test tube that I expect some to be undissolved. Ask a student volunteer to draw a “test tube” and “close up view” of what is going on at the board. I will emphasize that this is an inquiry introduction to equilibrium not a “learn it all” experience. Have the students use the lab sheet for guidance. Simulation Introduction: You may want to ask a student demonstrate “saturated solution” in Salts and Solubility to help students differentiate between unsaturated, saturated and a solution with undissolved crystal. Have another student, demonstrate “reaction equilibrium” using Reactions and Rates. Discuss that one represents a “Physical system” and the other “Chemical System.” I have found that if you use a total of around 180 particles, the data is more consistent.
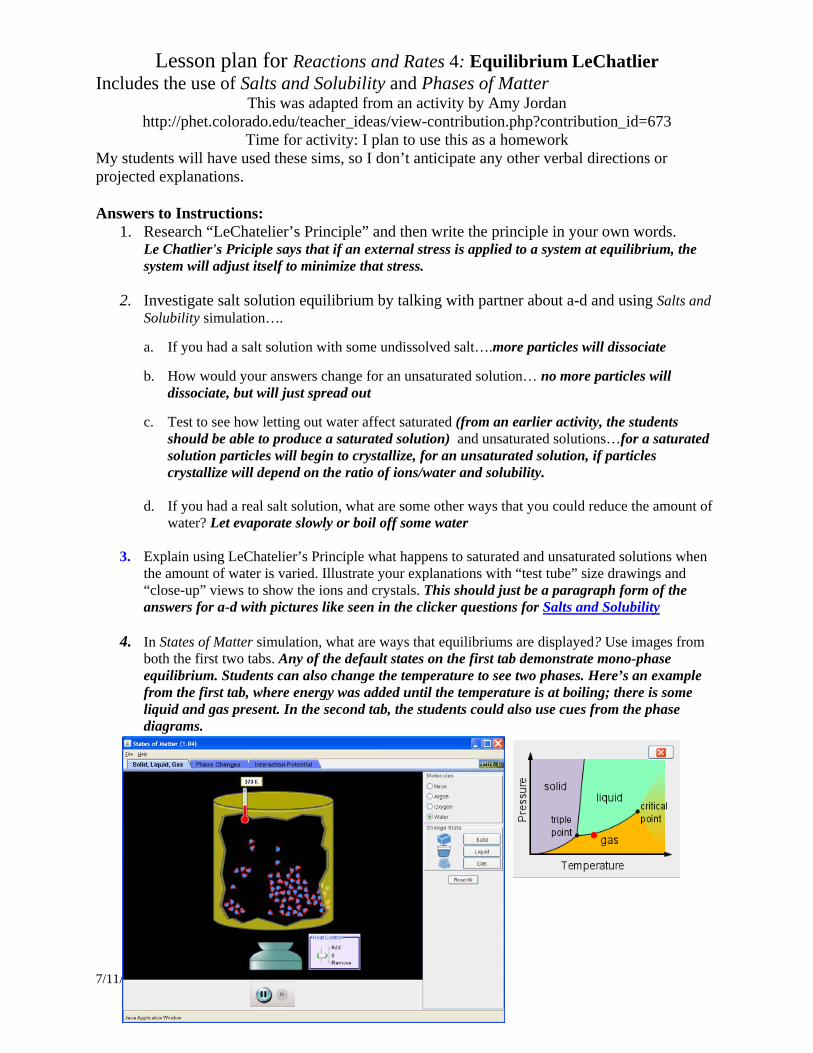
Lesson plan for Reactions and Rates 4: Equilibrium LeChatlier Includes the use of Salts and Solubility and Phases of Matter
This was adapted from an activity by Amy Jordan http://phet.colorado.edu/teacher_ideas/view-contribution.php?contribution_id=673
Time for activity: I plan to use this as a homework
7/11/2009 Loeblein http://phet.colorado.edu
My students will have used these sims, so I don’t anticipate any other verbal directions or projected explanations. Answers to Instructions:
1. Research “LeChatelier’s Principle” and then write the principle in your own words. Le Chatlier's Priciple says that if an external stress is applied to a system at equilibrium, the system will adjust itself to minimize that stress.
2. Investigate salt solution equilibrium by talking with partner about a-d and using Salts and Solubility simulation….
a. If you had a salt solution with some undissolved salt….more particles will dissociate
b. How would your answers change for an unsaturated solution… no more particles will
dissociate, but will just spread out
c. Test to see how letting out water affect saturated (from an earlier activity, the students should be able to produce a saturated solution) and unsaturated solutions…for a saturated solution particles will begin to crystallize, for an unsaturated solution, if particles crystallize will depend on the ratio of ions/water and solubility.
d. If you had a real salt solution, what are some other ways that you could reduce the amount of
water? Let evaporate slowly or boil off some water
3. Explain using LeChatelier’s Principle what happens to saturated and unsaturated solutions when the amount of water is varied. Illustrate your explanations with “test tube” size drawings and “close-up” views to show the ions and crystals. This should just be a paragraph form of the answers for a-d with pictures like seen in the clicker questions for Salts and Solubility
4. In States of Matter simulation, what are ways that equilibriums are displayed? Use images from both the first two tabs. Any of the default states on the first tab demonstrate mono-phase equilibrium. Students can also change the temperature to see two phases. Here’s an example from the first tab, where energy was added until the temperature is at boiling; there is some liquid and gas present. In the second tab, the students could also use cues from the phase diagrams.
Lesson plan for Reactions and Rates 4: Equilibrium LeChatlier Includes the use of Salts and Solubility and Phases of Matter
This was adapted from an activity by Amy Jordan http://phet.colorado.edu/teacher_ideas/view-contribution.php?contribution_id=673
Time for activity: I plan to use this as a homework
7/11/2009 Loeblein http://phet.colorado.edu
6. How would you identify a chemical equilibrium? What can you do to change it? Does it
matter which reaction you are testing? The number of reactants and products will be varying only a little. You can change initial amounts, temperature and you can add chemicals after the experiment has started.
7. Describe how chemical equilibriums are similar to physical equilibriums and identify areas where the chemical systems are more complicated. I am going to be looking for thoughtful answers, but I am not expecting exact correlation to problems that the students will be doing from the text. I will emphasize that this is an inquiry introduction to equilibrium not a “learn it all” experience. Dilution or concentration (reduction of solvent) changes the salt equilibrium. I am not sure that they will be able to determine the effects of lower overall concentration of reactants, but they should be able to see that using more of one does affect the outcome. I am hoping that they will see that introducing products affects the equilibrium state. For phase systems, it should be easy to see that increasing temperature enables more particles to have the speed to more up the phase diagrams and vise versus. I hope that they see that for reactions, general statements like this cannot be made because some reactions are endothermic, some exothermic, some have high activation energy, and some have products and reactants that are similar in energy.
Post lesson: Discuss how temperature effects salt solution equilibrium would include using a salt that has an endothermic dissolving process and one that is exothermic. My plan is to have a class discussion as opposed to doing a lab. Urea 108 g/100 ml(20°C)) 733g/100 mL (100 °C). CaCl2 74.5 g/100mL (20 °C) 159 g/100 mL (100 °C). Notice that urea which is an endotherimic dissolving process dramatically increases solubility with temperature, but that the difference is not so great for calcium chloride which is exothermic. I plan to move to the text book and discuss the examples and assign practice.
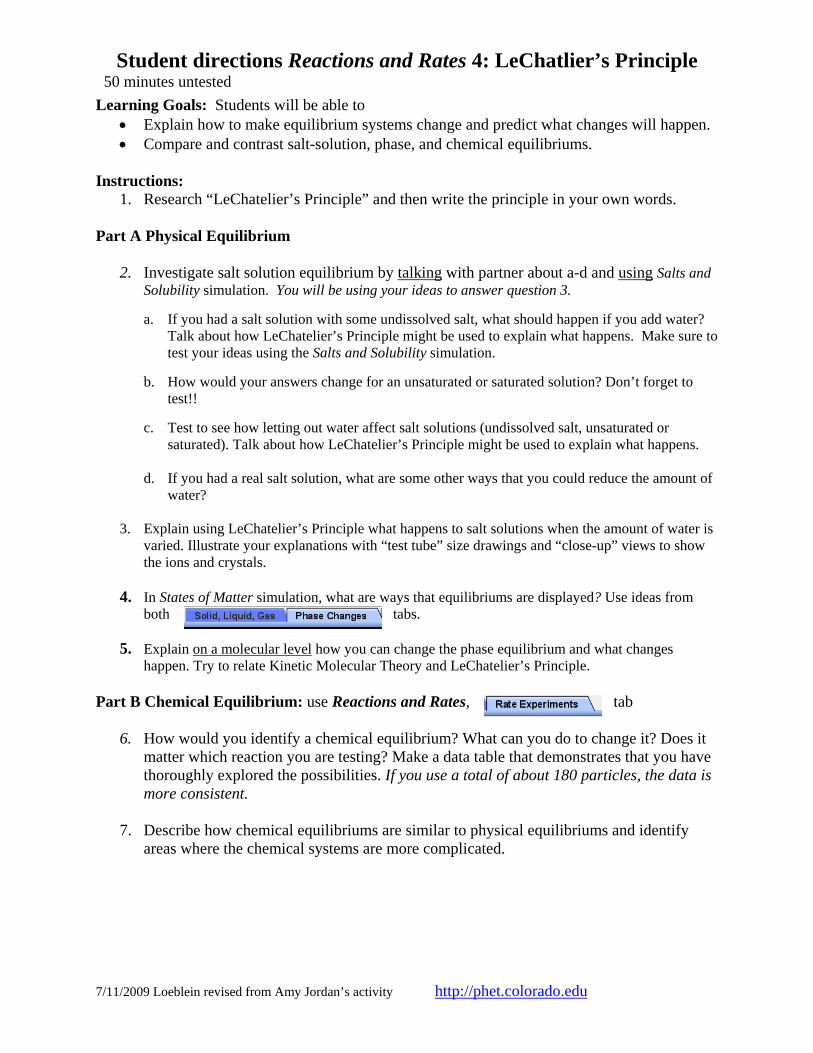
Student directions Reactions and Rates 4: LeChatlier’s Principle 50 minutes untested
7/11/2009 Loeblein revised from Amy Jordan’s activity http://phet.colorado.edu
Learning Goals: Students will be able to • Explain how to make equilibrium systems change and predict what changes will happen. • Compare and contrast salt-solution, phase, and chemical equilibriums.
Instructions:
1. Research “LeChatelier’s Principle” and then write the principle in your own words. Part A Physical Equilibrium
2. Investigate salt solution equilibrium by talking with partner about a-d and using Salts and Solubility simulation. You will be using your ideas to answer question 3.
a. If you had a salt solution with some undissolved salt, what should happen if you add water?
Talk about how LeChatelier’s Principle might be used to explain what happens. Make sure to test your ideas using the Salts and Solubility simulation.
b. How would your answers change for an unsaturated or saturated solution? Don’t forget to
test!!
c. Test to see how letting out water affect salt solutions (undissolved salt, unsaturated or saturated). Talk about how LeChatelier’s Principle might be used to explain what happens.
d. If you had a real salt solution, what are some other ways that you could reduce the amount of
water?
3. Explain using LeChatelier’s Principle what happens to salt solutions when the amount of water is varied. Illustrate your explanations with “test tube” size drawings and “close-up” views to show the ions and crystals.
4. In States of Matter simulation, what are ways that equilibriums are displayed? Use ideas from both tabs.
5. Explain on a molecular level how you can change the phase equilibrium and what changes happen. Try to relate Kinetic Molecular Theory and LeChatelier’s Principle.
Part B Chemical Equilibrium: use Reactions and Rates, tab
6. How would you identify a chemical equilibrium? What can you do to change it? Does it matter which reaction you are testing? Make a data table that demonstrates that you have thoroughly explored the possibilities. If you use a total of about 180 particles, the data is more consistent.
7. Describe how chemical equilibriums are similar to physical equilibriums and identify areas where the chemical systems are more complicated.

Reactions and Rates 4 Also uses Salts & Solubility and
States of Matter
Clicker Questions
LeChatlier’s Principle
Trish Loeblein
PhET
Students will be able to:
• Explain how to make equilibrium systems change and predict what changes will happen.
• Compare and contrast salt-solution, phase, and chemical equilibriums.
Learning Goals
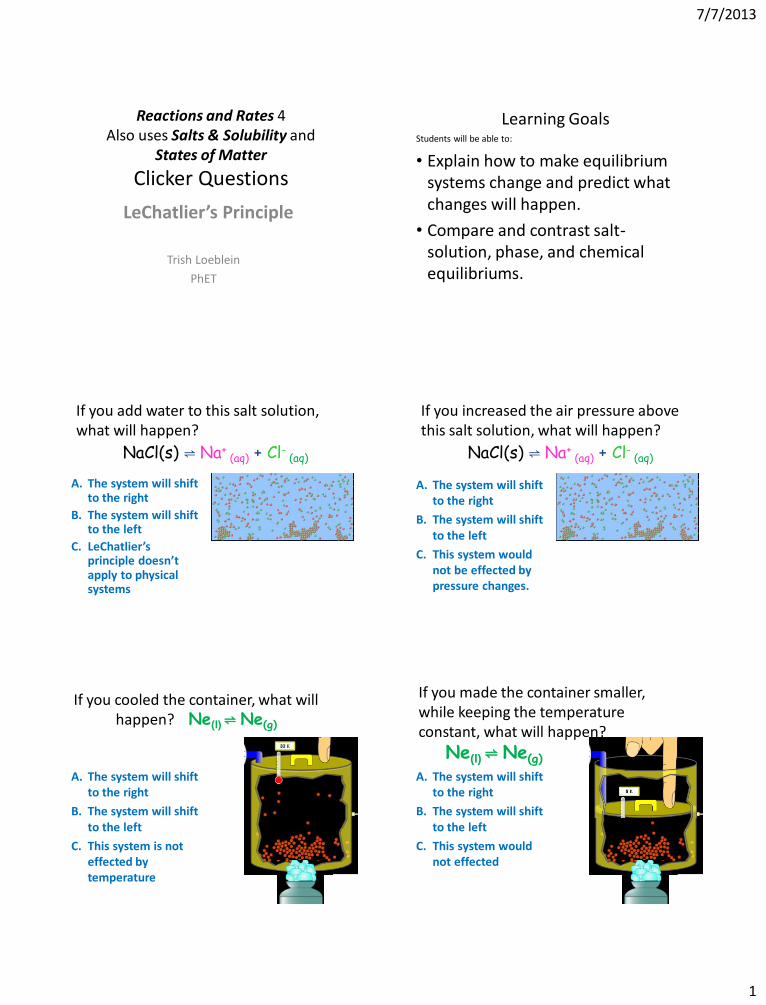
7/7/2013
1
Reactions and Rates 4 Also uses Salts & Solubility and
States of Matter
Clicker Questions
LeChatlier’s Principle
Trish Loeblein
PhET
Students will be able to:
• Explain how to make equilibrium systems change and predict what changes will happen.
• Compare and contrast salt-solution, phase, and chemical equilibriums.
Learning Goals
If you add water to this salt solution, what will happen?
A. The system will shift to the right
B. The system will shift to the left
C. LeChatlier’s principle doesn’t apply to physical systems
NaCl(s) ⇌ Na+ (aq) + Cl- (aq)
If you increased the air pressure above this salt solution, what will happen?
A. The system will shift to the right
B. The system will shift to the left
C. This system would not be effected by pressure changes.
NaCl(s) ⇌ Na+ (aq) + Cl- (aq)
If you cooled the container, what will happen? Ne(l) ⇌ Ne(g)
A. The system will shift to the right
B. The system will shift to the left
C. This system is not effected by temperature
If you made the container smaller, while keeping the temperature constant, what will happen?
A. The system will shift to the right
B. The system will shift to the left
C. This system would not effected
Ne(l) ⇌ Ne(g)
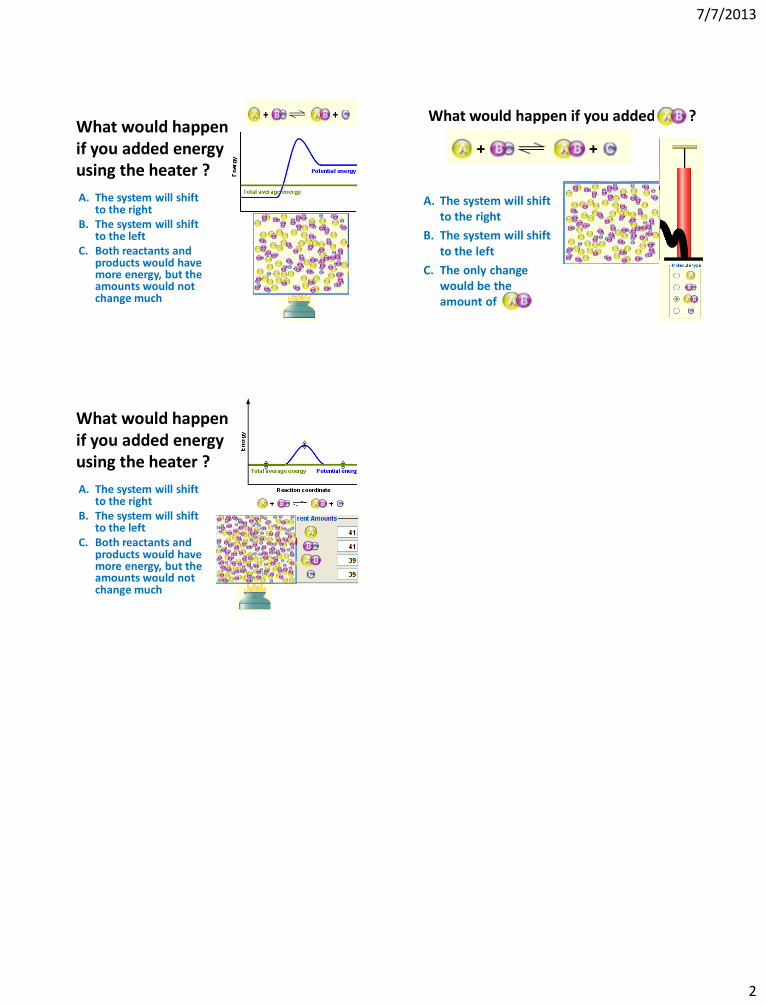
7/7/2013
2
What would happen if you added energy using the heater ?
A. The system will shift to the right
B. The system will shift to the left
C. Both reactants and products would have more energy, but the amounts would not change much
A. The system will shift to the right
B. The system will shift to the left
C. The only change would be the amount of
What would happen if you added ?
What would happen if you added energy using the heater ?
A. The system will shift to the right
B. The system will shift to the left
C. Both reactants and products would have more energy, but the amounts would not change much
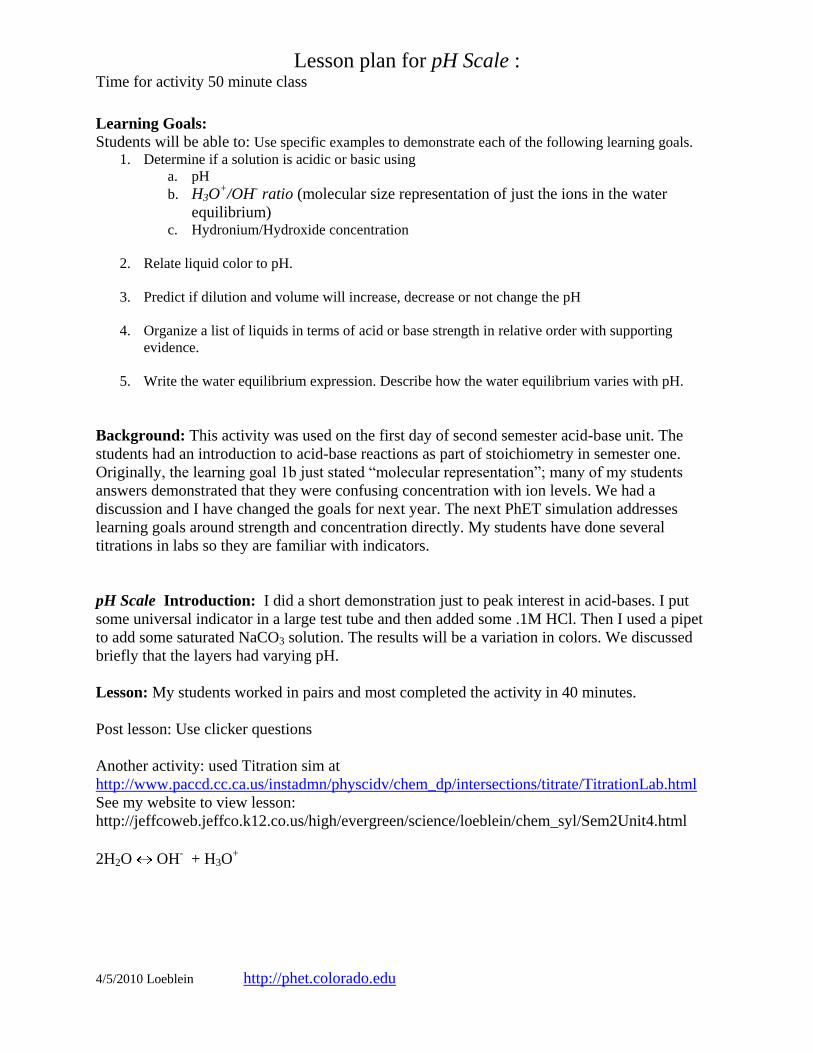
Lesson plan for pH Scale : Time for activity 50 minute class
4/5/2010 Loeblein http://phet.colorado.edu
Learning Goals:
Students will be able to: Use specific examples to demonstrate each of the following learning goals.
1. Determine if a solution is acidic or basic using
a. pH
b. H3O+/OH
- ratio (molecular size representation of just the ions in the water
equilibrium) c. Hydronium/Hydroxide concentration
2. Relate liquid color to pH.
3. Predict if dilution and volume will increase, decrease or not change the pH
4. Organize a list of liquids in terms of acid or base strength in relative order with supporting
evidence.
5. Write the water equilibrium expression. Describe how the water equilibrium varies with pH.
Background: This activity was used on the first day of second semester acid-base unit. The
students had an introduction to acid-base reactions as part of stoichiometry in semester one.
Originally, the learning goal 1b just stated “molecular representation”; many of my students
answers demonstrated that they were confusing concentration with ion levels. We had a
discussion and I have changed the goals for next year. The next PhET simulation addresses
learning goals around strength and concentration directly. My students have done several
titrations in labs so they are familiar with indicators.
pH Scale Introduction: I did a short demonstration just to peak interest in acid-bases. I put
some universal indicator in a large test tube and then added some .1M HCl. Then I used a pipet
to add some saturated NaCO3 solution. The results will be a variation in colors. We discussed
briefly that the layers had varying pH.
Lesson: My students worked in pairs and most completed the activity in 40 minutes.
Post lesson: Use clicker questions
Another activity: used Titration sim at
http://www.paccd.cc.ca.us/instadmn/physcidv/chem_dp/intersections/titrate/TitrationLab.html
See my website to view lesson:
http://jeffcoweb.jeffco.k12.co.us/high/evergreen/science/loeblein/chem_syl/Sem2Unit4.html
2H2O OH- + H3O
+

Student directions pH scale activity 1: Introduction to pH
http://phet.colorado.edu
8/13/2011 Loeblein http://phet.colorado.edu
Prelab: List some common liquids that you think are acidic or basic. For example, do you think orange
juice is acid or base? Talk to your partner about why you think the liquid is an acid or base. How do you
think adding water changes how acidic or basic the liquid is?
Directions: Use specific examples to demonstrate each of the following learning goals.
1. Determine if a solution is acidic or basic using
a. pH
b. H3O+/OH
- ratio (molecular size representation of just the ions in the water
equilibrium)
c. Hydronium/Hydroxide concentration
2. Relate liquid color to pH.
3. Predict if dilution and volume will increase, decrease or not change the pH
4. Organize a list of liquids in terms of acid or base strength in relative order with supporting
evidence.
5. Write the water equilibrium expression. Describe how the water equilibrium varies with
pH.
Student directions pH scale activity 1: Introduction to pH
Directions: Use specific examples to demonstrate each of the following learning goals.
1. Determine if a solution is acidic or basic using
a. pH
b. molecular representation
c. Hydronium/Hydroxide concentration
2. Relate liquid color to pH.
3. Predict if dilution and volume will increase, decrease or not change the pH
4. Organize a list of liquids in terms of acid or base strength in relative order with supporting
evidence.
5. Write the water equilibrium expression. Describe how the water equilibrium varies with
pH.
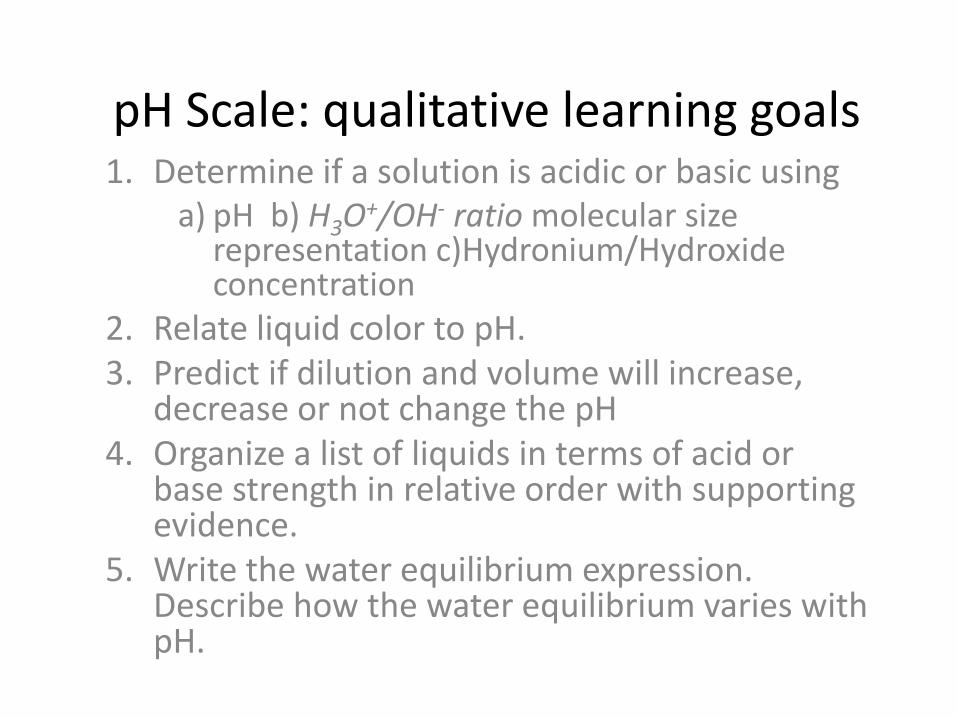
pH Scale: qualitative learning goals 1. Determine if a solution is acidic or basic using
a) pH b) H3O+/OH- ratio molecular size
representation c)Hydronium/Hydroxide concentration
2. Relate liquid color to pH.3. Predict if dilution and volume will increase,
decrease or not change the pH4. Organize a list of liquids in terms of acid or
base strength in relative order with supporting evidence.
5. Write the water equilibrium expression. Describe how the water equilibrium varies with pH.
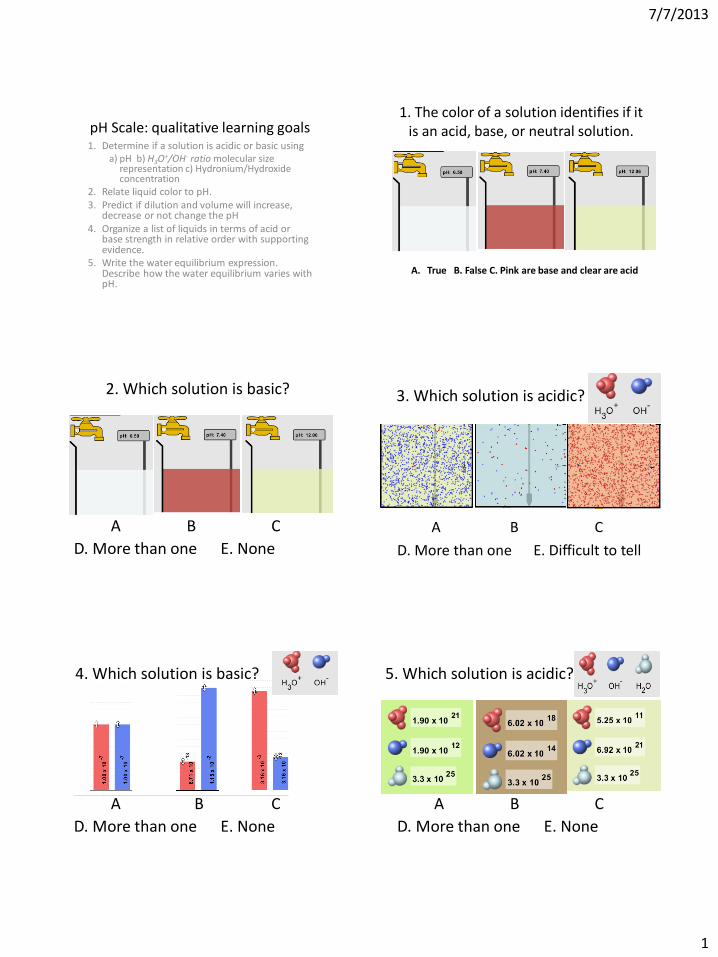
7/7/2013
1
pH Scale: qualitative learning goals 1. Determine if a solution is acidic or basic using
a) pH b) H3O+/OH- ratio molecular size representation c) Hydronium/Hydroxide concentration
2. Relate liquid color to pH. 3. Predict if dilution and volume will increase,
decrease or not change the pH 4. Organize a list of liquids in terms of acid or
base strength in relative order with supporting evidence.
5. Write the water equilibrium expression. Describe how the water equilibrium varies with pH.
1. The color of a solution identifies if it is an acid, base, or neutral solution.
A. True B. False C. Pink are base and clear are acid
2. Which solution is basic?
A B C
D. More than one E. None
3. Which solution is acidic?
A B C
D. More than one E. Difficult to tell
4. Which solution is basic?
A B C
D. More than one E. None
5. Which solution is acidic?
A B C
D. More than one E. None

7/7/2013
2
6. How will adding water effect the pH?
A.Increase the pH
B. Decrease the pH
C. No pH change
A: more water lessens the
acidity, so pH goes up
7. How will equal amount of water effect the pH?
A.Increase the pH
B. Decrease the pH
C. The pH will be cut in half
D.No pH change
B: more water lessens the basicity , so pH goes down, from 10 to 9.7, but not by 2 (log scale)
8. What is the order from most acidic to most basic?
A B C
A. A B C B. A C B C. B A C D. C B A E. C A B
9. What is the order from most acidic to most basic?
A B C
A. A B C B. A C B C. B A C D. C B A E. C A B

7/7/2013
3
10. If spit has a pH = 7.4, what does that tell you about the water equilibrium? 2H2O OH- + H3O+
A. Something was added that made the equilibrium shift left
B. Something was added that made the equilibrium shift right
C. pH has nothing to do with the water equilibrium
Answer to 10 Since the pH is not 7, then something was added to make the equilibrium shift left. For example, if NaOH was added to water, OH- is immediately in the solution and some of it will react with the H3O+ , so the pH (which is inversely related to [H3O+ ]), goes up. If something like HCl were added there would be more H3O+ , which would also cause a shift left, but there would be less OH- , (which is directly related to pH), so the pH is less than 7.
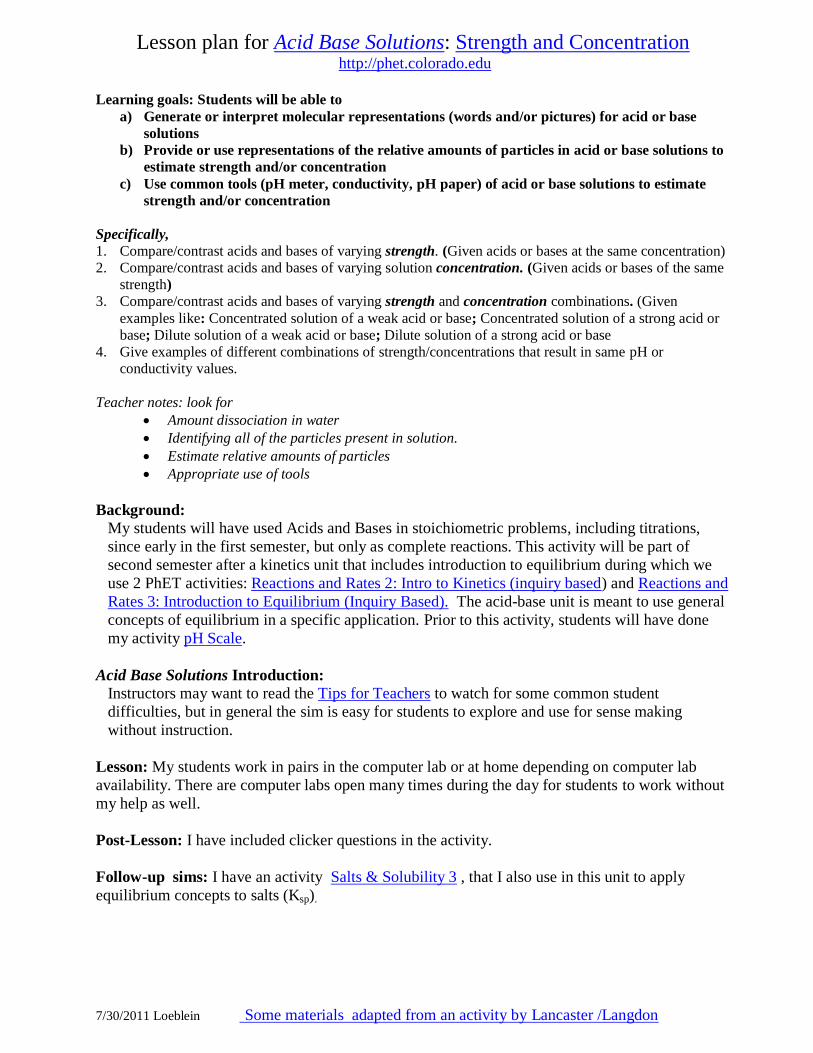
Lesson plan for Acid Base Solutions: Strength and Concentration http://phet.colorado.edu
7/30/2011 Loeblein Some materials adapted from an activity by Lancaster /Langdon
Learning goals: Students will be able to
a) Generate or interpret molecular representations (words and/or pictures) for acid or base
solutions
b) Provide or use representations of the relative amounts of particles in acid or base solutions to
estimate strength and/or concentration
c) Use common tools (pH meter, conductivity, pH paper) of acid or base solutions to estimate
strength and/or concentration
Specifically,
1. Compare/contrast acids and bases of varying strength. (Given acids or bases at the same concentration)
2. Compare/contrast acids and bases of varying solution concentration. (Given acids or bases of the same
strength)
3. Compare/contrast acids and bases of varying strength and concentration combinations. (Given
examples like: Concentrated solution of a weak acid or base; Concentrated solution of a strong acid or
base; Dilute solution of a weak acid or base; Dilute solution of a strong acid or base
4. Give examples of different combinations of strength/concentrations that result in same pH or
conductivity values.
Teacher notes: look for
Amount dissociation in water
Identifying all of the particles present in solution.
Estimate relative amounts of particles
Appropriate use of tools
Background:
My students will have used Acids and Bases in stoichiometric problems, including titrations,
since early in the first semester, but only as complete reactions. This activity will be part of
second semester after a kinetics unit that includes introduction to equilibrium during which we
use 2 PhET activities: Reactions and Rates 2: Intro to Kinetics (inquiry based) and Reactions and
Rates 3: Introduction to Equilibrium (Inquiry Based). The acid-base unit is meant to use general
concepts of equilibrium in a specific application. Prior to this activity, students will have done
my activity pH Scale.
Acid Base Solutions Introduction:
Instructors may want to read the Tips for Teachers to watch for some common student
difficulties, but in general the sim is easy for students to explore and use for sense making
without instruction.
Lesson: My students work in pairs in the computer lab or at home depending on computer lab
availability. There are computer labs open many times during the day for students to work without
my help as well.
Post-Lesson: I have included clicker questions in the activity.
Follow-up sims: I have an activity Salts & Solubility 3 , that I also use in this unit to apply
equilibrium concepts to salts (Ksp).
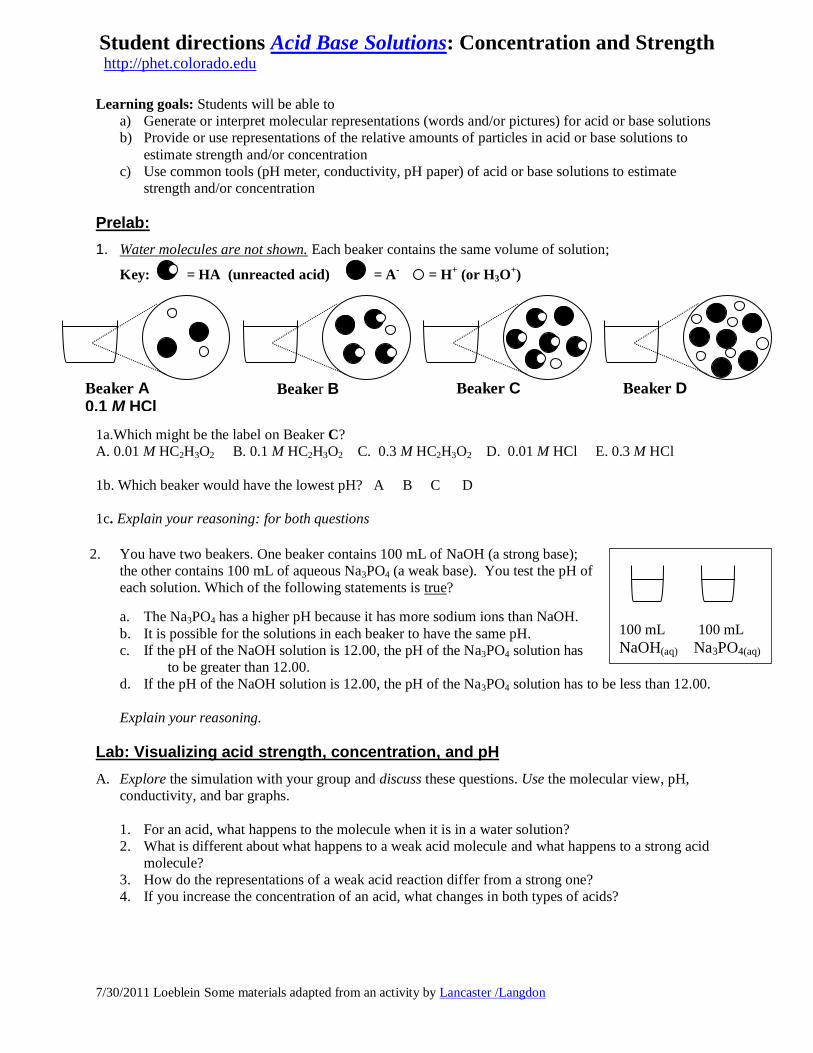
Student directions Acid Base Solutions: Concentration and Strength http://phet.colorado.edu
7/30/2011 Loeblein Some materials adapted from an activity by Lancaster /Langdon
Learning goals: Students will be able to
a) Generate or interpret molecular representations (words and/or pictures) for acid or base solutions
b) Provide or use representations of the relative amounts of particles in acid or base solutions to
estimate strength and/or concentration
c) Use common tools (pH meter, conductivity, pH paper) of acid or base solutions to estimate
strength and/or concentration
Prelab:
1. Water molecules are not shown. Each beaker contains the same volume of solution;
Key: = HA (unreacted acid) = A- = H
+ (or H3O
+)
1a.Which might be the label on Beaker C?
A. 0.01 M HC2H3O2 B. 0.1 M HC2H3O2 C. 0.3 M HC2H3O2 D. 0.01 M HCl E. 0.3 M HCl
1b. Which beaker would have the lowest pH? A B C D
1c. Explain your reasoning: for both questions
2. You have two beakers. One beaker contains 100 mL of NaOH (a strong base);
the other contains 100 mL of aqueous Na3PO4 (a weak base). You test the pH of
each solution. Which of the following statements is true?
a. The Na3PO4 has a higher pH because it has more sodium ions than NaOH.
b. It is possible for the solutions in each beaker to have the same pH.
c. If the pH of the NaOH solution is 12.00, the pH of the Na3PO4 solution has
to be greater than 12.00.
d. If the pH of the NaOH solution is 12.00, the pH of the Na3PO4 solution has to be less than 12.00.
Explain your reasoning.
Lab: Visualizing acid strength, concentration, and pH
A. Explore the simulation with your group and discuss these questions. Use the molecular view, pH,
conductivity, and bar graphs.
1. For an acid, what happens to the molecule when it is in a water solution?
2. What is different about what happens to a weak acid molecule and what happens to a strong acid
molecule?
3. How do the representations of a weak acid reaction differ from a strong one?
4. If you increase the concentration of an acid, what changes in both types of acids?
Beaker A 0.1 M HCl
Beaker B Beaker C
Beaker D
100 mL 100 mL
NaOH(aq) Na3PO4(aq)

Student directions Acid Base Solutions: Concentration and Strength http://phet.colorado.edu
7/30/2011 Loeblein Some materials adapted from an activity by Lancaster /Langdon
unreacted acid Water molecules are not shown in molecular views
B. These images (molecular view of solution/graph/pH/conductivity) depict a strong acid solution:
KEY:
a. How does the Key change for a weak acid?
b. How would the images change for a weak acid solution of the same concentration? Draw the
images as well as describing them in words.
c. Draw the images for a weak acid and a strong acid solution of the greater concentration? Make
any notes that might help you remember.
d. Write the chemical reactions for a weak acid and a strong acid.
e. Is there one type of representation that might be the best one for you to remember information
about weak and strong acids? Make any notes that might help you remember how to
compare/contrast the two types.
C. Repeat parts A and B for base solutions.
D. If your lab partner explains to you that concentration and strength effect acid base solution
representations the same way, are they right? Make notes of ideas that support the statement and
those that contradict.
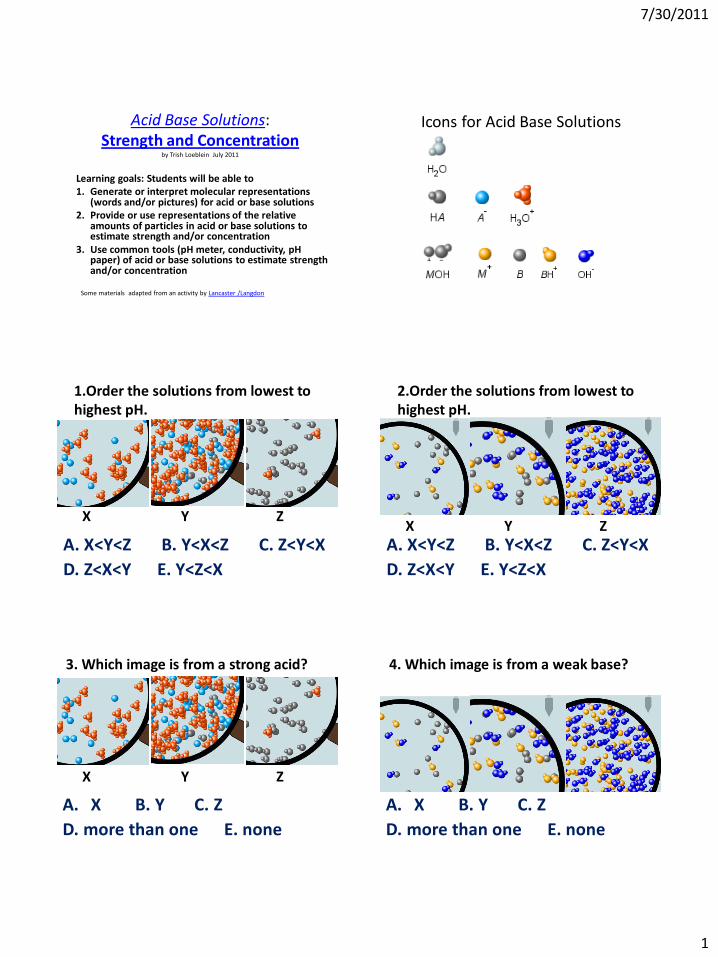
7/30/2011
1
Acid Base Solutions: Strength and Concentration
by Trish Loeblein July 2011
Learning goals: Students will be able to 1. Generate or interpret molecular representations
(words and/or pictures) for acid or base solutions 2. Provide or use representations of the relative
amounts of particles in acid or base solutions to estimate strength and/or concentration
3. Use common tools (pH meter, conductivity, pH paper) of acid or base solutions to estimate strength and/or concentration
Some materials adapted from an activity by Lancaster /Langdon
Icons for Acid Base Solutions
1.Order the solutions from lowest to highest pH.
A. X<Y<Z B. Y<X<Z C. Z<Y<X
D. Z<X<Y E. Y<Z<X
X Y Z
2.Order the solutions from lowest to highest pH.
A. X<Y<Z B. Y<X<Z C. Z<Y<X
D. Z<X<Y E. Y<Z<X
X Y Z
3. Which image is from a strong acid?
A. X B. Y C. Z
D. more than one E. none
X Y Z
4. Which image is from a weak base?
A. X B. Y C. Z
D. more than one E. none
X Y Z
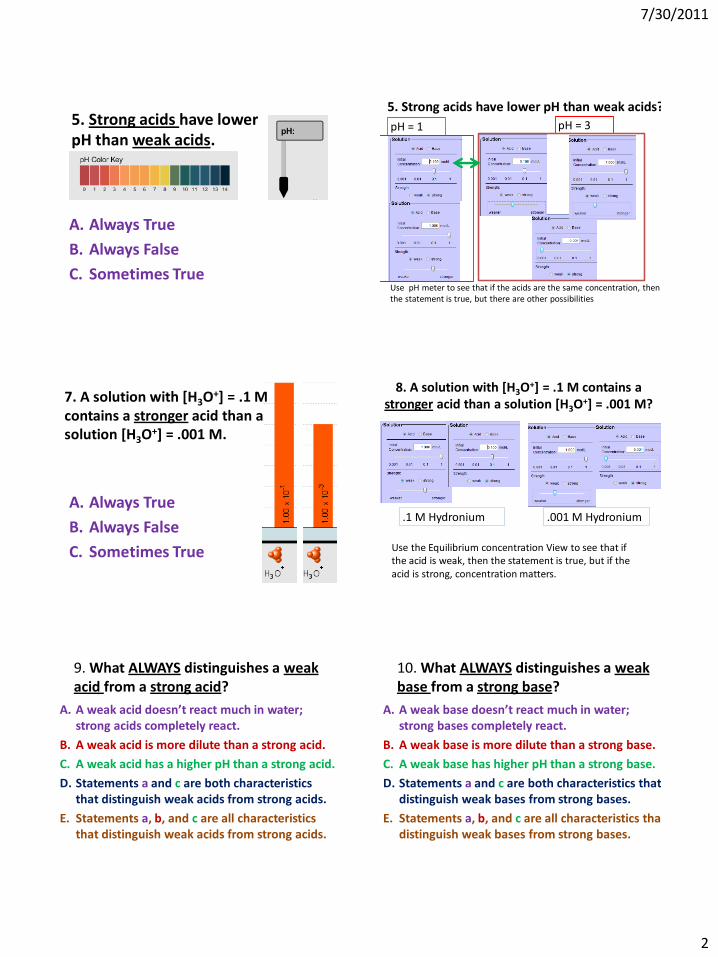
7/30/2011
2
5. Strong acids have lower pH than weak acids.
A. Always True
B. Always False
C. Sometimes True
5. Strong acids have lower pH than weak acids?
Use pH meter to see that if the acids are the same concentration, then the statement is true, but there are other possibilities
pH = 3 pH = 1
A. Always True
B. Always False
C. Sometimes True
7. A solution with [H3O+] = .1 M contains a stronger acid than a solution [H3O+] = .001 M.
8. A solution with [H3O+] = .1 M contains a stronger acid than a solution [H3O+] = .001 M?
.001 M Hydronium
Use the Equilibrium concentration View to see that if the acid is weak, then the statement is true, but if the acid is strong, concentration matters.
.1 M Hydronium
9. What ALWAYS distinguishes a weak acid from a strong acid?
A. A weak acid doesn’t react much in water; strong acids completely react.
B. A weak acid is more dilute than a strong acid.
C. A weak acid has a higher pH than a strong acid.
D. Statements a and c are both characteristics that distinguish weak acids from strong acids.
E. Statements a, b, and c are all characteristics that distinguish weak acids from strong acids.
10. What ALWAYS distinguishes a weak base from a strong base?
A. A weak base doesn’t react much in water; strong bases completely react.
B. A weak base is more dilute than a strong base.
C. A weak base has higher pH than a strong base.
D. Statements a and c are both characteristics that distinguish weak bases from strong bases.
E. Statements a, b, and c are all characteristics that distinguish weak bases from strong bases.

7/30/2011
3
Icons for Acid Base Solutions
Use these icons to write reactions for strong and weak acids and then for strong and weak bases.
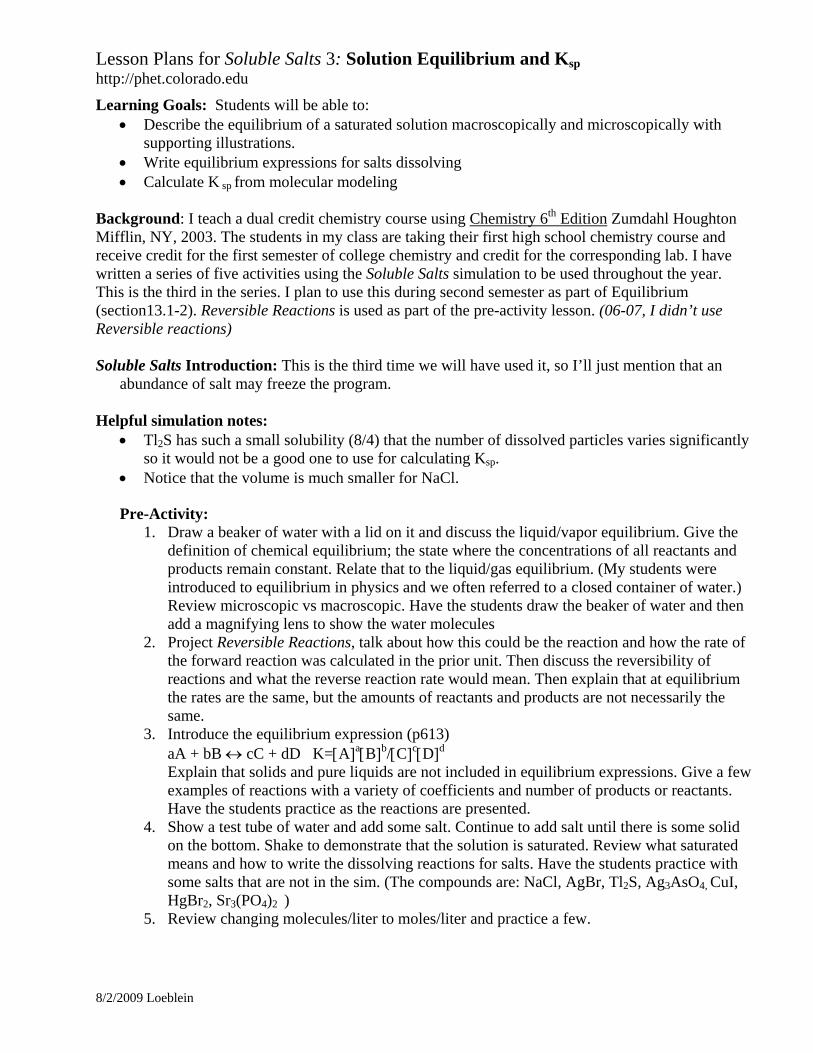
Lesson Plans for Soluble Salts 3: Solution Equilibrium and Ksp http://phet.colorado.edu
8/2/2009 Loeblein
Learning Goals: Students will be able to: • Describe the equilibrium of a saturated solution macroscopically and microscopically with
supporting illustrations. • Write equilibrium expressions for salts dissolving • Calculate K sp from molecular modeling
Background: I teach a dual credit chemistry course using Chemistry 6th Edition Zumdahl Houghton Mifflin, NY, 2003. The students in my class are taking their first high school chemistry course and receive credit for the first semester of college chemistry and credit for the corresponding lab. I have written a series of five activities using the Soluble Salts simulation to be used throughout the year. This is the third in the series. I plan to use this during second semester as part of Equilibrium (section13.1-2). Reversible Reactions is used as part of the pre-activity lesson. (06-07, I didn’t use Reversible reactions) Soluble Salts Introduction: This is the third time we will have used it, so I’ll just mention that an
abundance of salt may freeze the program. Helpful simulation notes:
• Tl2S has such a small solubility (8/4) that the number of dissolved particles varies significantly so it would not be a good one to use for calculating Ksp.
• Notice that the volume is much smaller for NaCl.
Pre-Activity: 1. Draw a beaker of water with a lid on it and discuss the liquid/vapor equilibrium. Give the
definition of chemical equilibrium; the state where the concentrations of all reactants and products remain constant. Relate that to the liquid/gas equilibrium. (My students were introduced to equilibrium in physics and we often referred to a closed container of water.) Review microscopic vs macroscopic. Have the students draw the beaker of water and then add a magnifying lens to show the water molecules
2. Project Reversible Reactions, talk about how this could be the reaction and how the rate of the forward reaction was calculated in the prior unit. Then discuss the reversibility of reactions and what the reverse reaction rate would mean. Then explain that at equilibrium the rates are the same, but the amounts of reactants and products are not necessarily the same.
3. Introduce the equilibrium expression (p613) aA + bB ↔ cC + dD K=[A]a[B]b/[C]c[D]d
Explain that solids and pure liquids are not included in equilibrium expressions. Give a few examples of reactions with a variety of coefficients and number of products or reactants. Have the students practice as the reactions are presented.
4. Show a test tube of water and add some salt. Continue to add salt until there is some solid on the bottom. Shake to demonstrate that the solution is saturated. Review what saturated means and how to write the dissolving reactions for salts. Have the students practice with some salts that are not in the sim. (The compounds are: NaCl, AgBr, Tl2S, Ag3AsO4, CuI, HgBr2, Sr3(PO4)2 )
5. Review changing molecules/liter to moles/liter and practice a few.
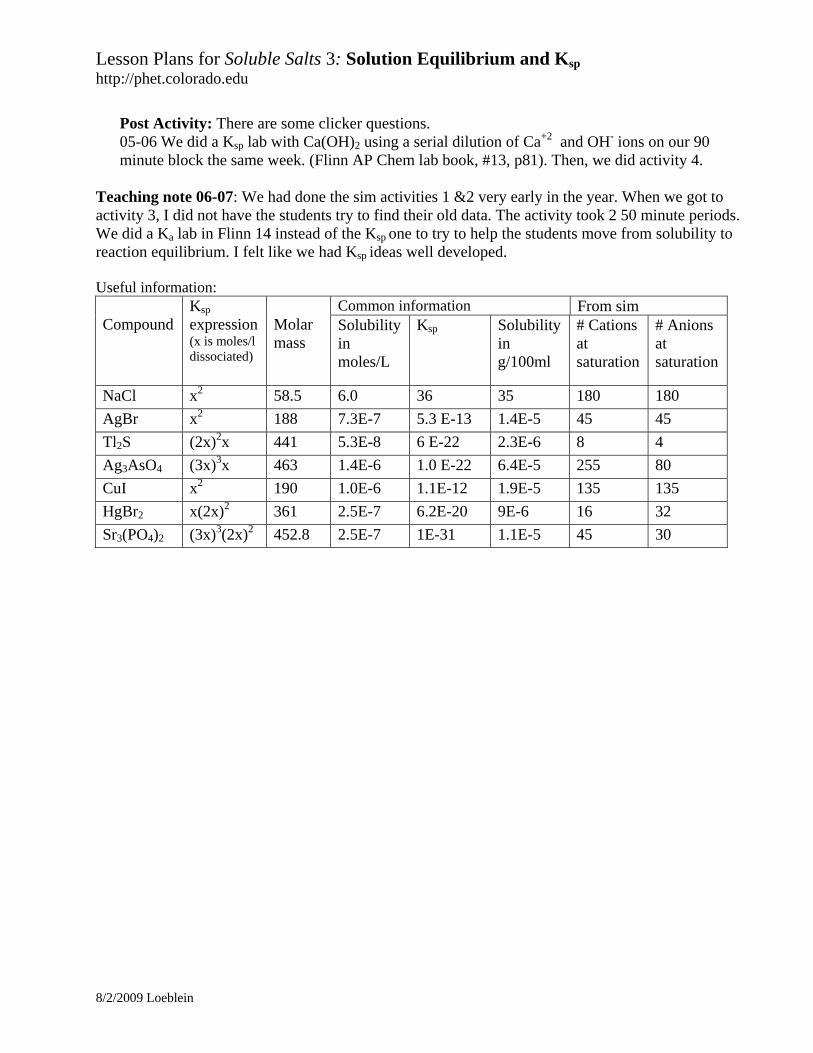
Lesson Plans for Soluble Salts 3: Solution Equilibrium and Ksp http://phet.colorado.edu
8/2/2009 Loeblein
Post Activity: There are some clicker questions. 05-06 We did a Ksp lab with Ca(OH)2 using a serial dilution of Ca+2 and OH- ions on our 90 minute block the same week. (Flinn AP Chem lab book, #13, p81). Then, we did activity 4.
Teaching note 06-07: We had done the sim activities 1 &2 very early in the year. When we got to activity 3, I did not have the students try to find their old data. The activity took 2 50 minute periods. We did a Ka lab in Flinn 14 instead of the Ksp one to try to help the students move from solubility to reaction equilibrium. I felt like we had Ksp ideas well developed. Useful information: Compound
Ksp expression (x is moles/l dissociated)
Molar mass
Common information From sim Solubility in moles/L
Ksp Solubility in g/100ml
# Cations at saturation
# Anions at saturation
NaCl x2 58.5 6.0 36 35 180 180 AgBr x2 188 7.3E-7 5.3 E-13 1.4E-5 45 45 Tl2S (2x)2x 441 5.3E-8 6 E-22 2.3E-6 8 4 Ag3AsO4 (3x)3x 463 1.4E-6 1.0 E-22 6.4E-5 255 80 CuI x2 190 1.0E-6 1.1E-12 1.9E-5 135 135 HgBr2 x(2x)2 361 2.5E-7 6.2E-20 9E-6 16 32 Sr3(PO4)2 (3x)3(2x)2 452.8 2.5E-7 1E-31 1.1E-5 45 30
Student Directions for Soluble Salts 3: Solution Equilibrium and Ksp http://phet.colorado.edu
8/2/2009 Loeblein
Launch Soluble Salts and start a Word document to write a lab report. Learning Goals: Students will be able to:
• Describe the equilibrium of a saturated solution macroscopically and microscopically with supporting illustrations.
• Write equilibrium expressions for salts dissolving • Calculate K sp from molecular modeling.
1. Observe what happens as you add one shaker of salt to the water. Talk about your observations and then investigate salts dissolving in water further. When you feel like you understand what equilibrium means for a salt dissolving in water, write an introduction for your lab report that explains your understanding of equilibrium. Illustrate your introduction with “test tube” size drawings and “close-up” views to show the ions and crystals. Some things to think about are:
a. In general terms, what the reactant is and what the products are when you put a salt in water. b. What would a test tube of the salt/water equilibrium look like? c. What is happening on a molecular scale when equilibrium is established? d. How does the speed at which you add the salt effect the equilibrium? e. How does the volume of water or amount of salt added affect the equilibrium?
2. Design experiments to determine the value of the constant for each salt include the effect of varying volume.
a. Write your procedure b. Show sample calculations. c. Make a data table for each salt that demonstrates good experimental design. d. Write the equilibrium expressions for each salt with the determined constant.
3. Write a conclusion for your experiment that includes addressing these questions.
a. Which salt gave you the best data? Explain your reasoning. b. Which salt gave you the poorest data? Explain your reasoning. c. How do your values compare to the published ones? Cite your references. d. How do the solubility rules relate to the Ksp values that you determined? e. How could you use Ksp values to predict solubility?
Salts and Solubility Activity 3Solution Equilibrium and Ksp
Learning Goals: Students will be able to:•Describe the equilibrium of a saturated solution macroscopically and microscopically with supporting illustrations. (not covered in these questions)•Write equilibrium expressions for salts dissolving •Calculate K sp from molecular modeling.
Trish Loeblein updated July 2008 I simplified the reactions by omitting (aq), my students have found this helpful and they know that they must put it on tests.

1
Salts and Solubility Activity 3
Solution Equilibrium and Ksp
Learning Goals: Students will be able to:
•Describe the equilibrium of a saturated solution macroscopically and
microscopically with supporting illustrations. (not covered in these questions)
•Write equilibrium expressions for salts dissolving
•Calculate K sp from molecular modeling.
Trish Loeblein updated July 2008 I simplified the reactions by omitting (aq), my students have found this
helpful and they know that they must put it on tests.
1 Write Ksp in terms of s (simple)
1. Table salt dissolves in water: NaCl(s) ⇌ Na+ + Cl-
What is the correct Ksp expression if s is the molar solubility Sodium chloride?
a. Ksp = s2
b. Ksp = 2s2
c. Ksp= s5
d. Ksp = 4s4
Answer to previous slide
Table salt dissolves in water: NaCl(s) ⇌ Na+ + Cl-
Ksp = [Na+] [Cl-]
For every NaCl molecule that dissolves there was one Na+ and one Cl- put into solution, so if we let s equal the amount of NaCl that dissolved then the expression substitutes to be Ksp = s2
2 Write Ksp in terms of s coefficients and exponents required
What is the correct Ksp expression if s is the molar solubility Silver arsenate?
a. Ksp = s2
b. Ksp = 3s2
c. Ksp= s4
d. Ksp = 3s4
e. Ksp = 27s4
2. Silver arsenate dissolves in water: Ag3AsO4(s) ⇌ 3 Ag+ + AsO4
3-
3 S in terms of Ksp
3. What is the proper expression for the molar solubility s of AgCl in terms of Ksp?
a. s = Ksp
b. s = (Ksp)2
c. s = (Ksp)1/2
d. s = Ksp/2
Answer to previous slide
Ksp = [Ag+][Br-]
[Ag+]=[Br-] (44 of each are dissolved)
Ksp = s2
s = (Ksp)1/2
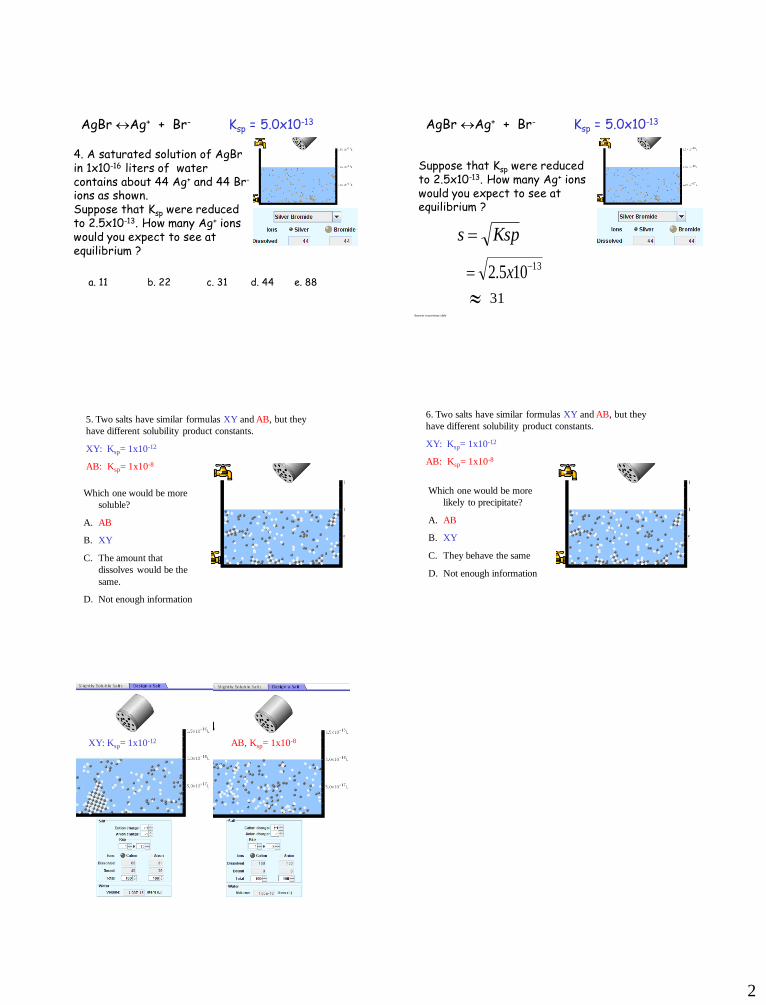
2
4 Effect of reducing Ksp
4. A saturated solution of AgBr in 1x10-16 liters of water contains about 44 Ag+ and 44 Br- ions as shown. Suppose that Ksp were reduced to 2.5x10⁻¹³. How many Ag+ ions would you expect to see at equilibrium ?
a. 11 b. 22 c. 31 d. 44 e. 88
AgBr Ag+ + Br- Ksp = 5.0x10⁻¹³
Answer to previous slide
Suppose that Ksp were reduced to 2.5x10⁻¹³. How many Ag+ ions would you expect to see at equilibrium ?
AgBr Ag+ + Br- Ksp = 5.0x10⁻¹³
Ksps
13105.2 x
31
5 Predicting solubility by comparing Ksp
5. Two salts have similar formulas XY and AB, but they
have different solubility product constants.
XY: Ksp= 1x10-12
AB: Ksp= 1x10⁻⁸
Which one would be more
soluble?
A. AB
B. XY
C. The amount that
dissolves would be the
same.
D. Not enough information
6 Predicting precipitation by comparing Ksp
6. Two salts have similar formulas XY and AB, but they
have different solubility product constants.
XY: Ksp= 1x10-12
AB: Ksp= 1x10⁻⁸
Which one would be more
likely to precipitate?
A. AB
B. XY
C. They behave the same
D. Not enough information
Demonstration of sim for previous question
XY: Ksp= 1x10-12 AB, Ksp= 1x10⁻⁸

Lesson plan for Alpha Decay: http://phet.colorado.edu
4/29/2012 Loeblein. Thanks to Phil Cook, [email protected], for his ideas from activities on PhET
Teaching Ideas: http://phet.colorado.edu/en/contributions/view/3221
Learning Goals: Students will be able to:
Explain alpha decay process. (radiation of alpha particles tunneling out of the nucleus causing a
decrease in mass number).
Explain what half-life means in terms of single particles and larger samples. (Alpha particles
escape the nucleus in variant intervals, but the time to decay can be averaged to give an overall
“half-life”- time for half of the particles to undergo decay.)
Background:
My students have likely heard about nuclear decay. They are high school seniors. I have
written this activity to be used with a substitute teacher near the end of the school year. They
have done many PhET activities throughout the year in class and as homework.
Alpha Decay Introduction:
I don’t plan to tell or show the students how to interact with the sim, but I will be watching to
see if they use the graph on the Single Atom tab for sense making or if it is a distraction. If I
see problems, I’ll tell students that they can ignore it. Tips for Teachers are provided by the
PhET team for this sim.
Lesson: My students will work in pairs in a computer lab. They have 95 minutes, so I will have
them do my activity with Beta Decay when they finish this one.
Post-Lesson: I plan to write clicker questions, but have not done so yet.
Follow-up sims: Beta Decay, Nuclear Fission (I plan to use Chasteen’s activity
http://phet.colorado.edu/en/contributions/view/3335) , Radioactive dating (I plan to use Bire’s
activity http://phet.colorado.edu/en/contributions/view/3534 )
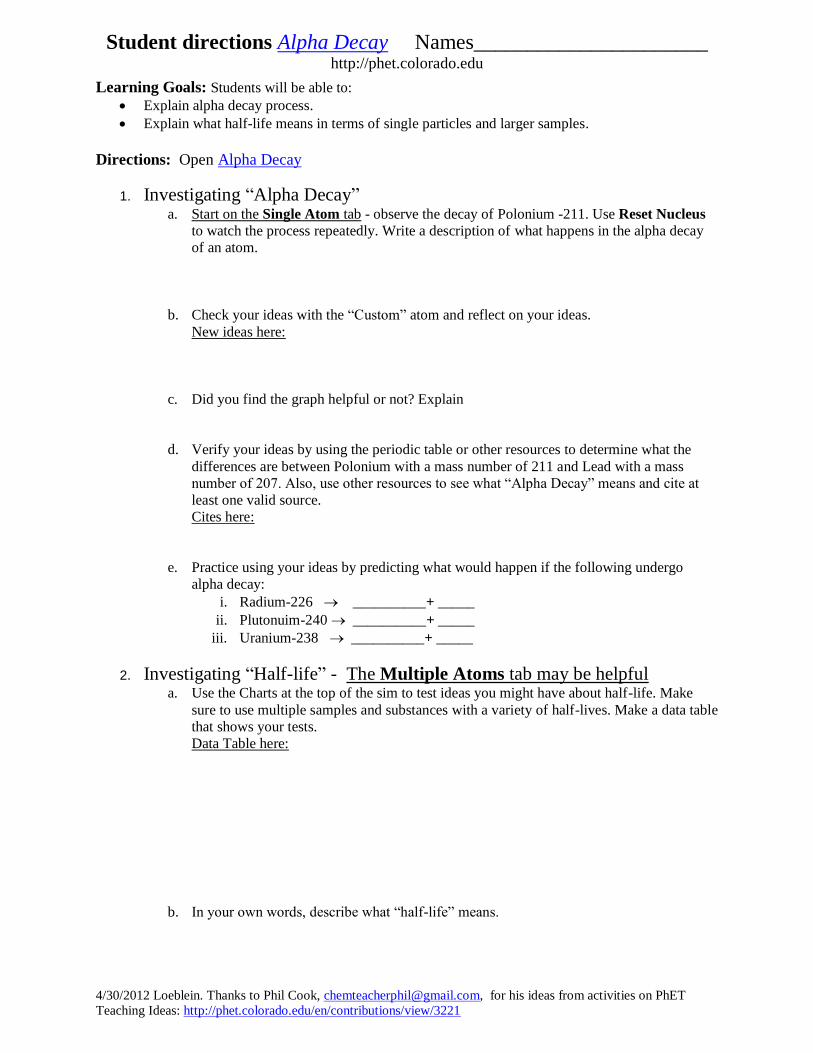
Student directions Alpha Decay Names______________________ http://phet.colorado.edu
4/30/2012 Loeblein. Thanks to Phil Cook, [email protected], for his ideas from activities on PhET
Teaching Ideas: http://phet.colorado.edu/en/contributions/view/3221
Learning Goals: Students will be able to:
Explain alpha decay process.
Explain what half-life means in terms of single particles and larger samples.
Directions: Open Alpha Decay
1. Investigating “Alpha Decay” a. Start on the Single Atom tab - observe the decay of Polonium -211. Use Reset Nucleus
to watch the process repeatedly. Write a description of what happens in the alpha decay
of an atom.
b. Check your ideas with the “Custom” atom and reflect on your ideas.
New ideas here:
c. Did you find the graph helpful or not? Explain
d. Verify your ideas by using the periodic table or other resources to determine what the
differences are between Polonium with a mass number of 211 and Lead with a mass
number of 207. Also, use other resources to see what “Alpha Decay” means and cite at
least one valid source.
Cites here:
e. Practice using your ideas by predicting what would happen if the following undergo
alpha decay:
i. Radium-226 __________+ _____
ii. Plutonuim-240 __________+ _____
iii. Uranium-238 __________+ _____
2. Investigating “Half-life” - The Multiple Atoms tab may be helpful a. Use the Charts at the top of the sim to test ideas you might have about half-life. Make
sure to use multiple samples and substances with a variety of half-lives. Make a data table
that shows your tests.
Data Table here:
b. In your own words, describe what “half-life” means.

Student directions Alpha Decay Names______________________ http://phet.colorado.edu
4/30/2012 Loeblein. Thanks to Phil Cook, [email protected], for his ideas from activities on PhET
Teaching Ideas: http://phet.colorado.edu/en/contributions/view/3221
t= 0.5s t=1.0s t=1.5s t=2s t=2s
t= 0.5s t=1.0s t=1.5s t=2s
c. Check your ideas by drawing predictions without using the sim for the following
scenario:
If you have a substance that has a half- life of 1.5 seconds make predictions of what will
happen by sketching the pie graphs indicating the number of the substance and it’s decayed
atoms for a reaction starting with 40 total atoms.
d. Use the sim to test the scenario. Copy the graphs. ( Pause and Step may help)
e. How do your predictions compare to the results shown in the sim?
f. Run the scenario repeatedly and compare the results of multiple trials. Use the Data table
to show your results:
Time(s) Trial 2 Trial 3 Trial 4 Trial 5
0
0.5
1.0
1.5
2.0
g. What ideas do you have to explain the similarities and differences in the data and also
your predictions?
h. Try another substance with a different half-life to see if your conclusions make sense.
Describe your test, results, and conclusions.
i. Practice using your ideas: Is it reasonable to assume that if you start with 10 atoms of
Polonium, that 0.5s later only 5 will remain? What if you start with 500 atoms? Explain.
Alpha Decay Questions Trish Loeblein 6/14/2011
http://phet.colorado.edu/
Learning Goals: Students will be able to:
• Explain alpha decay process.
• Explain what half-life means in terms of single particles and larger samples.
Lesson Plans and Activity
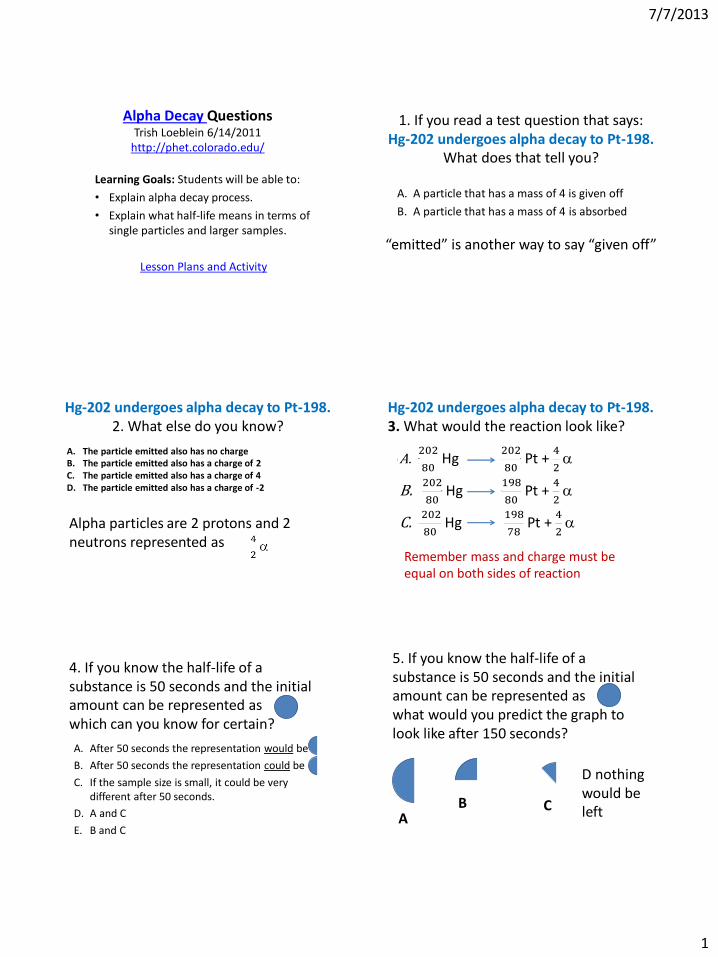
7/7/2013
1
Alpha Decay Questions Trish Loeblein 6/14/2011
http://phet.colorado.edu/
Learning Goals: Students will be able to:
• Explain alpha decay process.
• Explain what half-life means in terms of single particles and larger samples.
Lesson Plans and Activity
1. If you read a test question that says: Hg-202 undergoes alpha decay to Pt-198.
What does that tell you?
A. A particle that has a mass of 4 is given off
B. A particle that has a mass of 4 is absorbed
“emitted” is another way to say “given off”
Hg-202 undergoes alpha decay to Pt-198. 2. What else do you know?
A. The particle emitted also has no charge B. The particle emitted also has a charge of 2 C. The particle emitted also has a charge of 4 D. The particle emitted also has a charge of -2
Alpha particles are 2 protons and 2 neutrons represented as
A. 202
80 Hg
202
80 Pt +
4
2
B.202
80 Hg
198
80 Pt +
4
2
C. 202
80 Hg
198
78 Pt +
4
2
Hg-202 undergoes alpha decay to Pt-198. 3. What would the reaction look like?
Remember mass and charge must be equal on both sides of reaction
4. If you know the half-life of a substance is 50 seconds and the initial amount can be represented as which can you know for certain?
A. After 50 seconds the representation would be
B. After 50 seconds the representation could be
C. If the sample size is small, it could be very different after 50 seconds.
D. A and C
E. B and C
5. If you know the half-life of a substance is 50 seconds and the initial amount can be represented as what would you predict the graph to look like after 150 seconds?
D nothing would be left A
B C

Lesson plan for Beta Decay: http://phet.colorado.edu
2/25/2013 Loeblein Thanks to Phil Cook, [email protected] for his ideas on PhET Teaching Ideas:
http://phet.colorado.edu/en/contributions/view/3221
Learning Goals: Students will be able to:
Describe the process of beta decay
Differentiate between Alpha and Beta decay
Compare the meaning of “Half-life” for Alpha and Beta decay.
Background: This is written to follow Loeblein’s activity for Alpha Decay. This activity
could be used for homework. My students have likely heard about nuclear decay. They are
high school seniors. I have written this activity to be used with a substitute teacher near the end
of the school year. They have done many PhET activities throughout the year in class and as
homework.
Beta Decay Introduction:
Because this sim is similar to Alpha Decay, I do not expect the students to have difficulty using
the sim without guidance.
Lesson: My students will work in pairs in a computer lab.
Post-Lesson: I plan to write clicker questions, but have not done so yet.
Follow-up sims: Nuclear Fission (I plan to use Chasteen’s activity
http://phet.colorado.edu/en/contributions/view/3335) , Radioactive dating Activity
Beta Decay Questions Trish Loeblein 2/7/2013
http://phet.colorado.edu/
Learning Goals: Students will be able to: • Describe the process of Beta decay • Differentiate between Alpha and Beta
decay • Compare the meaning of “Half-life” for
Alpha and Beta decay.
Lesson plans and activity
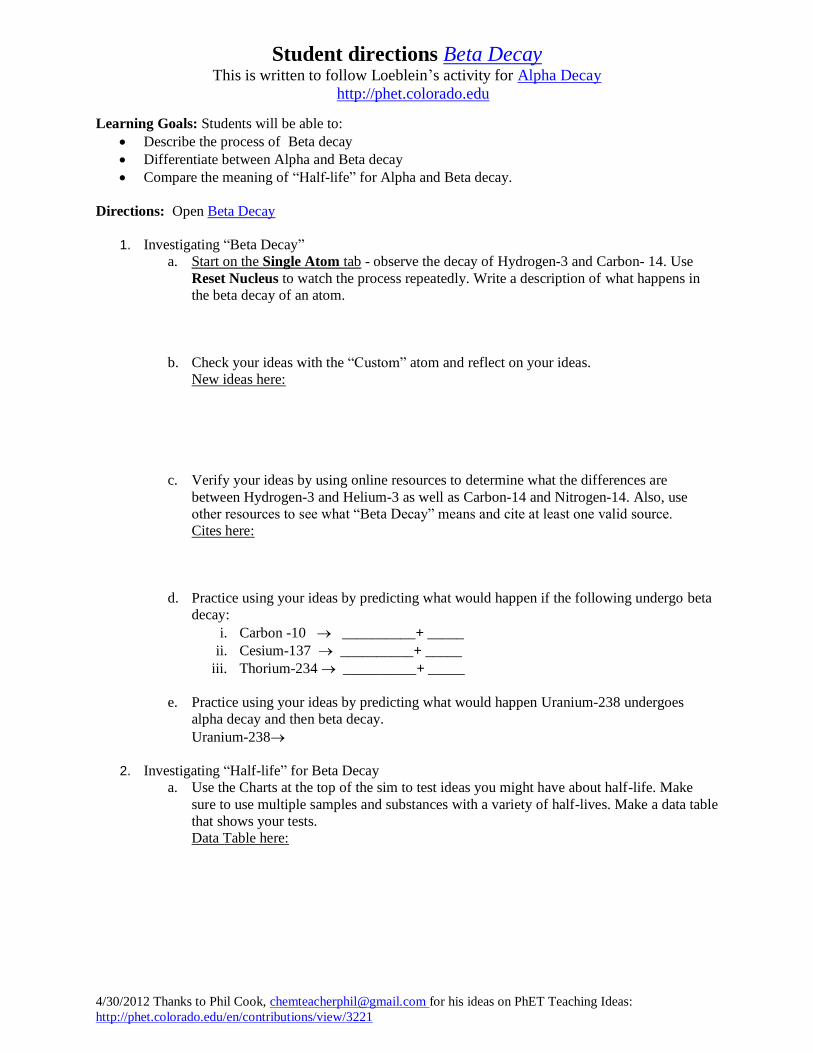
Student directions Beta Decay This is written to follow Loeblein’s activity for Alpha Decay
http://phet.colorado.edu
4/30/2012 Thanks to Phil Cook, [email protected] for his ideas on PhET Teaching Ideas:
http://phet.colorado.edu/en/contributions/view/3221
Learning Goals: Students will be able to:
Describe the process of Beta decay
Differentiate between Alpha and Beta decay
Compare the meaning of “Half-life” for Alpha and Beta decay.
Directions: Open Beta Decay
1. Investigating “Beta Decay”
a. Start on the Single Atom tab - observe the decay of Hydrogen-3 and Carbon- 14. Use
Reset Nucleus to watch the process repeatedly. Write a description of what happens in
the beta decay of an atom.
b. Check your ideas with the “Custom” atom and reflect on your ideas.
New ideas here:
c. Verify your ideas by using online resources to determine what the differences are
between Hydrogen-3 and Helium-3 as well as Carbon-14 and Nitrogen-14. Also, use
other resources to see what “Beta Decay” means and cite at least one valid source.
Cites here:
d. Practice using your ideas by predicting what would happen if the following undergo beta
decay:
i. Carbon -10 __________+ _____
ii. Cesium-137 __________+ _____
iii. Thorium-234 __________+ _____
e. Practice using your ideas by predicting what would happen Uranium-238 undergoes
alpha decay and then beta decay.
Uranium-238
2. Investigating “Half-life” for Beta Decay
a. Use the Charts at the top of the sim to test ideas you might have about half-life. Make
sure to use multiple samples and substances with a variety of half-lives. Make a data table
that shows your tests.
Data Table here:
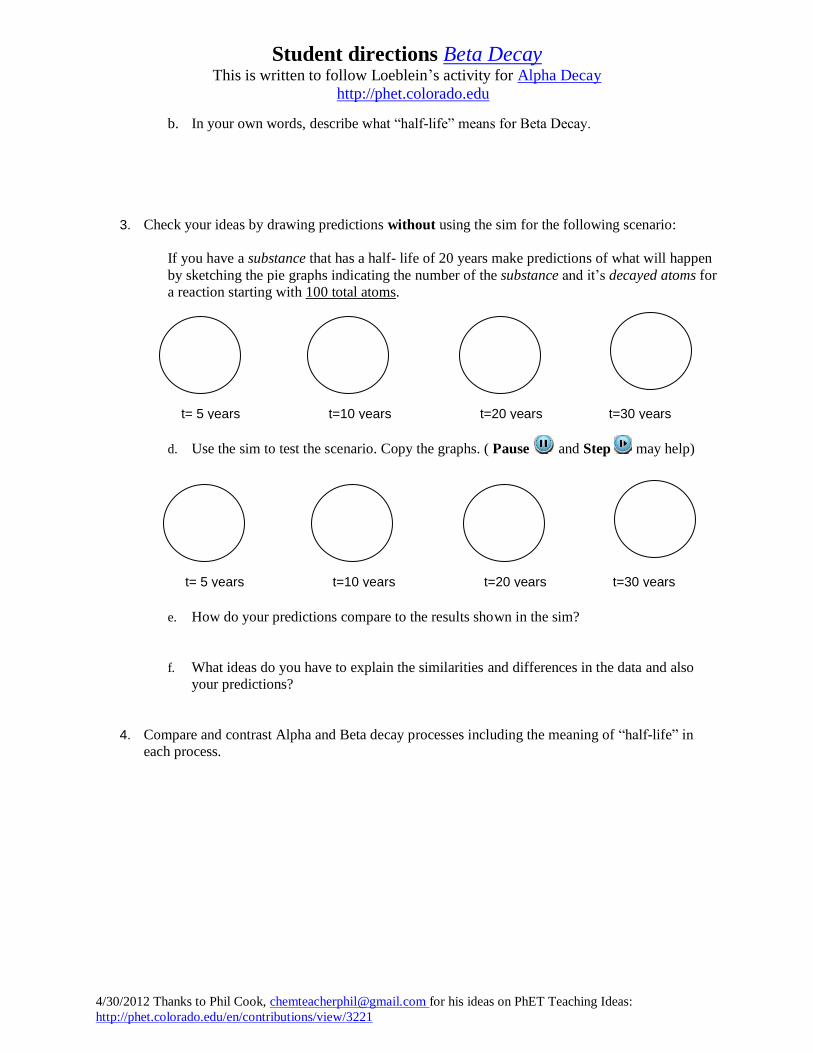
Student directions Beta Decay This is written to follow Loeblein’s activity for Alpha Decay
http://phet.colorado.edu
4/30/2012 Thanks to Phil Cook, [email protected] for his ideas on PhET Teaching Ideas:
http://phet.colorado.edu/en/contributions/view/3221
t= 5 years t=10 years t=20 years t=30 years t=2s
t= 5 years t=10 years t=20 years t=30 years
b. In your own words, describe what “half-life” means for Beta Decay.
3. Check your ideas by drawing predictions without using the sim for the following scenario:
If you have a substance that has a half- life of 20 years make predictions of what will happen
by sketching the pie graphs indicating the number of the substance and it’s decayed atoms for
a reaction starting with 100 total atoms.
d. Use the sim to test the scenario. Copy the graphs. ( Pause and Step may help)
e. How do your predictions compare to the results shown in the sim?
f. What ideas do you have to explain the similarities and differences in the data and also
your predictions?
4. Compare and contrast Alpha and Beta decay processes including the meaning of “half-life” in
each process.

Lesson plan for Radioactive Dating Game : http://phet.colorado.edu
2/19/2013 Loeblein http://phet.colorado.edu
Radioactive Dating Game Sim Description: Learn about different types of radiometric dating,
such as carbon dating. Understand how decay and half-life work to enable radiometric dating to
work. Play a game that tests your ability to match the percentage of the dating element that
remains to the age of the object.
Learning Goals: Students will be able to: Identify isotopes that are commonly used to determine how old matter might be.
Explain how radiometric dating works and why different elements are used for dating different
objects.
Use the percent of an isotope measured in an object to estimate its age.
Identify types of nuclear reaction used for dating; include how elements change and balanced
reaction.
Background: This sim does not show the underlying model for decay (use Alpha Decay or Beta
Decay for learning goals about decay processes). My students are in chemistry and will have
done Alpha Decay Activity and Beta Decay Activity.
Radioactive Dating Game Introduction:
Students should be able to explore the sim and use it without guidance provided they understand
how to make sense of graphs. Tips for Teachers may be helpful for instructors in case some
students are not as used to finding tools in interactive simulations.
Pre-Lesson: My students are in chemistry and will have done Alpha Decay Activity and Beta
Decay Activity and clicker questions
Lesson: I will point to the section in the text that uses similar learning goals and includes a
couple of pages about Radiometric Dating before they start to help them recognize why we are
studying this in chemistry class; I have found that some students think this is a sim for Biology
or Earth Science.
Post-Lesson: Since there is a game tab, I do not plan to write clicker questions.
Follow-up sims: I will use a Nuclear Fission Activity by Stephanie Chasteen
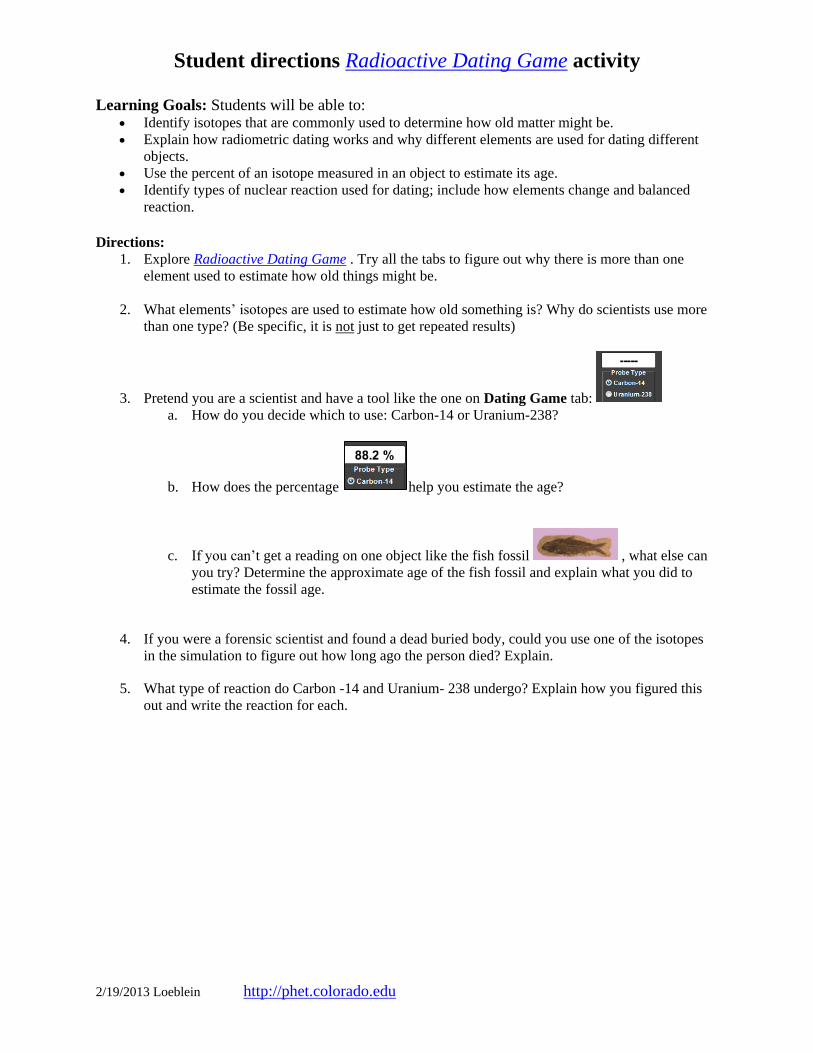
Student directions Radioactive Dating Game activity
2/19/2013 Loeblein http://phet.colorado.edu
Learning Goals: Students will be able to: Identify isotopes that are commonly used to determine how old matter might be.
Explain how radiometric dating works and why different elements are used for dating different
objects.
Use the percent of an isotope measured in an object to estimate its age.
Identify types of nuclear reaction used for dating; include how elements change and balanced
reaction.
Directions:
1. Explore Radioactive Dating Game . Try all the tabs to figure out why there is more than one
element used to estimate how old things might be.
2. What elements’ isotopes are used to estimate how old something is? Why do scientists use more
than one type? (Be specific, it is not just to get repeated results)
3. Pretend you are a scientist and have a tool like the one on Dating Game tab:
a. How do you decide which to use: Carbon-14 or Uranium-238?
b. How does the percentage help you estimate the age?
c. If you can’t get a reading on one object like the fish fossil , what else can
you try? Determine the approximate age of the fish fossil and explain what you did to
estimate the fossil age.
4. If you were a forensic scientist and found a dead buried body, could you use one of the isotopes
in the simulation to figure out how long ago the person died? Explain.
5. What type of reaction do Carbon -14 and Uranium- 238 undergo? Explain how you figured this
out and write the reaction for each.
These materials were developed by Stephanie Chasteen (CU‐Boulder) with reference to the PhET activities created by Phil Cook, Drew Isola, Kathy Perkins and Carl Wieman, available on the PhET site. Included as part of the teacher’s guide for the Adventures of Mr. Tompkins, at http://www.mrt.theadventuresofmrtompkins.com/
PhET Nuclear Fission Inquiry Lab After using this simulation, you will be able to:
• Describe how a neutron can give energy to a nucleus and cause it to fission. • Explain the byproducts of a fission event. • Explain how a chain reaction works, and describe the requirements for a sustained chain
reaction large enough to make a bomb. • Explain how a nuclear reactor works and how control rods can be used to slow
down the reaction. Use the Nuclear Fission Inquiry Lab Nuclear Fission PhET simulation at http://phet.colorado.edu/en/simulation/nuclear-fission to answer the questions on this page 1. Use the tab called “Fission – One Nucleus” to answer these questions:
a. Try to figure out how you can make U-235 unstable b. How do you know it’s unstable? c. Describe what you would do to make U-235 unstable, both in terms of what you
see and do in the simulation and what this represents, physically. d. In your own words, what does “unstable” mean when used to describe Uranium?
2. Imagine that you have many U-235 atoms and you fire a neutron at one of them. What do you think will happen? Explain your prediction using words and drawings. 3. Explore the features of the “Chain Reaction” tab. If you wanted to explain nuclear chain reactions to someone, what would you tell them? Briefly, explain your ideas using appropriate vocabulary and drawings. Make certain that your answer explains why the reaction occurs AND what affects the speed of the reaction.

PhET Nuclear Fission Inquiry Lab 2
4. Why is U-235 a good isotope of Uranium for creating chain reactions? 5. Now, you want to make an atom bomb. Use an Internet search to determine which materials are used for nuclear bombs, and use these materials to try to make your bomb. (Remember, a bomb must be transportable – what do you need to do so that it is transportable?) What can you do to make the bomb explode?
6. While using the simulation, what observations have you made that makes nuclear reactions good for bombs? 7. What are at least three things that you need in order to make an effective bomb, and why? 8. Explore the features of the “Nuclear Reactor” tab. What is the purpose of the control rods within a nuclear reactor?
PhET Nuclear Fission Inquiry Lab 3
Teacher Copy
PhET Nuclear Fission Inquiry Lab After using this simulation, students will be able to:
• Describe how a neutron can give energy to a nucleus and cause it to fission. • Explain the byproducts of a fission event. • Explain how a chain reaction works, and describe the requirements for a sustained chain
reaction large enough to make a bomb. • Explain how a nuclear reactor works and how control rods can be used to slow
down the reaction. Use the Nuclear Fission Inquiry Lab Nuclear Fission PhET simulation at http://phet.colorado.edu/en/simulation/nuclear-fission to answer the questions on this page 1. Use the tab called “Fission – One Nucleus” to answer these questions:
a. Try to figure out how you can make U-235 unstable b. How do you know it’s unstable? c. Describe what you would do to make U-235 unstable, both in terms of what you
see and do in the simulation and what this represents, physically. d. In your own words, what does “unstable” mean when used to describe Uranium?
You need to use the neutron gun to fire a neutron at the atom. This changes U235 to U236 through the addition of a neutron. U236 is unstable and quickly fissions into two daughter nuclei. “Unstable” means that the nucleus has too many neutrons to hold itself together. You can tell that the nucleus is unstable because it breaks into two daughter nuclei, and because the energy graph shows that this is in an energetically unstable state (i.e., the split atom is lower energy than the unsplit U236). There is no magic ratio of neutrons to protons that is always stable – it depends on the particular atom. 2. Imagine that you have many U-235 atoms and you fire a neutron at one of them. What do you think will happen? Explain your prediction using words and drawings. Student answers will vary. As they will see in the next step, the daughter nuclei from the induced fission of the first U235 atom will induce fission in the rest of the atoms.
PhET Nuclear Fission Inquiry Lab 4
3. Explore the features of the “Chain Reaction” tab. If you wanted to explain nuclear chain reactions to someone, what would you tell them? Briefly, explain your ideas using appropriate vocabulary and drawings. Make certain that your answer explains why the reaction occurs AND what affects the speed of the reaction. A nuclear chain reaction is when the products of one nuclear fission (i.e., the daughter nuclei from a split atom) prompt the fission of additional fissionable atoms, which prompt the fission of more atoms. The chain reaction only occurs if this process selfperpetuates; that is, enough fissionable atoms are present so that the products of each fission are likely to hit another fissionable atom. 4. Why is U-235 a good isotope of Uranium for creating chain reactions? U235 is ideal for creating a chain reaction because it splits into two daughter nuclei. Only one daughter nuclei is necessary to induce fission in another U235. So, since the number of fission products is more than the number required to induce fission, the chain reaction keeps going. 5. Now, you want to make an atom bomb. Use an Internet search to determine which materials are used for nuclear bombs, and use these materials to try to make your bomb. (Remember, a bomb must be transportable – what do you need to do so that it is transportable?) What can you do to make the bomb explode? The bomb must have a containment vessel and include both U238 and U235, since in the real world most Uranium is U238. U238 is not fissionable, and the chain reaction does not continue with a high ratio of U238. Thus, weaponsgrade Uranium (which naturally contains more U238) is enriched with U235.
6. While using the simulation, what observations have you made that makes nuclear reactions good for bombs? Each nuclear fission releases energy (as can be seen by the energy graph on the Fission: One Nucleus tab). The fission of a small number of atoms can trigger the fission of a large number of atoms, and thus the release of large amounts of energy. 7. What are at least three things that you need in order to make an effective bomb, and why?
a. It needs to include some fissionable nuclei (i.e., U235). Otherwise, there is no chain reaction.
b. Each induced fission must create more daughter nuclei than are needed to create a new fission event (see #4 above).
c. There must be a large enough ratio of fissionable nuclei (i.e., U235). Otherwise, the chain reaction does not reach all the nuclei. This ratio is reached when each fission
PhET Nuclear Fission Inquiry Lab 5
creates – on average – more than one daughter nuclei, so that a chain reaction will occur. That means we must have more U235 than U238.
d. The U235 must be densely spaced enough so that the daughter nuclei are likely to hit another U235 before hitting the container wall or escaping to the outside.
8. Explore the features of the “Nuclear Reactor” tab. What is the purpose of the control rods within a nuclear reactor? They control the rate of fission of the uranium in the reactor by absorbing neutrons and daughter nuclei. When partially removed, they allow a chain reaction to occur. Thus, the resence of control rods allow the reaction to be slowed or stopped, preventing the nuclear eactor from becoming a nuclear bomb. pr
These materials were developed by Stephanie Chasteen (CU-Boulder) with reference to the PhET activities created by Phil Cook, Drew Isola, Kathy Perkins and Carl Wieman, available on the PhET site. Included as part of the teacher’s guide for the Adventures of Mr. Tompkins, at http://www.mrt.theadventuresofmrtompkins.com/
PhET Nuclear Fission Inquiry Lab After using this simulation, you will be able to:
Describe how a neutron can give energy to a nucleus and cause it to fission.
Explain the byproducts of a fission event.
Explain how a chain reaction works, and describe the requirements for a sustained chain reaction large enough to make a bomb.
Explain how a nuclear reactor works and how control rods can be used to slow down the reaction.
Use the Nuclear Fission Inquiry Lab Nuclear Fission PhET simulation at http://phet.colorado.edu/en/simulation/nuclear-fission to answer the questions on this page 1. Use the tab called “Fission – One Nucleus” to answer these questions:
a. Try to figure out how you can make U-235 unstable b. How do you know it’s unstable? c. Describe what you would do to make U-235 unstable, both in terms of what you
see and do in the simulation and what this represents, physically. d. In your own words, what does “unstable” mean when used to describe Uranium?
2. Imagine that you have many U-235 atoms and you fire a neutron at one of them. What do you think will happen? Explain your prediction using words and drawings. 3. Explore the features of the “Chain Reaction” tab. If you wanted to explain nuclear chain reactions to someone, what would you tell them? Briefly, explain your ideas using appropriate vocabulary and drawings. Make certain that your answer explains why the reaction occurs AND what affects the speed of the reaction.
PhET Nuclear Fission Inquiry Lab 2
4. Why is U-235 a good isotope of Uranium for creating chain reactions? 5. Now, you want to make an atom bomb. Use an Internet search to determine which materials are used for nuclear bombs, and use these materials to try to make your bomb. (Remember, a bomb must be transportable – what do you need to do so that it is transportable?) What can you do to make the bomb explode?
6. While using the simulation, what observations have you made that makes nuclear reactions good for bombs? 7. What are at least three things that you need in order to make an effective bomb, and why? 8. Explore the features of the “Nuclear Reactor” tab. What is the purpose of the control rods within a nuclear reactor?