Smart Photography 2015 06.pdf
158
RS.150 INDIA’S NUMBER 1 IMAGING MAGAZINE! ISSUE 3 | VOLUME 11 | JUNE 2015 OLYMPUS TOUGH TG-4 SONY FE 24-240MM OSS REVIEWS HONOR 4X Vikram Bawa Interview Interview B K Agarwal Profile Profile Farrokh Chothia Kaushik Bhatia Special Profile Special Profile LEARNINGS SIX COMMON MISTAKES IN PHOTOGRAPHY CHOOSING APPROPRIATE BACKDROPS LEAST-USED CAMERA FEATURES TAKE BETTER HOME VIDEOS INDIA EXCLUSIVE REVIEW PANASONIC GM5 TRAVELOGUE Gujarat FASHION AND BEAUTY SPECIAL PHOTOGRAPHY Smart
-
Upload
khangminh22 -
Category
Documents
-
view
3 -
download
0
Transcript of Smart Photography 2015 06.pdf

RS.150INDIA’S NUMBER 1 IMAGING MAGAZINE!
ISSUE 3 | VOLUME 11 | JUNE 2015 OLYMPUS TOUGH TG-4
SONY FE 24-240MM OSSR
EV
IEW
SHONOR4X
Vikram BawaInterviewInterview
B K Agarwal
ProfileProfile
Farrokh ChothiaKaushik Bhatia
Special ProfileSpecial Profile
LEARNINGSSIX COMMON MISTAKES IN PHOTOGRAPHYCHOOSING APPROPRIATE BACKDROPS LEAST-USED CAMERA FEATURES TAKE BETTER HOME VIDEOS
INDIA
EXCLUSIVE
REVIEW
PANASONICGM5
TRAVELOGUE Gujarat
FASHION AND BEAUTY SPECIAL TRAVELOGUE FASHION AND BEAUTY SPECIAL
PHOTOGRAPHYSmart


www.smartphotography.in 5
Sm
art
Pho
tog
rap
hyJu
ne 2
015
Fashion photography is, perhaps, the most demanding and challenging sector in the imaging industry. To become a good fashion
photographer, an apprenticeship under a well-known professional photographer is almost a must. Understanding the interplay of light is also a must. To be a good fashion photographer, you need to have an eye for aesthetics as well. Many start off with fashion photography, but not all make
it big. The rewards, of course, are ample and the creative satisfaction, immense.
H. S. Billimoria
Views and opinions expressed in the magazine are not necessarily those of Next Gen Publishing Ltd. Next Gen Publishing does not take the responsibility for returning unsolicited material sent without adequate postal stamps for return postage. No part of the magazine may be reproduced in part or full without the prior express wri� en permission of the publisher. Printed by Girish Mallya, Next Gen Publishing Ltd., Trade World, 2nd Floor, C Wing, Kamala Mills Compound, Senapati Bapat Marg, Lower Parel (W), Mumbai 400013. Published by Girish Mallya on behalf of Next Gen Publishing Ltd., Trade World, 2nd Floor, C Wing, Kamala Mills Compound, Senapati Bapat Marg, Lower Parel (W), Mumbai 400013. Printed at Kala Jyothi Process Pvt. Ltd, 1-1-60/5 RTCX Roads, Hyderabad - 20. Published at Next Gen Publishing Ltd., Trade World, 2nd Floor, C Wing, Kamala Mills Compound,
Senapati Bapat Marg, Lower Parel (W), Mumbai 400013. Copyright 2014 SMART PHOTOGRAPHYAll readers are recommended to make their own independent enquiries before sending money, incurring expenses or entering into commitments in relation to any advertisement appearing in the publication. Smart Photography does not vouch for any claims made by advertisers for their products and services. � e editor, publisher, printer and employees of the publication shall not be held liable for any consequence in the events of such claims not being honoured by the advertisers. All disputes are subject to the exclusive jurisdiction of competent courts and forums in Mumbai only.
Editor – Hoshang S Billimoria
WELCOMEEDITOR
Hoshang S. BillimoriaTECHNICAL EDITOR
Rohinton MehtaSENIOR CORRESPONDENT
Sujith GopinathCOPY EDITOR
Disha Khemchandani
PHOTOGRAPHYMahesh Reddy
HEAD-DESIGN & PRODUCTION Ravi Parmar
DESIGNNandkishor Sawant
ADVERTISE DESIGNSanjay Awad
PRODUCTION SUPERVISOR Dinesh Bhajnik
PICTURES DESKDeepak Narkar
PUBLISHERGirish Mallya
PRODUCT MANAGERPerseus Master
HEAD OFFICE - MUMBAI2nd Floor, C Wing, Trade World, Kamala Mills Compound, Senapati Bapat Marg, Lower Parel (W), Mumbai 400013
Tel: + 91 22 43525252 Fax: + 91 22 24955394 Email: [email protected]
CIRCULATION AND SUBSCRIPTIONDigambar Kosamkar ([email protected])
Sachin Kelkar (Subscription Supervisor)
Tel: + 91 22 43525220 Fax: + 91 22 24955394 Email: [email protected]
Apple Newsstand & Magzter Queries: [email protected]
Zinio Subscriptions Queries: h� p://in.zinio.com/help/index.jsp
MARKETING OFFICESAhmedabad: Devendra Mehta - Mobile No.- 09714913234
Bengaluru: Unit No. 509, 5th Floor ‘B’ Wing, Mi� al Towers, MG Road, Bangalore -560001, Tel: +91 80 66110116/17 Fax: + 91 80 41472574
Chennai: Unit No. 20, 3rd Floor, Modern Towers, No. 35/23 West Co� Road, Royape� ah, Chennai 600014. Tel: + 91 44 39149889 Fax: + 91 44 39149892
New Delhi: 26-B, Ground Floor, Okhla Industrial Estate, Phase-III, New Delhi - 110020. Tel: +91 11 4234 6600 / 6678 Fax: + 91 11 4234 6679
Pune: 401B, Gandhi Empire, 2, Sareen Estate, Kondhwa Road, Pune 411040. Tel: + 91 20 32930292 Fax: + 91 20 26830465
Hyderabad: Srinivas Gangula, Territory Sales Incharge (Circulation), Mobile no. 09000555756
Kolkata: Vidyasagar Gupta Territory Sales Incharge (Circulation), Mobile no. 09804085683
WE ARE GLUED TO THE GLOBAL IMAGING INDUSTRYOur team is updated with all the benchmarks and road blocks that the � eld of photography and imaging across the globe experiences. � is helps us record the changes in the global perspective, thus making us the � rst to predict which products will be a rage in the Indian markets.
WE’RE IMPARTIALLoyalty towards our readers is a given, and their best interests are always on our mind. Every verdict is honest and not in� uenced by advertisers or personal favorites. So when we say a product is a ‘BEST BUY’, then, it is just that!
OUR TESTS ARE CONDUCTED BY EXPERTSAll equipment go through a series of tests at the hands of our experts. Our reviewers are experts in the � eld of photography across the country and have many years of experience. � at gives us the foresight to distinguish between a passing trend and a big change in the � eld of photography and imaging. And � nally, our reviews are not extended to just � ll up the pages!
WE ARE HERE TO HELP YOU� ere is no debate on why we are here. Our sole goal is to provide you options and better your judgement in product purchase while, sharing tips and tricks to improve your images. Our biggest joy is in building a bridge between you and your perfect picture!
HERE’S WHAT MAKES US#1
PHOTOGRAPHYSmart

Contents ISSUE 123 / JUNE 2015
ISSUE 10 | VOLUME 10 | JANUARY 2014
ISSUE 3 | VOLUME 11 | JUNE 2015
RS.150INDIA’S NUMBER 1 IMAGING MAGAZINE!
SUBS
CRIB
ER’S
COP
Y T
OTAL
PAG
ES 1
60
ISSUE 3 | VOLUME 11 | JUNE 2015
123
OLYMPUS TOUGH TG-4
SONY FE 24-240MM OSSR
EV
IEW
S
HONOR4X
Vikram BawaInterviewInterview
B K Agarwal
ProfileProfile
Farrokh ChothiaKaushik Bhatia
Special ProfileSpecial Profile
LEARNINGSSIX COMMON MISTAKES IN PHOTOGRAPHYCHOOSING APPROPRIATE BACKDROPS LEAST-USED CAMERA FEATURES TAKE BETTER HOME VIDEOS
INDIA
EXCLUSIVE
REVIEW
PANASONICGM5
TRAVELOGUE Gujarat
TRAVELOGUE
PHOTOGRAPHYSmart
Cover credits: Client: Asa Kazingmei Photographer: Vikram Bawa Model: Augustine Shinray Make-up Artist: Sarita Gurung Hair Stylist: Santosh Gastaraj Stylist: Asa Kazingmei
Just a moment!Readers can � nd the updated Buyer’s Guide, log on h� p://smartphotography.in/news/monthly-special
Smart Photography thanks the readers who participate in the Picture of the Month contest. We would like to bring to your a� ention a few changes in the rules for submission. From now on, you may send in your images with the longer side measuring atleast 17 inches. Please note that the images have to be horizontal. � is permits readers to submit panoramic shots, which was not possible with the current size of 17 x 11 inches.
REGULARS10 Mail Bag
12 News Watch
28 KaleidoscopeA platform for budding photographers to exhibit their talent and get noticed!
32 Picture of the Month
36 ShowcaseA photographic pro�ile of the person behind the lens
42 If I Were YouOur expert comments on how your pictures can be taken to another level
45 Ask Uncle RonnieYour photo queries answered by Uncle Ronnie
48 Photo feature Gujarat
56 MasterCraftsman The masters of the craft share their insights and photographs
66 Fashion and Beauty Features
158 The Last Word
28Kaleidoscope
36Showcase
48Photo Feature
Gujarat
56Master
Craftsman
66Fashion and
Beauty Feature158The Last Word
Contents Contents PHOTOGRAPHYPHOTOGRAPHY
Smart
www.smartphotography.in6
Sm
art
Pho
tog
rap
hyJu
ne 2
015


SUBSCRIPTION OFFERpage 95
SMART TRAVEL
CONTEST
54
Contents ISSUE 123 / JUNE 2015
LEARNINGS
REVIEWS
88 Six Common Mistakes and Remedies
96 Backdrops & Subject
103 Least-Used Camera Features
109 Home Video
112 PANASONIC LUMIX DMC-GM5
116 Olympus Tough TG-4
120 Panasonic Lumix G Vario 1:4 7-14mm ASPH
122 Sony FE 24-240mm F3.5-6.3 OSS
125 Honor 4X
88Learning
96Learning
103Learning
112Review
120Review
125Review
Contents Contents PHOTOGRAPHYPHOTOGRAPHY
Smart
www.smartphotography.in8
Sm
art
Pho
tog
rap
hyJu
ne 2
015


Write to us at: Smart Photography,Next Gen Publishing Ltd, Trade World, C-Wing, 2nd Floor, Kamala Mills Compound, Senapati Bapat Marg,Lower Parel(W), Mumbai 400013. E-mail: [email protected]
Awareness
To,The Editor, Smart Photography
Dear Sir,The article “Avian Photography” by Mr. Kiran Poonacha is an excellent one full of information. One must thank the editor of Smart Photography for bringing out such an informative article along with sharp pictures.
Yours sincerely,J.Dinakar
Inspiration
To,The Editor, Smart Photography
Dear Sir,I have been a subscriber of this magazine since the start and I must say that your articles have helped me improve my style of taking pictures. This is particularly in reference to the article on ‘Underwater Photography’ in the last issue. It has motivated me to try this genre too. Thank you so much.
Yours sincerely,S.T. Surve
Beginner’s Joy
To,The Editor, Smart Photography
Dear Sir,I have recently started subscribing to this magazine and I am glad that I did. Now, I am inspired to improve my photography skills. I really enjoyed reading the travelogue on Assam in the last issue of ‘Smart Photography.’ Now, I know where to head for a holiday with my camera. Keep up the good work.
Yours sincerely,M.D.Shah
ISSUE 10 | VOLUME 10 | JANUARY 2014
ISSUE 2 | VOLUME 11 | M
AY 2015
RS.150INDIA’S NUMBER 1 IMAGING MAGAZINE!
NIKON D7200
CANON POWERSHOT SX710 HSR
EV
IEW
S
ISSUE 2 | VOLUME 11 | MAY 2015
122
INDIA EXCLUSIVEOlympus OM-D E-M5 Mark II
ProfileProfileArup Biswas / Tammy Ruggles Parvin Dabas
InterviewInterview
LEARNINGSUNDERWATER
PHOTOGRAPHYDEPTH OF FIELD IN FASHION SHOOTS
PIN-HOLE PHOTOGRAPHYAQUARIUM PHOTOGRAPHY TIPS
LEARNINGSUNDERWATER
PHOTOGRAPHYDEPTH OF FIELD IN FASHION SHOOTS
PIN-HOLE PHOTOGRAPHYAQUARIUM PHOTOGRAPHY TIPS
HONOR6 PLUS
INDIA
PHOTOGRAPHYSmart
PHOTOGRAPHYPHOTOGRAPHYSmart
MAILBAG
www.smartphotography.in10
Sm
art
Pho
tog
rap
hyJu
ne 2
015

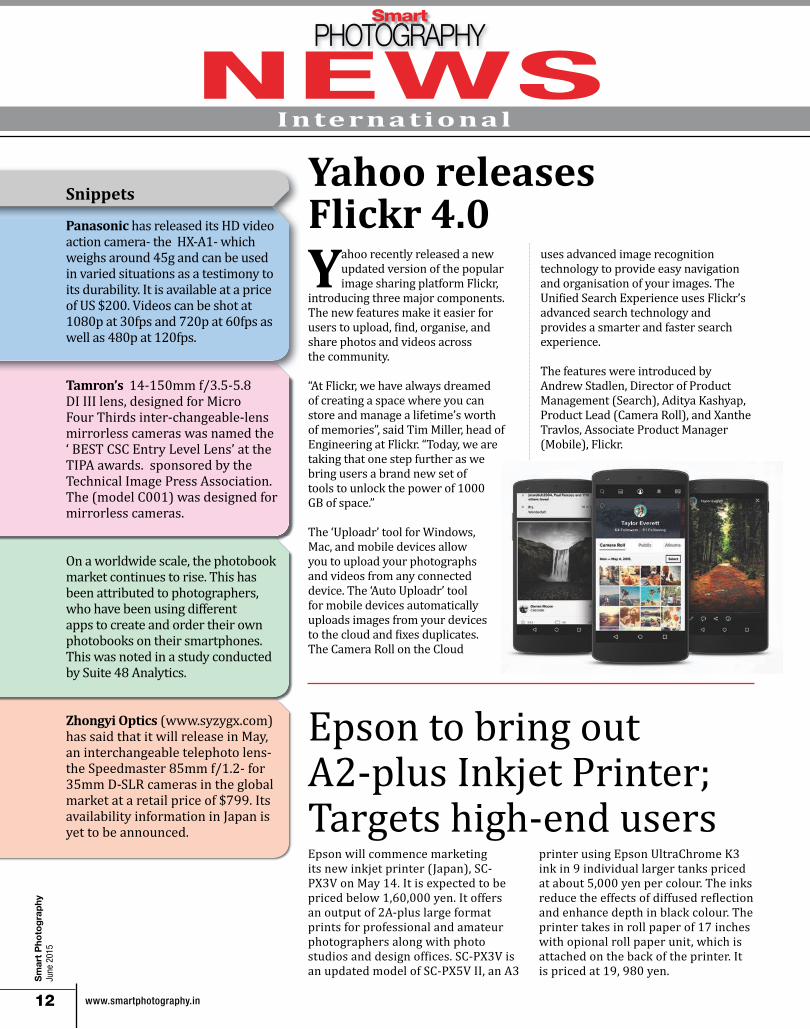
Yahoo releases Flickr 4.0Yahoo recently released a new
updated version of the popular image sharing platform Flickr,
introducing three major components. The new features make it easier for users to upload, �ind, organise, and share photos and videos across the community.
“At Flickr, we have always dreamed of creating a space where you can store and manage a lifetime’s worth of memories”, said Tim Miller, head of Engineering at Flickr. “Today, we are taking that one step further as we bring users a brand new set of tools to unlock the power of 1000 GB of space.”
The ‘Uploadr’ tool for Windows, Mac, and mobile devices allow you to upload your photographs and videos from any connected device. The ‘Auto Uploadr’ tool for mobile devices automatically uploads images from your devices to the cloud and �ixes duplicates. The Camera Roll on the Cloud
uses advanced image recognition technology to provide easy navigation and organisation of your images. The Uni�ied Search Experience uses Flickr’s advanced search technology and provides a smarter and faster search experience.
The features were introduced by Andrew Stadlen, Director of Product Management (Search), Aditya Kashyap, Product Lead (Camera Roll), and Xanthe Travlos, Associate Product Manager (Mobile), Flickr.
Snippets
Panasonic has released its HD video action camera- the HX-A1- which weighs around 45g and can be used in varied situations as a testimony to its durability. It is available at a price of US $200. Videos can be shot at 1080p at 30fps and 720p at 60fps as well as 480p at 120fps.
Tamron’s 14-150mm f/3.5-5.8 DI III lens, designed for Micro Four Thirds inter-changeable-lens mirrorless cameras was named the ‘ BEST CSC Entry Level Lens’ at the TIPA awards. sponsored by the Technical Image Press Association. The (model C001) was designed for mirrorless cameras.
On a worldwide scale, the photobook market continues to rise. This has been attributed to photographers, who have been using different apps to create and order their own photobooks on their smartphones. This was noted in a study conducted by Suite 48 Analytics.
Zhongyi Optics (www.syzygx.com) has said that it will release in May, an interchangeable telephoto lens- the Speedmaster 85mm f/1.2- for 35mm D-SLR cameras in the global market at a retail price of $799. Its availability information in Japan is yet to be announced.
International NEWSNEWS
PHOTOGRAPHYPHOTOGRAPHYSmart
Epson to bring out A2-plus Inkjet Printer; Targets high-end usersEpson will commence marketing its new inkjet printer (Japan), SC-PX3V on May 14. It is expected to be priced below 1,60,000 yen. It offers an output of 2A-plus large format prints for professional and amateur photographers along with photo studios and design of�ices. SC-PX3V is an updated model of SC-PX5V II, an A3
printer using Epson UltraChrome K3 ink in 9 individual larger tanks priced at about 5,000 yen per colour. The inks reduce the effects of diffused re�lection and enhance depth in black colour. The printer takes in roll paper of 17 inches with opional roll paper unit, which is attached on the back of the printer. It is priced at 19, 980 yen.
www.smartphotography.in12
Sm
art
Pho
tog
rap
hyJu
ne 2
015


Sigma and Nikon settle in patent infringement suitSigma and Nikon have released a
statement that the former will pay an undisclosed amount of
compensation to Nikon following the court’s counsel at the Intellectual Property High Court in Japan. Nikon �iled a law suite on May 25 2011 at the Tokyo District Court to demand Sigma to stop the manufacture and marketing
of interchangeable lenses. The point behind this suite was that image stabilisation technologies infringe Nikon’s patents.
According to a report, Nikon �iled a law suite in two patents asking for a compensation of 12.6 billion yen. The two cases were heard separately and
one case was dismissed at the Tokyo District Court in 2013. In February 2014, the court ordered Sigma to pay about 1.568 billion yen to Nikon. An appeal was made to the higher court. Both the companies have not chosen to accept the recommendations made by the higher court.
International NEWSNEWS PHOTOGRAPHYPHOTOGRAPHY
Smart
Wimbledon bans sel�ie sticks You might have felt the need of a sel�ie stick for taking perfect sel�ies. However, at Wimbledon, sel�ie sticks have been banned as they do hamper spectators’ enjoyment and also because of the nuisance that is caused by them.
The All England Lawn Tennis Club ( AELTC) has added the sel�ie stick to the list of items banned from its annual grass court championships.
An AELTC spokesman said, “ It is partly the nuisance value but primarily so it doesn’t interfere with spectators’ enjoyment. There is the possibility that if you are wandering around with one of these things in a fairly tight environment, you might poke someone’s eye out.”
Nikon Europe issues advisory on fake D-SLRs
Nikon Europe service centres have reported that fake Nikon D-SLRs have cropped up in alarming numbers. Nikon has attributed this phenomenon largely
to internet auctions. It has clearly made a point that such models will not come under its warranty. No responsibility will be accepted by Nikon for these models.
The models that have taken the hit are D800, D700 and D4. The outer covers of D800 have been changed with the ones from the D800E. To add to this, the nameplates of D7100 models have been replaced with those from the D610.
Nikon addressed its customers in a statement in which it
also said, “ Please take all necessary precautions to ensure the authenticity of a product before buying it.”
www.smartphotography.in14
Sm
art
Pho
tog
rap
hyJu
ne 2
015


International
Fuji�ilm makes an addition to XF line-upThe Fuji�ilm XF lens range has
expanded with a new 16mm f/1.4 wide-angle lens. The Fujinon
Lens XF16mm F1.4 R WR will be added to the X-Series interchangeable lens line-up in mid-May 2015. The lens has the ability to deliver optimal image quality in low light conditions.
The lens has 9 weather seals in 8 areas on the lens barrel. This protects the lens from a sudden change in the weather conditions like unexpected
rains. Another feature is the focus ring, which comes with a depth-of-�ield scale. This is extremely useful for photographers who are into street photography as it will help them to note the subject distance and thus use a suitable aperture for maximum control over the depth of �ield. The lens uses a rear focusing system for increased autofocus speed, which is 0.11 seconds. This is perfect for photographers who are into portraiture.
NEWSNEWS PHOTOGRAPHYPHOTOGRAPHY
Smart
Canon starts production of network cameras
Kenko Tokina to release AT-X 24-70 F2.8 PRO FX
Japan Digital Camera Grand Prix 2015 summer awards declared
Canon Inc. has begun producing surveillance cameras at its Nagasaki Plant in Kyushu island. The �irst lot comprising of 36 units of 2 models had been shipped on April 28. Nine models of surveillance network cameras will be produced in order to increase the domestic production rate from 40% to 60% in a matter of three years. Recently, Canon acquired Sweden’s Axis via TOB and has made it a consolidated subsidiary to make a giant leap in this product section.
Kenko Tokina Co. announced that it will release a standard zoom lens, ‘AT-X 24-70 F2.8 PRO FX’ for 35mm interchangeable lens digital cameras. It will be available in the market from early June for Nikon lens and in early July for Canon mount lens at a suggested price of 150,000 yen. The lens is constructed with15 elements in 11 groups including 3 glass molded aspherical elements and 3 ultra-low dispersion glass elements.
The 15th Digital Camera Grand Prix (DGP) summer awards were declared by camera retailers, photographers and analysts in areas of general, planning, technology and distinguished service.Gold award in the general ‘D-SLR Cameras’ category: Canon EOS 7D Mark IIGold award in the general ‘Mirrorless Camera’: Olympus OM-D E-M5 Mark IIGold award in the general ‘Compact Camera’: Panasonic LUMIX DMC-LX100Gold award in the general ‘ Interchangeable Lens for Digital SLR’: Canon EF100-400mm f/4.5-5.6L IS II USMGold award in the general ‘Interchangeable Lens for Mirrorless cameras’ category: Fuji�ilm Fujinon Lens XF16-55mm F2.8 R LM WRSpecial Grand Prix award selected by Judging Committee: Panasonic LUMIX DMC-CM1
Best Planning awardsFor development and commercialization of the following products:
Olympus Open Platform Camera: ‘OLYMPUS Air A01’Casio Computer: EXILIM EX-ZR1600h all-time connection with smartphonesToshiba: NFC-built-in Memory CardsNikon: Full-frame SLR Camera for astronomical photography- D810A, and Canon: EOS 5Ds/5Ds RVelbon: Revolving pan-head ‘PHD-55Q’
Technology awardsEye-�i Japan, Eye�i Cloud Smart tagOlympus: High-resolution image capturing technology ‘40M High-res shot’Japan Display: Pixel EyesCanon: the most powerful wideangle lens ‘EF11-24mm F4L USM’Seiko Epson: High-res/120fps ‘ULTIMICRON’Sony: Image stabilization technology in the body for full-size SLR Cameras
Distinguished Service award:Casio Computer: The 20th anniversary of the �irst consumer-use digital compactcamera ‘QV-10’.
www.smartphotography.in16
Sm
art
Pho
tog
rap
hyJu
ne 2
015


International NEWSNEWS PHOTOGRAPHYPHOTOGRAPHY
Smart
Canon launches new compact binocularsCanon U.S.A. Inc. added two
image stabiliser binoculars with the 10x30 IS II and
12x36 IS III. Equipped with a microcomputer for better IS performance and stable high-magni�ication viewing, the improved IS technology ensures better viewing comfort. It further eliminates the need for a tripod.
“We invested in research and technology for the design and manufacturing of these binoculars in order to achieve high-level optical performance and viewing comfort,” said Yuichi Ishizuka, President and COO, Canon U.S.A., Inc. “The improvements made to these models will enhance users’ experiences while offering the familiarity and quality they trust in Canon binoculars.”
The newly added electronic circuits help in reducing power consumption. At temperatures of 25 degrees Celsius/77 degrees Fahrenheit, both the binoculars provide up to nine hours of
continuous stabilisation on a pair of AA-size alkaline batteries.
The 10x30 IS II’s 10x high-magni�ication ratio is combined with a 30mm/1.18-inch effective diameter objective lens. This helps in light-gathering ability with high resolution and contrast. Birdwatchers, speci�ically, will bene�it from the new, less glossy front cover of this model, whose design was re�ined to provide a better anti-re�lective surface. Additionally, their compact size and light weight (127x150x70mm, approx. 1.3 lb.) adds to their portability.
The 12x36 IS III model has a 12x high magni�ication ratio. Its 36mm/1.42-inch effective diameter objective lens helps provide clear, bright and high-resolution images. These new binoculars are compact and lightweight [5 x 6.8 x 2.7 inches (WHD), approx. 1.5 lb.]
Both models feature Porro II Prisms, which enhance image resolution and help in reducing light loss. Viewing comfort is ensured by the long eye relief of 14.5mm, especially for people with glasses. The doublet �ield-�lattener on both models produces sharp and virtually distortion-free images from edge-to-edge. The hardware includes a low-re�lective exterior.
Canon’s 10x30 IS II and 12x36 IS III binocular models will be made available in August 2015 for suggested list prices of $549.99 and $849.99 respectively.
Fuji�ilm announces XF 90mm F2 R LM WRFuji�ilm has unveiled the Fujinon 90mm f/2 R LM WR lens. It was presented as a prototype at CP+. The 90mm lens has an optical design of 11 elements in 8 groups. Three of these elements feature extra-low dispersion (ED) glass that helps in reducing aberrations and vignetting, contributing to beautiful bokeh along with a 7-blade rounded diaphragm aperture.
Within the new lens, Quad Linear
Motor has been used for autofocus. Fuji�ilm says that the new motor “uses four magnets for higher torque. This provides a more versatile shooting experience.”The company has also stated that the lens has the ability of providing autofocus as quick as 0.14 seconds.
The lens can operate under temperatures as low as 14°F (–10ºC) and is dust-resistant as well as weather-resistant.
www.smartphotography.in18
Sm
art
Pho
tog
rap
hyJu
ne 2
015


BusinessNEWSNEWS
PHOTOGRAPHYPHOTOGRAPHYSmart
Canon declares financial results for Q1 2015
Sony’s electronics division posts profit of 140 billion yen
Epson’s profits increase by 34% on sales of 7.7%
The first quarter of fiscal 2015 for Canon Inc. was about declined profits on declined revenue.
This is attributed to a decrease in the sales of digital cameras and increased expenditure for research and development. The sale of office equipment was reasonable but it could not make up for the slow performance of the imaging division. The total revenue for the period declined by
1.3% and fell to 857.4 billion yen. A dip of 19.9% was observed and an operating profit of 66.19 billion yen was calculated. A net profit of 33.9 billion yen was reported. The interchangeable lens camera system market has seen a decline too and sales of Canon’s ILcamera dropped by 22%.
However, the US market has shown an improvement and there has been
a noteworthy rise in the sales in comparison to the last year. High end models such as EOS 7D Mark II have been well received. The progress of the compact camera market has been slow but higher models in image quality and zooming ratio have been appreciated. The demand for inkjet printers in developing countries is losing pace. Due to this, the total sales units have dropped.
Sony announced that it posted a 158.7% gain in profit in operation on sales of 8.215 trillion yen for the fiscal year 2014 to March 2015. It posted a before-tax profit of 39.7 billion yen along with a net loss of 125.9 billion yen. For the fiscal year, 2015/16, the company has estimated a 4 time jump in their operational profit, which comes to nearly 300 billion yen. The company has finished the restructuring of its electronics business division. It
Epson announced that its net profit gained 34% to 112.7 billion yen on sales of 1.086 trillion yen, a 7.7% gain, for the last fiscal year, ended March 2015. Favourable sales of larger ink tank inkjet printers targeted at the emerging
economies and a weaker yen. Net profit increased by 10.4% to 112.7 billion yen. The information related equipment segment showed a 7.8% gain in sales which was about 907 billion yen. This includes 699.7 billion yen of printing system
sales and visual communications like projectors. Their sales garnered a profit of 186.9 billion yen. Presently, the company is expanding its larger ink tank models in emerging economies and developed nations too.
has also estimated that image sensors used in smartphone cameras will perform favourably.
The company has a 40% share in the world image sensor market and will invest about 210 billion yen for R&D for the current year. The imaging products and solution division reported a 2.9% fall in sales to 720 billion yen with a 107.7% gain in profit in operation to 54.7 billion yen.
Due to the shrinking of the market, Sony’s move of shifting the product mix to value added models in digital and video cameras, did not affect the numbers.
Sony noted a loss of 1.7 billion yen in the performance of the electronics department, which includes all the 5 divisions. However, the company is hopeful to garner a profit of 194 billion yen.
www.smartphotography.in20
Sm
art
Pho
tog
rap
hyJu
ne 2
015


National NEWSNEWS
PHOTOGRAPHYPHOTOGRAPHYSmart
Gaurav Bhat captures ‘The Spirit of the Zoya Woman’Zoya, the chain of diamond
boutiques from the House of Tata played host to Gaurav Bhat.A
celebrity photographer by profession, he captured ‘The Spirit of the Zoya Woman’ in his photographs of some women acheivers from the field of cinema and sports. He brought out the elegance of Soha Ali Khan, energy of Deepika Padukone, spunkiness of Shraddha Kapoor, feminine charm of Saniya Mirza and many more. His eye for detail and the simplicity of each shot truly captured the qualities that one can associate with Zoya’s designs for different women.
The exhibition was opened by actor, Soha Ali Khan, who was all smiles looking at her picture along with the others. The serenity captured in her picture reminded one of the legendary Sharmila Tagore’s poise and calm.
Speaking on the occasion, Arif Padiath, Senior Manager and Business Head,
Zoya said, “The Zoya woman,who is a connoisseur, appreciates the unique inspiration behind every exquisite piece.Our craftsmen at Zoya create jewellery as beautiful, rare and
precious as the women who wear them. This exhibition is a creative view into the qualities that celebrate the spirit of iconic women and find resonance in the Zoya customer.”
Bharati Vidyapeeth adjudged best Photography SchoolBharati Vidyapeeth School of Photography (BVSP), Pune bagged the award of the ‘First Best Photography School’ at ‘The Edutainment Awards 2015’. The school was chosen from more than 120 nominees across media, design & communication sectors.
Speaking on the occasion, Mr. Vishwajeet Kadam, Secretary of Bharati Vidyapeeth stated, “This is indeed a moment of great pride.This year we are even celebrating our Golden Jubilee year. It will inspire
us to achieve greater heights and laurels in the future.”He also stated that a three year course in photography and cinematography along with a six month course in Archiving and Documentation will commence in August this year thereby widening the scope and reach of the school.
www.smartphotography.in22
Sm
art
Pho
tog
rap
hyJu
ne 2
015

Madhya Pradesh gets its first Canon Imagepress C800
Madurai gets its Canon Image Square store
It’s time to brush up your car photography knowledge
Indore-based Navin Digitech has installed Madhya Pradesh’s first Canon Imagepress C800 at one of its
four locations. Jagdish Wadhwani, one of its establishers says, “The machine’s ability to handle different substrates including heavy textured paper, recycled paper and also envelopes, opens up a
Canon launched its second Canon Image Square (CIS) in Madurai. The store is complete with varied photography and home printing solutions. These stores are exclusive and they offer its most sought-after products. This includes high-end to entry level D-SLRs and new compact cameras in PowerShot (zoom series camera) and IXUS (entry level pocket size camera) range.
The store is also equipped with other photography accessories such as tripods, camera bags, memory card, chargers etc...
Andrew Koh, Senior Director, Image Communication Products Group, Canon India said, “We are delighted to expand our retail division business in this part of country. It is a part of our effort to engage closely with customers
and to offer them the latest range of products and services in an easily accessible way. Our exclusive CIS stores ensure an interactive and informative buying experience for our customers. We are excited to establish our presence in the picturesque city of Madurai. This will be our 13th store in Tamil Nadu. With our increasing presence across the country, we hope to attract more and more people to explore the world of photography.”
The company has estimated about 200+ CIS stores by the end of 2015. The idea is to engage with their present customers and new ones for better services. Including this launch, Canon India has opened nearly 146 CIS stores spanning over 71 cities in India.
On June 7th, The Fisheye World Institute of Photography will conduct a one day workshop on the intermediate and advanced aspects of car photography. Photographer, Darshan Dixit will discuss popular concepts and special techniques. The learnings will be implemented on a selection of Mini Cooper cars at Mini Cooper’s showroom in Santacruz. The workshop duration will be of 3 hours. Each student will receive a participation certificate along with an assured photography gift. Fees: 2,500 INRDate: 7th JuneTime: 3.00 to 6.00 pmVenue: Mini Cooper showroom, Ground Floor, Savoy Chambers, V P Road, Santacruz West.
For more details, log on to www.bookmyshow.com or call on 9167996055/44/33.
wider range of applications for us.”
Puneet Datta, Director, Professional Printing Division, Canon India, said, “Madhya Pradesh is one of our new focus areas and Indore being the financial hub, who could have been a better choice than Navin Digitech
to start a business in the city? For us at Canon, we have always looked at defining new rules and changing the games as we go. The volume trend in Indore is an indicator of growth, and the C800 at Navin Digitech is all about delivering high quality print jobs at profitable prices.”
National
www.smartphotography.in 23
Sm
art
Pho
tog
rap
hyJu
ne 2
015

Canon India’s ‘Adopt a Village’ takes off in Karanjoti villageCanon India took Karanjoti village
in the Thane district of Mumbai, Maharashtra under its wings
through its CSR program, ‘Adopt a Village.’ Emphasising on Canon’s ‘3e’ which focuses on eye care, education and environment, this initiative began in 2012 and made a considerable impact to Ferozpur Namak village in Haryana and Maharaja Katte village in Bengaluru.
Speaking about Canon’s efforts in this direction, Mr. Kobayashi, President and CEO, Canon India said, “ At Canon India, we want to contribute by making Indian villages become self-reliant. Our target is to have six villages under the ‘Adopt a Village’ program by 2016.”
Over the next three years, Canon India aims to improve the school enrollment ratio by ensuring quality education and dependable infrastructure. Immediate steps will be taken to start an activity resource center that will be responsible for providing books, art and craft material, colours and sports equipment for school children. It will also arrange
drinking water and co-ordinate with local education authorities for infrastructural improvements in the school.
The newly inaugurated vision centre will provide eye care facilities to the villagers of Karanjoti and neighboring areas. A city hospital will supervise its activities. Arrangements will also
be made to transfer patients to other better equipped hospitals for surgery if the need arises.
To ensure that villagers can enjoy a green cover, Canon has kickstarted the improvement of the village environment by planting saplings. General health and sanitation awareness are being kept in check.
National NEWSNEWS PHOTOGRAPHYPHOTOGRAPHY
Smart
Announcing the Photostop Photo Contest & ExhibitionPlenty of good news is in store for photography enthusiasts. Photostop photo contest, which is an initiative by Honeycomb Creative support [P] & Bengaluru School of Arts and Photography (BSOAP) was announced on 25th March by professional wildlife photographer, T.N.A Perumal. He has been a life time acheivement awardee by the Government of India.
The two categories for this time’s contest are Nature and Culture. The registration fee for the contest is Rs.500. 40 entries from each category will be shortlisted
and will be printed and framed followed by an exhibition and sale at the Karnataka Chithra Kala Parishath, Bengaluru on 5th, 6th & 7th June 2015. A part of the proceeds will be given as royalty to the respective photographer and the rest will be donated.
The winners will be declared on 7th June 2015 at the exhibition venue. The first prize winners from both the categories will be rewarded with Rs.25000 each.
The runner up will be rewarded with Rs.15000.
Entries will be accepted till 10th May on the website www.photostop.in.
www.smartphotography.in24
Sm
art
Pho
tog
rap
hyJu
ne 2
015

National
Honor debuts 4C, BeeHonor, Huawei’s smartphone
ebrand for digital natives declared its expansion
plans with the launch of two new smartphones - Honor 4C and Honor Bee and a Power Bank AP007. These will be sold exclusively through their online partner, Flipkart.com. The power bank and the phones were launched by the Royal Challengers Bangalore players in the presence of Mr. Allen Wang, President Consumer Business Group, Huawei and Honor India.
Honor 4C was made available at Rs. 8,999 whereas Honor Bee at Rs. 4,999 and Honor Power Bank AP007 at Rs. 1,3999. As a limited period innaugural offer, 10% discount was announced on the purchase of Honor Bee via a debit or credit card.
According to Mr. Allen Wang, President of Consumer Business Group, Huawei & Honor India, “We are very excited to launch our two new powerful
smartphones 4C and Bee along with a Power Bank AP700 in India. The Honor 4C with faster speed, best quality and beautiful design will be an excellent choice for consumers in the mid segment market in India. The Power Bank AP007 will successfully address the power needs of today’s always-on-the-move generation. We are thankful to our customers for their continued support and for their overwhelming response on Honor 4X and Honor 6 Plus.”
SanDisk launched the New iXpand Flash DriveSanDisk Corporation (NASDAQ: SNDK) announced the SanDisk iXpand Flash Drive. It’s the company’s first USB Flash Drive made specifically for the iPhone and iPad. Rajesh Gupta, Country Manager – India & SAARC, SanDisk said, “With a significant increase in mobile-generated content, consumers are looking for easy ways to manage it all. We created the iXpand Flash Drive to offer consumers a quick and safe way to move their favorite content between devices so it’s available when and where they want it.”
The iXpand Flash Drive is a simple-to-use solution that quickly and conveniently transfers photos and videos from an iPhone or iPad to a Mac or PC — all without cables, internet connections or bandwidth limitations. It
also maintains the original photo or video resolution quality.
The flash drive is designed in such a way that a user need not remove its protective cover before usage. A metal exterior adds to the durability of the flash drive.
The full-featured iXpand sync app opens up when the iXpand Flash Drive is plugged into an iPhone or iPad. It can be configured to automatically sync photos and videos from the camera roll to the drive. Favourite movies can be stored on this flash drive and they can be played directly from the drive on the iPhone or iPad. Movie formats such as AVI & WMV are supported. This helps in saving time and avoiding conversion of video formats.
The flash drive is available in 16GB, 32GB, 64GB and 128GB and comes with a two year limited warranty. It is compatible with iPhone 6, iPhone 6 Plus, iPhone 5s, iPhone 5c, iPhone 5, iPad Air 2, iPad Air, iPad mini 3, iPad mini 2, iPad mini running iOS 8 or iOS 7. The iXpand sync app is available on the App Store for iPhone or iPad.
The iXpand Flash Drive in the capacities of 16GB, 32GB, 64GB and 128GB can be purchased in India from amazon.in at Rs 4,490, Rs 5,990, Rs 7,990 and Rs 11,490 respectively.
www.smartphotography.in 25
Sm
art
Pho
tog
rap
hyJu
ne 2
015


Ball HeadChannel
Trigger

Capturing ContrastsPragalbh Vashishth As told to Disha Khemchandani
It was Pragalbh’s love for travel that inspired him towards photography. His journey began when he held his �irst camera. His inquisitive
mind wanted to know how the camera worked, why the camera �lash did not �ire in day time shots and more.
He believes in the quality of light rather than the lighting gear itself. He likes to challenge himself by using just one light and give the impression of creating a work of art using several lights.
Pragalbh loves to travel and shoot landscapes
as much as he loves his indoor assignments. His passion for photography has taken him to locations like the Himalayas where it is nearly impossible to take uninteresting shots. He also loves to take still-life shots in his home studio.
A computer science graduate with post graduation in �inance, he is an IT professional by the day, and a photographer at other times. A collection of his work can be found on his website www.pragalbh.com as well as on his facebook page ‘pragalbh vashishth photography’ |SP
Camera: Nikon D90Aperture: F/5.6; Shutter speed: 1/160sec; ISO: 200
KALEIDOSCOPE
Pragalbh Vashishth
www.smartphotography.in28
Sm
art
Pho
tog
rap
hyJu
ne 2
015
Of�ice ready

Camera: Nikon D90Aperture: F/5; Shutter speed: 1/15sec; ISO: 200
www.smartphotography.in 29
Sm
art
Pho
tog
rap
hyJU
ne 2
015
creative space

Camera: Nikon D90Aperture: F/8; Shutter speed: 1/160sec; ISO: 200
Camera: Nikon D90Aperture: F/11; Shutter speed: 1/10sec; ISO: 100
www.smartphotography.in30
Sm
art
Pho
tog
rap
hyJu
ne 2
015
Need for Speed
Pink

Camera: Nikon D90Aperture: F/11; Shutter speed: 5sec; ISO: 400
Camera: Nikon D90Aperture: F/8; Shutter speed: 1/160sec; ISO: 100
Camera: Nikon D90Aperture: F/5.6; Shutter speed: 1/320sec; ISO: 400
www.smartphotography.in 31
Sm
art
Pho
tog
rap
hyJU
ne 2
015
Breakfast with a view
A
Neon trees

PICTURE OF THE MONTH
PICTURE OF THE MONTHWe are sure that all of you have a few pictures that you think are prize worthy. It happens very o� en that you don’t know where to send the image that could put a feather in your cap. If you have such images (we’re sure you have many!), send us ONE such horizontal image. If it quali� es, we shall publish it as a double-spread. a. You have to guarantee that the picture
was shot by youb. If there are people in the picture who can
be identi� ed, we’ll need a model releasec. � e picture should not have been printed
elsewhere (magazine newspaper, or o� ered to any publication)
d. Mark the entry as “Picture of the Month” and rename the � le using your name
e. You may send images via print/e-mail to: Next Gen Publishing Ltd.,2nd Floor, C Wing, Trade World, Kamala Mills Compound, Senapati Bapat Marg, Lower Parel (W), Mumbai 400013 (or) [email protected]
WIN!Sydney II 27
Camera Bag
Sponsored by:
Photograph by
Ameya Mathkar

1. � e picture has to be horizontal.2. Kindly ensure that the longer side should measure atleast 17 inches, at 300ppi.3. Low resolution images will not be accepted.4. We do not check images on online galleries.
5. Kindly ensure complete contact/address details are provided. Winners will have to collect their prize from SP’s Mumbai o� ce or send an authorised representative to do so.6. Please make sure that your picture does not have your name/logo on it.
A NOTE TO OUR READERS


Innocence with Style
Bijay Kumar Agrawal began his journey in photography at the age of twelve when his brother gifted him a Kodak box camera. He then
moved on to Click III, Billy Record, Yashica Mat, Minolta SRT 303 and �inally Nikon. His interest lay in portraits and �igure study. He has now moved into medium-format Pentax 645Z
Bijay has 800 acceptances and more than 100 awards in different national and international salons of art-photography. India International Photographic Council has honoured him with the most coveted fellowship (FIIPC) in 1999 in the fashion and advertisement section. Academy of Visual Media, New Delhi has honoured him with the Life Time Achievement Award in 2007.
He has conducted many fashion photography workshops in different parts of India. He has been a trainer for studio lighting for companies like Kodak Limited.
Bijay Kumar Agrawal
As told to Rohinton Mehta
Camera: Nikon D800Aperture: F/11; Shutter speed: 1/200sec; ISO: 200
Baby Krshna
Camera: Nikon D2XAperture: F/13; Shutter speed: 1/200sec; ISO: 100
SHOWCASE
www.smartphotography.in36
Sm
art
Pho
tog
rap
hyJu
ne 2
015

Chota Bhim
Camera: Nikon D70Aperture: F/16; Shutter speed: 1/80sec;
Happy Moments
www.smartphotography.in 37
Sm
art
Pho
tog
rap
hyJu
ne 2
015

The Tickle
Innocence
Camera: Nikon D800Aperture: F/11; Shutter speed: 1/200sec; ISO: 200
Camera: Nikon D3SAperture: F/13; Shutter speed: 1/200sec; ISO: 200
SHOWCASE
www.smartphotography.in38
Sm
art
Pho
tog
rap
hyJu
ne 2
015

Sleep Time
Sleeping Beauties
Camera: Nikon D3SAperture: F/13; Shutter speed: 1/200sec; ISO: 200
Camera: Nikon D2XAperture: F/16; Shutter speed: 1/90sec; ISO: 100
www.smartphotography.in 39
Sm
art
Pho
tog
rap
hyJu
ne 2
015

Camera: Nikon D3SAperture: F/9; Shutter speed: 1/100sec; ISO: 200
Camera: Nikon D3SAperture: F/9; Shutter speed: 1/100sec; ISO: 200
Self-Con�idence
Beauty
SHOWCASE
www.smartphotography.in40
Sm
art
Pho
tog
rap
hyJu
ne 2
015

35 B, 3rd Floor, Shahpur Jat, New Delhi-110049
* Terms & Conditions apply.
25% Discount on 3 & above Studio Bookings*
tudios
Log on to : studiorent.inContact : +91 92666 92666
Email : [email protected]
STUDIO FOR RENTWe are now in Shahpur Jat, Delhi

Camera: Canon Rebel T3i; Lens: Tamron 150-600mm at 150mmAperture: F/5; Shutter speed: 1/200sec; ISO: 160
The PeacockSachin Mittal from Jaipur has sent us this picture of a peacock and wants to know how it could be improved.
1. Birds and animals should ideally be photographed in their natural environment. In your photo, the peacock is sitting on a man-made structure.
Original
wings and then taken some shots. A peacock is most graceful when it spreads its plumage, but it may not do so unless it sees a peahen and then tries to attract her by showing off his beautiful feathers.
I would also have tried some close-ups of the bird’s face. At 600mm you could have had a decent close-up.
2. Unless it’s a close-up shot, no part of the subject should be cut. You have cut off its tail feathers.
I like the way you have managed to put the background out of focus. Doing so places greater emphasis on the bird. If I were you, I would have waited patiently till the peacock spread its
www.smartphotography.in42
Sm
art
Pho
tog
rap
hyJu
ne 2
015
Rohinton Mehta,Technical Editor, Smart Photography
Our Imaging ExpertNo one can take a picture that everyone likes. But, almost every picture can have scope of improvement. Often, we are not our best critics, while others can immediately point out the faults. In If I were you, our expert comments on how your pictures could be taken to another level.
If I Were You
E-mail your images at [email protected]

The Road AheadAnil Sukumar has sent this picture via email. He wants to know my views on improving it.
The tarred road, the white wall and the row of coconut trees leads the eye into the picture. This is a good way to create a feeling of depth in a scene. Unfortunately, the bald toneless sky does not help. So also the electric cables at the top left and the �luorescent light in the centre of the frame.
The only way out to improve the photo is to put in some colour and tone in the sky and get rid of the electric cables and the tube light. To put some blue in the sky, go to Selective Colour in the Layers panel. In the Colours �ield, select White.
Original
Camera: Data not availableAperture: F/2; Shutter speed: 1/100sec; ISO: 142
Edited
Select Absolute radio button. Move the Cyan and Magenta sliders to the right (more of Cyan, less of Magenta) till you are satis�ied with the blue in the sky area (see printscreen).
Now, using the Clone Stamp Tool, get rid of the cables and the tube light. Sharpen the image as necessary and save using the Save As command.
Printscreen
www.smartphotography.in 43
Sm
art
Pho
tog
rap
hyJu
ne 2
015

Ganga GhatIndranil Mazumdar from Kolkata says “I went for a morning walk to the Mallik Bazaar Ganga Ghat and took this shot. It is not good enough. How do I improve this image to make it more attractive?” The picture seems to have been taken on a cold wintry day. The back-
Camera: Nikon D5100Lens: 18-55mm kit lens at 24mmAperture: F/5.6; Shutter speed: 1/200sec; ISO: 250
Original
Edited
Note: If I Were You is meant to encourage and guide readers, and help them improve their photography. Please ensure that the required camera/exposure details are sent to us (or are available in the EXIF data). We shall not accept images for this section if the required data is not available. Readers are requested to send their images at 300ppi for 8 x 10-inch size. If they are too small, working on them is difficult, and hence they may be rejected.
light passing through the atmospheric haze and pollution has caused a loss of overall contrast which is probably the reason why you say that the picture is not good enough. Also. the picture is tilting to the right.
With such pictures, you need to be very
careful when you edit. You need to improve the contrast without taking away the cold early morning feel. In other words, you still need to keep some amount of image-degrading �lare. This what I have done in the edited image. The tilt towards the right has also been corrected. |SP
www.smartphotography.in44
Sm
art
Pho
tog
rap
hyJu
ne 2
015
IF I WERE YOUE-mail your images at [email protected]

Ask Uncle Ronnie
Tele-converterI am very much interested in bird photography. I have a Canon 1200 D with 55-250mm telephoto zoom, which is not sufficient for bird photography. I want to get a Canon 2x tele-coverter. I want to cover distant subjects and get them sharp!
Mantu Paul, via email
You cannot use a tele-converter with your existing 55-250mm lens.
Ideally, one should use a TC only with a prime (non-zoom) lens. Do also note that a 2x TC loses out 2 stops of light. So even if it were possible to physically attach the TC to your lens, it would become an f/11 lens and autofocus will not work.
You could consider the excellent Canon 100-400mm lens (the earlier version will do) or the Tamron 150-600mm f/5-6.3 lens.
Negatives to DigitalI have a large collection of negatives in 120 (6 x 6 cm) and 35mm size, mostly black & white, some colour, going back to 1965. I want your advice in solving two problems:
1. Many negatives have stuck to the glassine sleeves in which they were stored. How do I retrieve them in good condition?
2. Can you recommend a negative/slide scanner that I can buy to
Ask your question to Uncle at [email protected]
digitize these negatives? Where would it be available and for how much?
Phiroze B. Javeri, Mumbai
This was how we did it in the film era: In a large bowl of water, add a few drops of ‘Wetting Agent’. Place few negatives in the bowl (along with the stuck glassine sleeves). Let them stay for 5-7 minutes and then very gently try and separate the negatives from the sleeves. Once separated, you may need to clean the negatives (with a clean chamois leather) while still in the bowl. This is a delicate operation and you may need to experiment on a negative which is not really important to you. If the negatives were given a ‘hardening bath’ (when the film was initially processed), there is less chance of damage. Do note that the treatment will soften the film emulsion and hence you need to take extra care.
Regarding the negative/slide scanner, you may consider the Canon CanoScan 9000F which retails at an MRP of Rs.19,520. It will allow you to scan A4
Canon 1200D
Tamron 150-600mm f/5-6.3 lens
Canon CanoScan 9000F
www.smartphotography.in 45
Sm
art
Pho
tog
rap
hyJu
ne 2
015

a 18-135mm kit lens. I have been instructed not use a full-frame lens on APS-C camera body like the 7D and vice-versa. Kindly explain why it should not be used.
M. G. Suryavanshi, Karnataka
size documents + TPs + Negatives in 35mm and 120 format.
Not SatisfiedI own a Nikon 3100 along with a Tamron 18-200 mm lens (no VR). I am not satisfied with the results. Could it be a fault in the settings?
Premlal Rai, via email
You haven’t mentioned what settings you have on your camera. Even then, my experience tells me that in most probability, your camera settings could be wrong. There are various settings – some technically important and some for personal preferences – and many of them have a direct relationship to the final results. I am afraid it is beyond the scope of this column to explain how and why you need to correctly set the parameters. However, if you stay in Mumbai, or if not and you ever plan to come to Mumbai, you may make a telephonic appointment and come over to my office and I shall set-up the camera for you.
Besides the camera settings, your shooting technique also plays a very important role in achieving the desired results.
Canon’s EF and EF-S LensesI have a Canon 5D Mark III camera body with a 70-200mm L IS II USM lens and a Canon 7D camera with
Canon 5D Mark III
Canon EOS 7D
Canon 70-200mm L IS II USM
Canon 18-135mm
www.smartphotography.in46
Sm
art
Pho
tog
rap
hyJu
ne 2
015
ASK UNCLE RONNIE

Canon’s 35mm D-SLRs (often referred to as full-frame sensor cameras) like your 5D Mark III use EF lenses.
Canon’s APS-C sensor cameras (like your 7D) use EF-S lenses.
With Canon D-SLRs, you can use an EF lens on an APS-C body but you cannot use an EF-S lens on a 35mm body (it will not be possible to mount the EF-S lens on your 5D Mark III body).
Also note that when you mount a EF lens on an APS-C body, the Crop Factor will apply. For example, if you use your 70-200mm EF lens on your 7D body, the equivalent focal length will be 112-320mm.
DiffractionWhen shooting macros, the depth of field is very small. Some friends tell me to use the narrowest
aperture to gain DOF while others tell me that doing so will soften my pictures. Who is right?
A, S. Madan, Nagpur
In a way, both are right! Using a narrow aperture (like f/22 or f/32) will certainly increase the zone of sharpness (the DOF) but using such apertures also cause an overall softness in the pictures due to an optical phenomenon known as ‘diffraction of light’.
Here’s how I would go about it. If my final picture is going to be small in size (say 5 x 7” or thereabouts), I would not bother about the image going slightly ‘soft’; it may or may not be very noticeable at that size. However, if I intend to make the picture fairly large, I would try not to use very narrow apertures. For a 35mm size sensor camera (36 x 24mm sensor), I would prefer not going beyond f/16, while for a APS-C size sensor camera
(approx. 23.7 x 15.7mm sensor size), I would try not going beyond f/11.
As a rule, smaller the imaging sensor, greater the diffraction effects as you narrow down the aperture. Notice that most compact cameras offer apertures only up to f/8 for this reason.
Snake’s EyeHow can I take a natural-looking picture of a snake’s eye or any reptile while taking a shot at night using the camera’s built-in flash?
Amar Nayak, via email
I’m no snake expert but from what I do understand about snakes is that they shed their skins at regular intervals. The photo of the Asiatic water snake that you have sent is taken at such a time and due to that, its eye looks cloudy. Other than that, there is no special technique that I know of. |SP
www.smartphotography.in 47
Sm
art
Pho
tog
rap
hyJu
ne 2
015

Twins from Two Eras
Ajay Sood (Travelure) is an accomplished travel photographer and a travelogue writer. His sole objective is to make the destinations he covers desirable. He has been profiled as Mastercraftsman in Smart Photography (May 2012). He was on the jury of Canon Photomarathon 2012. He is also an assignment photographer for National Geographic Traveller.
He is a Canon Photo Mentor. Besides mentoring photography workshops, he leads photo-tours and contributes travelogues and features to various publications. He has a passion for capturing the sights, sounds and stories of places he visits. He has travelled across India extensively and to over 20 countries across the globe.
His 27 years in the communication industry have been his training ground, leading to his deep understanding of the visual medium, reflected in his unique compositions. More of his work may be seen at www.facebook.com/travelure
‘Winner of Grab Your Dream Season 2’ photo contest organised by Cox & Kings and EzeeGo
Ajay Sood (Travelure)Canon Photo Mentor
These twins were born a millennium apart and they hardly look identical! I refer to Ahmedabad-Gandhinagar - the
most improbable of the twin cities in India. Ahmedabad came about in the 11th Century as Ashaval (or Ashapalli), while Gandhinagar was designed, planned and developed by two Indian assistants of Le Corbusier (made famous in India as the architect of Chandigarh).
I visited the city in January for the 13th Pravasi Bhartiya Divas (PBD) celebrations. They were special this year as 9th January 2015 marked the 100th anniversary of the return of Mahatma Gandhi from South Africa. Given the landmark nature of the occasion, PM Narendra Modi had released couple of stamps and Rs.100 coins to mark Mahatma’s return from South Africa.
PHOTO FEATURE
www.smartphotography.in48
Sm
art
Pho
tog
rap
hyJu
ne 2
015
Revisiting Herita
ge

Sun Temple Modhera
I was staying in Ahmedabad while these celebrations were held at recently built Mahatma Mandir in Gandhinagar. This was my second visit to the city and I did not remember much about the city from my first visit.
My first impression of Ahmedabad
was of chaos. Though the city roads are nice, the traffic is unduly aggressive. There is little tolerance and consideration shown by people on the roads. Paradoxically, Gandhinagar traffic is far better regulated.
Given the limited spare time I had
to take in the city, I planned to visit select sites in and around Ahmedabad-Gandhinagar. The Mahatma Mandir complex that has been developed to play host to mega conventions, conferences and exhibitions impressed me. Its sheer scale was breathtaking.
www.smartphotography.in 49
Sm
art
Pho
tog
rap
hyJu
ne 2
015

The prominent water bodies in the city have been beautified better than the ones in other big cities. Here I refer to the well-kept riverfront of Sabarmati, developed á la Seine, and the banks of an imposing Kankaria Lake. These
looked even better in the night with stunning illumination that may not be routine and may have been put up for couple of mega events the city was hosting - the PBD and ‘Vibrant Gujarat’.
Two stamps on Gandhi were also released to mark the 100th anniversary of his return from South Africa
Folk Dance performance for delegates of Pravasi Bhartiya Diwas
PHOTO FEATURE
www.smartphotography.in50
Sm
art
Pho
tog
rap
hyJu
ne 2
015
Revisiting Herita
ge

Mahatma Mandir
Brilliant illumination and light play at Kankaria Lake
www.smartphotography.in 51
Sm
art
Pho
tog
rap
hyJu
ne 2
015

Multi-cultural influence on the city is evident in Solanki and Vaghela period landmarks, Dutch tombs near Kankaria Lake, or the Mughal influence in the walled
city. At the same time, the influence of freedom movement stalwarts like Mahatma Gandhi or Sardar Vallab Bhai Patel is equally evident.
Adalaj, a step-well from the Vaghela era, is elaborately decorated with exquisite carvings displaying motifs like fighting elephants, some Hindu Gods, lions, tridents etc. Over
the centuries, it has also developed a reputation as a ‘wishing well’.
Not far from the twin cities, in the towns of Modhera and Patan, you will
Adalaj, as you enter
Rani ki Vav layout at a glance
PHOTO FEATURE
www.smartphotography.in52
Sm
art
Pho
tog
rap
hyJu
ne 2
015
Revisiting Herita
ge

find two more stunning architectural marvels from the past - the Sun Temple (Modhera) and Rani ki Vav (Patan).
While Sun Temple was built by the Solanki rulers in 11th century, complete with a pure gold idol of their family deity, Sun, the idol and all the gold here was plundered by Mohammad Gazni and the temple was destroyed to a degree by Allauddin Khilji. Despite these ravages, the remaining structure still reflects the glory and grandeur of the temple that was. The stone carvings are intricate and delicate; the 52 pillars
supposedly represent the 52 weeks of the year; and the step-well called Suryakund is a gorgeous example of geometry and art.
Rani ki Vav is considered to be the most magnificent among step-wells in India. This 64-metres long step-well may not be the largest but the sculptures here surely are impressive. The theme of these carvings is the Dashavtar of Lord Vishnu and includes even his incarnation as Buddha. Additional sculptures include Nagkanyas, Apsaras and monks. The
most impressive sculpture here is of Vishnu resting on Shesh Shaiyya. At the base of this step-well, there is also a 30-kilometer long tunnel (now blocked by stone and mud) that led to Sidhpur and was a planned escape route in defeat.
If and when you plan a visit to these twins cities, do remember this important survival tip as Gujarat is a ‘dry’ state – if you enjoy your sundowner, please visit one of the many permit liquor shops in the city that cater mostly to travellers and charge a meagre amount of Rs.70 for making a drinking permit that is valid for a week. These shops are also permitted to sell liquor to visitors with a permit and while there, do try the vegetarian local delicacies like ‘Haandwa’, ‘Khakhra’, ‘Ganthia’, ‘Dhokla’ etc. |SP
From apsaras to Buddha Avatar of Vishnu at Rani ki Vav, Patan
A glimpse of grand scale of Sculpture in Rani ki Vav, Patan
Sun Temple Modhera
Exquisite sculpture in Rani ki Vav, Patan
www.smartphotography.in 53
Sm
art
Pho
tog
rap
hyJu
ne 2
015

Share your best travel images with us! And win exciting prizes...Can’t wait to print your travel photos on this canvas!Email your Photo to: [email protected]
• Send us maximum 4 images, Horizontal pictures with 300dpi. High Image Resolution. • Please ensure that you send your Complete postal address with telephone number.• Picture should not have been printed in any magazine / newspaper, or offered to any publication and, if applicable, scanned copy of model release (in case of identifiable portraits) along with the entry.

SMART TRAVEL C O N T E S T
Win
Godrej
GP Portable
Powerbank
City: U
daipur • B
y Haresh
Patel
• Please ensure that you have renamed the clicked image with Full name and the Destination name.This is to ensure that your correct name appears in the magazine along with the image.(e.g: If your name is RAVI SHARMA, rename the entry as RAVI SHARMA_Gateway of India _Mumbai.JPG . This is to ensure that your correct name appears in the magazine along with the image.

Fiery SoulsVikram Bawa is an internationally acclaimed Indian fashion and advertising photographer based in Mumbai, who is equally at ease with landscape and automobile photography. He is a recipient of many awards across the globe. Besides photography, his other interests include writing and travelling. He was included in the list of 200 Best Advertising Photographers by Luerzer’s Archive. More details about his work can be found at www.vikrambawa.com
Vikram Bawa
As told to Rohinton Mehta
What exactly is fashion photography? Tell us about the evolution of fashion photography in the Indian context.Fashion photography is the art of capturing clothes with a sense of style. To the common man it is taking simple pleasing photos showing the clothes in their entirety. To the ‘fashion photographer’, it is the art of creating images with a sense of style. A style is what makes the photographer stand out in comparison to his compatriots. Capturing the nuances of the garment become more important.
How did you get into the field of fashion photography? Did you face a period of struggle?I started out very late in life. I was in my late 20’s and photography was a passion for which I had left my earlier life. It definitely was a struggle. I am not from the media or fashion background. Not educated in the field of photography, I had no idea of the
© V
ikra
m B
awa
MASTERCRAFTSMAN
Vikram Bawa
www.smartphotography.in56
Sm
art
Pho
tog
rap
hyJu
ne 2
015

Client: Red Label; Model: Alina Simota; Make-up Artist: Elton Fernandez; Hair Stylist: Krishna Komi; Stylist: Allia
www.smartphotography.in 57
Sm
art
Pho
tog
rap
hyJu
ne 2
015

© V
ikra
m B
awa
Client: Falguni & Shane Peacock; Model: Natalia Uliasz; Make-up Artist: Ian Nguyen; Hair Stylist: Cyndia Harvey; Stylist: Karl Willet
MASTERCRAFTSMAN
Vikram Bawa
www.smartphotography.in58
Sm
art
Pho
tog
rap
hyJu
ne 2
015

industry, the people, the need for personal connect, whether I was good or bad. I designed a course for myself to learn photography and I am still struggling to make it as a good photographer.
I feel like I am still beginning my career.
We see many fashion shoots conducted at exotic locations rather than a studio. If it’s just a question of showcasing clothes and other fashion accessories that a model is wearing, what is the importance of having an exotic background?Every shoot is like a story you are telling. A story for the brand, client, a story for the clothes, a story with your direction. Definitely it is the combination of all the elements which make a great image. What’s the difference between contemporary fashion and still-life fashion?The difference is creating an
© V
ikra
m B
awa
Client: Krsala / TBZ; Model: Deepti Gujral; Make-up Artist: Pooja Arora; Hair Stylist: Beena; Stylist: Priyanka Karunakaran
www.smartphotography.in 59
Sm
art
Pho
tog
rap
hyJu
ne 2
015

© V
ikra
m B
awa
© V
ikra
m B
awa
Client: Yogesh Jasnani; Model: Pam (Toabh Talents), Preeti Chouhan; Make-up Artist: Ambereen Yusuf; Hair Stylist: Zing; Stylist: Nazneen
Client: Asa Kazingmei; Model: Augustine Shinray; Make-up Artist: Sarita Gurung;
Hair Stylist: Santosh Gastaraj; Stylist: Asa Kazingmei
MASTERCRAFTSMAN
Vikram Bawa
www.smartphotography.in60
Sm
art
Pho
tog
rap
hyJu
ne 2
015

www.smartphotography.in 61
Sm
art
Pho
tog
rap
hyJu
ne 2
015

image with or without models. One is the art of shooting the latest trends on a model and presenting a “look’’ of the garment as it would appear worn, whereas the other is the creation of an image with a sense of style / design to showcase the various elements in the particular look.
How does a newcomer get into fashion photography?Experiment and make a sense of style. Show your work in as many places as possible. And meet as many people as you can in the industry.
How do you differentiate fashion photography from glamour photography?Fashion is about clothes, glamour is
about the model. In one, the model is the prop showcasing the clothes, in the other the model herself is the product being highlighted.
We have noticed in recent times that some fashion photographs have very little or poor composition – cluttered backgrounds which takes attention away from the main subject, silly-looking dresses (which a lady would never dare to wear in public), hideous props and make-up. What’s going on, or am I getting old?Fashion is ever changing. It is dynamic in relation to the flux of the local culture. As such fashion photography is an extension of the
vision of the photographer. Whether he chooses to make a statement of the social or cultural values of the present time, or he chooses to be disconnected and only focusing on the sterile nature of the fabric being constructed as a garment to be worn as a basic necessity.
What would you consider as the basic equipment for a budding fashion A Camera! A pin hole, one lens, automatic, the phone, it does not matter what type, what brand, what lens.
It is the eye which visualizes and creates the image. The camera is just a tool to deliver your dreams on paper. |SP
© V
ikra
m B
awa
Client: Catwalk Shoe wear; Model: Matshidiso / Inega Models; Make-up Artist: Pooja Arora; Hair Stylist: Roshan; Stylist: Priyanka K.
MASTERCRAFTSMAN
Vikram Bawa
www.smartphotography.in62
Sm
art
Pho
tog
rap
hyJu
ne 2
015

PORTRA LITE P-10A REVOLUTIONARY VIDEO LIGHT
ADVERTORIAL
In modern Videography, Video Lights play an impressive role to make movies more lively & dynamic. For a movie maker & wedding
photographer, it is a very important factor to select a suitable model. There are several choices of brands & types of Video Lights available, offering various levels of sophistication at different prices. PHOTOPRO is one of the most reputed brand in the Indian photography industry. It designs & manufactures a wide range of Photography Products with a skilled team.
Portra Lite P-10, a revolutionary video light from Photopro, can be considered to be one of the best product of this segment. It is a must have for a movie maker & wedding photographer. It offers a wonderful experience while you make your movies or click your portraits. It is well supported by the sturdy tripod base which conveniently folds for ease of storage.
This light is extremely well build so that you can move it around to accommodate your subject during the shooting. The reflector gives you bright white light & angle to bring out the best in your subjects even in the dark surroundings.
It is available in Regular, Half & Full. Considering the quality of this light, it would be an ideal choice for
ABOUT PHOTOPRO:Based in India, PHOTOPRO design, manufacture
and market a wide range of PHOTOGRAPHIC PRODUCTS for professional photography market. Its vast experience fulfills the needs and requirements of a professional shutterbug and gives them the best quality products to use. Double sensor, half and full technique in video lights, triple diffusers in soft boxes, few innovations by Photopro. PHOTOPRO philosophy before developing a product is to verify the need of the customer and latter provide them with products that will not only enhance their work but will make the work easier. Photopro equips products
that offer good, affordable, easy to use and superlative quality products. It also pledges the same in future as well so as to make your work pleasurable and deliver paramount results. Research and development is going on world wide to boost the technological advancement in the field of photography. Photopro proved itself to be one of the major contributors to the photographic industry with the new “Twin Tech Technology” popularly called 3T which brought a major change in the way of using studio flash system. The innovation will continue from the house of Photopro as Indian contribution to the world of photography.
the professionals who are always looking for a good and powerfully performing product. Its rich look & decent price makes a perfect choice for all professional friends.

The state is a perfect tourist haven in terms of wild life, intricately carved step wells, stunning palaces, vibrant culture, mouth-watering cuisine and a plethora of tourist activities.
Gujarat, birthplace of Mahatma Gandhi and ‘textile king of India’ has a lot more going for
it. Recently, Gujarat Chief Minister Anandiben Patel, as per recent news reports announced the results of the 14th lion census said that there are 523 Asiatic lions in Gir forest as compared to 411 in 2010. Gir is one of the most important wild life sanctuaries in India and attracts thousands of tourists every year. Established in 1965, it is 43 km from Somnath, 65 km from Junagadh and 60 km from Amreli. Listed as endangered, the Asiatic lion (Panthera leo persica) differs from the African lion
R Srinivasan
Pic c
ourt
esy:
Him
ansh
uu S
heth
Pho
tosa
faar
is
Vibrant Gujarat
which has a better developed mane, and a larger body frame, but is no less majestic. Also found here are leopards, jungle cats, jackals, civets, chital, nilgai (bluebull) and blackbucks. The best time to spot wild life here is in summer.
Royale treatApart from the wild life, tourists can visit some of the palaces such as: Laxmi Vilas Palace: Considered to be four times larger than England’s Buckingham Palace, it is located in Baroda. Ranjit Vilas Palace: A fusion of Italian and European architecture, it
Laxmi Vilas Palace
Pic courtesy: Gujarat Tourism
TRAVELOGUE
www.smartphotography.in64
Sm
art
Pho
tog
rap
hyJu
ne 2
015

Vijay Vilas Palace
Pic courtesy: Him
anshuu Sheth Photosafaaris
Pic courtesy: Him
anshuu Sheth Photosafaaris
is situated in Wankaner. Vijay Vilas Palace is located at Mandvi beach in Kutch. Naulakha Palace at Gondal has a vintage cars collection. Nilambagh Palace in Bhavnagar is also a heritage hotel for tourism. To visit some of these palaces which are preferred as movie locations, tourists need to take prior permission and pay a certain nominal visiting charge.
Some other tourist attractions are Kirti Mandir - Mahatma Gandhi’s birthplace at Porbandar, Sardar Sarovar Dam, Somnath temple near Veraval, Lord Krishna’s Dwarakadheesh temple at Dwarka, Haji Pir dargah in Kutch, Lothal near Ahmedabad (which is one of the most ancient towns/cities in the world) and the Saputara hill station in Dang district, among others.
Architectural marvels These ancient step wells or ‘Vav’, (in Gujarati and Marwari language) in the semi-arid regions were once integral to the region as they provided basic water needs and served as natural reservoirs even as they collected rain water during the monsoons. In the past they were frequented by thirsty travellers as stop-overs along trade routes. They were also venues for colourful festivals and sacred rituals. They were constructed in such a manner that they have survived the ravages of time and earthquakes. Due to the well-planned ventilation on the various floors, it is much cooler within these structures as compared to the soaring temperatures outside. There are over 120 such wells in Gujarat, of which the one at Adalaj is most popular.
Adalaj step well: Its construction was started by Rana Veer Singh and after his
death king Mahmud Begada built it in Indo-Islamic architectural style in 1499. The five-storeyed sandstone structure has Islamic motifs that blend with intricately carved Hindu and Jain gods, elephants and women at various levels of the well. This step well is 5 km from Gandhinagar and one can get there from Ahmedabad airport or Kalupur, which is the nearest railhead. |SP
Other activitiesSee for yourself some spectacular kite flying during Makar Sankranti in January, fervour of garba during Navratri, Kalamkari block-printed cloth paintings done in honour of Goddess Durga (Mata ni pachhedi) during Navratri, textile hub Ahmedabad which is called ‘Manchester of the East’, shop till you drop for needlework tie-dyed fabrics, bead work, Patola and Zari work, try the Gujarati thali, visit India’s first skydiving zones at Dessa in Banas Kantha district, ride a hot air balloon over Kankaria lake (apart from paddle boating) or enjoy some artificial snowfall (at the snow park) in Ahmedabad where one can also ride on sleighs or go rock climbing. So as one can see, Gujarat has something for everyone.
Rani ni vav
Adalaj step well
Pic courtesy: Gujarat Tourism
www.smartphotography.in 65
Sm
art
Pho
tog
rap
hyJu
ne 2
015

Krystle D’Souza
FASHION & BEAUTY FEATURE
Kaushik Bhatia
www.smartphotography.in66
Sm
art
Pho
tog
rap
hyJu
ne 2
015

Kaushik Bhatia, also known as ‘Kaybee’ in photography circles, is a businessman and not a full-time photographer. Photography is his hobby and he is extremely passionate about it. His favourite quip is “Photography is my mother tongue”. He believes that a good photographer should “shoot to express and not to impress”. Kaybee loves to shoot fashion and glamour but is always ready to try his hand at other genres of photography. You can see more of his work at www.kaushikbhatia.com or www.facebook.com/KaushikBhatiaPhotography, www.kaushikbhatia.com
Kaushik Bhatia
FeminineShades
© K
aush
ik B
hatia
www.smartphotography.in 67
Sm
art
Pho
tog
rap
hyJu
ne 2
015

Khushi Rajput
FASHION & BEAUTY FEATURE
Kaushik Bhatia
www.smartphotography.in68
Sm
art
Pho
tog
rap
hyJu
ne 2
015

Krystle D’Souza
© K
aush
ik B
hatia
© K
aush
ik B
hatia
www.smartphotography.in 69
Sm
art
Pho
tog
rap
hyJu
ne 2
015

Krystle D’Souza
© K
aush
ik B
hatiaFASHION & BEAUTY FEATURE
Kaushik Bhatia
www.smartphotography.in70
Sm
art
Pho
tog
rap
hyJu
ne 2
015

Parveen Akhtar
© K
aush
ik B
hatia
www.smartphotography.in 71
Sm
art
Pho
tog
rap
hyJu
ne 2
015

Priyanka Vishnu
© K
aush
ik B
hatia
FASHION & BEAUTY FEATURE
Kaushik Bhatia
www.smartphotography.in72
Sm
art
Pho
tog
rap
hyJu
ne 2
015
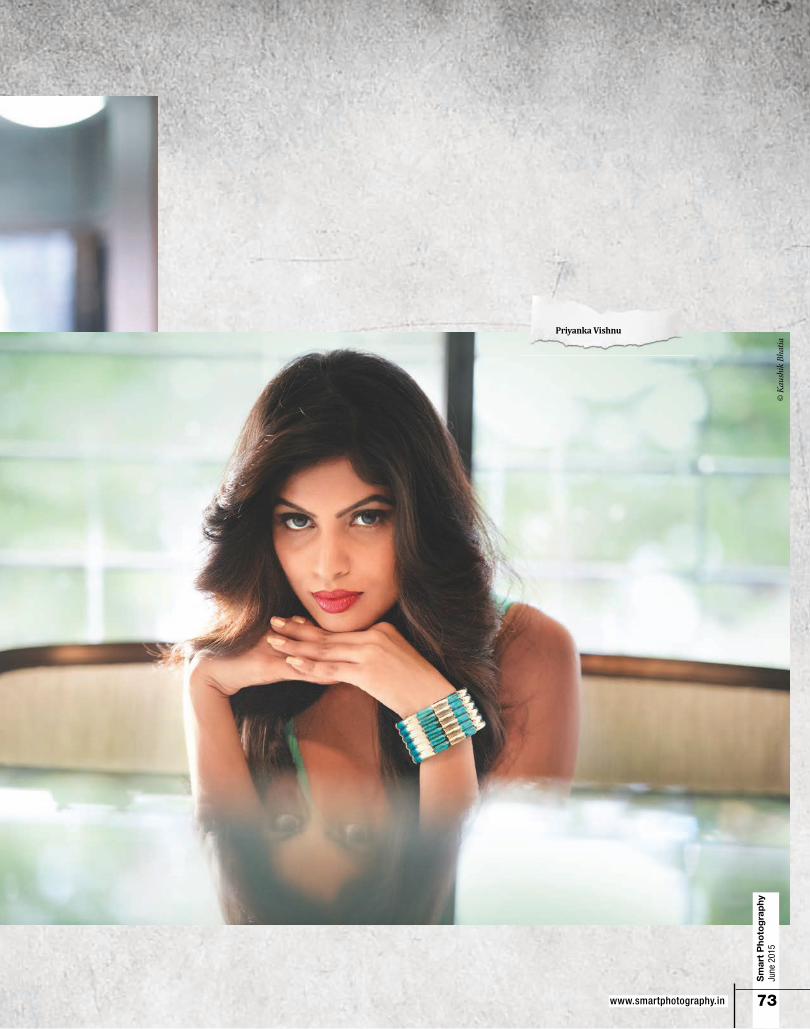
Priyanka Vishnu
© K
aush
ik B
hatia
www.smartphotography.in 73
Sm
art
Pho
tog
rap
hyJu
ne 2
015

Counted amongst India’s topmost fashion photographers, Farrokh Chothia found his calling in photography when he was studying in Jai Hind college. He has photographed divas like Aishwarya Rai Bachan, Malaika Arora Khan, Katrina Kaif and many others. He believes that the dusky Indian girl has the right amount of oomph and can inspire any photographer. He also advises newbies to understand the craft from its source and history, which will be helpful while learning.
Farrokh Chothia
Photographed for Taj Hotels,Falaknuma Palace, Hyderabad
VersatileWomen
© F
arro
kh C
hoth
ia
FASHION & BEAUTY FEATURE
Farrokh Chothia
www.smartphotography.in74
Sm
art
Pho
tog
rap
hyJu
ne 2
015

Rasika Navare/Anima models
Pooja Mor/ Anima Models
© F
arro
kh C
hoth
ia
© F
arro
kh C
hoth
ia
www.smartphotography.in 75
Sm
art
Pho
tog
rap
hyJu
ne 2
015

Lakshmi Menon
© F
arro
kh C
hoth
ia
FASHION & BEAUTY FEATURE
Farrokh Chothia
www.smartphotography.in76
Sm
art
Pho
tog
rap
hyJu
ne 2
015

Pooja Mor/ Anima Models
© F
arro
kh C
hoth
ia
www.smartphotography.in 77
Sm
art
Pho
tog
rap
hyJu
ne 2
015

Aishwarya Rai for Longines
© F
arro
kh C
hoth
iaFASHION & BEAUTY FEATURE
Farrokh Chothia
www.smartphotography.in78
Sm
art
Pho
tog
rap
hyJu
ne 2
015

© F
arro
kh C
hoth
ia
Aishwarya Rai
© F
arro
kh C
hoth
ia
Lisa Ray
www.smartphotography.in 79
Sm
art
Pho
tog
rap
hyJu
ne 2
015

Alia Bhattfor The Juice
© F
arro
kh C
hoth
ia
© F
arro
kh C
hoth
ia
© F
arro
kh C
hoth
ia
Lisa Haydon March 2015 cover for ELLE
FASHION & BEAUTY FEATURE
Farrokh Chothia
www.smartphotography.in80
Sm
art
Pho
tog
rap
hyJu
ne 2
015

Pallavi Das
www.smartphotography.in 81
Sm
art
Pho
tog
rap
hyJu
ne 2
015

BOOK
REVIEW
www.smartphotography.in82
Sm
art
Pho
tog
rap
hyJu
ne 2
015
Bringing alive the old city
SSusan Hapgood is an art historian and curator based in New York. She resided in Mumbai from 2010-2014.
She is a Senior Advisor to Independent Curators International & the Founder and Director of Mumbai Art Room. She has explored the evolution in photography in the Bombay of 1800s in her book, ‘Early Bombay Photography.’ It all began when the British used ‘Daguerreotypes’ and ‘Calotypes’ to capture the city in its various shades. The earliest picture was taken looking in the North direction along the newly built Colaba Causeway towards Fort.
Reasons for people’s love for this art have been brought to the fore. These stemmed from the Europeans’ desire to be in loop with this technology. Another point was to highlight the political, social, scientific and aesthetic motives of the people.
Citing the names of some photographers like Narayan Daji, Hurrichand Chintamon, Shivshanker Narayen and Shapoor N. Bhedwar, she discusses the techniques of those times. She further studies the contribution made by these photographers
Early Bombay Photography ` 1,950 Disha Khemchandani
and some European ones too. For example, from 1850s to 1880s, images were captured using wet collodian glass plate negatives placed in big cameras. These were quite inconvenient. Trends like these have been studied and analysed.
The book is rich in photographs that depict the life in Bombay. It is a treasure trove for anyone, who has longed to get a glimpse of this city in its early stages. Comprising of 95 photographs, each one is a collector’s pride.
The compilation has been published by
Mapin Publishing in association with Contemporary Arts Trust, Mumbai ( Mumbai Art Room) supported by Navajibai Ratan Tata Trust and Sir Ratan Tata Trust. It is an expansion of ‘ A Fantastic Legacy: Early Bombay Photography.’ It was an exhibition that was conducted in 2013 by the Goethe Institute/ Max Mueller Bhavan in Mumbai as a part of the FOCUS Photography Festival. |SP
The book is priced at Rs. 1950 For more information, visit www.manipub.com


Lear
ning
s88Six Common Mistakes and Remedies
96
103
109
Backdrops & Subject
Least-Used Camera Features
Home Video
LEARNING
Understanding Photography
Six Common Mistakes and Remedies
Let’s start with a list of the six common mistakes before we make a deep dive.
• Inclined horizon• Leaning Buildings• Wrong use of flash• Forgetting previously set parameters• Ignoring that the exposure meter is calibrated to a medium tone• Blurred images due to camera shake
Inclined horizon: Who does not like to photograph landscapes? Unfortunately, most look bad due to one very common error, which is the inclined horizon. Also called the “crooked”
or not before you press the shutter release. Also, many cameras (even P&S cameras) show a grid on the monitor or in the viewfinder as a visual aid. If
Smart Photography has been continually receiving requests to start a basic course for beginners. With this in mind, we have asked a very knowledgeable photographer from Hyderabad to take over writing these articles. We have also requested him to be as jargon-free as it is possible, so that newcomers to photography feel comfortable to pursue the hobby.
The author, Ashok Kandimalla has been in the photographic field for over three decades and has extensive experience in both film and digital photography. Being an electronics engineer by profession and a photographer, he possesses a unique and deep insight into the technical aspects of digital photography and equipment. He has published several articles on photography and some of his writings have also been published in the well-known international magazine Popular Photography.
An avid collector of photographic books and vintage cameras, Ashok has a keen interest in the history of photography and a passion for sharing his knowledge on photography through teaching and writing. He is presently working as a Management and Engineering consultant. You can see his work at http://www.flickr.com/photos/ashok_kandimalla. He can be reached at [email protected] Kandimalla
Often you might have lamented that your photographs are not looking good. What could be the reason? While there are many suggestions on how to improve your photography, we at Smart Photography thought that we will bring to you the six most basic errors that photographers make and suggest remedies for preventing them. All these are very simple to practice and will improve your photography tremendously.
or “misaligned” horizon, this simply means that the horizon is not level or in other words not perfectly horizontal. This happens when you don’t hold the camera’s base parallel to the ground (Picture 1). The effect will be obvious even if the horizon is tilted less than a degree! An inclined horizon is worse
if there is a water body, as water maintains (Picture 2) its own level. In the case of ‘land shots’, one could argue that the land was inclined. Even then, it’s best to keep the horizon level.
Avoiding this is a matter of taking care. Check carefully if camera is level
Picture 2: A tilted horizon mars an oth-erwise good picture.
Picture 3: The same with tilt corrected.
Picture 4: A bubble level that fits in the accessory shoe.Picture 5: The level indicator built into the camera as seen on the LCD
monitor. Green indicates that the camera is perfectly level.
Picture 1: This drawing shows what is meant by holding the camera level (left) and not level (right).
this feature is available on your camera switch it on and use it as a guide to help you keep the camera level. You can also buy an inexpensive bubble level
(Picture 4) that you can insert in the accessory shoe of your camera. More advanced cameras have a built-in level (Picture 5) which you can activate.
www.smartphotography.in www.smartphotography.in88 89
Sm
art
Pho
tog
rap
hyJu
ne 2
015
Sm
art
Pho
tog
rap
hyJu
ne 2
015
More often than not, it is the lighting that defines the mood in a picture. This is true in case
of still-life, panoramas etc and not just confined to portraits. Hence high-key or low-key pictures have their own story to tell. It is very important for the photographer to understand which picture to make high key and which has to be shot in low key. Ultimately any picture is an ‘expression’ of a photographer and the photographer has to take utmost care that he does not mismatch things. It is like creating a song by providing the right tune to a poem or lyrics. You may have read and experimented a lot with lighting and creation of mood through it; but the major factor that governs the output of such a shot and which many times goes unspoken about is the – Backdrop.
In this article I would like to talk about the readily available studio backdrops and the materials that you can use as backdrops to suit the subject.
Choosing a backdrop is important;
good as a portrait for a portfolio but if the message in the picture is meant for a cosmetic cream then it would always be wise to use a white backdrop. Similarly pastel colors like light pink are generally used for baby products, light green to define herbal products etc. These are the hidden guidelines of communication. Portrait of an old or a middle aged gentleman will always look good against a deeper backdrop like grey or brown. And adding a slight vignette to the background through lighting will always make it look much better than keeping it even. Even a dark patchy backdrop will look good for any serious portrait. Jewellery ads are generally shot on black or dark backdrops since the entire attention of the viewer should be on the gold or diamond jewellery worn by the model. Products that have a manly or rugged
In outdoor photography, a non-disturbing background is just as important as the subject. The same is the case with studio photography. The backdrop shoud compliment the subject without taking away from it.
it should compliment the subject. It is as important as matching your trouser with your shirt. Therefore photographing any subject against the wrong kind of backdrop should certainly be avoided. In case of street photography or candid photography, not everything is under the photographer’s control. But with a little forethought about the relation of a background with the subject, one can create a pleasing photograph.
Let me start with simple flat backdrops. First, understand the subject and the message you need to convey through your picture. You may go through references from books and/or the Internet. Try to discover what you might have overlooked. For example, observe the thumb rule that all model pictures shot for any cosmetic product advertisement are against a pure white backdrop. This is because white defines freshness and purity and a viewer’s mind readily accepts the same. A clear face against a black backdrop may look
Backdrops & Subject
Having crossed over 20 active years in commercial photography, Dilip Yande says his forte is Fashion and Portrait photography. He believes variety is the spice of life, and to keep himself motivated he does a lot of tabletop as well. For Dilip, names like Rembrandt, Renoir, Gauguin, Picasso, Turner, Monet are household names because of his childhood that was spent in a lineage of fine arts. This ‘fine art’ reflects in his work because he feels that there is always a little bit of ‘you’ in everything one does. Having shot for many advertising agencies, juried a few competitions, mentored many workshops, and guided many photographers in their formative years, for Dilip, photography is just another way to romance his first love – art. He may be contacted at [email protected].
Dilip Yande
Studio backgrounds can be classified as follows:
1) Paper rolls available in the market usually have a flat colour. They are available in different shades and lengths. The most selling variety is 9ft in width. One can create personalized backdrops by spray-painting on white paper rolls available in art material shops. The paint used for this purpose should be a plastic emulsion, which provides a matt finished surface.
2) Cloth backdrops (or canvas) are available in different shades and also with different textures generated through spray painting or effects created by dyeing techniques or batik or at times even hand painted. These are costlier than plain paper rolls. They are easily available in the market.
3) Use of wall papers, matt-finish laminates and handmade papers in case of table tops, a rough worn out wall as a backdrop in a studio, camphor boards which come in many textures like brick effect, stone textures etc.
4) Using sheets of aluminum (like checkered plates), galvanised iron roof sheets, rolling shutters, mats, ‘dhurries’ or even large leaves. They may all add value to the picture. Understanding what to use and where to use is the key to success.
feel like denim wear, leather shoes or after-shaves, men’s deos etc are shot on rusty or raw looking backdrops. Shooting a female model for a nail paint ad on such rusty backdrops would be a mistake. But sometimes it is important to judge the graphic values and forms in the background and accordingly an appropriate subject has to be posed against the same.
Let me explain the above statements with a few examples:
Pic 1: The model is wearing a traditional bridal outfit from Lucknow. To further enhance the Indian look, a traditional Lucknowi mat is used as the backdrop, which does not interfere with model’s look. It helps her to stand out.
Pic 2: Here the model is placed next to an old-time water heater and copper vessels. Taking her picture against a plain white or a black backdrop wouldn’t be appropriate. Hence a straw
Choosing a backdrop is important. It should compliment the subject.
Pic 1
LEARNING
www.smartphotography.in www.smartphotography.in96 97
Sm
art
Pho
tog
rap
hyJu
ne 2
015
Sm
art
Pho
tog
rap
hyJu
ne 2
015
Many of us don’t study our camera’s entire user manual. We generally read only what we are interested in, with a result that we don’t really know what our cameras are capable of. If you fit into this category, then read on; it will certainly and easily improve your final results.
Least-Used Camera Features
We all know the basic camera functions. We know when and how
to use Aperture Priority, Shutter Priority, Program and Manual exposure modes. We have a fairly good idea about using the various metering modes. In spite of that we often manage to have frames, which are less than satisfactory. Do you know that often-times it is possible to edit such images right within your camera? Surprised?
(For the purpose of this learning session, we shall use a Nikon D750 but other makes of cameras also perform similar tasks)
Welcome to the Retouch Menu. The following ‘corrections’ are generally possible (but do check the user manual for the possible edits on your own camera). Note that the camera always creates another JPEG copy of the image in question and never alters the original. Also note that this write-up explains what post-processing can be performed right within your camera but does not explain how to actually do it. For that, you have to study your user manual. Here are twelve available functions which I consider important:
D-Lighting I’m sure you’ve heard of Active D-Lighting (Canon calls it Auto Lighting Optimizer). In strong lighting, chances of overexposing the highlights are high. When you set Active D-Lighting, the camera underexposes to preserve highlight detail and then using internal software,
boosts the shadow areas so that they do not appear underexposed. Enabling this feature can slow down the camera (since it has to perform the additional task). But what if you want to take advantage of this feature without slowing down the camera? In that case you can go over to the Retouch Menu and use D-Lighting.
Remember, Active D-lighting is used when taking the photos; D-Lighting is used as a post-processing edit.
Rohinton Mehta
www.smartphotography.in 103
Sm
art
Pho
tog
rap
hyJu
ne 2
015
LEARNING
First Things First: Every still camera today offers video but we shall consider using a D-SLR
(HD-SLR). The question that first comes to mind is, shouldn’t we be using a dedicated video camera instead of a D-SLR? One reason to use a D-SLR instead of a dedicated video camera, is the cost. Since we already own a D-SLR – and we are not trying to compete with the quality offered by expensive professional video cameras – why not use it? And if this is any consolation to you, a 35mm camera sensor is much larger than the sensors in professional broadcast video cameras used in Hollywood!
What about APS-C sensor D-SLRs? Can they be used for home videos? Sure they can. In fact, some users prefer these to 35mm since they provide greater depth of field when shooting from the same camera position, using identical aperture and equivalent focal length.
You need to keep in mind that capturing video is like capturing ‘still’ images in JPEG – you cannot change the settings later on as you could when shooting in Raw. All camera settings – White Balance, Picture Styles (Canon)/Picture Control (Nikon),
You’ve been taking still pictures for a long time but your spouse keeps urging you to take videos of your children which they can enjoy when they have grown up. You agree with your spouse and finally decide to capture your very first video. That’s good but you are confused about the shutter speed, aperture, ISO, resolution to use, how to focus, what frame rate to set. Many other questions also come to mind. If you are in this boat, here’s a very basic video learning for you.
HOME VIDEO
image sharpness etc – are all baked into the video file. Hence it is very important to ensure that highlights/shadows are not clipped (over exposed or underexposed). If your camera offers Live Histogram, make use of it to acquire correct exposures. Note that, with most D-SLRs you cannot change the shutter speed or the aperture once the video recording starts. Another very important point to note is that with D-SLRs, you have to be in Live View mode to enable video; with interchangeable lens mirrorless cameras, you can view the subject
through the electronic viewfinder while capturing the video.
Video Resolution: Use the highest video resolution available (but for the time being, we’ll ignore 4K). Generally this is 1920 x 1080 pixels and this resolution is known as Full HD. This means that each frame of your video will be 1080 pixels in height.
Frame Rate: This refers to the number of frames the video will shoot per second. Different frame rates give a different ‘feel’ to the video. Many
Rohinton Mehta
www.smartphotography.in 109
Sm
art
Pho
tog
rap
hyJu
ne 2
015
LEARNING

LEARNING
Understanding Photography
Six Common Mistakes and Remedies
Let’s start with a list of the six common mistakes before we make a deep dive.
• Inclined horizon• Leaning Buildings• Wrong use of flash• Forgetting previously set parameters• Ignoring that the exposure meter is calibrated to a medium tone• Blurred images due to camera shake
Inclined horizon: Who does not like to photograph landscapes? Unfortunately, most look bad due to one very common error, which is the inclined horizon. Also called the “crooked”
Smart Photography has been continually receiving requests to start a basic course for beginners. With this in mind, we have asked a very knowledgeable photographer from Hyderabad to take over writing these articles. We have also requested him to be as jargon-free as it is possible, so that newcomers to photography feel comfortable to pursue the hobby.
The author, Ashok Kandimalla has been in the photographic field for over three decades and has extensive experience in both film and digital photography. Being an electronics engineer by profession and a photographer, he possesses a unique and deep insight into the technical aspects of digital photography and equipment. He has published several articles on photography and some of his writings have also been published in the well-known international magazine Popular Photography.
An avid collector of photographic books and vintage cameras, Ashok has a keen interest in the history of photography and a passion for sharing his knowledge on photography through teaching and writing. He is presently working as a Management and Engineering consultant. You can see his work at http://www.flickr.com/photos/ashok_kandimalla. He can be reached at [email protected] Kandimalla
Often you might have lamented that your photographs are not looking good. What could be the reason? While there are many suggestions on how to improve your photography, we at Smart Photography thought that we will bring to you the six most basic errors that photographers make and suggest remedies for preventing them. All these are very simple to practice and will improve your photography tremendously.
or “misaligned” horizon, this simply means that the horizon is not level or in other words not perfectly horizontal. This happens when you don’t hold the camera’s base parallel to the ground (Picture 1). The effect will be obvious even if the horizon is tilted less than a degree! An inclined horizon is worse
if there is a water body, as water maintains (Picture 2) its own level. In the case of ‘land shots’, one could argue that the land was inclined. Even then, it’s best to keep the horizon level.
Avoiding this is a matter of taking care. Check carefully if camera is level
Picture 1: This drawing shows what is meant by holding the camera level (left) and not level (right).
www.smartphotography.in88
Sm
art
Pho
tog
rap
hyJu
ne 2
015

or not before you press the shutter release. Also, many cameras (even P&S cameras) show a grid on the monitor or in the viewfinder as a visual aid. If
Picture 2: A tilted horizon mars an oth-erwise good picture.
Picture 3: The same with tilt corrected.
Picture 4: A bubble level that fits in the accessory shoe.Picture 5: The level indicator built into the camera as seen on the LCD
monitor. Green indicates that the camera is perfectly level.
this feature is available on your camera switch it on and use it as a guide to help you keep the camera level. You can also buy an inexpensive bubble level
(Picture 4) that you can insert in the accessory shoe of your camera. More advanced cameras have a built-in level (Picture 5) which you can activate.
www.smartphotography.in 89
Sm
art
Pho
tog
rap
hyJu
ne 2
015

LEARNING
Understanding Photography
Both these tools will help you to get the horizon level but you will need a tripod to use them effectively. You can also correct this tilt in post-processing (Picture 3) but you must be prepared to lose some pixels when you rotate the image and then crop it to a perfect rectangle. Plus, in any case it is always better do it right the first time.
Leaning Buildings: It is very likely that you have taken a photograph of a tall building or a tower from a close distance while standing near the base of the building and camera tilted up. When you look at such a photograph you would have noticed that the building appears to “lean” backwards. That is, vertical sides of the building are no longer vertical and the parallel sides look to be converging at the top (Picture 6). This is due to perspective. This is happening because you are
building in the front of the one you are photographing to take the picture. If both these are not possible then you need to do one of the following:Use a tilt/shift lens or a tilt/shift adapter with a mirrorless camera. (You only need the shift operation to correct this problem, tilt is not required). Correct with post-processing software like Photoshop or Lightroom (Picture 7).
Wrong use of flash: Have you seen photographers photographing large objects like buildings, monuments, valleys, hills, etc., using flash? Did you ever wonder how the result would look like? Well the whole picture would look just black as it would be severely underexposed. A flash is a handy tool but its usefulness (especially the one built into the camera) is limited to photographing objects which are
very close to the base of building (foreground), making it look large. You are also far from the top of the building (background) making it look small. This makes sides of the building look as if they are converging at the top (this is the same reason why railway tracks appear to converge at a distance) and hence gives the impression that the building is leaning. Often this “leaning” effect is labeled as “distortion”. This is simply not correct. Perspective is not distortion.
So, how do you rectify such a situation? One solution is to move away from the building so that the relative difference in distance between (you and) the top and base of the building is very less. This reduces the difference in size (on the image) between the top and base of the building thus correcting this “leaning”. Another way is to get into a
Picture 6: The “leaning” of the tower is due to perspective – you are close to the base of the building (making it appear large) and far from the top (making it look small). It is not because of focal length. This is not distortion either.
Picture 7: Here perspective correction was applied in Photoshop to correct the leaning to a great extent.
www.smartphotography.in90
Sm
art
Pho
tog
rap
hyJu
ne 2
015

within 15 feet (around 4.5 metres). The camera sets the exposure for the light from the flash which is woefully inadequate to illuminate the far away subjects resulting severe underexposure. The solution is as follows. Switch off the flash and let camera determine the exposure for the existing (ambient) light (Picture 8). This will result in a far better photograph. However, since the light is low the camera will set a slow shutter speed and hence a tripod or a sturdy support for the camera is a must.
Another bad use of flash is to use it when photographing through a glass window. You must have seen many photographers doing this when inside a
bus or a train. What they will get is this – a bright patch of light reflecting from the glass pane! The remedy is to switch off the flash, keep the lens close to the glass preferably touching it (or use a rubber lens hood or cup your hand around the lens) to avoid reflections and then take a photograph. Of course this works only if the outside light is sufficient but there is simply no other solution. (Tip: Increase your camera’s ISO if light is low).
Forgetting previously set parameters: Often parameters (also called settings) like White Balance, image quality, exposure compensation, etc. would have changed without your explicit knowledge. You yourself might have changed them to suit the then prevailing shooting conditions and then forgot to change them again. When you take your camera out again after sometime, the camera will definitely remember the changed settings while you won’t! Another possibility is that one of your friends might have handled your camera and having nothing else to do , changed the settings and neglected to inform you.
Whatever may be the reason, the current set of parameters may not be appropriate for the situation on hand. The result is poor quality images. For example, you might have set image size to small size for images intending to publish on a web. If you forget this and go on an expensive photography trip, you will return with files with a small pixel count that cannot be printed with high quality! So, it is advisable as they say to “look before you leap”. Make it a habit to check the following parameters every time before you take a photograph or at least before you start a new session.
Flashes are a handy tool but their usefulness (especially which are built into the camera) is limited to photographing
objects which are within 15 feet (around 4.5 metres).
Picture 8: Here the flash was switched off and the exposure was set for the ambient light, resulting in a proper exposure. An aperture of f/10 was used for adequate depth of field and ISO was set to 200 for good image quality. The resulting shutter speed was 1.3 seconds and hence the camera was mounted on a tripod.
Picture 9: The settings U1 and U2 are user definable and can recall previously set parameters instantly.
www.smartphotography.in 91
Sm
art
Pho
tog
rap
hyJu
ne 2
015

LEARNING
Understanding Photography
• Exposure mode• Metering mode• Exposure compensation • Exposure bracketing• Focus Mode• Focus area mode• ISO• Image quality and Image size• White Balance
Tip: Many DSLRs, CSCs and even P&S cameras have a mode dial (Picture 9) with user defined settings (called U1, U2 or C1, C2, C3 for example, depending on the manufacturer). These are used to store various parameters (listed above and some more) that you use as a set. You can define a few “sets” say for landscapes, action, etc. and assign a number like U1, U2 for each set. After this, you can dial in the wanted set by just turning the mode dial. This way you can get back to a known set of parameters in an instant. In case you have this facility, all you have to do is switch on the camera and then move the dial to the appropriate user defined set. This will ensure that you start with a known set of parameters. It is also a good idea to write down what you have defined (on a paper or a cell phone) and carry it with you as a reference.
Ignoring that the exposure meter is calibrated to a medium tone: All meters (whether they are evaluative, spot etc...) and all metering modes (aperture priority, program, metered manual, etc...) give an exposure assuming that the measured area is of medium (also called average) tone. This is also sometimes described as meters being calibrated to 18% reflectance since this corresponds roughly to medium tone.
Usually this is fine for many cases but will give wrong exposure in three cases that you will come across often. The result is that in these cases the meter will not see an average scene and will give
an erroneous reading. It is imperative that you recognize these situations and then apply suitable correction in the form of exposure compensation to get the right exposure.
You are likely to come across the following three cases where the overall scene will not present an average tone to the meter, hence causing the meter to err. a. High key scenesb. Low Key scenes c. Backlit scenes
a. High key scenes: A scene with predominantly light tones will result in what you call as a “High Key” photograph. Picture 10 shows some white crockery against a white background making the whole scene predominantly very light. This creates the high key effect. If you take a meter reading of such a high key scene, it will give a reading that will render the scene as medium tone. To get the correct tone in this case, an exposure compensation of +2.0 EV was given. This made the crockery and white background to come out very light w(the way we wanted) rather than in medium tone which is darker than what you want.
b. Low Key Scenes: Opposite of a high key scene is the low key scene which results in a “Low Key” photograph. Here, we have a black camera against a black background (Picture 11) making the whole scene predominantly very dark that is, low key. If you take a meter reading and expose it as it is, then scene will be rendered in medium tone once again. To avoid that an exposure compensation of –1.7 EV was given. Note that this rendered the camera black while at the same time retaining the details of the camera body and lens barrel. Without this minus compensation, the image would have been rendered in medium tone which is lighter than what you want.
Why does your meter give an error in these cases? A meter cannot distinguish between a predominantly light (high key) scene and a predominantly dark (low key) scene. In spit of the light scene having a much higher reflectance than the darker one. So, it will treat the first case as a medium toned scene in more light and the latter as a medium toned scene in less light. Hence, it will give less exposure than what is needed i n the first case and more exposure in the second case. This will make the high key scene darker due to underexposure
Picture 10: High Key scene. You need to give around +2.0 stops compensation for a scene like this.
www.smartphotography.in92
Sm
art
Pho
tog
rap
hyJu
ne 2
015

and the low key scene lighter due to overexposure. The consequence is that both scenes will be recorded as medium toned! You can easily understand this if you remember that meters are always calibrated to medium tone as they do not take into account the reflectance of the subject. Simply put meters are “tone blind”!
Since this is an important concept, here is a restatement of the same: Whatever you measure, the meter will give a reading (for that area) such that it will be rendered as medium tone (the calibrated tone) in the captured image. Hence, you need to remember that if you meter a scene whose tone is not medium tone to start with, then you will get results that may surprise you. In case you come across high and low key scenes you need to give more and less exposure respectively to get the scenes rendered properly.
c. Back lit scenes: This is a very commonly occurring error and occurs most frequently in portrait photographs (Picture 12) that are taken against a bright background. This is really a special case of a high key scene where the meter gets affected by the bright background and sets an exposure to render the background in medium tone (underexposes). This results in the subject being rendered in
a tone that is even darker than the mid-tone. The underexposure increases as the subject size decreases as the meter will see a greater area of brightness and will underexpose even more. Same is the case if the brightness of the background increases.
The remedy for backlit scenes is either to use a fill flash or to go close and take a meter reading of the subject’s face alone (that is the viewfinder must be filled with the face). You can also use a spot meter here instead. In any case, you need to compensate the meter reading based on the skin tone of the subject (Picture 13). You have to give positive or negative compensation depending on whether the skin is fair or dark.
Blurred images due to camera shake: This is the last one but perhaps it is the mistake that occurs most often. How often do you hear this complaint “my pictures are not sharp” (especially those taken with telephoto lenses)? Many times, for sure. While there are several reasons, the most common one is due to camera shake. While this vary from person to person, you need a certain minimum shutter speed to prevent shake when handholding a camera. The thumb rule for the slowest handholdable speed depends on the effective focal length of the lens in use, and is 1/the effective focal length, in seconds.
If you don’t get this, increase ISO (manually or by Auto ISO) till you get this. Now, what does the word effective focal length mean? It simply means that you should base the shutter speed depending on the format of the sensor apart from just focal length. Here are the effective focal lengths:
• For a full frame DSLR, Effective Focal Length = focal length of the lens
• For cropped sensor DSLR, Effective Focal Length = 1.5 X (focal length of the lens)
• For M4/3 (Micro Four third) camera, Effective Focal Length = 2 X (focal length of the lens)
However, it is difficult to handhold
Picture 11: Low key scene. Here a -1.7 stop compensation was given.
The thumb rule for the slowest shutter speed for hand-held photography is 1/the effective focal
length, in seconds.
www.smartphotography.in 93
Sm
art
Pho
tog
rap
hyJu
ne 2
015

LEARNING
Understanding Photography
You have read the six most frequently made errors along with remedies. Understanding why these mistakes occur and taking action to prevent them happening as explained in the article will do wonders to your basic photographic skills. These are not difficult to practice and you will master them very quickly. Result is better pictures!
CONCLUSION
at speeds below 1/30 sec even if the effective focal length is less than 30mm. So, to be safe, you should maintain a shutter speed of at least 1/60 sec or faster as determined by the thumb rule mentioned.
What if the light is low and you are unable to get a shutter speed as per the thumb rule? First open up the aperture of the lens fully. This will allow more light and hence a faster shutter speed. If even now, it is not
sufficient, bump up the ISO till you get the shutter speed you need. Yes, higher ISO will decrease the image quality due to grain, but then a grainy picture is better than a blurry one!
If your lens or camera has some anti-shake feature then you will be able to use even slower shutter speeds. However, remember that manufacturers’ claims are sometimes overstated. Hence, you should check personally to see what will be the slowest acceptable shutter speed you can use and still get sharp results. And here is a very important point. While the anti-shake feature reduces blurriness due to the camera shake it will do nothing to stop the movement of the subject. In case the subject is moving, like a bird in flight, then you must use a fast enough shutter speed to freeze the action. If you don’t, you will get a blurry subject. |SP
All t
ext d
iagr
ams a
nd im
ages
© A
shok
Kan
dim
alla
Picture 12: A backlit portrait. The exposure meter was influenced by the bright background and ren-dered it as medium tone. This caused the skin tone being recorded very dark.
Picture 13: Here a meter reading was taken from the face of subject and a compensation of +1.0 stop was given as the subject was fair skinned. Now, the subject is recorded with the proper tone but the background is over exposed. An alternate solution is to use a fill flash. This will brighten the subject without overexpos-ing the background.
www.smartphotography.in94
Sm
art
Pho
tog
rap
hyJu
ne 2
015

YOUR DETAILS (ALL DETAILS IN CAPITAL LETTERS)
Name: Mr/Ms
Occupation
Date of birth
Address
City State
Pincode Email
Phone (Off) Phone (Res)
Mobile No.
Please send me latest updates on Special Offers and Events of Smart Photography
Kindly draw the cheque/DD/PO in favor of NEXT GEN PUBLISHING LTD. (Please add
Rs. 20/- extra for outstation cheque)Please Find enclosed
Cheque/DD no. Dated
Bank
Branch
Or please charge my credit card Visa MasterCard
Card No.
Card expiry date
Name (as appears on card)
Date Signature
TO GIFT A SUBSCRIPTION (ALL DETAILS IN CAPITAL LETTERS)Please fi ll out both the recipient’s details, below, and your details above. To gift more than one subscription, please provide address details on a separate sheet.
Name: Mr/Ms
Occupation
Date of birth
Address
City State
Pincode Email
Phone (Off) Phone (Res)
Please complete the order form and mail it to us at Next Gen Publishing Ltd.,
2nd Floor, C Wing, Trade World, Kamala Mills Compound, S.B.Marg, Lower Parel (W). Mumbai 400013
You can also fax the order for credit card purchases to +91 22 2495 5394
For clari� cations, email: [email protected] or call +91 22 4352 5252
TERMS AND CONDITIONS: Please allow 4-5 weeks for processing of your subscription. Copies will be sent by
ordinary post only. Next Gen Publishing will not be responsible for postal delay, transit loses or mutilation of cop-
ies. No cancellation of subscriptions will be entertained after commencement of subscription. Please mention
your name and address on the reverse of your DD/Cheque. All disputes are subject to the exclusive jurisdiction
of courts in Mumbai only.
June
201
5*
Cash Discount Offer Pay ` 5400 ` 2700 for 3 Years subscription and save ` 2700 (50% Discount) on the cover price
Pay ` 1800 ` 1200 for 1 Year subscription and save ` 600 (33% Discount) on the cover priceInternational rate - 1 Year INR Rs. 8000 or USD 130 for by air mail post
Offer valid only till June 30, 2015!
Here are 4 really good reasons!Why would you buy a Smart Photography subscription?
1 Save up to 50% on cover prices
2Never miss an issue again
3 Delivered free to your door
4And most important of all, a seriously good
quality magazine...
TO SUBSCRIBE1 2 3Online Call Post
Visit athttp://secure.nextgenpublishing.in/ +91 22 4352 5252
Next Gen Publishing Ltd., Trade World, C-Wing, 2nd Floor, Kamala Mills Compound, Senapati Bapat Marg, Lower Parel (W), Mumbai 400013, India.
THREE EASY WAYS TO SUBSCRIBE
reasons!Why would you buy a Smart Photography subscription?
Exclusive
Anniversary
Off er 50%For 3 Years
Discount
PHOTOGRAPHYSmart

More often than not, it is the lighting that defines the mood in a picture. This is true in case
of still-life, panoramas etc and not just confined to portraits. Hence high-key or low-key pictures have their own story to tell. It is very important for the photographer to understand which picture to make high key and which has to be shot in low key. Ultimately any picture is an ‘expression’ of a photographer and the photographer has to take utmost care that he does not mismatch things. It is like creating a song by providing the right tune to a poem or lyrics. You may have read and experimented a lot with lighting and creation of mood through it; but the major factor that governs the output of such a shot and which many times goes unspoken about is the – Backdrop.
In this article I would like to talk about the readily available studio backdrops and the materials that you can use as backdrops to suit the subject.
Choosing a backdrop is important;
In outdoor photography, a non-disturbing background is just as important as the subject. The same is the case with studio photography. The backdrop shoud compliment the subject without taking away from it.
it should compliment the subject. It is as important as matching your trouser with your shirt. Therefore photographing any subject against the wrong kind of backdrop should certainly be avoided. In case of street photography or candid photography, not everything is under the photographer’s control. But with a little forethought about the relation of a background with the subject, one can create a pleasing photograph.
Let me start with simple flat backdrops. First, understand the subject and the message you need to convey through your picture. You may go through references from books and/or the Internet. Try to discover what you might have overlooked. For example, observe the thumb rule that all model pictures shot for any cosmetic product advertisement are against a pure white backdrop. This is because white defines freshness and purity and a viewer’s mind readily accepts the same. A clear face against a black backdrop may look
Backdrops & Subject
Having crossed over 20 active years in commercial photography, Dilip Yande says his forte is Fashion and Portrait photography. He believes variety is the spice of life, and to keep himself motivated he does a lot of tabletop as well. For Dilip, names like Rembrandt, Renoir, Gauguin, Picasso, Turner, Monet are household names because of his childhood that was spent in a lineage of fine arts. This ‘fine art’ reflects in his work because he feels that there is always a little bit of ‘you’ in everything one does. Having shot for many advertising agencies, juried a few competitions, mentored many workshops, and guided many photographers in their formative years, for Dilip, photography is just another way to romance his first love – art. He may be contacted at [email protected].
Dilip Yande
Studio backgrounds can be classified as follows:
1) Paper rolls available in the market usually have a flat colour. They are available in different shades and lengths. The most selling variety is 9ft in width. One can create personalized backdrops by spray-painting on white paper rolls available in art material shops. The paint used for this purpose should be a plastic emulsion, which provides a matt finished surface.
2) Cloth backdrops (or canvas) are available in different shades and also with different textures generated through spray painting or effects created by dyeing techniques or batik or at times even hand painted. These are costlier than plain paper rolls. They are easily available in the market.
3) Use of wall papers, matt-finish laminates and handmade papers in case of table tops, a rough worn out wall as a backdrop in a studio, camphor boards which come in many textures like brick effect, stone textures etc.
4) Using sheets of aluminum (like checkered plates), galvanised iron roof sheets, rolling shutters, mats, ‘dhurries’ or even large leaves. They may all add value to the picture. Understanding what to use and where to use is the key to success.
LEARNING
www.smartphotography.in96
Sm
art
Pho
tog
rap
hyJu
ne 2
015

good as a portrait for a portfolio but if the message in the picture is meant for a cosmetic cream then it would always be wise to use a white backdrop. Similarly pastel colors like light pink are generally used for baby products, light green to define herbal products etc. These are the hidden guidelines of communication. Portrait of an old or a middle aged gentleman will always look good against a deeper backdrop like grey or brown. And adding a slight vignette to the background through lighting will always make it look much better than keeping it even. Even a dark patchy backdrop will look good for any serious portrait. Jewellery ads are generally shot on black or dark backdrops since the entire attention of the viewer should be on the gold or diamond jewellery worn by the model. Products that have a manly or rugged
feel like denim wear, leather shoes or after-shaves, men’s deos etc are shot on rusty or raw looking backdrops. Shooting a female model for a nail paint ad on such rusty backdrops would be a mistake. But sometimes it is important to judge the graphic values and forms in the background and accordingly an appropriate subject has to be posed against the same.
Let me explain the above statements with a few examples:
Pic 1: The model is wearing a traditional bridal outfit from Lucknow. To further enhance the Indian look, a traditional Lucknowi mat is used as the backdrop, which does not interfere with model’s look. It helps her to stand out.
Pic 2: Here the model is placed next to an old-time water heater and copper vessels. Taking her picture against a plain white or a black backdrop wouldn’t be appropriate. Hence a straw
Choosing a backdrop is important. It should compliment the subject.
Pic 1
www.smartphotography.in 97
Sm
art
Pho
tog
rap
hyJu
ne 2
015

mat was used as the background to lend an appearance of ‘old time’. It was further painted with terracotta shade to give an earthy brown feel. This assured the ‘correct’ backdrop for this particular set-up.
Pic 3: Model portfolios where face and expressions are important, look nice against a neutral and plain backdrop like grey. The picture becomes nicer when one adds a glow to the background by using a light source through a honeycomb grid.
Pic 4: Any picture that has denims, leather apparels and macho props like shovels, ropes etc look good when shot against a backdrop of rolling shutters.
Pic 2
Pic 3
LEARNING
www.smartphotography.in98
Sm
art
Pho
tog
rap
hyJu
ne 2
015

Pic 5b
Pic 4
Pic 5a
www.smartphotography.in 99
Sm
art
Pho
tog
rap
hyJu
ne 2
015

Pic 5a and 5b: Model portfolio shots also look good when taken against such textured surfaces of Camphor boards. They are available in few shops which sell laminates or plywood sheets.
Pic 6: Model shots where hair is back-lit should always be taken against darker backdrops.
Pic 7: The model was wearing a tribal outfit with matching jewellery and appropriate makeup. To compliment this, a backdrop of back-lit leaves was added which has given a very natural feel to the subject.
Pic 8: Corrugated tin sheets – a roofing material – was used in this
Model shots where hair is back-lit should always be taken against darker
backdrops.
Pic 6
LEARNING
www.smartphotography.in100
Sm
art
Pho
tog
rap
hyJu
ne 2
015
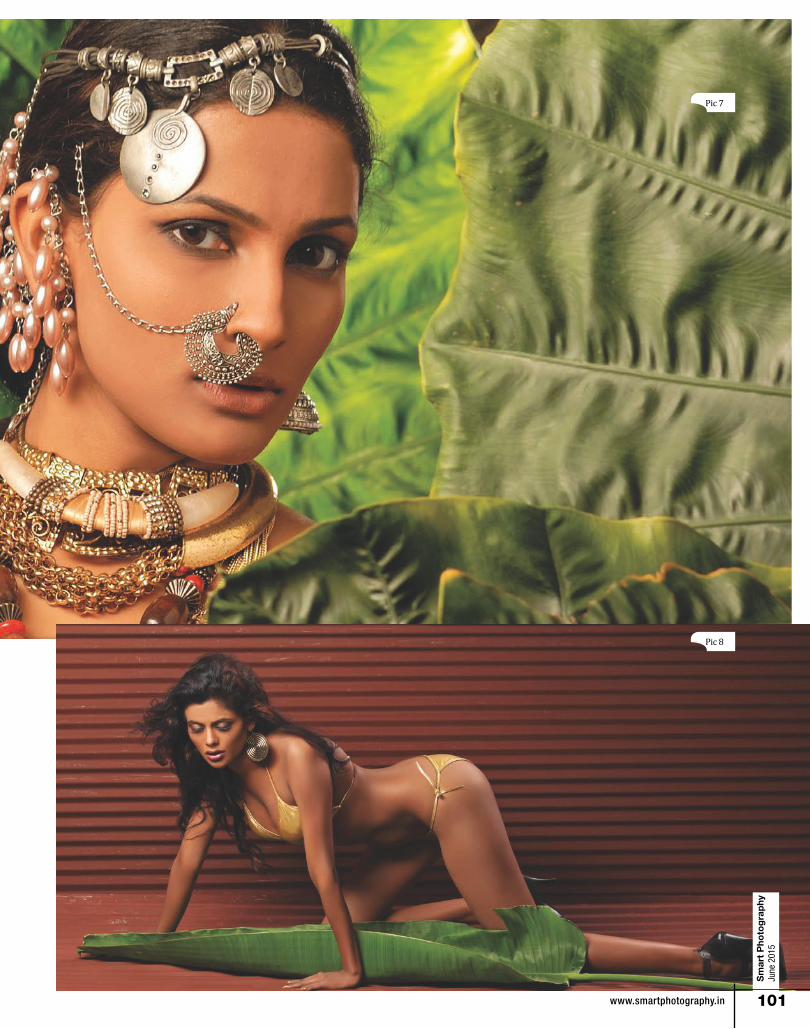
Pic 7
Pic 8
www.smartphotography.in 101
Sm
art
Pho
tog
rap
hyJu
ne 2
015

Credit Lines: Models: Pooja Mendon, Nayana Mukay, Archana Samant, Raavi Ambiger, Apoorva Dasgupta, Kartik Mane (coordinated by Songerwala of Angelz Models).Makeup: Anup Das Pics: Dilip Yande.
shot. They would ideally look good for ‘macho’ products. But in this case, the parallel lines on the roofing material was used as a graphic element against the model’s curvaceous body. Therefore, the body curves are aesthetically cutting the straight lines behind. To break the monotony, a simple palm leaf was added below.
Pic 9: The model is wearing a floral bikini which now calls for backdrops like sand, sky or something that symbolises an exotic resort. This was easily achieved by scattering banana leaves on the ground and making the model sleep over the same. |SP
Pic 9
LEARNING
www.smartphotography.in102
Sm
art
Pho
tog
rap
hyJu
ne 2
015

Many of us don’t study our camera’s entire user manual. We generally read only what we are interested in, with a result that we don’t really know what our cameras are capable of. If you fit into this category, then read on; it will certainly and easily improve your final results.
Least-Used Camera Features
We all know the basic camera functions. We know when and how
to use Aperture Priority, Shutter Priority, Program and Manual exposure modes. We have a fairly good idea about using the various metering modes. In spite of that we often manage to have frames, which are less than satisfactory. Do you know that often-times it is possible to edit such images right within your camera? Surprised?
(For the purpose of this learning session, we shall use a Nikon D750 but other makes of cameras also perform similar tasks)
Welcome to the Retouch Menu. The following ‘corrections’ are generally possible (but do check the user manual for the possible edits on your own camera). Note that the camera always creates another JPEG copy of the image in question and never alters the original. Also note that this write-up explains what post-processing can be performed right within your camera but does not explain how to actually do it. For that, you have to study your user manual. Here are twelve available functions which I consider important:
D-Lighting I’m sure you’ve heard of Active D-Lighting (Canon calls it Auto Lighting Optimizer). In strong lighting, chances of overexposing the highlights are high. When you set Active D-Lighting, the camera underexposes to preserve highlight detail and then using internal software,
boosts the shadow areas so that they do not appear underexposed. Enabling this feature can slow down the camera (since it has to perform the additional task). But what if you want to take advantage of this feature without slowing down the camera? In that case you can go over to the Retouch Menu and use D-Lighting.
Remember, Active D-lighting is used when taking the photos; D-Lighting is used as a post-processing edit.
Rohinton Mehta
www.smartphotography.in 103
Sm
art
Pho
tog
rap
hyJu
ne 2
015
LEARNING

Red-eye reduction Portraits taken using electronic flash often show red eyes, especially when ambient illumination is low and the subject is looking straight into the lens. The retina of the human eye is red in colour and when light from the flash hits the retina, it often reflects back directly into the lens. The closer the flash is to the lens, greater the chances of red-eyes. Using this feature, you can eliminate/reduce the dreaded red-eye effect. Do keep in mind though that if the image is very small, this feature may not be able to efficiently get rid of the red-eye effect. Trim (Cropping)
Let’s say that you have shot the picture in 4:3 aspect ratio but now you wish that you had taken the shot in 16:9 (panoramic) ratio. This feature allows you to crop to the new aspect ratio. Several crop ratios are available.
Monochrome (Convert colour images to black & white)In-camera conversion from colour to black & white. Note that this feature may not get you the best black & white conversion, but its pretty straightforward and easy.
LEARNING
www.smartphotography.in104
Sm
art
Pho
tog
rap
hyJu
ne 2
015

Filter effects Several filter effects are available. Some effects can be very subtle. You can warm up images, intensify red or green or blue colours, create star-effects on highlights, or ‘soften’ images for smooth skin on portraits or to create dreamy landscapes.
Image overlayThis is a great in-camera feature that allows us to create an entirely different image. For example, you take two Raw files, one of a landscape and the other of say, fireworks against a dark sky or the moon, and then combine the two images to form an entirely new picture – a kind of image that you’d get with Multiple Exposure on the same frame. The advantage here is that you can actually see and even control (to some extent) the effect before you okay the final picture. Note that while this is a fast and easy way to combine two Raw images to form a third (JPEG) image, it does not work well with some images.
Raw ProcessingWhen editing your images on your computer, you require a Raw Converter (software) to open and edit your Raw files. May be you don’t have one or may be you are not computer savvy and want an easy way out. Using this feature, you can create a good quality JPEG from your Raw file. As with other features in the Retouch Menu, a new file will be created; the Raw file will remain untouched.
Here are the edits that you can do: Set Image Quality (Fine/Normal/Basic), Image Size (Large, Medium, Small), Colour Space (Adobe RGB or sRGB), Picture Control (Standard, Neutral, Vivid etc), White Balance, High ISO Noise Reduction, and Exposure Compensation. Once you adjust the settings to your liking, you can apply the adjustments.
www.smartphotography.in 105
Sm
art
Pho
tog
rap
hyJu
ne 2
015

Barrel distortion
No distortion
Pin-cushion distortion
Resize We generally shoot our pictures in full resolution. Sometimes though, we need smaller files, say for emailing. The Resize feature allows us to create a lower resolution image from a high-resolution image. Note that this is not the same as ‘cropping’.
StraightenOne of the mistakes that most beginners do is not levelling the camera, resulting in a sloping horizon. This can be easily remedied using the Straighten feature in the Retouch Menu. Do note that the edges will be cropped.
Distortion controlMany lenses exhibit optical defects known as barrel and/or pincushion distortion. In barrel distortion, straight lines tend to bulge outwards from the middle, like in a barrel. Pincushion distortion is the opposite effect. It is possible for lens designers to correct for these shortcomings, but that would seriously boost up the costs. Hence many cameras offer the required corrections through the use of internal software. Using this feature will crop the sides.
LEARNING
www.smartphotography.in106
Sm
art
Pho
tog
rap
hyJu
ne 2
015

FisheyePictures shot with a fisheye lens create crazy effects and hence have their own appeal. Fisheye lenses can be quite expensive and the expense may not be justified for creating few such images. Using the Fisheye effect from the Retouch Menu, one can simulate the effect to a certain extent.
Perspective controlTall buildings, when photographed from near, appear to lean backwards because we tilt the camera to include the entire structure. You can easily straighten the lean (but it also depends on the amount of lean in the original image) using the Perspective control feature. The final image will be cropped.
www.smartphotography.in 107
Sm
art
Pho
tog
rap
hyJu
ne 2
015

Selective colourThis feature is used as a creative expression. May be you like to have a black & white portrait of a lady but keep her lips in colour. Or, as in the picture shown here, may be you want to show the Masai’s red shawl in colour and the rest in black & white. That’s when you’ll use Selective colour.
To sum upAll the edits described in this write-up could be accomplished using an image editing program (like Photoshop) on your computer. But that would require a very good knowledge of the software and would also take up considerable time in achieving the desired results. By using the Retouch Menu on your camera, the same edits could be accomplished in a matter of minutes and without any hassles.
This does not mean that image editing programs are obsolete. Programs like Photoshop, in knowledgeable hands, can do wonders. The Retouch Menu on the other hand can be used by anyone who has absolutely no knowledge of Photoshop. And the best thing is, it comes free with the camera! |SP
LEARNING
www.smartphotography.in108
Sm
art
Pho
tog
rap
hyJu
ne 2
015

First Things First: Every still camera today offers video but we shall consider using a D-SLR
(HD-SLR). The question that first comes to mind is, shouldn’t we be using a dedicated video camera instead of a D-SLR? One reason to use a D-SLR instead of a dedicated video camera, is the cost. Since we already own a D-SLR – and we are not trying to compete with the quality offered by expensive professional video cameras – why not use it? And if this is any consolation to you, a 35mm camera sensor is much larger than the sensors in professional broadcast video cameras used in Hollywood!
What about APS-C sensor D-SLRs? Can they be used for home videos? Sure they can. In fact, some users prefer these to 35mm since they provide greater depth of field when shooting from the same camera position, using identical aperture and equivalent focal length.
You need to keep in mind that capturing video is like capturing ‘still’ images in JPEG – you cannot change the settings later on as you could when shooting in Raw. All camera settings – White Balance, Picture Styles (Canon)/Picture Control (Nikon),
You’ve been taking still pictures for a long time but your spouse keeps urging you to take videos of your children which they can enjoy when they have grown up. You agree with your spouse and finally decide to capture your very first video. That’s good but you are confused about the shutter speed, aperture, ISO, resolution to use, how to focus, what frame rate to set. Many other questions also come to mind. If you are in this boat, here’s a very basic video learning for you.
HOME VIDEO
image sharpness etc – are all baked into the video file. Hence it is very important to ensure that highlights/shadows are not clipped (over exposed or underexposed). If your camera offers Live Histogram, make use of it to acquire correct exposures. Note that, with most D-SLRs you cannot change the shutter speed or the aperture once the video recording starts. Another very important point to note is that with D-SLRs, you have to be in Live View mode to enable video; with interchangeable lens mirrorless cameras, you can view the subject
through the electronic viewfinder while capturing the video.
Video Resolution: Use the highest video resolution available (but for the time being, we’ll ignore 4K). Generally this is 1920 x 1080 pixels and this resolution is known as Full HD. This means that each frame of your video will be 1080 pixels in height.
Frame Rate: This refers to the number of frames the video will shoot per second. Different frame rates give a different ‘feel’ to the video. Many
Rohinton Mehta
www.smartphotography.in 109
Sm
art
Pho
tog
rap
hyJu
ne 2
015
LEARNING

D-SLRs allow 24, 25, 30, 50 or 60 frames per second but for the most ‘cinematic’ look (closest to the way our eyes see things), it is suggested that we use 24fps. Higher frame rates with lower resolution is generally used for slow motion.
Video recording involves large amount of data being recorded in a short time. Hence you would required a high capacity memory card with a faster write speed. This will be discussed in detail in our subsequent issues.
ISO: For shooting in Manual exposure mode, use the lowest ISO for best image quality. However, if you wish to shoot in Program mode (which is often suggested for beginners), you may use Auto ISO. If light changes, the camera will automatically adjust the ISO keeping in mind the shutter speed and aperture selected by the Program mode.
Shutter Speed: In Manual exposure mode, use a shutter speed that is double the frame rate. For example, if you are using the recommended frame rate of 24fps, use 1/50 sec as the shutter speed. Higher shutter speeds will show less motion blur but can make the video look choppy. Note that video is easier to watch and feels more natural with the right amount of blur in moving subjects.
Aperture: Use a medium aperture like f/8. This will ensure reasonably good depth of field and also take care of minor errors in focussing.
Focus: Should we use autofocus? If yes, Continuous AF (AF-C) or Single AF (AF-S) or Full-time AF (AF-F)? It is suggested that we use neither. Instead, use Manual Focus (MF). The most expensive pro quality videos also use manual focus! As a beginner to
video photography, you may find this to be the most difficult thing to do (autofocus technology has really spoilt us, hasn’t it?).
Tip: Get yourself a lens that has a long ‘focus throw’ (the focussing ring must turn quite a bit when going from its closest focus to infinity; the longer the ‘throw’, the better). It also helps if the focussing ring has the right amount of ‘damping’ – it should neither be too smooth, nor too stiff, along with a wide rubberised grip. An example, a lens with a long focus throw would be a dedicated macro lens.
Using a lens wide open to throw the background out of focus is a trick we use in still (non-video) photography. You could, if you want to, do the same with video but remember you will be focussing manually and hence your focus may not be accurate (especially with moving subjects) at all times. Setting the aperture to f/8 or f/11 will get you greater depth of field and hence help in maintaining correct focus. Large size monitors (larger than the camera LCD) are available that can be connected to the camera to allow you greater precision in focussing.
Use a Tripod: A jerky video is extremely irritating to watch. A tripod is definitely recommended for smooth video, but if you use a tripod meant for still photography, your panning action
will never be smooth. A video tripod is hence recommended. Tripod ‘heads’ meant for video are generally ‘fluid heads’ which permit smooth, jerk-free panning. Do note that a tripod can have its limitations when you want to go closer or away from the subject. Specially designed ‘tracks’ are available for this purpose but since we are talking of home videos, we will cover this aspect in a later issue of SP.
Prime or Zoom
Lens? As a beginner in
video, you may be better off not using a zoom lens. Manually focussing and zooming at the same time on a moving subject is certainly not easy.
Audio: Having audio along with video is very important. Without audio, your videos will lose their impact. All current D-SLRs incorporate a microphone to record sounds. A drawback of using the built-in microphone is that it often picks up annoying sounds of camera operation and also the sound of
gushing wind. Dedicated external microphones are available that do not pick up these sounds and thus enhance the overall pleasure of the video.
The basic explanations given here are enough to help you start enjoying your home videos. Stay tuned with Smart Photography for more on videos in the future. |SP
A Video Head (Manfrotto)
LEARNING
www.smartphotography.in110
Sm
art
Pho
tog
rap
hyJu
ne 2
015

Revi
ews
112MILC ReviewPANASONIC LUMIX
DMC-GM5
Change in Rating SystemSmart Photography’s new rating system exercises stricter evaluation in view of improvements in the overall performance of photographic equipment. Marks will be awarded for the following parameters...
Final RankingsRecommended ......................................... 75-80%Best Buy .........................................81% and above
D-SLR CAMERAS
Design & Build Quality .................... (out of 20)
Key Features ........................................... (out of 20)
Ergonomics ............................................. (out of 20)
PerformanceAutofocus .................................................... (out of 5)Metering ...................................................... (out of 5)Noise control ........................................... (out of 5)Distortion/Sharpness .......................... (out of 5)LCD/View� nder..................................... (out of 5)Auto White Balance ........................... (out of 5)
Value for Money ....................... (out of 10)
Grand Total ............................... (out of 100)
LENSES
Design & Build Quality .................... (out of 20)
Key Features ........................................... (out of 20)
Ergonomics ............................................. (out of 20)
PerformanceAutofocus .................................................... (out of 5)Sharpness..................................................... (out of 5)Distortion control ................................. (out of 5)Aberrations ................................................ (out of 5)Darkening of corners ......................... (out of 5)Extra Features............................................ (out of 5)
Value for Money ................................. (out of 10)
Grand Total ......................................... (out of 100)
COMPACT CAMERAS
Design & Build Quality .................... (out of 20)
Key Features ........................................... (out of 20)
Ergonomics ............................................. (out of 20)
PerformanceAutofocus .................................................... (out of 5)Metering ...................................................... (out of 5)Noise control ........................................... (out of 5)Distortion/Sharpness .......................... (out of 5)LCD/View� nder..................................... (out of 5)Auto White Balance ........................... (out of 5)
Value for Money ....................... (out of 10)
Grand Total ............................... (out of 100)
125Smartphone ReviewHonor 4X
116Compact ReviewOlympus Tough TG-4
120Lens ReviewPanasonic Lumix G Vario 1:4
7-14mm ASPH
122Lens ReviewSony FE 24-240mm F3.5-6.3 OSS

The Micro Four Th irds System pioneered by Panasonic remains the only system in the world of
mirrorless cameras to have both smaller bodies and smaller lenses. Panasonic has attacked the market with a series of cameras aimed at diff erent segments. Th e GH-series is for the semi-professional market and promises outstanding still and video photography. Th e G-series comes with a D-SLR look but is smaller and lighter. Th e GF (and GX) -series comes with a compact camera look and are similar to the PEN series from Olympus. Th e GM-series began in 2013 with the launch of GM1. It was the fi rst in a line of ultra small compact mirrorless cameras from Panasonic. Th e GM1 has now been followed by the GM5. Don’t ask us where the GM 2, 3 or 4 disappeared!
Th e GM5 does not replace the GM1 but is, in fact, an addition to the GM range. It is currently the smallest mirrorless camera in the market with dimensions of 98.5x59.5x36.1mm. It is also smaller than Panasonic’s outstanding semi-professional compact camera, the LX100. Th e GM5 diff ers from the GM1 in that it has an electronic viewfi nder, a larger LCD screen, a hot-shoe and is bundled with a small fl ash which has to be attached to the body. In addition, the GM5 off ersFull High Defi nition video (although not 4K).
✓ Camera body + 12-32mm lens ✓ Battery ✓ Battery charger ✓ Strap ✓ USB cable ✓ Warranty card ✓ User manual (Advanced user manual on CD)
Inside the Box
Pocket Rocket
PANASONIC LUMIX DMC-GM5
` 55,000 H. S. Billimoria
The Panasonic GM5 is currently the smallest mirrorless interchangeable lens camera (MILC) in the Micro Four Thirds Standard.
Design & Build QualityTh e design and fi nish of the GM5 is extremely attractive. Panasonic off er this camera in black, silver and red fi nishes along with a 12-32mm pancake lens. Th is makes the camera both attractive and light weight. With the battery and a SD card, the GM5 weighs only 211g (body only) and 281g with the 12-32mm lens. Build quality is very good with the body being made from magnesium alloy and the top and bottom plates using aluminum. Given its size, the GM5 with the Pancake lens, is a pocketable camera.
Key FeaturesCentral to the GM5 is the 16 MP Four Th irds Live MOS sensor. Th is sensor has also been used in the LX100 and is larger than the 1” Type sensor found in premium compact cameras like the Sony RX100 III and the Canon PowerShot G7. Fitting such a large sensor into such a small camera body is indeed an engineering triumph for Panasonic engineers. Th e chart below gives the main features of the GM5 and compares it with the features of a top-grade compact camera like the Sony RX100 III as also the GM1:
(UK price equivalent)
MILC
REVIEW
www.smartphotography.in112
Sm
art
Pho
tog
rap
hyJu
ne 2
015

Mahesh Reddy
Panasonic GM1 Panasonic GM5 Sony RX100 IIISensor 16MP, Four Th irds 16MP, Four Th irds 20.2MP, 1”-type BSI CMOSSensor size (mm2) 225mm2 225mm2 116mm2Lens Mount Micro Four Th irds Micro Four Th irds FixedZoom range (kit or fi xed, 35mm equiv.) 24-64mm 24-64mm 24-70mm(fi xed)LCD 3.0-inch 1036K-dot fi xed touch screen 3.0-inch 921k-dot fi xed touch screen 3.0-inch 1229K-dot tiltingMetering Multi,centre,weighted,spot Multi,centre,weighted,spot Multi,centre,weighted,spotAutofocus points 23 23 25ISO Range 200-25600+auto 200-25600+auto 125-12800+autoShutter Speeds 1/16000-60 sec. 1/16000-60 sec. 1/2000-30 sec.Flash Built-in Bundled Built-inViewfi nder option None Built-in EVF Built-in EVFRaw shooting Yes Yes YesConnectivity Wi-Fi Wi-Fi Wi-Fi with NFCVideo capture max. resolution 1080 60i, 30p 1080 60p, 60i Full HD 1080 60p, 60i Full HDStabilization In-lens In-lens Optical Steady ShotDimensions 98.5 x 54.9 x 30.4 mm 99 x 60 x 36 mm 102 x 58 x 41 mm Power Rechargeable Li-ion pack
(DMW-BLH7)Rechargeable Li-ion pack (DMW-BLH7)
Rechargeable Li-ion pack(NP-BX1)
Weight 274 g 281 g 290 g
Aperture: f/8 Shutter Speed: 1/80sec ISO: 400
www.smartphotography.in 113
Sm
art
Pho
tog
rap
hyJu
ne 2
015

What we liked was the inclusion of an electronic viewfinder with a resolution of 1.17 million dots (the GM1 did not have it), the 3” touch-sensitive LCD display, the ability to record Full High Definition in video and the boost in continuous shooting from 5 frames per second to 5.8 frames per second. Also the GM5 introduces a new snap movie mode and manual creative control when recording video.
On the negative side, the camera does not have a built in flash not does it feature NFC (Near Field Communication).
Ergonomics:The GM5 is a tiny camera; really small. Users with large hands may find the camera too small for their liking.
ISO 1600 ISO 3200 ISO 6400 ISO 12800 ISO 25600
NOISE
However, the controls are decent in size and readily accessible making for easy handling. The thumb rest on the rear of the camera is also conveniently positioned in order that the camera may be gripped securely. Admittedly, the viewfinder is small but remember that the GM1 did not have a viewfinder at all. The camera has both a mechanical shutter and an electronic shutter.
The stepping motor used in the mechanical shutter limits its maximum speed to 1/15000 sec. Again, the camera’s flash sync speed is restricted to 1/50sec. The camera’s electronic shutter takes over afterwards and extends the max speed to 1/16000sec. The lithium ion battery supplied with the GM5 sadly does not last very long and is good for around 150 to 200 shots. Please ensure that you have
a spare battery readily available. On the positive side, we liked the eye sensor on the electronic viewfinder and the touch pad autofocus.
Performance:Autofocus performance on Micro Four Thirds cameras is now excellent and the GM5 was no exception. Focusing was fast and precise and locked on to the subject even in relatively low light. We were also satisfied with the three metering modes on offer. On the continuous shooting front, using a Class 4 SD card, we could shoot 7 continuous JPEG L/F frames before the buffer filled up. A Class 10 SD card would obviously offer a better performance. Video quality was fine and smooth and the camera did not pick up either focusing or zooming noise during video. On the noise front,
MILC
REVIEW
www.smartphotography.in114
Sm
art
Pho
tog
rap
hyJu
ne 2
015

FINAL SCORE
Design and Build Quality 18/20
Key Features 17/20
Ergonomics 17/20
PerformanceAutofocus 5/5Metering 4/5Noise Control 4/5Sharpness 4/5LCD/EVF 3.5/5Auto WB 4/5
Sub-Total 24.5/30
Value for Money 8/10
VERDICTThe GM5 is an attractive proposition. It is small, handles very well and produced excellent pictures and can be the beginning of a system since it is an interchangeable lens camera. If you go abroad and pick it up, you would not regret the choice.
PLUS• Wi-Fi• Engineering marvel in terms of size• Good build quality• Very fast autofocus
MINUS• Too small for some• Tiny electronic viewfinder• Battery life could be better• No NFC
84.5%
at 25% screen size, images were noise-free up to ISO 3200 and usable up to ISO 25600. At 50% screen size, images were usable up to ISO 6400 and at 100%, usable up to ISO 1600. Auto White Balance performed well under shade but produced a slight cast under other lighting conditions. This can, however, be removed easily during post processing.
The accompanying 12-35mm (24-64mm in 35mm format) f/3.5 - 5.6 lens has in-built image stabilisation. The lens produced sharp images and produced best results between f/4 and f/11.
Value For MoneyAs is the case with many cameras in its range, Panasonic is yet to introduce the GM5 into the Indian market. However, our readers who travel abroad frequently will be interested to know that the camera is available with the 12-32mm lens at around 575 pounds which is equivalent to around Rs.55,000 which makes it fair to good value. |SP
Camera Type: Digital Single Lens Mirrorless CameraSensor size: 17.3 x 13 mm (in 4:3 aspect ratio)Dust reduction system: Supersonic wave filterFile formate: Stills - JPEG/Raw Video : AVCHD/MP4Image quality: Raw, Raw + Fine, Raw + Standard, Fine, Standard, MPO + Fine, MPO + Standard (with 3D lens in MFT System)Lens mount: Micro Four ThirdsEffective pixles: 16MPFocus type: Contrast AF systemFocus mode: AFS/AFF/AFCAF mode: Face / Eye Detection / 23-area / 1-area / PinpointLight metering system: 1728-zone multipatternMetering modes: Multiple/Center weighted/SpotExp. modes: P/A/S/MISO sensitivity: Still-Auto/Intelligent ISO/ 200-25,600 (ISO 100 possible); Video - Up to ISO 3200White Balance: Auto/7 presetsPanorama shot: YesShutter speeds: Stills - 60-1/16000 sec. Video - 1/25 - 1/16000 sec.Flash sync speed: Less than 1/50 sec.LCD Monitor: 3”/ 16:9 aspect ratioRecording media: SD/SDHC/SDXC cardColour space: sRGB/Adobe RGBWi-Fi: YesNFC: NoDimensions: 98.5(W) x 59.5(H) x 36.1(D)mmWeight: Approx. 281g with battery, card and 12-32mm lens
KEY SPECIFICATIONS
www.smartphotography.in 115
Sm
art
Pho
tog
rap
hyJu
ne 2
015

The Olympus Tough TG-4 is a compact camera capable of underwater operations.
The camera is dust proof and shock proof too. Going by the published specifications, this is a minor upgrade from the TG-3, which also featured a 16 megapixel CMOS sensor and a 25-100mm lens. Going by the specifications, the improvements are limited to the inclusion of Raw format and addition of a few more shooting modes. Well, it is time to find out what else has changed.
Design and Build QualityThe Tough-series from Olympus has been hailed as the best waterproof and dustproof compact cameras available in the market. The TG-4 is essentially the TG-3 with a handful of additional features. So the camera has the same tough build quality as that of the TG-3. The lens and openings are sealed and made water-tight. The covers have double locking systems along with rubber gaskets to keep water away. The tough engineering plastic body with a metal reinforcement plate in the front adds to the shock-proofing. The LCD is protected by a thick screen cover, presumably made from tough plastic material. The device features Class 8 (IPX8) waterproofing and Class 6 (IP6X) dust proofing.
Key FeaturesThe 16 megapixel Olympus TG-4 uses
✓ Strap ✓ USB cable ✓ F-2AC AC adapter for internal charging ✓ LI-92B lithium ion rechargeable battery ✓ Olympus Viewer 3 CD-ROM ✓ Instruction manual and warranty card
Inside the Box
With Added Raw Power
Olympus Tough TG-4 ` 26,990 Sujith Gopinath
The Olympus tough series cameras are regarded as one of the best in water-proof compact cameras available in the market. The Tough TG-4 is an upgrade to the TG-3 we reviewed in 2013.
a 1/2.3-inch Type (6.16 x 4.62 mm) CMOS sensor. The lens has a focal length of 25 to 100 mm equivalent and the aperture is restricted to f/2.0, f/2.8 and f/8 at the wide-angle end and f/4.9, f/6.3 and f/18 at the telephoto end. The lens is constructed with 9 elements in 7 groups. In the default mode, it focusses from 0.1m to infinity, while in Super Macro mode, it focusses as close as 1cm. Filter diameter is 40.5mm. Still images can be recorded in JPEG or Raw format while videos are captured in MOV/H.264 or AVI/Motion JPEG (High-speed Movie, Time Lapse Movie)
format. The best quality for videos is 1920×1080. High-speed videos can be recorded at 640×480 pixels at 120fps or 320×240 pixels at 240fps. Audio is recorded in Stereo Linear PCM format.
The camera uses Sensor-shift Image Stabilisation for still images, while videos are stabilised electronically by boosting the equivalent sensitivity. The TG-4 uses Contrast Detection method for focussing and AF modes include Face Detection, iESP, Spot, and AF Tracking. Shooting modes
COMPACT
REVIEW
www.smartphotography.in116
Sm
art
Pho
tog
rap
hyJu
ne 2
015

available are Intelligent Auto (iAUTO), Program Auto (P), Aperture Priority (A), Custom1, Custom2, Underwater, Microscope, and Scene (SCN). Scene modes further provide options of Portrait, e-Portrait, Landscape, Interval Shooting, Hand-held Starlight, Night Scene, Night + Portrait, Sport, Indoor, Self Portrait, Sunset, Fireworks, Cuisine, Documents, Beach & Snow, Snow, Live Composite, Panorama, and Backlight HDR. Underwater modes are Underwater Snapshot, Underwater Wide (2 settings), Underwater Macro, and Backlight HDR while Microscope modes provide options of Microscope, Microscope Control, Focus stacking, and Focus bracketing. Picture
styles available are Vivid, Natural, Muted, Fish Eye, Sparkle, Reflection, Fragmented, Pop Art, Soft Focus, Pale and Light Colour, Grainy Film, Pin Hole, Diorama, and Dramatic Tone.
The TG-4 uses Digital ESP and Spot metering and shutter speeds range from 4 to 1/2000 sec. Exposure can be compensated up to ±2.0EV in steps of 1/3EV. ISO sensitivity ranges from ISO 100 to 6400 along with an Auto option. The camera features White Balance modes of Auto, Sunlight, Cloudy, Incandescent, Fluorescent, Underwater, and One-touch. The TG-4 can shoot continuous frames at 5 frames per second at full resolution. In High-speed Sequential Shooting
mode, it can shoot at 60 or 15 fps at 3 megapixels. Self-timer can be set to 2 sec, 12 sec or custom. Built-in flash has a range of 0.2 to 7.9m at the wide angle end and 0.2 to 3.1m at the telephoto end, at ISO1600. Flash modes available are Auto, Red Eye Reduction, Fill-in, Flash Off, and LED Flash. The camera uses a 3.0-inch, approximately 460,000 dot colour LCD screen. The TG-4 has an internal memory of 55MB and it accepts an SD/SDHC/SDXC (UHS-I compatible, up to 128GB) or Eye-Fi card for external storage. The camera is powered by an LI-92B Li-ion rechargeable battery. The device measures 111.5 x 65.9 x 31.2mm (Wx H x D) and weighs 247g including battery and memory card.
ErgonomicsThe Olympus TG-4 is quite comfortable to handle. It has a textured grip (presumably made of thermoplastics). The menu is user-friendly and the buttons are responsive. The camera has a
Mahesh Reddy
Aperture: f/11 Shutter Speed: 1/60sec ISO: 400
Th e TG-4’s covers have double locking systems along with rubber gaskets to keep water away.
www.smartphotography.in 117
Sm
art
Pho
tog
rap
hyJu
ne 2
015

dedicated video recording button. The camera has a removable ring in front of the lens, which can be removed to accommodate a 40.5mm (dia) filter. The lens mount is plastic, but we cannot complain since plastics (or carbon composites) are replacing metals at many places because of their high tensile strength and resistance to corrosion.
PerformanceThe TG-4 performed well in our tests. AF was fast and precise, and locked on to the subjects even in low light. Out-of-the-box JPEGs were sharp. We observed a tinge of darkening towards one side when photographing an evenly illuminated surface at the wide-angle end, with lens wide open. The lens produced heavy flare and
ISO 6400ISO 400 ISO 800 ISO 1600 ISO 3200
NOISE
magenta fringing in strong against-the-light shots at the wide-angle end at wide-open aperture. The metering modes worked well, but the aperture range is too narrow that it limits your flexibility with metering. The lens did not exhibit any perceptible distortion at any focal length. Videos were smooth and did not record any operating sound.
Auto White Balance performed reasonably well. The tones were perfect in daylight, and though it produced slight casts under other light sources, these were easily removable during post-processing. Native image size was 15.36 x 10.24 inches at 300 ppi. At 25 percent view, images were free of noise till ISO 800. Though ISO 3200 and 6400 were noisy, the images were usable up to ISO 3200.
As with all Tough series cameras, the TG-4 also went through our immersion test. We kept the camera in a tank of about 5ft water for nearly 10 minutes in video recording mode, and did not show any sign of water ingress. It also withstood a drop from about five feet on to a hard surface,
A118perture range of the camera is too narrow that
it limits your flexibility with metering
COMPACT
REVIEW
www.smartphotography.in118
Sm
art
Pho
tog
rap
hyJu
ne 2
015

FINAL SCORE
Design and Build Quality 18/20
Key Features 16/20
Ergonomics 17/20
PerformanceAutofocus 5/5Metering 4/5Noise Control 4/5Sharpness 5/5LCD/EVF 4/5Auto WB 3/5
Sub-Total 25/30
Value for Money 8/10
VERDICTAs mentioned before, the Olympus TG-4 is a minor improvement to its popular TG-3. The camera adds Raw format and a few shooting modes to the TG-3’s features. With a reasonably good performance, this weather-resistant model is certainly a great addition for your travel backpack. More importantly, it saves you the additional cost of an underwater housing.
PLUS• Water and dust proof• Raw format• Superior build quality• Fast autofocus• Fairly good noise control• Above average performance
MINUS• Heavy flare in strong daylight
84%
though we did not attempt to push the device to its limits.
Value for MoneyThe TG-4 retails at an MRP of Rs.26,990. Being a true underwater and ‘tough’ camera, we feel this price is reasonable for the TG-4. |SP
Effective Pixels: 16 millionImage sensor: 1/2.3-inch (6.16 x 4.62 mm) CMOSLens construction: 9 elements in 7 groupsFocal length 25 to 100mm equivalentMaximum aperture: 2.0 to 4.9119119119119Shooting range (from lens tip): Normal: 0.1m to ∞; Super Macro: 0.01m to 0.30mFilter diameter: 40.5mmRecording format: Still: JPEG, Raw; Movie: MOV/H.264, AVI/Motion JPEG (High-speed Movie, Time Lapse Movie)Best quality: 1920×1080High-Speed Movie: 120 (640×480, 120fps), 240 (320×240, 240fps)Movie audio recording format: Stereo Linear PCMSupported recording media: SD/SDHC/SDXC card (UHS-I compatible, 128MB to 128GB), Eye-Fi cardInternal memory: 55MB (user available)Monitor: 3.0-inch colour LCD, Approx. 460K dotsISO sensitivity: Auto, ISO 100 to 6400Image Stabilisation: Still: Sensor shift, Movie: ElectronicAF method: CMOS Contrast DetectionAF Modes: Face Detection, iESP, Spot, AF Tracking
Shooting modes: Intelligent Auto (iAUTO), Program Auto (P), Aperture Priority (A), Custom1, Custom2, Underwater, Microscope, Scene (SCN)Shutter speed: 4 to 1/2000 secMetering system: Digital ESP, SpotExposure compensation: ±2.0EV, step: 1/3EVSequential shooting mode: 5 fps at 16MHigh-speed sequential shooting: 60 or 15 fps at 3MSelf-timer: 2 sec, 12 sec, customBuilt-in flash range: W: 0.2m to 7.9m, T: 0.2m to 3.1m (ISO1600)Flash modes: Auto, Red Eye Reduction, Fill-in, Flash Off, LED FlashWaterproof: Equivalent to JIS/IEC protection class 8 (IPX8)Dustproof: Equivalent to JIS/IEC protection class 6 (IP6X)Interface: USB, HDMI Micro Connector (Type D)Power supply: LI-92B Lithium Ion Rechargeable BatterySize: 111.5mmx65.9mmx31.2mmWeight: 247g including battery and card
KEY SPECIFICATIONS
The TG-4 has a thick and sturdy protective screen over the LCD
www.smartphotography.in 119
Sm
art
Pho
tog
rap
hyJu
ne 2
015

The Panasonic 7-14mm f/4 Aspherical is a super-wide-angle zoom lens best suited for
interiors and landscape photography. Being very compact and lightweight, it is very easy to carry along the whole day.
Design & Build QualityThe lens is designed for Micro Four Thirds System cameras. In 35mm terms, it is equivalent to 14-28mm f/4 lens. The build quality as well as the �inish is very good. Its front element is bulbous and hence �ilters cannot be attached. The lens mount is made from metal and has eleven gold-plated contacts for communication with the camera body. The 7-14mm lens comes with its integrated lens hood. The lens weighs 300 g and is made in Japan.
Key FeaturesThe lens is constructed with 16 elements in 12 groups which include 4 ED glass elements and 2 Aspherical elements. Some of the elements are multi-coated to reduce �lare and ghosting. The lens covers a diagonal angle of view of 114° at 7mm and 75° at 14mm. The diaphragm is made of 7 blades (circular diaphragm) and the aperture range is from f/4 to f/22. The lens does not incorporate image stabilizer. The closest focussing
� Lens � Front & Rear caps � Lens pouch
Inside the Box
distance is 0.25 m (0.8 feet) at all focal lengths and the maximum magni�ication is 0.15x (35mm equivalent). As mentioned earlier, �ilters cannot be attached to this lens.
The Panasonic 7-14mm f/4 Aspherical’s zoom ring is marked at 7, 8, 9, 10, 12 and 14mm settings and the ring is towards the camera body. Both, the zoom ring and the manual focus ring are adorned with serrated rubber rings for a better grip.
A Superb Wide-Angle Zoom
Panasonic Lumix G Vario 1:4 7-14mm
ASPH ` 94,615
(at Amazon.in) Rohinton Mehta
ErgonomicsThe 7-14mm lens was very easy to use, though the body felt too small in my hands. But then this is a lens review and one could always use a larger Micro Four Thirds body if need be. The only drawback is that �ilters cannot be used with this lens.
PerformanceWe reviewed the 7-14mm lens using a Panasonic GM5 body and were very happy with the overall results.
LENS
REVIEW
www.smartphotography.in120
Sm
art
Pho
tog
rap
hyJu
ne 2
015

Autofocus was accurate and quite swift, even in moderately low light. When used wide open (at f/4) at 7mm, central sharpness was good but the corners were slightly softer. This is quite normal for such super-wide-angle lenses. Stopping down the aperture to f/5.6 improved the overall sharpness. At the other end (at 14mm), when used wide open at f/4, we felt that the sharpness was �ine but not as good as at 7mm. This could possibly be due to the greater depth of �ield at the 7mm setting. Here too, stopping down a bit, improved the overall sharpness. The optimum aperture seemed to be between f/5.6 and f/8. At f/16, there was de�inite loss of sharpness due to diffraction of light.
Slight corner darkening was noticed at all marked focal lengths with the lens wide open in spite of Shading Compensation being enabled. In everyday use though, this is not likely to pose any problem. Very slight barrel distortion could be seen at 7, 8 and 9mm settings while very slight pincushion distortion was noticed at 14mm. Flare was very well controlled
Aperture: f/8 Shutter Speed: 1/1000sec ISO: 250
Mahesh Reddy
FINAL SCORE
Design and Build Quality 17/20
Key Features 16/20
Ergonomics 18/20
Performance
Autofocus 4/5Metering 4/5Noise Control 3.5/5Sharpness 4/5LCD/EVF 4/5Auto WB 4/5
Sub-Total 23.5/30
Value for Money 7/10
VERDICTThe Panasonic 7-14mm f/4 Aspherical zoom lens is compact, lightweight, easy to use and a very good performer. The only negative point against it is that it does not allow �ilters to be attached. Normally, one wouldn’t attach a polarizing �ilter to such a wide-angle lens (due to the uneven darkening of the sky that would result) but what about using ND, graduated ND or lens protection �ilter? If you disregard this aspect, the 7-14mm lens is a very versatile and and extremely useful lens for the Micro Four Thirds System. De�initely a Best Buy!
PLUS• Compact and lightweight• Sharp images• Excellent control over Flare and CA
MINUS• Cannot use �ilters
81.5%
Focal length: 7-14mm Equivalent focal length: 14-28mm in 35mm formatMaximum aperture: F/4 throughout the zoom rangeAngle of coverage: 114° - 75°Lens construction: 16 elements in 12 groups (includes four ED and two Aspheri-cal elements)Image stabilizer: NoFilter size: Not applicableMax. magni�ication: 0.15x (35mm equivalent)Closest focus: 0.25 m (0.8 feet)Diomensions: Approx. 70 (D) x 83mm (L)Weight: 300 g
KEY SPECIFICATIONS
and we were unable to trace any chromatic aberration, which speaks highly of the special elements used in the lens construction.
Value for MoneyWe could not �ind the MRP on Panasonic India’s website but Amazon.in shows the price at Rs. 94,615. At this price we feel that the lens is fairly expensive |SP
www.smartphotography.in 121
Sm
art
Pho
tog
rap
hyJu
ne 2
015

Quality of zoom lenses have improved considerably over the past few years. The earlier
notion of considering anything beyond 5x zoom as untouchable is fading fast. The new-age super zoom lenses are emerging as hot favourites. Sony has introduced the FE 24-240mm f/3.5-6.3 OSS lens, which is a versatile solution to their E-mount cameras.
Design and Build QualityThe exterior of the Sony 24-240mm lens is predominantly built from sturdy polycarbonate-metal combination. The zoom ring has a knurled rubber grip, while the focus ring has a knurled plastic grip. The lens mount is metal, while the �ilter thread is plastic. The lens does not have any lever or button and neither does it have a focus distance window. The lens extends during zooming, revealing two coaxial plastic inner barrels. In the extended state, the lens does not have any ‘play’, which is an endorsement for precision engineering. The lens has a dust and moisture resistant design.
Key FeaturesThe Sony FE 24-240mm f/3.5-6.3 OSS lens is specially made for Sony E-mount (Mirrorless) cameras and hence it is not compatible
✓ FE 24-240mm OSS lens ✓ Petal-shaped lens hood ✓ Front Cap ✓ Back Cap
Inside the Box
with A-mount bodies. The lens features optical Steady Shot image stabilisation, and is constructed with 17 elements in 12 groups including �ive aspherical and one ED glass element. When mounted on Sony NEX cameras, this provides a 35mm equivalent focal-length of 36-360mm. Angle of view is 61 to 6 degrees and 50 minutes when mounted on cameras using APS-C sensors, while on bodies with 35mm sensors, the angle of view is 84 to 10 degree. Aperture ranges
One for All!
Sony FE 24-240mm F3.5-6.3 OSS ` 69,990 Sujith Gopinath
Sony has debuted the 24-240mm OSS lens as a versatile solution to their Alpha E-mount cameras, combining a high zoom range with quality optics.
from f/3.5 to 22 at the wide-angle end and f/6.3 to 40 at the telephoto end. The lens has a circular aperture with a seven-bladed diaphragm. It focusses from 50cm to in�inity at the wide-angle end and from 80cm to in�inity at the telephoto end. The 24-240mm lens provides a maximum magni�ication of 0.27x. It has a �ilter size of 72 mm.
Sony provides a petal shaped and bayonet type lens hood along with the lens. The lens has dimensions of
REVIEW
www.smartphotography.in122
Sm
art
Pho
tog
rap
hyJu
ne 2
015
LENS

approx. 80.5 (dia) x 118.5 mm and weighs 780g.
ErgonomicsWe tested the Sony 24-240mm OSS lens on an Alpha 7 II body and it �itted nicely without any protrusion at the base. The lens was comfortable to handle on the Alpha 7 II. The zoom ring was a little over-damped, but we expect this to loosen up a bit with regular use. The broad zoom ring is at the front, while the thinner focus ring is placed at the back. We somehow felt that the focus ring should have been at the front for ease of manual focussing.
Aperture: f/8 Shutter Speed: 1/1000sec ISO: 250
The zoom ring was a little over-damped, but we
expect this to loosen up a bit with regular use.
Mahesh Reddy
The lens barrel extends during zooming
The broad zoom ring has a knurled rubber grip
www.smartphotography.in 123
Sm
art
Pho
tog
rap
hyJu
ne 2
015

FINAL SCORE
Design and Build Quality 18/20
Key Features 16/20
Ergonomics 17/20
Performance
Autofocus 4/5Metering 4.5/5Noise Control 4.5/5Sharpness 3/5LCD/EVF 3/5Auto WB 4/5
Sub-Total 23/30
Value for Money 6/10
VERDICTThe Sony 24-240mm f/3.5-6.3 OSS is a slow, but versatile lens that can be considered a do-it-all solution for your everyday imaging needs. It provides sharp images throughout the zoom range. However, the lens could be too slow, especially at the telephoto end, for many serious imaging scenarios when the subject is not too bright. Certainly recommended.
PLUS• Sharp images throughout• Excellent build quality• Distortion well controlled• Weather-sealed• Fast AF
MINUS• Strong �lare and Chromatic Aberration• Too slow• Expensive
80%
PerformanceThe Sony 24-240mm OSS lens performed well on our test bench. Autofocus was fast and precise and it locked on to the subject even in reasonably low light. We observed prominent darkening of corners at the wide-angle end at f/3.5. This reduced gradually with narrowing apertures and vanished around f/8. The lens produced heavy �lare along with purple fringing. We did not see any perceptible distortion throughout the zoom range.
JPEG images were extremely sharp. At 24mm, the sweet spot was f/11. F/5.6 and f/8 also were equally sharp. Sweet spot shifted to f/16 towards the telephoto end while f/8 and f/11 also provided sharpness close to the sweet spot. The coatings did not produce any unwanted cast.
Value for MoneyThe Sony 24-240mm f/3.5-6.3 OSS retails at an MRP of Rs. 69,990. At this price, this ‘slow’ lens is on the expensive side. |SP
Product name: FE 24-240mm f/3.5-6.3 OSSModel name: SEL24240Lens mount: Sony E-mountFormat: 35mm full frameFocal-length: 24-240mm35mm equivalent focal-length: 36-360mmLens construction (groups-elements): 12-17Angle of view (APS-C): 61°-6°50’Angle of View (35mm): 84°-10°Maximum aperture (F): 3.5-6.3Minimum aperture (F): 22-40Number of aperture blade: 7Circular Aperture: YesMinimum focus distance: 0.5-0.8mMaximum magni�ication ratio: 0.27xFilter diameter: 72 mmImage stabilization: Optical SteadyShotHood type: Petal shape, bayonet typeDimensions (dia. x length): Approx. 80.5 x 118.5 mmWeight: Approx. 780g
KEY SPECIFICATIONS
Aperture: f/6.3 Shutter Speed: 1/125sec ISO: 250
Mahesh ReddyREV
IEW
www.smartphotography.in124
Sm
art
Pho
tog
rap
hyJu
ne 2
015
LENS

www.smartphotography.in 125
Sm
art
Pho
tog
rap
hyJu
ne 2
015
Pride of the Lightweights
The Honor 4X may not be as impressive as its big brother, the 6 Plus, but the phone is surely
worth a look among the mid-to-low end feature-rich Android smartphones. Here we will have a detailed look at the new smartphone.
Design and Build Quality� e Honor 4X is built with a polycarbonate exterior. � e inner protective cover is also made of plastic, and like most new smartphones, the components are completely covered. � e battery is visible, but cannot be replaced by the user. � e screen is not scratch-proof or shatter-resistant like the Gorilla Glass. However, considering the price of this phone, the build quality can be considered quite good.
Key Features� e Honor 4X uses a 1.2GHz Quad-core MSM8916 ARMv7 processor along with Adreno 306 GPU. � e device features a 5.5-inch IPS display capable of displaying 16 million colours. � e screen is multi-touch sensitive and has a native resolution of 1280 x 720 pixels (HD). � e smartphone is 4G enabled and can connect with GPS/AGPS/Glonass systems for location reporting.
Honor 4X ` 10,499 Sujith Gopinath
✓ Honor 4X smartphone ✓ USB Cable ✓ Power Adaptor
Inside the Box
� e Honor 4X features 2GB RAM and has an internal memory of 8 GB, of which over 4GB is available to the user. � e device also has expandable storage in the form of microSD card slot. It supports up to 32GB. It accepts dual Micro SIM cards.
� e interface is USB 2.0 (High Speed), and the phone features Bluetooth 4.0 and Wi-Fi (802.11b/g/n) with Wi-Fi Direct and Hotspot.
� e primary camera is a 13 megapixel model, producing images of up to 4208 x 3120 pixels size. Camera features include Autofocus, LED Flash, Geo-tagging, Touch Focus, Face Detection, and HDR. Videos can be captured at up to 1080p at 30 fps. � e 5 megapixel secondary camera can capture videos at up to 720p.
� e device has a high capacity non-removable 3000 mAh battery. � e Honor
The Honor 4X is a mid-to-low end Android smartphone from Huawei, and it comes with superior features compared to most smartphones in this price bracket.
SMARTPHONE
REVIEW
Processor: MSM8916, 1.2Ghz Quad-CoreSIM Card interface: Micro SIM cardTouch: Multiple-touch sensitive screenDisplay size: 5.5 inchesType: IPS DisplayColour: 16 M coloursResolution: 1280 pixels x 720 pixels (HD)Bluetooth: Bluetooth 4.0Wi� : 802.11b/g/n, Wi� Direct, HotspotGPS: GPS/AGPS/GlonassUSB: USB 2.0 high-speedFrequency: 4G TDDB40+FDD B3; 3G UMTS900/2100; 2G GSM 900/1800/1900Primary Camera: 13 MP, 4208 x 3120 pixels, AutoFocus, LED FlashVideo: 1080p@30fpsSecondary Camera: 5 MP Camera, 720pROM: 8 GB (Available memory for user is over 4GB))RAM: 2 GBExternal Memory Support: microSD card (up to 32GB)Battery: 3000 mAh batteryDimensions: 151.9 (L) x 77.3 (W) x 8.7 mm (T))Weight: 170 g (including battery)
KEY SPECIFICATIONS

SMARTPHONE
REVIEW
www.smartphotography.in126
Sm
art
Pho
tog
rap
hyJu
ne 2
015
VERDICTFeaturing a quad-core processor and 2GB RAM, the Honor 4X packs enough punch for most smartphone users, unless you are into hardcore gaming. Huawei has compromised a little on the build quality, but this certainly does not look cheap by any standards. If you are looking for a 4G-enabled smartphone that can do the job without worrying too much about heavy gaming or waterproo� ng, this is a great option.
PLUS• Quad-core processor• 2GB RAM• Decent build quality• 3000 mAh battery• Good value for money
MINUS• Screen is not scratch proof
at 300 ppi. At 25 percent screen size, we observed a tinge of noise at ISO 800, but you might not be able to observe this in normal day-to-day images. Enlarged
4X has dimensions of 151.9 x 77.3 x 8.7 mm and weighs 170g along with battery.
Ergonomics� e Honor 4X being an Android-based smartphone, the interface is as user-friendly as any Android interface. � e Emotion skin is quite nicely cra� ed with highly rounded edged rectangular icons. � e lock screen has a shortcut for camera, which is quite useful. � e display is crisp and clear. � e touch response is quite fast, and the sound quality is also good.
Performance� e Honor 4X performed quite well. � ough not as powerful as the 6 Plus, the 4X o� en lagged in graphic-heavy 3D games, but for a casual gamer, the device is quite good. � e camera performed reasonably well. Autofocus did not instantly lock on to the subject, but was precise. Images were very sharp out of the box. Colour reproduction was good and the White Balance modes performed very well under natural light. � ough the device produced some cast under arti� cial light sources, this was easy to correct in post-processing.
Native image size was 10.4 x 14.03 inches
Aperture: f/2 Shutter Speed: 1/50sec ISO: 400
Mahesh Reddy
Design and Build Quality 16/20
Key Features 17/20
Ergonomics 17/20
Performance 16/20
Value for Money 17/20
FINAL SCORE
83%
to 50 percent, we observed noise at ISO 800. A tinge of noise was seen even at ISO400. But all images were perfectly usable. Viewed at 100
percent, all images appeared noisy and were usable up to ISO 400.
� e Honour 4X provided impressive battery life in our tests with the benchmarking so� ware placing it well above all the recorded devices.
Value for Money� e Honor 4X retails at an MRP of Rs.10,499. At this price, the device is great value for money. |SP

PHOTOGRAPHY INSTITUTE
PHOTOGRAPHY INSTITUTE


Kenko SMART Filter Kit
Filter sizes available in stock 52, 55, 58, 67, 72, 77, 82mm
Kenko Smart Filter Kit features 3 main fi lters in one smart package. Kenko Smart Filter Kit is specially designed for beginners and amateur photographers as a initial set to start.
Kenko Smart Filter Kit is available in wide size range to fi t lenses for non-refl ex and digital refl ex cameras.
PROTECTORCIRCULAR PL ND8 (NEUTRAL DENSITY)
Protector is to use as a general protection of the lens. Made of high quality both sides multicoated glass, Smart Protector will not affect the quality of the image.
ND8 (Neutral Density) fi lter will decrease the volume of the light coming through the lens to achieve 8-times longer shutter speed or wider aperture during shiny day or to imitate blur motion of the water and moving objects.
Circular PL fi lter is a basic fi lter with polarization effect to eliminate unwanted refl ections or to enhance saturation and contrast of the sky and nature objects.
www.kenkoglobal.com
Kenko Smart Filter Kit consists of 3 fi lters: Protector, Circular PL and ND8. All 3 fi lters are arranged in one soft stylish branded pouch that is covered by hard paper package.


PHOTO PRODUCT AND ACCESSORIES
PHOTO PRODUCT AND ACCESSORIES


C
M
Y
CM
MY
CY
CMY
K
PHOTO PRODUCT AND ACCESSORIES
PHOTOGRAPHY INSTITUTE
PHOTO PRODUCT AND ACCESSORIES

INDIA’S NO.1 “TRAVEL AND PHOTOGRAPHY” COMPANY
www.toehold.in | 080-22442211 | [email protected]
Toehold’s professional photographers have spent thousands of hours in the �eld, so when you go on a Toehold Photo Tour, you’re riding on knowledge and expertise that are next only to the locals.
Sign up for a Toehold Photo Tour today to explore the globe as though it’s your own territory.
The Globe is your Territory.
Jun, July 2015 - KabiniWildlife Photography Tour
Jun 2015 - BandipurFashion Photography Bootcamp
Jul 2015 - LadakhLandscape Photography Expedition
Jul 2015 - AnaimalaiRainforest Photography Expedition
Jul 2015 - CoorgMacro Photography Bootcamp
Aug 2015 - Kamchatka, RussiaBrown Bear Photography Expedition
Oct 2015 - RanthambhoreWildlife Photography Tour
Nov 2015 - Bandhavgarh-KanhaWildlife Photography Tour
Oct 2015 - TadobaWildlife Photography Tour
Sep 2015 - Pantanal, BrazilJaguar Photography Expedition
© P
hoto
grap
h by
Jaya
nth
Shar
ma,
Toeh
old
®
Claim it!

PHOTO PRODUCT AND ACCESSORIES
PHOTOGRAPHY INSTITUTE
PHOTO PRODUCT AND ACCESSORIES


THE LAST WORD
www.smartphotography.in158
Sm
art
Pho
tog
rap
hyJu
ne 2
015
‘Tel, Maalish, Champi...’