Schoolyard safari - Primary Connections
99
Fully aligned with the Australian Curriculum Year 1 Biological sciences Schoolyard safari About this unit Schoolyard safari The world is teeming with animal life. Even the most unexpected places can host a diverse range of creatures. As humans, we share our wonderful planet with many other animals. Taking the time to really look at another species can provide a window into the similarities and differences among living beings, and can help us to appreciate how we are all part of a single, gloriously complex ecological system. The Schoolyard safari unit is an ideal way to link science with literacy in the classroom. By observing the features and behaviour of small animals, students glimpse the diversity of animal life. Students explore small animals leading to a better understanding of how their adaptations help them survive in their habitats. Through investigations, students learn how animals move, feed and protect themselves.
-
Upload
khangminh22 -
Category
Documents
-
view
3 -
download
0
Transcript of Schoolyard safari - Primary Connections

Fully alig
ned
with th
e Australian
Curriculum
Year 1 Biological sciences
Schoolyard safari
PrimaryConnections: Linking science with literacy is an innovative program linking
the teaching of science with the teaching of
literacy in primary schools.
The program combines a sophisticated
professional learning component with
exemplary curriculum resources.
PrimaryConnections features an inquiry-
based approach, embedded assessment and
incorporates Indigenous perspectives.
The PrimaryConnections curriculum
resources span Years F–6 of primary school.
ISBN 978-0-85847-319-5
9 780858 473195
PC4:S1
Schoolyard safari Year 1 Biological sciences
www.primaryconnections.org.au
Australian
Curriculum
About this unit Schoolyard safariThe world is teeming with animal life. Even the most unexpected places can host a diverse range of creatures. As humans, we share our wonderful planet with many other animals. Taking the time to really look at another species can provide a window into the similarities and differences among living beings, and can help us to appreciate how we are all part of a single, gloriously complex ecological system.
The Schoolyard safari unit is an ideal way to link science with literacy in the classroom. By observing the features and behaviour of small animals, students glimpse the diversity of animal life. Students explore small animals leading to a better understanding of how their adaptations help them survive in their habitats. Through investigations, students learn how animals move, feed and protect themselves.

ii
© Australian Academy of Science, September 2012. Revised June 2020.
Except as set out below or as allowed under relevant copyright law, you may not reproduce, communicate or otherwise use any of this publication in any of the ways reserved to the copyright owner without the written permission of the Australian Academy of Science.
For permissions, PrimaryConnections.
Educational purposes
If you work in an Australian educational institution, you may be able to rely on the provisions in Part VB of the Copyright Act 1968 (Cth) to photocopy and scan pages of this publication for educational purposes. These provisions permit a “reasonable portion” of a publication to be copied (usually, 10% or 1 chapter, but more if this publication is not commercially available in a reasonable time at an ordinary commercial price).
Notwithstanding the above, the individual teacher or organisation that purchased this publication new may photocopy or print out those pages that are marked “Resource sheet” to give hardcopy copies to his, her or its own students to use.
Australian education users may freely use this material for non-commercial educational purposes.
Published by the Australian Academy of Science.GPO Box 783 Canberra ACT 2601 Telephone: (02) 6201 9400Email: [email protected] www.primaryconnections.org.au
Typesetter: Sharyn Raggett Font: Helvetica Neue, DIN Print house: Daniels Printing Craftsmen Cover images: Stock.xchng. www.sxc.hu
ISBN 978 0 85847 686 8
Acknowledgments
The PrimaryConnections – Linking Science with Literacy project is supported by the Australian Government.
Thanks to the trial teachers and students of the trial schools Australia-wide and Fellows of the Australian Academy of Science who contributed to this unit.
All material identified by is material subject to copyright under the Copyright Act 1968 (Cth) and is owned by the Australian Curriculum, Assessment and Reporting Authority 2020.
For all Australian Curriculum material except elaborations: This is an extract from the Australian Curriculum.
Elaborations: This may be a modified extract from the Australian Curriculum and may include the work of other authors.
Disclaimer: ACARA neither endorses nor verifies the accuracy of the information provided and accepts no responsibility for incomplete or inaccurate information. In particular, ACARA does not endorse or verify that:
The content descriptions are solely for a particular year and subject;
All the content descriptions for that year and subject have been used; and
The author’s material aligns with the Australian Curriculum content descriptions for the relevant year and subject.
You can find the unaltered and most up to date version of this material at http://www.australiancurriculum.edu.au This material is reproduced with the permission of ACARA.
DisclaimersThe views expressed herein do not necessarily represent the views of the Australian Government.
These materials are intended for education and training only. Every effort is made to ensure the accuracy of the information presented in these materials. We do not assume any liability for the accuracy or completeness of the information contained within. The Australian Academy of Science accepts no liability or responsibility for any loss or damage whatsoever suffered as a result of direct or indirect use or application of any of these training materials.

iii
Contents
v
viii
xi
xv
The PrimaryConnections teaching and learning approach
Unit at a glance
Schoolyard safari—Alignment with the Australian Curriculum
Teacher background information
Lesson 1 In the yard 1
Lesson 2 Wiggly worms 14
Lesson 3 Slimy snails 25
Lesson 4 Ant antics 33
Lesson 5 Same or different? 40
Lesson 6 Habitat detectives 48
Lesson 7 Hidden in their habitat 55
Appendix 1 How to organise collaborative learning teams (Foundation—Year 1) 61
Appendix 2 How to use a science journal 65
Appendix 3 How to use a word wall 67
Appendix 4 How to construct and use a graph 69
Appendix 5 Schoolyard safari equipment list 71
Appendix 6 Schoolyard safari unit overview 75

Foreword
Never has there been a more important time for science in Australia. More than ever, we need a scientifically-literate community to engage in debates about issues that affect us all. We also need imaginative thinkers to discover the opportunities in our exponentially expanding knowledge base. Teachers play a vital role in nurturing the minds of our future citizens and scientists.
The Australian Academy of Science has a long, proud history of supporting scienceeducation. Our primary education program, PrimaryConnections: linking science with literacy, now has over 15 years’ experience in supporting teachers to facilitate quality learning experiences in their classrooms. Regular evaluations demonstrate the significant impact the program can have on both teacher confidence and student outcomes.
PrimaryConnections has been developed with the financial support of the Australian Government and endorsed by education authorities across the country. It has been guided by its Steering Committee, with members from the Australian Government and the Australian Academy of Science, and benefitted from input by its Reference Group, with representatives from all states and territories.
Key achievements of the program include engaging over 24,000 Australian teachers in professional learning workshops, producing multi award-winning curriculum resources, and developing an Indigenous perspective framework that acknowledges the diversity of perspectives in Australian classrooms.
The PrimaryConnections teaching and learning approach combines guided inquiry, using the 5Es model, with hands-on investigations. It encourages students to explore and test their own, and others’, ideas and to use evidence to support their claims. It focuses on developing the literacies of science and fosters lasting conceptual change by encouraging students to represent and re-represent their developing understandings. Students are not only engaged in science, they feel that they can do science.
This is one of 40 curriculum units developed to provide practical advice on implementing the teaching and learning approach while meeting the requirements of the Australian Curriculum: Science. Trialled in classrooms across the country and revised based on teacher feedback, and with the accuracy of the teacher background information verified by Fellows of the Academy, the experience of many brings this unit to you today.
I commend PrimaryConnections to you and wish you well in your teaching.
Professor John Shine, AC Pres AAPresident (2018–2022)Australian Academy of Science

v
The PrimaryConnections teaching and learning approachPrimaryConnections units embed inquiry-based learning into a modified 5Es instructional model. The relationship between the 5Es phases, investigations, literacy products and assessment is illustrated below:
PrimaryConnections 5Es teaching and learning model
Phase Focus Assessment focus
ENGAGE Engage students and elicit prior knowledge Diagnostic assessment
EXPLORE Provide hands-on experience of the phenomenon Formative assessment
EXPLAIN Develop scientific explanations for observations and represent developing conceptual understandingConsider current scientific explanations
Formative assessment
ELABORATE Extend understanding to a new context or make connections to additional concepts through a student-planned investigation
Summative assessment of the Science Inquiry Skills
EVALUATE Students re-represent their understanding and reflect on their learning journey, and teachers collect evidence about the achievement of outcomes
Summative assessment of the Science Understanding
More information on PrimaryConnections 5Es teaching and learning model can be found at: www.primaryconnections.org.au
Reference: Bybee, R.W. (1997). Achieving scientific literacy: from purposes to practical action. Portsmouth, NH: Heinemann.
Developing students’ scientific literacyThe PrimaryConnections program supports teachers in developing students’ scientific literacy. Scientific literacy is considered the main purpose of school science education and has been described as an individual’s:
• scientific knowledge and use of that knowledge to identify questions, acquire newknowledge, explain scientific phenomena and draw evidence-based conclusions aboutscience-related issues
• understanding of the characteristic features of science as a form of human knowledgeand enquiry
• awareness of how science and technology shape our material, intellectual andcultural environments
• willingness to engage in science-related issues, and with the ideas of science,as a reflective citizen.
Reference: Programme for International Student Assessment & Organisation for Economic Co-operation and Development. (2009). PISA 2009 assessment framework: key competencies in reading, mathematics and science. Paris: OECD Publishing.
Schoolyard safari

PrimaryConnections
vi
Linking science with literacyPrimaryConnections has an explicit focus on developing students’ knowledge, skills, understanding and capacities in science and literacy. Units employ a range of strategies to encourage students to think about and to represent science.
PrimaryConnections develops the literacies of science that students need to learn and to represent their understanding of science concepts, processes and skills. Representations in PrimaryConnections are multi-modal and include text, tables, graphs, models, drawings and embodied forms, such as gesture and role-play. Students use their everyday literacies to learn the new literacies of science. Science provides authentic contexts and meaningful purposes for literacy learning, and also provides opportunities to develop a wider range of literacies. Teaching science with literacy improves learning outcomes in both areas.
AssessmentScience is ongoing and embedded in PrimaryConnections units. Assessment is linked to the development of literacy practices and products. Relevant understandings and skills are highlighted at the beginning of each lesson. Different types of assessment are emphasised in different phases:
Diagnostic assessment occurs in the Engage phase. This assessment is to elicit students’ prior knowledge so that the teacher can take account of this when planning how the Explore and Explain lessons will be implemented.
Formative assessment occurs in the Explore and Explain phases. This enables the teacher to monitor students’ developing understanding and provide feedback that can extend and deepen students’ learning.
Summative assessment of the students’ achievement developed throughout the unit occurs in the Elaborate phase for the Science Inquiry Skills, and in the Evaluate phase for the Science Understanding.
Rubrics to help you make judgments against the relevant achievement standards of the Australian Curriculum are available on our website: www.primaryconnections.org.au
SafetyLearning to use materials and equipment safely is central to working scientifically. It is important, however, for teachers to review each lesson before teaching, to identify and manage safety issues specific to a group of students. A safety icon is included in lessons where there is a need to pay particular attention to potential safety hazards. The following guidelines will help minimise risks:
• Be aware of the school’s policy on safety in the classroom and for excursions.
• Check students’ health records for allergies or other health issues.
• Be aware of potential dangers by trying out activities before students do them.
• Caution students about potential dangers before they begin an activity.
• Clean up spills immediately as slippery floors are dangerous.
• Instruct students never to smell, taste or eat anything unless they are given permission.
• Discuss and display a list of safe practices for science activities.

vii
PrimaryConnections
Science Understanding
Biological sciences Understanding living things
Chemical sciences Understanding the composition and behaviour of substances
Earth and space sciences Understanding Earth’s dynamic structure and its place in the cosmos
Physical sciences Understanding the nature of forces and motion, and matter and energy
Science as a Human Endeavour
Nature and development of science
An appreciation of the unique nature of science and scientific knowledge.
Use and influence of science
How science knowledge and applications affect people’s lives and how science is influenced by society and can be used to inform decisions and actions
Science Inquiry Skills
Questioning and predicting
Identifying and constructing questions, proposing hypotheses and suggesting possible outcomes
Planning and conducting Making decisions regarding how to investigate or solve a problem and carrying out an investigation, including the collection of data
Processing and analysing data and information
Representing data in meaningful and useful ways; identifying trends, patterns and relationships in data, and using evidence to justify conclusions
Evaluating Considering the quality of available evidence and the merit or significance of a claim, proposition or conclusion with reference to that evidence
Communicating Conveying information or ideas to others through appropriate representations, text types and modes
Teaching to the Australian Curriculum: ScienceThe Australian Curriculum: Science has three interrelated strands—Science Understanding, Science as a Human Endeavour and Science Inquiry Skills—that together ‘provide students with understanding, knowledge and skills through which they can develop a scientific view of the world’ (ACARA 2020).
The content of these strands is described by the Australian Curriculum as:
PrimaryConnections has units to support teachers to teach each Science Understanding detailed in the Australian Curriculum: Science from Foundation to Year 6. Units also develop students’ skills and knowledge of the Science as a Human Endeavour and Science Inquiry Skills sub-strands, as well as specific sub-strands within the Australian Curriculum: English and Mathematics. Detailed information about its alignment with the Australian Curriculum is provided in each unit.
Above material is sourced from the Australian Curriculum: Australian Curriculum Assessment and Reporting Authority (ACARA). (2020). Australian Curriculum: Science. www.australiancurriculum.edu.au
Schoolyard safari

viii
Unit at a glance Schoolyard safariPhase Lesson At a glance
ENGAGE Lesson 1In the yardSession 1Curious creaturesSession 2In my schoolyardSession 3In my own backyard (Optional)
To capture students’ interest and find out what they think they know about how living things, such as small animals, have a variety of external features and live in different places where their needs are metTo elicit students’ questions about small animals
EXPLORE Lesson 2Wiggly wormsSession 1Watching earthwormsSession 2Earthworm viewer (Optional)
To provide students with hands-on, shared experiences of the features, behaviour and habitat of earthworms
Lesson 3Slimy snailsSession 1Snail surprisesSession 2Snail shack(Optional)
To provide students with hands-on, shared experiences of the features, behaviour and habitat of snails
Lesson 4Ant antics
To provide students with hands-on, shared experiences of the features, behaviour and habitat of ants
EXPLAIN Lesson 5Same or different?Session 1Comparing creaturesSession 2Animated animals (Optional)
To support students to represent and explain their understanding and observations about the similarities and differences between small animalsTo introduce current scientific views about how living things, such as small animals, have a variety of external features and live in different places where their needs are met
ELABORATE Lesson 6Habitat detectives
To support students to plan and conduct an investigation to compare different types of animal habitats, and the type and number of animals found
EVALUATE Lesson 7Hidden in their habitat
To provide opportunities for students to represent what they know about how living things, such as small animals, have a variety of external features and live in different places where their needs are met, and to reflect on their learning during the unit
A unit overview can be found in Appendix 6, page 75.

PrimaryConnections
Schoolyard safari—Alignment with the Australian CurriculumSchoolyard safari is written to align to the Year 1 level of the Australian Curriculum: Science. The Science Understanding, Science Inquiry Skills, and Science as a Human Endeavour strands are interrelated and embedded throughout the unit (see page xi for further details). This unit focuses on the Biological sciences sub-strand.
ix
Year 1 Science Understanding for the Biological Sciences:
Living things have a variety of external features (ACSSU017)Living things live in different places where their needs are met (ACSSU211)
Incorporation in Schoolyard safari: Students use their senses to observe and describe the features of modern and prehistoric living things. They make comparisons and claims about where animals might live, what they might eat and how they might move. Students’ questions and ideas about prehistoric animals are explored and tested.
Year 1 Achievement StandardThe Australian Curriculum: Science Year 1 achievement standard indicates the quality of learning that students should demonstrate by the end of Year 1.
By the end of Year 1, students describe objects and events that they encounter in their everyday lives, and the effects of interacting with materials and objects. They describe changes in their local environment and how different places meet the needs of living things.
Students respond to questions, make predictions, and participate in guided investigations of everyday phenomena. They follow instructions to record and sort their observations and share them with others.
The sections relevant to Schoolyard safari are bolded above. By the end of the unit, teachers will be able to make evidence-based judgments on whether the students are achieving below, at or above the achievement standard for the sections bolded above.
All the material in the first row of this table is sourced from the Australian Curriculum.
Schoolyard safari

PrimaryConnections
Overarching idea Incorporation in Schoolyard safari
Patterns, order and organisation
Students compare the similarities and differences between the external features of small animals. Students disrupt ant trails to examine how ants move and regroup
Form and function Students draw detailed observations of small animals to describe their physical characteristics and their related functions
Stability and change Students draw conclusions about the quantity and diversity of small animals found in the schoolyard
Scale and measurement
Students compare the shapes and sizes of small animals found in the schoolyard
Matter and energy Students discuss relationship between the habitat and the feeding needs of small animals
Systems Students make links between the physical features of living things and their habitats
SchoolySchoolyard safariard safari —Australian Curriculum Key ideasIn the Australian Curriculum: Science, there are six key ideas that represent key aspects of a scientific view of the world and bridge knowledge and understanding across the disciplines of science. The below table explains how these are represented in Wghoolyard safari.
PrimaryConnectionsCo
x

Schoolyard safari—Australian Curriculum: ScienceSchoolyard safari embeds all three strands of the Australian Curriculum: Science. For ease of reference, the table below outlines the sub-strands covered in Schoolyard safari, the content descriptions for Year 1 and their aligned lessons.
Strand Sub-strand Code Year 1 content descriptions Lessons
Science Understanding (SU)
Biological sciences
ACSSU017 Living things have a variety of external features
1–7
ACSSU211 Living things live in different places where their needs are met
1–7
Science as a Human Endeavour (SHE)
Nature and development of science
ACSHE021 Science involves observing, asking questions about, and describing changes in, objects and events
1–7
Use and influence of science
ACSHE022 People use science in their daily lives, including when caring for their environment and living things
1–7
Science Inquiry Skills (SIS)
Questioning and predicting
ACSIS024 Pose and respond to questions, and make predictions about familiar objects and events
1–7
Planning and conducting
ACSIS025 Participate in guided investigations to explore and answer questions
5, 6
ACSIS026 Use informal measurements to collect and record observations, using digital technologies as appropriate
2–7
Processing and analysing data and information
ACSIS027 Use a range of methods to sort information, including drawings and provided tables and through discussion, compare observations with predictions
1 - 4, 6
Evaluating ACSIS213 Compare observations with those of others
1–4, 6
Communicating ACSIS029 Represent and communicate observations and ideas in a variety of ways
1–7
All the material in the first four columns of this table is sourced from the Australian Curriculum.
Schoolyard safari
xi
General capabilitiesThe skills, behaviours and attributes that students need to succeed in life and work in the 21st century have been identified in the Australian Curriculum as general capabilities. There are seven general capabilities and they are embedded throughout the units. For further information see: www.australiancurriculum.edu.au
For examples of our unit-specific general capabilities information see the next page.
PrimaryConnectionsCo
xii
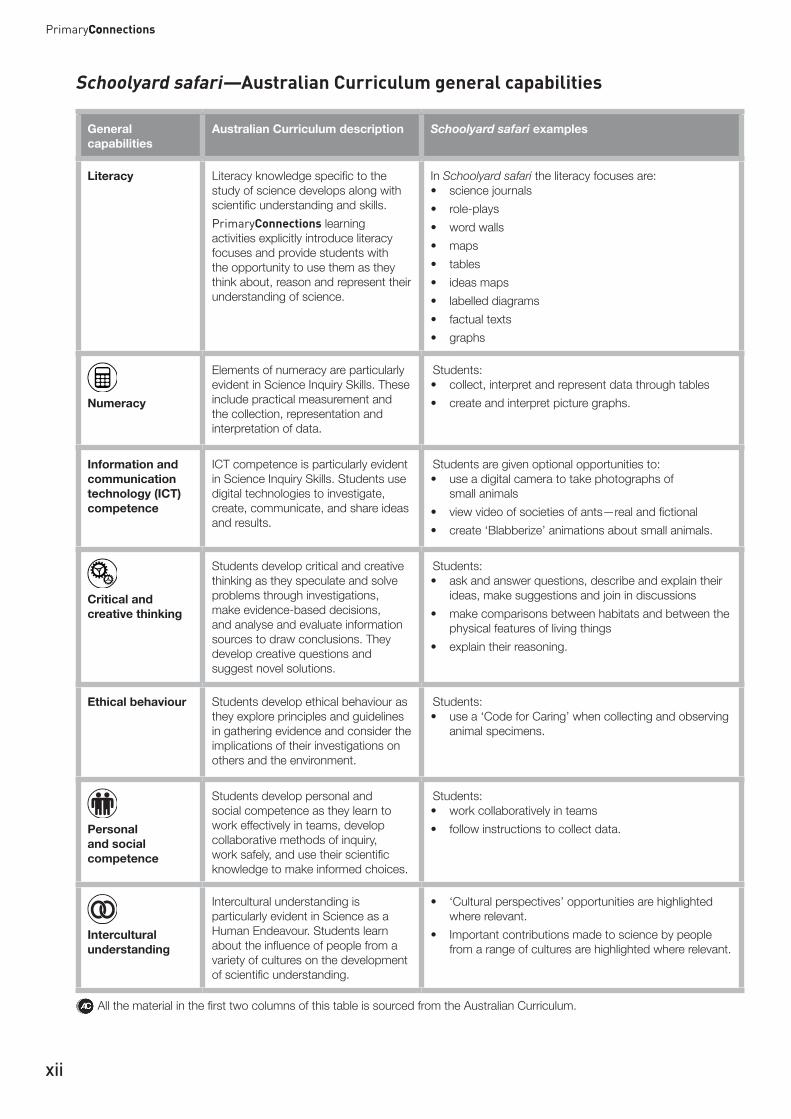
Schoolyard safari—Australian Curriculum general capabilities
General capabilities
Australian Curriculum description Schoolyard safari examples
Literacy Literacy knowledge specific to the study of science develops along with scientific understanding and skills.PrimaryConnections learning activities explicitly introduce literacy focuses and provide students with the opportunity to use them as they think about, reason and represent their understanding of science.
In Schoolyard safari the literacy focuses are:• science journals• role-plays• word walls• maps• tables• ideas maps• labelled diagrams• factual texts• graphs
Numeracy
Elements of numeracy are particularly evident in Science Inquiry Skills. These include practical measurement and the collection, representation and interpretation of data.
Students:• collect, interpret and represent data through tables• create and interpret picture graphs.
Information and communication technology (ICT) competence
ICT competence is particularly evident in Science Inquiry Skills. Students use digital technologies to investigate, create, communicate, and share ideas and results.
Students are given optional opportunities to:• use a digital camera to take photographs of
small animals• view video of societies of ants—real and fictional• create ‘Blabberize’ animations about small animals.
Critical and creative thinking
Students develop critical and creative thinking as they speculate and solve problems through investigations, make evidence-based decisions, and analyse and evaluate information sources to draw conclusions. They develop creative questions and suggest novel solutions.
Students:• ask and answer questions, describe and explain their
ideas, make suggestions and join in discussions• make comparisons between habitats and between the
physical features of living things• explain their reasoning.
Ethical behaviour Students develop ethical behaviour as they explore principles and guidelines in gathering evidence and consider the implications of their investigations on others and the environment.
Students:• use a ‘Code for Caring’ when collecting and observing
animal specimens.
Personal and social competence
Students develop personal and social competence as they learn to work effectively in teams, develop collaborative methods of inquiry, work safely, and use their scientific knowledge to make informed choices.
Students:• work collaboratively in teams• follow instructions to collect data.
Intercultural understanding
Intercultural understanding is particularly evident in Science as a Human Endeavour. Students learn about the influence of people from a variety of cultures on the development of scientific understanding.
• ‘Cultural perspectives’ opportunities are highlightedwhere relevant.
• Important contributions made to science by peoplefrom a range of cultures are highlighted where relevant.
All the material in the first two columns of this table is sourced from the Australian Curriculum.

PrimaryConnections
xiii
Schoolyard safari
Alignment with the Australian Curriculum: English and MathematicsStrand Sub-strand Code Year 1 content descriptions Lessons
English–Language
Text structure and organisation
ACELA1447 Understand that the purposes texts serve shape their structure in predictable ways
5, 7
English–Literacy
Interacting with others
ACELY1656 Engage in conversations and discussions, using active listening behaviours, showing interest, and contributing ideas, information and questions
2, 4, 6, 7
ACELY1788 Use interaction skills including turn-taking, recognising the contributions of others, speaking clearly and using appropriate volume and pace
1, 2, 3, 4, 5, 6
ACELY1657 Make short presentations using some introduced text structures and language, for example opening statements
7 (optional)
Interpreting, analysing, evaluating
ACELY1658 Describe some differences between imaginative informative and persuasive texts
5 (optional)
ACELY1660 Use comprehension strategies to build literal and inferred meaning about key events, ideas and information in texts that they listen to, view and read by drawing on growing knowledge of context, text structures and language features
5
Creating texts ACELY1661 Create short imaginative and informative texts that show emerging use of appropriate text structure, sentence-level grammar, word choice, spelling, punctuation and appropriate multimodal elements, for example illustrations and diagrams
1–7
Mathematics–Measurement and Geometry
Location and transformation
ACMMG023 Give and follow directions to familiar locations
1, 6
Using units of measurement
ACMMG019 Measure and compare the lengths and capacities of pairs of objects using uniform informal units
4
Mathematics–Statistics and Probability
Data representation and interpretation
ACMSP263 Represent data with objects and drawings where one object or drawing represents one data value. Describe the displays
6
All the material in the first four columns of this table is sourced from the Australian Curriculum.

Cross-curriculum prioritiesThere are three cross-curriculum priorities identified by the Australian Curriculum:
• Aboriginal and Torres Strait Islander histories and cultures
• Asia and Australia’s engagement with Asia
• Sustainability.
For further information see: www.australiancurriculum.edu.au
Aboriginal and Torres Strait Islander histories and culturesThe PrimaryConnections Indigenous perspectives framework supports teachers’ implementation of Aboriginal and Torres Strait Islander histories and cultures in science. The framework can be accessed at: www.primaryconnections.org.au
Schoolyard safari focuses on the Western science way of making evidence-based claims about how living things, such as small animals, have a variety of external features and live in different places where their needs are met.
Aboriginal and Torres Strait Islander Peoples might have other explanations for the external features of small animals and the places where they live.
PrimaryConnections recommends working with Aboriginal and Torres Strait Islander community members to access local and relevant cultural perspectives. Protocols for engaging with Aboriginal and Torres Strait Islander community members are provided in state and territory education guidelines. Links to these are provided on the PrimaryConnections website.
SustainabilityThe Schoolyard safari unit provides opportunities for students to develop an understanding of how the different places where small animals live can be affected by environmental conditions, including changes due to human activities. This unit helps them to develop an understanding of the fragility of the environment and living things. This can assist them to develop knowledge, skills and values for making decisions about individual and community actions that contribute to sustainable patterns of use of the Earth’s natural resources.
PrimaryConnectionsCo
xiv
PrimaryConnections
xv
Schoolyard safari
Teacher background information
Introduction to small animalsMany small animals can be found in the schoolyard environment. Animals are capable of actively moving from place to place at some stage in their life cycle, and they feed by consuming other living things—or parts of them. Most plants are fixed to one place and make their own food by photosynthesis, using energy from sunlight.
The schoolyard might have animals with a backbone (vertebrates) such as birds, lizards and some mammals such as cats and dogs. Many animals in the schoolyard are, however, likely to be very small and without a backbone (invertebrates) such as earthworms, snails, ants, ant lions, slaters, beetles and spiders.
Schoolyard safari explores some common invertebrates with land habitats. Students will investigate the parts of the animals that enable them to move, feed and protect themselves and will consider how their habitats provide for their needs such as food, water and shelter.
Invertebrates are a vital part of ecosystems because of their number, variety and their influence on larger animals and plants and even entire ecosystems. They play an important part in ecosystems by:
• helping to break down waste and recycle nutrients in the soil
• dispersing seeds of plants and
• assisting with pollination.
Some invertebrates (and vertebrates) have a negative effect on other living things by transmitting diseases—for example, mosquitoes—or multiplying excessively and consuming the food of other animals, for example, locust swarms.
In this unit students will have the opportunity to investigate three types of invertebrate animals:
• Annelids (‘ringed’): animals with no limbs and with bodies divided by rings into repeatedsegments, such as, earthworms and leeches.
• Molluscs: soft-bodied animals usually covered with a hard, outside shell that providesprotection, such as, snails and oysters.
• Arthropods: animals with a hard, external covering (exoskeleton) and jointed limbs. Theexoskeleton provides protection and a framework to which muscles are attached andwhich allows them to move. The arthropods include:
– crustaceans, such as, slaters and crabs.
– arachnids, which are animals with eight legs, a head and abdomen, such as, spidersand ticks.
– myriapods have many legs, such as, centipedes and millipedes.
– insects, the largest groups of arthropods, have a head, thorax and abdomen, six legsand antennae, such as, ants and bees.
Scientists have developed different classification systems for animals based on the features and/or the origin of species. These are being revised constantly as new knowledge emerges.

PrimaryConnectionsCo
xvi
Students’ conceptionsTaking account of students’ existing ideas is important in planning effective teaching approaches that help students learn science. Students develop their own ideas during their experiences in everyday life and might hold more than one idea about an event or phenomenon. Many students have non-scientific ideas about what an animal is. Many students’ concept of an animal is limited to common mammals such as cats, dogs and cows, and does not include humans or insects.
Students commonly hold anthropomorphic views of animals—that is, they attribute human motivation, features or behaviour to animals. These views are often perpetuated in storybooks and films.
The skill of observingFrom an early age, students use their senses to explore the diverse nature of the world around them. They do so mainly through observation, a skill that is fundamental to science and technology. Observation involves the use of the five senses: touch, taste, hearing, sight and smell. Each sense provides different information about what we are observing.
Learning to observe involves learning to communicate observations to others, by representation or description. This is an important skill so others can replicate an investigation or identify a described species.
Students might need practice and assistance through questioning to distinguish between observations and assumptions or inferences about the animal’s intent (anthropomorphic views). For example, ‘The ant is burrowing in the corner’ or ‘The ant is digging a tunnel near the wall of the jar’ are observations whereas ‘The ant is trying to escape’ or ‘The ant is looking at us’ are inferences.
Animal ethicsThis unit describes investigations of invertebrate animals. Each Australian state and territory has animal ethics requirements for school investigations involving vertebrate animals (those with a backbone such as birds or guinea pigs). You would need to comply with any requirements of the relevant Animal Welfare Act if you chose to investigate vertebrate animals. Each school might also have policies in place addressing animal welfare in classroom settings.
Insects and crustaceans are invertebrate animals and are not covered by the Animal Welfare Act but still require care and consideration.
SnailsA variety of snails, slugs and planarians are suitable intermediate hosts of the rat lungworm, Angiostrongylus cantonensis. Human infection occurs following ingestion of raw snails, slugs or planarians, something young toddlers particularly are prone to do. Another possible source of human infection is through ingestion of improperly washed vegetables such as lettuce.

PrimaryConnections
xvii
Schoolyard safari
It is recommended that the following safety procedures be followed during Schoolyard safari:
• wear gloves when handling any biological material
• always wash hands with soap and water after handling any biological material(particularly snails, slugs or their slime, and any vegetation such as vegetables or leaflitter), even after wearing gloves
• when handling snails or slugs, keep hands away from the mouth, and clarify withstudents that they should never encourage, or dare anyone to eat raw snails or slugs.
To access more in-depth science information in the form of text, diagrams and animations, refer to the PrimaryConnections Science Background Resource available on the PrimaryConnections website: www.primaryconnections.org.au
Note: This background information is intended for the teacher only.


Lesson 1 In the yard
EN
GA
GE
PrimaryConnections
Lesson focusThe focus of the Engage phase is to spark students’ interest, stimulate their curiosity, raise questions for inquiry and elicit their existing beliefs about the topic. These existing ideas can then be taken account of in future lessons.
Assessment focusDiagnostic assessment is an important aspect of the Engage phase. In this lesson you will elicit what students already know and understand about:• the external features of small animals and the habitats that meet their needs, and how
to care for living things and their environment. You will also monitor their developingscience inquiry skills (see page xi).
AT A GLANCE
To capture students’ interest and find out what they think they know about how living things, such as small animals, have a variety of external features and live in different places where their needs are met.
To elicit students’ questions about small animals.
Session 1 Curious creatures
Students:
• predict which animals they think will be found in their schoolyard environment• participate in a role-play to show what they think they know about the features and
behaviour of small animals.
Session 2 In my schoolyard
Students:
• explore the schoolyard for evidence of small animals• write about and draw their observations.
Session 3 In my own backyard (optional)
Students:
• observe, record and report on small animals found in their own backyard.
Lesson 1 In the yard 1

2 Lesson 1 In the yard
PrimaryConnections E
NG
AG
E
Key lesson outcomesScience
Students will be able to represent their current understanding as they:
• explain their existing ideas about thefeatures and behaviour of small animals
• follow directions to conduct an explorationof the ‘Schoolyard safari’ area
• use their senses to observe and identifysmall animals in their habitats.
Literacy
Students will be able to:
• describe the purpose and features ofa role-play
• use oral language and role-play torepresent what they think they knowabout the features and behaviour ofsmall animals
• describe the purpose and features ofa map
• use oral, written and visualrepresentation to report observations ofanimals in their habitats and comparethem with their predictions
• ask questions about small animals.
This lesson also provides opportunities to monitor the development of students’ general capabilities (highlighted through icons, see page xii).
Teacher background informationSmall animals likely to be found in the schoolyard environment
snailsslugs
earthwormsants
slatersmillipedescentipedes
aphidsdragonflies
spiderscockroachesgrasshoppers
cricketscicadas
fliesbees
ladybirdsbutterflies
mothswasps
mosquitoessilverfishbeetlesbirds
lizards
For further information about identification and naming of invertebrates see the PrimaryConnections website (www.primaryconnections.org.au).

PrimaryConnections Schoolyard safari
EN
GA
GE
How to collect, observe and care for small animals:• Search carefully, disturbing the surroundings as little as possible.
• Replace stones and logs after searching underneath them.
• Do not remove plants.
• Do not collect known dangerous small animals.
• Wear gloves when searching. Small animals can be aggressive (such as, bite or sting)when their habitat is disturbed.
• Handle small animals carefully. Use spoons and damp brushes, not fingers, as animalscould be crushed accidentally.
• Place small animals in small, sealable plastic containers with air holes.
• Label containers with the area collected so the small animals can be returned (thelabels can also provide information such as date collected).
• When collecting, keep different types of small animals in separate containers, so theydon’t injure or attack each other.
• After a short time, return the small animals to where they were found or make suitableclassroom homes for them.
The small animals selected in the unit have been chosen because they are found in most schoolyards and are relatively easy to find and observe.
Note: This unit is focused on small animals found in a land habitat. Other habitats—such as a freshwater pond, seashore or compost—could be explored using the lesson structure modelled in this unit.
Note: If vertebrate animals (such as birds, guinea pigs or lizards) are investigated, you will need to comply with your state’s animal ethics requirements, Animal Welfare Act and your school’s policy on the use of animals in classroom settings.
Read the safety information on page 9 about handling snails.
Lesson 1 In the yard 3

4 Lesson 1 In the yard
PrimaryConnections E
NG
AG
E
Session 1 Curious creatures
Equipment
FOR THE CLASS
• class science journal• word wall
Preparation• Read ‘How to use a science journal’ (Appendix 2).
• Read ‘How to use a word wall’ (Appendix 3).
• Prepare a page in the class science journal with the heading ‘Animals in our schoolyard’.
Lesson steps 1 Write ‘safari’ on the board and briefly discuss its meaning, focusing on the idea of
a safari being an expedition to look for and learn about a variety of animals. Add ‘schoolyard’ to ‘safari’ and ask students to think about what the title means and what animals might be found in their schoolyard.
2 Record students’ predictions about what animals they think they might find in the schoolyard under the ‘Animals in our schoolyard’ heading in the class science journal. Focus students’ thinking on small invertebrates for example, insects.Discuss the purpose and features of a science journal.
Literacy focus
Why do we use a science journal?We use a science journal to record what we see, hear, feel and think so that we can look at it later.What does a science journal include?A science journal includes dates and times. It might include written text, drawings, measurements, labelled diagrams, photographs, tables and graphs.
3 Organise the class to role-play some of the small animals on their list, including ants, earthworms and snails. Discuss the purpose and features of a role-play.

PrimaryConnections Schoolyard safari
EN
GA
GE
Literacy focus
Why do we use a role-play?We use a role-play to show how something works by acting it out.What does a role-play include?A role-play might include speech, actions and props.
4 Draw students’ attention to the way the features and behaviour of an animal are demonstrated in their role-play. For example, if a student is role-playing an earthworm, ask questions such as:• Why are you moving along the floor?• Why have you pulled your arms close to your body?• Why do you have your eyes shut?• Why are you wriggling along headfirst?
Note: In the Engage phase, do not provide any formal definitions or correct students’ answers as the purpose is to elicit students’ prior knowledge.
5 Discuss the small animals enacted, asking questions such as:• How does the animal move?• Which parts of the animal help it to move?• How does the animal see?• How does the animal eat?• What does the animal eat?• How does the animal protect itself?• What kind of place does the animal live in? Why does it live there?Record in the class science journal ideas about the small animals.
6 Explain that during the unit the class will find out more about small animals and where they live. Record students’ questions about small animals in the class science journal.
7 Begin a word wall with vocabulary about small animals. Discuss the purpose and features of a word wall.
Literacy focus
Why do we use a word wall?We use a word wall to record words we know or learn about a topic. We display the word wall in the classroom so that we can look up words we are learning about and see how they are spelt.What does a word wall include?A word wall includes a topic title or picture and words that we have seen or heard about the topic.
Lesson 1 In the yard 5

6
PrimaryConnections E
NG
AG
E
Session 2 In my schoolyard
Equipment
FOR THE CLASS FOR EACH TEAM
• class science journal• word wall• team roles chart• team skills chart• ‘Schoolyard safari’ map (see ‘Preparation’)• ‘Code for caring’ poster (see ‘Preparation’)
• role wristbands or badges for Managerand Speaker
• each team member’s science journal• 1 blank sheet of A4 paper• optional: 1 clipboard to hold blank sheet• gloves for each team member• 1 large hoop or skipping rope• self-adhesive notes
Preparation• Be aware of allergies that students might have, for example, plant allergies. Students
might also suffer from allergies to different substances and detergents as well as thelatex used in disposable gloves.
• Read ‘How to organise collaborative learning teams’ (Appendix 1). Display an enlargedcopy of the team skills chart and the team roles chart in the classroom. Prepare rolewristbands or badges and the equipment table.
• Identify an area of the schoolyard that would be suitable for small animal observation.It would be helpful for the area to have a range of habitats that could include light andshade, trees and shrubs, long grass, asphalt, logs, wet and dry areas, flowers and weeds.
• Make a large ‘Schoolyard safari’ map, including familiar landmarks for students. Dividethe area into sections and allocate a particular area to one or two teams.
• Optional: It could be helpful for students to mark off each section physically to createboundaries for their observation. This could be done using string and four chairs orwitch’s hats as corners for the area.
• Optional: Add a key to indicate different aspects of the habitat so that students canmake inferences about the habitat from the colouring (such as, brown = dirt, darkgreen = lush grass, light green = sparse grass).
• Prepare a blank poster with the title ‘Code for caring’ (see Lesson step 3).
• Check your state and territory guidelines for keeping and handling animals inclassrooms and schools.
• Read the safety information on page 9 about handling snails.
Lesson 1 In the yard

7
PrimaryConnections Schoolyard safari
EN
GA
GE
Lesson steps1 Review the previous session, referring to the class science journal and students’
predictions of what they might find in their schoolyard.
2 Explain that students will be working in collaborative learning teams to look for small animals that might be found in the ‘Schoolyard safari’ area.
If students are using collaborative learning teams for the first time, introduce and explain the team skills chart and the team roles chart. Explain that students will wear role wristbands or Manager and Speaker badges to help them (and you) know which role each team member should be doing.
Draw students’ attention to the equipment table and discuss its use. Explain that this is where Managers will collect and return equipment.
3 Introduce the blank poster with the title ‘Code for caring’. Discuss what a code is. Negotiate and record on the poster ways for students to care for small animals (see ‘Teacher background information’).
4 Introduce students to the ‘Schoolyard safari’ map and ask if they recognise its location in the schoolyard and any landmarks and areas that are familiar to the students. Discuss the purpose and features of a map.
Sample ‘Code for caring’ poster
Lesson 1 In the yard

8
PrimaryConnections E
NG
AG
E
Literacy focus
Why do we use a map?We use a map to show where things are, how far apart they are and how to get between them.What does a map include?A map includes a title, labels, symbols and a key to explain the symbols. It might include arrows to show a path and scale to show distances.
5 Draw attention to the designated areas for the teams and model how teams will use a large hoop or a skipping rope forming a circle on the ground to help them focus on their observation area.
6 Explain that the Manager will wear gloves to protect their hands as their role is to pick up rocks and move leaves and logs so the team can observe the small animals underneath. Other team members are not touching animals, they are just observing.
7 In the class science journal model how the Speaker will record the name or draw small animals observed on a blank A4 sheet and count the number found in their area.
8 Form teams and allocate roles.
9 Ask Managers to collect team equipment, and walk with their team to the ‘Schoolyard safari’ area, place their hoop on the ground and record the small animals inside it. Once placed, it is not to be moved so the observations are restricted to one area.
10 Allow students time to explore and observe the area.
Note: If students do not find animals in the viewing area of their hoop, ask them to explore another area.
Schoolyard safari map
Sample ‘Schoolyard safari’ map
Lesson 1 In the yard

PrimaryConnections Schoolyard safari
EN
GA
GE
On return to the classroom, review the students’ experience by asking questions such as:
• How many different kinds of small animals did you find?
• Which animals did you see lots of?
• What were the animals doing as you watched them?
• Were any animals difficult to see?
• Did any team find dead animals or parts of an animal?
• Did any team find an animal that other teams didn’t?
11 Review the students’ predictions from Session 1 in the class science journal. Using a different coloured pen, tick confirmed predictions and record the names of other small animals observed.
12 Record, on the ‘Schoolyard safari’ map, the number and type of animals found in each area using information recorded on each team’s A4 sheet.
13 Review students’ questions to see if any have been answered. Update the word wall with words and images.
Lesson 1 In the yard 9

PrimaryConnections E
NG
AG
E
Session 3 In my own backyard (optional)
Equipment
FOR THE CLASS FOR EACH STUDENT
• class science journal• word wall• ‘Code for caring’ poster (see Session 2)
• ‘In my own backyard’ folder or journal(eg, manila folder, book)
• ‘Information note for families’(Resource sheet 1)
• ‘Backyard safari search’ (Resource sheet 2)
Preparation• Make an ‘In my own backyard’ folder or journal for each student, including ‘Information
note for families’ (Resource sheet 1) and ‘Backyard safari search’ (Resource sheet 2).
• Decide when the students will present the information collected (see Lesson step 7)and write this information on ‘Information note for families’ (Resource sheet 1).
Lesson steps1 Using the ‘Schoolyard safari’ map, review the small animals that were found in the
schoolyard in the previous lesson.
2 Ask students what types of animals they might find in their own backyard. Record the predictions in the class science journal.
3 Review the ‘Code for caring’ poster and discuss how students could make observations of small animals in their own backyard (or the backyard of someone they know).
Remind students not to pick up small animals using their fingers as some of them can bite or sting.
4 Introduce the ‘In my own backyard’ folder or journal prepared for each student. Discuss how students will use their ‘In my own backyard’ journal to record information.
5 Use the classroom journal to model entries, such as:
• where the observation took place, the date and time
• draw or take a photograph of the small animals and where they were found
Optional: ask students to include a key to indicate different aspects of the habitat so that other students can make inferences about the habitat from the colouring, such as, brown = dirt, dark green = lush grass, light green = sparse grass.
6 Introduce the ‘Information note for families’ (Resource sheet 1) and discuss.
7 Explain that students will give presentations of what they find in their backyard either as the unit progresses or at the end of the unit.
1 0 Lesson 1 In the yard

11
PrimaryConnections Schoolyard safari
EN
GA
GE
Curriculum linksMathematics
• Develop understanding of the vocabulary of position and mapping. For example,construct a 3 x 3 grid using rulers on the floor or in a sandpit and add a few plasticanimals to the grid. Have students draw this grid and describe the location of theanimals, for example, the beetle is in A2.
The Arts
• Create an undergrowth environment in the classroom, for example, cover thewindows with green cellophane. Make 2-D and 3-D models of objects that are found in theundergrowth.
Indigenous perspectives• Insects have played an important part in the culture of Indigenous people for many
thousands of years. Extensively used for their food, medicine and as part of theircultural beliefs, these insects include the Bogong moth, witjuti (witchetty) grub,honeypot ant and native bee for its sugarbag (honey).
• Display pictures or drawings of some of the insects that are a part of Indigenousculture. Discuss and group according to the students’ ideas.
• For images see Australian National Insect Collection:https://www.csiro.au/en/Research/Collections/ANIC
• PrimaryConnections recommends working with Aboriginal and Torres Strait Islandercommunity members to access local and relevant cultural perspectives. Protocols forengaging with Aboriginal and Torres Strait Islander community members are providedin state and territory education guidelines. Links to these are provided on thePrimaryConnections website (www.primaryconnections.org.au).
Lesson 1 In the yard

Resource sheet 1
Schoolyard safari
Information note for families
Name: _________________________________________ Date:________________
Copyright © Australian Academy of Science, 2020.
Introducing ‘In my own backyard’ projectThis term, our class will explore small animals and their habitat in the science unit, Schoolyard safari. As part of this unit, we would like to learn about the small animals that might be found in the homes and gardens of students in our class.
Tasks to doEach student will have an ‘In my own backyard’ folder or journal to record information. This will include a ‘Backyard safari search’ sheet for drawing and writing about the animals found. Students are encouraged to take photographs if possible.
Students will be asked to share their observations with their classmates on_________________.
Code for caringThe class has established a ‘Code for caring’ to help students search carefully without disturbing the search area. This includes:
• Replace stones and logs after searching under them.• Leave all plants and gardens undisturbed.• Leave all dangerous small animals alone.• Wear gloves to avoid bites and stings.• Use spoons and damp brushes to avoid crushing small animals.• When observing animals, keep them in a labelled container that has air
holes and after a short time return the animal to where it was found.
Note: Students are not collecting the animals, they are observing them. Children should be supervised while observing snails. If students handle snails, slugs or their slime, ensure they keep their hands away from their mouths and wash their hands with soap afterwards.
Class Teacher
For further information about small animals see the CSIRO website. www.csiro.au/resources/pfhc.html

Resource sheet 2
Schoolyard safari
Backyard safari search
Name: _________________________________________ Date:________________
I found it ____________________________ I found it ____________________________
I found it ____________________________ I found it ____________________________
Name of animal _____________________ Name of animal _____________________
Name of animal _____________________ Name of animal _____________________
In my own backyardSearch around your home for small animals such as:
slugs, snails, earthworms, ants, slaters, millipedes, centipedes, aphids, spiders, earwigs, cockroaches, grasshoppers, beetles, cicadas, flies, bees, ladybirds, dragonflies, butterflies, moths, wasps, mosquitoes, silverfish, crickets, lizards or birds.
Copyright © Australian Academy of Science, 2020.

PrimaryConnections E
XP
LOR
E
14 Lesson 2 Wiggly worms
Lesson 2 Wiggly worms
Lesson focusThe Explore phase is designed to provide students with hands-on experiences of the science phenomenon. Students explore ideas, collect evidence, discuss their observations and keep records such as science journal entries. The Explore phase ensures all students have a shared experience that can be discussed and explained in the Explain phase.
Assessment focusFormative assessment is an ongoing aspect of the Explore phase. It involves monitoring students’ developing understanding and giving feedback that extends their learning. In this lesson you will monitor students’ developing understanding of:• the external features of an earthworm, how an underground habitat meets their needs
and how science involves asking questions. You will also monitor their developingunderstanding of science inquiry skills (see page xi).
AT A GLANCE
To provide students with hands-on, shared experiences of the features, behaviour and habitat of earthworms.
Session 1 Watching earthworms
Students:
• record what they think they know about earthworms• observe, discuss and draw earthworms• record what they find out about earthworms.
Session 2 Earthworm viewer (optional)
Students:
• observe a class earthworm viewer• record observations.
15Lesson 2 Wiggly worms
PrimaryConnections Schoolyard safari
EX
PLO
RE
Key lesson outcomesScience
Students will be able to:
• observe and draw the features ofan earthworm
• observe and describe earthwormmovement
• identify features of earthworms that allowthem to breathe, feed, move and protectthemselves underground
• optional: construct an earthworm habitat.
Literacy
Students will be able to:
• use oral, written and visual languageto report observations of the features,behaviour and habitat of the earthworm
• describe the purpose and features ofa table
• draw a detailed drawing aftercareful observation
• record ideas in a science journal
• answer questions about earthworms.
This lesson also provides opportunities to monitor the development of students’ general capabilities (highlighted through icons, see page xii).
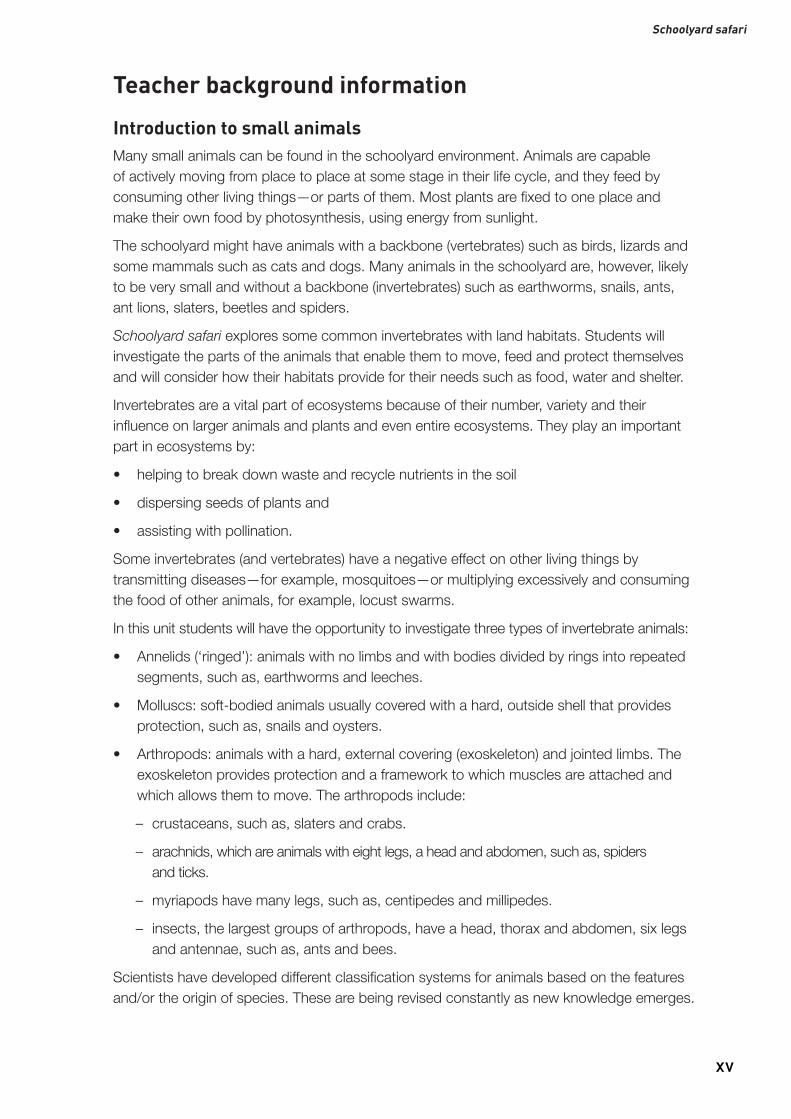
Teacher background informationAbout earthwormsEarthworms are annelids, which means ‘ringed’ animal. They are cylindrical animals without a backbone (invertebrate). They are divided into segments. While they don’t have lungs, they have very thin skin through which they absorb oxygen and expel carbon dioxide. As their skin is permeable, they can lose water by evaporation and it is important that they do not dry out or they will not be able to ‘breathe’. Earthworms have primitive
Labelled diagram of an earthworm
Note: This diagram is not intended for student use.

16 Lesson 2 Wiggly worms
PrimaryConnections E
XP
LOR
E
eyes, which allow them to avoid sunlight and therefore avoid the surface of the Earth, where they could be eaten by birds. They are one of a host of organisms that processes the world’s organic matter and helps maintain ecosystems.
There are two main types of earthworms: earthworkers and composting earthworms. Earthworkers are earthworms that live in the soil, creating burrows. These burrows allow air and water to circulate in the soil and make it easier for plant roots to penetrate. Compost worms do not live in soil; they live in organic matter (anything that was once living), in compost bins or the top layer of soil rich in organic matter, eating it and leaving castings (manure) that fertilise the ground.
The average adult earthworm is about 10 centimetres long. The Victorian Gippsland giant is the largest in Australia; a mature adult can stretch to two metres long when relaxed.
The earthworm’s body is divided into ring-like segments. Each segment has eight tiny bristles, called setae, which enable the earthworm to ‘grip’ the soil and move along. Adult earthworms have a clitellum near the head end of the body, which is part of the reproductive system. It is often called a saddle because it is a thickened, usually paler-coloured, saddle-shaped area.
How they moveEarthworms have two sets of muscles. They have circular muscles around each segment, which the earthworm tightens to stretch out, becoming long and thin. They also have a longitudinal set of muscles running along the length of their bodies. These compress the earthworm, making it shorter and fatter. Earthworms move by using their bristles (setae) to anchor themselves and push through the soil. If they can squeeze into small cracks they force their way through; otherwise they eat their way through.
How they eatThe mouth of an earthworm is folded in on itself. When earthworms eat, they fold out this front section and pull the soil or organic material back into the top of their digestive tract. The digested remains are deposited as manure or castings, which make the ground more fertile.
How to get a supply of earthwormsEarthworms can be found in a garden. Water an area of the garden and place a damp, dark cloth over it. Earthworms will rise to the surface as their burrows fill up, thinking that they are safe from predators as it seems to be night. Walk lightly and use a torch covered with red cellophane as they are not sensitive to red light. These earthworms are earthworker worms, or agricultural worms. They are slow to reproduce and grow. They also require a lot of space in which to live and breed.
It is possible that not enough earthworms will be found using this method. The alternative is to buy commercial, composting earthworms from earthworm farms, nurseries, the gardening section of larger department stores or bait shops. These earthworms can live in dense communities, growing and reproducing at a fast rate. Earthworms can be recycled into the school garden at the end of the unit.

17Lesson 2 Wiggly worms
PrimaryConnections Schoolyard safari
EX
PLO
RE
How to house earthworms1 Punch narrow holes in the bottom of a polystyrene box to allow water to drain through.
2 Place the polystyrene box inside another box without holes to catch the liquid. It will also catch earthworms that fall out through the holes. Place something like a brick in the bottom of the lower box to give the earthworms something to climb onto so they don’t drown.
3 Put several layers of wet newspaper in the bottom of your container and cover with layers of soil, sheep manure, tea leaves, shredded paper etc., dampening each layer as you go. A layer of soil over the top is also a good idea.
4 Add the earthworms. They will multiply rapidly providing they are kept fed, watered and in the dark.
5 Put organic (anything that was once living) kitchen waste on top of the bedding regularly but in small amounts. As the population increases, so will the amount of food required.
Earthworms like Earthworms don’t like
Fruit and vegetable scraps Hard pits and seeds, avocado skins
Cereals, grains, bread, rice, pasta Meat, fatty food, dairy products
Coffee and tea. These can become acidic, so are best mixed with crushed egg shell or wood ash
Food that stings your eye (eg, acidic or spicy food such as lemons, onions, chillies, raw potato, garlic, orange and grapefruit)
Garden waste. (Avoid diseased or infected plants.) Really salty foods
Note: Do not feed earthworms citrus, garlic, meat scraps or dairy products; they become sick if they ingest them.
6 Cover the food waste with damp newspaper, hessian or carpet underlay. A cover needs to allow air circulation, retain moisture and provide a dark environment. It is convenient for observation as earthworms will tend to congregate under the cover.
7 Add water to the soil whenever it begins to dry. It should be the consistency of a lightly squeezed sponge; if it is too wet the earthworms will die. A spray bottle is useful.
Avoid contact with bacteria and fungal spores in soil.
Worm farm

18
PrimaryConnections E
XP
LOR
E
Session 1 Watching earthworms
Equipment
FOR THE CLASS FOR EACH TEAM
• class science journal• word wall• team roles chart• team skills chart• ‘Schoolyard safari’ map (see Lesson 1)• ‘Code for caring’ poster (see Lesson 1)• ‘Watching earthworms’ table• 1 spray bottle of water
• role wristbands or badges for Managerand Speaker
• each team member’s science journal• 1 small clear plastic container• 1 magnifying glass• 1 soft-haired paint brush• 1 plastic spoon• composting earthworm• gloves for each team member• optional: each student’s ‘In my own
backyard’ journal (see Lesson 1)
Preparation• Obtain a supply of earthworms (see ‘Teacher background information’).
• Prepare a ‘Watching earthworms’ table in the class science journal, for example:
Watching earthworms
Before a close look After a close look
Lesson steps1 Review the previous lesson using the class science journal and the students’ pictures
of small animals found in the ‘Schoolyard safari’ area.
2 Ask if anyone observed earthworms in the ‘Schoolyard safari’ area and mark the location on the ‘Schoolyard safari’ map.
3 Optional: Ask students to report what they have identified in their garden recently using their ‘In my own backyard’ journal.
4 Explain that students will be working in collaborative learning teams to look closely at an earthworm. Discuss the purpose and features of a table.
Record what students know about earthworms in the ‘Before a close look’ column of the ‘Watching earthworms’ table (see ‘Preparation’).
Lesson 2 Wiggly worms

19Lesson 2 Wiggly worms
PrimaryConnections Schoolyard safari
EX
PLO
RE
Literacy focus
Why do we use a table?We use a table to organise information so we can understand it more easily.What does a table include?A table includes a title, columns with headings and information organised under each heading.
5 Ask students to draw, in their science journals, an earthworm under the title ‘Before a close look’.
Student work sample of a ‘Before a close look’ drawing
6 Show the earthworms to the class. Discuss what students might observe, such as:
• the colour and texture of the earthworm’s skin
• the shape and size of the earthworm
• how the earthworm moves
• whether the topside of the earthworm is different from the underside.
Refer to the ‘Code for caring’ poster created in Lesson 1. Instruct the students to wear gloves when handling earthworms and remind them of safety precautions such as not touching their eyes or mouth during the activity.
7 Demonstrate how to use the magnifying glass to assist their observations. Explain to the students that you might need to spray the earthworm gently with water to keep it moist.
8 Model how to observe the underside of an earthworm that is inside a small, clear plastic container.
9 Form teams and allocate roles. Ask Managers to collect team equipment.
10 Once teams have observed their earthworm, ask them to wash their hands and then share their observations with each other.
11 Ask Speakers to share their team’s findings. Record findings in the ‘After a close look’ column of the ‘Watching earthworms’ table in the class science journal.

20
PrimaryConnections E
XP
LOR
E
12 Review and discuss the drawings students made of an earthworm before the close observations. Ask them to discuss their ‘Before a close look’ drawings and suggest improvements based on their observations. Model drawing an earthworm on the board, taking students through the following steps:
• look closely at the earthworm
• draw the shape of the earthworm
• count and draw the segments
• add any details.
13 Provide students with the opportunity to look again at their earthworm and make a second drawing in their science journal with the title ‘After a close look’. The drawings should represent the shapes, quantity and location of the parts of the animal.
14 Discuss the importance of having a close look to gather detailed information and why scientists might find this useful.
Student work sample of an ‘After a close look’ drawing
15 Discuss the observations that students have made of the earthworm, and ask for suggestions about how the parts of the animal help it move, feed and protect itself in its habitat. Ask questions such as:
• How do earthworms see?
• How do earthworms breathe?
• How do earthworms eat?
• Where do earthworms usually live (their habitat)?
• How do the parts of the earthworm help it live in its habitat?
• How do earthworms find food and water in their habitat?
• How do earthworms protect themselves from drying out?
• How do earthworms protect themselves from being eaten by birds?
16 Review students’ questions to see if any have been answered. Update the word wall with words and images.
Lesson 2 Wiggly worms

21Lesson 2 Wiggly worms
PrimaryConnections Schoolyard safari
EX
PLO
RE
Session 2 Earthworm viewer (optional)
Equipment
FOR THE CLASS FOR EACH STUDENT
• class science journal• word wall• ‘Code for caring’ poster (see Lesson 1)• 1 earthworm viewer (see ‘How to make an
earthworm viewer’, Resource sheet 3)• composting earthworms• gloves
• science journal
Preparation• Obtain a supply of earthworms (see ‘Teacher background information’).
• Prepare an earthworm viewer (see ‘How to make an earthworm viewer’,Resource sheet 3).
Lesson steps1 Review the previous lesson and discuss the features and behaviour of the earthworm.
2 Draw students’ attention to the habitat of the earthworm. Ask them where they think earthworms live and what conditions earthworms might need to survive.
3 Show students the earthworm viewer you have made and discuss its features. Ask students questions such as:
• Why is the soil moist?
• Why does the bottle have holes in the bottom?
• Why have grass clippings been put on top of the soil?
• Why will we wrap the bottle in black plastic?
4 Draw a diagram of the earthworm viewer in the class science journal.
5 Wear gloves to add the earthworms to the top layer of grass and leaves. Watch the earthworms burrow into the soil.
6 Cover the earthworm viewer with the black plastic bin liner and place it in a cool dark place.
7 Organise for students to observe the earthworm viewer every few days and compare what is seen with the drawing in the class science journal. Keep the top layer moist as necessary.

22
PrimaryConnections E
XP
LOR
E
8 Optional: Make a second earthworm viewer with no earthworms in it to allow students to compare the two viewers to see the difference that earthworms made.
9 Ask students to record, using drawings and text, their claims and evidence about earthworm behaviour and habitat in their science journal. To assist students with their thinking, ask questions such as:
• Is there any evidence of the earthworms’ burrowing? How do you know?
• Has anything happened to the soil layers? What do you think has happened?
• Has anything happened to the grass clippings or leaves? What do you thinkhas happened?
10 Review students’ questions to see if any have been answered. Update the word wall with words and images.
Curriculum linksEnglish
• Read information and fiction books about earthworms. Students identify key wordsand complete a short report on earthworms.
Mathematics
• Find ways to measure and compare the lengths of the earthworms.
• Create a jumbled sequence of photos to show the transformation of a plastic drinkbottle into an earthworm viewer; ask students to reorder them.
Technology
• Design an effective worm farm.
Studies of society and environment
• Discuss sustainability programs and the possible role of earthworm farms in theschool environment.
Indigenous perspectivesThe witjuti (witchetty) grub is the larvae of cossid moths and is found in the roots of several desert plants. The grub is a food source (bush tucker) for some Indigenous people. The grubs are collected by digging up the roots of the acacia bush and cracking them open to locate the grubs within, and can be eaten raw or roasted.
• Watch the videoclip, Witchetty grubs are healthy.See: https://aso.gov.au/titles/documentaries/cool-drink-and-culture/clip2/
• Find images of witjuti grubs and carefully observe the body structure, including thedifferent sections of the grub. Use modelling clay or plasticine to make a model of awitjuti grub. Make a home for the grub using natural materials—inside a piece of rootor bark, or on a leaf.
Lesson 2 Wiggly worms

23Lesson 2 Wiggly worms
PrimaryConnections Schoolyard safari
EX
PLO
RE
• PrimaryConnections recommends working with Aboriginal and Torres Strait Islandercommunity members to access local and relevant cultural perspectives. Protocolsfor engaging with Aboriginal and Torres Strait Islander community members areprovided in state and territory education guidelines. Links to these are provided on thePrimaryConnections website (www.primaryconnections.org.au).
Work sample of a plasticine witjuti grub

Resource sheet 3
Schoolyard safari
How to make an earthworm viewer
• 1 empty 2 L clear plastic drink bottle• 1 empty 500 mL plastic drink bottle• 1 saucer• scissors• 1 marking pen• 1 nail and cork for nail-poke• candle and matches• water
• gravel• soil• sand• grass clippings or dead leaves• 12–15 earthworms• 1 black plastic bin liner• spray bottle with water
Steps to make an earthworm viewer 1 To make a nail-poke, push the head of a nail into a cork. 2 To use the nail-poke, heat the point of the nail over the candle flame. Push the hot poke into the
plastic bottle to make drainage holes. 3 Cut the top 10 cm off the 2 L plastic bottle and poke a ring of drainage holes about 2 cm from the
bottom. Place on tray or saucer to catch drained liquid. 4 Half fill the 500 mL plastic bottle with water and stand it inside the 2 L bottle. 5 Put a layer of gravel into the space between the two bottles up to the drainage holes. 6 Arrange the soil and sand in 2 cm layers until the bottle is almost full, starting and finishing with a soil
layer. Moisten each layer with water from the spray bottle. 7 On the outside of the bottle, mark the layers with a marking pen. 8 Add a layer of grass clippings and chopped up dead leaves. Moisten the layer with the spray bottle.
Equipment
Where to poke holes in the earthworm viewer
Completed earthworm viewer
Copyright © Australian Academy of Science, 2020.

25
Lesson 3 Slimy snails
Lesson 3 Slimy snails
EX
PLO
RE
Lesson focusThe Explore phase is designed to provide students with hands-on experiences of the science phenomenon. Students explore ideas, collect evidence, discuss their observations and keep records such as science journal entries. The Explore phase ensures all students have a shared experience that can be discussed and explained in the Explain phase.
Assessment focusFormative assessment is an ongoing aspect of the Explore phase. It involves monitoring students’ developing understanding and giving feedback that extends their learning. In this lesson you will monitor students’ developing understanding of:• the external features of a snail and how a snail’s habitat meets its needs, and how
science involves asking questions. You will also monitor their developing understandingof science inquiry skills (see page xi).
AT A GLANCE
To provide students with hands-on, shared experiences of the features, behaviour and habitat of snails.
Session 1 Snail surprises
Students:
• use an ideas map to show what they think they know about snails• work in teams to observe and draw snails• observe and record how snails move and eat.
Session 2 Snail shack (optional)
Students:
• construct a snail habitat• keep observation records about snails and their habitat.

26 Lesson 3 Slimy snails
PrimaryConnections E
XP
LOR
E
Key lesson outcomesScience
Students will be able to:
• observe and draw details of a snail’sexternal structure
• observe and describe the movement andfeeding of a snail
• identify features of snails that allow themto breathe, feed, move and protectthemselves in the yard
• optional: construct a snail habitat.
LiteracyStudents will be able to:
• use oral, written and visual languageto report observations of the features,function and habitat of a snail
• identify the purpose and features of anideas map
• identify the purpose and features of alabelled diagram
• record information as a labelled diagram• answer questions about snails.
This lesson also provides opportunities to monitor the development of students’ general capabilities (highlighted through icons, see page xii).
Teacher background information
About snailsSnails are gastropods (a specific type of mollusc), which means literally ‘belly-footed animal’. Snails have a large foot and a spiral shell, which protects and camouflages them. There are different types of snails: some live in water (marine and freshwater) and some live on land. In this unit, we are focusing on land snails. Land snails have a breathing hole near the base of their shell, which allows air to enter their lungs.
Land snails have two sets of tentacles on their head. The longer ones have black spots on the ends (their ‘eyes’). These are light sensitive but a snail’s eyesight is very poor so they rely on touch and smell to find food. The short tentacles are sensitive to vibrations.
Land snails are nocturnal animals. In summer, they hide and close up the entrance to their shell with a lid of slime, which dries into a hard skin that keeps predators out and keeps moisture in. This lid of slime has a small hole in it to let in air so that the snail can continue to breathe. They estivate (a period of dormancy like the hibernation of animals in northern hemisphere winters) until the weather becomes more clement.
How they moveSnails use the muscles in their foot to move. These muscles contract in a ripple movement, lifting the snail slightly off the surface it is on and pushing it forward. The push causes the snail’s foot to slide over the ground. To reduce friction, the snail creates a thick layer of slime to glide forward over. The slime is slippery but also sticky, allowing the snail to climb almost any surface. The production of slime requires a lot of water, which is why land snails are more active when it has just rained. This slime is visible when dry on some surfaces, showing a ‘snail track’.

27Lesson 3 Slimy snails
PrimaryConnections Schoolyard safari
EX
PLO
RE
How they eatMost snails are herbivores: they eat plants. They can also eat bits of rock such as limestone, which contains chalk, which they need for making their shells. Instead of teeth, they have a tongue with rough edges called a radula. The uneven edges work like a file to rip food into pieces, carrying the shreds into the snail’s mouth.
How to get a supply of snailsSnails are best collected when they are abundant. They can be stored safely for long periods. Land snails placed in a clean, dry, covered container, for example, a shoebox, will estivate. It is important to keep the humidity low, or they will become active and die. Containers with plastic or metal lids with holes poked in them will be too humid.
To bring snails out of estivation and prepare them for study, gently detach them, dip in water and place on a damp surface. (It can take up to eight hours for the snail to emerge, depending on how long it has been without food and water.) If they are reluctant, they might need to be dipped again. Sometimes leaving damp lettuce or other food and water in the box overnight can coax snails to emerge.
Snails that retreat into their shells during a class lesson can generally be coaxed out again by a brief dip in water.
How to house snailsActive snails can be kept for classroom viewing in a terrarium made from an aquarium, a large, wide-mouthed jar, or a fish bowl. The top should be covered securely with screen or part of a nylon stocking. Lids that have holes punched in them do not allow adequate ventilation and the sharp edges on the interior are a safety risk. Snails ‘chew’ their way out of containers covered with paper. The contents of the terrarium can be an elaborate recreation of a garden environment, or something as sparse as only food and water.
Water can be supplied in a shallow plastic lid, in a deeper dish that contains a water-soaked sponge, or by generously sprinkling lettuce or other fresh leafy food with water. Food can also be put into a shallow plastic lid. Snails are vegetarians and eat many kinds of plant material. Cornmeal, oatmeal and fresh green leaves are all appropriate foods. Chalk, egg shells or snail shells should be powdered and added to the food to provide the calcium necessary for healthy shells.
Cleaning should be done on a regular basis to remove mouldy food, the build-up of mucus and droppings. Overcrowding should be avoided. Too many snails in too small a space or inadequate ventilation can cause the humidity to rise to unacceptable levels and the snails will die.
For further information about how to house snails see the PrimaryConnections website (www.primaryconnections.org.au).
Read the safety information on page xvi about handling snails.

28
PrimaryConnections E
XP
LOR
E
Session 1 Snail surprises
Equipment
FOR THE CLASS FOR EACH TEAM
• class science journal• word wall• team roles chart• team skills chart• ‘Schoolyard safari’ map (see Lesson 1)• ‘Code for caring’ poster (see Lesson 1)• ideas map (see ‘Preparation’)• 2 different coloured marking pens• optional: 1 lettuce head• active snails• 1 shallow container of water in which to dip
reluctant snails
• role wristbands or badges for Managerand Speaker
• each team member’s science journal• 1 snail in a small, clear plastic container• 1 lettuce leaf• oatmeal mix (see ‘Preparation’)• 1 plastic spoon• 1 magnifying glass• gloves• optional: each student’s ‘In my own
backyard’ journal (see Lesson 1)
Preparation• Collect snails well before you want to use them. Read ‘Teacher background
information’ on collecting and keeping snails.
• Read the safety information on page 9 about handling snails.
• Make up some oatmeal mix (two parts oatmeal to one part water).
• Draw an ideas map in the class science journal or on a large sheet of paper (see Lessonstep 4).
Lesson steps1 Review the features, behaviour and habitat of the small animal explored in the
previous lesson.
2 Ask if anyone observed snails in the ‘Schoolyard safari’ area and mark the location on the ‘Schoolyard safari’ map.
Literacy focus
Why do we use an ideas map?We use an ideas map to show our thoughts about a topic.What does an ideas map include?An ideas map includes a title in the centre. Ideas are written around it and arrows are drawn between similar ideas. An ideas map might include pictures and symbols.
Lesson 3 Slimy snails
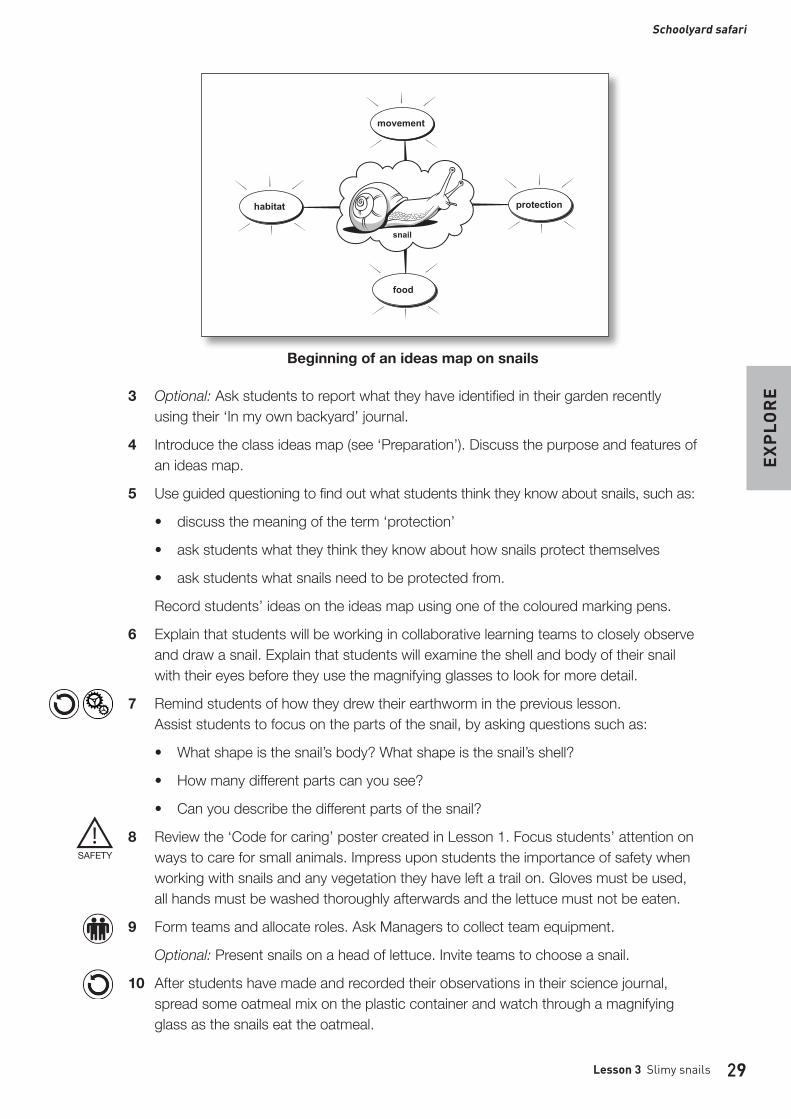
29Lesson 3 Slimy snails
PrimaryConnections Schoolyard safari
EX
PLO
RE3 Optional: Ask students to report what they have identified in their garden recently
using their ‘In my own backyard’ journal.
4 Introduce the class ideas map (see ‘Preparation’). Discuss the purpose and features of an ideas map.
5 Use guided questioning to find out what students think they know about snails, such as:
• discuss the meaning of the term ‘protection’
• ask students what they think they know about how snails protect themselves
• ask students what snails need to be protected from.
Record students’ ideas on the ideas map using one of the coloured marking pens.
6 Explain that students will be working in collaborative learning teams to closely observe and draw a snail. Explain that students will examine the shell and body of their snail with their eyes before they use the magnifying glasses to look for more detail.
7 Remind students of how they drew their earthworm in the previous lesson. Assist students to focus on the parts of the snail, by asking questions such as:
• What shape is the snail’s body? What shape is the snail’s shell?
• How many different parts can you see?
• Can you describe the different parts of the snail?
8 Review the ‘Code for caring’ poster created in Lesson 1. Focus students’ attention on ways to care for small animals. Impress upon students the importance of safety when working with snails and any vegetation they have left a trail on. Gloves must be used, all hands must be washed thoroughly afterwards and the lettuce must not be eaten.
9 Form teams and allocate roles. Ask Managers to collect team equipment.
Optional: Present snails on a head of lettuce. Invite teams to choose a snail.
10 After students have made and recorded their observations in their science journal, spread some oatmeal mix on the plastic container and watch through a magnifying glass as the snails eat the oatmeal.
Beginning of an ideas map on snails

30
PrimaryConnections E
XP
LOR
E
11 Discuss the observations that students have made about the parts of a snail, and ask for suggestions about how the parts of the animal help it move, feed and protect itself in its habitat. Ask questions such as:
• How do snails see?
• How do snails breathe?
• How do snails eat?
• Where do snails usually live (their habitat)?
• How do the parts of the snail help it live in its habitat?
• How do snails find food and water in their habitat?
• How do snails protect themselves from drying out?
• How do snails protect themselves from being eaten?
12 Draw a diagram in the class science journal of a snail and model how to label it. Discuss the purpose and features of a labelled diagram.
Literacy focus
Why do we use a labelled diagram?We use a labelled diagram to show the shape, size and features of an object.What does a labelled diagram include?A labelled diagram might include a title, a drawing, a scale to show the object’s size and labels showing the main features. A line or arrow connects the label to the feature.
Ask students to review their own drawings.
13 Review students’ questions to see if any have been answered.
14 Update the ideas map using the second coloured marking pen. Update the word wall with words and images.
Labelled diagram of a snail
Lesson 3 Slimy snails

31Lesson 3 Slimy snails
PrimaryConnections Schoolyard safari
EX
PLO
RE
Session 2 Snail shack (optional)
Equipment
FOR THE CLASS FOR EACH STUDENT
• class science journal• word wall• ‘Code for caring’ poster (see Lesson 1)• 1 large transparent container with screen lid• gravel• 1 shallow plastic container for water• 1 shallow plastic container for food• 1 piece of cuttlefish (from pet food shop)• pieces of plant material• rocks or pieces of terracotta pot• dark-coloured cloth to cover the container
• science journal
Preparation• Read ‘How to house snails’ in ‘Teacher background information’.
Lesson steps1 Review the information about snails from the previous session.
2 Introduce the ‘Snail shack’ container and ask students what they think is needed to make a good home for snails. Record their ideas in the class science journal.
3 With student help, organise the equipment in the ‘Snail shack’. Add water to the water tray and plant material to the food tray. Wear gloves when placing snails in the container. Remind students of safety precautions when working with snails.
4 Organise a roster of teams to clean the ‘Snail shack’ and care for the snails. Remind students about the ‘Code for caring’ poster created in Lesson 1.
5 Optional: Students track the snails’ movement over time by describing their location at particular times of the day. Tape can be placed on the ‘Snail shack’ to mark top/bottom and left/right to make the description easier.
6 Optional: Organise students into collaborative learning teams and provide teams with the equipment to make a ‘Snail shack’ for their snails.
7 Review students’ questions to see if any have been answered. Update the word wall with words and images.

32 Lesson 3 Slimy snails
PrimaryConnections E
XP
LOR
E
Curriculum linksMathematics
• Students create a 3-D model of an animal in plasticine from a drawing. Discuss thecorrespondence between the shapes, quantities and locations of parts of the animalon the drawing and on the model.
• Students make a series of action drawings and place them in sequence to show howthe snail moves.
Indigenous perspectives
• PrimaryConnections recommends working with Aboriginal and Torres Strait Islandercommunity members to access local and relevant cultural perspectives. Protocolsfor engaging with Aboriginal and Torres Strait Islander community members areprovided in state and territory education guidelines. Links to these are provided on thePrimaryConnections website (www.primaryconnections.org.au).
Snail shack without a lid

33
Lesson 4 Ant antics
Lesson 4 Ant antics
EX
PLO
RE
PrimaryConnections
Lesson focusThe Explore phase is designed to provide students with hands-on experiences of the science phenomenon. Students explore ideas, collect evidence, discuss their observations and keep records such as science journal entries. The Explore phase ensures all students have a shared experience that can be discussed and explained in the Explain phase.
Assessment focusFormative assessment is an ongoing aspect of the Explore phase. It involves monitoring students’ developing understanding and giving feedback that extends their learning. In this lesson you will monitor students’ developing understanding of:• the external features of ants, how ant farms meet the needs of ants and how science
involves asking questions. You will also monitor their developing understanding of science inquiry skills (see page xi).
AT A GLANCE
To provide students with hands-on, shared experiences of the features, behaviour and habitat of ants.
Students:
• record what they think they know about ants
• observe and draw ants
• track the movement of ants in an ant farm
• observe and record information about ants.

34 Lesson 4 Ant antics
PrimaryConnections E
XP
LOR
E
Key lesson outcomesScience
Students will be able to:
• observe and draw details of an ant’sexternal features
• observe and describe ant• movement and communication• make observations about how ants
carry food• identify features of ants that allow
them to breathe, feed, move andprotect themselves.
Literacy
Students will be able to:
• use oral, written and visual languageto report observations of the features,function and habitat of an ant
• contribute to discussions aboutant behaviour
• record observations as a labelled diagram• answer questions about ants.
This lesson also provides opportunities to monitor the development of students’ general capabilities (highlighted through icons, see page xii).
Teacher background information
About antsAnts are arthropods. They live in nests or colonies, with different ants having different roles (castes). Some species have little coordination between their members, whereas others have highly coordinated colonies with all groups working towards the same goal. This social interaction is possible because ants are able to communicate with each other, using their antennae and chemical signals they produce. For example, they can identify intruders.
The worker ants perform all of the work for the colony, including searching for food, nursing the young, constructing the nest and defending the colony. Worker ants are sterile females—generally all sisters.
The males play no role in the colony apart from mating with the future queens. They have wings and copulate with the future queens while flying (the mating flight). They die soon after.
The queen is larger than the worker ants and much larger than the males. She lays all the eggs for the colony. She can lay unfertilised eggs (which develop into males) or fertilised eggs (which develop into females). The fertilised eggs that are fed an average amount of food develop into sterile female workers. Those that are well nourished develop into fertile females.
The fertile females have wings, ready to take flight. They mate with the winged males during a mating flight and acquire a stock of sperm. They then establish a colony as a new queen and lose their wings.

35Lesson 4 Ant antics
PrimaryConnections Schoolyard safari
EX
PLO
RE
Note: This diagram is not intended for student use.
How they moveAdult ants have their skeleton on the ‘outside’—a hard exoskeleton that gives shape to their soft body and provides a structure for their muscles to pull against. They walk on all six legs. They use parts of their jaw—the mandibles—to carry things. The mandibles have many different, specialised shapes depending on the type of ant and its caste. Mandibles can be used to transport food (and sometimes even drops of water), to construct things and to defend the colony.
How they eatForager ants are the worker ants that look for food. They use their compound eyes (eyes made of hundreds of light-sensitive compartments) to look for food. The most important organs for perception—for the senses of touch and smell—are the antennae. When you observe an active ant, its antennae are in almost constant motion: tapping the ground, vegetation, other ants and food sources or ‘smelling’ the air.
Ants can collect food by:
• foraging for plant material
• feeding on dead animals
• hunting insects
• ‘farming’ aphids and other animals that produce honeydew
• cultivating mushrooms by feeding them leaf litter.
Most ants eat a wide variety of plant material, including leaves and seeds, and animal life. Like most animals, they need a balance of carbohydrates and protein.
Labelled diagram of an ant

36
PrimaryConnections E
XP
LOR
E
Ant trailsAnts find their way to sources of food by laying down chemicals called pheromones on the ground. Ants use their antennae to follow the scent trail. The pheromones are more concentrated the closer the trail gets to the nest, so the ants know if they are heading towards the food or away from it. The pheromones disappear gradually when the trail is no longer used.
For further information about ant trails see the PrimaryConnections website. www.primaryconnections.org.au
How to get a supply of antsThe simplest way to collect ants is by hand. Observe an area and, if there are foraging ants, simply follow them back to their colony. Care is needed when collecting ants, for example, by gently using the moistened tip of a paintbrush.
Bait can help attract ants if they are scarce. Try crumbled biscuits, tuna, peanut butter, honey or jam. There are as many types of baits as there are species of ants.
Note: Ensure the ants are sourced from only one colony; otherwise they could attack and injure each other.
Equipment
FOR THE CLASS FOR EACH TEAM
• class science journal• word wall• team roles chart• team skills chart• ‘Schoolyard safari’ map (see Lesson 1)• ‘Code for caring’ poster (see Lesson 1)• ants• honey• 1 flat ring of cardboard—about 20 cm in
diameter and 5–6 cm wide (see Lessonstep 7)
• optional: digital or video camera• optional: ant farm
• role wristbands or badges for Managerand Speaker
• each team member’s science journal• 1 ant in a clear plastic container• 1 magnifying glass• cake crumbs• gloves for each team member• optional: each student’s ‘In my own
backyard’ journal (see Lesson 1)
Preparation• Locate an ant colony where students can observe the comings and goings of ants.
• Collect enough ants for each team to have one ant for observation (see ‘Teacherbackground information’ for strategies to collect ants). Place one ant in each clearplastic container.
Optional: Students collect their own ant in teams.
Lesson 4 Ant antics

37Lesson 4 Ant antics
PrimaryConnections Schoolyard safari
EX
PLO
RE
Lesson steps1 Review the features, behaviour and habitat of the small animals explored in the
previous lessons.
2 Ask if anyone observed ants in the ‘Schoolyard safari’ area and mark the location on the ‘Schoolyard safari’ map.
Optional: Ask students to report what they have identified in their garden recently using their ‘In my own backyard’ journal.
3 Ask students what they think they know about ants and record their answers in the class science journal.
4 Explain that students will observe ants in the playground to learn about their features and behaviour. Remind students about the ‘Code for caring’ poster (see Lesson 1).
Warn students that ants can bite and sting so they must wear gloves.
5 Organise students so that they can observe an ant trail. Ask questions such as:
• In which direction are the ants walking?
• What happens when ants meet?
• Can you see an ant carrying anything?
• What happens when an ant comes to a large object?
If there is no ant trail, place honey on the ground about a metre away from the colony and wait. Ants are most active during the hottest part of the day.
6 Ask students to predict what would happen if the ant trail was disrupted, and explain why. Place the ring of cardboard around the source of food the ants are carrying back to the nest (or around the nest). Be careful not to squash the ants. Ask students to observe what happens.
Note: The ants will initially walk in all directions instead of heading for the food because the cardboard has disrupted their scent trail.
7 Return to the classroom and record students’ observations in the class science journal. Ask students why the ants behaved the way they did when they came to the cardboard.
8 Explain that students will be working in collaborative learning teams to closely observe and draw an ant. Review students’ detailed and labelled drawings of other small animals and the purpose and features of a labelled diagram.
Disruption of an ant trail with a cardboard circle

38
PrimaryConnections E
XP
LOR
E
9 Form teams and allocate roles. Ask Managers to collect team equipment.
10 Assist students to make accurate observations, asking questions such as:
• How many body parts does the ant have?
• How many legs?
• Where are the legs attached?
• How long are its antennae compared to its body?
11 Add a few cake crumbs to the students’ containers and ask questions such as:
• What did the ants do with the crumbs?
• What body parts do they use to carry or eat crumbs?
• What did you observe about the size of the crumbs compared with the size ofthe ant?
12 Ask students to draw a labelled diagram of their ant in their science journal.
Optional: Assist students with their observations using photographs taken with the digital camera.
13 Update what students know about ants in the class science journal.
Optional: Bring the class together and show them the ant farm. Ask students what they think will happen if they put their ants in the ant farm. Put each team’s ants into the ant farm.
Ant farm with ants’ tunnels in the sand
Lesson 4 Ant antics

39Lesson 4 Ant antics
PrimaryConnections Schoolyard safari
EX
PLO
RE
14 Discuss the observations that students have made about the parts of an ant, and ask for suggestions about how the parts of the animal help it move, feed and protect itself in its habitat. Ask questions such as:
• What do ants use their antennae for?
• How do ants eat?
• How do ants carry their food?
• Where do ants usually live (their habitat)?
• How do the parts of the ant help it live in its habitat?
• How do ants find food and water in their habitat?
• How do ants protect themselves from drying out?
• How do ants protect themselves from being eaten?
15 Review students’ questions to see if any have been answered. Update the word wall with words and images.
Curriculum linksMathematics
• Students work in pairs to make and record their own tracks in sand or soil. One studentmakes tracks and one student records. Ask them to compare physically how trackslook when someone changes direction or travels more quickly.
Studies of society and environment
• Students find out about the social structure of an ant colony and compare it with honey bees.
Indigenous perspectives
Various kinds of ants are used by some Indigenous people either as bush tucker or bush medicine. The honeypot ant (Melophoris inflatus) is found in Central Australia and stores honey in its stomach. Digging sticks are used to dig the ant from deep within the ground. The swollen honey-filled stomach of the ant is regarded as a delicacy.
• Watch the videoclip, Honey Ant.See https://aso.gov.au/titles/documentaries/living-country/clip3/
• Find images of a honeypot ant and create an annotated drawing usingIndigenous symbols. See http://www.aboriginalartstore.com.au/aboriginal-art-culture/aboriginal-symbols-glossary/Green tree ants (Oecophylla smaragdina) are found throughout northern Australia and areused as bush medicine.
• In consultation with local Indigenous community members and/or Indigenous educationsofficers, discuss Indigenous people’s use of green ants for medicinal purposes.
• PrimaryConnections recommends working with Aboriginal and Torres Strait Islandercommunity members to access local and relevant cultural perspectives. Protocolsfor engaging with Aboriginal and Torres Strait Islander community members are provided instate and territory education guidelines. Links to these are provided on thePrimaryConnections website (www.primaryconnections.org.au).

PrimaryConnections
40 Lesson 5 Same or different?
EX
PLA
IN
Lesson 5 Same or different?
Lesson focusIn the Explain phase students develop a literacy product to represent their developing understanding. They discuss and identify patterns and relationships within their observations. Students consider the current views of scientists and deepen their own understanding.
Assessment focusFormative assessment is an ongoing aspect of the Explain phase. It involves monitoring students’ developing understanding and giving feedback that extends their learning. In this lesson you will monitor students’ developing understanding of:• the external features of two small animals, how animals live in places where their
needs are met, and how science involves asking questions. You will also monitor theirdeveloping understanding of science inquiry skills (see page xi).
You are also able to look for evidence of students’ use of appropriate ways to represent what they know and understand about the external features of small animals and how they live in places that meet their needs, and give them feedback on their representations.
AT A GLANCE
To support students to represent and explain their understanding and observations about the similarities and differences between small animals.
To introduce current scientific views about how living things, such as small animals, have a variety of external features and live in different places where their needs are met.
Session 1 Comparing creatures
Students:
• work in teams to compare two small animals• as a class, develop a table that summarises information• read factual texts about small animals.
Session 2 Animated animals (optional)
Students:
• view an animated film about ants• consider how small animals are represented in animated films• compare their understanding of small animals with those in the film.

41Lesson 5 Same or different?
PrimaryConnections Schoolyard safari
EX
PLA
IN
Key lesson outcomesScienceStudents will be able to:• describe the features and behaviour of a
small animal• compare two small animals and
make conclusions about similaritiesand differences.
LiteracyStudents will be able to:• use a variety of resources to find current
scientific information about a small animal• record information in a table• use drawings and language to compare
two small animals• use scientific vocabulary appropriately in
their writing and talking.
This lesson also provides opportunities to monitor the development of students’ general capabilities (highlighted through icons, see page xii).
Session 1 Comparing creatures
Equipment
FOR THE CLASS FOR EACH TEAM
• class science journal• word wall• team roles chart• team skills chart• 1 enlarged copy of ‘Small animal
description’ (Resource sheet 4)• multi-modal factual texts about the animals
used in the Explore phase(see PrimaryConnections websitefor suggestions)
• optional: Life in the Undergrowth Episode 1,‘Invasion of the Land’, and Episode 5,‘Supersocieties’ (David Attenborough, 2006,BBC Worldwide Ltd)
• role wristbands or badges for Managerand Speaker
• each team member’s science journal• 2 copies of ‘Small animal description’
(Resource sheet 4)• each team member’s science journal• optional: each student’s ‘In my own
backyard’ journal (see Lesson 1)

42 Lesson 5 Same or different?
PrimaryConnections E
XP
LAIN
Preparation• Note: This lesson is about snails and ants. If you have not studied these animals, adjust
the lesson to focus on the animals you have explored.
• Optional: View Life in the Undergrowth (David Attenborough, 2006, BBC Worldwide Ltd)to check that the language is appropriate for your class, and to familiarise yourself withits information.
Episode 1, ‘Invasion of the Land’:
– 0–1.11 min is an introductory piece on snails
– 1.43–1.52 min and 2.16–2.43 min is footage of ants
– 12.05–15.21 min is about snails
– 31.05–32.11 min is about earthworms
– 33.05–35.15 min is about the giant earthworms of Gippsland.
Episode 5, ‘Supersocieties’:
– 17.52–37.19 is about different ant societies in different environments.
Lesson steps1 Review what students now know about earthworms, snails and ants.
2 Optional: Ask students to report on what they have identified in their garden recently using their ‘In my own backyard’ journal.
3 Explain that students will be working in collaborative learning teams to find out what is the same and what is different about snails and ants.
4 Explain that each student will research one animal using factual texts. Introduce the texts and discuss the purpose and features of such texts.
Literacy focus
Why do we use a factual text?We use a factual text to inform, teach or persuade someone reading it. We can read a factual text to collect information.What does a factual text include?A factual text includes a title, text and pictures. It might include labels, diagrams, maps and photographs.
5 Introduce the enlarged copy of ‘Small animal description’ (Resource sheet 4). Explain that each team member will record information about the animal they are researching on their ‘Small animal description’ (Resource sheet 4).
6 Form teams and allocate roles. Ask Managers to collect the resource sheets.
7 Allow students time to read texts and gather information.

43Lesson 5 Same or different?
PrimaryConnections Schoolyard safari
EX
PLA
IN
8 Ask students to share their ‘Small animal description’ (Resource sheet 4) in their teams, to find similarities and differences between the two animals. For example, students can record similarities and differences in their science journal.
9 Assist students to provide peer assessment of each others’ representations.
10 Discuss the similarity and difference of the animals as a class, asking Speakers to share their team’s conclusions. Record information in the class science journal.
11 Optional: View Life in the Undergrowth Episodes 1, ‘Invasion of the Land’, and 5, ‘Supersocieties’, pausing to discuss what students have seen (see ‘Preparation’).
12 Review students’ questions to see if any have been answered. Update the word wall with words and images.

Resource sheet 4
Schoolyard safari
Small animal description
Name: _________________________________________ Date:________________
My animal is a
A labelled drawing of my animal:
It has __________ legs.
It moves by_____________________________________________________________________________
It eats_____________________________________________________________________________
It eats by_____________________________________________________________________________
It lives_____________________________________________________________________________
because_____________________________________________________________________________
It protects itself by_____________________________________________________________________________
Copyright © Australian Academy of Science, 2020.

45Lesson 5 Same or different?
Schoolyard safari
EX
PLA
IN
Session 2 Animated animals (optional)
Teacher background informationStudents view many books, pictures, films and other literacy products in which animal characters take on the features of humans—such as speaking, walking upright, wearing clothes and showing emotion.
This can influence students’ conceptual understanding of the features, behaviour and habitat of small animals. For example, the book A worm’s eye view … the history of the world by Caren Trafford (2001, Etram, ISBN 0646415883) contains valuable information about earthworms, but the illustrations show earthworms with eyes, wearing hats and sitting on sofas. Such publications provide an opportunity for students to think critically about the text, audience and purpose by contrasting these anomalies with scientists’ views about earthworms.
Viewing the following animated films about ants could provide an opportunity to develop visual and critical literacy as well as help develop conceptual understanding. It is also a tool for formative assessment as students express their conceptual understanding.
Each film is set in and around an ant colony, so students need to have completed Lesson 4: Ant antics.
• The Ant Bully (G rating)
• A Bug’s Life (G rating)
• ANTZ (PG rating)
This lesson uses the film A Bug’s Life as an example.
Equipment
FOR THE CLASS FOR EACH STUDENT
• class science journal• word wall• A Bug’s Life DVD or video• DVD or video player with ‘Pause’ control
• science journal
Preparation• Select and preview the literacy product. If selecting a film, consider showing a segment.
For example, the opening scene of A Bug’s Life includes a number of things consistentwith the scientists’ view:
– an ant hill surrounded by soil that has been dug out of the colony
– ants that are dwarfed by the surrounding undergrowth
– ants carrying heavy loads
46
PrimaryConnections E
XP
LAIN
– an ant caring for an aphid.
It also includes things that are not consistent with the scientists’ view:
– ants walking upright with two legs and two arms
– ants carrying food with arms or driving a machine.
Lesson steps1 Review previous lessons and discuss what students know about the features,
behaviour and habitat of ants.
2 Ask students if they have seen A Bug’s Life or a similar film. Discuss animated films, drawing attention to the way characters are given human traits.
3 Explain that students will spot the similarities and differences between ‘real ants’ and ‘film ants’.
4 Show the segment of the film without stopping it so that students have an overall understanding of the setting and characters. Ask questions such as:
• What is happening in the film?
• What have you seen so far?
• Where is the action taking place?
• Was there anything that puzzled you in the film?
• How is the film like the real world?
5 Show the segment of the film for a second time. Guide the viewing by pausing and discussing similarities and differences between ‘real ants’ and ‘film ants’, such as:
• The ants in the film are carrying food with their arms. Do real ants have arms?What do they carry food with?
• The ants in the film are talking to each other. Do real ants talk? How do theycommunicate with each other?
Write students’ responses under the headings ‘Same’, ‘Different’ or ‘Not sure’ in the class science journal. Remind students to refer to information in their science journals when considering their responses.
6 Draw conclusions about the similarities and differences. Ask questions such as:
• How are cartoon ants and real ants the same and different?
• What have you learned about the features of real ants and cartoon ants?
• Does it matter if the ants in the film don’t have the same features as real ants?Why do you think that?
• Why do you think the film-makers show ants like this?
7 Review students’ questions to see if any have been answered. Update the word wall with words and images.
Lesson 5 Same or different?

47Lesson 5 Same or different?
PrimaryConnections Schoolyard safari
EX
PLA
IN
Curriculum linksIndigenous perspectives
• Contact the local Indigenous Land Council or cultural heritage centre to make contactwith local Indigenous community members. Invite them to visit the class and talk aboutinsects and their uses in the community. Include local Indigenous language for insectsas well as English common names on the word wall.
• PrimaryConnections recommends working with Aboriginal and Torres Strait Islandercommunity members to access local and relevant cultural perspectives. Protocolsfor engaging with Aboriginal and Torres Strait Islander community members areprovided in state and territory education guidelines. Links to these are provided on thePrimaryConnections website (www.primaryconnections.org.au).
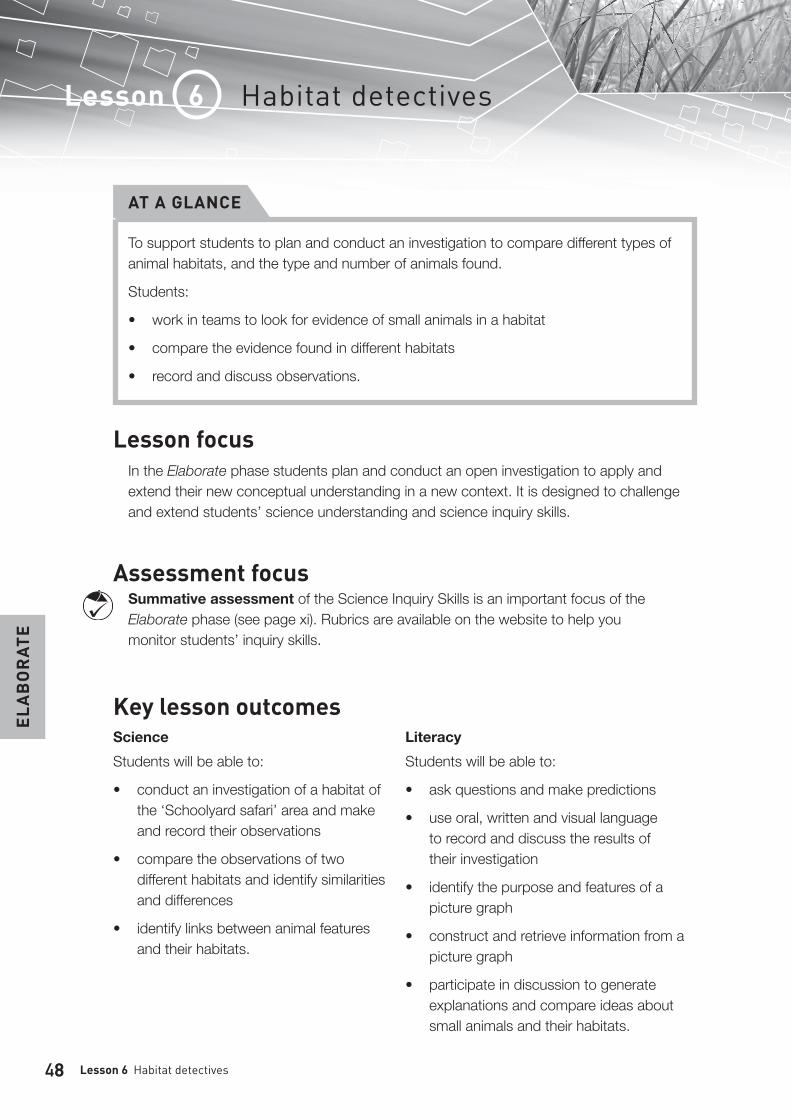
PrimaryConnections
48 Lesson 6 Habitat detectives
ELA
BO
RAT
E
Lesson 6 Habitat detectives
Lesson focusIn the Elaborate phase students plan and conduct an open investigation to apply and extend their new conceptual understanding in a new context. It is designed to challenge and extend students’ science understanding and science inquiry skills.
Assessment focusSummative assessment of the Science Inquiry Skills is an important focus of the Elaborate phase (see page xi). Rubrics are available on the website to help you monitor students’ inquiry skills.
Key lesson outcomesScienceStudents will be able to:
• conduct an investigation of a habitat ofthe ‘Schoolyard safari’ area and makeand record their observations
• compare the observations of twodifferent habitats and identify similaritiesand differences
• identify links between animal featuresand their habitats.
LiteracyStudents will be able to:
• ask questions and make predictions
• use oral, written and visual languageto record and discuss the results oftheir investigation
• identify the purpose and features of apicture graph
• construct and retrieve information from apicture graph
• participate in discussion to generateexplanations and compare ideas aboutsmall animals and their habitats.
AT A GLANCE
To support students to plan and conduct an investigation to compare different types of animal habitats, and the type and number of animals found.
Students:
• work in teams to look for evidence of small animals in a habitat
• compare the evidence found in different habitats
• record and discuss observations.

49Lesson 6 Habitat detectives
PrimaryConnections Schoolyard safari
ELA
BO
RAT
E
This lesson also provides opportunities to monitor the development of students’ general capabilities (highlighted through icons, see page xii).
Teacher background information
Comparative or descriptive studies typical of field biologyThe number, diversity and behaviour of animals in a particular habitat all vary depending on the local conditions, time of day and season. Field biologists therefore make a wide range of observations and record this information carefully because observations made at a single moment in time cannot be replicated.
Geography, habitat and climate are important for understanding the distribution of species; therefore, field biologists record a wealth of information, such as:
• date (time of year) of sampling
• time of day sample was found
• temperature, humidity, barometer readings and wind direction
• exactly where an animal was found
• size and detailed description of animal
• identification of the animal if possible, and reasoning
• other things that could be relevant, such as the surroundings of the sample site (Next toa road? Next to a forest?), and important recent biological/natural changes (Invasion by apest? Recent drought?).
Establishing the biodiversity of an area takes many repeated observations, at different times of day and year. By repeating observations, scientists can check the consistency of the results and can then make judgments about the trustworthiness of the findings.
When comparing sites, there are many different methods that are used. A common method when contrasting two environments is to examine several plots of the same size selected at random in each environment. The plots are examined using quadrants, which are square frames that define a set surface within the area. This allows the scientists to have an idea of the relative concentration of species.
Links between structure, function and habitatLiving things adapt to the constraints of the environment in which they live. The availability of resources such as water and food, and the presence of predators, affect an animal’s chances of survival and reproduction. The structures of the animals are suited to the functions that have to be performed for survival in a particular habitat. For example, different appendages enable efficient movement through the habitat to obtain food and avoid predators.
Different animals have adapted in different ways to the same environments. For example, underground dwellers can live with little light in an environment that is difficult to move in. Some underground dwellers have claws for digging through the soil, others eat their way through, and others excavate it to form chambers. Those that live almost exclusively underground don’t have good eyesight; those that foray out retain good eyesight.

50 Lesson 6 Habitat detectives
PrimaryConnections E
LAB
OR
ATE
Predators are part of the environment an animal adapts to. Different adaptations include:
• hiding, for example, earthworms burrow away from light
• protection, for example, snails have a hard shell
• defence, for example, ants can produce formic acid, and defend their colony aggressively.
Sometimes animals are found in habitats in which they did not evolve. For example, pigeons inhabit enclosed spaces such as railway stations. Animals that have changed habitats recently could retain adaptations from their old habitat, which might or might not help them to survive in the new habitat.
Equipment
FOR THE CLASS FOR EACH TEAM
• class science journal• word wall• team roles chart• team skills chart• class ‘Schoolyard safari’ map (see Lesson 1)• ‘Code for caring’ poster (see Lesson 1)• 1 enlarged copy of ‘Investigation record’
(Resource sheet 5)• 1 sheet of butcher’s paper with a horizontal
axis labelled ‘Type of small animal’ and avertical axis labelled ‘Number of small animals’
• role wristbands or badges for Managerand Speaker
• each team member’s science journal• 1 copy of ‘Investigation record’ (Resource
sheet 5)• gloves for each team member• large hoops or skipping rope (see Lesson
step 7)• 1 magnifying glass• 1 sheet of butcher’s paper (as for class)• small, same sized pieces of paper (see
Lesson step 11)• optional: 1 clipboard• optional: each student’s ‘In my own
backyard’ journal (see Lesson 1, Session 2)
Preparation• Be aware of allergies that students might have, for example, to plants. Students might
also suffer from allergies to different substances and detergents as well as the latexused in disposable gloves.
• Read ‘How to construct and use a graph’ (Appendix 4).
• Identify a number of different habitats for investigation, such as: pond, oval, garden,compost heap or school vegetable patch.
• Decide on the size of the area that each collaborative team will analyse, for example,the size of two large hoops. The larger the area, the more chance of finding smallanimals but the longer it will take to investigate.
• Allocate collaborative learning teams to each of the areas. It might be necessary toallocate more than one team to each habitat.
• Organise an older class, or adults, to help groups investigate the different habitats.

51Lesson 6 Habitat detectives
PrimaryConnections Schoolyard safari
ELA
BO
RAT
E
• On the class and each group’s piece of butcher’s paper draw a horizontal axis labelled‘Type of small animals’ and a vertical axis labelled ‘Number of small animals’. Includethe heading for each team’s graph ‘Number of small animals in [name of area] habitat’.
Lesson steps1 Review the walk in Lesson 1, to the ‘Schoolyard safari’ area using the class ‘Schoolyard
safari’ map and identify the areas the class observed and the number of animals recorded.
Optional: Ask students to report what they have identified in their garden recently using their ‘In my own backyard’ journal.
2 Indicate the asphalt and ask if you would find a fish there. Ask students to explain their answers, for example, ‘I don’t think you would find a fish there because fish die when they are out of water’. Explore the reasons why animals live in particular habitats by asking:
• Would you find a worm in the ground? Why do you think that?
• Would you find a snail in the ground? Why do you think that?
• What sort of animal might you find in water?
• What sort of animal might you find in the desert?
3 Explain that students will be working in collaborative learning teams to investigate the different types and number of small animals in different habitats in the ‘Schoolyard safari’ area.
4 Discuss the investigation and record in the class science journal student’s responses to questions such as:
• How will the habitats be different?
• What differences might there be in the animals found in the different habitats?
• How can you make the comparison fair? (For example, use the hoops to makesure they observe the same amount of space at each site.)
• What if team A counted animals in one hoop and team B counted animals infour hoops?
• What if there are too many small animals to count (see Lesson step 6)?
5 Introduce the enlarged copy of ‘Investigation record’ (Resource sheet 5). Explain how students will complete the boxes using words and sketches to record their findings. Explain that they will count how many of each small animal they find, however, after a certain number (for example, 20) they should stop counting and write ‘lots’. They can then concentrate on looking for evidence of other small animals.
Optional: If the habitats being investigated have mainly ants, you might like to encourage the students to look at the different kinds of ants.
6 Review the ‘Code for caring’ poster created in Lesson 1.
Remind students to wear gloves and not to pick up small animals with their fingers as some of them can sting and bite.
7 Form teams and allocate roles. Assign teams to habitats. Allocate an older helper to each team. Ask Managers to collect team equipment.

PrimaryConnections E
LAB
OR
ATE
8 Allow teams time to investigate their designated habitat and make notes and sketches on their ‘Investigation record’ (Resource sheet 5).
9 On returning to the classroom, discuss the investigation using questions such as:
• Describe the habitat you studied. Did it have shade? Did it have water?
• Which small animals did you find lots of? Why were there so many?
• Did you find evidence of any other small animals?
• Did you find any tracks of small animals? Were they easy to follow?
10 Discuss how to organise information on a graph: the horizontal axis is used to plot the types of animals while the vertical axis is used to plot the number of animals. Discuss the purpose and features of a graph.
Literacy focus
Why do we use a graph?We use a graph to organise information so we can look for patterns. We use different types of graphs, such as picture, column, or line graphs, for different purposes.What does a graph include?A graph includes a title, axes with labels and the units of measurement.
Model how to create a picture graph using small pieces of paper that are the same size. On each piece draw a picture of an animal that has been counted. Arrange the pictures in columns to match each animal.
11 Remind students that once they counted up to 20 animals they stopped counting and wrote ‘lots’. Discuss how to represent that on the graph, such as, writing ‘more than 20’ as the last line of the vertical axis or writing ‘more’ or ‘lots’ above the column of pictures.
12 Allow time for each group to complete a graph of their information.
Optional: Suggest students write under the graph a description of the habitat they investigated.
Optional: Ask older helpers associated with each group to assist the students with the graphing process.
13 Display the graphs. Ask students to identify how the graphs are similar and how the graphs are different. Ask questions such as:
• How many ants were in the playground?Near the pond? In the garden?On the asphalt?
• Which habitat had the most snails?
• Why were there no worms on the asphalt?
14 Record observations in the class science journal, asking questions such as:
Sample of a picture graph
Lesson 6 Habitat detectives52

553Lesson 6 Habitat detectives
PrimaryConnections Schoolyard safari
ELA
BO
RAT
E
• Are the small animals where we expected them to be? Why or why not?
• What features do the animals that live in the pond have in common?
• What type of animal did we find the most of in our ‘Schoolyard safari’ area?Why do you think that is the case?
• Why did we find lots of snails in this area but not that area?
• Why didn’t we find ants in that area?
Encourage students to make links between the types of habitats and the features of the animals that are found there and how that contributes to meeting their needs.
15 Review students’ questions to see if any have been answered. Update the word wall with words and images.
Curriculum linksScience
• Use fair testing to investigate which foods and habitats small animals prefer.
• Invite an entomologist or curator to talk to students about how researchers collectsmall animals including invertebrates.
Indigenous perspectives
• Ask a local Indigenous community member and/or Indigenous education officer withlocal knowledge to take students for a bush tucker walk. Observe insects and smallanimals that could be used as a food source.
• PrimaryConnections recommends working with Aboriginal and Torres Strait Islandercommunity members to access local and relevant cultural perspectives. Protocolsfor engaging with Aboriginal and Torres Strait Islander community members areprovided in state and territory education guidelines. Links to these are provided on thePrimaryConnections website (www.primaryconnections.org.au).
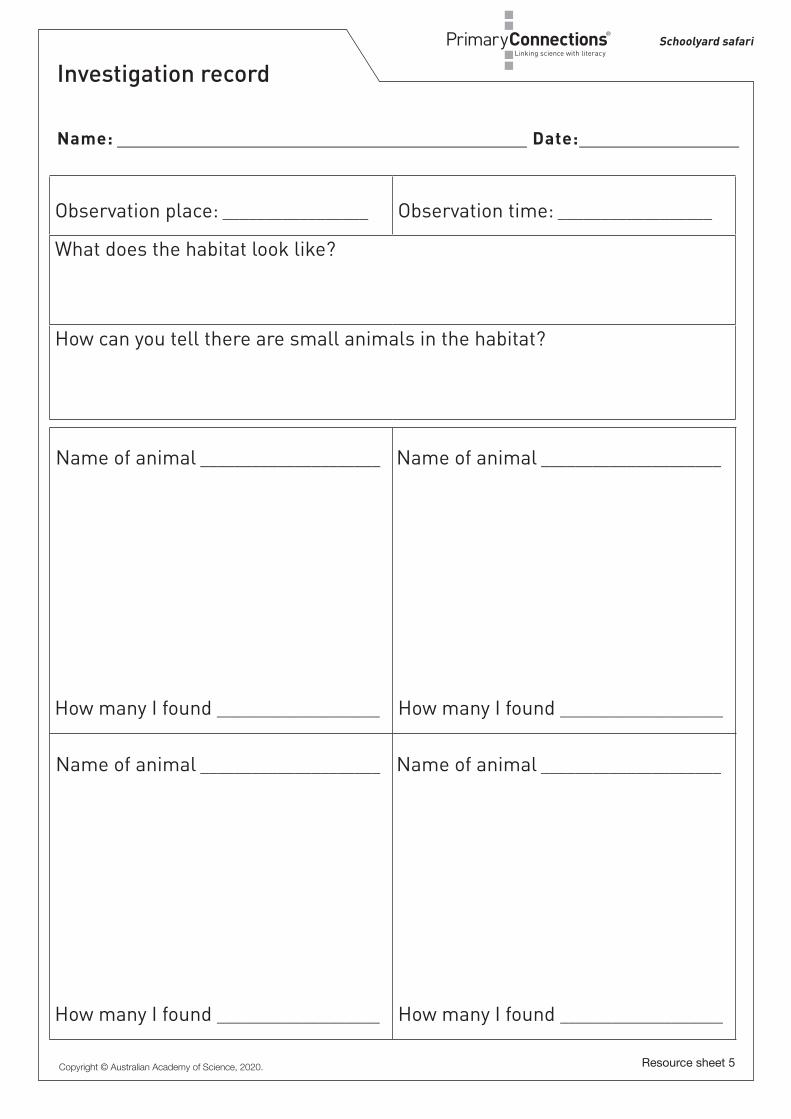
Resource sheet 5
Schoolyard safari
Investigation record
Name: _________________________________________ Date:________________
Observation place: _________________ Observation time: __________________
What does the habitat look like?
How can you tell there are small animals in the habitat?
How many I found ___________________ How many I found ___________________
How many I found ___________________ How many I found ___________________
Name of animal _____________________ Name of animal _____________________
Name of animal _____________________ Name of animal _____________________
Copyright © Australian Academy of Science, 2020.

55Lesson 7 Hidden in their habitat
EVA
LUAT
E
Lesson 7 Hidden in their habitat
Lesson focusIn the Evaluate phase students reflect on their learning journey and create a literacy product to re-represent their conceptual understanding.
Assessment focusSummative assessment of the Science Understanding descriptions is an important aspect of the Evaluate phase. In this lesson you will be looking for evidence of the extent to which students understand that:
• living things, such as small animals, have a variety of external features and live indifferent places where their needs are met.
Literacy products in this lesson provide useful work samples for assessment using the rubrics provided on the PrimaryConnections website.
AT A GLANCE
To provide opportunities for students to represent what they know about how living things, such as small animals, have a variety of external features and live in different places where their needs are met, and to reflect on their learning during the unit.
Students:
• construct a class ‘What am I?’ book of the small animals found in the ‘Schoolyardsafari’ area
• participate in a role-play
• reflect on their learning during the unit.

56 Lesson 7 Hidden in their habitat
PrimaryConnections E
VALU
ATE
Key lesson outcomesScienceStudents will be able to:
• identify the features of small animals forfeeding, movement and protection
• describe the habitat of small animals
• identify the ways small animals dependon their habitat for survival.
LiteracyStudents will be able to:
• ask questions and make predictions
• use oral, written and visual languageto record and discuss the results oftheir investigation
• identify the purpose and features of apicture graph
• construct and retrieve information from apicture graph
• participate in discussion to generateexplanations and compare ideas aboutsmall animals and their habitats.
This lesson also provides opportunities to monitor the development of students’ general capabilities (highlighted through icons, see page xii).
Equipment
FOR THE CLASS FOR EACH STUDENT
• class science journal• word wall• class ‘Schoolyard safari’ map from Lesson 1• class displays, charts and tables• 1 book entitled ‘What am I?’ (see ‘Preparation’)• optional: copy of Leaf Litter (Rachel Tonkin,
2006, Harper Collins) or similar book withlift-up flaps
• science journal• 1 copy of ‘What am I?’ (Resource sheet 6)• paper to make lift-up flaps• paper strip with name of small animal• optional: ‘In my own backyard’ journal
(see Lesson 1)

57Lesson 7 Hidden in their habitat
PrimaryConnections Schoolyard safari
EVA
LUAT
E
Preparation• Prepare a blank, class ‘What am I?’ book for students to glue their ‘What am I?’
(Resource sheet 6) into.
• Write the names of small animals on paper strips. Include all animals that have beenobserved in the ‘Schoolyard safari’ area. Place in a container.
• Organise props for the role-play (see Lesson step 4).
• Optional: Organise the class into groups of four (combine two collaborative learning teams)for a role-play activity.
• Cut out shapes to act as flaps over the square drawing space of the copies of‘What am I?’ (Resource sheet 6).
Optional: Use A3 paper to prepare a large blank, class ‘What am I?’ book for studentsto glue their ‘What am I?’ (Resource sheet 6) into.
Lesson steps1 Review literacy products from the unit such as the class science journal, the word wall,
the class ‘Schoolyard safari’ map and tables.
Optional: Students make a final presentation on what they found in their backyard using their ‘In my own backyard’ journal. In a class discussion, compare this information with what they found in the schoolyard.
2 Remind students about the role-play they performed at the start of the unit.
3 Explain that each student will role-play a small animal. Ask each student to select the name of the animal they will role-play from a container (see ‘Preparation’). The other students will try to guess which animal they are depicting and what they think the animal is doing.
Ask students to make a statement before they guess the name of the animal, such as:
• You have protected your body with a box and are hiding under it. I think you are asnail protecting yourself with your shell.
• You have tied a cloth around your body and are sliding on the ground. I think youare an earthworm moving through the ground and the cloth is the saddle.
4 Explain that each student is going to make a page about a small animal of their choice for a class book called ‘What am I?’.
Optional: Read from a text such as Leaf Litter and show how the author has used the lift-up flaps to hide the small animals in their habitat.
5 Introduce the enlarged copy of ‘What am I?’ (Resource sheet 6). Explain that students will fill in the sentences to give clues to the reader, and draw a labelled diagram of the small animal in the box. Model creating a flap that covers the picture. Ask students to represent the small animal’s habitat on the outside of the flap.
6 Allow time for students to complete their copy of ‘What am I?’ (Resource sheet 6). Encourage students to use their science journals, their drawings and diagrams and their investigation record to provide accurate information.

PrimaryConnections E
VALU
ATE
7 Ask students to share their completed sheets with each other. Collect them for the class ‘What am I?’ book. Read the book as a class and add it to the class reading area.
Optional: Create a simple ‘Blabberize’ animation about a small creature studied as part of the unit. http://blabberize.com/
For example: ‘Animal reports using Blabberize’ at http://stasbookreviews.blogspot.com.au/
8 Ask students to reflect on what they have learned and what has helped them to learn during the unit. Ask questions such as:
• What new things have you learnt about small animals?
• Why do small animals live where they do?
• What features help them to survive?
• What are you still wondering about?
• What activities helped you learn new things?
Record the students’ ideas in the class science journal.
9 Review students’ experiences of working in a collaborative learning team and performing in role-plays in this unit.
10 Optional: Ask students to share their new knowledge with a wider audience, such as:
• send a letter or email to another class
• take digital photos for display
• invite parents to view students’ work
• roster students to take the ‘What am I?’ book home
• invite a local newspaper to report on the unit.
Student work sample of ‘What am I?’ (Resource sheet 6)
Lesson 7 Hidden in their habitat58

59Lesson 7 Hidden in their habitat
PrimaryConnections Schoolyard safari
EVA
LUAT
E
Curriculum linksScience
Students create an imaginary animal and consider its habitat. They consider movement, defence and environment and write a report to demonstrate how the animal’s features assist it to live in its environment.
The ArtsCreate a diorama of a landscape view of the ‘Schoolyard safari’ area. Students draw a small animal on the inside of a folded piece of paper and its habitat on the outside flap. Students place their drawing in the diorama.
Indigenous perspectives• PrimaryConnections recommends working with Aboriginal and Torres Strait Islander
community members to access local and relevant cultural perspectives. Protocolsfor engaging with Aboriginal and Torres Strait Islander community members areprovided in state and territory education guidelines. Links to these are provided on thePrimaryConnections website (www.primaryconnections.org.au).

Resource sheet 6
Schoolyard safari
What am I?
Name: _________________________________________ Date:________________
I have _________ legs.
I move by _________________________________________________________________
I eat ______________________________________________________________________
When I eat I ______________________________________________________________
I live in ___________________________________________________________________
I protect myself by ________________________________________________________
I am a ______________________________________________________________
Glue flap here
Copyright © Australian Academy of Science, 2020.

61Appendix 1
Schoolyard safari
Appendix 1 How to organise cooperative learning teams (Foundation–Year 1)
IntroductionStudents working in collaborative teams is a key feature of the PrimaryConnections inquiry-based program. By working in collaborative teams students are able to:
• communicate and compare their ideas with one another
• build on one another’s ideas
• discuss and debate these ideas
• revise and rethink their reasoning
• present their final team understanding through multi-modal representations.
Opportunities for working in collaborative learning teams are highlighted throughout the unit.Students need to be taught how to work collaboratively. They need to work together regularly to develop effective group learning skills.
The development of these collaborative skills aligns to descriptions in the Australian Curriculum: English. See page xi.
Team structureThe first step towards teaching students to work collaboratively is to organise the team composition, roles and skills. Use the following ideas when planning collaborative learning with your class:
• Assign students to teams rather than allowing them to choose partners.
• Vary the composition of each team. Give students opportunities to work with otherswho might be of a different ability level, gender or cultural background.
• Keep teams together for two or more lessons so that students have enough time tolearn to work together successfully.
• If you cannot divide the students in your class into teams of three, form two teams oftwo students rather than one team of four. It is difficult for students to work togethereffectively in larger groups.
• Keep a record of the students who have worked together as a team so that by the endof the year each student has worked with as many others as possible.
Team rolesStudents are assigned roles within their team (see below). Each team member has a specific role but all members share leadership responsibilities. Each member is accountable for the performance of the team and should be able to explain how the team obtained its results. Students must therefore be concerned with the performance of all team members. It is important to rotate team jobs each time a team works together so that all students have an opportunity to perform different roles.
For Foundation—Year 2, teams consist of two students—Manager and Speaker. (For Year 3–Year 6, the teams consist of three students—Director, Manager and Speaker).

62 Appendix 1
PrimaryConnections
Each member of the team should wear something that identifies them as belonging to that role, such as a wristband, badge, or coloured clothes peg. This makes it easier for you to identify which role each student is doing and it is easier for the students to remember what they and their team mates should be doing.
ManagerThe Manager is responsible for collecting and returning the team’s equipment. The Manager also tells the teacher if any equipment is damaged or broken. All team members are responsible for clearing up after an activity and getting the equipment ready to return to the equipment table.
SpeakerThe Speaker is responsible for asking the teacher or another team’s Speaker for help. If the team cannot resolve a question or decide how to follow a procedure, the Speaker is the only person who may leave the team and seek help. The Speaker shares any information they obtain with team members. The teacher may speak to all team members, not just to the Speaker. The Speaker is not the only person who reports to the class; each team member should be able to report on the team’s results.
DirectorThe Director is responsible for making sure that the team understands the team investigation and helps team members focus on each step. The Director is also responsible for offering encouragement and support. When the team has finished, the Director helps team members check that they have accomplished the investigation successfully. The Director provides guidance but is not the team leader.
Team skillsPrimaryConnections focuses on social skills that will help students work in collaborative teams and communicate more effectively.
Students will practise the following team skills throughout the year:
• Move into your teams quickly and quietly
• Stay with your team
• Take turns.
To help reinforce these skills, display enlarged copies of the team skills chart (see the end of this Appendix) in a prominent place in the classroom.
Supporting equityIn science lessons, there can be a tendency for boys to manipulate materials and girls to record results. PrimaryConnections tries to avoid traditional social stereotyping by encouraging all students, irrespective of their gender, to maximise their learning potential. Collaborative learning encourages each student to participate in all aspects of team activities, including handling the equipment and taking intellectual risks.
Observe students when they are working in their collaborative teams and ensure that both girls and boys are participating in the hands-on activities.

TEAM ROLES
Manager Collects and returns all materials the team needs
Speaker Asks the teacher and other team speakers for help
PrimaryConnections

TEAM SKILLS
1 Move into your teams quickly and quietly
2 Stay with your team
3 Take turns
PrimaryConnections

65Appendix 2
Schoolyard safari
Appendix 2 How to use a science journal
IntroductionA science journal is a record of observations, experiences and reflections. It contains a series of dated, chronological entries. It can include written text, drawings, labelled diagrams, photographs, tables and graphs.
Using a science journal provides an opportunity for students to be engaged in a real science situation as they keep a record of their observations, ideas and thoughts about science activities. Students can use their science journals as a useful self-assessment tool as they reflect on their learning and how their ideas have changed and developed during a unit.
Monitoring students’ journals allows you to identify students’ alternative conceptions, find evidence of students’ learning and plan future learning activities in science and literacy.
Maintaining a science journal aligns to descriptions in the Australian Curriculum: Science and English. See pages xi and xiii.
Using a science journal1 At the start of the year, or before starting a science unit, provide each student with a
notebook or exercise book for their science journal or use an electronic format. Tailor the type of journal to fit the needs of your classroom. Explain to students that they will use their journals to keep a record of their observations, ideas and thoughts about science activities. Emphasise the importance of including pictorial representations as well as written entries.
2 Use a large project book or A3 paper to make a class science journal. This can be used at all stages to model journal entries. With younger students, the class science journal can be used more frequently than individual journals and can take the place of individual journals.
3 Make time to use the science journal. Provide opportunities for students to plan procedures and record predictions, and their reasons for predictions, before an activity. Use the journal to record observations during an activity and reflect afterwards, including comparing ideas and findings with initial predictions and reasons. It is important to encourage students to provide evidence that supports their ideas, reasons and reflections.
4 Provide guidelines in the form of questions and headings and facilitate discussion about recording strategies, such as, note-making, lists, tables and concept maps. Use the class science journal to show students how they can modify and improve their recording strategies.
5 Science journal entries can include narrative, poetry and prose as students represent their ideas in a range of styles and forms.
6 In science journal work, you can refer students to display charts, pictures, diagrams, word walls and phrases about the topic displayed around the classroom. Revisit and revise this material during the unit. Explore the vocabulary, visual texts and ideas that have developed from the science unit, and encourage students to use them in their science journals.

PrimaryConnections
66 Appendix 2
PrimaryConnections
7 Combine the use of resource sheets with journal entries. After students have pasted their completed resource sheets in their journal, they might like to add their own drawings and reflections.
8 Use the science journal to assess student learning in both science and literacy. For example, during the Engage phase, use journal entries for diagnostic assessment as you determine students’ prior knowledge.
9 Discuss the importance of entries in the science journal during the Explain and Evaluate phases. Demonstrate how the information in the journal will help students develop literacy products, such as posters, brochures, letters and oral or written presentations.
Schoolyard safari science journal

67Appendix 3
PrimaryConnections Schoolyard safariPrimaryConnections
Appendix 3 How to use a word wall
IntroductionA word wall is an organised collection of words and images displayed in the classroom. It supports the development of vocabulary related to a particular topic and provides a reference for students. The content of the word wall can be words that students see, hear and use in their reading, writing, speaking, listening and viewing.
Goals in using a word wallA word wall can be used to:
• support science and literacy experiences of reading, writing, speaking and viewing
• provide support for students during literacy activities across all key learning areas
• promote independence in students as they develop their literacy skills
• provide a visual representation to help students see patterns in words and decode them
• develop a growing bank of words that students can spell, read and/or use in writing tasks
• provide ongoing support for the various levels of academic ability in the class
• teach the strategy of using word sources as a real-life strategy.
OrganisationPosition the word wall so that students have easy access to the words. They need to be able to see, remove and return word cards to the wall. A classroom could have one main word wall and two or three smaller ones, each with a different focus, for example, high-frequency words.
Choose robust material for the word cards. Write or type words on cardboard and perhaps laminate them. Consider covering the wall with felt-type material and backing each word card with a self-fastening dot to make it easy for students to remove and replace word cards.
Word walls do not need to be confined to a wall. Use a portable wall, display screen, shower curtain or window curtain. Consider a cardboard shape that fits with the unit, for example, an apple for a needs unit.
The purpose is for students to be exposed to a print-rich environment that supports their science and literacy experiences.
Organise the words on the wall in a variety of ways. Place them alphabetically, or put them in word groups or groups suggested by the unit topic, for example, words for a Schoolyard safari unit might be organised using headings, such as ‘Animal names’, How animals move’, ‘What they look like’ and ‘What they need’.
Invite students to contribute words from different languages to the word wall. Group words about the same thing, for example, different names of the same animal, on the word wall so that students can make the connections. Identify the different languages used, for example, by using different-coloured cards or pens to record the words.

PrimaryConnections
68 Appendix 3
PrimaryConnections
Using a word wall1 Limit the number of words to those needed to support the science and literacy
experiences in the classroom.
2 Add words gradually, and include images where possible, such as drawings, diagrams or photographs. Build up the number of words on the word wall as students are introduced to the scientific vocabulary of the unit.
3 Encourage students to interact with the word wall. Practise using the words with students by reading them and playing word games. Refer to the words during science and literacy experiences and direct students to the wall when they need a word for writing. Encourage students to use the word wall to spell words correctly.
4 Use the word wall with the whole class, small groups and individual students during literacy experiences. Organise multi-level activities to cater for the individual needs of students.
Water works word wall Spinning in space word wall
Schoolyard safari word wall

69Appendix 4
PrimaryConnections Schoolyard safariPrimaryConnections
Appendix 4 How to construct and use a graph
IntroductionA graph organises, represents and summarises information so that patterns and relationships can be identified. Understanding the conventions of constructing and using graphs is an important aspect of scientific literacy.
During a scientific investigation, observations and measurements are made and measurements are usually recorded in a table. Graphs can be used to organise the data to identify patterns, which help answer the research question and communicate findings from the investigation.
Once you have decided to construct a graph, two decisions need to be made:
• What type of graph? and
• Which variable goes on each axis of the graph?
What type of graph?The Australian Curriculum: Mathematics describes data representation and interpretation for Year 1 as follows:
• Choose simple questions and gather responses.
• Represent data with objects and drawings where one object or drawing representsone data value. Describe the displays.
Picture graphPicture graphs support students in the transition from using physical representations to representing information using symbols or pictures in columns. The symbols or pictures must be the same size.
Table A shows the results recorded for an investigation of the types of small animals found in different environments. This information is represented in Graph A by using one small picture for each animal in Table A.
Types of small animals
Number of small animals
ant 5
worm 3
snail 2
Graph A: Number of small animals near the play equipment
Table A: Number of small animals near the play equipment
In the graph to the right, each picture might also represent a number of animals, for example, 1 picture = 5 animals found
PrimaryConnections
70 Appendix 4
PrimaryConnections
Which variable goes on each axis?It is conventional in science to plot the variable that has been changed on the horizontal axis (X axis) and the variable that has been measured/observed on the vertical axis (Y axis) of the graph.
Graph titles and labelsGraphs have titles and each variable is labelled on the graph axes, including the units of measurement. The title of the graph is usually in the form of ‘The effect of one variable on the other variable’. For example, ‘The effect of material on the amount of light that passes through.’
Steps in analysing and interpreting dataStep 1 Organise the data (for example, construct a graph) so you can see the pattern in data or the relationship between data for the variables (things that we change, measure/observe, or keep the same).
Step 2 Identify and describe the pattern or relationship in the data.
Step 3 Explain the pattern or relationship using science concepts.
Questioning for analysisTeachers use effective questioning to assist students to develop skills in interrogating and analysing data represented in graphs. Such as:
• What is the story of your graph?
• Do the data in your graph reveal any patterns?
• Is this what you expected? Why?
• Can you explain the pattern? Why did this happen?
• How certain are you of your results?
AnalysisAnalysis of Graph A shows that different numbers of small animals were found near the play equipment. Students could compare graphs of different environments to determine which environments suit which animals. For example, if lots of ants were found in the garden, near the play equipment and in the lunch area students might conclude that ants can live in lots of places in the schoolyard. If ants were only found in the garden, students might conclude that the ants prefer a garden habitat because they aren’t found in other places.

71Appendix 5
PrimaryConnections Schoolyard safariPrimaryConnections
App
endi
x 5
Scho
olya
rd s
afar
i equ
ipm
ent l
ist
EQU
IPM
ENT
ITEM
QUAN
TITIES
LESS
ON
11
12
23
34
55
67
SESS
ION
12
31
21
21
2
Equi
pmen
t and
mat
eria
ls
anim
als
–an
ts1
per t
eam
●
–ea
rthw
orm
s (c
ompo
stin
g)1
per t
eam
●●
–sn
ails
12 to
15
per c
lass
●●
–an
t far
m o
ptio
nal
1 pe
r clas
s●
bin
liner
, bla
ck p
last
ic1
per c
lass
●
cake
cru
mbs
¼ c
up p
er te
am●
cand
le1
per c
lass
●
card
boar
d, ri
ng, 2
0 cm
dia
met
er a
nd 5
–6 c
m w
ide
1 pe
r clas
s●
clip
boar
d op
tiona
l1
per t
eam
●●
clot
h, c
olou
red,
larg
e, d
ark
1 pe
r clas
s●
cont
aine
rs a
nd c
ups
–co
ntain
er, s
hallo
w, fo
r dip
ping
relu
ctan
t sna
ils1
per c
lass
●
–dr
ink
bottl
e, 5
00 m
L, e
mpt
y1
per c
lass
●
–dr
ink
bottl
e, 2
L, e
mpt
y, cle
ar p
lastic
1 pe
r clas
s●
–pl
astic
con
taine
r, cle
ar (e
g, a
take
away
dish
) for
eac
h te
am1
per t
eam
●●

72 Appendix 5
PrimaryConnections
EQU
IPM
ENT
ITEM
QUAN
TITIES
LESS
ON
11
12
23
34
55
67
SESS
ION
12
31
21
21
2
Equi
pmen
t and
mat
eria
ls (c
ontin
ued)
–pl
astic
con
taine
r, cle
ar w
ith lid
(eg,
Pet
ri di
sh) o
r clea
r plas
tic b
ottle
s1
per t
eam
●
–pl
astic
con
tain
ers,
sha
llow
2 pe
r clas
s●
–sp
ray
bottl
e of
wat
er1
per c
lass
●●
–tra
nspa
rent
con
tain
er, l
arge
with
scr
een
lid1
per c
lass
●
cuttl
efis
h, p
iec
1 pe
r clas
s●
‘Ear
thw
orm
vie
wer
’ (RS
3) o
ptio
nal
1 pe
r clas
s●
fact
ual t
exts
abo
ut s
mal
l ani
mal
sm
any
in c
lass
●
glov
es, s
mal
l gar
deni
ng o
r dis
posa
ble
cotto
n, ru
bber
or v
inyl
1 pa
ir pe
r stu
dent
●●
●●
●
gras
s cl
ippi
ngs
or d
ead
leav
esen
ough
for 1
wor
m v
iewer
●
grav
elen
ough
for 1
sna
il sha
ck●
grav
el, s
oil,
sand
enou
gh fo
r 1 w
orm
view
er●
hone
y1
tabl
espo
on p
er c
lass
●
hoop
s (la
rge)
or s
kipp
ing
rope
1 pe
r tea
m●
●
Leaf
Litt
er (R
ache
l Ton
kin,
Har
per C
olllin
s, 2
006)
or s
imila
r boo
k op
tiona
l1
per c
lass
●
lettu
ce h
ead
optio
nal
1 pe
r clas
s●
lettu
ce le
af1
per t
eam
●
mag
nify
ing
glas
s1
per t
eam
●●
●●
mar
king
pen
s, 2
col
ours
2 pe
r clas
s●
●
mat
ches
, box
of
1 pe
r clas
s●
nail
and
cork
for n
ail-p
oke
1 pe
r clas
s●

73Appendix 5
PrimaryConnections Schoolyard safari
EQU
IPM
ENT
ITEM
QUAN
TITIES
LESS
ON
11
12
23
34
55
67
SESS
ION
12
31
21
21
2
Equi
pmen
t and
mat
eria
ls (c
ontin
ued)
oatm
eal
¼ c
up m
ix pe
r tea
m●
pain
t bru
sh, s
oft-h
aire
d1
per t
eam
●
pape
r
–bl
ank
book
, lar
ge ti
tled
‘Wha
t am
I?’
1 pe
r clas
s●
–bl
ank
pape
r for
eac
h te
am1
per t
eam
●
–bl
ank
pape
r for
mak
ing
flaps
1 pe
r stu
dent
●
–bu
tche
r’s p
aper
with
ver
tical
and
horiz
onta
l axis
dra
wn
for c
lass
for c
lass
and
1 sh
eet p
er te
am●
–sm
all, s
ame
sized
piec
esfo
r clas
s an
d ea
ch te
am●
–‘In
my
own
back
yard
’ fol
der o
r jou
rnal
(eg,
man
illa fo
lder
, boo
k)fo
r eac
h st
uden
t opt
iona
l1
per s
tude
nt●
●●
●●
●●
–pa
per s
trips
with
nam
e of
sm
all a
nim
als s
tudi
ed in
uni
t1
per s
tude
nt●
–se
lf-ad
hesiv
e no
tes
for c
lass
seve
ral p
er te
am●
plan
t mat
eria
l, pi
eces
of
som
e pe
r clas
s●
plas
tic s
heet
, cle
ar1
per c
lass
rock
s or
pie
ces
of te
rraco
tta p
otso
me
per c
lass
●
sauc
er1
per c
lass
●
scis
sors
1 pe
r clas
s●
spoo
n, p
last
ic1
per t
eam
●●
Resou
rce
shee
ts
–‘In
form
atio
n no
te fo
r fam
ilies’
(RS1
)1
per s
tude
nt●
–‘B
acky
ard
safa
ri se
arch
’ (RS
2)1
per s
tude
nt●
–‘S
mall
ani
mal
desc
riptio
n’ (R
S4)
2 pe
r tea
m●

PrimaryConnections
74 Appendix 5
PrimaryConnections
EQU
IPM
ENT
ITEM
QUAN
TITIES
LESS
ON
11
12
23
34
55
67
SESS
ION
12
31
21
21
2
Resou
rce
shee
ts (c
ontin
ued)
–‘In
vest
igat
ion
reco
rd’ (
RS5)
1 pe
r stu
dent
●
–‘In
vest
igat
ion
reco
rd’ (
RS5)
, enl
arge
d1
per c
lass
●
–‘W
hat a
m I?
’ (RS
6)1
per s
tude
nt●
Teac
hing
Too
ls
clas
s sc
ienc
e jo
urna
l1
per c
lass
●●
●●
●●
●●
●●
●●
‘Cod
e fo
r car
ing’
pos
ter
1 pe
r clas
s●
●●
●●
●●
●●
colla
bora
tive
lear
ning
role
wris
tban
ds o
r bad
ges
1 se
t per
team
●●
●●
●●
colla
bora
tive
lear
ning
team
role
s ch
art
1 pe
r clas
s●
●●
●●
●
colla
bora
tive
lear
ning
team
s sk
ills c
hart
1 pe
r clas
s●
●●
●●
●
idea
s m
ap1
per c
lass
●●
‘Sch
ooly
ard
safa
ri’ m
ap1
per c
lass
●●
●●
●
stud
ent s
cien
ce jo
urna
l1
per s
tude
nt●
●●
●●
●●
●●
●
‘Wat
chin
g ea
rthw
orm
s’ ta
ble
1 pe
r clas
s●
●
wor
d w
all
1 pe
r clas
s●
●●
●●
●●
●●
●●
●
Multim
edia
digi
tal c
amer
a op
tiona
l1
per c
lass
●
DVD
or v
ideo
of L
ife in
the
Und
ergr
owth
Ep
isod
es 1
‘Inv
asio
n of
the
Land
’ and
5 ‘S
uper
soci
etie
s’.
Davi
d At
tenb
orou
gh (2
006)
opt
iona
l1
per c
lass
●
DVD
or v
ideo
of A
Bug
’s Li
fe (D
isne
y/PI
XAR)
1 pe
r clas
s●
DVD
or v
ideo
pla
yer w
ith ‘p
ause
’ con
trol
1 pe
r clas
s●
●
App
endi
x 6
Scho
olya
rd s
afar
i uni
t ove
rvie
w
SCIE
NCE
OU
TCO
MES
*LE
SSO
N O
UTC
OM
ES*
LESS
ON
SU
MM
AR
YA
SSES
SMEN
T O
PPO
RTU
NIT
IES
Stud
ents
will
be a
ble
to
repr
esen
t the
ir cu
rrent
un
ders
tand
ings
as
they
:St
uden
ts w
ill be
abl
e to
:St
uden
ts:
ENGAGE
Less
on 1
In th
e ya
rd
Sess
ion
1C
urio
us
crea
ture
s
Sess
ion
2In
my
scho
olya
rd
Sess
ion
3In
my
own
back
yard
(opt
iona
l)
•ex
plain
their
exis
ting
idea
s ab
out t
he fe
atur
es a
nd
beha
viour
of s
mall
ani
mals
•fo
llow
dire
ctio
ns to
co
nduc
t an
expl
orat
ion
of th
e ‘S
choo
lyard
saf
ari’
area
•us
e th
eir s
ense
s to
ob
serv
e an
d id
entif
y sm
all
anim
als in
their
hab
itats
.
•un
ders
tand
the
purp
ose
and
feat
ures
of a
role-
play
•us
e or
al lan
guag
e an
d ro
le-pl
ay to
repr
esen
t wha
t the
y th
ink
they
kno
w a
bout
the
feat
ures
and
beh
avio
ur o
f sm
all a
nim
als•
desc
ribe
the
purp
ose
and
feat
ures
of a
map
•us
e or
al, w
ritte
n an
d vis
ual
repr
esen
tatio
n to
repo
rt ob
serv
atio
ns o
f ani
mals
in
their
hab
itats
and
com
pare
th
em w
ith th
eir p
redi
ctio
ns•
ask
ques
tions
abo
ut s
mall
an
imals
.
Sess
ion
1C
urio
us c
reat
ures
•pr
edict
whi
ch a
nim
als th
ey
thin
k w
ill be
foun
d in
their
sc
hool
yard
env
ironm
ent
•pa
rticip
ate
in a
role-
play
to
show
wha
t the
y th
ink
they
kn
ow a
bout
the
feat
ures
and
beha
viour
of s
mall
ani
mals
.Se
ssio
n 2
In m
y sc
hool
yard
•ex
plor
e th
e sc
hool
yard
for
evid
ence
of s
mall
ani
mals
•w
rite
abou
t and
dra
w th
eir
obse
rvat
ions
.Se
ssio
n 3
In m
y ow
n ba
ckya
rd
(opt
iona
l)•
obse
rve,
reco
rd a
nd re
port
on s
mall
ani
mals
foun
d in
th
eir o
wn
back
yard
.
Dia
gnos
tic a
sses
smen
t•
Role-
play
and
di
scus
sions
•Pr
edict
ions
and
qu
estio
ns•
Scien
ce jo
urna
l ent
ries
•O
bser
vatio
n re
cord
s
* The
se le
sson
out
com
es a
re lin
ked
to re
levan
t des
crip
tions
of t
he A
ustra
lian
Curri
culu
m. S
ee p
age
2 fo
r Scie
nce
and
page
7 fo
r Eng
lish
and
Mat
hem
atics
.

75Appendix 6
PrimaryConnections Schoolyard safariPrimaryConnections
App
endi
x 6
Scho
olya
rd s
afar
i uni
t ove
rvie
w
SCIE
NCE
OU
TCO
MES
*LE
SSO
N O
UTC
OM
ES*
LESS
ON
SU
MM
AR
YA
SSES
SMEN
T O
PPO
RTU
NIT
IES
Stud
ents
will
be a
ble
to
repr
esen
t the
ir cu
rrent
un
ders
tand
ings
as
they
:St
uden
ts w
ill be
abl
e to
:St
uden
ts:
ENGAGE
Less
on 1
In th
e ya
rd
Sess
ion
1C
urio
us
crea
ture
s
Sess
ion
2In
my
scho
olya
rd
Sess
ion
3In
my
own
back
yard
(opt
iona
l)
•ex
plain
their
exis
ting
idea
sab
out t
he fe
atur
es a
ndbe
havio
ur o
f sm
all a
nim
als•
follo
w d
irect
ions
toco
nduc
t an
expl
orat
ion
of th
e ‘S
choo
lyard
saf
ari’
area
•us
e th
eir s
ense
s to
obse
rve
and
iden
tify
small
anim
als in
their
hab
itats
.
•un
ders
tand
the
purp
ose
and
feat
ures
of a
role-
play
•us
e or
al lan
guag
e an
d ro
le-pl
ay to
repr
esen
t wha
t the
yth
ink
they
kno
w a
bout
the
feat
ures
and
beh
avio
ur o
fsm
all a
nim
als•
desc
ribe
the
purp
ose
and
feat
ures
of a
map
•us
e or
al, w
ritte
n an
d vis
ual
repr
esen
tatio
n to
repo
rtob
serv
atio
ns o
f ani
mals
inth
eir h
abita
ts a
nd c
ompa
reth
em w
ith th
eir p
redi
ctio
ns•
ask
ques
tions
abo
ut s
mall
anim
als.
Sess
ion
1C
urio
us c
reat
ures
•pr
edict
whi
ch a
nim
als th
eyth
ink
will
be fo
und
in th
eirsc
hool
yard
env
ironm
ent
•pa
rticip
ate
in a
role-
play
tosh
ow w
hat t
hey
thin
k th
eykn
ow a
bout
the
feat
ures
and
beha
viour
of s
mall
ani
mals
.Se
ssio
n 2
In m
y sc
hool
yard
•ex
plor
e th
e sc
hool
yard
for
evid
ence
of s
mall
ani
mals
•w
rite
abou
t and
dra
w th
eirob
serv
atio
ns.
Sess
ion
3In
my
own
back
yard
(o
ptio
nal)
•ob
serv
e, re
cord
and
repo
rton
sm
all a
nim
als fo
und
inth
eir o
wn
back
yard
.
Dia
gnos
tic a
sses
smen
t•
Role-
play
and
disc
ussio
ns•
Pred
ictio
ns a
ndqu
estio
ns•
Scien
ce jo
urna
l ent
ries
•O
bser
vatio
n re
cord
s
* The
se le
sson
out
com
es a
re lin
ked
to re
levan
t des
crip
tions
of t
he A
ustra
lian
Curri
culu
m. S
ee p
age xi
for S
cienc
e an
d pa
ge xiii
for E
nglis
h an
d M
athe
mat
ics.

76 Appendix 6
PrimaryConnections
SCIE
NCE
OU
TCO
MES
*LE
SSO
N O
UTC
OM
ES*
LESS
ON
SU
MM
AR
YA
SSES
SMEN
T O
PPO
RTU
NIT
IES
Stud
ents
will
be a
ble
to:
Stud
ents
will
be a
ble
to:
Stud
ents
:
EXPLORE
Less
on 2
Wig
gly
wor
ms
Sess
ion
1W
atch
ing
earth
wor
ms
Sess
ion
2Ea
rthw
orm
vi
ewer
(o
ptio
nal)
•ob
serv
e an
d dr
aw th
efe
atur
es o
f an
earth
wor
m•
obse
rve
and
desc
ribe
earth
wor
m m
ovem
ent
•id
entif
y fe
atur
es o
fea
rthw
orm
s th
at a
llow
them
to b
reat
he, f
eed,
mov
e an
d pr
otec
tth
emse
lves
unde
rgro
und
•op
tiona
l con
stru
ct a
nea
rthw
orm
hab
itat.
•us
e or
al, w
ritte
n an
dvis
ual la
ngua
ge to
repo
rtob
serv
atio
ns o
f the
feat
ures
, beh
avio
ur a
ndha
bita
t of t
he e
arth
wor
m•
desc
ribe
the
purp
ose
and
feat
ures
of a
tabl
e•
draw
a d
etail
ed d
raw
ing
afte
r car
eful
obs
erva
tion
•re
cord
idea
s in
a s
cienc
ejo
urna
l•
answ
er q
uest
ions
abo
utea
rthw
orm
s.
Sess
ion
1W
atch
ing
earth
wor
ms
•re
cord
wha
t the
y th
ink
they
know
abo
ut e
arth
wor
ms
•ob
serv
e, d
iscus
s an
d dr
awea
rthw
orm
s•
reco
rd w
hat t
hey
find
out
abou
t ear
thw
orm
s.Se
ssio
n 2
Earth
wor
m v
iew
er (o
ptio
nal)
•ob
serv
e a
class
ear
thw
orm
view
er•
reco
rd o
bser
vatio
ns
Form
ativ
e as
sess
men
t•
Draw
ings
•Di
scus
sions
•‘W
atch
ing
wor
ms’
tabl
e•
Scien
ce jo
urna
l ent
ries
* The
se le
sson
out
com
es a
re lin
ked
to re
levan
t des
crip
tions
of t
he A
ustra
lian
Curri
culu
m. S
ee p
age xi
for S
cienc
e an
d pa
ge xiii
for E
nglis
h an
d M
athe
mat
ics.
SCIE
NCE
OU
TCO
MES
*LE
SSO
N O
UTC
OM
ES*
LESS
ON
SU
MM
AR
YA
SSES
SMEN
T O
PPO
RTU
NIT
IES
Stud
ents
will
be a
ble
to:
Stud
ents
will
be a
ble
to:
Stud
ents
:
EXPLORE
Less
on 3
Slim
y sn
ails
Sess
ion
1Sn
ail
surp
rises
Sess
ion
2Sn
ail s
hack
(o
ptio
nal)
•ob
serv
e an
d dr
aw d
etail
s of
a s
nail’s
ext
erna
l st
ruct
ure
•ob
serv
e an
d de
scrib
e th
e m
ovem
ent a
nd fe
edin
g of
a
snail
•id
entif
y fe
atur
es o
f sna
ils
that
allo
w th
em to
bre
athe
, fe
ed, m
ove
and
prot
ect
them
selve
s in
the
yard
•op
tiona
l con
stru
ct a
sna
il ha
bita
t.
•us
e or
al, w
ritte
n an
d vis
ual la
ngua
ge to
repo
rt ob
serv
atio
ns o
f the
fe
atur
es, f
unct
ion
and
habi
tat o
f a s
nail
•id
entif
y th
e pu
rpos
e an
d fe
atur
es o
f an
idea
s m
ap•
iden
tify
the
purp
ose
and
feat
ures
of a
labe
lled
diag
ram
•re
cord
info
rmat
ion
as a
lab
elled
diag
ram
•an
swer
que
stio
ns a
bout
sn
ails.
Sess
ion
1Sn
ail s
urpr
ises
•us
e an
idea
s m
ap to
sho
w
wha
t the
y th
ink
they
kno
w
abou
t sna
ils•
wor
k in
team
s to
obs
erve
an
d dr
aw s
nails
•ob
serv
e an
d re
cord
how
sn
ails
mov
e an
d ea
t.Se
ssio
n 2
Snai
l sha
ck (o
ptio
nal)
•co
nstru
ct a
sna
il hab
itat
•ke
ep o
bser
vatio
n re
cord
s ab
out s
nails
and
their
ha
bita
t.
Form
ativ
e as
sess
men
t•
Idea
s m
ap•
Labe
lled
diag
ram
s•
Disc
ussio
ns•
Scien
ce jo
urna
l ent
ries
Less
on 4
Ant a
ntic
s•
obse
rve
and
draw
det
ails
ofan
ant
’s ex
tern
al fe
atur
es•
obse
rve
and
desc
ribe
ant m
ovem
ent a
nd
com
mun
icatio
n•
mak
e ob
serv
atio
ns a
bout
ho
w a
nts
carry
food
•id
entif
y fe
atur
es o
f ant
s th
at a
llow
them
to b
reat
he,
feed
, mov
e an
d pr
otec
t th
emse
lves.
•us
e or
al, w
ritte
n an
d vis
ual la
ngua
ge to
repo
rt ob
serv
atio
ns o
f the
fe
atur
es, f
unct
ion
and
habi
tat o
f an
ant
•co
ntrib
ute
to d
iscus
sions
ab
out a
nt b
ehav
iour
•re
cord
obs
erva
tions
as
a lab
elled
diag
ram
•an
swer
que
stion
s abo
ut a
nts.
•re
cord
wha
t the
y th
ink
they
kno
w a
bout
ant
s•
obse
rve
and
draw
ant
s•
track
the
mov
emen
t of
ants
in a
n an
t far
m•
obse
rve
and
reco
rd
info
rmat
ion
abou
t ant
s.
Form
ativ
e as
sess
men
t•
Labe
lled
diag
ram
s•
Disc
ussio
ns•
Scien
ce jo
urna
l ent
ries
* The
se le
sson
out
com
es a
re lin
ked
to re
levan
t des
crip
tions
of t
he A
ustra
lian
Curri
culu
m. S
ee p
age
2 fo
r Scie
nce
and
page
7 fo
r Eng
lish
and
Mat
hem
atics
.

77Appendix 6
PrimaryConnections Schoolyard safari
SCIE
NCE
OU
TCO
MES
*LE
SSO
N O
UTC
OM
ES*
LESS
ON
SU
MM
AR
YA
SSES
SMEN
T O
PPO
RTU
NIT
IES
Stud
ents
will
be a
ble
to:
Stud
ents
will
be a
ble
to:
Stud
ents
:EXPLORE
Less
on 3
Slim
y sn
ails
Sess
ion
1Sn
ail
surp
rises
Sess
ion
2Sn
ail s
hack
(o
ptio
nal)
•ob
serv
e an
d dr
aw d
etail
sof
a s
nail’s
ext
erna
lst
ruct
ure
•ob
serv
e an
d de
scrib
e th
em
ovem
ent a
nd fe
edin
g of
a sn
ail•
iden
tify
feat
ures
of s
nails
that
allo
w th
em to
bre
athe
,fe
ed, m
ove
and
prot
ect
them
selve
s in
the
yard
•op
tiona
l con
stru
ct a
sna
ilha
bita
t.
•us
e or
al, w
ritte
n an
dvis
ual la
ngua
ge to
repo
rtob
serv
atio
ns o
f the
feat
ures
, fun
ctio
n an
dha
bita
t of a
sna
il•
iden
tify
the
purp
ose
and
feat
ures
of a
n id
eas
map
•id
entif
y th
e pu
rpos
e an
dfe
atur
es o
f a la
belle
ddi
agra
m•
reco
rd in
form
atio
n as
alab
elled
diag
ram
•an
swer
que
stio
ns a
bout
snail
s.
Sess
ion
1Sn
ail s
urpr
ises
•us
e an
idea
s m
ap to
sho
ww
hat t
hey
thin
k th
ey k
now
abou
t sna
ils•
wor
k in
team
s to
obs
erve
and
draw
sna
ils•
obse
rve
and
reco
rd h
owsn
ails
mov
e an
d ea
t.Se
ssio
n 2
Snai
l sha
ck (o
ptio
nal)
•co
nstru
ct a
sna
il hab
itat
•ke
ep o
bser
vatio
n re
cord
sab
out s
nails
and
their
habi
tat.
Form
ativ
e as
sess
men
t•
Idea
s m
ap•
Labe
lled
diag
ram
s•
Disc
ussio
ns•
Scien
ce jo
urna
l ent
ries
Less
on 4
Ant a
ntic
s•
obse
rve
and
draw
det
ails
ofan
ant
’s ex
tern
al fe
atur
es•
obse
rve
and
desc
ribe
ant m
ovem
ent a
ndco
mm
unica
tion
•m
ake
obse
rvat
ions
abo
utho
w a
nts
carry
food
•id
entif
y fe
atur
es o
f ant
sth
at a
llow
them
to b
reat
he,
feed
, mov
e an
d pr
otec
tth
emse
lves.
•us
e or
al, w
ritte
n an
dvis
ual la
ngua
ge to
repo
rtob
serv
atio
ns o
f the
feat
ures
, fun
ctio
n an
dha
bita
t of a
n an
t•
cont
ribut
e to
disc
ussio
nsab
out a
nt b
ehav
iour
•re
cord
obs
erva
tions
as
alab
elled
diag
ram
•an
swer
que
stion
s abo
ut a
nts.
•re
cord
wha
t the
y th
ink
they
kno
w a
bout
ant
s•
obse
rve
and
draw
ant
s•
track
the
mov
emen
t of
ants
in a
n an
t far
m•
obse
rve
and
reco
rdin
form
atio
n ab
out a
nts.
Form
ativ
e as
sess
men
t•
Labe
lled
diag
ram
s•
Disc
ussio
ns•
Scien
ce jo
urna
l ent
ries
* The
se le
sson
out
com
es a
re lin
ked
to re
levan
t des
crip
tions
of t
he A
ustra
lian
Curri
culu
m. S
ee p
age xi
for S
cienc
e an
d pa
ge xiii
for E
nglis
h an
d M
athe
mat
ics.

78
PrimaryConnections
SCIE
NCE
OU
TCO
MES
*LE
SSO
N O
UTC
OM
ES*
LESS
ON
SU
MM
AR
YA
SSES
SMEN
T O
PPO
RTU
NIT
IES
Stud
ents
will
be a
ble
to:
Stud
ents
will
be a
ble
to:
Stud
ents
:
EXPLAIN
Less
on 5
Sam
e or
di
ffere
nt?
Sess
ion
1C
ompa
ring
crea
ture
s
Sess
ion
2An
imat
ed
anim
als
(opt
iona
l)
•de
scrib
e th
e fe
atur
es a
ndbe
havio
ur o
f a s
mall
ani
mal
•co
mpa
re tw
o sm
allan
imals
and
mak
eco
nclu
sions
abo
utsim
ilarit
ies a
nd d
iffere
nces
.
•us
e a
varie
ty o
f res
ourc
esto
find
cur
rent
scie
ntific
info
rmat
ion
abou
t a s
mall
anim
al•
reco
rd in
form
atio
n in
a ta
ble
•us
e dr
awin
gs a
nd la
ngua
geto
com
pare
two
small
anim
als•
use
scien
tific
voca
bular
yap
prop
riate
ly in
their
writ
ing
and
talki
ng.
Sess
ion
1C
ompa
ring
crea
ture
s•
wor
k in
team
s to
com
pare
two
small
ani
mals
•as
a c
lass,
dev
elop
ata
ble
that
sum
mar
ises
the
info
rmat
ion
•re
ad fa
ctua
l tex
ts a
bout
small
ani
mals
.
Sess
ion
2An
imat
ed a
nim
als
(opt
iona
l)•
view
an
anim
ated
film
abou
t ant
s•
cons
ider
how
sm
allan
imals
are
repr
esen
ted
inan
imat
ed fi
lms
•co
mpa
re th
eirun
ders
tand
ing
of s
mall
anim
als w
ith th
ose
in th
efilm
.
Form
ativ
e as
sess
men
t•
Scien
ce jo
urna
l ent
ries
•‘S
mall
ani
mal
desc
riptio
n’ (R
esou
rce
shee
t 4)
*The
se le
sson
out
com
es a
re lin
ked
to re
levan
t des
crip
tions
of t
he A
ustra
lian
Curri
culu
m. S
ee p
age xi
for S
cienc
e an
d pa
ge xiii
for E
nglis
h an
d M
athe
mat
ics.
Appendix 6

79Appendix 6
PrimaryConnections Schoolyard safari
SCIE
NCE
OU
TCO
MES
*LE
SSO
N O
UTC
OM
ES*
LESS
ON
SU
MM
AR
YA
SSES
SMEN
T O
PPO
RTU
NIT
IES
Stud
ents
will
be a
ble
to:
Stud
ents
will
be a
ble
to:
Stud
ents
:
ELABORATE
Less
on 6
Hab
itat
dete
ctiv
es
•co
nduc
t an
inve
stig
atio
nof
a h
abita
t of t
he‘S
choo
lyard
saf
ari’
area
and
mak
e an
d re
cord
their
obse
rvat
ions
•co
mpa
re th
e ob
serv
atio
nsof
two
diffe
rent
hab
itats
and
iden
tify
simila
rities
and
diffe
renc
es•
iden
tify
links
bet
wee
nan
imal
feat
ures
and
their
habi
tats
.
•as
k qu
estio
ns a
nd m
ake
pred
ictio
ns•
use
oral,
writ
ten
and
visua
llan
guag
e to
reco
rd a
nddi
scus
s th
e re
sults
of t
heir
inve
stig
atio
n•
iden
tify
the
purp
ose
and
feat
ures
of a
pict
ure
grap
h•
cons
truct
and
retri
eve
info
rmat
ion
from
a p
ictur
egr
aph
•pa
rticip
ate
in d
iscus
sion
toge
nera
te e
xplan
atio
n an
dco
mpa
re id
eas
abou
t sm
allan
imals
and
their
hab
itats
.
•w
ork
in te
ams
to lo
ok fo
rev
iden
ce o
f sm
all a
nim
alsin
a h
abita
t•
com
pare
the
evid
ence
foun
d in
diffe
rent
hab
itats
•re
cord
and
disc
uss
obse
rvat
ions
.
Sum
mat
ive
asse
ssm
ent
of S
cien
ce In
quiry
Ski
lls•
Scien
ce jo
urna
l ent
ries
•‘In
vest
igat
ion
reco
rd’
(Res
ourc
e sh
eet 5
)•
Gra
phs
* The
se le
sson
out
com
es a
re lin
ked
to re
levan
t des
crip
tions
of t
he A
ustra
lian
Curri
culu
m. S
ee p
age xi
for S
cienc
e an
d pa
ge xiii
for E
nglis
h an
d M
athe
mat
ics.

80
PrimaryConnections
SCIE
NCE
OU
TCO
MES
*LE
SSO
N O
UTC
OM
ES*
LESS
ON
SU
MM
AR
YA
SSES
SMEN
T O
PPO
RTU
NIT
IES
Stud
ents
will
be a
ble
to:
Stud
ents
will
be a
ble
to:
Stud
ents
:
EVALUATE
Less
on 7
Hid
den
in
thei
r hab
itat
•id
entif
y th
e fe
atur
es o
fsm
all a
nim
als fo
r fee
ding
mov
emen
t and
pro
tect
ion
•de
scrib
e th
e ha
bita
t of
small
ani
mals
•id
entif
y th
e w
ays
small
anim
als d
epen
d on
their
habi
tat f
or s
urviv
al.
•co
ntrib
ute
to a
disc
ussio
nab
out t
he fe
atur
es, f
unct
ion
and
habi
tat o
f sm
all a
nim
als•
use
oral,
writ
ten
and
visua
llan
guag
e to
des
crib
e th
eha
bita
t of s
mall
ani
mals
•us
e w
ritte
n de
scrip
tions
and
role-
play
to re
pres
ent
their
und
erst
andi
ng o
f sm
allan
imals
and
their
hab
itats
•an
swer
que
stio
ns a
bout
small
ani
mals
.
•co
nstru
ct a
clas
s ‘W
hat
am I?
’ boo
k of
the
small
anim
als fo
und
in th
e‘S
choo
lyard
saf
ari’
area
•pa
rticip
ate
in a
role-
play
•re
flect
on
their
lear
ning
durin
g th
e un
it.
Sum
mat
ive
asse
ssm
ent
of S
cienc
e Un
ders
tand
ings
•Sc
ience
jour
nal e
ntrie
s•
‘Wha
t am
I?’ (
Reso
urce
shee
t 6)
•Ro
le-pl
ays
•Di
scus
sions
* The
se le
sson
out
com
es a
re lin
ked
to re
levan
t des
crip
tions
of t
he A
ustra
lian
Curri
culu
m. S
ee p
age xi
for S
cienc
e an
d pa
ge xiii
for E
nglis
h an
d M
athe
mat
ics.
Appendix 6

PrimaryConnections
SC
IEN
CE
OU
TCO
ME
S*
LITE
RA
CY
OU
TCO
ME
S*
LES
SO
N S
UM
MA
RY
AS
SE
SS
ME
NT
OP
PO
RTU
NIT
IES
Stud
ents
will
be a
ble
to:
Stud
ents
will
be a
ble
to:
Stud
ents
:
ELABORATE
Less
on 7
Rube
Gol
dber
g Se
ssio
n 1
Plan
it fi
rst
Sess
ion
2C
onst
ruct
ion
time
•ge
nera
te id
eas
and
cons
truct
a R
ube
Gol
dber
g m
achi
ne
•id
entif
y ho
w to
mak
e di
ffere
nt o
bjec
ts m
ove
thro
ugh
diffe
rent
pus
hes
and
pulls
.
•cr
eate
an
anno
tate
d dr
awin
g of
their
idea
s
•di
scus
s th
eir id
eas
abou
t how
to b
uild
and
fix
their
mac
hine
usin
g ap
prop
riate
wor
ds.
Sess
ion
1 Pl
an it
firs
t•
wor
k in
team
s to
plan
a
Rube
Gol
dber
g m
achi
ne
to m
eet d
esig
n cr
iteria
•
draw
an
anno
tate
d dr
awin
g an
d cr
eate
an
equi
pmen
t list
.Se
ssio
n 2
Con
stru
ctio
n tim
e•
follo
w th
eir p
lan to
co
nstru
ct a
Rub
e G
oldb
erg
mac
hine
•im
prov
e th
eir m
achi
ne
as n
eces
sary
to e
nsur
e it
wor
ks.
Sum
mat
ive
asse
ssm
ent
of S
cien
ce In
quiry
Ski
lls
•Sc
ience
jour
nal e
ntrie
s
•Cl
ass
disc
ussio
ns
•‘O
ur R
ube
Gol
dber
g M
achi
ne’
(Res
ourc
e sh
eet 9
)
EVALUATE
Less
on 8
Our
am
azin
g m
achi
ne
•ex
plain
how
pus
hes
and
pulls
affe
ct th
e m
ovem
ent
of o
bjec
ts in
their
m
achi
ne.
•cr
eate
an
anno
tate
d dr
awin
g•
use
oral
and
writ
ten
langu
age
to s
how
their
un
ders
tand
ing
and
refle
ct
on th
eir e
xper
ience
s.
•pr
esen
t the
ir fin
al Ru
be
Gol
dber
g m
achi
ne a
nd
expl
ain th
e pu
shes
and
pu
lls th
at m
ake
it w
ork
•re
flect
on
their
lear
ning
du
ring
the
unit.
Sum
mat
ive
asse
ssm
ent
of S
cien
ce U
nder
stan
ding
•Sc
ience
jour
nal e
ntrie
s
•Cl
ass
disc
ussio
ns
•An
nota
ted
draw
ings
(O
ptio
nal)
•O
ral p
rese
ntat
ions
YearBiological sciences
Chemical sciences
Earth and space sciences
Physical sciences
F
Staying alive That’s my hat!
Weather in my world On the move
Growing well What’s it made of?
1
Schoolyard safari Spot the difference Changes all around
Look! Listen!
Dinosaurs and more Bend it! Stretch it! Up, down and all around
2 Watch it grow! All mixed up Water works
Machine makers
Push-pull
3 Feathers, fur or leaves? Melting moments Night and day Heating up
4
Plants in action Material world
Beneath our feet
Magnetic moves
Friends or foes?
Package it better Smooth movesAmong the gum trees
5 Desert survivors What’s the matter? Earth’s place in space Light shows
6
Marvellous micro-organisms
Change detectives
Creators and destroyers Circuits and switches
Rising salt Earthquake explorers Essential energy
www.primaryconnections.org.au
PrimaryConnections Units
June 2020