Radical Art Template for Android
35
ANDROID™ 101: ART VIEWER TEMPLATE ImageSwitcher, Animations, and Git downloading. DOWNLOAD Project git download. Richard A. Perez Android 101
Transcript of Radical Art Template for Android

ANDROID™ 101:
ART VIEWER TEMPLATE ImageSwitcher, Animations, and Git downloading.
DOWNLOAD Project git
download.
Richard A.
Perez Android 101

Table of Contents
Introduction .................................................................................................................................................. 2
Android Manifest........................................................................................................................................... 3
Build.Gradle (module.app) ............................................................................................................................ 4
Animation XML files ..................................................................................................................................... 5
UI Layout ....................................................................................................................................................... 8
Menu and Action Bar Options ...................................................................................................................... 9
MainActivity.java .......................................................................................................................................... 10
Data.java ...................................................................................................................................................... 14
ArtViewer.java ............................................................................................................................................ 14
CommonVariables.java ................................................................................................................................ 19
CommonWork ........................................................................................................................................... 19
InOutAnimationSet ..................................................................................................................................... 20
MyMediaPlayer ............................................................................................................................................ 21
MySoundPool .............................................................................................................................................. 25
NewImageSwitcherImage.java ..................................................................................................................... 27
SavePhoto.java ............................................................................................................................................. 28
JUnit Testing ................................................................................................................................................ 30
Attribution .................................................................................................................................................. 34

Introduction The art viewer template is intended to be used by developers or artists who would like to
create an Android™ application to show images with music and sound effects as well as visual page turn
effects. You should be familiar with setting up a development environment on your own. Android
Studio™ is newly released (2015) and should fit your needs for development. I have designed this guide
and the project template so that non-developers can start learning how to implement an Activity’s life
cycle methods and how to handle UI events. Before using this guide you should have your Android
Studio IDE set up as well as be able to run Hello World! And other samples so you can be confident you
are ready to run the project code here. You can expect to spend a few hours on this initial work if you
are new to programming.
Essential Reading: http://developer.android.com/about/index.html
I have a Github code repository that can be used as source reference and contains the code that
is used in this tutorial. You can use the following link. It is strongly recommended to cross reference
coding here with the Github account coding since updates and improvements will occur over time.
Useful link: https://github.com/rperez22/RadicalArtTemplate
You will need to provide your own resources to complete the template. The resources to be
included are the sound files for images saved, page turn sound effect as well as a music track to play in
the background. Images to be replaced should be added into the drawable-nodpi folder as well as adding
the image filename into the Data.PICS array in the Data.java class. You can create new Android icons
from within Android Studio. There are animation files for the page turn transitions and you can edit
them in place or, use your own, or search the SDK for animation files that you think are interesting.
There are two arrow files for the page turn buttons that can be edited as well. Finally there is a gradient
background xml file that uses three colors to create a linear gradient, you should choose a gradient
color scheme that fits your collection or theme.
The user interface can be manipulated to some extent without hurting the code behind the view
objects. For instance, the button layout can be manipulated. The button click handler will always turn
the page no matter the location of its button. The ad banner can be removed if you find it to take up
too much screen space or you simply do not want to include it. It is also possible to switch from
Admob, which is what I am using, to any other ad company that works with Android. An Android
enabled phone will be needed to run or debug the application. Simply turn on developer options in your
phone’s settings. If you are forced to use the Android emulator install Intel HAXM to help performance
of the emulator if it seems to be running slow.
Also I introduce you to testing the functionality of Android features by showing a JUnit test
project and its classes. I will show how to run the tests multiple times by running a loop in the test suite
class. You should try to test your application on as many different devices as possible to look for layout
errors or any other un-expected errors.
Click into and read the Essential Reading sections… again if needed! I’ll go into each of the
source files and explain what each class is doing. I cover the view objects that make the UI in both
portrait and landscape modes. I will also cover the menu xml and creating handlers for the menu items.
The strings.xml class and the AndroidManifest.xml will be explained.
Essential Reading: https://developer.android.com/sdk/index.html

Android Manifest The Android manifest file can be thought of as a set of declarations for your application. There are some
fields or sections that simply will not change very often but there are also a few that will need to be
updated every time you have a new version of the application to upload to Google Play™.
Essential Reading: http://developer.android.com/guide/topics/manifest/manifest-intro.html
Package
package="radical.art.template"
You will need to declare a unique package name for your application
This name will need to be unique across all Google Play Store listings as well.
The package does not have to exist in folder system.
Install Location
android:installLocation="preferExternal"
I have it set to preferExternal so that it will use external memory if possible to keep
internal memory that can be limited, available.
Essential Reading: http://developer.android.com/guide/topics/data/install-location.html
Uses-Permission
<uses-permission android:name="android.permission.WRITE_EXTERNAL_STORAGE" /> <uses-permission android:name="android.permission.INTERNET" /> <uses-permission android:name="android.permission.ACCESS_NETWORK_STATE" />
Declarations for enabling different functionalities to the device.
This includes among others, access to the internet and access to the phone to write
images to it and index them for use in gallery.
Permissions’ can be used for JUnit testing such as SEND_SMS for testing that the sound
will quiet so a SMS notification is heard.
Essential Reading: http://developer.android.com/guide/topics/manifest/uses-permission-element.html
Application
You can set attributes such as the phone launch icon and title of application.
android:icon="@mipmap/ic_launcher" android:label="@string/app_name"
I also include meta-data tags required to use Google Play Services.
<meta-data android:name="com.google.android.gms.version" android:value="@integer/google_play_services_version" />

Activity
You will need to declare where the starting point for the application is by adding the
intent filter MAIN action from LAUNCHER category to an activity.
<activity android:name=".MainActivity" android:label="@string/app_name" > <intent-filter> <action android:name="android.intent.action.MAIN" /> <category android:name="android.intent.category.LAUNCHER" /> </intent-filter> </activity>
Essential Reading: http://developer.android.com/guide/topics/manifest/application-element.html
Build.Gradle (module.app) You will need to edit the build.gradle file as you are developing your application, to set items such as
build version and current application version.
Essential Reading: http://developer.android.com/sdk/installing/studio-build.html
The changes that will need to be made here over time will include updating the compiled SDK version.
The latest version as of this writing is 22 and build tools version is “22.0.1”.
compileSdkVersion 22 buildToolsVersion "22.0.1"
Possibly more common will be the version code and name. Your .apk files that are generated and
uploaded to your Google Play Store listing will need to be in sequential order whether in Alpha, Beta or
Production version.
versionCode 1 versionName "1.0"
Dependencies will need to be updated if you are adding AdMob ads. You will need to include the
statement so that it will compile the appropriate jar files into your application and successfully build.
compile 'com.google.android.gms:play-services:7.0.0'
Essential Reading: http://developer.android.com/google/play-services/setup.html
You will need to also include the SDK version that you are going to limit phone’s to. If you create a new
project the default values should reflect what the current largest percentile of projects should use to
reach the largest number of phones.
minSdkVersion 15 targetSdkVersion 22
Essential Reading: http://developer.android.com/guide/topics/manifest/uses-sdk-element.html

Animation XML files The Animation XML files will be used by the ImageSwitcher to animate images as they are switched and
to animate the layout on resume of the application. There is an IN and an OUT animation to be set
when switching images using the ImageSwitcher. The Animation files themselves can be found in the
anim folder in the res folder.
Essential Reading: http://developer.android.com/training/animation/index.html
Essential Reading: http://developer.android.com/guide/topics/graphics/view-animation.html
There are four animation effects to manipulate.
Alpha
Transparency effects for dissolve effects or fading effects.
Translate
Moving the object from a to b in location
Rotate
Moving the objects on a pivot point and rotating clock or counter clockwise.
Scale
Resizing the view object into or out of a focus point.
These effects can be manipulated and/or chained to create more effects. I use them in simple ways to
generate an idea then it’s just a matter of chaining values and finding the sweet spot for your animation
to have the effect you are looking for.
WarpVertical.xml
The effect was found on accident and I just had to change values a bit to find out how this could be
controlled and changed. The effect is supposed to resemble a warp and dissolve but I felt it had an
element of lift to it so I called it warp vertical.
<?xml version="1.0" encoding="utf-8"?> <set xmlns:android="http://schemas.android.com/apk/res/android" android:fillAfter="true" > <scale android:duration="500" android:fromXScale="1" android:fromYScale="1" android:interpolator="@android:anim/linear_interpolator" android:pivotX="50%" android:pivotY="50%" android:toXScale="0" android:toYScale="1" /> <alpha android:duration="500" android:fromAlpha="1.0" android:interpolator="@android:anim/linear_interpolator" android:toAlpha="0.0" /> </set>

Tip: Examples in the SDK use percentage for pivot points relative to view size.
Scale
android:duration="500" The milliseconds the animation should take to complete.
android:fromXScale="1 android:fromYScale="1"
Since scale is the resizing it has to be from a set size to another set size over time. This is a
float number from 0 to 1. Using 1 for both values would mean it starts in full size.
android:pivotX="50%" android:pivotY="50%"
The expanding and collapsing effect can be centered on a given point, this is the pivot point.
To have the point be centered in the object I use 50% for both.
android:toXScale="0" and android:toYScale="1"
I only have the view collapse from the sides or horizontally.
So I use 0 for X scale and 1 for Y scale.
android:toXScale="0" android:toYScale="1"
The rate of change at which the animation changes can be controlled using the interpolator.
In this example I use a linear interpolator here so the animation is a steady even one.
There are others to choose from. Read the known indirect subclasses for more variations
of interpolator in the essential reading below.
Alpha
android:fromAlpha="1.0"
The values range from 0 invisible to 1 full visibility. This means this example animation starts
fully visible.
android:toAlpha="0.0"
At the end of the animation it should be completely invisible.
Essential Reading: http://developer.android.com/reference/android/view/animation/Interpolator.html

top_left_corner_rotate_in.xml
Rotate
android:fromDegrees="180"
Start the animation
wound clockwise
android:pivotX="0%" android:pivotY="0%"
Meaning the top left
corner is the pivot point
for the swing
When rotating it will
swing the view counter
clockwise into view
android:toDegrees="0"
The stop point is when it
is in normal viewing
position
top_right_corner_rotate_in.xml
Rotate
android:fromDegrees="-180" Start the animation
wound counter-
clockwise
android:pivotX="100%" android:pivotY="0%"
The right corner is the
pivot for the swing effect.
Rotating it will swing the
view clockwise into view.
android:toDegrees="0"
The stop point is when it
is in normal viewing
position
Be creative and find animations that you think are interesting or will keep your user’s using your
application and entertained. You can use other attributes such as start offset to chain together different
animations and find ways to create unique effects. Most of the better animations I’ve been able to create
have been on accident and then I take a minute to figure what is exactly creating that effect. From there
I can start to make the effect more to my liking and to my design.

UI Layout The activity_main.xml file located in the layout and layout-land folders in the res folder and contains our
layout for the UI. The user interface for this application consists of the image switcher that will show the
images and perform the animations on switch of an image. Two buttons that will trigger the images to
switch are overlaid on top of the ImageSwitcher. Finally, there is an AdView banner that is below the
ImageSwitcher object. This layout is simple but you can safely move the position of objects without
affecting the code behind. For instance the banner could be on top of the ImageSwitcher and the
buttons could be below the ImageSwitcher completely. However this would also take more screen
space from the most important part, the images themselves.
You can make objects visible or invisible at any time and I do so when the user presses the screen. I
have it hide the UI buttons and on tap again they will be visible. This allows for full screen viewing of the
images. There is a line of code that will tell the animation controller to switch animation effect as well.
This can be removed if you prefer to force the user to use the menu in order to switch animations. For
the interaction and reaction, I kept the animation switching enabled on touch of the full screen image.
There are two layout folders one for layout and one layout-land, which is for landscape orientation of
the phone. If the layout just doesn’t work for landscape as it does for portrait then you can make
changes to these separately and Android will use whichever is appropriate for the current orientation.
Essential Reading: http://developer.android.com/guide/topics/ui/declaring-layout.html
For the current layout I use a Relative Layout. This allows for one object to be placed in a specific
location and then setting another’s relative to it.
<RelativeLayout xmlns:android="http://schemas.android.com/apk/res/android" xmlns:tools=http://schemas.android.com/tools android:layout_width="match_parent" xmlns:ads="http://schemas.android.com/apk/res-auto" android:layout_height="match_parent" tools:context=".MainActivity">
For instance the first object you see in the xml is the AdView that is placed on the bottom of the
screen.
<com.google.android.gms.ads.AdView android:id="@+id/adView" android:layout_width="match_parent" android:layout_height="wrap_content" android:layout_alignParentBottom="true" android:layout_centerHorizontal="true" ads:adSize="BANNER" ads:adUnitId="@string/banner_ad_unit_id" android:background="#000000" android:visibility="visible" > </com.google.android.gms.ads.AdView>
The ImageSwitcher is next and it is placed on top of the ad banner.
<ImageSwitcher android:id="@+id/mainImageSwitcher"

android:layout_width="fill_parent" android:layout_height="fill_parent" android:layout_above="@+id/adView" android:background="@drawable/gradient_background" android:onClick="imageSwitcherClick" />
From here we can place the buttons. With no placement declarations it will be placed on the top left of
the screen. Since the top left button will be placed in the top left corner of available space I only have to
add the declaration and Android will place it as I want it.
<ImageButton android:id="@+id/leftButton" android:layout_width="wrap_content" android:layout_height="wrap_content" android:contentDescription="@string/page_left_desc" android:onClick="LeftArrowClick" android:src="@drawable/left_arrow" />
However for the bottom right button I want it on top of the ad banner and in the bottom right corner
of the ImageSwitcher. For this I use the following declarations.
<ImageButton android:id="@+id/rightButton" android:layout_width="wrap_content" android:layout_height="wrap_content" android:layout_above="@+id/adView" android:layout_alignParentEnd="true" android:layout_alignParentRight="true" android:contentDescription="@string/page_right_desc" android:onClick="RightArrowClick" android:src="@drawable/right_arrow" />
This will allow the button to be placed as I need it. In order to declare a view object to be placed
relatively to another you will need to declare the object it will be placed relative to first for reference to
later. It is why I declare the adView first and then reference the other views afterwards.
Menu and Action Bar Options I have the minimum sdk version set for 11 this means that the Action Bar will be supported without the
use of the support library. You can target lower than 11 and import the support library to use the
Action Bar. This will allow more devices on Android to download this application. You can use this
official site to determine what versions are most used and if you have to make changes in your SDK
version how many people it might affect.
Essential Reading: https://developer.android.com/about/dashboards/index.html
For this application I create a menu to handle most of the settings and redirect links. However since it is
available I decided to change one line in the main.xml in the menu folder. This is for the first item with id
menu_save_image. I added the attribute android:showAsAction="ifRoom". Setting this allows for a
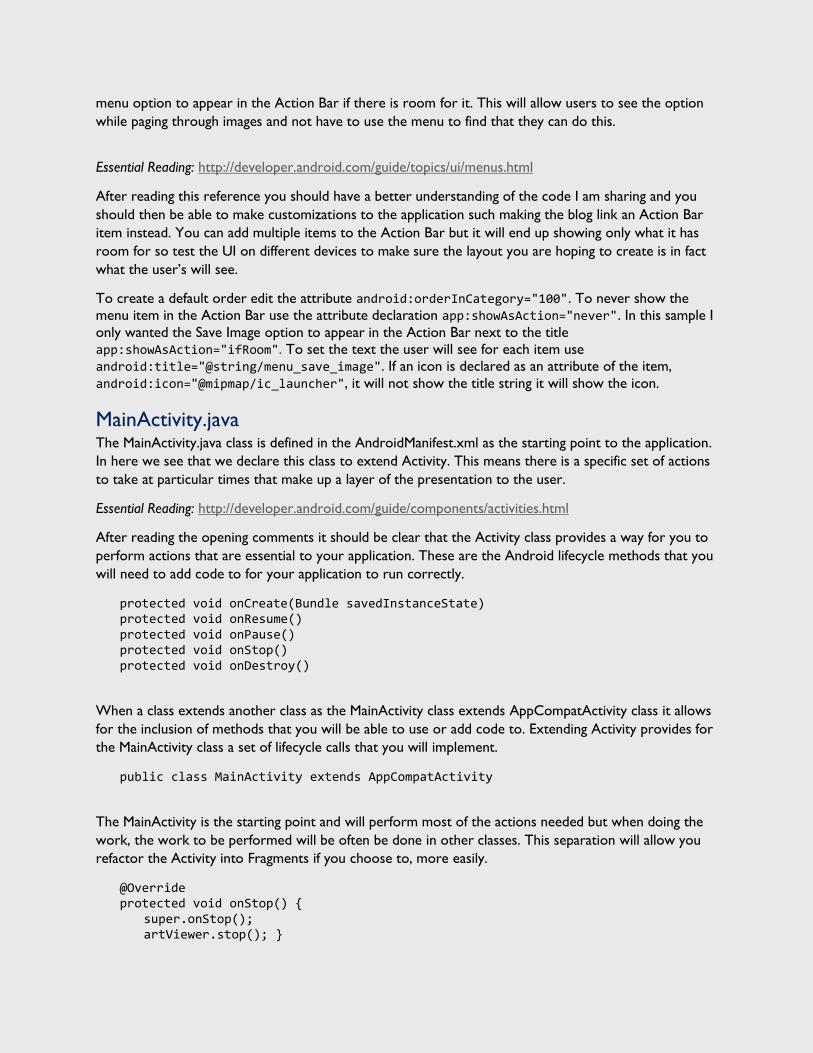
menu option to appear in the Action Bar if there is room for it. This will allow users to see the option
while paging through images and not have to use the menu to find that they can do this.
Essential Reading: http://developer.android.com/guide/topics/ui/menus.html
After reading this reference you should have a better understanding of the code I am sharing and you
should then be able to make customizations to the application such making the blog link an Action Bar
item instead. You can add multiple items to the Action Bar but it will end up showing only what it has
room for so test the UI on different devices to make sure the layout you are hoping to create is in fact
what the user’s will see.
To create a default order edit the attribute android:orderInCategory="100". To never show the
menu item in the Action Bar use the attribute declaration app:showAsAction="never". In this sample I
only wanted the Save Image option to appear in the Action Bar next to the title
app:showAsAction="ifRoom". To set the text the user will see for each item use
android:title="@string/menu_save_image". If an icon is declared as an attribute of the item,
android:icon="@mipmap/ic_launcher", it will not show the title string it will show the icon.
MainActivity.java The MainActivity.java class is defined in the AndroidManifest.xml as the starting point to the application.
In here we see that we declare this class to extend Activity. This means there is a specific set of actions
to take at particular times that make up a layer of the presentation to the user.
Essential Reading: http://developer.android.com/guide/components/activities.html
After reading the opening comments it should be clear that the Activity class provides a way for you to
perform actions that are essential to your application. These are the Android lifecycle methods that you
will need to add code to for your application to run correctly.
protected void onCreate(Bundle savedInstanceState) protected void onResume() protected void onPause() protected void onStop() protected void onDestroy()
When a class extends another class as the MainActivity class extends AppCompatActivity class it allows
for the inclusion of methods that you will be able to use or add code to. Extending Activity provides for
the MainActivity class a set of lifecycle calls that you will implement.
public class MainActivity extends AppCompatActivity
The MainActivity is the starting point and will perform most of the actions needed but when doing the
work, the work to be performed will be often be done in other classes. This separation will allow you
refactor the Activity into Fragments if you choose to, more easily.
@Override protected void onStop() { super.onStop(); artViewer.stop(); }

The NoisyAudioStreamReciever class will be used to quiet the sound of the application due to unusual
audio noise. Most likely this will be due to the user unplugging their headphones. For the receiver to
work a BroadcastReceiver will need to be implemented and we can tell it to listen for an Intent that will
specifically have the action of ACTION_AUDIO_BECOMING_NOISY. The receiver itself uses the onReceive
method to handle the sounds and you will have to check intent’s action is
ACTION_AUDIO_BECOMING_NOISY before you quiet the sound.
private class NoisyAudioStreamReceiver extends BroadcastReceiver { @Override public void onReceive(Context context, Intent intent) { if (AudioManager.ACTION_AUDIO_BECOMING_NOISY.equals(intent .getAction())) { artViewer.quietSound(); } } }
The receiver should be registered and unregistered in the pause and resume methods of the
MainActivity. Here we create a new receiver and start listening in OnResume and don’t stop until the
application calls the onPause method. This is all that is needed for the receiver to work, it is running
silently in the background simply waiting for the audio disruptions to be caught. When you plug in the
headphones it will signal AUDIOFOCUS_GAIN in the MediaPlayer and this will return the volume to the
previously set volume. When you add the declaration implements OnAudioFocusChangeListener in the
MediaPlayer class it will allow you to handle the audio focus changes and change the volume as needed.
startPlayback(); private void startPlayback() { registerReceiver(myNoisyAudioStreamReceiver, intentFilter); }
The work to quiet the sound will be performed in MyMediaPlayer class. Once in the quietSound method
of the ArtViewer.java class you can see that the volume will be changed if the MediaPlayer is not null.
artViewer.quietSound(); public void quietSound() { // set volume to low if (myMediaPlayer != null) { myMediaPlayer.setNewVolume(0.1f); } }
I include an instance of the CommonVariables class which is a class to hold variables that will be used
across the different classes. These are meant to be shared or have a value that is meant to be saved for
some amount of time and retrieved at a later time. For example the current sound position is stored
when the MediaPlayer is paused. Since the program logic will move from class to class, the sound
position will need to be retrieved at any time with access to the correct current value being essential.
CommonVariables cv = CommonVariables.getInstance();

I also include the ArtViewer class into the activity and you’ll find that most of the time the work to be
done is handed off to this class. If you decide to use a Fragment in your development you will find that
this class can be easily implemented into the Fragment and while you may have to refactor to some
degree you will not have to move all components simply the ArtViewer class itself.
ArtViewer artViewer = new ArtViewer();
onCreate
Starting the Android lifecycle calls with onCreate we first set the Content View this will not only tell
Android what layout file to use but it will call the constructors for the UI objects as well. If you open the
layout folder and look at the activity_main.xml class you’ll see it has four UI objects and after setting the
content view you can store a reference to them and be able to manipulate them from this point on.
setContentView(R.layout.activity_main);
Once the application is updated a call to initialize the ArtViewer is made and we send an instance of the
current class.
artViewer.init(this);
onResume
From here we create a new NoisyAudioStreamReceiver and call the StartPlayback method to begin
listening for unusual noise.
myNoisyAudioStreamReceiver = new NoisyAudioStreamReceiver(); startPlayback();
From here we can start the music if the application should be playing music. At this point the
SharedPreferences from the last state of the application have been loaded. If the application should not
play music what will happen then is that we call the method abandonFocus(). This tells the MediaPlayer
to release the audio to the device itself to use. If you started the application and you were playing music
on your phone then it will return audio to it while using the application. For the design of the application
the music player and sound player are separate classes so the sound effects will continue to play even if
the music is turned off allowing for separation of the different type of sound settings.
if (!cv.playMusic) { artViewer.myMediaPlayer.abandonFocus(); }
Next we can animate the view for the user so they can have some sort of visual cue that the application
is ready to be interacted with. First we create an animation by using AnimationUtils to load the
Animation into an Animation variable and resetting it. To start the animation first get a reference to the
entire layout that makes up the user’s view, this is defined in the MainActivity.xml in the layout with the
id relativeLayout. You can get a reference to this as a view object by finding the layout by id and then
clearing the animation and starting the animation.

Animation anim = AnimationUtils .loadAnimation(commonVariables.context, R.anim.expand); anim.reset(); View relativeLayout = findViewById(R.id.relativeLayout); relativeLayout.clearAnimation(); relativeLayout.startAnimation(anim);
onPause
Stop the playback of our receiver listener by calling stopPlayback in the onPause method. After we have
stopped the receiver from doing more work we can call the pause method of the ArtViewer class.
@Override protected void onPause() { super.onPause(); // unregister headphone listener try { stopPlayback(); } catch (Exception ignored) { } artViewer.pause(); }
onStop
This method being called means the state of the application needs to be saved, the work to do this will
be passed on to the ArtViewer class.
@Override protected void onStop() { super.onStop(); artViewer.stop(); }
onDestroy
The last lifecycle call to be made will be to onDestroy(). The artViewer.destroy() method will
contain work to do the final releasing of components AdView, MediaPlayer and finally the SoundPool.
Without releasing these components you will continue to use memory needlessly this will affect
performance of your device if not handled correctly. You have the official developer pages where you
can read the documentation for the MediaPlayer read the source and comments for further information.
Essential Reading: http://developer.android.com/guide/topics/media/mediaplayer.html
@Override protected void onDestroy() { super.onDestroy(); artViewer.destroy(); }

User Defined Methods
The MainActivity class can handle button clicks from the UI without creating a listener. This means that
in the layout file when creating the button we can declare the onClick attribute. In the Activity we can
include this method and see that we are passed a View object named view. Getting the view as a
parameter will allow us to have a reference of the view object clicked.
android:onClick="imageSwitcherClick" public void imageSwitcherClick(View view){ artViewer.imageSwitcher(view); }
Data.java The Data class I have created is for variables that might change from time to time should be expanded
on as you add more images or change the background music track. The array of integers PICS holds a
reference to every image you want the application to use. When you add images to your drawable-
nodpi folder you will have to add the title of the image to the array here in order for the code to be
able to select it when choosing the next image to show to the user.
public final static int[] PICS = { R.drawable.image0, R.drawable.image1, R.drawable.image2, R.drawable.image3… };
The path is a reference to the package of the project and will be used when referencing the music track.
You will have to update this when preparing to host your application online. The address here uses the
package declaration from the AndroidManifest.xml file. So when you change your package name, and you
will have to do this if you are planning on hosting your application online, you will need to update this
line of code for the system to be able to use the track.
public static String PATH = "android.resource://radical.art.viewer/";
For the background music track I add a variable here as a reference to the track. This combined with
the path will be used in order to tell the MediaPlayer what track should be used and where to find it. If
you add a music track that has a different name than track_01.mp3 then you will need to update the
reference here in the coding.
public static int TRACK_01 = R.raw.track01;
ArtViewer.java The ArtViewer class is one of the more important classes from the standpoint that the application
redirects to here from the MainActivity class in most lifecycle methods. Most of the work to be done is
directed to here first and either the work is done here or passed to another class. An application when
created will have a starting activity but I encapsulate the work in this way and its helped make using
Fragments easier and should be helpful to you when you decide to expand on this project.
The next class InOutAnimationSet is used to get Animations for our ImageSwitcher. We will have an
image shown and on change of an image it will get an animations for the current image as it moves out
of the user’s view and we will get an Animation for the image moving into view. There will be more
explanation on this class’s usage in its own class heading.

InOutAnimationSet inOutSet = new InOutAnimationSet();
Next we have the ImageSwitcherTask class that is defined as an AsyncTask meaning it will be able to be
use the methods of the AsyncTask class such as the doInBackground method and onPostExecute. This
will allow us to perform work off of the main Android thread. Too much work being done
synchronously will cause your application to slow down. Implementing the AsyncTask class will improve
your applications performance.
AsyncTask<Object, Object, BitmapDrawable> imageSwitcherTask;
init(Context context)
We use SharedPreferences to save variables that will be needed upon returning. Since we are handling
onStop logic in this class we can use an instance of SharedPreferences here for retrieval of the saved
values. First we get the saved variables, if possible, and then start recreating the state of the application
such as loading the image and playing the background track.
Next we continue to initialize the ArtViewer by getting the saved setting of the previous usage of the
application by getting the SharedPreferences we last saved if any. For this application most of the
SharedPreferences are saved independently of each other, meaning that resuming the MediaPlayer from
the last position will not affect the last viewed image and vice versa so if either should fail it won’t cause
problems for the other. If we set default values for the variables we can attempt to retrieve them and
know they will be valid in case the retrieval fails.
if (sharedpreferences.contains(vars.res .getString(R.string.current_image))) { vars.currentImagePosition = sharedpreferences.getInt( vars.res.getString(R.string.current_image), 0);
}
Next we have the MediaPlayer and SoundPool classes that I have separate classes created for. The main
difference is that the MediaPlayer is intended for playing music that will not be loaded and played as
frequently as a game’s sound effects that can be short and repetitious. These will be using SoundPool.
This separation will allow you to actually turn off the music and play your own while keeping the sound
effects playing if you desire. Both classes will have more details explained in their own sections.
public MyMediaPlayer myMediaPlayer = new MyMediaPlayer(); MySoundPool mySoundPool;
Next we can store a reference to our ImageSwitcher to handle showing and switching images. The
reference isn’t all to be done, the source documentation says we need to make a call to setFactory to
set the factory used to create the two views between which the ViewSwticher will flip between. The
views will fit in the center of the screen, using match parent will take up as much screen as possible.
imageSwitcher = (ImageSwitcher) act.findViewById(R.id.mainImageSwitcher); imageSwitcher.setFactory(new ViewFactory() { @Override public View makeView() { ImageView myView = new ImageView(act.getApplicationContext());

myView.setScaleType(ImageView.ScaleType.FIT_CENTER); myView.setLayoutParams(new ImageSwitcher.LayoutParams( LayoutParams.MATCH_PARENT, LayoutParams.MATCH_PARENT)); return myView; } }); imageSwitcher.setBackgroundResource(R.drawable.gradient_background); imageSwitcherTask = new NewImageSwitcherImage(imageSwitcher) .execute(new Object());
Finally, there is an AdView object that we will create a reference to and start to load the ad using the
adRequestBuilder.build method.
adView = (AdView) ((Activity) context).findViewById(R.id.adView); adView.setBackgroundColor(Color.BLACK); final AdRequest.Builder adRequestBuilder = new AdRequest.Builder(); adView.loadAd(adRequestBuilder.build());
Left(View view) and Right(View view)
You can see we use the simply named method left and right to perform switching of the images in
response to button clicks. Here we advance the current image position and reset it to the end or
beginning if needed to create a loop through all images effect.
vars.currentImagePosition--; if (vars.currentImagePosition < 0) vars.currentImagePosition = Data.PICS.length - 1; vars.currentImagePosition++; if (vars.currentImagePosition > Data.PICS.length - 1) vars.currentImagePosition = 0;
Next we set the animation for the views to perform. And then if there is a current image loading we can
cancel that task and start a new task with the most current image number. Finally we can play the page
turn sound to for additional feedback to the user and to make your application livelier
Animation in = inOutSet.getInAnimationRight(vars.pageTurnMode); Animation out = inOutSet.getOutAnimationRight(vars.pageTurnMode); imageSwitcher.setInAnimation(in); imageSwitcher.setOutAnimation(out); if (imageSwitcherTask != null) imageSwitcherTask.cancel(true); imageSwitcherTask = new NewImageSwitcherImage(imageSwitcher) .execute(new Object()); mySoundPool.playPageTurnSound();
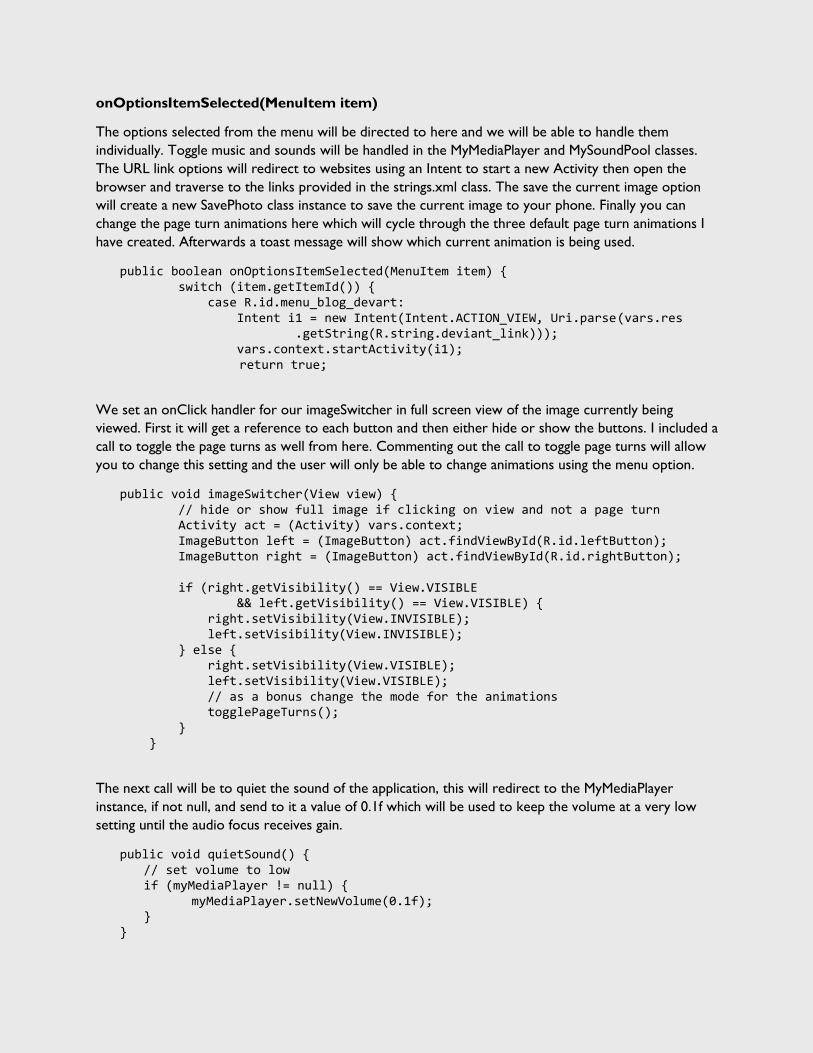
onOptionsItemSelected(MenuItem item)
The options selected from the menu will be directed to here and we will be able to handle them
individually. Toggle music and sounds will be handled in the MyMediaPlayer and MySoundPool classes.
The URL link options will redirect to websites using an Intent to start a new Activity then open the
browser and traverse to the links provided in the strings.xml class. The save the current image option
will create a new SavePhoto class instance to save the current image to your phone. Finally you can
change the page turn animations here which will cycle through the three default page turn animations I
have created. Afterwards a toast message will show which current animation is being used.
public boolean onOptionsItemSelected(MenuItem item) { switch (item.getItemId()) { case R.id.menu_blog_devart: Intent i1 = new Intent(Intent.ACTION_VIEW, Uri.parse(vars.res .getString(R.string.deviant_link))); vars.context.startActivity(i1); return true;
We set an onClick handler for our imageSwitcher in full screen view of the image currently being
viewed. First it will get a reference to each button and then either hide or show the buttons. I included a
call to toggle the page turns as well from here. Commenting out the call to toggle page turns will allow
you to change this setting and the user will only be able to change animations using the menu option.
public void imageSwitcher(View view) { // hide or show full image if clicking on view and not a page turn Activity act = (Activity) vars.context; ImageButton left = (ImageButton) act.findViewById(R.id.leftButton); ImageButton right = (ImageButton) act.findViewById(R.id.rightButton); if (right.getVisibility() == View.VISIBLE && left.getVisibility() == View.VISIBLE) { right.setVisibility(View.INVISIBLE); left.setVisibility(View.INVISIBLE); } else { right.setVisibility(View.VISIBLE); left.setVisibility(View.VISIBLE); // as a bonus change the mode for the animations togglePageTurns(); } }
The next call will be to quiet the sound of the application, this will redirect to the MyMediaPlayer
instance, if not null, and send to it a value of 0.1f which will be used to keep the volume at a very low
setting until the audio focus receives gain.
public void quietSound() { // set volume to low if (myMediaPlayer != null) { myMediaPlayer.setNewVolume(0.1f); } }

The next methods will be to handle the lifecycle calls such as resume, which will resume the adView
banner to the user’s view and will resume the MediaPlayer and SoundPool to be ready for use.
public void resume() { adView.resume(); if (vars.playMusic) myMediaPlayer.resume(); }
The pause method will pause the AdView object and pause the MediaPlayer. Being paused removes
audio focus from the application and allows external applications music to be played.
public void pause() { adView.pause(); myMediaPlayer.pause(); }
Stop will stop the MediaPlayer if playing and save position and then save all the application settings using
SharedPreferences.
public void stop() { if (myMediaPlayer != null) myMediaPlayer.onStop(); Editor editor = sharedpreferences.edit(); editor.putInt(vars.res.getString(R.string.current_image),
vars.currentImagePosition); editor.putInt(vars.res.getString(R.string.turn_mode), vars.pageTurnMode); editor.putBoolean(vars.res.getString(R.string.play_music), vars.playMusic); editor.putBoolean(vars.res.getString(R.string.play_save), vars.playSaveSound); editor.putBoolean(vars.res.getString(R.string.play_page_turn), vars.playPageTurnSound); editor.putInt(vars.res.getString(R.string.current_position), vars.currentSoundPosition); editor.apply(); }
Finally in the destroy method we can release resources associated with MyMediaPlayer and
MySoundPool as well as the AdView object itself.
public void destroy() { if (mySoundPool != null) { mySoundPool.release(); mySoundPool = null; } if (myMediaPlayer != null) { myMediaPlayer.cleanUp(); myMediaPlayer = null;

} adView.destroy(); }
CommonVariables.java The CommonVariables class contains the common variables that will be used across classes and will be
updated in one class and yet expected to retain the same value if the value is retrieved in another class.
If the concept of a Singleton class is new to you then you should review design patterns wiki below to
become more familiar.
Essential Reading: http://en.wikipedia.org/wiki/Singleton_pattern
I will summarize it for you as a class that you will need many times but you only create once. To help
guarantee that you create it only once you will need to declare it as volatile, meaning that it will go
directly to the memory with no caching to create or retrieve it. You will have to synchronize access to
it to avoid concurrency problems associated with multithreading or multiple points of possible access to
getting the instance of the singleton.
If you are familiar with creating new classes in java by calling its constructor you will find the Singleton
pattern to be unique in that you actually get the class by calling its .getInstance() method this will either
create the singleton for you behind the scenes or will return the one created. This way no matter who
calls for it, there is only ever one created.
public static CommonVariables getInstance() { if (instance == null) synchronized (CommonVariables.class) { if (instance == null) instance = new CommonVariables(); } return instance; }
The constructor is then private to make sure that no other class can create itself other than the
singleton itself through the static method getInstance()
private CommonVariables(){}
All of the variables used in the application that should be shared across classes and retain their values
are stored in this class. Variables for settings such as sound on and off are used across different classes
such as the ArtViewer and the MyMediaPlayer classes, the value should be consistent but the access to
them should be simple. Using a singleton class will limit one instance of all the variables declared in it.
CommonWork The common work to be done in the CommonWork class is to create Toast messages for the user.
This is a simple popup message that can be overwritten if consecutive Toast messages are created for
the user.
public void showToast(Context cont, String message) {

// create if not, or set text to it if (toast == null) { toast = Toast.makeText(cont, message, Toast.LENGTH_SHORT); toast.setGravity(Gravity.BOTTOM | Gravity.CENTER, 0, 0); } if (!toast.getView().isShown()) { toast.setText(message); toast.show(); } else { toast.cancel(); toast.setText(message); toast.show(); } }
The showToast method takes the application context as a parameter and the string message you would
like to show to the user. If the Toast is null it is likely the first time the method is being called. If this
Toast is not currently being shown we can set the message to the current Toast and show it. Otherwise
we can cancel out an existing message and overwrite it with the new message. This will prevent multiple
Toast messages from being created and forming a queue for the user that might end up stacking and
showing even after the application has been closed.
InOutAnimationSet The animations used to set the new view for the user and move the current image out of the user’s
view are stored and cycled through in this class. There are two Animations outAnimation and
inAnimation that will be set to the ImageSwitcher views. I include the CommonVariables class for access
to the context. There is a final int for the total animation count that can be set. In this project there are
three different animations that I have created. Each Animation retrieval method switches between these
three repeatedly when the user selects the menu option or taps on the image two times.
public Animation getInAnimationLeft(int anim) { switch (anim) { case WARP_VERTICAL: inAnimation = AnimationUtils.loadAnimation(vars.context, R.anim.fade_in); break; case COLLAPSE_ROTATE_CENTER: inAnimation = AnimationUtils.loadAnimation(vars.context, R.anim.top_left_corner_rotate_in); break; case EXPAND_COLLAPSE: inAnimation = AnimationUtils.loadAnimation(vars.context, R.anim.expand); break; } return inAnimation; } }

MyMediaPlayer The MediaPlayer class is Android’s music player class, it should be used to play music tracks and if not in
use should be released to free up resources that save your phone’s resources and battery power. Read
both the Android source documentation and the developer pages for media playback for a full
understanding as well as read the supported media formats section for further information on the topic.
Essential Reading: http://developer.android.com/reference/android/media/MediaPlayer.html
Essential Reading: http://developer.android.com/guide/topics/media/mediaplayer.html
Essential Reading: http://developer.android.com/guide/appendix/media-formats.html
CommonVariables and CommonWork classes are used for access to variables and toast messaging.
CommonVariables cv = CommonVariables.getInstance(); CommonWork cw = CommonWork.getInstance();
We also create a path for the MediaPlayer to find the music track that you are using. The path will be a
combination of the Path that is declared in the Data.java class and the track that is declared in the
Data.java class.
Uri path = Uri.parse(Data.PATH + Data.TRACK_01);
We can track the MediaPlayer’s state by getting and setting the currentState variable of the
MyMediaPlayer class. The MediaPlayer is state based and in creating your own set of States and methods
you should follow the documentation and diagrams supplied in the above readings.
enum States { Idle, Initialized, Prepared, Started, Preparing, Stopped, Paused, End, Error, PlaybackCompleted
} public States currentState;
This may be one of the better learning experiences you can have with Android, which is learning how to
code this from the state diagram and filling in logic from the source documentation as recommended. So
I will go over the MediaPlayer as best I can to give you an idea of how I implement it. You will need to
be sure to test your media player for playback and resuming as it should work.
The init method begins setup by creating a result from the request for audio focus by the application.
public void init() { am = (AudioManager) cv.context.getSystemService(Context.AUDIO_SERVICE); result = am.requestAudioFocus(this, AudioManager.STREAM_MUSIC, AudioManager.AUDIOFOCUS_GAIN);
if (mediaPlayer == null || currentState == States.Error || currentState == States.PlaybackCompleted) {
mediaPlayer = new MediaPlayer(); mediaPlayer.setOnPreparedListener(this); mediaPlayer.setOnErrorListener(this);

mediaPlayer.setOnCompletionListener(this); mediaPlayer.reset(); currentState = States.Idle; } }
From here we can create a new MediaPlayer and reset it. After this we add the listeners that are needed
to perform standard MediaPlayer actions. You can tell these three have this as a parameter after each
and we can do this in the coding because in the class declaration for MyMediaPlayer we are
implementing three interfaces that work directly with the MediaPlayer class itself, the
OnPreparedListener, the OnErrorListener, and the OnCompletionListener.
public class MyMediaPlayer implements MediaPlayer.OnPreparedListener, MediaPlayer.OnErrorListener, AudioManager.OnAudioFocusChangeListener, MediaPlayer.OnCompletionListener {
We implement the OnAudioFocusChangeListener but do not attach a listener to the MediaPlayer. The
application will call public void onAudioFocusChange(int focusChange) once we declare the
interface. After calling reset we put the MediaPlayer into the Idle state.
If we have focus we can check that we called the start method and that the MediaPlayer state is in the
Idle state. If not we can call init to do this. After which we can start to prepare the MediaPlayer if it is
not already Preparing. Doing this successfully we can continue to set the data source which will use
the context of the application and the path as defined earlier. If you changed the package declaration as
you should have, you will need to make sure the PATH variable in the Data.java class is accurate and
uses the same package as is in your AndroidManifest.xml file.
public void start() { if (cv.playMusic) { if (result == AudioManager.AUDIOFOCUS_REQUEST_GRANTED) { if (currentState != States.Idle) init(); if (currentState != States.Preparing) { try { mediaPlayer.setDataSource(cv.context, path); currentState = States.Initialized;
mediaPlayer.setAudioStreamType(AudioManager.STREAM_MUSIC); mediaPlayer.setVolume(cv.volume, cv.volume); mediaPlayer.prepareAsync(); currentState = States.Preparing; } catch (IllegalArgumentException e) {} catch
(SecurityException e) {} catch (IllegalStateException e) {} catch (IOException e) {} } } } }
We set the MediaPlayer to play using the music stream and set the volume to the stored volume setting
from when we first created the application. We can then make a call to prepareAsync(). While this is
happening there is a chance the coding logic could make its way here again to the start method and we

will not want to prepare it again if the first preparing has not failed or completed. To prevent this we
put the current state into the Preparing state. We will also need to catch any exceptions that might
come up from this method so the application can recover from error conditions.
After the work of the asynchronous call prepareAsync() is finished the method onPrepared is called.
@Override public void onPrepared(MediaPlayer player) { // check for option to play music and resume last position if (currentState == States.Preparing) { currentState = States.Prepared; if (cv.playMusic) { if (cv.currentSoundPosition >= 0) { mediaPlayer.seekTo(cv.currentSoundPosition); } if (currentState != States.End && !player.isPlaying()) { player.start(); currentState = States.Started; } } } }
The current state should be Preparing. If ready we can put the put the media player in the Prepared
state and if the stored variable for play music is set to true we are ready to move the media player into
the position we have last saved. Finally check the MediaPlayer isn’t released and make sure it isn’t
already playing. After which we can start the player and set the state as Started. If the MediaPlayer
does reach the OnError listener we will have to put the MediaPlayer in the Error state and re-start it.
We can do this by calling the start method, if the MediaPlayer is not in the Idle state in the start
method it will reset the MediaPlayer before attempting to resume playback.
@Override public boolean onError(MediaPlayer mediaPlayer, int i, int i2) { currentState = States.Error; init(); return true; }
Essential Reading:
http://developer.android.com/reference/android/media/MediaPlayer.OnErrorListener.html
We use the OnAudioFocusChange method to handle the cases where the audio focus has changed this
included the AudioFocus cases.
@Override public void onAudioFocusChange(int focusChange) {
AUDIOFOCUS_GAIN
The MediaPlayer should resume playing at normal volume.
AUDIOFOCUS_LOSS

The focus is lost for what may be an extended duration.
We will have to release focus for the device and pause if playing, stop and then release
the MediaPlayer and put the current state into the End state.
Setting the media player as null allows the resources associated with it to be freed.
AUDIOFOCUS_LOSS_TRANSIENT
Android may see it as a temporary loss of focus but we still need to pause the
MediaPlayer and record the position it stopped at.
AUDIOFOCUS_LOSS_TRANSIENT_CAN_DUCK
In this case we simply reduce the volume for notifications and it is expected that the
sound will return shortly.
This will be returned to the previous volume in the AUDIOFOCUS_GAIN case.
When we resume the playing of music after returning to the application or from the user pressing the
menu option for toggling the music we can restart the media player by calling init and start methods in
succession. This will attempt to re start the media player.
public void resume() { // media player should have been destroyed in last pause init(); start(); }
Whenever we set a new volume I track this new volume. We don’t want to set a new volume if the
current state is End, likely from shutting down. If the mediaplayer is not playing we don’t want to set a
new volume to it. This is a call from coding logic in the application and not a method that is called
because the user is changing volume manually.
public void setNewVolume(Float setVolume) { if (currentState != States.End && mediaPlayer.isPlaying()) { mediaPlayer.setVolume(setVolume, setVolume); } } The menu option for disabling and enabling the music is performed in the toggleMusic() method.
After which we simply set a flag to know what to do at that time and inform the user via our common
work class that the music has been resumed or shut off.
public void toggleMusic() { if (cv.playMusic) { cv.playMusic = false; cw.showToast(cv.context, "Music off"); pause(); } else { cv.playMusic = true; cw.showToast(cv.context, "Music on/restarted"); resume(); } }

The onCompletion listener is used to set the state of the MediaPlayer to PlaybackCompleted and we
will need to reset our sound position place to zero so it will play from the beginning on start. If you do
not want the music to loop you can comment the start call out if you like.
public void onCompletion(MediaPlayer mp) { currentState = States.PlaybackCompleted; cv.currentSoundPosition = 0; if (mp != null) { mp.release(); mp = null; } init(); start(); }
When stopping the application we want to make a call to onStop on our MediaPlayer that way we can
correctly pause and set the state to Paused. At this point we can get the current position for resuming.
public void onStop() { if (mediaPlayer != null) { if (mediaPlayer.isPlaying()) { mediaPlayer.pause(); currentState = States.Paused; cv.currentSoundPosition = mediaPlayer.getCurrentPosition(); } } cleanUp(); }
When leaving the application we will want to release the media player if it is not null and set the current
state as the End state. Finally we set the MediaPlayer to null to let Android free the resources associated
with the MediaPlayer.
public void cleanUp() { // a final check when the app closes down for good if (mediaPlayer != null) { mediaPlayer.release(); currentState = States.End; mediaPlayer = null; } }
MySoundPool The SoundPool class should be used to play short sound snippets, in rapid succession if needed. I use a
class that extends SoundPool so it does everything a SoundPool does but I can add in extra functionality
that is used in the application. The only variables included here are the CommonWork and
CommonVariables class you should be familiar with by now. You can read the documentation provided
by Android below for further information on the Android SoundPool.
Essential Reading: http://developer.android.com/reference/android/media/SoundPool.html

The default constructor is used in this version although as of Lollipop you can use a SoundPool builder
to create the SoundPool object. For the constructor I wanted to load two separate sounds and create a
flag for each so that when it comes time to play the sound the sound pool will know whether the sound
was loaded correctly. You can see there are two load calls and onLoadComplete each save variable has
a Boolean loaded variable associated with it. This will be the flag at run time as to whether or not the
device will play these sounds.
@SuppressWarnings("deprecation") public MySoundPool(int maxStreams, int streamType, int srcQuality) { super(maxStreams, streamType, srcQuality); // create a new sound pool and set up sounds this.setOnLoadCompleteListener(new OnLoadCompleteListener() { public void onLoadComplete(SoundPool soundPool, int sampleId, int status) { if (sampleId == vars.saveSound) vars.saveSoundLoaded = true; else if (sampleId == vars.pageTurnSound) vars.pageTurnLoaded = true; } }); vars.saveSound = load(vars.context, R.raw.imagesaved, 1); vars.pageTurnSound = load(vars.context, R.raw.pageturn, 1); } On play of either sound we will need to perform two checks before attempting to play the sound. Frist
we will make sure the sound was loaded on the start of the application and then we will need to check
that the user has not toggled the sounds off via the menu button.
public void playSaveSound() { // check for sound file to be loaded and wanting to be player if (vars.saveSoundLoaded && vars.playSaveSound) { play(vars.saveSound, vars.volume, vars.volume, 1, 0, 1f); } }
When the user does select the menu button we can toggle the sounds on and off. If either of the sounds
are off we can set the variables to true if they are loaded and send a message to the user that the
sounds are on or restarted. In the case the sounds are on and then shut off we send the message that
the sounds are off. I separated the checks for sounds to be loaded since one could have failed during
loading. This allows is to know that if one of them was loaded we can turn them both off.
public void toggleSounds() { // assume turning sound off boolean soundOff = false; // check for sound loaded the change flag if (vars.saveSoundLoaded) { if (vars.playSaveSound) { vars.playSaveSound = false; soundOff = true; } }

// again check for sound to be loaded first if (vars.pageTurnLoaded) { if (vars.playPageTurnSound) { vars.playPageTurnSound = false; soundOff = true; } } // if either sound had to be turned off then skip here if (!soundOff) { if (vars.saveSoundLoaded) vars.playSaveSound = true; if (vars.pageTurnLoaded) vars.playPageTurnSound = true; work.showToast(vars.context, "Sounds On/Restarted"); } else { work.showToast(vars.context, "Sounds Off"); } }
NewImageSwitcherImage.java If this is your first experience with AsyncTask you will find it useful to perform actions behind the
scenes and then modify the user’s view in a seamless way. Further reading can be found here.
Essential Reading: http://developer.android.com/reference/android/os/AsyncTask.html
For this example we are using it to load bitmaps to the ImageSwitcher. We will need a WeakReference
to hold the ImageSwitcher itself and then we need the CommonVariables class. When we call the
constructor we will need the ImageSwitcher object that is being used to store a copy of it.
public NewImageSwitcherImage(ImageSwitcher imageSwitcher) { // set reference to the image switcher is = new WeakReference<ImageSwitcher>(imageSwitcher); }
The doInBackground method takes parameters for updating to progress of work to the user. For this
example I simply add code to get screen dimensions and begin decoding and creating the bitmap to be
set. I get the screen dimensions from the window manager using display metrics. Here I store them in
the CommonVariables instance and also use them to decode the bitmap and create a scaled bitmap.
Finally we turn the bitmap into a BitmapDrawable that can be set to the ImageSwitcher.
@Override protected BitmapDrawable doInBackground(Object... params) { WindowManager wm = (WindowManager) common.context .getSystemService(Context.WINDOW_SERVICE); DisplayMetrics metrics = new DisplayMetrics(); wm.getDefaultDisplay().getMetrics(metrics); common.screenH = metrics.heightPixels; common.screenW = metrics.widthPixels; Bitmap bitmap = decodeSampledBitmapFromResource(common.res, Data.PICS[common.currentImagePosition], common.screenW,
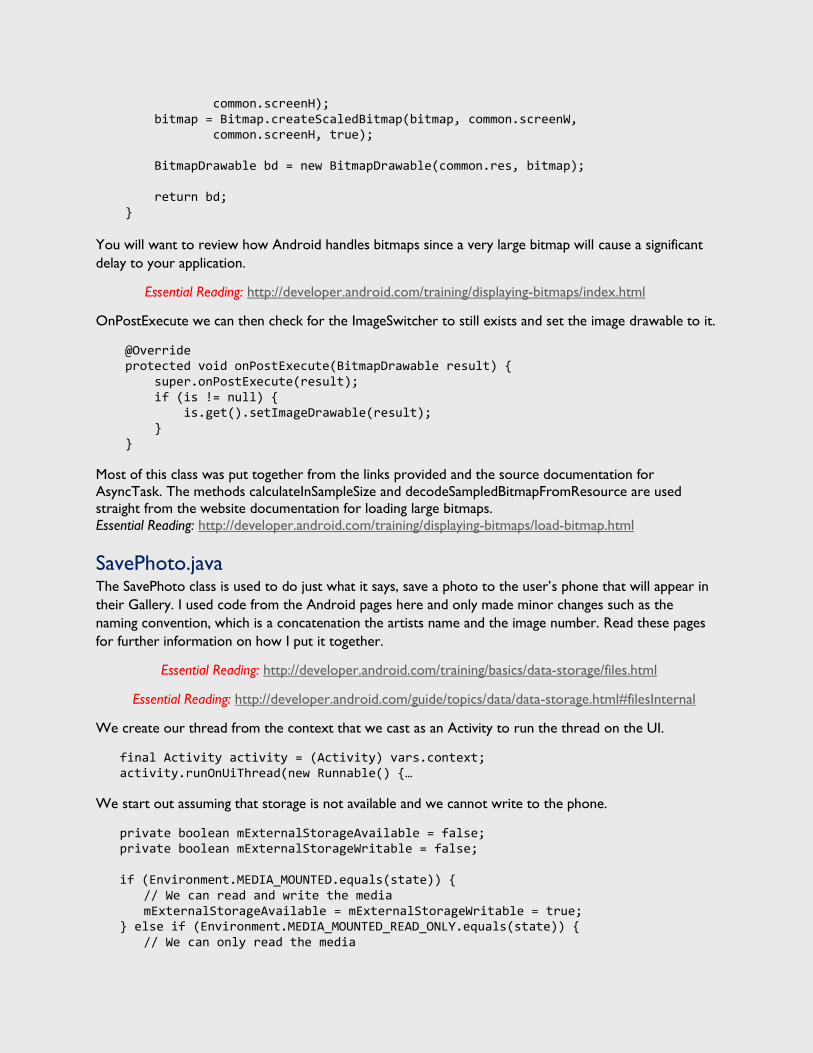
common.screenH); bitmap = Bitmap.createScaledBitmap(bitmap, common.screenW, common.screenH, true); BitmapDrawable bd = new BitmapDrawable(common.res, bitmap); return bd; }
You will want to review how Android handles bitmaps since a very large bitmap will cause a significant
delay to your application.
Essential Reading: http://developer.android.com/training/displaying-bitmaps/index.html
OnPostExecute we can then check for the ImageSwitcher to still exists and set the image drawable to it.
@Override protected void onPostExecute(BitmapDrawable result) { super.onPostExecute(result); if (is != null) { is.get().setImageDrawable(result); } } Most of this class was put together from the links provided and the source documentation for
AsyncTask. The methods calculateInSampleSize and decodeSampledBitmapFromResource are used
straight from the website documentation for loading large bitmaps.
Essential Reading: http://developer.android.com/training/displaying-bitmaps/load-bitmap.html
SavePhoto.java The SavePhoto class is used to do just what it says, save a photo to the user’s phone that will appear in
their Gallery. I used code from the Android pages here and only made minor changes such as the
naming convention, which is a concatenation the artists name and the image number. Read these pages
for further information on how I put it together.
Essential Reading: http://developer.android.com/training/basics/data-storage/files.html
Essential Reading: http://developer.android.com/guide/topics/data/data-storage.html#filesInternal
We create our thread from the context that we cast as an Activity to run the thread on the UI.
final Activity activity = (Activity) vars.context; activity.runOnUiThread(new Runnable() {…
We start out assuming that storage is not available and we cannot write to the phone.
private boolean mExternalStorageAvailable = false; private boolean mExternalStorageWritable = false; if (Environment.MEDIA_MOUNTED.equals(state)) { // We can read and write the media mExternalStorageAvailable = mExternalStorageWritable = true; } else if (Environment.MEDIA_MOUNTED_READ_ONLY.equals(state)) { // We can only read the media

mExternalStorageAvailable = true; mExternalStorageWritable = false; } else { // Something else is wrong. It may be one of many other // states, but all we need // to know is we can neither read nor write mExternalStorageAvailable = mExternalStorageWritable = false; }
After we check that this is possible we can start to declare the name and path of the file’s location in the
device for saving. Next we check that the file doesn’t already exist.
if (mExternalStorageAvailable && mExternalStorageWritable) { // then write picture to phone File path =
Environment.getExternalStoragePublicDirectory(Environment.DIRECTORY_PICTURES);
String name = vars.res.getString(R.string.artist) + "_" + currentImageToSave + ".jpeg";
File file = new File(path, name); InputStream is = null; // check for file in directory if (file.exists()) { work.showToast(vars.context, vars.res.getString(R.string.save_exists));
If we can make the directory or the directory exists we can begin to write to the device using
OutputStream.
boolean b1 = path.mkdirs(); oolean b2 = path.exists(); // Make sure the Pictures directory exists. if (b1 || b2) {
// get file into input stream is = activity.getResources().openRawResource( Data.PICS[currentImageToSave]);
OutputStream os = new FileOutputStream(file); byte[] data = new byte[is.available()]; is.read(data); os.write(data); is.close(); os.close();
work.showToast(vars.context, vars.res.getString(R.string.save_success));
At any point where the saving of the image might fail the CommonWork class is used to show a toast
message to the user. We also show the toast message on success of saving the image. Finally, the
MediaScannerConnection static method call to scanFile is used to refresh the device so that the image
will appear in the index of your phone or device.

MediaScannerConnection.scanFile( vars.context, new String[] { file.toString() }, null, new MediaScannerConnection.OnScanCompletedListener() { @Override public void onScanCompleted( String path, Uri uri) {} });
JUnit Testing Testing should be performed after you update the application and would like to not only prove it works
from a usual usage play testing perspective but also from the technical perspective.
The classes included are divided into three main classes a null object test class that tests that all essential
components are not null at the start of the application, there is a MediaPlayer test class, and a page turn
testing class that you can throttle the speed and number of times the pages turn to show new images.
To run all tests in succession for a defined number of times you use the Test suite method and call each
test class that you would like to add in. You can then run this in a loop for a specified number of times.
package radical.art.template; import junit.framework.Test; import junit.framework.TestSuite; public class AllTests { public static Test suite() { TestSuite suite = null; suite = new TestSuite(AllTests.class.getName()); for (int i = 0; i < 1; i++) { // $JUnit-BEGIN$ suite.addTestSuite(NonNullTests.class); suite.addTestSuite(MediaPlayerPuzzleTests.class); suite.addTestSuite(PageTurnTests.class); // $JUnit-END$ } return suite; } }
When I extend ActivityInstrumentationTestCase2 class to make test scripts the class is given a set of
common methods to be able to perform testing with, you can perform set up and tear down work. So
that when you start the application tests you can set the application in a particular state. Read the below
for a quick overview of these methods functionality.
Essential Reading:
http://developer.android.com/reference/android/test/ActivityInstrumentationTestCase2.html

I use a NonNullTests.java test class to test all the essential objects are in fact being created. It’s a simple
test class and a good starting point to see how to get a reference to your MainActivity instance and test
that it and other classes or objects are not null.
public void testImageSwitcherNotNull() { assertNotNull(mainActivity.artViewer.imageSwitcher); }
I also had some difficulty in creating the MediaPlayer before coding it to the state diagram from the
documentation. After wards I started writing the tests to reflect the functionality that I wanted the tests
to prove were working. For the MediaPlayer I include tests for the following.
1. Prove the media player starts on the start of the application.
a. You can test that the media player is playing by asserting the isPlaying() method of
the MediaPlayer is true.
if (!mainActivity.commonVariables.playMusic) { getInstrumentation().sendKeyDownUpSync(KeyEvent.KEYCODE_MENU); getInstrumentation().runOnMainSync(new Runnable() {@Override public void run() { mainActivity.menu.performIdentifierAction( R.id.menu_music_toggle, 0); } }); getInstrumentation().waitForIdleSync(); } try { Thread.sleep(500); } catch (InterruptedException e) { e.printStackTrace(); } assertTrue(mp.isPlaying());
II. Prove the menu button stops the MediaPlayer from playing.
b. At the start of the application pausing should take the MediaPlayer out of the started
state. You should run test without changing SharedPreferences.
public void testMediaPlayerMenuPlayingToPauseButtonToggleWorks() { getInstrumentation().sendKeyDownUpSync(KeyEvent.KEYCODE_MENU); getInstrumentation().runOnMainSync(new Runnable() {@Override public void run() { mainActivity.menu.performIdentifierAction( R.id.menu_music_toggle, 0); } }); getInstrumentation().waitForIdleSync(); try { Thread.sleep(500); } catch (InterruptedException e) { e.printStackTrace();

}
assertTrue(mainActivity.artViewer.myMediaPlayer.currentState != MyMediaPlayer.State.Started);
}
For the page turn methods, testLeftPageTurns and testRightPageTurns I use two variables TURNS
and SPEED to simulate the page turns of pressing the page turn buttons. You can change the settings of
each to find the threshold of your device for these actions. You can watch your device and see that the
pages are turning.
package radical.art.template; import android.test.ActivityInstrumentationTestCase2; public class PageTurnTests extends ActivityInstrumentationTestCase2 < MainActivity > { MainActivity mainActivity; public PageTurnTests() { super(MainActivity.class); } protected void setUp() throws Exception { super.setUp(); mainActivity = getActivity(); } protected void tearDown() throws Exception { super.tearDown(); } public void testRightTurn() { final int TURNS = 100; final int SPEED = 50; int before = mainActivity.cv.currentImagePosition; getInstrumentation().runOnMainSync(new Runnable() {@Override public void run() { mainActivity.RightArrowClick(null); } }); int actual = mainActivity.cv.currentImagePosition; assertTrue(actual != before); for (int i = 0; i < TURNS; i++) { try { Thread.sleep(SPEED); } catch (InterruptedException e) { e.printStackTrace(); }
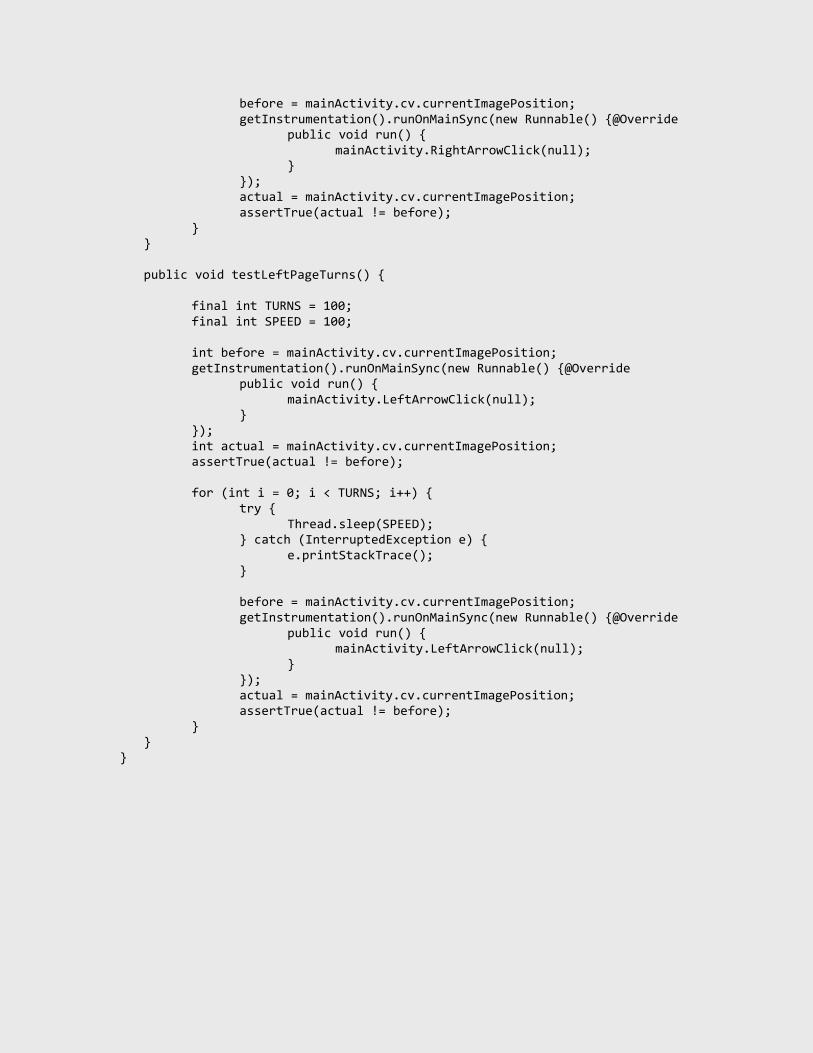
before = mainActivity.cv.currentImagePosition; getInstrumentation().runOnMainSync(new Runnable() {@Override public void run() { mainActivity.RightArrowClick(null); } }); actual = mainActivity.cv.currentImagePosition; assertTrue(actual != before); } } public void testLeftPageTurns() { final int TURNS = 100; final int SPEED = 100; int before = mainActivity.cv.currentImagePosition; getInstrumentation().runOnMainSync(new Runnable() {@Override public void run() { mainActivity.LeftArrowClick(null); } }); int actual = mainActivity.cv.currentImagePosition; assertTrue(actual != before); for (int i = 0; i < TURNS; i++) { try { Thread.sleep(SPEED); } catch (InterruptedException e) { e.printStackTrace(); } before = mainActivity.cv.currentImagePosition; getInstrumentation().runOnMainSync(new Runnable() {@Override public void run() { mainActivity.LeftArrowClick(null); } }); actual = mainActivity.cv.currentImagePosition; assertTrue(actual != before); } } }

Attribution The code in this guide is free to use for commercial or non-commercial use however we assume no
responsibility for the use or misuse of the contents or that the code will run correctly in every situation
or on every device.
Richard A. Perez cannot be held responsible for inept or inappropriate use of source code or for failure
of source code to perform as expected for any reason.
Android Studio is a trademark of Google Inc.
Android, Google and Google Play are trademarks of Google Inc.
Portions of this pdf are reproduced from work created and shared by the Android Open Source Project and used
according to terms described in the Creative Commons 2.5 Attribution License.
Portions of this pdf are modifications based on work created and shared by the Android Open Source Project and
used according to terms described in the Creative Commons 2.5 Attribution License.
Errors, suggestions, problems implementing the code given here, or comments can be emailed to me
and I will try to address each as best I can.
Thanks,
-Rick
Richard A. Perez