![ICND10S08A [Read-Only]](https://static.fdokumen.com/doc/165x107/6316f88cf68b807f880375d2/icnd10s08a-read-only.jpg)
Please read the following manual carefully before using your ...
72
Please read the following manual carefully before using your measurement device. This manual contains important information on how to properly operate this unit. IMPORT ANT : Be sure to send us the included registration card should you NOT have purchased this unit directly from us! Version 1.03-E HW Rev3 / Firmware V2.1 / © 2005-2008 by Aaronia AG, Germany, www.Spectran.com 1
-
Upload
khangminh22 -
Category
Documents
-
view
3 -
download
0
Transcript of Please read the following manual carefully before using your ...

Please read the following manual
carefully before using your
measurement device. This manual
contains important information on how
to properly operate this unit.
IMPORTANT: Be sure to send us the
included registration card should you
NOT have purchased this unit directly
from us!
Version 1.03-E
HW Rev3 / Firmware V2.1 / © 2005-2008 by Aaronia AG, Germany, www.Spectran.com 1

Congratulations! You’ve already won!
By purchasing this SPECTRAN high-frequency measurement device you
acquired a professional piece of equipment which allows measurement of
high-frequency fields.
Please note: For measurement of low-frequency fields (high-voltage lines, trac-
tion power, various household appliances etc.) you additionally need one of
our EMF (NF-)SPECTRAN models.
Thus, we recommend to buy one of our cost-effective measurement BUND-
LES. Bundles can be purchased from Aaronia at any time by paying the cor-
responding price difference.
Also please use our free PC-Software “LCS”. It offers much more features
then the basic SPECTRAN unit, a hughe number of optimized settings from
GSM to WLan, shows chanelnumber and provider, offers a PEP-measurement
and can reduce modulation based measurement errors (WLan and others).
In case of replacement, our devices are optimally recycled, including all cir-
cuitry. In this regard, also check our warranty’s terms and conditions in the
chapter “The Aaronia warranty”. Here you will see yourself:
With Aaronia, client is king!
HW Rev3 / Firmware V2.1 / © 2005-2008 by Aaronia AG, Germany, www.Spectran.com2

Chapter Page1.0 Safety precautions 52.0 Scope of delivery 63.0 LC display 74.0 Key layout 85.0 Your first measurements / modes 95.1 Operation mode spectrum analysis 105.2 The HOLD function 115.3 The panning approach 125.4 Operation mode exposure limit calculation 135.5 Operation mode audio output (demodulation) 155.6 Operation mode broadband detector (RF power-detector) 17
6.0 Setting a custom frequency range 197.0 The main menu 217.1 Center (center frequency) 227.2 Span (frequency range width) 227.3 fLow & fHigh (Start & Stop frequency) 237.4 RBW (bandwidth) 237.5 VBW (video filter) 247.6 SpTime (sample time) 247.7 Reflev (reference level) 247.8 Range (dynamics) 257.9 Atten (attenuator) 257.10 Demod (demodulator / audio analysis) 257.11 Pulse (measurement of pulsed signals) 267.12 Disp (activate HOLD mode) 277.13 Unit (set physical unit: dBm, V/m, mA/m, dBµV) 277.14 MrkCnt (set number of markers) 287.15 MrkLvl (set starting level of markers) 287.16 MrkDis (set marker position) 287.17 AntTyp (setup antenna) 297.18 Cable (setup cable) 297.19 Bright (set display brightness) 297.20 Logger (start data logger) 297.21 RunPrg (execute program) 307.22 Setup (configuration) 30
8.0 Correct measurement 318.1 Noise floor 318.2 Aliases and mirror frequencys 328.3 Measuring WLan and cellphones 328.4 Sensitivity 338.5 Measurement inaccuracy 338.6 Cursor and zoom functions 34
Contents
HW Rev3 / Firmware V2.1 / © 2005-2008 by Aaronia AG, Germany, www.Spectran.com 3

Contents
HW Rev3 / Firmware V2.1 / © 2005-2008 by Aaronia AG, Germany, www.Spectran.com4
Chapter Page9.0 Tips & tricks 3510.0 Exposure limits 3710.1 Limits for personal safety 3710.2 Device limits 3810.3 Architecture-biological limits 39
11.0 Antenna mounting and handling 4011.1 Single-hand usage with the SMA rod antenna 4011.2 Two-hands usage with the HyperLOG antenna 4111.3 Single-hand usage with the HyperLOG antenna 41
12.0 Connections 4312.1 External DC input (battery charging) 4312.2 Audio output 4412.3 Jog Dial / Volume control 4412.4 USB connector 44
13.0 Hardware setup 4514.0 Spectrum analysis basics 4515.0 RF exposure in practice 5115.1 Portable phones 5115.2 GSM & UMTS cellular phones 5215.3 Cell towers 5315.4 TV and radio broadcast stations 5415.5 Satellites 5515.6 Radio amateurs & CB radio 5615.7 Bluetooth - the end of all cables 5615.8 Computers, monitors, cables 5715.9 Microwave ovens 5715.10 Alarm clocks and radio-controlled clocks 58
16.0 What is electrosmog ? 5917.0 Physical units 6017.1 Measuring power [dBm; dBµV] 6017.2 Field strength [V/m; A/m] and power density [W/m²] 60
18.0 Formulas for high-frequency 6118.1 Calculating wave length in [m] 6218.2 Calculating the close-up range in [m] 6318.3 Calculating power density [W/m] from power [dBm] 63
19.0 Conversion tables 64dBm to W/m² with HyperLOG antenna 67
20.0 Frequency tables 67Cellphones & GSM900 67GSM1800 & UMTS 68
21.0 Registration card and warranty 6922.0 Frequencychart Spectrum Analyzer and Antennas 7023.0 For your notes 71
Never expose the device to water. Never use it outdoors while raining. Otherwi-
se, the sensitive electronics could be damaged.
Avoid excessively high temperatures. Do not leave the device on heatings, in
direct sunlight or in your car.
Due to the high sensitivity, the sensors and display of this device are sensitive
to shock, hence it should be handled with care.
Do not drop the device or antennas, as they could be damaged or destroyed!
We strongly recommend using our carrycase for storage and transport.
Even though the device is well secured through the use of counter-sunk screws,
it should still not be reachable by children as it could easily be diverted from its
intended use! Especially the SMA antenna, even though already protected by a
soft plastic layer, represents a potential thread (eyes, etc.)!
The device is maintenance-free. Only clean it externally with a damp cloth. Do
not use any kind of detergent.
ATTENTION:
Always attach antennas and adapters without excessive force. To attach
and release SMA connections, ONLY use the included plastic SMA tool,
as it offers an over-torque protection.
1.0 Safety precautions
HW Rev3 / Firmware V2.1 / © 2005-2008 by Aaronia AG, Germany, www.Spectran.com 5
WARNING:
Avoid to high signal power at the SMA-input! You could distroy your
SPECTRAN!
The maximum power the SPECTRAN units can handle is 0dBm.
Only the HF-6080 can handle higher power up to +10dBm.
Please check the package contents for completeness before first operation.
Reclaim possible missing parts instantly with Aaronia or your Aaronia dealer.
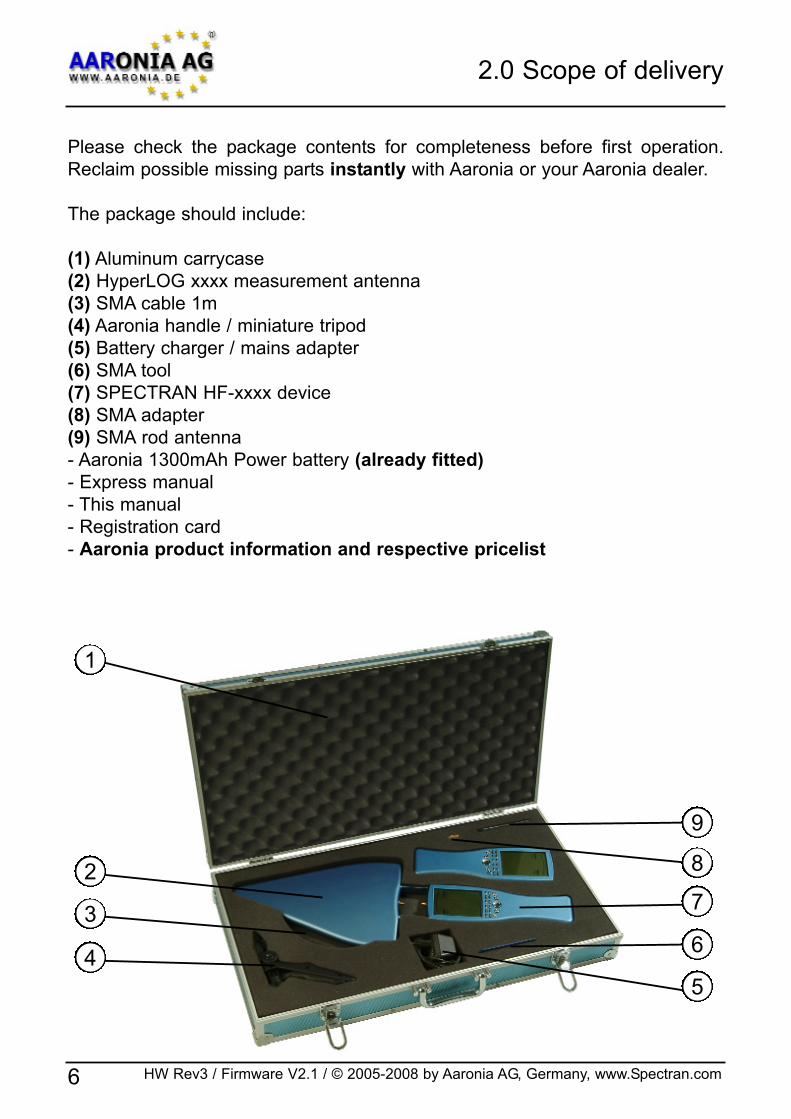
The package should include:
(1) Aluminum carrycase
(2) HyperLOG xxxx measurement antenna
(3) SMA cable 1m
(4) Aaronia handle / miniature tripod
(5) Battery charger / mains adapter
(6) SMA tool
(7) SPECTRAN HF-xxxx device
(8) SMA adapter
(9) SMA rod antenna
- Aaronia 1300mAh Power battery (already fitted)
- Express manual
- This manual
- Registration card
- Aaronia product information and respective pricelist
9
1
2
3
4
5
6
7
8
2.0 Scope of delivery
HW Rev3 / Firmware V2.1 / © 2005-2008 by Aaronia AG, Germany, www.Spectran.com6

(1) BATTERY display
(2) BARGRAPH (50 segments)
(3) Bargraph scaling (6 number blocks)
(4) STATUS field:
SETUP, REF, UNCALL, OVERLOAD!, NUMERIC ENTRY, MIN, MAX
LOW, HIGH, MAX-MIN, ZOOM, USB/PC
(5) AUDIO Status field
AM/FM, LEVEL, NORM
(6) MODE Status field:
AVG, PEAK, HOLD, TIME, MIN, MAX
(7) MARKER block 1
(8) Graphics display (Pixel display)
(9) MULTIPLICATOR field
(10) MEMORY Status field:
STORE, RECALL, RECORD, RESET
(11) DISPLAY MODE Status field:
SPECTRUM, RF, AM, FM, EXPOS.-LIMITS
(12) INFO display
(13) MAIN display
(14) MARKER block 2
(15) MARKER block 3Depending on the model, not all display elements may be available!
1
2
3
4
5
6
7
8
12
11
10
9
13
14
15
3.0 LC Display
HW Rev3 / Firmware V2.1 / © 2005-2008 by Aaronia AG, Germany, www.Spectran.com 7

(1) Numeric block (Hotkeys)1 = Scan 0-1 GHz2 = Scan 1-2 GHz3 = Scan 2-3 GHz4 = Scan 3-4 GHz5 = Scan 4-5 GHz6 = Scan WLan (2,4GHz) 7 = Scan GSM900 (D1 & D2 Cell towers, no cellphones!)8 = Scan GSM1800 (E-Plus Cell towers, no cellphones!)9 = Scan UMTS (UMTS cell towers, no cellphones!)0 = DECT-Analyser (Measure DECT phones)
(2) On-/Off buttonTurn the unit on/off
(3) Clear-/Reset key1.) ESCAPE key: Reset settings and start CW sweep 700MHz to 2,5GHz2.) With main menu active: Delete input.
(4) Arrow keys1.) With main menu active: Selection of menu entries2.) In Spectrum analysis mode:
Right/Left keys: Move frequency range by one SPAN. Up/Down keys: Move Reference-Level by 10dB.
3.) In Exposure limit calculation mode: Right/Left key: Select Exposure limits or W/m²-Display.
4.) In Audio mode: Right/Left key: Increase/decrease Centerfrequency by one RBW.Up/Down key: Increase/decrease RBW (bandwidth).
(5) Dot-key1.) In Spectrum & Exposure limit calculation modes: HOLD on/off.2.) In Audio mode: Switch between AM / FM.
(6) Shift-key In Spectrum & Exposure limit calculation modes: PULSE on/off.
(7) Enter-key1.) Switches between the operation modes spectrum analysis, audio,
exposure limit calculation and broadband detector (power-meter).2.) With main menu active: Confirms current input (ENTER-key)
(8) Menu-keyCall/Dismiss Main menu for changing various settings.
1
2
3
4 8
7
6
5
4.0 Key layout
HW Rev3 / Firmware V2.1 / © 2005-2008 by Aaronia AG, Germany, www.Spectran.com8

To explain how to use SPECTRAN, we will perform measurement of a cell
tower. Doing this, you will get to know the 3 different operation modes of
SPECTRAN, including the important HOLD function and the “panning
approach”: It is really very simple, just follow these instructions step by
step:
Prepare SPECTRAN for operation as follows:
Remove the protective film from the display. Now
connect the triangular HyperLOG-antenna with the
SPECTRAN, using the included 1m SMA cable
(more details on page 38). Should you not yet have
charged the internal battery, you can also operate
SPECTRAN with the included power supply (further
information on page 41).
Now press the On/Off button found at the bottom-left of the device.
SPECTRAN is now powered on and starts a short calibration procedure. To be
able to orient yourself better in the following steps, the most important parts of
the SPECTRAN display are briefly explained here:
5.0 Your first measurement / Modes
HW Rev3 / Firmware V2.1 / © 2005-2008 by Aaronia AG, Germany, www.Spectran.com 9
BARGRAPH (trend display)
Depending on signal strength, the half-circle will grow or shrink. A very
handy function for quickly changing levels!
On all SPECTRAN models with broadband detector the bargraph dis-
play will ALLWAYS show the broadband-power even in spectrum mode.
INFO display
Shows the selected preset (frequency range). Using the keys 0-9, furt-
her presets (DECT, UMTS, etc.) are available.
MAIN display
Displays the level (signal strength) of the strongest signal in dBm.
MARKER block (1 to 3)
Show frequency and signal strength of the strongest signals. Up to 3
markers can be displayed simultaneously.
GRAPHICS display (here: spectrum display)
This highly flexible display field allows display of a great variety of
information, both textual and graphical (spectrum, exposure limits,
menu text, etc.)
DISPLAY-MODE status field
Shows the current operation mode of the SPECTRAN. Possible
modes: SPECTRUM (spectrum analysis), EXPOS.-LIMITS (exposure
limit calculation), AM/FM (audio output) and RF (BB Detector mode).
MODE status field (PEAK & HOLD)
Shows the currently active mode. Possible modes: PEAK (PULSE
mode) and HOLD (Advanced HOLD mode).

Now we will perform our measurement as follows: As a basic prerequisite, you
should know that there are three different kinds of cell towers in Germany:
GSM900, GSM1800 and UMTS.
The optimal measurement parameters are already preprogrammed in SPEC-
TRAN on hotkeys 7 (GSM900), 8 (GSM1800) and 9 (UMTS). As GSM900 has
the highest availability, it is measurable almost everywhere and thus optimally
suited for explaining usage of SPECTRAN: Now, simply press the 7 key for set-
ting up optimal parameters for measurement of GSM900 cell towers. The Sta-
tus display should now show “GSM 900”. Now, you only need to choose the
correct operation mode:
The SPECTRAN devices offer 4 different OPERATION MODES:
- SPECTRUM analysis
- EXPOSURE LIMIT calculation
- AUDIO output
- Broadband PEAK-Detector (Powermeter) (Option. Only 2025E Rev3 up)
You can change the operation mode at any time using the Enter-key.
5.1 Operation mode Spectrum analysis:(The DISPLAY MODE status field shows “SPECTRUM”)
Now press the Enter key until the Display Mode sta-
tus field reads “SPECTRUM”. Should you have “good
reception” and a properly aligned antenna (this is impor-
tant!), you should now have results similar to those shown
in the image on the left. However, should the big Main
display show “----” or “-120”, no signal is being received
and you need to change your location or align the anten-
na differently. During every measurement, a little dot
moves from left to right in the Graphics display. Only
when this dot reaches the right border, the current
measurement is finished and all readings are updated.
The Main display always shows the level of the strongest signal, “-45” in our
example. The bigger this figure is (the closer it gets to “0” or a positive value),
the stronger the received signal (for example: “-35” is much stronger signal
than “-45” shown in our example).
5.0 Your first measurement / Modes
HW Rev3 / Firmware V2.1 / © 2005-2008 by Aaronia AG, Germany, www.Spectran.com10

Directly beneath, a max. of 3 so-called “Markers” are being displayed. They
show the frequencies and levels of the strongest signal sources. In our example,
we got two Markers: Marker1 at 930MHz at -75dBm and Marker2 at 950MHz
at -45dBm (-45dBm also being the strongest signal and thus also shown on the
Main display).
Beneath the Markers, a graphic with several “hills” is shown. It displays the level
distribution over the indicated frequency range. This is the so-called “SPEC-
TRUM DISPLAY”. The higher the “hills”, the stronger the signal at the respective
frequency. The aforementioned markers display the frequency and level at the
peaks of these “hills”.
The indicated frequencies allow exact mapping to origin and provider of the
transmitter. More details on this on page 44 ff., or in the frequency tables on
pages 64 ff.
5.2 The HOLD function(The MODE status field displays “HOLD”)
As you have probably noticed, the display constantly
changes. This is completely normal, as the signal
strength of the high frequency radiation also constantly
changes. This also depends on the alignment of the
antenna. Moving it only a few cm or a different bearing
can cause abrupt changes in readings. Just try it yourself
by aligning your antenna differently and checking out the
display.
Often, you will only want to evaluate the highest reading.
Though, as the display constantly changes, this proves
rather difficult. Thus, the so-called HOLD function is
used. To activate, press the Dot-key. “HOLD” appears in
the Mode status field. From now on, only the highest
value will be displayed. Also, the spectrum display does
not get erased anymore. The complete display now
appears “frozen”.
5.0 Your first measurements / Modes
HW Rev3 / Firmware V2.1 / © 2005-2008 by Aaronia AG, Germany, www.Spectran.com 11
Marker1
930MHz
-75dBm
Marker2
950MHz
-45dBm
Graphics display with
spectrum

If you press the dot key for a second time, “HOLD” disappears again from the
MODE status field, and the HOLD mode is deactivated. For finding the absolu-
te maximum, the so-called “panning approach” is used:
5.3 The “panning approach”When evaluating conformance of exposure limits, usually only the maximum
signal is considered. This value can be found using SPECTRAN and the Hyper-
LOG antenna using the so-called “panning approach”. The panning approach is
already officially approved in many countries. Application is as follows:
Choose the desired frequency range. In our example, we already did this
(GSM900 using the 7 key) and activate HOLD mode (dot key) as explained
above. Now turn and tilt the antenna slowly in all directions until the value stops
changing completely. You have now determined the signal maximum.
However, should you wish to evaluate the signal maximum in a room, you addi-
tionally need to take into account all locations. Walk through the entire room.
Measure especially in corners and near windows as these often produce the hig-
hest readings. During measurement, the maximum reading will also quickly
increase until it finally does not change anymore and “freezes” on its highest
level. When measuring a whole room, this may well take a few minutes.
Mostly, you will be able to find the highest reading by rotating the antenna to the
left or right by 90 degrees, as this corresponds with the alignment of the trans-
mission antennas.
As this antenna is directional, you can even do a bearing of the transmission
tower. However, often, this is only possible outside, as inside rooms, there are
too many reflections which produce erroneous bearings.
Now, just try to find the maximum in several rooms to get comfortable with the
“panning approach” and the important HOLD function.
Now, a measurement result is of course not too useful if it cannot be compared
to some kind of reference limit. Until now, this has been extremely complicated,
using complex tables and converting between units. An often exhausting task
even for some professionals, and particularly for the novice. Thus, SPECTRAN
offers a separate, very easy to use mode specifically for exposure limit calcula-
tion:
5.0 Your first measurements / Modes
HW Rev3 / Firmware V2.1 / © 2005-2008 by Aaronia AG, Germany, www.Spectran.com12

5.4 Operation mode Exposure limit calculation:(The Display status field shows “EXPOS.-LIMITS”)
Now press the Enter-key until the Display Mode
status field shows “EXPOS.-LIMITS”.
Firstly, the strongest signals are shown along with their
frequencies and levels using markers, just like in spec-
trum mode. The large main display shows the level of the
strongest signal, as usual.
In the graphics display below, the strongest signal is con-
verted to power flux density [W/m²] and displayed. The
cable and antenna data is already considered in these
calculations! Particularly practical: the so-called “Autorange” function: the W/m²
display is complemented with the correct fractional unit automatically:
m = 1/1000 (one thousandth)
µ = 1/1.000.000 (one millionth)
n = 1/1.000.000.000 (one billionth)
p = 1/1.000.000.000.000
f = 1/1.000.000.000.000.000
In our example, the display reads 797,21nW/m², or 797billionth W/m² or in
other words: 0,000.000.797.21 W/m².
As this example clearly shows, one would actually drown in the huge number of
“zeros” without the autorange function.
By the way, the practical HOLD feature is also available in this mode for keeping
the display “smoother”.
Better yet: you can even display a percentage relative to
an exposure limit: as vastly different exposure limits
exist depending on your measurement’s purpose and cir-
cumstances, SPECTRAN offers several exposure limits
right away. You can change between exposure
limits with the left/right arrow keys.
Further explanation of exposure limits can be found
in the Exposure limits chapter in this manual.
Just try for yourself: Select the different limits and com-
pare the results. The available choices are:
5.0 Your first measurements / Modes
HW Rev3 / Firmware V2.1 / © 2005-2008 by Aaronia AG, Germany, www.Spectran.com 13

ICNIRP = International exposure limit (a complex formula)
Salz 1 = Old Salzburg precautionary value (1mW/m²)
Salz 2 = Salzburg precautionary value outdoors 2002 (10µW/m²)
Salz 3 = Salzburg precautionary value indoors 2002 (1µW/m²)
In our fictional example, the bargraph display shows approximation to the inter-
national ICNIRP limit by 0,06%. As you can see, with this exposure limit, even a
relatively “strong” signal of -45dBm only generates a few hundredth of a per-
cent (namely 0,06%) of “deflection”. However, if you change to one of the Salz-
burg limits, the unit will quickly indicate even excess of the exposure limit.
When EXCEEDING a limit, the display shows percentages above 100% (for
example 128,00 = excess of exposure limit by 28%). When the percentage is
greater than 999,99%, “***.**” is displayed. This means overflow.
HINT: You can download new and/or updated exposure limits (which con-
stantly change!) from Aaronia’s homepage and keep SPECTRAN up-to-date at
any time. You should also check out our PC analysis software, which offers a
whole range of additional features.
Please note that the values in the graphic display can slightly change even if the
value at the main display is stable because SPECTRAN also uses the non visi-
ble fractions of the main display value to calculate the graphic display values.
One more alternative for finding the location of a signal source or for identifica-
tion / further processing of signals is the so-called Demodulation. Here, modula-
tion and pulsing of signal sources, if they exist, can be converted to sound and
thus become audible. SPECTRAN offers a special mode for this:
5.0 Your first measurements / Modes
HW Rev3 / Firmware V2.1 / © 2005-2008 by Aaronia AG, Germany, www.Spectran.com14

5.5 Operation mode audio output (Demodulation):(The DISPLAY MODE status field shows “AM” or “FM”)
All SPECTRAN units offer a so-called Demodulator. The
demodulator makes pulsing and modulation of a signal
source audible (if it exists).
The frequency-exact, selective acoustic reproduction of a
signal can be very helpful with identifying and finding a
signal source. As demodulation takes place in realtime, it
is also perfectly suited for quickly locating a signal sour-
ce.
SPECTRAN offers two demodulation modes:
AM (amplitude modulation)
FM (frequency modulation).
To switch between the two modes, use the dot key (the DISPLAY MODE sta-
tus field shows “AM” or “FM”).
Volume can be adjusted with the volume control on the
left.
ATTENTION: During audio analysis, the complete dis-
play is “frozen” and the pixel display is shut off to
free up enough CPU power for demodulation. Hence,
ONLY an acoustic reproduction takes place!
In contrast to simple broadband detectors, demodulation
only happens at a certain single frequency (center fre-
quency) with SPECTRAN. Hence, you can selectively
“monitor” very narrow frequency ranges. Please note though that in this mode,
filtering is a bit less effective, which might lead to very strong neighboring sig-
nals also being audible on the actually selected frequency.
For optimal acoustic reproduction of signals, you can select different filter band-
width using the Up/Down arrow keys. The selected filter is displayed in the
large INFO display. possible filters are:
FULL (50MHz)
3MHz
1MHz
300kHz
100kHz
5.0 Your first measurements / Modes
HW Rev3 / Firmware V2.1 / © 2005-2008 by Aaronia AG, Germany, www.Spectran.com 15
Display is “frozen”
Pixel display is shut off

5.0 Your first measurements / Modes
HW Rev3 / Firmware V2.1 / © 2005-2008 by Aaronia AG, Germany, www.Spectran.com16
Often, you will not be able to exactly “hit” the center frequency of a signal, and
demodulation is bad or impossible. Thus, you can fine-tune the center fre-
quency using the right/left arrow keys. The step width used is derived
from the selected filter. Should you have chosen, for example, the 1MHz filter,
steps are 1MHz wide etc. When changing the center frequency, it will be shown
on the main INFO display (full MHz).
Examples:- Cell towers/cell phones:
A GSM900 / GSM1800 cell tower (keys 7 / 8) emits a “beeping” or “crackling”
noise with many interruptions and morse-like “pulsing”. This is the so-called
“control channel”, which is always active and “beeps” exactly at 1733,33Hz.
When one or more cellphones are active, you can recognize an additional
217Hz “crackling” noise (similar to morse code).
An optimal reproduction can be achieved with the 1MHz or 3MHz filter.
- DECT phones:
An easily recognizable signal source is the base station of a DECT phone (Key
0). It produces a 100Hz “humming” sound. You can simply “prove” this by dis-
connecting the mains from the base station: the hum disappears. When you turn
the power back on, the hum will reappear after a few seconds.
Optimal reproduction is achieved by using the 1MHz filter.
ATTENTION: for optimal reproduction of a signal, its level should be at least
-70dBm, even better stronger than -60dBm.
HINT: Optionally, you can even visualize the demodulation using a LF spectrum
analyser. The SPECTRAN NF series lends itself optimally for this purpose, as
the NF-5010 and above offer the required signal input.

5.6 Operation mode broadband detector (RF power detector):(The DISPLAY MODE status field displays “RF”)
All SPECTRAN models with power detector option fea-
ture a integrated PEAK power detector (power meter),
allowing you to do BROADBAND PEAK measurements
of high-frequency power up to 10GHz (12GHz) in dBm or
dBµV.
The measurement sensitivity is about -50dBm. The hig-
hest usable level is +10dBm.
A principal limitation of this mode is that frequency display
is NOT possible, thus only a “0Hz” marker is displayd.
The graphics display now offers a Time Domain Display
and shows the power vs time. You can change the display speed with the
sampeltime (menu “SpTime”). The large main display and the bargraph show
you the measurement result in dBm or dBµV. The noisefloor is about -50dBm.
In addition, a potentially existing amplitude modulation (AM) will be made avai-
lable on the audio output (feature in development). The display mode status field
then will also display “AM”.
Broadband measurements with SPECTRAN offer an instant level display (in
contrast to “spectrum analysis mode“) of the “PEAK”-power in the complete
measurable frequency rage.
By utilizing a high-end, state-of-the-art Silicon-Germanium (SiGe) technology
detector chip, we even provide detection of ultra short pulsings! This opens up
a whole new range of possibilities: For example, measurement of ultra-short
RADAR bursts or other short pulses.
The optional drastically enhanced frequency range of up to 10GHz (12GHz) is
significantly larger than what the spectrum analysis of SPECTRAN can current-
ly offer (currently 7GHz maximum / 9.3GHz is in development) and thus allows,
among others, detection of PAR airport radar in the 9 GHz band.
Obviously, the usefulness of this kind of measurement is limited in certain ways,
as it does not offer any frequency filter (BUT you can use extrenal filter at any
time) or frequency display. Thus, neither direct display of power density or field
strength nor calculation of exposure limit calculation or antenna corection is pos-
sible BUT if you know the transmitter frequency you can calculate the power-
5.0 Your first measurements / Modes
HW Rev3 / Firmware V2.1 / © 2005-2008 by Aaronia AG, Germany, www.Spectran.com 17

density [W/m²] or field strength [V/m; A/m] from power [dBm]. Have a look on
page 63/64 in chapter 18.3. There you get the needet formula, sample calcula-
tions and a easy to use conversion table too.
To detect a signal maximum, you should definitely use the HOLD function (see
chapter 5.2) and the so-called “panning approach“ (see chapter 5.3). This is the
only way to accomplish a useful measurement!
Needless to say, you can also use the broadband option as a power meter. Its
high temperature stability guarantees very well reproducable results. As the
input impedance of the unit is “standard“ 50 Ohms, connection to other measu-
rement equipment is straightforward.
HINT: You can extend your unit with the broadband PEAK detector option at any
time! Depending on your SPECTRAN detectors for up to 10GHz (12 GHz) are
available. Just contact us should the need for one arise.
NOTE: On all SPECTRAN models with broadband PEAK detector option the
bargraph display will ALLWAYS show the broadband “PEAK”-power even in
spectrum analyzer mode.
This means you can get TWO displays in one:
Broadband “PEAK”-power and frequency selective RMS-power at the same
time on the same display.
A great function!
5.0 Your first measurements / Modes
HW Rev3 / Firmware V2.1 / © 2005-2008 by Aaronia AG, Germany, www.Spectran.com18
So far, we have only used the preset frequencies available on the various hot-
keys. However, you can also set a highly precise frequency range (so-called
sweep-range) manually. Like this, the frequency range can be configured for
one particular application to measure only these signals. Additionally, a smaller
frequency range increases sweep speed enormously and improves accuracy.
For setting this frequency range, you only need to know the start- and stop fre-
quencies of the corresponding application and program it in SPECTRAN.
You will also find an excerpt of various radio applications along with their
start- and stop frequencies in the frequency tables on pages 64 and 65.
Subsequently, we will illustrate custom configuration using the new mobile com-
munications standard UMTS as an example. In our case, we only want to find
and evaluate UMTS cell towers of the provider “Vodafone”.
For this, proceed as follows:
First, check the UMTS frequency list on page 65.
UMTS uses frequencies between 1.900,1 and 2.200,0MHz. As we only want to
measure the cell tower and not the cell phone, we only need the so-called
downlink frequency. This frequency, according to the frequency list, ranges
from 2.019,7 to 2.200,0 MHz. The Vodafone cell towers, according to the list,
only use frequencies between 2.110,3 and 2.120,2MHz. These are the start- and
stop frequencies we were looking for. Program them as follows:
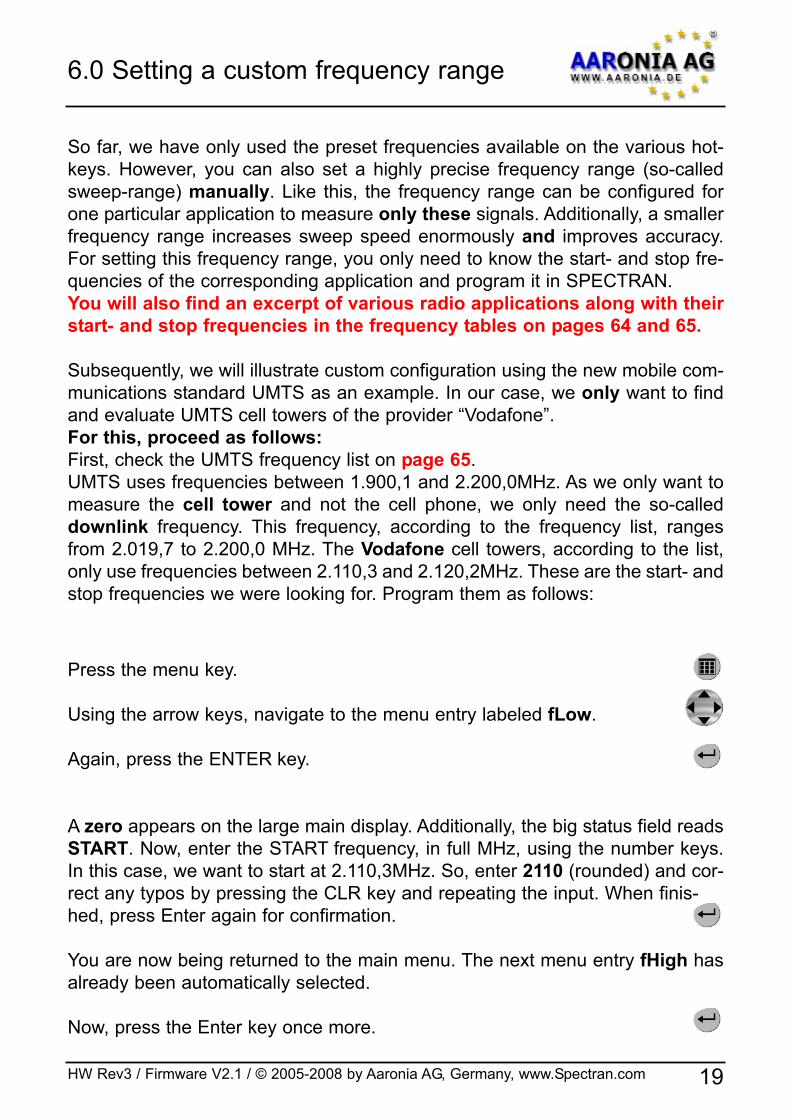
Press the menu key.
Using the arrow keys, navigate to the menu entry labeled fLow.
Again, press the ENTER key.
A zero appears on the large main display. Additionally, the big status field reads
START. Now, enter the START frequency, in full MHz, using the number keys.
In this case, we want to start at 2.110,3MHz. So, enter 2110 (rounded) and cor-
rect any typos by pressing the CLR key and repeating the input. When finis-
hed, press Enter again for confirmation.
You are now being returned to the main menu. The next menu entry fHigh has
already been automatically selected.
Now, press the Enter key once more.
6.0 Setting a custom frequency range
HW Rev3 / Firmware V2.1 / © 2005-2008 by Aaronia AG, Germany, www.Spectran.com 19

A zero appears in the main display. Additionally, the status field reads STOP.
Now, enter the STOP frequency, in full MHz, using the number keys. In our case,
we want to measure up to 2.120,2MHz. So, enter 2121 (rounded up) and press
Enter again for confirmation.
You are now being returned to the main menu. The next menu entry RBW
has already been automatically selected.
Again, press the Enter key.
Now, a list of various filter bandwidth is displayed.
3MHz has been chosen automatically and is ideal for measurement of cell
towers. Thus, you can confirm this setting by pressing Enter.
You are now being returned to the main menu.
Finally, press the menu key again, and all settings are being confirmed and
the sweep (measurement) starts! The big status field reads CUSTOM, indicating
a custom configuration.
Now, only the configured frequency range between 2.110 and 2.121MHz is
being sweeped (measured), thus all operation modes (exposure limit calculati-
on, spectrum display) now only refer to this frequency range!
Now, you can precisely evaluate if a Vodafone UMTS cell tower is active and
how strong the exposure exactly is. Using the HyperLOG antenna, you can
quickly take a bearing and locate the cell tower.
HINT: You can also save this setting on one of the keys 0 to 9 as a custom “Hot-
key”. More on this on the following pages.
HINT2: Using the Enter key, you can change between Spectrum analysis,
exposure limit calculation and audio reproduction modes at any time.
Though, as UMTS is an unpulsed signal, audio mode does not make sense
here.
Further tips and information regarding the configuration of a custom fre-
quency range and other main menu entries can be found on the following
pages covering the main menu.
6.0 Setting a custom frequency range
HW Rev3 / Firmware V2.1 / © 2005-2008 by Aaronia AG, Germany, www.Spectran.com20

By pressing the menu key, you get to the heart of
SPECTRAN: the menu system.
Here, you can control the entire device, change various
settings, but also do things like starting the datalogger or
save and recall your own programs. By pressing the
menu button again, you can exit the menu at any time.
After calling the menu system, a convenient menu navi-
gation is at your disposal: the currently selected menu
entry is displayed in inverse (black bar). In this example,
“Center” is selected.
For the currently selected menu entry, the current set-
ting is being displayed in “clear text” in the large info
field at the top. In our example, it is the currently set
center frequency (“940”). This way, you save yourself a
lot of manually checking each menu entry.
The marker blocks 1-3 permanently show the following information, from left
to right:
START-, CENTER- and STOP frequency (each in full MHz)
Below, the current values are shown for (from left to right):
Range, MrkLvl and Reflev
This is very practical: It e.g. allows you to quickly call the menu during a
measurement and check the current frequency range, etc., which is otherwise
hardly visible. After checking the values in question, just press the menu key
again, and the measurement continues without any change of parameters.
To move between menu entries, use the up/down arrow keys or the
Jog Dial.
Use the Enter key to activate the currently selected menu entry, which will
allow you to perform input using the keypad or make a selection using the
up/down arrow keys. Input / selection can be confirmed with the Enter key,
which will return you to the menu. Any changes will only take effect when you
finally leave the menu.
Next, each menu entry will be explained in detail, step by step.
7.0 The main menu
HW Rev3 / Firmware V2.1 / © 2005-2008 by Aaronia AG, Germany, www.Spectran.com 21

There are TWO ways to manually set the frequency range:
- Center (Center frequency) and Span (Frequency range width)
or
- fLow & fHigh (Start and stop frequency)
7.1 Center (Center frequency)Chooses the frequency displayed in the middle of the readout. When changing
the Center frequency, the SPAN parameter (see following description) is pre-
served. Thus, you can quickly evaluate different frequency ranges with identical
SPAN and without tedious re-adjustment of Start/Stop frequencies.
7.2 Span (Frequency range width)Span adjusts the width of the sweep. Changes are relative to the aforementio-
ned “Center frequency” of the display. By changing Span, the Start/Stop fre-
quency (see following description) is automatically adjusted to be able to con-
form to the Span. Thus, the Span function can be compared to a “magnifying
glass”, though only operating in the X axis.
EXAMPLE: You chose 945MHz as the Center frequency. Now choose 10 as
Span, and the sweep will range from 940 to 950MHz. Choose 200 as Span, and
the sweep will be performed from 845 to 1.045 MHz, etc. In other words, you
always increase or decrease the resolution, centered around the Center fre-
quency.
HINT: The right/left arrow keys can be used to directly move the sweep range
one SPAN unit to the right or left.
SPAN
Center Frequency
7.0 The main menu
HW Rev3 / Firmware V2.1 / © 2005-2008 by Aaronia AG, Germany, www.Spectran.com22

7.3 fLow & fHigh (Start & Stop frequency)fLow (start frequency) sets the frequency where the sweep should begin, whe-
reas fHigh (stop frequency) sets its ending frequency. From these two, the com-
plete frequency range which gets sweeped is derived.
Please note that a large frequency range will badly squeeze the display hori-
zontally (in the X axis) and thus significantly reduces measurement accuracy.
Individual signals, especially when close together, will often not be distinguisha-
ble anymore. However, if you narrow the frequency range, you will be able to
analyze the sweep range more precisely. You will be able to see far more detail
and higher accuracy. A large frequency span is thus mostly useful for a broad
overview, not for exact measurements.
7.4 RBW (bandwidth)By adjusting bandwidth, you can adjust detail clarity and sensitivity at once.
When bandwidth is set to a very high value or even to FULL, the sweep will be
very fast, however, the display becomes comparatively inaccurate and sensitivi-
ty is low. Hence, very weak signals will not be picked up anymore. The smaller
the bandwidth, the longer the sweep will take, but the display will be more pre-
cise and weaker signals can still be displayed. Thus, for example, a single sig-
nal initially sweeped with high bandwidth can turn out to be a number of sever-
al narrow, close together signals. However, this gain in accuracy has its downsi-
de in the far longer sweep times.
Attention: Please note that a few special digital protocols, like e.g. cell
phones, can often be unmeasurable with wrong bandwidth, as the “hit
rate” will dramatically decrease. For these, you should always use high
bandwidth (3MHz) for optimal measurement results.
fLow (Start frequency) fHigh (Stop frequency)
RBW (1MHz) RBW (3MHz)
7.0 The main menu
HW Rev3 / Firmware V2.1 / © 2005-2008 by Aaronia AG, Germany, www.Spectran.com 23

7.5 VBW (Video filter)The so-called Video filter is intended for optical smoothing of the signal. The
lower the Video filter setting, the broader and “smoother” the display of the sig-
nal becomes. Using this filter, you can mostly suppress unwanted noisefloors,
harmonics or sporadic peaks. However, with a low Video filter setting, the dis-
play can become less meaningful. In our example, there might be three sepa-
rate signals present. However, the low video filter straightens these signals out
to become one single “smooth” signal. The alleged noise band around the sig-
nal has also been “smoothed out”. Thus, when dealing with weak signals, the
Video filter should be used only at a higher setting.
7.6 SpTime (Sampletime)Sets the time per sample. As a measurement consists of several samples, the
time needed for a complete sweep will thusly increase, too. The higher the
sampletime, the more accurate the measurement, but the longer it will take,
too. Sampletime is measured and set in seconds (from 0.05 to 9.999).
Attention: Please note that special digital communication standards, like
e.g. cell phones, often might not be recognized well or at all with wrong
sampletimes as the “hit rate” will then greatly decrease. Here, you
should always work with the sampletime 0.5 seconds and a small SPAN.
Also note the optimized settings in our free “LCS” PC-Software.
7.7 Reflev (Reference level)The so-called Reference level sets the position of the signal display relative to
the upper display border. The smaller the setting, the closer you get to the so-
called noise floor and the greater the amount of visible interference. The Refe-
rence level thus can be used, for example, for optically suppressing distracting,
weak signals. The higher the Reference level, the smaller the amount of weak
signals that get displayed. Only the “peaks” of the strongest signals will be
shown, the rest is “cut off”. Like this, you can, for example, achieve a clearer dis-
play of an interesting, strong signal. Though, for the first measurement, the
Reference level should be set as low as possible to find even the weakest sig-
nals properly.
7.0 The main menu
HW Rev3 / Firmware V2.1 / © 2005-2008 by Aaronia AG, Germany, www.Spectran.com24
VBW=Full VBW=100KHz

HINT: Using the up/down arrow keys, you can directly move the position relati-
ve to the Reference level.
7.8 Range (Dynamics)Range sets the “size” of the visible range. Setting Range to 100dB (maximum)
will give you the best possible overview of all signal sources. The vertical bars
of the individual signals are virtually being “squeezed” from top to bottom to fit
all signals into the display. On the other hand, when Range is set to 50, more
details will become visible, though a few signals might now be “cut off” at the top
or bottom. In the end, the Range function is comparable with a “magnifying
glass”, though it only works in the Y axis.
7.9 Atten (Attenuator)An attenuator attenuates (weakens) the input signal by the corresponding dB
amount. This makes sense especially with very strong signals to avoid overloa-
ding the RF input. Available choices are:
Auto = The attenuator is chosen automatically (default setting)
0dB = No attenuator
10dB = Attenuate input by 10 dB
20dB = Attenuate input by 20 dB (only HF-6080!)
30dB = Attenuate input by 30 dB (only HF-6080!)
ATTENTION: When “Auto” is switched off, you NEED to manually select an
attenuator with signals over -20 dBm to avoid mismeasurement!
7.10 Demod (Demodulator/Audio analysis)The Demodulator allows you to make pulsing and modulation up to approx.
3,5kHz audible. SPECTRAN distinguishes between two modulation modes:
AM (amplitude modulation) and FM (frequency modulation). The dot-key can
later be used to switch between AM and FM at any time. By pressing Off or by
pressing the menu key, the demodulator is switched off.
Range (dynamics)
7.0 The main menu
HW Rev3 / Firmware V2.1 / © 2005-2008 by Aaronia AG, Germany, www.Spectran.com 25
Reflev (Reference level)

In contrast to simple broadband detectors, demodulation only takes place aro-
und the center frequency! The bandwidth can be set with RBW. Thus, you can
“tune in” to individual, small frequency ranges very selectively. Though, in this
mode, the filter is a bit “weaker”. Hence, very strong signals from neighboring
frequencies could “overshoot” into the actually selected frequency range and
become audible, too.
Example: You are demodulating the signal of a DECT phone (key 9), but there
is also a GSM900 transmitter nearby. Depending on the alignment of the anten-
na, you might also hear the GSM modulation simultaneously.
The frequency-exact, systematic “acoustical analysis” is very helpful when iden-
tifying signal sources. As demodulation is performed in realtime, it is also ide-
ally suited for quickly taking a bearing (locating) a signal source.
7.11 Pulse (measurement of pulsed signals)This mode allows both measurement of pulsed signal sources as well as sig-
nals working with “Frequency hopping”. Examples of devices falling into this
category include DECT phones, cell phones, microwave ovens etc. By choosing
Pulse, the mode is activated and the Mode status field reads “PEAK”. By selec-
ting Std., pulse mode is turned back off.
When set to Pulse, “real” signals display “hatched”.
ATTENTION: If possible, only use Pulse mode with small frequency ranges
(SPAN), as in this mode, aliases and interference signals are NOT being sup-
pressed. Measurements taken with a broad frequency range (e.g. 1GHz
sweeps) in Pulse mode can lead to significant mismeasurements. Also note that
in this mode, the noise floor is principally higher.
HINT: You can also toggle PULSE mode at any time using the Shift key.
7.0 The main menu
HW Rev3 / Firmware V2.1 / © 2005-2008 by Aaronia AG, Germany, www.Spectran.com26
Using the DECT hotkey (key 0), a DECT phone is being measured
(pulse mode is being activated automatically). Also the Time Domain
Mode is activated. Real DECT signals are shown as a view peaks.
GSM signals would be shown as a stable number of peaks similar to a
“fence”. This offers the ability to differ between those signals.
Our free PC software “LCS” offers a even better feature: The “Timeslot
Analysis” mode. This mode offers a 3D view of the DECT signal.

7.12 Hold (activate HOLD mode)With On, you can activate the HOLD mode and the Mode status field will read
“HOLD”. With Off, the HOLD mode is turned back off.
In HOLD mode, the spectrum display does not get erased anymore, thus all
measured signals (peaks) stay visible all the time. In this mode, the display can
only be overwritten by even stronger signals.
Likewise, only the highest three markers since the activation of HOLD mode will
be displayed, along with their frequencies and levels (in dBm).
As such, the HOLD mode in SPECTRAN turns into a true “Jack of all trades” and
is also called “ADVANCED HOLD” mode:
You can use this mode to create full-day diagrams: Simply leave SPECTRAN
in HOLD mode for e.g. 24 hours and the next day, you will see exactly what hap-
pened in the past 24 hours. In the same way, you can use it as an “EVENT-
RECORDER” should you want to catch signals only occurring in certain inter-
vals: Simply leave SPECTRAN running in HOLD mode until it caught the result.
Another situation where HOLD mode is indispensable is the “panning
approach” described in the following chapter.
Another situation where HOLD mode is very helpful is exposure limit calcu-
lation: You can use the readings acquired in HOLD mode for quick and easy
comparison with exposure limits - without acquiring new readings, as even the
markers along with all information are stored. Simply switch to exposure limit
calculation mode after the measurement, and you can instantly see the results.
HINT: You can also turn HOLD mode on/off by using the Dot key (erase
memory)
7.13 Unit (set physical unit)With Unit, you can set the physical unit used by SPECTRAN to show results.
Available choices are:
dBm (DecibelMilliWatts), dBµV (DecibelMicroWatts), V/m (VoltMeter) and
mA/m (MilliAmpereMeter).
Hint: In “EXPOSURE LIMIT analysis” mode, SPECTRAN additionally displays
power flux density in W/m² (incl. Autorange). Thus, in this mode, you can show
three units SIMULTANEOUSLY, as in addition, the bargraph shows values in
dBm!
7.0 The main menu
HW Rev3 / Firmware V2.1 / © 2005-2008 by Aaronia AG, Germany, www.Spectran.com 27
A typical result after a 20 minute car drive with activated HOLD
mode. Easily visible: During the whole drive, only transmitters from
T-Mobile (952 & 942MHz) and Vodafone (936MHz) have been
active.

Hint2: Using this function, you can also convert units. Simply “freeze” the rea-
ding with HOLD, and then choose a different unit. The conversion is being
shown immediately!
Hint3: You can force display of the selected unit in the large Info field by pres-
sing the menu key twice. The text in the large Info field will then be “overwritten”
by display of the unit.
7.14 MrkCnt (Set number of markers)MrkCnt is used to set the number of markers. Possible values are 1,2 or 3.
If you only need to measure one frequency you should reduce the number of
markers to “1”. You then get a very stable display with no “jumping“ markers after
every sweep.
7.15 MrkLvl (set starting level of markers)With MrkLvl, you can configure the reference level from which markers or
exposure limit calculations and readings in W/m² will be displayed. Three
settings ranging from -30dBm to -90dBm are available.
At the -30dBm setting, markers are only shown starting from a very high signal
strength of -30dBm. At -90dBm, even the weakest signals, but also other inter-
ference and noise are being shown as markers. The -70dBm setting mostly
offers the best results (default setting).
7.16 MrkDis (change marker display)The Marker Display Mode configures how markers are displayed. As the indi-
vidual display fields for markers are very different regarding size and readabili-
ty, two configurations are available:
Freq. (frequency) displays the frequency of the markers in the bigger display,
and the amplitude (signal strength in dBm) is displayed in smaller versions.
Ampl. (amplitude) displays the amplitude (signal strength in dBm) of the mar-
kers in the bigger display. The respective frequencies are displayed in smaller
versions.
Usually, you will use the Freq. mode, as the frequencies are often the most
7.0 The main menu
HW Rev3 / Firmware V2.1 / © 2005-2008 by Aaronia AG, Germany, www.Spectran.com28
Freq. (frequency displayed in big) Amp. (amplitude displayed in big)

7.17 AntTyp (Choose connected antenna)AntTyp needs to be used to set the connected antenna, as otherwise, serious
mismeasurement can occur! Here, “HL7025” is used for HyperLOG7025 etc. If
there is no antenna connected, choose “None” as type.
7.18 Cable (Choose connected cable or attenuator)Cable needs to be used to set the connected cable (leading from SPECTRAN
to the antenna), as otherwise, serious mismeasurement may occur! Here, “1m
Std” is used for the included 1m SMA cable. If no cable is connected, choose
“None” as type. The HF-6080 also offers “-20dB” to use the optional external
20dB attenuator to expand the range from +10dBm to +30dBm.
7.19 Bright (Set display brightness)The Bright option allows you to change display brightness. Simply turn the Jog
Dial until the desired brightness level is reached, and confirm the setting by pres-
sing the Enter key. The new setting will be permanently saved.
7.20 Logger (Start recording / Data Logger)With Logger, you can start a long-term recording (Log-
ger) in the current frequency range (HF-4040 and above).
Here, the highest reading and the corresponding level
and frequency is regularly recorded over and over.
Using this function, you can create perfect intraday dia-
grams of cell phones or similar. After processing this data
with a spread sheet software like Lotus123 on the PC, the
result might e.g. look like the diagram on the left.
After starting, the following parameters will be queried:
“Count” = Set the number of logs.
“Time” = Set the length of the pauses between the individual logs
(recordings) in seconds.
“FILEId” = Set the program number under which the recorded data
should be stored. Using the PC analysis software, you can read
out the data using this number. ATTENTION! At the moment
only the usage of program number 1000 is possible!
After inputting “FILEId”, the memory status field will read “RECORD”. The Log-
ger is now ready. Press the menu button again, and the recording starts. During
recording, the number of remaining logs is briefly being displayed in the pixel
7.0 The main menu
HW Rev3 / Firmware V2.1 / © 2005-2008 by Aaronia AG, Germany, www.Spectran.com 29

display on each log event (counter). This allows you to monitor how long the
recording is still going to take. Furthermore, on every log event, a short beep is
emitted. When recording is complete, “RECORD” disappears from the memory
status field and the data can be read out using our free PC analysis software
“LCS”:
Just start the “LCS” software. Go to "Extras" and then activate "Filemanager".
Now click on the left hand “Special” at "logger data". After a view seconds the
logger-data will show up as a table (first power [dBm] then frequency [MHz]).
This data can easily be imported in spread sheet software like Lotus123. Just
use the well known windows “copy and paste” function.
NOTE: It can take some time to transfer bigger data-volume from your SPEC-
TRAN to the PC.
ATTENTION: Please note that the internal 64K memory can quickly be filled.
Thus, we strongly recommend our 1MB memory expansion (Option 001, 99,95
Euros) for using the Logger function.
7.21 RunPrg (Run program)SPECTRAN has its own filesystem where various programs are stored. Even
you can write programs and store them in SPECTRAN’s program memory. Also,
SETUPs (see the following paragraph) are stored as programs. Every program
is stored under its specific program number. Program numbers can be called
with this function, and the corresponding program can be run. For this, simply
enter the desired program number.
7.22 Setup (Configuration)Using Setup, you can maintain individual configurations and programs.
Store saves the current configuration (fLow, fHigh, RBW, VBW, SpTime, Atten,
Reflev, Range, Pulse) as a “mini program”. For this, enter a number above 1000
under which you would like to save. Using the previously described RunPrg fun-
ction, you can recall it later. Del deletes a previously stored configuration. Enter
the number of the configuration which is to be deleted.
Factor resets the device into the default configuration (factory settings). This
function is particularly useful for novices to undo “unwanted” modificati-
ons to the configuration.
HINT: If you use program numbers between 100 and 109, you can later recall
these programs or configurations using the number keys 0 to 9!
7.0 The main menu
HW Rev3 / Firmware V2.1 / © 2005-2008 by Aaronia AG, Germany, www.Spectran.com30

Note that when measuring high frequency radiation, you will encounter
some “strange characteristics” which can be pretty irritating particularly
for novices:
In practice, high frequency radiation rarely constantly fades with distance from
the source: due to reflections, diffusion and diffraction (by houses, trees, walls
etc.), massive selective concentration (so-called “Hot Spots”) is often noti-
ceable, especially inside rooms. Here, the difference in measured signal
strength can easily vary by a factor of 10 or 100 in a range of just a few cm.
Thus, it is sometimes pretty difficult to find the actual source or the maximum
strength of RF radiation.
High-frequency fields are often also measurable on metal objects, as these act
like antennas and cause the corresponding “concentration” or forwarding of high
frequency radiation. Thus, electrical cables are another medium for high-fre-
quency radiation and can “catch” it and “release” it again at a totally different
location. Hence, even well screened rooms can become “contaminated” again
just due to a trivial mains cable. To avoid this, screened rooms must be equip-
ped with so-called mains filters.
Especially, however, the utilization of usual power cables for data transmission
(e.g. Internet, signal-, video- and audio transmission) is a serious source of inter-
ference and radiation.
8.1 Noise floorThe so-called noise floor indicates the limit below which real measurements
become impossible. Here, only interference will be detected. Visually, SPEC-
TRAN would display this as a collection of small “points” or bars which either
stay statically at the same place or change with every sweep (noise). Depen-
ding on frequency, though, the noise floor may get extremely varied. Usual-
ly, it increases with higher frequencies. The noise floor for the GSM1800 hotkey
(key 8), for example, is at around -70dBm. However, professionals with a lot of
experience can still “tease out” a lot - they can still well differentiate between the
usual noise and genuine signals. You can detect the level of the noise floor by
“measuring” WITHOUT antenna or signal.
8.0 Correct measurement
HW Rev3 / Firmware V2.1 / © 2005-2008 by Aaronia AG, Germany, www.Spectran.com 31
Noise floor (below the imaginary line)

8.2 Aliases and mirror frequencysThose are typical effects found in spectrum analysers: when you find a rather
strong signal, additional “phantom” signals appear next to the actual signal, at
fixed distances. These are not “real” signals! A 400MHz signal also shows up at
800MHz, 1200MHz, 1600MHz, a 1800MHz signal also at 3600MHz and
5400MHz. Those are the so called “mirror frequencys”.
Also “aliases” can show up. The distance between aliases and the main signal
is steps of 20MHz. The level difference between those signals and the main sig-
nal is typically very large (20-30dB). When evaluating exposure limits, they
mostly do not even matter at all. Please note when using the 100kHz filter: Two
5MHz Aliases will show up and are almost as strong as the main signal.
HINT: When using a sampletime of >=1, aliases (using RBW 300kHz-3MHz)
are suppressed by almost 100%. Here, an additional “Anti-alias Interleave
Sampling Algorithm” is hooked up. Obviously, though, this does not work with
activated pulse mode.
8.3 Measuring WLan and cell phones
To measure WLan and cell phones, you need to know their characteristics, as in
practice, both systems are only rarely “really” active to allow measurement:
With cell phones, you should actively place a call. Please also note that cell
phones actively decrease transmitting power with good reception conditions or
when you are not talking!
An example for best parameters for a GSM1800 cell phone follows:
fLow=”1710”; fHigh=”1781”; RBW=”3MHz”; SpTime=”0.5”; Pulse=”Pulse”
With Wifi or WLan, you should operate with continuously transfer data because
simple “Pin” mode operation would need a quite long time to detect and measu-
re a signal. An example for best parameters for a 2,4GHz WLan measurement
follows (or just use “hotkey” 6):
fLow=”2400”; fHigh=”2490”; RBW=”3MHz”; SpTime=”5”; Pulse=”Pulse”
Also note to add about 8dB to the signal strength, because the WLan signal is
20MHz wide, but in this case we measures with a 3MHz RBW.
8.0 Correct measurement
HW Rev3 / Firmware V2.1 / © 2005-2008 by Aaronia AG, Germany, www.Spectran.com32
Level difference (typically 20-30dB)
20MHz Distance between aliases is around 20MHz
NOTE: All Revision3 SPECTRANs offer a hardware aliases reduction and
have almost no aliases at all if you use RBW 300kHz-3MHz!
This example in GSM900 mode (key 7) shows a rather strong
main signal of -45dBm at 950MHz, and to the left, aliases at
930MHz with -75dBm.

8.4 SensitivityPlease note that the noise floor and sensitivity can vary widely with spectrum
analysers, depending on frequency. They can be quite different even with only
small frequency changes of a few 100 MHz. In general, however, the following
rule applies: The higher the frequency, the higher the noise floor and thus the
worse the sensitivity. In practice this means: You can measure significantly
weaker signals at “2GHz” than at “6GHz” with the same filter settings, etc.
8.5 Measurement inaccuracyAaronia states a typical accuracy for each SPECTRAN model. However, this
means that higher deviations are entirely possible. Especially when you
approach the so-called noise floor or the maximum sensitivity of a spectrum ana-
lyser, accuracy decreases by principle.
Even though SPECTRAN devices offer an impressive sensitivity considering
their price, a yet higher measurement inaccuracy than the base device itself has
is assumed in practice: The reason behind this are further factors which can
influence measurement inaccuracy: Some of them are: temperature dependen-
ce, repeatability, antenna errors, modulation dependence etc.
According to BUWAL (see also www.BUWAL.ch), one should always expect an
extended measurement inaccuracy of at least 35% even with absolutely profes-
sional equipment. So, expressed in dB, you should always expect a rounded +/-
3dB and consider this in every measurement!
Example: You measure a value of -45dBm. So, the actual result could, according
to the mentioned measurement inaccuracy, vary between -42dBm (-45dBm
+3dB) and -48dBm (-45dBm - 3dB). Thus, as you want to measure exposure
due to radiation, you should always assume the highest value, namely -42dBm.
In simple words:
Always add another 3dB to the measurement inaccuracy of the SPEC-
TRAN device with all measurements.
8.0 Correct measurement
HW Rev3 / Firmware V2.1 / © 2005-2008 by Aaronia AG, Germany, www.Spectran.com 33

8.6 The cursor and zoom functionsUsing the Jog dial, you can activate a cursor in spectrum
analysis mode. This cursor allows you to display the
exact frequency and signal level of a certain point on the
display. To activate the cursor, simply turn the Jog dial
and the cursor appears as a line in the spectrum display.
You can deactivate the cursor by pressing the menu key
twice. The portion of the spectrum display under the cur-
sor is drawn in inverse, so its information is preserved.
By turning the Jog dial, the cursor can be positioned freely on the display. The
readout on the big main display and the exposure limit display and demodulati-
on now ONLY belong to the current cursor position! The current frequency and
level display of the cursor are only updated after a complete sweep and shown
in the first (leftmost) marker field. As such, the auto marker feature is principally
disabled.
When you press the Jog dial after positioning the cursor, you can zoom into a
signal. Here, the CENTER frequency will be shifted to the indicated cursor posi-
tion and frequency, the SPAN is reduced by one half and a new sweep is initia-
ted. So, you have zoomed into the signal by 50%. This function can be repea-
ted as often as you wish until the desired resolution is reached. An incredibly
practical feature.
Deactivate the cursor again by pressing the menu button twice.
ATTENTION: The cursor does NOT get erased when in HOLD mode!
Frequency and level
at the current cursor position
Cursor
The spectrum portion under the
cursor is drawn in inverse
8.0 Correct measurement
HW Rev3 / Firmware V2.1 / © 2005-2008 by Aaronia AG, Germany, www.Spectran.com34

Quick Zero-span sweep (Time Domain Mode)
A quick measurement at a fixed frequency almost in realtime is achievable with
the so-called zero-span. Should you have found a signal on e.g. Hotkey 7
(GSM900), simply set the correct center-frequency using the cursor. Now, set
Span to “0” and SpTime to “0.05”. The level at the center frequency is now con-
tinuously and quickly being updated incl. time domain display!
Optimal for taking bearings and finding maximums using the “panning
approach”.
50MHz “turbo” sweep
Quick measurement of big frequency spans is possible using the 50MHz filter.
Set RBW to “FULL” (50MHz) and SpTime to “0.05”. The sweep now can take
less than a second, even with bigger frequency ranges. Of course, the frequen-
cy and level display is now only a very coarse approximation due to the extreme
filter bandwidth and some noise can show up. Also, levels must now be above
-45dBm or even much higher (depending on frequency) to still be recognized.
Still, a great feature for a coarse overview.
Measurements without aliases (phantom signals)
Aliases (phantom signals) can be almost completely suppressed using certain
settings. As soon as you set SpTime to “1” or higher AND use an RBW setting
from 300kHz-3MHz, an ADDITIONAL “Anti-aliasing interleave sampling algo-
rithm” is being added which almost completely eliminates the aliases. Though,
this filter is obviously not available in PULSE mode.
Allocate keys with your own parameters
The keys 0 to 9 can be allocated with custom configurations (incl. start/stop fre-
quency, RBW etc.). For this, program numbers 100 to 109 correspond to the
keys 0 to 9. Simply store the current configuration via the Setup & Store menu
entries using one of these program numbers, and they will be available at any
time using the corresponding key. It’s even easier with our free PC analysis soft-
ware “LCS”. Here you can even attach info texts. To recall the factory settings,
select “Factor” under the “Setup” menu.
Force display of the used physical unit
After leaving the main menu and after the first complete sweep, the physical unit
(dBm, V/m, A/m or dBµV) is displayed in the big info field. As soon as you press
a hotkey, however, the display is being overwritten by the hotkey’s info text. By
pressing the menu button twice, however, you can force redisplay of the unit.
9.0 Tips and tricks
HW Rev3 / Firmware V2.1 / © 2005-2008 by Aaronia AG, Germany, www.Spectran.com 35

DECT analysis
Using the “0” key, you can call up the DECT analyser to measure active DECT
phones. By pressing the DECT key (0 key) more than once, you can even ana-
lyze all 10 channels (display reads: “DECT 0-9”) INDIVIDUALLY. You will quick-
ly be able to see which of the 10 channels is currently being used and when
channel hopping occurs. This channel separation is particularly practical in Audio
mode. However, a very special feature is the AUTOMATIC-DECT-CHANNEL-
HOPPING-MODE (DECT Auto-Rotate). It is automatically activated after pres-
sing the DECT key for the first time. Here, all 10 channels are CONSTANTLY
being measured and displayed one after the other. Like this, you will never miss
a channel hopping and can e.g. quickly evaluate the exposure caused by ALL
channels, using HOLD mode. Also see chapter 7.11
Exposure limit calculation and display in W/m² with “weak” signals
Simply set the marker level Marker to “-90dBm”
“Conversion” of measurement results to other physical units
As you know, using the HOLD function, you can “freeze” readings. Now, simply
change the unit [V/m, mA/m, dBm, dBµV] in the Unit menu and the old reading
will instantly be converted after leaving the menu.
Correct settings for manual input/measurement
For this, it is best to use our PC analysis software “LCS”. Here, dozens of opti-
mized “profiles” ranging from model making to 5GHz WLan are available at a
mouseclick. Additionally, information like channel number, provider etc. is being
displayed. You can simply “copy” these parameters and transfer them to SPEC-
TRAN.
Generally, the following rules apply to most signals:
1.) Whenever possible, use only small frequency ranges (SPAN) from 10-
20MHz to eliminate interference or aliases and to have fast sweep times
2.) RBW setting of “3MHz” and SpTime of “5” is optimal.
3.) ONLY use Pulse-mode on pulsed signals!
Should you e.g. want to measure the GSM900 Uplink (active mobile phone),
use:
fLow=”876”; fHigh=”915”; RBW=”3MHz”; SpTime=”0.5”; Pulse=”Pulse”
Analysis on your PC
We offer the FREE PC analysis software “LCS” for SPECTRAN on our home-
page. This really versatile PRO software unleashes SPECTRAN’s full potential.
Whenever possible, you should use this software for getting everything possible
out of your SPECTRAN device.
9.0 Tips and tricks
HW Rev3 / Firmware V2.1 / © 2005-2008 by Aaronia AG, Germany, www.Spectran.com36

10.1 Exposure limits (for personal safety)For radio transmitters (including mobile phones/cell towers), internationally
approved exposure limits, but also various precautionary limits and recommen-
dations exist. Depending on the context and country, however, exposure limits
and recommendations differ vastly.
The German limits are defined by the “Regulierungsbehörde für Telekommuni-
kation und Post (Reg TP)”, a subsidiary of the “Bundesministerium für Wirtschaft
und Arbeit (BMWA)”. They are mainly based on the heat generation caused by
high-frequency fields. It is assumed that effects harmful to health only occur
when tissue warms by more than 1°C. These exposure limits are mostly accep-
ted by all national and international committees. For Germany, these limits are
recorded in the “Verordnung über elektromagnetische Felder (26. BlmSchV)”
and are mostly derived from the international recommendations. As an approval
for the compliance with these exposure limits, radio installations acquire the
“Reg TP Standortbescheinigung”.
The German exposure limits are designed for squared averages recorded over
intervals of 6 minutes, and are categorized by frequency ranges. Depending
on the affected group of persons, different limits apply. As an example, we will
use the limit defined for the general population:
Frequency [MHz] E field strength[V/m] M field strength[A/m]
1 - 10 87 / f 0,73 / f
10 - 400 27,5 0,073
400 - 2.000 1,375 * f 0,0037 * f
2.000 - 300.000 61 0,16
This graphic shows a visual
representation of aforementioned
formulas over a frequency range
from 1Hz to 100GHz. The graph
clearly shows that the simple,
wide-spread “broadband”
devices CANNOT measure and
evaluate exposure limits cor-
rectly as they are not frequen-
cy-dependent!
10.0 Exposure limits
HW Rev3 / Firmware V2.1 / © 2005-2008 by Aaronia AG, Germany, www.Spectran.com 37

10.0 Exposure limits
HW Rev3 / Firmware V2.1 / © 2005-2008 by Aaronia AG, Germany, www.Spectran.com38
Also, the difference between the exposure limits for a certain group of people
and the corresponding “maximum limits” are well visible.
Some math:
For D-Net (GSM900) cell towers, this means that the electrical field strength
needs to stay below 1,375 * 935 MHz or approx. 42 V/m.
For E-Net (GSM1800) base stations, this means that the electrical field strength
needs to stay below 1,375 * 1800 MHz or approx. 58 V/m. A huge difference!
Please note that the allowed absolute maximums are another 32 times hig-
her
The highest exposure to high-frequency radiation is mostly caused by the high
transmitting powers of TV and radio broadcast towers. Contrary to widespread
belief, however, often it’s not the cell towers that cause the strongest exposure
to radiation in homes - it’s often portable phones (so-called DECT phones) or
microwaves ovens.
10.2 Device exposure limitsContrary to the personal security limits, the so-called device exposure limits are
often SIGNIFICANTLY more restrictive and much more frequency-dependent.
For example, a cell phone has a totally different device exposure limit than a TV
broadcast station. Here, the allowed limits can easily vary by a factor of millions!
Still, all device exposure limits also need to adhere to the personal securi-
ty limits and are thus a subset of those. A particularly restrictive example is
the ISM868 band. It offers extreme dynamics inside a very small frequency
range:
868,0 868,6868,7
869,2869,3
869,4 869,65869,7
870,0
ERP [mW]
500
25
105
[MHz]

10.3 Architecture-biological limitsThe architecture-biological limits are vastly different to the official personal safety
limits: They are mostly significantly stricter. Well, this would be fine on its own.
However, to our big surprise, in contrast to the highly complex official ICNIRP
limits (which are also authoritative in Germany), they have no “frequency com-
ponent” at all, meaning that these exposure limits are absolutely identical both
at e.g. 900MHz and 2GHz.
Thus, professional technicians and experts in the area are mightily surprised by
this “curious” manner of handling exposure limits. There is a simple explanation
though: As the “measurement devices” used in the architecture-biological field
are cheap and broadband, frequency-selective, professional measurement is
impossible with these. Thus, frequency-selective architecture-biological expo-
sure limits would simply not be measurable with these devices. Though, we
hope that this will change quickly with SPECTRAN, as the frequency should
definitely not just be ignored.
Below, you will find an overview of the most common architecture-biological
limits which can all be selected and displayed instantly using SPECTRAN’s
“Exposure-limit calculation” mode, by using the right/left arrow keys:
Salzb1 = Salzburg precautionary limit (OLD) 1mW/m²
Salzb1 = ECOLOG recommendation indoors 1mW/m²
Salzb2 = Salzburg precautionary limit outdoors (2002) 10µW/m²
Salzb3 = Salzburg precautionary limit indoors (2002) 1µW/m²
Salzb3 = Citizen forum electrosmog for daytime areas (indoors) 1µW/m²
Note: 1mW = 1.000µW = 1.000.000nW
1µW = 0,001mW = 1.000nW
1nW = 0,000.001mW = 0,001µW
10.0 Exposure limits
HW Rev3 / Firmware V2.1 / © 2005-2008 by Aaronia AG, Germany, www.Spectran.com 39

At your choice, you can use SPECTRAN either for a quick frequency measure-
ment with the small SMA rod antenna or, for professional measurement, with
the HyperLOG antenna:
11.1 Single-hand operation with the SMA
rod antenna:The quickest and easiest way to measure frequen-
cies with SPECTRAN is using the small included
SMA rod antenna. This antenna can be directly
mounted to the SPECTRAN device, making a com-
pact, easy to handle measurement unit.
For this, carefully screw the included SMA rod anten-
na to the SMA socket on the SPECTRAN. Screwing
should be possible with only very slight force requi-
red. Never use excessive force! As soon as you
notice resistance, the antenna should be attached
firmly enough. After attaching, the antenna must not
wiggle around and should be seated firmly.
You can also turn the antenna by 45 or 90 degrees
like shown in the illustration on the left.
Finally, you can also screw the included pistol-style
handle to the bottom side of SPECTRAN. Like this, you can handle SPEC-
TRAN more easily or place it permanently on e.g. a table (for this, unfold the
handle to become a miniature tripod).
Please note that you cannot take bearings (measure where radiation comes
from) with the included SMA rod antenna. Furthermore, the SMA antenna CAN-
NOT be used for measuring power flux density [W/m²] or field strength [V/m or
A/m]! This is only possible by using the HyperLOG antenna. Hence, the SMA
antenna is not listed in the “AntTyp” menu, either.
For best results ALWAYS use the HyperLOG-antenna!
Usage of the HyperLOG antenna is explained in detail on the following pages
11.0 Antenna mounting and handling
HW Rev3 / Firmware V2.1 / © 2005-2008 by Aaronia AG, Germany, www.Spectran.com40
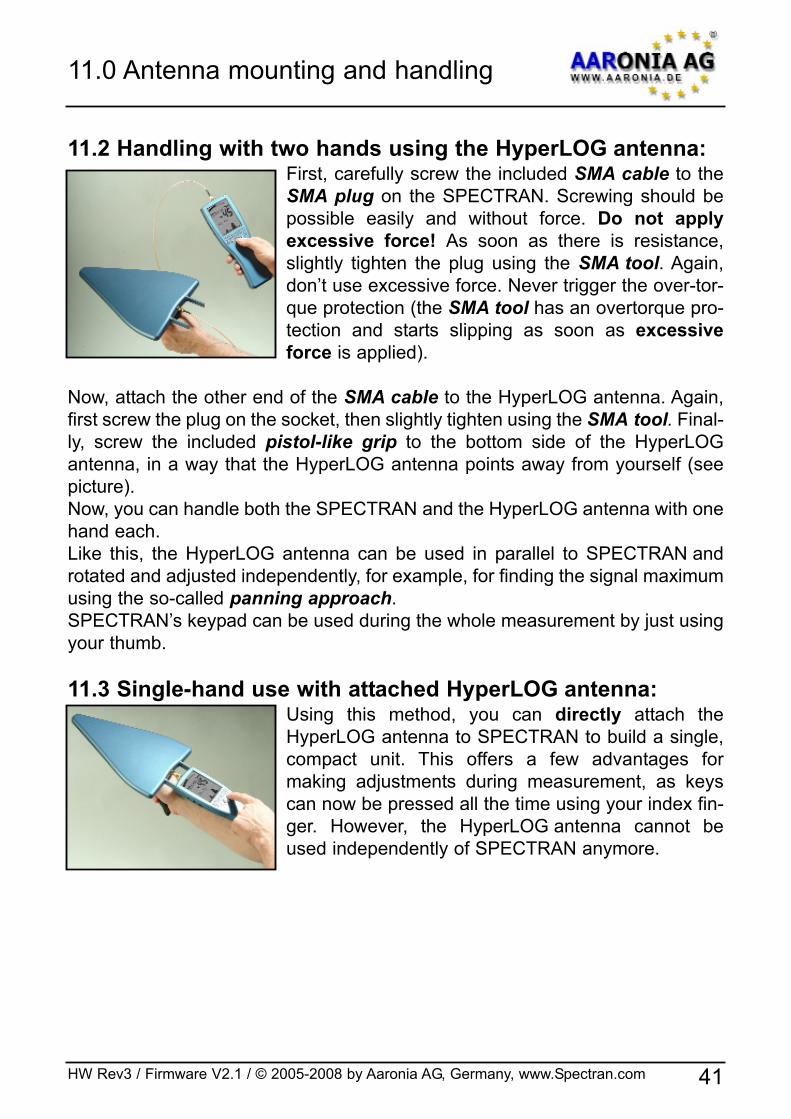
11.2 Handling with two hands using the HyperLOG antenna:First, carefully screw the included SMA cable to the
SMA plug on the SPECTRAN. Screwing should be
possible easily and without force. Do not apply
excessive force! As soon as there is resistance,
slightly tighten the plug using the SMA tool. Again,
don’t use excessive force. Never trigger the over-tor-
que protection (the SMA tool has an overtorque pro-
tection and starts slipping as soon as excessive
force is applied).
Now, attach the other end of the SMA cable to the HyperLOG antenna. Again,
first screw the plug on the socket, then slightly tighten using the SMA tool. Final-
ly, screw the included pistol-like grip to the bottom side of the HyperLOG
antenna, in a way that the HyperLOG antenna points away from yourself (see
picture).
Now, you can handle both the SPECTRAN and the HyperLOG antenna with one
hand each.
Like this, the HyperLOG antenna can be used in parallel to SPECTRAN and
rotated and adjusted independently, for example, for finding the signal maximum
using the so-called panning approach.
SPECTRAN’s keypad can be used during the whole measurement by just using
your thumb.
11.3 Single-hand use with attached HyperLOG antenna:Using this method, you can directly attach the
HyperLOG antenna to SPECTRAN to build a single,
compact unit. This offers a few advantages for
making adjustments during measurement, as keys
can now be pressed all the time using your index fin-
ger. However, the HyperLOG antenna cannot be
used independently of SPECTRAN anymore.
11.0 Antenna mounting and handling
HW Rev3 / Firmware V2.1 / © 2005-2008 by Aaronia AG, Germany, www.Spectran.com 41

11.0 Antenna mounting and handling
HW Rev3 / Firmware V2.1 / © 2005-2008 by Aaronia AG, Germany, www.Spectran.com42
First, carefully screw the SMA adapter to the SMA
socket on the SPECTRAN. Screwing should be pos-
sible without much resistance. Do not use excessi-
ve force! As soon as you notice a resistance, slight-
ly tighten the connection using the SMA tool. Again,
do not apply excessive force! Never trigger the over-
torque protection (the SMA tool features an overtor-
que protection as soon as excessive force is
applied).
Now attach the HyperLOG antenna. For this, the
HyperLOG’s guide rails need to be pushed carefully
and without force into the designated sensor
pickups on the SPECTRAN until the SMA socket of
the HyperLOG antenna snaps and locks into the
SMA adapter. Now screw the SMA adapter to the
HyperLOG antenna, as described before. While
doing so, slightly and continuously push the
HyperLOG antenna further into the sensor
pickups on the SPECTRAN. As soon as the SMA
adapter is screwed to the HyperLOG antenna, slightly tighten the connection
with the SMA tool, as described above.
Now attach the included pistol-like grip to the bot-
tom side of the HyperLOG antenna such that the
antenna and the SPECTRAN device make a single
unit and can be handled as shown in the image on
the left. The SPECTRAN device itself should be sup-
ported by the user’s arm. You now have a single,
compact, easy to handle measurement package.
Using the grip on the HyperLOG antenna, the com-
plete package can easily be adjusted as needed.
After unmounting the grip, the measurement package
can be stowed completely as-is into the Aaronia
carrycase. As such, it is ready-to-use for the next time
without further hassle.

12.1 External DC input (battery charging)All SPECTRAN RF measurement devices contain a
high-performance battery package which is already
installed in the unit. However, this battery is not yet
charged due to safety reasons. Hence, you should
charge it with the included charger. For this, connect
it to your usual mains and plug the small phone jack
into the DC input on the SPECTRAN. Now turn OFF
your SPECTRAN and the battery pack will be auto-
matically charged. Full charge is reached after about
24 hours for the standard 1300mAh battery, and
about 36 hours for the 2200mAh version.
Operating with an external power supply:
As described above, the DC input is meant for charging the internal battery pack.
However, it can also be used for operating SPECTRAN independently of the
internal battery pack.
You can also connect other DC power sources from 8V to 12V max., using a
3,5mm phone jack. Polarization of the jack needs to be as follows:
The inner conductor must be “+”, the outer conductor must be “-”.
Using our optional car power adapter (see price list), you can also operate
SPECTRAN devices in your car.
Should you wish to operate SPECTRAN via the wall power supply, please note
that the power supply will cause additional interference. This may lead to mis-
measurement in extreme cases.
If you wish to use an adequately clean power supply for long-term measure-
ment, it is recommended to operate SPECTRAN on an external, large battery,
which would be able to operate SPECTRAN for several weeks. We particularly
recommend the Aaronia “powerbag” or a comparable third party product. These
offer a regular 12V car adapter and thus can be used directly with our car power
adapter cable.
All cables/devices used for connection to the external DC input must supply a
DC voltage between 8 and 12V via a standard 3,5mm phone jack (inner con-
ductor PLUS, outer conductor MINUS).
12.0 Connections
HW Rev3 / Firmware V2.1 / © 2005-2008 by Aaronia AG, Germany, www.Spectran.com 43

12.0 Connections
HW Rev3 / Firmware V2.1 / © 2005-2008 by Aaronia AG, Germany, www.Spectran.com44
12.2 Audio outputThis is a standard 2,5mm STEREO phone jack that can
be connected to any device which offers an audio input.
Depending on model and manufacturer, these are labeled
differently: e.g. PHONO, CD, LINE IN, MIC etc. Depen-
ding on the kind of input, you need a fitting adapter cable,
which you can purchase from any third party dealer.
NOTE: The internal speaker will not be disabled if you
use the audio output.
12.3 Jog Dial / Volume controlThe Jog Dial, like on modern cell phones or PDAs, repla-
ces the up/down arrowkeys (“turn” the jog dial) and the
Enter key (briefly “press” the jog dial). Like this, you can
e.g. control the complete menu system just with this prac-
tical little wheel.
However, with the demodulator activated, this jog dial
serves as a volume control. As a precaution, before
connecting anything to the audio output, you should turn
this volume control all the way down to zero to avoid over-
load.
12.4 USB connectorThe 5-pin mini USB B connector on the SPECTRAN allo-
ws fast communication with a computer or notebook. With
this feature, you can e.g. download data from SPEC-
TRAN’s data logger, perform software (firmware) updates
or perform advanced signal analysis using your PC with
our SPECTRAN PC software.
For this connection, you need a high-grade, shielded
USB 2.0 cable with USB A to Mini USB B 5-pin (see Aaro-
nia accessory list).

Before taking any measurement, you must tell SPECTRAN WHICH antenna
and/or which cable is connected. Otherwise, SERIOUS mismeasurement can
occur, as every antenna and every cable has totally different characteristics. All
Aaronia antennas and cables have thus been calibrated. You can select these
pre-defined calibration data on SPECTRAN, but also load your own custom cali-
bration settings.
As a factory default (on delivery), the recommended configuration “HyperLOG
antenna” with “1m SMA cable” is selected. Thus, you do not need to make any
changes now if you are using this configuration.
For hardware setup, press the menu key now. You will be directed to the
main menu.
Now, using the up/down arrow keys or the jog dial, first navigate to the
AntTyp menu entry.
Activate the menu entry by pressing the ENTER key or clicking the jog dial.
You are now being shown a list of antennas. Using the up/down arrow
keys or the jog dial, choose the connected antenna. Here, “HL7025” cor-
responds to the HyperLOG7025 etc. If you do not have an antenna
connected, choose “None” as antenna type. Confirm your entry by pressing
the ENTER key or clicking the jog dial. You are now being taken back to
the main menu.
Now, again using the up/down arrow keys or the jog dial, navigate to the
menu entry Cable.
Activate the menu entry by pressing the ENTER key or clicking the jog dial.
You are now being presented a list of cables. Choose the connected
cable by using the up/down arrow keys or the jog dial. The “1m Std” entry
corresponds to the 1M SMA cable included with delivery. If there is no cable
connected, choose “None” as cable type.
Confirm your selection by pressing the ENTER key or clicking the jog dial.
You are now being taken back to the main menu.
Press the MENU button once more, and the new values are being confir-
med and stored.
ATTENTION! All settings regarding antennas and cables are stored perma-
nently, even after switching the unit off. Hence, each time you use the unit,
you should make sure that the connected antenna and cable really correspond
with the settings made in the Hardware SETUP, as otherwise, severe mis-
measurement may occur!
13.0 Hardware Setup
HW Rev3 / Firmware V2.1 / © 2005-2008 by Aaronia AG, Germany, www.Spectran.com 45

What is a frequency range?
Imagine a giant motorway, several kilometers wide, with thousands of lanes. On
this motorway, every imaginable kind of vehicle can be found: motorcycles, cars,
trucks, etc. To not let them get into each other’s way, every lane is reserved for
only a single group of road users: e.g., lane 1 ONLY for cyclists, lane 3 ONLY for
pedestrians, lane 40 ONLY for trucks etc. Depending on the traffic caused by the
individual groups, these lanes also have different widths: For example, the lane
reserved for cyclists is far narrower than that reserved for trucks, etc. High fre-
quency works exactly like this, just that here, the lanes are the so-called fre-
quency ranges, and the road users are applications (for example, a cell
phone, a microwave oven, a radio-controlled car lock, in effect all appliances
that somehow work with radio waves).
So, every application has its own frequency range for EXCLUSIVE use. By
assigning a separate frequency range for each application, conflicts between
different ‘road users’ can be avoided, so that e.g. a cell phone cannot be dis-
rupted by a microwave oven.
Big differences between exposure limits
Back to our motorway: Of course, all road users also have their own specific
speed limits. For our example, a pedestrian may only walk at up to 5 km/h. Cars,
in change, may speed at up to 300 km/h. Exposure limits for radio applications
work similarly: Here, however, the word “speed” is replaced by the transmitting
power: E.g., a broadcast station may have an enormous transmitting power of
1.000.000W or more, in contrast, a radio-controlled car lock only a few mW
(1mW = 0,001W) etc. 3 examples of exposure limits in practice:
Frequency range [MHz] Application Power limit [W EIRP]
1.880-1.900 DECT phones 0,25
2.320-2450 Amateur radio (11cm) 750
5.725-5.825 WLan 802.11a 0,025
It is easily visible that each radio application may only use one EXACTLY
DEFINED frequency range. Also, the high differences in admissible transmit-
ting power are noticeable.
Why spectrum analysis?
There are 2 main reasons:
1.) You would like to know WHICH radio applications are active
14.0 Spectrum analysis basics
HW Rev3 / Firmware V2.1 / © 2005-2008 by Aaronia AG, Germany, www.Spectran.com46

2.) You would like to measure the exposure caused by each of the radio appli-
cations separately, e.g. for evaluating exceeding of exposure limits.
Regarding 1):
Let’s reconsider our ‘giant motorway’ example:
Remember that every lane was only intended for use by a single kind of vehicle.
Now imagine that a huge bridge crossed this motorway, with you standing on the
bridge and looking down on the motorway. Wow, what a mess!
Now, for example, you would like to know exactly what is happening on the
motorway, and this for every single lane. However, the motorway is incredibly
wide, so you would need rather good binoculars to be able to even look a few
km far. Let’s just imagine that your binoculars have a range of 6km (6000m).
Now you would like to know how much traffic there is on a specific lane and how
fast it is travelling. So, you’ll take a piece of paper and write down the number of
the lane and the data you evaluated. Starting at lane 1, you see: nothing! OK,
let’s go on with lane 2: nothing either! Now lane 3: OK, there is some traffic going
at 18km/h. Continuing with lane 4: Nothing! etc. until you have reached the last
lane. What have you accomplished now? You’ve performed an ANALYSIS of
the entire range of lanes from 0-6km. Or, in other words: You performed a
RANGE ANALYSIS. As you know, to analyze something means breaking it down
into smaller parts which can be evaluated. In this case, the 6km wide motorway
was that big “something” and the smaller parts were the individual lanes. The
word “range” can now be replaced by the word “SPECTRUM” and there we are:
You have performed a SPECTRUM ANALYSIS! Who would have thought that
you are a Spectrum analyser!
Jokes aside: If you now in addition have a lanes plan telling you which lane is
assigned to which kind of vehicle, you can exactly determine what kinds of
vehicles have just been travelling.
Spectrum analysis in high frequency technology works exactly like that:
There are “lanes” here as well. Though, these lanes are called frequency ran-
ges. The width of these frequency ranges is measured in the unit Hz (Hertz).
However, as the frequency ranges are mostly found in high Hz ranges, writing
them in plain Hz would require huge numbers. Thus, the unit Hz is often exten-
ded to MHz (1.000.000Hz) and GHz (1.000.000.000Hz). Like this, the whole
thing becomes much clearer. So, 1.000.000.000Hz can also be written as
1.000MHz or 1GHz.
14.0 Spectrum analysis basics
HW Rev3 / Firmware V2.1 / © 2005-2008 by Aaronia AG, Germany, www.Spectran.com 47

But let’s go on: The different kinds of vehicles are called radio applications and
have their own abbreviations: e.g. the radio application “UMTS” (the new, digi-
tal mobile communications standard) has its own frequency range which spans
1.900 to 2.200MHz (1,9-2.2GHz).
The speed at which the vehicles are travelling can now be replaced by a new
expression: the signal strength or level.
So far, we have now explained the used expressions and units. Now, high-fre-
quency analysis works just as our motorway example:
For example, our measurement device should evaluate all frequency ranges
from 1MHz to 6.000MHz (in pictures, our 6.000m wide motorway). Step by step,
every frequency range is evaluated precisely. First, 0 to 1MHz, then 1MHz to
2MHz etc. until 6.000MHz. Also, the signal strength of every frequency range
is exactly stored. Like this, we also learn what signal strength was present on
which frequency range.
Real-world examples:
Let’s assume that we want to exactly evaluate the frequency range from 1GHz
to 6GHz, and that the following 3 radio applications were active simultaneous-
ly with various signal strengths (in practice, though, it will mostly be A LOT
MORE different applications!):
Frequency range [MHz] Application Reading
1.880-1.900 DECT portable phone 40
2.320-2450 Amateur radio (11cm) 20
5.725-5.825 WLan 802.11a 80
How can this be visually displayed on a measurement device? Well, first, we will
map the frequency range from 1GHz to 6GHz on a line from left to right (X-axis):
Ok, this was still pretty simple. Now, we tag each of the 3 applications depen-
ding on their frequency on the right spot of the X-axis and can thus see where
they can be found:
1GHz 6GHz
14.0 Spectrum analysis basics
HW Rev3 / Firmware V2.1 / © 2005-2008 by Aaronia AG, Germany, www.Spectran.com48

Well, this was again pretty simple. And finally, we display the strength of each of
the 3 readings as vertical bars on the Y-axis:
Additionally, we have also adapted the width of each vertical bar to the width of
the respective frequency range of each radio application (the so-called band-
width): DECT only has 20MHz (1.880-1.990MHz=20MHz) of bandwidth, a very
small range. Amateur radio, in contrast, already uses a far higher bandwidth
(2.320-2.450=130MHz) and so on.
Well, this wasn’t all that difficult, was it? We can now see ALL information con-
cerning these three signal sources.
In practice, this will look similar on the SPECTRAN display:
In this example, we also have 3 main signal sources (from left to right):
Signal#1=942MHz at -63dBmSignal#2=2.024MHz at -23dBmSignal#3=5.823MHz at -42dBm
1GHz 6GHz
1,88
0-1,
900G
Hz
2,32
0-2,
450G
Hz
5,72
5-5,
825G
Hz
1GHz 6GHz
1,88
0-1,
900G
Hz
2,32
0-2,
450G
Hz
5,72
5-5,
825G
Hz
40
20
80
14.0 Spectrum analysis basics
HW Rev3 / Firmware V2.1 / © 2005-2008 by Aaronia AG, Germany, www.Spectran.com 49

These are displayed as vertical bars. The same rule as in our example applies
here, too: The higher the measured signal strength, the higher the bar. Further
information regarding each of the bars is displayed from left to right as markers
in the upper display area. On the left, marker 1 is displayed: (the first bar from
the left) with 942MHz at -63dBm. In the middle, marker 2 (the second bar from
the left) 2.024MHz at -23dBm. On the right, marker 3 (the last, rightmost bar) is
displayed: 5.823MHz at -42dBm.
Notice: The configured frequency range is constantly being scanned. Thus, the
display will also constantly change. This is recognizable because of a small dot
above the graphics display which moves from left to right. This procedure of con-
tinuous scanning is called sweeping.
So, what kinds of information have we acquired now?
1.) In the entire frequency range from 0-6GHz, there are 3 main signal sources.
2.) The frequency and signal strength of all 3 sources is exactly known.
So, we have acquired a quick overview of WHAT is active in this frequency
range.
As the exact frequency of the signal sources is now know, it is easy to
determine the exact applications emitting these signals (see also our fre-
quency tables on pages 64-65 or the more extensive frequency tables on
the Aaronia homepage).
On the basis of these frequency tables, we can determine for e.g. 942MHz:
937,6 to 944,8MHz = GSM 900 (DL) T-Mobile
meaning that this is a GSM900 celltower (DL=Download) of the provider
T-Mobile.
14.0 Spectrum analysis basics
HW Rev3 / Firmware V2.1 / © 2005-2008 by Aaronia AG, Germany, www.Spectran.com50

In the real world, you will find hundreds of different high-frequency radiation
sources. In the following pages, we have collected the “most popular” ones,
explaining a few peculiarities about each of them. We will be especially precise
with cell towers and cell phones, as that is the field where we receive the largest
amount of inquiries:
15.1 Portable phones (CT1+ & DECT)Portable phones more and more replace the regular permanently installed
phone in home and office. The two most important available standards are sig-
nificantly different concerning their communications technology:
- CT1+
Transmission with this standard is analogue and not pulsed (thus not audible
even with activated demodulation) and only happens during a call. The trans-
mitting power is around 10 mW with frequencies of 885-887MHz (uplink = por-
table phone) and 930-932MHz (downlink=base station). The base station ONLY
transmits during a call.
- DECT
Radio transmission is done digitally and pulsed (at approx. 100Hz, which is
well audible with SPECTRAN with activated demodulation), even when no call
is being placed, as the base station of a DECT phone always transmits with
full power. The DECT phone, in contrast, ONLY transmits during a call and also
only when the user is actively talking. The transmitting power is approx. 250
mW at frequencies between 1.880 and 1.900MHz.
CT1+ in contrast to common misconceptions, the transmission (voice) quality is
virtually identical to that of the digital DECT standard, however, transmission is
done with very low transmitting power (approx. 10mW) and only during a call.
Until recently, only discontinued models of CT1+ have been available anymore.
However, recently these phones reappear in shops, just because of the afore-
mentioned “optimal” radiation characteristics. Just ask your dealer. By the way,
the utilized communications standard is mentioned in the product manual and
mostly also on the phone packaging. Please note, however, that operation
authorization for these phones expires on Dec 31 2008!
15.0 RF exposure in practice
HW Rev3 / Firmware V2.1 / © 2005-2008 by Aaronia AG, Germany, www.Spectran.com 51

15.2 GSM and UMTS cellular phonesSo-called “cellphones” are getting more and more popular
and already surpassed the number of conventional telepho-
ne network subscribers in 2005. With cellphones, radio trans-
mission is digital and mostly “pulsed”. UMTS, however, is
“not pulsed”. The transmitting frequencies are, depending on
the network, between 876MHz and 2,2GHz. See extensive
tables on pages 64-65.
You should observe that cellphones steadily increase or
decrease their transmitting power depending on reception
quality. This means: The further away you are from the next
celltower when placing calls, the higher the exposure to
radiation from the cellphone.
If you place calls with a cellphone from your car, you will receive a yet signifi-
cantly higher exposure to radiation as the “metal cage” of your car restricts
reception quality (it will mostly switch to full power) and additionally, the radia-
tion is being reflected in large amounts.
To avoid exposure to this strong radiation, you should definitely use an external
antenna for your car. Exposure then becomes minimal and reception quality will
also be significantly better.
Likewise, your cellphone will also transmit with full power inside buildings due
to their strong absorption characteristics.
When you are not placing a call, your cellphone also stops radiating. Like-
wise, when you stop talking during a call, the cellphone strongly turns
down the transmitter-power. When the cellphone is turned on, it will just sig-
nal its presence to the network once every 1 to 6 hours, using a short transmis-
sion impulse. Otherwise, it is completely “dead”.
In contrast, if you move around with a cellphone, it will (depending on movement
speed and network availability) repeatedly emit short pulses to login or logout to
the respective cell towers.
Attention: Recently, so-called “positivising” tachyon stickers, positivising chips,
crystals etc. are offered particularly for cellphones. These products are, as you
can see for yourself with SPECTRAN, total nonsense and complete ripoffs. They
have no effect whatsoever.
15.0 RF exposure in practice
HW Rev3 / Firmware V2.1 / © 2005-2008 by Aaronia AG, Germany, www.Spectran.com52

15.3 Cell towers Cell towers can be seen nearly everywhere these days.
There are only a few places (like large woodlands) which
are still “radiation free”.
The most obvious installations are the up to 100m high cell
towers (base-stations). In case of only a few customers
needing service, these base stations consist of so-called
omnidirectional antennas (mostly one transmitting antenna
in the middle and two reception antennas at either side).
Here, the radiation spreads almost equally in all directions.
Most base stations however can provide service to a much
larger amount of customers. In these cases, a group of
antennas (so-called radio cells) is installed on radio towers
which then only provides service for a certain direction (so-
called sector). Here, when doing measurements, you will
measure different amounts of radiation depending on the
position of the antenna group (see also the radiation pat-
tern on the left). Using this antenna technology, a signifi-
cantly higher transmitting power is possible, using the
same amount of space and the same licensing class. In
most cases, you will find the version with three radio cells
(triangular installation with 3 sectors spanning 120 degre-
es each, see image). Here, you will find a transmitting
antenna on every side, with two similar reception antennas
on either side of the transmitting antenna.
Construction of these “antennas” is very different from that
used for “regular” rod antennas (see picture). They rather
resemble some kind of “fence post”.
All radio cells together make up a huge transmitter network
available all over the country, always appearing as a
single, always optimally working radio cell to the user. In
practice, this works as follows: Say you are walking
through a pedestrian area, placing a call with your cell-
phone. Your phone will automatically recognize which cell
is closest and yields the best reception, and constantly
“jump” automatically to that with the best reception quality,
such that you will always have an optimal, drop-out-free
reception. This whole procedure happens unnoticeable for
the user.
Omnidirectional base
station with a single cell
Sector-base station with
3 radio cells. Each cell
serves a 120 degree
sector
Layout of the base stati-
on shown above
Cone-shaped radiation
diagram of a sector
(seen from above)
15.0 RF exposure in practice
HW Rev3 / Firmware V2.1 / © 2005-2008 by Aaronia AG, Germany, www.Spectran.com 53

The range of these radio cells (also called “radius”) is hig-
hly variable. In good geographic conditions and with small
amounts of users, the radius of such cells can span sever-
al km. So, in rural areas, you might travel several km until
the phone changes cells. That is why in such areas, there
are mostly only a few large base stations. In contrast, if
many users are to be expected and reception quality is
decreased, like in cities with large amounts of buildings,
walls etc., these cells might just have a radius of 100m. To
take this into account, of course, the number of radio cells
in cities must be increased significantly. Thus, in big
cities like Munich, you will find hundreds of individual radio
cells. As even the capacity and range of these cells is often
not sufficient, they are often subdivided once more into
smaller, so-called micro cells. If even these are not small
enough, they are further subdivided into the so-called pico
cells. Micro and pico cells are very inconspicuous as they
are mostly mounted without any kind of mast or tower and
are also of an extremely small size by themselves. Thou-
sands of micro and pico cells can be found in most cities,
often on the walls of buildings, but also inside buildings.
As peoples’ acceptance of mobile communications facili-
ties constantly decreases, though, they are increasingly
being disguised. They are hidden in billboards, company
logos, spires, below roofs etc. For the new generation of
mobile communications (UTMS), the number of cells will
need to be tripled, meaning that hundreds of thousands of
new, well disguised cells will become necessary. These will
only be detectable with high-performance measurement
equipment like SPECTRAN.
Thus, you should keep checking your personal exposure
monthly, even though you can’t see any new antennas.
Would you have known?
Disguised base station
in a spire
Very hard to find:
A micro cell on a buil-
ding wall, above and
below a billboard
Radio cell map divided
into base stations,
micro- and pico cells
15.0 RF exposure in practice
HW Rev3 / Firmware V2.1 / © 2005-2008 by Aaronia AG, Germany, www.Spectran.com54

15.4 TV and radio broadcast towersTV and radio broadcast towers are a relic from the “stone
age” of information transmission. They are among the
strongest radiation sources in existence. The highest
transmitting powers are used by TV broadcast stations,
which may employ more than 1000kW! (for comparison: a
cell tower uses about 40 watts=0,04kW). Short wave radio
stations employ transmitting powers of up to approx.
600kW. FM radio broadcast, employing approx. 100 kW,
are already “more conservative” in this respect. Recently,
these are being converted to digital standards (DVB-T and
T-DAB).
Seeing the enormous transmitting powers involved, it is
not surprising that close to these stations (approx. 100m),
even the extremely high official exposure limits are excee-
ded.
15.5 SatellitesSatellites are gaining an ever-increasing importance for
information transmission nowadays. They orbit the earth at
a height of approx. 36000 km in a geostationary orbit. Even
though these satellites employ a “high” transmitting power
in the high GHz range, the radiation exposure on earth is
so extremely low due to the vast distance that you need
the well known dish antennas seen everywhere to focus
the radiation like a lens. These dish antennas and the cor-
responding LNB receivers do not(!) radiate, in contrast to
popular misconceptions. They are completely passive
reception devices. Thus, satellite technology only causes a
very low amount of radiation exposure. If at all, the recei-
ver may cause radiation as it amplifies and converts sig-
nals for later sending them to the TV. For measuring this
radiation, you additionally need an LF measurement devi-
ce from the SPECTRAN series.
Stone-age technology:
Thousands of these bro-
adcast towers are in
operation.
Modern and almost
exposure-free: Informati-
on transmission via
satellites.
15.0 RF exposure in practice
HW Rev3 / Firmware V2.1 / © 2005-2008 by Aaronia AG, Germany, www.Spectran.com 55

15.6 Radio amateur and CB radioRadio amateurs are allowed transmitting powers of up to
750W divided into two license classes.
CB radio, however, is limited to a maximum 4W of trans-
mitting power, even though sometimes, significantly higher
transmitting powers are used by illegally employing power
amplifiers.
15.7 Bluetooth - the end of all cablesThe radio transmission system “Bluetooth” certainly will
find its way into almost all technical appliances during the
next years. Bluetooth is a new, very affordable, world-wide
standard using approx. 2,4GHz and a high data transfer
rate. Transmission is intended to be extremely resistant to
interference by using “frequency hopping”, and also very
secure by using automatic data encryption.
It will replace both the annoying connection cables used
for stereos, speakers, monitors, printers, PCs etc., as well
as enable communication between up to 8 devices like e.g.
UMTS cellphones or portable PCs. Just a few years
ahead, it will be pretty normal that the coffee maker will be
able to “talk” to the washing machine or the coke vending
machine...
Transmitting power and thus exposure to radiation is
extremely low with bluetooth devices, as power is limited
to just 1mW. However, its range is also limited to only 10m.
Though, suitable amplifiers will also be available, exten-
ding the range to several 100m.
By the way, U.S. market researchers forecast more than
1,4 billion sold bluetooth devices for 2005 alone.
An amateur radio stati-
on. High RF power of up
to 750W is possible.
Ericsson Bluetooth:
From camera to cellpho-
ne via radio.
Bluetooth module in the
year 2000: Newer deve-
lopments are just a tenth
in size...
Ericsson Bluetooth
headset: significantly
lower radiation exposure
compared to cellphones.
15.0 RF exposure in practice
HW Rev3 / Firmware V2.1 / © 2005-2008 by Aaronia AG, Germany, www.Spectran.com56

15.8 Computers, monitors and accessoriesAn ever increasing number of employees nowadays use a
PC at work. However, more then one out of two German
households today owns a PC. PCs (not as much the moni-
tors) create large amounts of EMFs. Particularly the CPU
and various expansion cards emit high doses of high-fre-
quency EMFs. Also, various PC accessories like monitors,
printers, scanners etc. emit low-frequency EMFs through
their mains cords. We recommend replacing these cables
and possible power strips with our screened cables and
power strips to avoide EMFs. This is a quick and easy task
and provides a very good protection efficiency.
15.09 Microwave ovensThe “microwave”, loved by almost everyone, actually is
just a high-frequency transmitter with extremely high trans-
mitting power. While authoritative exposure limits for cell-
phones try to avoid warming up of tissue in the head, exac-
tly this effect is utilized in a microwave oven. The electro-
magnetic waves generated in the oven excite vibrations in
the water molecules. The energy from these vibrations in
turn causes warming up of food, etc. The transmitting
power used is so extremely high that food heats up in a
matter of only a few seconds. Microwave ovens use high
frequencies of about 2,45GHZ. A bit higher than UMTS,
but one thousand times as much power. These devices
are screened badly against the inside RF radiation The
“radiation leakage” is very well measurable at large
distances without problems using SPECTRAN.
The radiation load cau-
sed by the mains supply
is often as high as the
high-frequency load
from CPU or insert
cards. Because of this,
computers and auxiliary
equipment should be
operated with screened
cables (see Aaronia
price list and cable bro-
chure).
Microwave Ovens:
Although the appliances
are well shielded by
their steel housing the
residual-radiation emis-
sion can still be detected
by SPECTRAN even at
big distance.
15.0 RF exposure in practice
HW Rev3 / Firmware V2.1 / © 2005-2008 by Aaronia AG, Germany, www.Spectran.com 57

15.10 Radio-controlled (alarm) clocksThese devices do not emit radio waves themselves, they
just receive them.
Radio-controlled clocks
do not emit radio waves
themselves. They only
receive them.
15.0 RF exposure in practice
HW Rev3 / Firmware V2.1 / © 2005-2008 by Aaronia AG, Germany, www.Spectran.com58

The word “electrosmog” is an artificial term coined in the 70s. The “smog” part is
a compound of the two English words “smoke” and “fog”. Thus, “smog” is roug-
hly equivalent to “dirt”. Finally, “electrosmog” could alternatively be described as
“electric dirt”.
In contrast to “normal” smog which is, year after year, easily noticeable in the
cities with our eyes and nose, “electrosmog” is not detectable with our sense
organs. Thus, we can only measure and evaluate “electrosmog” using dedicated
“electrosmog measurement devices”.
Commonly, electrosmog is divided into two types:
low-frequency electrosmog (e.g. traction power, mains cables,
high-voltage lines etc.)
high-frequency electrosmog (e.g. cellphones, cell towers, satellites, radar,
radio and TV broadcast, CB radio etc.)
With our RF (HF-) SPECTRANs, you can only measure high-frequency elec-
trosmog. For measuring low-frequency electrosmog, you additionally need one
of our LF (NF-) SPECTRAN models.
The electrosmog itself consists of electric and magnetic fields:
Electric fields
These fields result from a voltage between two poles. The nearer these poles
are to each other and the higher the voltage, the stronger the electric fields for-
med between them. Thus, electric fields are present even when no current is flo-
wing, meaning that even though your lamp, TV etc. might be turned off, its elec-
trical field is still present at full power! Every cable (especially those hidden
behind walls) is a potential source. Electric fields can be easily screened using
conductive materials. Thus, you should, if possible, replace ALL cables with our
screened versions (see attached brochure and price list).
Alternating magnetic fields
These fields form when current flows through a conductor. The higher the cur-
rent and the wider the conductors are placed to each other, the stronger the
magnetic field. The only way to effectively screen against magnetic fields is the
utilization of Aaronia Magno-Shield foil or panels.
High-frequency fields
As electric and magnetic fields do not form separately anymore at higher fre-
quencies, they are mostly measured as the sum of both field types, expressed
as power flux density (W/m² or V/m).
16.0 What is electrosmog ?
HW Rev3 / Firmware V2.1 / © 2005-2008 by Aaronia AG, Germany, www.Spectran.com 59

17.0 Units of measurement
HW Rev3 / Firmware V2.1 / © 2005-2008 by Aaronia AG, Germany, www.Spectran.com60
SPECTRAN offers several physical units to choose from. These can be selected
at any time in the “Unit” menu. Possible choices are: dBm, dBµV, V/m and
A/m. In “Exposure limit calculation mode”, additionally also W/m².
17.1 Measuring transmission power [dBm; dBµV]Measurements of communications equipment often show extremely big diffe-
rences between levels. Therefore, it is useful to express signal levels in loga-
rithmic units to avoid “drowning” readings in an endless number of zeros.
Thus, our SPECTRAN HF-2025 e.g. already comes up with a measurement
range of -80dBm to 0dBm. As amplification increases 10 fold once every 10dB,
“readings” of 0 to 100.000.000! would need to be displayed. Though, these
“numeric giants” would be nearly unreadable and result in steady, drastic chan-
ges of the displayed values. So, we use the much easier to handle logarithmic
unit dB:
As logarithms are dimensionless, logarithmic readings are always relative to a
certain reference level, i.e., a relationship between two levels is established. A
common reference level that has become a standard in radio technology is 1mW
or 1µV. So, logarithmic level readings are expressed in dB milliwatts [dBm] or
dB microvolts [dBµV].
17.2 Field strength [V/m; A/m] and power density [W/m²]If you don’t feed signals directly and instead perform measurements using an
antenna, you will mostly want to measure the so-called field strength or power
flux density instead of power. In professional measurement technology, mostly
only the “manageable” electric field strength is measured, using the unit V/m. As
with dBm, V/m produces manageable readings without endless rows of zeroes.
In contrast, cheap broadband devices often only provide readings of power
density (mostly in µW/m²) to confuse the customer with allegedly huge changes
in “electrosmog” strength. This is just as if you measured distances on motor-
ways in mm: Frankfurt to Munich = 400.000.000mm! Certainly “impressive”,
but just pure showiness, as it’s just 400km. Manageability and readability is left
behind, as the display constantly changes in huge steps. Of course, SPECTRAN
can also display power flux density in µW/m² or other “Giga-units”. However, in
contrast to the aforementioned cheap devices, SPECTRAN offers a practical
Autorange feature in W/m²-mode, e.g. instead of displaying an endless num-
ber of zeroes, it just displays the corresponding abbreviation f, p, n, µ or m befo-
re the unit.
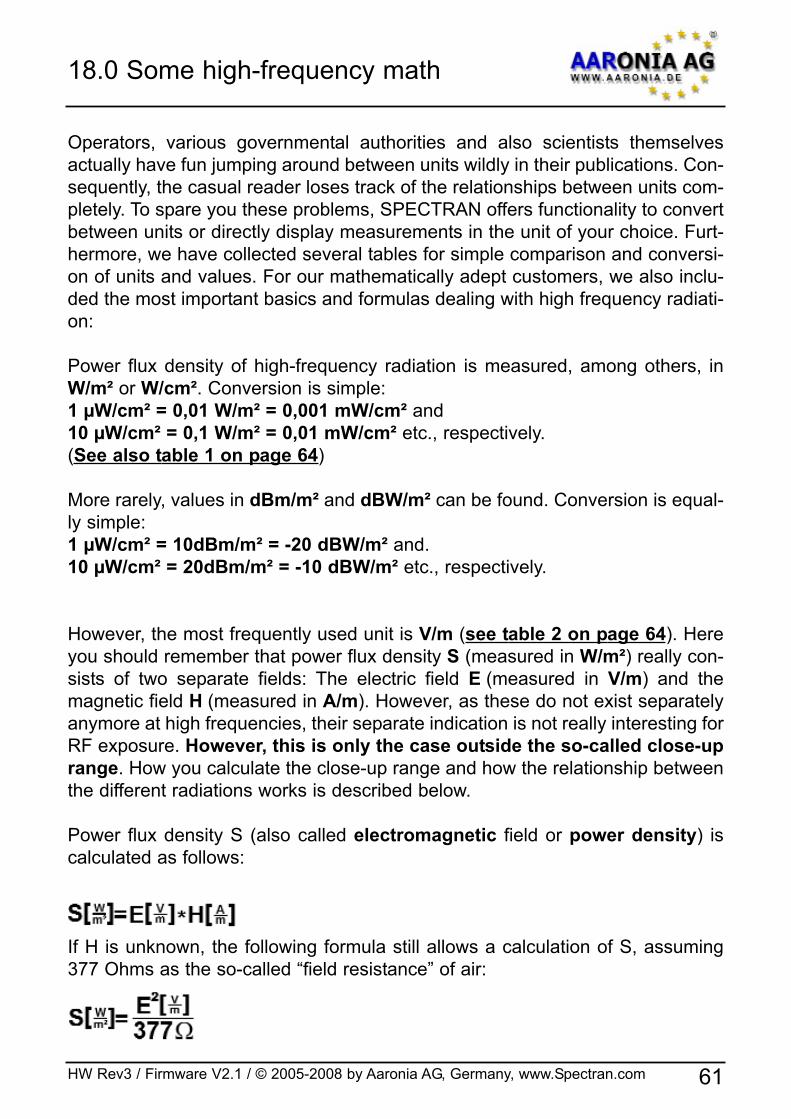
Operators, various governmental authorities and also scientists themselves
actually have fun jumping around between units wildly in their publications. Con-
sequently, the casual reader loses track of the relationships between units com-
pletely. To spare you these problems, SPECTRAN offers functionality to convert
between units or directly display measurements in the unit of your choice. Furt-
hermore, we have collected several tables for simple comparison and conversi-
on of units and values. For our mathematically adept customers, we also inclu-
ded the most important basics and formulas dealing with high frequency radiati-
on:
Power flux density of high-frequency radiation is measured, among others, in
W/m² or W/cm². Conversion is simple:
1 µW/cm² = 0,01 W/m² = 0,001 mW/cm² and
10 µW/cm² = 0,1 W/m² = 0,01 mW/cm² etc., respectively.
(See also table 1 on page 64)
More rarely, values in dBm/m² and dBW/m² can be found. Conversion is equal-
ly simple:
1 µW/cm² = 10dBm/m² = -20 dBW/m² and.
10 µW/cm² = 20dBm/m² = -10 dBW/m² etc., respectively.
However, the most frequently used unit is V/m (see table 2 on page 64). Here
you should remember that power flux density S (measured in W/m²) really con-
sists of two separate fields: The electric field E (measured in V/m) and the
magnetic field H (measured in A/m). However, as these do not exist separately
anymore at high frequencies, their separate indication is not really interesting for
RF exposure. However, this is only the case outside the so-called close-up
range. How you calculate the close-up range and how the relationship between
the different radiations works is described below.
Power flux density S (also called electromagnetic field or power density) is
calculated as follows:
If H is unknown, the following formula still allows a calculation of S, assuming
377 Ohms as the so-called “field resistance” of air:
18.0 Some high-frequency math
HW Rev3 / Firmware V2.1 / © 2005-2008 by Aaronia AG, Germany, www.Spectran.com 61

18.0 Some high-frequency math
HW Rev3 / Firmware V2.1 / © 2005-2008 by Aaronia AG, Germany, www.Spectran.com62
In contrast, if E is not known, calculation of S is still possible as follows:
Should you wish to calculate the electric field E, use the following formula:
The magnetic field H can be calculated as follows:
18.1 Calculation of wavelengthWavelength can be calculated using the formula:
Here, c corresponds to the speed of light in [m/s] (rounded to 300.000km/s in our
example), f to the frequency of the radiation in [Hz], and to the wavelength
in [m].
Examples:
(For 900 MHz, the result is 0,33m)
(For 1,8 GHz, the result is 0,17m)
(For 2 GHz, the result is 0,15m)
Further information concerning wavelength is contained in table 4 on page
64.

18.2 Calculating the “close-up range” in [m]If you want to perform a measurement, you need to do this outside the so-cal-
led close-up range of the transmitter. The close-up range depends on the trans-
mitter frequency. According to the aforementioned formula, the close-up range
can be determined quickly. Here, you simply need to multiply the resulting wave-
length by a factor of 10 (there are some sources which only use a factor of 3).
The result is the close-up range, i.e. the minimum distance to the transmitter in
which a sensible measurement can be achieved.
Example: For a “900MHz cellphone”, the wavelength is:
Hence, the close-up range is 0,33m * 10 = 3,3m.
It is easy to see that e.g. measurements taken directly next to the cellpho-
ne will definitely result in WRONG readings!
Notice: Inside the close-up range, E and H fields would need to be measured
separately. However, outside the close-up range, both field types are coupled
tightly to each other, so knowing the strength of one of them will be enough to
derive the other.
18.3 Calculating power density [W/m²] from power [dBm]ONLY if you know the transmitter frequency you can calculate power density
[W/m²] from power [dBm]. You also need the antenna gain of the used antenna.
The formula you need looks like this:
S represents the power density [W/m²], p is the measu-
red power [dBm], is the wavelength of the tranmitter
frequency [m] and G the antenna gain [dBi] (dBd-values
can be converted to dBi by adding 2,15).
You get the dBi antenna gain of the HyperLOG antennas easily by looking at the
“antenna.ini”-file used with our “LCS” PC-Software.
Example:
Pretend you measure -40dBm at 950MHz with a HyperLOG 7025 antenna (this
antenna offers 4,9dBi at 950MHz). The result is:
Also see the following conversion table!
18.0 Some high-frequency math
HW Rev3 / Firmware V2.1 / © 2005-2008 by Aaronia AG, Germany, www.Spectran.com 63
= 0,00000458 W/m² = 4,08µW/m²

19.0 Conversion tables
HW Rev3 / Firmware V2.1 / © 2005-2008 by Aaronia AG, Germany, www.Spectran.com64
Table 0 Conversion dBm to W/m² with HyperLOG antenna
Assuming the use of an idealized HyperLOG antenna with 5dBi gain and an idealized RG316U
cable of 1m length and a constant damping of 1dB, the following conversion table can be
applied to the signal sources below (all figures in W/m²):
dBm GSM900 GSM1800 UMTS WLan
+10 0,45 1,9 2,2 3,3
+9 0,36 1,5 1,8 2,7
+8 0,28 1,2 1,4 2,1
+7 0,23 0,95 1,1 1,7
+6 0,18 0,76 0,89 1,3
+5 0,14 0,60 0,70 1,06
+4 0,11 0,48 0,56 0,84
+3 0,09 0,38 0,44 0,67
+2 0,07 0,30 0,35 0,53
+1 0,06 0,24 0,28 0,42
0 0,045 0,019 0,022 0,033
-10 0,004 5 0,001 9 0,002 2 0,003 3
-20 0,000 45 0,000 19 0,000 22 0,000 33
-30 0,000 045 0,000 019 0,000 022 0,000 033
-40 0,000 004 5 0,000 001 9 0,000 002 2 0,000 003 3
-50 0,000 000 45 0,000 000 19 0,000 000 22 0,000 000 33
-60 0,000 000 045 0,000 000 019 0,000 000 022 0,000 000 033
We assume the following center frequencies (f):
GSM900 (f = 900MHz), GSM1800/DECT (f = 1850MHz), UMTS (f = 2000MHz) and WLan/micro-
wave ovens (f = 2450MHz).
The conversion table demonstrates a 10-fold reduction of power density with each 10dB step.
Likewise, the 1dB intermediate steps also express a constant ratio each. Consequently, this
table provides a straightforward way to quickly convert dBm figures into W/m².
Of course, this table can also be utilized in conjunction with other antennas, attenuators or cable
types:
For example, when using our 20dB attenuator (option), you would refer to those rows in the
table which are 20dB higher - i.e. -10dBm instead of -30dBm.
Likewise, when using an antenna with 24dBi gain, you would use those values which are 19dB
below (24dBi - 5dBi [because the values are already pre-multiplied by 5dBi]). Example: -43dBm
instead of -24dBm.
When using a cable with 5dB damping, you would use values 4dB higher (5dB - 1dB [because
the values are already pre-multiplied by 1dB]). Example: -24dBm instead of -28dBm.

19.0 Conversion tables
HW Rev3 / Firmware V2.1 / © 2005-2008 by Aaronia AG, Germany, www.Spectran.com 65
Table 1 Conversion between W/m², µW/cm² and mW/cm²
0,000.001 W/m² 0,000.1 µW/cm² 0,000.000.1 mW/cm²
0,000.01 W/m² 0,001 µW/cm² 0,000.001 mW/cm²
0,000.1 W/m² 0,01 µW/cm² 0,000.01 mW/cm²
0,001 W/m² 0,1 µW/cm² 0,000.1 mW/cm²
0,01 W/m² 1 µW/cm² 0,001 mW/cm²
0,1 W/m² 10 µW/cm² 0,01 mW/cm²
1 W/m² 100 µW/cm² 0,1 mW/cm²
Table 2 Conversion between µW/cm², V/m and A/m
0,000.1 µW/cm² 0,019.4 V/m 0,000.051.5 A/m
0,001 µW/cm² 0,061.4 V/m 0,000.162 A/m
0,01 µW/cm² 0,194 V/m 0,000.515 A/m
0,1 µW/cm² 0,614 V/m 0,001.62 A/m
1 µW/cm² 1,94 V/m 0,005.15 A/m
10 µW/cm² 6,14 V/m 0,016.2 A/m
100 µW/cm² 19,4 V/m 0,051.5 A/m
Table 3 Conversion between dBm, dBW and W
0 dBm -30dBW 0,001W 1mW
-10dBm -40dBW 0,000.1W 100µW
-20dBm -50dBW 0,000.01W 10µW
-30dBm -60dBW 0,000.001W 1µW
-40dBm -70dBW 0,000.000.1W 100nW
-50dBm -80dBW 0,000.000.01W 10nW
-60dBm -90dBW 0,000.000.001W 1nW
-70dBm -100dBW 0,000.000.000.1W 100pWdBm = DecibelmilliWatts, dBW = DecibelWatts, W = Watts,
mW = MilliWatts, µW=MicoWatts, nW= NanoWatts, pW=PicoWatts
Table 4 Frequency, wavelength and frequency band abbreviations
3 Hz-30 Hz 100.000 km - 10.000 km ULF
30 Hz-300 Hz 10.000 km - 1.000 km ELF
300 Hz-3 kHz 1.000 km - 100 km VF
3 kHz-30 kHz 100 km - 10 km VLF
30 kHz-300 kHz 10 km - 1 km LF
300 kHz-3 MHz 1 km - 100 m MF
3 MHz-30 MHz 100 m - 10 m HF
30 MHz-300 MHz 10 m - 1 m VHF
300 MHz-3 GHz 1 m - 10 cm UHF
3 GHz - 30 GHz 10 cm - 1 cm SHF

19.0 Conversion tables
HW Rev3 / Firmware V2.1 / © 2005-2008 by Aaronia AG, Germany, www.Spectran.com66
Table 5 Power amplification factor and corresponding value in dB
1 0 dB
2 3 dB
2,5 4 dB
4 6 dB
5 7 dB
8 9 dB
10 10 dB
100 20 dB
1 000 30 dB
10 000 40 dB
100 000 50 dB
1 000 000 60 dB
10 000 000 70 dBdB = Decibel
Table 6 Cellphone frequencies and providers
Start/Stop frequency Abbreviation Provider
864,1 868,1 CT2 Private
885,0 887,0 CT1+ (UL)* Private
914,0 915,0 CT1 (UL)* Private
930,0 932,0 CT1+ (DL)* Private
959,0 960,0 CT1 (DL)* Private
1.880 1.900 DECT Private
5.725 5.825 DECT2 Private(UL) = "Uplink" mostly means “portable device” (mobile transmitter which transmits towards the
base station, e.g. a cellphone).
(DL) = "Downlink" mostly means “base station” (fixed transmitter which transmits towards the
portable device, e.g. a base station).
* License expired
CT1+: Cordless phone (analogue). License expires 1/1/2009. 10mW EIRP
DECT: Base station always transmits even when not handling calls. 250mW EIRP.
DECT2: New generation of cordless phones (“DECT successor”). 25mW EIRP
Significantly more extensive lists available on the Aaronia homepage. To get the full
“luxury”, get our free PC analysis software directly from there!

20.0 Frequency tables
HW Rev3 / Firmware V2.1 / © 2005-2008 by Aaronia AG, Germany, www.Spectran.com 67
Table 7 German GSM900 frequencies and providers
Start/Stop frequency Abbreviation Provider
876,2 880,0 GSM-R (UL) Deutsche Bahn
880,1 885,1 GSM900 (UL) E-Plus (NEU)
885,1 890,1 GSM900 (UL) O2-Germany (NEU)
890,2 892,4 GSM900 (UL) Vodafone
892,6 899,8 GSM900 (UL) T-Mobile
900,0 906,0 GSM900 (UL) Vodafone
906,2 910,4 GSM900 (UL) T-Mobile
910,6 914,2 GSM900 (UL) Vodafone
914,4 914,8 GSM900 (UL) T-Mobile
921,2 925,0 GSM-R (DL) Deutsche Bahn
925,1 930,1 GSM900 (DL) E-Plus (NEU)
930,1 935,1 GSM900 (DL) O2-Germany (NEU)
935,2 937,4 GSM900 (DL) Vodafone
937,6 944,8 GSM900 (DL) T-Mobile
945,0 951,0 GSM900 (DL) Vodafone
951,2 955,4 GSM900 (DL) T-Mobile
955,6 959,2 GSM900 (DL) Vodafone
959,4 959,8 GSM900 (DL) T-Mobile(UL) = "Uplink" mostly means “portable device” (mobile transmitter which transmits towards the
base station, e.g. cellphones). Pulsed at 217Hz. Power variable between 20mW-2W (Peak)
(DL) = "Downlink" mostly means “base station” (fixed transmitter which transmits towards the
portable device, e.g. cell towers). Pulsed at 217Hz. Control channel pulsed at 1.736Hz. Power
variable between 0,5 and 400W ERP. Range of up to 32km.
Significantly more extensive lists available on the Aaronia homepage. To get the full
“luxury”, get our free PC analysis software directly from there!
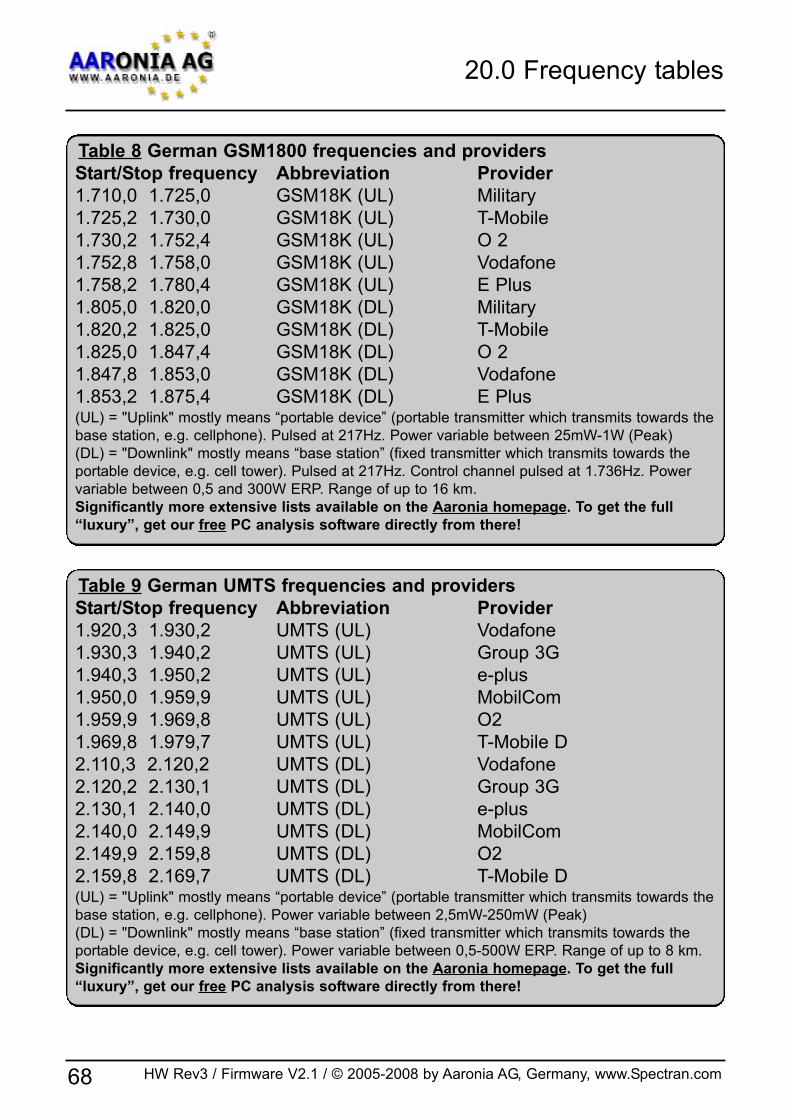
Table 9 German UMTS frequencies and providers
Start/Stop frequency Abbreviation Provider
1.920,3 1.930,2 UMTS (UL) Vodafone
1.930,3 1.940,2 UMTS (UL) Group 3G
1.940,3 1.950,2 UMTS (UL) e-plus
1.950,0 1.959,9 UMTS (UL) MobilCom
1.959,9 1.969,8 UMTS (UL) O2
1.969,8 1.979,7 UMTS (UL) T-Mobile D
2.110,3 2.120,2 UMTS (DL) Vodafone
2.120,2 2.130,1 UMTS (DL) Group 3G
2.130,1 2.140,0 UMTS (DL) e-plus
2.140,0 2.149,9 UMTS (DL) MobilCom
2.149,9 2.159,8 UMTS (DL) O2
2.159,8 2.169,7 UMTS (DL) T-Mobile D(UL) = "Uplink" mostly means “portable device” (portable transmitter which transmits towards the
base station, e.g. cellphone). Power variable between 2,5mW-250mW (Peak)
(DL) = "Downlink" mostly means “base station” (fixed transmitter which transmits towards the
portable device, e.g. cell tower). Power variable between 0,5-500W ERP. Range of up to 8 km.
Significantly more extensive lists available on the Aaronia homepage. To get the full
“luxury”, get our free PC analysis software directly from there!
20.0 Frequency tables
HW Rev3 / Firmware V2.1 / © 2005-2008 by Aaronia AG, Germany, www.Spectran.com68
Table 8 German GSM1800 frequencies and providers
Start/Stop frequency Abbreviation Provider
1.710,0 1.725,0 GSM18K (UL) Military
1.725,2 1.730,0 GSM18K (UL) T-Mobile
1.730,2 1.752,4 GSM18K (UL) O 2
1.752,8 1.758,0 GSM18K (UL) Vodafone
1.758,2 1.780,4 GSM18K (UL) E Plus
1.805,0 1.820,0 GSM18K (DL) Military
1.820,2 1.825,0 GSM18K (DL) T-Mobile
1.825,0 1.847,4 GSM18K (DL) O 2
1.847,8 1.853,0 GSM18K (DL) Vodafone
1.853,2 1.875,4 GSM18K (DL) E Plus(UL) = "Uplink" mostly means “portable device” (portable transmitter which transmits towards the
base station, e.g. cellphone). Pulsed at 217Hz. Power variable between 25mW-1W (Peak)
(DL) = "Downlink" mostly means “base station” (fixed transmitter which transmits towards the
portable device, e.g. cell tower). Pulsed at 217Hz. Control channel pulsed at 1.736Hz. Power
variable between 0,5 and 300W ERP. Range of up to 16 km.
Significantly more extensive lists available on the Aaronia homepage. To get the full
“luxury”, get our free PC analysis software directly from there!

The registration card
AARONIA products are constantly being improved.
As we offer you our replacement and upgrade service* for all of our future
measurement devices, we kindly ask you to send us the included, stamped regi-
stration card immediately. Only registered customers can make use of this ser-
vice, and only registered clients receive a 10 year warranty on their measure-
ment device!* See “The AARONIA warranty”
The AARONIA warranty
Replacement guarantee to “bigger” models
You can exchange your measurement device against a higher-grade model of
the same series at any time by simply paying the price difference.
For example, if you have purchased a SPECTRAN HF-2025E and notice that
you need a higher sensitivity after some time, you could replace it with the
SPECTRAN HF-4060 by just paying the difference to this model.
However, for taking advantage of this service, you need to be a registered custo-
mer! Thus, you should definitely fill the included registration card and send it to
Aaronia.
Replacement guarantee to newly developed models
As soon as we present new products, you can replace your model with a new
Aaronia measurement device of your choice at any time.
This has been realized for the first time in the year 2000, when we introduced
the new Multidetektor II series. Customers which sent back their Multidetektor 1
only had to pay half the price for the new Multidetektor II series device. The
used, returned units have subsequently been disposed of ecologically friendly by
Aaronia.
10 year warranty on all models
We offer 10 years warranty on our measurement equipment. We immediately
and unbureaucratically replace defective units, without further questions.
21.0 Registration card and warranty
HW Rev3 / Firmware V2.1 / © 2005-2008 by Aaronia AG, Germany, www.Spectran.com 69

22.0 Analyzer & Antenna Frequencychart
HW Rev3 / Firmware V2.1 / © 2005-2008 by Aaronia AG, Germany, www.Spectran.com70
Fre
qu
en
cych
art
S
PE
CT
RA
N S
pectr
um
An
aly
zer
Fre
qu
en
cych
art
Hyp
erL
OG
an
d B
ico
LO
G A
nte
nn
as a
nd
Pro
bes

23.0 For your notes
HW Rev3 / Firmware V2.1 / © 2005-2008 by Aaronia AG, Germany, www.Spectran.com 71

23.0 For your notes
HW Rev3 / Firmware V2.1 / © 2005-2008 by Aaronia AG, Germany, www.Spectran.com72


![08_08_12.html.ppt [Read-Only]](https://static.fdokumen.com/doc/165x107/633217ef5696ca4473030eca/080812htmlppt-read-only.jpg)

![Bles.ppt [Read-Only]](https://static.fdokumen.com/doc/165x107/633bffc7197a6737f10ceddf/blesppt-read-only.jpg)


