player handbook - Alderac Entertainment Group
40
1 John D Clair player handbook TM
-
Upload
khangminh22 -
Category
Documents
-
view
3 -
download
0
Transcript of player handbook - Alderac Entertainment Group
1
John D Clair
player handbook
TM
2
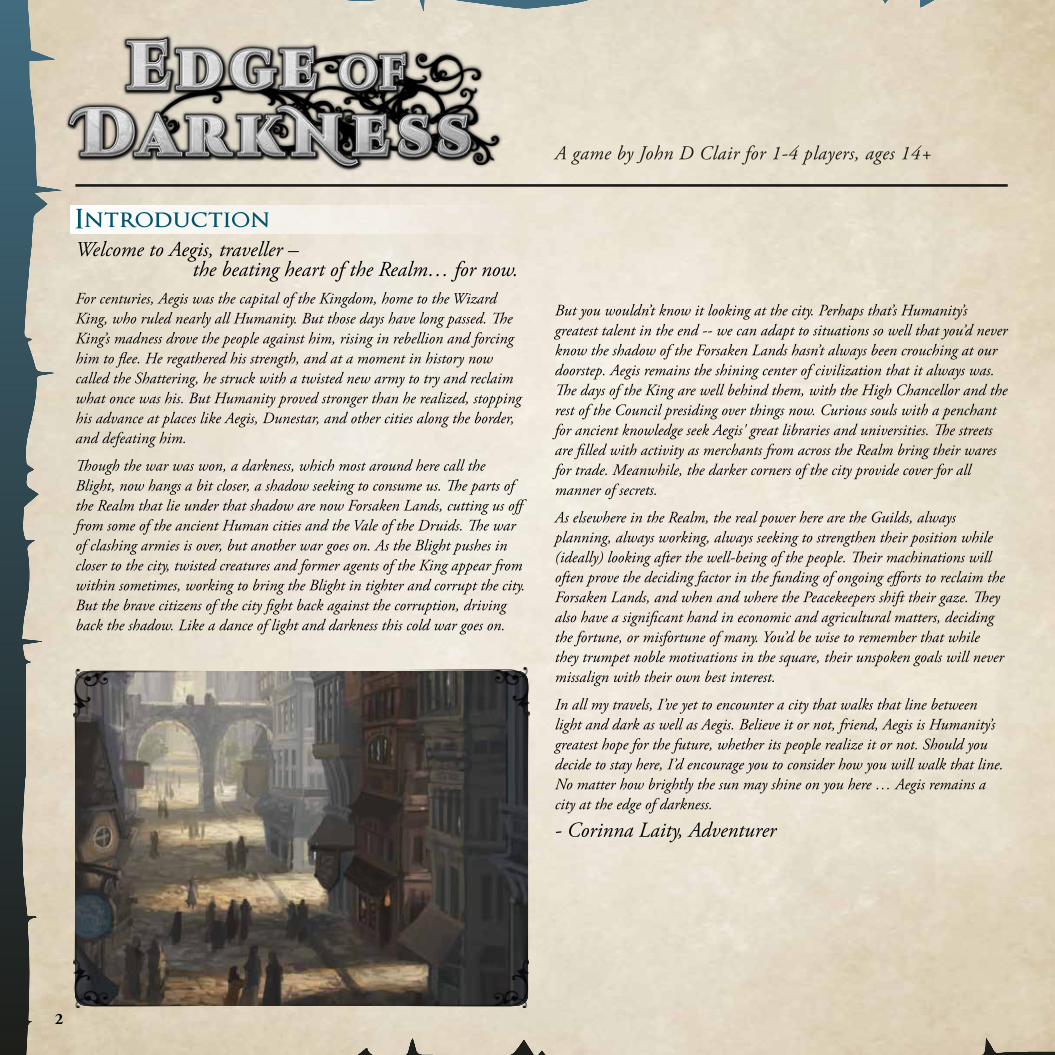
IntroductionWelcome to Aegis, traveller – the beating heart of the Realm… for now.For centuries, Aegis was the capital of the Kingdom, home to the Wizard King, who ruled nearly all Humanity. But those days have long passed. The King’s madness drove the people against him, rising in rebellion and forcing him to flee. He regathered his strength, and at a moment in history now called the Shattering, he struck with a twisted new army to try and reclaim what once was his. But Humanity proved stronger than he realized, stopping his advance at places like Aegis, Dunestar, and other cities along the border, and defeating him.
Though the war was won, a darkness, which most around here call the Blight, now hangs a bit closer, a shadow seeking to consume us. The parts of the Realm that lie under that shadow are now Forsaken Lands, cutting us off from some of the ancient Human cities and the Vale of the Druids. The war of clashing armies is over, but another war goes on. As the Blight pushes in closer to the city, twisted creatures and former agents of the King appear from within sometimes, working to bring the Blight in tighter and corrupt the city. But the brave citizens of the city fight back against the corruption, driving back the shadow. Like a dance of light and darkness this cold war goes on.
A game by John D Clair for 1-4 players, ages 14+
But you wouldn’t know it looking at the city. Perhaps that’s Humanity’s greatest talent in the end -- we can adapt to situations so well that you’d never know the shadow of the Forsaken Lands hasn’t always been crouching at our doorstep. Aegis remains the shining center of civilization that it always was. The days of the King are well behind them, with the High Chancellor and the rest of the Council presiding over things now. Curious souls with a penchant for ancient knowledge seek Aegis' great libraries and universities. The streets are filled with activity as merchants from across the Realm bring their wares for trade. Meanwhile, the darker corners of the city provide cover for all manner of secrets.
As elsewhere in the Realm, the real power here are the Guilds, always planning, always working, always seeking to strengthen their position while (ideally) looking after the well-being of the people. Their machinations will often prove the deciding factor in the funding of ongoing efforts to reclaim the Forsaken Lands, and when and where the Peacekeepers shift their gaze. They also have a significant hand in economic and agricultural matters, deciding the fortune, or misfortune of many. You’d be wise to remember that while they trumpet noble motivations in the square, their unspoken goals will never missalign with their own best interest.
In all my travels, I’ve yet to encounter a city that walks that line between light and dark as well as Aegis. Believe it or not, friend, Aegis is Humanity’s greatest hope for the future, whether its people realize it or not. Should you decide to stay here, I’d encourage you to consider how you will walk that line. No matter how brightly the sun may shine on you here … Aegis remains a city at the edge of darkness.
- Corinna Laity, Adventurer
3
Table of Contents Advice on Strategy ........................................................................p. 4Tale 1: The Gathering Storm ........................................................p. 6
Chapter 1 : Spring Disturbance ................................................p. 6 Chapter 2 : Summer Squall ......................................................p. 7Chapter 3 : Autumn Tempest ...................................................p. 8Chapter 4 : Winter Cyclone......................................................p. 9
Tale 2: Rise of the Silent Cult .......................................................p. 10Chapter 1 : The Silent Threat ...................................................p. 10 Chapter 2 : Arm the Hunters ....................................................p. 11Chapter 3 : Blood in the Streets ................................................p. 12Chapter 4 : Clash for the City ..................................................p. 13
Recommended Setups ..................................................................p. 14 Creating your Own Setups ...........................................................p. 17Location and Advancements Clarifications ...................................p. 18
Welcome Welcome to the Player’s Handbook, your definitive guide to the locations of the city of Aegis, and to your games of Edge of Darkness. Information contained herein is broken down into four primary sections:
• The first section offers story-based series of setups, called “Tales”.These Tales play out over several games, called “Chapters”, and offer a more thematic way to explore Edge of Darkness over a series of consecutive varied setups. There are 2 Tales with each 4 Chapters in this handbook.
• The second section offers 6 additional stand-alone balanced setups.
• The third offers rules for creating your own setups, random or curated, allowing you to customize your Edge of Darkness games.
• The final section runs through detailed clarifications for all the locations and advancements available in Edge of Darkness. Use this section as needed to clarify abilities and effects as you encounter them.
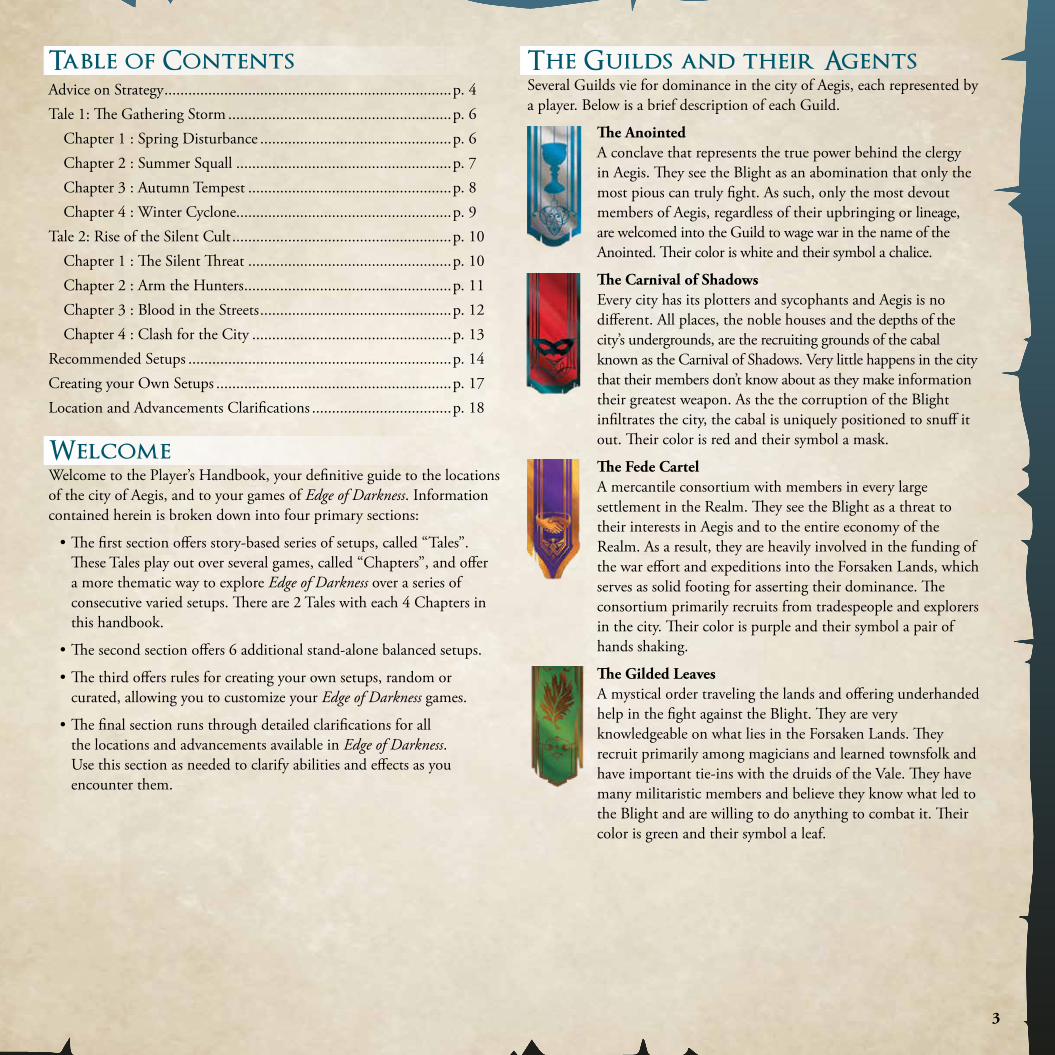
The Guilds and their Agents Several Guilds vie for dominance in the city of Aegis, each represented by a player. Below is a brief description of each Guild.
The Anointed A conclave that represents the true power behind the clergy in Aegis. They see the Blight as an abomination that only the most pious can truly fight. As such, only the most devout members of Aegis, regardless of their upbringing or lineage, are welcomed into the Guild to wage war in the name of the Anointed. Their color is white and their symbol a chalice.
The Carnival of Shadows Every city has its plotters and sycophants and Aegis is no different. All places, the noble houses and the depths of the city’s undergrounds, are the recruiting grounds of the cabal known as the Carnival of Shadows. Very little happens in the city that their members don’t know about as they make information their greatest weapon. As the the corruption of the Blight infiltrates the city, the cabal is uniquely positioned to snuff it out. Their color is red and their symbol a mask.
The Fede Cartel A mercantile consortium with members in every large settlement in the Realm. They see the Blight as a threat to their interests in Aegis and to the entire economy of the Realm. As a result, they are heavily involved in the funding of the war effort and expeditions into the Forsaken Lands, which serves as solid footing for asserting their dominance. The consortium primarily recruits from tradespeople and explorers in the city. Their color is purple and their symbol a pair of hands shaking.
The Gilded Leaves A mystical order traveling the lands and offering underhanded help in the fight against the Blight. They are very knowledgeable on what lies in the Forsaken Lands. They recruit primarily among magicians and learned townsfolk and have important tie-ins with the druids of the Vale. They have many militaristic members and believe they know what led to the Blight and are willing to do anything to combat it. Their color is green and their symbol a leaf.
4
Advice on Strategy The strategy of Edge of Darkness is largely about managing the balance between short term challenges while keeping longer term goals on target. Here are some things to think about. These are not hard-and-fast rules, and depending on the set of 10 locations in your particular game and what advancements you observe other players choosing, you should consider adjusting your strategy.
1. Sleeving: Always sleeve advancements on your own cards if possible rather than Neutral cards or other players’ cards.
2. Drafting: Early in the game, when drafting, try to get exactly 1 of your own cards in your hand so that you can sleeve on it. Skip other cards that are yours so that you will get them next turn.
3. Short Term Problem Solving: All advancements you sleeve can be used right away. Use your once-a-turn sleeve to adjust to immediate problems; out of money, out of Agents, about to be attacked by a threat, etc.
4. Long Term Planning: The counterpart to #3 is that all advancements you sleeve (especially early in the game) are investments in future turns as those cards will continue to cycle back to you. So if there is not an immediate problem to solve, make a long term setup move; claim Allegiance, dispatch Agents so you are ready to hunt threats etc.
5. Analyzing the Setup: Survey the set of 10 locations looking for a few things:
• How Agent intensive is this setup? If there are 7 or more locations that require Agents, you may want to sleeve a advancement early. However, if you see all the other players doing that, you can probably get away with using their cards and make a longer term setup move instead.
• How Coin intensive is this setup? Are there multiple effects that require Coins? Is there at least one easy way to get Coins? Are other player sleeving advancements that generate more than 1 Coin?
• How dangerous will the threats be this game? Pay attention to how many Threat cubes are indicated on the advancements that players are sleeving. If all, or most of, the advancements players are sleeving have Threat cubes on them, expect a lot of cubes to be going into the tower by mid game.
6. Defending Against Threats: Failing to defend against threats can rapidly start to cost you lots of Victory Points. Not only do you start losing points on the Defense track, but you also miss out on gaining 1 Reputation for each successfully defended threat. Overinvesting in defense however can mean missing out on building an engine. The key is to remember that no matter how big a threat is, it only knocks you down 1 spot on the Defense track. Think about investing in a
advancement early so you can defend against the small 2 and 3 Damage threats. If you only ever get hit by the big threats, you are defending efficiently.
7. Hunting Threats: Lots of points can be scored by hunting threats efficiently. Generally killing a few big threats rewards you with more than killing lots of small threats. However, getting a lot of Battle Strength all in one turn usually takes planning. Think about grouping
contacts on the same card so you can be sure to get those effects at the same time. Also, some like to say the best defense is a good offense; killing small threats can be efficient if you are picking them off before they attack you, but don’t bother killing a small threat if it’s unlikely to attack you unless you can do so for little or no cost.
Remember, all of these are just suggestions. Look for overarching dynamics among the 10 location abilities and contact effects, pay attention to what other players sleeve, and be ready to adapt!
Before you delve into the city, here are a few rules regarding the setups included in this handbook:
• Each lists 10 locations for you to play with.
• Each lists a difficulty level which indicates how hard it will be to defend the city from the Blight.
• Each lists a complexity level which indicates how complex the effects and possible combinations are.
• Some list a “Combative” tag. It indicates that one or more locations and corresponding advancements in the setup will have negative or “take that” actions. If you don’t like those types of effects in your games, simply swap out that location and corresponding advancement for another. You will have a recommended location to swap it for in the setup description.
4
5

6
Chapter 1 : Spring Disturbance
Tale 1: The Gathering StormThis Tale is designed to be played as your first four games of Edge of Darkness, starting you off with simpler effects and a balanced setup without particularly tight resources, and then gradually introducing more complexity and challenge in subsequent games.
With the rivers still swollen from the spring thaw, a group of raiders attacked Deephollow, one of the smaller towns along the border of the Forsaken Lands. The town militia was able to put a stop to it easily enough, but in the aftermath, they discovered that the raid was led by a member of Aegis’ watchmen, whom they managed to take prisoner.
An enraged Samara Nazenin, captain of the Deephollow militia (and essentially the town’s mayor as a result) took the prisoner to the steps of the City Watch and publicly accused Whitelock, the Watch Commander, of orchestrating the attack. Whitelock, a longtime supporter of Deephollow’s relationship with Aegis, denied it all, and promised a full investigation.
In the meantime, groups throughout the city are now on edge, wondering what this means for the future of the Realm’s greatest city if they can no longer trust those assigned the grave responsibility of protecting it. Can the Guilds calm this storm? Or will they see this as an opportunity to seize greater control in the wake of peoples’ fears?
This setup is curated for your first game. Most locations and corresponding advancements in it are on the simpler end of the spectrum, and no particularly complex effects are included. Depending on which strategic routes people go, threats can range in difficulty, however, this setup has two ways to defend as long as you plan in advance. Coins should be relatively easy to come by and hunting threats is quite possible, though getting big payoffs will take some planning.
If you are a confident set of gamers and would rather dive right into a tougher challenge, you may prefer the next setup for your first game since it is still mostly the same simple effects but has a bit more options for strategic depth and difficulty.
Use locations 1, 7, 10, 13, 18, 21, 23, 26, 29, and 33.
Chapter 1 : Spring Disturbance difficulty: easycomplexity: simple
7
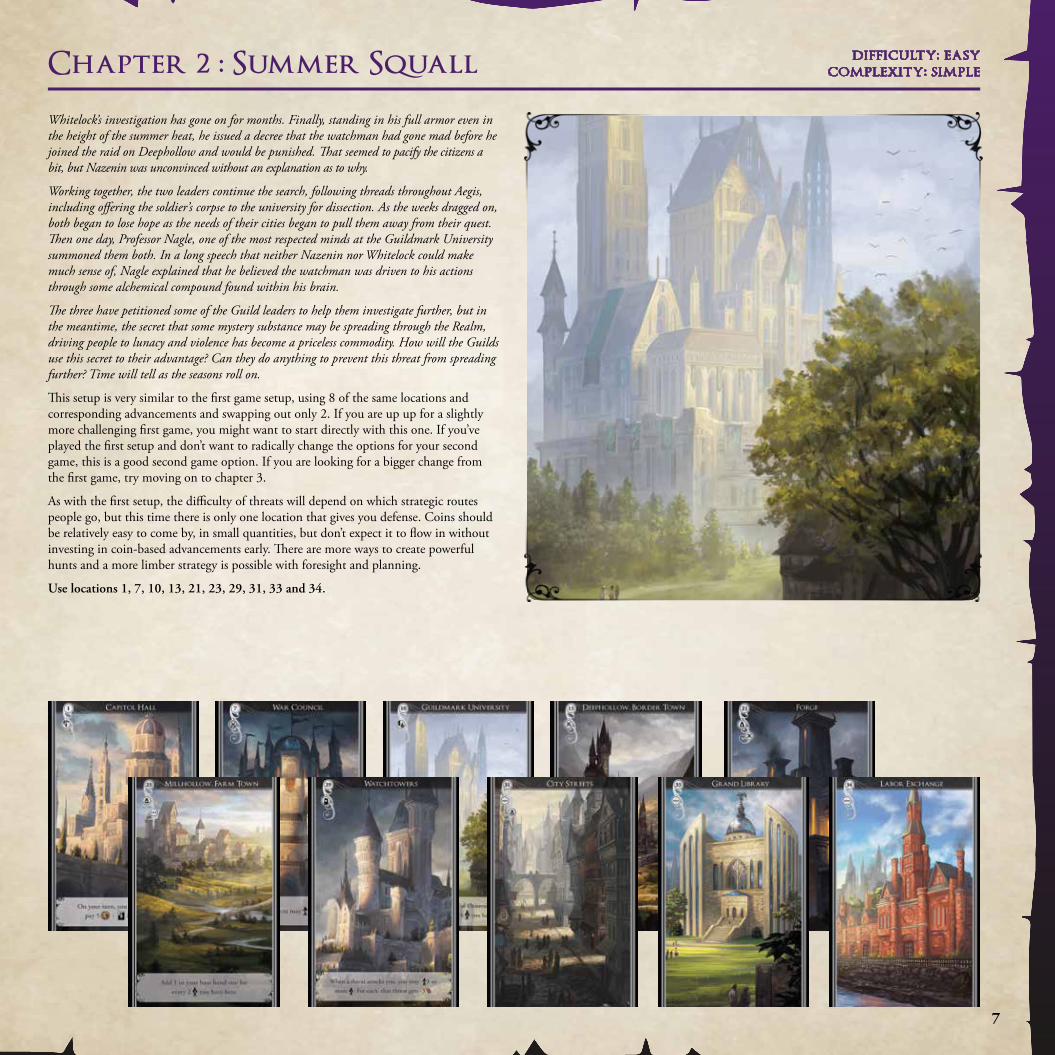
Whitelock’s investigation has gone on for months. Finally, standing in his full armor even in the height of the summer heat, he issued a decree that the watchman had gone mad before he joined the raid on Deephollow and would be punished. That seemed to pacify the citizens a bit, but Nazenin was unconvinced without an explanation as to why.
Working together, the two leaders continue the search, following threads throughout Aegis, including offering the soldier’s corpse to the university for dissection. As the weeks dragged on, both began to lose hope as the needs of their cities began to pull them away from their quest. Then one day, Professor Nagle, one of the most respected minds at the Guildmark University summoned them both. In a long speech that neither Nazenin nor Whitelock could make much sense of, Nagle explained that he believed the watchman was driven to his actions through some alchemical compound found within his brain.
The three have petitioned some of the Guild leaders to help them investigate further, but in the meantime, the secret that some mystery substance may be spreading through the Realm, driving people to lunacy and violence has become a priceless commodity. How will the Guilds use this secret to their advantage? Can they do anything to prevent this threat from spreading further? Time will tell as the seasons roll on.
This setup is very similar to the first game setup, using 8 of the same locations and corresponding advancements and swapping out only 2. If you are up up for a slightly more challenging first game, you might want to start directly with this one. If you’ve played the first setup and don’t want to radically change the options for your second game, this is a good second game option. If you are looking for a bigger change from the first game, try moving on to chapter 3.
As with the first setup, the difficulty of threats will depend on which strategic routes people go, but this time there is only one location that gives you defense. Coins should be relatively easy to come by, in small quantities, but don’t expect it to flow in without investing in coin-based advancements early. There are more ways to create powerful hunts and a more limber strategy is possible with foresight and planning.
Use locations 1, 7, 10, 13, 21, 23, 29, 31, 33 and 34.
difficulty: easycomplexity: simpleChapter 2 : Summer Squall
8
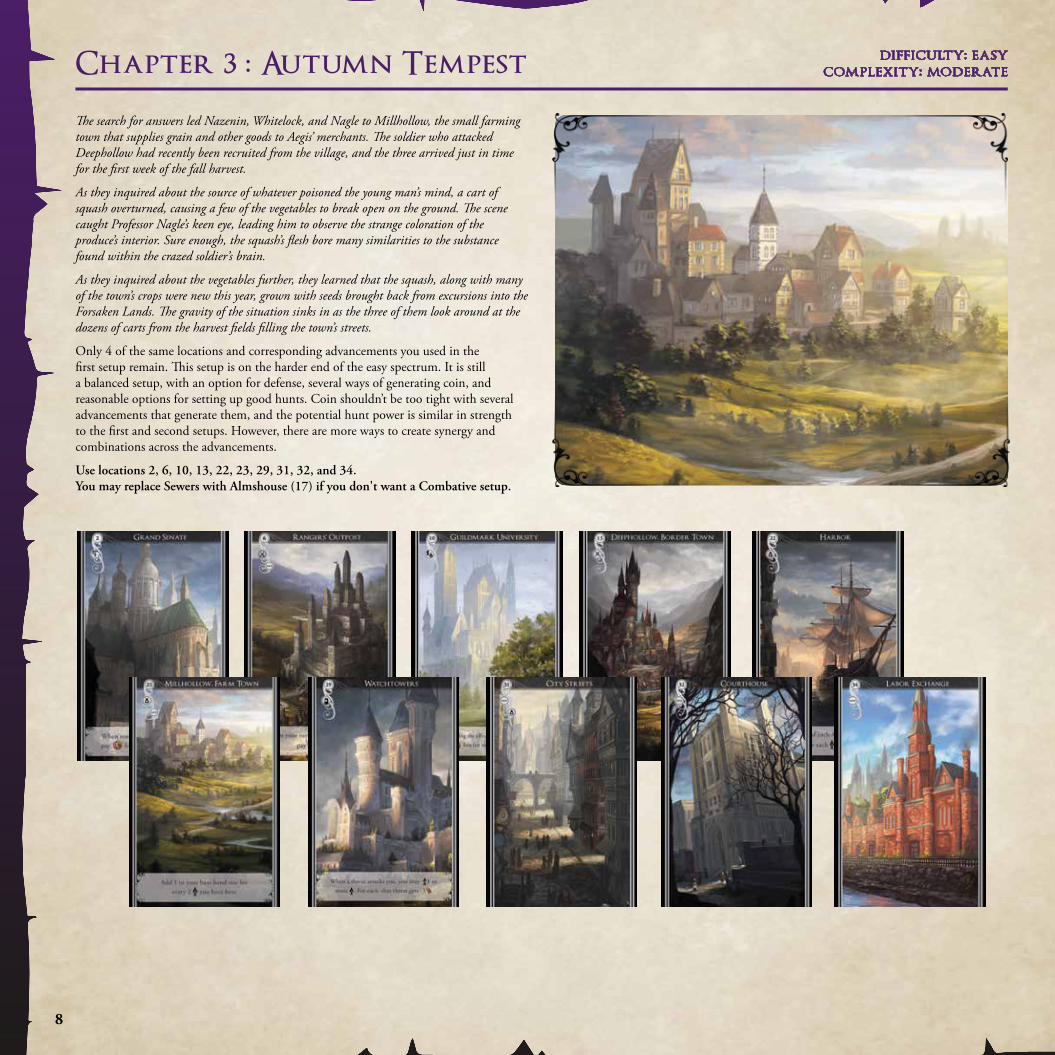
The search for answers led Nazenin, Whitelock, and Nagle to Millhollow, the small farming town that supplies grain and other goods to Aegis’ merchants. The soldier who attacked Deephollow had recently been recruited from the village, and the three arrived just in time for the first week of the fall harvest.
As they inquired about the source of whatever poisoned the young man’s mind, a cart of squash overturned, causing a few of the vegetables to break open on the ground. The scene caught Professor Nagle’s keen eye, leading him to observe the strange coloration of the produce’s interior. Sure enough, the squash’s flesh bore many similarities to the substance found within the crazed soldier’s brain.
As they inquired about the vegetables further, they learned that the squash, along with many of the town’s crops were new this year, grown with seeds brought back from excursions into the Forsaken Lands. The gravity of the situation sinks in as the three of them look around at the dozens of carts from the harvest fields filling the town’s streets.
Only 4 of the same locations and corresponding advancements you used in the first setup remain. This setup is on the harder end of the easy spectrum. It is still a balanced setup, with an option for defense, several ways of generating coin, and reasonable options for setting up good hunts. Coin shouldn’t be too tight with several advancements that generate them, and the potential hunt power is similar in strength to the first and second setups. However, there are more ways to create synergy and combinations across the advancements.
Use locations 2, 6, 10, 13, 22, 23, 29, 31, 32, and 34. You may replace Sewers with Almshouse (17) if you don't want a Combative setup.
Chapter 3 : Autumn Tempest difficulty: easycomplexity: moderate
9
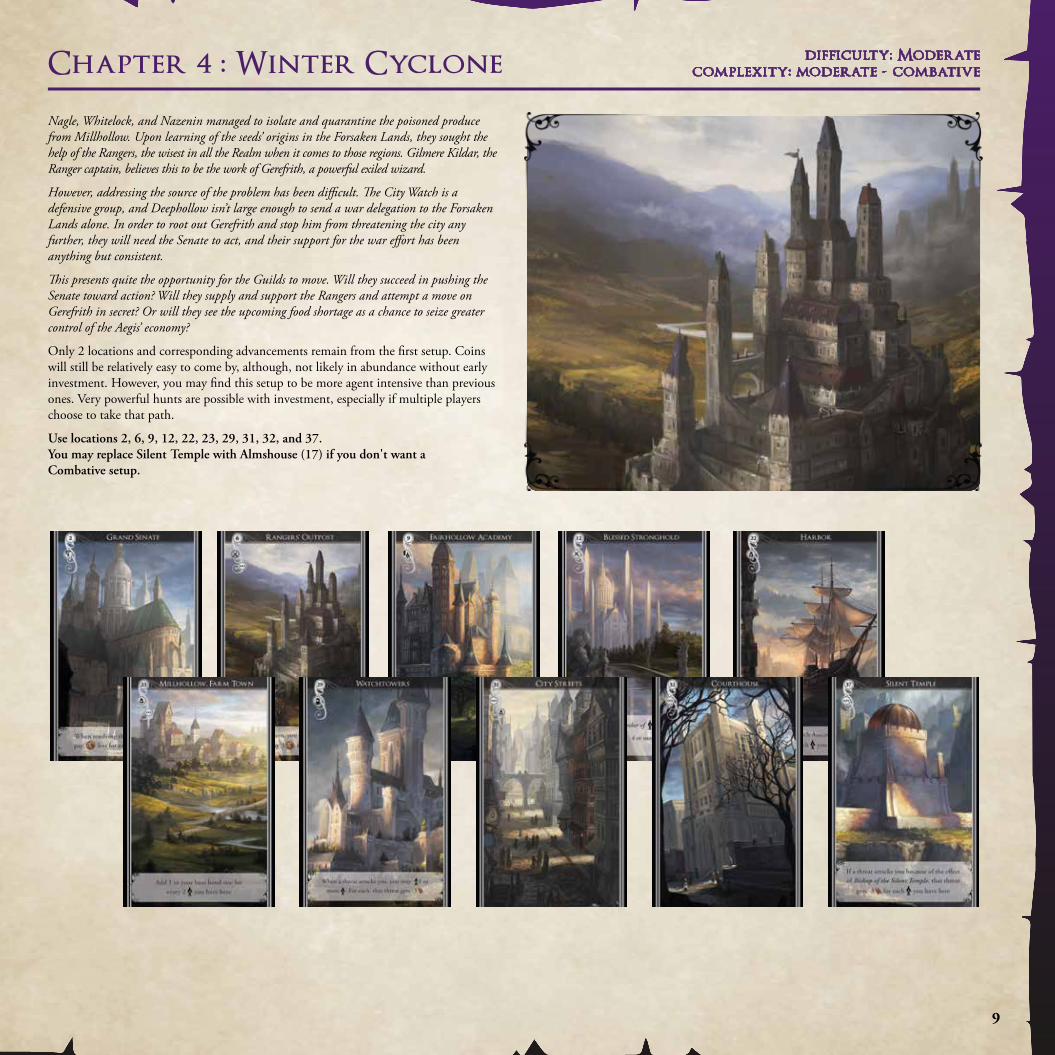
Nagle, Whitelock, and Nazenin managed to isolate and quarantine the poisoned produce from Millhollow. Upon learning of the seeds’ origins in the Forsaken Lands, they sought the help of the Rangers, the wisest in all the Realm when it comes to those regions. Gilmere Kildar, the Ranger captain, believes this to be the work of Gerefrith, a powerful exiled wizard.
However, addressing the source of the problem has been difficult. The City Watch is a defensive group, and Deephollow isn’t large enough to send a war delegation to the Forsaken Lands alone. In order to root out Gerefrith and stop him from threatening the city any further, they will need the Senate to act, and their support for the war effort has been anything but consistent.
This presents quite the opportunity for the Guilds to move. Will they succeed in pushing the Senate toward action? Will they supply and support the Rangers and attempt a move on Gerefrith in secret? Or will they see the upcoming food shortage as a chance to seize greater control of the Aegis’ economy?
Only 2 locations and corresponding advancements remain from the first setup. Coins will still be relatively easy to come by, although, not likely in abundance without early investment. However, you may find this setup to be more agent intensive than previous ones. Very powerful hunts are possible with investment, especially if multiple players choose to take that path.
Use locations 2, 6, 9, 12, 22, 23, 29, 31, 32, and 37. You may replace Silent Temple with Almshouse (17) if you don't want a Combative setup.
Chapter 4 : Winter Cyclone difficulty: Moderatecomplexity: moderate - combative
10
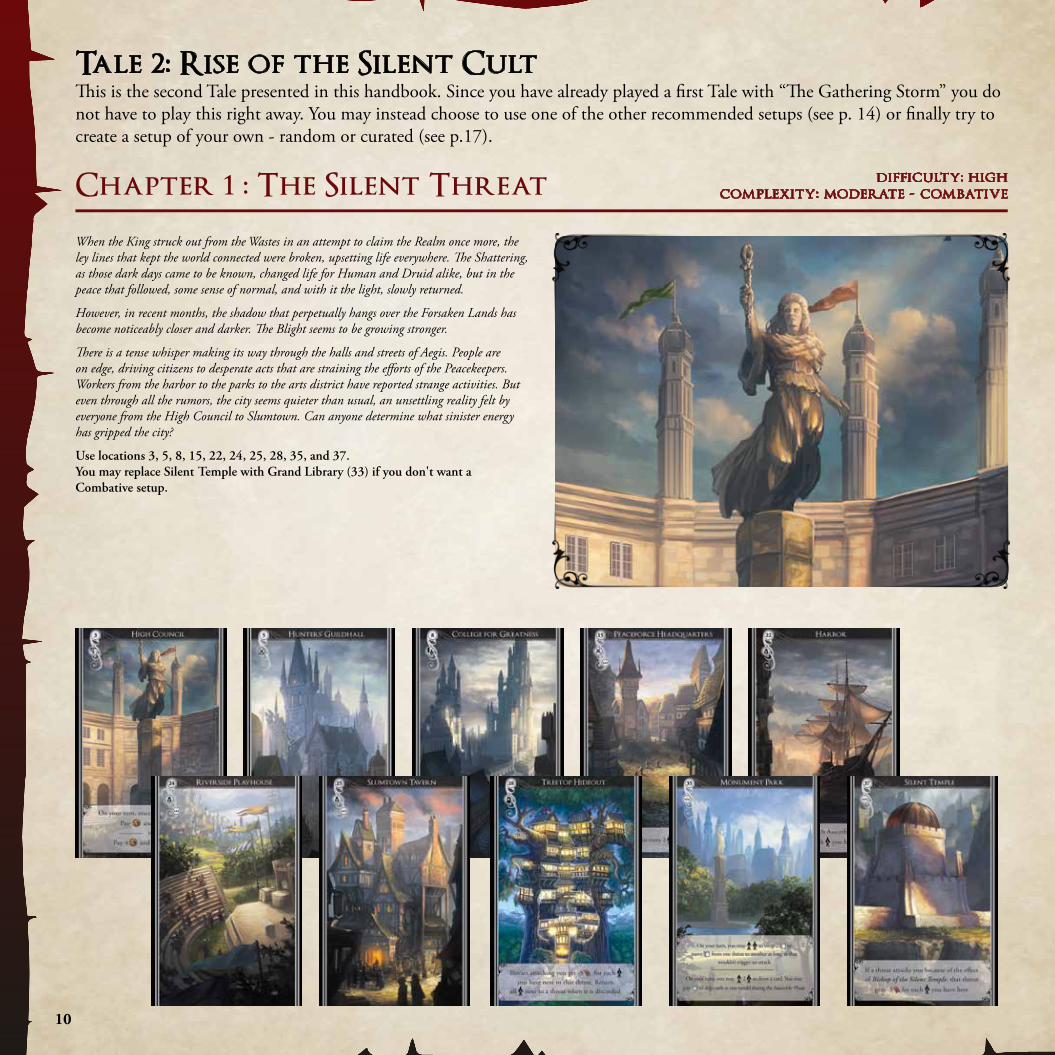
Chapter 1 : The Silent Threat
Tale 2: Rise of the Silent CultThis is the second Tale presented in this handbook. Since you have already played a first Tale with “The Gathering Storm” you do not have to play this right away. You may instead choose to use one of the other recommended setups (see p. 14) or finally try to create a setup of your own - random or curated (see p.17).
When the King struck out from the Wastes in an attempt to claim the Realm once more, the ley lines that kept the world connected were broken, upsetting life everywhere. The Shattering, as those dark days came to be known, changed life for Human and Druid alike, but in the peace that followed, some sense of normal, and with it the light, slowly returned.
However, in recent months, the shadow that perpetually hangs over the Forsaken Lands has become noticeably closer and darker. The Blight seems to be growing stronger.
There is a tense whisper making its way through the halls and streets of Aegis. People are on edge, driving citizens to desperate acts that are straining the efforts of the Peacekeepers. Workers from the harbor to the parks to the arts district have reported strange activities. But even through all the rumors, the city seems quieter than usual, an unsettling reality felt by everyone from the High Council to Slumtown. Can anyone determine what sinister energy has gripped the city?
Use locations 3, 5, 8, 15, 22, 24, 25, 28, 35, and 37. You may replace Silent Temple with Grand Library (33) if you don't want a Combative setup.
difficulty: highcomplexity: moderate - combative
11
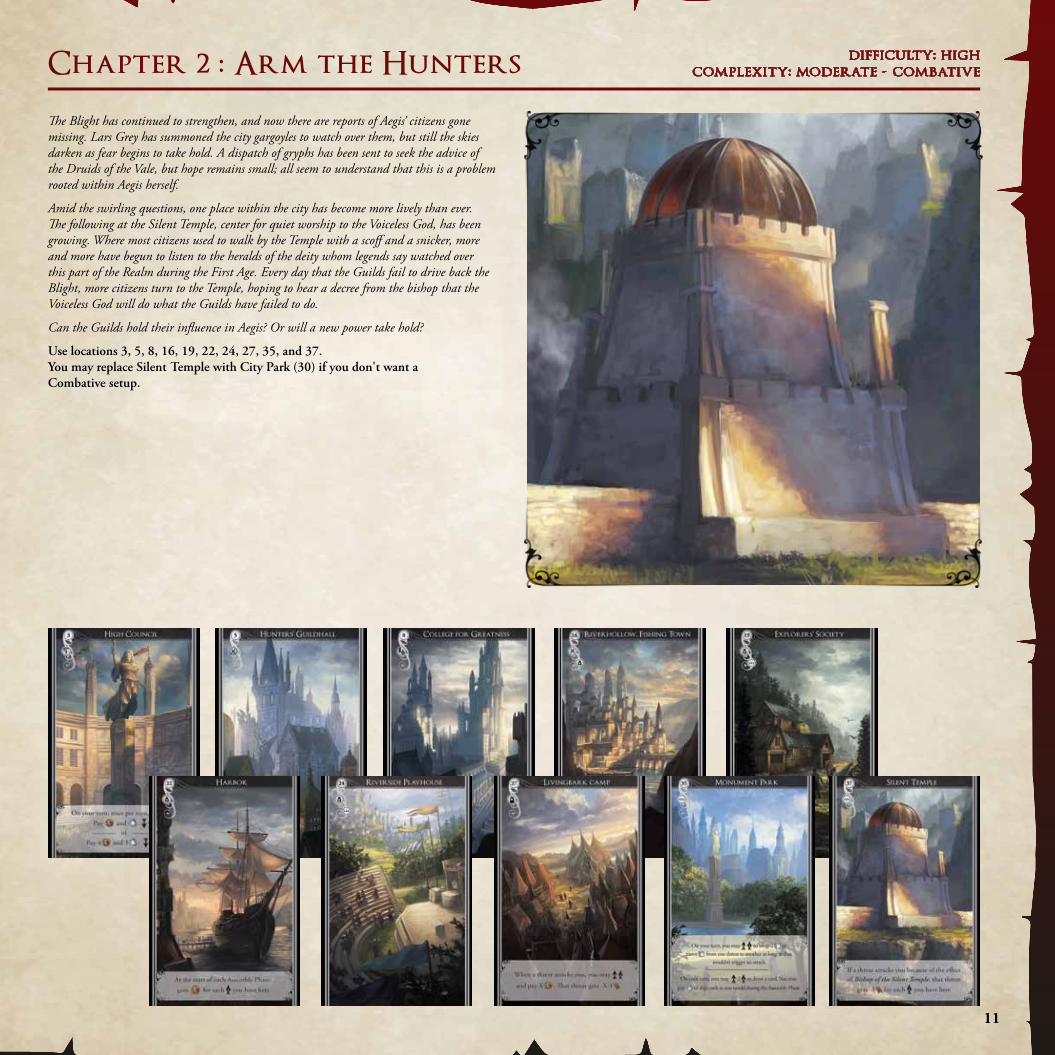
Chapter 2 : Arm the Hunters
The Blight has continued to strengthen, and now there are reports of Aegis’ citizens gone missing. Lars Grey has summoned the city gargoyles to watch over them, but still the skies darken as fear begins to take hold. A dispatch of gryphs has been sent to seek the advice of the Druids of the Vale, but hope remains small; all seem to understand that this is a problem rooted within Aegis herself.
Amid the swirling questions, one place within the city has become more lively than ever. The following at the Silent Temple, center for quiet worship to the Voiceless God, has been growing. Where most citizens used to walk by the Temple with a scoff and a snicker, more and more have begun to listen to the heralds of the deity whom legends say watched over this part of the Realm during the First Age. Every day that the Guilds fail to drive back the Blight, more citizens turn to the Temple, hoping to hear a decree from the bishop that the Voiceless God will do what the Guilds have failed to do.
Can the Guilds hold their influence in Aegis? Or will a new power take hold?
Use locations 3, 5, 8, 16, 19, 22, 24, 27, 35, and 37. You may replace Silent Temple with City Park (30) if you don't want a Combative setup.
difficulty: highcomplexity: moderate - combative
12
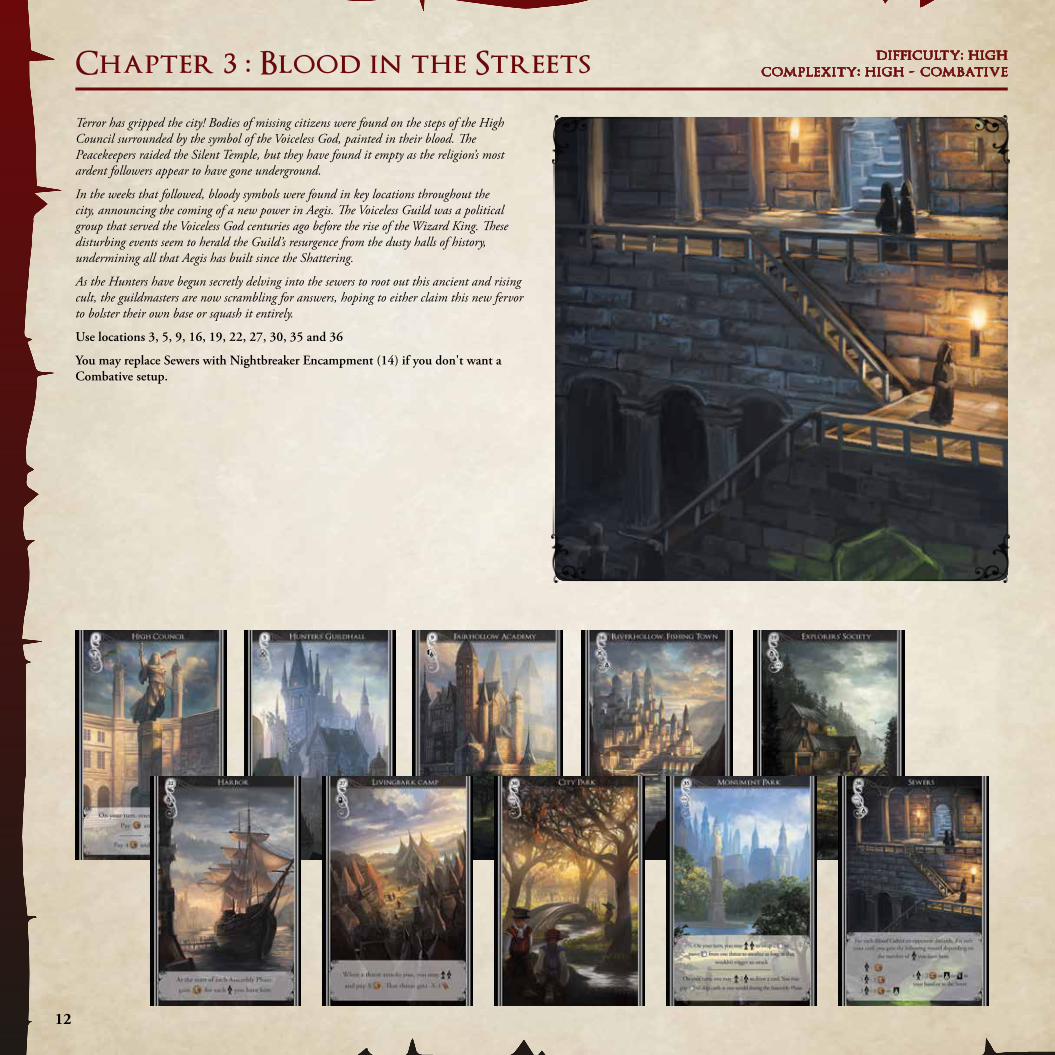
Chapter 3 : Blood in the Streets
Terror has gripped the city! Bodies of missing citizens were found on the steps of the High Council surrounded by the symbol of the Voiceless God, painted in their blood. The Peacekeepers raided the Silent Temple, but they have found it empty as the religion’s most ardent followers appear to have gone underground.
In the weeks that followed, bloody symbols were found in key locations throughout the city, announcing the coming of a new power in Aegis. The Voiceless Guild was a political group that served the Voiceless God centuries ago before the rise of the Wizard King. These disturbing events seem to herald the Guild’s resurgence from the dusty halls of history, undermining all that Aegis has built since the Shattering.
As the Hunters have begun secretly delving into the sewers to root out this ancient and rising cult, the guildmasters are now scrambling for answers, hoping to either claim this new fervor to bolster their own base or squash it entirely.
Use locations 3, 5, 9, 16, 19, 22, 27, 30, 35 and 36
You may replace Sewers with Nightbreaker Encampment (14) if you don't want a Combative setup.
difficulty: highcomplexity: high - combative
13
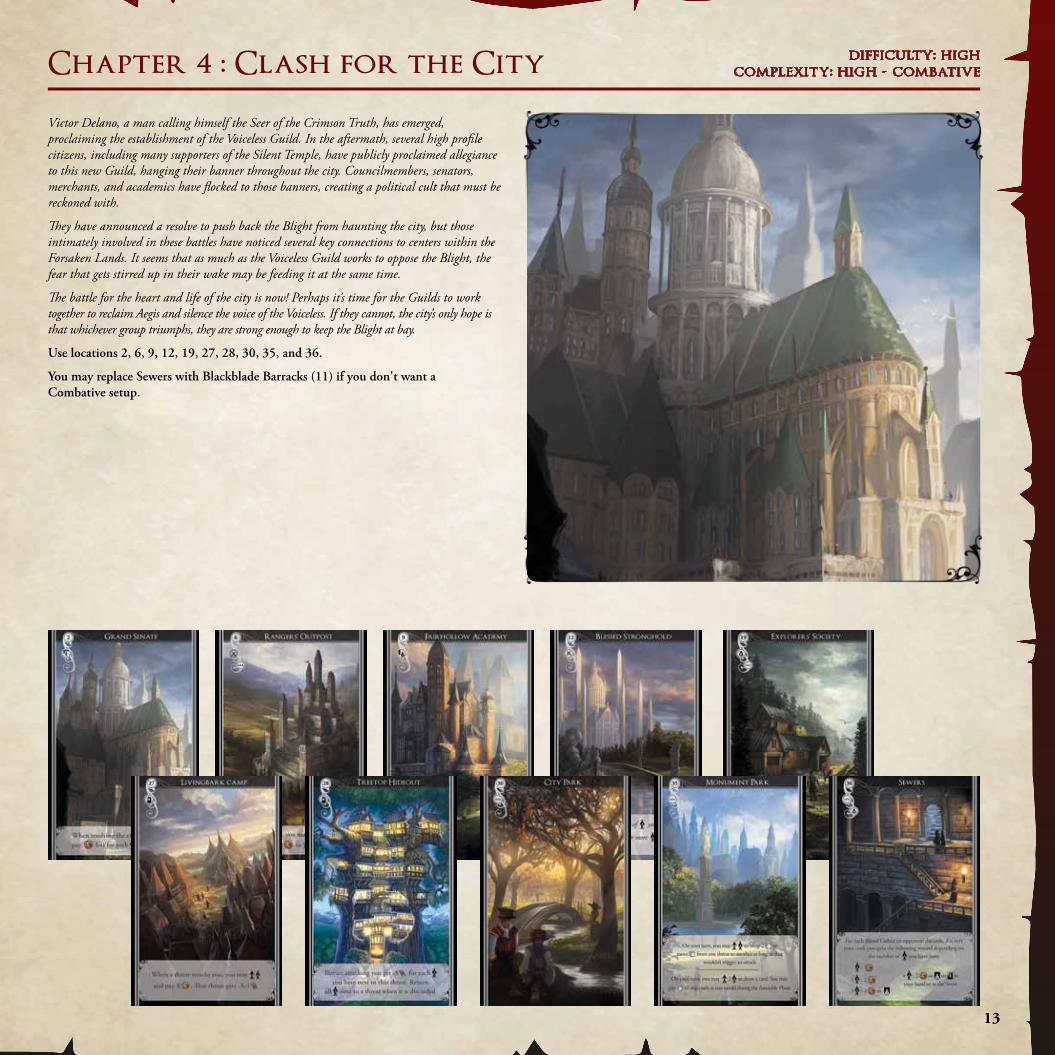
Chapter 4 : Clash for the City
Victor Delano, a man calling himself the Seer of the Crimson Truth, has emerged, proclaiming the establishment of the Voiceless Guild. In the aftermath, several high profile citizens, including many supporters of the Silent Temple, have publicly proclaimed allegiance to this new Guild, hanging their banner throughout the city. Councilmembers, senators, merchants, and academics have flocked to those banners, creating a political cult that must be reckoned with.
They have announced a resolve to push back the Blight from haunting the city, but those intimately involved in these battles have noticed several key connections to centers within the Forsaken Lands. It seems that as much as the Voiceless Guild works to oppose the Blight, the fear that gets stirred up in their wake may be feeding it at the same time.
The battle for the heart and life of the city is now! Perhaps it’s time for the Guilds to work together to reclaim Aegis and silence the voice of the Voiceless. If they cannot, the city’s only hope is that whichever group triumphs, they are strong enough to keep the Blight at bay.
Use locations 2, 6, 9, 12, 19, 27, 28, 30, 35, and 36.
You may replace Sewers with Blackblade Barracks (11) if you don't want a Combative setup.
difficulty: highcomplexity: high - combative
14
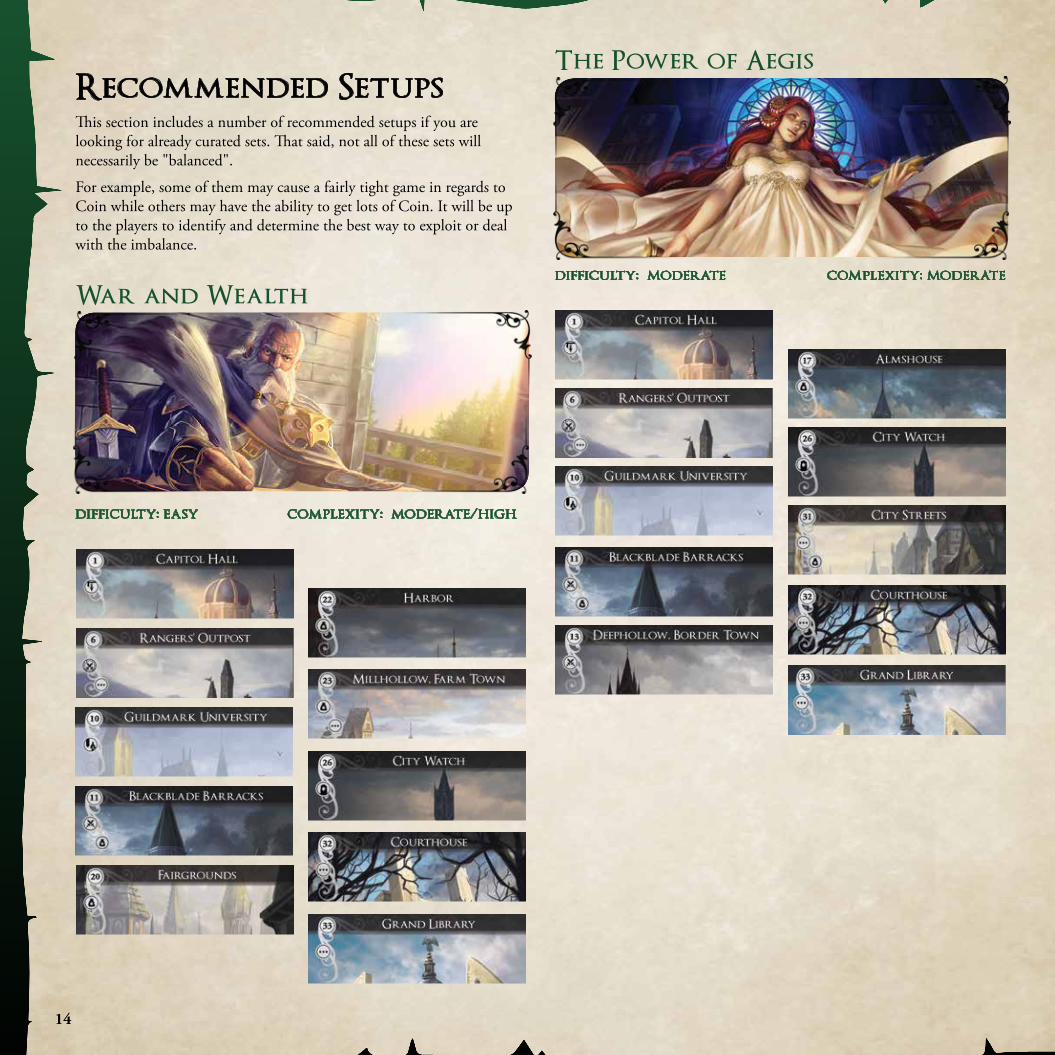
Recommended SetupsThis section includes a number of recommended setups if you are looking for already curated sets. That said, not all of these sets will necessarily be "balanced".
For example, some of them may cause a fairly tight game in regards to Coin while others may have the ability to get lots of Coin. It will be up to the players to identify and determine the best way to exploit or deal with the imbalance.
War and Wealth
difficulty: easy complexity: moderate/high
The Power of Aegis
difficulty: moderate complexity: moderate

15
Endangered Institutions
difficulty: moderate complexity: moderate - combative
You may replace Silent Temple with Monument Park (35) if you don’t want a Combative setup.
Breaking Storm
difficulty: high complexity: high
16
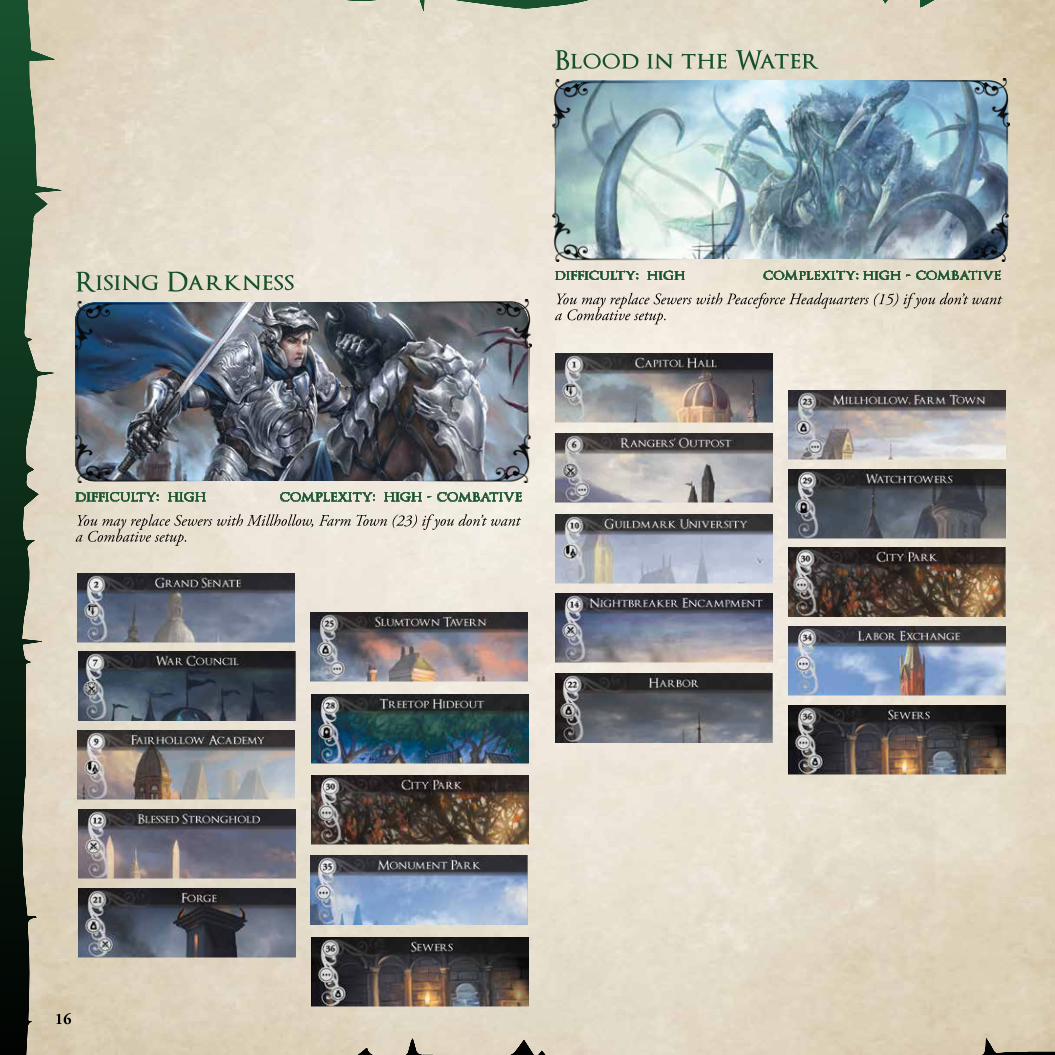
Rising Darkness
difficulty: high complexity: high - combative
You may replace Sewers with Millhollow, Farm Town (23) if you don’t want a Combative setup.
Blood in the Water
difficulty: high complexity: high - combative
You may replace Sewers with Peaceforce Headquarters (15) if you don’t want a Combative setup.

17
Creating your Own SetupsEdge of Darkness and the city of Aegis are vast, so there is no need to limit yourself to just playing with the above recommended setups.
When you are creating your own setup, it must meet certain parameters, listed below:
• Include exactly 1 location and corresponding advancement with .
• Include exactly 1 location and corresponding advancement with .
• Include exactly 1 location and corresponding advancement with .
Then it must include seven from the following effect types, broken down as:
• at least 1 location and corresponding advancement with .
• at least 2 locations and corresponding advancements with .
• at least 1 location and corresponding advancement with .
• 3 more locations and corresponding advancements with , , or .
Random SetupIn order to assist you with these parameters for random setups, the game includes Randomizer cards.
Their front, just like the Location boards, features the name of the location as well as its number and its Location type icons.
Their back features the icon used for the creation of the setups (random of curated).
Sort the randomizer cards by their back in four stacks, and shuffle each individually: , , , .
From the first three stacks, take the first card and set it aside.
From the stack, reveal cards one at a time. Set aside the first , first two and first you encounter. Once you have set aside these four cards, reveal the bottom three cards of the stack and set them aside.
These 10 cards form your random setup. Pick the corresponding Location boards and advancements from the box and follow the Setup instructions as per normal.
1 Capitol Hall
18
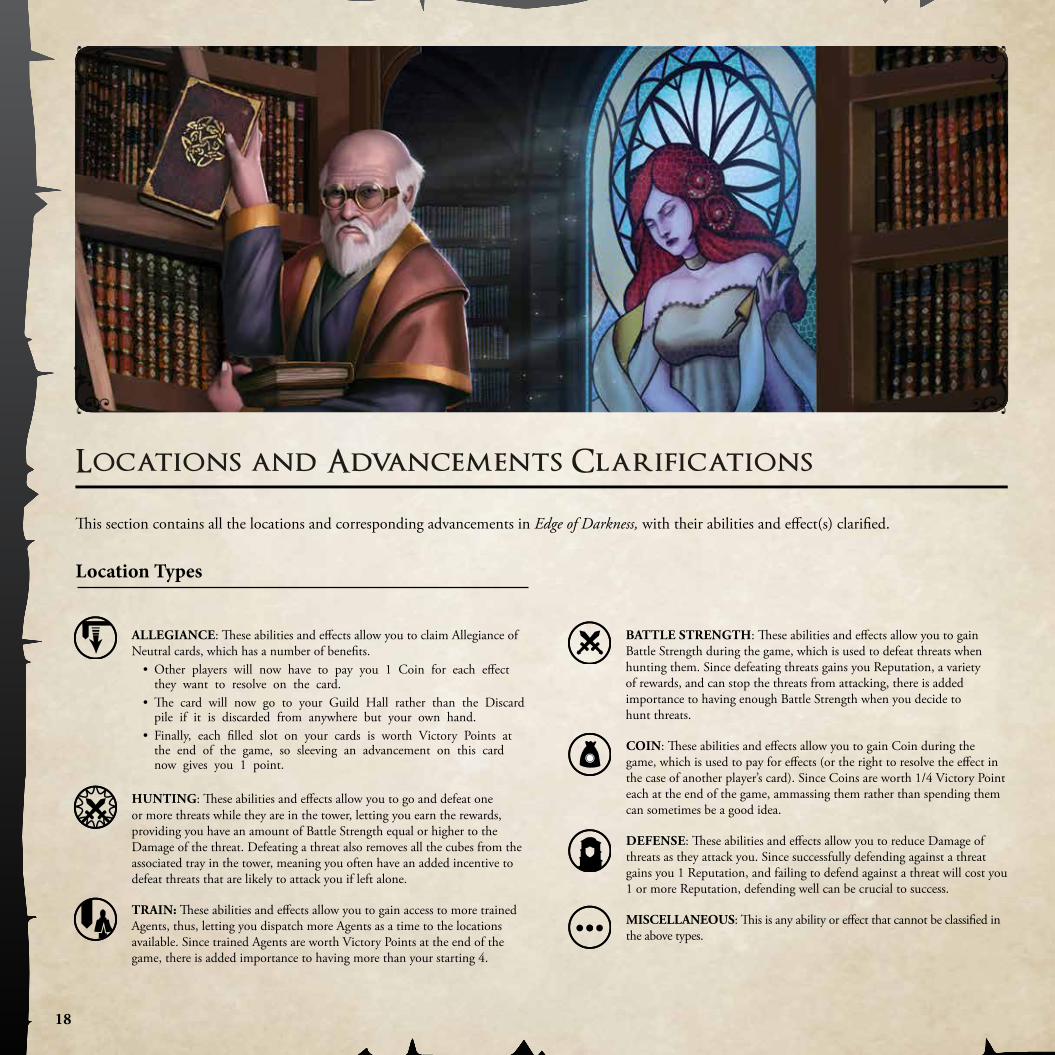
This section contains all the locations and corresponding advancements in Edge of Darkness, with their abilities and effect(s) clarified.
Location Types
Locations and Advancements Clarifications
ALLEGIANCE: These abilities and effects allow you to claim Allegiance of Neutral cards, which has a number of benefits.
• Other players will now have to pay you 1 Coin for each effect they want to resolve on the card.
• The card will now go to your Guild Hall rather than the Discard pile if it is discarded from anywhere but your own hand.
• Finally, each filled slot on your cards is worth Victory Points at the end of the game, so sleeving an advancement on this card now gives you 1 point.
HUNTING: These abilities and effects allow you to go and defeat one or more threats while they are in the tower, letting you earn the rewards, providing you have an amount of Battle Strength equal or higher to the Damage of the threat. Defeating a threat also removes all the cubes from the associated tray in the tower, meaning you often have an added incentive to defeat threats that are likely to attack you if left alone.
TRAIN: These abilities and effects allow you to gain access to more trained Agents, thus, letting you dispatch more Agents as a time to the locations available. Since trained Agents are worth Victory Points at the end of the game, there is added importance to having more than your starting 4.
BATTLE STRENGTH: These abilities and effects allow you to gain Battle Strength during the game, which is used to defeat threats when hunting them. Since defeating threats gains you Reputation, a variety of rewards, and can stop the threats from attacking, there is added importance to having enough Battle Strength when you decide to hunt threats.
COIN: These abilities and effects allow you to gain Coin during the game, which is used to pay for effects (or the right to resolve the effect in the case of another player’s card). Since Coins are worth 1/4 Victory Point each at the end of the game, ammassing them rather than spending them can sometimes be a good idea.
DEFENSE: These abilities and effects allow you to reduce Damage of threats as they attack you. Since successfully defending against a threat gains you 1 Reputation, and failing to defend against a threat will cost you 1 or more Reputation, defending well can be crucial to success.
MISCELLANEOUS: This is any ability or effect that cannot be classified in the above types.
19
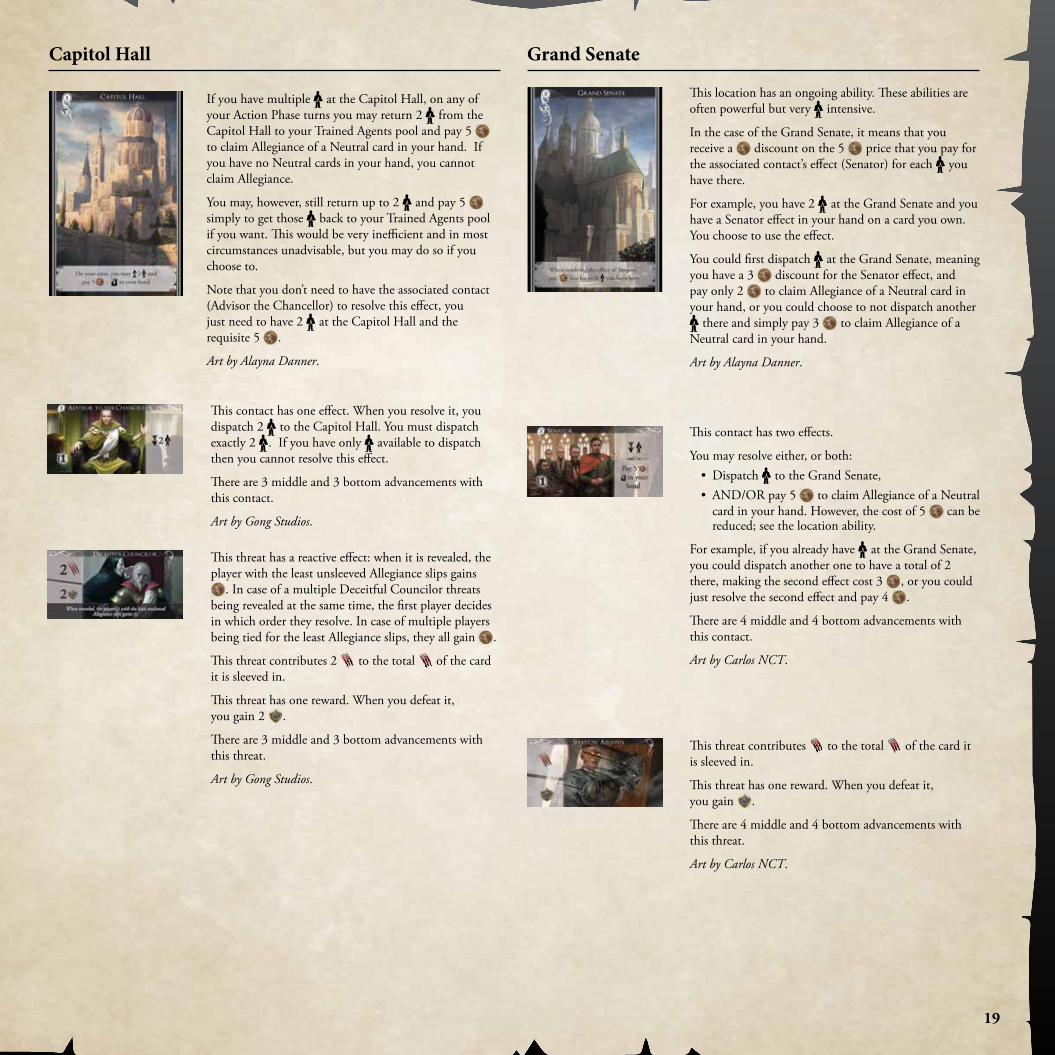
Capitol Hall
If you have multiple at the Capitol Hall, on any of your Action Phase turns you may return 2 from the Capitol Hall to your Trained Agents pool and pay 5 to claim Allegiance of a Neutral card in your hand. If you have no Neutral cards in your hand, you cannot claim Allegiance.
You may, however, still return up to 2 and pay 5 simply to get those back to your Trained Agents pool if you want. This would be very inefficient and in most circumstances unadvisable, but you may do so if you choose to.
Note that you don’t need to have the associated contact (Advisor the Chancellor) to resolve this effect, you just need to have 2 at the Capitol Hall and the requisite 5 .
Art by Alayna Danner.
This contact has one effect. When you resolve it, you dispatch 2 to the Capitol Hall. You must dispatch exactly 2 . If you have only available to dispatch then you cannot resolve this effect.
There are 3 middle and 3 bottom advancements with this contact.
Art by Gong Studios.
This threat has a reactive effect: when it is revealed, the player with the least unsleeved Allegiance slips gains
. In case of a multiple Deceitful Councilor threats being revealed at the same time, the first player decides in which order they resolve. In case of multiple players being tied for the least Allegiance slips, they all gain .
This threat contributes 2 to the total of the card it is sleeved in.
This threat has one reward. When you defeat it, you gain 2 .
There are 3 middle and 3 bottom advancements with this threat.
Art by Gong Studios.
Grand Senate
This location has an ongoing ability. These abilities are often powerful but very intensive.
In the case of the Grand Senate, it means that you receive a discount on the 5 price that you pay for the associated contact’s effect (Senator) for each you have there.
For example, you have 2 at the Grand Senate and you have a Senator effect in your hand on a card you own. You choose to use the effect.
You could first dispatch at the Grand Senate, meaning you have a 3 discount for the Senator effect, and pay only 2 to claim Allegiance of a Neutral card in your hand, or you could choose to not dispatch another
there and simply pay 3 to claim Allegiance of a Neutral card in your hand.
Art by Alayna Danner.
This contact has two effects.
You may resolve either, or both:• Dispatch to the Grand Senate,• AND/OR pay 5 to claim Allegiance of a Neutral
card in your hand. However, the cost of 5 can be reduced; see the location ability.
For example, if you already have at the Grand Senate, you could dispatch another one to have a total of 2 there, making the second effect cost 3 , or you could just resolve the second effect and pay 4 .
There are 4 middle and 4 bottom advancements with this contact.
Art by Carlos NCT.
This threat contributes to the total of the card it is sleeved in.
This threat has one reward. When you defeat it, you gain .
There are 4 middle and 4 bottom advancements with this threat.
Art by Carlos NCT.
20
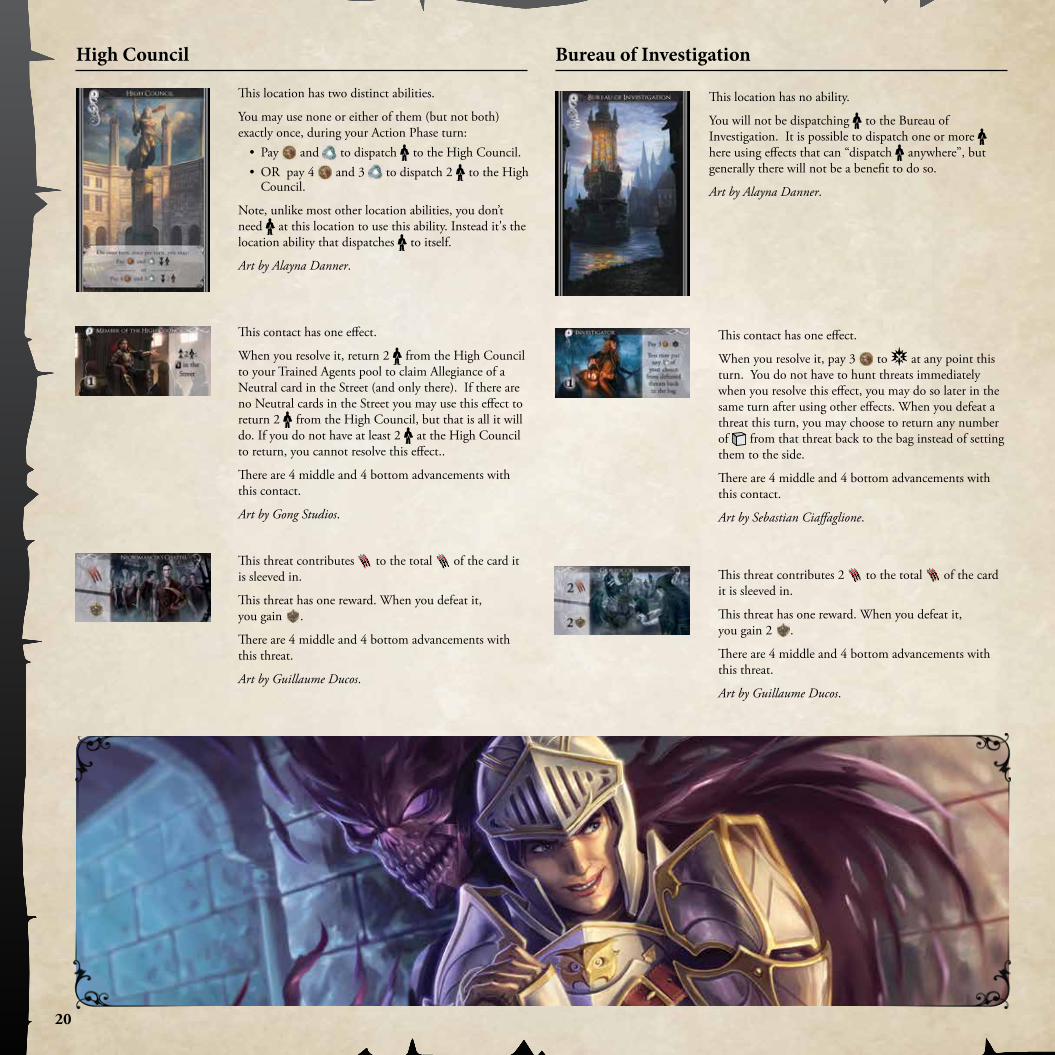
High Council
This location has two distinct abilities.
You may use none or either of them (but not both) exactly once, during your Action Phase turn:
• Pay and to dispatch to the High Council. • OR pay 4 and 3 to dispatch 2 to the High
Council.
Note, unlike most other location abilities, you don’t need at this location to use this ability. Instead it's the location ability that dispatches to itself.
Art by Alayna Danner.
This contact has one effect.
When you resolve it, return 2 from the High Council to your Trained Agents pool to claim Allegiance of a Neutral card in the Street (and only there). If there are no Neutral cards in the Street you may use this effect to return 2 from the High Council, but that is all it will do. If you do not have at least 2 at the High Council to return, you cannot resolve this effect..
There are 4 middle and 4 bottom advancements with this contact.
Art by Gong Studios.
This threat contributes to the total of the card it is sleeved in.
This threat has one reward. When you defeat it, you gain .
There are 4 middle and 4 bottom advancements with this threat.
Art by Guillaume Ducos.
Bureau of Investigation
This location has no ability.
You will not be dispatching to the Bureau of Investigation. It is possible to dispatch one or more here using effects that can “dispatch anywhere”, but generally there will not be a benefit to do so.
Art by Alayna Danner.
This contact has one effect.
When you resolve it, pay 3 to at any point this turn. You do not have to hunt threats immediately when you resolve this effect, you may do so later in the same turn after using other effects. When you defeat a threat this turn, you may choose to return any number of from that threat back to the bag instead of setting them to the side.
There are 4 middle and 4 bottom advancements with this contact.
Art by Sebastian Ciaffaglione.
This threat contributes 2 to the total of the card it is sleeved in.
This threat has one reward. When you defeat it, you gain 2 .
There are 4 middle and 4 bottom advancements with this threat.
Art by Guillaume Ducos.
21
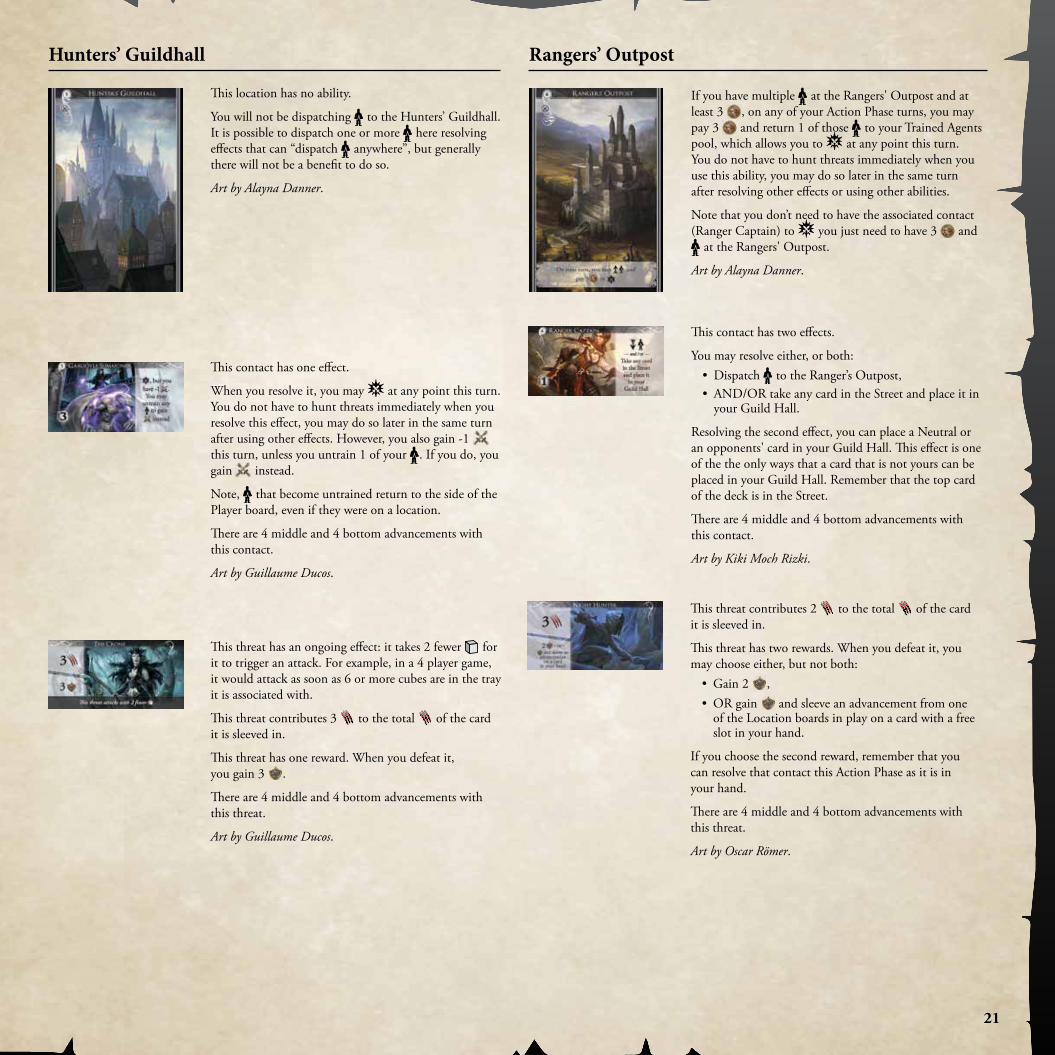
Hunters’ Guildhall
This location has no ability.
You will not be dispatching to the Hunters’ Guildhall. It is possible to dispatch one or more here resolving effects that can “dispatch anywhere”, but generally there will not be a benefit to do so.
Art by Alayna Danner.
This contact has one effect.
When you resolve it, you may at any point this turn. You do not have to hunt threats immediately when you resolve this effect, you may do so later in the same turn after using other effects. However, you also gain -1 this turn, unless you untrain 1 of your . If you do, you gain instead.
Note, that become untrained return to the side of the Player board, even if they were on a location.
There are 4 middle and 4 bottom advancements with this contact.
Art by Guillaume Ducos.
This threat has an ongoing effect: it takes 2 fewer for it to trigger an attack. For example, in a 4 player game, it would attack as soon as 6 or more cubes are in the tray it is associated with.
This threat contributes 3 to the total of the card it is sleeved in.
This threat has one reward. When you defeat it, you gain 3 .
There are 4 middle and 4 bottom advancements with this threat.
Art by Guillaume Ducos.
Rangers’ Outpost
If you have multiple at the Rangers' Outpost and at least 3 , on any of your Action Phase turns, you may pay 3 and return 1 of those to your Trained Agents pool, which allows you to at any point this turn. You do not have to hunt threats immediately when you use this ability, you may do so later in the same turn after resolving other effects or using other abilities.
Note that you don’t need to have the associated contact (Ranger Captain) to you just need to have 3 and
at the Rangers' Outpost.
Art by Alayna Danner.
This contact has two effects.
You may resolve either, or both:• Dispatch to the Ranger’s Outpost,• AND/OR take any card in the Street and place it in
your Guild Hall.
Resolving the second effect, you can place a Neutral or an opponents' card in your Guild Hall. This effect is one of the the only ways that a card that is not yours can be placed in your Guild Hall. Remember that the top card of the deck is in the Street.
There are 4 middle and 4 bottom advancements with this contact.
Art by Kiki Moch Rizki.
This threat contributes 2 to the total of the card it is sleeved in.
This threat has two rewards. When you defeat it, you may choose either, but not both:
• Gain 2 ,• OR gain and sleeve an advancement from one
of the Location boards in play on a card with a free slot in your hand.
If you choose the second reward, remember that you can resolve that contact this Action Phase as it is in your hand.
There are 4 middle and 4 bottom advancements with this threat.
Art by Oscar Römer.
22
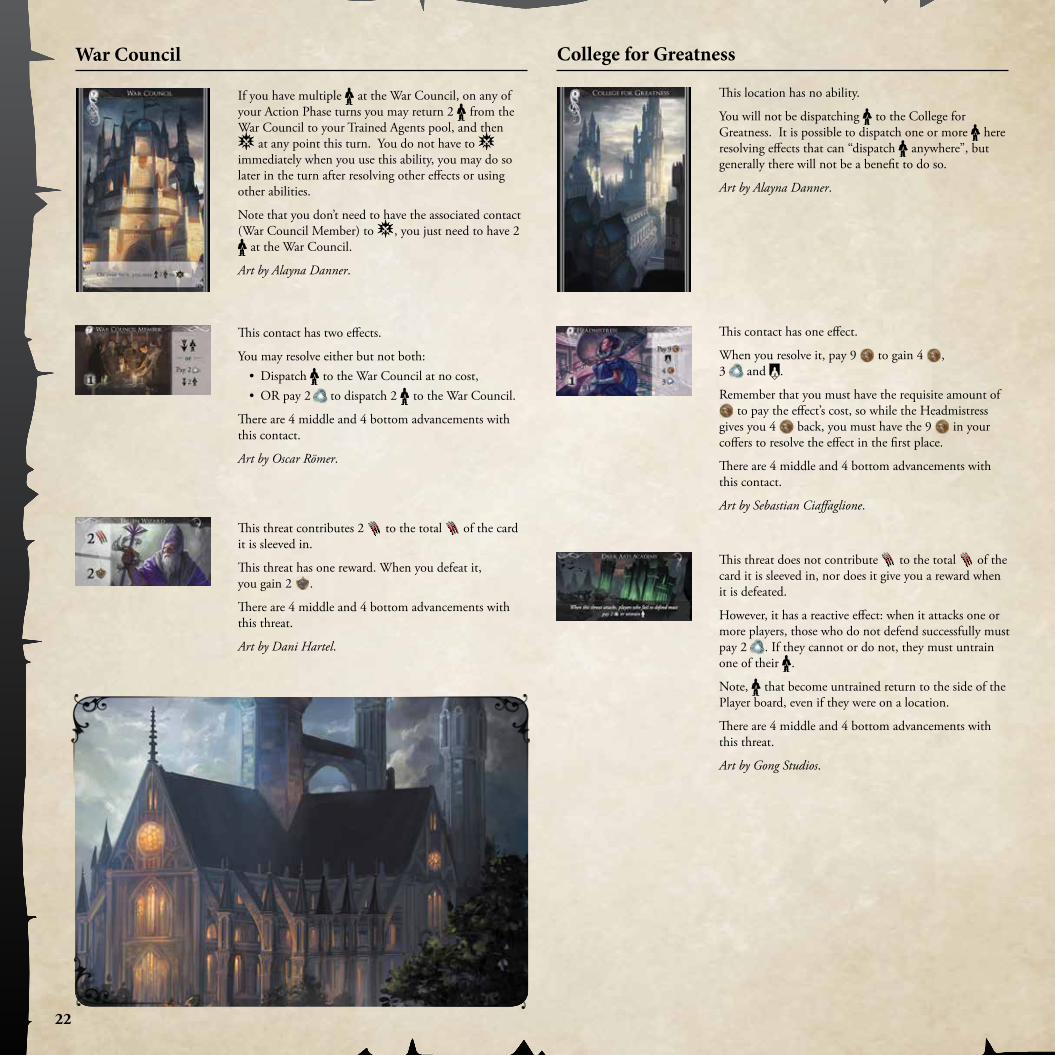
War Council
If you have multiple at the War Council, on any of your Action Phase turns you may return 2 from the War Council to your Trained Agents pool, and then
at any point this turn. You do not have to immediately when you use this ability, you may do so later in the turn after resolving other effects or using other abilities.
Note that you don’t need to have the associated contact (War Council Member) to , you just need to have 2
at the War Council.
Art by Alayna Danner.
This contact has two effects.
You may resolve either but not both: • Dispatch to the War Council at no cost,• OR pay 2 to dispatch 2 to the War Council.
There are 4 middle and 4 bottom advancements with this contact.
Art by Oscar Römer.
This threat contributes 2 to the total of the card it is sleeved in.
This threat has one reward. When you defeat it, you gain 2 .
There are 4 middle and 4 bottom advancements with this threat.
Art by Dani Hartel.
College for Greatness
This location has no ability.
You will not be dispatching to the College for Greatness. It is possible to dispatch one or more here resolving effects that can “dispatch anywhere”, but generally there will not be a benefit to do so.
Art by Alayna Danner.
This contact has one effect.
When you resolve it, pay 9 to gain 4 , 3 and .
Remember that you must have the requisite amount of to pay the effect’s cost, so while the Headmistress
gives you 4 back, you must have the 9 in your coffers to resolve the effect in the first place.
There are 4 middle and 4 bottom advancements with this contact.
Art by Sebastian Ciaffaglione.
This threat does not contribute to the total of the card it is sleeved in, nor does it give you a reward when it is defeated.
However, it has a reactive effect: when it attacks one or more players, those who do not defend successfully must pay 2 . If they cannot or do not, they must untrain one of their .
Note, that become untrained return to the side of the Player board, even if they were on a location.
There are 4 middle and 4 bottom advancements with this threat.
Art by Gong Studios.
23
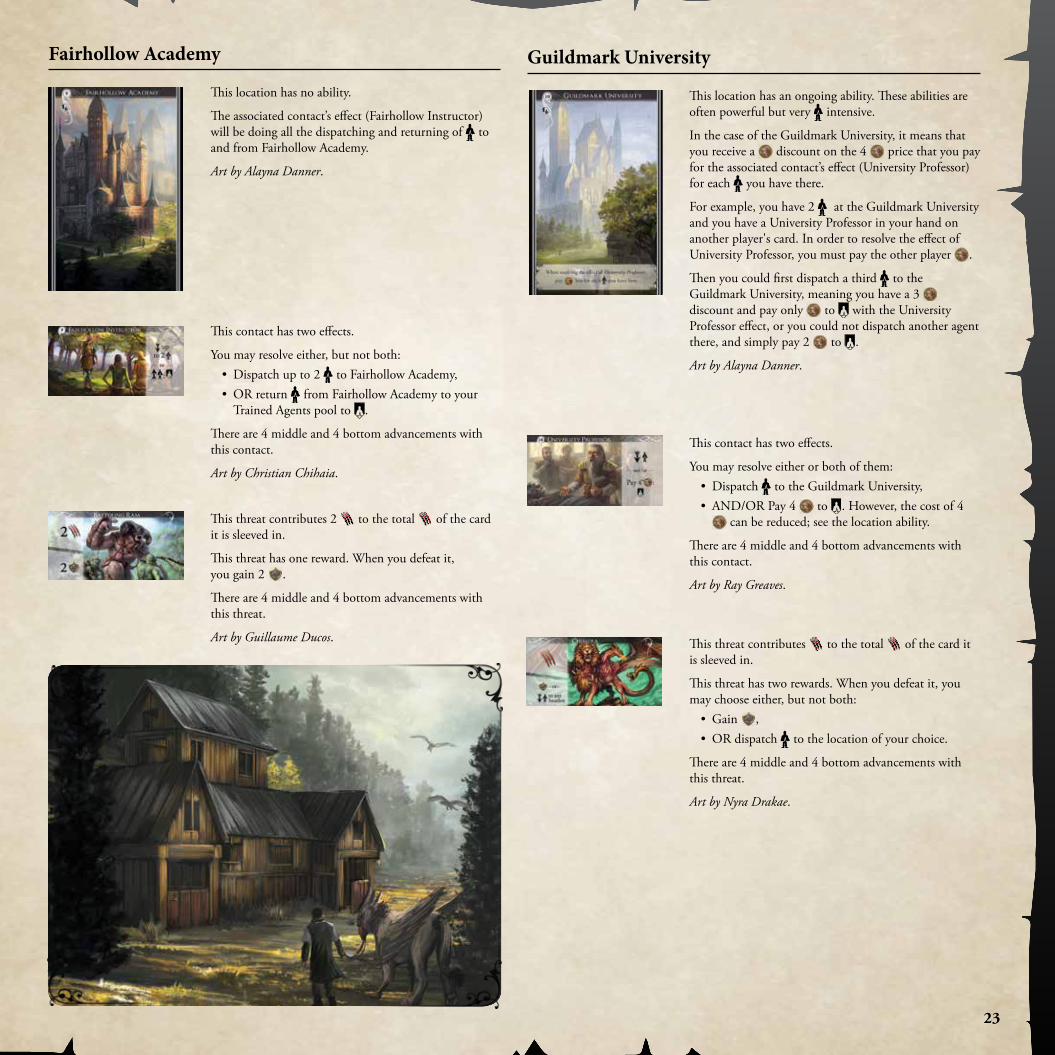
Guildmark University
This location has an ongoing ability. These abilities are often powerful but very intensive.
In the case of the Guildmark University, it means that you receive a discount on the 4 price that you pay for the associated contact’s effect (University Professor) for each you have there.
For example, you have 2 at the Guildmark University and you have a University Professor in your hand on another player's card. In order to resolve the effect of University Professor, you must pay the other player .
Then you could first dispatch a third to the Guildmark University, meaning you have a 3 discount and pay only to with the University Professor effect, or you could not dispatch another agent there, and simply pay 2 to .
Art by Alayna Danner.
This contact has two effects.
You may resolve either or both of them: • Dispatch to the Guildmark University, • AND/OR Pay 4 to . However, the cost of 4
can be reduced; see the location ability.
There are 4 middle and 4 bottom advancements with this contact.
Art by Ray Greaves.
This threat contributes to the total of the card it is sleeved in.
This threat has two rewards. When you defeat it, you may choose either, but not both:
• Gain ,• OR dispatch to the location of your choice.
There are 4 middle and 4 bottom advancements with this threat.
Art by Nyra Drakae.
Fairhollow Academy
This location has no ability.
The associated contact’s effect (Fairhollow Instructor) will be doing all the dispatching and returning of to and from Fairhollow Academy.
Art by Alayna Danner.
This contact has two effects.
You may resolve either, but not both:• Dispatch up to 2 to Fairhollow Academy,• OR return from Fairhollow Academy to your
Trained Agents pool to .
There are 4 middle and 4 bottom advancements with this contact.
Art by Christian Chihaia.
This threat contributes 2 to the total of the card it is sleeved in.
This threat has one reward. When you defeat it, you gain 2 .
There are 4 middle and 4 bottom advancements with this threat.
Art by Guillaume Ducos.
24
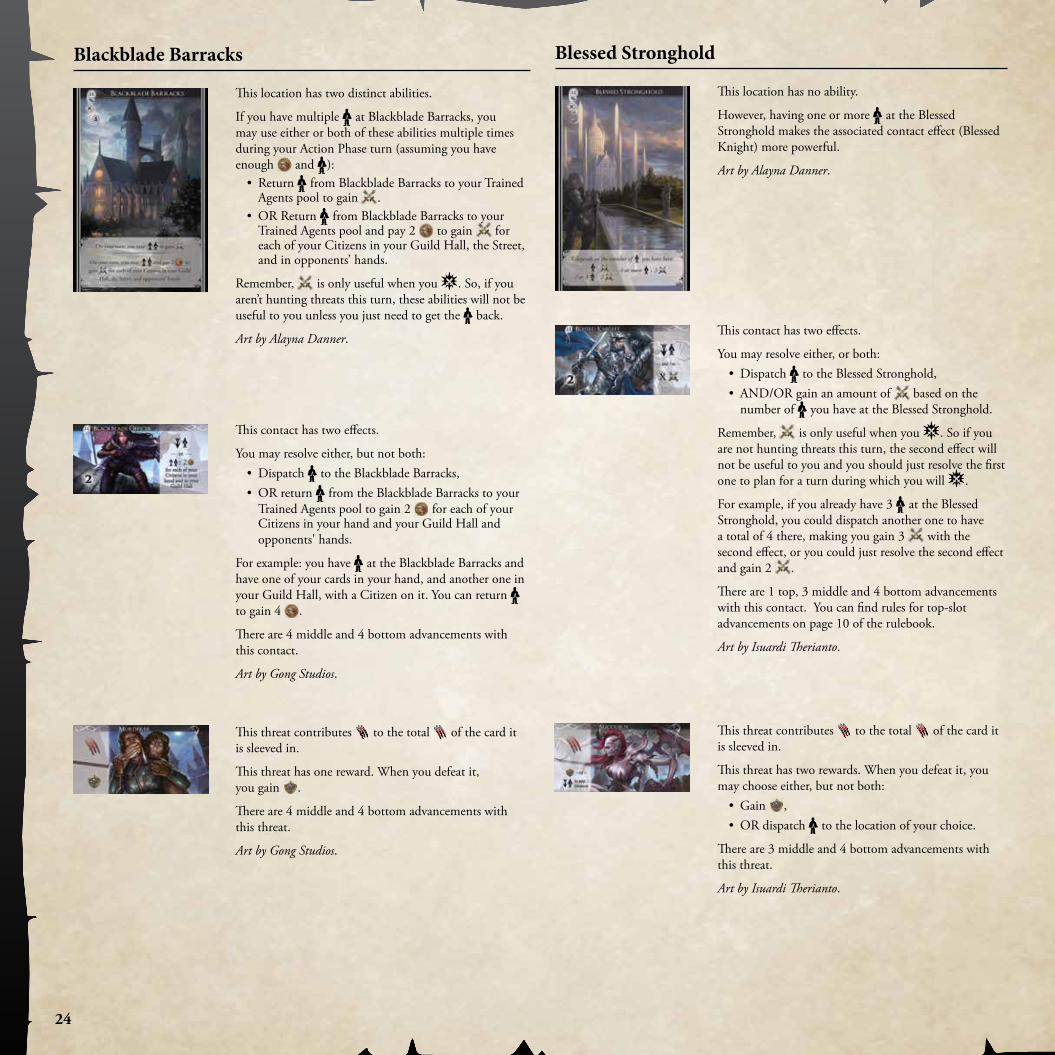
Blackblade Barracks
This location has two distinct abilities.
If you have multiple at Blackblade Barracks, you may use either or both of these abilities multiple times during your Action Phase turn (assuming you have enough and ):
• Return from Blackblade Barracks to your Trained Agents pool to gain .
• OR Return from Blackblade Barracks to your Trained Agents pool and pay 2 to gain for each of your Citizens in your Guild Hall, the Street, and in opponents’ hands.
Remember, is only useful when you . So, if you aren’t hunting threats this turn, these abilities will not be useful to you unless you just need to get the back.
Art by Alayna Danner.
This contact has two effects.
You may resolve either, but not both:• Dispatch to the Blackblade Barracks,• OR return from the Blackblade Barracks to your
Trained Agents pool to gain 2 for each of your Citizens in your hand and your Guild Hall and opponents' hands.
For example: you have at the Blackblade Barracks and have one of your cards in your hand, and another one in your Guild Hall, with a Citizen on it. You can return to gain 4 .
There are 4 middle and 4 bottom advancements with this contact.
Art by Gong Studios.
This threat contributes to the total of the card it is sleeved in.
This threat has one reward. When you defeat it, you gain .
There are 4 middle and 4 bottom advancements with this threat.
Art by Gong Studios.
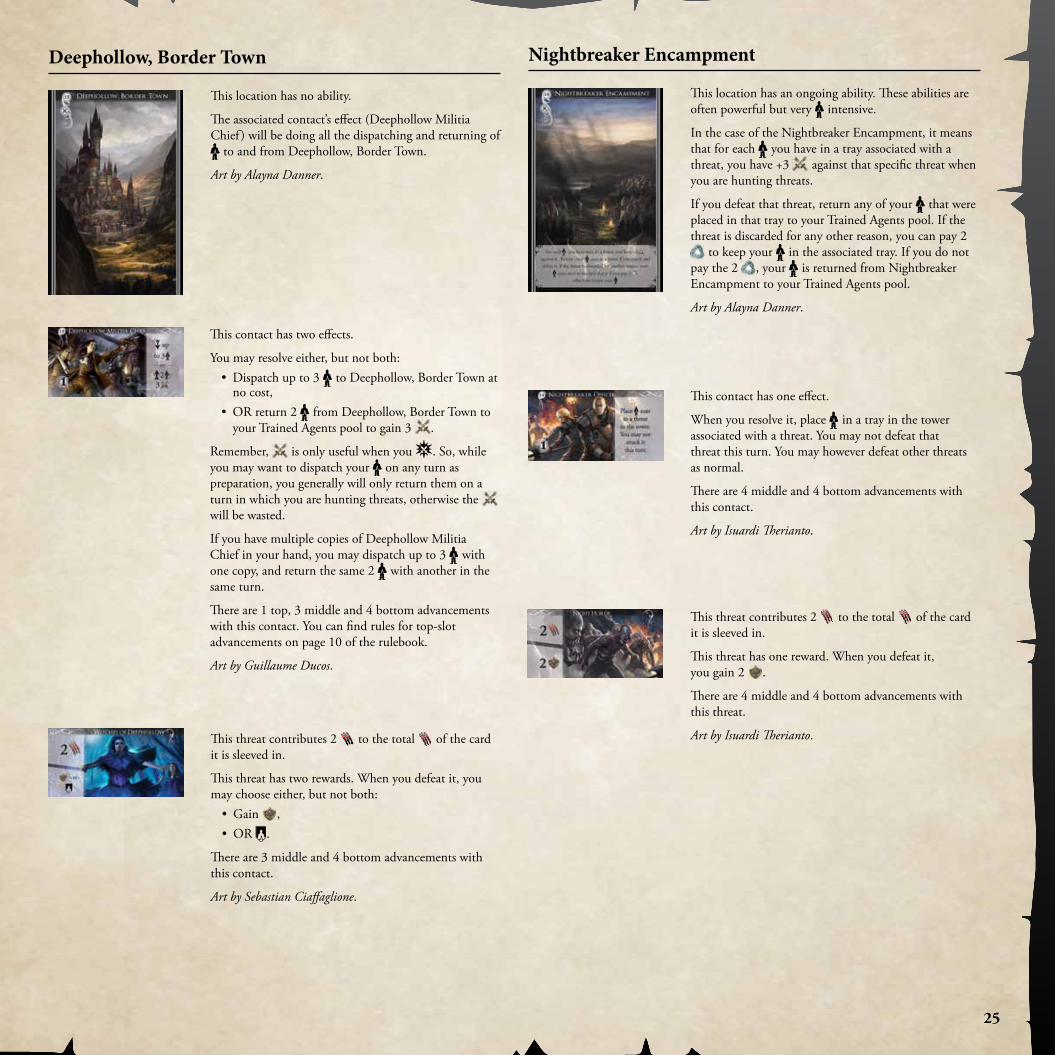
Blessed Stronghold
This location has no ability.
However, having one or more at the Blessed Stronghold makes the associated contact effect (Blessed Knight) more powerful.
Art by Alayna Danner.
This contact has two effects.
You may resolve either, or both:• Dispatch to the Blessed Stronghold,• AND/OR gain an amount of based on the
number of you have at the Blessed Stronghold.
Remember, is only useful when you . So if you are not hunting threats this turn, the second effect will not be useful to you and you should just resolve the first one to plan for a turn during which you will .
For example, if you already have 3 at the Blessed Stronghold, you could dispatch another one to have a total of 4 there, making you gain 3 with the second effect, or you could just resolve the second effect and gain 2 .
There are 1 top, 3 middle and 4 bottom advancements with this contact. You can find rules for top-slot advancements on page 10 of the rulebook.
Art by Isuardi Therianto.
This threat contributes to the total of the card it is sleeved in.
This threat has two rewards. When you defeat it, you may choose either, but not both:
• Gain ,• OR dispatch to the location of your choice.
There are 3 middle and 4 bottom advancements with this threat.
Art by Isuardi Therianto.
25
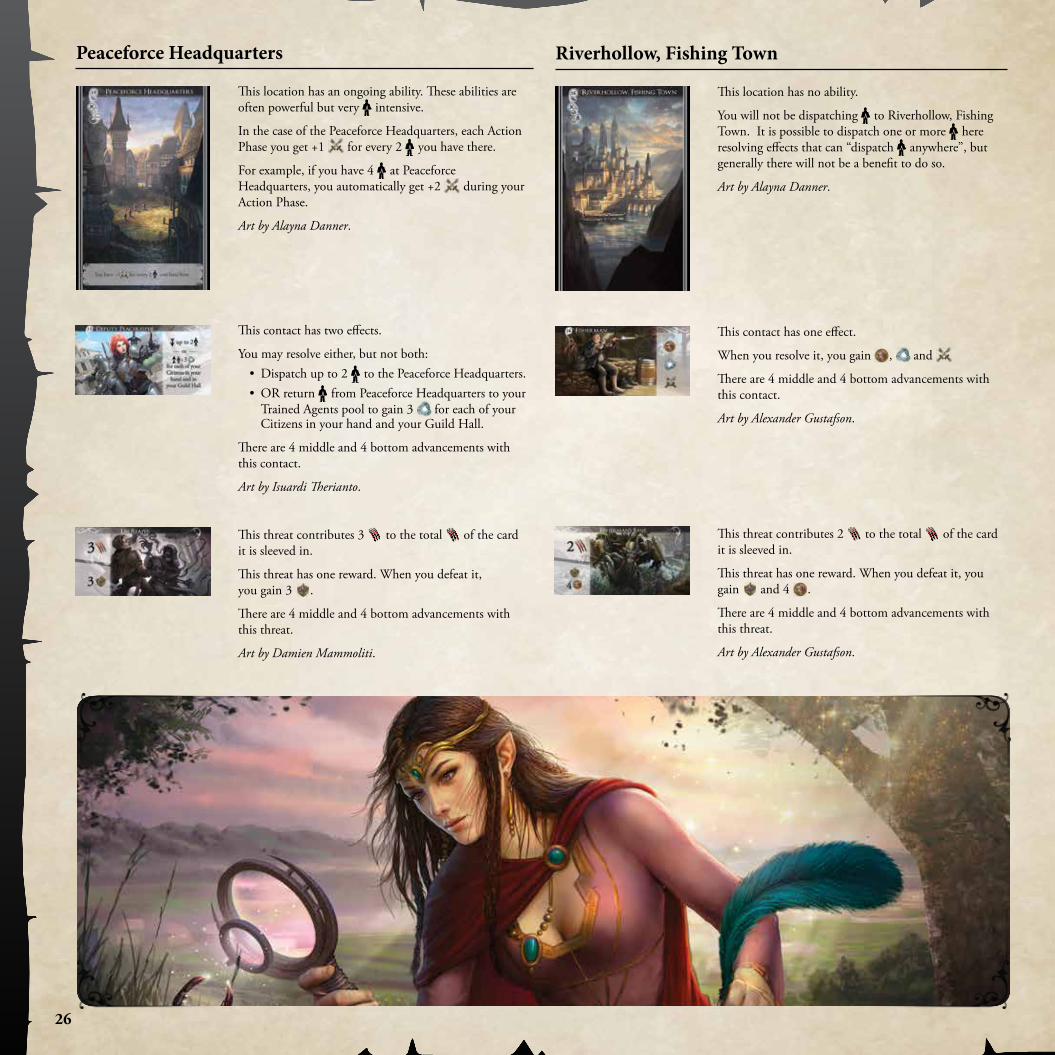
Deephollow, Border Town
This location has no ability.
The associated contact’s effect (Deephollow Militia Chief ) will be doing all the dispatching and returning of
to and from Deephollow, Border Town.
Art by Alayna Danner.
This contact has two effects.
You may resolve either, but not both:• Dispatch up to 3 to Deephollow, Border Town at
no cost,• OR return 2 from Deephollow, Border Town to
your Trained Agents pool to gain 3 .
Remember, is only useful when you . So, while you may want to dispatch your on any turn as preparation, you generally will only return them on a turn in which you are hunting threats, otherwise the will be wasted.
If you have multiple copies of Deephollow Militia Chief in your hand, you may dispatch up to 3 with one copy, and return the same 2 with another in the same turn.
There are 1 top, 3 middle and 4 bottom advancements with this contact. You can find rules for top-slot advancements on page 10 of the rulebook.
Art by Guillaume Ducos.
This threat contributes 2 to the total of the card it is sleeved in.
This threat has two rewards. When you defeat it, you may choose either, but not both:
• Gain ,• OR .
There are 3 middle and 4 bottom advancements with this contact.
Art by Sebastian Ciaffaglione.
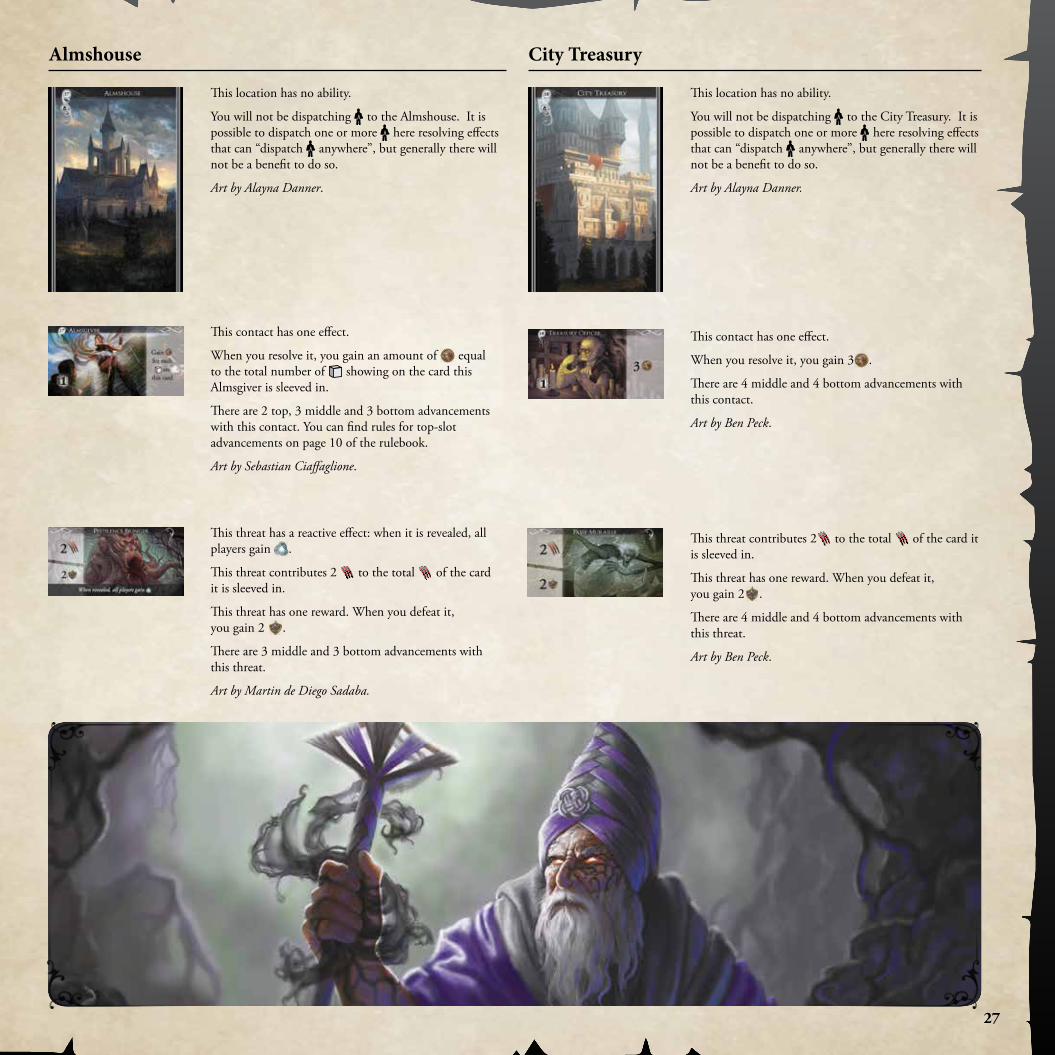
Nightbreaker Encampment
This location has an ongoing ability. These abilities are often powerful but very intensive.
In the case of the Nightbreaker Encampment, it means that for each you have in a tray associated with a threat, you have +3 against that specific threat when you are hunting threats.
If you defeat that threat, return any of your that were placed in that tray to your Trained Agents pool. If the threat is discarded for any other reason, you can pay 2
to keep your in the associated tray. If you do not pay the 2 , your is returned from Nightbreaker Encampment to your Trained Agents pool.
Art by Alayna Danner.
This contact has one effect.
When you resolve it, place in a tray in the tower associated with a threat. You may not defeat that threat this turn. You may however defeat other threats as normal.
There are 4 middle and 4 bottom advancements with this contact.
Art by Isuardi Therianto.
This threat contributes 2 to the total of the card it is sleeved in.
This threat has one reward. When you defeat it, you gain 2 .
There are 4 middle and 4 bottom advancements with this threat.
Art by Isuardi Therianto.
26
Riverhollow, Fishing Town
This location has no ability.
You will not be dispatching to Riverhollow, Fishing Town. It is possible to dispatch one or more here resolving effects that can “dispatch anywhere”, but generally there will not be a benefit to do so.
Art by Alayna Danner.
This contact has one effect.
When you resolve it, you gain , and
There are 4 middle and 4 bottom advancements with this contact.
Art by Alexander Gustafson.
This threat contributes 2 to the total of the card it is sleeved in.
This threat has one reward. When you defeat it, you gain and 4 .
There are 4 middle and 4 bottom advancements with this threat.
Art by Alexander Gustafson.
Peaceforce Headquarters
This location has an ongoing ability. These abilities are often powerful but very intensive.
In the case of the Peaceforce Headquarters, each Action Phase you get +1 for every 2 you have there.
For example, if you have 4 at Peaceforce Headquarters, you automatically get +2 during your Action Phase.
Art by Alayna Danner.
This contact has two effects.
You may resolve either, but not both:• Dispatch up to 2 to the Peaceforce Headquarters.• OR return from Peaceforce Headquarters to your
Trained Agents pool to gain 3 for each of your Citizens in your hand and your Guild Hall.
There are 4 middle and 4 bottom advancements with this contact.
Art by Isuardi Therianto.
This threat contributes 3 to the total of the card it is sleeved in.
This threat has one reward. When you defeat it, you gain 3 .
There are 4 middle and 4 bottom advancements with this threat.
Art by Damien Mammoliti.
27
Almshouse
This location has no ability.
You will not be dispatching to the Almshouse. It is possible to dispatch one or more here resolving effects that can “dispatch anywhere”, but generally there will not be a benefit to do so.
Art by Alayna Danner.
This contact has one effect.
When you resolve it, you gain an amount of equal to the total number of showing on the card this Almsgiver is sleeved in.
There are 2 top, 3 middle and 3 bottom advancements with this contact. You can find rules for top-slot advancements on page 10 of the rulebook.
Art by Sebastian Ciaffaglione.
This threat has a reactive effect: when it is revealed, all players gain .
This threat contributes 2 to the total of the card it is sleeved in.
This threat has one reward. When you defeat it, you gain 2 .
There are 3 middle and 3 bottom advancements with this threat.
Art by Martin de Diego Sadaba.
City Treasury
This location has no ability.
You will not be dispatching to the City Treasury. It is possible to dispatch one or more here resolving effects that can “dispatch anywhere”, but generally there will not be a benefit to do so.
Art by Alayna Danner.
This contact has one effect.
When you resolve it, you gain 3 .
There are 4 middle and 4 bottom advancements with this contact.
Art by Ben Peck.
This threat contributes 2 to the total of the card it is sleeved in.
This threat has one reward. When you defeat it, you gain 2 .
There are 4 middle and 4 bottom advancements with this threat.
Art by Ben Peck.
28
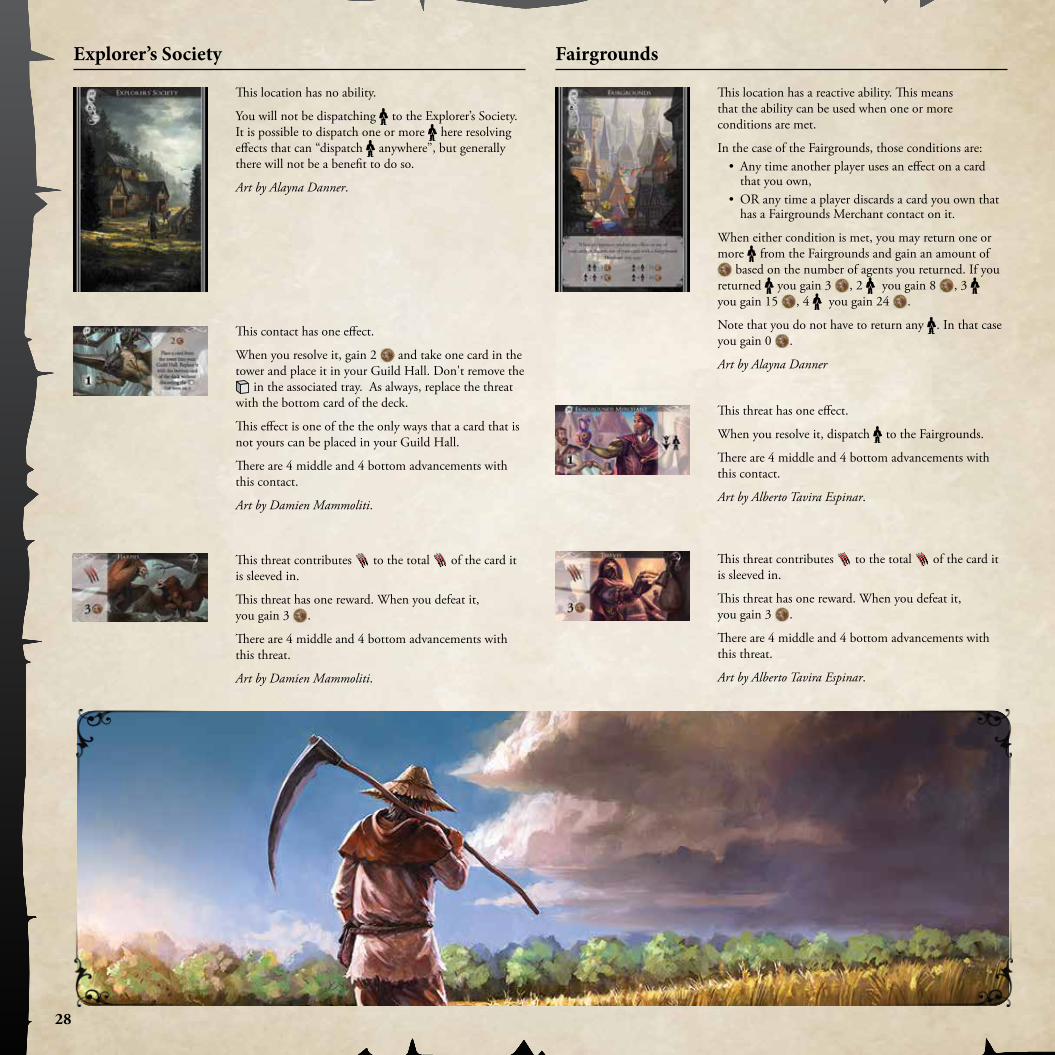
Fairgrounds
This location has a reactive ability. This means that the ability can be used when one or more conditions are met.
In the case of the Fairgrounds, those conditions are: • Any time another player uses an effect on a card
that you own,• OR any time a player discards a card you own that
has a Fairgrounds Merchant contact on it.
When either condition is met, you may return one or more from the Fairgrounds and gain an amount of
based on the number of agents you returned. If you returned you gain 3 , 2 you gain 8 , 3 you gain 15 , 4 you gain 24 .
Note that you do not have to return any . In that case you gain 0 .
Art by Alayna Danner
This threat has one effect.
When you resolve it, dispatch to the Fairgrounds.
There are 4 middle and 4 bottom advancements with this contact.
Art by Alberto Tavira Espinar.
This threat contributes to the total of the card it is sleeved in.
This threat has one reward. When you defeat it, you gain 3 .
There are 4 middle and 4 bottom advancements with this threat.
Art by Alberto Tavira Espinar.
Explorer’s Society
This location has no ability.
You will not be dispatching to the Explorer’s Society. It is possible to dispatch one or more here resolving effects that can “dispatch anywhere”, but generally there will not be a benefit to do so.
Art by Alayna Danner.
This contact has one effect.
When you resolve it, gain 2 and take one card in the tower and place it in your Guild Hall. Don't remove the
in the associated tray. As always, replace the threat with the bottom card of the deck.
This effect is one of the the only ways that a card that is not yours can be placed in your Guild Hall.
There are 4 middle and 4 bottom advancements with this contact.
Art by Damien Mammoliti.
This threat contributes to the total of the card it is sleeved in.
This threat has one reward. When you defeat it, you gain 3 .
There are 4 middle and 4 bottom advancements with this threat.
Art by Damien Mammoliti.
29
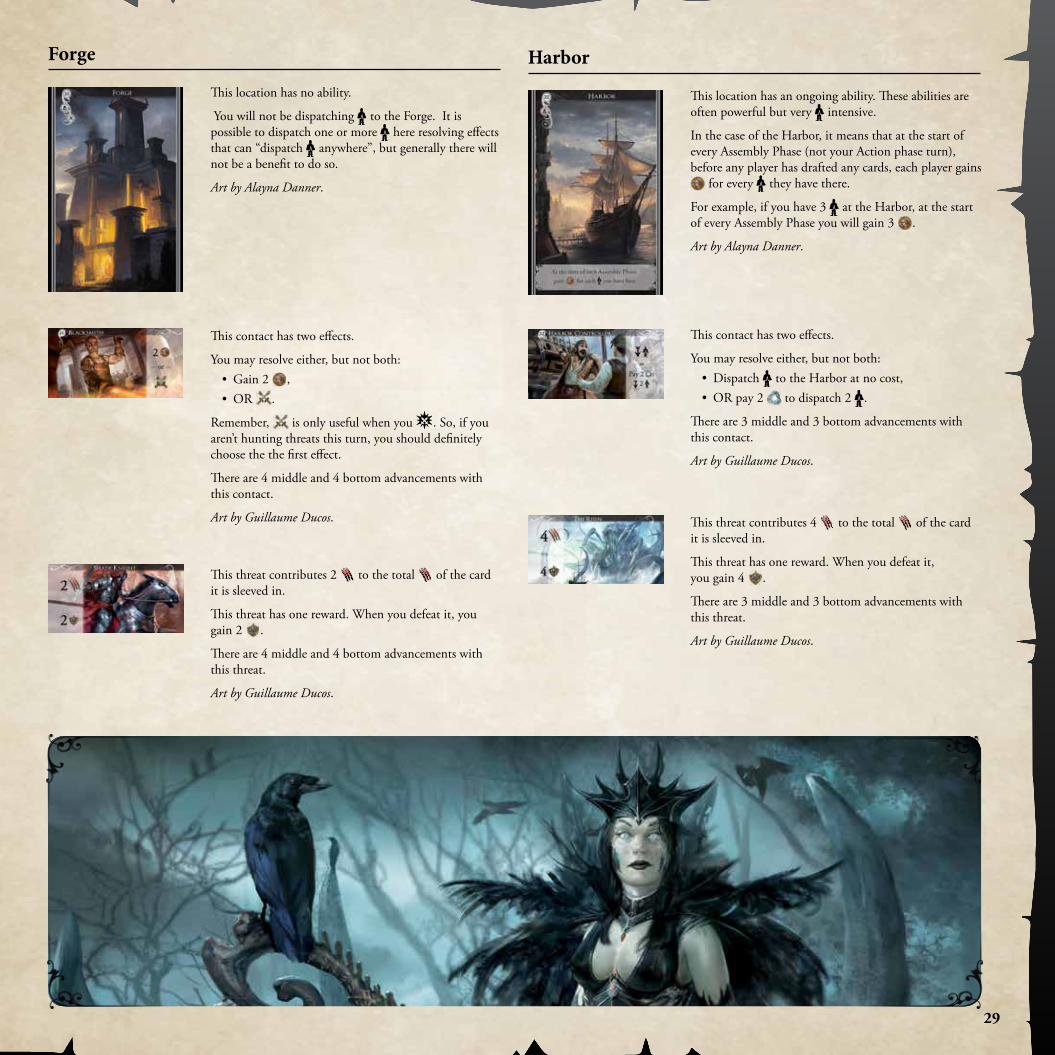
Harbor
This location has an ongoing ability. These abilities are often powerful but very intensive.
In the case of the Harbor, it means that at the start of every Assembly Phase (not your Action phase turn), before any player has drafted any cards, each player gains
for every they have there.
For example, if you have 3 at the Harbor, at the start of every Assembly Phase you will gain 3 .
Art by Alayna Danner.
This contact has two effects.
You may resolve either, but not both:• Dispatch to the Harbor at no cost,• OR pay 2 to dispatch 2 .
There are 3 middle and 3 bottom advancements with this contact.
Art by Guillaume Ducos.
This threat contributes 4 to the total of the card it is sleeved in.
This threat has one reward. When you defeat it, you gain 4 .
There are 3 middle and 3 bottom advancements with this threat.
Art by Guillaume Ducos.
Forge
This location has no ability.
You will not be dispatching to the Forge. It is possible to dispatch one or more here resolving effects that can “dispatch anywhere”, but generally there will not be a benefit to do so.
Art by Alayna Danner.
This contact has two effects.
You may resolve either, but not both: • Gain 2 ,• OR .
Remember, is only useful when you . So, if you aren’t hunting threats this turn, you should definitely choose the the first effect.
There are 4 middle and 4 bottom advancements with this contact.
Art by Guillaume Ducos.
This threat contributes 2 to the total of the card it is sleeved in.
This threat has one reward. When you defeat it, you gain 2 .
There are 4 middle and 4 bottom advancements with this threat.
Art by Guillaume Ducos.

30
Riverside Playhouse
This location has no ability.
The associated contact’s effect (Patron of the Arts) will be doing all the dispatching and returning of to and from the Riverside Playhouse.
Art by Alayna Danner.
This contact has two effects.
You may resolve either, or both:• Dispatch to the Riverside Playhouse to gain 2 ,• OR return from Riverside Playhouse to your
Trained Agents pool, and place this card in its owner’s Guild Hall.
When you resolve the second effect, you must immediately place the card in the Guild Hall of the player who owns the card, even if you haven't yet resolved all the effects on the card. If you place this card in your Guild Hall and then re-draw it in the same turn, you may resolve the effects on the card again.
There are 4 top, 2 middle and 2 bottom advancements with this contact. You can find rules for top-slot advancements on page 10 of the rulebook.
Art by Christian Chihaia.
This threat contributes to the total of the card it is sleeved in.
This threat has one reward. When you defeat it, you gain 3 .
There are 2 middle and 2 bottom advancements with this threat.
Art by Christian Chihaia.
Millhollow, Farm Town
This location has an ongoing ability. These abilities are often powerful but very intensive.
In the case of Millhollow, Farm Town, during your Assembly Phase when drafting your hand of cards you will get to draft 1 extra card for every 2 you have there.
For example, if you have 5 at this location, you would get to draft 2 extra cards each Assembly Phase (meaning you draft a total of 5 cards each Assembly Phase instead of 3).
Art by Alayna Danner.
This contact has two effects. You may resolve either, but not both:
• Dispatch to Millhollow, Farm Town to gain , • OR Return from Millhollow, Farm Town to your
Trained Agents pool to gain 3 .
Note that if you can’t dispatch or return then you cannot gain the corresponding amount of . If you have multiple copies of Millhollow Landowner in your hand, you may dispatch and gain with one copy and return that and gain 3 with another copy in the same turn.
There are 4 middle and 4 bottom advancements with this contact.
Art by Sergio Camarena.
This threat contributes 3 to the total of the card it is sleeved in.
This threat has two rewards. When you defeat it, you may choose either, but not both:
• Gain 2 ,• OR and gain .
There are 4 middle and 4 bottom advancements with this threat.
Art by Christian Chihaia.
31
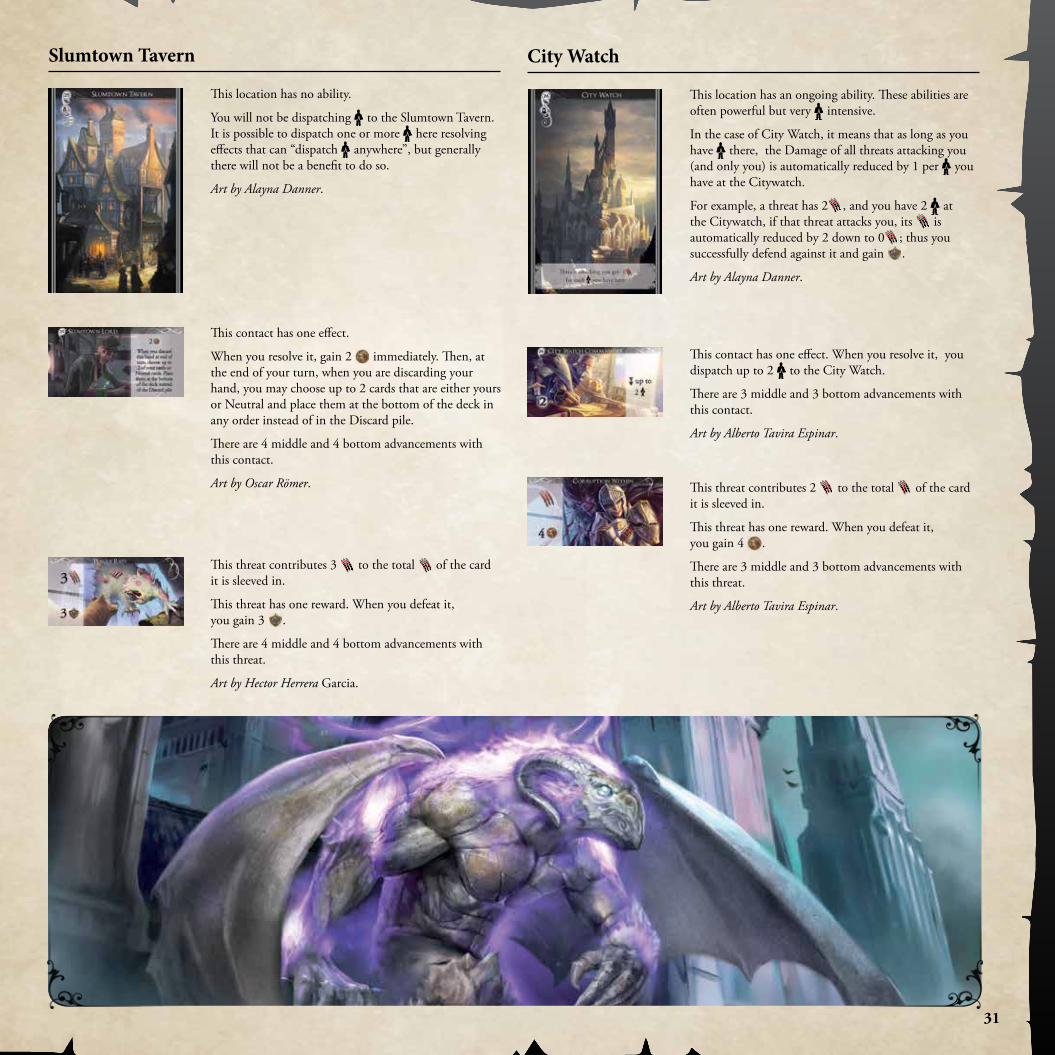
Slumtown Tavern
This location has no ability.
You will not be dispatching to the Slumtown Tavern. It is possible to dispatch one or more here resolving effects that can “dispatch anywhere”, but generally there will not be a benefit to do so.
Art by Alayna Danner.
This contact has one effect.
When you resolve it, gain 2 immediately. Then, at the end of your turn, when you are discarding your hand, you may choose up to 2 cards that are either yours or Neutral and place them at the bottom of the deck in any order instead of in the Discard pile.
There are 4 middle and 4 bottom advancements with this contact.
Art by Oscar Römer.
This threat contributes 3 to the total of the card it is sleeved in.
This threat has one reward. When you defeat it, you gain 3 .
There are 4 middle and 4 bottom advancements with this threat.
Art by Hector Herrera Garcia.
City Watch
This location has an ongoing ability. These abilities are often powerful but very intensive.
In the case of City Watch, it means that as long as you have there, the Damage of all threats attacking you (and only you) is automatically reduced by 1 per you have at the Citywatch.
For example, a threat has 2 , and you have 2 at the Citywatch, if that threat attacks you, its is automatically reduced by 2 down to 0 ; thus you successfully defend against it and gain .
Art by Alayna Danner.
This contact has one effect. When you resolve it, you dispatch up to 2 to the City Watch.
There are 3 middle and 3 bottom advancements with this contact.
Art by Alberto Tavira Espinar.
This threat contributes 2 to the total of the card it is sleeved in.
This threat has one reward. When you defeat it, you gain 4 .
There are 3 middle and 3 bottom advancements with this threat.
Art by Alberto Tavira Espinar.
32
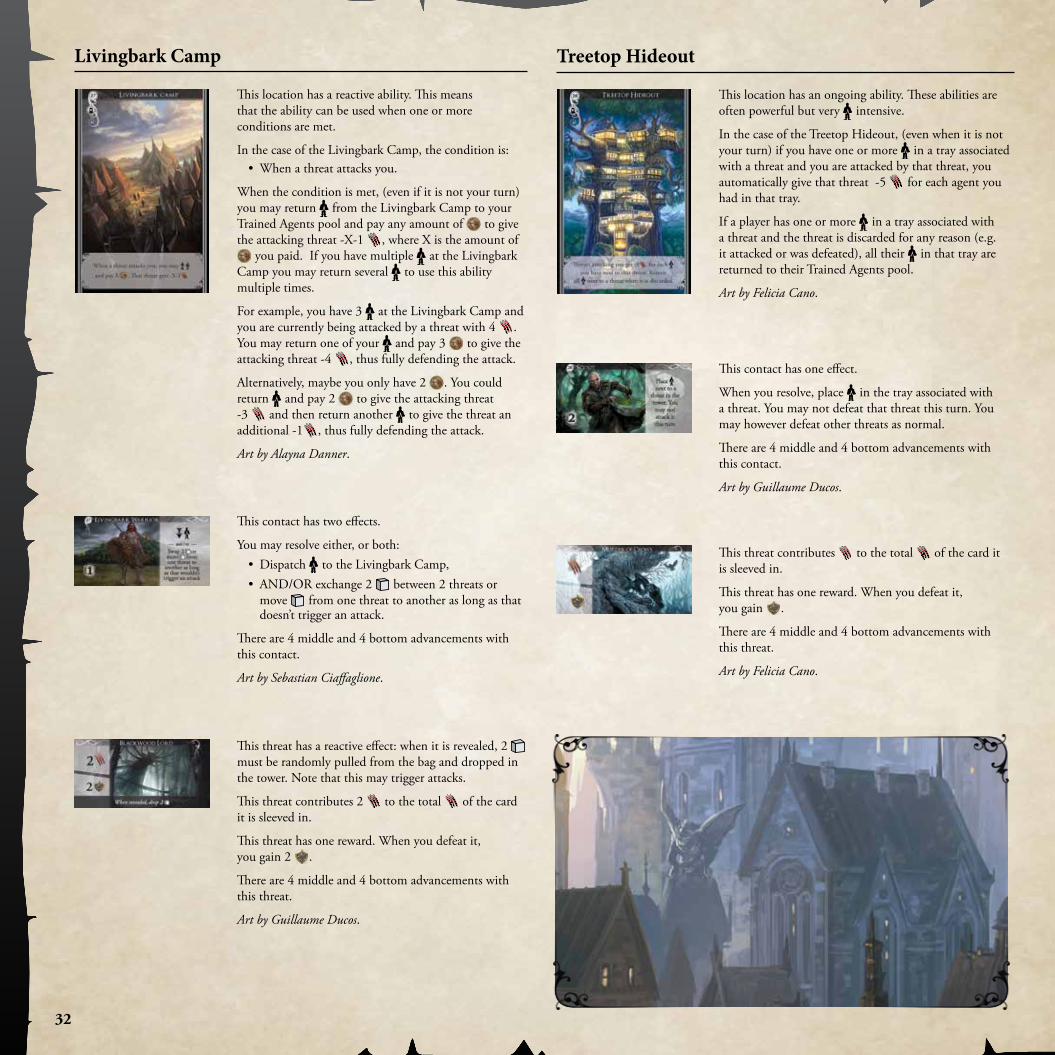
Treetop Hideout
This location has an ongoing ability. These abilities are often powerful but very intensive.
In the case of the Treetop Hideout, (even when it is not your turn) if you have one or more in a tray associated with a threat and you are attacked by that threat, you automatically give that threat -5 for each agent you had in that tray.
If a player has one or more in a tray associated with a threat and the threat is discarded for any reason (e.g. it attacked or was defeated), all their in that tray are returned to their Trained Agents pool.
Art by Felicia Cano.
This contact has one effect.
When you resolve, place in the tray associated with a threat. You may not defeat that threat this turn. You may however defeat other threats as normal.
There are 4 middle and 4 bottom advancements with this contact.
Art by Guillaume Ducos.
This threat contributes to the total of the card it is sleeved in.
This threat has one reward. When you defeat it, you gain .
There are 4 middle and 4 bottom advancements with this threat.
Art by Felicia Cano.
Livingbark Camp
This location has a reactive ability. This means that the ability can be used when one or more conditions are met.
In the case of the Livingbark Camp, the condition is: • When a threat attacks you.
When the condition is met, (even if it is not your turn) you may return from the Livingbark Camp to your Trained Agents pool and pay any amount of to give the attacking threat -X-1 , where X is the amount of
you paid. If you have multiple at the Livingbark Camp you may return several to use this ability multiple times.
For example, you have 3 at the Livingbark Camp and you are currently being attacked by a threat with 4 . You may return one of your and pay 3 to give the attacking threat -4 , thus fully defending the attack.
Alternatively, maybe you only have 2 . You could return and pay 2 to give the attacking threat -3 and then return another to give the threat an additional -1 , thus fully defending the attack.
Art by Alayna Danner.
This contact has two effects.
You may resolve either, or both:• Dispatch to the Livingbark Camp,• AND/OR exchange 2 between 2 threats or
move from one threat to another as long as that doesn’t trigger an attack.
There are 4 middle and 4 bottom advancements with this contact.
Art by Sebastian Ciaffaglione.
This threat has a reactive effect: when it is revealed, 2 must be randomly pulled from the bag and dropped in the tower. Note that this may trigger attacks.
This threat contributes 2 to the total of the card it is sleeved in.
This threat has one reward. When you defeat it, you gain 2 .
There are 4 middle and 4 bottom advancements with this threat.
Art by Guillaume Ducos.

33
City Park
This location has no ability.
You will not be dispatching to the City Park. It is possible to dispatch one or more here resolving effects that can “dispatch anywhere”, but generally there will not be a benefit to do so.
Art by Alayna Danner.
This contact has two effects.
You may resolve either, but not both:• Choose an effect on the same card as Savant and
resolve it again, • OR pay 2 to resolve again all other effects on the
same card as Savant.
Note that if you resolve again one or more effects on a another player’s card, you do not have to pay twice as the Savant is the effect that you are resolving (and thus paying for). The fact you get to resolve one or more effects is an added benefit.
For example, if you are resolving a Savant on another player’s card, and you want to resolve the Citizen on the card in the normal fashion, and then resolve the Savant to resolve the Citizen a second time you would pay that player to resolve the Citizen, and then another to resolve the Savant but you would not have to pay them another for the “duplicated” Citizen.
Also note, if you have multiple Savant effects sleeved on to the same card, they do not duplicate each other.
There are 4 top, 2 middle and 2 bottom advancements with this contact. You can find rules for top-slot advancements on page 10 of the rulebook.
Art by Martin de Diego Sadaba.
This threat contributes 2 to the total of the card it is sleeved in.
This threat has one reward. When you defeat it, you gain 2 .
There are 2 middle and 2 bottom advancements with this threat.
Art by Martin de Diego Sadaba.
Watchtowers
This location has a reactive ability. This means that the ability can be used when one or more conditions are met.
In the case of the Watchtowers, the condition is: • Any time a threat attacks you.
When the condition is met, (even if it is not your turn) you may return one or more from the Watchtowers to your Trained Agents pool, and give that threat -3
against you for each. So, if you have multiple at the Watchtowers, you may return several and give the theat -3 for each that you returned. If you reduce that threat's to 0, you successfully defend against the threat and gain .
Remember, reducing a threat's is only ever for you and does not affect other players also being attacked.
For example, you have 3 at the Watchtowers and you are currently being attacked by a threat with 4 . You may return 2 to give that threat -6 , which is more than enough to successfully defend against it. Because you successfully defended, you gain .
Another example: you have 2 Agents at the Watchtowers and are attacked by three different threats all at once; each threat has 2 . The threats resolve one at a time from left to right. First, you decide to do nothing about the first 2 threat, so you move down 1 space on your Defense track. Next, you return 1 of your from the Watchtower to give the second threat -3 , reducing it to 0 and gaining for successfully defending against it. Finally, you return your last from the Watchtower to give the third threat -3 , reducing it to 0 and gaining for successfully defending against it.
Note that even though the total of the threats was 6, you can only resolve the ability of the Watchtowers against one threat at a time. Thus, you could only reduce the of two of the threats.
Art by Alayna Danner.
This contact has one effect. When you resolve it, you dispatch to the Watchtower.
There are 4 middle and 4 bottom advancements with this contact.
Art by Carlos NCT.
This threat contributes to the total of the card it is sleeved in.
This threat has one reward. When you defeat it, you gain .
There are 4 middle and 4 bottom advancements with this threat.
Art by Carlos NCT.
34
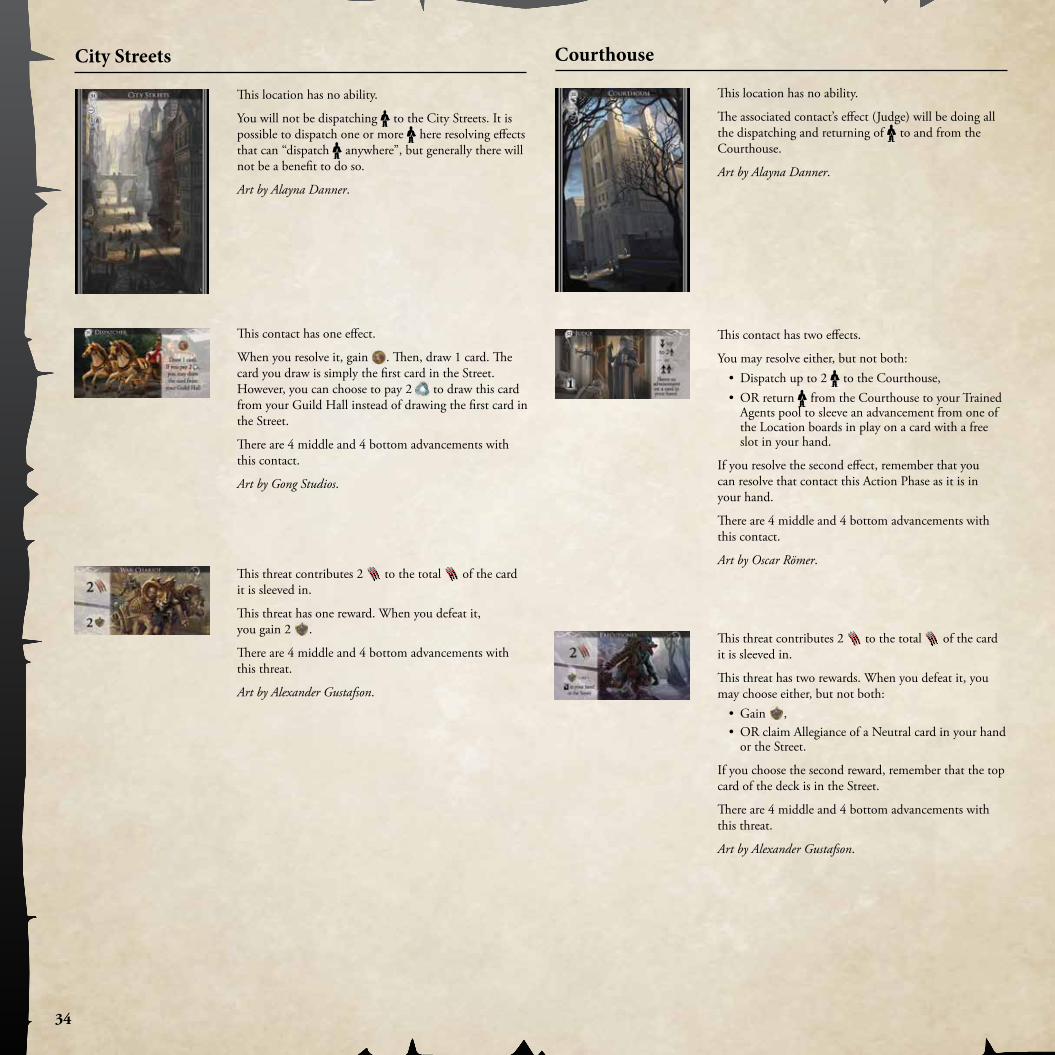
Courthouse
This location has no ability.
The associated contact’s effect (Judge) will be doing all the dispatching and returning of to and from the Courthouse.
Art by Alayna Danner.
This contact has two effects.
You may resolve either, but not both:• Dispatch up to 2 to the Courthouse,• OR return from the Courthouse to your Trained
Agents pool to sleeve an advancement from one of the Location boards in play on a card with a free slot in your hand.
If you resolve the second effect, remember that you can resolve that contact this Action Phase as it is in your hand.
There are 4 middle and 4 bottom advancements with this contact.
Art by Oscar Römer.
This threat contributes 2 to the total of the card it is sleeved in.
This threat has two rewards. When you defeat it, you may choose either, but not both:
• Gain ,• OR claim Allegiance of a Neutral card in your hand
or the Street.
If you choose the second reward, remember that the top card of the deck is in the Street.
There are 4 middle and 4 bottom advancements with this threat.
Art by Alexander Gustafson.
City Streets
This location has no ability.
You will not be dispatching to the City Streets. It is possible to dispatch one or more here resolving effects that can “dispatch anywhere”, but generally there will not be a benefit to do so.
Art by Alayna Danner.
This contact has one effect.
When you resolve it, gain . Then, draw 1 card. The card you draw is simply the first card in the Street. However, you can choose to pay 2 to draw this card from your Guild Hall instead of drawing the first card in the Street.
There are 4 middle and 4 bottom advancements with this contact.
Art by Gong Studios.
This threat contributes 2 to the total of the card it is sleeved in.
This threat has one reward. When you defeat it, you gain 2 .
There are 4 middle and 4 bottom advancements with this threat.
Art by Alexander Gustafson.
35
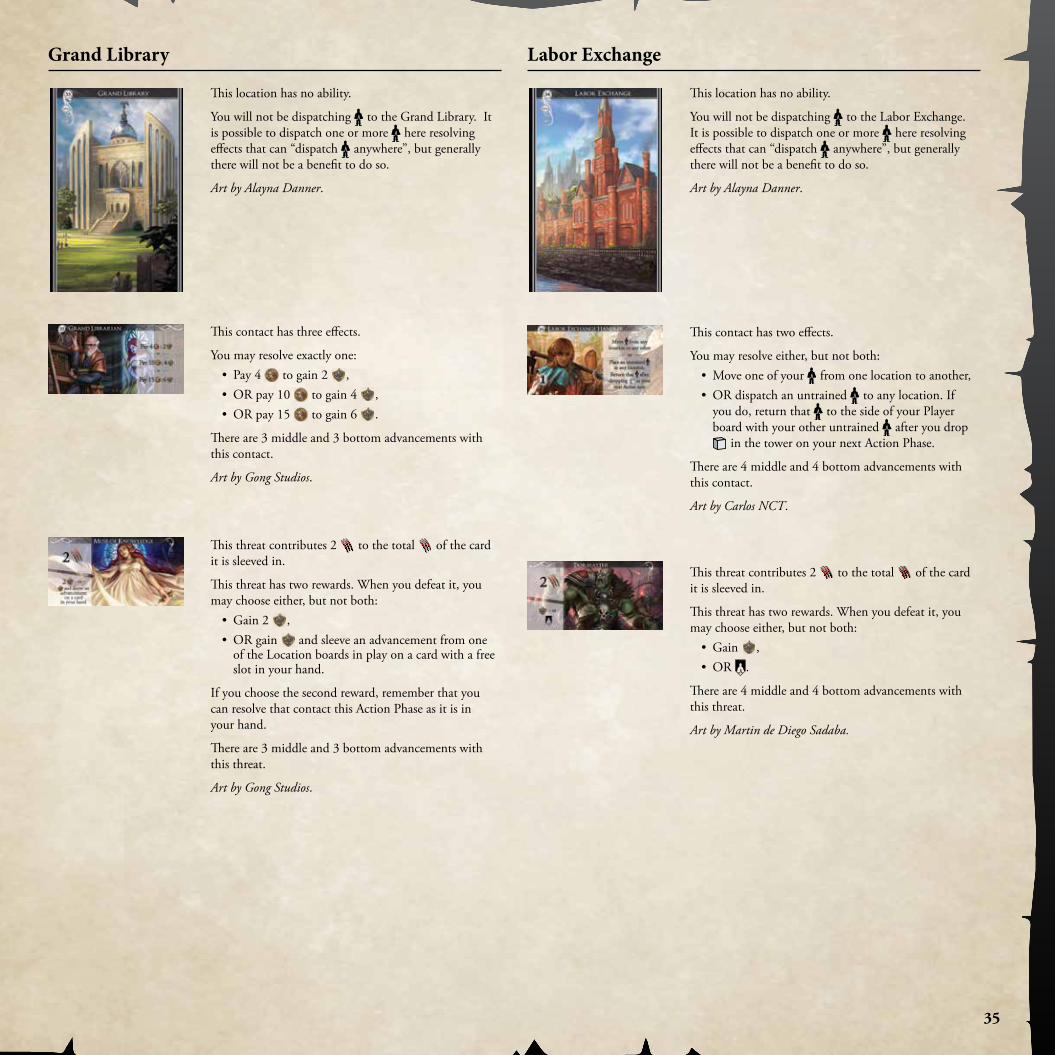
Grand Library
This location has no ability.
You will not be dispatching to the Grand Library. It is possible to dispatch one or more here resolving effects that can “dispatch anywhere”, but generally there will not be a benefit to do so.
Art by Alayna Danner.
This contact has three effects.
You may resolve exactly one:• Pay 4 to gain 2 ,• OR pay 10 to gain 4 , • OR pay 15 to gain 6 .
There are 3 middle and 3 bottom advancements with this contact.
Art by Gong Studios.
This threat contributes 2 to the total of the card it is sleeved in.
This threat has two rewards. When you defeat it, you may choose either, but not both:
• Gain 2 ,• OR gain and sleeve an advancement from one
of the Location boards in play on a card with a free slot in your hand.
If you choose the second reward, remember that you can resolve that contact this Action Phase as it is in your hand.
There are 3 middle and 3 bottom advancements with this threat.
Art by Gong Studios.
Labor Exchange
This location has no ability.
You will not be dispatching to the Labor Exchange. It is possible to dispatch one or more here resolving effects that can “dispatch anywhere”, but generally there will not be a benefit to do so.
Art by Alayna Danner.
This contact has two effects.
You may resolve either, but not both:• Move one of your from one location to another,• OR dispatch an untrained to any location. If
you do, return that to the side of your Player board with your other untrained after you drop
in the tower on your next Action Phase.
There are 4 middle and 4 bottom advancements with this contact.
Art by Carlos NCT.
This threat contributes 2 to the total of the card it is sleeved in.
This threat has two rewards. When you defeat it, you may choose either, but not both:
• Gain ,• OR .
There are 4 middle and 4 bottom advancements with this threat.
Art by Martin de Diego Sadaba.
36
Sewers
This location has a reactive ability. This means that the ability can be used when one or more conditions are met.
In the case of the Sewers, those conditions are: • Any time a card is discarded from a player’s hand
(this includes discarding a card to the Discard pile or to a player’s Guild Hall),
• AND a Blood Cultist contact is on that card.
When both conditions are met, if the discarded card is yours or you are the player discarding the card, you gain nothing. Otherwise, you will gain a benefit based on the number of you have at the Sewers: If you have 0 there, you gain nothing; if you have there, you gain
; if you have 2 there, you gain 2 ; If you have 3 there, you can either gain 2 or ; finally, if you have 4 or more there, you can gain either 2 , or , or claim Allegiance of a Neutral card in your hand or in the Street.
In the case of multiple Sewers abilities being used at the same time (e.g. multiple cards with a Blood Cultist on it were discarded at once, and/or one card was discarded with multiple Blood Cultists on it) and turn order matters (e.g. claiming Allegiance of cards in the Street), start with the active player and go clockwise, letting each player use all Sewers abilities that they get to use before proceeding to the next player.
Art by Alayna Danner.
This contact has no effect, and once sleeved it does nothing. However, at the moment you sleeve this contact you may dispatch to the Sewers. Generally it is best to sleeve Blood Cultist contacts on opponents' or Neutral cards.
There are 4 middle and 4 bottom advancements with this contact.
Art by Gong Studios.
This threat does not contribute to the total of the card it is sleeved in, nor does it give you a reward when it is defeated.
It, however, has a ongoing effect: it takes 2 fewer for it to trigger an attack.
When it attacks, if the owner of this card is the only one attacked, then instead it is all the other players who get attacked. If the owner of this card is one (but not the only) of the players attacked, then they are attacked with a total of 0; other players are attacked as normal. Players who are not the owner of the card this contact is sleeved in always get attacked for the full total .
Note that since the owner is attacked for 0 , they automatically defend against the threat when attacked by it, and gain .
There are 4 middle and 4 bottom advancements with this threat.
Art by Gong Studios.
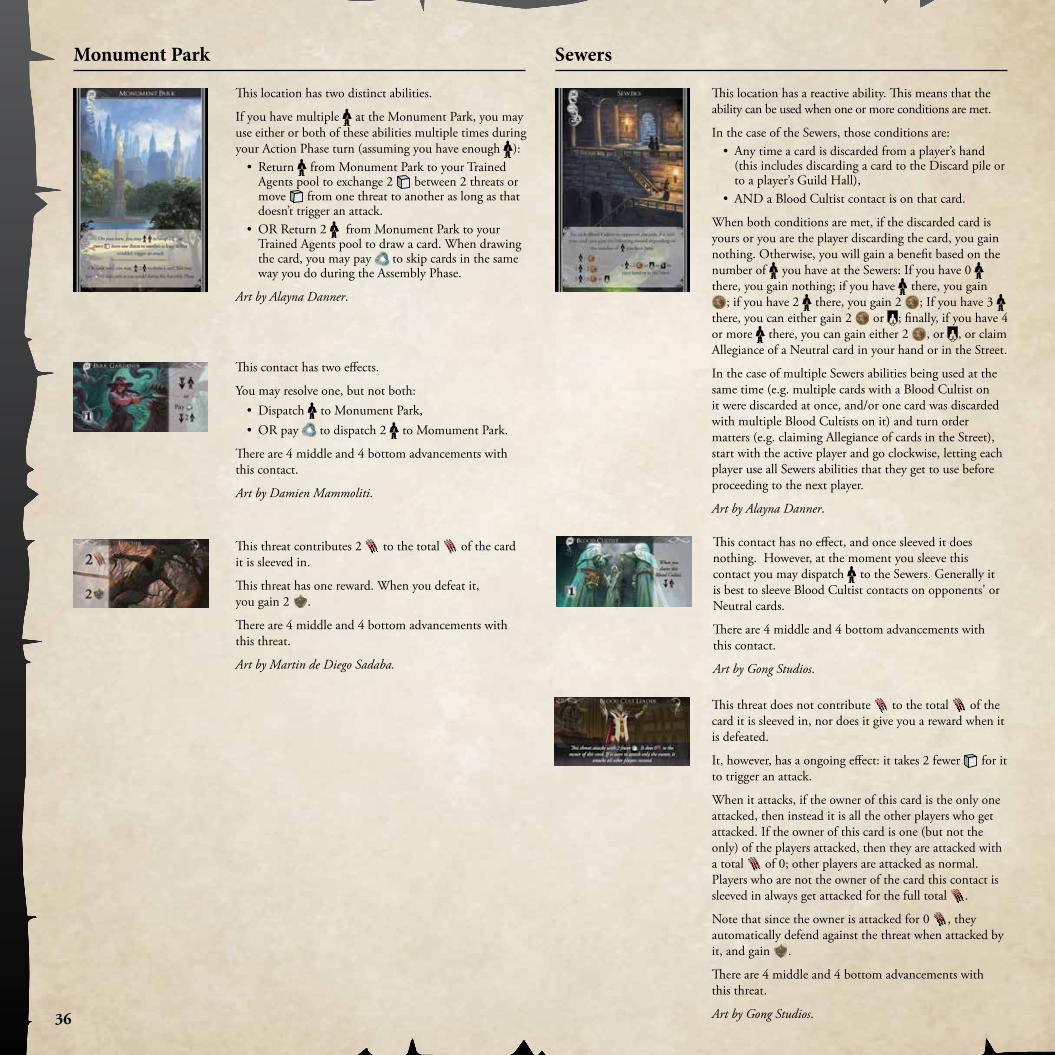
Monument Park
This location has two distinct abilities.
If you have multiple at the Monument Park, you may use either or both of these abilities multiple times during your Action Phase turn (assuming you have enough ):
• Return from Monument Park to your Trained Agents pool to exchange 2 between 2 threats or move from one threat to another as long as that doesn’t trigger an attack.
• OR Return 2 from Monument Park to your Trained Agents pool to draw a card. When drawing the card, you may pay to skip cards in the same way you do during the Assembly Phase.
Art by Alayna Danner.
This contact has two effects.
You may resolve one, but not both: • Dispatch to Monument Park,• OR pay to dispatch 2 to Momument Park.
There are 4 middle and 4 bottom advancements with this contact.
Art by Damien Mammoliti.
This threat contributes 2 to the total of the card it is sleeved in.
This threat has one reward. When you defeat it, you gain 2 .
There are 4 middle and 4 bottom advancements with this threat.
Art by Martin de Diego Sadaba.
37
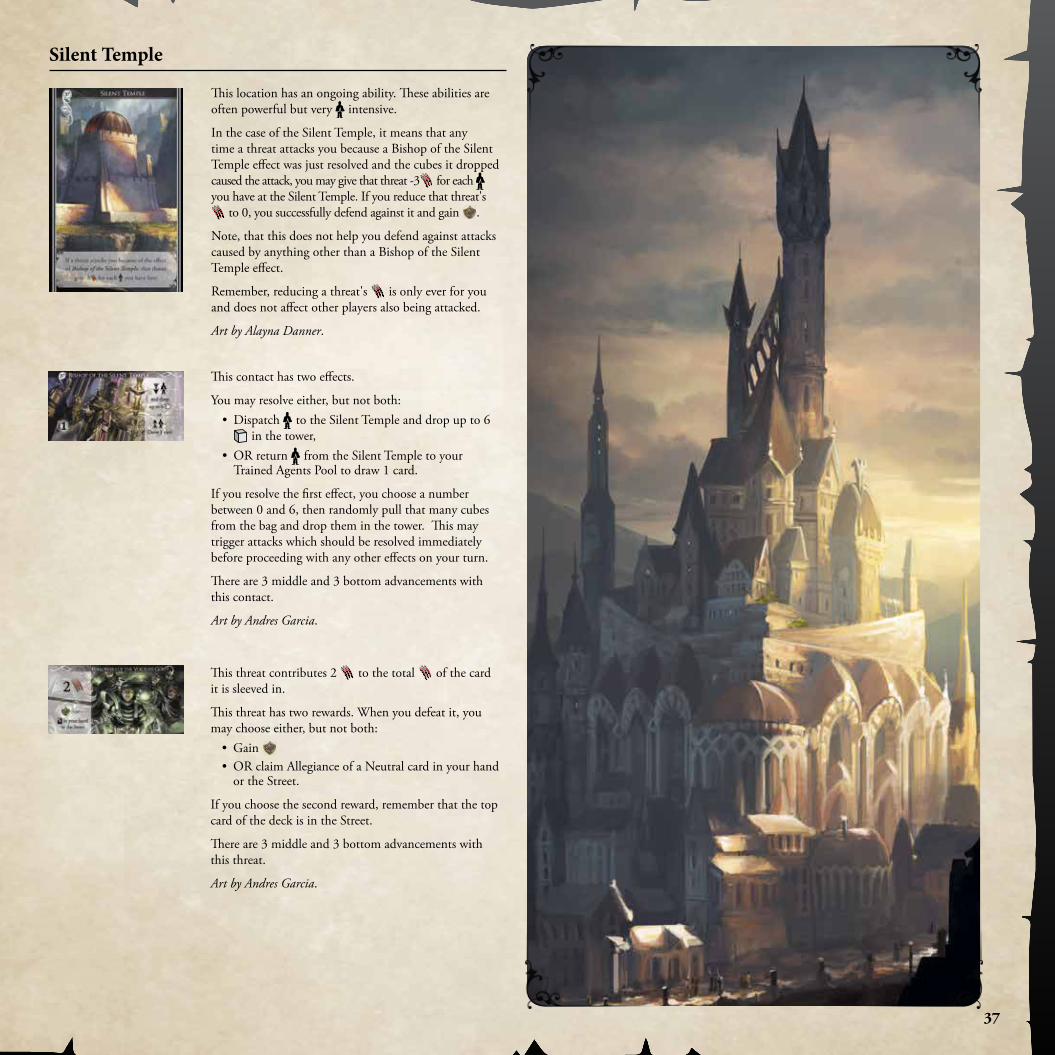
Silent Temple
This location has an ongoing ability. These abilities are often powerful but very intensive.
In the case of the Silent Temple, it means that any time a threat attacks you because a Bishop of the Silent Temple effect was just resolved and the cubes it dropped caused the attack, you may give that threat -3 for each you have at the Silent Temple. If you reduce that threat's
to 0, you successfully defend against it and gain .
Note, that this does not help you defend against attacks caused by anything other than a Bishop of the Silent Temple effect.
Remember, reducing a threat's is only ever for you and does not affect other players also being attacked.
Art by Alayna Danner.
This contact has two effects.
You may resolve either, but not both:• Dispatch to the Silent Temple and drop up to 6
in the tower,• OR return from the Silent Temple to your
Trained Agents Pool to draw 1 card.
If you resolve the first effect, you choose a number between 0 and 6, then randomly pull that many cubes from the bag and drop them in the tower. This may trigger attacks which should be resolved immediately before proceeding with any other effects on your turn.
There are 3 middle and 3 bottom advancements with this contact.
Art by Andres Garcia.
This threat contributes 2 to the total of the card it is sleeved in.
This threat has two rewards. When you defeat it, you may choose either, but not both:
• Gain • OR claim Allegiance of a Neutral card in your hand
or the Street.
If you choose the second reward, remember that the top card of the deck is in the Street.
There are 3 middle and 3 bottom advancements with this threat.
Art by Andres Garcia.

38

39
40