P6 Reporting Database Installation and Configuration Guide
80
P6 Reporting Database Installation and Configuration Guide Release 3.0 April 2013
-
Upload
khangminh22 -
Category
Documents
-
view
0 -
download
0
Transcript of P6 Reporting Database Installation and Configuration Guide
PP66 RReeppoorrttiinngg DDaattaabbaassee IInnssttaallllaattiioonn aanndd CCoonnffiigguurraattiioonn GGuuiiddee
RReelleeaassee 33..00
AApprriill 22001133

2
Oracle Primavera P6 Reporting Database Installation and Configuration Guide
Copyright © 2008, 2013, Oracle and/or its affiliates. All rights reserved.
Oracle and Java are registered trademarks of Oracle and/or its affiliates. Other names
may be trademarks of their respective owners.
This software and related documentation are provided under a license agreement
containing restrictions on use and disclosure and are protected by intellectual property
laws. Except as expressly permitted in your license agreement or allowed by law, you
may not use, copy, reproduce, translate, broadcast, modify, license, transmit, distribute,
exhibit, perform, publish or display any part, in any form, or by any means. Reverse
engineering, disassembly, or decompilation of this software, unless required by law for
interoperability, is prohibited.
The information contained herein is subject to change without notice and is not
warranted to be error-free. If you find any errors, please report them to us in writing.
The platform-specific hardware and software requirements included in this document
were current when this document was published. However, because new platforms and
operating system software versions might be certified after this document is published,
review the certification matrix on the My Oracle Support Web site for the most up-to-date
list of certified hardware platforms and operating system versions. The My Oracle Support
Web site is available at the following URL:
http://support.oracle.com/
If this is software or related documentation that is delivered to the U.S. Government or
anyone licensing it on behalf of the U.S. Government, the following notice is applicable:
U.S. GOVERNMENT END USERS: Oracle programs, including any operating system,
integrated software, any programs installed on the hardware, and/or documentation,
delivered to U.S. Government end users are “commercial computer software" pursuant
to the applicable Federal Acquisition Regulation and agency-specific supplemental
regulations. As such, use, duplication, disclosure, modification, and adaptation of the
programs, including any operating system, integrated software, any programs installed
on the hardware, and/or documentation, shall be subject to license terms and license
restrictions applicable to the programs. No other rights are granted to the U.S.
Government.
Copyright

Copyright
3
This software or hardware is developed for general use in a variety of information
management applications. It is not developed or intended for use in any inherently
dangerous applications, including applications that may create a risk of personal injury. If
you use this software or hardware in dangerous applications, then you shall be
responsible to take all appropriate failsafe, backup, redundancy, and other measures to
ensure its safe use. Oracle Corporation and its affiliates disclaim any liability for any
damages caused by use of this software or hardware in dangerous applications.
This software or hardware and documentation may provide access to or information on
content, products and services from third parties. Oracle Corporation and its affiliates are
not responsible for and expressly disclaim all warranties of any kind with respect to
third-party content, products, and services. Oracle Corporation and its affiliates will not
be responsible for any loss, costs, or damages incurred due to your access to or use of
third-party content, products, or services.
To view the list of third party technology disclosures related to this product, please see
the Commercial Notices and Disclosures document for the release.

5
Contents
Copyright ........................................................................................................................................... 2
Before You Begin .............................................................................................................................. 9
About P6 Reporting Database .......................................................................................................... 9
About the P6 EPPM Extended Schema....................................................................................... 9 About the Star Database ............................................................................................................. 9 About the Operational Data Store (ODS) .................................................................................. 10 About the STARETL Process ...................................................................................................... 10 About Data Sources ................................................................................................................... 10
About Scheduling ............................................................................................................................ 11
About History Fact Trending............................................................................................................ 11
About Dimensions ........................................................................................................................... 12
Prerequisites ................................................................................................................................... 13
P6 EPPM and JRE Requirements ................................................................................................... 13
Securing Project Superuser ............................................................................................................ 14
P6 EPPM Extended Schema Requirements .................................................................................. 14
Oracle Gateway Installation Requirements ................................................................................... 15
Oracle Database Password Requirements .................................................................................... 15
Oracle tnsnames.ora File Requirements ....................................................................................... 15
Required Database Instances, Collation Requirements, Character Sets, and Database Locations
.......................................................................................................................................................... 15
Required Database Instances ................................................................................................... 16 Database Collation Requirements ............................................................................................ 16 Recommended Database Instance Locations ......................................................................... 16
Operating System User Permissions .............................................................................................. 16
odsetl.bat (or odsetl.sh) and staretl.bat (or staretl.sh) Requirements ........................................ 16
Disk Storage Space Requirements ................................................................................................ 16
Creating the Oracle Tablespaces ................................................................................................... 17
Creating the ODS Tablespace.................................................................................................... 17 Oracle Database Partitioning .................................................................................................... 17
Adjusting Partition Ranges ................................................................................................. 18 Creating the Star Tablespace ............................................................................................ 18 Creating Non-partitioned Deployments ............................................................................. 19
Configuring the Oracle Gateway to Link to a P6 EPPM Database on a Microsoft SQL Server System21
Configuring the Oracle Gateway for a Specific Microsoft SQL Server Database ......................... 21
Before Installing and Configuring P6 Reporting Database ............................................................. 23
Installing and Configuring the Star Database ................................................................................. 25
Installing the Star Database ........................................................................................................... 25
Configuring the Star Database ....................................................................................................... 26
Configuring the P6 EPPM Database Connection for Star on an Oracle Instance .................. 26

P6 Reporting Database Installation and Configuration Guide
6
Configuring the Microsoft SQL Server Connection If the P6 EPPM is on a Microsoft SQL Server
..................................................................................................................................................... 27 Configuring the Oracle Star Database Connection .................................................................. 28 Configuring ETL Settings for Star .............................................................................................. 28 Configuring Codes for Star......................................................................................................... 29
Activity Code Descriptions .................................................................................................. 30 Project and Resource Code Descriptions ......................................................................... 31 Configuring Dynamic Codes ............................................................................................... 33 Dynamic Codes Overview ................................................................................................... 33
Configuring Additional Code Mappings ............................................................................. 35
Configuring User Defined Fields for Star .................................................................................. 36 Configuring Additional UDF Mappings............................................................................... 36
Finishing the Configuration Wizard ........................................................................................... 37
Star Security Configuration ............................................................................................................. 39
Adding or Updating a New Star User ......................................................................................... 39 Including Inactive Resources in the Star Tables ...................................................................... 39 Modifying User Access in Star ................................................................................................... 39 Deleting an Star User ................................................................................................................. 40
Running the staretl.bat (or staretl.sh) File ..................................................................................... 40
Multiple Data Sources in the Star Database ................................................................................. 43
Adding Three Additional Data Sources to the Star Database ................................................. 43 Adding Up to Three Additional Data Sources to the 8.1 or 8.2 P6 EPPM Extended Schema
............................................................................................................................................. 44 Adding ODS 2.1 Data Sources ........................................................................................... 44 Updating the Data Source.................................................................................................. 45
Adding More than Three Data Sources to the Star Database ................................................. 45 Combining Data Sources if Using Both Oracle and Microsoft SQL Server Data Sources ...... 47
Combining Data Sources if the Primary Data Source is on an Oracle Database ........... 47 Combining Data Sources if the Primary Data Source is on a Microsoft SQL Server Database
............................................................................................................................................. 47
Installing and Configuring the ODS Database ................................................................................ 49
Installing the ODS Database........................................................................................................... 49
Configuring the Oracle ODS Database ........................................................................................... 50
Configuring the P6 EPPM Database Connection for ODS on an Oracle Instance .................. 50 Configuring the Microsoft SQL Server Connection If the P6 EPPM is on a Microsoft SQL Server
..................................................................................................................................................... 51 Configuring the Oracle ODS Database Connection .................................................................. 52 Configuring ETL Settings for ODS .............................................................................................. 52 Finishing the Configuration Wizard for ODS ............................................................................. 53
ODS Security Configuration ............................................................................................................ 55
User-Level Security and User Name Restrictions ..................................................................... 55 Adding an ODS User or Updating an Existing User ................................................................... 56 Modifying User Access in ODS ................................................................................................... 57 Deleting an ODS User ................................................................................................................ 57
Finishing the ODS Database Configuration ................................................................................... 58
Upgrading P6 Reporting Database to the Latest Version ............................................................... 59
Upgrading the Star Database ......................................................................................................... 59

Contents
7
Upgrading the ODS Database ......................................................................................................... 60
Administrative Tasks ....................................................................................................................... 61
Securing the odsetl.properties and staretl.properties Files ......................................................... 61
Clearing and Refreshing the Data .................................................................................................. 62
Creating a Filtered ODS .................................................................................................................. 62
Creating a Filtered Star ................................................................................................................... 63
Scheduling the Database Update .................................................................................................. 64
Manually Launching the Database Update Process ..................................................................... 64
History Settings for P6 Reporting Database 3.0 ........................................................................... 64
Creating History Data for P6 EPPM R8.2 .................................................................................. 65 Creating History Data Against a P6 EPPM R8.1 Database ...................................................... 65
BI Publisher Administration Tasks .................................................................................................. 67
Overview of BI Publisher ................................................................................................................. 67
About Configuring P6 Database Connection Settings for BI Publisher ........................................ 67
Installing Oracle BI Publisher .......................................................................................................... 67
Configuring the JDBC Connection .................................................................................................. 67
Copying the P6REPORTS Folder ..................................................................................................... 68
Configuring BI Publisher Security ................................................................................................... 68
BI Publisher Database Authentication Setup ................................................................................ 69
Setting Up LDAP with BI Publisher ................................................................................................. 69
Running the Configuration Utility .................................................................................................... 71
Overview of the Configuration Utility .............................................................................................. 71
Running the Configuration Utility for the ODS Database .............................................................. 72
Running the Configuration Utility for the Star Database .............................................................. 72
Changing Passwords ....................................................................................................................... 72
Configuring the Secure Sockets Layer ............................................................................................ 73
Configuring the SSL Connection ..................................................................................................... 73
Configuring P6 Reporting Database to Use SSL to Run the ETL Process .................................... 74
Utility Tables, Log Files, and Troubleshooting ................................................................................ 75
Log Files ........................................................................................................................................... 75
Troubleshooting ............................................................................................................................... 76
Uninstalling P6 Reporting Database ............................................................................................... 79
Uninstalling the Software ................................................................................................................ 79


9
This section provides an overview of P6 Reporting Database and P6 Analytics.
P6 Analytics provides customers with an in-depth and comprehensive method for
analyzing and evaluating their project performance, project history, and resource
assignments and utilization.
P6 Reporting Database works with the P6 EPPM database to provide a robust and
powerful reporting solution.
In This Section
About P6 Reporting Database ................................................................................. 9
About Scheduling ..................................................................................................... 11
About History Fact Trending .................................................................................... 11
About Dimensions ..................................................................................................... 12
About P6 Reporting Database
P6 Reporting Database works with the P6 EPPM database to provide a robust and
powerful reporting solution. With P6 Reporting Database, you can create day-to-day
operational reports based on all aspects of your P6 EPPM data, through use of the P6
EPPM Extended Schema and the Star Schema (Star).
About the P6 EPPM Extended Schema
The P6 EPPM Extended Schema, and related Publication Services, provide near real-time
reporting. They enable users to exercise more control over what data is calculated and
stored, and the frequency at which this is done.
The ODS and Star databases are populated directly from new logical views that are part
of the P6 EPPM Extended Schema. The P6 EPPM Extended Views allow P6 Reporting
Database users to access BI Publisher reports directly from the P6 EPPM database.
For a more detailed overview of the P6 EPPM Extended Schema, see the P6 EPPM
documentation.
About the Star Database
The Star database enables an organization to perform advanced business analysis on
project and portfolio data. It supplies a dimensional schema that organizes P6 EPPM
hierarchical relationships.
Before You Begin

P6 Reporting Database Installation and Configuration Guide
10
P6 Analytics enables the highest level of query efficiency and flexibility in data analysis.
The Star database is designed to accumulate Project, WBS, and Activity data over time.
This provides organizations with historical data for tracking trends and for advanced
business intelligence.
About the Operational Data Store (ODS)
Note: The ODS became an optional component of P6 Reporting
Database when the P6 EPPM Extended Schema was introduced in
P6 EPPM R8.1. Oracle recommends using the P6 EPPM Extended
Schema. You should use the ODS only when users do not require
near real-time reporting, or if you need to move operational
reporting from the transactional database to a data repository
used strictly for reporting purposes.
The Operational Data Store portion of P6 Reporting Database is an optional relational
database that supplies day-to-day, easy to understand operational views of the P6 EPPM
database data.
Though the ODS is optional, it can still be used for supporting third-party reporting tools,
off-line analysis, and consolidation of P6 data into larger corporate data warehouses.
P6 Reporting Database users can view the same Operational Breakdown Structure
(OBS), project, cost, and resource data in ODS as they can in P6 EPPM.
The ODS database is populated from the P6 EPPM Extended Views.
About the STARETL Process
The STARETL process provides data movement between the P6 EPPM Extended Schema
and STAR schema.
Use one of the following to run the STARETL process:
staretl.bat (in a Microsoft Windows environment)
staretl.sh (in a unix or Linux based environment)
This can be run manually, or scheduled to run as you require. See "About Scheduling" in
the P6 Reporting Database Installation and Configuration Guide for more information
about scheduling the processes to run.
About Data Sources
P6 Reporting Database 3.0 can collect and store data from multiple P6 database
sources. P6 Reporting Database 3.0 supports P6 EPPM R8.1 or R8.2 as a primary data
source. It also supports ODS 2.1; however, you cannot use ODS 2.1 as the primary data
source. When you use P6 EPPM R8.1 or R8.2 as the data source, use the PX Reporting user
(e.g., PxRptUser) as the account where the data source will extract data from P6 EPPM.
Before You Begin
11
See Multiple Data Sources in the Star Database (on page 43) for more information.
About Scheduling
Decide when and how often to update the databases from the P6 EPPM extended
schema. The database will undergo a full refresh when it is updated, but the historical
trend data from previous periods will not refresh.
The process for updating the ODS and Star databases can be launched in the following
ways:
Manually when required.
Scheduled to occur one time in the future.
Scheduled to recur during regular intervals.
The files that launch the database refresh process are:
odsetl.bat and staretl.bat on a Windows platform.
odsetl.sh and staretl.sh on a non-Windows platform. For information on supported
non-Windows platforms, see the Tested Configurations document.
They reside in the following folders of your P6 Reporting Database installation folder:
<installation folder>\ods
<installation folder>\star
To ensure that your P6 Reporting Database system has the latest data from the P6 EPPM
extended schema, it is recommended that you run the data refresh process daily during
non-peak hours.
Note: Allow sufficient time to complete the scheduled run of the
database refresh process; this applies to multiple data source
environments as well. Do not overlap the ETL processes; run only
one ETL process at a time. Overlapping can cause unexpected
results. This includes multiple data source environments. Only one
ETL process should run at a time, regardless of the data source.
Any mechanism can be used to either launch, or schedule the launch, of the odsetl.bat
(or odsetl.sh on a non-Windows system) and staretl.bat (or staretl.sh on a non-Windows
system) files. The Windows AT command, Task Scheduler, or Unix CRON are all viable
options. The user who initiates the database refresh process needs read/write access
to the P6 Reporting Database installation folder.
About History Fact Trending
When staretl.bat (or staretl.sh on a non-Windows system) is run, it updates the Star
database with the latest data from the P6 EPPM Extended Schema.

P6 Reporting Database Installation and Configuration Guide
12
The Star can retain Project, WBS, and Activity level data from any previous run of
staretl.bat (or staretl.sh), so it can accumulate multiple sets of Project, WBS, and Activity
level data.
Preserving history data is an important step for ensuring the Star data warehouse is
successful. Ensure your organization has a backup and restore policy for the Star schema
history tables.
About Dimensions
Dimensions are a functionality of the Star schema, and describe how a business views
and analyzes its data. For example, actual project cost results might be analyzed (or
grouped and sorted) by the time dimension (when they were planned or when they
were actually incurred), and by the project dimension.
The time dimension can also provide comparison (for example, the previous year results
versus the current year results).
For a list of the Dimension tables, see "Tables in the Star Database" in the "Star Schema
(Star)" section of the P6 Analytics User’s Guide.
13
This section describes the prerequisites for installing and using P6 Reporting Database. It
includes required database instances, supported databases, and disk storage space
requirements.
P6 EPPM must already be installed, and a P6 EPPM database already created.
In This Section
P6 EPPM and JRE Requirements ............................................................................. 13
Securing Project Superuser ...................................................................................... 14
P6 EPPM Extended Schema Requirements ........................................................... 14
Oracle Gateway Installation Requirements .......................................................... 15
Oracle Database Password Requirements ........................................................... 15
Oracle tnsnames.ora File Requirements ................................................................ 15
Required Database Instances, Collation Requirements, Character Sets, and
Database Locations ................................................................................................. 15
Operating System User Permissions ........................................................................ 16
odsetl.bat (or odsetl.sh) and staretl.bat (or staretl.sh) Requirements ............... 16
Disk Storage Space Requirements ......................................................................... 16
Creating the Oracle Tablespaces .......................................................................... 17
P6 EPPM and JRE Requirements
P6 EPPM must be installed, and a P6 EPPM database must already be created.
The current versions of the P6 Reporting Database R3.0 and P6 Analytics R2.0 software
are compatible with Oracle Primavera P6 EPPM version 8.1 or 8.2.
The appropriate version of JRE must be installed on the machine where the ETL process
will be run. For information on the specific JRE versions and supported operating system
configurations, refer to the testedcfg.html document on the release media or download.
The ODS and Star databases must be in an Oracle instance. If the P6 EPPM database is a
Microsoft SQL Server database, the Oracle Gateway application must be used to
connect the P6 EPPM database to the Oracle server. Using Microsoft SQL Server for ODS
and Star is no longer supported. See Oracle Gateway Installation Requirements (on page
15) for more information.
Prerequisites

P6 Reporting Database Installation and Configuration Guide
14
Securing Project Superuser
You must run the ProjectSuperUserUpdate.sql file before you run the ETL process for the
Star Schema. Run the following script to populate project superuser security data:
1) Go to <installation directory>\<Operating System>\STAR\scripts.
2) On the P6 EPPM database, run the ProjectSuperUserUpdate.sql file as the
administrative user (e.g., admuser).
Note: Run this script before you run the P6 security service that
populates the extended schema.
P6 EPPM Extended Schema Requirements
The P6 EPPM Extended Schema, and related Publication Services, provide near real-time
reporting. They enable users to exercise more control over what data is calculated and
stored, and the frequency at which this is done.
The ODS and Star databases are populated directly from logical views that are part of
the the P6 EPPM Extended Schema.
For the P6 Reporting Database ETL process to access P6 EPPM data, you must configure
and run the P6 EPPM publication services before running the staretl or odsetl processes.
To configure the P6 EPPM publication services:
1) Login to P6.
2) Click the Administer menu and select Application Settings.
3) On the Application Settings pane, click Services.
4) On the Services page, in the Publication section set how much and how often data is
updated to the P6 EPPM Extended schema. The ODS and Star reporting databases
use the:
Start date to determine the start date for all time distributed data published.
Finish Date to determine the rolling end date for all time distributed data
published.
Time distributed interval (Day or Week) for the spread data bucket types.
5) Select the Enable Publish Projects option and adjust the remaining options in this
section as necessary for your data.
Once you've enabled publication, projects that qualify for publication based on your
settings will begin to publish to the P6 EPPM Extended Schema.
6) Once all necessary projects publish, run the P6 EPPM Global Scheduled Services:
a. Click the Administer menu and select Global Scheduled Services.
b. Set each service to run immediately.
See the P6 Help for more information on the P6 Publication Services.
Prerequisites
15
Note: You must run the publication services before you set up the
ODS or Star reporting databases.
Oracle Gateway Installation Requirements
If your P6 EPPM database is a Microsoft SQL Server database, you must first install and
configure the Oracle Gateway. Go to one of the following web sites, based on your
corresponding Oracle database version, for information about installing the Oracle
Gateway:
For Oracle Gateway 10g, go to the following web site:
For Release 1, go to
http://www.oracle.com/technetwork/documentation/gateways10g-097489.html.
For Release 2, go to http://www.oracle.com/pls/db102/gateways.
For Oracle Gateway 11g, go to the following web site:
http://download.oracle.com/docs/cd/B28359_01/gateways.111/b31043/toc.htm
Note: The URLs for the preceding web sites should each be on one
line. Format restrictions of this document might prevent them from
appearing on one line.
After you install the Oracle Gateway, you must configure it to use the P6 EPPM database.
See Configuring the Oracle Gateway for a Specific Microsoft SQL Server Database (on
page 21).
Oracle Database Password Requirements
For information on Oracle password requirements, see the following web site:
http://download.oracle.com/docs/cd/B28359_01/server.111/b28337/tdpsg_user_accou
nts.htm#BEICECGF
Oracle tnsnames.ora File Requirements
Ensure that the tnsnames.ora file contains references to the P6 EPPM database, the ODS
database, and the Star database, before configuring these databases. The
tnsnames.ora file must be on the machine where you installed P6 Reporting Database.
Required Database Instances, Collation Requirements, Character Sets, and Database
Locations
This section provides information regarding the required database instances, the
collation requirements, the recommended character sets, and recommended locations
for the ODS and Star database instances.

P6 Reporting Database Installation and Configuration Guide
16
Required Database Instances
The following database instances must already exist:
A database instance for the ODS database.
A database instance for the Star database.
These schemas can be in the same instance or separate instances.
Database Collation Requirements
The database collation that you set when you create the ODS and Star database
instances must be the same for each. The collation must match the database collation
set for the P6 EPPM database when it was created.
Recommended Database Instance Locations
It is recommended that the ODS and Star database instances reside on different physical
machines from the P6 EPPM database. This minimizes the impact that the P6 Reporting
Database has on the performance of the P6 EPPM database server.
Operating System User Permissions
To install P6 Reporting Database and run the ETL process, the users for Windows or
non-Windows platforms must have full read/write access to the P6 Reporting
Database installation directory. They also need access to the Oracle Client Files (such as
tnsnames.ora and sqlloader) and Java.
odsetl.bat (or odsetl.sh) and staretl.bat (or staretl.sh) Requirements
An Oracle database client must be installed on the server where the odsetl.bat (or
odsetl.sh on a non-Windows system) and staretl.bat (or staretl.sh on a non-Windows
system) will run.
Note: You must install SQLLDR. To do this install the full Oracle Client.
If you cannot install the full Oracle Client, you must install SQLLDR
manually before you begin installing P6 Reporting Database.
In a Linux or Unix environment, both the ORACLE_HOME and PATH must be manually set
on the server where the odsetl.bat (or odsetl.sh) and staretl.bat (or staretl.sh) will run.
PATH should be the ORACLE_HOME\bin folder.
Disk Storage Space Requirements
For detailed information, refer to the P6 Reporting Database Planning and Sizing Guide.

Prerequisites
17
Creating the Oracle Tablespaces
Before installing P6 Reporting Database, log onto SQL Plus as System\<system password>
to create the Oracle tablespaces.
Before creating the tablespace definitions, make sure that the ODS and Star databases
are in their proper locations. See Recommended Database Instance Locations (on page
16) for more information.
Related Topics
Creating the ODS Tablespace ................................................................................ 17
Oracle Database Partitioning ................................................................................. 17
Creating the ODS Tablespace
See Creating the Oracle Tablespaces (on page 17) before creating the ODS tablespace
for important information about the code shown in the following procedure. After
logging onto SQL Plus as System\<system password>, do the following to create the ODS
tablespace:
1) Connect to the P6 Reporting Database ODS instance with a user that has create
tablespace privileges.
2) Create tablespace ODS_DAT1. For example:
CREATE SMALLFILE TABLESPACE ODS_DAT1 DATAFILE '<path>/ods_dat1.dbf' SIZE 100M
AUTOEXTEND ON NEXT 100M MAXSIZE UNLIMITED LOGGING EXTENT MANAGEMENT
LOCAL UNIFORM SIZE 1M SEGMENT SPACE MANAGEMENT AUTO;
Note: In the preceding example, replace <path> with the actual
path to the location of the Oracle tablespaces.
Oracle Database Partitioning
You should install Oracle Partitioning on the Star database, but it is not required. Oracle
recommends that you use partitioning.
Note: You must have a license for the database partitioning option.
Contact your Oracle representative to ensure you have the
correct licenses.
Oracle Partitioning enables large tables and indexes to be split into smaller, more
manageable components. If you deploy without partitioning, the following features are
not supported:
WBS-level or activity-level history transfer to the Star schema
Multiple PMDB data sources
P6 Reporting Database Installation and Configuration Guide
18
Tips
See the P6 Reporting Database Planning and Sizing guide for more information on
partitioning requirements.
Adjusting Partition Ranges
The default for partition ranges is the current month +3 months. To adjust the range:
1) Go to the <installation directory>\<Operating System>\STAR\scripts folder.
2) Edit the create_star_tables_part.sql.
3) To extend or decrease the size of the partitions, change the numeric value for the
amount of days you want to add or subtract.
The w_project_history_f, w_wbs_history_f, and w_activity_history_f have sections for
partition R1, R2, and R3. The values represent a date (for example - LESS THAN (11748).
Tips
You can add more partitions by increasing PARTITION R values. See the P6 Reporting
Database Planning and Sizing guide for adding additional tablespaces.
Creating the Star Tablespace
See Creating the Oracle Tablespaces (on page 17) before creating the Star tablespace
for important information about the code shown in the following procedure. After
logging onto SQL Plus as System\<system password>, do the following to create the Star
tablespace:
1) Connect to the P6 Reporting Database Star instance with a user that has create
tablespace privileges.
2) Create tablespace star_dat1 with uniform extent size 1M and with blocksize 32K. For
example:
CREATE SMALLFILE TABLESPACE STAR_DAT1 DATAFILE
'<path>\oracle\oradata\hoth\star_dat1.dbf' SIZE 100M AUTOEXTEND ON NEXT 100M
MAXSIZE UNLIMITED LOGGING EXTENT MANAGEMENT LOCAL UNIFORM SIZE 1M
SEGMENT SPACE MANAGEMENT AUTO;
Note: In the preceding example, replace <path> with the actual
path to the location of the Oracle tablespaces.
3) Create tablespace star_hst1. For example:
CREATE SMALLFILE TABLESPACE STAR_HST1 DATAFILE
'<path>\oracle\oradata\hoth\star_hst1.dbf' SIZE 100M AUTOEXTEND ON NEXT 100M
MAXSIZE UNLIMITED LOGGING EXTENT MANAGEMENT LOCAL UNIFORM SIZE 1M
SEGMENT SPACE MANAGEMENT AUTO;

Prerequisites
19
Note: In the preceding example, replace <path> with the actual
path to the location of the Oracle tablespaces.
Creating Non-partitioned Deployments
While Oracle recommends that you use a partitioned environment, P6 Reporting
Database also supports non-partitioned environments with Oracle Database Standard
Edition or the Enterprise Edition.
If you deploy without partitioning, the following features are not supported:
WBS-level or activity-level history transfer to the Star schema
Multiple PMDB data sources
If you use an Oracle Standard Edition database, partitioning is not available. To setup a
non-partitioned P6 Reporting Database and P6 Analytics environment, do the following
before running staretl:
1) Rerun the configStar file from the <installation directory> and go back through the
configuration and setup screens, making the same choices you made before.
2) Go to the <installation directory>\scripts folder.
a. Move the following files to a different directory:
Create_star_indexes_part.sql
Create_star_tables_part.sql
b. Rename the following scripts:
1. Change Create_star_indexes.sql to Create_star_indexes_part.sql.
2. Change Create_star_tables.sql to Create_star_tables_part.sql.
These changes cause the ETL process to use these scripts, which do not include
partitioning, instead of the partitioned scripts.


21
Note: If your P6 EPPM database is not located on a Microsoft SQL
server, skip this section and move on to the instructions in the
Installing and Configuring the ODS Database (on page 49) and
Installing and Configuring the Star Database (on page 25) sections.
This section describes how to configure the Oracle Gateway to link a P6 EPPM database
if it is located on a Microsoft SQL Server. You must install and configure the Oracle
Gateway before installing P6 Reporting Database. See Oracle Gateway Installation
Requirements (on page 15) for information about installing the gateway.
In This Section
Configuring the Oracle Gateway for a Specific Microsoft SQL Server Database
..................................................................................................................................... 21
Configuring the Oracle Gateway for a Specific Microsoft SQL Server Database
If your P6 EPPM database is a Microsoft SQL Server database, do the following to
configure the Oracle Gateway to use that database:
See Oracle Gateway Installation Requirements (on page 15) for information on installing
the Oracle Gateway.
1) Go to the <Oracle Gateway install directory>\dg4msql\admin folder.
<Oracle Gateway install directory> is the directory where you installed the Oracle
Gateway.
The dg4msql\admin folder was created when you installed the Oracle Gateway.
2) Open the initdg4msql.ora file and edit the HS_FDS_CONNECT_INFO= parameter to be
in the format:
HS_FDS_CONNECT_INFO=<servername>/<instancename>/<pmdbdatabase>
Where: the < > brackets indicate the variables that you enter. Do not enter the
brackets as part of the variable name.
For example:
HS_FDS_CONNECT_INFO=win2k2/sqlserver/pmdb
The following example shows the parameter when an instancename is not specified:
HS_FDS_CONNECT_INFO=serverSQL//proj_pmdb
Configuring the Oracle Gateway to Link to a P6 EPPM
Database on a Microsoft SQL Server System
P6 Reporting Database Installation and Configuration Guide
22
3) In the <Oracle Gateway install directory>, go to the ADMIN folder, and add a new
TNSnames entry for each new SQLServer Gateway. For example:
dg4msql =
(DESCRIPTION=
(ADDRESS=(PROTOCOL=tcp)(HOST=<server name>)(PORT=1521))
(CONNECT_DATA=(SID=dg4msql))
(HS=OK)
)
4) In the same directory, edit Listener.Ora, and add information for each
necessary gateway. For example:
(SID_LIST=
(SID_DESC=
(SID_NAME=dg4msql)
(ORACLE_HOME=C:\product\11.1.0\tg_1)
(PROGRAM=dg4msql)
)
)
5) Stop any existing Listeners on the Oracle Gateway server.
6) If you need to connect to other Oracle instances, you must configure the TNS Names
in the directory where you installed the Oracle Gateway.
7) Start the Gateway Listener. The following Initialization parameters were set for the
Gateway:
HS_RPC_FETCH_SIZE=1000000
HS_ROWID_CACHE_SIZE=10000
HS_FDS_ROW_SIZE=50000
For a dataset with similar statistics:
TASK - 6 million rows
TASKACTV - 15 million rows
TASKRSRC - 9 million rows
UDFVALUE - 3 million rows
RSRCHOUR - 50 million rows
PROJWBS - 2 million rows
8) When configuring your Oracle Gateway, set HS_LANGUAGE for the Oracle character
set of your instance:
a. On the gateway machine, go to the gateway install directory (for example,
C:\product\11.1.0\tg_2\dg4msql\admin)
b. Edit the initdg4msql ini file, and add the following parameter specific to your
Oracle dataset. Depending on your character set, either add the following or
adjust for UTF8:
Before Installing and Configuring P6 Reporting Database
23
HS_LANGUAGE=american_america.WE8ISO8859P15
Or, add all of the following:
HS_NLS_LENGTH_SEMANTICS=CHAR
HS_FDS_CHARACTER_SEMANTICS = TRUE
HS_KEEP_REMOTE_COLUMN_SIZE=ALL
c. Save the initdg4msql ini file, and restart the Gateway listener.
Before installing the P6 Reporting Database software:
Be sure you have met the installation prerequisites. See Prerequisites (on page 13).
The Oracle database instances must already exist before running the installation. See
Required Database Instances (on page 16).
Note: Due to the global nature of the Oracle Universal Installer
(OUI), you cannot use the OUI Help to install or uninstall P6
Reporting Database. See Installing the ODS Database (on page 49)
and Installing the Star Database (on page 25) instead for
installation instructions.
If you are upgrading from a previous version of P6 Reporting Database, see Upgrading P6
Reporting Database to the Latest Version (on page 59) before proceeding.
Installing P6 Reporting Database involves installing the ODS and the Star databases.
When installing P6 Reporting Database, you can:
Install the ODS database without installing the Star database.
Install the Star database without installing the ODS database.
Install both the ODS and Star databases.
Note: If you are installing both the ODS and Star databases, it does
not matter in which order you install them.
Before Installing and Configuring P6 Reporting
Database


25
This section describes how to install and configure the Star database.
In This Section
Installing the Star Database .................................................................................... 25
Configuring the Star Database ............................................................................... 26
Star Security Configuration ...................................................................................... 39
Running the staretl.bat (or staretl.sh) File............................................................... 40
Multiple Data Sources in the Star Database ......................................................... 43
Installing the Star Database
Caution: The Star database portion of P6 Reporting Database must
be installed in a new directory. Do not install the Star database in
the same directory where a previous version of P6 Reporting
Database is installed.
Use the following procedure to install the Star database portion of P6 Reporting
Database:
1) From the P6 Reporting Database physical media or download location, run one of
the following depending on your system type:
If you are installing on a Microsoft Windows system:
Windows\Star\Disk1\install\setup.exe
If you are installing on a non-Microsoft Windows system:
<Operating System>\Star\Disk1\Install\runInstaller
where <Operating System> is a supported non-Windows platform. For information
on supported non-Windows platforms, see the Tested Configurations document
(testedcfg.htm) on the release media or download.
2) On the Welcome screen, click Next.
3) On the Specify Home Details screen:
a. In the Name field, enter or verify the name for the Star database.
b. In the Path field, verify or browse to the installation location for the Star database.
c. Click Next.
4) On the Java Runtime screen:
a. Click the Browse button to specify the location of the JRE version (for example,
c:\Program Files\Java\jre1.6.0_27).
Installing and Configuring the Star Database
P6 Reporting Database Installation and Configuration Guide
26
This must be a JRE location, not a JDK location.
Note: The appropriate version of JRE must be installed on the
machine where staretl.bat (or staretl.sh on a non-Windows system)
will be run. For information on the specific JRE versions and
supported operating system configurations, refer to the
testedcfg.html document on the release media or download.
If the location is a JDK location, select the JRE subfolder.
b. Click Next.
5) On the Summary screen:
a. Read the summary information that explains where the Star database will be
installed, the product languages, the space requirements, and what is being
installed.
b. Click Install to install the Star database.
6) Prior to installation completion, the P6 Reporting Database Configuration Utility will
launch in a separate window.
a. On the Welcome screen, click Next to begin.
b. See Configuring the Star Database (on page 26).
7) After completing the P6 Reporting Database configuration utility, the End of
Installation window displays. Click Exit to finish the installation.
Configuring the Star Database
This section describes how to configure the Star database portion of P6 Reporting
Database. The Configuration Utility launches after the installation of the Star database
completes.
Note: During the configuration phase, some fields might already
contain data. Check the data and change it as necessary.
Start with one of the following sections:
If the P6 EPPM database is on an Oracle instance, see Configuring the P6 EPPM
Database Connection for Star on an Oracle Instance (on page 26).
If the P6 EPPM database is on a Microsoft SQL Server, see Configuring the Microsoft
SQL Server Connection If the P6 EPPM is on a Microsoft SQL Server (on page 27)
Configuring the P6 EPPM Database Connection for Star on an Oracle Instance
Use the fields on the Reporting Database Configuration Utility - [STAR] configuration
wizard to configure the Star database with the P6 EPPM database. If your P6 EPPM
database is on a Microsoft SQL Server, follow the steps in Configuring the Microsoft SQL
Server Connection If the P6 EPPM is on a Microsoft SQL Server (on page 27) instead of the
steps in this section.

Installing and Configuring the Star Database
27
On the EPPM Reporting Database Connection screen:
1) For the Database Type option, choose Oracle.
2) In the Oracle Database Connection section:
a. In the Host Name field, enter the server machine name or IP address where you
installed the P6 EPPM database.
b. In the Port Number field, enter or verify the port number for your database.
The default for Oracle is 1521.
c. Choose the Service Name or SID option. Enter the Service Name or SID.
3) In the Reporting User section:
a. In the Username field, enter or verify your reporting database name (for example,
PxRptUser).
b. In the Password field, enter the password for the reporting database user.
4) Click Next.
When you click next, the wizard will test that the connection is valid. If the test fails,
ensure you have entered all the information correctly and try again.
Follow the steps in the Configuring the Oracle Star Database Connection (on page 28)
section.
Configuring the Microsoft SQL Server Connection If the P6 EPPM is on a Microsoft SQL Server
Use the instructions in this section only if your P6 EPPM database is on a Microsoft SQL
server. You must have already installed the Oracle Gateway software before installing
the Primavera P6 Reporting Database software. See Oracle Gateway Installation
Requirements (on page 15) for information about installing the gateway.
On the EPPM Reporting Database Connection screen:
1) For the Database Type option, choose SQL Server.
2) In the SQL Server Connection section:
a. In the Host Name field, enter the server machine name or IP address where you
installed the P6 EPPM database.
This is the SQL Server instance name of the Microsoft SQL Server where the P6 EPPM
database resides. For example, SQLServerName\databaseInstanceName.
b. In the Port Number field, enter or verify the port number for your database.
The default for Microsoft SQL Server is 1433.
c. In the Database Name field, enter the name of the P6 EPPM database. This
database must already exist.
3) In the Oracle Gateway Connection section:
a. In the Host Name field, enter the machine name or IP address where you installed
the Oracle Gateway.
b. In the Port Number field, enter the Service name where you installed the Oracle
Gateway.

P6 Reporting Database Installation and Configuration Guide
28
c. Choose the Service Name or SID option. Enter the Service Name or SID.
4) In the Reporting User section:
a. In the Username field, enter or verify your reporting database name (for example,
PxRptUser).
b. In the Password field, enter the password for the reporting database user.
5) Click Next, and follow the steps in one of the following sections:
If you are configuring the ODS database, see Configuring the Oracle ODS
Database Connection (on page 52) for information on configuring the ODS
database connection.
If you are configuring the Star database, see Configuring the Oracle Star Database
Connection (on page 28) for information on configuring the Star database
connection.
Configuring the Oracle Star Database Connection
On the Star Database Connection screen, configure the Star database connection to
the P6 EPPM database:
1) In the Oracle Database Connection section:
a. In the Host Name field, enter the server machine name or IP address where you
installed the database.
b. In the Port Number field, enter or verify the port number for your database.
The default for Oracle is 1521.
c. Choose the Service Name or SID option. Enter the Service Name or SID.
2) In the Database Administrator Account (DBA) section:
a. In the Username field, enter or verify your DBA user name that has DBA privileges
for the Star database. The default name is SYSTEM.
b. In the Password field, enter the password for the DBA user.
3) In the Create STAR user account section:
a. In the Username field, enter or verify your Star user name. This user will own the Star
tables.
b. In the Password and Confirm Password fields, enter a password for the STAR user.
4) Click Next.
See Configuring ETL Settings for Star (on page 28).
Configuring ETL Settings for Star
On the ETL Settings screen:
1) In the JVM Location field, enter or verify the path to the Java Virtual Machine (JRE
path).

Installing and Configuring the Star Database
29
The appropriate version of JRE must be installed on the machine where the ETL
process will run. For information on the specific JRE versions and supported
operating system configurations, refer to the testedcfg.html document on the
release media or download.
The path must refer to a location on the local machine, where the P6 Reporting
Database configuration utility is installed.
2) In the Max Java Heap Size (MB) field, enter parameter for the Java Heap Size. This
value maps to the JVM –Xmx setting in the Java Runtime Environment settings. The
default value is 1,024 MB.
The minimum value is 512 MB.
When changing the Maximum Java Heap Size setting, the values must be in 512
MB increments.
3) In the Log Detail Level field, choose the level of logging detail that you want to use.
The following are the logging detail levels you can choose:
Errors and Warnings – Logs errors and warnings.
General Information – This is the default value. This logs errors, warnings, and
informational messages on the progress of each step.
Debug and Trace Information – Provides all general information, errors and
warnings, and detailed output of each script, query, and connection being
executed.
Errors Only – Logs only errors and no other information.
Extra Debug Information – Provides all general information, errors and warnings. It
provides more fine grained information on each step and scripts being executed.
4) In the General Thread Count field, choose the number of threads the ETL process will
run. Extraction and Load processes are multi-threaded.
Oracle recommends keeping the default (5) for this setting.
5) In the Index Building Thread Count field, choose the number of threads that will build
the index. It specifies how many threads to run for building indexes for the ODS or Star
database.
6) Oracle recommends keeping the default (5) for this setting.
7) Click Next.
See Configuring Codes for Star (on page 29).
Configuring Codes for Star
Use the Codes screen to choose the Project, Activity, and Resource level P6 EPPM Codes
that will migrate to the STAR database. For information on how these codes work, see the
"Dynamic Codes" section of the P6 Analytics User’s Guide.
On the Codes screen:
1) Move the Activity, Project, and Resource codes that you want to use from the
available column to the selected column.

P6 Reporting Database Installation and Configuration Guide
30
Note: Project, Activity, and Resource codes must exist in P6 EPPM
for them to appear in the available codes list.
2) Click Next.
See Configuring User Defined Fields for Star (on page 36).
Activity Code Descriptions
The Activity list has the following fields:
Field Description
Name This field corresponds to the code's display name in
the P6 EPPM database. If you leave this field blank, it
automatically populates with an initial value. This field
can be edited.

Installing and Configuring the Star Database
31
Field Description
Scope Because activity codes can be defined for different
areas of your P6 EPPM database (Global, EPS, and
Project), P6 Reporting Database enables you to define
the Scope in which these activity codes are used.
The scope order is important because it determines a
tie-breaker if there is a code with the same name at
different levels. For example, if there is a global code
called MyCode, and a project has a code called
MyCode, the scope setting used would determine
which code value is used. If you select Global, Project,
then the global MyCode value will be used. If you
select Project, Global as the scope setting, then the
project level MyCode value will be used.
Use the scope list to choose one of the following:
Global
Global, EPS
Global, Project
Global, EPS, Project
Global, Project, EPS
EPS
EPS, Global
EPS, Project
EPS, Global, Project
EPS, Project, Global
Project
Project, EPS
Project, Global
Project, EPS, Global
Project, Global, EPS
ID Contains the Activity code's ID number. When you
choose an Activity ID, this is assigned sequentially
starting with number 1.
Project and Resource Code Descriptions
Project and Resource codes are not global, and have no scope. The Project and
Resource list has the following fields:

P6 Reporting Database Installation and Configuration Guide
32
Field Description
Name This field corresponds to the code's display name in
the P6 EPPM database. If you leave this field blank, it
automatically populates with an initial value. This field
can be edited.
ID Contains the code's ID number. When you choose a
code, this is assigned sequentially starting with number
1.

33
Configuring Dynamic Codes
This section provides an overview of Dynamic Codes, and describes how to add
additional code mappings. Dynamic Codes include Activity Codes, Project Codes, and
Resource Codes. Users can select the codes that will be displayed in OBI for organizing
data based on those code values.
P6 Analytics is shipped with 20 default code mappings for each code type (Activity,
Project, and Resource). You can add unlimited code mappings for each code type as
long as you can still add a column to the corresponding dimension table (W_ACTIVITY_D,
W_PROJECT_D, W_RESOURCE_D).
In This Section
Dynamic Codes Overview ...................................................................................... 33
Configuring Additional Code Mappings ............................................................... 35
Dynamic Codes Overview
During the set up process, you can define Dynamic Codes for the following:
Activity Codes (EPS, Global, Project)
Resource Codes
Project Codes
Defining dynamic codes enables these codes to be available in the Oracle Business
Intelligence (OBI) Answers and Dashboards applications. When defined, these codes
can be used for grouping and analyzing data.
P6 Analytics is shipped with 20 default code mapping columns for each code type
(Activity, Project, and Resource). You can add additional code mapping columns for
each code type by adding columns to the dimensional tables (the database has a limit
for the number of columns you can add). If you select five columns, then only five
columns will be available in Star.
Note: Oracle has a limit of 1,000 columns in a table.
To add additional code mapping columns, use the following syntax:
alter table
w_table_d
add
(
code_value_<#> varchar2(4000 char),
code_descr_<#> varchar2(120 char)
);
Where:

P6 Reporting Database Installation and Configuration Guide
34
table is the table you want to alter. You can replace table with project, activity, or
resource.
<#> is the next available column increment.
Both the code_value_<#> varchar2(4000 char) and code_descr_<#> varchar2(120
char) are required.
For example, to add bucket mapping column 21 to the w_project_d dimension table,
execute the following as STARUSER:
alter table
w_project_d
add
(
code_value_21 varchar2(4000 char),
code_descr_21 varchar2(120 char)
);
Where:
21 is the number of the next available column, because it is the next column added
after column 20.
Note: The columns should be added in succession. Do not skip
column numbers. For example, to add another column after
column 20, the column number should be 21. To add another
column after column 21, the column would be defined as
code_value_22 varchar2(4000 char) and code_descr_22
varchar2(120 char).
An optional priority setting is available for Activity Codes. An activity code can be an
EPS, Global, or Project Code. There can also be an activity code with the same name for
each of these different subject areas. During setup, you can specify which subject area
to search for first when selecting an activity code.
For example, suppose you have an activity code called Location, and also have EPS,
Global, and Project codes that each have the name Location. In dynamic Activity
codes, if the activity code that you want to search for first is the Global version of
Location, followed by Project second, and EPS third, you can order the search to use the
Global Location activity code first. The setting in the configuration utility (config) for
Activity dynamic codes, Scope would be:
Global
Project
EPS
In this example, the search will look for the Global Location activity code first, and will
populate those assignments. After that, the search will continue to the Project scope
level, and will populate those assignments. Finally, the search will continue to EPS and will
populate those assignments.

Installing and Configuring the Star Database
35
If you only want to search for the Project level activity code, then only the scope should
be set for that level during setup. For Project codes and Resource codes there is no
scope level.
Dynamic codes are defined in the configuration utility by defining the code, scope
(activity codes only), regular expression (usually, this is the name of the code), name (the
display name for the code name label in OBI), and description (the display name for the
code value label in OBI).
Configuring Additional Code Mappings
To configure additional code mappings, do the following:
1) Add additional code mapping columns, using the syntax described in Dynamic
Codes Overview (on page 33).
2) Edit the xlat.<LANG_CODE>.csv file located in <STAR_HOME>/star/res/xlat/
(LANG_CODE is your language code. For example, xlat.en.csv).
a. Copy this line:
"en","CN_Primavera_-_Activity_Codes_-_(Project)_Project_Code_Description_20","
Code Description","Y".
b. Paste it over this line in the csv file:
"en","CN_Primavera_-_Activity_Codes_-_(Project)_Project_Code_Description_21","
Code Description 21","Y"
c. Copy this line:
"en","CD_Primavera_-_Activity_Codes_-_(Project)_Project_Code_Description_20","
Description for the project code.","Y"
d. Paste it over this line in the csv file:
"en","CD_Primavera_-_Activity_Codes_-_(Project)_Project_Code_Description_21","
Description for the project code 21.","Y"
3) Edit the OraclePrimaveraAnalytics.rpd to include any new columns added in Step 1.
a. Any new columns added in Step 1 need to be manually added to the
OraclePrimaveraAnalytics.rpd.
b. Edit the OraclePrimaveraAnalytics.rpd using the Oracle BI Administration Tool, and
add the columns added in Step 1 to each layer of the rpd file (Physical, Business
Model and Mapping and Presentation). For example, in the ‘Presentation’ layer,
any additional activity code bucket (the 21st) column should be added as
‘Activity Code Value 21’ and ' Activity Code Description 21’.
Note: Be sure to follow the entry values naming convention
(adjusting only the bucket number) used for the pre-existing code
(1-20) bucket columns in each layer.

P6 Reporting Database Installation and Configuration Guide
36
Configuring User Defined Fields for Star
Use the User Defined Fields screen to choose the Project, WBS, and Activity level UDF
fields from P6 EPPM that will migrate to the Star database. P6 Reporting Database
supports Cost, Integer, and Number UDF types.
Note: 'Number' and 'Integer' UDF types are displayed in the
'Non-Cost' folders in the configuration wizard.
Users can select the UDFs that will display in Oracle Business Intelligence (OBI) to organize
data based on those UDF values.
P6 Analytics includes 20 default UDF mappings for each UDF area (Activity, Project, and
WBS). You can add up to 100 UDF mappings for each UDF area as long as you add a
column to the corresponding fact table (W_UDF_PROJECT_F, W_UDF_ACTIVITY_F,
W_UDF_WBS_F).
On the User Defined Fields screen:
1) Move the Project, WBS, and Activity UDFs that you want to use from the available
column to the selected column.
2) Click Next.
See Finishing the Configuration Wizard (on page 37).
Configuring Additional UDF Mappings
P6 Analytics includes 20 default UDF mapping columns for each UDF area (Activity,
Project, and WBS). You can add up to 100 mapping columns for each area by adding
columns to the fact tables.
To add additional UDF mapping columns:
1) Use one of the following syntax depending on which area you are changing:
Project has two types: number and cost. Depending on the type of UDF you are
adding, edit one of the following:
alter table w_udf_project_f add UDF_NUMBER_<#> NUMBER(10,0);
alter table w_udf_project_f add UDF_COST_<#> NUMBER(10,0);
For Activity:
alter table w_udf_activity_f add UDF_NUMBER_<#> NUMBER(10,0);
For WBS:
alter table w_udf_wbs_f add UDF_NUMBER_<#> NUMBER(10,0);
where <#> is the next available column increment
2) Edit the xlat.<LANG_CODE>.csv file located in <STAR_HOME>/star/res/xlat/
(LANG_CODE is your language code. For example, xlat.en.csv).
a. Locate the recently incremented UDF fields.

Installing and Configuring the Star Database
37
b. Copy this line:
"en","CN_Primavera_-_Project_User_Defined_Fields_Numbers_User_Defined_Field_
Number_20","User Defined Field Number 20","Y"
c. Paste it over this line in the csv file:
"en","CN_Primavera_-_Project_User_Defined_Fields_Numbers_User_Defined_Field_
Number_21","User Defined Field Number 21","Y"
d. Copy this line:
"en","CD_Primavera_-_Project_User_Defined_Fields_Numbers_User_Defined_Field_
Number_20","20","Y"
e. Paste it over this line in the csv file:
"en","CD_Primavera_-_Project_User_Defined_Fields_Numbers_User_Defined_Field_
Number_21","21","Y"
3) Edit the OraclePrimaveraAnalytics.rpd to include any new columns added in Step 1.
a. Any new columns added in Step 1 need to be manually added to the
OraclePrimaveraAnalytics.rpd.
b. Edit the OraclePrimaveraAnalytics.rpd using the Oracle BI Administration Tool, and
add the columns added in Step 1 to each layer of the rpd file (Physical, Business
Model and Mapping and Presentation). For example, in the ‘Presentation’ layer,
any additional activity code bucket (the 21st) column should be added as "User
Defined Field Number 21."
Note: Be sure to follow the entry values naming convention
(adjusting only the bucket number) used for the pre-existing code
(1-20) bucket columns in each layer.
Finishing the Configuration Wizard
To complete the configuration:
1) Choose whether you want to run the Reporting Database Diagnostic Utility. It will help
you troubleshoot your configuration if you choose to run it.
Note: If you run the diagnostic utility now, you will get a fail
message for the JDBC Star connection because the STARUSER has
not been created yet. You can ignore the message. The STARUSER
will be created when you run the staretl process.
2) Click Finish.
This generates all the scripts that go into the scripts directory.
All the settings configured with the Star database configuration utility will be stored in
the following location:
<installation path>\star\res\staretl.properties
This file is a Java properties file, which is a simple key = value storage file. For example:
db.star.application.username=STARUSER
P6 Reporting Database Installation and Configuration Guide
38

39
Star Security Configuration
This section describes the Star security configuration. These include adding a new Star
user, setting up security, and filtering out inactive resources.
In This Section
Adding or Updating a New Star User ..................................................................... 39
Including Inactive Resources in the Star Tables.................................................... 39
Modifying User Access in Star .................................................................................. 39
Deleting an Star User ................................................................................................ 40
Adding or Updating a New Star User
This topic describes how to add or update a new Star user.
In P6, do the following:
1) Add a new user, and give the user module access to P6 Analytics. Be sure to grant
the user the necessary Operational Breakdown Structure (OBS), cost, and resource
access. If you are modifying a user, change that user's privileges. (See the P6 Help for
more information.)
2) Click the Administer menu and select Global Scheduled Services.
3) Run the Publish Security service.
Note: You can schedule this service to run immediately or later, but
it must finish running before you run the staretl file.
4) Run staretl.bat (or staretl.sh on a non-Windows system).
Including Inactive Resources in the Star Tables
By default, inactive resources are filtered out of the Star tables. If inactive resources were
included, they would also be included in the spread data and in other dimension tables.
It might not be necessary to process this extra resource assignment information.
If you do want to include inactive resources in the Star tables, update the following
setting in the staretl.properties file, and set the =false parameter to =true in the following
statement:
star.utilization.include.inactive.rsrc=false
Modifying User Access in Star
Users given access to Star will only be able to access the data for which they have rights
in the P6 EPPM database.

P6 Reporting Database Installation and Configuration Guide
40
For example, if a user has the “Edit EPS Costs/Financials” privilege in the P6 EPPM
database, then that user will be able to view project cost information in Star. Conversely,
if a user does not have the “Edit EPS Costs/Financials” privilege in the P6 EPPM database,
they would see the word null in place of the value in fields that contain cost information.
Use the following procedure to give a user the ability to view cost information.
1) In P6, go to Administer, User Access, Project Security Profiles.
2) To provide access to cost information, ensure that the Edit EPS Costs/Financials
privilege option is selected in the user's project profile.
3) If necessary, assign the View Resource and Role Costs/Financials profile to enable
users to view resources costs if the user has resource access. It's a global security
profile.
4) Run one of the following files to create the database user:
staretl.bat (on a Windows platform)
staretl.sh (on a non-Windows platform)
Deleting an Star User
Use the following procedure to delete a user from Star.
1) In the P6 application, remove P6 Analytics from the user's module access.
2) On the machine where the Star database resides, run one of the following files:
staretl.bat (on a Windows platform)
staretl.sh (on a non-Windows platform)
For information on deleting a P6 EPPM user, see the P6 online help.
For additional information on Star security see the P6 Reporting Database User's Guide or
the P6 Analytics User’s Guide.
Running the staretl.bat (or staretl.sh) File
After you complete the installation and all configuration tasks, execute the staretl.bat (or
staretl.sh on a non-Windows system) file by doing the following:
1) Go to the <installation directory name> directory.
2) Click staretl.bat (or staretl.sh) to execute the file.
3) Go to <installation directory>\<Operating System>\STAR\Scripts and run the
STARSchemaStats.sql.
Notes:
You must run this script to ensure performance and gather
statistics.
You will only need to run this script once after the initial
installation.

Installing and Configuring the Star Database
41


43
Multiple Data Sources in the Star Database
If you want to pull data into Star from additional data sources, such as an 8.1 or 8.2 P6
EPPM Extended Schema, or 2.1 ODS data source, you can do so by following the steps in
this section. Pulling data from additional data sources will make the data available
through OBIEE analysis. OBI will use the data source values to make groupings. Multiple
data sources allow you to group matching data (such as resources, codes, and other
common attributes) from different data sources because they are part of the same Star
schema. The tables have a "datasource_id" field that you can use to distinguish where
the data came from.
Supported data sources are:
P6 EPPM Extended Schema 8.1 (Oracle only)
P6 EPPM Extended Schema 8.2 (Oracle and Microsoft SQL Server)
Note: Only the P6 EPPM Extended Schema SQL Server data source
for 8.2 is supported; earlier versions of SQL Server are not supported.
ODS 2.1 (Oracle only)
In This Section
Adding Three Additional Data Sources to the Star Database ........................... 43
Adding More than Three Data Sources to the Star Database ........................... 45
Combining Data Sources if Using Both Oracle and Microsoft SQL Server Data
Sources ....................................................................................................................... 47
Adding Three Additional Data Sources to the Star Database
If you need additional data sources, the Star database allows you to add up to three
data sources by default. If you add three data sources and want to add more, see
Adding More than Three Data Sources to the Star Database (on page 45). Follow the
instructions below to add data sources.
Note: Before adding any of these data sources, you must run either
the P6 EPPM Extended Schema services or the ODS ETL depending
on your P6 EPPM version. These data sources must be up-to-date.
1) Validate that Oracle Partitioning is running for your instance. Run this command:
select * from V$OPTION
2) Verify this line in the staretl.properties shows "true":
db.star.partitioned=true

P6 Reporting Database Installation and Configuration Guide
44
3) Continue to one of the following chapters: Adding Up to Three Additional Data
Sources to the 8.1 or 8.2 P6 EPPM Extended Schema (on page 44) or Adding ODS 2.1
Data Sources (on page 44).
Adding Up to Three Additional Data Sources to the 8.1 or 8.2 P6 EPPM Extended Schema
1) Create a DB link for the new data source:
CREATE DATABASE LINK DSLINK# CONNECT TO "pxrptuser" IDENTIFIED BY "pxrptuser" USING
'(DESCRIPTION=(ADDRESS=(PROTOCOL=TCP)(HOST=hostname)(PORT=portnumber
))(CONNECT_DATA=(SERVICE_NAME=servicename)))'
where hostname, portnumber, and servicename are specific to your environment
and # corresponds to number for the data source (for example, DSLINK02).
Note: The link name must be DSLINK#. Where # is the number that
corresponds to the data source. For example, DSLINK03.
2) Verify DB link is working by running the following command:
select * from project@dslink#
where # is the number that corresponds to the data source. For example, DSLINK02.
3) Run the ETL process for the new data source:
staretl.bat "-s#"
where # is the number that corresponds to the data source. For example, "-s2".
4) Verify the row counts by running the following command:
select count(*) from w_project_dc
5) Repeat these steps for each additional data source you want to add. (You can add
up to three).
6) Continue to Updating the Data Source (on page 45).
Adding ODS 2.1 Data Sources
1) Create a DB link for the new data source:
CREATE DATABASE LINK DSLINK# CONNECT TO "odsr8" IDENTIFIED BY "odsr8" USING
'(DESCRIPTION=(ADDRESS=(PROTOCOL=TCP)(HOST=hostname)(PORT=portnumber
))(CONNECT_DATA=(SERVICE_NAME=servicename)))'
where hostname, portnumber, and servicename are specific to your environment
and # corresponds to number for the data source (for example, DSLINK02)
Note: The link name must be DSLINK#. Where # is the number that
corresponds to the data source. For example, DSLINK03.

Installing and Configuring the Star Database
45
2) Verify DB link is working by running the following command:
select * from project@dslink#
where # is the number that corresponds to the data source. For example, DSLINK02.
3) Create a view line in staretl.properties file for the new data source.
star.project.filter.ds#=personal_view
where # is the number that corresponds to the data source (for example, ds2) and
personal_view is the name of your view.
4) Create a view to populate the object ID for the projects that will be included in the
Star database. The fill_project_list will look for a view if specified in the properties file or
enable_publication flag on a project for later versions.
CREATE OR REPLACE VIEW PERSONAL_VIEW AS Select ObjectId from Project
where isbaseline = 'N'
where PERSONAL_VIEW is the name of your view
Note: Your filter must include criteria to eliminate baselines;
otherwise, baseline projects will transfer into the view.
5) Create an additional view in the ODS schema (run as ODSUSER):
CREATE OR REPLACE FORCE VIEW PSVIEW AS SELECT u.objectid rdbmsuserid,
ps.projectobjectid, ps.costflag FROM projectsecurity ps INNER JOIN
users u ON ps.rdbmsuserid = u.rdbmsuserid;
6) Run the ETL process with the following file:
staretl "-s#"
where # is the number that corresponds to the data source. For example, "-s2".
7) Repeat these steps for each additional data source you want to add. (You can add
up to three).
8) Continue to Updating the Data Source (on page 45).
Updating the Data Source
After you have run the data source for the first time, run the staretl to update each
partition of Star.
1) Run the startetl.bat file to update data source 1.
2) Run the startetl.bat "-s2" file to update data source 2
3) Run startetl.bat "-s3" to update data source 3.
Adding More than Three Data Sources to the Star Database
Determine how many data sources to use before running the Star ETL. You must edit
scripts and rerun the ETL processes for each data source. The database will recreate
tables.

P6 Reporting Database Installation and Configuration Guide
46
Warning: Before editing the scripts, manually backup the history data. When you add more data sources, the staretl.bat "-r" file will rebuild all tables and remove all existing activity level history. If you don't backup your history data, it will disappear.
The default number of data sources you can create is three. If you want to add more
than three data sources, follow the steps below.
Notes:
The instructions assume that you have installed P6 Reporting
Database.
Before adding extra data sources, you must either run the P6
EPPM Extended Schema services or the ODS ETL and update
these data sources.
1) Back up your history data.
2) Go to the \star\scripts\ installation directory and open the
create_star_tables_part.sql file in an editor.
3) Find the Create Table Sections' PARTITION BY LIST. The table has three partition values
seen below:
PARTITION BY LIST(datasource_id) (
PARTITION P1 VALUES (1),
PARTITION P2 VALUES (2),
PARTITION P3 VALUES (3))
4) Add additional partitions to each Create Table Section as needed. For example:
PARTITION BY LIST(datasource_id) (
PARTITION P1 VALUES (1),
PARTITION P2 VALUES (2),
PARTITION P3 VALUES (3),
PARTITION P4 VALUES (4))
PARTITION P5 VALUES (5))
5) Adjust the subpartition tables for History Fact tables. History Fact tables have Oracle
partitioning and partitioning for multiple data sources. For example:
SUBPARTITION P1 VALUES (1),
SUBPARTITION P2 VALUES (2),
SUBPARTITION P3 VALUES (3),
SUBPARTITION P4 VALUES (4),
SUBPARTITION P5 VALUES (5)
6) Save and close the create_star_tables_part.sql.
7) Run the staretl.bat "-r."
8) Run all your other data sources. For example:
startetl.bat "-s2"

Installing and Configuring the Star Database
47
startetl.bat "-s3"
9) Run the additional data sources you just created. For example:
startetl.bat "-s4"
startetl.bat "-s5"
10) Locate the W_PROJECT_D table and verify that there is a datasource_id =4 (as well as
additional data sources if you created them) and that the other datasource_id's exist
for 1, 2, and 3.
Combining Data Sources if Using Both Oracle and Microsoft SQL Server Data Sources
If you installed the Star database on both an Oracle and Microsoft SQL Server database,
you will need to edit the properties file to get the data to combine correctly in your data
source.
Related Topics
Combining Data Sources if the Primary Data Source is on an Oracle Database
..................................................................................................................................... 47
Combining Data Sources if the Primary Data Source is on a Microsoft SQL Server
Database ................................................................................................................... 47
Combining Data Sources if the Primary Data Source is on an Oracle Database
If your primary data source is on an Oracle database:
1) Run the staretl for your additional data sources that are also on the Oracle database.
2) Make a backup copy of the star.properties file.
3) Run the configStar file.
4) When prompted, change the database for the PxRptUser so it points to the Microsoft
SQL Server database and finish the configuration.
5) Open the re-created star.properties file and verify that the PxRptUser now points to
the Microsoft SQL Server database.
Note: Keep both copies of the star.properties file, so you can switch
between the databases.
6) Run the staretl "s#" file for your Microsoft SQL Server data source (for example, staretl
"s2").
7) Switch back to the star.properties file for the Oracle database.
8) Run the staretl "s#" file for your Oracle data sources (for example, staretl "s2").
Combining Data Sources if the Primary Data Source is on a Microsoft SQL Server Database
If your primary data source is on a Microsoft SQL Server database:

P6 Reporting Database Installation and Configuration Guide
48
1) Run the staretl for your additional data sources that are also on the Microsoft SQL
Server database.
2) Make a backup copy of the star.properties file.
3) Run the configStar file.
4) When prompted, change the database for the PxRptUser so it points to the Oracle
database and finish the configuration.
5) Open the re-created star.properties file and verify that the PxRptUser now points to
the Oracle database.
Note: Keep both copies of the star.properties file, so you can switch
between the databases.
6) Run the staretl "s#" file for your Oracle data source (for example, staretl "s2").
7) Switch back to the star.properties file for the Microsoft SQL Server database.
8) Run the staretl "s#" file for your Microsoft SQL Server data sources (for example, staretl
"s2").

49
This section describes the steps necessary to install and configure the ODS database.
In This Section
Installing the ODS Database ................................................................................... 49
Configuring the Oracle ODS Database ................................................................ 50
ODS Security Configuration ..................................................................................... 55
Finishing the ODS Database Configuration .......................................................... 58
Installing the ODS Database
Caution: The ODS database portion of the P6 Reporting Database
3.0 must be installed in a new directory. Do not install the ODS
database in the same directory where a previous version of P6
Reporting Database is installed.
Use the following procedure to install the ODS database:
1) From the P6 Reporting Database physical media or download location, run one of
the following depending on your system type:
If you are installing on a Microsoft Windows system:
windows\ODS\Disk1\install\setup.exe
If you are installing on a non-Microsoft Windows system:
<Operating System>\ODS\Disk1\install\runInstaller
Where: <Operating System> is a supported non-Windows platform. For information
on supported non-Windows platforms, see the Tested Configurations document
(testedcfg.htm) on the release media or download.
2) On the Welcome window, click Next.
3) On the Specify Home Details window:
a. Enter an appropriate name for the ODS database in the Name field.
b. Click the Browse button next to the Path field to specify the installation location for
the ODS database.
c. Click Next.
4) On the Java Runtime window, click the Browse button to specify the location of the
JRE version (for example, C:\Program Files\Java\jre6).
a. This must be a JRE location, not a JDK location.
Installing and Configuring the ODS Database
P6 Reporting Database Installation and Configuration Guide
50
Note: The appropriate version of JRE must be installed on the
machine where odsetl.bat (or odsetl.sh on a non-Windows system)
will be run. For information on the specific JRE versions and
supported operating system configurations, refer to the
testedcfg.html document on the release media or download.
b. If the location is a JDK location, select the JRE subfolder (for example, C:\Program
Files\Java\jdk1.6.0_27\jre).
c. Click Next to continue.
5) Read the summary information that explains where the ODS database will be
installed, what features will be installed, and the total size, and click Install.
6) Prior to installation completion, the P6 Reporting Database configuration utility will
launch in a separate window.
a. On the Welcome screen, click Next to begin.
b. See Finishing the ODS Database Configuration (on page 58).
7) After completing the P6 Reporting Database configuration utility, the End of
Installation window displays. Click Exit to finish the installation.
Configuring the Oracle ODS Database
This section describes how to configure the ODS database portion of P6 Reporting
Database. The Configuration Utility launches after the installation of the ODS database
completes.
Note: During the configuration phase, some fields might already
contain data. Check the data and change it as necessary.
Start with one of the following sections:
If the P6 EPPM database is on an Oracle instance, see Configuring the P6 EPPM
Database Connection for ODS on an Oracle Instance (on page 50).
If the P6 EPPM database is on a Microsoft SQL Server, see Configuring the Microsoft
SQL Server Connection If the P6 EPPM is on a Microsoft SQL Server (on page 27).
Configuring the P6 EPPM Database Connection for ODS on an Oracle Instance
Use the fields on the Reporting Database Configuration Utility - [ODS] configuration wizard
to configure the ODS database with the P6 EPPM database. If your P6 EPPM database is
on a Microsoft SQL Server, follow the steps in Configuring the Microsoft SQL Server
Connection If the P6 EPPM is on a Microsoft SQL Server (on page 27) instead of the steps
in this section.
On the EPPM Reporting Database Connection screen:
1) For the Database Type option, choose Oracle.
2) In the Oracle Database Connection section:

Installing and Configuring the ODS Database
51
a. In the Host Name field, enter the server machine name or IP address where you
installed the P6 EPPM database.
b. In the Port Number field, enter or verify the port number for your database.
The default for Oracle is 1521.
c. Choose the Service Name or SID option. Enter the Service Name or SID.
3) In the Reporting User section:
a. In the Username field, enter or verify your reporting database name (for example,
PxRptUser).
b. In the Password field, enter the password for the reporting database user.
4) Click Next, and follow the steps in the Configuring the Oracle ODS Database
Connection (on page 52).
Configuring the Microsoft SQL Server Connection If the P6 EPPM is on a Microsoft SQL Server
Use the instructions in this section only if your P6 EPPM database is on a Microsoft SQL
server. You must have already installed the Oracle Gateway software before installing
the Primavera P6 Reporting Database software. See Oracle Gateway Installation
Requirements (on page 15) for information about installing the gateway.
On the EPPM Reporting Database Connection screen:
1) For the Database Type option, choose SQL Server.
2) In the SQL Server Connection section:
a. In the Host Name field, enter the server machine name or IP address where you
installed the P6 EPPM database.
This is the SQL Server instance name of the Microsoft SQL Server where the P6 EPPM
database resides. For example, SQLServerName\databaseInstanceName.
b. In the Port Number field, enter or verify the port number for your database.
The default for Microsoft SQL Server is 1433.
c. In the Database Name field, enter the name of the P6 EPPM database. This
database must already exist.
3) In the Oracle Gateway Connection section:
a. In the Host Name field, enter the machine name or IP address where you installed
the Oracle Gateway.
b. In the Port Number field, enter the Service name where you installed the Oracle
Gateway.
c. Choose the Service Name or SID option. Enter the Service Name or SID.
4) In the Reporting User section:
a. In the Username field, enter or verify your reporting database name (for example,
PxRptUser).
b. In the Password field, enter the password for the reporting database user.
5) Click Next, and follow the steps in one of the following sections:

P6 Reporting Database Installation and Configuration Guide
52
If you are configuring the ODS database, see Configuring the Oracle ODS
Database Connection (on page 52) for information on configuring the ODS
database connection.
If you are configuring the Star database, see Configuring the Oracle Star Database
Connection (on page 28) for information on configuring the Star database
connection.
Configuring the Oracle ODS Database Connection
Use the ODS Database Connection screen to configure the Oracle connection settings
for the ODS database instance:
1) In the Oracle Database Connection section:
a. In the Host Name field, enter the server machine name or IP address where you
installed the database.
b. In the Port Number field, enter or verify the port number for your database.
The default for Oracle is 1521.
c. Choose the Service Name or SID option. Enter the Service Name or SID.
2) In the Database Credentials section, enter the Oracle system username and
password:
a. In the Username field, enter or verify your DBA user name that has DBA privileges
for the ODS database. The default name is SYSTEM.
b. In the Password field, enter the password for the DBA user.
3) In the New User section, enter the connection information for the table owner:
a. In the Username field, enter or verify the ODS user name. This user will own the ODS
tables.
b. In the Password and Confirm Password fields, enter a password for the ODS user.
4) Click Next.
Configuring ETL Settings for ODS
On the ETL Settings screen:
1) In the JVM Location field, enter or verify the path to the Java Virtual Machine (JRE
path).
The appropriate version of JRE must be installed on the machine where the ETL
process will run. For information on the specific JRE versions and supported
operating system configurations, refer to the testedcfg.html document on the
release media or download.
The path must refer to a location on the local machine, where the P6 Reporting
Database configuration utility is installed.

Installing and Configuring the ODS Database
53
2) In the Max Java Heap Size (MB) field, enter parameter for the Java Heap Size. This
value maps to the JVM –Xmx setting in the Java Runtime Environment settings. The
default value is 1,024 MB.
The minimum value is 512 MB.
When changing the Maximum Java Heap Size setting, the values must be in 512
MB increments.
3) In the Log Detail Level field, choose the level of logging detail that you want to use.
The following are the logging detail levels you can choose:
Errors and Warnings – Logs errors and warnings.
General Information – This is the default value. This logs errors, warnings, and
informational messages on the progress of each step.
Debug and Trace Information – Provides all general information, errors and
warnings, and detailed output of each script, query, and connection being
executed.
Errors Only – Logs only errors and no other information.
Extra Debug Information – Provides all general information, errors and warnings. It
provides more fine grained information on each step and scripts being executed.
4) In the General Thread Count field, choose the number of threads the ETL process will
run. Extraction and Load processes are multi-threaded.
Oracle recommends keeping the default (5) for this setting.
5) In the Index Building Thread Count field, choose the number of threads that will build
the index. It specifies how many threads to run for building indexes for the ODS or Star
database.
Oracle recommends keeping the default (5) for this setting.
6) Click Next.
Finishing the Configuration Wizard for ODS
To complete the configuration:
1) Choose whether you want to run the Reporting Database Diagnostic Utility. It will help
you troubleshoot your configuration if you choose to run it.
2) Click Finish.
This generates all the scripts that go into the scripts directory.
All the settings configured with the ODS database configuration utility will be stored in
the following location:
<installation path>\ods\res\odsetl.properties
This file is a Java properties file, which is a simple key = value storage file. For example:
db.ods.application.username=ODSUSER


55
ODS Security Configuration
This section describes the ODS security configuration tasks. These include adding a new
user, modifying user access, and deleting an existing user.
In This Section
User-Level Security and User Name Restrictions ................................................... 55
Adding an ODS User or Updating an Existing User ............................................... 56
Modifying User Access in ODS ................................................................................. 57
Deleting an ODS User ............................................................................................... 57
User-Level Security and User Name Restrictions
For the ODS to properly implement P6 EPPM user-level security, the ODS will create a
database-level user if you give a user the Enterprise Reports module access in P6 (see the
P6 Help for more information).
You will have two options for creating security for the ODS user.
Option 1: Use the Database Security Model
For this method, you create the database users, and their views are based on what they
have security access to view. The P6 EPPM user name must:
Be between 1 and 30 characters. The ODS will remove extra characters.
Not have any special characters (such as @ # $ % , ^ & * . ( ) - + \ / : _ ; | < >,
etc.). The ODS will automatically remove special characters. For example, if the P6
EPPM user name is [email protected], the ODS database will create this user: johnd
Not have any spaces.
Start with a letter, not a number.
The ODS implements security that applies to the Oracle database, which is why you must
use these specifications for the user name.
Database views are created for the ODS tables. The ODS database then creates public
synonyms and gives users access to these synonyms. When the ODS database user
accesses the tables, row, and fields through these synonyms, a filter is applied that gives
users access to data based on their P6 EPPM security attributes.
If the user is an application user and has Enterprise Reports module access in the P6 EPPM
database, the Oracle instance of the ODS database will create a database login for the
user. The user can log into the P6 EPPM application with the application user password.
The user cannot log into the ODS database directly (for example, using SQL Plus)
because the ODS user has been created with a randomly generated password.
Therefore, the application user must have the ODS database user's password reset by a
system administrator.

P6 Reporting Database Installation and Configuration Guide
56
If you use this option, you will need to use Database Authentication and the JDBC
connection with the Proxy option selected when using BI Publisher. If you use this option,
your user names would compare as follows:
P6 user name: [email protected]
BI Publisher: johnd
Method 2: Use the Security Package (SECPAC)
Your second option is to use SECPAC. SECPAC is an internal database security package
for Oracle that sets session variables for security. If you use SECPAC, you will need to
consider the following when using BI Publisher.
You can use any authentication mode.
You would need to set the pre-process function (call
Secpac.SET_BIP_USER(:xdo_user_name)) for the JDBC connection setup in BI Publisher.
Your user names will be the same in both the P6 and BI Publisher databases.
Adding an ODS User or Updating an Existing User
When adding a new user, the username must conform to the format restrictions listed in
User-Level Security and User Name Restrictions (on page 55).
For detailed information on adding a new P6 EPPM user, see the P6 EPPM Post Installation
Administrator’s Guide, or the P6 Help.
For additional information on ODS security, see the P6 Reporting Database User's Guide.
Use the following procedure to add a new user for the ODS or to update an existing user:
1) Login to P6, and add a new ODS user.
This ODS username must start with a letter.
It must also conform to the username format restrictions described in User-Level
Security and User Name Restrictions (on page 55).
2) Configure the user's P6 EPPM security attributes.
3) Assign Enterprise Reports module access.
4) Run one of the following files to create the database user:
odsetl.bat (on a Windows platform)
odsetl.sh (on a non-Windows platform)
This adds the user to the ODS database, creates Views for the user, and adds the user
to Server Logins.
When odsetl.bat (or odsetl.sh on a non-Windows system) is run, a new database user
will be created in the ODS instance.
The user will be given role privileges to the P6Reports role. The password for that
database user must be manually altered for the user to be able to connect
directly as that user.

Installing and Configuring the ODS Database
57
The P6Reports role enables the user to connect and query the public synonyms for
'P6'.
Modifying User Access in ODS
Users given access to the ODS will only be able to access the data for which they have
rights in the P6 EPPM database.
For example, if a user has the “Edit EPS Costs/Financials” privilege in the P6 EPPM
database, then that user will be able to view project cost information in the ODS.
Conversely, if a user does not have the “Edit EPS Costs/Financials” privilege in the P6
EPPM database, they would see the word null in place of the value in fields that contain
cost information.
Use the following procedure to give a user the ability to view cost information.
1) In P6, go to Administer, User Access, Project Security Profiles.
2) To provide access to cost information, ensure that the Edit EPS Costs/Financials
privilege option is selected in the user's project profile.
3) If necessary, assign the View Resource and Role Costs/Financials profile to enable
users to view resources costs if the user has resource access. It's a global security
profile.
4) Run one of the following files to create the database user:
odsetl.bat (on a Windows platform)
odsetl.sh (on a non-Windows platform)
Deleting an ODS User
Use the following procedure to delete a user from ODS.
1) In the P6 application, remove Enterprise Reports from the user's module access.
2) On the machine where the ODS database resides, run one of the following files:
odsetl.bat (on a Windows platform)
odsetl.sh (on a non-Windows platform)
This removes the create a session privilege, and removes access to the public
synonyms for the database user.
3) The Oracle ODS user that was created will still exist in the ODS instance.
This user will be disconnected from any views pertaining to ODS tables.
This user can be dropped from the ODS instance by executing the following
query as the Oracle Instance system account or a user with permissions to drop
other database users:
Drop user deleteUserName cascade;
For information on deleting a P6 EPPM user, see the P6 online help.

P6 Reporting Database Installation and Configuration Guide
58
For additional information on ODS security see the P6 Reporting Database User's Guide or
the P6 Analytics User’s Guide.
Finishing the ODS Database Configuration
After you complete the installation and all configuration tasks, execute the odsetl.bat (or
odsetl.sh in a non-Windows environment) file to complete the installation and
configuration process by doing the following:
1) Go to the <installation directory name> directory.
2) Click odsetl.bat (or odsetl.sh) to execute the file.

59
The odsetl.bat (or odsetl.sh on a non-Windows system) and staretl.bat (or staretl.sh on a
non-Windows system) will do an update everything when they are run (there are no
incremental updates). Follow the procedures in Upgrading the ODS Database (on page
60) and Upgrading the Star Database (on page 59) to upgrade each of these databases.
Note: The ODS and Star databases must be installed in a new
directory. Do not install them in the same directory where a
previous version of P6 Reporting Database is installed.
In This Section
Upgrading the Star Database ................................................................................. 59
Upgrading the ODS Database................................................................................ 60
Upgrading the Star Database
You can upgrade P6 Reporting Database versions 2.0, 2.1, and 2.2 to 3.0. Use the
following procedure to upgrade to the latest version if the previous version of P6
Reporting Database included Star.
Note: You cannot upgrade from 1.x versions. If you are upgrading
from a 1.x version, you need to do a full install of the new P6
Reporting Database version.
1) Upgrade your P6 EPPM database to P6 EPPM 8.1 or 8.2.
Note: Backup your project history before you continue.
2) Follow the instructions in Installing the Star Database (on page 25).
Use the information in the topics in the Configuring the Star Database (on page 26)
section to configure it for Oracle.
3) Run the following command:
ALTER USER STARUSER QUOTA unlimited ON STAR_HST1;
where STARUSER is the user name and STAR_HST1 a tablespace. If you changed the
STARUSER name, change it in the command; it should match the user name for the
database you are upgrading.
4) Run the following command:
Upgrading P6 Reporting Database to the Latest Version

P6 Reporting Database Installation and Configuration Guide
60
update staruser.w_project_history_f
set project_wid = mod(project_wid,10000000000);
5) Run one of the following:
For Windows, run the staretl.bat 4 5.
For Linux, run the ./staretl.sh -from 4 -to 5.
6) Do the following:
a. Go to the \scripts folder.
b. Run upgradeStar.bat (or upgradeStar.sh when upgrading from a non-windows
system) to upgrade the Star database.
Upgrading the ODS Database
1) Upgrade your P6 EPPM database to P6 EPPM 8.2.
2) Follow the instructions in Installing the ODS Database (on page 49).
3) Use the information in the topics in the Finishing the ODS Database Configuration (on
page 58) section to configure it for Oracle.
4) Drop the existing odsuser:
drop user odsuser cascade;
5) You will have to reapply any customizations done to the existing odsuser.
6) The ODS database cannot be installed on a Microsoft SQL Server system.
7) Run odsetl.bat (or odsetl.sh on a non-Windows system).
61
Describes the general administrative tasks, including how to secure the staretl.properties
file, how to clear and refresh data, and how to schedule or manually launch a database
update.
In This Section
Securing the odsetl.properties and staretl.properties Files ................................. 61
Clearing and Refreshing the Data ......................................................................... 62
Creating a Filtered ODS ........................................................................................... 62
Creating a Filtered Star ............................................................................................ 63
Scheduling the Database Update ......................................................................... 64
Manually Launching the Database Update Process .......................................... 64
History Settings for P6 Reporting Database 3.0 ..................................................... 64
Securing the odsetl.properties and staretl.properties Files
This section contains information you need when securing the odsetl.properties and
staretl.properties files.
Ensure that only the user running the P6 Reporting Database scripts or processes has
access to the odsetl.properties and staretl.properties files, which are located in the
following folders:
<installation path>\ods\res
<installation path>\star\res
Only trusted users should have access to these files or folders.
File system protection can be set on all of the supported operating systems. Based on the
settings applied, the \res folder can be password protected or hidden. A new user can
be created with the least amount of permissions to this file and folder. Do not give any
other user access to this location.
For options for operating system-specific security, either contact your local administrator
or search for file system security for your specific operating system.
Administrative Tasks

P6 Reporting Database Installation and Configuration Guide
62
Clearing and Refreshing the Data
There are times when you might need to clear and refresh all the data in the ODS and
Star databases. It is not necessary to uninstall and reinstall P6 Reporting Database to
accomplish this task.
The following procedure assumes that you chose the default usernames (STARUSER and
ODSUSER) during the installation. If you choose different names, substitute those names
for the defaults.
1) Login to the P6 Reporting Database instance with a user account that has the Drop
User system privilege (such as System).
2) Run the following commands:
drop user odsuser cascade;
drop user staruser cascade;
Caution: Deleting the Star database will also delete the Project,
Activity, and WBS history fact data that was accumulated.
3) Run the following to drop the public synonyms for P6 EPPM data:
begin
for syndrop in (select synonym_name from all_synonyms where synonym_name
like 'P6%')
loop
execute immediate 'drop public synonym '||syndrop.synonym_name;
end LOOP;
end;
Dropping the users listed in step 2 of the preceding procedure will remove all data from
the P6 Reporting Database instance. You can rerun the following files to populate the
ODS and Star databases with the P6 EPPM database information:
odsetl.bat (on a Windows system) or odsetl.sh (on a supported non-windows system)
starsetl.bat (on a Windows system) or staretl.sh (on a supported non-windows system)
Creating a Filtered ODS
Because the data is already calculated in the P6 EPPM extended tables and P6 EPPM
database, a filter can be applied during the odsetl process to pull over data matching a
determined criteria. By creating a view, the projects that are included in the ODS can be
limited to a portfolio, an EPS, or another criteria. This enables much greater customization
by creating an ODS with only the projects that are important to the user.
When creating the ODS filter, the view must be created under the PxRptUser.
In the following example, a view is created for a specific portfolio called My Top 10
Projects, and the filter is called it_portfolio_view.
1) Use the following to create the it_portfolio_view filter:

Administrative Tasks
63
create or replace view it_portfolio_view
as
select PROJECTOBJECTID objectid
from projectportfolio pp, projectprojectportfolio ppp
where pp.objectid = ppp.PROJECTPORTFOLIOOBJECTID
and pp.name = 'My Top 10 Projects'
2) Edit the odsetl.properties file in \res. Add an entry for ods.project.filter.ds1=, and then
put in the name of the view that was created.
For example:
ods.project.filter.ds1=it_portfolio_view
3) Run the following command:
run ODSETL.bat
4) After process completes, make sure you can connect to the view through the
database link and return the list of object ids. For example:
select * from it_portfolio_view@ods2pxrpt
This will return the objectid’s that will be used to populate the etl_projectlist.
Creating a Filtered Star
Because the data is already calculated in the P6 EPPM extended tables and P6 EPPM
database, a filter can be applied during the staretl process to pull over data matching a
determined criteria. By creating a view, the projects that are included in the Star can be
limited to a portfolio, an EPS, or another criteria. This enables much greater customization
by creating a Star with only the projects that are important to the user.
When creating the Star filter, the view must be created under the PxRptUser.
In the following example, a view is created for a specific portfolio called My Top 10
Projects, and the filter is called it_portfolio_view.
1) Use the following to create the it_portfolio_view filter:
create or replace view it_portfolio_view
as
select PROJECTOBJECTID objectid
from projectportfolio pp, projectprojectportfolio ppp
where pp.objectid = ppp.PROJECTPORTFOLIOOBJECTID
and pp.name = 'My Top 10 Projects'
2) Edit the staretl.properties file in \res. Add an entry for star.project.filter.ds1=, and then
put in the name of the view that was created.
For example:
star.project.filter.ds1=it_portfolio_view
3) Run the following command:
run staretl.bat
P6 Reporting Database Installation and Configuration Guide
64
4) After process completes, make sure you can connect to the view through the
database link and return the list of object ids. For example:
select * from it_portfolio_view@dslink01
This will return the objectid’s that will be used to populate the etl_projectlist.
Scheduling the Database Update
Using a System Task Scheduler to Schedule Recurring ETL Jobs
To keep the ODS and Star databases current, odsetl.bat (or odsetl.sh on a non-Windows
system) and staretl.bat (or staretl.sh on a non-Windows system) must be run periodically.
Typically, this is done nightly during off hours.
Schedulers exist for both Windows and non-Windows operating systems. For Windows
operating systems, the Windows Task Scheduler can be used. For non-Windows
operating systems, this is done through a cron job using the Crontab command. Please
refer to your operating system documentation for specifics on how to configure the
process to run as a recurring job.
Caution: When configuring the scheduler, Oracle recommends
that you select the option to not start the next job until the previous
job has completed.
Manually Launching the Database Update Process
To launch the database update for ODS and Star, execute one of the following files on
the machine where you installed the ODS and Star databases:
odsetl.bat and staretl.bat (on a Windows platform)
odsetl.sh and staretl.sh (on a non-Windows platform)
The account used to launch the file must have administrative privileges on the machine.
History Settings for P6 Reporting Database 3.0
For P6 Reporting Database 3.0, you can control history interval and levels settings on the
project level in P6. If you installed a new P6 EPPM database, the settings will be turned off
for new projects. To start recording new history for projects, you must turn on the settings
in P6. If you upgraded an existing P6 EPPM database to R8.2, the history values will be on
and set to Monthly history.
Related Topics
Creating History Data for P6 EPPM R8.2 ................................................................. 65
Creating History Data Against a P6 EPPM R8.1 Database .................................. 65
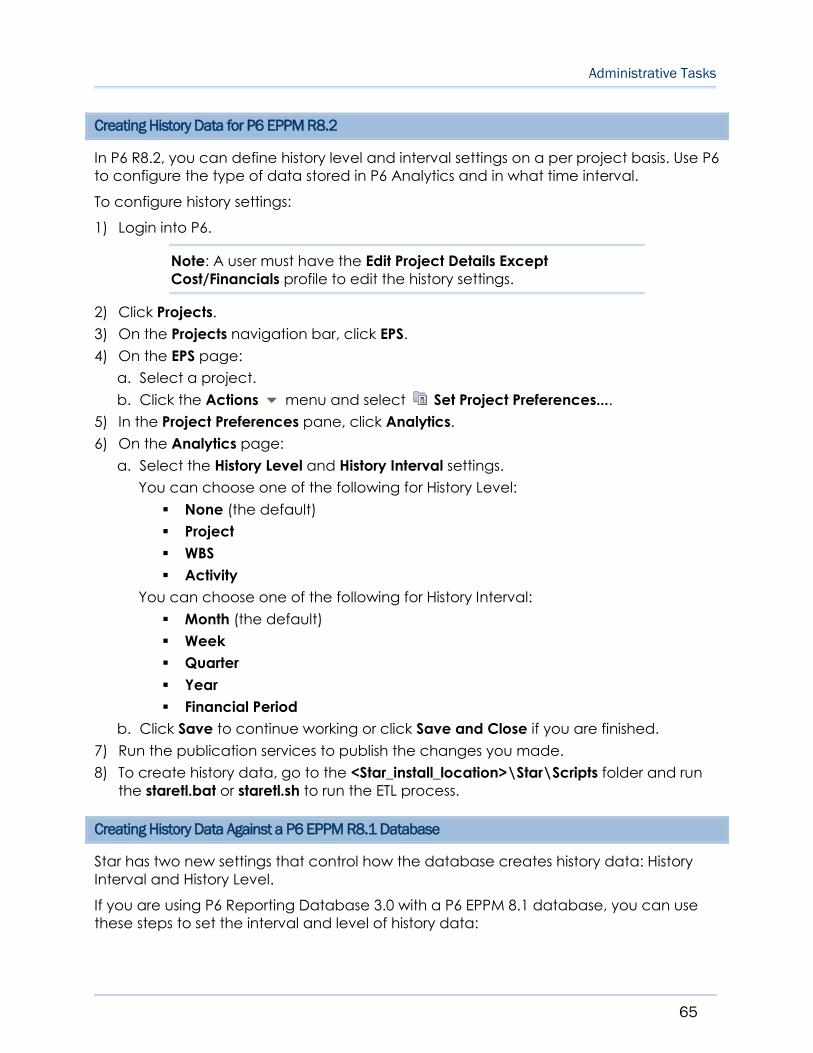
Administrative Tasks
65
Creating History Data for P6 EPPM R8.2
In P6 R8.2, you can define history level and interval settings on a per project basis. Use P6
to configure the type of data stored in P6 Analytics and in what time interval.
To configure history settings:
1) Login into P6.
Note: A user must have the Edit Project Details Except
Cost/Financials profile to edit the history settings.
2) Click Projects.
3) On the Projects navigation bar, click EPS.
4) On the EPS page:
a. Select a project.
b. Click the Actions menu and select Set Project Preferences....
5) In the Project Preferences pane, click Analytics.
6) On the Analytics page:
a. Select the History Level and History Interval settings.
You can choose one of the following for History Level:
None (the default)
Project
WBS
Activity
You can choose one of the following for History Interval:
Month (the default)
Week
Quarter
Year
Financial Period
b. Click Save to continue working or click Save and Close if you are finished.
7) Run the publication services to publish the changes you made.
8) To create history data, go to the <Star_install_location>\Star\Scripts folder and run
the staretl.bat or staretl.sh to run the ETL process.
Creating History Data Against a P6 EPPM R8.1 Database
Star has two new settings that control how the database creates history data: History
Interval and History Level.
If you are using P6 Reporting Database 3.0 with a P6 EPPM 8.1 database, you can use
these steps to set the interval and level of history data:

P6 Reporting Database Installation and Configuration Guide
66
Note:
If you don't make changes in the staretl.properties file, located
in <Star_install_location>\Star\Res, then the default for the
history interval is Month and the default for history level is
Project.
The changes you make will apply to all projects that are
brought over from the P6 EPPM Extended Views.
1) Go to the <Star_install_location>\Star\Res folder and edit the staretl.properties file.
Note: Complete these steps before you run ETL for the first time.
2) Add this History Interval line at the end of the file:
star.proj.hist.interval=<History_Interval>
where <History_Interval> is one of these:
Week
Month
Quarter
Year
FP (for Financial Period)
3) Add this History Level line at the end of the file:
star.proj.hist.level=<History_Level>
where <History_Level> is one of these:
HL_Project
HL_WBS
HL_Task
HL_None
Tips
To change the history settings after running the ETL process:
1) Edit the settings in the staretl.properties file.
2) Run staretl.bat.
After you run the ETL process, history data with the new settings is created. Existing
history data remains unchanged.
67
This section describes the BI Publisher administrative tasks, including installing BI Publisher,
configuring the JDBC connection, copying the P6REPORTS folder, configuring BI Publisher
security, and setting up BI Publisher database authentication.
In This Section
Overview of BI Publisher ........................................................................................... 67
About Configuring P6 Database Connection Settings for BI Publisher ............. 67
Installing Oracle BI Publisher .................................................................................... 67
Configuring the JDBC Connection ........................................................................ 67
Copying the P6REPORTS Folder .............................................................................. 68
Configuring BI Publisher Security ............................................................................. 68
BI Publisher Database Authentication Setup ........................................................ 69
Setting Up LDAP with BI Publisher ............................................................................ 69
Overview of BI Publisher
BI Publisher is an Oracle enterprise reporting solution that can be used with the ODS. For
complete overview information about BI Publisher, go to the following web site:
http://www.oracle.com/technology/products/xml-publisher/index.html
About Configuring P6 Database Connection Settings for BI Publisher
The Connecting BI Publisher to P6 Guide contains information about configuring P6
database connection settings for BI Publisher and using the P6 Administrator application.
Installing Oracle BI Publisher
For information on installing the Oracle BI Publisher, see the documentation included with
BI Publisher
Configuring the JDBC Connection
Login to BI Publisher, and do the following:
1) Click the Admin tab.
2) Under Data Sources, click the JDBC Connection link.
3) Click the Add Data Source button, and do the following:
BI Publisher Administration Tasks

P6 Reporting Database Installation and Configuration Guide
68
a. Create a new data source called P6RPT.
b. Specify connection information, odsuser name/password.
c. Do one of the following:
Choose the option for Use Proxy Authentication if you are using the
database security model.
Choose to specify the Pre Process Function
(Secpac.SET_BIP_USER(:xdo_user_name)) if you are using the SECPAC
security model.
See User-Level Security and User Name Restrictions (on page 55) for more
information.
4) Save the settings.
Copying the P6REPORTS Folder
Copy the P6REPORTS folder from the P6REPORTS.zip file to the BI Publisher application
deployment location (for example, %BI_HOME%\xmlp\XMLP\Reports (for 10g) or
%BIP_WLS_DomainHome%\config\bipublisher\repository\Reports (for 11g)).
Note: The P6REPORTS.zip also includes a folder named "Samples."
This folder contains PDF files that show what each of the sample
reports would look like when run.
Configuring BI Publisher Security
Logon to BI Publisher, and do the following:
1) Click the Admin tab.
2) Under Security Center, click the Security Configuration link.
3) In the Local Superuser section, do the following to configure the name and password
of the Local Superuser.
a. Select the Enable Local Superuser option.
b. In the Superuser name field, enter the Superuser’s name.
c. In the Password field, enter the Superuser’s password.
Note: Oracle BI Publisher enables an administrator to setup a
security model based on roles and permissions. These roles and
permissions can be enforced on folders containing reports created
from ODS data. For more information, see "Defining a Security
Model" in the Oracle BI Publisher online help.
4) In the Security Model section, do the following to configure the type of security to use.
a. From the Security Model list, choose the model to use. This can be:
BI Publisher Security

BI Publisher Administration Tasks
69
Oracle BI Server
Oracle Database
LDAP
Oracle Fusion Middleware
b. Enter the Connection String. This is the connection string used to connect to the
JDBC Data Source you previously configured. See Configuring the JDBC
Connection (on page 67).
c. Click Apply to save the changes.
BI Publisher Database Authentication Setup
Refer to the documentation for BI Publisher for information on setting up authentication.
Setting Up LDAP with BI Publisher
Refer to the documentation for BI Publisher for information on setting up LDAP.

71
This section describes how to run the Configuration Utility to reconfigure Settings, Options,
and Codes after P6 Reporting Database is already installed and configured.
In This Section
Overview of the Configuration Utility ..................................................................... 71
Running the Configuration Utility for the ODS Database .................................... 72
Running the Configuration Utility for the Star Database ..................................... 72
Changing Passwords ................................................................................................ 72
Overview of the Configuration Utility
This section describes where to find the information you need to change settings and
options after the ODS and Star databases are installed and configured.
For the ODS database, you can change:
Java Runtime Environment location
Logging detail level
Thread Settings
Note: Fields for the P6 EPPM DB and ODS will not be available for
change.
For the Star database, you can change:
Java Runtime Environment location
Logging detail level
Thread Settings
Activity, Project, and Resource codes
Activity, Project, and WBS UDFs
Note: Fields for the P6 EPPM DB and Star will not be available for
change.
The configuration utility should be access-control protected, and should be under
administrative control.
Running the Configuration Utility
P6 Reporting Database Installation and Configuration Guide
72
Running the Configuration Utility for the ODS Database
Do the following to run the Configuration Utility for the ODS database:
1) Locate the folder where P6 Reporting Database is installed.
2) Run the configODS.cmd.
a. You will be prompted to enter the proper PxRptUser security authorization in order
to access any data from the utility.
b. After authorization completes, you should see Settings on the configuration utility.
3) See Configuring ETL Settings for ODS (on page 52) for information on changing these
settings.
4) Click Finish when you are done.
Running the Configuration Utility for the Star Database
Do the following to run the Configuration Utility for the Star database:
1) Locate the folder where P6 Reporting Database is installed.
2) Run the configStar.cmd command.
You will be prompted to enter the proper PxRptUser security authorization to
access any data from the utility.
After authorization completes, verify the information on the STAR Database
Connection page then click Next.
See Configuring ETL Settings for Star (on page 28) for information on configuring
these settings.
3) Click Finish when you are done.
Changing Passwords
The passwords must be manually changed for ODS and Star by a user with database
administrative privileges. If the administrative user changes the staruser or odsuser
password, they must re-run the Configuration Utility and enter the new user password.
See the following for information on running the Configuration Utility for ODS and Star.
Running the Configuration Utility for the ODS Database (on page 72).
Running the Configuration Utility for the Star Database (on page 72).
73
This section describes how to configure the Secure Sockets Layer (SSL). SSL ensures a
secure connection between servers over the network.
In This Section
Configuring the SSL Connection ............................................................................. 73
Configuring P6 Reporting Database to Use SSL to Run the ETL Process ............ 74
Configuring the SSL Connection
This topic directs you to an Oracle web site that will provide an example of creating a
self-signed Oracle wallet for the server and client, configuring the database to use TCPS
with the server key, configuring an SQL client to connect through the TCPS protocol, and
creating simple java clients that show how to connect through TCPS in several different
examples. Use these examples to guide you in creating your SSL connection.
Oracle assumes that you already understand the concept of wallets, and that you
understand Secure Socket Layer (SSL) functionality.
1) Go to the following web site:
https://support.oracle.com/CSP/ui/flash.html
2) On the My Oracle Support window, do one of the following:
If you are already have a Username and Password for Oracle Support, click Sign
In.
If you are a new user, click the New user? Register here link, and follow the
instructions to obtain a Username and Password.
3) Enter your Username and Password, and click Go.
4) On the My Oracle Support Dashboard, in the Search Knowledge Base field, enter
762286.1, and press the Enter key (or, click the Search Knowledge Base icon to the
right of the field after you enter the number).
5) On the Knowledge Browser Dashboard, select End to End Examples of using SSL with
Oracle’s JDBC THIN Driver to see detailed examples. Use these examples as guides to
help you configure your system.
6) Next, configure P6 Reporting Database to run the ETL process using SSL.
Configuring the Secure Sockets Layer

P6 Reporting Database Installation and Configuration Guide
74
Configuring P6 Reporting Database to Use SSL to Run the ETL Process
Currently, the P6 Reporting Database Configuration Utility does not allow the
staretl.properties file to be directly configured for TCPS. After it is initially configured for
TCP, and after the SSL connection is configured, you must manually configure the P6
Reporting Database so that SSL is used to run the ETL process.
1) Using the wallet manager or OraclePKI, export the trusted certificate that is on the
server, and copy it to client where P6 Reporting Database is installed.
2) On the client machine, import the certificate using the keytool. For example:
C:\Program Files\Java\jre1.6.0_20\bin>keytool -importcert -file
C:\wallets\server_wallet\cert -keystore "C:\Program
Files\Java\jre1.6.0_20\lib\security\cacerts"
Note: The default password for the Java default keystore file
JAVA_HOME/lib/security/cacerts is 'changeit'.
3) Edit the etl properties file as follows:
a. Replace all occurrences of the default port number with the number of the SSL
port.
b. Replace all occurrences of PROTOCOL = TCP with PROTOCOL = TCPS.
Note: In this step, the etl properties file refers to the odsetl.properties
file and the staretl.properties file.
4) Run the runSubstitution.cmd file to update all files with the new port number and TCPS
setting. The file is located in the ERDB_HOME\etl\common\ directory.
5) Go to the ERDB_HOME\scripts directory.
6) Edit the odsetl.bat (or odsetl.sh).
7) Add the following variable to the first line of the file:
For Windows:
SET PRM_SSL_CONNECTION=Y
For Linux:
EXPORT PRM_SSL_CONNECTION=Y

75
This section describes the log files that can provide information about the installation and
daily operation of P6 Reporting Database.
In case a problem occurs, it tells where to get help if the log files do not provide sufficient
information.
In This Section
Log Files ...................................................................................................................... 75
Troubleshooting ......................................................................................................... 76
Log Files
P6 Reporting Database creates extensive log files for each step of the odsetl.bat (or
odsetl.sh on a non-Windows system) and the staretl.bat (or staretl.sh on a non-Windows
system) processes. The log files are stored in a ‘log’ folder in the root of the P6 Reporting
Database installation location.
The log files contain detailed information that you should inspect after running each file
in the installation process, and after running the database refresh process.
Log files
The following lists the log files, identifies when they are created, and gives a brief
description of their contents:
File Description
odsetlprocess.log Created when odsetlprocess.bat (or
odsetlprocess.sh) is run. Contains the details of the
SQL commands run to perform the database
refresh updates.
odsetlprocess.html Created when odsetlprocess.bat (or
odsetlprocess.sh) is run. Contains results of the
processes run to create the users, tables, and
transfer of data. Provides the time it took for each
step to run. Derived from the ETL_PROCESSMASTER,
ETL_PROCESSINFO, and ETL_PROCESSEXCEPTION
tables.
Utility Tables, Log Files, and Troubleshooting
P6 Reporting Database Installation and Configuration Guide
76
File Description
staretlprocess.log Created when staretlprocess.bat (or
staretlprocess.sh) is run. Contains the details of the
SQL commands run to perform the database
refresh updates.
staretlprocess.html Created when staretlprocess.bat (or
staretlprocess.sh) is run. Contains results of the
processes run to create the users, tables, and
transfer of data. Provides the time it took for each
step to run. Derived from the ETL_PROCESSMASTER,
ETL_PROCESSINFO, and ETL_PROCESSEXCEPTION
tables.
Troubleshooting
P6 Reporting Database writes detailed process information to the “log” directory under
the P6 Reporting Database home folder. The log directory contains information about
the installation, as well as about each run of the odsetl.bat (or odsetl.sh on a
non-Windows system) and staretl.bat (or staretl.sh on a non-Windows system) process. If
an error occurs, depending on the nature of the error, diagnostic information might be
included within the files of the log directory. Analyzing these files can help lead you to
the resolution or to the file or process which caused the error.
Oracle Database Gateway 11.2 reporting incorrect column size
If the Oracle Database Gateway 11.2 reports incorrect column size, and the extract fails,
ensure that the following are set in the initdg4msql.ora file:
HS_NLS_LENGTH_SEMANTICS=CHAR
HS_FDS_CHARACTER_SEMANTICS = TRUE
HS_KEEP_REMOTE_COLUMN_SIZE=ALL
The configuration utility does not launch during the P6 Reporting Database installation process
If you are installing P6 Reporting Database and the Configuration utility never launches,
the most likely cause is that the location used for JRE is incorrect. To correct this issue, run
the following:
For ODS on a Microsoft Windows system:
windows\ODS\Disk1\install\setup.exe
For ODS on a non-Microsoft Windows system:
<Operating System>\ODS\Disk1\install\runInstaller
For Star on a Microsoft Windows system:
Utility Tables, Log Files, and Troubleshooting
77
windows\StarDisk1\install\setup.exe
For Star on a non-Microsoft Windows system:
<Operating System>\Star\Disk1\install\runInstaller
Esure that you specify the correct location for your systems Java Runtime Environment
(JRE). The installer will show you an example of the correct path.
ETL and OBI query performance
P6 Reporting Database has default hints that are added based on data samples. The
hints aim to improve performance across all data sets. To further improve performance,
you can add non-default hints to P6 Reporting Database. You should investigate adding
non-default hints if you see bottlenecks in the OBI query performance or when you run
the ETL process on your data set.
Contacting Customer Support
See Where to Get Support for detailed information about contacting Customer Support.
If you have a question about using P6 Reporting Database that you or your network
administrator cannot resolve with information in the documentation, please contact
Customer Support.

79
This section describes how to uninstall the P6 Reporting Database for Windows and
non-Windows systems. For information on supported Windows and non-Windows
platforms, see the Tested Configurations document on the release media or download.
In This Section
Uninstalling the Software .......................................................................................... 79
Uninstalling the Software
To uninstall P6 Reporting Database, perform the following steps.
Note: Due to the global nature of the Oracle Universal Installer
(OUI), the OUI online help is not applicable for installing or
uninstalling P6 Reporting Database or for references to the
documentation. Instead, refer to the following for uninstalling
instructions.
1) From the P6 Reporting Database physical media or download location, run one of
the following depending on your system type:
If you are uninstalling on a Microsoft Windows system:
windows\Disk1\install\setup.exe
If you are uninstalling on a non-Microsoft Windows system:
<Operating System>\Disk1\install\runInstaller
Where:
<Operating System> is a supported non-Windows platform. For information on supported
platforms, see the Tested Configurations document on the release media or download.
2) Click Deinstall Products.
3) Select the name that represents the P6 Reporting Database installation and click
Remove.
You determined the name that represents the P6 Reporting Database installation
when you installed the product.
4) If the name of the item to remove is correct, click Yes to confirm.
5) Click Close.
6) Click Cancel and then Yes to confirm.
7) If you are uninstalling on a Microsoft Windows system, delete the <installation
folder>p6rdb folder,
Uninstalling P6 Reporting Database

P6 Reporting Database Installation and Configuration Guide
80
where <installation folder> is the folder in which you installed P6 Reporting Database.