
Mini Dragon Furnace General Owner's Guide
26
Mobile Glassblowing Studios’ Mini Dragon Furnace General Owner’s Guide Welcome to our Growing Global Community!
-
Upload
khangminh22 -
Category
Documents
-
view
0 -
download
0
Transcript of Mini Dragon Furnace General Owner's Guide

Mobile Glassblowing Studios’
Mini Dragon Furnace General Owner’s Guide
Welcome to our Growing Global Community!

Mini Dragon Furnace Guide: August 2018 CALL US WHEN YOU’RE READY TO LIGHT UP FOR THE FIRST TIME: 844-452-7246 EXT 3 or 229-352-9988 EXT 3
For more information, visit our website: www.mobileglassblowingstudios.com – see FAQ and Support
Pag
e2
Mini Dragon Furnace General Owner’s Guide
These instructions are guidelines for use of the Mini Dragon Glassblowing furnace. Please read this manual
and all supporting documents carefully prior to using your equipment. Should any questions arise, please
contact a representative of Mobile Glassblowing Studios IMMEDIATELY. 844-452-7246 EXT 3 or 229-352-9988
EXT 3. You can also reach us at [email protected]. We offer complimentary initial
support in setting up and operating your Dragon furnace and related equipment. More information about
ongoing support is on our website at www.mobileglassblowingstudios.com/customersupport.
You can also refer to the FAQ and Resources pages on our website for more information.
Mobile Glassblowing Studios, LLC, for a period of one year from date of shipment, warrants each system or
product of its own manufacture, with the exception of burner tips, crucibles and other refractory materials, to
the original Purchaser to be free from defects in material and workmanship under normal use, service and
maintenance. Normal use, service and maintenance means: (1) Not exceeding the maximum temperatures,
volumes, and other parameters specified in the Company’s instructions and/or Owner’s Manuals. (2) Using
only the fuels specified in the Company’s instructions and/or Owner’s Manuals. (3) Operation and
maintenance in compliance with the Company’s instructions and/or Owner’s Manuals. Products or goods not
manufactured by the Company and supplied in piece, or as components to a system designed or supplied by
the company, are not covered by this warranty. Components and parts of the equipment that are not
manufactured by the Company are not covered by the Company’s warranty, and the Company does not
warrant the performance, use and operation of those parts. For complete details, please refer to your Terms,
Conditions, and Limited Warranty document or visit www.mobileglassblowingstudios.com/warranty.
TABLE OF CONTENTS
System Specifications………………………………………………. 3 Unpacking………………………………………………………………… 4 - 5 Setup……………………………………………………………………….. 5 - 8 Pre- Light-Up Info…………………………………………………….. 9 - 11 Light-Up & Firing Guidelines…………………………………….. 12 Lighting the Furnace………………………………………………… 13 For the Initial Firing; Flame Adjustment…………………… 14 Regular Use; Things to Note; Transport……………………. 14 - 15 Air Pressure Safety System & Wiring Diagrams………… 16 Troubleshooting Burner Instability…………………………… 17 - 19 Don’t Blow ‘Um Up or Whack ‘Um with a Hammer….. 19 - 20 Component Specification Sheets……………………………… 21 – 26

Mini Dragon Furnace Guide: August 2018 CALL US WHEN YOU’RE READY TO LIGHT UP FOR THE FIRST TIME: 844-452-7246 EXT 3 or 229-352-9988 EXT 3
For more information, visit our website: www.mobileglassblowingstudios.com – see FAQ and Support
Pag
e3
System Specifications:
Mini Dragons
• Dimensions (Furnace & base, no burner train or accessories): 16” D x 16” W x 52" H (41cm D x 41cm W x 132cm H)
• Dimensions (assembled furnace with accessories - not including bench, annealer, marver, etc.): 48" D x 48" W x 81" H (122cm D x 122cm W x 206cm H)
• Curb Weight (approx.): 300 pounds (135 kg)
• Capacity: 15 pounds (7 kg)
• Electrical: Blower is 120V AC, 1A (240V available)
• Fuel Type: Propane or Natural Gas, 14” W.C. / 35mb pressure maximum
• Fuel Consumption: Propane: +/- 0.5 gallons or +/- .96 kg per hour; Natural gas: +/- 46 cubic ft or 1.4 cubic meters per hour
• Btu/H range: 10,000 – 40,000
• Maximum Temp: 2200 F (1177 C)

Mini Dragon Furnace Guide: August 2018 CALL US WHEN YOU’RE READY TO LIGHT UP FOR THE FIRST TIME: 844-452-7246 EXT 3 or 229-352-9988 EXT 3
For more information, visit our website: www.mobileglassblowingstudios.com – see FAQ and Support
Pag
e4
UNPACKING
The shipping crate should be disassembled starting with the lid, followed by the top half of each narrow side.
Carefully unpack the burner train. Be particularly careful with the burner train, as the pressure gauge and
ceramic burner tip can be broken if not handled carefully.
Continue disassembling the crate.
Unpack all parts before removing the furnace.
Look around the crate for any loose hardware, sometimes thumbscrews can come loose during shipping.
Once all loose parts are removed from the crate, assemble the stand (as pictured below) before moving the
furnace.

Mini Dragon Furnace Guide: August 2018 CALL US WHEN YOU’RE READY TO LIGHT UP FOR THE FIRST TIME: 844-452-7246 EXT 3 or 229-352-9988 EXT 3
For more information, visit our website: www.mobileglassblowingstudios.com – see FAQ and Support
Pag
e5
Be aware that the Mini Dragon furnace case weighs 200 pounds and is a team lift. There are 4 lift handles
included to be used for lifting, chariot style. Slip the handles into the square tubes underneath the furnace and
lift carefully. Set the furnace on the stand and secure as pictured below:
Once the furnace is on the stand, remove the lift handles and insert them into the open ends of the stand top.
Next, slip the two 1” square bars (with thru holes on either end) through the large square tubes on the bottom
of the furnace, such that the thru holes align with the thru holes on the stand’s top. Insert bolts and secure
with nuts (provided).
SET-UP (before lighting up for the first time)
Before assembling ANY other components to the Mini Dragon, move it into the position where you will be
firing it. The initial light-up sequence should take place outdoors or with adequate ventilation, without glass in
the crucible. The furnace has been cooked out at the factory but will need an additional firing to finish the
process. The furnace should be brought up to glowing orange slowly for the first time, and then allowed to
cool before using. There are some noxious fumes that will be emitted during this initial firing, which is why we
recommend doing it outdoors for the first time.

Mini Dragon Furnace Guide: August 2018 CALL US WHEN YOU’RE READY TO LIGHT UP FOR THE FIRST TIME: 844-452-7246 EXT 3 or 229-352-9988 EXT 3
For more information, visit our website: www.mobileglassblowingstudios.com – see FAQ and Support
Pag
e6
The Furnace reaches internal temperatures over 2000 degrees. Extremely hot air and flame come out of the
burner tip area (on top of the furnace) and from the front opening of the furnace.
The outside skin of the furnace, when in operation, will reach high temperatures. DO NOT TOUCH THE
OUTSIDE OF THE FURNACE WITH BARE HANDS ONCE IT HAS BEEN TURNED ON.
Set the furnace up in an open outside or well-ventilated area.
Set up away from flammable materials. Below is a diagram of recommended clearance minimums:
If setting up underneath a covering, the covering must be fire-proof.
Allow for plenty of ventilation, as the exhaust fumes from propane combustion can be harmful if allowed to
build up.
For the initial firing, there will be some smoke and fumes.
We recommend that the furnace is monitored while in operation, however the burner system is equipped
with safety systems allowing for continued use.

Mini Dragon Furnace Guide: August 2018 CALL US WHEN YOU’RE READY TO LIGHT UP FOR THE FIRST TIME: 844-452-7246 EXT 3 or 229-352-9988 EXT 3
For more information, visit our website: www.mobileglassblowingstudios.com – see FAQ and Support
Pag
e7
Once the furnace is set up in a safe location, adjust the two levelers so that the furnace is level. Assembly for
the initial firing can begin.
Unwrap burner system and set in place (as pictured). Burner tip should be centered in the burner block at top
of furnace and face of burner tip should be in contact with the inside lip of the burner block. Burner system
should be held level as the two bolts are tightened (a 9/16 ratchet is recommended).
Vacuum the inside of the furnace.
Attach the door.

Mini Dragon Furnace Guide: August 2018 CALL US WHEN YOU’RE READY TO LIGHT UP FOR THE FIRST TIME: 844-452-7246 EXT 3 or 229-352-9988 EXT 3
For more information, visit our website: www.mobileglassblowingstudios.com – see FAQ and Support
Pag
e8
Attach all the accessories, yoke bar & mounts, pipe warmer and pipe hanger as pictured. Tighten thumb
screws either by hand or with an adjustable wrench.

Mini Dragon Furnace Guide: August 2018 CALL US WHEN YOU’RE READY TO LIGHT UP FOR THE FIRST TIME: 844-452-7246 EXT 3 or 229-352-9988 EXT 3
For more information, visit our website: www.mobileglassblowingstudios.com – see FAQ and Support
Pag
e9
Pre Light-Up Info
The burner system uses a combination of gas and forced air for combustion. The ratio of the gas to air mixture
changes the dynamic of the flame. This proportion is changed manually by adjusting the green handle on the
butterfly valve and the knob on the needle valve.
The air flow is regulated by adjusting the angle of the green handle (butterfly valve) located directly in line
with the blower. When the handle is in line (parallel) with the pipe, it is fully open, allowing maximum air flow.
When the handle is across (perpendicular to) the pipe, it is fully closed, allowing minimal or no air flow.
The gas valve on the system is a fine adjustment needle valve. The valve should be fully in the “off” position
when the furnace is not in use. The needle valve is used to fine tune the amount of gas being fed to the
burner and is adjusted as follows: turning the knob counterclockwise will allow gas to flow through the valve,
turning the knob clockwise will restrict the flow of gas.

Mini Dragon Furnace Guide: August 2018 CALL US WHEN YOU’RE READY TO LIGHT UP FOR THE FIRST TIME: 844-452-7246 EXT 3 or 229-352-9988 EXT 3
For more information, visit our website: www.mobileglassblowingstudios.com – see FAQ and Support
Pag
e10
The burner system is set up for low pressure, either propane or natural gas. Do not exceed 14 water column
inches of pressure on the output of the regulator. Introduction of higher pressure will result in permanent
damage to the gauge and other safety components.
The burner has an output range of 10,000-40,000 BTU/hr. We recommend a minimum of ½” inside diameter
for the gas delivery hose. Smaller diameter may impede the flow and cause the burner to underperform.
The safety system is composed of two individual safety components wired in series on a circuit that opens the
gas solenoid valve, allowing gas to travel to the burner, mix with forced air from a powered blower and
combust inside the furnaces to heat the interior to over 2100 degrees F. The job of the safety components is
to open that electrical circuit if any of the prescribed parameters of the components are violated, thus
shutting off the gas flow to the burner. These components include:
Manual Switch
Air Low Pressure Switch
Once the furnace is lit, the components work as follows.
The Manual Switch, as well as aiding in the light up procedure, also acts as an emergency switch to open the
electrical circuit to the solenoid valves, shutting down the gas flow to the burner.
If the pressure from the blower drops below a preset value, the Air Low Pressure Switch will open the
electrical circuit to the solenoid valves, shutting down the gas flow to the burner.

Mini Dragon Furnace Guide: August 2018 CALL US WHEN YOU’RE READY TO LIGHT UP FOR THE FIRST TIME: 844-452-7246 EXT 3 or 229-352-9988 EXT 3
For more information, visit our website: www.mobileglassblowingstudios.com – see FAQ and Support
Pag
e11
Mini Dragon Furnace Guide: August 2018 CALL US WHEN YOU’RE READY TO LIGHT UP FOR THE FIRST TIME: 844-452-7246 EXT 3 or 229-352-9988 EXT 3
For more information, visit our website: www.mobileglassblowingstudios.com – see FAQ and Support
Pag
e12
Light-up & Firing Guidelines
When lighting up, it is a good idea to have a spray bottle with a soap & water mixture for checking for gas
leaks at the field connection points. All factory assembled plumbing has been pressure checked prior to
shipment. When the system is pressurized, spray the field connection areas with the mixture: if there is a leak,
foam will form around the joint. If a leak is detected, shut the gas off at the source and release the gas from
the lines (called “bleeding the line”). Once the system has been bled, wrench-tighten the joint that was
leaking. Re-test. DO NOT CHECK FOR LEAKS USING A FLAME.
Light up procedure is a specific sequence that must be followed in order to successfully start the furnace. If a
step is missed or skipped, the burner system will not ignite and you must start the sequence from the
beginning.
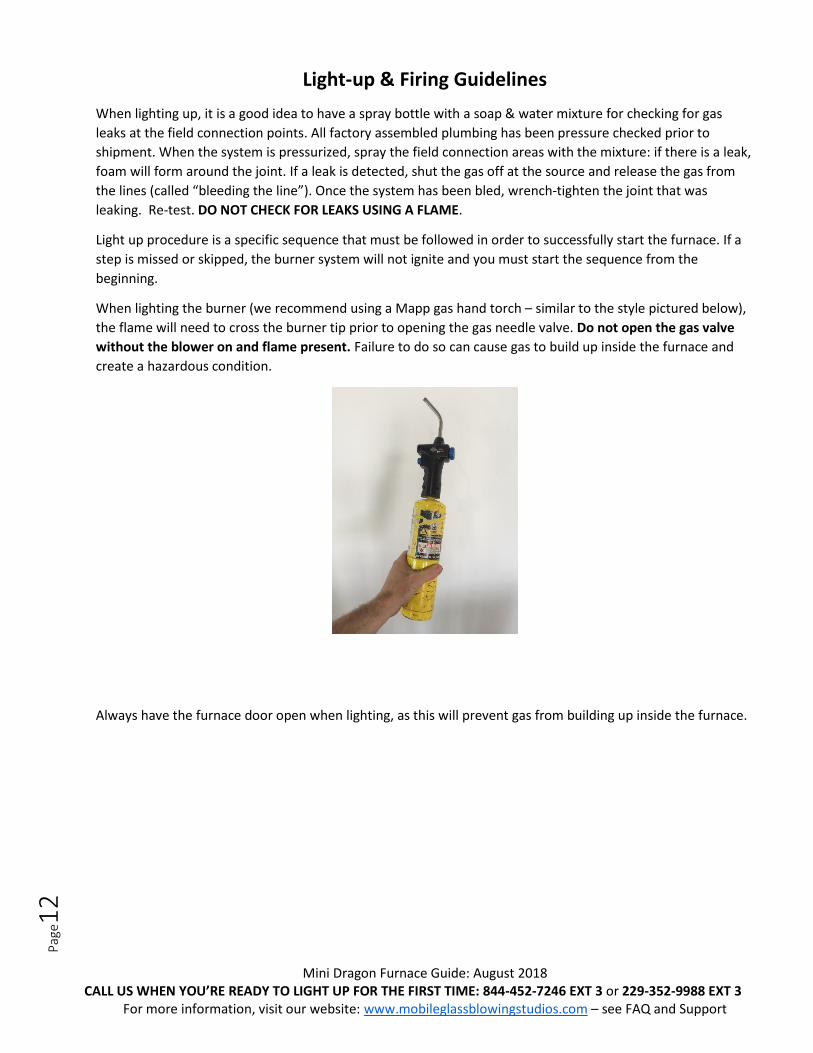
When lighting the burner (we recommend using a Mapp gas hand torch – similar to the style pictured below),
the flame will need to cross the burner tip prior to opening the gas needle valve. Do not open the gas valve
without the blower on and flame present. Failure to do so can cause gas to build up inside the furnace and
create a hazardous condition.
Always have the furnace door open when lighting, as this will prevent gas from building up inside the furnace.

Mini Dragon Furnace Guide: August 2018 CALL US WHEN YOU’RE READY TO LIGHT UP FOR THE FIRST TIME: 844-452-7246 EXT 3 or 229-352-9988 EXT 3
For more information, visit our website: www.mobileglassblowingstudios.com – see FAQ and Support
Pag
e13
Lighting the Furnace
1. Attach the gas delivery hose to your regulated fuel source
(propane or natural gas) and the burner train in accordance to
local regulations.
2. Before opening the gas valve at the fuel source, make sure the
needle valve is in the “off” position. Firing will require
adjusting the needle valve in order to dial in the proper
fuel/air mix.
3. Open the furnace door.
4. Check that the blower power switch is in the “off” position.
5. Plug in the blower.
6. Turn the blower switch to the “on” position. Press & hold
the push button for two seconds to start the blower.
7. Turn the green handle to the “11 o’clock” position (as shown
in the image to the right).
8. Turn on the gas valve at the fuel source. The line will now
have gas in it up to the needle valve.
9. Insert the lit flame of the Mapp gas torch so that the flame
crosses the burner tip inside the furnace (as shown below
right) and open the needle valve, allowing gas to flow into the
system.
10. Once the furnace is lit, use the needle valve and air butterfly
valve to adjust the mixture to your desired settings. See Flame
Adjustment on the next page for more information.

Mini Dragon Furnace Guide: August 2018 CALL US WHEN YOU’RE READY TO LIGHT UP FOR THE FIRST TIME: 844-452-7246 EXT 3 or 229-352-9988 EXT 3
For more information, visit our website: www.mobileglassblowingstudios.com – see FAQ and Support
Pag
e14
For the Initial Firing:
1. Adjust the mix using the air and gas valves as outlined in the “Flame Adjustment” section below. The
flame should have a solid roar and a flame with a blue core.
2. Leave the door open for now and let it cook for a couple of hours on a low setting.
3. After a couple of hours, close the door halfway, let it cook for a couple more hours.
4. Close the door so that there is only a half moon opening on the right side and continue to cook until
the inside is glowing orange.
5. Shut the furnace off by turning the needle valve to the “off” position
6. Close the valve at the fuel source.
7. Leave the blower running – this helps to keep the burner tip cool, overnight if possible.
Flame Adjustment
The flame is adjusted by changing the ratio of air and gas.
Too much gas results in a bushy (or lazy) flame, whereas too little gas can result in the flame blowing out.
The desired mix will give you a nice solid roar and a flame with a blue core.
If the sound is sputtering, too much air.
If there is a big yellow flame coming out of the door and or top of the furnace, not enough air.
Once you have an even mix, you can adjust it up or down, to control the speed at which the furnace heats up.
When adjusting the flame, do so in small increments.
To adjust the furnace up (bigger flame, hotter – faster), first increase the gas, then the air. If the air is
increased first, the flame could potentially blow out.
To adjust the furnace down, first decrease the amount of air, then the amount of gas.
Do not turn the furnace down to where the air is.
The burner system is manual and will require some getting used to. This takes time and experience. We
recommend documenting your firings, to refer to later.
Regular Use & Light Up
The instructions for regular use are very similar to those for the initial firing as far as furnace placement and
set-up sequence.
Once you have vacuumed the inside of the furnace, place cullet into the crucible, mounding it up to the top
Refer to the “Initial light-up” sequence 1-10 to light the furnace. Once lit, you can close the door such that
there is only a half moon opening on the right side.
Be sure to empty the crucible completely when finished, this can be accomplished by either gathering, or
using a casting ladle to scoop the molten glass out.

Mini Dragon Furnace Guide: August 2018 CALL US WHEN YOU’RE READY TO LIGHT UP FOR THE FIRST TIME: 844-452-7246 EXT 3 or 229-352-9988 EXT 3
For more information, visit our website: www.mobileglassblowingstudios.com – see FAQ and Support
Pag
e15
Once empty, shut the furnace off by turning the needle valve to the “off” position, close the valve at the fuel
source.
Leave the blower running overnight – this helps to keep the burner tip cool.
Things to Note
Quick on and off is abusive to the refractory materials. Though the crown has been cured and cooked
carefully, the rapid heat up and cool down may cause the crown to develop cracks, this is normal. These cracks
do not adversely affect the functionality, or the longevity of the furnace. This is true for the door as well, small
cracks may develop, but the door will stay intact.
The crucible will crack. This is also normal. It is backed up by castable refractory (semi-invested) and will last
for years even after small cracks develop.
The best practice is to allow for a long, slow heat-up and draining as much glass out of the crucible as possible
each time before shut-down.
The paint around the door will burn away – there is no paint that will withstand the temperatures we are
dealing with.
Transport
Do not travel with any components loose in a trailer or back of a truck.
Make sure the furnace is tied down with multiple tie down points. It is much better to over secure than under
secure.
The burner tip is ceramic and can break. Use care when moving.
Below is a sketch of how the furnace case fits within the furnace base:

Mini Dragon Furnace Guide: August 2018 CALL US WHEN YOU’RE READY TO LIGHT UP FOR THE FIRST TIME: 844-452-7246 EXT 3 or 229-352-9988 EXT 3
For more information, visit our website: www.mobileglassblowingstudios.com – see FAQ and Support
Pag
e16
The illustration to the right
outlines the burner system
components and their
relationships to each other in
the system.
Wiring Diagram
Below is the wiring diagram for the burner system for your reference. It is recommended that should any
problems arise, do not attempt to repair or modify the wiring. Contact Mobile Glassblowing Studios at 229-
352-9988 ext 3 for troubleshooting advice first before hiring a certified electrician for repairs.

Mini Dragon Furnace Guide: August 2018 CALL US WHEN YOU’RE READY TO LIGHT UP FOR THE FIRST TIME: 844-452-7246 EXT 3 or 229-352-9988 EXT 3
For more information, visit our website: www.mobileglassblowingstudios.com – see FAQ and Support
Pag
e17
The following is extracted from www.joppaglass.com, written by Dudley Giberson, inventor and manufacturer of the burner tips used on the Dragon furnaces.
Troubleshooting Burner Instability
If you have found this section of the web site you are probably experiencing difficulties in getting the burner system to stabilize. Or perhaps you are experiencing burner pop-back. Others are prudently looking ahead to ward off any possible difficulty, "to head them off at the pass," so to speak. This is the page where we talk about a seemingly puzzling situation called "pop-back" or "pre-ignition" or sometimes called "burn back". We begin by showing what is a stable situation of ongoing combustion.
Pictured here is an environment (glory hole or furnace) which is burning in a stable manner. The flame has a blue core, the environment is at working temperature, and the burner head and mixer are cool and could pass the touch test. Even the face of the head is relatively cool because of all the combustibles (cool air and gas) which are being pushed through it. The flame is burning quietly, but steadily. This is a happy burner system.
In contrast, this next image shows a burner system with burner pop-back. This is a condition where the mixture of gas and air are burning in the mixer and head area of the burner system. If this condition goes on for a while, the head and pipe work may become cherry red. When the system is shut off and naturally left to cool for a few minutes, it most often can be re-lit and everything is fine. But sometimes there is damage to the pipe and head. An inspection of the head will reveal if there are any serious cracks, and if so the head should be repaired or replaced. If this furnace had a safety system it would have shut down immediately when the flame began to rumble (or flutter). Such a safety system could be hooked to an alarm to notify you of any burner or furnace abnormality.
Here is a list of conditions that help identify this situation.
• First, you should always be able to touch the pipe work behind the burner head. Use the old spit on the finger technique. If it really sizzles, it most likely indicates the fire is burning in the head. If this condition is allowed to continue unchecked the entire pipe work can become cherry red as shown in the above image. Not a good situation. To rectify the problem, turn the gas off and wait for head to cool for a few minutes. Then attempt a re-light. If the head is cracked, you will most likely need to replace the head with a repaired or new one.
• The paint should not be burnt off the back of the head. If it is, this indicates there is or was a burn-back condition. • The flame should burn evenly (not "rumbly").

Mini Dragon Furnace Guide: August 2018 CALL US WHEN YOU’RE READY TO LIGHT UP FOR THE FIRST TIME: 844-452-7246 EXT 3 or 229-352-9988 EXT 3
For more information, visit our website: www.mobileglassblowingstudios.com – see FAQ and Support
Pag
e18
• There should be no popping noise. • Sometimes, a novice using a Giberson Head will not recognize when it is burning incorrectly, usually at a first start-
up. Check using the "spit on finger technique." • Another indication of "burn-back" is the flame will not go out of reduction, coupled with a "rumbly" burn. Call the
factory 229-352-9988 and ask for help.
There are two main causes for this condition:
1. The gas and air mix is moving too slowly through the system so that the speed at which this mixture burns is greater than the speed of the mix being pushed through the system. It is like in the movies where the bad guy is going to blow up the bank using his trusty drum of black powder. Not being very organized that morning he's forgotten his roll of fuse material so he pours out a line of powder for some feet, lights it and runs. For the sake of argument and demonstration this highly explosive material does in fact burn with a calculable rate of speed. Gas and air, when properly mixed, have that same property. The small holes in the burner face serve this interesting purpose, they provide the "speedifier effect" where the unburned mixture speeds up through the hole structure and keeps the burning gas/air mix on the far side. What this means is if you turn down your burner system to a point low enough, you will reach this pop-back point. This exists in every burner system.
2. There is a second reason for burner pop-back: A given mix of gas and air has a calculable temperature at which it ignites. If any part of the inside of the burner head reaches that ignition temperature, "pop, bang, rumble!" It is totally predictable. You could stake your life on it. It is a very simple proposition: the gas/air mix comes through the burner head keeping it cool. When this system of cooling the head gets disrupted, such as by turning the system down off a high temperature condition too quickly, the problem can occasionally show up.
Here is a probable scenario:
One day a glassblower makes a new melt and really gives it the business, gets the furnace really hot, and on the down side he is in a hurry and wants to plane it off because he has a hot date in a couple of hours. He turns it down to a setting which normally works when the furnace is a bit cooler and off he goes to visit his 'sweety.'
When he comes into his shop the next morning a sense of panic overcomes him. The furnace is roaring and the pipe work near the burner is red hot. The head is perhaps broken. (He did not have a safety system.) And he is indignant!

Mini Dragon Furnace Guide: August 2018 CALL US WHEN YOU’RE READY TO LIGHT UP FOR THE FIRST TIME: 844-452-7246 EXT 3 or 229-352-9988 EXT 3
For more information, visit our website: www.mobileglassblowingstudios.com – see FAQ and Support
Pag
e19
"That god dammed head! I knew it wasn't any good before I put it on! I saw some air bubbles in it. I think it was defective."
That's when I get a call from Mr. X. It takes me awhile to get Mr. X. back to the real problem and that is how to successfully turn down a burner after a melt and go on a date at the same time. I don't know about the date thing, but we can get the furnace turned down ok.
The idea of the red line (the 1000°F heat line).
Don't Blow 'Um Up
Or Whack 'Um with A Hammer Page
“There is another area we have yet to cover as a real trouble spot to the longevity of the burner heads. This is in the
area of physical abuse. The most classic is the case of binding the head in the burner port...crack! The casting is 4"
in diameter and the burner port is supposed to be 4.5" in diameter. This gives a little slack and allows for some
slight movement, but if they are both 4," the slightest movement breaks the head.
Not surprisingly, many people lose their burner heads during a big studio move where the plumber guy applies the
hammer to the pipe work to loosen it up a tad, and "whack!" If you pound on the pipe work five feet away the
shock still follows the metal all the way to the burner head and plop, on the floor it goes in a couple of big pieces‒
don't hammer the pipe work. Constant, hard vibration will eventually shake even a good burner head to pieces.
You see, the physical strength of the burner head is not that great. It is probably twice as strong as a soft brick. I did
a lot of experimenting trying to strengthen the physical mass, that's easy. I could make it hard as a rock. But the
harder I got it the less well it withstood the thermal changes.
Face it, the major threat to a burner head is the thermal stress it must go through each day in its cycle, not the
plumber with the hammer. So I made a mix which would take some physical abuse but which was stronger under

Mini Dragon Furnace Guide: August 2018 CALL US WHEN YOU’RE READY TO LIGHT UP FOR THE FIRST TIME: 844-452-7246 EXT 3 or 229-352-9988 EXT 3
For more information, visit our website: www.mobileglassblowingstudios.com – see FAQ and Support
Pag
e20
thermal abuse. I have experimented with a lot of different things but have returned to the original formula for
every burner I have ever sold.
While we are on the subject of physical abuse, occasionally I get a customer who will literally blow up a burner, like
an old-fashioned pipe-bomb. Well, it's more like a gas cannon. In my youth we'd celebrate appropriate holidays by
shooting off an acetylene and oxygen filled drive shaft housing plugged with a Life magazine. Boom! Instant
confetti. At a hundred seventy-five dollars a pop it loses its humor. So, what's happening to cause the explosion?
When a gas/air mix burns it expands rapidly, as much as seven times in volume. If the expansion happens in a
closed space, like in the mixer section behind the burner head, we get an explosion. Earlier, I talked about how any
burner system will have a pop-back point on the low end. This is true. If you turn down any system low enough it
will pop back... boom! It usually is a small boom but what if there's a lot of pipe work of large sizes behind the
head? Then we have a large explosion. It is a matter of physics.
Any excess piping and it is almost guaranteed that at some point you will blow the head right up. It may be the first
time you light it.
Well that's about it for the exciting stuff. No more explosions. But there is one more caution in the physical abuse
section. It is very important to mount the burner system by the iron pipe work behind the head. Use a regular
clamp or a "U" bolt and attach it to the frame of the furnace. This provides support for all the weight of the
burner/head/mixer, etc… It is especially important not to rest the totality of this weight onto the head and expect it
to hold up unscathed. It might hold up for a short while but to be so cavalier is asking for trouble.”
To summarize, if you set-up and operate your system by the guidelines in this manual, and use a turndown
schedule that keeps the heat out of the head, we eliminate nearly all the bumps in the road.

Mini Dragon Furnace Guide: August 2018 CALL US WHEN YOU’RE READY TO LIGHT UP FOR THE FIRST TIME: 844-452-7246 EXT 3 or 229-352-9988 EXT 3
For more information, visit our website: www.mobileglassblowingstudios.com – see FAQ and Support
Pag
e21
Component Spec Sheets:
The following are the manufacturer’s specification sheets for the solenoid valve, air switch and blower:

Mini Dragon Furnace Guide: August 2018 CALL US WHEN YOU’RE READY TO LIGHT UP FOR THE FIRST TIME: 844-452-7246 EXT 3 or 229-352-9988 EXT 3
For more information, visit our website: www.mobileglassblowingstudios.com – see FAQ and Support
Pag
e22

Mini Dragon Furnace Guide: August 2018 CALL US WHEN YOU’RE READY TO LIGHT UP FOR THE FIRST TIME: 844-452-7246 EXT 3 or 229-352-9988 EXT 3
For more information, visit our website: www.mobileglassblowingstudios.com – see FAQ and Support
Pag
e23

Mini Dragon Furnace Guide: August 2018 CALL US WHEN YOU’RE READY TO LIGHT UP FOR THE FIRST TIME: 844-452-7246 EXT 3 or 229-352-9988 EXT 3
For more information, visit our website: www.mobileglassblowingstudios.com – see FAQ and Support
Pag
e24

Mini Dragon Furnace Guide: August 2018 CALL US WHEN YOU’RE READY TO LIGHT UP FOR THE FIRST TIME: 844-452-7246 EXT 3 or 229-352-9988 EXT 3
For more information, visit our website: www.mobileglassblowingstudios.com – see FAQ and Support
Pag
e25

Mini Dragon Furnace Guide: August 2018 CALL US WHEN YOU’RE READY TO LIGHT UP FOR THE FIRST TIME: 844-452-7246 EXT 3 or 229-352-9988 EXT 3
For more information, visit our website: www.mobileglassblowingstudios.com – see FAQ and Support
Pag
e26