Management-Guide-for-cage-free-hens.pdf - Humane Society ...
53
1 MANAGEMENT GUIDE FOR THE CARE AND HOUSING OF CAGE- FREE EGG LAYING HENS IN VIETNAM Commissioned by Humane Society International
-
Upload
khangminh22 -
Category
Documents
-
view
0 -
download
0
Transcript of Management-Guide-for-cage-free-hens.pdf - Humane Society ...

1
MANAGEMENT GUIDE FOR THE CARE AND HOUSING OF CAGE-
FREE EGG LAYING HENS IN VIETNAM
Commissioned by Humane Society International

2

3
Authors
Authors
Elske de Haas
Mieke Matthijs
Jan van ’t Schip
Annemarie Mens
Bas Rodenburg
Jasper Heerkens
Utrecht University, Faculty of Veterinary Medicine, Utrecht, The Netherlands
Utrecht University, Faculty of Veterinary Medicine, Utrecht, The Netherlands
Utrecht University, Faculty of Veterinary Medicine, Utrecht, The Netherlands
Wageningen University and Research, Wageningen, The Netherlands
Utrecht University, Faculty of Veterinary Medicine, Utrecht, The Netherlands
Aeres University of Applied Sciences, Dronten, The Netherlands
Disclaimer
This management guide has been prepared by the authors with the greatest possible care and
dedication to inform farm managers and farm personnel to improve pullet and laying hen welfare and
the production results. However, specific circumstances on the farm may impact the usability and
reliability of the information provided in this management guide. No implied or explicit guarantees are
given by the authors (and the authors’ organizations) as to the accuracy and completeness of the
provided information in this management guide. Applying the information as stated in this
management guide on the concerning poultry housing environment remains a decision of the farm
manager, to be taken at his or her sole discretion. The authors and the authors’ organizations will not
be liable for any losses or damages whatsoever, arising from reliance on information contained in this
management guide.

4
Table of content Authors ................................................................................................................................................ 3
1. Introduction ............................................................................................................................. 6
2. Rearing cage-free pullets ...................................................................................................... 8
2.1 Stockmanship ................................................................................................................... 8
2.2 Inspection .......................................................................................................................... 8
2.3 Housing ............................................................................................................................ 10
2.4 Climate, temperature and relative humidity ........................................................... 11
2.5 Brooder guard with heat source ................................................................................ 12
2.6 Dark brooders ................................................................................................................ 13
2.7 Ventilation ....................................................................................................................... 14
2.8 Training of pullets.......................................................................................................... 15
2.9 Water training with adjustable water lines and platforms................................... 15
2.10 Increase living space by perches and platforms .................................................. 16
2.11 Lights .............................................................................................................................. 17
2.12 Environmental Enrichment for pullets ................................................................... 19
2.13 Litter ............................................................................................................................... 20
3. Keeping cage-free laying hens .......................................................................................... 23
3.1 Design and equipment ................................................................................................. 23
3.2 The start of a new flock in a cage-free barn ........................................................ 25
3.3 Ventilation and climate control .................................................................................. 27
3.4 Daily management procedures .................................................................................. 27
3.5 Litter management ....................................................................................................... 29
3.6 Light management ........................................................................................................ 30
3.7 Prevention of floor eggs ............................................................................................... 31
3.8 Feather pecking ............................................................................................................. 31
3.9 Piling & Smothering ...................................................................................................... 32
3.10 Feeding and nutrition of cage-free hens................................................................ 33
3.11 Environmental Enrichment ....................................................................................... 36
3.12 Covered veranda ......................................................................................................... 37
3.13 Health ............................................................................................................................ 38

5
3.14 Biosecurity .................................................................................................................... 41
4. Concluding remarks ............................................................................................................ 43
5. Suggestions for further reading ....................................................................................... 44
Appendix 1. Cage-free housing designs suitable for Vietnam ................................................ 45
1a. Cage-free laying hen facility with integrated perch-feeder system .................... 46
1b. Cage-free laying hen facility with modified A-frames (no rearing) ..................... 47
1c. Small scale cage-free facility ........................................................................................ 48
1d. All-in-all-out system Pullet rearing + egg production in one single facility ...... 49
2. Rearing system for pullets from DOC till 16-17 weeks of age ............................... 50
Appendix 2. Example of a daily inspection sheet of welfare indicators – rearing ................................ 52
Appendix 3. Example of a daily inspection sheet of welfare indicators – laying .................................. 53

6
1. Introduction
Cage-free systems for laying hens can be floor housing systems or aviary systems with
multiple tiers. These can be indoor systems or systems combined with covered verandas
or free range access. Successfully keeping laying hens in a cage-free environment
requires an appropriate building construction, a fitting housing design and efficient
management procedures which include stimulating natural behavior of the birds, as well
as taking good biosecurity measures.
Egg production of layers in a cage-free environment is common practice for several
decades in some parts of the World, particularly in Western-Europe. To keep laying hens
successfully in a cage-free environment during lay, it is required that the rearing of the
pullets is also cage-free. Decades of scientific research has led to understanding laying
hen behavior, health, performance and animal welfare. Animal welfare is defined as
successful adaptation to the environment, leading to the animal experiencing the
environment as positive. Experience and research in cage-free laying hen husbandry has
led to recommendations regarding management and house design. Regarding the design
of a cage-free housing system for pullets and laying hens, it is important that the design
can be newly built but can also be incorporated in existing houses. The design should
also be compatible with the local climatic conditions in Vietnam. Within the current
project, we have developed several designs for cage-free systems in Vietnam (appendix
1). This management guide aims to provide guidance to successfully keep laying hens in
these systems.
We advise that the company owner, farm manager, farm personnel and others involved
in keeping and managing the birds acquire basic knowledge regarding cage-free pullet
rearing and laying hen husbandry prior to setting up or working in such a poultry
operation. There are national and international institutes, universities (e.g. Aeres
University of Applied Sciences, Utrecht University; Wageningen University) or companies
(e.g. BelgaBroed, Jansen Poultry Equipment, Vencomatic, Hendrix Genetics, Lohmann
Tierzucht) that can provide advice, training and support prior to building and/or
retrofitting a new or existing pullet rearing or laying hen egg production facility. Training,
guidance and support during the rearing and production phase are strongly
recommended. This can be done by connecting to local and international experts.
This Management Guide is intended to provide basic information and tools to help farm
managers and farm personnel successfully house and care for a flock of laying hens in a
cage-free environment in Vietnam.

7
THIS MANAGEMENT GUIDES PROVIDES GUIDELINE RECOMMENDATIONS. INFORMATION GIVEN IN THIS DOCUMENT
IS BELIEVED TO BE UP-TO-DATE AND CORRECT. HOWEVER, THE AUTHORS AND AFFILIATED INSTITUTES DISCLAIM ANY
RESPONSIBILITY FOR BIRD HEALTH, WELFARE AND BEHAVIOR, PRODUCTION RESULTS, LOSSES OR ANY OTHER
PROBLEMS THAT MAY OCCUR IN YOUR POULTRY OPERATION.

8
2. Rearing cage-free pullets
A prerequisite for keeping cage-free layers is to rear them from day-old chicks in a cage-
free environment. Rearing the pullets cage-free ensures that the birds are well trained
and adapted for the cage-free housing system during the production period, ultimately
improving welfare, health and production. Already in the first few days the pullets
develop species-specific behavior. They develop foraging behavior by pecking to find out
what is edible and to find water. They roam and explore their environment. They will eat
starter feed from chick paper or from feeding plates. They learn to scratch the ground
and to take dust baths. They develop play behavior and start to roost during the night.
This chapter will describe some standard practices for pullet rearing in a cage-free
environment.
2.1 Stockmanship
The keeper having daily responsibility for the pullets should have received appropriate
training and be competent in the care and handling of pullets. It is important that the
keeper ensures that the staff, which has the daily responsibility for the pullets, has the
necessary skills in good management procedures and in understanding the welfare,
including the health and behavioral needs, of the pullets under their care. To this end
appropriate training is important to obtain understanding on how to comply with relevant
legislation. It is important that the staff is able to recognize normal behavior and signs of
good health, as well as abnormal behavior and signs of illness. Staff should also be able
to quickly take effective corrective measures when necessary. It is good practice for the
keeper to maintain records of staff training.
Animal handling should minimize stress and fear and injury. Each bird should be handled
gently, upright with two hands, and never picked up or carried by their head, neck, wings,
legs, or feet.
2.2 Inspection
The birds should be inspected at least two times daily at different times by the keeper or
by competent staff under the responsibility of the keeper. Attention should be given to
habituating the pullets to humans and to standard operating procedures and noise, to
minimize fear reactions. Habituation may for instance be achieved by conducting
frequent flock inspections and by varying the routine, personnel, numbers of personnel
and their clothing, as well as by increased inspection at the time when the chicks have
been placed in the house. Such procedures have been shown to help reduce fearfulness
in hens. Both daily flock inspections as well as more thorough, individual sample

9
inspections should be conducted. These should include at least an assessment of
plumage condition, skin condition, nutritional status, mortality, need for medical
treatment, signs of heat stress and fearfulness (Table 1). An example of a basic inspection
sheet is provided in Appendix 3. Inspection should identify birds that are sick, injured or
behaving abnormally, and include the functioning of automatic systems (e.g. feeding- and
drinking system, climate control) necessary for the health and welfare of the pullets. Any
dead birds must be removed at inspection. Mortality found at every inspection should be
recorded and possible causes should be investigated.
Collecting and documenting major animal welfare indicators is in the own interest of the
keeper, as well as the animals, as it provides information on the welfare of the flock and
enables the keeper to detect deficiencies and take corrective actions.
Table 1. List of most important animal welfare indicators for pullets and their possible causes.
Animal welfare indicator Possible causes
Plumage condition
Plumage condition, recorded especially in weeks 4, 12 and
16 of age and at the time of transfer to the laying hen farm
Feather-pecking, cannibalism;
nutritional inadequacies; feed form
Skin condition
Skin lesions, mainly around the back, wings, rump, cloaca
and toes, recorded especially in week 4 and 12 and at the
time of transfer to the laying hen farm
Feather-pecking, cannibalism;
overstocking
Nutritional status
Weight development and flock uniformity; ideally
recorded every week, but at least in week 4, 8 and 16
Nutritional inadequacies;
disease
Animal losses
High mortality (above normal), recorded daily
Increased morbidity (disease);
thermal stress; nutritional
deficiencies; injurious pecking,
cannibalism; predation or other
causes
Water intake
Daily water consumption (below or above normal),
recorded daily, if possible
Water shortage;
dripping water troughs; house
climate too warm;
incorrect drinker height; water
contamination
Thermal condition
Panting or wing spreading (indicating heat stress);
huddling (Indicating temperature too low),
observed daily
Temperature too high or too low
Fearfulness
Excessive withdrawal from personnel; panic reactions
(piling), observed daily
Lack of habituation to human
contact

10
Feather pecking and cannibalism can result in poor plumage and skin conditions, as
feathers are pulled out and the birds may be wounded when pecking continues in
denuded areas. Inappropriate feeding may also affect plumage condition, as feed
restriction or shortage of specific essential amino acids (methionine and cysteine) may
induce molting in the neck area. Overstocking can also affect skin condition, as birds may
damage other birds when climbing over each other, resulting in scratches on the back.
To evaluate nutritional status, feed intake and weight development should be monitored.
The latter can be done by weighing a subsample of birds. Together with animal losses
and use of veterinary drugs, nutritional status is also an important indicator of disease
and morbidity, as sick animals will often stop eating. Changes in water intake can indicate
water shortage, dripping water throughs (leakage), a too warm climate in the house, or
an unfavorable position of the drinkers (too high or too low). Observation of birds panting
in the house can also be used as a sign of heat stress. Finally, excessive withdrawal from
personnel and panic reactions when people enter the house are signs of a lack of
habituation to human contact and activities (see appendix 2).
Records should also be kept of all veterinary medical products used, and these should
be documented daily. Over time, patterns may indicate changes in disease status of the
flock.
2.3 Housing
In order for pullets to have enough space to fulfil their needs, stocking density and space
per feature (nest, drinker line, feeder line, foraging area, perch) should be sufficient (Table
2). At higher stocking densities the keeper should pay special attention to the amount
and quality of the foraging material since this becomes increasingly needed for the birds
to express their natural behavior and prevent development of feather pecking behavior
(see box 1 in paragraph 2.13).
At higher stocking densities, the keeper should have special attention to indicators of
welfare problems, in particular feather pecking. High stocking density can be a risk to the
welfare of the animals.
The space allowance for birds should be decided in relation to their demands on the
whole environment, their age, sex, live weight, genetics, health and their needs to show
certain behavior, taking account of the size of the group. The stocking density should be
such that it does not lead to behavioral or other disorders or injuries. Each bird should
be able to express her natural behavior including feeding and drinking, wing flapping,
dust bathing, foraging, perching and resting/sitting.

11
Table 2. Recommendations regarding maximum stocking density and space at drinkers and feeders at
0-1 week of age, 2 to 5 weeks of age and 6 to 17 weeks of age.
2.4 Climate, temperature and relative humidity
After hatch, the chicks should be housed at the appropriate temperature (see Table 3).
Note that chicks from a young parent flock (i.e. below 30 weeks of age) might require a
1oC higher house temperature on the day of arrival. The pullet rearing farmer should
receive information from the supplier regarding the parent flock. The farmer can also
weigh the day-old chicks to know if he received light or heavy chicks. In general, the
preferred relative humidity (RH) is around 55-65% during the first days of life and may
increase up to 75% towards the end of the rearing period (see Table 3). To check whether
the temperature at placement is correct, the body temperature of a sample of chicks from
different locations in the house can be measured with an ear thermometer. The normal
temperature is 40-41°C. When the measured body temperature is too low or too high,
the house temperature should be adjusted accordingly.
When heating the rearing house, attention should be given to the floor temperature,
which should be at approximately 20 °C before adding litter to avoid condensation,
resulting in moist litter, and to avoid cold stress of chicks at placement. The house should
be heated at least 96h before arrival of the chicks to 29-30°C.
Age of the bird
0-1 week 2 to 5 weeks 6 to 17 weeks
Stocking density 25 chicks/m2 15 pullets/m2 8-10 pullets/m2
Starter drinkers 1/70 chicks
Bell drinkers 1/150 chicks 1/75 pullets 1/75 pullets
Hanging drinkers 1/75 chicks 1/75 pullets 1/75 pullets
Nipple drinkers 1/10 chicks 1/10 pullets 1/10 pullets
Starting feeding pans 1/50 chicks
Linear chain feeders 2.5 cm/chick 4 cm/pullet 6 cm/pullet
Pan feeders 1/30 chicks 1/25 pullets 1/25 pullets

12
Table 3. Example of a temperature schedule for rearing pullets
Age Temperature
(°C)
Relative Humidity
(%)
0-3 days 34-35 55-65
4-7 days 31-33 55-60
2 wks 30 55-60
3 wks 28-29 55-60
4 wks 25-27 <70
5 wks 22-24 <70
6 wks 20-21 <75
7-17 wks 18-20 <75
2.5 Brooder guard with heat source
For brooding, both whole-house heating and spot heating can be applied. Spot heating
can be defined as heating only certain specific spots in the house up to 35°C, using
electrical heaters or gas hoods. Spot heating has the advantage that a temperature
gradient is created, allowing chicks to choose a temperature zone in which they feel
comfortable. With spot heating, the environmental temperature can be lower, although
it should not be lower than 25°C during the first week. Chick behavior should be
monitored carefully during the first week to avoid birds becoming either too warm
(indicated by dispersal away from the heat source and/or panting) or too cold (indicated
by huddling close to heat source and/or emitting distress calls). If spot heating is applied,
appropriate measures should be taken to avoid chicks from wandering too far from the
heat source during the first week of life, for instance by using a brooding guard (see Figure
1) that confines a group of chicks to the part of the house that includes a heater.
Figure 1. Brooder guard with heat source, water sources and feeders. Chicks are well distributed.
Brooder guard
Brooder guard Legend
water source
feeder
chicken
Legend
water source
feeder
chicken
Heat
source
Heat
source

13
A 40 cm high, wire or solid brooder guard around the heat source is recommended. A
diameter of 3 to 4 m (at maximum) is recommended, with no less than 25 cm2 per chick.
The guard should be located 150 to 200 cm from the heat source. In hot temperatures,
enlarge the diameter so that chicks do not get too hot. Regarding the heat source: a 250-
watt infra-red bulb can accommodate approximately 75 chicks. Provide at least two 4 liter
waterers and two 30-cm or 45-cm feeders for every 100 chicks. Enlarge the area after one
week and continue to expand the diameter each day (at approximately a 20-25%
increase) until the chicks are 14 days of age.
2.6 Dark brooders
Chicks like shelter when they are young, similar to that provided by a mother hen in
natural conditions. They will search for cover in dark places or hide under objects. When
spot brooding is applied, dark brooders may be considered. Dark brooders are heat
sources that do not produce visible light (supplying heat using infrared heat lamps, gas
hoods, or electrical heating) and that offer a dark and protective environment to the
chicks, mimicking a brooding mother hen. Dark brooders have been shown to have a
strong suppressive effect on fear and on the development of feather pecking during
rearing.
Dark brooders should be adjustable in height and winchable (able to be raised). They can
be placed above the floor of the house or on the tier of a housing system (Figure 2). During
the first few days, the brooders should be lifted up or winched up at every flock inspection
by farm personnel, to prevent the chicks from staying under the brooder and not finding
feed and water and to ensure that all chicks are visible for inspection. After inspection,
they can be lowered again. Each week the brooder should be elevated to match the size
of the chicks and to prevent overheating. After 5 weeks of age, when most pullets are
perching, the brooder can be removed.

14
2.7 Ventilation
Ventilation is required to provide sufficient oxygen (fresh air) and to remove harmful
gasses from the house. The minimum quantity of fresh air needed (minimum ventilation
rate) mainly depends on the weight and age of the pullets. In general, the minimum
ventilation rate is 0.7 m3/hour/kg live weight.
The maximum ventilation rate is approximately 4 m3/hour/kg live weight with wind
speeds that should not exceed 3 m/s. The airflow should be uniform with no excessive
draughts. When pullets are 2 weeks old or younger, the air flow should not be higher than
0.1 m/s. Furthermore, CO2 should be <3,000 ppm and NH3 <10-20 ppm. These parameters
are usually monitored by climate computers installed in the house or can be measured
by hand-held devices. If these are not available, high NH3 levels can also be detected by
smell by the caretakers during inspection and appropriate measures to increase
ventilation rate can be taken.
Figure 2. Example of a dark brooder set-up in a rearing house. From 0 to 2 weeks of age, the chicks
Figure 2. Example of a dark brooder set-up in a rearing house. From 0 to 2 weeks of age, the chicks
will rest under the dark brooder (top panel), from 3 weeks of age onwards they will also start to use
the perches (bottom panel).

15
2.8 Training of pullets
To guarantee the uniformity of pullets, the stocking densities per available living space as
presented in table 2 are considered acceptable, although this is highly dependent on the
housing design and management. Pullets can start on the floor, after which additional
living surface may be provided as they grow by offering tiers and winchable slats from 3
weeks of age. In an aviary rearing system the pullets should be placed in the middle tier,
before they are released.
Easily accessible feeders and drinkers should be used. Preferably, the same drinking and
feeding system (e.g. nipples with red cups and chain feeders) should be used during both
the rearing and production period. The height of the feeders and drinkers should be
adjusted for the age of the birds (Figure 3).
Figure 3. Example of the height adjustments needed for the drinking lines from 0 to 6 weeks of age.
2.9 Water training with adjustable water lines and platforms
Training pullets to gain access to water is especially important when birds need to
navigate different levels in the egg production facility (such as in an aviary system; Figure
4). If the rearing facility provides winchable platforms, place the water lines above the
platforms. From day 10-14 of age onwards, half of the platforms should to be elevated to
such a height that pullets can jump onto them (10 -15 cm). After 20 days of age the other
remaining platforms should be gradually elevated to such a height that all pullets are still
able to reach the water, forcing the pullets to go to the elevated platforms to find water.
This is called ‘water-training’.
When farm personnel inspect the flocks, the pullets will be more active, further
stimulating bird movement and ensuring the pullets are more acquainted with their living
environment, which can also prevent large groups of birds from piling and smothering.
After six weeks of age, chain feeders should be raised from floor level to a height of
approximately 15 cm. Providing different elevated structures to the birds also helps to
DOC
5 cm
2 weeks
2 weeks
9 cm
4 weeks
14 cm
6 weeks
20 cm

16
prevent smothering. At the time of vaccination, a drinking line on the slatted area should
be lowered to floor level to help pullets that show a strong vaccination response, but this
waterline should be removed/elevated after week 12, otherwise hens will not get proper
water training. For floor systems without any winchable platforms these adjustments are
not needed.
Figure 4. An aviary rearing farm in Canada.
2.10 Increase living space by perches and platforms
To increase the living space of the pullets, and to provide additional resting space,
platforms and elevated surfaces such as tables should be made accessible by gradually
providing ramps or perches that enable the pullets to reach higher locations. Any kind of
elevation should be carefully constructed so that it does not fall on or harm the birds.
When using winchable surfaces make sure that the roof construction is strong enough to
hold the weight of the platforms. For safety of farm personal and animals, installation by
qualified personnel is strongly recommended. Pullets should have access to perches,
ramps and slats from 10 days of age onwards. Offer variation in heights, if possible. At 7-
8 weeks the hens should be able to reach the highest platforms and perches. Ramps
should not be steeper than 45 and be at least 20 cm wide. This will stimulate the pullets
to use these facilities during the rearing phase to find feed and water and will train the
birds to be able to use these facilities during their adult life in the production facility. For
this reason, it is advisable to use the same type of perches in the rearing and laying
facility. Not only will birds learn to seek feed and water on elevated levels, they will also

17
become stronger and more agile so they can more easily move through the housing
system and access nest boxes during the production phase. The approximate perch
space needed per pullet is 12 cm. Horizontal space between perches should be at least
30 cm. The preferred shape of the perches is rectangular with rounded edges or
mushroom-shaped (Figure 5). Round-, and oval- shaped can be used as well, but those
perches are less optimal regarding gripping and comfort. Perches should be made of
durable materials that are not slippery and should easily be cleaned and disinfected after
each flock cycle. Perches should be placed on the slats or above a manure removal
system to prevent manure piling and to maintain good litter quality.
Figure 5. Preferred shape of perch (mushroom shaped).
2.11 Lights
In the first week of life, the chicks should be provided with an intermittent dark and light
cycle which stimulates feeding and resting. A 4-hour light and 2 hour dark cycle is
recommended. After the first week, day length should gradually be reduced from 20 to
10 hours of light per day at 7 weeks of age (see Figure 6). Light intensity at floor level
should be 20-40 lux. The light source should be dimmable LED and/or high frequency TL-
lights with warm white color of light (3000-3500 K). A house with no daylight during
rearing, with a covered veranda (covered outdoor run) where daylight can be dimmed is
recommended. Provide equal distribution of light over the house or smooth transitions
of light intensity in different zones to prevent overcrowding and wet litter spots.
In the morning the lights should be gradually switched on over 10 minutes. In the evening
dim the lights over 15-30 minutes, depending on the type of rearing system. It is
recommended to never abruptly turn the light off. In aviary rearing systems always first
switch the lights off in the scratching area, followed by the lights within the tiered system
(from the floor upwards). In this way, the pullets are stimulated to move to the night
perches. Dimmable dawn/dusk lights can also be used over the A-frame of perches or the
top tier of an aviary system.

18
An example of a dimming schedule for a more extensive system where the pullets need
to move from the scratching area into the system follows:
0-9 weeks: dimming OFF in 20 minutes*
17:00 – 17:05 Turn on Dusk/Dawn lights
17:00 – 17:10 Dim Main lights (scratching area) from 100% to 0%
17:10 – 17:18 Dim system lights from 100% to 0%
17:15 – 17:20 Dim Dusk/Dawn lights from 100% to 0%
10-12 weeks: dimming OFF in 32 minutes
17:00 – 17:05 Turn on Dusk/Dawn lights
17:00 – 17:10 Dim Main lights (scratching area) from 100% to 0%
17:10 – 17:30 Dim system lights from 100% to 0%
17:25 – 17:32 Dim Dusk/Dawn lights from 100% to 0%
13-17 weeks: dimming OFF in 27 minutes
17:00 – 17:05 Turn on Dusk/Dawn lights
17:00 – 17:10 Dim Main lights (scratching area) from 100% to 0%
17:10 – 17:25 Dim system lights from 100% to 0%
17:20 – 17:27 Dim Dusk/Dawn lights from 100% to 0%
*In case of smothering as the pullets move to their roosts, dim the lights faster, in 2-3 minutes.

19
Age of the birds per week
Hours
/day
1 2 3 4 5 6 7 8 9 10 11 12 13 14 15 16
24
23
22
20
21
18
20
16 ½
19
15
13 1/2
18
12
17
10
10
10
10
10
10
10
10
10
16
15
14
13
12
11
10
9
8
7
6
5
4
3
2
1
Figure 6. Light program and intensity in during rearing and production based on Lohmann Management
Guide for rearing layer pullets.
2.12 Environmental Enrichment for pullets
Environmental enrichment can be defined as improvement in the biological functioning
of captive animals resulting from modifications to their environment. Birds should be
provided with appropriate enrichments to encourage activity and natural behavior,
including foraging. The development of different behaviors typically takes place at an
early age. Early experience with a variety of enrichment types is therefore important as it
affects behavioral development. If pullets are deprived of enrichment, it may have long-
lasting consequences (due to stress and frustration). An example of this is feather
pecking, which may be the result of lack of dust bathing and foraging material at an early
age.
30-50
30-50
25
25
15 (reduce only when problems arise)
15 (reduce only when problems arise)
20-25
20-25
Light intensity – the required LUX
Light intensity – the required LUX

20
A variety of interesting objects and resources, which are safe for the birds, should be
placed throughout the house, and alternated. The types of enrichment should target the
behavioral needs of the birds, i.e. be biologically relevant. Effective environmental
enrichment will be used well by the birds. Any items which are not well used may be
replaced with alternatives. There should be close liaison between the pullet rearer and
the layer site to ensure that birds have a smooth transition on the access to (preferably
the same) enrichment in the laying farm.
The different types of enrichments are numerous. Bales of hay, alfalfa, rice straw,
chopped bamboo leaves or similar roughage materials can be placed in the litter area
(e.g. monthly 1 bale of 15-20kg per 1,000 hens). Hens will peck and scratch at the bales
creating additional substrate in the litter. Not only will this encourage these positive
behaviors, it also helps to keep the litter in good condition. Furthermore, providing a
roughage source stimulates the development of the gastro-intestinal tract and helps to
train the pullets to spend more time on eating related behavior. Once hens are used to
having substrate in the litter it is encouraged to always have some substrate at which to
peck and scratch. Once bales have disappeared and no more substrate is visible in the
litter, new bales should be placed to prevent hens from getting ‘bored’ and starting to
pecking at each other. An indicator for the development of feather pecking is the
disappearance of downy feathers from the litter (because the pullets are eating them).
Another indicator of feather pecking is that the pullets show a very high intake of the
roughage provided and the bales are disappearing fast.
Hanging objects can also be used as a form of enrichment. Objects can be bunches of
rope or string, empty bottles, shiny metallic discs, bundles of hay or straw and others in
the litter area. Changing and renewing these items regularly will ensure that the pullets
stay interested.
Another option for environmental enrichment is commercially available pecking blocks,
usually made from compressed aerated concrete. Pecking blocks not only offer an
opportunity to perform pecking behavior, they also help to gently blunt the tip of the
beak. A blunt beak reduces damage due to feather pecking.
2.13 Litter
Pullets should have access to litter during rearing in order to increase foraging behavior
and to reduce feather pecking (Box 1). Absence of litter may induce the development of
feather pecking behavior. Litter should be available from day one of age. Fresh litter
substrate should be of a suitable material (see Table 6 in paragraph 3.5) and particle size,
and should be managed to maintain it in a dry, friable condition. Small particle materials,
such as peat or sand, are best able to satisfy a pullets’ need to dust bathe. Separate areas
with peat or sand can be considered as well.

21
Litter should be of sufficient depth (1-5 cm new litter at the start of the flock) for dilution
of feces and should be dry and friable to stimulate foraging and dust bathing behavior.
Partially removing the litter or changing the complete litter (followed by providing fresh
litter substrate) is also a form of enrichment as it reactivates the pullets’ curiosity to
explore the newly provided litter and provides further positive association with the
caregiver when this practice is performed with care.
In aviary rearing systems, where litter cannot be used before the system is opened, it is
recommended to place chick paper and leave it during the rearing period. It has been
shown that the presence of chick paper on the floor of the aviary rearing system may
prevent feather pecking, because feces, feed and dust which accumulates on the paper
supplies the chicks with a basic foraging substrate.

22
Box 1. Feather pecking and litter availability
In the wild, chickens spend about 65% of their active time on exploratory and foraging behaviour,
expressed by scratching and pecking the ground in search of food items. In the domestic chicken, this
foraging motivation is less strong than in their wild ancestor, the Jungle fowl, but it is still present.
Therefore, litter availability is very important for both chicks, pullets and adult laying hens. If birds have
no access to litter, they will direct their pecking behaviour to the feathers of other birds and feather
pecking will develop. Research has shown that the risk of feather pecking outbreaks is strongly reduced
if birds have access to good quality, dry and friable litter. This is also the reason why in many cage-free
systems it is recommended to have a litter area in the house that measures at least 1/3 of the total
floor space (as can be seen in the photo above of a commercial flock of laying hens in a floor housing
system).
23
3. Keeping cage-free laying hens
3.1 Design and equipment
Cage-free housing of laying hens is characterized by different functional areas where the
hens can find feed and water, lay their eggs, rest on perches or perform other behavior
such as foraging and dust bathing. Allowing hens to freely perform these natural
behaviors improves their welfare.
While some regions have extensive experience with cage-free egg production, it is a fairly
new idea in other areas of the world. General guidelines and recommendations for the
management of cage-free hens are commonly based on EU regulations, scientific
findings, field experience, management guides from supplying companies (e.g. breeding
companies, equipment suppliers) and recommendations by poultry experts and NGO’s.
When designing and constructing a new cage-free facility in a tropical climate, where
cage-free egg production is relatively new, each barn should be considered separately. It
is recommended to consult with local experts.
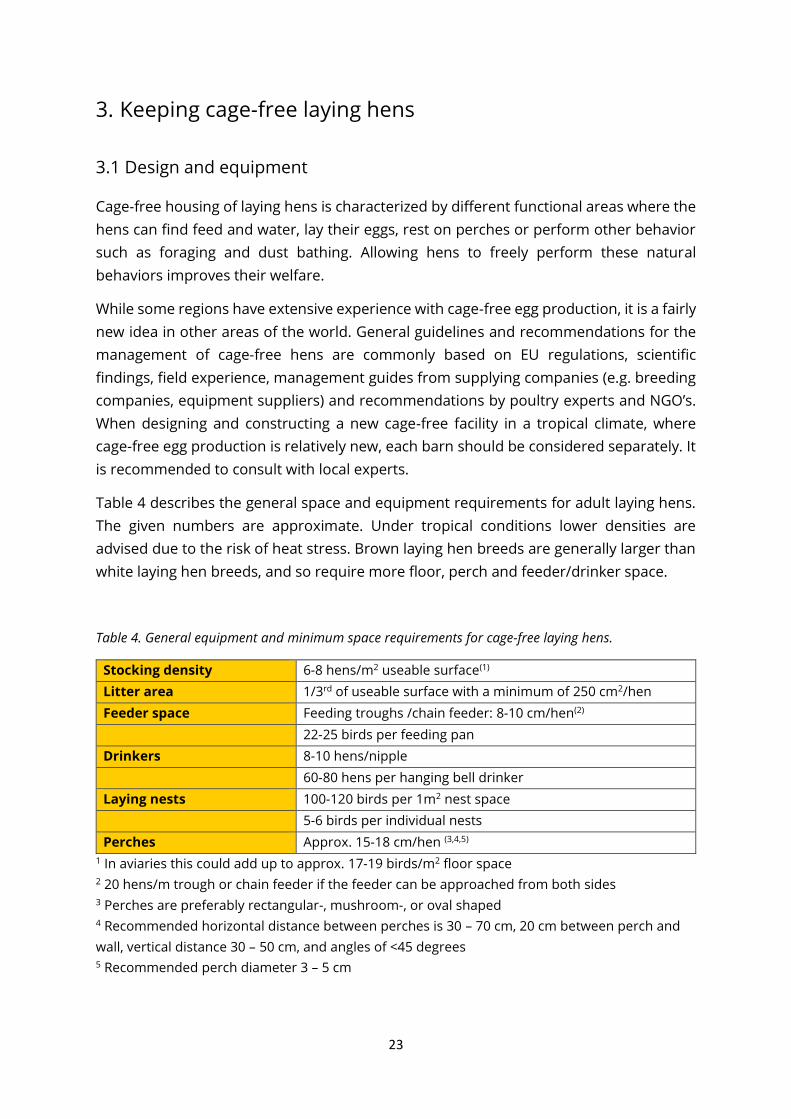
Table 4 describes the general space and equipment requirements for adult laying hens.
The given numbers are approximate. Under tropical conditions lower densities are
advised due to the risk of heat stress. Brown laying hen breeds are generally larger than
white laying hen breeds, and so require more floor, perch and feeder/drinker space.
Table 4. General equipment and minimum space requirements for cage-free laying hens.
Stocking density 6-8 hens/m2 useable surface(1)
Litter area 1/3rd of useable surface with a minimum of 250 cm2/hen
Feeder space Feeding troughs /chain feeder: 8-10 cm/hen(2)
22-25 birds per feeding pan
Drinkers 8-10 hens/nipple
60-80 hens per hanging bell drinker
Laying nests 100-120 birds per 1m2 nest space
5-6 birds per individual nests
Perches Approx. 15-18 cm/hen (3,4,5)
1 In aviaries this could add up to approx. 17-19 birds/m2 floor space 2 20 hens/m trough or chain feeder if the feeder can be approached from both sides 3 Perches are preferably rectangular-, mushroom-, or oval shaped 4 Recommended horizontal distance between perches is 30 – 70 cm, 20 cm between perch and
wall, vertical distance 30 – 50 cm, and angles of <45 degrees 5 Recommended perch diameter 3 – 5 cm
24
Perches should be made of durable material without sharp edges that could injure hens
or workers. Cracks, crevices and other narrow spots in the system should be closed off to
prevent ectoparasites from manifesting themselves near the hens. The preferred shape
of the perch is rectangular with rounded edges or mushroom shaped and this should be
the same as hens are used to during rearing (see Figure 5. in paragraph 2.10). These
shapes allow the best grip for the hens. Round or oval shaped perches are less favorable
because they provide poorer grip. Laying hens are strongly motivated to seek high sites
for resting and roosting (sleeping). Also, hens that are being pecked and try to escape as
well as hens that are not feeling well often seek refuge in higher situated areas.
Strategically placed, elevated perches offer the opportunity for the hens to perform those
behaviors. Perches also contribute to better movement through the system, especially in
aviary systems.
The laying nest should be an attractive, comfortable, easily accessible and clean place for
the hens to lay their eggs. This ensures that hens will lay their eggs in this designated
area, whereas cleaner eggs are better for premium price sales and food safety.
Furthermore, provision of good laying nests helps to prevent floor eggs, which are
laborious to collect and could be pecked at and eaten by the laying hens. For the nest to
be attractive for the hens, the nests should be dark inside (approximately 1 lux), easily
accessible, evenly spread through the house, at the same height as much as possible, free
of drafts, no hot air accumulation or condensation, made of laminated wood, plastic or
concrete plex (not metal sheeting). Flaps or curtains in front of the nest (not closing the
nest completely) make the nest an enclosure, which the laying hens experience as a safe
place to lay their eggs (Figure 7). The lining of the nest should allow scratching behavior
and dust should be able to fall through (e.g. perforated AstoTurf). This allows the hen to
perform her nesting behavior and keeps the eggs cleaner. Preferably, the nest should be
a rollaway nest. In such a nest the eggs are laid on a surface that is on a slight angle. Due
to the angle the eggs roll onto a collection belt when the hen stands up after laying her
egg. This prevents hens pecking and eating the egg and keeps the eggs cleaner. An expel
system in the nest allows the farmer to close the nests prior to the onset of laying. The
expel system also expels the hens out of the nests at the end of the day. This prevents
hens from sleeping in the nests and soiling the nest during the night. However, the nests
have to be opened again well before the hens wake up. Additionally, an expel system with
a fence generally creates space between the back wall of the nest and the expel fence.
This extra space ensures a better nest environment and breathing space, especially in hot
climates.

25
Figure 7. Group nests in a commercial cage-free system in Canada, with nest curtains and space between
the nests to allow easy passage through the system.
Individual nests with litter may be a lower cost initial investment but have some
disadvantages. There is a substantial increase in labor due to manual collection of the
eggs and replacement of the litter. There is also an additional cost of litter for nest lining,
and there can be a higher risk of production loss due to more floor eggs if the hens are
not well adapted to the nests. Hens may start pecking at floor eggs, if not collected
quickly, and they are generally dirtier eggs.
3.2 The start of a new flock in a cage-free barn
When rearing and laying takes place in one system, transfer of the hens from the rearing
facility to the laying facility is not needed (see Appendix 1, design 1.d, the “All-in-All-out”
system). When pullets are moved into the laying house from another pullet rearing facility
however, the catching, transport and adaptation to a new house is stressful for the birds
thus, care is needed when these procedures take place. Having a similar house design,
light management program, feeding time and feed type between rearing and laying
houses will help smooth the transition of hens from the rearing to the laying house.
Preparation of the cage-free barn:
• Transfer pullets to cage-free system before they begin laying eggs, usually at 16-
18 weeks of age.
• Plan the arrival. Confirm the date and time of the hens arrival with the pullet
moving company or rearing farmer. Hens preferably should arrive before midday
26
so they can settle in the poultry house before 14.00 hours (2 pm) and find feed
and water before the lights are turned off for the night.
• Arrange a sufficient number of people (dependent on type of system, number of
birds to be handled, type of transport and crates, etc.) to help unload the hens so
that hens can be unloaded in a short time span and placed in the house with care.
• During the first few days apply the same light and feeding schedules as in the
rearing house.
• All automatic equipment, back-up equipment and warning systems should be
tested (water lines, feed chains, ventilation, computers, time clocks, etc.) before
arrival of the birds.
• When using computer programmed management tools and/or timer-controlled
equipment, program the computer management programs and timers well before
arrival of the birds.
• Begin adjusting the house temperature 48 hours in advance to the desirable 18-
21oC.
• Disinfect the drinker lines or other drinking sources at least 48 hours prior to
arrival of the birds. Shortly before the hens arrive, flush the water lines thoroughly
and refill them with clean fresh water.
• Check the drinking system carefully by testing (individual) nipples for presence of
water and absence of leaks.
• Check the water pressure of the drinking lines (in front and back of the house).
• Fill feeders with feed before the hens arrive.
• Check light systems, replace defective lights, and check the dimming system.
• Provide 1 cm of litter. Litter will accumulate quickly after hens are placed in the
house and this provides a good basis for a dry and friable litter layer, while
preventing the risk of birds nesting on the floor and laying eggs on the floor,
instead of in the nests.
• Nests should be closed (and only opened for the first time after the first few eggs
are found).
Placement of the laying hens:
• All hens should be evenly spread on the slatted area (if available) close to the
drinkers and feeders or, in an aviary, directly into the tiers of the aviary system.
• It is important that the laying hens start to drink as soon as possible. Check and
monitor this carefully. After several days ‘dried-up’ hens can be recognized by a
shrunken comb. Assist these hens in finding water. Weak birds can be separated
from the flock to give them extra attention.
• Run feed chains only one time during the first day. This prevents startling the hens
but also attracts the hens to the feeders.
• A high light intensity will encourage hens to discover their new environment.
• After lights have been switched off the layers that remain in the litter area should
be placed into the system or on the slatted area manually. The farmer should
repeat this daily until at least 99% of the birds enter the system or slats by
themselves when the lights are switched off. This ensures that the hens can easily
find the drinkers and feeders in the morning. This will also prevent the hens from

27
becoming accustomed to resting overnight on the floor, which may be a risk for
laying floor eggs.
If pullets are transferred into the house from another location, they should be loaded
gently into and out of transport crates, without causing harm or injury. Each bird must be
carried upright, using two hands to hold the wings against the bird’s body (to prevent
injuries and stress from wing flapping). Hens or pullets should never be picked up or
carried by their head, neck, wings, legs or feet.
3.3 Ventilation and climate control
The three most important elements regarding climate are maintaining the correct
temperature, humidity and sufficient ventilation. In general, 18-21oC is the recommended
temperature with a relative humidity of 50-70%. Laying hens can adapt to maximum
temperatures of 26oC after which heat stress becomes a serious problem. The bandwidth
(difference between minimum and maximum temperature) should be set at 5-6oC.
Temperature changes that are too large are stressful for the hens.
Ventilation in closed barns ensures provision of fresh air and removal of stale air and
harmful gasses (CO2 should be <3,000 ppm and NH3 <10-20 ppm). Ventilation can also be
used to lower the ambient (effective) temperature in the cage-free barn with the use of
wind speed (with a maximum of 3 m/s wind speed), the so-called wind chill effect. Tunnel
ventilation allows large quantities of air to be pulled through the barn at considerable
wind speeds. With tunnel ventilation, the fresh air enters in the front of the barn and is
pulled through the barn in a longitudinal direction by means of exhaust fans that are
placed in the back of the barn. The minimum ventilation rate for laying hens is 0.7
m3/hour/kg live weight present in the house and the maximum ventilation rate is
approximate 4 kg/m3/kg live weight. Evaporative cooling (pad cooling) allows incoming air
temperature to be lowered. This is possible if the incoming air is not yet saturated with
water. High air humidity limits the effect of pad cooling.
Air flow can be checked with smoke to ensure there is no draft directly onto the hens
when they perch at night. Airflow should also not go directly into the nests, because this
is aversive to the birds.
3.4 Daily management procedures
Hens and housing should be inspected at least twice per day. Collecting and documenting
certain indicators for major animal welfare problems is in the own interest of the keeper,
as well as the animals, as it provides the maximum information on the welfare of the flock
and enables the keeper to detect deficiencies and take corrective actions. The following

28
table contains recommendations for collecting major animal welfare indicators during
the laying phase (Table 5).
Table 5. List of most important animal welfare indicators for laying hens and their possible causes.
Animal welfare indicator Possible causes
Plumage condition
Frequently damage develops from 30 weeks of
age onwards
Feather-pecking, cannibalism;
nutritional inadequacies; feed form; flock age
Skin condition
Skin lesions, mainly around the back, the
wings, the rump, the cloaca and the toes
Feather-pecking, cannibalism;
overstocking
Nutritional status
Weight development and feed consumption
Nutritional inadequacies;
disease
Animal losses
High mortality, recorded daily
Increased morbidity rate (disease); thermal
stress; injurious pecking or cannibalism;
nutritional deficiencies; predation, or other
causes
Water intake
Water consumption (below or above normal),
recorded daily, if possible
Water shortage; dripping water troughs;
house climate too warm; incorrect drinker
height; water contamination
Thermal condition
Panting or wing spreading (indicating heat
stress); huddling (indicating temperature too
low), observed daily
Temperature too high or too low
Fearfulness
Excessive withdrawal from personnel; panic
reactions (piling), observed daily
Lack of habituation to human contact
Feather pecking and cannibalism can result in poor plumage and skin conditions, as
feathers are pulled out and the birds may be wounded when pecking continues in
denuded areas. Inappropriate feeding may also affect plumage condition, as feed
restriction or shortage of specific essential amino acids (methionine and cysteine) may
induce molting in the neck area. Overstocking can also affect skin condition, as birds may
damage other birds when climbing over each other, resulting in scratches on the back.
To evaluate nutritional status, feed intake and weight development should be monitored.
The latter can be done by weighing a subsample of birds. Together with animal losses
and use of veterinary drugs, nutritional status is also an important indicator of disease
and morbidity, as sick animals will often stop eating. Changes in water intake can indicate
water shortage, dripping water throughs (leakage), a too warm climate in the house, or
an unfavorable position of the drinkers (too high or too low). Observation of birds panting
in the house can also be used as a sign of heat stress. Finally, excessive withdrawal from

29
personnel and panic reactions when people enter the house are signs of a lack of
habituation to human contact and activities (see appendix 3).
Dead hens should be removed daily and sick hens should be placed in a recovery pen
with feed and water and only returned to the flock once they have sufficiently recovered.
Hens in the recovery pen should be checked at least twice a day.
Records should also be kept of all veterinary medical products used, and these should
be documented daily. Over time, patterns may indicate changes in disease status of the
flock.
3.5 Litter management
A laying hen spends 40-60% of her daily activities foraging and scratching. Therefore,
providing good quality litter and implementing good litter management may substantially
contribute to improved welfare and production. Several materials can be used as litter
material, depending on cost and local availability (Table 6). Good litter management also
contributes to worker health by improving air quality in the barn.
Table 6. Potential litter materials for cage-free laying hen facilities.
Wood shavings Shredded paper
Saw dust Dried pineapple waste
Rice hulls Coffee hulls
Chopped oat, rice, wheat straw Ground maize cobs
Shredded maize stalks
Broadleaf leaves
Groundnut shells
Sand
Shredded sugar cane stalks
Peat moss
Good ventilation is important in litter management. Especially cold drafts may cause wet
litter and also make the hens more vulnerable to disease. Leakages of waterlines and
drinkers may also cause wet litter. Wet litter results in high ammonia levels which is
detrimental for both bird and worker health. The litter should not accumulate above 15
cm in depth. Litter that is too deep is a risk for increased floor eggs, high ammonia and
fine dust levels, adverse working conditions, wet litter and litter plaques. Timely removal
of litter should be part of the farm management to keep the litter in good condition and
at an appropriate depth (5-10 cm). If applicable, litter under slats may also be removed if
ammonia levels are too high or manure comes through the slats. Manure under the slats

30
may be collected and transported out of the house manually or with the use of manure
belts. Automated manure scrapers in the litter area can be used to remove litter and help
to prevent the laying of floor eggs.
Stimulating scratching behavior of the hens helps to keep the litter friable and dry. This
behavior can be stimulated by providing enrichments in the litter or by scattering
feed/whole grain in the litter area. Stimulating scratching and foraging behavior not only
helps to keep the litter in good condition, it also helps to prevent feather pecking.
3.6 Light management
Light should be evenly spread throughout the different areas of the barn. Warm white
light (2700-3500K) is preferred. The light source should be either LED or a light source
with a photo flicker frequency of 100Hz or higher to prevent hens experiencing the light
as a flickering light.
There should be no beams of light or shadowy areas in the litter area and these should
also be kept to a minimum on the slatted areas. The light intensity in the litter area should
be around 40 lux. Starting with a higher intensity (e.g. 50 lux) permits the lights to be
dimmed at a later stage and/or during the afternoon to a lower intensity to calm the hens.
Dimming lights is a measure for managing stress sensitivity of the flock and helps to
prevent smothering and feather pecking. This dimming should not be standard practice
from the start but should only be implemented if feather pecking or significant
smothering events start to develop.
Near the drinking line the light intensity should be around 20 lux. Hens prefer a darkened
nesting area. Only 1 lux of light in the nest is sufficient for the hens to perform their
nesting behavior and comfortably lay their egg.
In the evening, light should be switched off gradually (in 20-30 minutes) and in stages to
simulate sunset. Dimming lights will attract hens to the roosting area (e.g. the perches on
the slats or on the top of the aviary system). Guiding the hens towards the desired
roosting spot can be achieved by switching off the light in the littered areas before
switching off the lights near the roosting places.
The recommended number of hours of light per day differs with the age, breed of laying
hen and production goals. Follow the breeder organization guidelines after consulting
the local supplier for the specific breed light requirements and light management, but in
general for adult laying hens, a light-dark schedule of 14-16 hours light and 6-8 hours
dark will promote egg production. Strategically placed, translucent windows in sidewalls
and/or above 5-10% of the scratching area may provide natural daylight.

31
3.7 Prevention of floor eggs
Good management can encourage hens to lay their eggs in the designated nest boxes
and prevent them from laying on the floor. Floor eggs result in lost flock productivity
(some floor eggs are never found) and increased manual labor. Furthermore, laying eggs
outside the nests increases the risk for vent pecking (pecking at the cloaca) and thereby
increased mortality. To prevent floor eggs, take the following steps:
1. Avoid (unnecessary) obstacles in the litter area because these can create attractive
surfaces against which hens may nest.
2. Avoid areas with extensive shadows in the litter or in the system because hens are
attracted to the shadows to lay eggs.
3. Keep nests closed at arrival of the hens. Nests should be opened for the first time
after the first few eggs are found.
4. Walk through the barn several times per day (e.g. 6 times per day) for the first few
weeks during the onset of egg laying and collect all floor eggs. This is the critical
time to prevent hens from developing a pattern of laying their eggs on the floor,
and the presence of floor eggs is attractive to other hens to lay their egg nearby.
5. Place floor eggs in the nests. This attracts hens to lay more eggs in the nest.
6. Ensure there is no draught in the nests. Draughts can come directly from the inlets
into the nests as well as via the egg belt into the nest.
7. Make sure the feeders are filled with feed when the hens wake up and/or run the
feeder lines 15 minutes after the lights are switched on. Do not otherwise run the
feeder line during the laying period (the first 5-7 hours after the lights are switched
on) as this will attract the birds out of the nest boxes.
8. Place fences or wires near corners, edges, and partition walls of the house.
(Partition walls are used in large laying houses, where for instance a flock of 30,000
hens is split up in five groups of 6,000 hens using wire-mesh partition walls inside
the house.)
9. Ensure all hens sleep in the designated roosting area (e.g. the perches on the slats
or in the aviary system) by placing all birds that remain on the floor after the lights
are switched off in the system or on the slats.
3.8 Feather pecking
Feather pecking is the pecking at, or pulling out, of feathers of other birds. Feather
pecking can have a severe impact on the welfare of laying hens as well as on the
economics of the farm. It can result in plumage damage (naked areas), injuries, increased
disease susceptibility, productivity declines, increased feed consumption and increased
mortality due to cannibalism. Two major risk factors for the development of feather
pecking are lack of environmental stimulation and high fear and stress sensitivity. Lack of
environmental stimulation can be prevented by supplying good quality floor litter (see
section 3.5) and environmental enrichment (see section 3.11). To prevent high fear and

32
stress sensitivity, frequent inspection and varied routines can help. This may include
changes in routes taken, keepers’ clothes and appearance, activities in the barn and a
playing a radio. These kinds of activities are especially important in the early rearing
period. By habituating hens to varied experiences, the flock will be more resilient and
tend to remain calm under novel conditions. Conversely, it also important to try and
prevent sudden transitions, for instance in feed composition or noise levels, as these are
known risk factors for outbreaks of feather pecking.
To be able to respond to outbreaks of feather pecking in a timely manner, it is very
important to inspect the birds properly during daily rounds. Carefully listening and
observing while standing still or sitting allows the caretaker to detect early signs of feather
pecking behavior. Vocalizations such as pain squawks can indicate an outbreak of severe
feather pecking or injurious pecking. If the caretaker responds at the first signs of feather
pecking, for instance by providing a pecking substrate (alfalfa hay, pecking blocks, straw
bales, etc.), an outbreak of feather pecking can often be prevented. Once the outbreak
becomes more serious, it is very hard to prevent the birds from continuing to feather
peck.
As a last resort, the light can temporarily be dimmed to lower flock activity level, but this
also has negative welfare implications because social behavior can be hampered, and eye
health can deteriorate in the long-term.
Other measures to prevent injurious pecking include providing perches of sufficient
height (over the hens’ head height) to offer a refuge for potential victims, reducing the
stocking density and by choosing a laying hen strain specifically bred for cage-free
production (see section 5, and the Assurewel, Feather cover advice guide for further
information).
3.9 Piling & Smothering
To control birds’ distribution and prevent overcrowding and piling, it is advisable to
partition the house into different compartments (e.g. of 3,000 hens per compartment).
Overcrowding in the nest may lead to birds getting stuck, birds suffocating by piling or
overheating, broken eggs, and vent pecking. Nest capacity should be 100-120 birds per 1
m2 collective nest or a maximum of 5 birds per individual nest. Nest partitions placed in
front of the nest help to prevent overcrowding and piling in the nests. Such partitions
should be placed perpendicular to the nest every 5-8 meters. At the onset of egg laying,
the nests on the outside of the row can be left open to prevent smothering in the nests
(as these nests are usually the most attractive to the hens). Crossover areas between the
nests (approx. 2 meters wide per 3,000 hens; Figure 7 or over the nest roof facilitate easy
movement and accessibility throughout the whole compartment for both the hens as well
as for the workers.

33
3.10 Feeding and nutrition of cage-free hens
Hens kept in cage-free housing require more feed than those kept in cages. Table 7 shows
an example of a typical cage-free hen diet in the first half of the laying period. As laying
hens age, they require a bit less protein, a bit more calcium and a bit less phosphorous
in their diets. The same amount of energy is needed to produce a cage-free egg as
compared to a cage egg. However, cage-free hens have more space and opportunities to
perform natural behavior such as walking, flying, dustbathing and scratching the litter.
Because of this increase in activity, laying hens in cage-free systems use approximately
10-15% more energy than hens in cages. To reach this 10-15% increase in required
energy, the daily feed allowance can be increased by 10-15% (e.g. +12g/hen/day).
However, this strategy can only be implemented when the climate within the poultry
house is well controlled. Under hot conditions hens produce more heat, and in order to
balance their thermoregulation, they reduce their daily feed intake. Providing more feed
will not match their energy requirements, since the birds will not consume the initial
allowance.
Table 7: Example of a cage free diet in Europe (g/kg) (layer phase 1).
Diet Inclusion
ME (MJ) 11.8
Crude ash 127.9
Crude protein 160.9
Crude fat 58.4
Crude fibre 36.8
NSP 153.4
dig lysine 6.9
dig meth. + cys 6.1
dig threonine 4.8
dig tryptophan 1.5
Na 1.5
Cl 2.5
Ca 38
P (g) 4.9
Available P (g) 2.8
Under hot conditions, therefore it is advisable to increase the energy density of the diet
by 10-15%, aiming for approximately 363 kcal/day instead of 330 kcal/day (typical in a
caged hen diet). Increase the energy density when temperature is long lasting above 26
°C degrees (target value) or when behavioral signs indicate the temperature is too high
(i.e. drinking increases drastically, laying on the floor with wings spread out and panting).
To reach this increase in metabolizable energy in the diet, a grain (±12-14 MJ/kg) or lipid
source (± 30-40 MJ/kg) should be used such as animal fat or sustainably sourced palm oil.

34
Not all fats are appropriate, i.e. too much linoleic acid, which is naturally found in plant-
based oils such as soya-oil, maize oil and sunflower oil, increases the egg weight. If an egg
weight increase is undesirable, the total linoleic acid content of the diet should not
increase. Protein sources are less appropriate to increase the energy density. Protein
from the diet is used in small amounts for maintenance (±20%) and growth (±4%) and to
a greater extent for egg production (±76%). Thus, an increase in protein will result in
higher egg weights. It is recommended to include 16-17% crude protein in the diet.
The amino acid requirements for cage-free hens differ from that of caged hens. For
commercial hybrids, the specific amino acid requirements vary, therefore always follow
the management guides and consult the breeding company. In general, the lysine,
threonine and tryptophan should be increased in cage-free diets (Table 8).
Table 8. Several recommendations on the amino acid requirements (mg / hen / day) of laying hens in
non-caged systems from research, feeding table (CVB) and practice.
Amino acid Schutte
(1996)
Van
Krimpen
(2015)
CVB
(2018)
ISA
(2008)
Lohmann
(2009)
Adisseo
Lysine 700 810 620 805 830 838
Methionine +
Cysteine
650 650 550 690 755 714
Threonine 460 520 430 560 580 577
Tryptophan 130 165 130 178 174 155
It is important to use the same feeder and watering systems that were available during
rearing as possible. An automated chain feeder is advantageous because it permits fast
distribution of the feed and feeding can be done directly on the slats.
It is recommended to feed the hens within 15 minutes after the lights have been switched
on completely. The following 5-7 hours the hens should not be fed. During this 5-7 hour
timespan most hens will lay their eggs. If the feeder line runs in that period hens that are
about to lay their egg in the nest might get distracted and leave the nest. This may lead
to more floor eggs, broken eggs, vent pecking and restlessness. The feeder should be
emptied by the hens at least once per day. In this way the fine particles will be ingested,
which consist mostly of vitamins and minerals. Furthermore, the hens will have a higher
motivation to ingest the newly provided feed, which is beneficial for the total daily feed
intake. Feeders and drinkers should be cleaned regularly.
Laying hens should be fed ad libitum and frequently to maintain their nutritional
requirements for egg production. Laying hens should not be force-molted, which involves
feed and sometimes water restriction. Feeding schedules are depended on the light
schedule and can range from 5 – 8 runs per day. Midnight feeding is an option in hot
conditions to increase feed intake. When midnight feeding is applied, there must be a

35
dark period of at least 3 hours before and after the lights will be switched on for 1-2 hours
in the middle of the night. The feeders should be filled before the lights are turned on.
An example of a feeding schedule (depending on amount of hours light) is as follows:
• 15 minutes after lights on (feeder run 1)
• 5 – 7 hours after lights on (feeder run 2)
• 8 – 10 hours after lights on (feeder run 3)
• 12 – 14 hours after lights on (feeder run 4)
• Last feeding 1-2 hours before lights out. This ensures there is feed
available in the morning (feeder run 5)
A balanced diet is important to maintain laying hen health and productivity and to prevent
feather pecking and cannibalism. Feather pecking and feather damage result in a higher
energy requirement. When half of the feather cover has disappeared, the heat
production for maintenance increases approximately 8%. Nutrition is a promising
strategy to influence behavior since it causes quick responses from the hens and dietary
adjustments can be implemented quickly. Diet composition and feeding strategy can
influence feather pecking behavior during laying. Protein or amino acid shortages in the
diet can increase feather pecking. The diet should include 16-17% crude protein. The
protein source does not influence feather pecking. It has been shown that the inclusion
of appropriate levels of lysine and tryptophan can reduce feather pecking. It is advisable
to include at least 810 mg digestible lysine / hen / day to contribute to a good feather
cover and to prevent possible feather pecking issues. Furthermore, the level of digestible
tryptophan should be 130 mg/hen/day. Tryptophan is used by laying hens to produce
hormones that influence behavior. Feather pecking can sometimes be decreased by
feeding increasing the tryptophan content of the diet.
Dietary coarse fibers can also help to reduce feather pecking. By providing fibers the birds
are more satiated due to gizzard filling. Birds that are more satiated perform less feather
pecking. Furthermore, the provision of fibers positively influences gizzard development,
by increasing its weight and form. Feed with high fiber content will remain longer in the
foregut, again aiding satiety of the bird. It is recommended to use insoluble fibers (non-
starch polysaccharides) such as oat hulls or barley to dilute the diet. If dilution of the diet
is not possible due to hot conditions, at least 14g/hen/day of a fibrous source should be
included in the diet.
Another aspect that is important to consider is the feed form. Feeding a coarse mash or
crumble reduce feather pecking compared to feeding pellets. This is because birds spend
more time pecking in the feeder with mash or crumble, reducing their pecking motivation.
The mash or crumble should be homogenous to prevent selection of preferred feed
particles. Furthermore, providing a coarse mash stimulates the development and activity
of the gizzard. Improved digestion due to the gizzard activity increases gut health and
makes the birds more resistant against possible infections.
If the climate can be managed according to the mentioned recommendations in section
3.3 on ventilation and control, it is possible to dilute the diet with sand, grit or high fibrous

36
raw materials. Due to the lower energy content of the diet, the birds will increase their
fed intake. Time that is spent on eating cannot be spent on feather pecking. Furthermore,
by diluting the diets the hens are more satiated. If dilution of the diet is not possible due
to hot conditions, roughages should still be provided as an environmental enrichment.
Consultation of a local poultry nutritionist is strongly advised in order to maintain good
health and good egg production of the flock. Feeding companies can provide detailed
advice when a non-cage flock is developing early signs of feather pecking.
3.11 Environmental Enrichment
Enrichments should be provided to keep the hens occupied with scratching and pecking
at objects and substrates. This may prevent the development of damaging behaviors like
feather pecking and cannibalism and improve the overall quality of life of the hens. There
are numerous types of enrichments (see section 2.12). Bales of hay, alfalfa, rice straw or
similar local products can be placed in the litter area (e.g. monthly 1 bale of 15-20kg per
1,000 hens; Figure 8). Hens will peck and scratch at the bales creating additional substrate
in the litter. Not only will this encourage positive behavior, it also helps keep litter in good
condition. Once hens are used to having substrate in the litter it is encouraged to always
have some substrate at which hens may peck and scratch. Once bales have disappeared
and no more substrate is visible in the litter, new bales should be placed to prevent hens
getting ‘bored’ and start pecking each other.
Figure 8. Example of roughage provision in a laying hen farm: provision of
alfafalfa bales at the Kipster farm in The Netherlands.

37
3.12 Covered veranda
Additional space can be created in a semi-outdoor area by providing a covered veranda
on either one or both longitudinal sides of the house (Figure 9). Typically, the covered
veranda is a littered area in which the hens can perform behavior such as foraging,
scratching and dust bathing. Additional waterlines may also be provided in the covered
veranda. If the area of the covered veranda is included in the calculated living space to
determine the allowed flock’s size, access to the covered veranda must be provided at all
times. Hens enter the covered veranda through internal pop-holes, hen-sized exits on the
side of the house. The roof of the veranda may contain translucent windows, or the sides
of the covered veranda may be constructed of mesh, translucent windows or perforated
material to provide daylight to the hens. The roofing should be waterproof and exclude
wild birds or other animals from the outside. A covered veranda may strongly affect the
ventilation capacity and air flow in the house, and this should be taken into consideration
in the house design and installation of ventilation equipment.
Figure 9. Laying hens sunbathing in a covered veranda in The Netherlands.

38
3.13 Health
Cage-free hens can be kept in indoor systems,
indoor systems with a covered veranda or free-
range systems with an outdoor run. Free-range
systems have the benefits of providing the hens with
fresh air, extra foraging opportunities, a lower
stocking density outside and sunlight (a natural
antiseptic) but can also present health risks.
This is especially true in areas where the laying hens
can come into contact with wild birds or their
droppings.
In closed, indoor systems, there is no contact with
droppings from migratory birds, no predation,
climatic conditions can be better controlled, and rodents can be controlled easier (Figure
10).
Free-range systems require additional management to ensure healthy, safe hens. In free-
range systems, new airborne viral and bacterial infectious agents may be introduced to
the flock. Furthermore, infections with bacteria, protozoa (such as Histomonas) and
helminths (worms) can also occur through contact with contaminated soil. In areas where
migratory waterfowl are present (geese or ducks), poultry are especially susceptible to
diseases that they carry. Covered veranda systems offer many of the positive features
that are present in an outdoor free range, with fewer risks of pathogen exposure.
Foraging enrichments offered in either the litter area or the covered veranda can help
compensate for lack of foraging on the free range. Inspiring examples of farms designed
around this principle are the Dutch Rondeel system (www.rondeeleieren.nl/) and the
Dutch Kipster system (www.kipster.farm/ Figure 8).
The risks of free-range access can be reduced by proper range management. This
includes limiting the stocking density and using several pieces of land consecutively in
rotation, to prevent the buildup of infectious agents. Keep the area directly around the
house dry and clean (Figure 11). There should be at least one exit per 500 birds and exits
should be wide enough for two birds to pass freely without touching each other or the
side of the exit. The space surrounding exits tends to become denuded quickly and
requires special attention. Exit areas should be managed to prevent muddy conditions or
standing water. This can be done by maintaining the area with short vegetation and/or
by covering the area with a draining material, such as rock, gravel, pebble, straw,
overlaying platforms, or concrete. Gravel can also help clean the birds’ feet before going
back into the hen house, which helps ensure litter quality. However, loose rock must be
of a size and material that does not cause injury to the birds’ feet. Puddles and standing
Figure 10. Potential routes of infection
for indoor and free range systems.

39
water are sources of bacterial and parasitic infection, particularly if the hens drink from
them, and should be avoided. Land should be well-drained and vegetated, where
possible.
Hens and pullets should be protected from both aerial and terrestrial predators.
Overhead cover, either natural (trees, bushes, shrubs) or purpose-built (platforms, shade
cloth), will encourage the birds to exit the house, range over the outdoor areas and will
provide protection from the sun and the threat of aerial predators. Movable cover can be
used to encourage the birds to range over different areas of the outdoor space and can
help prevent the denuding of vegetation in one well-used place.
Enclosed, indoor facilities, should always be available to protect birds from adverse
climactic conditions and for in the event of an eminent disease outbreak and to safely
enclose all birds at night. Such shelter must be large enough to accommodate all birds
at the same time.
It is important to let the poultry house rest between flocks and to clean it thoroughly. A
period of four weeks without chickens is recommended. A thorough cleansing of walls
and equipment and removal of organic matter of the floor should always be done, to
prevent the build-up of litter or spots where E. coli could reside in large numbers.
Consider if, and which, infectious agents are to be removed. If no disease is present,
disinfection may not be needed in a dirt-floor house. Otherwise use a commercial
disinfectant solution.
Figure 11. A free-range farm in The Netherlands, where the area around the house is covered with
pebbles, to avoid muddy and dirty areas in the vicinity of the house.

40
The location of egg farms should be chosen to be safe from the effects of floods and other
natural disasters. Additionally, farms should be sited to avoid or minimize biosecurity
risks, exposure of birds to chemical and physical contaminants, noise, and adverse
climatic conditions.
Each farm should have a written animal health plan developed in consultation with a
qualified, local veterinarian that includes a vaccination schedule and other preventive
treatments such as routine parasite control. The animal health plan should include
monitoring and reducing any incidence of keel bone fractures and other common injuries
of laying hens. The animal health plan should be kept up to date, with daily recordings.
Regular monitoring of records aids management by permitting the detection of
underlying problems enabling timely intervention. Indicators of health problems in the
flock are reductions in feed intake, egg production, or flock activity and changes in comb
coloration (pale combs). During inspection rounds, the fresh feces in the house should
be inspected for abnormalities. In cases of diarrhea, the veterinarian should be consulted.
If persons in charge are not able to identify the causes of diseases, ill-health or distress,
or to correct these, or if they suspect the presence of a reportable disease, they should
seek advice from licensed veterinarians or other qualified advisers. Veterinary treatments
must only be prescribed and performed by or under the direct supervision of a licensed
veterinarian.
In case of disease or injury, when treatment has failed, or recovery is unlikely (e.g. birds
that are unable to reach feed and water), or severe pain that cannot be alleviated, the
animal should be euthanized as soon as possible. Euthanasia is killing an animal in a
humane (quick and painless) manner to alleviate suffering. Allowing a sick or injured
animal to linger unnecessarily results in poor welfare and should not occur. A prompt
diagnosis should be made to determine whether the bird should be treated or humanely
killed.
The farm should have documented procedures and the necessary equipment for on-farm
euthanasia. Staff should be trained by a licensed veterinarian in euthanasia procedures
appropriate for the age of the birds. Each farm should have an emergency response plan.
This should be designed to minimize and mitigate the effect of natural disasters (e.g.
earthquake, fire, flooding, and hurricanes), power or equipment failure, water or feed
supply shortages, and emergency disease outbreaks. Disaster plans should include
evacuation procedures, identifying high ground, maintaining emergency feed and water
stores, and destocking and humane killing when necessary. Procedures for humane
killing of sick or injured animals should be part of the disaster management plan.
Contingency plans should be documented and communicated to all responsible parties.
A method for providing clean, fresh water for a period of at least 24 hours during a shut-
off of the main water supply should be available on-site.

41
3.14 Biosecurity
Biosecurity can be defined as all the activities designed to keep diseases from entering
(or leaving) the farm. Each egg production site should have a good biosecurity plan
including the hygiene measures needed to reduce the risk of infection. An example of a
hygiene barrier for persons visiting the poultry house can be seen in Figure 12. Here, the
outer footwear is disinfected upon entry and the outer footwear and clothing are left at
one side of an area divider or demarcation, often a bench. On the other side, the inner
clothing and footwear are put on, to avoid contaminating the birds with bacteria and
viruses that may be on the outer clothing and footwear. Ideally, showers are available for
changing, rather than simply a bench, so that when contagious poultry diseases are in
the area, farm personnel and visitors can shower before entering the farm and again
when exiting. At the very minimum, the hands should be washed and disinfected at the
bench/demarcation.
Figure 12. Example of a hygiene barrier for visitors to the poultry house.
For the entire farm, a plan should be made regarding the routing of people, trucks, and
animals. An easy way to organize this is the traffic light system (Figure 13). The green area
is the outside world, the dirty area. The orange area is the fenced off farm area, which is
the buffer area, here visitors should change clothes and footwear and trucks should clean

42
and disinfect their wheels before entry. The red areas are the animal houses. Here, access
is highly restricted and for each house designated footwear is available at the door of the
house. To maintain good biosecurity on-farm, it is important that a proper biosecurity
plan is in place and that it is implemented and clear for all visitors. Systems in which
whole, new flocks are brought in and depopulated together, and where mortality is not
replaced, can prevent the infection of the flock by new birds carrying in pathogens. While
it is best not to house multiple age birds on the same site (because older birds can infect
younger birds), if pullets are reared on the same site, they should be cared for first, before
older flocks, in the daily management routine. In addition, risks of infection by rodents
and wild birds should be minimized by keeping the farm area tidy, the houses well
maintained and properly closed and by having a rodent control program in place. In high-
welfare farms, rodent control must be humane. Poisons, drowning and traps that can
maim animals must be avoided. Feed is secured in rodent-proof bins.
Figure 13. Example of the traffic light system for designing the biosecurity plan.

43
4. Concluding remarks
This management guide is aimed to provide basic information and tools to help farm
managers and farm personnel successfully house and care for a flock of laying hens in a
cage-free environment in Vietnam. The guide shows that housing and management
during the rearing phase (0-17 wk) and the laying phase (17-approximately 80 wk) are
equally important. During the rearing phase, the foundation is laid for the laying phase,
as behavior of the pullets is shaped during rearing. By adjusting housing and
management to the behavioral needs of the pullets, the pullets will make good use of the
system and problem behaviors such as feather pecking, cannibalism and smothering can
be avoided. Of course, the laying phase includes the majority of the laying hens’ lives, so
appropriate housing and management are also of the utmost importance. Lighting,
nutrition, and air quality are all key factors for the productivity and welfare of the birds.
In free-range systems, additional protection of the hens is needed to ensure their health,
comfort and safety. In indoor systems, behavioral freedom can be increased by adding a
covered veranda or an indoor foraging area with appropriate enrichments for pecking
and scratching.

44
5. Suggestions for further reading
• Assurewel. Feather cover advice guide.
www.assurewel.org/Portals/2/Documents/Laying%20hens/Feather%20Cover%20advice%
20guide.pdf
• Daigle, C.L., Rodenburg, T.B., Bolhuis, J.E., Swanson, J.C., Siegford, J.M., 2014. Use of
dynamic and rewarding environmental enrichment to alleviate feather pecking in non-
cage laying hens. Appl. Anim. Behav. Sci. 161, 75-85.
• de Haas, E.N., Bolhuis, J.E., de Jong, I.C., Kemp, B., Janczak, A.M., Rodenburg, T.B., 2014a.
Predicting feather damage in laying hens during the laying period. Is it the past or is it the
present? Appl. Anim. Behav. Sci. 160, 75-85.
• de Haas, E.N., Bolhuis, J.E., Kemp, B., Groothuis, T.G.G., Rodenburg, T.B., 2014b. Parents
and Early Life Environment Affect Behavioral Development of Laying Hen Chickens. Plos
One 9, e90577.
• de Haas, E.N., Kemp, B., Bolhuis, J.E., Groothuis, T., Rodenburg, T.B., 2013. Fear, stress,
and feather pecking in commercial white and brown laying hen parent-stock flocks and
their relationships with production parameters. Poult. Sci. 92, 2259-2269.
• de Jong, I.C., Rodenburg, T.B., van Niekerk, T.G.C.M., 2013. Management approaches to
reduce feather pecking in laying hens. CAB Reviews 8, No 036.
• Heerkens, J.L.T., Delezie, E., Ampe, B., Rodenburg, T.B., Tuyttens, F.A.M., 2016a. Ramps
and hybrid effects on keel bone and foot pad disorders in modified aviaries for laying
hens. Poult. Sci.
• Heerkens, J.L.T., Delezie, E., Rodenburg, T.B., Kempen, I., Zoons, J., Ampe, B., Tuyttens,
F.A.M., 2016b. Risk factors associated with keel bone and foot pad disorders in laying
hens housed in aviary systems. Poult. Sci. 95, 482-488.
• Heerkens, J.L.T., Delezie, E., Kempen, I., Zoons, J., Ampe, B., Rodenburg, T.B., Tuyttens,
F.A.M., 2015. Specific characteristics of the aviary housing system affect plumage
condition, mortality and production in laying hens. Poult. Sci. 94, 2008-2017.
• Nicol, C.J., Bestman, M., Gilani, A.-M., de Haas, E.N., de Jong, I.C., Lambton, S., Wagenaar,
J.P., Weeks, C.A., Rodenburg, T.B., 2013. The prevention and control of feather pecking:
application to commercial systems. World Poultry Sci. J. 69, 775-788.
• Tahamtani, F.M., Brantsæter, M., Nordgreen, J., Sandberg, E., Hansen, T.B., Nødtvedt, A.,
Rodenburg, T.B., Moe, R.O. and Janczak, A.M. 2016. Effects of litter provision during early
rearing and environmental enrichment during the production phase on feather pecking
and feather damage in laying hens. Poultry Science, 95: 2747-2756.
• Rodenburg, T.B., van Krimpen, M.M., de Jong, I.C., de Haas, E.N., Kops, M.S., Riedstra, B.J.,
Nordquist, R.E., Wagenaar, J.P., Bestman, M., Nicol, C.J., 2013. The prevention and control
of feather pecking in laying hens: identifying the underlying principles. World Poultry Sci.
J. 69, 361-374.

45
Appendix 1. Cage-free housing designs suitable for Vietnam
In the following section several housing designs are presented which could be
implemented to raise and keep cage-free layer pullets and laying hens in existing or newly
built pullet and laying hen barns in Vietnam. The purpose of the presented designs and
additional information is to give farmers, advisors, agricultural entrepreneurs, and all
others involved and interested general information of possibilities and
recommendations.
The following designs and recommendations will be presented in this section:
Single-tier barn system for laying hens
1a. Cage-free laying hen facility with integrated perch-feeder system
1b. Cage-free laying hen facility with modified A-frames
1c. Small-scale cage-free facility
1d. All-in-all-out system (pullet rearing + egg production in one single facility)
Rearing system for pullets
2. Rearing system for pullets from Day-old-Chick (DOC) till 16-17 weeks of age
NOTE: all dimensions are approximate. In flock size calculations, non-accessible or non-
countable space taken into account (e.g. space in front/back of house, nest space, egg
belt). Covered veranda is not counted as useable surface.

46
1a. Cage-free laying hen facility with integrated perch-feeder system
The principle of cage-free single-tier barn systems for laying hens is that laying hens can freely
move around the house. The litter area provides sufficient space, enrichments and substrates for
foraging, dustbathing and other behavior. Perches, feeders and drinkers are located on the slatted
area. The eggs can be laid in a safe, comfortable and secluded nesting area. An optional covered
veranda to allow hens more space in a surrounding with more fresh air and sun light may be
provided. Section 3 of the Management Guide provides further information on equipment
standards, management practices and other additional information.
Indication of house dimensions with flock size and housing requirements:
• E.g. 100m*13m: 7,000 hens (6 hens/m2) to 10,500 hens (9 hens/m
2)
• E.g. 75m*8m: 3,000 hens (6 hens/m2) to 4,500 hens (9 hens/m
2)
• Raised slats (plastic, hardwood, bamboo), approx. 2/3rd of available space. Height between
floor and slats ≤ 55 cm. Additional ramps or steps to aid movement from floor to slats.
• Deep pit manure collection. Optional to have a manure belt under the slats. Optional to have
manure scrapers in litter area.
• Automatic nests with expel system. Nests are lined with Astroturf. On top of nests an anti-
perch system is placed or a flat-top roof that allows bird movement on top of the nests.
• Integrated feeder-perch system with 15 cm perch/hen and 5 cm feeder space/hen
o Feeder system with chain or spiral.
o Preferred perch shape is rectangular, oval, mushroom-shaped
o Optional to place additional perches near the wall
• Drinkers in front of nests (min. 20 cm between drinker and nest entrance), 10 hens/nipple
• Tunnel ventilation with pad cooling
• Strategically placed lights to ensure correct light intensity at the different functional areas
• Divided in compartment of 3,000-5,000 birds per compartment
• See Management Guide for space requirements (e.g. hens/m2, birds/m2 nest space,
birds/m2 feeders, birds/nipple)
• Covered veranda optional (on one or both sides)
o For more enrichments see Management Guide
• Considerable to combine with All-in-all-out system (See All-in-all-out system)
o Side inlets should then be applied too
Pophole to covered veranda

47
1b. Cage-free laying hen facility with modified A-frames (no rearing)
The principle of a cage-free single-tier barn system for laying hens with modified A-frames is that
laying hens can freely move around the house. The litter area provides enough space,
enrichments and substrates for foraging, dustbathing, and other activity. Feeders and drinkers are
located on the slatted area, whereas perches and platforms are placed on A-frames that are
located in the litter area. These A-frames can be former battery cage frames. A manure scraper
can be installed under these frames to collect the manure. The eggs can be laid in a safe,
comfortable and secluded nesting area. Optional is to provide a covered veranda to allow the hens
more space in a surrounding area with more fresh air. Section 3 of the Management Guide
provides further information on equipment standards, management practices and other
additional information.
Differences compared to design 1a:
• More narrow slats with deep pit manure collection
• Feeders on the slats (with perch on top of feeder)
• Modified A-frames (e.g. former cage stands) with perches and platform placed in the
litter area
• Optional to install manure scraper under the A-frames
• For enrichments see Management Guide (section 2.12)

48
1c. Small scale cage-free facility
The principle of small-scale cage-free facility for laying hens is that laying hens can freely move
within the house. The litter area provides enough space, enrichments and substrates for foraging,
dustbathing, and other behavior. Feeders and drinkers are located on the slatted area, whereas
perches and platforms are placed on A-frames located in the litter area. These A-frames can be
former battery cage frames. The eggs can be laid in a safe, comfortable, and secluded nesting
area. A corridor behind the nests allows manual collection of the eggs. Providing a covered
veranda to allow the hens more space in a surrounding with more fresh air is an option.
Another option is to do the pullet rearing in the same facility (top figure, All-in-all-out). For rearing,
dark brooders, or other measures to ensure a brooding temperature of 32-34oC, should be
implemented in the house for the first 14 days. During the start of the rearing period, feed and
water must be provided in the scratching (litter) area. Furthermore, the nests should be closed
and covered until the first eggs are being laid. Sections 2 and 3 of the Management Guide provide
further information on equipment standards, management practices and other additional
information.
Indication of house dimensions with flock size:
• Flock capacity from 2,000 hens (e.g. house dimensions 50m*6m) up to 5,000 hens (e.g.
house dimensions of 75m*9m) at 9 hens/m2
• Flock capacity from 1,300 hens (e.g. house dimensions 50m*6m) up to 3,500 hens (e.g.
house dimensions of 75m*9m) at 6 hens/m2
• Nests can be with manual or automatic egg collection
• Walkway behind the nests (not accessible for the hens)
• Modified A-frame with perches and platform
• Feeders on the slats
• Considerable to combine with All-in-all-out system (top figure)
o Ventilation side inlets should then be applied too
o Dark brooders could be considered for the start
o Nests need to be covered until onset of lay
o See 1.d “All-in-all-out system” for additional requirements
• Covered veranda optional only on one side
• For enrichments see (section 2.12) Management Guide

49
1d. All-in-all-out system Pullet rearing + egg production in one single
facility
The principle of All-in-all-out systems with pullet rearing + egg production in one single facility is
that pullets are reared in the same cage-free facility as where they will be kept as laying hens. The
pullets (and later the laying hens) can freely move around the house. The litter area provides
enough space, enrichments and substrates for foraging, dustbathing, and other behavior. The day-
old-chicks start in the scratching are, hence feeders and drinkers are located in the scratching
(litter) area. During the brooding period dark brooders, or other measures to ensure a brooding
temperature of 32-34oC, should be implemented in the house. Once the pullets get older
and stronger, they will go up to the slats and find additional feed and water. When all pullets are
able to eat and drink on the slatted area, the feeding and drinking lines in scratching area are
elevated. The drinking line may be lowered during difficult periods (e.g. after vaccination or during
extreme warm conditions).
Furthermore, the nests should be closed and covered until the first eggs are being laid. Once the
pullets reach adulthood and start to lay eggs the nests can be revealed, enabling the hens to lay
their eggs in a safe, comfortable, and secluded nesting area.
An option is to provide a covered veranda to allow the hens more space in a surrounding area
with more fresh air. See previous laying hen housing system designs for requirements during the
production phase. Sections 2 and 3 of the Management Guide provides further information on
equipment standards, management practices and other additional information.

50
2. Rearing system for pullets from DOC till 16-17 weeks of age
The principle of this rearing system for layer pullets is that pullet training occurs by winchable slats
and/or table platforms that are raised as pullets grow, e.g. slats raised 10 cm after 10 days. By
providing feed and water on these raised surfaces pullets are trained to seek water at higher
levels, become stronger, more robust and become better in navigation and orientation skills.
Utilization of slats and platforms increases useable surface. Section 2 of the Management Guide
provides further information on the rearing and training of cage-free pullets.
Stocking density per useable surface (platforms increase useable surface available):
• 0-2 weeks: 20-25 hens/m2
• 2-5 weeks: 15 birds/m2
• 5 wks and older: 10 birds/m2
Further
• DOC can be enclosed in smaller compartments at the start (top figure)
• Heaters are needed to create a constant 35OC during brooding
• Side inlets are needed for proper minimal ventilation at start (tunnel ventilation is not
suitable for young chicks!)
• Chick paper with feed should be placed near the feeders and drinkers
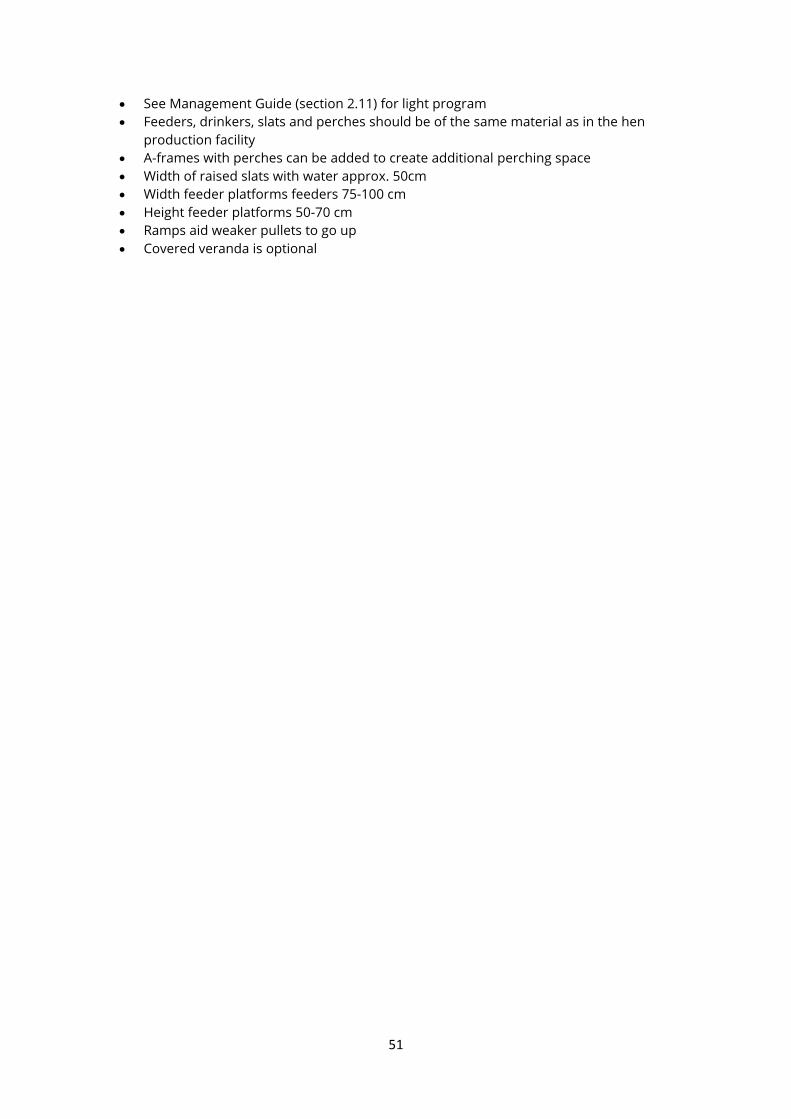
51
• See Management Guide (section 2.11) for light program
• Feeders, drinkers, slats and perches should be of the same material as in the hen
production facility
• A-frames with perches can be added to create additional perching space
• Width of raised slats with water approx. 50cm
• Width feeder platforms feeders 75-100 cm
• Height feeder platforms 50-70 cm
• Ramps aid weaker pullets to go up
• Covered veranda is optional

52
Appendix 2. Example of a daily inspection sheet of welfare indicators
– rearing
Animal welfare
indicator
Select the appropriate box
Plumage condition
neck, back, rump
and vent area
week 4, 12 and 16
No feather damage
or hardly any feather
damage (no bald
patches)
Some feather damage
(bald patches,
<50% body area)
Severe feather
damage
(bald patches,
>50% body area)
Skin condition
back, wings, rump,
cloaca and toes,
week 4, 12 and 16
No wounds
or lesions
Some evidence of
wounds and/or lesions
(<50% of the body area)
Severe wounds
and/or lesions (>50%
of the body area)
Nutritional status
week 4, 8 and 16
Body weight
according to breeder
guide
Feed intake normal
Body weight slightly too
low (<20%
under)
Feed intake too low
Body weight
significantly too low
(>20% under)
Feed intake too low
Animal losses
daily
No mortality Low mortality
(cumulative mortality <
5%)
High mortality
(cumulative mortality
> 5%)
Use of veterinary
medicinal products
daily
No veterinary
treatment
Veterinary treatment
according to standard
(dosages/animal/day)
Veterinary treatment
higher than standard
(dosages/animal/day)
Water intake /
Heat stress
daily
Normal water
consumption
No Signs of panting /
water spillage
Water consumption
slightly deviates from
normal
Signs of panting / water
spillage
Water consumption
strongly deviates
from normal
Signs of panting /
water spillage
Fearfulness
Excessive
withdrawal from
personnel
Panic reactions
(piling)
No withdrawal from
personnel
No panic reactions
Some withdrawal from
personnel (<5 m)
No panic reactions
Excessive withdrawal
from personnel (>5
m)
Panic reactions

53
Appendix 3. Example of a daily inspection sheet of welfare indicators
– laying
Animal welfare
indicator
Select the appropriate box
Plumage condition
neck, back, rump and
vent area
week 20, 30, 40, 50
No feather
damage or hardly
any feather
damage (no bald
patches)
Some feather damage
(bald patches,
<50% body area)
Severe feather
damage
(bald patches,
>50% body area)
Skin condition
back, wings, rump,
cloaca and toes,
week 20, 30, 40, 50
No wounds
or lesions
Some evidence of
wounds and/or
lesions (<50% of the
body area)
Severe wounds
and/or lesions (>50%
of the body area)
Nutritional status
daily
Body weight
according to
breeder guide
Feed intake
normal
Body weight slightly
too low
(<20% under)
Feed intake too low
Body weight
significantly too low
(>20% under)
Feed intake too low
Animal losses
daily
No mortality Low mortality
(cumulative mortality
< 5%)
High mortality
(cumulative mortality
> 5%)
Use of veterinary
medicinal products
daily
No veterinary
treatment
Veterinary treatment
according to standard
(dosages/animal/day)
Veterinary treatment
higher than standard
(dosages/animal/day)
Water intake /
Heat stress
daily
Normal water
consumption
No Signs of
panting / water
spillage
Water consumption
slightly deviates from
normal
Signs of panting /
water spillage
Water consumption
strongly deviates from
normal
Signs of panting /
water spillage
Fearfulness
Excessive withdrawal
from personnel
Panic reactions (piling)
No withdrawal
from personnel
No panic reaction
Some withdrawal
from personnel
(<5 m)
No panic reactions
Excessive withdrawal
from personnel (>5 m)
Panic reactions