Linux System Administration - Index Of
450
Linux System Administration LSYA-SSMN-9111A Revision 1.0
-
Upload
khangminh22 -
Category
Documents
-
view
1 -
download
0
Transcript of Linux System Administration - Index Of

Linux System Administration
LSYA-SSMN-9111ARevision 1.0

Linux System AdministrationLSYA-SSMN-9111A
Revision 1.0©1988-2000 Wave Technologies International, Inc.
All rights reserved.
Printed in the United States of America. No part of this book may be used or reproduced in anyform or by any means, or stored in a database or retrieval system, without prior writtenpermission of the publisher. Making copies of any part of this book for any purpose other thanyour own personal use is a violation of United States copyright laws. For information, contactWave Technologies International, Inc., 10845 Olive Blvd., Suite 250, St. Louis, Missouri63141.
This book is sold as is, without warranty of any kind, either express or implied, respecting thecontents of this book, including, but not limited to, implied warranties for the book’s quality,performance, merchantability, or fitness for any particular purpose. Neither Wave TechnologiesInternational, Inc., nor its dealers or distributors shall be liable to the purchaser or any otherperson or entity with respect to any liability, loss, or damage caused or alleged to be causeddirectly or indirectly by this book.
The Linux Professional Institute™ is a vendor-specific organization and does not endorse this orany other third-party exam preparation materials or techniques.
Trademarks
Trademarks and registered trademarks of products mentioned in this book are held by thecompanies producing them. Use of a term in this book should not be regarded as affecting thevalidity of any trademark or service mark.
The Wave logo is a registered trademark of Wave Technologies International, Inc., St. Louis,Missouri.
Copyrights of any screen captures in this book are the property of the software’s manufacturer.
Mention of any products in this book in no way constitutes an endorsement by WaveTechnologies International, Inc.
10 9 8 7 6 5 4 3 2 1

iii
ContentsIntroduction 1
Course Purpose................................................................................................................. 1Course Goals .................................................................................................................... 2Exercises ........................................................................................................................... 3Videos............................................................................................................................... 3Assessment ........................................................................................................................ 4
Chapter 1—Introduction to Linux Administration 5
Objectives ......................................................................................................................... 6Pre-Test Questions ........................................................................................................... 6Introduction ..................................................................................................................... 7The System Administrator’s Role...................................................................................... 7
General Responsibilities .................................................................................................... 9Supporting Users ............................................................................................................ 10
The root Account ........................................................................................................... 10The su Command........................................................................................................... 11Exercise 1-1: Using su .................................................................................................... 12Exercise 1-2: Navigating and Using an Administrator’s Shell ......................................... 15Traditional Administration ............................................................................................. 15Administration Shells ...................................................................................................... 15
Documentation............................................................................................................... 16Books.............................................................................................................................. 16Using the Internet........................................................................................................... 17Man Pages ...................................................................................................................... 18Exercise 1-3: Using Man Pages ...................................................................................... 19Info Pages ....................................................................................................................... 20HOWTOs ...................................................................................................................... 20Documenting the System................................................................................................ 21Identifying the Linux System .......................................................................................... 22Identifying Active Users .................................................................................................. 23Finding Files ................................................................................................................... 24Exercise 1-4: Using find ................................................................................................. 26The grep Family.............................................................................................................. 27Looking Inside Files ........................................................................................................ 28System Default Files........................................................................................................ 29
Summary ........................................................................................................................ 30Post-Test Questions........................................................................................................ 30

iv Contents
Chapter 2—Kernel Modules and Customization 33
Objectives ....................................................................................................................... 34Pre-Test Questions ......................................................................................................... 34Introduction ................................................................................................................... 35Kernel Basics................................................................................................................... 36
Structure of the Kernel.................................................................................................... 37Structure of the Source Tree ........................................................................................... 41
Compiling the Kernel ..................................................................................................... 42Preparing the Source Tree ............................................................................................... 42Configuring the Kernel ................................................................................................... 43Compiling ...................................................................................................................... 46Installing......................................................................................................................... 46Exercise 2-1: Rebuilding a Linux Kernel ........................................................................ 47Exercise 2-2: Restoring the Previous Kernel–in Case the New One Doesn’t Work......... 50
Modules.......................................................................................................................... 50Compiling and Installing ................................................................................................ 51Module Utilities.............................................................................................................. 51Configuring .................................................................................................................... 54
Kernel Tuning ................................................................................................................ 54Summary ........................................................................................................................ 55Post-Test Questions........................................................................................................ 56
Chapter 3—Package Management 59
Objectives ....................................................................................................................... 60Pre-Test Questions ......................................................................................................... 60Introduction ................................................................................................................... 61Managing Packages ......................................................................................................... 62
Installing Packages .......................................................................................................... 62Exercise 3-1: Basic Use of RPMs.................................................................................... 63Upgrading Packages ........................................................................................................ 64Removing Packages......................................................................................................... 65Querying Packages .......................................................................................................... 66Verifiying RPM Packages................................................................................................ 66Exercise 3-2: Verify the Installation of the Package ........................................................ 68Exercise 3-3: Verify the Location of the Database .......................................................... 68Forcing Packages............................................................................................................. 69Front-End Utilities ......................................................................................................... 69Exercise 3-4: dpkg/dselect .............................................................................................. 70

Contents v
Compiling Programs from Source................................................................................... 72Getting Source Packages ................................................................................................. 72Unpacking Tarballs......................................................................................................... 73Compiling ...................................................................................................................... 74Installing......................................................................................................................... 76Building Your Own Packages.......................................................................................... 76
Shared Libraries .............................................................................................................. 77Version Numbering Schemes .......................................................................................... 77Advantages of Shared Libraries........................................................................................ 78Disadvantages of Shared Libraries ................................................................................... 78Managing Shared Libraries.............................................................................................. 78
Summary ........................................................................................................................ 79Post-Test Questions........................................................................................................ 80
Chapter 4—Process Management 81
Objectives ....................................................................................................................... 82Pre-Test Questions ......................................................................................................... 82Introduction ................................................................................................................... 83Processes ......................................................................................................................... 84
Creating Processes........................................................................................................... 85Monitoring Processes ...................................................................................................... 86Managing Processes ........................................................................................................ 90Exercise 4-1: Processes ................................................................................................... 94
Signals ............................................................................................................................ 94Types of Signals .............................................................................................................. 96Exercise 4-2: Signals....................................................................................................... 98
Daemons ........................................................................................................................ 98Memory.......................................................................................................................... 99
Virtual Memory .............................................................................................................. 99Memory Usage.............................................................................................................. 101
Process Accounting ....................................................................................................... 103Enabling Process Accounting ........................................................................................ 104Reviewing Logged Information ..................................................................................... 105Exercise 4-3: Modifying Values in /proc ...................................................................... 108
Summary ...................................................................................................................... 109Post-Test Questions...................................................................................................... 109

vi Contents
Chapter 5—Disk Management and Quotas 111
Objectives ..................................................................................................................... 112Pre-Test Questions ....................................................................................................... 112Introduction ................................................................................................................. 113Files and Directories ..................................................................................................... 113
The Linux File System .................................................................................................. 115Access Control .............................................................................................................. 116Exercise 5-1: File Permissions....................................................................................... 119Set User and Group IDs ............................................................................................... 120The Sticky Bit ............................................................................................................... 121File Permission Commands........................................................................................... 122Links............................................................................................................................. 123Using Links................................................................................................................... 124Looking at Links ........................................................................................................... 127
File Systems .................................................................................................................. 128File System Types ......................................................................................................... 129Making a File System.................................................................................................... 130Mounting a File System ................................................................................................ 131File System Configuration Files .................................................................................... 132Free Disk Space ............................................................................................................ 133Disk Usage.................................................................................................................... 134
Disk Quotas.................................................................................................................. 134Exercise 5-2: Working with the quota Utilities............................................................. 136Exercise 5-3: File Systems............................................................................................. 137
Kernel File Cache.......................................................................................................... 138Dealing with Corrupt File Systems ............................................................................... 139Exercise 5-4: Identifying Lost Files............................................................................... 141Exercise 5-5: Examining and Checking File Systems .................................................... 142
Distributed File System (Dfs) ....................................................................................... 143Overview of NFS .......................................................................................................... 145The NFS Protocol Stack ............................................................................................... 146Overview of Samba ....................................................................................................... 147The NFS Client ............................................................................................................ 149Exercise 5-6: Using mount with NFS........................................................................... 150The NFS Server ............................................................................................................ 150NFS Security................................................................................................................. 151
RAID............................................................................................................................ 152RAID Levels ................................................................................................................. 152Hardware RAID ........................................................................................................... 154Software RAID ............................................................................................................. 155
Summary ...................................................................................................................... 156Post-Test Questions...................................................................................................... 157

Contents vii
Chapter 6—User Management 159
Objectives ..................................................................................................................... 160Pre-Test Questions ....................................................................................................... 160Introduction ................................................................................................................. 161Users and Groups ......................................................................................................... 162
Preparing Groups (/etc/group) ...................................................................................... 162The /etc/passwd File ..................................................................................................... 164Allocating User IDs (UIDs) and Conventions............................................................... 164Adding Users ................................................................................................................ 165Changing User Attributes ............................................................................................. 166Changing Group Membership ...................................................................................... 166Exercise 6-1: Adding and Modifying Users .................................................................. 167
Passwords...................................................................................................................... 168Choosing Passwords...................................................................................................... 169The /etc/shadow File..................................................................................................... 170The pwconv Utility....................................................................................................... 171Account Security........................................................................................................... 171Exercise 6-2: Account Security ..................................................................................... 172
Removing a User........................................................................................................... 174Removing User Account ............................................................................................... 174Exercise 6-3: Managing Users ...................................................................................... 176Exercise 6-4: Managing User Home Directories (Optional) ......................................... 178
Restrictions ................................................................................................................... 179Restricted root Access ................................................................................................... 180Environment Files......................................................................................................... 180Environmental Definitions ........................................................................................... 181The umask Command .................................................................................................. 182Message of the Day ....................................................................................................... 182Guest Accounts............................................................................................................. 184Shared Group Directories ............................................................................................. 184Exercise 6-5: Example Environment ............................................................................ 185Exercise 6-6: User Environments ................................................................................. 185Exercise 6-7: Restricted User Environment (Optional)................................................. 187

viii Contents
Logging in to Linux ...................................................................................................... 187Using mingetty ............................................................................................................. 188Login Defaults .............................................................................................................. 188Working with Terminals............................................................................................... 189Fixing Port Problems .................................................................................................... 190The Terminfo Database ................................................................................................ 190NIS............................................................................................................................... 191LDAP ........................................................................................................................... 192PAM............................................................................................................................. 192Exercise 6-8: Working with TERM Types ................................................................... 193Exercise 6-9: Logins and Terminals.............................................................................. 193
Summary ...................................................................................................................... 196Post-Test Questions...................................................................................................... 196
Chapter 7—Scheduling Tasks and Managing Backups 199
Objectives ..................................................................................................................... 200Pre-Test Questions ....................................................................................................... 200Introduction ................................................................................................................. 202Cron ............................................................................................................................. 202
The cron Daemon......................................................................................................... 203Crontab Files ................................................................................................................ 204
at and batch .................................................................................................................. 207Exercise 7-1: Using cron and at.................................................................................... 210
Backup and Restore ...................................................................................................... 211When to Back Up ......................................................................................................... 211Where to Store Backups................................................................................................ 212What to Back Up.......................................................................................................... 213
Backup Media............................................................................................................... 214Magnetic Tape.............................................................................................................. 214Optical Disks ................................................................................................................ 216Removable Disks .......................................................................................................... 217Linux Backup Terminology .......................................................................................... 217
Backup Utilities ............................................................................................................ 218Tape Archive and Restore (tar)...................................................................................... 219Copy to I/O (cpio)........................................................................................................ 220afio................................................................................................................................ 221Exercise 7-2: Using afio................................................................................................ 222Direct-Device Access..................................................................................................... 223Exercise 7-3: Copying a Disk ....................................................................................... 224Using dd to Identify File Type...................................................................................... 224Linux Tape Device Names............................................................................................ 225Handling Tapes with mt ............................................................................................... 225Working with DOS Diskettes with MTools ................................................................. 227

Contents ix
Putting Them Together with compress ......................................................................... 228Exercise 7-4: Using tar, gzip, and compress .................................................................. 229Network Backups with rsh ............................................................................................ 230Exercise 7-5: Backup and Restore................................................................................. 231Exercise 7-6: Timing Backups (Optional) .................................................................... 232Exercise 7-7: Backup Techniques ................................................................................. 233
Summary ...................................................................................................................... 234Post-Test Questions...................................................................................................... 234
Chapter 8—Configuring Printers 237
Objectives ..................................................................................................................... 238Pre-Test Questions ....................................................................................................... 238Introduction ................................................................................................................. 239Printing in Linux .......................................................................................................... 240
Layout of lpr Printing ................................................................................................... 241Printer Capabilities Database ........................................................................................ 242Adding a Printer ........................................................................................................... 243PostScript and HP Laser Printers .................................................................................. 243
Print Spooling System................................................................................................... 244Samba Spooler vs. UNIX/Linux Spooler ....................................................................... 244
Network Printing.......................................................................................................... 245Configuring a Print Server ............................................................................................ 246Samba Printing ............................................................................................................. 246
LPRng–Next Generation UNIX Printing ..................................................................... 247Getting LPRng ............................................................................................................. 248Similarities to BLPR ..................................................................................................... 248Differences from BLPR................................................................................................. 249Protocols, Filters, and IFHP.......................................................................................... 250LPRng Security ............................................................................................................. 250Exercise 8-1: Configuring and Using a Network Printer .............................................. 251Exercise 8-2: The Print Queue (Optional) ................................................................... 252
Summary ...................................................................................................................... 253Post-Test Questions...................................................................................................... 254
x Contents
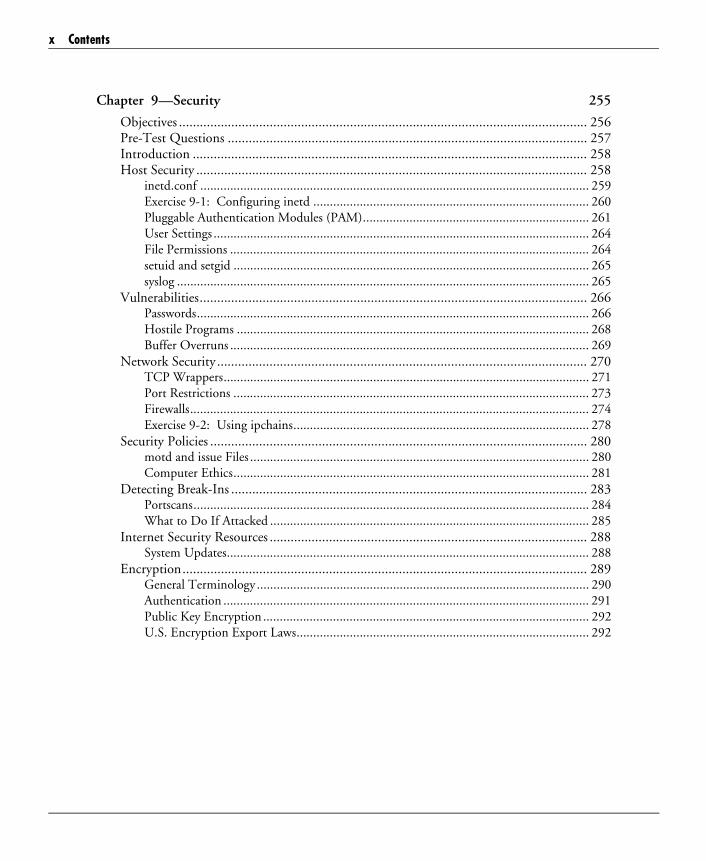
Chapter 9—Security 255
Objectives ..................................................................................................................... 256Pre-Test Questions ....................................................................................................... 257Introduction ................................................................................................................. 258Host Security ................................................................................................................ 258
inetd.conf ..................................................................................................................... 259Exercise 9-1: Configuring inetd ................................................................................... 260Pluggable Authentication Modules (PAM).................................................................... 261User Settings ................................................................................................................. 264File Permissions ............................................................................................................ 264setuid and setgid ........................................................................................................... 265syslog ............................................................................................................................ 265
Vulnerabilities............................................................................................................... 266Passwords...................................................................................................................... 266Hostile Programs .......................................................................................................... 268Buffer Overruns ............................................................................................................ 269
Network Security .......................................................................................................... 270TCP Wrappers.............................................................................................................. 271Port Restrictions ........................................................................................................... 273Firewalls........................................................................................................................ 274Exercise 9-2: Using ipchains......................................................................................... 278
Security Policies ............................................................................................................ 280motd and issue Files ...................................................................................................... 280Computer Ethics........................................................................................................... 281
Detecting Break-Ins ...................................................................................................... 283Portscans....................................................................................................................... 284What to Do If Attacked ................................................................................................ 285
Internet Security Resources ........................................................................................... 288System Updates............................................................................................................. 288
Encryption.................................................................................................................... 289General Terminology .................................................................................................... 290Authentication .............................................................................................................. 291Public Key Encryption .................................................................................................. 292U.S. Encryption Export Laws........................................................................................ 292

Contents xi
Security Tools ............................................................................................................... 293Saint ............................................................................................................................. 293Secure Shell (SSH)........................................................................................................ 294Exercise 9-3: Installing and Configuring OpenSSH ..................................................... 294tcplogd.......................................................................................................................... 295Simple WATCHer (swatch).......................................................................................... 296tcpdump ....................................................................................................................... 296whois ............................................................................................................................ 297
Summary ...................................................................................................................... 298Post-Test Questions...................................................................................................... 298
Chapter 10—System Logs 301
Objectives ..................................................................................................................... 302Pre-Test Questions ....................................................................................................... 302Introduction ................................................................................................................. 303Common Log Files ....................................................................................................... 303Logging Daemons......................................................................................................... 304
syslogd .......................................................................................................................... 305klogd............................................................................................................................. 308
Managing Log Files....................................................................................................... 308Logger........................................................................................................................... 309logrotate........................................................................................................................ 309Xconsole ....................................................................................................................... 311Exercise 10-1: Finding and Accessing Log Files............................................................ 312
Summary ...................................................................................................................... 314Post-Test Questions...................................................................................................... 314
Appendix A—Answers to Pre-Test and Post-Test Questions 317
Appendix B—Solutions 327
Glossary 351
Index 431
1
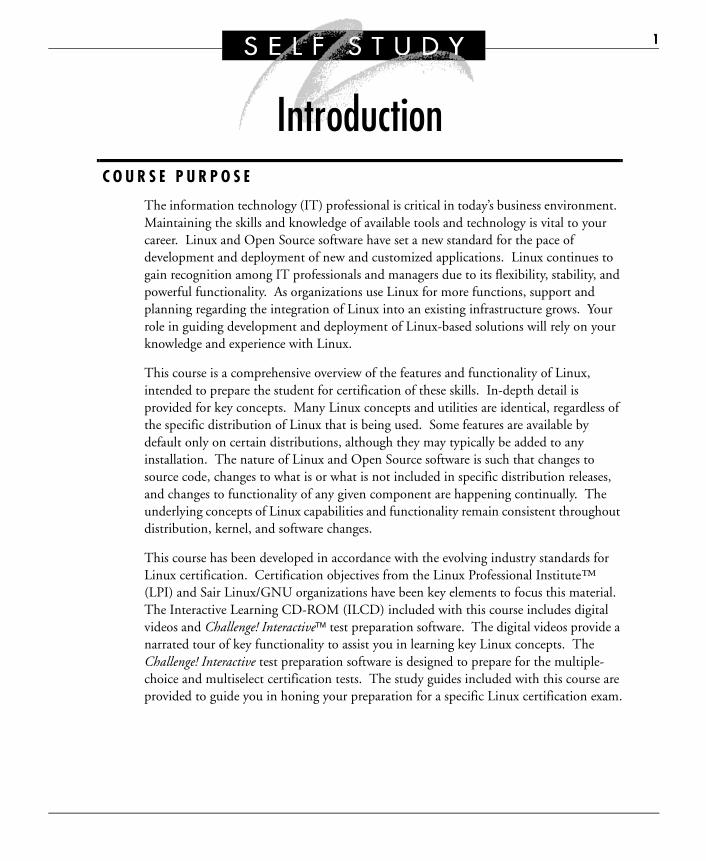
IntroductionC O U R S E P U R P O S E
The information technology (IT) professional is critical in today’s business environment. Maintaining the skills and knowledge of available tools and technology is vital to your career. Linux and Open Source software have set a new standard for the pace of development and deployment of new and customized applications. Linux continues to gain recognition among IT professionals and managers due to its flexibility, stability, and powerful functionality. As organizations use Linux for more functions, support and planning regarding the integration of Linux into an existing infrastructure grows. Your role in guiding development and deployment of Linux-based solutions will rely on your knowledge and experience with Linux.
This course is a comprehensive overview of the features and functionality of Linux, intended to prepare the student for certification of these skills. In-depth detail is provided for key concepts. Many Linux concepts and utilities are identical, regardless of the specific distribution of Linux that is being used. Some features are available by default only on certain distributions, although they may typically be added to any installation. The nature of Linux and Open Source software is such that changes to source code, changes to what is or what is not included in specific distribution releases, and changes to functionality of any given component are happening continually. The underlying concepts of Linux capabilities and functionality remain consistent throughout distribution, kernel, and software changes.
This course has been developed in accordance with the evolving industry standards for Linux certification. Certification objectives from the Linux Professional Institute™ (LPI) and Sair Linux/GNU organizations have been key elements to focus this material. The Interactive Learning CD-ROM (ILCD) included with this course includes digital videos and Challenge! InteractiveTM test preparation software. The digital videos provide a narrated tour of key functionality to assist you in learning key Linux concepts. The Challenge! Interactive test preparation software is designed to prepare for the multiple-choice and multiselect certification tests. The study guides included with this course are provided to guide you in honing your preparation for a specific Linux certification exam.

2 Introduction
Linux System Administration provides a foundation in the concepts and principles that are necessary to administer a Linux system. The scope of an administrator’s tasks may be very broad. This book guides you through an explanation of the administrator’s role, details the structure and function of the Linux kernel, and covers the key administrative topics of managing packages, processes, disk space, backups, and users as well as scheduling tasks. No administrative overview would be complete without a review of security procedures and system logs. This set of topics will allow you to properly administer a Linux system, whether for a few users or a few thousand users. The information in these chapters also provides you with the information needed to certify your Linux skills.
C O U R S E G O A L S
This self-study course will provide you with the information you need to complete the following:
� Describe the role of a Linux system administrator.
� Locate and use system documentation.
� Explain the function of the kernel and how it interacts with the rest of the system.
� Use package management to perform system updates and maintain system integrity.
� Build and install programs from source code.
� Perform basic process, memory, and performance management.
� Manage system functionality through daemons.
� Manage file ownership and permissions.
� Manage user and group accounts and related system files.
� Configure and verify system security.
� Customize and use the shell in user and system environments.
� Automate tedious administrative tasks.
� Design and maintain an effective data backup strategy.
� Configure logging and monitor log files of local and remote systems.
� Manage local and network printing systems.
� Describe various methods of securing a system and keeping it secure.
� Explain why security policies are necessary.

Exercises 3
E X E R C I S E S
The exercises in this manual are designed to give you hands-on practice working in both stand-alone and network environments. It is suggested that you complete the exercises when referenced. However, this may not always be convenient. If you need to skip an exercise, you should plan on completing the exercise later when time and circumstances allow.
You may find that there are some exercises that you are unable to complete due to hardware or software requirements. Do not let this stop you from completing the other exercises in this manual.
NOTICE:
The exercises in this self-study product are designed to be used on a system that is designated for training purposes only. Installing Linux, repartitioning to prepare to install Linux, or practicing the exercises on a LAN or workstation that is used for other purposes may cause configuration problems, which could require a reinstallation and/or restoration from a tape backup of the original configuration. Please keep this in mind when working through the exercises. While it is preferable to have a workstation dedicated to training purposes for this course, this option is not always available. Installing Linux in a dual-boot situation is a reasonable alternative, but make certain that your critical data is backed up before installing Linux or partitioning for a dual-boot installation.
V I D E O S
A key element of the Interactive Learning CD-ROM included with this course is digital video. Digital video lessons introduce key concepts covered in the manual. Often concepts are best understood by drawing a picture or following a visual description. Digital video segments provide a graphical illustration, accompanied by an instructor’s narration. These lessons are ideal both as introductions to key concepts and for reinforcement.
4 Introduction
A S S E S S M E N T
As reinforcement and review for certification exams, the Challenge! Interactive is significantly helpful. The Challenge! contains sample test items to prepare you for the exams. The sample tests are comprised of multiple-choice, multiselect, and scenario questions to better prepare you for exams. It is a good idea to take the Challenge! test, read the appropriate study guide, and then take the Challenge! test again. It is useful to take the Challenge! tests as frequently as possible because they are such excellent reinforcement tools.
Remember, there is always help available online. Please refer to the support pages in Getting Started for further information regarding online support.

M A J O R T O P I C S
1
Introduction toLinux Administration
Objectives ........................................................................ 6
Pre-Test Questions........................................................... 6
Introduction .................................................................... 7
The System Administrator’s Role ..................................... 7
The root Account........................................................... 10
Documentation.............................................................. 16
Summary ....................................................................... 30
Post-Test Questions ....................................................... 30

6 Chapter 1—Introduction to Linux Administration
O B J E C T I V E S
At the completion of this chapter, you will be able to:
� Describe the role of a Linux system administrator.
� Provide user support.
� Describe the proper use of the superuser (root) account.
� Use and manage local system documentation.
� Find Linux documentation on the Internet.
� Write system documentation.
P R E - T E S T Q U E S T I O N S
The answers to these questions are in Appendix A at the end of this manual.
1. What sources of documentation can you use to help administer a Linux system?
.....................................................................................................................................
.....................................................................................................................................
2. What kinds of things can you do with the linuxconf program?
.....................................................................................................................................
.....................................................................................................................................
3. Why should system administrators log their actions in an offline notebook?
.....................................................................................................................................
.....................................................................................................................................
4. How can you prevent the superuser account from being used improperly?
.....................................................................................................................................
.....................................................................................................................................

Introduction 7
I N T R O D U C T I O N
This chapter looks at the responsibilities of the Linux system administrator. We will also discuss how to locate and use documentation. Available documentation includes man pages, HOWTO documents, README files, Web sites, and books. Another important part of documentation is logging the actions you perform on a system. This helps to determine where and why things change and can help troubleshoot later problems.
In the role of system administrator, you will often need to use the superuser account, or root. It is important to understand the significance of the power involved in using the root account because, if used improperly, it can lead to many problems, including complete system failure. We will look at the role of the superuser account and how it should be used in proper day-to-day operation.
There are many tools available to help simplify a Linux system administrator’s work. One of the most popular of these is linuxconf. Linuxconf can be used from a terminal, from X, and even over the Web. We will give an overview of the linuxconf program to show how it can be used to simplify administration tasks.
T H E S Y S T E M A D M I N I S T R A T O R ’ S R O L E
This section focuses on the role of the Linux system administrator. A description of the role of a system administration shell is also included. The system administrator looks after the system. This covers everything from day-to-day tasks, such as performing backups and adding users to installing and configuring software. On larger multiuser systems, administrative tasks are differentiated between daily operations and less frequent administrative tasks. Systems operators are engaged to perform daily tasks and look after the operation of the system, leaving administrators free to deal with user-oriented functions.

8 Chapter 1—Introduction to Linux Administration
More complex matters, such as software installation and system upgrades, are often classified as technical support. In many small systems, the system administrator is expected to do everything from complex technical problem solving to routine tasks.
The system administrator is responsible for ensuring that the Linux system provides a reasonable service to its users. This involves a variety of activities; following are the most important ones:
� Adding new users to the system and configuring their home directories and basic privileges
� Installing any new software, including applications, new versions of the operating system, or bug fixes
� Monitoring the usage of the file system, ensuring that no one is using too much disk space and that all backups are carried out properly
� Responding to problems from users, attempting to track down bugs, and meeting with suppliers as appropriate
� Installing new hardware components
� Ensuring the smooth operation of any network services, such as electronic mail or remote access to other machines
The following topics are discussed in this section:
� General Responsibilities
� Supporting Users
Operations Technical SupportAdministrationOperations Technical SupportAdministration
The System Administrator’s Role 9
General Responsibilities
Identify your role as a system administrator. Find out what your manager expects and notify the users of your responsibilities and their privileges (if necessary).
Clarify any vague areas of responsibility. Find out if you can delegate work to the administrative staff. Changing printer paper and toner cartridges is not very difficult compared to configuring Linux file systems, so delegate if possible.
You should have hardware maintenance for your system. An engineer (or qualified technician) should come on site once every one to three months (depending on the system) to perform Preventive Maintenance (PM). PM is like a car service, since the engineer checks that the system is functioning correctly and cleans fans, circuit boards, tape heads, and so on. Some larger corporations carry a hardware maintenance contract, which can also include a quick help for solving problems when they occur and usually covers replacement hardware costs and labor.
The following are some additional things you might want to consider when assessing your role as a system administrator:
� Who is in charge of hardware support?
� Who uses the system?
� Is the system going to be upgraded at any time?
� Can you ask for more hardware?
� How can you get additional resources?

10 Chapter 1—Introduction to Linux Administration
Supporting Users
There are many instances where a user may need to contact the administrator of a system. In today’s world, e-mail is a common form of communication between the administrator and users. However, e-mail can be slow and may not be useful if quick and immediate action is necessary. In these cases, a user can employ the write command to send a message to an available administrator. This command sends a single message to another user on a system if, and only if, the other party is available. The availability of a user is controlled by the mesg command. Once the message is received, the administrator can respond with a message of his or her own or e-mail a response back to the user. If a more interactive session is required, a chat session may be created using the talk command. This allows two users of a system to communicate in real time. Users can stop messages with mesg n, and many administrators often put this command in the system profile (/etc/profile). Further, an administrator may wish to send a message to all users of the system. This can be done by using the wall (Write ALL) command.
$ write trapper
Do you know where the system logbook is?
^D
$ mesg
is no
$ mesg y
$ talk trapper
T H E R O O T A C C O U N T
The root (or superuser) account is the privileged user account. For security reasons, an administrator should rarely log in as root directly. Rather, the administrator should log in as a ordinary user and then su (or Switch User) to the root account, thus minimizing the risk of inadvertently damaging the system. If there is doubt as to what user is currently being used, the administrator can type “id”, which will return the Effective User ID (or EUID). Similarly, the whoami command returns the effective username.
WARNING:Root can irrevocably damage the system–take care when working as root!
Most system administration functions are carried out using the root account. Root has unrestricted access to all system functions. Some additional system accounts are used to administer subsystems. Use these accounts to ensure that file ownership and permissions are correct for the subsystem.

The root Account 11
On larger systems, administration may be done by several people. It is imperative that multiple administrators coordinate their activities. It is possible for one person to undo or corrupt work done by another.
Regardless of whether the machines are in a restricted access area (like a computer room), never keep the system console logged in as root. Some administrators disable root logins on other terminals to prevent multiple root users working on the system. This may be a good idea, but in the unlikely event the console locks up, there will be no way of working as root, so it may be a good idea to leave at least one other terminal with restricted root access permissions (SUDO).
The following topics are discussed in this section:
� The su Command
� Traditional Administration
� Administration Shells
The su Command
The su command is used by the system administrator to become another user temporarily. A new shell is invoked with the user and group IDs of the specified login name. If the dash (-) option is given, the shell executes the login profiles to set up the environment as though the new user had logged in normally. Without the - option to su, very little of the current shell environment is used for the new shell.
The su command can be given options for the login program. For most accounts, the login program is the shell, and the -c option can be used to specify a command to execute as the other user (the next parameter given in double quotes). Once that command is executed, su will return to the original user.
Many modern Linux systems with extra security features can disallow the su command on a per-user basis (either from or to individual accounts).

12 Chapter 1—Introduction to Linux Administration
Note that when performing the su root command, the path will normally be reset to the default root path. For security reasons, this default will not include the current working directory. To avoid Trojan Horse programs, you should always execute su using its full pathname (/bin/su) when changing to the root user.
Exercise 1-1: Using su
Solutions to this exercise are provided in Appendix B at the end of this manual.
1. Log in as a normal user on your system. We will refer to this user as username in the examples from now on.
a. What is your working directory? What is your search path?
.....................................................................................................................................
.....................................................................................................................................
b. Enter the following command:
$ su
Supply the root user password when prompted.
What are the values of your working directory and search path now?
.....................................................................................................................................
.....................................................................................................................................
c. Enter the following commands:
# exit
$ su -
and supply the root user password when prompted.
What are the values of your working directory and search path now?
.....................................................................................................................................
.....................................................................................................................................

The root Account 13
d. Enter the following command:
# su username
What are the values of your working directory and search path now?
.....................................................................................................................................
.....................................................................................................................................
e. How many shells are you running? Can you prove it?
.....................................................................................................................................
.....................................................................................................................................
Exit from each shell until you log out of the system.
2. Create a new user on the local machine using linuxconf.
If the system suggests a value for a field, accept it unless you choose to change any values.
If you have no idea what a field is asking for and no default is suggested, you may try to leave the field empty. The system will force you to fill the detail where it is compulsory.
a. Create a new user called henry.
Ensure you set the option to make the user’s home directory and select /bin/bash as his login shell. Do not forget to set a valid password for this account. Exit.
.....................................................................................................................................
.....................................................................................................................................

14 Chapter 1—Introduction to Linux Administration
b. Test your new user account.
Use su - henry to test this new user account.
Log out henry and log out root and then log in again as henry to test the account once more.
We will use this account in future questions, so make sure it is usable and has a valid password.
Create additional user accounts if you wish.
.....................................................................................................................................
.....................................................................................................................................
c. Experiment with user privileges.
Log in as henry (if you are not logged in as him already) and use shutdown -r now to try to reboot the system. If you cannot do this, can you explain why not?
.....................................................................................................................................
.....................................................................................................................................
d. What can you do to reboot the system without logging out again (pressing CONTROL+ALT+DELETE is not the solution we are looking for)?
.....................................................................................................................................
.....................................................................................................................................
3. What do the following commands do, and which ones require a password? (Assume the commands are typed sequentially into the same shell.)
$ su
# su - henry
$ su -
# su - lp -c lpsched
# exit
$ su root -c "rm /tmp/.lock321"
.....................................................................................................................................
.....................................................................................................................................
The root Account 15
Exercise 1-2: Navigating and Using an Administrator’s Shell
There are no solutions provided for this exercise.
Log in as the root user and run the system administrator’s GUI administration interface. Nearly every distribution provides some GUI interface for administrative task, such as linuxconf or YaST.
Experiment with some of the different options here, looking around to see what operations you can undertake.
Traditional Administration
As Linux was developed by a group of programmers, a certain level of knowledge about the system was assumed. Administrators were usually extremely knowledgeable and worked directly with low-level files and programs. This approach has slowly changed over recent years, and better administration interfaces are being provided.
Administration Shells
Administration shells have been introduced to make Linux more acceptable to the commercial marketplace. The shells simplify the administration of most functions so that relatively novice users can administer a Linux system.
The shells break down when something goes wrong, and the novice user will usually need help to correct the problems.
The # character represents the system’s prompt to you. You should not type this character in any of the examples used in this book. Note that the # prompt is used when you are logged in as root and the $ prompt is used when you are working as any other user.

16 Chapter 1—Introduction to Linux Administration
D O C U M E N T A T I O N
There are many sources for information regarding the system or systems that you administer. Information is available online, residing in electronic format on the system itself, and online via the Internet. Books are often an invaluable resource, particularly in cases where online material may not be accessible.
The following topics are discussed in this section:
� Books
� Using the Internet
� Man Pages
� Info Pages
� HOWTOs
� Documenting the System
� Identifying the Linux System
� Identifying Active Users
� Finding Files
� The grep Family
� Looking Inside Files
� System Default Files
Books
There is a growing supply of good quality reference material for Linux available in bound volumes. The reference material ranges from quick helps and general information to specific topics like Bind, NFS/NIS, etc. All are excellent sources of information when trying to search out a specific function or trying to troubleshoot an application.
The system manuals are indispensable tools of the trade for the system administrator. Make sure you have a complete set on hand at all times. If the users frequently borrow manuals, it is worthwhile to get a duplicate set for the administrator.

Documentation 17
There are usually two types of hard-copy manuals:
� Reference books
These provide virtually the same information as online manual pages.
� Guide books
Look for a Guide to Systems Administration or a similarly titled manual. This describes how to perform the administration of your system and often gives discussions, practical hints, etc.
Using the Internet
The Internet is probably the most useful tool available to any administrator. The Internet places the experience and expertise of millions of other administrators at your fingertips through chat rooms and large news groups (e.g., www.dejanews.com). Here, any number of questions can be asked and answered in a matter of minutes. Also, the Internet provides the most up-to-date software documentation available. Very often an administrator may find himself trying to configure the system using out-dated documentation. Probably the best source for documentation on the Internet is the Linux Documentation Project (www.ldp.org). This nonprofit group has been working diligently to document the features and uses of many Linux applications. They provide the explanations on how to install and/or configure various Linux packages. However, these how-tos are often not up to date on software but will almost always provide insight to the administrator.

18 Chapter 1—Introduction to Linux Administration
Man Pages
These pages document the various switches and components of Linux and its utilities. They are usually installed with the system and, thus, are always quickly available. Unfortunately, the manual pages are easily outdated as newer versions of software are released. If man pages are not updated, an administrator may find that a switch or an option has been made obsolete or has a new function.
A man page may be accessed by typing the man <command> command. This searches the directories indicated by the environment variable MANPATH. When the match is found, man displays the preformatted text to the screen. Some systems display all matched pages. Adding a section number to the man request will show only the command from the desired section: man 1 <command>.
The sections used by the man command are as follows:
1. General commands (tools and utilities)
2. System calls
3. C Library routines
4. Special files (mostly device files)
5. File formats
6. Special files and hardware support
7. Miscellaneous information and conventions
8. System maintenance and operation commands
The previous scenario works if the administrator already knows the name of the relevant man page. In other cases, it may be necessary to scan the whatis database for more information. The whatis database consists of the short descriptions of various commands found on the system. The commands apropos, man -k, or whatis will search the database and return any whole word matches. This is useful for finding the relevant man page to read.
whatis command Searches whatis database for complete words
apropos command Keyword searches for command
$ man man
$ man 1 intro
$ man open
$ man n open

Documentation 19
The PAGER variable is used to determine which screen page program is used to filter the output. The default may be either less or more, though less is probably much more suitable now, as it includes greater functionality.
$ PAGER=less
$ export PAGER
If the MANPATH variable is not set (and exported), then man will assume /usr/man. If MANPATH is set, then man will only look at directories explicitly set in the variable. If you wish to continue to use /usr/man, include it in MANPATH.
Exercise 1-3: Using Man Pages
The usefulness of manual pages should never be underestimated. Learn to use them! If the language and terminology of manual pages frightens you off, try man on a command you know well, like cat or ls. You will start recognizing common terms and expressions used throughout. Solutions to this exercise are provided in Appendix B at the end of this manual.
When you read manual pages, notice the sections at the very end, such as Files, References. Sometimes these sections convey the very information you need to know (e.g., how this command or file interacts with others, who needs it, who is needed, etc.).
1. Use the man command to display information about the passwd command. Note that this shows information about the passwd command. There is also a file called /etc/passwd.
Modify your man command so that a description of the passwd file rather than the passwd command is displayed.
.....................................................................................................................................
.....................................................................................................................................

20 Chapter 1—Introduction to Linux Administration
2. Find out which pager program is being used by man and modify your environment to use the other one (i.e., if it is using less, change to use more and vice versa). You may need to read the manual pages for the man command itself.
.....................................................................................................................................
.....................................................................................................................................
3. Find which commands from section 1 have anything to do with editing.
HINT: Use a combination of apropos command and grep (to pick up section 1 lines only).
.....................................................................................................................................
.....................................................................................................................................
Info Pages
An info page is intended to be the next generation of the man page. However, very few info pages exist. In the cases where an info page is not found, the info page simply calls the relevant man page. Let’s not understate the importance of the info pages, since in some cases, they will contain the most recent information on a topic.
HOWTOs
If more specific information is required for a given task, the HOWTO pages are another source to consider. There are versions of these HOWTO documents in HTML, SGML, and in plaintext, and they can typically be found in /usr/share/doc/HOWTO. Most broad topics have a HOWTO written for them, but for more specific topics, check the mini-HOWTO index, normally found in a mini/ subdirectory under the main HOWTO directory.

Documentation 21
Documenting the System
For the administrator who is responsible for multiple servers, it may be difficult or even impossible to remember the specifics of each individual host. For this reason, an administrator can rely on the kernel and operating environment to report some information about the host. It may also be a good idea to maintain a system log book containing detailed information about the system.
Using uname and hostname
The uname program can give the administrator some very specific information about the host (e.g., the operating system type, the network name, the hardware type, etc.). This data can be used when configuring the various components of the operating system (e.g., recompiling the kernel). The hostname command can also be used to help identify the machine and configure its machine name.
System Log Book
A system log book is an indispensable tool for the administrator. The log book is used to record all of the events that involve the system. The log book is a good place to store system details such as model numbers, installed hardware and software, and serial numbers.
The following is an outline of things that you should take note of:
� System crashes
� Maintenance
� Hardware problems
� System upgrades
� Software installations

22 Chapter 1—Introduction to Linux Administration
Preventive Maintenance reports and other bits of paper can be kept with the log book, providing a single point of reference for all information associated with the system. Be sure to keep this book under tight security as it will contain a lot of information that would be valuable to anyone who is out to cause mischief.
Identifying the Linux System
The uname command tells the system administrator information about the current machine and operating system. The following options may be used along with the uname command:
-a All information
-n System name (node name on network)
-s OS name
-r OS release number
-v OS version number
-m Machine hardware
-p Processor type
$ uname -a
SunOS mash4077 5.4 generic sun4c sparc
$ hostname
mash4077
The hostname command is in fact an alias to uname -n and may not be available on all machines.

Documentation 23
Identifying Active Users
The who family of commands returns the original identification of the user as provided during the login process. The information displayed by the who command is kept in /var/run/utmp. A history of every login is also kept in /var/log/wtmp. If the user subsequently switches the identity through the su command, who will still reflect the original name. who can also be used to identify the current user, as does the id command. Some systems also have a w command (originally BSD), which is identical to the who command.
$ who
trapper pts001 Jul 25 11:01
hawkeye console Jul 25 11:31
$ who am i
hawkeye console Jul 25 11:31
$ id
uid=318(hawkeye) gid=300(users)
$ who /var/log/wtmp
history of all system logins

24 Chapter 1—Introduction to Linux Administration
The id command shows the current name under which the user operates after the switch occurred.
$ su - lp
$ who
root console Jul 17 23:35
$ id
uid=7(lp) gid=9(lp) groups=9{lp)
switched to user lp: who shows the name I logged with; id shows the current
$ w
09:47 up 10:19, 2 users, load average: 0:00 0:00 0:00
User tty login@ idle JCPU PCPU what
root lft0 11:33 10:00 13 11 xinit
root pts/0 11:46 0 24 0 w
Finding Files
With a hierarchical directory structure, it is quite easy to forget where a particular file is located. The find command is Linux’s directory search command. It will search a directory and all subdirectories for files. Options to the command permit find to print the pathname of any files found, to find files of a particular name, or to execute a command for each file found, as shown in the following example:
find directories... search_criteria... action
Search criteria that can be used with the find command are as follows:
-name name Finds only files called name (can use shell wildcards)
-user name Finds only files owned by user name
-type letter Finds files of specified type: f (plain files), d (dirs), etc.
-mtime n Finds files modified n days ago, less than (-n) or greater than (+n)
-size n[c|K] Finds files of size n, larger than (+n) or smaller than (-n), c=chars, K=kilobytes (when omitted, 512-KB block size is implied)

Documentation 25
-newer pathname Finds files newer than specified file
-mount Specifies not to cross disk boundaries
The following actions can be associated with the find command:
-print Prints filenames found
-exec cmd {} \; Executes given command (filename will be given in place of {})
-ok cmd {} \; Executes command but prompts for confirmation
The -name option supports the same wildcard characters as the shell (*, ?, and []). Remember to put a name containing these characters in double quotes to prevent the shell from performing its own filename generation and argument substitution.
Many other options to find support very powerful search criteria and are described in the online manual page.
Be careful when using find on large directories as the search can take a very long time and can be unfriendly to other users of the system.
The find command has many options that are of particular interest to system administrators. find can be used to execute a command (with user confirmation) for each found file.
The time options allow you to find files that have been modified, accessed, or created a specified number of days ago. Therefore, -mtime -1 means files modified less than 1 day ago. Note that a day is a 24-hour period calculated from when the command is run. Thus, if it is now 3:00 P.M. on Thursday, -1 means all files, since 3:00 P.M. Wednesday. A 1 would mean exactly 1 day ago or between 3:00 P.M. Tuesday and 3:00 P.M. Wednesday.
It is often easier and more accurate to use touch to create a file with a specific creation date and time and use the -newer option.

26 Chapter 1—Introduction to Linux Administration
Another utility that can be used to find files in Linux is locate. This searches through a prebuilt database of files for a search string. To generate the database, either run updatedb or slocate -u. Keep in mind that any file changes will not be reflected until this database is updated again. Typically, the job of updating the database is left to the cron utility, which executes commands according to a set schedule. If you wish this update to be done on a daily basis, create a file in /etc/cron.daily/ with the following contents:
#!/bin/sh
/usr/bin/slocate -u
Exercise 1-4: Using find
Solutions to this exercise are provided in Appendix B at the end of this manual.
1. Find all of the directories on the system that are owned by henry.
.....................................................................................................................................
.....................................................................................................................................
2. Find all of the files in /usr/bin and /sbin that are owned by root and are greater than 100,000 characters.
.....................................................................................................................................
.....................................................................................................................................
3. Modify your previous find command to identify the contents of each file found.
.....................................................................................................................................
.....................................................................................................................................
4. What do the following find commands mean?
a. # find . -print
b. # find /etc -type d -print
c. # find /home -name .bash_profile -exec more {} \;
d. # find /dev -type f -mtime -7 -exec ls -l {} \;
e. # find /sbin /usr/sbin -name "user*" -exec ls -ld {} \;
.....................................................................................................................................
.....................................................................................................................................

Documentation 27
The grep Family
The grep command provides pattern-matching criteria to search for lines in a file containing a specified pattern. The pattern is specified as a full regular expression.
� fgrep uses fixed (simple) patterns:
fgrep [options] pattern [files...]
� grep uses regular expressions to define powerful pattern-matching templates:
grep [options] pattern [files...]
� egrep uses extended regular expressions and allows multipattern search:
egrep [options] pattern|pattern [files...]
Common options used with grep include:
-v Output nonmatched lines
-c Output count of lines matched
-i Ignore lower/upper case
-n Mark each matched line with its relative line number
The fgrep command is a faster version that does not use regular expressions and is usually more convenient.
The egrep command uses additions to the regular expression mechanism to get a more powerful expression-matching system; most notably, it allows a Boolean OR search; for example:
$ egrep "pattern1| pattern2" file
will return all lines containing either pattern1 or pattern2.

28 Chapter 1—Introduction to Linux Administration
Looking Inside Files
The file command identifies the contents of any file on the Linux system. It looks at the file type first (e.g., a directory), then looks at the file contents. The /usr/share/magic file contains magic numbers used to determine the contents of the files recognized by the file command. Data files use octal dump (od).
Use the -c option to display ASCII characters where possible.
# file *
feed.dat: ASCII text
myprog: iAPX 386 executable not stripped
myprog.c: C source code
runsys: commands text
x.jpeg: data
# od -c x.jpeg | less
Some systems supply a hex dump (hd) program.
Text files can be examined using standard utilities such as less, more, or vi. Non-ASCII text files can be examined using the od command. Each command dumps out every byte in the file using an octal representation (od -x for hexadecimal). When used with the -c option, a character equivalent is displayed wherever possible.
The strings command is useful for peeking into data files to extract just the ASCII strings, ignoring any nonprintable characters found.

Documentation 29
System Default Files
Linux system defaults were once hard coded into the individual programs. Gradually, user-configurable defaults were allowed but in an ad hoc manner. Linux stores some command defaults in files in the /etc/default directory. The following characteristics apply to file contents in this directory:
� Filename is the same as command name.
� Entries in the file take the form of environment variable definitions.
� Details of the defaults are defined in the command manual page.
� Files are usually edited manually.
# more /etc/default/useradd
# useradd defaults file
GROUP=100
HOME=/home
INACTIVE=-1
EXPIRE=
SHELL=/bin/bash
SKEL=/etc/skel

30 Chapter 1—Introduction to Linux Administration
S U M M A R Y
In this chapter, you were introduced to some system administration concepts, including:
� The role of the superuser account
� Using su to temporarily run as a different user
� The role an administrator should play in the workplace
� Simplifying Linux for administrators through administration shells such as linuxconf
� Using a wide suite of utility programs, including the following:
� man
� uname
� who, id
� write, wall, talk
� find
� grep
� more, less
� Finding and using documentation for all facets of Linux.
P O S T - T E S T Q U E S T I O N S
The answers to these questions are in Appendix A at the end of this manual.
1. What is the significance of the privileged (or root) account?
.....................................................................................................................................
.....................................................................................................................................
2. How might a user change his or her EUID? How does this affect the user?
.....................................................................................................................................
.....................................................................................................................................

Post-Test Questions 31
3. Why not just stay logged in as root at all times?
.....................................................................................................................................
.....................................................................................................................................
4. How can one user communicate with another user?
.....................................................................................................................................
.....................................................................................................................................
5. When should administrative tasks be delegated? Who should they be delegated to?
.....................................................................................................................................
.....................................................................................................................................

32 Chapter 1—Introduction to Linux Administration

M A J O R T O P I C S
2
Kernel Modules and Customization
Objectives ...................................................................... 34
Pre-Test Questions......................................................... 34
Introduction .................................................................. 35
Kernel Basics.................................................................. 36
Compiling the Kernel .................................................... 42
Modules......................................................................... 50
Kernel Tuning................................................................ 54
Summary ....................................................................... 55
Post-Test Questions ....................................................... 56

34 Chapter 2—Kernel Modules and Customization
O B J E C T I V E S
At the completion of this chapter, you will be able to:
� Explain the function of the kernel and how it interacts with the rest of the system.
� Describe the difference between a monolithic and a modular kernel.
� Distinguish between stable and development kernels. (Explain the kernel version numbering scheme.)
� Navigate the kernel source tree and the documentation it contains.
� Configure, build, and install a custom kernel and modules.
� Manage kernel modules at run time.
P R E - T E S T Q U E S T I O N S
The answers to these questions are in Appendix A at the end of this manual.
1. How can you distinguish a stable kernel from a development kernel?
.....................................................................................................................................
.....................................................................................................................................
2. What are three methods you can use to configure the kernel before building it?
.....................................................................................................................................
.....................................................................................................................................
3. What is a kernel module?
.....................................................................................................................................
.....................................................................................................................................

Introduction 35
4. Why would you want to build a kernel?
.....................................................................................................................................
.....................................................................................................................................
5. What is the purpose of the kernel?
.....................................................................................................................................
.....................................................................................................................................
I N T R O D U C T I O N
The kernel is the core of the operating system. The kernel acts as an interpreter between a user and the hardware. The kernel controls access to the hardware resources of the computer and determines how to share those resources on an equitable basis. It includes hardware drivers, file systems, networking, memory management, and process management.
The kernel can be configured and optimized to suit virtually any situation through the recompilation of the kernel itself. You might want to compile a version of the kernel to include the drivers for your specific hardware or to update drivers to get bug fixes or new features.
Linus Torvalds and a large group of programmers are committed to developing better code. Furthermore, through the support and contributions of the Open Source community, the Linux kernel has quickly been able to outperform virtually all other operating systems available today.
In this chapter, we will cover kernel basics, compiling the kernel, modules, and kernel tuning.

36 Chapter 2—Kernel Modules and Customization
K E R N E L B A S I C S
The kernel is among the first bits of software to run a system. Once the kernel has finished its startup, it calls the init process (sometimes known as the granddaddy of all other processes). The kernel provides all the basic functionality to the programs as well as managing all system resources: hardware, processes, memory, I/O, and file systems. The kernel’s functionality is easily improved by adding or removing compiled code called modules or device drivers.
The Linux kernel is an ongoing project with continuous development. In this process are two development tracks that run in parallel. The first is the stable version of the kernel and is intended for production use. It is updated very often with bug fixes, driver updates, security patches, and other new options. The second track is the development version of the kernel and is where the kernel developers try out new things. It is sometimes unstable, with bugs and incomplete features. You can tell whether a kernel is in the stable or development phase by the version number. The format of the version number is:
X.Y.Z
where X is the major version, Y is the minor version, and Z is the patch level. If the minor version is odd, you have a development kernel; if it is even, you have a stable kernel. For example, the kernel 2.2.13 would be a stable kernel and 2.3.29 would be a development kernel. In order to determine the current kernel version on a specific computer, use the uname -r command.
Note that many Linux distributions add a fourth number, denoting the number of changes the vendor has made to the kernel. Most systems administrators want to use a stable kernel to ensure reliability of service to the users. However, there are reasons for choosing to use a development kernel, such as:
� To gain support for a device not available in any stable kernel.
� To gain new features not available in the stable series.
There are other reasons for running the development kernel that might seem tempting (like helping the Open Source community), but an administrator must remember that her primary responsibilities are to the users, to the employer, and then to the Open Source community. Placing an unstable kernel on an active server machine in order to evaluate a new kernel is risking the stability and usability of the server. An administrator should use the development kernels on her server only when new functionality or new features are required.

Kernel Basics 37
The primary Web site for the Linux kernel is www.kernel.org. However, one may get updated kernels from the vendor of a specific distribution. The vendor may have made changes to the kernel that some programs in their distribution rely on. One may even be able to get a precompiled kernel that works ideally for a specific machine or business need.
In this section, we will discuss the following topics:
� Structure of the Kernel
� Structure of the Source Tree
Structure of the Kernel
The Linux kernel is the underlying component of any Linux operating system. The kernel allows all of the parts of the system, hardware and software, to interact and operate. Many aspects of Linux functionality are built into the kernel, such as support for hardware devices through device drivers, and support for other hardware-specific architectures. The kernel also includes support for networking protocols such as the TCP/IP stack and multiple file system formats. When support for these types of components is compiled into the kernel, it is often called native support. In addition to supporting hardware and communication protocols, the kernel manages memory and resource tasks, and provides an interface of system calls for programs to access resources.
Scheduling
One of the primary functions of a kernel is to schedule tasks (or processes). The kernel uses various scheduling algorithms to maximize the performance of the system. This introduces the idea of priority processing. Priority processing is a scheduling algorithm where each task is assigned a priority. The processing of tasks is then handled according to this assigned priority. All users can decrement a process’ priority, but only the root or superuser account can increment the priority of a process. In this way, every user has some input into the actual processing of the system. Although this may seem chaotic at first, it actually works very well.
38 Chapter 2—Kernel Modules and Customization
Architecture Abstraction
Although originally designed for the x86 architectures, the kernel has been altered in the past few years to run on a variety of hardware platforms. Most of the source code for the kernel is written in C and is easily ported. However, since the kernel must provide the interface between hardware and user programs, some portions vary from one type of platform to another. These portions are said to be architecture dependent, which means that they must be implemented independently among the different hardware system architectures. The hardware platforms the Linux kernel currently runs on are as follows:
� Intel x86 and compatible PC systems (ix86)
� Compaq (Digital) Alpha (AIX)
� Sun SPARC and compatible (SPARC and SPARC 64)
� PowerPC, including most Power Macintosh (ppc)
� Motorola 680x0, including some older Macintosh (m68k)
� MIPS R4000 series, including the Cobalt Qube and some SGI systems (mips)
� StrongARM, including systems from Acorn (arm)
Device Drivers
The kernel provides access to all hardware resources on the system through device drivers. In general, there will be a driver for programs that provides access to each hardware device. Often these drivers are compiled directly into the kernel as a form of optimization. However, occasionally it may be useful to leave the device drivers outside of the kernel itself. If the kernel is designed to be portable (i.e., installed on a root/boot floppy), you may wish to compile the drivers as modules, since the more drivers placed into the kernel, the larger the kernel size. A module consists of plug-in object code that can be installed into and removed from the kernel. In some cases, using modules is desirable because they allow hardware to be changed without the necessity of rebuilding the kernel.
With the recent growth of Linux, the availability of drivers for various devices has grown tremendously. In the past, it might have taken months or years to find a device driver for a particular piece of hardware. Recently, however, device drivers appear very quickly after the hardware is introduced (e.g., the Creative Labs Sound Blaster Live driver).

Kernel Basics 39
File Systems
Linux uses a file system in order to organize disk storage. A file system is a way of organizing files so that they may be easily found, read from, written to, and managed. There are three types of file systems:
� Local (tape, hard disk, floppy disk, etc.)
� Network (NFS, Samba)
� Virtual (kernel driven, for example, /proc)
Local file systems provide the normal file accesses that are most familiar. The most common local file system for Linux is called ext2. Most Linux installations use ext2 on all of their local partitions. Linux has the ability to read many other local file systems as long as the functionality is compiled into the kernel. The most common are iso9660 for CD-ROMs, vfat for MS-DOS and Windows 9x partitions, and hfs for Macintosh disks.
Network file systems make files available across a network connection. Network file systems have clients and servers. Servers store the actual data on their local drives and provide to other systems the ability to read and write to the files. Clients access the resources of the server over the network. Server programs are usually system services that run external to the kernel. The client programs are generally built into the kernel as drivers. The most common examples of network file systems that you will run into are nfs, smbfs (which connects to Windows or Samba shares), and ncpfs (NetWare).
Virtual file systems do not actually store any files in the traditional sense. The files are representations of the kernel’s memory space. Thus they often provide useful information about what is going on in the kernel. The most common example of a virtual file system is the /proc file system. In addition to reading the information in the /proc file system, some of the files can be written to in order to modify kernel parameters. Two other examples of virtual file systems are devpts and devfs.

40 Chapter 2—Kernel Modules and Customization
Networking
Network drivers provide support for network hardware devices and for network protocols. Linux provides one of the fastest, most secure network systems available today. Nearly as quickly as a network security problem is found, a solution is presented. Furthermore, the speed and compatibility with other systems makes for a very versatile system.
Although Linux is known for its high-performance IP stack, other high-performing protocols are available. Linux has implemented IPX/SPX and AppleTalk, as well as other protocols. The optimized kernel and advanced networking abilities have allowed for the development of packet-filtering firewalls and advanced proxy servers. The optimized routing options available to the kernel allow for increased performance on the Internet.
Memory Management
The computer has a limited amount of memory, which must be distributed among all the programs. The kernel is in charge of allocating these memory resources. It implements a virtual memory system, which allows more programs to be running in memory than the the system can accomodate on the basis of actual physical memory. Linux uses shared memory to pass messages from one process to another. Take the ps program, for example. It relies on the information found in the /proc file system (created by the kernel in memory) for its information. RAM is used to cache disk accesses for increased I/O performance. The amount of cache in use is allocated dynamically on the basis of the memory demands of the system at any given time.
System Calls
System calls are the means by which programs access kernel functionality. Along with the standard system libraries, the system calls provide an interface with which to communicate with the hardware. This interface is called an Application Program Interface (API). This API provides a portable interface between a program and the hardware. Most of the calls conform to the POSIX standard, which defines the interface for UNIX-like operating systems.
Almost any operation that requires access to hardware or system resources requires a system call into the kernel. A system call transfers control from the program to the kernel, using a special operating mode called privileged mode. The kernel uses this privileged mode to do the work and pass the result back to the requesting program.

Kernel Basics 41
Structure of the Source Tree
The source code of the kernel is located in the /usr/src/linux directory. Sometimes this directory is a link to another directory, such as /usr/src/linux-2.2.13, which contains actual source code to a specific version of the kernel. Note that some distributions do not install the kernel source by default; you may need to install it from a package.
The following are the branches of the source tree. These branches are the divisions of the kernel source code that allow for customization and optimization.
� Core
These are the necessary files regardless of the configuration chosen.
� Doc files
These files are documentation on compile options that require postconfiguration.
� Include files
These are links to the include files of a system; these are usually located in /usr/include and contain machine-specific parameters.
� Architecture-dependent
This is the machine-specific code necessary for each architecture (x86, AIX, etc).
� Drivers
This section contains the device drivers that allow the kernel to control and communicate with the hardware installed.
� Networking
This set of files modifies the server’s network behavior and functionality. These files control everything from optimization to which protocols are used on the system.

42 Chapter 2—Kernel Modules and Customization
C O M P I L I N G T H E K E R N E L
Why would you want to compile a kernel? Some reasons include:
� To optimize the kernel for a particular model of CPU.
� To get support for a driver that was not compiled in the standard kernel image.
� To get support for a new driver that was not previously available.
� To update drivers with bug fixes or new features.
� To access new features in a newer kernel.
� To remove unused drivers and features in order to optimize memory usage.
In this section, we will cover the following topics:
� Preparing the Source Tree
� Configuring the Kernel
� Compiling
� Installing
Preparing the Source Tree
Before you can compile the kernel, you must first unpack the source code into the proper location and prepare the source directory. This section assumes use of Linus’ standard kernel distribution from the kernel.org Web site. The kernel source packages included with your distribution can also be used, but that may not be as easily upgradable.
Unpack and Apply Patches
To unpack a kernel, use something similar to the following:
$ cd /usr/src
$ tar xzf ~/download/linux-2.2.13.tar.gz
This will unpack kernel version 2.2.13 into the /usr/src/linux directory.

Compiling the Kernel 43
The kernel packages are quite large, and they get larger with every release. In order to reduce the bandwidth required for downloading, patch files containing only the differences from one kernel version to the next are made available. If you are upgrading a kernel from one recent version to another, the patches instead of the whole kernel should be downloaded. Applying a patch looks something like this:
$ cd /usr/src
$ zcat ~/download/patch-2.2.14.gz | patch -p0 -N -E -s
This would upgrade the source tree in /usr/src/linux from version 2.2.13 to 2.2.14. Note that the patch command will fail and give errors if it does not find the kernel version it expects.
make mrproper
The last thing to do once you have unpacked the source tree is to tell the kernel source tree to clean itself up. To do that, give this command:
$ make mrproper
A complete kernel source tree is now ready to be configured and compiled. Note that this step is necessary only if you are patching the kernel tree.
Configuring the Kernel
After the kernel source tree has been prepared, the kernel build process must be configured. This tells the system what should be compiled into the kernel, what should be compiled separately as a module, and what should be left out of the kernel altogether. There are three ways to configure the kernel:
� make config
� make menuconfig
� make xconfig

44 Chapter 2—Kernel Modules and Customization
make config
Originally, the only configuration method was make config. This is the only one that is guaranteed to work in development kernels. (Actually, some development versions have even been known to break this configuration method–the moral: just about any part of a development kernel may be broken.) The other methods were added to provide more ease of use. Another related method, make oldconfig, asks only questions about new options and uses the previous choices for everything else.
The make config process shows you various options by name and with a short description. It then prompts you to indicate whether you want to include that feature. Some features also allow you to compile them as a module instead of compiling them directly into the kernel. You answer each prompt with a Y, N, or M and then press ENTER. The default answer is printed in upper-case letters; pressing ENTER selects that choice. You can also type a question mark (?) to get help on a particular feature. This prints a short description of the feature to help you determine whether to include the feature in your kernel. One drawback to using make config is that once a decision has been made about a certain parameter, it is impossible to go back and change that parameter. You have to start over to make any changes.
Here is a portion of what a make config session might look like:
* Loadable module support
Enable loadable module support (CONFIG_MODULES) [Y/n/?]
Set version info on symbols for modules (CONFIG_MODVERSIONS) [Y/n/?]
Kernel daemon support (autoload of modules) (CONFIG_KERNELD) [Y/n/?]
* General setup
Kernel math emulation (CONFIG_MATH_EMULATION) [Y/n/?]
Networking support (CONFIG_NET) [Y/n/?]
Limit memory to low 16MG (CONFIG_MAX_16M) [N/y/?]
PCI bios support (CONFIG_PCI) [Y/n/?]
PCI bridge optimization (experimental) (CONFIG_PCI_OPTIMIZE) [N/y/?]
System V IFC (CONFIG_SYSVIPC) [Y/n/?]
Kernel support for a.cut binaries (CONFIG_BINFMT_AOUT) [Y/m/n/?]
Kernel support for ELF binaries (CONFIG_BINFMT_ELF) [Y/m/n/?]
Kernel support for JAVA binaries (CONFIG_BINFMT_JAVA) [N/y/m/?]
Processor type (386, 486, Pentium, PPro) [386] 486
defined CONFIG_M486
* Floppy, IDE, and other block devices
Normal floppy disk support (CONFIG_DLK_DEV_FD) [Y/n/n/?]

Compiling the Kernel 45
Note that the options you see depend on the version of the kernel you are configuring and also the previous answers that you chose.
make menuconfig
A more user-friendly way to configure the kernel is provided by make menuconfig. Simply select the options wanted from a console menu. This menu-driven option is easy to use and allows you to go back and make changes to parameters. It is also easy to save different configurations in order to experiment with different options.
make xconfig
This is essentially the same thing as the previous menu-driven configuration but looks even nicer. You must be running X to use this and have Tcl/Tk installed.

46 Chapter 2—Kernel Modules and Customization
Compiling
You probably will still need to log in as root to install the kernel and modules. Once the kernel has been unpacked and configured, compiling it is rather simple. Just run the following commands:
$ make dep
$ make clean
$ make zImage (or $ make bzImage)
make dep builds dependency lists to figure out what order to use to build all the pieces. The make clean command removes any old files from the last time you compiled. make zImage (or make bzImage) is where all the real work takes place. Depending on the speed of your system, it may take several minutes or several hours to compile and link the new kernel. The new kernel can be found in the /usr/src/linux/arch/<YourArchType>/boot directory. The compilation process also creates a system.map file that needs to be copied to the /boot directory. (This is important only when changing kernel versions and may not be necessary otherwise.)
zImage is limited to 1 MB uncompressed, whereas bzImage does not have that limit. Also, zImage must be used on a non-i386 architecture system.
Installing
How you install the kernel depends primarily upon how you boot the kernel on that system. Most people boot with LILO, but some people boot using Loadlin; occasionally you may even need to create a Linux boot floppy. Much of the following can be automated by using make install instead of make bzImage/zImage.
LILO
If booting off the hard disk (as is done on most systems today), it may be necessary to reconfigure and reinstall LILO. To reconfigure LILO, simply add an entry similar to the following example:
image=/boot/vmlinuz-2.2.5-15
label=linux
root=/dev/hda2
read-only

Compiling the Kernel 47
Afterward, reinstall LILO by typing “lilo” at the command prompt. It is convenient and wise to leave the old kernel entry in /etc/lilo.conf. In the cases where the kernel compilation has failed or been corrupted, this old entry can save the administrator a lot of time in getting the system booted and functional.
Loadlin
Copy the zImage file to the relevant DOS partition and reboot.
Boot Floppy
Run make zdisk in order to create a bootable floppy.
Exercise 2-1: Rebuilding a Linux Kernel
This exercise walks you through the process of building and installing a kernel. We will be configuring the kernel to add support for the joystick device. This exercise requires approximately 100 MB of hard drive space and should take around 45 minutes, depending on the speed of your computer. There are no solutions provided for this exercise.
Make sure you have an emergency boot disk in case the new kernel does not boot. You might want to make sure that the boot disk works before you need it. You don’t want to find out that your boot disk doesn’t work when you have a problem.
This exercise assumes that you have downloaded kernel version 2.2.14 and a patch to upgrade to 2.2.15. You can use a newer version if you like. If you want to use the kernel sources that came with your system, you can skip the steps for downloading and unpacking the kernel sources. Using the kernel sources from your distribution is a good idea; you can be more certain that that kernel will have the features expected by the operating system.
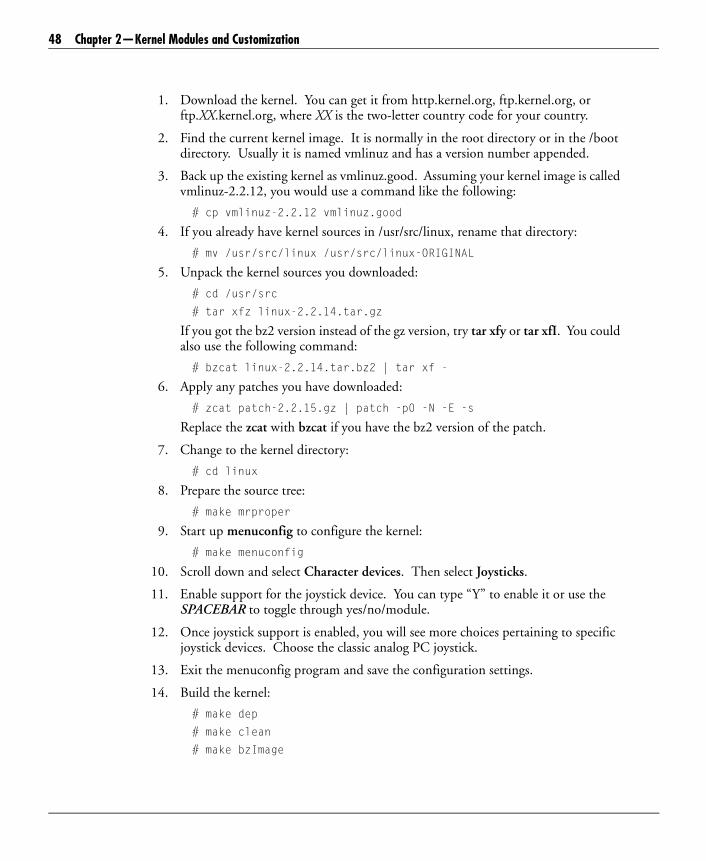
48 Chapter 2—Kernel Modules and Customization
1. Download the kernel. You can get it from http.kernel.org, ftp.kernel.org, or ftp.XX.kernel.org, where XX is the two-letter country code for your country.
2. Find the current kernel image. It is normally in the root directory or in the /boot directory. Usually it is named vmlinuz and has a version number appended.
3. Back up the existing kernel as vmlinuz.good. Assuming your kernel image is called vmlinuz-2.2.12, you would use a command like the following:
# cp vmlinuz-2.2.12 vmlinuz.good
4. If you already have kernel sources in /usr/src/linux, rename that directory:
# mv /usr/src/linux /usr/src/linux-ORIGINAL
5. Unpack the kernel sources you downloaded:
# cd /usr/src
# tar xfz linux-2.2.14.tar.gz
If you got the bz2 version instead of the gz version, try tar xfy or tar xfI. You could also use the following command:
# bzcat linux-2.2.14.tar.bz2 | tar xf -
6. Apply any patches you have downloaded:
# zcat patch-2.2.15.gz | patch -p0 -N -E -s
Replace the zcat with bzcat if you have the bz2 version of the patch.
7. Change to the kernel directory:
# cd linux
8. Prepare the source tree:
# make mrproper
9. Start up menuconfig to configure the kernel:
# make menuconfig
10. Scroll down and select Character devices. Then select Joysticks.
11. Enable support for the joystick device. You can type “Y” to enable it or use the SPACEBAR to toggle through yes/no/module.
12. Once joystick support is enabled, you will see more choices pertaining to specific joystick devices. Choose the classic analog PC joystick.
13. Exit the menuconfig program and save the configuration settings.
14. Build the kernel:
# make dep
# make clean
# make bzImage

Compiling the Kernel 49
15. Install the kernel in place of the old kernel image:
# cp arch/i386/boot/bzImage /boot/vmlinuz
16. Run lilo to tell the boot loader where the kernel is on disk:
# /sbin/lilo
17. Build the modules:
# make modules
18. Install the modules:
# make modules_install
19. Reboot the system.
20. If everything worked, you should be able to log back in once the system boots. Verify the version of the new kernel:
# uname -a
Linux sys.linux.org 2.2.15 #1 Mon May 15 10:40:35 CDT 2000 i686
21. Unless you are completely comfortable that the new kernel will be 100% compatible with your distribution, restore things back to the way they were. Copy the backup copies of the kernel image and the kernel sources back to their original locations.

50 Chapter 2—Kernel Modules and Customization
Exercise 2-2: Restoring the Previous Kernel–in Case the New One Doesn’t Work
No solutions are provided for this exercise.
NOTE: These steps will not be possible if you did not back up your existing kernel before installing the new kernel.
1. Reboot the system and intercept automatic boot:
lilo: <TAB>
linux goodlinux
lilo: goodlinux
2. Log in as root and restore the working kernel; then reboot:
login: root
password:
# cp /boot/vmlinuz.good vmlinuz
# vi /etc/lilo.conf
# lilo
# init 6
3. Try again!
M O D U L E S
At first, Linux was a monolithic kernel. Everything it needed was packaged into one large image, and features were either compiled into that image or left out. Eventually, the size of the kernel made it difficult to load and was inflexible to work with. Modules were introduced into the Linux kernel to allow more flexibility. They ran as if they were a part of the kernel, but they were dynamically added to the kernel while it was running.
The opposite of a monolithic kernel is a microkernel. A microkernel has no drivers built into it at all. The core kernel is very small and provides only a few primitive operations. Device drivers, file system drivers, network drivers, and sometimes even memory management are handled by system programs external to the microkernel. The Linux module system provides a nice balance between the two extremes of monolithic kernels and microkernels.
Even if you never have to recompile a kernel, you will probably need to manage modules to install and configure various device drivers. Fortunately, much of the module system is now automated.
Modules 51
The following topics will be covered in this section:
� Compiling and Installing
� Module Utilities
� Configuring
Compiling and Installing
Like the kernel, modules are easy to compile and install once completed with the kernel configuration process. You normally compile the modules right after compiling the kernel. To compile all of the kernel modules from the /usr/src/linux directory, simply type:
$ make modules
To install the modules as root, use:
# make modules_install
This will install the modules into a subdirectory of /lib/modules, named after the kernel version number. (For example, kernel 2.2.13 installs modules into the /lib/modules/2.2.13 directory.) Once the modules have been installed, configure them and load them into the kernel as needed.
Module Utilities
Several utilities are available to manage kernel modules. They are used to load modules into the kernel, remove modules from the kernel, and monitor which modules are being used. There is also a mechanism that can be used to load modules automatically into the kernel when they are needed and unload them when they are no longer needed.

52 Chapter 2—Kernel Modules and Customization
depmod
Some modules require other modules to be installed into the kernel before they can be used. These requirements are called module dependencies. The depmod program is used to create a dependency tree of all modules in the /lib/modules directory. The information is stored in a file called modules.dep. This is a plain text file that associates a module with other needed modules. The following is an excerpt from a modules.dep file:
/lib/modules/2.2.5-15/fs/umsdos.o: /lib/modules/2.2.5-15/fs/fat.o
The modprobe program can later be used to check the dependencies of a device driver. As we will see later, it installs these first and then the necessary modules.
It is important to understand the significance of the depmod command, but in truth, in very few instances will an administrator need to use it from a command-line situation in modern distributions. This command with the -a option is most often added to the boot scripts so that this file will be created when needed.
insmod
To install a module into the kernel, use the insmod command. Optional switches for the insmod command include the following:
-f Force even if using a different kernel version than required (for example, modules from outside the current kernel source tree)
-s Output to syslog instead of stdout
Follow these optional switches with module parameters. Examples of these parameters would be a memory address or IRQ number.
modprobe
The modprobe command basically does the same thing as insmod, but it checks for dependencies and loads other modules that are required for the named module to work.
Option -l (or list) combined with option -t (or type) lists all available modules of a certain type. For example, to see a list of file managers available for the mount command, use the following command:
# modprobe -l -t fs

Modules 53
lsmod
The lsmod command lists the modules currently loaded into the kernel, as shown below:
# /sbin/lsmod
Module Size Used by
nls_iso8859-1 2020 1 (autoclean)
loop 7648 10 (autoclean)
eepro100 12112 1 (autoclean)
3c59x 19112 1
The autoclean entries above have been automatically loaded by kerneld (discussed at the end of this section) and will automatically be unloaded when they are no longer required.
rmmod
This command removes a module from the kernel on the basis of its module name, not its filename. The driver must be unused in order for this command to work. Once removed, any resources (e.g., memory) held by the driver are released and available to the system. The -a option to rmmod removes all unused drivers from the system.
kerneld
The kernel daemon is probably the most advanced feature of the Linux kernel module system. It is able to determine when modules need to be loaded and unloaded, and it automates the process. It relies heavily on the device associations found in the conf.modules file (usually found in /etc). In newer versions of the kernel, kerneld has been replaced with kmod.

54 Chapter 2—Kernel Modules and Customization
Configuring
The conf.modules file is used to alias modules with device names. For example, the eth0 network card can be associated with the rtl8139 module by appending the following line to the conf.modules file:
alias eth0 rtl8139
Parameters to the device could be passed by including a post-install or pre-install line in the configuration file to add functionality to the driver. Further options can be added to the driver in a similar manner. For example:
options eth0 full_duplex
K E R N E L T U N I N G
Most tuning of the kernel is done by configuring and recompiling it. However, the Linux kernel now has a feature that allows you to change many kernel parameters while the kernel is running. This feature is called sysctl. The only consistent way of doing this is to use the /proc/sys file system interface. However, this requires that the /proc file system be compiled into the kernel. This is recommended, as there is no reason for not including this into the kernel.
Currently, the /proc/sys interface is the only way for some options to be altered in the kernel. While most files in /proc are read-only, some are writeable. If you write to such a file, the kernel will try to interpret the content that was written and modify internal operating parameters appropriately. For example, printing out the contents of the following file will tell whether TCP SYN cookies are enabled:
# cat /proc/sys/net/ipv4/tcp_syncookies
0
In this case, the 0 indicates that the feature is disabled. To enable it, you can write a 1 to the file:
# echo 1 > /proc/sys/net/ipv4/tcp_syncookies
This will activate the feature. If you print the contents of the file again, it will reflect the change. But the 1 that you wrote to the file never really got stored in the file. Instead, the kernel set the appropriate internal parameter to 1. Then when you read the file again, it converts that parameter into the contents of the file.
Summary 55
There are many files in the /proc/sys directory hierarchy. Most of the parameters that can be set are pretty obtuse. You can find more information about the parameters in the kernel documentation directory, /usr/src/linux/Documentation, especially in the sysctl directory. Generally, you should not mess around with the sysctl values unless you know what you are doing or you are specifically instructed to change a particular parameter in the documentation.
S U M M A R Y
In this chapter, issues relating to the Linux kernel were introduced. The fundamentals of the kernel structure were discussed as well as basic compilation steps. The use of modules was discussed. Key points to remember include:
� The kernel controls access to system resources.
� The kernel comes in development and stable versions.
� The second number in the version number is even for the stable series.
� Stick with the stable series for production environments.
� The kernel handles process scheduling, architecture abstraction, device drivers, file systems, networking, memory management, and system calls.
� There are several reasons that you may want to compile the kernel:
� To optimize performance for specific hardware
� To fix bugs or security holes
� To get support for new or updated drivers
� To access new features

56 Chapter 2—Kernel Modules and Customization
� Compiling the kernel involves several steps:
� Download source code and patches.
� Unpack the source and apply the patches.
� Clean up the build directory.
� Configure the kernel using one of the configuration programs:
� make config
� make menuconfig
� make xconfig
� make oldconfig
� Compile the kernel with the make zImage command.
� Install the kernel.
� Run lilo to tell the boot loader where to find the new kernel.
� Modules allow portions of the kernel to be loaded only when they are needed.
� Module loading can be configured in the /etc/modules.conf or conf.modules file.
� The kernel can be tuned by recompiling and supplying different configuration options or by setting parameters in the /proc/sys directory tree.
P O S T - T E S T Q U E S T I O N S
The answers to these questions are in Appendix A at the end of this manual.
1. List and describe at least two of the different types of source code found in the kernel source tree.
.....................................................................................................................................
.....................................................................................................................................
2. Describe one method of kernel optimization.
.....................................................................................................................................
.....................................................................................................................................
Post-Test Questions 57
3. When might an administrator use modules instead of compiling the code into the kernel itself?
.....................................................................................................................................
.....................................................................................................................................
4. What is the difference between a zImage and a bzImage?
.....................................................................................................................................
.....................................................................................................................................
5. When is it appropriate to recompile the kernel? What safety measures should always be in place when rebooting the machine using a new kernel?
.....................................................................................................................................
.....................................................................................................................................

58 Chapter 2—Kernel Modules and Customization

M A J O R T O P I C S
3
Package Management
Objectives ...................................................................... 60
Pre-Test Questions......................................................... 60
Introduction .................................................................. 61
Managing Packages........................................................ 62
Compiling Programs from Source.................................. 72
Shared Libraries ............................................................. 77
Summary ....................................................................... 79
Post-Test Questions ....................................................... 80

60 Chapter 3—Package Management
O B J E C T I V E S
At the completion of this chapter, you will be able to:
� Define what a package is and describe how it is used.
� Install, upgrade, delete, verify, and query packages on your system.
� Determine which package a file is located in.
� Compile and install programs from source.
� Define and manage shared libraries.
P R E - T E S T Q U E S T I O N S
The answers to these questions are in Appendix A at the end of this manual.
1. What is a package?
.....................................................................................................................................
.....................................................................................................................................
2. Name some of the common packaging formats.
.....................................................................................................................................
.....................................................................................................................................
3. What is a shared library?
.....................................................................................................................................
.....................................................................................................................................
4. If you download a source package, how do you normally build and install it?
.....................................................................................................................................
.....................................................................................................................................

Introduction 61
I N T R O D U C T I O N
Linux software is generally distributed in a format called a package. A package is a collection of files combined into a single file. This file also contains special information about its contents, such as dependencies, which are any packages necessary for it to function properly. Package managers, such as Red Hat’s RPM and Debian’s dpkg, are used to manipulate their respective package files. One of the roles of a Linux system administrator is to manage packages by installing, upgrading, removing, and verifying them.
The two most commonly employed package types are RPMs and debs (an RPM is manipulated by RPM and a deb by dpkg). Due to their robust feature set and open nature, many distributions employ the use of these two formats. RPMs are a used by Red Hat, Caldera, and many other distributions. Debian, Corel, and some others use debs.
The UNIX and UNIX-like community standard format for compressed archives of files (similar to zip files) is a tarball, which is manipulated using two standard utilities, tar and gzip. Tarballs lack the functionality that defines packaging systems and simply contain files, but they are often employed for distribution of things such as source code.
This chapter will cover the management of packages as well as source tarballs. It will also cover compiling programs from source code and managing shared libraries.

62 Chapter 3—Package Management
M A N A G I N G P A C K A G E S
This section will detail how to manipulate packages in both RPM and deb format.
Packages in RPM format are named in the following form:
package-version-revision.arch.rpm
Packages in deb files are named in the following format:
package-version-revision.deb
For these descriptions, package is the package name, version is the content’s version number, revision is the distributor’s revision of the package, and arch is the type of machine that the software runs on. The package will work with any architecture.
In this section, we will discuss the following topics:
� Installing Packages
� Upgrading Packages
� Removing Packages
� Querying Packages
� Verifying RPM Packages
� Forcing Packages
� Front-End Utilities
Installing Packages
You can install an packages with the following commands:
RPM: rpm -i package-x.y.z-r.i386.rpm
deb: dpkg -i package-x.y.z-r.deb
Both packaging systems maintain a database of installed packages and the files that belong to them. The database can be queried to keep track of all packages that exist in the system. Whenever a package is installed, upgraded, or removed, an appropriate entry is made in the database.
Managing Packages 63
Packages can depend on other packages, which means that they require other packages to be installed in order to run properly. If you try to install a package for which there is such an unresolved dependency, you will receive a warning detailing the required package(s). For example:
rpm -i package-x.y.z-r.i386.rpm
failed dependencies:
otherpackage is needed by package-x.y.z-r.i386.rpm
If you receive a dependency error, you should install the requested package(s).
Exercise 3-1: Basic Use of RPMs
In this exercise, you will become familiar with Red Hat Package Manager (RPM) and use this powerful utility to install an RPM package on your Linux system. Installing RPM packages is rather simple if the system supports the use of the RPM utility. We will be installing an RPM package, contained in the SupplementalFiles directory of the Interactive Learning CD-ROM, called grip-2.91-1.i386.rpm. This package is a CD-player and CD-ripper application. If you would like more information about grip, visit http://nostatic.org/grip. Solutions for this exercise are provided in Appendix B.
1. The first step in this exercise is to obtain the grip package itself. Although you may download the file from the Internet, since it is available on the Interactive Learning CD-ROM, we will simply install it directly from there. First, you must mount the CD-ROM with the mount command.
.....................................................................................................................................
.....................................................................................................................................

64 Chapter 3—Package Management
2. Next, navigate to the SupplementalFiles directory containing the grip-2.94-1.i386.rpm package.
.....................................................................................................................................
.....................................................................................................................................
3. Now, simply invoke the rpm command to install the package. Try to add options to make the installation more verbose and display hash marks to show the progress.
.....................................................................................................................................
.....................................................................................................................................
Upgrading Packages
You can upgrade packages with the following commands:
RPM: rpm -U package-x.y.z-r.i386.rpm
deb: dpkg -i package-x.y.z-r.deb
This will replace old versions of the package and install the new version. If there wasn’t an old version, it simply installs the package.
RPM will save old modified configuration files, presenting a message like this:
saving /etc/package.conf as /etc/package.conf.rpmsave
When using dpkg, you will be prompted with a list of options including overwriting the current configuration file with the new one from the package or leaving it as is.
Your changes to the configuration file may or may not be forward compatible with the new configuration file in the package, so you should investigate and resolve the differences between the two files as soon as possible to ensure that your system continues to function properly.

Managing Packages 65
Removing Packages
Uninstalling a package is just as simple as installing:
RPM: rpm -e package
deb: dpkg -r package
Notice that we used the package name “package”, not the name of the original package file, “package-x.y.z-r.<etc>”. When removing a package, type the name of the package itself, not the filename that it came from. One can encounter a dependency error when uninstalling a package if some other installed package depends on the one you are trying to remove. For example:
removing these packages would break dependencies:
package is needed by otherpackage
With debs, you may remove the configuration files for a package as well if you are sure you do not want them. The dpkg --purge package command does the same thing as dpkg -r package, but it also removes any configuration files.

66 Chapter 3—Package Management
Querying Packages
To see if a package is installed, you can run the following command:
RPM: rpm -q package
deb: dpkg -q package
To determine what package a file came from, use the following command:
RPM: rpm -qf /usr/bin/filename
deb: dpkg -S /usr/bin/filename
To get information about a package, you can print its information with:
RPM: rpm -qi package
deb: dpkg -s package
To get a listing of the files that a package will install, do this:
RPM: rpm -qpl package-x.y.z-r.i386.rpm
deb: dpkg --contents package-x.y.z-r.deb
Verifiying RPM Packages
Verifying a package compares information about files installed from a package with the same information from the original package. Among other things, verifying compares the size, MD5 sum, permissions, type, owner, and group of each file.
The rpm -V command verifies a package. You can use any of the package selection options listed for querying to specify the packages you wish to verify. A simple use is rpm -V foo, which verifies that all of the files in the foo package are as they were when they were originally installed.

Managing Packages 67
For example, to verify a package containing a particular file:
# rpm -Vf /bin/vi
To verify all installed packages:
# rpm -Va
To verify an installed package against an RPM package file:
# rpm -Vp foo-1.0-1.i386.rpm
This can be useful if you suspect that your RPM databases are corrupt.
If everything was verified properly, there will be no output. If there are any discrepancies, they will be displayed. The format of the output is a string of eight characters, a possible “c” denoting a configuration file, and then the filename. Each of the eight characters denotes the result of a comparison of one attribute of the file to the value of that attribute recorded in the RPM database. A single “.” (period) means the test passed. The following characters denote failure of certain tests:
5 MD5 checksum
S File size
L Symbolic link
T File modification time
D Device
U User
G Group
M Mode (includes permissions and file type)
68 Chapter 3—Package Management
Exercise 3-2: Verify the Installation of the Package
Solutions for this exercise are provided in Appendix B.
1. Using rpm, check the version of the installed package.
.....................................................................................................................................
.....................................................................................................................................
2. Once again with rpm, list all of the installed packages.
.....................................................................................................................................
.....................................................................................................................................
3. Use rpm to display information for a specific package.
.....................................................................................................................................
.....................................................................................................................................
4. Verify all installed packages using the verify option.
.....................................................................................................................................
.....................................................................................................................................
Exercise 3-3: Verify the Location of the Database
A solution for this exercise is provided in Appendix B.
Verify the location of the RPM database for the grip package using the rpm command and the verify option.
.....................................................................................................................................
.....................................................................................................................................

Managing Packages 69
Forcing Packages
Occasionally, difficulties will arise when managing package files. For example, you may find a package you are installing claims that you do not have a necessary application installed, but you have installed it by compiling its source code (instead of a package). In situations where the reccomendation or assumption of the package manager is not appropriate, it is necessary to ignore its warnings and force the operation. As there are numerable options (added as a flag to normal operations such as installations) when it comes to forcing, we will indicate the common ones:
RPM: --force, --nodeps
deb: --force, --ignore-depends
Again, these are potentially dangerous flags and should only be used as necessary. Please consult the man page for your respective package manager for details before employing any forces.
Front-End Utilities
Thus far, we have explained how to use the two most common core package management utilities. Although not as full-featured, there are many utilities written to simplify the direct use of package managers through easier command sets and graphical interfaces. You have probably encountered such tools during the installation process of your Linux distribution (for example, dselect is part of the Debian installation process). There are utilities such as alien and kpackage that will manage many types of package files through the console and X, respectively, and there are also format-specific ones such as GnoRPM for RPMs and dselect/apt for debs. SuSE uses its own YaST utility for management of the entire system, including packages.
Although we are not going to detail the usage of these utilities as there are so many of them, you should be aware of their existence and may wish to employ them. GnoRPM makes simple package management (such as new package installations) a breeze, and apt can upgrade every package installed on your system with one command (apt-get dist upgrade).

70 Chapter 3—Package Management
One of the package managers used in Debian is dselect. This is the same tool that is used to select packages during installation. It is a menu-based program, letting you choose the access method, packages to install, packages to remove, and configuration settings. Generally, you will want to go through each of the top-level menu items in order. The most important part of the application is package selection. This section will list all of the available packages, allowing you to choose which to install or remove. You can use the cursor keys to move around and the plus (+) and minus (-) keys to select packages to be installed or removed. Indicators on the left tell whether the package is already installed and whether you have chosen to remove it or install it.
Exercise 3-4: dpkg/dselect
Solutions for this exercise are provided in Appendix B.
dpkg
1. Install the Debian package zsh_3.1.2-10.deb, located in the SupplementalFiles directory of the Interactive Learning CD-ROM.
.....................................................................................................................................
.....................................................................................................................................
2. Remove the zsh_3 package. Make sure to remove all remnants of the package as well, including the configuration files.
HINT: There is a command for this action.
.....................................................................................................................................
.....................................................................................................................................
3. Queue the database by listing the installed packages by name.
.....................................................................................................................................
.....................................................................................................................................

Managing Packages 71
dselect
1. Open the dselect utility.
.....................................................................................................................................
.....................................................................................................................................
2. Select the option that allows you to choose the method of access. Choose the selection that allows the CD to be the method of installation.
.....................................................................................................................................
.....................................................................................................................................
3. Update the list of possible packages.
.....................................................................................................................................
.....................................................................................................................................
4. Install the available packages.
.....................................................................................................................................
.....................................................................................................................................

72 Chapter 3—Package Management
C O M P I L I N G P R O G R A M S F R O M S O U R C E
Sometimes it is necessary (or you may wish) to build and install a package from its source code. There are several reasons why you might need to do this; there may be no packages available for the program you want, or you may wish to configure the installation options.
Learning how to compile software from source is an important part of becoming a Linux system administrator; you will probably find wanted software that is only available in source form. Open Source developers distribute their programs as source code, and others may make (license permitting) a binary package of them. You should have a basic understanding of how to compile software from source code in case the need arises.
You may also be required to contruct your own Red Hat or Debian packages for internal or external distribution. We will briefly cover this topic. In addition, we will cover the following topics:
� Getting Source Packages
� Unpacking Tarballs
� Compiling
� Installing
� Building Your Own Packages
Getting Source Packages
Source code may be in either a tarball or a package.
Tarballs
Typically, programmers tend to give out gzipped tar files of the programs they have written. These tar files contain multiple source files usually created using the tar command, which is an archiving tool designed to store and extract files. The tarball created typically has a table of contents listing the files in it, and this can be viewed using the -t option to the tar command.

Compiling Programs from Source 73
Source Packages
In some cases, applications have restrictions that prohibit or discourage their distribution in binary form. A popular example of this would be the widely employed qmail mail transfer agent. This application has a license that has restrictions on binary distributions, so many source packages are available for it in common formats such as RPM and deb. A source package contains the information and files necessary to compile the software, create a binary package from the compiled software, and install that binary package.
Unpacking Tarballs
You may find tar archives that have an extension of .tar.gz, .tgz, or .tar. The .tar.gz and .tgz extensions indicate that the tar archive has been compressed with the gzip command. Most distributions include a version of tar that has inherent gzip functionality, which is called using the z flag. As most source is distributed in gzipped tar archives in order to reduce space and download time, all examples given will include the z flag. If you are working with a .tar file, omit the z from the tar command.
To unpack a tarball, first change to the directory where you wish to unpack into. Then execute the following command:
$ tar xfz package-x.y.z.tar.gz
This will usually create a subdirectory the package will have been expanded into.

74 Chapter 3—Package Management
Compiling
To compile a program from the source, first change to the directory where you unpacked the package–this is called the top-level directory of the package.
Most packages that you want to compile will hopefully contain adequate documentation explaining how to configure and build the software, and the first step is to read through that information. The first place you will want to look is in the README (or similarly named) file that came with the source code. This will often give you a quick overview of what the program is and either tell you how to compile it or where to look to find that information.
Most GNU software and a large majority of recently released free software uses the autoconf system. What this means to you is that you can run a configuration script to let the software determine what features are available on your system. First, run the following command to see if there are any special features in the package that you might want to enable:
$ ./configure --help
This will list all of the options to the configure script. The ones at the top are standard options that are generally used to tell the script where all of the files should be installed. The most important of these is the --prefix option. It usually defaults to the /usr/local directory. If you want to configure a package to install to your home directory instead, you would run configure with the following command:
$ ./configure --prefix=/home/username
The options near the bottom of the help screen usually differ from package to package. You will probably want to read the included documentation to determine which features you want to enable. However, the defaults are sufficient in most cases.

Compiling Programs from Source 75
Once the configure script has run and determined the features available on your system, you can build the software. This is accomplished by simply running:
$ make
This process will often take quite a while, depending on the size of the package and the speed of the computer. When the process is complete, you should be returned to the command prompt with no error messages displayed. If there is an error, you will need to determine the cause. That is beyond the scope of this book but will often be caused by a missing package, and you should check the source code’s documentation for dependencies.
On many packages, there is a command to test the program to ensure that is was compiled correctly. This command takes one of two forms:
$ make check
$ make test
If one of these is available, it will run a series of tests and report whether it thinks that the program will run correctly. You may also be able to run the program to test it before you install it. Be sure to remember to specify that you want to run the program from the current directory:
$ ./program
Note that many programs cannot be run until they are installed.

76 Chapter 3—Package Management
Installing
Once the source has been compiled into an executable, it can be installed. To install a program, you will need to have write access to the directories the files will be installed in. In most cases, this means logging in to the root account. Note that only the installation phase requires root access. The compilation phase generally does not require root access, so it should be done as a nonprivileged user to prevent problems. If you do not have root access, it may be possible to install the package into a directory in which you do have write access. This is generally specified using the --prefix option in the configuration phase, as discussed earlier. When you are ready to install, simply execute the following command:
# make install
This will copy all of the programs and all of the associated files to their proper locations. Once the installation process has completed, give the program a try.
Building Your Own Packages
In any type of environment, the need to build custom packages may arise. For example, you may be unable to locate a package for a specific piece of software that needs to be deployed on many machines. In cases like these, compiling the source code or transferring binaries manually to each machine would prove to be too lengthy of a process. Package installations would also register in the package manager’s database, which would increase the managability of custom software installations. A basic understanding of how packages are built and where to find help doing so are imperative.
Without plunging into the potentially complex details of constructing a package, we will lay out the basic principles one needs to understand and where to find proper documentation. Here is a list of simple steps necessary to build a binary package from source:
1. Retrieve the source code for the software you wish to include in your package.
2. Compile the source code into a binary.
3. Create a patch of changes you made to any source file(s).
4. Create a spec or control file (depending on the package format you are using).
5. Build the package using your package manager’s tool.

Shared Libraries 77
Red Hat packages use RPM to build them and Debian packages use dpkg-deb. Both packages are very dissimilar in structure, however, they function the same and require the same basic preparation. Refer to the RPM and dpkg-deb man pages, respectively, for more detailed information about package construction.
S H A R E D L I B R A R I E S
A shared library is shared code that many programs can use at once. The code that is common to a bunch of Linux executables is stored separately as a library file. These libraries are typically linked by the executables at run time. This drastically reduces the executable size and saves disk and RAM space.
Each binary using shared libraries used to have about 3 KB of startup code to find and load the shared libraries. Now that code has been put in a special shared library, /lib/ld.so), all binaries can use it. This wastes less disk space and makes upgrading easier.
In this section, we will discuss the following topics:
� Version Numbering Schemes
� Advantages of Shared Libraries
� Disadvantages of Shared Libraries
� Managing Shared Libraries
Version Numbering Schemes
Libraries tend to introduce new features, change the effect of existing ones, or remove old ones. This could be a problem for programs using them; what if it was depending on that old feature? This is where library versioning comes in. One can categorize the changes that might be made to a library as minor or major, and we rule that a minor change is not allowed to break old programs that are using the library. You can tell the version of a library by looking at its filename: lib.try.so.1.2 has major version 1 and minor version 2.

78 Chapter 3—Package Management
Advantages of Shared Libraries
Shared libraries have the following advantages:
� Saves on memory used in the system and on the disk
� Modularizes the system so that bugs can be fixed in one place and all programs that use the library will be fixed
Disadvantages of Shared Libraries
A disadvantage is that a shared library requires more packages because each library usually ends up as a separate package.
The interface (API) to the library cannot be changed without changing to a new major version and becoming incompatible with the old version. However, new subroutine calls can be added without becoming incompatible. (However, note that any program using the new call will require a version of the library that implements that call.)
Generally, the advantages outweigh the disadvantages.
Managing Shared Libraries
After installing a shared library, you will need to run ldconfig to ensure that the system will be able to find the new library when loading programs.
To determine what shared libraries are required by and used by an executable program, use the ldd command:
$ ldd /usr/bin/pine
libncurses.so.4 => /usr/lib/libncurses.so.4 (0x40019000)
libcrypt.so.1 => /lib/libcrypt.so.1 (0x40059000)
libc.so.6 => /lib/libc.so.6 (0x40086000)
/lib/ld-linux.so.2 => /lib/ld-linux.so.2 (0x40000000)
The first field shows which major version of each library is required. The second field shows the location of the actual library file that is being used. Note that this will most likely be a link to a specific version of the library file.
The /etc/ld.so.conf file contains a list of directories that will be searched to find shared libraries when loading programs.

Summary 79
S U M M A R Y
In this chapter, you were introduced to issues relating to packages, compiling programs from source, and libraries. These included:
� Packages
� Installing
� Upgrading
� Querying
� Removing
� Validating
� Using tar
� Source packages
� Compiling programs
� Using shared libraries

80 Chapter 3—Package Management
P O S T - T E S T Q U E S T I O N S
The answers to these questions are in Appendix A at the end of this manual.
1. What makes a package file different from a tarball?
.....................................................................................................................................
.....................................................................................................................................
2. What is a dependency, and what will happen if you attempt to install a package with one that is unresolved?
.....................................................................................................................................
.....................................................................................................................................
3. You have come across an unfamiliar binary on your system and wish to find out which package it belongs to. How would you do this with both RPM and dpkg?
.....................................................................................................................................
.....................................................................................................................................
4. What is a source package, and why might you create a source instead of a binary package?
.....................................................................................................................................
.....................................................................................................................................
5. You just compiled and installed a library from source and find that an application that requires it does not yet function. How would you verify that the application is able to locate the library, and how would you view all of the shared libraries that it requires?
.....................................................................................................................................
.....................................................................................................................................

M A J O R T O P I C S
4
Process Management
Objectives ...................................................................... 82
Pre-Test Questions......................................................... 82
Introduction .................................................................. 83
Processes ........................................................................ 84
Signals ........................................................................... 94
Daemons ....................................................................... 98
Memory......................................................................... 99
Process Accounting ...................................................... 103
Summary ..................................................................... 109
Post-Test Questions ..................................................... 109

82 Chapter 4—Process Management
O B J E C T I V E S
At the completion of this chapter, you will be able to:
� Perform basic process, memory, and performance management. (Use basic utilities such as ps, kill, killall, and free.)
� Create, monitor, and kill processes.
� Modify process priorities.
� Explain how to get around a locked-up program.
� Describe how daemons work, and how buffer overflow problems can affect security.
� Manage memory and CPU usage.
� Explain the use of core dump files and how to prevent them from being created.
� Configure and use process accounting.
P R E - T E S T Q U E S T I O N S
The answers to these questions are in Appendix A at the end of this manual.
1. Describe the function of the kill command.
.....................................................................................................................................
.....................................................................................................................................
2. How can core files be prevented from being created when programs crash?
.....................................................................................................................................
.....................................................................................................................................
3. How can you tell how much physical and swap space memory is being used on your system?
.....................................................................................................................................
.....................................................................................................................................

Introduction 83
4. Define the term daemon.
.....................................................................................................................................
.....................................................................................................................................
5. What is a buffer overflow?
.....................................................................................................................................
.....................................................................................................................................
I N T R O D U C T I O N
A process is the state of the program under execution. The kernel allocates resources to various processes and deallocates them once the process terminates. In this chapter, we will examine processes and two of the primary resources that they control: memory and CPU cycles.
We will also discuss signaling, which is a mechanism used to communicate between processes. We will explain daemons, which are special system processes that run in user space. We will also look into process accounting, which is an optional kernel feature that logs information about every process that is executed.
The chapter will cover processes, signals, daemons, memory, and process accounting.

84 Chapter 4—Process Management
P R O C E S S E S
A process is a running program. More precisely, it is the state of the program under execution at any point in time. It consists of the program code, the resources used by the program, and information used to maintain the current state of the program. Every running program has its own process. (Some programs actually use more than one process.) The kernel uses the state information to allocate resources such as CPU time, memory, files, and I/O among all the processes. It also uses the state information as a context to determine how to switch from one process to another.
A process is sometimes referred to as a task. Linux is a multitasking operating system, which gives the illusion that many processes are executing simultaneously. The kernel arranges for each process to have a short slice of CPU time, called a cycle, and automatically switches from executing one process to another. The switch between processes is called a context switch. Linux implements pre-emptive multitasking, which means that it does not require cooperation from the programs to switch between processes; the kernel can force a context switch any time it wants.
The state information of a process is stored in a Process Control Block (PCB), which is maintained by the kernel. All the PCBs are stored in the kernel’s process table. Each process has a unique Process ID (PID) that is used to find it in the process table. All processes, except init, have a parent process. init is the exception because it is started by the kernel at boot time. Thus, each process is the child of some other process. The parent/child relationship can be represented as a process tree, with the init process as the ancestor of all processes that have been run since the machine booted.
In this section we will cover the following things that you can do with processes:
� Creating Processes
� Monitoring Processes
� Managing Processes

Processes 85
Creating Processes
A new process is generally created every time a program is started. Except for commands that are built into the shell (for example, cd), each program that is run will be run in a new process. If you connect several statements using shell pipes, each segment of the pipe (each command) is run as a separate process. (See Exercise 4-1 for an example of how processes are created using a pipe.)
You can use the exec command to request that a new process not be created when starting a program. The exec command typically replaces the existing process’ image with a new image. Consider the following example:
$ exec emacs
But when the program exits, so does the shell. In other words, the exec command replaces the current shell with the specified program. The most practical use of the exec command is to replace one type of shell with another, such as changing from bash to tcsh.
The method by which a program creates a new process is called forking. Forking makes a duplicate copy of the process, including executable code, data, environment, variables, and open file handles. The child process can then replace itself with another program if that is what is needed. In modern operating systems such as Linux, the parent and child actually share the same memory until it is modified by one process or the other; each block of memory is copied only after it changes. This is called copy-on-write and is an effective way to manage memory usage. But as far as the processes, they each have their own copy of everything.

86 Chapter 4—Process Management
Usually, a newly forked child process immediately replaces itself with a new program loaded from disk. The system call to do this is the exec call, which works conceptually the same as the exec shell command. The process loads a new program into memory in place of the old one and begins executing it. To start a new program, the command-line shell does a fork and then an immediate exec; this is usually referred to as a fork-exec. Further, the shell waits for the child process that it created with a fork-exec sequence to finish before it gives out the shell prompt again. An alternative to this is background processing, wherein the shell does not wait for the child process to terminate.
Monitoring Processes
There is a lot of information stored in the PCB of each process. A lot of the information is only of importance to the kernel, while other information has systemwide implications. Some of the important items in the PCB are as follows:
� Process ID (PID)
� Parent Process ID (PPID)
� Real User and Group IDs (UID and GID)
� Effective User and Group IDs (EUID and EGID)
� Process state
� Signal state
The PID is a unique integer that is used to keep track of the process. PIDs are assigned in numerical order. That’s why init, the first process that is run on the system, is always process number 1. The largest PID in Linux is 32767 (which is the maximum integer value that can be represented by 2 bytes of memory). The process created after 32767 would have a PID of 1, but in order to keep PIDs unique, a new process cannot be assigned a PID that is currently in use. So the kernel will choose the next number in order that is not the PID of a currently running process. The PPID is the PID of the parent process.
The PCB contains several fields describing the owner of the process, for example, the real user ID and real group IDs of the user that started the program, and the effective user ID and effective group ID of the user when the program was started. These are used to determine what files and resources the process can access. Normally, the real IDs and effective IDs are the same. They will be different only when a program has the setuid bit set or when one user has su’ed to another. In both cases, the effective user ID is used to determine access privileges on the system.
We will discuss the process state and signals later in this chapter.

Processes 87
ps
The command you will use most often to look at processes and its attributes is ps. The default output shows only the processes that are running on the current terminal:
$ ps
PID TTY TIME CMD
1844 pts/7 00:00:00 bash
1857 pts/7 00:00:00 ps
The ps command has a lot of command-line options; most stick to a few variations in day-to-day use. Note that there are two different sets of options to recent versions of ps–ones that start with a dash (System-V compatible) and those that start without a dash (BSD compatible). Here are a few examples:
Options Descriptionps j Job control format (PPID, PGID, session ID, UID)
ps ax a means all processes on a terminal, x means show processes with no controlling tty (i.e., daemons)
ps l Long format (niceness, priority, memory usage, PPID)
ps u User format (username, memory usage, CPU usage, start time)
ps -ef -e means show all processes, -f means full format (username, start time)
ps -C bash Shows only processes running the bash command
ps -U booch Shows only processes for user booch

88 Chapter 4—Process Management
There are two commands related to ps, named w and who. They show who is logged in at each tty, how long they have been logged on, and what programs they are running.
$ whoroot tty1 Nov 27 11:29booch pts/1 Nov 30 07:44cbuchek pts/2 Nov 30 08:46$ w 10:53am up 13 days, 3:31, 3 users, load average: 0.34, 0.27, 0.18USER TTY FROM LOGIN@ IDLE JCPU PCPU WHATroot tty1 - 27Nov99 2days 2:03m 2:03m topbooch pts/1 red.sample.org 10:51am 1:57 0.10s 0.06s -bashcbuchek pts/2 blue.sample.org 8:46am 1.00s 0.48s 0.07s w
top
The top command is probably one of the most important system monitoring tools available. It lists running processes in order by resource usage and updates the display every 5 seconds by default. By default, it sorts by CPU usage but can be made to display in a different order. The information top displays is similar to that displayed by the ps command. Note that the top command itself often shows up near the top of the list when it starts, because it takes some CPU time to get itself started.
3:56pm up 2 days, 23:07, 4 users, load average: 0.08, 0.08, 0.0354 processes: 53 sleeping, 1 running, 0 zombie, 0 stoppedCPU states: 0.1% user, 0.1% system, 0.0% nice, 99.6% idleMem: 63448K av, 45828K used, 17620K free, 6628K shrd, 28164K buffSwap: 72256K av, 11552K used, 60704K free 7520K cached
PID USER PRI NI SIZE RSS SHARE STAT LIB %CPU %MEM TIME COMMAND11168 booch 12 0 968 968 788 R 0 0.3 1.5 0:00 top 1 root 0 0 104 52 36 S 0 0.0 0.0 0:03 init 2 root 0 0 0 0 0 SW 0 0.0 0.0 1:45 kflushd 269 daemon 0 0 72 0 0 SW 0 0.0 0.0 0:00 atd
While top is running, you can change the displayed information as well as the sorting order. Press ? to get a list of keys that you can use. The most important one is F, which is used to choose which information fields to display. Another often-used keystroke is SHIFT+M, which is used to sort by memory usage instead of CPU usage.
In the header of the top screen, there are some statistics about the machine as a whole. The first line tells how long the machine has been running, along with the system load average. The load average is the average number of processes that are waiting for a slice of CPU time, and is shown for the previous 1, 5, and 15 minutes. You can also get this information using the uptime command. The xload program shows a moving graphical display of the load average.
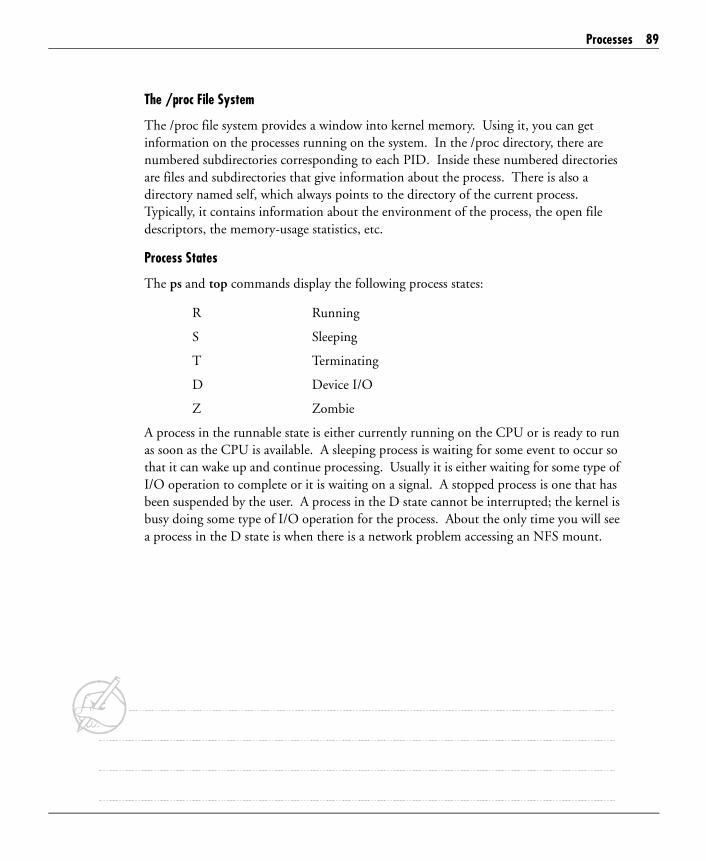
Processes 89
The /proc File System
The /proc file system provides a window into kernel memory. Using it, you can get information on the processes running on the system. In the /proc directory, there are numbered subdirectories corresponding to each PID. Inside these numbered directories are files and subdirectories that give information about the process. There is also a directory named self, which always points to the directory of the current process. Typically, it contains information about the environment of the process, the open file descriptors, the memory-usage statistics, etc.
Process States
The ps and top commands display the following process states:
R Running
S Sleeping
T Terminating
D Device I/O
Z Zombie
A process in the runnable state is either currently running on the CPU or is ready to run as soon as the CPU is available. A sleeping process is waiting for some event to occur so that it can wake up and continue processing. Usually it is either waiting for some type of I/O operation to complete or it is waiting on a signal. A stopped process is one that has been suspended by the user. A process in the D state cannot be interrupted; the kernel is busy doing some type of I/O operation for the process. About the only time you will see a process in the D state is when there is a network problem accessing an NFS mount.

90 Chapter 4—Process Management
Zombies
When a child process terminates before the parent, the kernel keeps some information about the child process for the parent to look at, such as the exit status. A parent process is notified via a SIGCHLD signal that its child has finished running. (See the section on signals later in this chapter.) The parent process must indicate to the kernel that it is done looking at that information before the kernel will free the memory associated with the child process. The parent provides this indication by using the wait system call. Until the parent does the wait call, a terminated child cannot be removed from the system and is in the zombie state; the process is dead, but it cannot go away.
Zombies do not take up any CPU time, but they do take up a slot in the process table and count toward any process limit placed on a user. A zombie is usually the result of a hung or buggy parent program. While it is undesirable to have zombies on your system, it is often difficult to remove them. You should try to unhang the parent program, perhaps by sending it a SIGHUP or other signal. If the parent process appears to be truly hung, you may want to kill it. If the parent process terminates before the child process has been released, the init program (process number 1) becomes the parent and will usually handle the process properly so that it can be removed from the process table. In some cases, a zombie process can be orphaned. This is when a child is not inherited by any other process.
Managing Processes
Now that we have seen how to create processes and how to check up on them, we will look at what we can do to a running process. You can interact with a running process, change its priority, pause or resume it, and send it signals. Signals are covered later in the chapter, but the others will be covered in this section.
Priorities
The kernel uses priority values to determine when and how often it should schedule each process. Each process has two priority values: static and dynamic. The static priority, also known as the niceness, does not change unless the user specifies that it should be changed. The dynamic priority is based on the static priority, but the kernel changes it to more fairly distribute CPU time. If a process has been using all of its allocated CPU time, the kernel will modify the dynamic priority so that other processes will get a chance to get more processor time for themselves. When we talk about priority, we generally mean static priority, because we have no control over the dynamic priority.

Processes 91
One thing about priorities is the meaning of their numeric values. Priority values range from -20 to 20. Most processes run with a priority of 0. Processes with lower priority values have the highest priority–they get the first chance to run. Raising the niceness, raising the priority value, and lowering the priority all mean the same thing. (This really makes discussions about priorities rather difficult.) To make things even more confusing, the kernel has a different way of expressing the dynamic priority than some of the tools. The key concept to remember about priorities is that a lower number means that the process gets more CPU time.
A process inherits the priority of its parent. To start a command with a niceness other than that of the parent shell, use the nice command:
$ nice xload &
$ nice -5 top
By default, nice raises the niceness value by 10, but you can specify some other increment by which to change the niceness. Only the superuser can lower the niceness of a process by issuing the following:
# nice --5 /usr/local/sbin/check_system
To change the niceness of a running process, use the renice command and specify the PID of the process you want to change the priority of:
$ ps ax
PID TTY STAT TIME COMMAND
1 ? S 0:17 init [3]
606 ? S 0:00 httpd
3960 pts/7 S 0:01 xload
5222 pts/3 R 0:00 ps xa
$ renice 2 3960
# renice -2 606

92 Chapter 4—Process Management
There are two things to note about the differences between nice and renice. First, nice requires that you specify the change in priority, whereas renice requires that you specify the priority that you want the process to end up with. Secondly, nice requires a dash (-) before the value, and two dashes for negative values; renice does not use a dash, except for negative values.
Job Control
Job control is a mechanism that allows you to run more than one program from a single terminal. At any one time, there will be only one program running in the foreground, but there may also be several processes running in the background. The foreground process is the program that has access to the keyboard input of the terminal. Background processes cannot read from the terminal; if they try to read from the terminal, they will pause their execution until they are able to. (You can also make background jobs stop when they try to write to your terminal with the stty tostop command.)
Normally a program will run in the foreground. To run a command in the background, end the command line with an ampersand (&), for example:
$ grep 'POSIX' /var/log/dmesg > posix.out &
The shell will respond in the following manner:
[1] 1658
The number in square brackets is the job number. The number outside the brackets is the PID. You can see what jobs are running with the jobs command:
$ jobs
[1]+ Running grep 'POSIX' /var/log/dmesg > posix.out &
When the background job completes, the shell will output the following:
[1]+ Done grep 'POSIX' /var/log/dmesg > posix.out
Note that the shell will not print that line until it is ready to print the prompt, so it does not interfere with any other program’s output.

Processes 93
You can move a background job into the foreground with the fg command. There are a couple of different ways to specify which job you mean. Most of the time, you’ll only have one job running in the background, and you can just run fg without any parameters. You can also specify the job number. Some shells may require a percent sign (%) before the job number, but that is optional in bash. You can specify the name of the command, but only if there are not multiple jobs running with the same command name. If you have several background jobs with the same command name, you can use a percent sign, then a question mark, followed by some text from the command line that will be unambiguous. There is also a shorthand version, which just requires the percent sign and the job number. All of the following would be equivalent, given the previous jobs output:
$ fg
$ fg 1
$ fg %1
$ fg %grep
$ fg %?dmesg
$ %1
You can also move a job from the foreground into the background. First, suspend the foreground job by pressing CONTROL+Z. Then use the bg command to put the suspended job in the background. This will start the process running in the background. (You can also put the suspended command in the foreground with fg.) If you forget to end a command with the ampersand (&), this is an easy way to go back and put it in the background so you can continue working. You can use the same variations to specify which job you want to put into the background as with the fg command. In addition, you can use the shorthand notation:
$ %1 &

94 Chapter 4—Process Management
Normally when you exit the shell, any background processes are sent a SIGHUP signal to stop them. Sometimes you would prefer that a program continue running after you have logged out. The command to do this is nohup. It keeps the process running after its parent has quit.
$ nohup ls -lR / &
$ exit
A nohup’ed process appends its output to a file called nohup.out in the current directory.
Exercise 4-1: Processes
Run ps several times in a row and note that the PID of the ps command keeps increasing. Next, run the following command line several times:
$ ps aux | grep ps
Note that you will usually see both the grep and ps processes, but sometimes only the ps command shows up because the grep command has not had enough time to be entered into the process table.
There are no solutions provided for this exercise.
S I G N A L S
Signaling is a mechanism that the kernel provides for processes to communicate with each other. There are a limited number of predefined signals (normally 32) available to use, so the communication is very simplistic. Signals can also be viewed as a type of out-of-band information; they interrupt normal processing to handle some abnormal situation. Most signals have predefined meanings, but some can be used in program-specific ways. These are referred to as signal handlers. Many of the signals are used to provide the process with some information from the kernel.
Programs can set up a handler to be executed when a particular signal is received. The handler is also called a signal trap. The actual handling of the signal is also called catching the signal. A program can also tell the kernel that it wants to ignore a particular signal. If a signal is not caught or ignored, the default action will take place when the process receives it. Two signals can never be ignored or trapped: STOP and KILL.

Signals 95
The following table lists some common signals, along with their name, number, and meaning. You can use kill -l to get a complete list of all the signal names and numbers.
You can send some signals to the currently running program with special key combinations on a terminal. To send the TSTP signal, press CONTROL+Z. This will normally suspend execution of the program and return you to the parent shell. To send the INT signal, press CONTROL+C. This will normally terminate the program. To send the QUIT signal, press CONTROL+\ (the CONTROL key and the backslash key). This will normally terminate the program and create a core dump. You can use the stty program to change which keys generate these signals. You can see which keys generate which signals by using stty -a.
NOTE: Only the INTR, QUIT, and SUSP fields pertain to signals–the others pertain to other terminal functions.
Name Number MeaningHUP 1 Hang up. Sent to children when a shell exits or a modem hangs up.
Also sent to some daemons to tell them to re-read their config file.
INT 2 Interrupt. Sent when you press CONTROL+C.
QUIT 3 Quit and dump core. Sent when you press CONTROL+\ .
BUS 7 Bus error. Almost always a program bug or faulty hardware.
FPE 8 Floating point exception. Sent by the kernel on division by zero and other errors.
KILL 9 Kill. Stop the program immediately. Cannot be trapped or ignored.
SEGV 11 Segmentation violation. Program tried to access memory it does not own.Usually an indication of a program bug or faulty RAM.
TERM 15 Terminate. End the program nicely, if possible. (Default signal sent by kill.)
STOP 17 Stop immediately. Can be continued with CONT signal.
TSTP 18 Terminal Stop. Program requested input, but does not have a controlling tty.Also sent when you press CONTROL+Z. Sometimes called Suspend (SUSP).
CONT 19 Continue. Used to resume a stopped process.
CHLD 20 Child exited. Sent to the parent process when a child is terminated.

96 Chapter 4—Process Management
Hardware-related program faults also cause signals such as the following:
� Bus (memory) error
� Divide by zero
� SEGV
One way Linux processes can communicate with others is via signals. There are a number of standard signals, which are described later. Each process can define its own signal-handling system to determine what to do. Typical default actions are to terminate the process (sometimes with a core dump) or to ignore the signal.
A signal is an event set once for the receiving process. Only when the process has serviced the event is it reset. Multiple occurrences of the same signal may only cause one instance of the process’s signal-handling code if they are generated very quickly (i.e., before the process is next scheduled to run). Signals will wake up a sleeping or waiting process.
The use of signals is a high-level method for interrupting a process’s execution. System administrators usually use signals to eliminate a process.
Types of Signals
The kill command is used to send a signal to a process. It takes an optional signal number or name and a list of PIDs to receive the signal.
Some signals are overloaded. The use of SIGHUP (hang-up) is often used to signal to a daemon process that it is to reinitialize itself. Sending SIGHUP to init causes it to reread the inittab file. Similarly, sending SIGHUP to the internet superuser (inetd) causes it to rescan its control file (/etc/inetd.conf).
Rogue processes are those that appear to have failed but do not terminate. In the worst case, these processes hog system resources such as memory, CPU time, and I/O devices.
Processes initiated from a terminal can usually be killed or unblocked by typing the interrupt key (typically CONTROL+C or DELETE). If this fails, the application programmer has caught the signal and chosen to ignore it. Unfortunately, QUIT often causes a core dump because many programmers forget about (or do not know about) the QUIT signal and fail to deal with it correctly.

Signals 97
Processes that cannot be killed from the terminal have to be terminated using the kill command issued from another terminal. Only the superuser can kill any process; normal users can only kill processes they own. Try the simple kill command (no signal number) to terminate a program cleanly with TERM. If this doesn’t work, use the kill -9 command (affectionately aliased as slay on some systems) to force the process to die with a KILL signal. An example is shown below.
# ps -fu trapper
UID PID PPID STIME TTY TIME CMD
trapper 92 1 10:02:04 tty1 0:03 -ksh
trapper 97 92 10:18:00 tty1 0:02 myprog
# kill 97
# ps -fu trapper | grep myprog
trapper 97 92 10:18:00 tty1 0:02 myprog
# kill -9 97
Processes that won’t die after receiving a KILL signal are trying to release system resources and will terminate when the resources have been freed. Zombie processes are already dead and cannot be killed; the parent must exit for these processes to disappear from the system. In extreme situations, it may be necessary to reboot the system to remove rogue processes.
Using kill and killall
Killing a process may kill all of its children as well. If they are running (not suspended) in the background, they will continue.
kill -TERM -1 (the number one) will send a signal to all processes with your UID, except the one sending the signal. This is helpful if you have processes spawning out of control, but will kill everything, even from other terminals. If you are root, it will signal everything but system processes. It’s a good idea to stop them before killing or terminating a large number of processes, in case you want to restart some of them.

98 Chapter 4—Process Management
Exercise 4-2: Signals
Start some programs (like perhaps less) and use CONTROL+Z, CONTROL+C, CONTROL+\ to see what happens. On CONTROL+Z, use the fg command, then CONTROL+Z again and use the bg command. Print out a ps u listing after each one. Then use the kill command to kill it. Be sure to look for the core file after the CONTROL+\.
There are no solutions provided for this exercise.
D A E M O N S
Daemons are processes that support system services. They are normally started up when multiuser mode is entered at boot time and stopped when the system shuts down. One key attribute of a daemon process is that it is not attached to a terminal; this can be seen in a ps listing as a question mark in the TTY column. This would imply that daemons will not receive the signals that are associated with the terminal. Typically, processes would receive a SIGTERM signal when the terminal associated with them is switched off. In the case of a daemon, no such thing would happen and the daemon would continue uninterrupted.
Daemons typically wait for an event such as a signal, a file being created, a time-out, or data input from a network connection. When the event occurs, the daemon wakes up, services the event, then goes back to sleep. Often, the daemon will fork a new child process to handle the event so that the daemon can quickly look for another event.
All processes that are running in the system can be viewed with the ps command using the -e or the -A option. Daemons, or for that matter any process without a controlling terminal, can be viewed with the following command:
ps -t ?
The -t option to the ps command displays all processes running in a particular terminal. In the case of daemons, not having any controlling terminal is denoted by a question mark. Thus, the above command displays all processes that have “?” as their terminal type.

Memory 99
M E M O R Y
Virtual memory systems are implemented in all modern multitasking operating systems. As it is a kernel-defined function, although similar to other UNIX and UNIX-like systems, its methodology and code base are unique to Linux.
In this section, we will cover the following topics:
� Virtual Memory
� Memory Usage
Virtual Memory
Linux implements a virtual memory system. Each process has a virtual memory space that makes it appear that it is the only program running on the machine.
Each process has its own view of memory. The OS makes it look right. The process can pretend that it is the only program running on the machine. A program cannot overwrite the memory of another program. This feature is called memory protection.
Linux systems use paged virtual memory as the means of managing the memory in the computer and sharing it among processes. Each process has its own view of memory that it can access and update. This is called virtual memory. Locations in this virtual memory are called virtual addresses. Each individual process has the same set of virtual addresses available to it. For example, every process begins at virtual address 0 and can use addresses up to some maximum value.

100 Chapter 4—Process Management
The virtual to physical mapping is achieved by dividing memory into a number of relatively small chunks called pages. Physical pages corresponding to virtual pages need not be contiguous or even in the same order. It is also possible that a particular virtual page may not be in physical memory. If it has not been accessed for a while, a page of memory may be copied out onto a special area of disk called the swap area, allowing the physical memory to be used by other processes. If a process attempts to access a page of memory that is not in memory, a page fault occurs and the page can then be copied into memory to allow the process to continue.
By treating memory as a sequence of pages, the kernel can make efficient use of the physical memory in the machine. However, there are times when there is very little spare memory, and processes must wait unacceptably long periods of time for memory to become available. In these cases, the system will swap an entire process out of memory onto the disk, freeing up multiple pages at once. Linux can use hard drive space to act as RAM. It moves memory areas that have not been used recently to the hard drive. When that memory area is accessed again later, it is moved back into RAM and made available for use. While the system is moving the data back into memory, it can run another process, temporarily suspending the process that needs the memory swapped back into RAM.
Linux swap areas consist of two categories: a separate disk partition or a file in an existing file system. Linux supports up to eight swap areas, each of which can be 2 GB in size. Thus, in all, Linux supports 16 GB of swap space, which is optimized by moving swap areas to the faster, least-used drives.

Memory 101
Memory Usage
The current state of memory usage can be vital information for determining what is happening on a system that is experiencing a slow response. Two GNU commands, free and vmstat, allow the administrator to examine memory usage information.
free
free displays the total amount of free and used physical and swap memory in the system, as well as the shared memory and buffers used by the kernel. Below is the output of the free command:
$ free total used free shared buffers cachedMem: 768964 761672 7292 0 26056 478236-/+ buffers/cache: 257380 511584Swap: 136512 0 136512
vmstat
The vmstat command is used to show statistics pertaining to the virtual memory system. vmstat reports information about processes, memory, paging, block IO, traps, and CPU activity. The first report produced gives averages since the last reboot. Additional reports give information on a sampling period of length delay. The process and memory reports are instantaneous in either case.
$ vmstat procs memory swap io system cpu r b w swpd free buff cache si so bi bo in cs us sy id 0 0 0 5108 8404 25792 14736 0 0 0 0 111 6 0 0 100memstat

102 Chapter 4—Process Management
memstat
memstat is another command that can be used to determine the amount of virtual memory that is being used. When reporting the amount of used virtual memory, memstat returns the running processes, shared libraries, and the total used virtual memory.
$ memstat 56k: PID 1 (/sbin/telinit) 36k: PID 464 (/sbin/mingetty) 36k: PID 465 (/sbin/mingetty) 36k: PID 466 (/sbin/mingetty) 36k: PID 467 (/sbin/mingetty) 36k: PID 4506 (/sbin/mingetty) 120k: PID 8102 (/etc/memstat/memstat) 8k: /etc/memstat/memstat 8102 896k: /lib/libc-2.1.2.so 1 179 220 232 234 256 270 280 288 298 308 318 3... 72k: /lib/ld-2.1.2.so 1 179 220 232 234 256 270 280 288 298 308 318 333... 20k: /usr/lib/libcrypt.so 436 438 7087 7977 112k: /usr/lib/libm.so 4542 7086 7087 7096 7113 7136 7137 7140 7143 7144... 76k: /usr/lib/libnsl.so 232 234 256 308 333 343 436 438 4542 7087 7112 ... 32k: /usr/lib/libnss_files.so 179 256 280 298 308 318 343 434 436 438 4... 36k: /usr/lib/libnss_nis.so 256 308 343 436 438 4542 7087 7977 8000 801... 8k: /usr/lib/libutil.so 333 7112 256k: /usr/lib/libndbm.so 4542 7087 8k: /usr/lib/libdl.so 333 436 438 4542 7086 7087 7112 7977 8000 8002 8... 40k: /usr/lib/libnss_nisplus.so 256 308 343 436 438 4542 7087 7977 8000... 28k: /lib/libpam.so.0.70 333 4542 7087 7112 7977 8k: /sbin/mingetty 464 465 466 467 4506 4558 ------- 1920 k
Core Files
A core file is a dump of the memory image of a process when the program crashed. The core file is written to the disk by the kernel when certain failures occur. A reason for a core dump could be a memory violation caused by a program. Memory violations occur when a program tries to read or write from or to memory that it does not have access to. This causes a segmentation fault. Core dumps can also occur due to bus errors and floating point exceptions. The core file can be used along with gdb to examine the state of the program and determine the cause for failure.

Process Accounting 103
ulimit
The ulimit command is used to limit the amount of resources that a user or process can use. The most common usage of ulimit is in user startup scripts to prevent core files from being created.
$ ulimit -c 0
The -c option sets the maximum size of core files, and setting it to zero says to never create them.
You can limit other resources, such as virtual memory (-v), CPU time per process (-t), and number of processes that the user can create at once (-u). If a program tries to exceed any of these limits, it will exit with an error message.
P R O C E S S A C C O U N T I N G
Process accounting is an optional kernel feature that logs information on every process that is run on the system. It keeps detailed information on user logins, CPU usage, memory usage, I/O transfers, and command names. This information is written to a log file every time a process exits.
In this section, we will discuss the following:
� Enabling Process Accounting
� Reviewing Logged Information

104 Chapter 4—Process Management
Enabling Process Accounting
The kernel is the source of all information that is gathered about process accounting; therefore, the first step is to enable process accounting to ensure that the kernel has the feature enabled. Some distributions will come with it enabled in the standard kernel. If not, you will need to compile a custom kernel to enable process accounting. The feature is called BSD Process Accounting.
Once your kernel is capable of process accounting, you will need to install the process accounting management software. The software is available from GNU in a source package called acct, but some distributions call the package by a different name, such as psacct.
Process accounting will not log to a file if the file does not exist. Therefore, you will need to make sure that the log file has been created. If it has not, create an empty file and determine who you want to be able to read it.
# touch /var/log/pacct
# chown root /var/log/pacct
# chmod 0600 /var/log/pacct
You may wish to allow some users read access to the file so that they can use the accounting tools. You would do this by specifying the owning group and a file mask of 0640 instead of 0600. Note that for tightest security, you do not want users to have access to all of the information that is available. You should also check permissions on the files /var/log/savacct and /var/log/usracct, which are used to cache information that the sa command gathers. Be aware that some distributions may put these log files in the /var/adm directory instead of /var/log.
After you have installed the process accounting package, you may need to turn it on. Some distributions will do this for you when you install the package. However, due to the high overhead that process accounting entails, most distributions will require you to turn it on explicitly. To start process accounting, you would use the following:
# /usr/sbin/accton /var/log/pacct
You will probably also want to modify the system boot scripts to activate the process accounting every time the system boots.
Some of the commands that come with the process accounting package (notably ac and last) actually use the /var/log/wtmp file to gather their information. This file is not managed by the kernel, but is written to by any program that can start a login script.

Process Accounting 105
Reviewing Logged Information
Once you have turned on process accounting, you will be able to look at the information it generates. There are several commands available to do this. They present the information in different ways.
ac
The ac command is used to show how much time users have spent logged on to the system. (All times displayed by ac are in hours.) It can break the information down by day and by user. Without any options, the command shows the total hours used by all the users listed, or all users on the system, as shown below:
$ ac
total 185.59
$ ac booch cbuchek
total 73.47
To show the total hours logged in by each user, use the following syntax:
$ ac -p
booch 33.84
cbuchek 39.63
root 112.12
total 185.59
To show a daily usage list for a user named booch, use the following syntax:
$ ac -d booch
Nov 10 total 2.76
Nov 11 total 4.61
Nov 12 total 2.86
Nov 15 total 2.51
Nov 16 total 7.82
Nov 17 total 10.32
Today total 3.05
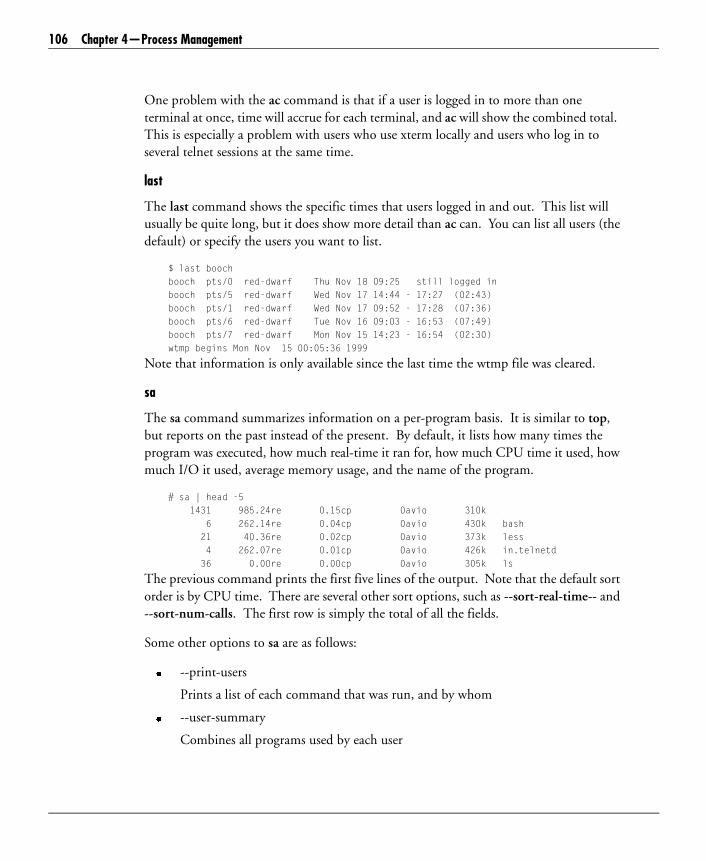
106 Chapter 4—Process Management
One problem with the ac command is that if a user is logged in to more than one terminal at once, time will accrue for each terminal, and ac will show the combined total. This is especially a problem with users who use xterm locally and users who log in to several telnet sessions at the same time.
last
The last command shows the specific times that users logged in and out. This list will usually be quite long, but it does show more detail than ac can. You can list all users (the default) or specify the users you want to list.
$ last boochbooch pts/0 red-dwarf Thu Nov 18 09:25 still logged inbooch pts/5 red-dwarf Wed Nov 17 14:44 - 17:27 (02:43)booch pts/1 red-dwarf Wed Nov 17 09:52 - 17:28 (07:36)booch pts/6 red-dwarf Tue Nov 16 09:03 - 16:53 (07:49)booch pts/7 red-dwarf Mon Nov 15 14:23 - 16:54 (02:30)wtmp begins Mon Nov 15 00:05:36 1999
Note that information is only available since the last time the wtmp file was cleared.
sa
The sa command summarizes information on a per-program basis. It is similar to top, but reports on the past instead of the present. By default, it lists how many times the program was executed, how much real-time it ran for, how much CPU time it used, how much I/O it used, average memory usage, and the name of the program.
# sa | head -5 1431 985.24re 0.15cp 0avio 310k 6 262.14re 0.04cp 0avio 430k bash 21 40.36re 0.02cp 0avio 373k less 4 262.07re 0.01cp 0avio 426k in.telnetd 36 0.00re 0.00cp 0avio 305k ls
The previous command prints the first five lines of the output. Note that the default sort order is by CPU time. There are several other sort options, such as --sort-real-time-- and --sort-num-calls. The first row is simply the total of all the fields.
Some other options to sa are as follows:
� --print-users
Prints a list of each command that was run, and by whom
� --user-summary
Combines all programs used by each user

Process Accounting 107
� -c, --percentages
Prints percentages of total time for the command’s user, system, and real-time values
� -n (--sort-num-calls)
Sorts by number of calls
� -k:
Sorts by average memory usage
� -t, --print-ratio
For each entry, prints the ratio of real-time to the sum of system and user times; if the sum of system and user times is too small to report (the sum is zero), “*ignore*” will appear in this field
lastcomm
The lastcomm command gives information on commands that users have executed. lastcomm prints out information about previously executed commands. If no arguments are specified, lastcomm will print information about all of the commands in /var/log/pacct (the record file). For example, to find out which users used command a.out and which users were logged in to tty0, type “lastcomm a.out tty0”.
This will print any entry for which a.out or tty0 matches in any of the record’s fields (command, name, or terminal). If you want to find only items that match *all* of the arguments on the command line, you must use the -strict-match option. For example, to list all of the executions of command a.out by user root on terminal tty0, type “lastcomm --strict-match a.out root tty0”. The order of the arguments is not important.

108 Chapter 4—Process Management
Exercise 4-3: Modifying Values in /proc
The /proc file system is a useful tool for monitoring the system directly. Under the /proc directory, there exists a number of directories with numerical names. These names refer to the PIDs of existing processes, and the files in each directory contain information about the corresponding process. Non-numerical directories and files under /proc contain information about the system itself.
The files representing processes do not have write permissions set. Usually only the files containing configuration information can be altered.
NOTE: Modifying this information is a potentially dangerous operation and should be done with great care on a live system.
The /proc/sys directory in particular, contains information about the system configuration. System configuration can, therefore, be modified on the fly by changing the information stored in /proc/sys. Occasionally, a machine will be asked to do more than is efficiently possible, given the compiled-in kernel configuration. For example, a Web server may be hosting an unexpectedly large number of users and may be exhausting the limit of available handles used when the system opens files. In that event, files cannot be opened until some of these handles are released. Modifying the /proc/sys/fs/file-max file allows you to change the maximum number of open file handles on the fly.
NOTE: Altering the kernel configuration parameters can cause the system to crash. Do not attempt this exercise on a production system.
Using the cat and echo command and output redirection, change the maximum number of file handles the kernel will allocate. The commands should take the following form:
# cat /proc/sys/fs/file-max
# echo newvalue > /proc/sys/fs/file-max
Determine the current number of maximum file handles and double it.
There are no solutions provided for this exercise.

Summary 109
S U M M A R Y
In this chapter, you were introduced to the following concepts:
� Processes and process management
� Signals
� Daemons
� Memory management
� Process accounting
P O S T - T E S T Q U E S T I O N S
The answers to these questions are in Appendix A at the end of this manual.
1. You have three programs that have locked up. Running ps ux shows the following:
USER PID %CPU %MEM VSZ RSS TTY STAT START TIME COMMANDcbuchek 692 0.0 1.2 3908 1636 ? S 08:59 0:04 smbd -Dcbuchek 728 0.0 0.7 1760 996 pts/1 S 09:58 0:00 -bashcbuchek 893 0.0 0.7 2664 952 pts/1 R 13:16 0:00 ps uxbooch 14463 99.9 0.7 720 220 p2 R 19:23 8:41 ./a.outbooch 14464 0.0 0.0 0 0 p2 Z 19:23 0:00 (a.out <zombie>)
What is the PID of each of these processes? What is the state of these processes?
.....................................................................................................................................
.....................................................................................................................................
2. You have made a change to the configuration file of a daemon called xyzd. However, the daemon does not seem to recognize the changes. What can be done to make the daemon reread the config file?
.....................................................................................................................................
.....................................................................................................................................

110 Chapter 4—Process Management
3. You are running a make command that spawns and runs other child make commands, and it is starting to bog the CPU (since compilations tend to be CPU intensive). How can this be stopped?
.....................................................................................................................................
.....................................................................................................................................
4. How can you show what program has been run the most times since the system was last rebooted?
.....................................................................................................................................
.....................................................................................................................................
5. Tom started a process with the nice command, giving it an initial priority value lower than the system default (indicating that his process is a lesser-priority process). He later realizes that due to his initial assignment, his process takes forever to complete, and he decides to change it to the default priority. What should Tom do to alter the priority?
.....................................................................................................................................
.....................................................................................................................................

M A J O R T O P I C S
5
Disk Management and Quotas
Objectives .................................................................... 112
Pre-Test Questions....................................................... 112
Introduction ................................................................ 113
Files and Directories .................................................... 113
File Systems ................................................................. 128
Disk Quotas................................................................. 134
Kernel File Cache......................................................... 138
Distributed File System (Dfs) ...................................... 143
RAID........................................................................... 152
Summary ..................................................................... 156
Post-Test Questions ..................................................... 157

112 Chapter 5—Disk Management and Quotas
O B J E C T I V E S
At the completion of this chapter, you will be able to:
� Manage file ownership and permissions.
� Set, manage, and view disk quotas.
P R E - T E S T Q U E S T I O N S
The answers to these questions are in Appendix A at the end of this manual.
1. List some file system types available in Linux.
.....................................................................................................................................
.....................................................................................................................................
2. What command is used to partition a hard disk?
.....................................................................................................................................
.....................................................................................................................................
3. What is the purpose of quotas?
.....................................................................................................................................
.....................................................................................................................................
4. What file can be used to specify partitions to mount automatically, as well as optional mount parameters?
.....................................................................................................................................
.....................................................................................................................................
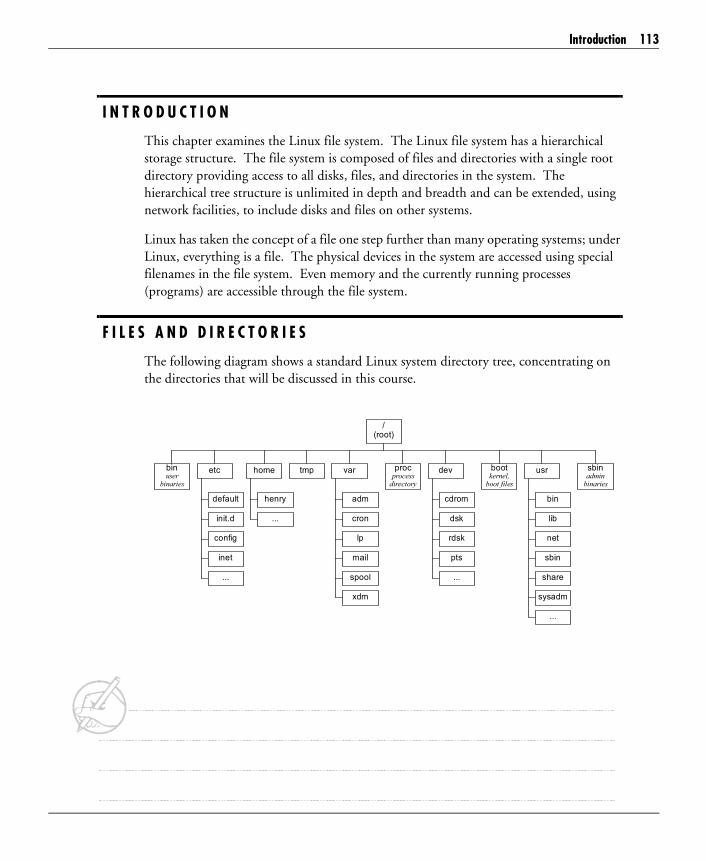
Introduction 113
I N T R O D U C T I O N
This chapter examines the Linux file system. The Linux file system has a hierarchical storage structure. The file system is composed of files and directories with a single root directory providing access to all disks, files, and directories in the system. The hierarchical tree structure is unlimited in depth and breadth and can be extended, using network facilities, to include disks and files on other systems.
Linux has taken the concept of a file one step further than many operating systems; under Linux, everything is a file. The physical devices in the system are accessed using special filenames in the file system. Even memory and the currently running processes (programs) are accessible through the file system.
F I L E S A N D D I R E C T O R I E S
The following diagram shows a standard Linux system directory tree, concentrating on the directories that will be discussed in this course.
binuser
binaries
etc
default
init.d
config
inet
...
home
henry
...
tmp var
adm
cron
lp
spool
xdm
procprocess
directory
dev
cdrom
dsk
rdsk
pts
...
bootkernel,
boot files
bin
lib
net
sbin
share
sysadm
...
usr sbinadmin
binaries
/(root)

114 Chapter 5—Disk Management and Quotas
Some of the top-level directories are:
/bin Binary executable programs essential to system operation; often a symbolic link to a file in /usr/bin; typically, these are user commands and utilities
/etc System configuration files and some system executables
/home User accounts (home directories)
/tmp Temporary directory (sometimes incorrectly set up as a symbolic link to /var/tmp); used by many utilities, such as pg, vi, etc.
/var Volatile information (the varying directory) used for spool files, logs, requests, mail, etc.
/proc Process directory used to map currently running processes into files
/dev Devices directory containing special files, referring to all devices
/boot Flat directory, containing Linux kernel and boot configuration files
/usr User-related programs and libraries
/sbin System, mostly administrative, executable programs; often a symbolic link to /usr/sbin
A few selected directories from the lower levels include:
/etc/default System default files, containing default parameters for several commands
/etc/init.d Master startup scripts (not used as part of startup configuration)
/etc/rc*.d Runlevel startup configuration scripts; usually links to files in the /etc/init.d directory
/usr/lib Library files (run time, shared, etc.)
/usr/share Information that can be shared (read-only) on a network (e.g., man pages)

Files and Directories 115
The following topics are discussed in this section:
� The Linux File System
� Access Control
� Set User and Group IDs
� The Sticky Bit
� File Permission Commands
� Links
� Using Links
� Looking at Links
The Linux File System
In order to use disks to store files under Linux, a file system must be written onto the disk. Linux supports several different types of file systems, but ext2fs (Second Extended File System) is the standard. Linux also supports MS-DOS/Windows 95/98/NT, Mac OS HFS, OS/2, NFS, and other file systems.
Linux supports multiple partitions. Each partition is accessed through a node of the directory structure and can be any supported partition type.
Each native Linux file system partition has an inode table, which contains one record for each file stored within the partition. Each file is uniquely identified within the file system by its inode number, and each file has a single inode table entry. The inode table entry holds all attributes of a file, such as file size, user, group, permissions, etc.
Directories map names into inode numbers but do not store file attributes. A directory can have more than one name referencing an inode number.

116 Chapter 5—Disk Management and Quotas
The following diagram shows annotated output from a long directory listing.
Files and directories have attributes that are stored in the inode table. The combined attributes of permission and file ownership provide a sophisticated file access mechanism.
Access Control
Each file has three types of access permitted for each of three types of user. To access a file, the relevant access for the user type must be allowed.
Using a file’s ownership and group attributes, in combination with the user’s user ID and group, three kinds of access to the file can be determined. The superuser is unrestricted. If the user owns the file, the owner (user) flags are used. If the user does not own the file but is in the same group as the file, the group flags are used. If the user is not the owner and not in the file’s group, the other (world) flags are used.
# ls –aldrwxr-xr-x 2 hawkeye users 512 Jul 11 11:21drwxr-xr-x 9 root sys 512 Jul 11 10:54-rw-r-r-- 1 hawkeye users 23 Jul 15 10:21 file1drwxr-xr-x 2 hawkeye users 512 Jul 15 10:25 dir1
Type of file- plain filed directoryl symbolic link
File user (owner)and group
Size in Bytes
Date and time of last modification
NameLink Count
Permissionsr readw writex execute

Files and Directories 117
File and Directory Access Permission
Using the appropriate permission bits, the various file operations can be performed if the relevant bit is set.
Types of file access are as follows:
r Read file
w Write file (does not imply read)
x Execute file (program or shell script); for program,read is not required; for shell, read is required
Types of directory access are as follows:
r Can read directory list (does not imply access to files)
w Can write to directory (create, rename, and delete files)
x Can search directory (pass through and access files)
To create a file, you need the following:
--x Permission on all directories in the pathname
-wx Permission on the last directory in the pathname
To read a file, you need the following:
--x Permission on all directories in the pathname
r-- Permission on the file
To write into a file, you need the following:
--x Permission on all directories in the pathname
-w- Permission on the file

118 Chapter 5—Disk Management and Quotas
To execute a command, the execute bit must be set. Look at the files in /usr/bin to see that all of the common utility programs have their execute bit set. Look at the system bin directory /usr/sbin to see that for many of the commands, the owner and maybe the group have execute permission, but normal users do not. Note that shell scripts require read permission as well as execute permission before they can be invoked.
The filename is not part of the file; it is a function of the directory containing the file. Therefore, to delete or rename a file, write access to the directory is needed. Moving a file from one directory to another requires write access to both directories.
The execute bit for a directory does not mean execute; it means search. If this bit is not set, then a user cannot search the directory (i.e., cannot look for files in the directory), even if she is the owner of the directory. Even if users have the appropriate permissions for a file and know that the file exists, they cannot access the file if they do not have search (execute) permission to the directory. The read permission for a directory allows the filenames in the directory to be read, but the files themselves cannot be accessed without directory search permission.
File Manipulation Permissions
File manipulation permissions define the ability to write into a directory, i.e., executing cp, rm, mv, mkdir, and rmdir. To write into a directory, you need write permission and execute permission as follows:
-x Permission on all directories in the pathname
-wx Permission on the last directory in the pathname
To remove a file, you do not need access to the contents of the file itself nor be the file owner. The rm and mv commands try to be helpful; they will prompt you to confirm the operation for those files you do not have write access for:
$ rm mypass
mypass mode 444? # type y or n
The -f (force) option on either command suppresses this prompt:
$ rm -f mypass # done without question
Thus, rm -f and mv -f are often used within shell scripts in case the file is not writeable. This ensures that the operation does not fail in the middle of the script with a user prompt for confirmation.
When deleting directories recursively (rm -r), rm -rf is usually used to avoid numerous prompts for any nonwriteable files.

Files and Directories 119
The sticky bit on directories (which appears as a “t” rather than an “x” in the other permissions) means that files in the directory can only be deleted by their owner, regardless of the other directory permissions.
Exercise 5-1: File Permissions
The solutions to this exercise are provided in Appendix B at the end of this manual.
The following is a session:
$ id -a
uid=318(hawkeye) gid=300(users) groups=100(staff),300(users)
$ ls -ld . file* /etc/passwd /etc/shadow /etc
drwxr-xr-x 2 trapper users 512 Jul 11 11:21 .
-rw-rw-r-- 1 trapper staff 23 Jul 15 10:21 file1
-rw-r----- 1 trapper mash 41 Jul 15 10:21 file2
-rw-rw-rw- 1 hawkeye mash 41 Jul 15 10:21 file3
-r--r--r-- 1 root sys 132 Jan 01 9:30 /etc/passwd
-r-------- 1 root sys 96 Jan 01 9:30 /etc/shadow
drwxrwxr x 49 root sys 4096 Jan 01 9:30 /etc

120 Chapter 5—Disk Management and Quotas
Which of the following operations are permitted?
$ more file1
$ more file2
$ ls -l >file1
$ more /etc/passwd
$ more /etc/shadow
$ rm file2
$ rm file3
$ cp file1 file4
$ rm /etc/passwd
$ rm /etc/shadow
.....................................................................................................................................
.....................................................................................................................................
Set User and Group IDs
A program is a file on disk. That file, like any other file, has attributes. If the x (execute) bit is set, the file can be executed. When such a file is executed, it becomes a process in memory. A process will inherit several of the file’s attributes, but ownership of the process (user and group) is normally that of the user and group of the shell that kicked it off.
If a program has been designed to perform an operation not normally permitted to casual users, like writing into the shadow file, and yet they are expected to be able to run that program (in this example, to change their password, thus update the shadow file), there must be a way to achieve a happy compromise. The mechanism of SUID and SGID permissions attempts to do just that.
# ls -l /etc/shadow /usr/bin/passwd
-r-------- 1 root sys 473 Dec 25 09:30 /etc/shadow
-r-sr-sr-x 1 root sys 18888 Jan 9 1992 /usr/bin/passwd
NOTE: The SETUID and SETGUID mechanisms give the normal user special privileges, those of the program owner, for the duration of the program execution.
This allows normal users, in a controlled manner, to access otherwise restricted files and directories.
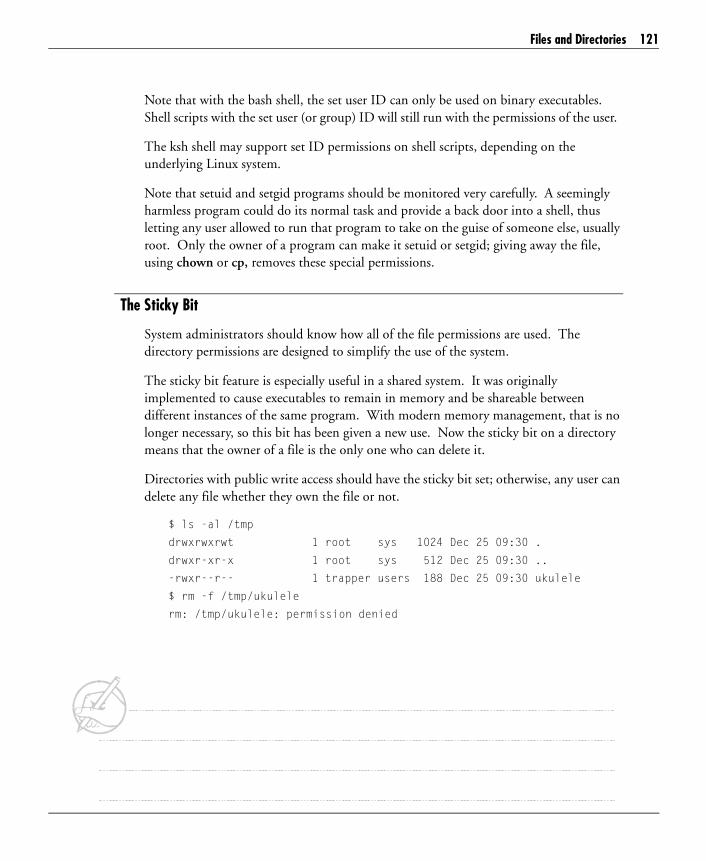
Files and Directories 121
Note that with the bash shell, the set user ID can only be used on binary executables. Shell scripts with the set user (or group) ID will still run with the permissions of the user.
The ksh shell may support set ID permissions on shell scripts, depending on the underlying Linux system.
Note that setuid and setgid programs should be monitored very carefully. A seemingly harmless program could do its normal task and provide a back door into a shell, thus letting any user allowed to run that program to take on the guise of someone else, usually root. Only the owner of a program can make it setuid or setgid; giving away the file, using chown or cp, removes these special permissions.
The Sticky Bit
System administrators should know how all of the file permissions are used. The directory permissions are designed to simplify the use of the system.
The sticky bit feature is especially useful in a shared system. It was originally implemented to cause executables to remain in memory and be shareable between different instances of the same program. With modern memory management, that is no longer necessary, so this bit has been given a new use. Now the sticky bit on a directory means that the owner of a file is the only one who can delete it.
Directories with public write access should have the sticky bit set; otherwise, any user can delete any file whether they own the file or not.
$ ls -al /tmp
drwxrwxrwt 1 root sys 1024 Dec 25 09:30 .
drwxr-xr-x 1 root sys 512 Dec 25 09:30 ..
-rwxr--r-- 1 trapper users 188 Dec 25 09:30 ukulele
$ rm -f /tmp/ukulele
rm: /tmp/ukulele: permission denied

122 Chapter 5—Disk Management and Quotas
File Permission Commands
The Linux commands chown and chgrp are provided to change a file’s owner or its group. These commands enable different sets of protection flags to be used under different circumstances.
Changing file ownership is not a normal user operation. The user must currently own the file. Once the file has changed owners, the previous user will not be able to get the file back. Some systems only permit the superuser to change file ownership. The chown command is used to change file ownership:
chown [-R] user files...
The chgrp command changes the group ownership of a file:
chgrp [-R] group files...
# chown root /usr/bin/passwd
# chgrp sys /usr/bin/passwd
# chown -R user12 /home/user12
The permissions on a file can be changed by the owner using the chmod command:
chmod [-R] perms files...
The perms field can be either in symbolic form, [oug][+=-][rwxst], or expressed as octal digits:
# chmod ugo=rwx /tmp
# chmod +t /tmp
# chmod ug+s /usr/bin/passwd
# chmod 1777 /tmp
# chmod -R 664 /project/bin
The use of groups is a common method of permitting several users to modify files that reside in a common project directory.
Linux systems allow the chown command to change both file ownership and group in one command using the following syntax:
chown owner.group files...

Files and Directories 123
Links
A file can have any number of names (links). An obvious example is that every directory always has at least two names: the name the directory was created with and the name “.” in the directory itself. The ln command creates a new link to an existing file:
ln [-snf] file target
The three optional arguments for ln are as follows:
-s Symbolic or soft link
-n Do not overwrite existing filename
-f Force overwrite of existing filename (default)
Linking a file allows it to be called by different names and possibly stored in different places. A common example is the awk command. There are two versions of awk, now known as oawk (old awk) and nawk (new awk). The awk program is usually a link to either oawk or nawk, according to the system configuration.
There are two kinds of links: symbolic (ln -s) and hard (ln). Hard links are actual new directory entries for a file, while symbolic links are pointers to an existing directory entry. Each type of link has specific uses it is best suited for; neither one fits all needs. Hard links can only be made to the same file system; symbolic links can point to a file anywhere that is accessible to the user. Symbolic links are often used to link to files in a different file system or to point to directories–these things cannot be achieved using hard links.
The rm command is used to remove files. That is the easy way to think of it, but it is not complete. The rm command does not actually delete a file, it only removes a (hard) link to the file. Only when the last link is removed will the Linux kernel delete the file, as it no longer has any links in the directory system; the user never actually deletes a file. The original name of a file is not special and is not stored in the inode. It is possible to remove the original filename without removing the file. In fact, Linux does not know which is a file’s original name–all names are equal.

124 Chapter 5—Disk Management and Quotas
Similarly, the mv command does not rename the file it changes; it moves the link around the directory hierarchy and may, in the process, change the name stored in the directory.
All of this must be considered when dealing with soft links. Since the soft link is just a pointer to a directory entry, removing that directory entry causes the soft link to no longer point to the original file, producing a dangling link. The file itself may still be around, with a different name. This can be used as a feature if you point a symbolic link to a file that is replaced periodically while remaining available under another name. As long as a file is there with the right name, the symbolic link will be satisfied. If it was a hard link, it would always point to the same data.
Using Links
Links are used to save space or to allow files to be known by multiple names. Consider files of sales data in which each doctor puts his monthly figures in a separate file. Using links, we can organize the files in two different ways: by doctor or by month.
The diagram shows how common files can be accessed using different directory structures when links are utilized. The commands required to set up this structure are:
$ mkdir operations operations/data
$ mkdir operations/hawkeye operations/trapper
$ mkdir operations/5101 operations/5102 operations/5103
operations
hawkeye trapper data
hp5101 hp5102 hp5103tm5101 tm5102 tm5103
5101 5102 5103

Files and Directories 125
Create Empty Data Files
The following commands are used to create empty data files:
$ cd operations/data
$ touch hp5101 hp5102 hp5104 tm5101 tm5102 tm5103
Create Links
The following commands are used to create links:
$ ..
$ ln data/hp5101 hawkeye/5101
$ ln data/hp5102 hawkeye/5102
$ ln data/hp5103 hawkeye/5103
$ ln data/tm5101 trapper/5101
$ ln data/tm5102 trapper/5102
$ ln data/tm5103 trapper/5103
$ ln data/hp5101 5101/hawkeye
$ ln data/tm5101 5101/trapper
$ ln data/hp5102 5102/hawkeye
$ ln data/tm5102 5102/trapper
$ ln data/hp5103 5103/hawkeye
$ ln data/tm5103 5104/trapper

126 Chapter 5—Disk Management and Quotas
Confirm Links
The following commands are used to confirm links:
$ find hawkeye trapper "51*" -print
./hawkeye
./hawkeye/5101
./hawkeye/5102
./hawkeye/5103
./trapper
./trapper/5101
./trapper/5102
./trapper/5103
./5101
./5101/hawkeye
./5101/trapper
./5102
./5102/hawkeye
./5102/trapper
./5103
./5103/hawkeye
./5103/trapper
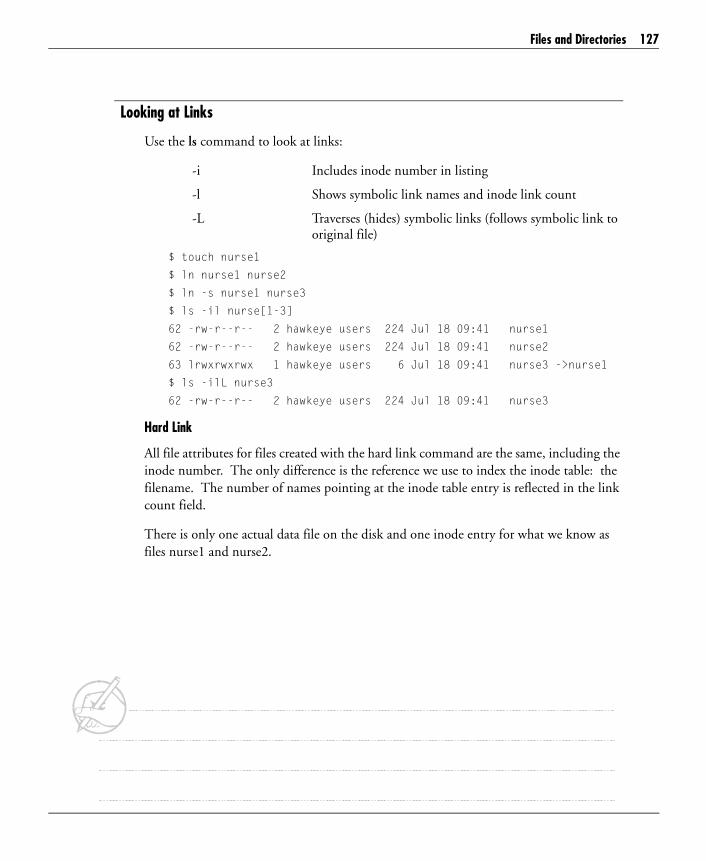
Files and Directories 127
Looking at Links
Use the ls command to look at links:
-i Includes inode number in listing
-l Shows symbolic link names and inode link count
-L Traverses (hides) symbolic links (follows symbolic link to original file)
$ touch nurse1
$ ln nurse1 nurse2
$ ln -s nurse1 nurse3
$ ls -il nurse[1-3]
62 -rw-r--r-- 2 hawkeye users 224 Jul 18 09:41 nurse1
62 -rw-r--r-- 2 hawkeye users 224 Jul 18 09:41 nurse2
63 lrwxrwxrwx 1 hawkeye users 6 Jul 18 09:41 nurse3 ->nurse1
$ ls -ilL nurse3
62 -rw-r--r-- 2 hawkeye users 224 Jul 18 09:41 nurse3
Hard Link
All file attributes for files created with the hard link command are the same, including the inode number. The only difference is the reference we use to index the inode table: the filename. The number of names pointing at the inode table entry is reflected in the link count field.
There is only one actual data file on the disk and one inode entry for what we know as files nurse1 and nurse2.

128 Chapter 5—Disk Management and Quotas
Symbolic Link
A separate file, nurse3, is created, containing a pointer to the original file, nurse1. Hence, there is a different inode number, the “l” in the file type position, and a different file size field that merely reflect the length of the name we are pointing at (not the size of the data file).
Attributes of the nurse3 file, when obtained conventionally through ls -li, show attributes of the pointer file, not those of the file itself. Use the ls -Lli command, where -L means follow symbolic link, to obtain the real attributes.
F I L E S Y S T E M S
The file system defines how disks are structured. Individual disks are hidden from the casual user. All access to a file is through the directory structure, and file permissions are used to control user access to the system. Different disks can be formatted with different file systems and must be mounted into the directory structure to be accessed. A disk or partition can be mounted into any directory, which is then referred to as the mount point for that disk.
The Linux file system is an inverted tree structure with a single, top-level directory called the root directory (/). All file and device access in a Linux system is through the file system structure. Different disks (fixed and removable) and partitions on the same disk are mapped into the directory hierarchy using the mount command.
The superblock contains information about the file system installed on the disk (or disk partition). This includes a list of the first few free blocks on the disk and of the first few free inodes. These lists are sufficiently large to meet the immediate needs of the operating system. Whenever these lists run down, the system will automatically replenish them by scanning the free block list on the disk or the inode list as required.
Inodes define the files in the file system. Each file has one allocated inode containing all of the file information except the file’s name. The filename is stored in the directory containing the file.
The inode contains a list of the first ten blocks allocated to the file. Subsequent block numbers are kept in a separate block pointed to by the inode. This is called the indirect block list. To handle larger files, the inode also has a double-indirect block pointer and a triple-indirect block pointer.

File Systems 129
The following topics are discussed in this section:
� File System Types
� Making a File System
� Mounting a File System
� File System Configuration Files
� Free Disk Space
� Disk Usage
File System Types
File systems have a type associated with them. The types of file systems supported by a given Linux implementation are compiled into the kernel, allowing the builder to configure the file systems that will actually be used. This saves memory space by only including code for file systems that are needed. System manufacturers can add their own proprietary file system types into the kernel. In practice, most systems only implement the most common file systems.
A file system type defines how the disk data is structured. Linux supports many different file system types (typically twelve or more). The ext2fs is standard across all Linux distributions. All Linux systems can include support for Microsoft’s FAT, VFAT, FAT32, and NTFS for use with DOS/Windows systems as well as OS/2 and NFS.

130 Chapter 5—Disk Management and Quotas
Making a File System
The mkfs command is used to create a file system on a disk or partition. Making a file system is similar to formatting, as shown in the following example:
� Format a hard disk as an ext2 disk:
# mkfs -t ext2 /dev/hda5 102400
� Format a floppy as a DOS disk:
# mkfs -t msdos /dev/fd0
The examples use -t to override the file system default type. The command requires the raw disk device name (/dev/hda5, /dev/fd0). Additional parameters will vary depending on the file system type. The command creates a superblock and an inode list. The inode list is fixed in size and cannot be extended, but you can override the number of inodes initially created.
If you want to change the number of inodes, you must know the physical size of the disk (in physical blocks) and convert this to the number of logical blocks. Typically, a disk block is 512 bytes and a logical block is 1,024 blocks, so a 64-MB disk actually has 64-KB logical blocks (65,536) and 128-KB physical blocks (131,072). Use the default number of inodes unless you expect to create a lot of very small files or a few very big ones. A larger block size (2,048) will give better disk performance but will waste more space due to partially filled blocks at the end of files. Smaller block sizes (512) use less space, but disk performance is worse.
You do not have to make the file system the same size as the disk. Any space not allocated to a file system can be allocated to another, separate file system or can be left empty for later use.
Once a file system has been made, it cannot be altered without destroying all of the data on the file system. Increasing the number of inodes requires backing up the entire disk, making a new file system with more inodes, and restoring the backed-up data.

File Systems 131
Mounting a File System
A Linux file system can only be accessed if it is mounted on the file system hierarchy (tree structure). The directory used to mount the file system is called the mount point. Any directory can act as a mount point for any type of file system, and mounted file systems can contain other mounted file systems. Since mounting a file system will hide the previous contents of the mount point directory, it is customary to choose an empty directory for the mount point. The /mnt directory is provided as a temporary mount point.
The mount command is used to add any disk containing a file system to the tree structure.
# mount -t ext2 /dev/hda2 /home
# ls /home
lost+found
File systems that are no longer needed can be removed from the root file structure using the umount command. File systems with open files or containing other mount points cannot be unmounted. The fuser command can be used to determine which processes (and users) are using the file system and can be used to kill these processes if necessary.
# umount /home
# ls /home
As long as the kernel understands the format (type) of the file system, it can be mounted onto the hierarchy. An MS-DOS file system mounted in this way is accessed as though it was a normal Linux file system. Linux uses file system type msdos (or vfat for Win95). The mount mechanism is also the way network disk systems, such as NFS or RFS, are accessed.
The mount command, without any parameters, lists the mounted file systems. The df command provides a different view, showing percentages used and available. The mount command maintains the /etc/mtab file with information concerning the currently mounted files. Corrupting this file will upset the mount and umount commands.

132 Chapter 5—Disk Management and Quotas
File System Configuration Files
The /etc/fstab file is maintained by the system administrator and is used to define the standard mountable disks on the local system. The system startup and the commands use the information in this file to mount file systems automatically.
Entries in /etc/fstab consist of one line per file system, with space- or tab-separated fields of the following form:
block device mountpoint Fstype mount options dump fsck order
# cat /etc/fstab
/dev/hda5 / ext2 defaults 1 1
/dev/hda1 /boot ext2 defaults 1 2
/dev/hda6 swap swap defaults 0 0
/dev/fd0 /mnt/floppy ext2 noauto 0 0
/dev/cdrom /mnt/cdrom iso9660 noauto,ro 0 0
none /proc proc defaults 0 0
/dev/hdb5 /daj ext2 defaults 0 3
Use a hyphen for fields that do not require the following values: no raw device, no fsck pass number, or no mount options. Lines starting with a # symbol are ignored and can be used for comments.
The fields in /etc/fstab are listed in the following table.
Field Exampleblock device /dev/hda5
mount point /
file system type ext2
mount options auto, rw
dump order 1 (yes)
fsck order 1 (first)

File Systems 133
Free Disk Space
Use the df command (disk free) to report on free disk space. Older versions would report size in 512-byte blocks, with a -k switch to give size in kilobytes (now the default); a -m switch gives size in megabytes. Use the -t switch to get a report on partitions of a specific file system type. The df command only reports on mounted file systems.
When first sizing disks for a new system, df is invaluable for working out file system sizes; on a stable running system, df can be used to monitor file system space usage. Run df as an hourly cron job and filter the output (in a shell script) to look for file systems getting within 10% or 5% of capacity. Some Linux systems provide administration utilities that do this automatically.
# df -k
File system 1024-blocks Used Available Capacity Mounted on
/dev/hda5 642009 446269 162579 73% /
/dev/hda1 16554 593 15106 4% /boot
/dev/hdb5 1189119 13 1127670 0% /daj
# df -m
File system MB-blocks Used Available Capacity Mounted on
/dev/hda5 626 435 158 73% /
/dev/hda1 16 1 14 7% /boot
/dev/hdb5 1161 0 1101 0% /daj

134 Chapter 5—Disk Management and Quotas
Disk Usage
Use the du (disk usage) command to look recursively at files and directories. By default, it lists only directory sizes (for all directories in the current path), but other switches allow it to also list all files (-a) or just summarize the named files or directories (-s). Linked files are only counted once. Sizes may be given in 512-byte blocks unless the -k option is used to show kilobytes, though this differs on some systems.
# du -s /home/*
25 /home/frank
0 /home/hawkeye
5 /home/henry
67 /home/hotlips
0 /home/lost+found
15 /home/klinger
51 /home/mulcahy
976 /home/radar
1 /home/trapper
The quota command checks a user’s disk usage and limit. Some Linux administrators choose not to enable quota checking; it is compiled into the kernel and activated by the system administrator.
D I S K Q U O T A S
Linux file systems implement the disk quota mechanism. Users can be allocated disk quotas on specific file systems and can be restricted by number of disk blocks and/or number of inodes. Quotas have two kinds of limits: hard and soft. The soft limit can be exceeded for a certain grace period; failure to reduce the allocated space before the timer expires will trigger the quota. Hard limits apply immediately. Users exceeding their quota on a disk will be advised that they have run out of space. This is often confused with a full disk, as the system does not differentiate between the two error conditions. For the user in question, the disk is full.
The disk quota mechanism can be switched on and off, as required, once it is enabled for a file system and can be applied by user or group. Users not given disk quotas are not included in the system. It is advisable to apply disk quotas to some users but not to others. Especially note that any files created by a quota user when quota is not switched on will not be counted by the quota system.

Disk Quotas 135
To set up quotas on a file system, first create the quota files (one or the other, or both) at that file system’s root level:
# touch /home/quota.user
# touch /home/quota.group
Edit a user or group’s quota properties with edquota. (Adjust the EDITOR system environment variable as necessary to enable your preferred editor.)
# edquota frank
Turn on quotas for a file system with the quotaon command:
# quotaon -v /home
Quotas can be turned on for all systems with quotas enabled using the -a switch:
# quotaon -a
Turn off quotas for a file system with the quotaoff command:
# quotaoff /home
A user can examine his or her own quota status using quota, but only root can look at the quotas of others. Unless a user is over quota, the quota command will return no output. For a more detailed output of quota information, a user would run quota -v.
$ quota -v
Disk quotas for booch (uid 1002):
Filesystem usage quota limit grace files quota limit grace
/usr/homeA 0 5120 6144 0 0 0
/usr/homeB 4612 5120 6144 305 0 0

136 Chapter 5—Disk Management and Quotas
For each file system where a quota has been defined, the current user will receive a line of output with the following fields:
Filesystem Mountpoint of the file system with quotas
Usage Amount of blocks used
Quota Number of blocks allowed (soft)
Limit Blocks allowed (hard)
Grace Applicable only if over quota
Files Current number of files used
Quota Number of blocks allowed (soft)
Limit Blocks allowed (hard)
Grace Applicable only if over quota
Exercise 5-2: Working with the quota Utilities
Solutions to this exercise are provided in Appendix B at the end of this manual.
1. Modify the following line in /etc/fstab to allow for user and group quotas:
/dev/hda1 /home ext2 defaults 1 2
.....................................................................................................................................
.....................................................................................................................................
2. Examine the following example output from edquota -u tempuser:
Quotas for user tempuser:
/dev/hda2: blocks in use: 6502, limits (soft = 8000, hard = 10000)
inodes in use: 814, limits (soft = 2000, hard = 2500)
Write the command to duplicate this quota for every user in the tools group.
.....................................................................................................................................
.....................................................................................................................................

Disk Quotas 137
3. Using one of the commands in the quota suite of programs, write the command to obtain a listing of all quotas set on a machine.
.....................................................................................................................................
.....................................................................................................................................
4. What daemon would allow for obtaining quota information from remotely mounted directories?
.....................................................................................................................................
.....................................................................................................................................
Exercise 5-3: File Systems
Solutions to this exercise are provided in Appendix B at the end of this manual.
Write the commands to perform the following:
1. Create an ext2 file system on a 200-MB disk hda5.
.....................................................................................................................................
.....................................................................................................................................
2. Mount this file system on /usr.
.....................................................................................................................................
.....................................................................................................................................

138 Chapter 5—Disk Management and Quotas
3. Create an ext2 file system on a 150-MB disk hda6.
.....................................................................................................................................
.....................................................................................................................................
4. Mount this file system on /usr/lib. Create this directory if it does not already exist.
.....................................................................................................................................
.....................................................................................................................................
5. Create a minix file system on 100-MB disk slice hdb2 and mount on /home.
.....................................................................................................................................
.....................................................................................................................................
6. Unmount all three file systems; notice that you must unmount /usr/lib before you can unmount /usr.
.....................................................................................................................................
.....................................................................................................................................
K E R N E L F I L E C A C H E
The Linux kernel maintains a cache in memory of file data, including the superblock, several inodes, and several data blocks; this cache gets written to disk periodically. This caching improves performance by reducing data accesses to disk, as the kernel will frequently find the data it wants in the cache in memory. Contents of the cache can be written to the disk manually with the sync command. A very old method of closing down a Linux system was to issue the following commands:
$ sync
$ sync
$ halt
The first sync writes the data to disk, and the second command gives the (slow) disk hardware a chance to complete the I/O operation. Then the system can be halted safely.

Kernel File Cache 139
The currently accepted method is to issue the shutdown command, with -h for halt or -r for restart:
$ shutdown -h time [warning message]
$ shutdown -h now System going down now!
See the man pages for all of the possible variations. You can practice different options with -k. Remember to include the optional message to users so they will know what is going on while you test or when you actually do have to shut down a system. The most common problem when shutting down is that the operator forgets to include the time field, which can be a specific clock time, an interval in seconds, or (most common) now.
If the system crashes, or is not closed down properly, the cached data is lost and the file system is left in an inconsistent state. The more modern journaling systems, now under development, will recover automatically on reboot. Until they become available, the fsck program, working with the /lost+found directory, provides our last line of defense against corruption.
In this section, we will discuss dealing with corrupt file systems.
Dealing with Corrupt File Systems
The mkfs command creates an empty /lost+found directory for use by the fsck process when recovering files in the event of a file system corruption. Since fsck cannot create the lost+found directory, nor can it increase the number of allocated disk blocks (the file system is corrupt, remember?), this directory must initially be large enough to hold entries for as many recovered files as the program will find. The directory must also never be deleted. Because of the special size considerations, it would be difficult to create outside of mkfs.

140 Chapter 5—Disk Management and Quotas
Each time the system starts, the file system check program (fsck) checks file system integrity. If a file system is not in a consistent state, it is modified to return everything to a consistent state. The lost+found directory comes into use when active inodes are found that are not referenced from any directory. Such lost files are placed in the lost+found directory. Since directory entries, which would show the files’ names, are missing, the files receive their inode numbers as names (use the file command to identify file types). Some files that were open at the time of the incident may be completely lost or damaged to the point of being unrecoverable. Recovered directories will be empty.
# /sbin/e2fsck -f -v /dev/hda5
e2fsck 1.12, 9-Jul-98 for EXT2 FS 0.5b, 95/08/09
Pass 1: Checking inodes, blocks, and sizes
Pass 2: Checking directory structure
Pass 3: Checking directory connectivity
Pass 4: Checking reference counts
Pass 5: Checking group summary information
11 inodes used (0%)
0 non-contiguous inodes (0.0%)
# of inodes with ind/dind/tind blocks: 0/0/0
719 blocks used (3%)
0 bad blocks
0 regular files
2 directories
0 character device files
0 block device files
0 fifos
0 links
0 symbolic links (0 fast symbolic links)
0 sockets
--------
2 files

Kernel File Cache 141
Exercise 5-4: Identifying Lost Files
Solutions to this exercise are provided in Appendix B at the end of this manual.
Given the following lost+found directory:
# cd /home/lost+found
# file *
000541: ASCII text
000872: commands text
001065: iAPX 386 executable not stripped
001085: C source code
001461: data
which command(s) would you use to identify the contents of each file?
To identify file 000541?
.....................................................................................................................................
.....................................................................................................................................
To identify file 000872?
.....................................................................................................................................
.....................................................................................................................................
To identify file 001065?
.....................................................................................................................................
.....................................................................................................................................

142 Chapter 5—Disk Management and Quotas
To identify file 001085?
.....................................................................................................................................
.....................................................................................................................................
To identify file 001461?
.....................................................................................................................................
.....................................................................................................................................
Exercise 5-5: Examining and Checking File Systems
Solutions to this exercise are provided in Appendix B at the end of this manual.
Write the commands to perform the following:
1. Set the maximum mount count on /dev/hda3 between bootup fscks to 20.
.....................................................................................................................................
.....................................................................................................................................
2. Give two commands to check for bad blocks on /dev/hda2 (with 65,535 blocks).
.....................................................................................................................................
.....................................................................................................................................
3. Show the process (without acutal execution) for a file system check of all file systems listed in fstab.
.....................................................................................................................................
.....................................................................................................................................
4. Execute a verbose file system check on /dev/hda3 with progress bars, specifying the vfat file system.
.....................................................................................................................................
.....................................................................................................................................

Distributed File System (Dfs) 143
D I S T R I B U T E D F I L E S Y S T E M ( D F S )
Linux-based Distributed File Systems are used to centralize administration of disks and provide transparent file sharing across a network. Linux Dfs packages usually include client and server components. A Dfs server shares local files on the network; a Dfs client mounts shared files locally. A Linux system can be a client, server, or both, depending on which commands are executed.
The Network File System (NFS) was developed by Sun Microsystems in 1984 and licensed to many vendors. It essentially allows a server to make available its file systems/directories, typically application and home directories, to clients who mount from the server. The client then sees the data as if it were local; i.e., the mount should be transparent to the client. NFS eliminates the need to install applications and multiple copies of identical data files on multiple machines.

144 Chapter 5—Disk Management and Quotas
Samba (System Message Block, or SMB) was developed by Andrew Tridgell, a computer science Ph.D. at the Australian National University, in 1991. He developed it in order to make his PC, on which he was beta testing an X server that required a DEC-proprietary network protocol (based on NetBIOS), talk to his workstation. He officially started NetBIOS for UNIX in late 1993. His software is now included with nearly every Linux distribution.
The following topics are discussed in this section:
� Overview of NFS
� The NFS Protocol Stack
� Overview of Samba
� The NFS Client
� The NFS Server
� NFS Security

Distributed File System (Dfs) 145
Overview of NFS
Sun’s NFS is independent of operating system, network, and transport protocols and is now available on a variety of platforms, including DOS, OS/2, MVS, and VMS. The openness and statelessness of NFS makes maintaining Linux file system semantics less straightforward. Because other operating systems, such as VMS or DOS, can be accessed via NFS, operations, such as creating symbolic links, cannot be supported if the remote system does not support them. Another example is that of deleting files while they are still open. A Linux program may do this to create a temporary file–the file is opened, then deleted. It is still accessible by the program, but it does not have a name in the file system; Linux does not free the disk blocks until the file has finally been closed. Supporting this in the NFS protocol would mean introducing state into the server; it can be supported on the client, however. Another example would be if a Linux special file accesses a device. NFS provides no support for this over a network.
File locking becomes difficult in a networked environment–we are trying to introduce state into a system that was designed to be stateless. However, a separate lock manager daemon does handle file locking.

146 Chapter 5—Disk Management and Quotas
The NFS Protocol Stack
In terms of the protocol stack, NFS is an application. eXternal Data Representation (XDR) is our Presentation layer, and Remote Procedure Calls (RPCs) are our Session-layer entity.
On the client side, we mount from the server using the mount command. On the server side, mountd (the mount daemon) responds to the mount request and allows or disallows the mount.
Data is represented using XDR in an operating system-independent fashion, therefore allowing data sharing among many OSs, including Linux, DOS, OS/2, NetWare, MVS, VMS, and more.
When the client wishes to communicate with the server, it generates RPCs, and the server’s Network File System Daemons (NFSDs) answer the client’s calls.
Record locking is implemented using the lockd and statd daemons, which must be run on both the server and the client.
MOUNTMOUNT
RPCRPC
XDRXDR
TRANSPORT, NETWORK, LINK & PHYSICAL LAYERS
NFSNFS
biod
statdlockd
mountd
nfsd
serverclient
statdlockd

Distributed File System (Dfs) 147
Overview of Samba
Although Samba allows integration of Linux systems with existing Windows-based networks, the integration is not perfectly seamless. Nonlocal disks can be accessed but are not technically part of the Linux file system.
Daemons used to interface with SMB (in /usr/sbin) include the following:
smbd SMB daemon (usually started by inetd)
nmbd NetBIOS nameserver support for clients (usually started by inetd)
Programs used to share resources (in /usr/bin) include the following:
smbclient SMB client for Linux machine (similar to ftp)
smbprint Script to print to printer on SMB host (if in /etc/printcap)
smbstatus Lists current SMB connections for local host
smbrun Glue script to facilitate running applications on SMB hosts
Other Samba programs are available as well. See the man pages for a complete listing.
In order to use Samba, the /etc/smb.conf file must be correctly configured. The man pages for smb.conf give a complete description of the various entries in this file. A program called testparm is included to test the correctness of your Samba configuration.

148 Chapter 5—Disk Management and Quotas
The following is a sample Samba configuration:
; /etc/smb.conf
;
; Make sure and restart the server after making changes to this file, ex:
[global]
; Uncomment this if you want a guest account
; guest account = nobody
log file = /var/log/samba-log.%m
lock directory = /var/lock/samba
share modes = yes
[homes]
comment = Home Directories
browseable = no
read only = no
create mode = 0750
[tmp]
comment = Temporary file space
path = /tmp
read only = no
public = yes
To share a directory with the public, create a clone of the previously shown tmp section:
[public]
comment = Public Stuff
path = /home/public
public = yes
writable = yes
printable = yes
It is a similar matter to share a printer. See the manual pages and Samba documentation for examples.

Distributed File System (Dfs) 149
The NFS Client
An NFS client accesses network-shared directories using the mount command. NFS mount options include the following:
rw/ro Read/write (default) or read-only
hard Retries mount operation until server responds (default)
soft Tries mount once and allows to time out
retrans & Transmission and timeout parameters for soft-mounted operations time out
bg After first mount failure, retries mount in the background
intr Allows operations on file systems to be interrupted with signals
The following example uses NFS mount options:
# mount -t nfs -o bg,soft,intr rosies:/bar /home/rosies
The client-side mount command contacts the server’s rpcbind (portmapper) to ask which port number the mount daemon (mountd) is listening on. The port number should be thought of as an application’s address. Once the client’s mount contacts the server’s mountd, the mount is either allowed or denied, based on rights specified by the server in /etc/exports.
If the mount is allowed, the server passes the client an identifier called a File Handle, which the client machine’s kernel puts in its mount table. When it references the mounted structure in the future, it simply passes the server the File Handle to indicate what it is attempting to access.
To make the mounts happen at boot time, edit /etc/fstab. Mounts made on the command line will be lost on a reboot.

150 Chapter 5—Disk Management and Quotas
Exercise 5-6: Using mount with NFS
Solutions to this exercise are provided in Appendix B at the end of this manual.
1. What command will mount /usr/share from mash4077 on the local mount point /usr/share with background mount and timeout?
.....................................................................................................................................
.....................................................................................................................................
2. Fill in the mount options for the following two /etc/fstab files:
# grep home /etc/fstab
rosies:/home/rosies /home/rosies nfs 0 0
# rsh rosies grep home /etc/fstab
mash4077:/home/hawkeye /home/hawkeye nfs 0 0
.....................................................................................................................................
.....................................................................................................................................
The NFS Server
A Linux system becomes an NFS server by running several daemons, as shown in the following example:
/sbin/portmap The portmapper
nfsd NFS daemon
mountd Mount daemon
Shared file systems must be specified in /etc/exports. The following example gives the machine atlnet read/write access on /mnt/rh1/local.
# cat /etc/exports
/mnt/rh1/local atlnet(rw)
System rc files (in /etc/rc.d/rc.#) must be modified to start nfsd and mountd on system startup.

Distributed File System (Dfs) 151
NFS Security
Although NFS is inherently insecure (for a number of reasons), there are several techniques that help reduce the level of insecurity. NFS can be run in encrypted mode, which encrypts data over the network. Access across the network uses UIDs, not usernames, so mismatched user IDs cause access and security problems; UIDs must be coordinated across all platforms. Root access is denied by default; root (UID 0) is mapped to user nobody.
# mount | grep "/share"
rosies:/share on /share
# id
uid=318(hawkeye) gid=300(users)
# touch /share/martini
# rsh rosies ls -l /share/martini
-rwxr-xr-x 2 soonlee users 0 Jan 11 11:21 /share/martini
In the previous example, we used UID=318 for user hawkeye, but the same UID on the remote system was assigned to user soonlee. Many sites will not implement NFS because of the weakness of its access control.
See http://www.cert.org for various Computer Emergency Response Team (CERT) advisories on NFS.

152 Chapter 5—Disk Management and Quotas
R A I D
When systems carry critical data with a high level of importance, drive efficiency and crash recovery quickly become paramount. To this end, Linux offers support for RAID (Redundant Array of Independent Disks). RAID is a method for increasing redundancy in block devices, and its typical use is to combine several physical hard disks into an array so that they appear to be a single logical drive. The technique can also be used to improve disk read/write performance and protect against hard drive failures through redundancy.
RAID can be implemented using commercially available hardware controllers or through software drivers. The latest Linux kernels support many hardware RAID configurations, and although these solutions offer more speed and efficiency than software options, they are also quite expensive. Installing software-based RAID support is accomplished through freely available kernel patches and software tools.
The redundancy offered by RAID is intended to protect against disk failures only, so data corruption, power failures, or other problems should be addressed elsewhere. Although RAID provides a powerful tool for maintaining system integrity, nothing is a substitute for frequent system backups.
The following topics are discussed in this section:
� RAID Levels
� Hardware RAID
� Software RAID
RAID Levels
At the core of RAID technology, there are three basic functions: mirroring, spanning, and striping. Mirroring is the copying of the information on one partition to another to create one apparent partition, and provides the redundancy necessary to recover from a disk failure. With drive mirroring, it is important to note that the resultant drive size will only be as large as the smallest drive mirrored. Spanning creates one apparent partition by simply appending one partition to the end of another. This implies that the resultant size of this apparent partition will be the combined size of the component drives used. Striping serves the same function as appending but accomplishes the data combination in a different manner. In striping, data writes are alternated between component drives so that data is written in parallel. This allows for faster disk accessing but sacrifices redundancy in the process.

RAID 153
RAID support can be grouped into several levels, each of which provide different levels of support for differing situations. Linux supports the following basic RAID levels:
Linear This is another name for spanning. When a component disk becomes full, the next drive is used. No safeguards against disk failures are provided at this level. At least two drives are required for linear mode.
RAID 0 Data is striped among the disks in the array. No redundancy is available at this level, although disk reads and writes will be faster due to the implicit parallelism that striping yields. At least two drives are required to implement RAID 0.
RAID 1 Mirroring is used to achieve a level of redundancy. If drives fail or are removed, the stored data is safe as long as one drive in the mirror is intact. Write performance will suffer because data must be written to each drive in the mirror. RAID 1 requires at least two drives.
RAID 4 At this level, data is striped over all drives like RAID 0, except for one drive. This drive is used to store parity information, which provides crash redundancy. RAID 4 support requires at least three drives.
RAID 5 Striping is used to achieve the same functionality as RAID 4, but parity information is distributed over the component drives. This allows for redundancy but avoids the speed hit taken by storing parity data on a dedicated disk. This level also allows for spare disks that are only used when a drive fails. At least three drives are required for RAID 5 support.
Linear mode and RAID 0 are technically not RAID because they do not implement redundancy. However, they are implemented in much the same way that the other RAID levels are implemented. RAID levels 2 and 3 are generally considered to be obsolete because of improvements in modern disk drives and, thus, are left unsupported by the software-based Linux drivers as well as most hardware systems.

154 Chapter 5—Disk Management and Quotas
Hardware RAID
All enterprise-class operating systems support hardware RAID (Redundant Array of Inexpensive Disks) adapters. Linux has lagged behind to some extent in this area, mostly due to the difficulty in getting information from the hardware vendors themselves with specifics about individual RAID adapters. As Linux has gained credibility as an enterprise-level operating system and support has been announced by major vendors such as IBM and Compaq, this has begun to turn around, and there now exist excellent RAID solutions for Linux.
Most RAID controllers are high-end SCSI cards that can be quite expensive. IBM ServeRAID adapters and Compaq SmartArray RAID adapters are now natively supported in the 2.2 series of Linux kernels. These adapters are typically found in IBM NetFinity Servers and Compaq ProLiant Servers. Both IBM and Compaq sell and support preconfigured Linux machines with hardware RAID arrays installed.
Note that if you add a RAID adapter to a server from one of these families as an option, then install Linux yourself, you may have to apply kernel patches to get everything to the correct supported operating level. Always check the vendor’s Web site for Linux-specific information.
Several other RAID adapters from reputable vendors are directly supported in the series 2.2 kernels. These are:
� Distributed Processing Technology, Inc.
EATA-DMA Series RAID Adapters
Examples: DPT PM2011B and PM2012B
� Mylex, Inc.
Mylex/BusLogic RAID Adapters
Examples: Mylex DAC960/1100 Series
� ICP Vortex, Inc.
Examples: GDT RP, RD, RS, and RN Series RAID Adapters
All of these vendors have long-established reputations for building high-performance SCSI RAID adapters and providing excellent support.
Hardware RAID devices appear to the operating system as normal SCSI drives. The hardware does all of the virtualization so that the logical drives appear to the operating system as if they were physical drives.

RAID 155
Software RAID
Since RAID hardware can be pretty expensive, the Linux developers decided to develop a RAID implementation software. While software RAID cannot handle failure of the boot disk, it can handle just about anything else and is a great cost saver. Performance differences between hardware and software are debatable. Many hardware controllers also include large amounts of disk cache and have dedicated processors. The main CPUs on lightly or moderately loaded systems are more than powerful enough to do RAID processing without greatly taxing the CPU.
The Linux kernel implements RAID in a module called md (multiple disks). On many distributions, it will already be compiled into the kernel. If it is not, you will have to configure the kernel to add support for it, then compile and install the new kernel. Software RAID also requires a package of utilities called raidtools.
The configuration of RAID disks is done in the /etc/raidtab file. The software RAID system can actually use partitions instead of full disks to make up the member disks of the drive array. You use the mkraid command to initialize an array specified in the raidtab file. Once the array has been created, you can format, mount, and use the drive array just like a normal partition. Software RAID partitions have names such as /dev/md0.

156 Chapter 5—Disk Management and Quotas
S U M M A R Y
In this chapter, we covered several aspects of disk management and quotas. Some of the issues we discussed included:
� The Linux file system is a hierarchical tree structure with a single root node.
� The underlying disk layout is hidden from the casual user, and the files on a disk are identified by a unique number called the inode number.
� Directories map names onto inode numbers that permit file links (more than one name for a file).
� Access to all aspects of the system is controlled through the file permissions.
� Linux has a standard directory structure used by most systems.
� The Linux file structure hides the underlying disk layout.
� Disks are used to store file systems that are made using mkfs.
� Several different file systems are supported by each Linux system.
� Disks have to be mounted (using mount) into the hierarchy before they can be used.
� Permanent mounts are stored in /etc/fstab.
� The kernel optimizes disk access by keeping a cache of inodes and data blocks.
� An inconsistent disk file system cannot be mounted until it is repaired with fsck. Linux also supports file sharing across a network.
� The most popular system that allows Linux to share files with other operating systems is NFS.
� Clients must use mount to access shared drives.
� Permanent mounts are specified in /etc/fstab.
� Samba is quickly gaining popularity as Linux systems are integrated with NT systems.
� Clients use smbclient to access shared resources.
� RAID provides fault-tolerant storage by duplicating data across disks in a transparent manner.

Post-Test Questions 157
P O S T - T E S T Q U E S T I O N S
The answers to these questions are in Appendix A at the end of this manual.
1. What must you do in order to use disks to store files under Linux?
.....................................................................................................................................
.....................................................................................................................................
2. What is the process of file deletion when you run the rm command?
.....................................................................................................................................
.....................................................................................................................................
3. What is the difference between a hard quota and a soft quota?
.....................................................................................................................................
.....................................................................................................................................
4. What is Samba used for?
.....................................................................................................................................
.....................................................................................................................................
5. What is the purpose of the kernel’s cache?
.....................................................................................................................................
.....................................................................................................................................

158 Chapter 5—Disk Management and Quotas
M A J O R T O P I C S
6
User Management
Objectives .................................................................... 160
Pre-Test Questions....................................................... 160
Introduction ................................................................ 161
Users and Groups ........................................................ 162
Passwords .................................................................... 168
Removing a User.......................................................... 174
Restrictions.................................................................. 179
Logging in to Linux ..................................................... 187
Summary ..................................................................... 196
Post-Test Questions ..................................................... 196

160 Chapter 6—User Management
O B J E C T I V E S
At the completion of this chapter, you will be able to:
� Create user accounts.
� Manage user and group accounts and related system files.
� Set up user-level security.
� Customize and use the shell environment.
� Tune the user environment and system environment variables.
� Create user and system profiles.
� Use basic user commands.
� Describe the distinction between user, group, and other.
P R E - T E S T Q U E S T I O N S
The answers to these questions are in Appendix A at the end of this manual.
1. To manually create a new user account at the command line, what files should be edited?
.....................................................................................................................................
.....................................................................................................................................
2. How can a user put his or her office phone number into the /etc/passwd file?
.....................................................................................................................................
.....................................................................................................................................
3. When a new user is created, some files are created in his or her home directory. Where are those files copied from?
.....................................................................................................................................
.....................................................................................................................................
Introduction 161
4. Name all of the configuration files that a bash login shell may run.
.....................................................................................................................................
.....................................................................................................................................
5. What command is used to make a variable available to the environment in bash? What command is used in tcsh?
.....................................................................................................................................
.....................................................................................................................................
I N T R O D U C T I O N
A new user requires an account and a working environment within the Linux system. The system administrator must set this up in the /etc/passwd file before the user can log on. For security reasons for both the administrator and the users, the actual passwords of the users are stored in the /etc/shadow file. This file also stores the password aging information for each user on the system. Similarly, the group names are stored in the /etc/group file and the group passwords are stored in /etc/gshadow. These files will be discussed in more depth in upcoming sections.
A good administrator will provide a default profile as well as login scripts for all new users (/etc/skel), and an initial welcome message telling the user whom to contact for help or further information (/etc/motd).
The steps and utilities used in setting up a user are straightforward and easy to use. The most important aspect of adding users is determining the following about how the users are going to fit into the system: which groups they will belong to, their ID number, and their usernames. Using first names as login names as a rule is a bad idea because it creates potential problems if you later have another user with the same first name. The moral of the story is to plan ahead, then the actual setup will be easy and correct!

162 Chapter 6—User Management
U S E R S A N D G R O U P S
Every computer system must have some way to define who is allowed to connect and what they are permitted to do. The Linux environment allows effective control of user access through the entries in the /etc/passwd and /etc/group files. Group entries, properly formatted, can allow users to share access to directories where there is a common need and be excluded from directories where they should not go.
The following topics are discussed in this section:
� Preparing Groups (/etc/group)
� The /etc/passwd File
� Allocating User IDs (UIDs) and Conventions
� Adding Users
� Changing User Attributes
� Changing Group Membership
Preparing Groups (/etc/group)
The main function of the /etc/group file is to define valid system groups and provide a cross-reference between user-friendly group names and computer-friendly numbers. Each line in the group file corresponds to a group and contains a list of all members of that group. Group names usually reflect the structure of your company or department and should relate to the type of work that will be performed by the users belonging to each group. This will control how the files can be shared between them.
root:x:0:root
bin:x:1:root,bin,daemon
daemon:x:2:root,bin,daemon
sys:x:3:root,bin,adm
adm:x:4:root,adm,daemon
tty:x:5:
disk:x:6:root
lp:x:7:daemon,lp
mem:x:8:
kmem:x:9:

Users and Groups 163
The following table describes the significance of each field in each line of the group file.
When using the utilities described in this book, only the groups that exist in this file can be used to assign a primary group to a user. It is therefore important that you set up this file with a lot of thought before you start adding users.
The groups can have passwords supplied in the second field, but very few sites utilize this feature and it is often not configured by default. Password-protected groups can be accessed by any user knowing the password (using the newgrp command). Normally, group passwords are disabled (with the asterisk) and the list of permitted users within the group is given in the last field. On some systems, the gpasswd file is used to changed the password for a group, and on others, this functionality is built into the conventional passwd program.
To create a new group, an administrator needs to append a line to the group file, then append the appropriate usernames to the line. This direct method is full of potential hazards and is not recommended. Additionally, tools to help automate this process are available, for example, groupdel for removing group, groupmod for modifying group properties, and groupadd for adding a group. The following is an example of the syntax for each of these commands:
# groupadd -g 151 swamp
# groupmod -g 151 -n newgroup swamp
# groupadd swamp
Field Descriptionx: The password field (an “x” when the shadow password is used)
gid: Numeric ID
user1,user2 List of users allowed secondary access to this group
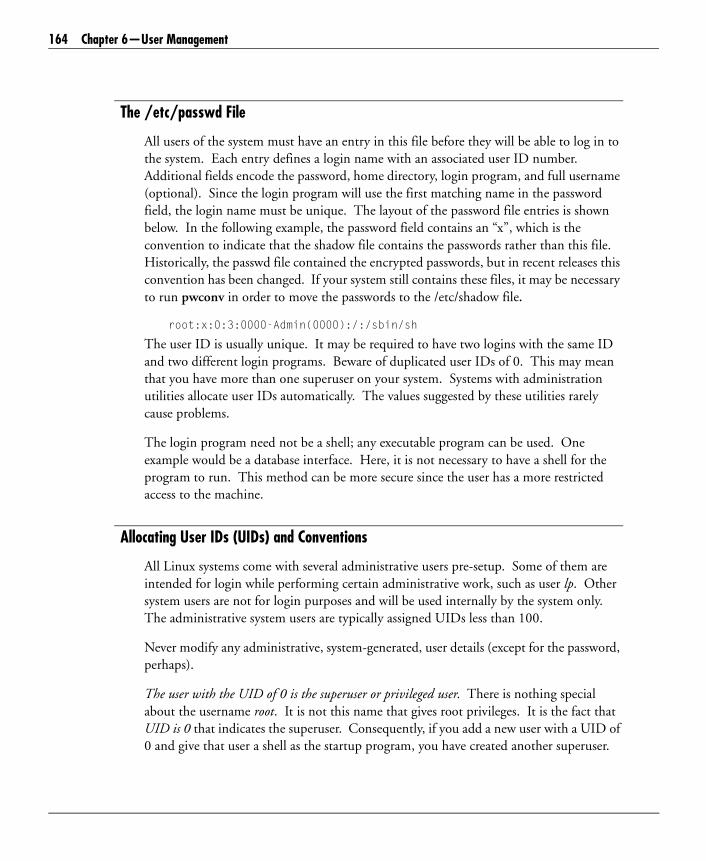
164 Chapter 6—User Management
The /etc/passwd File
All users of the system must have an entry in this file before they will be able to log in to the system. Each entry defines a login name with an associated user ID number. Additional fields encode the password, home directory, login program, and full username (optional). Since the login program will use the first matching name in the password field, the login name must be unique. The layout of the password file entries is shown below. In the following example, the password field contains an “x”, which is the convention to indicate that the shadow file contains the passwords rather than this file. Historically, the passwd file contained the encrypted passwords, but in recent releases this convention has been changed. If your system still contains these files, it may be necessary to run pwconv in order to move the passwords to the /etc/shadow file.
root:x:0:3:0000-Admin(0000):/:/sbin/sh
The user ID is usually unique. It may be required to have two logins with the same ID and two different login programs. Beware of duplicated user IDs of 0. This may mean that you have more than one superuser on your system. Systems with administration utilities allocate user IDs automatically. The values suggested by these utilities rarely cause problems.
The login program need not be a shell; any executable program can be used. One example would be a database interface. Here, it is not necessary to have a shell for the program to run. This method can be more secure since the user has a more restricted access to the machine.
Allocating User IDs (UIDs) and Conventions
All Linux systems come with several administrative users pre-setup. Some of them are intended for login while performing certain administrative work, such as user lp. Other system users are not for login purposes and will be used internally by the system only. The administrative system users are typically assigned UIDs less than 100.
Never modify any administrative, system-generated, user details (except for the password, perhaps).
The user with the UID of 0 is the superuser or privileged user. There is nothing special about the username root. It is not this name that gives root privileges. It is the fact that UID is 0 that indicates the superuser. Consequently, if you add a new user with a UID of 0 and give that user a shell as the startup program, you have created another superuser.
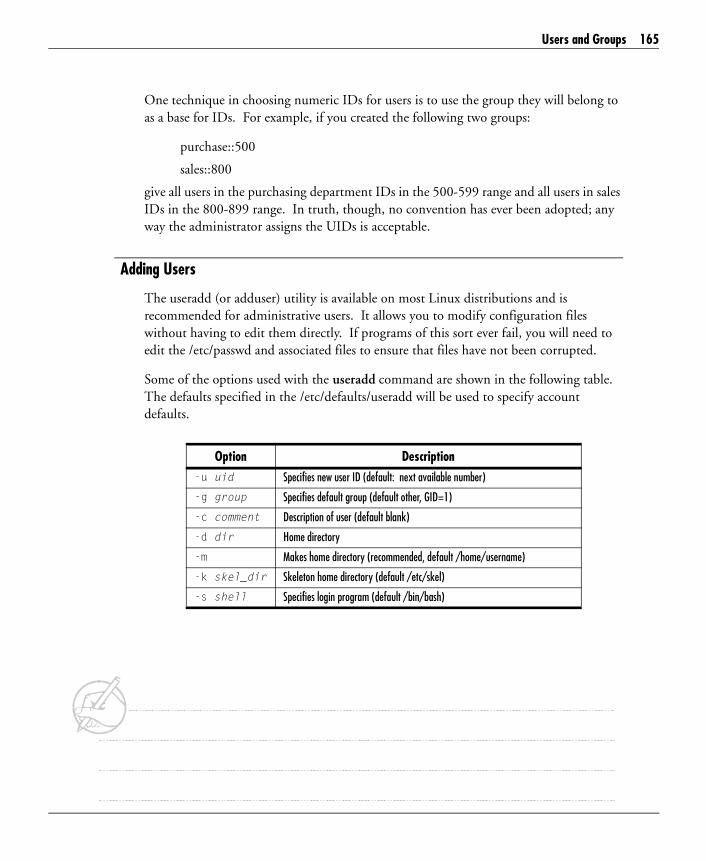
Users and Groups 165
One technique in choosing numeric IDs for users is to use the group they will belong to as a base for IDs. For example, if you created the following two groups:
purchase::500
sales::800
give all users in the purchasing department IDs in the 500-599 range and all users in sales IDs in the 800-899 range. In truth, though, no convention has ever been adopted; any way the administrator assigns the UIDs is acceptable.
Adding Users
The useradd (or adduser) utility is available on most Linux distributions and is recommended for administrative users. It allows you to modify configuration files without having to edit them directly. If programs of this sort ever fail, you will need to edit the /etc/passwd and associated files to ensure that files have not been corrupted.
Some of the options used with the useradd command are shown in the following table. The defaults specified in the /etc/defaults/useradd will be used to specify account defaults.
Option Description-u uid Specifies new user ID (default: next available number)
-g group Specifies default group (default other, GID=1)
-c comment Description of user (default blank)
-d dir Home directory
-m Makes home directory (recommended, default /home/username)
-k skel_dir Skeleton home directory (default /etc/skel)
-s shell Specifies login program (default /bin/bash)
166 Chapter 6—User Management
On some systems, the login.defs will also play a role in the default configuration for a user account. Keep in mind that useradd can ensure that the home directory has all of the permissions set properly; in other words, it will run the chown and chgrp commands. Otherwise, permissions will have to be set manually.
The skeleton directory allows you to configure a kind of template directory structure you intend to provide to new users. When requested with the -k option, useradd will re-create this skeleton directory within the home directory of the new user, again making sure that the access permissions are set correctly. Systems with multiple groups may find it more convenient to maintain two or three skeleton directories, one for each group.
Changing User Attributes
There is a good degree of compatibility between options used here and those used by the sister program, useradd. This tool can also be used to change the UID of a user. This is not recommended and not usually practical. Note that usermod will change the UID of files that are located in the user’s home directory, but it will not change any other files (like cron and mail files), even though the new value will be recorded in the /etc/passwd file.
The usermod program can also be used to set a couple of password-aging attributes associated with password control, namely to set the expiration date, the warn period, and the absolute date beyond which the account will be locked. Password control will be discussed in more depth later in this chapter.
# usermod -f 10 henry
# usermod -e 01/31/97 hotlips
Changing Group Membership
Users can be assigned secondary membership in groups other than the one defined for them in the /etc/passwd file. As stated previously, the last field in the /etc/group file contains a list of users who belong to that group. Groups are useful for allowing users to share files. It is common for a user to belong to more than one group. The following example demonstrates how the groupadd tool is used to create a group.
# groupadd -g 200 adm
The members of the group can be modified either by editing the /etc/group file or by using the usermod command. When modifying the /etc/group file, note that there are no spaces between usernames and commas in the last field. It is not necessary for a user to have an entry in the /etc/group file for the default or primary group.
Users and Groups 167
Groups tend to be under used in Linux environments. This is unfortunate, as intelligent use of groups can simplify working practices and user administration. An administrator is always wise to make full use of groups. For example, it is better if a team of users employs a group to share common files, rather than allocates files to individual users. This helps to create a more secure work environment while still maintaining shared file access.
Exercise 6-1: Adding and Modifying Users
Solutions to this exercise are provided in Appendix B at the end of this manual.
Write down the commands used to perform the following.
1. Add a user called frank.
.....................................................................................................................................
.....................................................................................................................................
2. Add a user called radar specifying the Korn shell.
.....................................................................................................................................
.....................................................................................................................................
3. Add a user called klinger using /home2/klinger as the home directory.
.....................................................................................................................................
.....................................................................................................................................
4. Add a user called mulcahy specifying a UID of 400 and a group of staff.
.....................................................................................................................................
.....................................................................................................................................
168 Chapter 6—User Management
5. Modify the user frank to use the korn shell.
.....................................................................................................................................
.....................................................................................................................................
6. Modify radar to give him a new UID of 401.
.....................................................................................................................................
.....................................................................................................................................
P A S S W O R D S
The password for a user is set using the passwd command. On most systems, the administrators allow users to optionally change the password whenever they like as well as force the change at regular time intervals. Users of these systems can use the passwd command but will be prompted for the old password. Only the root can set a password without knowledge of the original password.
WARNING: Linux does allow a user to have a NULL password. It is encouraged to force the password lengths to some minimum value (usually five). This is usually defined in the /etc/login.defs configuration file.
Users often forget their passwords and ask the system administrator to tell them what their password is. This is not possible under Linux. Instead, the password has to be set to a new value, and the user informed of the new password. If password aging is in force, use the indicated option to expire the new password, forcing the user to change the password the next time they log on. For security reasons, the administrator needs to ensure that the person asking for a password to be reset is the account owner. See the user in person, if possible, and get a signed confirmation.

Passwords 169
The following topics are discussed in this section:
� Choosing Passwords
� The /etc/shadow File
� The pwconv Utility
� Account Security
Choosing Passwords
Users generally choose inappropriate or simple-to-guess passwords. A little bit of education on what constitutes a good password will help most users tighten security by using sensible passwords. Most systems insist on a minimum-length password and enforce nondictionary passwords. The following is a list of items that will help make a password more secure:
� Don’t use proper words or names.
� Use letters and digits.
� Include symbols.
Not only must a password be well chosen, it must be easily remembered. It is especially important that the root password is well-chosen. You should also choose the password policies with care. The following reflects some common policies that help ensure the security and life of the system:
� Enforce a minimum password length.
� Enforce the use of non-alphanumericals.
� Maintain updated dictionaries of disallowed words.
� Do not ever have guest accounts (anonymous ftp may be an exception).
� If someone has to use your system, give them an account with a password.
� Always use the full functionality of password aging. The features are there for a reason. Use them!

170 Chapter 6—User Management
The /etc/shadow File
Although a user’s password is encrypted in /etc/passwd, a security risk still exists. Because the password file is world readable, a malicious user can copy the file to his or her local machine, and using dictionary-based, brute-force methods, attempt to crack the encrypted password hash using the same program that was used to encrypt it. Therefore, once the encrypted password hash is discovered, it is only a matter of time before it can be cracked and the actual password revealed. Advanced software used to break these password files even uses common passwords and permutations of individual user information to attempt more likely used passwords before it attempts a dictionary-based attack.
The passwords (or rather, their encrypted representations) are stored in the /etc/shadow file if shadow passwords are used. The shadow file does not contain UIDs. The relationship between the password file and the shadow file is by username and position. It is vital that these files are maintained in an orderly fashion if hand-edited. This file is where the password-aging data is stored. The following is the basic design of each line in this file. Notice that a colon delimits each field.
name:password:last_change:min_length:max_length:warn_time:inactive_time:expire_time:flag
It is very important to maintain tight security on this file, especially on older systems using 56-bit encryption, which is much easier to crack on newer, faster machines (but only if the file can be accessed by a malicious hacker).

Passwords 171
The pwconv Utility
The pwconv program is a utility that converts the /etc/passwd file into shadow passwords. When you use the pwconv command, all of the entries in /etc/passwd are copied to create an /etc/shadow file. The passwords are moved into the shadow file, and the /etc/passwd has the password set to an “x”. In this way, only programs that are aware of shadow passwords can be used to log in. Other programs will encrypt the password that the user enters and try to compare that encrypted version with the “x”. Since an encrypted password will never end up being an “x”, there is no way the password typed will ever match the entry in the /etc/passwd file.
In addition to the pwconv utility, there is also a pwunconv program that converts shadow passwords back to the old insecure standard passwords. This utility removes the shadow file and restores the encrypted passwords back to the /etc/passwd file. The use of this program will be pretty rare. However, you may find it easier to fix a problem with the passwd and shadow files by first using pwunconv to convert to the old format, then using pwconv to restore the shadow password system.
Account Security
Users are the biggest security risk for any Linux system. Advising users on sensible passwords can help, but other actions can also improve security. Note that only users with the root password can gain access to the encrypted passwords on the system. If the administrator leaves, he or she can take the encrypted password list, regardless of legal and/or ethical considerations. With the encrypted passwords, it is quite possible for someone to apply standard techniques to guess passwords and thereby break back into your system. Newer systems use 128-bit encryption techniques instead of the old 56-bit encryption. However, just because the encryption is stronger, it does not in any way indicate that the passwords are more secure.

172 Chapter 6—User Management
Many users dislike password aging because it forces them to change their passwords on a regular basis. An administrator should insist that password aging is enforced. The password warning time indicates when the user will be asked to change the password before it actually expires. The warning is repeated every day until the user changes the password (or it expires).
Traditional forms of security are still important. The following is a list of practices often employed by successful administrators:
� When a member of the administrative staff leaves, change the passwords he or she previously had access to.
� Replace all passwords when any of the key administrators leave.
� Never keep a written copy of the root password–anywhere.
� Give the root password on an as-needed basis to as few users as possible.
� Change the root password regularly.
� Always inform users and staff of password changes in person. Do not use e-mail–no matter how convenient.
Exercise 6-2: Account Security
Solutions to this exercise are provided in Appendix B at the end of this manual.
Write down the commands used to perform the following. (You may need to read the man pages for syntax and options.)
1. Add a password for user frank.
.....................................................................................................................................
.....................................................................................................................................
2. Force frank to change his password at next login.
.....................................................................................................................................
.....................................................................................................................................

Passwords 173
3. Enable password aging for trapper (min 21 max 31 warn 7).
.....................................................................................................................................
.....................................................................................................................................
4. Set the expiration date for hawkeye to 31 Dec 1999.
.....................................................................................................................................
.....................................................................................................................................
5. Lock henry’s account.
.....................................................................................................................................
.....................................................................................................................................
6. Unlock henry’s account.
.....................................................................................................................................
.....................................................................................................................................
174 Chapter 6—User Management
R E M O V I N G A U S E R
A user may leave a company or may no longer require use of the system. When this happens, the system administrator must clean up the user’s account and mail system. It is best to leave the entry in the log file so that the user ID and login name will not be reallocated. The clutter of an unused account must be removed, but any information required by other users that was maintained by the outgoing user must be recovered.
Removing User Account
The user’s files should be collected together and saved for a short period of time to allow the user’s manager to extract any important files.
The user’s mail may need to be forwarded to a manager once the mailbox has been emptied. Alternatively, the system administrator may wish to use the vacation command to send a message to all users who are still sending mail to the user. In other cases, simply deleting the account will be sufficient.
You should also check if the user left behind any cron or at tasks. If you remove user’s files with the suggested find command, the files containing the scheduled tasks will go as well. There may be jobs that your system still requires, and you may need to reassign those to somebody else.
The following is the full description of the suggested steps to take when a user leaves the company:
� Expire the account, effectively locking the password.
# chage -E /01/01/99 henry
� Create and protect the directory in which you will store all user’s files.
# mkdir /hold; chmod 000 /hold
� Create a compressed (cpio format) file of all of the user’s files. Notice that we have changed to root and issued find in current (dot) directory deliberately to save relative pathnames. This will ensure that when we restore files for inspection, they will not be inserted at different places in the system.
# cd /; find . -user henry -print | cpio -ov | compress >/hold/henry

Removing a User 175
� Now that we saved the files, we can remove them. Notice that we have not dealt with any directories that may have belonged to the user but contained files owned by others.
# find . -user henry -type f -exec rm -f {} \;
# find . -user henry -type d -exec rmdir {} \;
� The incoming mail can be redirected to another user. This will work even when we eventually remove the user’s account from the system altogether.
# su - henry -c "mail -F bigboss"
Many systems don’t reuse user IDs, as this could risk a potential security problem. The new user of an old ID would have access to any files owned by the old user that were inadvertently not removed. This is a bad thing.
In practice, an administrator will use the userdel command since it can be used to delete the home directory, leaving any other file (for example, mail). The following is an example of how an administrator would delete the user henry:
# userdel -r henry

176 Chapter 6—User Management
Exercise 6-3: Managing Users
Solutions to this exercise are provided in Appendix B at the end of this manual.
1. Use useradd to add a new user called hawkeye (full name Pierce) with a user ID of 318. Don’t forget to use the -m option to create the user’s home directory.
Set a password for this account and force this password to expire the next time the user logs in. Test your new account first by using su and then by logging out and back in again as the new user hawkeye.
.....................................................................................................................................
.....................................................................................................................................
2. Correct the full name for user hawkeye to be B F Pierce and give him /bin/bash as his login shell.
.....................................................................................................................................
.....................................................................................................................................
3. As root, use chage –l to show the status of hawkeye’s password protection.
Change the password aging to:
Maximum number of days: 7
Minimum number of days: 2
Warning number: 7
Log in as hawkeye and try to change the password. If you cannot, su to root and fix the problem. Exit from the root shell and change the password for hawkeye.
.....................................................................................................................................
.....................................................................................................................................

Removing a User 177
4. Create a new group called swamp. Modify hawkeye to be a member of group swamp; do not modify hawkeye’s default group.
In one command, add a new user trapper with full name J F X McIntyre, user ID 319, and membership in the supplementary group swamp (leave the user’s default group as its default value). Set a password for trapper and log out. Verify that you can log in as trapper correctly and, as trapper, enter the following commands:
$ batch
date
^D
This will ensure that there is a mail message for trapper. Do not read this mail message yet; we want it to remain in the mailbox.
.....................................................................................................................................
.....................................................................................................................................
5. Remove the account for trapper, including the home directory. Now find out if trapper still owns any files on the system.
Use useradd to re-create the trapper account with the same parameters as before. You will not be able to do this because the system will not let you reuse the 319 user ID for another 20 days.
What command option should you have specified to ensure that you could reuse the 319 user ID?
.....................................................................................................................................
.....................................................................................................................................
6. List all of the groups that root is a member of (don’t forget the default group).
.....................................................................................................................................
.....................................................................................................................................

178 Chapter 6—User Management
Exercise 6-4: Managing User Home Directories (Optional)
Solutions to this exercise are provided in Appendix B at the end of this manual.
1. Create a directory called /home/skeleton, which contains all of the files in /etc/skel (note that there will be hidden files in /etc/skel). Create two empty files called footlocker and uniform in /home/skeleton.
Create a new account for frank (full name F M Burns, user ID 320) with a skeleton directory of /home/skeleton. Verify that the correct files are in /home/frank.
.....................................................................................................................................
.....................................................................................................................................
2. Add a new account for hotlips (full name M Houlihan, user ID 321) but do not make the home directory.
Set a password for hotlips’ account and verify the account with:
# su - hotlips
# pwd
What is your working directory shown by the last command? Why isn’t this /home/hotlips?
Log out and try and log in as hotlips. You will not be able to do so because the home directory doesn’t exist.
Log in as root and manually create the home directory for hotlips using /home/skeleton as a skeleton directory.
Log in as hotlips and verify that you can put something in your footlocker (i.e., edit the footlocker file).
.....................................................................................................................................
.....................................................................................................................................
3. Change the user ID for frank to 322. Now enter the following command:
# ls -al /home/frank
Does everything look correct or did you forget to do something?
.....................................................................................................................................
.....................................................................................................................................

Restrictions 179
R E S T R I C T I O N S
Linux’s interactive command interpreter is known as the shell. It is called the shell because it is thought to provide a protective layer around the system functions concerned with invoking commands, thereby shielding the user from too much detail. The shell is the means by which interactive users access the many utilities that Linux provides. It reads commands from the user and executes the appropriate programs.
An important feature of Linux is that the shell is not implemented as part of the operating system kernel. The shell is simply a user-level program. It has no privileges over other such programs; it merely and cleverly uses the facilities provided by the kernel so that it may manipulate other programs and processes.
Therefore, the administrator may easily replace the standard shell with an equivalent program. Indeed, most Linux systems now provide a choice of three different shells. These shells differ in how they operate, but basically their functionality is equivalent.
Bourne-Again Shell (bash) This is a superset of the commands of the original Bourne shell. It implements features of csh and ksh.
Tcsh (tcsh) This is a superset of the commands of the original C shell.
Public-Domain Korn Shell (pdksh)This is a public-domain implementation of the popular Korn shell (ksh).
For the examples in this section, we will use the Bourne-Again Shell (bash). The following topics are discussed in this section:
� Restricted root Access
� Environment Files
� Environmental Definitions
� The umask Command

180 Chapter 6—User Management
� Message of the Day
� Guest Accounts
� Shared Group Directories
Restricted root Access
In a networked environment, giving a workstation’s root password to an ordinary user opens up the entire network to the risk of security violations with little effort. For this reason, an administrator may wish to create pseudo-root accounts (or SUDOers). This is a relatively simple thing to do. Read the documentation on your Linux system for more information.
Another way of giving root privileges out to users is to create special accounts in which the login shell is a script that performs the function. For example, a special shutdown account can be created that will close the system down if anyone logs into the account. Give the password of this account to anyone permitted to shut down the system. In order for this to work, however, the script must run with a UID of 0 (root). This is dangerous and leaves the system subject to a hacker. The SUDO method, discussed previously, is preferred.
Environment Files
When the shell is invoked, it initially reads commands from two files. The /etc/profile and /etc/bashrc files contain systemwide commands and are maintained by the system administrator to set up local system variables and special requirements. The user’s startup files (in $HOME/.bash_profile and $HOME/.bashrc) are maintained by each user and can be configured to perform any special initialization for the bash shell. The administrator needs to ensure that any shell-specific items are not placed into /etc/profile, but are rather placed into /etc/bashrc. Many users may prefer csh or some other. In such cases, details of the configurations may differ.
The profile files are only read under certain conditions, usually when the user logs in. The profiles are not read when running shell scripts or subshells, since the current environment is duplicated at startup.
All of the files are optional, but it is unusual to find a system without an /etc/profile or a /etc/bashrc. Many users do not bother configuring a local .bash_profile and .bashrc. Therefore, it is left to the system administrator to modify the configuration files.

Restrictions 181
If the variable ENV is defined and exported to the environment, any child bash shells will read and invoke the commands in the file defined by this variable. The bash shell startup instructions are usually located in the $HOME/.bashrc file. This file should be used to set shell features that are required for all bash shells, not just the login shell. For security reasons, this file is often accessible only by the owner.
Environmental Definitions
The following table lists some of the definitions common in the startup files. These are only a portion of the full set used by a shell for its operation. To see a full list of system variables complete with their description, look up manual pages for the shell being used.
To see all of the current variable settings, execute the set command without any options. To see the settings of all of those definitions in the current environment that have been exported, use the env command.
Script Text DescriptionPATH=$PATH:/usr/X11R6/bin: Includes required search directories
EDITOR=vi Defines line-editing editor (for history mechanism)
TERM=vt100 Must reflect terminal used; otherwise, all noncharacter-based applications, including vi, will fail
MAIL=/var/spool/mail/$LOGNAME Location for your mailbox
SHELL=/bin/bash Shell used for “escape” from programs; e.g., when you type “:!cmd” within vi, the cmd is executed by the shell defined here
ENV=$HOME/.bashrc Location of the bash shell run command file

182 Chapter 6—User Management
The umask Command
umask creates the default file creation permissions by unsetting (or subtracting) the permissions described by the mask from the octal value 666 (or rw-rw-rw). For example, a common umask is 022, which sets the default permissions to 644. In octal, 6 (binary 110) minus 2 (binary 010) gives 4 (binary 100). The following table shows the most common masks in everyday use. System administrators set a default mask in /etc/profile (usually 022), but many users set their own umasks in their .profile.
Message of the Day
The /etc/motd file contains the message of the day (or motd) so that users are informed of important information whenever they log in. As the text is outputted before the system profile is executed, it is worth keeping output from the profile to a minimum; otherwise, the message will scroll off the screen before it can be read. For security purposes, you should output a message similar to the one shown in the following example. Unauthorized users continuing to use the system after they have read this message know they are performing illegally. This is an important point for prosecuting system hackers.
Welcome to Acme's Development System.
Access to this system is restricted to authorized users only.
Unauthorized access is prohibited and offenders are liable to prosecution.
System will be down all day on Sun 23 April for preventive maintenance.
It is important that this message does not scroll off the screen before it can be read, so it is best to check that output from the /etc/motd file and other startup files do not scroll the proprietary warning off the screen.
umask Plain Text Files (vi) Directories (mkdir)rw-rw-rw- rwxrwxrwx
000 rw-rw-rw- rwxrwxrwx
022 rw-r--r-- rwxr-xr-x
033 rw-r--r-- rwxr--r--
027 rw-r----- rwxr-x---
077 rw------- rwx------

Restrictions 183
Your legal department should advise you on the exact nature of the warning message for your establishment.
To establish a motd, simply use a text editor and modify the /etc/motd file. Be aware, however, that on some distributions of Linux, the motd will be replaced with a default message every time you reboot. To fix this problem, you will have to comment out lines or edit lines located in the /etc/rc.d/rc.local file.
Two other message programs (issue and issue.net) are similar to motd. Issue is the program that displays the message above the login. The default is usually an identification of the Linux distribution, kernel version, and the name of the computer you are working on. This message is changed just like motd, using a text editor to modify the /etc/issue file. Like motd, issue is also set back to default unless the /etc/rc.d/rc.local file is changed.
Issue.net is similar to motd and issue because it also displays a welcome message; however, it displays that messages to users accessing your machine through a telnet connection. Often, a legal warning is included in this message since most hacker attacks occur from outside your local system. The issue.net message is written in the /etc/issue.net file and accepts some getty characters. These characters are listed in the following chart.
Character Action%t Displays the current tty
%h Displays the system node name
%D Displays the name of the NIS domain
%d Displays the time and date
%s Displays the name of the OS
%m Displays the hardware type
%r Displays the OS release
%v Displays the OS version
%% Displays a single “%” character

184 Chapter 6—User Management
Another similarity between issue.net and issue is that it will be set to default unless you adjust the /etc/rc.d/rc.local file. Unless you want to repeat your work on these three messages, it is important that you modify this file.
Guest Accounts
Guest accounts are bad weaknesses for a system. Do not ever create them or use them. Guest accounts are a lazy person’s answer to not creating the necessary accounts. Further, there is no justification for ever creating a guest account, no matter how tempting it might be.
A guest account should not be confused with the anonymous ftp account used within the context of the Internet setup, where although the password is not fixed, access control is achieved through different mechanisms.
Shared Group Directories
Setting the group ID bit is very useful for shared directories where a group of users will store and manipulate files. The Set Group ID or (SGID) on a directory ensures that all files created in the directory have their group owner set to that of the directory and not the creating user. The SGID bit is set by setting the group bit (4 or 010) on the system permissions. This will place an “s” in the execute bit’s place to indicate the SGID bit is set. The following is an example that demonstrates the use of the SGID bit.
# chmod 4770 checkers
# ls -l checkers
drwxrws--- 4 root root 1024 Oct. 6 07:08 checkers

Restrictions 185
Exercise 6-5: Example Environment
The solution to this exercise is provided in Appendix B at the end of this manual.
Which of these files is maintained by the administrator?
/etc/profile
/etc/bashrc
$HOME/.bash-profile
$HOME/.bashrc
.....................................................................................................................................
.....................................................................................................................................
Exercise 6-6: User Environments
Solutions to this exercise are provided in Appendix B at the end of this manual.
1. Use useradd to add a new user called shutdown, which calls the /sbin/shutdown program as its login shell. Note that shutdown must be run from the root directory (/) and must be run by root (user ID 0). Make sure you can shut down the system simply by logging in to this account.
You will need to use the -o option for useradd when specifying a user ID of 0 (look in the manual page).
.....................................................................................................................................
.....................................................................................................................................

186 Chapter 6—User Management
2. Add a new user called date that calls the /bin/date program.
Set a blank password for this account and test the account using su.
.....................................................................................................................................
.....................................................................................................................................
3. Log in as henry and find out your default value for umask. Where is the umask being set?
Enter the following commands:
$ mkdir demo
$ cd demo
$ umask 0
$ touch um000
$ umask 022
$ touch um022
$ umask 077
$ touch um077
$ umask 770
$ touch um770
$ ls -l
Look at the different file permissions. Which file permissions do you think you would want to use as a default when creating files?
Set the umask accordingly so that the next time you log in this will be your default umask. Make this change and log out and back in again to verify your changes.
What is odd about the permissions on the um770 file?
.....................................................................................................................................
.....................................................................................................................................

Logging in to Linux 187
Exercise 6-7: Restricted User Environment (Optional)
The solution to this exercise is provided in Appendix B at the end of this manual.
1. Modify hawkeye’s environment so that he cannot change or delete his profile.
.....................................................................................................................................
.....................................................................................................................................
2. Test your changes by logging in as hawkeye and verifying that he cannot edit .bash_profile or delete the file.
L O G G I N G I N T O L I N U X
The getty program is the traditional UNIX program for starting the login process. It sets the terminal line speed (baud rate) and issues the login prompt. It uses the mingetty program, which is a minimal getty program for use with virtual consoles. After reading the username, it then execs the login program, which reads the password and verifies the username and password before finally executing the login shell. There is also a uugetty program, which works with UUCP.
The following topics are discussed in this section:
� Using mingetty
� Login Defaults
� Working with Terminals
� Fixing Port Problems
� The Terminfo Database
� NIS
� LDAP
� PAM

188 Chapter 6—User Management
Using mingetty
The mingetty program is used to set the terminal-line characteristics, allowing the login program to print its prompt then to get the login name and password from the user.
Under Linux, mingetty is run by init. init reads its configuration from the /etc/inittab file. When making changes to the inittab file, it will be necessary to use the init q command in order to tell init to reread the inittab file. Linux supplies the use of virtual consoles on a single system. By pressing ALT+F[1-6], you can switch between the different consoles. Remember not to ever use the tty7 console because this is used by the X Window System.
The following is an excerpt from the /etc/inittab file:
1:12345:respawn:/sbin/mingetty tty1
2:2345:respawn:/sbin/mingetty tty2
3:2345:respawn:/sbin/mingetty tty3
4:2345:respawn:/sbin/mingetty tty4
5:2345:respawn:/sbin/mingetty tty5
6:2345:respawn:/sbin/mingetty tty6
Once init starts, it reads its configuration file. Afterward, it spawns all of the mingettys necessary for the current runlevel. The mingettys call the login program, which can, in turn, call a shell upon a successful login. The following example better illustrates this process.
Login Defaults
Login defaults are defined in /etc/login.defs. This is the default configuration file for the shadow password suite. It should only be accessed by the root user since it sets the defaults for the system logins as well as password-aging defaults. Some options available here include the maximum number of retry attempts allowed, the name of the failed logins log file, the users’ mail files location, su log configuration (this will not work on newer Red Hat distributions), and the login timeout configurations.
mingetty login /bin/bashexec exec
initspawns

Logging in to Linux 189
Working with Terminals
Once logged in, the user can change the current serial line configuration using the stty command. There are a lot of options to this command, many of which have special uses. The novice system administrator need only know a few of them. Complete information can be found in the man pages.
Current terminal-line settings can be listed with the stty command with no options (as shown in the following example). The bash shell has many user friendly options available by default. To learn the special features of another shell, look into a manual specific to that shell.
# stty -a
speed 9600; line = 1;
intr=^c; quit=^\; erase=^h; kill=^u; eof=^d; susp=^z;...
In order to discover what terminal is being modified, use the tty command, as it will echo the current terminal in use. Consider the following example.
# tty
/dev/console
Modern implementations use a pts/x system (or pseudo terminals) for each network connection.

190 Chapter 6—User Management
Fixing Port Problems
Troubleshooting a terminal problem is nothing unique or specific to Linux. The following commonsense rules should apply:
� Check the physical connection, cable, etc.
� Make sure the terminal resets to the correct emulation.
� Check the terminal’s settings for serial line communication, such as baud rate, etc.
Only when you are confident that the physical connectivity is correct should you look at the port monitor settings, the stty settings, and the TERM value.
Unless there are separate terminals attached to the Linux machine, this should not be an issue. The same concepts previously mentioned would apply when one of the virtual consoles crashes; you can simply ALT+F to another one and fix it as previously shown.
Regular console terminals or pseudo terminals can be reset by typing “sane” or “reset”. If a terminal locks up where it cannot accept input from the keyboard, then it may be necessary to switch to another terminal and correct the behavior. The following example demonstrates this.
# stty sane </dev/tty01
# stty </dev/tty01
speed 9600; line = 1;
intr=^?; quit=^\; erase=#; kill=@; eof=^D; susp=^Z;
...
# stty intr "^C" erase "^H" kill "^U"
In the worst cases, the terminal can be sent the KILL signal by switching to a different virtual terminal and typing “kill -KILL <appropriate mingetty PID>”.
The Terminfo Database
UNIX started off with dumb terminals, and the terminal type didn’t matter. When cursor-addressable terminals became popular, UNIX had to support them. Many proprietary systems (such as DEC and IBM) could constrain users to certain terminals. As an open system, UNIX could not enforce any such constraints, and therefore adopted a different approach. Linux continues this tradition.
The terminfo database contains detailed definitions of the characteristics of many terminals. The TERM variable specifies which set of characteristics to use. With the appropriate settings, programs such as vi can work correctly with any terminal.

Logging in to Linux 191
Terminal manufacturers define the terminfo and termcap entries for their terminals, so most administrators do not have to worry about dealing with the text files. Occasionally, problems occur in the definitions, and minor amendments have to be made. Novice administrators can leave this to an expert. The infocmp program, as its name implies, also compares two terminal definitions and displays the differences in a readable form.
Many systems do not provide the text sources of the terminfo database; those that do usually place them in /usr/src/terminfo.
On Linux systems, an ASCII /etc/termcap file may replace the terminfo database. In most cases, both the termcap file and terminfo database will be present.
For sites with different types of terminals, novice users can run into problems with TERM not being set correctly. Some manufacturers provide terminal recognition programs that address the problem for many common terminals.
NIS
Network Information Service (NIS) is a tool that allows a group of computers to network and share commonly used files. The best example of such files would be the /etc/passwd file. By using NIS on only one computer, the NIS server, or master, hosts the actual /etc/passwd file for the network. The other computers read the file directly from the NIS server as if it was their own.
Originally, NIS was named YP, or Yellow Pages; however, the name was copyrighted in Britain and had to be changed. References to the original name are still commonly used. Essentially, NIS combines a number of different computers by using commonly shared files stored on one master computer.

192 Chapter 6—User Management
The advantages of using NIS in large networks should be clear. Passwords can be synchronized across a network of computers. Imagine a computer network with 30 computers. If a system administrator wanted to add a user to the system without using NIS, he or she would have to add the user’s account to each computer separately. The same would apply for every time users wanted to change their passwords. With NIS, the system administrator simply adds the user to the NIS master server and he or she is done.
LDAP
Lightweight Directory Access Protocol (LDAP) is a protocol for shared information over a large network, such as a corporate WAN. It uses distributed database servers, which replicate and synchronize with each other. The directory can contain virtually any type of information but is best suited for keeping information on users and network resources.
Some Linux distributions are starting to provide the option of using an LDAP server to provide user login information. Setting up an LDAP server can be a bit complicated, so you will generally only see it in a large enterprise setting. The most common LDAP server on Linux is called OpenLDAP.
PAM
Traditionally, UNIX has always used local passwords stored in /etc/passwd. However, newer methods of confirming password information have been introduced, requiring password programs to be rewritten to handle all of the new methods. Eventually, too many authentication methods made it too difficult to rewrite all of the programs every time a new authentication method was developed. Sun Microsystems developed the Pluggable Authentication Methods (PAM) system to allow authentication programs, such as login, to use programmable authentication methods.
Using the PAM system, each authentication program has a configuration in /etc/pam or the /etc/pam.d directory. The configuration tells which authentication method to use for each authentication program. For example, you can have the login program look in /etc/passwd and have the su program use NIS or LDAP. PAM can also be used when setting or changing passwords.
PAM provides a way to easily customize the authentication methods you use on your system. It gives the administrator flexibility and allows programs to decouple the authentication methods from their code. All that is required is that the program be written to use PAM for all of its authentication systems.

Logging in to Linux 193
Exercise 6-8: Working with TERM Types
The solutions to this exercise are provided in Appendix B at the end of this manual.
What will the user prompt display after the following sequence of bash shell commands?
$ tput rev
$ tput rmso
$ REV=$(tput rev)
$ NRM=$(tput rmso)
$ PS1=$REV$(uname -n)$NRM: 'echo $PWD: '
.....................................................................................................................................
.....................................................................................................................................
Exercise 6-9: Logins and Terminals
Solutions to this exercise are provided in Appendix B at the end of this manual.
1. Change the login defaults so that the systemwide umask is 077. Make sure that /etc/profile does not override this value and verify your changes.
.....................................................................................................................................
.....................................................................................................................................

194 Chapter 6—User Management
2. Log in as henry and write down the settings for the following special keys described by stty:
erase?
intr?
kill?
eof?
Change your interrupt key to be CONTROL+A and your kill key to be CONTROL+B.
Enter a partial command line and press CONTROL+C. What happened?
Press CONTROL+A; what happened this time?
Enter a partial command line and press CONTROL+B. What happened?
.....................................................................................................................................
.....................................................................................................................................
3. Log in as henry and determine your quit character (it is probably CONTROL+BACKSLASH).
Run the following command (this should take a long time). Press the quit key at any time.
$ ls -lR /
Look at the size of the core file that was generated.
Enter the following commands:
$ rm core*
$ ulimit -c 0
Try the first part of the question again and notice the different core file size.
.....................................................................................................................................
.....................................................................................................................................

Logging in to Linux 195
4. What is your terminal type set to?
Enter the following commands:
$ OTERM=$TERM
$ TERM=wyse50
$ vi
:q! # quit out of vi as everything has gone wrong
$ TERM=$OTERM
Why was vi unable to draw the screen correctly?
.....................................................................................................................................
.....................................................................................................................................
5. Type the following commands (note that the first three use parentheses; the last uses braces):
$ BOLD=$(tput bold)
$ BLINK=$(tput blink)
$ NORM=$(tput sgr0)
$ PS1='${BOLD}Yes ${BLINK}Master${NORM}? '
$ tput clear
6. Be sure to set everything back the way it was before you started the exercise.

196 Chapter 6—User Management
S U M M A R Y
During this chapter, the following topics were covered:
� User account management and setup
� Security and regulating access to user accounts
� Customization of the user environment
� Terminal setup
P O S T - T E S T Q U E S T I O N S
The answers to these questions are in Appendix A at the end of this manual.
1. What is a virtual terminal? How can a user distinguish what terminal they are operating on?
.....................................................................................................................................
.....................................................................................................................................
2. Describe how to correct a locked terminal.
.....................................................................................................................................
.....................................................................................................................................
3. Describe the role of the mingetty in users’ logins.
.....................................................................................................................................
.....................................................................................................................................

Post-Test Questions 197
4. How can a user redefine a terminal option?
.....................................................................................................................................
.....................................................................................................................................
5. Describe how and why a system administrator may configure a directory with the SGID bit set.
.....................................................................................................................................
.....................................................................................................................................

198 Chapter 6—User Management

M A J O R T O P I C S
7
Scheduling Tasks and Managing Backups
Objectives .................................................................... 200
Pre-Test Questions....................................................... 200
Introduction ................................................................ 202
Cron ............................................................................ 202
at and batch ................................................................. 207
Backup and Restore ..................................................... 211
Backup Media.............................................................. 214
Backup Utilities ........................................................... 218
Summary ..................................................................... 234
Post-Test Questions ..................................................... 234

200 Chapter 7—Scheduling Tasks and Managing Backups
O B J E C T I V E S
At the completion of this chapter, you will be able to:
� Automate system administration tasks by scheduling jobs to run in the future.
� Use cron and related tools.
� Design and maintain an effective data backup strategy.
� Use tape archive and restore (tar) for archiving and restoring files.
� Use copy to I/O (cpio) to read and write various archive types.
P R E - T E S T Q U E S T I O N S
The answers to these questions are in Appendix A at the end of this manual.
1. What are the five time fields in a crontab entry?
.....................................................................................................................................
.....................................................................................................................................
2. How do you edit a crontab entry?
.....................................................................................................................................
.....................................................................................................................................
3. How can you schedule a program to run as a one-time event?
.....................................................................................................................................
.....................................................................................................................................
4. What program must be running for a crontab entry to execute?
.....................................................................................................................................
.....................................................................................................................................

Pre-Test Questions 201
5. What should you do after you back up a file?
.....................................................................................................................................
.....................................................................................................................................
6. What are the advantages and disadvantages of network backups?
.....................................................................................................................................
.....................................................................................................................................
7. What are the different tools available on Linux to back up your system?
.....................................................................................................................................
.....................................................................................................................................
8. List two different ways to unpack a gzip-compressed tar file named xyz.tar.gz.
.....................................................................................................................................
.....................................................................................................................................

202 Chapter 7—Scheduling Tasks and Managing Backups
I N T R O D U C T I O N
The whole idea behind using computers is to automate tasks that are too time consuming or tedious for humans. System administration can become quite tedious, so we look for ways to automate our everyday tasks. One way is through shell scripts, which combine a series of commands into one command. Another way to automate system administration tasks is to have the computer run commands automatically at specified times. The mechanisms that Linux provides to accomplish this are the cron and at systems. The cron and at systems can be used to run single commands or a series of commands in a shell script.
Backup is one of the most important system administration tasks. It is always good to prepare for the worst and keep a copy of all your data in case of hardware malfunctions, accidental deletions of important files, or natural calamity. Depending on the importance of your data and its rate of change, you need to develop an efficient backup strategy for the rate of your backups. You can either do full backups of your system or incremental backups, which will change only the files changed since the last backup. Different tools exist in Linux to do your backups; you can use them to make your backups on a variety of different media.
This chapter introduces you to the fundamentals of scheduling tasks with cron and at, performing a backup, and using popular Linux tools to achieve your goals.
C R O N
Cron is a system for scheduling processes that are to be run on a regular basis. Some common uses of cron are to log system status, start backups, rotate log files, and initiate system cleanup scripts. The cron system consists of a daemon and per-user configuration files. Each configuration file is called a cron table, or crontab for short. An entry in a crontab file is called an event or a job. (Note that these jobs are separate and distinct from the background jobs generated from using the bg command.)
Please note that there are at least two different versions of cron in use on Linux systems. While the basic concepts remain the same, some of the particulars vary. Always check the documentation and be sure that you know how things work before using any system administration tool.
The following topics are discussed in this section:
� The cron Daemon
� Crontab Files

Cron 203
The cron Daemon
Like most system services, cron’s functionality is provided by a system daemon. This daemon is called cron or crond, depending on the distribution you are using. cron reads the configuration files to determine which commands to run at what times. Once every minute, cron reads all of the crontab files to see what commands it should run. If it finds an entry that matches the current time, it runs the corresponding command. cron runs commands as the owner of the crontab file. Therefore, you can only do in a cron job what you can do from the shell prompt.
cron can be configured to allow or deny specific users the ability to schedule events. The files used to specify who can use cron are /etc/cron.allow and /etc/cron.deny. If the allow file exists, only users listed in the file can use cron. If the allow file does not exist, only users not listed in the deny file are allowed to schedule cron jobs. An empty deny file permits all users access to the utility as long as the allow file does not exist. If neither file exists, the program may allow either everyone or only root to use cron, depending on the configuration of the cron daemon and the distribution used.
cron maintains a spool directory to store crontab files in. Usually, this directory is /var/spool/cron, with a crontab file in it for every user that has at least one job scheduled. There is also a system crontab file in /etc/crontab. The system crontab may have a slightly different syntax than the user crontabs, with a field to specify which user the job is to be run as.
Normally, the output of a cron job is mailed to the user. This can be changed by redirecting a command’s output to a file or by specifying a different user to mail to.
204 Chapter 7—Scheduling Tasks and Managing Backups
Crontab Files
The crontab file tells the cron daemon what programs you want to start and when you want to start them. Each user has a crontab file, and there is also a global crontab file in the /etc directory. The program used to manage crontab files is also called crontab.
Two types of entries exist in a crontab file: environment variable definitions and events. An environment variable definition tells cron to set some environment variables for any program that it starts due to a cron event. To set a variable, enter the variable name, an equals sign (=), and the value that the variable should have. There is a special environmental variable named MAILTO that specifies where to send any output. If you set it to an empty string (MAILTO = ""), all output will be discarded. By default, output is e-mailed to the owner of the crontab file.
NOTE: Some versions of cron do not support the setting of environment variables in the crontab file. Check your system documentation, especially the crontab entries in sections 1 and 5 of the manual pages.
Most entries in the crontab file will be events. An event has two parts: the time that the event runs and what to do when that time arrives. Five fields in the event entry represent the time. In order, they are minute, hour, day of the month, month, and day of the week. Fields are separated by spaces or tabs. Remember that hours are given in 24-hour (military) form. In the day of the week field, you can use either 0 or 7 for Sunday, with the other days of the week numerically in order.
An event will run when the time fields match the current time. The cron daemon checks once per minute to find which entries should be started. For an event to be started, each of the time fields needs to match the current time, except for the day of week and day of month fields; only one of those two fields needs to match.
In addition to typing a single value in each field, you can use a wildcard, a range of values, a list of values, or an increment. The asterisk (*) is the wildcard character; it will match any value. A range is delineated by a dash, indicating that any value in between the two given values will match as well. A list is separated by commas; you list each possible value that should match. An increment is indicated by using the wildcard character (*), followed by a forward slash (/), followed by a number. The increment field will match when the value is a multiple of the number after the slash. Some versions of cron will allow you to use names for the months and the days of the week, and allow you to combine ranges, lists, and increments; however, it is best to avoid these constructs because they are not portable across systems.

Cron 205
Following the five time fields is the command to be executed. The command takes up the rest of the line after the time fields and may include spaces. Most versions of cron require an additional username field before the command field for the system crontab, /etc/crontab. This is the user that the command should be run as; it will usually be root, daemon, or nobody.
The following is an example crontab file:
# This is an example crontab file.
MAILTO = cbuchek
0 * * * * echo "Runs at the top of every hour."
0 1,2 * * * echo "Runs at 1AM and 2AM."
13 2 1 * * echo "Runs at 2:13AM on the 1st of the month."
9 17 * * 1-5 echo "Runs at 5:09PM every weekday."
0 0 1 1 * echo "Happy New Year!"
0 6 */2 * * echo "Runs at 6AM on even-numbered days."
Be careful that you get all of the time fields correct. You will probably not get any error messages if you have a mistake in the time format, but your job will not run as expected. It’s a good idea to make a comment near the top of the file like the following:
# Min Hour Day Month Weekday Command
Put the corresponding field directly under the header. This will help verify that there are the correct number of fields and that each field is in the correct location.
Watch out for crontab entries such as:
0 0 15 * 6 echo "Be careful!"
The command will run every Saturday and it will run the 15th of every month.

206 Chapter 7—Scheduling Tasks and Managing Backups
crontab Command
You should not edit your crontab file by directly editing it in the spool directory. Instead, use the following command:
$ crontab -e
This command will use the editor defined in the VISUAL or EDITOR environment variable. If neither of those environment variables is defined, it will use the system default, usually vi.
You can display your current crontab with the following command:
$ crontab -l
To remove everything from your crontab, use the following command:
$ crontab -r
You can also specify a file for crontab to read in order to get the table:
$ crontab /home/cbuchek/mycrontab
Note that su can confuse the mechanism that crontab uses to determine which crontab file to use, so use the -u option to specify which user’s crontab file is to be affected:
$ crontab -u cbuchek /home/cbuchek/mycrontab
Preconfigured cron Jobs
Most distributions come preconfigured with several default cron jobs active. These are provided to run system cleanup scripts. Generally, they run scripts called /etc/cron.hourly, /etc/cron.daily, /etc/cron.weekly, and /etc/cron.monthly. The system administrator then can modify those scripts to do any work that he or she wants to have done on a regular basis. Except for the hourly scripts, these are set to run at off-peak times late at night.
Increasingly, distributions are shifting to a system where these shell scripts are replaced with directories full of shell scripts. The directory has the same name as the old shell script, but instead of running a single shell script, all of the shell scripts inside of the directory are run. This is similar to the system used to start and stop services when changing runlevels.

at and batch 207
Typical cron jobs are used to update system databases. One common cron job calls the logrotate command. This command backs up log files and truncates them so that they do not get too large. Another command that is normally run on a daily basis is the updatedb command. This command creates a list of all files on the system so that the locate command can later be used to find files without searching the entire file system. Other common cron jobs are used to run security checks on the system.
A T A N D B A T C H
The at command is used to run a command or script at a specified time. Unlike cron, these jobs are run only once, not on a recurring basis. The batch command is much like the at command, but it specifies that the given commands be run when the load average falls below a certain level. The default load average limit is 0.8, but a different limit can be specified by the superuser.
Jobs that are submitted via the at and batch commands are handled by the atd daemon. This program works much like the cron daemon but maintains a queue of jobs and the times that they are supposed to run. The atd daemon does not need to keep checking for new jobs; it just waits until it is time to start a queued job or the at command tells it to add something to the queue. The at system has allow and deny files (/etc/at.allow and /etc/at.deny) to control who can use it. These fields work just like those of the cron system. The spool directory for atd is usually in the /var/spool/at directory. The only option to atd that you will probably ever need to use is the -l option, which specifies the maximum load average that batch jobs are allowed to run at.

208 Chapter 7—Scheduling Tasks and Managing Backups
To schedule an at job, use the at command and give the time that you want to start the job. When you press ENTER, you will go into a mode that allows you to type in the commands that you want to run in the job. Type in the commands and press CONTROL+D to end the input:
$ at 1pm
at> echo "It's 1 PM."
at> ^D
warning: commands will be executed using /bin/sh
job 12 at 1999-11-24 13:00
Alternatively, you can specify a file to run by using the -f option:
$ at 2pm -f /home/cbuchek/2pm.sh
warning: commands will be executed using /bin/sh
job 14 at 1999-11-24 14:00
Note the warning message about using /bin/sh. This can be significant if you are used to using tcsh instead of bash because the two have a different syntax. Any output from the command is mailed to the user.
The at command is pretty flexible in accepting date and time formats. You can specify the time in hh:mm format or just give the hour. There is also a now keyword to specify the current time. You can specify the date in mm/dd/yy or mm/dd format or spell out the month name. You can also specify a time followed by a plus sign (+) with an increment in some number of minutes, hours, days, or weeks. Weekday names and the keywords today and tomorrow are also available to specify a date.
The following example illustrates some of these formats:
$ at now + 1 hour
$ at 4:30pm + 2 days
$ at 1:30 tomorrow
$ at 1am
$ at 1am 12/23/1999
$ at 9:35 Dec 23
$ at 2 Friday
The main thing to remember is that the time is required, and it is in 24-hour format unless you specify “am” or “pm”.
at and batch 209
You can take a look at the at queue in one of the following two ways:
$ at -l
8 1999-11-26 00:00 a
4 1999-11-23 16:30 a
10 1999-11-26 13:00 a
$ atq
8 1999-11-26 00:00 a
4 1999-11-23 16:30 a
10 1999-11-26 13:00 a
They both do the same thing, just with a different syntax. If you are the superuser, you will see everyone’s jobs listed. Most versions of at will not let normal users see the jobs of other users.
To see exactly what commands a particular job will run, use at -c. It will give a list of all of the commands that will be run. It may show a lot of environment variable definitions and a change directory command because at runs the jobs in the same environment that they were created in.
The atrm command is used to remove queued jobs. Just give the number of the job in the queue. You can also use the -d option (or -r in some versions) of the at command:
$ atrm 10
$ at -d 10

210 Chapter 7—Scheduling Tasks and Managing Backups
Exercise 7-1: Using cron and at
Solutions for this exercise are provided in Appendix B at the end of this manual.
1. You should set the VISUAL or EDITOR environment variables before running crontab so that you do not end up with a text editor that you don’t know how to use. Recommended text editors are pico, jed, emacs, and vi. (Note that not all distributions will have all of these installed by default.)
.....................................................................................................................................
.....................................................................................................................................
2. Edit your cron table using the crontab command.
.....................................................................................................................................
.....................................................................................................................................
3. Create a cron job to send yourself an e-mail greeting on your birthday. Create another cron job to send yourself an e-mail 10 minutes from now. Make sure that you receive that message.
.....................................................................................................................................
.....................................................................................................................................
4. Use at to send yourself an e-mail message 5 minutes from now. Make sure that you receive it. Try out some other time formats as well.
.....................................................................................................................................
.....................................................................................................................................
5. View the at queue and remove some entries.
.....................................................................................................................................
.....................................................................................................................................
Backup and Restore 211
B A C K U P A N D R E S T O R E
Backups are important because they provide an alternate storage media for important data. Backups would not be necessary if computer systems were 100% reliable. In reality, all computer systems fail now and then. Most system failures result in the loss or corruption of some data. A regular backup regimen enables the system administrator to recover the system data to the state it was in when the last backup took place. Backups are also used for transferring data between non-networked machines.
Users are notorious for making mistakes, such as deleting old data files only to discover that the data is still required. A good backup regimen will allow the system administrator to recover data from backup storage.
Backups are useless if the data on them cannot be recovered. It is probably better not to do backups than to think you have backed-up data that cannot subsequently be restored. If no standard backups are made, the users will be aware of this and take more care, or even ask for specific data to be saved just in case.
The following topics are discussed in this section:
� When to Back Up
� Where to Store Backups
� What to Back Up
When to Back Up
When to perform backups is a difficult question to answer. The usual reply is as often as necessary. A better way is to view the importance of the data.
Can you afford to lose one year’s worth of data? What about one month’s data? How about one week’s or perhaps one day’s worth?

212 Chapter 7—Scheduling Tasks and Managing Backups
In reality, most people cannot afford to lose more than one day’s worth of data, so backups are performed on a daily basis.
Use cron to schedule backup scripts to run overnight; use incremental backups if you have more data to back up than online drive capacity. For example, you have 5 GB of data to back up to only one DAT drive, which accepts at most 4 GB of data (compressed). By performing a full backup just once a week, you only need to attend the backup to change tapes once a week. You need two tapes for a full backup. The rest of the week you can use one tape to store just the changes since the last full backup. The incremental backup can be run overnight, and all you need to do is change the backup tape every morning when you get into work. Don’t back up to the same tape all of the time!
Where to Store Backups
Take backups off site as often as it is practical to do so. Insurance policies cover the cost of replacing computer equipment in the event of a fire or other natural disaster. No one can cover the cost of replacing data that was not taken off site and was lost in the same fire.
Make use of a fireproof safe if you have one; keep full backups there and incremental backups as well if there is room. Also, use the fireproof safe for master copies of all original purchased software.
Be sensible when storing backup tapes; keep them as far from the computer systems as possible. A fire or flood in the machine room might not damage backup media in a separate room, whereas it will damage media situated near the machines.
Be aware that Linux backups are insecure; there are no access controls. Keep all backups that contain confidential or sensitive data under lock and key.

Backup and Restore 213
What to Back Up
Do not back up the entire system every time. Only back up the files that change on a daily basis. The files and directories that you might want to consider backing up everyday are:
/etc Linux configuration file
/var Linux files that vary on a day-to-day basis
/home User files
You will still need to back up the entire system on a regular basis, especially before updating the system and before preventive maintenance or moving the hardware.
When you are backing up database systems, be careful. Most databases usually involve several files, which must be consistent. Stop a database system before backing up its files. Some database programs have a backup mode to use when the system cannot be taken down for backup. Be sure to read carefully about your database before taking it down. Databases using raw disks for storage will provide their own backup methods.

214 Chapter 7—Scheduling Tasks and Managing Backups
B A C K U P M E D I A
The most common backup media is magnetic tape in its various guises. The new optical media (WORM, CD-R, and CD-RW), based on CD-ROM technology, are rapidly becoming accepted. In addition, Linux can readily use removable drives like Iomega’s Zip and Jaz drives. A 100-MB Zip disk (or the newer 250-MB version) would be suitable for incremental backups, while the 1-GB Jaz disk (or the newer and faster 2-GB version) might be better suited for full backups.
The following topics are discussed in this section:
� Magnetic Tape
� Optical Disks
� Removable Disks
� Linux Backup Terminology
Magnetic Tape
Magnetic tapes are popular because they have been reasonably cheap to use compared to other backup systems, although the cost difference is becoming less as optical systems drop in price and are becoming more popular.
Magnetic tapes all suffer from time and usage degradation. Tapes should be replaced on a regular basis, depending on usage (ideally no more than ten writes to a QIC tape) and time (discard tapes over two years old). Unfortunately, most sites do not replace tapes often enough and are plagued with unreliable backups and tape errors.
Tapes should be stored in a temperature- and humidity-controlled environment to improve their reliability; not doing so can be quite costly. Tapes left on a windowsill in summer will probably be unreadable by the next day.
Reel-to-reel tapes have been used for backups for a long time. Although the media is bulky and difficult to handle, it is still very popular on larger machines. Most reel-to-reel drives require special boards for the proprietary drive controller, though SCSI-adapted drives are now available.
Cartridge tapes are the most common forms of tape backup media at the present time. The drives are cheap, easily available, and usually connected via the SCSI interface.
Backup Media 215
Tapes come in different lengths and different recording densities. Older drives record at QIC-60 (60 MB on a 600-foot tape), other sizes, such as QIC-80 and QIC-120, are possible, but the later equipment records at QIC-150 (150-MB capacity).
Drives can usually read lower density tapes, and most do so automatically by sensing the recording format when the tape is read. Some drives support writing tapes at different densities, and the Linux system will usually support this by using a different device name for the lower densities (same major device, but a different minor device number).
The QIC tapes are mounted on an aluminum base plate providing a very robust media. They are of a similar size to VHS videotapes. Cartridge tape has been a popular medium for distributing software. Many system manufacturers are now moving toward CD-ROM for system software distribution. This is leaving the third-party suppliers as the primary users of cartridge tape for distribution, though they are rapidly moving toward CD-ROM distribution as well.
Video-8 (or Exabyte) tapes use a helical scan technique (like a video recorder) to pack an enormous amount of data onto a relatively small tape format. Typically, an exabyte tape will hold 2.3 GB. The tape itself is hardly bigger than an audio compact cassette.
The Digital Audio Tape (DAT) uses digital recording techniques to provide much higher data reliability than the analog recording methods used on other tape media. Tapes are similar in appearance but about half the cost and half the capacity of exabyte tapes.

216 Chapter 7—Scheduling Tasks and Managing Backups
Optical Disks
Optical disks are the latest technology to reach computer backup. The use of CD-ROM for software distribution is becoming standard among workstation system suppliers and software publishers. The drives are inexpensive, and the medium is inexpensive to produce in volume, while holding significantly more than cartridge tapes (but not more than exabyte tapes).
WORM drives have been around for some time and provide high-capacity storage for permanent archive. The medium cannot be reused, so it is less general in use than its successor, the rewriteable magneto-optical (MO) disk.
The current MO disks offer performance similar to a slow hard disk on a PC and capacities of 350 MB on each side of a two-sided disk. The big advantage of MO disks is the fact that they are disks and can be mounted onto the Linux file system, permitting more sophisticated backup techniques than a simple sequential medium permits. Full directory hierarchies can be copied verbatim. If MO disk access times halve and data transfer rates double, it could begin to compete with the ubiquitous hard disk!
The big advantage of all optical media is the high reliability provided by not using magnetic storage techniques. Data is not subject to erasure by magnetic fields, data stored on MO and WORM media does not degrade with time, and MO media reuse is measured in thousands, not tens of times.
The medium for MO disks is similar to a 5-1/2-in. audio CD. WORM disks with significantly larger capacities are around. Newer recordable CD technology (CD-R and CD-RW) is dropping in price dramatically, and the media can be read back in any standard CD-ROM drive. In addition, recordable CDs are very inexpensive, especially when purchased in bulk quantities.

Backup Media 217
Removable Disks
Removable disks have become increasingly popular in the last few years. Most of the popular removable drives, such as those by Iomega, are integrated into a Linux system with little difficulty; usually a kernel recompile is the only necessary step. The drives are relatively inexpensive, especially in comparison with most CD writers, although the media is generally much more expensive and may be damaged by magnetic fields.
Since the removable media can be treated as Linux disks, it is trivial to mount them as separate partitions and simply copy the necessary files to the partition (i.e., /backup), making backup a snap.
Linux Backup Terminology
The following terms will prove useful as you study Linux backups:
Archive A full backup taken offline (deleted from the system)
Image backup A complete (byte-by-byte) copy of a disk or partition
Full backup A complete directory backup by files
Differential backup A backup of files changed since the last full backup
Incremental backup A backup of files changed since the last full or incremental backup
Dump levels (0-9) The files changed since the last backup at the same or lower dump level (level 0 dump is a full backup)

218 Chapter 7—Scheduling Tasks and Managing Backups
B A C K U P U T I L I T I E S
Numerous utilities exist to do your backups. Depending on the type of backups you are making, you may want to use different utilities. The major kinds that exist are as follows:
� File-oriented utilities:
cpio Copy to I/O
afio An updated version of cpio
tar Tape archive and restore
� Device level:
dd Direct-device access (image backups)
Some distributions provide their own proprietary utilities, and many Internet sites carry information on third-party applications for Linux.
The following topics are discussed in this section:
� Tape Archive and Restore (tar)
� Copy to I/O (cpio)
� afio
� Direct-Device Access
� Using dd to Identify File Type
� Linux Tape Device Names
� Handling Tapes with mt
� Working with DOS Diskettes with MTools
� Putting Them Together with compress
� Network Backups with rsh

Backup Utilities 219
Tape Archive and Restore (tar)
Use tar for quick and simple backups. It is not flexible enough for sophisticated backup strategies.
Files are written to the archive in tar format and all of the following information is also stored about the files:
� Directory pathname and inode information
� User, group, and permission information
� Creation and modification times
Let’s say you want to back up the /home/radar directory. The commands for it would use the c (create) argument:
# cd /home/radar
# tar cvf /dev/ftape
This would back up the /home/radar directory to the tape device at /dev/ftape.
To recover these files, you can use the tar command with the x (extract) argument:
# cd /tmp
# tar xvf /dev/ftape
This will extract all of the files from /home/radar to /tmp.
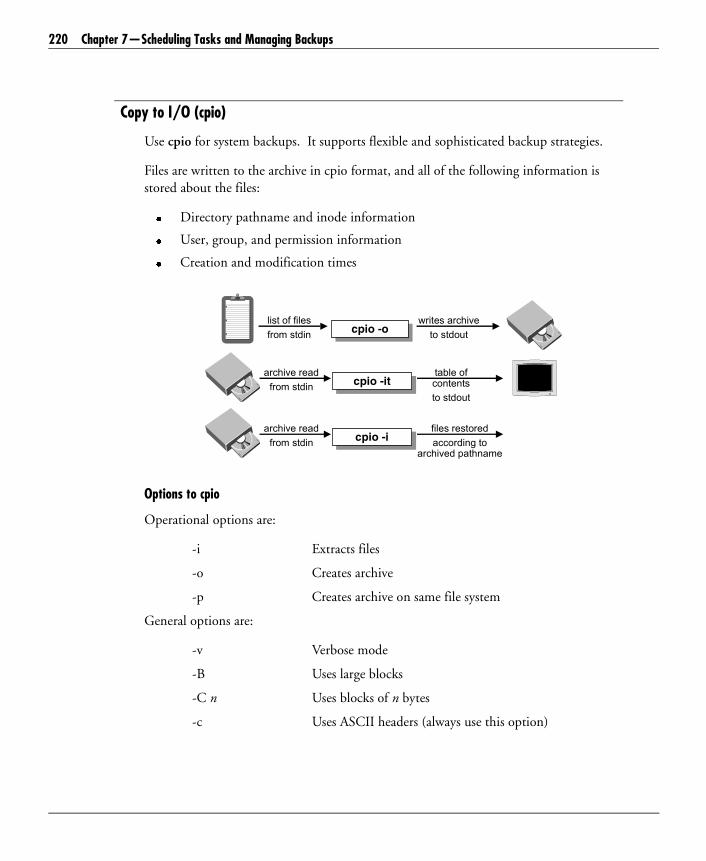
220 Chapter 7—Scheduling Tasks and Managing Backups
Copy to I/O (cpio)
Use cpio for system backups. It supports flexible and sophisticated backup strategies.
Files are written to the archive in cpio format, and all of the following information is stored about the files:
� Directory pathname and inode information
� User, group, and permission information
� Creation and modification times
Options to cpio
Operational options are:
-i Extracts files
-o Creates archive
-p Creates archive on same file system
General options are:
-v Verbose mode
-B Uses large blocks
-C n Uses blocks of n bytes
-c Uses ASCII headers (always use this option)
cpio -ocpio -olist of filesfrom stdin
writes archiveto stdout
cpio -itcpio -itarchive read
from stdintable ofcontentsto stdout
cpio -icpio -iarchive read
from stdinfiles restoredaccording to
archived pathname

Backup Utilities 221
Specify I/O devices with the following options:
-O file For better handling of multivolume media when archiving
-I file For better handling of multivolume media when restoring
Input (restore) options are:
-t Lists table of contents rather than restore files
-d Creates directories if needed
-u Unconditionally restores files
-m Retains file modification times
afio
The afio command is another archiving utility, using cpio format archives but creating ASCII headers for compatibility (similar to cpio -c). Some features of afio include:
� Interactive prompting for files
� Compatibility with cpio
� More available options than cpio
� Compressed afio archives are safer than compressed tar or cpio archives
Options to afio
Operational options are:
-i Extracts files
-o Creates archive
-t Prints archive table of contents
-r Verifies archive against file system
222 Chapter 7—Scheduling Tasks and Managing Backups
General options for afio are:
-v Verbose mode
-Z Uses gzip to compress/uncompress files in an archive
Options for tape and floppy drives are:
-s volumesize Size of the volume (default is 5120) but also recognizes size followed by k, m, and g for KB, MB, and GB
-c n Places n number of blocks between each I/O operation
-F Device is a floppy drive; -s is required for this option
Input (restore) options are:
-n Does not overwrite newer files
-k Skips corrupt data at the beginning of an archive
Exercise 7-2: Using afio
Solutions to this exercise are provided in Appendix B at the end of this manual.
Explain the purpose of the following commands.
1. # find . -print | afio -ovb > /dev/ftape
.....................................................................................................................................
.....................................................................................................................................
2. # afio -tb < /dev/ftape
.....................................................................................................................................
.....................................................................................................................................
3. # cd /tmp
# afio -ivab < /dev/ftape
.....................................................................................................................................
.....................................................................................................................................

Backup Utilities 223
4. # cd /
# find etc home var -print | afio -ovb /dev/ftape
.....................................................................................................................................
.....................................................................................................................................
5. # cd /tmp
# afio -ivaby etc/init.d /dev/ftape
.....................................................................................................................................
.....................................................................................................................................
Direct-Device Access
dd is used to access a device directly. It is often used to copy large pieces of data such as in backups. It raw-writes the contents of your files to the device. Some useful parameters for the dd command are:
of=file Writes to named file instead of stdout
if=file Reads from named file instead of stdin
bs=size Specifies block size (also ibs and obs)
count=n Copies just n records
conv=ascii Converts EBCDIC to ASCII
conv=ebcdic Converts ASCII to EBCDIC
conv=ibm Slightly different convert from ASCII to EBCDIC
conv=swab Swaps every pair of bytes (big endian/little endian)

224 Chapter 7—Scheduling Tasks and Managing Backups
The following command will copy the data from /dev/ftape to /tmp/ibm.tape in chunks of 4,095 bytes:
# dd if=/dev/ftape of=/tmp/ibm.tape \
bs=4095 conv=ibm,swab
Exercise 7-3: Copying a Disk
The solution to this exercise is provided in Appendix B at the end of this manual.
How would you copy any formatted floppy disk?
.....................................................................................................................................
.....................................................................................................................................
Using dd to Identify File Type
Imagine you are given a backup disk marked with a filename but no information about the command used to create it. You are asked to restore data from that backup. Which utility will you use?
This is where dd comes in:
# dd if=/dev/fd0 count=1 of=test1
[read just one block from the device and store it in a file]
# file test1
test1: tar
This is much neater than trying each utility in turn to see if it works! The dd command is very versatile and well worth learning.
In this example, we use it to read one block of data from a device. We are relying on the fact that whichever utility we had used to back up data first stores the header information at the beginning of the storage medium, identifying itself.
This is how each command knows whether the data is in its format and will refuse reading the device if the header is somebody else’s.
dd, however, is not bothered–it is an image copier and will read anything that is readable!

Backup Utilities 225
Linux Tape Device Names
Linux systems use simple conventions. Tape devices are kept in /dev. Devices are rft* and nrft* (aliased to ftape and nftape, respectively). Tape devices begin with r (rewind) or nr (no rewind).
You can manipulate magnetic tapes with the mt command. Many useful parameters are recognized, allowing you to wind and rewind the tape to a specific point as well as print the status of the tape.
A program called ftape is also available and is more feature rich than mt.
Magnetic tape device names use the most diverse of the naming conventions. The one common factor is to include r or nr in the name to indicate rewind or no-rewind devices.
Handling Tapes with mt
You can manipulate magnetic tapes with the mt command. You specify a particular tape device with -f. Useful command parameters recognized include:
rewind Rewinds to start of tape
offline Rewinds and takes offline (drive may eject tape)
fsf n Skips forward n files
bsf n Skips backward n files
eom Skips to end of medium
status Prints tape unit status information

226 Chapter 7—Scheduling Tasks and Managing Backups
For example:
# cd /
# mt -f /dev/ftape rewind
# echo "Filesystem: /etc\nDate: `date`" | dd of=/dev/ftape
# find etc -print | cpio -ocv >/dev/rmt/0n
# mt -f /dev/ftape rewind
# mt -f /dev/ftape fsf 1
# cpio -itvc </dev/ftape
# mt -f /dev/ftape offline
The mt command is useful for working with tapes when multiple files are to be written to the same tape.
The previous example writes the same data to the tape (a label and a cpio backup), but does so in a less error-prone manner. Note that the tape is taken offline after the backup so that it cannot be overwritten accidentally.

Backup Utilities 227
Working with DOS Diskettes with MTools
Most versions of Linux support DOS-formatted floppy diskettes. For more information on the topic, you can check under the man pages for mtools. Some of the commands that are supported by the MTools are:
mdir directory DOS-style directory listing
mcopy file file Copies files to/from diskette
mdel file... Removes file(s)
mformat drive Formats DOS FAT file system on specified drive
Diskette filenames can be specified using the following:
drive:pathname Pathname uses either / or \
$ mdir a:
CAESAR TXT 1,463 10/06/95 17:42
COUNTRY TXT 7,795 14/06/95 13:39
ROMEO TXT 172 10/06/95 17:47
3 file(s) 9,430 bytes
718,848 bytes free
$ mcopy a:/country.txt .
The MTools package includes nearly all of the DOS tools for manipulating the file system:
mattrib, mbadblocks, mcd, mcopy, mdel, mdeltree, mdir, mdu, mformat, mkmanifest, minfo, mlabel, mmd, mmount, mmove, mpartition, mrd, mren, mshowfat, mtoolstest, mtype, mzip, xcopy
As always, see the man pages for mtools for more complete information.

228 Chapter 7—Scheduling Tasks and Managing Backups
Putting Them Together with compress
You can speed up backups and reduce storage by using compression. Use the Linux compress utility to reduce archive size. For more efficient compression, you can use the gzip and bzip2 formats.
For larger blocks, use the dd command:
# find . -print | cpio -ocvB | \
compress | dd of=/dev/ftape bs=65536
# dd if=/dev/ftape bs=65536 | \
uncompress | cpio -itvcB
Sometimes special backup techniques are required for systems. These are usually beyond the scope of the system administration interface and require more knowledge and ability from the system administrator.
Archived file sizes can be reduced quite dramatically using the compress utility in a pipeline with the backup commands. Coupled with a larger blocking factor (from dd), a large backup can be reduced in size and squeezed onto a smaller medium. The cost is, of course, in terms of CPU time and load on the system. The smaller volume of backup data will probably reduce the overall backup time as well.

Backup Utilities 229
Exercise 7-4: Using tar, gzip, and compress
Solutions for this exercise are provided in Appendix B at the end of this manual.
This exercise will deal with the use of tar, gzip, and compress to archive and compress several files in order to create a backup.
1. What is the simplest way to place the contents of the /bin/ directory in a single tar archive named bin.tar?
.....................................................................................................................................
.....................................................................................................................................
2. Using gzip, how can the archive be compressed to save the most space?
.....................................................................................................................................
.....................................................................................................................................
3. How can the archive be compressed using compress?
.....................................................................................................................................
.....................................................................................................................................
4. Can these steps be combined in a simpler way? If so, how?
.....................................................................................................................................
.....................................................................................................................................

230 Chapter 7—Scheduling Tasks and Managing Backups
5. How can the gzippped file be uncompressed? How can the compressed file be uncompressed?
.....................................................................................................................................
.....................................................................................................................................
6. What command will expand the uncompressed archive file?
.....................................................................................................................................
.....................................................................................................................................
7. How can the uncompress and untar commands be executed at the same time?
.....................................................................................................................................
.....................................................................................................................................
Network Backups with rsh
You can also do your backups over the network. You can use the rsh command to accomplish this. You will have to mount network file systems using NFS or something similar before starting. Data can be backed up from any file system, including networked drives. If you are using networked drives, be careful about backing up file systems you don’t want or already have backed up from another system. You can use find -mount to restrict the file search.
Networked Linux systems can easily be backed up using standard network utilities such as shared network drives or the remote execution of commands.
In a networked environment, not every machine requiring backup facilities needs to have a drive, provided it has access to a machine on the network with a suitable drive. The following examples show how to back up over a network to a drive on a different machine.
# find . -print | cpio -ocvB | rsh rosies dd of=/dev/ftape
# rsh rosies dd if=/dev/ftape | cpio -itvcB
# rsh mash4077 'find . -print | cpio -ocvB' | dd of=/dev/ftape
# dd if=/dev/ftape | rsh mash4077 cpio -itvcB

Backup Utilities 231
The first example shows a backup from the local machine to the remote machine named rosies (where the backup drive is); the second assumes the drive is on the local system, and the remote machine mash4077 is being backed up.
NOTE: For security reasons, you should use ssh in place of rsh.
Exercise 7-5: Backup and Restore
Solutions to this exercise are provided in Appendix B at the end of this manual.
1. Log in as root and run the following command:
# touch /home/backup
2. Change to the /usr directory and back up the dict directory to floppy disk using tar. The floppy disk device is /dev/fd0.
Why do you think you were asked to change directory and back up disks as two separate actions? How would you verify that the backup worked?
Restore the backup into the /tmp/dict.tar directory.
.....................................................................................................................................
.....................................................................................................................................
3. Repeat the previous backup and restore using cpio (restore to /tmp/dict.cpio).
.....................................................................................................................................
.....................................................................................................................................
4. If you didn’t know what format of data was written to the floppy disk, how would you find out?
.....................................................................................................................................
.....................................................................................................................................

232 Chapter 7—Scheduling Tasks and Managing Backups
Exercise 7-6: Timing Backups (Optional)
Solutions to this exercise are provided in Appendix B at the end of this manual.
1. Repeat the backup operations from steps 2 and 3 in Exercise 7-5, first using tar and then cpio, but time the operation using the time command as in the following examples:
# cd /usr
# time tar cvf /dev/fd0 dict
# time (find dict -print | cpio -ocv >/dev/fd0)
Why do you think we used parentheses in the second example?
.....................................................................................................................................
.....................................................................................................................................
2. Repeat the two backups again, but this time output to files /tmp/tar and /tmp/cpio rather than to the floppy disk.
Repeat again, but this time make tar and cpio write to standard output, pipe this through the compress command, and redirect the whole thing to files /tmp/tar.Z and /tmp/cpio.Z. The following examples show what is required:
# cd /dict
# tar cvf - dict | compress >/tmp/tar.Z
# find dict -print | cpio -ocv | compress >/tmp/cpio.Z
Now compare the sizes of all four archive files.
.....................................................................................................................................
.....................................................................................................................................
3. How would you back up all of the files that have been modified since /home/backup was created?
.....................................................................................................................................
.....................................................................................................................................

Backup Utilities 233
Exercise 7-7: Backup Techniques
Solutions to this exercise are provided in Appendix B at the end of this manual.
1. Put the floppy disk containing a backup into the disk drive and enter the following commands:
# dd if=/dev/fd0 count=1 of=/tmp/fd
# file /tmp/fd
What do you think you have just done?
.....................................................................................................................................
.....................................................................................................................................
2. Format your floppy disk with a DOS file system.
Copy the hosts file onto this floppy disk. Take a directory listing to prove it’s there.
Now copy this file back to /tmp and call it DOS.hosts. Look at this file to make sure it’s valid.
Copy the entire floppy disk to a file called /tmp/dos.fd.
Enter the following command to corrupt the DOS diskette:
# dd if=/usr/bin/date of=/dev/fd0
Can you get a DOS directory listing from the floppy disk?
Now copy your floppy disk image from /tmp/dos.fd onto the floppy disk.
Can you get a DOS directory listing from the floppy disk now?
.....................................................................................................................................
.....................................................................................................................................

234 Chapter 7—Scheduling Tasks and Managing Backups
S U M M A R Y
In this chapter, you were introduced to the following:
� Scheduling and backup concepts and utilities
� Backup commands such as tar, cpio, and dd
� The lack of built-in access control restrictions in Linux backups
� Using backups to maintain system integrity
� Using off-site storage when possible
� Saving storage with backup utilities in conjunction with the compress command
� Backups over the network using the rsh command
� Common backup media: tapes and compact discs (CD-R, CD-RW)
� Linux support for special commands working with DOS-formatted diskettes
P O S T - T E S T Q U E S T I O N S
The answers for these questions are in Appendix A at the end of this manual.
1. Which of the following are valid crontab file entries?
A. * * * * * echo “Hello” > /tmp/hello.out
B. # Month Day Hour Minute Command
C. 0 2/4 * * * echo “Hello”
D. * * * 0 * echo “Hello”
E. 1 1 1 1 1 echo “Hello”
F. 13 13 13 13 * echo “Hello”
G. * */4 * * * * echo “Hello”

Post-Test Questions 235
2. Which of the following are valid at time/date representations?
A. 1
B. next friday
C. last tuesday
D. 12/23/99
E. 12/23/99 9am
F. 1 tomorrow
G. now
H. 4:11pm + 2 days
I. 10:00 am july 31
J. noon + 2 hours
K. midnight + 1 week
3. Show a crontab entry that would run uptime at 1:00 A.M. on any Tuesday and any day of the month ending in a 0.
.....................................................................................................................................
.....................................................................................................................................
4. How would you schedule a program to run at 1:23 A.M. every Monday and 2:34 A.M. every Tuesday?
.....................................................................................................................................
.....................................................................................................................................

236 Chapter 7—Scheduling Tasks and Managing Backups
5. You run a full backup on Sunday. You run incremental backups on Monday and Tuesday nights. You need to restore a file Wednesday morning. How many tapes do you need to use to restore the file if the file is modified every day?
.....................................................................................................................................
.....................................................................................................................................
6. Which backup utility can you use to find specific files to back up? Give an example of the command you would use.
.....................................................................................................................................
.....................................................................................................................................
7. What are some of the important directories in a Linux system that change very frequently and need to be backed up on a very regular basis?
.....................................................................................................................................
.....................................................................................................................................
M A J O R T O P I C S
8
Configuring Printers
Objectives .................................................................... 238
Pre-Test Questions....................................................... 238
Introduction ................................................................ 239
Printing in Linux ......................................................... 240
Print Spooling System.................................................. 244
Network Printing......................................................... 245
LPRng–Next Generation UNIX Printing .................... 247
Summary ..................................................................... 253
Post-Test Questions ..................................................... 254

238 Chapter 8—Configuring Printers
O B J E C T I V E S
At the completion of this chapter, you will be able to:
� Manage printers and print queues.
� Install and configure local and remote printers.
� Explain the LPD printing system.
� Configure the printer control file (/etc/printcap).
� Configure printer filters.
P R E - T E S T Q U E S T I O N S
The answers to these questions are in Appendix A at the end of this manual.
1. Where does a print job go while it is waiting for the printer to become available?
.....................................................................................................................................
.....................................................................................................................................
2. What graphical program can be used to configure a printer?
.....................................................................................................................................
.....................................................................................................................................
3. What needs to be installed and running in order to print to a printer that is attached to a Windows system?
.....................................................................................................................................
.....................................................................................................................................

Introduction 239
4. What kind of printer should not be purchased for use with Linux?
.....................................................................................................................................
.....................................................................................................................................
5. You print three files to printer laser1; the files are still in the print queue (with job numbers 1, 2, and 3). How can you make the third file print first?
.....................................................................................................................................
.....................................................................................................................................
I N T R O D U C T I O N
This chapter covers the basics of printing under Linux. Printing is mediated by a group of programs and configuration files named Berkeley LPR, for Berkeley Line Print. We will discuss the structure of this software, how to use it to create a network print server, how to interact with a Windows network, and its long-overdue overhaul, LPRng.
Of course, these days, strict line printers are used only in specific roles, such as invoice printing and system logging. Most printers for end users are laser printers. We show how LPR can be used with modern printers via the mechanism of print filters.
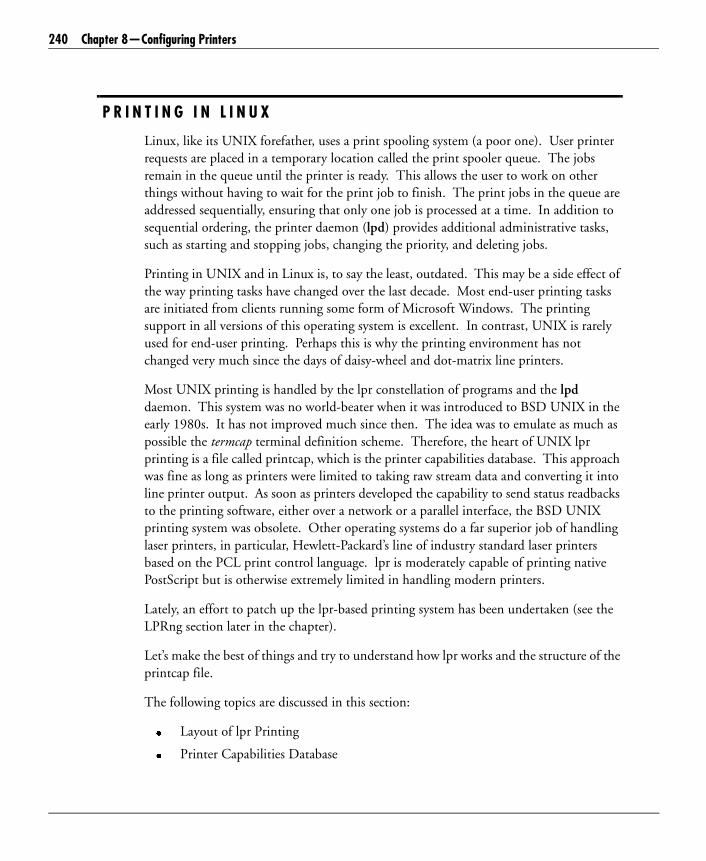
240 Chapter 8—Configuring Printers
P R I N T I N G I N L I N U X
Linux, like its UNIX forefather, uses a print spooling system (a poor one). User printer requests are placed in a temporary location called the print spooler queue. The jobs remain in the queue until the printer is ready. This allows the user to work on other things without having to wait for the print job to finish. The print jobs in the queue are addressed sequentially, ensuring that only one job is processed at a time. In addition to sequential ordering, the printer daemon (lpd) provides additional administrative tasks, such as starting and stopping jobs, changing the priority, and deleting jobs.
Printing in UNIX and in Linux is, to say the least, outdated. This may be a side effect of the way printing tasks have changed over the last decade. Most end-user printing tasks are initiated from clients running some form of Microsoft Windows. The printing support in all versions of this operating system is excellent. In contrast, UNIX is rarely used for end-user printing. Perhaps this is why the printing environment has not changed very much since the days of daisy-wheel and dot-matrix line printers.
Most UNIX printing is handled by the lpr constellation of programs and the lpd daemon. This system was no world-beater when it was introduced to BSD UNIX in the early 1980s. It has not improved much since then. The idea was to emulate as much as possible the termcap terminal definition scheme. Therefore, the heart of UNIX lpr printing is a file called printcap, which is the printer capabilities database. This approach was fine as long as printers were limited to taking raw stream data and converting it into line printer output. As soon as printers developed the capability to send status readbacks to the printing software, either over a network or a parallel interface, the BSD UNIX printing system was obsolete. Other operating systems do a far superior job of handling laser printers, in particular, Hewlett-Packard’s line of industry standard laser printers based on the PCL print control language. lpr is moderately capable of printing native PostScript but is otherwise extremely limited in handling modern printers.
Lately, an effort to patch up the lpr-based printing system has been undertaken (see the LPRng section later in the chapter).
Let’s make the best of things and try to understand how lpr works and the structure of the printcap file.
The following topics are discussed in this section:
� Layout of lpr Printing
� Printer Capabilities Database

Printing in Linux 241
� Adding a Printer
� PostScript and HP Laser Printers
Layout of lpr Printing
As stated previously, the server-side components of lpr are the print spooler daemon lpd and the printer capabilities database. Spool directories are typically named /var/spool/lpd/lpx, where x is a somewhat arbitrary number assigned to a physical printer. lp0 is usually the first printer.
Printing is initiated by the client program lpr. The syntax (deliberately simplified here) is:
$ lpr -Pprinter -T title -U user -C class -J job -#num file1 file2..
The parameters are printer (the lpx printer designation), title, user, class, and job (strictly informational strings for the printer burst page), num (for number of copies), and file1 file2... (which are the files to be printed).
Like any good UNIX command, lpr can accept pipes and redirection.
The lpr command contacts the lpd print server daemon, which makes the necessary permission checks. If the print request is determined to have originated on a valid host from an authorized user, the print data is spooled into the directory in /var/log/spool corresponding to the printer. Printing occurs strictly on a first-in, first-out basis.
There are several other programs used for controlling printing, including:
lpq Checks print queue
lprm Removes entry from queue
lpc Controls a queue

242 Chapter 8—Configuring Printers
Typically, these are used only by the system administrator. Here we see the prime weaknesses of lpr printing: lack of fine control over queues and lack of intelligent arbitration of print jobs. Without manual intervention from the system administrator, a job can fail and prevent other jobs behind it from printing.
So much for the mechanics of getting data headed to the printer. How does the printing system know how to format the data?
Printer Capabilities Database
The /etc/printcap file defines printers for the lpd daemon. The following is a typical printcap entry:
#
# Typical printcap entry - printer name lp0
#
lp0:\
:sd=/var/spool/lpd/lp0:\ # The spooling directory
:mx#0:\ # No limit on job size
:sh:\ # Suppress burst page
:lp=/dev/lp0:\ # Printer device to open for output
:af=/var/spool/lpd/lp0/acct:\ # Accounting filter
:if=/var/spool/lpd/lp0/filter: # Input filter
Each \ represents continuation characters. Like their termcap counterparts, printcap entries are single wrapped lines.
The last two lines refer to filters. These are where most of the printing work happens in that they are responsible for formatting the raw spool data for the printer. A filter is just what you would think–it works like sed or tr, manipulating the raw data of the print job to match the printer. These are executable files. They are also owned by root, bringing up another serious problem with lpr. Anything that wants to use a filter has to be root; therefore, all user print requests require, at some point, a setuid root operation. This is a large security hole.
Fortunately, this is as much as you need to know about the guts of lpr. The modern distributions all have printer setup tools that work well. Use them!

Printing in Linux 243
Adding a Printer
Adding a printer is very straightforward with easy-to-use tools such as printtool, which is available with most distributions. Without such a program, manual editing of configuration files (like /etc/printcap) is required. Such manual editing requires in-depth knowledge about the printer filter, the data type of the printer (PCL, PS, raw, etc.), and intimate knowledge of the options used in the printcap file.
You should be aware that, on some distributions, printtool requires the X Window System. If you are working with a purely text-based server, you will need to manually configure your hardware and filters (see the detailed HOWTOs). If you intend to do a lot of Linux printing, use a printer-friendly distribution!
PostScript and HP Laser Printers
PostScript printers (which are almost exclusively laser printers) are becoming among the most popular business printers. They provide superb graphic capabilities and are becoming a de facto standard printer for many applications, such as CAD/CAM and DTP. Linux systems include excellent support for PostScript printers.
Support for Hewlett-Packard’s high-end laser printers is, unfortunately, primitive. It will be difficult to use advanced features such as HP’s Resolution Enhancement Technology. If you will do much printing to HP printers, use LPRng. LPRng has the ability to get status readbacks from the printer and can make use of all of the features on modern printers.
If you are using a non-PostScript printer, Ghostscript can be used as an interpreter/filter; Ghostscript produces superb output and supports a large number of (less expensive) printers that are more commonly found in home use. Ghostscript is a free implementation of a PostScript interpreter.

244 Chapter 8—Configuring Printers
P R I N T S P O O L I N G S Y S T E M
As mentioned earlier, the print spooling system accepts print requests from users, temporarily copies the request to the appropriate location, and prints the request once the printer becomes available. Linux places print requests in the /var/spool/lpd/printer directory. Therefore, for every printer attached to the system, there needs to be a directory with the same name created in the /var/spool/lpd directory to handle print requests. For an HP printer installed locally on a system, there will be a device (/dev/lp#) to handle using this printer. The first printer installed will be lp0, the second lp1, and so on. In the same manner, a /var/spool/lpd/HP directory should be created by the administrator to handle printing requests to the HP printer. Print jobs sent to the HP printer are stored in the /var/spool/lpd/HP directory until the HP printer becomes available.
In this section, we will discuss the use of Samba spoolers versus UNIX/Linux spoolers.
Samba Spooler vs. UNIX/Linux Spooler
A print spooler is a program that takes a print file from a program, places it in a designated area, and sends the print file to the printer. The program also performs adminstrative tasks such as starting/stopping printing, printer status information, and removal of print files or print jobs.
The print spooler is a client/server-based application. The client sends print jobs to the server. The server may perform several tasks, which may include verifying the client access to printing, running additional programs to convert the print job to another format before printing, or other administrative tasks.
A program submits a job to the printer. When printing from the UNIX/Linux operating system, the lpr daemon is eventually used. The lpr daemon searches the /etc/printcap file and the environmental settings for a defined printer. If the requested printer and a printer setting found by lpr do not coincide, the print job does not go through. A requested print job is sent the printer spool site found at /var/spool/lpd/lp0. If the printer is available, the job is immediately printed. If the printer is in use, the job is placed on hold in the order the job was received. Only the administrator can change the order of jobs. If jobs needs to be canceled, the creator of the job or the administrator can delete the job from the queue.

Network Printing 245
Samba is a set of UNIX (thus Linux as well) applications that use the SMB (Server Message Block) protocol to share services with other operating systems. By running Samba, a user can share files on different file systems, share printers, verify logging on to a Windows domain, and perform many more functions. When it comes to printing, the Samba server receives the print job instead of the print spooler, thus allowing for administrative tasks such as quota enforcement.
N E T W O R K P R I N T I N G
One thing lpr has going for it is the ease with which it works with networks. If local printing can be configured, network printing is a snap.
You have (at least) two options when setting up network printing:
� Use lpr the traditional way; i.e., treat the printer as a UNIX printer.
� Use Samba (SMB) to print; i.e., treat the printer as a Windows printer.
The following topics are discussed in this section:
� Configuring a Print Server
� Samba Printing

246 Chapter 8—Configuring Printers
Configuring a Print Server
Configuring a printer server starts with two basic requirements: make sure networking is enabled and make sure the printer is attached to the system. Most printtool utilities handle print server installation. To manually configure a print server, open and edit /etc/hosts.lpd or /etc/hosts.equiv to include names of remote machines that you want to allow to print to your printer.
Without the -P option, lpr assumes the default printer is named lp. You can make a symbolic link in /dev to lp0, lp1, etc., depending on your system setup. You can also set the environment variable, PRINTER, to the name of the default printer. Therefore, a user can change what printer the job is to be printed on by resetting the PRINTER environment variable.
Samba Printing
Samba is a Microsoft Windows connectivity program that bridges the gap between the Linux world and the Windows world. This allows a Linux machine to access the shares of a Windows machine, including any printers on it. This is different from remote printing. In remote printing, the job is spooled directly to the printer itself; print quotas are not enforced. However, if you restrict access to the printer by forcing users to print through the Samba print server, it is possible to enforce the printer quotas. This method can double traffic on the network if the printer is networked because the job must be spooled to the server first, then to the printer.
Windows clients will be much happier with Samba printers than they will with lpr printers. Therefore, this method is highly recommended if there are significant numbers of Windows clients on your network.
Be aware that printing through Samba does not eliminate the lpr daemon or the underlying printing methodology. What it does do (which makes it well worth the trouble of setting up) is manage permissions far more intelligently. You will still need a functioning lpr setup to make a Samba print server.
LPRng–Next Generation UNIX Printing 247
L P R N G – N E X T G E N E R A T I O N U N I X P R I N T I N G
Until recently, UNIX and Linux printing has seemed stubbornly determined to remain archaic. The forest of configuration files, obscure printcap entries, lack of hardware support for specific printers, lack of status readback from the printer, flocks of oddball commands and daemons, sparse settings of printing protocols, and nightmares of user and group access permissions to print queues all add up to big headaches for administrators and equally big pains for users.
Fortunately, this shows signs of changing. Third parties are developing complete printing solutions for UNIX, and a heavily revised implementation of the Berkeley lpr printing software, known as LPRng (lpr Next Generation), is gaining wide acceptance.
LPRng aims to replace the bewildering complexity of Berkeley lpr (BLPR) printing with a simplified, more capable set of programs, yet keep backward compatibility for minimal impact on legacy systems or systems not servicing a high volume of print jobs. This is a tall order since there is little flexibility in the antiquated BLPR system, which was developed primarily to drive dot-matrix and daisy-wheel printers with straight ASCII text or, at worst, nroff-formatted text.
The following list is some of the features offered by LPRng:
� Ground-up reimplementation of RFC 1179 with security extensions
� Lightweight client programs–lpr, lpc, and lprm need no databases
� Dynamic redirection of print queues and print load balancing
� One-to-many, queue-to-printer relationships
� Automatic job holding
� Verbose diagnostic messages, human readable
� Enhanced security and user authentication

248 Chapter 8—Configuring Printers
The following topics are discussed in this section:
� Getting LPRng
� Similarities to BLPR
� Differences from BLPR
� Protocols, Filters, and IFHP
� LPRng Security
Getting LPRng
Tarballs or rpm packages can be downloaded from the semi-official sponsor AStArt Technologies at its Web site, http://www.astart.com. There are two components, the LPRng software itself (daemon, configuration files, client programs) and the IFHP print filters for HP printers. The latter mediates bidirectional communication with the physical printers. There is a third set of additional print filters for odd legacy printers and a facility for using Ghostscript to filter PostScript files for non-PostScript printers.
The software is released under both the GNU public license and the Perl-style Artistic license per user’s choice. The source code is also available. AStArt will provide the software under a special licensing agreement if direct support for the software is needed.
Similarities to BLPR
The changes to BLPR are mostly internal in that the software consists of an lpd daemon to be installed on each print server, the usual client programs (lpc, lpr, and lprm), a set of print filters, and the usual configuration files, including the printcap database. The BLPR client programs can be used with the new lpd daemon without any local changes to clients. While there still exists the printcap file, the format is different, as this file is used primarily by the new lpd daemon itself and not the client programs. There are two new files in /etc to control the daemon, lpd.conf and lpd.perms.
The new printcap file is the heart of an LPRng print server, and contains information specific to controlling physical printers. It also contains information about available print queues, which hosts are valid for a queue, and how connections from client programs are handled.
LPRng emulates the UNIX System V commands lp and lpstat and cancel programs. These are required by many utilities in the System V environment.

LPRng–Next Generation UNIX Printing 249
Differences from BLPR
LPRng, while compatible with BLPR and similar in structure, is actually a very different program with a number of significant enhancements.
The client programs are lightweight, meaning no local databases are needed for their operation. One of the most painful aspects of BLPR printing was the need to copy databases to every client machine for proper client program operation. This is somewhat analogous to requiring a specific printer driver on each machine in a Windows network. As Windows NT solved that problem with server-based printer drivers, LPRng solves the UNIX problem by moving the printing intelligence into the lpd daemon. The clients talk directly to the print server.
Printing can be load balanced across several queues, and individual print queues can be dynamically redirected. If a queue gets stuck due to a halted job or backed up due to a 150-slide PowerPoint document, print jobs can be intelligently redirected to alternate queues. This is a tremendous gain in usability for UNIX printing.
Print jobs can be automatically held. If something goes wrong with a job, the server can place it on hold and continue printing, removing some of the all-or-nothing characteristics of BLPR printing and reducing the possibility that one user will block a queue indefinitely.
Verbose, human-readable diagnostic messages mean great time savers for the administrator trying to diagnose a printing problem.
Bounce queue definitions allow print jobs to be automatically forwarded to a remote print server. The implication of this is that the client can interact with a single print server, yet have access to any number of actual print servers.

250 Chapter 8—Configuring Printers
Perhaps the most significant enhancement in the new software is the avoidance of setuid root calls by client programs, which were necessary to place a print job on the queue of a BLPR server. In traditional BLPR, these lead not only to numerous administration headaches with user permissions that expand exponentially with the number of users and print servers, but also represent a significant security risk.
Protocols, Filters, and IFHP
LPRng acknowledges the fact the printers have grown up considerably since UNIX was invented. The new print filter mechanism allows for status readback from printers. Clients can now be informed that the printer is out of paper, jammed, has a low toner condition, or any other status messages the printer wishes to send.
LPRng also includes native support for HP-PCL as well as PostScript print jobs. There is a specific set of print filters, IFHP, for interfacing to HP printers that allow UNIX to access their more advanced features.
LPRng has been designed to happily coexist with the world of Windows printing. In fact, the same physical printer can be set up on a Linux machine as both a Samba printer and as an LPRng printer and transparently print from Windows and UNIX. The Samba team and the LPRng team have taken pains to acknowledge the existence of each other and make their releases compatible.
LPRng Security
BLPR had practically nonexistent security measures. That has changed with LPRng. In addition to avoidance of setuid root calls previously mentioned, LPRng implements standard security protocols, such as Kerberos 5, throughout its operation. However, these are not mandated, and if lax security is appropriate (e.g., a local workgroup printing solution), the extra headaches of implementing a tight security policy can be bypassed.

LPRng–Next Generation UNIX Printing 251
Exercise 8-1: Configuring and Using a Network Printer
In this exercise, you will configure a network printer and share it among several systems. A system with a printer directly attached will be set up as a print server. To any other system, this printer is a network printer; to this system, it is a local printer. Any other system will be referred to as a client of the print server. Solutions to this exercise are provided in Appendix B at the end of this manual.
1. Working on the print server, verify that you can send data to the printer and that it prints.
.....................................................................................................................................
.....................................................................................................................................
2. On the print server, configure the local printer using printtool.
Print a small test job (the /etc/passwd file is a good test).
.....................................................................................................................................
.....................................................................................................................................
3. On a client, add a network printer using printtool.
Print a small test job (the /etc/passwd file is a good test).
.....................................................................................................................................
.....................................................................................................................................

252 Chapter 8—Configuring Printers
Exercise 8-2: The Print Queue (Optional)
Solutions to this exercise are provided in Appendix B at the end of this manual.
1. On your system, either client or server, disable your print queue.
.....................................................................................................................................
.....................................................................................................................................
2. Print three different files (remember the order you printed them in). Look at the outstanding print jobs with lpc -status and lpq.
.....................................................................................................................................
.....................................................................................................................................
3. Set the last job to be the next job to print.
.....................................................................................................................................
.....................................................................................................................................
4. Cancel the middle job using lprm.
.....................................................................................................................................
.....................................................................................................................................
5. Cancel all of the jobs using a single lprm command.
.....................................................................................................................................
.....................................................................................................................................

Summary 253
S U M M A R Y
In this chapter, you were introduced to the following topics:
� The spooler queue model used by Linux printers
� Adding new printers using printtool (or other configuration tool)
� Looking at printers and requests with lpc
� Configuring network printing by modifying /etc/printcap, /etc/hosts.lpd, and/or /etc/hosts.equiv
� Monitoring or controlling printing on a Linux system through the use of the lpc, lpq, and lprm commands
� Printing from a Linux system through the network to a Windows systems through the proper use of Samba

254 Chapter 8—Configuring Printers
P O S T - T E S T Q U E S T I O N S
The answers to these questions are in Appendix A at the end of this manual.
1. How would you remove the print job reports (which is the only job in the queue) from the queue of the laser printer admin?
.....................................................................................................................................
.....................................................................................................................................
2. How would you find out the status of laser printer admin?
.....................................................................................................................................
.....................................................................................................................................
3. Suppose the laser printer admin is the default printer. List two ways to find out what jobs are waiting in its queue.
.....................................................................................................................................
.....................................................................................................................................

M A J O R T O P I C S
9
Security
Objectives .................................................................... 256
Pre-Test Questions....................................................... 257
Introduction ................................................................ 258
Host Security ............................................................... 258
Vulnerabilities .............................................................. 266
Network Security ......................................................... 270
Security Policies ........................................................... 280
Detecting Break-Ins ..................................................... 283
Internet Security Resources.......................................... 288
Encryption................................................................... 289
Security Tools .............................................................. 293
Summary ..................................................................... 298
Post-Test Questions ..................................................... 298

256 Chapter 9—Security
O B J E C T I V E S
At the completion of this chapter, you will be able to:
� Set up host security.
� Explain and implement file system security.
� Implement password security policies.
� Use available security tools.
� Use /etc/securetty to limit locations that root can log in from.
� Determine whether services should run as root or nobody.
� Explain the security implications of buffer overruns.
� Configure Pluggable Authentication Modules (PAM).
� Apply the SGID bit.
� Describe why setuid shell scripts do not work.
� Explain the problems of viruses, worms, and Trojan horses.
� Perform daily system checks.
� Implement shadow passwords.
� Develop a security policy.
� Implement TCP wrappers for inetd security.
� Use /etc/hosts.allow and /etc/hosts.deny to allow or disallow network access from specific machines.
� Respond to a break-in attempt.
� Find and use security advisories from CERT, rootshell.com, and other organizations.
� Explain U.S. import and export restrictions on encryption software.
� Describe intruder dectection and removal.

Pre-Test Questions 257
P R E - T E S T Q U E S T I O N S
The answers to these questions are in Appendix A at the end of this manual.
1. What is the best way to prevent unused services from being compromised?
.....................................................................................................................................
.....................................................................................................................................
2. Why should you use PAM?
.....................................................................................................................................
.....................................................................................................................................
3. What would you put in /etc/hosts.deny to prevent all computers in the bad.people.com domain from accessing the ftp service?
.....................................................................................................................................
.....................................................................................................................................
4. A file has a mode of 640 and is owned by joe.user. Who can do what to the file?
.....................................................................................................................................
.....................................................................................................................................
5. What happens if a network service that is being run by user nobody is compromised?
.....................................................................................................................................
.....................................................................................................................................

258 Chapter 9—Security
I N T R O D U C T I O N
There is no such thing as a secure system. The closest thing to a secure system is a stand-alone system locked in a room that only one person has access to. While this system is close to being secure, it is not very practical. For a system to be useful in today’s business world, it almost always needs to be attached to a network of some kind. While we can never achieve a 100% secure system, we can take steps to make things as secure as possible.
Any Linux system that is going to be on a shared or public network needs to be secured. The default installations are getting better about not leaving systems open to attack, but there are still several things that must be done to prepare for the exposure associated with a network environment, especially if the system will ever come in contact with the Internet. As the Internet expands, the frequency of attacks on systems increases as well.
Not all attacks are attempts to gain access. Some attacks are carried out for the sole purpose of disabling a machine as completely as possible. This type of attack is called a Denial of Service (DoS). This chapter introduces several aspects of securing a Linux system within a networked environment, some vulnerabilities that may be present in a standard installation, and also some tools and methods that can decrease the vulnerability of a system.
H O S T S E C U R I T Y
Host security involves securing the non-network subsystems on a Linux system. One of the best ways to implement host security is to enable PAM. File permissions play an important role in Linux system security. They protect files so that they can only be accessed by specified users. Special file permissions called SUID and SGID allow a program to be run with the privileges of another user. While this can be useful, it also involves a lot of risks. You should also check your logs regularly and check the Internet for warnings about vulnerabilities that have been found in system programs.
The following topics will be covered in this section:
� inetd.conf
� Pluggable Authentication Modules (PAM)
� User Settings

Host Security 259
� File Permissions
� setuid and setgid
� syslog
inetd.conf
The inetd.conf file controls the network services that are to be provided by the system. Many services that are enabled by default may not be needed and, thus, decrease the security of the system unnecessarily. Opening the file with a text editor will reveal a list of configuration lines that represent the potential services. Comments (#) at the beginning of a line indicate a service that has been disabled. The best method to determine what should be enabled in this file is to comment all but the bare minimum and then allow other services as they are needed. A good way to start would be to disable everything except ftp, telnet, and ident. What needs to be enabled is dependent on the machine’s function, but it’s important to only run what is needed. The following example shows a portion of an inetd.conf file with some services disabled:
telnet stream tcp nowait root /usr/sbin/tcpd in.telnetd
# nntp stream tcp nowait news /usr/sbin/tcpd /usr/sbin/leafnode
# smtp stream tcp nowait root /usr/sbin/sendmail sendmail -bs
After changing the inetd.conf file, run the following command to restart the service:
# killall -HUP inetd

260 Chapter 9—Security
Exercise 9-1: Configuring inetd
In this exercise, you will configure the inetd super-server to add a network service.
The solutions to this exercise are provided in Appendix B at the end of this manual.
1. Create the /usr/local/sbin/fingerd file, containing the following:
#!/bin/sh
echo "Finger information for this system is not available."
2. Make the /usr/local/sbin/fingerd file executable.
.....................................................................................................................................
.....................................................................................................................................
3. Edit the inetd.conf file to comment out any previous finger service. Add the following line:
finger stream tcp nowait nobody /usr/local/sbin/fingerd
.....................................................................................................................................
.....................................................................................................................................
4. Force the inetd daemon to reread its configuration file.
.....................................................................................................................................
.....................................................................................................................................
5. Test the finger service on the system.
.....................................................................................................................................
.....................................................................................................................................
6. Disable the finger service in the inetd.conf file.
.....................................................................................................................................
.....................................................................................................................................

Host Security 261
7. Have the inetd daemon reread the configuration file.
.....................................................................................................................................
.....................................................................................................................................
8. Test the finger service again.
.....................................................................................................................................
.....................................................................................................................................
Pluggable Authentication Modules (PAM)
PAM is a standard for securing a system at the service level where certain programs can require authorization before running. With this safeguard, an attacker who obtains privileged access to the system can still face additional layers of security presented by PAM. One of the possible drawbacks to PAM is that programs need to have PAM functionality specifically included when they are written. Programs that have not been prepared in this way cannot work with PAM. This does not discount the usefulness of this security method to any great extent since many important system files have had this functionality for some time now. There are four types of modules: account, auth(entication), password, and session, which can be used alone or in any combination.
Configuration Files
There are two slightly different methods for configuring PAM. The /etc/pam.conf file or an /etc/pam.d directory that contains a configuration file for each service can be used. Depending on your distribution, PAM may use one or the other, possibly both.

262 Chapter 9—Security
Stacked Modules
PAM can have several modules associated with the invocation of a service. When several configuration lines are created for a service that are of the same module type, they are said to be stacked.
This way, a series of modules can work in concert to determine if it is appropriate to go ahead and allow access to that service. The order of the entries can be an aspect of the configuration.
The following is an example that will be used in the next five sections.
# service-name module-type control-flag module-path arguments
kde auth required /lib/security/pam_pwdb.so
service-name
This is the PAM-enabled program that is to be configured. In the example, the program is kde.
module-type
You can choose from the following module types:
� account
Causes the program to check the status of the user’s account information, such as the status of passwords, group membership, or access rights to the service.
� auth
Forces the users to present identification information before starting the service. This identification information is typically a password, but there are many possible methods that could include anything from smart cards to biosensors.
� password
Requires that passwords or other challenge methods be changed or updated. This typically requires that a password be changed.
� session
Involves steps to be carried out before the service is started and after it is stopped.

Host Security 263
control
The results of a PAM module invocation can result in a number of different actions. The control field works in combination with these results to determine what will happen next.
� requisite
Failure causes the service to terminate immediately, and no other modules will be attempted.
� required
Failure causes the entire process to fail, but any remaining modules will be run anyway. (This could keep an attacker from knowing he was getting close if he had to compromise several modules.)
� sufficient
Passing this authentication module will grant access regardless of other modules in the stack. (Think of it as a logical or.)
� optional
Pass/fail is irrelevant to authentication unless there are no other auth methods defined for the service and type.
module-path
The module-path field contains the file and path of the PAM service. It will usually point to a shared object in the /lib/security directory:
/lib/security/pam_pwdb.so
arguments
These are settings that are specific to individual modules. Argument lists for each model can be found in the PAM documentation.

264 Chapter 9—Security
pam.d
The only difference between using a pam.d directory versus a pam.conf file is how the service name is defined. Within pam.conf, a service name is defined as the first field in a configuration line. When the pam.d configuration is used, each file within that directory represents a service name, and the file contents define the settings for that service. The configuration lines within the pam.d files do not contain a service-name field, so module-type is the first field.
User Settings
The /etc/securetty file determines where root logins will be allowed from. By default, root is only allowed to log in from a console attached directly to the system itself. If a user was to telnet into such system and try to log in as root, he would be denied entry, regardless of using the correct password. Root can always modify this file.
File Permissions
File permissions are designed to allow read, write, and/or execute permissions to a file. By manipulating the file permissions, access to files and directories may be allowed or denied based on the username or group name. Improper file settings can jeopardize the security of a file or directory.
File permissions allow three groups of people to have different access permissions for a file. The owner has one set of permissions, the group a second set of permissions, and everyone else has another set of permissions.
The majority of security problems arise in the third set of permissions, the permissions for all other users. If a file has granted write or execute permission to all other users, this file is now a potential liability, since an attacker can modify the file to perform any task.

Host Security 265
setuid and setgid
Some programs require users to have root-level access before they are invoked. Enabling setuid for a program allows a regular user to invoke it and then have it run with all of the privileges of root (or some other user). For example, when a user changes her own password, she needs to have the same permissions as root to make the change.
The problem with setuid is that any program that has been granted this privilege becomes a potential weak link. Since the program has the same access as root, an attack through that single program could compromise the security of the entire system.
The setgid feature is another tool used to help determine file permissions. If the setgid bit is set on a directory, then any files created in that directory will have the group ownership of that directory rather than the default group of the user.
syslog
Depending on the experience and perhaps luck of the attacker, the system logs may be modified after an attack to cover the tracks of the intruder. Someone who gets in and starts tampering with system files is more than likely to generate some traffic in the system logs that can give helpful clues as to what he was doing, where he came from, and when it all happened.
Have your logs sent to another location, just in case an attacker has gotten in and has erased his tracks from the system logs. Occasionally compare the logs from the remote location with the logs on the current system.
/var/log/secure
For many distributions, several security-related messages will be directed to this log file. It would be a good candidate for e-mailing to a remote location.

266 Chapter 9—Security
V U L N E R A B I L I T I E S
The first thing to do when securing a system is to assess its vulnerabilities. Things to check include password policies, downloaded programs, and buffer overruns.
The following topics will be covered in this section:
� Passwords
� Hostile Programs
� Buffer Overruns
Passwords
An ideal password would contain eight characters and be a random mix of letters and numbers, with the characters being both upper and lower case. There are not many efficient ways to crack a good password. Unfortunately, the best passwords are also the hardest to remember. Most people have more than one password they use on a regular basis and choose things they will not forget. Common passwords are typically the name of a spouse or relative, or other words that a person is frequently exposed to. The trouble with passwords like these is their vulnerability to dictionary attacks or even someone trying some educated guesses at the password prompt.
It’s common for the /etc/passwd file to be world readable as many nonprivileged programs have relied on being able to read that file. As a result, someone can grab the file and do a brute-force attack on the encoded passwords.
However, the passwords people tend to choose only amount to a small percentage of the possible combinations. This allows a malicious system hacker to simply use a dictionary instead of a random character generator, and you might be surprised on the success rate.

Vulnerabilities 267
Shadow Passwords
Shadow passwords are a replacement for utilities that are used to create and maintain security settings about the users of the system. Shadow passwords address several vulnerabilities that existed in past password utilities, such as the /etc/passwd file being world readable. Encrypted passwords are instead stored in /etc/shadow. Shadow also provides enhanced functionality for password management. Some of shadow’s features include:
� Encoded passwords are only accessible by root.
� Account information can be aged, meaning that users are automatically prompted to change passwords from time to time, or accounts that will expire after a set period of time can be set up on a temporary basis.
� Requirements for users to create good passwords.
� Improved utilities for account/password management.
� A configuration file to set login defaults (/etc/login.defs).
Here is an example of what the /etc/shadow file might look like:
root:1YVmyqfO2FbWk:10787:0:10000::::
bin:*:8902:0:10000::::
daemon:*:8902:0:10000::::
lp:*:9473:0:10000::::
news:*:8902:0:10000::::
uucp:*:0:0:10000::::
games:*:0:0:10000::::
fprat:KdNLoLsg854kI:10799:0:10000::::::

268 Chapter 9—Security
Hostile Programs
Hostile programs are programs that can do harm to your system. They include Trojan horses, viruses, and worms. We will discuss each of those in this section.
Hostile programs are not very common on Linux. Only a few have ever been seen. The main reason is that they are not able to do all that much damage unless they run as root. Most programs and configuration information on the system can only be written to by root. So if a virus or Trojan horse is run by a nonroot user, it isn’t likely to do too much damage. Chances are that it won’t be able to spread very well either. If it is able to run as root, it would be able to do a lot more damage. That’s one good reason why you should only use the root account when completely necessary. When running as root, you should also be careful about running programs from untrustworthy sources. Without looking at the source, you could be opening yourself up to trouble.
Trojan Horses
Trojan horses are named after the method in which the Greeks were able to circumvent the security of the Romans. The program looks harmless and claims to do something useful (or entertaining) for the user. When the program is run, it appears to do a certain task for the user, but its primary (hidden) function is to perform another, possibly malicious, task.
A favorite example of a Trojan horse is a replacement of the login program. The Trojan program appears to perform the login command. In reality, the Trojan program captures the password of the user that logged in to the system, mails the password to another account, logs the user in (or gives an error message and surrenders to the real login program), and removes itself (Trojan program) from the system. This example would be installed by the intruder, and its presence would not be immediately known to the user.
Another example might display an amusing animation or offer to play a game. While the user is being entertained, the program goes about its task of exploring the system, sending contact information to its master, or vandalizing the host system.

Vulnerabilities 269
Viruses
Viruses are another form of attack. A virus is a piece of code that might enter a system as part of a program. Once in the system, it may hide itself in memory and attach itself to every program that runs or every program file it finds on disk. Some viruses are deliberately destructive in nature, destroying the Master Boot Record on your hard drive, erasing programs, or simply rendering programs inoperable. Other viruses may not intend to cause damage but merely be an annoyance, such as displaying a message or animation on your monitor. Frequently, due to poor coding technique, this class of virus can consume excessive resources and inadvertently cause downtime or data loss, sometimes due to simple user panic.
Worms
Worms are yet another form of attack. Unlike a virus, they enter a computer system as a stand-alone program not attached to other pieces of code. Once in the system, they go about their business. Like a virus, a worm may be intentionally destructive or it may be benign. Sometimes a benign worm, like a benign virus, will go out of control and cause unintentional damage or resource depletion.
Buffer Overruns
Buffer overruns are the source of most attacks to Linux systems. Why buffer overruns? The vulnerability comes from certain coding errors that are difficult for programmers to avoid, so naturally a lot of programs contain these errors. It’s caused when certain variables receive more data than the programmer anticipated or prepared for. If that variable happens to be responsible for storing input that someone can modify, a skilled attacker can induce the error condition at will, causing the program to crash or to function in ways that weren’t part of its original design. When an important and/or high-availability program contains one of these errors, it will eventually be found by someone and used as a path of attack.

270 Chapter 9—Security
Attackers seek certain types of programs when looking for buffer-overrun candidates. Favorites are those that have setuid privileges. Setuid programs have root-level access but only use the privilege to perform some small tasks and nothing else; the privilege to do just about anything is there, nonetheless. When an attacker can induce a buffer overrun within a setuid program, the program can crash in a way that leaves a root shell for the attacker. Another possibility is acceptance of errant behavior finessed from the program, as if it originated from root.
Buffer overflow problems have recently been exploited in such popular network daemons as qpopper, named, wu-ftpd, as well as many others. One method to help protect against buffer overflows, and thus gain root access to the shell, is to create a nobody account. Assign nobody as the owner of system services. If the buffer is overflowed, the attacker gains access to the system as nobody, with nobody’s permissions, not as root!
N E T W O R K S E C U R I T Y
The number one concern when trying to secure your system will probably be the network. The network allows users to reach information on other systems and also allows others to access information on your machine. However, you must carefully control what you allow outsiders to access. You must also ensure that there are no security holes that make your system vulnerable to attacks. The best way to minimize the risks is to limit available services and to stay current with security resources on the Web. In this section, we’ll explore ways to limit network access using TCP wrappers, inetd, and firewalls. We’ll cover some popular Web resources later in this chapter.
The following topics will be discussed in this section:
� TCP Wrappers
� Port Restrictions
� Firewalls

Network Security 271
TCP Wrappers
Depending on the function of the system, there may be a number of services running that are exposed to attacks from some network or even the entire world if the machine is connected to the Internet. TCP wrappers enable every connection to these services to be evaluated and logged (through syslog) before access is allowed through that service. Some important features include the following:
� Access control
Remote hosts must pass certain checks before being allowed to access the system or specific service. Checks can require the use of identd information from the originating host.
� Spoofing protection
Attackers often implement methods that can make them appear to be originating from a location that differs from their true address. Some spoofing methods can even trick a system into thinking an attacker is within a server’s own domain. TCP wrappers can detect spoofing methods and will deny access to them by default.
Configuring TCP Wrappers
TCP wrappers is a feature that allows an additional layer of security to be added to a specific service. TCP wrappers works in conjunction with the inetd.conf file to determine which service to filter.

272 Chapter 9—Security
inetd.conf
If inetd has not already been configured to work with TCP wrappers, some changes will need to be made for each service that is to be filtered so that they point to /usr/sbin/tcpd. Here is an example of how a change might look:
#telnet stream tcp nowait root /usr/sbin/telnetd telnetd
telnet stream tcp nowait root /usr/sbin/tcpd telnetd
In the example, we have commented out the original line that would have launched the telnet service for a client. We need to have inetd launch TCP wrappers instead, so we add the appropriate line, which simply changes the path and executable. This will need to be done for each service that needs to be configured.
hosts.allow and hosts.deny
Two files determine who is allowed to utilize the services that are under control of TCP wrappers: /etc/hosts.allow and /etc/hosts.deny. Why two lists? This gives you flexibility in how you want to structure your security. For tight security or a system that does not need to offer many services to outsiders, you can deny all and then follow through with hosts.allow, which permits only a very narrow range of clients to get through. Or you could use an open configuration that allows all and then limits certain clients from accessing services. Or you could choose to use both. Connections that have not been specifically denied are accepted by default.
TCP wrappers has a set of wildcards that allows matching services and clients. One important wildcard that you need to know to get a basic configuration together is the ALL wildcard. It matches everything in the daemon or client fields such that:
ALL:ALL
will match all services and all clients.
A configuration line can contain multiple entries for each field, but each field must be separated by a space or comma. Below is an example with multiple entries for hosts.allow that grants telnet and ftp services to everyone from within the local domain and everyone from trusted.domain.com:
#/etc/hosts.allow
in.ftpd, in.telnet.d: LOCAL, trusted.domain.com

Network Security 273
Clients can be denied or allowed in either file as long as it is specified with the DENY or ALLOW flag at the end of the configuration line. The following example demonstrates a denial in the allow file:
#/etc/hosts.allow
ALL : untrusted.domain.com DENY
What you decide to allow and deny depends on the function of your machine. A dial-up box that doesn’t need to serve any clients could deny everything and then maybe let a few friends through. Systems that serve clients on the Internet or other network require a more proactive approach, since denying everyone isn’t an option.
Port Restrictions
Not every service daemon can be run from inetd. Unfortunately those services cannot use TCP wrappers. This is because TCP wrappers requires the daemon to be started anew each time a connection is made. Fortunately, there are ways that you can secure services that are not using TCP wrappers. In fact, many stand-alone services use the hosts.allow and hosts.deny files themselves or provide a similar mechanism in their own configuration files.
Removing Unused Services
The first thing you’ll want to do when securing the network services on a system is to remove any unused services. On many Linux systems, the inetd.conf file leaves many services enabled. You should go through and disable any service that you do not need. On a desktop system, this probably means all the services. To do so, simply put a hash mark (#) in front of each line to comment it out. Then restart the inetd daemon:
# killall -HUP inetd
The best method of securing inetd is to remove everything and then add in any services that you have a need for. Note that some distributions are starting to ship with all services disabled by default. This provides a more secure system without creating extra work for the administrator.

274 Chapter 9—Security
Port Numbers
Linux restricts the use of some TCP and UDP ports. Only root is able to bind sockets to ports 0 through 1,023. Any user is allows to bind a socket to ports 1,024 through 65,535. So to use the lower-numbered ports, daemons must be started by root or they must be setuid root. This creates an interesting problem–root access is required to run a service on these ports, yet running a daemon as root poses more security problems if the service is breached. One common solution is for the program to be setuid root but to drop root privileges once the socket has been bound to the port.
Most network daemons can be configured to run on different port numbers. This often allows nonroot users to run them as they can use a higher port number. Port numbers can usually be assigned by name or by number. If a name is used, the program will look up the name in the /etc/services file to get the number. This file contains a mapping of names to their well-known port numbers. Note that changing the port number that a service runs on does not really add any security. While it may make it a little harder to find the service, a port scan can easily determine all the services that are running and what ports they are on.
Firewalls
An even better way to secure your network connection is with a firewall. A firewall separates parts of a network, such as a business network, from the Internet. It protects the network from intruders and allows you to control how information travels into and out of your network. Having a firewall is an important part of network security since it allows an administrator to centralize many security policies on one system rather than having to worry about every single machine on the network. The presence of a firewall doesn’t guarantee absolute security but can enhance it significantly if well maintained.
There are many firewall systems available today. You can get stand-alone firewall systems, routers with firewalls, or add-on software for just about any operating system. The standard firewall system on Linux is called ipchains. It is implemented in the kernel with user-space programs to control the behavior.
ipchains
Linux 2.2 implements a feature called ipchains that filters packets going through the TCP/IP network stack. Each chain is a set of rules that looks at the packet going through and decides what to do with it. This type of firewall is called a packet filter.

Network Security 275
As you can see in the following figure, there are three points where packets can be filtered: input, output, and forward. The input chain filter is applied to every packet that comes in on an interface, unless it fails the checksum or sanity check. The forward chain applies to any packet that the kernel forwards from one interface out to another. We’ll cover IP forwarding later in this section. The output chain filter applies to all outgoing packets.
Each chain has a set of rules that it applies to packets going through. The rules can look at the protocol type, source and destination address, port numbers, and a few other tests. An action is associated with each rule. Possible actions include dropping the packet (DENY), allowing it to pass through (ACCEPT), dropping it but informing the sender (REJECT), and returning it to the previous chain (RETURN).
Another part of the ipchains system is masquerading. This allows you to have your Linux system sit between the Internet with a public IP address and a private network. The masquerade system takes packets outbound from the private network to the Internet and rewrites the source IP address to be that of the masquerade box. When incoming replies arrive, the masquerade system has to determine which system on the internal network the packet should be directed to. Masquerading is another way to limit the availability of systems on the public Internet.
inputChain
outputChain
forwardChain
ACCEPT/REDIRECT
lo interference
{Routing }{Decision}
DENY/REJECT
DENY
DENY
DENY/REJECT DENY/
REJECT
ACCEPT
Local Process
Checksum
Sanity
Demasqerade

276 Chapter 9—Security
Examples
The syntax for ipchains is fairly complex, and the best way to show its use is probably by showing some examples. First let’s add a simple rule to the input chain:
# ipchains -A input -s 201.202.203.58/32 www -p tcp -j DENY
Any TCP packets sent to the www (HTTP) port with a source address of 201.202.203.58 would be denied.
The following is an example that creates a new chain called check, then sends all packets that go through the input chain through the check chain.
# ipchains -N check
# ipchains -A check -s 201.202.203.0/24 -j ACCEPT
# ipchains -A check -s ! 201.202.203.0/24 -j DENY
# ipchains -A input -j check
Any packets that come from the 201.202.203.0 network are accepted, and any packets not from the 201.202.203.0 network are denied. The exclamation point (!) is treated as a NOT; therefore, any packets whose source isn’t the 201.202.203.0 network will be matched.
The following example will deny telnet (port 23) connections from any source address to be routed (forwarded) through the system:
# ipchains -I forward -s 0.0.0.0 23 -j DENY
netfilter
The ipchains implementation was created for the 2.2 kernel series. Before ipchains, the Linux kernel had a slightly different system called ipfwadm. In the 2.4 kernels, ipchains has been replaced with a new system called netfilter. All three implementations are similar and use similar syntax for the filters. The netfilter system is a lot cleaner than the earlier attempts and provides more flexibility.
The netfilter system uses the iptables command in place of the ipchains command. However, there are kernel modules available that will let you use the ipchains or even the ipfwadm command instead. The syntax of the utilities have slight variations, so check the man pages if you are trying to convert from one of the older systems.

Network Security 277
There are a few major differences in the way netfilter works as opposed to ipchains. First of all, forwarded packets only pass through the forward chain and do not pass through the input or output chains. In addition, masquerading has been moved to a separate subsystem and is now called Network Address Translation (NAT). You use the ipnatctl program to configure it.
IP Forwarding
In most cases, you’ll use your Linux system as a firewall for the entire network. In this case, you’ll have to enable routing on the system. For simple routing, you can enable IP forwarding. To do this, you simply write a 1 to the /proc/sys/net/ipv4/ip_forward file:
# echo "1" > /proc/sys/net/ipv4/ip_forward
This tells the kernel that it should route a packet from one of its interfaces to another if the packet is bound for the network attached to the other side. For more complex routing situations, you’ll need to install full routing support, including daemons that can process routing protocols.
Note that IP forwarding is only required if the system is acting as a firewall for a network. You can actually enable ipchains for a single system. In this case, the forward chain will never be used, but you will still be able to filter incoming and outgoing packets. This makes a nice simple local firewall.
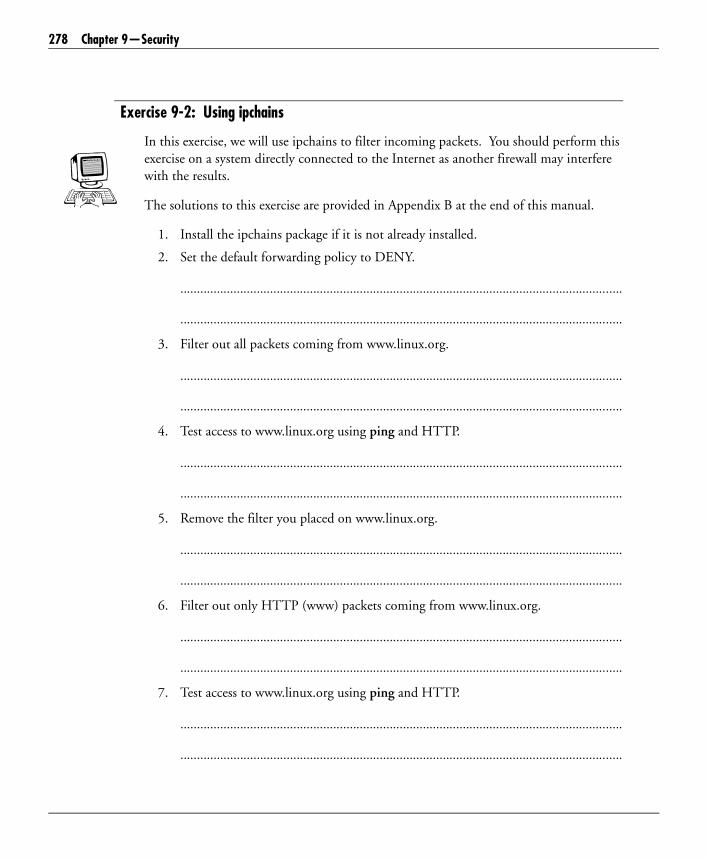
278 Chapter 9—Security
Exercise 9-2: Using ipchains
In this exercise, we will use ipchains to filter incoming packets. You should perform this exercise on a system directly connected to the Internet as another firewall may interfere with the results.
The solutions to this exercise are provided in Appendix B at the end of this manual.
1. Install the ipchains package if it is not already installed.
2. Set the default forwarding policy to DENY.
.....................................................................................................................................
.....................................................................................................................................
3. Filter out all packets coming from www.linux.org.
.....................................................................................................................................
.....................................................................................................................................
4. Test access to www.linux.org using ping and HTTP.
.....................................................................................................................................
.....................................................................................................................................
5. Remove the filter you placed on www.linux.org.
.....................................................................................................................................
.....................................................................................................................................
6. Filter out only HTTP (www) packets coming from www.linux.org.
.....................................................................................................................................
.....................................................................................................................................
7. Test access to www.linux.org using ping and HTTP.
.....................................................................................................................................
.....................................................................................................................................

Network Security 279
8. List all of the chains.
.....................................................................................................................................
.....................................................................................................................................
9. Remove all of the rules on the input chain.
.....................................................................................................................................
.....................................................................................................................................
10. Make sure IP forwarding is enabled.
.....................................................................................................................................
.....................................................................................................................................
11. Turn on masquerading with no packet filtering.
.....................................................................................................................................
.....................................................................................................................................

280 Chapter 9—Security
S E C U R I T Y P O L I C I E S
System attacks are an eventuality on any networked system. Absolute security cannot be guaranteed, so policies specific to handling these issues as they happen must be implemented. A security breach within a large company could affect thousands of users. How quickly the potential chaos can be resolved depends greatly on the preparation and coordination of analysts, managers, and others. Aspects of the policy should also have preventive measures, such as companywide standards regarding secure configurations and timely methods of conveying security-related information.
The following topics are discussed in this section:
� motd and issue Files
� Computer Ethics
motd and issue Files
These files reside in the /etc directory and can be used to alert the system users of security issues and prepare them for changes in the system. The issue file contains the text that appears over the login prompt. The motd file contains the message of the day and will be presented to each user when they log in. Configuring is simple; just add the message you want in /etc/motd or /etc/issue.

Security Policies 281
Computer Ethics
The era that we are living in has been dubbed by some as the Information Age. In a nutshell, this means that the devices, systems, and methodologies available today allow us to save, retrieve, and share information at such speeds and in such quantities that were unheard of only a few years ago. Some might say that this is a good and appropriate use of computing power, while others might say that computing is spinning out of control.
Regardless of your opinion of the Information Age, you will likely encounter situations where you will have to rely less on your math, logic, and computing skills and depend on commonsense, ethics, morality, and legality. With the Internet still in its infancy, new questions are being asked every day about how we should handle the vast amounts of information available. Consider the following hypothetical situations:
� While working on the system of a co-worker, you find some data that is illegal for her to possess. Whether it be pirated software, pornography, terrorist information, etc., what should you do?
� As a system administrator, you have access to files containing secret corporate information. Although your role is to simply manage the files, do you need to protect yourself from any repercussions that might happen if you were to see the actual information contained within the files?
� Your company has strict policies prohibiting the use of corporate equipment for personal use. As network administrator, your job is to maintain the integrity of the bandwidth. Occasionally, however, you type a letter on your home computer and e-mail it from work to your son who goes to college in another state. Are you violating the same policies you are supposed to be enforcing?
� Someone makes you an offer to purchase some software code that was written on a laptop that is owned by your current employer. Although it was written at home, in your spare time, and has absolutely nothing to do with your employer’s business, who rightfully owns the code?
282 Chapter 9—Security
Although these are all hypothetical situations, you will encounter similar situations where you are forced to decide between right and wrong, legal and illegal. There are also many gray areas where the answer is not as concrete. There are a few laws that are in place to protect people and companies, such as piracy and intellectual property laws. But for every rule, a dozen exceptions emerge.
How can you prevent yourself from being a victim or a perpetrator of such crimes? The following are some general guidelines that can help you:
� Use common sense.
Everyday you are presented with situations that force you to consider the ethical implications of your actions. Although the circumstances might be different, right and wrong are usually easy to distinguish. If you encounter a situation where you are unsure what to do, consider the pros and cons of each choice. If you cannot ascertain which is the correct decision, consult a superior or one of the resources listed later in this section.
� Be consistent.
Your company should have well-thought-out policies, which you should follow to the letter. Just as your organization might have policies for requesting vacation time, they should have policies governing the appropriate use of information technology. Many corporations send their IT employees to training seminars to learn how to set policies and adhere to them.
� Know the limitations of technology.
Although there are many means of securing information, you need to realize that once a file is saved or a message is sent, there is a very good possibility that the information contained within will be available to parties other than the desired recipients. Always remember that deleting a file or message does not necessarily mean that it is gone forever. Items that don’t appear on your local machine may reside on a remote backup system or removable medium somewhere else. A good rule of thumb is to not possess any files or send any messages that you would be unable to explain their purpose at a later date.
� Know the law.
Not since the Industrial Revolution has there been so much new technology and information appearing at such a rapid pace. With all this new information comes the need to protect individuals and groups from the misuse of this technology. The laws governing technology change nearly as rapidly as technology itself, making it nearly impossible to know all of the current legislation. You should, however, keep up to date with computing law, as it affects you. Below are some resources that can help you in your search.

Detecting Break-Ins 283
Resources
“Intellectual Honesty in the Era of Computing,” by Dr. Frank W. Connolly:
http://www.luc.edu/infotech/cease/honesty.html
Computer Professionals for Social Responsibility:
http://www.cpsr.org/
Computing and the Law:
http://samsara.law.cwru.edu/comp_law/
D E T E C T I N G B R E A K - I N S
Keeping the system up to date, having adequate security policies, and being aware of current security risks are all good preventive measures. You also must be proactive and be ready to take action quickly if needed. This involves keeping an eye out for signs of intrusion. Each type of popular attack has its own methodology. A portscan will probe a range of ports with various types of information to look for weaknesses. A Denial of Service (DoS) attack may flood a port with some sort of information to disable the service on that port. An NFS exploit may try to send extremely long filenames to the NFS daemon. All of these things and more can show up in the system logs if an administrator has prepared for the eventuality of these attacks. Monitoring system logs closely is an important part of security.
In this section, we will discuss the following topics:
� Portscans
� What to Do If Attacked

284 Chapter 9—Security
Portscans
Typically a portscan will occur before an attack. The potential intruder does this to determine what services are available on the target system and bases the attack on what is found. Below is what an attacker would see after portscanning a test machine:
Port State Protocol Service
23 open tcp telnet
80 open tcp www
111 open tcp sunrpc
139 open tcp netbios-ssn
515 open tcp printer
734 open tcp unknown
767 open tcp unknown
And on the other side of the scan, the scanlogd utility on the machine has detected this and noted so accordingly in the system logs.
Sep 29 21:59:40 brunr2 scanlogd: From 127.0.0.1 to 127.0.0.1 ports 62711, 430, 76, 753, 825, 826, 899, 63, 474, ...
NFS
NFS allows file systems to be transparently shared across systems on a network. It can be a very useful service to run, but security was not a major focus at the time of its design. If it is used, it should be kept as up to date as possible and only export specific directories, never the root file system. Exports (directories to be shared) are defined in /etc/exports, the main NFS configuration file. Recent attacks have focused on generating buffer overruns. The following is a log entry from a system that was attacked during the summer of 1999:
Aug 28 06:12:56 brunr2 mountd[157]: Blocked attempt of 199.xxx..xx.xx to mount 2202202202202202202200202020202020202020202202020202020202020202020 0202020202020202020202022002020202020202020202020202020202.............
Aug 28 06:12:56 brunr2 mountd[157]: Unauthorized access by NFS client 199.xxx.xx.xx.
The administrator had been looking at the system logs trying to resolve some unrelated issue when he saw the above. The string of numbers continued on for thousands of characters. The attacker was clearly looking for a buffer overrun but was out of luck since the NFS daemon had been recently updated on that particular system.

Detecting Break-Ins 285
Sendmail
This mail package is enabled by default on most installs. Care needs to be taken that it is as up to date as possible since there are many exploits for this program floating around the Internet. It has been the target of attackers for years, and it was exploited in 1988 with an attack that disabled roughly 10% of the systems attached to the Internet. There are alternatives to Sendmail, such as qmail and postfix, that offer the same services and are more secure. If you need to run Sendmail, it is very important that it be up to date.
Teardrop DoS
A Denial of Service (DoS) attack is an attack that does not allow an attacker to access the system, but simply makes the system inaccessible for any user. The teardrop DoS was a common attack prior to 2.0.32 that exploited a flaw in the TCP/IP protocol itself, so a number of operating systems, including Linux, were vulnerable. Linux systems that had been attacked with the teardrop DoS would often lock up and require a reboot after being targeted by this attack. Because of the open nature of the Linux source code, patches were made, and administrators were quickly able to fix the kernel to resolve this problem.
What to Do If Attacked
If your system comes under attack, you should:
� Gather as much information as possible.
� Determine what part of the system was vulnerable.
� Make the appropriate changes.

286 Chapter 9—Security
If your network has been attacked, you need to gather as much information as possible. Start with the system logs to try and determine how and when the attackers got in. Some attackers use their tools to attempt to remove this information from the system logs, so be observant for the disappearance of information as well. Careful examination of the logs will hopefully provide you with the attacker’s method of entry (which security loophole they came through). Once you know the vulnerability, you can check the different resources (BugTraq, CERT, or distribution sites) to see if a patch has been made available for this loophole and, if so, apply it to your system. If you cannot find a patch, you can certainly disseminate the existence of a security loophole, and a patch will usually be created for use in a short time.
Fortunately, most log entries that relate to security issues on an up-to-date system represent failures on the part of the attacker. The Linux community usually responds very quickly to system weaknesses and provides regular updates that render many intrusion tools useless. Addressing failed attempts usually involves blocking the offending IP and contacting the service provider that owns the originating address. It would also be a good idea to check CERT and Rootshell to see if there are any new exploits for the targeted service. No system can be completely secure, and from time to time, an intruder will be successful and perhaps even gain privileged access. In a worst-case scenario, finding an intruder on a system might require dropping network interfaces, rebooting the server, or even a major restore of system files.
Handling an Attack that is in Progress
If you happen to catch an attack while it is in progress, the best thing to do is to remove the system from the network until the weakness can be resolved. You might unplug the Ethernet or hang up the modem. This isn’t always an option if the system absolutely needs to be available to other users during the time of the attack. If you cannot bring down the network, you could disable the service that the attack is originating by commenting it out in inetd.conf, followed by a kill -HUP <pid>. If that service is the one that must stay up, try to block a range of the attacker’s IP in TCP wrappers. Regardless of how it’s done, it must be done quickly to minimize damage.
Notify Service Provider or Local Authorities
If you were able to get the IP address of the attacker (this is not difficult in most situations), you may be able to use the whois utility to find out who owns the domain block the attack originated from. If the owner isn’t the attacker, you will most likely get some assistance.

Detecting Break-Ins 287
Restore the System
A situation like this will be greatly aided if tools like tripwire were in use to point out files that have been tampered with. Having known, good backups of critical system files (login, ls, bash, etc.) is important, too, since they are often used as backdoors or Trojan horses by those who have gained privileged access. If at all possible, keep the system disconnected from the network until the cause of the security breach can be resolved.
Block IP Addresses
Once you have determined the domain the attack originated from, it might be a good idea to block as much of it as possible. If the attacker has a dynamic IP address and you just blocked one IP address, the attacker could return at another time with a slightly different IP and be allowed access. Blocking as much of the attacker’s domain as possible will prevent this.
Counterattack?
Never! Launching an attack is a very bad idea. Doing so could make it impossible to determine the origin of attack. There is a very high probability that the origin is simply some random machine on the Internet that has been compromised. There could be a whole chain of compromised systems that lay in between you and that system. So before you get any ideas of launching a counterattack, remember it’s probably not the correct machine. Launching an assault on a system could land you in seriously hot water. If you feel that something needs to be done, gather as much information about the attacker’s origin and report it to the origin’s service provider or to the authorities.
288 Chapter 9—Security
I N T E R N E T S E C U R I T Y R E S O U R C E S
There are many resources on the Internet that can aid in enhancing the security of a Linux system. One of the main concepts for many Internet sites that provide security information is that security through obscurity does not work. Simply put, there is no real benefit to concealing security weaknesses or tools that exploit them. Having such information easily accessible allows administrators to be prepared. Keeping the lid on things usually results in a situation where the attackers have more knowledge than the administrators, which is a poor environment for security. In this section, we will discuss system updates.
System Updates
Most major distributions post system updates on their Web sites that contain security fixes. An administrator should implement all security-related updates provided by his or her distribution. In addition to resources provided by the distributions, there are other resources on the Internet that provide important information about network security.
CERT
CERT is a research center located at Carnegie Mellon University that was formed after a network worm crippled the Internet in 1988. The CERT site (www.cert.org) contains a wealth of information about past and present security issues. CERT is a major reporting center for exploits and other system weaknesses that are discovered. The main page contains headlines and important security alerts. Each alert contains detailed information about what operating systems are affected. If a method of addressing the problem is found (usually several methods are listed), detailed instructions toward the resolution are provided.
BugTraq
BugTraq is an Internet resource that focuses on alerting administrators to known bugs or exploits and associated fixes or patches. BugTraq exists as a Web site at www.security-focus.com and as an e-mail list that administrators may sign up with in order to receive alerts regarding bugs and other security issues.
Encryption 289
Rootshell
Rootshell.com has information similar to CERT as far as the alerts and other information. At Rootshell, many more of the actual exploits can be found. For example, an alert about the teardrop DoS can be found in addition to the actual code that generates the attack. This gives administrators an opportunity to determine how effective those tools are against their systems.
E N C R Y P T I O N
Encryption is the process of encoding information so that it is difficult for others to read or modify. Encryption has become a very important part of computer security. It is used in a wide range of areas, including password authentication, network security, digital signatures, and e-mail security.
The following passage from the book Applied Cryptography does a wonderful job of describing how encryption enhances security.
“If I take a letter, lock it in a safe, hide the safe somewhere in New York, and then tell you to read the letter, that’s not security. That’s obscurity. On the other hand, if I take a letter and lock it in a safe, and then give you the safe along with the design specifications of the safe and a hundred identical safes with their combinations so that you and the world’s best safecrackers can study the locking mechanism–and you still can’t open the safe and read the letter, that’s security.”
The following topics will be covered in this section:
� General Terminology
� Authentication
� Public Key Encryption
� U.S. Encryption Export Laws

290 Chapter 9—Security
General Terminology
Information that is not encrypted is called plain text. You can encrypt the plain text into ciphertext using an encryption key. The algorithm you use to encrypt the text is called a cipher. A decryption key is used to decrypt the ciphertext back into plain text. The keys are kept secret so that only those holding the keys are able to encrypt or decrypt the message. In symmetric systems, the same key is used as for encryption and decryption. The whole idea of encryption is that it should be difficult or nearly impossible to recover the plain text without the encryption key. In modern cryptography, this is done using complex mathematical algorithms.
Most encryption algorithms are block ciphers. This means that they work on a block of data at a time. The size of this block is called the block size and is typically 8 bytes, or 64 bits. Other algorithms are called stream ciphers. They work on data a byte or a bit at a time. Stream ciphers are more convenient for converting data on the fly. Block ciphers can be made to work like stream ciphers using a process called chaining. Results from the previous block are mixed in to encode each successive block.
The security of encryption methods are often measured by the key length. The key length describes how long the key is that is used to encode and decode the data and is measured in bits. Typical key lengths today range from 40 bits to 1,024 bits. The higher the number of bits, the more difficult it is to break the cipher using a brute-force attack. In a brute-force attack, every possible key is tried. So if you increase the key length, you increase the number of keys that need to be tried. For most algorithms, increasing the key length by 1 bit doubles the amount of time required to try the entire key space. Note that key length comparisons between different encryption algorithms are not valid because each algorithm takes a different amount of time and a different method to attack.
There are other means of attacking a cipher than brute force. The field of cryptanalysis uses mathematics to try to find an easier way to get the plain text from an encrypted message. Most of the common encryption algorithms have stood up well to cryptanalysis, but some have been found to be vulnerable. Another method of attack is to attack the peripheral elements of the encryption system. Some of the most successful of these attacks target the pseudo-random number generator. Random numbers are used to generate encryption keys. If the random number generator is not sufficiently random, an attacker can narrow down the key space to only those keys that the random number generator might select.

Encryption 291
There are many different encryption algorithms available today. The most common is probably DES, the U.S. government’s Data Encryption Standard developed in 1988. It is beginning to show its age, and a new project is underway to develop its successor, the Advanced Encryption Algorithm (AES). Several newer algorithms are also common. The most popular is probably Blowfish, which is faster than DES and is also free of patents and copyrights.
Authentication
Authentication is the process of ensuring that something is what it is supposed to be. The most common use of authentication is logging in to a system using a password. In this case, the password is entered into the password program. The password program takes the password and generates a one-way hash. A one-way hash is an algorithm that takes plain text and generates a number from it, but the generated hash cannot be used to figure out the password. This is how UNIX and NT are able to authenticate your password even though they never store the password itself on the system.
A one-way hash function is sometimes called a digest. One handy use of a digest is to determine whether a file has changed. The md5sum program generates a one-way hash on the contents of a file on your system. While it is possible for an attacker to replace system files without changing their size or date, it is nearly impossible to change the file in a way that would generate the same hash. This way, you can record the hash values for important system files and verify that they have not been changed.

292 Chapter 9—Security
Public Key Encryption
Public key encryption is a form of asymmetric encryption. There are two related keys: a private key and a private key. You allow people to know your public key so that they can encrypt data that is sent to you. You then use your private key to decrypt the message. The two keys are mathematically related so that the decryption process reverses the encryption process. However, the relationship must make it difficult to determine the private key given the public key.
Public key encryption solves one of the problems of traditional encryption–transmitting the keys. If you cannot use a secure channel to exchange the keys, you cannot be sure that nobody has intercepted your key.
You can also use public key encryption for authentication. Instead of (or in addition to) encrypting the data with the receiver’s public key, you can encrypt it with your private key. When the receiver gets the message, he or she can decrypt it using your public key. Since nobody else knows your private key, only you could have signed the message so that your public key can unlock it. This authentication method is often called a digital signature.
The most popular use of public key encryption is the PGP program. It uses a cipher called RSA or another called Diffie-Hillman. These algorithms are more complex than symmetric algorithms, so in practice, the full message is not encrypted using the public key cipher. Instead, the public key cipher is used to encrypt a secret key, which is then used to encrypt the plain text. This system provides the speed advantage of the symmetric algorithm as well as the flexibility of a public key system.
U.S. Encryption Export Laws
At the time of this writing, the regulations pertaining to encryption are undergoing change. Currently, any use of strong encryption (key lengths that are greater than 40 bits for the RC4 method and 512 bits for RSA) is limited in regard to how it’s used or distributed to places outside the U.S. There is much controversy over this law, and some changes are occurring that may allow stronger exportable encryption in the future. Until then, the safest approach is to use weak encryption for any aspect of an implementation that could cross U.S. borders.
There are also patent restrictions on some encryption algorithms. For example, the RSA cipher is patented in the U.S. until September 2000. This means that any use of the algorithm must be licensed. Many countries do not recognize these patents, so they can use software utilizing these patents without worrying about licensing issues.

Security Tools 293
S E C U R I T Y T O O L S
There are many different software tools that allow you to quickly assess security topics, continually monitor aspects of maintaining a secure system, or otherwise enhance the security of the system. The usefulness of any particular tool, or the frequency of its use, will vary between hosts and network environments.
The following tools will be covered in this section:
� Saint
� Secure Shell (SSH)
� tcplogd
� Simple WATCHer (swatch)
� tcpdump
� whois
Saint
Saint is a program that can check a networked system for security weaknesses and has an easy-to-use, Web browser-based interface. When invoked, it begins a series of checks against a host to see what services and settings are vulnerable to attack. The services and settings that Saint tests cover many of the common mistakes and holes that administrators often leave open, or weaknesses remaining after a default installation. Naturally, these security points are the same things attackers try first. An administrator can use the report Saint generates to make any necessary changes. Care should be taken when using Saint so that unintentional scans will not be performed on machines outside of your network. Scanning an unexpecting system with Saint would be seen as an attack, would be considered illegal in many places, and would likely result in a typical security incident response.

294 Chapter 9—Security
Secure Shell (SSH)
Most packets that move across a network do so in unencrypted form. Data or other secure information, such as passwords, can be parsed from the network traffic. There are situations where these can be intercepted, and there is a potential for passwords and other information to be compromised. SSH addresses this problem by creating an encrypted channel from which all data is encrypted between two points. The only real drawback to SSH is that it requires a certain amount of CPU overhead to manage the encryption. It is strongly recommended that the superuser use SSH to perform administration tasks on remote machines instead of telnet. Once set up, SSH isn’t much different than logging in with a telnet session:
$ ssh remote.location
There are a few different versions of SSH now available. The original SSH 1.x was made available under a free license. Then SSH 2.0 was released, and the license restricted commercial and other uses. Some members of the OpenBSD team took the original SSH code and updated it, keeping it under a less restrictive license. Eventually they were able to add in all of the protocols that SSH 2.0 supports. The only thing missing from OpenSSH is support for patented encryption algorithms, such as RSA.
Exercise 9-3: Installing and Configuring OpenSSH
In this exercise, you will download and install the OpenSSH server and client. You will need two machines for this exercise: one server and one client.
The solutions to this exercise are provided in Appendix B at the end of this manual.
1. Download the RPMs from ftp.openssh.com. They are in the /pub/OpenBSD/OpenSSH/portable/rpm directory. (They are also on the ILCD in Supplemental Files, but you should download them over the Internet if possible to get the latest versions.)
.....................................................................................................................................
.....................................................................................................................................
2. Install the RPMs.
.....................................................................................................................................
.....................................................................................................................................

Security Tools 295
3. Start the ssh server daemon on the server system.
.....................................................................................................................................
.....................................................................................................................................
4. Connect to the server from the client using ssh.
.....................................................................................................................................
.....................................................................................................................................
tcplogd
This logging utility watches for activity on any number of predetermined ports and listens for certain types of attacks. It can discern between ICMP attacks, flooding, and portscans, and gives the location of the origin. tcplogd sends its information through syslog, so its output can be used in conjunction with utilities like swatch. tcplogd’s behavior is controlled by the /etc/tcplogd.cf file. After installing the RPM (or whatever method used for the install), it’s a good idea to make sure the following entry is in the configuration file:
trusted {"localhost"}
The trusted definition contains a list of hosts that tcplogd does not log. tcplogd is quite sensitive, and local traffic on the network can result in many false alarms if it is not included in the trusted list. As tcplogd is very sensitive to potential break-ins, take some time to become familiar with its output.
296 Chapter 9—Security
Simple WATCHer (swatch)
swatch is a utility that watches syslog for keywords and then performs some action that is associated with that keyword. It has several methods of triggering alarms and can also be configured to trigger external events. Programs like swatch save an administrator from having to continuously check the system logs for signs of intruders. Configuring swatch involves deciding what services to watch and then adding a configuration line within .swatchrc (default behavior is to look for the configuration file in the directory of the user who invokes swatch). The following is an example of a basic .swatchrc entry. The first field is a keyword to look for in syslog; the second is the action to take:
/warning/ bell
In the above example, any log entry that contains “warning” will cause a bell to sound on the system where swatch is running.
tcpdump
This utility allows an administrator to monitor all packets that are going through a given interface. If an attack is in progress, information about the attacker can be obtained from the output. This is not as effective if used on a busy interface on a system, as there will be a lot of standard traffic scrolling by. Use this with care, as any user information going through the interface will be displayed as well. Invoking tcpdump in the following manner will display all information passing through eth0:
tcpdump -s 1500 eth0
Or, output can be directed to a file and then viewed. On a busy network, this file can get large quickly!
tcpdump -s 1500 eth0 -w filename
For reference, the -s 1500 represents the snaplen, or maximum length of the packet that tcpdump will try to look at. If tcpdump uses a snaplen shorter than the packet length on the network interface (which usually defaults to some small value), garbage will appear on the screen.

Security Tools 297
whois
Log entries associated with intrusion will usually contain a domain name or IP address that points to the location that triggered the log. Having an IP or domain allows an administrator to block as needed with utilities like TCP wrappers, but even more information can be obtained by using whois to look up the owner of the address. The following example shows the type of details a whois request can generate:
# whois Iattacku.com
[rs.internic.net]
Registrant:
Company Name (IATTACKU-DOM)
999 Underside Rock
Some City, UT 22222
US
Domain Name:WWW.IATTACKU.COM
Administrative Contact, Technical Contact, Zone Contact:
Admin, Rand [email protected]
555-555-5555
Billing Contact:
Rand [email protected]
555-555-5555
Record last updated on 12-Oct-98.
Record created on 12-Oct-98.
Database last updated on 7-Apr-99 12:28:52 EDT.
Domain servers in listed order:
NS.AUTONO.NET 209.48.2.11
NS10.AUTONO.NET 206.86.247.30
As you can see, some useful contacts and information can be obtained through a whois request. A whois request could turn up a university or ISP that could then assist from their end to help resolve a security issue.
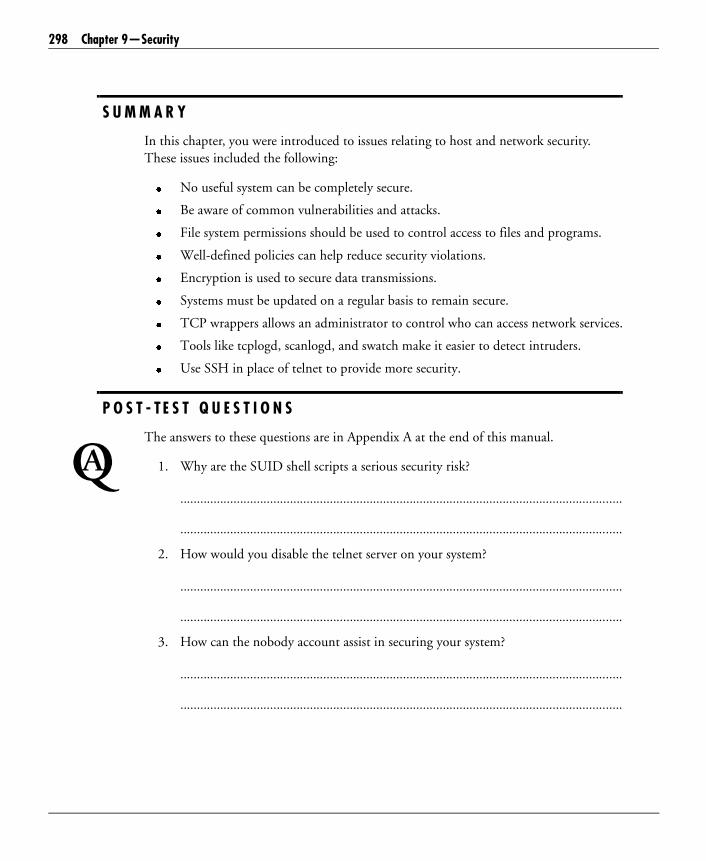
298 Chapter 9—Security
S U M M A R Y
In this chapter, you were introduced to issues relating to host and network security. These issues included the following:
� No useful system can be completely secure.
� Be aware of common vulnerabilities and attacks.
� File system permissions should be used to control access to files and programs.
� Well-defined policies can help reduce security violations.
� Encryption is used to secure data transmissions.
� Systems must be updated on a regular basis to remain secure.
� TCP wrappers allows an administrator to control who can access network services.
� Tools like tcplogd, scanlogd, and swatch make it easier to detect intruders.
� Use SSH in place of telnet to provide more security.
P O S T - T E S T Q U E S T I O N S
The answers to these questions are in Appendix A at the end of this manual.
1. Why are the SUID shell scripts a serious security risk?
.....................................................................................................................................
.....................................................................................................................................
2. How would you disable the telnet server on your system?
.....................................................................................................................................
.....................................................................................................................................
3. How can the nobody account assist in securing your system?
.....................................................................................................................................
.....................................................................................................................................

Post-Test Questions 299
4. What does the /etc/securetty file contain?
.....................................................................................................................................
.....................................................................................................................................
5. Shadow passwords keep the encrypted password information hidden from the users. What permissions should be set on the /etc/shadow file?
.....................................................................................................................................
.....................................................................................................................................

300 Chapter 9—Security

M A J O R T O P I C S
10
System Logs
Objectives .................................................................... 302
Pre-Test Questions....................................................... 302
Introduction ................................................................ 303
Common Log Files ...................................................... 303
Logging Daemons........................................................ 304
Managing Log Files...................................................... 308
Summary ..................................................................... 314
Post-Test Questions ..................................................... 314

302 Chapter 10—System Logs
O B J E C T I V E S
At the completion of this chapter, you will be able to:
� Configure and use system log files to meet administrative and security needs.
� Monitor log files of local and remote systems.
� Manage log files with tools such as logrotate.
� Explain how syslog and klog work.
� Describe the purpose of various log files.
P R E - T E S T Q U E S T I O N S
The answers to these questions are in Appendix A at the end of this manual.
1. What file is used to determine which events get logged to what files?
.....................................................................................................................................
.....................................................................................................................................
2. What is the purpose of log files?
.....................................................................................................................................
.....................................................................................................................................
3. What can be done about log files that become too large?
.....................................................................................................................................
.....................................................................................................................................

Introduction 303
4. What criteria are used to determine which events are logged and where?
.....................................................................................................................................
.....................................................................................................................................
5. Which log file can be considered the catch-all that gets most syslog messages?
.....................................................................................................................................
.....................................................................................................................................
I N T R O D U C T I O N
A typical Linux system is usually doing something at any given moment. It may be updating databases, sending mail, routing packets, or any number of things. If something goes wrong, how can you possibly determine the culprit amidst all of the activity? If you know which process is responsible, is there any more information you can find out about the problem? Log files provide detailed information about the system. If anything significant happens to the system, there is a very good chance that its cause can be found somewhere in the logs. This chapter will give you an idea of how the logs work and how to take advantage of them.
C O M M O N L O G F I L E S
Go to your /var/log directory and look at the messages file. There will be a long list of events (in chronological order), with each line representing an individual log entry. The/var/log/messages file is somewhat of a catch-all for many of the log messages passed by the kernel and programs that generate loggable events. Most errors and system messages can be found in this file. If you don’t find what you are looking for in /var/log/messages, or you need more specific information about a particular process, look for files or subdirectories with the program’s name in the /var/log directory.

304 Chapter 10—System Logs
Another log file is the /var/log/secure file, which contains information specific to the user who is accessing the system, how the user accessed the system, and possible breaches of security. Much of this information is also mirrored in /var/log/messages. By default, all root logins get logged to this file. Depending on your distribution, there may be a /var/log/secure file that is for the results of whatever security strategy your distribution uses. Monitoring security logs is an important part of system security.
Kernel bootup messages get logged to /var/log/dmesg. This file contains information about kernel subsystems and drivers as they load. Often, the drivers will display diagnostic information about each piece of hardware as they load. If a driver cannot load, due to a misconfiguration or hardware problem, you may find some hints as to the cause of the problem in the /var/log/dmesg file. This file can be accessed directly with a text editor or through the dmesg command. The dmesg command prints the boot log when it is invoked.
Invoking the lastlog command will produce a list of all system users and show the port, the machine they were connecting from, and the last time they were logged in to the system. If a user has never logged in to the system, it will be noted in the output. lastlog gets its information from the /var/log/lastlog file. The lastlog file is not in human-readable format; its contents are viewed with the lastlog command.
Some programs have their own directories and can log a great deal of information if they are configured to do so. Daemons, such as httpd, squid, and samba, usually have separate files or directories detailing events specific to the task they are responsible for.
L O G G I N G D A E M O N S
Linux has several methods of logging information into log files. Some programs simply write information out to their own log files. Most programs use a standard API provided by the kernel called syslog. A daemon called syslogd accepts messages from the kernel and decides where each one should go. The kernel itself has its own logging mechanism. The klogd daemon accepts these messages from the kernel and sends them to syslogd.
In this section, we will cover the following topics:
� syslogd
� klogd

Logging Daemons 305
syslogd
In Linux, a standard called syslog dictates how programs send messages through the system. The system libraries that programs use have syslog functions built in. Access to these functions allows programs to produce messages that can be managed by the system. A daemon called syslogd listens for these messages, reformats them, and then dumps them to places defined in the /etc/syslog.conf configuration file.
Syslog is up and running by default in most every distribution available. Its default may very well serve your purposes. However, you may want to make some changes, and there are a few interesting features worth checking out.
There are three parts to the typical syslog.conf entry:
� Facility
� Priority
� Action
The following syntax is used for controlling syslogd’s behavior:
mail.* -/var/log/mail
The first two are at the left-hand side of the entry. They consist of a facility and a priority, separated by a period. Both are keywords used internally by the messaging system. In the previous example, the facility would be mail, with the priority being a wildcard. The example entry will send any (note the wildcard) system message to the location defined in the third entry to the right, in this case, /var/log/mail. The location field is also known as the action.
Besides the three parts of the syslog.conf entry, we will discuss remote logging.

306 Chapter 10—System Logs
Facility
The available logging facilities are:
cron, daemon, kern, local, lpr, mail, news, priv, syslog, user, uucp
Some of these should look familiar as they reflect common system processes. The process you want to log will fall under one of these categories. The program that creates a log entry decides which facility it falls under. Choose one to log specific facilities or a wildcard for any facility.
Priority
The available logging priorities are (in order of increasing severity):
debug, info, notice, warning, err, crit, alert, emerg, panic
These determine the severity of the message. Choose one to log specific priorities or a wildcard for any priority.
Action
The action field determines where the log gets placed.
� A path and filename in the action field creates a log on the local machine.
� An @ in the action field indicates that the log will be sent to another system through the network. The log will go to the network address that immediately follows the @ symbol (there is no space between @ and the address).
That’s all there is to it. Making a small change in a syslog.conf file can direct the logs to another system across the network instead of a file. The next section describes how to enable remote logging on your system.
Remote Logging
Syslogd has a built-in function to allow logs to be passed between systems that are running syslogd. If you are responsible for several systems, the remote logging abilities can be a real timesaver. There are a few steps for setting up remote logging:
1. Make sure syslog is defined in /etc/services for all systems.
2. Configure syslog on each machine to start with remote logging enabled.
3. Edit /etc/syslog.conf on the machines that will be forwarding their logs.

Logging Daemons 307
Look in /etc/services. In order for syslogd to start with remote logging enabled, there should be an entry that looks like the following:
syslog 514/udp
Next, you will need to have syslogd start with remote logging enabled. You will need to ensure that the syslogd program gets invoked with the -r option:
/usr/sbin/syslogd -r
Some distributions may start it with the -r option, but you will need to manually add it in the startup scripts on some distributions.
Finally, modify the /etc/syslogd.conf file. To have the logs sent to another machine, an entry will need to be added that tells syslog where to send them. The following is an example of /etc/syslog.conf on a system that has been configured to send all of its loggable events to another machine:
*.* @some.machine.com
The previous entry will forward all syslog messages to some.machine.com. At the receiving system, the log entries will show up in /var/log/messages with the date, time, and the name of the system that sent it.
One of the primary uses of remote logging is that it allows you to set up a dedicated server that receives all logged events from all systems on the network. This provides an added measure of security because intruders will not be able to cover their tracks unless they are able to compromise the logging server as well. An even more secure method is to have all log events print out on hard copy.

308 Chapter 10—System Logs
klogd
Linux has a logging facility with the sole purpose of listening for messages produced by the kernel. This facility is provided by the klogd system process.
Kernel messages are processed using the following steps:
1. Some part of the kernel performs a system call to create a log entry.
2. The klogd daemon retrieves the message from /proc/kmsg, where the kernel has made it available to external programs.
3. The message’s priority field is converted from the format used by the kernel (a single digit from 0-7) to make it compatible with syslog’s expectations.
4. The message is sent to syslogd, where it is recognized as a kern facility and processed in the same manner as a system log.
M A N A G I N G L O G F I L E S
Log files are desinged to gather information about the system as it runs. These log files are generated in order to provide you with this information. If you never look at the information, it is useless.
When looking at log files, it is important to know what to look for. It is a good idea to periodically look at the log files to establish what a normal system should look like. This way you will be more prepared when you are trying to locate a problem.
The following topics are discussed in this section:
� Logger
� logrotate
� Xconsole

Managing Log Files 309
Logger
The logger program is a simple tool that allows you to place a time-stamped message into your /var/log/messages file. This can be useful when you are about to change something and are unsure of how it will work. If there are problems later on, you will have a convenient reference when you ask yourself, “Why did this stop working?!” Using logger is simple:
$ logger Hmm...What happens when I push this button....
Later, when you check your logs, you will see your message:
Nov. 17 14:19:45 brunr2 brunr: Hmm...What happens when push this button....
Logger makes it very easy to timestamp changes you’ve made to the system, or anything else for that matter.
logrotate
Logs are always collecting information, unless the system is idle with no services in active use. The /var/log/messages file is the target location for many system messages. This file can grow large quickly. If left alone, it would continue to grow in size and become awkward to work with. Many log files grow large over time if they are not managed, so it is good to have tools like logrotate. logrotate does an excellent job of keeping things in order. The logrotate program is a flexible tool that can do many things. If things get too old, they can be automatically deleted after a set time. If they get too large, they can be compressed. If the system is at a remote location, log files can be e-mailed to a remote administrator.

310 Chapter 10—System Logs
You can customize logrotate’s behavior by editing the logrotate.conf file in the /etc directory. The following is an example entry in logrotate.conf:
#Global settings
compress
size=100k
#Individual settings
"/var/log/httpd/access.log" {
mail [email protected]
size=200k
nocompress
endscript }
The first entries in /etc/logrotate.conf are global. All logs will use them unless otherwise specified in a separate entry. The second entry is for a specific log file, in this case, the /var/log/httpd/access.log file. The actions logrotate will take are as follows:
� size
logrotate will process the log(s) once the defined size is reached.
� compress
Log(s) are compacted during processing.
� nocompress
Do not compress during processing.
Log files will be sent to this mailbox once they are processed.
The lower portion of the example logfile.conf defines specific actions for one file, access.log. The definition begins with the location of the log file (or directory full of log files) in double quotes, followed by an open brace. The definition ends with the endscript keyword and then a closing brace. Everything in between is the actions specific to that log file. The changes from the default global settings for access.log caused compression to be disabled and the logs to be mailed to [email protected].
Some logs are more important than others, depending on what function the system serves, i.e., Web server, file server, or multiuser shell access. Being able to manage log files on an individual basis is useful when there are specific things you need to keep an eye on.

Managing Log Files 311
Xconsole
Messages output to the system console usually mean that important, often system-critical events have taken place. Normally, this is adequate for systems operations, but if a graphical login to X has been implemented on a system, these messages will remain unseen. This is where the xconsole utility comes into play. The xconsole program provides a window that outputs all data from the system console. The file associated with the console is /dev/console. For this to work properly from X, this special device file must be readable by the current user, and a chown command may be necessary to ensure this. Normally, xdm and other graphical login programs will handle changing the ownership of the system console. Additionally, a terminal that is capable of outputting the console messages can be accomplished by invoking the following:
# xterm -C
The system console is an important part of maintaining system integrity because it acts as a catch-all for system emergencies. It is highly recommended that you use either xconsole or a dedicated virtual console for these emergency messages.

312 Chapter 10—System Logs
Exercise 10-1: Finding and Accessing Log Files
During this exercise, you will locate some of your system’s log files and learn how to properly parse and access them. The most important directory to note when making use of log files is /var/log. This directory is typically the destination for all system logs, although the syslogd utility allows for redirection to any directory. Being able to access log files is an important ability for any administrator. There are no solutions provided for this exercise.
1. Log in to your machine as root. If you are using X, open a terminal window. Execute the following:
# cd /var/log
This will place you in the directory with your log files. Execute an ls -la to list the files in this directory. These are the various logs from the syslogd and klogd daemons.
2. Search for the destination of kernel messages in the syslogd configuration file by running the following:
# grep kern /etc/syslog.conf
This searches the file for the string “kern” and displays the results. You should receive an output similar to the following:
# Log all kernel messages to the console.
kern.* /var/log/kernmsg
3. Seeing how this log file can grow to be quite large, you only want to parse through the last 50 lines of it. The pipe character (|) is used in this exercise to parse output from one program into another. We want to be able to read all 50 lines from the log, including the ones that would normally scroll past the display. This can be accomplished by executing the following:
# tail -50 kernmsg | less

Managing Log Files 313
4. Lines in standard log files are written in the following format:
date hostname facility: message
If, for example, you found the following line:
Jun 1 16:44:19 aitsu kernel: PCI latency timer (CFLT) is unreasonably low at 32. Setting to 64 clocks.
and you wish to output only the last five lines that contain the string “PCI” from the kernel message log, you can combine the grep functionality with that of tail. Execute the following:
# grep PCI kernmsg | tail -5
5. Use the head command if you want to view the first ten lines of the same log file. Run the following command:
# head -10 kernmsg
6. How can you see a log as it is updated without having to re-run these parsing commands each time? There are actually two typical ways to do this. The first requires that you enter a line like the following:
*.* /dev/tty12
in the /etc/syslog.conf file and perform a killall -HUP syslogd to cause the daemon to reread the configuration file. This sends all logging output to the twelfth virtual terminal, so any time you wish to see the last screen of logs, you can press ALT+F12 to switch to the twelfth virtual terminal.
The second way to view a log as it is written is to use a special command-line parameter of the tail command to follow a log as it grows. The command:
# tail -f /var/log/messages
will not return the prompt after it has run (unlike other tail commands). It will continue to update the display with each line in the log file as it is written. This is a very useful technique for debugging or general system administration.

314 Chapter 10—System Logs
S U M M A R Y
In this chapter, you were introduced to issues that included the following:
� System logs
� Some common log files
� Purpose of logrotate
� Description of the Linux messaging system
� Configuring syslog
� Remote logging
� The logger program
� Xconsole
P O S T - T E S T Q U E S T I O N S
The answers to these questions are in Appendix A at the end of this manual.
1. What type of files would you look through in order to find certain process problems?
.....................................................................................................................................
.....................................................................................................................................
2. If an administrator wanted to find out who was using the system, what file would he or she look at?
.....................................................................................................................................
.....................................................................................................................................

Post-Test Questions 315
3. What logs give a good indication of the overall health of the system?
.....................................................................................................................................
.....................................................................................................................................
4. Is it a good or bad practice to regularly check your logs?
.....................................................................................................................................
.....................................................................................................................................

316 Chapter 10—System Logs

317
Appendix A—Answers to Pre-Test and Post-Test Questions
C H A P T E R 1
Pre-Test Answers
1. Reference books, man pages, README files, HOWTO files, Web pages (especially the Linux Documentation Project at http://www.linuxdoc.org)
2. Linuxconf can be used to manage users, manage storage, configure networking, and set the default runlevel. It can also be used to configure many other system services.
3. So they can review what has been done on a system in order to troubleshoot problems, even if the system is down
4. Use proper password policies; don’t use the root account unless it is necessary for a particular task; keep the console in a secure location; disallow root logins on a per-terminal basis using /etc/securetty.
Post-Test Answers
1. This account has unrestricted access.
2. With the su command, a user can temporarily change his/her effective user ID.
3. For security reasons, the system administrator should not leave a terminal logged in as root unattended.
4. The talk command allows two users to communicate in real-time.
5. Hardware maintenance should be done by an engineer or qualified technician. Other maintenance, such as adding printer paper or changing toner cartridges, can be delegated to other administrative staff.

318 Appendix A—Answers to Pre-Test and Post-Test Questions
C H A P T E R 2
Pre-Test Answers
1. Given a kernel number A.B.C, if B is even, then it is a stable kernel; if B is odd, then it is a development kernel.
2. make config, make xconfig, make menuconfig
3. A kernel module is a component of the kernel (such as a device driver) that can be added to the kernel while it is running.
4. To gain new features or fix bugs by updating to a newer version that is not yet ready for distribution, to add or configure devices that are not in the standard distribution kernel, or to tune a kernel for a specific processor type or server task
5. The kernel controls access to hardware resources and makes them available to programs. It provides the basic functions of the operating system.
Post-Test Answers
1. One type is the set of core files, which must be included in every kernel compilation. Another type is the set of architecture-dependent files, which include files specific to the architecture of the machine the kernel is being compiled for.
2. Compiling the kernel for processor-specific instructions
3. Using modules will decrease the size of the kernel and will allow hardware to be changed without requiring the recompilation of the kernel.
4. zImage must be used on non-i386 architectures and is also limited to a 1-MB uncompressed file size. bzImage is not limited in its file size.
5. It is appropriate to recompile the kernel to incorporate new features, eliminate bugs, or to gain support for new hardware. You should always keep a copy of the most recent, fully functional kernel in case of problems with the new compilation.

Appendix A—Answers to Pre-Test and Post-Test Questions 319
C H A P T E R 3
Pre-Test Answers
1. A package is a collection of files combined into a single file. It may be installed on a system to provide one or more programs, along with all the files required for the operation of those programs. Packages also typically contain dependencies referring to other packages that must be installed in order for the programs to work. (Tarballs do not generally contain this dependency information.)
2. RPM, DEB, tarballs
3. A shared library is a file containing commonly used program code that can be shared by several programs. It only needs to be loaded into memory in one location, and all programs will use that same location to access the code.
4. Unpack, configure, compile, and install with the following commands:
tar xfz package-x.y.z.tar.gz
cd package-x.y.z
./configure
make
make install
Post-Test Answers
1. Although a package may contain a number of files, it also has installation, uninstallation, configuration, and dependency details that are read by the package manager to perform extended operations.
2. A dependency is a package that is required by another package for it to function properly. If one attempts to install a package with an unresolved dependency, the installation will halt, and that package may not be installed (without forcing) until its dependencies are resolved. If forced, the package may not function.
3. rpm -qf <filename> and dpkg -S <filename>, respectively
4. A source package is a package that contains the source code and instructions to pass to the package manager in order for it to be compiled and installed in binary form. A prohibitive distribution license is one reason a source package would be created.
5. You would need to run the ldconfig command to rebuild the system’s shared library location database in order to verify that your new library could be located by an application. The ldd <filename> command would tell you which shared libraries the target binary requires.

320 Appendix A—Answers to Pre-Test and Post-Test Questions
C H A P T E R 4
Pre-Test Answers
1. The kill command does not actually kill processes. It sends a signal to a process. Some signals may be handled by a process so it can react to the signal. If a signal is not handled, the operating system determines what to do with it. Some signals cannot be handled, and the kernel always decides what to do with it. Signal 9 is one such signal, and the kernel terminates the process when it receives that signal.
2. ulimit -c 0
3. Use either the free command or cat /proc/meminfo.
4. A daemon is a program that runs in the background and provides a system service. It waits for something to happen that it can respond to.
5. Daemons usually run as root or some other privileged user. If the program can be tricked into overflowing an internal buffer, it may overwrite parts of the program, causing the program to run erratically. In some cases, the program can be tricked into writing to specific files, and the daemon will be able to write to any file that the owner of the daemon can.
Post-Test Answers
1. The a.out program forked a child process, which died immediately (looking at the start times of both 14463 and 14464), and the parent has not yet done the cleanup and is busy doing something else (its CPU usage is 99%). Thus, the death of the child is not properly cleaned up by the parent.
2. killall -hup xyzd (You could also run ps to find the PID of the xyzd daemon and kill -hup that PID.)
3. killall -STOP make
4. sa -n (The first command listed will be the one that has run the most; the totals will appear on the first line.)
5. renice 0 <pid>

Appendix A—Answers to Pre-Test and Post-Test Questions 321
C H A P T E R 5
Pre-Test Answers
1. ext2fs, vfat, iso9660, proc, smbfs, nfs (You can use cat /proc/filesystems to see what types your kernel supports. See the mount man page for a larger list of file systems.)
2. fdisk (Other commands available are cfdisk, sfdisk, and GNU parted.)
3. Quotas limit the amount of disk space that a user may use.
4. /etc/fstab
Post-Test Answers
1. You must create a file system on the disk.
2. When you run the rm command, you are only removing a link to the file. Once the kernal sees that there are no links to the file, it will delete the file. The user never actually deletes a file.
3. Soft quota limits allow the user to exceed quota for a certain period of time. Hard quota limits do not allow a user to exceed quotas at all.
4. Samba is used to integrate Linux systems with existing Microsoft Windows-based networks.
5. The purpose of the cache is to improve performance by replacing data accesses to disk, as the kernel will frequently find the data it wants in the cache.

322 Appendix A—Answers to Pre-Test and Post-Test Questions
C H A P T E R 6
Pre-Test Answers
1. Edit the /etc/passwd and /etc/groups files. You should also create the user’s home directory and assign ownership of it to the new user. If shadow passwords are enabled, you will need to edit the /etc/shadow file as well. (However, you should always use the tools available instead of doing things by hand, because if some things are done using the tools and some are done by hand, things may become inconsistent.)
2. Use the chfn command.
3. /etc/skel
4. /etc/profile, everything in the /etc/profile.d directory, /etc/bashrc, ~/.bash_profile, ~/.bashrc
5. bash: export; tcsh: setenv
Post-Test Answers
1. It is a method that allows multitasking by offering several consoles (prompts) on a single physical device (monitor).
The tty command will return a different string for each virtual terminal.
2. Switch to a different virtual terminal and use the sane or reset command, or kill the login shell for the hung terminal, depending on the circumstances.
3. It sets terminal-line characteristics, which allows login to prompt users for their name and password.
4. Use the stty command.
5. The SGID bit may be set by setting the system permission to the following:
chmod 4770 filename
You would set this bit when any files created in the directory need to have their group owner set to that of the directory rather than their creating user.

Appendix A—Answers to Pre-Test and Post-Test Questions 323
C H A P T E R 7
Pre-Test Answers
1. minute, hour, day of month, month, day of week
2. crontab -e
3. Use the at command.
4. crond (The cron daemon is named crond on some systems and cron on others.)
5. Verify that it can be restored.
6. Advantages: Only need backup hardware on one machine; centralized backup administration
Disadvantages: Lots of network traffic; data may not be secure while traveling over the network
7. cpio, tar, and dd
8. Any two of the following:
tar xfz xyz.tar.gz
zcat xyz.tar.gz | tar xf -
gzip -dc xyz.tar.gz | tar xf -
gunzip -c xyz.tar.gz | tar xf -

324 Appendix A—Answers to Pre-Test and Post-Test Questions
Post-Test Answers
1. A, B, and E. A is valid; it will run once every minute. B is a valid comment, although it is confusing because it does not list the fields properly. C is not valid because there is no hour that is equal to 2 but divisible by 4. D is not valid because there is no month 0. E is valid, but note that it will run at 1:01 A.M. on January 1st and 1:01 A.M. every Monday in January. F is invalid because there is no 13th month of the year. G is not valid because it has an extra asterisk after the five time fields.
2. A, F, G, H, I, J, and K. B and D are invalid because they do not specify a time. C is not valid because last is not a valid keyword for the at command. E is invalid because you must specify the time before the date.
3. 0 1 */10 * 2 uptime
4. Use two separate lines in the crontab:
23 1 * * 1 program-name
34 2 * * 2 program-name
5. Three (Sunday, Monday, and Tuesday); if you used differential backups, you would not need the Monday tape
6. One backup utility is cpio. An example might be:
cpio -ivcdmB -I /dev/ftape '/etc/init.d'
7. You should always back up the /etc, /var, and /home directories.
C H A P T E R 8
Pre-Test Answers
1. It goes into the printer spool, usually in some subdirectory of /var/spool/lpd.
2. printtool
3. Samba
4. Windows-only printers; they use a proprietary control language and offload the majority of the work required to print to the PC. It is theoretically possible to write Linux filters or drivers for these printers, but it would be quite difficult, and the information on the control languages is not readily available.
5. lpc topq laser1 3 1 2
Post-Test Answers
1. lprm -P admin -
2. As root, lpc status admin
3. lpq or lpq -P admin
Appendix A—Answers to Pre-Test and Post-Test Questions 325
C H A P T E R 9
Pre-Test Answers
1. Disable them in /etc/inetd.conf.
2. PAM gives the system administrator more flexibility in configuring authentication methods for programs that require authentication and separates the authentication schemes from the programs.
3. in.ftpd: bad.people.com
4. Joe can read or write to the file. Anyone in the group user can read the file. Root can do whatever he/she wants to the file. Everybody else has no access to the file.
5. The attacker will be able to access files that the user nobody has access to. Hopefully, no files on the system will be owned by nobody, so the attacker will not have gained any further access.
Post-Test Answers
1. SUID on a shell script is dangerous because an attacker can use that script to gain root access.
2. Place a comment in front of the telnet definition in /etc/inetd.conf. Then run killall -HUP inetd to restart inetd.
3. Nobody can be given ownership of system services so that any attacker who uses buffer overflows will gain access at nobody instead of root.
4. The /etc/securetty file lists the TTYs (terminals) that root is allowed to log in from.
5. The /etc/shadow file should be readable only by root and writeable by no users.
326 Appendix A—Answers to Pre-Test and Post-Test Questions
C H A P T E R 1 0
Pre-Test Answers
1. The /etc/syslog.conf file is used to control which files events get logged to.
2. To record events so that any changes or problems in the system can be tracked
3. Use logrotate to remove older log entries to another file.
4. Facility (the subsystem that generated the message) and priority (severity of the problem)
5. The catch-all file is /var/log/messages (or syslog).
Post-Test Answers
1. Look for a file or subdirectory in the /var/log directory.
2. Look at /var/log/secure.
3. Look at /var/log/messages.
4. It is good to review the log files on a regular basis to look for discrepancies or problem areas.

327
Appendix B—SolutionsC H A P T E R 1
Exercise 1-1
1. Log in as a normal user on your system. We will refer to this user as username in the examples from now on.
a. What is your working directory? What is your search path?
$ pwd
/home/username
$ echo $PATH
/usr/local/bin:/usr/bin:/usr/X11R6/bin:/home/username/bin
b. Enter the following command:
$ su
Supply the root user password when prompted.
What are the values of your working directory and search path now?
$ pwd
/home/username
$ echo $PATH
/usr/local/bin:/usr/bin:/usr/X11R6/bin:/home/username/bin
c. Enter the following commands:
# exit
$ su -
and supply the root user password when prompted.
What are the values of your working directory and search path now?
$ pwd
/root
$ echo $PATH
/bin:/sbin:/usr/bin:/usr/sbin:/usr/local/bin:/usr/local/sbin:/usr/bin/X11:/usr/X11R6/bin:/root/bin

328 Appendix B—Solutions
d. Enter the following command:
# su username
What are the values of your working directory and search path now?
$ pwd
/root
$ echo $PATH
/bin:/sbin:/usr/bin:/usr/sbin:/usr/local/bin:/usr/local/sbin:/usr/bin/X11:/usr/X11R6/bin:/root/bin
e. How many shells are you running? Can you prove it?
After the second su command (to username), you will be running three shells:
� Your original login shell
� Shell resulting from su to root
� Shell resulting from su to username
$ ps as
....
will show all of the shells you are running.
2. Create a new user on the local machine using linuxconf.
a. Create a new user called henry. (This answer is provided for linuxconf.)
Select Users accounts | Normal | User accounts, then select Add; fill in the fields on the User details form. You should be prompted to supply a new password at this point. Choose the password option from the list currently showing no password; fill in the password when prompted.
b. Test your new user account.
If all went well, you should be able to both su into and log in as user henry.
c. Experiment with user privileges.
Only root can run shutdown to shut down the system.
d. What can you do to reboot the system without logging out again (pressing CONTROL+ALT+DELETE is not the solution we are looking for)?
Try the following command:
$ su root -c shutdown –r now
password:

Appendix B—Solutions 329
3. What do the following commands do, and which ones require a password?
$ su
Switches to root without modifying the environment; password is required as we started as normal user ($ prompt gives that away).
# su - henry
Switches to henry; gets his environment; password is not required as we are currently logged in as root.
$ su -
Switches to root; gets root’s environment; password is required.
# su - lp -c lpsched
Switches to user lp to run lpsched; uses lp’s environment; password is not required; once lpsched has finished, we are back to root’s ID.
# exit
$ su root -c "rm /tmp/.lock321"
Exits the root account and becomes henry again. Switches to user root to remove an invisible lock file. Password is required as we are a normal user ($ prompt).
Exercise 1-3
1. To get help on the passwd command:
$ man passwd
Modify your man command so that a description of the passwd file rather than the passwd command is displayed.
Use the following command to display the manual page for /etc/passwd:
$ man 5 passwd
2. Find out which pager program is being used by man and modify your environment to use the other one (i.e., if it is using less, change to use more and vice versa).
man uses more unless the PAGER environment variable is set. To use less, enter the following:
$ PAGER=less
$ export PAGER
3. Find which commands from section 1 have anything to do with editing:
$ apropos edit | grep '(1)'

330 Appendix B—Solutions
Exercise 1-4
1. Find all of the directories on the system that are owned by henry:
$ find / -user henry -print l
2. Find all of the files in /usr/bin and /sbin that are owned by root and are greater than 100,000 characters:
$ find /usr/bin /sbin -user root -size +100000c -print
3. Modify your previous find command to identify the contents of each file found:
$ find /usr/bin /sbin -user root -size +100000c \
-exec file {} \;
The backslash at the end of the first line is known as a continuation character. Backslash is used by the shell to stop interpreting the character that follows as a special character. In this case, we run out of line. If we typed <CR> (carriage return), the shell would think we’ve finished our command. By preceding the <CR> character with the backslash, we achieved the screen functionality of carriage return, but our shell did not interpret it as end-of-command-line.
4. What do the following find commands mean?
a. # find . -print
The find command requires a starting directory and one or more switches. If no switch is specified, -print is the default (in modern versions). Older versions would not print if not asked to, so removing the print switch would find everything, then do nothing. So this find command starts in the current directory and prints what it finds–in this case, everything from the working directory and subdirectories.
b. # find /etc -type d -print
Starting in /etc, it finds files of type d (directory) and prints them to standard output.
c. # find /home -name .bash_profile -exec more {} \;
Starting in /home, it finds files with name .bash_profile and executes more {} /;. The -exec switch causes the stated command to be executed on each file found; {} is replaced with the file found. The -exec switch requires a /; at the end.

Appendix B—Solutions 331
d. # find /dev -type f -mtime -7 -exec ls -l {} \;
Starting in /dev, it finds files of type f (file, not directory) modified in the past 7 days.
The -mtime option is explained in the find man page:
-mtime n
File's data was last modified n*24 hours ago.
The n variant to the find command is also explained in the find man page:
Numeric arguments can be specified as
+n for greater than n,
-n for less than n,
n for exactly n.
For each file found, execute an 1s -1 on the found file.
e. # find /sbin /usr/sbin -name "user*" -exec ls -ld {} \;
The find command accepts a list of paths to search, so it performs the search in the /sbin and /usr/sbin directories. It will find a file whose name begins with user and will execute 1s -1d on the found file.
C H A P T E R 3
Exercise 3-1
1. Use mount to mount the CD-ROM:
# mount /mnt/cdrom
2. Use cd to navigate to the directory containing grip:
# cd /mnt/cdrom/SupplementalFiles
3. Use rpm with either the -i or --install option and the -vh switch:
# rpm -ivh grip-2.94-1.i386.rpm
or
# rpm --install -vh grip-2.91-1.i386.rpm
Exercise 3-2
1. Use the rpm command with the -q option:
$ rpm -q grip
2. Use the rpm command with the -qa option:
$ rpm -qa

332 Appendix B—Solutions
3. Use the rpm command with the -qi option and the name of the package:
$ rpm -qi grip
A good example for this last command is to use it on the actual rpm command:
$ rpm -qi rpm
4. $ rpm -Va
Exercise 3-3
Use the rpm command with the verify option combined with -vv:
$ rpm -Vvv grip
The first line of the output will contain the location of the RPM database. The default setting for the database is /var/lib/rpm/.
Exercise 3-4
dpkg
1. # dpkg -i zsh_3.1.2-10.deb
or
# dpkg --install zsh_3.1.2-10.deb
2. # dpkg -r zsh_3
# dpkg --purge zsh_3
3. # dpkg -l pattern
or
# dpkg --list pattern
dselect
1. As the root user, run dselect from the command prompt.
2. Select the 0. [A]ccess option from the main dselect menu and select CD as the media type.
3. Choose the 1. [U]pdate option from the main dselect menu. From here, you will be presented with options as to where to update the available package listing from.
4. Select the 5. [I]nstall option from the main dselect menu, and the utility will automatically install any selected packages.

Appendix B—Solutions 333
C H A P T E R 5
Exercise 5-1
These operations are permitted:
$ more file1
$ ls -l > file1
$ more /etc/passwd
$ rm file3
$ cp file1 file4
Exercise 5-2
1. /dev/hda1 /home ext2 defaults,usrquota,grpquota 1 2
2. # edquota -p tempuser -g tools
3. # repquota -a
4. This service is provided by the rquotad daemon.
Exercise 5-3
Write down the commands to perform the following:
1. Create an ext2 file system on a 200-MB disk hda5:
# mkfs -t ext2 /dev/hda5 400000
HINT: If you have problems converting blocks to kilobytes or megabytes, use the df command, pick up a size in blocks for a particular partition, then run df -k, which gives the size in kilobytes. That will show you the conversion factor.
2. Mount this file system on /usr:
# mount -t ext2 /dev/hda5 /usr
3. Create an ext2 file system on a 150-MB disk hda6:
# mkfs -t ext2 /dev/hda6 300000
4. Mount this file system on /usr/lib; notice that the /usr/lib directory must already exist.
# mkdir /usr/lib
# mount -t ext2 /dev/hda5 /usr/lib

334 Appendix B—Solutions
5. Create a minix file system on a 100-MB disk slice hdb2 and mount on /home:
# mkfs -t minix /dev/hdb2 200000
# mount -t minix /dev/hdb2 /home
6. Unmount all three file systems; notice that you must unmount /usr/lib before you can unmount /usr.
# umount /home
# umount /usr/lib
# umount /usr
Exercise 5-4
Given this lost+found directory, which command(s) would you use to identify the contents of each file?
# cd /home/lost+found
# file *
000541: ASCII text
000872: commands text
001065: iAPX 386 executable not stripped
001085: C source code
001461: data
� To identify file 000541?
Read it: less, more, tail, vi, cat
� To identify file 000872?
Read it: less, more, tail, vi, cat
� To identify file 001065?
Don’t execute; use strings command
� To identify file 001085?
Read it: less, more, tail, vi, cat
� To identify file 001461?
Use od command (which stands for octal dump)

Appendix B—Solutions 335
Exercise 5-5
1. # tune2fs -c 20 /dev/hda3
2. # fsck.ext2 -c /dev/hda2
or
# badblocks /dev/hda2 65535
3. # fsck -NA
4. # fsck -t vfat -CVr /dev/hda3
Exercise 5-6
1. What command will mount /usr/share from mash4077 on the local mount point /usr/share?
# mount -o bg,soft,int mash4077:/usr/share /usr/share
2. Fill in the mount options for these two /etc/fstab files:
# grep home /etc/fstab
rosies:/home/rosies /home/rosies nfs
soft,bg,intr 0 0
# rsh rosies grep home /etc/fstab
mash4077:/home/hawkeye /home/hawkeye nfs
soft,bg,intr 0 0
C H A P T E R 6
Exercise 6-1
1. Add a user called frank:
# useradd -m frank
2. Add a user called radar specifying the Korn shell:
# useradd -m -s /bin/ksh radar
3. Add a user called klinger using home2/klinger as the home directory:
# useradd -m -d /home2/klinger klinger
4. Add a user called mulcahy specifying a UID of 400 and a group of staff:
# useradd -u 400 -g staff mulcahy
5. Modify the user frank to use the korn shell:
# usermod -s /bin/ksh frank
6. Modify radar to give him a new UID of 401:
# usermod -u 401 radar

336 Appendix B—Solutions
Exercise 6-2
1. Add a password for user frank:
# passwd frank
2. Force frank to change his password at next login:
# passwd -f frank
3. Enable password aging for trapper (min 21 max 31 warn 7):
# chage -m 21 -M 31 -w 7 trapper
4. Set the expiration date for hawkeye to 31 Dec 1999:
# usermod -e 12/31/99 hawkeye
5. Lock henry’s account:
# chage -E 01/01/99 henry
6. Now unlock henry’s account:
# chage -E 0 henry
Exercise 6-3
1. Use useradd to add a new user called hawkeye (full name Pierce) with a user ID of 318. Don’t forget to use the -m option to create the user’s home directory.
# useradd -u 318 -c Pierce -m hawkeye
Set a password for this account and force this password to expire the next time the user logs in:
# passwd hawkeye
password:
retype password:
# chage –m 0 –M 1 –W 2 hawkeye
Test your new account first by using su and then by logging out and back in again as the new user hawkeye:
#su -hawkeye
$ pwd
2. Correct the full name for user hawkeye to be B F Pierce and give him a /bin/bash as his login shell:
# usermod -s /bin/bash -c "B F Pierce" hawkeye
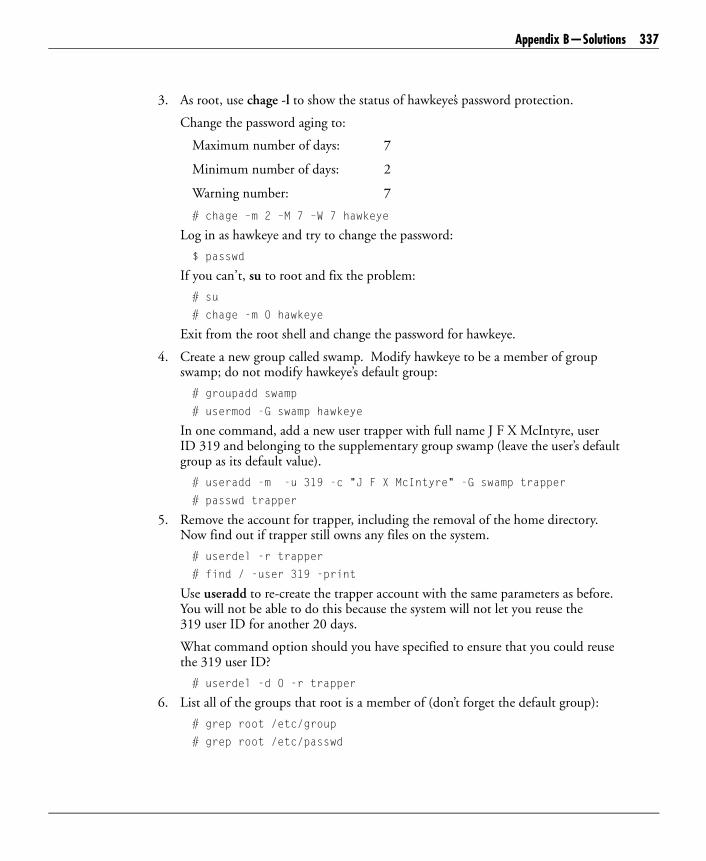
Appendix B—Solutions 337
3. As root, use chage -l to show the status of hawkeye’s password protection.
Change the password aging to:
Maximum number of days: 7
Minimum number of days: 2
Warning number: 7
# chage –m 2 –M 7 –W 7 hawkeye
Log in as hawkeye and try to change the password:
$ passwd
If you can’t, su to root and fix the problem:
# su
# chage -m 0 hawkeye
Exit from the root shell and change the password for hawkeye.
4. Create a new group called swamp. Modify hawkeye to be a member of group swamp; do not modify hawkeye’s default group:
# groupadd swamp
# usermod -G swamp hawkeye
In one command, add a new user trapper with full name J F X McIntyre, user ID 319 and belonging to the supplementary group swamp (leave the user’s default group as its default value).
# useradd -m -u 319 -c "J F X McIntyre" -G swamp trapper
# passwd trapper
5. Remove the account for trapper, including the removal of the home directory. Now find out if trapper still owns any files on the system.
# userdel -r trapper
# find / -user 319 -print
Use useradd to re-create the trapper account with the same parameters as before. You will not be able to do this because the system will not let you reuse the 319 user ID for another 20 days.
What command option should you have specified to ensure that you could reuse the 319 user ID?
# userdel -d 0 -r trapper
6. List all of the groups that root is a member of (don’t forget the default group):
# grep root /etc/group
# grep root /etc/passwd

338 Appendix B—Solutions
Exercise 6-4
1. Create a directory called /home/skeleton, which contains all of the files in /etc/skel (note that there will be hidden files in /etc/skel). Create two empty files called footlocker and uniform in /home/skeleton:
# mkdir /home/skeleton
# cd /etc/skel
# cp -r ./* /home/skeleton
# cd /home
# touch footlocker uniform
Create a new account for frank (full name F M Burns, user ID 320) with a skeleton directory of /home/skeleton. Verify that the correct files are in /home/frank:
# useradd -u 320 -c "F M Burns" -m -k /home/skeleton frank
# ls -a /home/frank
2. Add a new account for hotlips (full name M Houlihan, user ID 321) but do not make the home directory:
# useradd -u 321 -c "M Houlihan" hotlips
Set a password for hotlips’ account and verify the account with the following:
# su - hotlips
# pwd
What is your working directory shown by the last command? Why isn’t this /home/hotlips?
The directory will not have changed as /home/hotlips does not exist.
Log out and try and log in as hotlips–you will not be able to do so because the home directory doesn’t exist.
Log in as root and manually create the home directory for hotlips using /home/skeleton as a skeleton directory:
# mkdir /home/hotlips
# cd /home/skeleton
# cp -r * .* /home/hotlips
# chown -R hotlips /home/hotlips
# chgrp -R staff /home/hotlips
Log in as hotlips and verify that you can put something in your footlocker (i.e., edit the footlocker file).

Appendix B—Solutions 339
3. Change the user ID for frank to 322:
# usermod -u 322 frank
Now enter the command:
# ls -al /home/frank
Does everything look correct or did you forget to do something?
You didn’t change the ownership on all of frank’s files.
# find / -user 320 -exec chown frank {} \;
or
# find / -user 320 -print | xargs chown frank
Exercise 6-5
/etc/profile and /etc/bashrc
Exercise 6-6
1. Use useradd to add a new user called shutdown, which calls the /sbin/shutdown program as its login shell. Note that shutdown must be run from the root directory (/) and must be run by root (user ID 0). Make sure you can shut down the system simply by logging in to this account.
You will need to use the -o option for useradd when specifying a user ID of 0 (look in the man page):
# useradd -u 0 -o -d / -c "Shutdown" -s /sbin/shutdown shutdown
# passwd shutdown
password:
retype password:
2. Add a new user called date that calls the /bin/date program:
# useradd -d /tmp -s /bin/date date
Set a password for this account and test the account using su:
# passwd date
# su date

340 Appendix B—Solutions
3. Log in as henry and find out your default value for umask. Where is umask being set?
The umask can be set in one of three places, shown below in priority order, highest first:
$HOME/.bash_profile
/etc/profile
/etc/default/login
Which file permissions do you think you would want to use as a default when creating files?
Using a umask of 022 or 077 is preferred when creating files.
Set the umask accordingly so that the next time you log in this will be your default umask.
Edit .bash_profile.
What is odd about the permissions on the file um770?
This file grants read/write access to everyone except the owner and members of the same group as the file. In other words, you can’t read or modify the file, but everyone else can!
Exercise 6-7
1. Modify hawkeye’s environment so that he cannot change or delete his profile:
# chown root /home/hawkeye/.bash_profile
# chmod u=rw,og=r /home/hawkeye/.bash_profile
# chmod +t /home/hawkeye
Exercise 6-8
The prompt now displays the hostname reversed (black lettering on white screen color), followed by a colon, the current directory (full path), and a colon, which are not reversed.

Appendix B—Solutions 341
Exercise 6-9
1. Change the login defaults so that the systemwide umask is 077. Make sure that /etc/profile does not override this value and verify your changes.
Add a UMASK=077 line to /etc/default/login and delete any umask lines in /etc/profile.
2. Log in as henry and write down the settings for the following special keys described by stty:
$ stty -a
erase? ^H
intr? ^C
kill? ^U
eof? ^D
Change your interrupt key to be CONTROL+A and your kill key to be CONTROL+B:
$ stty intr ^A kill ^B
Enter a partial command line and type CONTROL+C. What happened?
The CONTROL+C was inserted into the line as it no longer generates an INT signal.
Now type CONTROL+A; what happened this time?
The command was aborted and the prompt re-issued; CONTROL+A now generates an INT signal.
Enter a partial command line and type CONTROL+B. What happened?
The line was abandoned, and you can now restart the command on a new line. Note that the prompt is not re-issued.

342 Appendix B—Solutions
3. Log in as henry and determine your quit character (it is probably CONTROL+BACKSLASH):
$ stty -a
Run the following command, which should take a long time. Press the quit key at any time:
$ ls -lR /
Look at the size of the core file that was generated.
The file should be fairly large (around 150,000 bytes).
Now enter the following commands:
$ rm core*
$ ulimit -c 0
Now try the first part of the question again and notice the different core file size.
This time the core file should have zero size.
4. What is your terminal type set to?
$ echo $TERM
Enter the following commands:
$ OTERM=$TERM
$ TERM=wyse50
$ vi
:q! # quit out of vi as everything has gone wrong
$ TERM=$OTERM
Why was vi unable to draw the screen correctly?
The terminal type was incorrect, and vi used the wrong escape sequences to clear the screen, move the cursor, etc.
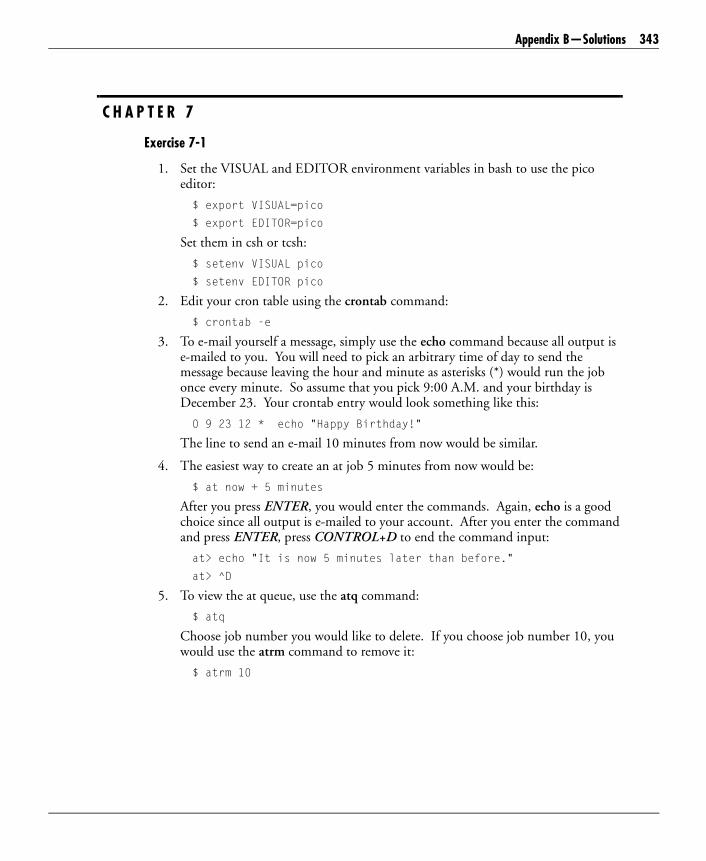
Appendix B—Solutions 343
C H A P T E R 7
Exercise 7-1
1. Set the VISUAL and EDITOR environment variables in bash to use the pico editor:
$ export VISUAL=pico
$ export EDITOR=pico
Set them in csh or tcsh:
$ setenv VISUAL pico
$ setenv EDITOR pico
2. Edit your cron table using the crontab command:
$ crontab -e
3. To e-mail yourself a message, simply use the echo command because all output is e-mailed to you. You will need to pick an arbitrary time of day to send the message because leaving the hour and minute as asterisks (*) would run the job once every minute. So assume that you pick 9:00 A.M. and your birthday is December 23. Your crontab entry would look something like this:
0 9 23 12 * echo "Happy Birthday!"
The line to send an e-mail 10 minutes from now would be similar.
4. The easiest way to create an at job 5 minutes from now would be:
$ at now + 5 minutes
After you press ENTER, you would enter the commands. Again, echo is a good choice since all output is e-mailed to your account. After you enter the command and press ENTER, press CONTROL+D to end the command input:
at> echo "It is now 5 minutes later than before."
at> ^D
5. To view the at queue, use the atq command:
$ atq
Choose job number you would like to delete. If you choose job number 10, you would use the atrm command to remove it:
$ atrm 10

344 Appendix B—Solutions
Exercise 7-2
1. All files and directories under the current directory are archived on the tape device.
2. A list of all files archived on the tape device is printed.
3. The archive stored on tape is restored under /tmp.
4. All files under /etc, /home, and /var are archived to tape.
5. The etc/init.d file is retrieved from the archive stored on tape.
Exercise 7-3
It is a four-step process:
1. Insert the disk to be copied.
2. $ dd if=/dev/fd0 of=/tmp/fd.image
3. Change floppy disk (insert blank).
4. # dd if=/tmp/fd.image of=/dev/fd0
Exercise 7-4
1. $ tar cf bin.tar /bin
2. $ gzip bin.tar (which will create the bin.tar.gz file)
3. $ compress bin.tar (which will create the bin.tar.Z file)
4. $ tar cfz bin.tar.gz
5. $ gunzip bin.tar.gz; uncompress bin.tar.gz
6. $ tar xf bin.tar
7. $ tar xfz bin.tar.gz, tar xfz bin.tar.Z
Exercise 7-5
2. Change to the /usr directory and back up the dict directory to floppy disk using tar. The floppy disk device is /dev/fd0.
# cd /usr
# tar cvf /dev/fd0 dict
Why do you think you were asked to change directory and back up dict as two separate actions?
So that you can back up /usr/dict using a relative pathname.
How would you verify that the backup worked?

Appendix B—Solutions 345
Take a table of contents using:
# tar tvf /dev/fd0
Restore the backup into the /tmp/dict.tar directory:
# mkdir /tmp/dict.tar
# cd /tmp/dict.tar
# tar xvf /dev/fd0
3. Repeat the previous backup and restore using cpio (restore to /tmp/dict.cpio):
# cd /usr
# find dict -print | cpio -ocv >/dev/fd0
# cpio -itvc </dev/fd0
# mkdir /tmp/dict.cpio
# cd /tmp/dict.cpio
# cpio -ivcdum </dev/rfd0
4. If you didn’t know what format of data was written to the floppy disk, how would you find out?
Take a table of contents using tar and cpio. Whichever one works tells you the type of backup on the media. Alternatively, you could copy a block off of the media using dd and run the file command on the partial data file. For example:
# dd if=/dev/fd0 of=/tmp/unknown
# file /tmp/unknown
Exercise 7-6
1. Repeat the backup operations from steps 2 and 3 in Exercise 7-5, first using tar and then cpio, but time the operation using the time command as in the following examples:
# cd /usr
# time tar cvf /dev/fd0 dict
# time (find dict -print | cpio -ocv >/dev/fd0)
Why do you think we used parentheses in the second example?
To group the find and cpio commands together; otherwise, the time would have only applied to the find command.
2. Repeat the two backups again, but this time output to files /tmp/tar and /tmp/cpio rather than to the floppy disk:
# cd /dict
# tar cvf /tmp/tar dict
# find dict -print | cpio -ocv >/tmp/cpio

346 Appendix B—Solutions
Repeat again, but this time make tar and cpio write to standard output, pipe this through the compress command, and redirect the whole thing to files /tmp/tar.Z and /tmp/cpio.Z. The following examples show what is required:
# cd /dict
# tar cvf - dict | compress >/tmp/tar.Z
# find dict -print | cpio -ocv | compress >/tmp/cpio.Z
Now compare the sizes of all four archive files:
# ls -l /tmp/tar* /tmp/cpio*
3. How would you back up all of the files that have been modified since /home/backup was created?
# cd /
# find . -newer /home/backup -print | cpio -ocv >device
Exercise 7-7
1. Put the floppy disk containing a backup into the disk drive and enter the following commands:
# dd if=/dev/fd0 count=1 of=/tmp/fd
# file /tmp/fd
What do you think you have just done?
Read a single block from the floppy into a file called /tmp/fd and used file to determine the file contents. In other words, you have determined the type of archive written to the floppy.
2. Format your floppy disk with a DOS file system:
# mformat /dev/fd0
Copy the hosts file onto this floppy disk. Take a directory listing to prove it’s there:
# mcopy /etc/hosts a:
# mdir a:
Now copy this file back to /tmp and call it DOS.hosts. Look at this file to make sure it’s valid:
# mcopy a:hosts. /tmp/DOS.hosts # note the . in the source file
Copy the entire floppy disk to a file called /tmp/dos.fd:
# dd if=/dev/fd0 of=/tmp/dos.fd
Enter the following command to corrupt the DOS diskette:
# dd if=/usr/bin/date of=/dev/fd0

Appendix B—Solutions 347
Can you get a DOS directory listing from the floppy disk?
# mdir a:
This should fail.
Now copy your floppy disk image from /tmp/dos.fd onto the floppy disk:
# dd if=/tmp/fd of=/dev/rfd0
Can you get a DOS directory listing from the floppy disk now?
# mdir a:
This should work.
C H A P T E R 8
Exercise 8-1
1. Working on the print server, verify that you can send data to the printer and that it prints:
# date >/dev/lp0
2. On the print server configure the local printer using printtool:
# printtool
Follow directions in GUI.
Print a small test job (the /etc/passwd file is a good test):
# lpr /etc/passwd
3. On a client, add a network printer using printtool:
# printtool
Follow directions in GUI and call the printer netprinter.
Print a small test job (the /etc/passwd file is a good test):
# lpr -Pnetprinter /etc/passwd

348 Appendix B—Solutions
Exercise 8-2
1. Disable your print queue:
# lpc -disable printer
2. Print three different files (remember the order you printed them in). Look at the outstanding print jobs with lpc -status and lpq:
# lpr /etc/passwd
request id printer-10
# lpr /etc/group
request id printer-12
# lpr /etc/shadow
request id printer-15
# lpc –status printer
# lpq
3. Set the last job to be the next job to print:
# lpc -topq printer-15
4. Cancel the original middle job using lprm:
# lprm printer-12
5. Cancel all of the jobs using a single lprm command:
# lprm -P printer root
C H A P T E R 9
Exercise 9-1
2. Make the /usr/local/sbin/fingerd file executable:
# chmod +x /usr/local/sbin/fingerd
3. Comment out any finger lines in the /etc/inetd.conf file with a hash (#) character. Add the line as given.
4. Force the inetd daemon to reread its configuration file:
# killall -HUP inetd
5. Test the finger service on the system:
$ finger @127.0.0.1
[127.0.0.1]
Finger information for this system is not available.
6. Comment out the line that you added to the inetd.conf file.

Appendix B—Solutions 349
7. Have the inetd daemon reread the configuration file:
# killall -HUP inetd
8. Test the finger service again:
$ finger @127.0.0.1
[127.0.0.1]
finger: connect: Connection refused
It doesn’t work because the network service daemon is not running.
Exercise 9-2
1. Install the ipchains package if it is not already installed. Install from RPMs if they are available.
2. Set the default forwarding policy to DENY:
# ipchains -P forward -j DENY
3. Filter out all packets coming from www.linux.org:
# ipchains -A input -s www.linux.org -j DENY
4. You cannot receive any packets from www.linux.org via ping or HTTP because you are filtering all packets from that address.
5. Remove the filter you placed on www.linux.org:
# ipchains -D input -s www.linux.org -j DENY
6. Filter out only HTTP (www) packets coming from www.linux.org:
# ipchains -A input -p tcp -s www.linux.org www -j DENY
7. ping works this time because we are only filtering HTTP packets.
8. List all of the chains:
# ipchains -L
Chain input (policy ACCEPT):
target prot opt source destination ports
DENY tcp ---- www.linux.org anywhere www -> any
Chain forward (policy DENY):
Chain output (policy ACCEPT):
9. Remove all the rules on the input chain:
# ipchains -F input

350 Appendix B—Solutions
10. Make sure IP forwarding is enabled:
# echo 1 > /proc/sys/net/ipv4/ip_forward
# cat /proc/sys/net/ipv4/ip_forward
1
A better way to do this on most systems is to make sure that there is a line in the /etc/sysconfig/network file that reads as follows:
IPFORWARDING=yes
11. Turn on masquerading with no packet filtering:
# ipchains -P forward -j ACCEPT
# ipchains -A forward -j MASQ
Exercise 9-3
1. Download the RPMs from ftp.openssh.com. Assume you’re using ncftp:
$ ncftp ftp.openssh.com
ncftp> cd /pub/OpenBSD/OpenSSH/portable/rpm
ncftp> get openssl-0.9.5a.i386.rpm
ncftp> get openssh-2.1.1.p2-1.i386.rpm
ncftp> get openssh-server-2.1.1.p2-1.i386.rpm
ncftp> get openssh-clients-2.1.1.p2-1.i386.rpm
The standard FTP client should work similarly.
2. Install the RPMs:
# rpm -i openssl-0.9.5a.i386.rpm
# rpm -i openssh-2.1.1.p2-1.i386.rpm
# rpm -i openssh-server-2.1.1.p2-1.i386.rpm
# rpm -i openssh-clients-2.1.1.p2-1.i386.rpm
You’ll need to install these on both the client and server systems.
3. Start the ssh server daemon on the server system:
# /etc/rc.d/init.d/sshd start
or
# /usr/sbin/sshd
4. On the client system, start the ssh program to connect to the server:
$ ssh server
billg@server password: ********
Welcome, Bill.
$ hostname
server

351
56k LineA digital phone-line connection (leased line) that can carry 56,000 bps. At this speed, a megabyte will take approximately 3 minutes to transfer, making it four times as fast as a 14,400-bps modem.
$DISPLAYA shell variable containing the current user’s default display for the X Window System.
$HOMEA shell variable containing the path to the current user’s home directory.
$PATHA shell variable containing a list of directories that will be searched for a command or program upon execution.
$TERMA shell variable containing the current user’s default terminal type.
.bash_profileIn the user’s home directory, a file containing commands to be executed at login after the execution of the systemwide /etc/profile. Available for user customization.
.bashrcIn the user’s home directory, a file containing commands to be executed to initialize each new shell. Under some circumstances, this is a default name; other circumstances may require the name of this file to be stored in a global variable $ENV or $BASH_ENV.
.rhostsA file located in a user’s home directory that grants or denies password-free access to the “r” network services (e.g., rlogin, rsh, rcp).
/The root directory of a file system is referred to as /. The / character is also used to separate directory names in a path.
/etcDirectory containing system configuration files and directories and some configuration commands.
/etc/bashrcA file containing commands to be executed to initialize each new shell for all users on the system.
/homeBy convention, directory containing users’ home directories.
/mntBy convention, location for temporarily mounting removable drive directory trees.
/procSee proc.
Glossary

352 /var/log
/var/logBy convention, directory containing log files for system processes. The /var portion of the path name indicates files that vary frequently.
Active windowThe window that is currently selected in a desktop environment, such as X, KDE, or GNOME.
AdapterA piece of hardware, usually with a type of interface port, added to a system to perform a specific funtion. Commonly used in reference to video and network cards.
AddressA unique designation for the location of data, the identity of an intelligent device, or a logical network address. An address allows each device on a single communications line to respond to its own message.
adduserOriginally, a script that performed the tasks necessary to add a user account to the system. It has been superceded by the useradd program. Many Linux distributions still provide both methods, although some have begun to remove adduser and create a symbolic link to useradd in place of it.
American National Standards Institute (ANSI)A group of committees formed to establish voluntary commercial and government standards. The committee responsible for computing, data processing, and information technology is ANSI-X3, formerly named USASI (United States of America Standards Institute). ANSI is a member of the International Organization for Standardization (ISO).
Anonymous FTPAn Internet utility that allows a user to connect to a remote computer as a guest to retrieve documents, files, programs, and other archived data without having a user ID or password on the host system. Users identify themselves as anonymous and skip local security checks.
ApacheAn extremely popular Web server product. The name is from “a patchy Web server” since the server was originally derived by patching the NCSA Web server. Apache is a successful example of Open Source software.
AuthenticationA way to verify that requests for a connection or service are coming from a trusted source.
awkA pattern-matching text processing utility that applies regular expressions to the data stream. The name is derived from the initials of the authors: Aho, Weinberger, and Kernighan. Due to its unique pattern-matching syntax, it is often used in data retrieval and data transformation.
Background processA process that is not the focus of user input. A currently running process can be moved into the background by pressing CONTROL+z, which will suspend the process. You may then run the bg command, which will move the suspended process into the background. You may also choose to have a program run in the background by appending the & character to the end of the execution line. The process will be started in the background.
Back upTo copy information, usually onto diskette or tape, for safekeeping.

Case sensitive 353
BackupInformation that has been backed up, or the media containing that information.
BandwidthThe speed at which data travels over a particular media. Bandwidth is measured in bits per second, kilobits per second, or megabits per second. Commonly used when referring to network interfaces; today’s standard network cards run at 10 and 100 megabits per second.
Basic Input/Output System (BIOS)A set of routines stored in ROM (Read-Only Memory), usually found on the motherboard of a computer, that provides access to devices such as keyboards and mice. The BIOS also contains the instructions to start the operating system. Examples of BIOS manufacturers include AMI and Phoenix.
Berkeley Software Distribution (BSD)A UNIX variant developed by the Computer Systems Research Group of the University of California at Berkeley from 1979 to 1993. Berkeley Systems Design, founded in 1991, continues to develop and market its commercial BSD-based operating system. There are several free BSD derivatives, such as FreeBSD, OpenBSD, and NetBSD.
Big-endianA format for storing or transmitting binary data in which the most significant bit (or byte) comes first. From a story in Gulliver’s Travels (Swift) in which two warring factions disputed over which end of an egg should be opened. The reverse convention is called little-endian.
BroadcastA message sent simultaneously to every node on the network. Many network protocols, such as ARP, rely on broadcast methods.
BusA pathway on which data travels. Examples of buses include the ISA bus, PCI bus, and SCSI bus.
CA popular programming language that originated concurrently with the UNIX operating system, developed by Bell Labs’ Thompson and Ritchie. Successor to B and BCPL. This high-level language is able to manipulate the computer at a low level, like assembly language. In the latter half of the 1980s, C became the language of choice for developing most commercial software and a general replacement for most assembly coding. In modern systems, especially RISC, part of the development strategy is to replace hand optimization of code with reliance on the ability of the compiler to optimize the code.
CacheAn area set aside for frequently used data to speed operations. Some caches are general purpose, while others are for specific operations. A disk cache is an area of system memory reserved for caching disk reads and writes. A CPU cache is a dedicated, high-speed memory array used to cache pending instructions. A Web cache is used in proxy servers to serve frequently requested documents.
Caldera OpenLinuxA Linux distribution known for its Novell integration and graphical installation.
Case sensitiveLinux allows both upper-case and lower-case characters in filenames and, therefore, requires that files be specified in their proper case. For example, unlike DOS, where the change directory command could be used in either upper case (CD) or lower case (cd), Linux requires that you use lower case as the program file is named using lower-case characters.

354 cd
cdThe change directory command (cd) allows moving from one directory to another within the file system. Relative path names are then referenced from the new current directory.
ClientA workstation that requests services of another computer, usually referred to as the server.
In the case of the X Window System, the roles seem backward. The X server provides the local display, and the X client sends information to the display.
Client/Server ModelThe Client/Server Model concerns networking and provides for distributed processing. Applications and data files are stored on the file server. The files are downloaded to intelligent workstations (the clients) for processing. The results of the processing are uploaded to the server for storage. The server may provide additional services to the client such as printing or communications support.
In the case of the X Window System, the roles seem backward. The X server provides the local display, and the X client sends information to the display.
ClusterA group of networked computers connected via a software package for the purpose of load balancing, fault tolerance, or parallel processing. The Beowulf project is one clustering implementation commonly used for parallel processing on Linux systems. TurboLinux Cluster Server is a cluster solution for availability.
Command-Line Interface (CLI)Similar to DOS, Linux allows the manipulation of files and execution of programs from a text prompt. Many experienced users and old-fashioned users prefer the speed of a command-line interface over a graphical user interface (GUI).
Command promptA displayed symbol, such as $ or #, that informs the user that the command-line interface is ready to receive input. If the command prompt is displaying the # symbol, you can usually assume that the root user is currently logged in. The $ symbol is commonly used for all other users who use the bash or Bourne shells.
CompilerA program that translates language-specific source code to machine-readable code. One of the many reasons that Linux became popular in the educational community is the fact that Linux is distributed with an open-source C compiler. This allowed programming students to write C code, compile it, and test it for free rather than paying for an expensive commercial compiler.
ConflictTwo or more devices or programs attempting to use the same system resources at the same time. Conflicts are not uncommon among ISA hardware, as many predate the Plug and Play specification and, therefore, attempt to use interrupts or addresses already in use.
conf.modulesOne of the two configuration files used by the kernel module tools to load modules. The conf.modules file specifies any aliases and parameters that may be needed to load modules. Note that some distributions use the filename modules.conf to fulfill the same functionality.
ConsoleA console is a terminal directly connected to a system. From the console, an operator sends commands to the system and performs other operations. See also Virtual console.

Disk partition 355
CopyleftA copyright notice that both protects the author and his original work as well as giving the ability of a person to use and modify that work so long as credit is given to the original author and the terms of the copyleft agreement are used in all derivitive works. See also GNU Public License.
Core dumpA copy of memory contents saved when a program terminates abnormally (aborts).
Cox, AlanRight-hand man to Linus Torvalds. He maintains stable kernels once Linus has given up control of them. He has done a large amount of work on various parts of the kernel and many drivers.
CrackerA computer user who breaks into secure systems for malicious purposes. Often confused with hacker.
DaemonA program not used explicitly but normally loaded when the system is started and lying dormant in the background awaiting the occurrence of some communication. A server-side program that waits for client connections.
Debian GNU/LinuxA free Linux distribution known for its strict adherence to the policies of the Free Software and rapid package development using its own robust package manager, dpkg.
Denial of Service attack (DoS)A system attack wherein the attacker floods the system with excessive amounts of a particular kind of traffic, effectively disabling a service on the system. Usually relatively easy to perform and difficult to defend against.
depmodA command that determines kernel loadable module dependencies.
Device driverHardware-specific software that acts as an interface between the operating system and the hardware attached to a computer. Device drivers allow applications to communicate with hardware in a controlled and orderly fashion. A device driver is installed when the system is initialized, either compiled into the kernel or loaded as a kernel module. Some examples of device drivers are SCSI adapter drivers and network interface card drivers.
Directory permissionsA list of permissions given to a particular directory. They can include, but are not limited to, read, write, and execute permissions.
Disk DruidDisk partitioning software more convenient and helpful than fdisk.
Disk partitionWhen a hard disk is partitioned, logical divisions are created on the hard disk. This makes the disk storage areas available to the system. Multiple partitions may be created on the same hard disk, including partitions for different operating systems. For example, a hard disk may be set up as a dual-boot system with both Linux and DOS disk partitions.
Linux usually requires a minimum of two partitions, one for the file system and one for swap space. It is possible to run Linux without a swap partition, but it is not recommended. It is also possible to install Linux on a FAT partition, as used by DOS, however, it is preferable to let Linux have its own partition.

356 Display adapter
Linux uses partition type 83 (ext2) for its file system and partition type 82 for swap partitions.
Disk partitions may be changed at any time, but extreme care must be taken. Creating, deleting, or modifying the size of disk partitions will cause all of the information in the affected partitions to be lost.
Display adapterThe circuitry used to drive a video display monitor. Some computers include the video adapter circuitry on the system board while others require an expansion card. There are two formats with which data may be sent from the adapter to the display: analog or digital.
Distributed file systemA technology that allows file system resources to be browsed and accessed in a way that makes their physical location on the network transparent to the user. NFS and Samba provide a distributed file system service.
dmesgA command to list messages (error and other) that had been displayed to the operating console, which are stored in the file /var/log/dmesg.
DomainIn the Internet, a domain is a part of the naming hierarchy. The domain name is a sequence of names (separated by periods) that identify host sites. For example: www.gnu.org.
Domain Name System (DNS)A hierarchical, distributed method of organizing systems and network names on the Internet. DNS administratively groups hosts (systems) into a hierarchy of authority that allows addressing and other information to be widely distributed and maintained. A big advantage of DNS is that using it eliminates dependence on files located on each host system that map host names to addresses.
Electronic mail (e-mail)The most popular Internet application and the driving force behind the Internet’s rapid growth. E-mail allows the sending of an electronic message, similar to a letter sent by the postal service, over the Internet, to another user. The time the message takes to get from the originating system to the destination system depends on a number of factors, including mail server configuration and network bandwidth availability.
EMACSA UNIX text editor (Editor MACroS) developed at MIT that includes a number of distinctive features including multiple windows and an internal programming language based on LISP. Common alternative to vi.
Encryption The process of encoding information so that it is difficult for others to read or modify it. The two main types of encryption are symmetric and asymmetric, which is also known as public key encryption. The Data Encryption Standard (DES) is a popular symmetric encryption algorithm. RSA is a popular public key algorithm.
EnlightenmentA window manager that runs under X, programmable in perl.

File server 357
EthernetEthernet was originally developed by Xerox, Intel, and Digital Equipment Corporation in 1976 with specifications first released in 1980. The standard defines the cabling, connectors, and other characteristics for the transmission of data, voice, and video over local area networks at 10 Mbps. Recent improvements have increased the speed to 100 Mbps.
The types of Ethernet cables are Thin Ethernet (Thinnet), Thick Ethernet (Thicknet), Twisted Pair, and Fiber Optic.
export1. In Linux shell, the export command flags a variable for use by other shells spawned by the current shell, i.e., export PATH=$PATH:$HOME/bin:.
2. The transportation of software executable code across national boundaries, subject to government restriction by the Department of Commerce. Export restrictions have been primarily applied to software products implementing strong encryption. A reduction in export restrictions took place in early January 2000 after years of dispute.
ext2The standard file system employed by all Linux distributions.
fdiskA disk partitioning utility that creates partitions on a disk to prepare the hard disk for formatting.
Fiber Distributed Data Interface (FDDI)A LAN (Local Area Network) specification from ANSI X3T9.5 committee on computer input/output interface standards. FDDI uses fiber optic cables with token-passing access in a ring topology and transmits at 100 megabits per second across a cable length of up to 62.1 miles with up to 1.24 miles between nodes.
Fiber opticsTransmission of data in the form of light pulses produced by a laser or light-emitting diode (LED) through glass fiber, plastic, or other electrically nonconductive material. Fiber optics provide high-speed, long-distance transmission at low power.
File1. A sequence of bytes stored on a secondary storage medium such as a floppy disk or hard disk. Generally, a computer file contains either a program or data.
2. The file command, from the GNU commands, used to show file type, e.g., ELF 32-bit LSB executable, C program text, gzip compressed data, ASCII text, etc.
Program files contain instructions or commands that are to be executed by the computer. Data files that contain only ASCII characters are text files, while files containing binary data, i.e., data other than ASCII characters, are called binary files. Bytes that comprise a file are not necessarily stored on contiguous disk blocks and may be scattered across a disk due to fragmentation.
File cachingThis improves file access time by using the RAM memory to store recently accessed files.
File serverA computer that stores files and provides access to them from workstations. File servers generally contain large hard disks and high amounts of memory.
If a computer is used exclusively as a file server, it is a dedicated file server. If a computer is used as a workstation and a file server simultaneously, it is a nondedicated file server.

358 File system
The file server must be running software that controls access to files, printers, and other network resources. In Linux, the NFS daemon allows sharing of files, the lp daemon allows sharing of printers, and the Samba suite provides both.
File systemA file system is composed of files and directories, organized in a tree-like structure. The file system can be made up of multiple partitions and/or devices, all accessed seamlessly under a single tree without the end user knowing the difference.
File System Hierarchy Standard (FHS)An attempt to standardize path name usage for commonly used directories.
File system typeThere are a number of different standard file system types; Linux uses the ext2 file system, DOS uses the FAT file system, and CD-ROMs use the ISO 9660 file system. There are also distributed file systems supported by Linux, including the Network File System (NFS).
File Transfer Protocol (FTP)A part of the TCP/IP suite that is used to transfer files between any two computers, provided they support FTP. The two computers do not have to be running the same operating system.
In general, people use FTP to move files from one account or machine to another. For example, if storage space on a particular machine is low, the user can free up storage space by using FTP to move the files to a machine with more space. Another reason to move a file to a different account is to print a file to a particular printer. If the file is on a machine that cannot access the desired printer, it must be moved to a machine that does have access.
Despite the variety of FTP servers and clients on the Internet and the different operating systems they use, FTP servers and clients generally support the same basic commands. This standard command set allows users to accomplish tasks such as looking at a list of files in the current directory of the remote system, regardless of the operating system in use. Other common commands allow users to change directories, get specific file information, copy files to a local machine, and change parameters.
Graphical Web browsers transform the traditional character-based, command-line FTP interface into a point-and-click environment.
findThe find command allows searching of a file system or part of a file system for a particular string. It searches recursively, checking each subdirectory below the starting point. Depending on the search and the size of the file system specified, a search can take anywhere from seconds to an hour or more, depending on the speed of the storage medium, the amount of available memory, and the speed and current load of the processor.
FingerA utility program that retrieves information and allows users to locate a particular user on the local or remote system. It typically shows the full name, last login time, idle time, terminal line, and terminal location (where applicable). In addition, it may display plan and project files defined by the user.
Finger is also sometimes used to give access to nonpersonal information, but the most common use is to see if a person has an account at a particular Internet site. Many sites do not allow incoming finger requests.
FIPSA DOS program used to resize DOS partitions.

fvwm 359
FirewallUsed as a security measure between a company’s local area network (LAN) and the Internet. The firewall prevents users from accessing certain address Web sites. A firewall also helps to prevent hackers from accessing internal resources on the network. A combination of hardware and software that separates a LAN into two or more parts for security purposes. Today, firewalls are commonly used to prevent unauthorized access to a network from the Internet.
Linux distributions and the Linux kernel contain the software and code necessary to set up an effective packet-level firewall.
Foreground processA process that can receive user input. You can move a suspended process or a process in the backgound to the foreground using the fg command.
FrameIn IEEE (Institute of Electrical and Electronics Engineers) terminology, the unit of data transferred at the OSI (Open Systems Interconnection) Data Link layer.
Frequently Asked Questions (FAQ)A file posted for many usergroups, newsgroups, and other services containing questions and answers of general interest or which are commonly asked by new users on the Internet. Such lists have come to be known as FAQs (pronounced faks).
There are hundreds of FAQs on subjects as diverse as pet groooming and cryptography. Subject FAQs are usually written by people who have tired of answering the same question over and over. Internet users are encouraged to read FAQ files before asking questions.
Most Linux distributions provide a selection of FAQs in the /usr/doc/FAQ directory. The Linux Documentation Project Web site, http://www.linuxdoc.org/, is a good place to find new and updated FAQs.
Free softwareFree software refers to the rights a user has in regards to using the software; it does not necessarily mean free as in cost. The Free Software Foundation defines the free software principle as:
� Freedom to run the software.
� Freedom to look at the internal workings of a software.
� Freedom to give away copies of the software.
� Freedom to make changes to the software and distribute your changes to the community.
Free Software Foundation (FSF)The Free Software Foundation is a nonprofit organization dedicated to promoting the use of free software and helping in the development of the GNU operating system.
fstabA file located in the /etc directory containing a list of frequently used file systems, where they are located, what type of file system they are, what permissions to set on them, whether to check them when mounting, and if they are to be mounted automatically during the initialization process.
Fully Qualified Domain Name (FQDN)The name of a host, including its domain hierarchy. For example, a host named HR inside the MyCo.com domain would have a fully qualified domain name of HR.MyCo.com.
fvwmA common window manager for use under X.
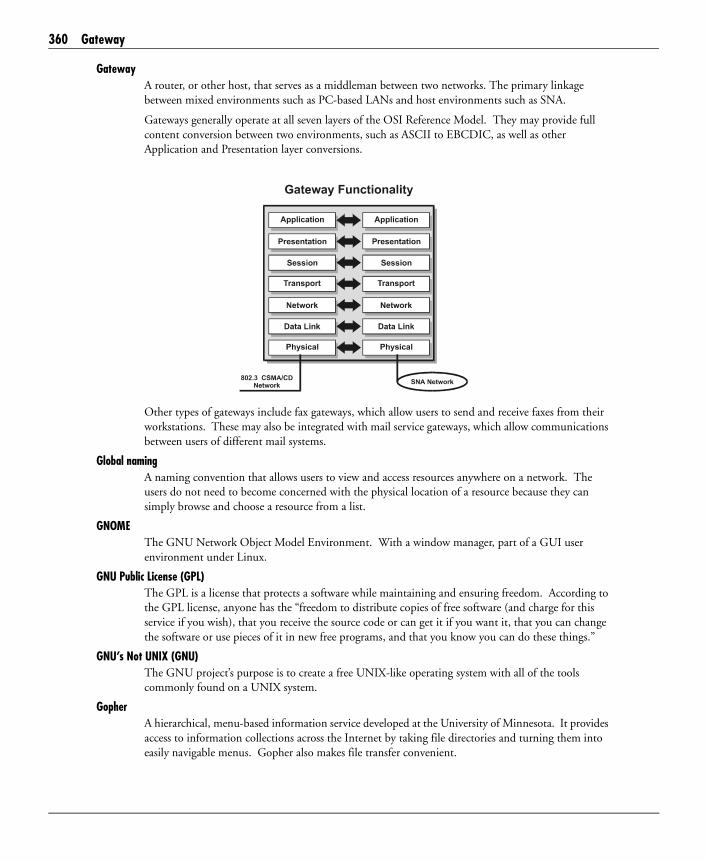
360 Gateway
GatewayA router, or other host, that serves as a middleman between two networks. The primary linkage between mixed environments such as PC-based LANs and host environments such as SNA.
Gateways generally operate at all seven layers of the OSI Reference Model. They may provide full content conversion between two environments, such as ASCII to EBCDIC, as well as other Application and Presentation layer conversions.
Other types of gateways include fax gateways, which allow users to send and receive faxes from their workstations. These may also be integrated with mail service gateways, which allow communications between users of different mail systems.
Global namingA naming convention that allows users to view and access resources anywhere on a network. The users do not need to become concerned with the physical location of a resource because they can simply browse and choose a resource from a list.
GNOMEThe GNU Network Object Model Environment. With a window manager, part of a GUI user environment under Linux.
GNU Public License (GPL)The GPL is a license that protects a software while maintaining and ensuring freedom. According to the GPL license, anyone has the “freedom to distribute copies of free software (and charge for this service if you wish), that you receive the source code or can get it if you want it, that you can change the software or use pieces of it in new free programs, and that you know you can do these things.”
GNU’s Not UNIX (GNU)The GNU project’s purpose is to create a free UNIX-like operating system with all of the tools commonly found on a UNIX system.
GopherA hierarchical, menu-based information service developed at the University of Minnesota. It provides access to information collections across the Internet by taking file directories and turning them into easily navigable menus. Gopher also makes file transfer convenient.

Handshaking 361
Gopher functions as a client server that connects the user to the menu item(s) selected from the gopher server menu. The user must have a Gopher Client program.
Although Gopher spread rapidly across the globe in only a couple of years, it is being largely supplanted by Hypertext, also known as WWW (World Wide Web). There are thousands of Gopher Servers on the Internet and they will remain for a while.
Graphical User Interface (GUI)A program that executes commands given by the user to the computer. A GUI uses graphic representations of commands and/or a menu format to display commands that the user may execute with a mouse or similar device.
The graphical user interface makes using a computer easier, especially for the beginner. Linux users have the option of using a GUI. Most distributions come with XFree86, an open-source X Window System.
Graphics modeThe mode enabling applications to display graphics in addition to text. GUI-based applications always run in a graphics mode. DOS applications can run either in graphics or text mode.
GroupA collection of users. All members get, as implicit rights, any rights assigned to a group. Each group has a name and a group ID. The group name and ID are listed in /etc/group, along with any supplemental members of the group. Each user’s primary group membership is listed in the user’s entry in /etc/passwd. A user’s primary group membership need not be listed in /etc/group, though the group must be listed in order to be used.
Group ID (GID)The unique numerical ID of a group under Linux. See group.
Group replyAn electronic mail tool used to respond to a number of individuals simultaneously.
gzipA common compression utility for UNIX and UNIX-like systems.
HackerA person who is an expert at solving problems with computers. The term is often confused with cracker, which is the name given to a person who illegally attempts to access computer systems or has destructive intentions.
Half-duplex (HDX)Transmission link that allows two-way communication, although transmission is possible only one way at a time. When the communications device at one end has completed its transmission, it must advise the device at the other end that it has finished and is ready to receive. Half-duplex transmission is analogous to a single-lane bridge on a two-way road.
HandshakeUsed in communications technology to define the exchange of data when connection is achieved.
HandshakingBefore data is transmitted serially, certain communications conditions, or protocols, must be met. Handshaking allows both the sending and receiving computers to understand the required signals, i.e., the method of transmission.

362 Hard disk
Hard diskA peripheral mass-storage device that uses sealed, rotating, nonflexible, magnetically coated disks to store data and program files. Hard disk types include SCSI, IDE, and EIDE.
Hard Disk ControllerThe board that communicates with and controls the hard (fixed) disk drive.
Hard Disk InterfaceThe communication device that allows the hard disk drive to interact with the hard disk controller. There are many different types that will affect the speed of data transfers. Examples of hard disk interfaces are ST506, SCSI, ESDI, and IDE.
HardcopySending computer data out to the printer and printing the information on paper is referred to as producing hardcopy, or a copy on paper that can be physically handled.
HardwareAll electronic components of a computer system, including peripherals, circuit boards, and input and output devices. Hardware is the physical equipment, as opposed to software consisting of programs, data procedures, rules, and associated documentation.
Head crashThe read/write heads fly across the surface of the disk drive’s platters, traveling on a cushion of air. If the head comes in contact with the platter, a head crash occurs. Head crashes damage the platter and corrupt the data. Often the data is rendered inaccessible.
HeaderThe initial portion of a file or packet containing identifying information.
Electronic mail message headers contain the message originator’s name and address, receiver, subject, date, etc.
A packet header carries the source and destination addresses along with other information.
HeadsThe read/write head on a hard disk drive is similar to the read/write head on a tape recorder. Data is stored as changes in magnetic flux on the disk platters. The read/write heads sweep across the surface, traveling on a cushion of air. Read/write heads can perform both the reading and writing of data. The drive will usually have an additional read-only, servo head that is used for disk positioning.
Hertz (Hz)The International System of Units measure of frequency. Hertz was named for German physicist Heinrich Hertz and was often abbreviated as Hz. One Hertz is one complete cycle per second. A cycle may relate to light, heat, radio waves, or other vibrations.
HexadecimalA base-16 numeric notation system that specifies addresses in computer memory. In hexadecimal notation, the decimal numbers 0 through 15 are represented by the decimal digits 0 through 9 and the characters A through F (A=decimal 10, B=decimal 11, and so on).
Hidden fileA file that is not visible in a normal directory listing. By placing a period (.) at the beginning of a filename, it is possible to make a file hidden from normal view. By using the ls -a command to get a directory listing, you can see the hidden files.

hosts.deny 363
Hierarchical file system (HPFS)A file system that is arranged in a tree-like structure. The file system begins with the root and then contains branches (directories), each of which may contain leaves (files) or more branches.
Linux uses this type of file system.
Also, the name given to the Macintosh file system before Mac OS 8.1 introduced the extended hierarchical file system or HFS+.
Hierarchical routingDesigned to simplify routing on large networks, hierarchical routing considers a network as a series of levels, where each level handles its own routing. The Internet operates as three levels: the backbone level that carries data (packets) at high speed and knows how to route between the next level (mid-level); the mid-level that knows how to route between the sites; and sites (or local or stub networks) that know internal routing.
High Performance File System (HPFS)This is the native file system for OS/2.
High-Level Data Link Control (HDLC)A data link control protocol developed by ISO (International Organization for Standardization) in response to IBM’s SDLC (Synchronous Data Link Control), which is a subset of HDLC.
HistoryRefers to a list of previous steps or processes completed by a program. The bash shell has a history function so that you can see previous commands issued; the list is normally stored in the ~/.bash_history file.
Home directoryA directory that belongs to a single user for storage of data. Normally, the user is the only person with access to this directory. The root account can also access any user’s home directory.
HopDescribes routing through a network. A hop is a data packet moving through routers from the point of origination to the destination.
Hop countThe number of cable segments a message packet passes through between its source and network or internetwork destination. The destination can be no more than 16 hops from the source.
HostA computer that is remotely accessible and provides information or services for users on a network. It is quite common to have one host machine provide several services, such as WWW and USENET. A host computer on the Internet can be accessed by using an application program such as electronic mail, telnet, or FTP. A host computer may also be a bulletin board.
HostnameThe name given to a computer that identifies it on a LAN or the Internet.
hostsA file listing IP addresses and associated names; generally supplanted by DNS.
hosts.allowFile listing hosts that are allowed to access specified network services on the local machine.
hosts.denyFile listing hosts that are denied access to specified network services on the local machine.

364 hosts.equiv
hosts.equivA file located in /etc that grants or denies password-free access to the “r” network services (rlogin, rsh, rcp) on the local machine.
HOWTOSimilar to README, but less common, this file contains tips on using or on installing software in the including directory.
Hub1. In disk drives, the hub is the central mechanism within the drive that causes the disk to rotate and keeps it centered during the rotation. On floppy diskettes, the hub fits into the hole in the center of the diskette to keep it level and balanced during rotation.
2. In networking, a central connecting point for network wiring.
HyperlinkWords, phrases, images, or characters highlighted in bold indicate connections in a given document to information within another document. The user also has the option to underline these hyperlinks.
HypermediaThe name for richly formatted documents containing a variety of information types such as textual, image, movie, and audio. These information types are easily found through hyperlinks.
HypertextAllows users to move from one site or place in a document to another. Hypertext links in World Wide Web documents link the user from terms in one document to the site referenced in the original document.
HyperText Markup Language (HTML)Standard Generalized Markup Language (SGML) is a worldwide method of representing document formatting. It is also a broad language that is used to define particular markup languages for particular purposes.
The language that the Web uses is a specific application of SGML called HyperText Markup Language (HTML). HTML is the standard language that the Web uses for creating and recognizing hypermedia documents.
Languages such as HTML follow the SGML format and allow document creators to separate document content from document presentation. As a markup language, HTML is more concerned with the structure of a document than with the appearance.
HTML documents are standard ASCII files with formatting codes that contain information about layout (document titles, paragraphs, breaks, lists) and hyperlinks. Although most browsers will display any document that is written in plain text, by creating documents using HTML, writers can include links to other files, graphics, and various types of media.
HTML specifies a document’s logical organization. While a formatting language, such as Rich Text Format (RTF), indicates typeface, font size, and style of the text in a document, HTML uses tags to mark the headings, normal paragraphs, and lists (and whether or not they are numbered).
While the HTML standard supports simple hypermedia document creation and layout, it is not capable of supporting some of the complex layout techniques found in traditional document publishing. As the Web and HTML gain additional momentum and are used by more people for more purposes, it will most likely gain some of the functionality used in desktop publishing.

inetd 365
HTML is an evolving language. Different Web browsers recognize slightly different HTML tags. Some Web document creators attempt to get around formatting limitations in HTML by using graphics and browser-specific HTML tags. The creators do this in an attempt to make their documents look a certain way in a particular browser.
Even with comprehensive capabilities, HTML is still an easy-to-use language and is simple enough to type directly into a word-processing application without the use of an HTML editor.
HyperText Transfer Protocol (HTTP)A set of directions for Web servers that tells them how to respond to various events initiated by users. HTTP is the most important protocol used in the World Wide Web (WWW).
An HTTP client program is required on one end and an HTTP server program on the other. Most Linux distributions come with both clients and a server. Apache is currently the Web’s most popular Web server software and is Open Source Software that is included in most Linux distributions. Netscape and Lynx, two clients, are also available with most distributions.
I/OI/O (Input/Output) refers to the sending and receiving of data from the central processing unit (CPU) to other peripheral devices such as disk drives. The input/output channel carries out all transfer of data so as to free up the CPU. The keyboard is the most common input device, and the monitor is the most common output device.
I/O addressSpace used to access I/O hardware such as I/O adapters, buses, and special registers used by I/O devices known as control status registers (CSR). I/O address space is one of two equal parts of primary memory, or addressable memory. The other equal part is memory address space.
IBM Token-Ring networkA baseband star-wired ring network developed by IBM, using the token-passing access method and running at 4 or 16 megabits per second (Mbps).
IconA graphical picture used to represent an application, folder, file, disk drive, or printer.
IF...THEN...ELSEA programming convention providing conditional execution.
ifconfigA command used in Linux to configure kernel-level network interfaces, including TCP/IP.
ifdownA command available on some Linux distributions that is used to deactivate network interfaces.
ifupA command available on some Linux distributions that is used to activate network interfaces according to predefined settings in a configuration file.
In My Humble Opinion (IMHO)A shorthand appended to a comment written in an online forum, IMHO indicates that the writer is aware that they are expressing a debatable view, probably on a subject already under discussion.
inetdThe Internet meta-daemon; waits for requests on several IP ports and launches programs to service those requests as required.

366 inetd.conf
inetd.confThe configuration file for inetd.
InfraredLight waves in the 100-GHz to 1,000-THz range, between the shortest microwaves and visible light.
Infrared Data Association (IrDA)A nonprofit organization founded in 1993 to establish standards for infrared communication. Also the standard for infrared devices that the IrDA established.
initThe first process that starts on a Linux system.
Initial ramdisk image (initrd)A special device initialized by the boot loader as a RAM disk before the kernel is started.
inittabThe table read by init to determine how to start the system.
insmodThe command to load kernel modules; does not handle dependencies. See modprobe.
Installation scriptA file containing a group of commands used to automate a setup program.
Institute of Electrical and Electronic Engineers (IEEE)A professional ANSI-accredited body of scientists and engineers based in the U.S. IEEE promotes standardization and consults to the American National Standards Institute on matters relating to electrical and electronic development. The IEEE 802 Standards Committee is the leading official standard organization for LANs (Local Area Networks).
Integrated Drive Electronics (IDE)The standard interface for a hard disk drive. Controller electronics are integrated into the drive. The controller connects to a paddleboard that may be external to, or on, the system board. The paddleboard then interfaces with the bus to the CPU. An IDE bus can be identified by its 40-pin connector, as opposed to the 50-pin connector of a SCSI bus.
Integrated Services Digital Network (ISDN)A special kind of telecommunications network designed to handle more than just data. Using existing telephone lines and computer networks, integrated networks can handle video, text, voice, data, facsimile images, graphics, etc.
IntegrityData consistency and accuracy.
InteractiveThe exchange of information and control between the user and a computer process.
Interactive also refers to time-dependent (real-time) data communications. Typically communications in which a user enters data and then waits for a response message from the destination before continuing.
Interface1. A shared boundary between two functional units, defined by functional characteristics, signal characteristics, and other characteristics, as appropriate.
2. A contract between an object and its users.

Internet 367
3. Any of the electrical and logical devices that permit computers and peripherals to be interconnected. A network interface is the most common example.
InterfacesA set of methods that can be implemented by Java classes.
Interior Gateway Protocol (IGP)The protocol used to exchange routing information between collaborating routers in the Internet. Router Information Protocol (RIP) and Open Shortest Path First (OSPF) are examples of IGPs.
InterlacedA technique used in display monitors. It draws every other line to the display in one frame, then draws the other half of the lines phased to appear between the first set of lines drawn. Interlaced monitors are cheaper to make because they do not have to operate in as wide a range of frequency as noninterlaced monitors. You should avoid interlaced display modes because they flicker more and are not as sharp. Television technology also uses interlacing.
InterleaveA method of arranging disk sectors to compensate for relatively slow computers. It attempts to minimize the amount of time required to read consecutive sectors from a single track on the fixed disk. By numbering every other sector it encounters as though it were the next consecutive sector, the controller is effectively able to slow the spin rate of the fixed disk drive so that it can issue a command to read the next consecutively numbered sector.
An interleave ratio that is set to read every other sector as consecutive is said to run at a 2-to-1 rate. For example, it would start with Sector 1, skip a sector, number the next sector 2, skip a sector, number the next sector 3, skip a sector, etc. If set to read every third sector, the interleave is 3-to-1. Ideally, interleave should be set to the lowest number that the computer, the disk drive, and the disk controller can support. Virtually all new computers and disk controllers support a 1-to-1 interleave rate.
Internal Organization of the Network Layer (IONL)The Open System Interconnection (OSI) standard for the detailed architecture of the Network layer. Basically, it partitions the Network layer into subnetworks interconnected by convergence protocols (equivalent to internetworking protocols), creating what Internet calls a catenet or internet.
International Consultative Committee for Telegraphy and Telephony (CCITT)An international consultative committee that sets international communications standards. It develops interface, modem, and data network recommendations. Membership includes PTT’s scientific and trade associations, and private companies. CCITT is part of the International Telecommunications Union (a United Nations treaty organization in Geneva).
International Organization for Standardization (ISO)Established in 1947, the ISO promotes the development of international standards for the computer, communications, and other fields. ISO members are the standards organizations of 130 countries. The United States representative is the American National Standards Institute (ANSI).
InternetAn international computer network of networks that connect government, academic, and business institutions. Networks on the Internet include MILNET, NSFnet, and other backbone networks, as well as mid-level networks and stub (local) networks.
Internet networks communicate using TCP/IP (Transmission Control Protocol/Internet Protocol). The Internet connects colleges, universities, military organizations and contractors, corporations, government research laboratories, and individuals.

368 Internet address
Although parts of the Internet operate under single administrative domains, the Internet as a whole reaches around the globe, connects computers (from personal computers to supercomputers), and is not administered by any single authority. The Internet in July 1995 roughly connected 60,000 independent networks into a vast global Internet.
Used as a descriptive term, an internet is a collection of interconnected packet-switching networks. Any time you connect two or more networks together, you have an internet—as in international or interstate.
Internet addressA 32-bit value written or displayed in numbers that specify a particular network and node on that network. See IP address.
Internet Architecture Board (IAB)The IAB is the technical body that oversees the development of the Internet suite of protocols commonly referred to as “TCP/IP.” It has two task forces, the IRTF and the IETF, each charged with investigating a particular area.
Internet Control Message Protocol (ICMP)Used for error reporting and recovery, and is a required component of any IP implementation.
Internet Engineering Steering Group (IESG)The executive committee of the Internet Engineering Task Force (IETF).
Internet Engineering Task Force (IETF)One of the task forces of the IAB, the IETF is responsible for solving short-term engineering needs of the Internet. It has more than 40 Working Groups.
Internet Gateway Routing Protocol (IGRP)A proprietary IGP used by Cisco System’s routers.
Internet Protocol (IP) The OSI layer 3 routed protocol used to transmit packetized information on a TCP/IP network.
Internet Relay Chat (IRC)An Internet protocol that supports real-time conversations between Internet users worldwide.
Internet Research Task Force (IRTF)One of the task forces of the Internet Architecture Board (IAB), it is responsible for research and development of the Internet protocol suite.
Internet Service Provider (ISP)Companies that provide an Internet connection for educational institutions, individuals, companies, and organizations.
InternetworkTwo or more networks connected by a router.
Internetwork Packet Exchange (IPX)Used with SPX as the resident protocol in NetWare. A router with IPX routing can interconnect local area networks (LANs) so that Novell NetWare clients and servers can communicate.
In NetWare 3.x, IPX is the name of the command-line utility used to see the versions and options of IPX.COM. This was used prior to the introduction of ODI drivers. IPX is supported by Linux.

IP address 369
InterNICThe Internet Network Information Center (InterNIC) is a registered service mark of the U.S. Department of Commerce that provides information services to Internet users. It offers a reference desk that provides networking information, referrals to other resources, and associate users with their local NICs. It also provides coordination to share information and activities with U.S. and international organizations, as well as education services to train mid-level and campus NICs, and to end users to promote Internet use.
InteroperabilityThe ability to use products from different vendors in the same system. Communication protocols, such as IP or AFP, can be used in ODI to process information from the network. The user does not have to know each protocol’s required method of packet transmission. Interoperability also means an application can share files, even when running on different platforms, such as Macintosh or UNIX.
Interprocess communication (IPC)The exchange of information between processes by means of messages.
InterruptA request for attention by a subsystem. Depending on conditions and the type of interrupt, an interrupt may be handled immediately or deferred either until the current interrupt has been handled or until all higher priority interrupts have been handled. An interrupt is usually fairly important and should not be kept waiting for very long.
Interrupt Request (IRQ) linesInterrupt Request lines are normally referred to as IRQ lines, and each line requires a separate IRQ number. Many PC add-in boards and devices require a unique dedicated IRQ line. Some IRQs are assigned to system devices.
The original IBM PC was an 8-bit system with eight available IRQ lines numbered 0 through 7. These lines support the system timer, keyboard, COM and LPT ports, and the floppy disk controller.
With the 16-bit IBM AT came eight additional IRQ lines that cascade through IRQ 2. These IRQ lines support the Real Time Clock, hard disk controller, math coprocessor, and other devices. Examples of devices that use these IRQ lines are VGA and network adapters, CD-ROM drives, and SCSI controllers.
Some COM ports share IRQ lines. All odd-numbered COM ports (COM1, COM3, etc.) share IRQ 4, while all even numbered COM ports share IRQ 3.
IntranetA private internet, usually within a company, for facilitating information sharing. It looks and acts just like the public Internet.
IP addressEach host in the network is assigned a unique IP address for each network connection (installed network adapter). The IP address is used to identify packet source and destination hosts.
An IP address is a 32-bit address, written as 4 octets (bytes) separated by periods. For example, 195.143.67.2.
This way of representing an IP address is also known as dotted decimal notation. Each address will also have an associated subnet mask, dividing the address into its network prefix and host suffix. For example, you might have the following defined as a subnet mask: 255.255.255.0. The subnet mask is used to identify the network and host portions of the address.
370 IP datagram
The network portion identifies where the host is located, and the host portion identifies the device connected to that network.
When dealing with a network the size of the Internet, address assignments must be carefully coordinated. With millions of hosts operating on thousands of networks, the potential for duplicate addresses is significant. The job of coordinating Internet IP addresses is given to the Network Information Center.
An assigned address is only required if your network is connected to the Internet. If connected to the Internet, your network address will be assigned through the Internetwork Network Information Center, or InterNIC.
To get an Internet address, contact the InterNIC at InterNIC Registration Services, c/o Network Solutions, Inc., 505 Huntmar Park Drive, Herndon, Virginia 22070, (703) 742-4777, or at [email protected].
An organization is assigned a network address. The organization can further divide this into its own subnets and assign the host addresses.
Rather than going to the InterNIC, it is more likely that an organization will work through a local provider for address assignment. The organization will then subdivide the address, if necessary, and assign host addresses.
IP datagramThe fundamental unit of information passed across the Internet. It contains source and destination addresses along with data and a number of fields that define the length of the datagram, the header checksum, and flags to indicate whether the datagram can be (or has been) fragmented.
IP NumberSometimes called a dotted quad, it is a unique number consisting of four parts separated by periods. For example, 109.123.251.2. Each value in the dotted quad ranges from 0 to 255, representing the decimal form of an eight bit binary number.
Every machine that is on the Internet has a unique IP number. If a machine does not have an IP number, it is not really on the Internet. Most machines also have one or more Domain Names so that they are easier for people to remember.
ipchainsA kernel mechanism for filtering packets that can be used to implement a firewall.
isapnptoolsA set of utilities for probing and configuring PnP (Plug and Play) devices. See Plug and Play.
JavaA programming language with a colorful history and a meteoric rise. Java was not designed for the Internet or World Wide Web. It was developed by a team at Sun Microsystems that was developing software for consumer electronics.
Existing languages like C and C++ were inadequate for the purposes of the software the team was developing. C and C++ programs need to be compiled for particular computer chips. When a new chip is released, C and C++ programs must be recompiled to run on the new chip. These programs are not flexible enough to be moved to new software libraries.
In the consumer electronics market, pricing of components is crucial, and chips are often replaced with newer, more cost-effective chips at a rapid rate. This swapping of chips is not the ideal environment for C and C++ programs.

Join-compatible columns 371
Backward compatibility is an issue in consumer electronics because it is not uncommon for somebody to have a TV that is 5 or 10 years old. Reliability is another issue because consumer electronics normally have to be replaced if a component goes bad.
Java was originally named Oak by James Gosling, who was the team leader for the original development project. The name was inspired by a large oak tree outside of Gosling’s office. It was discovered that there was another programming language called Oak, and a new name had to be coined for the language. The name Java was an inspiration after some of the team members visited a coffee shop near their office.
The Java market is rapidly expanding with many companies licensing Java technology for integration into their products. For browsers, Netscape Communications Corporation added Java support to their Netscape Navigator 2.0 browser giving Netscape Navigator users the opportunity to view Java-enhanced Web pages. Other browser vendors, like Microsoft, are adding Java support in their browsers. Microsoft has also licensed Java for inclusion in future versions of Windows.
Sun Microsystems has started a new business unit called Javasoft and has announced the release of new Java development tools. Java WorkShop is a set of Java development tools designed to work within a Java-capable browser. With Java WorkShop, developers have the ability to design, test, and deploy Java applications for the Web. Another new product is Internet WorkShop, which includes Java WorkShop, Visual WorkShop for C++, and a Network Object Environment (NOE) for development of powerful Web applications.
Java BeansPlatform-independent component technology based on the Java platform.
Java compiler (javac)Compiles Java source code files into executable Java bytecode.
Java Database Connectivity (JDBC)A structured interface to SQL databases.
Java Development Kit (JDK)Software that has a compiler, basic debugging tools, and common class libraries.
JobsIn Linux, a command to list currently running or stopped background processes associated with the current session. Also, the set of background processes associated with the current session. Sometimes a reference to Steve Jobs, one of the founders of Apple Computer.
Join1. In database terminology, a relational operator that produces a single table from two tables, based on a comparison of particular column values (join columns) in each of the tables. The result is a table containing rows formed by the concatenation of the rows in the two tables. The values of the join columns compare or, if specified, include nonmatching rows.
2. Hence, a command in GNU/Linux (and UNIX) to join sorted files.
Join columnIn database terminology, a column used to set conditions for a join. A join column is usually a primary key or foreign key column.
Join-compatible columnsIn database terminology, key columns or columns of similar data type and values.

372 Jughead
JugheadA server that maintains a database of menu items at a gopher site. It allows users to search the site. Jughead is an acronym for Jonzy’s Universal Gopher Hierarchy Excavation And Display.
K Desktop Environment (KDE)An Open Source collection of X Window applications.
KA9QA popular implementation of TCP/IP and associated protocols for amateur packet radio systems.
KermitA file transfer and terminal emulation program.
KernelA set of essential operating routines used by the operating system (usually hidden from the user) to perform important system tasks such as managing the system memory or controlling disk operations.
Kernel panicAn unpredictable termination of a process being controlled by the kernel.
KeyboardThe device that allows the user to input data into the computer or to execute commands. Most keyboards resemble a typewriter.
KeysAttribute columns that show a unique value for each entity. Hence, the fields in a record (line) used by the Linux sort command to sort a file when the keys option is used.
KickstartA Red Hat utility for installing Linux locally or remotely, used to automate an installation and minimize local keyboard input.
killA command to send interrupt signals and completion instructions to end a running job or process.
Kilobit (Kb)In computing, it refers to 1,024 bits. (A bit is the basic unit for storing data in primary storage.) Kilobit is used mainly to express the speed of data transmission.
Kilobits per second (Kbps)Thousands of bits per second.
Kilobyte (KB)In computing, it refers to 1,024 bytes. (A byte is a unit of information consisting of 8 bits.) Kilobyte is mainly used to express the capacity of primary storage.
Kilobytes per second (KBps)Thousands of bytes per second.
LabelLinux TK built-in command to create and manipulate label widgets.

Link 373
Landing ZoneOn fixed disk drives, the read/write heads must return to a specific position when the drive is not operating (or when the system is powered off). This position is referred to as the landing zone. Early fixed disk drives (for instance, those introduced in the IBM XT systems) had problems with the heads falling on the surface of the disk drive platters when the systems lost power, causing a head crash. The landing zone is a portion of the disk where no data is read or written, thereby ensuring no damage to the data if the heads accidentally touch the disk platter surface.
Latin-1Also known, more cryptically, as ISO 8879. Latin-1 is an 8-bit character set (containing, therefore, 256 characters, of which the first 32 are nonprinting or “control” characters like tab and linefeed) that includes the diacritically marked characters used in European languages like French and German. (It does not, however, include the Polish barred L, the Czech r and s, the Turkish dotless i.) HTML browsers vary in how well they support Latin-1. Generally speaking, accented letters will work everywhere; special characters may not. In HTML source code, non-ASCII characters are denoted by “escape sequences” like é or §.
Launcher1. An application that simplifies access to Macintosh programs and files. This application is standard with Macintosh Operating System 8.
2. Hence, any application (or user interface structure) that presents a convenient way to access programs and files, such as the panel device in KDE and GNOME.
Leased-lineA telephone line reserved for the exclusive use of leasing customers, without interexchange switching arrangements. Also called a Private Line.
Legacy1. Older, non-Plug-and-Play hardware in use.
2. Older applications, such as those running on IBM Mainframes.
LibraryA collection of precompiled routines or objects in a file. Programs use routines from libraries so that they do not have to duplicate the code for each program.
Lightweight Directory Access Protocol (LDAP)A platform-independent service that may be employed to provide directories of information (such as e-mail addresses) using TCP/IP. It is similar to Microsoft’s Active Directory and Novell’s NDS.
LILOLInux LOader–a boot loader for the Linux kernel.
lilo.confThe /etc/lilo.conf file contains configuration parameters used by LILO to bring up Linux or other operating systems.
LinkAny part of a Web page that is connected to something else. Clicking on or selecting a link will make that something else appear. (This is one major difference between virtual reality and real reality.) The first part of the URL named in a link denotes the method or kind of link. The methods include file (for local files), ftp, gopher, http, mailto, news, and wais (for some kinds of searches).

374 Linux
LinuxA UNIX-like operating system originally created by Linus Torvalds at the University of Finland with the assistance of developers around the world. The goal of Linux is to provide the PC with a free or very low-cost operating system comparable to high-priced UNIX system software. Linux tries to conform to the POSIX standard user and programming interfaces. Linux has been ported to several hardware architectures, including Intel-based, PowerPC, Sparc, and Alpha-based computers.
linuxconfA program to configure a Linux system; has terminal, X, and Web interfaces.
Linux Documentation Project (LDP)A project to write documentation for all facets of Linux.
Linux Standards Base (LSB)A committee that is developing a set of standards Linux distributions may adhere to in order to ensure compatibility with other compliant distributions.
Liquid Crystal Display (LCD)LCD monitors are typically used in laptop and notebook systems as well as other devices, such as pocket calculators. Their light weight, small size, and low power consumption make them ideal for these applications. Most PC systems using LCD monitors now use backlit displays, which allow them to be read in low light conditions. Color LCD displays are also available.
Little-endianA format for storage or transmission of binary data in which the least significant byte (bit) comes first. From a story in Gulliver’s Travels (Swift) in which two warring factions disputed over which end of an egg should be opened. The reverse convention is called big-endian.
Local Area Network (LAN)A group of computers running specialized communications software and joined through an external data path.
A LAN will cover a small geographic area, usually no larger than a single building. The computers have a direct high-speed connection between all workstations and servers, and share hardware resources and data files. A LAN has centralized management of resources and network security.
PC-based networks can trace their heritage back to what are now often referred to as legacy systems. These systems were mainframe and minicomputer hosts accessed through dumb terminals.
There are a number of similarities between LANs and these legacy systems, such as centralized storage and backup, access security, and central management of resources. There are, however, a number of differences.
Traditional host systems are characterized by centralized processing, dumb terminals, custom applications, and high expansion costs and management overhead. LANs are characterized by distributed processing, intelligent workstations (PCs), and off-the-shelf applications. LANs are modular, are inexpensive to expand, and have more moderate management costs.
Local driveThe common name for a physical drive attached to a workstation.
Local printerA printer directly connected to one of the ports on the computer. The opposite is one connected through a network, which would be a remote or network printer.
Local serverThe server a user is logged in to, located on the Local Area Network.

lpd 375
locateA program used to locate files using a database usually updated daily; similar in some ways to find.
Locked filesFiles protected by an application against user access.
LocksA mechanism used by an application to prevent multiple concurrent user updates from interfering with one another and causing update anomalies.
Log fileIn Linux, a file in the /var/log/ directory that tracks any of a number of events.
Logic BoardThe electronic circuit board containing the primary system components such as CPU, RAM, ROMs, etc.
Logic errorError occurring due to poorly designed applications or improperly applied functions and operators.
Logical operatorsAlso called Boolean operators, they include AND (joins two or more conditions and returns results when all of the conditions are true), OR (connects two or more conditions and returns results when either or both of the conditions are true), and NOT (negates a condition).
LoginThe act of entering into a computer system, usually requiring a password, and identification of the user by a unique username. The login process includes a defined set of commands called the login script, either .profile (Bourne shell and its derivatives) or .login (csh).
Logging inThe process of gaining access to a computer system by providing an authorized username and then a password.
Logging outThe process of ending a user’s connection to the operating system, closing all resources for that user.
Login restrictionsThese control access to the network by requiring a password, setting account limits, limiting disk space, limiting the number of connections, and setting time restrictions. If a user violates login restrictions, Linux can disable the account, allowing no logins using that username and preventing unauthorized users from logging in.
Loop1. A series of program statements running in cyclic repetition.
2. An iterative programming construct. Loops are used to repeatedly execute a block of code.
Low priority categoryA classification of processes that consists of processes that get CPU time only when no other thread in higher priorities needs it. In Linux, a process can have any of several priorities.
lpdThe daemon that controls print jobs and spools each one to a printer.

376 LPT port
LPT portAlso known as a parallel port, it is a connection on the computer, usually LPT1, where the cable for a parallel printer is connected. Generally, LPT1 through LPT3 can exist on a personal computer, referenced as lp0, lp1, and lp2 in Linux.
lsThe command to list contents of a directory.
lsmodThe command to list loaded kernel modules.
LU6.2A communication protocol. IBM has identified LU6.2 as the transport mechanism for applications using the future Enhanced Connectivity Facility (ECF) within SAA.
LuminosityA value between 0 and 240 that indicates the amount of black or white contained in a particular color. A value of 0 indicates all black. A value of 240 indicates all white.
LynxA text-based interface to the World Wide Web.
Macintosh clientA Macintosh computer that attaches to the network. A Linux server running netatalk support allows the Macintosh client to store data on and retrieve data from the network. The client can also run executable Macintosh network files, share files with other clients (DOS, MS Windows, OS/2, and UNIX/Linux), and monitor print queues.
Macintosh filesFiles used on Macintosh computers. They contain two parts: the data fork, which contains information specified by the user, and the resource fork, which contains Macintosh-specific information such as the windows and icons used with the file. Macintosh files can be shared transparently in a number of ways. The Linux file server should run netatalk to make files transparently available to the Macintosh client. Use of Macintosh files by non-Macintosh clients only requires that the resource fork be ignored.
Magnetic stripe readerThe device that reads magnetic stripes on credit cards and bank cards.
Mail exploderPart of an electronic mail delivery system that allows a message to be delivered to a list of addressees. Mail exploders are used to implement mailing lists. Users send messages to a single address (e.g., [email protected]) and the mail exploder takes care of delivery to the individual mailboxes in the list.
Mail gatewayA machine that connects to two or more electronic mail systems, including those on different networks, and transfers mail messages among them.
MailboxAn area on a computer used to receive and store electronic mail messages.
Mailing listA list of electronic mail addresses. A mailing list can be maintained by an individual user to send messages to groups of people. The mailing list is also used by listserv and other mail exploder programs to forward electronic mail messages on a specific topic to the listserv subscriber list.

Megabit (Mb) 377
Mailing lists are like newsletters except that any subscriber may contribute. A message sent to the list will automatically be sent to everyone who has subscribed to the list. A series of messages with the same subject line is called a thread.
MailtoIn a URL, mailto indicates a link that will allow a user to send e-mail to the person whose address follows in the URL.
MainframeA legacy computer that is capable of multitasking and other robust operations. It is generally used as a host for a large number of users.
MakepipeNamed pipe test utility.
Management Information Base (MIB)A collection of objects that can be accessed via a network management protocol.
manThe command to display man (manual) pages.
Manual (man) pagesManual entries; most commands have a man page to document how they work.
Master Boot Record (MBR)The first block loaded on a PC system, which tells it how to load the operating system.
Mapping1. The transferring of data between a disk and a computer’s RAM.
2. Attaching to a server-based directory using the local drive ID.
Math coprocessorA specialized chip that supplements the mathematical operations of the CPU or microprocessor. Older systems had a separate chip for this purpose, while newer systems incorporate it into the microprocessor.
Maximum Transmission Unit (MTU)The largest possible unit of data that can be sent on a given physical medium. For example, the MTU of Ethernet is 1,500 bytes.
MediaA generic term for the medium that is used to record data. Media can be a floppy diskette, a hard disk, compact disc, or other similar recording surface (an audio tape, for instance).
Media Access Control (MAC) addressThe hardware address of a device connected to a channel, such as the address of a terminal connected to an Ethernet.
Media Access Control (MAC) SublayerThe level of the IEEE 802 data station that controls and mediates access to media.
Media Access Unit (MAU)An Ethernet transceiver.
Megabit (Mb)1,048,576 bits.

378 Megabits per second (Mbps)
Megabits per second (Mbps)Millions of bits per second (bps).
Megabyte (MB)1,048,576 bytes.
Megabytes per second (MBps)Millions of bytes per second (Bps).
Megahertz (MHz)A million cycles per second. A CPU that operates at 200 Mhz uses a clock oscillator that runs at 200 million cycles per second.
MemoryA hardware component of a computer system that can store information and applications for later retrieval. Types of memory are RAM (Random Access Memory), ROM (Read-Only Memory), conventional, expanded, and extended memory.
Memory managerThe section of an operating system that allocates both physical memory and virtual memory.
Memory modelA compiler setting for 16-bit application development that determines various memory allocation variables, such as the number of bits in a particular data type.
MenuA displayed list of items from which a user can make a selection.
Menu barThe bar of selections found at the top of a window in a GUI environment such as KDE or GNOME.
MessageA notification from one object to another that some event has occurred.
Message Handling System (MHS)The system of message user agents, message transfer agents, message stores, and access units, which together provide OSI electronic mail. MHS is specified in the CCITT X.400 series of Recommendations.
Message Transfer Agent (MTA)Electronic mail component that transfers messages between message stores.
MethodA defined behavior for a particular interface. An object that owns an interface must implement its methods.
Micro-to-mainframe linkThe connection of personal computers to mainframe-based networks.
MigrationTransfer of users, groups, and application data from one application to another.
Million Instructions Per Second (MIPS)A measure of the speed of execution of a computer’s central processsing unit.
Milliseconds (ms)A thousandth of a second. Access rates are expressed in milliseconds.

Motherboard 379
MinicomputerA legacy computer that is capable of multitasking but can support fewer users than a mainframe. An IBM AS/400 is a minicomputer.
Mirror1. Mirroring is the type of data redundancy provided at RAID level 1 and entails copying a hard disk’s partition and data and duplicating it on another hard disk at the same time it is written on the original disk.
2. A site that replicates data from a popular, busy, or remote location to another location. Unlike RAID mirroring, which is done simultaneously, site mirrors are often updated only at night or during periods of lower network usage.
ModemAn abbreviation for modulator/demodulator. A modem is a peripheral device that permits a personal computer, microcomputer, or mainframe to receive and transmit data in digital format across voice-oriented communications links such as telephone lines.
ModeratorA person who monitors the content of a listserv, newsgroup, or bulletin board. The moderator determines which messages to pass on to subscribers.
modprobeThe command to load modules and their dependencies.
ModulationThe process of changing the amplitude, frequency, or phase of a carrier wave in a periodic or intermittent way from a digital signal to an analog signal for the purpose of transmitting information.
ModulesParts of a system that can be loaded as needed; usually refers to kernel modules in Linux.
modules.confAn alternate naming convention for the kernel module configuration file. See conf.modules.
modules.depThe file containing module dependency information.
ModuloAn arithmetic operator (the percentage symbol %) that gives the integer remainder after a division operation on two integers. For example, 9 modulo 2 is 1 because 9 divided by 2 equals 4 with a remainder of 1.
MonochromeRefers to one color (mono=one, chrome=color). Early PC adapters and monitors were able to send only a single color to be displayed on the black background of the screen. Although the term “black and white” is commonly used to describe monochrome, studies have shown that other popular monochrome colors, like amber and green, actually create less eye strain than white. While only a single color appears on the black background, many monochrome monitors do support multiple shades of “gray.”
MotherboardThe electronic circuit board containing the primary computer components such as CPU, RAM, ROMs, etc.

380 mount
mountThe command used to load a file system; also the process of making a file system available. Used as a noun to refer to the mounted file system, e.g., a mount; look at the list of mounts.
Mount pointThe directory under which a file system will be located when it is mounted. A common mount for removable file systems is in /mnt.
MS-DOSMS-DOS is Microsoft’s version of the DOS operating system.
Multihomed hostA computer connected to more than one network or having more than one network address. The network addresses may or may not be on the same network and could even be on different kinds of networks.
Multistation Access Unit (MSAU)The central hub where drop cables attach to the Token-Ring network. MSAUs are typically located in central locations, such as a wiring closet.
Multi-User Dungeon or Dimension (MUD)A multiuser simulation environment that is usually text-based. Some MUDs are purely for fun and flirting, others are used for serious software development or education purposes and all that lies in between.
A significant feature of most MUDs is that users can create objects that stay in the environment after the user leaves. Other users can interact with this object in the originator’s absence, thus allowing a world to be built gradually and collectively.
MulticastA special form of broadcast where copies of the packet are delivered to only a subset of all possible destinations.
MultimediaIn computing, multimedia refers to the presentation of information using sound, graphics, animation, and text.
MultiplexorA device that takes several input signals and combines them into a single output signal in such a manner that each of the input signals can be recovered.
A device used to transmit information more efficiently and economically across a network. A multiplexor combines a number of low-speed inputs into a smaller number of high-speed outputs. Some multiplexors temporarily store information in buffers, so all of the information can be sent at once when the line becomes free.
MultiplexingIn data transmission, a function that permits two or more data sources to share a common transmission medium in such a way that each data source has its own channel.
Multipoint lineA circuit established between one primary station and multiple secondary stations simultaneously. This type of network groups devices together so they can share the same communications line.
MultiprocessingThe ability to execute more than one thread simultaneously.

named.conf 381
Multipurpose Internet Mail Extensions (MIME)The standard for attaching non-text files to standard Internet mail messages. Non-text files include graphics, spreadsheets, formatted word-processor documents, sound files, etc. An e-mail program is said to be “MIME compliant” if it can both send and receive files using the MIME standard. When non-text files are sent using the MIME standard they are converted (encoded) into text, although the resulting text is not really readable. Generally speaking, the MIME standard is a way of specifying both the type of file being sent (e.g., a QuicktimeTM video file) and the method that should be used to turn it back into its original form. Besides e-mail software, the MIME standard is also universally used by Web servers to identify the files they are sending to Web clients; in this way, new file formats can be accommodated simply by updating the browsers’ list of pairs of MIME types and appropriate software for handling each type.
MultitaskingA mode of operation that provides for the concurrent performance or interleaved execution of two or more tasks.
MultithreadedA feature by which applications can execute multiple sets of instructions (threads) simultaneously.
Multithreaded applicationAn executable that activates more than one thread of execution, for example, a thread to handle user input and one to perform background operations.
MultiuserThe ability of a computer to support several interactive terminals at the same time. This allows several users to access the computer’s resources, usually at the same time; each user will have an account to keep individual resources for different users separate.
MUSEOne kind of MUD, usually with little or no violence.
Musical Instrument Digital Interface (MIDI)A standard communications protocol for the connection of a computer to a musical synthesizer. MIDI enables musicians to compose complex music on a piano-style keyboard and then capture that information using a computer that can be used to automatically write the score.
Name resolutionThe process of translating a network name into a network address.
namedThe Berkeley Internet Name Domain (BIND) DNS server process.
Named pipeIn GNU/Linux, an InterProcess Communication (IPC) facility that allows data to be exchanged from one application to another either over a network or running within the same computer. The use of the term pipes for interprocess communication was coined in UNIX.
Named shared memoryA memory segment that can be accessed simultaneously by more than one process. Its name allows processes to request access to it.
named.bootThe DNS configuration file for BIND version 4.
named.confThe DNS configuration file for BIND version 8.

382 National Center for Supercomputing Applications (NCSA)
National Center for Supercomputing Applications (NCSA)One of the five original centers in the National Science Foundation’s Supercomputer Center Program located at the University of Illinois in Urbana-Champaign, Illinois.
National Information Standards OrganizationAn organization that develops standards and promotes the voluntary use of technical standards in libraries, publishing, and information services.
National Institute of Standards and Technology (NIST)U.S. governmental agency that assists in developing standards. Formerly the National Bureau of Standards.
National Research and Education Network (NREN)A U.S. national computer network outlined in the initiative signed into law in December 1991. NREN is to be built on NSFnet, the National Science Foundation Network connecting national and regional networks. NREN will be able to transmit data at more than 40 times the rate of NSFnet.
National Science Foundation (NSF)An independent agency of the U.S. government that promotes the advancement of science.
This foundation funded NSFnet, a high-speed network connecting supercomputing and research facilities in the United States. NFSnet also has connections to Canada, Mexico, Europe, and other geographic locations.
NSFnet is part of the Internet.
National Science Foundation Network (NSFnet)An Internet backbone that began as a project with the National Science Foundation in cooperation with corporate partners IBM, MCI, and the Michigan Strategic Fund.
NSFnet was established to enable researchers and scientists working on complex problems to instantaneously access library resources, supercomputer computation, and databases, as well as to exchange information with colleagues worldwide.
NSFnet links regional networks to each other and to the NSF-sponsored supercomputer networks. These other networks include BARRNET (Stanford University), NCAR/USAN (National Center for Atmospheric Research), NorthWestNet (University of Washington), SDSCNET (San Diego Supercomputer Center), Sesquinet (Rice University), Westnet (Colorado State University), MIDnet (University of Nebraska-Lincoln), NDSA/UIUC (University of Illinois), CNSF (Cornell Theory Center), JvNC (John von Neumann Supercomputer Center), NYSERNet (Syracuse, New York), PSCnet (Pittsburgh Supercomputing Center), and SURAnet (University of Maryland). These networks are based on TCP/IP and are part of the Internet.
Negative AcKnowledgment (NAK)Notifies a packet sender that a corrupted packet of information has been received. If a packet is correctly received over a network, an acknowledgment (ACK) is sent to the packet originator.
Nested if“If” statements appearing within “if” statements.
Nested loopsEmbedding one loop inside another.
NetBIOSShort for Network Basic Input/Output System, this is a standard programming interface for the development of distributed applications. Used primarily by IBM and Microsoft.

Network address 383
NetBIOS Enhanced User Interface (NetBEUI)This is a nonroutable transport protocol written to the NetBIOS interface.
NetBIOS nameMicrosoft networks, including workgroups and NT Server domains, always use NetBIOS names to identify workstations and servers. Machines recognize each other through unique machine names. Shared resources, files, and printers are accessed using NetBIOS names. For example, resources are identified by their Universal Naming Convention (UNC) name, which uses the format \\server\share_name.
In a UNC name, “server” is the NetBIOS name of the machine where the resource is physically located, and “share_name” is the name uniquely identifying the resource.
Microsoft NetBIOS names may contain up to 15 characters and are used to identify entities to NetBIOS. These entities include computers, domain names, workgroup names, and users.
In an internetwork TCP/IP environment, it is necessary to support resolution between NetBIOS names and IP addresses. Microsoft provides two methods of supporting this name resolution: LMHOSTS and Windows Internet Name Service (WINS).
LMHOSTS name resolution is based on a locally stored ASCII text file.
WINS Name resolution is based on WINS servers.
When designing your network, you will need to select the most appropriate method for your organizational requirements.
NetiquetteDescribes the code of conduct or etiquette governing personal behavior on the Internet. For example, it is considered poor netiquette to use all upper-case letters for casual conversations or messages. Upper case normally conveys the meaning that the originator is shouting angrily.
NetizenDerived from the term citizen, it referrs to a citizen of the Internet or someone who uses networked resources. The term implies civic responsibility and participation.
Netscape Communications CorporationThe company that produced Netscape Navigator and Netscape Server products. Purchased by AOL in 1999.
netstatA network utility that displays network information such as network connections, interface statistics, routing tables, masquerade connections, netlink messages, and multicast memberships.
NetworkA group of computers and other devices connected together so they can communicate with each other.
Network adapterThe card that allows a computer to interface with the network. Also known as a Network Interface Card (NIC).
Network address1. A network number that uniquely identifies a network cable segment.
384 Network administrator
2. A network address can also be the network portion of an IP address. For a Class A network, the network address is the first byte of the IP address. For a Class B network, the network address is the first two bytes of the IP address. For a Class C network, the network address is the first three bytes of the IP address, e.g., 192.168.1.0 is the network address for the hosts 192.168.1.1-192.168.1.254. In each case, the remainder is the host address.
Network administratorThe person in charge of all facets of a computer network.
Network applicationA computer program housed on a server and designed to run over the network instead of being installed and run locally.
Network backboneA central cabling system that provides connection to other cable segments. The central cable handles all internetwork traffic, decreasing packet transmission time and traffic on the network.
Network File System (NFS)Software developed by Sun Microsystems that allows you to use files on another computer or network as if they were on your local computer.
Network Information Center (NIC)A resource providing network administrative support as well as information services and support to users. The most famous of these on the Internet is the InterNIC, which is where new domain names are registered.
Network Information Service (NIS)A system for sharing configuration files (such as password files) over a network.
Network installationThe process of installing an operating system by pulling installation files from a network file server.
Network Interface Card (NIC)The card that allows a computer to interface with a network. Workstations communicate with each other and the network server via this circuit board, which is installed in each computer. It can also be referred to as a network adapter, NIC, LAN card, LAN adapter, or network card.
Network layerThe OSI layer that is responsible for routing, switching, and subnetwork access across the entire OSI environment.
Network newsNetwork news (also called newsgroups) is a misleading name for this popular function of the Internet. Network news has no relation to the world or local news reports. Although it includes news coverage, a newsgroup’s function is far broader than simply reporting events.
Network news is made up of discussion groups, or forums, where Internet users can browse a multitude of articles (postings) that cover a variety of topics. USENET is a term often used in conjunction with Network news. Network news grew out of USENET, which is a UNIX function that services discussion groups. The two terms are generally used interchangeably.
Users can choose articles on a variety of subjects. In 1995, more than 7,000 topics were covered by newsgroups, and new groups are constantly being created. The group “new.announce.newuser” lists new newsgroup additions. Though the address is similar to the domain name system, it has no relation to domain names. This format is just a convention for identifying newsgroups.
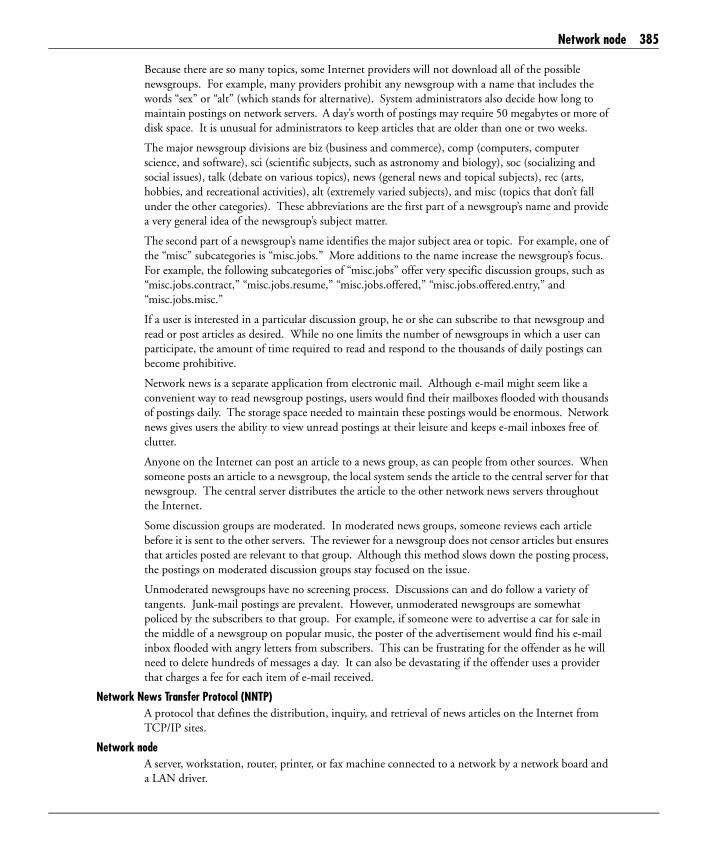
Network node 385
Because there are so many topics, some Internet providers will not download all of the possible newsgroups. For example, many providers prohibit any newsgroup with a name that includes the words “sex” or “alt” (which stands for alternative). System administrators also decide how long to maintain postings on network servers. A day’s worth of postings may require 50 megabytes or more of disk space. It is unusual for administrators to keep articles that are older than one or two weeks.
The major newsgroup divisions are biz (business and commerce), comp (computers, computer science, and software), sci (scientific subjects, such as astronomy and biology), soc (socializing and social issues), talk (debate on various topics), news (general news and topical subjects), rec (arts, hobbies, and recreational activities), alt (extremely varied subjects), and misc (topics that don’t fall under the other categories). These abbreviations are the first part of a newsgroup’s name and provide a very general idea of the newsgroup’s subject matter.
The second part of a newsgroup’s name identifies the major subject area or topic. For example, one of the “misc” subcategories is “misc.jobs.” More additions to the name increase the newsgroup’s focus. For example, the following subcategories of “misc.jobs” offer very specific discussion groups, such as “misc.jobs.contract,” “misc.jobs.resume,” “misc.jobs.offered,” “misc.jobs.offered.entry,” and “misc.jobs.misc.”
If a user is interested in a particular discussion group, he or she can subscribe to that newsgroup and read or post articles as desired. While no one limits the number of newsgroups in which a user can participate, the amount of time required to read and respond to the thousands of daily postings can become prohibitive.
Network news is a separate application from electronic mail. Although e-mail might seem like a convenient way to read newsgroup postings, users would find their mailboxes flooded with thousands of postings daily. The storage space needed to maintain these postings would be enormous. Network news gives users the ability to view unread postings at their leisure and keeps e-mail inboxes free of clutter.
Anyone on the Internet can post an article to a news group, as can people from other sources. When someone posts an article to a newsgroup, the local system sends the article to the central server for that newsgroup. The central server distributes the article to the other network news servers throughout the Internet.
Some discussion groups are moderated. In moderated news groups, someone reviews each article before it is sent to the other servers. The reviewer for a newsgroup does not censor articles but ensures that articles posted are relevant to that group. Although this method slows down the posting process, the postings on moderated discussion groups stay focused on the issue.
Unmoderated newsgroups have no screening process. Discussions can and do follow a variety of tangents. Junk-mail postings are prevalent. However, unmoderated newsgroups are somewhat policed by the subscribers to that group. For example, if someone were to advertise a car for sale in the middle of a newsgroup on popular music, the poster of the advertisement would find his e-mail inbox flooded with angry letters from subscribers. This can be frustrating for the offender as he will need to delete hundreds of messages a day. It can also be devastating if the offender uses a provider that charges a fee for each item of e-mail received.
Network News Transfer Protocol (NNTP)A protocol that defines the distribution, inquiry, and retrieval of news articles on the Internet from TCP/IP sites.
Network nodeA server, workstation, router, printer, or fax machine connected to a network by a network board and a LAN driver.

386 Network number
Network numberA number that uniquely identifies a network cable segment. In TCP/IP networks, the network address is determined by the IP address and subnet mask. In IPX/SPX networks, it is also referred to as the IPX external network number.
Network Operations Center (NOC)The authority for monitoring network or Internet operations. Each Internet service provider (organization providing Internet connections) maintains its own network operations center and is responsible for users’ connectivity.
Network printerA printer shared by multiple computers over a network.
Network serverA network node that provides file management, printing, or other services to other nodes or workstations. A node can function as a file server exclusively or as both a file server and a workstation.
Network Service Access Point (NSAP)The point at which the OSI Network Service is made available to a Transport entity. The NSAPs are identified by OSI Network Addresses.
Network supervisorThe person responsible for configuring a network server, workstations, user access, printing, etc. He or she may also be referred to as network administrator.
Network Time Protocol (NTP)A protocol that ensures accurate local timekeeping with reference to radio and atomic clocks located on the Internet.
New Technology File System (NTFS)A fast and reliable file system provided with Windows NT.
NewbieA novice user, typically of the Internet.
NewsgroupsMessage centers devoted to a particular topic, such as history or science. They resemble mailing lists except that no one need subscribe to them. Anyone with access to a computer that receives Usenet news may both read and contribute to every newsgroup to which they have access. In URLs, newsgroups are denoted by the prefix “news.”
nfsstatA program that displays NFS server statistics.
niceA command to change scheduling priority of a process.
nmbdThe Samba daemon that provides NetBIOS naming services. Equivalent to WINS on Windows NT.
NodeA device at a physical location that performs a control function and influences the flow of data in a network. Node can also refer to the points of connection in the links of a network. Any single computer connected to a network.

Online documentation 387
Node numberA number that uniquely identifies a network board. It may also be referred to as a station address, physical node address, or node address. Every node must have at least one network board connecting it to the network. Each board must have a unique node number to distinguish it from other network boards on the network.
NoiseIn data transmission, any unwanted electrical signal that interferes with a communications channel. Noise is often a random transmission of varying frequency, amplitude, and phase. Such noise may radiate from fluorescent lights and electric motors, and can also be caused by static, temperature changes, electric or magnetic fields, or from the sun and the stars.
Nonpriority SchemeA Token Ring can be used on a priority or nonpriority basis. When a station receives a free token it transmits the data units it needs to send. Opposite of Priority Scheme.
nslookupA program used to query domain name servers.
NuBusThe original expansion bus designed at MIT and adopted by Apple Computer for use in the Macintosh line, from the Macintosh II through the early PowerPC models. This has been replaced by the PCI bus. Supported by MKLinux, but not by LinuxPPC, which requires the PCI bus.
Null modemA device that connects two DTE devices directly by emulating the physical connections of a DCE device.
Null variableA variable set specifically to a value of null.
Numeric variableA variable used to store numeric values, such as integer or real.
Object1. Any program, file, or utility that can be accessed by the user.
2. In some environments, an object is an item that is contained in the site database.
Object-oriented programming (OOP)Component-based application development. C++ is a popular object-oriented language, providing classes that combine data and functionality in a single object.
OctetA set of 8 bits or one byte. Usually only used when referring to networking.
Online accessRefers to direct interaction with a host computer through local or long-distance telecommunications links.
Online documentationRefers to help documents in electronic format. Linux provides extensive online documentation in the /usr/doc directory. The information is written in a number of styles, including HOWTO documents, FAQs, and manuals, and is available in different languages and formats, such as HTML and plain text.

388 Online Public Access Catalog (OPAC)
More online documentation can be found on the Internet. On the Internet, information can be found by using search engines or visiting Linux help sites such as http://www.linux.org/. See also Linux Documentation Project.
Online Public Access Catalog (OPAC)A computerized library catalog. OPACs worldwide are accessible through the Internet.
Open Host Controller Interface (OpenHCI)The specification that describes the capabilities required for a PC to utilize a Universal Serial Bus (USB). It also defines a standard programming interface for accessing a USB device.
Open Shortest Path First (OSPF)A proposed standard IGP for the Internet.
Open sourceDevelopment, licensing, and marketing strategy in which software source is open to a vast community of developers. Product can be sold at any price, but source must be included.
Open Systems Interconnection (OSI)To support international standardization of network terminology and protocols, the International Standards Organization (ISO) proposed a reference model of open systems interconnection. Currently under development, OSI ensures that any open system will communicate with any other OSI-compliant system.
Open Token FoundationA private nonprofit organization composed of users and vendors of Token-Ring products who are dedicated to expanding the interoperability of multivendor Token-Ring products and broadening their use. Founded in 1988 by such companies as 3Com, Momorex Telex, Madge Networks LTD., Proteon Corp., NCR, and Texas Instruments.
OpenTypeAllows a TrueType font file to contain an Adobe Postcript file.
Operating systemThe software program that controls all system hardware and provides the user interface.
Optical fiberA thin filament of glass or other transparent material through which a signal-encoded light beam may be transmitted by means of total internal reflection.
OSI layer 1The Physical layer. It is the lowest of the seven defined layers of the generalized network architecture. It defines the transmission of bits over a communication channel, ensuring that 1s and 0s are recognized as such. The physical layer accepts and transmits a bit stream without recognizing or defining any structure or meaning.
OSI layer 2The Data link layer. It provides methodologies for transforming the new Physical layer link into a channel that appears free of errors to the network layer (the next higher layer). The Data link layer accomplishes this by splitting the input or data stream provided in the physical layer into data frames that are transmitted sequentially as messages and by processing the acknowledgment (ACK) frames sent back over the channel by the receiver.
OSI layer 3The Network layer. It accepts messages of data frames from the transmitting host, converts the messages to packets, and routes the packets to their destination.
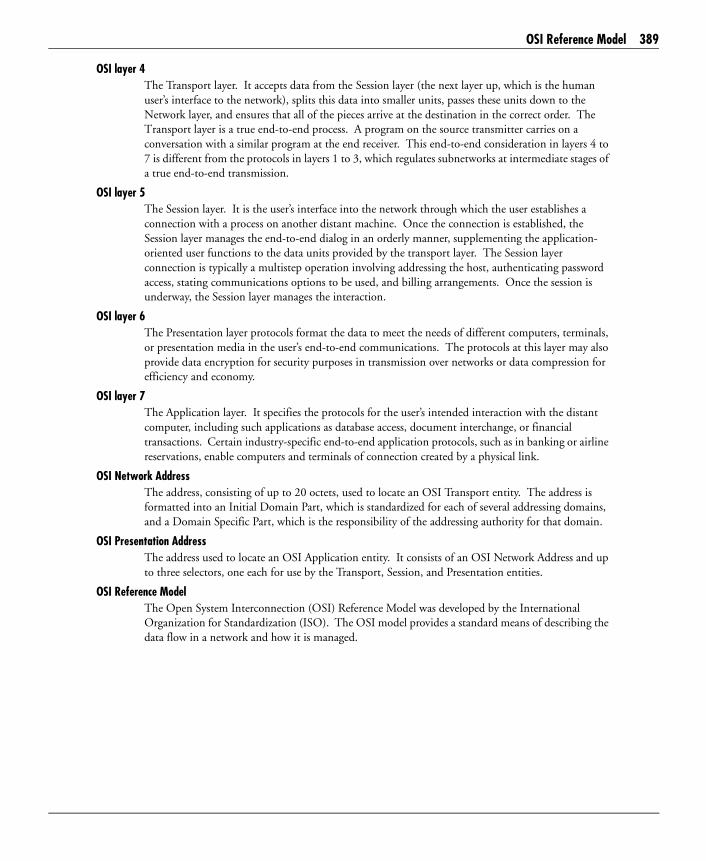
OSI Reference Model 389
OSI layer 4The Transport layer. It accepts data from the Session layer (the next layer up, which is the human user’s interface to the network), splits this data into smaller units, passes these units down to the Network layer, and ensures that all of the pieces arrive at the destination in the correct order. The Transport layer is a true end-to-end process. A program on the source transmitter carries on a conversation with a similar program at the end receiver. This end-to-end consideration in layers 4 to 7 is different from the protocols in layers 1 to 3, which regulates subnetworks at intermediate stages of a true end-to-end transmission.
OSI layer 5The Session layer. It is the user’s interface into the network through which the user establishes a connection with a process on another distant machine. Once the connection is established, the Session layer manages the end-to-end dialog in an orderly manner, supplementing the application-oriented user functions to the data units provided by the transport layer. The Session layer connection is typically a multistep operation involving addressing the host, authenticating password access, stating communications options to be used, and billing arrangements. Once the session is underway, the Session layer manages the interaction.
OSI layer 6The Presentation layer protocols format the data to meet the needs of different computers, terminals, or presentation media in the user’s end-to-end communications. The protocols at this layer may also provide data encryption for security purposes in transmission over networks or data compression for efficiency and economy.
OSI layer 7The Application layer. It specifies the protocols for the user’s intended interaction with the distant computer, including such applications as database access, document interchange, or financial transactions. Certain industry-specific end-to-end application protocols, such as in banking or airline reservations, enable computers and terminals of connection created by a physical link.
OSI Network AddressThe address, consisting of up to 20 octets, used to locate an OSI Transport entity. The address is formatted into an Initial Domain Part, which is standardized for each of several addressing domains, and a Domain Specific Part, which is the responsibility of the addressing authority for that domain.
OSI Presentation AddressThe address used to locate an OSI Application entity. It consists of an OSI Network Address and up to three selectors, one each for use by the Transport, Session, and Presentation entities.
OSI Reference ModelThe Open System Interconnection (OSI) Reference Model was developed by the International Organization for Standardization (ISO). The OSI model provides a standard means of describing the data flow in a network and how it is managed.

390 OSI Transport Protocol Class 0 (TP0)
While a number of companies have endorsed and agreed to apply this model within their own products, few follow its guidelines exactly. Some use their own networking model, most of which closely parallels the OSI standard. It is still a helpful tool, allowing a common point of reference for discussing network devices and concepts.
OSI Transport Protocol Class 0 (TP0)Also known as Simple Class, this is the simplest OSI Transport Protocol, useful only on top of an X.25 network (or other network that does not lose or damage data).
OSI Transport Protocol Class 4 (TP4)Also known as Error Detection and Recovery Class, this is the most powerful OSI Transport Protocol, useful on top of any type of network. TP4 is the OSI equivalent to TCP.
Outer joinA join that includes all nonmatching rows from one of the join tables in the result table.
PackageA collection of documentation, configuration files, source code, and executable binary files that together provide functional applications or utilities.
PacketA unit of data transmitted at the OSI Network layer; or any addressed segment of data transmitted on a network.
Packet Assembler/Disassembler (PAD)A translating computer that provides access for asynchronous character-at-a-time terminals to a synchronous packet-switching network.
Packet Internet groper (Ping)A program used to test reachability of destinations by sending them an ICMP echo request and waiting for a reply. The term is used as a verb: “Ping host X to see if it is operational!”
Packet Switch Node (PSN)A computer that accepts, routes, and forwards packets in a packet-switching network.

Parallel transmission 391
Packet-switching networkA communications network that breaks a message into small units called packets in order to transmit data from one computer to another. Each packet contains destination (header) information and a part of the message. The packets are routed from the sending computer to the receiving computer through switching points, where each of the switches (nodes) is a computer capable of recognizing the address information and routing the packet to its destination.
The Packet-Switching Nodes can dynamically select the best route for each packet so that later packets may arrive prior to earlier packets. The switch at the receiving end reassembles the packets in the proper order. Packet-switching networks do not establish a real connection between transmitter and receiver but, instead, create a virtual circuit that emulates the connection created by a physical link.
Page1. A unit of memory that can be swapped to disk using virtual memory.
2. The process of copying information from memory to the swap space on disk.
3. A Web-based document. Often called a Web page or a home page.
Pages per minute (ppm)A term used to describe the output speed of printers.
Paging fileDedicated hard disk space used to emulate RAM for virtual memory.
Palette1. The palette is a set of colors that can be displayed on a particular device such as a video monitor.
2. A movable tool bar within an application (known as a tool palette).
PanicSee Kernel panic.
Parallel interfaceA connection between a parallel device, such as a printer, and a computer. The computer sends multiple bits of information to the device simultaneously.
Parallel portsIn a parallel interface, eight data bits of data are sent at the same time, in parallel, on eight separate wires. Therefore, parallel transmissions are faster than serial transmissions.
Parallel ports, also called LPT ports, were originally used to connect line printers and terminals. Most systems have at least one parallel port, which is called /dev/lp0.
There are two parallel standards: Bi-Tronics and Centronics (IEEE 1284). Centronics cables support a higher data rate. The Centronics connector is a 25-pin D-shell connector and is considered the standard.
Printers generally use parallel communications, as do some early notebook PC network adapters. Devices are available that allow the connection of SCSI devices to a parallel port.
Parallel transmissionIn computer communications, parallel transmission is the transmission of data (binary digits) simultaneously (in parallel with each other) using separate lines. In contrast, serial transmission sends only one bit after the other using only one communications line.
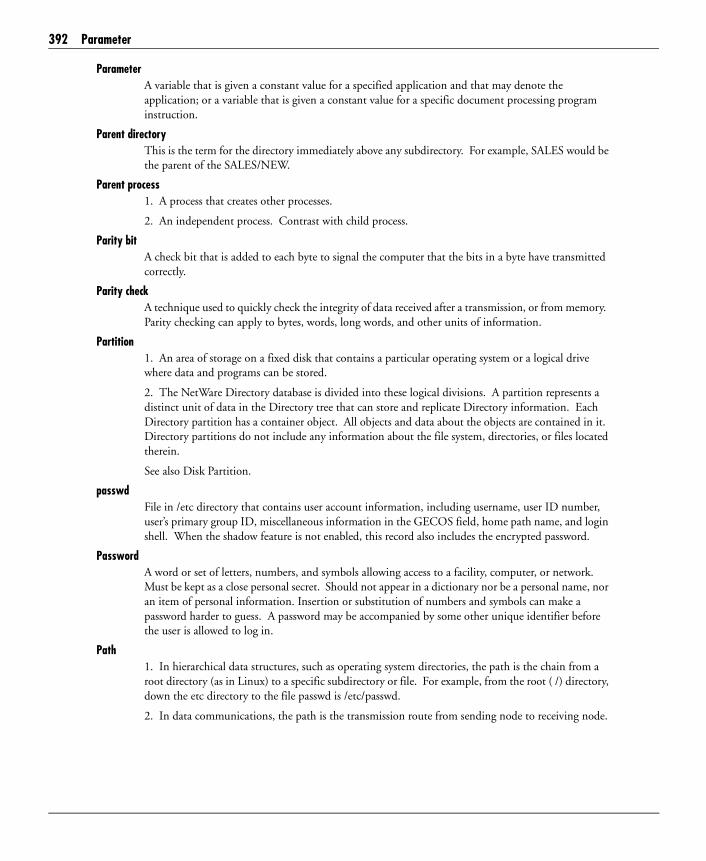
392 Parameter
ParameterA variable that is given a constant value for a specified application and that may denote the application; or a variable that is given a constant value for a specific document processing program instruction.
Parent directoryThis is the term for the directory immediately above any subdirectory. For example, SALES would be the parent of the SALES/NEW.
Parent process1. A process that creates other processes.
2. An independent process. Contrast with child process.
Parity bitA check bit that is added to each byte to signal the computer that the bits in a byte have transmitted correctly.
Parity checkA technique used to quickly check the integrity of data received after a transmission, or from memory. Parity checking can apply to bytes, words, long words, and other units of information.
Partition1. An area of storage on a fixed disk that contains a particular operating system or a logical drive where data and programs can be stored.
2. The NetWare Directory database is divided into these logical divisions. A partition represents a distinct unit of data in the Directory tree that can store and replicate Directory information. Each Directory partition has a container object. All objects and data about the objects are contained in it. Directory partitions do not include any information about the file system, directories, or files located therein.
See also Disk Partition.
passwdFile in /etc directory that contains user account information, including username, user ID number, user’s primary group ID, miscellaneous information in the GECOS field, home path name, and login shell. When the shadow feature is not enabled, this record also includes the encrypted password.
PasswordA word or set of letters, numbers, and symbols allowing access to a facility, computer, or network. Must be kept as a close personal secret. Should not appear in a dictionary nor be a personal name, nor an item of personal information. Insertion or substitution of numbers and symbols can make a password harder to guess. A password may be accompanied by some other unique identifier before the user is allowed to log in.
Path1. In hierarchical data structures, such as operating system directories, the path is the chain from a root directory (as in Linux) to a specific subdirectory or file. For example, from the root ( /) directory, down the etc directory to the file passwd is /etc/passwd.
2. In data communications, the path is the transmission route from sending node to receiving node.

Phase modulation 393
Path nameThe path name is information that uniquely designates an item on a server. Path names have the form “volume/folder/.../name,” where the volume is the storage device (typically a hard disk) on which the file resides, and “folder/.../” designates the series of nested folders (or, in the DOS and UNIX worlds, directories) containing the file.
PC Card Personal Computer Memory Card International Association (PCMCIA)A bus definition that defines a hardware interface that supports very small peripherals, such as credit-card-sized modems, network interface cards, hard drives, and memory cards. Sometimes referred to by the acronym “People Can’t Memorize Computer Industry Acronyms.” Although now called PC Card, it is still often referred to as PCMCIA.
PC-DOSIBM’s version of the DOS operating system. Often referred to simply as DOS.
Peer-to-peerCommunication in which two communications systems communicate as equal partners sharing the processing and control of the exchange, as opposed to host-terminal communication in which the host does most of the processing and controls the exchange.
Peripheral Component Interconnect (PCI)A high-speed expansion bus technology used by PC and Apple computers.
PerlPractical Extraction and Report Language. A popular scripting language used almost universally to control system processes and script Web sites. Designed to make scripting faster and easier, perl features relatively clear syntax and is readily extensible.
Also, Pathologically Eclectic Rubbish Lister.
Permanent Virtual Circuit (PVC)Provides for a fixed logical connection between two network subscribers by reserving buffer space in the switching nodes. A connection between two subscribers can be established by either a virtual call or a permanent virtual circuit. The permanent virtual circuit is established by prior arrangement between the network subscribers and the network provider. On a permanent virtual circuit, the network is aware of the fixed association between two stations. Permanent logical channel numbers are assigned exclusively to the permanent circuit.
PermissionsAuthority to run certain actions on certain database objects or to run certain commands. SQL Server permissions are generated using Grant and Revoke commands.
In Linux, three sets of flags attached to each file and directory, one each for owner, group, and other users on the system. Permissions include read, write, and execute.
Persistent connectionA network connection that is restored each time the workstation or user logs on to the network.
Personal profileThe server-based, user-specific profile applied when a user logs in from any domain workstation. Users are allowed to make changes to local profiles.
Phase modulationThe time difference between two identical wave forms that are delayed (phased) to represent the binary digits 0 and 1.
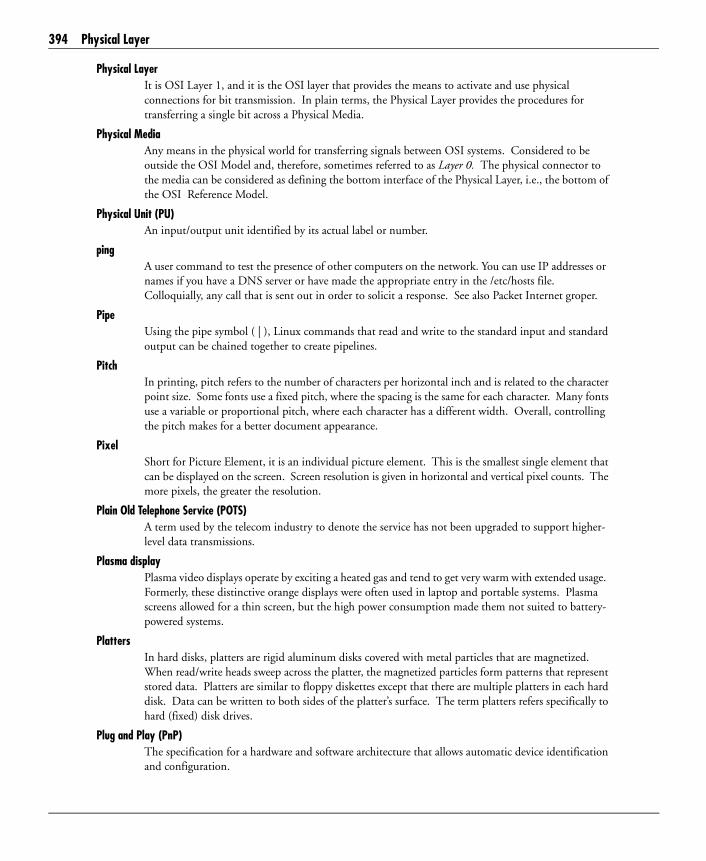
394 Physical Layer
Physical LayerIt is OSI Layer 1, and it is the OSI layer that provides the means to activate and use physical connections for bit transmission. In plain terms, the Physical Layer provides the procedures for transferring a single bit across a Physical Media.
Physical MediaAny means in the physical world for transferring signals between OSI systems. Considered to be outside the OSI Model and, therefore, sometimes referred to as Layer 0. The physical connector to the media can be considered as defining the bottom interface of the Physical Layer, i.e., the bottom of the OSI Reference Model.
Physical Unit (PU)An input/output unit identified by its actual label or number.
pingA user command to test the presence of other computers on the network. You can use IP addresses or names if you have a DNS server or have made the appropriate entry in the /etc/hosts file. Colloquially, any call that is sent out in order to solicit a response. See also Packet Internet groper.
PipeUsing the pipe symbol ( | ), Linux commands that read and write to the standard input and standard output can be chained together to create pipelines.
PitchIn printing, pitch refers to the number of characters per horizontal inch and is related to the character point size. Some fonts use a fixed pitch, where the spacing is the same for each character. Many fonts use a variable or proportional pitch, where each character has a different width. Overall, controlling the pitch makes for a better document appearance.
PixelShort for Picture Element, it is an individual picture element. This is the smallest single element that can be displayed on the screen. Screen resolution is given in horizontal and vertical pixel counts. The more pixels, the greater the resolution.
Plain Old Telephone Service (POTS)A term used by the telecom industry to denote the service has not been upgraded to support higher-level data transmissions.
Plasma displayPlasma video displays operate by exciting a heated gas and tend to get very warm with extended usage. Formerly, these distinctive orange displays were often used in laptop and portable systems. Plasma screens allowed for a thin screen, but the high power consumption made them not suited to battery-powered systems.
PlattersIn hard disks, platters are rigid aluminum disks covered with metal particles that are magnetized. When read/write heads sweep across the platter, the magnetized particles form patterns that represent stored data. Platters are similar to floppy diskettes except that there are multiple platters in each hard disk. Data can be written to both sides of the platter’s surface. The term platters refers specifically to hard (fixed) disk drives.
Plug and Play (PnP)The specification for a hardware and software architecture that allows automatic device identification and configuration.

Port 395
Pluggable Authentication Modules (PAMs)A programming interface that enables third-party security methods to be used in UNIX. For example, smart cards, Kerberos, and RSA technologies can be integrated with various UNIX functions such as rlogin, telnet, and ftp.
Plug-InA software utility that conforms to a specific application’s add-on software architecture. For example, Adobe Photoshop can be extended through the use of third-party Plug-Ins such as Kai’s Power Tools from MetaCreations, Inc. Netscape for UNIX/Linux uses plug-ins.
Point of Presence (POP)The access point to a public data network (PDN). It is a location where a network can be connected to the PDN, often with dial-up phone lines.
If an Internet company says they will soon have a POP in Belgrade, it means that they will soon have a local phone number in Belgrade and/or a place where leased lines can connect to their network.
Point sizeIn printing, characters are measured in points. There are 72 points per inch. The point size refers to the maximum size for any character, measured top-to-bottom.
Point-to-pointData communications links are divided into two main categories, depending on how the line is structured: either point-to-point or multipoint. Point-to-point describes a channel that is established between two, and only two, stations. The link may be a dedicated or a dial-up line connecting a processor and a terminal, two processors, or two terminals.
Point-to-Point Protocol (PPP)The successor to the SLIP protocol, PPP allows a computer to use a regular telephone line and a modem to make IP connections. PPP can also carry other routable protocols such as IPX.
Point-to-Point Tunneling Protocol (PPTP)A method of providing secure client connections over the Internet.
Pointer1. Represents the memory address of a data variable.
2. A screen symbol used to point to some element on the screen, erroneously referred to as the cursor.
3. In database programming, an address embedded in a record that specifies the location of data in another record or file.
Port1. A memory address that identifies the physical circuit used to transfer information between a microprocessor and a peripheral, or a physical interface allowing connection between devices, e.g., “Connect your modem to the DB25 serial port...”
2. On the Internet, port often refers to a number that is part of the TCP/IP packet. Every service on an Internet server listens on a particular port number on that server. Most services have standard port numbers. Web servers normally listen on port 80. Services can also listen on nonstandard ports, in which case the port number must be specified in a URL when accessing the server. You might see a URL specify a port in the form gopher://peg.cwis.uci.edu:7000/, which shows a gopher server running on a nonstandard port (the standard gopher port is 70).
3. Port also refers to translating a piece of software from one type of computer system to another, for example, translating the source code written for a program to run on the i386 architecture to the Alpha architecture.

396 Post
Post To send a message to a network newsgroup or electronic bulletin board.
Post Office Protocol (POP)Refers to the way e-mail software, such as Eudora, gets mail from a mail server. When you obtain a SLIP, PPP, or shell account, you normally get a POP account. You set your e-mail software to use this account for receiving mail.
PostScriptA registered trademark of Adobe Systems Incorporated and the accepted language standard for high-resolution printing on laser printers. PostScript is a language used to tell the printer how to print a character on the page. PostScript uses vector information to define graphics. Some printers, such as Apple LaserWriter printers, are true PostScript printers. Some printers use PostScript emulation, either at the system or in the printer. A free emulation of PostScript included with Linux is Ghostscript.
Power On Self Test (POST)When you first start a PC, it will go through a Power On Self Test (POST). The various parts of the computer are checked in a particular order. If errors are detected, they are reported to the user. The BIOS then loads the boot loader.
Power SupplyA PC’s power supply is a device that takes the AC (alternating current) electric current from the wall and converts it into the DC (direct current) current required by the computer.
The power supply outputs four discreet voltages: +5 VDC, -5 VDC, +12 VDC, and -12 VDC. Spikes are smoothed out with capacitors connected across the power supply leads.
PowerPCThe microprocessor family jointly developed by IBM, Apple, and Motorola. These processors are found in Power Macintosh and Power chip compatible computers. PowerPC is named after IBM’s Performance Optimization with Enhanced RISC.
Preemptive multitaskingA multitasking method where the operating system allocates processor time to tasks according to their relative priority.
Presentation layerOSI Layer 6. It is the OSI layer that determines how application information is represented (i.e., encoded) while in transit between two end systems.
Primary time serverThis server synchronizes the time with at least one other Primary or Reference time server. It also provides the time to Secondary time servers and workstations.
Print queueA directory that stores print jobs. The print server takes the print job out of the queue and sends it when the printer is ready. It can hold as many print jobs as disk space allows.
Print SpoolerA program that allows background printing so that a computer may be used for other processing tasks while a print job is in progress.
printcapThe /etc/printcap file defines all system printers. Use printtool under X environment to modify.

Profile 397
PrinterA peripheral hardware device that produces printed material (hard copy).
Printer Control Language (PCL)Hewlett-Packard developed PCL for its own LaserJet printers. PCL instructs the printer on how to construct the output on a page. A large number of other manufacturers also support the HP PCL language.
Printer languagesIn addition to simple control characters, more advanced printers (such as laser printers) support a command and control language, which allows for even greater application support. PCL (Hewlett-Packard) and PostScript (Adobe) are two primary, de facto industry standards for printer languages.
PrioritySometimes abbreviated as PRI, PRIO, or PRTY; a rank assigned to a task that determines its precedence in receiving system resources.
Private Branch Exchange (PBX)A telephone exchange on the user’s premises. Provides a switching facility for telephones on extension lines within the building and access to the public telephone network. May be manual (PMBX) or automatic (PABX). A digital PBX that also handles data devices without modems is called a CBX.
Privilege modeA special execution mode (also known as ring 0) supported by the 80286/80386 hardware. Code executing in this mode can execute restricted instructions that are used to manipulate key system structures and tables. Only the kernel and device drivers run in this mode.
Problem determinationThe process of identifying the source of a problem, such as machine failure, power loss, or user error.
ProcA pseudo file system. It provides information on currently running processes, system statistics such as memory availability and processor usage, and hardware information, including interrupts and addresses used by adapters.
ProcedureA block of program code with or without formal parameters (the execution of which is invoked by means of a procedure call). In C, a procedure is referred to as a function. Usually, except in C, a procedure is distinguished from a function in that a function returns a value and a procedure does not.
ProcessThe basic unit of program execution. Each program consists of one or more processes.
Process Identification Number (PID)A unique code that the operating system assigns to a process when the process is created. The PID may be any number except 0, which is reserved for the init process.
ProcessorIn a computer, the processor, or Central Processing Unit (CPU); this is a functional unit that interprets and executes instructions. A processor contains at least an instruction control unit and an arithmetic and logic unit.
ProfileFile in /etc directory that is the template for all user logins.
398 Promiscuous mode
Promiscuous modeEnables a network adapter card to hear all of the frames that pass over the network.
ProtocolA set of strict rules (usually developed by a standards committee) that govern the exchange of information between computer devices. Also, a set of semantic and syntactic rules that determine the behavior of hardware and software in achieving communication. Any set of agreed upon methods, names, locations, and process steps to be used.
Protocol Control Information (PCI)The protocol information added by an OSI entity to the service data unit passed down from the layer above, all together forming a Protocol Data Unit (PDU).
Protocol Data Unit (PDU)This is OSI terminology for packet. A PDU is a data object exchanged by protocol machines (entities) within a given layer. PDUs consist of both Protocol Control Information (PCI) and user data.
Proxy1. The mechanism whereby one system fronts for another system in responding to protocol requests. Proxy systems are used in network management to avoid implementing full protocol stacks in simple devices, such as modems.
2. A copy of an out-of-process component’s interfaces. Its role is to marshal method and property calls across process boundaries.
Some proxy servers will cache results of requests so that a repeated request can be served from the proxy, reducing network traffic and server load.
psUser command to list processes.
Public switched networkAny switching communications system—such as Telex, TWX, or public telephone networks—that provides circuit-switched connections to many customers.
PythonA cross-platform object-oriented scripting language often compared to Perl.
Quality of Service (QoS)The ability to measure and guarantee transmission rates and error rates.
QueueA holding area in which items are removed in a first in, first out (FIFO) manner. In contrast, a stack removes items in a last in, first out (LIFO) manner.
RAM disk driveAlso known as a virtual drive. A portion of memory used as if it were a hard disk drive. RAM drives are faster than hard disks because the memory access time is much faster than the access time of a hard disk. Information on a RAM drive is lost when the computer is turned off.
Random accessFile access method where data can be read from the file in any order.
Random Access Memory (RAM)The computer’s storage area to write, store, and retrieve information and program instructions so they can be used by the central processing unit. The contents of RAM are not permanent.

Remote access 399
RAS programsReliability, Availability, and Serviceability programs. These programs monitor the operating system and facilitate problem determination.
Raymond, EricA Linux and Open Source proponent, he worked to popularize Linux. Often referred to by his initials, ESR.
rc.dDirectory containing system startup directories.
rc.sysinitThe system intialization script. First script to be run by the init process.
rc.localA script run by init on system startup that is used for controlling network services.
rcpA standard BSD-based command used for remote copying of files. Since it is known to have security issues, you should use scp instead.
Read-Only Memory (ROM)Read-Only Memory is used to store permanent instructions for the computer’s general housekeeping operations. A user can read and use, but not change, the data stored in the computer’s ROM. ROM is stored on a nonvolatile memory chip, enabling the information to be retained even after the computer’s power has been turned off.
READMEStandard filename for information about installing or using a software package.
Read/write headsIn a fixed disk drive, there is one read/write head for every side of each platter. The read/write heads are said to be gang mounted because they move together in unison across multiple platters.
RebootThe process of restarting a computer system.
Red Hat LinuxA Linux distribution known for its commercial dominance and robust package manager, RPM.
Red Hat Package Manager (RPM)The program that installs and queries software packages.
Redundant Array of Independent Disks (RAID)Usually referred to as a RAID system. The “I” originally stood for Inexpensive but was changed to Independent because RAID systems are typically expensive.
A RAID system is composed of multiple hard disks that can either act independently or emulate one large disk. A RAID disk system allows increased capacity, speed, and reliability.
Refresh RateThe rate at which a video display monitor redraws screen contents. Higher refresh rates (72 Hz and above) provide better display characteristics than lower rates (60 Hz).
Remote accessThe ability of a computer to access an offsite or distant computer using telephone lines or a network.

400 Remote File System (RFS)
Remote File System (RFS)A distributed file system, similar to NFS, developed by AT&T and distributed with its UNIX System V operating system.
Remote loginA method of activating a login procedure to a computer network that enables the user to access files and other services as though attached locally.
Remote Operations Service Element (ROSE)A lightweight RPC protocol used in OSI Message Handling, Directory, and Network Management application protocols.
Remote Procedure Call (RPC)A protocol that standardizes initiation and control processes on remote computers.
Remote workstationA terminal or personal computer that is connected to the LAN by a remote asynchronous connection.
RepeatersThe earliest functional role of repeaters was to extend the physical length of a LAN. This is still the primary benefit of a repeater.
There are, however, several potential problem areas that are not addressed by repeaters. These include signal quality, time delays, network traffic, and node limitations.
Most repeaters do nothing to filter noise out of the line, so it is amplified and sent on with the signal.
Time delays can occur as signals are generated over greater distances. These delays may eventually generate timeout errors. This is why repeaters are not used for remote links.
Repeaters do nothing to reduce the network traffic load because they don’t have any capacity for filtering traffic. Repeaters are “invisible” to access protocols. All nodes added through a repeater count toward the total that can be supported in a subnet.
Repeaters are typically used on bus networks. To get the best signal quality, place the repeater so that the two connected segments are approximately the same length.
ReplyAn electronic mail program feature that enables a message receiver to automatically respond to a received message without manually addressing the message.
Request For Comments (RFC)The name of the result and process for creating a standard on the Internet. New standards are proposed and published online as a Request For Comments.
The Internet Engineering Task Force is a consensus-building body that facilitates discussion and new standards. When a new standard is established, the reference number/name for the standard retains the acronym RFC. For example, the official standard for e-mail is RFC 822.
Resolution1. The process of identifying an IP address with an associated host name. Nameserver resolution order is specified in /etc/resolv.conf.
2. In monitors, this refers to the sharpness of the displayed image or text on a monitor and is a direct function of the number of pixels in the display area. Resolution is the number of pixels across one line of the monitor by the number of lines down the screen (for example, 800x480). The greater the pixel count, the higher the resolution and the clearer the screen image.

Router configuration 401
Reverse Address Resolution Protocol (RARP)Used to map the MAC, or hardware address, to a host’s IP, or software address.
If the only thing a station knows at initialization is its own MAC address (usually from configuration information supplied by the manufacturer), how can it learn its IP address? The RARP protocol serves this purpose.
RARP allows a station to send out a broadcast request in the form of a datagram that asks, “Who am I?” or “What is my IP address?” Another host (typically a RARP server) must be prepared to do the inverse of ARP, f. For example, taking the MAC address and mapping it into an IP network and node number. This only happens at startup. RARP is not run again until the next time the device is reset or restarted.
A value of 0x8035 in the Ethernet Type field indicates that the datagram is a RARP datagram. There must be a RARP server on each segment because broadcasting is used, and broadcasts are not normally forwarded by IP routers. All machines on the network receive the request, but only those authorized to supply the RARP service will process the request and send a reply. Such machines are known as RARP servers.
RloginA service offered by Berkeley UNIX that allows users of one machine to log in to other UNIX systems across a network (for which they are authorized) and interact as if their terminals were connected directly. Similar to Telnet.
rootThe superuser account that has access to all system resources.
Root directoryThe first-level directory of a disk, created when the user first formats a disk and then is able to create files and subdirectories in it. In Linux, the first level of the file system. Also called /. Note the distinction between the first-level directory, /, and the root user’s home directory, /root.
Round-robin schedulingA method of allocating CPU time in a multiuser environment, with each user being allocated a certain amount of quantum or processor time. Once a user has exhausted his quantum, control passes to the next user.
RouteTo move data between multiple connected networks.
Router1. A connection between two networks that specifies message paths and may perform other functions, such as data compression.
2. In early versions of NetWare, the term bridge was sometimes used interchangeably with the term router.
Router configurationThe settings and parameters that configure a NetWare 4 server as a router. They are set through internetwork utilities.

402 Router Information Protocol (RIP)
Router Information Protocol (RIP)1. This protocol allows routers to exchange routing details on a NetWare internetwork. Using RIP, NetWare routers can create and maintain a database, or routing table, of current information. Workstations can query the nearest router to determine the fastest route to a distant network by broadcasting a RIP request packet. Routers send periodic RIP broadcast packets with current information to keep all routers on the internetwork synchronized. They also send RIP update broadcasts when a change is detected in the internetwork configuration.
2. An Internet standard (Interior Gateway Protocol) IGP supplied with Berkeley UNIX. It is based on distance-vector algorithms that measure the shortest path between two points on a network.
Routing domainA set of routers (devices connecting hosts on a network) exchanging routing information within an administrative domain (computers and networks under a single administrative authority).
Routing Table Maintenance Protocol (RTMP)The routing protocol used by routers to share network information in an AppleTalk network. RTMP is responsible for maintaining routing table information. This information is received from broadcasts from other networks and routers on the network.
RPMsRPM packages (plural), containing binary or source software, and installation procedures.
RunlevelsThe various modes in which a Linux system can run.
SambaFile server system software that lets you share files and printers with MS Windows clients and servers.
Scan modeWhen a monitor screen is refreshed by the electron gun and beam, there are two modes of scanning that may be used. With sequential scanning, all lines are scanned in order from the top left corner, across, and then down the screen. This is sometimes referred to as noninterlaced scanning. With interlaced scanning, the lines are divided into an odd and an even group. First one (the odd) and then the other (the even) group is scanned each time the screen is refreshed. As a result, interlaced scanning takes more time and the image on the display begins to deteriorate. Because it takes longer for the electron beam to return to the top corner, after the odd and even scan, to start scanning the odd group again, flicker is produced as the electron gun refreshes and excites the phosphor elements on the screen. Noninterlaced scanning is considered preferable over interlaced.
Scan rateScreens must be refreshed several times per second to continue displaying data. This is called their refresh rate or the frame rate. This rate is expressed in Hertz (Hz). Standard rates vary from 50 to 72 Hz (or more), which means that the screen is scanned 50 to 72 times per second. The more times a refresh occurs per second, the sharper the image, the less the image decays between scans, and the less flicker can be seen.
Scanning frequencyThe number of lines scanned per second on a monitor. The formula for frequency is the number of pixels scanned per second divided by the number of pixels per line. The higher the frequency, the higher the resolution.
scpA secure encrypted implementation of the rcp command. The scp program is a part of the SSH suite.

Serial port 403
ScriptsFiles containing a series of commands to be executed.
SCSI busThis is an interface that connects Host Bus Adapters (HBAs) to controllers and hard disks.
Search engineA search engine is a computer or group of computers that provides search capabilities for resources on the Internet.
SectorIn disk drives, each track is divided into sectors. Sectors resemble pieces of a pie.
Sector Sparing Disk fault tolerance feature that allows remapping of bad sectors to an alternate sector when disk I/O errors occur.
Secure Shell (SSH)A replacement for rsh, and an enhancement for telnet, that encryps all transmitted data so that other users on the network cannot use packet sniffers to see information as it crosses the network.
Secure Sockets Layer (SSL)A transmission scheme developed by Netscape Communications Corporation. It is a low-level encryption scheme used to encrypt data sent over in high-level protocols such as HTTP and FTP. An SSL transmission over HTTP is specified by using the protocol HTTPS. The latest revision of the standard is called Transport Layer Security (TLS).
SegmentA section of a network bounded by a switch or router, dividing a larger network into smaller portions. Ethernet traffic is normally sent to all nodes on a segment, and only the node meant to receive the packet listens; all other nodes usually drop packets not destined for their own address.
Sequenced Packet Exchange (SPX)A Novell protocol used as the resident protocol in NetWare, along with IPX. Analogous to TCP in the IP protocol stack.
Serial communicationThe transmission of data between devices over a single line, one bit at a time.
Serial interfaceA connection point through which information is transferred one digital bit at a time. The term serial interface is sometimes applied to interfaces in which the data is transferred serially via one path, but some control signals can be transferred simultaneously via parallel paths.
Serial Line Internet Protocol (SLIP)An Internet protocol used to run IP over serial lines such as telephone circuits or RS-232 cables interconnecting two systems. SLIP is now being replaced by PPP.
Serial portIn a serial interface, bits of information are sent in a series, one at a time. Data bits are typically surrounded by starting and ending flags, which provide synchronization.
Serial ports are also called communication (COM) ports and referenced by number; COM1 is serial port 1. Most PCs come with two COM ports. On Linux, the serial ports are named ttyS0 for the first serial port, ttyS1 for the second, and so on.

404 Serial transmission
The standard serial port connector is a 9-pin D-shell connector, but some systems still have older 25-pin D-shell connectors. Adapters are available to convert between the two standard connectors. With either connector, only 9 connector pins are soldered to 9 wires inside the cable.
Serial transmissionTransmission in which data (binary digits) can be transmitted only one bit at a time using only one communications line. In contrast, parallel transmission sends each byte simultaneously using separate lines. Connections exceeding one meter in distance typically use serial transmission.
ServerA computer or a software package that provides services to client software running on other computers on a network. Possible services include file sharing, printer sharing, or communications services.
Server Message Block (SMB)A network protocol most widely employed by Microsoft operating systems for its file and print sharing facilities. SMB services may be provided on Linux using Samba.
Session LayerOSI Layer 5 is the OSI layer that provides means for dialogue control between end systems.
setA command used to set shell variables or to query what variables have been set.
Shadow PasswordsA method of storing passwords so that users cannot see the encrypted form, making passwords more difficult to crack. Restricting access to the encrypted copy of the password makes it more difficult for a cracker to guess the password.
ShellA portion of a program that responds to user commands, also called user interface. A command-line interpreter, including examples such as bash and tcsh.
showmountA command available on some Linux distributions that details mount information for an NFS server.
Shutting downThe process of preparing the machine to power off in an orderly manner. Includes termination of all processes in the proper sequence and closing all files so that data is preserved.
SignalingUsing semaphores to notify threads that certain events or activities have taken place.
SignalsNotification mechanisms implemented in software that operate in a fashion analogous to hardware interrupts. In UNIX and Linux, programs are terminated using signals. Many services follow a convention of re-reading their configuration files when receiving a HUP signal.
Signature1. A short message at the bottom of a piece of electronic mail or a USENET article identifying the sender.
2. A number associated with a file or other object, signifying the content. If the content is changed at all, the signature will change. In this way, you can compare known file signatures with the current signatures to see if any files on your system were changed. Often used by security programs.

smbmount 405
Simple Mail Transfer Protocol (SMTP)The Internet standard protocol for transferring electronic mail messages between computers.
Simple Network Management Protocol (SNMP)One of the most comprehensive tools available for TCP/IP network management. It operates through conversations between SNMP agents and management systems. Through these conversations, the SNMP management systems can collect statistics from and modify configuration parameters on agents.
The agents are any components running the SNMP agent service and are capable of being managed remotely. Agents can include minicomputers, mainframes, workstations, servers, bridges, routers, gateways, terminal servers, and wiring hubs.
Management stations are typically more powerful workstations. Common implementations are Windows NT or UNIX stations running a product such as HP OpenView, IBM Systemview/6000, or Cabletron Spectrum. The software provides a graphic representation of the network, allowing you to move through the network hierarchy to the individual device level.
There are three basic commands used in SNMP conversations: GET, SET, and TRAP.
The GET command is used by the management station to retrieve a specific parameter value from an SNMP agent. If a combination of parameters is grouped together on an agent, GET-NEXT retrieves the next item in a group. For example, a management system’s graphic representation of a hub includes the state of all status lights. This information is gathered through GET and GET-NEXT.
The management system uses SET to change a selected parameter on an SNMP agent. For example, SET would be used by the management system to disable a failing port on a hub.
SNMP agents send TRAP packets to the management system in response to extraordinary events, such as a line failure on a hub. When the hub status light goes red on the management systems representation, it is in response to a TRAP.
An SNMP management station generates GET and SET commands. Agents are able to respond to SET and GET and to generate TRAP commands.
Site1. Any location of Internet files and services.
2. A site is a group of domains and/or computers. A site can be either a primary or secondary site. The Central site is the highest site in the hierarchy and can administer all sites in the system.
Small Computer System Interface (SCSI)A high-speed interface bus used for disk drives, scanners, printers, CD-ROM drives, digital cameras, and other devices. Available in several versions including SCSI-I, SCSI-II (Fast SCSI), Wide (16-bit data path), or UltraWide.
smb.confThe configuration file for Samba, typically located in /etc. Used to specify Samba network and print shares.
smbdThe Samba daemon that provides SMB services.
smbmountA Linux-specific Samba enhancement that allows SMB file shares to be mounted and treated as if they were local.
406 Snail mail
Snail mailA term used to describe conventional postal service mail delivery. This contrasts with the speed of near instantaneous electronic mail delivery.
SoftwareA computer program, or a set of instructions written in a specific language, that commands the computer to perform various operations on data contained in the program or supplied by the user.
Source codeProgramming instructions (text) in human-readable form.
SpamLarge quantities of traffic, usually unwelcome and/or repetitive, on any of a number of transmission media, frequently in the form of an excessive number of e-mail messages. An inappropriate attempt to use a mailing list, USENET, or other networked communications facility as a broadcast medium (which it is not) by sending the same message to a large number of people who didn’t request it.
Spam probably comes from a famous Monty Python skit that featured the word “spam” repeated over and over. The term may also have come from someone’s low opinion of the food product with the same name, which is generally perceived as a generic, content-free waste of resources. Spam is a registered trademark of Hormel Corporation for its processed meat product.
Spool directoryThe location in /var/spool/ where print jobs are stored on a disk while waiting to be printed.
SpoolerSystem software used to provide background printing.
SPXThe abbreviation for Sequenced Packet eXchange. It is the Novell protocol used as the resident protocol in NetWare, along with IPX.
SRPMsSource RPMs. See RPMs.
Stallman, RichardFounder of the Free Software Foundation and the GNU project; often referred to as RMS.
Standard Generalized Markup Language (SGML)An international standard, it is an encoding scheme for creating textual information. HTML is a subset of SGML.
Start/stop bitsAdditional bits inserted to mark the beginning and the end of transmitted characters. Start bits and stop bits are used in asynchronous communications.
Startup diskThe system boot drive. May be a floppy disk, hard disk, CD-ROM, or other drive.
Static RAM (SRAM)Random Access Memory built from active electronic components (transistors). Does not require periodic refreshing as does Dynamic RAM.
StationA term used as a shortened form of workstation, but it can also refer to a server, router, printer, fax machine, or any computer device connected to a network by a network board and communication medium.

Subnet 407
StringA sequence of characters, whether they make sense or not. For example, “dogcow” is a string, but so is “z@x#tt!.” Every word is a string, but relatively few strings are words. A search form will sometimes ask you to enter a search string, meaning a keyword or keywords to search on. Sometimes string means a sequence that does not include space, tab, return, and other blank or nonprinting characters.
String variableA variable used to store text.
Structural programming languageA programming language that revolves around a control mechanism, such as a main loop. Execution proceeds through the code along a predefined path. PASCAL and C are structural programming languages.
Structure of Management Information (SMI)The rules used to define the objects that can be accessed via a network management protocol.
Structured Query Language (SQL)An ISO data-definition and data-manipulation language for relational databases. Variations of SQL are offered by most major vendors for their relational database products. SQL is consistent with IBM’s Systems Application Architecture and has been standardized by the American National Standards Institute (ANSI).
Stub networkA local network that carries data to and from local hosts exclusively. Even if connected to other networks, a stub network depends on other levels in the Internet hierarchy of networks, the mid-level and backbone networks, to carry traffic for other networks.
suThe command to switch users (if a username is specified) or to become the superuser.
Sub procedureA procedure that does not return a value to the calling procedure.
SubdirectoryThis is a directory that lies below another in the file system structure. For example, in SALES/NEW, NEW is a subdirectory of SALES.
SubnetThe primary reason to divide a network into subnets is network performance and available bandwidth. Without separate networks, each transmission would be broadcast across the entire internetwork, waiting for the destination system to respond. As the network grows, this causes increases in traffic until it exceeds the available bandwidth.

408 Subnet mask
Routers divide, as well as provide, communications between the networks. Packets bound for a destination within the local network are kept local. Only packets bound for other networks are broadcast across the network, moving from router to router. Overall traffic levels are reduced.
Subnet maskA bit mask used to select bits from an Internet (TCP/IP) address for subnet addressing. The mask is 32 bits long and selects the network portion of the Internet address and two or more bits of the local portion. It is sometimes called address mask. Local systems have subnet masks so they can restrict the broadcast to be received on the local network only.
SubnettingWhen a complex network is recognized as a single address from outside of the network.
SubnetworkA collection of OSI end systems and intermediate systems under the control of a single administrative domain and utilizing a single network access protocol. For example, private X.25 networks amid a collection of bridged LANs.
sudoA command that allows a user to perform a specified command (or list of commands) as the superuser.
SuperuserSee root.
SuSE LinuxA commercial Linux distribution based in Germany. Known for its strong European market share and many contributions to open Linux development.
SuspendAn action that causes an active program to become temporarily inactive. In effect, the suspended program is waiting for the user to reactivate it.
Swap fileA file that contains temporary data moved out of main storage to the swap file on disk. A swap file is sometimes known as a paging file.

T4 409
SwappingThe process of interchanging the contents of an area of main storage with the contents of an area of auxiliary storage. Swapping is sometimes known as paging.
SwitchA statement that selects an action from a number of alternatives. On the shell command line, switches are often separated by a hyphen, e.g., ls -a and ls -al display different results of the ls command.
Symmetric Multiprocessing (SMP)In an SMP operating system, the operating system can run on any processor or can share tasks between several processors. User and application threads can also be shared between processors, making best use of processor time and reducing bottlenecks. The Linux kernel supports SMP.
syncThe command to force memory buffers to write to hard drives so that all changed information is saved.
syslogThe command to start/stop system logging services.
System Network Architecture (SNA)A proprietary network that links IBM and non-IBM devices together. Introduced in 1974 before the OSI reference model was defined, SNA was originally a mainframe-centered hierarchical network architecture. SNA is an architecture or design specification that defines the data communications facilities, functions, and procedures that are distributed throughout the network. It also defines the formats and protocols used to support communication between programs, device operators, storage media, and workstations that may be located anywhere in the network. Before SNA, there were no formalized architecture standards or guidelines for computer-based online data-processing systems.
System softwareThe operating system software.
Systems Operator (Sysop)Anyone responsible for the physical operations of a computer system or network resource. A System Administrator decides how often backups and maintenance should be performed, and the System Operator performs those tasks.
T1A leased-line connection capable of carrying data at 1.54 Mbps. At maximum theoretical capacity, a T1 line could move a megabyte in less than 10 seconds. That is still not fast enough for full-screen, full-motion video, for which you need at least 10,000,000 bits per second. T1 is the fastest speed commonly used to connect networks to the Internet.
T2A leased-line connection capable of carrying data at 6.3 Mbps.
T3A leased-line connection capable of carrying data at 43 Mbps. This is more than enough to do full-screen, full-motion video.
T4An AT&T term for a digital circuit capable of supporting transmissions at a rate of up to 274.176 megabits per second.

410 Tag
TagA string of characters of the form <...> or </...>. (The latter is for closing tags only.) Tags tell a Web browser how to format text or various bits of text. For example, the pair of tags <B>... </B> tells the browser to put the text between the two tags in boldface. The single tag <HR> tells the browser to insert a horizontal line. The tag pair <TABLE>... </TABLE> tells the browser to format the material in between as a table.
Tape backup deviceThis internal or external tape drive backs up data from hard disks.
tarA standard command used to store and extract files from a singular file that is used as an archive. Originally stood for tape archive but is now usually used to create an archive file.
TaskIn a multiprogramming or multiprocessing environment, one or more sequences of instructions created by a control program as an element of work to be accomplished by a computer.
TaskbarThe Linux KDE/GNOME user interface element that shows the running applications and open windows.
TCP wrappersThe daemon that controls almost all TCP network services. It checks the requesting source address of the connection. Can be used to booby trap suspected intruders.
tcpdumpA standard BSD-based command used for monitoring network traffic that passes through the client system’s network segment (known as packet sniffing).
Telnet1. The Telnet protocol is a part of the TCP/IP protocol suite. Many Internet nodes support Telnet, which is similar to UNIX’s rlogin program. Telnet lets users log in to any other computer on the Internet, provided that the target computer allows Telnet logins, and the user has a valid login name and password. The computers do not have to be of the same type to Telnet between them.
Some systems expect external access, and a special software package is set up to handle outside calls. This eliminates the need to log in once a user reaches the remote host.
The most popular reason to log in to a remote computer is to run software that is available only on the remote computer. Another reason is when a user’s computer is incompatible with a particular program, operating system, available memory, or doesn’t have the necessary processing power.
People with several Internet accounts can use Telnet to switch from one account to the other without logging out of any of the accounts.
Users can use Telnet as an information-gathering tool by searching databases for information. These databases include LOCIS (the Library of Congress Information System), CARL (Colorado Association of Research Libraries), ERIC (Educational Resources Information Center), and CIJE (Current Index to Journals in Education).
2. An Internet standard user-level protocol that allows a user’s remote terminal to log in to computer systems on the Internet. To connect to a computer using Telnet, the user types Telnet and the address of the site or host computer.

Token Ring 411
TerminalA device that allows you to send commands to a computer somewhere else. At a minimum, this usually means a keyboard and a display screen and some simple circuitry. Usually you will use terminal software in a personal computer. The software pretends to be (“emulates”) a physical terminal and allows you to type commands to a computer somewhere else.
Terminal emulationThe use of hardware and software on a personal computer to duplicate the operation of a terminal device at both the operator and communications interface sides of the connection so that a mainframe computer capable of supporting the emulated terminal will also support the PC.
Terminal emulatorA program that allows a computer to act like a terminal when logged in to a remote host. The VT100 terminal is emulated by many popular communications packages.
Terminal serverA special-purpose computer that has places to plug in many modems on one side and a connection to a LAN or host machine on the other side. Thus, the terminal server does the work of answering the calls and passes the connections on to the appropriate node. Most terminal servers can provide PPP or SLIP services if connected to the Internet.
TerminationPlacement of a load on the ends of a cable. For example, both SCSI and Ethernet bus cabling required termination.
ThreadThe object of a process that is responsible for executing a block of code. A process can have one or multiple threads. Each process must have at least one thread. Threads are responsible for executing code.
Three-way handshakeThe process whereby two protocol entities synchronize during connection establishment, typically accomplished at the initiation of a TCP/IP connection.
Time outWhen two computers are talking and, for whatever reason, one of the computers fails to respond.
Time to Live (TTL)The amount of time between when a packet of data leaves its point of origin and when it reaches its destination. The TTL is encoded in the IP header and is used as a hop count (to measure the route to the packet’s destination).
TokenIn a LAN (Local Area Network), the symbol of authority that is passed successively from one data station to another to indicate the station temporarily in control of the transmission medium. Each data station has an opportunity to acquire and use the token to control the medium.
Token RingIBM originally created Token Ring (IEEE 802.5). Over the last few years, it has steadily gained popularity.
It is a network that runs as a logical ring but is usually wired as a physical star. It has a 4-Mbps or 16-Mbps transfer rate and runs on Unshielded Twisted Pair, Shielded Twisted Pair, or Fiber Optic cabling.

412 Topology
A Token (data frame) passes from system to system. A system can attach data to a token if the token is free (empty). In turn, each system on the ring receives, regenerates, and passes the token.
With Token Ring, it is possible to predict the passage of the token. The predictability inherent in Token Ring makes it a popular choice for timing-critical and control applications.
TopologyRefers to the physical layout of network components (such as cables, stations, gateways, and hubs). Major topologies are bus, star, ring, and mesh.
Torvalds, LinusCreator and maintainer of the Linux kernel.
tracerouteA standard command that displays the route a packet of data would take to reach a target host.
TrackballAn alternative input device, similar in function to a mouse.
TrackpadThe standard input device found on many portable computers. Often recognized as a standard PS/2 style pointing device.
TracksOn a disk, data is organized into concentric circles, or tracks, on the disk medium. One complete circle represents one track. Tracks on disks are analogous to the tracks you might see on a record used in a record player (curving lines on the record surface). Tracks are typically numbered from the outermost track to the innermost, or from the outer edge of the medium to the inner hub area. To figure out the number of tracks on a fixed disk drive, multiply the number of cylinders by the number of heads.
TrafficThe total information flow in a communications system.
TransceiverA terminal device that can transmit and receive information signals. Transceiver is a contraction of transmitter-receiver.

Twisted-pair cabling 413
TransducerThe part of a phone device that is responsible for sending and receiving data.
TransmissionThe electrical transfer of a message signal from one location to another.
Transmission Control Protocol (TCP)The reliable connection-oriented protocol used by DARPA (Defense Advanced Research Projects Agency) for their internetworking research. TCP uses a three-way handshake with a clock-based sequence number selection to synchronize connecting entities and to minimize the chance of erroneous connections due to delayed messages. TCP is usually used with IP (Internet Protocol), the combination being known as TCP/IP.
Transmission Control Protocol/Internet Protocol (TCP/IP)Originally designed for WANs (Wide Area Networks), TCP/IP was developed in the 1970s to link the research center of the U.S. Government’s Defense Advanced Research Projects Agency. TCP/IP is a protocol that enables communication between the same or different types of computers on a network. TCP/IP can be carried over a wide range of communication channels. The Transmission Control Protocol is connection-oriented and monitors the correct transfer of data between computers. The Internet Protocol is stream-oriented and breaks data into packets.
Transmission rateThe transmission rate is stated in baud or bps. If the connection cannot be made at the selected transmission rate, most modems and communication software will automatically attempt to connect at a slower speed.
Transport layerOSI Layer 4, which is responsible for reliable end-to-end data transfer between end systems.
TrueType fonts (TTF)Fonts conforming to a specification developed by Microsoft and Apple. TrueType fonts can be scaled to any height and will print exactly as they appear on the screen to the highest resolution available to the output device. The fonts may be generated as bitmaps or soft fonts, depending on the output device’s capabilities.
ttyThe command to print the filename of the terminal connected to the standard input of the command, if any.
TurboLinuxA Linux distribution known for its strong Asian market share and robust commercial clustering package.
Twisted-pair cablingTwisted Pair (TP) is made of insulated, copper wires that have been twisted around each other to form wire pairs. Usually the wire is 22 to 26 gauge, and more than one pair can be carried in a single jacket or sheath. When working with twisted pair, note the difference between wire and pair. A two pair cable has four wires.
Because any wire carrying electricity transmits and receives electromagnetic energy, nearby pairs of wires carrying signals can interfere with each other. This is called crosstalk. To reduce crosstalk and other Electro-Magnetic Interference (EMI), the wires are twisted. This causes any noise to be received more evenly by both wires in a pair. A voltage difference between the two wires carries the signal so noise that is equal on both wires cancels itself.

414 Type 1 font
Twisted-pair wiring may or may not have an electromagnetic shield around the pairs. Therefore, it is classed into one of two types: Unshielded Twisted Pair (UTP) and Shielded Twisted Pair (STP). Unshielded Twisted Pair is a set of twisted wire pairs within a plastic sheath. The most common use for this type of cable is telephone wire. Different types of UTP cabling are suitable for different speed communications.
UTP is usually the least expensive of all of the network transmission media types.
Shielded Twisted Pair includes a protective sheathing around the conductors. This cuts down on outside interference.
Type 1 fontThe font format developed by Adobe Systems for PostScript fonts.
TypefaceThe style or appearance of the set of characters. Typeface examples include Times New Roman, Helvetica, Script, etc. Many font names are trademarked and may be called by different names when coming from different sources.
UnicodeAn international standard that is used to define characters in any written language. Unicode uses a 16-bit character set.
Unicode collationSort order for Unicode data.
Uniform Resource Locator (URL)A URL is the pathname of a document on the Internet. URLs can be absolute or relative. An absolute URL consists of a prefix denoting a method (http for Web sites, gopher for gophers, and so forth). The prefix is followed by a colon, two slashes (://), and an address. The address consists of a domain name followed by a slash and a pathname (or “username@domain name” for mailto). The last part is an optional anchor, which is preceded by a #. The # symbol points to a place within the Web page.
Uninterruptible Power Supply (UPS)If power loss, surges, or drops (brownouts) are a significant concern, an Uninterruptible Power Supply (UPS) may be your best option. With a UPS, line voltage is fed into a battery, keeping it constantly charged. The computer is, in turn, powered from the battery. Because the computer is already running from the battery, there is no switching time if power is lost. UPS systems supply protection against power events more effectively than most other devices. Uninterruptible Power Supplies are considered essential for network servers. If normal power is lost or interrupted, the UPS allows time to safely shut down the file server. Many UPSs can alert network users to warn when the system is going down.

User Datagram Protocol (UDP) 415
When selecting a UPS, examine the software and hardware available for the UPS. Options and features vary greatly.
Universal Serial Bus (USB)A standard promoted by Intel for communication between an IBM PC and an external peripharal over an inexpensive cable using biserial transmission.
USB works at 12 Mbps with specific cost consideration for low-cost peripherals. It supports up to 127 devices and both isochronous and asynchronous data transfers. Cables can be up to 5 meters long, and it includes built-in power distribution for low power devices. It supports daisy-chaining through a tiered multidrop topology.
Before March 1996, Intel started to integrate the necessary logic into PC chip sets and encourage other manufacturers to do likewise, so currently there is widespread availability and support.
Because of its relatively low speed, USB is intended to replace existing serial ports, parallel ports, keyboard and monitor connectors, and be used with keyboard, mice, monitors, printers, and possibly some low-speed scanners and removable hard drives. For faster devices, existing IDE, SCSI, or emerging FC-AL or FireWire interfaces can be used.
UNIXA computer operating system originally developed at AT&T’s Bell Research Laboratories and later at the University of California Berkeley. It is implemented in a growing number of minicomputer and microcomputer systems.
UNIX is multiuser because it is designed to be used by many people at the same time and has TCP/IP built into the operating system. It is the most common operating system for servers on the Internet.
UNIX-to-UNIX Copy Program (UUCP)A software program that facilitates file transfer from one UNIX system to another via dial-up phone lines. The UUCP protocol also describes the international network used to transfer USENET News and electronic mail.
Upstream neighbor addressIn Token-Ring networks, it is the address of the network station that is physically and immediately upstream from another specific node. The upstream neighbor is the location from which the signal is being received.
UsenetA worldwide system of discussion groups, with comments passed among hundreds of thousands of machines. Not all Usenet machines are on the Internet–only about half. Usenet is completely decentralized, with more than 10,000 discussion areas, called newsgroups.
User1. An individual permitted to access a computer, network, or other system.
2. SQL database access account.
User Agent (UA)An OSI application process that represents a human user or organization in the X.400 Message Handling System. Creates, submits, and takes delivery of messages on the user’s behalf.
User Datagram Protocol (UDP)A transport protocol in the Internet suite of protocols. UDP, like TCP, uses IP for delivery. However, unlike TCP, UDP provides for exchange of datagrams without acknowledgements or guaranteed delivery.
416 User ID (UID)
User ID (UID)The unique number associated with each user in the /etc/passwd file.
User private groupA Red Hat security scheme that involves creating a group for each user.
User programA program that resides and runs in the outside of the operating system kernel.
User-level protocolsExamples are telnet, SMTP (Simple Mail Transfer Protocol), and FTP, which allow users to perform operations or applications.
useraddA utility to add or update users from the command-line interface.
UsernameThe name by which a login ID is known within the context of a session.
UtilitiesUtilities can be in the form of console commands, including screen commands, installation, and variables.
In programming, a variable is used for temporary data storage. Each variable will have an identifying name, a data type, and an assigned (or assumed) value.
The term declaration is used to refer to the statement that causes a variable to be created.
The two types of variable declarations in Visual Basic are explicit and implicit.
An explicit declaration is when a variable is defined or created before it is needed. This is normally a better method of defining variables because it forces better planning and control.
With implicit declaration, the variable is defined on the fly. You define the variable by referring to it as part of a program statement. Any time Visual Basic encounters a name in your code that is not defined elsewhere, a new variable is created using that name.
Very Large-Scale Integration (VLSI)A chip technology with 20,000 to 900,000 logic gates per chip. The flow of electrons in chips is controlled by the transistors that form switches or logic gates. Chips are categorized by the number of logic gates available.
viA visual display presentation editor; standard equipment on Linux and UNIX systems.
Video cardThe hardware board that contains the electronic circuitry to drive a video display monitor.
Virtual circuitA network service that acts like a dedicated line between a user’s computer and a host. Data is processed through a virtual circuit in the order in which it is sent, regardless of the underlying network structure.
Virtual consoleAllows a single machine to display more than one terminal by using a hot key to switch from one display to another.
Wide Area Network (WAN) 417
Virtual DesktopIn GNOME, a method of having multiple (four) screen images accessible by scrolling off the current display area, like looking at one pane of a window with four glass panels. In KDE, a method of having multiple screen images (four, six, or eight) selectable from the control area.
A window can appear in one of the virtual desktop areas, all of the desktops, or (in GNOME) can overlap between two or more desktops.
Virtual memorySome operating systems have the ability to increase the apparent physical system memory through virtual memory. Virtual Memory is a file on the hard disk that emulates physical Random Access Memory (RAM). This file is called a swap file.
Virtual Private Network (VPN)A tunnel through a physical network to create a private conversation between two computers.
VirusA program that can destroy data and change itself to escape detection. A virus can move into other computer systems by incorporating itself into programs or files that are shared among computer systems. Linux generally does not suffer from computer virus programs because users are restricted to their home directories.
VT100A computer terminal manufactured by Digital Equipment Corporation. Many communications software packages emulate the VT100.
wA utility that shows who is on a system and what they are doing.
W3 ConsortiumW3C works with the global community to produce specifications and reference software. W3C is funded by industrial members, but its products are free and available to all.
Web browserA client program that serves as the interface between the user and the resources of the World Wide Web.
whoA utility that shows who is on the system.
whoisAn Internet software program that enables users to register their names and electronic mail addresses and to query a database of people, domains, networks, and hosts. The database is maintained at the Defense Data Network Network Information Center (DDN NIC) and can be reached through telnet at nic.ddn.mil.
Wide Area Network (WAN)Expands the basic LAN model by linking Local Area Networks (LANs) and allowing them to communicate with each other. By traditional definition, a LAN becomes a WAN when it crosses a public right-of-way, requiring a public carrier for data transmission. More current usage of the term usually includes any situation where a network expands beyond one location/building. A WAN is characterized by low- to high-speed communication links and usually covers a wide geographic area. The remote links may be operational LANs or only groups of workstations. With the exception of a WAN’s wider area of operation, the benefits and features of LANs and WANs are the same.

418 Wide Area Telephone Service (WATS)
Wide Area Telephone Service (WATS)A service provided by telephone companies in the United States that permits a customer to make calls to or from telephones in specific zones for a flat monthly charge. The monthly charges are based on the size of the zone instead of the number of calls.
Wildcard charactersCharacters that have special meaning when used in pattern-matching strings. They can represent one character or any number of characters or exclude certain characters.
Window managerA program that controls icons, default buttons, borders, resizing, drag-and-drop features, virtual desktops, and other aspects of X sessions.
WindowingIn routing terms, windowing refers to a flow control technique to send multiple message packets before requiring an acknowledgment from the receiver.
WorkstationA personal computer that is connected to a network. It can perform tasks through application programs or utilities. The term client or station may also be used.
World Wide Web (WWW)A recent, and the fastest-growing, addition to the Internet.
In 1991, Tim Berners-Lee developed the World Wide Web for the European Council for Nuclear Research (CERN). It was designed as a means of communicating research and ideas between members of the high-energy physics community.
Browsers are the client tools that allow users to view the contents of the Web. The Web at that time had no easily accessible viewing capabilities. The browsers were text-only, line-mode tools that offered no graphical capabilities and few navigation links.
Early in 1993, a team at the National Center for Supercomputing Applications (NCSA) at the University of Illinois at Champaign-Urbana developed an Internet browsing program called Mosaic. The NCSA had no way to disseminate or market the program.
Later that year, a former NCSA graduate student (Tim Krauskopf) offered the University of Illinois a business plan and was given the rights to license Mosaic. The company is called Spyglass. Another company, with the help of former NCSA programmers, created its own Internet browser company and wanted to call it Mosaic Communications, but the NCSA would not allow this. The company was renamed Netscape, and their graphical Web browser was named Netscape Navigator. Netscape markets its browsers and servers directly to consumers, while Spyglass markets Mosaic to component suppliers such as AT&T, IBM, and Microsoft.
Because the Mosaic project initiated the graphical browser implementation, the term Mosaic is sometimes still used to describe any graphical Web browser.
The Web unifies many of the existing network tools with hypertext (also called hyperlinks). Hypertext gives users the ability to explore paths of information in nonlinear ways. Instead of reading through files in a preplanned sequential arrangement, users can move from item to item in any order they choose.
Some hyperlinks lead to ftp sites, newsgroups, gopher sites, and other Web sites that house additional graphical Web documents. To navigate these Web sites and find links, search engines are available. While current engines can only identify sites that meet the user’s criteria, second-generation search engines will use artificial intelligence to report to users on information that exactly meets their needs.

X.500 419
The graphical interfaces make the Internet much more appealing, powerful, and simple. Besides being more intuitive than text-based tools, graphical browsers offer full hypermedia support. As recently as 1994, few trade journals mentioned the Web.
Today, Web addresses (URLs) are included in television, radio, magazine, and movie advertisements and on billboards. By 1995, Web traffic was doubling every four months and was growing more than twice as fast as general Internet traffic. Entire businesses now reside on the Web, and millions of people use it for communications and educational resources.
WormA computer program that replicates itself infinitely, filling up memory space. It can pass from one network to another.
XSee X Window System.
X clientThe part of X that generates the application data that is displayed elsewhere (on the display server).
X serverControls the keyboard, mouse, and screen for users interacting with applications that work under X Window displays.
X recommendationsThe CCITT documents that describe data communication network standards. Well-known ones include X.25 Packet Switching standard, X.400 Message Handling System, and X.500 Directory Services.
X seriesStandards of the CCITT for communications interfaces, such as modems.
X Window SystemWindow system used to display graphical output on a wide variety of systems. It was developed at MIT and is an open standard. Commonly called X or X11, but never X Windows, X has network support built in so that you can run a program on one system and display the output on another. The X Window System is made up of several different components including the X server, window manager, display manager, and client programs.
X.25A data communications interface specification that describes how data passes into and out of packet-switching networks. The protocol suite approved by the CCITT and International Organization for Standardization (ISO) defines the origination, termination, and use of virtual circuits that connect host computers and terminals across the network.
X.400The CCITT and International Organization for Standardization (ISO) protocol for electronic mail and public data networks. X.400 wraps messages in an electronic envelope, which will then be accepted by any system that can read the envelope. Thus, a user of one electronic mail system can communicate with an individual using another because both employ the X.400 standard (and have agreed to the interconnection).
X.500The CCITT and International Organization for Standardization (ISO) standard for listing names in an electronic directory (e.g., electronic white pages). This standard enables the directory to be accessed internationally and by a variety of electronic networks.
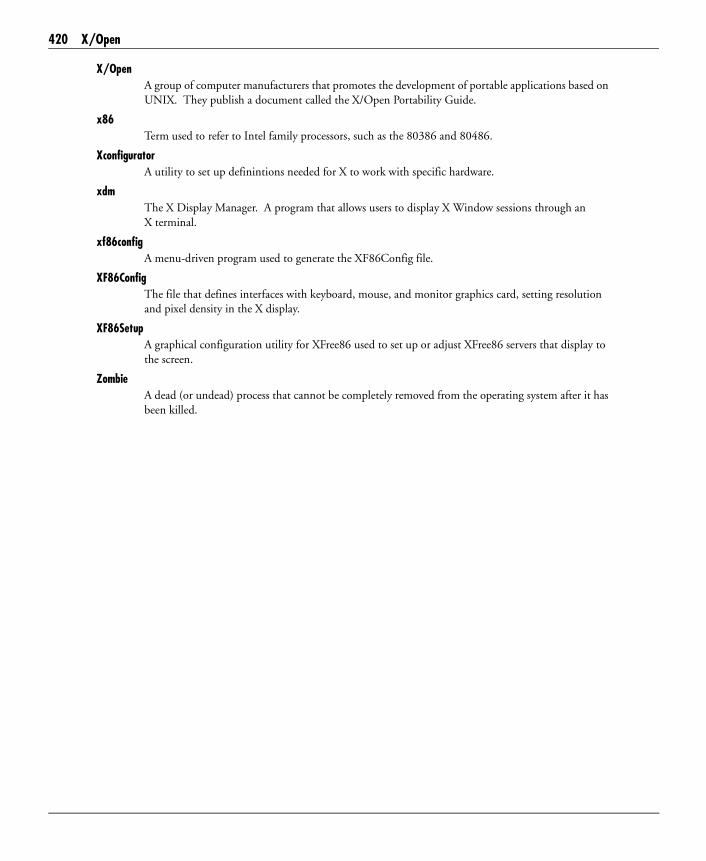
420 X/Open
X/OpenA group of computer manufacturers that promotes the development of portable applications based on UNIX. They publish a document called the X/Open Portability Guide.
x86Term used to refer to Intel family processors, such as the 80386 and 80486.
XconfiguratorA utility to set up definintions needed for X to work with specific hardware.
xdmThe X Display Manager. A program that allows users to display X Window sessions through an X terminal.
xf86configA menu-driven program used to generate the XF86Config file.
XF86ConfigThe file that defines interfaces with keyboard, mouse, and monitor graphics card, setting resolution and pixel density in the X display.
XF86SetupA graphical configuration utility for XFree86 used to set up or adjust XFree86 servers that display to the screen.
ZombieA dead (or undead) process that cannot be completely removed from the operating system after it has been killed.

—B— 421
A C R O N Y M S
—A—Abend Abnormal end
ACE Access Control Entry
ACK Acknowledgment
ACL Access Control List
ACPI Advanced Configuration and Power Interface
ADSP AppleTalk Data Stream Protocol
AEP AppleTalk Echo Protocol
AFP AppleTalk Filing Protocol
AGP Accelerated Graphics Port
AIFF Audio Interchange File Format
ANI Automatic Number Identification
ANSI American National Standards Institute
API Application Programming Interface
APM Advanced Power Management
ARA AppleTalk Remote Access
ARP Address Resolution Protocol
ARPA Advanced Research Projects Agency
ARPANET Advanced Research Projects Agency Network
ARQ Automatic Request for Retransmission
ASCII American Standard Code for Information Interchange
ASMP Asymmetric Multiprocessing
ASP Active Server Pages
ASP AppleTalk Session Protocol
ATM Asynchronous Transfer Mode
ATP AppleTalk Transaction Protocol
AUI Attachment Unit Interface
AUP Acceptable Use Policy
AWG American Wire Gauge
—B—BBS Bulletin Board System
BIOS Basic Input/Output System
bit Binary Digit
BNC British Naval Connector
Bps Bytes per second
bps Bits per second

422 —C—
BRI Basic Rate Interface (ISDN)
BSD Berkeley Software Distribution
—C—CBR Constant Bit Rate
CBT Computer-Based Training
CCITT International Consultative Committee for Telegraphy and Telephony (now the ITU)
CD-ROM Compact Disc Read-only Memory
CDF Channel Definition Format
CERN European Laboratory for Particle Physics
CERT Computer Emergency Response Team
CGA Color Graphics Adapter
CGI Common Gateway Interface
CISC Complex Instruction Set Computer
CMOS Complementary Metal Oxide Semiconductor
CN Common Name
CO Central Office
cps Characters per second
CPU Central Processing Unit
CRC Cyclic Redundancy Check
CREN Corporation for Research and Educational Networking
CRT Cathode Ray Tube (monitor)
CSMA Carrier Sense Multiple Access
CSMA/CA Carrier Sense Multiple Access with Collision Avoidance
CSMA/CD Carrier Sense Multiple Access with Collision Detection
—D—DAC Digital to Analog Converter
DARPA Defense Advanced Research Projects Agency
DBMS Database Management System
DCE Data Communications Equipment
DDP Datagram Delivery Protocol
DES Data Encryption Standard
Dfs Distributed File System
DHCP Dynamic Host Configuration Protocol
DHTML Dynamic HTML
DIMM Dual, In-line Memory Module
DLC Data Link Control
DLL Dynamic-link library
DMA Direct Memory Access
DNS Domain Name System
DOS Disk Operating System
dpi Dots per inch

—F— 423
DQDB Distributed Queue Dual Bus
DRAM Dynamic Random Access Memory
DS1 Digital Signaling Level 1
DS2 Digital Signaling Level 2
DS3 Digital Signaling Level 3
DSA Directory System Agent
DSE Data Service Equipment
DSP Digital Signal Processor
DSU Data Service Unit
DTE Data Terminal Equipment
DTR Data Terminal Ready
DUA Directory User Agent
DVD Digital Video Disc or Digital Versatile Disc
DXF Drawing Exchange Format
DXI Data Exchange Interface
—E—E-mail Electronic mail
EARN European Academic and Research Network
EBCDIC Extended Binary-Coded Decimal Interchange Code
ECP Extended Capabilities Port
EDI Electronic Data Interchange
EFF Electronic Frontier Foundation
EGA Enhanced Graphics Adapter
EGP Exterior Gateway Protocol
EIDE Enhanced IDE
EMS Expanded Memory Specification
EPS Encapsulated PostScript
ESDI Enhanced Industry Standard Architecture
—F—FAQ Frequently Asked Questions
FAT File Allocation Table
FCB File Control Block
FCC Federal Communications Commission
FDDI Fiber Distributed Data Interface
FIPS Federal Information Processing Standard
FM Frequency Modulation
FPU Floating Point Unit
FQDN Fully Qualified Domain Name
FT1 Fractional T1
FT3 Fractional T3
FTAM File Transfer, Access, and Management

424 —G—
FTP File Transfer Protocol
FYI For Your Information
—G—GIF Graphics Interchange Format
GUI Graphical User Interface
—H—HAL Hardware Abstraction Layer
HDLC High-level Data Link Control
HFS Hierarchical File System
HID Human Interface Device
HMA High Memory Area
HPFS High Performance File System
HTML HyperText Markup Language
HTTP HyperText Transfer Protocol
Hz Hertz
—I—IAB Internet Architecture Board
ICM Image Color Management
ICMP Internet Control Message Protocol
IDE Integrated Drive Electronics
IEEE Institute of Electrical and Electronic Engineers
IESG Internet Engineering Steering Group
IETF Internet Engineering Task Force
IGP Interior Gateway Protocol
IGRP Internet Gateway Routing Protocol
IMHO In My Humble Opinion
IONL Internal Organization of the Network Layer
IP Internet Protocol
IPX Internetwork Packet Exchange
IPXODI Internetwork Packet Exchange Open Data link Interface
IRC Internet Relay Chat
IrDA Infrared Data Association
IRQ Interrupt Request
IRTF Internet Research Task Force
ISDN Integrated Services Digital Network
ISO International Organization for Standardization
ISP Internet Service Provider
—J—JPEG Joint Photographic Experts Group
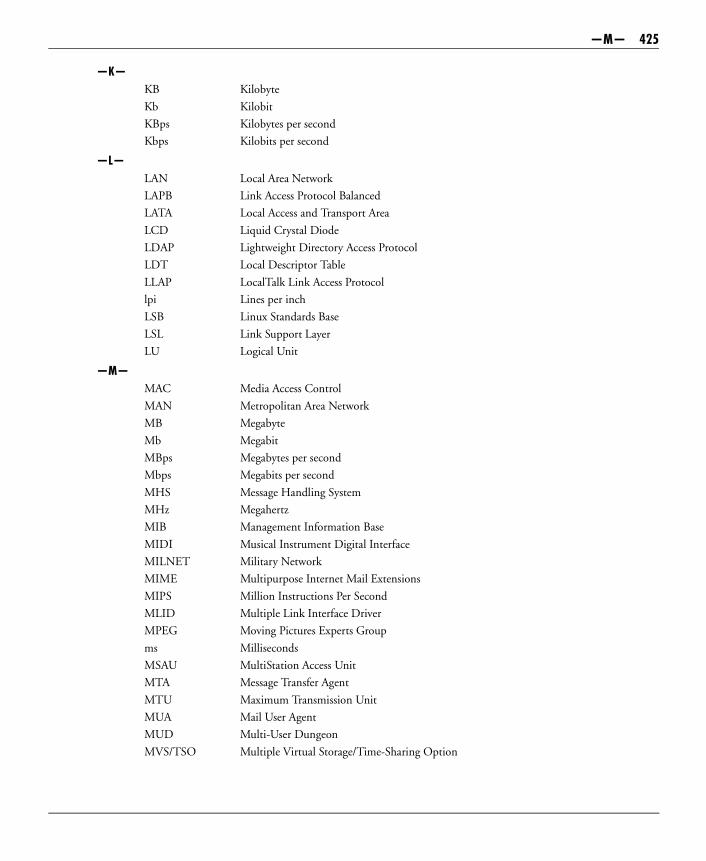
—M— 425
—K—KB Kilobyte
Kb Kilobit
KBps Kilobytes per second
Kbps Kilobits per second
—L—LAN Local Area Network
LAPB Link Access Protocol Balanced
LATA Local Access and Transport Area
LCD Liquid Crystal Diode
LDAP Lightweight Directory Access Protocol
LDT Local Descriptor Table
LLAP LocalTalk Link Access Protocol
lpi Lines per inch
LSB Linux Standards Base
LSL Link Support Layer
LU Logical Unit
—M—MAC Media Access Control
MAN Metropolitan Area Network
MB Megabyte
Mb Megabit
MBps Megabytes per second
Mbps Megabits per second
MHS Message Handling System
MHz Megahertz
MIB Management Information Base
MIDI Musical Instrument Digital Interface
MILNET Military Network
MIME Multipurpose Internet Mail Extensions
MIPS Million Instructions Per Second
MLID Multiple Link Interface Driver
MPEG Moving Pictures Experts Group
ms Milliseconds
MSAU MultiStation Access Unit
MTA Message Transfer Agent
MTU Maximum Transmission Unit
MUA Mail User Agent
MUD Multi-User Dungeon
MVS/TSO Multiple Virtual Storage/Time-Sharing Option

426 —N—
—N—NAK Negative AcKnowledgment
NBP Name Binding Protocol
NCP NetWare Core Protocol
NCSA National Center for Supercomputing Applications
NDS NetWare Directory Services
NetBEUI NetBIOS Enhanced User Interface
NFS Network File System
NIC Network Information Center
NIC Network Interface Card
NIST National Institute of Standards and Technology
NLM NetWare Loadable Module
NLQ Near Letter Quality
NLSP NetWare Link Services Protocol
NNS NetWare Name Service
NNTP Network News Transfer Protocol
NOC Network Operations Center
NREN National Research and Education Network
NSF National Science Foundation
NSFnet National Science Foundation Network
NT Windows NT
NT1 Network Termination 1
NT2 Network Termination 2
NTFS New Technology File System
NTP Network Time Protocol
NWADMIN Network Administrator
—O—ODI Open Datalink Interface
OHCI Open Host Controller Interface
OLE Object Linking and Embedding
ONC Open Network Computing
OOP Object-oriented programming
OpenHCI Open Host Controller Interface
OSI Open Systems Interconnection
OSPF Open Shortest Path First
—P—PBX Private Branch Exchange
PCI Peripheral Component Interconnect
PCL Printer Control Language
PCM Pulse Code Modulation
PCMCIA Personal Computer Memory Card International Association

—S— 427
PDF Portable Document Format
PDN Packet Data Network
PDS Processor-Direct Slot
PDU Protocol Data Unit
PID Process Identification Number
Ping Packet internet groper
PMMU Paged Memory Management Unit
POP Point of Presence
POP Post Office Protocol
POST Power On Self Test
POTS Plain Old Telephone Service
ppm pages per minute
PPP Point-to-Point Protocol
PPTP Point-to-Point Tunneling Protocol
PRAM Parameter RAM
PRI Primary Rate Interface (ISDN)
PU Physical Unit
PUC Public Utility Commission
PVC Permanent Virtual Circuit
—Q—QoS Quality of Service
—R—RAID Redundant Array of Independent Disks
RAM Random Access Memory
RARP Reverse Address Resolution Protocol
RAS Remote Access Server
RBOC Regional Bell Operating Company
REM Remark
RFC Request For Comments
RIP Router Information Protocol
RISC Reduced Instruction Set Computer
ROM Read-Only Memory
RPC Remote Procedure Call
RTF Rich Text Format
RTMP Routing Table Maintenance Protocol
—S—SAA Systems Application Architecture
SAP Service Advertising Protocol
SCSI Small Computer Systems Interface
SDI Storage Device Interface
SDLC Synchronous Data Link Control

428 —T—
SGML Standard Generalized Markup Language
SGMP Simple Gateway Management Protocol
SID Security Identifier
SIMM Single, In-line Memory Module
SLIP Serial Line Internet Protocol
SMB Server Message Block
SMDS Switched Multimegabit Data Service
SMP Symmetric Multiprocessing
SMS Storage Management Services
SMTP Simple Mail Transfer Protocol
SNA System Network Architecture
SNMP Simple Network Management Protocol
SONET Synchronous Optical Network
SPX Sequenced Packet Exchange
SQL Structured Query Language
SRAM Static RAM
SSL Secure Sockets Layer
STDM Statistical Time Division Multiplexing
SVC Switched Virtual Circuit
Sysop System Operator
—T—TA Terminal Adapter
TAC Terminal Access Controller
TCP Transmission Control Protcol
TCP/IP Transmission Control Protocol/Internet Protocol
TDM Time-Division Multiplexor
TE1 Terminal Equipment Type 1
TE2 Terminal Equipment Type 2
Telex Teleprinter Exchange
TIFF Tagged Image File Format
TLI Transport Layer Interface
TP0 OSI Transport Protocol Class 0
TP4 OSI Transport Protocol Class 4
TSA Target Server Agent
TSR Terminate and Stay Resident program
TTF TrueType fonts
TTL Time to Live
TTS Transaction Tracking System

429
—U—UA User Agent
UDP User Datagram Protocol
UNC Universal Naming Convention
UPS Uninterruptible Power Supply
URL Uniform Resource Locator
USB Universal Serial Bus
UUCP UNIX-to-UNIX Copy Program
—V—VBR Variable Bit Rate
VC Virtual Console
VGA Video Graphics Array
VLM Virtual Loadable Module
VLSI Very Large-Scale Integration
VM/CMS Virtual Machine/Conversational Monitor System
VMM Virtual Memory Manager
VNET Virtual Network
VPI Virtual Path Identifier
VPN Virtual Private Network
VRAM Video RAM
VRML Virtual Reality Modeling Language
VT Virtual Terminal
—W—WAIS Wide Area Information Servers
WAN Wide Area Network
WATS Wide Area Telephone Service
WWW World Wide Web
WYSIWYG What You See Is What You Get
—X—XDR External Data Representation
XMS Extended Memory
XNS Xerox Network System
—Z—ZIP Zone Information Protocol

430

431
Symbols
$EDITOR ............................................... 135$PAGER .................................................... 19.profile ..................................................... 182/boot ........................................................ 114/dev .................................................. 114, 225/dev/ftape................................................. 224/etc ........................................................... 114/etc/at.allow ............................................. 207/etc/at.deny .............................................. 207/etc/bashrc ............................................... 180/etc/cron.allow ......................................... 203/etc/cron.daily.......................................... 206/etc/cron.deny.......................................... 203/etc/cron.hourly ....................................... 206/etc/cron.monthly .................................... 206/etc/cron.weekly....................................... 206/etc/crontab ..................................... 203, 205/etc/defaults/useradd ............................... 165/etc/exports .............................................. 284/etc/group ................................................ 162/etc/gshadow............................................ 161/etc/hosts.allow ........................................ 272/etc/hosts.deny......................................... 272/etc/inittab ............................................... 188/etc/issue .................................................. 280/etc/login.defs .................................. 168, 188/etc/logrotate.conf ................................... 310/etc/motd ................................. 161, 182, 280/etc/pam.conf........................................... 261/etc/passwd ....................... 161, 164, 266-267/etc/printcap ............................................ 243/etc/profile ............................................... 180/etc/securetty ........................................... 264/etc/services.............................................. 307/etc/shadow ............................. 161, 164, 170/etc/skel ................................................... 161/etc/syslog.conf ........................................ 305
/etc/syslogd.conf ...................................... 307/etc/termcap ............................................ 191/home ...................................................... 114/proc ............................................ 39, 89, 114/proc/kmsg .............................................. 308/proc/sys .................................................... 54/sbin/mingetty ......................................... 188/tmp......................................................... 114/usr .......................................................... 114/usr/src/terminfo ..................................... 191/var .......................................................... 114/var/log .................................................... 303/var/log/dmesg......................................... 304/var/log/httpd/access.log ......................... 310/var/log/lastlog......................................... 304/var/log/messages..................... 303, 307, 309/var/log/secure ......................................... 304/var/spool/at ............................................ 207/var/spool/cron ........................................ 203
A
ac ...................................................... 104-106Access control .......................................... 116Account ................................................... 161Account owner......................................... 168Account Security...................................... 171accton ...................................................... 104Adding a Printer ...................................... 243Adding Users ........................................... 165adduser .................................................... 165Administrative system users..................... 164afio........................................................... 218Allow file ......................................... 203, 207ALT+F ..................................................... 188Ampersand (&)..................................... 92-93Anonymous ftp ................................ 169, 184API ...................................................... 40, 78apropos ...................................................... 18
Index

432 Index
Architecture ............................................... 62Architecture-dependent ............................. 38Archive..................................................... 217ASCII....................................................... 223at.............................................................. 202at command ...................................... 207-210at job........................................................ 208at.allow .................................................... 207at.deny ..................................................... 207atd............................................................ 207atq............................................................ 209atrm ......................................................... 209autoconf ..................................................... 74
B
Back up over a network ........................... 230Background .......................................... 92-93Backup ............................................. 202, 211Backup media .......................................... 214bash ..................................... 85, 93, 179, 208batch command ....................................... 207Batch jobs ................................................ 207bg ................................................. 93, 98, 202Big endian................................................ 223Block size ................................................. 130Boot floppy ................................................ 47Boot log ................................................... 304Bourne-Again Shell.................................. 179Brute-force attack .................................... 266Buffer overflows....................................... 270Buffer overruns ........................................ 269BugTraq .................................................. 288bzip2 ........................................................ 228
C
Cache ....................................................... 138CERT .............................................. 151, 288chage ........................................................ 174Change the current serial-line
configuration........................................ 189Changing Group Membership ................ 166Changing User Attributes........................ 166chgrp........................................................ 122chmod ...................................................... 122Choosing Passwords ................................ 169
chown ............................................... 121-122Comment ................................................ 205Compiling ............................... 46, 51, 72, 74Compress ................................................. 228compress .................................................. 228configure.................................................... 74Configuring a Print Server ...................... 246Console tty7 ............................................ 188Context...................................................... 84Context switch........................................... 84Control how the files can be shared......... 162Control of user access .............................. 162Convert.................................................... 223Copy-on-write ........................................... 85Core dump .............................................. 102Core file ............................................. 98, 102cpio .................................................. 218, 220CPU.......37, 83-84, 88-91, 96, 101, 103, 106Cron ................................. 202-204, 207, 212Cron daemon............................ 203-204, 207Cron job .................................................. 210Cron table........................................ 202, 210cron.allow ................................................ 203cron.deny ................................................. 203crond ....................................................... 203crontab command.................... 204, 206, 210Crontab file ...................................... 202-206Current environment............................... 181Current terminal in use ........................... 189Current terminal-line settings ................. 189
D
Daemon .......................... 53, 83, 98, 146-147Daemon user account .............................. 205DAT ........................................................ 215dd............................................. 218, 223, 228Default file creation permissions ............. 182Default mask ........................................... 182Default printer......................................... 246Default profile ......................................... 161Denial of Service (DoS) ........... 258, 283, 285Deny file .......................................... 203, 207Department ............................................. 162depmod...................................................... 52Development kernel version ...................... 36

Index 433
Device drivers ............................................ 38df ..................................................... 131, 133Dictionary attacks.................................... 266Different consoles .................................... 188Different shells ........................................ 179Differential backup .................................. 217Digital Audio Tape.................................. 215Direct-Device Access ............................... 223Directory tree .......................................... 113dmesg....................................................... 304Documentation..................................... 16-17DoS.................................................. 258, 283DOS Diskettes......................................... 227DOS-formatted floppy diskettes.............. 227du............................................................. 134Dumb terminals ...................................... 190Dump levels ............................................. 217Duplicated user IDs................................. 164
E
EBCDIC .................................................. 223EDITOR environment variable....... 206, 210edquota .................................................... 135Effective UID ............................................ 86EGID ......................................................... 86emacs ....................................................... 210ENV......................................................... 181env ........................................................... 181Environment Files ................................... 180Environment variable ...................... 204, 206Environmental Definitions ...................... 181EUID ................................................... 10, 86Event................................................ 202, 204Exabyte .................................................... 215exec command ...................................... 85-86exec system call .......................................... 86Exercise 1-1
Using su.................................................. 12Exercise 1-2
Navigating and Using an Administrator’s Shell ........................... 15
Exercise 1-3Using Man Pages .................................... 19
Exercise 1-4Using find............................................... 26
Exercise 2-1Rebuilding a Linux Kernel...................... 47
Exercise 2-2Restoring the Previous Kernel–in Case
the New One Doesn’t Work .............. 50Exercise 3-1
Basic Use of RPMs ................................. 63Exercise 3-2
Verify the Installation of the Package...... 68Exercise 3-3
Verify the Location of the Database........ 68Exercise 3-4
dpkg/dselect............................................ 70Exercise 4-1
Processes ................................................. 94Exercise 4-2
Signals .................................................... 98Exercise 4-3
Modifying Values in /proc .................... 108Exercise 5-1
File Permissions .................................... 119Exercise 5-2
Working with the quota utilities ........... 136Exercise 5-3
File Systems .......................................... 137Exercise 5-4
Identifying Lost Files ............................ 141Exercise 5-5
Examining and Checking File Systems ...................................... 142
Exercise 5-6Using mount with NFS ........................ 150
Exercise 6-1Adding and Modifying Users................ 167
Exercise 6-2Account Security................................... 172
Exercise 6-3Managing Users .................................... 176
Exercise 6-4Managing User Home
Directories (Optional)....................... 178Exercise 6-5
Example Environment .......................... 185Exercise 6-6
User Environments ............................... 185

434 Index
Exercise 6-7Restricted User Environment
(Optional) ......................................... 187Exercise 6-8
Working with TERM Types................. 193Exercise 6-9
Logins and Terminals ........................... 193Exercise 7-1
Using cron and at ................................. 210Exercise 7-2
Using cpio ............................................ 222Exercise 7-3
Copying a Disk..................................... 224Exercise 7-4
Using tar, gzip, and compress ............... 229Exercise 7-5
Backup and Restore .............................. 231Exercise 7-6
Timing Backups (Optional).................. 232Exercise 7-7
Backup Techniques............................... 233Exercise 8-1
Configuring and Using a Network Printer ............................. 251
Exercise 8-2The Print Queue (Optional) ................. 252
Exercise 9-1Configuring inetd ................................. 260
Exercise 9-2Using ipchains ...................................... 278
Exercise 9-3Installing and Configuring OpenSSH... 294
Exercise 10-1Finding and Accessing Log Files ........... 312
exports ..................................................... 149ext2 .................................................. 115, 129ext2 file system .......................................... 39
F
Facilities............................................ 305-306Failed logins log file ................................. 188FAT ......................................................... 129FAT32 ..................................................... 129fg.......................................................... 93, 98File ..................................................... 28, 140
File handle ............................................... 149File link.................................................... 123File permissions ............... 117, 122, 128, 264
Permissions........................................... 122File system ......................................... 39, 115
Local....................................................... 39Network ................................................. 39Virtual .................................................... 39
find ....................................................... 24-25Fixing Port Problems............................... 190Foreground ........................................... 92-93Fork ........................................................... 98Fork system call ......................................... 86Fork-exec ................................................... 86Forking ...................................................... 85free........................................................... 101fsck........................................................... 139fstab ................................................. 132, 149ftape......................................................... 225Full backup ...................................... 212, 217fuser ......................................................... 131
G
getty......................................................... 187GID ................................................... 86, 163GNU.......................................................... 74Good password ........................................ 169gpasswd ................................................... 163grep............................................................ 27groupadd ................................................. 163groupdel................................................... 163groupmod ................................................ 163Groups..................................................... 162Guest accounts................................. 169, 184gzip .......................................................... 228
H
Hard limit................................................ 134Hard link ......................................... 123, 127hostname .............................................. 21-22hrc............................................................ 296httpd ........................................................ 304

Index 435
I
id........................................................... 23-24Image backup .......................................... 217Incremental backup ......................... 212, 217inedtd.conf............................................... 288inetd......................................................... 272inetd.conf......................................... 259, 271info ............................................................ 20infocmp ................................................... 191init ............................................... 86, 90, 188init q ........................................................ 188Initial welcome message .......................... 161inittab ...................................................... 188Inode ....................... 115, 128, 134, 138, 140Inode number ................................... 127-128insmod ....................................................... 52Interactive command interpreter ............. 179IP stack ...................................................... 40IPX ............................................................ 40issue ......................................................... 280
J
jed ............................................................ 210Job ..................................................... 93, 202Job control ................................................. 92Job number........................................... 92-93jobs command ........................................... 92Journaling file system .............................. 139
K
Kernel ................ 35-38, 40-42, 50-51, 83-84,86, 90-91, 94, 100, 103-104, 138Tuning ................................................... 54
kerneld ....................................................... 53KILL ........................................................ 190kill......................................................... 95-98klogd ................................................ 303, 308kmod.......................................................... 53Korn Shell................................................ 179
L
Laser printers ........................................... 243last ................................................... 104, 106lastcomm ................................................. 107
lastlog ...................................................... 304ldconfig...................................................... 78ldd.............................................................. 78LILO.......................................................... 46Line-editing editor................................... 181Link ......................................................... 123
Hard............................................. 123, 127Soft................................................ 123-124Symbolic................................ 123-124, 128
Linux Documentation Project ................... 17Little endian ............................................ 223ln ............................................................. 123Load average ...................................... 88, 207Loadlin ...................................................... 47Location for your mailbox ....................... 181lockd ........................................................ 146Log file...................................... 103-104, 303Logger...................................................... 309Logging facilities...................................... 306Logging in to Linux ................................. 187Logging priorities .................................... 306login......................................................... 188Login Defaults ......................................... 188Login names ............................................ 161Login scripts ............................................ 161Login timeout .......................................... 188login.defs ................................................. 166Logrotate ................................................. 309logrotate.conf........................................... 310Logs ......................................................... 303Lost+found .............................................. 139lp.............................................................. 246lsmod ......................................................... 53
M
Magic numbers .......................................... 28Magnetic Tape................................. 214, 225Mail ......................................................... 174Mailbox ................................................... 174MAILTO ................................................. 204make ............................................... 43-44, 75make config ............................................... 44make install................................................ 46make menuconfig ...................................... 45make modules ............................................ 51

436 Index
make oldconfig .......................................... 44make xconfig.............................................. 45make zImage .............................................. 46man............................................................ 18Manual pages............................................. 18mcopy ...................................................... 227mdel ......................................................... 227mdir ......................................................... 227Memory .............40, 83-84, 99-101, 103, 106
Virtual .................................................... 99Memory management.................. 37, 40, 121Memory protection.................................... 99mesg........................................................... 10Message of the day................................... 182mformat ................................................... 227Micro-kernel .............................................. 50mingetty .................................................. 187Minimum password length...................... 169mkfs ................................................. 130, 139modprobe .................................................. 52Modules ..................................................... 50
Configuring ............................................ 54Dependencies ......................................... 52Utilities................................................... 51
Monolithic kernel ...................................... 50motd ........................................................ 182mount ...................................... 131, 146, 149Mount point ............................................ 131mountd ............................................. 149-150mt ............................................................ 225MTools .................................................... 227Multitasking .............................................. 84
Pre-emptive ............................................ 84mv............................................................ 124
N
named ...................................................... 270NetBIOS.......................................... 144, 147NetWare .................................................... 39Network File System ............................... 143Networked drives..................................... 230New user.................................................. 161newgrp ..................................................... 163NFS .....39, 143, 145-146, 149-151, 230, 284NFS exploit.............................................. 283
nfsd .......................................................... 150nftape....................................................... 225nice ....................................................... 91-92Niceness................................................ 90-91nmbd ....................................................... 147nobody..................................................... 270Nobody user account ............................... 205nohup ........................................................ 94Non-PostScript printer............................ 243no-rewind ................................................ 225now .......................................................... 208NTFS....................................................... 129NULL password ...................................... 168Numeric ID ............................................. 163
O
od............................................................... 28offline ...................................................... 225Optical Disks........................................... 216
P
Package ...................................................... 62Page fault ................................................. 100Paging................................................. 99-101PAM ................................................ 258, 261pam.conf.................................................. 264pam.d............................................... 261, 264Partition .......................................... 115, 128passwd ..................................................... 168password .......................................... 168, 266Password aging ................. 161, 168-169, 172Password control ..................................... 166Password field.......................................... 163Password for a group ............................... 163Password policies ..................................... 169Password warning time ........................... 172Passwordaging ................................. 166, 170Password-aging defaults .......................... 188Patches files ............................................... 42PCB ..................................................... 84, 86PCL ......................................................... 243pdksh ....................................................... 179Permissions.............. 117, 122, 128, 182, 264Pico.......................................................... 210PID.......................................... 84, 86, 89, 91

Index 437
Pipe............................................................ 85Pluggable Authentication Modules ......... 261portmap ................................................... 150portscan ............................................ 283-284POSIX ....................................................... 40postfix ...................................................... 285PostScript interpreter .............................. 243PostScript printers ................................... 243PPID ......................................................... 86Pre-emptive multitasking .......................... 84Primary group ......................................... 163printcap ................................................... 243PRINTER................................................ 246Printer filter ............................................. 243printtool .................................................. 243Priority ..................................90-92, 305-306Privileged user ......................................... 164Process ...........37, 83-92, 96, 98-99, 101, 103
Creating.................................................. 85Management........................................... 90States ...................................................... 89
Process accounting...................... 83, 103-105Process control block ................................. 84Process ID ......................... 84, 86, 92, 94, 96Process table .................................. 84, 90, 94Process tree ................................................ 84Profile files............................................... 180ps ..................................... 87, 89, 94, 98, 243Pseudo-root accounts............................... 180Pseudo-terminals ..................................... 189pts/x system ............................................. 189pwconv .................................................... 164
Q
qmail........................................................ 285qpopper ................................................... 270Quota................................................ 134-135quotaoff ................................................... 135quotaon.................................................... 135
R
raw ........................................................... 243README .................................................. 74Record locking ......................................... 146recover data.............................................. 211
Remote Logging ...................................... 306Removing a User ..................................... 174renice .................................................... 91-92Required search directories ...................... 181reset ......................................................... 190Resources .........35, 37-38, 40, 83-84, 97, 103respawn.................................................... 188Restricted root Access .............................. 180Retry attempts ......................................... 188rewind...................................................... 225rm ............................................................ 123rmmod ....................................................... 53root ........ 10, 37, 97, 135, 151, 164, 168, 205Root directory.................................. 113, 128Root password ................................. 169, 171Root privileges ......................................... 180Rootshell.................................................. 289RPC ......................................................... 146RPM .......................................................... 62
Installing................................................. 62Querying ................................................ 66Removing ............................................... 65Source..................................................... 73Upgrading .............................................. 64Validating............................................... 66
rsh............................................................ 230
S
sa.............................................................. 106Saint ........................................................ 293Samba ........................ 39, 144, 147, 246, 304Samba Printing........................................ 244sane.......................................................... 190scanlogd ................................................... 284Schedule .................................................... 90Scheduling ................................................. 37Scripts ...................................................... 121Security risk ............................................. 171Sendmail .................................................. 285Sensible passwords................................... 169set ............................................................ 181Set Group ID........................................... 184SetGID .................................................... 120Setuid ................................ 86, 120, 265, 270SGID ....................................... 120, 184, 258

438 Index
Shadow .................................................... 267Shadow file ...................................... 164, 170Shadow password .................... 163, 170, 267Shadow password suite ............................ 188Share access to directories ........................ 162Shared directories .................................... 184Shared Group Directories........................ 184Shared library ....................................... 77-78Shares ...................................................... 246shell.......................................................... 179Shell pipe ................................................... 85Shell script ....................................... 202, 207shutdown ......................................... 139, 180Signal ...................................89-90, 94-96, 98Signal handler ............................................ 94Simple-to-guess passwords ...................... 169Skeleton directory .................................... 166SMB ........................................................ 147smb.conf .................................................. 147smbclient ................................................. 147smbd ........................................................ 147Soft limit.................................................. 134Soft link ............................................ 123-124Source code............................... 41-42, 72, 74Spoofing .................................................. 271Spool........................................................ 207squid ........................................................ 304SRPM ........................................................ 73SSH ......................................................... 294ssh ............................................................ 294Stable kernel version .................................. 36statd ......................................................... 146Sticky bit.......................................... 119, 121Strings........................................................ 28stty ............................................... 92, 95, 189su ............................................ 10-11, 23, 206su log configuration ................................. 188SUDO ..................................................... 180SUID ............................................... 120, 258Superblock ....................................... 128, 138Superuser ............................... 10, 37, 97, 164Swap ........................................................ 100Swatch ..................................................... 296Symbolic link............................ 123-124, 128sync .......................................................... 138
Sysctl.......................................................... 54syslog ....................................................... 265syslog.conf ........................................ 305-306syslogd ............................................. 305, 308System calls................................................ 40System logs ............................... 265, 283-284Systemwide commands............................ 180
T
talk............................................................. 10Tape devices ............................................ 225tar ............................................... 72, 218-219Tarball ....................................................... 72Task ..................................................... 37, 84TCP wrappers ......................................... 271tcpd.......................................................... 272tcpdump .................................................. 296tcplogd ..................................................... 295tcsh ............................................ 85, 179, 208teardrop ................................................... 285Telnet ...................................................... 106Template directory structure ................... 166TERM ..................................................... 190termcap.................................................... 191Terminal used.......................................... 181Terminal-line characteristics ................... 188Terminfo database ................................... 190testparm................................................... 147today ........................................................ 208tomorrow................................................. 208top ................................................ 88-89, 106Torvalds, Linus.......................................... 35touch.......................................................... 25tput .......................................................... 193Trap........................................................... 94Trojan horses ........................................... 268Troubleshooting a terminal problem....... 190tty ............................................................ 189
U
UID ..................................................... 86, 97UID of 0 .................................................. 164ulimit ....................................................... 103umask ...................................................... 182umount .................................................... 131

Index 439
uname ............................................. 21-22, 36unused account ........................................ 174Upstream ................................................... 62uptime ....................................................... 88User ID.................................................... 164User’s startup files ................................... 180useradd .................................................... 165userdel ..................................................... 175usermod ................................................... 166Users’ mail files location .......................... 188UUCP...................................................... 187uugetty..................................................... 187
V
vacation.................................................... 174Version number ....................... 36, 51, 62, 77VFAT....................................................... 129vi .............................................. 181, 190, 210Video-8 .................................................... 215Virtual consoles ....................................... 187Virtual memory ........................... 40, 99, 103Viruses .............................................. 268-269VISUAL environment variable ........ 206, 210vmstat ...................................................... 101
W
w command ............................................... 88wait system call .......................................... 90wall ............................................................ 10Warning message..................................... 183whatis ........................................................ 18who ...................................................... 23, 88whoami ...................................................... 10whois ............................................... 286, 297Wildcard .................................................. 204Working environment ............................. 161WORM drives ......................................... 216Worms .............................................. 268-269write........................................................... 10wtmp ....................................................... 106wu-ftpd .................................................... 270
X
Xconsole .................................................. 311XDR ........................................................ 146xload .......................................................... 88xterm ....................................................... 106
Z
Zombie ........................................... 89-90, 97