
Life Skills Curriculum - Overcoming Obstacles
718
Life Skills Curriculum HIGH SCHOOL LEVEL
-
Upload
khangminh22 -
Category
Documents
-
view
1 -
download
0
Transcript of Life Skills Curriculum - Overcoming Obstacles

Life Skills Curriculum
HIGH SCHOOL LEVEL

© 2022 by Community for Education Foundation. All rights reserved.
Overcoming Obstacles grants you permission to download and print copies of the Curriculum in accordance with the Terms of
Use at www.overcomingobstacles.org. For any other use, contact Overcoming Obstacles at 1.212.406.7488 or
Overcoming Obstacles and the Overcoming Obstacles logo are registered trademarks of Community for Education Foundation.
Community for Education Foundation does not have any control over and does not assume any responsibility for third-party
websites and their content.

TABLE OF CONTENTS
PART I: CREATING A POSITIVE ENVIRONMENTGetting Started 7
1. What Is Overcoming Obstacles?
2. Setting Expectations
Confidence Building 27
1. Giving and Earning Respect
2. Identifying Strengths
3. Establishing What’s Important
4. Improving Well-Being
5. Developing Personal Power
PART II: ACQUIRING CORE SKILLSCommunication 71
1. Understanding Nonverbal Communication
2. Listening
3. Listening Critically
4. Speaking Responsibly
5. Communicating Constructively
Decision Making 127
1. Starting the Decision Making Process
2. Gathering Information
3. Exploring Alternatives and Considering Consequences
4. Making and Evaluating Decisions
Goal Setting 167
1. Identifying Goals
2. Setting Priorities
3. Developing a Positive Attitude

4. Accessing Resources
5. Learning to Be Assertive
PART III: DEVELOPING RELATED SKILLSResolving Conflicts 216
1. Introducing Conflict Resolution
2. Uncovering Stereotypes
3. Managing Anger in Conflict Situations
4. Creating a Win-Win Situation
5. Resolving Conflict
Problem Solving 260
1. Problem Solving Techniques
2. Problem Solving in School
3. Problem Solving on the Job
4. Problem Solving at Home
Skills for School and Beyond 292
1. Identifying Your Learning Style
2. Managing Your Time
3. Reading, Listening, and Note Taking
4. Writing Reports and Presenting to an Audience
5. Preparing for Tests and Exams
6. Managing Stress
A Game Plan for College 355
1. Assessing Your Talents and Interests
2. Colleges, Universities, and Technical Schools
3. Applying to Colleges, Universities, & Technical Schools
4. Discovering Money: Scholarships, Grants, and Loans
A Game Plan for Work 406
1. Working Toward Your Goals
2. Exploring Job Possibilities
3. Looking for a Job

4. Networking
5. Preparing a Resume
6. Making Contacts
Getting the Job 471
1. Completing Applications
2. Preparing for an Interview
3. Interviewing
4. Following the Interview
5. Responding to a Job Offer
On-the-Job 521
1. Developing a Positive Work Ethic
2. Working with Others
3. Communicating on the Job
4. Managing Time, Money, & People
5. Advancing on the Job
Managing Your Life 571
1. Managing Your Finances
2. Making a Budget
3. Understanding Advertising & Mass Media
4. Becoming a Responsible Citizen
5. Nurturing the Development of Young Children
PART IV: DEMONSTRATING THE SKILLSService Learning Handbook 627
1. Introduction
2. Getting Started
3. Designing a Plan
4. Finalizing the Action Plan and Getting Approval
5. Taking Action
6. Assessment
7. Introduction to Service Learning

8. Designing An Action Plan
9. Gathering Information and Making the Commitment
10. Formalizing and Finalizing the Action Plan
11. Giving Presentations
12. Taking Action
13. The Big Day
14. Self-Assessment
15. Public Assessment

PART I
CREATING A POSITIVE ENVIRONMENT
GETTING STARTED

TABLE OF CONTENTS
PART I: CREATING A POSITIVE ENVIRONMENT
1. What Is Overcoming Obstacles? 9
2. Setting Expectations 20
Getting Started

GETTING STARTED | LESSON 1: WHAT IS OVERCOMING OBSTACLES?
overcomingobstacles.org
AGENDA
Starter
Identifying Obstacles
A Day in a Life
A Day in My Life
Conclusion
Student Assessment
Objectives
Students will identify the specific skills they will learn and practice through the Overcoming
Obstacles course.
Students will recognize how they will apply these skills to their everyday lives.
Materials Needed
One copy of the “Table of Contents” activity sheet for each student (Parts I–III)
One copy of the “A Day in a Life” activity sheet for each student (Parts II and III)
Slips of paper with job titles students might hold in the future (Part III)
A hat (Part III)
1LESSON
WHAT IS OVERCOMING OBSTACLES?

GETTING STARTED | LESSON 1: WHAT IS OVERCOMING OBSTACLES?
overcomingobstacles.org
Invite students to make a list of activities they enjoy doing that require practice to do well (e.g., playing a sport or musical instrument, ballet, tap dancing). Read the following scenario out loud:
At band practice, your teacher only talks about the song you’re learning, but does so without explaining what he is doing. You’re expected to learn by listening and watching. You never play an instrument until the day of the first concert.
Ask students to comment on the effectiveness of this method of learning. Ask students how well they think they’d do when asked to perform without practicing first. (Students might respond: although you might learn some fundamentals, you can’t learn just by watching; you need to practice to improve your technique; you need to know where your skills are weak so you know what to work on.)
Point out that for many of the most important skills we need in life, we don’t always get sufficient practice before we’re expected to demonstrate them. Often, they are skills we learn by watching others, which students have determined is not the best way to learn. Invite the class to suggest what some of these life skills might be. If students are unsure, explain that this lesson will help them identify these skills and how they apply to students’ lives now and in the future.
Explain to students that the Overcoming Obstacles course will give them an opportunity to learn and to practice skills they need to succeed in school, at home, in their communities, and on the job.
Starter (3 minutes)
Purpose: Students analyze the program title “Overcoming Obstacles” by identifying common obstacles in daily life.
1. Students define “obstacle” and explore options for dealing with obstacles.
Write “obstacle” on the board. Ask students to define the word. Relate the word to concrete experiences. Ask students to visualize a time when they were driving, hiking, or riding a bike and came upon something that was an obstacle to continuing on their way. Ask, “What did you do about the obstacle?” Invite students to share their experiences and solutions, such as moving the object, going around it, or finding an alternative route to reach their destination.
Explain to students that while they are likely to encounter such physical obstacles, they are just as likely to experience many “life obstacles,” some of which can be very damaging. Brainstorm with students examples of these life obstacles, such as emotional roadblocks that they encounter in their relationships with friends and family members. For example, have students identify an obstacle that may occur between friends that must be overcome for the friendship to continue. Write their responses on the board.
Part I Identifying Obstacles (10 minutes)

GETTING STARTED | LESSON 1: WHAT IS OVERCOMING OBSTACLES?
overcomingobstacles.org
2. Students review the table of contents for the Overcoming Obstacles curriculum and define “life skills.”
Distribute copies of the “Table of Contents” activity sheet to students and have them review it (or have them access the activity sheet through their electronic devices). Explain to students that the table of contents lists skills that they will be developing and practicing in this class. Encourage students to comment on what is covered in the curriculum and why these topics are called life skills. Have students define the phrase “life skills.”
3. Students anticipate the benefits of the Overcoming Obstacles course.
Ask students to consider why this course is called Overcoming Obstacles. Refer students to the list of obstacles they’ve identified on the board. Invite volunteers to suggest ways that the particular skills they’ll be learning can help them find ways around life’s obstacles, just as they’d find a way around a fallen tree or a concrete barrier in their path.
Purpose: Students explore the relevance of the Overcoming Obstacles curriculum by analyzing the activities and life skills that are part of a fictional student’s day.
1. Students review a fictional student’s day.
Have students work in pairs. Either give each student a copy of the “A Day in a Life” activity sheet or share electronically. Review the sheet with students to be sure they understand that it is the schedule for a fictional student, Camilla Juarez. Tell students that they will also need the “Table of Contents” activity sheet.
Explain that most of our daily activities are a series of actions and decisions. Waking up in the morning, for example, requires deciding what hour to get up in order to get to school or a job on time and remembering to set the alarm the night before.
2. Students analyze which life skills are used by a fictional character.
Ask students to analyze Camilla’s day. Next to each activity, they should list skills from the “Table of Contents” activity sheet that are relevant to that activity. If students are unsure about the specific content of some lessons, have them make their best guess. Suggest that they focus on the skills that may result in more positive outcomes for Camilla.
Ask students to share the specific skills they listed for each of Camilla’s activities. Encourage discussion about the kinds of obstacles Camilla is facing on this particular day. Have them predict how practicing the skills that Overcoming Obstacles offers could help Camilla overcome her challenges and obstacles.
Part II A Day in a Life (20 minutes)

GETTING STARTED | LESSON 1: WHAT IS OVERCOMING OBSTACLES?
overcomingobstacles.org
Purpose: Students explore the relevance of the Overcoming Obstacles curriculum by analyzing how the skills it offers are useful in their own lives.
1. Students recognize how the life skills they will learn through Overcoming Obstacles apply to their daily activities.
Have students repeat the previous activity, this time working alone and substituting activities in their own lives for Camilla’s. Have students list on a sheet of paper 10 activities in their daily schedule. They may include some of the same activities from the “A Day in a Life” activity sheet but should also include at least two specific issues that they are dealing with at this time (e.g., getting a better grade on the next math test).
Ask students to jot down notes for each activity identifying the skills from the “Table of Contents” activity sheet that they would use to successfully complete it. Have them comment on how applying the skills they will develop through the Overcoming Obstacles course will help them to become more successful.
Invite students to share examples of ways in which the skills they will learn through Overcoming Obstacles apply to their own lives. Suggest that students save their notes and responses to this activity. As they progress through the curriculum, they can return to their notes from this discussion to check how their mastery of the life skills they are learning is deepening.
2. Students identify skills that will prepare them for potential obstacles that may arise on the job.
Give the class one minute to arrange themselves into small groups of three to five students. Place the slips of paper with the job titles in a hat. Pass the hat around and have each student draw one slip.
Have students work in their groups to identify the jobs they have drawn, name obstacles they might face in those jobs, and identify life skills they will develop in this class that could help them overcome those obstacles. Encourage students to help each other identify obstacles and relevant life skills.
Part III A Day in My Life (20 minutes)

GETTING STARTED | LESSON 1: WHAT IS OVERCOMING OBSTACLES?
overcomingobstacles.org
Ask students to name some of the skills they will learn in this course. Elicit from students the following key points that were taught in this lesson:
The Overcoming Obstacles course is about the life skills that are relevant to success at home, at school, with peers, and on the job.
The Overcoming Obstacles course allows students to learn and practice these skills, helping them to overcome obstacles in their daily lives.
The Overcoming Obstacles curriculum is relevant to students’ lives now and in the future as adults.
Conclusion (2 minutes)
1. Describe an obstacle you have faced in your life. What skills helped you overcome this obstacle?
2. What skills would you most like to learn in this course?
Student Assessment

GETTING STARTED | LESSON 1: WHAT IS OVERCOMING OBSTACLES?
overcomingobstacles.org
LESSON EXTENSIONS
Using Quotations
“Practice makes perfect.” —Pablo Casals, world-famous cellist who practiced six hours a day
Have students write about why they think Casals practiced every day. As a class, discuss why it is
important for students to practice the skills they will learn through this course.
Addressing Multiple Learning Styles
Ask students to make a pie chart that shows how they allot their time in a typical day. Have students
identify the relevant skills they use during each activity represented on the chart.
Writing in Your Journal
Introduce students to the idea of a journal. Discuss the importance of writing down thoughts and
feelings. Ask students to begin a journal with the following question: “What does overcoming obstacles
mean to you?” Have students discuss what they have written with a partner.
Using Technology
Ask students to research a profession of their choice on online and identify the relevant life skills
needed for that job. Have students share their work with the class.
Homework
Ask students to interview adults about their jobs. Students should find out which life skills the adults
use on the job, how they learned these skills, and why these skills are important.

GETTING STARTED | LESSON 1: WHAT IS OVERCOMING OBSTACLES?
overcomingobstacles.org
Additional Resources
Have students read sections of The Diary of a Young Girl by Anne Frank or I Know Why the Caged
Bird Sings by Maya Angelou, identifying the obstacles faced and how they were overcome.

GETTING STARTED | WHAT IS OVERCOMING OBSTACLES?©
20
21
Ove
rco
min
g O
bst
acle
s
PROGRAM OVERVIEW .......................................................................................................................
PART I: CREATING A POSITIVE ENVIRONMENT
GETTING STARTED ...............................................................................................................................
1. What Is Overcoming Obstacles?2. Setting Expectations
CONFIDENCE BUILDING ....................................................................................................................
1. Giving and Earning Respect2. Identifying Strengths3. Establishing What’s Important4. Improving Well-Being5. Developing Personal Power
PART II: ACQUIRING CORE SKILLS
MODULE ONE: COMMUNICATION SKILLS ................................................................................
1. Understanding Nonverbal Communication2. Listening3. Listening Critically (two-session lesson)4. Speaking Responsibly5. Communicating Constructively
MODULE TWO: DECISION MAKING SKILLS ...............................................................................
1. Starting the Decision Making Process2. Gathering Information3. Exploring Alternatives and Considering Consequences4. Making and Evaluating Decisions
MODULE THREE: SETTING AND ACHIEVING GOALS .............................................................
1. Identifying Goals2. Setting Priorities3. Developing a Positive Attitude4. Accessing Resources5. Learning to Be Assertive
TABLE OF CONTENTS
overcomingobstacles.org

GETTING STARTED | WHAT IS OVERCOMING OBSTACLES?©
20
21
Ove
rco
min
g O
bst
acle
s
PART III: DEVELOPING RELATED SKILLS
MODULE FOUR: RESOLVING CONFLICTS ...................................................................................
1. Introducing Conflict Resolution2. Uncovering Stereotypes3. Managing Anger in Conflict Situations4. Creating a Win-Win Situation5. Resolving Conflict
MODULE FIVE: PROBLEM SOLVING ..............................................................................................
1. Problem Solving Techniques2. Problem Solving in School3. Problem Solving on the Job4. Problem Solving at Home
MODULE SIX: SKILLS FOR SCHOOL AND BEYOND .................................................................
1. Identifying Your Learning Style2. Managing Your Time3. Reading, Listening, and Note Taking4. Writing Reports and Presenting to an Audience (two-session lesson) 5. Preparing for Tests and Exams6. Managing Stress
MODULE SEVEN: A GAME PLAN FOR COLLEGE/HIGHER EDUCATION .........................
1. Assessing Your Talents and Interests2. Determining the Training and Education You’ll Need (two-session lesson)3. Choosing the Right Place: Colleges, Universities, and Technical Schools4. Applying to Colleges, Universities, and Technical Schools (two-session lesson)5. Discovering Money: Scholarships, Grants, and Loans
MODULE EIGHT: A GAME PLAN FOR WORK .............................................................................
1. Working toward Your Goals (two-session lesson)2. Exploring Job Possibilities3. Looking for a Job4. Networking5. Preparing a Resume (two-session lesson)6. Making Contacts (two-session lesson)
TABLE OF CONTENTS(CONTINUED)
overcomingobstacles.org

GETTING STARTED | WHAT IS OVERCOMING OBSTACLES?©
20
21
Ove
rco
min
g O
bst
acle
s
MODULE NINE: GETTING THE JOB ................................................................................................
1. Completing Applications2. Preparing for an Interview 3. Interviewing4. Following the Interview (two-session lesson)5. Responding to a Job Offer
MODULE TEN: ON-THE-JOB SKILLS ..............................................................................................
1. Developing a Positive Work Ethic2. Working with Others (two-session lesson)3. Communicating on the Job4. Managing Time, Money, and People5. Advancing on the Job
MODULE ELEVEN: MANAGING YOUR LIFE ................................................................................
1. Managing Your Finances 2. Making a Budget3. Understanding Advertising and Mass Media (two-session lesson)4. Becoming a Responsible Citizen5. Nurturing the Development of Young Children
PART IV: DEMONSTRATING THE SKILLS
SERVICE LEARNING..............................................................................................................................
1. Introduction 2. GettingStarted 3. DesigningaPlan 4. Finalizing the Action Plan and Getting Approval5. TakingAction 6. Assessment
TABLE OF CONTENTS(CONTINUED)
overcomingobstacles.org

GETTING STARTED | WHAT IS OVERCOMING OBSTACLES?©
20
21
Ove
rco
min
g O
bst
acle
s
Camilla Juarez is a high school senior. The following are the activities she has planned for today.
6:15 am 1. Wake up.
6:25 am 2. Take a shower and get dressed.
6:45 am 3. Eat breakfast.
6:55 am 4. Get books and papers together for school.
7:00 am 5. Leave for school.
7:00 pm 6. Complete homework.
8:00 pm 7. Decide how to spend or save my paycheck.
8:30 pm 8. Try to find a different job.
7:45 am 1. Meet with Mr. Jones to ask if I can retake the test.
9:00 am 2. Take notes in history class.
11:30 am 3. Talk to Jack at lunch about the argument we had yesterday.
1:00 pm 4. Complete science project with my group.
2:45 pm 1. Catch a bus to work.
3:00 pm 2. Check supplies inventory before my shift starts.
5:30 pm 3. Speak to my boss about the raise that was promised.
Where Time Activity
Related Overcoming Obstacles Lessons
Hom
eScho
olWork
A DAY IN A LIFE
overcomingobstacles.orgPowered by TCPDF (www.tcpdf.org)

GETTING STARTED | LESSON 2: SETTING EXPECTATIONS
overcomingobstacles.org
AGENDA
Starter
What You Put In Is What You Get Out
Building Cooperation
Overcoming Obstacles Bill of Rights
Conclusion
Student Assessment
Objectives
Students will recognize that their active participation is critical to their getting the most from
the Overcoming Obstacles course.
Students will identify the challenges and benefits of working with other students in a group.
Students will recognize the need to cooperate with and respect other class members as they
master life skills together.
Students will identify a set of rights that promote cooperation and respect in the Overcoming
Obstacles classroom.
Materials Needed
15 sheets of newspaper for each group (Part II)
About three feet of masking tape for each group (Part II)
Chart paper and a marker (Part III)
2LESSON
SETTING EXPECTATIONS

GETTING STARTED | LESSON 2: SETTING EXPECTATIONS
overcomingobstacles.org
Ask students if they have ever seen a preview for a movie that seemed interesting. Ask whether they went to see the movie when it opened. If so, find out if the movie was better than they thought it would be. Was it worse? Did it meet their expectations?
Tell students that this lesson is about setting expectations and that they will discuss as a class what to expect from the lessons, from the teacher, and from one another.
Starter (2 minutes)
Purpose: Students identify what they expect from the Overcoming Obstacles course and why their active participation is required to meet those expectations.
1. Students identify their expectations for this class.
Remind students that the previous lesson provided an overview of what they’ll be learning in the Overcoming Obstacles course. Ask students to write down their expectations. Offer examples such as the following:
I’ll learn to make better decisions.
I’ll learn how to use my time more efficiently.
2. Students discuss how they will acquire life skills.
Remind students of the discussion in the previous lesson about the best way to learn a song for a concert. Ask students to recall their conclusions about the best way to develop new skills. (Students should mention that it’s best to learn by doing and practicing.)
Ask students to review their expectations and to consider how well they’ll meet those expectations if they don’t practice the skills. Ask students how well they will succeed if they only sit in their seats and listen to you talk and watch others develop these life skills. Encourage discussion.
Conclude by emphasizing that Overcoming Obstacles is a course about life. Explain that you will help every student relate the skills and activities to their own life, but it’s ultimately up to each student to practice the skills in order to master them.
Part I What You Put In Is What You Get Out (10 minutes)

GETTING STARTED | LESSON 2: SETTING EXPECTATIONS
overcomingobstacles.org
Purpose: Students demonstrate the benefits of group work and the importance of cooperation to group success.
1. Students identify the importance of learning how to work with others.
Ask, “Why is it important for you to be able to work as part of a group?” Point out to students that as young people now and later as adults, they will often be required to work in groups or teams. Explain to students that group activities will be a frequently occurring format in the Overcoming Obstacles course and that the course will teach them skills that will enable them to function well as part of a team. Tell students that you expect them to work cooperatively.
2. Students participate in a cooperative group activity.
Divide the class into groups of four or five students. Have students arrange their desks to create an open work space for each group. Distribute 15 sheets of newspaper and three feet of masking tape to each group.
Give the groups the following directions:
Please don’t start until I tell you to do so.
Using only the materials I gave out, you will have 10 minutes to build the highest freestanding tower you can.
The tower cannot be taped to the desks or to the floor. It must stand on its own.
Answer any questions students may have, then instruct them to begin. Circulate through the room, observing group interactions and noting conversations and comments. Watch for evidence of both cooperation and dissension.
3. Students reflect on the experience.
When 10 minutes have passed, check students’ results and involve all groups in a discussion of the experience. Ask the groups to describe how they built their tower and why they think they were or weren’t successful. Share your observations and encourage students to elaborate on what took place. Ask for examples of how all team members contributed. Allow students to discuss, in respectful terms, any tensions that developed.
Give each group two to three minutes to summarize what they learned from the experience. Offer questions such as the following for guidance:
Part II Building Cooperation (20 minutes)

GETTING STARTED | LESSON 2: SETTING EXPECTATIONS
overcomingobstacles.org
What is easy about working with others?
What is difficult?
Why is cooperation necessary?
What will your group do differently the next time you work together?
Ask the groups to share their summaries. Have them describe what it is like to work as a team and how to improve cooperation in the future. Write their responses on the board.
Purpose: Students work together to establish guidelines and expectations for the class.
1. Students recall their expectations for the class.
Point out that so far, students have stated their expectations for the course, and you have stated your expectation of how students will work together cooperatively in groups. Explain that students also have a right to expect certain treatment and behavior from fellow students in this class.
2. Students discuss the purpose of rules.
Ask students to name some school rules and to suggest reasons why these rules are in place. Affirm that rules are designed not just to stop negative behavior, but to protect the rights of those who behave appropriately.
3. Students create a classroom bill of rights.
Have students identify the document that guarantees individual rights in the United States. (Students should mention the Bill of Rights, the first 10 amendments to the Constitution.)
Have students read the Bill of Rights (available at www.archives.gov/founding-docs/bill-of-rights-transcript). Have students review the document and describe its characteristics. Write student responses on the board. Guide students to focus on the document’s language, format, and structure, as well as its content. (Students might respond: the date and place are written at the top of the document, the first sentence tells why Americans need the document, the language is formal.)
Divide students into pairs. Have them create a bill of rights for this class that’s patterned after this important document. Remind them that their bill of rights should protect the right of every class member to be treated with respect, to voice different opinions, to expect confidentiality when sharing personal experiences, and to be considered a valued member of the group. Guide them in coming to an agreement on 10 basic rights. Write them on chart paper.
Part III Overcoming Obstacles Bill of Rights (20 minutes)

GETTING STARTED | LESSON 2: SETTING EXPECTATIONS
overcomingobstacles.org
When the list is complete, have students come forward to sign the document. Post the bill of rights on a bulletin board for the duration of the course. Remind students that this document will be referred to frequently in this class. It provides a statement of mutual understandings about respectful behavior that will be expected from all members of the class.
Ask students to explain the relationship between participating in class and learning. Elicit from students the following key points that were taught in this lesson:
Each student is responsible for giving the most to and getting the most from the content taught in this course.
Students will work together in groups in this course, so they must know how to cooperate with others.
The bill of rights will remind students of how they expect to be treated and how others expect to be treated by them.
Conclusion (3 minutes)
1. List three advantages and three disadvantages of working with others in a group.
2. List five examples of times when people must work together in a group or as a team.
3. What skills are necessary for people to work well together?
Student Assessment

GETTING STARTED | LESSON 2: SETTING EXPECTATIONS
overcomingobstacles.org
LESSON EXTENSIONS
Using Quotations
“History has demonstrated that the most notable winners usually encountered heartbreaking obstacles
before they triumphed. They won because they refused to become discouraged by their defeats.” —B. C.
Forbes
Ask students to research a person who has overcome obstacles. Have students write at least three
paragraphs on the obstacles the person overcame and prepare a two-minute presentation.
Addressing Multiple Learning Styles
Have students create the following lists:
1. Their expectations for school.
2. Their responsibilities.
3. Experiences they would like to have (e.g., skydiving).
4. The skills they hope to learn.
5. What they hope to learn about themselves and others.
Ask students to share one item from each list.
Writing in Your Journal
Ask students to write a letter to themselves. Have them include their expectations for school, events or
experiences they are looking forward to, special memories, and first impressions of the year.
Discuss writing letters to yourself as a technique for staying focused on your dreams and keeping
yourself “in check.”

GETTING STARTED | LESSON 2: SETTING EXPECTATIONS
overcomingobstacles.org
Addressing Multiple Learning Styles
Divide students into small groups. Have each group perform two role plays, one showing a classroom
that does not follow the bill of rights the class made and another showing a class that does.
Discuss the importance of following the classroom bill of rights.
Homework
Have students keep a list of the obstacles and challenges they face over the next three days. At the end
of the three days, have them note next to each obstacle which skills from the “Table of Contents”
activity sheet can help them overcome that obstacle.
Have volunteers share the skills they most look forward to learning through this course.
Additional Resources
Have students review The Secret of Success Is Not a Secret: Stories of Famous People Who
Persevered by Darcy Andries or Top Performance: How to Develop Excellence in Yourself and Others
by Zig Ziglar.
Ask students to choose and discuss five key ideas from one of the books.

PART I
CREATING A POSITIVE ENVIRONMENT
CONFIDENCE BUILDING

TABLE OF CONTENTS
PART I: CREATING A POSITIVE ENVIRONMENT
1. Giving and Earning Respect 29
2. Identifying Strengths 36
3. Establishing What’s Important 45
4. Improving Well-Being 54
5. Developing Personal Power 64
Confidence Building

CONFIDENCE BUILDING | LESSON 1: GIVING AND EARNING RESPECT
overcomingobstacles.org
AGENDA
Starter
R-E-S-P-E-C-T
What’s Best about Me
Tested
Conclusion
Student Assessment
Objectives
Students will define “respect.”
Students will identify the importance of self-respect.
Students will demonstrate parameters of respect.
Students will identify and evaluate qualities that justify self-respect.
Materials Needed
A physical or online dictionary (Part I)
1LESSON
GIVING AND EARNING RESPECT

CONFIDENCE BUILDING | LESSON 1: GIVING AND EARNING RESPECT
overcomingobstacles.org
Begin class today by writing “R-E-S-P-E-C-T” on the board and ask students to brainstorm a list of people they deem worthy of their respect. Engage students in a brief discussion of why the people on this list deserve their respect.
On the board, write “Who is worthy of respect, and why are they worthy of it?” Explain that students will be able to answer this question by the end of the lesson.
Starter (3 minutes)
Purpose: Students define “respect” and identify qualities that justify respect.
1. Students develop a definition of “respect.”
Elicit from students a definition of “respect.” Write the definition on the board.
At the same time, have a volunteer look up the definition of “respect” in a dictionary. Challenge the class to consider the dictionary definition in light of their own definition and to make adjustments as they see fit.
2. Students draw conclusions about respect.
Guide students to draw conclusions about who deserves respect and why. Direct students to the definition on the board or interactive projection device and ask them if they notice “wealthy” or “successful” listed anywhere.
Ask students to draw a conclusion about this observation. Engage students in a discussion about moving beyond external qualities, such as wealth or success, to determine who is worthy of respect. For example, write the name “Steven Spielberg” (or another well-known person’s name) on the board. Brainstorm the qualities that helped him achieve his wealth and his success: talent, hard work, and perseverance. Contrast this by mentioning someone who has achieved wealth or fame via corruption, dishonesty, or exploitation.
Conclude that the qualities beneath the surface are the ones that determine the people who earn our respect. Have students look at the names of the people they wrote down earlier and ask them if, according to their definition, those people still deserve their respect. Encourage students to explain their responses and challenge them to add more names to the list. Point out that students probably know many people who could be added to their lists.
Part I R-E-S-P-E-C-T (10 minutes)

CONFIDENCE BUILDING | LESSON 1: GIVING AND EARNING RESPECT
overcomingobstacles.org
Purpose: Students identify the importance of self-respect.
1. Students define “self-respect.”
Have students recap qualities worthy of respect and write them on the board. Ask if, based on these qualities, they would add their own names to the list. Students may suggest that this would be bragging. Point out that each student has special qualities, just like the people they listed; these qualities make them worthy of respect, as well.
2. Students identify and discuss incidents in which qualities that deserve respect are evident.
Ask students to consider the respectable qualities they have discussed thus far and instruct them to list a few of those qualities that apply to themselves. Ask them to think about a time when they demonstrated one of those qualities.
Divide students into pairs. Have each student describe the time they thought of to their partner. If necessary, prompt students with the following examples:
Standing up for a friend
Getting a job
Studying hard to pass a difficult exam
As students speak, have their partners take notes describing the tone of voice, facial expressions, and body language of the speakers. Have partners switch roles so that each student has a chance to describe their best moment.
Now, ask students to briefly describe a negative moment or one that they would be happy to forget. Again, as students speak, have their partners take notes on the tone of voice, facial expressions, and body language of the speakers.
3. Students analyze behavior and identify the need for self-respect.
Have students report on what they noticed about their partner’s behavior. Ask students if they noticed a difference in their partner’s tone of voice, facial expressions, and body language between when they described the positive event and when they described the negative event. Most students are likely to report that the partner’s tone of voice, facial expressions, and body language were far more cheerful and confident when describing a pride-filled moment than when describing one of embarrassment.
Part II What’s Best about Me (15 minutes)

CONFIDENCE BUILDING | LESSON 1: GIVING AND EARNING RESPECT
overcomingobstacles.org
Conclude that, when we respect ourselves, we send out signals of confidence, such as a lively tone of voice, good eye contact, laughter, or an upright posture. When a person displays self-confidence, they become a magnet to others. Self-confidence—the expression of self-respect—empowers us by drawing others’ attention to our best qualities.
Purpose: Students learn that the qualities from which they derive their self-respect will be tested throughout their lives.
1. Students role-play different scenarios that test their best qualities.
Explain to students that recognizing their own best qualities not only fosters self-respect, but is also an essential part of being an effective person. Being responsible, honest, and fair-minded, for example, benefits those around us. Tell students that they will often have these qualities tested; therefore, they must know the extent to which they are willing to compromise these traits.
Divide the class into three groups. Have each group discuss one of the following scenarios and act it out for the class:
You’re a responsible person. You have final exams that demand many hours of concentrated study time. It’s the night before the first final, and a neighbor for whom you babysit regularly has asked you to sit for her infant while she handles a family emergency. You know that the baby will demand a good amount of your time. What do you do?
You pride yourself on your honesty, and your best friend has asked for your opinion about their romantic partner. The relationship has just started, so you haven’t spent a lot of time with this new person, but your initial impressions are negative. This person seems self-centered and inconsiderate toward your friend. Do you tell your friend the truth about how you feel? What do you do?
You’re a fair-minded person, but it’s hard to maintain your objectivity about your best friend when they are accused of shoplifting something from the local drugstore. Your friend has a history of theft and witnesses claim to have seen the crime, but your friend has assured you that the past is the past. Do you think your friend did it? What do you say to your friend?
When students are finished performing, explain that throughout our lives, the qualities of character from which we derive our self-respect are frequently pushed to the limit, compromised, or put to the test. Point out that each of these conflicts is open-ended and is likely to have a different resolution, depending on the person who resolves it. Encourage discussion and debate about students’ approaches to each situation. Ask students to think about the following question: How far can you push the boundaries of your own best qualities and still maintain your self-respect?
2. Students apply what they have learned.
Part III Tested (20 minutes)
CONFIDENCE BUILDING | LESSON 1: GIVING AND EARNING RESPECT
overcomingobstacles.org
Ask students to consider the qualities discussed in Part II of this lesson and have them list other qualities in themselves that are worthy of self-respect. Briefly discuss and evaluate the importance of these qualities in their daily lives, distinguishing surface values from attributes that are worthy of respect.
Have students write a journal entry describing their lives three years from now. Have them invent and describe a future incident in which a respectable quality empowers them.
Have students brainstorm several examples of situations in which having self-respect could help them. Elicit from students the following key points that were taught in this lesson:
Respect for ourselves and others is very important.
To build self-respect, focus on what’s best about you.
Self-respect shines through as self-confidence; self-confident people draw others to them in a positive way.
Our best qualities can often be pushed to the limit by certain life situations. It is important to be able to identify those situations and to be able to cope with them.
Conclusion (2 minutes)
1. What do you think it means to respect someone?
2. Name a person you respect. Why do you respect this person?
3. There is an expression that says, “If you don’t respect yourself, you can’t respect anyone else.”
What does this mean to you?
Student Assessment

CONFIDENCE BUILDING | LESSON 1: GIVING AND EARNING RESPECT
overcomingobstacles.org
LESSON EXTENSIONS
Using Quotations
“As within, so without.” —Hermesianax, Greek poet
Have students read and discuss the meaning of the quote. Discuss how our level of self-respect can
affect how we interact with others and how we deal with difficult situations.
Addressing Multiple Learning Styles
Have students create a collage or concept map of people they respect (e.g., family, friends, famous
people).
Have students share their collages with the class or hang them on the walls.
Writing in Your Journal
Have students write about a time when someone blatantly disrespected them. Ask, “How did you
handle it? What would you do differently? What would you do the same? Did it affect your self-
confidence?”
Discuss how being disrespected impacts a person’s self-confidence. Have students brainstorm ways to
cope with feeling disrespected.
Using Technology
Have students create songs about respect.
Encourage students to perform the song for the class, print the lyrics of the song and have the class sing
it, or record the song and play it for the class.

CONFIDENCE BUILDING | LESSON 1: GIVING AND EARNING RESPECT
overcomingobstacles.org
Homework
Have students write a letter to or interview someone they respect.
Discuss what the students hope to learn from those they respect. Ask students to identify the personal
qualities that they have developed as a result of modeling themselves after people they respect.
Additional Resources
Read aloud Blubber by Judy Blume.
Discuss with students how Blubber’s classmates put her down. Discuss how they showed a lack of
respect for her. Brainstorm ways that Blubber’s classmates should have behaved.

CONFIDENCE BUILDING | LESSON 2: IDENTIFYING STRENGTHS
overcomingobstacles.org
AGENDA
Starter
Jeopardy
Strengths Interview
Take It Outside
Conclusion
Student Assessment
Objectives
Students will recognize that every individual has personal strengths.
Students will identify some of their strengths.
Materials Needed
One copy of the “Jeopardy” activity sheet for each student (Part I)
Five index cards for each student (Part I)
Two clickers, or similar noisemakers (Part I)
One copy of the “Strengths Interview” activity sheet for each student (Part II)
2LESSON
IDENTIFYING STRENGTHS

CONFIDENCE BUILDING | LESSON 2: IDENTIFYING STRENGTHS
overcomingobstacles.org
Remind students of the previous lesson on respect—for oneself and for others. Point out that what we respect about ourselves and others emanates from our strengths. Brainstorm the strengths of a few respected public figures or celebrities students are familiar with. Encourage students to go beyond external qualities; for example, in addition to being famous for their work in movies, many popular actors and actresses are also dedicated philanthropists.
Write the following questions on the board: “Do we all have personal strengths? If so, what are they?” Explain to students that they will be able to answer these questions by the end of this session.
Starter (3 minutes)
Purpose: Students discover that they all have personal strengths.
1. Students prepare for the activity.
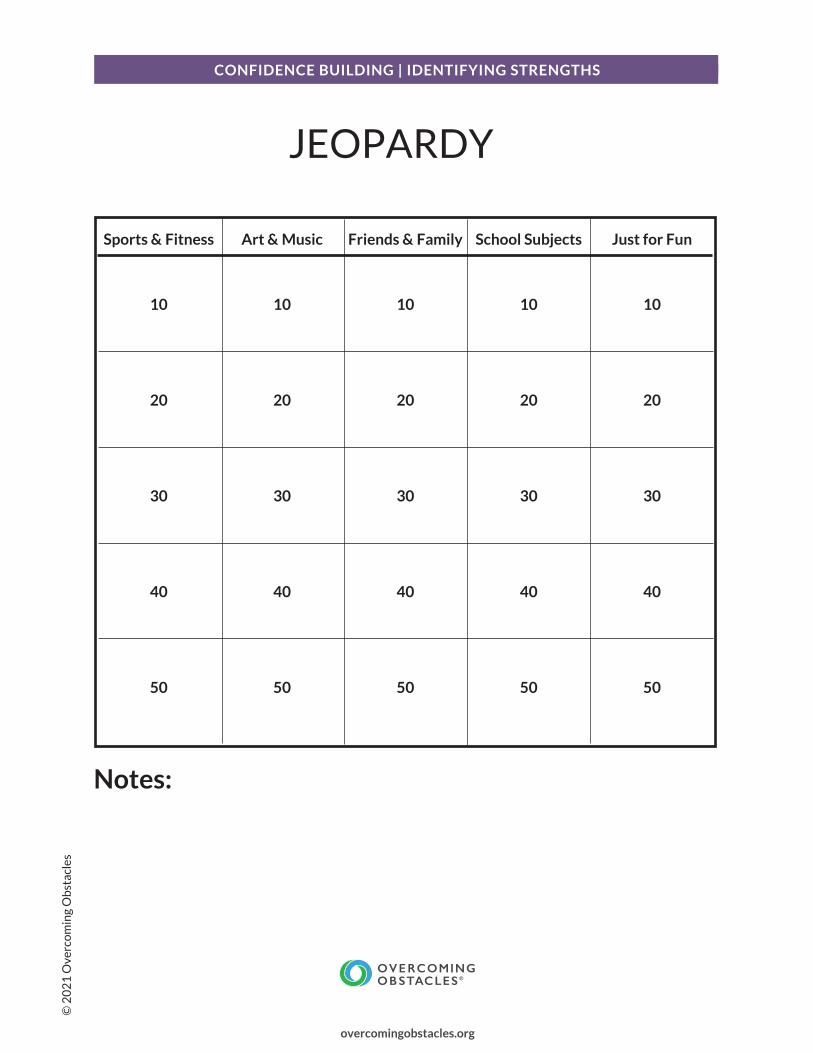
Distribute a copy of the “Jeopardy” activity sheet and five index cards to each student. Point out to students that there are five categories across the top of the activity sheet—Sports & Fitness, Arts & Music, Friends & Family, School Subjects, and Just for Fun—and that each category has boxes beneath it labeled 10, 20, 30, 40, and 50.
Ask students to write the titles of the categories on the backs of their index cards. Then ask them to write their names and a strength they possess in each category on the other side of the cards.
When the class has finished, choose five volunteers, one to be in charge of each category. Explain that these five volunteers will generate the statements and verify the “question-phrased” answers, as per the TV game show Jeopardy! Have each volunteer collect the cards for their category and sort them by the strengths that students have listed. Have the volunteers put the cards with the strengths that apply to the greatest number of students on top of the pile and the strengths that apply to the least number of students on the bottom of the pile. Explain that the greater the number of students who possess a strength, the lower the point value of the question. (For example, if 15 students wrote that they are good at math, that card is on top of the pile and the question is worth only 10 points, since the majority of students provided that answer.)
2. Students participate in the activity.
Part I Jeopardy (25 minutes)

CONFIDENCE BUILDING | LESSON 2: IDENTIFYING STRENGTHS
overcomingobstacles.org
Divide the class into two teams and provide each team with a clicker. Choose one team to go first and have the first student from that team pick the category for the first question. For example, if the student chooses “School Subjects for 10,” have the School Subjects student make a statement relating to a strength that others have described on their cards (e.g., “this person is good at math”). The team that clicks in first must name a student who is good at math (e.g., “Who is Hector?”). If the team is right, it gets 10 points. If the team is wrong, then the other team gets a chance to answer and earn 10 points. Once the question has been answered correctly, all students who are good at math must stand to identify themselves. Players then pass the clicker to the next member of the team to play out the next question.
Ask students to cross out a box once its point value has been played. Continue until the entire game board has been played. The winning team is the one with the most points.
3. Students draw conclusions from this exercise.
Summarize the activity by noting that the game board has 25 different squares on it. Point out that everyone is good at something, so everyone should have been able to identify with at least one or two of the categories.
Ask students to discuss their reactions to discovering the strengths they share with their classmates. Then, talk about the strengths that make each person unique within the group.
Purpose: Students identify five of their personal strengths.
1. Students learn that people have strengths in different areas.
Ask students if they felt that it was difficult to list strengths for every category. Take a poll to see how many students left one or more index cards blank. Point out that nobody shines in every area. We all have our own personal strengths and interests.
2. Students interview partners to identify their strengths.
Distribute one copy of the “Strengths Interview” activity sheet to each student. Divide the class into pairs and provide these directions for students:
Part II Strengths Interview (15 minutes)

CONFIDENCE BUILDING | LESSON 2: IDENTIFYING STRENGTHS
overcomingobstacles.org
Take turns interviewing one another.
Your task is to find out five of your partner’s strengths.
No matter how much your partner tries to convince you that they don't have any more strengths, you must keep asking until you’ve written down five.
If your partner says that they have no strengths, ask specific questions about their interests. A person’s interests often prompt the pursuit of related activities. For example, someone who loves music might learn how to play the guitar or the saxophone. Over time, they may discover a musical talent or a level of expertise that makes this a strength.
Allow five minutes for each interview.
3. Students discuss the activity.
Elicit students’ comments on the experience of interviewing their peers. Ask questions such as the following:
Were you surprised to find that you had a lot in common?
Did you learn anything new while you were interviewing your partner?
Purpose: Students discuss the importance of identifying their strengths.
1. Students discuss why knowing their strengths can be useful.
Ask students why they think it might be important to know their strengths. (Students might reply: because it helps us keep our self-respect, because it helps us to make decisions.)
Ask students how they can continue to use these strengths in their everyday lives. Point out that they don’t need to stop with the five they listed in Part II. They should take time to think about other strengths they possess and how they might use them.
2. Students apply what they’ve learned.
Encourage students to write down their strengths on paper and post them on their bedroom wall, mirror, or locker door as a reminder. Explain that reminding ourselves of our special qualities will help us to persevere when we’re experiencing challenges.
Part III Take It Outside (5 minutes)

CONFIDENCE BUILDING | LESSON 2: IDENTIFYING STRENGTHS
overcomingobstacles.org
Have students respond to the questions posed in the starter. Elicit from students the following key points that were taught in this lesson:
Everyone has strengths.
Some of our strengths are shared by others. Some are unique.
It’s important for each of us to know our strengths and use them every day.
Conclusion (2 minutes)
1. List three of your personal strengths.
2. Explain how one of your strengths helps you in your daily life.
Student Assessment

CONFIDENCE BUILDING | LESSON 2: IDENTIFYING STRENGTHS
overcomingobstacles.org
LESSON EXTENSIONS
Using Quotations
“Our strengths are our tools.” —Joe Batten
Have students write a paragraph or draw a picture that shows how they use their strengths every day.
Addressing Multiple Learning Styles
Have students create or bring in an object that represents their strengths.
Invite students to share how the object represents their strengths.
Writing in Your Journal
Have students write about the strengths they possess and times when they have used these strengths.
Discuss with students the importance of being able to identify and focus on their own strengths.
Using Technology
Show students a video about someone with many strengths.
After viewing the video, ask students to create a list of the person’s strengths.
Homework
Have students write an autobiography that focuses on their strengths.
Ask students to share their autobiographies with the class.

CONFIDENCE BUILDING | LESSON 2: IDENTIFYING STRENGTHS
overcomingobstacles.org
Additional Resources
Have students review biographical information for well-known people.
Ask students to find and share strengths that may be surprising or not well-known (for instance, an
athlete who is skilled at painting).
CONFIDENCE BUILDING | IDENTIFYING STRENGTHS©
20
21
Ove
rco
min
g O
bst
acle
s
JEOPARDY
Sports & Fitness
10
20
30
40
50
Art & Music
10
20
30
40
50
Friends & Family
10
20
30
40
50
School Subjects
10
20
30
40
50
Just for Fun
10
20
30
40
50
Notes:
overcomingobstacles.org

CONFIDENCE BUILDING | IDENTIFYING STRENGTHS©
20
21
Ove
rco
min
g O
bst
acle
s
STRENGTHS INTERVIEW
Five of ___________________________________’s StrengthsName of interviewee
1.
2.
3.
4.
5.
Interviewed by ______________________________________Name
overcomingobstacles.orgPowered by TCPDF (www.tcpdf.org)
CONFIDENCE BUILDING | LESSON 3: ESTABLISHING WHAT’S IMPORTANT
overcomingobstacles.org
AGENDA
Starter
The Top 10
Hmm, Let Me Think about That
"To Thine Own Self Be True"
Conclusion
Student Assessment
Objectives
Students will examine and determine their personal values.
Students will make decisions based on their values.
Students will practice resisting pressure to make decisions that are not in line with their
personal values.
Materials Needed
One copy of the “Top 10” activity sheet for each student (Part I)
3LESSON
ESTABLISHING WHAT’S IMPORTANT

CONFIDENCE BUILDING | LESSON 3: ESTABLISHING WHAT’S IMPORTANT
overcomingobstacles.org
Ask students to identify who George Lucas is. (He is the writer and director who created Star Wars, Indiana Jones, and the sequels to those movies. He is also the founder of Industrial Light & Magic, a computer technology company that creates special effects for movies.)
Tell students that Lucas was quoted as saying, “I used to think there was nothing more important in the world than making movies, but there is…raising children is more important.”
From his blockbuster films, we know that George Lucas is an accomplished filmmaker who has invested a great deal of effort in his career. However, it is reported that he also made a decision to take a 16-year break to raise his children as a single father. Point out that this decision would indicate that George Lucas values his family. Explain to students that although most people cannot afford to leave their jobs in order to raise their children as George Lucas did, everyone makes choices about their lifestyle, their values, and the priorities in their lives. This is how we establish what is most important to us.
Starter (3 minutes)
Purpose: Students examine and determine their personal values.
1. Students identify the people, places, and things that are important to them.
Distribute a copy of the “Top 10” activity sheet to each student. Explain that these top 10 lists are meant to help them discover who and what is important to them. Direct students to think about what they really feel before they start writing. Tell students to list their top 10 choices for each category.
Allow students 10 minutes to complete the activity sheet.
2. Students examine their choices and draw conclusions about their personal values.
When students have completed the activity sheet, ask the following questions:
Part I The Top 10 (20 minutes)

CONFIDENCE BUILDING | LESSON 3: ESTABLISHING WHAT’S IMPORTANT
overcomingobstacles.org
Look at your top 10 list of people. Are they mostly friends or family? Are they people that you’ve known for a long time? Are they people you know well or admire from a distance? What qualities of character, if any, do these people share?
Look at your top 10 list of things you like to do. Are they things you do with others or alone? Do you mostly use your body, your mind, or both to do them? Can you do them near your home, or must you travel? Do they cost a lot of money, or are they free?
Look at your top 10 list of places. Are they near or far? Do you like to go there alone or with other people? Are they all real, or are some imaginary? Do they cost a lot of money, or are they free?
Look at your top 10 list of things you’d like to own. What did you write down? How do these things reflect your values? If, for example, your list is filled with clothes, does this mean that you value looking good?
Look at your top 10 list of rules to live by. What qualities of character do these rules reflect (e.g., honesty, loyalty, perseverance)?
Guide students to conclude that the people, places, and things that are important to us and the rules we live by reflect who we are and what we value. We all have things that we value, and those values affect every choice we make.
Purpose: Students make decisions based on their values.
1. Students prepare for the activity.
Explain that you will be presenting students with a series of choices. Students will make a choice and either stand up or remain seated, depending on where you point. Demonstrate how this will work by saying: “For example, I will ask if you would rather have X (point up, meaning stand up) or Y (point down, meaning remain seated).”
2. Students make some choices.
Ask a series of questions like the following, beginning with simple choices and moving to more difficult ones:
Part II Hmm, Let Me Think about That (10 minutes)

CONFIDENCE BUILDING | LESSON 3: ESTABLISHING WHAT’S IMPORTANT
overcomingobstacles.org
Would you rather dress up or dress down?
Would you rather be onstage or in the audience?
Would you rather be an athlete or an artist?
Would you rather have dinner at home with your family or go to a fast-food restaurant with friends?
Would you rather take a long walk by yourself or be with friends?
Would you rather be healthy but poor or sick but very rich?
3. Students reflect on the choices they made.
Ask students if they thought the choices became more difficult toward the end. Encourage them to explain why and tell how they finally made a decision. Explain that the decisions and choices we make are influenced by what is important to us, or what we value. Point out that everyone made different choices and that there are as many different sets of values as there are people.
Purpose: Students practice resisting pressure to make decisions that are not compatible with their personal values.
1. Students perform role plays.
Share the following quote from William Shakespeare’s Hamlet: “To thine own self be true.” Discuss the meaning of this quote. Explain that once we know what’s important to us, we must live by those values, even in the face of pressure.
Divide the class into three groups. Have each group brainstorm one of the following scenarios and act it out for the class:
You’re at a party with a popular crowd, and someone you like and want to impress is encouraging you to do drugs. What do you do?
Someone you like has the answers to your midterm exam and is passing them around. You’ve been worried about passing this course—it’s a tough one. There’s little chance of getting caught because almost everyone who’s been approached has taken the answers, so they’re not likely to snitch. What do you do?
You notice that your friends like to taunt the less-popular students at school. They want you to join in, and they tease you when you don’t. What do you do?
Part III "To Thine Own Self Be True" (15 minutes)

CONFIDENCE BUILDING | LESSON 3: ESTABLISHING WHAT’S IMPORTANT
overcomingobstacles.org
Discuss the difficulty of maintaining your values in the face of pressure to change them. Remind students that self-respect, as well as the respect of others, is strongly tied to our values. Ask students if they think that self-respect is more important than having the respect of others. Point out that self-respect is defined by a person’s own value system, while the respect of others is defined by their value systems. Since another person’s value system may be different from their own, remind students again of the quote, “To thine own self be true.”
2. Students apply what they have learned.
Have students write a paragraph describing a time when their values conflicted with the values of someone close to them. Ask volunteers to read their paragraphs out loud. Have the rest of the class suggest resolutions to the conflicts.
Ask students to name the one thing that is of paramount importance to them. Elicit from students the following key points that were taught in this lesson:
The things you value influence everything you do.
Decide what things you value and make choices based on them.
Stay true to your beliefs in your actions. Make decisions that are aligned with the rules that you live by.
Conclusion (2 minutes)
1. List three values that are important to you. Explain how these values influence your actions.
2. Explain what is meant by the saying "To thine own self be true."
3. On whose values is self-respect based? What about the respect of others?
Student Assessment

CONFIDENCE BUILDING | LESSON 3: ESTABLISHING WHAT’S IMPORTANT
overcomingobstacles.org
LESSON EXTENSIONS
Using Quotations
"Try not to become a man of success, but rather try to become a man of value." —Albert Einstein
Ask, "If you were to live by your values, do you think you would be vulnerable to pressure from peers?
Why? Why not?" Brainstorm with students ways to stick to their own values.
Addressing Multiple Learning Styles
Ask students to stand in the middle of the room. Label the corners of the room “strongly agree,”
“somewhat agree,” “strongly disagree,” and “somewhat disagree.” Ask students questions related to
values. Tell students to go to the corner that represents how they feel.
Have students explain why they feel the way they do.
Writing in Your Journal
Have students write about a person who they think has values similar to their own and why they think
this is the case.
Discuss with students how values are formed and how values might change.
Using Technology
Watch a high school-themed movie as a class. Talk with students about the values (or lack thereof) that
are represented in the film. Ask, “Are these values realistic? Do you agree with or accept the values
portrayed?”

CONFIDENCE BUILDING | LESSON 3: ESTABLISHING WHAT’S IMPORTANT
overcomingobstacles.org
Homework
Ask students to create a “Me Bag.” Students should decorate a bag or box and fill it with items that
represent them and their values.
Have students describe the contents of their “Me Bag.”
Additional Resources
Choose a short story that emphasizes values and share it with the class.
Have students choose and share their favorite quote from the story.

CONFIDENCE BUILDING | ESTABLISHING WHAT’S IMPORTANT©
20
21
Ove
rco
min
g O
bst
acle
s
The top 10 people in my life:
1. 6.
2. 7.
3. 8.
4. 9.
5. 10.
The top 10 things I like to do:
1. 6.
2. 7.
3. 8.
4. 9.
5. 10.
The top 10 places I like to go:
1. 6.
2. 7.
3. 8.
4. 9.
5. 10.
TOP 10
overcomingobstacles.org

CONFIDENCE BUILDING | ESTABLISHING WHAT’S IMPORTANT©
20
21
Ove
rco
min
g O
bst
acle
s
The top 10 things I’d like to own:
1. 6.
2. 7.
3. 8.
4. 9.
5. 10.
The top 10 rules I live by:
1. 6.
2. 7.
3. 8.
4. 9.
5. 10.
The top 10 dreams I have for the future:
1. 6.
2. 7.
3. 8.
4. 9.
5. 10.
TOP 10(CONTINUED)
overcomingobstacles.orgPowered by TCPDF (www.tcpdf.org)

CONFIDENCE BUILDING | LESSON 4: IMPROVING WELL-BEING
overcomingobstacles.org
AGENDA
Starter
Be a Health “Freak”
Say Yes to Less Stress
A Day at the Health Club
Conclusion
Student Assessment
Objectives
Students will identify good health and physical fitness as essential to self-esteem.
Students will identify stress factors in their lives and explore ways to manage and reduce them.
Materials Needed
One copy of the “MyPlate” activity sheet for each student (Part I)
One copy of the “Say Yes to Less Stress” activity sheet for each student (Part II)
4LESSON
IMPROVING WELL-BEING

CONFIDENCE BUILDING | LESSON 4: IMPROVING WELL-BEING
overcomingobstacles.org
Give students the following directions:
Raise your hand if you ate a cookie, drank soda, or ate a candy bar yesterday.
Raise your hand if you stayed up late last night, regardless of the reason.
Raise your hand if you get less than one hour of exercise a week. (Point out that exercise does not have to be a sport.)
Tell students that in this lesson they’ll be learning how diet, exercise, and sleep affect their health, and they’ll see how good health can make it easier for them to feel, think, and perform their best.
Starter (3 minutes)
Purpose: Students examine how healthy patterns of diet, exercise, and sleep can help them look and feel their best.
1. Students review important food groups and the need for a balanced diet.
Distribute copies of the “MyPlate” activity sheet to each student. Explain that the food we eat affects our energy level and our ability to do things well. A balanced diet means eating different kinds of food in proper quantities. This food gives our body the nutrients it needs to work and grow. A balanced diet also helps us look our best; it keeps our skin healthy and makes our hair and bones stronger.
Briefly discuss each section of the chart and ask students to brainstorm a list of favorite foods from each group:
Part I Be a Health “Freak” (15 minutes)

CONFIDENCE BUILDING | LESSON 4: IMPROVING WELL-BEING
overcomingobstacles.org
Grains (like bread, cereal, rice, and pasta) are high in proteins and carbohydrates. They are important for creating energy. Notice how this section takes up a large portion of the plate.
Vegetables and fruits are high in vitamins and nutrients that help fight infection and disease. Fruits are also a good source of energy. These two portions take up half of the plate, meaning that half of our meals should consist of fruits and vegetables.
Sources of protein, such as meat, poultry, fish, beans, eggs, and nuts, should be a part of every meal, as they provide us with the building blocks of the body.
The small cup represents dairy products, like low-fat yogurt or milk. We should include dairy products with our meals, as they give us calcium, which helps our bones and teeth grow strong. Those who are lactose intolerant can have lactose-free dairy or calcium-fortified soy milk.
Oils, sweets, and unhealthy fats (which aren’t even shown on the plate) are foods to eat sparingly; these foods include potato chips, French fries, fried chicken, cookies, and soda. Fats and oils can clog our arteries and affect the way our heart functions. Sweets have no nutritional value and can cause health problems.
By a show of hands for each food group, poll students to see if they are eating appropriate amounts from each group. Discuss ways to change eating habits, such as eating fewer sweets, eating more fruit, eating three small meals a day, and having healthy snacks between meals.
2. Students examine how food affects self-esteem.
Ask students to finish each sentence:
When I eat too much candy, I feel ___ (heavy, tired).
When I feel that way, I have a ___ (hard) time getting things done.
When that happens, I feel ___ (bad) about myself.
When I eat a balanced diet, I feel ___ (good, energetic, strong).
When I feel that way, I have a(n) ___ (easy) time getting things done.
When that happens, I feel ___ (good) about myself.
Have students write their own series of sentences like the ones above to show how food affects their self-esteem. Encourage them to share their thoughts with partners.
3. Students review the need for exercise.
Explain that exercise increases energy. It increases the flow of oxygen to the brain, which stimulates the mind and body. It strengthens our muscles, bones, and other tissues and organs.
Tell students to brainstorm a list of physical activities that they enjoy. Write responses on the board.

CONFIDENCE BUILDING | LESSON 4: IMPROVING WELL-BEING
overcomingobstacles.org
Have students stand and stretch. Lead them in some bending and stretching exercises to get their oxygen flowing. Invite volunteers to share some exercises they know and lead the class in them.
4. Students examine how exercise affects self-esteem.
Have students work in pairs to role-play a scene between a healthy person and a couch potato. Each healthy person must try to convince their couch potato friend that exercise will improve their life. Tell the healthy people that they have three minutes to provide their friends with at least three compelling reasons why exercise will bolster their self-confidence. They should then switch roles and repeat the procedure. When students have finished, ask:
How many couch potatoes were convinced to change their ways? What was said that convinced you to change?
How many couch potatoes held firm to the couch? What, for you, are the benefits of being a couch potato?
Point out that exercise also relieves the body of tension and stress. Ask students if they have ever noticed that going out and doing something helps them feel better when they’re angry or upset. Remind students that getting a good night’s sleep (seven to 10 hours) also helps them to become more productive by relaxing the mind and body.
Purpose: Students identify stress factors in their lives and explore ways to manage and reduce that stress.
1. Students discuss common sources and signals of stress.
Explain that stress is tension, or a feeling of pressure or anxiety. Stress occurs when you feel out of control or under a lot of pressure, and it affects how you respond to people or situations. Ask students to provide an example of an event that causes them to feel stress, either at school, at home, on the job (if they have one), with their friends, or in the community.
Have a volunteer write student responses on the board.
Tell students to describe how they know that they’re feeling stress. Ask:
Part II Say Yes to Less Stress (15 minutes)
CONFIDENCE BUILDING | LESSON 4: IMPROVING WELL-BEING
overcomingobstacles.org
Does your body send you signals? (Students may mention common signals, such as back, neck, or stomach pains.)
Does your mind send you signals? How do your feelings or emotions change? (Students may suggest that they get angry or frustrated.)
How does your behavior change? (Some may retreat inside themselves and become quiet. Others may show anxiety by talking too loudly or quickly.)
Point out that you can’t always control the events in your life, but you can control your behavior.
2. Students explore ways to respond to stressful situations.
Discuss the following scenarios:
You have a test at school. What are three things you can do to feel confident instead of anxious? (Students may answer: study hard, be prepared, get a good night’s sleep.)
You’re coming home late from work. You feel unsafe on the street where you are walking. What can you do to make yourself feel less anxious? (Students may say: walk under streetlights or where people can see you, carry a whistle or something that makes noise, plan to walk with someone rather than alone, take a longer but safer route to get home.)
Distribute one copy of the “Say Yes to Less Stress” activity sheet to each student. Allow students five minutes to complete this activity sheet.
When students have finished, have them discuss how they try to reduce stress in their lives. Encourage students to offer helpful suggestions to one another about techniques that work for them. Invite volunteers who are familiar with breathing strategies, for example, to lead the class in some exercises. Other students may have expertise in yoga, relaxation, meditation, or cultural traditions that they can share.
Purpose: Students plan a healthy routine of diet, exercise, and sleep, including some strategies to reduce stress.
1. Students apply what they have learned by planning a “day at the health club.”
Divide the class into groups of five or six. Explain that each group is going to plan a pretend “day at the health club” for the class. The plan must include the following:
Part III A Day at the Health Club (15 minutes)

CONFIDENCE BUILDING | LESSON 4: IMPROVING WELL-BEING
overcomingobstacles.org
A menu for breakfast, lunch, and dinner that is healthy and nutritious and has the proper quantities of all the food groups for each meal
A schedule of daily exercise, including sports, workouts, and walks
A separate schedule of lectures and classes on stress-reduction techniques, including breathing strategies, relaxation, meditation, yoga, and cultural traditions
Allow 10 minutes for students to prepare the plan.
2. Students share their plans.
Allow each group to share its plan with the class. Have the class evaluate the plans and determine the one that would be most healthy. Explain to students that while it is unlikely that they will be able to incorporate all of the “health club” activities in their daily lives, they should make an effort to include some.
Ask students to summarize the ways diet, exercise, and stress reduction impact their lives. Elicit from students the following key points that were taught in this lesson:
When you are healthy, you look, feel, think, and do your best.
The food you eat affects your energy and your health.
Exercise increases your energy. It strengthens your body and relieves tension and stress.
Healthy, well-rested people are better prepared to deal with stress.
Often, we can control the amount of stress in our lives by determining how to respond to stressful situations.
Conclusion (2 minutes)
1. Create a menu for a healthy, well-balanced meal.
2. List three benefits of regular exercise.
3. List three techniques for reducing stress.
Student Assessment

CONFIDENCE BUILDING | LESSON 4: IMPROVING WELL-BEING
overcomingobstacles.org
LESSON EXTENSIONS
Using Quotations
“Remember to create a code of behavior to guide your actions toward a healthy lifestyle.” —Glenn Van
Ekeren
Have students create an outline for healthy living that is possible for them to follow. Discuss the
elements of healthy living.
Addressing Multiple Learning Styles
Explain to students that stress reduction techniques that are effective for one person may not work for
another. Have students research various techniques and identify three each that they feel might be
useful to them. Have each student share one technique and create a summary list to share with the class.
Writing in Your Journal
Challenge students to keep a record of the times they feel stressed throughout the week. Have them
write down what made them stressed and how they dealt with the stress.
After one week, have students report the results of their stress records to the class.
Using Technology
Have students visit https://www.myplate.gov/myplate-plan. Tell them to fill out the form that appears
to receive a daily food plan that is customized for their height and weight.
Have students print their plans. As a class, discuss ways and make a commitment to follow the plans.

CONFIDENCE BUILDING | LESSON 4: IMPROVING WELL-BEING
overcomingobstacles.org
Homework
Have students choose four foods in their homes and estimate the nutrition information of each (e.g.,
calories, fat, protein). Have them look at the panel on the side or back and see if the foods are as
nutritious as they thought.
Have students report their findings to the class.
Additional Resources
Show a yoga or exercise video to the class. Have students follow along, if possible.
Discuss with students how the yoga or exercise made them feel (or could make them feel).

CONFIDENCE BUILDING | IMPROVING WELL-BEING©
20
21
Ove
rco
min
g O
bst
acle
s
MYPLATE
overcomingobstacles.org

CONFIDENCE BUILDING | IMPROVING WELL-BEING©
20
21
Ove
rco
min
g O
bst
acle
s
SAY YES TO LESS STRESS
THE SOURCE THE SIGNAL I SAY YES TO LESS STRESS BY
1. a.
2. b.
3. c.
4. d.
5. e.
overcomingobstacles.orgPowered by TCPDF (www.tcpdf.org)
CONFIDENCE BUILDING | LESSON 5: DEVELOPING PERSONAL POWER
overcomingobstacles.org
AGENDA
Starter
The Power Within
Who’s the Boss?
Power for Positive Change
Conclusion
Student Assessment
Objectives
Students will develop an understanding of power.
Students will identify the forms that power can take.
Students will identify the power of personal responsibility.
5LESSON
DEVELOPING PERSONAL POWER

CONFIDENCE BUILDING | LESSON 5: DEVELOPING PERSONAL POWER
overcomingobstacles.org
Clear a space in the classroom big enough for students to walk around in. Tell students to stand in that space. Ask them to select (in their minds) two other students and to keep these students’ identities a secret. Explain that each student’s goal is to walk around the room until they are equidistant from the two chosen students. Give students three minutes to achieve their goal. They will notice that each time one student moves, it affects the movement of everyone else in the room.
Elicit from students that this is an example of how they have the power to effect change in their environment. Physical and mental power worked together to effect the change.
Tell students that they probably have much more personal power than they think.
Starter (3 minutes)
Purpose: Students identify power in its many forms, including the decisions they make.
1. Students explore different forms of power.
Remind students that the exercise they’ve just completed shows that strength and intelligence can become sources of personal power. By asking questions such as the following, prompt students to think about other things that give people power:
Does health give people power?
Does wealth give people power?
Does beauty give people power?
Does physical size give people power?
Does knowledge give people power?
Does popularity give people power?
Does the ability to communicate give people power?
Encourage students to explain their answers.
Write student responses where everyone can see. Afterward, take a quick poll of the class, item by item, to see how many agree that the things they listed really give people power. Ask students to provide examples of newsmakers or people from the past who used these forms of power. Have them identify what these people have accomplished through their own personal power.
2. Students consider the true sources of power.
Part I The Power Within (13 minutes)

CONFIDENCE BUILDING | LESSON 5: DEVELOPING PERSONAL POWER
overcomingobstacles.org
Have students name someone or something that has more power than they do. Ask students to explain the source of this power.
Explore examples given to help guide students to the source of true power. For example, if a student says a judge or the courts have power because they can suspend a person’s driver’s license, make the following points in sequence:
Explain that even though the court has the power to suspend a person’s driver’s license, it does not have to do so.
Before the court suspends a license, it gathers information on the offense and makes a decision about it.
Prior to the court’s decision to suspend a license, the driver made a decision to violate the law.
What decision might the driver have made? (Among other things, students might answer: speeding or drinking and driving.)
Lead students to conclude that the ability to make choices is a kind of power. As students agree, add “the ability to make a choice” to the list on the board and circle it. Tell students that they will spend more time later in this course learning about how to make better decisions.
Purpose: Students explore the use of personal power to influence their own lives.
1. Students rate their effectiveness on a scale of one to 10.
Tell students to write down a number from one to 10 that rates the amount of power they feel they have to do the following (10 is the largest amount of power, one is the smallest amount of power):
Wear what they want
Get good grades in school
Get a part-time job
Go out with the girl or boy that they like
Once students have added up their numbers, tell students that a score above 20 means that they have a fair amount of personal power and they know it! A score below 20 means that they probably have more personal power than they think. Explain that they will look at how they use their decision making power to influence their lives.
2. Students apply decision making power to aspects of their daily lives.
Part II Who’s the Boss? (15 minutes)

CONFIDENCE BUILDING | LESSON 5: DEVELOPING PERSONAL POWER
overcomingobstacles.org
Review each of the above questions with students to see how they rated themselves. Ask students who rated themselves five or above on their power to get good grades to pair with students who rated themselves less than five. Ask students who rated themselves five or above to describe ways in which the choices they make help influence their grades. Then, ask students who rated themselves less than five to brainstorm ways in which they can get better grades in school. Repeat this procedure for the third and fourth items on the list.
Purpose: Students recognize the power of personal responsibility.
1. Students apply their personal power to effect positive change.
Remind students that we alone are responsible for how we use our personal power. Throughout history, people have used and abused different forms of power. Ask students for examples of uses and abuses of power in today’s news. For abuses, have volunteers offer one or two options for positive change.
Point out that our personal power can be used to effect change, not only in our own lives, but in the lives of those in our families, our schools, and our communities.
Divide the class into groups of three or four and ask each group to choose something they’d like to change about their school. Have them decide upon a plan to use their personal power to effect change. Point out that this power may take different forms within the group. Ask students to try to identify the forms of power (such as intelligence, wit, and decision making) they will use to effect a positive change in their school community.
2. Students present their plans.
Ask each group to present its plan. Have the whole class reach consensus on whether to present one or more of the plans to the school principal. Discuss with students the criteria they used to determine the importance of the issue and the readiness of the plan. Point out the variety of ways in which students can choose to use the power they have.
Part III Power for Positive Change (15 minutes)
Remind students that their goal should be to use their personal power to positively influence their lives. Ask students to identify situations in their own lives in which they can begin to make their personal power work for them. Elicit from students the following key points that were taught in this lesson:
Conclusion (2 minutes)

CONFIDENCE BUILDING | LESSON 5: DEVELOPING PERSONAL POWER
overcomingobstacles.org
Personal power lies in the choices we make.
Your choices will affect your own life and often the lives of others.
You alone are responsible for how you use your power.
1. List three things that can give people power.
2. Name someone who has a lot of power. What kind of power does this person have? How did this
person get this power?
3. List three things in your life that you have the power to control.
Student Assessment

CONFIDENCE BUILDING | LESSON 5: DEVELOPING PERSONAL POWER
overcomingobstacles.org
LESSON EXTENSIONS
Using Quotations
“Actually, I have no regard for money. Aside from its purchasing power, it’s completely useless as far as
I’m concerned.” —Alfred Hitchcock
Have students interpret this quote. Discuss students’ views on money as a source of power.
Addressing Multiple Learning Styles
Have small groups of students create posters or electronic collages that represent personal power.
Allow each group to show their poster and explain how it represents personal power.
Writing in Your Journal
Have students write about the personal power they possess and how they will use this power in a
positive way.
Discuss with students the forms and uses of personal power.
Using Technology
Have each student choose a person they think has or had power. Tell each to research that person using
the internet or traditional resources.
Have students report their findings to the class. Have them identify the type of power the person they
chose had/has and how the person used it.

CONFIDENCE BUILDING | LESSON 5: DEVELOPING PERSONAL POWER
overcomingobstacles.org
Homework
Have students print out or clip a newspaper article in which ordinary people use personal power to
effect change among their families, friends, schools, or communities.
Discuss everyday and “newsworthy” instances of personal power.
Additional Resources
Have students review biographies of leaders. (You may want to choose a particular group of leaders,
such as women, African Americans, politicians, etc.)
Discuss the reasons why each person studied had/has power. Discuss how each person used their
power. Write responses on the board or on an interactive projection device.

PART II
ACQUIRING CORE SKILLS
COMMUNICATION
TABLE OF CONTENTS
PART II: ACQUIRING CORE SKILLS
1. Understanding Nonverbal Communication 73
2. Listening 83
3. Listening Critically 92
4. Speaking Responsibly 105
5. Communicating Constructively 115
Communication

COMMUNICATION | LESSON 1: UNDERSTANDING NONVERBAL COMMUNICATION
overcomingobstacles.org
AGENDA
Starter
Shh…It Goes over Here
What Am I Trying to Tell You?
It’s in the Delivery
Conclusion
Student Assessment
Objectives
Students will identify nonverbal cues.
Students will analyze nonverbal cues to determine the messages they convey.
Students will demonstrate and apply nonverbal communication in real-life situations.
Students will evaluate the importance of nonverbal cues to communication.
Materials Needed
Two pictures of faces, one displaying a positive emotion and one displaying a negative emotion
(Starter)
Copies of the “Square Puzzle Set” activity sheet, cut into pieces for each group of three students
(Part I)
Five index cards, each card stating one of these emotions: happiness, sadness, anger, fear, or
1LESSON
UNDERSTANDING NONVERBAL COMMUNICATION

COMMUNICATION | LESSON 1: UNDERSTANDING NONVERBAL COMMUNICATION
overcomingobstacles.org
worry (Part II)
Student- or teacher-developed scenarios from real life that lend themselves to obvious nonverbal
messages (e.g., a disappointing test score, reaction to a rumor) (Part III)
One copy of the “Critique Sheet” activity sheet for each group (Part III)

COMMUNICATION | LESSON 1: UNDERSTANDING NONVERBAL COMMUNICATION
overcomingobstacles.org
Show students the two pictures. Ask students to determine what emotion each image is showing. Have students explain their answers. Students should mention nonverbal cues evident in the facial expressions.
Explain to students that they will learn in this lesson how to interpret and use nonverbal communication.
Starter (3 minutes)
Purpose: Students explore the concept of nonverbal communication by working on a puzzle with a small group.
1. Students work in groups of three to silently put together a square puzzle.
Organize students into groups of three. Give each group a cut-up copy of the “Square Puzzle Set” activity sheet. Read the following rules aloud to the class:
Each team has seven minutes to put the puzzle together without speaking to each other.
Any team that is talking or writing notes will be disqualified.
When teams complete the puzzle, they should cover the solution and raise their hands. I will come to check the solution.
Suggest that as students work to solve the puzzle, they pay attention to the interaction within their group. Time the activity.
2. Students identify the nonverbal cues they used.
Ask teams to list what they observed as they were solving the puzzle.
Inquire how the team members communicated. Have students identify the positive and negative nonverbal messages that they saw during this activity and how these messages were conveyed. Student responses should include eye contact, facial expressions, gestures, and body language. Write student responses where everyone can see. You will refer to this list in Part III.
3. Students discuss the difficulty of the task.
Ask students if the task was easy or difficult. Have students explain their answers.
Ask students what they felt as they first tried to solve the puzzle. Inquire if their feelings changed and if the nonverbal communication became easier as time passed.
Part I Shh…It Goes over Here (15 minutes)

COMMUNICATION | LESSON 1: UNDERSTANDING NONVERBAL COMMUNICATION
overcomingobstacles.org
4. Students analyze their experience.
Tell students that the puzzle would have been easier to solve if they had been allowed to speak, but you wanted them to experience nonverbal communication. Explain that there are many forms of communication other than speaking.
Have teams summarize their experience for each other and explain any insights that occurred to them during the game and the class discussion. Circulate the room and write down some of the insights that you overhear. Be sure to share at least one from each group with the entire class.
Ask students to name forms of communication that do not require speaking. Call on a volunteer to review the list of forms of communication nonverbally.
Purpose: Students experience and understand the power of nonverbal cues.
1. Students demonstrate nonverbal communication.
Ask for five volunteers. Give each volunteer an index card with an emotion written on it. Tell the volunteers to communicate to the class their assigned emotions using only nonverbal cues. Have students write down the emotions they think the volunteers were trying to convey.
As a class, have students share what they wrote down. Have the volunteers identify the emotion they each attempted to communicate.
2. Students explain why recognizing nonverbal cues can help them understand others.
Tell students that the volunteers communicated the emotions through gestures, facial expressions, and body language. Ask students to identify the gestures, facial expressions, and body language that the volunteers used to communicate the emotions. List the responses where everyone can see.
Inquire how recognizing the messages of nonverbal communication might be helpful. Direct students to the understanding that knowledge of nonverbal communication can help them recognize what an individual is really feeling and thinking.
3. Students explain how using nonverbal cues can help them communicate with others.
Have students identify how they want others to see them. Have them identify what image they might wish to project when interviewing for a job, when talking to a new student, or in other real-life situations. (Students might respond: friendly, confident, powerful, etc.) Ask students to model or explain how they might communicate these traits nonverbally.
Part II What Am I Trying to Tell You? (10 minutes)

COMMUNICATION | LESSON 1: UNDERSTANDING NONVERBAL COMMUNICATION
overcomingobstacles.org
Ask students to explain why effective nonverbal communication can be a valuable tool to use. Help them understand that effective nonverbal communication can strengthen the message that they wish to communicate.
4. Students summarize what they have learned.
Have students summarize what they have learned about nonverbal communication. If students need a jump-start, explain the following:
We all experience nonverbal communication every day.
We use it to understand what people are communicating to us.
We send nonverbal messages through our facial expressions, body language, gestures, and eye contact.
Effective nonverbal communication can make our messages stronger and clearer.
Purpose: Students practice what they have learned about nonverbal communication by role-playing everyday situations.
1. Students prepare to role-play effective nonverbal communication.
Explain to students that they will role-play different scenarios in which nonverbal communication is an important method of getting a point across. Their goal in these role plays is to use their nonverbal communication skills to make the point effectively. Tell students that the class will evaluate each performance.
Have students return to their groups from Part I of this lesson. Provide each group with one of the real-life scenarios and have them prepare their role plays.
2. Students present their role plays.
Ask each group to present its role play to the class. Have students carefully observe the nonverbal communication that takes place. During a few of the role plays, tell the performers to freeze. Explain that when students hear this, they are to freeze in their current poses. Quietly tell one student in the role play to alter their nonverbal messages so that they conflict with the verbal messages that they are sending. After each scenario is presented, give the groups a minute or two to critique the performances. (See step 3 below.)
3. Students critique the performances.
Part III It’s in the Delivery (20 minutes)
COMMUNICATION | LESSON 1: UNDERSTANDING NONVERBAL COMMUNICATION
overcomingobstacles.org
After the first performance, distribute a copy of the “Critique Sheet” activity sheet to each group. Have the groups identify the nonverbal communication techniques used in each performance and evaluate their effectiveness. Clarify for students that they are not judging the acting performance, but weighing the appropriateness of the nonverbal communication used in the role play.
4. Students identify examples of good nonverbal communication.
After students have finished the performances and the evaluations, ask each group for an example from the scenarios of powerful and effective nonverbal communication.
5. Students discuss and analyze conflicting messages.
Ask students to recall the conflicting messages that were portrayed when you stopped some of the role plays. Ask students whether the verbal or nonverbal cues were stronger.
Ask students to name examples of nonverbal communication that occur in their daily lives. Ask them how using nonverbal communication effectively can be a powerful tool. Elicit from students the following key points that were taught in this lesson:
People communicate their thoughts and feelings nonverbally.
Paying attention to facial expressions, gestures, eye contact, and body language enables us to understand nonverbal messages.
People send nonverbal messages constantly; we can learn to recognize and interpret others’ nonverbal messages.
People have the ability to control the nonverbal messages they send.
Conclusion (2 minutes)
1. Describe three situations in the last week in which you communicated something nonverbally.
2. Describe a situation in which someone’s words say one thing and their nonverbal communication
says something different.
3. Describe appropriate ways to communicate nonverbally with your friends, in class, and on a job
interview.
Student Assessment

COMMUNICATION | LESSON 1: UNDERSTANDING NONVERBAL COMMUNICATION
overcomingobstacles.org
LESSON EXTENSIONS
Using Quotations
“The most important thing in communication is to hear what isn’t being said.” —Peter Drucker
Have students write about the meaning of this quote. Ask them to relate an experience that might
support Drucker’s quote.
Addressing Multiple Learning Styles
Ask students to observe other people and note the nonverbal communication they witness for a day.
Have the class discuss the nature of their observations (e.g., situations in which nonverbal
communication was most evident, what was communicated).
Writing in Your Journal
Ask students to write about an incident in which nonverbal communication was an important part of a
message they gave or received.
Have volunteers share what they wrote with the class or have students read each others’ journals and
write brief responses.
Using Technology
Have students watch a clip of the first segment of a popular sitcom. Play this clip with the sound turned
off.
Ask students to predict the plot and describe the nonverbal communication that supports their guesses.
Replay the clip with the sound on to allow them to determine the accuracy of their guesses.

COMMUNICATION | LESSON 1: UNDERSTANDING NONVERBAL COMMUNICATION
overcomingobstacles.org
Homework
Have students use international business and travel books to research appropriate nonverbal behavior
in other countries.
Have students demonstrate and explain proper nonverbal etiquette in other parts of the world.
Additional Resources
Invite a trial lawyer to talk about nonverbal communication in jury selection, the presentation of the
defendant, and interactions with the judge and jury.
Have students take notes and write a summary.

COMMUNICATION SKILLS | UNDERSTANDING NONVERBAL COMMUNICATION©
20
21
Ove
rco
min
g O
bst
acle
s
SQUARE PUZZLE SET
overcomingobstacles.org

COMMUNICATION SKILLS | UNDERSTANDING NONVERBAL COMMUNICATION©
20
21
Ove
rco
min
g O
bst
acle
s
CRITIQUE SHEETDIRECTIONS:1. Write a brief description of the situation in each “scenario” box.2. Describe the nonverbal messages that each actor sent during their role play.3. Identify if the nonverbal messages in each scenario were effective, and why.
Nonverbal Effective or ineffective? messages sent Why?
Scenario 1:
Scenario 2:
Scenario 3:
Scenario 4:
overcomingobstacles.orgPowered by TCPDF (www.tcpdf.org)

COMMUNICATION | LESSON 2: LISTENING
overcomingobstacles.org
AGENDA
Starter
Listening Dos and Don’ts
Picking Up the Signals
Telephone
Conclusion
Student Assessment
Objectives
Students will identify characteristics of active listening.
Students will identify and familiarize themselves with the verbal and nonverbal signals that are
important to good listening.
Students will practice listening techniques and skills.
Materials Needed
One copy of the “Listening Signals” activity sheet for each student (Part II)
2LESSON
LISTENING

COMMUNICATION | LESSON 2: LISTENING
overcomingobstacles.org
Explain to students that you will begin the lesson with a riddle. Tell them not to say the answer if they have heard the riddle, because they will spoil it for those who have not heard it.
Tell students the following riddle: “A man walks into a museum, sees a portrait on the wall, and says, ‘That man’s father is my father’s son.’ Who is the person in the picture?” (Answer: the first man’s son or nephew)
Allow students one minute to quietly figure out the answer. Tell students that you will tell them the answer at the end of the period.
Explain that the reason you began the class with a riddle is to illustrate that a person must do more than just hear what is being said—they must also listen very carefully. Point out that good listening means both hearing and understanding.
Explain to students that in this lesson they will discuss techniques that help people listen effectively.
Starter (3 minutes)
Purpose: Students identify characteristics of active listening by observing role plays and discussing their observations.
1. Students observe a demonstration of poor listening habits.
Note: Before beginning this activity, select a student volunteer. In order to prevent hurt feelings, explain the activity to them privately before you begin.
Ask the student to tell you about a favorite movie, plans for the weekend, or a special sport or hobby. Once the student begins speaking, act as though you are not paying attention by looking for your grade book, doodling, slouching, snoring, asking unrelated questions, or repeating what the student says imprecisely.
2. Students identify poor listening habits.
Stop and ask students if they think that you were a good listener. Have them critique your listening. List the poor behaviors they observed where everyone can see.
Suggest that another poor listening habit is thinking about a response instead of listening to the speaker.
3. Students identify good listening techniques.
Part I Listening Dos and Don’ts (5 minutes)

COMMUNICATION | LESSON 2: LISTENING
overcomingobstacles.org
Have students suggest ways in which you could have been a better listener. Refer students to the list of poor listening habits to stimulate their thinking. (Student responses should include the following: making eye contact, attentive posture, nodding or performing other gestures that acknowledge understanding, asking questions, and repeating ideas in your own words.)
Write student suggestions next to the list of poor listening habits to make a list of dos and don’ts for listening.
4. Students observe a demonstration of good listening techniques.
Repeat the conversation with the volunteer, this time using good listening skills. If time allows, let other students take over your role.
5. Students discuss listening skills.
Explain that people know when someone is not listening. It is frustrating to a speaker when others are not being good, active listeners.
Explain to students that as listeners, they can use the techniques just discussed to show the speaker that they are listening actively. These techniques can be summarized as focus on the speaker, confirm what they are saying, and respond with your own thoughts.
Refer to each suggestion on the listening dos list and ask students to classify them as techniques for focusing, confirming, or responding. Write the appropriate word next to each suggestion on the list.
Purpose: Students identify and familiarize themselves with signals that are important to good listening.
1. Students understand the difference between listening and hearing.
Review with students that listening and hearing are not the same thing. People hear simply because sound reaches their ears—hearing is passive. Listening, on the other hand, is an active thinking skill that requires focus in order to understand, integrate, and evaluate/interpret what is heard.
2. Students learn verbal signals that can help them focus on important ideas.
Explain that focusing is the key to listening. Tell students that they can develop the important skill of focusing by learning to interpret signals. Explain that speakers often use signal words and phrases to alert listeners to important ideas. Recognizing a speaker’s signals helps a listener to focus on the message.
Part II Picking Up the Signals (15 minutes)

COMMUNICATION | LESSON 2: LISTENING
overcomingobstacles.org
Distribute the “Listening Signals” activity sheet to students. Ask if any of these phrases seem familiar. Have students identify who might use them (e.g., parents, teachers, bosses, friends). Have students add other signal words and phrases to the sheet. Tell students that these verbal signals are important to remember as they listen to others.
3. Students identify nonverbal signals.
Explain that speakers may guide listeners at certain points with movements and gestures to reinforce verbal signals. Ask students to generate a list of these nonverbal signals. (Student responses may include moving arms, standing up, moving closer to listeners, etc.) Have them add their responses to their activity sheets.
Tell students that watching the speaker’s eyes and actions can help them to further understand what is being said.
4. Students work in pairs to practice using verbal and nonverbal signals.
Divide students into pairs. Have one student in each pair speak to their partner about an important topic (e.g., homework policy, plans for the future). The rest of the students should listen to their partners and observe their verbal and nonverbal signals.
After one minute, ask students to switch roles.
5. Students discuss their observations.
As a class, discuss student observations. Ask them how being sensitive to signals improved their listening.
Purpose: Students play a game of “Telephone” to practice their listening skills.
1. Students prepare to play “Telephone.”
Divide the class into groups of six. Have each group stand in a circle. Ask one volunteer from each group to join you at the front of the class.
Give the volunteers the following directions:
Part III Telephone (20 minutes)

COMMUNICATION | LESSON 2: LISTENING
overcomingobstacles.org
I am going to tell you a story. Your job is to listen carefully, and then to whisper the story to one other member of your group, using the exact words that I used.
Don’t let the other members of the group hear you.
Each person passes the story word for word to the next person.
Use verbal and nonverbal signals to make sure your listener understands what you say.
Tell volunteers the following story:
Let’s begin with some facts. There are 15 passengers on a bus. At the first stop, four people get off the bus. Two are women, one is a man, and one is a baby. Next, two men get on and four children get off. That is the end of the story.
2. Students apply listening skills to a game of “Telephone.”
Explain that students are going to play a version of the game “Telephone.” Tell students that they will be practicing the “focus and confirm” techniques that they have been developing during this lesson:
The listener focuses while listening. (Remind students of the techniques for focusing.)
The listener then confirms what has been heard by repeating it to the next listener.
Have the volunteers return to their groups and tell the story to the person on their right, who will then pass the story to the next person, and so on, until everyone in the group has heard the story.
3. Students analyze the effectiveness of their listening skills.
When all groups have completed the activity, ask the last person in each group to repeat to the class what they heard.
Ask students if they know the driver’s name. Tell them that they can’t know the name because it was never said. Explain that good listening also means identifying what information isn’t being conveyed.
Ask students how many people are on the bus as the story ends. Allow students a few minutes to work this out. If necessary, repeat the story. (There are 10 people on the bus—nine passengers and the driver.)
Ask students to consider how effectively they think they listened and whether good listening skills helped them to remember the story better.
Conclude by reminding students that active listening skills are an important part of good communication.

COMMUNICATION | LESSON 2: LISTENING
overcomingobstacles.org
Ask students how active listening contributes to effective communication. Elicit from students the following key points that were taught in this lesson:
Being an active listener is key to good communication and requires more than just hearing.
To be a good listener, focus, confirm, and respond.
Recognizing verbal and nonverbal signals enables us to focus our listening more effectively.
Conclusion (2 minutes)
1. What is the difference between hearing and listening?
2. What are the steps to being a good listener?
3. List three examples of bad listening techniques and three examples of good listening techniques.
4. Are you a good listener? Why or why not? What can you do to improve as a listener?
Student Assessment

COMMUNICATION | LESSON 2: LISTENING
overcomingobstacles.org
LESSON EXTENSIONS
Using Quotations
“The opposite of talking isn’t listening. The opposite of talking is waiting.” —Fran Lebowitz
Ask students if they agree with this quote. Have them write captions for news photos of two people
having a conversation. Tell them to include the thoughts of the “listener” to show what they are really
thinking.
Addressing Multiple Learning Styles
Have students prepare five-minute oral reports on a person in the news. (Historical figures may also be
included.) Explain that the class will be taking notes, so speakers should be sure to include appropriate
verbal and nonverbal signals.
Have students present their reports in small groups, with the other students providing feedback on the
points covered.
Writing in Your Journal
Have students think about a time when someone was definitely not listening to them. Tell them to write
about how they could tell the person wasn’t listening and what that felt like.
Have students share their writing in small groups and compile a class list of signs that someone isn’t
listening.
Using Technology
Have students watch a talk or news show and evaluate the host’s listening skills during an interview.
Have each student write a review of the show, evaluating whether or not the host was an active
listener. Compare student reviews with the opinions of professional reviewers.

COMMUNICATION | LESSON 2: LISTENING
overcomingobstacles.org
Homework
Have students select one teacher in whose class they will practice specific listening skills for a week.
Have students note how lectures begin and end, how the teacher indicates a change in topic, how they
stress something of importance, and how they use the board. Ask students to list ways in which these
techniques improve their listening comprehension.
Have volunteers create a transparency of their class notes and share them with the class.
Additional Resources
Divide the class into four groups: video, article, podcast, and social media. Have groups list the methods
that their assigned medium uses to capture attention, organize information, and alert readers/viewers
to what is important or coming soon.
Have the class compare notes on the techniques used by each medium. Ask, “Why are they trying so
hard to grab your attention and keep it? How are these methods similar to the signals sent by an
instructor during a lesson?”

COMMUNICATION SKILLS | LISTENING©
20
21
Ove
rco
min
g O
bst
acle
s
LISTENING SIGNALS
VERBAL SIGNALS NONVERBAL SIGNALS
Introduction Speaking more loudlyLet’s discuss Speaking more emphaticallyI want to talk about MovementToday’s lecture covers Moving closer to the listenerFirst Eyes rolling Finger waggingMain IdeasLet me repeat This is really important Make a note of Remember that
Change in DirectionNextLet’s move on toOn the other handEven though
Major Details For instanceFor exampleNamelyThe following reasons
ConclusionFinallyThe last pointIn conclusionAll in all
Additional SignalsVerbal Nonverbal
____________________________________________________________________________________________________________________________________________________________________________________________________________________________________________________________________________________________
overcomingobstacles.orgPowered by TCPDF (www.tcpdf.org)

COMMUNICATION | LESSON 3: LISTENING CRITICALLY
overcomingobstacles.org
AGENDA
SESSION 1
Starter
It’s Not What They Said, But How They Said It
You Don’t Say!
SESSION 2
One More Time
Critically Listening to the Media
Conclusion
Student Assessment
Objectives
Students will learn that critical listening means recognizing and filtering imprecise
communication.
Students will practice critical listening and analyzing ambiguous messages.
Students will apply critical listening techniques to evaluate the media.
Materials Needed
Session 1: One copy of the “Critical Listening: Misleading Communication” activity sheet for each
student (Part I)
Session 1: One copy of the “Critical Listening: Analysis” activity sheet for each group (Part II)
3LESSON
LISTENING CRITICALLY

COMMUNICATION | LESSON 3: LISTENING CRITICALLY
overcomingobstacles.org
Session 2: A clip of a television news program, political speech, or “talking heads” program that
contains misleading information, approximately 30 minutes in length (Part II)
Session 2: One copy of the “Critical Listening: Analysis” activity sheet for each student (Part II)
Session 2: A/V equipment

COMMUNICATION | LESSON 3: LISTENING CRITICALLY
overcomingobstacles.org
SESSION 1
Tell students that you are going to test their listening skills. Ask students to listen carefully as you read the following paragraph. State that they will be asked to give a one-sentence summary of what you read.
Read the following paragraph:
I hereby give and convey to you, all and singular, my estate and interest, right, title, claim, and advantages of and in said orange, together with its rind, skin, juice, and pulp, and all rights and advantages therein and full power to bite, chew, or otherwise eat the same or give the same away with or without the rind, skin, juice, and pulp, anything hereinbefore or hereinafter or in any other means of whatever nature or kind to the contrary in any wise notwithstanding.
After you have finished reading, ask students what just happened in the paragraph you read. Direct students to the understanding that, in the paragraph, a person is giving another person an orange. Tell them that the paragraph was difficult to understand because it was written in legal jargon that obscures the simple meaning of the paragraph.
Explain to students that in this lesson they will be learning about some techniques speakers or writers sometimes use to hide the meaning of what they are saying. Understanding the techniques and how they can be used or misused can help students listen more critically.
Starter (3 minutes)
Purpose: Students recognize the techniques that speakers and writers sometimes use to mislead their audience.
1. Students learn the importance of listening critically by discussing incidents of miscommunication.
Share with students an anecdote from your own experience—preferably humorous—in which a miscommunication between two people caused a misunderstanding. Have students share similar experiences.
Ask students what caused the misunderstandings. (Student responses should include incomprehensible/vague vocabulary and misinterpretation of meaning.) Point out that what is said by one person is not always what is heard by another. Explain that critical listening can help people avoid such problems.
Part I It’s Not What They Said, But How They Said It (20 minutes)

COMMUNICATION | LESSON 3: LISTENING CRITICALLY
overcomingobstacles.org
Explain to students that listening critically often means filtering out the tone, or the way things are said, in order to understand the information being conveyed. Critical listening means judging the validity of a speaker’s words and message. Say, “You listen critically in order to analyze and evaluate a speaker’s words.”
2. Students identify several techniques of misleading communication.
Elicit from students a definition of the word “ambiguous.” Lead students to the understanding that when something is ambiguous, its meaning is difficult to understand. Explain that speakers and writers often want to either soften the reality of what they are saying or make the information appropriate for a particular audience. Sometimes, they choose to use ambiguous words or phrases that may result in misleading communication. Discuss the difference between ambiguous messages, misleading communication, and lying.
Distribute a copy of the “Critical Listening: Misleading Communication” activity sheet to each student. Ask volunteers to read the definitions of the techniques. Discuss the definitions with the class and answer any questions students may have about them.
3. Students offer examples of misleading communication.
Have students recall the experiences class members shared at the beginning of this activity. Have students use the activity sheet to identify and share what caused each misunderstanding.
4. Students recognize the reasons why people might intentionally use misleading messages.
As a class, brainstorm when and why people might knowingly apply one of these techniques. Ask:
Who might try to use an opinion as a fact? (Possible responses: a politician trying to convince people to support a policy, a teen asking for permission to stay out later than usual, television and radio commercials.)
When might someone use negative or positive connotations? (Students may respond: when a person is trying to persuade through appeals to emotion rather than logic.)
Why might someone use euphemisms? (Students may say: to avoid a negative reaction that a more accurate word might cause; for example, using “collateral damage” instead of “civilian deaths.”)
When might a person use inflated language? (Students may respond: to fit in with a style of language from a certain profession or discipline, to try to sound impressive.)
5. Students briefly review the definitions of the four techniques.
Call on volunteers to name and define the four techniques of misleading communication in their own words.

COMMUNICATION | LESSON 3: LISTENING CRITICALLY
overcomingobstacles.org
Purpose: Through role play, students understand the techniques of misleading communication and improve their critical listening skills.
1. Students prepare short speeches and dialogues for role-playing.
Form groups of three to four students. Explain that each group will present a short, one-minute sketch or speech that incorporates the techniques of misleading communication. Have each group select a situation for which they will create a dialogue or short sketch. Tell students that they are to use at least one of the techniques of misleading communication in their performances.
Allow students to choose from the following situations:
Reporters on a television news program
A politician giving a speech to an audience
A lecture given in a history, science, or math class
A discussion about school policy that includes the principal and/or vice principal
A community forum held to discuss a pollution issue
Closing arguments in a murder trial
A rally for the high school football team
Teens asking a parent for a coed sleepover or permission to stay out late
Allow students 10 minutes to prepare. Suggest that they use part of that time to rehearse quietly.
2. Students perform dialogues and speeches.
Before students perform, remind the rest of the class that they are to listen critically so that they can analyze and evaluate the way that the speakers are conveying information. Pass out the “Critical Listening: Analysis” activity sheet to each group. Tell the class that the groups are to identify misleading messages in each sketch/speech and analyze the motivations of the individuals using the misleading communication techniques.
Have the groups perform their sketches/speeches.
3. Students discuss the techniques of misleading communication portrayed in the sketches/speeches and the reasons they were used.
When all groups have performed and have been evaluated, discuss the techniques and motivations portrayed in each short speech/dialogue. For each performance, ask questions such as the following:
Part II You Don’t Say! (25 minutes)

COMMUNICATION | LESSON 3: LISTENING CRITICALLY
overcomingobstacles.org
What techniques did the group use in their performance?
How did you identify those techniques?
What was the purpose for using the techniques?
If you had actually been involved in this situation, what questions could you have asked or what actions could you have taken to find out what the facts really were?
4. Students recognize the value of critical listening.
Ask students to review what they have learned about critical listening. Have them write one or two sentences describing critical listening at the bottom of the activity sheet.

COMMUNICATION | LESSON 3: LISTENING CRITICALLY
overcomingobstacles.org
SESSION 2
Purpose: Students revisit what they learned about critical listening in the previous session.
1. Students describe critical listening.
Have volunteers read the sentences that they wrote in the previous session that describe critical listening.
2. Students reexamine the techniques of misleading communication.
Write in a place where everyone can see the four techniques of misleading communication: opinion disguised as fact, deceptive connotation, questionable euphemisms, and inflated language. Call on students to explain and give an example of each.
Part I One More Time (5 minutes)
Purpose: Students apply critical listening techniques to the evaluation of a media program.
1. Students watch and critically listen to an actual media program.
Tell students that they are now going to practice applying critical listening skills to an actual media program. Set up the video you have previously chosen to show to the class. Pass out the “Critical Listening: Analysis” activity sheet to each student. Instruct students to use the activity sheet to take notes on the techniques of misleading communication evident in the program. Remind them to be specific in pointing out ambiguous words and phrases. Suggest that they note any nonverbal communication as well.
Play the program for students.
2. Students discuss their analyses of the program.
After viewing the program, discuss the students’ observations. Ask questions such as the following:
Part II Critically Listening to the Media (40 minutes)

COMMUNICATION | LESSON 3: LISTENING CRITICALLY
overcomingobstacles.org
What was your overall impression of the program in terms of accuracy and communication?
What techniques of misleading communication did you observe?
What ambiguous words and phrases were used? Can you restate the words/phrases that reveal the speakers’ meaning?
Why do you think the speakers chose to use these techniques?
What nonverbal communication did you notice? Was it effective?
If you were the director of the program, how would you have scripted it? What would you have done differently?
3. Students write about the importance of critical listening in their lives.
After the discussion is completed, ask students to take five minutes to write a short paragraph explaining the importance of critical listening in their lives. Suggest that they include how they may benefit from using critical listening techniques and identifying techniques of misleading communication.

COMMUNICATION | LESSON 3: LISTENING CRITICALLY
overcomingobstacles.org
Ask students to describe times when they either heard communication that was purposefully misleading or when they used such techniques. Elicit from students the following key points that were taught in this lesson:
Critical listening means analyzing and evaluating the ways in which information is communicated.
Speakers and writers sometimes convey information in a way that makes it difficult to identify the true meaning of their words.
Recognizing misleading communication and understanding a speaker’s or writer’s motivations are essential for effective critical listening.
Conclusion (2 minutes)
1. Define critical listening.
2. List the four techniques of misleading communication. Write four short monologues or dialogues
that show examples of each of the techniques.
1. Describe a situation in which you were misled by one of the four misleading techniques.
2. Analyze a news article or an editorial that uses at least one of the techniques of misleading
communication. Explain what is misleading about the article or editorial.
3. Why is critical listening an important skill to have?
Student Assessment
Session 1
Session 2

COMMUNICATION | LESSON 3: LISTENING CRITICALLY
overcomingobstacles.org
LESSON EXTENSIONS
Using Quotations
“The fewer the facts, the stronger the opinion.” —Arnold H. Glasow
Have students bring in examples of persuasive writing (e.g., advertisements, editorials, campaign
literature). Have students fold a piece of paper down the middle, write “Fact” as the heading on one side
and write “Opinion” on the other side. Tell students to list statements from their persuasive writing
examples in the appropriate columns. Have them discuss their results in small groups.
Addressing Multiple Learning Styles
Show students a picture of a house. Have them write or draw a description of the house and its
surroundings.
Have students compare their work. Point out the different interpretations of your instructions. Explain
that people often interpret the same thing in different ways. Discuss the role that this plays in
misunderstandings/misleading communication.
Writing in Your Journal
Have students write about appropriate and inappropriate times to use the techniques discussed in this
lesson. For example, euphemisms may be appropriate when the situation calls for sensitivity.
Have students share their work with the class.
Real-World Uses
Discuss the use of euphemisms in real estate or auto ads (e.g., “handyman’s special” for a house that’s in
bad shape, “executive homes” for expensive neighborhoods).
Have students read the want ads in search of euphemisms. They should create a list of the euphemisms,
along with their translations.

COMMUNICATION | LESSON 3: LISTENING CRITICALLY
overcomingobstacles.org
Homework
Have students repeat Part II of Session 2 as they view or listen to a talk show on TV, a podcast, or
YouTube, using the “Critical Listening: Analysis” activity sheet as a guide.
Discuss students’ observations in class. Have students write a paragraph summarizing their findings.
Additional Resources
Have students read The 7 Powers of Questions: Secrets to Successful Communication in Life and at
Work by Dorothy Leeds.
As a class, discuss the role that questions play in listening critically.

COMMUNICATION SKILLS | LISTENING CRITICALLY©
20
21
Ove
rco
min
g O
bst
acle
s
CRITICAL LISTENING:MISLEADING COMMUNICATION
Technique
Opinion disguised as fact
Deceptive connotation
Questionable euphemisms
Inflated language
Explanation
A fact is something that can be verified as true or as something that actually happened. An opinion is someone’s feelings or judg-ment. If a speaker does not support information that is given as fact, then it is an opinion disguised as fact.
The denotation of a word is its literal meaning. The conno tation is a word’s sug-gested meaning and the asso-ciations that the word has. Connotations can make a listener feel or think a certain way.
A euphemism is a word or phrase that is used to avoid speaking directly about something that is unpleas-ant or improper.
Inflated language is lan-guage that consists of scholarly, technical, or scientific words and overly long phrases. Jargon, the specialized vocabulary of a profession or a hobby, is an example of this.
Example
Fact: George Washington was the first president of the United States.Opinion disguised as fact: Historians agree that George Washington was the greatest presi-dent that the United States has ever had.
Neutral denotation: His determination sur-prised us.Unfavorable conno-tation: His stubborn-ness surprised us.
Euphemism: The remains of the sol-diers were never found.Direct word: The dead bodies of the soldiers were never found.
Inflated language: No viable alternative exists for diligent commitment to an endeavor.Concise language: There is no substi-tute for hard work.
Detection Hints
Speakers must sup-port opinions with facts before you can accept them as valid. Ask ques-tions to discover facts. Verify facts by checking reference sources.
If a speaker uses the connotation of a word to distort the truth and sway the listener, it is impre-cise communication. Ask yourself if the connotation of any word is used to dis-tort the truth.
Euphemisms are used to soften the truth. Ask yourself why a speaker chose to use a euphemism instead of a more accurate term.
Jargon appears to be technical. It may present ideas you could understand more easily if they were stated clearly. Ask yourself why inflated language was used.
overcomingobstacles.org

COMMUNICATION SKILLS | LISTENING CRITICALLY©
20
21
Ove
rco
min
g O
bst
acle
s
CRITICAL LISTENING: ANALYSIS
Program: ___________________________________________________________________________
Speaker Statement/Action Purpose/Motivation
overcomingobstacles.orgPowered by TCPDF (www.tcpdf.org)

COMMUNICATION | LESSON 4: SPEAKING RESPONSIBLY
overcomingobstacles.org
AGENDA
Starter
Can You Handle the Truth?
Tell Me about Yourself
Every Word Counts
Conclusion
Student Assessment
Objectives
Students will discover the power of words.
Students will recognize that people are responsible for what they say.
Students will discover that people have the ability to control what they say and how they say it.
Students will recognize that using words responsibly is part of being an effective communicator.
Materials Needed
A clip of the courtroom scene from the movie A Few Good Men, in which Jack Nicholson explodes
with the famous line, “You can’t handle the truth!” (Part I)
One copy of the “Tell Me about Yourself ” activity sheet for each student (Part II)
4LESSON
SPEAKING RESPONSIBLY

COMMUNICATION | LESSON 4: SPEAKING RESPONSIBLY
overcomingobstacles.org
Begin class today by writing “speaker + listener = communication” where everyone can see. Have a volunteer read the equation out loud. Then, write “responsible speaker + critical listener = effective communication” below it. Review key points from the previous lesson about being a critical listener.
Circle the word “speaker” in the first equation as you say, “Today, we are going to focus on this part of the equation and the importance it has in communication.” Leave the equation for use throughout the session.
Starter (3 minutes)
Purpose: Students recognize the power of words. Students learn that people are responsible for what they say.
1. Students observe a scene from a movie to consider the power of words.
Before class, set up the clip of the famous courtroom confrontation scene from A Few Good Men between Tom Cruise, playing a lawyer sent to investigate the death of a marine, and Jack Nicholson, playing the head of the military base where the marine died.
To give students background, explain that at this point in the film, Cruise suspects that there’s been a cover-up in the death of the marine. He suspects that Nicholson’s character gave an order that resulted in the death. In this climactic scene, Cruise—in his frustration—demands the truth, to which Nicholson replies, “You can’t handle the truth!”
After viewing the clip, discuss the power of words. Ask questions such as the following:
What power do words have for Cruise in this movie? (Words will provide information that can help him determine whether or not a cover-up has taken place.)
How did Nicholson and his staff use words in this movie? (They used them to lie and cover up what really happened.)
What was the “truth” that Nicholson thought a civilian couldn’t handle? (In his mind, the military has to toughen up its soldiers to face the horrors of war by any means necessary. He views these methods as needed, and says that the death, though tragic, was beneficial.)
2. Students discuss and identify responsibility.
Part I Can You Handle the Truth? (15 minutes)
COMMUNICATION | LESSON 4: SPEAKING RESPONSIBLY
overcomingobstacles.org
Circle the words “responsible speaker” in the second equation on the board. Ask, “What do you think it means to be a responsible speaker?” Elicit from students that one meaning is to speak honestly based on one’s own experience.
Ask these questions to prompt a discussion:
How did Nicholson use words in the courtroom scene in this particular speech? (He used them to rationalize, or justify, his unjustifiable behavior.)
Is this an example of speaking responsibly? (Absolutely not; covering up the truth is a manipulation of words in order to deceive someone.)
Does Nicholson take responsibility for his use of words? (Yes; he believes he is doing a great service to his country by “toughening up” the military. He has thought things through and believes that what he is doing is right.)
What are the consequences of his words? (He’s now been exposed.)
What will be the consequences of his actions? (He will likely receive a dishonorable discharge from the military, face a court martial, and go to jail.)
Conclude the discussion by saying, “Words are powerful, so be careful and think about the consequences of your words, since you must take responsibility for them. Remember, if the words come out of your mouth, they are yours.”
Purpose: Students learn that people have the ability to control what they say and how they say it.
1. Students analyze two interviews.
Tell students that our words create an impression, so it is important to use words in ways that show respect for ourselves and for the people around us. In a job interview, for example, a prospective employer can learn a lot about you based on what you say and how you say it.
Distribute copies of the “Tell Me about Yourself” activity sheet to each student. Have volunteers act out the roles of the interviewer, candidate 1, and candidate 2, improvising actions as they speak. Ask students to listen carefully to these interviews, thinking about what the candidates say and how they say it.
2. Students distinguish effective speaking from ineffective speaking.
Part II Tell Me about Yourself (15 minutes)

COMMUNICATION | LESSON 4: SPEAKING RESPONSIBLY
overcomingobstacles.org
Have students list the strengths and weaknesses of each candidate. Write their responses on the board. (Candidate 1 is fast, strong, and athletic but is boastful and has no related experience. He treats the job lightly and makes promises he may not be able to keep, such as using his bike for deliveries. Candidate 2 is a problem solver—he’s already figured out how to fit the job into his schedule. He also provides examples of comparable work he’s done and skills/knowledge that would make him successful. However, candidate 2 has no direct experience.)
Ask students to tell, by a show of hands, which candidate they would hire for the job. Have a student who supports candidate 2 summarize how this person was able to use words responsibly. (Candidate 2 used words to make a good impression, showing respect for himself and the position. He communicated his interest in and showed that he is qualified for the job.)
Underline the words “responsible speaker” on the board. Ask, “What else does it mean to be a responsible speaker?” Elicit from students that responsible speakers speak not only truthfully, but also respectfully. They use words to make a positive impression. Ask how using words responsibly might benefit candidate 2. (He will probably get the job.)
3. Students recognize the connection between nonverbal communication and effective speaking.
Point out to students that the “Tell Me about Yourself” activity sheet has no stage directions except “lounging across the chair.” Ask them to reread each interview, trying to envision how each candidate might speak or behave as he says the words. Have students provide their own stage directions based on their visualizations. If time permits, allow volunteers to act out the scenes with stage directions.
Purpose: Students learn that using words responsibly is part of being an effective communicator.
1. Students recognize the role that effective communication plays in persuasion.
Remind students that you must choose your words carefully in an interview—not only to make a good impression, but also to persuade someone to hire you. You want to convince a prospective employer that you are the right person for the job.
Explain that one purpose of effective speaking is to persuade—to try to sway someone’s thoughts or feelings. Ask students to think of other times when words are used to persuade. (Students may respond: in advertisements, in sales, in political speeches, in fund-raising efforts.) Then, ask students to think of situations in which they have used words to try to persuade or convince someone of something. (Students may suggest that they have tried to convince a teacher to give them an extension on a paper, tried to convince their parents to allow them to stay out late, tried to convince their employer to give them a raise or a day off.)
Part III Every Word Counts (15 minutes)

COMMUNICATION | LESSON 4: SPEAKING RESPONSIBLY
overcomingobstacles.org
Have volunteers act out a few of the situations above, as the class critiques the effectiveness of their words. Ask, “What kind of impression did (student’s name) make? Were their arguments compelling? If not, what might they have said to convince the other person to honor that request?”
2. Students recognize the importance of effective communication in conveying messages clearly.
Point out that clarity is another reason for using words responsibly. When you communicate simply and clearly, you are more likely to get your point across. Ask students to briefly write a set of directions from your classroom to the cafeteria. Have volunteers read their directions. Ask students which set of directions would most effectively get a new student from this classroom to the cafeteria.
3. Students recognize the role that effective communication plays in diplomacy.
Finally, explain that diplomacy is yet another reason to choose words carefully and speak responsibly. Being honest and tactful, rather than blunt, can give people a gentle push in the right direction.
Encourage discussion on how to be diplomatic in the following situations:
A friend is planning to wear casual clothes to a formal party.
A friend is commenting on every scene in a movie, and it’s annoying.
A friend is considering applying for a job that requires skills you know this person does not have.
Conclude that words are powerful agents of change when they are used responsibly.
End this session by referring to the equation that you wrote on the board to begin class. Ask, “Who do you think has the most power in this equation—the speaker or the listener?” Elicit from students the following key points that were taught in this lesson:
Words are powerful, so use them wisely.
You must take responsibility for your words because they belong to you.
Using words responsibly is part of being an effective communicator.
Speak responsibly for persuasion, clarity, and diplomacy.
Conclusion (2 minutes)
Student Assessment

COMMUNICATION | LESSON 4: SPEAKING RESPONSIBLY
overcomingobstacles.org
1. List four things that you can do to be a responsible speaker.
2. Describe someone you know who is a responsible speaker and someone who is not a responsible
speaker (no names are necessary). Which one do you trust more? Why?

COMMUNICATION | LESSON 4: SPEAKING RESPONSIBLY
overcomingobstacles.org
LESSON EXTENSIONS
Using Quotations
“Words have a magical power. They can bring either the greatest happiness or deepest despair; they
can transfer knowledge from teacher to student; words enable the orator to sway his audience and
dictate its decisions. Words are capable of arousing the strongest emotions and prompting all men’s
actions.” —Sigmund Freud, the founder of psychoanalysis
Ask students if they agree or disagree with Freud. Discuss the quote.
Addressing Multiple Learning Styles
Have each student write a short story in which a character must communicate a difficult truth to
someone else. Students should show this character speaking without tact and include the consequences
of this blunt conversation.
Have students share their stories. As a class, discuss the importance of being tactful.
Writing in Your Journal
Have students write about a time when they said something they didn’t mean to say and wanted to take
it back.
Allow students to take back what they wish they had never said.
Using Technology
Have students visit www.youtube.com and search for examples of effective and ineffective
communication. Tell students to share the videos they find with a partner and discuss their content.

COMMUNICATION | LESSON 4: SPEAKING RESPONSIBLY
overcomingobstacles.org
Homework
Have students read the “My Friend Is Mad at Me...” activity sheet.
Have students write a reply to this letter.
Additional Resources
Time magazine has a section in each issue titled “Verbatim.” This section contains quotes and their
sources. Have students analyze an issue’s quotes and determine precautions that people should take to
ensure that they are being responsible with the words they choose to speak. If copies of Time are not
readily available, access some of these quotes online.
Discuss why Time might include this section in its magazine.

COMMUNICATION SKILLS | SPEAKING RESPONSIBLY©
20
21
Ove
rco
min
g O
bst
acle
s
My friend is mad at me for saying things about her. I did say stuff when I was with other friends, but somehow she thinks it was just me and is ignoring me. I’m getting blamed for something that was part of a group conver-sation! How do I fix this?
C.T., 15, Hawaii
Find a way to tell your friend how sorry you are, even if you have to write a note and stick it in her locker. Even though you weren’t alone, you have to take respon-sibility for what you said. Don’t expect your other friends to confess to their part
in the conversation if they’ve already skated, but do enlist their help to get her to accept your apology. The next time you feel like joining the gossip session about someone you care for, remember this and stop yourself.
*Reprinted with permission from React magazine.
MY FRIEND IS MAD AT ME
overcomingobstacles.org

COMMUNICATION SKILLS | SPEAKING RESPONSIBLY©
20
21
Ove
rco
min
g O
bst
acle
s
CANDIDATE #1:
INTERVIEWER: Tell me about yourself.
CANDIDATE: (lounging across the chair) Well, I’m prob-ably the top athlete in my school. I’m fast as anything, and I can bench press 250 pounds.
INTERVIEWER: So, loading and unloading boxes…
CANDIDATE: …would be a piece of cake! And I just got a new 10-speed bike that I could use to make deliveries FAST. I really don’t think my twin brother would mind, even though the bike belongs to both of us.
INTERVIEWER: Have you ever done this kind of work before?
CANDIDATE: Nah, but it’s no big deal. I can handle it.
CANDIDATE #2:
INTERVIEWER: Tell me about yourself.
CANDIDATE: Well, I just moved here about a month ago. I’m a pretty good student. My classes don’t seem too tough, so I think I can handle an after-school job.
INTERVIEWER: So, the hours won’t interfere with your schedule or homework?
CANDIDATE: No. They work out fine for this semester.
INTERVIEWER: You know that the job involves lifting some heavy boxes…
CANDIDATE: …I know. I’m stronger than I look! When we moved here, I had to lift some really heavy boxes. I did okay with them.
INTERVIEWER: Have you ever done anything else that’s similar to this kind of work?
CANDIDATE: No, but I’m really well organized. And I’ve been to this store a lot, so I know where things are. Iknow the neighborhood, too. So I won’t get lost making deliveries. I think I can do the job.
STRENGTHS & WEAKNESSES
TELL ME ABOUT YOURSELF
overcomingobstacles.orgPowered by TCPDF (www.tcpdf.org)

COMMUNICATION | LESSON 5: COMMUNICATING CONSTRUCTIVELY
overcomingobstacles.org
AGENDA
Starter
Easy Talk, Tough Talk
I-Messages
Controlled Debate
Conclusion
Student Assessment
Objectives
Students will explore what makes some conversations easy and others difficult.
Students will develop techniques to communicate their feelings and encourage open dialogue in
difficult situations.
Students will practice communicating in a constructive manner, even when they disagree.
Materials Needed
One copy of the “I-Messages” activity sheet and one copy of the “Vocabulary of Feelings” activity
sheet for each student (Part II)
One copy of the “Topics for a Controlled Debate” activity sheet (Part III)
Activity rules written on the board, a transparency, or a piece of poster paper (Part III)
5LESSON
COMMUNICATING CONSTRUCTIVELY

COMMUNICATION | LESSON 5: COMMUNICATING CONSTRUCTIVELY
overcomingobstacles.org
Write the following list where everyone can see: talking on the telephone, joking with friends, conversing with an adult, quarreling with a sibling, asking to borrow money, discussing a homework assignment. Ask students what all of these conversations have in common. (All require verbal communication.)
On a scale of one to five, with five being extremely important and one being not important at all, ask students to rank the importance of verbal communication in their daily lives. (Most students will rank communication high.)
Ask for a show of hands to check the students’ rankings from one to five. Write their rankings where everyone can see.
Explain that verbal communication is very important. Ask whether students believe that some types of verbal communication are more difficult than others. Explain that this lesson will help them make difficult conversations easier and more effective.
Starter (3 minutes)
Purpose: Students explore what makes some conversations easy while others are more difficult.
1. Students classify conversations as easy, average, or difficult.
Instruct students to take out a piece of paper and fold it into three columns. Have them title the left column “Easy,” the middle column “Average,” and the right column “Difficult.”
Explain that this activity will have them classify different conversations according to their difficulty. Ask them to list, for example, a conversation with a close friend about what to wear to a party (easy), a telephone conversation to schedule a dentist appointment (average), and a request to a boss for a raise (difficult).
Divide the class into pairs. Tell students that they have three minutes to list as many examples of verbal communication in each column as they can think of. Tell them that their goal is to have at least three examples in each column. If needed, prompt students by asking questions such as the following:
Part I Easy Talk, Tough Talk (10 minutes)
COMMUNICATION | LESSON 5: COMMUNICATING CONSTRUCTIVELY
overcomingobstacles.org
Think about conversations you have had with your parents. Are some more comfortable than others?
How would you rank conversations with members of the opposite sex?
Where would you rank confrontations with peers?
How do you feel about conversations with teachers?
While students are writing, draw the three columns in a place where everyone can see.
When the three minutes are up, ask volunteers to fill in the columns on the board. Discuss which conversations are easy, which are average, and which are difficult.
2. Students analyze what makes some conversations easy and others difficult.
Ask students to form groups of four to five. Have each group select a note taker/reporter. Tell the groups that their task is to determine what makes certain conversations easy and others difficult. Allow about three minutes for the discussion.
3. Students recognize that difficult conversations often involve strong emotions.
Call on each group to share its analysis with the rest of the class. Write important points where everyone can see. Reinforce observations that difficult conversations often involve conflict. They may arouse emotions such as fear, anger, sadness, insecurity, and hurt feelings, while easy conversations tend to evoke more positive emotions. There may also be some risk in a difficult conversation, like the possibility of rejection.
Explain that an awareness of each party’s emotions can help make a difficult conversation easier.
Purpose: Students use an activity sheet to develop techniques to communicate their feelings and encourage open dialogue in difficult situations.
1. Students learn the purpose of an I-Message.
Say, “An I-Message is a technique you can use to express yourself when you are upset or angry that will lead to open discussion and will not escalate conflict. When you use an I-Message, people are more willing to listen to you and respond to your requests without becoming defensive. I-Messages encourage discussion and help reduce friction.”
Explain how an I-Message works:
Part II I-Messages (10 minutes)

COMMUNICATION | LESSON 5: COMMUNICATING CONSTRUCTIVELY
overcomingobstacles.org
Tell students that an I-Message begins with a statement of feelings (e.g., “I feel afraid, tense, worried…”).
It is followed by a statement of what the problem is (e.g., “…when you don’t take out the garbage, when you are late picking me up, when you skip class…”).
An I-Message ends with your reasons for feeling the way you do. It tells how the observed behavior affects you, and it avoids using the word “you.”
Provide students with a sample I-Message. Say, “I feel tense when you ditch English class because I can’t ignore your absences, and attending English class is a requirement for graduation.”
2. Students create their own I-Messages.
Distribute the “I-Messages” activity sheet and the “Vocabulary of Feelings” activity sheet to students.
Tell students that they are going to write their own I-Messages. Explain the proper format for filling out the “I-Messages” activity sheet:
Line 1: By beginning with “I feel…” students explain their feelings and do not accuse the other person. Though students may feel mad or angry, they should not use “mad,” “angry,” or other aggressive or accusatory words on this line because such words do not encourage dialogue. Students should use the “Vocabulary of Feelings” activity sheet to find words other than “mad” or “angry” to describe how they feel. Remind them to avoid using the word “you.”
Line 2: This line should be a description of what the other person does that upsets the student. It should describe the other person’s specific action, but not label or accuse the person. For example, students should write “when you don’t return my things” (describes the action). Students should not write “when you are inconsiderate” (broadly labels the person). Lead students to the understanding that when a person acts in a way that seems inconsiderate, it is the specific behavior that is causing the negative feeling; that person is not always inconsiderate.
Line 3: This line should explain in detail why the student is feeling how they are feeling. For example, a student might write “because they are important to me.” This line explains the importance of the action or behavior to the other person.
Instruct students to fill out the remaining I-Messages on their activity sheets.
3. Students discuss their I-Messages.
When students have completed the activity sheet, ask them to share their I-Messages with the class.
Discuss the value of I-Messages by asking the following questions:
Why are I-Messages a valuable tool for communication?
When could you use an I-Message?

COMMUNICATION | LESSON 5: COMMUNICATING CONSTRUCTIVELY
overcomingobstacles.org
Remind students that when their sentences begin with “I,” they are not accusing the other person, and the other person will not become defensive. I-Messages allow students to express how they feel, encourage open discussion, and can help resolve a conflict quickly and easily.
You may wish to tell students that using I-Messages is an important skill that requires practice. It takes a while to get used to wording feelings this way. It is important to understand the technique and practice using it. Over time, using I-Messages will become natural.
Purpose: Students participate in a controlled debate to practice communicating in a constructive manner, even when they disagree.
1. Students prepare the classroom for the activity.
Have students arrange all of the classroom chairs in two rows that face each other. Students will be moving back and forth between the rows, so make sure that there are no obstacles to block them.
2. Students choose the topic for the controlled debate.
The debate topic can be an issue discussed in class, or you can choose another topic of interest to students. Consider presenting students with a choice from among four controversial topics that are relevant to their lives, using the “Topics for a Controlled Debate” activity sheet.
Write each topic as a statement where everyone can see. To the right of the statements, create two columns labeled “Agree” and “Disagree.” Write the number of students who agree and disagree with each statement. The best topic for the debate is the topic that has the most even split between those who agree and those who disagree.
3. Students prepare for the debate.
Have all students who agree with the statement sit in one row of chairs and all students who disagree sit in the other row.
Refer students to the rules of the debate that you have previously written:
Part III Controlled Debate (25 minutes)

COMMUNICATION | LESSON 5: COMMUNICATING CONSTRUCTIVELY
overcomingobstacles.org
Only one person may speak at a time.
Speakers from the two sides will alternate.
To make a point, raise your hand.
Do not raise your hand until the person who is speaking is finished.
If someone on the opposing team makes a point you agree with, get out of your seat and move to the other row. This does not mean that you have changed your mind about the debate topic; it means that you agree with that one point.
Move back to your original side when someone on your team makes a point with which you agree.
4. Students engage in the controlled debate.
Begin the debate by flipping a coin to determine which team begins. Remind students to use the techniques of effective verbal communication (including active listening) that they have learned.
Explain that the debate will last 10 minutes.
The following are some suggestions for facilitating this activity:
It is important that you act only as a referee and avoid offering your opinion.
If students stray from the topic, help them bring the discussion back to the debate.
Enforce the rules, allowing only one student to talk at a time, calling only on students who wait until others finish talking before raising their hands, and encouraging students to change sides when strong points are made by the opposing team.
Remind students that agreeing with a specific point (and therefore changing sides) does not mean that the student has completely changed their mind on the topic. It signifies that they are able to see the merit of a point made by the opposing side.
Ensure that students remain respectful of each other’s opinions.
Keep the class apprised of the time remaining in the debate.
5. Students discuss the debate experience.
When 10 minutes have passed, have students remain in the rows and ask them the following questions:

COMMUNICATION | LESSON 5: COMMUNICATING CONSTRUCTIVELY
overcomingobstacles.org
How was this debate different from disagreements you have in everyday life?
What was difficult about this activity?
How did you feel when you wanted to say something but couldn’t? How about when you wanted to raise your hand, but someone else was speaking?
Did you resist switching sides? Why? Did you have all of the information on this topic before the debate? Have any of the points you heard caused you to take a closer look at the issue? Which points did you find most effective?
How well did you and others use techniques for good listening and good communication?
What can you apply to “real life” from this debate?
Have students discuss recent situations that could have been improved through the use of I-Messages. Elicit from students the following key points that were taught in this lesson:
Effective communication is important in people’s lives.
An awareness of both parties’ emotions in a conversation can help make communication more effective.
An I-Message is a technique that helps people to communicate when they are upset or angry, without escalating conflict.
Conclusion (3 minutes)
1. Why are some conversations more difficult than others?
2. Write three angry or accusatory statements, and then rewrite them as I-Messages.
3. List three reasons why I-Messages are often a more effective communication tool than angry or
accusatory statements.
Student Assessment

COMMUNICATION | LESSON 5: COMMUNICATING CONSTRUCTIVELY
overcomingobstacles.org
LESSON EXTENSIONS
Using Quotations
“Speech is power…to persuade, to convert, to compel.” —Ralph Waldo Emerson
Have the class give examples of how speech might empower people in everyday situations.
Addressing Multiple Learning Styles
Provide students with texts of historical speeches. Have small groups of students analyze the speakers’
styles and messages. Possible subjects for analysis: historic events leading up to the speech, the
audience, possible controversy, desired outcome, and notes on the historical accuracy of the text.
Have groups share their analyses. Discuss the role that effective, careful communication played in the
speeches.
Writing in Your Journal
Have students write about a disagreement they’ve had. Have them write a paragraph that explains the
situation and an I-Message that might have helped them get their point across.
Have students share their I-Messages (with identifying details omitted) in small groups, suggesting
changes as needed.
Using Technology
Have students observe one segment of a television show (commercial to commercial) that includes a
disagreement between characters.
Have students write a summary of the scene and rewrite the dialogue using I-Messages. If desired, have
students role-play their scenes for the class.
COMMUNICATION | LESSON 5: COMMUNICATING CONSTRUCTIVELY
overcomingobstacles.org
Homework
Have students read “Eleven” by Sandra Cisneros (from Woman Hollering Creek and Other Stories). The
11-year-old narrator of this short story is embarrassed by her teacher in front of the class.
Have students write a paragraph about how the narrator might have maintained her dignity, and
strategies for using I-Messages with authority figures. Discuss students’ work as a class.
Additional Resources
Have students read Mad: How to Deal with Your Anger and Get Respect by James J. Crist, PhD.
As a class, discuss how anger can get in the way of constructive communication. Have students
brainstorm ways to control their anger. Reiterate that I-Messages allow people to effectively share
their anger without escalating conflict.

COMMUNICATION SKILLS | COMMUNICATING CONSTRUCTIVELY©
20
21
Ove
rco
min
g O
bst
acle
s
I-Messages are a great way to explain yourself when you are upset. When you use I-Messages, people are more willing to listen to you and respond to your requests without becoming defensive. I-Messages encourage open discussion and can help resolve a conflict quickly and easily.
EXAMPLE
One of your friends often borrows things from you and doesn’t return them.
I feel ____________________________________________________________
when you _________________________________________________________
because __________________________________________________________
Fill in the blanks for the following I-Messages:
1. Your closest friend is telling others about your personal life.
I feel ____________________________________________________________
when you _________________________________________________________
because __________________________________________________________
2. You haven’t been called on all week, even though you’ve raised your hand.
I feel ____________________________________________________________
when you _________________________________________________________
because __________________________________________________________
3. Someone in your family keeps forgetting to give you messages.
I feel ____________________________________________________________
when you _________________________________________________________
because __________________________________________________________
upset
don’t return my things
they are important to me.
I-MESSAGES
overcomingobstacles.org

COMMUNICATION SKILLS | COMMUNICATING CONSTRUCTIVELY©
20
21
Ove
rco
min
g O
bst
acle
s
AAfraid
AggressiveAnnoyedAnxious
Apathetic Apologetic
ApprehensiveAshamed
Audacious
BBashful
BoldBoredBrave
CCalm
CautiousCheerful
ComfortableCompetentConfidentConfusedCuriousCynical
DDecisive
DepressedDetermined
DisappointedDisapproving
DisgustedDistressed
EEbullientEcstatic
Embarrassed EnergeticEnraged
EnthusiasticEnviousExcited
Exhausted
FFriendly
FrightenedFrustrated
GGratefulGreedyGuilty
HHappy
HelplessHopeful
Horrified
IImpatient
IncompetentIndecisiveIndifferent
InnocentInsecureInspiredInsulted
IntimidatedIrritated
JJealousJoyous
LLazy
ListlessLonely
MMarvelous
MischievousMiserable
Morose
NNegativeNervous
OOblivious
OptimisticOverwhelmed
PParanoidPeaceful
PerplexedPetrified
ProudPuzzled
RRecklessRegretfulRelaxedRestless
SSad
SatisfiedSecureSerene
ShockedShySilly
SkepticalSleepy
SluggishSmart
Stimulated StupefiedSubdued
SullenSurprised
SuspiciousSympathetic
TTense
TentativeTimid
TranquilTrusting
UUncomfortable
Undecided
WWary
WhimsicalWorried
ZZealous
VOCABULARY OF FEELINGS
overcomingobstacles.org

COMMUNICATION SKILLS | COMMUNICATING CONSTRUCTIVELY©
20
21
Ove
rco
min
g O
bst
acle
s
• Students who get in trouble with the law should be expelled.
• Healthy people should become organ donors.
• People should be banned from talking on their cell phones in public places.
• Animals should live in their natural habitats, not in zoos or circuses.
• Boys and girls should be allowed to try out for and play on any high school sports
team they want, including basketball and football.
• Squirt guns, laser pointers, and other toys that look like guns should be banned from
schools.
• Policies banning homework should be established in school districts.
• All schools should require uniforms.
• All students should be required to learn a foreign language.
• Athletes should be required to graduate from college before playing professional
sports.
• Schools and libraries should block certain websites on computers used by high
school students.
• Student government should have the power to change school policy.
TOPICS FOR A CONTROLLED DEBATE
overcomingobstacles.orgPowered by TCPDF (www.tcpdf.org)

PART II
ACQUIRING CORE SKILLS
DECISION MAKING

TABLE OF CONTENTS
PART II: ACQUIRING CORE SKILLS
1. Starting the Decision Making Process 129
2. Gathering Information 137
3. Exploring Alternatives and Considering Consequences 148
4. Making and Evaluating Decisions 157
Decision Making

DECISION MAKING | LESSON 1: STARTING THE DECISION MAKING PROCESS
overcomingobstacles.org
AGENDA
Starter
Quick Toss
Let It Flow
Fallout Shelter: Defining the Problem
Conclusion
Student Assessment
Objectives
Students will discover what makes some decisions harder than others.
Students will learn that decisions are influenced by many factors.
Students will identify and illustrate the steps of the decision making process.
Students will begin the fallout shelter simulation, which allows students to practice the decision
making process.
Materials Needed
A soft ball or a ball of rolled-up socks (Part I)
Six large pieces of poster board, and six long strips of paper (Part II)
One manila folder for each group of six or seven students (Part III)
1LESSON
STARTING THE DECISION MAKING PROCESS

DECISION MAKING | LESSON 1: STARTING THE DECISION MAKING PROCESS
overcomingobstacles.org
Explain to students that today they will begin to study the decision making process. Begin the discussion by asking students to consider all of the decisions they have made during the day so far. Have three volunteers alternate writing student responses on the board so that students can quickly call out answers for about one minute.
Have the volunteers tally the number of decisions made by the class. The number should be large. Point out to students that people make many decisions every day, some easy and some more difficult. Explain that today’s lesson will help them learn the process for making a decision, which can make tough decisions easier.
Starter (3 minutes)
Purpose: Students discover what makes some decisions harder than others and learn that decisions are influenced by many factors.
1. Students participate in an activity that requires them to make choices.
Hold the soft ball or the ball of rolled-up socks. Explain that you are going to ask a question and then throw the ball to a student. That student has three seconds to answer the question and throw the ball back to you. You will then repeat the exercise with different questions and different students.
Toss the ball. Begin by asking students to make easy decisions. For example:
Which show will you watch on television tonight?
What color would you choose for a new car?
If possible, throw the ball to every student.
2. Students respond to increasingly complex questions.
As the game continues, increase the difficulty of the questions. For example:
If you found money, what would you do with it?
If your dog were very ill, would you put it to sleep or spend as much money as possible to cure it?
Then, ask about the process students use to make decisions. For example:
How did you decide to wear your hair like that?
How did you choose your after-school job?
Part I Quick Toss (10 minutes)

DECISION MAKING | LESSON 1: STARTING THE DECISION MAKING PROCESS
overcomingobstacles.org
3. Students discuss what makes some decisions more difficult than others.
Discuss what students experienced during the game. Ask questions such as the following:
What made some of the decisions easy? What made some of the decisions more difficult?
Would it have helped to know what your friends think about the situation? Why?
If you had more information, would the choice have been easier? What kind of information would you like to have had?
Lead students to the understanding that consequences usually make decisions difficult. Often, the more significant the consequences, the more difficult the decision.
Ask students to suggest some other factors that can influence the decisions they make. (Students might respond: peer pressure, personal beliefs, the opinions of someone they respect.) Elicit from them that such factors affect the choices they make.
Purpose: Students identify the steps of the decision making process and create a flowchart to illustrate the process.
1. Students identify the steps of the decision making process.
Ask students to think about what they have learned regarding the factors they consider when making a decision (e.g., consequences, peer influence, personal beliefs). Have them suggest the steps they think people should take when making an important decision. Once students have created a list, have them put the steps in order. The final list should resemble the following:
1. Define the issue.2. Gather information.3. Develop alternatives.4. Analyze the consequences.5. Make the decision.6. Consider feedback and evaluate.
Point out that the final step—consider feedback and evaluate—may result in returning to the first step to rework the decision. Decision making can be a recursive process. Sometimes, one must return to the beginning of the process or repeat a step several times.
2. Students create a flowchart that shows the decision making process.
Provide the class with the following scenario: the local school board is trying to decide if students at your high school should be required to wear uniforms to school.
Part II Let It Flow (10 minutes)

DECISION MAKING | LESSON 1: STARTING THE DECISION MAKING PROCESS
overcomingobstacles.org
Divide the class into six groups. Tell students that each group will illustrate one step of the decision making process regarding the school board’s choice. Give each group a large piece of poster paper and a long strip of paper.
Assign each group one step of the decision making process. Tell them to consider and discuss the problem with regard to the step assigned to them. For example, the “gather information” group would discuss how the school board would gather relevant information to help in its decision making. On their poster papers, the groups are to illustrate their assigned steps of the decision making process. They should use the long piece of paper to make an arrow that will be used to connect their steps to the next step.
When students have finished, collect the steps and post them on a bulletin board or wall. Connect all of the steps using the arrows. Review the results to reinforce the steps of the decision making process.
Purpose: Students begin a simulation, which continues throughout this module, and practice the first step of the decision making process (define the issue).
1. Students prepare for a simulation that highlights decision making.
Explain to students that they are now going to begin working through the decision making process, as illustrated in their flowcharts. Explain that the activity will continue over the next few lessons.
Divide the class into groups of six or seven. Give each group a manila folder. Have a member of the group write all the members’ names on the folder. Inform students that all group work and notes related to this activity are to be kept in the folders. You will collect them at the end of each session and distribute the folders at the beginning of the next.
Explain the following situation to the groups:
Your group is composed of members of a federal agency in Washington, D.C., that is in charge of running fallout shelters in the far outposts of civilization. Suddenly, World War III breaks out and nuclear bombs begin dropping, destroying places all across the globe. People are heading for whatever fallout shelters are available. You receive a desperate call from one of your stations asking for help.
It seems that 10 people have arrived looking for shelter, but there is only enough space, air, food, and water in the fallout shelter for six people for a period of three months, which is how long they must stay underground before they can safely leave. They realize that if they have to decide among themselves which six should go into the shelter, they are likely to become irrational and begin fighting. So, they have decided to call your department and leave the decision to you. They will abide by your decision.
Part III Fallout Shelter: Defining the Problem (30 minutes)

DECISION MAKING | LESSON 1: STARTING THE DECISION MAKING PROCESS
overcomingobstacles.org
Explain to students that, as a group, they have to decide which four people will have to be eliminated from the shelter. Impress upon them the following important considerations:
It is possible that the six people they choose to stay in the shelter might be the only six people left to continue the human race.
You (the federal agency group) must make the decision—no exceptions.
2. Students begin the simulation by defining the problem.
Explain to students that their responsibility today is to carefully define the problem. Instruct students to take 10 minutes to write a clear definition of the situation, including all the factors they feel are important.
Instruct the groups’ members to brainstorm the most important criteria (including core beliefs and values) to consider when making this decision. Have students include any outcomes the group wants. As a prompt, ask, “What qualities are important: intelligence, creativity, kindness, or other qualities?” Allow students 10 minutes to write their answers.
3. Students discuss their group work.
Have each group share its definition with the class. Ask:
What difficulties did you encounter when your group wrote its definition of the problem?
Why is it necessary to have a clear definition of a problem when making a decision?
Lead students to the understanding that having a clear definition of the problem helps them to focus on each specific aspect of the problem and helps ensure that they will not be distracted later by things that aren’t part of the issue.
Have the groups return their materials to their folders. Collect the folders.

DECISION MAKING | LESSON 1: STARTING THE DECISION MAKING PROCESS
overcomingobstacles.org
Ask students how often they make decisions. Ask them to explain how good decisions are made. Elicit from students the following key points that were taught in this lesson:
People make many decisions every day, some more difficult than others.
Decisions are influenced by many factors, including beliefs and values.
Following the decision making process results in the best decisions.
A clear definition of the problem leads to a better understanding of the issue.
Conclusion (2 minutes)
1. What factors can make some decisions more difficult than others?
2. List three factors that influence the decisions you make.
3. List the steps of the decision making process in order.
Student Assessment

DECISION MAKING | LESSON 1: STARTING THE DECISION MAKING PROCESS
overcomingobstacles.org
LESSON EXTENSIONS
Using Quotations
“If one does not know to which port one is sailing, no wind is favorable.” —Seneca the Younger
Have students illustrate this quote (perhaps by showing a ship labeled with a decision being buffeted by
various winds). Display the drawings or have students explain them in small groups.
Using Technology
Choose a television show with a historic or ecological theme. Pick one example of decision making
illustrated in the show. Have students create flowcharts of the example based on the decision making
process.
Have students discuss the flowcharts in small groups.
Writing in Your Journal
Have students write about a decision they will have to make in the near future. Students should define
the problem and describe why the choice may be difficult to make. Students should choose a topic they
can discuss with their classmates.
Ask students to submit a one-sentence description of the problem they’ve identified. Have the class
discuss the types of problems to be solved.
Addressing Multiple Learning Styles
Explain to students that mnemonic devices are techniques for assisting memory. Provide the class with
an example of a mnemonic device.
Divide students into groups. Have each group create a mnemonic to help students remember the
decision making process (e.g., “Dizzy gators don’t always make choices.”). Have groups share their
mnemonic devices with the class.

DECISION MAKING | LESSON 1: STARTING THE DECISION MAKING PROCESS
overcomingobstacles.org
Homework
Have students track news stories that describe choices to be made by local, state, or national
government officials.
Have students keep a log of their stories and write a short paragraph summarizing each decision made,
including stated reasons for arriving at decisions as well as hidden agendas.
Additional Resources
Have students research a recent decision made by the president or another political figure.
Have students chart the process that may have been used in making this decision.

DECISION MAKING | LESSON 2: GATHERING INFORMATION
overcomingobstacles.org
AGENDA
Starter
The Box
Info Search
Fallout Shelter: Exploring Alternatives
Conclusion
Student Assessment
Objectives
Students will recognize the importance of gathering relevant facts and ignoring irrelevant
information when making a decision.
Students will learn that their prior experiences can direct them to good sources of information.
Students will apply the step of gathering information to the fallout shelter simulation.
Materials Needed
10 slides or large pictures of diverse groups of people, such as Asians, African Americans, Native
Americans, Latinos, Caucasians, men, women, teenagers, children, elderly people, well-dressed
people, and so forth (Starter)
Projector, if using slides (Starter)
A cardboard box filled with various small items, including string, paper clips, toothpicks, one or
two red items, and one or two blue items (Part I)
One copy of “The Search” activity sheet for each student (Part II)
2LESSON
GATHERING INFORMATION

DECISION MAKING | LESSON 2: GATHERING INFORMATION
overcomingobstacles.org
One copy of the “Fallout Shelter Hidden Biographies” activity sheets for each role-playing
volunteer (Each volunteer receives a unique biography.) (Part III)
Fallout shelter folders (Part III)
One copy of the “Fallout Shelter Biographies” activity sheet for each group (Part III)

DECISION MAKING | LESSON 2: GATHERING INFORMATION
overcomingobstacles.org
Show students the 10 slides or large pictures featuring varieties of people.
Ask students to write their answers to the following questions:
Whom would you choose as a friend? Why?
Whom would you like your sibling to have as a friend? Why?
Which of these people would make the best teacher? Why?
Which of these people would get your vote for president of the United States? Why?
Ask students how comfortable they are with their choices. Elicit from them that these decisions seem difficult because they do not know anything about the people other than their appearance. Point out that in order to make an informed decision, they would need more information.
Starter (3 minutes)
Purpose: Students recognize the importance of gathering relevant facts and ignoring irrelevant information when making a decision.
1. Students complete a task using relevant information.
Explain to students that you have a challenge for them. Draw their attention to the box containing the various small items.
Ask for a volunteer to come to the box. Inform the volunteer that they have 10 seconds to connect a red item and a blue item using paper clips, strings, or other items from the box. Dump the contents of the box on the floor or the table and say, “Go!” When 10 seconds have passed or when the student is finished, ask if anyone sees other solutions. Have these students connect the red and blue items they suggest.
2. Students discuss the importance of using relevant information to make decisions.
When students have exhausted combinations, ask students why no one attached irrelevant items. For example, hold up two items that were not red or blue and say, “Why didn’t you connect these?” You might also hold up another item and ask, “Why didn’t anyone use this to connect a red and a blue object?” Elicit from students that these things did not fulfill the requirements of the challenge.
Ask students why the solution was so easy. Elicit from them that they had the knowledge to recognize what was important in this exercise and what did not fit the solution. Point out that to make a good decision, one must have the relevant facts and ignore information that is unrelated.
Part I The Box (10 minutes)

DECISION MAKING | LESSON 2: GATHERING INFORMATION
overcomingobstacles.org
Purpose: Students recognize that their experiences can direct them to good sources of information.
1. Students recognize the importance of identifying appropriate sources of information.
Explain to students that sometimes they will not have all the important facts they need, which will require them to find additional sources of information.
Ask students, “Where would you go to find the scores of last night’s baseball (or another sport, depending on the season) game?” Encourage students to give several sources, such as sports websites, newspapers, and television. Ask students why they would choose those sources. Lead students to the understanding that they would choose those sources because they have found the information there before.
2. Students practice identifying appropriate sources of information.
Explain that students will practice identifying the appropriate sources of information for different situations. Tell students that they will be able to do this easily if they use their prior experiences and knowledge. Distribute a copy of “The Search” activity sheet to each student.
Allow students five minutes to complete the activity sheet. While students are working, write the five situations on the board.
When time has expired, have students share the sources of information that they felt were pertinent to each situation. Have two volunteers list the responses under the appropriate situation on the board. Elicit from students the greatest variety of sources possible. (Students might respond: libraries, reference books, atlases, encyclopedias, interviews with knowledgeable people, the internet, newspapers, magazines, clubs, organizations, and associations.)
Have students add any new sources of information to their worksheets. Suggest that students keep their lists of sources as an aid for research and information gathering. Explain that when they are trying to gather information, reviewing the list will help them uncover sources they may not immediately consider.
Part II Info Search (10 minutes)
Purpose: Students apply the step of gathering information to the fallout shelter simulation.
1. Volunteers prepare character roles for the fallout shelter simulation.
Explain to students that they are now going to return to the fallout shelter simulation to practice gathering information from different sources.
Part III Fallout Shelter: Exploring Alternatives (30 minutes)

DECISION MAKING | LESSON 2: GATHERING INFORMATION
overcomingobstacles.org
Ask for 10 volunteers to play special roles in this activity. Assign each volunteer a character to role-play. Give each volunteer one of the “Fallout Shelter Hidden Biographies” activity sheets and ask them to read the hidden biographical information quietly. Explain that the activity will require them to answer questions related to their characters. Instruct them to answer truthfully, creatively, and in character if there is a question not covered in the hidden biography. Instruct each volunteer to write down the answers to the questions they are asked during the activity so that they can give consistent information to any groups that ask similar questions.
2. Students receive biographical information about the characters in the simulation.
Have students return to their simulation groups; then, distribute the fallout shelter folders. Review the fallout shelter situation with students. Remind them that each group has to decide which four people will have to be eliminated from the shelter. Point out that the six people they choose to stay in the shelter may be the only six people left to start the human race again, so this decision is very important.
Distribute copies of the “Fallout Shelter Biographies” activity sheet. Explain that this is all they know about the 10 people. Read the sheet out loud:
Bookkeeper, 31 years old
Second-year medical student, member of militant group
Famous historian, 42 years old
The famous historian’s 12-year-old daughter
Hollywood star, actor/actress
Biochemist
Member of the clergy, 54 years old
Olympic athlete in track and field, world-class triathlete
College student
Firefighter
3. Students develop a list of questions to answer.
Explain to students that their task is to decide what they need to know in order to make the decision. They must develop a series of questions that will elicit the information they need about each person. Allow students 10 minutes to prepare their lists of questions.
4. The fallout shelter groups identify the sources that they would use to gather relevant information.

DECISION MAKING | LESSON 2: GATHERING INFORMATION
overcomingobstacles.org
When 10 minutes have passed and the groups have completed their lists of questions, tell them that they must identify as many sources as possible to find the information they need. Give students two to three minutes to complete this task. Ask the class if they included interviews with the individuals as important sources of information.
5. Groups interview the fallout shelter characters.
Explain to the class that the teams are able to communicate with the fallout shelter site, so they will be able to ask reasonable questions of each of the individuals involved.
Ask the 10 volunteers to stand. Introduce each one as the character they are portraying.
Have the actors circulate among the groups for a few minutes and answer questions. Remind the actors that if they do not have information on the hidden bio to answer a specific question, they must make up an answer that is consistent with the character. Tell actors to write down the made-up information they give out so all groups that ask similar questions get similar answers. Instruct group members to take notes on the information they learn from the characters.
When time has expired, have students put all their materials in their group folders. Collect the folders from each group and put them aside until the next session.
Ask students what they must do in order to make well-informed decisions. Ask students to explain the importance of discerning between relevant and irrelevant information. Elicit from students the following key points that were taught in this lesson:
To make an informed decision, gather relevant information and ignore information that does not apply to the situation.
Our own experiences can guide us to appropriate sources of information.
Collect information from varied sources to gain a comprehensive understanding of the situation.
Conclusion (2 minutes)
1. Imagine that you have been chosen to plan a class trip. List the information that you need to
gather and how and where you would get this information.
2. Explain the differences between relevant and irrelevant information. List examples of relevant
and irrelevant information in planning the class trip.
Student Assessment

DECISION MAKING | LESSON 2: GATHERING INFORMATION
overcomingobstacles.org
LESSON EXTENSIONS
Using Quotations
“Basic research is what I am doing when I don’t know what I am doing.” —Wernher von Braun
Have a volunteer prepare a one-minute bio on von Braun, a German rocket scientist who came to the
U.S. during World War II. Discuss the possibility of someone so accomplished not knowing what he’s
doing.
Additional Resources
Invite a businessperson or government representative to speak to the class about choices they make,
factors they consider in decision making, whom they consult, etc.
Have students write an article for the school newspaper (or a career newsletter) summarizing what
they learned.
Addressing Multiple Learning Styles
Divide the class into small groups. Have each group make a list of 10 to 20 questions concerning famous
decisions/decision makers (e.g., “Which president decided to free the slaves?”).
Have teams trade their lists and answer the questions. Award prizes in various categories. Have each
student write a one-minute report on a different decision maker, what dilemma they faced, and how
they arrived at a decision.

DECISION MAKING | LESSON 2: GATHERING INFORMATION
overcomingobstacles.org
Using Technology
Show Breaking Away and/or October Sky, movies about kids who dream of escaping their small-town,
working-class lives. The first is the charming story of Dave, a college-town kid who fancies himself an
Italian bicycle racer. The second is the true—though highly romanticized—story of Homer Hickam, who,
as a Sputnik-era youth, “went bonkers” about rockets and ultimately found work at NASA.
Have students list factors the main characters considered in the decisions to pursue their dreams.
Homework
Have students choose and research a controversial issue faced by a government official.
Have students list possible resources that could help the official make a decision about the issue.
Writing in Your Journal
Have students write about a decision they must soon make. Tell them to list possible sources of
information that might help them make their decisions.
Have volunteers share their work with the class.

DECISION MAKING | LESSON 2: GATHERING INFORMATION
overcomingobstacles.org
Lesson 2: Gathering Information | High School
© 2022 Overcoming Obstacles
LESSON 2: GATHERING INFORMATION | LESSON #2: FALLOUT SHELTER HIDDEN BIOGRAPHIES (1 - 10) 9

DECISION MAKING SKILLS | GATHERING INFORMATION©
20
21
Ove
rco
min
g O
bst
acle
s
THE SEARCH
Where would you go to find information that could help you with the following situations? List as many sources as possible.
1. You have to write a research paper for history class.
2. You are writing an editorial for the school newspaper on a problem in your community.
3. You are searching for a part-time job to earn money.
4. You are interested in getting to know and possibly dating a new student in the school.
5. You are buying a new stereo system.
overcomingobstacles.org

DECISION MAKING SKILLS | GATHERING INFORMATION©
20
21
Ove
rco
min
g O
bst
acle
s
Bookkeeper, 31 years old
Second-year medical student
Famous historian, 42 years old
The famous historian’s 12-year-old daughter
Hollywood star, actor/actress
Biochemist
Member of the clergy, 54 years old
Olympic athlete in track and field, world-class triathlete
College student
Firefighter
FALLOUT SHELTERBIOGRAPHIES
overcomingobstacles.orgPowered by TCPDF (www.tcpdf.org)

DECISION MAKING | LESSON 3: EXPLORING ALTERNATIVES AND CONSIDERING
CONSEQUENCES
overcomingobstacles.org
AGENDA
Starter
Hit the Nail on the Head
The Gift
Fallout Shelter: Considering Consequences
Conclusion
Student Assessment
Objectives
Students will discover that they should think creatively about alternative solutions to problems
and not restrict themselves to obvious choices.
Students will practice weighing the consequences of various alternatives by investigating the
positives and negatives of each.
Students will apply the steps of exploring alternatives and weighing options to the fallout
shelter simulation.
Materials Needed
Nails, a long wood board, a rock, a hammer, a mallet, and a balloon (Part I)
One copy of “The Gift” activity sheet for each student (Part II)
Fallout shelter folders (Part III)
3LESSON
EXPLORING ALTERNATIVES AND CONSIDERING CONSEQUENCES

DECISION MAKING | LESSON 3: EXPLORING ALTERNATIVES AND CONSIDERING
CONSEQUENCES
overcomingobstacles.org
Ask students to imagine that it’s a rainy Saturday evening, and they’re on their way to a concert. They hear that an accident has closed the route to the concert. What will they do? (Students will likely mention taking an alternate route.)
Now, ask them to imagine that a fire has closed the alternate route they’ve chosen. What will they do now? (Students will likely mention taking yet another route.)
Ask them which route they would choose. (Students should respond that to get to the concert on time, they will try to find the shortest alternative route.)
Explain that to get to their destination, they must identify their goal, look at all the possibilities, and consider the advantages and disadvantages of each one. Explain that the same is true when they make any decision—they must know what is important, explore all the alternatives, and consider the consequences of each possibility.
Starter (3 minutes)
Purpose: Students discover that they should think creatively about alternative solutions to problems and not restrict themselves to obvious choices.
1. Students identify solutions to a challenge.
Place a hammer, several nails, wood, a rock, and a balloon on a table in the front of the room or on the floor in the middle of the classroom. Ask a student volunteer to figure out a way to drive a nail into the wood. Ask the volunteer to write a sentence describing the solution on the board (e.g., “I would use the hammer to drive the nail into the wood”).
Ask other volunteers to demonstrate other solutions. Have each volunteer write their solution on the board.
2. Students recognize that they instinctively weigh options.
Ask students why none of them chose to drive in the nail with the balloon. (Responses should indicate that the balloon would pop and would not drive in the nail.)
Ask students to consider why you might have asked such a silly question. Lead students to the understanding that they used their experiences to weigh options and disregard possibilities that obviously would not work.
3. Students create alternative solutions.
Part I Hit the Nail on the Head (10 minutes)

DECISION MAKING | LESSON 3: EXPLORING ALTERNATIVES AND CONSIDERING
CONSEQUENCES
overcomingobstacles.org
Ask students why no one used their shoe. (Students may respond that you did not tell them that they could use something that was not on the table.) Explain that you told them to figure out a way to drive the nail into the wood, not what to use or where to find it.
Now that students know this, ask them to suggest other ways they could achieve the goal. Have students brainstorm possibilities and add them to the list.
When students have finished brainstorming, explain that what they have just done is come up with some creative alternatives that contribute to well-thought-out decisions. Remind them that when they are exploring alternatives, they shouldn’t restrict their thinking; they should evaluate their options and consider consequences only after they’ve created a list of alternatives.
Purpose: Students weigh the positive and negative consequences of various alternatives.
1. Students are presented with a situation that requires a decision.
Distribute “The Gift” activity sheet to students.
Read aloud the following situation:
You have just won $2,000. You’ve wanted to buy a used car that a neighbor is selling. The last time you asked, the owner said she would sell the car for $1,995. You know what money you have saved and what you earn weekly.
On the chart, list the positives and negatives of buying the car.
2. Students analyze positive and negative consequences.
As students begin to fill out the positives and negatives on the activity sheet, prompt them with the following questions:
Have you considered the cost of gas, maintenance, and insurance?
Would you have to give up spending money on some things to pay for car expenses? How will you deal with this?
How will your time be affected if you buy the car?
Could car ownership affect your social life?
Are there any consequences that might affect your family?
Ask students to share some of the positive and negative consequences that they listed. Allow students to add consequences that they find relevant.
Part II The Gift (10 minutes)
DECISION MAKING | LESSON 3: EXPLORING ALTERNATIVES AND CONSIDERING
CONSEQUENCES
overcomingobstacles.org
Ask students to raise their hands if, after analyzing the positives and negatives, they will buy the car.
3. Students are confronted with unexpected consequences.
Say, “You’ve decided to buy the car. You tell a close friend that you’re getting wheels next Tuesday. Your friend says, ‘That’s great. I can’t wait to borrow it.’ What are the consequences of telling your friend that he can drive the car? What are the consequences of telling your friend he can’t drive the car?”
Give students a minute to fill in the positives and negatives of each choice in the second row.
When students have finished listing the consequences, say, “Something else has come up. When you tell your mom that you’re going to buy the car, she tells you that if you buy the car, you will have to pick up your brother at the elementary school and your sister at the middle school every day. Then, she adds that you can also help her take the groceries to your grandmother every Saturday morning. What are the positives and negatives here?”
4. Students learn that a decision can be revised when unexpected consequences appear.
Give students time to add the consequences in the third row. Then, have students discuss their responses. Ask if any of these unexpected consequences caused them to change their decision. Why?
Point out to students that decisions can be changed or revised when they have considered all the consequences, if a situation changes, or if more information becomes available. Explain that in this case, their decision affected not only themselves, but others around them (including friends and family).
Purpose: Students apply the steps of exploring alternatives and weighing options to the fallout shelter simulation.
1. Students review their progress in the fallout shelter simulation.
Have students return to their simulation groups. Return the fallout shelter folders. Ask a volunteer to summarize the situation and the decision that each group must make. Reinforce the understanding that the groups must decide which six individuals make the best combination of people.
Remind them that during the last lesson, they developed questions for which they needed answers to help make the decision. They also identified sources that would be useful in obtaining pertinent information. In addition, they learned more about the characters.
2. Students determine the alternatives.
Part III Fallout Shelter: Considering Consequences (30 minutes)

DECISION MAKING | LESSON 3: EXPLORING ALTERNATIVES AND CONSIDERING
CONSEQUENCES
overcomingobstacles.org
Have students work in their groups to determine as many alternative groupings as possible. Remind students that they should keep their minds open and look for alternatives that are “outside the box.” Remind them that they should not restrict themselves or comment on others’ suggestions at this stage. Explain that they should also not be weighing consequences yet; they are just brainstorming alternatives and will weigh consequences next. Allow them 10 minutes to complete this step.
3. Students consider the positive and negative consequences of each alternative.
After 10 minutes have passed, suggest that the group decide on a simple method of recording positives and negatives (e.g., pro/con lists). Allow them 10 minutes to weigh the positives and negatives for each alternative. Remind them to look for unexpected consequences.
4. Students participate in a debriefing process for the simulation.
Ask groups to identify how many alternatives they discovered. Then, ask them to think about the process of considering the consequences. Inquire:
What methods or procedures did your group develop in order to consider the positives and the negatives?
What problems or challenges did your group face?
How did your group resolve any difficulties?
If you were to do this step again, what would your group do differently?
What were some of the surprising or interesting alternatives and consequences your group considered?
Have the groups return any materials to their folders. Collect the folders.
Tell students that during the next session, they will make their decisions.

DECISION MAKING | LESSON 3: EXPLORING ALTERNATIVES AND CONSIDERING
CONSEQUENCES
overcomingobstacles.org
Ask students to explain why it is important to consider the long-term effects of their decisions. Ask students to explain how it is possible that the decisions they make may affect other people. Elicit from students the following key points that were taught in this lesson:
When making a decision, consider all the alternatives and think creatively.
Carefully weigh the consequences of each alternative by examining the positives and the negatives of each possibility.
Conclusion (2 minutes)
1. List five positive consequences and three negative consequences of doing volunteer work in your
community.
2. Describe a situation in which you made a decision that led to unexpected consequences. How did
you react to those unexpected consequences? Would you react differently now?
Student Assessment

DECISION MAKING | LESSON 3: EXPLORING ALTERNATIVES AND CONSIDERING
CONSEQUENCES
overcomingobstacles.org
LESSON EXTENSIONS
Using Quotations
“Most of the things we decide are not what we know to be the best. We say yes, merely because we are
driven into a corner and must say something.” —Frank Crane
Have volunteers relate situations in which students might say yes when they want to say no. Discuss the
consequences of these decisions.
Addressing Multiple Learning Styles
Have students create comic strips illustrating decisions they must soon make, the options available to
them, and possible consequences for each alternative.
Post the strips around the classroom.
Writing in Your Journal
Have students identify a problem in their communities. Tell them to list options for solving this problem
and write the possible positive and negative consequences for each option.
Have students share their work in small groups. Ask the groups to discuss options/consequences that
might have been overlooked.
Using Technology
Show Hoop Dreams, a documentary that follows the high school careers of two African American
teenage boys, both extraordinary basketball players who hope to earn NBA contracts.
Discuss with students who and what influenced the boys’ decisions, the alternatives open to them, and
what consequences seemed to be most important in their decisions.

DECISION MAKING | LESSON 3: EXPLORING ALTERNATIVES AND CONSIDERING
CONSEQUENCES
overcomingobstacles.org
Homework
Have students chart their TV viewing for one week. The chart should include shows, genres, characters,
decisions made, and how those decisions were made (e.g., peer influence, advice, research). Students
should also include the outcome of each decision.
Have students construct a bar graph categorizing the influences on decisions in each show, using a
different color for each one.
Additional Resources
Have students read Into Thin Air by Jon Krakauer, his taut first-person account of the 1996 Everest
expeditions that resulted in the deaths of 12 people—a chronicle of bad decisions from start to finish.
Have students chart the reasons for the various decisions in the book and the consequences of those
decisions.

DECISION MAKING SKILLS | EXPLORING ALTERNATIVES AND CONSIDERING CONSEQUENCES©
20
21
Ove
rco
min
g O
bst
acle
s
You have just won $2,000. You’ve wanted to buy a used car that a neighbor is selling. The last time you asked, the owner said she would sell the car for $1,995. You know what money you have saved and what you earn weekly.
On the chart, list the positives and negatives of buying the car.
THE GIFT
Positive Consequences Negative Consequences
1. Expected Consequences
2. Unexpected Consequences
3. Unexpected Consequences
overcomingobstacles.orgPowered by TCPDF (www.tcpdf.org)

DECISION MAKING | LESSON 4: MAKING AND EVALUATING DECISIONS
overcomingobstacles.org
AGENDA
Starter
Fallout Shelter: Making the Choice
Because...
One More Time
Conclusion
Student Assessment
Objectives
Students will demonstrate the decision making process by making the final decision in the
fallout shelter simulation.
Students will explain and defend their decisions.
Students will review the decision making process.
Students will recognize that some decisions need to be modified and will reflect on the decisions
made by their groups.
Materials Needed
4LESSON
MAKING AND EVALUATING DECISIONS

DECISION MAKING | LESSON 4: MAKING AND EVALUATING DECISIONS
overcomingobstacles.org
Fallout shelter folders (Part I)
One copy of the “Evaluating Fallout Shelter Decisions” activity sheet for each student (Part II)
Journals or writing paper for student responses (Part III)

DECISION MAKING | LESSON 4: MAKING AND EVALUATING DECISIONS
overcomingobstacles.org
Tell students that “a stitch in time saves nine” is a maxim, or well-known saying. Ben Franklin first wrote this saying in Poor Richard’s Almanac. Ask students to explain what the maxim means.
Lead students to the understanding that it means that if we do things in a timely manner, we will save ourselves work.
Explain to students that the same is true for decisions. Ask for a show of hands from students who feel they often procrastinate when they make decisions. Explain that this is common. Ask students to suggest reasons why this happens. (Students might respond: people can’t make up their minds, they believe that there are going to be bad consequences no matter what.)
Explain that if people procrastinate as they make decisions, opportunities can be lost and the consequences can be serious. Explain to students that they will now have to make a timely decision.
Starter (2 minutes)
Purpose: Students review the decision making process as they make their final decisions in the simulation.
1. Students review the decision making steps they have taken.
Distribute the folders to the groups.
Review with students the first four steps of the decision making process that you have covered so far:
1. Define the issue.2. Gather information.3. Develop alternatives.4. Analyze the consequences.
Call on volunteers to name the steps. Ask each volunteer to explain what their group did while working on that step. As appropriate, ask what difficulties the groups faced as they worked and why those difficulties occurred.
2. Student groups make the final decision.
Explain to students that in today’s session they will decide which characters will be accepted into the fallout shelter.
Have students recall their assignment: they must choose four people who will not be allowed into the shelter. Remind them of the gravity of the situation—the six people they choose might be the only six people left to start the human race over again.
Part I Fallout Shelter: Making the Choice (15 minutes)

DECISION MAKING | LESSON 4: MAKING AND EVALUATING DECISIONS
overcomingobstacles.org
Allow students five minutes to make their decisions. Remind them to review the data, issues, and considerations they had gathered in order to make their decisions.
3. Groups prepare to present their decisions.
While students are working, write the following questions on the board:
What critical issues and considerations did you have to take into account?
Who did you choose to move into the fallout shelter?
Why did you choose these people?
Explain to the groups that they will present their decisions and their reasoning to the entire class. Tell the class that each group will have two minutes for its presentation. Have each group select one or two spokespersons and allow them five minutes to organize their answers. Instruct students to address the specific questions above in their presentations.
Purpose: Students explain and defend their decisions.
1. Groups present their decisions to the class.
Distribute copies of the “Evaluating Fallout Shelter Decisions” activity sheet to each student. Then, call on each group to present its decision and explain its reasoning within two minutes.
2. Groups are questioned about their decisions.
After each presentation, allow a brief question and answer period, during which the class asks about and comments on the decision. Remind students that some groups may have different information because they asked the characters different questions.
If necessary, remind students about the importance of being respectful of other people’s decisions. Point out to students that some of the factors involved in the decision making process are a person’s personal beliefs and values. For that reason, even people who have the same information might make different decisions.
3. Students evaluate each group’s decision.
After each presentation and discussion, allow students several minutes to complete the activity sheet by rating the decisions and the justifications on a scale of 1 to 5, with 1 being extremely poor and 5 being outstanding.
Have students place all material, including the evaluations, into the group folders. Collect the folders.
Part II Because... (20 minutes)

DECISION MAKING | LESSON 4: MAKING AND EVALUATING DECISIONS
overcomingobstacles.org
Purpose: Students recognize that some decisions need to be modified and reflect on the decisions made by their groups.
1. Students have an opportunity to revisit their decisions.
Remind students that the last step of the decision making process is to revisit, revise, and modify decisions if necessary or if more information becomes available.
Ask students to respond to the following prompt in their journals: “Explain what you would change about or why you stand by your group’s decision.”
2. Students examine their own performance during the fallout shelter simulation.
Ask that students try to disregard the content of the activity and instead examine the process.
After several minutes, prompt students to consider how their experiences in this activity relate to their decision making processes in general. Ask the following questions and have students continue to write their responses in their journals:
What influenced your decisions in this activity? What factors influence your decisions on a daily basis?
What did you find difficult in this simulation? How does that compare with the decisions that you are faced with every day?
What would have helped make the decision making process easier?
If you were to do this again, what would you do differently? What do you think you did well?
How will you use the decision making process in your life?
Why is it important to understand how good decisions are made?
Part III One More Time (10 minutes)

DECISION MAKING | LESSON 4: MAKING AND EVALUATING DECISIONS
overcomingobstacles.org
Ask students why following the decision making process is helpful. Ask students to explain why knowing how to make good decisions can help guide them in the future. Elicit from students the following key points that were taught in this lesson:
Decisions must be made in a timely manner.
Part of the decision making process is the opportunity to revisit and modify decisions we have made.
Conclusion (3 minutes)
1. What does it mean to make a timely decision? Why is making a timely decision important?
2. When, why, and how would you revise a decision?
Student Assessment

DECISION MAKING | LESSON 4: MAKING AND EVALUATING DECISIONS
overcomingobstacles.org
LESSON EXTENSIONS
Using Quotations
“We can try to avoid making choices by doing nothing, but even that is a decision.” —Gary Collins
Have students give examples of choices that were made because they took no action.
Addressing Multiple Learning Styles
Have students choose a step of the decision making process and create a presentation that illustrates
that step. Students should use various media in their presentations, including artwork, videos, songs,
brochures, etc.
Have students evaluate each presentation.
Writing in Your Journal
Have students read the “Everyday Heroes” activity sheet and write their reactions.
Have students discuss making the choice to become an organ donor. Ask, “What might the decision
making process for becoming an organ donor look like?”
Using Technology
Have students use the internet to research news articles about a recent decision the government has
made.
Divide students into groups. Have students discuss their articles and evaluate the decision making
process that was used.

DECISION MAKING | LESSON 4: MAKING AND EVALUATING DECISIONS
overcomingobstacles.org
Homework
Have students research the Oklahoma Dust Bowl and the resulting migration to California.
Have students write a one-page paper or prepare a chart illustrating the choices the migrating families
had to make and the consequences of those decisions.
Additional Resources
Read Out of the Dust by Karen Hesse and/or The Grapes of Wrath by John Steinbeck. Compare these
novels of Depression-era struggle with historical material on the causes and effects of drought in the
Oklahoma Dust Bowl.
Have students debate the agricultural and political decisions made during this era, arguing for/against
alternatives that might have prevented disaster.

DECISION MAKING SKILLS | MAKING AND EVALUATING DECISIONS©
20
21
Ove
rco
min
g O
bst
acle
s
Directions: Using a scale of 1 to 5, with 1 being extremely poor and 5 being outstanding, evaluate the work done in the fallout shelter simulation.
EVALUATING FALLOUTSHELTER DECISIONS
Group MembersScore for the
DecisionScore for the Justification
Comments
overcomingobstacles.org

DECISION MAKING SKILLS | MAKING AND EVALUATING DECISIONS©
20
21
Ove
rco
min
g O
bst
acle
s
THE GIFT THAT KEEPS ON LIVING Tiffany Culy urges teens to become organ donors.
EVERYDAY HEROES
When she started feeling sick to her stomach, Tiffany Culy figured it was the flu. But a few days later, the Saline, Mich., teen woke up with yellow eyes and yel-low skin and an “unbelievable pain” in her belly. Rushed to a hospital, she began slipping into a coma. Tiffany had Wilson’s disease, which was destroying her liver. Doctors said she would die without an immediate liver transplant. After reviewing four possible organ donations, surgeons were able to find a liver that would work for her. Tiffany spent three months in the hospital. Now 19 and a freshman at Hope College in Holland, Mich., Tiffany is so healthy that she competed in two swimming events. She also has become a crusader for organ donations. “Over 61,000 Americans are waiting for a lifesaving organ transplant,” Tiffany says. And an average of 12 Americans die each day waiting for a new liver, heart, kidney or other organ, according to the nonprofit Coalition for Donation.
Tiffany gives talks at schools and for youth groups, telling kids that needing an organ can happen to anyone. “It took me totally by surprise,” she says. Tiffany tries to dispel myths about organ donation. For example, she says celebrities are not put at the top of the list for donations. “And there is no black market for stolen organs.” Tiffany says she got a liver because “I was basically healthy and my chances for survival were good.” When deciding who gets an organ, the coalition says it does not take into account race, gender, age, income or celebrity. Becoming a donor is simple, Tiffany says. “All you really have to do is tell your next of kin, because that’s who will be asked at the time of death. You can also sign up when you get your driver’s license.” And you shouldn’t wait. “Even though you’re a teen, you’re not invincible,” she says. “Talk to your family. Tell them you want to save someone’s life.”
—Nancy Vittorini
*Reprinted with permission from React magazine.
overcomingobstacles.orgPowered by TCPDF (www.tcpdf.org)

PART II
ACQUIRING CORE SKILLS
GOAL SETTING

TABLE OF CONTENTS
PART II: ACQUIRING CORE SKILLS
1. Identifying Goals 169
2. Setting Priorities 179
3. Developing a Positive Attitude 187
4. Accessing Resources 197
5. Learning to Be Assertive 203
Goal Setting

GOAL SETTING | LESSON 1: IDENTIFYING GOALS
overcomingobstacles.org
AGENDA
Starter
Why Goals?
Can I Do It?
Stepping-Stone Goals
Conclusion
Student Assessment
Objectives
Students will recognize the importance of having goals.
Students will recognize that there are realistic and unrealistic goals.
Students will identify goals as short term, medium range, and long term.
Materials Needed
A physical or online dictionary (Part I)
One copy of the “My Goals” activity sheet for each student (Part I)
One copy of the “On Your Way” activity sheet for each student (Part III)
1LESSON
IDENTIFYING GOALS

GOAL SETTING | LESSON 1: IDENTIFYING GOALS
overcomingobstacles.org
Divide the class into four groups. Tell students that each group will make a certain noise. The members of the first group will rub their hands together. People in the second group will snap their fingers continuously. Students in the third group will hit their thighs with their hands. Members of the fourth group will stomp their feet. On the count of three, have students begin making the noises until you say stop.
After about 30 seconds, stop the game and ask what the purpose of that exercise was. Ask, “Did we accomplish anything during this activity? Did we have a goal?”
Students should respond negatively to these questions. Point out that they made an effort but didn’t accomplish anything. Explain to students that having a goal can help ensure that they accomplish what is important to them.
Tell students that in the next few lessons, they will be discussing goals and the ways in which goals can help them succeed in life.
Starter (3 minutes)
Purpose: Students identify the importance of having goals.
1. Students define “goal.”
Ask students to suggest meanings for the word “goal.” Have a volunteer look up “goal” in the dictionary and read the definition to the class. Have the volunteer write the definition on the board. Have students offer their own definitions and elicit from them that a goal is something a person wants to accomplish.
2. Students identify the purpose and importance of goals.
Tell students that they are now going to repeat the activity in the starter, but this time with the goal of making the sound of a rainstorm. Remind each group of its assigned sound. Tell students that you will point to one group at a time. When you point to a group, that group is to begin making its noise and continue until you point to the next group. Explain that when you point to a group, students should join that group in making their sound. Tell students that when you point to their group a second time, they should return to making their original sound.
Point to each group in succession, so that the noise builds and sounds like a rainstorm. Then reverse the order, so it sounds as if the rain is slowing down.
Part I Why Goals? (15 minutes)

GOAL SETTING | LESSON 1: IDENTIFYING GOALS
overcomingobstacles.org
Ask students what they accomplished this time. Lead students to recognize that having a goal helped them focus and make sense out of some seemingly disconnected activities. Explain to students that having goals for what they want to accomplish in life can help them stay on track and make sense of the many activities they undertake.
3. Students identify their own goals.
Distribute the “My Goals” activity sheet to students. Ask students to brainstorm their goals on the activity sheet. Remind students that a goal is something a person wants to accomplish. Use prompts to stimulate students’ thinking.
4. Students share their goals.
Ask every student to share at least one of their goals. Write the goals on the board.
Tell students that goals are indispensable for their success in life. Goals are a guide and a target to work toward. Goals help people to do their best and accomplish what they want.
Purpose: Students recognize that there are realistic and unrealistic goals.
1. Students recognize realistic and unrealistic goals.
Tell students that it is important for their goals to be realistic. Explain to students that if a goal is not realistic, they could become discouraged, but that if it is too easy, they could become bored. Lead students to recognize that a goal should be both achievable and challenging.
2. Students classify their personal goals as realistic or unrealistic.
Suggest goals such as the following to students, and ask them to categorize the goals as realistic or unrealistic:
A 14-year-old girl, interested in science, sets a goal to become a veterinarian.
A high school senior who hasn’t worked or saved any money wants to travel to Europe during the summer after graduating from high school.
The school principal wants all graduating seniors to go to college.
Ask students why they classified the goals as they did. Direct students to the recognition that the time frame attached to a goal is important. Tell students that each of their long-term goals should always specify a time frame in which the goal will be achieved.
Part II Can I Do It? (10 minutes)

GOAL SETTING | LESSON 1: IDENTIFYING GOALS
overcomingobstacles.org
Have students share their personal goals and classify them as realistic or unrealistic. They should also ensure that their goals are achievable and challenging. Remind students to think carefully about the time frames they establish.
Purpose: Students identify goals as short term, medium range, and long term.
1. Students recognize that long-term goals can be broken down into short-term and medium-range goals.
On the board, write the following: “Eat a good meal. Concentrate on math homework. Pass tests. Graduate. Study for math tests. Pass classes.” Explain to students that the goal here is to graduate from high school. Challenge students to order the events so that this goal can be achieved. Ask students to suggest an order.
Summarize the process:
You had to eat a good meal in order to concentrate on your homework and study for your tests effectively. These are examples of short-term goals.
By studying effectively, you were able to pass your tests and therefore pass your classes. These are examples of medium-range goals.
Achieving those short-term goals and medium-range goals allowed you to graduate. That is a long-term goal.
2. Students examine stepping-stone goals.
Tell students that the things you have to do now or soon in order to accomplish your goals are stepping-stone goals.
Explain stepping-stone goals as the following:
Short-term goals are objectives that you want to achieve in a short time frame—an hour from now, today, or as far as a month away. Short-term goals can also be things you have to do along the way to reach your medium-range or long-term goals.
Medium-range goals are objectives that you want to achieve that will take more time, between a month or so and a year. Medium-range goals can be achieved on the way to reaching long-term goals.
Long-term goals are objectives that you want to achieve in the future, whether you hope to accomplish them a few years from now or when you are much older.
Part III Stepping-Stone Goals (20 minutes)

GOAL SETTING | LESSON 1: IDENTIFYING GOALS
overcomingobstacles.org
Explain to students that stepping-stone goals help us to achieve realistic goals in realistic periods of time.
3. Students set stepping-stone goals for themselves.
Distribute the “On Your Way” activity sheet. Tell students to choose one of the long-term goals that they identified on the “My Goals” activity sheet and write it in the top box on the “On Your Way” activity sheet.
Allow students to choose a realistic goal for themselves. Circulate the room and ensure that students have chosen appropriate long-term goals. Say to students, “Backtrack, and decide what goal you need to accomplish just before you achieve your long-term goal. Put that in the second box from the top. Continue backtracking until you identify all of the short-term goals necessary to reach the long-term goal.”
Have students complete the activity sheet. Work with students to fill in the entire staircase so that it begins with a simple, easily attainable task.
4. Students add deadlines to their action plan.
Point out to students that what they have developed is only the start of an action plan. Most complete action plans include some kind of time line. Tell students that they are now going to revisit their stepping-stone goals and set deadlines. Remind students to be realistic and to work backward, using their time frames for their long-term goals.
Have students add deadlines to their stepping-stone goals. Then, review with students the following steps of an action plan:
Determine your long-term goal.
Establish stepping-stone goals (which include short-term and medium-range goals).
Set deadlines for completing each goal.
Complete each step on time.
Continue until you attain your goal.
Ask students to define short-term goals, medium-range goals, and long-term goals. Elicit from students the following key points that were taught in this lesson:
Conclusion (2 minutes)

GOAL SETTING | LESSON 1: IDENTIFYING GOALS
overcomingobstacles.org
Set positive and realistic goals.
Realistic goals are ones that you can achieve. They should not be too easy or too hard.
Stepping-stone goals help you to achieve long-term goals.
1. Why is it important to set goals?
2. Explain the difference between a realistic and an unrealistic goal.
3. List a long-term goal different from the one you chose in class.
4. List four short-term and four medium-range goals that you need to achieve in order to meet your
long-term goal.
Student Assessment

GOAL SETTING | LESSON 1: IDENTIFYING GOALS
overcomingobstacles.org
LESSON EXTENSIONS
Using Quotations
“The journey of a thousand miles begins with one step.” —Lao Tzu
Explain that Thomas Edison worked on 3,000 different theories before finally inventing an efficient
light bulb. Have students consider the role that failure plays in accomplishing goals. Discuss how failure
can lead to discovery.
Addressing Multiple Learning Styles
Show students that making daily lists can help to remind them of tasks that they have to do that day.
Have students make and keep daily lists. Have them demonstrate how they keep and use these lists. Be
sure to explain that a system that works for one student may not work for another.
Writing in Your Journal
Have students write letters to themselves about where they want to be five years from now and what
they would like to be doing then. Tell them to put their letters somewhere safe and to open them in five
years.
Have students write down their goals and their plans to reach them. Discuss students’ plans as a class.
Using Technology
Have students use the internet to research how politicians reach decisions in government.
Have students brainstorm the goals political figures must first identify before making such decisions.

GOAL SETTING | LESSON 1: IDENTIFYING GOALS
overcomingobstacles.org
Homework
Have students make a list of 10 things they like to do.
Explain that accomplishing goals sometimes requires doing things we don’t enjoy. Discuss how
connecting our goals to things we enjoy doing can make accomplishing them easier.
Additional Resources
Have students read excerpts from The Story of My Life by Helen Keller. Remind students that Helen
Keller, having never heard how people speak, wrote this book by dictation.
Have students discuss what they think of the book’s language. Ask students if they find her message
inspirational.

SETTING AND ACHIEVING GOALS | IDENTIFYING GOALS©
20
21
Ove
rco
min
g O
bst
acle
s
MY GOALSCareer?
Family?
Education?
Leisure Time?
Home?
Possessions?
overcomingobstacles.org

SETTING AND ACHIEVING GOALS | IDENTIFYING GOALS©
20
21
Ove
rco
min
g O
bst
acle
s
Long-Term Goal
1. Write one of your long-term goals in the top box.
2. Think about the tasks you need to accomplish before you achieve your goal.
3. Work backward from your long-term goal and fill in the boxes with medium-range and short-term goals. These should help you reach your long-term goal.
overcomingobstacles.orgPowered by TCPDF (www.tcpdf.org)

GOAL SETTING | LESSON 2: SETTING PRIORITIES
overcomingobstacles.org
AGENDA
Starter
What’s First?
Getting It Done
Setting Priorities
Conclusion
Student Assessment
Objectives
Students will define “prioritize.”
Students will determine how to prioritize activities and will practice prioritizing their own
activities.
Students will recognize and resolve conflicting goals.
Materials Needed
At least five soft foam balls or five balls of rolled-up socks (Starter)
Completed “On Your Way” activity sheets from the previous lesson (Part III)
2LESSON
SETTING PRIORITIES

GOAL SETTING | LESSON 2: SETTING PRIORITIES
overcomingobstacles.org
Ask for a volunteer to join you at the front of the class. Tell the volunteer to stand about six feet away from you.
Take all five of the soft foam balls and toss them all at once to the volunteer. As you do this, say to the student, “Here, catch!”
Once you and the volunteer have picked up all the balls, tell the volunteer to catch again and toss each ball to the student, one at a time.
Explain to the class that it is easier to do things one at a time, rather than all at once. Tell them, “Picture all the things you want to do today. If you tried to do them all at once, you would be lucky to get any of them done.”
Explain that today’s lesson will focus on prioritizing their tasks and goals, which will allow students to get them all done, one at a time.
Starter (3 minutes)
Purpose: Students define “prioritize.”
1. Students discuss what to prioritize.
Ask students, “What does it mean to prioritize something?” Lead students to recognize that “prioritize” means to place a group of items in order from most important to least important.
Ask students to list people, places, or things that are important to them. Write responses on the board. When there are 10 items listed, ask students to number them from one (the most important) to 10 (the least important). Ask volunteers to share their rankings. Point out that people have different priorities.
Ask students why they might need to prioritize items. Explain that people often prioritize tasks they must do so that they know which things to focus on.
2. Students recognize that to prioritize, they must identify the tasks they need to accomplish.
Point out that students need to know their tasks in order to establish an order of priority. Tell them that as simple as that sounds, people often waste time just trying to remember the things they need to do when they have a lot to get done. Ask students to suggest possible solutions to this. Lead students to recognize that a written list of tasks is a useful tool for prioritizing activities.
Part I What’s First? (10 minutes)

GOAL SETTING | LESSON 2: SETTING PRIORITIES
overcomingobstacles.org
Ask students to name some of the tasks that they might put on a written list to prioritize. Write student responses on the board. (Students might respond: chores, jobs at work, homework assignments, and personal goals.)
3. Students learn that there are different ways to prioritize.
Ask students, “Which would you rather eat: a bowl of ice cream, a head of lettuce, or a banana?”
Have students vote. Write the number of votes for each item on the board. Then, elicit students’ responses for why they chose one item over another. Point out that people have different ways to prioritize. Ask students to identify the different ways the list could be arranged. (Students might respond: by what you like to eat, by what is least fattening, by which might be the most nutritious.)
Explain that the process of prioritizing is similar to what they just did. Point out that the different ways to prioritize a list produce different results.
Ask students to identify the criteria they could use to prioritize the different items on their lists of tasks to accomplish. (Students might respond: chronological order, importance, what they need to do in order to achieve a goal.)
4. Students learn that determining priorities involves considering consequences.
Point out to students that prioritizing is a decision making process: they are deciding which task to do first or spend the most time on. Remind students of the importance of considering consequences in the decision making process. Refer students to the options on the previous page and have them list the consequences of choosing one food item over the other.
Tell students that once they have determined what the likely consequences are, they must decide which of the consequences is most important to them.
Purpose: Students learn to prioritize activities.
1. Students discuss multiple priorities.
Explain to students that it is necessary in many cases to prioritize tasks based on more than one criterion. Ask students to suggest examples of times when they might need to take into consideration more than one criterion. Write student responses on the board. (Students might respond: when more than one task is a step toward your goals, when you are asked to do something by someone you respect, when you have promised to do something.)
Ask students to recall some of the different ways these items can be prioritized.
Part II Getting It Done (15 minutes)

GOAL SETTING | LESSON 2: SETTING PRIORITIES
overcomingobstacles.org
Explain to students that time is almost always an element in prioritizing. Some activities, such as chores or homework, may be limited to one day. Other activities, such as long-term career goals, can take place over several years.
2. Students learn how to prioritize their tasks.
Explain to students that they are now going to prioritize their tasks. Say, “Let’s imagine you have three things you have to do: go to a party, do your homework, and do some chores around the house.”
Ask students to suggest ways that they would prioritize the tasks. List their responses on the board.
When students disagree about the way the list should be prioritized, have them defend their reasoning. Encourage students to explain the consequences of choosing to do one task over another.
During the discussion, make the important point that doing homework is a stepping-stone goal to most long-term goals. For this reason, one important consequence of not doing their homework is that their action plan for achieving their long-term goals will be set back. Remind students of the importance of keeping their long-term goals in sight.
Lead students to the following prioritization:
1. Homework should be first, as it relates to their long-term goals.2. Household chores are next. If students don’t do their chores, they may lose the privilege of
going to the party.3. Going to the party is last. Socializing and being with friends is important but should not distract
students from other goals and responsibilities.
Tell students that if they made homework their first priority, they stayed focused on their long-term goals. Point out that they also saw that taking care of family responsibilities made it possible to have fun and go to the party.
3. Students recognize that their goals can sometimes conflict.
Ask students what they would do if they only had one hour to finish their homework and do household chores, but each of these tasks would take an hour to complete.
Explain to students that when they have several tasks and not all of them can be completed, they have conflicting goals.
Ask students to suggest the major reasons for running into conflicting goals. Elicit from students that the most common source of conflict is time limitations.
4. Students identify ways to deal with conflicting goals.

GOAL SETTING | LESSON 2: SETTING PRIORITIES
overcomingobstacles.org
Ask students to offer possible solutions to the conflicting goals of doing homework, going to the party, and doing the chores. (Students might respond: go late to the party or don’t go at all, don’t do the homework, don’t do the household chores.)
Have students discuss the consequences of each option. Tell students that when they change priorities, they have to look at the consequences. It is important that they do not make a change that seems positive in the short term but has a negative impact on their long-term goals.
Purpose: Students practice prioritizing their own activities.
1. Students make their own to-do lists.
Tell students that they are now going to practice prioritizing their short-term goals. Have students refer to their “On Your Way” activity sheets from the previous lesson and any planners they may have. Have them create a list of the tasks they need to accomplish this week. Remind students to include any regularly scheduled activities (such as homework or extracurricular activities).
2. Students prioritize their lists.
Give students about five minutes to number their lists in order of priority. Encourage students to discuss any conflicts with you or with each other. Remind them to always consider the consequences of their decisions.
3. Students discuss the prioritizing process.
Ask students to explain the process they went through to prioritize their activities. Ask them to share any conflicts that seemed particularly difficult to resolve and explain what they considered when prioritizing. Encourage students to discuss consequences.
Explain to students that there are two steps to dealing with conflicting goals. First, they must recognize that a conflict exists. Second, they must create a plan to deal with the situation and then act on it. Point out that they shouldn’t make the mistake of hoping that a conflict will simply go away, because it won’t.
Part III Setting Priorities (15 minutes)
Ask students to define “prioritizing.” Elicit from students the following key points that were taught in this lesson:
Conclusion (2 minutes)

GOAL SETTING | LESSON 2: SETTING PRIORITIES
overcomingobstacles.org
“Prioritizing” means ordering items from the most important to the least important so that goals can be accomplished.
The criteria for prioritizing can differ depending on circumstances and needs.
It is important to consider consequences when prioritizing activities.
When goals conflict, it is important to consider alternatives that might resolve the problem.
1. How does setting priorities help people accomplish their goals?
2. List all of the things that you need to do this week. Prioritize the list.
3. What criteria did you use to prioritize your list?
Student Assessment

GOAL SETTING | LESSON 2: SETTING PRIORITIES
overcomingobstacles.org
LESSON EXTENSIONS
Using Quotations
“One today is worth two tomorrows.” —Benjamin Franklin
Ask students to think of other proverbs that are similar to Franklin’s (e.g., “never put off until tomorrow
what you can do today,” “a bird in the hand is worth two in the bush,” “a stitch in time saves nine”). Ask
students why they think there are so many variations on this sentiment.
Addressing Multiple Learning Styles
Explain to students that all news stories must answer these questions: Who? What? When? Where?
Why? How? Have students make a list of seven things they must do today by answering these questions.
Discuss how answering these six questions will help students to stay focused and finish tasks
completely.
Writing in Your Journal
Have students list things they must accomplish tomorrow in the order they should be done.
Have students revisit this page the following evening, when they make another list for the next day and
analyze whether their intended list was accomplished. If not, why?
Using Technology
Have students name inventions that help people finish work more quickly. To prompt students,
compare the oven and the microwave, or a manual and electric pencil sharpener.
Have students draw a picture depicting life before the inventions and life after the inventions. Have
students rank the inventions based on their impact on everyday life (e.g., the car had more of an impact
than the iPod).

GOAL SETTING | LESSON 2: SETTING PRIORITIES
overcomingobstacles.org
Homework
Have students interview a family member to find out how they prioritize tasks.
Ask students to explain how their family members prioritize tasks. Discuss the various ways that people
determine priorities (e.g., time, ease, importance, values).
Additional Resources
Have students read Aesop’s “The Tortoise and the Hare.”
Have students discuss the message of this fable and the priorities of both the tortoise and the hare.

GOAL SETTING | LESSON 3: DEVELOPING A POSITIVE ATTITUDE
overcomingobstacles.org
AGENDA
Starter
Positive’s a Plus!
Let’s Be Positive
See It, Think It
Conclusion
Student Assessment
Objectives
Students will define “positive attitude.”
Students will identify principles of positive thinking and behavior.
Students will practice developing a positive attitude.
Materials Needed
Art materials for each group of four students, including poster paper, old newspapers, old
magazines, markers, crayons, scissors, and glue (Part I)
One copy of the “Visualization Techniques” activity sheet for each student (Part II)
One copy of the “Affirmation Statement Techniques” activity sheet for each student (Part II)
3LESSON
DEVELOPING A POSITIVE ATTITUDE

GOAL SETTING | LESSON 3: DEVELOPING A POSITIVE ATTITUDE
overcomingobstacles.org
Tell the class to imagine two runners, both of equal ability. As they get ready to begin a race, one is thinking, “I’ll never win. I feel so sluggish. I can’t believe I’m even in this race. This girl next to me looks so much faster; I bet she’s going to run right past me.” The other runner is thinking, “I feel great—light and fast! This is going to be the best race I’ve ever run. I’m strong, and I’ve been practicing for weeks. I can’t wait to get started.”
Ask students which runner will perform better. Have them defend their answers. Elicit from students other examples of how attitude can affect performance. Lead students to see the connection between attitude and performance.
Tell students that today they are going to learn about the power of positive thinking and how having a positive attitude can help them achieve their goals.
Starter (3 minutes)
Purpose: Students define “positive attitude.”
1. Students define “attitude.”
Ask students to suggest definitions for the word “attitude.”
Lead students to understand that “attitude” refers to their outlook on life—a way of thinking about themselves, others, and the world.
2. Students discuss positive attitude.
Divide students into groups of four. Instruct the groups to answer the following questions:
Describe a positive attitude.
How do you create a positive attitude?
How does it feel to have a positive attitude?
Allow the groups about five minutes to discuss their responses.
3. Students create visual representations of positive attitude.
After five minutes have passed, have groups use the art materials to create visual representations of positive attitude. Encourage students to try to represent their answers to the above questions.
Allow students about 10 minutes to create their posters.
Part I Positive’s a Plus! (20 minutes)

GOAL SETTING | LESSON 3: DEVELOPING A POSITIVE ATTITUDE
overcomingobstacles.org
4. Students learn how a positive attitude can help them achieve their goals.
Have groups share their posters. After the discussion is completed, elicit from students these points to add to the class definition of “positive attitude”:
Having a positive attitude means being strong and motivated.
It means focusing on strengths and confidently moving forward.
Refer to the starter and ask students to suggest reasons why having a positive attitude might lead to goal achievement. Write student responses on the board. Direct students to understand that thinking positively affects our behavior—when we have a positive attitude, we act in a way that reflects that attitude. Lead students to recognize that people who have a positive attitude “bounce back” more quickly from setbacks.
Purpose: Students learn principles of positive thinking and behavior.
1. Students recognize how positive behavior can benefit them.
Explain to students that when people behave positively, their brains create chemicals called endorphins, which enhance performance. Endorphins can increase physical energy, increase mental alertness, reduce anxiety, and improve problem solving skills.
2. Students learn how to develop positive behavior.
Ask students to predict how they might develop positive behavior. Write responses on the board.
Offer these steps:
Positive behavior can be developed by forming positive habits.
Think of yourself as successful and have positive expectations for everything you do.
Remind yourself of your past successes.
Never dwell on past failures, but learn from and avoid repeating them.
Surround yourself with positive people and ideas.
Keep trying until you achieve the results you want. You only fail when you quit trying.
Ask students to share examples of experiences in which having a positive expectation produced positive results. Then, ask them to share times when they experienced negative results because of negative expectations.
Part II Let’s Be Positive (15 minutes)

GOAL SETTING | LESSON 3: DEVELOPING A POSITIVE ATTITUDE
overcomingobstacles.org
Students may want to discuss times when they had negative expectations (such as a time when they thought they would do poorly on a test) and were pleasantly surprised. Suggest to students that they should consider how well they might have done if they had a positive attitude.
3. Students understand the technique of visualization.
Explain to students that there are many techniques that promote a positive attitude. One of these techniques is called visualization.
Ask students if they know what visualization is. Ask them to suggest meanings of the word “visualization” based on their knowledge of the root word and the suffixes.
After students have offered definitions, explain that visualization is the technique of purposefully creating a mental picture of a successful performance. Visualization improves performance because the positive picture stimulates the brain to trigger corresponding positive responses that support the mental image.
Continue by explaining that this is the technique used by many athletes to enhance their abilities on the field or court, by entertainers to ensure their best performances, and by successful professionals to achieve their goals.
Distribute the “Visualization Techniques” activity sheet to each student and discuss each step.
Tell students that they will have an opportunity to practice visualizing after they learn another technique.
4. Students understand the technique of affirmation.
Ask students if they have ever heard of the technique of affirmation, which is another way of creating a positive attitude. Ask students to suggest meanings of the word “affirmation” based on their knowledge of the root word and the suffix.
Point out to students that visualization is creating a “mental movie” in which they are the stars. Affirmations are like mental commercials that encourage them to buy into positive images of themselves. Affirmative statements are positive self-reminders that help us strengthen our efforts and achieve our goals.
Distribute the “Affirmation Statement Techniques” activity sheet to each student and discuss each step.
Purpose: Students practice developing a positive attitude.
Part III See It, Think It (10 minutes)

GOAL SETTING | LESSON 3: DEVELOPING A POSITIVE ATTITUDE
overcomingobstacles.org
1. Students brainstorm areas of their lives in which having a positive attitude could help them.
Tell students that they are now going to consider the areas of their lives in which having a positive attitude might help them. Have students brainstorm situations or activities that might benefit from their having a more positive attitude or using the techniques discussed. Write student responses on the board.
2. Students consider situations in their own lives in which attitude plays a role.
Have students think of a current, specific situation in their own lives in which they might have a negative attitude. If students cannot think of anything current, have them consider something that might happen in the future, such as a major test, presentation, or job interview.
Tell students to write about the situation at the top of a piece of paper. Allow them about two minutes to describe their current attitude toward the situation. Then, have students describe the positive attitude they would like to have. Give students about eight minutes to answer the following questions:
How could visualization help you? Describe a visualization that might be useful.
What affirmations might be useful?
How might your behavior change as a result of changing your attitude?
Tell students to keep what they wrote so they can reflect on it when their attitude might be keeping them from their goals.

GOAL SETTING | LESSON 3: DEVELOPING A POSITIVE ATTITUDE
overcomingobstacles.org
Close this session by asking students to define “visualization” and “affirmation.” Elicit from students the following key points that were taught in this lesson:
A positive attitude can lead to positive behavior.
Positive expectations, behaviors, and habits bring positive results.
Visualization and affirmation are techniques that you can use to promote a positive attitude and help you achieve your goals.
Conclusion (2 minutes)
1. Describe someone with a negative attitude and someone with a positive attitude (no names are
necessary). Which one do you think will be more successful in life? Why?
2. List three benefits of demonstrating a positive attitude.
3. List three things someone can do to work toward having a positive attitude.
Student Assessment

GOAL SETTING | LESSON 3: DEVELOPING A POSITIVE ATTITUDE
overcomingobstacles.org
LESSON EXTENSIONS
Using Quotations
“The greater part of our happiness or misery depends on our disposition and not on our circumstances.”
—Martha Washington
Discuss this quote with students. Have students reflect on a recent experience in which thinking about
the meaning of this quote would have helped them. Have students discuss how this quote may be
helpful to them in the future.
Addressing Multiple Learning Styles
Have each student write their name on a sheet of paper. Instruct students to exchange papers. Ask
them to write one positive comment about the student listed on each paper they receive. Continue this
process until each student has commented on every other student’s paper.
Once students have finished, collect and edit the lists. Then, give them back to their owners. Have
students write about their reactions to their lists.
Writing in Your Journal
Have students revisit the list they wrote during Lesson 2’s journal-writing extension.
Ask, “Were you able to accomplish everything on your list? How do you feel about it?” Have them make
another list for tomorrow.
Using Technology
Have students share their feelings about friends who consistently post negative status messages on
social networking sites. Explain that negative attitudes can be infectious.
Have students search the internet for different ways to develop a positive attitude. Have them share
their findings with the rest of the class.

GOAL SETTING | LESSON 3: DEVELOPING A POSITIVE ATTITUDE
overcomingobstacles.org
Homework
Have students interview a business owner about their business, how they got into it, what it takes to
run this kind of business, and what they like about it. They should also ask how having a positive attitude
helps the owner with their business’s challenges.
Have students present their findings to the class.
Additional Resources
Have students read the positive affirmations at www.happierhuman.com/positive-affirmations-teens/.
Ask them to choose an affirmation from the list and use it every day for one week. At the end of the
week, discuss with your students how using positive affirmations made them feel.
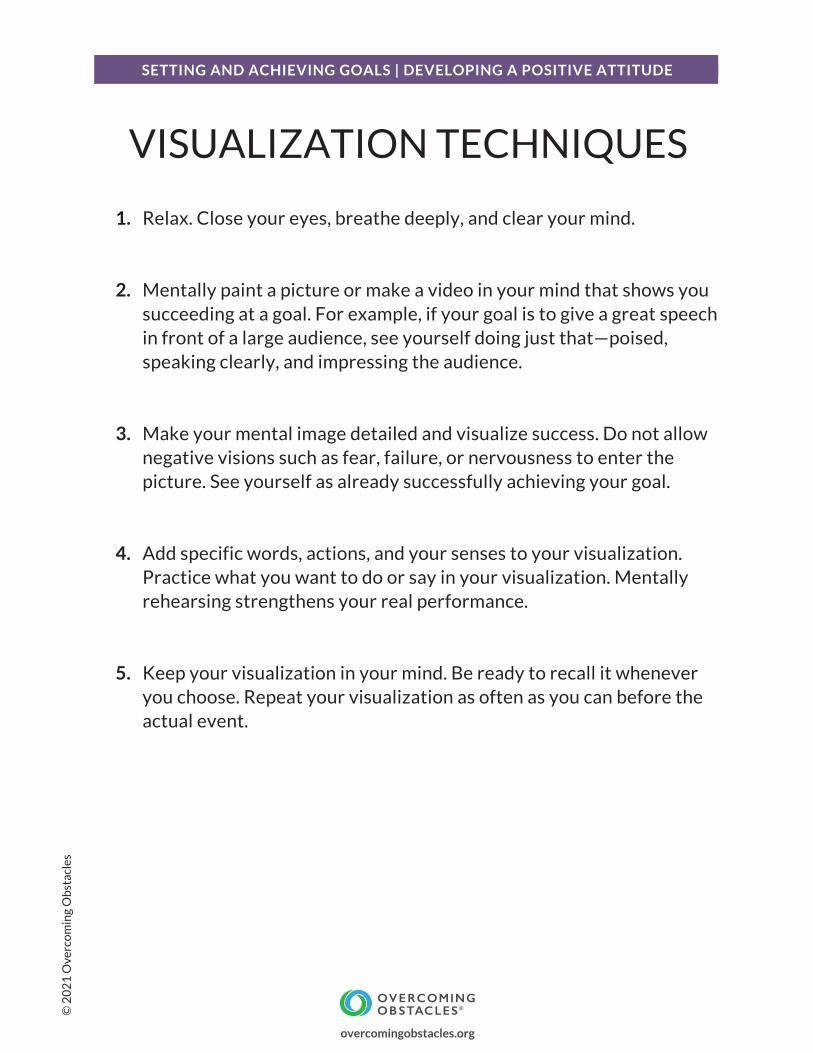
SETTING AND ACHIEVING GOALS | DEVELOPING A POSITIVE ATTITUDE©
20
21
Ove
rco
min
g O
bst
acle
s
1. Relax. Close your eyes, breathe deeply, and clear your mind.
2. Mentally paint a picture or make a video in your mind that shows you succeeding at a goal. For example, if your goal is to give a great speech in front of a large audience, see yourself doing just that—poised, speaking clearly, and impressing the audience.
3. Make your mental image detailed and visualize success. Do not allow negative visions such as fear, failure, or nervousness to enter the picture. See yourself as already successfully achieving your goal.
4. Add specific words, actions, and your senses to your visualization.
Practice what you want to do or say in your visualization. Mentally rehearsing strengthens your real performance.
5. Keep your visualization in your mind. Be ready to recall it whenever you choose. Repeat your visualization as often as you can before the actual event.
VISUALIZATION TECHNIQUES
overcomingobstacles.org

SETTING AND ACHIEVING GOALS | DEVELOPING A POSITIVE ATTITUDE©
20
21
Ove
rco
min
g O
bst
acle
s
1. Make the statements personal. Use your name, “I,” or “you.”
2. Keep the statements short. You want to remember them. Long statements are harder to remember.
3. Use positive language. If you want to control your nervousness, say, “I am calm and confident. I am well prepared for this test.” Don’t say, “I will not be nervous about my math test.”
4. State your affirmations as facts, as if they are happening, even if you have not achieved them yet. For example, say, “I will graduate from high school with a 3.2 GPA.”
5. Repeat your affirmations at least once a day. Repetition stimulates your brain to help you reach your goals.
6. In your mind, say your affirmations often. Also, write down your affirmations and place them where you can see them often. Just like advertisements on television or the internet, the more you see or hear an affirmation, the more you believe it.
Here are some examples of affirmations:• I have the talent to be cast as the lead in the play.• I will be offered this job because I am prepared for the interview.• My brother and I will get along well for the rest of the summer.
AFFIRMATION STATEMENT TECHNIQUES
overcomingobstacles.orgPowered by TCPDF (www.tcpdf.org)

GOAL SETTING | LESSON 4: ACCESSING RESOURCES
overcomingobstacles.org
AGENDA
Starter
Help!
Inside or Outside?
Accessing Resources
Conclusion
Student Assessment
Objectives
Students will analyze the need for help with achieving their goals.
Students will identify resources in their community and ways to access available resources.
Materials Needed
15 paper plates (Part I)
Internet access (Part III)
4LESSON
ACCESSING RESOURCES

GOAL SETTING | LESSON 4: ACCESSING RESOURCES
overcomingobstacles.org
Say to students:
Imagine that you have finally asked someone you really like for a date, and they say yes. The date is Friday, and you can’t wait. You have tickets to the best concert of the year, and you just bought a great new shirt. On Friday, you get ready, but as you’re tying your favorite pair of shoes, the shoelace breaks. So you call your date and say, “I’m sorry, but I’ve run into a problem. My shoelace is broken. I don’t have a spare one, so we’ll have to cancel tonight.”
Ask students if this makes sense.
When students say that it doesn’t, lead them to understand that neither does giving up on any goal or plan just because they’ve hit an obstacle. Explain that when they are working toward their goals, there are many resources they can access to help them succeed.
Starter (3 minutes)
Purpose: Students learn that they may need help with achieving their goals.
1. Students participate in an activity.
Prior to class, arrange the desks so that there is an open space in the center of the classroom. Place 15 paper plates in a straight line across the floor, leaving about a foot of space between each plate.
Divide the class into two teams—team A and team B. Have each team line up at opposite ends of the line of paper plates. Explain to students that the goal is to have the teams switch positions by stepping only on the paper plates. Students who step off the plates must move to the back of their line and begin again.
Allow team A to move across the paper plates. Tell the second student on team A to begin moving across the line when the first student steps on the fifth plate. Tell the third student on team A to begin moving across the line when the second student steps on the fifth plate, and so on. Once team A has moved to the other side, have team B repeat the same process.
Ask students if it was easy or difficult to accomplish the goal. Ask students to explain their answers. (Students might respond: there was nothing to stop each person, it was a simple task.)
2. Students repeat the activity.
Part I Help! (10 minutes)

GOAL SETTING | LESSON 4: ACCESSING RESOURCES
overcomingobstacles.org
Tell students that they are going to repeat the activity. Tell them that the rules and the goal are the same, but you have added an obstacle. Explain that this time the first student on each team will begin at the same time. As teams attempt to switch positions, remind students that they are not competing with the other team and that those students waiting in line can make suggestions.
3. Students discuss the activity.
Ask students to explain if it was easier or more difficult to accomplish the goal the second time. Ask them to tell how they solved the problem or how they think they might solve it if given another chance. (Students might respond: one person can squat down while the other steps over them, students can slide on the plates by supporting each other’s balance until they have switched places.)
Ask students if the teams could have switched positions without communicating with each other. Ask students to suggest how this activity might relate to the concept of goal achievement. Elicit from students that at times, it may seem as though others are working against them when they are trying to reach a goal. Tell students that, especially at those times, they should ask for help and work with others to discover ways to ensure that their goals are accomplished.
Purpose: Students analyze the need for help with achieving their goals.
1. Students recognize the need for outside help.
Say to the class, “If I were to choose one of you and give you one minute to rearrange all of the furniture in the principal’s office, how would you do it?”
Discuss the situation with students. Remind them to use the steps of the decision making process: gather information, weigh options, make a choice, and take action.
Ask, “What information do you need to gather in order to solve the problem of rearranging all of the furniture in the principal’s office?” (Students might respond: what furniture there is to move, the weight of each piece, the location of electrical outlets.)
2. Students identify the need for outside resources.
Say to students, “As you gather information on the problem, does it lead you to the conclusion that you are going to need outside resources to complete the task in the one-minute time period?”
Ask students to suggest some of the resources that they could use to help rearrange the furniture. Encourage them to be as inventive as possible. (Students might respond: classmates, a custodian, equipment.) Explain to students that asking for help instead of giving up will reflect positively on them because it proves that they have perseverance. It shows that their goals are important to them. It also proves that they are aware of their own limitations but will not allow those limitations to stop them.
Part II Inside or Outside? (15 minutes)

GOAL SETTING | LESSON 4: ACCESSING RESOURCES
overcomingobstacles.org
Purpose: Students recognize how to access the resources in their community.
1. Students recognize that they can find resources to help them achieve their goals.
Tell students that they are going to discuss hypothetical situations in which a friend is having personal troubles. Have students brainstorm some fictional problems (e.g., the friend has a substance abuse problem, family difficulties, needs tutoring, etc.). Write the problems on the board.
Ask, “What can you do to help your friend?” Ask students to brainstorm places they would go to find help for the various problems that they identified. (Students might respond: school counselor, teacher, parents, drug hotline, youth center.)
2. Students recognize that there are many resources available to assist them.
Divide students into groups and instruct them to find as many resources online as possible that might help their friend in the situations they brainstormed.
When students have finished, allow each group to share its findings. Write responses on the board. Discuss how students can use the internet to locate resources for themselves.
Part III Accessing Resources (20 minutes)
Ask students to list one goal they have and one corresponding resource from today’s lesson that might help them achieve that goal. Elicit from students the following key points that were taught in this lesson:
There will be times on your path to achieving your goals that will require you to ask for help.
When you encounter obstacles, access resources rather than giving up on your goals.
Your community has many resources to help you achieve your goals.
Conclusion (2 minutes)
1. Describe a situation in which you needed someone else’s help. How did you go about getting that
help?
2. List three situations in which outside resources would be helpful.
3. Describe one of your goals. List three resources that you can use to help you achieve this goal.
Student Assessment

GOAL SETTING | LESSON 4: ACCESSING RESOURCES
overcomingobstacles.org
LESSON EXTENSIONS
Using Quotations
“If you want to succeed, ask three old people for advice.” —Chinese proverb
Write the words “teacher,” “doctor,” “psychologist,” “social worker,” “librarian,” “adult relative,”
“sibling,” “dentist,” and “clergy” on the board. Have students brainstorm the problems these people
might be able to help them with.
Addressing Multiple Learning Styles
Remind students that a library has more than just books. Ask a librarian to show the resources a library
offers, from computers to reference materials. Librarians themselves are also a great resource.
Have students discuss how they can use the library as a resource when trying to achieve a goal.
Writing in Your Journal
Have students revisit their lists from the previous journal-writing extension. Ask, “Were you able to
accomplish everything on your list? How do you feel about it?” Have them make another list for
tomorrow.
Using Technology
Introduce students to www.refdesk.com, which links users to over 1,000 other sites. Invite students to
access a newspaper through the site.
Have students search the internet for resources that can help them achieve their goals. Have them
share their findings with the class.

GOAL SETTING | LESSON 4: ACCESSING RESOURCES
overcomingobstacles.org
Homework
Ask students what they would do if they had a toothache, needed to find a dentist, and needed to get to
the dentist’s office on their own after school.
Have students write all the steps needed to successfully complete this assignment, including ways to
find a dentist, get to the office, pay the dentist, and get home. They should also list who will help them
with each step.
Additional Resources
Have students visit Khan Academy at www.khanacademy.org. Khan Academy is a website containing a
wide variety of free classes across a diverse number of categories.
Have students search Khan Academy for information. Ask them to identify how this site, and other sites
like it, can help them achieve their academic goals.

GOAL SETTING | LESSON 5: LEARNING TO BE ASSERTIVE
overcomingobstacles.org
AGENDA
Starter
Passive? Aggressive? Assertive?
Action Reaction
Developing Assertive Behavior
Conclusion
Student Assessment
Objectives
Students will define passive, aggressive, and assertive behavior.
Students will practice using assertive behavior and will learn to recognize passive and
aggressive behavior.
Students will practice techniques to improve their assertiveness.
Materials Needed
5LESSON
LEARNING TO BE ASSERTIVE

GOAL SETTING | LESSON 5: LEARNING TO BE ASSERTIVE
overcomingobstacles.org
Three dictionaries (Part I)
Copies of the “Passive, Aggressive, and Assertive Behaviors: The Scenarios” activity sheet cut into
sections (Circle one behavior type in each section. Each group should have one scenario.) (Part II)
One copy of the “Developing Assertiveness Skills: Personal Characteristics” activity sheet for each
student (Part III)
One copy of the “Developing Assertiveness Skills: Action Plan” activity sheet for each student
(Part III)

GOAL SETTING | LESSON 5: LEARNING TO BE ASSERTIVE
overcomingobstacles.org
Tell students to take out a piece of paper and a pen. Tell them that they are to answer yes or no to the following questions:
Does everyone have the right to earn respect and to retain dignity in all situations?
Should people be able to say yes or no like they mean it?
Should everyone be able to express opinions?
Should people be able to ask for what they want?
Explain to students that the answer to all of these questions is yes; they have these rights, and so do other people. Tell students that this lesson will help them learn how to exercise these rights in a way that is respectful of others.
Starter (3 minutes)
Purpose: Students define passive, aggressive, and assertive behavior.
1. Students discuss passive, aggressive, and assertive behavior.
Before the session begins, create three columns on the board. Title each column “passive,” “aggressive,” or “assertive.”
Divide the class into three groups. Call students’ attention to the column headings and ask, “Have you ever heard the words on the board before?” Assign one word to each group. Explain that each group is responsible for brainstorming and writing a definition of its assigned word.
2. Student groups define passive, aggressive, and assertive behavior.
After the groups have written their definitions, distribute dictionaries to each group. Have each group find the dictionary definition of its assigned word and write it beneath its own definition.
Ask each group to present its definitions to the class. Ask students to comment on the differences between the group definitions and the dictionary definitions. Review the following with the class:
Passive people seem to lack confidence and may seem ineffective.
Aggressive people often seem to be offensive and have a strong need to dominate. Often, aggressive people seem to be annoying, pushy, or brash.
Assertive people seem to be positive, confident, and fair when dealing with people.
Part I Passive? Aggressive? Assertive? (10 minutes)

GOAL SETTING | LESSON 5: LEARNING TO BE ASSERTIVE
overcomingobstacles.org
Ask students to describe how an aggressive person and a passive person might act. Establish that aggressive behavior can include such behavior as using a hostile tone of voice, invading other people’s personal space, and using inappropriate physical contact. Passive behavior can include using a low tone of voice, avoiding eye contact, and having a slouched posture.
Ask students to consider how they usually react when someone uses these behaviors around them or toward them. Students should respond that both passive behaviors and aggressive behaviors often lead to negative reactions.
3. Students create a class definition of assertive behavior.
After each group has presented its work, develop a class definition of assertive behavior.
Elicit from students that assertive behavior encourages equality and healthy relationships among people. Assertive people stand up for their rights, express themselves honestly and courteously, and respect the rights of others.
Purpose: Students practice using assertive behavior and learn to recognize passive and aggressive behavior.
1. Students role-play passive, aggressive, and assertive behavior.
Have ready the “Passive, Aggressive, and Assertive Behaviors: The Scenarios” activity sheet, which should be cut into sections and filled out so that there is one scenario and one behavior for each group. Be sure to vary the behaviors so that each type is presented approximately the same number of times.
Divide the class into groups of three or four. Tell students the following:
Each group will receive a scenario.
Each group will role-play passive, aggressive, or assertive behaviors. One student will serve as a narrator, and the other two or three students will act out the situation.
As the scenarios are presented, the other groups will identify what type of behavior was demonstrated.
Distribute the scenarios and allow students five minutes to prepare. Then, call on groups to present their scenarios.
2. Students analyze the role plays.
Part II Action Reaction (25 minutes)

GOAL SETTING | LESSON 5: LEARNING TO BE ASSERTIVE
overcomingobstacles.org
After each scenario, ask, “Can you identify the kind of behavior just demonstrated? What leads you to that conclusion?”
Discuss the performers’ nonverbal and verbal communication, their use of statements that focus on what they think and feel, and whether they calmly asked questions and acted courteously.
3. Students evaluate the effectiveness of each type of behavior.
When all of the scenarios have been performed, ask, “In the scenarios, which kind of behavior did you think was most effective? When did people seem best able to achieve their goals?”
Lead students to recognize that assertive behavior is usually the most effective, but allow observations that sometimes there might be situations in which aggressive or passive behavior is needed or acceptable (e.g., a parent may need to be aggressive when a child is in danger). Passive behavior may be appropriate when one person in a conflict situation is out of control.
Purpose: Students practice techniques to improve their assertiveness.
1. Students create a class mission statement regarding assertiveness.
Explain to students that a mission statement describes a philosophy and a course of action to reach a goal. The class will now create a mission statement that will guide them toward the goal of assertive behavior.
Elicit from the class a philosophy on assertive behavior. If necessary, offer students this prompt: “We believe that assertive behavior is essential to achieving success.”
You may wish to suggest that students add statements such as the following: “As assertive people, we are confident. We express our needs and opinions comfortably. We are sensitive to the feelings and needs of others. We have the right to be listened to and taken seriously, and we recognize that right for others.”
2. Students list their strengths and weaknesses.
Tell students that they will need to practice assertive behavior. Distribute the “Developing Assertiveness Skills: Personal Characteristics” activity sheet.
Ask students to recall the earlier discussion about the characteristics that passive, aggressive, and assertive people display. Then, ask students to consider their own behavior patterns. Have students list on the activity sheet the strengths and weaknesses they possess that relate to assertive behavior. Remind students to think of their behavior in light of the class discussion and role plays.
Part III Developing Assertive Behavior (15 minutes)

GOAL SETTING | LESSON 5: LEARNING TO BE ASSERTIVE
overcomingobstacles.org
3. Students identify a weakness to improve.
Ask students to select one of the weaknesses they’ve written on the activity sheet that they would like to improve (e.g., lack of initiative, shyness).
Explain that being assertive requires self-confidence. Remind students that confidence is built largely through their efforts to focus on their strengths. Explain that the more they build their confidence by continuing to identify and improve upon their weaknesses, the easier it will be for them to assert themselves.
4. Students develop an action plan to improve their assertiveness.
Distribute a copy of the “Developing Assertiveness Skills: Action Plan” activity sheet to each student.
Have students complete the action plan. Review the steps of an action plan that were taught in lesson 1:
Determine your long-term goal.
Establish stepping-stone goals.
Set deadlines for completing each goal.
Complete each step on time.
Continue until you attain your goal.
Tell students that they will evaluate and record their progress daily, so they should write the action plan in a format that is easy to read and consider.
Give students time in class for a week or two to develop the habit of evaluating their action plans and progress. Explain that as they develop self-confidence, they should continue to practice assertive behavior. Tell them to be more open, to express their ideas, and to show acceptance of others. Encourage students to act in a confident way. Remind them that being assertive becomes easier the more they practice such behavior. Explain that people will respect them more when they act assertively.
Ask students to name the characteristics of assertive behavior. Elicit from students the following key points that were taught in this lesson:
Conclusion (2 minutes)

GOAL SETTING | LESSON 5: LEARNING TO BE ASSERTIVE
overcomingobstacles.org
Assertive people are positive, confident, and fair in dealing with others.
Be assertive by using statements that show you are responsible, by remaining calm and asking questions, and by respecting others.
Assertive behavior is usually the most effective way to achieve goals.
Practice assertive behavior, and you will become more self-confident and respected.
1. Create three scenarios—one that illustrates passive behavior, one that illustrates aggressive
behavior, and one that illustrates assertive behavior.
2. List the advantages and disadvantages of passive, aggressive, and assertive behavior.
3. List three things you can do to become more assertive.
Student Assessment

GOAL SETTING | LESSON 5: LEARNING TO BE ASSERTIVE
overcomingobstacles.org
LESSON EXTENSIONS
Using Quotations
“Manners are a sensitive awareness of the feelings of others.” —Emily Post
Have students brainstorm rules of etiquette and compare their rules to an actual etiquette book.
Discuss rules that still seem important and others that seem outdated. Discuss how manners and
respect are important to assertive behavior.
Addressing Multiple Learning Styles
Have students write, using carefully selected words, a 10-second speech about an issue that concerns
them. Students should try to assertively and clearly make their points within this time limit.
Have students share their speeches. Invite other students to judge the speeches.
Writing in Your Journal
Have students imagine the complaints they’d hear if inanimate objects could talk. For example, have
them imagine a pencil complaining, “Oh, stop biting my eraser!”
Have students write their own imaginary conversations between two assertive inanimate objects.
Using Technology
Have students visit www.youtube.com and view a presidential debate. Tell them to note the manner in
which the candidates make their points.
As a class, discuss how each candidate demonstrates assertive behavior during the debate.

GOAL SETTING | LESSON 5: LEARNING TO BE ASSERTIVE
overcomingobstacles.org
Homework
Have students choose a news story, event, or idea that is likely to have opposing points of view.
Have students write a short essay in favor of the issue and then write another short essay against it.
Have them make sure that they assertively back up both points of view with facts, quotes, and
substance.
Additional Resources
Have students read selections from An Autobiography: The Story of My Experiments with Truth by
Mahatma Gandhi.
Have students research Gandhi’s life. Have them report their findings to the class and identify how
Gandhi exhibited assertive behavior.

SETTING AND ACHIEVING GOALS | LEARNING TO BE ASSERTIVE©
20
21
Ove
rco
min
g O
bst
acle
s
Instructions to the teacher: Reproduce this activity sheet as needed. Circle one of the behaviors listed beneath each scenario; vary the behaviors you circle so that each one is equally represented. Cut out each scenario and its list of behaviors. Distribute one to each group.
You borrowed your cousin’s favorite shirt and accidentally spilled something on it. You’ve apologized, and your cousin has forgiven you. Now, you want to borrow your cousin’s new shoes, which will look great with what you’re wearing tonight. What will you do?
Portray the behavior circled below:
AGGRESSIVE PASSIVE ASSERTIVE
You find out that someone you thought was a friend has been spreading rumors about you. You see the friend walking down the street toward you. What do you do?
Portray the behavior circled below:
AGGRESSIVE PASSIVE ASSERTIVE
Your best friend needs to pass math. You are in the same class. Tomorrow is a very important test, and your friend has not studied. She wants to cheat off of you. What do you do?
Portray the behavior circled below:
AGGRESSIVE PASSIVE ASSERTIVE
You work at a pet shop after school and on Saturdays. Your boss has noticed that money has been missing from the cash register. He has accused you. Tell him that you are not the person who has been taking money.
Portray the behavior circled below:
AGGRESSIVE PASSIVE ASSERTIVE
PASSIVE, AGGRESSIVE, AND ASSERTIVE BEHAVIORS:
THE SCENARIOS
overcomingobstacles.org

SETTING AND ACHIEVING GOALS | LEARNING TO BE ASSERTIVE©
20
21
Ove
rco
min
g O
bst
acle
s
Your parents have established a curfew for you on weekends. As a high school student, you feel that the time they have set is unreasonable. Ask them to change the curfew.
Portray the behavior circled below:
AGGRESSIVE PASSIVE ASSERTIVE
A student with a reputation for being irrational and violent has taken your backpack. You ask him to return it.
Portray the behavior circled below:
AGGRESSIVE PASSIVE ASSERTIVE
Your neighbor’s dog is in your yard or in front of your door almost every day making a mess and barking. Tell your neighbor to control her dog.
Portray the behavior circled below:
AGGRESSIVE PASSIVE ASSERTIVE
You have loaned money to a close friend. It has been over three weeks, and he still has not paid you back. You need the money to go out this weekend. Ask for the money.
Portray the behavior circled below:
AGGRESSIVE PASSIVE ASSERTIVE
(CONTINUED)
PASSIVE, AGGRESSIVE, AND ASSERTIVE BEHAVIORS:
THE SCENARIOS
overcomingobstacles.org

SETTING AND ACHIEVING GOALS | LEARNING TO BE ASSERTIVE©
20
21
Ove
rco
min
g O
bst
acle
s
STRENGTHS WEAKNESSES
DEVELOPING ASSERTIVENESS SKILLS
PERSONAL CHARACTERISTICS
overcomingobstacles.org

SETTING AND ACHIEVING GOALS | LEARNING TO BE ASSERTIVE©
20
21
Ove
rco
min
g O
bst
acle
s
Goals: ________________________________________________________________________________________________________
_________________________________________________________________________________________________________________
Personal Action Plan to Achieve Goal: ________________________________________________________________
_________________________________________________________________________________________________________________
_________________________________________________________________________________________________________________
_________________________________________________________________________________________________________________
_________________________________________________________________________________________________________________
_________________________________________________________________________________________________________________
_________________________________________________________________________________________________________________
_________________________________________________________________________________________________________________
_________________________________________________________________________________________________________________
_________________________________________________________________________________________________________________
_________________________________________________________________________________________________________________
_________________________________________________________________________________________________________________
_________________________________________________________________________________________________________________
Time Frame for Action Plan: _________________________________________________________________
_________________________________________________________________________________________________________________
_________________________________________________________________________________________________________________
_________________________________________________________________________________________________________________
_________________________________________________________________________________________________________________
_________________________________________________________________________________________________________________
_________________________________________________________________________________________________________________
_________________________________________________________________________________________________________________
_________________________________________________________________________________________________________________
_________________________________________________________________________________________________________________
_________________________________________________________________________________________________________________
_________________________________________________________________________________________________________________
_________________________________________________________________________________________________________________
DEVELOPING ASSERTIVENESS SKILLS
ACTION PLAN
overcomingobstacles.orgPowered by TCPDF (www.tcpdf.org)

PART III
DEVELOPING RELATED SKILLS
RESOLVING CONFLICTS

TABLE OF CONTENTS
PART III: DEVELOPING RELATED SKILLS
1. Introducing Conflict Resolution 218
2. Uncovering Stereotypes 228
3. Managing Anger in Conflict Situations 236
4. Creating a Win-Win Situation 244
5. Resolving Conflict 253
Resolving Conflicts

RESOLVING CONFLICTS | LESSON 1: INTRODUCING CONFLICT RESOLUTION
overcomingobstacles.org
AGENDA
Starter
What Is Conflict?
Conflict in the News
Freeze Frame
Conclusion
Student Assessment
Objectives
Students will define “conflict” and identify the stages of conflict.
Students will identify conflict triggers.
Students will analyze the role of emotions in conflict.
Students will set goals for reducing conflict in their own lives.
Materials Needed
A dictionary (Part I)
One copy of a current news article describing a conflict for each student (Part II)
One copy of “The Stages of Conflict” activity sheet for each student (Part II)
One copy of the “Vocabulary of Feelings” activity sheet for each student (Part III)
1LESSON
INTRODUCING CONFLICT RESOLUTION

RESOLVING CONFLICTS | LESSON 1: INTRODUCING CONFLICT RESOLUTION
overcomingobstacles.org
Read the following scenario to students:
Tatiana and Desmond are the top students in their grade. They have competed against each other for the highest grades in every subject, and they both want to be the class valedictorian. They try to outdo each other. They try to impress their teachers. They taunt each other before tests. One day before a test, the teasing between Tatiana and Desmond escalates into a full-blown shouting match.
Tell students that, at times, conflict can actually produce positive results. Ask students what positive outcomes might result from this situation. (Students might respond: Tatiana and Desmond might learn how to solve their problem, work together to help each other do better, and begin to recognize their similarities rather than their differences.)
Tell students that in the next few lessons they will practice resolving conflicts in a way that can produce positive results.
Starter (3 minutes)
Purpose: Students define “conflict” and identify their own conflict triggers.
1. Students create a conflict web.
Ask students what they think of when they hear the word “conflict.” Encourage them to consider situations that create conflict, how they feel when they are involved in conflict, the results of conflict, and so on. Write student responses where everyone can see, grouping similar responses to create a web or a cluster.
2. Students define “conflict.”
When students have exhausted their ideas, ask them to review the web or cluster on the board and suggest a definition for “conflict.” Write student responses.
Then, ask a volunteer to look up the word “conflict” in the dictionary. A dictionary definition might read “mental struggle resulting from incompatible or opposing needs, drives, wishes, or demands.” Have students review their definition and add to it or change it as needed. Lead students to recognize the important idea that conflict refers primarily to the mental struggle between two people. Point out that a physical struggle, according to this definition, is most likely the result of a mental struggle that escalates out of control.
3. Students consider the relationship between stress and conflict.
Part I What Is Conflict? (10 minutes)

RESOLVING CONFLICTS | LESSON 1: INTRODUCING CONFLICT RESOLUTION
overcomingobstacles.org
Ask students to explain the meaning of the saying, “That was the straw that broke the camel’s back.” Lead students to recognize that when people are feeling burdened, a small incident might “break” them.
Explain to students that stress is like a burden and can be the catalyst that turns a small conflict into an out-of-control situation. Ask students to recall the sources of stress that they discussed in “Lesson 4: Improving Well-Being” of the Confidence Building module. (Students should mention problems at school, problems on the job, and pressure from friends or family.) Tell students that many sources of stress are common to conflict situations.
Point out to students that the relationship between conflict and stress is reciprocal—conflict is stressful and stress can provoke conflict. When we feel stressed, we are more likely to let conflict escalate. Review with students the stress management, breathing, exercise, and relaxation techniques they discussed in “Lesson 4: Improving Well-Being” of the Confidence Building module. Tell students that using these strategies to reduce stress can help them more effectively manage conflict.
4. Students identify recurring situations of conflict in their lives.
Tell students that conflict is a natural part of life that we can learn from and, in turn, try to make into a positive experience. One strategy for managing conflict is to be ready for it.
Ask students to consider the situations in their lives that involve conflict. Instruct students to write down recurring conflict situations and to pay close attention to the factors that trigger conflict in their lives.
Tell students to write down several specific conflict situations that they want to manage more effectively. Explain that they will keep this list and refer to it at the end of each lesson in this module.
Purpose: Students identify the stages of conflict.
1. Students review a conflict in the news.
Tell students that one place where we can almost always find recurring examples of conflict is in the news. Distribute copies of a current news article that describes a conflict. Read the article aloud for your students or give them time to read it independently.
Where all students can see, create an outline of the story. Elicit from students a step-by-step description of what happened. If details are missing, have students make inferences as to what probably took place.
2. Students identify the stages of conflict in the news story.
Part II Conflict in the News (15 minutes)

RESOLVING CONFLICTS | LESSON 1: INTRODUCING CONFLICT RESOLUTION
overcomingobstacles.org
Distribute “The Stages of Conflict” activity sheet to students. Instruct them to compare the stages of conflict on the activity sheet with the outline they created for the news article. Point out that these stages do not always happen in the same order and that the evolution of a conflict can be recursive (for example, the parties involved can return to dialogue several times). Have students label each event from the news article with the corresponding stage of conflict. Explain that one event might represent more than one stage of conflict.
Tell students that at each stage of conflict, there is the potential for the situation to be resolved. Say, “Controlling emotions at each stage is essential to ensuring that the conflict does not get out of control.”
Purpose: Students demonstrate the effects of emotion in conflicts and set personal conflict resolution goals.
1. Students develop conflict-situation role plays.
Brainstorm with students examples of conflict situations that they have encountered. Write the situations in a place where everyone can see. Encourage students to describe the situations using the stages of conflict from Part II.
Divide the class into groups of four or five. Tell students that each group is going to prepare and perform a role play of a conflict situation. Assign each group a scenario from the class suggestions or use one of the following:
A student is watching television with a family member. The family member wants to watch a different show.
Two friends go out to eat. When the check comes, one of the friends says that he doesn’t have enough money and asks to borrow some. This has happened many times before.
A younger sibling wants to join in an older sibling’s activities. The older sibling wants to be left alone.
Allow the groups several minutes to prepare their role plays.
2. Students perform the role plays.
When students are finished preparing, explain that they are going to perform the role plays. Also explain that while the groups are performing, you will tell them to freeze at certain points. When you do, the group will stop acting to participate in a class discussion.
Part III Freeze Frame (20 minutes)

RESOLVING CONFLICTS | LESSON 1: INTRODUCING CONFLICT RESOLUTION
overcomingobstacles.org
Distribute one copy of the “Vocabulary of Feelings” activity sheet to each student. Tell them that they are going to observe the effect that emotions have in each role play and that they can refer to the activity sheet to specifically describe what they are seeing.
Ask the first group to present its role play. While the group is performing, watch for evidence of the different stages of conflict. When a stage of conflict arises, tell the group to freeze and elicit students’ observations regarding the buildup of the conflict. Have students use the “Vocabulary of Feelings” activity sheet to identify the specific emotions involved. Have the students performing identify the emotions that they are portraying and what they will do next. Discuss with the class alternative reactions to those emotions that might have better results. As the role play proceeds, discuss how the conflict is either escalating or defusing.
3. Students discuss the effects of inappropriate reactions during conflicts.
Ask students for examples of inappropriate reactions during conflicts. (Student responses might include laughing when someone gets hurt, laughing at someone who is yelling at you, showing anger when someone has given you a gift.) Elicit from students that inappropriate reactions are demonstrations of feelings that do not fit a situation. Ask students if they think that a conflict escalates or defuses when one party demonstrates an inappropriate reaction. Point out that being aware of other people’s emotions at each stage of a conflict will help to avoid demonstrating inappropriate reactions.
4. Students apply their observations from the role plays to determine real-life conflict resolution goals.
Tell students to refer to the lists that they created at the end of Part I, in which they identified recurring situations of conflict in their lives. Tell students to choose three of their recurring conflicts to focus on.
Direct students to think about these situations in light of the role plays that they just conducted. Guide them to think about the following:
Are any of these situations similar to the situations in the role plays?
Are the emotions discussed in the role plays related to situations in their lives?
What alternative reactions might reduce conflict?
Guide students to set appropriate goals for reducing conflict in the areas that they have identified. Remind them that effective goals are specific, measurable, realistic, and include a deadline. Remind students that they will refer to their conflict resolution goals several more times in this module.

RESOLVING CONFLICTS | LESSON 1: INTRODUCING CONFLICT RESOLUTION
overcomingobstacles.org
Ask the class to recall the stages of conflict. Elicit from students the following key points that were taught in this lesson:
Conflict is a mental struggle that results from opposing needs.
One strategy for managing conflict is to know what situations trigger conflict for you.
Controlling emotions is essential to defusing conflict.
Demonstrating inappropriate reactions escalates conflict.
Conclusion (2 minutes)
1. What role does emotion play in conflict?
2. Describe each of the six stages of conflict in order.
Student Assessment

RESOLVING CONFLICTS | LESSON 1: INTRODUCING CONFLICT RESOLUTION
overcomingobstacles.org
LESSON EXTENSIONS
Using Quotations
“Do not look back in anger, or forward in fear, but around in awareness.” —James Thurber
As a class, discuss how this quote relates to controlling emotions during conflict and recognizing what
situations cause conflict for individual students.
Addressing Multiple Learning Styles
The definition of “conflict” mentioned in this lesson states that it is a mental struggle between opposing
sides. Have students illustrate (through movement, songs, essays, poems, images, etc.) the definition.
Have students perform or explain their illustrations.
Writing in Your Journal
Have students focus on the goals they set for conflict resolution and write about how confident they are
that they can achieve their goals. Have them describe why they set these particular goals.
Discuss how the students’ values impacted their conflict resolution goals.
Math Connection
Everywhere we turn, there are stories about conflict. Have students create charts and graphs that
depict the types of conflicts that exist in our lives.
Tell students to read the top stories of a news site every day for one week. Have students graph how
often stories featuring conflict appear during that week.

RESOLVING CONFLICTS | LESSON 1: INTRODUCING CONFLICT RESOLUTION
overcomingobstacles.org
Homework
Write the following words and their definitions on the board: “confrontation,” “compromise,”
“withdraw,” “settlement,” and “arbitration.”
Have students look up the definition of each word and write a few sentences describing their role in
conflict.
Additional Resources
Have students read the scene from J. D. Salinger’s The Catcher in the Rye in which Holden Caulfield
gets into a fight with his roommate, Stradlater.
Have students discuss the emotions that Holden was feeling and what he could have done to control
those emotions.

RESOLVING CONFLICTS | INTRODUCING CONFLICT RESOLUTION©
20
21
Ove
rco
min
g O
bst
acle
s
THE STAGES OF CONFLICT
8. People involved can’t accurately describe their emotions; they can only say that they are angry.
6. People stop listening. They begin saying things they don’t mean.
4. People are thinking only of their own goals and ignore the needs of others.
2. Dialogue doesn’t seem to work—people begin to argue.
1. People’s needs or wants clash.
3. People stop trusting each other and grow suspicious.
5. People resort to criticisms and generalizations.
9. Conflict escalates into physical violence.
7. Others outside the conflict get involved.
overcomingobstacles.org

RESOLVING CONFLICTS | INTRODUCING CONFLICT RESOLUTION©
20
21
Ove
rco
min
g O
bst
acle
s
VOCABULARY OF FEELINGS
AAfraid
AggressiveAnnoyedAnxious
Apathetic Apologetic
ApprehensiveAshamed
Audacious
BBashful
BoldBoredBrave
CCalm
CautiousCheerful
ComfortableCompetentConfidentConfusedCuriousCynical
DDecisive
DepressedDetermined
DisappointedDisapproving
DisgustedDistressed
EEbullientEcstatic
Embarrassed EnergeticEnraged
EnthusiasticEnviousExcited
Exhausted
FFriendly
FrightenedFrustrated
GGratefulGreedyGuilty
HHappy
HelplessHopeful
Horrified
IImpatient
IncompetentIndecisiveIndifferent
InnocentInsecureInspiredInsulted
IntimidatedIrritated
JJealousJoyous
LLazy
ListlessLonely
MMarvelous
MischievousMiserable
Morose
NNegativeNervous
OOblivious
OptimisticOverwhelmed
PParanoidPeaceful
PerplexedPetrified
ProudPuzzled
RRecklessRegretfulRelaxedRestless
SSad
SatisfiedSecureSerene
ShockedShySilly
SkepticalSleepy
SluggishSmart
Stimulated StupefiedSubdued
SullenSuspiciousSurprised
Sympathetic
TTense
TentativeTimid
TranquilTrusting
UUncomfortable
Undecided
WWary
WhimsicalWorried
ZZealous
overcomingobstacles.orgPowered by TCPDF (www.tcpdf.org)

RESOLVING CONFLICTS | LESSON 2: UNCOVERING STEREOTYPES
overcomingobstacles.org
AGENDA
Starter
Don’t Judge a Book by Its Cover
Common Ground
Walk a Mile in Their Shoes
Conclusion
Student Assessment
Objectives
Students will define stereotypes as misleading generalizations.
Students will discover common ground with people they assume they won’t like.
Students will explain the importance of dispelling stereotypes and considering the individual.
Materials Needed
Pictures of movie stars, with a list of movies they’ve been in and the roles they played (Starter)
Five brown paper bags numbered one through five, each with a different item inside, including one
with a dollar bill (Other items might include a pack of pencils, a dictionary, a piece of pound cake,
cookies, rubber bands, etc.) (Part I)
Pen and slip of paper for each student (Part II)
Pen and index card for each student (Part III)
2LESSON
UNCOVERING STEREOTYPES

RESOLVING CONFLICTS | LESSON 2: UNCOVERING STEREOTYPES
overcomingobstacles.org
Before class, display pictures of well-known movie stars who are currently popular. Elicit from students the titles of movies these stars were in and the roles they played. Write responses under the pictures. Ask students to describe the stars’ personalities; then, ask if they personally know any of these famous people.
Explain to students that “typecasting” is assigning actors to play certain roles again and again because those are the roles in which audiences love to see them. Provide examples, such as Tom Hanks usually portraying the “good guy” in movies. Point out that once an actor begins to play similar roles in every movie, we begin to make assumptions about their real personality. Most people base their beliefs about actors on the roles they play.
Tell students that stereotypes are similar to the assumptions that people make about a star’s real personality based on the roles they play in movies. Stereotypes are assumptions about people based on little information.
Starter (3 minutes)
Purpose: Students recognize that stereotypes are misleading generalizations.
1. Students recognize misleading preconceptions.
Ask for five volunteers. Have each volunteer choose one of the brown paper bags with an item inside. Tell the students that they are not to open up the bags until you tell them to do so.
Once all five students have chosen a bag, tell them that they are going to get one chance to trade their bag for another or to keep the one that they have. Allow the student who was last to choose a bag the opportunity to trade first. Continue in reverse order until each of the five volunteers has had a chance to trade.
Ask the volunteers to share their feelings about the bag that they are holding. Elicit from the rest of the class their opinions about what might be in the bags.
Ask the volunteers why they chose to trade or keep their bags. Allow them to look in their bags and again share their feelings about it.
2. Students define stereotypes as misleading generalizations.
Discuss the judgments that were made before opening the bags and the different emotions that those judgments aroused.
Part I Don’t Judge a Book by Its Cover (10 minutes)

RESOLVING CONFLICTS | LESSON 2: UNCOVERING STEREOTYPES
overcomingobstacles.org
Ask students to identify the generalizations that drove their thinking about the contents of the bags. For example, students might say that heavy items are more valuable than light items or that items that rattle are broken.
Point out to students that, based on the real contents of the bags, some of their first reactions were unjustified. Explain to students that stereotypes are similar generalizations about people that can have the same effect, misleading us and our reactions to people.
3. Students define “stereotype.”
Ask students to define the word “stereotype.” (Students might respond: people or things conforming to a type; a generalization about a group of people.) Have a volunteer look up “stereotype” in the dictionary. Write student responses where everyone can see. Guide students to recognize that stereotypes are oversimplifications and ignore the fact that people are uniquely different from each other.
Ask students how they think stereotypes might play a role in some interpersonal conflicts. (Students might respond: making judgments about people based on little information increases the likelihood of having a misunderstanding; preconceptions can be misleading; if we have preconceptions, we may not hear exactly what a person is saying to us.)
Purpose: Students recognize the need to look for common ground in conflict situations and with people they assume they won’t like.
1. Students create a list of rival groups from pop culture, literature, and history.
Distribute pens and slips of paper to students. Ask students to brainstorm a list of groups that they know are famous for their rivalry. Encourage students to think about groups in pop culture and groups that they’ve studied in subjects such as English literature or world history. Prompt students by providing at least one example that they may be familiar with, like the Montagues and the Capulets from Shakespeare’s Romeo and Juliet, the Jedi and the Sith from Star Wars, the Allied forces and the Axis powers in World War II, the Order of the Phoenix and the Death Eaters from the Harry Potterseries, or the Autobots and the Decepticons from Transformers.
Collect the lists and place the names of the rival groups inside an empty bag or container. Shake the bag or container, and then randomly pick out the names of two rival groups. Divide students into two equal groups and have them sit on opposite sides of the room, facing each other. Assign each group one of the names you drew.
Explain that the groups will be addressing each other as rivals, like the groups they have listed.
2. Students create lists of their own likes and dislikes.
Part II Common Ground (30 minutes)

RESOLVING CONFLICTS | LESSON 2: UNCOVERING STEREOTYPES
overcomingobstacles.org
Distribute one index card or piece of paper to each student in both groups. Ask students to make a list of likes and dislikes for each of the following categories: food, clothing, hobbies, places, and TV shows. (Depending on your time constraint, you may choose to add or omit categories.)
Give each group time to discuss their likes and dislikes within their group and to form a group trait based on the things they have most in common. For example, one group may identify themselves as “pizza lovers” or “star athletes.”
Remind each group to see the opposing team as the “enemy.” Ask each group to come up with one reason why they would not like each other or get along.
3. Students find common ground with an opposing group by analyzing similar likes and dislikes.
Tell students that they will take turns with students from their opposing group, reading aloud one of their likes and dislikes. Explain to students that when they hear a like or dislike they agree with, they should raise their hands. Assign one student from each group to be a record keeper. Each record keeper will keep a tally of the number of students from the opposing group who agree with a like or dislike named by the record keeper’s own group.
Have students begin reading their lists. Continue in this manner until most students have had a chance to share one of their likes or dislikes.
4. Students discuss why finding common ground is important.
Ask students to reconvene with their groups and discuss the end results of their tallies. Ask them to examine and discuss how much they have in common with their “enemy group.”
Ask students:
In which categories did you expect to have the least in common? What about the most in common?
Were you surprised by the total number of shared interests you had with the opposing group? Why or why not?
How does this activity relate to the ways people form opinions about a person or group of people?
Point out to students that their “warring” groups behaved similarly to the way people act when they believe stereotypes. Explain that sometimes people claim not to like someone in a group based on false preconceptions or misguided beliefs.
Ask students to suggest some ideas on how people can look beyond superficial stereotypes and find common ground with people who appear to be very different. Lead students to understand that challenging themselves to find commonalities with each other can help them improve communication and resolve conflicts.

RESOLVING CONFLICTS | LESSON 2: UNCOVERING STEREOTYPES
overcomingobstacles.org
Purpose: Students confront and dispel stereotypes about various groups of people.
1. Students examine stereotypes.
Give each student a pen and an index card. Ask students to create a list of at least three generalizations about various groups of people that they have read, heard, or seen. Let students know that their cards will remain anonymous and that they do not have to agree with their listed generalizations. Remind students to use school-appropriate language.
Have students write the stereotypes on their index cards in the following format: “I’ve heard that (group of people) are all (generalization/stereotype).”
Ask students to turn their index cards over once they have completed their lists. Collect and shuffle the index cards; then, randomly distribute one to every student.
Allow students a few minutes to read their new cards silently.
While this is a serious and sensitive topic, expect the class to laugh when appropriate, as well as to experience the various feelings and hurt that these stereotypes can evoke in people.
Ask students to take turns reading the stereotypes aloud to the class.
2. Students experience stereotypes and labels.
Divide students into groups of five. Have each group create a three-minute nonverbal skit that uses at least two of the stereotypes written on their index cards. The skits should show the effect that these stereotypes can have.
Have each group perform its skit in front of the class. Remind students that they may not speak when performing, but they are allowed to make sounds or alter their appearance (e.g., hum a song, take off accessories, etc.). Tell them to be mindful of their facial expressions and body language when communicating with each other.
After each group’s performance, ask the class to respond to the following questions:
Describe the ways that the characters interacted with each other.
How did the actors portray the story without speaking?
What emotions did they express in their actions?
Based on your observations, what stereotypes were depicted in the group’s skit? How did these stereotypes affect the characters?
Part III Walk a Mile in Their Shoes (20 minutes)

RESOLVING CONFLICTS | LESSON 2: UNCOVERING STEREOTYPES
overcomingobstacles.org
Explain to the class that anyone can be stereotyped and that one of the best ways to dispel a stereotype is to be aware of the stereotype, how others perceive you, and how you choose to see others. Ask students to generate positive suggestions for ways to foresee stereotypes that they may form about someone and strategies that they can use to see beyond their own assumptions.
Ask students how dispelling stereotypes can help reduce interpersonal conflicts. Elicit from students the following key points that were taught in this lesson:
Stereotypes are misleading generalizations that ignore the fact that every person is a unique individual.
Looking for common ground with someone in a conflict situation can help us to ease tension by recognizing the other person’s needs.
Focusing on people’s strengths rather than superficial, stereotyped traits creates stronger, more positive relationships and reduces conflict.
Conclusion (2 minutes)
1. Why can stereotypes be harmful?
2. What stereotype has been used to describe you or one of your friends? How is this stereotype
simplistic or inaccurate?
3. How can you see past stereotypes and find common ground with someone who is different from
you?
Student Assessment

RESOLVING CONFLICTS | LESSON 2: UNCOVERING STEREOTYPES
overcomingobstacles.org
LESSON EXTENSIONS
Using Quotations
“What we see depends mainly on what we’re looking for.” —John Lubbock
Have students discuss the danger in looking for characteristics that confirm stereotypes.
Addressing Multiple Learning Styles
Before class, hide the titles of a variety of books under pieces of paper. Have students look at the covers
and make assumptions about the books. Ask students to discuss why they made the assumptions that
they did. Discuss the proverb “Don’t judge a book by its cover.”
Have students write their own proverbs that warn of the dangers of stereotypes.
Writing in Your Journal
Tell students to reflect on a time when they felt that they had been stereotyped.
Have students write about a time that they know they let stereotypes dictate their behavior toward
someone.
Using Technology
Show students commercials that play on stereotypes (e.g., women wash laundry, men play sports). Have
students identify the stereotypes.
Have students write business letters to the companies whose products are being advertised and
propose changes to the commercials.

RESOLVING CONFLICTS | LESSON 2: UNCOVERING STEREOTYPES
overcomingobstacles.org
Homework
Have students play word association games with two people outside of the class. Tell students that they
are to name a group and tell the person to say the first thing that comes to their mind.
Ask students to share the answers that their subjects gave. Have students discuss their reactions to
what their subjects said.
Additional Resources
Have students read and discuss an article from Learning for Justice, an online magazine and website
published each spring and fall.
To obtain the magazine, visit www.learningforjustice.org.

RESOLVING CONFLICTS | LESSON 3: MANAGING ANGER IN CONFLICT SITUATIONS
overcomingobstacles.org
AGENDA
Starter
What Makes You Angry?
I Said…I Meant
Alternate Ending
Conclusion
Student Assessment
Objectives
Students will identify situations that make them angry and consider ways to reduce or control
anger.
Students will identify the real meaning behind words exchanged in conflict situations.
Students will analyze a clip depicting a conflict that turns to anger and violence.
Materials Needed
Masking tape and a small rubber ball or golf ball (Starter)
One copy of the “I Said…I Meant” activity sheet for each student (Part II)
A movie or news clip depicting a conflict that turns to violence or anger (Part III)
3LESSON
MANAGING ANGER IN CONFLICT SITUATIONS

RESOLVING CONFLICTS | LESSON 3: MANAGING ANGER IN CONFLICT SITUATIONS
overcomingobstacles.org
Before class, use masking tape to make a circle about two feet in diameter on the floor of the classroom. Begin class by showing students the small ball and telling them that their challenge is to roll the ball from about 10 feet away and aim for the center of the circle. Explain that they will have two chances, but if the ball stops short on the first try, they will forfeit the second try.
Have students take turns rolling the ball into the circle. When students are finished trying, elicit the observation that most students rolled the ball past the circle. Ask students why they think this happened. Lead them to recognize that when they were afraid of falling short, they tended to overcompensate.
Say, “The ball is like our emotions in situations with conflict; we often overcompensate because we are afraid of losing. Once we let our emotions reach this level, it’s hard to stop and back away. One possible effect of this is excessive anger.”
Explain to students that today they will discuss ways to keep anger in check during a conflict situation.
Starter (3 minutes)
Purpose: Students identify situations that make them angry and consider ways to reduce or control anger.
1. Students identify situations that evoke emotions of anger.
Ask students, “What makes you feel angry?” Encourage students to list as many specific situations as possible. Write student responses where everyone can see.
Then ask students, “How do you know when you are angry?” (Students might respond: I just feel mad, my tone of voice gets sharper, my voice increases in volume, my muscles become tense, my heart starts racing, I start to sweat.) Explain to students that these are physiological indications that a person is experiencing anger. Many people have those responses.
2. Students identify ways to reduce or control anger.
Ask students, “If so many different situations have the potential to evoke anger in us, how can we become better able to manage our anger and function more effectively?” Lead students to recognize that there are specific techniques that we can use to control our anger.
Elicit from students actions they can take to limit their anger. Write their suggestions in a place where everyone can see. (Students might respond: controlled breathing, counting to 10, taking a walk, talking with someone, listening to relaxing music, exercising, etc.)
Part I What Makes You Angry? (10 minutes)

RESOLVING CONFLICTS | LESSON 3: MANAGING ANGER IN CONFLICT SITUATIONS
overcomingobstacles.org
When students have exhausted their ideas, have them select five techniques from the list that they think might work well for them. Have them write those techniques on a piece of paper. Tell students to hold on to their lists for use at the end of the lesson.
Purpose: Students identify the underlying meaning behind words exchanged in conflict situations.
1. Students read a conflict scenario.
Distribute copies of the “I Said…I Meant” activity sheet to each student. Have students fold the activity sheet in half on the dotted line, so that the bottom half is not visible while students are reading the top half.
Ask two volunteers to read the dialogue between Brenda and Maria, supplying appropriate tone of voice, body language, and facial expressions.
When the volunteers are finished, ask students to explain what happened in this scenario and identify the problem that was causing the conflict. (Students might respond: Brenda wanted to do a favor for Maria. Maria is angry at Brenda for leaving the baby at home to get milk.)
Ask the class to describe the tone of voice, body language, and facial expressions of the two volunteers and elicit comments about how their nonverbal messages reflected their feelings.
2. Students consider the unspoken thoughts and emotions behind the conflict.
Tell students to unfold the activity sheet to expose the dialogue that includes the characters’ real thoughts and feelings in italics. Ask two volunteers to read the italicized parts of the dialogue, using nonverbal messages that reflect what they are saying.
Ask the class to comment on how the volunteers’ nonverbal communication differed from the first reading and what that might say about the characters’ emotions. (Student responses should include emotions other than anger, such as amazement, frustration, and anxiety.)
3. Students recognize that controlling anger allows people to communicate more effectively.
Ask students why the characters in the scenario didn’t just say what they meant. Lead them to understand that sometimes our anger leads us to speak without thinking. Point out to students how differently this conflict might have ended if the two people had communicated what they really meant.
Remind students of “the straw that broke the camel’s back” and the role of stress in conflict situations. Guide students to the realization that, in conflict situations, there are often hidden emotions and events that contribute to the intensity of the conflict. Suggest that students be aware of the underlying feelings that contribute to conflict situations. Tell students that being aware of the emotions that are involved in a conflict will help them to communicate more accurately.
Part II I Said…I Meant (15 minutes)

RESOLVING CONFLICTS | LESSON 3: MANAGING ANGER IN CONFLICT SITUATIONS
overcomingobstacles.org
Purpose: Students analyze a video clip depicting a conflict that turns to anger or violence.
1. Students view a clip of a conflict that results in anger or violence.
Tell students that they are going to watch a short clip showing a conflict that results in anger or violence. Provide students with any necessary background information for the scene they are going to watch.
Instruct students to look for the following as they watch the clip:
What is the conflict?
What are the needs or wants of the opposing parties?
What did they say about the issue or the conflict?
What do you think they meant?
2. Students rewrite the scene to reduce the anger presented.
When students have finished viewing the clip, discuss their responses to the above questions. Then, instruct them to refer to their lists of anger management techniques from Part I to suggest actions that might have reduced the characters’ anger and avoided the violence portrayed in the video.
Allow students about 10 minutes to write an outline for what might have occurred if anger management techniques had been used.
3. Students discuss the role of anger in the media and in real life.
Ask students to share their outlines. After students have shared their writing, ask the class how the clip would be different if the conflict had been resolved as they proposed. (Students might respond: it would be boring, no one would go see it, there would be no action, etc.)
Point out that reducing conflict might not make for a good movie. Lead students to recognize that while conflict and anger make for interesting fiction, they can be destructive if not managed properly in real life.
4. Students revisit their conflict resolution goals.
Have students revisit the goals for conflict resolution that they established in lesson 1 of this module. Have them identify situations in which miscommunication contributes to conflict. Guide them to consider how anger management could reduce the intensity and impact of their conflict situations.
Part III Alternate Ending (25 minutes)

RESOLVING CONFLICTS | LESSON 3: MANAGING ANGER IN CONFLICT SITUATIONS
overcomingobstacles.org
Ask students to name three anger management techniques that can be used to reduce anger in conflict situations. Elicit from students the following key points that were taught in this lesson:
Sometimes our anger leads us to say and do things that we don’t mean.
Using anger management techniques to control our anger can help us improve how we communicate.
Conclusion (2 minutes)
1. List three positive methods for relieving anger.
2. Describe a conflict you have been in from the other person’s point of view.
3. List three examples of violence you have recently seen in the media. How can seeing this violence
affect viewers?
Student Assessment

RESOLVING CONFLICTS | LESSON 3: MANAGING ANGER IN CONFLICT SITUATIONS
overcomingobstacles.org
LESSON EXTENSIONS
Using Quotations
“Anger is a momentary madness, so control your passion or it will control you.” —Horace, Epistles
Have students discuss the meaning of this quote and how it feels to be controlled by anger.
Addressing Multiple Learning Styles
Have students create a checklist of actions to take when they feel themselves becoming angry.
Ask students to share the checklist they have written with the class. Allow students to offer suggestions
to each other.
Writing in Your Journal
Have students write about the amount of impact the movie industry has on people. Have them discuss
whether we are reflections of what is in the movies or if the movies are a reflection of real life. They
should also discuss if the movies accurately reflect how people handle anger.
Discuss this topic as a whole class.
Addressing Multiple Learning Styles
Have students create posters to help younger children control their anger in conflict situations and to
help them choose words that accurately reflect what they are feeling. Remind students to use language
at the appropriate readability level of the intended audience.
Have students mail the posters, along with explanations of them, to elementary school teachers in your
district.

RESOLVING CONFLICTS | LESSON 3: MANAGING ANGER IN CONFLICT SITUATIONS
overcomingobstacles.org
Homework
Have students keep track of the number of times they feel angry in one week. Have them write what
was happening when they became angry and how their bodies reacted to their anger.
Ask students to create a plan for avoiding situations in which they become angry and managing the way
they react to anger.
Additional Resources
Have students read “Listen to Your Feelings (They Are Trying to Tell You Something)” from Don’t Sweat
the Small Stuff…and It’s All Small Stuff by Dr. Richard Carlson. This passage is about paying attention
to what you are feeling and why you are feeling that way.
Have students discuss the benefits of knowing why they feel as they do.

RESOLVING CONFLICTS | MANAGING ANGER IN CONFLICT SITUATIONS©
20
21
Ove
rco
min
g O
bst
acle
s
Brenda and Maria are yelling at each other…
BRENDA: “I went to the store because I had to buy milk for Shante.”
MARIA: “I can’t believe you did that! You’re so stupid, leaving my baby sister by herself!”
BRENDA: “...but I asked Jeremy to watch her while I was out.”
MARIA: “I don’t even know why I trusted you to watch her anyway!”
BRENDA: “Fine! Take care of your own baby sister!”
They meant…
BRENDA: “I went to the store because I had to buy milk for Shante.” I was worried because there wasn’t any milk in the house for the baby.
MARIA: “I can’t believe you did that! You’re so stupid, leaving my baby sister by herself!” It’s so dangerous to leave a baby alone! I’m terrified that something could have
happened to her!
BRENDA: “...but I asked Jeremy to watch her while I was out.” I’m stupid? What kind of sister takes care of her baby sister but doesn’t have milk in the house?
MARIA: “I don’t even know why I trusted you to watch her anyway!” I had doubts about leaving Shante with her anyway. I remember the time she let her cry in the crib. I never said anything, but I was really annoyed.
BRENDA: “Fine! Take care of your own baby sister!” And I was only doing her a favor! Forget it. I’ll never help her out again.
I SAID...I MEANT
overcomingobstacles.orgPowered by TCPDF (www.tcpdf.org)

RESOLVING CONFLICTS | LESSON 4: CREATING A WIN-WIN SITUATION
overcomingobstacles.org
AGENDA
Starter
Who Wins the Dollar?
Win-Win, My Needs/Your Needs
Someone in the Middle
Conclusion
Student Assessment
Objectives
Students will identify the characteristics of win-win solutions.
Students will practice the techniques of win-win negotiation in a conflict and apply those
techniques to their personal conflict resolution goals.
Students will identify the role of a mediator in conflict resolution and practice mediating conflict.
Materials Needed
Several wadded-up pieces of paper and a wastebasket (Starter)
Two one-dollar bills (Part I)
One copy of the “Win-Win, My Needs/Your Needs” activity sheet for each student (Part II)
A dictionary (Part III)
4LESSON
CREATING A WIN-WIN SITUATION

RESOLVING CONFLICTS | LESSON 4: CREATING A WIN-WIN SITUATION
overcomingobstacles.org
Divide the class into two teams. Tell students that each of them will get one chance to shoot a paper ball into the wastebasket. Have each team choose a team name. Write the names on the board with a line under each.
As students take turns shooting, record one point for each shot made and one point for each shot missed. The class is likely to complain that it doesn’t matter if they miss the shot or not. Urge them to continue playing until most students have a chance to shoot.
Ask students to share their feelings regarding the competition and how it felt to not have any incentives to win. Guide them to realize that while it might have been disappointing to know that there would be no winning team, it was also reassuring to know that there would be no loser.
Point out to students that our culture generally encourages competition and that the desire to win is ingrained in us. Tell students to keep the urge to win in mind while they discuss a type of conflict resolution in which no one loses.
Starter (3 minutes)
Purpose: Students identify the characteristics of win-win solutions.
1. Students bid on a dollar in order to define “win-lose” and “lose-lose.”
Ask for two volunteers. Hold up a dollar bill and explain that you are going to hold an auction. Explain to students that at an auction people take turns stating a price that they are willing to pay for something until one of them is not willing to bid any higher for the item. A competitive energy develops whereby each party wants to take the item home.
Start the bidding for the dollar at one cent and let the volunteers continue bidding until one of them gives up or they have surpassed the value of one dollar in bids. In a place where everyone can see, write the names of the two students and a record of what they each bid.
Ask students who won. Lead students to define “win-lose” as a scenario in which one student won the dollar and the other gave up. Define “lose-lose” as a scenario in which one student won the dollar but paid more than a dollar for it, and the other student withdrew from the bidding.
2. Students bid on a dollar to create a win-win situation.
Explain to students that you are now going to auction another dollar to two different students who think that they can create a situation in which both parties win. Select two volunteers and allow them to come up with a strategy for bidding.
Part I Who Wins the Dollar? (10 minutes)

RESOLVING CONFLICTS | LESSON 4: CREATING A WIN-WIN SITUATION
overcomingobstacles.org
Allow the students to bid and again analyze the outcome. If the class does not come to the solution on its own, explain that there is a way in which both students could make money. The volunteers should agree to stop the bidding at two cents and split the remaining 98 cents. Point out to students that in this situation, neither person gets all of what they wanted (i.e., the entire dollar), but by compromising and working together, both can make money.
3. Students identify the characteristics of win-win solutions.
Ask the class to use the situation it just experienced to define the characteristics of win-win solutions to conflict. Lead students to recognize the following key points about win-win situations:
Both parties compromise.
Both parties may not get all of what they want, but the results are positive for each.
Both parties leave the situation feeling as if they have accomplished something.
Both parties work together and consider each other’s needs.
Tell students to recall the discussion from the starter about the competitive instinct and ask them to suggest how that instinct might affect their efforts toward creating a win-win situation. Elicit from students the understanding that in order to create situations in which both parties win, competition must be set aside.
Purpose: Students practice the techniques of win-win negotiation in a conflict and apply those techniques to their own personal conflict resolution goals.
1. Students identify a conflict situation.
Tell students that they are going to practice creating win-win solutions to conflicts. Have them brainstorm specific conflict situations and write their suggestions where everyone can see.
Explain that the best situation to analyze will be one in which they can clearly imagine how both sides feel and why they feel that way. Then have them vote to select one situation to analyze and write the votes next to each situation. Keep this list for use in Part III.
Tell students that they are now going to analyze the specific situation they have selected.
2. Students consider the goals and needs of both participants in a conflict.
Distribute copies of the “Win-Win, My Needs/Your Needs” activity sheet to each student.
Part II Win-Win, My Needs/Your Needs (30 minutes)

RESOLVING CONFLICTS | LESSON 4: CREATING A WIN-WIN SITUATION
overcomingobstacles.org
Review the guidelines for creating win-win situations with students. Ask them to suggest the purpose of each guideline and the ways in which each might help to defuse a conflict. Tell them to apply these guidelines to the specific conflict the class selected.
Refer students to the bottom of the page. Discuss possible responses to each question with the class. Encourage students to create as complete a picture of the conflict as possible.
3. Students consider their own personal goals for conflict resolution.
Tell students that the guidelines are an outline of the mental process that they can follow to create win-win solutions for conflicts in which they are involved.
Have students review their personal goals for conflict resolution. Instruct students to consider those situations in light of the guidelines and questions on the activity sheet and to analyze the needs and goals of the different people involved in each conflict. Have them jot down their thoughts with an eye toward creating win-win situations to resolve those conflicts.
Remind students to hold on to their goals for use in the next lesson.
Purpose: Students identify the role of a mediator in conflict resolution and practice mediating conflict.
1. Students define “mediator.”
Ask students if they know what a mediator is. Elicit a definition from the class and write it in a place where everyone can see.
Ask a volunteer to look up “mediator” in the dictionary and modify the class definition as needed. Ensure that the class understands the following important points:
Mediators establish reconciliation between two parties.
Mediators are not directly involved in the conflict.
Mediators remain impartial.
If your school has a peer mediation program, ask the class if they are familiar with it. Have students share their understanding of what is involved in peer mediation and provide them with additional information that you may have gathered.
Say, “Sometimes a conflict is too big for us to handle on our own. A mediator can be helpful in those situations.”
2. Students identify guidelines for mediation.
Part III Someone in the Middle (20 minutes)

RESOLVING CONFLICTS | LESSON 4: CREATING A WIN-WIN SITUATION
overcomingobstacles.org
Explain to students that some of the most difficult conflicts that police face are domestic disputes. Explain that the police need to help the couple defuse anger and avoid violence, but that they must let the couple resolve the situation on their own. Lead students to understand that mediators do not solve problems; they merely bring two parties together and assist them in communicating.
Share with students the following mediation guidelines based on those that police officers use when responding to domestic disputes:
Bring the disputants together. Don’t give preference to one side over the other. Establish rapport with both sides.
Keep the parties facing you, not squared off against one another.
Encourage both parties to listen to each other.
Encourage both parties to avoid exaggerations and instead use specific examples and I-statements.
Don’t make judgments.
Maintain calm control.
Avoid suggesting a solution; let the disputants come up with solutions on their own.
3. Students write and perform dialogues.
Divide students into groups of three. Tell each group to choose a conflict to mediate from those the class listed in Part II.
Instruct students to use the guidelines for mediation to write scripts for the selected conflict situations. Tell them to create roles for the disputants and for a mediator in the form of a dialogue. Remind students that they may want to refer to their “Win-Win, My Needs/Your Needs” activity sheets in order to help determine what the disputants might say to each other.
Have the groups take turns performing their dialogues for the class. Encourage the class to critique the dialogues using the mediation guidelines as criteria and discussion points.
Say, “Remember that if it seems impossible to come up with a win-win solution, a mediator might be able to provide the guidance you need.”
Ask students to recall the guidelines for mediation. Elicit from students the following key points that were taught in this lesson:
Conclusion (2 minutes)

RESOLVING CONFLICTS | LESSON 4: CREATING A WIN-WIN SITUATION
overcomingobstacles.org
A win-win situation is one in which the needs of both parties are at least partially met.
A mediator can help two opposing parties find common ground and resolve their dispute.
1. Identify a win-win outcome and list an example.
2. What is mediation and when is it necessary?
3. List four mediation strategies.
Student Assessment

RESOLVING CONFLICTS | LESSON 4: CREATING A WIN-WIN SITUATION
overcomingobstacles.org
LESSON EXTENSIONS
Using Quotations
“There have to be compromises. The middle of the road is all of the usable surface. The extremes, right
and left, are in the gutters.” —Dwight D. Eisenhower
Have students create posters displaying and illustrating this quote.
Addressing Multiple Learning Styles
Have small groups of students create a guide to finding win-win situations. Each student should
contribute to the guide. Each guide should include instructions, diagrams, narratives, stories of conflict,
and so on.
Have students display the guides and present them to peer mediators and staff at the school.
Writing in Your Journal
Have students write about an occasion in which they helped two people solve a dispute.
Have students discuss the difficulty of the task, how they felt after the conflict was over, what they
would do again, and what they would do differently.
Using Technology
Have students use the internet to research various treaties.
Have students discuss the language used in the treaties and the long-term impact of the selected
verbiage.

RESOLVING CONFLICTS | LESSON 4: CREATING A WIN-WIN SITUATION
overcomingobstacles.org
Homework
Have students create lists of jobs that involve conflict resolution or mediation skills.
Have each student choose one job that they find interesting and write a profile of that job.
Additional Resources
Have students read “Part Ten: Talking with the Enemy” from Long Walk to Freedom by Nelson
Mandela.
Have students research and write a few paragraphs about the negotiations to end apartheid in South
Africa.

RESOLVING CONFLICTS | CREATING A WIN-WIN SITUATION©
20
21
Ove
rco
min
g O
bst
acle
s
GUIDELINES FOR CREATING WIN-WIN SITUATIONS
o Choose neutral territory for a meeting.
o Don’t lie or exaggerate; build trust from the start.
o Use good nonverbal communication: make eye contact, use a nonthreatening posture, and stay focused.
o Try to find common ground.
o Be open-minded about other suggestions.
o Focus on the things that are most important to you and try to determine the things that are most important to the other person.
o Stay in the present; avoid bringing up past arguments.
o Set a time frame that both of you agree on.
o Commit to a solution and don’t go back.
MY NEEDS/YOUR NEEDS
What is the problem? __________________________________________________________
What do both sides stand to lose? ________________________________________________
What does person A want? Why? _________________________________________________
What does person B want? Why? _________________________________________________
What does person A need? _____________________________________________________
What does person B need? _____________________________________________________
Other factors for person A?* ____________________________________________________
____________________________________________________________________________
Other factors for person B?* ____________________________________________________
____________________________________________________________________________
*Other factors that motivate people may include a need to be in control, a need for money, and a need to feel recognized or loved.
WIN-WIN, MY NEEDS/YOUR NEEDS
overcomingobstacles.orgPowered by TCPDF (www.tcpdf.org)

RESOLVING CONFLICTS | LESSON 5: RESOLVING CONFLICT
overcomingobstacles.org
AGENDA
Starter
Paper Tiger
Resolution
Conflict Resolution Games
Conclusion
Student Assessment
Objectives
Students will identify the importance of being assertive when addressing conflicts.
Students will identify the steps to conflict resolution.
Students will apply the steps to conflict resolution to recurring conflicts in their own lives.
Materials Needed
Comics pages from the daily newspaper, one set for each group of four students (Starter)
Several pieces of paper cut into long four-inch-wide strips (Part II)
One or two board games, such as Sorry, Chutes and Ladders, Life, etc. (Part III)
Art materials, including one piece of poster board or cardboard for each group of three students;
markers; glue; construction paper; and found objects such as buttons, fasteners, bottle tops, etc.
(Part III)
5LESSON
RESOLVING CONFLICT

RESOLVING CONFLICTS | LESSON 5: RESOLVING CONFLICT
overcomingobstacles.org
Divide the class into groups of four and give each group a set of comic strips from either a daily newspaper or online publication. Tell students to find one comic strip that is built around a conflict. Have them cut it out, paste it on a larger piece of paper, and answer the following questions:
Who are the parties in the conflict?
What is the nature of the conflict?
What emotions are depicted in the comic strip?
Does the comic strip show a win-lose, lose-lose, or win-win situation?
Could this conflict be resolved as a win-win situation for the parties involved?
Have each group present its comic strip to the class and discuss the above issues. Some groups may wish to discuss what is inherently funny about the comic they selected. Remind students that conflict is a part of our everyday lives and that sometimes it helps to find humor in difficult situations, even ones involving interpersonal conflict.
Starter (3 minutes)
Purpose: Students identify the importance of being assertive and facing conflict head-on.
1. Students analyze a quote.
Write the following Zen proverb on the board: “You must turn and face the tiger to learn that it is made of paper.”
Ask students what they think the proverb means. Lead students to understand that the “tigers” in the quote are the conflicts and challenges that present themselves to us. Elicit from students the understanding that the quote is about having the courage to face our challenges directly. Tell students that when we face our conflicts and address them, we often find that they are not as overwhelming as we had thought. Sometimes our biggest obstacles are in our own minds (“made of paper”) and the challenge can be handled head-on.
2. Students recognize the importance of being assertive when addressing conflict.
Ask students to recall what they learned about being assertive in “Lesson 5: Learning to Be Assertive” of Module Three: Setting and Achieving Goals. Ask students to describe what they think happens to passive people and aggressive people in conflict situations. (Students might respond: Passive people often find themselves on the losing end of a win-lose situation. Aggressive people might let their anger get out of control or resort to violence).
Part I Paper Tiger (5 minutes)
RESOLVING CONFLICTS | LESSON 5: RESOLVING CONFLICT
overcomingobstacles.org
Tell students that “turning to face the paper tiger” means addressing your conflicts in an assertive manner with the goal of a win-win resolution.
Purpose: Students identify and order the steps to resolving conflicts and apply the process to the conflicts in their own lives.
1. Students identify the steps to conflict resolution.
Explain to students that they are going to recall and list the steps to conflict resolution, based on what they have learned in the past four lessons. Then, they will prioritize the steps.
As students recall the steps, write their responses in a place where everyone can see. Discuss each of their ideas, defining the steps to ensure that they don’t overlap. (See the list below for likely student responses.)
2. Students order the steps to conflict resolution.
Ask volunteers to each write one of the steps on a strip of paper and post it with the other steps in no particular order in the front of the room. Discuss the best order for the steps and arrange the strips in the order decided.
Student responses are likely to include the following steps in a similar order:
1. Identify the source of the conflict.2. Identify the needs and wants of the two parties.3. Say what you mean: communicate responsibly, using I-statements and avoiding
generalizations, name-calling, and stereotypes.4. Use anger management techniques to control emotions.5. Look for common ground with the other person.6. Consider all available resolutions.7. Work toward a win-win situation and find a solution that is acceptable to both parties.8. If no acceptable resolution can be found, bring in a mediator.
3. Students revisit their conflict resolution goals.
Ask students to look at the conflict resolution goals that they have developed throughout this module. Instruct students to use the steps to resolution to devise a plan for assertively addressing the conflicts that they are dealing with in their own lives.
Encourage students to work independently to create a plan that they can monitor and that will help them assess their progress. Circulate as students work, offering feedback or advice as needed.
Part II Resolution (15 minutes)

RESOLVING CONFLICTS | LESSON 5: RESOLVING CONFLICT
overcomingobstacles.org
Purpose: Students create games to demonstrate the steps to conflict resolution.
1. Students identify the characteristics of a board game.
Say, “Now that you know how to resolve conflict effectively, you can practice and share your expertise with others.”
Divide students into groups of three or four. (You may want to consider letting them choose their own groups for this activity.) Tell students that they are going to create games that demonstrate the steps to conflict resolution.
In order to help students identify the characteristics of a board game, show them one or two examples. Help students plan their own games by holding up one of the games and asking questions such as the following:
What is the goal of this game?
What is the broad concept of this game?
How is the board designed?
How do you advance to the next square, level and so on?
How are obstacles presented?
How do players win and lose this game?
Give groups time to explore a variety of games and suggest that they answer similar questions in order to understand the strategies of published board games.
2. Students create conflict-resolution board games.
Provide the groups with poster paper or cardboard and art materials. Remind them that their games are to demonstrate exemplary ways to resolve conflicts. To do so, they will have to structure the game around conflicts that occur in daily life. Encourage them to be creative in the design of their games.
Allow students about 25 minutes to design their games. You may want to set aside an additional class period to allow students to exchange and play each others’ games.
Part III Conflict Resolution Games (30 minutes)

RESOLVING CONFLICTS | LESSON 5: RESOLVING CONFLICT
overcomingobstacles.org
Ask students to share their action steps for resolving conflict. Ask the class to comment on what in this module they think has helped them most with their goals for conflict resolution. Elicit from students the following key points that were taught in this lesson:
It is important to be assertive when addressing the conflicts that we face.
The steps to conflict resolution can serve as guidelines for our own conflict resolution goals.
Conclusion (2 minutes)
1. Describe a conflict you have seen in a movie or on TV. Analyze this conflict according to the steps
of conflict resolution.
2. Describe a conflict that you have been in and then rewrite it, undoing the crucial moment that led
to the conflict.
3. List three conflict resolution strategies that can help you.
Student Assessment

RESOLVING CONFLICTS | LESSON 5: RESOLVING CONFLICT
overcomingobstacles.org
LESSON EXTENSIONS
Using Quotations
“The great tragedies of history occur not when right confronts wrong, but when two rights confront
each other.” —Henry A. Kissinger
Have students discuss the meaning of this quote and how it relates to conflict between two people.
Addressing Multiple Learning Styles
Have groups of students create “living statues” of conflict and then of resolution by posing in a scene.
Ask each group to explain its formation and how it would resolve the conflict shown in its first statue.
Writing in Your Journal
Have students write about the challenges they face when trying to be assertive in conflict situations.
As a class, compile one list of the challenges that students face and allow them to offer suggestions on
how to overcome these challenges.
Using Technology
Show the movie The Mighty, starring Sharon Stone.
Have students track the ways that Max and “Freak” resolve their conflicts. Discuss the assertive
behavior demonstrated by each character.
Homework
Have students reflect on their achievement with regard to their conflict resolution goals.
Have each student create a certificate of achievement for someone else in class.

RESOLVING CONFLICTS | LESSON 5: RESOLVING CONFLICT
overcomingobstacles.org
Additional Resources
Have students read excerpts from Long Walk to Freedom by Nelson Mandela.
Discuss how Mandela confronted his own conflicts while acting as a mediator to others.

PART III
DEVELOPING RELATED SKILLS
PROBLEM SOLVING

TABLE OF CONTENTS
PART III: DEVELOPING RELATED SKILLS
1. Problem Solving Techniques 262
2. Problem Solving in School 270
3. Problem Solving on the Job 277
4. Problem Solving at Home 284
Problem Solving

PROBLEM SOLVING | LESSON 1: PROBLEM SOLVING TECHNIQUES
overcomingobstacles.org
AGENDA
Starter
Problems, Problems; Solutions, Solutions
What We Know
Do It Again, Sam
Conclusion
Student Assessment
Objectives
Students will identify problems that they face.
Students will identify strategies that can be used for problem solving.
Students will apply the steps of the decision making process to problem solving.
Materials Needed
One copy of the “Problem Solving” activity sheet for each group (Part III)
1LESSON
PROBLEM SOLVING TECHNIQUES

PROBLEM SOLVING | LESSON 1: PROBLEM SOLVING TECHNIQUES
overcomingobstacles.org
Tell students the following story:
Marta comes into school one morning and sees her best friend, Ali, talking with Marta’s boyfriend, Rodrigo. Neither Rodrigo nor Ali sees Marta as she gets closer. They are smiling and whispering to each other. When they see Marta, they stop talking, move away from each other, and look embarrassed. They all say hello to each other, and Ali and Marta go to class together. Rodrigo heads for his class in another room. Marta asks Ali what they were talking about. Ali says, “Oh…nothing much. Just homework.” Marta feels uncomfortable about the scene she just saw but doesn’t know what to do.
Ask students to describe Marta’s problem. Ask if Ali and Rodrigo also have a problem.
After students have had a chance to express their ideas, explain that they will develop problem solving skills in this module.
Starter (3 minutes)
Purpose: Students identify problems that they face.
1. Students define “problem.”
Ask students what it means to have a problem. Have students discuss their definition of “problem.” Ensure that they focus on defining “problem” instead of offering examples.
Elicit comments such as the following from students:
A problem is a question that needs to be answered.
A problem is a situation that is puzzling or creates difficulty.
2. Students identify problems that they experience in their lives.
Point out to students that everyone experiences problems. Elicit from students examples of problems that they have had. Encourage them to think of examples from all areas of their lives. In order to prompt discussion, suggest the following examples:
Part I Problems, Problems; Solutions, Solutions (10 minutes)

PROBLEM SOLVING | LESSON 1: PROBLEM SOLVING TECHNIQUES
overcomingobstacles.org
Problems with their bosses
Problems with co-workers
Problems in their family
Problems with school assignments or teachers
Problems with classmates or friends
Have a volunteer write students’ answers in a place where everyone can see.
3. Students classify problems.
Explain to students that in this module they are going to be addressing problem solving at school, at work, and at home. Ask them to classify each of the problems listed into one of those categories. Have a category of “other” for problems that do not fit within the school, home, or work classifications.
Write the categories for each of the problems listed.
Purpose: Students identify techniques they have learned that can be used for problem solving.
1. Students understand what it means to solve a problem.
Ask students what it means to solve a problem. Lead students to understand that solving a problem means resolving some kind of confusion or difficulty and having a clear course of action. Point out to students that sometimes the solution will be the “lesser of two evils.”
2. Students recognize the strategies they have used to solve problems.
Ask several students to identify problems from the list on the board that they have solved. Guide students to verbally outline the process they used to solve the problem. Write key words or phrases from their explanations where everyone can see. Have students compare the processes that they used to solve their problems. Make a list of the words and phrases that suggest there is a process for problem solving. Additionally, mention skills that students have developed that will help them to solve problems well, including communication skills, decision making skills, goal setting skills, and so on.
Explain that students will be using and combining some of these skills to refine their problem solving skills.
3. Students recognize that they have the ability to solve problems.
Part II What We Know (15 minutes)

PROBLEM SOLVING | LESSON 1: PROBLEM SOLVING TECHNIQUES
overcomingobstacles.org
Refer students to the list of problems that they have brainstormed and ask if any of these problems cannot be solved. Lead students to recognize that they have the ability to solve or alleviate the impact of their problems.
Tell students that problem solving is similar to decision making. When they are problem solving, they are searching for the best option, or solution, to their problem (as in decision making).
Purpose: Students apply the decision making process to problem solving.
1. Students review the steps of the decision making process.
Ask students to recall the steps of the decision making process that they learned in Module Two: Decision Making Skills. They are:
1. Define the issue.2. Gather information.3. Develop alternatives.4. Analyze consequences.5. Make the decision.6. Consider feedback and evaluation.
2. Students apply the steps of the decision making process to problem solving.
Divide the class into groups of four or five students. Assign each group one character from the starter (Marta, Ali, or Rodrigo). Give each group one copy of the “Problem Solving” activity sheet and a character to focus on. Reread the starter to the class.
Give students the following instructions:
Your task is to solve your character’s problem.
Put your character’s name on the activity line.
Use the six-step decision making process to find a solution.
If necessary, prompt students by saying, for example, “Does Ali have a problem? If so, what is it? The first step is to define the issue or problem that Ali has.”
Move around the classroom and whisper to the groups assigned Ali and Rodrigo that their characters are planning a surprise party for Marta. As you circulate, remind the groups to follow the steps of the decision making process.
3. Groups present their results to the class.
Part III Do It Again, Sam (20 minutes)
PROBLEM SOLVING | LESSON 1: PROBLEM SOLVING TECHNIQUES
overcomingobstacles.org
After students have completed their activity sheets, have each group present its results to the class.
Ask the groups assigned Marta if knowing about the surprise party would have made a difference in how they chose to solve the problem. Ask them how they could have discovered that information.
Have the groups explain the steps they took and the reasons for each. Point out to students that each group chose a slightly different solution. Remind students that there are usually several different solutions to a problem and that one of the steps of the problem solving process is to consider as many options as possible.
Conclude by asking students to review the steps of the problem solving process. Elicit from students the following key points that were taught in this lesson:
A problem is a question that needs answering or a situation that creates difficulty.
Everyone has problems and the ability to solve them.
Problem solving utilizes the techniques and steps of the decision making process.
Conclusion (2 minutes)
1. List the steps to effective problem solving.
2. Create a scenario or short story in which someone demonstrates the steps of the problem solving
process.
Student Assessment

PROBLEM SOLVING | LESSON 1: PROBLEM SOLVING TECHNIQUES
overcomingobstacles.org
LESSON EXTENSIONS
Using Quotations
“Problems are not stop signs, they are guidelines.” —Robert Schuller
Have students create signs that represent a problem as a guideline. Ask students to share their signs
with the class and explain why they represent guides to problem solving.
Addressing Multiple Learning Styles
Present students with a problem. Ask them to create a KWS chart of what they know about the problem
(K), what they want to know about it (W), and possible solutions to it (S).
Have students discuss their KWS charts.
Writing in Your Journal
Have students write about whom they turn to for advice when they have a problem. Have them write a
letter to that person asking for advice about a problem they have.
Have students share their letter with a partner and discuss possible solutions to their problem.
Using Technology
Have students create road or concept maps showing the path to solving problems. The maps should
show a path from a problem to its solution and give directions that will help others solve problems. Ask
students to draw and color the maps.
Have students present their maps on a smartboard.

PROBLEM SOLVING | LESSON 1: PROBLEM SOLVING TECHNIQUES
overcomingobstacles.org
Homework
Have students read “Dear Abby” or another advice column and bring in the piece they read.
Discuss a few of the questions and the advice that was given. Do students agree with the advice given?
How would they advise the person in each situation?
Additional Resources
Have students read A Whack on the Side of the Head: How You Can Be More Creative by Dr. Roger
von Oech.
Have students summarize what they have read.

PROBLEM SOLVING | PROBLEM SOLVING TECHNIQUES©
20
21
Ove
rco
min
g O
bst
acle
s
GROUP MEMBERS _____________________________________________________________________
ACTIVITY _______________________________________________________________________________
DECISION MAKING STEPS COMMENTS
1. Define the issue.
2. Gather information.
3. Develop alternatives.
4. Analyze the consequences.
5. Make the decision.
6. Consider feedback and evaluation.
PROBLEM SOLVINGBY
overcomingobstacles.orgPowered by TCPDF (www.tcpdf.org)

PROBLEM SOLVING | LESSON 2: PROBLEM SOLVING IN SCHOOL
overcomingobstacles.org
AGENDA
Starter
What’s the Problem?
Define and Gather
Act It Out
Conclusion
Student Assessment
Objectives
Students will apply the steps of the problem solving process to solving problems at school.
Students will identify resources available in school that can help them solve common problems.
Materials Needed
A list of resources available in the school that can help students solve problems (Part I)
2LESSON
PROBLEM SOLVING IN SCHOOL

PROBLEM SOLVING | LESSON 2: PROBLEM SOLVING IN SCHOOL
overcomingobstacles.org
Write the following quote where everyone can see: “If you are not part of the solution, you are part of the problem.” Elicit from students their thoughts about the meaning of this saying.
Ask the class to suggest one problem their school faces and who should solve this problem. Point out to students how easy it can be to wait for other people to solve problems that affect us. Explain that the quote means that if we are not taking responsibility for solving problems that affect us, we are helping to prolong them.
Explain to students that this lesson will help them develop new skills for solving problems that they encounter in school.
Starter (3 minutes)
Purpose: Students will develop new problem solving strategies to apply to problems at school.
1. Students identify problems at school.
Ask the class to list some problems students typically have in school. Have a volunteer write student responses where everyone can see. (Students might respond: problems with other students, problems with teachers, problems with cliques, dating and social pressures, drug and alcohol pressures, disciplinary problems.)
Save this list for use in Part II.
2. Students identify problem indicators.
Select one of the problems identified by students and ask them to list indicators that would help them identify it as a problem. Write the indicators in a place where everyone can see.
Look for a response that can be built upon to make the point that problems cannot be ignored; they must be dealt with or they will often become worse. Remind students that when they are problem solving, their goal is to clearly identify what the problem is so that they can take appropriate steps to address it.
Tell students that it may sometimes be helpful to talk to friends when they believe they have a problem. Ask students what characteristics they should look for in a friend when considering confiding in them. Write student responses in a place where everyone can see. (Students might respond: the person should be someone whose judgment and insight you respect, the person should be someone who will keep the discussion confidential.)
3. Students identify resources available in their school that can help them solve problems.
Part I What’s the Problem? (10 minutes)

PROBLEM SOLVING | LESSON 2: PROBLEM SOLVING IN SCHOOL
overcomingobstacles.org
Referring to the list of problems that students brainstormed, elicit suggestions regarding places to go for help with solving problems in school. Guide students to identify school personnel whom they respect and who might help them. (Students might respond: teachers, principals, school counselors, social workers, librarians, school nurses, police, coaches, etc.) Also point out that community organizations or outside programs are available to students.
Purpose: Students practice defining and gathering information to solve problems.
1. Students develop scenarios that call for problem solving.
Explain to students that they are going to brainstorm a list of situations in school that require problem solving. The class will then be divided into small groups to apply the first two steps of the problem solving process: define the problem and gather information.
Refer to the list of general situations that students brainstormed in Part I, and then ask them to suggest specific problem situations at school. Suggest situations such as the following to facilitate discussion:
A friend is lying about you behind your back.
You have missed five English classes in the past three weeks; there is a test tomorrow.
You know that a friend has brought a weapon to school.
Someone has taken your homework. You think that you know who it is, but you aren’t sure.
A close friend is having difficulty with his parents, and he has started drinking at school.
Your teacher has accused you of copying someone else’s answers on a test.
Your PE teacher yells at you because she doesn’t think you are trying hard enough. It has made you so upset that you don’t even want to go to gym class.
2. Students define the problems.
Divide the class into small groups of five or six students. Assign one scenario from the class list to each group. Make sure that there are enough scenarios to give one to each group.
Explain to students that they are going to focus on the first two steps of the problem solving process: define the problem and gather information. Point out to students that in order to solve the problem that they have been assigned, they need to identify the causes of the problem, who is involved, the motives of the individuals involved, and so on.
Part II Define and Gather (20 minutes)

PROBLEM SOLVING | LESSON 2: PROBLEM SOLVING IN SCHOOL
overcomingobstacles.org
Write the following questions where everyone can see them: Who? What? When? Where? Why? How? Suggest to the groups that the first step of defining the problem is to answer as many of those questions as possible.
Allow students about five minutes to develop answers that more specifically define their problems.
3. Students define strategies for gathering information.
After about five minutes, stop the groups and ask how many of them still have unanswered questions. Explain to students that when you have defined the problem as clearly as possible and still have questions, it is time to gather additional information.
Ask students how they can find answers to the questions that remain. Write student responses on the board. (Students may respond: talk directly to the people involved, consult a counselor or other expert, talk to other friends or witnesses.) Explain to them that these are strategies for the second step of the problem solving process: gather information.
Tell students that they are now going to prepare role plays. Tell them that their role plays should demonstrate clearly defined problems and include characters who are gathering information in order to develop solutions to the problems.
Allow students about 10 minutes to prepare their role plays.
Purpose: Students present and evaluate their problem-scenario role plays.
1. Students present and evaluate their role plays.
Ask for a group to present its role play first. Direct the rest of the class to write down the six questions (i.e., Who? What? When? Where? Why? How?) on a piece of paper and to define the problem by answering the questions as the group role-plays.
Have the first group present its role play.
2. Students gather information by asking effective questions.
When the role play is complete, ask the students in the group to remain in character. Direct the rest of the class to look at their lists and determine which elements of the problem are still unclear. Encourage them to ask specific questions of the role-playing group in order to determine the remaining details.
Students should ask questions similar to the following:
Part III Act It Out (15 minutes)

PROBLEM SOLVING | LESSON 2: PROBLEM SOLVING IN SCHOOL
overcomingobstacles.org
Why did you feel that you had to spread gossip?
How did you find out that your friend is having problems with her parents?
When did you first notice that your friend was drinking in school?
What does your teacher think about the absences?
3. Students suggest other resources for gathering information.
After the class has had a chance to question the characters, ask the students observing the role plays to suggest other resources that the characters might use to solve their problems. To guide their thinking, refer students to the list of resources that they created in Part I.
Repeat this process and discussion for each group.
Ask students to think about a problem they currently have or anticipate having in school. Ask them to consider how well-defined the problem is: How much information do they have? What other pieces of information are missing? Elicit from students the following key points that were taught in this lesson:
Once you determine that you have a problem, the first step is to clearly define it.
Answering the six questions (i.e., Who? What? When? Where? Why? How?) can help us define a problem and determine what other information we need.
There are many resources available to help us gather information and solve problems at school.
Conclusion (2 minutes)
1. List three possible problems that someone might face in school. For each problem, discuss who
can help answer questions about it.
2. What questions do you need to answer in order to gather information about a problem?
Student Assessment

PROBLEM SOLVING | LESSON 2: PROBLEM SOLVING IN SCHOOL
overcomingobstacles.org
LESSON EXTENSIONS
Using Quotations
“In creative problem solving, it is frequently more important to look at the problem from different
vantage points rather than run with the first solution that pops into your head.” —Eugene Raudsepp
Have students think of a problem they had recently and their reaction to it. Have them write a new
solution to the problem. Ask, “How could you have looked at the problem differently?”
Addressing Multiple Learning Styles
Present students with a problem. Ask students to create a time line for solving the problem.
Have groups of students brainstorm alternative time lines.
Writing in Your Journal
Have students write about how they deal with problems at school. Have each student create a plan of
action to use the next time they face a problem at school.
Have students share their plans with partners and discuss alternative solutions and possible resources
within the school.
Using Technology
Have students research current education issues online. Offer various websites that discuss such issues.
Ask students to write two or three paragraphs about one of the issues.
Homework
Ask students to bring in or draw an object that represents a problem (such as a knot).
Have students describe how the object is a representation of a problem in school.

PROBLEM SOLVING | LESSON 2: PROBLEM SOLVING IN SCHOOL
overcomingobstacles.org
Additional Resources
Have students review The Thinker’s Toolkit: 14 Techniques for Problem Solving by Morgan D. Jones.
Have students debate the ideas in the book or add some of their own.

PROBLEM SOLVING | LESSON 3: PROBLEM SOLVING ON THE JOB
overcomingobstacles.org
AGENDA
Starter
Outside the Box
Consequences, Consequences
On the Job
Conclusion
Student Assessment
Objectives
Students will practice developing alternatives and analyzing consequences in order to solve
problems at work.
Students will apply problem solving strategies to specific workplace problems.
Materials Needed
White paper, markers, colored pencils, rulers, magazines, glue, scissors, etc. (Part I)
Copies of a news or magazine article for each student about an allegation of workplace
discrimination (Part III)
3LESSON
PROBLEM SOLVING ON THE JOB

PROBLEM SOLVING | LESSON 3: PROBLEM SOLVING ON THE JOB
overcomingobstacles.org
Ask students if they have ever used a correction fluid like Wite-Out or Liquid Paper to fix a mistake they made while writing. If they haven’t, explain that correction fluid is a white, paintlike liquid used to hide errors on paper.
Tell students that correction fluid was invented in 1951 by Bette Nesmith Graham, a secretary. Before the advent of word processors and home computers, all typing had to be performed on typewriters. Work done on a typewriter, unlike work done in a word processor, could not be edited before appearing on paper. Therefore, a single mistake—no matter how minor—meant that the whole page had to be retyped from the beginning. Graham, who was proud of being an efficient employee, wanted to find a better way to fix typing errors. One night, she mixed paint and created what she called “Mistake Out”; she soon began using it at work. Her correction fluid quickly became popular, eventually leading her to establish a company that she later sold for $47.5 million.
Explain to students that, in business, people look for inventive and creative solutions to problems. In this situation, correction fluid solved the problem. Tell students that in this lesson they will be focusing on steps three and four of the problem solving process: develop alternatives and analyze consequences.
Starter (3 minutes)
Purpose: Students develop possible alternatives to solve workplace problems.
1. Students identify the kinds of problems that occur in the workplace.
Ask students to list problems that they have experienced at their jobs, including self-employed positions such as babysitting or dog walking. Suggest that students also list job problems that they have heard about from friends or family members. Write student responses where everyone can see. (Students might respond: not knowing how to do a task, scheduling conflicts, a supervisor who doesn’t seem to like them, uncooperative or unfriendly co-workers, gender or racial discrimination, sexual harassment, etc.)
2. Students develop a workplace scenario that calls for creative problem solving.
Tell students that they are now going to use one of the problems they just listed in order to practice developing alternatives and analyzing consequences.
From the list students developed, choose a problem for them to work on in which inventing a system, process, or object might produce a solution. Ask the class to further develop the situation, providing who, what, when, where, why, and how details. Write student responses where everyone can see as a reference for the next activity.
Part I Outside the Box (20 minutes)

PROBLEM SOLVING | LESSON 3: PROBLEM SOLVING ON THE JOB
overcomingobstacles.org
3. Students invent possible solutions to the problem that they have developed.
Ask students if they have ever heard the expression, “Think outside of the box.” Elicit students’ thoughts as to what the saying might mean. Lead them to understand that the saying means considering all possibilities, even those that might seem unusual or strange at first. Point out to students that thinking “outside of the box” is a useful strategy in this step of problem solving, when it is important to consider as many solutions as possible.
Remind students of the story behind correction fluid. Tell students that this is an example of thinking “outside of the box.” Explain that they are now going to create similar inventions to solve the problem that they just discussed.
Divide the class into groups of three or four students. Remind students that their inventions can be objects, systems, or processes. Tell students to try to “think outside of the box” when considering solutions. Tell them that each group will choose one possible invention to present to the class.
Give the groups about five minutes to come up with their ideas.
Provide groups with art materials and instruct them to create visual representations of the inventions that they have decided upon.
Purpose: Students analyze the consequences of the inventions they created.
1. Students present their inventions to the class.
When students have finished working, ask each group to share its invention with the class and explain why it chose the particular invention that it did.
2. Students analyze the consequences of their inventions.
After each group presents its project, ask the class, “What are some of the possible consequences of this invention?”
Remind students to consider all possible consequences, both positive and negative. If students need prompting, provide them with examples of the possible consequences of correction fluid (e.g., more work could be performed, as mistakes were easier to fix; less time was needed to prepare a typed document; work might have become sloppier as correcting mistakes became less time consuming).
Have a volunteer write students’ suggestions on the board. When students have exhausted their ideas, review the list that they created. Ask them to determine whether or not the invention seems effective. Also encourage students to consider what other changes might have to take place in order for their inventions to work.
Part II Consequences, Consequences (10 minutes)

PROBLEM SOLVING | LESSON 3: PROBLEM SOLVING ON THE JOB
overcomingobstacles.org
Purpose: Students apply their problem solving skills to a real workplace issue.
1. Students learn about the Civil Rights Act.
Explain that one problem that may occur on the job is discrimination. Explain to students that federal law prohibits discrimination based on:
Race, color, or national origin
Age or gender
Religion
Pregnancy
Disability
Many states also have laws prohibiting discrimination based on sexual orientation, parental status, marital status, and political affiliation.
2. Students identify possible solutions for problems involving discrimination in the workplace.
Ask students to suggest possible actions for situations in which they believe that they have been discriminated against on the job. Students may identify some of the following approaches:
Document instances in which you believe you have been discriminated against by writing down what happened and who was present.
Check your company’s policy or talk to your supervisor to see if what you’re experiencing is considered discrimination.
If you can, use good communication skills to talk to the person and tell them that you believe they are discriminating against you and you want it to stop.
If the behavior doesn’t stop, follow the company policy and take the next step. If necessary, seek help from your supervisor or human resources manager.
If the person practicing discrimination is your supervisor or the human resources manager, see their supervisor.
If none of these steps takes care of the problem, file a complaint with the Equal Employment Opportunity Commission (EEOC). Go to www.eeoc.gov.
If you file a complaint, understand that the charges you are bringing are very serious and that you must not take them lightly. The records you have kept will be very helpful in ensuring that the claim is responsibly processed.
Part III On the Job (15 minutes)

PROBLEM SOLVING | LESSON 3: PROBLEM SOLVING ON THE JOB
overcomingobstacles.org
3. Students apply their solutions to an example of workplace discrimination.
Distribute copies of a news or magazine article relating allegations of workplace discrimination or tell students about an incident with which you are familiar.
Divide students into groups of five or six. Have each group review the situation described in the article and apply steps three and four of the problem solving process by developing possible solutions to the problem and analyzing the consequences.
Ask each group to share its results with the class.
Conclude by asking students to list the four steps of the problem solving process that they have practiced so far. Tell students that the next lesson will focus on the final two steps: make a decision and evaluate the results. Elicit from students the following key points that were taught in this lesson:
Thinking “outside of the box” can help you develop many possible solutions to a problem.
It is important to consider the consequences of potential solutions before making a final decision.
The Civil Rights Act prohibits discrimination in the workplace.
Conclusion (2 minutes)
1. What are the benefits of thinking “outside of the box”?
2. What can you do if you see discrimination in your workplace?
Student Assessment

PROBLEM SOLVING | LESSON 3: PROBLEM SOLVING ON THE JOB
overcomingobstacles.org
LESSON EXTENSIONS
Using Quotations
“Each problem has hidden in it an opportunity so powerful that it literally dwarfs the problem. The
greatest success stories were created by people who recognized a problem and turned it into an
opportunity.” —Joseph Sugarman
Have students brainstorm problems on the job that might be seen as opportunities.
Addressing Multiple Learning Styles
Have students write “if, then” statements that might solve problems at work (e.g., “if someone is not
willing to share equipment with you, then ask someone else”).
Have students create a book of “if, then” at-work statements.
Writing in Your Journal
Have students write about why it is important to be able to solve problems on the job.
Have students discuss ways that being a good problem solver could benefit people in the workplace.
Using Technology
Have students create lists of questions for professionals in different fields about the various work
problems they encounter. Ask your school’s office manager and principal if your students could send
their questions to professionals who are willing to answer them.
Discuss with students the answers that are sent back to your class.

PROBLEM SOLVING | LESSON 3: PROBLEM SOLVING ON THE JOB
overcomingobstacles.org
Homework
Ask students to interview someone about job-related problems. Ask them to discuss the course of
action that the person took in response to these problems. Discuss the results of the interviews. What
were the reactions to the problems encountered on the job and the courses of action taken to deal with
the problems?
Additional Resources
Have students read a story from Chicken Soup for the Soul at Work.
Have students write letters to the author of the story that share their reactions to it.
PROBLEM SOLVING | LESSON 4: PROBLEM SOLVING AT HOME
overcomingobstacles.org
AGENDA
Starter
Scenes from Home
Storyboard
Gallery Walk
Conclusion
Student Assessment
Objectives
Students will analyze a video clip of a problem at home.
Students will practice techniques of evaluation and feedback.
Students will apply the six steps of the problem solving process to problems at home.
Materials Needed
A balloon (not inflated) with the words “family relationships” written on it (Starter)
A pin (Starter)
A video clip from a popular movie or TV show showing teens grappling with a problem at home
(Part I)
Poster board in dark colors, one piece for each group of four or five students (Part II)
Sheets of white drawing paper, approximately one per student (Part II)
Glue and an assortment of colored markers, crayons, pencils, magazines, etc. (Part II)
4LESSON
PROBLEM SOLVING AT HOME

PROBLEM SOLVING | LESSON 4: PROBLEM SOLVING AT HOME
overcomingobstacles.org
Several stacks of sticky notes, enough so that each student gets several notes (Part III)
PROBLEM SOLVING | LESSON 4: PROBLEM SOLVING AT HOME
overcomingobstacles.org
Take the balloon with the words “family relationships” written on it and slowly blow it up for the class. When the balloon is almost at full capacity, stop inflating it for a moment and ask the class what would happen if you kept blowing air into it. (Student responses should indicate that the balloon would pop.)
Continue blowing up the balloon until it is at full capacity. Ask students how many of them feel tension or fear that the balloon will pop as the pressure on it increases. Pop the balloon suddenly with the pin. Tell students that this is how stress affects family relationships; as stress increases, the tension grows, problems become worse, and the situation may explode out of control.
Brainstorm with students some examples of common problems at home; write student responses where everyone can see. (Students might respond: feeling as though parents don’t trust them, feeling as though parents are too strict or not strict enough, feeling as though they are treated differently than their siblings, not getting along with siblings, feeling as though they are given too much responsibility for younger brothers and sisters, wishing they had more privacy.) Save this list for use in Part II.
Tell students that they are going to practice applying the final two steps of the problem solving process to problems at home.
Starter (3 minutes)
Purpose: Students analyze the problem solving strategies depicted in a video clip.
1. Students define the final two steps of the problem solving process.
Tell students that the final steps of the problem solving process are making and evaluating a decision. Ask students what it means to evaluate a decision. (Student responses should indicate that this means seeing how the solution turns out and deciding whether the actual consequences are primarily good or bad.)
Point out to students that the final step is often overlooked—people may thoroughly work through a solution to a problem but may not revisit it to see if it was effective.
2. Students view a video clip depicting a problem at home.
Tell students that they are going to watch a clip of a common problem at home. Instruct students to take notes while they are watching in order to identify the steps of the problem solving process that are being followed. Tell students that they should also note indications that the steps are not being followed, such as someone who has not gathered enough information. Show the video clip to students.
3. Students identify the steps of the problem solving process that are evident in the clip.
Part I Scenes from Home (15 minutes)

PROBLEM SOLVING | LESSON 4: PROBLEM SOLVING AT HOME
overcomingobstacles.org
When the video is finished, ask students to list the steps of the problem solving process that were apparent in the video and identify the specific scenes or dialogue that relate to each step. Discuss students’ responses and lead students to draw inferences about the steps of the problem solving process that were not overtly addressed in the clip.
As students identify the steps in the video, create a rough storyboard on the board. (Draw a large, horizontal rectangle; then draw six boxes inside that rectangle. Each small box represents one step of the problem solving process.) Write in each box key words or dialogue from the scenes that relate to each problem solving step.
Purpose: Students develop storyboards to demonstrate problem solving techniques.
1. Students choose problem solving scenarios to illustrate.
Point out to students the sketch you have made on the board. Explain that this is an outline for a storyboard of the video clip they watched. Tell students that storyboards contain drawings or visual representations of each scene and are used by animators, artists, and filmmakers to create films and shows.
Tell students that they are now going to create storyboards that outline solutions for their problems at home. Divide the class into groups of four or five students. Referring them to the list of problems that they brainstormed in the starter, instruct the groups to each choose a problem that is important to them. Explain that each group will then create a storyboard to visually represent possible solutions to its problem.
2. Students create storyboards to demonstrate problem solving skills.
Display a completed storyboard for the class or label the sketch on the board to show students how to assemble their materials.
Distribute the poster board, white paper, markers, glue, and other art supplies to each group. Students should design their scenes on white paper and attach these, in order, to the dark poster board. Give students about 20 minutes to work on their storyboards. Ask each group to post its finished storyboard on one of the classroom’s walls.
Part II Storyboard (20 minutes)
Purpose: Students practice evaluation and feedback techniques.
1. Students prepare for a gallery walk.
Part III Gallery Walk (10 minutes)

PROBLEM SOLVING | LESSON 4: PROBLEM SOLVING AT HOME
overcomingobstacles.org
Explain that the class is going to do a gallery walk around the classroom to evaluate the storyboards. Ask students if they have ever been to a gallery or art museum. Explain that in a gallery, people browse among the works, pausing to look at and think about each piece of art.
2. Students learn evaluation and feedback techniques.
Ask students what “evaluation” means. Direct them to define “evaluation” as determining the strengths and weaknesses of something through careful review. Explain that it is important to review all aspects of something in order to evaluate its overall impact. Tell students that they are going to practice evaluation by looking at and thinking about the storyboards.
Ask students what “feedback” means. Tell students that feedback consists of constructive comments that describe the impact of something. Explain that they are going to give feedback to each other by making notes about the storyboards.
Point out to students that effective feedback can be both negative (“I felt confused when I read this”) and positive (“I was excited to see that you did it this way because…”), but that it should always be constructive and help the person improve the project. Remind students to practice responsible communication by using I-Messages.
Remind students that providing carefully worded feedback is an important tool to use when addressing problem situations, particularly situations involving our families and others with whom we tend to interact rather informally.
3. Students participate in a gallery walk to provide feedback on the storyboards.
Give each student a small stack of sticky notes and instruct them to use the notes to provide feedback on the storyboards by writing their comments and sticking the notes on the wall near each poster. Tell students to focus on the ways that the storyboards convey the six steps of the problem solving process and whether they think that the solution is effective.
Allow students several minutes to circulate the room to review the storyboards.

PROBLEM SOLVING | LESSON 4: PROBLEM SOLVING AT HOME
overcomingobstacles.org
Ask students to name the steps of the problem solving process. Encourage them to focus on specific situations in their own lives in which problem solving might be useful. Elicit from students the following key points that were taught in this lesson:
Cooperation reduces problems in the family.
Handling stress helps problems become more manageable.
Problem solving techniques work in family situations.
Conclusion (2 minutes)
1. What can you do to help build cooperation in your family?
2. Describe a problem that you have had at home. How did you overcome this problem? How could
the steps of the problem solving process have helped you?
Student Assessment

PROBLEM SOLVING | LESSON 4: PROBLEM SOLVING AT HOME
overcomingobstacles.org
LESSON EXTENSIONS
Using Quotations
“There is little less trouble in governing a private family than a whole kingdom.” —Michel Eyquem de
Montaigne, 16th century essayist
As a class, discuss the meaning of the quote. Have students write possible solutions for solving
problems at home.
Addressing Multiple Learning Styles
Have students imagine their family as a sports team. Ask, “What sport would you play? What position
would each family member play? What would your team name and colors be?”
Have students meet in groups based on the sport their families would play (e.g., all soccer teams
together). Have each group present the members of their league to the class.
Writing in Your Journal
Have students describe a situation in which their family used cooperation to solve a problem.
Have students share their descriptions with a partner.
Using Technology
Have students research various services available to families.
Have students record PSAs for a service offered to help families solve problems.

PROBLEM SOLVING | LESSON 4: PROBLEM SOLVING AT HOME
overcomingobstacles.org
Homework
Have students create a bar graph of their problems at home, at work, at school, and with friends. Have
them keep the chart for one week and track how many times problems arise.
Have students present their bar graphs to the class and share their solutions or ask for advice.
Additional Resources
Have students research songs about families or family members.
Have students discuss the lyrics of these songs and the messages they send about families and problems
at home.

PART III
DEVELOPING RELATED SKILLS
SKILLS FOR SCHOOL AND BEYOND

TABLE OF CONTENTS
PART III: DEVELOPING RELATED SKILLS
1. Identifying Your Learning Style 294
2. Managing Your Time 303
3. Reading, Listening, and Note Taking 316
4. Writing Reports and Presenting to an Audience 325
5. Preparing for Tests and Exams 337
6. Managing Stress 346
Skills for School and Beyond

SKILLS FOR SCHOOL AND BEYOND | LESSON 1: IDENTIFYING YOUR LEARNING STYLE
overcomingobstacles.org
AGENDA
Starter
How Do I Learn?
What Do We Do Best?
Putting It All Together
Conclusion
Student Assessment
Objectives
Students will recognize that there are a variety of learning styles.
Students will identify their own preferred learning styles.
Students will practice using their primary learning styles to master new content.
Materials Needed
One copy of the “Learning Styles Profile” activity sheet for each student (Part I)
One copy of the “Learning Styles Summary” activity sheet for each student (Part I)
One copy of the “Project Assignment” activity sheet for each group of four to five students (Part
III)
1LESSON
IDENTIFYING YOUR LEARNING STYLE

SKILLS FOR SCHOOL AND BEYOND | LESSON 1: IDENTIFYING YOUR LEARNING STYLE
overcomingobstacles.org
Write on the board the names of famous people from different fields who have/had considerable talent (e.g., Albert Einstein, Duke Ellington, Toni Morrison, Vincent Van Gogh, Babe Ruth, Mahatma Gandhi).
Ask students who they think is/was the smartest. Why do they think that? Lead students to recognize that it is difficult to assess who on that list is/was the smartest, because each has/had great talent in a different area. Explain that there are many different ways of learning and that different people excel in different areas. This lesson will help students identify their own learning styles.
Tell students that each individual on the list excelled in one of the following areas:
Logical-mathematical (math)
Musical (music and rhythm)
Linguistic (language)
Spatial (visual)
Bodily-kinesthetic (athletic, body)
Interpersonal (people)
Intrapersonal (emotional)
Explain that each area of learning is different and requires a different set of skills and capacities.
Starter (3 minutes)
Purpose: Students recognize the importance of identifying their own preferred learning styles, and complete an inventory to help them do so.
1. Students recognize the importance of identifying their own learning styles.
Ask students to explain why identifying their own learning styles might be useful. Lead students to recognize that identifying their learning styles will enable them to develop study practices that will help them learn more effectively. This awareness will also help students to plan projects and respond to assignments by capitalizing on their learning strengths.
2. Students complete an inventory that assesses different learning styles.
Distribute a copy of the “Learning Styles Profile” activity sheet to each student. Tell students they will have 10 minutes to complete the profile.
Part I How Do I Learn? (15 minutes)

SKILLS FOR SCHOOL AND BEYOND | LESSON 1: IDENTIFYING YOUR LEARNING STYLE
overcomingobstacles.org
When students are finished, distribute the “Learning Styles Summary” activity sheet. Have students write their responses to each question in the spaces provided and then total their responses to each type of question.
Purpose: Students identify study methods that capitalize on their preferred learning styles.
1. Students group themselves according to their learning styles.
Instruct students to organize themselves into groups according to their preferred learning style (the style with the highest response on their summary sheets). If students have two styles with equal scores, suggest that they choose the one they feel is their strongest area. Divide large groups as needed.
2. Students brainstorm study methods that capitalize on their learning styles.
Instruct groups to brainstorm study methods that capitalize on their preferred learning styles and that will help them learn material as they prepare for tests. Encourage students to design specific activities, such as the following:
Use string to create models of geometrical figures (visual/artistic/spatial).
Conduct a role play of the signing of the Declaration of Independence (verbal/linguistic).
Organize a study group to review the main ideas in Hamlet. Have each student in the group focus on a different part of the play. Have each student present their findings to the group (social/interpersonal).
3. Groups share the results of their discussions.
Invite the groups to share their ideas with the rest of the class.
Encourage the class to offer suggestions for each group’s list.
Part II What Do We Do Best? (10 minutes)
Purpose: Students work with others who have learning styles different from their own.
1. Students develop an outline for a project.
Instruct students in each group to count off. Then, have students regroup according to their number (i.e., all the ones in one group, the twos in another, and so on).
Part III Putting It All Together (20 minutes)

SKILLS FOR SCHOOL AND BEYOND | LESSON 1: IDENTIFYING YOUR LEARNING STYLE
overcomingobstacles.org
Distribute the “Project Assignment” activity sheet to each group. Explain that each group must create a plan for a presentation about one of the key events that preceded the Revolutionary War (or another assignment of your choosing).
Instruct each group to develop a plan for the project that incorporates the preferred learning styles of all its members. Remind students to assign initial tasks for each learning style (such as interviewing subjects, library research, or obtaining supplies), as well as to assign appropriate roles for the final presentation.
Allow students 10 minutes to complete this task.
2. Students present their project plans to the class.
Invite each group to present its plans to the class. Have the groups identify who would be responsible for each task and the reasons for assigning the roles as they did.
Ask students why it is important to recognize their own preferred learning styles. Elicit from students the following key points that were taught in this lesson:
There are many different ways of learning.
Identifying our own preferred learning styles enables us to develop study practices that will help us learn more effectively.
Conclusion (2 minutes)
1. Which learning style (or styles) best suits you? Why?
2. List three professions that are well-suited for people with your learning style.
3. When working with others, would it be helpful to know their learning styles? Why or why not?
Student Assessment

SKILLS FOR SCHOOL AND BEYOND | LESSON 1: IDENTIFYING YOUR LEARNING STYLE
overcomingobstacles.org
LESSON EXTENSIONS
Using Quotations
“Everybody is ignorant, only on different subjects.” —Will Rogers
Discuss how this quote applies to learning styles.
Addressing Multiple Learning Styles
Have students make a class chart that lists the names of students and the learning style each one
prefers.
Have students create a pie chart showing the percentage of students in each category.
Writing in Your Journal
Have students write two paragraphs with the following starters: “I learn best when…” and “I have
difficulty learning when…”
Have each student partner with someone else in the class who prefers a different learning style. Have
students discuss their preferred learning styles with their partners and adapt their partners’ styles to fit
their own needs.
Using Technology
Have students search the internet for software/gadgets that might complement their learning styles
and aid them in their studies (e.g., Inspiration for spatial learners, the Livescribe pen for linguistic
learners).
Have students report on their findings.

SKILLS FOR SCHOOL AND BEYOND | LESSON 1: IDENTIFYING YOUR LEARNING STYLE
overcomingobstacles.org
Homework
Have students give the learning styles quiz to an adult they admire. Have them interview this adult
about learning experiences in an area of strength and in an area of weakness.
Have students write a paragraph or two summarizing what they learned. Discuss what students learned
in class.
Additional Resources
Have students read Chapters 4, 5, and 6 of Talkers, Watchers, and Doers: Unlocking Your Child’s
Unique Learning Style by Cheri Fuller. Explain that this book presents a slightly different view of
learning styles.
Tell students to reflect on the learning styles they preferred when they were younger, identifying if they
were “talkers,” “watchers,” or “doers.” Have them adopt some of the techniques in the book to their own
styles today.

SKILLS FOR SCHOOL AND BEYOND | IDENTIFYING YOUR LEARNING STYLE©
20
21
Ove
rco
min
g O
bst
acle
s
For the following statements, write “2” if the statement describes you almost always, “1” if the statement describes you sometimes, and “0” if the statement describes you almost never.
1. ______ I understand what a teacher is saying much better if they draw a diagram or graph.
2. ______ I can hear a song once or twice and am able to sing the lyrics. 3. ______ I learn best when I discuss the material with someone else. 4. ______ I prefer solving algebra problems to solving geometry problems. 5. ______ When I decide that I want something, I do everything I can to get it. 6. ______ I am good at doing impressions of people. 7. ______ I am a good writer. 8. ______ I like to figure out the relationship between items. 9. ______ I remember names well. 10. ______ I think in images and mental pictures. 11. ______ I am very aware of my emotions. 12. ______ I can tell when musical notes are off key. 13. ______ I am good at persuading people to agree with me. 14. ______ I like being physically active. 15. ______ I often sing to myself. 16. ______ I like to write stories, letters, or poems. 17. ______ I know how I will react in most situations. 18. ______ I like playing games of strategy (like chess) and solving riddles. 19. ______ I am able to sense what other people are feeling. 20. ______ I like to tell stories. 21. ______ I like keeping my possessions well organized. 22. ______ I can quickly pick up new dance steps or sports moves. 23. ______ I need time to myself every day. 24. ______ I draw sketches all over my notebooks. 25. ______ I enjoy participating in clubs and group activities. 26. ______ I like to create rhythms. 27. ______ I am good at packing and fitting items into suitcases, boxes, cars, and so on. 28. ______ I like learning about science or math. 29. ______ I know what my strengths and weaknesses are. 30. ______ I play a musical instrument well. 31. ______ Taking a walk helps me relax. 32. ______ I often feel that the best way for me to express myself is to write down my
thoughts. 33. ______ I am the person people call to find out what is happening on the weekend. 34. ______ It really helps me to color code notes or assignments. 35. ______ I am good with tools.
LEARNING STYLES PROFILE
overcomingobstacles.org

SKILLS FOR SCHOOL AND BEYOND | IDENTIFYING YOUR LEARNING STYLE©
20
21
Ove
rco
min
g O
bst
acle
s
Bodily-Kinesthetic
6 ________
14 ________
22 ________
31 ________
35 ________
Total: ______
Musical
2 ________
12 ________
15 ________
26 ________
30 ________
Total: ______
Spatial
1 ________
10 ________
24 ________
27 ________
34 ________
Total: ______
Logical- M
athematical
4 ________
8 ________
18 ________
21 ________
28 ________
Total: ______
Linguistic
7 ________
9 ________
16 ________
20 ________
32 ________
Total: ______
Interpersonal
3 ________
13 ________
19 ________
25 ________
33 ________
Total: ______
Intrapersonal
5 ________
11 ________
17 ________
23 ________
29 ________
Total: ______
LEA
RN
ING
STY
LES SU
MM
AR
Y
QUESTION NUMBER
overcomingobstacles.org

SKILLS FOR SCHOOL AND BEYOND | IDENTIFYING YOUR LEARNING STYLE©
20
21
Ove
rco
min
g O
bst
acle
s
CLASS: U.S. HISTORY
Topic: The events that preceded the Revolutionary War (e.g., the Boston Tea Party, the Stamp Act, the Boston Massacre, Paul Revere’s ride)
Assignment: Create a plan for a presentation about one of the key events that preceded the Revolutionary War.
Tasks To Be Completed By Preferred Learning Style
PROJECT ASSIGNMENT
Make Posters Lamar Ling Visual/Spatial
overcomingobstacles.orgPowered by TCPDF (www.tcpdf.org)

SKILLS FOR SCHOOL AND BEYOND | LESSON 2: MANAGING YOUR TIME
overcomingobstacles.org
AGENDA
Starter
Time Savers and Time Wasters
Taking Care of the Minutes
Daily Planning
Conclusion
Student Assessment
Objectives
Students will identify time management strategies and barriers to effective time management.
Students will recognize that effective time management can help them accomplish their goals.
Students will demonstrate effective time management strategies by prioritizing tasks and
creating schedules.
Materials Needed
One copy of the “Luis’s Story” activity sheet for each student (Part I)
One copy of the “Daily Planner” activity sheet for each student (Part III)
One copy of the “Weekly Planner” activity sheet for each student (Part III)
One copy of the “Term Planner” activity sheet for each student (Part III)
2LESSON
MANAGING YOUR TIME

SKILLS FOR SCHOOL AND BEYOND | LESSON 2: MANAGING YOUR TIME
overcomingobstacles.org
Write the following quote on the board:
“Take care in your minutes, and the hours will take care of themselves.” —Lord Chesterfield
Elicit opinions from students about the meaning of this quote. Mention that most people “waste” small amounts of time (about five to 10 minutes of every waking hour) in a variety of ways, such as waiting in line, looking for misplaced objects, and so on. Explain that although this may not seem like much time, it can add up to many hours—almost a whole day each week.
Tell students that this lesson is about learning to take care of the minutes—in other words, effective time management.
Starter (3 minutes)
Purpose: Students consider barriers to effective time management and develop an understanding of strategies that can help them manage their time more effectively.
1. Students read a story that illustrates poor time management and compare the story to their own experiences.
Divide students into groups of four. Give each student a copy of the “Luis’s Story” activity sheet. Explain that they will have 10 minutes to read the story silently to themselves and then discuss the questions that follow with their groups. Suggest that one student in each group keep track of time. Another group member should serve as a reporter and share the group’s responses with the class.
While students read, draw a two-column chart on the board. Label one column “Time Wasters” and the other “Time Savers.”
2. Groups share their responses to the questions.
After 10 minutes have passed, ask the reporters to summarize their groups’ answers to each question.
While discussing the first two questions, encourage students to relate the story to their own experiences, recalling how difficult and frustrating it can be when there doesn’t seem to be enough time to accomplish everything they want to do. Point out that feeling discouraged can lead to ineffective use of time.
Part I Time Savers and Time Wasters (15 minutes)

SKILLS FOR SCHOOL AND BEYOND | LESSON 2: MANAGING YOUR TIME
overcomingobstacles.org
Questions three and four ask students to list specific time wasters and time savers. List the groups’ ideas on the board in the appropriate columns. Time wasters might include distractions (such as TV), urges (such as snacking), not having materials in a convenient location, and excuses (such as being too tired). Time savers might include writing assignments in one place, prioritizing tasks, breaking down large tasks into manageable activities, and scheduling.
Purpose: Students practice prioritizing tasks.
1. Students recognize that effective time management helps them achieve their goals.
When the list of time savers and time wasters is complete, ask students to identify Luis’s goal in the story. Ask students if they think Luis is on his way to achieving his goal. Lead students to identify the relationship between time management and goal achievement.
2. Students recognize that spending time wisely means deciding what is important.
Ask students what it means to spend money wisely. Lead students to understand that spending money wisely means not wasting it on items that are unimportant. Point out that how one person chooses to spend money may be very different from how someone else chooses to spend it. Encourage students to realize that individuals must decide on what is most important for themselves.
Ask students what was more important to Luis—passing his classes or watching TV. If students are unsure, rephrase the question by asking, “What might Luis have done if he had been given the choice to pass all of his classes or watch TV for an hour?” Point out that Luis’s actions don’t reflect what is important to him. Luis did not prioritize his tasks for the day. Effective time management requires prioritizing. Elicit definitions for “prioritize” from the class.
3. Students make to-do lists of their tasks for the day.
Tell students that in order to prioritize, they must consider all of their tasks. Instruct students to use a blank piece of paper to make a to-do list for that afternoon. Tell them to list the activities and tasks they must do after school. Remind them to include everything, including extracurricular activities, phone calls, household chores, and homework assignments.
4. Students prioritize their tasks for the day.
Instruct students to go through the list and prioritize their tasks. They should number each task according to how important the task is to them, with number one being the most important.
Part II Taking Care of the Minutes (15 minutes)

SKILLS FOR SCHOOL AND BEYOND | LESSON 2: MANAGING YOUR TIME
overcomingobstacles.org
Purpose: Students use their prioritized to-do lists to create daily schedules.
1. Students understand the importance of schedules.
Tell students that writing down and prioritizing their tasks is only the first step to effective time management. It is important to create systems that will facilitate effective time management. Explain that people without effective systems often waste time looking for items such as assignments, keys, passwords, and so on.
Remind students that one of Luis’s difficulties was that he had written down his math assignment but couldn’t find it. He had no system for keeping his tasks organized.
Speculate with students how a calendar or planner might help organize such items. Ask, “Why do we use calendars and planners?” (Students might respond: to keep track of due dates, to keep all assignments in one place, to schedule time for responsibilities and activities, to plan ahead for projects or exams.)
2. Students write their to-do lists on the daily planner.
Distribute the “Daily Planner” activity sheet, “Weekly Planner” activity sheet, and “Term Planner” activity sheet to students. Explain that using planners is an important time-management strategy. Encourage students to describe other planning tools with which they are familiar.
Instruct students to write their to-do lists on the “Daily Planner” activity sheet. Point out the space for materials needed and encourage them to write down specific books or materials that they must remember to bring home. Instruct students to use the schedule space to write all scheduled activities. Allow them several minutes to complete the task.
Remind students that the tasks they have identified as most important should be completed first, even if the other tasks are more appealing.
3. Students observe the benefits of using both short- and long-term planners.
After students have written their assignments on their “Daily Planner” activity sheet, ask them to speculate what problems might occur if they do not follow up by also using the weekly or term planners. (Students might respond: it would be difficult to plan ahead, to see when long-term projects were due, and to allocate time properly.)
Ask students to consider what problems they might encounter if, on the other hand, they used only a weekly or term planner. (Students might respond: there is not enough room to write detailed information, they might forget about smaller daily tasks.)
Part III Daily Planning (15 minutes)

SKILLS FOR SCHOOL AND BEYOND | LESSON 2: MANAGING YOUR TIME
overcomingobstacles.org
Explain that most people use a combination of planners to manage their time. A daily planner should be reviewed every day, either at night or first thing in the morning. A weekly planner should be reviewed at the beginning of each week. Encourage students to suggest ways to set up routines for planner reviews.
4. Students commit to trying out a scheduling system for three weeks.
Mention that one of the biggest difficulties people have with time management is that they try using a planner, yet they stop after only a week. Invite students who have had this experience to share reasons why they did this. (Students might respond: too time-consuming, too bulky to carry around, they didn’t like feeling so strictly scheduled.)
Share with students that they have many options about the type of planner to use and that the samples you provided are only suggestions. Encourage students to personalize their planners by choosing layouts that make sense to them and to find systems that complement their learning styles.
Brainstorm with students places where people can buy planners. Elicit ideas about what they could do if they wanted a planner but did not want to buy one.
Tell students that psychologists say it takes three weeks for something new to become a habit. For this reason, ask students to commit to using their planners for three weeks, at the end of which you will measure their success with the planners. Encourage students to write that date in their planners.
Refer to the quote from the starter. Ask students how using a planner and prioritizing tasks allow them to “take care” in their minutes and save hours in the end. Elicit from students the following key points that were taught in this lesson:
Effective time management helps people to accomplish their goals.
Managing time effectively requires prioritizing.
Using planners is an important time-management strategy.
Conclusion (2 minutes)
1. List as many time wasters as you can from your day.
2. What time-saving techniques can you use to cut down on your time wasters?
3. List four time-management strategies. Which of these strategies do you already practice?
Student Assessment

SKILLS FOR SCHOOL AND BEYOND | LESSON 2: MANAGING YOUR TIME
overcomingobstacles.org
LESSON EXTENSIONS
Using Quotations
“One thing you can’t recycle is wasted time.” —Anonymous
Have small groups of students brainstorm ways in which they waste time during the day. Have them
write these time wasters on large strips of paper. Post them on the bulletin board.
Addressing Multiple Learning Styles
As a class, discuss the history of timekeeping. Refer to https://www.nist.gov/pml/time-and-frequency-
division/popular-links/walk-through-time.
After a short discussion, have students write about their own philosophy of time. How much time do
they need to relax and think? What’s the most important part of their day? What would they like to
accomplish?
Writing in Your Journal
Have students write about how they would spend an ideal day.
As a class, discuss strategies for “building more time” into the day for the activities that students enjoy.
Using Technology
Have students use the internet to investigate time-management software programs (e.g., Microsoft
Outlook).
Have students write quick software reviews on index cards and share them in small groups. Tell each
group to choose the best software and share it with the rest of the class.

SKILLS FOR SCHOOL AND BEYOND | LESSON 2: MANAGING YOUR TIME
overcomingobstacles.org
Homework
Have students create a chart that divides their waking hours into 15-minute increments. Have them
record their activities for one day.
Have students discuss the results in small groups. How are they spending most of their time? Is there
anything they want to change?
Additional Resources
Have students read the “Out of Time” activity sheet.
Have students write a review of the article.

SKILLS FOR SCHOOL AND BEYOND | MANAGING YOUR TIME©
20
21
Ove
rco
min
g O
bst
acle
s
Week of: _____________________
Monday
Tuesday
Wednesday
Thursday
Friday
Saturday
Sunday
WEEKLY PLANNER
overcomingobstacles.org

SKILLS FOR SCHOOL AND BEYOND | MANAGING YOUR TIME©
20
21
Ove
rco
min
g O
bst
acle
s
Luis’s alarm began blaring at 6:00 in the morning. He had decided to get up early to finish an oral presentation that was due that day. Thinking that a few extra minutes of sleep would make him feel well rested and help his presentation, Luis reached out and pressed the snooze button. After dozing for what felt like seconds, Luis reached over to hit the snooze but-ton again and saw that it was 7:00, his usual wake-up time. He jumped out of bed and got ready for school. He had about five minutes to look over his presentation before he ran out the door. When school ended at 3:30, Luis’s day hadn’t gone well. Not only had he been unprepared for his presentation, but he had also forgotten about an essay that had been due that day. Luis really wanted to pass his classes this semester. He needed good grades in order to get into the school that his brother attended. Frustrated, Luis decided that he needed a break from schoolwork. He walked home and turned on the TV to help him unwind. At 4:30, he realized that he only had 30 minutes before he had to leave for work. He lugged his backpack to his room and dumped his books out on the desk. Luis knew that he had written down his math assignment somewhere, but he couldn’t find it. When Luis finally found the assign-ment, he realized that he needed a pencil
and went to the kitchen to get one. In the kitchen, Luis saw a bag of chips sitting on the counter and started eating. His boss never let him eat on the job, so he decided to fix himself a sandwich. Glancing at the clock, Luis sat down with his sandwich and realized that he only had 10 minutes before he had to leave for work. He knew that he could never get anything done in such a short time. He felt as if he’d never catch up with his home-work. When Luis got home from work at 9:00, he was exhausted. His favorite show was on, so he watched TV with his brother. When the show ended at 10:00, he sat down at his desk to do homework. He had to complete the essay and that math assignment. Luis figured he could rush through the math assignment because his teacher didn’t always check homework, so he started with that. Luis finished the math and moved on to the essay. As he was dig-ging through his papers looking for the right text and notes to answer the ques-tion, the phone rang—it was his girlfriend. They’d had an argument the day before, and Luis hadn’t spoken to her since. He talked to her for a while. When Luis finally got off the phone, it was close to midnight. He looked at the papers scattered on his desk. There was no way he could finish this tonight anyway.
LUIS’S STORY
1. Did you relate to Luis’s story? Why or why not?
2. How did Luis’s own feelings of frustration affect his studies?
3. What things distracted Luis from getting his homework done? Give specific exam-ples from the story.
4. What could Luis have done differently to better manage his time?
overcomingobstacles.org

SKILLS FOR SCHOOL AND BEYOND | MANAGING YOUR TIME©
20
21
Ove
rco
min
g O
bst
acle
s
Today’s Date: _____________________
7:00 – 8:00
8:00 – 9:00
9:00 – 10:00
10:00 – 11:00
11:00 – 12:00
12:00 – 1:00
1:00 – 2:00
2:00 – 3:00
3:00 – 4:00
4:00 – 5:00
5:00 – 6:00
6:00 – 7:00
7:00 – 8:00
8:00 – 9:00
9:00 – 10:00
10:00 – 11:00
Don’t forget:
DAILY PLANNER
MATERIALS NEEDED(E.G., BOOKS, SPORTS
EQUIPMENT, ETC.)SCHEDULE
overcomingobstacles.org

SKILLS FOR SCHOOL AND BEYOND | MANAGING YOUR TIME©
20
21
Ove
rco
min
g O
bst
acle
s
DATE MONTH:____________________________ DATE MONTH:____________________________
DATE MONTH:____________________________ DATE MONTH:____________________________
DATE MONTH:____________________________ DATE MONTH:____________________________
DATE MONTH:____________________________ DATE MONTH:____________________________
DATE MONTH:____________________________ DATE MONTH:____________________________
DATE MONTH:____________________________ DATE MONTH:____________________________
TERM PLANNER
overcomingobstacles.org

SKILLS FOR SCHOOL AND BEYOND | MANAGING YOUR TIME©
20
21
Ove
rco
min
g O
bst
acle
s
“I feel like I’m indoors all the time,” says Michael Colley, 18, a junior at Mount Vernon High School in New York. “I miss going to the park, seeing movies and relax-ing.” Megan Thornton, 17, a junior at Cumber-land Valley High School in Mechanicsburg, Pa., says: “People always tell me that life is only going to get more hectic in college. But I know it can’t possibly get any worse than it is now.” Michael and Megan have the same prob-lem: overbooked schedules. They spend more time on their extracurricular activi-ties and jobs than on their homework, and more time on their homework than with their friends. And they’re just two members of a generation of time-challenged teens: 66 percent of you told a React poll that you don’t have enough free time. “Adolescence is so much more competi-tive,” says Penny Peterson, psychologist for Montgomery County, Md., public schools. “It’s no longer enough to get the lead in the school play or be hockey captain: You have to do those things and be head of the stu-dent council and hold down your job at the mall.” Many teens say they overload their high school schedules in a race for college admis-sions. “I did all kinds of activities in high school and was busy all the time,” says Kim Warhurst, 18, a freshman at Butler County Community College in El Dorado, Kan., near Wichita. “My guidance counselor said that activities look good on your transcript—that you’ve got a better shot at college scholar-ships if you’re extremely well-rounded. And the adults in charge of each activity all expected you to put their activity first.
“I’m still busy all the time,” Kim says. Most days, she gets back to her room after mid-night, after classes, homework, time at her college newspaper and a part-time job at WalMart. Her schedule, she says, forced her to give up some of her high school activities: “I had to quit violin and softball because I had to focus on future goals.” Megan had been pursuing a career in music, practicing piano, flute and voice each for a half-hour a day, but has now changed her focus. “I know that I’d have to put in more time and effort than I’m willing to at this point,” she says. “There’s too much time involved in practicing. I’d rather have time to talk on the phone with my friends. There’s more to life than practicing piano, flute and voice all the time. I’d rather have more balance.” For other students, social pressures, not schedules, keep them working into the night. “Kids in my school seem really rich—they’re wearing a different North Face jacket every week,” says Aryanna Fernando, 18, a senior at Beekman High School in New York City. Along with dance practice and pottery class, Aryanna has held a series of jobs to earn the cash she feels she needs to keep up with her peers. “I don’t want to be a slacker,” she says, “and because I’m a senior, I get much less sleep than ever before.” There are some benefits: Kim says work-ing on school publications is preparing her for a future as a writer. David Skeist, 18, a senior at the Dalton School in New York City, says that his singing group, chorus and school play give him a built-in social life: “Putting on a production with a bunch of people makes me feel proud, part of a team. But by belonging to various groups, I don’t
OUT OF TIMEWhen work and activities take up all your so-called free time, how can you find a min-ute to be yourself?
overcomingobstacles.org

SKILLS FOR SCHOOL AND BEYOND | MANAGING YOUR TIME©
20
21
Ove
rco
min
g O
bst
acle
s
get stuck in one clique.” But there are risks to stressful, fast-paced days, such as skimping on sleep to squeeze in homework late at night or at dawn and then relying on caffeine and junk food to reenergize. “I’m seeing an increasing num-ber of teens with stress-related physical complaints—gastrointestinal problems, insomnia, headaches and trouble staying awake in class,” Peterson says. And when overwhelmed students turn to alcohol, ciga-rettes or other drugs to stay awake all night, to get to sleep or to reduce emotional stress, an impressive high school transcript can turn into a ticket to the hospital, she says. To prevent a stuffed schedule from sucking the joy out of life, Peterson says, ask yourself this question: Do I no longer have time for things in my life that give me joy—like time with family or friends or the hobby I used to love? If so, it’s time to make a change. “It takes courage to turn things down, but you’ve got to do it,” she says. “Eliminate a couple of activities. It’s much better to involve yourself in two or three activities and really excel in them, rather than spread yourself too thin with things you only have time to do halfheartedly.”
TAKE YOUR TIME BACK If your schedule is threatening to swallow you whole, try following these tips for stop-ping the stress.
KICK BACK When you finally make it home, Dr. Peterson recommends that you take some “mental health” time for yourself. Before
starting your homework, lie down on your bed for a few minutes or have a quick chat on the phone. The break will give you a chance to switch gears from soccer to geom-etry. Kim says she listens to classical music and takes long drives in the country to relax. Michael watches videos. Herbal baths and meditation work for Aryanna.
DON’T PANIC Are you afraid that if you’re not involved with every activity at school, you won’t make it into the college of your choice? Don’t be. For one thing, Peterson says, “You might juggle all those activities and still not get into your dream school.” On the other hand, many schools are often more impressed by students who did amazing things with one or two time-intensive activi-ties than by those who joined 15 groups they couldn’t have spent that much time with.
FIND A SYMPATHETIC EAR Megan tells her parents whenever she feels like she’s drowning, and it pays off. But if you can’t imagine making the changes you need in your lifestyle to cut your stress—and your parents can’t help because they don’t understand the pressures you’re under—ask a guidance counselor for help. “Sometimes you need to hear from your parents, your coach or whoever that it’s OK to shift pri-orities—that it’s crucial for your sanity,” Peterson says.
—Jennifer Kornreich
OUT OF TIME(continued)
*Reprinted with permission from React magazine.
overcomingobstacles.orgPowered by TCPDF (www.tcpdf.org)
SKILLS FOR SCHOOL AND BEYOND | LESSON 3: READING, LISTENING, AND NOTE TAKING
overcomingobstacles.org
AGENDA
Starter
Know Where You’re Headed and Why
Less Is More
Note This
Conclusion
Student Assessment
Objectives
Students will recognize the importance of accurate note taking while reading or listening.
Students will identify effective note taking techniques to use when reading or listening.
Students will practice effective note taking techniques.
Materials Needed
The “Active Note Taking” activity sheet (Part I)
An article to be read out loud (if students need more practice taking notes while listening) or one
copy of an article for each student to read independently (if students need more practice taking
notes while reading) (Part III)
3LESSON
READING, LISTENING, AND NOTE TAKING

SKILLS FOR SCHOOL AND BEYOND | LESSON 3: READING, LISTENING, AND NOTE TAKING
overcomingobstacles.org
Ask students to imagine that they are going to a deserted island where millions of dollars have been buried. They must choose to bring either a shovel or a treasure map showing the location of the treasure.
Discuss which item students would choose and the reasons for their choice. Help them conclude that if they chose the shovel, they would have to dig randomly around the island, hoping to come across the treasure. However, if they chose the map, digging might be harder, but the treasure would be found.
Suggest to students that people often take notes like the person with the shovel. They take stabs at recording information, hoping that they will write down the important ideas. Explain that today’s lesson will help them develop mental “maps” that will enable them to record important information accurately.
Starter (3 minutes)
Purpose: Students recognize the difference between active and passive learning and develop strategies for becoming active learners.
1. Students recognize the difference between active and passive learning.
If the class already covered effective listening skills in Lessons 2 and 3 of Module One: Communication Skills, ask students to explain the difference between passive listening and active listening. If not, briefly explain the following:
Passive listening occurs when we hear without really thinking about what is being said.
Active listening occurs when we think about what we hear, ask questions, and make connections.
Elicit from students that it is possible to listen either passively or actively while taking notes in class. Ask whether the same is true for reading as well. If responses are slow, ask students to explain the difference between mindlessly reading a textbook and becoming absorbed in an exciting story. What content are they more likely to recall?
Explain to students that the strategies they are about to learn are effective for taking notes when they are actively reading and listening.
2. Students recognize questioning as the first step to active learning.
Talk with students about why some stories are more interesting than others. Ask if they know what a page-turner is. Lead students to define “page-turner” as a story that is hard to put down. Such stories cause readers to want to discover certain answers, like who did it and what happens next.
Part I Know Where You’re Headed and Why (15 minutes)

SKILLS FOR SCHOOL AND BEYOND | LESSON 3: READING, LISTENING, AND NOTE TAKING
overcomingobstacles.org
The same can be said when we read or listen to learn information. Explain that the first step in being an active learner, whether we are listening or reading, is to ask good questions. Before students start to take notes, they should ask themselves, “What do I know about this topic? What do I want to know about this topic? How will I find out what I want to know?” These questions will allow them to predict which ideas to record and which ideas might be on a test.
3. Students learn specific questions to ask in order to actively learn.
Display the “Active Note Taking” activity sheet on the board. Ask students to suggest questions that they can ask themselves before taking notes in order to become more actively involved in the learning process. For example:
For question one (“What do I know about this topic?”): Where have I heard about this topic before? What do I know about it? What are the most memorable ideas related to this topic?
For question two (“What do I want to know about this topic?”): What key words or terms appeared or were said more than once? What did the teacher write on the board? What questions were posed? How were they answered? How will this be useful to me in the future?
For question three (“How will I find out what I want to know?”): Where is the information written? Whom can I ask about it?
4. Students discuss how active learners use notes.
Explain that active learners ensure that they have all of the information that they want to know by asking themselves questions, reviewing their notes, and doing research in order to obtain information that is missing. Encourage students to develop a system for organizing their notes and to review notes after reading or listening to information.
Purpose: Students identify ways to focus on important information while note taking.
1. Students write a general description of themselves.
Tell students that once they’ve asked the important questions, they are ready to begin taking notes. Explain that the following activity will help them recognize how the answers to those questions make note taking easier and more effective.
Instruct students to spend three minutes writing descriptions of themselves. They are to write as much as they can in three minutes. Guide students to describe their physical appearance, where they live, the number of siblings they have, and so on.
2. Students take notes from written descriptions.
Part II Less Is More (10 minutes)

SKILLS FOR SCHOOL AND BEYOND | LESSON 3: READING, LISTENING, AND NOTE TAKING
overcomingobstacles.org
Divide students into pairs. Tell the pairs to trade papers and to take notes on the description as they silently read each other’s work.
Allow students one minute to read and take notes. Remind them to ask themselves each question before they begin reading and to make mental notes of what they already know and what they want to learn.
Ask students to compare their notes with the written description. Elicit from students the differences between their notes and the written description.
3. Students identify abbreviations to use during note taking.
Ask students how they might ensure that they write everything they need to remember without taking the time to write exactly what they read or hear. Elicit from students that abbreviations and shorthand are effective strategies to use when taking notes. Have students brainstorm abbreviations and shorthand. Ask them to identify different symbols and abbreviations that are commonly used. Offer suggestions such as the following: “lbs.” for “pounds,” “St.” for “street,” “b/c” for “because,” “10 yrs.” for “10 years,” etc.
4. Students repeat the exercise.
Ask students to find a different partner. Tell students to trade their papers and to take notes again. Remind them that they have one minute to write the most comprehensive notes they possibly can.
Ask students to again compare their notes with the written description. Elicit from students the differences between their notes and the written description.
5. Students recognize that the second set of notes is more effective.
With the class, compare and contrast the two activities. Ask:
Which of the two assignments was easier? Why?
Did you need the same amount of time to get as much information as possible? Why?
Which set of notes is more concise? Why?
Tell students that when taking notes, less is more. Speculate why this might be true. Lead students to recognize that it is best to write down only important information and to be as brief as possible. The questions they ask themselves before they begin taking notes will help them to determine which information is important.
6. Students recognize strategies for identifying important information.
SKILLS FOR SCHOOL AND BEYOND | LESSON 3: READING, LISTENING, AND NOTE TAKING
overcomingobstacles.org
Refer again to the activity sheet and direct students’ attention to “Focus on the important details.” Ask students to suggest ways to identify the important information in a book they are reading. (Students might respond: chapter titles, bold or italicized words, concepts that relate to material already covered in class.)
Ask students to suggest ways to identify important information when listening. Remind students about nonverbal communication and refer to part II of “Lesson 2: Listening” of Module One: Communication Skills, which focused on picking up verbal and nonverbal signals in order to listen effectively.
Explain that people often use their tone of voice and facial expressions to stress important ideas.
Purpose: Students practice note taking techniques and skills.
1. Students summarize specific note taking techniques.
Ask students to describe the ways in which note taking differs from writing. Write students’ responses on the board. (Students might respond: notes are shorter, complete sentences are not necessary, grammar and spelling are not important, symbols and other abbreviations are used.)
2. Students practice effective note taking.
Invite students to practice effective note taking. Depending on student’s strengths, either read an article out loud or distribute copies of reading material from which students will take notes. If students are reading, allow them 10 minutes to read and take notes.
3. Students compare notes with partners.
When students have finished taking notes, ask them to each select a partner with whom they will compare their written notes. Have them discuss why certain points were included or omitted. Encourage them to offer constructive suggestions to each other about their note taking techniques.
Part III Note This (20 minutes)
Ask students to describe an active learner. Elicit from students the following key points that were taught in this lesson:
Conclusion (2 minutes)

SKILLS FOR SCHOOL AND BEYOND | LESSON 3: READING, LISTENING, AND NOTE TAKING
overcomingobstacles.org
Active learning is more effective than passive learning.
Asking questions is the first step to effective note taking.
The questions that students ask will help them determine which information is important.
1. As an active learner, what questions can you ask yourself to help you get focused?
2. How do you choose which information to take notes on?
3. In what ways are the strategies for taking effective notes on a book and taking notes on a lecture
similar? How are they different?
Student Assessment

SKILLS FOR SCHOOL AND BEYOND | LESSON 3: READING, LISTENING, AND NOTE TAKING
overcomingobstacles.org
LESSON EXTENSIONS
Using Quotations
“Indiscriminate study bloats the mind.” —D. Sutten
Have students draw a diagram representing their minds, indicating what they study and what they
would like to focus on most. Have them explain how this relates to the quote.
Addressing Multiple Learning Styles
Have students examine the way their favorite websites are constructed. Have them use index cards to
show the sites’ layouts (i.e., how details are subsumed under main ideas).
Have each student construct an outline of their favorite site from their index cards (headings only) and
write a justification for the choice.
Writing in Your Journal
Have students write a paragraph evaluating their skills as note takers. (See How to Improve Your Study
Skills by Marcia J. Coman and Kathy L. Heavers.) Have them set a specific goal for improvement.
Have students share their goals with a classmate. If possible, pair good note takers with those whose
skills need improvement.
Using Technology
Have groups use a search engine of their choice to research a topic. Have them carefully word their
questions so their search is as focused as possible.
Have the groups present the sites that provide the best answers to their questions—as well as a few
that are off topic—and explain how narrowing their question helped them focus their search. Emphasize
to students that just as their searches must be concise, so must their note taking be concise and focused
to be effective.

SKILLS FOR SCHOOL AND BEYOND | LESSON 3: READING, LISTENING, AND NOTE TAKING
overcomingobstacles.org
Homework
Have students discover who, besides students, takes notes. Tell students to observe restaurant and
store employees. They should also ask people they know if they take notes on the job.
As a class, create a list of people who take notes on the job. Discuss student reactions to the need for
notes after finishing school.
Additional Resources
Review How to Improve Your Study Skills by Marcia J. Coman and Kathy L. Heavers as a class. Assign
groups one of the following topics from the book: outlining, signal words, patterning, highlighting,
margin notes, and streamlining. Have each group read its assigned section and prepare a presentation.
After their presentation, groups should read a passage out loud that offers students a chance to
practice the skill covered.

SKILLS FOR SCHOOL AND BEYOND | READING, LISTENING, AND NOTE TAKING©
20
21
Ove
rco
min
g O
bst
acle
s
1. What do I know about this topic?
2. What do I want to know about this topic?
3. How will I find out what I want to know?
4. Focus on the important details.
ACTIVE NOTE TAKING
overcomingobstacles.orgPowered by TCPDF (www.tcpdf.org)

SKILLS FOR SCHOOL AND BEYOND | LESSON 4: WRITING REPORTS AND PRESENTING TO AN
AUDIENCE
overcomingobstacles.org
AGENDA
SESSION 1
Starter
Get to the Point
Get Organized
Write It or Say It
SESSION 2
Review
Look It Over
Say It Loud and Clear
Conclusion
Student Assessment
Objectives
Students will recognize the importance of effective reports and oral presentations.
Students will identify effective presentation skills and report techniques.
Students will recognize the importance of revising and proofreading.
Students will identify and practice effective oral presentation techniques.
4LESSON
WRITING REPORTS AND PRESENTING TO AN AUDIENCE

SKILLS FOR SCHOOL AND BEYOND | LESSON 4: WRITING REPORTS AND PRESENTING TO AN
AUDIENCE
overcomingobstacles.org
Materials Needed
Session 1: 10 index cards for each student (Part I)
Session 2: A board on which you have written the steps to an effective report covered in Session 1
(Part I)
Session 2: One copy of the “Count the Letter” activity sheet for each student (Part II)
Session 2: Students’ first-draft reports from Session 1 (Part II)
Session 2: 10 index cards for each student (Part III)

SKILLS FOR SCHOOL AND BEYOND | LESSON 4: WRITING REPORTS AND PRESENTING TO AN
AUDIENCE
overcomingobstacles.org
SESSION 1
Begin by modeling poor oral presentation skills. Read the following text:
Today, we are going to learn how to give good presentations and oral reports. Oral presentations are very important. Did you see that show last night? It reminds me of giving presentations. I like that actress, too. Where was I? Oh, yeah. Reports.
Your actions should be exaggerated, and your words and train of thought difficult to hear and follow. Keep your head down, make no eye contact, mumble, and slouch.
Pause and ask students to describe your presentation. Have students list the characteristics that were ineffective. Ask students why report preparation and presentation skills are important. Elicit from students that reports and oral presentations are intended to convey information to other people. If the information is not clearly presented, it is lost to its intended audience.
Explain to students that in this lesson they are going to work through the process of writing a very short report and preparing an oral presentation.
Starter (2 minutes)
Purpose: Students understand the importance of having a well-defined topic for a report. Students practice doing research and taking notes for their reports.
1. Students understand the difference between a general topic and a specific topic.
Explain to students that sometimes when a report is assigned, it is mentioned in general terms. It is the student’s responsibility to narrow the general topic to a more specific idea.
Start a list on the board with the heading “Steps to Effective Reports and Presentations.” Write “Step 1: Have a general topic” beneath it.
Provide an example of a general topic, preferably one from a course students are currently taking (e.g., the Civil War). Point out that one report on the entire Civil War would be very long. A more effective report would narrow the topic to a more specific idea. Encourage students to generate specific topics based on the general one. As students come up with ideas, point out that it helps to know something about the general topic in order to decide on a specific one.
Write “Step 2: Research the general topic for more specific topics” and “Step 3: Narrow the general topic to a more specific topic” on the board.
2. Students prepare to research their topics.
Part I Get to the Point (15 minutes)

SKILLS FOR SCHOOL AND BEYOND | LESSON 4: WRITING REPORTS AND PRESENTING TO AN
AUDIENCE
overcomingobstacles.org
Explain that now that students have a specific topic, step four is to research the topic. Write “Step 4: Research your topic” on the board.
Ask students what they think it means to be an active researcher. Suggest that they think about the characteristics of an active listener or an active learner. Explain that researching a report involves asking thoughtful questions and taking good notes to answer those questions. Review tips for taking good notes with students (covered in “Lesson 3: Reading, Listening, and Note Taking”).
Suggest to students that they take notes for their report on index cards. This way of taking notes allows students to put one idea on each card. Then, when they are finished, they can arrange their ideas easily, as if completing a puzzle. Tell students that they are going to practice using note cards for their in-class minireports.
3. Students research and take notes on a specific topic.
Explain to students that they are now going to research a specific topic. Ask them to write a report on a general topic—their community. Tell them to imagine that they have narrowed this wide topic to the specific idea of the community surrounding the school. Tell students that they are to research this topic by recalling the area. If time and circumstances permit, allow students to go outside to conduct further research. Encourage them to consider all aspects of the community—what it looks like, the activities they see, the sounds they hear, the aromas they smell, and so on. If there is additional time, suggest that students read the local newspaper or spend some time doing research in the library.
Distribute approximately 10 note cards to each student. Remind students that they are to write only one idea on each card. Suggest that students label cards with a heading, such as “Sounds” or “Activities,” as a way of organizing the information.
Tell students that you are going to give them eight minutes to observe the community, either by recalling it or by going on a quick walk.
Purpose: Students practice compiling notes and writing a report from notes.
1. Students compare notes with their groups.
Arrange the class into groups of five or six. Instruct each group of students to compare their notes from part I with each other. Allow approximately five minutes for this activity.
2. Students practice organizing notes for a report.
Have students describe the structure of a report. Explain that a report has an introduction, a body, and a conclusion. Encourage students to offer the content that belongs to each of these sections.
Part II Get Organized (13 minutes)

SKILLS FOR SCHOOL AND BEYOND | LESSON 4: WRITING REPORTS AND PRESENTING TO AN
AUDIENCE
overcomingobstacles.org
Instruct each group to discuss the best sequence of ideas for each student’s notes. Encourage them to determine which points belong in the introduction, body, or conclusion. Allow approximately five minutes for this activity.
As students work, write “Step 5: Organize notes” on the board.
Point out that although many people think only of writing a report, much of the process is actually doing the research and organizing the notes.
Purpose: Students write short reports from their notes.
1. Students prepare to write reports from their notes.
Tell students that their notes should now be complete and well organized. They are ready to begin writing. Write “Step 6: Write report” on the board.
Ask students what they must do next in order to turn their notes into a finished report. (Students might respond: compose cohesive, logical paragraphs; write complete sentences; add transition words.)
2. Students write short reports from their notes.
Tell students that they have 15 minutes to write a first draft of a minireport from their notes. Explain that this first draft does not have to be neat, with perfect spelling and grammar. They will proofread it later. The first draft is intended to get their ideas on paper in an organized fashion.
Before students leave, collect the first drafts of their minireports and keep them for use in the next class period.
Part III Write It or Say It (20 minutes)

SKILLS FOR SCHOOL AND BEYOND | LESSON 4: WRITING REPORTS AND PRESENTING TO AN
AUDIENCE
overcomingobstacles.org
SESSION 2
Purpose: Students review the minireports they have written and recall the steps to writing an effective report or presentation.
1. Students review the first drafts of their minireports.
Distribute the reports students wrote during Session 1. Allow students several minutes to read their reports quietly to themselves.
2. Students recall the steps of writing an effective report.
Briefly review the steps of writing an effective report, which should be written on the board.
Part I Review (5 minutes)
Purpose: Students recognize the importance of peer editing, revising, and proofreading.
1. Students recognize the importance of revising.
Explain that the next step of writing a report is revising. Remind students that a piece of writing is not finished until the ideas are expressed logically and clearly.
2. Students practice peer editing.
Ask students what they should look for when they revise their own writing. Write students’ ideas on the board. (Students might respond: sentence structure, clarity of ideas, choice of vocabulary.)
Guide students to the awareness that it is often difficult to look critically at their own writing, especially when they have been working intensely on it. Explain that peer editing can help with this problem. Peer editing involves exchanging papers with other students to proofread each other’s work. Briefly discuss the guidelines for peer editing: The proofreader should be tactful and thoughtful. The writer should remember that the proofreader is making suggestions and intends to be helpful. Students must respect their classmates’ work and offer all criticisms and suggestions in the most constructive way possible.
Tell students to exchange papers. Give them five minutes to read and make suggestions about each other’s work. When they are finished, ask students to return the papers. Give students time to revise their writing to form a solid second draft.
3. Students recognize the importance of careful proofreading.
Part II Look It Over (18 minutes)

SKILLS FOR SCHOOL AND BEYOND | LESSON 4: WRITING REPORTS AND PRESENTING TO AN
AUDIENCE
overcomingobstacles.org
Invite students to complete an exercise in proofreading. Distribute copies of the “Count the Letter” activity sheet. Give students approximately 30 seconds to count the number of times the letter “f” appears in the paragraph.
Once students are finished, take a poll to see how many times they counted the letter “f.” Students might be surprised at the varied numbers. Explain that some of them miscounted because the eye tends to overlook things that are familiar. Ask students how they think this might impact their own proofreading. Tell students that the letter “f” appears 11 times.
Explain to students that once they have revised their writing, they are ready to proofread. Remind students that no matter how strong their ideas are, the report will be difficult to read if it contains grammar, punctuation, and spelling errors. Careful proofreading is essential to writing a report. Instruct students to proofread their reports and correct them until they are free of errors. Suggest that they again exchange papers with a partner and proofread each other’s minireports to be sure that they are totally correct. Assign students to write their final drafts as homework for the following day.
Write “Step 7: Revise report” and “Step 8: Proofread report” on the board.
Purpose: Students understand the techniques of preparing and presenting an effective oral report.
1. Students recognize that oral presentations are generated the same way as written reports.
Refer students to the list of steps generated throughout the lesson. Encourage students to add one more step to turn their written reports into oral presentations. Explain that an oral presentation involves the same preparation as a written report, with the added element of effective speaking.
Students may have trouble deciding whether an oral presentation should be written. Remind students of the importance of following the structure of introduction, body, and conclusion. Point out that those same elements are also needed in an oral presentation. Although we do not read from a report when presenting, writing the report provides an opportunity to structure the key points into a logical and coherent presentation.
2. Students break their reports into notes for an oral presentation.
Share with students that while it is not appropriate to read from a report, many speakers prepare note cards to refer to as they speak. Because these note cards contain main ideas, key phrases, and critical transitions, they are different from the note cards students used to write their reports. Distribute 10 index cards to each student.
Part III Say It Loud and Clear (25 minutes)

SKILLS FOR SCHOOL AND BEYOND | LESSON 4: WRITING REPORTS AND PRESENTING TO AN
AUDIENCE
overcomingobstacles.org
Instruct students to break down their written reports into notes that they might use for an oral presentation. Focus their attention on which notes will help them give the report orally by having them consider the following questions: What are the main ideas? Which key phrases must they remember? What transitions will be most helpful to the audience? Allow students 10 minutes to create note cards.
3. Students recall characteristics of an ineffective speaker.
Ask students to recall from the starter activity at the beginning of this lesson the characteristics that make an oral presentation ineffective. Create a two-column chart on the board. List the ineffective characteristics in one column. When that list is complete, have students change the ineffective characteristics to make them effective techniques. For example, if “mumbling” is in the left column, students will say “speak loudly and clearly” in the right column. Write their changes in the adjacent column.
4. Students recognize the importance of practicing their presentations.
Have students discuss ways to ensure that they use effective oral presentation techniques when presenting. Elicit from students that an oral presentation must be well rehearsed. Suggest to students that the best way to rehearse an oral presentation is to practice in front of someone else.
5. Students work in pairs to practice effective oral presentations.
Divide students into pairs and instruct them to practice their presentations with each other. Remind students to observe their partners in order to provide constructive feedback for improving the presentations. Suggest that students base their evaluations on organization of ideas; clear introductions, bodies, and conclusions; liveliness; and volume and speed of the speaker’s voice.

SKILLS FOR SCHOOL AND BEYOND | LESSON 4: WRITING REPORTS AND PRESENTING TO AN
AUDIENCE
overcomingobstacles.org
Ask students to identify the steps of developing a written report. Elicit from students the following key points that were taught in this lesson:
Reports and oral presentations are often required at work and at school.
Deciding on a well-defined topic is the first step to writing an effective report or presentation.
Careful proofreading is essential to completing a report.
Peer editing can be helpful.
An oral report involves the same preparation as a written report, with the added responsibility of effective speaking.
Conclusion (2 minutes)
SESSION 1
1. Why is it helpful to choose a specific report topic?
2. List three reasons to take notes on note cards.
SESSION 2
1. List five things you should look for when you proofread.
2. How is preparing an oral report similar to and different from preparing a written report?
3. List three characteristics of an effective oral presentation.
Student Assessment

SKILLS FOR SCHOOL AND BEYOND | LESSON 4: WRITING REPORTS AND PRESENTING TO AN
AUDIENCE
overcomingobstacles.org
LESSON EXTENSIONS
Using Quotations
“It usually takes more than three weeks to prepare a good impromptu speech.” —Mark Twain
Have a volunteer give the definition of “impromptu.” As a class, discuss the contradiction in this quote.
Addressing Multiple Learning Styles
Have students play a version of The $25,000 Pyramid. Draw a pyramid with three boxes on the bottom,
two in the middle, and one on top. Each box should contain a general category guessable by giving
specific clues (e.g., for a category called “U.S. Presidents,” students could use “George Washington” as a
clue). Have students play in two teams of two and alternate giving and receiving clues.
Writing in Your Journal
Have students write a how-to report about something they excel at (e.g., how to shop for computers,
make a friend, entertain a child younger than two).
Ask students to present their journal entries as oral reports. Have listeners outline the information
given and compare notes.
Using Technology
Have students choose a general subject for a report and use the internet to research and narrow it
down.
Have students present their suggested topic to a small group for critique.

SKILLS FOR SCHOOL AND BEYOND | LESSON 4: WRITING REPORTS AND PRESENTING TO AN
AUDIENCE
overcomingobstacles.org
Homework
Discuss with students how writers research scripts for television shows and movies (e.g., by reading
about a certain time period, running focus groups, etc.).
Have students watch their favorite television show or movie and write a list describing what the writer
might have needed to research before completing the script. Then have students write, with their lists
in mind, their own scripts about a historical event.
Additional Resources
Divide students into eight groups, one for each major part of Ron Hoff’s I Can See You Naked. Assign
each group a part of the book to read.
Have each group report on the tips that Hoff gives regarding presentations.

SKILLS FOR SCHOOL AND BEYOND | WRITING REPORTS & PRESENTING TO AN AUDIENCE©
20
21
Ove
rco
min
g O
bst
acle
s
Read the following paragraph and count the number of times the letter “f” appears.
The sheriff of Fargo, North Dakota, recently
found a large bag of five dollar bills.
He’s not sure how many fives there are
in the bag, but he is going to assign some of
Fargo’s most fearless investigators to
look into the incident.
COUNT THE LETTER
overcomingobstacles.orgPowered by TCPDF (www.tcpdf.org)

SKILLS FOR SCHOOL AND BEYOND | LESSON 5: PREPARING FOR TESTS AND EXAMS
overcomingobstacles.org
AGENDA
Starter
Studying: Getting Ready
Test Day
Showing Off What You Know: Game Show
Conclusion
Student Assessment
Objectives
Students will recognize the importance of preparing for tests.
Students will identify strategies for preparing for tests and examinations.
Students will practice techniques for effective test taking.
Materials Needed
One copy of the “Test-Taking Self-Assessment” activity sheet for each student (Starter and Part I)
One copy of the “Game Show” activity sheet for each student (Part III)
5LESSON
PREPARING FOR TESTS AND EXAMS

SKILLS FOR SCHOOL AND BEYOND | LESSON 5: PREPARING FOR TESTS AND EXAMS
overcomingobstacles.org
Tell students that you are going to give them an opportunity to reflect on something that they have been doing for years: taking tests. In your usual manner, tell students that they are about to take an important pop quiz. Have them clear off their desks. Distribute the “Test-Taking Self-Assessment” activity sheet. Once students have had a chance to read it, tell them that this exercise will not be graded. Have students complete the activity sheet, keeping in mind how they felt when you announced the pop quiz.
Starter (6 minutes)
Purpose: Students recognize the importance of preparing in advance for a test.
1. Students discuss their views on taking tests.
Discuss student responses to question one on the activity sheet. Let students share their feelings about taking tests. Mention that people can improve their attitude toward test taking if they think of a test as an opportunity to demonstrate what they know.
2. Students recognize the impact that preparing for a test has on their attitude.
Talk about question two. Ask students why some of them might have felt anxious about taking this test. Ask, “Would your reactions have been different had you received advance notice?”
Point out to students that although the material on a pop quiz might be the same as on an announced test, a pop quiz often causes more anxiety because students don’t have an opportunity to prepare. Elicit from students the awareness that preparing in advance for an exam helps to decrease anxiety.
3. Students recognize the impact that preparing for a test has on their performance.
Discuss question three. Invite students to share how far in advance they usually prepare for a test. Suggest to students that they could prepare for a test as a runner prepares for a marathon: a marathon runner begins training well in advance of a race. Gradually, the runner builds endurance, running longer and longer distances. Finally, it is the day of the race. The runner is confident that they are ready and able to complete the race at peak performance.
Challenge students to relate preparation for a marathon with test preparation. Explain to students that just as with training for a marathon, people perform their best on exams when they allow themselves plenty of time to prepare.
4. Students identify effective study practices.
Part I Studying: Getting Ready (15 minutes)

SKILLS FOR SCHOOL AND BEYOND | LESSON 5: PREPARING FOR TESTS AND EXAMS
overcomingobstacles.org
Talk about question four. Encourage students to share specific ways that they prepare for an exam. Write student responses on the board. (Students might respond: taking good notes in class, staying organized, making note cards or flashcards.)
Elicit from students that study sheets can be extremely useful when preparing for a major exam, especially the following two types of sheets:
A “key terms” sheet, which contains dates, names, events, places, and other specific facts that need to be memorized
A “general themes” sheet, which groups and outlines major ideas or recurring themes that must be reviewed
Point out that the key terms study sheet is useful when preparing for short-answer tests, while the general themes sheet enables students to organize information that might appear in essay questions. Suggest to students that they should prepare study sheets five to seven days before a major test.
Discuss with students the usefulness of mnemonic devices for remembering key terms. Explain that mnemonic devices are tricks to enhance memory. For example, some people remember the order of the planets with a sentence like “My very entertaining mother just served us nachos” (Mercury, Venus, Earth, Mars, Jupiter, Saturn, Uranus, Neptune). Elicit from students examples of mnemonic devices that have been helpful to them in the past.
Remind students that in the first lesson of this module they identified their learning styles and discussed techniques for studying that complement their learning style. Explain that mnemonics, study sheets, and even study groups are adaptable to various learning styles.
5. Students identify advantages and disadvantages of studying in groups.
Take a poll of students who get together with friends to study. Elicit from students the advantages and disadvantages of this method. Write their ideas on the board. (Advantages include: learning from one another, in-depth discussions, steady studying schedule, makes studying more fun. Disadvantages include: lost time if friends are not prepared, panicky students spread test anxiety to each other, groups may use time more inefficiently than one person alone, more distractions in groups.)
Conclude with students that choosing the right people to study with is important.
Purpose: Students identify effective test-taking strategies.
1. Students recognize that it is important to relax and sleep well the night before an exam.
Part II Test Day (15 minutes)

SKILLS FOR SCHOOL AND BEYOND | LESSON 5: PREPARING FOR TESTS AND EXAMS
overcomingobstacles.org
Ask students to imagine that it is now the night before an exam. Have students suggest useful pretest activities. Point out that they should have done most of their major studying already, and that, ideally, all they need is a brief review. Lead students to understand that the most important thing that they can do the night before an exam is to relax and get a good night’s sleep.
2. Students brainstorm effective pretest strategies.
Divide the class into groups of four or five. Give students the following instructions:
Each group needs a sheet of writing paper.
At my signal, one student in each group will write down one pretest strategy. This can be anything you do from the time you wake up until the minute before the exam begins.
That student then passes the paper to the student on their right, who adds a different strategy to the list.
Continue to pass the paper around the circle.
Give the groups two minutes to list as many pretest strategies as they can. The paper can go around the circle more than once. (Students might respond: eating a good breakfast, being on time, dressing in comfortable clothing, bringing all materials needed for the test [e.g., sharpened pencils, pens, scrap paper, calculators], bringing a watch, arriving a minute or two early to quickly review notes, avoiding talking to anxious students.)
3. Students brainstorm effective test-taking strategies.
When two minutes have passed, instruct students to take two more minutes to write down as many test-taking strategies as they can. Groups should again pass the paper around the circle and include ideas from each member. (Students might respond: looking over the entire test first, budgeting time, reading directions carefully, reading each question carefully, watching the time, circling difficult questions and coming back to them.)
4. Students discuss the strategies identified by their groups.
When two minutes have passed, have the groups discuss the pretest strategies. Compile the groups’ ideas on the board and add other ideas they might have missed.
On a separate list, compile students’ test-taking strategies and add any that are missing. Duplicate the lists and distribute them to students for their future reference.
5. Students discuss strategies to reduce anxiety.
Ask students how many are anxious before or during a test. Explain that test anxiety is very common but that there are some simple things that they can do to combat it. Encourage students to offer suggestions. (Students might respond: being well prepared, taking deep breaths, thinking calm thoughts.)

SKILLS FOR SCHOOL AND BEYOND | LESSON 5: PREPARING FOR TESTS AND EXAMS
overcomingobstacles.org
Purpose: Students learn and recall pretest and test-taking strategies in a game-show style activity.
1. Students participate in a game-show style activity.
This activity provides an opportunity to reemphasize strategies that might be particularly important to your students. Use the questions and answers on the “Game Show” activity sheet as you facilitate the game.
Divide the class into two or more teams. Tell students that you will read questions out loud. The teams should raise their hands as soon as they know the answer. Call on the first team to raise their hands.
Begin the activity.
Part III Showing Off What You Know: Game Show (12 minutes)
Ask students to identify three strategies that they use to prepare for and take tests. Elicit from students the following key points that were taught in this lesson:
Preparing in advance for an exam helps to decrease anxiety and increase the likelihood of success.
Study sheets are useful when compiling notes in preparation for a major exam.
Specific test-taking strategies can be applied during an exam to improve performance.
Conclusion (2 minutes)
1. What are your usual strategies for test preparation in the week leading up to a test? What can you
do to make your preparation more effective?
2. List three mnemonic devices that you find effective.
3. List five test-preparation techniques that can help you get ready the day of a test.
Student Assessment

SKILLS FOR SCHOOL AND BEYOND | LESSON 5: PREPARING FOR TESTS AND EXAMS
overcomingobstacles.org
LESSON EXTENSIONS
Using Quotations
“No man ever became wise by chance.” —Seneca the Younger
Discuss the meaning of this quote. Have students create their own sayings with similar meanings.
Addressing Multiple Learning Styles
Distribute a magazine or news article to students. In small groups, have students devise 10 test
questions (four true/false, four multiple choice, two essay) on the article.
Discuss how students arrived at the points they included on the test as well as the process for writing
each question. Chart the groups’ questions to see the overlap in what they included on the test.
Writing in Your Journal
Have students complete this sentence: “The worst test-taking experience I ever had was….”
Have students share their work with a partner and brainstorm ways to improve future test-taking
experiences. Have them keep a list of suggestions in their journals.
Using Technology
Have students use software to create outlines, flowcharts, and study guides to help them review for
tests. Have them visit http://www.discoveryeducation.com/free-puzzlemaker to make custom
crossword puzzles for vocabulary review.
Have students create study guides, at least a week in advance, for an upcoming exam. After the exam,
have them discuss which tools were most helpful.

SKILLS FOR SCHOOL AND BEYOND | LESSON 5: PREPARING FOR TESTS AND EXAMS
overcomingobstacles.org
Homework
Have students review the U.S. Department of Education’s “Helping Your Child with Test-Taking,” found
on https://www2.ed.gov/parents/academic/help/succeed/part9.html. Students may want to show this
page to their parents or guardians.
Have students take notes on new information or tips they find especially helpful.
Additional Resources
Assign groups selections from Test-Taking Strategies by Judy Kesselmann-Turkel.
Ask the groups to present strategies for taking different kinds of tests.

SKILLS FOR SCHOOL AND BEYOND | PREPARING FOR TESTS AND EXAMS©
20
21
Ove
rco
min
g O
bst
acle
s
1. How did you feel when the teacher said that you were going to take a quiz?
2. Why did you feel this way?
3. How far in advance do you usually begin studying for a test?
4. Name three study tools that help you prepare for a test.
TEST-TAKING SELF-ASSESSMENT
overcomingobstacles.org

SKILLS FOR SCHOOL AND BEYOND | PREPARING FOR TESTS AND EXAMS©
20
21
Ove
rco
min
g O
bst
acle
s
1. What kind of study sheet helps you to compile notes, such as names and dates? A key terms sheet
2. How far in advance should you begin to study for a test? Five to seven days
3. Complete the sentence: It can help your attitude to think of a test as _____________ . An opportunity to show what you know
4. Why does a pop quiz often cause more anxiety than a quiz announced beforehand? Because you don’t have an opportunity to prepare
5. Name two effective study practices. Any two of the following: taking good notes in class, staying organized, making
note cards or flash cards, compiling notes into a key terms sheet or a general themes sheet, mnemonic devices, studying in groups, scheduling study time, reviewing notes after class, or finding a quiet place
6. True or false: You should spend as many hours as possible studying the night before a major test.
False—you should relax and get a good night’s sleep
7. What kinds of people should you avoid on the day of an exam? People who make you nervous
8. Name two advantages of studying in groups. Any two of the following: lets students learn from one another, in-depth discus-
sions, steady studying schedule, moral support, makes studying more fun, teach-ing others increases your own retention of facts
9. Name two disadvantages of studying in groups. Any two of the following: lost time if friends are not prepared, lost time going over
things you already know well, panicky students spread test anxiety, groups use time less efficiently
10. Name two things you should do the morning of a test. Any two of the following: eat a good breakfast, dress comfortably, bring a watch,
arrive early, make sure you have all the materials you need
11. True or false: You should eat a very big breakfast the day of an exam. False—you should eat a healthy breakfast, but not more than you usually eat
12. Name two important strategies to use during a test. Any two of the following: look over the entire test before you begin, budget time
(based on point values), read directions carefully, read each question carefully, watch the time and pace yourself, circle difficult questions and come back to them
13. Name one anxiety-reducing strategy. Any of the following: be well prepared, take deep breaths, think of a peaceful
place
GAME SHOW
overcomingobstacles.orgPowered by TCPDF (www.tcpdf.org)

SKILLS FOR SCHOOL AND BEYOND | LESSON 6: MANAGING STRESS
overcomingobstacles.org
AGENDA
Starter
Stress or Not?
You Stress Me Out
Analyze This
Conclusion
Student Assessment
Objectives
Students will identify sources and symptoms of stress.
Students will identify ways to manage and reduce stress.
Materials Needed
Three copies of the “Stress or Not?” activity sheet (Starter and Part I)
A dictionary (Part I)
One copy of the “Stressful Situations” activity sheet or one blank piece of paper that you have
folded and unfolded to make 10 or 12 boxes (Part II)
6LESSON
MANAGING STRESS

SKILLS FOR SCHOOL AND BEYOND | LESSON 6: MANAGING STRESS
overcomingobstacles.org
Before you begin, give three students who like to perform copies of the “Stress or Not?” activity sheet dialogue to practice quietly.
On the board, write the word “stress.” Draw a circle around it to begin a word web. Explain word webs to students who are not familiar with this kind of organizer. Have students freely associate words that they relate with the word “stress” as you write their responses in the area surrounding the circle.
Discuss students’ ideas and conclude that stress is a big part of our daily lives. Explain that today’s lesson will help them recognize and manage stress.
Starter (3 minutes)
Purpose: Students define “stress” and the ways in which our perceptions of situations determine whether or not we are stressed.
1. Students define “stress.”
Ask a volunteer to look up the word “stress” in the dictionary. List the various definitions on the board. Have students identify the definitions with which they are most familiar. (Students might respond: tension, pressure, mental or physical strain.)
2. Three students perform a dialogue for the class.
Explain to the class that they are going to see a brief skit about stress. Remind them to keep the definition of “stress” in mind.
Instruct the three students you chose during the starter to perform the dialogue for the class.
3. Students recognize that our perceptions of situations determine whether we are stressed.
When the dialogue is complete, ask students if they thought that the test was stressful. Lead students to understand that the test was stressful for Eddie, but it was not stressful for Dominique. Have students identify the reasons why this was the case. (Student responses may include that Eddie was not prepared for the test, while Dominique was prepared.)
Point out that the students’ attitudes toward the test were different. Guide students to realize that attitude is a major factor in how we perceive the level of stress involved in a situation. Most situations are not stressful in themselves; rather, it is how we perceive them that determines the stress.
Part I Stress or Not? (10 minutes)

SKILLS FOR SCHOOL AND BEYOND | LESSON 6: MANAGING STRESS
overcomingobstacles.org
Purpose: Students identify situations that cause stress.
1. Students brainstorm situations that they find stressful.
Ask students to list situations that they find stressful. Write their ideas on the board. In addition, ask a volunteer to write the situations on the “Stressful Situations” activity sheet or the sheet of paper you have previously folded to create boxes. Have the volunteer write one situation in each square.
2. Students identify symptoms of stress.
Refer students to a situation on the board. Ask them to describe how they feel when that situation occurs. Encourage them to consider their emotional and physical reactions. (Students might respond: tension, rapid breathing, losing sleep, sleeping too much, depression, getting sick, anger, eating too much or not enough.)
Explain that these responses can be symptoms of stress and that learning to recognize these symptoms can help us reduce stress.
3. Students work in groups and prepare to role-play stressful situations.
Divide the class into groups of three or four. Ask the student volunteer to tear the activity sheet or folded paper into pieces so that one situation is on each piece. Place the papers in a bag or box. Have each group randomly choose a stressful situation to role-play.
Instruct students to include the following in the role plays:
Identify and describe the stressful situation by acting it out.
Show the symptoms of stress.
Show how and why one character’s perceptions of the situation make it stressful.
Explain to students that they do not need to show a resolution for the situation at this time.
Allow students five minutes to prepare their role plays.
4. Students perform their role plays.
Have students perform their role plays for the class.
Part II You Stress Me Out (20 minutes)

SKILLS FOR SCHOOL AND BEYOND | LESSON 6: MANAGING STRESS
overcomingobstacles.org
Purpose: Students analyze the role plays and suggest techniques for managing orreducing stress.
1. Students brainstorm some stress-management techniques.
Explain to students that they are now going to suggest ways to manage or reduce the stress that they saw in the role plays.
Ask students to suggest some common techniques for managing or reducing stress. (Students may respond: being prepared, staying healthy, talking it out, going for a walk, breaking down big tasks into manageable pieces, breathing deeply, visualizing relaxing places, exercising, thinking of the “big picture.”)
2. Groups analyze the role plays.
Explain to students that they are now going to suggest appropriate ways to handle the stressful situations they portrayed in their role plays. Assign each group one of the role plays that another group performed.
Allow students eight minutes to discuss the following questions:
Why was the situation perceived as stressful?
What stress-management techniques could be useful?
When they are finished, have groups share their analyses with the class.
Part III Analyze This (15 minutes)

SKILLS FOR SCHOOL AND BEYOND | LESSON 6: MANAGING STRESS
overcomingobstacles.org
Ask students to identify techniques for reducing stress that they can apply to their own lives. Elicit from students the following key points that were taught in this lesson:
Most situations are not stressful in themselves; rather, it is how we perceive them that determines the stress we feel.
Recognizing the symptoms of stress can help us reduce stress.
Conclusion (2 minutes)
1. Define “stress.”
2. List three physical and three emotional signs of stress.
3. List three techniques for managing your stress.
4. Describe a stressful situation in your life. What can you do to make this situation less stressful?
Student Assessment

SKILLS FOR SCHOOL AND BEYOND | LESSON 6: MANAGING STRESS
overcomingobstacles.org
LESSON EXTENSIONS
Using Quotations
“When one door of happiness closes, another opens; but often we look so long at the closed door that
we do not see the one which has opened for us.” —Helen Keller
Discuss the role of acceptance and flexibility in reducing stress.
Addressing Multiple Learning Styles
Have students compile a resource guide of stress-management tips. Students might contribute
information from teen-interest magazines or reference books for adults. Use a recipe box to separate
this information by categories.
Have students write their favorite tips on an index card to keep with them wherever they go.
Writing in Your Journal
Have students use the following prompt to begin their journal writing: “Stress! I’ve got plenty. For
example….” Have them identify symptoms of stress, develop a personal plan of stress-reducing
techniques, and identify where to get help with tough problems.
Discuss sources of stress common to the students in the class.
Using Technology
Show a relaxation or stress release video. Discuss the elements of the video and the suggestions it
offers.
Have students create their own stress release videos.

SKILLS FOR SCHOOL AND BEYOND | LESSON 6: MANAGING STRESS
overcomingobstacles.org
Homework
Have students take a quiz to find out their “hassle quotient.” (See pages 21–24 of Urban Ease: Stress-
Free Living in the Big City by Allen Elkin, PhD, or have students make up their own quiz.)
Discuss the quiz results in class. Talk about how people respond differently to stressful events. Students
might want to give the quiz to a family member and discuss whether their coping styles are the same or
different.
Additional Resources
Invite a guest speaker skilled in a particular method of relaxation (e.g., meditation, yoga, tai chi) or a
traditional sport to demonstrate and discuss their area of expertise and how it reduces stress.
Have students write about the activity and whether it seems likely that the strategy will work for them.

SKILLS FOR SCHOOL AND BEYOND | MANAGING STRESS©
20
21
Ove
rco
min
g O
bst
acle
s
The following dialogue has three roles:
• Teacher • Eddie • Dominique
Practice the dialogue several times before performing it in front of the class.
For about 30 seconds, the two students sit at desks at the front of the room. Eddie shuffles frantically through papers, trying to cram for a history test. Dominique sits calmly and looks relaxed, perhaps reading a book. The teacher enters the room and walks over to his desk in the corner, talking as he walks.
TEACHER: Okay, class, it’s time for your history test. I need you to clear everything off your desks.
EDDIE: (still shuffling, to himself) One more time…Okay, who was president during the Great Depression?
TEACHER: Eddie, did you hear me? It’s time for the test. Please clear everything off your desk. (Teacher begins organizing some papers.)
DOMINIQUE: (to Eddie) Hey, what are you so worried about? This thing is going to be a breeze!
EDDIE: What do you mean it’s going to be a breeze? I need at least a B in this class to be eligible to play this year, and if I don’t do well on this test, I’m never going to get it.
DOMINIQUE: Well, I need to get a good grade in this class, too. This is an important requirement for the college I want to get into. But you don’t see me freaking out over it.
TEACHER: (returning attention to students) Class, I can’t begin the test until your desks are clear.
DOMINIQUE: (to Eddie) C’mon! I want to get started!
Eddie looks up with an expression of panic.
STRESS OR NOT?
overcomingobstacles.org

SKILLS FOR SCHOOL AND BEYOND | MANAGING STRESS©
20
21
Ove
rco
min
g O
bst
acle
s
STRESSFUL SITUATIONS
overcomingobstacles.orgPowered by TCPDF (www.tcpdf.org)

PART III
DEVELOPING RELATED SKILLS
A GAME PLAN FOR COLLEGE

TABLE OF CONTENTS
PART III: DEVELOPING RELATED SKILLS
1. Assessing Your Talents and Interests 357
2. Colleges, Universities, and Technical Schools 369
3. Applying to Colleges, Universities, & Technical Schools 382
4. Discovering Money: Scholarships, Grants, and Loans 396
A Game Plan for College

A GAME PLAN FOR COLLEGE | LESSON 1: ASSESSING YOUR TALENTS AND INTERESTS
overcomingobstacles.org
AGENDA
Starter
My Time
We Have Skills
Interests + Skills + Learning Styles = Careers
Conclusion
Student Assessment
Objectives
Students will identify the relationship between their interests and how they spend their time.
Students will identify the skills that relate to their interests.
Students will identify and categorize personal, career, and professional skills.
Students will use their skills and interests to determine career options.
Materials Needed
A dictionary (Parts I and II)
One copy of the “Real Time” activity sheet for each student (Students should complete this
activity sheet for homework during the week prior to this class.) (Part I)
One copy of the “Real Time Tally” activity sheet for each student (Parts I, II, and III)
One copy of the “Skills” activity sheet for each student (Parts II and III)
1LESSON
ASSESSING YOUR TALENTS AND INTERESTS

A GAME PLAN FOR COLLEGE | LESSON 1: ASSESSING YOUR TALENTS AND INTERESTS
overcomingobstacles.org
One copy of the “Three Skill Groups, Many Occupations” activity sheet for each student (Part II)
Several pairs of scissors (Part III)

A GAME PLAN FOR COLLEGE | LESSON 1: ASSESSING YOUR TALENTS AND INTERESTS
overcomingobstacles.org
Lead students through the following calculations:
1. Start with the number of hours worked each day at a nine-to-five job. (8)2. Multiply by 5 (number of workdays in a week). (40)3. Multiply by 52 (number of weeks in a year). (2,080)4. Multiply the answer to step two by 2 (two-week vacation). (80)5. Subtract step four from step three. (2,000)6. Subtract 80 (number of federal holidays multiplied by 8). (1,920)7. Subtract your current age from 65. (for a 16-year-old: 49)*8. Multiply the answer to step seven by the answer to step six. (94,080)
Tell students that the final answer is the approximate number of hours that they will probably work at a job. Students are likely to be surprised by the final number. Lead students to recognize that it is important to have jobs, careers, or professions that they enjoy. Remind them that they have already thought about their dreams and goals. Tell them that in today’s lesson they will look at their interests to see how they can be translated into careers and professions.
*Step seven of this calculation assumes that students will work 40 hours a week starting at their current age. You may want to adjust this step depending on your students.
Starter (3 minutes)
Purpose: Students recognize the connection between their interests and how they spend their time.
1. Students define “discretionary time.”
Write the word “discretion” on the board. Ask the class to suggest the meaning of the word. Then, instruct a volunteer to find the definition of “discretion” in the dictionary. (Merriam-Webster defines “discretion” as “individual choice or judgment.”)
With this definition in mind, ask students to consider what might be meant by “discretionary time.” Lead them to recognize that discretionary time is free time to use as they see fit, to pursue an activity of personal interest that they find fulfilling.
Instruct students to take out the “Real Time” activity sheet, which they completed during the week preceding this class. Ask for volunteers to share how they spend their discretionary time. Write student responses on the board. Elicit reasons why students find their activities worthwhile; write the reasons next to the items on the list.
2. Students calculate how they spend their time.
Part I My Time (5 minutes)

A GAME PLAN FOR COLLEGE | LESSON 1: ASSESSING YOUR TALENTS AND INTERESTS
overcomingobstacles.org
Distribute the “Real Time Tally” activity sheets and have students use the information from their “Real Time” activity sheet to fill in the top half.
Then, ask students to circle the five activities that they enjoy most and order the activities from one to five, with one being the most enjoyable and five being the least enjoyable. Ask students why they enjoy the noted activities. Point out to students that often people most enjoy doing the things at which they excel.
Purpose: Students define the concept of skill and identify the skills that relate to their interests.
1. Students define “skill.”
Write the word “skill” on the board. Have the class brainstorm a definition for the word. Then, have a volunteer read a definition from the dictionary. (Merriam-Webster defines “skill” as “a developed aptitude or ability.”)
Select one of the discretionary time activities that students listed earlier. Elicit from students the skills needed for that activity. For example, coordination; the ability to jump, move fast, throw, catch, and aim; and teamwork are needed to play basketball.
Point out to students that almost all of their discretionary time activities demonstrate specific skills. Explain that the skills people bring to a job are the talents, gifts, and abilities that they possess. Tell students that knowing their gifts, talents, or abilities—and how these things translate into jobs—will help them target potential careers and professions.
2. Students identify the skills that relate to their favorite activities.
Divide the class into groups of three or four students and distribute one copy of the “Skills” activity sheet to each student.
Tell students to look at their top five favorite activities from the “Real Time Tally” activity sheet and choose three activities to consider. Instruct students to work with their groups to identify the skills needed to excel at each activity they wrote on the top half of their “Skills” activity sheet.
After students have finished working, discuss the skills they listed. Encourage students with similar interests to add skills that they had not thought of. List several skills on the board and have students brainstorm a variety of activities and interests that might utilize those skills.
Tell students to leave the bottom half of the activity sheet blank for now.
3. Students explore the three skill groups.
Part II We Have Skills (20 minutes)

A GAME PLAN FOR COLLEGE | LESSON 1: ASSESSING YOUR TALENTS AND INTERESTS
overcomingobstacles.org
Distribute the “Three Skill Groups, Many Occupations” activity sheet to students.
Explain to students that most skills can be categorized into one of three different groups: people/animals, things, and information. Define each group and discuss as needed. Elicit suggestions from the class for completing the activity sheet and have students fill in the blanks. Student responses may include some of the following:
People or Animals: serving, counseling, advising, managing, performing, consulting, persuading, communicating, supervising, negotiating
Things: fixing, operating equipment, physical/athletic effort, handling objects, working with the environment
Information: planning, developing, creating, improving, designing, organizing, researching, visualizing, adapting, evaluating, computing, observing
Instruct students to brainstorm occupations or careers for each skill group.
Have groups share their occupation lists with the class.
4. Students identify and evaluate their skills in terms of the three skill groups.
Refer students to the bottom half of the “Skills” activity sheet. Explain that they are now going to complete this activity sheet by categorizing the skills they listed in the three columns. Have them list each skill under its appropriate heading.
When students have finished working, have them total the number of skills in each group. Ask students to share what they think that information reveals about their interests.
Point out to students that, usually, the profession that would be most interesting to them is the one at which they would do best. Remind them of the calculation that they made in the starter and suggest that their profession should be something that interests them a great deal.
Purpose: Students connect learning styles to the three main skill groups.
1. Students review the different learning styles.
Ask students to recall the learning style activities that they did in Module Six: Skills for School and Beyond. Elicit the following list of learning styles from the class and write it on the board: athletic/body, musical, visual/spatial, mathematical/logical, verbal/linguistic, social/interpersonal, and intrapersonal.
2. Students evaluate interest categories in terms of learning style profiles.
Part III Interests + Skills + Learning Styles = Careers (30 minutes)

A GAME PLAN FOR COLLEGE | LESSON 1: ASSESSING YOUR TALENTS AND INTERESTS
overcomingobstacles.org
Divide students into groups of four or five and distribute scissors. Have students cut out the learning style labels on the bottom of their “Real Time Tally” activity sheets from Part II. Then, have them match the learning styles to the skill groups on the “Skills” activity sheet. Tell them that more than one learning style may be appropriate for each skill group.
When students have finished working, have the groups share their results.
3. Students evaluate their personal data.
Tell students that they are now going to put their interests, their learning styles, and the skill groups all together. Tell students to complete the following sentences independently:
My favorite activity is ________.
My learning style is _______.
My preferred career skill group category is _________.
Have students consider if the categories complement or clash and if their learning styles are compatible with their activity preferences and the career categories. Discuss what they can conclude if the three answers complement each other and what they can conclude if they clash.
Ask students to summarize why it is important to assess our talents and interests. Elicit from students the following key points that were taught in this lesson:
Work is a large part of our adult lives; therefore, it is important to choose a career or profession that we enjoy.
Our interests, hobbies, and favorite activities involve skills that can be applied to jobs or careers.
Identifying our interests, skills, and learning styles gives us important information about the kinds of work or careers we should explore.
Conclusion (2 minutes)
1. List one of your favorite after-school activities and the skills that you use for it.
2. How does your learning style complement your skills and interests?
3. How can knowing your skills, interests, and learning styles help you in the future?
Student Assessment

A GAME PLAN FOR COLLEGE | LESSON 1: ASSESSING YOUR TALENTS AND INTERESTS
overcomingobstacles.org
LESSON EXTENSIONS
Using Quotations
“I never did a day’s work in my life. It was all fun.” —Thomas Edison, inventor
Have students read and interpret this quote. Have them discuss careers that would be “all fun.”
Addressing Multiple Learning Styles
Have students create flowcharts that depict the progression of strengths and interests to careers.
Have students share their charts with the class or hang them on the walls.
Writing in Your Journal
Have students write about why it is important to choose a career based on their talents and interests.
Have students discuss careers that they know they are not interested in pursuing.
Using Technology
Have students choose careers that interest them and that match their skills. Ask students to access and
list websites that might be used as resources for people in those careers.
Have students share their lists with the class. Create a “master list” of website resources for students to
use.
Homework
Ask students to list their interests and talents. Have them look at a college catalog and choose three
classes that match their listed talents and skills.
Have students write a few paragraphs describing how these classes and their skills/interests are related.

A GAME PLAN FOR COLLEGE | LESSON 1: ASSESSING YOUR TALENTS AND INTERESTS
overcomingobstacles.org
Additional Resources
Have students review the list of 18 very odd jobs from The Book of Lists by David Wallechinsky and
Amy Wallace.
Have students categorize each job based on the categories presented in this lesson.

A GAME PLAN FOR COLLEGE | ASSESSING YOUR TALENTS AND INTERESTS©
20
21
Ove
rco
min
g O
bst
acle
s
REAL TIMEFo
r on
e week, reco
rd th
e amo
un
t of tim
e you
spen
d o
n each
activity you
do
. Write in
after-scho
ol o
r part-
time jo
bs, sp
orts o
r oth
er ho
bb
ies, cho
res, readin
g for p
leasure, talkin
g on
the p
ho
ne, d
ates, and
so o
n.
Da
y:
morning:
afternoon:
evening:
To
Ta
ls:
minutes/hours
sleeping:school:eating:T
V:
phone:other activities:_____________________________________________________________________________
Da
y:
morning:
afternoon:
evening:
To
Ta
ls:
minutes/hours
sleeping:school:eating:T
V:
phone:other activities:_____________________________________________________________________________
Da
y:
morning:
afternoon:
evening:
To
Ta
ls:
minutes/hours
sleeping:school:eating:T
V:
phone:other activities:_____________________________________________________________________________
Da
y:
morning:
afternoon:
evening:
To
Ta
ls:
minutes/hours
sleeping:school:eating:T
V:
phone:other activities:_____________________________________________________________________________
Da
y:
morning:
afternoon:
evening:
To
Ta
ls:
minutes/hours
sleeping:school:eating:T
V:
phone:other activities:_____________________________________________________________________________
Da
y:
morning:
afternoon:
evening:
To
Ta
ls:
minutes/hours
sleeping:school:eating:T
V:
phone:other activities:_____________________________________________________________________________
Da
y:
morning:
afternoon:
evening:
To
Ta
ls:
minutes/hours
sleeping:school:eating:T
V:
phone:other activities:_____________________________________________________________________________
overcomingobstacles.org

A GAME PLAN FOR COLLEGE | ASSESSING YOUR TALENTS AND INTERESTS©
20
21
Ove
rco
min
g O
bst
acle
s
REAL TIME TALLYT
here are 1
68
ho
urs in
the w
eek. H
ere is ho
w I sp
end
my tim
e:
sleepin
g: _____________________________________________
oth
er activities:
scho
ol: _______________________________________________
_______________________________________________________
eating: _______________________________________________
_______________________________________________________
watch
ing T
V: _________________________________________
_______________________________________________________
talking o
n th
e ph
on
e: ________________________________
_______________________________________________________
To
p Fiv
e Fa
vo
riT
e ac
Tiv
iTie
s:
1. ___________________________________________
2. ___________________________________________
3. ___________________________________________
4. ___________________________________________
5. ___________________________________________
LEA
RN
ING
STY
LES (T
o th
e teacher: Save fo
r Part 3
.)
Cu
t ou
t each learn
ing style. T
ape th
em to
the b
otto
m o
f the ap
pro
priate skill catego
ry on
the “Skills”
activity sheet.
Athletic, B
ody
Athletic, B
ody
Athletic, B
ody
Musical
Musical
Musical
Visual,
Artistic
Visual,
Artistic
Visual,
Artistic
Mathem
atical, L
ogical
Mathem
atical, L
ogical
Mathem
atical, L
ogical
Verbal,
Linguistic
Verbal,
Linguistic
Verbal,
Linguistic
Social,
Interpersonal
Social,
Interpersonal
Social,
Interpersonal
Intrapersonal
Intrapersonal
Intrapersonal
overcomingobstacles.org

A GAME PLAN FOR COLLEGE | ASSESSING YOUR TALENTS AND INTERESTS©
20
21
Ove
rco
min
g O
bst
acle
s
SKILLSP
ick th
ree of yo
ur favo
rite activities. List the sk
ills need
ed fo
r each b
elow
.
A
ctivity: A
ctivity: A
ctivity:
Skills:
Skills: Skills:
List each sk
ill abo
ve un
der th
e app
rop
riate head
ing b
elow
. Co
un
t the n
um
ber o
f skills an
d
write th
e total b
elow
each b
ox
.
P
EO
PLE
(or A
NIM
ALS)
TH
ING
S IN
FO
RM
AT
ION
Learn
ing Style(s):
Learnin
g Style(s): Learn
ing Style(s):
TO
TA
L: ________ T
OT
AL: ________
TO
TA
L: ________
With
the skills I h
ave, I migh
t enjo
y a job
, career, or p
rofessio
n w
orkin
g with
________________ __________________________________________________________________________________
overcomingobstacles.org

A GAME PLAN FOR COLLEGE | ASSESSING YOUR TALENTS AND INTERESTS©
20
21
Ove
rco
min
g O
bst
acle
s
TH
RE
E SK
ILL GR
OU
PS, M
AN
Y O
CC
UP
AT
ION
S
A. P
eop
le (or A
nim
als)
•
help
ing o
r caring fo
r
•
entertain
ing
•
teachin
g
•
coach
ing
•
_____________
•
_____________
•
_____________
Occu
patio
ns
•
_____________
•
_____________
•
_____________
•
_____________
•
_____________
•
_____________
B. T
hin
gs
•
repairin
g
•
op
erating veh
icles
•
usin
g too
ls
•
wo
rking w
ith n
ature
•
_____________
•
_____________
•
_____________
Occu
patio
ns
•
_____________
•
_____________
•
_____________
•
_____________
•
_____________
•
_____________
C. In
form
ation
•
plan
nin
g
•
creating
•
design
ing
•
organ
izing
•
_____________
•
_____________
•
_____________
Occu
patio
ns
•
_____________
•
_____________
•
_____________
•
_____________
•
_____________
•
_____________
overcomingobstacles.orgPowered by TCPDF (www.tcpdf.org)

A GAME PLAN FOR COLLEGE | LESSON 2: COLLEGES, UNIVERSITIES, AND TECHNICAL
SCHOOLS
overcomingobstacles.org
AGENDA
Starter
Two-Year Colleges, Four-Year Colleges
Narrow the Field
The Right Stuff
Conclusion
Student Assessment
Objectives
Students identify the differences among universities, colleges, community colleges, and
technical schools.
Students will clarify their postsecondary education needs in terms of schools’ strengths,
requirements, tuitions, and locations.
Materials Needed
A local road or transit map (Starter)
An assortment of college descriptions, brochures, and catalogs from your school library, enough
for each pair of students (Include four-year, community, and technical colleges, with an emphasis
on local schools.) (Part I)
One copy of the “College Survey” activity sheet for each student (Parts I and II)
One copy of the “Narrowing the Field” activity sheet for each student (Part II)
2LESSON
COLLEGES, UNIVERSITIES, AND TECHNICAL SCHOOLS

A GAME PLAN FOR COLLEGE | LESSON 2: COLLEGES, UNIVERSITIES, AND TECHNICAL
SCHOOLS
overcomingobstacles.org
One copy of the “Prep for College” activity sheet for each student (Part II)
One copy of the “Bronx Roots Still Nurture Career Paths” activity sheet for each student (Part III)

A GAME PLAN FOR COLLEGE | LESSON 2: COLLEGES, UNIVERSITIES, AND TECHNICAL
SCHOOLS
overcomingobstacles.org
Show students a local road or transit map. Point out the locations of the school and another landmark. Ask, “How would you get from the school to this landmark?” Let the class discuss various routes and options. Ask, “What is the best way to get there? What do you need to know in order to make the trip?” (The best way is probably the most direct route. You need to know the roads and/or transportation options in order to identify the most direct or best route.)
Tell students that rewarding careers are the destinations and colleges, universities, and technical schools are the different options for getting there. Explain that they will begin to explore the different post-high school roads available.
Starter (3 minutes)
Purpose: Students understand the differences between two-year colleges and four-year colleges.
1. Students read about different types of colleges.
Tell students that they are going to investigate some of the postsecondary education options available to them. Divide the class into pairs and give each pair of students a description, brochure, or catalog from a local college.
Explain to students that each pair are going to present their college to the rest of the class. As students read about their colleges, have them underline or circle any words or terms that need defining or further discussion. Discuss and define the following, along with any other terms students may be confused about, as needed:
Community colleges: These are local colleges that offer associate’s degree programs that usually take two years of full-time study. Many students transfer to a four-year college to earn their bachelor’s degree.
Technical/occupational/vocational schools: These schools provide occupational training that leads to a diploma or certification in a field. Some community colleges offer joint programs with technical schools so that students can earn college credits along with their vocational training.
Four-year colleges: Four-year colleges offer bachelor’s degree programs that require approximately 120 credits to graduate and usually take four years of full-time study.
Universities: Universities are large institutions that include a college of arts and/or sciences, professional schools, and graduate studies. Like four-year colleges, universities also offer undergraduate degrees.
Part I Two-Year Colleges, Four-Year Colleges (15 minutes)

A GAME PLAN FOR COLLEGE | LESSON 2: COLLEGES, UNIVERSITIES, AND TECHNICAL
SCHOOLS
overcomingobstacles.org
In their presentations, students should include information on degree programs, tuition, location, transportation options, entrance requirements, clubs, facilities, and sports. Give students a few minutes to prepare their presentations.
2. Students share information about different colleges.
When students are finished working, distribute the “College Survey” activity sheet. Have each pair present its school to the class. As students listen to their classmates, have them use the activity sheet to note information they think is important or interesting.
3. Students match careers/professions with two-year and four-year colleges.
Have students use the notes on their “College Survey” activity sheet to find one or more colleges that fit the jobs, careers, or professions that interest them. Tell them to mark career-appropriate colleges on their activity sheets. Have students consult with their partners to verify their choices and answer any further questions.
Purpose: Students identify factors that influence school choice, including tuition, location, and requirements.
1. Students compare tuition and other costs.
Distribute the “Narrowing the Field” activity sheet. Have students select three colleges from their “College Survey” activity sheets and write the names of these colleges at the top of each column on the “Narrowing the Field” sheet. Direct each pair to compute the cost of a degree at the colleges in which they are interested (generally 60 credits for associate’s degrees and 120 credits for bachelor’s degrees). Have students discuss the information with their partners and write it on their “Narrowing the Field” activity sheets. Students will be surprised and probably discouraged by the cost of higher education. Tell them that in future lessons they will learn about different ways to pay for their education, including scholarships, grants, and loans.
2. Students consider location and transportation factors.
Ask pairs to analyze their colleges in relation to where they live. Could they commute? Is there public transportation? Would they need a car? Would they have to live on campus or close to the school? Have each pair review the transportation information on their “College Survey” sheet and add it to their “Narrowing the Field” sheets.
3. Students compare college entrance requirements.
Part II Narrow the Field (15 minutes)

A GAME PLAN FOR COLLEGE | LESSON 2: COLLEGES, UNIVERSITIES, AND TECHNICAL
SCHOOLS
overcomingobstacles.org
Write the following terms on the board: “SAT scores,” “GPA,” “class rank,” and “personal interview.” Explain these terms to students as needed. Because there are limited facilities, colleges have requirements such as these in order to select students from among those who apply. Direct students to research the specific requirements for the schools in which they are interested. Then, distribute the “Prep for College” activity sheet to students. Have students check off the courses that they have already taken and make note of the requirements that they have yet to complete. Have students add the new information to complete their “Narrowing the Field” activity sheets.
4. Students consider other factors related to choosing a college.
Write the following terms on the board: “campus,” “facilities,” “sports,” and “clubs.” Elicit from students a definition for each term. Discuss with students why these factors should be considered when choosing a college. Point out that though it is very unlikely that one school will meet all of their needs, they should still look for a school that has as many of their ideal characteristics as possible. Have pairs review their “College Survey” sheets for this information. Give students a few minutes to add this new data to their “Narrowing the Field” activity sheets.
5. Students rank the colleges in which they are interested.
Point out to students that they now have considerable information about the colleges in which they are interested. Tell students to number the colleges in their survey from one to three in order of preference (one being the top preference) and to share their results with their partners. Encourage them to ask questions about their classmates’ choices, pointing out, for example, any factors that may have been overlooked.
Purpose: Students listen to and discuss a real-life success story and apply what they have learned.
1. Students read a real-life success story.
Distribute the “Bronx Roots Still Nurture Career Paths” activity sheet. Have students read the article alone or in small groups.
2. Students discuss the story and how it might apply to their lives.
Begin a discussion of the article by asking questions such as the following: “What do you have in common with Mr. Cappelli? With Ms. Cruz? Why did Mr. Cappelli give Ms. Cruz a job? How do you think Ms. Cruz’s schoolwork changed after the first summer she worked for Mr. Cappelli?”
Ask students to consider how a young Louie Cappelli might have benefited from this module.
Part III The Right Stuff (15 minutes)
Conclusion (2 minutes)

A GAME PLAN FOR COLLEGE | LESSON 2: COLLEGES, UNIVERSITIES, AND TECHNICAL
SCHOOLS
overcomingobstacles.org
Have students review the activity sheets that they completed in this lesson. Ask, “What can you do next semester or this summer to make you better prepared for college?” Elicit from students the following key points that were taught in this lesson:
There are different kinds of colleges, each offering different degrees.
Select a college that offers degrees or programs in your field of interest.
Factors to take into account when choosing a college include tuition, location, and entrance requirements.
1. List four factors that are important in choosing a college.
2. Where can you get information on colleges in which you are interested?
3. What steps can you take toward being accepted by the college of your choice?
Student Assessment
A GAME PLAN FOR COLLEGE | LESSON 2: COLLEGES, UNIVERSITIES, AND TECHNICAL
SCHOOLS
overcomingobstacles.org
LESSON EXTENSIONS
Using Quotations
“In all things, success depends upon previous preparation, and without such preparation there is sure to
be failure.” —Confucius
Have students write a paragraph about how this lesson will help them when choosing a college.
Addressing Multiple Learning Styles
Have students write songs or poems that describe their ideal institute of higher learning.
Have students recite their poems or lyrics to their song.
Writing in Your Journal
Have students write about what they hope to get out of the institution they choose to attend.
Have students describe why they think they want to attend certain institutions.
Using Technology
Have students take “virtual tours” of colleges by visiting the websites of the schools in which they are
interested. Have students describe what they saw and what they liked most about each school.
Homework
Ask students to research which schools have good reputations for programs in the field of study they
wish to pursue. Ask them why the school has a good reputation (e.g., because of faculty, research,
curriculum, etc.).
Have students make a list of five schools that they could possibly attend.

A GAME PLAN FOR COLLEGE | LESSON 2: COLLEGES, UNIVERSITIES, AND TECHNICAL
SCHOOLS
overcomingobstacles.org
Additional Resources
Have students research books and articles on applying to college and ask them to share their findings
with the class. Compile a list of resources and provide each student with a copy.

A GAME PLAN FOR COLLEGE | COLLEGES, UNIVERSITIES, AND TECH SCHOOLS©
20
21
Ove
rco
min
g O
bst
acle
s
COLLEGE SURVEY
Technical Schools Community Colleges Four-Year Colleges/Universities
Name: Name: Name: Notes: Notes: Notes:
Name: Name: Name: Notes: Notes: Notes:
Name: Name: Name: Notes: Notes: Notes:
overcomingobstacles.org

A GAME PLAN FOR COLLEGE | COLLEGES, UNIVERSITIES, AND TECH SCHOOLS©
20
21
Ove
rco
min
g O
bst
acle
s
NA
RR
OW
ING
TH
E F
IELD
co
lleg
e a:
________________________________
Tu
ition
: $ __________________ p
er credit
Co
st of ____________________ d
egree:
$ ____________________
Locatio
n:
Req
uirem
ents:
Oth
er Info
rmatio
n:
co
llege B
:
________________________________
Tu
ition
: $ __________________ p
er credit
Co
st of ____________________ d
egree:
$ ____________________
Locatio
n:
Req
uirem
ents:
Oth
er Info
rmatio
n:
co
llege c
:
________________________________
Tu
ition
: $ __________________ p
er credit
Co
st of ____________________ d
egree:
$ ____________________
Locatio
n:
Req
uirem
ents:
Oth
er Info
rmatio
n:
overcomingobstacles.org

A GAME PLAN FOR COLLEGE | COLLEGES, UNIVERSITIES, AND TECH SCHOOLS©
20
21
Ove
rco
min
g O
bst
acle
s
PR
EP
FO
R C
OLLE
GE
9T
h gr
ad
e
En
glish: ______________
Grad
e: ___
Math
: ________________ G
rade: ___
History: ______________
Grad
e: ___
Science: ______________
Grad
e: ___
Fo
reign Lan
guage:
_____________________ G
rade: ___
Art (V
isual an
d
Perfo
rmin
g): _____________________ G
rade: ___
Electives/other courses:
_____________________ G
rade: ___
_____________________ G
rade: ___
10
Th g
ra
de
English: ______________
Grad
e: ___
Math
: ________________ G
rade: ___
History: ______________
Grad
e: ___
Science: ______________ G
rade: ___
Fo
reign Lan
guage:
_____________________ G
rade: ___
Art (V
isual an
d
Perfo
rmin
g): _____________________ G
rade: ___
Electives/other courses:
_____________________ G
rade: ___
_____________________ G
rade: ___
11
Th g
ra
de
English: ______________
Grad
e: ___
Math
: ________________ G
rade: ___
History: ______________
Grad
e: ___
Science: ______________ G
rade: ___
Fo
reign Lan
guage:
_____________________ G
rade: ___
Art (V
isual an
d
Perfo
rmin
g): _____________________ G
rade: ___
Electives/other courses:
_____________________ G
rade: ___
_____________________ G
rade: ___
12
Th g
ra
de
English: ______________
Grad
e: ___
Math
: ________________ G
rade: ___
History: ______________
Grad
e: ___
Science: ______________ G
rade: ___
Fo
reign Lan
guage:
_____________________ G
rade: ___
Art (V
isual an
d
Perfo
rmin
g): _____________________ G
rade: ___
Electives/other courses:
_____________________ G
rade: ___
_____________________ G
rade: ___
overcomingobstacles.org

A GAME PLAN FOR COLLEGE | COLLEGES, UNIVERSITIES, AND TECH SCHOOLS©
20
21
Ove
rco
min
g O
bst
acle
s
When Louis J. Cappelli graduated from William H. Taft High School in 1949, he ended up doing what most of his buddies in the Bronx did: not much. There was a reces-sion, and jobs were tight. He would walk from his home at Courtlandt Avenue and 160th Street, cross Park Avenue and head to their hangout on Morris Avenue and 165th, where the biggest attraction some days was watching the street get paved. “None of us was working,” he said. “We had a nice time hanging out on the corner, shooting pool, listening to music and going to the movies. We made a few dollars deliv-ering orders.” Then came another order. “My father said, ‘Louie, get a job,’” Mr. Cappelli said. “My father only had to tell me once.” So Louie dressed himself up in his high school graduation suit, bought the New York Times and looked in the classifieds under “Office Boy,” because that was “what I thought I was capable of doing.” One ad led him to the Standard Factors Corporation. “I was instantly offered the job,” he said. “I started working the same day. And I’ve been here ever since.” Has he ever. Louie, the iceman’s son, has gone from the street corner to the corner office as the chairman and chief executive officer of Sterling Bancorp, the successor to Standard Factors. His 50-year journey left him grateful for life’s many blessings, start-ing with his parents’ work ethic. So when he goes to his Park Avenue office, he remem-bers that road’s northern reaches in his old neighborhood. “I never forgot where I come from,” he said. “I tell my colleagues, when you look in the mirror, don’t kid yourself about who you are. Don’t try to be anything else.” There was a time when others told him to forget about being much of anything. He admits to having been an average student, one who sometimes sassed the teachers. Back then, his family lived at Morris Avenue and 162nd Street, near Yankee Stadium…. His father, Peter, who came to America as a teenager, made his living hauling hunks of ice. Though he was not educated, he kept track of accounts in his mind. He taught his children the value of respecting family and community. Mr. Cappelli’s two brothers and sister taught him the value of education, urging him to get an academic diploma at Taft, rather than go to the vocational schools that his friends attended. He rose through the bank’s hierarchy while earning a degree from City College at night. He studied accounting, a discipline that he speaks of reverently. The numbers on a spreadsheet, he says, tell stories of businesses and the people who work for them, including his bank. He feels a responsibility to them, he said, because at one point or another in his career, he probably had their job….
BRONX ROOTS STILL NURTURE CAREER PATHS
by David Gonzalez
overcomingobstacles.org

A GAME PLAN FOR COLLEGE | COLLEGES, UNIVERSITIES, AND TECH SCHOOLS©
20
21
Ove
rco
min
g O
bst
acle
s
“I traveled through the ranks, so I know what it’s like. I didn’t come out of Harvard Business School and start as a vice president…. “If you’re smart enough,” he said. “It’s not luck. It’s timing. You need to be in the sta-tion at the right time.” Or the classroom. A few years ago he was Principal for a Day at Taft High School….In one sophomore class, Noemi Cruz listened to his corporate success story. “How do I get a job at your bank?” she asked, half joking. He hired her. She began working summers, and continued after graduation. She is now an administrative assistant, working full time while going to New York University at night, courtesy of the bank. “I want to stay right here,” she said. “Hopefully, I’ll get his office....” “I can relate to her,” he said. He snapped his fingers. “Like that, I can relate to her.”
*This article is excerpted and reprinted from The New York Times.
BRONX ROOTS STILL NURTURE CAREER PATHS
(CONTINUED)
overcomingobstacles.orgPowered by TCPDF (www.tcpdf.org)

A GAME PLAN FOR COLLEGE | LESSON 3: APPLYING TO COLLEGES, UNIVERSITIES, &
TECHNICAL SCHOOLS
overcomingobstacles.org
AGENDA
SESSION 1
Starter
Step One: Apply
Step Two: Take My Application, Please!
SESSION 2
The Write Stuff: Why?
The Write Process
Conclusion
Student Assessment
Objectives
Students will identify the benefits of applying to a range of schools.
Students will practice completing college applications.
Students will write model entrance essays.
Materials Needed
Session 1: One copy of the “A+ Applications” activity sheet for each student (Part I)
Session 1: Scissors and tape (Part I)
3LESSON
APPLYING TO COLLEGES, UNIVERSITIES, & TECHNICAL SCHOOLS

A GAME PLAN FOR COLLEGE | LESSON 3: APPLYING TO COLLEGES, UNIVERSITIES, &
TECHNICAL SCHOOLS
overcomingobstacles.org
Session 1: One copy of the “College Application Planner” activity sheet for each student (Part II)
Session 1: College catalogs and brochures (Part II)
Session 1: Highlighters (Part II)
Session 1: One copy of the Common Application for each student (Part II and Session 2, Part I)
(Note: If your guidance department does not have the Common Application, you may contact the
College Board directly or find it online at www.commonapp.org.)
Session 2: One copy of the “Apply Yourself” activity sheet for each student (Part I)
Session 2: Copies of a sample essay, one for each group of four or five students (This essay may be
taken from a book on college essays in the school library or guidance office.) (Part I)
Session 2: One copy of the “Topic Brainstorming” activity sheet for each student (Part I)
Session 2: Four or more index cards for each student (Part II)

A GAME PLAN FOR COLLEGE | LESSON 3: APPLYING TO COLLEGES, UNIVERSITIES, &
TECHNICAL SCHOOLS
overcomingobstacles.org
SESSION 1
Write these advertising slogans for a state lottery on the board: “Hey, you never know” and “You’ve got to be in it to win it.” Ask students how these ideas could connect to applying to and going to college. (Students may answer: if you don’t try, you’ll never know what you could accomplish.)
Explain to students that the next two sessions will take them through the step-by-step process of applying to colleges.
Starter (3 minutes)
Purpose: Students identify the benefits of applying to a range of schools and the appropriate steps to filling out applications.
1. Students learn the purpose of applications.
Divide the class into groups of three or four. Instruct students to consider the following situation:
Suppose that we as a class decided to let five new students join us. We can select whomever we want. Much to our surprise, 100 students want to join our class! How will we choose from among them? What would we want to know about them? What criteria will we use to select the new students?
Give groups five minutes to develop an application or other admissions screening ideas. Then, have them share their ideas with the class.
Ask students to consider the process that they developed to identify some of the reasons for the college application process. Write student responses on the board.
2. Students organize the steps to filling out college applications.
Distribute copies of the “A+ Applications” activity sheet, scissors, and tape to the groups. Explain to students that these are the steps they should follow when filling out applications, but that they are out of order.
Instruct students to cut along the dotted lines and arrange the steps in the order they think is best. Have them tape their steps together to share with the class.
Discuss the different organizational plans. Have students revise within their groups. Tell students to write these steps in their journals or to save the activity sheets to use as reminders when they begin the application process.
Part I Step One: Apply (20 minutes)
A GAME PLAN FOR COLLEGE | LESSON 3: APPLYING TO COLLEGES, UNIVERSITIES, &
TECHNICAL SCHOOLS
overcomingobstacles.org
Purpose: Students identify a range of schools to apply to and determine how to request admissions applications.
1. Students identify a range of schools to apply to and contact for applications.
Explain to students that many guides suggest applying to four to six schools in three different categories: “reach schools” (less than 50% chance of being accepted), “good-shot schools” (50/50 chance), and “safety schools” (better than 50% chance). In the previous lesson, students identified three schools that interested them. Have them work with partners to review their notes and reexamine catalogs/brochures as needed in order to identify their reach schools, good-shot schools, and safety schools.
Distribute the “College Application Planner” activity sheet to each student. Have students write their three school choices (from Lesson 3 in this module) in the first column.
Read through the steps on the activity sheet to be sure students understand each one. Then have students check college catalogs to find out how to request applications. As a homework assignment, have students contact the schools they listed for applications and write the date of their request on their activity sheets.
2. Students review the Common Application.
Explain to students that many colleges use the Common Application—a standardized form that students fill out once and send to multiple schools. Distribute copies of the Common Application for students to use as practice.
Give students highlighters and have them work in small groups to read through the Common Application. Let them highlight unfamiliar terms or questions. If the group cannot answer the questions, bring the class together. Here are some terms that may need explanation:
Early Action or Early Decision Candidate
SAT or SAT I
SAT II or Achievement Tests
ACT: American College Test
TOEFL: Test of English as a Foreign Language
Tell students that the next session will focus on the essays that many schools require as part of the application process.
As a homework assignment before beginning Session 2, ask students to find interesting first sentences from their favorite books.
Part II Step Two: Take My Application, Please! (20 minutes)

A GAME PLAN FOR COLLEGE | LESSON 3: APPLYING TO COLLEGES, UNIVERSITIES, &
TECHNICAL SCHOOLS
overcomingobstacles.org
SESSION 2
Purpose: Students understand the purpose of the personal essay and prepare to write a model admission essay.
1. Students discuss why a personal essay is part of the application process.
Have students look at the information they’ve written on their practice Common Applications. Ask, “How would you feel if a decision about your future were made using just this information?” (Students might respond: the information is just numbers; it doesn’t tell anything about them as people.)
Explain that the purpose of the essay is to give all applicants the opportunity to present themselves as the unique individuals that they are. Point out to students that the essay is not a test; rather, it allows colleges to get to know students personally.
Distribute copies of the “Apply Yourself” activity sheet. Give students a few minutes to read the article. Have them summarize the information by asking them to describe some of the essay-writing tips given in the article. (Students may answer: write about something personal, describe the event as it happened, don’t try anything off-the-wall unless you are a strong writer.)
2. Students read and discuss sample essays.
Tell students that they are now going to review an essay.
Divide the class into groups of four or five. Distribute copies of a sample essay from a library or guidance office resource to each group. Ask students to imagine that they are admissions officers reading the essay. Then, give them about 10 minutes to read and discuss the essay. Discuss the following questions as a group:
What topic did the writer choose?
What are some examples of sentences that are personal or that contain vivid descriptions of an object or action?
What did you learn about the writer?
Would the writer fit in at our school?
3. Students explore essay themes and topics.
Refer students to the Common Application. Have them read the directions for writing the essay. Distribute copies of the “Topic Brainstorming” activity sheet to students in their small groups.
Part I The Write Stuff: Why? (20 minutes)

A GAME PLAN FOR COLLEGE | LESSON 3: APPLYING TO COLLEGES, UNIVERSITIES, &
TECHNICAL SCHOOLS
overcomingobstacles.org
Explain to students that it is important to look for an original topic for their essays. Interesting or unusual topics make for interesting and unusual essays that will stand out. Give groups 10 minutes to brainstorm topics for each category on the activity sheet.
When the class is finished, have one group read its list for the first category, “Personal Relationships and Influences.” Have the other groups cross out the same topics if they appear on their lists. Then have another group read its list, and so on. Repeat for “Life Experiences” and “Personal Qualities.”
Students may be surprised by the number of repeated ideas. How many unusual topics did the class come up with? The answer could be none! If time allows, regroup students and repeat the activity, or try it again on another day. Work until students have brainstormed interesting, unusual ideas to write about.
Purpose: Students explore the writing process: looking for topics, choosing the important first sentence, and organizing a first draft.
1. Students explore personal resources for essay topics.
As students work through the following activities, remind them that the purpose of the essay is for them to express themselves. You may want to make signs in the shape of keys with the following reminders written on them: be yourself, be honest, and tell a story rich in details.
Explain to students that the best topic for their essays will be one that is meaningful to them and about which they know a great deal. Distribute four or more index cards to each student. Have students write one extracurricular activity, hobby, and work experience on each card. Then, give them five minutes to free-associate a list of thoughts, ideas, phrases, and images for each card.
Have students look through their journals and old essays for topics and ideas about which to write. Encourage them to discuss their ideas with other students using questions such as “Does this topic or theme sound interesting? What does it tell you about me?”
Tell students that top-10 lists are another way to generate ideas for topics. Have students brainstorm a variety of top-10 lists (e.g., 10 most important personal experiences, 10 most important people, 10 best movies, 10 book characters you’d like to meet, and so on).
You might also encourage students to draw clusters around a theme. For example, a student might put “work experiences” in a center circle and draw a web about their job experiences. Students should see one area of the cluster that looks particularly rich and for which they provided many details.
2. Students discuss sample first sentences.
Part II The Write Process (25 minutes)

A GAME PLAN FOR COLLEGE | LESSON 3: APPLYING TO COLLEGES, UNIVERSITIES, &
TECHNICAL SCHOOLS
overcomingobstacles.org
Ask volunteers to share the first sentences from some of their favorite books. Instruct students to tell what they enjoyed most about the book.
Then ask students, “Why is an interesting first sentence important for your personal essays?” (Students might respond: you want to grab the attention of the admissions officer reading your essay so you stand out.)
3. Students review the steps of the writing process.
Explain to students that the process of writing their personal essays can take many months. The more time they allow for it, the better their essays will be. Review these writing steps:
Take notes, writing stream of consciousness. Use index cards or pieces of paper folded into sections. Write one idea on each card or in each section. Don’t worry about mechanics (i.e., spelling, punctuation, and grammar).
Organize your notes. Put your index cards or cut-up sections in order.
Create an outline. Add specific details for each main point.
Write a first draft.
Rest the first draft by putting it away for a day or two.
Revise and rewrite several days later.
Rest the second draft, then revise and rewrite.
Get feedback from peers, teachers, and school counselors.
Revise and rewrite.
Repeat draft writing, resting, and revising.
Proofread. Check spelling, grammar, and punctuation.
Make a final copy of the essay.
Suggest that when students begin to write essays, they work with writing partners. If necessary, remind students of the guidelines for constructive feedback and to use I-Messages and questions when critiquing someone else’s work. List appropriate questions or phrases partners can use when reading each other’s work, such as the following:
I’m not sure what you mean in this sentence.
I like these words together—they make me see X.
I don’t understand how Y led to Z.
How did X change the way you look at Y?
I don’t get a sense of how this made you feel.

A GAME PLAN FOR COLLEGE | LESSON 3: APPLYING TO COLLEGES, UNIVERSITIES, &
TECHNICAL SCHOOLS
overcomingobstacles.org
Ask students to summarize the steps they must take to apply to college. Elicit from them the following key points that were taught in this lesson:
Apply to a range of colleges, including reach schools, good-shot schools, and safety schools.
Applications can be obtained over the internet, by phone, or by mail.
Filling out the application takes time and patience.
The essay is important because it is your chance to make a personal impression.
Conclusion (3 minutes)
SESSION 1
1. List the steps to filling out a college application.
2. List one reach school, one good-shot school, and one safety school to which you are considering
applying. Explain why each is either a reach, a good-shot, or a safety school.
3. What is the Common Application?
SESSION 2
1. List three of your most important personal experiences, three of the most important people to
you, and three of your favorite characters from a book or movie. Explain why each experience,
person, and character is significant for you. Which of these topics can be expanded into an essay
that would interest you?
2. Describe the steps of the writing process.
Student Assessment

A GAME PLAN FOR COLLEGE | LESSON 3: APPLYING TO COLLEGES, UNIVERSITIES, &
TECHNICAL SCHOOLS
overcomingobstacles.org
LESSON EXTENSIONS
Using Quotations
“Never let the fear of striking out get in your way.” —Babe Ruth, legendary New York Yankee
Discuss how this quote relates to applying to colleges, universities, and technical schools.
Addressing Multiple Learning Styles
Have students create graphs of schools in which they are interested. Have them include information
such as degrees conferred; whether the school is a reach, good-shot, or safety school; requirements;
tuition; location; etc.
Have students display their graphs on poster paper and hang them around the room.
Writing in Your Journal
Tell students to brainstorm challenges they have faced, why they want to pursue a certain course of
study, what an application won’t tell admissions staff, etc.
Have them outline a possible college essay on one of these topics.
Using Technology
Have students bring in their favorite song—one that they would write about in a college essay because
it represents them. Play the songs for the class.
Have students describe why their chosen song represents them.
Homework
Have students obtain applications for the schools to which they wish to apply.
Have students compare and contrast the applications they receive.

A GAME PLAN FOR COLLEGE | LESSON 3: APPLYING TO COLLEGES, UNIVERSITIES, &
TECHNICAL SCHOOLS
overcomingobstacles.org
Additional Resources
Have students refer to The Best College Admission Essays by Mark Alan Stewart and Cynthia C.
Muchnick and Essays That Will Get You into College by Amy Burnham, Daniel Kaufman, and Chris
Dowhan.
Have students describe the elements of a great essay.
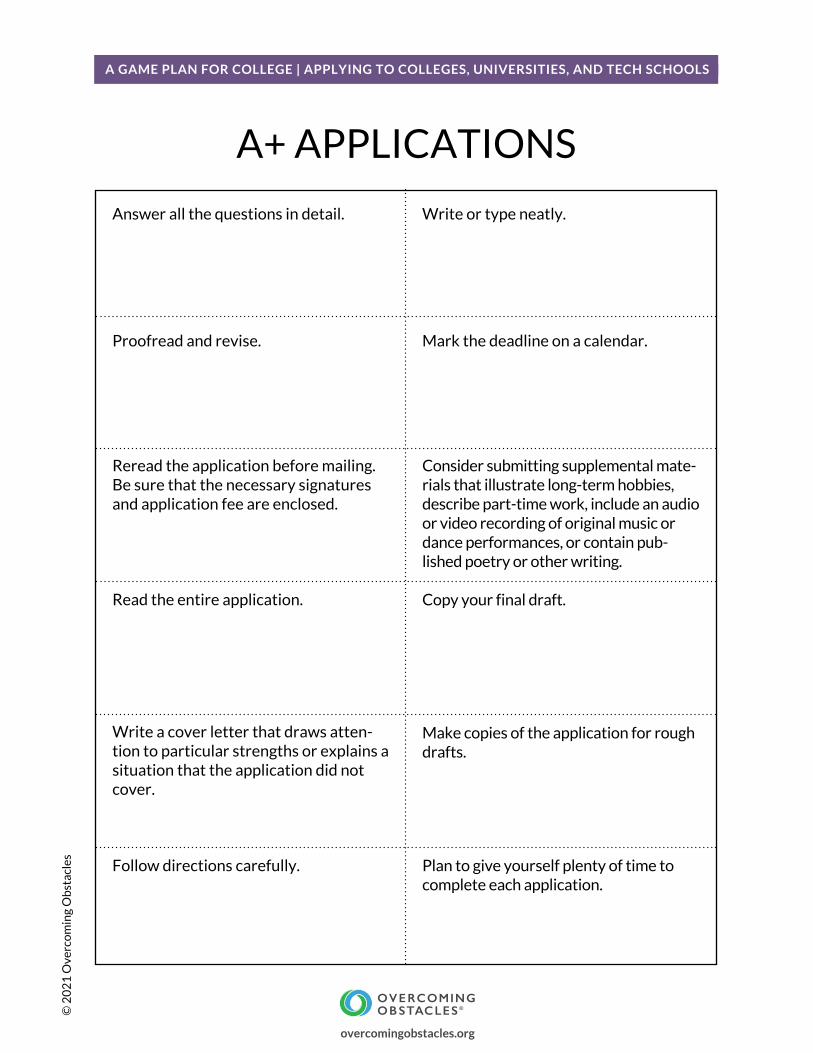
A GAME PLAN FOR COLLEGE | APPLYING TO COLLEGES, UNIVERSITIES, AND TECH SCHOOLS©
20
21
Ove
rco
min
g O
bst
acle
s
Answer all the questions in detail.
Proofread and revise.
Reread the application before mailing. Be sure that the necessary signatures and application fee are enclosed.
Read the entire application.
Write a cover letter that draws atten-tion to particular strengths or explains a situation that the application did not cover.
Follow directions carefully.
Write or type neatly.
Mark the deadline on a calendar.
Consider submitting supplemental mate-rials that illustrate long-term hobbies, describe part-time work, include an audio or video recording of original music or dance performances, or contain pub-lished poetry or other writing.
Copy your final draft.
Make copies of the application for rough drafts.
Plan to give yourself plenty of time to complete each application.
A+ APPLICATIONS
overcomingobstacles.org

A GAME PLAN FOR COLLEGE | APPLYING TO COLLEGES, UNIVERSITIES, AND TECH SCHOOLS©
20
21
Ove
rco
min
g O
bst
acle
s
Directions: Write the name of one of your top college choices in each column. Fill in the dates as you complete each step.
COLLEGE APPLICATION PLANNER
APPLICATION STEPS COLLEGE COLLEGE COLLEGE
Application requested
Application received
*APPLICATION DUE
Personal data completed
Educational data completed
Test information completed
Family information completed
Honors, extracurricular completed
Work experience completed
Short essay draft 1
revised
final
Personal statement outline
draft 1
draft 1 revised
draft 2
draft 2 revised
draft 3
draft 3 revised
final draft
proofread
completed
APPLICATION MAILED
overcomingobstacles.org
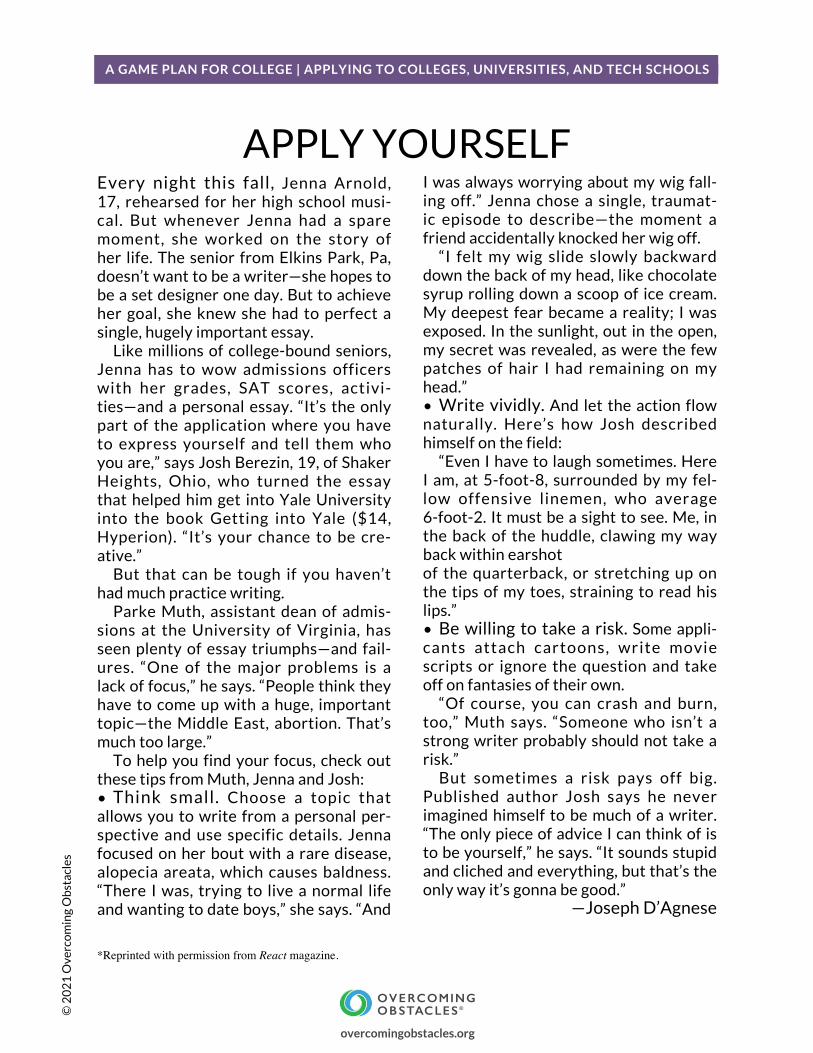
A GAME PLAN FOR COLLEGE | APPLYING TO COLLEGES, UNIVERSITIES, AND TECH SCHOOLS©
20
21
Ove
rco
min
g O
bst
acle
s
Every night this fall, Jenna Arnold, 17, rehearsed for her high school musi-cal. But whenever Jenna had a spare moment, she worked on the story of her life. The senior from Elkins Park, Pa, doesn’t want to be a writer—she hopes to be a set designer one day. But to achieve her goal, she knew she had to perfect a single, hugely important essay. Like millions of college-bound seniors, Jenna has to wow admissions officers with her grades, SAT scores, activi-ties—and a personal essay. “It’s the only part of the application where you have to express yourself and tell them who you are,” says Josh Berezin, 19, of Shaker Heights, Ohio, who turned the essay that helped him get into Yale University into the book Getting into Yale ($14, Hyperion). “It’s your chance to be cre-ative.” But that can be tough if you haven’t had much practice writing. Parke Muth, assistant dean of admis-sions at the University of Virginia, has seen plenty of essay triumphs—and fail-ures. “One of the major problems is a lack of focus,” he says. “People think they have to come up with a huge, important topic—the Middle East, abortion. That’s much too large.” To help you find your focus, check out these tips from Muth, Jenna and Josh:• Think small. Choose a topic that allows you to write from a personal per-spective and use specific details. Jenna focused on her bout with a rare disease, alopecia areata, which causes baldness. “There I was, trying to live a normal life and wanting to date boys,” she says. “And
I was always worrying about my wig fall-ing off.” Jenna chose a single, traumat-ic episode to describe—the moment a friend accidentally knocked her wig off. “I felt my wig slide slowly backward down the back of my head, like chocolate syrup rolling down a scoop of ice cream. My deepest fear became a reality; I was exposed. In the sunlight, out in the open, my secret was revealed, as were the few patches of hair I had remaining on my head.”• Write vividly. And let the action flow naturally. Here’s how Josh described himself on the field: “Even I have to laugh sometimes. Here I am, at 5-foot-8, surrounded by my fel-low offensive linemen, who average 6-foot-2. It must be a sight to see. Me, in the back of the huddle, clawing my way back within earshot of the quarterback, or stretching up on the tips of my toes, straining to read his lips.”• Be willing to take a risk. Some appli-cants attach cartoons, write movie scripts or ignore the question and take off on fantasies of their own. “Of course, you can crash and burn, too,” Muth says. “Someone who isn’t a strong writer probably should not take a risk.” But sometimes a risk pays off big. Published author Josh says he never imagined himself to be much of a writer. “The only piece of advice I can think of is to be yourself,” he says. “It sounds stupid and cliched and everything, but that’s the only way it’s gonna be good.”
—Joseph D’Agnese
APPLY YOURSELF
*Reprinted with permission from React magazine.
overcomingobstacles.org

A GAME PLAN FOR COLLEGE | APPLYING TO COLLEGES, UNIVERSITIES, AND TECH SCHOOLS©
20
21
Ove
rco
min
g O
bst
acle
s
Write one idea in each box.
TOPIC BRAINSTORMING
PERSONAL RELATIONSHIPS AND INFLUENCES
LIFE EXPERIENCES PERSONAL QUALITIES
overcomingobstacles.orgPowered by TCPDF (www.tcpdf.org)

A GAME PLAN FOR COLLEGE | LESSON 4: DISCOVERING MONEY: SCHOLARSHIPS, GRANTS,
AND LOANS
overcomingobstacles.org
AGENDA
Starter
Scholarships, Grants, and Loans! Oh My!
Treasure Hunt
More Forms!
Conclusion
Student Assessment
Objectives
Students will determine the differences between scholarships, grants, and loans.
Students will identify scholarships, grants, and loans available from colleges, technical schools,
the government, and the private sector.
Materials Needed
Index cards with financial aid terms written on them and a large bag (Part II)
Books or catalogs on financial aid and/or internet access (Include sources of information for about
14 groups to do research.) (Part II)
One copy of the “Here’s the Money” activity sheet for each student (Part II)
One copy of the “Statement of Educational Purpose/Registration Compliance” activity sheet for
each student (Part II)
4LESSON
DISCOVERING MONEY: SCHOLARSHIPS, GRANTS, AND LOANS

A GAME PLAN FOR COLLEGE | LESSON 4: DISCOVERING MONEY: SCHOLARSHIPS, GRANTS,
AND LOANS
overcomingobstacles.org
One copy of the FAFSA form for each student (available from your guidance office or on
www.studentaid.ed.gov) (Part III)
Highlighters, one for each pair of students (Part III)

A GAME PLAN FOR COLLEGE | LESSON 4: DISCOVERING MONEY: SCHOLARSHIPS, GRANTS,
AND LOANS
overcomingobstacles.org
Say to students, “You want to buy a new pair of sneakers, but you don’t have the cash. How many different (legal) ways can you think of to get the money for the sneakers?” Have the class brainstorm ways to raise money. (Among other things, students might suggest: ask a parent for cash, do chores or find a job to earn the money, borrow money.)
Tell students that just as there are different ways to raise or earn money for sneakers, there are different ways to raise or earn money to pay for a college education.
Starter (3 minutes)
Purpose: Students determine the differences between scholarships, grants, and loans and identify questions about financial aid to guide their research.
1. Students understand the differences between scholarships, grants, work-study programs, and loans.
Tell students that the cost of college should NOT be the deciding factor in their selection of schools. Point out that two of the most expensive schools, Harvard and Stanford, give financial aid to more than half of the students they accept. Tell them that close to half of all college students receive some sort of financial aid. Also, many students work while going to school.
Divide students into eight groups and assign each of the following words to the groups (two groups will work on each word): “scholarship,” “grant,” “work-study,” and “loan.” Instruct each group to develop a definition for their word as they think it relates to financing college.
When students have developed definitions, ask each group to share their results with the class. You may want to have prepared definitions for each of these terms.
2. Students brainstorm financial aid questions.
Instruct each group to develop a list of questions that they have about financial aid and getting money for college. When groups have finished, ask a volunteer from each group to write their questions on the board or chart paper. Display the list for students to refer and add to throughout this lesson.
Part I Scholarships, Grants, and Loans! Oh My! (10 minutes)
Purpose: Students research and report on sources of financial aid.
1. Students research financial aid sources.
Part II Treasure Hunt (20 minutes)

A GAME PLAN FOR COLLEGE | LESSON 4: DISCOVERING MONEY: SCHOLARSHIPS, GRANTS,
AND LOANS
overcomingobstacles.org
Divide the class into pairs or small groups (about 14 groups). Have the following written on index cards and placed in a bag:
Federal Stafford Loan
Federal PLUS Loan
Federal Perkins Loan
Federal Pell Grants
Federal Work-Study Program (FWS)
Military and Veterans’ Programs
Federal Supplemental Educational Opportunity Grant (FSEOG)
Federal Family Education Loan (FFEL)
[Name of your state] aid programs
Athletic scholarships
Aid for women
Aid for people with disabilities
Aid for ethnic minorities
Local banks
Have each group pick a card from the bag. Then, have groups become financial aid “experts” about the program, group, or source of aid they have chosen. Tell each group that they are to find as much information as they can and that they will present that information to the rest of the class.
The following websites and books from the school library or guidance office will get students started on their research:
www.fastweb.com
www.finaid.org
https://studentaid.ed.gov/sa/
www.collegeboard.org
Give each group one or more copies of the “Here’s the Money” activity sheet to complete. Tell students to fill out this sheet with the information they find. Explain to students that at the end of class, you will photocopy all of the activity sheets, creating a class set for each student to use for reference in the future.
2. Student groups share their findings with the class.

A GAME PLAN FOR COLLEGE | LESSON 4: DISCOVERING MONEY: SCHOLARSHIPS, GRANTS,
AND LOANS
overcomingobstacles.org
Give each group time to prepare and present the results of their research to the class. Remind them to address the list of questions from Part I.
Students will discover that every federal financial aid program requires the Statement of Educational Purpose/Registration Compliance. Distribute copies of the “Statement of Educational Purpose/Registration Compliance” activity sheet. Read through the activity sheet with students and give them time to complete it.
3. Students learn about scholarship contests.
Tell students the story of Benjamin Kaplan, who won $90,000 in scholarship contests. He discovered that most scholarship applications asked for an essay, a list of activities, an academic transcript, and letters of recommendation. Kaplan wrote several essays and adapted them for each scholarship. His themes included college plans, career goals, and future contributions to society. He entered large national contests and contests available to local students or members of organizations. His hunt began in his senior year, but he discovered that there are contests for younger students, too.
Purpose: Students examine the FAFSA form.
1. Students work with partners to read through the FAFSA form.
Give each pair of students one FAFSA (Free Application for Federal Student Aid) form and a highlighter. Tell students to read through the form and highlight any lines or directions that need clarification. Then instruct students to use the resources from Part II to answer each other’s questions.
When students have finished working, have each group share what they found. Clarify for students as needed.
2. Students begin to fill in the FAFSA form.
Help students begin to fill in the form to the best of their ability. If they do not finish the form in class, or if students need help discovering some of the information on the form, have them complete it at home with their parents or guardians. Remind students that their parents/guardians may not want to share their financial information with them. When the time comes to submit the FAFSA to schools, parents/guardians might choose to complete and submit it without sharing it with students. Tell students to keep these forms in a safe place so they can use them when they are applying to college.
Part III More Forms! (20 minutes)

A GAME PLAN FOR COLLEGE | LESSON 4: DISCOVERING MONEY: SCHOLARSHIPS, GRANTS,
AND LOANS
overcomingobstacles.org
Elicit students’ opinions regarding how this lesson has changed their thinking about pursuing a college education. Elicit from them the following key points that were taught in this lesson:
There are many different ways to pay for a college education.
There is money for college available from schools; local, state, and federal governments; and the private sector. There are also scholarship contests that students can enter.
Applying for any kind of financial aid involves research and filling out forms carefully, honestly, and on time.
Conclusion (2 minutes)
1. What is financial aid? Why is it important to start thinking about financial aid now?
2. Explain the differences between scholarships, grants, and loans.
3. List and describe five sources of financial aid.
Student Assessment

A GAME PLAN FOR COLLEGE | LESSON 4: DISCOVERING MONEY: SCHOLARSHIPS, GRANTS,
AND LOANS
overcomingobstacles.org
LESSON EXTENSIONS
Analyzing the Numbers
Have students visit https://nces.ed.gov/fastfacts/display.asp?id=31 and identify the statistics that they
find interesting or surprising. Alternatively, you might select some figures from this site ahead of time
and present them to the class.
Discuss the implications of these numbers and the opportunity that exists as a result.
Addressing Multiple Learning Styles
Ask students to create a time line of the college application and loan processes.
Discuss the importance of deadlines in these processes.
Writing in Your Journal
Have students begin a journal entry with, “A college education is worth….”
Have students discuss the importance of being able to access the money that is available in
scholarships, grants, and loans.
Using Technology
Have students research sources of scholarships online.
Ask students to list these sources on index cards and share them with the class.
Homework
Ask students to create a budget for one semester of college, including tuition, books, room and board,
and entertainment.
Have students share the budgets they have created.

A GAME PLAN FOR COLLEGE | LESSON 4: DISCOVERING MONEY: SCHOLARSHIPS, GRANTS,
AND LOANS
overcomingobstacles.org
Additional Resources
Have students review a book about scholarships or visit www.fastweb.com.
Have students discuss their options for financing a college education.

A GAME PLAN FOR COLLEGE | DISCOVERING MONEY: SCHOLARSHIPS, GRANTS, & LOANS©
20
21
Ove
rco
min
g O
bst
acle
s
Program name: ________________________________________________
Program description:
What you must be to be eligible:
What you must do while in school:
Loan or grant amount or limit:
Repayment begins as follows:
How to apply:
When to apply:
Notes:
HERE’S THE MONEY
overcomingobstacles.org

A GAME PLAN FOR COLLEGE | DISCOVERING MONEY: SCHOLARSHIPS, GRANTS, & LOANS©
20
21
Ove
rco
min
g O
bst
acle
s
I hereby affirm that any funds received under the Pell Grant, the Supplemental Educational Opportunity Grant, the College Work-Study, the Perkins/Stafford Loan, the Supplemental Loans for Students, or the Parent Loans for Undergraduate Students will be used solely for expenses related to attendance or continued attendance at the institution below. I further understand that I am responsible for repayment of a prorated amount of any portion of payments made which cannot reasonably be attributed to meeting educa-tional expenses related to attendance at the institution. The amount of such repayment is to be determined on the basis of criteria set forth by the U.S. Secretary of Education.
I affirm that to the best of my knowledge, I do not owe a repayment on a Pell Grant, a Supplemental Educational Opportunity Grant, or a State Student Incentive Grant previously received for study at any institution. To the best of my knowledge, I am not in default on a Perkins/Stafford Student Loan or a Parent Loan for Undergraduate Students.
___ I certify that I am registered with the Selective Service.or___ I certify that I am NOT required to be registered with the Selective Service because ___ I have not reached my eighteenth birthday. ___ I am a female. ___ I am in the Armed Services on active duty. (Members of the
National Guard and the Reserves are not considered on active duty.) ___ I am a permanent member of the Trust Territory of the Pacific
Islands or the Northern Mariana Islands.
Notice: You will not receive Title IV financial aid unless you complete the statement and, if required, provide proof that you are registered with Selective Service. If you state falsely that you are registered or that you are not required to register, you may be subject to fine, imprisonment, or both.
I certify that the information contained in this application is true and complete. I will noti-fy the Director of Financial Aid of any change in my family’s financial status in writing.
WARNING: If you purposely give false or misleading information on this form, you may get a fine, a prison sentence, or both.
______________________________________________________________ ___________________Signature Date______________________________________________________________ ___________________Parent or Guardian’s Signature(s) Date
STATEMENT OF EDUCATIONALPURPOSE/REGISTRATION COMPLIANCE
overcomingobstacles.orgPowered by TCPDF (www.tcpdf.org)

PART III
DEVELOPING RELATED SKILLS
A GAME PLAN FOR WORK

TABLE OF CONTENTS
PART III: DEVELOPING RELATED SKILLS
1. Working Toward Your Goals 408
2. Exploring Job Possibilities 419
3. Looking for a Job 428
4. Networking 436
5. Preparing a Resume 443
6. Making Contacts 458
A Game Plan for Work

A GAME PLAN FOR WORK | LESSON 1: WORKING TOWARD YOUR GOALS
overcomingobstacles.org
AGENDA
SESSION 1
Starter
In the Future
A Career Hypothesis
SESSION 2
A Career Hypothesis: Show Results
Why Work?
Conclusion
Student Assessment
Objectives
Students will identify their career goals.
Students will recognize how education can help them achieve their goals.
Students will identify the steps to reaching their career goals.
Students will recognize the importance of short-term employment to achieving their long-term
career goals.
Materials Needed
Session 1: Journals or notebook paper, a dictionary (Part I)
Session 1: Four job postings requiring different levels of skill, education, and experience (Part I)
1LESSON
WORKING TOWARD YOUR GOALS

A GAME PLAN FOR WORK | LESSON 1: WORKING TOWARD YOUR GOALS
overcomingobstacles.org
Session 1: One copy of the “Job Analysis” activity sheet for each student (Part I)
Session 1: Internet access or books/articles about securing jobs (Part II)
Note: If possible, arrange for a school counselor to attend the second half of Session 1 for student interviews
Session 2: Poster paper, old magazines, tape, glue, markers, scissors, etc. (Part I)

A GAME PLAN FOR WORK | LESSON 1: WORKING TOWARD YOUR GOALS
overcomingobstacles.org
SESSION 1
Note: This lesson has students consider goals they have for the future. If possible, consider teaching your students the lessons in the Goal Setting module before this lesson, so they will be familiar with goal setting concepts.
Write the following quote on the board: “The future depends on what you do today.”
Ask students to interpret the quote. Discuss the relationship between goal setting and success in life.
Explain that in this lesson students will identify careers they may be interested in and learn skills that will help them achieve their goals.
Starter (3 minutes)
Purpose: Students identify their career aspirations and recognize how education can help them achieve these goals.
1. Students visualize their goals for the future.
Ask students to close their eyes. Say, “Imagine yourself 15 years from now. What are you doing with your life? Think about some of the goals you have set for yourself. Have you achieved those goals? How are you making a living?”
Ask students to open their eyes. Allow them a few minutes to write about what they were thinking as you spoke. Ask them to include details of their career goals.
2. Students share their career goals.
When students have finished writing, ask volunteers to share what they wrote. As students share their future goals, write their responses on the board.
Explain to students that no matter what their goals are, they will need a plan to achieve them.
3. Students distinguish between jobs and careers.
Explain to students that the writing they just did was about their career goals. Ask students if they know the difference between the words “job” and “career.” If necessary, have two volunteers look up the words in a dictionary and read the definitions out loud. Lead students to the understanding that “job” refers to working and getting paid. Explain that jobs are often short term. Tell students that “career” indicates something long term that people plan for and strive to advance in.
Part I In the Future (15 minutes)

A GAME PLAN FOR WORK | LESSON 1: WORKING TOWARD YOUR GOALS
overcomingobstacles.org
Explain that people change jobs often, especially when they are young. Tell students that it is also becoming more common for people to change their career paths. (Provide an example of this, preferably one from personal experience or knowledge.) Share with students how statistics indicate that they are likely to change careers several times during their lives and that they will have many jobs in each career. Point out that this makes mastering the skills of looking for a job important.
Explain to students that you had them begin by thinking about their long-term career goals because they will ideally choose short-term jobs that fit with those goals.
4. Students analyze the requirements and compensations of several jobs.
Before class, identify four job listings in your area from an online job board (for example, www.indeed.com or www.monster.com). Ensure the options require different levels of skill, education, and experience (such as a mover, administrative assistant, computer technician, and teacher). Either print the postings for each student or display them where the entire class can see them.
Explain to students that they are going to compare and contrast different jobs. Distribute copies of the “Job Analysis” activity sheet to students. Have a volunteer read out loud to the class a job posting that does not require any previous experience. Ask students what skills an applicant for this job needs, writing their responses on the activity sheet in the box labeled “Skills.”
Then, ask students what level of education is needed for the job (e.g., a high school diploma or a college degree). Instruct students to fill in the “School” box appropriately.
Next, have students identify the job’s pay and benefits. (If students do not understand what benefits are, explain health care coverage, vacation time, tuition reimbursement, etc.) Have students add the appropriate information to the activity sheet; then, ask if they think there is an opportunity for advancement.
Ask students to consider whether this job is something that they would want for a career, not just for a short-term job. Have them fill in this information in the final column.
5. Students recognize that education can help them achieve their career goals.
Discuss each of the other job advertisements you selected. Have students fill in the boxes.
When they are finished, ask students which job they would choose and why. After students have responded, challenge them to find the relationship between education, salary, benefits, and advancement. Students should notice that more education brings better salary, benefits, and advancement opportunities.
Explain that a good education can help people secure competitive jobs and achieve career goals in almost any field.

A GAME PLAN FOR WORK | LESSON 1: WORKING TOWARD YOUR GOALS
overcomingobstacles.org
Purpose: Students identify the steps to reaching their career goals.
1. Students hypothesize about what is necessary for them to reach their career goals.
Introduce the concept of planning for a future career by explaining the steps that you personally took to become a teacher. Include your high school education, temporary jobs, college experience, special training, and other factors that helped you. Tell students they need to think about what they can do now and in the future to reach their goals. Explain that you’re going to ask them to make some guesses about what they’ll need to do to have the careers they desire.
Ask students to define “hypothesis.” Explain that in science, a hypothesis is a proposed testable solution or educated guess that scientists make after gathering information.
Instruct students to write a hypothesis concerning what they need to do to achieve their career goals. Point out that they gathered information when they looked at the job postings to see what is necessary to get certain jobs, and that you gave them more information when you told them how you became a teacher. Remind students to consider factors such as education, work experience, special talents or abilities, and money as they write their hypotheses.
Allow students 10 minutes to write their hypotheses.
2. Students share their career-path hypotheses.
When 10 minutes have passed, ask volunteers to share their ideas with the class. Allow students to add to and alter their own hypotheses if other students’ ideas work for them.
Explain that scientists always test their hypotheses to see if they will work. Ask students to suggest ways they can test their hypotheses. (Students should suggest: research on the internet, interviews, consulting the school counseling department, speaking with someone from a human resources department, consulting professionals in their desired fields, etc.) List all resources on the board.
3. Students research what is required to achieve their career goals.
Group students with similar career goals. Challenge the groups to use the resources they identified to test and modify their hypotheses. Explain that they have the rest of the session and until the next session to state a conclusion about the steps they need to take to build their careers. Direct students to use the books you have available, the internet, interviews with a school counselor, and other references to test their hypotheses.
Conclude by informing students that in the next session they will have 25 minutes to create a visual representation of their findings. Instruct students to bring to class any visuals they encounter in their research that they would like to incorporate into their presentations (e.g., charts, photographs, worksheets).
Part II A Career Hypothesis (30 minutes)

A GAME PLAN FOR WORK | LESSON 1: WORKING TOWARD YOUR GOALS
overcomingobstacles.org
SESSION 2
Purpose: Students create visual representations of their career plans.
1. Students report on the steps they need to take to reach their career goals.
Have ready poster paper, construction paper, old magazines, tape, glue, markers, scissors, and so forth for students to use.
Explain to students that they have had time to discover the steps they will need to take to pursue their career goals. Have students return to their groups from Part II of Session 1. Tell the groups to work for 25 minutes to create visuals that represent the steps necessary to achieving their career goals. Encourage students to use charts, cartoons, flowcharts, photographs, etc.
2. Students discuss the steps to reaching their career goals.
When 25 minutes have passed, have the groups display their visuals around the classroom. Point out that students found that education, experience, and talent are all important to achieving career goals.
Remind students that their career plans will have to be continually revised and updated. Point out that they may change their career goals a number of times during their lives; each time, they will need to revise their plans.
Ask the groups to share the most interesting or surprising thing that they discovered as they tested their career-goal hypotheses.
Part I A Career Hypothesis: Show Results (30 minutes)
Purpose: Students recognize the importance of short-term employment to achieving their long-term career goals.
1. Students realize that holding a part-time job is a meaningful career strategy.
Remind students that they recognized that experience helps in achieving career goals.
Lead students to the understanding that they gain experience when they work in a field related to their career goals. Prompt students by saying, “If I wanted to be a musician, what kinds of jobs would give me valuable experience?” (Students should respond: working in a music store or playing in a band.) Explain to students that those kinds of experiences would allow you to learn more about music, making you a better musician. Also, point out that you’d be earning money while you learned.
2. Students recognize how working helps them learn life skills.
Part II Why Work? (15 minutes)

A GAME PLAN FOR WORK | LESSON 1: WORKING TOWARD YOUR GOALS
overcomingobstacles.org
Ask students to suggest other reasons, besides knowledge of the job, that employers look for people with experience. Lead students to the understanding that someone who has held a job before will have learned some basic skills related to work. Point out that these basic skills will help students succeed in their careers no matter what their goals are.
Ask students to suggest some basic skills that they might learn by working. Write student responses on the board. (Students might respond: reliability [being on time and prepared], solving problems and making decisions independently when possible, communication skills [getting along with co-workers, resolving differences, communicating with supervisors, etc.], financial responsibility [handling their paychecks and perhaps customers’ money], or knowledge about taxes and Social Security deductions.)
3. Students brainstorm part-time jobs that will help them achieve their career goals.
Say to students, “If a student wants to be a doctor, what kind of job might she get now, while she is in high school, that will help her accomplish this goal?” Have students brainstorm some possibilities. Write responses on the board. (Students might respond: work in a hospital, at a pharmacy, or with the school nurse.)
Students will have to take various things into consideration when preparing for a future career and looking for a part-time job. Point out that for someone who wants to become a doctor, a great high school job experience might be to work in a hospital. However, many of these types of positions are volunteer and unpaid. If a student needs to earn money, they might have to consider a job unrelated to the medical field or balance a paid job with the hospital volunteer position. Explain that it is important to weigh all of the consequences.
Repeat the activity with other occupations in which students have shown interest.

A GAME PLAN FOR WORK | LESSON 1: WORKING TOWARD YOUR GOALS
overcomingobstacles.org
Ask students to describe how these sessions have helped them clarify their career paths. Tell them that the following lessons will provide them with the tools to secure the jobs they’ve identified. Elicit from students the following key points that were taught in this lesson:
A good education helps people achieve their career goals.
If you know what is needed to have the career you want, you can take these steps to get you there: graduation, higher education or training, and work experience.
Part-time jobs not only pay money but can also provide experience in a career field.
Conclusion (2 minutes)
SESSION 1
1. Explain the difference between a job and a career.
2. What is one of your career goals?
3. What are some of the steps you must take to achieve your career goals?
SESSION 2
1. List three positive benefits of getting a part-time job.
2. What can you do now to work toward achieving your career goals?
Student Assessment

A GAME PLAN FOR WORK | LESSON 1: WORKING TOWARD YOUR GOALS
overcomingobstacles.org
LESSON EXTENSIONS
Using Quotations
“Strivers achieve what dreamers believe.”
As a class, discuss the importance of action in realizing a dream. Explain that everyone has a dream
career, but not everyone takes the steps they need to make their dream a reality.
Addressing Multiple Learning Styles
Have students fold a piece of paper into quarters. In the fourth box, have students draw a cartoon
showing themselves at their dream jobs sometime in the future. In the first three boxes, have them
illustrate the steps needed to realize those dreams, with deadlines if desired.
Writing in Your Journal
Have students think about why a particular career is interesting to them. Have them write about why
they think this career will be a good fit for who they are and the kind of adult they want to become.
Have each student exchange their work with a classmate for feedback.
Using Technology
Have students search the internet for a publication about the career they’ve chosen (e.g., New England
Journal of Medicine, Harvard Law Review, Instructor, Variety). Have them write a review of the
publication that gives other students an overview of the magazine’s regular features and content.
Have students present their information to the class. Place their reviews in a binder of job-hunting
resources.

A GAME PLAN FOR WORK | LESSON 1: WORKING TOWARD YOUR GOALS
overcomingobstacles.org
Homework
Have students arrange to shadow someone at work in their desired profession. Have them write a diary
describing what this person’s day is like.
Have students present their results to the class. Place their work in a binder of job-hunting resources
for in-class use.
Additional Resources
Have students read Teenagers Preparing for the Real World by Chad Foster (available at
www.chadfoster.com). It has great advice for teens on how to find the work they love, with the
observation that they’ll spend 86,000 hours of their lives doing that work.
Have small groups list tips for finding the work they love.

© 2
022
OV
ER
CO
MIN
G O
BS
TAC
LESA GAME PLAN FOR WORK | WORKING TOWARD YOUR GOALS
JOB ANALYSIS
Directions: Complete the chart below by writing the appropriate information in each box.
SKILLS SCHOOL SALARY BENEFITS CAREER
Job #1:
Job #2:
Job #3:
Job #4:
Powered by TCPDF (www.tcpdf.org)

A GAME PLAN FOR WORK | LESSON 2: EXPLORING JOB POSSIBILITIES
overcomingobstacles.org
AGENDA
Starter
My Qualifications
This Is Your Job
The Ideal Part-Time Job
Conclusion
Student Assessment
Objectives
Students will revisit their strengths and identify their interests.
Students will identify the process of finding a job.
Students will identify the characteristics of their ideal jobs.
Materials Needed
The help wanted section of a local newspaper (Starter)
One copy of the “My Qualifications” activity sheet for each student (Parts I and III)
One copy of the “Ideal Job Equation” activity sheet for each student (Part III)
2LESSON
EXPLORING JOB POSSIBILITIES

A GAME PLAN FOR WORK | LESSON 2: EXPLORING JOB POSSIBILITIES
overcomingobstacles.org
Bring to class the help wanted section of a local paper or print out online postings of nearby jobs. Distribute one page to each student. Have students count the number of jobs on each page; write the totals on the board. If the section is very long, ask a volunteer to calculate the average number of jobs per page; then, tell the class how many pages are in the help wanted section and ask them to calculate the approximate number of jobs open.
Say, “With so many choices, how can you decide which job is the right one for you?” Explain that today’s lesson will help students determine how to find the right job for them.
Starter (3 minutes)
Purpose: Students identify their qualifications and interests.
1. Students identify their qualifications and interests as they complete an activity sheet.
Explain to students that each of them brings certain qualifications and interests to a job. Identifying their unique qualities will help direct them to a job that is appropriate for them.
Distribute copies of the “My Qualifications” activity sheet. Begin by discussing strengths. Remind students that strengths are admirable qualities that people have. Ask students to name a few. (Students might respond: loyal, caring, sense of humor, and so forth. If they name a talent, accept it.)
If students completed the “Strengths Interview” activity sheet (Confidence Building, “Lesson 2: Identifying Strengths”), ask them to take it out of their folders and review it for about a minute. If students have not completed the activity sheet, give them a minute to brainstorm a list of their strengths.
Discuss the “My Qualifications” activity sheet with students and clarify the different sections. As appropriate, explain:
Strengths: You listed these on the “Strengths Interview” activity sheet (or during the brainstorming that you just did).
Knowledge: This is what you have learned in school, in classes such as math, science, or English. Knowledge can also be what you’ve learned from your hobbies, activities, or other experiences.
Talents: These are things that you do well, like singing, swimming, or writing.
Interests: These are things that you enjoy doing, like listening to music, playing sports, or going to the movies. You don’t have to be good at doing something for it to be an interest.
Experience: These are jobs or activities in which you have been involved.
Part I My Qualifications (10 minutes)

A GAME PLAN FOR WORK | LESSON 2: EXPLORING JOB POSSIBILITIES
overcomingobstacles.org
They might include babysitting, delivering papers, entering a science fair, or working in a store or office.
2. Students recognize that their strengths, talents, interests, experience, and knowledge can help them find a job.
Have students fill out the “My Qualifications” activity sheet.
When students have finished, point out that they should tell potential employers about these qualifications, as they show their strengths and make them good candidates for a job.
Purpose: Students recognize what they are looking for in a job.
1. Students are randomly assigned jobs to spark their thinking about what they want to do.
Say, “Now that you have realized your qualifications and interests, who wants a part-time or summer job?”
Walk around the room and randomly give jobs to the students who have their hands raised. Tell one student that they are a veterinarian’s assistant, another that they are a cashier at a drugstore, and another that they deliver pizzas.
When all of the volunteers have been assigned jobs, ask students if getting a job is really that easy.
2. Students discuss the process of getting an after-school job.
When students respond that it is not that easy to find a job, ask them how someone does get an after-school or part-time job.
Elicit from students some of the following steps:
Answering advertisements
Responding to postings in store windows
Filling out applications
Aptitude testing
Interviewing
Networking (making contacts in the career field)
Write student responses on the board.
Part II This Is Your Job (15 minutes)

A GAME PLAN FOR WORK | LESSON 2: EXPLORING JOB POSSIBILITIES
overcomingobstacles.org
3. Students discuss what they want in an after-school job.
Explain to students that there are many things they have to think about and do before they get hired for a job. Ask students to suggest some of the things they need to consider. Add responses to those already on the board. (Students might respond: you need to decide what you want to do, think about where you want to work, find out what jobs are available, and decide which jobs you’re qualified for.)
To conclude, point out to students that they already know about the different things that interest them or that they would like to do. They also know what they can’t do because of their schedules or because they have limited transportation or other restrictions. Explain that they need to find a job that meets all of those requirements.
Purpose: Students identify the characteristics of their ideal part-time jobs.
1. Students use an activity sheet to determine important factors to consider while looking for employment.
Remind students that short-term jobs provide excellent training and great experience. Explain that this activity will help them consider the factors that will determine what their ideal short-term jobs are.
Distribute copies of the “Ideal Job Equation” activity sheet. Discuss the sections of the activity sheet with the class. Explain to students that qualifications are the skills they have, such as knowledge or experience, that will help them get a job, and that salary is how much they will be paid.
Ask students to identify some of the factors that determine salary. Elicit from students that experience and level of education can affect how much money they earn. Encourage students to think about how much money they need to make.
Point out that location is also important because they need to be able to get to their jobs. If they don’t have access to transportation, they have to think about jobs that are within walking distance.
Explain to students that job environment is important because they will want to feel comfortable where they are working. Ask students to consider whether they want to work indoors or outside, with people or alone, in a big office or for a small company.
Explain that limitations are factors that might keep an employer from hiring them, such as their age, their availability to work full time, or their school schedule.
Have students fill in the boxes on the activity sheet with appropriate responses. Suggest that students use the “My Qualifications” activity sheet for reference.
2. Students consider their ideal jobs.
Part III The Ideal Part-Time Job (20 minutes)

A GAME PLAN FOR WORK | LESSON 2: EXPLORING JOB POSSIBILITIES
overcomingobstacles.org
After students have completed the activity sheet, explain that based on the factors they listed, they should be able to determine their ideal part-time jobs. For example, they might want an after-school job that allows them to be outdoors, that allows them to work only on the weekends, and that pays more than minimum wage. With these criteria, they might be able to find a job at a park or with a florist or landscaper.
Elicit other examples from students and have the class brainstorm possible job options.
Ask students how they will use decision making skills, such as gathering information and weighing options, in their job searches. Elicit from students the following key points that were taught in this lesson:
Each person has unique strengths, interests, knowledge, talents, and experiences.
To find a job, individuals must determine their qualifications and interests.
An ideal short-term job is one that meets all personal requirements.
Conclusion (2 minutes)
1. List three jobs that would use some of your qualifications. Explain which of your qualifications
would be used and how.
2. List three things that you are looking for in a job.
3. What jobs are available to you now? Which of them meet your personal requirements?
Student Assessment

A GAME PLAN FOR WORK | LESSON 2: EXPLORING JOB POSSIBILITIES
overcomingobstacles.org
LESSON EXTENSIONS
Using Quotations
“Find a job you like, and you add five days to every week.” —H. Jackson Brown Jr.
Discuss with students the difference between spending their time doing something they like and doing
something they tolerate.
Addressing Multiple Learning Styles
Have students read biographies and magazine articles about people who’ve been successful in the field
of their choice.
Have each student give a brief oral report on the early work life of the person that they have chosen,
without naming the person. Play “20 Questions.” Have other students guess who the person is and
where they ended up.
Writing in Your Journal
Have students summarize their entries on the “Ideal Job Equation” activity sheet. They should identify
which elements are most important to them as they select their ideal jobs.
Discuss how each element was chosen.
Using Technology
Have students discuss their job preferences and areas of interest. Then, have them visit the
Occupational Outlook Handbook site at https:// www.bls.gov/ooh/ and research information about
their desired professions.
Have students report on the job outlooks in their fields of interest.

A GAME PLAN FOR WORK | LESSON 2: EXPLORING JOB POSSIBILITIES
overcomingobstacles.org
Homework
Ask students to interview parents, businesspeople, and community members about their first jobs and
how they started their careers.
Have students write summaries of the interviews, discuss them, and include them in the class binder.
Additional Resources
Read “I Hear America Singing” by Walt Whitman out loud. This poem celebrates various professions.
Have students update the poem to include more working women and jobs for the information age.

A GAME PLAN FOR WORK | EXPLORING JOB POSSIBILITIES©
20
21
Ove
rco
min
g O
bst
acle
s
MY QUALIFICATIONS
Personal Facts:
overcomingobstacles.org

A GAME PLAN FOR WORK | EXPLORING JOB POSSIBILITIES©
20
21
Ove
rco
min
g O
bst
acle
s
IDE
AL JO
B E
QU
AT
ION
++
+
–=
$ ________________
Q
UA
LIFIC
AT
ION
S SA
LAR
Y/B
EN
EF
ITS
LOC
AT
ION
E
NV
IRO
NM
EN
T
LIMIT
ING
FA
CT
OR
S M
Y ID
EA
L JOB !
overcomingobstacles.orgPowered by TCPDF (www.tcpdf.org)

A GAME PLAN FOR WORK | LESSON 3: LOOKING FOR A JOB
overcomingobstacles.org
AGENDA
Starter
Finding Job Listings
Reading and Understanding Job Descriptions
Is This a Fit?
Conclusion
Student Assessment
Objectives
Students will learn how to identify jobs.
Students will understand how to read and understand a job description.
Students will learn how to determine if a job is a good fit.
Materials Needed
Whiteboard and markers (Parts I and II)
“Sample Job Posting” Activity Sheet (Part II)
Internet access (Part III)
3LESSON
LOOKING FOR A JOB

A GAME PLAN FOR WORK | LESSON 3: LOOKING FOR A JOB
overcomingobstacles.org
Have students recall the last time they decided to watch a movie. Ask, “When choosing a film, did you just select a title at random and press play?” Elicit from students that a lot of thought and consideration can go into the decision of what movie to watch. Say, “You might consider the type of film you feel like seeing, read the description to see if it interests you, or find reviews before deciding.”
Explain to students that, just as they would not select a movie at random, the same should apply when trying to find a job. Tell students that in this lesson they will learn the process of looking for a job.
Starter (3 minutes)
Purpose: Students learn how to use job posting resources.
1. Students identify job-hunting resources.
Ask students where they might find information about jobs in which they are interested and list their responses where everyone can see them. (Student responses may include job search engines, company websites, and social networking sites.) Explain to students that not all jobs are listed in one place, and they may have to search through many sources in order to find the right job for them.
2. Students understand how the same type of job can be posted under different names.
Ask students for a show of hands if they have ever seen the insect that emits light during the summer. After taking the survey, ask for a volunteer to share the name of the insect you described (students may say “lightning bug” or “firefly”). Point out that people refer to this insect by different names, like “lightning bug,” “firefly,” “glowworm,” and “june bug.” Say, “Even though we are referring to the same thing, we can have many different names for it. This is also true for job postings.”
Say, “For example, some companies may refer to a position as an ‘Office Manager,’ whereas others may call the same job an ‘Office Administrator,’ ‘Executive Assistant,’ or ‘Office Coordinator.’ Emphasize that, when looking for a job, it is important to do the proper research and identify all of the possible titles and descriptions for the job you are seeking.
3. Students find similar jobs with different titles.
Group students into pairs and tell them you are going to give each of them a job title and they need to find different ways the job title can be listed in postings. Examples could include:
Part I Finding Job Listings (15 minutes)

A GAME PLAN FOR WORK | LESSON 3: LOOKING FOR A JOB
overcomingobstacles.org
Communications Coordinator (e.g., Engagement Manager, Marketing Coordinator)
Customer Service Representative (e.g., Receptionist, Technical Support)
Data Scientist (e.g., Data Engineer, Data Analyst)
Event Planner (e.g., Event Coordinator, Event Manager)
Office Clerk (e.g., Office Assistant, Office Worker)
Project Manager (e.g., Project Coordinator, Project Engineer)
Security Guard (e.g., Security Officer, Security Specialist)
Tell students they have five minutes to work as a team and identify as many different job titles for that position as possible. Once they have finished, have them share their findings with the class, offering your ideas as well.
Purpose: Students understand how to read a job description.
1. Students learn why it is important to read a job description thoroughly.
Tell students that the majority of job openings are posted with a description that provides details on the position that is available. Say to students, “While you may find that the same job can be listed under several different titles, the reverse can also be true. Sometimes, you may see that a job with the same title is listed for multiple companies, but the responsibilities for the position can be significantly different. That’s why it is important to read job descriptions thoroughly.”
2. Students read a job description and identify key terms and requirements.
Say to students, “It is important to pay attention to the language of a job description, as it usually contains keywords that describe what the employer is looking for in a new hire.” Distribute copies of the “Sample Job Posting” activity sheet to each student (alternatively, you can find a job posting online) and tell them to highlight the information they need to address when they apply for the job (for example, experience managing social media accounts).
After five minutes, have students share what they highlighted and explain their reasons for doing so. Point out that some qualifications may seem intimidating at first, but most employers do not require applicants to possess everything that is outlined. So, it is important to apply for jobs you want even if you do not fully match the description. Say, “Maybe you have never managed a social media account professionally, but you have experience with them personally. This could make you a good fit for the job.”
Part II Reading and Understanding Job Descriptions (10 minutes)

A GAME PLAN FOR WORK | LESSON 3: LOOKING FOR A JOB
overcomingobstacles.org
Next, say, “In addition to understanding the key responsibilities’ and qualifications, knowing how to apply is very important. Oftentimes, people will not include the required documentation when applying for a job.” Point out that this posting asks for a cover letter and resume, but other jobs may ask for more information, like school transcripts. Tell students that where you send the documentation is just as important. This posting asks for it to be emailed, but others may ask for applicants to upload it to a company job portal.
Say, “If you do not read a job description thoroughly, you may miss some important instructions, and this could cause your application to be disqualified without ever being read. You want to ensure you are giving yourself the best chance of being considered for the job you want.”
Purpose: Students reflect on the type of job they would like to have.
1. Students identify the difference between nonprofit and for-profit jobs.
Ask students to raise their hands if they know the difference between a nonprofit and for-profit job. Then tell students that, generally speaking, a nonprofit organization exists to provide a service to a community, further a cause, or work toward a specific mission. A for-profit business is primarily focused on generating a profit. Say, “When deciding on a career path, it’s important to consider your interests. Would you prefer to focus on helping your community directly or on helping a business become as successful as possible?”
Emphasize that there is no right answer to this question—many for-profit businesses do a lot of good for their community and support a variety of causes, and many people in the nonprofit sector can be very successful. Say, “The important thing is to consider what path would be the best fit for you and your interests.”
2. Students learn that researching a company is important.
Tell students that an important step in the job-seeking process is researching the company they are interested in working for. Say, “Knowing as much as possible about a company can help put you ahead of other applicants when applying for a job.” Point out that most companies have social media accounts and web pages, and some may even have news articles, press releases, or Wikipedia pages. Emphasize that knowing about their potential employer will help them in the application and interview process, as well as give them a greater understanding of how the employer operates.
3. Students learn how to research the culture of a company.
Part III Is This a Fit? (20 minutes)

A GAME PLAN FOR WORK | LESSON 3: LOOKING FOR A JOB
overcomingobstacles.org
Say to students, “While it’s important to research a company to help you in the application process, this can also be an opportunity to learn more about the culture of the company.” Explain that there are websites that allow current and former employees to voice their opinions on a company. Say, “Websites like these can offer valuable insight into what the day-to-day is like at a company and also provide more details on benefits, work environment, and more.”
Have students select a well-known company they may want to work for and take 10 minutes to research what it is like to work there. Tell them to consider things that are important to them (for example, opportunities for advancement, work-life balance, or salary ranges). Once they have finished, have volunteers share what they have learned with the class. Was there anything about working for a specific company that surprised them? Ask, “After researching the company, are you more interested or less interested in a career with them?”
Ask students to name three important steps in looking for a job. Elicit from students the following key points that were taught in the lesson:
Understand the different ways that jobs are posted.
Read a job description closely.
Research the employer and make sure you are a good fit for each other.
Tell students that, while the job-seeking process can seem intimidating at first, breaking it down into smaller steps can help provide them with the ability to apply with confidence. Then, write this quote where everyone can see it and encourage students to write it in their journal, “It’s the possibility of having a dream come true that makes life interesting.”
Conclusion (2 minutes)
1. What are three sources for job postings?
2. What information should you look for in a job description?
3. How can you determine if you are a good fit for a job, and vice versa?
Student Assessment

A GAME PLAN FOR WORK | LESSON 3: LOOKING FOR A JOB
overcomingobstacles.org
LESSON EXTENSIONS
Using Quotations
“Opportunities are usually disguised as hard work, so most people don’t recognize them.”
Ask volunteers to complete this sentence: “I will make my own opportunities by…”
Writing in Your Journal
Have students write about how looking for work makes them feel. Have them describe what they find
exciting and what they find challenging. Ask student volunteers to share their journal entry.
Using Technology
Have students take the free personality test at www.16personalities.com/free-personality-test. After
students receive their results, ask if there are any careers they think may be a good fit for them. Ask too
if there are careers recommended that they have not considered.
Homework
Have students identify five industry-specific sources (for example, jobs in education, jobs in the
medical field, local government jobs) where jobs are posted and bring them to class the next day.
Using Quotations
“One thing to remember is that you’re not alone. There are lots of people who’ve struggled with job
searches and staying motivated but have pushed through and found the job of their dreams. It’s not
always quick or easy, but it can and will happen.”
Encourage students to write this quote down and display it at home where they can see it.

A GAME PLAN FOR WORK | LESSON 3: LOOKING FOR A JOB
overcomingobstacles.org
Addressing Multiple Learning Styles
Before beginning this activity, prepare six responses that students might hear from a hiring manager
when inquiring about part-time jobs (for example, “We’re not hiring,” “Please apply online,” “What are
your qualifications?”). Write these responses on the board and assign each a number from one to six.
Divide students into pairs and have them take turns playing job seeker and hiring manager. Students
playing the latter should roll a die to determine which of the six responses to use.
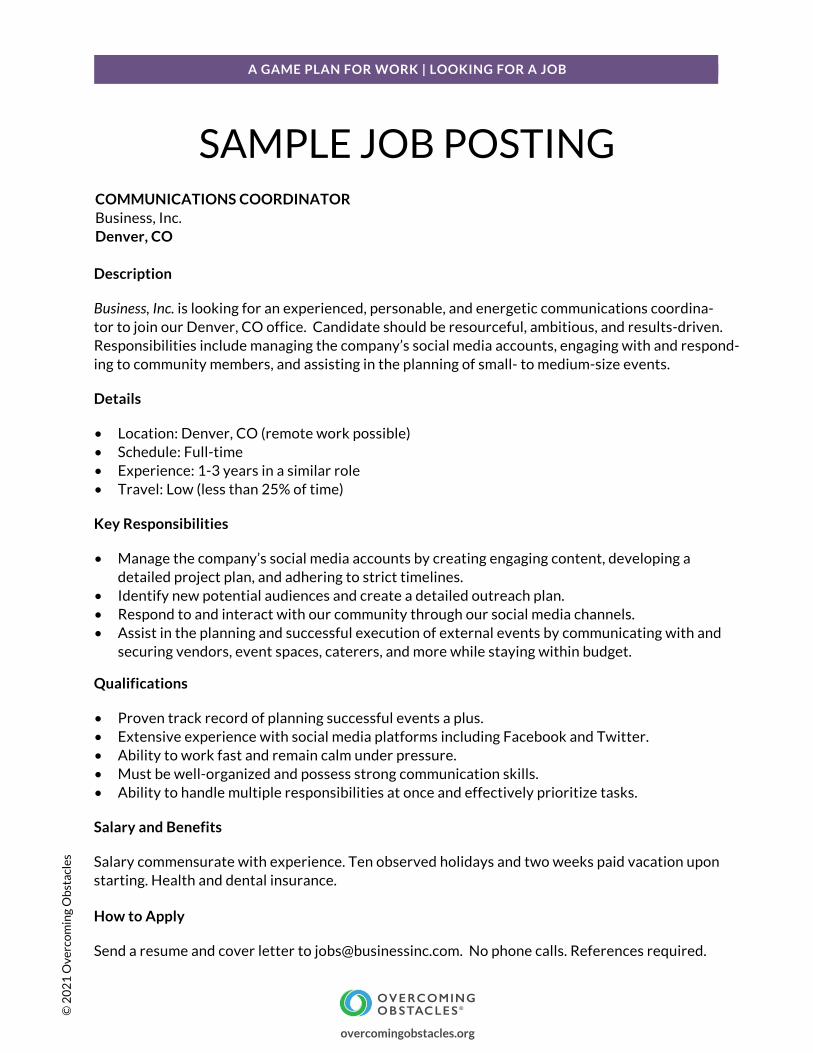
A GAME PLAN FOR WORK | LOOKING FOR A JOB©
20
21
Ove
rco
min
g O
bst
acle
s
COMMUNICATIONS COORDINATORBusiness, Inc.Denver, CO
Description
Business, Inc. is looking for an experienced, personable, and energetic communications coordina-tor to join our Denver, CO office. Candidate should be resourceful, ambitious, and results-driven. Responsibilities include managing the company’s social media accounts, engaging with and respond-ing to community members, and assisting in the planning of small- to medium-size events.
Details
• Location: Denver, CO (remote work possible)• Schedule: Full-time• Experience: 1-3 years in a similar role• Travel: Low (less than 25% of time)
Key Responsibilities
• Manage the company’s social media accounts by creating engaging content, developing a detailed project plan, and adhering to strict timelines.
• Identify new potential audiences and create a detailed outreach plan.• Respond to and interact with our community through our social media channels.• Assist in the planning and successful execution of external events by communicating with and
securing vendors, event spaces, caterers, and more while staying within budget.
Qualifications
• Proven track record of planning successful events a plus.• Extensive experience with social media platforms including Facebook and Twitter.• Ability to work fast and remain calm under pressure.• Must be well-organized and possess strong communication skills. • Ability to handle multiple responsibilities at once and effectively prioritize tasks.
Salary and Benefits
Salary commensurate with experience. Ten observed holidays and two weeks paid vacation upon starting. Health and dental insurance.
How to Apply
Send a resume and cover letter to [email protected]. No phone calls. References required.
SAMPLE JOB POSTING
overcomingobstacles.orgPowered by TCPDF (www.tcpdf.org)

A GAME PLAN FOR WORK | LESSON 4: NETWORKING
overcomingobstacles.org
AGENDA
Starter
Make the Connection
The Right Way and the Right Time
In the Network
Conclusion
Student Assessment
Objectives
Students will understand what networking is.
Students will identify the right way and the right time to network.
Students will recognize that the people they know can help them to network.
Materials Needed
One 10-foot piece of string for each student in the class (Part I)
4LESSON
NETWORKING

A GAME PLAN FOR WORK | LESSON 4: NETWORKING
overcomingobstacles.org
Ask students if they can explain the phrase “six degrees of separation.” Lead students to the understanding that the phrase means that you can link yourself to anyone in the world in fewer than six “steps.”
Guide the class through an example, linking the class to someone remote and writing each step on the board. For example, ask students if anyone knows the mayor. If not, ask students if anyone knows of another person who might know the mayor (perhaps the superintendent). Ask if anyone knows the superintendent. If not, ask who might know the superintendent (a principal). Does anyone know the principal? Continue in this way, making the connection back to the class.
Explain to students that the process of “knowing someone who knows someone” is called networking and that today’s lesson will help them learn the right way and the right time to network for job opportunities.
Starter (3 minutes)
Purpose: Students identify the right way to network.
1. Students demonstrate the process of networking.
Tell students that they are going to do an experiment to see how easily information can travel. Ask a volunteer to think up a simple statement that uses their name (e.g., “Jane Smith is looking for a job.”). Tell the class that the goal is to get the message to all of the students in the room, but each student can tell only two others.
Ask students how many links they think there will be between the volunteer and the last students to hear the message. Hand all the pieces of string (one for each student) to the volunteer and explain to the class that they will mark the links by holding a piece of string between them each time the information is shared.
Have the volunteer quietly tell the message to two other students and, holding the end of all the strings, pass half of the strings to each of them. Have those students tell two more students and pass half of their strings to each of them. This process should continue until all students have heard the statement. (Students should continue holding their pieces of the string and passing the rest along. If the first student was holding 20 pieces, the next two should each have 10 strings, the next four should each have 5 strings, and so on.)
Ask students to determine the number of links between the first student and the last. Explain that the strings represent a network of people. Networking allows information to be communicated rapidly in a short amount of time.
Part I Make the Connection (10 minutes)

A GAME PLAN FOR WORK | LESSON 4: NETWORKING
overcomingobstacles.org
2. Students learn the benefits of networking.
Ask students to suggest how networking relates to looking for a job. Lead students to the understanding that networking is the process of telling people that you are looking for a job.
Ask students to imagine the following scenario: A student they have never seen before comes up to them, hands them a piece of paper, and walks away. The paper says that there is going to be a surprise quiz in math tomorrow. Ask students if they are likely to believe the note.
Then, have students imagine that a friend from their math class tells them the same information. Ask students if they would pay more attention to the friend. Have students suggest reasons why.
Remind students that, when hiring, employers are trying to make a decision that is very important to them. In making this decision, they gather information from sources they trust. Explain that they are interested in recommendations from people they know, such as friends, family, coworkers, etc.
Lead students to recognize that these connections are more effective than a blind application or resume alone. Mention that some companies don’t even publicize jobs that are open and rely solely on word of mouth.
Purpose: Students identify the right way and the right time to network.
1. Students learn the steps of networking.
Explain to students that there are three steps for telling people that you are looking for a job:
1. Say, for example, “I am looking for a job to earn money for college and to get work experience.”2. Tell the person the type of job you are looking for. Use phrasing such as, “I would like to find a
job in the health care industry because I want to be a doctor.”3. Ask people to help you by saying, “If you know anybody who might help me find a job like that, I
would appreciate it if you would let me know.” You may also say, “If you hear about a job that I might be qualified for, I would appreciate it if you called me.”
2. Students learn the right way to network.
Tell students the following story:
I had a friend come over the other day, and she was very unhappy. She told me that she was at a party and saw the manager of a department store. She needed a job, so she went up to the manager and told her, “I really need a job. I’ll do any type of work. Please give me a job.” My friend said the manager just looked at her and walked away.
Part II The Right Way and the Right Time (15 minutes)
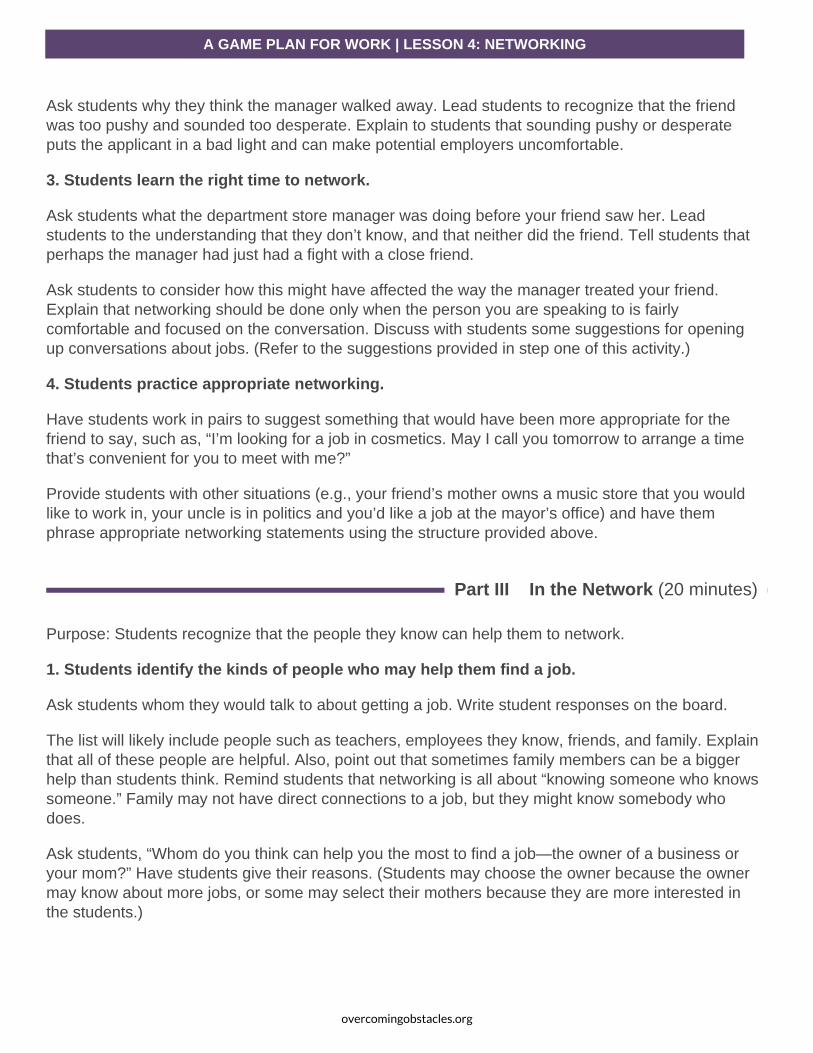
A GAME PLAN FOR WORK | LESSON 4: NETWORKING
overcomingobstacles.org
Ask students why they think the manager walked away. Lead students to recognize that the friend was too pushy and sounded too desperate. Explain to students that sounding pushy or desperate puts the applicant in a bad light and can make potential employers uncomfortable.
3. Students learn the right time to network.
Ask students what the department store manager was doing before your friend saw her. Lead students to the understanding that they don’t know, and that neither did the friend. Tell students that perhaps the manager had just had a fight with a close friend.
Ask students to consider how this might have affected the way the manager treated your friend. Explain that networking should be done only when the person you are speaking to is fairly comfortable and focused on the conversation. Discuss with students some suggestions for opening up conversations about jobs. (Refer to the suggestions provided in step one of this activity.)
4. Students practice appropriate networking.
Have students work in pairs to suggest something that would have been more appropriate for the friend to say, such as, “I’m looking for a job in cosmetics. May I call you tomorrow to arrange a time that’s convenient for you to meet with me?”
Provide students with other situations (e.g., your friend’s mother owns a music store that you would like to work in, your uncle is in politics and you’d like a job at the mayor’s office) and have them phrase appropriate networking statements using the structure provided above.
Purpose: Students recognize that the people they know can help them to network.
1. Students identify the kinds of people who may help them find a job.
Ask students whom they would talk to about getting a job. Write student responses on the board.
The list will likely include people such as teachers, employees they know, friends, and family. Explain that all of these people are helpful. Also, point out that sometimes family members can be a bigger help than students think. Remind students that networking is all about “knowing someone who knows someone.” Family may not have direct connections to a job, but they might know somebody who does.
Ask students, “Whom do you think can help you the most to find a job—the owner of a business or your mom?” Have students give their reasons. (Students may choose the owner because the owner may know about more jobs, or some may select their mothers because they are more interested in the students.)
Part III In the Network (20 minutes)
A GAME PLAN FOR WORK | LESSON 4: NETWORKING
overcomingobstacles.org
Tell students it is important that they explore all possibilities when networking and not rule out anyone prematurely. Explain to them that it is as important to talk to someone who will pass their name around as it is to try to find a person who may know about a lot of jobs.
2. Students brainstorm specific people to include in their networks.
Have students individually brainstorm all of the people who might help them in their job hunts. If students are familiar with clustering (a graphic organizer for brainstorming around a central theme), have them put themselves at the center; draw circles for family, school, friends, and activities around their name; and include names and connections in each area.
Instruct students to list everyone who might possibly be helpful to them, even if they aren’t sure how. Also, encourage students to list names of people their contacts might know.
Point out to students that they probably know many more people than they think.
Remind students that networking is a process that never stops. Even when they aren’t actively looking for a job, they should develop relationships that might help them in their careers. Elicit from students the following key points that were taught in this lesson:
Networking means asking other people to help with your job search.
Any time can be the right time to talk about job possibilities as long as the other person is interested in the conversation.
Networking is a tool to let others know you are looking for a job and to discover job openings.
It is as important to talk to someone who will pass your name around as it is to try to find a person who may know about a lot of jobs.
Conclusion (2 minutes)
1. Define “networking” and explain why it is important.
2. List four things a good networker does and says.
3. List three people you can use for networking and explain how each of these people may be able to
help you.
Student Assessment

A GAME PLAN FOR WORK | LESSON 4: NETWORKING
overcomingobstacles.org
LESSON EXTENSIONS
Using Quotations
“Every successful businessperson can point to one item that is the key to their success…It’s almost
always a $9.95 Rolodex.” —Chad Foster
Explain that a Rolodex is a filing device that organizes contact information; it’s similar to a contact list
on a cell phone or in software such as Outlook. Have students ask people they know to tell them about
five of their most important contacts, how long they’ve known each person, and how they got to know
these people. Discuss the answers in class.
Addressing Multiple Learning Styles
Discuss that networking works both ways and that helping others find work builds lasting relationships.
Create a class bulletin board for job tips and referrals. Have students choose partners to encourage
them in their efforts.
Writing in Your Journal
Have students reflect on the idea of networking. Have them answer the following questions: Is this
intimidating to you? Do you think that networking sounds easy? What tips do you have for people who
find networking difficult? What tips do you want regarding networking?
Have students share the tips they want and the tips that they can give others.
Using Technology
Have students use the internet to locate professional, service, volunteer, and mentoring organizations.
Have them research information about the organizations they find.
Have each student write a paragraph summarizing the different organizations they found and their
contact information. Include their paragraphs in the class job-hunting binder.

A GAME PLAN FOR WORK | LESSON 4: NETWORKING
overcomingobstacles.org
Homework
Have the class poll students in school who have part-time jobs. Have them find out what these students
do and how they found work.
Have the class create two graphs, one that shows the jobs students hold and another that shows how
they got them.
Additional Resources
Have students read Make Things Happen: The Key to Networking for Teens by Lara Zielin.
Have small groups list tips for networking and choose one tip they can put into action.

A GAME PLAN FOR WORK | LESSON 5: PREPARING A RESUME
overcomingobstacles.org
AGENDA
SESSION 1
Starter
Skills, Talents, and Experience
You Have Skills
What’s in a Resume?
SESSION 2
Make It Sharp
Putting It All Together
Conclusion
Student Assessment
Objectives
Students will identify the experiences and job skills they possess that will help them find jobs.
Students will analyze the skills they identified to find those appropriate for their resumes.
Students will learn what to include in their resumes.
Students will learn what a resume should look like.
Materials Needed
Session 1: A dictionary (Part I)
Session 1: Completed copies of the “My Qualifications” activity sheet (Part I)
5LESSON
PREPARING A RESUME

A GAME PLAN FOR WORK | LESSON 5: PREPARING A RESUME
overcomingobstacles.org
Session 1: One copy of the “Skills Translator” activity sheet for each student (Part II)
Session 1: Sets of real job application forms from such places as fast-food restaurants, department
stores, and gas stations for each small group (Part II)
Session 1: One copy of the “Sample Resume A” and “Sample Resume B” activity sheets for each
small group (Part III)
Session 2: One set of real resumes on various kinds of paper and in various fonts for each small
group (Part I)
Session 2: One copy of the “My Resume” activity sheet for each student (Part II)
Session 2: Dictionaries and other reference materials (Part II)

A GAME PLAN FOR WORK | LESSON 5: PREPARING A RESUME
overcomingobstacles.org
SESSION 1
Tell students the following story:
Dave Thomas was the owner of Wendy’s, the worldwide fast-food chain, and starred in the company’s commercials. Even though Dave owned Wendy’s, he handled very little of the company’s day-to-day operations. He admitted that he wasn’t very good with those details. But Dave was a great speaker; so instead, he traveled around to the different restaurants to motivate his staff and he was featured in Wendy’s commercials. Dave knew what his strengths and weaknesses were. He translated his strengths into a skill that he used to make his business more successful.
Explain to students that they will need to present their unique strengths, experiences, and skills to potential employers; a resume is an effective tool with which to do that.
Starter (3 minutes)
Purpose: Students recall the experience and job skills they possess that will help them find jobs.
1. Students identify what a resume is.
Ask students if they know what a resume is. After several students have volunteered explanations, ask a student to look up “resume” in the dictionary. Explain that a resume is a summary of an individual’s education and work experience.
2. Students identify experiences that may help them get a job.
Ask students to raise their hands if they have work experience. If any students raise their hands, ask them to share their experience with the class. Explain that other experiences can translate into skills that are important to employers.
Ask students to take out the “My Qualifications” activity sheet, which they completed in Lesson 2. If students have not completed the activity sheet, conduct a brainstorming session so they can identify their own skills, strengths, and talents.
Remind students not to limit themselves to work experience when considering things to include on their resumes. Explain that many things they do on a regular basis can provide experience and indicate skills. Offer examples such as babysitting for younger siblings, helping with the cooking, volunteering, and participating in school activities.
Prompt students by instructing them to think about the things they like to do and the skills or talents that these things involve. Allow them several minutes to make a list of their experiences.
Part I Skills, Talents, and Experience (10 minutes)

A GAME PLAN FOR WORK | LESSON 5: PREPARING A RESUME
overcomingobstacles.org
3. Students recognize the value of their skills, talents, and experience.
When students have finished, explain that all of these things they have listed are skills they can talk about when they apply for a job. Job skills can come from hobbies, activities, education, and prior jobs.
Purpose: Students analyze the skills they have identified to find those appropriate for their resumes.
1. Students recognize how their skills, talents, and experiences translate into job skills.
Hand out the “Skills Translator” activity sheet. Explain that this activity sheet will help them turn the experiences and talents that they just identified into skills for the workplace.
Provide an example for students, such as, “One of my activities is basketball, so I put that in my activity box. What are some of the skills I use playing basketball? To play basketball, I have to be a team player, I have to have discipline to go to practice, I’m able to jump high, I have an accurate shot, and I can calculate scores.”
Point out that you considered all of the skills that you have gained from basketball, even if they aren’t directly related to a job. Ask if anyone can translate any of the basketball skills into skills that an employer might want. Lead students to the understanding that being a team player shows the ability to work well with other employees in the company, that discipline shows perseverance and indicates likely good attendance, and that the ability to keep score shows basic math skills.
Repeat this process using an experience offered by a volunteer.
2. Students translate their skills, talents, and experiences into job skills.
Have students fill out the activity sheet using their individual skills, experiences, activities, and talents.
3. Students analyze the types of skills that are important for various jobs.
Have students form small groups. Distribute the job application forms to each group. Ask students to analyze the questions that are asked on each application. From their analyses, have students deduce the types of skills needed for each type of job.
Ask students to compare questions and skills for each job. Have the groups write two lists: one that lists skills that most jobs require and another that lists specialized skills that apply to only certain jobs.
Have a volunteer from one group read their group’s list. Write responses on the board. Ask other groups to add to the lists.
Part II You Have Skills (20 minutes)

A GAME PLAN FOR WORK | LESSON 5: PREPARING A RESUME
overcomingobstacles.org
Have groups compare their activity sheet responses with the lists on the board. Have them notice similarities. Ask students to revise and adjust their individual lists to better reflect the skills that employers want.
4. Students share their revised skill lists with the class.
Have volunteers share their revised activity sheet responses with the class. Allow students to make positive comments and offer constructive criticism. Suggest that students “borrow” talents and skills if any apply to them.
Explain that a resume will help students organize their skills so they can get the job that they want. Explain that a resume is a clear, easy-to-read summary that shows a potential employer the skills they have.
Purpose: Students learn to determine the areas that should be covered in their resumes. They also recognize the two most important elements of a resume: content and format.
1. Students examine the formats of real resumes.
Distribute the “Sample Resume” activity sheets and ask the groups to notice the format of “Sample Resume A.” Ask students if any of the headings on the resume look like categories where their skills would fit.
Explain that the headings on the resume are there to help organize the information being presented. Headings make resumes easy to read and send a message signifying what is impressive about the resume writer.
Ask students to examine “Sample Resume B.” Have groups notice the differences between the resumes. Discuss their observations.
Explain that while formats differ, there are a few things that should be included on every resume, such as your name, address, and how the person can get in touch with you. Additionally, point out to students that no matter what, their resumes should focus on their strengths.
2. Students review what they have learned about resumes.
Remind students that many of the things they do every day can be considered impressive skills. For example, if they know a lot about computers or if they speak another language, they have skills that not everyone has, and they should be sure to create a category on their resumes that will let them highlight those skills.
Part III What’s in a Resume? (10 minutes)

A GAME PLAN FOR WORK | LESSON 5: PREPARING A RESUME
overcomingobstacles.org
Explain that students will write resumes of their own in the next session. Ask that they continue to think about their skills, talents, and experiences in the interim. Suggest that they add these qualifications to their lists so that they will be even more prepared to create an impressive resume during the next session.

A GAME PLAN FOR WORK | LESSON 5: PREPARING A RESUME
overcomingobstacles.org
SESSION 2
Purpose: Students appreciate the importance of a clear format and proper grammar on their resumes.
1. Students review the parts of a resume.
Reiterate that a resume is a summary of an individual’s education and work experience and is a way to showcase skills to a potential employer. Remind students that they have many talents and strengths that can be assets when looking for a job. Explain that a resume will help to organize and present those skills.
2. Students discover the dos of resumes.
Discuss with students why it is advantageous for their resumes to stand out. Ask about ways that resumes can be made to stand out. Have student groups look at the real resumes and notice the ways in which different resumes look special. (Some examples might be: the choice of font, the use of boldface, or underlining important words.) Explain that resumes should be clear and easy to read.
3. Students discover the don’ts of resumes.
Ask students if they can describe the kinds of resume mistakes that might catch an employer’s eye and cast them in a negative light. (Students may respond: poor grammar, misspellings, or a handwritten—instead of typed—resume.)
Ask students to take the point of view of employers and think about the characteristics they would look for in their employees. Point out that employers want to know that potential employees complete every job to the best of their abilities, consider every task important, and make sure each job is done properly. Explain to students that when they submit a resume without any grammar or spelling errors, they’re telling potential employers that they care about the things they produce. That makes them good prospective employees.
Highlight the importance of this by explaining that employers usually get many resumes for one position and that if a resume has many grammar or spelling errors, the employer may not even read it.
4. Students recognize the importance of editing and proofreading their resumes.
Explain the importance of editing and proofreading. If you’ve done the lesson on writing reports, ask students to recall why having someone else look over a paper is important. Explain that it’s important to have at least two people they trust look over their resumes before they send them to anyone. Remind students that spelling and grammar are easy to fix. Suggest that students ask a friend to proofread their resumes so that prospective employers will not be turned off by errors.
Part I Make It Sharp (15 minutes)

A GAME PLAN FOR WORK | LESSON 5: PREPARING A RESUME
overcomingobstacles.org
5. Students decide on categories with which to organize their resumes.
Remind students that to make resumes organized and easy to read, their qualifications must be organized into categories. Qualifications that are similar should go into the same category. For example, they might list sports, chess, and cooking under “Activities” if they frequently participate in these activities.
Have students recall some other categories for a resume. (Students might respond: education, work experience, volunteer experience, school activities, interests, and talents/strengths.)
Ask students to choose appropriate categories that they will use in their resumes.
6. Students learn about putting the finishing touches on their resumes.
Explain to students that there is one more thing they need to know. Say, “Your resume is all about you. Make sure it presents you in the positive light you deserve and that your name is in the largest font size on the page.”
Purpose: Students write and correct their resumes.
1. Students write their own resumes.
Give each student a copy of the “My Resume” activity sheet.
Explain that this outline will help them create their resumes. They should put one activity or skill on each line and highlight their special skills. These are the characteristics that will make them stand out from other applicants.
Have students use the activity sheet as an outline for drafting their resumes in class.
Refer students to dictionaries and other reference materials. Consider allowing them to work in pairs or small groups so that they may help each other.
After students have drafted their resumes, remind them that real resumes are always typed. Consider allowing students to go to the school computer room or library to type their resumes into the format they like (or assign typing and printing the resume as homework).
2. Students evaluate their peers’ resumes.
Part II Putting It All Together (25 minutes)

A GAME PLAN FOR WORK | LESSON 5: PREPARING A RESUME
overcomingobstacles.org
Explain that most employers take less than a minute to look at a resume before they put it down. Remind students to make sure that their resumes are so clear and easy to read that potential employers get the important information in a short amount of time. Spelling, grammar, and neatness are essential.
If time permits, ask students to work with a partner to edit and proofread their resumes.
Ask students if they can actually use the resumes that they wrote. Elicit from students the following key points that were taught in this lesson:
Students have talents and strengths that can be assets when looking for a job.
A resume helps present these skills.
A well-written, error-free resume with appropriate details can impress a potential employer.
Conclusion (2 minutes)
SESSION 1
1. What is a resume? List the benefits of having one.
2. List three categories that you should include in a resume.
3. Imagine you want to apply for an after-school job as a salesperson at your favorite clothing store.
The job description reads, “Seeking salesperson with some experience. Must have a good
understanding of merchandise and cash register. Must feel comfortable approaching customers.
Must work well as a member of a team.” List the skills that you might need to be qualified for this
job.
SESSION 2
1. List five characteristics of an effective resume and three characteristics of an ineffective resume.
2. What can you do to make your resume presentable to a potential employer?
Student Assessment

A GAME PLAN FOR WORK | LESSON 5: PREPARING A RESUME
overcomingobstacles.org
LESSON EXTENSIONS
Using Quotations
“Use what talents you possess; the woods would be very silent if no birds sang there except those that
sang best.” —Henry Van Dyke
Discuss recognizing and building on existing skills.
Addressing Multiple Learning Styles
Have students create resumes for famous characters from history or literature by analyzing the skills
evidenced in the subject’s activities and putting a spin on historic events or literary works.
Have students share these resumes with the class and discuss appropriate word choices and
descriptions.
Writing in Your Journal
Ask students to write about personal experiences that involved special talents and skills.
Have volunteers share what they wrote with the class. The other students should offer suggestions for
incorporating these unique experiences into a resume.
Using Technology
Have students type their resumes in a word processor and save the files for later use.
Divide students into pairs. Each student should proofread their partner’s resume for spelling, grammar,
and content suggestions.

A GAME PLAN FOR WORK | LESSON 5: PREPARING A RESUME
overcomingobstacles.org
Homework
Have students create charts that list effective action words and various formats that they can use on
their resumes.
Have students share their work with the class. Then, have them discuss how their resumes can show
how they’ve grown and changed over time.
Additional Resources
Review resume guides such as Your First Resume by Ron Fry and The Damn Good Resume Guide: A
Crash Course in Resume Writing by Yana Parker.
Have students select resume formats that work well for people just beginning their careers. Give
examples of ways in which volunteer work and student activities can be included.

A GAME PLAN FOR WORK | PREPARING A RESUME©
20
21
Ove
rco
min
g O
bst
acle
s
> =
SKILLS TRANSLATOR
1. Fill in the small box with your experience or activity.2. List the skills you use to accomplish that activity in the “Skills” box.3. Those skills can be translated into the “Job Skills” box.
EXPERIENCE/ACTIVITY SKILLS JOB SKILLS
> = EXPERIENCE/ACTIVITY SKILLS JOB SKILLS
overcomingobstacles.org

A GAME PLAN FOR WORK | PREPARING A RESUME©
20
21
Ove
rco
min
g O
bst
acle
s
Carlos DiSanto925 Riverside Drive, Apartment #1FSan Diego, CA 90013(619) 555-0485
Education
Junior at Carver High School20XX-20XX Forensics Team20XX-20XX Community Service
Shore Road Middle School, Class of 20XX
Experience
Sales/CashierHaagen Dazs Stores, San Diego, CA; April to December 20XXResponsible for customer service, cash register, inventory, and storemaintenance.
Kitchen HelperSummer Camp; 20XXAssisted in meal preparation for entire camp; worked as a waiter and busboy.
Tutor/BabysitterNumerous families; 20XX-20XXResponsible for child care and math tutoring for numerous families with children ages 1– 9.
Skills
Knowledge of personal computers and basketball. Avid reader.
References available upon request.
SAMPLE RESUME A
overcomingobstacles.org

A GAME PLAN FOR WORK | PREPARING A RESUME©
20
21
Ove
rco
min
g O
bst
acle
s
Amaya Adams1 Liberty Plaza, Apartment #3New York, NY 10025(212) 555-7606
Experience
5/XX–8/XX Summer Youth Intern Central Park Conservancy, NY, NY Functioned as member of an ecology team for recycling and beautification projects in Central Park.
4/XX–12/XX Sales/Cashier CVS, NY, NY Responsible for customer service, inventory, and store maintenance.
6/XX–9/XX Kitchen Helper Summer Camp, NY, NY Assisted in meal preparation for entire camp; worked as a waitress and bus girl.
1/XX–3/XX Helper/Babysitter Responsible for child care and related tasks for numerous families with
children ages 1 to 10.
Education Dalton High School Women’s varsity basketball team, 3 years (Co-captain; All-Star Team
MVP Award) Women’s varsity soccer team, 2 years
P.S. 175, Class of 20XX
Skills PC literate, photography/darkroom experience, classical guitar, and various sports.
References available upon request.
SAMPLE RESUME B
overcomingobstacles.org

A GAME PLAN FOR WORK | PREPARING A RESUME©
20
21
Ove
rco
min
g O
bst
acle
s
Name
Street
City, State, Zip
Phone
EDUCATION/SKILLS____________________________________________________________________________________________________________________________________________________________________________________________________________________________
JOB EXPERIENCE/SKILLS____________________________________________________________________________________________________________________________________________________________________________________________________________________________
SKILLS/HOBBIES/SPECIAL INTERESTS____________________________________________________________________________________________________________________________________________________________________________________________________________________________
REFERENCES____________________________________________________________________________________________________________________________________________________________________________________________________________________________
MY RESUME
overcomingobstacles.orgPowered by TCPDF (www.tcpdf.org)

A GAME PLAN FOR WORK | LESSON 6: MAKING CONTACTS
overcomingobstacles.org
AGENDA
SESSION 1
Starter
Who Can Talk about You?
Preparing Your References
SESSION 2
Cover Letters
Writing a Cover Letter
Conclusion
Student Assessment
Objectives
Students will recognize the importance of good references and identify potential references.
Students will learn how to determine what employers might want to learn from references.
Students will learn to prepare references for phone calls or other inquiries from employers.
Students will recognize why cover letters are important and identify the parts of letter.
Students will write a cover letter for a job of their choice.
Materials Needed
6LESSON
MAKING CONTACTS

A GAME PLAN FOR WORK | LESSON 6: MAKING CONTACTS
overcomingobstacles.org
Session 2: One copy of the “Sample Cover Letter” activity sheet for each student (Part I)
Session 2: One copy of the “Your Cover Letter” activity sheet for each student (Part II)

A GAME PLAN FOR WORK | LESSON 6: MAKING CONTACTS
overcomingobstacles.org
SESSION 1
Tell students to imagine that they have to choose to work on a project with one of two classmates whom they don’t know. Both of these students claim to know a lot about the subject, to be hard workers, and to have great grades. Ask, “How are you going to decide which student to work with?”
Lead students to the understanding that the best way would be to get the opinions of other students or teachers who have worked with them before.
Explain to students that employers try to find out more about applicants in the same way. References are the people who will speak to potential employers about an applicant’s ability to do a job. The first session will help students identify and contact references. The second session will help students write appropriate cover letters to potential employers.
Starter (3 minutes)
Purpose: Students recognize the importance of securing good references and identify potential references.
1. Students consider what employers want to know about them.
Place students in small groups. Ask groups to brainstorm information that an employer might want to know about them. Have them develop a list of questions that employers might have.
Have groups share their questions with the class. Write the questions on the board. As they offer their questions, ask students to explain why an employer would want to know such information. Help students discover the qualities that employers are looking for in a new employee.
2. Students identify the characteristics they should look for when choosing references.
Ask students, “If the personnel manager at the company where you applied wanted to find out information about you, what kinds of people would you suggest the manager talk to?”
Students should share that people for whom they have worked (as volunteers or for pay) are good choices. Also, teachers, counselors, and coaches are valuable references.
Ask students why they chose these people. List the reasons on the board. Have them organize this list by order of importance. Help students reach a consensus about the top four qualities a reference should have.
Lead students to the understanding that they should choose references who know them well, respect them, and like them.
Part I Who Can Talk about You? (25 minutes)

A GAME PLAN FOR WORK | LESSON 6: MAKING CONTACTS
overcomingobstacles.org
3. Students recognize potentially inappropriate references.
Ask students if any of them have listed family members as references. Ask the class to consider some of the pros and cons of listing family members. (Pros include that family members know them very well. Also, some students may only have family references. Cons include that employers may feel that a family member is not an objective source or that a student is trying to hide something by having only a family member as a reference.)
Ask students if they can think of other people who might not make appropriate references. (Students might respond: close friends and social peers.) Have them explain their thinking.
Have students review their lists. Ask if they would like to change, add, or delete categories of people from their lists of possible references. If so, have them explain why before making the appropriate changes.
4. Students choose people to use as references.
Have students take a minute to write down the names of two or three people to use as references when applying for a part-time job. Have students find their references’ telephone numbers and addresses as part of their homework.
Purpose: Students will learn to prepare references for telephone calls or other inquiries from potential employers.
1. Students recognize that communication with references is important.
Ask students to consider what they would do if they received a phone call from someone they don’t know asking their opinion of a friend.
Have volunteers share their answers with the class. (Students should mention that they might not answer the questions or that they might give a poor responses, as they wouldn’t be prepared for the conversation.)
Point out that if references don’t know that they are references, they might not give the best recommendations.
2. Students learn to prepare references for calls from potential employers.
Explain that students need to prepare their references to talk about their strengths to a potential employer. Students should be sure to ask the person if it’s okay to use them as a reference.
Part II Preparing Your References (20 minutes)
A GAME PLAN FOR WORK | LESSON 6: MAKING CONTACTS
overcomingobstacles.org
Explain that if a person agrees to be a reference, students should call and tell them the name of the employer and the job sought. Point out that if students haven’t spoken to a reference in a while, they may need to update the reference on their job goals and their other recent activities. That way, references will be prepared and can give strong, effective information.
Have several pairs of volunteers take turns role-playing a conversation in which a student asks an individual to be a reference. Have other students critique the performances.

A GAME PLAN FOR WORK | LESSON 6: MAKING CONTACTS
overcomingobstacles.org
SESSION 2
Purpose: Students recognize why cover letters are important and learn how to write a cover letter.
1. Students recognize the importance of cover letters.
Tell students that once they have identified the job they want to apply to, written their resumes, and prepared their references, the next step is to write a cover letter.
Ask students to explain what a cover letter is. Lead students to the understanding that a cover letter introduces them to the employer and identifies the position in which they are interested.
Explain to students that a cover letter also allows them to explain things about themselves that aren’t immediately visible in their resumes. Provide students with the following example:
You’re applying for a job at a local ice cream store. Mr. Steven Chip, the manager, is interviewing 50 young people for summer jobs. You know your resume is strong, but your resume can’t show how good you are with people, that you love ice cream, and that you’ve been a customer at Mr. Chip’s store for years. Your cover letter can!
2. Students discover how cover letters can expand and complement a resume.
Tell students that a cover letter is the place to specify to an employer the job in which they are interested. A cover letter allows applicants to show that they know something about the company and have initiative. Cover letters can also bring up or expand upon special skills or talents that might not be highlighted in a resume.
Ask students to identify other things that they might include in their cover letters. (Students might respond: special experiences that could prove useful on a job, willingness to take on all tasks.)
3. Students analyze the parts of a cover letter.
Have students form small groups. Distribute copies of the “Sample Cover Letter” activity sheet. Give groups four or five minutes to identify the elements of a good cover letter. Call on each group to identify one important element that the members found in the sample. (Students might respond: the heading; an inside address; a salutation; the body, which includes who the writer is, how they found out about the job, and why the writer is qualified for the job; a closing; and a signature.)
4. Students learn the dos and don’ts of writing good cover letters.
Give students the following pointers. You may wish to have them take notes.
Part I Cover Letters (20 minutes)

A GAME PLAN FOR WORK | LESSON 6: MAKING CONTACTS
overcomingobstacles.org
Address the letter to a specific person. Don’t use “To Whom It May Concern.” Call the company to find out how to spell the person’s name. Be sure to include their title. If there is no way to find out the individual’s name, use “Dear Hiring Manager” or “Dear Personnel Manager.”
Make your letter short and to the point. The first paragraph should say that you are applying for a job and provide a description of the job.
Use the letter to describe the skills you have that make you a good candidate for the job.
Don’t begin every sentence with “I.” Vary your sentences.
At the end of the letter, explain that you will contact the employer to follow up. Also, thank the employer for their time.
Close the letter with “Sincerely.”
Check your letter for mistakes and then print the letter and the envelope. Don’t forget to put your return address on the envelope.
Be sure to sign your name.
Ask someone to proofread your letter before you mail it.
5. Students identify key points about cover letters.
Point out that a cover letter must be specific. Students will need to write a new cover letter for each job they apply to. Remind them that cover letters and the interview process can turn a no into a yes.
Purpose: Students will write their own cover letters.
1. Students develop ideas that they might include in their personal cover letters.
Have students take a few seconds to think about a job that they would like to have. Ask them to think about some of the things that they might include in a cover letter to give more information about themselves and to show interest.
2. Students draft their cover letters.
Pass out the “Your Cover Letter” activity sheet. Have students write a first draft of their cover letters. They can make up addresses for the companies and names for the heads of personnel if they do not have that information.
3. Students use peer evaluation to offer constructive criticism.
Part II Writing a Cover Letter (25 minutes)

A GAME PLAN FOR WORK | LESSON 6: MAKING CONTACTS
overcomingobstacles.org
After students have completed their drafts, have them meet in small groups to exchange cover letters and offer constructive criticism. Remind students of what constructive criticism is. You may want to establish rules for peer evaluation by requiring each group member to make a positive comment before criticizing or correcting.
4. Students revise their cover letters.
Direct students to reexamine their first drafts. Suggest that they look for places where they can improve their letters by shortening sentences, being more to the point, or substituting words that are more precise. Ask them to think about the changes that were suggested by their peer evaluation group. Have students make changes that improve their letters.
5. Students check for errors in spelling, grammar, mechanics, and form.
Provide time for students to exchange and proofread the revised letters. Remind students that they should always proofread their cover letters and not rely on their word processor’s spelling and grammar check features.

A GAME PLAN FOR WORK | LESSON 6: MAKING CONTACTS
overcomingobstacles.org
Ask students to identify how references and cover letters can help strengthen their resumes for a potential employer. Suggest that students keep a copy of their list of references and cover letters so they can use them as models in the future. Elicit from students the following key points that were taught in this lesson:
References are a way for a potential employer to find out more about an applicant.
People who know you and respect your abilities are good choices for references.
References are important and could be the factor that helps get you the job.
A cover letter gives you a chance to give a potential employer more information and to make your resume stand out.
An effective cover letter is brief, precise, and error-free and follows proper business-letter format.
Conclusion (2 minutes)
SESSION 1
1. List your references. Explain your relationship with them and why you think they would be good
references.
2. Who might make an inappropriate reference?
3. How should you prepare your references for being contacted by potential employers?
SESSION 2
1. What is a cover letter, and why is it important?
2. What is in a good cover letter?
3. What might employers think when they receive cover letters with spelling and grammar errors?
Student Assessment

A GAME PLAN FOR WORK | LESSON 6: MAKING CONTACTS
overcomingobstacles.org
LESSON EXTENSIONS
Using Quotations
“A wise man knows everything. A smart man knows everyone. A successful man knows both.” —Chinese
proverb
Have students explain why it takes both knowledge and contacts to be successful. Encourage them to
give examples.
Addressing Multiple Learning Styles
Print sample cover letters on heavy paper and cut them into parts. Distribute three or four letters (in
pieces) to each group of students for assembly. Students should note qualifications in the body of the
letter that match the needs of the target company.
Review the standard parts of a business letter. Have students explain how they assembled the pieces
(e.g., the writer used the company name in the body of the letter).
Writing in Your Journal
Have students write about the reasons they chose the references they selected and the activities they
have shared with those people that shed light on their character or skills.
Have students share their work with a classmate.
Using Technology
See What Color Is Your Parachute? Guide to Job-Hunting Online by Richard N. Bolles and Mark Emery
Bolles for a list of job-related websites.
Have students visit and write reviews of these sites. Have them share their work with the class.

A GAME PLAN FOR WORK | LESSON 6: MAKING CONTACTS
overcomingobstacles.org
Homework
Have students research a company they’d like to work for. Have them visit the company’s website and
research information about the company at the library.
Explain to students that a cover letter should describe ways in which their skills could benefit the
employer. Have them make notes about how their skills might be useful to the company. They should
include a sentence or two about this in the final drafts of their cover letters.
Additional Resources
Assign topics from Winning Cover Letters by Robin Ryan, which addresses 42 cover letter mistakes, to
groups of students. Have them report their findings to the class.
Have students decide which mistakes might apply to beginning job hunters. Make a class list of dos and
don’ts.

A GAME PLAN FOR WORK | MAKING CONTACTS©
20
21
Ove
rco
min
g O
bst
acle
s
1347 Regata DriveGeorgetown, RI 02931
May 15, 20XX
Ms. Beverly JohnsonSupervisor Cortland Pharmacy233 Jones StreetGeorgetown, RI 02931
Dear Ms. Johnson:
In response to your recent advertisement in the Ledger, I am applying for the position of weekend clerk. I have included my resume to provide you with information about my skills in working with people.
Experiences that have prepared me for this position include my present job at Flagman’s Sporting Goods, where I have worked as a cashier for one year providing customer assis-tance and pleasant service. I also volunteer at the community hospital, so I am familiar with pharmaceutical names.
I am interested in a future career in medicine. Working at Cortland Pharmacy would offer me the chance to build knowledge in the field. My strong interest in medicine would also benefit your store.
I will contact you early next week to discuss a good time for us to meet. If you have any questions, I can be reached at (401) 555-5656. Thank you for your time, and I look for-ward to speaking with you.
Sincerely,
Jason WashingtonJason Washington
SAMPLE COVER LETTER
overcomingobstacles.org

A GAME PLAN FOR WORK | MAKING CONTACTS©
20
21
Ove
rco
min
g O
bst
acle
s
Your address
Your city, state, ZIP
Date
Name
Title
Address
City, state, ZIP code
Dear ____________,
I am applying for
Experiences that have prepared me for this job include
I will contact you
Sincerely,
Signature
Your name
YOUR COVER LETTER
overcomingobstacles.orgPowered by TCPDF (www.tcpdf.org)

PART III
DEVELOPING RELATED SKILLS
GETTING THE JOB

TABLE OF CONTENTS
PART III: DEVELOPING RELATED SKILLS
1. Completing Applications 473
2. Preparing for an Interview 483
3. Interviewing 494
4. Following the Interview 503
5. Responding to a Job Offer 514
Getting the Job

GETTING THE JOB | LESSON 1: COMPLETING APPLICATIONS
overcomingobstacles.org
AGENDA
Starter
Directions
Questions
Apply!
Conclusion
Student Assessment
Objectives
Students will recognize the importance of following directions on job or school applications.
Students will identify questions they may come across on job or school applications.
Students will complete a model application.
Materials Needed
Two watches with second hands (Starter)
One copy of the “Directions” activity sheet for each student (Part I)
One copy of the “Sample Job Application” activity sheet for each student (Part II)
One copy of the “Sample Undergraduate Application for Admission” activity sheet for each
student (Part II)
1LESSON
COMPLETING APPLICATIONS

GETTING THE JOB | LESSON 1: COMPLETING APPLICATIONS
overcomingobstacles.org
Ask for two student volunteers. Explain to the class that they are going to have a shoe-tying race. Ask both volunteers to untie their shoes.
When the volunteers are ready, hand each of them a watch with a second hand. As you hand them the watches, make a mental note of the time on each watch. Tell the competitors to look at the watches and to time how long it takes them to tie their shoes. When they are ready, say go.
As the volunteers claim to have won, take the watches back from them. As they hand the watches back to you, record the time from each watch. Ask the volunteers how long it took them to tie their shoes. Then, ask them to identify the time they started and the time they finished.
Point out to students that the volunteers had to follow directions and pay attention to details. Remind students that you told the competitors to look at the watches and to time how long it took to tie the shoes. Explain to students that today’s lesson will help them learn to follow directions and pay attention to details when completing applications for jobs or college.
Starter (3 minutes)
Purpose: Students recognize the importance of following directions on a job or school application.
1. Students learn the importance of reading directions before filling out a job application.
Hand out copies of the “Directions” activity sheet.
Explain to students that you are going to test their ability to follow directions. Allow them three minutes to complete the activity sheet.
When the three minutes are up, ask how many students followed all of the directions on the activity sheet.
Tell them to look at item number 10. Ask a volunteer to read that direction—they are to ignore directions three through nine. Explain that the only way to have known about skipping those numbers is to have read all of the directions before beginning.
Explain that when filling out applications for jobs or for college, it is important to follow directions. The best way to do that is to read the directions very carefully. Tell them that if they don’t understand a direction, they should ask for clarification. It is better to ask a question than to put something wrong on an application.
Part I Directions (10 minutes)

GETTING THE JOB | LESSON 1: COMPLETING APPLICATIONS
overcomingobstacles.org
Purpose: Students identify questions they may come across on applications.
1. Students identify situations in which they may need to complete applications.
Have students recall some of the times when they have had to fill out forms and applications in the past. Ask, “When might you need to fill out applications in the future?”
Explain that job applications, school applications, credit card applications, bank account applications, and information forms at the doctor or pharmacy are all examples of applications they will need to complete.
2. Students examine the information that a company or school may want to know about an applicant.
Ask students to imagine that they are the owners of a small convenience store and are looking to hire a part-time clerk. Ask them to think about what they would ask a person who has come to them about the job. Write student responses on the board.
Explain to students that one major purpose of an application is to give some basic information to a potential employer or school administrator. This saves time when selecting qualified applicants. It is also important to complete applications accurately and neatly, as they are the first impression employers have of an applicant.
3. Students recognize that applications may have questions that ask for information they don’t have.
Distribute copies of the “Sample Job Application” activity sheet.
Ask students if they see a question on the application that they can’t answer. (Students may be unable to provide their Social Security number or the address of a previous employer.)
Distribute copies of the “Sample Undergraduate Application for Admission” activity sheet.
Ask students to identify any differences between the questions on the job application and the school application. (In reply, students may point out ethnic background, emergency contact information, etc.)
Explain to students that they must complete all sections of an application to be considered a serious candidate for a job or school. Remind them that unless a question clearly does not apply to them, they should make sure to answer everything.
Explain that in the next activity, students will learn how to deal with questions that they may not have answers to.
Part II Questions (15 minutes)

GETTING THE JOB | LESSON 1: COMPLETING APPLICATIONS
overcomingobstacles.org
Purpose: Students apply what they have learned by completing an application.
1. Students begin to fill out an application.
Tell students to select one of the sample applications to work on. Instruct students to fill out as much of the application as they can and to circle any questions they can’t answer. For the Social Security number lines, tell students to try to recall their number but not to write it down. They should circle that question if they can’t recall their number.
Allow students several minutes to complete the applications.
2. Students learn how to get the information necessary to complete an application.
When students have finished, ask them to share some of the questions that they could not answer. Write those questions on the board.
Ask students to identify ways to get the answers to those questions. List the solutions beside the questions. Explain that they can have a parent or family member supply Social Security numbers. The school principal or a school counselor can help with school records. Medical information can come from a doctor or from school records.
Explain to them that they should keep this information on a card or sheet of paper to take with them when they apply for a job. This will make completing applications easier.
Part III Apply! (20 minutes)

GETTING THE JOB | LESSON 1: COMPLETING APPLICATIONS
overcomingobstacles.org
Ask students why it is important to fill out an application correctly. Ask them why this is a skill that they will use for the rest of their lives. Elicit from students the following key points that were taught in this lesson:
It is important to follow directions on applications carefully.
Be sure the information is accurate and the application looks neat.
Be prepared. Have the information you will likely need to provide with you when you complete the application.
Conclusion (2 minutes)
1. What information should you have with you before filling out an application?
2. List three things you should be sure to do when filling out an application.
3. Complete any unanswered questions on your application from class as if you were going to give it
to a potential employer (with the exception of your Social Security number).
Student Assessment

GETTING THE JOB | LESSON 1: COMPLETING APPLICATIONS
overcomingobstacles.org
LESSON EXTENSIONS
Using Quotations
“In the long run, men hit only what they aim at.” —Henry David Thoreau
Ask students, “How does this quote apply to looking for a job? How does it apply to completing an
application?”
Addressing Multiple Learning Styles
Have students begin a class list of special instructions found on job applications, with descriptions of
what’s expected. You may also want to create a list of common spellings and usage that might be
troublesome (e.g., experience, its/it’s, there/their/they’re, etc.).
Have students use this information when completing applications.
Writing in Your Journal
Have students write about the importance of accurately completing job applications. They should
answer the following questions: How can an application represent you? How can an application
communicate your skills?
Have students share their writing with a partner.
Using Technology
Have students use the internet to find a job they would like to have and list the qualifications identified
in the job advertisement.
As a class, have students describe the jobs and qualifications they found. Discuss how students can use
an application to describe how their qualifications are suited for their desired position.
GETTING THE JOB | LESSON 1: COMPLETING APPLICATIONS
overcomingobstacles.org
Homework
Have students make cards with the personal information they need to fill out an application (e.g., job
history, etc.).
Have students use the information to complete a job application.
Using Technology
Have students browse the job application guide at https://www.thebalance.com/job-application-guide-
2061575.
When they have finished, have students create a brief list of rules about filling out job applications with
care.

GETTING THE JOB | COMPLETING APPLICATIONS©
20
21
Ove
rco
min
g O
bst
acle
s
1. Write your name in the top right corner of the paper.
2. Fold the paper in half by bringing the top right corner to
meet the top left corner and the bottom right corner to meet
the bottom left corner.
3. Unfold the paper.
4. Tear off the bottom left corner of this paper.
5. Stand up.
6. Turn around in a circle.
7. Sit down.
8. Poke two holes in the middle of the paper.
9. Look through the holes.
10. Ignore directions three through nine on this paper.
DIRECTIONS
overcomingobstacles.org

GETTING THE JOB | COMPLETING APPLICATIONS©
20
21
Ove
rco
min
g O
bst
acle
s
(PLEASE PRINT CLEARLY)
Position(s) applied for: _________________________________________________________________Were you previously employed by us? ________ If yes, when? ____________________________If your application is considered favorably, on what date will you be available for work?_________________________________________________________________________________________
PERSONAL
Name: ________________________________ Social Security Number: ______________________________Present Address: ______________________ Telephone Number: __________________________Are you legally eligible for employment in the USA? ______ (If yes, verification required.)Are you of the legal age to work? _________
LIST YOUR EMPLOYMENT HISTORY BELOW, BEGINNING WITH YOUR MOST RECENT JOB:
SAMPLE JOB APPLICATION
FromMo. Yr.
ToMo. Yr.
Starting Salary
Last Salary Reason for Leaving
Name and Address of Company and Type of Business
Telephone:
Describe the work you did:
Circle Highest Grade of School Completed 7 8 9 10 11 12 Higher Education:
I hereby give permission to contact the employers listed above concerning my prior work experience.Signature ________________________________________ Date ________ / ________ /_________
FromMo. Yr.
ToMo. Yr.
Starting Salary
Last Salary Reason for Leaving
Name and Address of Company and Type of Business
Telephone:
Describe the work you did:
For Office Use Only Locations Positions ___________ ___________
overcomingobstacles.org

GETTING THE JOB | COMPLETING APPLICATIONS©
20
21
Ove
rco
min
g O
bst
acle
s
THIS APPLICATION MUST BE ACCOMPANIED BY A $25.00 APPLICATION FEE.
Social Security Number _________________ - _________________ - _________________ Name (last, first, middle) ______________________________________________________________Permanent Address ____________________________________________________________________City ___________________ State _________ ZIP ____________ Phone (_____) _______ - ________Mailing Address (if different from above) _______________________________________________City ___________________ State _________ ZIP ____________ Phone (_____) _______ - ________Birth date (day/month/year) ______ /______ /______ Gender ___________________Ethnic Origin (Optional. Response to this question will not affect the admissions decision.) o White (Non-Hispanic) o Black (Non-Hispanic) o Latino/Hispanic o American Indian or Alaskan Native o Asian or Pacific Islandero U.S. Citizen o Non-U.S. Citizeno Perm. Resident Alien(Alien Registration Number)____________In case of emergency, contact: o Parent o Guardian o SpouseName _________________________________________________ Phone (_____) _______ - ________Address _______________________________________________________________________________City ___________________________________________________ State ________ ZIP ____________Home Phone (_____) ________ - ________Applying as: o Freshman o Transfer Applying for: o Fall o Spring o SummerIntended Major _______________________________________
SCHOOLS ATTENDED:
THIS APPLICATION MUST BE SIGNED. I understand that withholding information requested on this application or giving false information may make me ineligible for admission to the University or subject to dis-missal. I certify that the information provided on this application is correct and complete.
Signature ________________________________________ Date ________ / ________ /_________
SAMPLE UNDERGRADUATE APPLICATION FOR ADMISSION
School Name City, State Dates Attended Degrees Honors Earned
overcomingobstacles.orgPowered by TCPDF (www.tcpdf.org)

GETTING THE JOB | LESSON 2: PREPARING FOR AN INTERVIEW
overcomingobstacles.org
AGENDA
Starter
Get Ready
What’s the Question?
Dress for Success
Conclusion
Student Assessment
Objectives
Students will identify ways to reduce the stress involved with interviewing.
Students will identify and prepare answers for potential interview questions.
Students will identify appropriate and inappropriate attire for interviews.
Materials Needed
One copy of the “Any Questions?” activity sheet for each student (Part I)
Magazines and scissors for each group of three or four students (Part III)
2LESSON
PREPARING FOR AN INTERVIEW

GETTING THE JOB | LESSON 2: PREPARING FOR AN INTERVIEW
overcomingobstacles.org
Tell students, “Please clear your desks and take out a pencil and paper. We’re going to have a surprise quiz! Write the numbers one through seven on your paper. Okay, here we go!”
Ask students the following questions:
1. What’s the capital of North Dakota?2. How do you spell “pneumonia”?3. Name a single-celled organism.4. Who was the third vice president of the United States?5. What is the square root of 7,238?6. Identify five paintings by Leonardo da Vinci.7. List the laws of thermodynamics.
After asking students the seven questions, ask them how they felt. Were they nervous and anxious? Did they think that they could do better if they had a chance to study the material for the quiz?
Explain to them that they wouldn’t be human if they didn’t feel nervous. Point out that they could have done better if they had been given a chance to prepare.
Explain that an interview is somewhat like a quiz. The difference between this quiz and an interview is that in an interview the students have the answers to all of the questions—they just need to be prepared to answer them.
Starter (2 minutes)
Purpose: Students discuss ways to reduce the stress involved with interviewing.
1. Students learn that preparation is the best way to remain in control of an interview.
Ask students to identify the person who decided what to include on their resumes and on the applications they completed. Lead students to the understanding that they were in control and they decided what to include. Explain that they decided which of their experiences and talents would show their best qualities to an employer.
Emphasize that students should also view an interview as a situation in which they should be in control. They decide which of their experiences and talents they will share with a potential employer. Explain that being prepared is the best way to remain in control while being interviewed.
2. Students discover ways to be prepared for an interview.
Part I Get Ready (10 minutes)

GETTING THE JOB | LESSON 2: PREPARING FOR AN INTERVIEW
overcomingobstacles.org
Ask students to brainstorm ways to prepare for an interview even before they leave home. As students offer responses, write key words on the board.
Students should respond:
Bring a copy of your personal information sheet in case you need to complete applications, forms, or official documents.
Keep your resume in a folder to protect it from getting folded or dirty.
Think of questions that you might be asked in an interview and prepare responses.
3. Students create questions to ask interviewers.
Explain that generally when an interviewer is finished asking their questions, it is the interviewee’s turn to ask questions. Tell students that before they go to an interview, they should prepare a list of two or three good questions about the job. Having prepared questions is very important. Have students identify the kinds of questions they might ask. Write student responses on the board. (Students may say: clarification about job responsibilities, hours of operation, benefits offered, dress code, etc.)
When students have offered possible questions, distribute copies of the “Any Questions?” activity sheet. Ask volunteers to read aloud the sample questions listed on the activity sheet. Encourage students to add appropriate questions from the class list to the activity sheet.
4. Students understand the importance of being on time for an interview.
Explain to students that another important part of preparing for an interview is calling the employer to confirm the time of the meeting and to get directions.
Ask students to consider how they feel when they’re supposed to meet someone at a certain time and that person shows up late. After students have answered, point out that if they annoy an employer by showing up late to their interview, they will not make a good first impression. In fact, the interview will probably not go well, and it is unlikely that they will be offered the job.
Stress that students should plan to arrive a little early for the interview. They can use the extra time to make sure that they’re organized and prepared.
Purpose: Students identify and prepare answers for potential interview questions.
1. Students brainstorm job-specific questions that interviewers might ask.
Part II What’s the Question? (20 minutes)

GETTING THE JOB | LESSON 2: PREPARING FOR AN INTERVIEW
overcomingobstacles.org
Ask students to begin thinking about what some of the questions in an interview could be. Provide students with an example, such as, “If you were interviewing for a job in a restaurant, the interviewer might ask, ‘What serving experience do you have?’ What else do you think the interviewer might ask?” Write student responses on the board.
Ask students to imagine that they are interviewing for a position in an office. Would they be asked the same questions? Students should realize that the questions will differ. Ask students what kinds of questions might be asked in an interview for an office position. Write their responses on the board.
Ask, “What if you were interviewing for a job as a computer technician? What would you be asked then?”
When the brainstorm is complete, point out that some interview questions are job-specific. Students need to be able to answer questions in the interview that show that they have the experience and knowledge to do the job well.
2. Students consider questions concerning themselves as individuals.
Explain to students that no matter what job they’re applying for, the employer will always want to know that they’re going to be reliable and honest hard workers. Even if they don’t have a lot of experience, the interviewer wants to know that they can learn what they need to know to do the job well.
Ask, “What kinds of questions will an interviewer ask to find out about you as a person?” Encourage students to suggest examples such as the following:
Why would you like to work here?
What are your strengths?
What are your weaknesses?
What are your goals for the future?
Point out to students that sometimes questions like these feel overwhelming in an interview. They should keep in mind that they know the answers to all of these questions—they’ve already answered some of them during this course. Refer students to the activity sheets that they have completed, particularly the “Strengths Interview” activity sheet from the Confidence Building module and the “Skills Translator,” “My Qualifications,” and “Ideal Job Equation” activity sheets from Module Eight. Remind students to review their resumes from “Lesson 5: Preparing a Resume” of Module Eight: A Game Plan for Work.
3. Students prepare answers to questions about their potential as employees.
Call on several students and ask each to name some of the reasons that they will make good employees. Write their responses on the board.

GETTING THE JOB | LESSON 2: PREPARING FOR AN INTERVIEW
overcomingobstacles.org
Ask students to consider what they would say if an interviewer asks them a tough question, such as “What is your biggest weakness?” Allow one or two volunteers to respond. Point out that as long as they stay focused on their strengths and the experiences that they have had, they’ll be able to use questions like that to their advantage.
As an example, describe a weakness that could be turned into a strength. For instance, explain, “I’m not a great speller, but this means I’m very careful about proofreading everything I write.”
Ask students what they would think if someone told them that was their biggest weakness. Explain that it shows that the person values paying attention to details and doing a good job. Those are qualities that all employers want.
Advise students not to use “fake” weaknesses, such as “I sometimes work too hard.” Explain that such answers don’t sound genuine.
Purpose: Students identify appropriate and inappropriate attire for interviews.
1. Students recognize that proper grooming makes a good impression.
Say, “When you were putting your resume together, you learned how important it is for your resume to look neat and error-free.” Ask students to recall why those things are important. (Student responses might state that neatness and correctness make a good impression on a potential employer.)
Explain to students that the same rule applies to their appearance when they first meet an employer. The way that they dress will influence the impression that they make on the employer. Remind them that they want to dress appropriately.
2. Students discuss guidelines for appropriate interview clothing.
Explain to students that it can be difficult to decide what is appropriate attire for work. Students should wear clothes that they feel comfortable in, but they should also follow some general guidelines for what is appropriate for an interview:
Part III Dress for Success (15 minutes)

GETTING THE JOB | LESSON 2: PREPARING FOR AN INTERVIEW
overcomingobstacles.org
Don’t wear jeans, sneakers, sandals, or hats, no matter how nice they are. They’re too casual, and the potential employer may interpret them as an indication that you’re not taking the interview seriously.
Make sure your hair is neat and that it isn’t falling in your face or bothering you. If you have to keep brushing it out of your face during the interview, it can be distracting to you and the employer.
Too much jewelry, lots of makeup or perfume, saggy pants, shirts that show your stomach, and very bright nail polish can also detract from the impression you want to make.
Here is a good rule for interview clothing: if there’s something you’re wearing that your eyes seem to focus on when you look in the mirror before your interview, change it. You want the interviewer to give you, not your clothes, all of their attention.
Point out to students that they do not have to spend a lot of money on clothes for an interview, particularly if they will not be required to dress up on the job. Have students suggest ways that they could get an outfit without spending a great deal of money. (Students might respond: borrowing an outfit from a friend or family member or purchasing one new item to complement clothes they already own.)
3. Students identify appropriate interview clothing.
Divide students into groups of three or four. Give each group a magazine and scissors and instruct them to cut out clothing that would be appropriate interview attire for them.
Allow students about five minutes to choose clothing. When students have finished, have each group briefly explain the clothing they chose.
4. Students recognize that attention to details is important.
Ask students to suggest the final details they should consider when dressing for an interview. (Student responses might include: ironing clothes, straightening a tie, shaving, shining shoes, and making sure to have clean hands and fingernails.)
Point out that these things are like proofreading a resume. Even though these details don’t specifically relate to your ability to do a job, they are factors that, if neglected, might cause an employer to immediately lose interest.
5. Students recognize the benefits of creating an interview preparation checklist.
Ask students to recall the time management activities from “Lesson 2: Managing Your Time” of Module Six: Skills for School and Beyond and the techniques that were presented to help them complete tasks. Ask students what techniques can be applied to interview preparation. (Student responses might include prioritizing and creating to-do lists.)

GETTING THE JOB | LESSON 2: PREPARING FOR AN INTERVIEW
overcomingobstacles.org
Ask students to explain that they can successfully prepare for an interview. Elicit from students the following key points that were taught in this lesson:
By preparing possible questions and answers, you can feel prepared and confident in an interview.
Focusing on strengths can enable you to answer tough questions well.
We have control over what an employer sees and hears about us in an interview. By preparing well and dressing appropriately, we will be able to confidently present ourselves as excellent candidates for employment.
Conclusion (2 minutes)
1. Imagine that you are going on a job interview tomorrow. Create your own interview preparation
checklist.
2. What does it mean to dress appropriately for an interview? Why is this important?
3. Answer the following questions as if you were at an interview:
1. What would you add to our company?
2. What are your weaknesses?
3. What are your goals for the future?
Student Assessment

GETTING THE JOB | LESSON 2: PREPARING FOR AN INTERVIEW
overcomingobstacles.org
LESSON EXTENSIONS
Using Quotations
“Depend on the rabbit’s foot if you will, but remember it didn’t work for the rabbit.” —R. E. Shay
Have students discuss what they need (besides luck) to ace an interview.
Addressing Multiple Learning Styles
Have students write a short story about a successful interview, casting themselves as the hero.
Have students read the stories in small groups.
Writing in Your Journal
Have students read the “I Got Fired” activity sheet.
Have students write about an experience they wouldn’t want to admit in a job interview.
Using Technology
Have students visit www.monster.com, which gives dozens of links for researching potential employers.
Have students report on industries and employers of interest. Students should also list three strengths
or skills that might be useful to their business or company of choice.
Homework
Have each student create a poster that lists their three greatest strengths. Have them choose their
interview clothing and wear it to school for interview role-playing.
Take photos and display them with students’ posters in the classroom.

GETTING THE JOB | LESSON 2: PREPARING FOR AN INTERVIEW
overcomingobstacles.org
Additional Resources
Copy appropriate questions from The 250 Job Interview Questions You’ll Most Likely Be Asked…and
the Answers That Will Get You Hired! by Peter Veruki onto index cards.
Have students role-play job interviews, with the “interviewer” selecting questions from the list. Have
students critique interview techniques in small groups.

GETTING THE JOB | PREPARING FOR AN INTERVIEW©
20
21
Ove
rco
min
g O
bst
acle
s
What are the responsibilities of the job?
Are there opportunities for advancement? To what other jobs?
Do you offer any benefits?
What are the regular work hours of the job?
What are the qualities you’re looking for in a candidate?
ANY QUESTIONS?
overcomingobstacles.org

GETTING THE JOB | PREPARING FOR AN INTERVIEW©
20
21
Ove
rco
min
g O
bst
acle
s
I GOT FIREDAFTER THREE WEEKS AT MY JOB
I got fired after three weeks at my job because I wasn’t good at making burgers. Now I’m going for a job at a different type of restaurant. Do I have to tell them about my last job? Dave, 16, New York
While you’re not obliged to bring up your previous job, don’t lie if you are asked about it. Even though making burgers wasn’t your thing, there are many other restaurant jobs available—hosts and hostesses, wait staff, table prep and cleanup crew, to name just a few. Bradley G. Richardson, founder of JobSmarts, a
firm that deals with career-develop-ment issues, says, “A rule of thumb in the business world is that you don’t have to list a job on your resume unless you worked there at least 30 to 90 days. Never be dishonest, though, if you are asked if you’ve ever been fired.”
*Reprinted with permission from React magazine.
overcomingobstacles.orgPowered by TCPDF (www.tcpdf.org)

GETTING THE JOB | LESSON 3: INTERVIEWING
overcomingobstacles.org
AGENDA
Starter
Shake
Questions and Answers
Interview Jitters
Conclusion
Student Assessment
Objectives
Students will identify how to demonstrate confidence when they greet someone.
Students will practice answering difficult interview questions.
Students will discuss last-minute interview preparation techniques.
Materials Needed
One copy of the “Tough Questions” activity sheet for each student (Part II)
One copy of the “Interview Preparation Checklist” activity sheet for each student (Part III)
3LESSON
INTERVIEWING

GETTING THE JOB | LESSON 3: INTERVIEWING
overcomingobstacles.org
Choose two volunteers. Ask one volunteer to come into the classroom smiling and standing up straight. This student should walk around the room shaking hands and saying hello to classmates. Tell the other volunteer to slink into the classroom, give a weak handshake, and mumble hello without looking the other students in the eyes.
After the volunteers have greeted several of the students, ask the class, “What was your impression of the two volunteers? Whom would you be more inclined to hire? Why?”
Explain to students that it is important to show that they are confident individuals while on an interview. Tell students that they learned about preparing for an interview in Lesson 2, and now they are going to explore ways to show their self-confidence.
Starter (3 minutes)
Purpose: Students identify techniques for greeting someone with confidence.
1. Students identify what makes a good handshake.
Ask students, “What makes a good handshake?” Write responses on the board. (Students may say: strong, firm, confident, not limp.)
Explain that the best way to shake hands well is to master the “web to web” handshake. Place the part of your hand where the thumb and index finger are connected (the “web”) against the web of the hand you are shaking.
Ask for a volunteer to help demonstrate the “web to web” handshake. Explain that it is important to have a firm, but not too strong, handshake. Tell students that it is not a contest with the other person; an interviewer would not be likely to hire someone who hurts their hand in a handshake.
2. Students identify what other actions are involved in a good handshake.
Remind students of the starter and ask them to identify some of the other differences between the ways the two volunteers entered and walked around the room.
Lead students to the understanding that to complete the impression of a confident and friendly person, an interviewee needs to look the interviewer in the eye and say (while they are shaking hands) that they are pleased to meet them.
3. Students practice their greeting.
Tell students that they have all of the ingredients for a successful greeting. They know the “web to web” handshake, how to make eye contact, and what to say.
Part I Shake (10 minutes)

GETTING THE JOB | LESSON 3: INTERVIEWING
overcomingobstacles.org
Tell students to walk around the room and practice greeting each other. Allow a few minutes for this. Move around the room and shake hands with every student.
Tell students that the first part of an interview is very important. Some experts say that a decision to hire or not to hire a candidate is made in the first three minutes, and that the balance of the time is spent justifying the decision. A good greeting can get the student off to a positive start in an interview.
Purpose: Students practice answering difficult interview questions.
1. Students review difficult questions and identify ways to respond.
Divide the class into pairs. Tell students that the best way to be prepared for a difficult interview question is to practice what to say if asked one.
Distribute copies of the “Tough Questions” activity sheet. Explain that the activity sheet has some diagrams on it to stimulate thinking about answers to difficult questions.
Tell students how to complete the activity sheet:
In the first space, identify a weakness you have.
In the second space, write about how the weakness makes you work harder or pay attention to details—characteristics any employer wants in an employee.
In the third space, describe a positive strength that comes from overcoming this weakness.
Allow students several minutes to complete the activity sheet.
2. Students see the importance of ending an answer positively.
Ask students to explain what they observe about the last boxes for the questions on the activity sheet.
Lead students to understand that they should always conclude their answers with something positive. Point out that they should respond to all interview questions, even straightforward ones, with a positive answer.
3. Students practice responding to difficult questions.
Write the following question on the board: “If you could change one thing about yourself, what would it be and why?” Tell students to reflect on how they would respond to an interviewer who asked this question.
Part II Questions and Answers (20 minutes)

GETTING THE JOB | LESSON 3: INTERVIEWING
overcomingobstacles.org
Remind students to focus on something positive. Tell them to practice their responses with their partners.
Students may feel anxious about an interview after going through this exercise. Remind them that they know the answers to the questions and they are prepared to go into the interview.
Explain that an interviewer has a problem to solve: they must select and hire someone. The interviewee’s task is to show that they are capable of handling the job.
Purpose: Students discuss last-minute interview preparation techniques.
1. Students recognize that it is normal to be nervous going into an interview.
Tell students that everyone is nervous about an interview. Point out that even interviewers likely had to interview to get their job—and probably felt nervous, too! Students should keep in mind that the goal is not to eliminate anxiety, but to keep it from getting in the way.
2. Students review how to prepare for an interview.
Distribute copies of the “Interview Preparation Checklist” activity sheet. Ask a volunteer to read the checklist out loud to the class. Have students identify items they feel unsure of and discuss ways they can be better prepared.
Explain to students that when they feel nervous while on an interview, they should remind themselves that they are well prepared. This is the best strategy for staying calm.
3. Students use relaxation techniques.
Ask students to identify the signs that might indicate that a person is nervous. Write student responses on the board. (Students might respond: sweaty palms, fidgeting, tapping feet, tapping pencils, avoiding eye contact, speaking in a low voice, giving short answers to questions.)
Tell students to review good communication skills (see Module One: Communication Skills). Explain that interviews are good opportunities to use active listening skills and to pay attention to the nonverbal messages they are sending.
Remind students of the stress management techniques learned in Module Six: Skills for School and Beyond. Tell students to remind themselves, while on an interview, that they’ve done all the right things to prepare for it and that they are ready. Ask students to visualize a successful interview. What images do students see?
Part III Interview Jitters (15 minutes)

GETTING THE JOB | LESSON 3: INTERVIEWING
overcomingobstacles.org
Ask students to describe the characteristics of a successful job interview. Elicit from students the following key points that were taught in this lesson:
A firm handshake and eye contact imply confidence.
Prepare answers for difficult questions by focusing on and ending with something positive.
Everyone feels nervous about an interview, but relaxation and stress management techniques can be used to remain calm.
Conclusion (2 minutes)
1. List three things you should do in an interview to show that you are confident and friendly.
2. Describe the differences between an unsuccessful job interview and a successful one.
Student Assessment

GETTING THE JOB | LESSON 3: INTERVIEWING
overcomingobstacles.org
LESSON EXTENSIONS
Using Quotations
“Eighty percent of success is showing up.” —Woody Allen
Tell students that the other 20% is preparation. Have students create a list of things to remember when
going on job interviews.
Using Technology
Have students take a virtual interview at http://resources.monster.com/tools and note the feedback
they receive.
Discuss the questions that students encountered and the feedback they received.
Writing in Your Journal
Have students complete the following sentence: “Interviews make me nervous because…”
Have students work with a partner to develop an affirmation that will help them overcome their
nervousness (e.g., if their response was “because I’m worried I won’t get the job,” students could remind
themselves that they’d be a great addition to the company).
Additional Resources
Have students review the chapter on work from Speaker’s Sourcebook II by Glenn Van Ekeren. This
book offers quotes and stories about loving your work and giving your all.
Have students explain the importance of a can-do attitude.

GETTING THE JOB | LESSON 3: INTERVIEWING
overcomingobstacles.org
Homework
Have students review the articles about interviews on http://career-advice.monster.com/job-
interview/careers.aspx. Have them also create packets containing all the materials they will need for
interviews, such as resumes and references.
Divide students into small groups. Groups should develop checklists to help them make sure they have
everything they need for an interview.
Additional Resources
Ask a personnel manager or human resources director from the community to speak about what to
expect in an interview.
Have students write a paragraph summarizing the information given.

GETTING THE JOB | INTERVIEWING©
20
21
Ove
rco
min
g O
bst
acle
s
s In the triangle, identify your weakness.
n In the rectangle, talk about what you do to overcome that weakness or what you’ve learned from your mistake. Think about how this has made you work harder and how it has helped you grow.
l In the circle, write about a positive strength that comes from overcoming this obstacle.
TOUGH QUESTIONS
WHAT IS YOUR BIGGEST WEAKNESS?
➤➤➤ ➤➤
WHAT IS YOUR BIGGEST WEAKNESS?
➤➤➤ ➤➤
I need
structured tasks.
I structure my own tasks when no one
else does.
I can take a project and break
it down into smaller tasks and identify
what needs to be done.
overcomingobstacles.org

GETTING THE JOB | INTERVIEWING©
20
21
Ove
rco
min
g O
bst
acle
s
DO I HAvE…
o COPIES OF MY RESUME
o THREE QUESTIONS TO ASK THE INTERVIEWER
INFORMATION I MIGHT NEED IN ORDER TO FILL OUT AN APPLICATION
o Social Security number
o Name of an emergency contact
o Names and telephone numbers of references
APPROPRIATE CLOTHING AND GROOMING
o Clean shoes
o Hair is clean and out of my face
o Clothes aren’t wrinkled
o Not wearing a hat
o Not wearing anything that distracts the interviewer from what I’m saying
o Tie is straight
o Shirt is tucked in
o Clean-shaven, if appropriate
o Blouse
o Suit or dress pants
o Professional skirt or dress
INTERVIEW PREPARATION CHECKLIST
overcomingobstacles.orgPowered by TCPDF (www.tcpdf.org)

GETTING THE JOB | LESSON 4: FOLLOWING THE INTERVIEW
overcomingobstacles.org
AGENDA
SESSION 1
Starter
The End
Thank You, Thank You
SESSION 2
Thank You, Thank You (continued)
Make the Call
Conclusion
Student Assessment
Objectives
Students will recognize the importance of following up after an interview.
Students will identify the elements of strong thank-you letters.
Students will write thank-you letters.
Students will recognize the importance of follow-up telephone calls and will practice such calls.
Materials Needed
Session 1: Two boxes containing the same item, one beautifully wrapped and the other covered in
tattered newspaper (Starter)
Session 1: One copy of the “Interview Thank-You Letter” activity sheet for each student (Part II)
4LESSON
FOLLOWING THE INTERVIEW

GETTING THE JOB | LESSON 4: FOLLOWING THE INTERVIEW
overcomingobstacles.org
Session 1: One copy of the “Parts of a Business Letter” activity sheet for each student (Part II)

GETTING THE JOB | LESSON 4: FOLLOWING THE INTERVIEW
overcomingobstacles.org
SESSION 1
Hold up the wrapped boxes. Ask students which of the presents they would want to receive. Students will respond that the beautifully wrapped package makes a better impression. Reveal to the class that both boxes contain the same item, but, as the class noted, the beautiful wrapping is more desirable and makes that package more appealing.
Explain to students that when they close an interview and follow-up, they need to make a good final impression. Explain that it just might make them stand out from the crowd.
Starter (3 minutes)
Purpose: Students learn the importance of interview follow-up.
1. Students identify the final steps of the interview process.
Explain that the next step of the interview process is to find out when the company expects to make a decision about hiring. Suggest that students ask an interviewer one of the following questions before leaving:
Would you like me to follow up with you next week?
Can I expect to hear from you or may I contact you?
Explain that if an interviewer states that they will call, students should make clear when and where they can be reached.
2. Students learn to conclude their interview with a thank-you.
Tell students to imagine that they answered every question well during an interview because they were prepared. Ask students to describe what they would do as the interview is ending.
Remind students that their interviewer has taken time out of the day to find out more about the student, so it’s important to acknowledge that. Elicit from the class that this is the time to thank the person for the opportunity to meet with them and learn about the company. Point out that this is an appropriate time to shake hands again.
3. Students practice what to do at the end of an interview.
Ask students to find a partner. Explain that the pairs will have five minutes to practice the following steps to ending an interview well:
Part I The End (20 minutes)

GETTING THE JOB | LESSON 4: FOLLOWING THE INTERVIEW
overcomingobstacles.org
State when and where the employer can reach you.
Ask about making a follow-up telephone call.
Thank the interviewer for their time.
Shake the interviewer’s hand.
Have the partners take turns playing interviewer and interviewee.
When students finish, ask them to identify what was done well and what could be improved.
Purpose: Students identify the elements of strong thank-you letters and incorporate these elements into their own letters.
1. Students recognize the value of thank-you letters.
Explain to students that even after they have left an interview, there is still more they can do to increase their chances of landing the job. Ask students to identify a step that they could take to impress an interviewer. (Students should say they have to write a thank-you letter.)
Tell students that the best time to write the letter is immediately following their meeting, while the details of the interview are still fresh in their minds. They should send out the letter a day or two after the interview.
Ask students to identify the purpose of writing thank-you letters. Establish that thank-you letters are an opportunity for students to emphasize their strengths as they relate to a job, add any information that they may have forgotten to mention, express appreciation to the interviewer, and reiterate their interest in a job opening.
2. Students identify the parts of a thank-you letter.
Distribute the “Interview Thank-You Letter” activity sheet to each student. Ask students to study it carefully and identify the parts of the letter.
Help students identify the heading, inside address, salutation, body, complimentary closing, and signature. Students should also recognize that they should use a computer to write their thank-you letters.
Distribute the “Parts of a Business Letter” activity sheet to each student. Read the explanations out loud. Explain to students that they are to keep and use the handout to help them write business letters in the future.
3. Students examine the content of a thank-you letter.
Part II Thank You, Thank You (25 minutes)

GETTING THE JOB | LESSON 4: FOLLOWING THE INTERVIEW
overcomingobstacles.org
Explain to students that a good thank-you letter has the following content:
A thank-you comment
Confirmation of interest in the job
Reiteration of how the student’s strengths and talents relate to the job
Any further information that may be helpful or important
A specific reference to the interview
A statement confirming the student’s willingness to answer any other questions
Follow-up information about where and when to contact the student
Ask volunteers to read the corresponding sections from the sample letter.
4. Students write a draft of a thank-you letter.
Instruct students to use the remaining class time to draft thank-you letters to their role-playing partners from Part I.
Explain that they will revise and polish their letters in the next session.

GETTING THE JOB | LESSON 4: FOLLOWING THE INTERVIEW
overcomingobstacles.org
SESSION 2
Purpose: Students edit and revise their thank-you letters.
1. Students polish their thank-you letters.
Have students work with a partner to revise and edit their thank-you letters. Ask students to exchange drafts and read the letters twice. First, have them read for content and meaning. Then, have them read for errors in spelling, mechanics, capitalization, grammar, and business-letter format. Instruct them to write suggestions and corrections neatly on the draft.
2. Students write a final draft of their thank-you letters.
Ask students to write a revised copy of their thank-you letters. Suggest that students keep their revised thank-you letters as a model to modify and use after a real interview.
Part I Thank You, Thank You (continued) (20 minutes)
Purpose: Students learn the importance of follow-up telephone calls.
1. Students learn the purpose of a follow-up phone call.
Explain to students that a follow-up phone call has a purpose similar to a thank-you letter. Ask students to identify how the two are similar. (Students should mention these similar components: an opportunity to emphasize their strengths, provide additional information, express appreciation, correct any false impressions that may have been created in the interview, etc.)
Have students suggest possible topics for discussion in a follow-up telephone call. (Students might suggest: ask if the interviewer received the thank-you letter; ask if the interviewer has any more questions; reemphasize strengths and talents; express continuing interest in the position; correct or improve any impressions that were not favorable.)
2. Students practice follow-up telephone calls.
Have students work in pairs to write scripts for follow-up phone calls. Allow students 10 minutes to use these scripts to practice placing the follow-up phone calls.
Have two or three pairs who did especially well present their phone calls to the class. Ask students to critique the performances and point out what was done well.
Part II Make the Call (25 minutes)

GETTING THE JOB | LESSON 4: FOLLOWING THE INTERVIEW
overcomingobstacles.org
Ask students to explain the roles of thank-you letters and follow-up phone calls in interviews. Elicit from students the following key points that were taught in this lesson:
In ending an interview, it is important to be confident and to thank the interviewer for their time.
A post-interview thank-you letter provides an opportunity to reemphasize strengths and to clarify any points made during an interview.
A follow-up phone call is an opportunity to express continuing interest in a position and allows an interviewer to ask additional questions.
Conclusion (3 minutes)
SESSION 1
1. List three things you should say or do at the end of an interview.
2. Why should you write a thank-you letter?
3. What should be in a thank-you letter?
SESSION 2
1. Why should you make a follow-up phone call after an interview?
2. How are follow-up phone calls and thank-you letters similar?
3. List four possible questions or topics to discuss in a follow-up call.
Student Assessment

GETTING THE JOB | LESSON 4: FOLLOWING THE INTERVIEW
overcomingobstacles.org
LESSON EXTENSIONS
Using Quotations
“A friendship can weather most things and thrive in thin soil; but it needs a little mulch of letters and
phone calls…just to save it from drying out completely.” —Pam Brown
Have students talk about the “mulch” of friendship and the ways in which this idea can be applied to
business relationships.
Addressing Multiple Learning Styles
Have students write rap lyrics that reiterate their qualifications and thank their interviewer.
Have volunteers read or perform their lyrics aloud. Have students explain why reiterating their
qualifications is important.
Writing in Your Journal
Have students write about the importance of a thank-you they gave or received.
Have volunteers share their work in small groups.
Using Technology
Have students visit www.cover-letters.com. There are many sample letters on this site, including
various thank-you letters.
Have students summarize one letter from the site, stating why they think the letter would (or wouldn’t)
help the writer get the job.

GETTING THE JOB | LESSON 4: FOLLOWING THE INTERVIEW
overcomingobstacles.org
Homework
Have students write a thank-you note to a mentor or community member who has made a presentation
to the class.
Have volunteers read their letters out loud and talk about how important it is to let people who’ve been
helpful know that their efforts are appreciated. Tell students to exchange and proofread their letters.
Additional Resources
Have students review The Art of Thank You: Crafting Notes of Gratitude by Connie Leas to investigate
how to write thank-you notes.
With the class, chart similarities and differences between personal thank-yous and those written for
business purposes.

GETTING THE JOB | FOLLOWING THE INTERVIEW©
20
21
Ove
rco
min
g O
bst
acle
s
2051 Glenview Terrace Brighton, MA 02135
February 8, 20XX
Mr. Ricardo DominguezDominguez Boots and Shoes 304 Llewellen DriveBrighton, MA 02135
Dear Mr. Dominguez:
Thank you for taking the time to meet with me yesterday. I was impressed by your store. I am very interested in the sales position that is available. As I mentioned during the interview, my time selling candy door-to-door for my soccer team has given me great experience in customer service. Working at Dominguez Boots and Shoes would be an excellent way for me to develop my sales skills.
I appreciate your considering me for the sales position. I will contact you later in the week to answer any questions you may have. If you would like to contact me before then, please call me at (617) 555-9625.
Thank you for your time.
Sincerely,
Kameika MooreKameika Moore
INTERVIEW THANK-YOU LETTER
THANK-YOU COMMENT
CONFIRMATION OF YOUR INTEREST IN THE JOB; HIGHLIGHT YOUR STRENGTHS
FOLLOW-UP INFORMATION
overcomingobstacles.org

GETTING THE JOB | FOLLOWING THE INTERVIEW©
20
21
Ove
rco
min
g O
bst
acle
s
PARTS OF A BUSINESS LETTER
The heading gives the writer’s complete address and the date.
The inside address gives the recipient’s name and address.
• Call the company if you are not sure of addresses or spelling so that
your letter has the correct information.
The salutation begins with the word “Dear” and ends with a colon, not a
comma.
• If you cannot get the person’s name, use “Dear” plus the person’s
title, such as “Dear Personnel Manager.”
The body consists of single-spaced paragraphs with double spacing,
not indents, between paragraphs.
• If the body goes to a second page, put the recipient’s name at the
top left, the number 2 in the center, and the date at the right
margin.
The closing includes phrases such as “Sincerely” or “Yours truly” fol-
lowed by a comma.
The signature includes both the writer’s handwritten and typed name.
overcomingobstacles.orgPowered by TCPDF (www.tcpdf.org)

GETTING THE JOB | LESSON 5: RESPONDING TO A JOB OFFER
overcomingobstacles.org
AGENDA
Starter
Gathering Information
Pro/Con
Choose and Act
Conclusion
Student Assessment
Objectives
Students will practice gathering the information that will help them decide whether to accept a
job offer.
Students will practice weighing their options and using a pro/con list.
Students will practice making a decision and acting on it.
Students will identify how to appropriately interact with an employer when they are offered a
job.
Materials Needed
One copy of the “Job Offers” activity sheet for each student (Part I)
5LESSON
RESPONDING TO A JOB OFFER

GETTING THE JOB | LESSON 5: RESPONDING TO A JOB OFFER
overcomingobstacles.org
Say to students, “Congratulations! I’d like to offer you a job as my assistant. Your hours are Monday through Friday from 3 p.m. to 4 p.m. and Saturdays from 11 a.m. to 1 p.m. You’ll help me prepare for classes, make copies, and clean up the classroom each day. Your pay will be $8.00 per hour.”
Ask students if they would accept this job offer. Why or why not?
Explain to students that almost all job offers will have some trade-offs. For example, the pay may be higher than they expected, but there are fewer hours, so their total income is less than they wanted. They might also find a job with ideal hours and responsibilities but very low pay.
Point out to students that they will need to use their decision-making skills when deciding whether to accept a job.
Starter (3 minutes)
Purpose: Students practice gathering the information that will help them decide whether to accept a job offer.
1. Students are reminded that the first step of the decision making process is gathering information.
Ask students, “What should you do first when trying to decide whether to accept a job?”
Remind them that when making any decision, the first thing to do is gather information. Explain that though they may have been given information about the job in the offer itself, they may need to find other information before taking the job.
2. Students identify the information that is important when making a decision about a job offer.
Distribute copies of the “Job Offers” activity sheet. Ask students to count off by threes so that each person has either a number one, two, or three.
Tell students, “Ones, you have been offered the first job on the activity sheet. Twos, you have been offered the second job. Threes, you have been offered the third job.”
Tell students to take out their “Ideal Job Equation” activity sheet from “Lesson 2: Exploring Job Possibilities” of Module Eight: A Game Plan for Work. Ask them to take a few minutes to compare the information on their “Ideal Job Equation” activity sheet with their new job offer.
Ask, “What do you need to know about the job before you can make a decision?” Write responses on the board.
Part I Gathering Information (10 minutes)

GETTING THE JOB | LESSON 5: RESPONDING TO A JOB OFFER
overcomingobstacles.org
3. Students learn how to get answers to their questions.
Ask students how they would get answers to these questions. Explain that they can get some answers by talking to people they know. If it is important enough, they can even call the company, particularly the person for whom they would be working, to ask the question. Remind students that gathering information is an important part of the decision making process.
Purpose: Students practice weighing their options and using a pro/con list.
1. Students make a pro/con list.
Ask students to identify the next step of the decision making process. Lead them to the understanding that the next step is to weigh their options. One way to do that is to use a pro/con list. Explain that by investigating jobs carefully, students will not put themselves in a position where they might not do their best because they don’t like what they’re doing.
Ask students to take a piece of paper and fold it in half lengthwise. Have students title one half “Pros” and the other half “Cons.” Explain to students that the positive reasons for taking the job go in the “Pros” column, and the reasons why the job may not be right for them go in the “Cons” column.
Instruct students to complete the pro/con list for their job number.
2. Students recognize the importance of using pro/con lists.
After students have completed the list, explain that they now have an idea of whether the job is likely to be a positive or negative opportunity. Organizing the information in this fashion makes it easier to decide whether to accept or turn down the job offer.
Point out to students that they probably won’t find a job that meets all of their criteria, so they should pursue a job that satisfies most of the criteria.
Part II Pro/Con (15 minutes)
Purpose: Students recognize how to appropriately interact with an employer when they are offered a job and practice making a decision and acting on it.
1. Students identify how to respond professionally to a job offer.
Part III Choose and Act (20 minutes)

GETTING THE JOB | LESSON 5: RESPONDING TO A JOB OFFER
overcomingobstacles.org
Ask students to identify what they can do when they receive a job offer but need to take some time to weigh their options. What should they tell the prospective employer? Elicit student suggestions. Lead students to the understanding that it is important to thank the employer for the offer and tell them a specific date by which they will provide an answer.
Explain to students that they should always call a prospective employer back to tell them their decision. Point out that even if they do not take the job, they should thank the individual for the opportunity to have interviewed for the job and to have met them.
2. Students make a job choice.
Have students identify, by a show of hands, if they would take the job offered on the activity sheet. Instruct students to give a few reasons why they are or are not taking the job.
3. Students role-play calling a prospective employer to accept or decline a job offer.
Have pairs of students role-play calling employers to let them know when to expect a response to a job offer. Allow students a few minutes to practice. Then, ask students to role-play calling to accept or refuse the position.
Ask pairs that did an exceptional job to demonstrate the telephone calls for the class.
Ask students to describe how to decide whether to accept a job offer. Ask students to describe the information they should gather before making a decision about a job offer. Elicit from students the following key points that were taught in this lesson:
Use the steps of the decision making process to decide whether to accept a job.
Choose a job that is right for you.
Always call the person who interviewed you with your decision and thank them for the interview.
Conclusion (2 minutes)
1. What factors are important to you in deciding whether to accept a job?
2. Describe how you would accept or reject a job offer in a professional manner.
Student Assessment

GETTING THE JOB | LESSON 5: RESPONDING TO A JOB OFFER
overcomingobstacles.org
LESSON EXTENSIONS
Using Quotations
“You are free to choose, but the choices you make today will determine what you will have, be, and do in
the tomorrow of your life.” —Zig Ziglar
Have students explain why they agree or disagree with this statement. Discuss the idea that although
current choices will have a big impact on their lives, not everyone knows their ultimate destination.
Addressing Multiple Learning Styles
Arrange for members of the class to visit parents, mentors, and community members in the workplace.
Have students make a list of the job activities observed, the skills needed for those jobs, and ways in
which the jobs matched or did not match their needs and goals.
Writing in Your Journal
Have students write about their first day of work. If students have never held a job, have them write
about what they anticipate their first day will be like.
Have students discuss the anxiety and expectations of their first day at a new job.
Additional Resources
Have students read The Back Door Guide to Short-Term Job Adventures by Michael Landes, which
includes information about internships, seasonal jobs, volunteering, etc.
Have students report on the opportunity of their choice. If possible, have them write or call for more
information, read brochures, interview people who’ve participated, etc.

GETTING THE JOB | LESSON 5: RESPONDING TO A JOB OFFER
overcomingobstacles.org
Homework
Have students think of people who have presented them with opportunities or helped them in their job
search. Then, have them mark two dates within the coming year to send updates to these people.
Students should mail postcards or letters to these individuals on these dates. They should bring copies
of these updates to class when they mail them.
Additional Resources
Have students invite members of the community to class to talk about jobs in their field. Be sure they
include local businesses that might have job opportunities for teens.
Have students write summaries of the opportunities and job requirements covered during the day.

GETTING THE JOB | RESPONDING TO A JOB OFFER©
20
21
Ove
rco
min
g O
bst
acle
s
WHAT I WANT IN A JOB
In the space below, write down the key factors you want in a job as shown on your “Ideal Job Equation” activity sheet. Then compare them to the job descriptions above.
JOB OFFERS
Pet Store Attendant
Responsibilities include caring for ani-mals, cleaning the cages and tanks daily, and sweeping floors. This is an entry-level position, but there is an opportunity for promotion. You can set your own schedule, the hours are flexible, but you can work no more than 8 hours/week. There is a one-month probationary peri-od. Experience with animals is preferred but not required. The salary is $10/hour.
Bank Teller
Responsibilities include working at a teller window assisting clients with basic transactions. Three weeks of training required. Training is held Monday–Friday from 3:00 to 5:00 p.m. Teller hours are available from 8:00 a.m. to 5:00 p.m. on Saturdays. Promotion avail-able after six months. Professional envi-ronment. Distance from home to work is 40 minutes. Starting salary is $12/hour.
Counter Service/Cashier
Responsibilities include customer ser-vice, maintaining seating area, work-ing the cash register, receiving store deliveries, and cleaning the stock room. Must work a minimum of three clos-ing shifts per week (5:00 p.m. to 10:30 p.m.) and one full Saturday per month. Free meal for all shifts that exceed five hours. Starts immediately. The salary is $9/hour.
Job #1 Job #2
Job #3
overcomingobstacles.orgPowered by TCPDF (www.tcpdf.org)

PART III
DEVELOPING RELATED SKILLS
ON-THE-JOB

TABLE OF CONTENTS
PART III: DEVELOPING RELATED SKILLS
1. Developing a Positive Work Ethic 523
2. Working with Others 531
3. Communicating on the Job 543
4. Managing Time, Money, & People 553
5. Advancing on the Job 562
On-the-Job

ON-THE-JOB | LESSON 1: DEVELOPING A POSITIVE WORK ETHIC
overcomingobstacles.org
AGENDA
Starter
Passes
Learning the Rules
Following the Rules
Conclusion
Student Assessment
Objectives
Students will discover the importance of learning the rules of the workplace.
Students will learn the types of rules they are likely to encounter in the workplace.
Students will identify and define a positive work ethic.
Students will practice following company rules and having a positive work ethic.
Materials Needed
Two pens for each circle of students (Part I)
1LESSON
DEVELOPING A POSITIVE WORK ETHIC

ON-THE-JOB | LESSON 1: DEVELOPING A POSITIVE WORK ETHIC
overcomingobstacles.org
Ask a student what they like to be called. After the student responds, say, “I think I’ll just call you Herman (or another incorrect name).” Ask the student to explain how that makes them feel. Explain that most people would feel annoyed, surprised, and even angry to be intentionally called by the wrong name.
Ask the class, “Why is the way you are addressed so important?” Suggest that it is about respect. We want people to call us the name with which we are comfortable. If someone doesn’t, it feels as though they don't respect us enough to use our name correctly.
Point out that the same is true in the workplace, especially with a supervisor. It is important to find out what your supervisor and coworkers like to be called. Do they prefer titles like Mr. or Ms.? Do they want to be called by their first names? Explain that this is one of the rules of the workplace that students need to know. In this lesson, the class will learn about other rules that are important to follow if they want to be successful.
Starter (3 minutes)
Purpose: Students discover the importance of learning the rules of the workplace and identify the types of rules they are likely to encounter.
1. Students participate in a game to learn the importance of knowing the rules of the workplace.
Ask students to sit in a circle. You should also sit in the circle. If the class is large, form smaller circles and explain the game to a student leader. Each circle of students will need two pens.
Explain the game:
The goal is to figure out how to pass the two pens around the circle correctly.
Explain that you are going to pass the pens in the proper manner. Tell students to pay attention to what you do because they have to copy it exactly in order to pass the pens correctly.
Emphasize that no one, except for you, is to communicate with anyone in any way during the game. Tell students that they must concentrate on identifying the proper way to pass the pens.
Pass the pens to a person in the circle. When you pass them, be sure that your legs are crossed in some manner. Do not call attention to this.
Each time a student passes the pens, say whether the pass was correct or not. If students cross their legs in the same manner as you while they pass the pens, they have completed the pass correctly. If a student does not cross their legs when passing the pens, the pass is incorrect.
Part I Passes (15 minutes)

ON-THE-JOB | LESSON 1: DEVELOPING A POSITIVE WORK ETHIC
overcomingobstacles.org
After five minutes, stop the game and ask students to name the rule that defined a correct pass. If students have not recognized that their legs must be crossed when passing the pens, tell them.
Ask the class to describe how it felt when they were trying to figure out how to pass the pens. Was it frustrating? Allow students to respond.
Lead students to the understanding that it is important to know the rules of a game if they are going to play it well. The same idea is true in the workplace. If they don’t know the rules or what their employer expects from them, they might not behave or work properly. Explain that they need to find out the rules and procedures of their job before they break them by mistake.
2. Students brainstorm the types of rules they might encounter in the workplace.
Ask students to list the kinds of workplace rules they might need to learn. Write student responses on the board. (Students might respond: vacation and holiday policies; time allowed for lunch; personal use of telephones and computers; break times; where to put coats and bags; whether personal pictures, mementos, and plants are allowed.)
3. Students discover how to find out the rules of the workplace.
Ask students to suggest ways to find the answers to these kinds of issues. Lead students to the understanding that they should ask their supervisor and coworkers or obtain a copy of the company’s policies and rules.
Purpose: Students learn about having a positive work ethic.
1. Students recognize that ethical behavior in the workplace includes punctuality.
Explain to students that in addition to the rules they discussed, there are more general rules for the workplace that everyone should follow in order to be a good employee.
Ask students to imagine that they’re throwing a surprise party and have asked their guests to come at a specific time. Instead, the guests all arrive at different times. Ask, “Why is their lateness a problem?” (Students should respond that the surprise aspect of the party would be ruined.) Direct students to the understanding that being on time is important.
Point out that just as it’s important for everyone to arrive at a surprise party on time, we arrive at our jobs on time so that the business operates smoothly. Lead students to identify punctuality as an important rule.
Part II Learning the Rules (10 minutes)

ON-THE-JOB | LESSON 1: DEVELOPING A POSITIVE WORK ETHIC
overcomingobstacles.org
Explain to students that being on time shows they understand that it’s important to fulfill their responsibilities and that they want to help keep things running smoothly. It also shows respect for company policy and for coworkers.
2. Students recognize that telling their employers when they are sick is important.
Ask students to imagine that they plan to meet a friend at the movies, but the friend never shows up. The friend calls two days later, saying she was sick. Ask students to consider how they would feel and what they would think about their friend.
Lead students to understand that they would feel like the friend didn’t think they were important enough to call. Explain that the same is true for times when they’re sick and can’t go to work. If they don’t call in, their boss will think that the job isn’t important to them.
3. Students recognize that taking company property is stealing.
Tell students to imagine that a friend visits their home and, after the friend leaves, they realize that their headphones are missing. Ask students to share what they would think. (Student responses should mention stealing and that they’d probably be angry.)
Point out that the same is true on the job. Taking supplies home from the job for personal use or making personal phone calls is stealing because the company has to pay for those things. Point out to students that if they need to make a phone call in an emergency, they should explain the situation to a supervisor and ask to make a brief call. Otherwise, making phone calls or taking supplies home can cause difficulties on the job.
Purpose: Students practice following company rules and having a positive work ethic.
1. Students recognize that decision making is part of ethical workplace behavior.
Explain to students that sometimes it’s hard to follow the rules, especially when other people are breaking them and it seems okay to disobey them, too. Point out that students need to consider whether they are willing to jeopardize their job and risk being fired. Explain that they have to weigh the options and decide whether what they get from breaking a rule is more important than having their job. Remind them that another potential consequence is incurring the disapproval of their boss or other coworkers.
Tell students that this situation calls for decision making. Point out that if having the job is more important, then it’s not worth breaking the rules.
2. Students role-play workplace situations in which they must decide whether to break a company rule.
Part III Following the Rules (20 minutes)

ON-THE-JOB | LESSON 1: DEVELOPING A POSITIVE WORK ETHIC
overcomingobstacles.org
Divide students into pairs. Explain to students that, with their partners, they will role-play a scenario in which they have to decide whether to break one of the company rules. Remind students to follow the steps of the decision making process.
Ask students to use one of the following scenarios or create their own:
You’re working at an ice cream parlor, and everyone else takes home a pint of ice cream when they leave. Your coworker is taking some and asks if you want a pint.
You’re at work, and you want to call your friend who lives in a different area code. Your coworker tells you about a time that he made a long-distance call on the phone at work and didn’t get caught.
A friend’s family has invited you to go to the mountains with them for the weekend. However, the people who invited you are leaving today, and you have no other means of transportation. You’re supposed to work tonight. Your friend tells you to call in sick. You know that there will be little coverage at work tonight.
Remind students about peer pressure and how to reject peer pressure while maintaining respect for themselves and their peers.
Have students perform their role plays for the class.
3. Students analyze their scenarios.
When students have finished performing, ask them the following questions:
Was it difficult to decide what to do in these situations? Why or why not?
How would you respond to your coworker if they were encouraging you to break a rule?
Discuss the variety of responses with the class.

ON-THE-JOB | LESSON 1: DEVELOPING A POSITIVE WORK ETHIC
overcomingobstacles.org
Close this session by reminding students that when they have worked hard to get a job, following the rules will help them keep the job. Following the rules can also get them noticed by supervisors and result in a promotion. Elicit from students the following key points that were taught in this lesson:
Learn the rules of the company and follow them.
Good employees also follow unwritten rules of personal conduct.
It may be tempting to break the rules, especially when other people are doing so, but following the rules shows self-respect and respect for the company.
Conclusion (2 minutes)
1. Define “positive work ethic” and explain why having one is important.
2. List five types of rules you might encounter in the workplace.
3. Why is it important to learn workplace rules?
Student Assessment

ON-THE-JOB | LESSON 1: DEVELOPING A POSITIVE WORK ETHIC
overcomingobstacles.org
LESSON EXTENSIONS
Using Quotations
“Our labour preserves us from three great evils—weariness, vice, and want.” —Voltaire, French writer
Tell students that a full-time workweek generally consists of 40 hours over five days. Ask, “Is 40 hours
long enough or too long? What would be better: 10-hour days over four days or eight-hour days over
five days? How can having a full-time job benefit you?”
Addressing Multiple Learning Styles
Have students describe a time when they were treated poorly by an employee who should have been
assisting them (e.g., at a store or fast-food restaurant). Have groups of students illustrate (in words,
movement, or images) one of these situations.
Discuss each group’s work. Have students identify how these situations might reflect a poor work ethic.
Ask, “How might having a poor work ethic affect you personally?”
Writing in Your Journal
Have students write about how they feel when people break community rules, such as no littering. Ask
them to think about community rules in the workplace.
Discuss how adhering to rules can affect the workplace.
Using Technology
Have students visit https://www.thebalance.com/rules-for-usingcell-phones-at-work-526258 for rules
about cell phone use while on the job. Ask them to identify how breaking these rules could affect them.

ON-THE-JOB | LESSON 1: DEVELOPING A POSITIVE WORK ETHIC
overcomingobstacles.org
Homework
Tell students that the military is known for rules and discipline. Review specifics if possible.
Have students write a paragraph about how such a rigid structure would affect the workplace.
Additional Resources
Have students consult etiquette books and note the different tips they offer.
Brainstorm with students as to why common courtesy is important in the workplace. It is also important
to realize that different cultures have different rules of etiquette. Have students find out why some of
these rules exist.

ON-THE-JOB | LESSON 2: WORKING WITH OTHERS
overcomingobstacles.org
AGENDA
SESSION 1
Starter
Workplace Dos
Workplace Don'ts
SESSION 2
Workplace Don'ts (continued)
Practice, Practice, Practice
Conclusion
Student Assessment
Objectives
Students will identify positive behaviors in the workplace.
Students will identify negative behaviors in the workplace and recognize that constructive
criticism can correct those behaviors.
Students will practice their skills for working well with coworkers.
Materials Needed
Session 1: Two Hula-Hoops (Part I)
Session 1: Dictionary (Part I)
Session 2: Dictionary (Part I)
2LESSON
WORKING WITH OTHERS

ON-THE-JOB | LESSON 2: WORKING WITH OTHERS
overcomingobstacles.org
Session 2: One copy of the “Workplace Role Plays” activity sheet for each student (Part II)

ON-THE-JOB | LESSON 2: WORKING WITH OTHERS
overcomingobstacles.org
SESSION 1
Ask students, “If you had to build a skyscraper, how would you do it?” Allow students to offer responses.
Explain to students that one thing is certain: the construction of the Empire State Building and all other skyscrapers required teamwork. Tell students that this lesson will help them learn the skills that they need to cooperate with coworkers and keep a positive attitude on the job.
Starter (3 minutes)
Purpose: Students identify the importance of working together, offering and receiving praise, and taking responsibility in the workplace.
1. Students learn the importance of teamwork.
Tell students that in this activity they are going to develop some positive workplace behaviors.
Divide the class into two groups. Give students in both groups the following directions:
As a group, your goal is to raise the Hula-Hoop to eye level and then lower it to the ground.
You may only use your index fingers to raise and lower the hoop. No other fingers may touch the hoop. Your index fingers must be kept flat and cannot hook around the hoop.
You may talk as you play. You can do whatever you think will allow you to raise and lower the hoop quickly.
If you drop the hoop, you must start over.
The first team to raise and lower the hoop wins.
Have the groups form two circles and keep their hands at waist level. Tell them to extend their index fingers. Place the hula-hoops on their index fingers. Then, tell the groups to take two or three minutes to plan how to achieve the goal. After the groups have agreed on how to raise and lower the hoop, tell them to begin.
Stop the game when one team has finished. Ask the first team to finish to explain what they did to win the game. Allow students to respond. Lead students to the understanding that though they may have had many different strategies, they all had to work together and communicate effectively to accomplish their goal.
Part I Workplace Dos (35 minutes)

ON-THE-JOB | LESSON 2: WORKING WITH OTHERS
overcomingobstacles.org
Ask students to imagine that their group is the kitchen crew at a local restaurant. It’s lunch hour, and the restaurant is filled with hungry people who need to get back to work quickly. The boss is tense, and he is yelling at them to hurry. What could they do in this situation to make things run smoothly and efficiently? Allow the groups two or three minutes to brainstorm courses of action.
Ask each group to present a solution. Write their responses on the board. When students have presented their ideas, encourage them to realize that working together on the job makes things go much more smoothly and effectively and keeps relationships with coworkers positive.
Ask students if teamwork has another result. Prompt them by asking them to consider how they felt while they were trying to raise and lower the Hula-Hoops. Elicit from students that they were having fun and that working together makes things—including jobs—more enjoyable.
2. Students recognize the power of praise in the workplace.
Ask students to imagine that they played an incredible game of basketball, did everything right, and scored lots of points, but no one congratulated them or acknowledged how well they played. How would they feel?
Point out to students that we don’t do things well just because we want praise. We do them because people with self-respect always do their best at everything they do. Emphasize, however, that when we do something well, it’s nice for people to notice. Praise can increase our self-respect. Lead students to understand that receiving a compliment on the job can show people that they are respected and that the job they are doing is appreciated.
3. Students recognize the importance of personal accountability in the workplace.
Say to students:
Imagine that your favorite clothing brand has just made a new jacket that you want. Your best friend already owns it. You don’t have the cash to buy it right now, so you borrow your friend’s jacket for the afternoon and evening. You promise to be careful with it and to return it tomorrow. When you get home, you’re about to put the jacket into the closet when you accidentally knock your soda over and spill it on the jacket! You try to clean it up, but it’s too late. It’s ruined. You don’t have enough money to replace it. What are you going to do?
Write their responses on the board.
Ask students to speculate on the outcomes of each action they suggested. Students should understand that if they choose to lie, the friend could find out the truth and never trust the student again. The consequences of honesty are that the friend will be upset but will probably get over it and forgive the student.
Ask students to consider if they behave differently with a person they do not trust. (Student responses might include that they don’t tell the person things, they don’t count on the person, and they don’t respect them.)

ON-THE-JOB | LESSON 2: WORKING WITH OTHERS
overcomingobstacles.org
Ask students to translate this to the workplace. If their coworkers felt this way about them, what would work be like? Lead students to understand that it would probably not be a comfortable place to work.
It’s crucial to develop trust with the people with whom we work. At work, we need credibility. Ask a volunteer to look up the word “credibility.” Credibility is trustworthiness. Explain that when students have credibility, people respect them and believe what they say. Ask students to suggest ways to build credibility, or trustworthiness. Write student responses on the board. (Students might respond: behaving honestly and openly, admitting when you have made a mistake or need help, being friendly.)
Purpose: Students identify negative behaviors in the workplace and learn how to build credibility.
1. Students predict behaviors that are detrimental in the workplace.
Explain to students that they will now be examining some behaviors that are not acceptable in the workplace.
Ask students to predict what some of these behaviors might be. Write their responses on the board. Save this list for use in Session 2.
2. Students recognize that rudeness and negativity in the workplace are destructive.
Ask students to define the phrase “What goes around comes around.” Lead students to the understanding that when they praise other people and show them respect, they will receive respect in return. Point out that it also means that if students are disrespectful, that behavior will be noticed and returned as well.
Ask students how disrespect might show up in the workplace. (Students might respond: being rude, being overly critical, gossiping, and having a bad attitude.)
Summarize by pointing out that one of the best ways to build credibility is to show that you’re accountable for your actions by taking responsibility for them, whether they have positive or negative results. Sometimes, this means admitting that you made a mistake—like admitting to your friend that you ruined the jacket. Just like in that situation, the odds are always better when you tell the truth.
Part II Workplace Don'ts (10 minutes)

ON-THE-JOB | LESSON 2: WORKING WITH OTHERS
overcomingobstacles.org
SESSION 2
Purpose: Students identify negative behaviors in the workplace and learn that constructive criticism can correct those behaviors.
1. Students review workplace dos and don’ts.
Before class begins, write the following questions on the board:
How old are they?
What do they like to eat?
What did they do last weekend?
Briefly review the previous session. Elicit from students the importance of teamwork, praise, accountability, and the avoidance of rudeness and negativity.
2. Students recognize the danger of office gossip.
Explain to students that there is another behavior in the workplace that can be destructive: gossip. Tell students that they will play a game to see the problems that gossip can cause.
Divide the class into groups of four. Ask for a volunteer from each group. Give each volunteer the following directions: “You must pretend that you’re invisible. You can see and hear everything that’s going on, but you can’t do or say anything about it.”
Give these directions to the other students: “Your job is to have a conversation about the volunteer. You’re going to discuss the three questions on the board. If you don’t know the answers, you can guess or make them up.” Remind students to maintain school-appropriate behavior.
Instruct students to begin.
After each group has answered the questions about their volunteer, ask:
How many of you made up answers when you didn’t know them?
Volunteers, did the people talking about you answer the questions correctly? How did you feel when people were talking about you?
Lead students to understand that answering questions about other people can be risky. If you give wrong answers, you may be spreading gossip.
Part I Workplace Don'ts (continued) (20 minutes)
ON-THE-JOB | LESSON 2: WORKING WITH OTHERS
overcomingobstacles.org
Ask the class to define “gossip.” Lead students to understand that gossip is rumor—information spread about people without their knowledge that is not necessarily true or kind. Explain that simply passing on information that you have heard, whether it is true or false, is gossiping.
Help students to recognize that gossiping is disrespectful. It puts another person in a powerless position because the individual cannot correct the information. It’s often difficult to figure out the real story from gossip, so the information may very well be untrue.
Ask students to think of the problems that workplace gossip can cause. (Students might respond: if someone feels you can’t be trusted, they may not share important information with you; if the supervisor and the people you work with don’t think you’re trustworthy, you won’t receive additional opportunities; gossip is bad for morale and office culture; gossip can make it difficult to keep a positive attitude.)
3. Students review their list of poor workplace behaviors.
Call students’ attention to the list of negative behaviors on the board. Have them discuss what they learned about rudeness, negativity, criticism, disrespect, and gossip.
Point out that positive behavior in the workplace is similar to good behavior anywhere: courteous and respectful words and actions are always appropriate.
4. Students learn about constructive criticism.
Ask students to describe how they would feel if someone were to criticize them constantly. Lead students to recognize that being criticized all the time can hurt one’s self-esteem. Explain that there are ways to give criticism constructively that actually help people to improve instead of making them feel bad about themselves and their contributions.
Give students the following scenario:
You’re working in an office, and one of your tasks is to file a stack of papers. You’re in a hurry, so you make all the files and you put the papers in the correct folders, but you don’t put the files themselves in alphabetical order. Your boss finds them and feels that you could have done a more complete job. How could your boss best convey this to you?
Give students 30 seconds to write down their answers. Ask volunteers to share their responses. Write their answers on the board.
Ask, “What’s the difference between a comment like ‘This is terrible! Don’t you know how to alphabetize?’ and ‘Next time, would you please alphabetize the files?’” Note that it is most helpful to point out a specific behavior and offer a suggestion for improvement to the person you would like to correct. Point out that this is called “constructive criticism” or “feedback.”

ON-THE-JOB | LESSON 2: WORKING WITH OTHERS
overcomingobstacles.org
Ask students what the word “constructive” means. If students do not know, ask a volunteer to look it up in a dictionary. Students should recognize that “constructive” means useful and helpful. Explain that constructive criticism helps a person to understand mistakes in order to improve the next time.
Point out that constructive criticism helps people improve themselves and their performance on the job. While people usually don’t want to hear any criticism, constructive comments help people improve without feeling embarrassed or angry.
Purpose: Students practice their skills for working well with coworkers.
1. Students work in groups to prepare scenarios about the workplace.
Have students form groups of three or four.
Explain to students that they will role-play some scenarios about working well with coworkers. Instruct students to create relevant scenarios or adapt the ones found on the “Workplace Role Plays” activity sheet. Remind students to consider what they have learned about positive and negative workplace behaviors.
2. Students present their role plays.
Allow students about five minutes to rehearse their role plays; then, ask each group to perform its role play for the class.
3. Students analyze the role plays.
When students have finished performing, discuss the role plays with the class. Ask the following questions:
Did you find it easy or difficult to handle these situations?
What did you think about as you tried to find good solutions for these situations?
What did you or others do well?
What could you or others have done better?
Sum up the role-playing exercise by stating that working well with others takes a lot of practice and patience. Remind students that keeping a good attitude makes it easier. People will appreciate their positive approach, and that will lead to more opportunities, promotions, and good recommendations.
Part II Practice, Practice, Practice (30 minutes)
ON-THE-JOB | LESSON 2: WORKING WITH OTHERS
overcomingobstacles.org
Ask students to list positive behaviors that improve the workplace. Elicit from students the following key points that were taught in this lesson:
Teamwork on the job is important.
Use good communication skills, including praise and constructive criticism, while on the job.
Be accountable for your actions. Take responsibility for the bad as well as the good.
Avoid gossip in the workplace.
Conclusion (2 minutes)
SESSION 1
1. List three ways that you can encourage teamwork on the job.
2. Define “credibility” and explain what you can do to gain and maintain it in the workplace.
SESSION 2
1. List three possible results of gossiping in the workplace.
2. What is the difference between criticism and constructive criticism?
3. Describe a person who works well with others on the job.
Student Assessment

ON-THE-JOB | LESSON 2: WORKING WITH OTHERS
overcomingobstacles.org
LESSON EXTENSIONS
Using Quotations
“A chain is only as strong as its weakest link.” —Proverb
Explain to students that the workplace is similar to a sports team. For any business to be a success, each
employee must give their all. Discuss with students how one poor employee brings down morale and
affects productivity.
Addressing Multiple Learning Styles
Play some of the great jazz recordings of Ella Fitzgerald scatting with Duke Ellington.
Invite students to explain improvising or scatting. Discuss the importance of improvising in the
workplace.
Writing in Your Journal
Have students assess their day. What does having a great day mean to them? Is it the day they get a
phone call they’ve been waiting for, winning a contest, getting an A on an exam, going someplace
special, or just a day when nothing goes wrong?
Have students discuss what a great workday would be for them.
Using Technology
Play Beethoven’s Ninth Symphony. Explain to students that classical music involves discipline and
teamwork. Discuss with students how an orchestra has over 100 musicians—strings, woodwinds, brass,
percussion—playing in unison under the direction of a conductor. The Ninth Symphony also features a
full chorus of basses, baritones, altos, and sopranos. All must read music and sing their parts perfectly.
Invite students to pick out their favorite parts of the Ninth Symphony. Discuss how working together to
create music is similar to working together on the job.

ON-THE-JOB | LESSON 2: WORKING WITH OTHERS
overcomingobstacles.org
Homework
Have students interview a family member about problems they have had with coworkers.
Have students report on how their family members resolved conflicts they had on the job.
Additional Resources
Have students review Winning with Teamwork: Quotations to Inspire the Power of Teamwork by
Katherine Karvelas. Have students share the quotes they found most inspiring. As a class, discuss the
effect that strong teamwork skills can have on one’s life, job, and career.

ON-THE-JOB SKILLS | WORKING WITH OTHERS©
20
21
Ove
rco
min
g O
bst
acle
s
1. You and a coworker are on your lunch break. Two other coworkers sit down with you and begin gossiping about another coworker. They encourage you to gossip with them. What do you do?
2. You’re stocking shelves with someone who is new on the job. The new person doesn’t know that the shelves are stocked alphabetically, so he is stocking them according to size. The individual is proud of the artistic job he is doing. What do you do?
3. You and your coworkers at the restaurant where you work have just spent 45 minutes cleaning the kitchen. Your boss comes in and asks in an irritated voice why the kitchen is such a mess. The sink has dishes in it, and the counters need to be wiped. What do you do?
4. You and a coworker both applied for a promotion. You are both good workers, but your colleague has been on the job for about six months longer than you have, so he gets the promotion. What do you say to your coworker?
5. You have completed all of your tasks for your shift. You are about to ask your boss if you can leave a few minutes early. Then, a coworker comes to you to ask for your help. Your colleague has six tasks to do before her shift ends, and she is not sure they can all be finished. What do you do?
6. You are working at an ice cream parlor near your house. A mother with five young children comes in and places a very complicated order. You observe that a newly hired coworker fills the difficult order correctly and with a pleasant smile. What do you do?
WORKPLACE ROLE PLAYS
overcomingobstacles.orgPowered by TCPDF (www.tcpdf.org)

ON-THE-JOB | LESSON 3: COMMUNICATING ON THE JOB
overcomingobstacles.org
AGENDA
Starter
The Phone Call
The Write Stuff
Customer Service
Conclusion
Student Assessment
Objectives
Students will learn guidelines for answering the phone at work.
Students will recognize the importance of good writing skills in a work environment.
Students will demonstrate the importance of good customer service and learn techniques for
dealing with customers.
Materials Needed
A sponge ball, rolled-up socks, or similar soft item to throw (Starter)
One copy of the “Writing for the Workplace” activity sheet for each student (Part II)
A transparency of the “Whoops” activity sheet or one copy for each student (Part II)
3LESSON
COMMUNICATING ON THE JOB

ON-THE-JOB | LESSON 3: COMMUNICATING ON THE JOB
overcomingobstacles.org
Tell students that they are going to conduct an experiment on ways to answer the phone. Hold up a sponge ball, rolled-up socks, or a similar soft item. Explain to students that the sponge ball represents a phone call. They will pretend to answer the phone when the ball is thrown to them.
Explain to students that while the ball is in flight, you are going to say “home” or “work.” If you say “home,” students are to answer the call as if they are at home. If you say “work,” they are to answer as if they are clerks at a company called Ajax Graphics.
Toss the ball to several students, with equal numbers of home and work calls. Ask students to discuss what they noticed about the differences between the ways they answered the calls at home and the calls at work.
Explain to students that there are some guidelines that are used in business communications—both written and on the telephone. As a new employee, it is important to understand what these guidelines are.
Starter (3 minutes)
Purpose: Students learn guidelines for answering the phone at work.
1. Students learn how to find out about a company’s rules for answering the telephone.
Ask students to imagine that it’s their first day at a new job. Explain that many companies have guidelines that detail how employees should answer the phone. Ask students to consider how they might find out about these guidelines. Lead students to understand that they can ask the boss, ask a coworker, or listen to coworkers answering the phone.
2. Students explore the basics of answering phone calls at work.
Ask students to imagine that there are no explicit company guidelines about phone calls at their job. Elicit suggestions from them about what to say when answering the phone in this situation. Write student responses on the board. (Students might respond: greet the caller with “good afternoon” or “good morning,” followed by your company’s name and your name; ask how you may assist the caller.)
3. Students discuss using a proper tone during a business call.
Ask students, “When you answered your home phone during the starter, how do you think you might have sounded to a caller? Were you friendly? How was it different from the way you answered the work call? How do you feel when you call an organization and the person who answers is gruff and sounds unfriendly?”
Part I The Phone Call (15 minutes)

ON-THE-JOB | LESSON 3: COMMUNICATING ON THE JOB
overcomingobstacles.org
Ask students how the following sounds: (in a friendly voice) “Thank you for calling Ajax Graphics. Bill speaking. How may I help you?”
Point out to students that they can also be too casual; they shouldn’t confuse being casual with being friendly. Being friendly can put the caller at ease, but being casual can be unprofessional. It is possible to be professional and friendly at the same time.
4. Students practice answering phone calls in a professional manner.
Ask students to form pairs. Tell students to alternate between caller and employee as they role-play answering the phone for Ajax Graphics. Remind the class to use the list of guidelines about how to answer the phone.
5. Students learn the importance of taking messages.
When students have finished, ask, “Suppose the phone rings during your shift. You answer it, but the caller wants someone who is not available. How can you make sure to tell the person about the phone call they missed?”
Lead students to understand that if a voicemail system is not in use, they should always write down phone messages.
Ask students to identify the information that they should write when taking a phone message. Write students’ responses on the board. Explain that the most important parts of a phone message are: (a) the name of the person the message is for, (b) the name of the person who called, (c) the caller’s company or business, (d) the caller’s phone number, (e) the date and time they called, and (f ) the message the caller would like to leave.
Point out to students that writing a complete message with all of the above information will prevent confusion in the future.
Purpose: Students recognize the importance of good writing skills in a work environment.
1. Students identify writing tasks they might have in the workplace.
Explain to students that all businesses, whether big or small, need employees who not only speak well but also write well. Tell students that good writing skills will help them get and keep a job. Businesses need people who can express ideas clearly and communicate information effectively.
Ask students to identify the kinds of things they might write in a business situation. (Students might respond: letters, emails, reports, memos, project notes, proposals, pamphlets or brochures, newsletters, speeches.)
Part II The Write Stuff (15 minutes)

ON-THE-JOB | LESSON 3: COMMUNICATING ON THE JOB
overcomingobstacles.org
2. Students learn common elements of business writing.
Remind students that they learned about business letters when they wrote their cover letters and thank-you letters.
Distribute the “Writing for the Workplace” activity sheet and discuss it with the class. Remind students to remember the big picture—they want to share information and ideas. They want the reader to know why they are writing and what the reader needs to understand or do. Tell students to always consider the impact of their writing on the reader.
3. Students identify language that should be avoided in the workplace.
Ask students to identify language that should be avoided in business communications. Elicit the following from students and ask them to provide examples of each: slang, cliches, and insensitive or inappropriate language. Write student responses and examples on the board.
Show the transparency or distribute copies of the “Whoops” activity sheet to each student. As a class or in small groups, identify and correct the poor phrasing and inappropriate expressions.
Summarize this activity by pointing out that workplace writing should be clear and should use effective, honest language. Writing should be direct, concise, tactful, and sensitive to all genders, races, and religions.
Purpose: Students demonstrate the importance of good customer service and learn constructive ways to deal with customers.
1. Students role-play to show the difference between good and bad customer service.
Ask for four volunteers.
Tell the volunteers that they are going to role-play two restaurant scenes. Two of the volunteers will be servers, and the other two will be customers. The two servers will each take a turn receiving the customers’ orders. Quietly tell one server to behave in a friendly, cheerful, and polite manner. Then, quietly tell the other server to act disinterested, bored, and even rude. Have the two customers sit facing each other at the front of the room, as if they are in a restaurant.
Instruct the rest of the class to carefully watch the interactions between the two servers and the customers. Tell the volunteers to begin, allowing the volunteer playing the polite server to take the orders first.
2. Students analyze the differences in service shown in the role play.
Part III Customer Service (15 minutes)

ON-THE-JOB | LESSON 3: COMMUNICATING ON THE JOB
overcomingobstacles.org
When the volunteers have finished role-playing, ask, “Which server would you rather have in a restaurant?” Have students describe why they would prefer one server over the other.
Explain that many people will pay more or travel farther to get good service. Others will forgo buying an item if they have had a bad service experience with the company selling it.
Point out that employees are on the front line of customer service. Suggest to students that many of their first jobs will involve direct dealings with customers and that much of their success will be tied to the customer service they provide.
3. Students discuss the benefits of good customer service.
Ask students to identify jobs in which an employee can directly benefit from providing good customer service. Students may suggest that in the restaurant business, for example, income—through tips—can be directly tied to the service that employees provide their customers. In retail, employees are often given a commission based on their sales.
Point out that even in other jobs, good customer service can benefit employees. For example, if an employee provides good customer service, their employer may notice. Also, a customer who has been treated well may make a favorable comment to the supervisor, which could lead to a raise or promotion for the employee. Good customer service has a positive impact on the company and is an important part of being a good employee.
4. Students learn how to handle an unhappy customer.
Ask students, “How would you handle a situation in which a customer is upset with you no matter what you try to do?” Write student responses on the board.
Explain that there are a few guidelines that students can use to help them in these situations. Give them the following guidelines:
Keep a positive, friendly attitude.
Keep calm. If you stay calm, the customer will often calm down, too.
If you cannot get the customer to calm down, tell them that you think they should speak with your supervisor. Get your supervisor and ask them to speak with the customer.
5. Students list ways to show good customer service.
Ask students to identify some of the ways that they can demonstrate good service to a customer. (Students might respond: smile, make eye contact, good attitude, be polite, calling customers “sir” or “ma’am.”)

ON-THE-JOB | LESSON 3: COMMUNICATING ON THE JOB
overcomingobstacles.org
Review with students the ways in which they will have to communicate on the job. Ask, “Which communication skills do you need to develop?” Elicit from students the following key points that were taught in this lesson:
Business phone calls should be friendly enough to put the caller at ease, but also be professional.
It is important to remember to take thorough messages if a caller wants to speak with someone who is not available.
Workplace writing should be clear and businesslike and should use effective and appropriate language.
Conclusion (2 minutes)
1. Describe the difference between how you talk on the phone at home and how you should talk on
the phone at work.
2. List three things someone can do to provide good customer service.
3. List three positive ways to handle an unhappy customer.
Student Assessment

ON-THE-JOB | LESSON 3: COMMUNICATING ON THE JOB
overcomingobstacles.org
LESSON EXTENSIONS
Using Quotations
“Excellence, then, is not an act, but a habit.” —Aristotle, Greek philosopher
Have students create a list of guidelines for making excellence on the job a habit.
Addressing Multiple Learning Styles
Practice telephone etiquette with students. Callers should always identify themselves: “Hello, this is
____. May I speak with ____?” Stress the importance of identifying yourself on the phone. It’s polite and
saves people from asking who is calling. When answering, a pleasant hello and “May I take a message?”
are effective.
Have students practice answering the phone. Have them assess each other’s performances.
Writing in Your Journal
Have students practice their handwriting in their journals.
Have students critique and examine their own handwriting by identifying numbers, letters, and words
that they can write more legibly. Discuss the importance of legible handwriting to workplace
communication.
Using Technology
Have students practice and record outgoing messages that would be appropriate for voice mail systems
at work. (For example, “You have reached the voice mailbox of _________. I am unable to answer your call
at the moment. Please leave a message, and I will get back to you as soon as possible.”) Have students
practice good articulation and tone in class, ensuring that they speak clearly and slowly.
Have students assess each other’s recordings or performances.

ON-THE-JOB | LESSON 3: COMMUNICATING ON THE JOB
overcomingobstacles.org
Homework
Have students create a list of the different forms of communication they might use on the job.
Discuss the various forms of communication used in the business world and why it is beneficial to be an
effective communicator at work.
Additional Resources
Read or hand out excerpts from How to Win Friends and Influence People by Dale Carnegie.
Ask students if they think Carnegie’s advice is valuable or not. Have them describe ways they can utilize
his advice in the workplace.

ON-THE-JOB SKILLS | WORKING WITH OTHERS©
20
21
Ove
rco
min
g O
bst
acle
s
Characteristic
Starting point
Purpose
Audience
Form
Voice
WRITING FOR THE WORKPLACE
Explanation
Think about the need your letter addresses.
You’ll be solving problems, completing work, or asking for action through sharing ideas and information.
Think about your reader. Know your reader’s position, needs, and knowledge. Craft the message accordingly.
Most workplace writing has a standard format: (1) three-part structure explaining purpose, giving details, and suggesting action, and (2) data, including strategies, numbers, and visuals.
Be conversational but direct. Do not be too formal or too personal.
Example
I’m writing to apply… As you requested…
A possible solution to the problem is...
We may need to modify our procedures for…
The staff at Three Oaks Day Camp appreciated the honor of the mayor’s presence at our benefit dinner last week.
On behalf of the Hawks Little League team, I wish to thank you for the tickets you sent. We had a great time at the Lakers game.
I’m writing for information about your new photocopy machine. Our company is small but makes at least 100 copies per day. Please call (969) 555-1756 Monday through Thursday and ask for me, Julio Vaca.
We offer the following services:• Window washing• Carpet cleaning• Floor waxing
We welcome you to the Pasadena business community.
I could set up a news conference that will give us good publicity.
overcomingobstacles.org

ON-THE-JOB SKILLS | COMMUNICATING ON THE JOB©
20
21
Ove
rco
min
g O
bst
acle
s
1. That was a cool presentation.
2. I don’t mean to rock the boat.
3. Our product will appeal to the lower class.
4. All persons employed by this company should make certain to sched-ule their commutes to ensure that their arrivals are in compliance with their agreed-upon start times.
5. Our department will have to go back to square one.
6. Ms. Herman is burned out, so I suggested she take her vacation early.
7. Contractor may not assign or delegate their duties hereunder.
8. Chicks will be allowed to play on the company softball team.
9. I put the stuff you asked for in this envelope.
10. In consideration of your payment of $1,000.00, receipt is hereby acknowledged.
WHOOPS
overcomingobstacles.orgPowered by TCPDF (www.tcpdf.org)

ON-THE-JOB | LESSON 4: MANAGING TIME, MONEY, & PEOPLE
overcomingobstacles.org
AGENDA
Starter
Mind the Money
Keeping Records
Can’t Do It All
Conclusion
Student Assessment
Objectives
Students will identify strategies for successfully managing money on the job.
Students will recognize the importance of keeping written records of their work.
Students will recognize the importance of keeping managers informed and asking for help when
needed.
Materials Needed
One copy of the “To Do” activity sheet for each student (Starter)
4LESSON
MANAGING TIME, MONEY, & PEOPLE

ON-THE-JOB | LESSON 4: MANAGING TIME, MONEY, & PEOPLE
overcomingobstacles.org
Distribute copies of the “To Do” activity sheet.
Say to students, “Imagine that you have a job at a clothing store. During your shift today, these are the tasks that your boss has asked you to complete. Your shift is four hours long.”
Ask students to describe how they are going to get all of these tasks done in four hours. Ask them to identify ways to make sure that they don’t forget anything or run out of time. Remind students that a to-do list will help them manage their time and ensure that they don’t forget a task or responsibility.
Tell students that their boss has also asked them to count the money in the cash register drawer and match the amount against the receipts. Have students list any special concerns about handling money and state how they will fit this additional task into their to-do lists.
Starter (3 minutes)
Purpose: Students identify effective money-management techniques.
1. Students identify resources that they might have to manage on a job.
Ask students to consider the following scenario:
You have been working at a local retail store for the past year. One of the managers recently quit, and your boss has asked you to be responsible for closing at night until he hires another manager. You have been in the store when others have closed but have never done it on your own. Closing is a major responsibility and the first step to becoming a manager.
Explain that at the end of the day, there are many tasks related to closing a retail store or any place of business. Ask students to name those tasks. (Students might respond: vacuum or mop the floors, fold clothing, straighten merchandise on shelves or racks, lock the doors, take out the trash, close out the register.)
Ask students to explain what the word “resources” means in the context of a job situation. (Students should say that it means the time, skills, people, or objects needed to complete tasks.) Remind students that they learned how to manage time in Module Six: Skills for School and Beyond, and that time is considered a resource. Ask students to identify other resources that they will have to manage now that they have been given the responsibility of closing up. (Students might respond: equipment, merchandise, people, security, money.)
2. Students identify strategies for managing money on the job.
Part I Mind the Money (15 minutes)

ON-THE-JOB | LESSON 4: MANAGING TIME, MONEY, & PEOPLE
overcomingobstacles.org
Ask students to identify situations in which they might handle money on the job. Write student responses on the board. (Students might respond: closing out a cash register, running errands for the office, giving change to customers.)
Ask students to focus on one situation listed on the board.
Have students raise their hands when you read the item they have chosen. Group students interested in the same situation together.
Have each group write a dialogue or screenplay that explains why its situation requires effective money-management skills and demonstrates effective money-management strategies. If students are having difficulty generating reasons for having these skills, offer the following suggestions:
Match receipts to register tapes, checks, credit card slips, and cash.
Make sure you can account for every penny spent doing errands.
Customers must get the correct change.
If students are having difficulty generating money-management strategies, offer the following suggestions:
Count money very carefully.
Keep an eye on the money drawer.
Report any discrepancies immediately to a supervisor.
Purpose: Students recognize the importance of keeping written records and of managing their relationship with their supervisor.
1. Students learn some of the reasons for keeping written records.
Tell students that the misplacement of memos and other communiqués is a frequent occurrence in an office. Ask students to list strategies for solving this common problem. Elicit from students that copies of the memo or an electronic file will usually solve the problem. Having a record in a log that shows when the memo was sent will also help.
2. Students learn other ways and reasons to keep written records.
Part II Keeping Records (15 minutes)

ON-THE-JOB | LESSON 4: MANAGING TIME, MONEY, & PEOPLE
overcomingobstacles.org
Tell students that there are other reasons for keeping written records. Ask students to imagine that they have used their prioritized to-do list, but that they are coming to the end of their shift and haven’t done everything on the list. They decide that they’ve accomplished the most important things and that they’ll finish the rest when they come in tomorrow. When they walk in the next day, their boss says, “How much were you able to accomplish yesterday?”
Ask students to respond to the boss’s question. (Students should respond: showing the boss the to-do list to indicate what has been accomplished, stating their strategy of completing what could be done.)
Ask students if there are other constructive ways to handle the situation. List additional student responses on the board.
3. Students understand the concept of managing their relationships with their supervisors.
Lead students to understand that the best way to handle the situation is to keep the boss informed. In this example, leaving a note at the end of the shift that details what they had done, what was yet to be completed, and when they expect to complete a task would have made the boss feel that they were managing their time.
Explain to students that this is an example of anticipating the boss’s needs and trying to meet them. Help students recognize that if they are proactive about managing their relationship with their supervisor, the supervisor is likely to think of them as good employees.
4. Students understand the importance of keeping completed to-do lists.
Suggest to students that they always keep their to-do lists, even when they have completed them, since they provide a record of what has been accomplished on the job. Ask students to suggest ways to keep all the to-do lists so that they are easily accessible. (Students might respond: keep them in a manila folder, in a computer folder, or in a planner.)
Purpose: Students recognize the importance of asking for help.
1. Students see the impact of scheduling conflicts.
Tell students to refer again to their to-do lists. Tell them that the manager has just come in and has one more thing he wants them to do. This task is significant and seems to conflict with their other scheduled tasks. Ask students if they think that they are getting overbooked.
2. Students discuss ways to deal with scheduling conflicts.
Part III Can’t Do It All (15 minutes)

ON-THE-JOB | LESSON 4: MANAGING TIME, MONEY, & PEOPLE
overcomingobstacles.org
Ask students to suggest solutions to this problem. Write student responses on the board. Lead them to understand that:
Doing nothing means the problem will not be solved. In addition, the boss will be upset because he will expect the task to be done.
Students need to ask for help, but they need to do it in the right way, using good communication skills.
3. Students learn how to ask for help.
Ask students how they feel about asking their boss for help. Write student responses on the board. Explain that sometimes people think it is a weakness to ask for help. Tell students that a responsible employee will bring scheduling or priority conflicts to their boss for help resolving them as soon as they are known.
Ask students if they see a good way to bring this problem to the boss’s attention. Elicit from students that the best way to approach their boss is to have the problem laid out so that it is easy to understand. One of the best ways to do this is with their to-do lists. They should show the boss how they have prioritized everything and estimated the time required to complete each task. The boss will more quickly understand the problem and will help with prioritizing or changing some tasks.
Point out to students that this involves managing the relationship they have with their supervisor. Putting the scheduling conflict in writing will help the boss more quickly understand the conflict and demonstrates respect for the boss’s time.
4. Students practice asking for help.
Ask students to find a partner. Tell each pair to alternate being the boss and the employee. Have them role-play asking a boss for help with prioritizing all of the new tasks they have been given. Remind students to practice managing their partners by anticipating their needs and trying to make their jobs easier.

ON-THE-JOB | LESSON 4: MANAGING TIME, MONEY, & PEOPLE
overcomingobstacles.org
Ask students to list strategies for managing time, money, and the people they work with at their job. Elicit from students the following key points that were taught in this lesson:
Planning, scheduling, and managing money are very important on the job.
Keeping written records of your work can contribute to a good relationship with a supervisor.
Asking a manager for help on the job can be important to success.
Conclusion (2 minutes)
1. Describe two strategies for organizing your time.
2. List three reasons why you should keep written records of your work.
Student Assessment

ON-THE-JOB | LESSON 4: MANAGING TIME, MONEY, & PEOPLE
overcomingobstacles.org
LESSON EXTENSIONS
Using Quotations
“A stitch in time saves nine.” —Benjamin Franklin
Explain to students that while making lists and prioritizing is effective, sometimes you must drop
everything to take care of something more urgent. Brainstorm with students about how to handle these
situations.
Addressing Multiple Learning Styles
Have students think about the day as divided into thirds: eight hours rest, eight hours work, eight hours
of free time. Ask, “Is this schedule possible or impossible to keep?” Explain to students that although this
is the ideal, there will be times in their life when this will not be possible.
Have students create pie charts and bar graphs comparing the actual division of their day to the ideal
division of their day.
Writing in Your Journal
Have students write about how long it takes them to get ready in the morning. Have them consider how
much time they spend looking for something to wear, homework, or change for the bus.
Have students figure out what they can do the night before that would make their mornings easier.
Have them make a checklist and stick with it. Have them see if they save time and are less stressed in
the morning by doing some preparation the night before.

ON-THE-JOB | LESSON 4: MANAGING TIME, MONEY, & PEOPLE
overcomingobstacles.org
Using Technology
Show students how a desk calendar or planner—seemingly low-tech devices—are time savers and
important to any business.
Invite students to investigate and report on other types of organizers, from a simple telephone list to a
contact list and calendar in Microsoft Outlook.
Homework
Have students keep track of the time they spend on activities that they choose to do and those that
they must do.
Discuss how students’ time is spent. Ask students if they have ever heard someone say, “Do the things
you have to do so that you can do the things you want to do.” Have students describe how this saying
relates to them.
Additional Resources
Divide students into groups to investigate time in sports and leisure. Have one group list sports that rely
on time. Have another group list leisure activities that rely on time (such as TV shows, films, or songs).
List the findings on the board. Which activities have more flexibility regarding time? Why?

ON-THE-JOB SKILLS | MANAGING TIME, MONEY, AND PEOPLE©
20
21
Ove
rco
min
g O
bst
acle
s
The following is a list of tasks that you must complete by the end of your shift at the clothing shop. Each task has an estimated amount of time that it will take to complete. You are working for a total of four hours. Pay close attention to the description of each task. Order these tasks so they can all be accomplished.
To Do List:
Task Time It Will Take
Vacuum. This must be done at the end of the shift, just (45 minutes) after the store closes.
Clean mirrors. This must be done just before the (20 minutes) vacuuming.
Record items moved from stock to shelves. (50 minutes)
Wipe down counters with damp cloth. This must be done (15 minutes) at the end of the shift.
Empty dressing rooms and put clothes back on hangers. (45 minutes) This must be done throughout the shift, not necessarily for 45 consecutive minutes.
Water plants. (10 minutes)
Create signs for a big sale. (45 minutes)
Refold clothes on shelves. This must be done throughout (45 minutes) the shift and at the end, not necessarily for 45 consecutive minutes.
How will I get these tasks completed?
TO DO
overcomingobstacles.orgPowered by TCPDF (www.tcpdf.org)

ON-THE-JOB | LESSON 5: ADVANCING ON THE JOB
overcomingobstacles.org
AGENDA
Starter
The Numbers Game
Strategy
Moving On
Conclusion
Student Assessment
Objectives
Students will develop a strategy for job advancement.
Students will demonstrate how to ask for a promotion.
Students will determine how to leave a job properly.
Materials Needed
A blanket (Starter)
5LESSON
ADVANCING ON THE JOB

ON-THE-JOB | LESSON 5: ADVANCING ON THE JOB
overcomingobstacles.org
Before students arrive, select a typical classroom object, such as a book or file cabinet, and cover it with a blanket. Make sure that the covered item’s form does not reveal what is underneath the blanket.
After students have arrived, ask them, “What is under this blanket?”
Let the students guess for a while. Then, ask them to formulate questions to ask that will reveal what is under the blanket. Lead them to understand that questions such as “May I see what is under the blanket?” or “May I have what is under the blanket?” would reveal the answer.
Explain to students that asking the right question at the right time can be a key to advancing in the workplace. It may not be any more difficult than asking to look under the blanket.
Starter (2 minutes)
Purpose: Students recognize the need to plan ahead.
1. Students participate in a numbers game.
Divide students into pairs. Explain to students that they are going to play a numbers game. The rules of the game are as follows:
Each partner will take turns counting out loud. The winner is the person who reaches 30 first.
You can say one or two numbers per turn. For example: Player A: “1”
Player B: “2, 3”
Player A: “4, 5”
Player B: “6”
Player A: “7”
Allow students to play a few rounds.
2. Students understand the meaning of the numbers activity.
Ask students to identify the trick of the game. (Students should respond that the trick is to get their partners to say either 28 or 29 so that they can say 30.)
Part I The Numbers Game (10 minutes)

ON-THE-JOB | LESSON 5: ADVANCING ON THE JOB
overcomingobstacles.org
Tell students that they can win if they figure out the strategy: plan ahead and play smart. Point out that this is the same strategy they should use to get a promotion.
Purpose: Students learn how to ask for a promotion.
1. Students define “promotion.”
Explain to students that you talked about asking the right questions in the starter and about the need for a strategy in the first activity. Explain that you’re now going to combine those into a plan to request a promotion.
Ask students to define “promotion.” (Students might respond: job advancement, increased responsibilities, sometimes an increase in pay, etc.)
2. Students review the characteristics of a good employee.
Tell students that they’ve already discussed the need for a long-term strategy to get a promotion. Ask them to name some things that might be part of that strategy. Lead students to understand that part of their strategy could be keeping a checklist of what good employees do and making sure that they do those things. Ask students to recall from past classes some of the characteristics of good employees. (Students might respond: ability to manage resources effectively, communicating well with coworkers, being honest, getting to work on time, following company rules, etc.) Write student responses on the board.
3. Students discuss some of the guidelines they need to follow to be considered for a promotion.
Tell students that in addition to these examples of good employee behavior, there are some guidelines that they need to follow. Ask students to name some of the guidelines that they have discussed in previous sessions. Elicit from students the following guidelines:
Use good listening and communication skills on the job.
Ask for feedback from your supervisors. Be open to comments and constructive criticism.
Look for a person who has been at your job longer than you have. Ask that person to teach you about the job and listen to their advice—their experience can help you avoid mistakes.
Since a strategy is a long-term plan, it’s important that you continue to reevaluate and ensure that your strategy is working.
Write student responses on the board.
4. Students find ways to show their boss that they deserve a promotion.
Part II Strategy (20 minutes)

ON-THE-JOB | LESSON 5: ADVANCING ON THE JOB
overcomingobstacles.org
Ask students to think of additional ways that they can show their boss that they are ready to be promoted. Write student responses on the board.
Explain to students that another part of their strategy for advancement might be to ask for increased responsibility. This shows that they’re eager to learn and work hard. It also shows that they believe in their own abilities.
5. Students learn how to ask for a promotion.
Explain to students that even when they prove themselves worthy of a promotion, their boss may not realize how well they are doing. Supervisors have a lot of responsibility and might need to be reminded of an employee’s worth to the company.
Ask students what they think would happen if they went into their boss’s office and said, “I deserve a raise. I expect more weekends off, money tomorrow, and a new car.”
Help students to recognize that aggressive behavior will not lead to success when asking for a promotion. Explain that the best way to let their boss know about their skills and accomplishments is to be assertive and to tell them about how they have handled their increased responsibility. One suggestion is to outline the steps they’ve taken and what they’ve achieved for the boss.
6. Students role-play requesting a promotion and recognize the importance of timing.
Ask for two volunteers to come to the front of the class and role-play asking for a promotion. Tell one volunteer to play the owner of an ice cream parlor. Tell the other volunteer to play an employee who wants a promotion to the manager position.
Tell the volunteers to begin the role play and ask the class to observe how the employee tries to convince the owner that they are worthy of a promotion. After the volunteers have finished their role play, have the class share their observations.
Tell students that they are going to watch another role play. Ask for two new volunteers. Tell the new volunteers that the roles and situation are the same, except that it is the afternoon and there are groups of children screaming for ice cream. The owner has just run out of ice cream cones. Tell the volunteer playing the employee to ask for the promotion. If the role play doesn’t demonstrate the situation well, give the two students additional directions to make the scene more stressful (e.g., the freezer broke and the ice cream is melting, the cash register will not open).
When the second set of volunteers finish their role play, ask the class to explain what was wrong with the employee asking the owner for a promotion when they did.
Lead students to recognize that timing is an extremely important part of their strategy. Tell them to make sure that their boss is in a receptive mood, that operations are running smoothly, and that the boss isn’t too busy and is able to listen to what they’re saying.

ON-THE-JOB | LESSON 5: ADVANCING ON THE JOB
overcomingobstacles.org
Purpose: Students learn how to leave a job properly.
1. Students discuss when it’s time to leave a job.
Ask students to imagine that they have done everything they can to move ahead at their current job, but their boss still hasn’t given them a promotion. What should they do?
Ask students what the consequences would be if they quit. Point out that if they quit, they won’t be getting a paycheck. If their strategy for advancement within their current company isn’t working, they need to rethink their overall strategy and create a plan for advancement outside the company.
Ask students if they think that it is easier to find a new job if they are not working. Have them consider this from the perspective of an employer by asking, “If you were an employer, would you be more likely to hire someone who is working or someone who isn’t? Why?”
Remind students that employers look for someone who can work hard and show responsibility. Point out that having a job and good references makes it easier for them to demonstrate those qualities.
2. Students learn the proper way to leave their current job.
Have students imagine that they have been offered a new job at a different company. Ask students what they should do about their current job once they’ve accepted the new job.
Emphasize to students the need for good references. Since they have been good employees, they should not lose the opportunity to use their current boss as a reference. Explain that it is important that they treat their current boss and company with respect no matter how unhappy they are with the job. Employees should generally give two weeks' notice when leaving a job.
Tell students that when they decide to leave a job, they should go to their boss and explain their plans. They should be prepared to explain their reasons for leaving. If they have to resign in writing, they should take care to use good written communication skills to explain their reason for leaving.
Part III Moving On (15 minutes)

ON-THE-JOB | LESSON 5: ADVANCING ON THE JOB
overcomingobstacles.org
Ask students to explain how and when to ask for a promotion. Elicit from students the following key points that were taught in this lesson:
Planning ahead is important when considering a job change.
Timing is an important part of the strategy of asking for a promotion.
When leaving a job, it’s important to treat your boss and your company respectfully.
Conclusion (2 minutes)
1. List five characteristics of a good employee.
2. List three things you can do to show your boss that you deserve a promotion.
3. Describe how you could appropriately and effectively ask for a promotion.
Student Assessment

ON-THE-JOB | LESSON 5: ADVANCING ON THE JOB
overcomingobstacles.org
LESSON EXTENSIONS
Using Quotations
“Advancement only comes with habitually doing more than you are asked.” —Gary Ryan Blair
Tell students that it is a good idea to periodically make a list of their accomplishments on the job. Have
them list skills that they have learned and recent projects that they have handled successfully. Ask them
to consider ways that they can improve their performance or handle more responsibility. Discuss the
value of keeping track of success at work.
Addressing Multiple Learning Styles
Read these quotes to students:
“Opportunity is missed by most people because it is dressed in overalls and looks like work.” —Thomas
Edison;
“Diligence is the mother of good luck.” —Benjamin Franklin;
“The world is full of willing people; some willing to work, the rest willing to let them.” —Robert Frost;
Have students interpret these quotes (or others) by creating drawings, songs, etc.
Writing in Your Journal
Show students a job board with local openings. Have students write their own posting describing their
skills, the kind of job that they would like, and where they would like to work.
Using Technology
Have students type emails to a supervisor, either thanking that person for an experience or sharing an
achievement.
Have students send the messages to each other and respond to them. Discuss the effects of praise and
recognition in the workplace.

ON-THE-JOB | LESSON 5: ADVANCING ON THE JOB
overcomingobstacles.org
Homework
Have students research what positions are available in the career they wish to pursue.
Have students draw flowcharts that depict advancement within a chosen career.
Additional Resources
Have students read I Could Do Anything If I Only Knew What It Was: How to Discover What You
Really Want and How to Get It by Barbara Sher.
Have students describe their goals and what they really want out of a job and life.

ON-THE-JOB SKILLS | GLOSSARY©
20
21
Ove
rco
min
g O
bst
acle
s
accountable: responsible for; required to account for one’s conduct.
company policy: the standards and procedures set by a business organization to influence and determine decisions and actions.
credibility: the quality of being trusted and believed in.
demeanor: 1. the way in which a person behaves. 2. the attitude with which one carries oneself.
ethical behavior: behaving in accordance with the accepted principles of right and wrong that govern the conduct of a person or the members of a profession.
jeopardize: to expose to loss or injury.
legible: possible to read or figure out; clear.
mandatory: required; necessary.
notation: a brief note or summary used for convenience.
personal ethics: a person’s own set of principles of conduct.
recommendation: a favorable statement concerning a person’s character or qualifications.
slang: a kind of language occurring mainly in casual or playful speech.
verify: to determine or test the truth or accuracy of something.
work ethic: a set of principles of conduct that involve respect for the rules of the workplace.
GLOSSARY
overcomingobstacles.orgPowered by TCPDF (www.tcpdf.org)

PART III
DEVELOPING RELATED SKILLS
MANAGING YOUR LIFE

TABLE OF CONTENTS
PART III: DEVELOPING RELATED SKILLS
1. Managing Your Finances 573
2. Making a Budget 585
3. Understanding Advertising & Mass Media 595
4. Becoming a Responsible Citizen 608
5. Nurturing the Development of Young Children 617
Managing Your Life

MANAGING YOUR LIFE | LESSON 1: MANAGING YOUR FINANCES
overcomingobstacles.org
AGENDA
Starter
Understanding Deductions
Bank Accounts
Your Credit and Credit Score
Conclusion
Student Assessment
Objectives
Students will identify the information included on a paycheck and check stub.
Students will understand how bank accounts work.
Students will learn about credit and their credit score.
Materials Needed
“Words to Know in Finance” activity sheets for each student (Parts I, II, and III)
“Paycheck” activity sheet for each student (Part I)
Internet access (Part III)
1LESSON
MANAGING YOUR FINANCES

MANAGING YOUR LIFE | LESSON 1: MANAGING YOUR FINANCES
overcomingobstacles.org
Display the following quote where everyone can see it: “Financial education is more valuable than money.” Ask students what they think this means and have volunteers share their thoughts with the class. Explain that one of the most important aspects of managing your life is financial literacy—the ability to understand how money works and how to manage it effectively.
Distribute copies of the “Words to Know in Finance” activity sheets to students and say, “Today, we are going to start developing a greater sense of financial literacy. These sheets will provide you with definitions of common financial terms.” Instruct students to refer to the activity sheets during the lesson. (All words and phrases that appear on the “Words to Know in Finance” activity sheets are displayed in bold throughout the “Managing Your Finances” and “Making a Budget” lessons.)
Starter (5 minutes)
Purpose: Students understand the deductions on their paycheck.
1. Students identify the difference between “net” and “gross” pay.
Display a copy of the “Paycheck” activity sheet where everyone can see it. Say to students, “Rose Arrington has a full-time job where she works 40 hours each week and earns $20 for every hour she works. If she is paid every week, that would make her weekly salary $800. However, her paycheck is for $625. Why do you think that is?” Allow students time to respond and then ask, “Does anybody know the difference between ‘net pay’ and ‘gross pay’?” Remind students to refer to the “Words to Know in Finance” activity sheets. Explain that gross pay is the amount of money a person has earned prior to any taxes or other deductions, and net pay is the final, or “take home,” amount of someone’s paycheck.
Clarify for students by saying, “For the hours she worked, $800 was Rose’s gross pay and $625 was her net pay, which means she had $175 deducted from her paycheck. Some of these withholdingsare voluntary, meaning she gets to decide whether they are withheld each pay period. Others are mandatory, which means they are required to be withheld.” Tell students they are going to learn more about voluntary deductions and mandatory deductions.
2. Students learn about mandatory deductions.
Distribute copies of the “Paycheck” activity sheet to students and draw their attention to the “Taxes and Deductions” section. Say to students, “Each pay period, part of what you have earned is withheld to cover various expenses, and these are either voluntary deductions or mandatory deductions.”
Part I Understanding Deductions (15 minutes)

MANAGING YOUR LIFE | LESSON 1: MANAGING YOUR FINANCES
overcomingobstacles.org
Have a volunteer read the definition of “mandatory deductions” out loud. Then, ask students to put a check mark next to all of the mandatory deductions on the paycheck. Students should identify the following:
FICA tax
Federal income tax
State income tax
Ask if anyone knows the purpose of these deductions. Give students time to respond, then say, “The money that is withheld from your paycheck is used to support many services, from government programs like Social Security and Medicare, to public resources like libraries and schools.”
Point out to students that while many of them will have their pay deposited directly into their bank accounts—known as direct deposit—they should still receive a physical copy of their pay stub for their records. Emphasize that it is important to always check the information on their pay stub as companies can make mistakes when calculating payroll. Advise students that if they don’t understand the purpose of a deduction, they should ask their supervisor or the person in charge of payroll.
3. Students discuss the value of voluntary deductions.
Ask students what they think voluntary deductions are. Lead them to understand that voluntary deductions—unlike mandatory ones—are optional. Offer examples such as medical coverage, life insurance, and retirement benefits such as a 401(k) and SIMPLE IRA.
Tell students why it is important that they understand and consider the benefits an employer offers. Health insurance and retirement accounts are two of the most common. Remind students to make sure that their decision to join or forgo these voluntary deductions takes into consideration their long-term goals (for example, choosing not to contribute to a 401(k) until later in life would result in their having less money when it comes time to retire).
Purpose: Students learn about bank accounts.
1. Students understand what a bank account is.
Ask students to describe a bank account. Lead them to recognize that a bank account is an agreement between a depositor and a bank that says the bank will keep their money in trust until it is withdrawn.
Ask students what a bank does with the money it keeps in trust. Lead them to understand that banks hold a portion of the money, invest a portion of it in bonds, and lend a portion to other people and businesses as loans for attending college, buying a car, purchasing a home, and more.
Part II Bank Accounts (15 minutes)

MANAGING YOUR LIFE | LESSON 1: MANAGING YOUR FINANCES
overcomingobstacles.org
Explain that there are many types of bank accounts. Two of the most common are checking accounts and savings accounts. A checking account is primarily used to cover deposits and withdrawals and is where most of their expenses will come from, while a savings account is used to keep—or save—money for a longer period of time. Add that, since checking account holders access their funds regularly, banks usually provide them with a debit card. This card allows them to make charges directly to their account and withdraw funds from automated teller machines.
2. Students understand the value of bank accounts.
Ask students to suggest reasons for keeping money in a bank. Write student responses on the board. (Student responses may include safety, convenience, and the ability to earn interest.) Explain to students that there are some things they need to consider when making a decision about opening a bank account. List the following questions where students can see them and elicit responses:
How often will you need cash? (Both checking and savings accounts will generally allow for withdrawals of cash. Savings accounts are designed to keep money with a bank for a longer period of time, so the number of monthly withdrawals may be limited or account holders might lose interest or be given a service charge if they exceed that amount.)
How are you planning to pay your bills? (If you are planning to pay your bills by check, you will need a checking account.)
What is the minimum balance your bank requires? (Some banks require you to keep a certain amount of money in your account and will charge a fee if you drop below that.)
Point out to students that banks vary greatly in the services they offer and that it is always a good idea to find the one that best fits their needs. Add that many banks offer accounts specifically for students.
3. Students learn to manage their bank accounts.
Tell students that a bank account is a major responsibility that will have financial repercussions if not managed properly. Say, “If you make a purchase and don’t have enough money in your account to cover the charge, your account will have a negative balance. This can lead to overdraft fees.”
Point out to students that one of the best ways to avoid overdraft fees is to make sure they keep track of their income and expenses. Say, “Most banks provide an app that allows you to view the amount of your available funds as well as any posted and pending transactions. There are also many free apps that help you categorize your spending and set savings goals.” Tell students that not everyone has access to a banking app, then ask volunteers to suggest other ways to keep track of spending. (Student responses may include viewing their account activity online, using a checkbook, and keeping receipts.)
Add that, in addition to helping track spending habits, these apps can also help identify incorrect or fraudulent transactions. Say, “It’s possible for another person to obtain your banking information and make unapproved charges. By checking your account activity regularly, you can catch suspicious charges and report them to your bank.”

MANAGING YOUR LIFE | LESSON 1: MANAGING YOUR FINANCES
overcomingobstacles.org
Purpose: Students develop an understanding of credit.
1. Students understand how credit works.
Say to students, “I’m going to ask you a series of questions. If you agree with what I say, raise your hand.” Then, ask students the following questions, pausing for a brief moment between each to give them time to respond.
Say, “Imagine there is something you really want that costs $50, but you can’t afford it right now. What if I told you I’d lend you money so you can purchase it today? Would you accept it?
What if you have to pay 20% more than what I lent you if you take longer than 30 days to repay me? For example, if I give you $50, you’ll owe me $60 if you don’t repay me in 30 days, and then $72, and so on.
What if I said you didn’t have to pay me all back at once? Instead, you could pay me as little as $10 each month.
What if I said that, even if you agree to a $10 per month payment schedule, you’ll still be charged 20% on your remaining balance each month? So, if you owe $50 and pay me $10, the next month you’ll owe me $48 instead of $40?”
Tell students that this is similar to how credit works. Lead students to understand that credit is the ability to borrow money to make purchases that you will pay back at a later date. Point out that one of the primary ways people make purchases using credit is through a credit card. Say, “Credit cards are an agreement between you and an issuer where you promise to pay back whatever they have lent you, plus other agreed-to charges.”
Emphasize that these other “agreed-to charges” are important to keep in mind when using a credit card. Tell students that credit cards can seem like “free money,” but they are not. Explain that every credit card has different terms, but generally, if cardholders pay the full amount of the credit card balance due every month, they will not have to pay interest. On the other hand, if they pay only the minimum payment amount, or anything less than the full balance due, they will pay interest.
2. Students learn about credit scores.
Divide students into three groups and say, “While it could make sense to delay a purchase until you have enough cash to cover the cost, there are times when that may not be possible. I’m going to present each group with a scenario in which someone wants to make a large purchase or is faced with a large expense, and your job will be to research the costs and the options to pay for it.” Then, assign groups with one of the following:
Part III Your Credit and Credit Score (25 minutes)

MANAGING YOUR LIFE | LESSON 1: MANAGING YOUR FINANCES
overcomingobstacles.org
A couple is looking to buy a two-bedroom house in your neighborhood.
A high school graduate wants to attend college and is trying to determine whether to stay in-state or go out of state.
A mother of three young children wants to purchase an SUV.
A person needs knee surgery.
Inform students they have 10 minutes to gather as much information as possible. When doing their research, have them consider things such as what options are available to the purchasers, what the standard interest rates are, and how much (if any) cash they might need upfront. After 10 minutes have passed, ask volunteers from each group to share their findings with the class.
After each group has presented, stress that there are some purchases or expenses that may not be possible without receiving a loan. Say, “However, financial institutions will not just loan money to anyone. Banks and other institutions want to make sure that you have the ability to repay the money you borrow, and they determine this using your credit score. I’m going to play a video for you that shows how your score is calculated.” Then, play the “What is a Credit Score? Kal Penn Explains | Mashable” video at the following link: www.youtube.com/watch?v=f2ortkJfTKw.
Tell students that their credit score is a number that will be associated with them for their entire lives and can determine what they are able to do in their future. Then, say, “Your credit score can go up or down depending on your financial decisions, so it’s important to manage and spend your money responsibly. Always remember, good credit can help us receive loans, which can allow us to obtain things we may want, such as a house, or to accomplish things, like attending college, that may be cost-prohibitive otherwise.”
3. Students learn what to do if they have a credit problem.
Tell students to suggest some things that may happen if they are irresponsible with their credit. List student responses. (Students responses may include, their credit card gets revoked, debt collectors may repeatedly call, they can damage their credit score, and it will be difficult to get loans in the future.)
Ask students, “What do you do when you have a problem that you can’t solve?” Suggest to students that they should ask for help. Explain that if they get into a situation in which they can’t make payments on their debt, the best thing to do is to talk to the people or companies to whom they owe money. Explain that sometimes, those companies will help develop an affordable payment plan to pay off the debt.
Have students consider what they discussed regarding credit cards and offer ways to avoid some of the drawbacks. List student responses. (Students responses might inclue: never put more on a credit card than you can pay every month, save money until you have enough to make a purchase, make sure you are comfortable with the minimum payment for loans, understand the terms associated with the money you are borrowing.)

MANAGING YOUR LIFE | LESSON 1: MANAGING YOUR FINANCES
overcomingobstacles.org
Tell students that regardless of whether they get a debit card or a credit card, it is essential to avoid overspending. While money charged to a debit card is removed directly from the user’s bank account, you can still get into trouble by depleting your funds. As mentioned earlier in the lesson, many banks will penalize account holders whose funds go below a predetermined amount. Remind students that it is important to monitor their checking account balance and credit card activity regularly in order to stay on top of their finances and avoid potential issues.
Explain to students that the best way to avoid financial trouble is to manage their money carefully. Remind students of the following key points that were taught in this lesson:
Paychecks show not only the gross amount earned but also all the mandatory and voluntary deductions made.
Credit cards have strengths, such as ease of use and safety, and drawbacks, such as annual fees and the danger of excessive debt.
Establishing good credit is essential in order to make larger purchases in the future.
Conclusion (2 minutes)
1. List two mandatory and two voluntary deductions from a paycheck.
2. Name three ways to track your bank account activity.
3. Identify three scenarios in which a person might purchase something using credit.
4. How is a credit score determined?
Student Assessment

MANAGING YOUR LIFE | LESSON 1: MANAGING YOUR FINANCES
overcomingobstacles.org
LESSON EXTENSIONS
Using Quotations
“Never spend your money before you have it.” —Thomas Jefferson
Discuss the meaning of this quote with your students. Then, have them write about how it could apply
to bank accounts as well as debit and credit cards, and when this quote may not be sound advice (
for example, home mortgages, student loans, and car financing).
Writing in Your Journal
Have students write about their financial goals, making sure to include what they would like to
purchase someday, what portion of their income they would like to put into savings, if they would prefer
to use a debit or credit card (or both), and the rules they will lay out for themselves to avoid financial
trouble.
Have student volunteers present their journal entries and discuss as a class.
Homework
Have students research local banks and determine, based on fees and requirements, which one
provides the best services for their needs. Tell students that most banks have different types of
checking and savings accounts. Encourage students to learn the differences between the accounts
banks offer and the steps they need to take in order to open an account. Have volunteers share their
findings with the class.
Using Technology
Explain to students that being patient and doing research on pricing trends can save them money. Tell
students that there are several apps, websites, and web browser extensions whose purpose is to save
them money by automatically applying coupons to purchases or tracking an item’s price. Have students
identify three ways they can use technology to save money (for example, Honey, Mint, Keepa).

MANAGING YOUR LIFE | LESSON 1: MANAGING YOUR FINANCES
overcomingobstacles.org
Homework
Have students track their spending habits for one week, writing down every expense no matter how
small. At the end of the week, have them review their spending data (you can also encourage them to
categorize their expenses into “essential” and “nonessential purchases”) and write about what surprised
them and what they learned.
Additional Resources
Have students read “Money Tips For Teenagers: Your Future Self Will Thank You” at
https://www.listenmoneymatters.com/money-tips-for-teenagers/. Ask students to comment on the
article and share their favorite tips with the class.
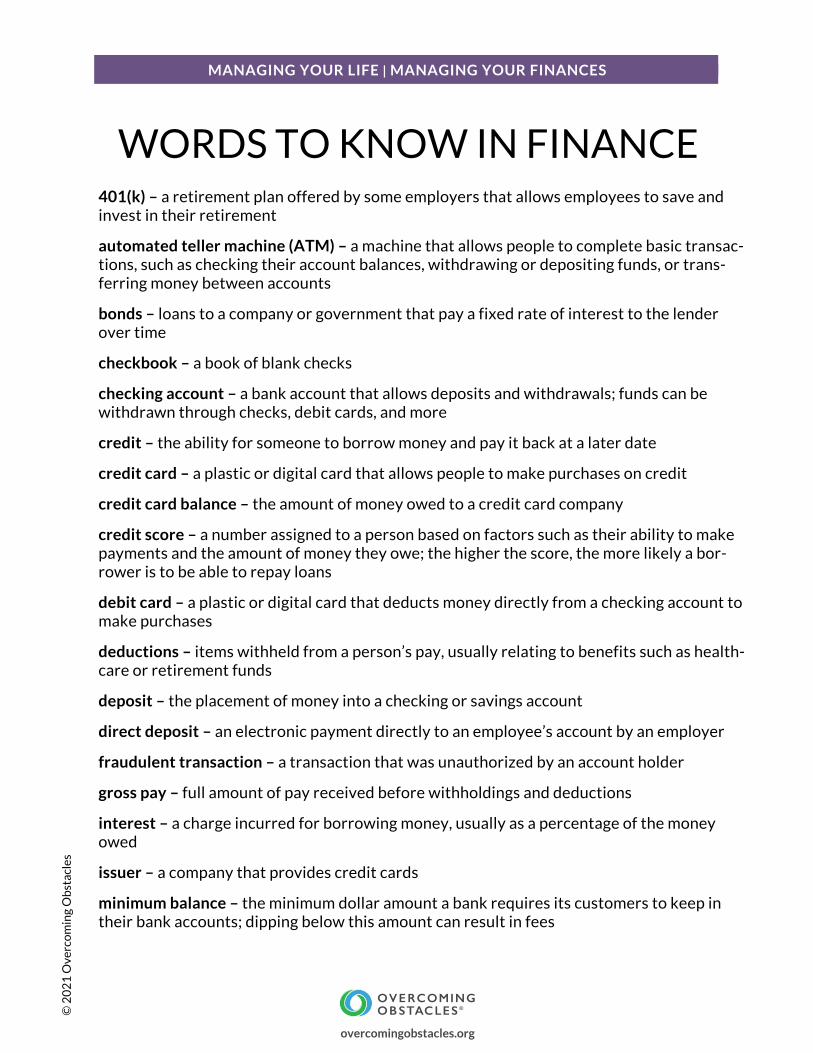
MANAGING YOUR LIFE | MANAGING YOUR FINANCES©
20
21
Ove
rco
min
g O
bst
acle
s
401(k) – a retirement plan offered by some employers that allows employees to save and invest in their retirement
automated teller machine (ATM) – a machine that allows people to complete basic transac-tions, such as checking their account balances, withdrawing or depositing funds, or trans-ferring money between accounts
bonds – loans to a company or government that pay a fixed rate of interest to the lender over time
checkbook – a book of blank checks
checking account – a bank account that allows deposits and withdrawals; funds can be withdrawn through checks, debit cards, and more
credit – the ability for someone to borrow money and pay it back at a later date
credit card – a plastic or digital card that allows people to make purchases on credit
credit card balance – the amount of money owed to a credit card company
credit score – a number assigned to a person based on factors such as their ability to make payments and the amount of money they owe; the higher the score, the more likely a bor-rower is to be able to repay loans
debit card – a plastic or digital card that deducts money directly from a checking account to make purchases
deductions – items withheld from a person’s pay, usually relating to benefits such as health-care or retirement funds
deposit – the placement of money into a checking or savings account
direct deposit – an electronic payment directly to an employee’s account by an employer
fraudulent transaction – a transaction that was unauthorized by an account holder
gross pay – full amount of pay received before withholdings and deductions
interest – a charge incurred for borrowing money, usually as a percentage of the money owed
issuer – a company that provides credit cards
minimum balance – the minimum dollar amount a bank requires its customers to keep in their bank accounts; dipping below this amount can result in fees
WORDS TO KNOW IN FINANCE
overcomingobstacles.org

MANAGING YOUR LIFE | MANAGING YOUR FINANCES©
20
21
Ove
rco
min
g O
bst
acle
s
minimum payment – the lowest amount of money required to be paid on a loan or credit card balance each payment due date
negative balance – an account balance of less than zero, indicating that more money has been spent than was available in the account
net pay – amount of pay remaining after deductions from a person’s gross pay
online banking – known as internet banking or web banking, an electronic payment system that enables customers of a bank or other financial institution to conduct a range of finan-cial transactions through the financial institution’s website or app
overdraft fee – a fee incurred when a bank covers a payment that is greater than the avail-able funds in a checking account
pay period – the recurring schedule that determines how frequently a person is paid
paycheck – a check or payment for salary or wages
payment schedule – a schedule of when repayment is made between a borrower and a lender
pay stub – a piece of paper accompanying each paycheck that lists gross pay, withholdings, deductions, and net pay
pending transaction – an approved transaction that may be reflected in your account bal-ance but has yet to be fully processed
posted transaction – an account transaction that has been fully processed
savings account – a bank account that earns interest and is meant to hold funds for an extended period of time
SIMPLE IRA – a retirement plan designed for small businesses that allows employees to save and invest in their retirement
state and federal unemployment taxes – amount of pay withheld to cover unemployment taxes
union dues – regular payments made to labor unions (which are organizations that repre-sent collective interests of employees) to cover the cost of membership
withdraw – to take money out of an account
withholdings – mandatory items withheld from a person’s pay, such as income taxes, Social Security taxes, and unemployment taxes
WORDS TO KNOW IN FINANCE(continued)
overcomingobstacles.org

MANAGING YOUR LIFE | MANAGING YOUR FINANCES©
20
21
Ove
rco
min
g O
bst
acle
s
PAYCHECK
Burke Food Supply Company Dolores Lopez Check number: 7207869123 Avenue Q 714 Ivy Road Pay period ending: 8/14/20XXLos Angeles, CA 90019 Los Angeles 90018
Hours and Earnings Taxes and Deductions
Description Amount Description Current Y-T-D Amount Amount
Rate of pay Reg. 15.00 FICA Tax 22.95 757.35Hours Worked 20 Fed. Income Tax 23.43 773.19. State Income Tax 2.82 93.06 . State Disability Tax 3.00 99.00 Union Dues 2.00 66.00Gross Pay 300.00 Net Pay 245.80Total Gross Y-T-D 9,900.00 Total 54.20 1,788.60
Statement of earnings. Detach and keep for records.
Burke Food Supply Company 7207869123 Avenue QLos Angeles, CA 90019
Date: August 14, 20XX
Pay to the Dolores Lopez $***245.80 order of 714 Ivy Road Los Angeles, CA 90018
Two Hundred forty-five And 80/100 . . . . . . . . . . . . . . . . . . . . . . . . .DOLLARS
Joseph W. Burke
❘ : 61777 ❘ : 614728066 ❘ ❘ . 7207869
City Savings & Loan23 Sebastian St.Los Angeles, CA 90230
overcomingobstacles.orgPowered by TCPDF (www.tcpdf.org)

MANAGING YOUR LIFE | LESSON 2: MAKING A BUDGET
overcomingobstacles.org
AGENDA
Starter
Shopping Spree
Where the Money Goes
My Budget
Conclusion
Student Assessment
Objectives
Students will recognize the need to keep a budget.
Students will learn what a budget is and identify the items commonly included in a budget.
Students will create their own budgets.
Materials Needed
Copies of the “Shopping Spree” activity sheet, cut up so that each student has one list (Part I)
One copy of the “My Budget” activity sheet for each student (Part III)
2LESSON
MAKING A BUDGET

MANAGING YOUR LIFE | LESSON 2: MAKING A BUDGET
overcomingobstacles.org
Have students browse www.moneysmartfamily.com, a website about “America’s cheapest family.” Share with them the story of Steve and Annette Economides, who through wise money management and budgeting have managed to pay cash for their home and several cars, take lavish family vacations without building debt, feed a family of seven for only $350 a month, and put their children through college without any school loans—all on an average income of only $35,000 a year! Their budgeting skills have allowed them to become New York Times best-selling authors and have even allowed them to appear on many national television shows.
Starter (2 minutes)
Purpose: Students recognize the need to keep a budget.
1. Students prepare for a shopping spree.
Ask for five volunteers. Tell them that they each own a business. Assign each volunteer one of the following businesses:
Bank: Your goal is to try to get people to save money. When they come to the bank, they can save either $75, $100, or $250.
Clothing Store: Your goal is to sell clothing. A shirt costs $60, and a full outfit is $120 (a discount price).
Electronics Store: Your goal is to sell a stereo for $200. This is a super deal on the best stereo in the store.
Shoe Store: Your goal is to sell athletic shoes for $95 or dress shoes for $70.
Supermarket: Your goal is to have each shopper buy $150 worth of food. They may split the cost into two installments of $75 each.
Assign each business a location within the classroom. Make sure that the instructions are clear to each of the business owners. Distribute the cards cut from the “Shopping Spree” activity sheet to the other students. Read the following directions to the class:
You are all shoppers and have $500 to spend at (name the stores). As you go from store to store, write down the amount of your transaction on your card so you can keep track of how much money you’ve spent. Have the store owner initial the transaction. Be sure to think about how much money you have and what is most important to you. When I say freeze, you must stop where you are, and we’ll see how everyone is doing.
2. Students participate in a shopping spree.
Part I Shopping Spree (20 minutes)

MANAGING YOUR LIFE | LESSON 2: MAKING A BUDGET
overcomingobstacles.org
Tell students to begin. Circulate the room and make sure that each student has at least one item on their card before you say "freeze." Say, “Now it’s time to pay your bills. Everyone’s had a few unexpected medical expenses, so everyone must subtract $100 under ‘Miscellaneous.’”
Point out to students that if they went to the bank and opened a savings account, they can use that money to help pay their bills. Have students total their expenses. Tell students that if they went over their $500 budget, they must sit down. Tell the students who are still standing that they can continue to shop.
After a few more minutes, say "freeze." Say, “Your refrigerator broke, and your food spoiled. You need to replace the food. It costs you $75 at the supermarket.” Tell students that if this puts them over the limit, then they must sit down. If they have money in the bank, they can subtract $75 and continue to play.
Determine whether or not to keep playing based on the number of students still standing. The following are suggestions for additional "freezes": (a) taxes are due, (b) your car broke down, and (c) you were invited to a party and need a special outfit.
3. Students discuss the implications of the shopping spree.
After everyone has had enough time to play, ask students, “Who put money in the bank? Did it come in handy?” Then ask the seated students how they spent so much money that they had to sit down. Lead them to identify the pressure of the salespeople or the appeal of various items. Explain that they don’t have an unlimited supply of money in real life, so it is important to spend money wisely and to keep track of what is spent. Explain that a budget is useful in accomplishing that goal.
Purpose: Students learn what a budget is and what is included in a budget.
1. Students discuss what a budget is.
Ask students how they can keep track of what they spend. Ask if anyone looked at their card to see how much money they had before they went to the next store. Tell students that keeping track of their balance allowed them to budget their money.
Explain to students that a budget is a written plan that describes how they want to spend and save their money. It helps them set priorities, prepare for unexpected expenses, and keep track of how much money they have.
2. Students learn what items to include in a budget.
Have students describe how they spend their money. Write student responses on the board. (Students may respond: clothes, snacks, magazines, books, movies, makeup, gifts, and savings.)
Part II Where the Money Goes (10 minutes)

MANAGING YOUR LIFE | LESSON 2: MAKING A BUDGET
overcomingobstacles.org
Remind students to also consider expenses that don’t occur frequently, such as holiday or birthday presents for family, special events or trips, etc.
3. Students estimate the cost of items in a budget and learn that budgets reflect personal priorities.
Ask the class to estimate costs for each item listed and write the amounts alongside the items.
Point out to students that when trying to determine the costs of specific items, they didn’t always suggest the same amounts. Explain to students that different people have different budgets because they have different priorities. For example, students who have jobs may be able to afford going to the movies every week. Those who have jobs might also have additional costs for transportation, such as public transportation or car expenses. Those students who are not working right now might have to put their money toward the basics.
Explain to students that in the next activity they will consider their priorities, and decide what they would like to buy or how much they want to save. This will allow them to make their own budgets.
Purpose: Students make their own budget.
1. Students complete the “My Budget” activity sheet.
Distribute copies of the “My Budget” activity sheet to each student. Explain to students that the activity sheet is their practice budget.
Give students the following instructions:
In the top area, you’re told what your income is, how much money you are putting into savings, and how much you spend on food each week.
Go through the activity sheet and, in the left column, write down the items that you need or on which you want to spend money. Think about the items that you identified in the previous activity.
Remind students that most successful investors say that the first bill paid each month should be to their own savings account. Tell them to keep in mind that people who spend all of their income on expensive items are not rich if they have no money in the bank to support their lifestyle.
2. Students calculate their weekly and monthly expenses.
After students have listed their weekly expenses in the column on the left side of the sheet, have them write the weekly amount of each item in the center column, which is labeled “Cost.” Then have students multiply those amounts by 4 to find the amount to write in the column on the right, which is labeled “Monthly Expenses.”
Part III My Budget (15 minutes)

MANAGING YOUR LIFE | LESSON 2: MAKING A BUDGET
overcomingobstacles.org
Point out to students that not every expense will occur weekly. For example, they might go to the movies only once a month. For these expenses, they should write the monthly expense in the column on the right and calculate how much they’ll spend on those items each week. For example, if they go to one movie a month, the cost per month is about $8. That means that the cost per week is $8 divided by 4, so the weekly expense would be about $2. The $2 should be written in the column on the left, which is labeled “Cost.”
As students are completing the activity sheet, move around the room and assist them with their calculations as necessary.
3. Students calculate their total weekly and monthly expenses.
Once students have finished completing the monthly column, tell them to add everything in the center “Cost” column and write the total at the bottom to see how much they’re spending each week. Next, instruct them to add everything in the “Monthly Expenses” column and write that total at the bottom to see how much they’re spending each month. Remind students to include the money they have to spend on food.
4. Students see if their budget is balanced.
Instruct students to subtract their total expenses from their total income. Explain that if the remainder is greater than zero, their budget is balanced and they have money that they can save. Explain to students that if the remainder is less than zero, their budget is not balanced because they have more expenses than they have income and savings.
Ask students to suggest ways to correct an unbalanced budget. Lead them to recognize that there are two solutions: increase income or decrease spending.
5. Students learn that their budget is a guide.
Point out to students that a budget is a guideline but that there will always be unexpected events that will impact their budgets. Ask students what can be done to help keep their budgets balanced.
Explain to students that while there are several ways that they can deal with changes to their budget, the one thing they should never do is ignore the need for one and hope that financial problems will go away. They won’t, and students will find that their financial problems worsen as long as they ignore the situation.
Conclude by asking students to comment on why a budget would be a helpful tool for them. Elicit from students the following key points that were taught in this lesson:
Conclusion (2 minutes)

MANAGING YOUR LIFE | LESSON 2: MAKING A BUDGET
overcomingobstacles.org
A budget is a useful device to plan saving and spending money wisely.
People have different budgets because of different priorities.
A balanced budget allows people to save money.
If a budget is not balanced, people should find ways to increase their income or cut back on spending.
1. List three ways in which making a budget can help you manage your money.
2. How can you complete your personal budgets for the week and month as thoroughly as possible?
Student Assessment

MANAGING YOUR LIFE | LESSON 2: MAKING A BUDGET
overcomingobstacles.org
LESSON EXTENSIONS
Using Quotations
“Budgets are for cutting; that’s why you set them.” —Dr. Laurence Buckman
Explain to students that governments, from local to federal, maintain a budget. Have students
investigate a local, state, or federal government budget.
Addressing Multiple Learning Styles
Explain to students that the only effective way to save money is to make saving their first expense.
Brainstorm with students how they can figure what amount to put into savings every week and where
they will put it.
Writing in Your Journal
Have students think of something they want that will require them to save (e.g., a vacation, a special
item of clothing, a gift for someone important to them, tickets to a show, etc.).
Have students create a budget that allows them to save for the item. Have them keep a daily list of
expenditures and savings as they work toward their goal.
Using Technology
Demonstrate to students how an electronic spreadsheet works. You can use Excel or a free spreadsheet
program online. Show students how expenditures are divided into categories and how amounts spent
and earned are plotted. This can be done manually in a ledger as well.
Invite students to set up their own spreadsheets.

MANAGING YOUR LIFE | LESSON 2: MAKING A BUDGET
overcomingobstacles.org
Homework
Have students find an annual report from a business in which they are interested. Many companies will
send one on request. Encourage students to call, send emails, or write letters requesting annual reports.
Discuss the budget of each company that sends an annual report.
Additional Resources
Have students read The Pocket Idiot’s Guide to Living on a Budget, Second Edition by Peter J. Sander
and Jennifer Basye Gander.
Have students create posters showing their favorite tips from the book. Display the posters around the
classroom.

MANAGING YOUR LIFE | MAKING A BUDGET©
20
21
Ove
rco
min
g O
bst
acle
s
SHOPPING SPREE
$500.00
Bank $ ______________
Clothing $ ______________
Electronics $ ______________
Shoe Store $ ______________
Supermarket $ ______________
Miscellaneous $ ______________
Total Spent $ ______________
Total Saved $ ______________
$500.00
Bank $ ______________
Clothing $ ______________
Electronics $ ______________
Shoe Store $ ______________
Supermarket $ ______________
Miscellaneous $ ______________
Total Spent $ ______________
Total Saved $ ______________
$500.00
Bank $ ______________
Clothing $ ______________
Electronics $ ______________
Shoe Store $ ______________
Supermarket $ ______________
Miscellaneous $ ______________
Total Spent $ ______________
Total Saved $ ______________
$500.00
Bank $ ______________
Clothing $ ______________
Electronics $ ______________
Shoe Store $ ______________
Supermarket $ ______________
Miscellaneous $ ______________
Total Spent $ ______________
Total Saved $ ______________
overcomingobstacles.org

MANAGING YOUR LIFE | MAKING A BUDGET©
20
21
Ove
rco
min
g O
bst
acle
s
Per Week Per Month
Income $ ___________ × 4 $ ___________
Savings $ ___________ × 4 $ ___________
Food $ ___________ × 4 $ ___________
MY BUDGET
100.00 400.00
20.00 80.00
40.00 160.00
Per Week Per Month
Income $ _________________ × 4 $ _________________
Weekly Wants/needs Cost Monthly expenses
Savings $ _________________ × 4 $ _________________
_______________ $ _________________ × 4 $ _________________
_______________ $ _________________ × 4 $ _________________
_______________ $ _________________ × 4 $ _________________
_______________ $ _________________ × 4 $ _________________
_______________ $ _________________ × 4 $ _________________
_______________ $ _________________ × 4 $ _________________
_______________ $ _________________ × 4 $ _________________
_______________ $ _________________ × 4 $ _________________
_______________ $ _________________ × 4 $ _________________
_______________ $ _________________ × 4 $ _________________
Total Income $ _________________ $ _________________
– Total Spent – $ _________________ – $ _________________
= $ _________________ = $ _________________ (This must be larger than zero) (This must be larger than zero)
overcomingobstacles.orgPowered by TCPDF (www.tcpdf.org)

MANAGING YOUR LIFE | LESSON 3: UNDERSTANDING ADVERTISING & MASS MEDIA
overcomingobstacles.org
AGENDA
SESSION 1
Starter
Demand and More Demand
Ad It Up!
SESSION 2
Ad It Up! (continued)
Complaint Department
Conclusion
Student Assessment
Objectives
Students will identify mass media as a source for building consumer wants.
Students will examine mass media messages critically.
Students will recognize advertising techniques.
Students will consider their rights and responsibilities as consumers.
Materials Needed
Session 1: Five advertisements, with the product names removed, cut from magazines or
newspapers or printed from a website (Starter)
3LESSON
UNDERSTANDING ADVERTISING & MASS MEDIA

MANAGING YOUR LIFE | LESSON 3: UNDERSTANDING ADVERTISING & MASS MEDIA
overcomingobstacles.org
Session 1: One copy of the “Products for Advertising Campaigns” activity sheet, cut into pieces
according to the directions (Part II)
Session 1: One copy of the “Advertising Techniques” activity sheet for each student (Part II)
Session 1: Additional commercials, radio spots, internet ads, and/or print advertisements (Part II)
Session 1: One or two large pieces of construction paper for each group and colored pencils, pens,
and/or markers (Part II)
Session 2: One copy of the “Advertising Campaign Evaluation” activity sheet for each group (Part I)

MANAGING YOUR LIFE | LESSON 3: UNDERSTANDING ADVERTISING & MASS MEDIA
overcomingobstacles.org
SESSION 1
Ask students to take out a piece of paper and number it from one to five. Explain to students that you will test their consumer awareness. Show them five advertisements with the product names removed and have students identify the associated products.
After students have identified the ads, ask them what their knowledge shows about American consumers. Lead them to recognize that advertising and the media are an integral part of American life.
Explain to students that the purpose of advertising in the mass media is to inform and to sell. Explain that as consumers, it is important that we make informed decisions and that we do not allow ourselves to be manipulated by advertising.
Starter (2 minutes)
Purpose: Students identify mass media as a source for building consumer wants.
1. Students define “mass media.”
Ask students to define “mass media” and to give examples of it. Write student responses on the board. Ensure students understand that “mass media” encompasses various channels of mass communication, including television, radio, podcasts, news publications, magazines, movies, and the internet.
Ask students how much money they think it costs to air a 30-second commercial during the Super Bowl. Have them suggest reasons why the costs are so high. Lead students to recognize that information in the media is sent to many people at once, so it’s a great way to make a point or to promote a product.
2. Students recognize that businesses want to increase demand to sell more products.
Ask students to consider how businesses and corporations make money. Elicit from students that businesses create demand by convincing consumers to alter their tastes and to spend money on a product. Increasing demand increases sales and revenue.
3. Students recognize that companies increase demand through advertising and the media.
Ask students to imagine that they own a business. How would they increase the demand for their product or service? Elicit from students that advertising is an excellent way to increase demand for a product or service.
Part I Demand and More Demand (10 minutes)

MANAGING YOUR LIFE | LESSON 3: UNDERSTANDING ADVERTISING & MASS MEDIA
overcomingobstacles.org
Say, “Advertising is an influential aspect of American life. Video ads, online banners, radio spots, billboards, and newspaper ads are everywhere.”
4. Students discuss the pros and cons of advertising.
Explain to students that there are different views of advertising. Here are two views:
Some believe that advertising leads to extra profits because consumers make unnecessary impulse purchases. These people tend to believe that ads are responsible for extra borrowing and the problems associated with consumers’ going into debt.
Others believe that advertising makes consumers wiser by providing important information about prices, quality, and availability.
Ask students what they think. Discuss and debate the issue, making sure that students support their positions with facts and logic.
Purpose: Students critically examine mass media messages and recognize advertising ploys and techniques.
1. Students identify persuasive techniques used in advertising.
Before beginning this activity, have one copy of the “Products for Advertising Campaigns” activity sheet cut into strips and placed in a container.
Explain to students that no matter where companies choose to place their advertisements, there are some basic techniques that they employ in their ads to persuade consumers to buy.
Distribute one copy of the “Advertising Techniques” activity sheet to each student. Ask volunteers to read the six techniques. Discuss the techniques with the class.
2. Students identify persuasive techniques used in current advertisements.
Have students use the ads from the starter, as well as others you have found, to identify the techniques that each advertisement employs.
Discuss how students recognized the techniques and what makes each technique effective or ineffective.
3. Students create ad campaigns using advertising techniques.
Divide the class into groups of four or five.
Part II Ad It Up! (35 minutes)

MANAGING YOUR LIFE | LESSON 3: UNDERSTANDING ADVERTISING & MASS MEDIA
overcomingobstacles.org
Explain that each group will be developing an advertising campaign that must include a print ad and a video or radio/podcast commercial. The campaign must use at least one of the advertising techniques they have studied. Explain to students that part of the task is to determine the benefits of the product and its target audience—the type of consumer who would want the product.
Ask a volunteer from each group to draw a product that will be the focus of the group’s ad campaign. Distribute the art supplies to groups.
Tell students that they have the rest of the class period to create their print advertisement and their commercial. Inform the class that commercials are rarely longer than 30 seconds. Suggest that they use what they know works in advertising as a springboard. Encourage them to be innovative, use their creativity, and have fun.

MANAGING YOUR LIFE | LESSON 3: UNDERSTANDING ADVERTISING & MASS MEDIA
overcomingobstacles.org
SESSION 2
1. Students present their advertising campaigns and evaluate each other’s presentations.
Give students 10 minutes to complete their advertising campaigns and to polish their performances.
Distribute the “Advertising Campaign Evaluation” activity sheet to each group. Then have each group perform its commercial and show and explain its print ad. After each performance, have groups comment on the effectiveness of the advertising campaign.
Part I Ad It Up! (continued) (30 minutes)
Purpose: Students recognize their rights and responsibilities as consumers.
1. Students understand that it is their responsibility to be informed consumers.
Explain to students that while we cannot be experts on the safety and quality of all goods and services, we can be informed consumers. Ask students to suggest actions that we can all take to make wise decisions about what to buy. Write key points of the discussion on the board. (Students might respond: define the product or issue, gather information about the product, consider alternatives, and weigh options and consequences.)
Direct students to understand that by reading the fine print, researching on the internet and in other reference materials, and talking to well-informed individuals, they can gather information that will help them with their consumer decisions. Point out that they can also use their decision making skills when purchasing products and services.
2. Students learn about private and governmental consumer groups.
Tell students that there are consumer organizations that can help them get the product information they need.
Help students learn the following:
Part II Complaint Department (20 minutes)

MANAGING YOUR LIFE | LESSON 3: UNDERSTANDING ADVERTISING & MASS MEDIA
overcomingobstacles.org
The Food and Drug Administration (FDA) oversees the safety of foods and drugs. No drug can be sold for human use without the FDA’s approval. This agency also ensures that pet food is safe.
The Federal Trade Commission (FTC) enforces standards for advertising, selling, and other business practices. If an ad misrepresents a product or service, the FTC investigates. The FTC also accepts complaints from consumers regarding products or services.
State and local governments also handle consumer issues. Their agencies look into problems with insurance, real estate, or utilities, among other industries.
Private consumer organizations such as the Better Business Bureau (BBB) provide valuable assistance to consumers and field complaints. The BBB keeps files on local businesses and can help consumers resolve problems.
The American Medical Association (AMA), the American Dental Association (ADA), and the American Bar Association (ABA) are organizations that maintain ethical standards for their professions and process complaints against doctors, dentists, and lawyers.
National organizations also provide consumer information. The best known is the Consumers Union of the United States, which publishes the magazine Consumer Reports.
3. Students practice using good communication skills to make consumer complaints.
Point out that it is a consumer’s responsibility to use good communication skills to inform businesses that they are not satisfied with a product or service.
Explain that to do so effectively, consumers must produce evidence that there is a problem and that the company is responsible. These are the facts that they must communicate:
The transaction: where, when, and how they purchased the product or received the service
The product or service: what they bought, including the model and the serial number
The problem: the details of the problem and how they were inconvenienced
Attempted solutions: what they did (if anything) to try to solve the problem, or the names of people they may have spoken to about it already
The solution: what action they want taken (e.g., a refund, a replacement, or an apology)
Point out that consumers should always be thorough, clear, and courteous when they are stating a complaint.
Have students write business letters stating a consumer complaint. Remind them to use the appropriate form for business letters.

MANAGING YOUR LIFE | LESSON 3: UNDERSTANDING ADVERTISING & MASS MEDIA
overcomingobstacles.org
Ask students to review the role of mass media in the American consumer’s life. Have students describe important advertising techniques. Elicit from students the following key points that were taught in this lesson:
Advertising in the mass media influences the demand for products.
By recognizing advertising techniques, people can become better-educated consumers.
Governmental and private organizations can help consumers find information and solve problems.
Consumers have a responsibility to inform businesses about poor products and services.
Conclusion (2 minutes)
SESSION 1
1. Define “mass media.”
2. List two positive and two negative effects of advertising.
3. Describe a commercial or an ad from a magazine. Explain the persuasive techniques that this
advertisement uses.
SESSION 2
1. List three things that you can do to be an informed consumer.
2. List three organizations that keep consumers informed. Describe the information that each
organization provides.
3. Describe an ineffective consumer complaint and an effective consumer complaint.
Student Assessment

MANAGING YOUR LIFE | LESSON 3: UNDERSTANDING ADVERTISING & MASS MEDIA
overcomingobstacles.org
LESSON EXTENSIONS
Using Quotations
“You can tell the ideals of a nation by its advertisements.” —Norman Douglas
Display several print ads for the class. Have each student select a print ad and write a short essay about
what the ad says about our nation. Is the ad’s message positive or negative? Is it accurate or inaccurate?
Addressing Multiple Learning Styles
Ask students if they believe that teens are accurately portrayed in the media. Say, “Are there any good
teen role models on television? How well do TV shows and movies deal with teen issues?”
Discuss the issue as a class, and then have students write a short screenplay for a television show or
movie that accurately portrays teens and their issues.
Writing in Your Journal
Have students look through their wardrobe. Have them count how many items have brand names or
cartoon characters on them or are endorsed by sports figures, sports teams, organizations, etc.
Have students make a list of the items that are endorsed by famous people, have brand names, etc.
Discuss the influences that impact our decisions as consumers.
Using Technology
Explain to students that product placement in films is an important form of advertising and supplies
money to filmmakers. Advertisers pay a lot of money to have their products shown in a film.
Discuss other advertising strategies, including advertising on the internet. Have students write a short
paragraph about these strategies.

MANAGING YOUR LIFE | LESSON 3: UNDERSTANDING ADVERTISING & MASS MEDIA
overcomingobstacles.org
Homework
Have students tally the number of advertisements that they encounter in one day and make note of
how much time elapses between these ads.
Discuss the number of items that companies are trying to sell to the American people on a daily basis.
Additional Resources
Have students read an issue of Consumer Reports and note which articles they find interesting or
surprising.
Have students discuss what they read and identify reasons why reading reviews and investigating
product claims are important.

MANAGING YOUR LIFE | UNDERSTANDING ADVERTISING AND MASS MEDIA©
20
21
Ove
rco
min
g O
bst
acle
s
Appeals to emotions: This technique exploits consumers’ fears and misgivings. For example, an advertisement using emotional appeals might ask “Do you have bad breath?” or state “Dandruff isn’t sexy.” The message targets vanity and creates doubt about oneself. The solution offered is, of course, to buy the product advertised.
Bandwagon approach: This technique tells people to do what everyone else is doing. It takes advantage of people’s desire to conform. Implied in the bandwagon approach is that consumers must “keep up with the Joneses.” Consumers don’t want to be odd by not buying the product. This style of advertisement is often employed in political cam-paigns.
Testimonials: This form of advertising uses well-known people, such as athletes, actors, and musicians, or even ordinary folks to endorse products. The concept is that if these people like the product or service, the average consumer will like it, too. These ads also imply that some of the fame of the celebrity might just “rub off” on the user.
Glittering generalities: This type of ad uses exaggerated or catchy phrases, such as “Good to the last drop” or “I never forget a woman wearing diamonds.” While these phrases attract attention, they don’t really mean anything.
Superiority appeal: This technique implies that it would be flattering or prestigious to be like the rich person in the ad. It suggests that the consumer can become superior to friends and neighbors by purchasing the product. Many luxury car advertisements use this technique.
Brand names: A brand name is a word, picture, or logo for a product or service. Many companies know how powerful brand-name identification is, so they spend a lot of money advertising and building consumer awareness of their product. Consumers are influenced by names they see frequently in newspapers and magazines or on television.
ADVERTISING TECHNIQUES
overcomingobstacles.org

MANAGING YOUR LIFE | UNDERSTANDING ADVERTISING AND MASS MEDIA©
20
21
Ove
rco
min
g O
bst
acle
s
Group Members
_________________________________________________________________________
RATING SYSTEM:
ADVERTISING CAMPAIGN EVALUATION
Group product AdvertisinG
technique
WhAt WAs
effective
WhAt could Be improved
rAtinG
**** outstanding
*** excellent** good
* poor
overcomingobstacles.org

MANAGING YOUR LIFE | UNDERSTANDING ADVERTISING AND MASS MEDIA©
20
21
Ove
rco
min
g O
bst
acle
s
Directions: Cut the following product descriptions into strips so that group volunteers can each draw one.
Ball that does not bounce
Candy that tastes like sawdust
A light bulb that lasts only five minutes
Music app that only plays songs backward
Dog collar that makes the dog bark
Suntan lotion that causes sunburn
Automobile that gets only six miles per gallon of gas
Soft drink that makes you tired
In-line skates with square wheels
Clothing detergent that leaves your clothes smelling like dirt
Perfume that smells like gasoline
PRODUCTS FOR ADVERTISING CAMPAIGNS
overcomingobstacles.orgPowered by TCPDF (www.tcpdf.org)

MANAGING YOUR LIFE | LESSON 4: BECOMING A RESPONSIBLE CITIZEN
overcomingobstacles.org
AGENDA
Starter
The Law of the Land
Vote!
What the Government Gives and Gets
Conclusion
Student Assessment
Objectives
Students will identify the need for rules and the reasons why people should abide by the law.
Students will recognize that voting is a valuable right and that they have a responsibility to be
informed voters.
Students will identify reasons for paying taxes.
4LESSON
BECOMING A RESPONSIBLE CITIZEN

MANAGING YOUR LIFE | LESSON 4: BECOMING A RESPONSIBLE CITIZEN
overcomingobstacles.org
Ask students to describe what happens when a traffic light at a busy intersection isn’t working. Encourage responses that describe chaos, noise, and gridlock. Elicit from students reasons why people don’t all cooperate intelligently to get through the intersection. Lead students to recognize that people have their own priorities and personal schedules.
Explain to students that when hundreds of thousands of people live close together—as in many congested areas of our country—they agree on rules to limit chaos. Point out to students that traffic lights are just one of the mechanisms that we have put in place to make our society run more effectively.
Explain that this lesson will focus on ways that we can participate in our government to make it work for us.
Starter (2 minutes)
Purpose: Students discuss the need for rules and why they should abide by the law.
1. Students identify familiar laws.
Ask students to suggest a definition of “laws.” Students’ initial responses might describe laws as being strictly prohibitive. Allow that definition to stand for now; students will reconsider it later.
Ask students to list laws other than traffic laws. Encourage students to list laws that cover as many areas of life as possible. Write student responses on the board.
2. Students explore reasons for creating laws.
Ask students to describe what life might be like if laws didn’t exist. Allow students to list alternatives that might seem positive to them (such as driving rights for 13-year-olds) as well as those laws that have negative or chaotic consequences. Write student responses in a column next to the laws listed.
When the list is complete, direct students to focus their attention on the second column. Lead students to understand that laws are not created to prevent us from doing things, but rather to protect people and to make our lives more efficient. Using specific examples from the students’ list, point out that many laws are created to protect the community and its resources.
3. Students discuss the reasons for abiding by the law.
Part I The Law of the Land (10 minutes)

MANAGING YOUR LIFE | LESSON 4: BECOMING A RESPONSIBLE CITIZEN
overcomingobstacles.org
Ask students to consider why it might be important to follow rules or abide by laws, even if they think that breaking a rule or law won’t affect anybody else. Write students’ responses on the board. (Student responses should include these points: even though you may not realize how breaking a specific law affects somebody else, it probably does; your religious or ethical values require you to play by the rules; there might be consequences for you if you are caught.)
4. Students discuss the consequences of breaking a law.
Ask students to identify the negative consequences of breaking a law. In order to facilitate discussion, ask questions such as the following:
How would you feel if you broke a law and someone got hurt?
What happens to people who get caught breaking laws?
How are family and friends affected when a person breaks a law?
How does breaking the law affect one’s education and career goals?
Do you think that breaking a law increases the likelihood of breaking more serious laws?
Emphasize to students that there are many reasons to obey laws. One of the most serious is that, if they do break a law, they may have to deal with negative consequences for the rest of their lives.
Purpose: Students identify the importance of informed voting.
1. Students consider the purpose of government.
Tell students that when a government is created, the founders agree to a set of laws that establishes how citizens will treat each other. Explain that all people who live within the territory of that government must follow the “law of the land” or face consequences.
Cross your arms and firmly tell students, “Well, I never said I wanted laws for traffic lights, so I’m not going to obey them anymore.”
Ask students what they think about your position. Ask them to consider what the consequences might be for you and how your actions might affect others.
2. Students recognize that voting is a valuable right.
Ask students if you are justified in saying that you never said you wanted a law for traffic lights. Lead students to recognize that although you didn’t directly ask for the law, an elected official (or someone hired/appointed by an elected official) made the law.
Part II Vote! (10 minutes)

MANAGING YOUR LIFE | LESSON 4: BECOMING A RESPONSIBLE CITIZEN
overcomingobstacles.org
Protest to students, “Well, what if I didn’t vote?” Elicit from students the understanding that you gave up your right to have a voice on the issue when you decided not to vote.
Tell students that voting is a valuable right that citizens of the United States have. Ask students why they think voting is important. Lead them to recognize that the right to vote allows citizens to have a voice (a form of power) in their own government.
3. Students recognize the importance of being an informed voter.
Ask students to consider what happens if they don’t know anything about the candidates in an election. Direct students to understand that this is similar to not voting at all: out of ignorance they deny their right to choose how they will be governed.
Explain to students that it is their (and everyone’s) responsibility to be informed about the candidates and issues in an election.
4. Students learn how to become informed voters.
Ask students, “Where do you think you can get information about candidates and issues in an election?” (Student responses should include news publications, the internet, TV, libraries, candidate forums and offices, mailers, etc.)
Remind students about what they learned in the lessons on advertising. Explain that like companies, candidates will want to present themselves in the most favorable light in order to get votes. Tell them to keep what they learned about listening critically to advertisements in mind, as the same issues apply to political campaigns.
Purpose: Students identify government services and learn that taxes are the price we pay for these services.
1. Students identify services that the government provides.
Tell students that they are going to determine what the government does for them. Divide students into four groups. Assign each group one of the following categories: (a) transportation; (b) schools; (c) municipal services, such as libraries and recreation; (d) health and safety services, such as hospitals, police, and firehouses. Challenge students to list as many different services and institutions that the government provides in their assigned area as they can.
Allow groups about five minutes to work. Elicit from students their ideas. Write responses on the board. When this list is complete, point out the wide variety of areas in which the government provides services that we depend on and often take for granted.
Part III What the Government Gives and Gets (20 minutes)

MANAGING YOUR LIFE | LESSON 4: BECOMING A RESPONSIBLE CITIZEN
overcomingobstacles.org
2. Students explore the reasons for establishing and paying taxes.
Ask students if they know where the government gets money to pay for the services that they just listed. Explain that the government collects taxes in order to offer those services to its citizens.
Elicit from students reasons why it is important for us to pay our taxes. Ask each group to offer descriptions of what might occur if the services or institutions they discussed earlier were neglected.
Lead students to recognize the following: It is every citizen’s responsibility to pay for the benefits that the government provides. Paying taxes is a law, and there are negative consequences if that law isn’t followed. People who don’t pay their taxes often get caught and end up in jail or have to pay the government a lot more money.
3. Students discuss different types of taxes.
Ask students to list different types of taxes. Explain to students that the government directly collects certain taxes, such as sales taxes. Other taxes— income taxes, for example—require us to file reports to the government when we pay our taxes.
4. Students learn about filing income tax returns.
Say to students, “Suppose you have been working at a job and a deduction has been made for your income tax every payday. Do you have to file a tax return at tax time?”
Explain to students that even though they have had taxes withheld from their paychecks, they still need to file a tax return. They must tell the government how much was withheld from their paychecks during the year. They must also determine how much they owe or how much the government must refund.
Ask students to suggest places where they can go to get help in preparing a tax return. Elicit suggestions such as the following:
Parents and friends who have experience preparing taxes
Organizations specializing in tax preparation (There are organizations that charge for the service, but other organizations do the work for free. Sometimes, free tax preparation requires that your income be below a certain level. These services are often offered at universities and colleges as well.)
The Internal Revenue Service or state taxing authority
Remind students that they may be required to file federal and state tax returns annually, especially when they work.

MANAGING YOUR LIFE | LESSON 4: BECOMING A RESPONSIBLE CITIZEN
overcomingobstacles.org
Close this session by asking students to summarize their rights and responsibilities as citizens. Elicit from students the following key points that were taught in this lesson:
There are many reasons to abide by laws, and there are serious consequences to breaking laws.
It is the responsibility of citizens to be informed.
It is a citizen’s right to vote.
Taxes are the price we pay for government services.
It is important to file tax returns and pay what is owed.
Conclusion (2 minutes)
1. Why do we have laws? Why are they necessary?
2. List three public services that are paid for by taxes.
3. Why is it necessary to pay taxes?
Student Assessment

MANAGING YOUR LIFE | LESSON 4: BECOMING A RESPONSIBLE CITIZEN
overcomingobstacles.org
LESSON EXTENSIONS
Using Quotations
“Liberty means responsibility. That is why most men dread it.” —George Bernard Shaw, playwright
Explain to students that the price of liberty is “eternal vigilance.” Guarding our liberty means behaving
in a responsible way. Have students discuss ways in which they take responsibility for protecting liberty.
Addressing Multiple Learning Styles
Explain to students that many organizations rely on volunteers.
Find out if your school offers credit for volunteering and which organizations in your community use
student volunteers. Inform students of these opportunities.
Writing in Your Journal
Have students write about what they have learned regarding the responsibilities that come with being
an American citizen.
Discuss how students feel about these responsibilities.
Using Technology
Explain to students that voting effects change and that organizing voting blocs is an effective way to
collect votes. Divide the class into groups. Have each group concentrate on a voting bloc (e.g., seniors,
minorities, youth, etc.). Each group should conduct research (e.g., internet, library, telephone interviews,
and so on) to find out what concerns these groups have and how to best motivate each group to register
and vote.
Have each group create and present a campaign to motivate its bloc to the class.
MANAGING YOUR LIFE | LESSON 4: BECOMING A RESPONSIBLE CITIZEN
overcomingobstacles.org
Homework
Have students write a law concerning a behavior that they find annoying. The law should change that
behavior but cannot infringe on individual rights.
Have students present their new “laws” to the class.
Additional Resources
Divide the class into groups. Ask each group to study one of the first 10 amendments to the
Constitution (the Bill of Rights).
Have groups paraphrase and illustrate their amendment and then present their work to the class.
Display their work around the room.

MANAGING YOUR LIFE | GLOSSARY©
20
21
Ove
rco
min
g O
bst
acle
s
bank account: a formal banking relationship established to provide for depositing or withdrawing money.
budget: a systematic plan for the spending of a usually fixed resource, such as money or time, during a given period.
checking account: bank account used for payments via written checks.
credit card: a plastic card from a bank or other institution authorizing the purchase of goods on credit.
direct deposit: an agreement between a company and a bank that allows an employee’s paycheck to be deposited directly into their bank account.
ethical values: a set of principles of conduct and the choices concerning behavior.
federal: of or relating to the central government of the United States.
gross amount: total income or profit before deductions.
income: the amount of money or its equivalent received during a period of time in exchange for labor or services.
interest: money paid for the use of money lent.
media: 1. mass communications, such as newspapers, magazines, radio, television, or the internet. 2. the group of journalists and others who constitute the communications industry and profession.
payee: a person to whom money is paid.
persuasive: tending to have the power to convince or influence.
savings account: a bank account used to save money over a period of time that earns interest.
tax return: a form that a worker must file with the government to report the amount of taxes to be paid.
transaction: a business agreement or exchange; a business deal.
voided: having no legal force or validity.
withholding tax: taxes that the federal, state, or local governments deduct from a worker’s paycheck.
GLOSSARY
overcomingobstacles.orgPowered by TCPDF (www.tcpdf.org)

MANAGING YOUR LIFE | LESSON 5: NURTURING THE DEVELOPMENT OF YOUNG CHILDREN
overcomingobstacles.org
AGENDA
Starter
Neuro-what?
Serve and Return
Developmental Milestones
Conclusion
Student Assessment
Objectives
Students will understand why it is essential to support the development of young children.
Students will learn how they can positively impact the development of a child.
Students will comprehend neuroplasticity and the role it plays over a person’s lifetime.
Materials Needed
An internet connection and device to play a video (Parts I and II)
One copy of the “Brain Plasticity” activity sheet to display (Part I)
Board or chart paper and markers (Part II)
One copy of the “Developmental Milestones” activity sheet for each student (Part III)
5LESSON
NURTURING THE DEVELOPMENT OF YOUNG CHILDREN

MANAGING YOUR LIFE | LESSON 5: NURTURING THE DEVELOPMENT OF YOUNG CHILDREN
overcomingobstacles.org
Begin class by asking students, “Who wants to be a parent one day?” After students respond, say, “Raise your hand if you’ve ever had to take care of a baby or a small child.” After a show of hands, ask, “How many of you think you know a lot about how babies communicate?” Then say, “Today, we’re going to watch a social experiment involving a baby and a parent called ‘Still Face Experiment.’ Pay close attention to the types of facial expressions that relate to specific emotions.” Then play http://www.youtube.com/watch?v=apzXGEbZht0.
After watching the video, ask students how the experiment made them feel (answers could include sad, uncomfortable, angry). Once several students have responded, say, “The video we watched shows us the effect parents have on young children. So, how can we make sure those effects are positive ones?” After a brief pause, say, “Today we’re going to learn ways to engage, encourage, support, and enhance young children’s growth and development.”
Starter (5 minutes)
Purpose: Students learn how a young child’s mind develops.
1. Students discover the rate at which our minds develop.
Ask students if they think there are many differences between a 16-year-old and a 17-year-old. Do they think a lot of development takes place during that year? Give volunteers a chance to respond, and then ask them to consider the differences between a newborn and a one-year-old. Ask students, “Who do you think develops more? Someone going from 16 to 17 years old or a baby in the first year of their life?” Then, say, “The first years of our life are when our minds develop the most, and this is due to something called ‘neuroplasticity.’”
2. Students learn about neuroplasticity.
Tell students that “neuroplasticity”—also known as “brain plasticity”—is the ability of our brains to change and adapt throughout our lives. Then, say, “Our brain is made up of neurons, which are cells that send messages to the rest of our bodies. During our earliest years, these neurons constantly form connections with each other, enhancing our ability to learn and impacting how we behave and communicate.”
Then, ask students, “How many neural connections do you think a child’s brain makes each second during their early years of development?” After several students respond, say, “A child’s brain makes over 1 million connections a second! That’s over 86 billion connections every day!” Then say, “Research has shown that exposure to the right kind of environment during the first years of life actually affects the physical structure of a child’s brain, vastly increasing the number of neural connections. This means that the more engaging and positive an environment is when a child is young, the more neural connections they will have.
Part I Neuro-what? (10 minutes)

MANAGING YOUR LIFE | LESSON 5: NURTURING THE DEVELOPMENT OF YOUNG CHILDREN
overcomingobstacles.org
3. Students learn that it is easier for a young mind to develop.
Display the “Brain Plasticity” activity sheet where students can see it (for example, on a SMART Board or projected onto a screen). Guide them to see that it takes significantly more effort to change as we grow older compared to when we are younger. Say, “These neural connections in our earliest years of life are part of the reason why it’s easier for young children to learn a language than for an adult. Young minds are incredible!”
Stress that since it is easier for young minds to develop, it is important to provide them with a stimulating environment. Say, “Children are learning all the time through their environment, their own actions, and through playing with the adults and other children in their lives. It’s important that we do everything we can to nurture that development.
Purpose: Students learn that “Serve and Return” is critical for brain building in young minds.
1. Students learn about “Serve and Return.”
Tell students that one of the key ways we can support children’s development is through something called “Serve and Return.” Say, “‘Serve and Return’ is a playful back-and-forth interaction in which we respond to a child’s verbal cues and actions.” Then, show students the “5 Steps for Brain-Building Serve and Return” video at the following link: www.youtube.com/watch?v=KNrnZag17Ek.
2. Students review the five steps of “Serve and Return.”
Display the five steps of “Serve and Return” where students can see them and read them aloud:
1. Notice the serve and share the child’s focus of attention.2. Return the seve by supporting and encouraging.3. Give it a name!4. Take turns and wait. Keep the interaction going back and forth.5. Practice endings and beginnings.
Ask students to identify ways they can practice “Serve and Return” with a child (for example, reading a book together, going for a walk, going to the store, playing with blocks). Remind students that “Serve and Return” interactions should be positive and fun and are vital to a child’s healthy brain development.
3. Students see the effect of neglect on a child’s brain development.
Part II Serve and Return (15 minutes)

MANAGING YOUR LIFE | LESSON 5: NURTURING THE DEVELOPMENT OF YOUNG CHILDREN
overcomingobstacles.org
Show students the image of the PET scan at the following link: www.onesky.org/the-situation/a-babys-brain. Have students point out the differences they notice in the two brains. Ask, “Which brain has more areas of activity?” After students respond, say, “Not only is it essential to support the development of young minds, but neglecting to support a child’s development can cause a significant amount of physical and emotional damage. And while it’s possible to repair the damage of a brain that was neglected during development, we’re going to learn strategies for supporting developmental milestones that will help ensure the children in our lives grow in a way that is healthy and happy.”
Purpose: Students will learn how to support a young child’s development.
1. Students discover ways to support developmental milestones.
Distribute copies of the “Developmental Milestones” activity sheets to each student and have them take a few minutes to read the material. Say to students, “As young children grow emotionally, physically, and socially, it’s very important to help them develop in a happy, safe, and healthy way. These handouts list just some of the milestones in a young child’s development and ways we can support them.”
2. Students participate in a group activity.
Break students into groups of four or five. Direct each group to create a one-minute Public Service Announcement (PSA) that focuses on what we can do to support the development of a young child in everyday situations. Ask them to keep in mind what they learned about “Serve and Return.” Subjects for the PSA could include the following:
Teaching a baby how to crawl
Taking a young child to the grocery store
Cooking dinner with a child
Going for a walk with a child
Tell students they will have 10 minutes to create their PSA. Once they are finished, ask each group to present their PSA to the class. When each presentation concludes, ask a representative of the group to explain their PSA and how they think its message could help young children.
Part III Developmental Milestones (20 minutes)

MANAGING YOUR LIFE | LESSON 5: NURTURING THE DEVELOPMENT OF YOUNG CHILDREN
overcomingobstacles.org
Read this quote to your students, “Every day, in 100 small ways, our children ask, ‘Do you hear me? Do you see me? Do I matter?’ Their behavior often reflects our response.” Ask volunteers to share what this quote means to them. Then, conclude the lesson by reminding students, “As we’re learning to manage our lives, it’s important to take care and nurture this group of people who are the most in need of our support—young children.”
Conclusion (3 minutes)
1. What is neuroplasticity, and why is it important?
2. Why is “Serve and Return” important to a child’s development?
3. What can happen if we do not support a child’s development?
4. Describe three developmental milestones and ways you can support them.
Student Assessment

MANAGING YOUR LIFE | LESSON 5: NURTURING THE DEVELOPMENT OF YOUNG CHILDREN
overcomingobstacles.org
LESSON EXTENSIONS
Using Quotations
“The human brain has 100 billion neurons; each neuron is connected to 10,000 other neurons. Sitting on
your shoulders is the most complicated object in the known universe.” —Michio Kaku
Have students write about what this quote means to them.
Addressing Multiple Learning Styles
Ask students to turn to a partner and describe a person who had a positive impact on their life when
they were younger. It may be a parent, guardian, teacher, or camp counselor. Then, ask the class, “How
do you think this person made a difference in your development?” Have student volunteers share their
thoughts with the class.
Writing in Your Journal
Have students write themselves a letter in which they share their ideas for how they can be a positive
factor in young children’s lives now and in the future. When your students are finished, ask for
volunteers to share parts of what they wrote.
Homework
Have students create a poster or comic strip illustrating how the “Serve and Return” interaction
supports a child’s development. Have students present their posters or comic strips to the class.

MANAGING YOUR LIFE | LESSON 5: NURTURING THE DEVELOPMENT OF YOUNG CHILDREN
overcomingobstacles.org
Using Technology
Have your students visit one of these websites to learn more about nurturing young children. Ask
students to share their findings with the class in a brief presentation:
www.naeyc.org
www.cdc.gov/ncbddd/actearly/milestones/index.html
www.zerotothree.org
developingchild.harvard.edu
Additional Resources
Have students watch the “Brain Hero” video at www.youtube.com/watch?v=s31HdBeBgg4.
Discuss the video as a class and how actions by a young child’s family, teachers, and community can
impact their development.

MANAGING YOUR LIFE | NURTURING THE DEVELOPMENT OF YOUNG CHILDREN©
20
21
Ove
rco
min
g O
bst
acle
s
BRAIN PLASTICITYNeuroplasticity (or brain plasticity) is the ability of the brain to change and adapt throughout a person’s life. Your brain’s plasticity is especially strong in the earliest years of your life.
2 4 6 8 10 20 30 40 50 60 70
THE BRAIN’S ABILITY TO
CHANGE
AGE
AMOUNT OF EFFORT REQUIRED
TO CHANGE
overcomingobstacles.org

MANAGING YOUR LIFE | NURTURING THE DEVELOPMENT OF YOUNG CHILDREN©
20
21
Ove
rco
min
g O
bst
acle
s
DEVELOPMENTAL MILESTONES
Smiles at peopleTurns head toward soundsCan hold their head up on their own
TWO MONTHSLook at pictures of relatives with themTalk, read, and sing to themEncourage them to lift their head by holding a toy at eye level
Begins to babble and copies sounds they hear Cries in different ways to show hunger, pain, or being tiredResponds to affection
Copy their sounds back to themHelp them learn how to calm themselves by remaining patient and using a soothing voiceHold them and talk to them cheerfully
Likes to play with othersShows curiosity about things and tries to get things that are out of reachBegins to sit without support
Play on the floor with them as often as possiblePoint to the object they are reaching for and talk about itPlace pillows around them to help them balance
Makes a lot of different sounds like “mamamama” and “bababababa”May be clingy with familiar adultsCrawls
Copy their sounds and words back to themAs they move around, try to stay close so they know you are nearPut them close to things they like, encouraging them to crawl
Hands you a book when they want to hear a storyTries to say words you sayLooks at the right picture or thing when it’s named
• Read to them and ask them to participate by turning the pages and identifying the pictures
• Talk to them about what you are doing (for example, “I am cleaning the dishes”)
• Give them lots of praise when they do something positive
MILESTONES SUPPORT
FOUR MONTHS
SIX MONTHS
NINE MONTHS
ONE-YEAR
overcomingobstacles.org

MANAGING YOUR LIFE | NURTURING THE DEVELOPMENT OF YOUNG CHILDREN©
20
21
Ove
rco
min
g O
bst
acle
s
Plays simple pretend, such as feeding a dollScribbles on their ownWalks alone
Encourage them to use their imagination Draw with themProvide safe areas for them to move around
Copies others, especially adults and older childrenShows defiant behaviorRepeats words overheard in conversation
Encourage them to help with simple choresGive them praise when they follow instructions and limit praise when they don’tDo not correct them when they mispronounce a word; repeat it back to them correctly instead
Carries on a conversation using two to three sentencesFollows instructions with two or three stepsTurns book pages one at a time
Ask them about their dayGive them simple instructions, such as “put your shoes on”Read to them and ask them to repeat words after you
Sings a song from memory, such as “The Wheels on the Bus”Tells storiesNames some colors and numbers
Play their favorite music and sing with themEncourage participation by asking them what they think will happen nextIdentify colors of things in books and around your home
Speaks very clearly Uses future tense; for example, “Grandma will be here”Can print some letters or numbers
Ask them to describe what they are doingTeach them concepts such as morning, noon, and nighttimeKeep a pencil, paper, and crayons handy to encourage them to write and draw
EIGHTEEN MONTHS
MILESTONES SUPPORT
TWO YEARS
THREE YEARS
FOUR YEARS
FIVE YEARS
DEVELOPMENTAL MILESTONES (continued)
overcomingobstacles.orgPowered by TCPDF (www.tcpdf.org)

PART IV
DEMONSTRATING THE SKILLS
SERVICE LEARNING HANDBOOK

TABLE OF CONTENTS
PART IV: DEMONSTRATING THE SKILLS
1. Introduction 629
2. Getting Started 636
3. Designing a Plan 642
4. Finalizing the Action Plan and Getting Approval 653
5. Taking Action 659
6. Assessment 668
7. Introduction to Service Learning 674
8. Designing An Action Plan 679
9. Gathering Information and Making the Commitment 685
10. Formalizing and Finalizing the Action Plan 691
11. Giving Presentations 696
12. Taking Action 701
13. The Big Day 709
14. Self-Assessment 712
15. Public Assessment 716
Service Learning Handbook

SERVICE LEARNING HANDBOOK | INTRODUCTION
overcomingobstacles.org
INTRODUCTION
AGENDA
About Service Learning
Service Learning: A Closer Look
Scheduling
Organizing the Work
Time and Resource Management—The Paper Trail
Planning—A Guide and Checklist

SERVICE LEARNING HANDBOOK | INTRODUCTION
overcomingobstacles.org
Motivated young people who have been prepared for life in the world beyond school are most likely to succeed when they begin their first jobs or start college. The key to this preparedness is ensuring that they learn the skills necessary for success in a context that is relevant to them. Providing such an experience while they are in school can be a challenge.
A service learning project is an opportunity to address this challenge. Students put their life skills into practice as they work to fulfill a goal that has relevance and meaning to them. Neither the size nor the scope of the service learning project is critical to its worth—rather, it is the dedication and commitment that students make to fulfilling the project’s goals that make it successful. The opportunities in a service learning project for students to apply and practice their communication, time management, goal setting, and decision making skills are of paramount importance.
Many experts consider adolescence to be the ideal time to foster the desire to help others. During adolescence, young people tend to be idealistic and think about ways to make a difference in the world. Developing and carrying out a service learning project satisfies many needs, including the need to belong, the need to be recognized, the need for diverse experiences with clear boundaries and structure, and the need for self-exploration. Students who participate in service learning projects are impacting the world in which they live in a manner of their own choosing. These students experience the powerful feelings of connectedness and satisfaction that come from working with others to fill a need in their communities.
Organizing a class of adolescents into a goal-oriented, detail-focused project team may seem like a daunting task. This module provides a comprehensive plan for developing a successful service learning project. It outlines the steps, lists the materials and tools, and offers suggestions and resources that will help you engage your students in a meaningful project.
We suggest that you read the entire module and all the lessons before you start this project in your classroom. Do some preliminary planning. Discuss what you have read and what you plan to do with others in your school. By doing these things, you will give yourself the firm foundation you need to launch your service learning project.
About Service Learning
Defining “Service Learning”
Service learning is an educational process through which students learn by participating in a project that meets a need in their communities. It should be integrated into and enhanced by specific academic courses within your school’s curriculum. In a service learning project, academic skills are applied to meet a community need. “Service” and “learning” are complementary—the service aspect makes the learning relevant to students’ lives and increases student motivation.
Service Learning: A Closer Look

SERVICE LEARNING HANDBOOK | INTRODUCTION
overcomingobstacles.org
Service Learning vs. Community Service
Many students equate service learning with community service. The commonalities between the two start and end with the word “service.” The major distinction between the two is that service learning is facilitated by a teacher and carried out by students who are actively learning; the learning and the service are equally important. Community service is carried out by a group of people who are contributing to the improvement of their surroundings. Clarifying the two terms for your students will allow them to gain an appreciation for service learning and to recognize how this project will allow them to apply the skills they are learning in school.
The Benefits of Service Learning
Students, schools, and communities all benefit from service learning projects. The table on page 3 lists a few of those benefits. Throughout the service learning experience, you and your students will discover many more benefits than those listed.
A service learning project is completed through a three-step process:
1. Planning and preparation2. Action3. Reflection
It is a simple design that’s fairly easy to execute, particularly if you choose the method of scheduling that works best for you and your students. Two scheduling possibilities are outlined below.
Weaving a Service Learning Project into the Overcoming Obstacles Curriculum
The service learning project is designed to integrate with the Overcoming Obstacles curriculum. The project enables students to apply and demonstrate the skills taught in the various modules and lessons. In this way, Overcoming Obstacles becomes a project based curriculum in which the skills taught are immediately applied to an experience outside of school, resulting in more effective learning, a better understanding, and an internalization of the skills.
In weaving the service learning project into the course, it is preferable that the project’s topic be identified early. This requires a certain degree of initial interest and commitment from your students. Some classes become a cohesive group from the onset, and the necessary level of commitment naturally results. In other cases, it takes more time. Don’t worry and don’t force it—if you’re weaving the service learning project into the curriculum, your commitment, momentum, and enthusiasm will carry you through until the group becomes cohesive and develops interest in the project.
BENEFITS OF A SERVICE LEARNING PROJECT
Scheduling

SERVICE LEARNING HANDBOOK | INTRODUCTION
overcomingobstacles.org
Students
Students form or strengthen connections to their communities.
Students learn tolerance by working with different people, organizations, or causes.
Students practice teamwork by joining efforts with others to create a positive impact on their communities.
Students apply their academic knowledge and skills to the project; these skills become increasingly relevant to their lives, making school more exciting.
Community
The community develops a sense of pride in students involved in the project.
Community members, who may not have the opportunity otherwise, experience positive interaction with young people.
The community sees that the school uses resources effectively.
Schools
When a school supports the efforts of the community, it will experience an improvement in community relations.
Service learning empowers and motivates students to make a positive impact in their schools.
Teachers who strive to make education relevant to students’ lives and assist them in positively impacting their communities foster a better rapport with their students.
Concluding the Overcoming Obstacles Curriculum with a Service Learning Project
The service learning project complements the Overcoming Obstacles curriculum, as students must apply the skills they’ve learned during the course. This scheduling method can be useful if your students need a more substantial amount of time to develop a group identity or to become comfortable with the Overcoming Obstacles classroom environment.
The Bottom Line in Scheduling
Whether your class undertakes the service learning project simultaneously with or at the conclusion of the course, the steps of the process outlined throughout this module are the same. Choose the schedule that allows your students to benefit the most from the service learning experience.

SERVICE LEARNING HANDBOOK | INTRODUCTION
overcomingobstacles.org
Just as you have some flexibility in scheduling the project, there are options for organizing students to carry out the work. Consider your students as individuals and as a group, and choose the method of organization that works best for your class.
Whole-Class Project
Enlisting the entire class to work on one big project can foster a strong sense of teamwork and commitment in a classroom. Whole-class projects may be larger in scope than projects in which students work individually or in small groups.
The most effective way to organize a whole-class project is to encourage students to form small groups, each of which is responsible for one aspect of the project. This encourages interaction between students who may not normally work together without causing them to feel that they are being separated from their friends. Many teachers find it easier to track the details for one big project than for a variety of individual or small-group projects.
Whole-class projects have a way of internally addressing the issue of individual responsibility. While each small group is responsible for one aspect of the project, each student is accountable to the larger group, which is depending on the completion of the smaller tasks. This helps to keep commitment and interest high even when students are encountering obstacles. The tracking sheet introduced in this section demonstrates the “paper trail” that each student will create in order to detail their work. This system of documentation allows students to assume appropriate responsibility for the completion of the project.
Small-Group or Partner Projects
Encouraging partners or small groups of students to work on different projects is an excellent way to address differing student interests. If students cannot agree on a whole-class project, small-group projects can mean the difference between commitment and resentment.
However, small-group projects usually necessitate limiting the scope of each one. Tracking the progress of many small-group projects can be difficult for the teacher because more projects mean more details. It is also important to consider that smallgroup projects will not generate a sense of teamwork within the whole class.
On the other hand, strong facilitation and thorough preparation can result in groups that compare notes and work collaboratively to help one another address issues and pitfalls as they arise.
Individual Projects
Organizing the Work

SERVICE LEARNING HANDBOOK | INTRODUCTION
overcomingobstacles.org
Individual student projects may arise out of a student’s journal writings or meetings with a teacher in which the student expresses a commitment to a particular project topic. An individual project can be especially empowering for students who feel that one person can’t make a difference. It can foster an increased sense of responsibility and commitment to a goal.
The drawbacks of individual projects are essentially the same as those outlined for small-group projects: limited scope and limited opportunities to practice teamwork skills. While this can actually make it easier for you to assess the projects, tracking the details may be difficult.
Setting up record-keeping systems before the planning stages begin is crucial. In a process that has many steps, having good records of what’s been done, by whom, and when will help you and your students to feel more in control and more relaxed.
Included in this module are activity sheets that you can use to create your “paper trail.” Descriptions of each are below.
The Contract
Formalizing students’ participation in the project with a written contract is a proactive way to ensure that they will be seriously engaged in the process. While the project should be fun and interesting, it is also a serious undertaking. A service learning project is reciprocal, meaning that people are expecting the students to follow through on the service that they’ve agreed to provide. In that respect, it’s like a job (a parallel you may wish to highlight); when people agree to provide a service, they often formalize that agreement with a written contract.
A sample contract is provided in this module, but the contract that you use must be pertinent to your students’ projects. One way to ensure relevance is to guide students to write their own contracts. Most importantly, the contract should state the students’ agreement to undertake the project seriously, to meet commitments fully and on time, and to see the project through to its completion. Contracts should be signed by students, by you, and by another student acting as a “witness.” File one copy of the signed contract and give another copy to the student who signed it.
Time Management
A blank tracking sheet is included with this module. This sheet will allow you and your students to stay organized, keep track of the work that’s been done and that needs to be done, and adhere to a schedule. In addition, this tracking sheet will help students to practice crucial time-management skills, such as keeping a personal schedule and accounting for their work. The sheet should also help you to easily evaluate your students’ work throughout the process instead of assessing them only at the project’s completion. After all, the process is as important as the result—during the planning of the project, students must regularly demonstrate the life and job skills that they’ve learned throughout the Overcoming Obstacles lessons.
Time and Resource Management—The Paper Trail

SERVICE LEARNING HANDBOOK | INTRODUCTION
overcomingobstacles.org
There are several options that exist for tracking students’ progress. Project journals may be used, for example. Weekly progress reports can also be used in conjunction with the tracking sheet; the reports may also eliminate the need for the sheet. Whether you choose to use a tracking sheet or not, students should be reminded of how to create and use a to-do list in order to complete tasks.
The remainder of this module details the steps to facilitating a service learning project. It includes lessons that you can use to help your students complete these steps. It also includes activity sheets that you can copy and distribute to aid students with completing the project.
As mentioned previously, the goal of this module is to provide you with a step-by-step guide to navigating the service learning project process. We have created a checklist/guide that corresponds to each step outlined in the module. Although it does not offer the detail and resources that you’ll find within the module, it is a useful tool for charting your class’s progress and judging where you are—and where you are headed next—in the service learning process. We’ve designed the checklist so that it can be photocopied and slipped into your plan book or hung on a bulletin board near your desk.
Planning—A Guide and Checklist

SERVICE LEARNING HANDBOOK | GETTING STARTED
overcomingobstacles.org
GETTING STARTED
AGENDA
Choosing a Topic
Project Examples
Methods for Eliciting Student-Generated Topics
Choosing a Project Topic
Establishing Groups

SERVICE LEARNING HANDBOOK | GETTING STARTED
overcomingobstacles.org
It is crucial for students to feel that the project is relevant to them. This fact should determine how the class is organized for the project and how the project topic is chosen. Be sure to consult school and district policies regarding projects, field trips, and student service activities—they may be relevant to the feasibility of certain projects.
This section describes methods for choosing a project topic, along with the pros and cons of each method.
Teacher-Generated Topics
If you know that you’ll be facing especially stringent limitations on time and/or resources, generating a list of preapproved topics is one way to ensure that students are able to complete their projects. Offering possible ideas can also be used to inspire your group to create a list of its own.
If your class’s service learning project is to be chosen from a list of topics that you generate, it is necessary that you do research. Look over the list of suggested topics on the next page, speak to other teachers, or contact local volunteer organizations for information on projects that other student groups have taken on. Before adding a topic to the list, consider your time and resource limitations, and determine whether a project is within the scope of those limitations.
District-Generated Topics
Some school districts consider service learning projects to be a part of their curricular (or extracurricular) goals. In some cases, this translates to plans, resources, and support that are already in place. There may be a list of potential projects that has been established and approved at the district level.
Though it’s important to be attuned to students’ choices, if plans and support are in place for a district-selected project, use them. There are ways of creatively introducing a preapproved project that will leave students feeling empowered and committed to the process (e.g., bring in a video clip that supports the need for a project to address a certain issue, play topic “Jeopardy” to reveal preapproved projects, record a plea for support). District personnel may be willing to speak to your students about the importance of the project they are undertaking and offer them encouragement.
Student-Generated Topics
Though this process requires a fairly well-developed level of communication among students, a student-generated project topic is ideal. When students choose to take on a project of their own creation, a strong sense of ownership is fostered, leading to greater student commitment to the project.
Choosing a Topic

SERVICE LEARNING HANDBOOK | GETTING STARTED
overcomingobstacles.org
Because the best scenario includes students generating a list of project topics that interest them and then choosing the one(s) in which they’re most interested, the success of this approach also depends on the initial commitment of students to take the process of generating and choosing topics seriously. If this is a potential issue in your classroom, bear in mind that student-chosen projects are the most empowering and successful, even if the choices themselves are generated by another method.
Encouraging your students to work on a service learning project of their own choosing is the best way to ensure that the project is relevant to them. Use the following list of potential service learning projects to spur students’ thinking:
1. Students collect and distribute shoes and clothing to the homeless.2. Students collect toys for foster children.3. Students raise money for a nonprofit organization (e.g., National Urban League, Big
Brothers/Big Sisters, ASPCA, American Cancer Society, Farm Aid).4. Students write children’s books and donate them to elementary schools.5. Students clean up neighborhood parks.6. Students create greeting cards for children in the hospital.7. Students perform a play for senior citizens.8. Students create a community garden in a vacant lot.9. Students plan a holiday party for homeless children.
Project Examples
A topic may be generated as a result of a catalytic event that takes place in the school or in the community, or an issue may emerge from an intense class discussion. Sometimes, the class must engage in a deliberate process in order to generate an appropriate project topic. The following are strategies to help students consider potential service learning project topics and methods to help you implement these strategies in your classroom.
Motivation through Inspiration
The work of others who have done service learning projects can provide you with a variety of resources to help the class generate topics.
To introduce your students to potential service learning projects, use articles, videos, and guest speakers who can share their community service experiences. Look for information on projects completed by public figures, including athletes and entertainers. Showing students what others have accomplished can inspire and enable them to generate at least one project idea that they’d be interested in trying themselves.
Methods for Eliciting Student-Generated Topics

SERVICE LEARNING HANDBOOK | GETTING STARTED
overcomingobstacles.org
Use the internet to research information on the following organizations and events:
All for Good—www.allforgood.org
Youth Service America—www.ysa.org
Do Something—www.dosomething.org
The VH1 Save the Music Foundation—www.vh1savethemusic.com
Tackling the Tough Questions
Many of your students may never have been asked to offer their opinions on their school, their communities, or the portrayal of young people in the popular media. Pose questions such as the following to your students in order to generate discussions about these topics:
What do you think are the “hot” issues in your community and in your school?
What things do you wish were different in your community and in your school?
How do you think people perceive your community and your school?
How do you want people to perceive your community and your school?
How do you think most people perceive adolescents? Do you think that their perceptions are accurate?
What would you change about the way you, as young people, are perceived?
During this discussion, focus on the issues instead of jumping straight to identifying a topic. Giving your students time to discuss what they think is happening in the world will assist you in your efforts to excite them about the ensuing project.
The following is an example of how this discussion might play out in the classroom:
What are the “hot” issues in your community? (Students might respond: people don’t get along or don’t like to come to our town.)
More specifically, who doesn’t get along? (Students might mention people from different generations or different ethnicities.)
How can we address this? (Students might respond: break down stereotypes, improve communication.)
What are some ways that we can break down stereotypes? (Students might respond: visit a local senior citizens center, arrange a multicultural event.)
Which senior centers can we visit?
Which of these is easiest to get to?
Are they willing to work with us? How can we find out?

SERVICE LEARNING HANDBOOK | GETTING STARTED
overcomingobstacles.org
The result of this discussion will essentially be a list of issues that concern your students. Once these issues are identified, it’s time to move from the general to the specific, to consider each issue and the options that exist, and to address the issues within your community. Ask the class to gather information on the options, whom they can work with, where they can go, and what they can do to address these issues.
At the end of this process, you’ll have a detailed list of service learning project options generated by the brainstorming session or by examining what others have done. Over the course of the discussion, it may have become clear that interest in some topics was low. Perhaps one project naturally emerged as your students’ first choice. Maybe there are a variety of viable options, in which case it’s time to make some decisions.
The decision making process will go smoothly if you establish some rules that will govern it. For example, consider whether the decision will be made by consensus or by majority rule. If you choose to employ the latter, discuss the importance of students’ commitment to whatever project is chosen, even if the topic isn’t the one for which they most strongly advocated.
You may also use a combination of the majority rule and consensus methods: first narrow the project topic options with a consensus vote, then take a vote by majority rule to determine the final topic.
As the decision making process evolves, consider the grouping and organization options that were outlined in section 1 of this module. For example, if it seems as though choosing one project is becoming too divisive to ensure a successful outcome, you may wish to consider organizing students into two different groups focused on two different projects.
Choosing a Project Topic
By now, your students have chosen to work as a whole group on one project, in small groups on different projects, or individually on different projects. If the decision making process dictated the formation of project groups or individual projects, move on to the contract stage. If your whole class will work on the same project, work with your students to form the small groups that will concentrate on planning different aspects of the project.
Groups can be formed in a variety of ways:
Establishing Groups

SERVICE LEARNING HANDBOOK | GETTING STARTED
overcomingobstacles.org
Random: Assign students to groups based on birthday month, names that fall between two letters of the alphabet, who is wearing a certain color—anything that randomly assigns students to a particular group. Though students may balk at being separated from their friends, this method ensures that students are working with others with whom they may not normally interact.
Assigned: Assign particular students to particular groups. This gives you a chance to consider students’ various strengths and weaknesses, and to group students who you believe may work well together and will learn well from one another. However, assigned groups may breed a sense of injustice among students who want to work specifically with their friends.
Self-selected: Allow students to form their own groups. Generally the most popular choice among young people, this method of organization can alleviate feelings of discomfort that some students feel when working with classmates whom they don’t know. However, this option can breed or enhance a sense of cliquishness among students who have fewer friends. You may wish to allow students the opportunity to go by their task preferences when they choose their groups. This may reduce the likelihood that students will form groups composed only of friends.
Consider your particular students and the dynamics of your class, and choose the grouping method that you believe will lead to the most successful overall experience for your students. Whatever method you choose, encourage each group to create rules and to discuss expectations of members’ participation, division of work, commitment, and the like. Formalize these discussions in the student contracts.
After students have chosen a topic and formed groups, have them create and sign project contracts.

SERVICE LEARNING HANDBOOK | DESIGNING A PLAN
overcomingobstacles.org
DESIGNING A PLAN
AGENDA
The Importance of a Well-Crafted Plan
The Parts of a Plan
Student-Needs Assessment
The Necessary Research

SERVICE LEARNING HANDBOOK | DESIGNING A PLAN
overcomingobstacles.org
The service learning project is designed to be a vehicle for students to apply what they’ve learned and to have a positive, community-centered experience. It’s the process—the opportunity to prepare for the project and the desire to make a contribution to the community—that’s most important. If your students are able to practice and implement what they’ve learned in your classroom, then the service learning project is a success.
Creating an action plan is a crucial step of the service learning project process. The plan has several purposes:
Outline exactly which resources are available and which must be acquired for the project
Provide a schedule and a time line
Encourage critical examination of the project’s scope in light of the resources available
The creation of an action plan by students is primarily an exercise in goal setting, decision making, problem solving, and communication skills, as well as an opportunity to practice effective writing. The finished action plan will serve as students’ ongoing guide to project completion, providing a framework for where they’re going and a map for how they plan to get there. It should clearly outline the materials, people, and tasks that will comprise the project, as well as a time line that indicates what will happen and when.
Take the time to ensure that your students recognize the relevance of the action plan to more than just the project at hand. Explain that any well-prepared project or task, including those that occur in the workplace, has an action plan that participants can follow and refer to. (An example might be the lesson plans that you, as an educator, prepare and follow.) Just like in the workplace, this project will need to be reviewed and approved by the people who manage the school and are responsible for the students (e.g., principals, administrators, teachers).
Creating an action plan primarily involves considering the following questions: Who? What? When? Where? Why? How? Gathering the information that answers these questions and organizing that information in a written document are the steps to creating an action plan. This section of the module outlines the parts of the plan and what questions each part should address. It also suggests a variety of methods for finding the answers.
Don’t limit the questions to those suggested here. Use the module only as a guide and encourage your students to delve deeper into the details of their project, to ask additional questions, and to consider the project’s specific needs. As a general rule, if an issue is under consideration by the project planners, it should be addressed somewhere in the action plan.
The Importance of a Well-Crafted Plan

SERVICE LEARNING HANDBOOK | DESIGNING A PLAN
overcomingobstacles.org
Steps to Be Taken
A well-crafted plan should answer the following questions: What is the goal of the project? What will happen during the project? What steps led up to the project? What are the stepping stones to reaching the goal?
Students create a working list of steps by working backward. You and your students should create a mental picture of the ideal project and how it will look at completion. Using this mental picture, determine the following:
Who is involved?
What are they doing?
Are they using any particular materials?
What kinds of facilities are at their disposal?
Work backward to determine how each of the elements that are in the mental picture must be contacted and secured.
Students should also create a series of lists onto which they will record their work. The lists can be entitled “People,” “Materials,” and “Activities.” (See examples in section 4.) Alternatively, each list might be titled with the description of an activity and contain information on the people needed, the materials that must be secured, and the tasks that must be completed in order to perform the activity. Explain that these lists can be running lists to which items are added or taken away as the discussion and the action plan become more detailed.
Materials
Every project requires materials. Students who decide to clean up a local park will need to identify and gather the tools necessary for cleaning. Students who decide to launch a letter-writing campaign to support an issue will need to gather writing materials. It is important to create a list that covers all possible needs; students may decide later that certain materials are not necessary, but suggest that they err on the side of caution. It is discouraging and frustrating not to have an item when it is needed.
As discussed above, a materials list may stand alone or be integrated into the description of each project activity. In addition, encourage students to consider what they will need to do in order to gather the materials for the project—gathering materials might require obtaining postage, a telephone, paper, and envelopes. If publicizing the project is a priority, remind students to consider the materials that they will need in order to inform others of their project (e.g., paper, poster board, printers).
The Parts of a Plan

SERVICE LEARNING HANDBOOK | DESIGNING A PLAN
overcomingobstacles.org
Encourage students to revisit the steps they need to take and carefully check the materials list against each step.
If your school has a website, speak with the site’s administrator about publicizing and requesting help and support for your class’s project on the website. If possible, have students design portions of the project’s web advertisements. You might also encourage students to code the advertisements themselves and submit them to the administrator for approval—many students who are interested in technology careers are eager for projects that will allow them to build their web-design portfolios.
Necessary Approvals
Because the project will most likely require time, resources, and activities that are not part of the typical school day, it’s important to inform those in charge. Students should submit their plans and get official approval for the project if approval is required. Consider the following:
Who needs to know that your students are doing a service learning project? How do you need to inform them? Are there special forms to be completed? Whose signatures are required?
Does the project require the approval of the principal, the superintendent, and/or any local government agencies (particularly if you plan to clean up a local park or beach)?
Do parents need to be notified? If so, how and when?
Will the project require the teacher to be away from the school for a day? Will a substitute need to be found for that day? If so, what needs to be done in order to hire the substitute?
Encourage students to revisit the steps they need to take and their materials lists, and list items such as field trips or telephone access that may also require specific approvals.
Time and People Resources
Although tangible materials and approvals are necessary for a project, the skills and time commitments of participants are in many ways a project’s most valuable resources. Urge students to consider the following as they work to identify how much time and which people the project will require:

SERVICE LEARNING HANDBOOK | DESIGNING A PLAN
overcomingobstacles.org
Whose time will be needed? When? For how long? Remind students to consider your time and whether you will be needed outside of class.
Are certain resources available only at certain times? For example, can calls related to the project be made only at certain times from a certain telephone?
Will all students be able to give the time required for their schoolwork and still be able to complete the project as scheduled?
How many people must participate in the actual execution of the project? Is everyone in the class needed? Do they need to recruit additional people?
What roles are students interested in taking on? How do they wish to organize themselves? Do they need team leaders, task managers, communications specialists, and so on? What are the descriptions for each of these jobs?
Who can teach students about the facts/rules they should keep in mind for their particular project (e.g., special considerations for working with senior citizens, health considerations when cleaning a park, things to know about working with younger students)?
Will students be working with an outside group or agency to complete the project? What are the limitations for the agency’s time and people resources?
Encourage collaboration with other groups or agencies whose experience and resources will help students to better implement their projects. In addition to providing a great opportunity to practice teamwork and communication skills, working with other groups means further exposure to the world outside of school, to new career options, and to potential role models. If students choose to complete the project in cooperation with another group, urge them to consider the who, what, why, when, where, and how details of this collaboration:
What organization will the group contact?
Who will contact the organization?
When does the organization need to be contacted?
How should that organization be contacted? What should be said?
What exactly will the organization’s role be?
Consider creating a contract with any outside organizations to formalize their commitment and demonstrate how serious students are about this project.

SERVICE LEARNING HANDBOOK | DESIGNING A PLAN
overcomingobstacles.org
The service learning project is primarily an opportunity for your students to practice their life skills. In particular, on-the-job and communication skills may need to be reviewed in relation to project planning. You may want students to practice these skills before they need to use them. Questions to consider include the following:
Will students need to make phone calls to businesses, organizations, or agencies? Will they need to write business letters?
Are there any physical or academic skills that your students must develop in order to complete the project? For example, if they have chosen to record books for the blind, it’s important that they are skilled at reading aloud.
If your students are not versed in the skills needed, how can you address this? What’s the most efficient way to help them develop their skills?
Student-Needs Assessment
The purpose of research in the context of a service learning project is twofold. First, students will gather information to support the need for the project and search for answers to questions regarding the necessary steps, materials, approvals, skills, and time required to complete the project. The amount of information that’s needed to create the plan may seem overwhelming, but it is available. Identifying that information will be fairly easy because you and your students have taken the time to assess the project needs and know what to look for.
Second, many professional and academic situations require students to effectively gather information, a skill that’s also required to make good decisions. This is an excellent opportunity for students to hone their information-gathering skills and to use what they learn in order to make decisions about the project.
Help students organize their research efforts so that work is not duplicated among groups of students. The following are strategies for organizing students’ research efforts:
The Necessary Research

SERVICE LEARNING HANDBOOK | DESIGNING A PLAN
overcomingobstacles.org
Divide the class into small groups. Each group is responsible for finding answers to all of the questions posed, but each will use a different research method.
Invite individuals to choose a research method they are interested in utilizing, allowing no more than four or five students to choose any one method. Remind students that one method may seem more interesting than another, but it may be more difficult to access (e.g., in-person interviews). Each student is then responsible for researching all of the questions posed, using the method of research they have chosen.
Divide the class into small groups, and assign each group a few of the questions posed. Encourage each group to use all of the research methods at their disposal.
Consider both the strengths and weaknesses of your students, and the other methods by which the project is being organized. The way you choose to organize research efforts should reflect your students’ current level of commitment to the project. You can gauge that level of commitment by asking yourself questions such as the following:
Does every aspect of the project seem to be centered around group work? Do students need an opportunity to conduct research individually for grading purposes or for skill development?
Are small groups experiencing personality conflicts? Could research be used as an opportunity to have students work in different groups than those in which they’ll be working for the duration of the project, thus restoring commitment to the larger group?
Can students working on several small-group projects combine their research efforts on any common issues in order to develop a sense of class unity? (For example, two groups working on projects focused on elementary school students may wish to combine their research efforts on the stages of child development.)
Many resources are available to help students find the information that they are looking for. The following are some suggested methods that should be available to your students.
Guest Speakers/Interviews
When possible, accessing a primary source is the best way to get information. Primary sources include people who have personally participated in other service learning projects, people who work at the organization to which students are offering service, or people who have had similar experiences. Learning about the process that others have used to develop service learning or community service projects can be very beneficial even if the project topics differ.

SERVICE LEARNING HANDBOOK | DESIGNING A PLAN
overcomingobstacles.org
Ask students if they know of others in their school who have participated in service learning projects. Encourage them to find out, either by asking around in the school or contacting local organizations. Ask students to research what steps these people followed and what lessons they learned. Help students to invite guests who can speak in the classroom about their project experiences or about the resources necessary for the project your students want to complete. If guests are unavailable to visit, help students arrange one-on-one or small-group interviews in person or by phone. In either case, remind students that the best way to ensure they get all the information they need is to prepare a list of questions before the interview.
Before a guest speaker makes an appearance in the classroom, discuss with students the procedures and expectations surrounding the speaker’s presentation (e.g., students should avoid side conversations, determine what kinds of questions are appropriate to ask, and consider the procedure for asking questions). Establish and explain to students the repercussions of displaying inappropriate behavior or asking inappropriate questions. Encourage students to take notes during the presentation.
Your students may be unsure of where to begin their search for a speaker or a person whom they can interview. The best place to begin is the local phone book. Even if the first few organizations they contact can’t help, they will most likely be able to refer your students to someone who can. Another option is for students to contact one of the national organizations listed below and to explain what kind of information they are looking for. These agencies have a broad geographic network and may be able to suggest someone in your area whom your students should contact.
If students plan to contact these agencies by phone, suggest that they write down exactly what they want to say (i.e., who is calling and for what purpose) before making the call. Explain that it’s easy to get flustered on the phone and it can become difficult to express yourself clearly, especially if you are being transferred to different people and must repeat yourself several times.

SERVICE LEARNING HANDBOOK | DESIGNING A PLAN
overcomingobstacles.org
Corporation for National and Community Service 1201 New York Avenue, NW Washington, DC 20525 (202) 606-5000 www.nationalservice.gov
Youth Service America 1101 15th Street, NW, Suite 200 Washington, DC 20005 (202) 296-2992 www.ysa.org
Points of Light Institute 600 Means Street, Suite 210 Atlanta, GA 30318 (404) 979-2900 www.pointsoflight.org
United Way of America 701 North Fairfax Street Alexandria, VA 22314 (703) 836-7112 www.unitedway.org
4-H National Headquarters National Institute of Food and Agriculture U.S. Department of Agriculture 1400 Independence Avenue, SW, Stop 2225 Washington, DC 20250 (202) 401-4114 www.4-h.org
Library Research
Explain to students that library research involves exploring secondary resources, such as magazines, newspapers, and television news or public interest programs, that provide a secondhand account of an event or an idea. Though primary research conducted with an interview is almost always more desirable, secondary research is still a valuable source of information.
If students are unfamiliar with the library (e.g., how the information is catalogued, how to use microfiche), schedule a trip to your school or nearby public library and arrange for the resource librarian to acclimate students to the library system. (This usually takes about two hours.) Most public libraries have programs designed to help students learn to use the library effectively.

SERVICE LEARNING HANDBOOK | DESIGNING A PLAN
overcomingobstacles.org
You may need to provide students with a “crash course” in effectively using printed materials for research. For example, explain to your students the concept of “skimming” through material to quickly find what they’re looking for, instead of reading every word. Discuss techniques for using the table of contents in a book or magazine in order to determine whether the source contains the information they’re seeking. Point out the differences between quoting, paraphrasing, and plagiarizing, and show students how to properly cite sources if they choose to use quotations to support statements made in their action plan
Locating television shows or videos to use as research can be difficult if your library does not catalogue such sources. However, there are other ways to find such programs. First, students might visit www.youtube.com or a local station’s website, and search for clips or whole videos of the program they are looking for. Students can also use the local newspaper to track the television programming scheduled for your area and watch for programs that may be of interest to them as they work on the project. (Remind them to add TV and DVR to their materials list, if necessary.) Encourage students to pay close attention to the programming on educational or public broadcasting stations and to weekend programming that’s aimed at young people; these shows are more likely to highlight activities in which other young people are involved.
Internet
In addition to using the internet at your school, most public libraries allow community members with library cards to use their computers free of charge. The internet contains a plethora of resources that your students may want to use for their research. In general, the rules for conducting research on the internet are the same as those rules that govern library research. Most of what your students will find on the internet can be considered a secondary source, like a book or magazine article. Below is a list of websites that might be useful to your students.
Suggested Secondary Resources
Teen Ink—www.teenink.com
Time for Kids—www.timeforkids.com
Newsweek—www.newsweek.com
National and local newspaper sites
Service Learning Websites
The Corporation for National and Community Service—www.nationalservice.gov
IPSL—www.ipsl.org
National Wildlife Federation—www.nwf.org
Volunteer Match—www.volunteermatch.org
Idealist—www.idealist.org

SERVICE LEARNING HANDBOOK | DESIGNING A PLAN
overcomingobstacles.org
Using a search engine will allow you and your students to conduct more effective research online. Search engines are sites that use a word or phrase to find other sites containing the information you are looking for. For example, if you enter “service learning” into a search engine, the engine will search the internet for sites containing that phrase. A list of some recommended engines is included below. Encourage students to use search engines responsibly and to get permission before going online.
Search Engines
Yahoo—www.yahoo.com
Bing—www.bing.com
Google—www.google.com
It is possible that in the course of their research, students will locate an actual copy of an action plan that was created for another project. If so, encourage them to use it as a model. While it’s not appropriate to plagiarize material that someone else has created and published, it’s also not necessary to reinvent the wheel. Using a plan that’s already been successful as a model for the one students want to develop is an effective use of resources.

SERVICE LEARNING HANDBOOK | FINALIZING THE ACTION PLAN AND GETTING APPROVAL
overcomingobstacles.org
FINALIZING THE ACTION PLAN AND GETTING APPROVAL
AGENDA
The Contents of a Complete Action Plan
Submitting the Action Plan
Presenting the Action Plan
Approvals

SERVICE LEARNING HANDBOOK | FINALIZING THE ACTION PLAN AND GETTING APPROVAL
overcomingobstacles.org
At this point in the planning process, students will organize the information that they have gathered from their research in section 3 to create a formal action plan.
An action plan is a formal explanation of the project. Thus, it should be written clearly and presented neatly. A complete action plan will contain the following information.
Introduction
This section of the plan states the need for the students’ proposed project and articulates their motivation for engaging in it.
It would be helpful for students to review their notes from the brainstorming sessions and the research that they gathered. This section of the action plan should include all background information so that readers will have an overall picture of the project, including who is involved, what will happen during the project, when and where it will happen, and why and how it will happen. Below is an example:
Project Summary: Eight students from Ms. Grimes’s seventh-grade science class have chosen to develop and act out a play about the ecosystem of a local park. The students will perform the play for students at the elementary school as part of their science curriculum. In order for students to create a play that explains the ecosystem in a meaningful way, they will visit and study the local park. They will also research the developmental level of the students who will watch the play.
Materials Needed
It is acceptable to include a simple, straightforward list of the materials needed, but encourage students to create a more detailed list of tasks to be performed and the materials needed for each task. In either case, next to each listed material should be an indication of whether it is already available or whether it must be procured. If the material must be procured, the action plan should explain where it can be found and how it will be obtained (e.g., money must be raised to buy it, will ask for donations, can borrow).
Example (partial list)
Human Resources
This section of the action plan will clearly state the people needed to complete the project, along with their availability, skills, and commitment.
The Contents of a Complete Action Plan

SERVICE LEARNING HANDBOOK | FINALIZING THE ACTION PLAN AND GETTING APPROVAL
overcomingobstacles.org
Like the materials list, the human resources list can be organized by activity or task. This section of the action plan should explain which people will do which tasks in order to successfully complete each aspect of the project. This information can also be organized by outlining the areas of expertise required by the project and listing the people who are skilled in them.
Jobs and Responsibilities
Encourage students to outline the responsibilities each person has taken on by naming the role each person has agreed to fulfill (e.g., team leader, publicity manager, materials manager) and listing the duties of each job. Include each participant’s name, title, and job description.
Examples:
Ms. Grimes, Supervising Teacher: Ms. Grimes will act as the liaison between the students and the administration at our school and at the elementary school. Ms. Grimes will sign transportation requests and chaperone (or find a suitable chaperone for) off-campus activities.
Helen Wilson, Playwright and Editor: Helen will research information about ecosystems, and prepare potential plot outlines and characters for a play about the ecosystem at Winnipeg Park. She will complete the first edit of the script.
Jim Graham, Playwright and Editor: Jim will research how stage directions are written, and write and title a play about the ecosystem at Winnipeg Park. He will complete the final edit of the script.
If students are working with an outside organization or agency, the introduction to this section of the action plan should clearly outline the nature of the collaboration and the role that the agency will be playing. Remind them to include the names of the agency personnel who will be working on the project and a description of the tasks to which they have committed.
Example:
The students in Ms. Grimes’ class will collaborate with the city’s Department of Parks and Recreation. The Department of Parks and Recreation staff will provide written materials and be available for interviews during the research phase of the project. They will guide students on a tour of Winnipeg Park and supply the necessary permission to conduct a field trip there.
Schedules and Contacts
This section of the plan should include transportation schedules (collected from train/bus stations and so on), work schedules, and a general list of resources and references. A list of all participants and their contact information (i.e., address, phone number, email address) should be included. If an outside organization is participating in the project, include its contact information and the names of the people there with whom students will be working.
Time Line

SERVICE LEARNING HANDBOOK | FINALIZING THE ACTION PLAN AND GETTING APPROVAL
overcomingobstacles.org
Goals have a measurable time line, and a service learning project is no exception. The time line provides a plan to follow and ensures that tasks are completed on schedule. This is especially important if the start of one task must be preceded by the completion of another.
Though it’s acceptable for the time line to be somewhat preliminary, it should indicate as many concrete dates as possible. Students may wish to organize their time lines by listing the tasks that must be completed each week or each month from now until the end of the project. The time line should also include a detailed schedule of what will happen on the day of the project.
While it’s likely that a project’s schedule will change, it is important to create a strong working time line as both an indicator of what should be done by what date and a barometer by which to judge how much work is expected to be done in a certain amount of time.
Appendix
If students have referred to particular materials, or if the project was inspired by a particular newspaper article or story, encourage them to include photocopies in an appendix. This section of the plan should also contain photocopies of student contracts, transcripts from interviews, and a list of all the sources that students used to gather information.
The action plan should serve as a proposal to those who must approve the project. As in the workplace, the proposal should be typed and should look professional. Though your principal and administrators should know that the proposal is coming from your students, you may wish to add a cover memo explaining the nature of service learning and your students’ proposal.
Once the action plan is completed, ask students to share it by sending copies of it to others. In addition to obtaining any necessary administrative approvals, sharing an action plan often gets others involved in and excited about the project. It is also an excellent method of getting feedback.
Example:
MEMORANDUM
TO: Principal DominguezFROM: Ms. GrimesDATE: December 12, 20XXRE: Ecosystems Instruction for Casimiro Fontanez Elementary SchoolCC: Helen Wilson, Jim Graham, Chris Yates, John Armin, Kate Clark, Dr. Bashir
Submitting the Action Plan

SERVICE LEARNING HANDBOOK | FINALIZING THE ACTION PLAN AND GETTING APPROVAL
overcomingobstacles.org
The students mentioned below have spent the past month researching and developing a service learning project. They would like to complete the project by the end of this marking period and they would like your approval to do so. The attached proposal has been prepared for your review. Please respond by Friday, December 17, 20XX.
Due Diligence
Once the action plan is written, you and your students must critically examine the project’s strengths and weaknesses, and encourage others to do the same. Have students ask those who have received a copy of the action plan to consider its limitations and whether or not it can be accomplished on time. Model for your students what it’s like to honestly address these issues, and encourage them to critically examine their plan. If necessary, work as a class to revisit or scale back the project by again considering the issues outlined in section 3. Your goal is to emerge from this stage with an action plan that is detailed, realistic, and achievable.
You may wish to ask questions such as the following:
Do you think the proposed project can realistically be completed in the time allotted? Why or why not?
What challenges do you see the group facing as they try to complete this project? Can you offer any suggestions for how the group can respond to these challenges?
Do you have any general advice for the group?
A complete written proposal will usually provide the information necessary for the pertinent parties to make a judgment about the project. However, they may require further information or wish to speak directly with students to discuss the project in more detail. In this case, students may need to prepare a project presentation.
Ensure that students understand that it is common for approval of a project to be contingent on both a written proposal and a face-to-face meeting. A project presentation is a positive event—it enables those proposing the project to immediately address questions and concerns, and provides a great opportunity to excite administrators about the project. A face-to-face meeting will make the students’ personal enthusiasm for the project more apparent than even a well-written proposal.
Presentation Preparation
Since your students have completed a written action plan, they already have all the information needed to make an effective presentation. Preparing for a presentation is similar to preparing for a job interview—it is a matter of organizing one’s thoughts and preparing for questions.
Presenting the Action Plan

SERVICE LEARNING HANDBOOK | FINALIZING THE ACTION PLAN AND GETTING APPROVAL
overcomingobstacles.org
Revisit with students the questions they considered when first putting together their action plan: Who? What? When? Where? Why? How? Each student or group of students should be responsible for preparing part of the presentation. If your class is working as a whole on one project, you may wish to have students work in small groups to prepare their answers to these questions, with each group discussing and organizing the answers to one question. Students should create note cards with the points that they want to make in order to best answer their questions.
A great way to keep a presenter on topic is with the use of visuals, which can be very simple and still be effective. For example, a poster that lists the benefits of the service learning project will be useful for both the presenter and for the audience. Students may also choose to create a visual for each question. If students have access to a projector and a computer, allow them to use presentation software (e.g., PowerPoint). Demonstrating effective presentation skills will serve as a testimony to how seriously students are taking the project. Remind students that visuals can be useful, but the presentation is only as strong as the content they present.
Making the Presentation
Some students may feel nervous about speaking publicly or intimidated about answering questions posed by an adult or an authority figure. Calm their fears by reminding them of two points:
If they have done the work needed to create a detailed action plan, they should be proud of what they have accomplished and fully prepared to answer questions about their project.
It is acceptable to respond to a question by saying, “I don’t know the answer to that question, but I can find out and get back to you.” It is possible that a concern about the project is one that your students did not take into account. This is not a negative response—in fact, action plans are submitted for approval specifically so that others can examine them for potential problems and ensure that issues are dealt with before they become actual problems.
Remind students that, just as they would for a job interview, they should consider their oral presentation at the meeting to be a reflection of how they feel about the project. There is no need to dress up, but students should dress neatly. Clear, appropriate language that is audible to everyone is important.
With both the written action plan and in-person presentation, your students should have provided all of the information requested by those whose approval is needed to move forward. Remind students to establish a date by which they expect to hear a response to their proposal and to follow up with a visit or phone call. Students should also indicate that they would like to receive a response in writing—as in the workplace, it’s important to establish good records. A written approval may be needed as a reference during the course of the project. Once students have received a written approval, remind them to make a photocopy and file it.
Approvals

SERVICE LEARNING HANDBOOK | TAKING ACTION
overcomingobstacles.org
TAKING ACTION
AGENDA
Working
Fundraising
Special Considerations
The Big Day
Celebrate
Project Briefs

SERVICE LEARNING HANDBOOK | TAKING ACTION
overcomingobstacles.org
Your students should now begin tackling the many tasks required to make their service learning project a reality, as outlined in their action plan. Whether that work spans just a few weeks or an entire marking period, it is important for students to track their progress throughout the process and to keep their commitment to the project active. The following are some strategies and methods for helping your students to track their work and stay committed to the project. Because it is possible that some projects will require students to raise funds or pursue in-kind donations of materials or services, this section of the module will also outline strategies for fundraising and seeking donations.
Tracking Progress
Tracking students’ progress is a very important part of any service learning project. Use the “Tracking Sheet” activity sheet to do so. This sheet is designed to be used throughout the course of the project to track students’ progress as they complete the tasks they’ve outlined in their action plan. If you have not done so previously, introduce students to this tool as a means of recording the work they have completed, when they completed it, and when additional tasks are scheduled for completion. Tell students to regularly update their lists and schedules, including those originating from their action plan, as both a means of tracking progress and a way of creating records of their work.
Explain the concept of numbering and dating the different versions of their schedules and checklists to avoid confusing old and new versions. Suggest that students keep these tracking sheets in a project notebook or folder.
Another way to track progress throughout the project is to visually record students’ work. If a camera or video recorder is available, encourage students to capture images of their work as they proceed during the project. You may wish to have students keep a project journal, in which they both describe the work they are doing and personally reflect upon their experiences.
Work Ethic
For young people and adults alike, it can be difficult to maintain enthusiasm and keep interest high over the course of an entire project. Inevitably, there are obstacles and challenges, high points and low points, and times during the process when it can be tough to stay motivated. However, the concept of having a strong work ethic—which includes honoring commitments and working to meet deadlines—is one with which students should become familiar. Like any project, a successful service learning project requires a sustained commitment from all involved. The following strategies can help your students to stay enthusiastic throughout their service learning experience.
Student-to-Student Motivation
Working

SERVICE LEARNING HANDBOOK | TAKING ACTION
overcomingobstacles.org
This strategy requires managing the group dynamic so that students keep one another motivated, help their classmates remain enthusiastic, and hold one another to commitments and deadlines. This strategy will foster the feeling that the project is a team effort; that there is a responsibility to the team; and that losing motivation, not completing tasks, or not meeting deadlines fails classmates and teammates. One way to help students keep each other motivated is to have them create team banners or slogans.
When to Step In
Sometimes, student commitment to a project weakens and their work ethic begins to wane. Deadlines aren’t met, tasks aren’t fully completed, and general disinterest sets in. You may need to step in, especially if some students are feeling frustrated because they are keeping their commitments and feeling let down by their classmates. If this happens, it may be an indication that the entire group needs to review the action plan and evaluate their reasons for initiating this project.
To remedy this, you might invite a community leader to remind students of how their project will have long-term benefits. You might also have students research college scholarships that are given for school service projects. Another option is to spend a class period doing team-building activities to invigorate students and remind them that working together can and should be fun.
It is not uncommon for a project to require more resources than those that are readily available. However, locating those resources through fundraising and seeking in-kind donations can be an excellent opportunity for students to practice their communication and goal setting skills. The identification and procurement of donations requires carefully crafted letters, phone conversations, a step-by-step approach, and follow-up.
Fundraising can be fun, but it can also be difficult. Avoid projects that rely on fundraising to procure the majority of materials. Encourage students to reevaluate their plans if too much fundraising is involved.
Raising Money
Ensure that students understand the concept of financial philanthropy as an agreement between two parties: one party furnishes money in order for the other to concentrate on providing a service. Encourage students to consider their fundraising efforts as a nonprofit venture—one that generates enough money to provide a service but does not focus on financial gain.
You may wish to try the following fundraisers:
Fundraising

SERVICE LEARNING HANDBOOK | TAKING ACTION
overcomingobstacles.org
Bake sale
Book fair
Dance-a-thon or walk-a-thon
Selling balloons or candy for holidays (e.g., Valentine’s Day, Christmas)
Crazy clothes day (students pay $1 to wear crazy clothing or hats)
Car wash
In-Kind Donations
Often, it is easier for students to simply have materials donated instead of raising the money to buy them. Explain to students that in-kind donations are donations of goods or services, instead of financial donations.
Local businesses are usually eager to get involved with young people who are contributing to the community. They want to both support students’ efforts and to have their business name associated with a constructive effort.
In-kind donations can be solicited for a variety of project needs and plans. Suggestions include the following:
Materials and prizes from hardware stores, craft stores, general goods stores, supermarkets, sporting goods stores, toy stores, and restaurants
Advertising from local television and radio stations, newspapers, local business newsletters, and church bulletins
Work space from hotels, colleges and universities, and community organizations
Services from transportation companies, printing companies, and advertising agencies
In order to solicit donations, explain to students that they will need to contact the people or businesses whose help they would like by telephone, in writing, or both. Their communications should explain the details of their project and clearly state what benefits the potential donor will receive by becoming involved (e.g., opportunity for positive media attention, recommendations from students, being part of a constructive effort, and so on). Remind students to treat these communications with great care and respect in order to achieve the best possible results.

SERVICE LEARNING HANDBOOK | TAKING ACTION
overcomingobstacles.org
There are many elements to the service learning project, and within those elements are many details. This is perhaps most evident in two specific tasks: the collection of materials and the arrangement of transportation. The following section outlines some strategies and special considerations to take into account for these tasks.
Materials
Ensure that those responsible understand that managing the project’s materials means more than simply finding out how to acquire the articles needed. Additional considerations include record keeping, storage, and maintenance of the materials.
Record Keeping
In their action plan, students included a checklist of the materials they needed and indicated how they planned to procure each item. Even if their project requires few materials, it is still important for them to keep track of the following:
What’s needed
What’s been acquired
What needs to be returned
Where things are stored
Encourage your students to add columns to the materials checklist in their action plan reflecting the above issues. They should use this extended checklist to keep records of the project’s materials. This checklist should be updated weekly.
Storage
Remind students to consider not only the amount of space needed to store their materials, but also issues of safety and maintenance. They should consider questions such as the following:
Do you have permission to store things where you’d like to keep them?
Is your storage area in a secure place, where you know the materials won’t be disturbed?
Are there any materials that must be specially stored (e.g., paint, cleaning solvents, breakable materials, perishable items)?
How long can you use the space to store materials?
Encourage students to contact staff members within the school who are familiar with these issues, such as the maintenance crew or the cafeteria staff. Remind students to consider them as business contacts and treat them accordingly. Also, remind them to always put requests in writing.
Special Considerations

SERVICE LEARNING HANDBOOK | TAKING ACTION
overcomingobstacles.org
Maintenance
Ask students to imagine what will happen when the project has been completed and they have to clean up. They should consider questions such as the following:
Will there be any trash left over from the materials used? How will the trash be disposed of? Are there any special procedures to be followed (e.g., separating recyclables, using special trash bags or bins)?
What will be done with leftover materials?
Are there any borrowed materials that must be returned immediately after the project is completed? How will students get materials where they need to go on time?
What kind of cleanup will be required? Are there any potential messes or spills that must be prepared for? Will any particular cleaning supplies be needed in order to adequately clean up these spills?
Explain to students that materials, maintenance, and cleanup should be considered integral parts of the project, not afterthoughts. As a general rule, project sites should be left as clean or cleaner than they were found, and commitments to return borrowed items should be honored without fail. Remind students not to let a successful project be marred by misgivings about an inadequate cleanup job, or the loss or untimely return of borrowed items.
Transportation
Arranging transportation for a service learning project can be a project in itself. Even if students are not planning a project that takes place off school grounds, transportation will likely be needed in order to take trips off-site for meetings or collection of materials.
The process for securing transportation often varies from district to district—and sometimes from school to school—but there are questions everyone must consider when arranging transportation:

SERVICE LEARNING HANDBOOK | TAKING ACTION
overcomingobstacles.org
Money: Is there a school budget that dictates how many times buses or vans can be made available for student trips? If so, are there budgetary constraints?
Chaperones: Is there a required chaperone-to-student ratio? What are the requirements to be a chaperone? Whom can you recruit to act as a chaperone?
Space: How many people need to be transported (including teachers, students, chaperones, etc.)? How many buses or vans will be needed to accommodate them? How much space will be needed to transport materials?
Time: What time is the project scheduled to begin? What time do you need to arrive in order to have sufficient time to set up? Until what time will you need to stay in order to have sufficient time to clean up?
Paperwork: Are there specific forms that must be filled out when requesting transportation? Who needs to complete and sign them? To whom should they be submitted?
Availability: Are there buses available for the dates and times that your group needs them?
Alternatives: If transportation cannot be arranged through your school, are there other options (e.g., parents, private bus services, public transportation) that can satisfy your transportation needs?
Though students are responsible for handling the details of their service learning project, you may need to spearhead the process of securing transportation. Encourage students to solicit your help on their behalf, just as they would if they were soliciting the help and participation of an outside partner.
Every moment and detail leading up to the “big day” has been important, and those moments and details—when added together—actually require more time and energy than the event itself! This module reflects that same phenomenon. Many pages of explanation regarding planning have preceded this one, and it seems as though the “big day” requires less explanation than all the sections that came before it.
For days, weeks, or perhaps months, your students have worked to plan and prepare a project that will, for some of them, be their first experience in making a contribution to their communities. They have practiced and applied their communication and teamwork skills, as well as their time management and decision making skills. They have also shown themselves to be competent writers and record keepers. They have undoubtedly encountered obstacles along the way, but they have found ways to address them and to persevere.
Your students will likely feel a mix of excitement and nervousness on the day that their project takes place. They will likely look to you for help and encouragement as their teacher and mentor. If they sense in you a feeling of pride and calm, they will be able to effectively perform their tasks that day and enjoy themselves.
The Big Day

SERVICE LEARNING HANDBOOK | TAKING ACTION
overcomingobstacles.org
Tips for the Day of the Project
Don’t forget to eat! Arrange for snacks or lunch if you will be away from school during regular meal times.
Take pictures! Bring cameras and record as much of the day as possible. Consider appointing a few students to be the day’s photographers. Sometimes, convenience stores or large drugstore chains will donate disposable cameras that are still on the shelves after their expiration dates have passed. The cameras still work, but cannot be sold.
Invite others to take part! If appropriate, formally invite local political and community leaders, your school principal, your district superintendent, or others who may be interested in seeing the results of students’ work.
If appropriate, demonstrate school spirit! Make a sign explaining who you are and hang it at the site of your project. Wear clothing in your school’s colors, or decorate your own T-shirts.
If things fall apart—for example, if weather or administrative issues impede or halt the project entirely—help your students to remember that it’s the process and commitment that are most important. Even an unfulfilled project does not diminish the commitment to community that your students have demonstrated. Allow students time to feel sad or angry that they were not able to fulfill their plans, and provide them with an opportunity to discuss those feelings. However, make sure that students ultimately understand that their work has not been in vain because of what they have learned from the service learning project.
You and your students have put a great deal of time and energy into this project, and you deserve to reward yourselves for your efforts. Whether the outcome of the project was exactly what you had hoped for or not, this is a time to celebrate. The celebration can be whatever your class decides is enjoyable and in line with school regulations. You may choose to watch a video of your project, watch a video about helping others, or create a photo album to tell your service learning story. Do you have the time and money to go to an amusement park, go to a sporting event, or have a picnic in a nearby park? Be creative in how you choose to celebrate your success. The limits for celebration should only be those set by the school and by the district—other than those, the sky should be the limit!
Celebrate
This module would not be complete without some brief descriptions of exemplary service learning projects. We hope these either serve as models of what can be accomplished in a project of this sort or inspire your class to organize a similar project.
Project Briefs

SERVICE LEARNING HANDBOOK | TAKING ACTION
overcomingobstacles.org
A group of high school students in New Jersey began their participation with a local charitable organization at the start of the school year. They decided that two of the most pressing issues facing youths in their area were drugs and teen pregnancy. The teacher provided students with a list of local charitable organizations, which she obtained from the internet. The description of one such organization appealed to the students as a way to address the two issues. The organization is a home for “boarder babies.” These babies, who have been abandoned, neglected, exposed to drugs and/or HIV, are healthy enough to go home from the hospital, but have no homes to go to. The organization posted their wish list on the internet, and the students decided that they would raise money through bake sales to purchase items from the list and deliver those items to the organization on Make a Difference Day. The students spent Make a Difference Day caring for the babies and learning about their needs. The students continued to support the organization through bake sales and donations. They donated over $500 and many hours of their time.
A middle school class in Michigan learned about lead poisoning contracted from house paint. The students contacted the local Department of Health to obtain a list of houses in the area that needed to be repainted in order to not be condemned. The students visited nearby homes and offered to repaint a house owned by an elderly couple. The students had the paint donated, recruited the assistance of a professional painter, and worked for a week to complete the painting.
A high school math class in Arizona noticed that the elementary school yard looked uninviting and neglected. Students researched the developmental stages of elementary school students and invited a mathematician and an elementary school teacher to be guest speakers. The students obtained permission to paint a mural of geometric shapes and designs on the wall that faced the school yard and created math games for the students to play during recess. Once a month, students supervised recess at the elementary school.

SERVICE LEARNING HANDBOOK | ASSESSMENT
overcomingobstacles.org
ASSESSMENT
AGENDA
Student Assessment
Teacher Assessment

SERVICE LEARNING HANDBOOK | ASSESSMENT
overcomingobstacles.org
Ongoing Assessment
Ongoing assessment and evaluation of the project will help you to notice small problems before they grow, keep students focused, and create records of the project’s progress and outcomes. It also eliminates the need for a post-project evaluation, which might seem like a grade based on whether the project goal was realized.
Over the course of the project, a variety of progress reports should be written and exchanged among participants. The content of the reports will vary depending on who is involved, but possible exchanges include the following:
From individuals, small groups, or teams to the rest of the class
From individuals, small groups, or teams to the teacher
From individuals, small groups, or teams to school administrators
From individuals, small groups, or teams to participating outside organizations or agencies
Help students establish a format for reports and a regular schedule of when reports will be sent, depending on the overall length of the project. Remind the class that, like a memo sent in the workplace, their progress reports should be neat and succinct. They may even use bullets instead of complete sentences.
Example:
TO: Ms. Grimes FROM: Playwriting Team RE: Weekly Progress Report DATE: March 22
This week, our team accomplished the following tasks:
Wrote a second draft of the play’s second act.
Proofread the first act, which is now complete.
Met with the research team to discuss the following questions that we still need answered for the final act of the play:
What species of fish are part of the park’s ecosystem?
How does the change of seasons affect the ecosystem?
We have the following challenges to overcome:
Student Assessment

SERVICE LEARNING HANDBOOK | ASSESSMENT
overcomingobstacles.org
The elementary school auditorium is booked on the day we had planned for our performance.
We still cannot find cardboard boxes for scenery.
Next week, we plan to complete the following tasks:
Write the first draft of the play’s third and final act.
Get the second draft of the second act proofread.
Reschedule date for auditorium at the elementary school; review time lines.
Contact more local stores and recycling plants to request cardboard boxes.
Post-Project Assessment
Because your students have done important work throughout the project, discourage them from basing an evaluation of their performance on just the culmination of that work. Encourage students to instead focus on their preparation and planning for the project and on their commitment to making a contribution to the community. There are a variety of ways to conduct a post-project assessment. Use the method most appropriate to your students and their projects.
Self-Assessment
Section 1 of this module describes a service learning project as a student-directed educational process. Just as the planning and production of the project relied heavily on the students’ work, so too should the culminating assessment of the project.
Encouraging students to reflect on their work helps them to master the skill of self-assessment and provides an opportunity for them to consider the personal lessons and insights that they gained from the project. These lessons and insights may be related to their own abilities, issues of social awareness, their communities, or their experiences working with others.
Students can assess themselves in a variety of ways. If they have been keeping journals of their experiences, you may wish to have them write a final entry summarizing their thoughts, the lessons they learned, and their feelings of accomplishment. Also, you may wish to have them express their thoughts and recount their experiences using the medium of their choice (e.g., writing, art, music).
However you choose to engage your students in self-assessment, ensure that they consider various aspects of their experience by posing questions such as these:

SERVICE LEARNING HANDBOOK | ASSESSMENT
overcomingobstacles.org
What was the goal of the project? Do you think the goal was achieved? Why or why not?
Was the work you did personally meaningful? Why?
Who do you think benefited from your work? How?
What made you happy about your experience? What made you unhappy? Was there anything you did or saw during the project that bothered you? What? Why?
Did you have a chance to interact with the people whom the project was serving? How? What was that like?
If you could do one thing about the project differently, what would it be? Why?
What was the best part of your service learning experience? The worst? Why?
What new things did you learn during the process?
What issue in our community/society made your project necessary?
Are there any assumptions or stereotypes that you held when you started this project that you now know to be false?
How did participating in the service learning project change you?
Although the vast majority of young people are positively affected by their service learning experiences, it is not inconceivable that students may express negative feelings about the project. This may be because their beliefs have been challenged, because there were conflicts within their work groups, or perhaps because they believe they put more into the project than others did, but did not receive recognition for their efforts. If this happens, encourage the student or students to discuss their experiences. Depending on the dynamics within your classroom, this discussion may involve the entire class, a specific student and their work group, or just you and the student in a one-on-one conversation. In any case, act as a discussion facilitator in order to avoid making students uncomfortable about sharing their feelings and to alleviate the potential for a group conflict. Encourage students to utilize their conflict management skills during the discussion (e.g., use I-statements). Try to consider all students’ feelings in an open manner.
Public Assessment
In addition to self-assessment, it is very valuable to produce a public report of the project and the process by which it came about. Explain to students that public assessment is one way to ensure outside recognition of their efforts. In the workplace, it is appropriate to report back to those who approved a project’s creation; the same theory applies to a service learning project. Additionally, just as your class searched for information on others’ project reports in hopes of using their experience as a guide, another group that wishes to execute a project might find a report of your students’ experiences useful. Remind students that the more groups they share their assessment with, the more they increase their chances of recognition in the form of awards, certificates of merit, and praise. If your students have decided to join one of the national service efforts mentioned earlier, they may find organizational websites or publications devoted to sharing the stories of participants.

SERVICE LEARNING HANDBOOK | ASSESSMENT
overcomingobstacles.org
You may wish to have your students work as a group to create a public report or assign them to individually report on the project. Consider inviting students to report on their work using the medium of their choice. Options include the following:
A written report
A newspaper article
A public question-and-answer forum
A slide show
An annotated photo album
A video
Remind students that just as a formal report in the workplace is well thought out and neatly organized, the presentation of their reports will reflect their feelings about the work they did on the service learning project.
Just as your students have evaluated their service learning experience, it is appropriate for you as the teacher and service learning leader to evaluate the project. This evaluation should cover two topics:
Overall execution of your students’ project
Your students’ overall service learning experience
Evaluating Your Students’ Project
Consider the following:
Teacher Assessment

SERVICE LEARNING HANDBOOK | ASSESSMENT
overcomingobstacles.org
Was the project age-appropriate for my students?
Were there safety factors that should be addressed if I were to have another group of students work on this project?
Were the scope and size of the project appropriate for my students and the time and resources they had available?
Were students able to complete the majority of the planning and work on their own, or was much adult help required?
If the project was held in conjunction with an outside agency, is the agency a candidate for future collaborations?
How did students respond to the work? If there were clients involved, how did students respond to the clients?
Have students drawn any inappropriate conclusions from their experience?
Evaluating Students’ Overall Service Learning Experience
In order to determine how you can improve on this experience for other students, consider the following:
Did students have the opportunity to practice a set of skills in a real-world context?
Were my students academically and socially ready for this kind of experience?
Did the project fulfill the definition of “service learning,” in that it meshed with students’ academic curricula?
What kind of impact did the service learning project have on my students?
What kind of emotional responses did students have? Was I adequately prepared for these responses?
What major lessons did my students learn from their experience? Are these satisfactory, or does the project need to be altered in order to achieve different goals?
Use your evaluation to consider the future role of service learning in your classroom, what you would change, and what you would repeat. Most importantly, take time to congratulate yourself. A complex project that is student-focused requires a great deal of organization, patience, and good humor.
Service learning projects become easier to facilitate each time you repeat the process. Set an example for others by making service learning a standard part of your curriculum—and provide your students with the unmatched opportunity to connect with their communities while they learn an invaluable set of skills. This project is certain to be a win-win situation for all participants, and most importantly, the students. It is likely to be one of the richest experiences of their school careers.
SERVICE LEARNING HANDBOOK | LESSON 1: INTRODUCTION TO SERVICE LEARNING
overcomingobstacles.org
AGENDA
What’s a Service Learning Project?
What’s Going On?
Making Up Your Mind
Objectives
Students will define “service learning project.”
Students will identify issues and problems that they perceive in their communities.
Students will select an issue to address in a service learning project.
Materials Needed
One or two dictionaries (Part I)
Articles about young people or celebrities who’ve done service projects and/or a guest speaker
who can describe a personal experience with a service project (Part II)
One large sheet of paper and marker per group (Part II)
1LESSON
INTRODUCTION TO SERVICE LEARNING

SERVICE LEARNING HANDBOOK | LESSON 1: INTRODUCTION TO SERVICE LEARNING
overcomingobstacles.org
Purpose: Students define “service learning project.”
1. STUDENTS INTERPRET A QUOTE ABOUT COMMUNITY INVOLVEMENT.
Display the following quote on the board:
“If you want your neighborhood clean, sweep the front of your steps and maybe the house on the left and the right. If you don’t want graffiti, paint over the graffiti that’s close to you. If you don’t want it to be so noisy, you try being quiet. You’ve got to treat others the way you want to be treated.” —LL Cool J
Ask students to interpret this quote. Ask if it applies to their communities. Elicit from students that the quote suggests that people have the power to improve their communities, no matter what its problems are. Ask if they have ever heard the last sentence before.
2. STUDENTS DEFINE “SERVICE LEARNING PROJECT.”
Ask students to brainstorm the meanings of the words “service” and “learning.” Ask a volunteer to write students’ definitions on the board.
Ask two other volunteers to look in the dictionary for the definitions of these words. Invite these volunteers to read aloud the definitions they find, and to write them under or next to the suggested definitions. (Students should respond: Service is work done for another or for a community; it is assistance or benefit given. Learning is knowledge acquired by study.)
Ask the class to use this information to make an educated guess about what a service learning project is. Discuss their definition, and explain that a service learning project is one in which the participants choose to do a project that provides a service to the community. Explain the difference between service learning and community service. Tell students that the participants in a service learning project are guided by a teacher to practice and use a set of skills that they have learned.
Part I What’s a Service Learning Project?
Purpose: Students consider service learning topics by learning about and discussing other service learning/community service projects.
1. STUDENTS READ ARTICLES OR LISTEN TO A PRESENTATION ABOUT OTHER PROJECTS.
Provide each student with a copy of an article about a service learning project executed by a young person or by a person who is well known to your students. Allow students a few minutes to read the article. If a person who has been closely involved in a community project is available to speak to the class, invite them to describe the project and the work it accomplished.
Part II What’s Going On?

SERVICE LEARNING HANDBOOK | LESSON 1: INTRODUCTION TO SERVICE LEARNING
overcomingobstacles.org
Encourage students to write down comments or questions while listening to the speaker. Have them ask their questions after the speaker’s presentation.
2. STUDENTS DISCUSS WHAT THEY’VE READ OR HEARD.
Organize students into groups of three or four. Give each group a large piece of paper and a marker. Assign each group questions such as the following to answer:
Who is the focus of the article/the guest’s speech? What did this person do?
Where does this person live?
What prompted this person/group to act? What would you have done in their position?
What issue is the focus of the article/speech? Why did this person/group choose to address this particular issue?
What did the person/group do to address the issue?
What are the plans for follow-up? Is this an ongoing project?
Circulate through the room while students are working and write down striking statements.
3. STUDENTS REPORT THEIR ANSWERS TO THE WHOLE CLASS.
Facilitate a brief discussion on the information students have read or heard, encouraging them to offer their opinions on the project described, the issue it addressed, and the participants’ overall experience. Read aloud the statements that you overheard while students were working.
Purpose: Students discuss issues in their own communities and choose a topic for their service learning project(s).
1. STUDENTS SHARE THEIR OPINIONS.
Ask students to respond to some or all of the following questions:
What problems do you see in your town, state, or country?
What do you think are the “hot” issues in your community and in your school?
What things do you wish were different in your community and your school?
How do you think people perceive your community and your school?
How do you think most people perceive adolescents? Do you think their perception is a realistic one?
Part III Making Up Your Mind

SERVICE LEARNING HANDBOOK | LESSON 1: INTRODUCTION TO SERVICE LEARNING
overcomingobstacles.org
Write their responses on the board.
2. STUDENTS DELVE MORE DEEPLY INTO THE ISSUES THEY’VE IDENTIFIED.
Focusing on the top five issues that generated the most interest, facilitate a discussion of the details surrounding the issues that students have identified. Ask questions such as these:
Who is involved in this issue?
What specifically would help to alleviate the issue or problem?
What are some things you could do that would lead to that help?
Are there places in your community where you could provide help?
This discussion addresses those issues that your students identified. If necessary, list the actions on a separate part of the board so that students can see them clearly.
3. SET RULES FOR DECISION MAKING.
Explain to students that they’ve just created a list of potential service learning projects. Explain that while each has merit, you’d like them to try to choose one on which they’d like to focus.
Explain that a final choice will be made either by majority rule (i.e., a vote will be held and the topic that receives the most votes will win) or by consensus (i.e., those in favor of a topic must convince those opposed to accept the topic). Using the same debate structure as in Module One: Communication Skills, you may choose to have students participate in a controlled debate to finalize a topic.
Another alternative is that a final choice will be made first by consensus and then by majority rule (i.e., after each group makes an argument for why their project topic should be chosen, a vote is held and the topic with the most votes will be acted upon).
4. IF THE DECISION IS BEING MADE BY MAJORITY RULE, STUDENTS VOTE ON TOPICS.
Number the potential topics as they are listed on the board. Ask each student to write on a piece of paper the number of the topic in which they are most interested. Collect the papers, count the votes, and announce which topic received the most votes.
If the number of votes between two topics is equal or especially close, consider holding a runoff vote. If the voting is still close, or if choosing becomes divisive, consider inviting students to work in smaller groups on separate projects.
5. IF THE DECISION IS BEING MADE BY CONSENSUS, STUDENTS DISCUSS AND VOTE ON TOPICS.

SERVICE LEARNING HANDBOOK | LESSON 1: INTRODUCTION TO SERVICE LEARNING
overcomingobstacles.org
Number the potential topics as they are listed on the board. Call out each option and ask students to raise their hands to vote for the topic of their choice. Have students who voted similarly meet in small groups. Give each group five minutes to discuss arguments for why its choice is best. Give each group two or three minutes to present its arguments to the rest of the class. Then, hold another vote.
If you have decided to combine the consensus and majority rule methods, announce which topic received the most votes. If you have decided to make a decision solely by consensus, repeat this process until students agree upon a project.

SERVICE LEARNING HANDBOOK | LESSON 2: DESIGNING AN ACTION PLAN
overcomingobstacles.org
AGENDA
Why and How?
The Parts of the Plan
Research Methods
Objectives
Students will evaluate the usefulness of an action plan.
Students will explore the parts of an action plan.
Students will discover different methods of doing research in order to complete an action plan.
Materials Needed
Magazines or newspapers with pictures that students can cut out (Part II)
Scissors, glue (Part II)
Poster board (Part II)
Copies of two or three articles and/or book excerpts related to the students’ project topics (Part
III)
One copy of a well-known story or poem (Part III)
2LESSON
DESIGNING AN ACTION PLAN

SERVICE LEARNING HANDBOOK | LESSON 2: DESIGNING AN ACTION PLAN
overcomingobstacles.org
Purpose: Students define and evaluate the usefulness of an action plan.
1. Students define a sports “play” as an action plan.
On the board, have a student athlete or a coach diagram a “play” that could be used during a sports competition. Ask volunteers to explain what they think has been drawn. Elicit the understanding that the diagram is an outline of a play that a team could use during a game. Ensure that students are familiar with this coaching technique, then ask them to explain why they think it might be useful. Help students to understand that diagramming a play provides the players with a plan and a strategy for what actions to take.
2. Students brainstorm analogies to an action plan.
Ask students to brainstorm other situations in which a specific set of instructions or steps can be useful. (Students might respond: directions for getting somewhere, directions for assembling something, a recipe for cooking.) Explain that an action plan and its purpose are similar to what they have mentioned.
3. Students outline the elements of an action plan.
Engage students in a more specific discussion about what makes up an action plan and how an action plan is useful. Elicit the following:
An action plan spells out what outcome is desired.
An action plan outlines which resources are available and which need to be acquired for completing the project.
An action plan outlines a schedule and a time line for completing the project.
An action plan outlines the steps that must be taken in order to complete the project.
Part I Why and How?
Purpose: Students explore the information that should be included in an action plan.
1. Students review the definition of a goal.
Review with students the concept of goal setting, and the definition of a goal as a dream or plan that’s measurable and has a time line for completion.
2. Students define the goals of the project.
Part II The Parts of the Plan

SERVICE LEARNING HANDBOOK | LESSON 2: DESIGNING AN ACTION PLAN
overcomingobstacles.org
Invite a volunteer to write the service learning project topic on the board. Ask students to determine if the completion of this project is a realistic, measurable goal. If the goal is not explicit in what the student has written, discuss with students how to make the goal realistic and measurable (e.g., determine how many people will be reached, how much space will be affected, and so on).
3. Students visualize the elements of their project in order to organize their action plan.
Have students form small groups. Provide each group with poster board, magazines, newspapers, scissors, and glue. Write the following on the board: “Who? What? When? Where? Why? How?”
Have each group visualize the completed service learning project, imagining and picturing it in detail. Tell students that as they visualize, they should consider the questions that you have written on the board and create collages depicting the answers to those questions. You may wish to have students annotate their collages with written lists and descriptions.
Invite each group to present and describe the different parts of their collages. Encourage students to organize their notes under the headings of the questions posed (Who? What? When? Where? Why? How?). As students present information, ask them questions such as the following to elicit more specific information:
Who exactly will do that?
When in the sequence of steps will that happen?
What needs to happen before then?
When students are unable to answer a question, encourage them to write the question under the appropriate heading and explain that they will need to do some research in order to find the answer.
Remind them to transfer this information to paper or poster board, since they will use it to formally write their action plan.
Purpose: Students discuss different methods of research.
1. Students discuss the need for research.
Ask students to discuss what they would do if you dropped them off in the middle of a town they had never visited, and told them to find their way home without a map. Elicit from them that just as it’s easier to find one’s way around an unfamiliar place by using a map to gather information about their location, students are likely to make their service learning project more successful if they gather information about the topic and learn how to successfully complete a project. Guide them to the awareness that research is the best way for them to find useful information.
Part III Research Methods

SERVICE LEARNING HANDBOOK | LESSON 2: DESIGNING AN ACTION PLAN
overcomingobstacles.org
2. Students discuss primary and secondary resources.
Have students pair up with the classmate they interviewed for the homework assignment mentioned at the start of this lesson. Have each pair team up with one or two other pairs, creating groups of four to six students. Ask each student to take out the article they completed for homework. Invite students to sit in a circle and to pass the articles they wrote to the person on their left, who will read the article. Continue this process until students have read each article in their groups. Encourage students to take notes on the articles if they wish.
Have students take turns being interviewed by their groups about how they spent their last school vacations. Encourage groups to ask questions and engage in detailed discussions about each student’s experience.
When all students have been interviewed by their groups, pose the following questions to the entire class:
After you read the articles on your classmates’ experiences, did you feel that you had all of the details on their vacations?
After interviewing your classmates, did you feel that you had all of the details?
If I gave you the task of planning a vacation and told you to research what kinds of vacations others had taken, would you read articles about their experiences or speak to them personally?
3. Students consider how to locate primary and secondary resources.
Ask, “If you were looking for information on someone’s service learning experience, would you read someone else’s account of what happened or speak to someone who was actually there?” Have students explain the reasoning for their answers.
Explain that primary sources are those that provide firsthand information. Secondary sources, such as books, newspapers, and magazines, are those that provide secondhand accounts. Elicit from students that primary sources are the best sources of information and allow the researcher to pose specific questions.
Ask students to identify ways that they might locate a primary source who can tell them about a service learning experience or answer questions about their topic. Write the results of the discussion on the board. (Students might respond: use the phone book to find and contact local community organizations.) Help students to contact local organizations and arrange for a primary source to visit the classroom and participate in a question-and-answer session. Encourage students to consider in advance exactly what information they would like to find and the questions they’d like answered.
Explain to students that while secondary sources provide secondhand accounts of information, they are still very valuable. Ask students where they might locate secondary sources that will provide them with information that they can use for their project. (Students should mention visiting the library or using the internet.)

SERVICE LEARNING HANDBOOK | LESSON 2: DESIGNING AN ACTION PLAN
overcomingobstacles.org
Arrange a trip to the library so that students can conduct research. You may also discuss opportunities for them to visit the library outside of class time.
4. Students discuss using the internet for research.
Have students identify how and when they should use the internet for research. Ensure that students understand that, like books or newspapers, internet research is considered a secondary source, and should be treated the same way.
Remind students that material published on the internet may have factual errors and/or may be undocumented information. Students should be cautious about the information they find while researching online.
5. Students discuss effective research methods.
Ask students if reading every word of a newspaper every day to find information on their service learning project would be an effective use of their time. Elicit from students that this method is too time-consuming and inefficient.
Explain that there are two strategies that can be used for faster and more effective research:
Check a resource’s table of contents and index to see if it covers the topic you’re researching.
Skim the text, glancing quickly over paragraphs to find those that contain the information you need.
Distribute copies of two or three articles and/or book excerpts related to the students’ project topic. Give students five minutes to skim the text for pertinent information. Then, facilitate a discussion of the information they were able to glean during that time.
6. Students recognize the importance of citing their sources.
Tell students that you would like their opinion on a story or poem that you recently wrote. Then, read a short passage from a well-known story or poem aloud. Ask students if they think that your work is good. If they do not challenge you on their own, ask students if they really believe that you are the author of the piece.
When students recognize that you did not write the piece, ask them to share their opinions on what you have done (claimed as yours something written by someone else). Ask students what they would do and what they would think if someone else took credit for their own work.
Explain that if students find information in their research that they would like to note or write down, they need to credit the source they got it from, including the name of the resource, the author’s name, the date of publication, and the page on which the information was found. On the board, model the form you would like students to use for citations.

SERVICE LEARNING | ACTIVITY SHEET©
20
21
Ove
rco
min
g O
bst
acle
s
SERVICE LEARNING GUIDE AND CHECKLIST
Choosing a Projecto Define “service learning” for students.o Motivate and inspire students to get involved.o Help students choose a project topic.
Creating an Action Plan and Preparing for the Projecto Define “action plan” and explain why one should be made.o Explain what information should be included in the action plan.o Familiarize students with different ways to find information on service learning.o Organize students’ research efforts.o Have students sign project contracts.o Organize students’ work efforts by forming project teams or work groups.o Help students write an action plan.o Assist students with the creation of a project time line/work flowchart.o Have students submit the plan for approval from those who must okay the project.o Prepare students to make presentations about the project.o Help students refine their action plan, if necessary.o Guide students as they follow the steps outlined in their action plan in order to pre-
pare for the project.o Explain the importance of and methods for tracking students’ progress as they work
to complete the project.o Explain the concept and importance of having a strong work ethic.o Explain special considerations that students may face while working on the project.
Carrying Out the Projecto Remind students to check and double-check to ensure that they have completed all
the work for their project.o Help students brainstorm last-minute project issues. o Have students walk through the project and create an agenda for the day of the
project.o Support students as they complete their service learning project.o Celebrate.
Self-Assessment and Public Assessmento Explain what self-assessment is and why it is useful.o Explain what self-assessment should include.o Have students complete a self-assessment of their project work.o Explain what a public assessment is and why it is useful.o Explain what a public assessment should include.o Have students complete a public assessment of their work.
overcomingobstacles.orgPowered by TCPDF (www.tcpdf.org)

SERVICE LEARNING HANDBOOK | LESSON 3: GATHERING INFORMATION AND MAKING THE
COMMITMENT
overcomingobstacles.org
AGENDA
Organizing the Work
Making a Commitment
Forming Work Groups
Objectives
Students will organize their work efforts in order to effectively complete their research.
Students will discuss and create contracts that formalize their commitment to the service
learning project.
Students will form work groups and create job descriptions.
3LESSON
GATHERING INFORMATION AND MAKING THE COMMITMENT

SERVICE LEARNING HANDBOOK | LESSON 3: GATHERING INFORMATION AND MAKING THE
COMMITMENT
overcomingobstacles.org
Purpose: Students discuss the importance of working effectively and organize themselves accordingly.
1. Students explore the importance of organizing their work efforts.
Tell students that they have two minutes to perform the following tasks:
Write all the words you can find on the first page of [any book in your classroom] that begin with the letter “B.”
Count the number of ceiling tiles in this room.
Get the phone number of the school’s main office.
Stop the activity after two minutes, and ask students the following questions:
Did you complete the tasks? Why not?
Do you think you were working as effectively as possible? Were there multiple people doing the same tasks? Do you think that was efficient?
Is there a better way that you could have organized your work?
Elicit from students that to be effective, a team must organize its efforts so that it can get the most done in the least amount of time. It is important that people aren’t duplicating each other’s work.
2. Students organize into research groups.
Ask students to state how they can most effectively do the necessary research for their service learning project. Pose the following options to students:
The class divides into small groups, one for each method of research. Each group is responsible for locating the same information, but each will use a different research method.
The class divides into small groups. Each group concentrates on different portions of the information needed, using all of the research methods at its disposal.
Individuals choose a particular research method. Each person is responsible for researching all of the information needed, using the method of research they chose.
Help students divide their research tasks according to one of the above options, or others that the class has identified.
Part I Organizing the Work

SERVICE LEARNING HANDBOOK | LESSON 3: GATHERING INFORMATION AND MAKING THE
COMMITMENT
overcomingobstacles.org
Purpose: Students create contracts formalizing their commitment to the service learning project.
1. Students explore the usefulness of a contract.
Ask students why contracts with professional athletic teams are mentioned so often in the news. Students will likely offer what they know about individual NBA players and their contract negotiations, and may offer similar data about football and baseball players who have negotiated huge salaries. Some students may comment on seasons that began late because the teams could not negotiate their contracts.
Ask the class why contract talks are so important to athletes. Help students to recognize that contracts are created to protect two parties when people do business together. It is imperative that a contract makes clear the terms and conditions of the agreement so that everyone knows what is expected of them. Remind students that it is important to read a contract carefully, including the fine print, before one signs such an agreement.
2. Students recognize what is expected of them during the project.
Ask students to recall the definition of “service learning project.” (Students should mention: a project that provides a service to the community and is carried out by participants who are practicing a set of skills they have learned.)
Reinforce students’ understanding that a service learning project has reciprocal benefits for its participants: those creating the project get the benefit of learning and practicing a set of skills, and a segment of the community receives a service that’s needed. In other words, there will be people expecting to receive a service that they have been promised, and it’s up to the project participants to keep that commitment.
3. Students create contracts.
Have students work in small groups to consider what information should be outlined in their contracts. Ask students to consider the following:
Time commitment
Completing assigned tasks on time
Communication and conflict resolution
Perseverance
Work as a class to create a standard contract that each student will sign, or assign students the task of writing their own contracts. Remind students to draw up their contracts neatly and professionally, just as they would do in a business situation.
Part II Making a Commitment

SERVICE LEARNING HANDBOOK | LESSON 3: GATHERING INFORMATION AND MAKING THE
COMMITMENT
overcomingobstacles.org
4. Contracts are amended, signed, and filed.
Have students submit contracts to you for approval. If the contracts are complete and acceptable, meet with each student to complete a contract. You should each sign the contract, along with one or two witnesses.
If you feel that a contract is missing an important element, propose an amendment and discuss it with students.
When each student has completed and signed a contract, make a photocopy for the student and file the original in a safe place.
Purpose: Students will organize the work to be completed for their service learning project.
1. Students review the need to organize work.
Ask students to recount the reasons they organized their research tasks. (Students should respond: good organization leads to effective work, helps avoid repetition of work, and allows the most work to be completed in the least amount of time.)
Explain to students that just as they organized their research in order to complete it effectively, they’ll need to organize their work to prepare for and execute the project.
2. Students determine what groups are needed.
Have students brainstorm, based on their research and their work on their action plans, a list of the different tasks that their project will require. Write responses on the board, and label them with the title “Project Tasks.”
3. Students are assigned to work groups.
Explain that you will be assigning students to the groups in which you would like them to work. There are several methods of assigning students to groups. You might randomly assign students to groups (e.g., by grouping students with the same last initial or with birthdays that fall in the same month, by randomly assigning numbers to students). Alternatively, you may ask students to write on a piece of paper the three project tasks that they would most like to work on, and then assign as many students as possible to the group focusing on their first choices.
4. Students create job descriptions.
Part III Forming Work Groups

SERVICE LEARNING HANDBOOK | LESSON 3: GATHERING INFORMATION AND MAKING THE
COMMITMENT
overcomingobstacles.org
Facilitate a discussion with the class about what kinds of jobs may be available in each work group (e.g., group leader, record keeper, reporter). Consider jobs that may be specific to your students’ project. Have each work group create job descriptions for each position. Encourage students to use bullet points in their descriptions.
Have each group report back to the class on the job descriptions they created. Help each group to reach a general agreement on the contents of its descriptions.
5. Students choose jobs.
Have students choose jobs within their work groups. Tell students that they may discuss within their groups the positions that each person should have. They may also vote on the job that each group member should do. Remind students that they identified their learning styles in Module Six: Skills for School and Beyond and their goals in Module Three: Setting and Achieving Goals. Tell them to use this information to choose appropriate jobs.
Have students write their job titles and submit photocopies to you for record-keeping purposes.

SERVICE LEARNING | ACTIVITY SHEET©
20
21
Ove
rco
min
g O
bst
acle
s
I, (student’s name), as a member of (educator’s name and subject) class, hereby state my commitment to the service learning project that our class is going to execute. As part of the project team, I agree to the following:
o Come to class on time in order to maximize our work time on the project.
o Treat the project and all work involved seriously.
o Complete tasks on time and to the best of my ability.
o Keep all project commitments.
o Continue working on the project until it is completed, or until the team agrees that the work is done.
Signed on ___________________
Date
______________________________________
Student’s signature
______________________________________
Educator’s signature
______________________________________
Witness’ signature
SAMPLE CONTRACT
overcomingobstacles.orgPowered by TCPDF (www.tcpdf.org)

SERVICE LEARNING HANDBOOK | LESSON 4: FORMALIZING AND FINALIZING THE ACTION PLAN
overcomingobstacles.org
AGENDA
Parts of the Plan
Getting Approval
Creating a Time Line
Objectives
Students will identify the information that should be included in a formal action plan.
Students will determine whose approval is needed in order for them to complete their project.
Students will create a time line for the completion of their service learning project.
Materials Needed
Magazine pictures that you have cut into puzzle pieces, enough for each group of four to five
students to have a puzzle (Part I)
Calendar pages for each month of your project (Part I)
4LESSON
FORMALIZING AND FINALIZING THE ACTION PLAN

SERVICE LEARNING HANDBOOK | LESSON 4: FORMALIZING AND FINALIZING THE ACTION PLAN
overcomingobstacles.org
Purpose: Students explore the information that should be included in an action plan.
1. Students review the usefulness of an action plan.
Review with students why an action plan is useful:
It outlines what resources are available and what needs to be acquired.
It outlines a schedule and a time line for completing the project.
2. Students complete a puzzle.
Have students form small groups of four or five. Distribute a puzzle piece to each group member, without explaining what the pieces are. Then, ask students to tell you what is depicted in the pictures you’ve given them. If the groups do not begin to put the puzzles together, explain that they each have five minutes to assemble the pieces they’ve been given into a complete picture.
After students have assembled their puzzles, ask questions such as the following:
What did you start with in this activity?
What did you finish the activity with?
Elicit from students that when they correctly assembled the puzzle pieces they started with, they were able to finish the activity with a clear picture. Ask students to take out the information they collected while presenting their collages during Lesson 2. Also, ensure that they have the information they collected from their research. Explain to students that they will be using all of this information to create a formal action plan—a clear picture of what their project will involve.
3. Students explore the sections that will be included in their action plan.
Write the following sections of an action plan on the board in a single column:
Introduction
Materials
Human Resources
Jobs and Responsibilities
Schedules and Contracts
Time Line
Appendix
Part I Parts of the Plan

SERVICE LEARNING HANDBOOK | LESSON 4: FORMALIZING AND FINALIZING THE ACTION PLAN
overcomingobstacles.org
Explain each section. As you speak, write notes next to each heading indicating what should be covered in that section of the plan. When each section has been described, suggest to students that, just as they have divided their work on the project, they might consider dividing the writing according to their work group’s tasks.
4. Students review the writing process.
Explain to students that there is an established process for writing that helps to ensure that the work will be complete, clear, and free of mistakes. Explain the five steps of the writing process:
Prewriting: Use techniques such as word association, brainstorming, and outlines to generate ideas for your work.
Writing: Use the prewriting information to write a first draft of the work.
Revising: Read and reread your own work, and have peers review your work to make sure it is clear.
Proofreading: Read your work again to find grammatical and spelling errors. Correct any problems.
Publishing: After a final proofread, format the work in a way that makes it easy to read. Put it in a folder or notebook.
5. Students determine a schedule for creating their action plan.
Work with students to determine deadlines for each stage of the writing process and for each section of the action plan. Also, identify a final deadline by which the action plan will be published. Give each group a set of calendar pages. Encourage students to complete their calendars by detailing each deadline and the work expected on each date.
Purpose: Students determine what approvals they will need in order to complete their project.
1. Students consider situations in which they need to get approval.
Ask students to name activities for which they need their parents’ permission. (Students might respond: going out with friends, staying out late, etc.) Ask them to name activities for which they need their teachers’ permission. (Students might respond: leaving the classroom to go to the restroom.)
Elicit from students that approval is usually needed when someone wants to do something atypical or out of the ordinary. Since the service learning project is not something that happens every day, it will require the approval of certain people.
2. Students determine whose approval will be needed.
Part II Getting Approval

SERVICE LEARNING HANDBOOK | LESSON 4: FORMALIZING AND FINALIZING THE ACTION PLAN
overcomingobstacles.org
Have students brainstorm whose approval might be needed for their project. Ask questions such as the following:
Who at school might need to approve the project?
Will your project take place somewhere else? Who might need to approve use of that space?
Will your project take place in a public facility? Who needs to give approval for you to use that facility?
Will the project take place during school hours? Who might need to give approval for you to be somewhere else during the school day?
Have students write their answers. Explain that this information will also be included in their action plan.
Purpose: Students create a time line and a schedule for completing their project.
1. Students evaluate the usefulness of creating a step-by-step outline.
Write the following on the board:
Melt one cup of butter.
Form into small balls on a cookie sheet.
Add eggs and flour.
Bake at 350 degrees for 10 minutes.
Add one cup of sugar.
Gather ingredients.
Mix.
Ask students what would happen if they completed these steps as they are written. (Students should mention that they’d make a big mess.) Now, ask students if there is a different way that they could arrange these steps in order to achieve the desired result. Students should arrange the steps as follows:
Part III Creating a Time Line

SERVICE LEARNING HANDBOOK | LESSON 4: FORMALIZING AND FINALIZING THE ACTION PLAN
overcomingobstacles.org
Gather ingredients.
Melt one cup of butter.
Add one cup of sugar.
Add eggs and flour.
Mix.
Form into small balls on a cookie sheet.
Bake at 350 degrees for 10 minutes.
Ask students what would happen if they did step five before step two, or step four before step one. Elicit that without following the right order, the latter steps cannot be completed properly. Explain to students that this same idea applies to a service learning project. To get the results they want, students will need to create and follow a step-by-step plan outlining what needs to be done and when.
2. Students identify and order the steps of a project time line.
Encourage students to work in their teams to brainstorm the steps that need to be taken for the different parts of the project. Suggest that groups focus on topics such as getting materials, contacting people, getting approvals, etc.
When the groups have completed their brainstorming, have each group present its ideas about the steps that need to be followed in order to complete the project. Help students to place the steps in order, just as they ordered the steps to make cookies. Ensure that the final step of their time lines is completing the project.
3. Students attach dates to their project time lines.
When students have ordered the steps, write the date on which the project is scheduled to be completed next to the final step. Discuss with students how much time there is between now and that date. Then, facilitate students’ work to attach a date to each step they have written. Encourage them to consider both the date on which a step must be completed and how long it will take to complete that step.
Conclude the activity by explaining to students that they have created a schedule, or time line, to follow as they complete their project, with time frames and deadlines that detail when each step should be accomplished. Explain that this information should be included in their action plan, and should therefore be written neatly and clearly.

SERVICE LEARNING HANDBOOK | LESSON 5: GIVING PRESENTATIONS
overcomingobstacles.org
AGENDA
Presentation Preparation
Practicing the Presentation
Refining and Revising
Objectives
Students will prepare an oral presentation.
Students will practice giving an oral presentation.
Students will discover the steps to refining their action plan.
Materials Needed
Index cards for each group (Part I)
Art materials (e.g., poster board, markers) (Part I)
Presentation software (e.g., PowerPoint, OpenOffice Impress) (Part I)
5LESSON
GIVING PRESENTATIONS

SERVICE LEARNING HANDBOOK | LESSON 5: GIVING PRESENTATIONS
overcomingobstacles.org
Purpose: Students identify the characteristics of effective presentations.
1. Students identify the characteristics of a good presentation.
Introduce the exercise by poorly giving a brief presentation (e.g., slouch, mumble, speak very informally).
Ask students what they thought of your presentation. Elicit their criticisms of your presentation. Then, ask how the presentation could be improved. List their answers on the board. (Students should respond: speak clearly and loudly enough to be heard, use good posture, organize your thoughts so listeners can easily follow your presentation.)
Explain to students that all good presentations display these characteristics.
2. Students plan the organization of their presentation and make presentation notes.
Explain to students that if they have created a written action plan, they have already completed most of the preparation necessary to give a presentation, since both the written plan and the presentation include the same information: an introduction, information on each activity to be undertaken, and a conclusion.
Ask students if it would make sense to just read aloud from their action plan if they are presenting it to someone who has already received it. Elicit that this would not make sense, since the listener has probably read the action plan and wants more information. Instead, the presentation should elaborate on the action plan’s key points.
Have students work in their groups to identify the key points of the action plan (e.g., who, what, when, where, why, and how) and to write them on index cards. Work with each group to ensure that the key points are organized in an order that makes sense, just as they are organized in the action plan. Then, encourage each group to present the section of the plan on which they have worked. Engage students in a discussion about the organization of the entire presentation, including who will present which information.
3. Students create visuals for their presentations.
Ask students whether they think the presentation will be interesting if it’s just a series of people standing up, reading, and then sitting down. Ask students to suggest ways to enliven the presentation so that listeners will be interested in and excited about it. Elicit that visuals would help with capturing interest.
Part I Presentation Preparation

SERVICE LEARNING HANDBOOK | LESSON 5: GIVING PRESENTATIONS
overcomingobstacles.org
Have small groups brainstorm visuals that might enhance each section of the presentation. Remind students that visuals are meant to enhance the presentation, not draw attention away from it; therefore, they should be colorful (but not distracting), simple, and easy to read. Encourage students to use photographs, charts, and graphs.
Have students choose and create at least one visual for each section of their presentation using the art materials and presentation software you have provided. When they have finished working, have students practice their presentation using their visuals. If necessary, discuss again with students the organization of their presentation, including who will be in charge of presenting visuals while others are speaking.
Purpose: Students complete final preparations and practice their presentation.
1. Students practice their presentation.
Ask students why professional dancers or actors practice instead of just showing up to perform. (Students should respond: in order to improve their performances, to sharpen their skills, to practice working well together.) Explain that practice does the same thing for everyone. The best way for students to ensure that a presentation goes smoothly is to practice it until they are completely comfortable with it.
First, encourage students to practice each section of the presentation for their peers. Listeners should take notes on whether the information is organized clearly and whether the speaker can be heard. Next, have students practice their entire presentation while you take notes on the organization and flow of information, whether speakers can be heard clearly, whether the visuals are being used well, and whether students are taking an appropriate amount of time to complete their presentation. If possible, have students invite others, such as another class or teacher, to watch their presentation and to make suggestions.
2. Students practice answering questions during their presentation.
Ask students to talk about an experience in which they were listeners at a presentation. Prompt student participation by posing questions such as the following:
What kept you interested—or disinterested—in the presentation?
What did the speaker do well?
As listeners, did you have questions? How and when did you ask those questions?
Tell students that it is very likely that their listeners will have questions, and that it is up to them as presenters to tell their listeners whether they would like to take questions during or after the presentation.
Part II Practicing the Presentation

SERVICE LEARNING HANDBOOK | LESSON 5: GIVING PRESENTATIONS
overcomingobstacles.org
Explain to students that preparing for questions during a presentation is much like preparing for questions during a job interview—they should think about what they would want to know if they were hearing about the project. Encourage students to brainstorm possible questions that a person outside the classroom might have about the project.
Prepare students to field questions by acting as an attendee at the presentation and asking questions. Invite other teachers or students to do the same. Remind students that if they do not know the answer to a question, it is appropriate to respond by saying, “I don’t know, but I’ll find out and get back to you.”
3. Students make final preparations for their presentation.
Discuss the following with students:
Attire—As in a job interview, the way that you present yourself reflects how you feel about what you’re presenting. The way you dress can prove that you are taking your project seriously. There’s no need to be formal, but you should dress neatly and professionally.
Behavior—It won’t matter what you’re wearing if your behavior doesn’t also show that you are taking the project seriously. You should consider the presentation to be like an interview, and behave appropriately. Holding side conversations or arguing with one another is not appropriate. If you behave professionally, your listeners will take you seriously.
Conclusion and Thank-You—Because you’ll be presenting a lot of information, it’s important to include a conclusion that briefly summarizes your presentation’s key points. A conclusion also lets your audience know when it’s time to ask questions or to leave. Remember that your listeners have other commitments as well, so you should be sure to thank them for their time.
Notes—You’re going to be concentrating hard during your presentation, and you’ll probably be excited; it can be easy to forget some of the things that happen during the presentation. It’s a good idea to appoint a few people to take notes on what happens, what questions are asked, and what requests are made, so that you will remember what needs to be done after the presentation.
Requests—Remember that if you are asking your listeners for approval or for feedback, you must clearly describe what you want and suggest a deadline.
Purpose: Students explore the steps to revising their action plan.
1. Students share their feelings about revising their project.
Ask students to discuss or write about their project experience up to now. Encourage them to discuss their feelings about having to revisit or revise their original plan.
Part III Refining and Revising

SERVICE LEARNING HANDBOOK | LESSON 5: GIVING PRESENTATIONS
overcomingobstacles.org
Help students to understand that revising a project is like revising a piece of writing—the goal is to improve the outcome. While it may seem difficult to revise a plan that was exciting and seemed perfect, there’s no reason to be discouraged. Help students to reexamine what inspired them to do a project in the first place. Remind them that their service learning project will allow them to practice skills they’ve learned and provide a service to their communities.
2. Students identify what needs to be changed.
If students are revising the project based on a request from someone whose approval is required, facilitate a class discussion about the requested changes. Encourage students to seek clarification about anything that is unclear.
If students are revising the project because their planning made it clear that the project could not be completed as they had hoped (perhaps because of time or resource restrictions), encourage them to pinpoint the problem areas of their plan and create a list of issues that must be addressed.
3. Students revise their action plan.
Ask students to review the definition and uses of an action plan:
Action plans outline what resources are available and what needs to be acquired.
Action plans also outline a schedule and a time line for completing the project.
Help students to revisit the activities and questions they encountered in the first four lessons and revise their action plan.

SERVICE LEARNING HANDBOOK | LESSON 6: TAKING ACTION
overcomingobstacles.org
AGENDA
Tracking Your Progress
Work Ethic
Special Considerations
Objectives
Students will evaluate means of tracking their progress as they work to complete their project.
Students will explore the importance of and the qualities that comprise a strong work ethic.
Students will evaluate specific project issues that may require special attention.
Materials Needed
A popular song, a well-known poem or speech, or a clip of a popular television show or movie (Part
I)
One copy of the “Tracking Sheet” activity sheet for each student (Part I)
One copy of the “Sample Memo” activity sheet for each student (Part I)
Six to 10 index cards or playing cards for each student (Part II)
6LESSON
TAKING ACTION

SERVICE LEARNING HANDBOOK | LESSON 6: TAKING ACTION
overcomingobstacles.org
Purpose: Students evaluate the use of tracking sheets and status memos.
1. Students discover the usefulness of keeping records.
Before playing a popular song, reciting a well-known poem or speech, or playing a clip of a popular television show or movie for students, count the number of times a particular letter, word, or phrase (of your choosing) appears in the piece. Choose one that will appear many times. Then, tell students to pay close attention to the piece, as you’ll be asking them questions about it afterward.
Play or recite the piece. Then, ask students how many times the particular letter, word, or phrase appeared in the piece. Students should be unable to accurately recall the correct number.
Tell students that you will give them another chance to find the correct answer. Encourage them to keep a record this time of what they’re looking for on a piece of paper.
Play or recite the piece again. Ask students again how many times the particular letter, word, or phrase appeared in the piece. Then, ask questions such as the following:
Why are you able to answer this question?
If you hadn’t kept records, would you be able to answer the question confidently?
Explain to students that in the workplace, record keeping is crucial. It’s impossible to remember the details of everything that happens, so careful record keeping ensures that they can make good comparisons and learn from work that’s already been done. This is similar to their looking for information about others’ service learning projects in order to learn from what others have done. Record keeping also helps to keep track of which tasks have been completed and which still need to be done.
2. Students become familiar with tracking sheets.
Distribute the “Tracking Sheet” activity sheet to each student, and place a copy of the tracking sheet where everyone can see. Walk students through each section of the sheet, first soliciting their opinions on the purpose of each section, and then providing a straightforward explanation for each. As a class, decide on an example that you can use to fill out the tracking sheet.
Discuss with students a schedule for submitting tracking sheets to you, and establish dates on which you expect to receive tracking sheets from each group. Also, discuss with students what sort of filing system they will adopt in order to keep their records safe and organized.
3. Students become familiar with status memos.
Part I Tracking Your Progress

SERVICE LEARNING HANDBOOK | LESSON 6: TAKING ACTION
overcomingobstacles.org
Distribute copies of the “Sample Memo” activity sheet, and place a copy of the sample memo where everyone can see it. Explain to students that memos are a crucial form of communication used in the workplace. Explain that learning to write a memo is not difficult because the structure of a memo is always the same. Once students know the structure, they will always be able to write memos.
Walk students through each part of a memo, beginning with the headings (“To,” “From,” “Re,” “Date”). Explain that the body of a memo can be divided into three parts:
Explanation of why the memo is being written
Important information
How to contact the writer
A memo should always be written as simply as possible, and it should not exceed one page.
4. Students practice writing a status memo.
Have students work in small groups. Assign each team to compose two status memos: one that will be sent to you, and one that will be sent to the other teams working on the project. The memo should explain the current status of the project.
Ask students if they had difficulty writing their status memos. As a class, discuss ways to determine which information should be included in their memos.
Afterward, have students identify which people involved in their project should receive memos (e.g., principal, community leader). Discuss how often memos should be sent, and create a schedule for sending memos (if appropriate).
Purpose: Students explore the importance of a strong work ethic.
1. Students build a house of cards.
Distribute index cards or playing cards to students; then, have them form small groups. Instruct each group to build a house of cards. The team that builds the tallest house wins. Give students three minutes to complete the activity. While students are working, move around the room and watch them work.
When the activity is over, ask students the following questions:
Part II Work Ethic

SERVICE LEARNING HANDBOOK | LESSON 6: TAKING ACTION
overcomingobstacles.org
Was it easy to build a house that didn’t fall down? What method did you use to keep the cards up?
What caused the house to fall down?
If your house were standing and you took out one card, would the house have remained standing?
Help students to understand that in a house of cards, all the cards are dependent on one another—if one card drops, the whole house comes down. Explain that when working with a team on a project, the same principle applies—if one person loses momentum, or doesn’t meet their responsibilities, the whole project can fall apart.
2. Students discuss the importance of commitment.
Ask students to pretend that they are business owners who have put all of their personal resources into the business of their dreams. The business grows, and they decide to hire employees. Ask students, “What qualities do you want to see in your employees?”
Remind students that they have put all of their personal resources into the business, so they are dependent on its success. Write their answers to the question on the board. (Students should respond: people who are committed to their work, complete tasks on time, keep others informed, stay enthusiastic even in the face of obstacles, communicate well with their co-workers, and are more concerned about the success of the project than about “getting their way.”)
Have students identify what would happen if they hired employees who weren’t committed to their business. Explain that just as commitment is important to a business, students must be committed to their service learning project in order for it to be a success.
3. Students learn about the power of attitudes and expressions.
Have students work in pairs. Explain to students that their assignment is to mirror one another’s emotional expressions, but to do so without speaking. Say, “For example, if your ‘mirror image’ appears sad, you should mirror their sad expression. If your mirror image’s emotional expression changes to enthusiastic, your expression should mirror that change.”
Explain that students must concentrate intensely in order to seamlessly mirror one another. Give the class five minutes to complete the activity.
When students have finished the exercise, encourage them to share their responses. Ask:
Was it easy to mirror your partner’s image?
Did one person model most of the expressions while the other person mirrored them, or did you take turns modeling and mirroring?
What thoughts were running through your mind as you mirrored one another’s expressions?
Do you think this exercise was anything like real life? What happens when the people around you are expressing a particular emotion?

SERVICE LEARNING HANDBOOK | LESSON 6: TAKING ACTION
overcomingobstacles.org
Elicit from students that people’s emotions and expressions tend to influence the emotions and expressions of those around them. Ask students what effect this might have if people’s emotional expressions are primarily negative. Elicit from students that their attitude and expressions will affect their service learning project; therefore, it’s important for everyone to stay positive and motivated.
4. Students discuss the importance of dependability.
Read the following scenario to students:
You call a friend, and the two of you decide to go to the movies. The movie you’re going to see is brand new and popular, so you decide that he’ll meet you at the theater by 6:30 in order to get tickets. As soon as you hang up the phone, it rings—it’s another friend, someone you haven’t seen in a while. She’s leaving at 6:15 to go to a party and wants you to come. You say thanks, but tell her that you already have plans. You hang up and head for the theater. Six-thirty comes and goes, and your friend is nowhere to be found. At 6:45, the tickets sell out. At 7:00 he walks up casually and asks if you’re ready to see the movie.
Ask students:
How would you feel?
What would you do?
How will you feel the next time your friend asks you to go to the movies with him?
As a class, discuss the importance of dependability and keeping commitments to the service learning project. Tell students that if they fail to keep a commitment, they must be sure to apologize and work to correct their behavior.
Purpose: Students evaluate project issues that may require special attention.
1. Students discuss special considerations for project materials.
Explain to students that managing project materials means more than simply collecting them. Encourage students to brainstorm what other issues, with regard to materials, might need to be considered. (Students should respond: record keeping, storage, cleanup, special agreements for donated or borrowed items.)
Help students to create a checklist that will help them keep track of what materials they need, how and when they’ll get these materials, and where the materials can be found.
Ask students to consider the following questions regarding how to store their materials:
Part III Special Considerations

SERVICE LEARNING HANDBOOK | LESSON 6: TAKING ACTION
overcomingobstacles.org
Do you have permission to store things where you’d like to keep them?
Is your storage area in a secure place, where you know the materials won’t be disturbed?
Are there any materials that must be specially stored (e.g., paint or cleaning solvents, breakable items, perishable items)?
How long can you use the space to store things?
Do the appropriate people know where materials are stored?
Have students consider the following additional questions:
Will there be any trash left over from the materials used? How will the trash be disposed of? Are there any special procedures to be followed (e.g., separating recyclables, using special trash bags or bins)?
What will be done with leftover materials?
Are there any borrowed materials that must be returned immediately after the project is completed? How will you get them where they need to go on time?
What kind of cleanup will be required? Are there any potential messes or spills that must be prepared for? Would any particular cleaning supplies be needed in order to adequately clean up these spills or messes?
Students should create an established plan for managing, cleaning up, and returning materials on time.
2. Students discuss special considerations for transportation.
Ask students the following questions:
Will your project take place off school grounds? How do you plan on getting there on the day of the project?
Will you need to visit the site before the actual day of the project? How many times will you need to visit the site beforehand? How do you plan on getting there?
Do you need to go anywhere else in order to meet with people or pick up materials? How do you plan on getting there?
Will you need to transport materials anywhere? How will you do that?
As a class, discuss these transportation issues and how they might be addressed. Explain that if students need to, they may request your help with arranging transportation, completing the appropriate paperwork, and so on.

SERVICE LEARNING | ACTIVITY SHEET©
20
21
Ove
rco
min
g O
bst
acle
s
NAME:
TODAY’S DATE:
PROJECT TOPIC:
TRACKING SHEET
Name Task CommentsTarget Date
ActualDate
overcomingobstacles.org

SERVICE LEARNING | ACTIVITY SHEET©
20
21
Ove
rco
min
g O
bst
acle
s
TO: Ms. GrimesFROM: Playwriting TeamRE: Weekly Progress ReportDATE: March 22
This week, our team accomplished the following tasks:
• Wrote a second draft of the play’s second act.
• Proofread the first act, which is now complete.
• Met with the research team to discuss the following questions that we still need answered for the final act of the play:
– What species of fish are part of the park’s ecosystem?
– How does the change of seasons affect the ecosystem?
We have the following challenges to overcome:
• The elementary school auditorium is booked on the day we had planned for our performance.
• We still cannot find cardboard boxes for scenery.
Next week, we plan to complete the following tasks:
• Write the first draft of the play’s third and final act.
• Get the second draft of the second act proofread.
• Reschedule date for auditorium at the elementary school; review time lines.
• Contact more local stores and recycling plants to request cardboard boxes.
SAMPLE MEMO
overcomingobstacles.orgPowered by TCPDF (www.tcpdf.org)

SERVICE LEARNING HANDBOOK | LESSON 7: THE BIG DAY
overcomingobstacles.org
AGENDA
Checking and Double-Checking
Last-Minute Issues
Walk-Through
Objectives
Students will look over their action plan and ensure that they have completed each step of their
project planning.
Students will brainstorm and create action plans to address last-minute project issues.
Students will create a project agenda.
Materials Needed
One large sheet of paper and one marker for each group of two to three students (Part II)
7LESSON
THE BIG DAY

SERVICE LEARNING HANDBOOK | LESSON 7: THE BIG DAY
overcomingobstacles.org
Purpose: Students ensure they have completed each project-planning step.
1. Students discuss the importance of checking and double-checking.
Ask students to raise their hands if they have ever packed a bag to take with them on an overnight trip or sleepover. Ask students if they have ever forgotten to pack an item that they needed, such as toothpaste or a toothbrush. Ask those students if they knew when they left home that they had not packed every item that they would need.
Remind students that they have created materials lists, time lines, and plans for their service learning project. Tell them that after all of that work, it would be a shame not to have everything go as planned simply because they forgot something. Explain to students that it is important to double-check everything about their project, even if it seems obvious.
2. Students double-check each step of their project.
Have students work in small groups of two or three to look over their action plan, checklists, schedules, and status memos. Have each group report on whether each of their planning steps has been completed or whether they are still working to complete parts of the action plan.
Part I Checking and Double-Checking
Purpose: Students brainstorm last-minute project issues and needs.
1. Students brainstorm last-minute project needs.
Have the entire class brainstorm last-minute project needs, issues, or potential problems. Have a volunteer write results on the board. Encourage students to concentrate on identifying all issues of concern before discussing or addressing any of them.
2. Students create action plans for addressing last-minute issues.
Explain to students that the best way to ensure that each issue they’ve identified is addressed is to create mini–action plans. Have students work in small groups of two to three, with each group considering one or two issues, identifying that issue’s details, and creating a plan for dealing with the issue. Give each group a large sheet of paper and a marker. Students should write their plans on the large sheet of paper. Have groups report back to the class on their plans.
Part II Last-Minute Issues

SERVICE LEARNING HANDBOOK | LESSON 7: THE BIG DAY
overcomingobstacles.org
Purpose: Students walk through each step of their service learning project.
1. Students do a project walk-through.
As a class, have students verbally walk through each step of their service learning project, beginning with their arrival at school that morning and ending with their departure from school at the end of the day. Students should describe what will happen during each part of the day and how long each step will take.
2. Students create an agenda.
As students describe the day of their project, write their descriptions and time estimates on the board. Help students use this information to create an agenda for the day of the project. Encourage students to write or type their agenda and to distribute copies to all participants.
Part III Walk-Through

SERVICE LEARNING HANDBOOK | LESSON 8: SELF-ASSESSMENT
overcomingobstacles.org
AGENDA
Self-Assessment: What and Why
What to Consider
Methods of Self-Assessing
Objectives
Students will explore the usefulness of their self-assessment.
Students will discover questions to consider when self-assessing.
Students will choose a method of self-assessing their service learning experiences.
8LESSON
SELF-ASSESSMENT

SERVICE LEARNING HANDBOOK | LESSON 8: SELF-ASSESSMENT
overcomingobstacles.org
Purpose: Students discuss what self-assessment is and why it can be useful.
1. Students write about a personal experience.
Ask students to write about a personal experience that was either very positive or very negative. Tell students to be as descriptive as they can. They should include what happened, how they felt, what they would change about the experience, and what actions they would repeat.
2. Students self-assess the experience.
Encourage students to discuss what they wrote, and ask them if they learned anything from their experiences. Explain that they have just completed the process of self-assessment: taking stock of a situation and deciding what lessons were learned, what actions to repeat, and what not to repeat. Self-assessment is how people learn in the workplace and in life.
Part I Self-Assessment: What and Why
Purpose: Students explore questions to consider when self-assessing.
1. Students brainstorm self-assessment questions.
Have students brainstorm questions they think should be considered when self-assessing their service learning project. Write responses on the board. If appropriate, include some or all of the following:
Part II What to Consider
SERVICE LEARNING HANDBOOK | LESSON 8: SELF-ASSESSMENT
overcomingobstacles.org
What was the goal of the project? Do you think the goal was achieved? Why or why not?
Was the work you did personally meaningful to you? Why?
Who do you think benefited from your work? How did they benefit?
What made you happy about your experience? What made you unhappy? Was there anything about the project that bothered you? What? Why?
Did you have a chance to interact with people whom the project was serving? How? What was that like?
If you could have done one thing about the project differently, what would it have been? Why?
What was the best part of your service learning experience? The worst? Why?
Did you learn anything new during the process? What?
What is happening in your community/society that makes your project necessary?
Are there any assumptions or stereotypes that you held when you started this project that you now know to be false?
How are you different after participating in the service learning project?
Purpose: Students choose a means of self-assessing their service learning experience.
1. Students identify modes of expression.
Have students work in small groups of three or four to brainstorm different ways in which people express themselves. To help students begin their work, you may need to provide some examples (e.g., writing, music, painting). Have each group report back to the class on the results of its brainstorming while a volunteer writes responses on the board.
After all responses are recorded, engage the class in a discussion about the modes of expression that are listed. Ask students to explain which mode they feel most comfortable using to express their own thoughts and feelings, and which they are most able to understand or learn from.
Explain to students that people learn and express what they know or think in many different ways. Ensure that students understand that no one mode of expression or learning is better than the others—whichever mode allows them to learn or express themselves best is the mode that they should use.
2. Students complete a self-assessment of their project.
Part III Methods of Self-Assessing

SERVICE LEARNING HANDBOOK | LESSON 8: SELF-ASSESSMENT
overcomingobstacles.org
Have students complete a self-assessment of their participation in the service learning project in a way that takes advantage of their preferred learning and/or expression styles. Students may wish to express their thoughts in writing, music, art, or dance. If students wish, invite them to share their self-assessment projects with their classmates. If students feel that their self-assessment works are personal, assure them that they will be kept private.

SERVICE LEARNING HANDBOOK | LESSON 9: PUBLIC ASSESSMENT
overcomingobstacles.org
AGENDA
Public Assessment: What and Why
What to Consider
Methods of Public Assessment
Objectives
Students will explore the usefulness and methods of public assessment.
Students will discover questions to consider when creating a public assessment.
Students will choose a means of publicly assessing their service learning experience.
Students will prepare a public assessment.
9LESSON
PUBLIC ASSESSMENT

SERVICE LEARNING HANDBOOK | LESSON 9: PUBLIC ASSESSMENT
overcomingobstacles.org
Purpose: Students discuss what public assessment is and why it can be useful.
1. Students recall how they began work on their service learning project.
Ask students to recall the process they went through when starting their service learning project. Elicit from students that they started with an idea and then researched information on the project topic and on service learning in general. Ask students what kinds of sources they searched for and consulted in order to find this information. Elicit from students that one of the sources they looked for was information on other service learning projects.
Explain to students that in the workplace, a public assessment of a project is almost always expected. Public assessments report to others what kinds of projects took place and whether they were successful. The assessments also provide important information to others who may want to initiate similar projects. Explain to students that a public assessment of their service learning project will provide a source of information for others who are interested in service learning or in their project topic.
Part I Public Assessment: What and Why
Purpose: Students explore questions to consider when creating a public assessment.
1. Students discuss information to consider in a public assessment.
Have students list information they looked for when they did research for the project. (Students should respond: what happened during previous projects and planning processes, what steps were taken to plan and complete the projects, what were the projects’ outcomes, what were some suggestions concerning steps or actions taken that others should repeat or avoid.)
Have a volunteer list students’ responses on the board. Explain to students that the information they have listed should be addressed in their assessment of the project.
Part II What to Consider
Purpose: Students choose a means of publicly assessing their service learning project.
1. Students discuss means of assessing their project.
Part III Methods of Public Assessment

SERVICE LEARNING HANDBOOK | LESSON 9: PUBLIC ASSESSMENT
overcomingobstacles.org
Have students work in small groups of four or five to brainstorm different ways they could present a public assessment of their project. Encourage students to consider their suggestions about ways of self-assessing their projects. You may wish to provide students with the following examples of public assessments:
Written report
Annotated photo album or collage
Public presentation
Public forum, question-and-answer session
Play or video about their experiences
Publishing excerpts from their journals
Newspaper or newsletter articles
Website
Have each group report the results of their brainstorming to the class while a volunteer writes responses on the board.
2. Students complete a public assessment.
Have students work as a class to discuss and choose the method or methods they wish to use in order to create a public assessment of their project. Have them prepare the assessment and present it.
Powered by TCPDF (www.tcpdf.org)