Less is More - Amazon S3
139
4/3/2019 1 Less is More Minimally Invasive Treatment Options for Enamel Caries and Defects JEANETTE MACLEAN, DDS, DABPD, FAAPD Jeanette MacLean, DDS Diplomate, American Board of Pediatric Dentistry Fellow, American Academy of Pediatric Dentistry Owner, Affiliated Children’s Dental Specialists BS Chemistry, Northern Arizona University 1999 DDS University of Southern California 2003 Pediatric Dentist, University of Nevada School of Medicine/Sunrise Children’s Hospital 2005 Disclosures: Neither myself nor my family members have any owner interest or stock in any of the products mentioned in this presentation www.kidsteethandbraces.com
-
Upload
khangminh22 -
Category
Documents
-
view
4 -
download
0
Transcript of Less is More - Amazon S3

4/3/2019
1
Less is MoreMinimally Invasive Treatment Options for Enamel Caries and DefectsJEANETTE MACLEAN, DDS, DABPD, FAAPD
Jeanette MacLean, DDSDiplomate, American Board of Pediatric DentistryFellow, American Academy of Pediatric DentistryOwner, Affiliated Children’s Dental Specialists
BS Chemistry, Northern Arizona University 1999DDS University of Southern California 2003Pediatric Dentist, University of Nevada School of Medicine/Sunrise Children’s Hospital 2005
Disclosures: Neither myself nor my family members have any owner interest or stock in any of the products mentioned in this presentation
www.kidsteethandbraces.com

4/3/2019
2
Community - AZDA’s Women in Dentistry Advocacy – AHCCCS Subcommittee
USC – AYUDA/Rotary International Dental Clinics; Southern California, Mexico, Belize, Costa Rica

4/3/2019
3
Disclaimer;
▪ I am a clinician and forever student▪ Science is ever-evolving
Enamel Normal enamel reflects light from the surface and
subsurface
Different aspects of tooth structure will reflect, refract, and absorb different wavelengths of light at different degrees
Reflection and scattering of light from the surface and subsurface should be relatively the same, in which case the dentition will have a natural appearance
Disturbance of the enamel matrix results in an altered appearance
Categories of Enamel Discoloration
Congenital (intrinsic)
Enamel mottling
Enamel defects
Acquired (extrinsic)
Decalcification
White spot lesions (WSLs)

4/3/2019
4
Challenges in treating enamel defects and WSLs in Aesthetic Zones
Cost
Invasiveness
Timing
Patient age
Future orthodontic needs
Peer teasing/bullying
Differential Diagnosis ofCongenital Enamel Defects Trauma
Infection
Molar Incisor Hypomineralization
Fluorosis
Other potential contributing factors; fever, premature birth, illness during gestation, systemic illness, genetic (Amelogenesis Imperfecta), unknown etiology
Jeanette MacLean, DDS
Trauma to the Primary Tooth
Injury to a primary tooth can potentially damage the developing enamel of its permanent successor
Bleeding into the sulcus can contribute to a yellow defect
*This example is of an 8 year old girl with documented history of trauma to #E & F as a toddler – October and November 2011
Jeanette MacLean, DDS

4/3/2019
5
Infection Related to the Primary Tooth
Infection (abscess) of a primary tooth can potentially damage the developing enamel of its permanent successor
Possible etiology is a disturbance of the pH within the dental follicle
Molar Incisor Hypomineralization
Prevalence 20 - 40%
Can affect one or all permanent first molars, and/or permanent incisors and primary second molars
Demarcated enamel opacities with varying discoloration (white, cream, yellow, or brown) bordered by sound enamel
Hypersensitivity
10-fold higher risk of developing caries
Unknown etiology of systemic origin
Fluorosis First described by GV Black in 1909 as
“Colorado Brown Stain,” which subsequently led to the discovery of fluoride
Etiology = ingestion of excessive fluoride during tooth development, such as well water with high levels of naturally occurring fluoride, consuming infant formula reconstituted with fluoridated water, swallowing toothpaste, etc.
Jeanette MacLean, DDS

4/3/2019
6
Mild fluorosis
Jeanette MacLean, DDS
MouthHealthy.org
offers tips on how to prevent fluorosis
White Spot Lesions Caused by a cyclical imbalance between demineralization and
remineralization, resulting from an acidic environment created by cariogenic bacteria
Prevalence amongst orthodontic patients has been reported as anywhere between 2 – 97%
Enamel crystal dissolution begins with subsurface demineralization, creating pores between the enamel rods
Mineral loss on the surface and subsurface create an optical phenomenon of chalky white enamel, particularly when dehydrated
Surface roughness and loss of surface shine results in an altered refractive index with increased visual opacity
4/3/2019
7
Etiology of White Spot Lesions
Ecological Plaque Hypothesis
Orthodontic brackets and appliances
Poor oral hygiene
Poor dietary habits
Ecological Hypothesis of Dentin and Root Caries
First proposed in 1994
Acidogenic and Aciduric Stages; Bacterial acid-induced adaptation and selection for acidogenic and aciduric bacteria tilts the balance of de- and remineralization of dental hard tissues towards demineralization
Enhanced in 2016 to include the Proteolytic Stage; The considerable amount of organic material present in dentin and root tissue further suggests that protein degradation is also involved in caries formation
Takahashi & Nyvad, Caries res 2016;50:422-431
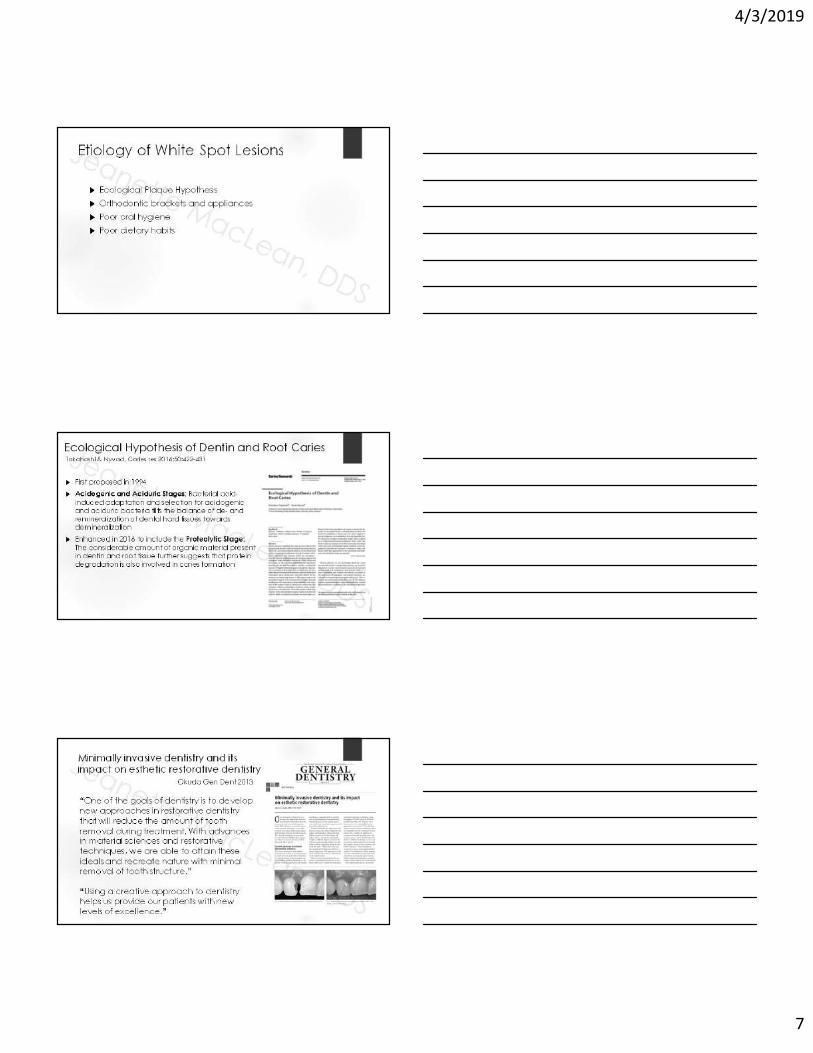
Minimally invasive dentistry and its impact on esthetic restorative dentistry
Okuda Gen Dent 2013
“One of the goals of dentistry is to develop new approaches in restorative dentistry that will reduce the amount of tooth removal during treatment. With advances in material sciences and restorative techniques, we are able to attain these ideals and recreate nature with minimal removal of tooth structure.”
“Using a creative approach to dentistry helps us provide our patients with new levels of excellence.”

4/3/2019
8
Minimally invasive treatment options Bleaching
Enamel microabrasion
Acid + abrasive
PREMA
Opalustre
Remineralization
Recaldent CPP-ACP (Casein Phosphopeptide – Amorphous Calcium Phosphate)
Etch + MI Paste and MI Paste Plus
Resin Infiltration
ICON
Etch Bleach Seal
Combination Therapy
Minimally invasive treatment options Bleaching
Enamel microabrasion
Acid + abrasive
PREMA
Opalustre
Remineralization
Recaldent CPP-ACP (Casein Phosphopeptide – Amorphous Calcium Phosphate)
Etch + MI Paste and MI Paste Plus
Resin Infiltration
ICON
Etch Bleach Seal
Combination Therapy
Minimally invasive treatment options Bleaching
Enamel microabrasion
Acid + abrasive
PREMA
Opalustre
Remineralization
Recaldent CPP-ACP (Casein Phosphopeptide – Amorphous Calcium Phosphate)
Etch + MI Paste and MI Paste Plus
Resin Infiltration
ICON
Etch Bleach Seal
Combination Therapy
Surgical Interventions;• Resin fillings• Bondings• Veneers

4/3/2019
9
Minimally invasive treatment options Bleaching
Enamel microabrasion
Acid + abrasive
PREMA
Opalustre
Remineralization
Recaldent CPP-ACP (Casein Phosphopeptide – Amorphous Calcium Phosphate)
Etch + MI Paste and MI Paste Plus
Resin Infiltration
ICON
Etch Bleach Seal
Combination Therapy
Challenges:
Do these therapies work??
Contradicting research findings creates confusion
Case selection can be challenging
Use your best judgement
Set realistic goals and expectations
Learning curve
Minimally Invasive Treatment of White Spot Lesions;A Systematic Review
Abdullah Z, John J. Oral Health Prev Dent 2016
PURPOSE: To evaluate the efficacy of minimally invasive methods for the treatment of white-spot lesions involving fluorides, CPP-ACP (casein phosphopeptide-stabilised amorphous calcium phosphate) and resin infiltration vs a placebo or control.
CONCLUSION: Evidence suggests minimally invasive treatment modalities of white spot lesions produced significant improvement in the appearance and regression of white spot lesions following treatment when compared to a control or placebo.

4/3/2019
10
Enamel remineralization therapies for treating postorthodontic white-spot lesions; A systematic review
Fernandez-Ferrer et al JADA 2018
“Among the studies of remineralizing therapy, neither fluoride mouthrinses nor phosphopeptidetoothpastes with or without fluoride had any positive effect in addition to oral hygiene maintenance with fluoride toothpaste. A 5% sodium fluoride varnish was the only therapy to show a statistically significant improvement compared with results in the control group. The authors found large variations in results among the studies reviewed because of the different methods used.
“None of the treatments was capable of remineralizing WSLs. A 5% sodium fluoride varnish could improve remineralization of WSLs.”
“Could promote regression of WSLs. Esthetic more favorable outcome for CPP-ACP”
Andersson 2007
“CPP-ACP significantly enhanced regression of WSLs compared with results with placebo cream
Bailey 2009
“CPP-ACP cream significantly reduced loss of fluorescence values and a reduced area of the lesions after 4 wk This improvement was not superior to regression with FT”
Brochner 2011
Therapies for white spot lesions –A systematic review
Paula et al J Evid Base Dent Pract 2017
Purpose was to investigate which remineralizing agents are effective for the treatment of WSLs
Therapies in the literature include; hygiene education, fluorides, phosphopeptide compounds, xylitol, infiltrative resins, microabrasion and/or bleaching, and preparation and restoration
“More studies are required for scientific evidence in order to reach a conclusion of the most suitable therapeutic method for the treatment of surface and subsurface demineralization of the enamel.”
4/3/2019
11
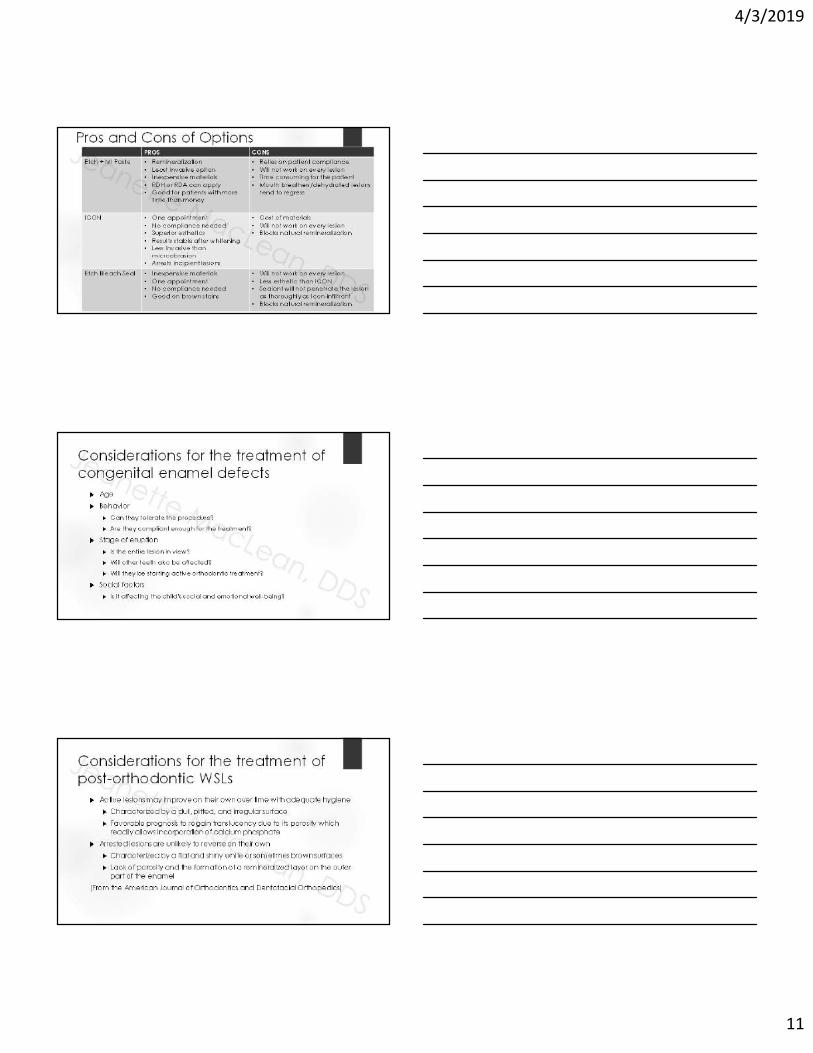
Pros and Cons of OptionsPROS CONS
Etch + MI Paste • Remineralization• Least invasive option• Inexpensive materials• RDH or RDA can apply• Good for patients with more
time than money
• Relies on patient compliance• Will not work on every lesion• Time consuming for the patient• Mouth breathers/dehydrated lesions
tend to regress
ICON • One appointment• No compliance needed• Superior esthetics• Results stable after whitening• Less invasive than
microabrasion• Arrests incipient lesions
• Cost of materials• Will not work on every lesion• Blocks natural remineralization
Etch Bleach Seal • Inexpensive materials• One appointment• No compliance needed• Good on brown stains
• Will not work on every lesion• Less esthetic than ICON• Sealant will not penetrate the lesion
as thoroughly as Icon-infiltrant• Blocks natural remineralization
Considerations for the treatment of congenital enamel defects
Age
Behavior
Can they tolerate the procedure?
Are they compliant enough for the treatment?
Stage of eruption
Is the entire lesion in view?
Will other teeth also be affected?
Will they be starting active orthodontic treatment?
Social factors
Is it affecting the child’s social and emotional well-being?
Considerations for the treatment of post-orthodontic WSLs
Active lesions may improve on their own over time with adequate hygiene
Characterized by a dull, pitted, and irregular surface
Favorable prognosis to regain translucency due to its porosity which readily allows incorporation of calcium phosphate
Arrested lesions are unlikely to reverse on their own
Characterized by a flat and shiny white or sometimes brown surfaces
Lack of porosity and the formation of a remineralized layer on the outer part of the enamel
(From the American Journal of Orthodontics and Dentofacial Orthopedics)

4/3/2019
12
Considerations for the treatment of post-orthodontic WSLs continued… Allow lesions to reverse naturally at first
“Often within the first few weeks after debanding, there is usually a significant natural reduction of WSL size by remineralization.”
How much time to wait? 3 months? 6 months? What does the soft tissue look like?
“If the lesions persist, professional bleaching of the teeth to diminish the contrast between the WSL and the rest of the enamel surface should be considered.”
On the contrary, my clinical observation has been that sometimes whitening can increase sensitivity and/or noticeability of the WSL
“The most conservative approach to tooth structure should be considered first.”
“Lastly, aggressive restorative treatment such as direct or indirect veneers could be considered.”
(From the American Journal of Orthodontics and Dentofacial Orthopedics, Vol 138, No. 6)
Treatment Planning Document per tooth and by surface in the patient chart
Length and number of appointments vary depending on the chosen treatment protocol
Etch + MI Paste will be multiple appointments
ICON and Etch Bleach Seal will be one, longer appointment
We will discuss this as well as the procedure codes and suggested fees more in-depth when we get to the individual protocols
Most insurance plans consider these treatments to be “cosmetic” and they are not covered, however, when given the option and when presented with the risks, benefits, and alternatives, many patients (parents) are happy to have this option and willingly pay out of pocket for the procedure.
Informed consent What are the risks, benefits, and alternatives to the proposed treatment?
It is important to convey that these treatments are elective and they will not work on every patient
“We can do this procedure to help improve the appearance of your teeth, however, we can not guarantee or predict which lesions will reverse entirely. Best case scenario, the spot(s) will reverse completely. Worse case scenario, there will be no change in the appearance, however, nothing invasive will have been done to the tooth, and the surface will be more caries resistant. It is a conservative and inexpensive alternative to more invasive procedures like bondings and veneers, so it’s a good place to start.”
“This is a treatment we offer to help fade the appearance of WSLs & hypo spots. We can not guarantee the spot will disappear completely, but in most cases it provides a significant cosmetic improvement in one simple, painless visit. Worse case scenario – there’s no change in appearance, but at least nothing irreversible or invasive has been done to the tooth.”
Document the informed consent conversation in the patient’s chart
It is not necessary to have a special, separate consent specific to ICON, etc.

4/3/2019
13
MI Paste and MI Paste Plus Topical crème
Releases bioavailable calcium and phosphate in the saliva
Contains RECALDENTTM (CPP-ACP)Casein Phosphopeptide – Amorphous Calcium Phosphate
MI Paste is fluoride free
For children 6 and under and pregnant women
MI Paste Plus contains 900ppm fluoride (similar to OTC fluoride toothpaste)
MI Paste and MI Paste Plus Benefits
Relief of sensitivity
CPP-ACP occludes dentinal tubules
Prevention
Remineralization
Non-irritating for xerostomic patients
Safe for lactose intolerant patients
Contraindicated for patients with a casein (milk protein) allergy
Kosher and Gluten Free
SEM by Prof E. Reynolds

4/3/2019
14
MI Paste and MI Paste Plus
We carry both
The concept of CPP-ACP as a remineralizing agent was first postulated in 1998 and patented by the University of Melbourne, Australia, and the Victorian Dairy Industry Authority, Abbotsford, Australia.
Bonlac Foods Limited (an Australian company owned by 2,300 dairy farmers in Victoria and Tasmania) has retained exclusive manufacturing and marketing rights for CPP-ACP and is the owner of the trademark RecaldentTM
The protective anticariogenic effects of CPP-calcium phosphate complexes have been shown in various laboratory, animal and human in situ studies
Remineralization with CPP-ACP Casein Phosphopeptide – Amorphous Calcium Phosphate
(CPP-ACP)
RECALDENTTM technology developed by Eric Reynolds, molecular biochemist, at the University of Melbourne Dental School
Topical fluoride ions, in the presence of calcium and phosphate ions, promote the formation of fluorapatite in tooth enamel by a process referred to as remineralization. For net remineralization to occur, adequate levels of calcium and phosphate ions must be available.
(Reynolds Aust Dent J 2008)
Slows the progression of caries and remineralizes enamel subsurface lesions (Reynolds et al J Dent Res 2008)

4/3/2019
15
NMR studies of a novel calcium, phosphate and fluoride delivery vehicle-alpha(S1)-casein(59-79) by stabilized amorphous calcium fluoride phosphate nanocomplexes. Cross et al Biomaterials 2004
The repair of early tooth enamel lesions has been demonstrated by casein phosphopeptides (CPP) derived from milk caseins that associate with amorphous calcium phosphate (ACP) forming stable complexes.
The formation of calcium phosphate delivery vehicles slow enamel demineralization and promote remineralization.
These peptides also stabilize calcium fluoride phosphate as soluble complexes (CPP-ACFP) and have the potential to provide superior clinical efficacy in preventing dental caries and treating and repairing early stages of disease.
A 12-week assessment of the treatment of white spot lesions with CPP-ACP paste and/or fluoride varnish
Guclu et al BioMed Res Int 2016
CPP-ACP acts as a salivary biomimetic source of calcium and phosphate
Recommended as an adjunct to and not a replacement for fluoride therapy
“The findings of this 12-week clinical study have indicated that twice daily topical applications of 10% CPP-ACP paste as an adjunct to a standard oral hygiene programme, which includes fluoridated dentifrice, antimicrobial mouthwash and xylitol chewing gum, significantly improve the appearance and remineralisation of white spot lesions. This study also found that there was no clinical advantage for the use of 5% sodium fluoride varnish as a supplement to either the standard or CPP-ACP-enhanced oral hygiene regimes.”
Enhanced Remineralisation of Tooth Enamel UsingCasein Phosphopeptide-Amorphous Calcium Phosphate Complex: A Review
Nidhi Chhabra, Anuj Chhabra
Recent developments in the area of remineralisation include casein phosphopeptide (CPP)-ACP nanocomplexes, which are derived from bovine milk protein, casein, calcium, and phosphate
CPP-ACP complex acts as a calcium phosphate reservoir and buffer the activities of free calcium and phosphate ions in the plaque
Calcium phosphate stabilized by CPP produces a metastable solution supersaturated with respect to the amorphous and crystalline calcium phosphate phases, thereby depressing enamel demineralisation and enhancing mineralisation.

4/3/2019
16
Why use MI Paste? “One concern for the use of fluoride therapy alone for the
treatment of WSLs is the potential hypermineralization of the surface layer in the presence of high concentrations of fluoride ions which prevent the subsequent penetration of calcium and phosphate ions into the body of the lesion” (Guclu et al BioMed Res Int 2016)
High doses of fluoride are recommended to inhibit initial lesion formation, however, exposure of WSLs to excessive quantities of fluoride may be detrimental to subsurface remineralization
The concentration and bioavailability of calcium ions is a limiting factor in remineralization
Hypermineralization in the presence of high concentrations of fluoride ions physically blocks the subsequent ingress of calcium and phosphate ions into the body of the lesion
CCP-ACP increases the concentration of calcium and phosphate in saliva and plaque
Controversy;Use of high fluoride concentration products in the presence of WSLs “For WSLs on the visible labial surface of teeth following orthodontic treatment, the
use of concentrated fluoride agents is not recommended. Such use will limit the possibility of remineralization and the resulting white spot will not naturally reduce in size and may become unsightly through staining.” (Willmot Seminars in Ortho 2008)
Concentrated fluoride agents arrest demineralization and remineralization in the lesion by surface hypermineralization, plugging diffusion pathways, and preventing the subsequent natural remineralization by saliva
Arrested lesions stay the same size and frequently become unsightly and stained by organic debris
Consider instead;
Low-dose fluoride in the presence of WSL
“Acid-etching of fluoride treated lesions could facilitate remineralization of the lesion”
(the concept behind Etch + MI Paste, and potential explanation for those lesions which are more resistant to ICON treatment if the patient has been on 5000 ppm toothpaste and/or hand a recent professional fluoride application)
Etch + MI Paste Protocol Armamentarium• MI Paste (Plain or Plus)• Plain pumice• Prophy angle• 37% Phosphoric acid etch• Timer• 2x2 Gauze• Protective glasses• Cotton rolls• Camera for before/after
photos• Optional; towel,
OptraGate, liquid dam, rubber dam

4/3/2019
17
Basic Etch + MI Paste Protocol Congenital enamel defects on maxillary permanent central incisors
Jeanette MacLean, DDS
Etch + MI Paste Protocol 1. Clean teeth with plain pumice using a prophy cup
Etch + MI Paste Protocol 2. Isolate with cotton rolls and a towel
(optional; OptraGate, Liquid dam, rubber dam)

4/3/2019
18
Etch + MI Paste Protocol 3. Apply 37% Phosphoric acid etch to the white spot only for 1-2 minutes
Etch + MI Paste Protocol 4. Rinse thoroughly
Etch + MI Paste Protocol 5. Apply MI Paste to the entire facial surface

4/3/2019
19
Etch + MI Paste Protocol 6. Optional – rub in the MI Paste with the prophy cup, add pumice for stubborn lesions
Etch + MI Paste Protocol 7. Let the MI Paste sit for 5 minutes
Etch + MI Paste Protocol 8. Wipe MI Paste off with wet 2x2 gauze and inspect the teeth

4/3/2019
20
Etch + MI Paste Protocol
This was immediately the first in-office treatment
I Highly recommend taking before and after photos, patients will forget what their teeth looked like, and so will you!
Etch + MI Paste Protocol Results after 5 appointments
Etch + MI Paste Protocol 9. If possible, reapply MI Paste before they leave

4/3/2019
21
Post Op InstructionsEtch + MI Paste Protocol
10. Review home instructions;
Brush and floss as usual with a fluoride toothpaste
Using a finger, apply MI Paste “like a lotion” to all of the teeth at bedtime
Custom trays are optional, not mandatory
If possible, also apply MI Paste in the morning
Avoid dark colored drinks or foods containing dyes
Free download at Kidsteethandbraces.com
Home Care InstructionsGeneral MI Paste Use
download at Kidsteethandbraces.com

4/3/2019
22
6 Month Follow-up
In Australia, MI Paste is called“Tooth Mousse”
I love to tell patients this to get them to better understand this is a special treatment, not simply a toothpaste
“Put it on your teeth like a lotion before you go to bed”

4/3/2019
23
Coding and BillingEtch + MI Paste Protocol
D2999 Unspecified Restorative Procedure, by Report
D9970 Enamel Microabrasion
D9910 Application of Desensitizing Medicament
D9630 Other Drugs and/or Medicaments, by Report
(for the MI Paste)
Coding and Billing in CanadaEtch + MI Paste Protocol
Bill under Resin Infiltration
Use code 13601 Series per unit of time
Use code 13602 for two units of time
Use code 13609 for each additional unit over two
It has a “Plus E” in the description field
Additional costs would be captured using the code 99555
Insurance companies may vary in terms of coverage allocated. A pre-determination would be recommended. The DDS code is 23700 – One Surface.
Jeanette MacLean, DDS
Fee Schedule ExampleEtch + MI Paste Protocol Option 1: Number of teeth x $10 x number of sessions
Example: 10 teeth x $10 = $100 x 4 sessions =$400
office chooses fee value per tooth
Patient buys tube of MI Paste/MI Paste Plus separately
Option 2: One fee for initial visit ($150-$250)
includes the treatment, custom tray, and a tube of MI Paste/MI Paste Plus
Each visit thereafter charge $75-$175
Option 3: Charge one fee (example $350)
includes the complete treatment up to 4-5 visits
This may or may not include the cost of the MI Paste for the initial treatment

4/3/2019
24
SchedulingEtch + MI Paste Protocol
Book approximately 15 minute appointments
10 days - 2 weeks apart
Can take 4-6 appointments, but may take more
Delegate - dental assistants and hygienists can do this procedure
Etch + MI Paste to treat post-ortho WSLs and moderate to severe sensitivity
Etch + MI Paste to treat post-ortho WSLs and moderate to severe sensitivity

4/3/2019
25
Etch + MI Paste
8 month follow-up

4/3/2019
26
8 month follow-up
For more information on MI Paste
Download at Kidsteethandbraces.com
ICON Resin Infiltration• “Infiltration Concept”
• Minimally invasive treatment via micro-invasive technology
• Treats decalcification and incipient decay in up to 1/3 of outer dentin
• Reinforces demineralized areas via capillary action uptake of a highly fluid resin which seals enamel porosities and creates a diffusion barrier which prevents further cavitation or breakdown of the tooth
• Infiltration of resin impregnates the voids left by decalcification and has the same refractive index as enamel, so it restores the optical nature of the treated surface to its natural esthetics without tooth removal

4/3/2019
27
Adhesive penetration in human artificial and natural white-spots
The concept of resin infiltration was first described over 40 years ago
Davila et al Journal of Dental Research 1975
Commercially available as Icon since 2009
Earlier focus of research and literature was on the use of Icon for the treatment of interproximal lesions
Caries Infiltration With Resins:A Novel Treatment Option for Interproximal Caries
Phark et al 2009
“Noninvasive (preventive) measures involving fluoridation, dietary control, and oral hygiene instruction, as well as invasive restorative methods, are the standard treatment options for interproximal caries. Intermediate treatment options, similar to pit-and-fissure sealing on occlusal surfaces that has been shown to be effective in preventing and inhibiting caries, have not yet been established on interproximal surfaces. Recently, the application of resins on interproximal caries lesions has been studied and improved, leading to the development of new materials, which infiltrate and seal the carious lesion, improving the inhibition of caries progression. Clinical data show this new technique complements existing treatment options for interproximal caries by delaying the time point for a restoration and consequently closing the gap between noninvasive and invasive treatment options.”

4/3/2019
28
ICONResin Infiltration Revolutionary treatment for clinicians to treat
early caries without anesthesia or a drill vs. “wait and see”
Dr. Richard Chaet’s 3 year retrospective study found;
98% success for interproximal lesions confined to enamel
65% success for interproximal lesions past the DEJ
“Now we only treat lesions confined within the enamel and surgically restore lesions radiographically into the DEJ.”
Caries Infiltration With Resins:A Novel Treatment Option for Interproximal Caries
Phark et al 2009
“When noninvasive measures are ineffective, invasive intervention is indicated. Unfortunately, for interproximal surfaces in particular, large areas of sound enamel have to be removed even with minimally invasive preparation techniques. In addition, different treatment philosophies lead to diverse recommendations for the timing of invasive treatment. Therefore, the decision between the two treatment methods is often difficult, especially for lesions radiographically extending just to the dentoenamel junction.”
In enamel caries, the pores in the subsurface lesion body act as diffusion pathways for organic acids and minerals
Occlusion of these pores by penetration with low-viscosity light-curing resins arrest lesion progression.
In contrast to caries sealing where a superficial resin coat is created, the caries infiltration technique establishes a barrier within the caries lesions themselves that strengthens the enamel structure, thus preventing cavitation or break-down of the enamel surface
Radiographic effectiveness of resin infiltration in arresting incipient proximal enamel lesions in primary molars
Bagher, et al. Ped Dent 2018 Split-mouth, randomized, prospective trial of Icon vs. standard of care prevention on
E1 and E2 lesions over 24 months in 5 – 8 year olds they chose to treat D1 lesions with conventional restorations citing;
Higher failure rates of dentin involved lesions in 2 prior RCTs
Caries progresses faster in dentin
According to Pitts and Rimmer, nearly 1/3 of D1 lesions examined clinically are, in fact, cavitated, compared to 2% of E1 and 2.9% of E2 lesions
Standard of care prevention = 5% FV, diet counselling, OHI, and flossing
Topical anesthetic, rubber dam placement with clamp, and insertion of a wedge (vs. prior ortho spacer)
40% of test lesions progressed vs. 72% of control lesions
Disadvantage: “the resin infiltrants currently used is radiolucent, which makes the radiographic evaluation of recurrent lesions difficult”
Conclusions: resin infiltration can be considered as an effective, conservative, non-invasive treatment for incipient proximal lesions in primary teeth

4/3/2019
29
The evidence is lacking the support resin infiltration for proximal lesions Nainar Ped Dent 2014
“Carious lesions involving dentin in the proximal surfaces of primary molars are best managed with conventional restorations.”
“Superficial enamel lesions in primary molars are best managed with conventional remineralization, given the slow progression of carious lesions through primary tooth enamel.”
Based the on Ekstrand et al. Caries Res 2010 clinical trial which examined lesions at the DEJ or in the outer 1/3 of dentin and found failure rates of;
Resin infiltration 23%
FV 62%
In comparison, the mean annual failure rates for;
Amalgam 8%
Composite 6%
RMGI 4%
Resin Infiltration “requires procedure time and instrumentation similar to that of conventional restorations.”
Cochrane ReviewDorri 2015
“The available evidence shows that micro-invasive treatment of proximal caries lesions arrests non-cavitated enamel and initial dentinal lesions (limited to outer third of dentine, based on radiograph) and is significantly more effective than non-invasive professional treatment (e.g. fluoride varnish) or advice (e.g. to floss). We can be moderately confident that further research is unlikely to substantially change the estimate of effect.”
JADA Clinical Scan April 2019
Resin infiltration as an adjunct to fluoride varnish seems to reduce the risk of noncavitated proximal carious lesions’ progressing after 2 years in patients at high risk of developing caries
Split-mouth randomized clinical trial in high risk patients
After 2 years, lesions that received resin infiltration had 18% less absolute risk of experiencing progression than those that did not

4/3/2019
30
ADA Clinical Practice Guideline on the Use of Nonsurgical (Nonrestorative) Treatments for Caries Management
Council on Clinical Affairs, Chair Dr. Rebecca Slayton
Available at ADA.org/caries
“For patients with noncavitated coronal (approximal) lesions; Recommendation 5: To arrest/reverse noncavitated caries lesions on
approximal surfaces on primary teeth, the expert panel suggests clinicians use 5% sodium fluoride varnish (every 3-6 months) (Very Low quality evidence, Conditional recommendation), resin infiltration alone (Very low quality evidence, Conditional recommendation), resin infiltration + 5% sodium fluoride varnish (every 3-6 months) (Very low quality evidence, Conditional recommendation), or sealants alone (Low quality evidence, Conditional recommendation).
Recommendation 6: To arrest/reverse noncavitated caries lesions on approximal surfaces on permanent teeth, the expert panel suggests clinicians use 5% sodium fluoride varnish (every 3-6 months) (Very Low quality evidence, Conditional recommendation), resin infiltration alone (Low quality evidence, Conditional recommendation), resin infiltration + 5% sodium fluoride varnish (every 3-6 months) (Very Low quality evidence, Conditional recommendation), or sealants alone (Low quality evidence, Conditional recommendation)”
More recent publications shifted focus to the use of Icon in the aesthetic zone and for the treatment of congenital lesions
Novel treatment of white spot lesions: A report of two cases
Shivanna V, Shivakumar B. J Conserv Dent 2011
“A technique used to treat smooth surface white spot lesions microinvasively. It is based on the infiltration of an initial enamel caries lesion with low-viscosity light-curing resins called infiltrants. The surface layer is eroded and desiccated, followed by resin infiltrant application. The resin penetrates into the lesion microporosities driven by capillary force and is hardened by light curing. Infiltrated lesions lose their whitish appearance and look similar to sound enamel. Additionally, the treatment prevents lesion progression. This technique might be an alternative to microabrasion and restorative treatment in treating of white spot lesions of esthetically relevant teeth.”
4/3/2019
31
Minimally invasive resin infiltration of arrested white-spot lesions
Senestraro et al, JADA 2013
• 72.9% of orthodontic patients develop a WSL during treatment
• With time, remineralization at the outer surface of the lesion decreases access of calcium and other ions into deeper portions of the lesion, resulting in an arrest of the remineralization process
• The lesion’s opaque white appearance is due to scattering of light at the subsurface demineralized enamel
Senestraro et al JADA 2013
Microabrasion has the potential to remove large amounts of enamel
Bleaching results in limited esthetic improvement and has been associated with sensitivity and reduced enamel microhardness
“Because orthodontic WSLs predominantly affect a young patient population, long-term prognosis of the restored teeth is a significant concern. Considering the invasiveness of microabrasion or traditional restorations compared with the relatively small amount of demineralized enamel in in WSLs, a less invasive restorative technique would be preferable.”
Microabrasion Developed in the 1980s
Popular for fluorosis
Hydrochloric acid has been used in dentistry for microabrasion in concentrations up to 18% combined with pumice or silica particles
Microabrasion eroded and abraded up to 360 ± 130 µm of enamel within 100 seconds, and needed to be applied repeatedly up to total of 9 minutes
Etching for resin infiltration using a 15% hydrochloric acid gel for 2 min removed less than 30 µm of demineralized and sound enamel
(Phark et al Compendium 2009)
Unfortunately, with this technique, substantial amounts of enamel often have to be eroded to improve appearance. The inherent danger of using a strong acid intraorally, and the inconvenience and time required for application have led to the search for a safer, quicker, easier method
(Munoz et al J Esthet Restor Dent 2013)

4/3/2019
32
Alternative Esthetic Management of Fluorosis and Hypoplasia Stains: Blending Effect Obtained with Resin Infiltration Techniques
Munoz et al J Esthet Restor Dent 2013
Purpose: This clinical report presents and describes cases in which the minimally invasive infiltrant resin technique was used for blending different microporous lesions, mild-to-moderate fluorosis, and hypoplasia stains related to traumatic dental injuries.
Results: The fluorosis stain showed visually perceptual improvements. In the cases of hypoplasia, stains were not completely blended. However, the general clinical outcomes of these cases were considered successful and recovered the patients’ self-esteem.
*NOTE: they did not do additional rounds of etching or any disking, so they may have been able to achieve better results
Conclusion: Based on the results obtained, it could be concluded that the resin infiltration technique shows promising results and could be considered a minimally invasive procedure for mild-to-moderate fluorosis and hypoplasia stains.
Treatment of Fluorosis Spots Using a Resin Infiltration Technique: 14-month Follow-up
Cocco et al Oper Dent 2016
“The aim of this study was to report a clinical case of moderate fluorosis spots treated with infiltration of low-viscosity resin. A commercial resin was applied to the facial surfaces on the anterior teeth in both the maxillary and mandibular arches. The white spots of fluorosis lost their whitish appearance and appeared similar to sound enamel. This technique, which might constitute an alternative to white-masking of fluorosis spots, showed optimal esthetic results.”
White Lesion Eradication Using Resin Infiltration Greenwall Oral Health 2017
Should Bleaching of the Tooth Be Done First?
Depending on the size of the lesion, it is always best to undertake bleaching first (Greenwall 2009) and this may reduce the size of the white mark and the entire appearance of the lesion.
It is important to warn patients that the white marks may appear whiter and brighter initially as whitening commences.
Direct composite bonding over the mark may also be necessary if there is a defect in the enamel surface and the enamel surface is not intact.

4/3/2019
33
Continued…
For some teeth the result improved after one-week post infiltration rather than immediately after the infiltration.
No change initially – Deeper penetration may be required. Through a continuous phase of sandblasting, etching and alcohol, the tooth can be treated for three to five applications prior to placement of the resin.
Further treatment sessions can be undertaken two to three weeks apart. The resin does continue to work on the tooth over time and thus it is advisable to wait between treatment sessions for the resin to take effect.
With further experience, we now know that the lesions that do not respond to complete white spot removal can be treated again.
White halo – incomplete treatment of the white area. Further sandblasting and etchant must be done.
Timing for Post-Ortho WSLs
Wait 3 months after removal of braces
“Regression of WSLs after removal of orthodontic appliances occurs predominantly in the first three months, and lesions present after this time are likely to remain.” (Senestraro et al JADA 2013)

4/3/2019
34
Timing Pre-Ortho
Evaluation of bond strength of composite resin to enamel demineralized, exposed to remineralization and subjected to caries infiltration Chrispim dos Reis Brazilian Dental Science 2016
Objective: To evaluate the bond strength between resin composite and different enamel substrates: sound enamel; demineralized enamel submitted or not to remineralization; and demineralized enamel infiltrated with an infiltrating resin.
Conclusion: The surface infiltrated with an infiltrating resin (Icon) did not negatively affect the bond strength between resin composite and enamel. The demineralized and remineralized groups with sodium fluoride and artificial saliva presented statistically lower results when compared to the other groups.
Influences on bond strength of orthodontic bracketsPhark et al J Dent Res 1989
“Resin infiltration of demineralized enamel does not affect the bond strength of orthodontic brackets”
The evaluation of resin infiltration for masking labial enamel white spot lesions
Kim et al Int J Paediatr Dent 2011
OBJECTIVE: The aim of this study was to clinically assess the effectiveness of masking white spot enamel lesions using a resin infiltration technique that was recently developed to arrest incipient caries in a micro-invasive concept.
CONCLUSION: The masking effect was dramatic in some cases but not in others. The long-term colour stability of the result should be followed up through continuous clinical and scientific studies.

4/3/2019
35
Infiltrants inhibit progression of natural caries lesions in vitro Paris, Meyer-Lueckel J Dent Res 2010
To define the optimized material properties of caries-infiltrating resins (infiltrants), we evaluated the effects of infiltrant composition and penetration coefficient (PC) on the inhibition of the progression of natural approximal caries lesions in vitro
Infiltrants with PC > 200 cm/sec are capable of inhibiting lesion progression
Penetration Coefficients (PCs) Resin mixtures with high TEGDMA (triethylene glycol dimethacrylate)
concentrations tended to show better inhibition of lesion progression than those with high concentration of BISGMA (bisphenol A glycidyl methacrylate), which was due to better penetration capabilities after application of ethanol
Resins with higher PCs (infiltrants) show superior ability to penetrate natural lesions compared with resins with lower PCs
(Meyer-Lüeckel et al J Dent Res 2008)
Adhesive (PC: 31 cm/sec)
Infiltrant (PC: 273 cm/sec)
Etching with 15% hydrochloric acid gel is more suitable than 37% phosphoric acid gel as a pre-treatment for caries lesions intended to be infiltrated (Paris et al J Dent Res 2007)
This is the scientific rationale behind the superiority of ICON over Etch Bleach Seal
Surface layer erosion of natural caries lesions with phosphoric and hydrochloric acid gels in preparation for resin infiltrationMeyer-Lüeckel, Paris, Kielbassa Caries Res 2007
Drilling-no-thanks.info

4/3/2019
36
ICON Resin Infiltration
“Pathogenic bacteria have breached the enamel layer, and organic acids produced by the bacteria have leached out a certain amount of calcium and phosphate ions that fails to replace naturally by the remineralisation process. This loss of mineralized layer creates porosities that change the refractive index of usually translucent enamel”
Shivanna V, Shivakumar B. J Conserv Dent 2011
Improved resin infiltration of natural caries lesionsMeyer-Lüeckel, Paris J Dent Res 2008
Drilling-no-thanks.info
Refractive Index (RI) The degree light bends when it travels from one medium to another
Enamel has a refractive index of 1.62 (Kidd and Fejerkaro J Dent Res 2004)
The difference in refractive index between the water and the enamel affects light scattering and makes the lesion look opaque.
Microporosities of the enamel caries lesion are filled with either a watery medium (R.I. of 1.33) or air (R.I of 1.0).
The microporosities of infiltrated lesions are filled with resin (R.I. of 1.46), which, in contrast to the watery medium, cannot evaporate. Therefore, the difference in refractive indices between the porosities and enamel is negligible and lesions appear similar to the surrounding sound enamel. (Munoz et al J Esthet Restor Dent 2013)
* This is why dehydrated lesions/mouth breathers look even worse*

4/3/2019
37
ICONResin Infiltration
InterproximalSmooth Surface
Patient packs sold as mini kit (2) or cube (7)
ICON Resin Infiltration
Icon resin infiltration “fills’ micro-porosities in the lesion without mechanical preparation or unnecessary removal of tooth structureUp to 800µm
International Caries Detection and Assessment System (ICDAS)
Source: Pocket Dentistry

4/3/2019
38
Caries infiltration in teeth varying in ICDAS-II codes in vitroMeyer-Lüeckel et al J Dent Res 1989
Drilling-no-thanks.info

4/3/2019
39
Charting and documentation
Patient passbook
Sticker for patient chart
Record card for patient to keep, useful if they move/transfer to a new provider
Or just enter into your office software by the procedure code (D2990 and surface treated)
Smooth surface kit components 15% Hydrochloric acid gel
Drying agent (ethanol)
Infiltrant
Unfilled resin
High penetration coefficient
Applicator tips
4/3/2019
40
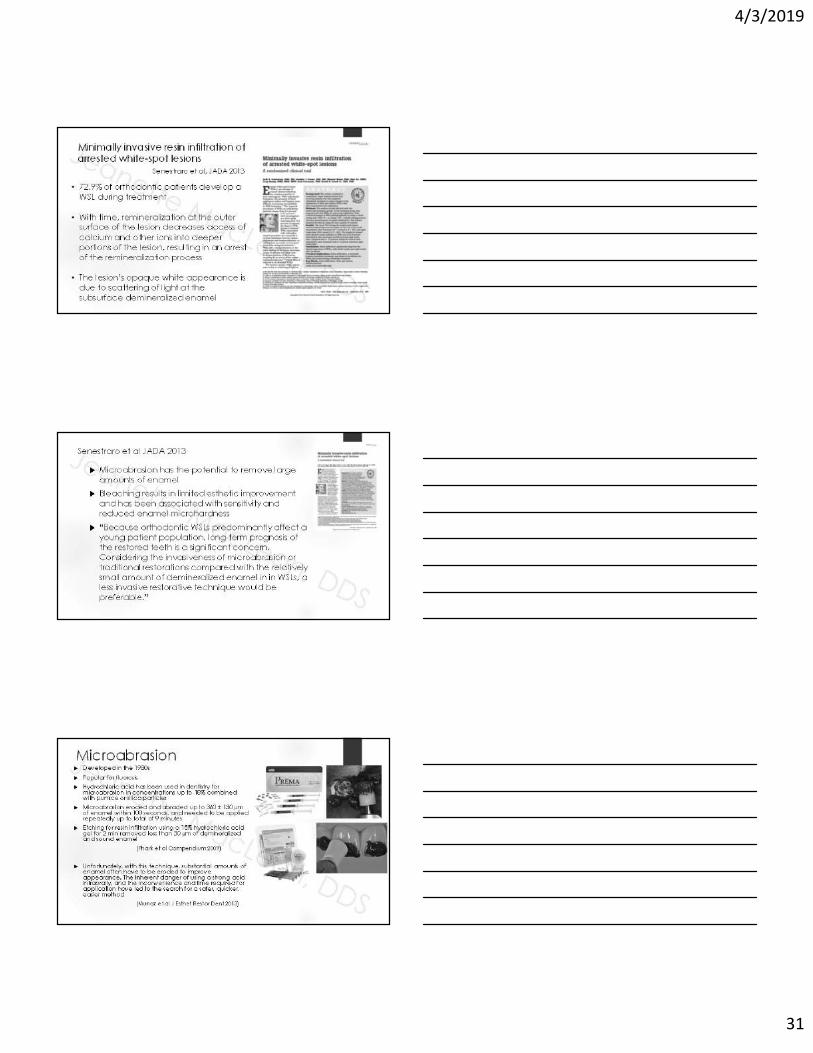
Interproximal kit components 15% Hydrochloric acid gel
Drying agent (ethanol)
Infiltrant
Unfilled resin
High penetration coefficient
Applicator tips
Wedges
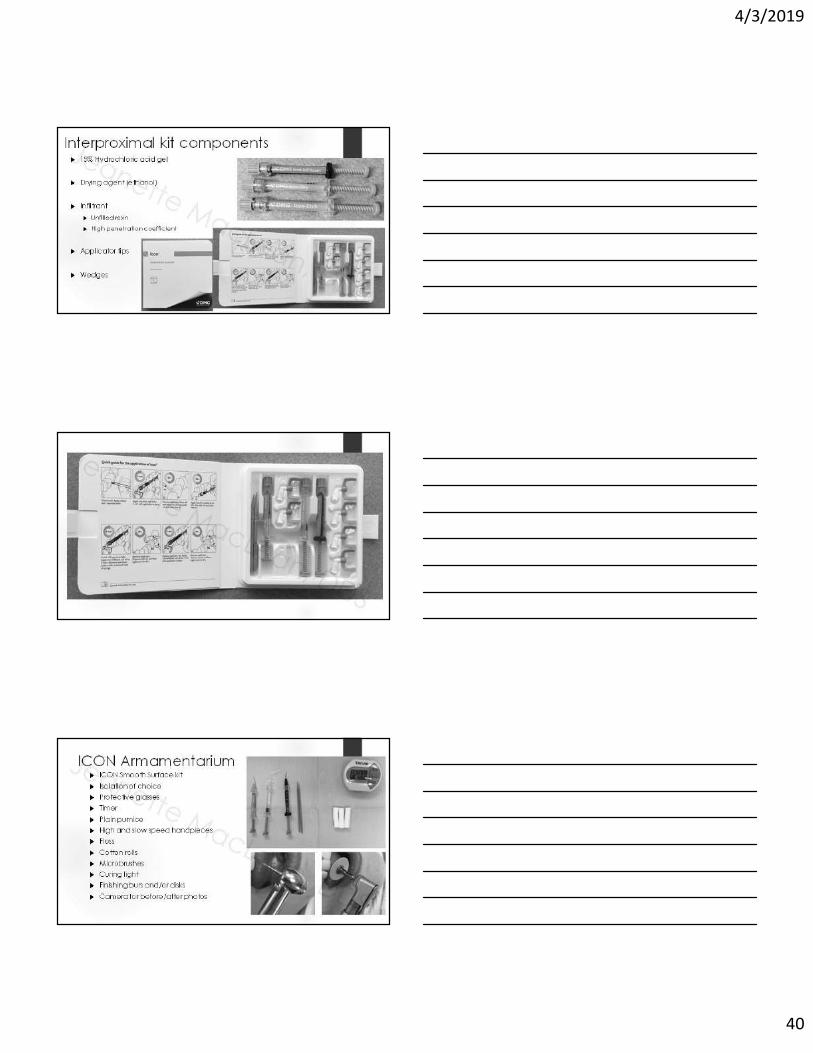
ICON Armamentarium ICON Smooth Surface kit
Isolation of choice
Protective glasses
Timer
Plain pumice
High and slow speed handpieces
Floss
Cotton rolls
Microbrushes
Curing light
Finishing burs and/or disks
Camera for before/after photos

4/3/2019
41
Isolation options for anterior ICON Rubber dam
Cotton rolls
Towel
OptraGate
Liquid dam
NOLA Dry Field System
Isolite
OptraGate By Ivoclar Vivadent
Latex free
Jeanette MacLean, DDS
The NOLA Dry Field System
A great isolation option when treating multiple post-ortho WSLs

4/3/2019
42
Liquid dam
NOLA Dry Field + Kool-Dam
An excellent isolation technique for multi-quadrant Icon Resin Infiltration System treatment of post-ortho WSLs which reduces bleeding and post-op soft tissue irritation
Jeanette MacLean, DDS
Isolation options for proximal ICON Rubber dam
DMG MiniDam
Use of a rubber dam for posterior, proximal Icon is critical
Images from Dr. Joel Berg and DMG

4/3/2019
43
DO NOT USE: Rubber dams made from thermoplastic elastomers
Such as Flexi-Dam
Use caution with non-latex rubber dams, ensure it is a compatible brand or the material could dissolve
ICON Compatible Rubber Dams;
Hygienic “Dental Dam Latex” Heavy and Medium
Roeko “Dental Dam Silicone Non Latex”
Ivoclar Vivadent “Optra Dam”
SDS “Isodam Latexfree”
SDS “Ivory Kofferdam”
Dental Dam von Crosstex non latex (F-130779)
Zirc Company “Latex Free Insti-Dam”
Aseptico “Handi Dam – LF”
Rubber dam for ortho WSLs

4/3/2019
44
Gingival irritation
Basic ICON Protocol
Congenital enamel defect on maxillary right permanent central incisor
Jeanette MacLean, DDS
ICON Protocol 1. Clean teeth with plain pumice using a prophy cup

4/3/2019
45
ICON Protocol 2. Isolate as needed
3. Apply Icon-etch to the entire facial surface area for 2 minutes * or at least 2mm beyond the lesion
From the manufacturer:
“At the discretion of the dentist the entire smooth surface area ought to be etched and infiltrated in case of large area white spots as they occur after bracket removal.”
ICON Protocol 4. You will notice small bubbles in the etch, agitate/move around the
etch with a microbrush or the syringe tip

4/3/2019
46
ICON Protocol Fuzzy applicator tips – my personal preference is a syringe tip
because I feel like I have more control
ICON Protocol
The etch can be agitated with a microbrush, however, a lot of the material just adheres to the bristles
ICON Protocol

4/3/2019
47
ICON Protocol 5. Suction then rinse thoroughly with water for 30 seconds
6. Dry with oil-free air
ICON Protocol 7. For anterior teeth, apply Icon-etch at least twice for 2 minutes to
sufficiently remove the thicker surface inhibiting zone (pseudo-intact-layer) *
8. Suction, rinse, and dry again
* Unless treating WSLs less than 2 months after bracket removal
ICON Protocol 9. Inspect the surface to see if it appears “chalky white”
4/3/2019
48
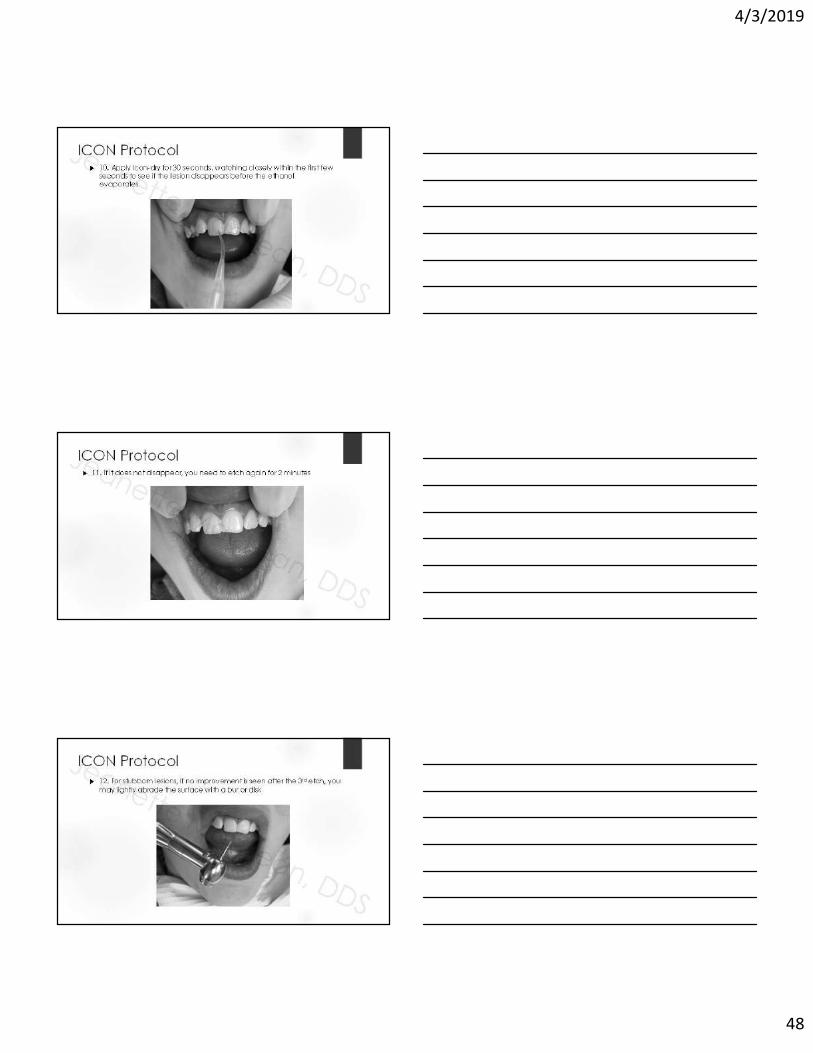
ICON Protocol 10. Apply Icon-dry for 30 seconds, watching closely within the first few
seconds to see if the lesion disappears before the ethanol evaporates
ICON Protocol 11. If it does not disappear, you need to etch again for 2 minutes
ICON Protocol 12. For stubborn lesions, if no improvement is seen after the 3rd etch, you
may lightly abrade the surface with a bur or disk

4/3/2019
49
ICON Protocol 13. Repeat 2 minute Icon-etch, suction, rinse, dry, and Icon-dry
as needed to eliminate the lesion
ICON Protocol 14. Apply the Icon-infiltrant, flooding the entire facial surface of the
tooth, and allow to soak for 3 minutes
15. Eliminate overhead light to avoid accidental early setting of the material
ICON Protocol 16. Apply additional Icon-infiltrant as needed and as it absorbs into
the tooth via capillary action, maintaining a surface “wet” with the infiltrant

4/3/2019
50
ICON Protocol 17. After 3 minutes, remove the excess Icon-infiltrant
I like to use clean, dry cotton rolls, rubbing until it “squeaks”
ICON Protocol 18. Use clean, dry microbrushes to remove excess Icon-infiltrant from
contacts and embrasures
ICON Protocol 19. Floss to remove any excess Icon-infiltrant from the contacts

4/3/2019
51
ICON Protocol 20. Light cure for 40 seconds
ICON Protocol 21. Reapply the Icon-infiltrant, this time allowing it to soak for 1 minute
(polymerization shrinkage)
ICON Protocol 22. After 1 minute, repeat steps for removal of any excess Icon-
infiltrants

4/3/2019
52
ICON Protocol 23. Light cure again for 40 seconds
ICON Protocol 24. Smooth and polish with finishing burs, disks, and/or strips
ICON Protocol

4/3/2019
53
Post Op InstructionsIcon
Free download at Kidsteethandbraces.com
Tips Sand/abrade stubborn spots after 3rd etch
Etching beyond 3 times is considered “off label”
Agitate etch around
Wait 2 weeks after professional fluoride treatment
Discontinue 5000 ppm toothpaste 2 weeks prior to procedure
Often looks even better the next day (dehydration)
Make sure you thoroughly cure the infiltrant
Turn overhead light off
Case selection
Polish with finishing disks or burs after for smoother texture
Failure to adequately remove excess infiltrant may give a yellow look

4/3/2019
54
Long term follow-up 71 year old, 5 years later
Jeanette MacLean, DDS
Jeanette MacLean, DDS
Long term follow-up
Results stable 4 years later, even after whitening
Jeanette MacLean, DDS
Jeanette MacLean, DDS
Example ICON cases
4/3/2019
55
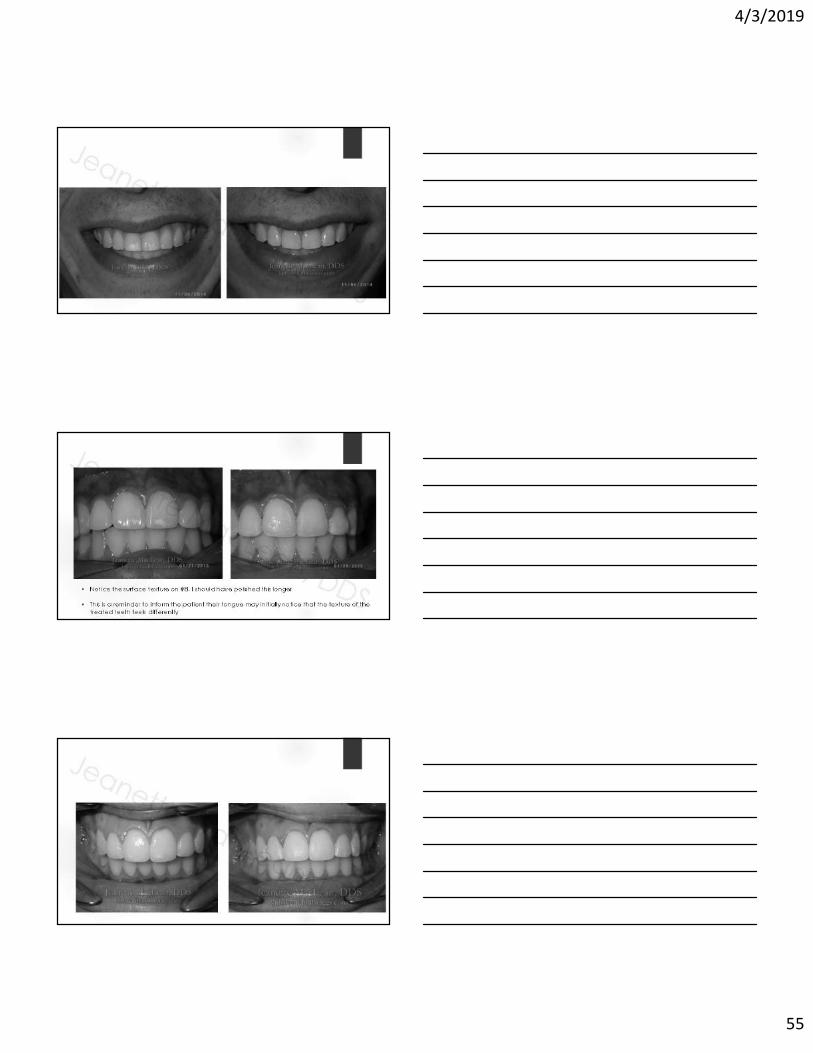
• Notice the surface texture on #8, I should have polished this longer
• This is a reminder to inform the patient their tongue may initially notice that the texture of the treated teeth feels differently

4/3/2019
56

4/3/2019
57
ICON to treat post-ortho WSLs

4/3/2019
58
Notice the soft tissue irritation

4/3/2019
59
Facebook review:
“… My daughter had braces for 7 months we went to a completely different orthodontist for her braces since we herd great things about them. Unfortunately it was the worse 7 months we ever went through. She had major white spot lesions and demineralization on her teeth. We [saw] Dr. MacLean and we discussed the Icon treatment, I was very nervous going through with it since you don’t hear [too] much about it. But I can say this was the best decision I have ever made for my daughters teeth. They are so healthy and beautiful. She did a miracle on my daughters teeth. And I can say my daughter is so happy with the out come and is happy to smile again. The best staff I’ve ever dealt with in this kind of environment. Thank you all!”
2 Week Follow-up Notice the soft tissue healing

4/3/2019
60
ICON to treat mild fluorosis

4/3/2019
61
ICON to treat mild fluorosis
• Inspection of all of the teeth leads me to believe this is mild fluorosis, though the patient elected to only treat #8 & 9
• Notice how all of the teeth appear dehydrated immediately after treatment. In most cases, the esthetics get even by the following day as the tooth rehydrates
ICON to treat mild fluorosis
ICON to treat MIH

4/3/2019
62
ICON to treat MIHJune 2014
ICON to treat MIHAugust 2018
Patient education
Jeanette MacLean, DDS
Binder with before and after images and information

4/3/2019
63
Patient education Product brochures
Coding and BillingIcon Resin Infiltration
CDT Code
D2990 Resin infiltration of incipient smooth surface lesions
My fee is similar to a one surface resin
Some do up to 4 surface resin
Most insurances do not cover, but many are happy to pay out of pocket for this service
Coding and Billing in CanadaIcon Resin Infiltration
Bill under Resin Infiltration
Use code 13601 Series per unit of time
Use code 13602 for two units of time
Use code 13609 for each additional unit over two
It has a “Plus E” in the description field
Additional costs would be captured using the code 99555
Insurance companies may vary in terms of coverage allocated. A pre-determination would be recommended. The DDS code is 23700 – One Surface.

4/3/2019
64
Coding and Billing in CanadaIcon Resin Infiltration
New Brunswick, Nova Scotia, New Foundland, Prince Edward Island and Quebec;
Smooth surface 23111
Proximal 91120
Scheduling One appointment
Consider nitrous, especially if they're apprehensive or wiggly
Depends number of teeth, location, behavior
Central incisors – 30 minutes
Multiple quads of gumline decalcification – 60-75 minutes
Late AM prior to lunch is a great time, in case you have to run over
Who can do this procedure?
Depends on your state law
I personally do this with an assistant
List available at www.adha.org

4/3/2019
65
www.danb.org
Etch Bleach Seal
4/3/2019
66
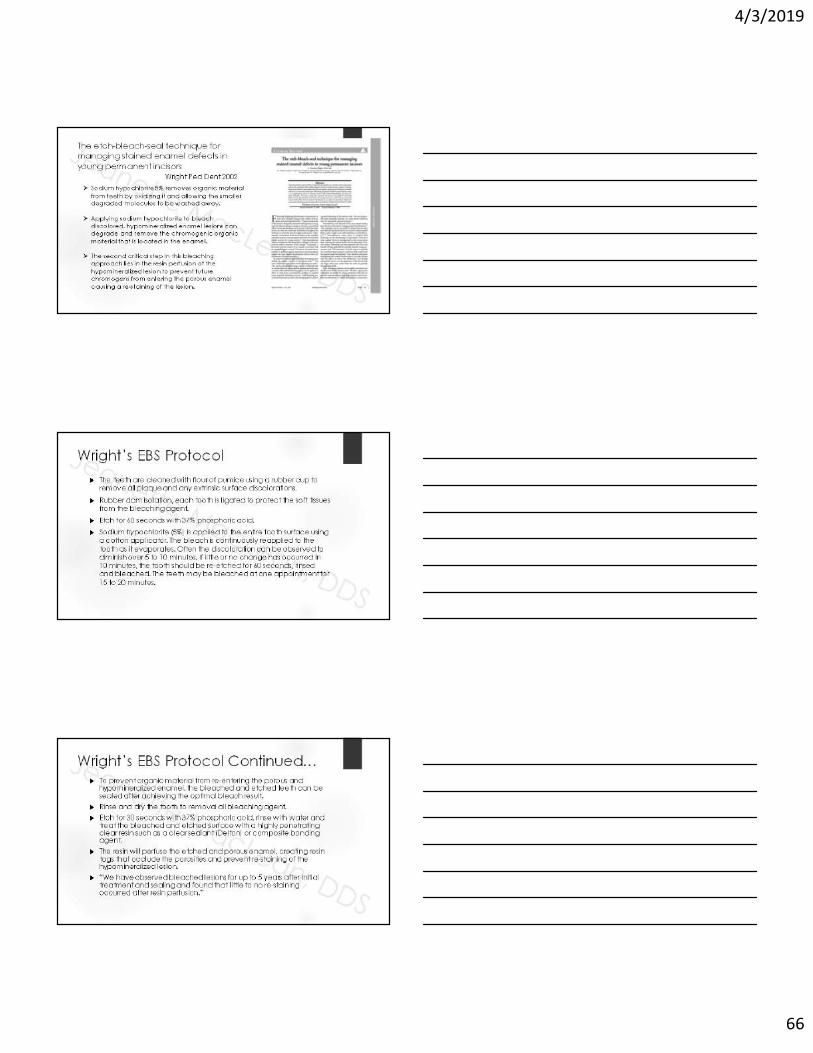
The etch-bleach-seal technique for managing stained enamel defects in young permanent incisors
Wright Ped Dent 2002
Sodium hypochlorite 5% removes organic material from teeth by oxidizing it and allowing the smaller degraded molecules to be washed away.
Applying sodium hypochlorite to bleach discolored, hypomineralized enamel lesions can degrade and remove the chromogenic organic material that is located in the enamel.
The second critical step in this bleaching approach lies in the resin perfusion of the hypomineralized lesion to prevent future chromogens from entering the porous enamel causing a re-staining of the lesion.
Wright’s EBS Protocol
The teeth are cleaned with flour of pumice using a rubber cup to remove all plaque and any extrinsic surface discolorations.
Rubber dam isolation, each tooth is ligated to protect the soft tissues from the bleaching agent.
Etch for 60 seconds with 37% phosphoric acid.
Sodium hypochlorite (5%) is applied to the entire tooth surface using a cotton applicator. The bleach is continuously reapplied to the tooth as it evaporates. Often the discoloration can be observed to diminish over 5 to 10 minutes. If little or no change has occurred in 10 minutes, the tooth should be re-etched for 60 seconds, rinsed and bleached. The teeth may be bleached at one appointment for 15 to 20 minutes.
Wright’s EBS Protocol Continued… To prevent organic material from re-entering the porous and
hypomineralized enamel, the bleached and etched teeth can be sealed after achieving the optimal bleach result.
Rinse and dry the tooth to removal all bleaching agent.
Etch for 30 seconds with 37% phosphoric acid, rinse with water and treat the bleached and etched surface with a highly penetrating clear resin such as a clear sealant (Delton) or composite bonding agent.
The resin will perfuse the etched and porous enamel, creating resin tags that occlude the porosities and prevent re-staining of the hypomineralized lesion.
“We have observed bleached lesions for up to 5 years after initial treatment and sealing and found that little to no re-staining occurred after resin perfusion.”

4/3/2019
67
Images from Dr. Wright
NaOCl affect on Hypo Enamel
Hypochlorous acid, a substance present in NaOCl solution, releases chlorine when in contact with organic tissue as a solvent that combines with the protein amino group, forming chloramines (chloramination reaction).
Hypochlorous acid and hypochlorite ions lead to amino acid degradation and hydrolysis.
When NaOCl contacts hypomineralized and discolored enamel, it degrades and removes the chromogenic organic material located on the enamel surface.
(Flores et al 2009)
Clinical Efficacy of 5% Sodium Hypochlorite for Removal of Stains Caused by Dental Fluorosis
Flores et al J Clin Ped Dent 2009
39 patients ranging in age from 8 to 12, pumice, 15 second 37% phosphoric acid etch, 15-20 minutes NaOCl 5%, sealed with Fortify, Bisco
Results: clinically and statistically significant difference after treatment with lighter (whiter) appearance
“In young permanent teeth that are partially erupted and have large pulp chambers, bleaching with 5% NaOCl is an excellent alternative for the treatment of fluorosis stains. NaOCl is a commonly used irrigating solution that has been shown to have both antimicrobial properties and the ability to dissolve organic material.”
“It is simple, low cost, noninvasive so the enamel keeps its structure, relatively rapid, and safe; it requires no special materials, and it can be used with safety on young permanent teeth.”

4/3/2019
68
Flores et al 2009
The use of a ‘bleach‐etch‐seal’ deproteinizationtechnique on MIH affected enamel
Gandhi et al Int J Paed Dent 2012
Aims: To ascertain whether deproteinization pretreatment of molar‐incisor hypomineralization (MIH) enamel affects resin sealant infiltration.
Design: 31 extracted MIH teeth were divided into 3 sections and randomly allocated into the Control (etch and FS), Treatment 1 (5% NaOCl, etched and fissure sealed), and Treatment 2 (5% NaOCl and fissure sealed with no etch) groups. 279 sealant tag/enamel grade observations were recorded by scanning electron microscopy.
Conclusions: The findings suggest that there was no significant difference in the tag quality between the conventional technique and the ‘bleach‐etch‐seal’ technique. There was a high‐predicted probability of obtaining ‘poor’ sealant tags in MIH enamel, regardless of which of the three treatments was used.
Resin penetration in artificial enamel carious lesions after using sodium hypochlorite as a deproteinization agent
Gomez, et al. J Clin Ped Dent 2014
20.1% significantly greater penetration when using sodium hypochlorite
“Conclusion: The results demonstrated a significant penetration of the sealing resin when the conventional technique is complemented with the application of 5.25% sodium hypochlorite for one minute in artificial enamel carious lesions.”

4/3/2019
69
Etch Bleach Seal Protocol Armamentarium• Plain pumice
• Prophy angle
• 37% Phosphoric acid etch
• Timer
• Protective glasses
• NaOCl 5% (Clorox 6%)
• Clear Delton Sealant
• Microbrushes
• Cotton rolls
• Floss
• Curing light
• Camera for before/after photos
• Isolation; towel, OptraGate, liquid dam, rubber dam
Etch Bleach Seal Protocol BEFORE
Jeanette MacLean, DDS
Etch Bleach Seal Protocol 1. Isolate the teeth

4/3/2019
70
Etch Bleach Seal Protocol 2. Clean teeth with plain pumice then rinse
Etch Bleach Seal Protocol 3. Apply 37% phosphoric acid etch
Etch Bleach Seal Protocol 4. Allow etch to sit for 2 minutes

4/3/2019
71
Etch Bleach Seal Protocol 5. Rinse
Etch Bleach Seal Protocol 6. Apply bleach with a microbrush, applying more as it evaporates
Etch Bleach Seal Protocol

4/3/2019
72
Etch Bleach Seal Protocol 7. Rinse and dry
Etch Bleach Seal Protocol 8. Inspect the teeth
Etch Bleach Seal Protocol 9. Apply clear Delton sealant

4/3/2019
73
Etch Bleach Seal Protocol 10. Allow sealant to absorb
Etch Bleach Seal Protocol 11. Remove excess sealant
Etch Bleach Seal Protocol 12. Light cure 20 seconds

4/3/2019
74
Etch Bleach Seal Protocol AFTER
Jeanette MacLean, DDS
Etch Bleach Seal Protocol
4/3/2019
75
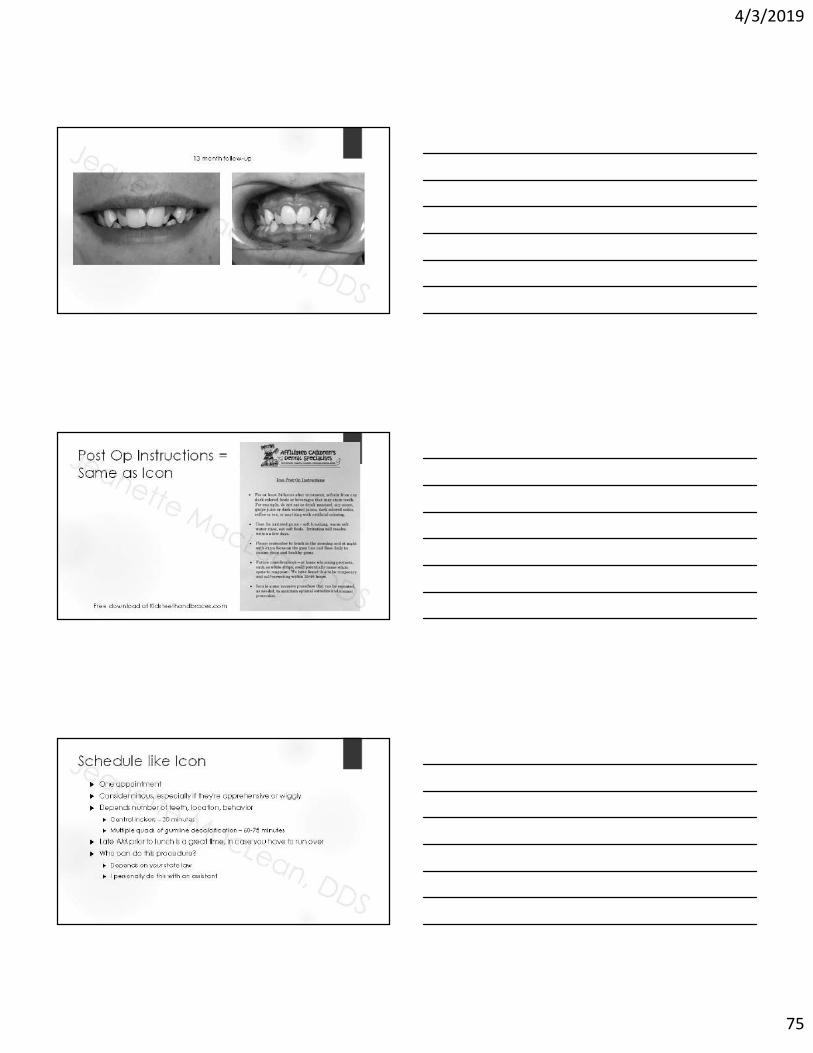
13 month follow-up
Post Op Instructions =Same as Icon
Free download at Kidsteethandbraces.com
Schedule like Icon One appointment
Consider nitrous, especially if they're apprehensive or wiggly
Depends number of teeth, location, behavior
Central incisors – 30 minutes
Multiple quads of gumline decalcification – 60-75 minutes
Late AM prior to lunch is a great time, in case you have to run over
Who can do this procedure?
Depends on your state law
I personally do this with an assistant

4/3/2019
76
Coding and BillingEtch Bleach Seal Protocol
D2999 Unspecified Restorative Procedure, by Report
D9970 Enamel Microabrasion
A reasonable fee would be similar to a one surface resin
Jeanette MacLean, DDS
Part 2:Incipient Approximal Lesions
Icon Resin Infiltration 28 year old
Circumferential gumline decalcification

4/3/2019
77
Icon Proximal Protocol Proximal Kit
Icon Proximal Protocol 1. Place separator
Icon Proximal Protocol 2. Apply topical for the clamp

4/3/2019
78
Icon Proximal Protocol 3. Remove the separator
Icon Proximal Protocol 4. Clean with plain pumice
5. Rinse
Icon Proximal Protocol 6. Rubber dam or mini dam isolation

4/3/2019
79
Icon Proximal Protocol 7. Insert wedge, if needed, to create additional space
Icon Proximal Protocol 8. Insert applicator with Icon-Etch with green side and perforations facing
the surface to be treated
Icon Proximal Protocol 9. Twist to dispense the Icon-Etch
10. Let sit for 2 minutes with applicator in place
4/3/2019
80
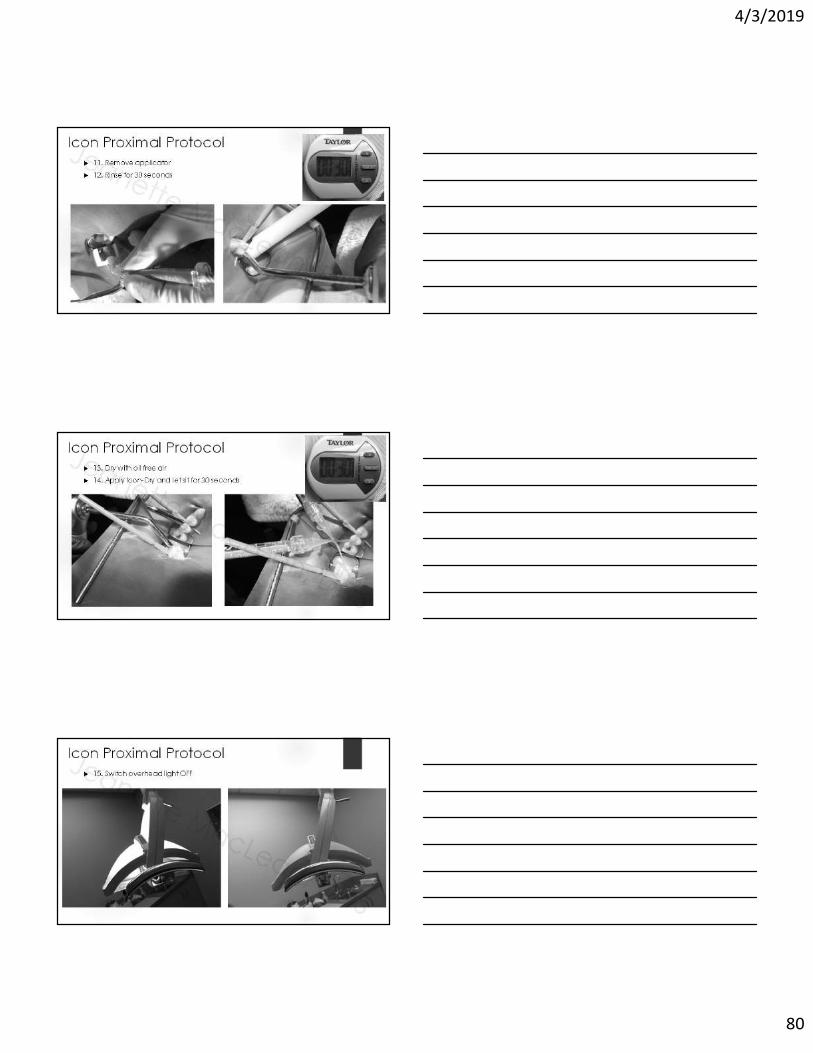
Icon Proximal Protocol 11. Remove applicator
12. Rinse for 30 seconds
Icon Proximal Protocol 13. Dry with oil free air
14. Apply Icon-Dry and let sit for 30 seconds
Icon Proximal Protocol 15. Switch overhead light OFF

4/3/2019
81
Icon Proximal Protocol 16. Insert applicator for Icon-Infiltrant
17. Flood the tooth with Icon-Infiltrant for 3 minutes
18. Maintain wet lesion surface with occasional twist of syringe
Icon Proximal Protocol 19. Remove applicator
Icon Proximal Protocol 20. Disperse excess Icon-infiltrant with oil free air

4/3/2019
82
Icon Proximal Protocol 21. Floss
Icon Proximal Protocol 22. Light-cure for 40 seconds
Icon Proximal Protocol23. Place a new applicator tip on the Icon-Infiltrant

4/3/2019
83
Icon Proximal Protocol 24. Apply Icon-Infiltrant again, this time for 1 minute
Icon Proximal Protocol 25. Remove the applicator
26. Disperse with oil free air
27. Floss
28. Light-cure for 40 seconds
Icon Proximal Protocol 29. Remove the wedge

4/3/2019
84
Icon Proximal Protocol 30. Rinse thoroughly with water
Icon Proximal Protocol 31. Immediately post-op after removing rubber dam
7 Year Old Girl
Williams Syndrome
Past GA for restorations
#30 – mesial Icon resin infiltration stable since 8/27/15

4/3/2019
85
11 Year Old Boy
Long history of interproximal caries
8/4/14 - #14 and #30 mesialstreated with Icon resin infiltration
11 Year Old Boy
Results stable almost 2 years later, then parents got divorced and patient became inactive
Not the best BWs due to bend and artifacts…
10 Year Old Boy “Doesn’t like to floss” uses Waterpik
1/21/15- Enamel caries noted, reviewed diet and oral hygiene, recommended a fluoride rinse
8/19/15 – treatment planned #30 – MO composite, Icon resin infiltration for #3,14,19 mesials, and everything was completed within 5 weeks

4/3/2019
86
10 Year Old Boy 6/9/16 – Icon failure and lesion
progression, #3 and #14 treatment planned for MO composites
6/21/17 - #19 mesial still stable, but family moves to Florida
What if we had applied SDF back in January of 2015 ?
ADA Clinical Practice Guideline on the Use of Nonsurgical (Nonrestorative) Treatments for Caries Management Council on Clinical Affairs, Chair Dr. Rebecca Slayton
Available at ADA.org/caries
“For patients with cavitated coronal (all surfaces) lesions
Recommendation 1: To arrest advanced/cavitated caries lesions on any coronal surface on primary teeth, the expert panel recommends clinicians use 38% silver diamine fluoride solution (twice a year) versus 5% sodium fluoride varnish (once a week for 3 weeks) (Moderate quality evidence, Strong recommendation).
Recommendation 2: To arrest advanced/cavitated caries lesions on any coronal surface on permanent teeth, the expert panel suggests clinicians use 38% silver diamine fluoride solution (twice a year) versus 5% sodium fluoride varnish (once a week for 3 weeks ) (Low quality evidence, Conditional recommendation)”

4/3/2019
87
Caries management for the modern age: Improving practice one guideline at a time
Margherita Fontana JADA November 2018
“Although extensive efforts have been made to teach and perform caries management under a minimally invasive (that is, noninvasive and microinvasive) approach that emphasizes clinical and public health preventive services, the “drill and fill” approach may still remain predominant in some settings, neglecting to fully address the underlying disease process. Over the years, experts in the field of cariologyconceptualized that caries acts as a recurrent disease cycle that involves varied states of demineralization and remineralization over a patient’s life span. This concept is the crux of modern-day caries management: a patient-centered, risk-based philosophy that prioritizes prevention, early detection, and noninvasive and microinvasive treatments.”
Timing and scope of each chapter for the ADAclinical practice guideline series on caries management

4/3/2019
88
Public Awareness and Demand
2016 - A Cavity-Fighting Liquid Helps Kids Avoid Dentists’ Drills
>70,000 views of Dr. Jeremy’s Horst’s UCSF Protocol, with largest spikes coinciding with this article’s publication
The SDF secret is out… and patients and parents want it!
PBS News Hour 2018

4/3/2019
89
August 24, 2017
Daisy Lynn, 14 months Marvelena, 3 Amber, 4 Mykel, 4
When the treatments become riskier than the disease itself, We must reexamine our approach
Daleyza, 3
Online reaction = “I’m not taking my baby to the dentist”
Zion, 2

4/3/2019
90
What have our current approaches to caries prevention and surgical management accomplished?
The Healthy People initiative reports that, from 1990 to 2010, the percentage of children with untreated decay remained virtually unchanged at almost 30%
In underserved, rural, and minority populations, the percentage is significantly higher at almost 50%
During the same period, yearly governmental dental expenditures for children increased from $1 billion to $7 billion.
Spending is expected to reach $15 billion by 2020.
“This data indicates that oral health is not improving in concert with spending.” Niederman, NYU
Dye, B A and G Thornton-Evans. 2010. “Trends in Oral Health by Poverty Status as Measured by Healthy People 2010 Objectives.” Public Health 125 (6): 817–30.
CMS (Centers for Medicare and Medicaid Services). 2011b. “National Health Expenditure Projections 2011–2021.” U.S. Department of Health and Human Services, Washington, DC
“It is now known that surgical intervention of dental caries alone does not stop the disease process. Additionally, many lesions do not progress, and tooth restorations have a finite longevity. Therefore, modern management of dental caries should be more conservative.”
AAPD GUIDELINE ON CARIES-RISK ASSESSMENT AND
MANAGEMENT FOR INFANTS, CHILDREN, AND ADOLESCENTS
The Oral Microbiome – An Update for Oral Healthcare ProfessionalsKilian et al. British Dental Journal 2016
• Dysbiosis – a disturbance of the normal microbiome population
• “It is now an accepted concept that the bacteria historically considered as oral “pathogens” can be found in low numbers at healthy sites, and oral disease occurs as a consequence of a deleterious change to the natural balance of the microbiota rather than as a result of exogenous “infection.”
• “Our current understanding of this rapidly evolving scientific field supports the notion that clinical practice needs to shift from its historical focus on management of caries and periodontitis by elimination of the micobiota, to a new focus on proactive management of oral health through an ecological approach to the holobiont.”
• ► The Ecologic Plaque Hypothesis

4/3/2019
91
Adoption of Minimal
Interventions
Patient Awareness
and Demand
Organized Dentistry
and Academia
The Economics
The
Evidence
The Evidence

4/3/2019
92
Silver Diamine Fluoride Ag(NH3)2F 25% Silver – antimicrobial
8% Ammonia – solvent
5% Fluoride – remineralization
SDF is the synergy of silver and fluoride, they are better in combination than individually
Actions
1. Arrests dental caries
2. Prevents dental caries
3. Decreases dentinal hypersensitivity
Mechanisms of Action Occludes dentinal tubules
Increases mineral density and hardness
Produces
Fluorohydroxyapatite
Silver-protein conjugates
Silver phosphate
Antimicrobial
Inhibits biofilm adhesion
Denatures proteins
Breaks cell walls
Inhibits DNA replication
Penetrates tooth structure
Enamel: ~25 microns
Dentin: 200-300 microns
Imaging courtesy of Dr. Jeremy Horst
An Abundance of Evidence 12 randomized clinical trials
>4,000 children treated globally under a variety of conditions
Rosenblatt A, Stamford TCM, Niderman R. Silver Diamine Fluoride: A Caries “Silver-Fluoride Bullet.” J Dent Res 2009;88(2)116-125
Horst J, Ellenikiotis H, Milgrom P. UCSF Protocol for Caries Arrest Using Silver Diamine Fluoride: Rationale, Indications and Consent. J Calif Dent Assoc2016;44(1):17-28
Crystal Y, Niederman R. Silver Diamine Fluoride Treatment Considerations in Children’s Caries Management. Pediatr Dent 2016;38(7)466-471
Chibinski A et al. Silver Diamine Fluoride Has Efficacy in Controlling Caries Progression in Primary Teeth: A Systemic Review and Meta-Analysis. Caries Res 2017;51:527-541
Contreras V et al. Effectiveness of Silver Diamine Fluoride in Caries Prevention and Arrest: A Systemic Literature ReviewGen Dent 2017 May-Jun;65(3):22-29

4/3/2019
93
Rosenblatt A, Stamford TCM, Niderman R. Silver Diamine Fluoride: A Caries “Silver-Fluoride Bullet.” J Dent Res 2009;88(2)116-125
►“99 human clinical trials in three languages published between 1966 and 2006.”
Horst J, Ellenikiotis H, Milgrom P. UCSF Protocol for Caries Arrest Using Silver Diamine Fluoride: Rationale, Indications and Consent. J Calif Dent Assoc 2016;44(1):17-28.
Crystal Y, Niederman R. Silver Diamine Fluoride Treatment Considerations in Children’s Caries Management. PediatrDent 2016;38(7)466-471.

4/3/2019
94
Chibinski A et al. Silver Diamine Fluoride Has Efficacy in Controlling Caries Progression in Primary Teeth: A Systemic Review and Meta-Analysis. Caries Res 2017;51:527-541
The use of SDF is 89% more effective in controlling/arresting caries than other treatments or placebos
The quality of evidence was graded as high
Contreras V et al. Effectiveness of Silver Diamine Fluoride in Caries Prevention and Arrest: A Systemic Literature ReviewGen Dent 2017 May-Jun;65(3):22-29
Screened 821 publications in English from 2005-2016 on clinical studies using SDF
“A systematic review of 7 studies indicated that SDF, at concentrations of 30% and 38%, is more effective than other preventive management strategies for arresting dentinal caries in the primary dentition.”
“30% and 38% concentrations of SDF show potential as a caries preventive treatment in primary teeth and permanent first molars.”
Key points SDF is safe and effective
SDF is more effective than fluoride varnish
SDF is more effective than Interim Therapeutic Restoration (ITR)
SDF is most effective when applied twice a year
SDF arrests 80% of lesions
SDF satisfies the “Triple Aim of Care”
Increases access
Improves health
Reduces cost
4/3/2019
95
Organized Dentistry and Academia
Challenge: SDF was not part of the vast majority of practicing dentist’s
education
2015 survey of pediatric dental residency program finds only 25% using SDF, while 100% used varnish.
This number increased to 55% in a 2017 survey of dental schools – yet 58% of respondents could not confirm if they had a protocol in place.
2018 dental school survey; 67.7% report SDF as part of curricula, Only 18 respondents were able to confirm an existing protocol.
“These findings suggest that, with the use of SDF increasing rapidly in the US and its adoption in most dental schools, there is a need for a development of standardized evidence-based protocols.” (Ngoc et al JDE 2018)
Many dentists have still never even heard of it
Many who purchased the product still have no clue how to actually use it
Decreased ADA and AAPD membership, i.e. less access to journal publications (if anyone was even reading them in the first place)
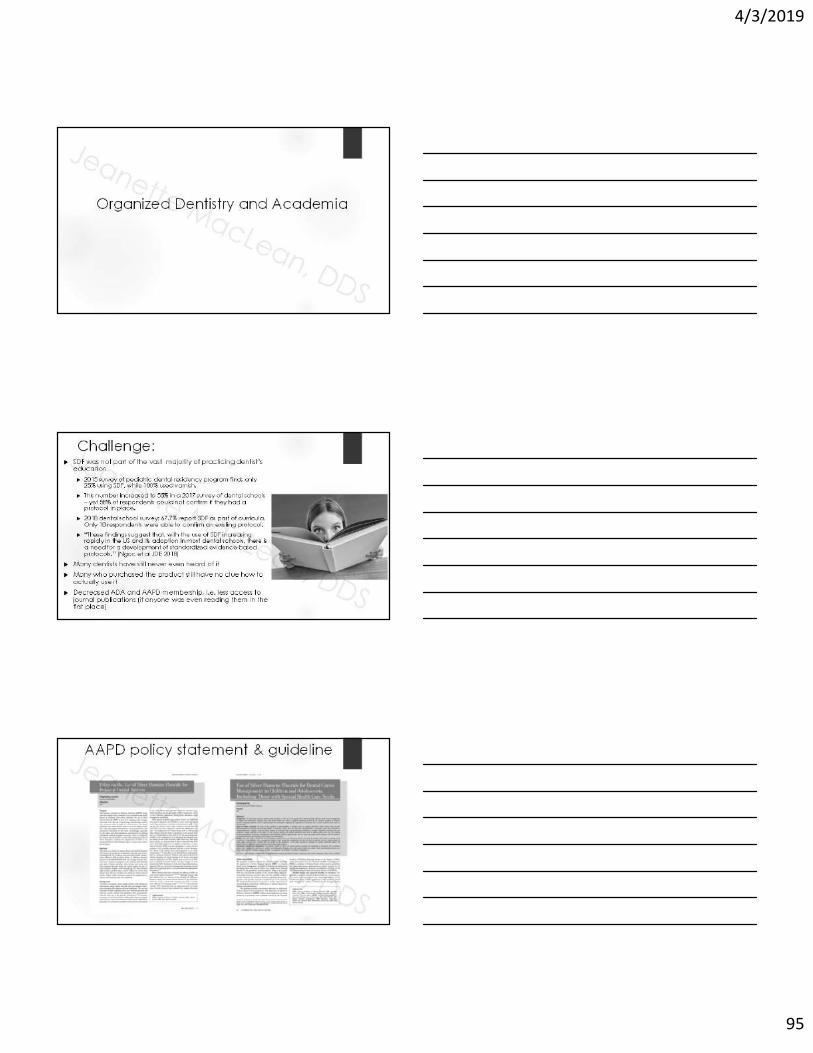
AAPD policy statement & guideline

4/3/2019
96
Key points from the new AAPD reference manual; The AAPD “Supports the use of SDF as part of an ongoing caries management
plan with the aim of optimizing individualized patient care consistent with the goals of a dental home”
The AAPD “Supports third party reimbursement for fees associated with SDF”
The AAPD supports the “off label” use of SDF to treat caries in children
“Recently, the Food and Drug Administration approved SDF as a device for reducing tooth sensitivity, and off label use for arresting caries is now permissible and appropriate for patients”
This point is irrelevant in Canada – Health Canada already recognizes SDF as a caries treatment!
CDA Journal Special Issue January and February 2018
Controlling caries in exposed root surfaces with silver diamine fluoride: A systematic review with meta-analysis
“"Yearly 38% SDF applications to exposed root surfaces of older adults are a simple, inexpensive, and effective way of preventing caries initiation and progression."
Oliveira JADA August 2018

4/3/2019
97
The International Caries Consensus Collaboration (ICCC)
21 global experts in cariology convene in Belgium, 2015
Frecken, Innes, Fontana…
To address “A gap between research findings and clinical practice. The reasons for this are complex, but contributing factors are inconsistencies in clinical guidelines, dental education, national health care policies, and renumeration systems.”
Findings and consensus publications featured in the 2016 special issue of Advances in Dental Research
Contemporary Concepts in Carious Tissue Removal: A Review“Modern concepts for managing caries and its symptoms (ie, carious lesions) aim to avoid invasive treatments whenever possible and instead attempt to control the activity of the biofilm and the lesions.”
Ecologic Plaque Hypothesis = caries is an ecologic imbalance within the dental biofilm, with acidogenic and aciduric bacteria being more competitive under frequent intake of carbohydrates, eventually dominating the biofilm. The result is a further imbalance between mineral gain (from saliva) and mineral loss (by demineralization), leading to the symptom of the disease, the carious lesion

4/3/2019
98
Don’t Know, Can’t Do, Won’t Change: Barriers to Moving Knowledge to Action in Managing the Carious Lesion
“The failure to follow new evidence is not limited to dentists who are “out of touch,” do not undertake continuing professional development, or have been practicing for many years; in some countries and some schools, new dentists are still taught to remove all infected carious tissue, and it is actually not possible to pass professional examinations without demonstrating this. The reasons underlying this failure to translate evidence into clinical practice are many and complex.”
“The “don’t know” could be due to general ignorance (perhaps remedied with an appropriate educational intervention) or the more problematic willful ignorance, where the subject chooses not to learn more about a topic (perhaps because it challenges his or her current beliefs).”
We used to think the earth was flat…
Top 5 Misconceptions:1. It’s going to run you out of business
2. Patients will reject it due to poor aesthetics
3. It’s only for children
4. Patients will not get treatment completed
5. You can’t bond to it

4/3/2019
99
1. I still run a 7 figure producing practice
2. Many parents choose SDF
3. People of all ages can benefit from SDF
4. Silver diamine fluoride IS treatment, especially when you combine forces with glass ionomer cement, i.e. SMART
5. You CAN bond to SDFNo difference in microtensile bond strength of composite to SDF treated dentin in primary and permanent teeth (Quock, et al Op Dent 2012;37(6)610-616, Wu, et al PediatrDent 2016;38(2):148-153)
“Silver diamine fluoride does not adversely affect the bond strength between glass ionomer cement and carious primary dentin in vitro.” (Puwanawiroj A et al Ped Dent 2018)
*** “There is an improvement in the retention properties of a fissure sealant applied after treatment with silver diamine fluoride” (Perez-Hernandez et al European Archives of PaediatricDentistry 2018 doi.org/10.1007/s40368-018-0374-4)
My Personal Stance;TAKE NOTHING OUT OF YOUR TOOLBOX
I still do “everything”
Sealants, fillings, crowns, extractions, etc.
I have dramatically reduced the amount of minimal to moderate oral conscious sedation cases that I do, I no longer offer in office IV sedation, and rarely have the need to refer out for GA
67% reduction in total OCS cases since 2014
All while maintaining a thriving, 7 figure producing private practice
The Economics

4/3/2019
100
Getting the Incentives RightNiederman et al AJPH 2017
Despite significant financial, training, and program investments, US children’s caries experience and inequities continues to increase over the past 20 years
Dental insurance payment systems are not aligned with the current best evidence, exacerbating inequities
Effective preventive interventions are either (1) consistently compensated less than ineffective interventions or (2) not compensated at all
This economic and clinical misalignment may account for underuse of effective caries prevention and subsequent overuse of restorative care
What can offering minimal interventions do for your practice?
Patient centered care
Increased patient retention
Increased internal marketing
Improved outcomes
Reduced stress for dentist and patient
Increased access to care when you can see a higher volume of patients
Reduced overhead expenses
Reduced recurrent caries with antimicrobial restoratives
Reduced individual cost per patient
Minimally invasive treatment options, like SDF, are increasing in public awareness, popularity, and demand

4/3/2019
101
What does your “menu” look like ?
Are you In-N-Out ?
Or are you the deli ?

4/3/2019
102
Which dentist is more productive ?
Dentist A sees a 4 year old new patient with occlusal caries on their primary second molars (#A,J,K,T). Treatment plans occlusal resin composites and IV sedation.
1 hour is blocked out exclusively for this patient (if not longer)
Anesthesia fees go to the anesthesiologist
Now let’s imagine the patient decides to no show or violate NPO, or gets sick the morning of and same-day cancels… Talk about a waste of time and money!
Dentist B applies SDF to #A,J,K,T at the exam appointment (D1354 x 4 in addition to any exam and hygiene fees also collected with mere minutes of added chair time). Treatment plans EQUIA Forte restorations in 2-4 weeks with no local or sedation
Normal load of patients are being seen simultaneously for routine care
Even if this patient no shows, 80% of lesions arrest with one application the dentist is still seeing other patients in the practice
Just add SDF
• Attract new patients
• Better serve the patients you already have
• Increase patient satisfaction
• Improve outcomes
• Improve access to care
• TREAT THE BIOFILMS THAT CONTRIBUTE TO THE DISEASE
Free Download; kidsteethandbraces.com

4/3/2019
103
• Adaptation of the UCSF form
• Office logo
• Primary teeth
• 2xyear max effect
• Attorney enhanced language
• Signature lines for parent/minor name
My Consent Form;
Free Download;kidsteethandbraces.com
Patient and Staff Education
• We hand every patient/parent a copy of the New York Times SDF article along with our informed consent
• Familiarizes them with the treatment and terminology
• Motivates and excites them for the treatment
• Improves word of mouth referrals and internal marketing
• I recommend having your entire staff read and familiarize themselves with SDF
• UCSF Protocol, Informed Consent, and New York Times Article
• Parents/patients talk with your staff when you’re not there, make sure they know what they’re talking about
• Yes, even the folks that answer phones
Free Download;kidsteethandbraces.com
D1354 - Coding D1354 – INTERIM CARIES ARRESTING MEDICAMENT APPLICATION PER
TOOTH
This code is not intended “per application” and that is specified in the new CDT 2018
THIS IS NOT VARNISH – do not swab SDF all over the mouth, it permanently stains decay and decalcification, and can stain the margins of restorations
Think like a sealant, involves careful diagnosis, isolation, and application to site specific lesions
Chart just as you would any other treatment or restoration, by tooth and surface
SDF does not restore form or function
Cavitations (holes that trap food) will still benefit from a restoration to prevent further break down of the tooth and to improve cleansibility of the tooth, without which certain lesions could eventually fracture and/or food entrapment would be more likely to lead to lesion reactivation
Fore example; caries arrested by SDF in a fissured groove, will still be a fissured groove that is more difficult to cleanse. Placing a GIC sealant over the arrested caries in the fissured groove would be beneficial for improving the cleansibility of the tooth and maintaining arrest of the lesion
4/3/2019
104
Silver and fluoride content and short-term stability of 38% silver diamine fluoride
Crystal JADA 2019
"Over 28 days, the product pH is stable, whereas the fluoride content tends to increase and the silver content tends to decrease." (product tested was Advantage Arrest from Elevate Oral Care)
Some practical clinical tips from this;
Store the bottle upright in its original box in a cool, dry place
Immediately recap tightly
Use as soon as dispensed
If you use the product infrequently, consider unit dose ampules vs. bottle
If you use it frequently (I use it daily) the bottle is less expensive per dose (65 US/88 CA cents a dose
D1354 – Billing
Few insurances recognize or reimburse this code yet, but as adoption increases, hopefully so will reimbursement
Some private plans are reimbursing; MetLife, United Concordia, some Aetna plans
New - Delta Dental recognizes the code nationally, and some individual plans are now reimbursing, submit with narrative to help drive future coverage
Approximately ½ US Medicaid programs
Most parents/patients are happy to pay out of pocket for this option
Many are charging similar fee to fluoride, varies greatly
One drop of Advantage Arrest treats up to 5-6 teeth, one bottle has approx. 250 drops, roughly 65 cents a dose (88 cents Canadian/unit dose would be higher)
Riva Star comes in a 10 dose kit, roughly $10/dose

4/3/2019
105
Armamentarium“The SDF Kit”
Advantage Arrest 38% SDF
Disposable dappen dishes
Microbrushes
Vaseline
Q-tips
Dry-aides/angles
Cotton rolls
2x2 gauze
Superfloss/ GUM Expanding Floss
Plastic lined patient bib/bracket paper
Protective glasses
2.5% FluoriMax Varnish
Bite block
Optional; Garmers cotton roll holders,
scented lip balm, xylitol lollipops, timer
Basic set up video
Video link available at Kidsteethandbraces.com
Basic Protocol1. Patient/Clinic protection; safety/sunglasses, plastic lined bib, bracket cover
2. Vaseline over perioral area

4/3/2019
106
Basic Protocol3. “Toothbrush clean”
Basic Protocol4. Isolate with Dri-Aides and cotton rolls
Basic Protocol5. DRY DRY DRY!!!

4/3/2019
107
Basic Protocol6. Apply SDF with a microbrush for 1 - 3 minute
Use a plastic, disposable dappen dish
Use caution to only get it on the desired tooth/teeth
Saturate the surface of the lesion and allow to absorb via capillary action
Basic Protocol7. Cover with fluoride varnish
DO NOT RINSE
could also use Vaseline to help keep saliva away longer
or cover with GIC for SMART
Basic Protocol8. No eating or drinking restrictions
9. Color change occurs over 24 hours
10. Do not reapply more than once a week
11. Re-evaluate and reapply to cavitations or lesions into dentin in 2-4 weeks, incipient lesions in 6 months
*** This can vary considerably, depending which clinical trial you look at, though biannual applications are shown to be the most effective (91% arrest, Zhi et al 2012)
12. Reassess and reapply in 3-6 months depending on the size and location of the lesion as well as the patient’s risk level
13. Once a restoration is placed or the lesion is shiny and hard/smooth, stable and/or asymptomatic, it is not necessary to keep reapplying the SDF
*** It is important to communicate that this is a treatment, not a cure, and proper diet, hygiene, and daily fluoride use will play a critical role in the success of this treatment. Further, if the tooth is non-cleansable and broken down, a restoration is favorable when possible

4/3/2019
108
Interproximal tutorials online
Superfloss Technique
1. Follow basic protocol2. Place Superfloss into the contact3. Using a fuzzy microbrush (so as not to snag the floss), dip into SDF
then apply to the Superfloss on the lingual aspect of the contact
4. Apply SDF to the buccal aspect of the contact
5. Then apply SDF up over the marginal ridge
* If you adequately isolated and dried the area, and your Superfloss is nice and dry, you will see the SDF soak up into the fibers

4/3/2019
109
6. Let the SDF sit for 1 minute. Do not move or slide the floss around,just leave it alone
7. Grab both ends of the Superfloss between your fingers, then pull straight occlusal and out of the contact
8. Cover treated area with varnish
Superfloss technique video
Video link available at Kidsteethandbraces.com

4/3/2019
110
The Interproximal Technique Some slide the floss through the contact, some dip
the floss in SDF ahead of time… I’ve tried these and found they were some of the only times I ever stained someone’s lips
Some place separators then bring the patient back in a few days to “apply directly to the lesion”… I feel making this a multi-step process is not necessary and just delays something you could offer right then and there at the exam
I have done hundreds of Superfloss applications to interproximal lesions, the overwhelming majority have had positive outcomes at 6, 12, and 18 months. I am in the process of doing a retrospective study on my data with Ohio State University’s pediatric dental residency program
‘Rack of Lamb’ SDF Style

4/3/2019
111
Studies on Topical Application of Ag(NH3)2F for the Control of Interproximal Caries in Human Primary Molars
Tsutsumi, Osaka University, 1981
Clinical trial of 58 children with contralateral interproximal lesions treated with SDF applied with unwaxed floss followed for 18 months
• Significantly reduced incidence of new interproximal caries vs. control
• Significantly reduced progress of enamel caries on interproximal surfaces vs. control
• Summary: multiple topical applications of SDF on interproximal surfaces in primary molars should be effective for interproximal caries development
SDF used to treat incipient interproximal lesions
The Superfloss Technique

4/3/2019
112
19 year old
Interproximal SDF

4/3/2019
113
SDF + floss to avoid sedation and fillings in a 4 year old
Sometimes you win, sometimes you lose…
Interproximal SDF on an admitted non-flosser

4/3/2019
114
Tips to avoid accidental stain
Tips to avoid accidental stain
Notice how the arrested lesions did not stain

4/3/2019
115
Remineralizing toothpaste for white spots with questionable lesion activity
MI Paste with casein X-Pur Remin with nano hydroxyapatite
Fuji EQUIA Forte Fillings + Interproximal SDF to Remineralize the adjacent Permanent Molar
12 yo with over-retained teeth
#J had a DO EQUIA Forte filling done 7/24/17
JB1

Slide 345
JB1 Jeanette Budd, 4/2/2019

4/3/2019
116
SDF is Not a Cure-all
Extracted primary molar treated with SDF only for 2 years
I see the glass as half full
SDF + Superfloss used to treat dentin interproximal lesions to avoid sedation
It is important to be realistic with the parent that you can try this option, but some lesions may continue to grow and could require a restoration or even abscess and extraction. Remember from Dr. Graham Craig’s Bourke Study, interproximal of the primary molars have the highest risk of caries progression

4/3/2019
117
Meet Autumn 14 lesions treated with SDF, 2 SMART
fillings, over the past 2.5 years.
She is now 5 years old and excited to have lost her first tooth.
I am more excited that the tooth exfoliated naturally and without the need for surgical intervention or sedation
Quotes from Autumn’s mom on YouTube
Me: “So mom, what do you think about this option for her teeth”
Mom: “I love it! Much better than sedation or anesthesia or any other alternative.”
Me: “And does the color bother you or do you not even notice at this point?”
Mom: “Don’t even notice it anymore.”
Parental Acceptance of SDF 2016 survey of pediatric dental residency program directors found
>90% believe that parental acceptance is a concern
Chu et al 2002, Yee et al 2009, and Zhi et al 2012, found that actually < 7% of parents were concerned with the staining
Tesoriero and Lee 2016
73% of parents preferred SDF treatment
Factors associated with increased parental acceptance of SDF included;
male gender
Behavior
Location
Need for local anesthesia
Crystal et al 2017
“Although parents may perceive the staining of SDF in anterior teeth as esthetically unacceptable, 70-76% prefer this treatment option to advanced behavior techniques.”

4/3/2019
118
TeamSmile Parental Consent:
86% SDF
80% restorative
65% extraction of primary teeth
To cure or not to cure? Exposing SDF treated teeth to a curing light is NOT a necessary step
What happens?
EVERYTHING the SDF touched will turn black, the soft tissue, the healthy enamel, the affected dentin, etc…
Why? The curing light causes the silver to precipitate out of solution
The problem – precipitating the silver out at the surface of the lesion will not allow adequate capillary action time for the SDF to penetrate deeper into the dentin
You will get surface arrest
You won’t get the nano wires
Image courtesy of Jeremy Horst
Some state they cure the SDF to “see where it went.” Advantage Arrest is now blue, hopefully that takes care of this issue
If treating same day with a light-cure RMGI or resin, the entire restoration will turn gray/dark (there are some pro hacks to avoid this which we will review later)
Evaluating The Effectiveness Of Light Cured SDF And Its Penetration: An In Vitro Study
McDonald, 2018 UIC Masters Thesis
"Practitioners who wanted to ensure that SDF was active developed the implied notion that light curing SDF aids with product placement and arrest. There is no concrete data that supports such claims.”
Light curing SDF does not result in activation of silver ions or caries arrest.
Silver ions are light sensitive and can become oxidized out of the solution.
“Our results showed that there was no significant difference in the penetration or percentage of silver ions in our samples because of light curing.”
“SDF is favored for its ease of application and minimal requirement of equipment. In pediatric dentistry, an additional 20 secs of light curing per SDF treated surface along with 3 minutes of isolation and drying could result in additional chair time for an already uncooperative patient."

4/3/2019
119
The curing light dilemma continued...Where does this confusion stem from?
“Anecdotal evidence reports that, in clinical settings, the use of a curing light after drying seems to improve arrest in posterior areas that are not exposed to natural light, as light-cured surfaces immediately turn dark. Formal research is needed to investigate if the arrest in these lesions is at least as effective and sustainable as the rates reported in the clinical trials.“
- Crystal Y, et al. Pediatr Dent 2016;38(7)466-471
“Light curing will improve surface precipitation and decrease deeper penetration. These wires we're seeing that strengthen the weakened dentin so much seem to depend on deeper penetration, and staying in solution rather than precipitating out… Overall, I'd say to wait as long as possible before light curing because it does take time for SDF to permeate into dentin… I don't light cure, and highly recommend to cover with varnish or Vaseline instead.”
– Jeremy Horst
The curing light dilemma continued…
"Anterior teeth have higher rates of arrest. This could be due to the fact that they are more easily cleansable or that surfaces exposed to light may result in more active silver precipitation." Crystal, Y
In my opinion, the anatomy of teeth and their exposure/ability to cleanse + bathe in saliva are key factors in arrest, and has nothing to do with light exposure.
Dr. Graham Craig's Handbook of Expanded Atraumatic Techniques identifies high vs. low risk sites for caries progression based on how "open" the lesion is to remineralization from saliva.
Dr. Craig’s book is available at www.dentaloutlook.com.au

4/3/2019
120
Other tips DO NOT RINSE
Think of the SDF like medicine. Why would you want to rinse off a medicine you just applied?
SDF needs adequate time for capillary action to allow it to penetrate the dentinal tubules
The UCSF Protocol includes rinsing after SDF application, this was a concession to the committee at the time of the protocols approval, and Dr. Jeremy Horst does NOT recommend to rinse
DO NOT BLOW AIR ON THE SDF AFTER IT IS PLACED
Why would you blow air on a medicine you just applied, pushing the liquid into areas you had not intended? Or worse, evaporating the ammonia so it can’t absorb?
The new AAPD guide suggests doing this, however, it is not part of the 4 RCTs cited (Chu 2002, Llodra 2005, Zhi 2012, or Yee 2009) and I have recommended removing this for the 2018-2019 Reference Manual revision
Updated package insert
Special Considerations Silver allergy – although none reported in the medical literature, often
confused with nickel allergy
Mouth sores – coat with Vaseline or avoid
Can induce a burning sensation if it comes in contact with inflamed tissue, gingivitis, even the tongue, due to the ammonia
Metallic taste - varnish and/or xylitol lollipops help with this
Warn the patient/parent about potential for accidental stain. Protect with Vaseline, inform will take anywhere form 2 days to 2 weeks for a henna-like tattoo mark to disappear
Will permanently stain active caries

4/3/2019
121
Stain Removal Fabrics
Potassium Iodide
Napisan
Surfaces
Bar Keeper’s Friend
Mr. Clean Magic Eraser
Comet
Skin
Hydrogen Peroxide
Salt slurry
Hair dye remover pads
Remember – prevention is the best stain remover!
Jeanette MacLean, DDS
TOXICITY 1 drop of SDF can treat up to 5-6 teeth (this may
be a stretch depending on the size/location of the lesion) I regularly treat more than 6 teeth at a time
1 drop per 10kg body weight, with weekly intervals at most, is considered a safe dose This takes into account the lethal subcutaneous
dose (LD50) of 380mg/kg, and gives a five-hundredfold safety margin – UCSF Protocol
Fluoride content in 1 drop of SDF is only 2.24mg (compared to 11.3mg in 5% varnish) Whitford’s probable Toxic Dose for fluoride =
5mg/kg (or 50mg for a 10kg child)
1 drop SDF + 5% varnish = 13.54mg fluoride (at most! I rarely use the entire varnish)
2.5% FluoriMax varnish is available from Elevate Oral Care, 0.3mL unit dose contains 3.39mg fluoride
1 drop SDF + 2.5% varnish = 5.63mg fluoride Pediatr Dent 2016;38(7)466-471
SDF and varnish can be safely applied on the same day

4/3/2019
122
2.5% FluoriMax Varnish
Enamel maxes fluoride absorption at 2.5%
(Carey, U of CO, IADR)
“Consequently it can be stated at a reasonable level of certainty that if a difference in the efficacy of the two varnishes exists, it is probably minute. Lowering the fluoride concentration of Duraphat is worth considering at least when used in children.”
(Seppa et al 1994)
TOXICITY 0.05 ml drop of a 38% SDF contains;
19mg SDF
4.74mg silver
2.24mg fluoride
0.1 ml unit dose ampule of a 38% SDF contains;
38mg SDF
9.48mg silver
4.48mg fluoride
Short term serum pharmacokinetics of diamine silver fluoride after oral application
“Fluoride exposure was below the U.S. Environmental Protection Agency (EPA) oral reference dose. Silver exposure exceeded the EPA oral reference dose for cumulative daily exposure over a lifetime, but for occasional use (typically biannual application) was well below the concentrations associated with toxicity.”
(Vasquez et al BMC Oral Health 2012, 12:60 http://biomedcentral.com/1472-6831/12/60)
Pharmacokinetics of 38% topical silver diamine fluoride in healthy adult volunteers
Lin et al JADA March 2019
"The low dosage applied topically and the frequency of treatment mitigate concerns about risks. It is important, nevertheless, to understand the disposition of silver and fluoride after SDF application in both adults and children. It would be challenging ethically and practically to conduct a pharmacokinetic study in children because of the intensive and long duration of blood sampling required to monitor silver concentrations.“
"After application of SDF in healthy adult volunteers, the circulating levels of silver peaked at 3 hours and slowly declined in 24 hours in most participants, although some participants had a delayed peak serum silver concentration that was observed from 6 through 24 hours. The average half-life of silver was approximately 2 days.“
"Results from our study support the continued development of topical SDF as a safe and efficacious treatment.”
“SDF was well tolerated in this study, and no adverse events related to SDF were reported."

4/3/2019
123
Potassium Iodide Some report it minimizes stain, but the results may be minimal at best
and not long term
Potential to minimize the long lasting antimicrobial effects of the silver
This is why I don’t bother with KI
There are products that offer the KI such as Riva Star from Australia
“In this zone of inhibition sample I compared #1 Saforide, #2 SDF made by Graham Craig, #3 Riva SDF by its self and #4 Riva SDF followed by their KI treatment. Note the diminished ZOI in #4. I suspect that the free Ag bound to I to form AgIand reduced the bioavailability of free Ag ion to interact with the bacteria. One reason I am not a fan of the Riva product. There are others.” – S. Duffin
Riva Star Dr. Graham Craig
“It was originally designed for one use and one use only. That is on vital, asymptomatic permanent posterior teeth where some caries is to be left to avoid a pulp exposure. If used incorrectly, or in other situations, staining can occur.”
Must be used with immediate placement of a glass ionomer restoration or base
When used alone or for minimally invasive treatments, such as with primary teeth or elderly root caries, staining will inevitably occur
For more information; YouTube, Dental Outlook, Riva Star Use and Abuse

4/3/2019
124
Zhao et al 2017
“SDF + KI treatment inhibited development of secondary caries on GIC restorations, but was not as effective as SDF treatment alone. Moreover, SDF + KI treatment caused a perceptible staining at therestoration margin, but the intensity was less than that with purely SDF treatment”
Effect of Silver Diamine Fluoride and Potassium Iodide Treatment on Secondary Caries Prevention and Tooth Discolouration in Cervical Glass IonomerCement Restoration
Randomized clinical trial on arresting dental root caries through silver diammine fluoride applications in community-dwelling elders
Li R, Lo ECM, Liu BY, Wong MCM, Chu, C.H. Journal of Dentistry 2016
“Application of SDF solution, with or without application of KI afterwards, is effective in arresting root caries among elders in a water fluoridated area. In the long term, blackening of arrested root caries is not reduced by immediate application of KI after the application of SDF.”

4/3/2019
125
Clinical images from Geoff Knight
Most recent SDI banner ad
Case Selection – 0.5-1mm of sound dentinUCSF identifies key candidates;
1. High risk for caries
Salivary dysfunction secondary to cancer treatment, Sjorgen’s syndrome, polypharmacy, aging or methamphetamine abuse
Severe early childhood caries
2. Patients who cannot tolerate standard treatment for medical or psychological reasons
Precooperative children, the frail elderly, individuals with severe cognitive or physical disabilities, dental phobias, and immunocompromise
3. Patients with more lesions than can be treated in one visit
Multiple quadrants, dental school setting
4. Lesions that are difficult to treat
Crown margins, root caries
5. Patients without access to dental care
Follow up assessment
Clinical assessment
SDF arrested caries should have a matte black “charcoal briquette” appearance
Should feel firm to a perio probe or dycal instrument
Do not try piercing it with a sharp explorer
Radiographic assessment
Watch for stability of lesion size
Secondary dentin formation
Patient assessment
Asymptomatic
Decreased sensitivity

4/3/2019
126
SDF Pitfalls
Poor case selection
Inadequate isolation and drying
Rinsing
Light curing
Not covering with varnish
Patient/parent is not on board with behavior modification
“Cure all” or “one and done” mentality
Lack of understanding of caries etiology
Delayed placement of a sealed restoration (SMART, Hall) in cavitated lesions that are not easily cleansed or open to saliva
SDF Pitfalls
Poor case selection
Inadequate isolation and drying
Rinsing
Light curing
Not covering with varnish
Patient/parent is not on board with behavior modification
“Cure-all” or “one and done” mentality
Lack of understanding of caries etiology
Delayed placement of a sealed restoration (SMART, Hall) in cavitated lesions that are not easily cleansed or open to saliva
Jeanette MacLean, DDS

4/3/2019
127
SMART Hall patient from Fort Smith, N. Territory
Got SDF ?Will travel !
For More Information;
Kidsteethandbraces.com
Dentaltown.com Online CE
Silver is the New Black: Improving Your Practice with Silver Diamine Fluoride
Affiliated Children’s Dental Specialists
Black in Black T-shirts
100% of proceeds to support children’s dental charities with an emphasis on improving access to care
Available at Elevateoralcare.com
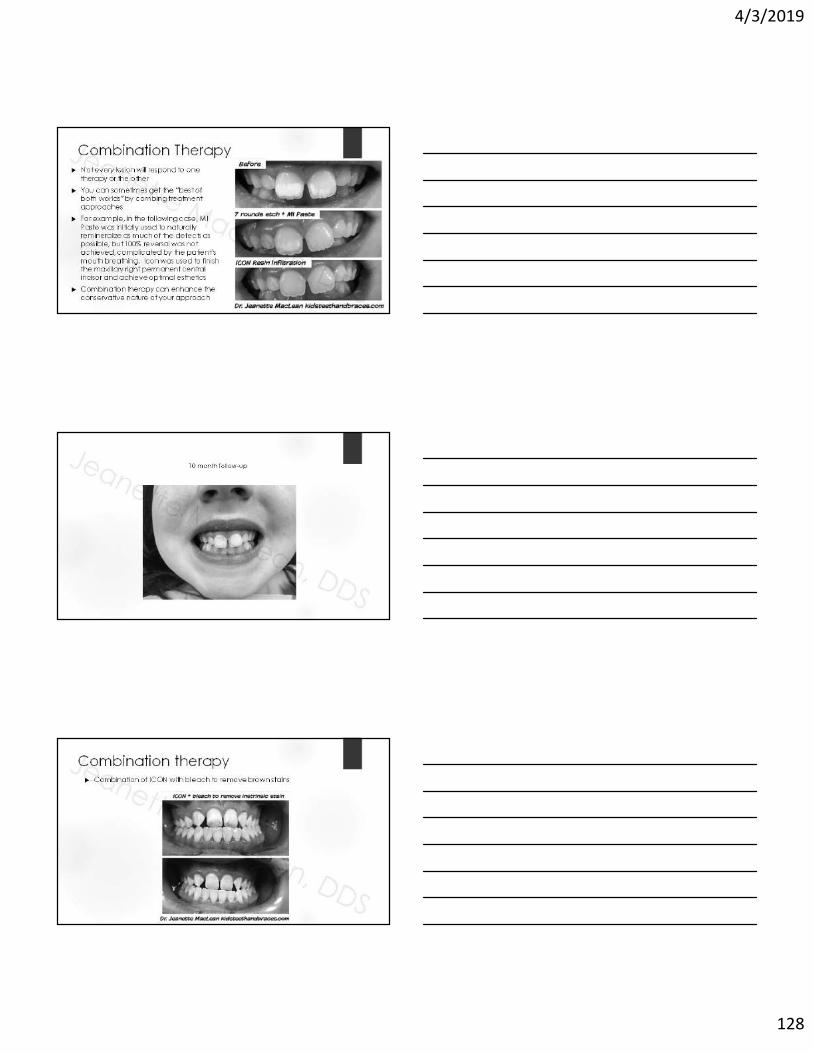
4/3/2019
128
Combination Therapy Not every lesion will respond to one
therapy or the other
You can sometimes get the “best of both worlds” by combing treatment approaches
For example, in the following case, MI Paste was initially used to naturally remineralize as much of the defects as possible, but 100% reversal was not achieved, complicated by the patient’s mouth breathing. Icon was used to finish the maxillary right permanent central incisor and achieve optimal esthetics
Combination therapy can enhance the conservative nature of your approach
10 month follow-up
Combination therapy Combination of ICON with bleach to remove brown stains

4/3/2019
129
Combination Therapy
Jeanette MacLean, DDS
1 year follow-up
Fluorosis Combination Therapy 12 year old with severe fluorosis and a history of hypersensitivity
Treated with a combination of Etch +MI Paste, bleach, and ICON
Maxillary canine to canine treated with Etch + MI Paste and 6% NaOCl
Nightly MI Paste applied to all of the teeth
Jeanette MacLean, DDS

4/3/2019
130
Fluorosis Combination Therapy Etch + bleach helped remove the brown stains
Etch + MI Paste improve the aesthetics, but not enough
Fluorosis Combination Therapy Isolate
Fluorosis Combination Therapy Polish with plain pumice
Rinse and dry

4/3/2019
131
Fluorosis Combination Therapy Apply Icon etch for 2 minutes
Fluorosis Combination Therapy Agitate the etch around with the syringe tip or a microbrush
Rinse, dry, and repeat
Fluorosis Combination Therapy Apply Icon Dry (ethanol)

4/3/2019
132
Fluorosis Combination Therapy Apply NaOCl with a microbrush, apply more as it absorbs
This case was 15 minutes of bleaching time
Fluorosis Combination Therapy Rinse thoroughly and then apply Icon dry
Fluorosis Combination Therapy Apply Icon infiltrant for 3 minutes, adding more as it absorbs

4/3/2019
133
Fluorosis Combination Therapy Thoroughly remove excess infiltrant
Fluorosis Combination Therapy Light cure for 40 seconds
Fluorosis Combination Therapy Apply Icon infiltrant again for 1 minute

4/3/2019
134
Fluorosis Combination Therapy Thoroughly remove excess infiltrant
Fluorosis Combination Therapy Light cure for 40 seconds
Fluorosis Combination Therapy Smooth and polish with finishing burs if needed

4/3/2019
135
Fluorosis Combination Therapy Same Icon post op instructions
Fluorosis Combination Therapy
A significant improvement that will helps this young man smile with more confidence
Fluorosis Combination Therapy Icon + Pumice + Bleach for Moderate Fluorosis

4/3/2019
136
ICON to treat MIH
16 year old female
Interesting case where the patient had to be debanded from ortho due to a systemic allergic reaction to the metal
Patient remained very self-conscious about the appearance of her teeth
I treated her with ICON prior to her senior pictures, and even though they weren’t “perfect” and didn’t remove the stain entirely, she was so happy with the result, she cried tears of joy
ICON to treat MIH
4 years later
Patient is now 20

4/3/2019
137
Minimal Interventions as aPractice Builder Word of Mouth/Internal Marketing
Practice newsletter
Photos on display
Website
Blog
Social Media
Networking, lunch and learns
Orthodontists
Pediatricians
Icon Provider Directory
http://drilling-no-thanks.info
Marketing Post Card

4/3/2019
138
For More Information;
Kidsteethandbraces.com
Dentaltown.com Online CE
Less is More: Minimally Invasive Cosmetic Treatment Options for Enamel Defects
Affiliated Children’s Dental Specialists
THANK YOU
Kidsteethandbraces.com