IT-SDN: Installation Guide (for Linux 64 bits – March, 2017)
11
IT-SDN: Installation Guide (for Linux 64 bits – March, 2017) Renan C. A. Alves 1 , Doriedson A. G. Oliveira 1 , Gustavo N. Segura 1 , Cintia B. Margi 1 * 1 Escola Politécnica – Universidade de São Paulo – São Paulo, Brazil 1. Introduction IT-SDN is a Software Defined Wireless Sensor Network (SDWSN) tool that is com- pletely open and freely available, designed to be independent of the operating sys- tem and its functions. Although it is inspired by TinySDN [de Oliveira et al. 2014, de Oliveira and Margi 2016], we improved the architecture, protocols and implementa- tion. The IT-SDN framework version presented here comprises SDN enabled-nodes developed under Contiki OS and a controller developed in C and C++ with Qt. In order to compile and run IT-SDN nodes and controller, you need to follow these steps (described in the next sections): 2. Obtain Contiki OS; 3. Obtain IT-SDN; 4. Obtain the GCC toolchain for MSP430; 5. Obtain Qt framework; 6. IT-SDN compilation; 7. IT-SDN execution; 8. Running on hardware. 2. Obtain Contiki OS Download Contiki release 3.0 available at https://github.com/contiki-os/ contiki/releases/tag/3.0 After downloading, place the contiki directory in the home folder /home/USERNAME and rename directory from contiki-3.0 to contiki. Alternatively, you can get Contiki release 3.0 in the command line, as follows: $ cd /home/USERNAME $ wget https://github.com/contiki-os/contiki/archive/3.0.zip $ unzip 3.0.zip $ mv contiki-3.0 ~/contiki You need to get MSPSim to run Cooja (the Contiki Network Simulator). Down- load it from https://github.com/contiki-os/mspsim and unpack it in direc- tory /home/USERNAME/contiki/tools/mspsim/. To run Cooja, you will need Java JDK as well as the ant build tool. If you need to install them, use the following commands in a terminal. * C. B. Margi is supported by CNPq research fellowship #307304/2015-9.
-
Upload
khangminh22 -
Category
Documents
-
view
4 -
download
0
Transcript of IT-SDN: Installation Guide (for Linux 64 bits – March, 2017)
IT-SDN: Installation Guide(for Linux 64 bits – March, 2017)
Renan C. A. Alves1, Doriedson A. G. Oliveira1, Gustavo N. Segura1, Cintia B. Margi1 ∗
1Escola Politécnica – Universidade de São Paulo – São Paulo, Brazil
1. Introduction
IT-SDN is a Software Defined Wireless Sensor Network (SDWSN) tool that is com-pletely open and freely available, designed to be independent of the operating sys-tem and its functions. Although it is inspired by TinySDN [de Oliveira et al. 2014,de Oliveira and Margi 2016], we improved the architecture, protocols and implementa-tion.
The IT-SDN framework version presented here comprises SDN enabled-nodesdeveloped under Contiki OS and a controller developed in C and C++ with Qt.
In order to compile and run IT-SDN nodes and controller, you need to follow thesesteps (described in the next sections):
2. Obtain Contiki OS;3. Obtain IT-SDN;4. Obtain the GCC toolchain for MSP430;5. Obtain Qt framework;6. IT-SDN compilation;7. IT-SDN execution;8. Running on hardware.
2. Obtain Contiki OS
Download Contiki release 3.0 available at https://github.com/contiki-os/contiki/releases/tag/3.0
After downloading, place the contiki directory in the home folder/home/USERNAME and rename directory from contiki-3.0 to contiki.
Alternatively, you can get Contiki release 3.0 in the command line, as follows:$ cd /home/USERNAME$ wget https://github.com/contiki-os/contiki/archive/3.0.zip$ unzip 3.0.zip$ mv contiki-3.0 ~/contiki
You need to get MSPSim to run Cooja (the Contiki Network Simulator). Down-load it from https://github.com/contiki-os/mspsim and unpack it in direc-tory /home/USERNAME/contiki/tools/mspsim/.
To run Cooja, you will need Java JDK as well as the ant build tool. If you need toinstall them, use the following commands in a terminal.
∗C. B. Margi is supported by CNPq research fellowship #307304/2015-9.

~$ sudo apt-get install ant~$ sudo apt-get install default-jdk
To test if download and extraction succeeded, run the command ant run onfolder /home/USERNAME/contiki/tools/cooja:
~/contiki/tools/cooja$ ant run
If everything was installed correctly, it will start with a blue empty window (Cooja:The Contiki Network Simulator) as shown in Figure 1.
Figure 1. Cooja execution interface.
You can get more information about Cooja at https://github.com/contiki-os/contiki/wiki/An-Introduction-to-Cooja.

3. Obtain IT-SDN
Download the IT-SDN framework from http://www.larc.usp.br/~cbmargi/it-sdn
When downloaded, extract and place the direc-tory on /home/USERNAME. Change the first line in filesMakefile_enabled_node and Makefile_controller_node, lo-cated on folder /home/USERNAME/it-sdn/applications, toCONTIKI?=/home/USERNAME/contiki to indicate Contiki source files loca-tion.
4. Obtain the GCC toolchain for MSP430
We are using MSP430-based platforms (such as Tmote) and thus the following packagesare needed: binutils-msp430, gcc-msp430, msp430-libc, msp430mcuand mspdebug to compile and run enabled-nodes and controller-node developed toContikiOS.
You can run the following command to install all packages:
$ sudo apt-get install build-essential binutils-msp430 gcc-msp430 msp430-libcmsp430mcu mspdebug
You can get more information about MSP430-gcc at https://github.com/jlhonora/mspgcc-install.
If all previous steps succeed, you can compile enabled-nodes and controller-nodeusing the compilation script provided as follows.
$ cd ~/it-sdn/applications/$ ./compile.sh
If the compilation script provided does not have permission to execute, run chmod +xcompile.sh on the terminal to grant permission.
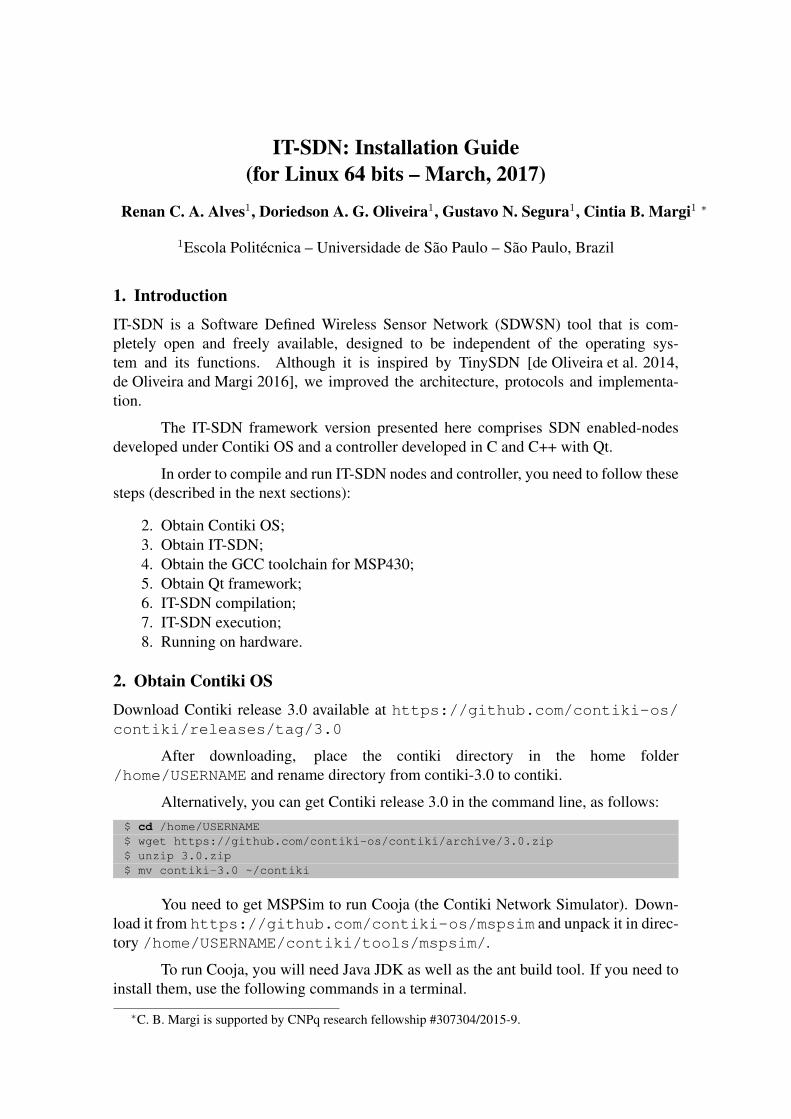
More information about the compilation script is provided in Section 6.1. If com-pilation succeeded, you will see the size of the three firmwares (enabled-node, sink-nodeand controller-node), as shown in Figure 2.
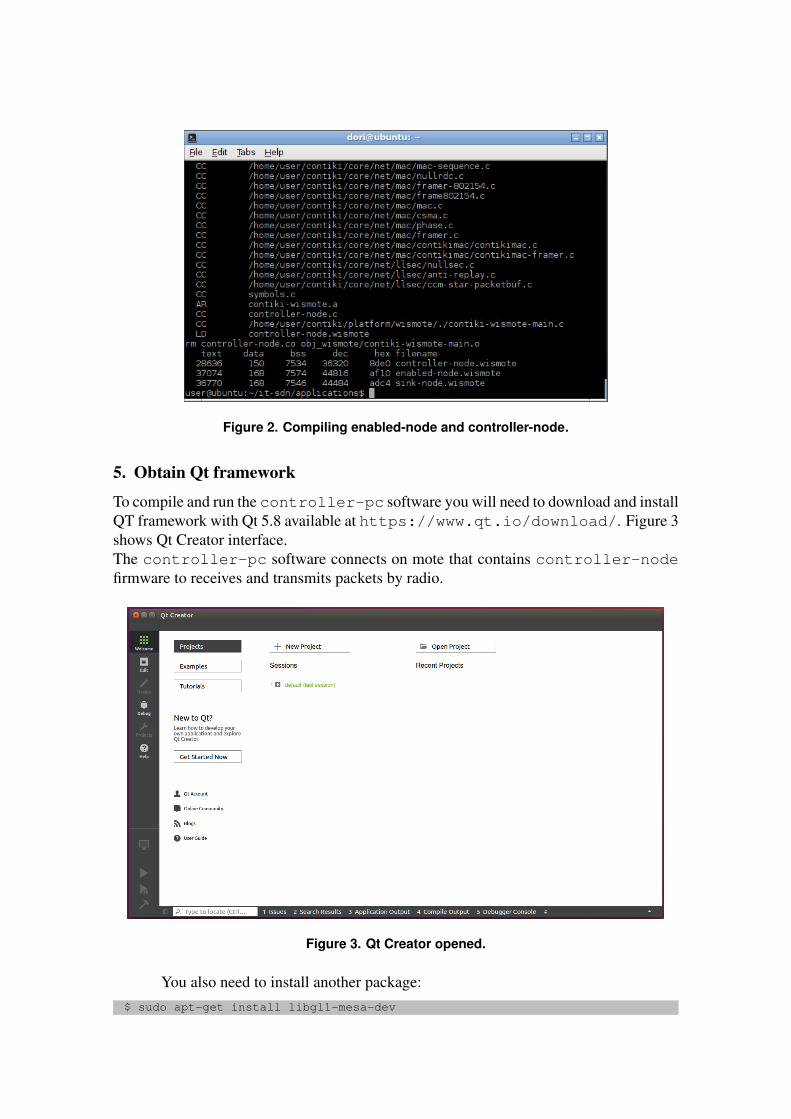
Figure 2. Compiling enabled-node and controller-node.
5. Obtain Qt framework
To compile and run the controller-pc software you will need to download and installQT framework with Qt 5.8 available at https://www.qt.io/download/. Figure 3shows Qt Creator interface.The controller-pc software connects on mote that contains controller-nodefirmware to receives and transmits packets by radio.
Figure 3. Qt Creator opened.
You also need to install another package:$ sudo apt-get install libgl1-mesa-dev

6. IT-SDN compilation
In the next sections, we describe how to compile and execute IT-SDN.
6.1. Compile enabled-nodes and controller-node
To compile enabled-node and the controller-node source code example you shouldchange the first line Contiki=... on the Makefile_enabled_node andMakefile_controller_node, in folder it-sdn/applications, to indicatesthe Contiki source files as shown below:
CONTIKI=/home/USERNAME/contiki
And to compile go to the applications directory and use the compilation scriptprovided as follows. Verify if script has the appropriate permission to execute.
$ cd ~/it-sdn/applications/$ ./compile.sh
You can change the target platform typing the platform as script parameter of thecompile.sh file. Example:
$ ./compile.sh wismote
The target is defined to wismote if the script is called without parameter. We testedour code to both wismote and telosb platforms.
In order to show that the compilation succeeded, we used size *.wismote asthe last command of the compile.sh script. If compilation succeeded, you will see thesize of the three firmwares (enabled-node, sink-node and controller-node), as shown inFigure 2.
6.2. Compile controller-pc
To compile and run controller-pc, open the Qt Creator andclick on button [Open Project]. Navigate to the path/home/USERNAME/it-sdn/controller-server/controller-pc andselect the project controller-pc.pro.You will see a message informing: "No .user settings file created by this instance...", asshown in Figure 4.
Click on [Yes]. Now you will see the Configure Project window (depicted inFigure 5), click on [Configure Project].
Before compiling the controller-pc, you need to indicate Contiki path. Todo so, create a file named controller-pc.pro.contiki and save on folder/home/USERNAME/it-sdn/controller-server/controller-pc with thefollowing content:
CONTIKI=/home/USERNAME/contiki
Now you are ready to compile the controller-pc. Click on menu Build→Build All.

Figure 4. Openning IT-SDN controller-pc project and choosing the settings file.
Figure 5. Configuring project kit to controller-pc.
7. IT-SDN execution7.1. Running controller-pcAfter compiling, click on menu Build→Run to run controller-pc and you will see thecontroller-pc window as shown in Figure 7.
7.2. Starting CoojaIn the terminal window, go to the Cooja directory and then start Cooja as follows.$ cd ~/contiki/tools/cooja/$ ant run

Figure 6. Creating file to indicate the Contiki files source orientation.
Figure 7. First window for controller-pc.
7.3. Running Cooja Simulation
Go to the File menu and click Open simulation → Browse. . . Nav-igate to /home/USERNAME/it-sdn/simulation/ and select fileContikiSDNSimulation.csc, as shown in Figure 8. Click on [Start] to ini-tialize the simulation, as shown in Figure 9.
Notice: The speed limit should be configured accordingly (menu depicted in Fig-ure 9. We tested the simulation with maximum speed on 200%. We do not advise runningthe simulation above this speed because of the synchronization with the controller-pc.

Figure 8. Opening Cooja simulation.
Figure 9. Starting Cooja simulation.
7.4. Connecting controller-pc to controller-node
Once Cooja simulation started, you need to connect the controller-pc to controller-node.On controller-pc window (Figure 7), click [Connect] button. Once they are connected,the interface will change as depicted in Figure 10.

Figure 10. Connecting the controller-pc to controller-node.
8. Running on hardwareIn this section we describe how you can execute IT-SDN in a testbed, i.e., run an applica-tion using IT-SDN framework on actual devices. For the description, we assume you willbe using TelosB motes.
Notice: We have tested the framework both in the TelosB and SensorTag1 devices.
8.1. Compiling to different platformYou can compile the source files to TelosB through the following commands:$ cd ~/it-sdn/applications/$ ./compile.sh sky
And now, you got three firmwares: controller-node.sky, enabled-node.skyand sink-node.sky.
8.2. Uploading enabled-node and sink-node firmwares on hardwareTo upload the IT-SDN enabled-node and sink-node firmwares on a TelosB, you mustconnect the device to a USB port of your PC.After connecting the TelosB on USB port you can check the TelosB port address throughof the command:$ motelist
The Figure 11 depict the output command. You can observe the address on Devicecolumn.
You can install the motelist by typing sudo apt-get install motelist.To upload firmware through the serial port, you have to add your user to group dialoutwith the following command:
1http://www.ti.com/tool/TIDC-CC2650STK-SENSORTAG

Figure 11. Example to terminal output from motelist command.
$ sudo adduser USERNAME dialout
Here, we consider that the mote TelosB is connected on address /dev/ttyUSB0, asshown in Figure 11.You can upload enabled-node firmware with the following command:
$ cp Makefile_enabled_node Makefile$ make TARGET=sky clean MOTES=/dev/ttyUSB0 enabled_node.upload
The MOTES=/dev/ttyUSB0 parameter is only necessary if you have more than oneconnected mote on USB to indicates which mote should receives the firmware by upload.And to upload sink-node firmware type the following command:
$ cp Makefile_enabled_node Makefile$ make TARGET=sky clean MOTES=/dev/ttyUSB1 sink_node.upload
Note that, in order to successfully use the .upload parameter, there must be a file namedMakefile, not Makefile_enabled_node, Makefile_controller_node, orany other name.
Repeat the process for as many TelosB devices as you want to be SDN enabled-nodes and sink-nodes in the testbed.
8.3. Running controller-node on hardware
We assume the controller-node will run on a TelosB mote, which is connected to a USBport of your PC. Open a terminal window and go to the applications directory:
$ cd ~/it-sdn/applications/
According to section 8.1, you already have compiled the controller-node firmware and toupload for mote type the following commands:
$ cp Makefile_controller_node Makefile$ make TARGET=sky clean MOTES=/dev/ttyUSB2 controller-node.upload
Lastly run the controller-pc and connect to mote controller-node connected to a USB portof your PC, as shown in Figure 12.
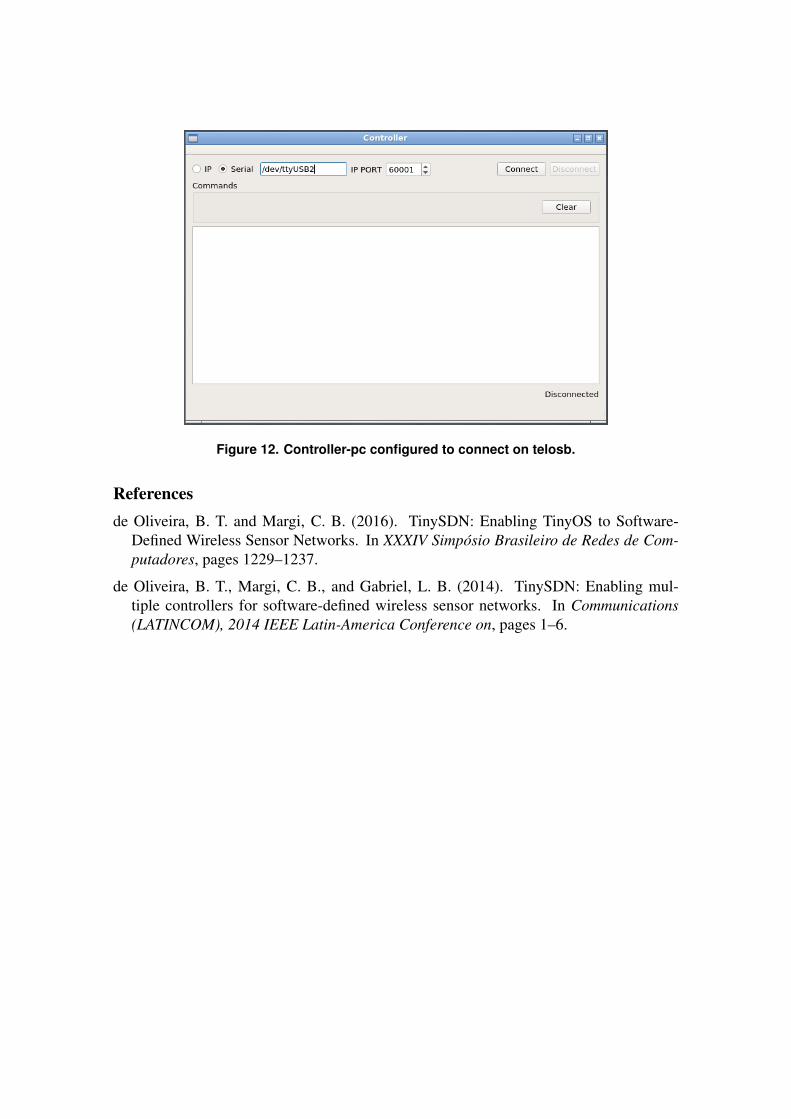
Figure 12. Controller-pc configured to connect on telosb.
Referencesde Oliveira, B. T. and Margi, C. B. (2016). TinySDN: Enabling TinyOS to Software-
Defined Wireless Sensor Networks. In XXXIV Simpósio Brasileiro de Redes de Com-putadores, pages 1229–1237.
de Oliveira, B. T., Margi, C. B., and Gabriel, L. B. (2014). TinySDN: Enabling mul-tiple controllers for software-defined wireless sensor networks. In Communications(LATINCOM), 2014 IEEE Latin-America Conference on, pages 1–6.