iri-playbook Documentation - Read the Docs
35
iri-playbook Documentation Release docs Dec 17, 2017
-
Upload
khangminh22 -
Category
Documents
-
view
0 -
download
0
Transcript of iri-playbook Documentation - Read the Docs

iri-playbook DocumentationRelease docs
Dec 17, 2017


Contents
1 In this installation 3
2 Work in progress 52.1 Introduction . . . . . . . . . . . . . . . . . . . . . . . . . . . . . . . . . . . . . . . . . . . . . . . 52.2 Overview . . . . . . . . . . . . . . . . . . . . . . . . . . . . . . . . . . . . . . . . . . . . . . . . . 62.3 Getting Started Quickly . . . . . . . . . . . . . . . . . . . . . . . . . . . . . . . . . . . . . . . . . 72.4 The Requirements . . . . . . . . . . . . . . . . . . . . . . . . . . . . . . . . . . . . . . . . . . . . 92.5 Installation . . . . . . . . . . . . . . . . . . . . . . . . . . . . . . . . . . . . . . . . . . . . . . . . 102.6 Post Installation . . . . . . . . . . . . . . . . . . . . . . . . . . . . . . . . . . . . . . . . . . . . . 142.7 Full Node Remote Access . . . . . . . . . . . . . . . . . . . . . . . . . . . . . . . . . . . . . . . . 182.8 Files and Locations . . . . . . . . . . . . . . . . . . . . . . . . . . . . . . . . . . . . . . . . . . . . 202.9 Maintenance . . . . . . . . . . . . . . . . . . . . . . . . . . . . . . . . . . . . . . . . . . . . . . . 212.10 FAQ . . . . . . . . . . . . . . . . . . . . . . . . . . . . . . . . . . . . . . . . . . . . . . . . . . . . 232.11 Command Glossary . . . . . . . . . . . . . . . . . . . . . . . . . . . . . . . . . . . . . . . . . . . 272.12 Appendix . . . . . . . . . . . . . . . . . . . . . . . . . . . . . . . . . . . . . . . . . . . . . . . . . 282.13 Disclaimer . . . . . . . . . . . . . . . . . . . . . . . . . . . . . . . . . . . . . . . . . . . . . . . . 312.14 Donations . . . . . . . . . . . . . . . . . . . . . . . . . . . . . . . . . . . . . . . . . . . . . . . . . 31
i

ii

iri-playbook Documentation, Release docs
For a “click-‘n-go” installation see Getting Started Quickly.
Contents 1

iri-playbook Documentation, Release docs
2 Contents

CHAPTER 1
In this installation
• Automate the installation
• Take care of firewalls
• Automatically configure the java memory limit based on your system’s RAM
• Explain how to connect a wallet to your full node
• Install IOTA Peer Manager
• Make IOTA Peer Manager accessible via the browser
• Password protect IOTA Peer Manager
• Install monitoring graphs. Big thanks to Chris Holliday’s IOTA Exporter.
3

iri-playbook Documentation, Release docs
4 Chapter 1. In this installation
CHAPTER 2
Work in progress
• Integrate alerting/notifications when node is not healthy
• Instead of compiling IRI, download the jar to expedite the installation a bit
• Security hardening steps
• Make it possible to install graphs for those who already did this installation. At the moment nodejs version willconflict.
2.1 Introduction
My first tutorial I wrote around August 2017. Due to the exponential growth of the community and users who want torun their own full node, I thought it is a good time to write a new, more comprehensive tu torial.
2.1.1 Why Another Tutorial?
I am hoping this tutorial will come in handy for those who posses less or almost no skills with Linux. And indeed, thistutorial focuses on Linux – as suggest ed by many other tutorials (and justifiably), Linux is the best way to go.
I found that many tutorials lack some basic system configuration and explanations thereof. For example, running IRIas an unprivileged user, configuring firewa lls, how to connect to it remotely and so on.
A copy-paste tutorial is awesome, and as it so often happens, the user can miss on some basic technical explanationabout the setup. While it is impossible to include a crash-course of Linux for the purpose of this tutorial, I will try toexplain some basic concepts where I find that many users had troubles with.
Feel free to comment, create issues or contact me on IOTA’s slack channel (nuriel77) for advice and information.
Good luck!
5
iri-playbook Documentation, Release docs
2.2 Overview
This tutorial will help you setup a full node on a Linux system (Ubuntu or CentOS).
I hope to be adding other distributions like Debian in the future.
The git repository I have created includes an automated installation using Ansibe Playbook.
The automated installed installs IRI and IOTA peer manager, a web GUI with which you can view your neighbors,add or remove neighbors, view the sync etc.
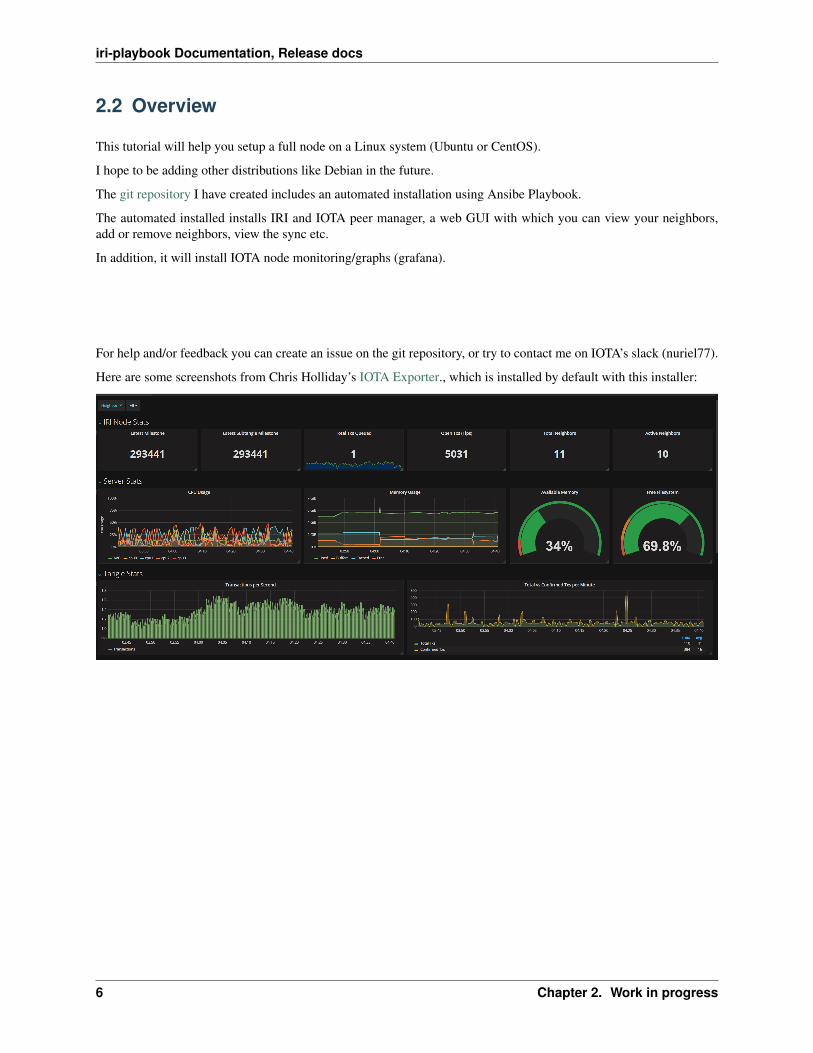
In addition, it will install IOTA node monitoring/graphs (grafana).
For help and/or feedback you can create an issue on the git repository, or try to contact me on IOTA’s slack (nuriel77).
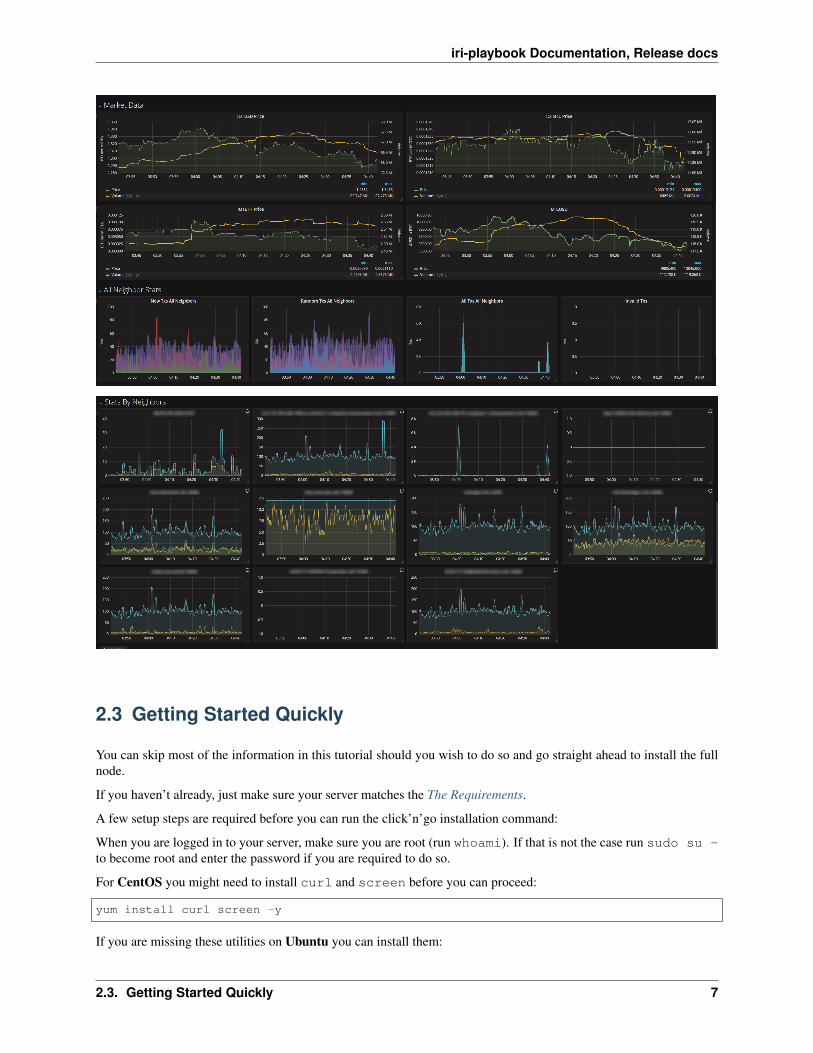
Here are some screenshots from Chris Holliday’s IOTA Exporter., which is installed by default with this installer:
6 Chapter 2. Work in progress
iri-playbook Documentation, Release docs
2.3 Getting Started Quickly
You can skip most of the information in this tutorial should you wish to do so and go straight ahead to install the fullnode.
If you haven’t already, just make sure your server matches the The Requirements.
A few setup steps are required before you can run the click’n’go installation command:
When you are logged in to your server, make sure you are root (run whoami). If that is not the case run sudo su -to become root and enter the password if you are required to do so.
For CentOS you might need to install curl and screen before you can proceed:
yum install curl screen -y
If you are missing these utilities on Ubuntu you can install them:
2.3. Getting Started Quickly 7
iri-playbook Documentation, Release docs
apt-get install curl screen -y
2.3.1 Run the Installer!
First, let’s ensure the installation is running within a “screen” session. This ensures that the installer stays running inthe background if the connection to the server breaks:
screen -S iota
Now we can run the installer:
bash <(curl https://raw.githubusercontent.com/nuriel77/iri-playbook/master/fullnode_→˓install.sh)
Note: If during the installation you are requested to reboot the node, just do so and re-run the command above oncethe node is back.
That’s it. You can proceed to the Post Installation for additional information on managing your node.
If you lost connection to your server during the installation, don’t worry. It is running in the background because weare running it inside a “screen” session .
You can always “reattach” back that session when you re-connect to your server:
screen -r -d iota
Note: Pressing arrow up on the keyboard will scroll up the command history you’ve been running. This saves sometyping when you need to run the same command again!
Warning: Some VPS providers might be depending on Network Block Devices (for example Scaleway). Ifusing Ubuntu, you need to configure ufw prior to running the installer. See: https://gist.github.com/georgkreimer/7a02af49604da91c5e3605b08b2872ec
Accessing Peer Manager
You can access the peer manager using the user ‘iotapm’ and the password you’ve configured during installation:
http://your-ip:8811
Accessing Monitoring Graphs
You can access the Grafana IOTA graphs using ‘iotapm’ and the password you’ve configured during the installaton
http://your-ip:5555
Big thanks to Chris Holliday’s amazing tool for node monitoring
8 Chapter 2. Work in progress
iri-playbook Documentation, Release docs
2.4 The Requirements
• Virtual Private Server
• Operating System
• Accessing the VPS
• System User
2.4.1 Virtual Private Server
This is probably the best and most common option for running a full node.
I will not get into where or how to purchase a VPS (virtual private server). There are many companies offering a VPSfor good prices.
The basic recommendation is to have one with at least 4GB RAM, 2 cores and minimum 30GB harddrive (SSDpreferably).
Note: At time of writing (December 2018) many users are experiencing out-of-memory errors with 4GB RAM. Thisshould be remedied by next snapshot.
2.4.2 Operating System
When you purchase a VPS you are often given the option which operating system (Linux of course) and whichdistribution to install on it.
This tutorial/installer was tested on:
• Ubuntu 16.04 cloud image (Xenial)
• Ubuntu 17.04 cloud image (Zesty)
• CentOS 7.4 cloud image
Note: This installation does not support operating systems with pre-installed panels such as cpane, whcms, plesk etc.If you can, choose a “bare” system.
Warning: Some VPS providers provide a custom OS installation (Ubuntu or CentOS) with additional softwareinstalled (cpanel etc). These images will not work nicely with the installer. In some cases, VPS providers modifyimages and might deliver operating systems that will be incompatible with this installer.
2.4.3 Accessing the VPS
Once you have your VPS deployed, most hosting provide a terminal (either GUI application or web-based terminal).With the terminal you can login to your VPS’s command line. You probably received a password with which you canlogin to the server. This can be a ‘root’ password, or a ‘privileged’ user (with which you can access ‘root ‘ privileges).
The best way to access the server is via a Secure Shell (SSH). If your desktop is Mac or Linux, this is native on thecommand line. If you use Windows, I recommend installing Putty
2.4. The Requirements 9
iri-playbook Documentation, Release docs
There are plenty of tutorials on the web explaining how to use SSH (or SSH via Putty). Basically, you can use apassword login or SSH keys (better).
2.4.4 System User
Given you are the owner of the server, you should either have direct access to the ‘root’ account or to a user which isprivileged. It is often recommended to run all commands as the privileges user, prefixing the commands with ‘sudo’.In this tutorial I will leave it to the user to decide.
If you accessed the server as a privileged user, and want to become ‘root’, you can issue a sudo su -. Otherwise,you will have to prefix most commands with sudo, e.g.
sudo apt-get install something
2.5 Installation
To prepare for running the automated “playbook” from this repository you require some basic packages. First, it isalways a good practice to check for updates on the server.
2.5.1 Update System Packages
For Ubuntu we type:
apt-get update
and for CentOS:
yum update
This will search for any packages to update on the system and require you to confirm the update.
Reboot Required?
Sometimes it is required to reboot the system after these updates (e.g. kernel updated).
For Ubuntu we can check if a reboot is required. Issue the command ls -l /var/run/reboot-required:
# ls -l /var/run/reboot-required-rw-r--r-- 1 root root 32 Dec 8 10:09 /var/run/reboot-required
If the file is found as seen here, you can issue a reboot (shutdown -r now or simply reboot).
For Centos we have a few options how to check if a reboot is required.
One of these options requires to install yum-utils:
yum install yum-utils -y
Once installed, we can run needs-restarting -r:
10 Chapter 2. Work in progress
iri-playbook Documentation, Release docs
# needs-restarting -rCore libraries or services have been updated:systemd -> 219-42.el7_4.4glibc -> 2.17-196.el7_4.2linux-firmware -> 20170606-56.gitc990aae.el7gnutls -> 3.3.26-9.el7glibc -> 2.17-196.el7_4.2kernel -> 3.10.0-693.11.1.el7
Reboot is required to ensure that your system benefits from these updates.
More information:https://access.redhat.com/solutions/27943
As you can see, a reboot is required (do so by issuing a reboot or shutdown -r now)
2.5.2 Installing Ansible
Ansible is an awesome software used to automate configuration and/or deployment of services. This repository con-tains what Ansible refers to as a “Playbook” which is a set of instructions on how to configure the system.
This playbook installs required dependencies, the IOTA IRI package and IOTA Peer Manager. In addition, it configuresfirewalls and places some handy files for us to control these services.
To install Ansible on Ubuntu I refer to the official documentation:
apt-get upgrade -y && apt-get clean && apt-get update -y && apt-get install software-→˓properties-common -y && apt-add-repository ppa:ansible/ansible -y && apt-get update→˓-y && apt-get install ansible git -y
For CentOS, simply run:
yum install ansible git nano -y
You will notice I’ve added ‘git’ which is required (at least on CentOS it doesn’t have it pre-installed as in Ubuntu). Inaddition, I’ve added ‘nano’ which is helpful for beginners to edit files with (use vi or vim if you are adventurous).
2.5.3 Cloning the Repository
To clone, run:
cd /opt && git clone https://github.com/nuriel77/iri-playbook.git && cd iri-playbook
This will pull the repository to the directory in which you are and move you into the repository’s directory.
2.5.4 Configuring Values
There are some values you can tweak before the installation runs. There are two files you can edit:
group_vars/all/iri.yml
and
2.5. Installation 11
iri-playbook Documentation, Release docs
group_vars/all/iotapm.yml
(Use ‘nano’ or ‘vi’ to edit the files)
These files have comments above each option to help you figure out if anything needs to be modified.
Configure Memory Limits
The options iri_java_mem and iri_init_java_mem in the configuration files can determine what are thememory usage limits for IRI.
Depending on how much RAM your server has, you should set these accordingly.
For example, if your server has 4096MB (4GB memory), a good setting would be:
iri_java_mem: 3072iri_init_java_mem: 256
Just leave some room for the operating system and other processes. You will also be able to tweak this after theinstallation, so don’t worry about it too much.
Note: For the click-‘n-go installation, these values are automatically configured. You can choose to auto-configurethose values: When running the playbook (later in this guide) you can add -e "memory_autoset=true" to theansible-playbook command.
Set Access Password
Very important value to set before the installation is the password and/or username with which you can access IOTAPeer Manager on the browser.
Edit the group_vars/all/iotapm.yml file and set a user and (strong!) password of your choice:
iotapm_nginx_user: someuseriotapm_nginx_password: 'put-a-strong-password-here'
If you already finished the installation and would like to add an additional user to access IOTA PM, run:
htpasswd /etc/nginx/.htpasswd newuser
Replace ‘newuser’ with the user name of your choice. You will be prompted for a password.
To remove a user from authenticating:
htpasswd -D /etc/nginx/.htpasswd username
Note: This username and password will also be used for Grafana (monitoring graphs)
2.5.5 Running the Playbook
Two prerequisites here: you have already installed Ansible and cloned the playbook’s repository.
By default, the playbook will run locally on the server where you’ve cloned it to. You can run it:
12 Chapter 2. Work in progress
iri-playbook Documentation, Release docs
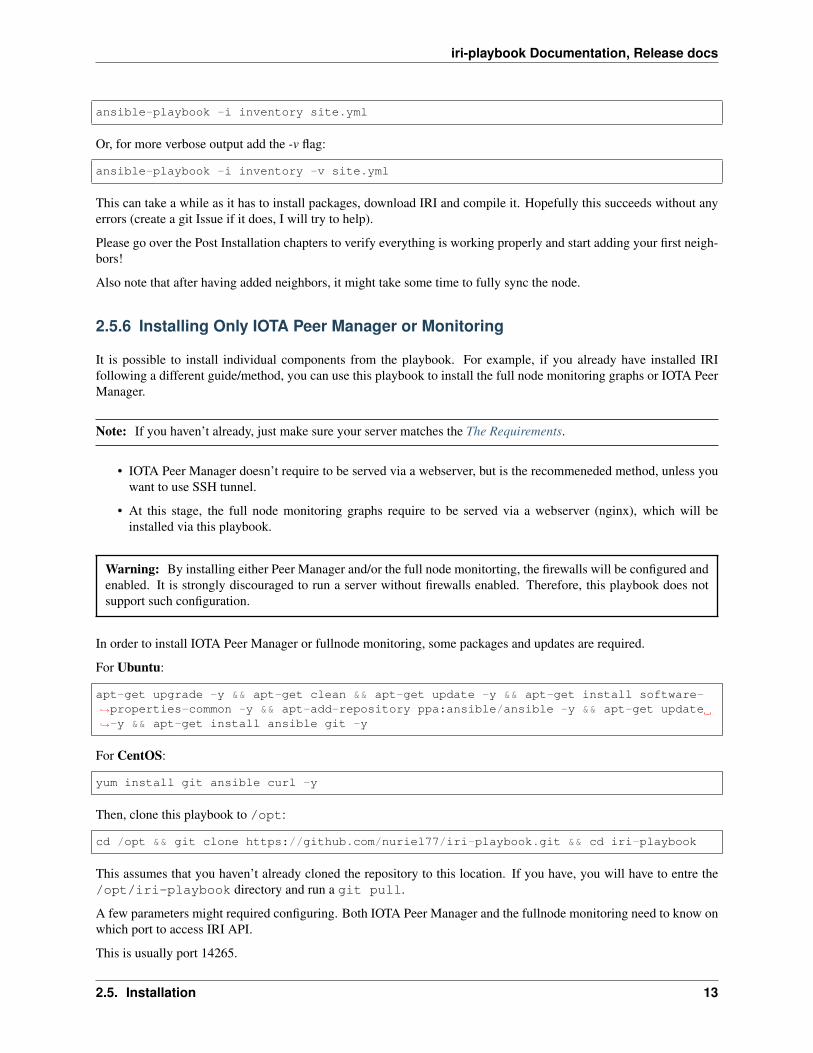
ansible-playbook -i inventory site.yml
Or, for more verbose output add the -v flag:
ansible-playbook -i inventory -v site.yml
This can take a while as it has to install packages, download IRI and compile it. Hopefully this succeeds without anyerrors (create a git Issue if it does, I will try to help).
Please go over the Post Installation chapters to verify everything is working properly and start adding your first neigh-bors!
Also note that after having added neighbors, it might take some time to fully sync the node.
2.5.6 Installing Only IOTA Peer Manager or Monitoring
It is possible to install individual components from the playbook. For example, if you already have installed IRIfollowing a different guide/method, you can use this playbook to install the full node monitoring graphs or IOTA PeerManager.
Note: If you haven’t already, just make sure your server matches the The Requirements.
• IOTA Peer Manager doesn’t require to be served via a webserver, but is the recommeneded method, unless youwant to use SSH tunnel.
• At this stage, the full node monitoring graphs require to be served via a webserver (nginx), which will beinstalled via this playbook.
Warning: By installing either Peer Manager and/or the full node monitorting, the firewalls will be configured andenabled. It is strongly discouraged to run a server without firewalls enabled. Therefore, this playbook does notsupport such configuration.
In order to install IOTA Peer Manager or fullnode monitoring, some packages and updates are required.
For Ubuntu:
apt-get upgrade -y && apt-get clean && apt-get update -y && apt-get install software-→˓properties-common -y && apt-add-repository ppa:ansible/ansible -y && apt-get update→˓-y && apt-get install ansible git -y
For CentOS:
yum install git ansible curl -y
Then, clone this playbook to /opt:
cd /opt && git clone https://github.com/nuriel77/iri-playbook.git && cd iri-playbook
This assumes that you haven’t already cloned the repository to this location. If you have, you will have to entre the/opt/iri-playbook directory and run a git pull.
A few parameters might required configuring. Both IOTA Peer Manager and the fullnode monitoring need to know onwhich port to access IRI API.
This is usually port 14265.
2.5. Installation 13
iri-playbook Documentation, Release docs
1. Edit edit group_vars/all/iri.yml and make sure iri_api_port: option points to the correct IRIAPI port. In addition, ensure that iri_udp_port and iri_tcp_port match the ports your IRI is using forneighbor peering.
2. Edit group_vars/all/iotapm.yml. Here you will see install_nginx: true, set it to false ifyou don’t want to install nginx and serve these services via webserver. If you choose to install nginx leave itwith true (if you already have nginx installed, just leave it as true).
As mentioned earlier: currently, the fullnode monitoring depends on nginx being installed.
3. If using nginx, edit iotapm_nginx_user and iotapm_nginx_password, this will set the user andpassword with which you will be able to access Peer Manager and/or the fullnode monitoring graphs.
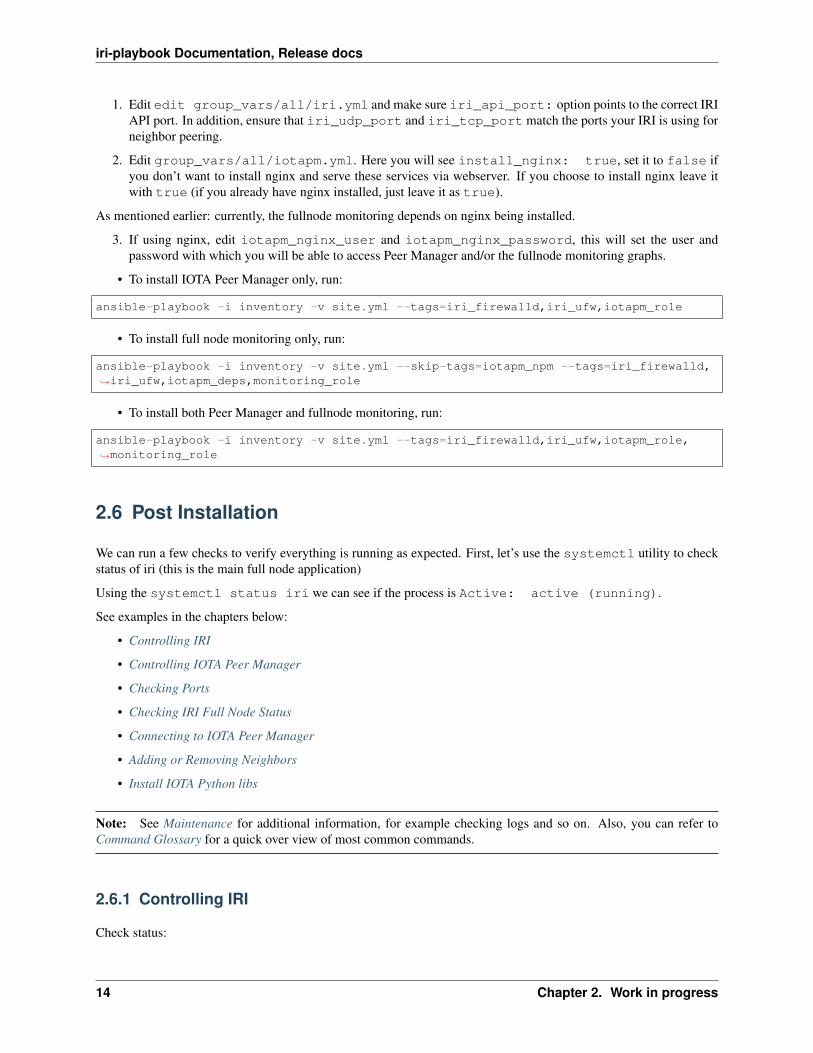
• To install IOTA Peer Manager only, run:
ansible-playbook -i inventory -v site.yml --tags=iri_firewalld,iri_ufw,iotapm_role
• To install full node monitoring only, run:
ansible-playbook -i inventory -v site.yml --skip-tags=iotapm_npm --tags=iri_firewalld,→˓iri_ufw,iotapm_deps,monitoring_role
• To install both Peer Manager and fullnode monitoring, run:
ansible-playbook -i inventory -v site.yml --tags=iri_firewalld,iri_ufw,iotapm_role,→˓monitoring_role
2.6 Post Installation
We can run a few checks to verify everything is running as expected. First, let’s use the systemctl utility to checkstatus of iri (this is the main full node application)
Using the systemctl status iri we can see if the process is Active: active (running).
See examples in the chapters below:
• Controlling IRI
• Controlling IOTA Peer Manager
• Checking Ports
• Checking IRI Full Node Status
• Connecting to IOTA Peer Manager
• Adding or Removing Neighbors
• Install IOTA Python libs
Note: See Maintenance for additional information, for example checking logs and so on. Also, you can refer toCommand Glossary for a quick over view of most common commands.
2.6.1 Controlling IRI
Check status:
14 Chapter 2. Work in progress
iri-playbook Documentation, Release docs
systemctl status iri
Stop:
systemctl stop iri
Start:
systemctl start iri
Restart:
systemctl restart iri
2.6.2 Controlling IOTA Peer Manager
Check status:
systemctl status iota-pm
Stop:
systemctl stop iota-pm
Start:
systemctl start iota-pm
Restart:
systemctl restart iota-pm
2.6.3 Checking Ports
IRI uses 3 ports by default:
1. UDP neighbor peering port
2. TCP neighbor peering port
3. TCP API port (this is where a light wallet would connect to or iota peer manageR)
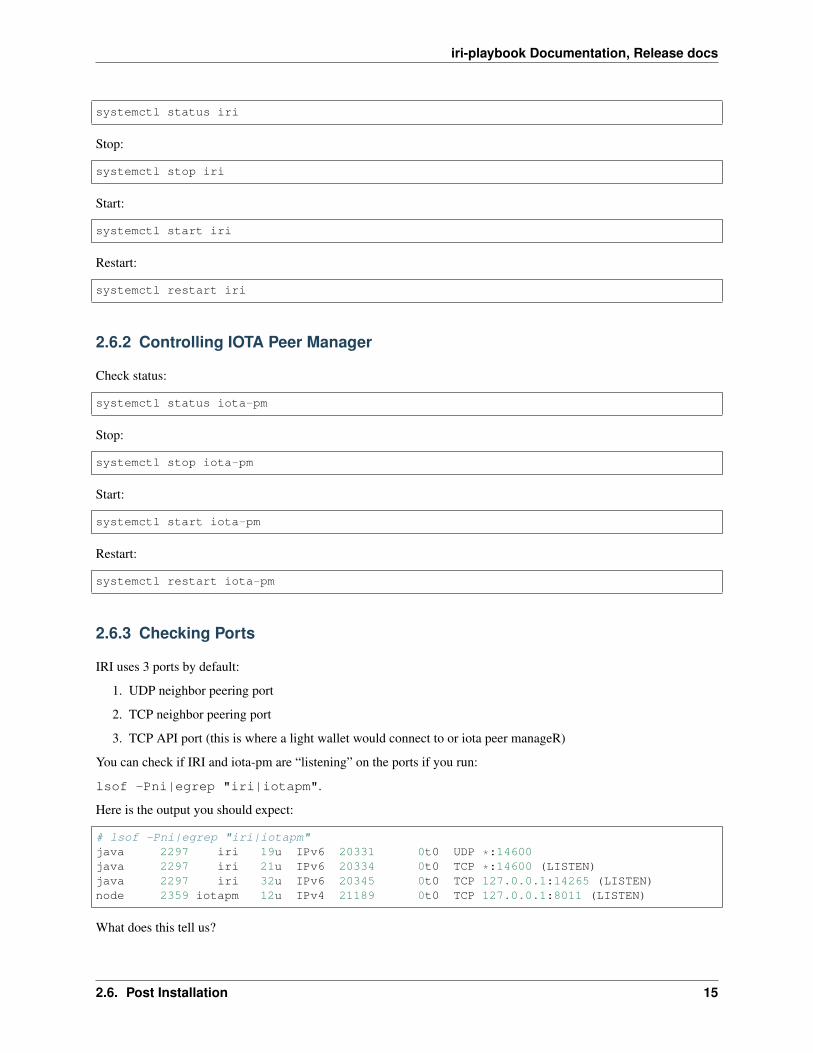
You can check if IRI and iota-pm are “listening” on the ports if you run:
lsof -Pni|egrep "iri|iotapm".
Here is the output you should expect:
# lsof -Pni|egrep "iri|iotapm"java 2297 iri 19u IPv6 20331 0t0 UDP *:14600java 2297 iri 21u IPv6 20334 0t0 TCP *:14600 (LISTEN)java 2297 iri 32u IPv6 20345 0t0 TCP 127.0.0.1:14265 (LISTEN)node 2359 iotapm 12u IPv4 21189 0t0 TCP 127.0.0.1:8011 (LISTEN)
What does this tell us?
2.6. Post Installation 15
iri-playbook Documentation, Release docs
1. *:<port number> means this port is listening on all interfaces - from the example above we see that IRI islistening on ports TCP and UDP no. 14600
2. IRI is listening for API (or wallet connections) on a local interface (not accessible from “outside”) no. 14265
3. Iota-PM is listening on local interface port no. 8011
Now we can tell new neighbors to connect to our IP address.
Here’s how to check your IP address:
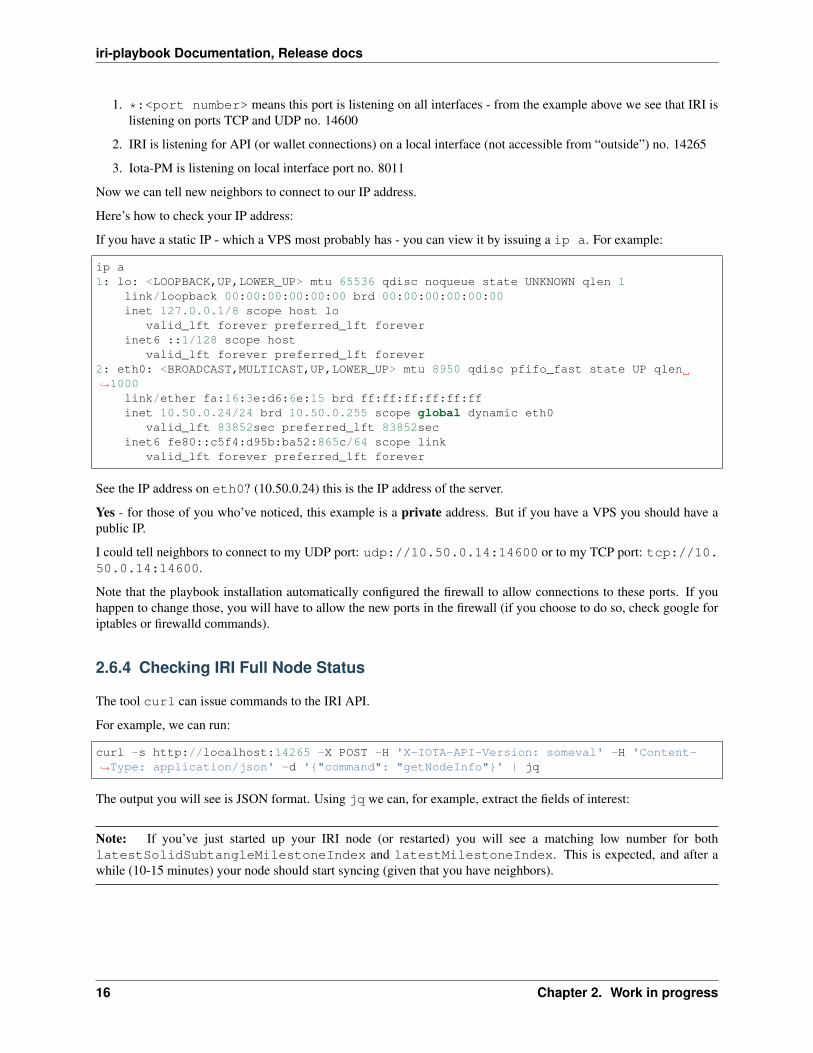
If you have a static IP - which a VPS most probably has - you can view it by issuing a ip a. For example:
ip a1: lo: <LOOPBACK,UP,LOWER_UP> mtu 65536 qdisc noqueue state UNKNOWN qlen 1
link/loopback 00:00:00:00:00:00 brd 00:00:00:00:00:00inet 127.0.0.1/8 scope host lo
valid_lft forever preferred_lft foreverinet6 ::1/128 scope host
valid_lft forever preferred_lft forever2: eth0: <BROADCAST,MULTICAST,UP,LOWER_UP> mtu 8950 qdisc pfifo_fast state UP qlen→˓1000
link/ether fa:16:3e:d6:6e:15 brd ff:ff:ff:ff:ff:ffinet 10.50.0.24/24 brd 10.50.0.255 scope global dynamic eth0
valid_lft 83852sec preferred_lft 83852secinet6 fe80::c5f4:d95b:ba52:865c/64 scope link
valid_lft forever preferred_lft forever
See the IP address on eth0? (10.50.0.24) this is the IP address of the server.
Yes - for those of you who’ve noticed, this example is a private address. But if you have a VPS you should have apublic IP.
I could tell neighbors to connect to my UDP port: udp://10.50.0.14:14600 or to my TCP port: tcp://10.50.0.14:14600.
Note that the playbook installation automatically configured the firewall to allow connections to these ports. If youhappen to change those, you will have to allow the new ports in the firewall (if you choose to do so, check google foriptables or firewalld commands).
2.6.4 Checking IRI Full Node Status
The tool curl can issue commands to the IRI API.
For example, we can run:
curl -s http://localhost:14265 -X POST -H 'X-IOTA-API-Version: someval' -H 'Content-→˓Type: application/json' -d '{"command": "getNodeInfo"}' | jq
The output you will see is JSON format. Using jq we can, for example, extract the fields of interest:
Note: If you’ve just started up your IRI node (or restarted) you will see a matching low number for bothlatestSolidSubtangleMilestoneIndex and latestMilestoneIndex. This is expected, and after awhile (10-15 minutes) your node should start syncing (given that you have neighbors).
16 Chapter 2. Work in progress

iri-playbook Documentation, Release docs
2.6.5 Connecting to IOTA Peer Manager
For IOTA Peer Manager, this installation has already configured it to be accessible via a webserver. See ‘Peer Man-ager Behind WebServer with Password‘_.
2.6.6 Adding or Removing Neighbors
In order to add neighbors you can either use the iota Peer Manager or do that on the command-line.
To use the command line you can use a script that was shipped with this installation, e.g:
nbctl -a -n udp://1.2.3.4:12345 -n tcp://4.3.2.1:4321
The script will default to connect to IRI API on http://localhost:14265. If you need to connect to a differentendpoint you can provide it via -i http://my-node-address:port.
If you don’t have this helper script you will need to run a curl command, e.g. to add:
curl -H 'X-IOTA-API-VERSION: 1.4' -d '{"command":"addNeighbors","uris":["udp://neighbor-ip:port", "udp://neighbor-ip:port"]}' http://localhost:14265
to remove:
curl -H 'X-IOTA-API-VERSION: 1.4' -d '{"command":"removeNeighbors","uris":["udp://neighbor-ip:port", "udp://neighbor-ip:port"]}' http://localhost:14265
Note: Adding or remove neighbors is done “on the fly”, so you will also have to add (or remove) the neighbor(s) inthe configuration file of IRI.
The reason to add it to the configuration file is that after a restart of IRI, any neighbors added with the peer managerwill be gone.
In CentOS you can add neighbors to the file:
/etc/sysconfig/iri
In Ubuntu:
/etc/default/iri
Edit the IRI_NEIGHBORS="" value as shown in the comment in the file.
2.6.7 Install IOTA Python libs
You can install the official iota.libs.py to use for various python scripting with IOTA and the iota-cli.
On Ubuntu:
apt-get install python-pip -y && pip install --upgrade pip && pip install pyota
You can test with the script that shipped with this installation (to reattach pending transactions):
reattach -h
On CentOS this is a little more complicated, and better install pyota in a “virtualenv”:
2.6. Post Installation 17
iri-playbook Documentation, Release docs
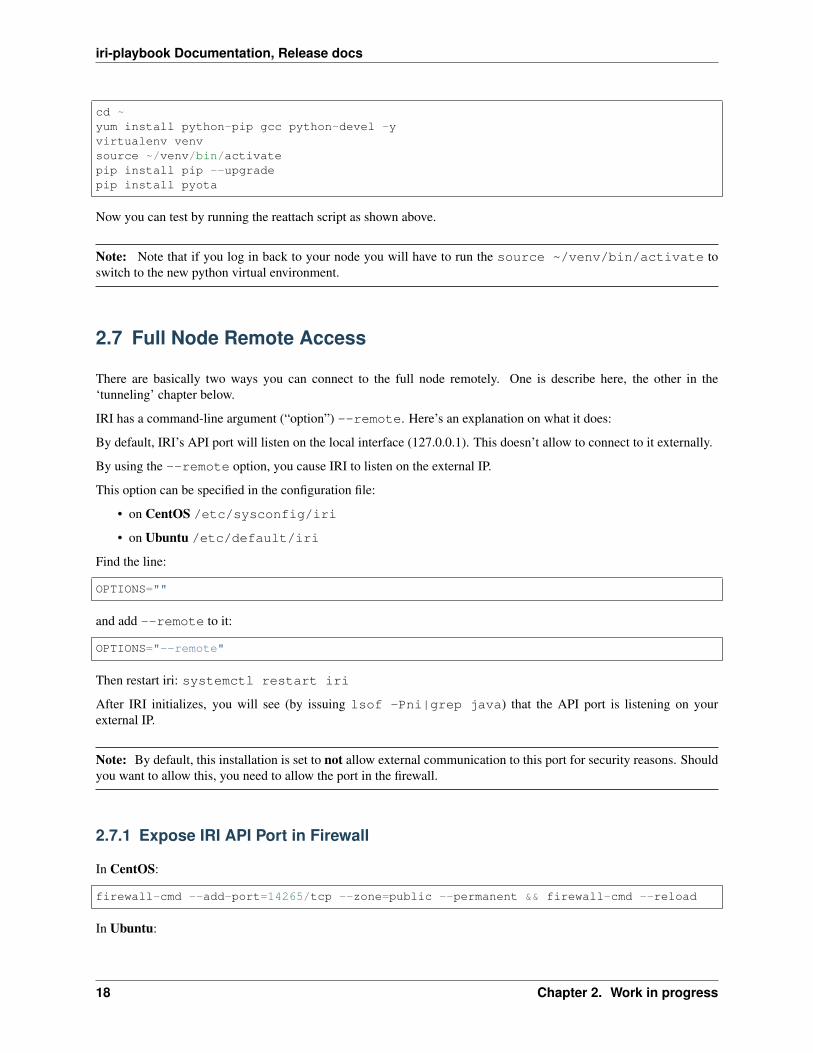
cd ~yum install python-pip gcc python-devel -yvirtualenv venvsource ~/venv/bin/activatepip install pip --upgradepip install pyota
Now you can test by running the reattach script as shown above.
Note: Note that if you log in back to your node you will have to run the source ~/venv/bin/activate toswitch to the new python virtual environment.
2.7 Full Node Remote Access
There are basically two ways you can connect to the full node remotely. One is describe here, the other in the‘tunneling’ chapter below.
IRI has a command-line argument (“option”) --remote. Here’s an explanation on what it does:
By default, IRI’s API port will listen on the local interface (127.0.0.1). This doesn’t allow to connect to it externally.
By using the --remote option, you cause IRI to listen on the external IP.
This option can be specified in the configuration file:
• on CentOS /etc/sysconfig/iri
• on Ubuntu /etc/default/iri
Find the line:
OPTIONS=""
and add --remote to it:
OPTIONS="--remote"
Then restart iri: systemctl restart iri
After IRI initializes, you will see (by issuing lsof -Pni|grep java) that the API port is listening on yourexternal IP.
Note: By default, this installation is set to not allow external communication to this port for security reasons. Shouldyou want to allow this, you need to allow the port in the firewall.
2.7.1 Expose IRI API Port in Firewall
In CentOS:
firewall-cmd --add-port=14265/tcp --zone=public --permanent && firewall-cmd --reload
In Ubuntu:
18 Chapter 2. Work in progress
iri-playbook Documentation, Release docs
ufw allow 14265/tcp
Now you should be able to point your (desktop’s) light wallet to your server’s IP:port (e.g. 80.120.140.100:14265)
More in this chapter:
• Tunneling IRI API for Wallet Connection
• Peer Manager Behind WebServer with Password
• Limiting Remote Commands
2.7.2 Tunneling IRI API for Wallet Connection
Another option for accessing IRI and/or the iota-pm GUI is to use a SSH tunnel.
SSH tunnel is created within a SSH connection from your computer (desktop/laptop) towards the server.
The benefit here is that you don’t have to expose any of the ports or use the --remote flag. You use SSH to help youtunnel through its connection to the server in order to bind to the ports you need.
Note: For IOTA Peer Manager, this installation has already configured it to be accessible via a webserver. See PeerManager Behind WebServer with Password
What do you need to “forward” the IRI API?
• Your server’s IP
• The SSH port (22 by default in which case it doesn’t need specifying)
• The port on which IRI API is listening
• The port on which you want to access IRI API on (let’s just leave it the same as the one IRI API is listening on)
A default installation would have IRI API listening on TCP port 14265.
Note: In order to create the tunnel you need to run the commands below from your laptop/desktop and not on theserver where IRI is running.
For Windows desktop/laptop
You can use Putty to create the tunnel/port forward - you can use this example<http://realprogrammers.com/how_to/set_up_an_ssh_tunnel_with_putty.html> to get you going, just replacethe MySQL 3306 port with that of IRI API.
For any type of bash command line (Mac/Linux/Windows bash)
Here is the tunnel we would have to create (run this on our laptop/desktop)
ssh -p <ssh port> -N -L <iota-pm-port>:localhost:<iota-pm-port> <user-name>@<server-→˓ip>
Which would look like:
2.7. Full Node Remote Access 19

iri-playbook Documentation, Release docs
ssh -p 22 -N -L 14265:localhost:14265 root@<your-server-ip>
Should it ask you for host key verification, reply ‘yes’.
Once the command is running you will not see anything, but you can connect with your wallet. Edit your wallet’s“Edit Node Configuration” to point to a custom host and use http://localhost:14265 as address.
To stop the tunnel simply press Ctrl-C.
You can do the same using the IRI API port (14265) and use a light wallet from your desktop to connect to http://localhost:14265.
2.7.3 Peer Manager Behind WebServer with Password
This installation also configured a webserver (nginx) to help access IOTA Peer Manager. It also locks the page usinga password, one which you probably configured earlier during the installation steps.
The IOTA Peer Manager can be accessed if you point your browser to: http://your-server-ip:8811.
Note: The port 8811 will be configured by default unless you changed this before the installation in the variables file.
2.7.4 Limiting Remote Commands
There’s an option in the configuration file which works in conjunction with the --remote option:
REMOTE_LIMIT_API="removeNeighbors, addNeighbors, interruptAttachingToTangle,→˓attachToTangle, getNeighbors"
On CentOS edit /etc/sysconfig/iri, on Ubuntu /etc/default/iri.
This option excludes the commands in it for the remote connection. This is to protect your node. If you make changesto this option, you will have to restart IRI (systemctl restart iri).
2.8 Files and Locations
Here’s a list of files and locations that might be useful to know:
IRI configuration file (changes require iri to restart):
Ubuntu: /etc/default/iriCentOS: /etc/sysconfig/iri
IOTA Peer Manager configuration file (changes require iota-pm restart):
Ubuntu: /etc/default/iota-pmCentOS: /etc/sysconfig/iota-pm
IRI installation path:
/var/lib/iri/target
IRI database:
20 Chapter 2. Work in progress

iri-playbook Documentation, Release docs
/var/lib/iri/target/mainnet*
Grafana configuration file:
/etc/grafana/grafana.ini
2.9 Maintenance
• Upgrade IRI
• Upgrade IOTA Monitoring
• Check Database Size
• Check Logs
• Replace Database
2.9.1 Upgrade IRI
If a new version of IRI has been released, it should suffice to replace the jar file. The jar file is located e.g.:
/var/lib/iri/target/iri-1.4.1.2.jar
Let’s say you downloaded a new version iri-1.6.2.jar (latest release is available here. You can download it to thedirectory:
cd /var/lib/iri/target/ && curl https://github.com/iotaledger/iri/releases/download/→˓v1.6.2/original-iri-1.6.2.jar --output iri-1.6.2.jar
Then edit the IRI configuration file:
In Ubuntu:
/etc/default/iri
In CentOS:
/etc/sysconfig/iri
And update the version line to match, e.g.:
IRI_VERSION=1.6.2
This requires a iri restart (systemctl restart iri).
Note: The foundation normally announces additional information regarding upgrades, for example whether to usethe --rescan flag etc. Such options can be specified in the OPTIONS="" value in the same file.
2.9. Maintenance 21
iri-playbook Documentation, Release docs
2.9.2 Upgrade IOTA Monitoring
IOTA Prometheus Monitoring is used by Grafana which are the awesome graphs about the full node.
Running this command will check for updates, if any, will update iota-prom-exporter:
cd /opt/iri-playbook/ && ansible-playbook -i inventory site.yml --tags=iota_prom_→˓exporter -v
2.9.3 Check Database Size
You can check the size of the database using du -hs /var/lib/iri/target/mainnetdb/, e.g.:
# du -hs /var/lib/iri/target/mainnetdb/4.9G /var/lib/iri/target/mainnetdb/
Note: To check free space on the system’s paritions use df -h If one of the paritions’ usage exceeds 85% youshould consider a cleanup. Don’t worry about the /boot paritition though.
2.9.4 Check Logs
Follow the last 50 lines of the log (iri):
journalctl -n 50 -f -u iri
For iota-pm:
journalctl -n 50 -f -u iota-pm
Click ‘Ctrl-C’ to stop following and return to the prompt.
Alternatively, omit the -f and use --no-pager to view the logs.
2.9.5 Replace Database
At any time you can remove the existing database and start sync all over again. This is required if you know yourdatabase is corrupt (don’t assume, use the community’s help to verify such suspicion) or if you want your node to syncmore quickly.
To remove an existing database:
1. stop IRI: systemctl stop iri.
2. delete the database: rm -rf /var/lib/iri/target/mainnet*
3. start IRI: systemctl start iri
If you want to import an already existing database, check the [FAQ](#where-can-i-get-a-fully-synced-database-to-help-kick-start-my-node) – there’s information on who to do that.
22 Chapter 2. Work in progress
iri-playbook Documentation, Release docs
2.10 FAQ
• How to tell if my node is synced
• Why do I see the Latest Milestone as 243000
• How do I tell if I am syncing with my neighbors
• Why is latestSolidSubtangleMilestoneIndex always behind latestMilestoneIndex
• How to get my node swap less
• What are the revalidate and rescan options for
• Where can I get a fully synced database to help kick start my node
• I try to connect the light wallet to my node but get connection refused
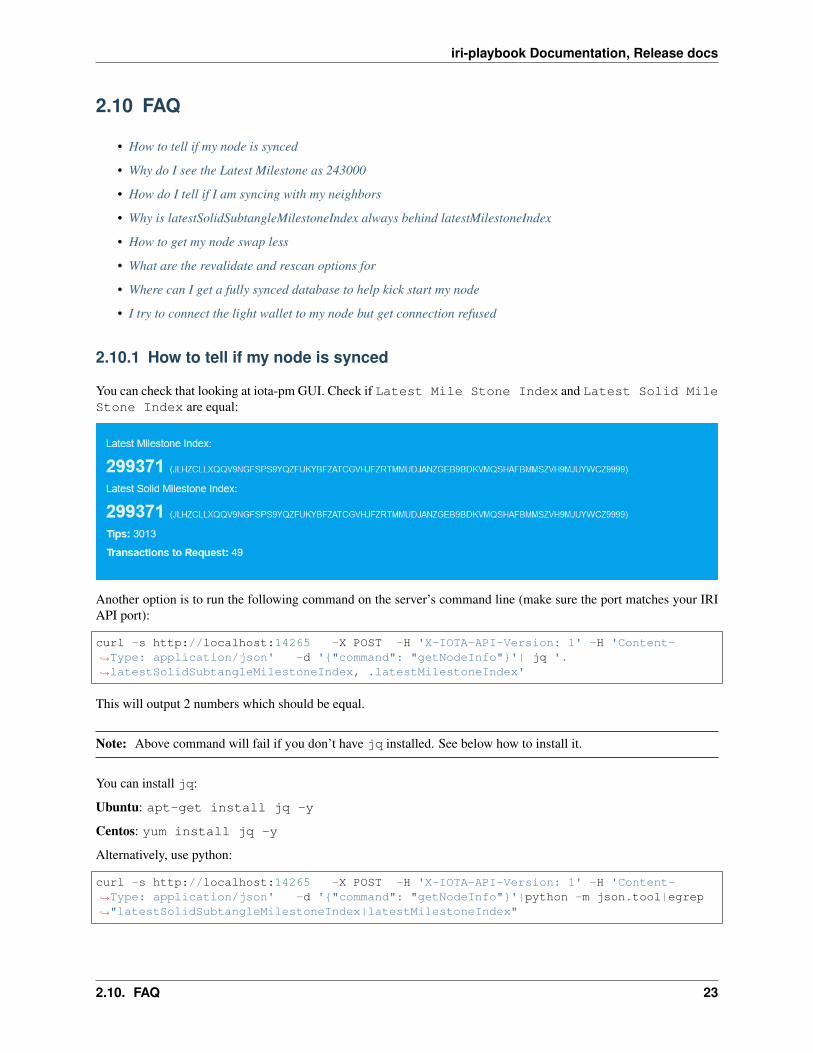
2.10.1 How to tell if my node is synced
You can check that looking at iota-pm GUI. Check if Latest Mile Stone Index and Latest Solid MileStone Index are equal:
Another option is to run the following command on the server’s command line (make sure the port matches your IRIAPI port):
curl -s http://localhost:14265 -X POST -H 'X-IOTA-API-Version: 1' -H 'Content-→˓Type: application/json' -d '{"command": "getNodeInfo"}'| jq '.→˓latestSolidSubtangleMilestoneIndex, .latestMilestoneIndex'
This will output 2 numbers which should be equal.
Note: Above command will fail if you don’t have jq installed. See below how to install it.
You can install jq:
Ubuntu: apt-get install jq -y
Centos: yum install jq -y
Alternatively, use python:
curl -s http://localhost:14265 -X POST -H 'X-IOTA-API-Version: 1' -H 'Content-→˓Type: application/json' -d '{"command": "getNodeInfo"}'|python -m json.tool|egrep→˓"latestSolidSubtangleMilestoneIndex|latestMilestoneIndex"
2.10. FAQ 23
iri-playbook Documentation, Release docs
2.10.2 Why do I see the Latest Milestone as 243000
This is expected behavior of you restarted IRI recently. Depending on various factors, it might take up to 30 minutesfor this number to clear and the mile stones start increasing.
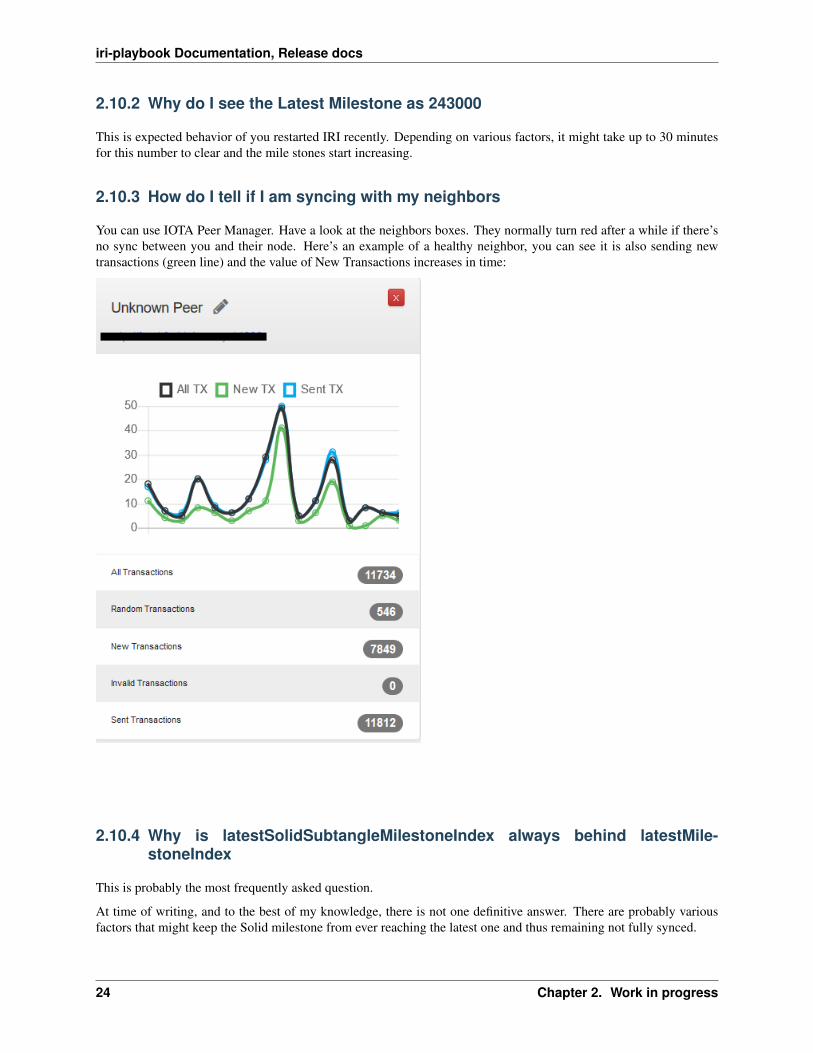
2.10.3 How do I tell if I am syncing with my neighbors
You can use IOTA Peer Manager. Have a look at the neighbors boxes. They normally turn red after a while if there’sno sync between you and their node. Here’s an example of a healthy neighbor, you can see it is also sending newtransactions (green line) and the value of New Transactions increases in time:
2.10.4 Why is latestSolidSubtangleMilestoneIndex always behind latestMile-stoneIndex
This is probably the most frequently asked question.
At time of writing, and to the best of my knowledge, there is not one definitive answer. There are probably variousfactors that might keep the Solid milestone from ever reaching the latest one and thus remaining not fully synced.
24 Chapter 2. Work in progress

iri-playbook Documentation, Release docs
I have noticed that this problem exacerbates when the database is relatively large (5GB+). This is mostly never aproblem right after a snapshot, when things run much smoother. This might also be related to ongoing “bad” spamattacks directed against the network.
What helped my node to sync was:
• How to get my node swap less
• Where can I get a fully synced database to help kick start my node
• Finding “healthier” neighbors. This one is actually often hard to ascertain – who is “healthy”, probably otherfully synced nodes.
2.10.5 How to get my node swap less
You can always completely turn off swap, which is not always the best solution. Using less swap (max 1GB) can behelpful at times to avoid some OOM killers (out-of-memory).
As a simple solution you can change the “swappiness” of your linux system. I have a 8GB 4 core VPS, I lowered theswappiness down to 1. You can start with a value of 10, or 5. Run these two commands:
echo "vm.swappiness = 1" >>/etc/sysctl.conf
and:
sysctl -p
You might need to restart IRI in order for it to adapt to the new setting. Try to monitor the memory usage using free-m, swap in particular, e.g.:
free -mtotal used free shared buff/cache available
Mem: 7822 3331 692 117 3798 4030Swap: 3815 1 3814
You’ll see that in this example nothing is being used. If a large “used” value appears for Swap, it might be a good ideato lower the value and restart IRI.
2.10.6 What are the revalidate and rescan options for
Here’s a brief explanation what each does, courtesy of Alon Elmaliah:
Revalidate “drops” the stored solid milestone “table”. So all the milestones are revalidated once the node starts(checks signatures, balances etc). This is used it you take a DB from someone else, or have an issue with solidmilestones acting out.
Rescan drops all the tables, except for the raw transaction trits, and re stores the transactions (refilling the metadata,address indexes etc) - this is used when a migration is needed when the DB schema changes mostly.
It is possible to add these options to the IRI configuration file (or startup command):
--revalidate or --rescan.
If you have used this installation’s tutorial / automation, you will find the configuration file in the following location:
2.10. FAQ 25
iri-playbook Documentation, Release docs
On Ubuntu: /etc/default/iriOn CentOS: /etc/sysconfig/iri
You will see the OPTIONS variable, so you can tweak it like so:
OPTIONS="--rescan"
and restart IRI to take effect: systemctl restart iri
Note: Once you’ve restarted the service with the --rescan or --revalidate options you can remove the optionfrom the configuration file. If it stays in the configuration file, subsequent restarts will use that option again, perhapswhen you do not explicitly choose to enable it.
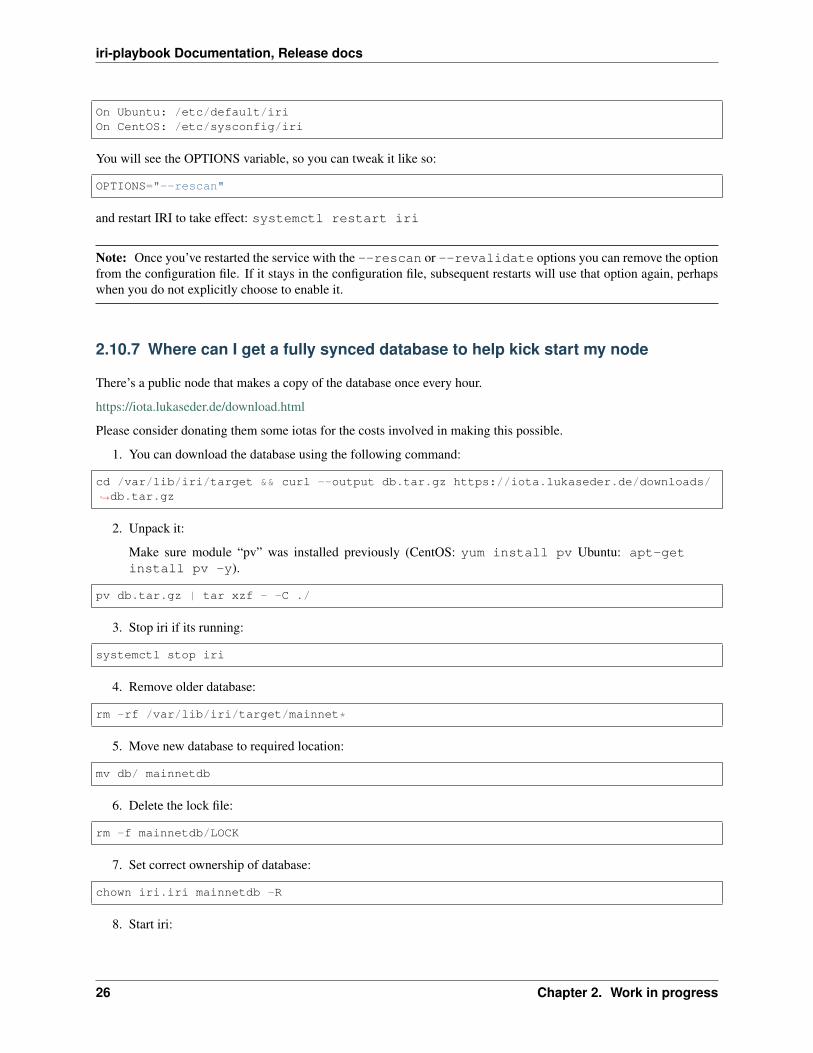
2.10.7 Where can I get a fully synced database to help kick start my node
There’s a public node that makes a copy of the database once every hour.
https://iota.lukaseder.de/download.html
Please consider donating them some iotas for the costs involved in making this possible.
1. You can download the database using the following command:
cd /var/lib/iri/target && curl --output db.tar.gz https://iota.lukaseder.de/downloads/→˓db.tar.gz
2. Unpack it:
Make sure module “pv” was installed previously (CentOS: yum install pv Ubuntu: apt-getinstall pv -y).
pv db.tar.gz | tar xzf - -C ./
3. Stop iri if its running:
systemctl stop iri
4. Remove older database:
rm -rf /var/lib/iri/target/mainnet*
5. Move new database to required location:
mv db/ mainnetdb
6. Delete the lock file:
rm -f mainnetdb/LOCK
7. Set correct ownership of database:
chown iri.iri mainnetdb -R
8. Start iri:
26 Chapter 2. Work in progress
iri-playbook Documentation, Release docs
systemctl start iri
Note: There was some debate on the slack channel whether after having imported a foreign database if it is requiredto run IRI with the --revalidate or --rescan flags. Some said they got fully synced without any of these.
To shed some light on what these options actually do, you can read about it in What are the revalidate and rescanoptions for
2.10.8 I try to connect the light wallet to my node but get connection refused
There are commonly two reasons for this to happen:
If your full node is on a different machine from where the light wallet is running from, there might be a firewallbetween, or, your full node is not configured to accept external connections.
See Full Node Remote Access
2.11 Command Glossary
This is a collection of most command commands to come in handy.
2.11.1 Check IRI’s node status
curl -s http://localhost:14265 -X POST -H 'X-IOTA-API-Version: someval' -H 'Content-→˓Type: application/json' -d '{"command": "getNodeInfo"}' | jq
Same as above but extract the milestones
curl -s http://localhost:14265 -X POST -H 'X-IOTA-API-Version: 1' -H 'Content-→˓Type: application/json' -d '{"command": "getNodeInfo"}'|python -m json.tool|egrep→˓"latestSolidSubtangleMilestoneIndex|latestMilestoneIndex"
2.11.2 Add neighbors
This is the nbctl script that shipped with this installation (use it with -h to get help):
nbctl -a -n udp://1.2.3.4:12345 -n tcp://4.3.2.1:4321
2.11.3 Remove neighbors
This is the nbctl script that shipped with this installation (use it with -h to get help):
nbctl -r -n udp://1.2.3.4:12345 -n tcp://4.3.2.1:4321
2.11. Command Glossary 27
iri-playbook Documentation, Release docs
2.11.4 Check iri and iota-pm ports listening
lsof -Pni|egrep "iri|iotapm
2.11.5 Check all ports on the node
lsof -Pni
2.11.6 Opening a port in the firewall
In CentOS:
firewall-cmd --add-port=14265/tcp --zone=public --permanent && firewall-cmd --reload
In Ubuntu:
ufw allow 14265/tcp
2.11.7 Checking memory usage per application
This is the ps_mem script that shipped with this installation. If you don’t have it you can see total memory usage usingfree -m.
ps_mem
2.11.8 Checking system load and memory usage
All Linux systems have top, but there’s a nicer utility called htop.
You might need to install it:
On Ubuntu: apt-get install htop -yOn CentOS: yum install htop -y
Then run htop
Note: If ‘htop’ is not available in CentOS you need to install ‘epel-release’ and try again, i.e. ‘yum install epel-release-y’
2.12 Appendix
This chapter includes additional configuration options and/or general systems configuration.
It is meant for more advanced usage.
28 Chapter 2. Work in progress

iri-playbook Documentation, Release docs
2.12.1 Using Fully Qualified Domain Name for my server
This requires that you have set up DNS service to point a fully qualified domain name to your server’s IP address.
For example, x-vps.com points to 185.10.48.110 (if you simply ping x-vps.com you will see the IP address).
Instead of using the ports e.g. 8811 and 5555 with IP combination, we can use a FQDN, e.g. pm.example.com toreach peer manager on our server.
In this chapter we are going to configure nginx to serve IOTA Peer Manager and Grafana on port 80, while using afully qualified domain name.
You should be able to create subdomains for your main domain name. For example, if your FQDN is “example.com”,you can create in your DNS service an entry for:
pm.example.com
and:
grafana.example.com
Here’s what you have to change:
For Peer Manager, edit the file /etc/nginx/conf.d/iotapm.conf:
upstream iotapm {server 127.0.0.1:8011;
}
server {listen 80;server_name pm.example.com;server_tokens off;
auth_basic "Restricted";auth_basic_user_file /etc/nginx/.htpasswd;
location / {proxy_pass http://iotapm;
}}
Of course, don’t forget to replace pm.example.com with your own FQDN e.g. pm.my-fqdn.com.
Now, test nginx is okay with the change:
nginx -t
Output should look like this:
# nginx -tnginx: the configuration file /etc/nginx/nginx.conf syntax is oknginx: configuration file /etc/nginx/nginx.conf test is successful
Then, reload nginx configuration:
2.12. Appendix 29
iri-playbook Documentation, Release docs
systemctl reload nginx
You should be able to point your browser to http://pm.my-fqdn.com and see the Peer Manager.
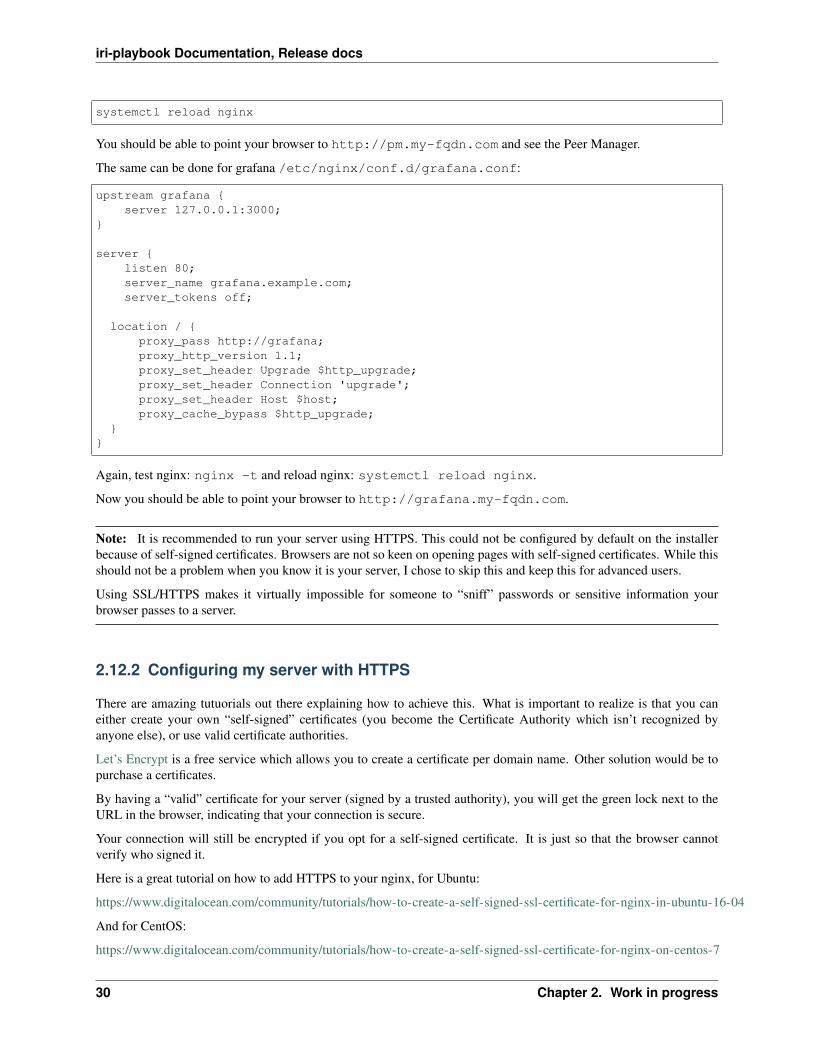
The same can be done for grafana /etc/nginx/conf.d/grafana.conf:
upstream grafana {server 127.0.0.1:3000;
}
server {listen 80;server_name grafana.example.com;server_tokens off;
location / {proxy_pass http://grafana;proxy_http_version 1.1;proxy_set_header Upgrade $http_upgrade;proxy_set_header Connection 'upgrade';proxy_set_header Host $host;proxy_cache_bypass $http_upgrade;
}}
Again, test nginx: nginx -t and reload nginx: systemctl reload nginx.
Now you should be able to point your browser to http://grafana.my-fqdn.com.
Note: It is recommended to run your server using HTTPS. This could not be configured by default on the installerbecause of self-signed certificates. Browsers are not so keen on opening pages with self-signed certificates. While thisshould not be a problem when you know it is your server, I chose to skip this and keep this for advanced users.
Using SSL/HTTPS makes it virtually impossible for someone to “sniff” passwords or sensitive information yourbrowser passes to a server.
2.12.2 Configuring my server with HTTPS
There are amazing tutuorials out there explaining how to achieve this. What is important to realize is that you caneither create your own “self-signed” certificates (you become the Certificate Authority which isn’t recognized byanyone else), or use valid certificate authorities.
Let’s Encrypt is a free service which allows you to create a certificate per domain name. Other solution would be topurchase a certificates.
By having a “valid” certificate for your server (signed by a trusted authority), you will get the green lock next to theURL in the browser, indicating that your connection is secure.
Your connection will still be encrypted if you opt for a self-signed certificate. It is just so that the browser cannotverify who signed it.
Here is a great tutorial on how to add HTTPS to your nginx, for Ubuntu:
https://www.digitalocean.com/community/tutorials/how-to-create-a-self-signed-ssl-certificate-for-nginx-in-ubuntu-16-04
And for CentOS:
https://www.digitalocean.com/community/tutorials/how-to-create-a-self-signed-ssl-certificate-for-nginx-on-centos-7
30 Chapter 2. Work in progress
iri-playbook Documentation, Release docs
Note: I encourage you to refer to the previous chapter about configuring FQDN for Peer Manager and Grafana. Fromthere you can proceed to adding HTTPS to those configurations.
2.13 Disclaimer
• This tutorial is based on the repository’s Ansible-playbook I provided. It has been tested on CentOS 7.4 andUbuntu 16.04.
• Installar is meant to be installed on a clean OS. I do not take any responsibility for having installed this on asystem with already existing software and/or mission critical services.
• This tutorial does not include information on how to harden security on your server.
• For some details I will leave it to you to google (for example, how to SSH access your server). Otherwise thetutorial becomes too lofty.
• I recommend that you use SSH key authentication to your server, disable root SSH access and disable passwordauthentication. In addition, do not expose firewall ports if not necessary.
• I am not associated with the IOTA foundation. I am simply an enthusiastic community member.
2.14 Donations
If you liked this tutorial, and would like to leave a donation you can use this IOTA address:
LDWOMAW9IBFEPQ9DRMCIOLLOLVCWGT9OISWNXVQTXPQANRJNDRLNWZVITVBYLMVFSQQFNZXHXQYWLWHEXKWROI9FMZ
Thanks!
2.13. Disclaimer 31