
How to ferment YOUR Harvest - Ecology Action Centre
11
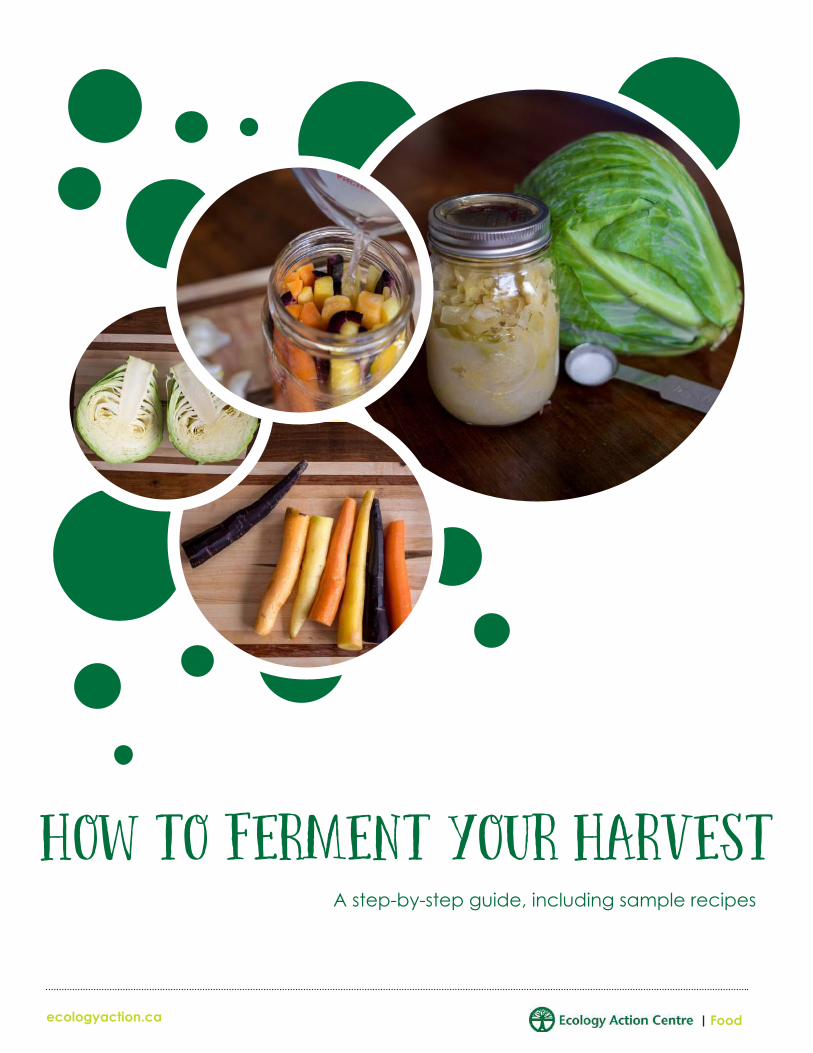
How to ferment YOUR Harvest A step-by-step guide, including sample recipes ecologyaction.ca Food
-
Upload
khangminh22 -
Category
Documents
-
view
0 -
download
0
Transcript of How to ferment YOUR Harvest - Ecology Action Centre
How to ferment YOUR HarvestA step-by-step guide, including sample recipes
ecologyaction.ca Food

Layout and Content Curation: Jen Organ, Community Food Programmer, The Our Food Project with support from Amy Brierley, Our Food Project volunteer.
Content: Thank you to Nicole Marcoux, Registered Holistic Nutritionist, for sharing her knowledge and resources for the development of this toolkit (specifically page 4, 8, 10). Additional toolkit content was developed by the The Our Food Project for community food programs over the years.
Photo Credits: Kaleigh Betty Jackson (www.kaleighbettyphotography.com)
Learn more about the Our Food Project:https://ecologyaction.ca/issue-area/food-action
Find this and other resources online at the Halifax Garden Network: www.halifaxgardennetwork.com
Follow us on our blog, ‘Adventures in Local Food’: https://adventuresinlocalfood.wordpress.com/
Prepared By:
The Our Food: Reconnecting Food and Community Project is a four year project made possible by the generous funding of the Public Health Agency of Canada (PHAC). The overarching goal of the Our Food Project is to strengthen communities’ relationship to food by helping to build what we call ‘positive food environments’. Positive food envi-ronments are the physical and social spaces that help to normalize healthy eating by making it easier to grow, sell, and eat good food. We work at the individual, communi-ty and systemic level to increase the availability of nutritious food as well as our access to it. In doing so, we actively involve people in the development of more localized food systems.
Funding for this project has been provided by the Public Health Agency of Canada (PHAC). The views expressed herein do not necessarily represent the views of PHAC.

3
In This Toolkit
Introduction to Fermentation 4
Fermenting Tools 5
Fermentation Recipe // Simple Sauerkraut 6
Fermentation Recipe // Lacto-Fermented Veggies
8
Fermenting Tips & Tricks 10
Additional Resources 11
ecologyaction.ca Food

4
introduction to fermentationLots of every day foods are fermented: cheese, bread, vinegars, and even choco-late. Wild fermentation is one of the oldest and easiest methods of food preserva-tion. If you have salt, a jar, and some vegetables, you’re basically done.
Fermentation is a great source for probiotics. Probiotics are living bacteria in our bodies and they play crucial roles in our health. High levels of healthy flora (bacteria) in our guts can contribute to increased immunity and improved digestive functions as well as greater mental health. Fermented foods are living foods, literally ALIVE with bacteria.
Sometimes vegetable ferments are called lacto-ferments, not because they have anything to do with milk or lactose, but because when the bacteria and enzymes begin working away eating the sugars in our vegetables, lactic acid is produced. Lactic acid and carbon dioxide are both by-products of lacto-fermentation. In lacto-fermentation, we are not sealing anything. We are constantly checking on our ferments, shaking, smelling, poking, and tasting them to get them as delicious as possible. The salt water we use provides an environment that will not allow harmful bacteria to grow (because salt is anti-septic), but still allows helpful bacteria to thrive.
A note on Food Safety:
Botulism is an illness caused by the bacteria Clostridium botulinum. The bacteria is commonly found in soil and water. It only becomes dangerous to humans in an anaerobic environment of, an environment without oxygen. This is why, when we are hot water canning (jams, salsa, etc), extra precautions are taken to ensure everything is sterilized to avoid the risk of botulism.
In lacto-fermentation, there is NO risk of botulism, because we do not use oxygen-free environments to ferment. The worst thing that can happen with lacto-fermentation is the dreaded green or black mold, which you will be able to see clearly. To keep mold at bay, ensure your hands, veggies, vessels, and tools are cleaned thoroughly and check your ferments daily to make sure everything is well under the brine!
fermenting TOOLS
ecologyaction.ca Food

Fermenting Vessels
Weights
5
fermenting TOOLS
Use a ceramic, glass, or food grade plastic vessel. Mason jars, crock pots, or empty honey buckets work well. Avoid metal bowls and utensils because they will damage some kind of
cultures.
Place a smaller mason jar inside a larger one. Fill the smaller mason jar with water if more weight is
required.
A weight helps to ensure ingredients remain below the brine during the fermentation process. You can purchase ceramic weights from craftspeople, online, and in kitchen stores. Or, you can use the following:
A clean cloth is helpful to place over your
vessel to keep fruit flies and dust
bunnies away.
For larger vessels, such as food grade plastic buckets, place a plate over top
of your ferments inside the vessel.
A Zip Lock bag filled with water can take on whatever
shape of your fermenting vessel. This is a great option
for narrow mouth jars.
Small Mason Jars
Plate
Zip Lock Bag
ecologyaction.ca Food

6
Simple sauerkraut
Ingredients:
1. Wash and cut (or shred) fresh cabbage. Remove any damaged outer leaves.
2. Salt and mix the cabbage in a non-metal vessel.
3. Pack cabbage into a crock or food-grade plastic bucket (or large glass jar). Pound the cabbage with a non-metal tool, such as a mason jar or rolling pin. If you like your kraut crispy, be gentle. Water will emerge from the cabbage.
4. Use a weight appropriate for your vessel size. The brine should cover the cabbage with this added weight. If there is not enough brine, you can add your own salt water mixture to the kraut (1 TBSP salt with one cup water).
5. Place a clean cloth over top to protect your sauerkraut from fruit flies etc.
6. Let stand up to 6 weeks (depending on how strong you would like your sauerkraut to taste). If you’re keeping your kraut at room temperature it may be ready in as little as 3 weeks. Cooler temperatures (less than 18 degrees Celsius) will require longer fermentation, but some say it gives you better flavour.
7. Keep tasting the kraut as the weeks progress and refrigerate when it achieves the tanginess you like!
Directions
☐ 5 lbs cut cabbage (approx. 2 small cabbages)
☐ 3 Tablespoons Kosher or pickling salt (non-iodized)
☐ Grated apple ☐ Grated beet ☐ Chopped onion ☐ Dill seeds ☐ Juniper berries ☐ Caraway seeds ☐ Celery seeds ☐ Bay leaves
Delicious Additions (Optional):
This method is for a bigger batch, but feel free to use the general ratios and experiment!
ecologyaction.ca Food

7
SteP by Step // Simple sauerkraut
Wash and cut (or shred) fresh cabbage. Remove any
damaged outer leaves and the core.
Add salt to cabbage in a non-metallic vessel.
Massage to draw moisture from the cabbage.
You will begin to see water collect at the bottom of the
vessel.
Place a weight slightly smaller than the vessel you are using
on top of the sauerkraut. The brine should cover the cabbage with this added
weight.
More water will emerge from the cabbage and should cover
the entire contents.
Pack cabbage into a non-
metallic vessel. Pound cabbage with a non-metal
tool. Be gentle if you like your kraut crispy.
4.
1.
5. 6.
7. 8.
Place a clean cloth over top to protect your sauerkraut
from fruit flies, etc.
Let stand up to 6 weeks (depending on how strong
you would like your sauerkraut to taste). If kept at room
temperature, your kraut may be ready in as little as 3 weeks. Place in fridge when it reaches
the flavor you like.
9.
2. 3.
ecologyaction.ca Food

8
☐ salt ☐ veggies of choice cut into desired shape ☐ fresh dill ☐ garlic ☐ chilis (fresh or dried, if desired)
Directions:
lacto-fermented veggies
Ingredients:
1. Rinse and cut veggies into desired shape. If you’re using beans or carrots, trim off both ends.
2. Peel garlic cloves and cut in half. Chop dill and chilies roughly.
3. Place dill, garlic, and chilies at the bottom of the jar.
4. Pack veggies in tightly. Make sure the garlic, dill, and chilies are covered and pushed down by the veggies. Ensure there is at least 1/2 inch between the top of the veggies and the top of the jar.
5. Mix brine: 2 cups of water + 1 TBSP salt = 4% salinity. TIP: the salinity should taste similar to your tears.
6. Fill jar with brine and cover with lid or plate (you do not have to seal tightly, but you can). If you are using a metal lid, place parchment paper between the lid and jar to prevent rusting.
7. ‘Burp’ the jar daily to release any pressure.
8. Keep tasting the veggies as the days progress and refrigerate when they achieve the tanginess you like!
9. Store in fridge for up to 6 months or longer. Your ferments may become cloudy. This is normal and safe to consume.
This recipe can apply to any vegetable you are interested in fermenting. This is where the fun begins! Beets, carrots, beans, kohlrabi, radishes, garlic cloves - you name it, you can ferment it. You can also experiment with different spices to taste to see what tastes they add to your ferments. Here is a basic recipe to get you started:
ecologyaction.ca Food

9
Step by Step // lacto-fermented veggies
Rinse and cut veggies into desired shape. If you’re using beans or carrots, trim off both
ends.
Peel garlic cloves and cut in half.
Place garlic, dill, chilies and/or other spices at the bottom of
the jar.
Mix brine: 2 cups of water + 1 TBSP salt
Fill jar with brine so that the veggies are covered.
Taste the veggies as the weeks progress and refrigerate when
they achieve the tanginess you like – likely around 5-9 days.
‘Burp’ the jar to release any pressure and check on this
each day.
Pack veggies tightly. Ensure the garlic, dill, chilies and
other spices are covered and pushed down by the veggies.
Leave at leat 1/2 inch between veggies and the
top of the jar.
4.
1.
5. 6.
7. 8. 9.
Cover jar with lid or plate (you don’t need to seal tightly).
2. 3.
ecologyaction.ca Food

10
Tips & tricks for Lact0-fermentation
‘Seat belt’ your ingredients to prevent them from floating above the brine. If you’re making sauerkraut, save a couple whole cabbage leaves. Place the cabbage leaf on top of the ferment, tuck it around the sides of the jar, and let the brine come up around it. You can then place a weight on top of the cabbage leaf to keep everything under the brine. The leaf acts as a tarp, preventing too many things from floating to the surface.
Bubbles are a natural part of fermentation and a sign that things are working away and alive (as seen in
photo). This is why it’s important to ‘burp’ your ferments each day - to prevent too much pressure that could
cause your vessel to break. Your brine will also likely become cloudy overtime which is also normal and safe to consume. White mold is ok and completely harmless. It will change the taste, but is safe to eat. Scrape it off and eat your ferments as
usual. Green or black mold is NOT safe to eat. Compost your ferments and start over. Don’t be discouraged!
Seat belt your ingredients
Bubbles, discolouration and mold
Preventing rusty lids
If using a metal lid, place parchment paper between the lid and the jar. This will protect the lid from rusting overtime due to the salt brine.
Salty solutions
Table salt often has added sugar to it. It’s ok to use if that’s what’s available, but if you have sea salt
or other salt that is just salt, use that first. A less salty brine will result in a stronger flavour, because it allows
more bacteria to grow in the ferments, but is more susceptible to spoilage. A more salty brine will have a
lower probiotic count, but will last longer.
ecologyaction.ca Food

11
Additional Resources
Websites:
Adventures in Local Food (Blog): https://adventuresinlocalfood.wordpress.com/
Wild Fermentation: http://www.wildfermentation.com/
Books:
Wild Fermentation. Author: Sandor Ellix Katz
The Art of Fermentation.Author: Sandor Ellix Katz
ecologyaction.ca Food