Honda Civic Type R Dump Valve Installation Instructions
14
Honda Civic Type R Dump Valve Installation Instructions Tools Required: Flat headed screw driver Phillips screw driver Hose clamp drive 10mm and 12mm socket with suitable wrench and extensions 10mm spanner
-
Upload
khangminh22 -
Category
Documents
-
view
6 -
download
0
Transcript of Honda Civic Type R Dump Valve Installation Instructions

Honda Civic Type R Dump Valve Installation
Instructions
Tools Required:
Flat headed screw driver
Phillips screw driver
Hose clamp drive
10mm and 12mm socket with suitable wrench and extensions
10mm spanner

1. Disconnect the MAF sensor and undo the two bolts to remove the rubber scoop.
2. Undo the clip on the rubber hose and undo the two bolts on the filter box, pull the filter box upwards to
remove from the vehicle.
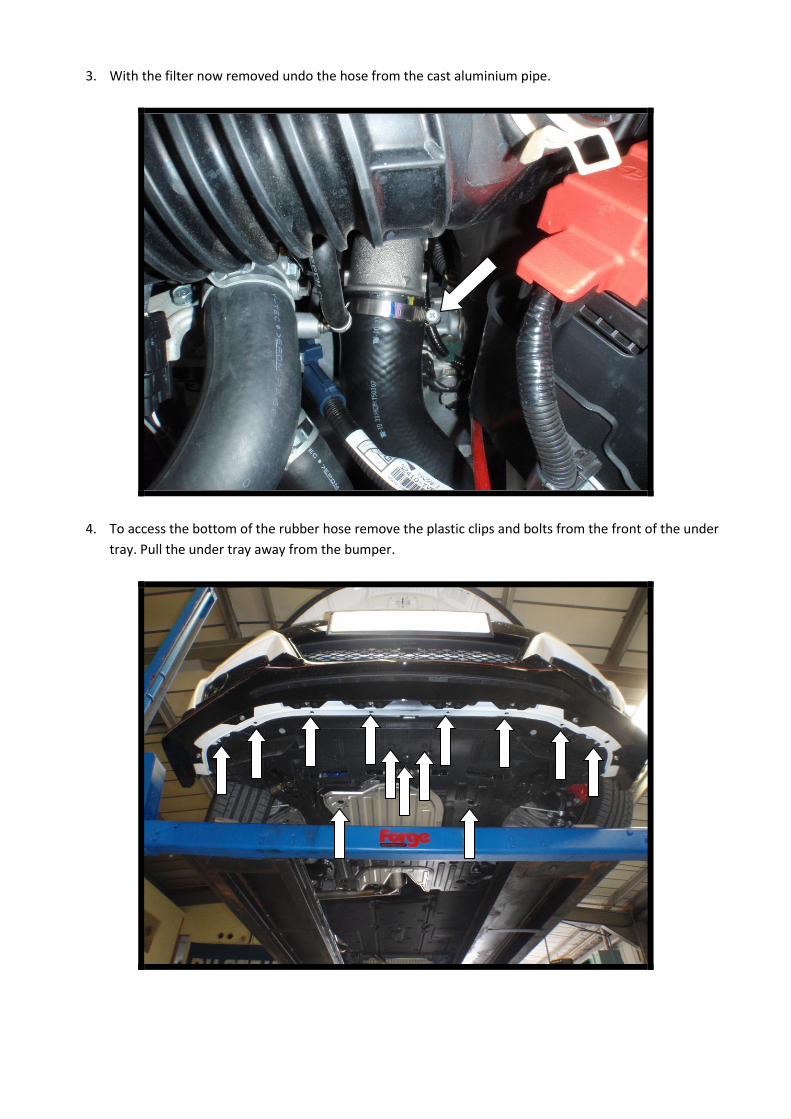
3. With the filter now removed undo the hose from the cast aluminium pipe.
4. To access the bottom of the rubber hose remove the plastic clips and bolts from the front of the under
tray. Pull the under tray away from the bumper.
5. There is a second under tray which also needs to be removed undo the two clips and pull out the under
tray.
6. Undo the hose clamp and remove the rubber hose.

7. Attach the dump valve to the hose with the vacuum port facing down. Install the new silicon hose making
sure there is clearance around the dump valve and attach with the clips supplied in the kit.
8. Remove the clips from the slam panel cover and remove.

9. Please note the following Steps 9 - 12 are not necessary if you are fitting the supplied blanking plate.
Unclip the vacuum hose leading to the dump valve and remove the small boost hose.
10. Using the short pieces of silicon hose make a loop with a t-piece in it and connect the vacuum hose leading
to the dump valve. This will keep the OEM dump valve permanently shut.

11. Connect the longer length of silicon hose to the vacuum source.
12. Feed the silicon hose through the slam panel, across the radiator and back to the new dump valve.
Installation is now complete ! Refit all other part following steps 8-1 in reverse order.

13. If you wish to remove the stock valve because it has failed or the potential of it failing. Remove the bottom
screw and two plastic clips from inside the wheel arches.
14. Remove all the plastic clip from the edge of the under tray.
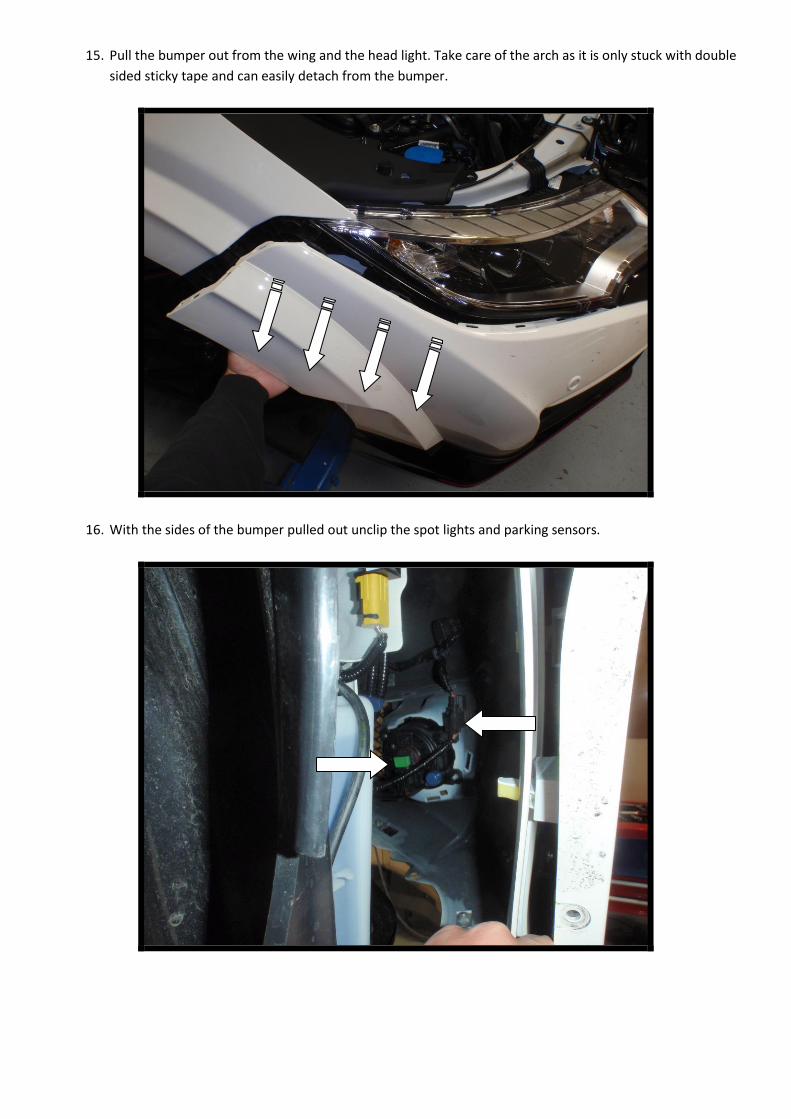
15. Pull the bumper out from the wing and the head light. Take care of the arch as it is only stuck with double
sided sticky tape and can easily detach from the bumper.
16. With the sides of the bumper pulled out unclip the spot lights and parking sensors.

17. Undo the two bolts at the front of the bumper, the bumper is now free to remove.
18. Undo the plastic clips on the wing cover and remove.
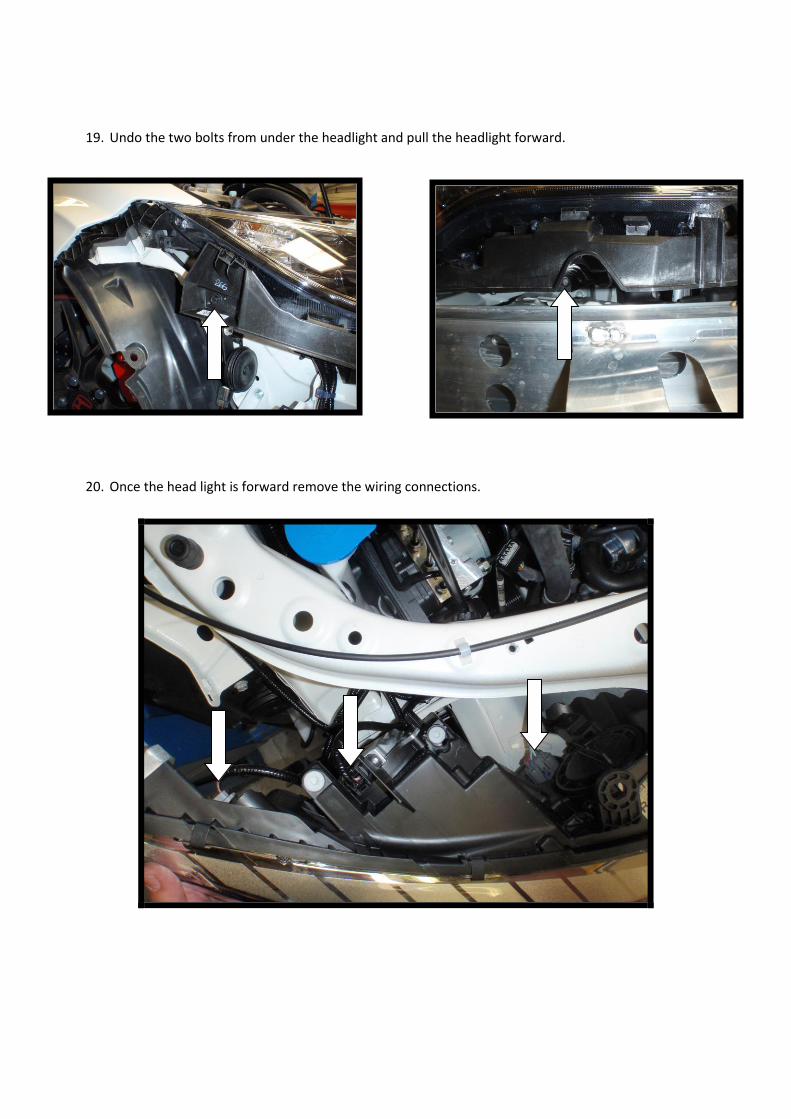
19. Undo the two bolts from under the headlight and pull the headlight forward.
20. Once the head light is forward remove the wiring connections.

21. With the bumper and headlight removed you will now need to remove the inlet pipe. Undo the hose clip
and pull away from the pipe, undo the four bolts holding the pipe work in position and one bolt at the
back holding the inlet pipe in position. Remove the small rubber hose to the left.
22. Undo the two bolts holding the plastic clip in position and move it as far out of the way as possible. Undo
the two bolts from the flange of the pipe and remove.

23. To gain excess to the dump valve remove the rubber ducting and unplug the air conditioning.
24. Unclip the vacuum hose, undo the three bolts and remove the dump valve.

25. Install the planking plate and refit the inlet pipe in reverse order of removal.
26. Connect the vacuum hose to the long length of silicon hose and joiner supplied in the kit. Feed the silicon
hose through the slam panel, across the radiator and back to the new dump valve.
Installation is now complete! Refit all other part following steps 13-20 in reverse order.