HD DVVR User's Manual Ver 2.1.0 - CCTV Services
56
HD DV VR User’s Manua al Ver 2.1.0 0
-
Upload
khangminh22 -
Category
Documents
-
view
0 -
download
0
Transcript of HD DVVR User's Manual Ver 2.1.0 - CCTV Services

HD DV
VR User’s Manuaal Ver 2.1.0
0
HD DV
ABOWelco• Recoeven
• HD-to-op
• The• Theoper
• Fullythe a
• Liveinclu
• Exte• CCT(GUImanoptio
The C• CCT• CCT
COPThe cwritte ● CCTServic● Re
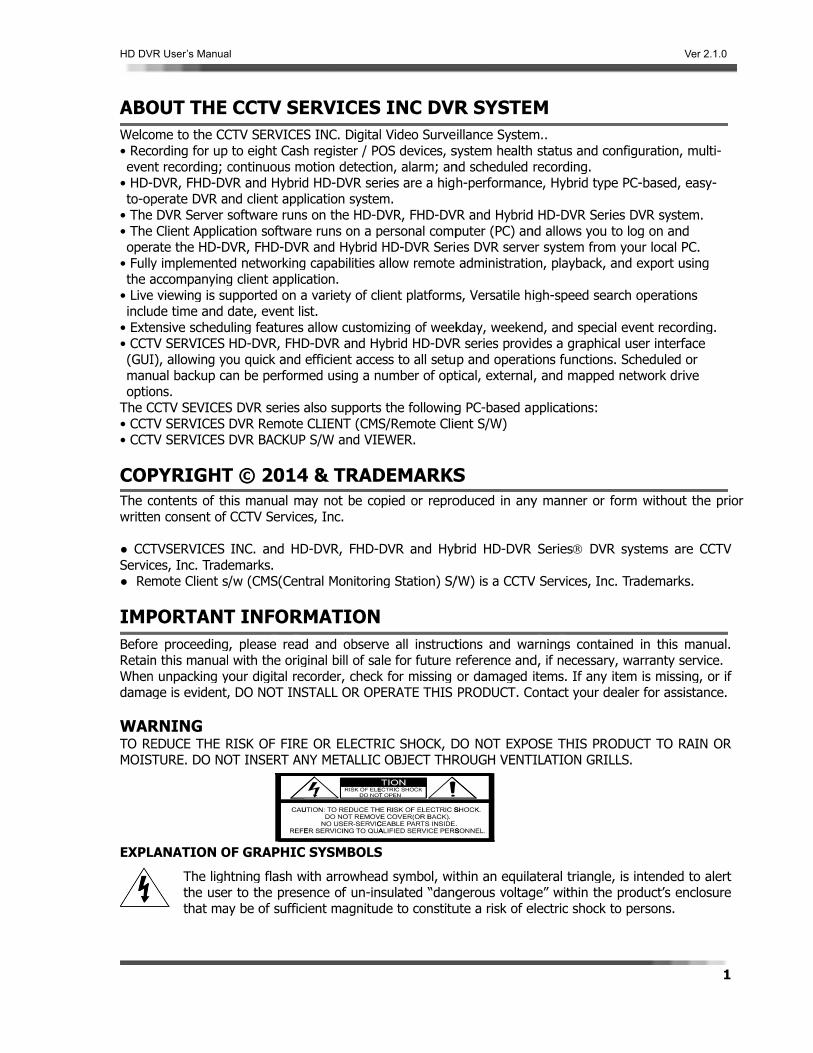
IMPBeforeRetainWhendama WARTO REMOIST EXPL
VR User’s Manua
OUT THE ome to the CCording for up
nt recording; c-DVR, FHD-DVperate DVR a DVR Server s Client Applic
rate the HD-Dy implementeaccompanyinge viewing is suude time and densive scheduTV SERVICES I), allowing youal backup caons. CCTV SEVICESTV SERVICES TV SERVICES
PYRIGHTcontents of then consent of
TVSERVICES ces, Inc. Tradmote Client s/
PORTANTe proceedingn this manualn unpacking yge is evident,
RNING EDUCE THE RTURE. DO NO
LANATION O
The lighthe usethat ma
al
CCTV SECTV SERVICESto eight Cash
continuous mVR and Hybridnd client appsoftware runsation softwar
DVR, FHD-DVRed networkingg client applicupported on adate, event liuling features HD-DVR, FHDou quick and an be perform
S DVR series aDVR Remote DVR BACKUP
T © 2014his manual mCCTV Service
INC. and HDemarks. /w (CMS(Cen
T INFORM, please read with the orig
your digital re, DO NOT INS
RISK OF FIREOT INSERT AN
OF GRAPHIC
htning flash wr to the presey be of suffic
ERVICESS INC. Digitalh register / PO
motion detectiod HD-DVR serlication systems on the HD-Dre runs on a pR and Hybrid g capabilities acation. a variety of clst. allow custom
D-DVR and Hyefficient acce
med using a n
also supportsCLIENT (CMS
P S/W and VIE
4 & TRADay not be coes, Inc.
D-DVR, FHD-D
ntral Monitorin
MATIONd and observginal bill of sacorder, checkSTALL OR OP
E OR ELECTRNY METALLIC
C SYSMBOLS
with arrowheaence of un-incient magnitud
S INC DVRl Video SurveOS devices, son, alarm; anries are a highm. DVR, FHD-DVpersonal compHD-DVR Serieallow remote
ient platforms
mizing of weekybrid HD-DVRess to all setunumber of opt
s the followingS/Remote ClieEWER.
DEMARKSopied or repro
DVR and Hyb
ng Station) S/
ve all instructle for future r
k for missing ERATE THIS
RIC SHOCK, D OBJECT THR
S
d symbol, witsulated “dangde to constitu
R SYSTEillance System
system healthnd scheduled h-performanc
VR and Hybridputer (PC) anes DVR serveadministratio
s, Versatile h
kday, weekenR series providp and operattical, external
g PC-based aent S/W)
S oduced in any
brid HD-DVR
/W) is a CCTV
tions and wareference andor damaged PRODUCT. Co
DO NOT EXPOROUGH VENT
thin an equilagerous voltagute a risk of e
M m.. status and crecording. ce, Hybrid typ
d HD-DVR Sernd allows you er system fromon, playback,
igh-speed sea
nd, and speciades a graphicions functions, and mapped
pplications:
y manner or
Series DVR
V Services, Inc
arnings contad, if necessaryitems. If any ontact your d
OSE THIS PROTILATION GRI
ateral trianglege” within theelectric shock
configuration,
pe PC-based,
ries DVR systeto log on and
m your local Pand export u
arch operatio
al event recorcal user interfs. Scheduled d network dri
form without
R systems ar
c. Trademark
ined in this y, warranty sitem is missi
dealer for assi
ODUCT TO RLLS.
e, is intended e product’s ento persons.
Ver 2.1.0
1
multi-
easy-
em. d PC. using
ns
rding. face or ive
t the prior
re CCTV
ks.
manual. service. ng, or if istance.
RAIN OR
to alert nclosure

HD DV
PRE
SA by not To Allo (ru INT
excThe
CLEUsmi
IMPREADopera1. A
2. P
3. P
4. O
5. S
6. D
- - - -
7. Ruo
VR User’s Manua
The exclpresenceaccompa
CAUTION AFETY: Should
the qualified t going to be disconnect th
ow adequate ugs, blankets,
TALLATION:cessive dust oe unit is not dEANNING: Cse a mild housight damage
PORTANT INSTRUCTIO
ated. ATTACHMENTmanufacture
POWER SOURsource indicahome, consumonitor or e
POWER CORDequipment w
OBJECT AND through opein a fire or e
SERVICING –removing coqualified serv
DAMAGE REQservicing to q
When the If liquid haIf the videIf the vide
adjust only adjustmen a qualified
REPLACEMENTused replacemoriginal part. U
al
amation poin of importannying the pro
d any liquid opersonnel beused for seve
he cord, pull iair circulationetc.) or near
: Do not instar mechanical
designed to beClean the unitsehold detergthe finish of t
T SAFETYONS – All the
TS – Do not uer as they mayRCES – Video ated on the mult your videquipment des
DS – Do not awhere persons
LIQUID ENTnings as theylectric shock.
– Do not atteovers may exvice personne
QUIRING SERVqualified servpower-supply
as spilled, or eo product haeo product doy those contrnt of other cod technician to
T PARTS – Wment parts spUnauthorized
nt within an nt operating oduct.
or solid objectefore operatineral days or mit out by the pn to prevent ir materials (cu
all the unit in vibration.
e waterproof.t with a slightgent. Never uthe unit.
YGUARDsafety and op
use attachmey result in themonitor or e
marking label.eo monitor osigned to opeallow anythings walking on i
TRY - Never py may touch d
Never spill liqempt to servpose you to el. VICE – Unplugvice personnely cord or the objects have s been expos
oes not operatols that are cntrols may reo restore the
When replacemecified by the substitutions
equilateral tand mainten
t fall into the ng it any furthmore. plug. Never pnternal heat urtains, drape
an extremely
Exposure to ly damp soft se strong solv
perating instr
ents not recoe risk of fire, eequipment sho. If you are nor equipmenterate from batg to rest on tit will abuse tpush objects dangerous volquid of any kvice video mdangerous vo
g video monitl under the foplug has beefallen into th
sed to rain or te normally bycovered by theesult in damagvideo produc
ment parts are manufactures may result in
triangle is innance (servic
cabinet, unplher. Unplug th
pull the cord itbuild-up. Do eries) that ma
y hot or humid
rain or watercloth. vents such as
ructions shoul
mmended byelectric shockould be operanot sure of tht dealer or lttery power rehe power corthe cord. of any kind
ltage points okind on the promonitor or eqoltage or oth
tor or equipmollowing conden damaged.e video produwater. y following the operating inge and will ofct to its norma
re required, ber or that havn fire, electric
tended to alcing) instruct
ug the unit ahe unit from t
tself. not place the
ay block the v
d area or in a
r may damage
s thinners or b
ld be read be
y the video mk or injury to ated only frohe type of poocal power efer to the oprd. Do not loc
into video mor short-out poduct.
quipment youher hazards. R
ment from the itions:
uct.
he operating instructions asften require eal operation.
be sure the seve the same cc shock or oth
lert the userion in the lit
nd have it chhe wall outlet
e unit on surfaventilation ho
an area subjec
e the unit.
benzene as th
fore the appli
monitor or equpersons. m the type o
ower supplied company. Foperating instrcate video mo
monitor or equparts that cou
urself as opeRefer all serv
wall outlet a
instructions,s an improperxtensive work
ervice techniccharacteristicher hazards.
Ver 2.1.0
2
r to the terature
ecked t if it is
aces les.
ct to
hey
iance is
uipment
of power to your
or video uctions. onitor or
uipment ld result
ening or vicing to
nd refer
r k by
cian has cs as the

HD DV
AIMIM D C111 C2222 C333333 C44444
FAWG
VR User’s Manua
TABOUT CCTV SMPORTANT INFO
MPORTANT SAF
DVR SYSTEM
CHAPTER 1. G.1. BASIC FEAT
.2 .UNPACKING
.3. SYSTEM RE
CHAPTER 2. U.1.MAIN SCREE
.2. BASIC FUNC
.3. PTZ CONTR
.4. ADDITIONAL
CHAPTER 3. R.1. UNDERSTAN
.2. RETRIEVAL
.3. SMART SEA
.3. ADVANCED
.4. ADDITIONAL
.5. PERFORMIN
CHAPTER 4. U.1. MANUAL BA
.2. SCHEDULE
.3 CONCURRE
.4. DIRECT BAC
.5. BACKUP VIE
AQ. ..............WARRENTY. .....GROSSARY. .....
al
TABLSERVICES INC DORMATION. .....FETYGUARD. ...
CONTENTS.
GETTING STATURES ............G ....................EAR CONNECTI
USING THE DEN DESCRIPTIO
CTIONS. .........ROL PANEL .....L FUNCTIONS. .
RETRIVAL OFNDING SEARCH
RECORDED DA
ARCH. ............ SEARCH. .......L SEARCH FUN
NG EXPORT(SA
USING THE BACKUP. ........... BACKUP . .......NT BACKUP ....CKUP . ............EWER . ...........
.....................
.....................
.....................
LE ODVR SYSTEM. ..........................................
. ....................
ARTED. ..................................................ON ................
DVR SYSTEMON ................................................................................
F RECORDEH SCREEN. ......ATA. .........................................................CTIONS. .........
AVE AS) . .........
BACKUP SOF.........................................................................................................
.....................
.....................
.....................
OF CO .................................................................
......................
......................
......................
......................
......................
.............................................................................................................
D IMAGE .........................................................................................................................................
FTWARE .....................................................................................................................
......................
......................
......................
ONT...............................................................
.....................
.....................
.....................
.....................
.....................
.....................
.....................
.....................
.....................
.....................
.....................
.....................
.....................
.....................
.....................
.....................
.....................
.....................
.....................
.....................
.....................
.....................
.....................
.....................
.....................
.....................
ENT...............................................................
.....................
.....................
.....................
.....................
.....................
.....................
.....................
.....................
.....................
.....................
.....................
.....................
.....................
.....................
.....................
.....................
.....................
.....................
.....................
.....................
.....................
.....................
.....................
.....................
.....................
.....................
TS
.....................
.....................
.....................
.....................
.....................
.....................
.....................
.....................
.....................
.....................
.....................
................... 1
................... 1
.................. .2
................... 2
................... 2
................... 2
................... 3
................... 3
................... 3
.................. .4
................... 4
................... 4
................... 4
................... 4
................... 4
................... 5
................... 5
................... 5
Ver 2.1.0
3
1 1 2
3
4 5 6 7
8 9 9 5 8
21 22 26 27 30 34 39
43 44 45 47 47 49
52 53 54

HD DV
GS
VR User’s Manua
GEST
al
ETTTAR
TIRT
INTE
G ED
Ver 2.1.0
4

HD DV
1.1 TheSysplayanaimp
1123456
7
8
910 1
12 13
14
15
16
1718
19
VR User’s Manua
BASIC F
e Digital Vistem for Secuys back the dalog CCTV. Itpressive featu
. Camera In. Display Sc. Recorded R. Display Sp. Users' easy. Check and. Outstandin
The systemevent or co
. Efficient FiThe system
This file sythe stored
. Convenien The system convenien. Image prin0. Archived Im Video foota format (sav1. 16 Channe ● When mo ● Recordin2. Pre/post a ● Recordin ● This ens
3. Easy to us ● Makes fi ● Gives a q ● Index fe ● Run an4. Various Ne The syste functions The trans5. One up to
camera loc6. Remote no
moving lin7. Remote vie8. Analog out
spot monit9. Multi-serve
al
FEATURE
deo Recordurity and madigital video imt implements res, making t
put: Hybrid inreens: 1, 4, 6Resolution: 35eed: 480 fps y change of V Control Cam
ng Image Quam provides vaonstantly savele System.
m stores dataystem efficiend data is effect User Interfam allows usernce, a VCR stnting: Saved images can beage can be stve).
els of Motion Dotion detectiog interval andlarm recordinng takes placesures the entie Search Funinding the timquick overvieeature to booknd Search datetwork Functioem provides tas well as th
smission can a16 Channel
cally and remootification fune, enlarged sewing by eithtputs on Softwtors the can ser so 1 busine
ES
der (DVR) isnufactured bmages in a faa user friend
the CCTV SER
nput - up to 36, 9, 10, 13, 152X240, 704x(real-time) b
Video Arrangeera and IP prality and Seararious search ed data.
on baskets wtly aligns dat
ctively protectace. rs to operate tyle playback image file cane backed up otored in 1 of 2
Detector funcon occurs, thed frame rate cng function. e 0-8 frames re event was ction Timeline
me and date ow as to wherk mark eventsta of DVR (Anons. he remote moe two-way voalso be enablAudio record otely, two waction (email, creen, and emer LAN for reware Based Bsequentially swess owner can
s the core of y CCTV SERashion that sidly Graphical RVICES INC D
32 channels o16, 20, 25 andx240, 704x48oards NTSC (
ement in Live roducts statusrch Methods.conditions an
which are the a and maximted.
it with simplecontrol, and
n be printed wonto any back2 ways, using
ctions. e system immcontrol during
before and afrecorded as we and Calend
of an event eae and when as for quick ret
nalog) and IP
onitoring, recoice communied using a teand playback
ay audio operatext transmis
mail) mote surveillaBoards and 1 witch. n watch up to
the Digital VRVICES INCignificantly imUser Interfac
DVR the obvio
of normal CCTd 36 camera s
80 (frames per seMonitoring b
s at Tree Men nd an excelle
disk space pamizes the spee
e mouse operGives the abi
with conventiok-up device fog a Backup Vie
mediately startg an event for
fter and alarmwell as recordar. asy to locate.activity took ptrieval at a laas the same
cording, searcication throug
elephone modk at playbackations. ssion) and va
ance and remAnalog outpu
o 8 locations a
Video SurveillC. The DVR mproves on thce (GUI) comous choice.
TV camera plusplit screens.
econd). by Virtual Matrnu.
ent image qua
artitioned intoed of data pro
ration in a GUility to retrievonal Printers. or long-term sewer (Backup
ts recording ir optimized im
m event takesding lead-time
place. ater time. way.
ching, sendinggh a network dem and diverk recorded im
rious type of
mote managemut for hardwa
at one time
ance with Recollects, sav
he defects of mplemented w
us 4 SDI came
rix·.
ality for searc
o certain areaocessing. In a
UI environmenve information
storage. p), or using th
mages onto tmage saving.
s place. e up to the ev
g, and controin real time.
rse networks.mage with co-
alarms. (bee
ment. are based boa
Ver 2.1.0
5
ecording ves, and existing
with very
eras.
ching an
as. addition,
nt for n quickly.
he AVI
the HDD.
vent.
lling
-working
p sound,
ards, for

HD DV
1.2
DVHD
Ins
LC
CoPle
VR User’s Manua
UNPACK
VR Set ConfD DVR system
stallation CD
CD Monitor(Si
omponents caease unpack
al
KING
figuration m (1SET)
DV
-Manual -Driver -Setup S/W
ize depend on
an be changea system in f
VR User’s Ma
n order entry)
ed according tflat and not we
anual
)
to option seleet place. Plea
System Pow
Video
Key Board /
Monitor con/LCD monito
ection. ase check all
wer cable
input pigtail
/ Mouse
nnect cable or Power Ada
components
aptor
are in the pa
Ver 2.1.0
6
ckage.

HD DV
1.3
DV
DV
VR User’s Manua
SYSTE
VR SYSTEM
VR SYSTE
al
M REAR
REAR INTE
M REAR C
CONNEC
RFACE
CONNECTI
CTION
ION
Ver 2.1.0
7

HD DV
UD
VR User’s Manua
USDV
al
SINVR
NGR S
G TSYS
THST
HETE
E EM
Ver 2.1.0
8
M

HD DV
2-1 DVR pthe s LOG
Des
unacha
UseFill
ChaFUN
UND
VR User’s Manua
MAIN SC
program startsystem booti
IN TO DV
scription Tu
authorized opanges, you m
er authenticatin the ID, PasTo operate abe assignedUser authen
anging SETUNCTION butto
DERSTAND
Live field
Screen Split cfield Split button(1~16), (36: HD-32Page, Full , Aut
al
CREEN D
ts automaticaing process.
R MAIN SC
To access the user name and
LOCK peration, For
must unlock f
tions prompt assword, and tand configure an Administr
ntications promP values / Ions, Making i
DING THE
image View
control
16ch:HD-2), Move o
DESCRIPT
lly once the s.
CREEN
features of td password.
is setup to use front bufirst.
appear after cthen click on te all but the mrator user accmpt will be apIndependent initial file syst
MAIN SCR
Additional FunLive Audio, ImBackup, DVR CD Burning butt
TION
system power
he CCTV SER
prevent froutton and set
clicking on ththe OK buttonmost basic feacount. ppearing wheSEARCH, PT
tem (and add
REEN
nction field mage Adjust, Mproperties, Log tons area
FunctKEYLOPTZ,
rs up, the follo
RVICES INC D
om tup
TheID:
Add ID: 19
he UNLOCK bun to log in. atures of the
en you accessTZ control, Fding HDD )
Manual view,
ction button OCK, Search,
OldeImag
owing Main s
DVR, you mus
e built in Admadmin, Pass
ded default Ad5, 393 / Pas
utton,
CCTV SERVIC
s the below fuFront SPLIT
Exit
CamerinformatioCAMERA B
est recorded ges info
screen appear
st log in with
ministrator usesword: 1111.dministrator ussword: 195
CES DVR, you
unctions, buttons, Add
ra n and
Button
Ver 2.1.0
9
rs after
a valid
er . user, 5. 393
u must
ditional

HD DV
MAI
SC SPL
VR User’s Manua
N FUNCTI
LO(u
SEhaFr
PThaca
Mre (D
Bu
LODVfo
Pr
CREEN CON
LIT SCREEN
1 CAMthere This cathe maclickin
4 CAMIt can at onecamerdisplay
6 CAMarea. camer
9 CAMarea. camer
10 CAarea. camer
13 CAarea. camer
16 CAarea. camer
al
ION BUTTO
OCK button: Inlock) the wi
EARCH buttoard disk drivereedom Syste
TZ button: Tas a PTZ camamera mode, BACKUP butcorded onto tDetail refer tourn button: bOG Viewer bVR system calder in DVR foroperties bu
NTROL BU
N BUTTON MERA SCREENis only a singan be done inain viewing ag the single c
MERA SCREENshow either
e time. To sra select sectyed, if 5, 6, 7
MERA SCREEN It will displa
ra display boxMERA SCREENIt will display
ra display boxAMERA SCREE It will displa
ra display boxAMERA SCREE It will displa
ra display boxAMERA SCREE It will displa
ra display box
ONS
In order to usndows functio
on: This butte. Pressing thms live viewin
his button is mera select itor selecting ittton: This bacthe HDD driveo Chapter 4)burning CD dibutton: This vn built the syolder at the otton: checkin
UTTONS
N: This Buttole view of onen one of two warea, and 2) bcamera selectN: This button
cameras 1-4 elect which 4ion. For exa
7, or 8 is pressN: This buttay cameras 1x. N: This butty cameras 1-
x. EN: This buttoay cameras 1x EN: This buttoay cameras 1x EN: This buttoay cameras 1x.
se windows fuon keys in the
ton is pressedhe search butng so the cam
only for use t in the maint in any multickup Button ise to your syst
rectly on the viewer file locaystem.log, eveoperating. g system info
on will change camera. ways; 1) By d
by clicking an t. n will show 4 (quad A), 5-
4 multi screeample, if the sed quad B won will show1-6 or any ca
on will show-10 or any ca
on will show 1-10 or any c
on will show 1-13 or any c
on will show 1-16 or any c
unctions aftere DVR system
d to view imatton will open
meras are still
with pan tiltn viewing are screen with s pressed to btem partition
main screen.ated at the DVent.log, Motio
ormation
ge the camera
double clickinimage one ti
cameras in th-8 (quad B), en is viewed; either 1, 2, 3
will be displayew 6 cameras aameras that
w 9 cameras aameras that
10 cameras cameras that
13 cameras cameras that
16 cameras cameras that
r starting them.
ages that wern another pro recording.
t zoom cameea by either wthe RED highbackup imporarea.
. VR folder in t
on.log, Newor
as in the ma
g an image inime so it is h
he main view9-12 (quad Cclick any ca
3, or 4 is preed and so on.at one time the user cho
at one time the user cho
at one time the user cho
at one time the user cho
at one time the user cho
e system, first
re recorded oogram on top
eras. If your watching it in
hlight. rtant data tha
the program frk.log files in t
ain viewing a
n any multi scighlighted RE
wing area. C), or 13-16(qmera numbeessed quad A. in the main
ooses to drag
in the main ooses to drag
in the main ooses to drag
in the main ooses to drag
in the main ooses to drag
Ver 2.1.0
10
t enable
onto the p of the
system n the 1
at were
folder. the Log
area so
creen in ED, then
quad D) r in the
A will be
viewing g into a
viewing g into a
viewing g into a
viewing g into a
viewing g into a

HD DV
Acc(ExAUT
PR
FUL
Do
Qu
SplOn
VR User’s Manua
20 CAarea. camer
25 CAarea. camer
36 CAarea. camer
cording to use, When usingTO SEQUEN
AUTO prescamfor 1
EVIOUS & N
PREVIchannEX) WMode)
NEXT:othersEX) WMode)
LL SCREEN B
FULL Swords not beProvid
ouble click an
ick change f
Step1 Wto
Step2 Wto
its screen Dne Screen D
al
AMERA SCREE It will displa
ra display boxAMERA SCREE It will displa
ra display boxAMERA SCREE It will displa
ra display boxed Board Modg 4ch Board, 6CING BUTTOSEQUENCE:
set time intervmera displayed1, 4, 6 and 9,
NEXT SCREEUOS: Show tels or others)
When users see), it goes to 1Show the NE
s) When users see), it goes to 5
BUTTON: SCREEN: Thisthe entire co
e displayed agding more screywhere on th
from split scWhile on multo quickly chan
When double-o previous sc
Double-Click tDouble-Click t
EN: This buttoay cameras 1x. EN: This buttoay cameras 1x. EN: This buttoay cameras 1x. el, some butt
6, 9, 10, 16 scON Pressing the vals. The sind in the main , 10 camera vN BUTTONhe PREVIOUS) e camera 2 o~4 (Quad Mo
EXT channel (
e camera 1 o~8(Quad Mod
s button will momputer monigain until the een area to dhe screen to s
creen to a siiple screen vinge to SINGLclick the LEFTreen. he LEFT mouhe LEFT mou
on will show 1-20 or any c
on will show 1-25 or any c
on will show 1-36 or any c
tons are not acreen layout i
Auto button ngle auto mod
viewing areaviews.
S channel (in
n full screen, ode). (in one chann
n full screen, de).
make the maiitor will displaleft mouse buisplay image.
show previous
ingle screenew, double c
LE camera scrT mouse butt
use button: Chuse button: R
20 cameras cameras that
25 cameras cameras that
36 cameras cameras that
active. icons are not
will sequentde is used fora will automat
one channel)
it goes to ca
nel) or next sc
it goes to ca
n viewing areay the camerautton is clicke. s screen with
n lick LEFT moureen. ton on the SIN
hange to oneReturn to prev
at one time the user cho
at one time the user cho
at one time the user cho
active.)
tially switch thr monitoring atically sequen
) or previous s
mera 1. Whe
creen division
mera 2. Whe
ea the entire sas only. The ed anywhere
interface.
use button on
NGLE camera
Screen. vious splits Sc
in the main ooses to drag
in the main ooses to drag
in the main ooses to drag
he camera via single screence. You can
screen divisio
n seeing 5~8
n (in 4 channe
n seeing 1~4
screen. In ottoolbar buttoon the screen
n the desired
Screen, it be
creen.
Ver 2.1.0
11
viewing g into a
viewing g into a
viewing g into a
iews for en. The do this
on (in 4
8 (Quad
els or
4(Quad
ther ons will n.
camera
ecomes

HD DV
VR User’s Manua
SPLAY IN
MERA STAT
TE/TIME IN
te/Time/
etwork nnectio
n ormatio
n
Thi[NeIt s
afte(distim
N SCREEN DI
truction Theis s
CAMERA NORecording Scording, [C&ECamera NamPTZ: When PTAudio: When
Red BordeLine in that
al
DICATOR
US LIST TREDisplays T It shows tusage sta• CCTV CA
GREENRED: C
• IP CameGREENRED: D
(V
YELLOOn the siCamera n
NDICATOR
s shows the Detwork Conshow currently
Client conner click on thesplay it bright
me/date indica
ISPLAY(OSDe OSD consissuperimposed
O : Shows camStatus: [R] RE]Continuous &me (DescriptTZ camera is Audio is con
er Line : Whechannel.
EE INDICATTop-down, hie
the attached atus. AMERA N: Normal CamCamera Signa
era or Video SN: Normal CaDisconnected Video signal
OW: Try to conngle camera
number.
Data/Time inection Icony connected C
nection statuse CONNECTIOtly) on the rigator.
D) INDICATOts of camera
d on each pan
mera number Recording, [C& Event Recoion) : Showsconnected an
nnected, [A] isen Event is se
TOR erarchical ma
CAMERA info
mera signal.l Loss
Server mera signal.from the Netloss)
nnect from thmode, you c
information n] Client Statu
s will be appeaON INDICATOght area in
OR Number, Des
ne.
in that channC] Continuousording, [S&M]s the Name ofnd setup, [P]s shown. etup in each
nagement of
ormation, VID
twork
he Network(stcan select ind
us.
aring OR
scription, Reco
nel s Recording, Sensor & Mof each channeis shown.
channel, it s
DVR cameras
EO LOSS stat
till Video signdividual camer
ording status,
[M]Motion Reotion Recordinel
hows Red Bo
s.
tus, and came
al loss) ra by clicking
, PTZ and Au
ecording, [S]ng
rder
Ver 2.1.0
12
era
g on the
dio that
Sensor

HD DV
2-2
DIG
DigDig
VIRT
ChoscreClicmovRele
ThisVirt
VR User’s Manua
BASIC F
ITAL ZOO
ital Zoom, Whital zoom for
TUAL DISP
oose the one een. ck and hold thve camera. ease the mou
s does not inftual Display C
al
FUNCTIO
MING
hen clicking Ocertain area
PLAY MAT
of screen firs
he left mouse
use button wh
fluence the reChange.
ONS
One Channel pis available by
TRIX
t, and then th
button and t
hen you have
ecording; it ju
popup, you cay dragging
he chosen scr
hen dreg the
repositioned
ust changes th
an see 16:9 L
reen can be m
mouse point
the camera t
he position sh
Live screen po
moved to the
ter in the dire
to the desired
hown in the S
opup.
location of th
ection you wa
d location.
Screen splits.
Ver 2.1.0
13
he
nt to
It is

HD DV
LIST
Desc
Step
Step
Step
Step
COL
VR User’s Manua
TEN TO LIV
cription GivT
p1
p2 WhStoClic
set
p3
p4
OR ADJUS
AcTsTyWs
BCSH
W
W
al
VE AUDIO
ve the instructTo listen to Li
SeScLiv
hen click on thop button. ck on the STO
tup in each ch
Cl
STMENT
ADJUST COLOcamera. The lighting inseasons, with These simple tyour recordingWhen click onscreen. (Show
BRIGHTNESSCONTRAST: SATURATIONHUE: Up/Dow
When users w
When users w
O
tion to get Livive Sound, fielect the Camcreen. ve Audio cont
he Play butto
OP button to s
hannel
If you To chathe moSound)
lick on the AU
OR: This menu
n the cameraschanges in wto use controg environmen the ‘COLOR
wn below).
S: Up/Down, Up/Down, Ad
N: Up/Down, wn, Adjust the
want to save th
want to apply t
ve Sound wirst users hav
mera channel a
trol dialog wil
n, will be liste
stop if you ne
Users can
need volume nge gain valonitored place)
UDIO button a
u will allow yo
s view will chaweather, and mol bars ensuret.
R’ button, COL
Adjust the Brdjust the ConAdjust the Sa
e Hue Values o
his value, use
this value to a
ith live viewinve to setup. and Click on t
ll appear on t
ening to audio
eed to stop au
n see available
up or down, ue, users have( gain ‘0’ me
again to closin
ou alter the in
ange throughmany other v
e that your ca
LOR ADJUST b
rightness Valuntrast Values oaturation Valuof Video.
ers can use th
all channels,
ng in the Main
the AUDIO bu
the screen. (S
o after Play b
udio.
e channel wit
clicking on dve to use Micreans No Com
ng the AUDIO
ndividual char
hout the day, variances. meras are pro
button will be
ues of Video. of Video. ues of Video.
his.
users can use
n Screen.
utton in the M
Shown next p
button change
th Audio whic
down, up buttrophone direc
mpensation in
O listening fun
racteristics of
with the chan
operly adjuste
e appearing in
e this.
Ver 2.1.0
14
Main
age.
es to
ch is
ton. ctly in
nction.
f each
nge of
ed for
n the

HD DV
2-3 USIDescTIPS
Desc
S
PTZ
PTZDesc
VR User’s Manua
W
PTZ CON
NG PTZ cription S OF PTZ CO
cription
AlloPTZU Acamin P
etup A ti(Re
PANEL BUT
1. S2. C [Co
PRESET cription A p
(caposusePR1. C
al
When users w
NTROL P
UseONTROL ows users witZ presets, andUsers have toAccording to mera, DVR sysPTZ Setting.(Cick inside the efer to PT set
TTON DESCRSelect channeControl using
ontrol Butto
preset is a usemera’s auto fsitioning and e this feature.
ROGRAMINGClick on the P
want to change
PANEL
ers can opera
th access righd tours.
o setup the PTPTZ control istem not worCamera 1 = Pbox indicates
tting in Came
RIPTION el No, just clicbelow button
ons] • POWER• LAMP• AUX : • PTZ Di• Auto-P• PTZ Ca
• Iris +/• Focus• Zoom• Speed
Setu• PRESET• PRESET• TOUR b• TOUR S• Scan Gr• Scan Gr
er-defined camfocus option mprogramming. ( Refer to Ap
G A PRESET, PTZ button aft
e all values to
te PTZ camer
ts to operate
TZ on the DEVn DVR system
rking at “ID=0PTZ ID 1) s PT SET on
era Tab)
cking on leftns.
R : Camera P: Camera LigAuxiliary Powrection ControPan : Auto PAamera Selectio
/- Button. in/out Buttonin/out Button
d up/down Bu
up Button, T Button. T Setup Butto
button SETUP buttonroup Button roup Setup Bu
mera positionmust be turneg using Pelco ppendix) do the followter chosen CA
o DEFAULT v
ras when ente
e camera lens
VICE of SETUm, Do not set0” due to DVR
the Camera T
/ right(◄ ►
Power On/Off.ght On/Off. wer On/Off. rol Panel. AN On/Off on.
n. n utton
Execute Bu
on
utton
n using PTZ aned off). Only cD, P, or suppo
wing: AMERA CHAN
values.
ering this but
control featu
UP dialog befotup the “ID=0R system “ID
Tab in SETUP.
►) button.
tton
nd focus comcameras that orted third-pa
NEL.
tton.
ures and to pr
ore using PTZ0” on to PTZ D=0” not ava
.
mmands the support arty protocols
Ver 2.1.0
15
rogram
.
ailable
s can

HD DV
ProgPTZ Pres
PREDesc
ProgPresTour
VR User’s Manua
graming et
2. C
3. M4. P5. Cbe Wh6. U7. H8. C STA1. C
Cliccam
ESET TOUR cription A p
preTheAt l
graming et and r
PR
SETon TheTo
al
Click on the
Move the camPreset ADD dClick on the Alisted on the
hen you progrUsers can addHave to save Click Exit butt
ART PRESETChoose the ac
ck on the mera accordin
preset tour allesets. e DVR-2000 oleast one PTZ
ROGRAMING
TUP the severthe Touring ae “Tour” dialoProgramming
button in
mera to wanteialog appearin
ADD button toPreset list fie
ram the samed presets makprogrammed ton to exit pro
T ctivated Prese
PRESET RUng to activated
ows a camera
or DVR-3000 SZ preset mustG PRESET TO
ral PRESET poarea in PTZ Paog box opens.g Preset Tour,
n the PRESET
click on thed place ng.(Shown abo activate pre
eld in Preset de Preset No, thking same proPreset, just c
ogramming m
et position in
UN button to td preset posit
a to move thr
Series DVR cat be set in ordOUR
osition first, aanel. . (Shown nextdo the follow
field on PTZ
he ADD butto
bove) fill in Preset and Exitdialog. he last No is sogress. (3~5)click on the S
mode in the Pr
the Preset lis
testing Presettion.
rough a progr
an store up toder to create a
and then Click
xt page) wing:
Panel. Prese
on
reset No and button, Activa
saved. ). SAVE button. reset dialog.
st field.
t position, wil
rammed sequ
o four preset a preset tour.
k on the S
et dialog appe
Description.ated Preset N
l be Move the
uence of PTZ
tours.
SETTINIG but
Ver 2.1.0
16
earing,
NO will
e
tton

HD DV
VR User’s Manua
STA
Clicacc Wsevour[NOPlemoa. Sb. Rc. Pd. P
al
a. Tour ADtour on
b. Fill in T
c. Select athe DurChosen Touring
When sIf need c
d. Click onthe Tou
e. Activatef. Have tog. Click on
ART TOURIN
ck on the cording to proWhen users uveral PTZ camr Touring is dOTICE] ease check agaovement exactSelected PTZRight ProtocPTZ camera HPower.
DD dialog appthe Tour dial
TOUR NO and
and Add Preseration Time ofpreset will be programming
set this as 2, tcheck cameran the ADD bur dialog.
ed Preset touro save programn the Exit to c
NG
Choose the
tour run butogrammed touse PTZ and D
meras at the sadone by S/W
gain below if uctly. camera is in ol.
H/W connec
pearing after clog. (Shown led DESCRIPTIO
et in list by clf touring. e move on tog need severathe preset Dwa position, jusutton to activa
r will be listedmmed Presetclose program
listed Tour on
tton to starts our. Dome cameraame time, us
users can not
the List to su
ction.
click on the Aeft) ON.
icking on the
o Tour Membeal Touring juwelling time isst double clickate preset tou
d on the Tour t, just click on
mming tour.
n the Tour list
touring, , wil
a with Presetsers can not u
t get right mov
upport or not.
ADD button to
button
er field. ust making ths set as 5 secking, it starts ur and Exit bu
r list field in Ton the SAVE bu
t field in PTZ
l be moving t
t Receiver, house Touring.
ovement after
.
o add presets
n and then de
he same progrconds. testing of tou
utton to return
Tour dialog. utton.
panel.
the camera
owever, when This is beca
r checking the
Ver 2.1.0
17
s to a
efine
ress.
uring. n to
using use
e
HD DV
2-4
FUN
SYST
VR User’s Manua
ADDITIO
NCTION IN A
ThiPRO
TEM PROP
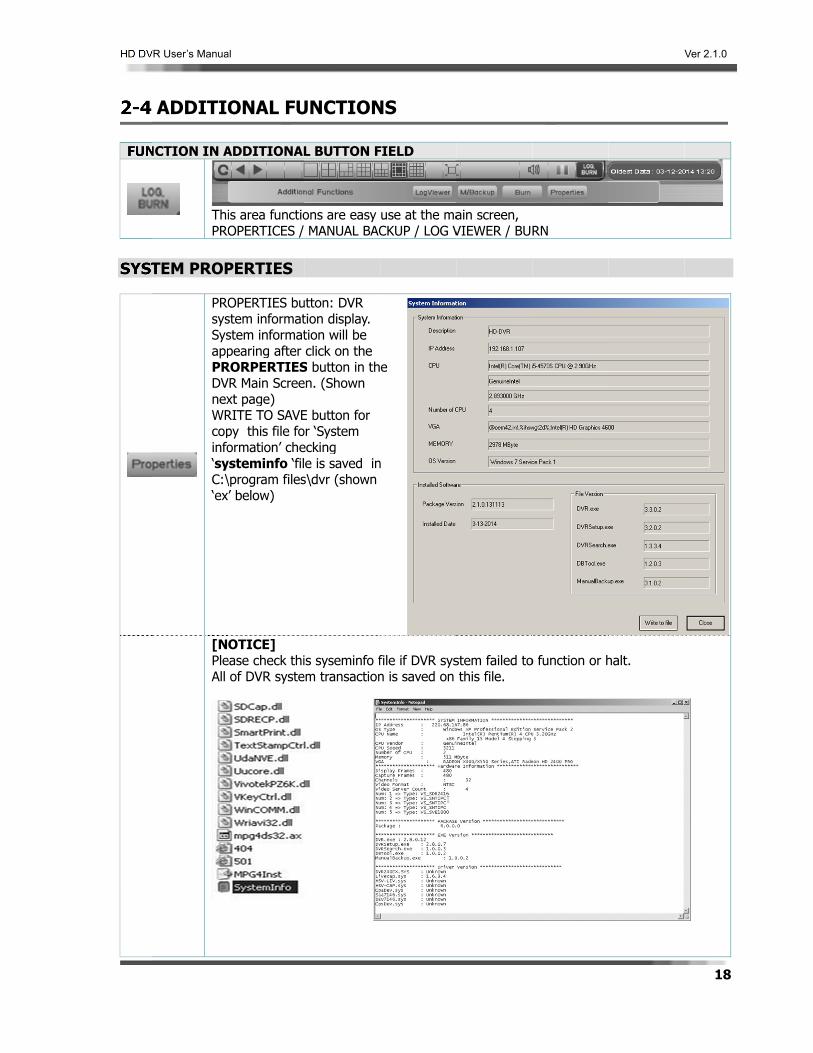
PROsysSysappPRDVnexWRcopinfo‘syC:\‘ex
[NPleAll
al
ONAL FU
ADDITIONAL
is area functioOPERTICES /
PERTIES
OPERTIES bustem informatstem informatpearing after
RORPERTIESVR Main Screext page) RITE TO SAVEpy this file foormation’ che
ysteminfo ‘fil\program files’ below)
OTICE] ease check thiof DVR syste
UNCTION
L BUTTON F
ons are easy MANUAL BAC
utton: DVR tion display. tion will be click on the
S button in then. (Shown
E button for or ‘System ecking e is saved in
s\dvr (shown
is syseminfo fem transaction
NS
FIELD
use at the maCKUP / LOG V
e
n
file if DVR sysn is saved on
ain screen, VIEWER / BUR
stem failed tothis file.
RN
o function or h
halt.
Ver 2.1.0
18

HD DV
LOG
Desc
VR User’s Manua
VIEWER
cription
LOGDVdurLOGOT
Ho1. 2.
3.
Sea
(Ma
(EV
(NE
al
G VIEW buttoVR system crering DVR progGVIEWER dia
THER button fw to viewing
Choose theChoose the
MAIN : SY EVENT : M NETWORK
Click on thearching Start,ain Log: Show
VENT Log: Sh
ETWORK Log
on is pressed ates the Loggram runningalog will be afield. (Shown log files, do t
e log view stae Search fieldYSTEM / CAMEMOTION / SENK : CONNECT e SEARCH but, and appearinwn below)
hown below)
: Shown next
to view DVR files on the p. appearing aftbelow) the following:rt date and ti: Main, EventERA / ERROR
NSOR / NOTIFY tton. ng the checke
t page)
system log fiprogram files
ter click on th
: me, END date
t, Network. R
ed log inform
les. folder / DVR
he LOGVIEW
e and time.
ation.
folder / Log f
WER button
Ver 2.1.0
19
folder
on the

HD DV
BUR
VR User’s Manua
RN
BU(ToCDtheAdAdREWRERburEX
No
al
URN button foo burn CD, h BURN Dialog
e OTHER buttdd Folder: Addd File: SelecESET: Clear aRITE: Start B
RASE: Delete rning selected
XIT: closing C
otice: Check t
or CD burninghave to saveg will be appeon field. (Shodding folder ot the data fordded files or
Burning. the data in
d data. CD burn dialog
the file size to
g directly on te files onto Hearing in the sown below). on the CD. r burning. folder.
CD-RW,DVD-
g.
o burn in CD
the DVR mainHDD) screen, when
-RW media, U
before Burn i
n screen.
n click on the
Use this butt
n CD and bur
CD BURN bu
ton If not wa
rn.
Ver 2.1.0
20
tton in
ant to

HD DV
VR User’s Manua
REREDA
al
ETECAT
TRCOTA
RIEORA
EVRD
VAED
L D
Ver 2.1.0
21

HD DV
3-1
EntersWhen(Show
1. ReInfor
2. Pl
VR User’s Manua
UNDER
s the search mn click on the wn below) The
ecorded data rmation Calen
ayback Time
3
al
RSTANDI
mode and opeSEARCH butte name and f
ndar
ThthWth*NchIf No
Line
Threoftryap* re
ING SEA
ens the Searcton in the Viewfunction of ea
he calendar ishat are YELLO
WHITE are dayhe month are Note: The sihanges the yea date conta
o Recorded Dhe Timeline Tecorded throuf day footage ying to find, sppropriate camNotice that
epresents mili
10
ARCH SCR
ch SCREEN, pwing Main Scach button are
s how the datOW, are days tys without anyto select diffengle arrow c
ear. ins recorded
Data: WHITETable gives a bghout the dawas recorded
simply click omera and timevery green tary time form
2
REEN
providing accereen, Search e described b
te you wish tothat have videy video footaerent monthschanges the
data, the dat, Current Datbrief overviewy. The greend. In order ton the green li
me. line is for a
mat.
2
ess to search screen will ap
below.
o view is seleeo footage. Tge. The arro
s and years. month and
te will be dispte: RED w as to wheren lines correspo locate the fine that corre
different cam
11
6
8
features. ppear.
cted. The daThe days that ows on the sid
the double
played YELLO
e motion was pond to what footage you aesponds to the
mera and the
7
5
4
1
9
12
Ver 2.1.0
22
ays are
des of
arrow
OW,
time are e
e clock

HD DV
3. CACam
4. In
5. Pl
6. SPZOO
7. FU
8. Bo9. SEButto10. IWind11. CSetu
12. E
VR User’s Manua
AMERA SCROmera Label
nformation Wi
ayback Contr
PLITS, PANOROM, FULL butt
UNCTIOIN Bu
ook Mark ButtELECT SOURCon Image displaydow Color adjust, up button
Exit button
al
[ ██████████
OLL and Thsyre
indow It Ti
rol Panel TsePl
RAMA, on
SItimMcaplNoThPAmToNoZOclm
uttons Pr
tons Ca
CE SeU
y If co
OSD PlOThcoSe
Color for ea
White: No █ Green: Co█ Yellow: Mo█ Orange: S█ Blue: Cont█ Pink: SensEach Dark Co
his scroll barystem. Click emainder of th
shows the inime/Date/FileThe play buttoelected on thay by Frame,INGLE buttome.
MULTI buttonameras in playayback 4 camote: The camhe subsequenANORAMA: P
motion of a sino use this featote: You canOOM: Specifiick of the mo
magnify the rerint, Save, Sm
an Book mark
elect the Storpdate all recoyou double t
ontinue to douayback imagen screen text he EXIT buttontinue recorearch mode.
ach Recorde
Data ntinuous Recotion Recordeensor Recordtinuous & Evesor & Motion olor means Rr and Camera
and hold thehe cameras.nformation of e Size/Recordion will begin the camera tim revere Play bn: The single
(4/9/16): givyback at the s
meras, 9 camemera in the topnt cameras wiPanorama butngle camera inture, click pan also changeic areas may use, and dragd box to the f
mart Search, I
king certain re
age drive of rorded image athe click the puble click the e color adjustdisplay posit
ton will take yrding while y
d Mode]
orded Data ed Data ded Data ent Recorded Recorded Dat
Recorded witha label will se tab, then d
recorded dating Mode the playing ofme line. Forwby frame, pee
e icon is for re
ves you the asame time. Ceras, 16 camep left corner will automaticatton is a plan nine individnorama buttothe playbackbe selectivelygging it to crefull screen Image Color A
ecorded data
recorded dataand reload picture, the si
picture until tment by Colotion setup by you back to liyou are sea
Data ta Audio
show the othdrag up and
ta.
f the video froward Play, reved up/down, eviewing only
bility to view Click the eacheras. will be the fir
ally fill-in in nuayback featu
dual frames, oon, then play. k speed wheny “zoomed” byeate a red box
Adjust Tool
.
a.
ze will increayou reach itsor Adj buttonSet OSD butive viewing mrching record
her cameras odown to sho
om where yoverse play, foStop, Audio one camera
4, 9, or 16 h button to
rst camera seumerical ordere that show
one frame at a
using this fey holding thex, will effectiv
se. You can s maximum sin, tton
mode. The DVded images
Ver 2.1.0
23
on the ow the
u have orward play at a
lected. er. ws the a time.
eature. e right-vely
ze.
VR will in the

HD DV
3-2
Des
The
To R
VR User’s Manua
RETRI
scription Rv
WSearch Main
Retrieval Recoa. Cb. R
Nata
c. Cv
d. CTT
e. DT
al
IEVAL RE
Recorded videvideo, recorde
When click onscreen will ap
rded data, doChoose the ExRecorded data
ames of eachable. Click on the Uview. Click on the TThe Yellow coTime Line Display the reTable.
ECORDED
eo can be plaed video is vie
n the SEARCHppear on to sc
o the followingxisting Recorda time informa
h camera are
Up/Down bu
ime Line in tolor Changes
corded image
D DATA
ayed back onewed from the
H button in thcreen. (Show
g: ded data inforation appears
displayed in
utton on the l
the playback to RED colo
e data on to s
ne channel ate camera view
he DVR main wn below)
rmation indicas on the Statu
the CAM1 - C
eft side, and
Time Line. or in the cho
screen accord
t a time on thw window on
screen,
ated on the Cus Time Line T
CAM16 areas
choose the c
osen hour ar
ding to chose
he screen. Lithe screen.
Calendar. Table.
on the status
camera you w
rea in the Pla
n hour on the
Ver 2.1.0
24
ke live
s Time
wish to
ayback
e Time

HD DV
HouIn Hby 5
To ch
HouDoubinterMinDoubhour
VR User’s Manua
f. Cv
The above Pur/Minute Taour zone, Re minutes as w
hange from H
ur to Minuteble-clicking rirvals. ute to Hourble-clicking rir intervals.
al
Click on the video on the w
Picture show table ed Line is showell.
Hour to Minu
: ght mouse on
: ight mouse o
Play bwindow. (Show
the data when
own by 3 hou
ute:
n the Hour p
on the minute
button to playwn below)
n click on the
urs for easy c
playback time
e playback ti
yback in the P
e Yellow date
checking, and
line to chang
ime line to c
Play button p
e.
d In Min zone
ge from hour
change from
panel, play ba
, Red Line is
r intervals to m
minute interv
Ver 2.1.0
25
ack the
shown
minute
vals to

HD DV
1. Ca
1. Ca
2. Se3. SePLA
INFO
AUD
a. Clb. Pl
VR User’s Manua
ameral Move
amera Move
elect camera earch Pointer
AYBACK PAN
PLAseleREV
STto sto
SPfasSpema
SPnex
PRbacthe
NEa tmo
So
ORMATION
DIO PLAY AT
lick on the Auay the record
al
(Up/Down bu
name or NO
NEL AY button: Tected on the VERSE PLAY b
TOP button: Cwhere the vi
op when the tPEED DOWNster play. eed Down Buaximum 8X. PEED UP buttxt click 4x up,
REVIOUS PLckward. To ue frame 1 framEXT PLAY butime. In ordeove one frameund play bu
WINDOW
ThCa
N
MS
T THE RETRI
udio button wded image wit
utton) 2. SeleCamerasthe Up/DIt point oIt point o
The play buttocamera timelbutton: This bClicking the stdeo was startimeline hits 5 button: Whe
utton, the PLA
ton: When Cl, next click 8x
LAY button: Tuse this featume down utton: This buer to use thise forward tton at a play
his shows theamera Name,
Normal(R) C
Motion(R) MSensor(R) SIEVAL IMAG
when playbacth AUDIO.
ect camera nas are GroupedDown Buttonout the currenout the curren
on will begin tine. button is to ptop button storted. For exa5 PM; the reden Clicking bu
AY goes slowe
licking buttonx up from norThis button are you must c
tton will allows feature, you
yback the reco
e Y/M/D and, Recorded Mo
Continuous R
Motion REC Sensor REC
GE
k recorded im
ame or NO 3.d 4, users movn. nt SEARCH Hont SEARCH Ho
the playing of
play the video ops the footaample, if youd timeline barutton, the foo
er down to 2/
n, the footagermal play. (R,xallows you toclick the icon
w you to viewu must click t
orded image
d H/M/S of reode as well.
REC Norma
SensoMotion
mage data.
Search Pointve to next Gr
our / Min. our / Min.
f the video fro
footage in rege AND bring
u start playingr will return tootage will play
/4/8 times aft
e will play fastx2,x4,x8).
o manually vien every time y
w the recordedthis icon ever
data
ecorded Data
al & Event CE
or & n
SM
ter oup just click
om where you
everse gs the timeling at 4 PM ano 4 PM. y slower dow
ter Speed Up
ter first click 2
ew frame by you want to c
d data one frary time you w
a in searching
Continuous &Event REC Sensor & Motion REC
Ver 2.1.0
26
k on
u have
e back nd click
n from
p max
2x up,
frame change
ame at want to
g, and
&

HD DV
3-3 THU
Desc
S
S
VR User’s Manua
SMART
UMBNAIL S
cription Thumo
tep1 To sea
tep2
To
Selscre
Step3
al
T SEARC
SEARCH
umbnail searcore easily by saccess the M
arch feature thgo Thumbnai
ect the Thumeen will be ap
CH
ch is a functioshowing everyotion Detectiohe user will nil search, do t
mbnail searchppears(below
Item (1) (2)
(3)
(4) (5)
3
on that helps y hour’s stop on you will ne
need to click othe following
h after click w screen)
Search aShows thShows thchoosing(Hour=>PlaybackSelected
users to find eed to open ton the SMAR
on Smart Se
nd enlarge thhumbnail videhe fist videos g the video it >10min=>1mk button for se
image for bo
2
4
1
the videos, th
the search feaRT SEARCH b
earch button,
Description humbnail videeos in the selecteshows every in=>10seconelected some ook mark or s
hey are look f
ature. Once ibutton.
, Thumbnail
eos
ed time. Whe10 min’s vide
nds) nail images aave
5
Ver 2.1.0
27
for
n the
search
n eos.
area.
5

HD DV
MOT
Desc
1) St
St
VR User’s Manua
TION SEAR
cription
Thethatin sthe the wenscre
tep 1
To
seabutt
OncMotFromthe wou
tep2
FirsOncleft minOnc
Nowproc
al
RCH
e advanced Smt allows a usemart search fuser to definfootage for t
nt on in thoeenshots will access the M
rch feature thton.
ce you have etion Detectionm this screenDate, the Sta
uld like watcht, you will nece the date hamouse butto
nute to determce you have s
w that you haceed and draw
mart Search fer to find a cefeature. Therne specific arthe time specse specific aassist you. otion Detectio
he user will ne
entered into Sn portion of th, you can choart Time and h. ed to select tas been selecn and click th
mine the exacselected the d
ave all your cw boxes arou
feature is a nertain event ore are two paeas of a camcified. They areas the use
on you will ne
eed to click o
SMART Searchhe search. oose the timeEnd Time in c
the date from cted you will nhe up and dowct time you wodate, time you
correspondingund the areas
new addition tof any cameraarts to this nemeras recordin
will then be er has defin
eed to open t
on the
h, you will be
e you want to chosen came
the top rightneed to selectwn areas by tould like to seu will continue
g times, timethat we wou
to the CCTV a at anytime bew function. Tng and the soable to revie
ned. To do
the search fea
SM
in the
search for mra from which
t that you wot the time. Tothe corresponearch for chose to the next
e and date seld like to sear
SERVICES INby utilizing thThe first part oftware will aew any motiothis, the fol
ature. Once i
MART SEARC
motion by seleh camera you
uld like. o do this, use nding hour ansen camera. step.
elected we nrch for.
Ver 2.1.0
28
NC DVR he built allows
analyze on that llowing
in the
H
cting u
your d
eed to

HD DV
St
St
St
PLAPlayb1. Se2. Cl3. Cl4. Cl5. St W
VR User’s Manua
By areafromyou
tep2
NowNexsen
tep 3
You
tep3
AYBACK FROback Searcheelect the one lick on the ADlick on the chlick Play buttotart the playb
When clicking
al
holding downa that would m where you will be seein
w that the arext Click on thesitivity.
u will now see
OM MOTIONed image from
of list in the DD button to Bosen list on ton on the Smback video aftethe motion ev
n the left moulike to choosedid the drawg.
ea is selected,e SEARCH but
e a detailed lis
Search finisN EVENT LISTm bookmark, dMotion checkBookmark, chhe Motion seart search diaer appearing vent list, vide
use button one from. Once
wing over the
, The picture tton to start s
st of every tim
shed messageT do the followiking list field. hosen list will lection field.alog. search screen
eo playback m
n the camerae the area is picture. The
above will sh
search after c
me an object
e appear afte
ng: be added on
n. message will b
a view, you dchosen, a grefollowing pict
how what youchosen Search
passed throu
r finished sea
the book ma
be shown and
raw a box oveen box will ature will show
u have just doh area and ad
gh the RED b
arch.
ark list field.
d can play.
Ver 2.1.0
29
ver the appear w what
one. djusted
box.

HD DV
If yoSma
3-4 QUI
Des
To S
VR User’s Manua
ou need to Prt search dial
ADVAN
CK SEARC
scription
QS
earch and Pla
al
rint or save Jog.
NCED SEA
CH
Quick SearchSearch when uayback video
a. Click Rig
JPG file, Click
ARCH
h made for eusers need urusing the Qu
ght mouse bu
1. C
2. CMotion Se
3. CMotion Se
4. Juthe Play b
k on Print bu
easy and qurgent search. ick Search, dotton on the c
Choose the on
Click on the Aelection field.Choose the lelection field.ust click on thbutton to play
tton or JPG s
uick search o o the followinhosen camera
b.
playback dr c.
to playbackon the chosd.
zone will plscreen insta Click speedup.
ne of date in t
Add button t
isted one of
he chosen lisyback.
save button o
on the Main S
ng: a channel.
Wrop down me
ook on drop dowsen time rang
Thlayback on thantly.
d up button if
the list field.
to bookmark
f bookmark
st, and then c
on the Play a
Screen w/o en
Will be appearinu. (Shown b
ose the time rwn menu and ge. he chosen time Quick Playb
f you need to
Ver 2.1.0
30
k on to
in the
click on
area in
ntering
ing below)
range click
me back
speed

HD DV
If yo
MUL
Desc
VR User’s Manua
ou need playb
LTPLE SPL
cription Use
MULthe
ClicMul
al
Not exisleft)
back in others a. Doubb. Minutc. Choosd. The re. Click
IT PLAYBA
ers can searchLTI button (4same time.
k on the PLAYtiple modes w
st data mess
s time zone, d
ble clicking onte drop downse the minuterecorded imagon EXIT butto
ACK
h and playbac4/9/16) gives Click the each
Y button afterwill be playba
Adjust Pl
sage will app
do the followin
chosen year, menu will bee time range tge data will pon to close Q
ck multi-channyou the abilith button to pl
r chosen Splitck.
ayback Speed
pear if record
ng:
, date and hoe appearing.to playback o
playback on thQuick search a
nel data ty to view 4, layback 4 cam
ts button. (4/
d
ded data doe
our. (Shown be
on drop down he screen after the stop
9, or 16 cammeras, 9 came
9/16).
es not exist.(
elow)
menu
playback.
meras in playberas, 16 came
Ver 2.1.0
31
Shown
back at eras.

HD DV
PAN
Des
S
S
PanoSear
GOT
Desc
S
VR User’s Manua
NORAMA P
scription P1
Step1 T(T
Step2
orama rch
C
TO(TIME S
cription Thesele
tep1
To
fea
al
PLAYBACK
PANORAMA a 16 individual fTo use this feaTo do the sam
Click
Click on the PL
SEARCH)
e GOTO buttoected cameraaccess the GO
ture the user
K
playback feaframes, one frature, Step 1~me thing to H
on the PANO
LAY button to
on will go toa, recorded daOTO, you wil
r will need to
ature that shorame at a tim~5 is the samour/Min Zone
RAMA button
o Panorama P
o the playing ate and time.ll need to ope
click on the
ows the motiome. me as one chae Search)
n.
Play back. (Sh
position of t
en the search
GOTO bu
on of a single
annel SEARCH
own below)
the video fro
feature. Onc
utton.
e camera in 4
H.
om where you
ce in the sear
Ver 2.1.0
32
4’ 9, or
u have
rch

HD DV
S
FULL
Des
SCb
VR User’s Manua
tep2
Wil
Fill dire
L SCREEN
scription Fs
FULL CREEN button
F
dto
al
l be appears
in the Chanectly and ima
PLAYBAC
FULL SCREEN splits mode. FULL: The full
done watchingo the regular s
Select time d
nel(camera nge will be dis
CK
playback fea
button will m
in full screen search method
ialog(Shown
no), Date andplay on to scr
ture that disp
make the record
you must clicd.
below)
d time and Creen.
play full scree
ded video play
ck the FUL
Click “OK” go
en image whe
y in full screen
LL screen butt
o to image lo
en playback th
n. Once you a
ton again to re
Ver 2.1.0
33
ocation
he one
are
eturn

HD DV
3-5 PAR
Des
S
S
VR User’s Manua
ADITIO
RTIAL ZOO
scription
TNm
Step 1
SS
C
Step 2
al
ONAL SEA
OMING
To search wanN.B This functmovement in bStep 1~3 is thSearch)
Click on the
ARCH FU
nted images etion is very usbig place.
he same as 1c
Partial Z
UNCTION
easily by searcseful in search
ch Search.(To
OOM button.
Will be app Select EnlaSquare like Selected sq
NS
ching in <Enlhing and findi
o do the same
pearing the zo
arged area ine left Picture a
quare image w
arged> imaging wanted im
e thing to Hou
oom window.(
n the image aat zoom windo
will be enlarge
es. mages or
ur/Min Zone
(see left)
and Draw theow..
ed.
Ver 2.1.0
34
e

HD DV
ZOO
Desc
ZoomDoub
BOO
Desc
S
S
S
VR User’s Manua
A
OM IN/OUT
cription
On imaIf rwo
m up only for ble click the le
OKMARK
cription ThemaThi
tep1 Ste
tep2
Loc
tep3
To
a
c
d
al
Another zoom
single displayage. An imagerecorded dataorking.
quarter size eft button mou
e Search allowrked time wins feature is u
ep 1~5 is the cate the timel
create book m
a. b. c.
d.
ing by
y, left buttone may be maga are high reso
(352x240(CIFuse to 1.5X, ag
ws you to boondow to multiused in conjunsame as 1ch ine at the boo
mark, do the
COLO COLOR Aon the Adwindow.
double-clickgnified no moolution (704x
F) resolution) gain Double cl
okmark a videiple. nction with thSearch.(To dok mark point
following:
Click on theAdd book mFill in informbutton. Book marke
mark list fie
R Adjust pane
Adjust panel adjustment B(Shown belo
on mouse maore than threex480 or 720x4
recorded datlick to 2X, Dou
eo region for
he export feato the same tht you want to
e Indexmark dialog apmation and co
ed date and tield.
el,
appears on thButton on theow)
ay be used toe times. (x1, 480), zoom up
ta. uble click to 1
one camera a
ture. hing to Hour/o bookmark.
button. ppearing. omment, and
ime will be ad
e screen aftee Search main
o magnify the x1.5, x2) p function no
X.
and apply tha
/Min Zone Sea
the click on t
dded on the b
Ver 2.1.0
35
r click n
ot
at book
arch)
the OK
book

HD DV
On
Boo
PRIN
Des
S
S
VR User’s Manua
Clic
screen
ONJusbe
Ent
okmark list
Wh(Sh
AubutIf ndisp
NT
scription To
Step1 b
Step2
PDo
al
ck on the ExitN SCREEN BOst click RIGHTappearing on
ter simple des
hen click on thhown below)
to is book matton. need show implay the recor
To print the se
utton. (ShowRINT dialog w
Descriptions ofn the OK butt
t button to cloOOK MARK T button mousn to screen.
(Shown lescription to Id
he List b
arked at the S
mage on book rded image o
earched image
Comn below) will be appearf printed imagton.(Shown b
ose book mar
se on the cho
eft) dentify Bookm
button, bookm
Smart Search
marked positn to search s
e. The image
mment dialog
r after fill in ge, then Clickbelow)
rk.
osen image. B
mark, and cl
mark list will b
. Manual is b
tion, Just clickscreen accord
Size depends
g will be appe
k
Bookmark dro
ick on the OK
be appearing.
book marked
king on the cing bookmar
s on Resolutio
earing after cli
p down menu
K button.
.
by book mar
chosen book mrked position.
on
ick on the PR
Ver 2.1.0
36
u will
rk
mark,
RINT

HD DV
S
Infor1. Si2. Na3. Si4. Re5. Pr
SETU
ADJU
VR User’s Manua
Step3
Cd
rmation of Prgnature: Guaame and ID ote installed, oecorded timerinted time: T
UP OSD TA
Description
USTMENT
Description
al
Click on the PRescription
inted Image aranteed DVRof the cameraowner, site inf: Time record
Time the imag
AXT POSIT
This frecord
adjust
T COLOR
This findividvideo.
RINT button o
R Image. a. formation. ded by the sysge is printed..
TION
feature will ded image It
Clickting OSD disp
feature will aldual still fram. It is only for
on the print d
stem.
6. Co7. OS8. Vid9. Co
allow you tois only for the
on the ‘Set play position o
low you to ade. The chang
r the one still
dialog after co
omputer User S and Serial Ndeo Image. omments.
o adjust thee one still fram
OSD’ buttonon the playba
djust the brigges you makeframe you ar
onfirming the
Name. O.
e OSD displame you are vi
n on the Searack image.
ghtness, conte will not carrre viewing.
image and
ay position oiewing.
rch Main scre
trast and HUEry over to the
Ver 2.1.0
37
on the
een for
E of an e entire

HD DV
VR User’s Manua
NG SELECT
cription
Upd
ou need to upation of file D
ct source dr
en. k local Systebe updating a
earch recordea. Choose thb. Browse fo
screen. c. Choose thd. Click on te. Existing r
al
adjust
BrighContrHUE SharpBlur :GRAYOriginUNDO
T SOURCE
dating all reco
Dpdate all recDB, click on t
rop down m
em data tab all recorded im
ed data by Sohe one of souor Folder dialo
he location ofthe OK buttonrecorded data
Clickting playback
htness : Brighrast : Contras: Color Value pness : Sharp: Blur Y : White/Blacnal : Go to oO : Cancel : E
E BUTTON
orded image a
Default data frcorded imagthe SELECT S
menu will be
for updating
mage and relo
ource button, urce data locaog will be app
f data Disk win to close Broa information
k on the ‘Coloimage.
htness compest correctionCompensatiopness/Undo
ck Change: Uriginal data
Exit
and reload, To
rom file DB ine and reloadSOURCE but
appearing o
all recorded oad.
do the followation type. pearing on the
ith folder namwse for Foldeappearing on
or Adj’ butto
ensation
on
ndo, Exit
To easy go to
n Local Systemd or searchintton on the Se
on the
image,
wing:
e
me, default foer dialog on thn the Calenda
on on the Sea
recorded data
m at a runninng recordedearch screen.
lder is ‘_Backhe dialog. r. (YELLOW
arch Main scre
a location
g Search. d data from
kup.
color)
Ver 2.1.0
38
een for
other

HD DV
3-6 STIL
De
VR User’s Manua
f. Follo
PERFOR
LL IMAGE(
escription
Step1
Step 2
Step3
Step4
al
owing step sa
RMING T
(JPEG) FO
Save currentDISK (includDVR SystemSaved JPG fo
Clicking on tSAVE as JPEthe drop dowmenu
Click on the (File name isA tick insideFolder of Dr
JPEG file cop
ame as SEARC
THE EXPO
ORMAT
t image as a ding external
m can Save a iformat type fil
SAVEmenu
the EG in wn
SAVE button s made autom
e the round inive after click
pied message
CH and PLAYB
ORT
bmp or JPEG USB Drive. images onto tles have a Wa
E AS JPEG or u after clickin
after choosematically, but ndicates JPEGk on the OK b
e will appear a
BACK progres
format to a d
the HDD or Fatermarking f
SAVE AS AVI ng on SAVE bu
e the DISK DRcan be chang
G, and then wbutton.
after the copy
ss.
diskette or de
DD, USD HDDfeature.
will be appeautton. (Shown
RIVE and SAVged as user wwill save the i
y is done.
estination Driv
D, USB stick.
ar on to drop n below).
VE Folder. wants.) image on to c
Ver 2.1.0
39
ve
down
chosen

HD DV
AVI
Desc
VR User’s Manua
VIDEO FO
cription
al
ORMAT
Save is a woverwritten.images of a To save a fudrop down bTo the save
a. Clickb. Cho
c. AVI
d. Choe. Set f. Click
ay that you c You can thparticular camull motion vidbox, choose tas AVI, do thk on the SAVose the Save
backup dialo
ose the CameStart Time ank on the AUD
can save videhen save the mera to a flopdeo file followhe Save as AV
he following:VE button on te as AVI on t
g will appear.
era Channel.nd Set End TiIO RECORDIN
eo the footag footage on ppy disk or cow the same sVI.
the SEARCH Wthe drop dow
. (Shown belo
me. NG for Audio
ge to hard drto a compac
ompact disk. step, but in t
Window screewn menu.(Sho
ow)
record with im
rive so it will ct disc, or sa
the Save as t
en. wn below)
mage.
Ver 2.1.0
40
not be ave still
type in

HD DV
[NOAudiAudiBut tSo in
[NOBack1.De
2. ExWIn
3. War
AVI UsininstaSAV
De
ManaSaveAlso
VR User’s Manua
OTICE] o Synchronizao synchronizathis is done wn Motion reco
OTICE] kup Media efault: Backu
CD/Dxternal: Backuhen users na this <time/d
When users dide saved , all bFile Play g Window M
alled in the syVED FOLDER
escription
agement dialoed AVI backupdisplay the a
al
In t Aud
g. Chonam
Click on Progress ratAVI file (full
ation Functionation with Vidwhen at least ording, Audio
Exit programBackup dialo
Click on the
p in the rootDVD: CD R/RWup in USB extmed the foldeate> folder, ad not name thbackup data a
Media Player, ystem. R MANAGEME
To managemplayback. og will be appp data save oavailable back
the motion redio Synchroniose the Media
me. the Start Re
te bar will appmotion video
n. deo is done au1 fps is savedSynchronizati
m dialog will bog. (Shown be
YES button t
t, C:\_backupW,DVD R/RWternal HDD orer, all backup all backup dathe folder , <tare saved as
users can p
ENT ment saved A
pearing after n to others M
kup media spa
cording, audiization cannoa to save, if y
ecording butpear after clico clip) will sav
utomatically. d,. So users hion cannot be
be appearing elow)
o exit Save as
p in Local HD
r other externfiles are save
ta are saved aime/date> fo<time/date>
play backup
AVI files in b
click MANAGEMedia or foldeace.
o synchronizaot be perfect.you need the
tton, AVI formcking on the Sve to the chos
have to save ae perfect.
after click on
s AVI.
DD(Can be us
nal storage. ed in the <timas <time/date
older is made .file.
AVI File jus
backup medi
EMENT buttoer and delete
ation with vid
folder name,
mat creating wSTART RECOsen folder.
at least 1 fps.
the EXIT but
ed again)
me/date> folde>.file. and in this al
st double-clic
ia, which is
n. (Shown neit on this dialo
deo automatic
fill in the fold
will starting.ORDING butt
.
tton in the AV
der when bac
ll data
king when W
very useful
ext page og.
Ver 2.1.0
41
cally.
der
ton,
VI
kup.
WMP is
to AVI

HD DV
Click CD/
De
SelecA ticClick
VR User’s Manua
k on the Exit b
/DVD SETUPescription
ct used CD/Dck inside the bk on the Save
al
button to clos
P Specify CD/D
DVD device. box indicates e button to clo
se manageme
DVD media, us
Save in Disk, ose.
ent dialog.
se or not save
when you ch
e on to select
hosen media D
ted media at
Device.
the AVI back
Ver 2.1.0
42
kup.

HD DV
UB
VR User’s Manua
USBA
al
SINAC
NGKU
G TUP
THP S
HES/W
E W
Ver 2.1.0
43

HD DV
Therefile di 4-1
De
It AvWh
in firs
(
VR User’s Manua
e are 3 kinds orectly just ide
MANUA
escription
is recommenvailable Medhen using somthis case use
st(CD-R, CD-R
Step1 (Backup Dialog)
al
of Backup forentifying the B
AL BACK
Users can uminute perioded to backu
dia: HDD, DVme Backup deers have to iR/W, DVD) be
First Click o
Next, click oManual back
.
r Manual, SchBackup Date.
KUP
use this to bd with Audio.p the selecte
VD, DAT, CDevices, users nstall this S.W
efore backup
on the
on thekup dialog wil
edule, and AV
backup the d. d data (based-R/W, Exterhave to use W in the sys
LOG,BURN
Backull be appear b
VI backup. M
ata recorded
d on time, mirnal USB HDspecific S.W
stem. More u
N button in th
up button on below as,
oreover users
d in specific
n, or specific DD, Networkwhich is sup
users have to
he Main scree
the other fun
s can backup
camera, time
filtered) k Drive ported by a d
o format this
en.
nction field.
Ver 2.1.0
44
all data
e, and
device, media

HD DV
S
4-2
Des
SScB
VR User’s Manua
Step2
Toa.b.c. d.M
e.
Ba
WdoCl
SCHED
scription
UsS※
Set up chedule Backup C
sS
al
o Manual Ba Chose the Ca Choose the TChoose the MBackup Folde Fill in the folessage dialog
Backup will b
ackup Done m
Will be return tone dialog.(shick on the EX
DULE BAC
Users can maksetup date/tim When backSpace messag※Users can nTo run Auto
check the IcWhen Syste
Click right buttscreen. Schedule back
ckup, do theamera ChannTime: Set StaMedia to Backer in Drive C/ lder name on g appear (Sho
be progress a
message dialo
to Manual bachown above)XIT button to
CKUP
ke automatic me for selectekup Drive spacge will be shoot use Schedmatic Backupcon in Tray Bem starts, Sch
ton Mouse on
kup sub drop
e following: nel. art Time and Ekup: Default iCD,DVR Drivto folder nam
own below) if
after click on t
og appear aft
ckup main dia closing Manu
backup usingd data. ce is not enouown. dule Backup ap, Start ScheBar) hedule Backu
n the Schedu
down menu w
End Time. is ‘_Backup Fove / Other Extme area. not fill in fold
the START BA
ter backup do
alog after clic
ual backup.
g Schedule B
ugh to save a
and Concurredule Backup
up runs by DV
ule icon in the
will be appea
older’ in Driveternal Media(U
der name.
ACKUP button
one ,
k on the OK b
Backup to bac
all selected da
rent Backup ap has to be ac
VRLoader aut
e bottom righ
ring. (Shown
e C. USB HDD etc)
n.
button on bac
ckup the data
ata, Not Enou
at the same tctive status.(P
tomatically.
ht of Windows
below)
Ver 2.1.0
45
)
ckup
a in
ugh
time. Please
s

HD DV
[AutBackType1. ScBack(SelePerioBack2.CoBack
SELS
S
S
S(B
S
S
VR User’s Manua
SS
tomatic kup e] chedule kup ected od kup) oncurrent kup
ECT BACKUPStep1 A
Step2
12
Step3
CF
Step4 In Full ackup) C
(
Step5 C(
Step6 C
al
SCHEDULE BASETUP in the d
P TIME(InclA tick inside th1) Click on the2) A tick inside Auto Dele
full, and oveChoose the BaFull Backup(2
Choose the StStart Time fo
Choose the StFrom the data
Click on the O When Back
ACKUP dialog drop down m
luding Full Bhe box indicate Select butte the box indetion is auto-erwrites data.ackup Type. 24 hours)
tart Backup r Schedule Ba
tart Date. a of this time
OK button to ekup is done by
will be appeaenu. (Shown
Backup ) tes Scheduleon and selecticates Use Au-delete the ol.
Selec(Back
Time. ackup is done
e, data is Backexit. y Schedule Ba
aring when chbelow).
e Backup ent Backup Drivuto Deletionldest data wh
cted Specifikup the data f
e for the first
kup automatic
ackup, users c
hosen BACKU
nabled. ve. n if need it. hen selected
cation Timefrom Start to
t time)
cally)
can see this b
P SCHEDULE
Drive HDD sp
e Backup End Time)
by Backup Vie
Ver 2.1.0
46
pace is
ewer.

HD DV
4-3
Des
Ins
4-4
Dire
Des
Ins
VR User’s Manua
CONCU
scription
C
struction
23
4
DIRECT
ect Backup
scription UH
struction
al
URRENT B
To use Conrecommendedone by once
Concurrent Bsaved in HDHDD Drive (users can baImageDB.
1. A tick
2. Click on the3. A tick insid
Disk 4. After click oWith Backup
T BACKU
Users can bacHowever, user
BACKUP
ncurrent baced to use Big e in a day. Backup is the D. Briefly spnormally in Dackup this re
k inside the b
e Select buttode the box ind
on the OK butp Viewer, use
UP
kup the data rs can not sea
ckup, ScheduSize HDD af
system to baeaking, our sD:) as Imagecorded data
ox indicates C
on and selectdicates □ Ov
tton to exit, itrs can see ba
at the same arch for the d
ule Backup(infter calculatio
ackup the datsystem saveseDB, so whenin selected H
Concurrent
t Backup Driveverwrite for
t automaticalackup data.
speed as PC ata before Ba
Drop d(showbuttoBack
Next cafter
ncluding Full Bon of selected
ta at the sames the recorden users use CHDD drive at
Backup enab
e. r overwriting
ly starts Conc
Copy Speed, ackup. down menu wwn left) after on mouse on kup running Ic
click on the Dr chosen it.
Backup ), used data Size.
e time when ed data in seConcurrent Bt the same ti
bled.
after full in B
current Backu
will be appearclick the RIGthe schedule con.
DIRECT BACKU
Ver 2.1.0
47
ers are This is
data is elected
Backup, ime as
Backup
up.
r GHT
UP tab

HD DV
S
S
S
UsMan
D
VR User’s Manua
Step1
Step2 B
Step3
sers can see tnual Data Fil
Description
al
Backup will be
this by Backule Backup (F PleaseExpert orIt is very sImageDB [Please u HDD prUsers hto backup Manage
e starting, cho
p Viewer. Files Copy)e be careful r Manager usimilar like DiB.
use this in broblems! ave to replacHDD in troub
er needs this.
osen data bac
Backupcomple
Pleassaved
in using thisuses this in urect Backup,
elow cases]
ce systems whbled system..
Click Recoleft)
YMD
YMDchaSo ubase
Shidata)
ckup on to de
p done messagetely.
se check the folder.
s Backup, iturgent case but the only
]
hen some sys
on the Backuorded data Tieafter chosen
D/Record StarD/Record Endnnels. users can baced on this inf
ift(Select All),)
efault data sav
ge will be app
backup folde
t is recommelike HDD prdifference is t
stems have a
up button one Dialog. (Shodate.
rt Time ~ d Time for all
ckup all the dformation.
, Ctrl(Select s
ve folder.
pear after Bac
r (Ex, 200610
ended that roblems. to backup ma
problem, and
Ver 2.1.0
48
n the own
ata
several
ckup
017) in
anually
d have

HD DV
I
Us 4-5
Des
Ins
VR User’s Manua
Instruction
sers can see b
BACKU
scription UB
struction
RRC
[IfB
CB
al
1. Open W2. Search 3. Choose4. With Sfiles easily Have to (Ex, WS4. Copy th
(Please backup data w
UP VIEWE
Use Backup VBackup, DirectWindow MeRun 1)Start >Run 2) Run BaC:\Program Fi
NOTICE] f not installed
Backup view s
Click on SeleBackup Disk
Window ExploDVR folder in
e the Files to chift, Ctrl key to copy. o select ImagS000017 / Whem to …. copy this not
with Backup V
ER
Viewer when t Backup, anddia Player can
> Program > ackup Viewer les\DVR\Back
d Backup views/w is one of v
ect Source
rer n ImageDB mcopy in IMAGey (like Windo
ge file and indWS000017.id
t <move>) Viewer.
monitor andd Files Copy bn be used in ADVR >Backudirectly.
kupView.ex
w s/w, Please viewer s/w
button for s
made directoryEDB folder. ow), or Drag
dex together adx )
d see AVI Bacby Manual. AVI backup pup View.
xe …Just Doub
install first be
search and p
y.
g & Drop, u
as a couple
ckup, Manua
playing as wel
ble-Click
efore using b
playback the
users can sele
l Backup, Sc
ll.
ackup view.
Backup data
Ver 2.1.0
49
ect the
hedule
a from

HD DV
S
S
S
S
VR User’s Manua
Step1
Step2
FS
Step3
R
C
Step4
al
For Manual BaStep 3. For Schedul
Copy, users Required recov
Click on the DThis Recov
as Dat file this.
Data
ackup, users c
le Backup, Cohave to Recover the Data
Data Conversvery procedur
to save the b
a Conversion s
can see backu
oncurrent Bacovery ProcessDialog, Click
Will be app
sion button.re needs, becbackup time.
status
Users haveBackup foon the OK Left Pict
on the sS/W.
up data direct
ckup, and Ds (Step3) to seon Yes
pear the Recov
cause in the bTo see this us
e to search alder exactly. W
K button.
ture shows thsearch butto
tly on Backup
Direct Backup,ee the data b
ver the data d
backup processers have to
Conversion
nd designate When finding
he image when in Backup V
p Viewer witho
, and Manauby Backup Vie
dialog.
ss the data isrecover this
n finished
Ver 2.1.0
50
the , click
en click View
out
ul Files ewer.
s saved to see

HD DV
S
N(R
mos
VR User’s Manua
Step5
123
W‘SD
NOTE Red are st FAQs)
al
1. Click on the2. Search the 3. next step saWhen users wSelect SourcDetails refer
Users haveIn above ca
date form thdate from.(Enot play Bacanother PC
When the Bmake it as t
e Yellow daterecorded dataame as Searc
want to searchce’ button andr to 3.3.5 Se
to install Bacse, when Dahe same as DEX. When PC ckup files….usin the date fo
Backup Drive ithe same. And
e (which has a by camera,
ch process. h other Backud do the samlect Source.
ckup Viewer Pate form is difDVR PC. Please
DVR date forsers have to corm DMY) is different in d users have
the recorded time, and mi
up data, userme procedure (
.
Package to sefferent in DVRe note that Brm is YMD, anchange date f
Backup PC ato recover th
data) in the inute on the t
rs can search (Step1~4) an
ee backup datR PC , users hBackup folder nd another PCform YMD (it
and Backp Plais even if Man
calendar. time table.
this by just cnd monitor.
ta in another have to changfollows the P
C is DMY, uset is backup in
ay PC, users hnual Backup.
Ver 2.1.0
51
clicking
PC ge the C DVR rs can
have to

HD DV
FA
Pow
Disp
Vide
PTZ
Reco
RemSear
Bac
Prin
Netw
VR User’s Manua
AQ
wer
<Q1.2.3.
play
<Q1.2.3.
eo
<Q1234
<Q12
<Q1.(
2.
ording
<Q12
<Q123 4
mote rch
<QChIf Cl
kup <QCh(T
t
<Q124
work
<Q123
<Q123
al
Q01> When D Check the co Check the Vo When using
Q02> When di Check the M Check the co Check the B
Q03> When C1. Check the c2. Check the P3. Check the U4. Check the C
Q04> When C1. Check the c2. Check the r Check the S
Q05>When PTCheck the rigPlease refer t Change the
Q06> When <M1. Check the r2. Check the rSchedule of R
Q07> When <S1. Check the c2. Check the r3. Check the r recording.
4. Check the <Q08>When us
heck the RSEnot running, Click Start > Pr
Q09>When usheck the Date
The Date FormQ10> When <P1. Check the c2. Check the r4. Check the D
Q11> When C1. Check the N2. Check the r3. Check the <
Q12> When 2W1. Check the r2. Check the U3. Check the c
VR power Oonnection of Poltage (115V/Multi-Tab, ch
isplay is not Monitors Poweonnection betrightness of Mamera Imageconnection ofPower of CamUse Camera Camera statuamera imagecameras staturight Status oSet AdvancedTZ is not worght connectionto PTZ H/W cconnection ofMotion Recoright setup of right setup of Recording. ChSensor Recoconnection ofright Sensor tright setup of
<Holiday> setsers can notEngine.exe ruCan you execrograms > DVsers can not e Form (Y/M/Dm(Y/M/D) hasPrint> does nconnection ofright Driver inDefault Printelient (CMS) aNetwork Cablright <IP setu<Use> of NetWay-Audio dright work of <Unlock of <Blconnection an
n, Does not Power Cable./230V).(Switceck the powe
coming. er and DVR Stween DVR aMonitor. es are not cof cable of Cammera. in DEVICE S
us whether it ie comes in Bus first, and cf Video Type d System dialrking normaln of RS-422/4connection in f RX-422/485
ording> is noMotion Area Schedule of heck the Holidording> is nof Sensor and type and normSchedule of
tup for that daRemote Seanning in the D
cute the RSEnVR > RSEnginmonitor <BaD) of DVR an
s to be the samnot work norf Printer and D
nstallation in Per Setup whenare not connle connectionp> in <Netwo
twork i in <Nedoes not wor<Agent client>ocking>(of Find setup of M
boot up syst.
cher) er and connec
System Powerand Monitor.
oming. meras and DV
Setup tab in Ds normal or n
B/W or abnorchange them.NTSC /PAL, og in SYSTElly. 485 converterInstallation M
5 converter. ot working no
in Camera taMotion Recoday setup for
ot working noCamera in <S
mal connectioSensor Reco
ate arch(Cant noDVR system.ngine.exe onne. ackup> data.nd another PCme as DVR)rmally. DVR and PowPC DVR for pn several prin
nected. n. ork> Setup. etwork> Setuprk normally.> irewall) in win
Microphone,
tem.
ction.
r.
VR board.
VR. not. rmal (warped
and camera tEM Setup tab
r and PAN/TILManual)
ormally. ab, Setup. rding in r that date. ormally. Sensor> and on. ording in Sche
t found file s
n the DVR fold
. C (to monitor t
wer On/Off rinter.
nters are used
p.
ndow XP sp2.
d) status..
type too. in DVR.
LT
<Relay>.
edule of
system ;-1)
der.
the Backup D
d
Ver 2.1.0
52
Data)

HD DV
WCCTV workmCCTV1) C2) T3) T4) T5) T6) P7) R
Tco
RMA If waReturIn orddeparpurchthe m PleaseCCTV ServicServicof RMand s The reFedExPleaseI undcost tverbaCCTV
VR User’s Manua
ARRASERVICES w
manship for aV SERVICES CTV Services his warranty oThe warranty To obtain servTo obtain servPurchaser muRegarding all here are no aonnected carr(Return Merranty repair n Merchandisder to have yortment and oase date. All
main unit. Any
e describe thServices. Yo
ces professionces profession
MA, explanatiohipping cost i
epaired or rex). e make sure terstand that that incurs ol. In the evenSERVICES II
al
ANTYwill repair or re
period of onINC. Warraextending thonly covers fadoes not cov
vice the originvice the originst include fullaccessories, t
advanced replrier service paerchandise A
is required, se Authorizatioour Merchandbtain a RMA the parts anmissing parts
he problems wour contact nals. After anals will decidon will be folloif necessary, a
placement un
the return addin the event n a order plant the shipmeNC has the ri
Y eplace, withoe year after tnty Statemeis warranty oailures due tover damages dnal purchaser nal purchaser l name, shippthey are no wacements on artner. Authorizatio
The Dealer mon (RMA) Numdise repaired a
number. Thind/or accessos and/or acce
which you haperson will in internal th
de to accept itowed. CCTV Saccording to C
nit will be del
dress is delivemy shipmentace by princients are returght to charge
ut charge, anthe date of insent only to the orio defects in mdue to normamust presentmust send th
ping address awarranty nor e
products and
on) must contactmber, and proand/or replacs warranty is
ories that comessories will n
ave with CCTimmediately orough invest as RMA or nServices contCCTV Service
livered to the
erable by ovets the customipals or reprerned or refusee all shipping
ny merchandistallation or d
ginal purchasmaterials and w
l everyday ust a sales recehe product/s pand telephoneexchange andd defective ite
t CCTVSERVICovide the folloced by warrans valid for onmes with the not be accepte
TV Services pforward you
stigation withnot and issue tact person wes Warranty po
e customer by
ersea carrier smer is responsesentatives ined by the cusand handling
se proved dedelivered.
ser. workmanshipsage. eipt / proof of prepaid to CCe number for d returns. ems will be re
CES Service owing informanty, you must ne year, startiproduct mused for warran
roduct to your problem to
h the provide RMA numbe
will inform youolicy.
y carrier serv
service. sible for all shn the compastomer, througg costs.
efective in ma
p by the manu
f purchase. CTV Services
our reference
eturned via ou
provider to oation. contact our s
ing from the st be sent alonty repair.
ur contact peo experienceed descriptionr. If it is not t
u of the RMA
ice (like a UP
hipping and hny, either wrgh UPS, FedE
Ver 2.1.0
53
aterial or
ufacturer.
e
ur
obtain a
shipping original
ong with
erson of d CCTV n, CCTV the case number
PS, DHL,
handling ritten or Ex, DHL.

HD DV
GLANT
VR User’s Manua
OSSART
ADSL AGP AVI BNC CCTV CD-R
CD-RW CPU DAT
DVD-RAM GB GUI HDD HDSL HTTP ISDN JPEG KB LAN MB
MPEG4 N/C N/O
NTSC PAL PC PCI
PSTN PTZ RAM RCA
TCP/IP USB VGA WAN
al
RY
ABayo
Joint
udio Video Inonet Neill Con
Digit
t Photographi
NationaPhase Altern
Trans
AsymmetricAccele
nterleave (Miccelman conne
ClosedCompaCompac
CentDig
tal Versatile D
GrapH
High bit-ratHyperTe
Integrated ic Experts Gro
Loc
Moving PicNN
al Television Snating Line (v
PerPeripheral CPublic Switc
PanRando
Radio Cosmission Cont
UnivVideo
Wid
c Digital Subserated Graphicrosoft’s multiector, or somd Circuit Televct Disk - Recoct Disk – Re-Wtral Processor gital Audio TaDisk – Random
Gigabyte phic User InteHard Disk Drivte Digital Subs
Text Transfer PService Digit
oup (video coKilobyte
cal Area NetwMegabyte
ctures Expertormally Close
Normally OpenSystem Comm
video broadcarsonal CompuComponent Inched Telephon, Tilt and Zoom Access Meorporation of trol Protocol /versal Serial o Graphic Adade Area Netw
scriber Line ic Port imedia compr
metimes Britishvision ordable Writable r Unit ape m Access Mem
rface ve scriber Line Protocol tal Network ompression fo
work
ts Group 4 ed n mittee(525 TVst standard 6
uter nterconnect ne Network om emory America
/ Internet ProBus aptor
work
ression formah Naval Conne
mory
ormat) IS 109
V-lines) 625 TV-lines)
otocol
Ver 2.1.0
54
t) ector
18-1

HD DV
VR User’s Manuaal Ver 2.1.0
55