eo getting started.pdf - Microsoft
77
With Your E0* Personal Gommunicator ec
-
Upload
khangminh22 -
Category
Documents
-
view
3 -
download
0
Transcript of eo getting started.pdf - Microsoft

With Your E0* Personal Gommunicator
ec

Getting StartedWith Your E0" Personal Gommunicator
ee
@ 1992, 1993 E0, lnc, All rights reserved.
EO, the EO logo, EO Personal Communicator, EO Lock,EO Phone, EO Sound, EO Calc, and EO Cellular Module aretrademarks of EO, Inc.
A number of trademarks and registered trademarks appear in thismanual. The companies listed below own the marks followingtheir names:
AI&T: AT&T Mail, Easylink, AT&T Easylink Services;GO Corporation: GO Fax, GO Mail, PenPoint, MiniText,MiniNote; Pensoft Corporation: Personal Perspective; SunMicrosystems: PenCentral, PenTOPS ; Notable Corporation:PenCross.
Terms and conditions forAI&T Easylink Services are subject tochange without notice.
EO PublicationsThis manual was written by Ann Cullen, under the direction ofTed Bamett, Product Manager. The book was designed byfrogdesign.
Printed on recycled paper.
Wdcome
Welcome to the world of E0rM personal communications. Theten easy sessions in this guide are designed to bring youquickly up to speed on your new E0 Personal Communicator440 or E0 Personal Communicator 880.
A Ouick 0rientation
Your EO Personal Communicator (referred to in this guide as
your EO) combines advanced communications technology witha familiar pen-and-paper way of working. You can use your EOto send and receive faxes and electronic mail over standardtelephone lines, or you can communicate wirelessly, using theoptional EO Cellular ModulerM.
Your E0 hardware can connect you with the worldYour EO Personal Communicator is loaded with connectivityhardware, including standard PC (serial) and printer (paratlel)ports, a keyboard port, a phone porl for a standard phone line,and a communications port for the optional EO CellularModule. The EO 880 also has a SCSI port and a VGA port towhich you can connect an external monitor.
Everything you need is already hereAll the tools you need for personal and business communicationscome ready to use. Your EO Personal Communicator islightweight, battery-powered, and mobile.
Your E0 is an integrated solutionYour EO Personal Communicator offers a unique combinationof hardware and software that gives you the edge incommunications. But your EO is more than a communicationstool. It's also a powerful computer you can use to capture,analyze, and transmit information, write and revise documents,
A 0uick 0rientation iii
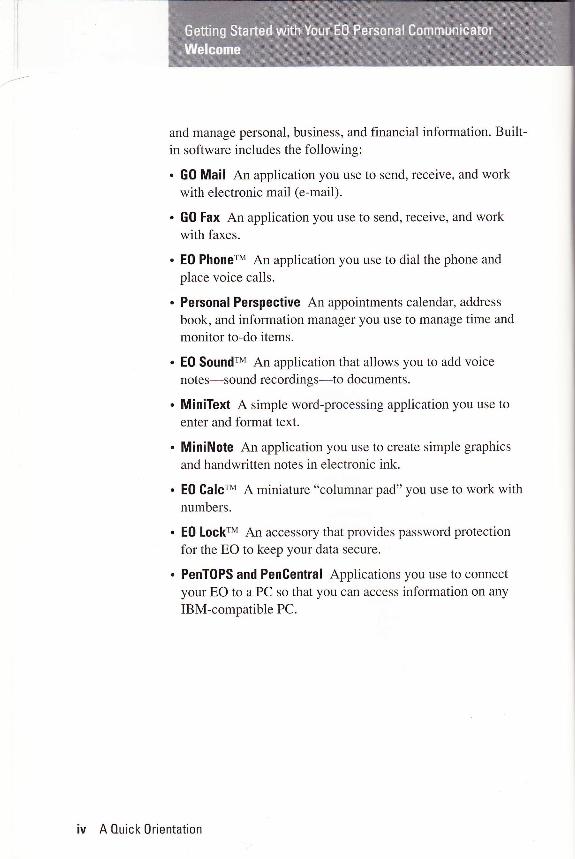
and manage personal, business, and financial information. Built-in software includes the following:
. G0 Mail An application you use to send, receive, and workwith electronic mail (e-mail).
. G0 Fax An application you use to send, receive, and workwith faxes.
. E0 PhonerM An application you use to dial the phone and
place voice calls.
. Personal Perspective An appointments calendar, address
book, and information manager you use to manage time and
monitor to-do items.
. E0 SoundrM An application that allows you to add voicenotes-sound recordings-{s dssurngnts.
. MiniText A simple word-processing application you use to
enter and format text.
. MiniNote An application you use to create simple graphics
and handwritten notes in electronic ink.
. E0 GalcrM A miniature "columnar pad" you use to work withnumbers.
. E0 LockrM An accessory that provides password protection
for the EO to keep your data secure.
. PenT0PS and PenGentral Applications you use to connect
your EO to a PC so that you can access information on any
IBM-compatible PC.
iv A 0uick 0rientation
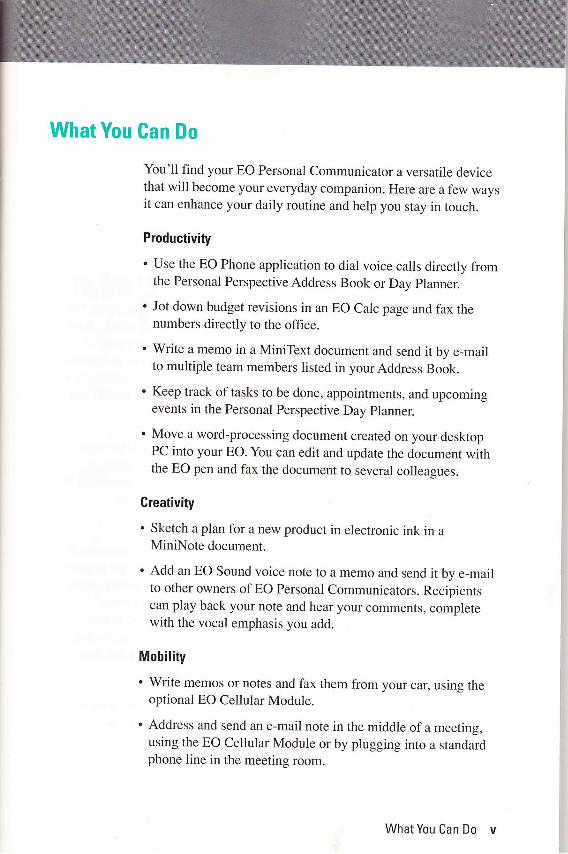
What You Can Do
You'll find your EO Personal Communicator a versatile devicethat will become your everyday companion. Here are a few waysit can enhance your daily routine and help you stay in touch.
Productivity
. Use the EO Phone application to dial voice calls directly fromthe Personal Perspective Address Book or Day planner.
. Jot down budget revisions in an EO Calc page and fax thenumbers directly to the office.
. Write a memo in a MiniText document and send it by e-mailto multiple team members listed in yourAddress Book.
. Keep track of tasks to be done, appointments, and upcomingevents in the Personal Perspective Day planner.
. Move a word-processing document created on your desktopPC into your EO. You can edit and update the document withthe EO pen and fax the document to several colleagues.
Greativity
. Sketch a plan for a new product in electronic ink in aMiniNote document.
. Add an EO Sound voice note to a memo and send it by e-mailto other owners of EO Personal Communicators. Recipientscan play back your note and hear your comments, completewith the vocal emphasis you add.
Mobility
. Write memos or notes and fax them from your car, using theoptional EO Cellular Module.
. Address and send an e-mail note in the middle of a meeting,using the EO Cellular Module or by plugging into a standardphone line in the meeting room.
WhatYou Can Do v
Fax a request for data and receive the data directly on the EO,
without leaving your hotel room.
Put the lightweight EO Personal Communicator in your lap on
long airline trips and jot notes, draw sketches, or work on
financial plans.
Before You Start
Your EO Personal Communicator is easy to use, but to use itsuccessfully you need to leam a new way of using a pen. The
gestures you use on the EO represent a new "alphabet." Printing
and writing by hand on the screen represent a new way ofadding information. Most people need a little time to become
accustomed to these new skills, so don't worry if you make a
few mistakes, or if the EO doesn't seem to "understand" you.
Practice is essentialWhether you're new to computers or an advanced user, we
encourage you to spend an hour or two with this guide. Byworking through the ten startup sessions, you'll save much time
and trouble later on, when you put your EO to work.
You may need to train your handwritingYou use the special EO pen to write and make gestures on the
screen, as described in this guide. Most EO users get gestures
and handwriting right only after they've put in some practice.
You may need to adapt your style of printing for better
recognition by your EO. If you become frustrated at first,
remember that you're leaming a completely new technology.
Practice should make you an expert user in just a few hours.
lf you're an experienced mouse user
Even if you're an experienced mouse user, EO recommends that
you work through Getting Started. Although tapping with the
vi Before You Start

pen is similar to clicking a mouse button, many conventions aredifferent. Keep the following in mind:
. Avoid the temptation to double tap. You need to tap only onceto select an item.
. Use the Contents tab to retum to the Table of Contents. Don'tclose the Notebook. It's a book. not a window.
lf You Don't Read Manuals
If you don't read manuals, you may want to work throughsessions 2 through 4 of this guide. These sessions show you howto open on-screen tutorials that introduce the EO Notebook andother software.
Important information about thebattery Don't skip section l, "setting Up theEO." This session provides importantinformation about setting up the EO, starting it,ancl restoring the charge to the main battery.
If you're a light reader, you're probably also an experimenter.A context-sensitive help system is available as you try thingsout. To open help, write a question mark anywhere on thescreen. Tap the Help Notebook button to turn to the EO's built-in reference manual.
lf You Donl Bead Manuals vii
Contents
Welcome.A Quick OrientationWhatYou Can Do.Before You StartIf You Don't Read Manuals . . . .
SettingUptheE0... ......1BefbreYouBegin... .::.. ............... 1
ConnectingthePowerAdapter. .......2UnderstandingPowerStates. ......... 4InstallingtheBackupBatteries. ....... 5
InstallingtheMainBattery. ....6SettingUpforCommunications.. .....8SwitchingtheEOOn... .....10Troubleshooting.. ....12TakingOutthePen... .......12
lntroducingtheNotebook..... ...13NotebookBasics. ..... 13
StartingtheTutorial ...15FinishingtheEOTutorial .....11GettingOn-ScreenHelp.. ....11TurningtoHelp ......18ClosingHelp.. .......19
HandwritingPractice. ....21Aligning the Pen. . . . . . 2lOpeningHandwritingPractice .......23FinishingHandwritingPractice ...... 24
GesturePractice ........25
FinishingGesturePractice ....21
liliiivvivii
Contents ix
SeftingtheDayandTime ........ ZgSettingToday'sDate.. .......29SettingtheTime ......30OpeningtheClock ....32
FaxingaNote ....33CreatingaNote. ......33RenamingtheNote ....34WritingtheNote ......36CorrectingOtherMistakes.... ...... 38PreparingtheNoteforFaxing ....... 38AddingtheRecipient'sFaxNumber ........ 40TransmittingtheFax. ........41MoreAboutMiniNoteandGOFax . . ....... 44
Writingalefter ...45AboutText .. ........ 45Creating aNew MiniTextDocument . . ... . .. 46AddingMoreText. ....50InsertingaWordintheMiddle..... ........ 50Retuming to the Table of Contents. . . . 51MoreAboutMiniText. .......51
OrganizingYourDay. ..... b3Turning to the Day Planner. . . . 53SwitchingtoText .....54SchedulinganAppointmenr... ...... 55MovingtheAppointment... ........ 56Moving theAppointmentto aDifferentDay . . . . . . . . 56CancelinganAppointmenr... ....... 57TumingtotheAddressBook ........57UsinglntelligentText ........59WritingalinkedNote. ......61CheckingtheNote ....61MoreAboutPersonalPerspective. ....62
x Contents
BechargingtheBattery. ...63Recharging ....63DisconnectingtheAdapterCable .....64OnYourOwn. .......65WheretoGofromHere. .....66
Registration. .....69RegisteringYourEO. ........69RegisteringforAl&TMail. ........10EOCustomerService ........71
Appendix: Software License .........73
Contents xi
1
Setting Up the E0
This session shows you how to set up your EOrM personalCommunicator 440 or E0 Personal Gommunicator gg0. First-timesetup should take from 5 to l0 minutes.
As you set up your E0, follow the sequence of topics and thenumbered steps carefully. The sequence is designed to ensurethat your batteries are properly installed and charged.
lf you purchased an optional E0 Cellular ModulerM, don'tconnect it until you've set up the E0. "setting Up forGommunications," on page 8 in this guide, shows theappropriate point for connecting the Gellular Module.
Before You Begin
Before you begin the setup process, take a moment to check thecontents of the Accessory Kit.
L Bemove the E0 Persona! Communicator from the antistatic bagand place it on a clean, flat sur{ace.
Z. "bnect the contents of the Accessory Kit to see that you haveeverything you need.In addition to this Getting Started guide, the Accessory Kitshould contain the following items:
. Book: Lookup Guide to the EO Personal Communicator.
. Book: The World of Messaging: An Introduction to personalCommunications.
. Slipcase for the EO.
. Main battery.
. Two type CRl23A barreries (the backup batteries).
Before You Begin 1
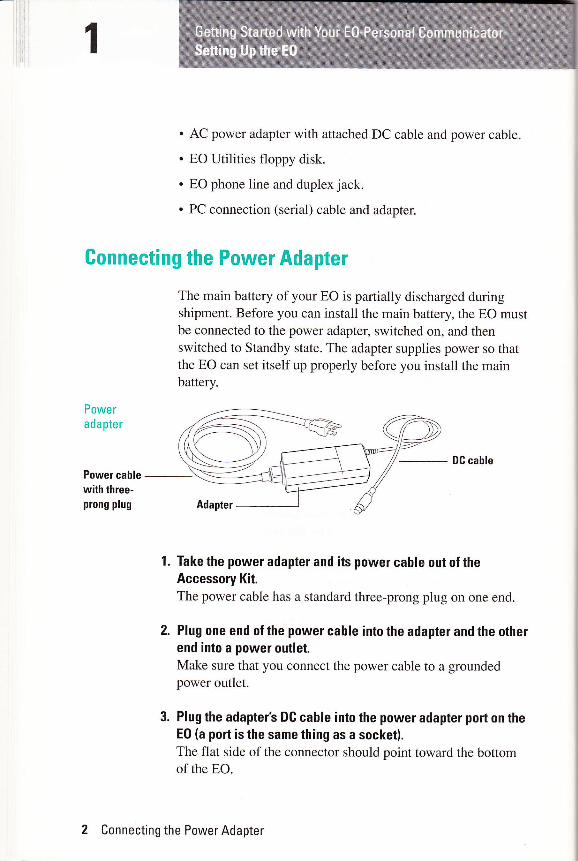
. AC power adapter with attached DC cable and power cable.
. EO Utilities floppy disk.
. EO phone line and duplex jack.
. PC connection (serial) cable and adapter.
Gonnecting the Power Adapter
Poweradapter
Power cablewith three-prong plug
1.
The main battery of your EO is partially discharged duringshipment. Before you can install the main battery, the EO mustbe connected to the power adapter, switched on, and thenswitched to Standby state. The adapter supplies power so thatthe EO can set itself up properly before you install the mainbattery.
DC cable
Take the power adapter and its power cable out of theAccessory Kit.The power cable has a standard three-prong plug on one end.
Plug one end of the power cable into the adapter and the otherend into a power outlet.Make sure that you connect the power cable to a groundedpower outlet.
PIug the adapter's DC cable into the power adapter port on theE0 (a port is the same thing as a socket),The flat side of the connector should point toward the bottomof the EO.
3.
2 Connecting the Power Adapter

Connecting tothe poweradapter port
Brightness andc o ntra stsliders
Gontrast
slider
o
The green charging light comes on to show that the poweradapter is connected, and the EO immediately begins its startupprocess.
Wait about 3 minutes as the E0 starts up.During startup, a picture of a pen appears on the screen. The penfills with ink as startup proceeds. Don't worry if the bar in thepen stops for 30 seconds or so-this is normal.
If you don't see anything Try adjusting thecontrast control slider.
Brightness
slider (E0 880)
-.ai
Contrast
slider
oE0 440
E0 880
Connecting the Power Adapter 3
1
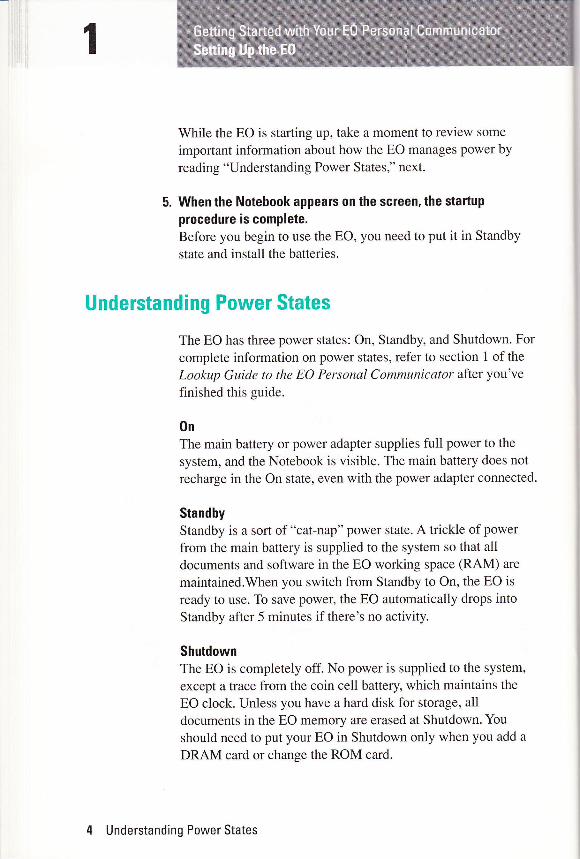
While the EO is starting up, take a moment to review some
important information about how the EO manages power by
reading "Understanding Power States," next.
When the Notebook appears on the screen, the startup
procedure is complete.Before you begin to use the EO, you need to put it in Standby
state and install the batteries.
Understanding Power States
The EO has three power states: On, Standby, and Shutdown. For
complete information on power states, refer to section 1 of the
Lookup Guide to the EO Personal Communicator aftet you've
finished this guide.
0nThe main battery or power adapter supplies full power to the
system, and the Notebook is visible. The main battery does not
recharge in the On state, even with the power adapter connected.
StandbyStandby is a sort of "cat-nap" power state. A trickle of power
from the main battery is supplied to the system so that all
documents and software in the EO working space (RAM) are
maintained.When you switch from Standby to On, the EO is
ready to use. To save power, the EO automatically drops into
Standby after 5 minutes if there's no activity.
ShutdownThe EO is completely off. No power is supplied to the system,
except a trace from the coin cell battery, which maintains the
EO clock. Unless you have a hard disk for storage, al1
documents in the EO memory are erased at Shutdown. You
should need to put your EO in Shutdown only when you add a
DRAM card or change the ROM card.
4 Understanding Power States
lmportance of BackupsIn the On and Standby states, the information you add to the EOis stored in memory. When you switch to Shutdown state,memory is cleared and all information is lost (except that on ahard disk or other storage device). If you don't have a hard disk,never switch to Shutdown until you've backed up theinformation in your EO. For instructions on backing up, refer tothe Lookup Guide to the EO Personal Communicator., section12, "Backups and Copies."
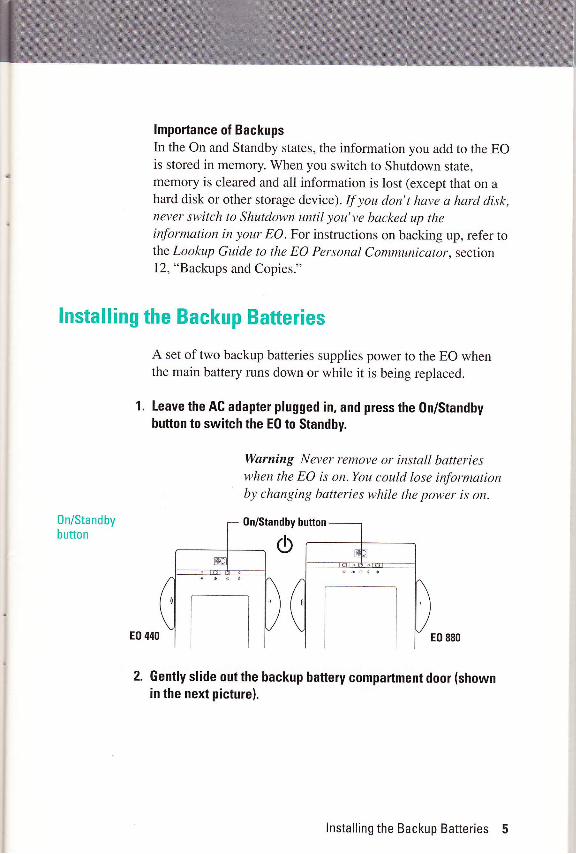
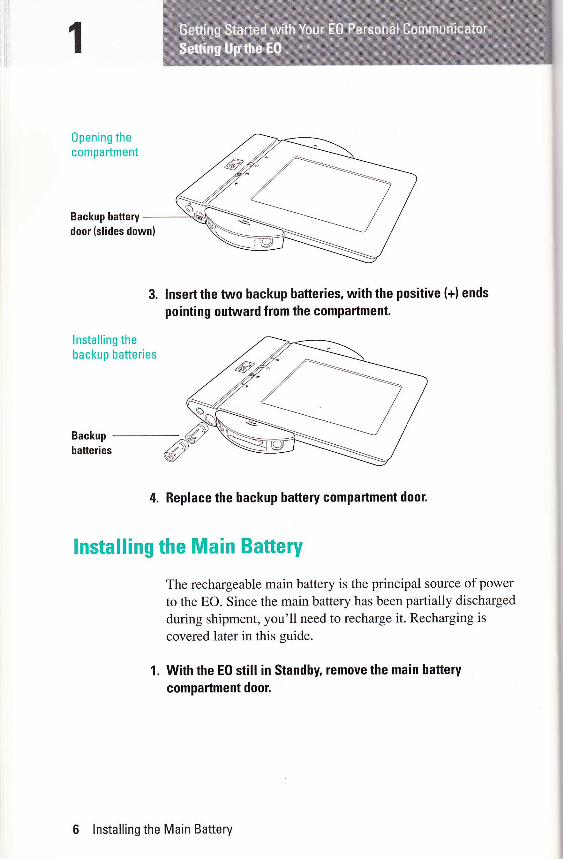
lnstalling the Backup Batteries
0n/Standbybutton
A set of two backup batteries supplies power to the EO whenthe main battery runs down or while it is being replaced.
1, Leave the AC adapter plugged in, and press the 0n/Standbybufton to switch the E0 to Standby.
Warning Never remove or install batterieswhen the EO is on.You could lose informationby changing batteries while the power is on.
0n/Standby button
E0 880
2. Gently slide out the backup battery compartment door (shownin the next picture).
Installing the Backup Batteries 5
1
0pening thecompartment
Backup hattery
door (slides down)
3.
lnstalling thebackup batteries
lnsert the two backup bafteries, with the positive (+) ends
pointing outward from the compartment.
4. Replace the backup hattery compartment door.
Installing the Main Battery
The rechargeable main battery is the principal source of power
to the EO. Since the main battery has been partially discharged
during shipment, you'll need to recharge it. Recharging is
covered later in this guide.
1. With the E0 still in Standby, remove the main battery
compartment door.
6 lnstalling the Main Battery

0pening thebattery door
Main bafterylatch
lnserting themain battery
Slide the latch tounlock thebattery door.
Pull the doordown to remove it,
2. lnsert the main battery.
Main hattery
Beplace the compartment door.
leave the E0 in Standby while you set up for communicationsin the next topic.
lnstalling the Main Battery 7
1
Setting Up for Gommunications
To use your EO Personal Communicator for fax, e-mail, and
phone calls, you need to connect the EO to a phone line.
If your EO is a 4MB system, or if you don'thave a modem With a 4-megabyte system, faxand e-mail applications are not available foruse. If you don' t have a modem in your EO , you
won't be able to communicate over a phoneline.
E0 Cellular Module
If you have an optional EO Cellular Module, you shouldconnect it to the EO now. For instructions, refer to ConnectingwithYour EO Cellular Module, and return to this guide whenthe Cellular Module is attached.
Standard Phone [ine
1. Take the E0 phone cord and duplex phone jack out of theAccessory Kit.The EO phone cord has a small "bump" near one end of the
cord. This bump contains electronics that help reduce electricalemissions during telephone transmissions. Whenever youconnect your EO to a phone jack, you should use the EO phone
cord provided and make sure that the end nearest the bump isplugged into the EO.
2. Unplug the existing phone cord from its wall outlet and plug theduplex iack into the wall outlet.Using the duplex jack allows you to keep both the EO and a
standard phone connected to the wall outlet.
8 Setting Up for Communications
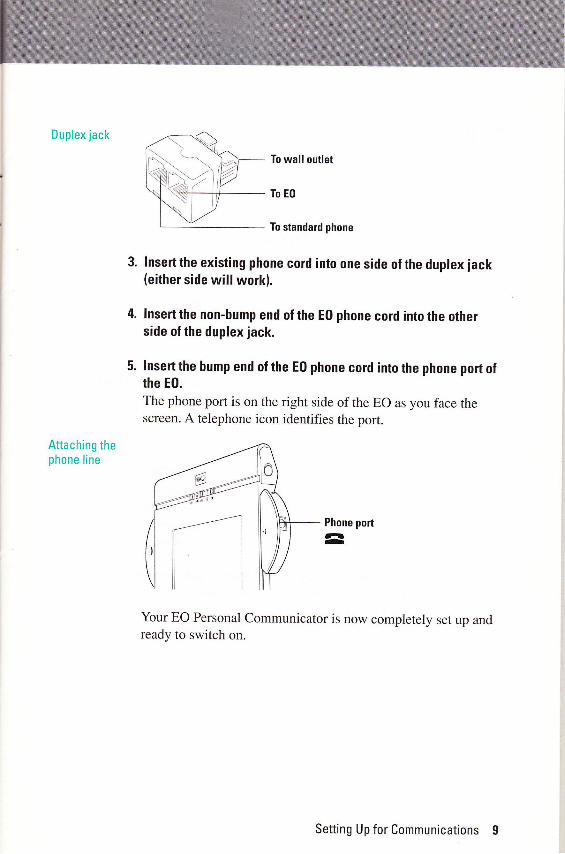
Duplex jack
Attaching thephone line
5.
To wall outlet
To E0
To standard phone
lnsertthe existing phone cord into one side ofthe duplex jack(either side will work).
lnsert the non-bump end of the E0 phone cord into the otherside of the duplex jack.
lnsert the bump end of the E0 phone cord into the phone port ofthe E0.
The phone port is on the right side of the EO as you face thescreen. A telephone icon identifies the port.
Phone porta-
Your EO Personal Communicator is now completely set up andready to switch on.
Setting Up for Communications I

1
Switching theE0 on
Switching the E0 0n
Since the startup procedure was completed earlier, the screen
and Notebook will come to life almost immediately when you
switch to the On state.
L Pressthe On/Standhy button.
0n/Standby hufton
E0 880
The Notebook appears in a moment, and you're ready to
continue with this guide.
Recharging still to come The main batterT has
not yet been recharged, so the EO shouldremain connected to the power adapter for the
time being. At the end of this guide, you'll learnhow to fully charge the battery.
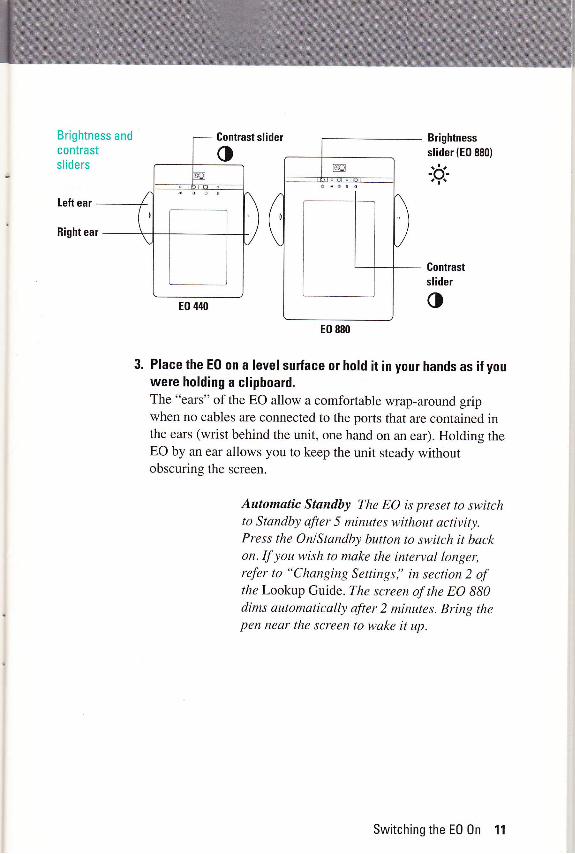
2. Adjust screen contrast and brightness to a comfortahle level by
moving the sliders to the right or left.On the EO 440, you can adjust screen contrast. On the EO 880,you can adjust both contrast and brightness.
10 Switching the E0 0n
Brightness andcontrastslid e rs
Left ear
Bight ear
Brightness
slider (E0 880)
-:*
E0 880
Place the E0 on a level surface or hold it in your hands as if youwere holding a clipboard.The "ears" of the EO allow a comfortable wrap-around gripwhen no cables are connected to the ports that are contained inthe ears (wrist behind the unit, one hand on an ear). Holding theEO by an ear allows you to keep the unit steady withoutobscuring the screen.
Automatic Standby The EO is preset to switchto Standby after 5 minutes without qctivity.Press the OnlStandby button to switch it backon. If you wish to make the interval longer,refer to "Changing Settingsl' in section 2 oftheLookup Guide. The screen of the EO 880dims automatically after 2 minutes. Bring thepen near the screen to wake it up.
Contrasl
o
Contrast
slider
oE0 440
Switching the E0 0n 11
1
Trouhleshooting
If your EO didn't come on properly, or if you don't see the
Notebook even after adjusting the screen contrast, try repeating
the startup procedure. Remove both the main battery and the
two backup batteries and retum to "Connecting the Power
Adapter," on page 2.
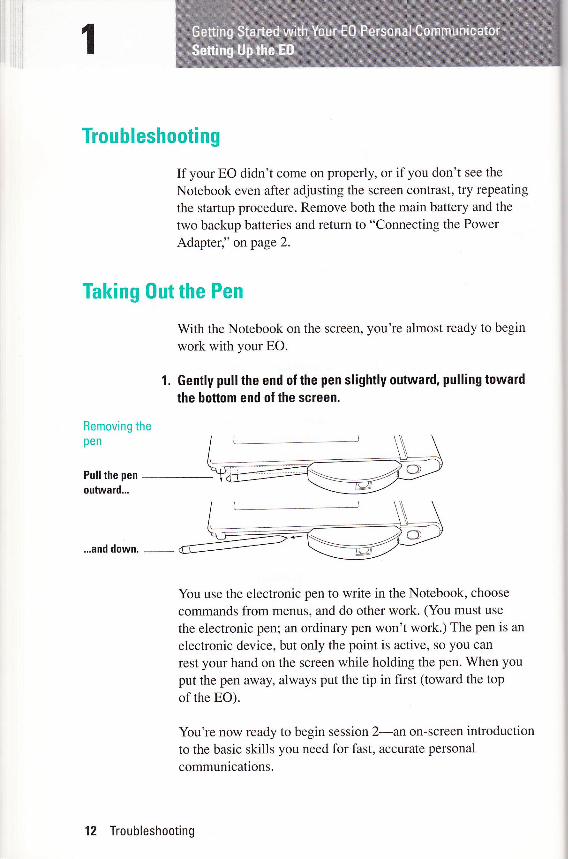
Taking Out the Pen
With the Notebook on the screen, you're almost ready to begin
work with your EO.
1. Gently pull the end of the pen slightly outward, pulling toward
the bottom end of the screen.
Removing thepen
Pull the pen
outward...
...and down.
-You use the electronic pen to write in the Notebook, choose
commands from menus, and do other work. (You must use
the electronic pen; an ordinary pen won't work.) The pen is an
electronic device, but only the point is active, so you can
rest your hand on the screen while holding the pen. When you
put the pen away, always put the tip in first (toward the top
of the EO).
You're now ready to begin session /-3n sn-sgleen introduction
to the basic skills you need for fast, accurate personal
communications.
12 Troubleshooting

Introducing the Notehook
This session introduces you to the Notebook and shows youhow to open the on-screen E0 tutorial. ln the tutorial, you,llactively use the pen as you learn ahout E0 concepts andactivities.
This session also shows you how to open the built_in helpsystem.
Notebook Basics
Before you begin the on-screen tutorial, take a moment toreview the way information is arranged in your EO.
The EO organizes information in an electronic Notebook that'ssimilar to a loose-leaf notebook. The Table of Contents is thefirst page of the Notebook. From here, you can turrr to any pagein the Notebook.
The pages listed in the Table of Contents represent documents-files you create to hold letters, lists, addresses, and otherinformation. Each document occupies a different page in theNotebook. For easy access to similar information, pages can beorganized into sections. The tabs on the right side turn to thepages or sections labeled on the tabs.
Notebook Basics 13
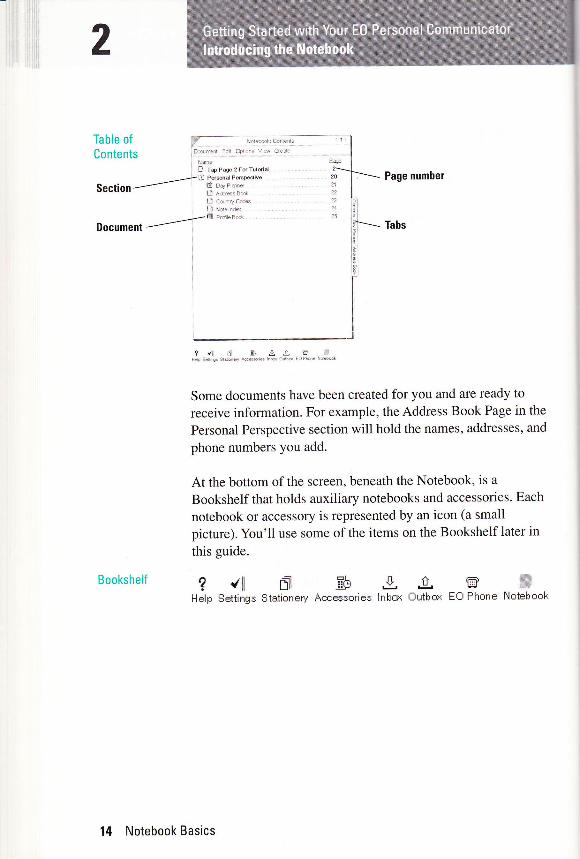
Table ofContents
/ " r.* -,'"
l. ' .r _o" (o t'e' :'' rI@D TePage2ForTulorid
/0) Persond PqspedNe
Section/ l!:i;.,,,!l ornlr/ ooe"!i Nore idalr -o1(Boo'
Document
-
Page number
Tabs
stgH
lnhor Outh':+<
,ia
EO Phone NoEhook
?t0Ip.!,E.p Sa!E: lrdtdi4 A..6io,8 hb.r
Bookshell
="-.-iB+I
I
I
II
III
-l
g o irll
oilbil EoPh.fe N.Et..r
Some documents have been created for you and are ready to
receive information. For example, the Address Book Page in the
Personal Perspective section will hold the names, addresses, and
phone numbers you add.
At the bottom of the screen, beneath the Notebook, is a
Bookshelf that holds auxiliary notebooks and accessories. Each
notebook or accessory is represented by an icon (a small
picture). You'll use some of the items on the Bookshelf later in
this guide.
? {ll Dil EhHelp Settings Stationery Ac,=essories
14 Notebook Basics

Starting the Tutorial
1.
3.
Now that you're familiar with the Table of Contents, you,reready to begin the tutorial and try out the electronic pen.The rest of this guide assumes that you have worked throughthe tutorial.
About gestures This tutorial introduces you togestures-the marks you make with the pen todo work on the EO. In this and other EOguides, gestures are shown with a special font.For example, an instruction to tap with the penis shown as "tupY."
lf the E0 is not on, switch it on by pressing the 0n/Standbyhutton.If you've not yet set up your EO, refer to section 1.
ln the Table of Contents, look for the page titled "Tap page 2 forTutoria!."
Hold the pen the same way you hold an ordinary pen or pencilwhen you're ready to write.
Tap I the page number, 2.
Tapping is like dotting an"i." Lightly touch the tip of the pen tothe number, and then lift the pen away from the screen.
r ll.,l,rc;trDoclmeil Edil Opliois View Creae
Where tosta rt
D T+Pa@2FdTutorid0l Portrd Perspedive
!3 ory cran",'t Addess 86r!) c*nrrycoaesD noe na*!11 er* eeo*
Tap here.
Starting the Tutorial 15

ilillii;i
iilli
iill,'il,t,;l
Welcome
5.
6.
In a moment you see a list of the tutorial section's contents.
If nothing happens You may have tapped too
lightly. Ifyou see a starburst on the screen, the
pen may have slipped.Try again, tappingdirectly on the page number.
Tap here.
Tap I page 3.
When you tap the page number, the EO turns to the first session
of the tutorial.
Follow the on-screen instructions to work through the tutoria!.
Your changes won't be permanent, so you can experiment as
much as you like.
Troubleshooting If you find you have trouble
turning pages in the tutorial, try the page-turn
gesture: A short flick to the left in the title line(at the top ofthe page).
li wd.ome TeP4e3ro 5di T4pinqwihrhePs
16 Starting the Tutorial
Finishing the E0 Tutorial
When you've finished the EO tutorial, you'll need to tum backto the Table of Contents.
1. Look on the right side of the tutorial page for a tab that says"Contents."
2. Tap Y the Contents tah to turn to the Notebook Table ofGontents.
Getting 0n-Screen Help
Your EO Personal Communicator was designed to travel withyou, so a help system is built in. You can leave the EO books ona shelf and still answer questions that occur to you when you'reon the road. The help system is also an excellent way to leam touse the EO efficiently.
On-screen help comes in two varieties:
. 0uick Help Provides short descriptions, how-to instructions,and explanations for objects you tap while Quick Help isopen. You can leam a lot about the EO by exploring thesebite-sized descriptions.
. Help Notebook Provides more extensive how-to instructionsand explanations.
Getting 0n-Screen Help 1l
Turning to Help
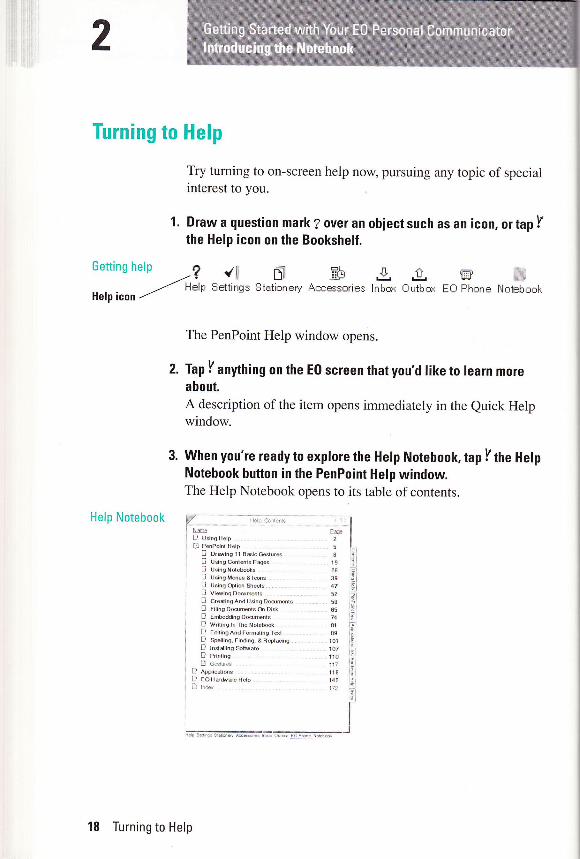
Try tuming to on-screen help now, pursuing any topic of specialinterest to you.
1. Draw a question mark ? over an objectsuch as an icon, ortap Ithe Help icon on the Bookshelf.
Gettino helo rl rl n- EL n A_,r {ll EII Eh .9, .9. E ..
--/ Help Eettings Stationery Acr:essories lnbcr,r Ouths EO phone Not=boohHelpicon./
The PenPoint Help window opens.
2. Tap I anything on the E0 screen that you'd like to learn moreabout.A description of the item opens immediately in the Quick Helpwindow.
3. When you're ready to exptore the Help Notebook, tap y the HelpNotebook button in the PenPoint Help window.The Help Notebook opens to its table of contents.
Help Notebook
! Usins Help
0l PenPoinr HelpD Dr*ins 11 AGicce$uresI u6in9 contenls P@sD Using NotebooksD Using Menu6 & l@nsD Using Qtlon SheotsD vidins DoomentsD CredingAndUsing DodmentsD FitinsDoomenlsoDi6k! EmbeddingooamenrsD Wrninq rn lhe NorebookD EdlingAndFormdingTdD Spellinq, Findng, & HepladngD lnsdllng SoflwileD Prinringlf oe"r,,""
D ApplicdlonsD EOHa&deHdpll naa
_.r'l1*l:t6!rs |l28i47*
ss ,i:ns iit4+81 E89.101 ,qlro7 i[;110 ?117 :r8 3
142 raiq
18 Turning to Help
4. Tap I the page number for any topic you want to review.The Help Notebook works the same as the main Notebook. Youtap page numbers or tabs to tum to the topic you want to review.Tap Y Index for an alphabetical lisring.
EO Hardware Help Near the bottom of theHelp Notebook table of contents you' ll see " EOHardware Help." Turn to this section of help
for quick answers to hardware-relatedquestions.
5. To return to the Help Notebook's main table of contents, tap Ithe Contents tab.
Glosing Help
When you've finished exploring the Help Notebook, close it so
that you're ready for the next session. To do so:
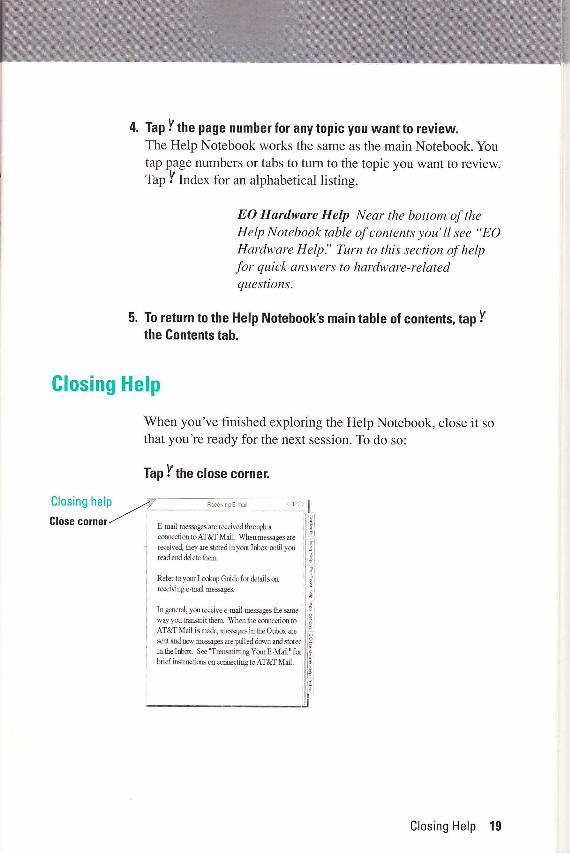
Tap I the close corner.
Closing help B{elngE.mal 12:
! pnil 6esqpes 66 leseived ftrou$ a
cmctim to AT&T Mail. When mmges aereceive( they ae stored iaym I$o udil you
read aod ddete them.
Refer to yru Lo*up Guide for &tails mreceiviog e-mail mmge
Io gereral , you receive e-mail mevges fie weway you trmit them. When the cmctim toAT&T Mail is made, m.*ms io the Oubc uexnt md w mesga ue pdl ed dwn and stuedinthe I6q. Se'Trmitting Yu E-Mail' fqbrief iretrrctim ocmtirg toAT&T Mail.
Close corner 3lq
q,
'd
a1
El
Closing Help 19
Good time for a break
oStandby If you take a break, press the OnlStandby button to switch the EO to Standby.With the power adapter connected, the mainbattery will begin recharging while you'reaway. Actually, because the EO drops intoStandby automatically, you'll find it in Standbyif you leave itfor more than 5 minutes.
20 Closing Help
Handwriting Practice
ln this session, you'll work through another on-screen tutorial.This one will show how to write with the pen so that the E0 canread your handwriting accurately.
This session gives you an on-screen demonstration of the bestway to write each lefter and numher and a chance to practicedifferent letters, numhers, and characters so that they're easierfor your E0 to recognize,
For trouble-free work with applications and documents, ffrbsession is very important.
Aligning the Pen
0pening theSettingsNotebook
Before you start the handwriting session, take a few moments toalign the electronic pen. Aligning the pen shows the EO yourpersonal writing style-the angle at which you hold the penwhen you write on paper or on the screen. proper pen alignmenthelps you write more recognizable letters. you need to set penalignment only once.
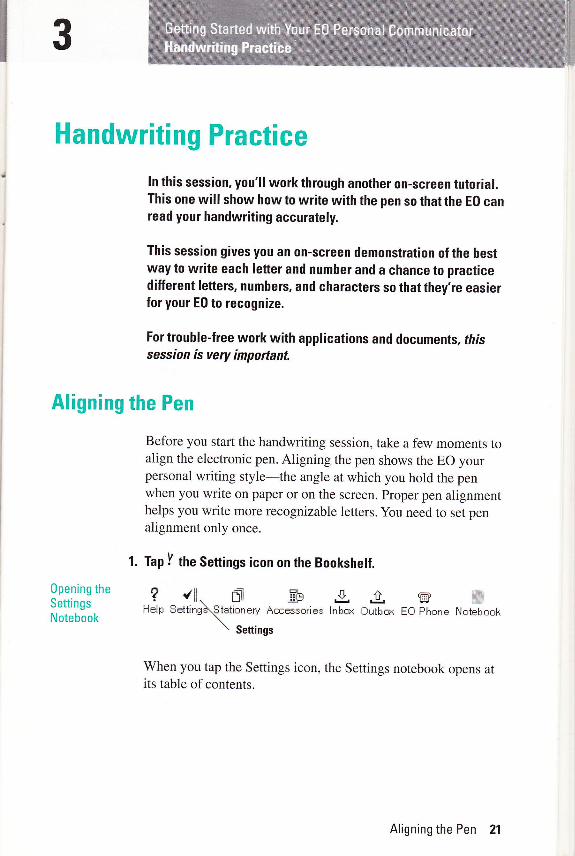
1. Tap Y the Settings icon on the Bookshelf.
? r'li. Dj: EF .9. .9, EHelp Settinq\Stationery Accrssories lnhcpr Outh,:N ED Fhone l,l,:Ebook-\
\ seftings
When you tap the Settings icon, the Settings notebook opens atits table ofcontents.
Aligning the Pen 21
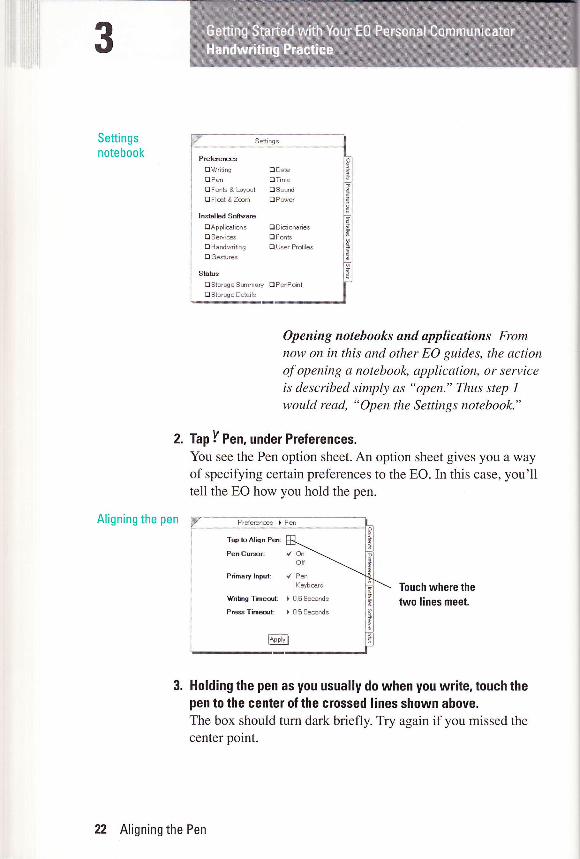
Settingsnotebook
Aligning the pen
OWriiing
O Pen
OFonb & LiyoultrFlmt &Zom
lnsblbd Soft*reBApplimlions
O Sefrr6OHanderiting
trGeduES
Shtos
ODale
OTime
Ogound
E Pwer
ODidionaries
OFonh
trUser Proiiles
ESlorage Summary OPenPorni
trStErqe 0dails
Opening notebooks and applications Fromnow on in this and other EO guides, the actionof opening a notebook, application, or serviceis described simply as "open." Thus step Iwould read, "Open the Settings notebook."
2. Tap[ Pen, under Preferences.You see the Pen option sheet. An option sheet gives you a wayof specifying certain preferences to the EO. In this case, you'lltell the EO how you hold the pen.
Touch where the
two lines meet.
Holding the pen as you usually do when you write, touch thepen to the center of the crossed Iines shown ahove.The box should tum dark briefly. Try again if you missed thecenter point.
Primary lnput: v leenlKqberd
l#riling fimesi: ) 0.6 Semnds
PeTimat: ) 05Semnds
n Aligning the Pen

4.
5.
1.
2.
Tap Y Apply.This tells the EO to adopt the pen alignment you just set.
From now on, the EO recognizes your angle of writing and can
translate your writing more efficiently.
tap I the Settings notebook's Gontents tab to return to the tahteof contents.In the next series of steps you'll open the on-screen handwritingtutorial, and you need to be at the Settings contents page to do so.
Handwritingpra ctic e
0pening Handwriting Practice
Now that you've aligned the pen, you're ready to practicewriting a few letters and other characters. In this part of thesession, you'll get an on-screen demonstration of the best wayto form letters and numbers.
0n the Settings contents page, tap I Handwriting, underlnstalled Software.You see the Handwriting page.
Tap I Practice to begin the Handwriting session.
Tap here.
Follow the instructions on the screen to practice writingletters, numbers, and symbols.You don't need to practice all the letters. Just writing a few willgive you a good idea of the need for writing each character in aconsistent way.
0pening Handwriting Practice 23
ii.i::
Return later You can return to this session atany time to review the best way to write a letter
for recognition by the EO.
Finishing Handwriting Practice
When you've had enough practice, close the HandwritingPractice tutorial so that you're ready for the next session inthis guide.
1. Tap I the close corner of the Handwriting sheet.You retum to the Handwriting page.
2. Tap I the close corner of the Handwriting page.
The Settings notebook is automatically closed.
for a breakGood time
c
24 Finishing Handwriting Practice

Gesture Practice
In this session you'll work through the final on-screen tutorial.This one will help you hecome familiar with the most-usedgestures in the E0 Notebook environment. you'll learn what allthe gestures are, what they do, and how to draw them.
Starting Gesture Practice
You already have some experience with gestures. In the EOtutorial, you tapped I to tr.n pages and open documents,and you drew a caret 7, to create a new document. Now is agood time to explore the many other gestures you'll use as
you work with the EO.
1. lf you switched the E0 to Standby at the end of the last session,switch it on (press the On/Standby hutton).The Notebook appears, ready to use.
2. Open the Settings notebook.
3. Tap I Gestures, under lnstalled Software.You see the Gestures page.
Gesture practice
4. Tap I Practice to begin the tutorial, and fotlow the on-screeninstructions.
VI
Otdg
Starting Gesture Practice 25
Gestures
o
LX
I
I
;!
. Tap i Flick up dryn I Brrcket riqhtr Doubletap o Cirde + Ar#up... Tripletap e Cirde liner1 Cluadrupletap o Doublecircle
- Pres q Undo.- Tappess v Che*i Flick up A Cdei! Flick dwn i Csd t+.- Flick left j| Double B€t-. Flick riqht X C€ss outii Doubletlick up
lnsed chsadei
lnsert tsbNew peaq6phNew line
J lnilial 6ps
You don't need to practice all the gestures. Try a few of them,though, so that you can become familiar with this new alphabet.Here is a list of the most frequently used gestures, preceded bythe symbols used for them in EO publications:
Symbol Gesture name
Cross out (delete)
Caret (insert)
Check (change options)
Circle (edit)
Insert space(s)
Undo
Flick up (scroll page up)
Flick down (scroll page down)
Flick right (scroll page right)
Flick left (scroll page left)
Tap (select)
Press (move)
X
26 Starting Gesture Practice
Symbol Gesture name
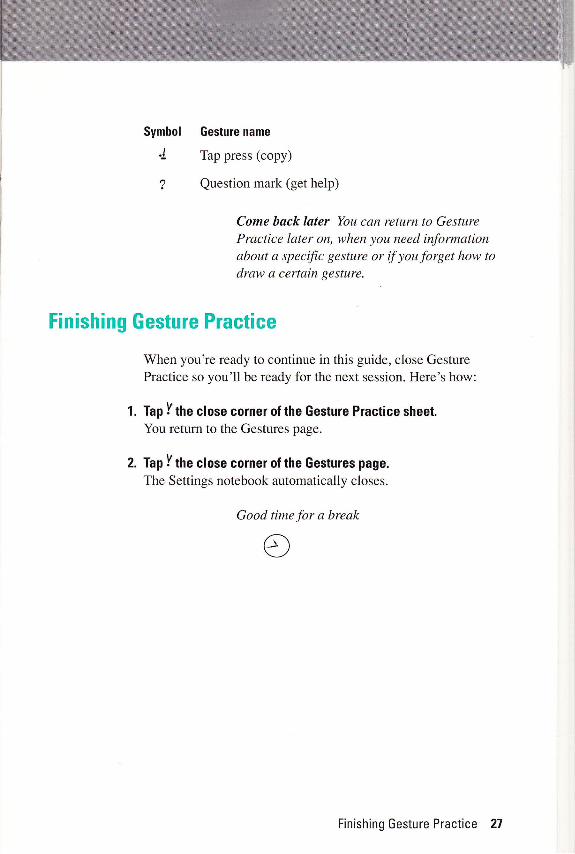
J tap press (copy)
Question mark (get help)
Come back lnter You can return to GesturePractice later on, whenyou need informationabout a specific gesture or if youforget how todraw a certain gesture.
Finishing Gesture Practice
When you're ready to continue in this guide, close GesturePractice so you'll be ready for the next session. Here's how:
Tap I the close corner ol the Gesture Practice sheet,You retum to the Gestures page.
Tap Y the close corner of the Gestures page.
The Settings notebook automatically closes.
1.
Good time for a break
o
Finishing Gesture Practice 27
Setting the Day and Time
ln this short session, you'll setthe E0 system clock andcalendar and check the settings hy opening the on-screenclock.
Setting Today s Date
When you create and modify documents, the EO notes the dateand time based on the system clock and calendar. Also, thecalendar and alarm features in Personal Perspective read thetime and date from the system settings. It's a good idea to set thedate and time now, since you'll be creating a new document insession 6 and working with the Personal Perspective DayPlanner in session 8,
1. Open the Settings notebook and tap I Date.
You see the Date option sheet.
2. ln the appropriate boxes, write the current date and year.
Setting the date |;, 'F;;i;i;;;';; ; -ji;' -
Currenl Dde: February 1, 1993
Formd: t Jaruaryl5,l99O
I Monlh: t Febtuily
i.q'l!-
l-il
q,
Lg
:
E
'l
3. Choose the options you want from the Format and Monthspop-up lists.To choose an option, open the pop-up list and then tap I theoption you want. The list closes as soon as you choose anoption.
Setting Today's Date 29
0 pening a
pop-up list
hnth: r Febru{y
Dry iri i
Yed: ipi:ibiit
Tap an arrow toview a pop-up
list.
Tap an arrow toview a pop-up
list.
When the date is corect, tap Y Apply.
The date in the top line changes to the date you set.
Leave the Date option sheet open for the next steps.
Setting the Time
Switchingoption sheets
Setting the time involves steps similar to those for setting
the date.
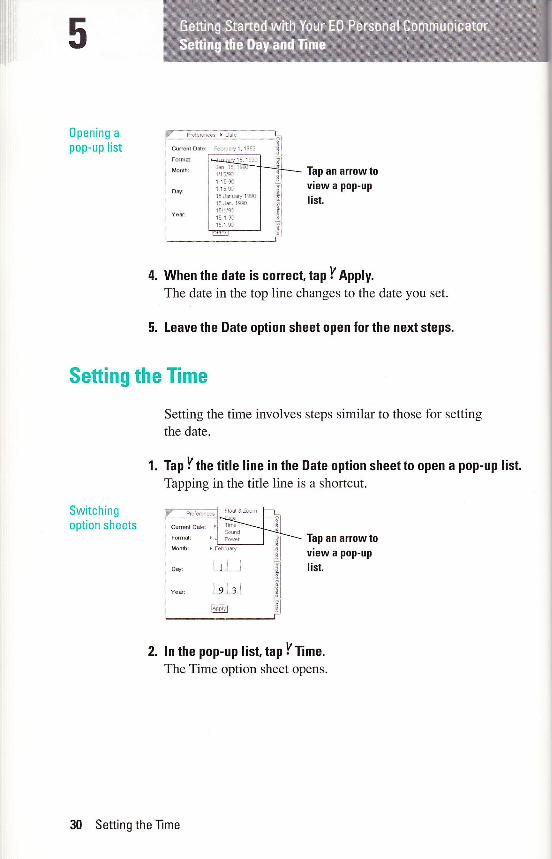
1. Tap I the title line in the Date option sheet to open a pop-up list.Tapping in the title line is a shortcut.
ln the pop-up list, tap I Time.
The Time option sheet opens.
30 Setting the Time
Setting the time
4.
5.
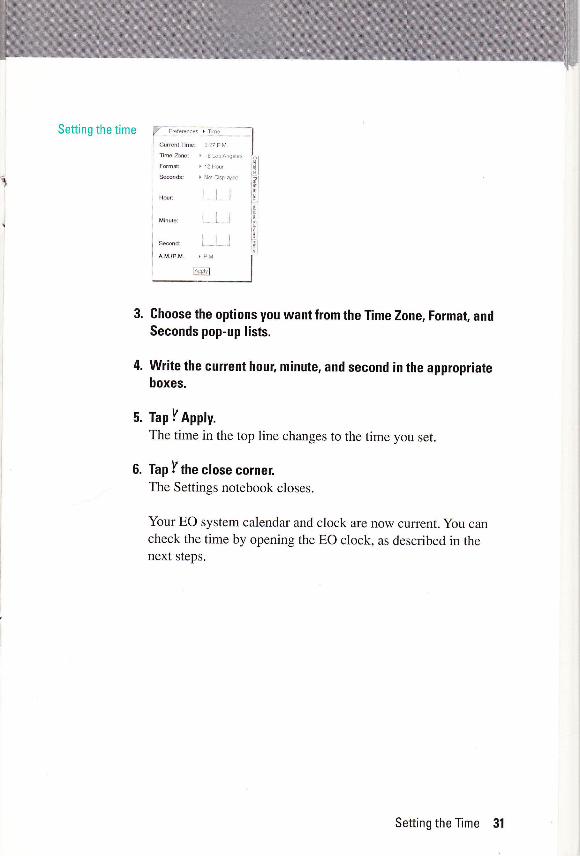
Ghoose the options you want from the fime Zone, Format, andSeconds pop-up lists.
Write the current hour, minute, and second in the appropriateboxes.
Tap Y Appty.The time in the top line changes to the time you set.
Tap I the close corner.The Settings notebook closes.
Your EO system calendar and clock are now current. You cancheck the time by opening the EO clock, as described in thenext steps.
Setting the llme 31
0pening the Glock
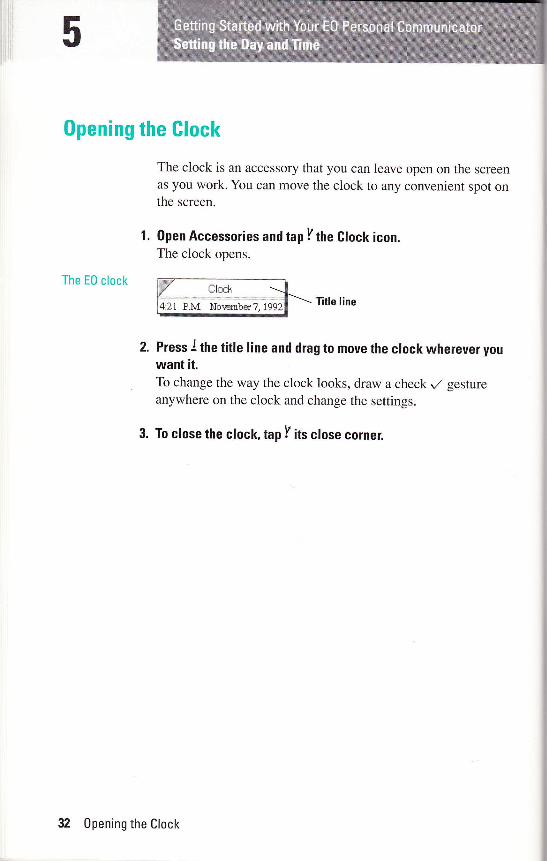
The clock is an accessory that you can leave open on the screenas you work. You can move the clock to any convenient spot onthe screen.
1. Open Accessories and tap Y the GIock icon.The clock opens.
The E0 clockClock
4:21 F.M hlormubEr?, 1
2. Press J the title Iine and drag to move the clock wherever youwant it.To change the way the clock looks, draw a check y' gestureanywhere on the clock and change the settings.
3. To close the clock, tap Y its close corner.
Iitle line
32 0pening the Clock
I
I
Faxing a Note
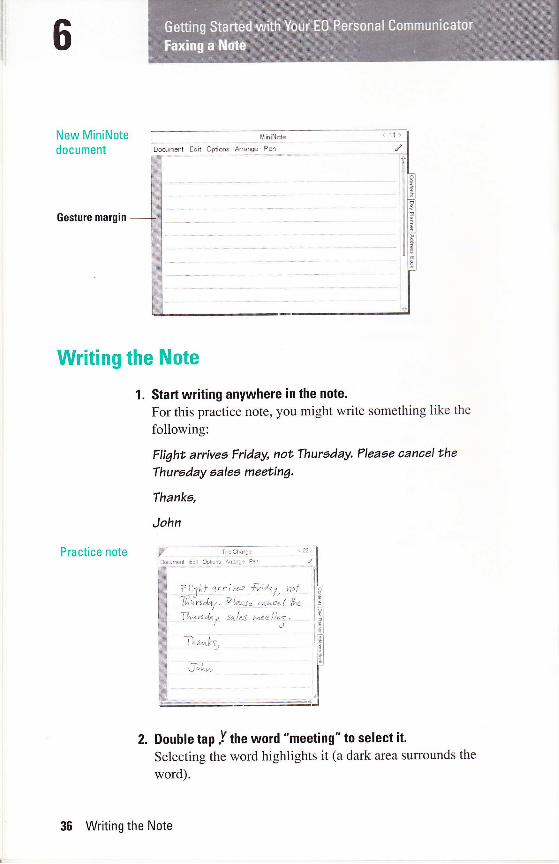
Creating a Note
You're now ahout halfway through this guide. ln this session,you'll use what you've learned so far to create a new document,write a note, and fax the note to a local fax number.
If your EO is a 4MB system, or if you don,thave a modem Wth a 4-megabyte system, faxand e-mail applications are not available foruse. If you don't have a modem in your EO, youwon't be able to communicate over a phoneline. Tb check, tapY the Document menu andthen tap I Send. The Send command. is dimmedif you have no modem.
I
Suppose you're in a hotel room and need to let the home officeknow of a change in your travel plans. A short note written inelectronic ink, and then faxed to the office, will do the jobquickly. The first step is to use the MiniNote application tocreate a new document.
l. lf necessary tap I the Gontents tab on the main Notebook toreturn to the main Table of Gontents.
2. Double tap J the Personat perspective section title (not theicon) to close the section.
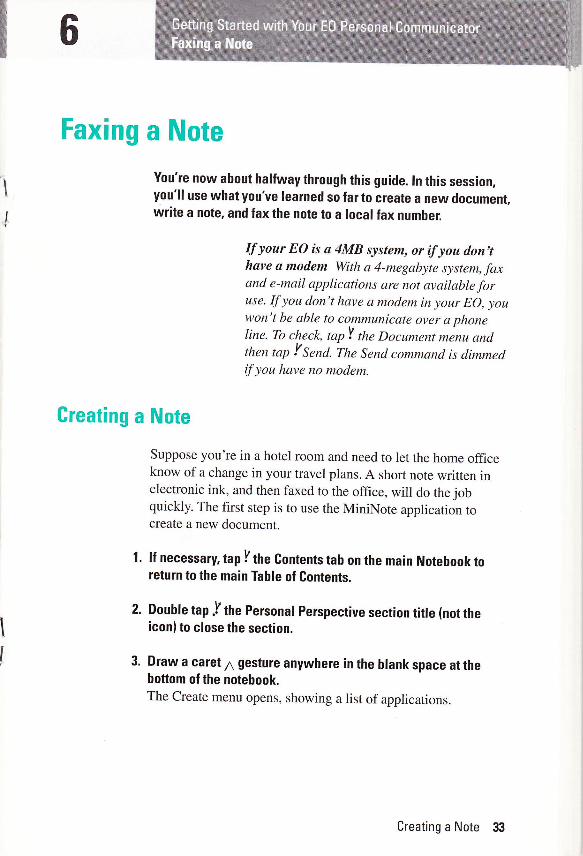
3. Draw a caret n gesture anywhere in the blank space at thebottom of the notebook.The Create menu opens, showing a list of applications.
Creating a Note 33

document IE"t-_lrge 2 For -11 uiniNole I
'"t'"Pt{ MiniTexr I
I Sound I
I s".'r*
|
4. Tap Y MiniNote.In a moment a new MiniNote document icon appears at the
bottom of the main Notebook's Table of Contents.
New document Norehk: Anlenrs
m..", ell"op,""" v ", t,"a"kD T+P@2FdTuidtdD Pdtrd PersFdv6
.E uniroe
The new document is automatically named for the application
that created it: MiniNote.
Renaming the Note
You rename a document-in this case the note-by writing a
new name over the old one.
1. Draw a circle o gesture over the name MiniNote (in the Table
of Gontents).
An editing pad opens.
2. Tap I Clear to clear the editing pad.
3. Print a new name:
Trip Change
34 Renaming the Note
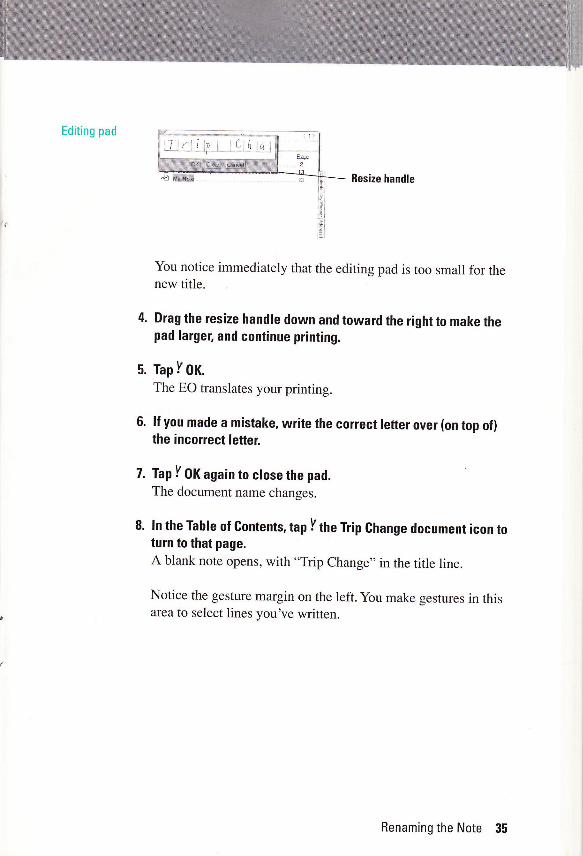
Editing pad
Resize handle
You notice immediately that the editing pad is too small for thenew title.
4. Drag the resize handle down and toward the right to make thepad largel and continue printing.
5. Tap I 0r.The EO translates your printing.
6. lf you made a mistake, write the correct tetter over (on top of)the incorrect letter.
7. Tap I 0K again to close the pad.The document name changes.
8. ln the Table of Gontents, tap Y the Trip Ghange document icon toturn to that page.A blank note opens, with "Trip Change,,in the title line.
Notice the gesture margin on the left. you make gestures in thisarea to select lines you've written.
Renaming the Note 35
I
i'
',1I
New MiniNotedocument
MiniNde
Dodmenl Edit Opiio': A'arge Fen
Gesture margin
Writing the Note
Practice note
1. Start writing anywhere in the note.
For this practice note, you might write something like the
following:
Fli,6ht, arriveo Friday, not Thuroday, Please cancel theThuroday salea meeting,
Thanks,
John
/ '0
Lnmqe
kurerl Edl GIons Arranoe Pen
T lilh f ar.i ves {v;lq7. lbfIiinJry Pte,r. u^'i.( tL"
TLacCay salr; ^rut'in1
.
Douhle tap J the word "meeting" to select it.
Selecting the word highlights it (a dark area surrounds the
word).
36 Writing the Note
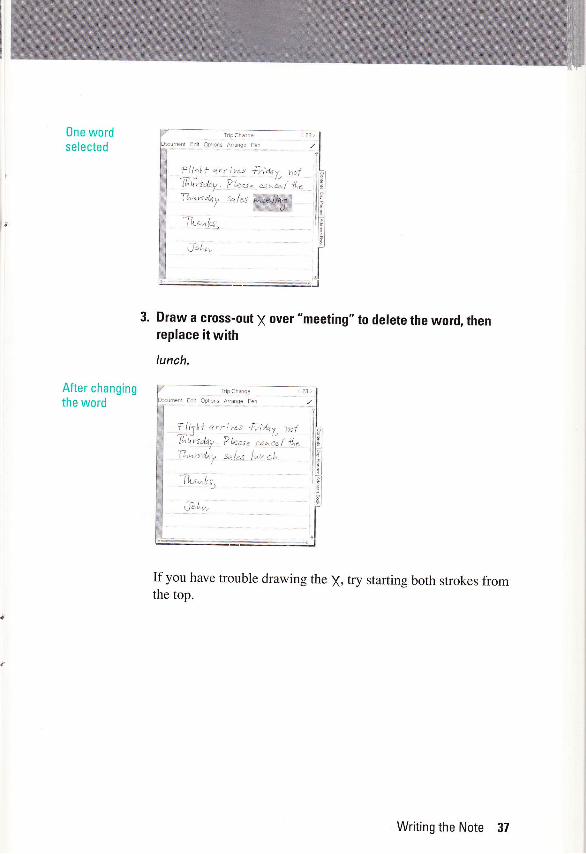
One wordselected
After changingthe word
TrpChageEdil Oplofs Anange Pen
f li1[ t <,r',"s {r |ea,,',07ll"trrsday. ?b-s. quu[ 1Le
Thunday sales W
IL*,|u.
,J"La,
3. Draw a cross-out X over "meeting" to delete the word, thenreplace it with
lunch.
Trp Chtrge
Edir oplons AnanE. Pen
Tl'1lnf <,rirts fridrt nolGinday ?h,-r. *^L( 1""]7^acda, sql<s !uv,ch.
1Lu14;
JnL*
If you have trouble drawing the X, try starting both strokes fromthe top.
Writing the Note 37
Gorrecting 0ther Mistakes
In an ink-based document like this, the EO can't tell a scribble
from a gesture, so you use a special column-the gesture
margin-to select lines you want to erase and rewrite'
MiniNote does not have an "eraser." You need to select items
and then delete them to make corrections.
1. Tap I in the gesture margin to select a line.
A gray box aPPears around the line.
2. Ghoose Glear from the Edit menu.
The line is erased. You could also draw a cross out X in the
gesture margin next to the line.
3. Rewrite the line.There are many other editing methods you can use in a
MiniNote document. For information, refer tothe Lookup Guide
to the EO Personal Communicatar when you've finished this
guide.
4. When you've completed the note, leave it on the screen and
Proceed to the nexttoPic.
Preparing the Note for Faxing
You're now ready to fax the note. Before you actually transmit a
fax you prepare a cover sheet, just as you would for a phone-
based fax device.
Since this is a practice session, you can fax the note from your
EO to a fax device at your home or office. If you don't have a
fax to use for practice, you can work through the addressing
stePs but not transmit the fax.
38 Correcting Other Mistakes

t1f q.ritzs {r;a<7, nolP{.-t. u.u*,/ l,esql"^t lut c!..
Document menu
Fax CoverSheet
1. Tap !'the Document menu, tap I Send, and then tap I 69 pr*.
You see the GO Fax Cover Sheet, which identifies the fax tothe person who receives it. The Cover Sheet is the first page ofthe fax.
Edi Oplions
t rom: I
_]!rl-.Emoy-
o Urgenl B Send Cov.r Sh*l
-[r'a cmu.
From sheet
2. ln the cover sheet, tap I From to open the From sheet.
Preparing the Note for Faxing 39
3. Neatly print your name and company, phone number, and laxnumber on the sheet.
The EO translates your printing as you go. You may need to
make a few corrections. If so, draw a small circle o gesture on
the name or number to open an editing pad and make your
corrections in the pad.
This is a one-time step The From sheet keeps
your name qnd number until you change it,
so-unless your fax number or other
information changes-you need to fill in the
sheet only once.
4. Tap I Rpply & Glose.
Your name appears next to the From button.
Adding the Recipient's Fax Number
The next step is to add the phone number for the recipient's fax
device. If you're using an office or home fax number forpractice, use that number here.
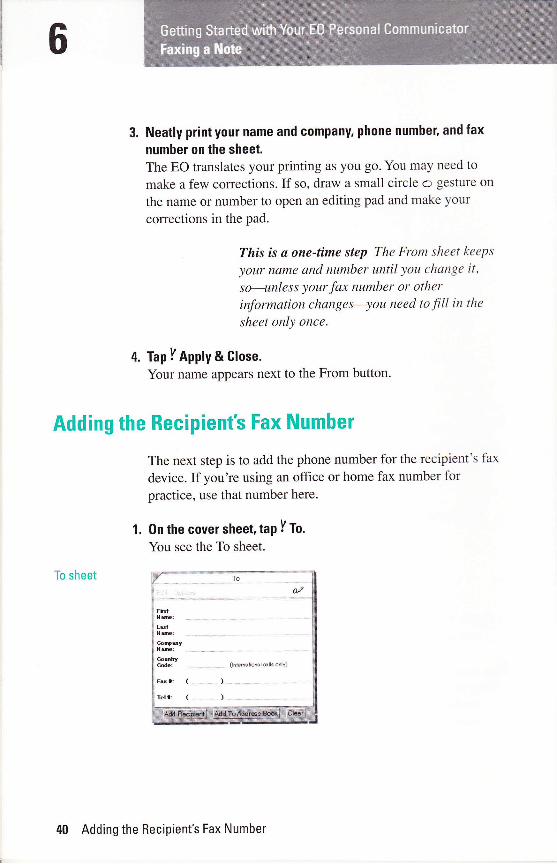
1. 0n the cover sheet, taP I To.
You see the To sheet.
To sheetan
(hhh.noh€l6lls onlrl
Fst: ( )
rell: (. )
40 Adding the Recipient's Fax Number

2. Print your name and the fax number (or any name and numher towhich you want to send the practice note).Be sure to include the area code, even ifthis is a local call. Ifyou make a mistake, draw a circle o gesture over the name ornumber and make corrections in the editing pad.
3. When the name and number are correct, tap I ttre AddRecipient bufton.The name and number are added to the cover sheet.
4. Tap Ythe close corner.The To sheet closes.
5. Tap Y Send.
The Eo sends the note to the outbox. The outbox collects faxes(and e-mail messages) until you find a convenient moment toconnect to a phone line and transmit them. If you have an EOCellular Module attached, you can transmit at any time.
Transmitting the Fax
You're now ready to ftansmit the fax from the Outbox to the faxnumber. To transmit the fax, you first tell the Outbox that you,reready to transmit and then set up a Dialing Location sheet.
l. Tap Ithe 0uthox icon to open the 0utbox notebook.You see the Trip Change note in the GO Fax list.
0utbox
Transmifiing the Fax 41
2.
Cettular Module If you have attached an EO
Cellular Module and want to transmit the faxvia cellular, mpY the GO Fax tab' Choose Fax
Service from the Options menu to open on
option sheet. Change the M.odem Service
setting toWireless and tapY lpply & Close.
You can leave the GO Faxpage openfor the
rest of these stePs.
0n the G0 Fax line, tap Y Enabled to add a check mark.
When you tap Enabled, you're giving the EO "permission" to
transmit faxes.
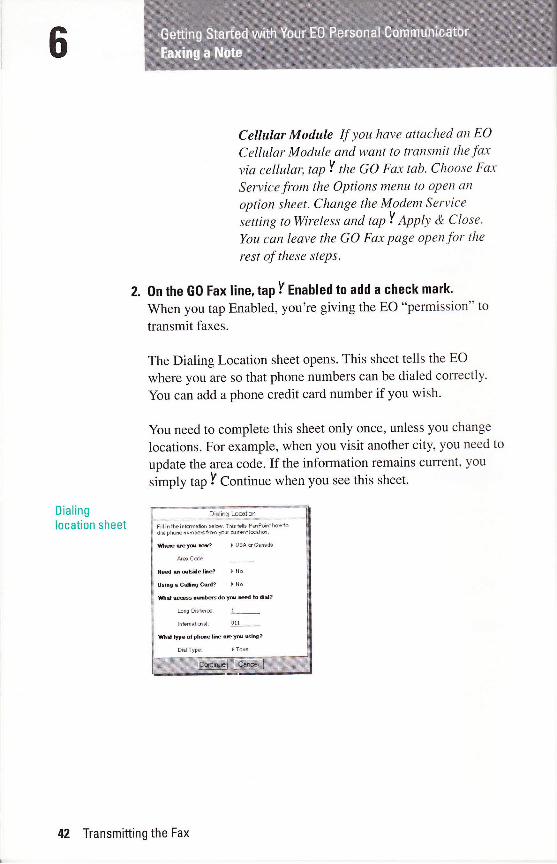
The Dialing Location sheet opens. This sheet tells the EO
where you are so that phone numbers can be dialed conectly.
You can add a phone credit card number if you wish.
You need to complete this sheet only once, unless you change
locations. For example, when you visit another city, you need to
update the area code. If the information remains current, you
simply tap I gsnlirue when you see this sheet.
Dialinglocation sheet
qg,^s +..9r1?!Fillin ihe ihtumaion beld. Thishlls PePointhowtodid phohenumbetstrm pilr aE.t lctis.
ffie eg ff ) USA *CsEda
AeCde:
Xdsotlelie? )flo
Usin! rc{lng Gd? I No
fid.essnlmD#doF d hdid?
bhe Diske:
tnhnatiodi 01t
hdinedph6eliEGp Giq?
DialTYDer I Tone
42 Transmitting the Fax
3. Fill in your area code and other information on the DialingLocation sheet.In most cases, you need to change only the area code.
The EO translates as you go. If you need to make a correction,draw a circle o gesture over a word or number to open anediting pad and make your corrections there.
4. When the sheet is complete, tap Y Qsnl;rr..The Dialing Preview sheet appears, showing the dialingsequence. If you made a mistake in the fax number, you cancorrect it here.
5. ln the Dialing Preview sheet, tap I Gontinue.The EO dials the internal modem, connects, and transmits thefax. A series of messages shows the status of the transmission.
6. When transmission is complete, tap y 16s Enahled box on theG0 Fax line to disahle fax transmission.
7. Tap Ithe close corner ofthe Outbox.The next time you send a fax-if you haven't changedlocations-you simply fill in the cover sheet, send the fax to theOutbox, open the Outbox, and tap Enabled. All the fax setuptime is behind you. If you create several faxes during the day,you can let them collect in the Outbox and send them all at oncewhen you're ready.
Transmitting the Fax 43
More About MiniNote and G0 Fax
For complete information about working with MiniNote
documents, refer to section 10 of the Lookup Guide to the EO
Personal Communicator after you've finished this guide' For
information about GO Fax, refer to section 6.
Refer also to The World of Messaging: An Introduction to
Personal Communications for information on addressing and
other general concepts related to electronic messaging'
Good time for a break
M More About MiniNote and G0 Fax
About Text
Writing a Letter
When you wrote a note in session 6 you wrote in ink, in aMiniNote document. This session introduces you to a differentkind of writing: writing for text translation.
ln this session you'll learn to use MiniText-a basic word-processing application that comes with the E0-to write andrevise a short letter.
In a MiniText document, you write words and sentences andthen have the EO translate your writing into computer text.Translated into text, your writing is easier for others to read.Also, you can style and format text as if it were typeset. Ink, onthe other hand, is like paint. What you see is what you get-legible or not.
There's another advantage, too: text can be smart. What youlearn in this session about text translation will be very importantin session 8, "Organizing Your Day." In personal perspective,text is not simply easier to read-it's intelligent.
Electroni.c mail When you want to send anelectronic mail message to someone whodoesn't have an EO, you must use translatedtext.
AboutText 45

Greating a New MiniText Document
Suppose you want to write a short report about a client meeting'
The report will become part of the client file, so you want it
to look neat and professional. A MiniText document works well
for these Purposes.
When you create a MiniText document for this session,
you'll be using the same procedure you use to create other
EO documents. These include MiniNote, EO Soundr\I ,
and EO CalcrM documents (covered inthe Lookup Guide)'
l. lf necessary, tap I the Gontents tab on the main Notebook to
turn to the main Table ol Gontents.
2. !f you reopened the Personal Perspective section, double tap Jthe section title to close it'
3. Draw a caret n gesture at the bottom of the Table of Gontents.
You can also tap Y Ct"ut" on the menu bar'
The Create menu opens, showing a list of document types'
including MiniText.
4. Tap Y MiniText.In a moment a new document icon appears at the bottom of the
main Notebook's Table of Contents. The new document is
automatically named for the application that created it:
MiniText.
Creating a new f No,eh.k coilenrs
kL+4 I oj Oplol' \ '! (r'J'
document trne: D TQ P46 2FdTuldid
I Persd Per+edMe4 tPs&r
/' J v'-"',/,/
document icon
'i'lIq*l
:-I::t., l,I
e
ii,
46 Creating a New MiniText Document
5. Rename the document, giving it the title
Report
As before, simply draw a circle o gesture on the name.
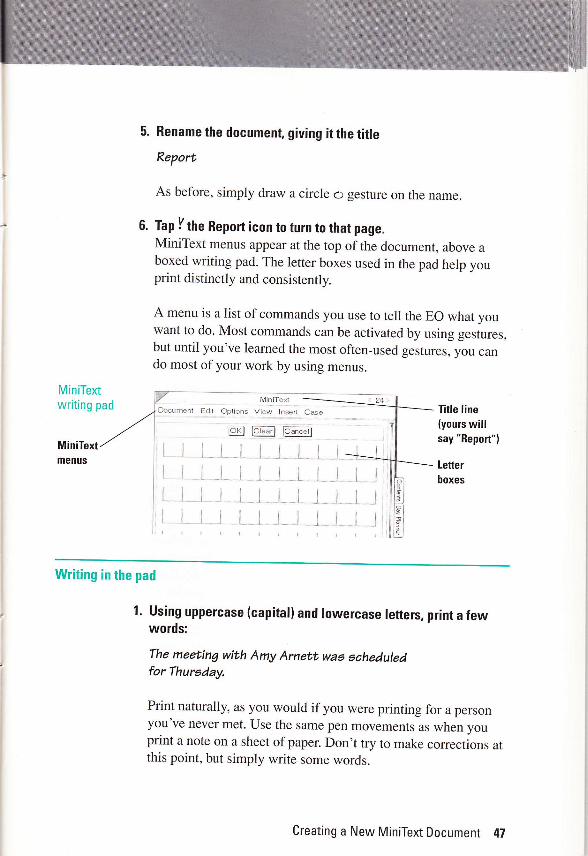
6. Tap I the Report icon to turn to that page.MiniText menus appear at the top of the document, above aboxed writing pad. The letter boxes used in the pad help youprint distinctly and consistently.
A menu is a list of commands you use to tell the EO what youwant to do. Most commands can be activated by using gestures,but until you've leamed the most often-used gestures, you cando most of your work by using menus.
MiniTextwriting pad
MiniTextmenus
MiniTe{Title line(yours willsay "Report")
Document Edit Options
Letter
boxes
I
l
j
I
joB Eb*I
iltlrttl
re-.dl
t
j
lilt
Writing in the pad
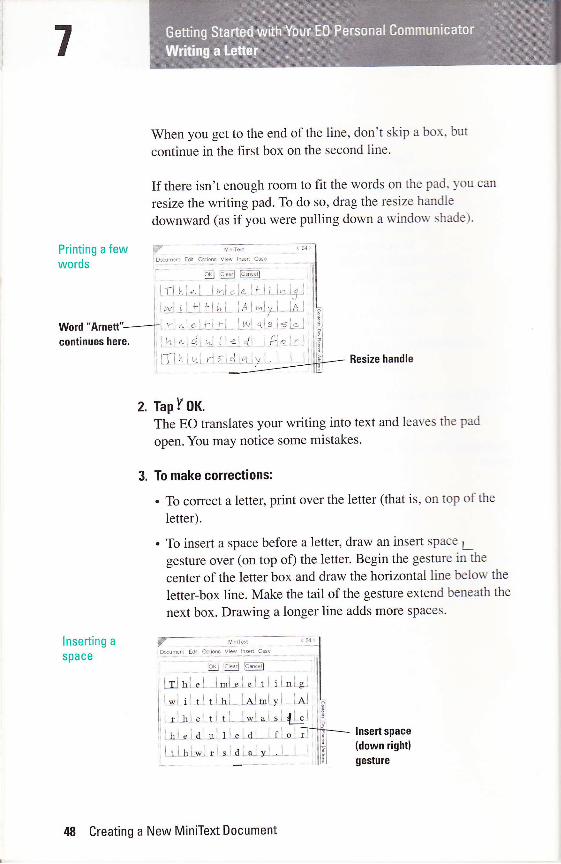
l. Using uppercase (capital) and lowercase lefters, print a fewwords:
The meeting with Amy Arnett was scheduledfor Thureday.
Print naturally, as you would if you were printing for a personyou've never met. Use the same pen movements as when youprint a note on a sheet of paper. Don,t try to make corrections althis point, but simply write some words.
Creating a New MiniText Document 47
Printing a fewwords
lnserting a
space
i ri.l: .i.ri,t l,]wi ai,s i {.ic,irri*ialnir:,uial i f ior il
: I r r-l I i i : iitjn:*irirla:u.yi.i, ;
When you get to the end of the line, don't skip a box, but
continue in the first box on the second line.
If there isn't enough room to fit the words on the pad- )rou can
resize the writing pad. To do so, drag the resize handle
downward (as if you were pulling down a windorv shade).
M.Tci < 21
El:l:] .;;il
a:e ,f ii i,. rJ I
iAii.,ri/: .a.: rar, qls i=,g l
z',41 I Ap i" r
Resize handle
z. Tap I 0x.The EO translates your writing into text and leaves the pad
open. You may notice some mistakes.
3. To make corrections:
. To correct a letter, print over the letter (that is, on top ofthe
letter).
. To insert a space before a letter, draw an insert space 1gesture over (on top of) the letter. Begin the gesture in the
center of the letter box and draw the horizontal line below the
letter-box line. Make the tail of the gesture extend beneath the
next box. Drawing a longer line adds more spaces'
p, -'
3'Deumnl Edl OPllons V ew lnsen C6e
B pli."dl
irlt i"i imiei "l ti ii":giirlilrt tlrri ia:m:yi lali i,: i.l i i I l-lr:^l
lnsert space(down right)gesture
word "A]nett"- 1 L' c
continueshere. ihle;d;l^t L{
48 Creating a New MiniText Document
Deleting a
Ietter
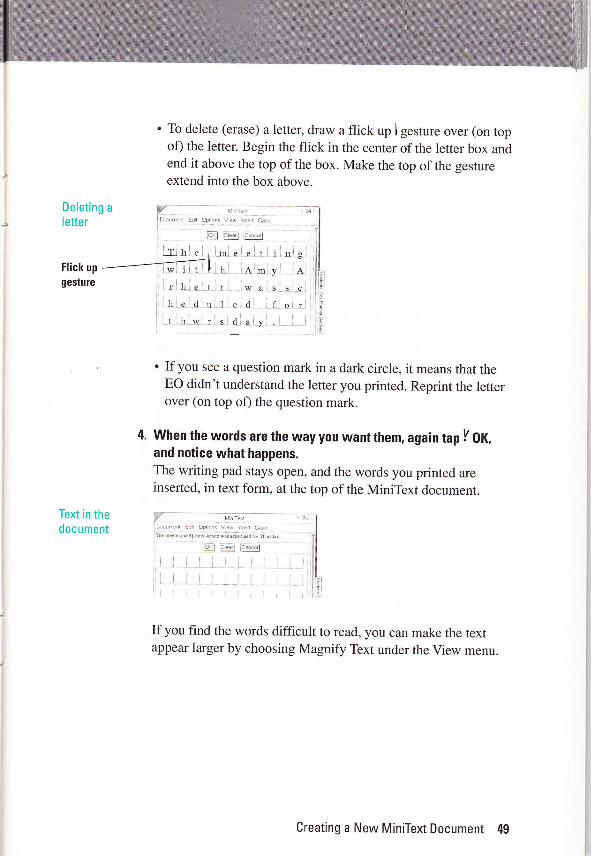
To delete (erase) a letter, draw a flick up I gesture over (on topof) the letter. Begin the flick in the center of the letter box andend it above the top of the box. Make the top of the gestureextend into the box above.
rrlhiei
. If you see a question mark in a dark circle, it means that theEO didn't understand the letter you printed. Reprint the letterover (on top of) the question mark.
4. When the words are the way you want them, again tap I 0K,and notice what happens.The writing pad stays open, and the words you printed areinserted, in text form, at the top of the MiniText document.
}/ Mnirei ILo Lr.' -o" OpLo.. v6\ .e | ' d -r" n-Dre\ L,irrv k,ed!a...n"olearo n ,.a,r
9-.1 -::l '.. 'l
If you find the words difficult to read, you can make the textappear larger by choosing Magnify Text under the View menu.
i
lll.;
ti
r
Flick upgesture
Text in thedocument
)aj
Creating a New MiniText Document 49
Adding More Text
1. Now skip a line of hoxes and print a few more words:
Amy will sign the new contract next week,
Skipping a line of boxes tells MiniText that you want to begin a
new paragraph. If you run out of space in the pad, translate and
insert the first words, drag the resize handle to make the pad
longer, and continue printing.
tap Y Of to translate and insert the words
Make any needed corrections and again tap 0K.The words appear in the document after the words you printedearlier.
lnserting a Word in the Middle
1. ln the actual document (not in the writing pad), draw a caret nhetween the words "contract" and "next."
An editing pad opens.
Print:
early
tap Y Of to translate the word.
Make any needed corrections and again tap I 0K.The word appears in the document after the point at whichyou drew the caret 7, for an insertion. The last sentence should
now read
Amy will oign the new aontraat early next week,
50 Adding More Text
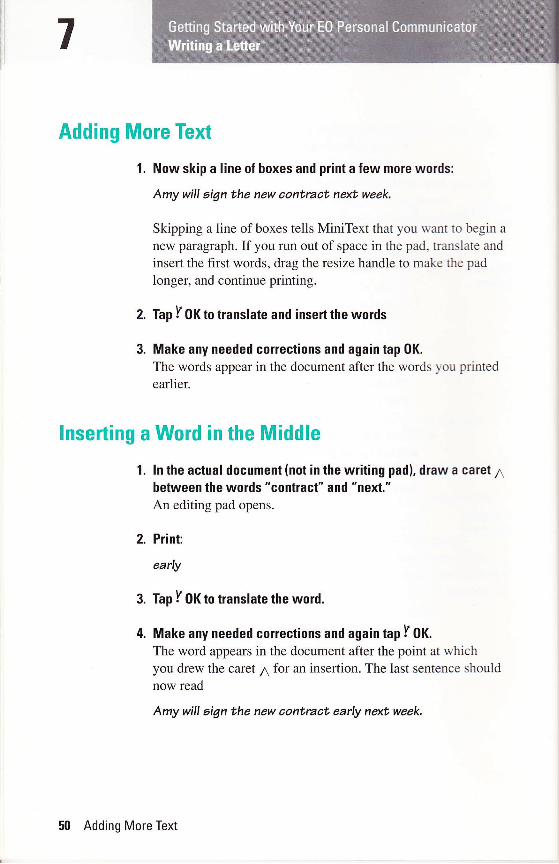
Afterinsertion
lnserted word
Returning to the Table of Contents
You can continue to write and translate text if you need morepractice. When you're ready, return to the Table of Contents sothat you're ready for the next session.
1. Tap I the Gontents tab for the main Notebook.You never really close a document on the EO. Instead, yousimply tum to anotherpage. When you do, the EO automaticallysaves the contents of the document.
2. To verify this, tap I the Report icon in the Table of Contents.The Report document reopens, with your text intact.
3. Tap I the Gontents tab now so that you're ready for the nextsession.
More Ahout MiniText
You can change the appearance of text by changing the typefont, size, and style. You can also indent paragraphs, add tabs,and otherwise polish the look of a MiniText document. Forcomplete information on using MiniText documents, refer tosection 10 of the Lookup Guide to the EO PersonalCommunicator after you've finished this guide.
More About MiniText 51
0rganizing Your Day
Now that you've written some text for translation, you,reready to get started with Personal perspective, anintelligent information manager that looks much like a paperplanning book,
In this session you'll learn to use the Day planner forscheduling appointments, add a name to the Address Book,and work with linked information.
Turning to the Day Planner
Personal Perspective gives you everything you need to keeptrack of daily appointments and events, to-do items, andaddresses. In the EO Notebook's Table of Contents, you see fourPersonal Perspective documents. The Day planner and AddressBook are two of these. Because you'll probably be using theDay Planner and Address Book often, both have been assignedtabs for quick access.
Tap Y the Day Planner tab on the main Notebook.You see a calendar page that's similar to a page in manyschedule planners.
Turning to the Day Planner 53
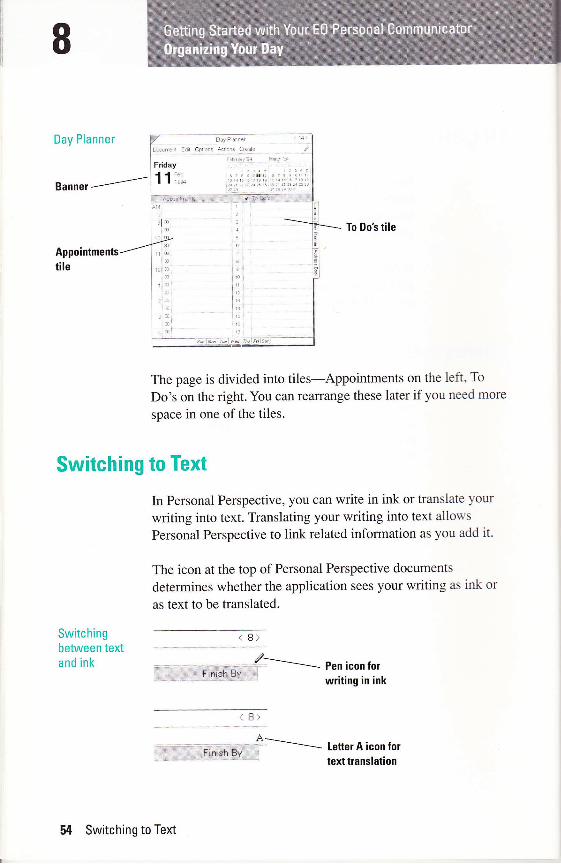
To Do's tile
Appointmentstile
The page is divided into tiles-Appointments on the left' To
Do's on the right. You can realrange these later if you need more
space in one of the tiles.
Switching to Text
In Personal Perspective, you can write in ink or translate your
writing into text. Translating your writing into text allows
Personal Perspective to link related information as you add it'
The icon at the top of Personal Perspective documents
determines whether the application sees your writing as ink or
as text to be translated.
Switchingbetween textand ink
.\ o?
Pen icon forl-tnsh HY:::i:.:l:.:i.:r....,.;',:.r...ii Wfiting in ink
\ D/
A:-----=-- Letter A icon for
'' texttranslation
54 Switching to Text
:Iiry,pli.,9Y
In this session, you'll write for text translation so that you cansee how Personal Perspective automatically links relatedinformation.
Tap I the pen icon now to switch to the letter A icon.
Scheduling an Appointment
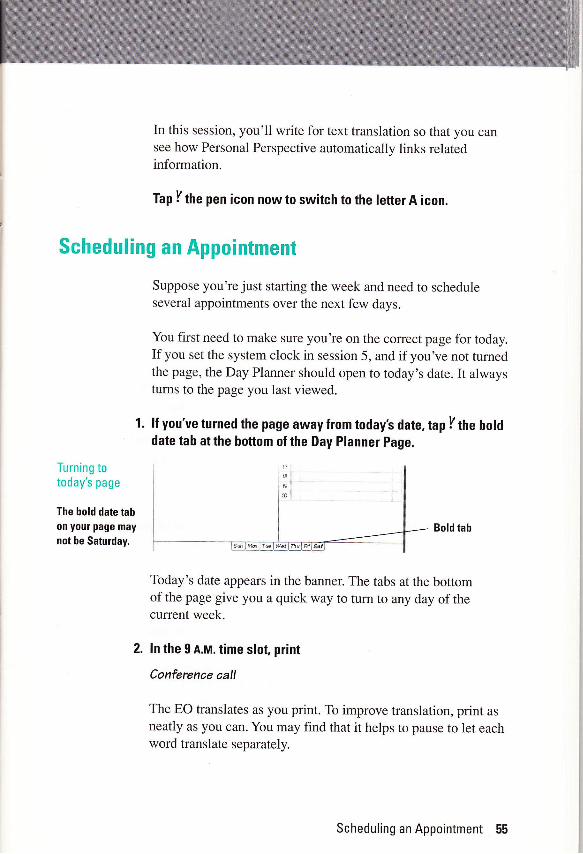
Turning totoday's page
The bold date tab0n your page may
not be Saturday.
Suppose you're just starting the week and need to scheduleseveral appointments over the next few days.
You first need to make sure you're on the correct page for today.If you set the system clock in session 5, and if you've not tumedthe page, the Day Planner should open to today's date. It alwaystums to the page you last viewed.
1. lf you've turned the page away from today's date, tap Y the holddate tah at the bottom ol the Day Planner Page.
Today's date appears in the banner. The tabs at the bottomof the page give you a quick way to turn to any day of thecurrent week.
2. ln the I A.M. time slot, print
Conferenoe call
The EO translates as you print. To improve translation, print as
neatly as you can. You may find that it helps to pause to let eachword translate separately.
Scheduling an Appointment 55
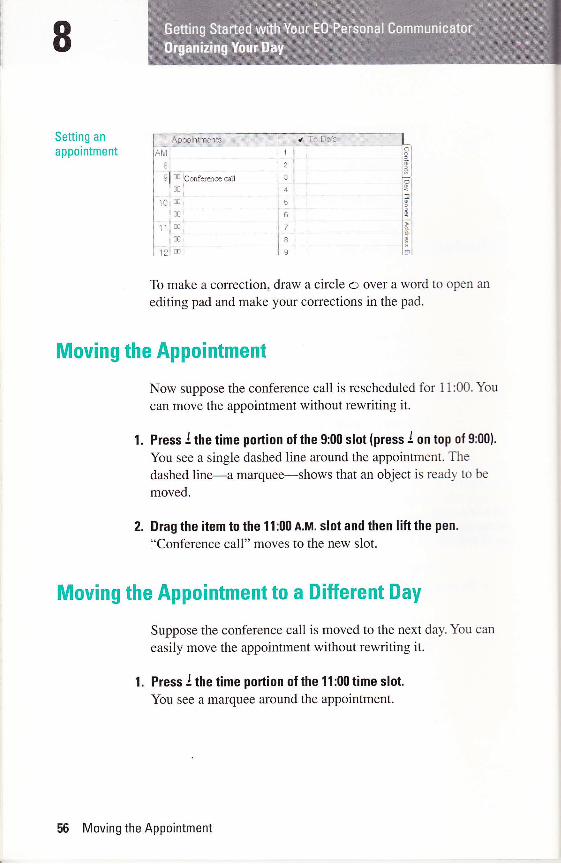
Setting an
appointmentSppq,rytrp[l$
9l m Cmfermce call;:0
10m
ji nl
1t IL
To make a correction, draw a circle o over a word to open an
editing pad and make your corrections in the pad.
Moving the Appointment to a Different Day
Suppose the conference call is moved to the next day. You can
easily move the appointment without rewriting it.
1. Press I the time portion of the 11:00 time slot.You see a marquee around the appointment.
Moving the Appointment
Now suppose the conference call is rescheduled for 1 l:00. You
can move the appointment without rewriting it.
1. Press J the time portion of the 9:00 slot (press J on top of 9:fi1).
You see a single dashed line around the appointment. The
dashed line-a marquee-shows that an object is ready to be
moved.
2. Dragthe itemtothe 11:00n.nl. slotandthen liftthe pen.
"Conference call" moves to the new slot.
56 Moving the Appointment
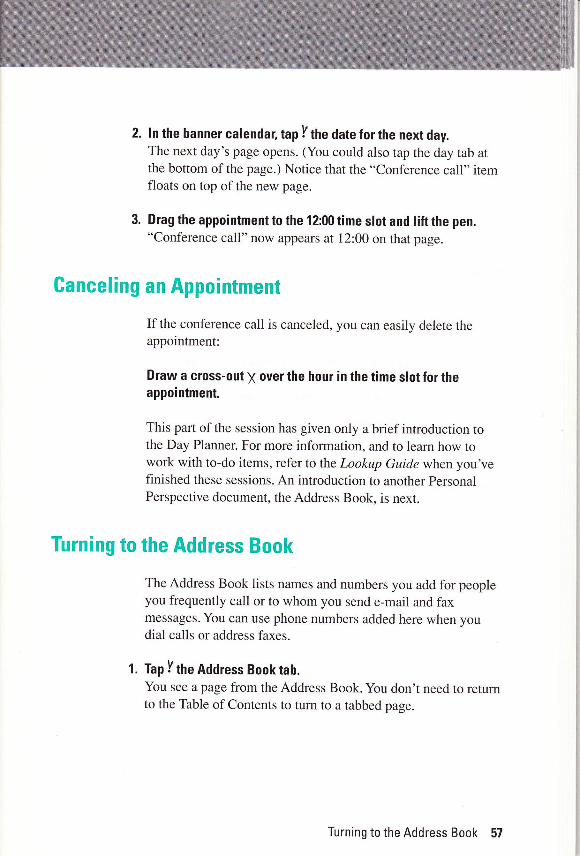
2, ln the banner catendar, tap I the date for the next day.The next day's page opens. (You could also tap the day tab atthe bottom of the page.) Notice that the "Conference call" itemfloats on top of the new page.
3. Drag the appointment to the 12:00 time slot and lift the pen."Conference call" now appears at 12:00 on that page.
Canceling an Appointment
If the conference call is canceled, you can easily delete theappointment:
Draw a cross-out y over the hour in the time slot for theappointment.
This part of the session has given only a brief introduction tothe Day Planner. For more information, and to learn how towork with to-do items, refer to the Lookup Guide when you'vefinished these sessions. An introduction to another personal
Perspective document, the Address Book, is next.
Turning to the Address Book
The Address Book lists names and numbers you add for peopleyou frequently call or to whom you send e-mail and faxmessages. You can use phone numbers added here when youdial calls or address faxes.
1. Tap Ythe Address Booktab.You see a page from the Address Book. You don't need to retumto the Table of Contents to tum to a tabbed page.
Turning to the Address Book 57
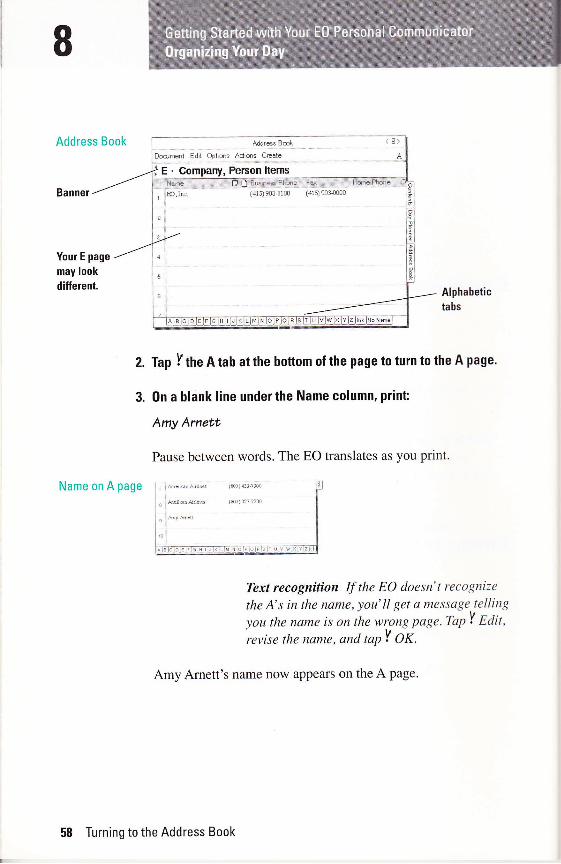
ArldtesBmk .19'Do*ment Edt OFtions Adiors CEate A
E - Comparry, Person llems
Address Book
Your E page
may lookdiflerent.
Text recognition If the EO doesn't recognize
the A' s in the name, you' ll get a message telling
you the name is on the wrong page. TqpY f,att,revise the name, and mpY Of .
Amy Arnett's name now appears on the A page.
E,€rl:qti Phene
{4lq 903-8100
f.8n:..-i ......(415 903{000
Alphabetictabs
2. Tap I ttre I tab at the bottom of the page to turn to the A page.
3. 0n a blank line under the Name column, print:
Amy Arnett
Pause between words. The EO translates as you print.
58 Turning to the Address Book
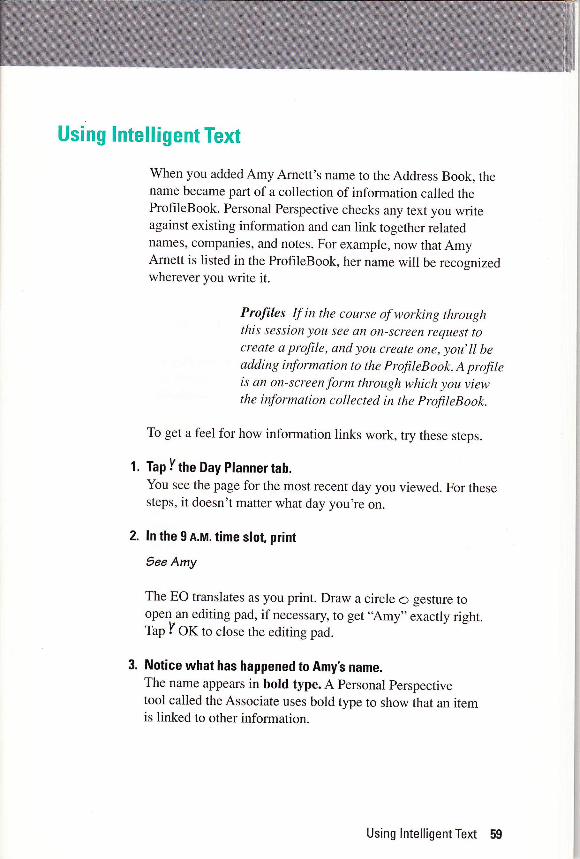
Using lntelligent Text
When you added Amy Amett's name to the Address Book, thename became part of a collection of information called theProfileBook. Personal Perspective checks any text you writeagainst existing information and can link together relatednames, companies, and notes. For example, now that AmyAmett is listed in the ProfileBook, her name will be recognizedwherever you write it.
Profiles If in the course of working throughthis session you see an on-screen request tocreate a profile, andyou create one,you,ll beadding information to the profileBook. A profileis an on-screen form through which you viewthe information collected in the profileBook.
To get a feel for how information links work, try these steps.
1. Tap Ithe Day Plannertab,You see the page for the most recent day you viewed. For thesesteps, it doesn't matter what day you're on.
2. In the 9 n.m. time slot, print
5ee Amy
The EO translates as you print. Draw a circle o gesture toopen.an editing pad, if necessary, to get .Amy,, exactly right.Tap I Q11 to close the editing pad.
3. Notice what has happened to Amy's name.The name appears in bold type. A personal perspective
tool called the Associate uses bold type to show that an itemis linked to other information.
Using lntelligent Text 59
Linked
information
Bold name
lnformation in
a profile
i, i ar;
,.,:,,,',,,Y1
Se &yru 3" q 9:@ N
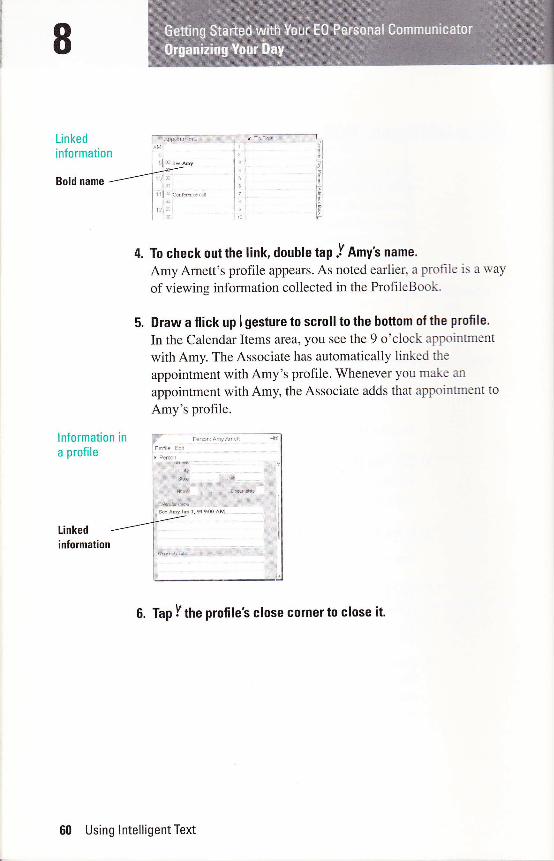
6. Tap I the profile's close corner to close it'
4. To check out the link, douhle tap J Amy's name.
Amy Amett's profile appears. As noted earlier. a prohle is a way
of viewing information collected in the ProfileBook.
5. Draw a flick up I gesture to scroll to the hottom of the profile.
In the Calendar Items area, you see the 9 o'clock appointment
with Amy. The Associate has automatically linked the
appointment with Amy's profile. Whenever you malie an
appointment with Amy, the Associate adds that appointment to
Amy's profile.
60 Using lntelligent Text

Writing a Linked Note
Suppose you need to remind yourself of a legal question thatyou want to ask Amy Amett at your scheduled meeting. you canwrite a note to yourself that will be automatically linked toAmy's name. Follow these steps.
1. With the Day Planner page stiil open, tap I Create and chooseNote from the Greate menu.A note is similar to the MiniNote document you created insession 6.
2. Tap I the small pen icon near the top right corner of the note sothat the letter A appears.This tells the Eo to translate your writing into text. (If the letterA is already showing, leave the setting as is.)
3. Within the note, print this reminder:
AmyLegal queation
The EO translates the note as you print. As soon as you print'Amy," the name is made bold to show that the Associatehas recognized the name and linked it with other informationabout Amy.
4. Tap I the note's close corner to save the note and close it.
Ghecking the Note
To remind you that the note you wrote is linked to theappointment, the Associate puts a note icon in Amy,s profile andnext to her name in the Address Book. Follow these steps tocheck the results.
1. Tap I the Address Book tab to turn to the Address Book.
Checking the Note 61
lf you've turned away from the A page, tap I the A tab at the
bottom of the page to turn to the A page (for Arnett).
Notice the icon in the Notes column to the right of Amy's name.
This icon lets you know that a note is linked to Am1"5 1n*".
The link formed in this example was automatic. You can also
link information by hand, and you can link a note to an
appointment.
Tap Y the note icon.
A label appears, showing the name and date of the note. Ifseveral notes had been linked to Amy's name, all rvould be
listed in the label.
Tap Y the label to reopen the note.
The note reappears, showing the contents you wrote.
Tap I the close corner to put away the note.
More About Personal Perspective
There is much more to leam about managing information withPersonal Perspective. For complete information, refer to section
8 of the Lookup Guide to the EO Personal Commwicotor afler
you've finished this guide.
2.
4.
5.
62 More About Personal Perspective
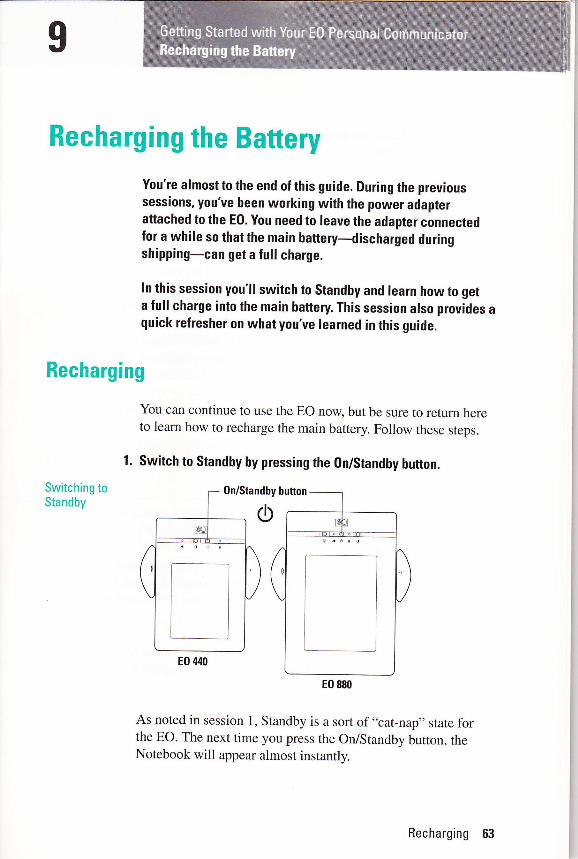
Recharging the Battery
You're almost to the end of this guide. Ouring the previoussessions, you've been working with the power adapteraftached to the E0. you need to leave the adapter connectedfor a while so that the main battery-discharged duringshipping-can get a full charge.
!n this session you'll switch to Standby and learn how to geta full charge into the main baftery. This session atso provides aquick refresher on what you've learned in this guide.
Recharging
You can continue to use the EO now, but be sure to return hereto learn how to recharge the main battery. Follow these steps.
1. Switch to Standhy by pressing the On/Standby button.
Switching toStandby
0n/Standby button
As noted in session 1, Standby is a sort of ..cat-nap,, state for
the EO. The next time you press the On/Standby button, theNotebook will appear almost instantly.
1lllE0 440
[--]llllE0 880
Recharging 63
2. Leave the power adapter plugged in for ahout 90 minutes,
during a time when you're not using the E0.
Make sure the EO stays in Standby so that charging can take
place. The green charging light flashes while the battery is
recharging. The main battery does not recharge while you're
using the EO, even when the adapter is connected. To
recharge, the adapter must be plugged in and the EO must
be in Standby state. For a more complete explanation of the
lights and charging, see section I in the Lookup Guide.
When the charge is complete, the green Iight goes off.
A full charge should give your EO 2 to 4 hours of use in the
On state, depending on the type of use. An optional extended
life battery that allows up to 6 hours of use is available forthe EO 440.
Battery ffi The first three or four times vou
use your new battery, it will not operate for the
full capacity. Only after the battery has been
used and recharged several times x'ill it tvQnn
up to.full capacity.
3.
Disconnecting the Adapter Gable
If you want to take your EO on the road, you should disconnect
the power adapter after you've recharged the main battery.
Remember to take the adapter with you if you think the battery
will need a recharge.
You can leave the adapter connected while the EO is desk-
bound. There is no danger of overcharging the main battery.
64 Disconnecting the Adapter Cable
Grasp the sleeve of the adapter plug at the point where the plugenters the E0 port,You can unplug the adapter plug at any time, even when theEO is on.
Slide the sleeve in the direction of the cable to release theplug, and then pull outthe plug.
0n Your Own
Congratulations on compreting the practice sessions in thisguide! All that remains is for you to register your ownership andsign up for an Ar&T Mail account. These topics are coveredin session 10.
Remember that you can retum to this book at any time to reviewa topic or to reopen the practice sessions.
1.
Reminders
To do this Do this
Create a new MiniText document (if you want From the Notebook s Table of Contents, chooset0 translate your writing into text and send an MiniText from the c,eate ,Lnr.electronic mail message)
Create a new MiniNote document (if you wantto write in ink and send a quick fax, or if yousimply want to do a drawing)
From the Notebooks Table of Contents, chooseMiniNote from the Create menu.
Review basic activities in the E0 Notebook Return t0 session 2 for instructions on openingthe E0 tutorial.
Learn and practice gestures 0pen the Settings notebook, tap Y Sg51x1.r,and then tap I P16s116r.
Practice writing on the screen 0pen the Settings notebook, tap I Handwriting,and then tap !/ Pis611g..
Save a current document and any changesyou've made to it
Turn to a different page in the Notebook, orchoose Checkpoint from the Document menu
0n Your Own 65
To do this Do this
Fax a document Select the document title in the main Noteb00k,
0r open the document you want t0 send. Then
choose Send > G0 Fax from the Document
menu and complete the cover sheet.
Get on-screen help Write a question mark on any object on the
screen, or tap Y the Help icon on the Bookshelf
and follow the help instructions.
Where to Go from Here
When you want to leam more advanced ways of performing
certain activities-or if you run into trouble-you can turn to
several other information sources provided with your EO
Personal Communicator.
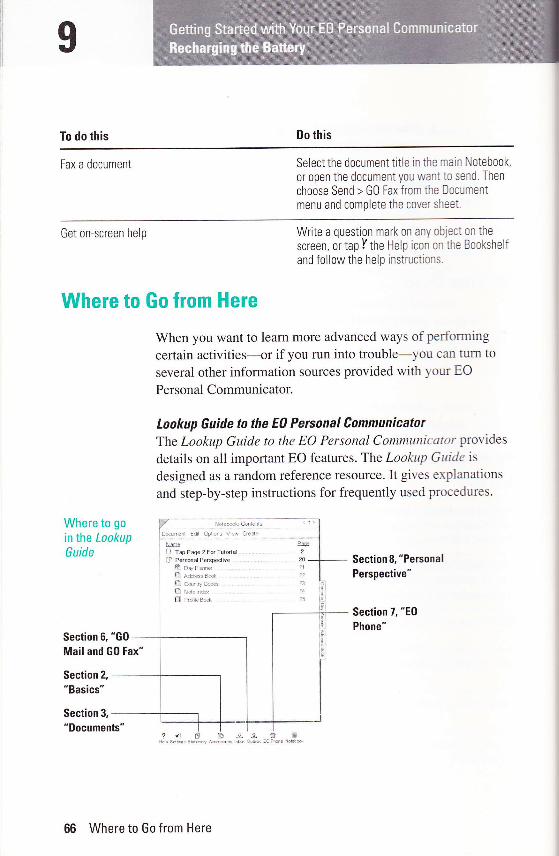
Lookup Guide to the E0 Personal Communicator
The Lookup Guide to the EO Personal Communicator provides
details on all important EO features. The Lookup Guide is
designed as a random reference resource. It gives explanations
and step-by-step instructions for frequently used procedures.
Where to go
inthe LookupGuide
NlreFok Conlenls
Edr Opro.s vew qede
D tqery zrututola0l Persmd Porspodive
lG oryranerD Address Bnok
D Counlry adesD Nore .@i3 FrorieBo.[
Section S, "Personal
Perspective"
Section 7, "E0
Phone"Section 6, "G0
Mail and G0 Fax"
Section 2,
"Basics"
Section 3,
"Documents"
Es2
m.21
22
24
66 Where to Go from Here

The World ol MessagingThe World of Messaging: An Introduction to personalCommunicatlars introduces you to the concepts involved in faxand e-mail messaging. This book can also help you leam how todetermine another person's e-mail address and how to useelectronic messaging efficiently and effectively.
0uick Help
Quick Help gives summary descriptions of objects on thescreen. Quick Help travels with you and is available on_screen.Write a question mark on any object on the screen, or tap I1[eHelp icon on the Bookshelf, to look up topics of interest.
Help NotehookThe Help Notebook provides comprehensive detail on manytopics. Like Quick Help, the Help Notebook travels with youand is available on-screen. A special section, ,,EO HardwareHelp," tells you how to manage battery changes when theLookup Guide isn'thandy. To open the Help Notebook, firstopen Quick Help.by drawing a question mark anywhere on thescreen. Then tap I the Help Notebook button.
Practice and ExperimentationEO encourages you to try out all the menus and open all thedialog and option sheets to see what they do. If you get mixedup. tap I the Contents tabs or close corners to retum to the spotwhere you started. There is very little you can do to harm thesoftware, and the best way to leam about your EO personalCommunicator is to try out all its features. The three bestgestures to use are v/ to see what options are available, ! to gethelp, and o to make changes.
Where to Go from Here 67

E0 lncorporatedB00A East Middlefield Boad
Mountain View, CA 94043
Part No. 043-0100001 -41
Printed in the U.S.A.
Printed on recycled paper.