Dr Acolla Lewis-Cameron The University of the West Indies, St ...
42
Dr Acolla Lewis-Cameron The University of the West Indies, St Augustine Campus
-
Upload
khangminh22 -
Category
Documents
-
view
3 -
download
0
Transcript of Dr Acolla Lewis-Cameron The University of the West Indies, St ...
Dr Acolla Lewis-Cameron
The University of the West Indies, St Augustine
Campus
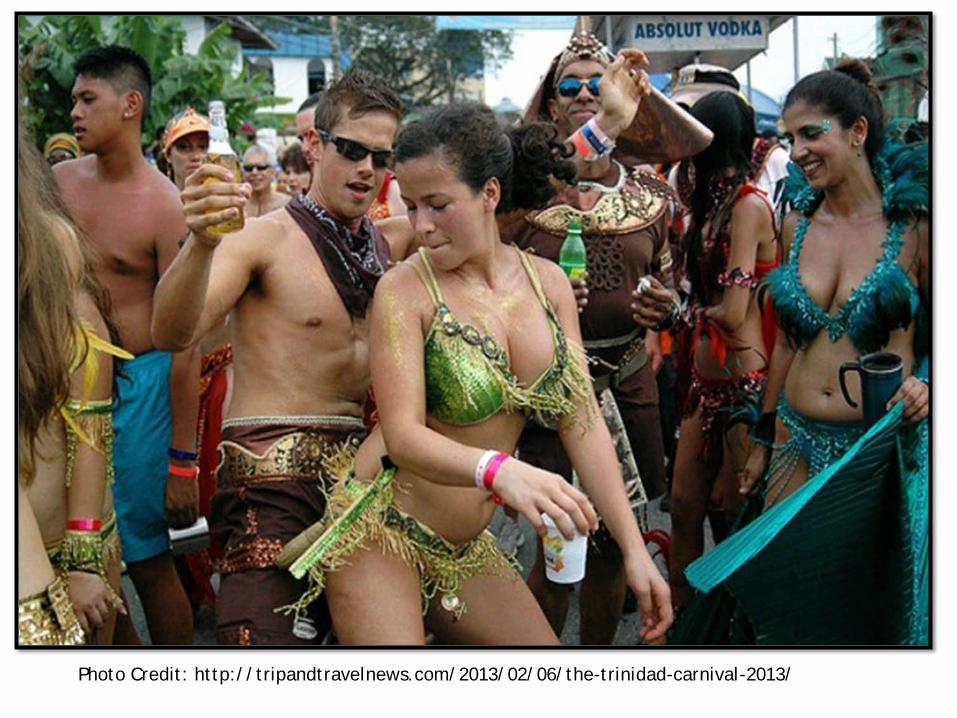
Photo Credit: http://tripandtravelnews.com/2013/02/06/the-trinidad-carnival-2013/

Photo Credit: http://coolgeography.co.uk/GCSE/AQA/Tourism/Mass%20Tourism/Mass%20Tourism.htm

Photo Credit: http://www.summitfdn.org/stories/steering-cruise-ship-tourism-toward-environmental-sustainability/

TRADITIONAL CARIBBEAN TOURISM MODEL
Basic Caribbean ‘product’
Sun, Sea and Sand
Escape from a life of routine and stress into a life of ease and comfort
Coastal resorts
Photo Credit- http://www.tourism-review.com/caribbean-tourism-analysis-jamaica-records-growth-news1804
Presenter
Presentation Notes
Faded picture background with full-color overlay (Intermediate) Tip: For best results with the picture overlay on this slide, use a picture that is the same dimensions as the slide: 7.5” high and 10” wide. If the picture is not the same height and width, resize or crop to those dimensions before following the instructions below. To reproduce the background effects on this slide, do the following: On the Home tab, in the Slides group, click Layout, and then click Blank. Right-click the slide and then click Format Background. In the Format Background dialog box, click Fill in the left pane. In the Fill pane, select Picture or texture fill, and then under Insert from, click File. In the Insert Picture dialog box, select a picture, and then click Insert. Also in the Format Background dialog box, in the Fill pane, in the Transparency box, enter 50%. Also in the Format Background dialog box, click Picture Color in the left pane. In the Picture Color pane, under Recolor, click the button next to Presets, and then click Tan, Background color 2 Light (third row, first option from the left). On the Insert tab, in the Images group, click Picture. In the Insert Picture dialog box, select the same picture chosen for the background, and then click Insert. Select the picture. Under Picture Tools, on the Format tab, in the bottom right corner of the Size group, click the Size and Position dialog box launcher. In the Format Picture dialog box, resize or crop the image so that the height is set to 7.5” and the width is set to 2.25”. To crop the picture, click Crop in the left pane, and in the Crop pane, under Crop position, enter values into the Height, Width, Left, and Top boxes. To resize the picture, click Size in the left pane, and in the Size pane, under Size and rotate, enter values into the Height and Width boxes. Also in the Format Picture dialog box, click Glow and Soft Edges in the left pane, and then in the Glow and Soft Edges pane, under Soft Edges, in the Size box enter 10 point.

TRADITIONAL CARIBBEAN TOURISM MODEL
Emergence of more than the traditional ‘product’
Adventure tourism
Ecotourism
Health tourism
Sport tourism
Festivals and culture
All-inclusive resorts
Supported by the combined efforts of tour operators, travel agencies, accommodation etc.
Integration of other sectors and amenities to support tourism attractions- agriculture, financial services, transportation, food, technical services and material products
Presenter
Presentation Notes
Faded picture background with full-color overlay (Intermediate) Tip: For best results with the picture overlay on this slide, use a picture that is the same dimensions as the slide: 7.5” high and 10” wide. If the picture is not the same height and width, resize or crop to those dimensions before following the instructions below. To reproduce the background effects on this slide, do the following: On the Home tab, in the Slides group, click Layout, and then click Blank. Right-click the slide and then click Format Background. In the Format Background dialog box, click Fill in the left pane. In the Fill pane, select Picture or texture fill, and then under Insert from, click File. In the Insert Picture dialog box, select a picture, and then click Insert. Also in the Format Background dialog box, in the Fill pane, in the Transparency box, enter 50%. Also in the Format Background dialog box, click Picture Color in the left pane. In the Picture Color pane, under Recolor, click the button next to Presets, and then click Tan, Background color 2 Light (third row, first option from the left). On the Insert tab, in the Images group, click Picture. In the Insert Picture dialog box, select the same picture chosen for the background, and then click Insert. Select the picture. Under Picture Tools, on the Format tab, in the bottom right corner of the Size group, click the Size and Position dialog box launcher. In the Format Picture dialog box, resize or crop the image so that the height is set to 7.5” and the width is set to 2.25”. To crop the picture, click Crop in the left pane, and in the Crop pane, under Crop position, enter values into the Height, Width, Left, and Top boxes. To resize the picture, click Size in the left pane, and in the Size pane, under Size and rotate, enter values into the Height and Width boxes. Also in the Format Picture dialog box, click Glow and Soft Edges in the left pane, and then in the Glow and Soft Edges pane, under Soft Edges, in the Size box enter 10 point.

TRENDS IN TOURISM DEMAND
People are better educated and are interested in learning travel experiences.
People are more exposed to information and the media.
People are becoming career travellers, depending on an endless flow of new experiences, and looking for deeper experiences within the communities they visit.
People are seeking genuine experiences rather than staged ones
The demand for well-being, health and fitness and stress management products is growing in developed economies.
More global trade in consumer goods & services which raises the prospect of growing homogeneity of cultures & values.
More heterogeneous and individualistic demands and expectations
Increase in multi-generational travel
People are seeking travels that involve volunteering, or that include a particular mission, for instance, learning a new language, exploring new culinary techniques etc.
Presenter
Presentation Notes
Faded picture background with full-color overlay (Intermediate) Tip: For best results with the picture overlay on this slide, use a picture that is the same dimensions as the slide: 7.5” high and 10” wide. If the picture is not the same height and width, resize or crop to those dimensions before following the instructions below. To reproduce the background effects on this slide, do the following: On the Home tab, in the Slides group, click Layout, and then click Blank. Right-click the slide and then click Format Background. In the Format Background dialog box, click Fill in the left pane. In the Fill pane, select Picture or texture fill, and then under Insert from, click File. In the Insert Picture dialog box, select a picture, and then click Insert. Also in the Format Background dialog box, in the Fill pane, in the Transparency box, enter 50%. Also in the Format Background dialog box, click Picture Color in the left pane. In the Picture Color pane, under Recolor, click the button next to Presets, and then click Tan, Background color 2 Light (third row, first option from the left). On the Insert tab, in the Images group, click Picture. In the Insert Picture dialog box, select the same picture chosen for the background, and then click Insert. Select the picture. Under Picture Tools, on the Format tab, in the bottom right corner of the Size group, click the Size and Position dialog box launcher. In the Format Picture dialog box, resize or crop the image so that the height is set to 7.5” and the width is set to 2.25”. To crop the picture, click Crop in the left pane, and in the Crop pane, under Crop position, enter values into the Height, Width, Left, and Top boxes. To resize the picture, click Size in the left pane, and in the Size pane, under Size and rotate, enter values into the Height and Width boxes. Also in the Format Picture dialog box, click Glow and Soft Edges in the left pane, and then in the Glow and Soft Edges pane, under Soft Edges, in the Size box enter 10 point.
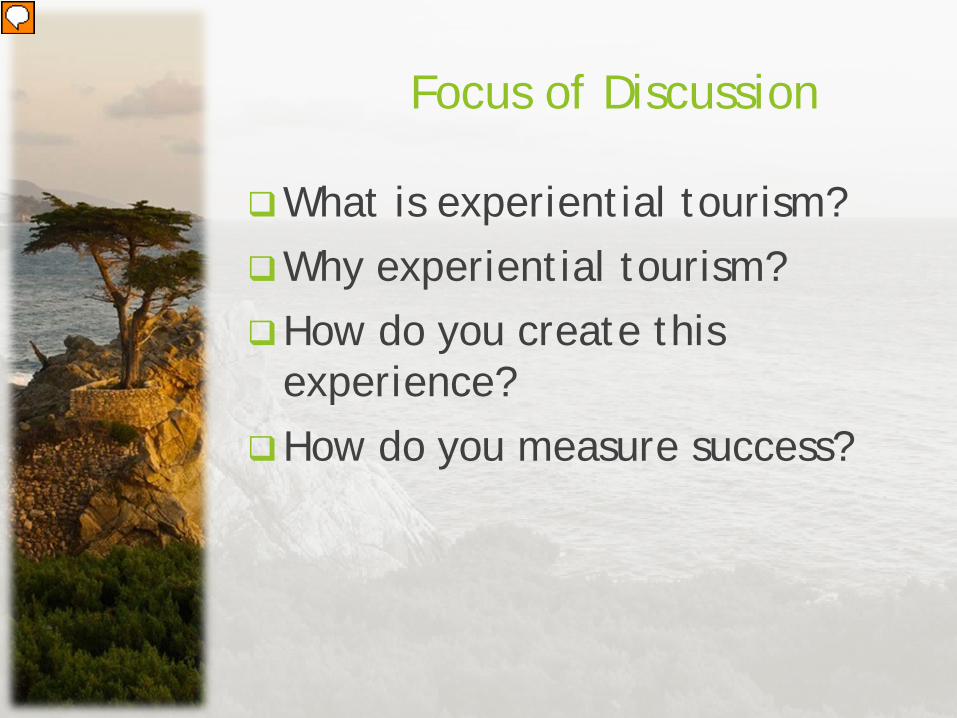
Focus of Discussion
What is experiential tourism?
Why experiential tourism?
How do you create this experience?
How do you measure success?
Presenter
Presentation Notes
Faded picture background with full-color overlay (Intermediate) Tip: For best results with the picture overlay on this slide, use a picture that is the same dimensions as the slide: 7.5” high and 10” wide. If the picture is not the same height and width, resize or crop to those dimensions before following the instructions below. To reproduce the background effects on this slide, do the following: On the Home tab, in the Slides group, click Layout, and then click Blank. Right-click the slide and then click Format Background. In the Format Background dialog box, click Fill in the left pane. In the Fill pane, select Picture or texture fill, and then under Insert from, click File. In the Insert Picture dialog box, select a picture, and then click Insert. Also in the Format Background dialog box, in the Fill pane, in the Transparency box, enter 50%. Also in the Format Background dialog box, click Picture Color in the left pane. In the Picture Color pane, under Recolor, click the button next to Presets, and then click Tan, Background color 2 Light (third row, first option from the left). On the Insert tab, in the Images group, click Picture. In the Insert Picture dialog box, select the same picture chosen for the background, and then click Insert. Select the picture. Under Picture Tools, on the Format tab, in the bottom right corner of the Size group, click the Size and Position dialog box launcher. In the Format Picture dialog box, resize or crop the image so that the height is set to 7.5” and the width is set to 2.25”. To crop the picture, click Crop in the left pane, and in the Crop pane, under Crop position, enter values into the Height, Width, Left, and Top boxes. To resize the picture, click Size in the left pane, and in the Size pane, under Size and rotate, enter values into the Height and Width boxes. Also in the Format Picture dialog box, click Glow and Soft Edges in the left pane, and then in the Glow and Soft Edges pane, under Soft Edges, in the Size box enter 10 point.

EXPERIENTIAL TOURISM “Travel that engages travellers in a series of memorable events, that are
related over time, are inherently personal, involve the senses, and make a connection on an emotional, physical, spiritual or intellectual level.” (Canadian
Tourism Commission)
Photo Credit- http://en-corporate.canada.travel/content/news_release/signature-experiences-collection-sec-48-businesses
Presenter
Presentation Notes
Faded picture background with full-color overlay (Intermediate) Tip: For best results with the picture overlay on this slide, use a picture that is the same dimensions as the slide: 7.5” high and 10” wide. If the picture is not the same height and width, resize or crop to those dimensions before following the instructions below. To reproduce the background effects on this slide, do the following: On the Home tab, in the Slides group, click Layout, and then click Blank. Right-click the slide and then click Format Background. In the Format Background dialog box, click Fill in the left pane. In the Fill pane, select Picture or texture fill, and then under Insert from, click File. In the Insert Picture dialog box, select a picture, and then click Insert. Also in the Format Background dialog box, in the Fill pane, in the Transparency box, enter 50%. Also in the Format Background dialog box, click Picture Color in the left pane. In the Picture Color pane, under Recolor, click the button next to Presets, and then click Tan, Background color 2 Light (third row, first option from the left). On the Insert tab, in the Images group, click Picture. In the Insert Picture dialog box, select the same picture chosen for the background, and then click Insert. Select the picture. Under Picture Tools, on the Format tab, in the bottom right corner of the Size group, click the Size and Position dialog box launcher. In the Format Picture dialog box, resize or crop the image so that the height is set to 7.5” and the width is set to 2.25”. To crop the picture, click Crop in the left pane, and in the Crop pane, under Crop position, enter values into the Height, Width, Left, and Top boxes. To resize the picture, click Size in the left pane, and in the Size pane, under Size and rotate, enter values into the Height and Width boxes. Also in the Format Picture dialog box, click Glow and Soft Edges in the left pane, and then in the Glow and Soft Edges pane, under Soft Edges, in the Size box enter 10 point.
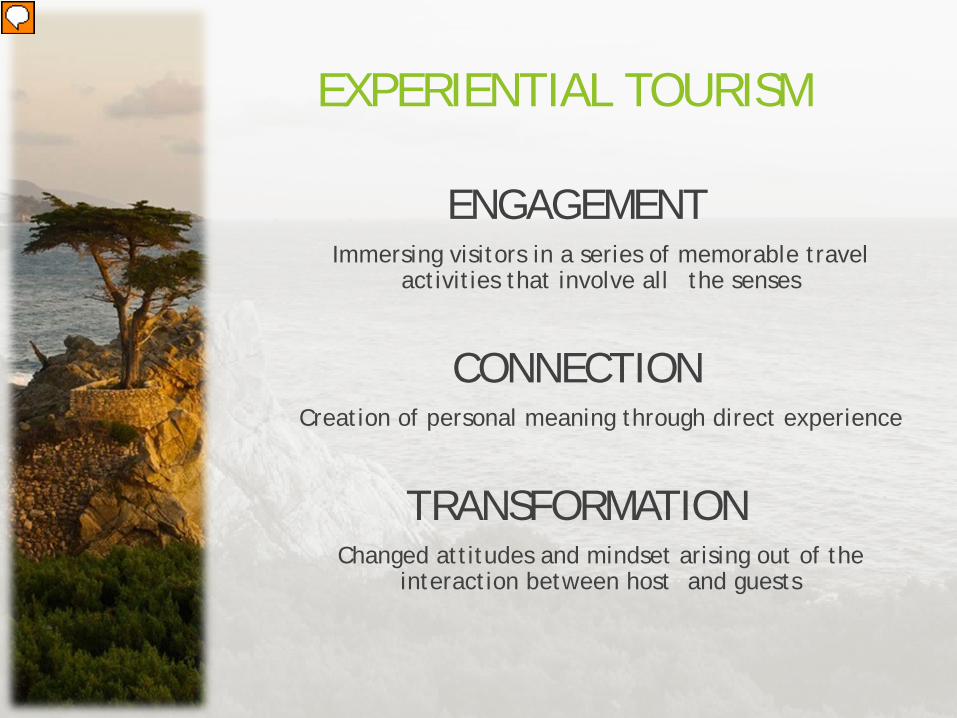
EXPERIENTIAL TOURISM
ENGAGEMENT Immersing visitors in a series of memorable travel
activities that involve all the senses
CONNECTION Creation of personal meaning through direct experience
TRANSFORMATION Changed attitudes and mindset arising out of the
interaction between host and guests
Presenter
Presentation Notes
Faded picture background with full-color overlay (Intermediate) Tip: For best results with the picture overlay on this slide, use a picture that is the same dimensions as the slide: 7.5” high and 10” wide. If the picture is not the same height and width, resize or crop to those dimensions before following the instructions below. To reproduce the background effects on this slide, do the following: On the Home tab, in the Slides group, click Layout, and then click Blank. Right-click the slide and then click Format Background. In the Format Background dialog box, click Fill in the left pane. In the Fill pane, select Picture or texture fill, and then under Insert from, click File. In the Insert Picture dialog box, select a picture, and then click Insert. Also in the Format Background dialog box, in the Fill pane, in the Transparency box, enter 50%. Also in the Format Background dialog box, click Picture Color in the left pane. In the Picture Color pane, under Recolor, click the button next to Presets, and then click Tan, Background color 2 Light (third row, first option from the left). On the Insert tab, in the Images group, click Picture. In the Insert Picture dialog box, select the same picture chosen for the background, and then click Insert. Select the picture. Under Picture Tools, on the Format tab, in the bottom right corner of the Size group, click the Size and Position dialog box launcher. In the Format Picture dialog box, resize or crop the image so that the height is set to 7.5” and the width is set to 2.25”. To crop the picture, click Crop in the left pane, and in the Crop pane, under Crop position, enter values into the Height, Width, Left, and Top boxes. To resize the picture, click Size in the left pane, and in the Size pane, under Size and rotate, enter values into the Height and Width boxes. Also in the Format Picture dialog box, click Glow and Soft Edges in the left pane, and then in the Glow and Soft Edges pane, under Soft Edges, in the Size box enter 10 point.

TOURISTIC EXPERIENCES
Getting emotionally affected
Getting informed
Getting practiced
Getting transformed
Presenter
Presentation Notes
Faded picture background with full-color overlay (Intermediate) Tip: For best results with the picture overlay on this slide, use a picture that is the same dimensions as the slide: 7.5” high and 10” wide. If the picture is not the same height and width, resize or crop to those dimensions before following the instructions below. To reproduce the background effects on this slide, do the following: On the Home tab, in the Slides group, click Layout, and then click Blank. Right-click the slide and then click Format Background. In the Format Background dialog box, click Fill in the left pane. In the Fill pane, select Picture or texture fill, and then under Insert from, click File. In the Insert Picture dialog box, select a picture, and then click Insert. Also in the Format Background dialog box, in the Fill pane, in the Transparency box, enter 50%. Also in the Format Background dialog box, click Picture Color in the left pane. In the Picture Color pane, under Recolor, click the button next to Presets, and then click Tan, Background color 2 Light (third row, first option from the left). On the Insert tab, in the Images group, click Picture. In the Insert Picture dialog box, select the same picture chosen for the background, and then click Insert. Select the picture. Under Picture Tools, on the Format tab, in the bottom right corner of the Size group, click the Size and Position dialog box launcher. In the Format Picture dialog box, resize or crop the image so that the height is set to 7.5” and the width is set to 2.25”. To crop the picture, click Crop in the left pane, and in the Crop pane, under Crop position, enter values into the Height, Width, Left, and Top boxes. To resize the picture, click Size in the left pane, and in the Size pane, under Size and rotate, enter values into the Height and Width boxes. Also in the Format Picture dialog box, click Glow and Soft Edges in the left pane, and then in the Glow and Soft Edges pane, under Soft Edges, in the Size box enter 10 point.

HOW IS IT DIFFERENT?
“A tourism product is what you BUY;
a tourism experience is what you REMEMBER”
Source- Canadian Tourism Commission
Photo Credit- http://drinkster.blogspot.com/2013/06/nick-cave-barossa-ad-not-about-wine.html
Presenter
Presentation Notes
Faded picture background with full-color overlay (Intermediate) Tip: For best results with the picture overlay on this slide, use a picture that is the same dimensions as the slide: 7.5” high and 10” wide. If the picture is not the same height and width, resize or crop to those dimensions before following the instructions below. To reproduce the background effects on this slide, do the following: On the Home tab, in the Slides group, click Layout, and then click Blank. Right-click the slide and then click Format Background. In the Format Background dialog box, click Fill in the left pane. In the Fill pane, select Picture or texture fill, and then under Insert from, click File. In the Insert Picture dialog box, select a picture, and then click Insert. Also in the Format Background dialog box, in the Fill pane, in the Transparency box, enter 50%. Also in the Format Background dialog box, click Picture Color in the left pane. In the Picture Color pane, under Recolor, click the button next to Presets, and then click Tan, Background color 2 Light (third row, first option from the left). On the Insert tab, in the Images group, click Picture. In the Insert Picture dialog box, select the same picture chosen for the background, and then click Insert. Select the picture. Under Picture Tools, on the Format tab, in the bottom right corner of the Size group, click the Size and Position dialog box launcher. In the Format Picture dialog box, resize or crop the image so that the height is set to 7.5” and the width is set to 2.25”. To crop the picture, click Crop in the left pane, and in the Crop pane, under Crop position, enter values into the Height, Width, Left, and Top boxes. To resize the picture, click Size in the left pane, and in the Size pane, under Size and rotate, enter values into the Height and Width boxes. Also in the Format Picture dialog box, click Glow and Soft Edges in the left pane, and then in the Glow and Soft Edges pane, under Soft Edges, in the Size box enter 10 point.
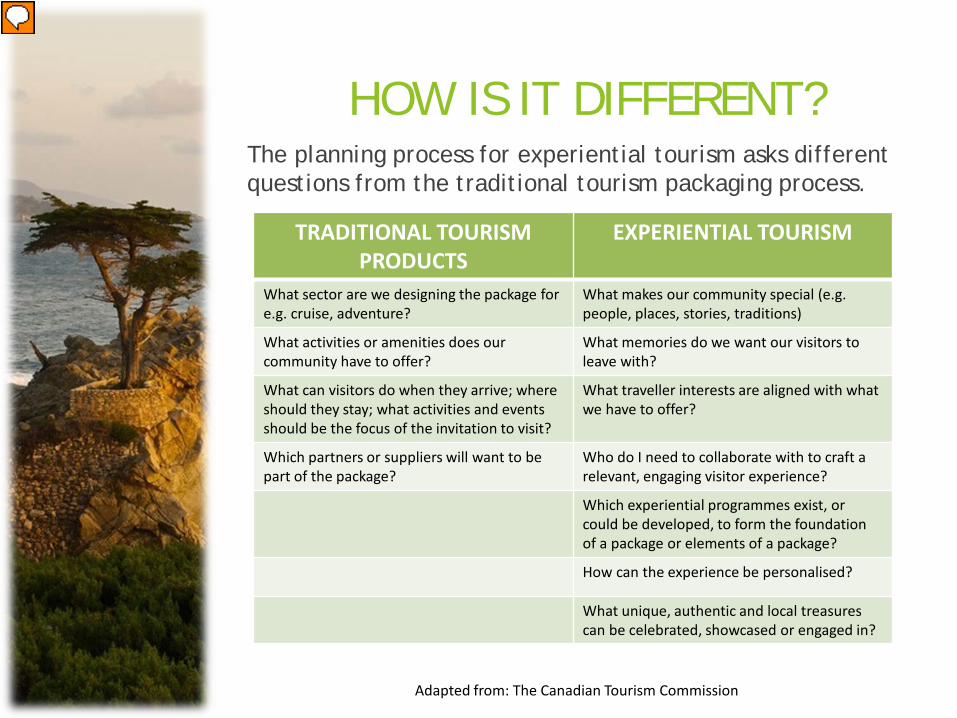
HOW IS IT DIFFERENT?
TRADITIONAL TOURISM PRODUCTS
EXPERIENTIAL TOURISM
What sector are we designing the package for e.g. cruise, adventure?
What makes our community special (e.g. people, places, stories, traditions)
What activities or amenities does our community have to offer?
What memories do we want our visitors to leave with?
What can visitors do when they arrive; where should they stay; what activities and events should be the focus of the invitation to visit?
What traveller interests are aligned with what we have to offer?
Which partners or suppliers will want to be part of the package?
Who do I need to collaborate with to craft a relevant, engaging visitor experience?
Which experiential programmes exist, or could be developed, to form the foundation of a package or elements of a package?
How can the experience be personalised?
What unique, authentic and local treasures can be celebrated, showcased or engaged in?
The planning process for experiential tourism asks different questions from the traditional tourism packaging process.
Adapted from: The Canadian Tourism Commission
Presenter
Presentation Notes
Faded picture background with full-color overlay (Intermediate) Tip: For best results with the picture overlay on this slide, use a picture that is the same dimensions as the slide: 7.5” high and 10” wide. If the picture is not the same height and width, resize or crop to those dimensions before following the instructions below. To reproduce the background effects on this slide, do the following: On the Home tab, in the Slides group, click Layout, and then click Blank. Right-click the slide and then click Format Background. In the Format Background dialog box, click Fill in the left pane. In the Fill pane, select Picture or texture fill, and then under Insert from, click File. In the Insert Picture dialog box, select a picture, and then click Insert. Also in the Format Background dialog box, in the Fill pane, in the Transparency box, enter 50%. Also in the Format Background dialog box, click Picture Color in the left pane. In the Picture Color pane, under Recolor, click the button next to Presets, and then click Tan, Background color 2 Light (third row, first option from the left). On the Insert tab, in the Images group, click Picture. In the Insert Picture dialog box, select the same picture chosen for the background, and then click Insert. Select the picture. Under Picture Tools, on the Format tab, in the bottom right corner of the Size group, click the Size and Position dialog box launcher. In the Format Picture dialog box, resize or crop the image so that the height is set to 7.5” and the width is set to 2.25”. To crop the picture, click Crop in the left pane, and in the Crop pane, under Crop position, enter values into the Height, Width, Left, and Top boxes. To resize the picture, click Size in the left pane, and in the Size pane, under Size and rotate, enter values into the Height and Width boxes. Also in the Format Picture dialog box, click Glow and Soft Edges in the left pane, and then in the Glow and Soft Edges pane, under Soft Edges, in the Size box enter 10 point.

THE EXPERIENTIAL ECONOMY- FROM PRODUCTS TO
TRANSFORMATIVE EXPERIENCES
Presenter
Presentation Notes
Faded picture background with full-color overlay (Intermediate) Tip: For best results with the picture overlay on this slide, use a picture that is the same dimensions as the slide: 7.5” high and 10” wide. If the picture is not the same height and width, resize or crop to those dimensions before following the instructions below. To reproduce the background effects on this slide, do the following: On the Home tab, in the Slides group, click Layout, and then click Blank. Right-click the slide and then click Format Background. In the Format Background dialog box, click Fill in the left pane. In the Fill pane, select Picture or texture fill, and then under Insert from, click File. In the Insert Picture dialog box, select a picture, and then click Insert. Also in the Format Background dialog box, in the Fill pane, in the Transparency box, enter 50%. Also in the Format Background dialog box, click Picture Color in the left pane. In the Picture Color pane, under Recolor, click the button next to Presets, and then click Tan, Background color 2 Light (third row, first option from the left). On the Insert tab, in the Images group, click Picture. In the Insert Picture dialog box, select the same picture chosen for the background, and then click Insert. Select the picture. Under Picture Tools, on the Format tab, in the bottom right corner of the Size group, click the Size and Position dialog box launcher. In the Format Picture dialog box, resize or crop the image so that the height is set to 7.5” and the width is set to 2.25”. To crop the picture, click Crop in the left pane, and in the Crop pane, under Crop position, enter values into the Height, Width, Left, and Top boxes. To resize the picture, click Size in the left pane, and in the Size pane, under Size and rotate, enter values into the Height and Width boxes. Also in the Format Picture dialog box, click Glow and Soft Edges in the left pane, and then in the Glow and Soft Edges pane, under Soft Edges, in the Size box enter 10 point.

WHY EXPERIENTIAL TOURISM?
To respond to changing market trends.
To add value to tourism offerings.
As a means of differentiation by celebrating your unique sources of competitive advantage.
To attract higher-end, more educated, more socially, culturally, and environmentally conscious travellers
Identify and work with new collaborating partners
To minimize risk and maximise returns from tourism by shifting the focus from infrastructural development to building capacity of people who can tell your ‘story’ and connect with tourists
To increase length of stay and amount of visitor spending
To promote low volume, high value tourism
To strengthen and build communities
Presenter
Presentation Notes
Faded picture background with full-color overlay (Intermediate) Tip: For best results with the picture overlay on this slide, use a picture that is the same dimensions as the slide: 7.5” high and 10” wide. If the picture is not the same height and width, resize or crop to those dimensions before following the instructions below. To reproduce the background effects on this slide, do the following: On the Home tab, in the Slides group, click Layout, and then click Blank. Right-click the slide and then click Format Background. In the Format Background dialog box, click Fill in the left pane. In the Fill pane, select Picture or texture fill, and then under Insert from, click File. In the Insert Picture dialog box, select a picture, and then click Insert. Also in the Format Background dialog box, in the Fill pane, in the Transparency box, enter 50%. Also in the Format Background dialog box, click Picture Color in the left pane. In the Picture Color pane, under Recolor, click the button next to Presets, and then click Tan, Background color 2 Light (third row, first option from the left). On the Insert tab, in the Images group, click Picture. In the Insert Picture dialog box, select the same picture chosen for the background, and then click Insert. Select the picture. Under Picture Tools, on the Format tab, in the bottom right corner of the Size group, click the Size and Position dialog box launcher. In the Format Picture dialog box, resize or crop the image so that the height is set to 7.5” and the width is set to 2.25”. To crop the picture, click Crop in the left pane, and in the Crop pane, under Crop position, enter values into the Height, Width, Left, and Top boxes. To resize the picture, click Size in the left pane, and in the Size pane, under Size and rotate, enter values into the Height and Width boxes. Also in the Format Picture dialog box, click Glow and Soft Edges in the left pane, and then in the Glow and Soft Edges pane, under Soft Edges, in the Size box enter 10 point.

VISITOR EXPERIENCES IN DEMAND
Reaching into the community
Meeting local people; kitchen parties, home visits, farm visits; community experiences
Participatory, Hands-On and Interactive Activities
Special Access, Behind-the-Scenes and Exclusivity
Learning and Discovery
Shared Experiences
Presenter
Presentation Notes
Faded picture background with full-color overlay (Intermediate) Tip: For best results with the picture overlay on this slide, use a picture that is the same dimensions as the slide: 7.5” high and 10” wide. If the picture is not the same height and width, resize or crop to those dimensions before following the instructions below. To reproduce the background effects on this slide, do the following: On the Home tab, in the Slides group, click Layout, and then click Blank. Right-click the slide and then click Format Background. In the Format Background dialog box, click Fill in the left pane. In the Fill pane, select Picture or texture fill, and then under Insert from, click File. In the Insert Picture dialog box, select a picture, and then click Insert. Also in the Format Background dialog box, in the Fill pane, in the Transparency box, enter 50%. Also in the Format Background dialog box, click Picture Color in the left pane. In the Picture Color pane, under Recolor, click the button next to Presets, and then click Tan, Background color 2 Light (third row, first option from the left). On the Insert tab, in the Images group, click Picture. In the Insert Picture dialog box, select the same picture chosen for the background, and then click Insert. Select the picture. Under Picture Tools, on the Format tab, in the bottom right corner of the Size group, click the Size and Position dialog box launcher. In the Format Picture dialog box, resize or crop the image so that the height is set to 7.5” and the width is set to 2.25”. To crop the picture, click Crop in the left pane, and in the Crop pane, under Crop position, enter values into the Height, Width, Left, and Top boxes. To resize the picture, click Size in the left pane, and in the Size pane, under Size and rotate, enter values into the Height and Width boxes. Also in the Format Picture dialog box, click Glow and Soft Edges in the left pane, and then in the Glow and Soft Edges pane, under Soft Edges, in the Size box enter 10 point.

DESIGNING TOURISM EXPERIENCES
Presenter
Presentation Notes
Faded picture background with full-color overlay (Intermediate) Tip: For best results with the picture overlay on this slide, use a picture that is the same dimensions as the slide: 7.5” high and 10” wide. If the picture is not the same height and width, resize or crop to those dimensions before following the instructions below. To reproduce the background effects on this slide, do the following: On the Home tab, in the Slides group, click Layout, and then click Blank. Right-click the slide and then click Format Background. In the Format Background dialog box, click Fill in the left pane. In the Fill pane, select Picture or texture fill, and then under Insert from, click File. In the Insert Picture dialog box, select a picture, and then click Insert. Also in the Format Background dialog box, in the Fill pane, in the Transparency box, enter 50%. Also in the Format Background dialog box, click Picture Color in the left pane. In the Picture Color pane, under Recolor, click the button next to Presets, and then click Tan, Background color 2 Light (third row, first option from the left). On the Insert tab, in the Images group, click Picture. In the Insert Picture dialog box, select the same picture chosen for the background, and then click Insert. Select the picture. Under Picture Tools, on the Format tab, in the bottom right corner of the Size group, click the Size and Position dialog box launcher. In the Format Picture dialog box, resize or crop the image so that the height is set to 7.5” and the width is set to 2.25”. To crop the picture, click Crop in the left pane, and in the Crop pane, under Crop position, enter values into the Height, Width, Left, and Top boxes. To resize the picture, click Size in the left pane, and in the Size pane, under Size and rotate, enter values into the Height and Width boxes. Also in the Format Picture dialog box, click Glow and Soft Edges in the left pane, and then in the Glow and Soft Edges pane, under Soft Edges, in the Size box enter 10 point.

To create such tourism experiences we must take a new look at the goods and
services that have traditionally been part of our tourist industry and redesign them to allow opportunities for visitors to learn about our region and enjoy its character
in a completely new way.
Source- Northern Ireland Tourism Board
Presenter
Presentation Notes
Faded picture background with full-color overlay (Intermediate) Tip: For best results with the picture overlay on this slide, use a picture that is the same dimensions as the slide: 7.5” high and 10” wide. If the picture is not the same height and width, resize or crop to those dimensions before following the instructions below. To reproduce the background effects on this slide, do the following: On the Home tab, in the Slides group, click Layout, and then click Blank. Right-click the slide and then click Format Background. In the Format Background dialog box, click Fill in the left pane. In the Fill pane, select Picture or texture fill, and then under Insert from, click File. In the Insert Picture dialog box, select a picture, and then click Insert. Also in the Format Background dialog box, in the Fill pane, in the Transparency box, enter 50%. Also in the Format Background dialog box, click Picture Color in the left pane. In the Picture Color pane, under Recolor, click the button next to Presets, and then click Tan, Background color 2 Light (third row, first option from the left). On the Insert tab, in the Images group, click Picture. In the Insert Picture dialog box, select the same picture chosen for the background, and then click Insert. Select the picture. Under Picture Tools, on the Format tab, in the bottom right corner of the Size group, click the Size and Position dialog box launcher. In the Format Picture dialog box, resize or crop the image so that the height is set to 7.5” and the width is set to 2.25”. To crop the picture, click Crop in the left pane, and in the Crop pane, under Crop position, enter values into the Height, Width, Left, and Top boxes. To resize the picture, click Size in the left pane, and in the Size pane, under Size and rotate, enter values into the Height and Width boxes. Also in the Format Picture dialog box, click Glow and Soft Edges in the left pane, and then in the Glow and Soft Edges pane, under Soft Edges, in the Size box enter 10 point.

Ideas for these experiences can be stimulated by nature, heritage, art, sport
or whatever a local region has in its cultural locker. The important thing is that they are designed with the individual user in mind and
that the activities involved are enhanced through direct contact with the
place, its people and way of life.
Source- Northern Ireland Tourism Board
Photo Credit- http://en.paperblog.com/6-initiatives-for-growth-of-experiential-tourism-in-india-517062/
Presenter
Presentation Notes
Faded picture background with full-color overlay (Intermediate) Tip: For best results with the picture overlay on this slide, use a picture that is the same dimensions as the slide: 7.5” high and 10” wide. If the picture is not the same height and width, resize or crop to those dimensions before following the instructions below. To reproduce the background effects on this slide, do the following: On the Home tab, in the Slides group, click Layout, and then click Blank. Right-click the slide and then click Format Background. In the Format Background dialog box, click Fill in the left pane. In the Fill pane, select Picture or texture fill, and then under Insert from, click File. In the Insert Picture dialog box, select a picture, and then click Insert. Also in the Format Background dialog box, in the Fill pane, in the Transparency box, enter 50%. Also in the Format Background dialog box, click Picture Color in the left pane. In the Picture Color pane, under Recolor, click the button next to Presets, and then click Tan, Background color 2 Light (third row, first option from the left). On the Insert tab, in the Images group, click Picture. In the Insert Picture dialog box, select the same picture chosen for the background, and then click Insert. Select the picture. Under Picture Tools, on the Format tab, in the bottom right corner of the Size group, click the Size and Position dialog box launcher. In the Format Picture dialog box, resize or crop the image so that the height is set to 7.5” and the width is set to 2.25”. To crop the picture, click Crop in the left pane, and in the Crop pane, under Crop position, enter values into the Height, Width, Left, and Top boxes. To resize the picture, click Size in the left pane, and in the Size pane, under Size and rotate, enter values into the Height and Width boxes. Also in the Format Picture dialog box, click Glow and Soft Edges in the left pane, and then in the Glow and Soft Edges pane, under Soft Edges, in the Size box enter 10 point.

“The best experiences connect a region’s
physical assets with the emotional interactions that travellers want to
experience.”
Source- Northern Ireland Tourism Board
Presenter
Presentation Notes
Faded picture background with full-color overlay (Intermediate) Tip: For best results with the picture overlay on this slide, use a picture that is the same dimensions as the slide: 7.5” high and 10” wide. If the picture is not the same height and width, resize or crop to those dimensions before following the instructions below. To reproduce the background effects on this slide, do the following: On the Home tab, in the Slides group, click Layout, and then click Blank. Right-click the slide and then click Format Background. In the Format Background dialog box, click Fill in the left pane. In the Fill pane, select Picture or texture fill, and then under Insert from, click File. In the Insert Picture dialog box, select a picture, and then click Insert. Also in the Format Background dialog box, in the Fill pane, in the Transparency box, enter 50%. Also in the Format Background dialog box, click Picture Color in the left pane. In the Picture Color pane, under Recolor, click the button next to Presets, and then click Tan, Background color 2 Light (third row, first option from the left). On the Insert tab, in the Images group, click Picture. In the Insert Picture dialog box, select the same picture chosen for the background, and then click Insert. Select the picture. Under Picture Tools, on the Format tab, in the bottom right corner of the Size group, click the Size and Position dialog box launcher. In the Format Picture dialog box, resize or crop the image so that the height is set to 7.5” and the width is set to 2.25”. To crop the picture, click Crop in the left pane, and in the Crop pane, under Crop position, enter values into the Height, Width, Left, and Top boxes. To resize the picture, click Size in the left pane, and in the Size pane, under Size and rotate, enter values into the Height and Width boxes. Also in the Format Picture dialog box, click Glow and Soft Edges in the left pane, and then in the Glow and Soft Edges pane, under Soft Edges, in the Size box enter 10 point.
INGREDIENTS OF A WELL-CRAFTED EXPERIENCE
Authentic local people and their stories are at the heart of any well-crafted experience.
The experience is supported by positive cues.
Multiple interactive methods and tools are used to assist in the learning process.
Carefully thought out program themes and titles that intrigue visitors are very important.
Using as many of the five (5) senses as possible will lead to better immersion and intensity for the traveller.
Smaller groups will provide for better enrichment or hands-on learning
Source: Nancy Arsenault (Tourism Cafe Canada), Celes Davar (Earth Rhythms) & Travel Manitoba (2012)
Presenter
Presentation Notes
Faded picture background with full-color overlay (Intermediate) Tip: For best results with the picture overlay on this slide, use a picture that is the same dimensions as the slide: 7.5” high and 10” wide. If the picture is not the same height and width, resize or crop to those dimensions before following the instructions below. To reproduce the background effects on this slide, do the following: On the Home tab, in the Slides group, click Layout, and then click Blank. Right-click the slide and then click Format Background. In the Format Background dialog box, click Fill in the left pane. In the Fill pane, select Picture or texture fill, and then under Insert from, click File. In the Insert Picture dialog box, select a picture, and then click Insert. Also in the Format Background dialog box, in the Fill pane, in the Transparency box, enter 50%. Also in the Format Background dialog box, click Picture Color in the left pane. In the Picture Color pane, under Recolor, click the button next to Presets, and then click Tan, Background color 2 Light (third row, first option from the left). On the Insert tab, in the Images group, click Picture. In the Insert Picture dialog box, select the same picture chosen for the background, and then click Insert. Select the picture. Under Picture Tools, on the Format tab, in the bottom right corner of the Size group, click the Size and Position dialog box launcher. In the Format Picture dialog box, resize or crop the image so that the height is set to 7.5” and the width is set to 2.25”. To crop the picture, click Crop in the left pane, and in the Crop pane, under Crop position, enter values into the Height, Width, Left, and Top boxes. To resize the picture, click Size in the left pane, and in the Size pane, under Size and rotate, enter values into the Height and Width boxes. Also in the Format Picture dialog box, click Glow and Soft Edges in the left pane, and then in the Glow and Soft Edges pane, under Soft Edges, in the Size box enter 10 point.
INGREDIENTS OF A WELL-CRAFTED EXPERIENCE
Experiences involve a shift from dependence on a guide’s knowledge, to facilitation by the interpreter or resource specialist so that travellers are more dependent on themselves for their own learning.
Relevant takeaways (memorabilia) are provided during the experience. They are tangible reminders of the experience.
Simple activities, carefully planned, that focus on one or two main activities for travellers to take part in, are best.
Techniques that tap into the different learning styles and multiple intelligences provide for deeper learning and a much more engaged participant.
Source: Nancy Arsenault (Tourism Cafe Canada), Celes Davar (Earth
Rhythms) & Travel Manitoba (2012)
Presenter
Presentation Notes
Faded picture background with full-color overlay (Intermediate) Tip: For best results with the picture overlay on this slide, use a picture that is the same dimensions as the slide: 7.5” high and 10” wide. If the picture is not the same height and width, resize or crop to those dimensions before following the instructions below. To reproduce the background effects on this slide, do the following: On the Home tab, in the Slides group, click Layout, and then click Blank. Right-click the slide and then click Format Background. In the Format Background dialog box, click Fill in the left pane. In the Fill pane, select Picture or texture fill, and then under Insert from, click File. In the Insert Picture dialog box, select a picture, and then click Insert. Also in the Format Background dialog box, in the Fill pane, in the Transparency box, enter 50%. Also in the Format Background dialog box, click Picture Color in the left pane. In the Picture Color pane, under Recolor, click the button next to Presets, and then click Tan, Background color 2 Light (third row, first option from the left). On the Insert tab, in the Images group, click Picture. In the Insert Picture dialog box, select the same picture chosen for the background, and then click Insert. Select the picture. Under Picture Tools, on the Format tab, in the bottom right corner of the Size group, click the Size and Position dialog box launcher. In the Format Picture dialog box, resize or crop the image so that the height is set to 7.5” and the width is set to 2.25”. To crop the picture, click Crop in the left pane, and in the Crop pane, under Crop position, enter values into the Height, Width, Left, and Top boxes. To resize the picture, click Size in the left pane, and in the Size pane, under Size and rotate, enter values into the Height and Width boxes. Also in the Format Picture dialog box, click Glow and Soft Edges in the left pane, and then in the Glow and Soft Edges pane, under Soft Edges, in the Size box enter 10 point.
INGREDIENTS OF A WELL-CRAFTED EXPERIENCE
Develop and enhance with WOW aspects - Integrate regional foods, a remarkable vista or place, talented storytellers, and interactive learning - together, they have a combined effect.
Personalization or customization of the experience leaves traveller with a feeling of deep appreciation.
Source: Nancy Arsenault (Tourism Cafe Canada), Celes Davar (Earth Rhythms) & Travel Manitoba (2012)
Presenter
Presentation Notes
Faded picture background with full-color overlay (Intermediate) Tip: For best results with the picture overlay on this slide, use a picture that is the same dimensions as the slide: 7.5” high and 10” wide. If the picture is not the same height and width, resize or crop to those dimensions before following the instructions below. To reproduce the background effects on this slide, do the following: On the Home tab, in the Slides group, click Layout, and then click Blank. Right-click the slide and then click Format Background. In the Format Background dialog box, click Fill in the left pane. In the Fill pane, select Picture or texture fill, and then under Insert from, click File. In the Insert Picture dialog box, select a picture, and then click Insert. Also in the Format Background dialog box, in the Fill pane, in the Transparency box, enter 50%. Also in the Format Background dialog box, click Picture Color in the left pane. In the Picture Color pane, under Recolor, click the button next to Presets, and then click Tan, Background color 2 Light (third row, first option from the left). On the Insert tab, in the Images group, click Picture. In the Insert Picture dialog box, select the same picture chosen for the background, and then click Insert. Select the picture. Under Picture Tools, on the Format tab, in the bottom right corner of the Size group, click the Size and Position dialog box launcher. In the Format Picture dialog box, resize or crop the image so that the height is set to 7.5” and the width is set to 2.25”. To crop the picture, click Crop in the left pane, and in the Crop pane, under Crop position, enter values into the Height, Width, Left, and Top boxes. To resize the picture, click Size in the left pane, and in the Size pane, under Size and rotate, enter values into the Height and Width boxes. Also in the Format Picture dialog box, click Glow and Soft Edges in the left pane, and then in the Glow and Soft Edges pane, under Soft Edges, in the Size box enter 10 point.

THE PROCESS OF CREATING A MEMORABLE VISITOR EXPERIENCE
Presenter
Presentation Notes
Faded picture background with full-color overlay (Intermediate) Tip: For best results with the picture overlay on this slide, use a picture that is the same dimensions as the slide: 7.5” high and 10” wide. If the picture is not the same height and width, resize or crop to those dimensions before following the instructions below. To reproduce the background effects on this slide, do the following: On the Home tab, in the Slides group, click Layout, and then click Blank. Right-click the slide and then click Format Background. In the Format Background dialog box, click Fill in the left pane. In the Fill pane, select Picture or texture fill, and then under Insert from, click File. In the Insert Picture dialog box, select a picture, and then click Insert. Also in the Format Background dialog box, in the Fill pane, in the Transparency box, enter 50%. Also in the Format Background dialog box, click Picture Color in the left pane. In the Picture Color pane, under Recolor, click the button next to Presets, and then click Tan, Background color 2 Light (third row, first option from the left). On the Insert tab, in the Images group, click Picture. In the Insert Picture dialog box, select the same picture chosen for the background, and then click Insert. Select the picture. Under Picture Tools, on the Format tab, in the bottom right corner of the Size group, click the Size and Position dialog box launcher. In the Format Picture dialog box, resize or crop the image so that the height is set to 7.5” and the width is set to 2.25”. To crop the picture, click Crop in the left pane, and in the Crop pane, under Crop position, enter values into the Height, Width, Left, and Top boxes. To resize the picture, click Size in the left pane, and in the Size pane, under Size and rotate, enter values into the Height and Width boxes. Also in the Format Picture dialog box, click Glow and Soft Edges in the left pane, and then in the Glow and Soft Edges pane, under Soft Edges, in the Size box enter 10 point.
Step 1- Know your customers
Step 2- Know your community and region
Step 3- Think about the types of experience that makes sense for your business
Step 4- Choose a theme or story
Step 5- Plan the experience
Step 6- Establish the flow with the itinerary
Step 7- Select partners, suppliers, and experience providers
Step 8- Think about market positioning
Step 9- Set the selling price
Step 10- Marketing and Communication
Step 11- Prepare the team and pilot the experience
Step 12- Develop and evaluate the experience.
Presenter
Presentation Notes
Faded picture background with full-color overlay (Intermediate) Tip: For best results with the picture overlay on this slide, use a picture that is the same dimensions as the slide: 7.5” high and 10” wide. If the picture is not the same height and width, resize or crop to those dimensions before following the instructions below. To reproduce the background effects on this slide, do the following: On the Home tab, in the Slides group, click Layout, and then click Blank. Right-click the slide and then click Format Background. In the Format Background dialog box, click Fill in the left pane. In the Fill pane, select Picture or texture fill, and then under Insert from, click File. In the Insert Picture dialog box, select a picture, and then click Insert. Also in the Format Background dialog box, in the Fill pane, in the Transparency box, enter 50%. Also in the Format Background dialog box, click Picture Color in the left pane. In the Picture Color pane, under Recolor, click the button next to Presets, and then click Tan, Background color 2 Light (third row, first option from the left). On the Insert tab, in the Images group, click Picture. In the Insert Picture dialog box, select the same picture chosen for the background, and then click Insert. Select the picture. Under Picture Tools, on the Format tab, in the bottom right corner of the Size group, click the Size and Position dialog box launcher. In the Format Picture dialog box, resize or crop the image so that the height is set to 7.5” and the width is set to 2.25”. To crop the picture, click Crop in the left pane, and in the Crop pane, under Crop position, enter values into the Height, Width, Left, and Top boxes. To resize the picture, click Size in the left pane, and in the Size pane, under Size and rotate, enter values into the Height and Width boxes. Also in the Format Picture dialog box, click Glow and Soft Edges in the left pane, and then in the Glow and Soft Edges pane, under Soft Edges, in the Size box enter 10 point.

MEASURING SUCCESS
Presenter
Presentation Notes
Faded picture background with full-color overlay (Intermediate) Tip: For best results with the picture overlay on this slide, use a picture that is the same dimensions as the slide: 7.5” high and 10” wide. If the picture is not the same height and width, resize or crop to those dimensions before following the instructions below. To reproduce the background effects on this slide, do the following: On the Home tab, in the Slides group, click Layout, and then click Blank. Right-click the slide and then click Format Background. In the Format Background dialog box, click Fill in the left pane. In the Fill pane, select Picture or texture fill, and then under Insert from, click File. In the Insert Picture dialog box, select a picture, and then click Insert. Also in the Format Background dialog box, in the Fill pane, in the Transparency box, enter 50%. Also in the Format Background dialog box, click Picture Color in the left pane. In the Picture Color pane, under Recolor, click the button next to Presets, and then click Tan, Background color 2 Light (third row, first option from the left). On the Insert tab, in the Images group, click Picture. In the Insert Picture dialog box, select the same picture chosen for the background, and then click Insert. Select the picture. Under Picture Tools, on the Format tab, in the bottom right corner of the Size group, click the Size and Position dialog box launcher. In the Format Picture dialog box, resize or crop the image so that the height is set to 7.5” and the width is set to 2.25”. To crop the picture, click Crop in the left pane, and in the Crop pane, under Crop position, enter values into the Height, Width, Left, and Top boxes. To resize the picture, click Size in the left pane, and in the Size pane, under Size and rotate, enter values into the Height and Width boxes. Also in the Format Picture dialog box, click Glow and Soft Edges in the left pane, and then in the Glow and Soft Edges pane, under Soft Edges, in the Size box enter 10 point.

MEASURING SUCCESS What does success look like?
What qualitative measures of success are you using? (e.g. Trip Advisor, customer experience feedback forms, post-visit contact etc.) How are you extracting from the ‘words’ and tracking this information so it informs your product development and marketing?
What quantitative measures of success are you using? (E.g. • Number of experiences sold, • Number of participants, • Profit margin and other financial measures, • Market reach, • Number of new experiences in the market annually, • Number of partners developed, • Hours of coaching required to bring an experience provider, to delivery, etc.
How are you celebrating success?
Adapted from: Nancy Arsenault (Tourism Cafe Canada), Celes Davar (Earth Rhythms) & Travel Manitoba (2012)
Presenter
Presentation Notes
Faded picture background with full-color overlay (Intermediate) Tip: For best results with the picture overlay on this slide, use a picture that is the same dimensions as the slide: 7.5” high and 10” wide. If the picture is not the same height and width, resize or crop to those dimensions before following the instructions below. To reproduce the background effects on this slide, do the following: On the Home tab, in the Slides group, click Layout, and then click Blank. Right-click the slide and then click Format Background. In the Format Background dialog box, click Fill in the left pane. In the Fill pane, select Picture or texture fill, and then under Insert from, click File. In the Insert Picture dialog box, select a picture, and then click Insert. Also in the Format Background dialog box, in the Fill pane, in the Transparency box, enter 50%. Also in the Format Background dialog box, click Picture Color in the left pane. In the Picture Color pane, under Recolor, click the button next to Presets, and then click Tan, Background color 2 Light (third row, first option from the left). On the Insert tab, in the Images group, click Picture. In the Insert Picture dialog box, select the same picture chosen for the background, and then click Insert. Select the picture. Under Picture Tools, on the Format tab, in the bottom right corner of the Size group, click the Size and Position dialog box launcher. In the Format Picture dialog box, resize or crop the image so that the height is set to 7.5” and the width is set to 2.25”. To crop the picture, click Crop in the left pane, and in the Crop pane, under Crop position, enter values into the Height, Width, Left, and Top boxes. To resize the picture, click Size in the left pane, and in the Size pane, under Size and rotate, enter values into the Height and Width boxes. Also in the Format Picture dialog box, click Glow and Soft Edges in the left pane, and then in the Glow and Soft Edges pane, under Soft Edges, in the Size box enter 10 point.

EXPERIENTIAL TOURISM IN PRACTICE
Presenter
Presentation Notes
Faded picture background with full-color overlay (Intermediate) Tip: For best results with the picture overlay on this slide, use a picture that is the same dimensions as the slide: 7.5” high and 10” wide. If the picture is not the same height and width, resize or crop to those dimensions before following the instructions below. To reproduce the background effects on this slide, do the following: On the Home tab, in the Slides group, click Layout, and then click Blank. Right-click the slide and then click Format Background. In the Format Background dialog box, click Fill in the left pane. In the Fill pane, select Picture or texture fill, and then under Insert from, click File. In the Insert Picture dialog box, select a picture, and then click Insert. Also in the Format Background dialog box, in the Fill pane, in the Transparency box, enter 50%. Also in the Format Background dialog box, click Picture Color in the left pane. In the Picture Color pane, under Recolor, click the button next to Presets, and then click Tan, Background color 2 Light (third row, first option from the left). On the Insert tab, in the Images group, click Picture. In the Insert Picture dialog box, select the same picture chosen for the background, and then click Insert. Select the picture. Under Picture Tools, on the Format tab, in the bottom right corner of the Size group, click the Size and Position dialog box launcher. In the Format Picture dialog box, resize or crop the image so that the height is set to 7.5” and the width is set to 2.25”. To crop the picture, click Crop in the left pane, and in the Crop pane, under Crop position, enter values into the Height, Width, Left, and Top boxes. To resize the picture, click Size in the left pane, and in the Size pane, under Size and rotate, enter values into the Height and Width boxes. Also in the Format Picture dialog box, click Glow and Soft Edges in the left pane, and then in the Glow and Soft Edges pane, under Soft Edges, in the Size box enter 10 point.

EXPERIENTIAL TOURISM IN INDIA
Many tourists are opting for Puducherry for its offbeat mix of spirituality, the experimental township of Auroville, French old-world charm, and beaches.
Visitors learn the Indian way of cooking at Sita Cultural Centre and have the opportunity to enrol in Ayurveda massage classes.
Close to Auroville, the Mohanam Cultural Centre offers cooking, classical dance and classical music classes geared towards the long-stay travellers.
Source- http://www.thehindu.com/todays-paper/tp-national/tp-tamilnadu/a-taste-of-exciting-experiential-tourism/article6179555.ece
Presenter
Presentation Notes
Faded picture background with full-color overlay (Intermediate) Tip: For best results with the picture overlay on this slide, use a picture that is the same dimensions as the slide: 7.5” high and 10” wide. If the picture is not the same height and width, resize or crop to those dimensions before following the instructions below. To reproduce the background effects on this slide, do the following: On the Home tab, in the Slides group, click Layout, and then click Blank. Right-click the slide and then click Format Background. In the Format Background dialog box, click Fill in the left pane. In the Fill pane, select Picture or texture fill, and then under Insert from, click File. In the Insert Picture dialog box, select a picture, and then click Insert. Also in the Format Background dialog box, in the Fill pane, in the Transparency box, enter 50%. Also in the Format Background dialog box, click Picture Color in the left pane. In the Picture Color pane, under Recolor, click the button next to Presets, and then click Tan, Background color 2 Light (third row, first option from the left). On the Insert tab, in the Images group, click Picture. In the Insert Picture dialog box, select the same picture chosen for the background, and then click Insert. Select the picture. Under Picture Tools, on the Format tab, in the bottom right corner of the Size group, click the Size and Position dialog box launcher. In the Format Picture dialog box, resize or crop the image so that the height is set to 7.5” and the width is set to 2.25”. To crop the picture, click Crop in the left pane, and in the Crop pane, under Crop position, enter values into the Height, Width, Left, and Top boxes. To resize the picture, click Size in the left pane, and in the Size pane, under Size and rotate, enter values into the Height and Width boxes. Also in the Format Picture dialog box, click Glow and Soft Edges in the left pane, and then in the Glow and Soft Edges pane, under Soft Edges, in the Size box enter 10 point.

EXPERIENTIAL TOURISM IN INDIA
Half-day and 1 to 2-day ‘village university’ programmes where visitors can experience Tamil village lifestyle and culture, with guidance from professors from Pondicherry University are also arranged.
A new trend which is seen, especially among the French, is for families who stay on for a year, enrolling their children at the Lycee Francais or the Study School, and attending classes
Source- http://www.thehindu.com/todays-paper/tp-national/tp-tamilnadu/a-taste-of-exciting-experiential-tourism/article6179555.ece
Presenter
Presentation Notes
Faded picture background with full-color overlay (Intermediate) Tip: For best results with the picture overlay on this slide, use a picture that is the same dimensions as the slide: 7.5” high and 10” wide. If the picture is not the same height and width, resize or crop to those dimensions before following the instructions below. To reproduce the background effects on this slide, do the following: On the Home tab, in the Slides group, click Layout, and then click Blank. Right-click the slide and then click Format Background. In the Format Background dialog box, click Fill in the left pane. In the Fill pane, select Picture or texture fill, and then under Insert from, click File. In the Insert Picture dialog box, select a picture, and then click Insert. Also in the Format Background dialog box, in the Fill pane, in the Transparency box, enter 50%. Also in the Format Background dialog box, click Picture Color in the left pane. In the Picture Color pane, under Recolor, click the button next to Presets, and then click Tan, Background color 2 Light (third row, first option from the left). On the Insert tab, in the Images group, click Picture. In the Insert Picture dialog box, select the same picture chosen for the background, and then click Insert. Select the picture. Under Picture Tools, on the Format tab, in the bottom right corner of the Size group, click the Size and Position dialog box launcher. In the Format Picture dialog box, resize or crop the image so that the height is set to 7.5” and the width is set to 2.25”. To crop the picture, click Crop in the left pane, and in the Crop pane, under Crop position, enter values into the Height, Width, Left, and Top boxes. To resize the picture, click Size in the left pane, and in the Size pane, under Size and rotate, enter values into the Height and Width boxes. Also in the Format Picture dialog box, click Glow and Soft Edges in the left pane, and then in the Glow and Soft Edges pane, under Soft Edges, in the Size box enter 10 point.
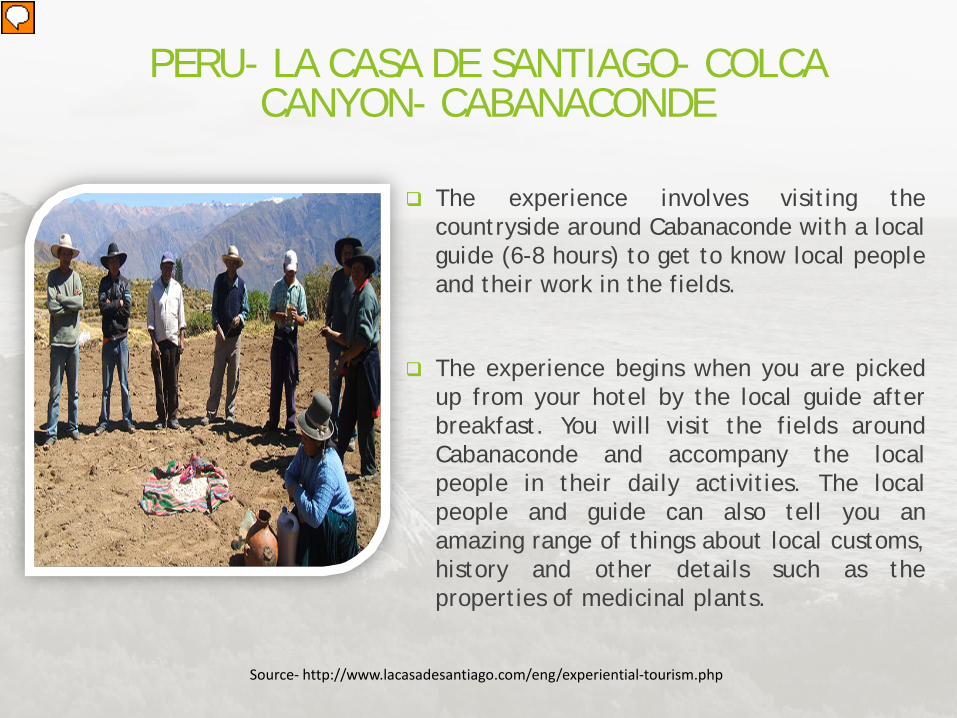
PERU- LA CASA DE SANTIAGO- COLCA CANYON- CABANACONDE
The experience involves visiting the countryside around Cabanaconde with a local guide (6-8 hours) to get to know local people and their work in the fields.
The experience begins when you are picked up from your hotel by the local guide after breakfast. You will visit the fields around Cabanaconde and accompany the local people in their daily activities. The local people and guide can also tell you an amazing range of things about local customs, history and other details such as the properties of medicinal plants.
Source- http://www.lacasadesantiago.com/eng/experiential-tourism.php
Presenter
Presentation Notes
Faded picture background with full-color overlay (Intermediate) Tip: For best results with the picture overlay on this slide, use a picture that is the same dimensions as the slide: 7.5” high and 10” wide. If the picture is not the same height and width, resize or crop to those dimensions before following the instructions below. To reproduce the background effects on this slide, do the following: On the Home tab, in the Slides group, click Layout, and then click Blank. Right-click the slide and then click Format Background. In the Format Background dialog box, click Fill in the left pane. In the Fill pane, select Picture or texture fill, and then under Insert from, click File. In the Insert Picture dialog box, select a picture, and then click Insert. Also in the Format Background dialog box, in the Fill pane, in the Transparency box, enter 50%. Also in the Format Background dialog box, click Picture Color in the left pane. In the Picture Color pane, under Recolor, click the button next to Presets, and then click Tan, Background color 2 Light (third row, first option from the left). On the Insert tab, in the Images group, click Picture. In the Insert Picture dialog box, select the same picture chosen for the background, and then click Insert. Select the picture. Under Picture Tools, on the Format tab, in the bottom right corner of the Size group, click the Size and Position dialog box launcher. In the Format Picture dialog box, resize or crop the image so that the height is set to 7.5” and the width is set to 2.25”. To crop the picture, click Crop in the left pane, and in the Crop pane, under Crop position, enter values into the Height, Width, Left, and Top boxes. To resize the picture, click Size in the left pane, and in the Size pane, under Size and rotate, enter values into the Height and Width boxes. Also in the Format Picture dialog box, click Glow and Soft Edges in the left pane, and then in the Glow and Soft Edges pane, under Soft Edges, in the Size box enter 10 point.
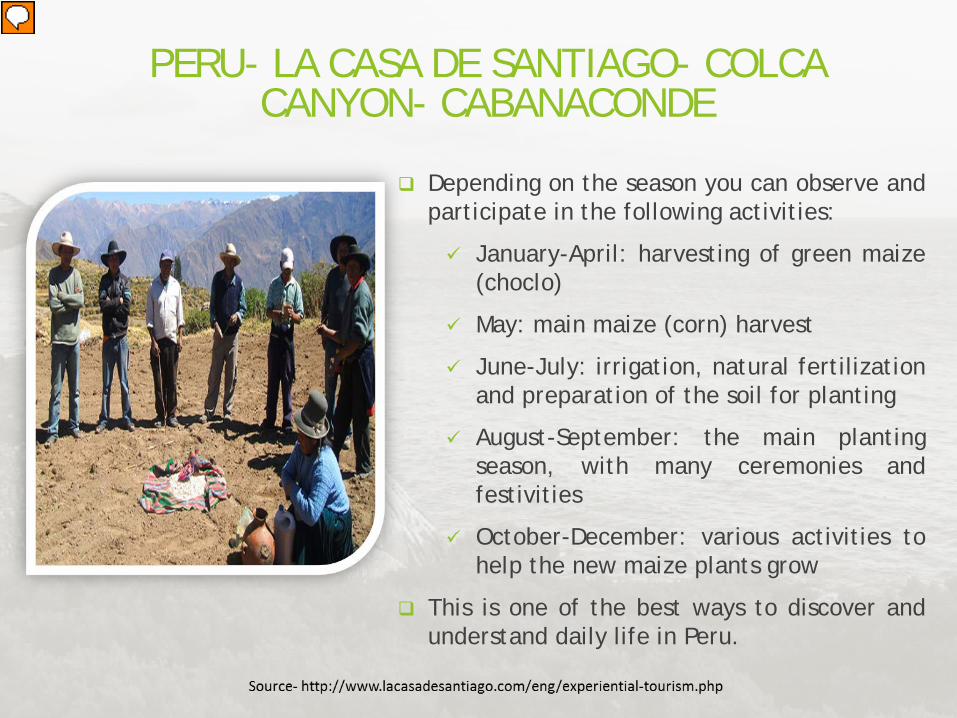
Depending on the season you can observe and participate in the following activities:
January-April: harvesting of green maize (choclo)
May: main maize (corn) harvest
June-July: irrigation, natural fertilization and preparation of the soil for planting
August-September: the main planting season, with many ceremonies and festivities
October-December: various activities to help the new maize plants grow
This is one of the best ways to discover and understand daily life in Peru.
PERU- LA CASA DE SANTIAGO- COLCA CANYON- CABANACONDE
Presenter
Presentation Notes
Faded picture background with full-color overlay (Intermediate) Tip: For best results with the picture overlay on this slide, use a picture that is the same dimensions as the slide: 7.5” high and 10” wide. If the picture is not the same height and width, resize or crop to those dimensions before following the instructions below. To reproduce the background effects on this slide, do the following: On the Home tab, in the Slides group, click Layout, and then click Blank. Right-click the slide and then click Format Background. In the Format Background dialog box, click Fill in the left pane. In the Fill pane, select Picture or texture fill, and then under Insert from, click File. In the Insert Picture dialog box, select a picture, and then click Insert. Also in the Format Background dialog box, in the Fill pane, in the Transparency box, enter 50%. Also in the Format Background dialog box, click Picture Color in the left pane. In the Picture Color pane, under Recolor, click the button next to Presets, and then click Tan, Background color 2 Light (third row, first option from the left). On the Insert tab, in the Images group, click Picture. In the Insert Picture dialog box, select the same picture chosen for the background, and then click Insert. Select the picture. Under Picture Tools, on the Format tab, in the bottom right corner of the Size group, click the Size and Position dialog box launcher. In the Format Picture dialog box, resize or crop the image so that the height is set to 7.5” and the width is set to 2.25”. To crop the picture, click Crop in the left pane, and in the Crop pane, under Crop position, enter values into the Height, Width, Left, and Top boxes. To resize the picture, click Size in the left pane, and in the Size pane, under Size and rotate, enter values into the Height and Width boxes. Also in the Format Picture dialog box, click Glow and Soft Edges in the left pane, and then in the Glow and Soft Edges pane, under Soft Edges, in the Size box enter 10 point.

AGRITOURISM EXPERIENCE- BELMONT ESTATE, GRENADA
Photo Credit-grenadaexplorer.com
Photo Credit- gogrenada.gd
Belmont Estate is a unique and authentic 17th century plantation that offers guests an opportunity to participate in and observe the workings of a fully functional historic plantation.
The experience includes:
An organic farm
Gardens
A heritage museum
Cocoa processing facilities
A restaurant featuring traditional Grenadian cuisine
A goat dairy farm
A produce shop
A craft market
Source- belmontestate.net
Presenter
Presentation Notes
Faded picture background with full-color overlay (Intermediate) Tip: For best results with the picture overlay on this slide, use a picture that is the same dimensions as the slide: 7.5” high and 10” wide. If the picture is not the same height and width, resize or crop to those dimensions before following the instructions below. To reproduce the background effects on this slide, do the following: On the Home tab, in the Slides group, click Layout, and then click Blank. Right-click the slide and then click Format Background. In the Format Background dialog box, click Fill in the left pane. In the Fill pane, select Picture or texture fill, and then under Insert from, click File. In the Insert Picture dialog box, select a picture, and then click Insert. Also in the Format Background dialog box, in the Fill pane, in the Transparency box, enter 50%. Also in the Format Background dialog box, click Picture Color in the left pane. In the Picture Color pane, under Recolor, click the button next to Presets, and then click Tan, Background color 2 Light (third row, first option from the left). On the Insert tab, in the Images group, click Picture. In the Insert Picture dialog box, select the same picture chosen for the background, and then click Insert. Select the picture. Under Picture Tools, on the Format tab, in the bottom right corner of the Size group, click the Size and Position dialog box launcher. In the Format Picture dialog box, resize or crop the image so that the height is set to 7.5” and the width is set to 2.25”. To crop the picture, click Crop in the left pane, and in the Crop pane, under Crop position, enter values into the Height, Width, Left, and Top boxes. To resize the picture, click Size in the left pane, and in the Size pane, under Size and rotate, enter values into the Height and Width boxes. Also in the Format Picture dialog box, click Glow and Soft Edges in the left pane, and then in the Glow and Soft Edges pane, under Soft Edges, in the Size box enter 10 point.

IMPLICATIONS FOR PLANNERS
Presenter
Presentation Notes
Faded picture background with full-color overlay (Intermediate) Tip: For best results with the picture overlay on this slide, use a picture that is the same dimensions as the slide: 7.5” high and 10” wide. If the picture is not the same height and width, resize or crop to those dimensions before following the instructions below. To reproduce the background effects on this slide, do the following: On the Home tab, in the Slides group, click Layout, and then click Blank. Right-click the slide and then click Format Background. In the Format Background dialog box, click Fill in the left pane. In the Fill pane, select Picture or texture fill, and then under Insert from, click File. In the Insert Picture dialog box, select a picture, and then click Insert. Also in the Format Background dialog box, in the Fill pane, in the Transparency box, enter 50%. Also in the Format Background dialog box, click Picture Color in the left pane. In the Picture Color pane, under Recolor, click the button next to Presets, and then click Tan, Background color 2 Light (third row, first option from the left). On the Insert tab, in the Images group, click Picture. In the Insert Picture dialog box, select the same picture chosen for the background, and then click Insert. Select the picture. Under Picture Tools, on the Format tab, in the bottom right corner of the Size group, click the Size and Position dialog box launcher. In the Format Picture dialog box, resize or crop the image so that the height is set to 7.5” and the width is set to 2.25”. To crop the picture, click Crop in the left pane, and in the Crop pane, under Crop position, enter values into the Height, Width, Left, and Top boxes. To resize the picture, click Size in the left pane, and in the Size pane, under Size and rotate, enter values into the Height and Width boxes. Also in the Format Picture dialog box, click Glow and Soft Edges in the left pane, and then in the Glow and Soft Edges pane, under Soft Edges, in the Size box enter 10 point.

MACRO LEVEL IMPLICATIONS
1. Tourism policy decisions
2. Communicating the destination’s message
3. Institutional arrangements
Presenter
Presentation Notes
Faded picture background with full-color overlay (Intermediate) Tip: For best results with the picture overlay on this slide, use a picture that is the same dimensions as the slide: 7.5” high and 10” wide. If the picture is not the same height and width, resize or crop to those dimensions before following the instructions below. To reproduce the background effects on this slide, do the following: On the Home tab, in the Slides group, click Layout, and then click Blank. Right-click the slide and then click Format Background. In the Format Background dialog box, click Fill in the left pane. In the Fill pane, select Picture or texture fill, and then under Insert from, click File. In the Insert Picture dialog box, select a picture, and then click Insert. Also in the Format Background dialog box, in the Fill pane, in the Transparency box, enter 50%. Also in the Format Background dialog box, click Picture Color in the left pane. In the Picture Color pane, under Recolor, click the button next to Presets, and then click Tan, Background color 2 Light (third row, first option from the left). On the Insert tab, in the Images group, click Picture. In the Insert Picture dialog box, select the same picture chosen for the background, and then click Insert. Select the picture. Under Picture Tools, on the Format tab, in the bottom right corner of the Size group, click the Size and Position dialog box launcher. In the Format Picture dialog box, resize or crop the image so that the height is set to 7.5” and the width is set to 2.25”. To crop the picture, click Crop in the left pane, and in the Crop pane, under Crop position, enter values into the Height, Width, Left, and Top boxes. To resize the picture, click Size in the left pane, and in the Size pane, under Size and rotate, enter values into the Height and Width boxes. Also in the Format Picture dialog box, click Glow and Soft Edges in the left pane, and then in the Glow and Soft Edges pane, under Soft Edges, in the Size box enter 10 point.
MICRO LEVEL IMPLICATIONS
• The importance, role, skill, resourcefulness and networks of tour directors and tour guides
• Need for local resources specialists or subject matter experts
• The element of surprise – both planned & spontaneous
• The need for free time, flexibility and spontaneity which allows for self-discovery and time to enjoy unplanned activities
Presenter
Presentation Notes
Faded picture background with full-color overlay (Intermediate) Tip: For best results with the picture overlay on this slide, use a picture that is the same dimensions as the slide: 7.5” high and 10” wide. If the picture is not the same height and width, resize or crop to those dimensions before following the instructions below. To reproduce the background effects on this slide, do the following: On the Home tab, in the Slides group, click Layout, and then click Blank. Right-click the slide and then click Format Background. In the Format Background dialog box, click Fill in the left pane. In the Fill pane, select Picture or texture fill, and then under Insert from, click File. In the Insert Picture dialog box, select a picture, and then click Insert. Also in the Format Background dialog box, in the Fill pane, in the Transparency box, enter 50%. Also in the Format Background dialog box, click Picture Color in the left pane. In the Picture Color pane, under Recolor, click the button next to Presets, and then click Tan, Background color 2 Light (third row, first option from the left). On the Insert tab, in the Images group, click Picture. In the Insert Picture dialog box, select the same picture chosen for the background, and then click Insert. Select the picture. Under Picture Tools, on the Format tab, in the bottom right corner of the Size group, click the Size and Position dialog box launcher. In the Format Picture dialog box, resize or crop the image so that the height is set to 7.5” and the width is set to 2.25”. To crop the picture, click Crop in the left pane, and in the Crop pane, under Crop position, enter values into the Height, Width, Left, and Top boxes. To resize the picture, click Size in the left pane, and in the Size pane, under Size and rotate, enter values into the Height and Width boxes. Also in the Format Picture dialog box, click Glow and Soft Edges in the left pane, and then in the Glow and Soft Edges pane, under Soft Edges, in the Size box enter 10 point.

TOBAGO HERITAGE FESTIVAL
Photo Credit- legacy.guardian.co.tt
Presenter
Presentation Notes
Faded picture background with full-color overlay (Intermediate) Tip: For best results with the picture overlay on this slide, use a picture that is the same dimensions as the slide: 7.5” high and 10” wide. If the picture is not the same height and width, resize or crop to those dimensions before following the instructions below. To reproduce the background effects on this slide, do the following: On the Home tab, in the Slides group, click Layout, and then click Blank. Right-click the slide and then click Format Background. In the Format Background dialog box, click Fill in the left pane. In the Fill pane, select Picture or texture fill, and then under Insert from, click File. In the Insert Picture dialog box, select a picture, and then click Insert. Also in the Format Background dialog box, in the Fill pane, in the Transparency box, enter 50%. Also in the Format Background dialog box, click Picture Color in the left pane. In the Picture Color pane, under Recolor, click the button next to Presets, and then click Tan, Background color 2 Light (third row, first option from the left). On the Insert tab, in the Images group, click Picture. In the Insert Picture dialog box, select the same picture chosen for the background, and then click Insert. Select the picture. Under Picture Tools, on the Format tab, in the bottom right corner of the Size group, click the Size and Position dialog box launcher. In the Format Picture dialog box, resize or crop the image so that the height is set to 7.5” and the width is set to 2.25”. To crop the picture, click Crop in the left pane, and in the Crop pane, under Crop position, enter values into the Height, Width, Left, and Top boxes. To resize the picture, click Size in the left pane, and in the Size pane, under Size and rotate, enter values into the Height and Width boxes. Also in the Format Picture dialog box, click Glow and Soft Edges in the left pane, and then in the Glow and Soft Edges pane, under Soft Edges, in the Size box enter 10 point.

TOBAGO BLUE FOOD FESTIVAL
Photo Credit- trinijunglejuice.com
Presenter
Presentation Notes
Faded picture background with full-color overlay (Intermediate) Tip: For best results with the picture overlay on this slide, use a picture that is the same dimensions as the slide: 7.5” high and 10” wide. If the picture is not the same height and width, resize or crop to those dimensions before following the instructions below. To reproduce the background effects on this slide, do the following: On the Home tab, in the Slides group, click Layout, and then click Blank. Right-click the slide and then click Format Background. In the Format Background dialog box, click Fill in the left pane. In the Fill pane, select Picture or texture fill, and then under Insert from, click File. In the Insert Picture dialog box, select a picture, and then click Insert. Also in the Format Background dialog box, in the Fill pane, in the Transparency box, enter 50%. Also in the Format Background dialog box, click Picture Color in the left pane. In the Picture Color pane, under Recolor, click the button next to Presets, and then click Tan, Background color 2 Light (third row, first option from the left). On the Insert tab, in the Images group, click Picture. In the Insert Picture dialog box, select the same picture chosen for the background, and then click Insert. Select the picture. Under Picture Tools, on the Format tab, in the bottom right corner of the Size group, click the Size and Position dialog box launcher. In the Format Picture dialog box, resize or crop the image so that the height is set to 7.5” and the width is set to 2.25”. To crop the picture, click Crop in the left pane, and in the Crop pane, under Crop position, enter values into the Height, Width, Left, and Top boxes. To resize the picture, click Size in the left pane, and in the Size pane, under Size and rotate, enter values into the Height and Width boxes. Also in the Format Picture dialog box, click Glow and Soft Edges in the left pane, and then in the Glow and Soft Edges pane, under Soft Edges, in the Size box enter 10 point.

GOAT RACING
Photo Credit- Reuters/ Andrea da Silva
Presenter
Presentation Notes
Faded picture background with full-color overlay (Intermediate) Tip: For best results with the picture overlay on this slide, use a picture that is the same dimensions as the slide: 7.5” high and 10” wide. If the picture is not the same height and width, resize or crop to those dimensions before following the instructions below. To reproduce the background effects on this slide, do the following: On the Home tab, in the Slides group, click Layout, and then click Blank. Right-click the slide and then click Format Background. In the Format Background dialog box, click Fill in the left pane. In the Fill pane, select Picture or texture fill, and then under Insert from, click File. In the Insert Picture dialog box, select a picture, and then click Insert. Also in the Format Background dialog box, in the Fill pane, in the Transparency box, enter 50%. Also in the Format Background dialog box, click Picture Color in the left pane. In the Picture Color pane, under Recolor, click the button next to Presets, and then click Tan, Background color 2 Light (third row, first option from the left). On the Insert tab, in the Images group, click Picture. In the Insert Picture dialog box, select the same picture chosen for the background, and then click Insert. Select the picture. Under Picture Tools, on the Format tab, in the bottom right corner of the Size group, click the Size and Position dialog box launcher. In the Format Picture dialog box, resize or crop the image so that the height is set to 7.5” and the width is set to 2.25”. To crop the picture, click Crop in the left pane, and in the Crop pane, under Crop position, enter values into the Height, Width, Left, and Top boxes. To resize the picture, click Size in the left pane, and in the Size pane, under Size and rotate, enter values into the Height and Width boxes. Also in the Format Picture dialog box, click Glow and Soft Edges in the left pane, and then in the Glow and Soft Edges pane, under Soft Edges, in the Size box enter 10 point.

HOW CAN YOU ACHIEVE
ENGAGEMENT, CONNECTION AND TRANSFORMATION?
Presenter
Presentation Notes
Faded picture background with full-color overlay (Intermediate) Tip: For best results with the picture overlay on this slide, use a picture that is the same dimensions as the slide: 7.5” high and 10” wide. If the picture is not the same height and width, resize or crop to those dimensions before following the instructions below. To reproduce the background effects on this slide, do the following: On the Home tab, in the Slides group, click Layout, and then click Blank. Right-click the slide and then click Format Background. In the Format Background dialog box, click Fill in the left pane. In the Fill pane, select Picture or texture fill, and then under Insert from, click File. In the Insert Picture dialog box, select a picture, and then click Insert. Also in the Format Background dialog box, in the Fill pane, in the Transparency box, enter 50%. Also in the Format Background dialog box, click Picture Color in the left pane. In the Picture Color pane, under Recolor, click the button next to Presets, and then click Tan, Background color 2 Light (third row, first option from the left). On the Insert tab, in the Images group, click Picture. In the Insert Picture dialog box, select the same picture chosen for the background, and then click Insert. Select the picture. Under Picture Tools, on the Format tab, in the bottom right corner of the Size group, click the Size and Position dialog box launcher. In the Format Picture dialog box, resize or crop the image so that the height is set to 7.5” and the width is set to 2.25”. To crop the picture, click Crop in the left pane, and in the Crop pane, under Crop position, enter values into the Height, Width, Left, and Top boxes. To resize the picture, click Size in the left pane, and in the Size pane, under Size and rotate, enter values into the Height and Width boxes. Also in the Format Picture dialog box, click Glow and Soft Edges in the left pane, and then in the Glow and Soft Edges pane, under Soft Edges, in the Size box enter 10 point.
SOURCES AND RESOURCES The following are acknowledged as key sources of information for this presentation: Experiences- A toolkit for partners of the CTC (2nd Edition)-
The Canadian Tourism Commision Measuring & Celebrating Success- Nancy Arsenault
(Tourism Cafe Canada), Celes Davar (Earth Rhythms) & Travel Manitoba (2012)
Ingredients of a Well-Crafted Travel Experience- Nancy Arsenault (Tourism Cafe Canada), Celes Davar (Earth Rhythms) & Travel Manitoba (2012)
Creating Experiences- A Toolkit for the NI Tourism Industry- Northern Ireland Tourism Board.
Presenter
Presentation Notes
Faded picture background with full-color overlay (Intermediate) Tip: For best results with the picture overlay on this slide, use a picture that is the same dimensions as the slide: 7.5” high and 10” wide. If the picture is not the same height and width, resize or crop to those dimensions before following the instructions below. To reproduce the background effects on this slide, do the following: On the Home tab, in the Slides group, click Layout, and then click Blank. Right-click the slide and then click Format Background. In the Format Background dialog box, click Fill in the left pane. In the Fill pane, select Picture or texture fill, and then under Insert from, click File. In the Insert Picture dialog box, select a picture, and then click Insert. Also in the Format Background dialog box, in the Fill pane, in the Transparency box, enter 50%. Also in the Format Background dialog box, click Picture Color in the left pane. In the Picture Color pane, under Recolor, click the button next to Presets, and then click Tan, Background color 2 Light (third row, first option from the left). On the Insert tab, in the Images group, click Picture. In the Insert Picture dialog box, select the same picture chosen for the background, and then click Insert. Select the picture. Under Picture Tools, on the Format tab, in the bottom right corner of the Size group, click the Size and Position dialog box launcher. In the Format Picture dialog box, resize or crop the image so that the height is set to 7.5” and the width is set to 2.25”. To crop the picture, click Crop in the left pane, and in the Crop pane, under Crop position, enter values into the Height, Width, Left, and Top boxes. To resize the picture, click Size in the left pane, and in the Size pane, under Size and rotate, enter values into the Height and Width boxes. Also in the Format Picture dialog box, click Glow and Soft Edges in the left pane, and then in the Glow and Soft Edges pane, under Soft Edges, in the Size box enter 10 point.