Collaborative BPMN process design - Creatio Academy
38
Collaborative BPMN process design Version 7.18
-
Upload
khangminh22 -
Category
Documents
-
view
6 -
download
0
Transcript of Collaborative BPMN process design - Creatio Academy

Collaborative BPMN processdesignVersion 7.18

This documentation is provided under restrictions on use and are protected by intellectual property laws. Except asexpressly permitted in your license agreement or allowed by law, you may not use, copy, reproduce, translate,broadcast, modify, license, transmit, distribute, exhibit, perform, publish or display any part, in any form, or by anymeans. Reverse engineering, disassembly, or decompilation of this documentation, unless required by law forinteroperability, is prohibited.
The information contained herein is subject to change without notice and is not warranted to be error-free. If youfind any errors, please report them to us in writing.
© 2022 Creatio. All rights reserved.
4
7
7
8
9
11
11
12
15
16
16
18
20
20
23
23
25
28
29
29
31
31
34
35
37
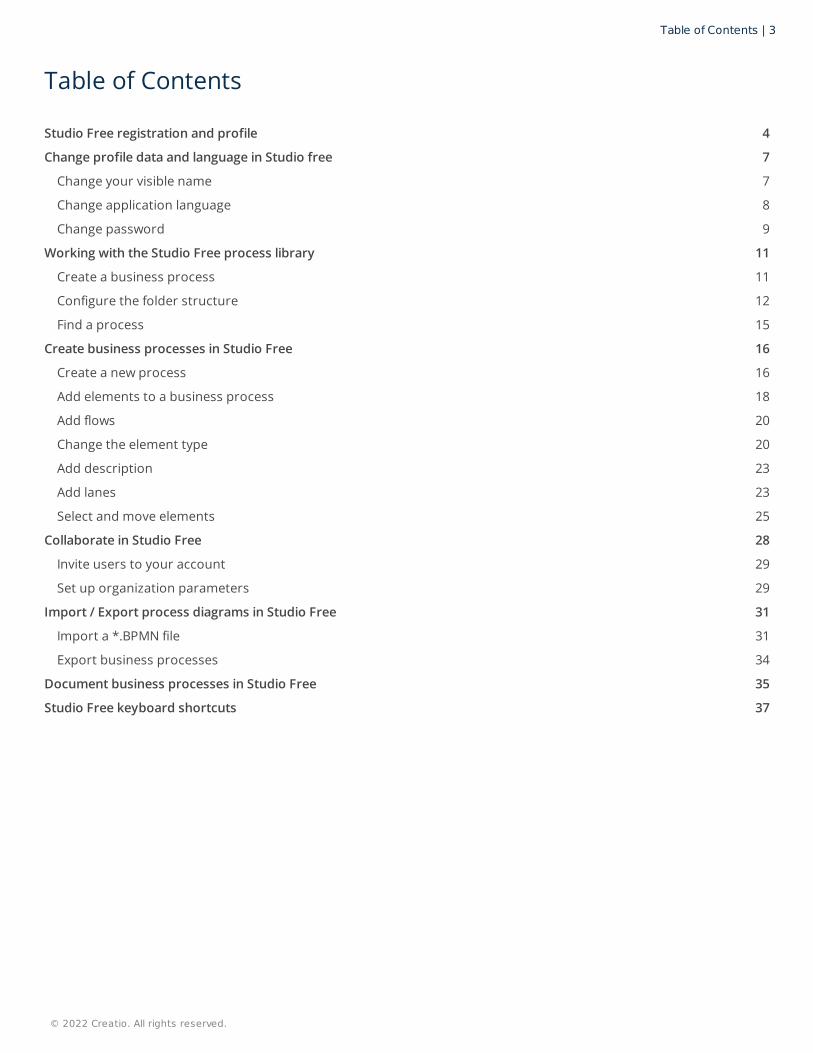
Table of Contents
Studio Free registration and profile
Change profile data and language in Studio free
Change your visible name
Change application language
Change password
Working with the Studio Free process library
Create a business process
Configure the folder structure
Find a process
Create business processes in Studio Free
Create a new process
Add elements to a business process
Add flows
Change the element type
Add description
Add lanes
Select and move elements
Collaborate in Studio Free
Invite users to your account
Set up organization parameters
Import / Export process diagrams in Studio Free
Import a *.BPMN file
Export business processes
Document business processes in Studio Free
Studio Free keyboard shortcuts
Table of Contents | 3
© 2022 Creatio. All rights reserved.

Studio Free registration and profilePRODUCTS: STUDIO FREE
You will need to create a user account before you begin designing and sharing business processes in StudioCreatio, free edition. Once you have a user account, you can begin designing processes, collaborate with otherusers on their processes, or invite them to your team.
There are two ways to create an account in Creatio studio free:
Attention. Make sure you have access to your registration email: you will need to use it for accountverification and password restoration purposes.
To sign up:
Receive an invitation. Your colleagues or associates may invite you to participate in their projects via aninvitation page in their organization account settings. Click the link in the invitation email to finish yourregistration. As a result, you will join an organization account to collaborate on business process development.
Self-registration. You can complete the steps below to sign up for Studio Creatio, free edition, on your own.As a result, you will become an administrator of a new organization account – a team that can collaborate onbusiness process development. In this case, you will be able to send invitations to join your team. Learn moreabout collaboration in the “Collaborate in Studio Free” article. Self-registration is described below.
Go to the Studio Creatio, free edition, registration page.1.
Enter your email and password and click [ Sign up ].2.
Studio Free registration and profile | 4
© 2022 Creatio. All rights reserved.

As a result, an email with a confirmation link will be sent to your mailbox.
Studio Free registration and profile | 5
© 2022 Creatio. All rights reserved.

As a result, you will be able to log in to Studio Creatio, free edition, using your credentials.
Check your registration mailbox and confirm your registration by clicking the [ Confirm email ] link in the emailfrom Studio Creatio.
3.
Studio Free registration and profile | 6
© 2022 Creatio. All rights reserved.

Note. You can quickly sign up with your Google or Facebook account. If you register manually with yourGmail, or email address used for your Facebook account, you will still be able to sign in quickly using thecorresponding Google/Facebook account.
Change profile data and language in StudiofreePRODUCTS: STUDIO FREE
In Studio Creatio, free edition, you can change the visible name of the user, the application language, and theuser profile password at any time.
Change your visible nameYour first and last name will be visible to other Creatio users who collaborate with you on the business processdesign. These names do not affect your login information. You can change your visible name as follows:
Click and select the [ Profile ] command in the menu. Profile page opens.1.
Edit your name by typing in the [ First name ] and [ Last name ] fields.2.
Change profile data and language in Studio free | 7
© 2022 Creatio. All rights reserved.

Change application language
Click on your profile photo and select the [ Profile ] command in the menu. Profile page opens.1.
Select interface language in the [ Interface language ] field.2.
Change profile data and language in Studio free | 8
© 2022 Creatio. All rights reserved.

Change password
Click on your profile photo and select the [ Profile ] command in the menu. Profile page opens.1.
Change profile data and language in Studio free | 9
© 2022 Creatio. All rights reserved.

Working with the Studio Free process
Click [ Change ] password.2.
Enter [ Current password ] and [ New password ] and click [ Change ].3.
Change profile data and language in Studio free | 10
© 2022 Creatio. All rights reserved.

libraryPRODUCTS: STUDIO FREE
All business processes belonging to your organization are stored in the process library, which enables you to:
Click to toggle the process library panel. A list of all folders and processes that belong to your organizationwill be displayed on the left-hand side of the application.
Create a business processClick to add a new folders or processes, as well as import *.bpmn files to the library.
Note. In the process library, the root “All processes” folder is created by default and cannot be modified.
Easily navigate the entire list of business processes.
Add new business processes to your library by creating or importing them
Organize business processes in a hierarchical structure
Search for processes and folders
Working with the Studio Free process library | 11
© 2022 Creatio. All rights reserved.

Configure the folder structureYou can organize your folders by creating a folder tree.
Select the root folder, click , and select “Folder” to create a subordinate folder.
Working with the Studio Free process library | 12
© 2022 Creatio. All rights reserved.

Click and select “Process” to add a new process to a specific folder, select the folder.
Drag and drop processes (or folders) to move them from one location to another. Moving an entire folder will
Working with the Studio Free process library | 13
© 2022 Creatio. All rights reserved.

also move all its contents.
To delete or rename a folder / process, click and select the necessary option in the list. Additionally, youcan import a process from a *.bpmn file or add it directly into the selected folder.
Working with the Studio Free process library | 14
© 2022 Creatio. All rights reserved.

Attention. Deleting a folder will delete all its contents, i.e. all other processes and folders in it.
Find a processTo search for folders and processes, click and start typing your request. The process library panel willshow a list of folders and processes that match search criteria.
Click a list item to open it.
Working with the Studio Free process library | 15
© 2022 Creatio. All rights reserved.

Create business processes in Studio FreePRODUCTS: STUDIO FREE
You design a business process by adding elements to the working area, arranging them, connecting, and addingtheir descriptions.
Note. The development of business processes in Creatio is based on the BPMN 2.0 notation developed bythe Object Management Group consortium. Learn more about the BPMN notation on the OMGconsortium’s website.
Create a new processAdd a new business process in the following ways:
Click in the Studio toolbar and select [ Process ]. A new process will be added to the currently selectedprocess library folder.
Create business processes in Studio Free | 16
© 2022 Creatio. All rights reserved.

Select a process library folder and click [ New process ].
Create business processes in Studio Free | 17
© 2022 Creatio. All rights reserved.

Add elements to a business processThere are two ways of adding process elements in Creatio:
In a process library folder menu, click and select [ New process ].
Drag&drop an element from the element toolbar.
Create business processes in Studio Free | 18
© 2022 Creatio. All rights reserved.

Drag an element from any element on the diagram. This will add the corresponding new element, connected tothe previously selected element with a sequence flow.
Create business processes in Studio Free | 19
© 2022 Creatio. All rights reserved.

Add flowsTo connect two elements on the diagram with a flow, click the first element, click flow in the element contextmenu, then drag the flow to the second element. After the new flow has been added, you can change its positionon the diagram, and the flow type (conditional or default).
Change the element typeThe process element toolbar and process element context menu contain general categories of elements:action, start/intermediate/end event, gateway, flow.
To add a specific process element first add an element of the corresponding category (e.g., “action”), and thenset its type (e.g., “User action”).
To change an element type:
Select the element.1.
Click in its context menu.2.
Select the needed type from the menu that appears.3.
Create business processes in Studio Free | 20
© 2022 Creatio. All rights reserved.

Similarly, you can change types of other elements:
To add a loop, parallel, sequential, or compensation marker to an activity – select it, click in itscontext menu, and select the needed marker.
Create business processes in Studio Free | 21
© 2022 Creatio. All rights reserved.

To add a conditional flow or default flow, add a sequence flow, select it, click in its contextmenu, and change its type to the needed one.
Create business processes in Studio Free | 22
© 2022 Creatio. All rights reserved.

Add descriptionUse the setup area of the Process Designer to change the process or element name and add a description,which is vital for documenting business processes.
Make sure that you populate a description for the process and each of its elements. Descriptionnormally explains what happens when the element is executed as part of the process flow.
You can open the settings toolbar in the following ways:
Add lanesSwimlanes are a means of organizing elements on the diagram. They usually denote different processparticipants, as well as organize and categorize activities. You can add swimlanes at any time, but it is generallyrecommended to map them first and add other elements on the needed pool/lane, to exclude rearrangingexisting process steps.
Double-click an element to open its setup area. If you double-click the empty process designer workingarea, the process setup area will open.
Click on the top right side of the Process Designer window to open the setup area of the currentlyselected element. If no elements are selected, the process setup area will open.
To add a pool, drag it to the designer working area from the element toolbar.
Create business processes in Studio Free | 23
© 2022 Creatio. All rights reserved.

To add a lane, select a pool on the diagram and click or . A lane will be added to the selected pool in thecorresponding position.
Create business processes in Studio Free | 24
© 2022 Creatio. All rights reserved.

Select and move elementsUse the [ Lasso ] tool to select several elements at once. Selected elements can be moved, copied (Ctrl + C),or deleted (Del).
To split a lane in two, select the lane and click .
Create business processes in Studio Free | 25
© 2022 Creatio. All rights reserved.

Use [ Space ] tool to shift all elements on the diagram left/right or up/down. This tool applies to all elements tothe right or left from the cursor – when shifting elements horizontally. Likewise, when shifting elements vertically,the tool will apply to all elements above the cursor (when shifting upwards) and all elements below the cursor(when shifting the elements downward).
The [ Arrow ] tool is the default mode in which you work with the elements on the working area. Use thetoolbar to switch the cursor back to [ Arrow ] after using [ Lasso ] or [ Space ] tool.
Drag&drop the working area canvas to navigate large diagrams. Use the mouse wheel while holding down
Create business processes in Studio Free | 26
© 2022 Creatio. All rights reserved.

the Ctrl key to zoom. Use the zoom menu to restore default zoom and alignment.
Use the mini-map for fast diagram navigation.
Create business processes in Studio Free | 27
© 2022 Creatio. All rights reserved.

Collaborate in Studio FreePRODUCTS: STUDIO FREE
To collaborate on business process design in Studio Creatio, free edition, you need to invite people to your teamor join someone else's team. Business process design teams are represented with “organization accounts.”
Once you complete your registration in Studio Creatio, free edition, you will have a user account and anorganization account.
There are two types of user roles in an organization account:
A user account is your personal account, that you use to log in to Studio Creatio, free edition.
An organization account is designed to share business processes and collaborate during the processdesign. By default, every new user who registers on their own (as opposed to being invited to someone’saccount) has an organization account.
Collaborate in Studio Free | 28
© 2022 Creatio. All rights reserved.

If one of the administrator users deletes their user account, other team members will be able to continue theirwork on the organization’s business processes. You cannot delete a single administrator user from anorganization.
Invite users to your account
As a result, the user will be sent an invitation to sign up with Studio Creatio, free edition. The invitation will displayin your organization account settings as a new user with the specified role in the “Invited” status.
If the user accepts the invitation and signs up, their state will change to “Active.”
Note. You can only invite new users if they have not previously signed up for Studio Creatio, free edition.
Set up organization parametersThe users you invite to your team have access to your business processes, can edit them, document them, andexchange messages. You can manage your team on the “Manage account” page.
Can edit. Any user who has been invited to the account by its administrator and accepted the invitationbecomes the editor user. “Can edit” users can create, view, edit and delete all folders and business processes.
Administrator. Each user who signs up on their own (without an invitation), becomes an administrator oftheir own organization account. In addition to all “Can edit” privileges, administrator users can rename theaccount, invite other users to join, or remove users from the account. An organization can have more thanone administrator, but at least one administrator is required.
Click . User invitation pop-up opens.1.
In the window that opens, enter the registration email and role of the user who you wish to invite, then click[ Send invitation ].
2.
Collaborate in Studio Free | 29
© 2022 Creatio. All rights reserved.

Click next to the organization name in the top right corner of the application. Select [ Manage account ] inthe menu.
1.
Account profile page opens.
2.
To rename your team in Creatio studio, type in the new name in the [ Account name ] field.
To add more users, click [ Invite member ], specify the user emails, and the roles that should be assignedto the invited users.
To change a user role, click to the right of the role name and select the needed value in the list thatopens. Note that you can only change the roles of the users who accepted your invitation. You can also
Collaborate in Studio Free | 30
© 2022 Creatio. All rights reserved.

All your changes are saved in real-time.
Note. If you delete a user from your team, they can sign up again on their own. However, they will nolonger be able to see or work with your team’s processes and folders.
Import / Export process diagrams in StudioFreePRODUCTS: STUDIO FREE
You can create a new business process diagram by importing a *.bpmn file. You can also export any businessprocess in Studio Creatio, free edition as a *.bpmn file, or a *.svg or *.png image.
Note. A *.bpmn file is an XML document, describing a BPMN diagram. The XML structure corresponds tothe one documented in BPMN 2.0.2 specification. This universal format is supported by most businessprocess editors and is perfect for migrating BPMN processes between different systems.
Import a *.BPMN fileThere are several ways you can import a business process from a *.bpmn file.
change a role for an administrator provided you have at least one more administrator in the organization.
To delete a user from your organization team, click .
Drag&drop a *.bpmn file on the Process Designer working area.
Import / Export process diagrams in Studio Free | 31
© 2022 Creatio. All rights reserved.

Select a folder and click [ Import *.bpmn file ]. Locate and select a local *.bpmn file to import.
Import / Export process diagrams in Studio Free | 32
© 2022 Creatio. All rights reserved.

Select a folder in the process library, click and select [ Import from *.bpmn ]. Locate and select a local*.bpmn file to import.
Click in the studio toolbar and select [ Import ]. Locate and select a local *.bpmn file to import.
Import / Export process diagrams in Studio Free | 33
© 2022 Creatio. All rights reserved.

As a result, a new process will appear in the selected folder.
Export business processesTo export a business process, select it in the process library, click and select [ Export to *.bpmn ], [ Export to*.svg ] or [ Export to *.png ]. This action will download the corresponding file via your browser download UI.
Import / Export process diagrams in Studio Free | 34
© 2022 Creatio. All rights reserved.

Business process diagrams that you export from Studio Creatio, free edition to a *.bpmn file can be imported toStudio Creatio, enterprise edition, and other Creatio apps. The imported diagram will become an “executable”business process, which will execute automatic activities and interact with users.
Document business processes in StudioFreePRODUCTS: STUDIO FREE
Understanding each step of a business process by every participant is crucial for successful implementation. Youcan export documentation on each process created in Studio Creatio, free edition, as a PDF file. Thedocumentation will contain a detailed and meaningful digest of all process elements. This is an optimal format topresent a business process to employees and run a training program.
To generate the documentation:
This action will download the generated file via your browser download UI.
Select the needed process in the library.1.
Click .2.
Select [ Download documentation ] in the window that opens.3.
Document business processes in Studio Free | 35
© 2022 Creatio. All rights reserved.

Before exporting the documentation, make sure that you have provided a description of the process and itselements:
The general BPMN naming conventions are available below:
Process title. Name the process to help the users understand its purpose. As a rule, the title of a process isdescriptive, such as “Long sales,” “Shipment,” and so on.
1.
Process description. Describe the process. Aside from the purpose, cover all details that are not directlydisplayed in the diagram. Creatio uses this description as the intro when generating the processdocumentation.
2.
Process element names and descriptions. The name of each business process element must complywith the BPMN notation guidelines. Short and meaningful element names are good practice. Avoid pronouns,articles, unnecessary precisions, and ambiguity. For example, use “Conduct meeting” rather than “Conductthe scheduled meeting with the customer.”
3.
Document business processes in Studio Free | 36
© 2022 Creatio. All rights reserved.

Processelements
BPMN naming conventions and documentation guidelines
Actions An action name should start with a descriptive action verb. For example, “Call customer.”
The action description contains action details. For example, “The manager calls thecustomer and appoints a meeting.” The users need such descriptions to figure out whatthey should do to progress the business process.
Events Construct event names using an action object and a past participle of an active verb. Forexample, “Employee hired.” Use specific time-dates or specific conditions to name timerand conditional events. For example, use “Every morning at 10 AM” for a timer event or“Yes,” “Correct” and so on for a conditional event. Make sure that paired start andintermediate events share matching names.
An event description should include detailed information about the event: what, how,and when it occurs. Such descriptions help users to find out if the event has happened.
Gateways Gateway names depend on the gateway type. Diverging exclusive gateways (OR)normally have interrogative names phrased as closed questions. The answers to thequestion are used to name the outgoing conditional flows. For example, “Does candidatequalify?” Names are optional for other gateway types.
The gateway description covers the process branching on the respective gateway. Forexample, “The process branches depending on the job qualifications of the candidate”(exclusive gateway (OR)).
Flows A conditional flow name includes the condition that triggers the flow. Sequence flowsand default flows usually have no names.
Flow descriptions will not be included in the documentation and are optional.
Artifacts The name of the data object includes the name of the business object. For example,“Organization profile.”
The comment contains additional information and can be filled in arbitrarily.
Lanes The lane name should match the role of the business process participant. In the processdocumentation, lanes are listed as process participants.
Studio Free keyboard shortcutsPRODUCTS: STUDIO FREE
Studio Free keyboard shortcuts | 37
© 2022 Creatio. All rights reserved.

Key Notes
Ctrl + A Select all elements on the Process Designer working area.
Ctrl + C Copy selected element(s) on the Process Designer working area to clipboard.
Ctrl + V Paste copied process element(s) in the Process Designer working area from theclipboard. Left-click to place the elements.
Del Delete selected element(s) on the diagram.
Ctrl + Z Undo the last action on the Process Designer working area.
Ctrl + Y
Ctrl + Shift + Z
Redo the last action on the Process Designer working area.
Drag with the leftmouse button
Navigate the canvas in the Process Designer working area.
Shift + drag withthe left mousebutton
Select multiple elements on the diagram via the selection box (similar to the“Lasso” tool).
Ctrl + left click Select multiple elements by clicking on them.
If you left-click a folder or process in the process library while holding down theCtrl key, that folder or process will open on a new browser tab.
Mouse wheel Scroll the canvas in the Process Designer working area up/down.
Shift + mousewheel
Scroll the canvas in the Process Designer working area right/left.
Ctrl + mouse wheel Zoom the diagram in and out. If you place the mouse cursor over the diagram,only the diagram will be zoomed.
Ctrl + Enter
Shift + Enter
Alt + Enter
Insert line break when entering element captions on the working area or in thesetup area.
Studio Free keyboard shortcuts | 38
© 2022 Creatio. All rights reserved.