cmpl5103 programming languages
307
COURSE NAME Programming Languages THE COURSE CURRICULUM IS DEVELOPED BY THE OPEN UNIVERSITY MALAYSIA
-
Upload
khangminh22 -
Category
Documents
-
view
3 -
download
0
Transcript of cmpl5103 programming languages
COURSE NAME
Programming Languages
THE COURSE CURRICULUM IS
DEVELOPED BY THE OPEN
UNIVERSITY MALAYSIA
CMPL5103 PROGRAMMING LANGUAGES Nantha Kumar Subramaniam Dr Mohd Jan Nordin Dr Sufian Idris Azizi Abdullah
Copyright © Open University Malaysia (OUM), July 2010, CMPL5103 All rights reserved. No part of this work may be reproduced in any form or by any means without the written permission of the President, Open University Malaysia (OUM). Version July 2010
Project Directors: Prof Dr Mansor Fadzil Prof Dr Rahmah Hashim Open University Malaysia Module Writers: Nantha Kumar Subramaniam Open University Malaysia Dr Mohd Jan Nordin Dr Sufian Idris Azizi Abdullah Universiti Kebangsaan Malaysia Moderator: Jaspal Kaur Open University Malaysia Developed by: Centre for Instructional Design and Technology Open University Malaysia Printed by: Meteor Doc. Sdn. Bhd. Lot 47-48, Jalan SR 1/9, Seksyen 9, Jalan Serdang Raya, Taman Serdang Raya, 43300 Seri Kembangan, Selangor Darul Ehsan First Printing, September 2008 Sixth Printing, March 2010 Seventh Printing, July 2010
able of Contents
T Course Guide xi-xxii Topic 1 Introduction to Java 1 1.1 Java Environment 1 1.2 Characteristics of Java 3 1.3 Tools to Develop Java Programs 4 1.4 Writing Java Programs 5 1.4.1 Writing Text-Based Application Using Structured
Approach 5 1.4.2 Writing Text-Based Application Using
Object-Oriented Approach 10 1.5 Writing Applets 13 Summary 15 Key Terms 15 Topic 2 Basic Construction to Java 16 2.1 Data Types 17 2.1.1 Integer 17 2.1.2 Real 18 2.1.3 Characters 19 2.1.4 Boolean 20 2.2 Variables, Declaration and Constant 21 2.2.1 Name of Variable 22 2.2.2 Variable Declaration 23 2.2.3 Constant 24 2.2.4 Comment 25 2.3 Assignment Statement, Initial Value and Changing Numeric Value 27 2.3.1 Assignment Statement 27 2.3.2 Initial Value 28 2.3.3 Changing Numeric Value 29 2.4 Operator 32 2.4.1 Arithmetic 32 2.4.2 Multiple Assignments 33 2.4.3 Addition and Subtraction 33 2.4.4 Relational Operators 34 2.4.5 Boolean Operators 37

TABLE OF CONTENTS iv
Summary 38 Key Terms 39 Topic 3 Control Structure and Method 40 3.1 Control Structure 40 3.2 Selection Structure: If, Else, Switch, Break 41 3.2.1 The if, else Statements 41 3.2.2 Switch Statement 47 3.3 Repetitive Structure: While, Do-While For 49 3.3.1 The while and do-while Statement 50 3.3.2 The for Statement 52 3.3.3 The break and continue Statements 52 3.3.4 Nested Loops 53 3.3.5 Compound Statement 55 3.4 Method 58 3.4.1 Types of Method in Java 58 3.4.2 Creating a Method 59 3.4.3 Calling a Method 62 3.4.4 Method Overloading 64 Summary 66 Key Terms 66 Topic 4 Array, String and Input Reading 67 4.1 Array 68 4.1.1 Array Declaration 69 4.1.2 Array as Object 71 4.1.2.1 Length Attribute 71 4.1.2.2 Arraycopy( ) Method 72 4.2 String 75 4.2.1 String Declaration 75 4.2.2 String Operation 76 4.3 Capturing Input from User During Runtime 80 4.3.1 Using Pembaca Class 80 4.4 Output Formatting 83 Summary 84 Key Terms 85

TABLE OF CONTENTS v
Topic 5 Object Oriented Programming (Part 1) 86 5.1 Objects and Classes 87 5.1.1 Object Characteristics 90 5.2 Defining Classes 91 5.3 Creating an Object from a Defined Class 93 5.4 Initialising Class Objects: Constructors 97 5.5 Member Methods 103 5.5.1 Calling Member Methods 108 5.5.2 Overloaded Member Methods 112 5.6 Overloaded Constructors 113 Summary 125 Key Terms Topic 6 Object Oriented Programming (Part II) 126 6.1 Access Modifiers 127 6.1.1 Private Access Modifier 127 6.1.2 Public Access Modifier 129 6.2 static Class Members 130 6.3 Using this Reference 136 6.4 Reference Type Variables 141 6.5 Passing Objects to Methods 145 6.6 Objects as a Members of Other Class 148 6.7 Array of Objects 150 Summary 157 Key Terms 158
Topic 7 Object Oriented Programming (Part III) 159 7.1 Inheritance 161 7.2 Using the Super Keyword 169
7.2.1 Calling Superclass's Constructor 169 7.2.2 Calling SuperclassÊs Methods 170 7.2.3 Relationship between Superclass Objects and Subclass Objects 171
7.3 Overriding Methods 174 7.4 Overriding versus Overloading 174 7.5 Polymorphism 176 7.6 Using Protected Access Modifier 179 7.7 Using Final Keyword 181 7.8 Abstract Classes and Abstract Methods 182 Summary 189 Key Terms 189
TABLE OF CONTENTS vi
Topic 8 Java Class Library 190 8.1 Packages 191 8.2 Using Package 192 8.3 Java Class Library 194 8.3.1 Methods to Use Java Class Library 195 Summary 198 Key Terms 199 Topic 9 Applet 200 9.1 Difference Between Applet and Application 200 9.2 Building an Applet 201 9.2.1 Building an Applet with Default Behaviour 201 9.2.2 Changing and Overriding Default Behaviour Applet 203 9.3 The Life Cycle of an Applet 206 9.3.1 Program that Determines the Life Cycle of an Applet 208 Summary 210 Key Terms 211 Topic 10 GUI Components 212 10.1 Planning and Building an Interface 213 10.1.1 Work Space for the JApplet 215 10.2 Control Components 217 10.2.1 Buttons 217 10.2.2 Text Field 219 10.2.3 Password Field 220 10.2.4 Text Label 220 10.2.5 Check Box and Radio Button 221 10.2.6 List 225 10.2.7 Combo Box 227 10.2.8 Panel 229 10.2.9 Text Area 230 10.2.10 Slider 231 10.3 Layout Manager 233 10.3.1 FlowLayout 235 10.3.2 BorderLayout 236 10.3.3 GridLayout 239 10.4 Case Study: Developing Gui-Based Applet which has Many Layout Managers 241 Summary 249 Key Terms 250

TABLE OF CONTENTS vii
Topic 11 Event Handling 251 11.1 The Event Delegation Model 252 11.1.1 Event Listener Framework Program 252 11.1.2 Registering the Event Listener Components 253 11.1.3 Handling Event for Component 254 11.2 The Components of Actionlistener Listener 255 11.3 The Components of Itemlistener Listener 259 11.4 The Components of Adjustmentlistener 261 Summary 266 Key Terms 266 Topic 12 Exceptional Handling 267 12.1 What is Exceptional Handling? 268 12.1.1 JavaÊs Exceptional Classes 268 12.2 Handling Exceptions Using Try-Catch Block 269 12.3 Using Throw Instruction to Handle Exceptions 270 12.4 Using finally Block 274 12.5 Exception Propagation and Throws Instruction 276 12.5.1 Checked Exception 277 12.6 Case Study 278 Summary 282 Key Terms 283 References 284


COURSE GUIDE


COURSE GUIDE
xi
Table of Contents Welcome to CMPL5103 - Programming Languages xiii What Will You Get from Doing This Course xiii Description of the Course xiii Course Objectives xiii Course Structure xiv Learning Support xvi Study Path for Success in This Course xvii Guide to Assessment in Post-graduate Courses at Open University Malaysia xviii Assessment Format xix Plagiarism xix What is Plagiarism? xix Avoiding Plagiarism xx Documenting Sources xx Referencing xxi Concluding Remarks xxi

COURSE GUIDE
xii
COURSE GUIDE
xiii
WELCOME TO CMPL5103 PROGRAMMING LANGUAGES
Welcome to CMPL5103 Programming Languages. This course is a three-credit, middle-level course on computer programming within the Master of Information Technology and other IT-related programs at masterÊs level. This is a self-contained course. Thus, you are not required to have basic knowledge in programming.
WHAT WILL YOU GET FROM DOING THIS COURSE?
Description of the Course
Think of your study module as reading the lecture instead of hearing it from a lecturer. Basically, in the open distance mode of education, the module replace your live lecture presentation. However, the module still require you to think for yourself to learn new concepts. In the same way that a lecturer in a conventional full-time mode of study might give you an in-class exercise, your study chapters will have exercises for you to do at appropriate points. These exercises and self-tests give you an opportunity to test your understanding level on the chapters that you have learned in the module. This will give you more confidence in preparing for the final examination. You are also strongly advised to discuss with your tutors, during the tutorial sessions, difficult points or chapters you may encounter in the module.
COURSE OBJECTIVES
CMPL5103 Programming Languages is geared towards students who wish to acquire a solid background in the area of object oriented programming using Java. This aim of the course is to introduce the concept of Java programming using object-oriented approach. By the end of this course, you should be able to: Understand the fundamental aspects of Java. Understand the important concepts and terminologies in object-oriented
programming. Write Java applications using object oriented approach. Write Java Applets. Write Java Applets that have event handling and exceptional handling.
COURSE GUIDE
xiv
COURSE STRUCTURE
There are 12 topics in this module. A brief summary of the chapters are given below: Topic 1: Introduction to Java This topic gives overview about Java including its advantages. The types of Java program with their sample codes will be elaborated in this topic. In addition, the students will be exposed of how to compile and execute a Java program. Topic 2: Basic Constructs of Java There are two basic blocks of programming: data and instructions and to work with data, you need to understand variables and data types; to work with instructions, you need to understand control structures and subroutines. This chapter will focus on how variables and data types and its related concepts that could be implemented in Java. Topic 3: Control Structure and Method As highlighted in Topic 2, there are two basic aspects of programming: data and instructions. To work with data, you need to understand variables and data types; to work with instructions, you need to understand control structures and methods. This topic will focus on control structures (such as if-else statement, switch-case statement, loops, etc) and methods. Topic 4: Array, String and Input String Like other programming languages, there are THREE important constructs in Java that enable us to write complete and comprehensive Java programs such as programs that will (just to name a few):
Process the marks of 100 students and determine the highest and lowest marks
Determine number of characters in a String
Enable an user to key in data during program run-time. These constructs are listed below and will be discussed in this topic:
Array
String
Input Reading

COURSE GUIDE
xv
Topic 5: Object Oriented Programming (Part I) This topic will discuss the important terms and concepts related to object-oriented programming such as object, class, member methods, constructors, attributes and method overloading. These concepts are explained using various Java programs. This will help the students to master the concept easily in a short time. Topic 6: Object Oriented Programming (Part II) Manipulating objects effectively is another important area that should be emphasised by programmers. This will enable them to write effective and efficient code. How objects could be handled effectively in a program? To answer this question, you should well versed on the following concepts of object oriented programming (OOP): Access modifiers of public and private, static class members, using this keyword, sending objects to a method, writing classes that has object as its member and array of objects. All these concepts of OOP will be elaborated in this topic. Topic 7: Object Oriented Programming (Part III) This topic will discuss about inheritance. Inheritance is one of the most important concepts in object-oriented programming. It enables us to write a class that is similar to an existing class, but that still has some of its properties. Polymorphism, which is closely related to inheritance, will also be discussed in this topic. Topic 8: Java Class Library Java provides a lot of class library for many different tasks in programming such as mathematical operation, organisation, sequence, graphic, multithreading and network. This topic will discuss in detail the different types of Java class library and how we can use it in programming. Topic 9: Applet. The specialty of Java is on its ability to build a program that can operate in a networking environment. To achieve this, Java programming using applet is introduced in this topic. Applet is a Java program that can be executed in a web page through the Java-enabled web browser. An example of Java browser that is Java enabled is Netscape 2.0 and higher versions and Internet Explorer. With applet, we can write a program that is interactive whereby the user use mouse and keyboard to interact with the program. Topic 10: GUI Components This Topic will discuss on how to arrange the graphical user interface (GUI) components in Java Applet using swing library class. GUI components allow us to develop interactive programs.
COURSE GUIDE
xvi
Topic 11: Event Handling The GUI component developed in Topic 6 does not perform any actions on the users input. When developing an applet, we definitely would want some meaningful actions. We would probably want the applets to perform some calculations when a user clicks the button, or the background color changes when a user scrolls the scroll bar, and etc. To make our programs responsive or interactive, we need to write the commands in the code. This is known as Event Handling. The programs developed must react accordingly to the event in order to do something. Event handling will be discussed in this topic.
Topic 12: Exceptional Handling Final topic of this module will focus on exceptional handling. Here, you will learn on how to write Java programs that capable to handle errors using try-catch-finally, throw and throws clauses.
LEARNING SUPPORT
1. Seminars There are 15 hours of seminars provided in support of the course. There
will be five seminars sessions of 3 hours each. You will be notified of the dates, times and locations of these seminars, together with the name and phone number of your facilitator, as soon as you are allocated a seminars group.
2. MyVLE Online Discussion Besides face-to-face sessions, you will receive support through online
discussions in myVLE with your coursemates. From time to time, you will be required to work on activities from the various chapters of the course. You may be asked to respond to a question or issue or to comment on some of the content covered during the face-to-face facilitatory sessions. You may also be asked to discuss the assignments so that you and your coursemates can benefit from deliberation and debate on the course content.
It is therefore important to respond to the questions or comments of a classmate or the facilitator. Your participation in the discussion, particularly the degree to which your contribution indicates knowledge of the readings and thoughtfulness on your part and moves the discussion forward. You need to take part in order to understand the subject matter. Your participation would involve discussions with your coursemates and facilitator.
COURSE GUIDE
xvii
3. Feedback and Input from Facilitator As you work on the activities and the assigned text, your facilitator will
provide assistance to you throughout the course. At any time that you need assistance, do not hesitate to approach your facilitator. The seminar sessions and online forum can also be used when you:
Have difficulty with a self-test or activity;
Have a question or problem related to the assignment; or
Do not understand something in any of the assigned readings. It is important to bear in mind that communication is important for you to
be able to get the most out of this course. Therefore, you should at all times be in touch with your facilitator and coursemates and be aware of all the requirements for the successful completion of this course.
4. Digital Library OUM has a comprehensive digital library for students seeking reference
materials and conducting library-based research. For this course, you may use the following databases: infotrac, proquest and ebsco. From time to time, materials from these databases will be assigned for additional reading and activities.
STUDYPATH FOR SUCCESS IN THIS COURSE
1. Time Commitment for Studying You should plan to spend about 20 hours on each chapter, which include
the time spent on all the Activities, Self-Tests and Assigned Readings. You must work out a schedule so that you have enough time for each chapter in this course. It is often more effective to distribute the study hours over a number of days rather than spend one whole day studying one chapter.
2. Proposed Strategy The following is a proposed strategy for working through the course. If you
have difficulty following the strategy, discuss it with your facilitator during the seminar sessions.
(i) The most important step is to read the contents of this Course Guide thoroughly.
(ii) Organise a study schedule. Note the following the amount of time you are expected to spend on each chapter; the submission date for assignments; and the dates of seminars and examinations. Put all this information in one place, such as your diary or a wall calendar.

COURSE GUIDE
xviii
Whatever method you choose to use, you should decide on and jot down your own dates for working on each chapter. You have some flexibility as there are 14 topics spread over a period of 14 weeks.
(iii) Once you have created a study schedule, make every effort to stick to it. The main reason students are unable to cope is that they delay their coursework.
(iv) To begin working on a topic, do the following:
Study the Topic Overview and examine the relationship of a chapter to the other chapters;
Do all the Activities and take the Self-tests to see whether you understand the various concepts and facts presented in the chapters;
Read all the publications listed under Assigned Textbook/Readings to gain knowledge of the various dimensions of the course; and
Work on your assignment as the semester progresses so that you are able to systematically produce a commendable report or paper.
(v) After completing all the topics, review the course content to prepare
for the final examination. Review the objectives of the course to see whether you have covered all the relevant parts of the course.
GUIDE TO ASSESSMENT IN POST-GRADUATE COURSES AT OPEN UNIVERSITY MALAYSIA
In the following pages, the Assessment Guide explains the basis on which you will be assessed in this course during the semester. It contains details of the facilitator-marked assignments (FMA), the final examination, and the participation required for this course in the online discussion. One element in the assessment strategy is that all students should have the same information as facilitators about the answers to be assessed. Therefore, this guide also contains the marking criteria that facilitators will use to assess your work.

COURSE GUIDE
xix
ASSESSMENT FORMAT
There are two aspects in the assessment of the course: one assignment and final examination. A summary of the assessment requirements and the dates for these requirements are shown in the table below.
Component Marks Due Date
Final Exam (3 hours) 40% Questions are based on application (writing programs), analysis and synthesis Final Exam
NO objective/Multiple Choice Questions or True-False questions
Examination week
at the end of the
semester
Assignment 60% Seminar 4
PLAGIARISM
What is Plagiarism?
Any written assignment (essays, project, take-home exams, etc) submitted by a student must not be deceptive regarding the abilities, knowledge or amount of work contributed by the student. There are many ways that this rule can be violated, as listed below.
Outright plagiarism: Large sections of the paper are simply copied from other sources and are not acknowledged as quotations.
Paraphrasing: The student paraphrases a closely reasoned argument of an author without acknowledging that he or she has done so. Clearly, all our knowledge is derived from somewhere but detailed arguments from clearly identifiable sources must be acknowledged.
Other sources: Essays or papers written by other students or sold by unscrupulous organisations are submitted by students.
Works by others: Taking credit deliberately or not deliberately for work produced by another without giving proper acknowledgement. The work includes photographs, charts, graphs, drawings, statistics, video clips, audio clips, verbal exchanges such as interviews or lectures, performances on television and texts printed on the web.
Double Credit: The student submits the same essay for two or more courses.

COURSE GUIDE
xx
Avoiding Plagiarism
Insert quotation marks around a „copy and paste‰ clause, phrase, sentence or paragraph and cite the original source;
Paraphrase a clause, phrase, sentence or paragraph in your own words and cite the source;
Adhere to the American Psychological Association (APA) stylistic format when citing a source and when writing the bibliography or reference page;
Attempt to write independently without being overly dependent on information from other peopleÊs original works; and
Educate yourself on what may be considered as common knowledge (no copyright necessary), public domain (copyright has expired or not protected under copyright law) or copyrighted (legally protected).
DOCUMENTING SOURCES
Whenever you quote, paraphrase, summarise or otherwise refer to the work of another, you are required to cite its source in parenthetical documentation. Here are some of the most commonly cited forms of material.
Direct Citation Simply having thinking skills is no assurance that children will use them. In order for such skills to become part of day-to-day behaviour, they must be cultivated in an environment that values and sustains them. “Just as children’s musical skills will likely lay fallow in an environm ent that doesn’t encourage music, learner’s thinking skills tend to languish in a culture that doesn’t encourage thinking” (Tishman, Perkins & Jay, 1995, p.5).
Indirect Citation
According to Wurman (1988), the new disease of the 21st century will be information anxiety, which has been defined as the ever-widening gap between what one understands and what one thinks one should understand.

COURSE GUIDE
xxi
REFERENCING
All sources that you cite in your paper should be listed in the Reference section at the end of your paper. HereÊs how you should do your referencing.
Journal Brown, E. (1996). The lake of seduction: Silence, hysteria, and the space of feminist theatre. JTD: Journal of Theatre and Drama, 2, 175-200.
Online Journal Evnine, S. J. (2001). The universality of logic: On the connection between rationality and logical ability [Electronic version]. Mind, 110, 335-367.
Webpage National Park Service. (2003, February 11). Abraham Lincoln birthplace national historic site. Retrieved February 13, 2003, from http://www.nps.gov/abli/
Book Fleming, T. (1997). Liberty! The American revolution. New York: Viking.
Article in a Book Cassel, J., & Zambella, B. (1996). Without a net: Supporting ourselves in a tremulous atmosphere. In T. W. Leonhardt (Ed.), "LOEX" of the West: Teaching and learning in a climate of constant change (pp. 75-92). Greenwich, CT: JAI Press Inc.
Printed Newspaper
Holden, S. (1998, May 16). Frank Sinatra dies at 82: Matchless stylist of pop. The New York Times, pp. A1, A22-A23.
CONCLUDING REMARKS
You are now ready to begin the course. We wish you success in the course and hope that you will find it interesting and useful for your development as a professional. We also hope you will enjoy your experience learning in OUM and will continue as a lifelong learner with us.

INTRODUCTION
Starting from a failed project, Java has emerged as a popular programming language within a short period of time. JavaSoft Sun MicroSystems had successfully signed up 38 licenses in only one year after the Java technology was announced. Besides, it also successfully attracted 6000 programmers to attend the first seminar - JavaOne Developer ConferenceTM in 1996.
What is so special in Java that computer industries and businesses can accept it within a very short period of time compared to other new technologies in the computer history? The answer to this question is provided in the next subtopic 1.2: Characteristics of Java. The next section will give overview of Java.
JAVA ENVIRONMENT In the traditional language environment such as C, C++ and Pascal, the source code compilation will generate the object code in binary file format (Figure 1.1) below. This binary file is specific for the machine that generates it; in other words, it cannot be executed directly on other machines. For example, the binary file generated by the SPARC machine cannot be executed on a Pentium machine.
1.1
TTooppiic c Introduction to Java 11
3. Explain the types of Java program; and
4. Compile and execute a Java program.
2. Describe the strength of Java;
1. Describe the Java environment;
By the end of this topic, you should be able to:
LEARNING OUTCOMES

TOPIC 1 INTRODUCTION TO JAVA
2
To execute the program on another machine, the program source code must be recompiled on that machine. The traditional programming environment depends heavily on this computer architecture.
Binary File (Pentium)
Binary File (PowerPC) Compiler (PowerPC)
Compiler (Pentium)
Compiler (SPARC) Binary File (SPARC)
Source code File
Figure 1.1: Traditional language environment
Figure 1.2 illustrates the Java programming environment. The output of Java program compilation is in the form of bytecode. Java bytecode is a set of instructions that is quite similar to the machine code instructions or native code for a machine. The difference is that the bytecode is not specific to any processor. The result of compilation can be implemented by a Java Virtual Machine (JVM), any machine that will interpret the bytecode.
Java Interpreter (Pentium)
Java Interpreter (Power PC)
Java Interpreter (SPARC)
Java Program Java Java Compiler
Figure 1.2: Java language environment
If we want to implement a Java program on a Pentium machine, then we need an interpreter or JVM for the Pentium machine. The same applies for the SPARC machine. However, unlike traditional languages such as C and Pascal, a Java program does not have to be recompiled to enable it to run on another machine.

TOPIC 1 INTRODUCTION TO JAVA
3
What are the Advantages of Using Bytecode? Using bytecode as an intermediate and not allowing each person compile it into the machine language of whatever computer they want to run give us advantages. A compiler has to understand Java in order to compile it. Compiler, on one hand, is a complex program. A Java bytecode interpreter, on the other hand, is a simple program. This makes it easy to write a bytecode interpreter for a new type of computer; once that is done, that computer can run any compiled Java program. It would be much difficult to write a Java compiler for the same computer.
CHARACTERISTICS OF JAVA 1.2
Java technology provides a neat development platform based on objects. Java environment provides class library, which contains various classes that have already been tested. This class library can be accessed by the programmer who wants to use it in his/her program development; furthermore, this library can be extended by the programmer according to his or her requirements. Other main characteristics of Java are highlighted below: (a) Simple
Java has functionality needed to implement its rich feature set. It does not add lots of syntactic structure or unnecessary features.
(b) Object-Oriented
Almost everything in Java is either a class, an interface, a method or an object.
(c) Platform Independent
Java programs are compiled to a byte code format that can be read and run by interpreters on many platforms including Windows 95, Windows NT, and Solaris 2.3 and later.
(d) Safe
Java code can be executed in an environment that prohibits it from introducing viruses, deleting or modifying files, or otherwise performing data destroying and computer crashing operations.
(e) High Performance
Java can be compiled on the fly with a Just-In-Time compiler (JIT) to code that rivals C++ in speed.
TOPIC 1 INTRODUCTION TO JAVA
4
(f) Multi-Threaded Java is inherently multi-threaded. A single Java program can have many different things processing independently and continuously.
TOOLS TO DEVELOP JAVA PROGRAMS 1.3
When Java was introduced in 1995, JDK was the only development tool available. Although what is provided in JDK is sufficient to develop any Java program, the facilities provided for the programmer are outdated compared to the latest integrated development environment for languages such as Visual Basic and C++.
Integrated Development Environment (IDE) refers to the software package that combines various development tools. This includes program editor, compiler, debugger and other utilities. Most IDE has features such as windows, drag-and-drop, and other graphic elements. The aim is to make the software development process fast, efficient, and easy to debug.
Part of IDE uses the Rapid Application Development (RAD) approach. RAD accelerates the software development process by using tools such as the interface designer. Many of the Java IDE available in the market uses the graphical interface to support RAD.
The following are some Java IDE software with their URLs:
WinEdit (http://www.winedit.com/)
Jcreator (http://www.jcreator.com)
Java WebIDE (http://www.chami.com/webide)
Symantec Café/Visual Café (http://www.symantec.com/)
Forte for Java (http://www.sun.com/forte/ffj/)
Microsoft Visual J++ (http://www.microsoft.com/java/sdk)
Visual Age (http://www-4.ibm.com/software/ad/vajava/)
JDK can be downloaded free from the website http://java.sun.com/j2se
TOPIC 1 INTRODUCTION TO JAVA
5
WRITING JAVA PROGRAMS 1.4
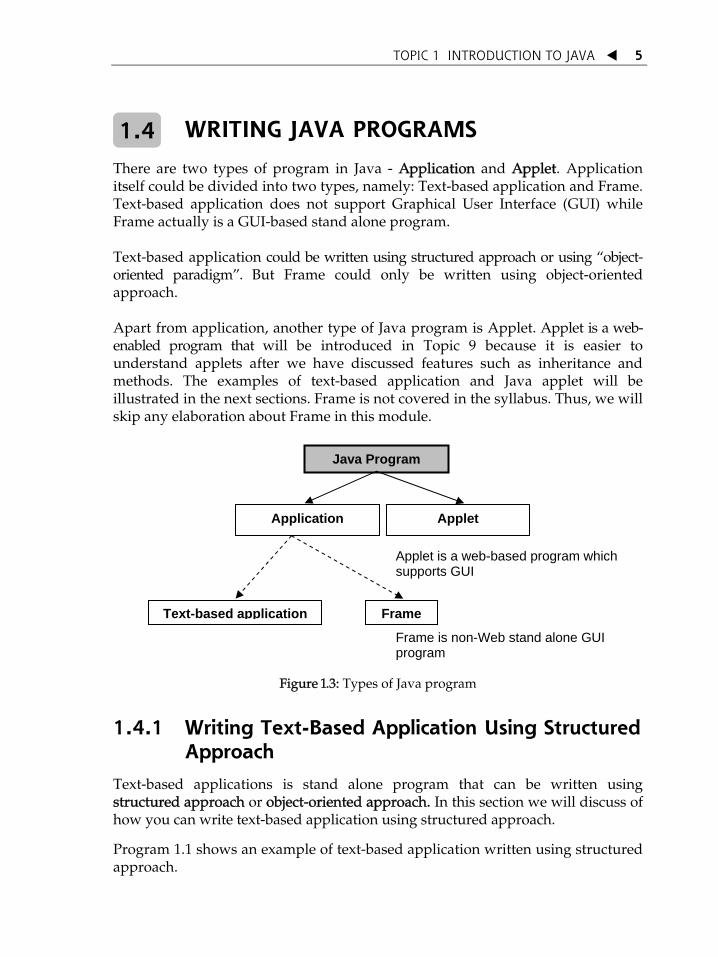
There are two types of program in Java - Application and Applet. Application itself could be divided into two types, namely: Text-based application and Frame. Text-based application does not support Graphical User Interface (GUI) while Frame actually is a GUI-based stand alone program. Text-based application could be written using structured approach or using „object-oriented paradigm‰. But Frame could only be written using object-oriented approach. Apart from application, another type of Java program is Applet. Applet is a web-enabled program that will be introduced in Topic 9 because it is easier to understand applets after we have discussed features such as inheritance and methods. The examples of text-based application and Java applet will be illustrated in the next sections. Frame is not covered in the syllabus. Thus, we will skip any elaboration about Frame in this module.
Application Applet
Text-based application
Applet is a web-based program which supports GUI
Frame
Java Program
Frame is non-Web stand alone GUI program
Figure 1.3: Types of Java program
1.4.1 Writing Text-Based Application Using Structured Approach
Text-based applications is stand alone program that can be written using structured approach or object-oriented approach. In this section we will discuss of how you can write text-based application using structured approach. Program 1.1 shows an example of text-based application written using structured approach.

TOPIC 1 INTRODUCTION TO JAVA
6
Program 1.1: Hello.java Line Number
1 // this program displays “Hello world” 2 class Hello{ 3 public static void main (String args[]) { 4 System.out.println(“Hello world!”); 5 } 6 }
In structured approach, all the statements and instructions are dump into main method. Sometime, extra methods could be added to perform specific tasks. No object(s) is /are created when writing Java programs using structured approach. The Program 1.1 above is described below. (a) Line 1
Line 1 in the program is comments written by the programmer. It helps others to understand the nature of the program. Thus, the program becomes more readable.
(b) Line 2
Line 2 declares the name of the class as Hello. (c) Line 3
Line 3 is where the program starts to execute. In this class, a method called main() contains the statements to display the „Hello world!‰ string. The main() method must be present in all Java applications because it is the first method that will be executed when an application runs (i.e. It is where the program starts to execute). The Java technology interpreter must find this defined exactly as given or it refuses to run the program. The following describes each element of line 3:
(ii) public: The method main() can be accessed by anything, including the Java interpreter.
(iii) static: This keyword tells the compiler that the main() method is usable in the context of the class Hello. No object is needed to execute static methods. (We will learn about object in Topic 5).
(iv) void: This keyword indicates that the method main() does not return any values (i.e.: There is no return keyword in the main() method). String[ ] args: This method declares the single parameter to the main() method. The name of the parameter is args with the type of String array.

TOPIC 1 INTRODUCTION TO JAVA
7
(d) Line 4 The statement System.out.println(“Hello world!”) in Line 4 in the body of the method will instruct the computer to display the message „Hello world‰ upon execution.
(e) Line 5, 6
Line 5 and 6 contain two braces to close the method main() and class Hello respectively.
How to compile and execute Java application? The following activity will guide you to compile and execute Program 1.1:
ACTIVITY 1.1
The purpose of this exercise is for you to compile and execute Program 1.1. It is compulsory for you to follow all the steps to ensure that you can learn how to compile and execute Java program using JDK. STEP 1 By using notepad in Windows, type program 1.1 (without the line numbers). Then save it in a file with the name Hello.java in the correct directory (For JDK, the program is to be saved in jdk1.x.x/bin directory unless you have given a new name to this directory). Note: x.x in jdk1.x.x refers to the jdk version installed in your computer. Latest jdk use abbreviation j2sdk1.x.x

TOPIC 1 INTRODUCTION TO JAVA
8
STEP 2 Now enter the DOS window (also known as Command Prompt or C Prompt) and type DOS command cd:\ to enter directory C:\
Then, you need to enter to the directory that stores the program that you have typed in step 1.Use the DOS command cd to enter the correct directory namely jdk1.x.x/bin

TOPIC 1 INTRODUCTION TO JAVA
9
STEP 3 Compile the Java program using the instruction javac Hello.java in the DOS environment. Example is shown below: C:\jdk1.x.x\bin>javac Hello.java
If the error message is displayed, go to Step 4. If no error message was not displayed, go to Step 5. STEP 4 Go back to notepad and open the file that you have typed in Step 1 (and at the same time do not close DOS window). Do the necessary correction in your program. Make sure you save your file after the corrections. Now go back to DOS window and repeat Step 3. STEP 5 If there is no error, the compiler will generate the bytecode file that is Hello.class. Now you are ready to execute your program. In order to do this, type the command java Hello in DOS Window as shown below: C:\jdk1.x.x\bin>java Hello
TOPIC 1 INTRODUCTION TO JAVA
10
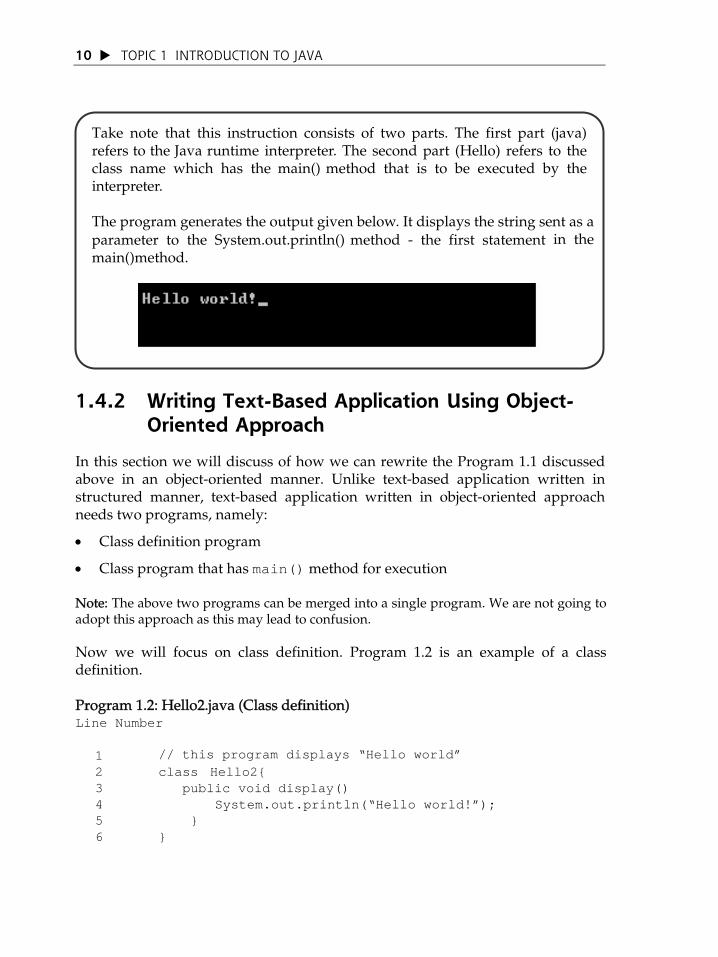
The program generates the output given below. It displays the string sent as a parameter to the System.out.println() method - the first statement in the main() method.
Take note that this instruction consists of two parts. The first part (java) refers to the Java runtime interpreter. The second part (Hello) refers to the class name which has the main() method that is to be executed by the interpreter.
1.4.2 Writing Text-Based Application Using Object-Oriented Approach
In this section we will discuss of how we can rewrite the Program 1.1 discussed above in an object-oriented manner. Unlike text-based application written in structured manner, text-based application written in object-oriented approach needs two programs, namely:
Class definition program
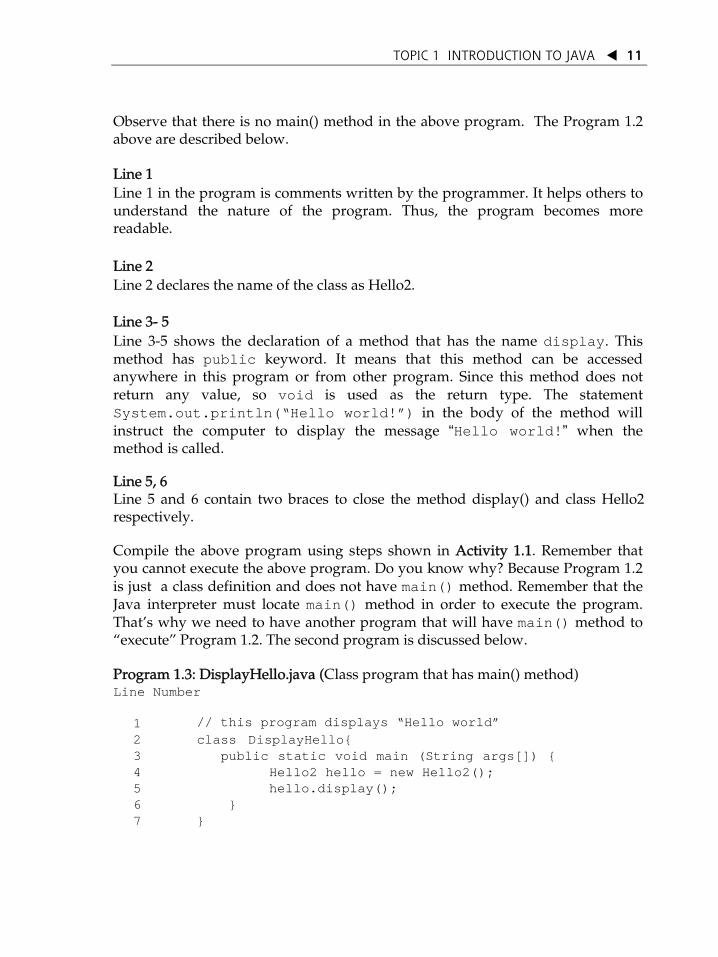
Class program that has main() method for execution Note: The above two programs can be merged into a single program. We are not going to adopt this approach as this may lead to confusion. Now we will focus on class definition. Program 1.2 is an example of a class definition. Program 1.2: Hello2.java (Class definition) Li ne Number
1 // this program displays “Hello world” 2 class Hello2{ 3 public void display() 4 System.out.println(“Hello world!”); 5 } 6 }
TOPIC 1 INTRODUCTION TO JAVA
11
Observe that there is no main() method in the above program. The Program 1.2 above are described below. Line 1 Line 1 in the program is comments written by the programmer. It helps others to understand the nature of the program. Thus, the program becomes more readable. Line 2 Line 2 declares the name of the class as Hello2. Line 3- 5 Line 3-5 shows the declaration of a method that has the name display. This method has public keyword. It means that this method can be accessed anywhere in this program or from other program. Since this method does not return any value, so void is used as the return type. The statement System.out.println(“Hello world!”) in the body of the method will instruct the computer to display the message “Hello world!” when the method is called. Line 5, 6 Line 5 and 6 contain two braces to close the method display() and class Hello2 respectively. Compile the above program using steps shown in Activity 1.1. Remember that you cannot execute the above program. Do you know why? Because Program 1.2 is just a class definition and does not have main() method. Remember that the Java interpreter must locate main() method in order to execute the program. ThatÊs why we need to have another program that will have main() method to „execute‰ Program 1.2. The second program is discussed below. Program 1.3: DisplayHello.java (Class program that has main() method) Line Number
1 // this program displays “Hello world” 2 class DisplayHello{ 3 public static void main (String args[]) { 4 Hello2 hello = new Hello2(); 5 hello.display(); 6 } 7 }

TOPIC 1 INTRODUCTION TO JAVA
12
The Program 1.3 above is described below. Line 1 Line 1 in the program is comments written by the programmer. It helps others to understand the nature of the program. Thus, the program becomes more readable. Line 2 Line 2 declares the name of the class as DisplayHello. Line 3 Line 3 is where the program starts to execute. In this class, a method called main() contains the statements to create and use an object named hello. The main() method must be present in all Java applications because it is the first method that will be executed when an application runs (i.e. It is the where the program starts to execute). The Java technology interpreter must find this defined exactly as given or it refuses to run the program. The following describes each element of line 3:
public: The method main() can be accessed by anything, including the Java interpreter. static: This keyword tells the compiler that the main() method is usable in the context of the class DisplayHello. No instance of the class is needed to execute static methods void: This keyword indicates that the method main() does not return any values (i.e.: There is no return keyword in the main() method). String[ ] args: This method declares the single parameter to the main() method. The name of the parameter is args with the type of String array.
Line 4 This line shows how to create an object. The „new Hello2‰ syntax instructs the Java interpreter to construct a new object of Hello2. hello is the object of the class Hello2. Line 5 Line 5 shows the object hello calling the method display available in the class Hello2.

TOPIC 1 INTRODUCTION TO JAVA
13
Line 6, 7 Line 6 and 7 contain two braces to close the method main() and class DisplayHello respectively. Compile Program 1.3 using steps shown in Activity 1.1. Now you can execute Program 1.3 as it has the main() method. The output will be like this:
WRITING APPLETS
1.5
An applet program is a Java program that could be executed from web browser. Java Applet also supports GUI components. How to differentiate an Applet from an application? It is very simple. All Applet programs must start with the heading that ends with extends JApplet keywords as shown in the following program: Program 1.4: myApplet.java (Applet program)
All Applet programs must have these keywords
public class myApplet extends JApplet {
public void paint(Graphics g){
g.drawString(“Hello world!”, 50,50); }
}
When the program is executed, the interface produced can be seen in Figure 1.4.

TOPIC 1 INTRODUCTION TO JAVA
14
Figure 1.4: Output of myApplet
We would go into detail on the program above when we study about Applets in Topic 9. You can compile the above program using the steps shown Activity 1.1 but you cannot use the command java to execute an Applet. We are not going to elaborate of how to execute an Applet at the moment. We will do this in Topic 9.
Remember…..
Take note that Frame is a GUI-based Java application that is stand alone. Unlike Applet, frame could not be called by Web browsers. Frame is not in the scope of the syllabus. But it is easy to develop Frame once you how to develop GUI-based programs using Applet. You need to do some minor modification in order to convert a GUI-based applet into a frame application.
Points to ponder….. Observe that the Program 1.1 – Program 1.4 discussed in the previous sections will produce the same output even though each was written using different approaches. Then, which approach would you choose from the following:
Java programs written in structured approach?
Java programs written in object-oriented approach?
Applet-based Java programs?
The answer is depends on your problem’s requirements. But always remember that Java’s strength lies on its capability of object-oriented paradigm that also supports Internet/Web platform. Object oriented paradigm in Java makes us easy to reuse the applications.
Basic constructs of Java and structured programming in Java will be introduced in Topic 1 – Topic 4. Topic 5 – Topic 7 will deal with object-oriented programming while Applet and it’s associated topics will be discussed in Topic 9 – Topic 11.

TOPIC 1 INTRODUCTION TO JAVA
15
Starting from a failed project, Java has emerged as a popular programming
language within a short period of time.
The strength of Java which lies on its object-oriented paradigm has contributed to this success.
Object oriented paradigm in Java makes us easy to reuse the applications.
In addition, the types of Java program also have been discussed in this topic.
It important for the students to understand the types of Java program and be able to compile and execute those programs.
Below is the summary of Java applications and Applet discussed in the previous sections:
Type of Java Program How it Could be Written?
Where the Output Will be Produced?
Text-based Application
Structured OR Object-oriented (OO)
Command Prompt
Frame Object-oriented Windows of the userÊs PCÊs operating system
Applet Object-oriented Web browsers (Internet Explorer, Netscape, etc)
Applet
Bytecode
Frame
Object-oriented programming
Text-based application

INTRODUCTION
What is a computer program? A program is a sequence of instructions that a computer can execute to perform some task. There are two basic blocks of programming: data and instructions and to work with data, you need to understand variables and data types; to work with instructions, you need to understand control structures and subroutines (methods). This topic will focus on how variables and data types and its related concepts can be implemented in Java.
TTooppiicc Basic Constructs 22 of Java
By the end of this topic, you should be able to:
1. Describe the importance of data type and variable in Java;
2. List the primitive data type in Java;
3. List the rules of naming a variable in Java;
4. Describe variable assignment;
5. Describe boolean operators and relational operators; and
6. Explain operator precedence.
LEARNING OUTCOMES

TOPIC 2 BASIC CONSTRUCTS OF JAVA
17
DATA TYPES 2.1 Java is a kind of language that places importance on the types. This means each variable should consist of the approved types. There are eight types of primitive data in Java. Six of these are numerical types, while the other two are data that is used for characters in the Unicode coding Boolean, for the truth values (true or false). All types of data in Java have the same cell sizes in any environment. All the variables in Java must have a type. (Variables will be elaborated in section 2.2.)
2.1.1 Integer
The integer type of data is used for numbers that do not have decimals. The negative values are also allowed. Java prepares four types of integer data, namely int, short, long and byte. The storage size and the value range for each of this data type is shown in Table 2.1 below:
Table 2.1: Value Range for the Integer Data Type
Type Storage Capacity Minimum Value Maximum Value
int Short Long byte
32-bit 16-bit 64-bit 8-bit
-2,147,483,648 -32,768
-9,223,372,036,854,775,808L -128
2,143,483,647 32,767
9,223,372,036,854,775,807L
In many cases, the int type data is the most practical. If the integer value used is too large, for example, in representing the income of PETRONAS, the most appropriate data is long. The byte and short data type are for the use of specific application such as keeping files at a lower level or a larger array if the storage space is insufficient. In the Java language, the range for the integer data type does not depend on the machine where the Java code is executed. Unlike Java, in C or C++ language, the int data type is different according to the machine. For the 16 bytes processor such as the 8086, the int cell size is 2 bytes while for the 32 bytes processor such as the Sun SPARC, the cell size is 4 bytes. For the Intel Pentium processor, the integer data type depends on the operation system: for DOS and Windows 3.1, the integer cell size is 2 bytes and when using the 32 bytes processor on Windows 95 or Windows NT, the cell size is 4 bytes.

TOPIC 2 BASIC CONSTRUCTS OF JAVA 18
As the range for all types of Java data is fixed, the Java program will produce the same results if run on any machine. This makes it easier for the programmers who wish to transfer their codes from one machine to another or between the operational systems on the same platform. The long type of numerical integer has the L suffix (for example 2412345600L). The hexadecimal numbers have the initial 0x (for example 0xA9B9). Take note that Java does not have the type of data with unsigned descriptor as in C.
2.1.2 Real
The real data type or floating point represents numbers that have the decimal parts. There are two types of real data types, which are float and double. The storage size and value range for each of these data is shown in Table 2.2 below.
Table 2.2: Value Range for the Real Type Data
Type Storage Capacity
Minimum Value Maximum Value
float double
32 bit 64 bit
3.40282347E+38F 1.797693134862+31570E+308
1.40239846E-45F 4.9406545645841246544E-324
The name double is used because the number from this type has two times the precision of the float type numbers. Sometimes it is called the variable with double precision. In many applications, the double type is picked to represent real numbers. This is because the float data type can only represent 7 meaningful digits (decimals). The precision of limited float data is insufficient in most cases. One of the reasons for using it is when there is a need for quick processing or when the real number count that needs to be stored is large.
The real number from the float type has the F suffix, for example 75.43F. The floating point number without the suffix F such as 75.43 would be considered double. This is because the double data type is the default data that represents real numbers in Java. This is different from C language that uses the float as its default data type. We could also add the D suffix to represent the double type numbers. All the floating point data types follow the IEEE 754 specifications. An overflow occurs when the range error takes place and an underflow when the zero division operation takes place.

TOPIC 2 BASIC CONSTRUCTS OF JAVA
19
2.1.3 Characters
The character data type is represented by char. The single open inverted sign (Â) is used to show character constant. ÂYÊ character constant „Y‰ string that contains only the Y character The char data type follows the Unicode coding scheme. Unicode was created to facilitate the programmer to deal with the non-Roman characters. As the Unicode was invented to handle all characters existent in all the written languages in the world, the cell size is 2 bytes. This size allows character representation of up to 65 536 compared to the ASCII/ANSI code, which is the 1 byte code and only allows 255 character representation. Until recently, only 35 000 character codes were used. The Unicode character is usually expressed in the hexadecimal coding scheme that starts with Â\ u0000Ê until Â\uFFFFÊ. The initial \u shows the Unicode value and the next four hexadecimal digits show the represented Unicode characters. For example, \u2122 is the trademark symbol (™).
Please refer to the web location http://www.unicode.org for further explanations on the Unicode.
Java has also allowed us to use the escape sequence for special characters as shown in Table 2.3 below.
Table 2.3: Unicode Value for Special Characters
Escape Squence Meaning Unicode Value
\b \t \n \r \‰ \Ê \\
Backspace Tab
New Line Carriage return
„ Â \
\u0008 \u0009 \u000a \u000d \u0022 \u0027 \u005e
TOPIC 2 BASIC CONSTRUCTS OF JAVA 20
Although Java allows any Unicode character in the Applet or Java applications, the question whether that character can be displayed on the Applet or console depends on the support provided. For example, we cannot display the Kanji character (a type of Japanese writing) on the machine that operates using the Windows 95 of US version.
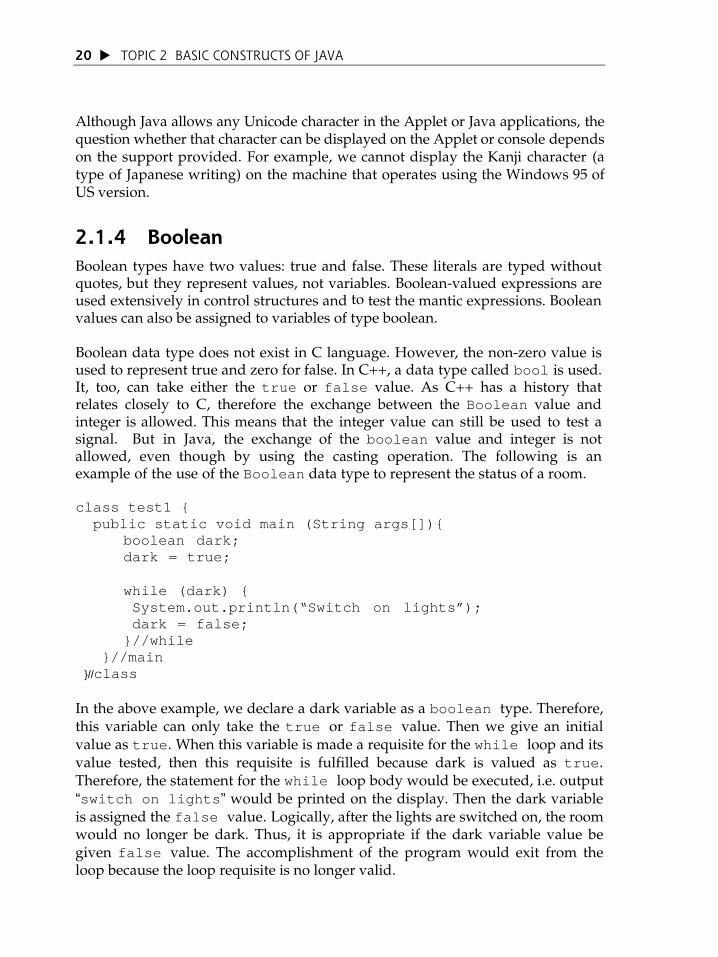
2.1.4 Boolean Boolean types have two values: true and false. These literals are typed without quotes, but they represent values, not variables. Boolean-valued expressions are used extensively in control structures and to test the mantic expressions. Boolean values can also be assigned to variables of type boolean. Boolean data type does not exist in C language. However, the non-zero value is used to represent true and zero for false. In C++, a data type called bool is used. It, too, can take either the true or false value. As C++ has a history that relates closely to C, therefore the exchange between the Boolean value and integer is allowed. This means that the integer value can still be used to test a signal. But in Java, the exchange of the boolean value and integer is not allowed, even though by using the casting operation. The following is an example of the use of the Boolean data type to represent the status of a room. class test1 { public static void main (String args[]){ boolean dark;
dark = true;
while (dark) { System.out.println(“Switch on lights”); dark = false; }//while
}//main }//class
In the above example, we declare a dark variable as a boolean type. Therefore, this variable can only take the true or false value. Then we give an initial value as true. When this variable is made a requisite for the while loop and its value tested, then this requisite is fulfilled because dark is valued as true. Therefore, the statement for the while loop body would be executed, i.e. output “switch on lights” would be printed on the display. Then the dark variable is assigned the false value. Logically, after the lights are switched on, the room would no longer be dark. Thus, it is appropriate if the dark variable value be given false value. The accomplishment of the program would exit from the loop because the loop requisite is no longer valid.

TOPIC 2 BASIC CONSTRUCTS OF JAVA
21
ACTIVITY 2.1
You wish to develop a program to evaluate students based on the marks obtained. What is the type of data involved in the development of the said program?
EXERCISE 2.1
State the appropriate data type for the values below.
(a) 51
(b) 31444843
(c) 3.14
(d) 5.301E 10
At the end of this section, you should be able to list the types of data that could be used in developing a Java program and differentiate the four data types that have been discussed. In the subsequent section, we will learn how to name and declare a variable with the appropriate data type.
VARIABLES, DECLARATION AND CONSTANT
2.2
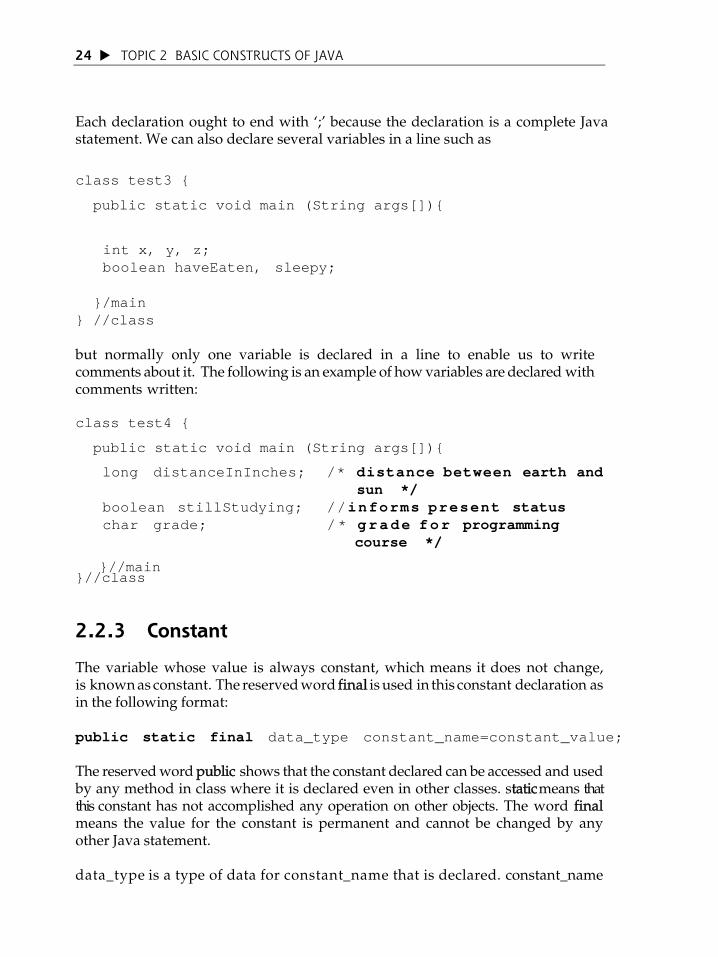
Programs manipulate data that are stored in memory. In machine language, data can only be referred to by giving the numerical address of the location in memory where it is stored. In a high-level language such as Java, names are used instead of numbers to refer to data. It is the job of the computer to keep track of where in memory the data is actually stored; the programmer only has to remember the name. A name used in this way -- to refer to data stored in memory -- is called a variable. Figure 2.1 and Figure 2.2 below shows the concept of memory location in a CPU of a computer.
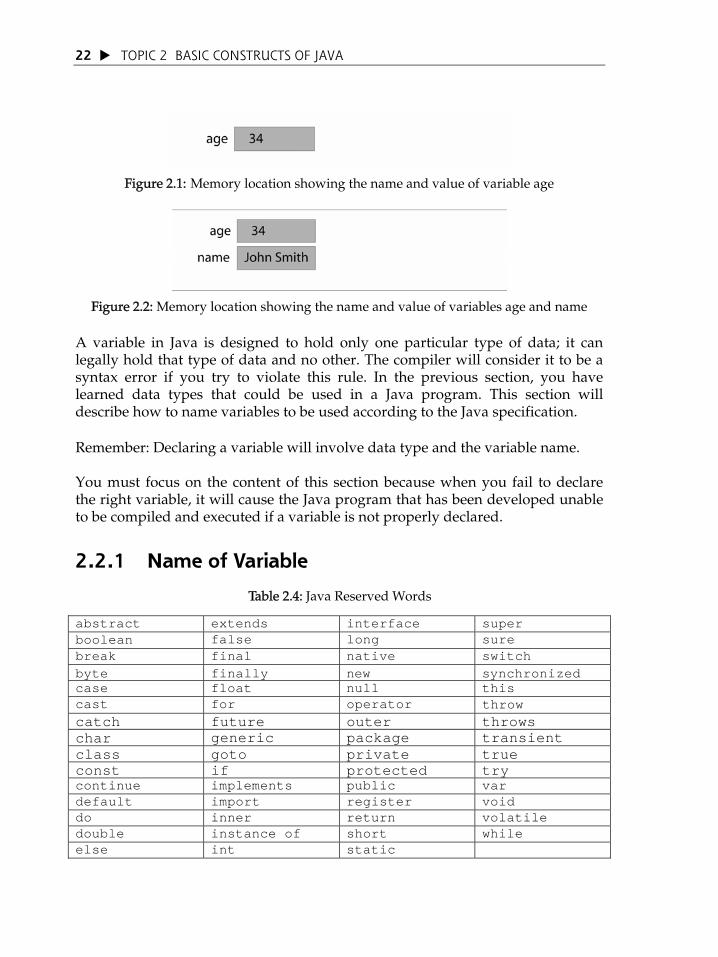
TOPIC 2 BASIC CONSTRUCTS OF JAVA 22
Figure 2.1: Memory location showing the name and value of variable age
Figure 2.2: Memory location showing the name and value of variables age and name
A variable in Java is designed to hold only one particular type of data; it can legally hold that type of data and no other. The compiler will consider it to be a syntax error if you try to violate this rule. In the previous section, you have learned data types that could be used in a Java program. This section will describe how to name variables to be used according to the Java specification.
Remember: Declaring a variable will involve data type and the variable name. You must focus on the content of this section because when you fail to declare the right variable, it will cause the Java program that has been developed unable to be compiled and executed if a variable is not properly declared.
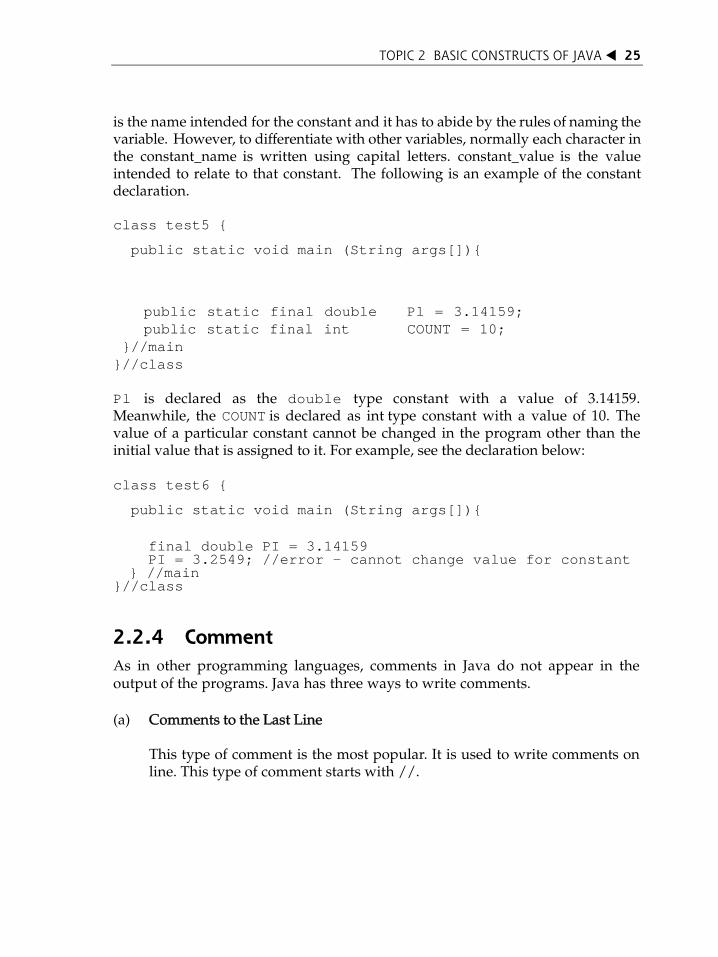
2.2.1 Name of Variable
Table 2.4: Java Reserved Words abstract extends interface super boolean false long sure break final native switch byte finally new synchronized case float null this cast for operator throw catch future outer throws char generic package transient class goto private true const if protected try continue implements public var default import register void do inner return volatile double instance of short while else int static

TOPIC 2 BASIC CONSTRUCTS OF JAVA
23
There is also a style in naming the variable, especially if that name consists of several words. The rule discussed above does not allow empty space characters to be used to separate words. The most popular among the programming community is by starting the first word with a small letter and the capital letter to start each of the next words. Character Â_Ê is not selected even though it does not break the above rules. Below is an example of the name of a variable. studentName, totalMarks, pricePerunit is the style suggested compared to student_name,total_marks,price_perunit
ACTIVITY 2.2
You intend to develop a program on workers salary system. Try list down the variables that represent the information that is going to be used.
2.2.2 Variable Declaration
Like other programming languages, Java claims each variable be declared first before it is used. The variable declaration is done by placing the data type first and followed by the name of the variable. The syntax for variable declaration is given below. data_type variable_name; Some examples of declaration are shown below:
class test2 {
public static void main (String args[]){
byte presentStatus; int n; long distanceInInches; boolean stillStudying; char grade; }//main }//class
TOPIC 2 BASIC CONSTRUCTS OF JAVA 24
Each declaration ought to end with Â;Ê because the declaration is a complete Java statement. We can also declare several variables in a line such as
class test3 {
public static void main (String args[]){
int x, y, z; boolean haveEaten, sleepy;
}/main } //class but normally only one variable is declared in a line to enable us to write comments about it. The following is an example of how variables are declared with comments written: class test4 {
public static void main (String args[]){
long distanceInInches; /* distance between earth and sun */ boolean stillStudying; //informs present status char grade; / * grade for programming course */ }//main//class
}
2.2.3 Constant
The variable whose value is always constant, which means it does not change, is known as constant. The reserved word final is used in this constant declaration as in the following format: public static final data_type constant_name=constant_value; The reserved word public shows that the constant declared can be accessed and used by any method in class where it is declared even in other classes. static means that this constant has not accomplished any operation on other objects. The word final means the value for the constant is permanent and cannot be changed by any other Java statement. data_type is a type of data for constant_name that is declared. constant_name
TOPIC 2 BASIC CONSTRUCTS OF JAVA
25
is the name intended for the constant and it has to abide by the rules of naming the variable. However, to differentiate with other variables, normally each character in the constant_name is written using capital letters. constant_value is the value intended to relate to that constant. The following is an example of the constant declaration. class test5 {
public static void main (String args[]){
public static final double Pl = 3.14159; public static final int COUNT = 10;
}//main }//class Pl is declared as the double type constant with a value of 3.14159. Meanwhile, the COUNT is declared as int type constant with a value of 10. The value of a particular constant cannot be changed in the program other than the initial value that is assigned to it. For example, see the declaration below: class test6 {
public static void main (String args[]){
final double PI = 3.14159 PI = 3.2549; //error – cannot change value for constant } //main
}//class
2.2.4 Comment As in other programming languages, comments in Java do not appear in the output of the programs. Java has three ways to write comments. (a) Comments to the Last Line
This type of comment is the most popular. It is used to write comments on line. This type of comment starts with //.

TOPIC 2 BASIC CONSTRUCTS OF JAVA 26
class test7 {
public static void main (String args[]){
System.out.println(“Welcome”); //one line comment
}//main
}//class
(b) Comment Block
Comment block is usually used to write comments that exceed one line. It starts with /* and ends with */. class test8 { public static void main (String args[]){
/* This is a comment example that exceeds one line. Therefore, it needs to be written in block form. */
}//main }//class Answer the following questions to test your knowledge of what you have learned in this topic.
ACTIVITY 2.3
You have known the type of comments that can be used logically. Do you know the importance of comments in a program?

TOPIC 2 BASIC CONSTRUCTS OF JAVA
27
EXERCISE 2.2
State whether the variables below is valid or otherwise. For the variables that are invalid, please state the following reasons: (a) nameLength (b) Name_length (c) Import (d) 43650BBB (e) BBB43650 (f) touch&go (g) touch-and-go (h) 2nd (i) break (j) OUM
After reading through this section, you should be able to declare a variable with the appropriate data type. You should also enable to differentiate the two types of comment and how to use it.
ASSIGNMENT STATEMENT, INITIAL VALUE AND CHANGING NUMERIC VALUE
2.3
After the var iab le i s dec lared , it has to be given initial value using assignment statement. Normally, the compiler would give warning message if there is variable with no initial value.
2.3.1 Assignment Statement
SELF-CHECK 2.1
What is meant by Assignment Statement and Initial Value?
In Java, the only way to get data into a variable is with an assignment statement. An assignment statement in Java has the following form:
TOPIC 2 BASIC CONSTRUCTS OF JAVA 28
variable = expression;
where expression refers to data or its computation whereas variable is any name of variable that has been declared. The expression can consist of any variable, constant, expression or a combination of the three that is linked by the operator such as +, -, /, * and others that can produce a value.
When the computer comes to an assignment statement when executing a program, it evaluates the expression and puts the resulting data value into the variable. For example, consider the simple assignment statement (modified from David J. Eck, 2006):
discount = 100;
The variable in this assignment statement is discount, and the expression is the number 100. The computer executes this assignment statement by putting the number 100 in the variable discount, replacing whatever was there before. Now, consider the following assignment statement, which might come later in the same program:
newPrice=oldPrice-discount;
Here, the value of the expression "oldPrice-discount" is being assigned to the variable newPrice. In the expression, the - is a "substraction operator" that tells the computer to subtract the value of discount from the oldPrice. The names oldPrice and discount are themselves variables, and it is the values stored in those variables that are to be computed (modified from David J. Eck, 2006).
2.3.2 Initial Value
The following program shows how a variable is given an initial value: class test9 {
public static void main (String args[]){
int age; //declaration of int variable
char sex; //declaration of the char variable
boolean status; //declaration of the boolean
age = 10; // assigned value 10 for age
gender = ‘M’; // assigned character ‘M’ for sex
status = false; //status has value false

TOPIC 2 BASIC CONSTRUCTS OF JAVA
29
}//main
}//class
Java allows both declaration and giving initial value to be executed on the same line. For example:
class test10 {
public static void main (String args[]){
int age = 10; //initial value of age is 10
boolean status = false; /*initial value of status is
false */
long lengthBridge = 8864L;
double weight = 37.266;
float average = 67.35F;
double pressure = 26.77e3;
}//main
}//class
The declaration of the variable can be placed anywhere in the code so long as it is declared before the variable is used. However, a variable can only be declared once in a method. The contents of the variable may change based on the last assigned expression and it has only one value.
2.3.3 Changing Numeric Value
In general, the type of the expression on the right-hand side of an assignment statement must be the same as the type of the variable on the left-hand side. However, in some cases, the computer will automatically convert the value computed by the expression to match the type of the variable. Java does not face problems in executing the multiplication operation of an integer of the int type with a double type real number. The result of this multiplication is double. Generally, any binary operation on a numeric value from a different type is acceptable and the result would be evaluated as follows:
If one is of the double type operand, the other operand would be changed to double.

TOPIC 2 BASIC CONSTRUCTS OF JAVA 30
On the other hand, if one of it is a float type operand, the other operant would be changed to float.
On the other hand, if one of it is a long type operand, the other operand would be changed to long.
The same principle applies to integer types: int, short, and byte. There is a possibility that we may assume a double number as an integer. The numeric change is allowed in Java, unfortunately there may be information that may be lost. This happens if the casting operator is used. The syntax for the casting operator is by providing parenthesis for the target type that is desired followed by the name of the variable. For example:
double grandTotal = 100.89; int ringgit = (int) grandTotal;
The value assigned to the ringgit is 100. Changing the floating point value to int would cut off the decimal portion of the float point value. If we wish to round up a floating point number to the nearest integer, use the Math.round method:
double grandTotal = 100.89; int ringgit = (int) Math.round(grandTotal);
The sum assigned to the ringgit is 101. Note that the use of the casting operation (int) is still needed. This is because the value returned by the round method is a long type, and a long value can only be changed to int value with the casting operator. The Java compiler will not give any warning if we try to change a certain number from one type to another, which is outside the target type range. Therefore, a good programming practice is by testing whether the intended value to be changed is within the target type range before change can be made. Java allows the change in value of a particular variable from one type to another without the casting operation following the sequence below:
byte short int long float double
and char int

TOPIC 2 BASIC CONSTRUCTS OF JAVA
31
A value of a type that occurs earlier in this list can be converted automatically to a value that occurs later. For example (Source: David J. Eck, 2006): int A;
double X;
short B;
A = 17;
X = A; // Acceptable; A is converted to a double
B = A; // illegal; no automatic conversion from int to short
In some cases, you might want to force a conversion that wouldn't be done automatically. For this, you can use casting. For example (Source: David J. Eck, 2006),
int A;
short B;
A = 17;
B = (short)A; // Acceptable; A is explicitly type cast
// to a value of type short
You can do casting from any numeric type to any other numeric type. However, you should note that you might change the numeric value of a number by type-casting it. You can also type-cast between the type char and the numeric types. The numeric value of a char is its Unicode code number. For example, (char)97 is 'a', and (int)'+' is 43 (Source: David J. Eck, 2006)
EXERCISE 2.3
The following Java program has few mistakes. Rewrite the program by correcting the mistakes. class Error { public static void main (String[ ] args){ width = 15 area = length * width; System.out.println(„Area is „ + area); } }

TOPIC 2 BASIC CONSTRUCTS OF JAVA 32
After knowing of how to give initial value to the variable and performing binary operations to numerics with different data types without data lost, you will learn in detail on operators and operator's operation that involve numeric values in the next section.
OPERATOR 2.4
In developing a program, we will use mathematical operations to do the calculation. In this topic, students will be exposed to the arithmetic operations, assignment, increment and decrement that could be used in a Java program. Arithmetic operation, assignment as well as addition and subtraction in Java is the same as in C language.
2.4.1 Arithmetic
Table 2.5 below shows the operator and operation that is used in Java. The operation for this operator is the same as in C language.
Table 2.5: Arithmetic Operator
Operator Operation
+ Addition - Subtraction * Multiplication / Division % Remainder (modulo)
The / operator refers to the integer division if both operands are integers. This means that the results obtained are integers. If otherwise, the division is division of real numbers. The % operator meanwhile refers to the integer remainder. Look at several examples that are shown in Table 2.6 below.
Table 2.6: Example of the Division Operation and Modulo
Operation Result
5 / 2 2 5.0 / 2 2.5
5.0 / 2.0 2.5 5 / 2.0 2.5 5 % 2 1

TOPIC 2 BASIC CONSTRUCTS OF JAVA
33
2.4.2 Multiple Assignments Multiple assignment operator provides a short cut to using the arithmetic operation in the assignment statement. Table 2.7 below shows a multiple assignment operator, an example of its usage and the meaning of that assignment statement.
Table 2.7: Multiple Assignment Operator
Operator Example Meaning
+=
no += 7
no = no + 7
-= no -= 7 no = no - 7
*= no *= 7 no = no * 7
/ no / = 7 no = no / 7
%= no % = 7 no= no % 7
2.4.3 Addition and Subtraction As in C and C++, the addition and subtraction operator are used in the same way. Only one operant is involved in this operation. The operand must be a variable from the integer type. There are two forms of usage of the addition and subtraction operator, which are known as a prefix or postfix of a variable. The table 2.8 below shows an addition and subtraction operator, an example of its usage and the meaning of each particular operators.
Table 2.8: Addition and Reduction Operators
Operator Usage Meaning
i++ Add value i by 1 after being used in a statement
++ ++i Add value i by 1 before being used in a statement
i-- Reduce value i by 1 after being used in a statement
- - --i Reduce value i by 1 before being
used in a statement

TOPIC 2 BASIC CONSTRUCTS OF JAVA 34
This operation will change the value of the variable. Therefore, it cannot be done on a constant, for example 7++. See several examples below:
class test11 {
public static void main (String args[]){
int i = 1; int j = 1;
of x int x = 7-++i;//the value is 5, and i becomes 2
int y = 7–j++;//the value of y is 6, and j becomes 2 }//main
}//class
Note that the values of x and y are different even though the original value of i and j are the same. This is because the third statement, the value of i is added by 1 first before subtracting from 7 while in the last statement, the original value of j is subtracted from 7 and then only added by 1. The use of the addition and subtraction operator in the statement can cause confusion which is difficult to trace. Therefore, the use of this operator is not encouraged in statements such as the examples shown above. However, it can be used in cases such as follows:
int n = 0;
n++; //alternative to n = n+ 1;
2.4.4 Relational Operators
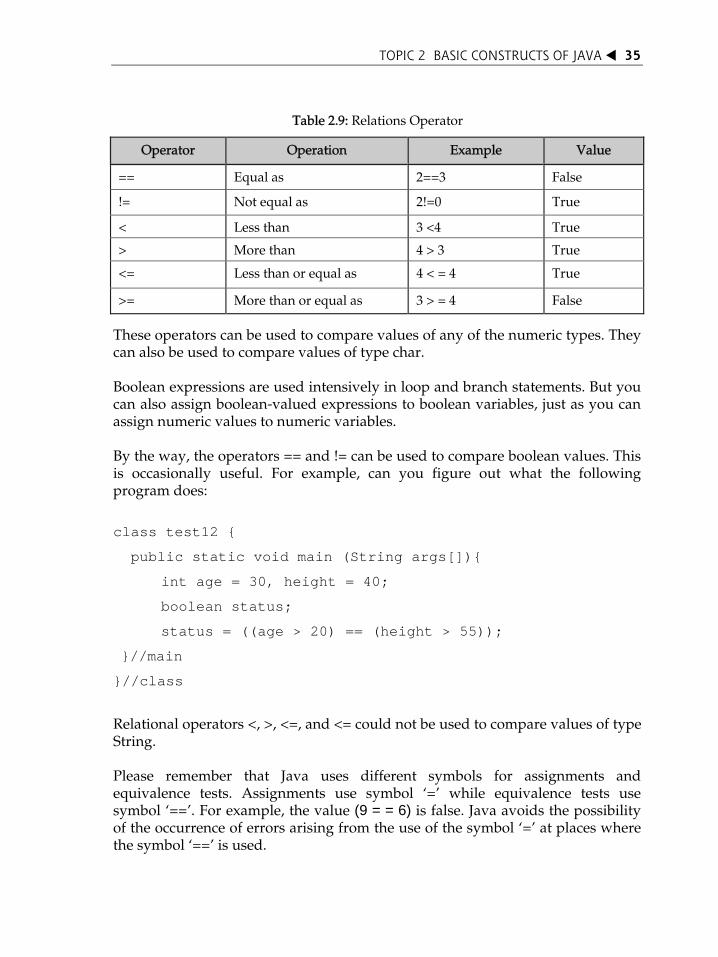
Java has boolean variables and boolean-valued expressions that can be used to express conditions that can be either true or false using a relational operator. Relational operators in Table 2.9 are used to test whether two values are equal, whether one value is greater than another, and so forth. The relation operators in Java are: ==, !=, <, >, <=, and >=. The meanings of these operators are:
TOPIC 2 BASIC CONSTRUCTS OF JAVA
35
Table 2.9: Relations Operator
Operator Operation Example Value
== Equal as 2==3 False
!= Not equal as 2!=0 True
< Less than 3 <4 True
> More than 4 > 3 True
<= Less than or equal as 4 < = 4 True
>= More than or equal as 3 > = 4 False
These operators can be used to compare values of any of the numeric types. They can also be used to compare values of type char. Boolean expressions are used intensively in loop and branch statements. But you can also assign boolean-valued expressions to boolean variables, just as you can assign numeric values to numeric variables. By the way, the operators == and != can be used to compare boolean values. This is occasionally useful. For example, can you figure out what the following program does:
class test12 {
public static void main (String args[]){
int age = 30, height = 40;
boolean status;
status = ((age > 20) == (height > 55));
}//main
}//class
Relational operators <, >, <=, and <= could not be used to compare values of type String. Please remember that Java uses different symbols for assignments and equivalence tests. Assignments use symbol Â=Ê while equivalence tests use symbol Â==Ê. For example, the value (9 = = 6) is false. Java avoids the possibility of the occurrence of errors arising from the use of the symbol Â=Ê at places where the symbol Â==Ê is used.

TOPIC 2 BASIC CONSTRUCTS OF JAVA 36
If you use several operators in one expression, and if you don't use parentheses to explicitly indicate the order of evaluation, then you have to worry about the precedence rules that determine the order of evaluation.
Table 2.10 below shows the priority level of the numeric operator including relations.
Table 2.10: Level of Operator Priority
Priority Order Operator
1 2 3 4 5 6
( ) ++ -- * / %
+ - <> <= >=
== != Operators on the same line have the same precedence. When they occur together, unary operators and assignment operators are evaluated right-to-left, and the remaining operators are evaluated left-to-right.
For example, A*B/C means (A*B)/C, while A=B=C means A=(B=C). Let us see more examples below.
Example 1: Evaluating 2 + 4/2
2 + 4/2
2 + 2 = 4
(Note: 4/2 will be evaluated first as the operator / has higher priority than operator +) Example 2: Evaluating (2 + 4)/2
(2 + 4)/2
6 / 2 = 3
(Note: Those operands and operator in the parentheses will be evaluated first as parentheses have the highest priority. Thus 2 + 4 in the parentheses will be evaluated first and the result will be divided with 2) Can you evaluate the expression 2+(4/2)-4/2-(6-2/2)? The answer is -3.

TOPIC 2 BASIC CONSTRUCTS OF JAVA
37
2.4.5 Boolean Operators "And", "or", and "not" are the boolean operators in Java that allow us to do complicated condition.
Table 2.11: Boolean Operators
Operator Meaning Value
&& AND boolean
|| OR boolean ! NOT boolean
In Java, the boolean operator "and" is represented by &&. The && operator is used to combine two boolean values. The result is also a boolean value. The result is true if both of the combined values are true, and the result is false if either of the combined values is false. For example, "(x == 0) && (y == 0)" is true if and only if both x is equal to 0 and y is equal to 0. The boolean operator "or" is represented by ||. The expression "A || B" is true if either A is true or B is true, or if both are true. "A || B" is false only if both A and B are false. The && and || operators are evaluated using a short cut method. This means in evaluating the following statement:
(valueA && valueB)
if the statement or the A value variable has been evaluated as false, therefore the statement or B value variable need no longer be evaluated to obtain the overall value of that statement.
The boolean operator "not" is a unary operator. In Java, it is indicated by ! and is written in front of its single operand. For example, if test is a boolean variable, then
test = !test;
will reverse the value of test, changing it from true to false, or from false to true.
TOPIC 2 BASIC CONSTRUCTS OF JAVA 38
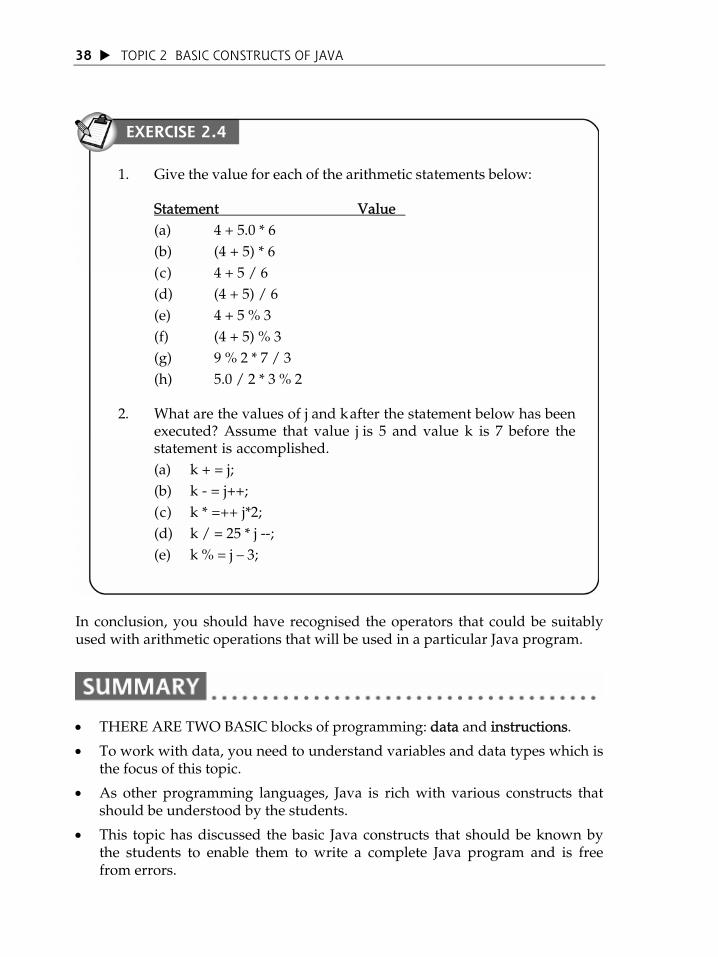
EXERCISE 2.4
1. Give the value for each of the arithmetic statements below:
Statement Value (a) 4 + 5.0 * 6 (b) (4 + 5) * 6 (c) 4 + 5 / 6 (d) (4 + 5) / 6 (e) 4 + 5 % 3 (f) (4 + 5) % 3 (g) 9 % 2 * 7 / 3 (h) 5.0 / 2 * 3 % 2
2. What are the values of j and k after the statement below has been
executed? Assume that value j is 5 and value k is 7 before the statement is accomplished. (a) k + = j; (b) k - = j++; (c) k * =++ j*2; (d) k / = 25 * j --; (e) k % = j 3;
In conclusion, you should have recognised the operators that could be suitably used with arithmetic operations that will be used in a particular Java program.
THERE ARE TWO BASIC blocks of programming: data and instructions.
To work with data, you need to understand variables and data types which is the focus of this topic.
As other programming languages, Java is rich with various constructs that should be understood by the students.
This topic has discussed the basic Java constructs that should be known by the students to enable them to write a complete Java program and is free from errors.

TOPIC 2 BASIC CONSTRUCTS OF JAVA
39
Boolean
Boolean operator
Data types
Expression
Relational operator
Variable

INTRODUCTION
As highlighted in Topic 2, there are two basic aspects of programming: data and instructions. To work with data, you need to understand variables and data types; to work with instructions, you need to understand control structures and methods. This topic will focus on control structures and methods. Variables and data types have been elaborated in Topic 2.
CONTROL STRUCTURE A program is a sequence of instructions. In the ordinary "flow of control," the computer executes the instructions in the sequence in which they appear, one after the other. This condition is called sequence accomplishment. In programming, the statement that will be accomplished next is not necessarily located in the next line. This scenario is known as transfer of program control.
3.1
TTooppiicc Control Structure and Method
33
By the end of this topic, you should be able to:
1. Describe the three structures in a control structure;
2. Develop programs using selection structures;
3. Develop programs using repetitive structures;
4. Describe the syntax of declaring a method in Java; and
5. Develop Java programs that have method overloading.
LEARNING OUTCOMES

TOPIC 3 CONTROL STRUCTURE AND METHOD 41
Bohm and Jacopini have conducted research in the 1960s and have concluded that all programs can be written in a structured way by only using three control structures, that is:
Type of Control Structure Meaning
Sequence structure Sequence of instructions is executed sequentially line by line
Selection structure
Selection structure allows the computer to decide between two or more different courses of action by testing conditions that occur as the program is running.
Repetitive structure Repetitive structure allows a sequence of instructions to be repeated over and over.
The above three structures that are capable to change the flow of control in a program can be implemented in the Java language. The following sections touch on this.
SELECTION STRUCTURE: IF, ELSE, SWITCH, BREAK
3.2
Selection structure allows the computer to decide between two or more different courses of action by testing conditions that occur as the program is running. There are three forms of selection structures in Java:
single selection.
bi-selection.
multi-selection. Single selection as in C, is implemented using the if statement.
3.2.1 The if, else Statements
Single Selection The if syntax structure can be written generally as follows:
if (expression)
statement;

TOPIC 3 CONTROL STRUCTURE AND METHOD 42
In Java, the expression value is from the boolean type, that is, the expression has true/false values. Therefore, the expression value besides the true or false is invalid to be used in the expression as shown in Figure 3.1. Following is an example of the if algorithm for selection structure:
If your age is more or the same as 55, Print “Compulsory Retirement”
What is Algorithm?
A step-by-step problem-solving procedure written in natural language such English.
The above algorithm can be translated to the Java code as
if (age > = 55)
System.out.println(“Compulsory retirement”);
Bi-selection The if syntax structure can be written generally as follows:
if(expression)
statement 1;
else
statement 2;
Bi-selection provides other alternatives if the requisite is not fulfilled. The following is an example of an algorithm condition, where one of the choices is accomplished.
If your age is less than 55
Print “Still Eligible for Employment”
If_ not
Print “Compulsory retirement”

TOPIC 3 CONTROL STRUCTURE AND METHOD 43
Generally, the syntax in the Figure 3.1 below represents the if-else statement.
Figure 3.1: if-else statement
Figure 3.2: Selection structures in bi-selection

TOPIC 3 CONTROL STRUCTURE AND METHOD 44
The above algorithm can be translated to the if-else structure as
if (age < 55)
System.out.println(“Still eligible for employment”);
else
System.out.println(“Compulsory retirement”);
In the case of single selection, if the expression has false value, no action will be taken. This is different with the case of bi-selection, where we are given another alternative, that is if the expression has false value, statement 2 will be accomplished. With reference to the above example, if the age is or more than 55, the words Âcompulsory retirement‰ will be printed. Multi Selection Multi selection enables the programmer to determine the actions that have to be accomplished in certain conditions by imposing a requisite. Observe the following algorithm: If the race code is the same as ‘M’ Print “Malay” If_not, race code is the same as ‘C’ Print “Chinese” If_not, race code is the same as‘I’ Print “Indian’ If_not Print “Others” At any one time, only one situation can take place. We use the if-else if structure. The Java code that is at par with it is : if (raceCode == ‘M’)
System.out.println (“Malay”);
else if (raceCode == ‘C’)
System.out.println (“Chinese”);
else if (raceCode ==’I’)
System.out.println (“Indian”);
else
System.out.println (“Others”)
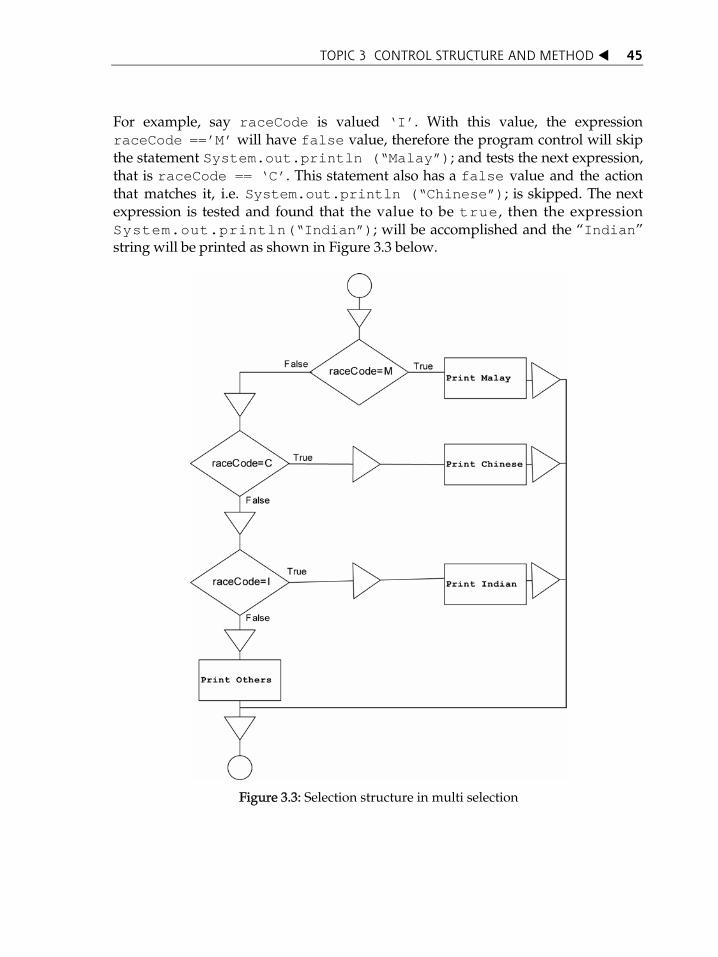
TOPIC 3 CONTROL STRUCTURE AND METHOD 45
For example, say raceCode is valued ‘I’. With this value, the expression raceCode ==’M’ will have false value, therefore the program control will skip the statement System.out.println (“Malay”); and tests the next expression, that is raceCode == ‘C’. This statement also has a false value and the action that matches it, i.e. System.out.println (“Chinese”); is skipped. The next expression is tested and found that the value to be true, then the expression System.out.println(“Indian”); will be accomplished and the „Indian‰ string will be printed as shown in Figure 3.3 below.
Figure 3.3: Selection structure in multi selection

TOPIC 3 CONTROL STRUCTURE AND METHOD 46
Java also supports the use of the ? operator, which is sometimes very useful. The expression
requisite ? statement1 : statement2
will accomplish statement 1 value if the requisite value is true. On the other hand, if the requisite value is false, the expression will accomplish statement2 value. Boolean operators such as &&, || and ! also could be used in if expression. Example:
if (age >=10) && (age <=20) System.out.println("You are qualified"); else if (age >20) && (age <=30) System.out.println("You are not qualified"); else System.out.println("Input error"); if expression with combination of more than one boolean operations is valid to use such as shown in the above code.
EXERCISE 3.1
What is the output that will be displayed by the following program segment: r = 2;
if (r > 1)
System.out.println (“AAA”);
else System.out.println (“BBB”);
if (r < 1)
System.out.println (“AAA”);
else System.out.println (“BBB”);
if (r != 1)
System.out.println (“AAA”);
else System.out.println(“BBB”);
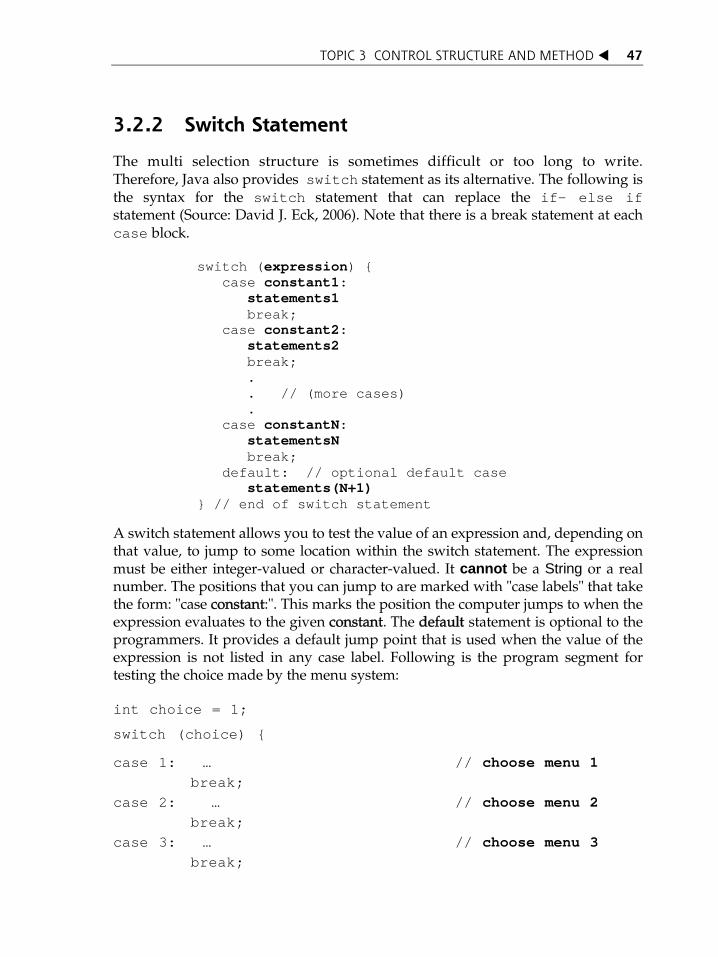
TOPIC 3 CONTROL STRUCTURE AND METHOD 47
3.2.2 Switch Statement
The multi selection structure is sometimes difficult or too long to write. Therefore, Java also provides switch statement as its alternative. The following is the syntax for the switch statement that can replace the if- else if statement (Source: David J. Eck, 2006). Note that there is a break statement at each case block. switch (expression) { case constant1: statements1 break; case constant2: statements2 break; . . // (more cases) . cas constantN: e statementsN break; default: // optional default case statements(N+1) } // end of switch statement
A switch statement allows you to test the value of an expression and, depending on that value, to jump to some location within the switch statement. The expression must be either integer-valued or character-valued. It cannot be a String or a real number. The positions that you can jump to are marked with "case labels" that take the form: "case constant:". This marks the position the computer jumps to when the expression evaluates to the given constant. The default statement is optional to the programmers. It provides a default jump point that is used when the value of the expression is not listed in any case label. Following is the program segment for testing the choice made by the menu system: int choice = 1;
switch (choice) {
case 1: … // choose menu 1 break;
case 2: … // choose menu 2 break;
case 3: … // choose menu 3 break;

TOPIC 3 CONTROL STRUCTURE AND METHOD 48
case 4: … // choose menu 4 break;
default: … // wrong input break;
} The break statement can also be used to force program control exit any loop blocks. The decision on whether to use if or switch statement depends on the users requirement. if statement is normally used to make decision based on the range of the value or specific conditions while switch statement is used to make decision based on a integer or character value. Also, the value for every case must be different.
Figure 3.4: Selection structure in multi selection using switch and break
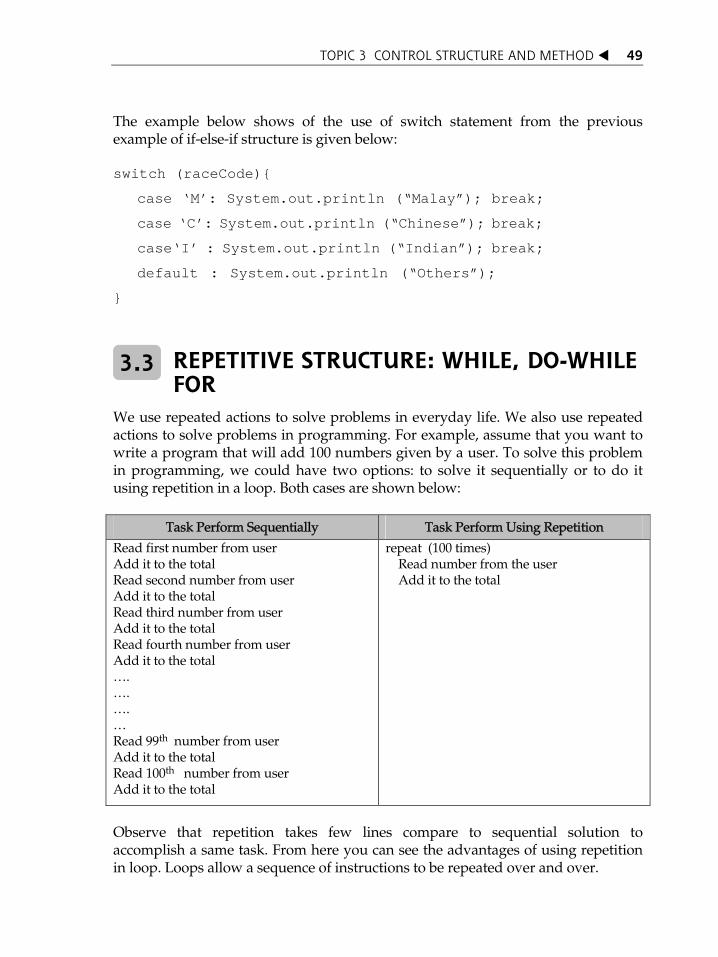
TOPIC 3 CONTROL STRUCTURE AND METHOD 49
The example below shows of the use of switch statement from the previous example of if-else-if structure is given below: switch (raceCode){
case ‘M’: System.out.println (“Malay”); break;
case ‘C’: System.out.println (“Chinese”); break;
case‘I’ : System.out.println (“Indian”); break;
default : System.out.println (“Others”);
}
REPETITIVE STRUCTURE: WHILE, DO-WHILE FOR
3.3
We use repeated actions to solve problems in everyday life. We also use repeated actions to solve problems in programming. For example, assume that you want to write a program that will add 100 numbers given by a user. To solve this problem in programming, we could have two options: to solve it sequentially or to do it using repetition in a loop. Both cases are shown below:
Task Perform Sequentially Task Perform Using Repetition
Read first number from user Add it to the total Read second number from user Add it to the total Read third number from user Add it to the total Read fourth number from user Add it to the total ⁄. ⁄. ⁄. ⁄ Read 99th number from user Add it to the total Read 100th number from user Add it to the total
repeat (100 times) Read number from the user Add it to the total
Observe that repetition takes few lines compare to sequential solution to accomplish a same task. From here you can see the advantages of using repetition in loop. Loops allow a sequence of instructions to be repeated over and over.

TOPIC 3 CONTROL STRUCTURE AND METHOD 50
The repetitive structure in Java is the same as in C, except that the expression that is tested should take the boolean value. Repetition can be implemented by using one of the following structures: while, do-while or for.
3.3.1 The while and do-while Statement
The while and do-while loop is frequently used when we are unable to estimate how many times a statement block should be repeated. The while loop will only accomplish a block_statement body as long as the expression value is true. The general form is as follows:
while (expression) {
block_statement
}
The while loop will not be accomplished at all if the expression value is false the first time it is tested. Notice the example below to find the addition integer from 1 to 100.
/*Find the addition of the integers 1+2+3+99+…+100*/
sum = 0;
i = 1;
while (i <= 100) {
sum += i;
i++;
}
The while loop in the above example will stop when the value i exceeds 100. When the i value exceeds 100, the requisite (expression)will become false. For the repetitive structure while, there are four basic components that need to be fulfilled. 1. Initial Statement This statement will assign initial value for the variable that will be used in the
loop. In our example, the i = 1 statement is the initial statement.
TOPIC 3 CONTROL STRUCTURE AND METHOD 51
2. Stop Requisite This requisite will be tested to determine whether the next iteration needs to
be accomplished. In the above example, i < = 100 is the stop requisite. 3. The Process that Needs to be Accomplished In our example, sum += i statement will be accomplished if the requisite is
true. 4. Updated Statement Normally, this statement is placed at the end of the loop. In our example, the
control variable, which is i will be updated i++. In contrast, the do-while loop is a variation of the while loop. Its syntax is as below: do {
Statement1
Statement2
……
……
StatementN
} while (condition);
For the do-while loop, the loop body will be executed first, Then condition is evaluated. If the condition is true, the loop body will be executed. Otherwise the loop will be terminated. The difference between while loop and do-while loop is the order in which the condition is evaluated and the loop body executed.

TOPIC 3 CONTROL STRUCTURE AND METHOD 52
3.3.2 The for Statement
The for loop in Java takes the following general syntax: for(initial_value;requisite;update){
block_statement
}
Unlike while and do-while statements, for loop is used for the number of loop repetitions that already known in advance.
We can give initial value to several variables that usually act as the calculator in the first slot. Unlike C, Java allows int type variable to be declared and given its initial value at this slot. However, it is only valid in the body or for loop block where it is declared. The second slot requisite is used to test the requisite that determines whether the body of a for loop will be accomplished or not. The third slot explained is updates that describes how to update to change the initial_value (counter). block_statement can consist of only one simple statement or a block. Therefore, nested loop is also allowed. The following is an example of the for loop:
for (int line = 1; line <= 5; line++){
System.out.println(‘HI ’);
}
The result that will be displayed is: HI HI HI HI HI
3.3.3 The break and continue Statements
Some times we need to exit from a loop before the completion of the loop. In such cases, use break statement to exit from the loop prematurely. The break statement
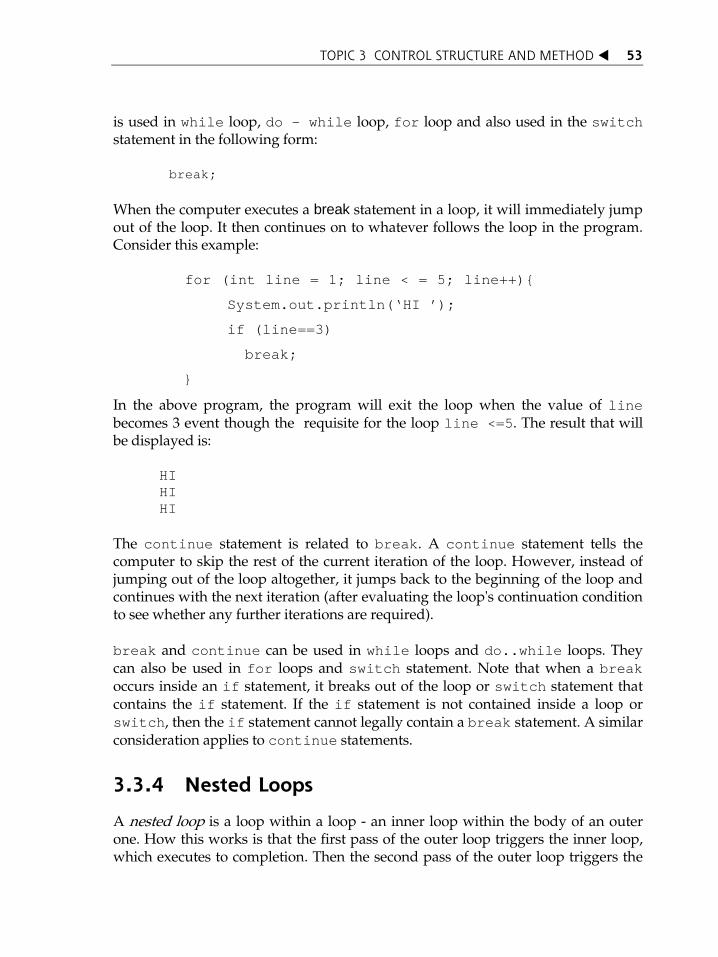
TOPIC 3 CONTROL STRUCTURE AND METHOD 53
is used in while loop, do - while loop, for loop and also used in the switch statement in the following form:
break;
When the computer executes a break statement in a loop, it will immediately jump out of the loop. It then continues on to whatever follows the loop in the program. Consider this example:
for (int line = 1; line < = 5; line++){
System.out.println(‘HI ’);
if (line==3)
break;
}
In the above program, the program will exit the loop when the value of line becomes 3 event though the requisite for the loop line <=5. The result that will be displayed is:
HI HI HI
The continue statement is related to break. A continue statement tells the computer to skip the rest of the current iteration of the loop. However, instead of jumping out of the loop altogether, it jumps back to the beginning of the loop and continues with the next iteration (after evaluating the loop's continuation condition to see whether any further iterations are required). break and continue can be used in while loops and do..while loops. They can also be used in for loops and switch statement. Note that when a break occurs inside an if statement, it breaks out of the loop or switch statement that contains the if statement. If the if statement is not contained inside a loop or switch, then the if statement cannot legally contain a break statement. A similar consideration applies to continue statements.
3.3.4 Nested Loops
A nested loop is a loop within a loop - an inner loop within the body of an outer one. How this works is that the first pass of the outer loop triggers the inner loop, which executes to completion. Then the second pass of the outer loop triggers the
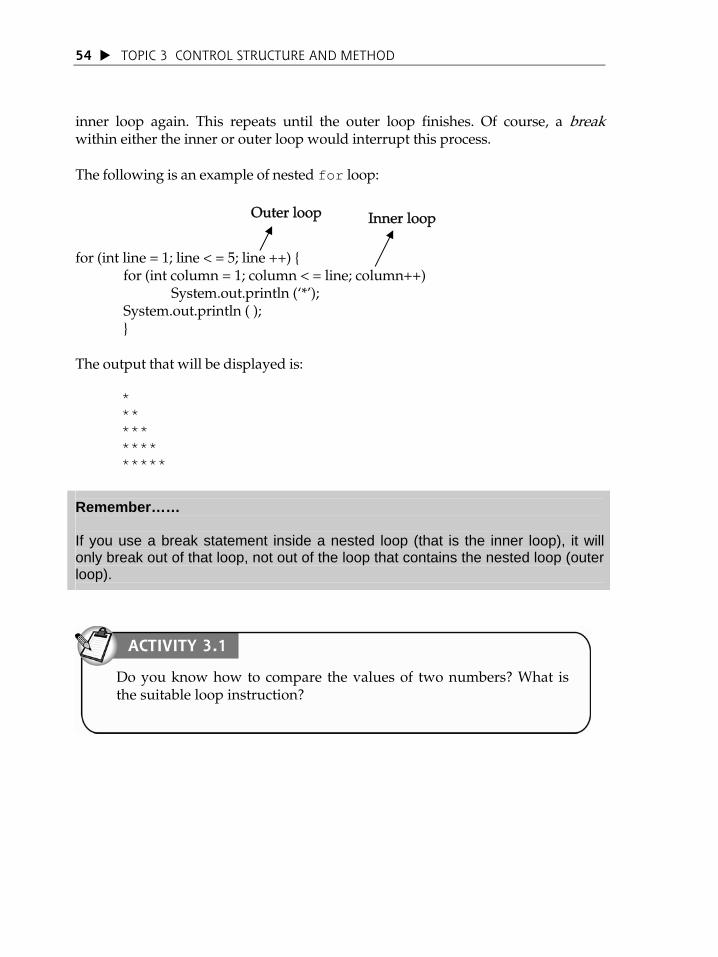
TOPIC 3 CONTROL STRUCTURE AND METHOD 54
inner loop again. This repeats until the outer loop finishes. Of course, a break within either the inner or outer loop would interrupt this process. The following is an example of nested for loop:
for (int line = 1; line < = 5; line ++) { for (int column = 1; column < = line; column++)
Outer loop Inner loop
System.out.println (Â*Ê); System.out.println ( ); } The output that will be displayed is:
* ** *** **** *****
Remember…… If you use a break statement inside a nested loop (that is the inner loop), it will only break out of that loop, not out of the loop that contains the nested loop (outer loop).
ACTIVITY 3.1
Do you know how to compare the values of two numbers? What is the suitable loop instruction?

TOPIC 3 CONTROL STRUCTURE AND METHOD 55
3.3.5 Compound Statement
SELF-CHECK 3.1
When using if/else, for, while loops, there is one important concept that you should know that is Compound Statement. What is Compound Statement?
We will start with two examples in order to explain the concept of compound statements. Consider the following two examples: Example 1: 1 int x=2; 2 if (x==3) 3 System.out.println(“Hi”); 4 System.out.println(“Hello”); 5 System.out.println(“Bye”); Example 2: 1 int x=2; 2 if (x==3) 3 { 4 System.out.println(“Hi”); 5 System.out.println(“Hello”); 6 } 7 System.out.println(“Bye”);
The output for Example 1 is:
Hello
Bye
while the output for Example 2 is
Bye
Do you know why there is a difference between the output for the Example 1 and Example2?
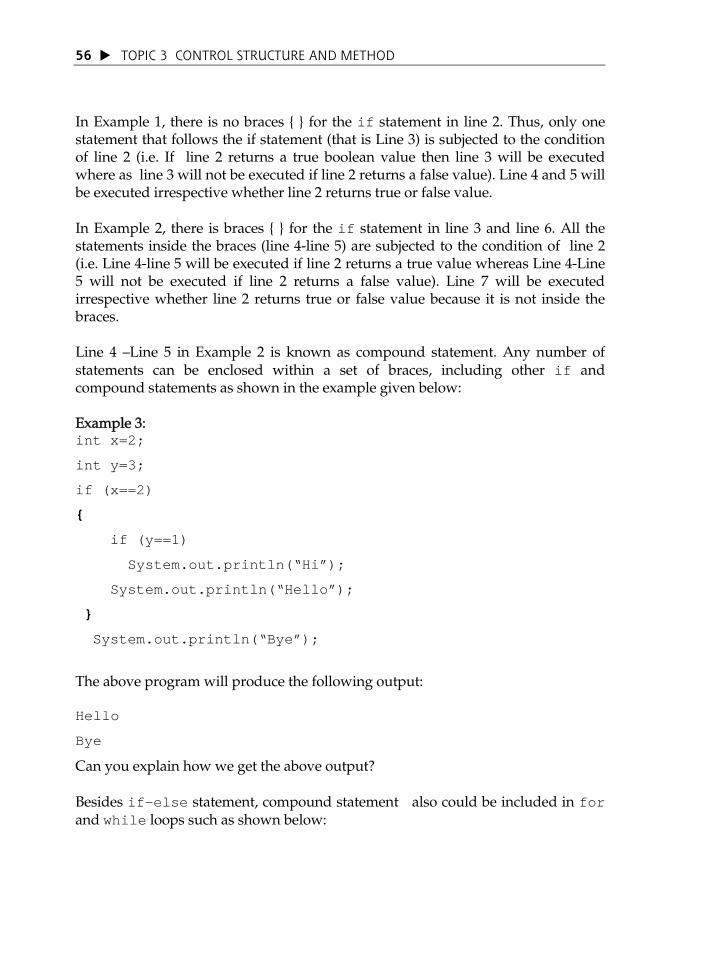
TOPIC 3 CONTROL STRUCTURE AND METHOD 56
In Example 1, there is no braces { } for the if statement in line 2. Thus, only one statement that follows the if statement (that is Line 3) is subjected to the condition of line 2 (i.e. If line 2 returns a true boolean value then line 3 will be executed where as line 3 will not be executed if line 2 returns a false value). Line 4 and 5 will be executed irrespective whether line 2 returns true or false value. In Example 2, there is braces { } for the if statement in line 3 and line 6. All the statements inside the braces (line 4-line 5) are subjected to the condition of line 2 (i.e. Line 4-line 5 will be executed if line 2 returns a true value whereas Line 4-Line 5 will not be executed if line 2 returns a false value). Line 7 will be executed irrespective whether line 2 returns true or false value because it is not inside the braces. Line 4 Line 5 in Example 2 is known as compound statement. Any number of statements can be enclosed within a set of braces, including other if and compound statements as shown in the example given below: Example 3: int x=2;
int y=3;
if (x==2)
{
if (y==1)
System.out.println(“Hi”);
System.out.println(“Hello”);
}
System.out.println(“Bye”);
The above program will produce the following output: Hello
Bye
Can you explain how we get the above output? Besides if-else statement, compound statement also could be included in for and while loops such as shown below:

TOPIC 3 CONTROL STRUCTURE AND METHOD 57
Example 4: for (int a=1; a<=3; a++){
System.out.println(“Hi”);
System.out.println(“Hello”);
}
System.out.println(“**************”);
for (int b=1; b<=3; b++)
System.out.println(“Hi”);
System.out.println(“Hello”);
Compound Statement
Notice that there is no braces in this line
The above program will produce the following output: Hi
Hello
Hi
Hello
Hi
Hello
*********************
Hi
Hi
Hi
Hello
Can you explain how we get the above output?

TOPIC 3 CONTROL STRUCTURE AND METHOD 58
EXERCISE 3.2
What is the output that is displayed from the following program segment:
(a) for (f = 0; f < 3; ++f)
for ( g = 0; g < 2; ++g)
System.out.println (f + “ “+ g + “ “);
(b) for ( num = 1; num < 100; ++num)
if ( 100 % num == 0)
System.out.println (num + “);
METHOD 3.4
Methods allow the programmer to modularise a program - each method will perform a single specialised task.
A method is subprogram. When code becomes long or repetitive, it is often helpful to be able to decompose the task into separate methods. Such decomposition has the effect of making each piece (method) smaller and therefore easier to write and read.
In object-oriented programming such as Java, method plays an important role.
3.4.1 Types of method in Java
In general, there are four types of methods that could be written namely constructor operation, query operation, update operation and task operation. Constructor method is used to create new objects for a class by giving initial values for the attributes. The name of the constructor operation is same with the name of the class. (We will learn more about constructor method in Topic 5).
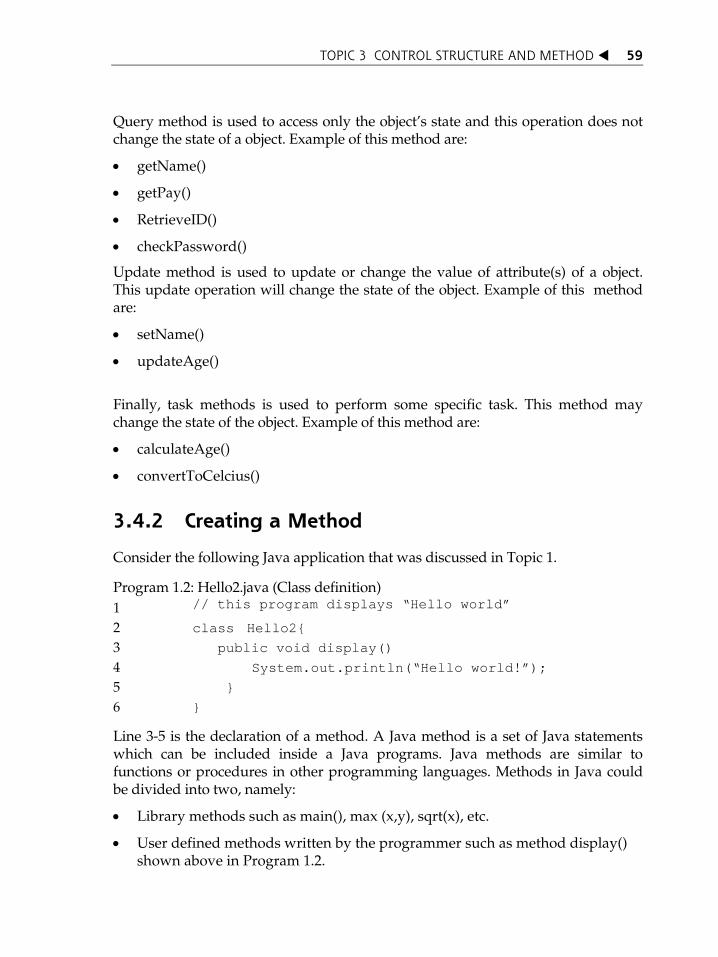
TOPIC 3 CONTROL STRUCTURE AND METHOD 59
Query method is used to access only the objectÊs state and this operation does not change the state of a object. Example of this method are:
getName()
getPay()
RetrieveID()
checkPassword()
Update method is used to update or change the value of attribute(s) of a object. This update operation will change the state of the object. Example of this method are:
setName()
updateAge()
Finally, task methods is used to perform some specific task. This method may change the state of the object. Example of this method are:
calculateAge()
convertToCelcius()
3.4.2 Creating a Method
Consider the following Java application that was discussed in Topic 1.
Program 1.2: Hello2.java (Class definition) 1 // this program displays “Hello world”
2 class Hello2{
3 public void display()
4 System.out.println(“Hello world!”);
5 }
6 }
Line 3-5 is the declaration of a method. A Java method is a set of Java statements which can be included inside a Java programs. Java methods are similar to functions or procedures in other programming languages. Methods in Java could be divided into two, namely:
Library methods such as main(), max (x,y), sqrt(x), etc.
User defined methods written by the programmer such as method display() shown above in Program 1.2.
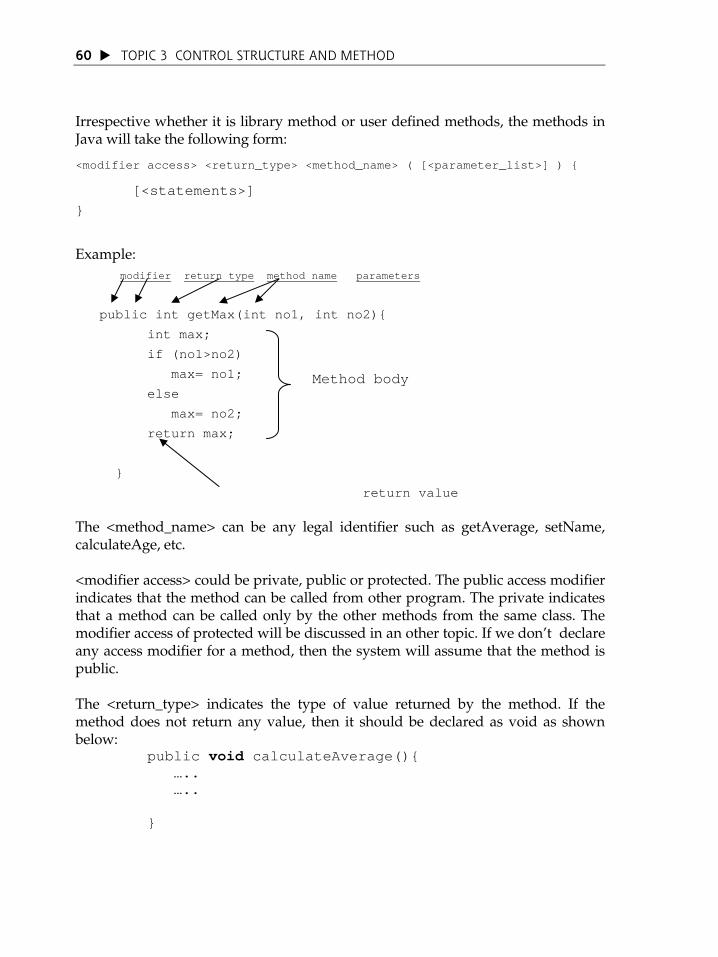
TOPIC 3 CONTROL STRUCTURE AND METHOD 60
Irrespective whether it is library method or user defined methods, the methods in Java will take the following form:
<modifier access> <return_type> <method_name> ( [<parameter_list>] ) {
[<statements>] }
Example: modifier return type method name parameters
public int getMax(int no1, int no2){
int max;
if (no1>no2)
max= no1;
else
max= no2;
return max;
}
return value
Method body
The <method_name> can be any legal identifier such as getAverage, setName, calculateAge, etc. <modifier access> could be private, public or protected. The public access modifier indicates that the method can be called from other program. The private indicates that a method can be called only by the other methods from the same class. The modifier access of protected will be discussed in an other topic. If we donÊt declare any access modifier for a method, then the system will assume that the method is public. The <return_type> indicates the type of value returned by the method. If the method does not return any value, then it should be declared as void as shown below:
public void calculateAverage(){ ….. ….. }

TOPIC 3 CONTROL STRUCTURE AND METHOD 61
If the method returns a value such an int value, then the method should be declared as int as shown in the example below:
public int getAverage(){ int x=1; int y=2 int average=(x+y)/2; return average; }
Average must match int return type
If the method returns a value a String value, then the method should be declared as String as shown in the example below:
public String getAverage(){ ….. ….. return ..; }
The same goes for other methods that returns other data types such float, double, char, boolean, etc. Use return statement within the method to pass back value if the method return a value as shown in the next example:
public int getAverage(){ ….. return …..; }
Note that the return statement should not be included within the method if it is void method.
public void getAverage(){ ….. return …..; /*ERROR! Cannot return value if the method is void */ }
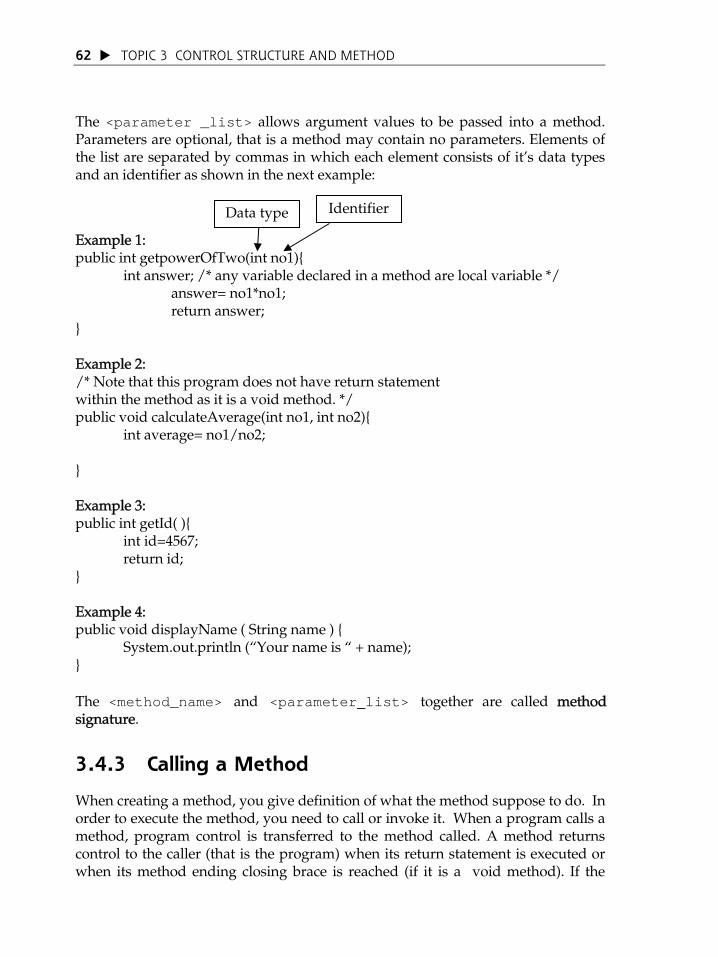
TOPIC 3 CONTROL STRUCTURE AND METHOD 62
The <parameter _list> allows argument values to be passed into a method. Parameters are optional, that is a method may contain no parameters. Elements of the list are separated by commas in which each element consists of itÊs data types and an identifier as shown in the next example:
Example 1: public int getpowerOfTwo(int no1){
Data type
Identifier
int answer; /* any variable declared in a method are local variable */ answer= no1*no1; return answer; } Example 2: /* Note that this program does not have return statement within the method as it is a void method. */ public void calculateAverage(int no1, int no2){ int average= no1/no2; } Example 3: public int getId( ){ int id=4567; return id; } Example 4: public void displayName ( String name ) { System.out.println („Your name is „ + name); } The <method_name> and <parameter_list> together are called method signature.
3.4.3 Calling a Method
When creating a method, you give definition of what the method suppose to do. In order to execute the method, you need to call or invoke it. When a program calls a method, program control is transferred to the method called. A method returns control to the caller (that is the program) when its return statement is executed or when its method ending closing brace is reached (if it is a void method). If the

TOPIC 3 CONTROL STRUCTURE AND METHOD 63
method returns a value, a variable should be declared to receive the value returned by the method. For example: int max= getMax(34,67);
Arguments If a method does not return any value (i.e. it is a void method), then method must be statement. For example:
calculateAge();
If a method has a parameter, then you need to include the arguments during the method invocation. The arguments must match the parameters in order, number and compatible as defined in the method signature. Example 5 below shows a complete program which has method declaration and method invocation. Example 5: class obj {
public static void main (String[ ] args ){
int a=67;
int b=80;
int max=getMax(a,b);
System.out.println(“Maximum is “ + max);
}
public static int getMax(int no1, int no2){ int max;//local variable if (no1>no2) max= no1; else max= no2; return max; }
pass thevalue
return the result
}

TOPIC 3 CONTROL STRUCTURE AND METHOD 64
When you invoke a method that has parameter(s), the value of the argument is passed to the parameter in the method as pass-by-value. It means the value of the variable represented as argument in the method invocation will be passed to the parameter. The argument will not be affected regardless of the changes made to the parameter inside the method.
Any variable declared inside a method is known as local variable. Local variables are only recognised inside its method.
Tips of Using Methods:
Each method should be used to perform single task such as calculate average, determine maximum number, etc.
Avoid having a multiple tasks in a method such calculate average, and determine maximum that are combined in one method.
3.4.4 Method Overloading
Consider the program shown in the previous Example 5. The method getMax() will determine the maximum value between two integer numbers. But what if you need to find which of the two floating-point numbers that has the maximum value? The solution is to create another method with the same name but with different parameters as shown in the following program: 1. class obj {
2. public static void main (String[ ] args ){
3. int a=67, b=80;
4. float c=4.5f, d=89.7f;
5. int max1=getMax(a,b); //Line 5
6. float max2=getMax(c,d); //Line 6
7. System.out.println(“Maximum integer number is “ + max1);
8. System.out.println(“Maximum float number is “ + max2);
9. }
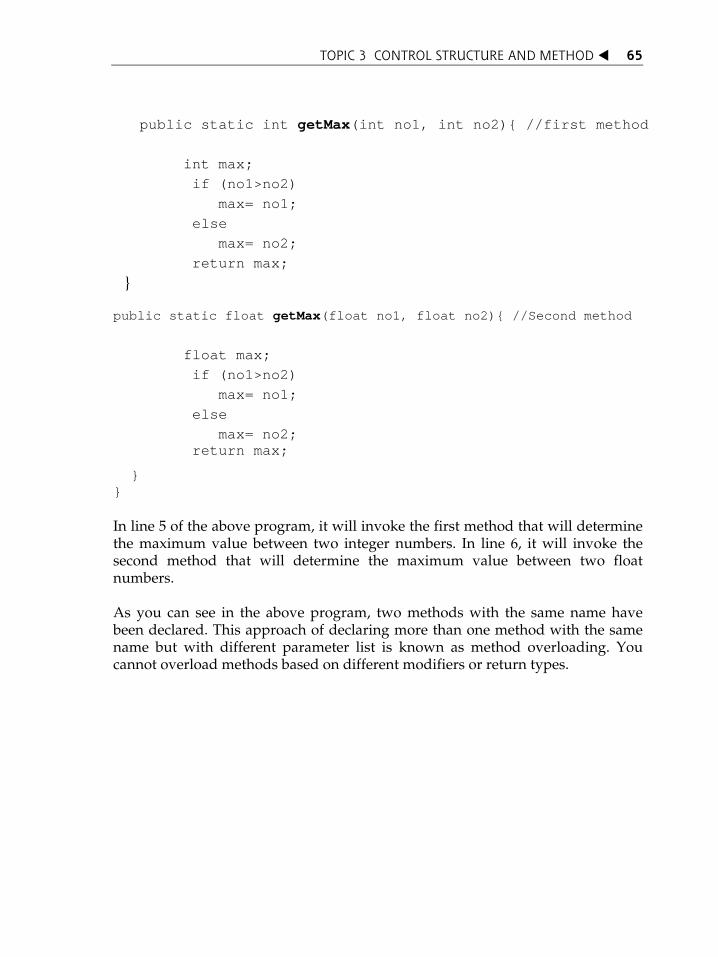
TOPIC 3 CONTROL STRUCTURE AND METHOD 65
public static int getMax(int no1, int no2){ //first method int max; if (no1>no2) max= no1; else max= no2; return max; }
public static float getMax(float no1, float no2){ //Second method
float max; if (no1>no2) max= no1; else max= no2; return max;
} } In line 5 of the above program, it will invoke the first method that will determine the maximum value between two integer numbers. In line 6, it will invoke the second method that will determine the maximum value between two float numbers. As you can see in the above program, two methods with the same name have been declared. This approach of declaring more than one method with the same name but with different parameter list is known as method overloading. You cannot overload methods based on different modifiers or return types.

TOPIC 3 CONTROL STRUCTURE AND METHOD 66
A program is a sequence of instructions.
In the ordinary "flow of control," the computer executes the instructions in the sequence in which they appear, one after the other.
This condition is called sequence accomplishment.
In programming, the statement that will be accomplished next is not necessarily located in the next line.
This scenario is known as transfer of program control.
Bohm and Jacopini have conducted research in the 1960s and have concluded that all programs can be written in a structured way by only using three control structures, namely: sequential structure, selection structure and repetitive structure.
Sequential structure in Java could be implements using if, if-else, if-else if and switch statements.
Repetitive structure in Java could be implemented using while, do-while and for loops.
Methods in program allow us to modularise the program. Thus, it makes the program more readable and organised.
break
case
continue
do-while
for
if
if-else
method
nested loops
Repetitive structure
Selection structure
Sequential structure
switch
while
INTRODUCTION
A program is a sequence of instructions that a computer can execute to perform some tasks. There are two basic blocks of programming: data and instructions. To work with data, you need to understand variables and data types; to work with instructions, you need to understand control structures and methods. All these have been elaborated in Topic 2 and Topic 3.
Like other programming languages, there are also THREE other important constructs in Java as listed below:
Array
String
Input Reading
The above constructs enable us to write a complete and comprehensive Java programs such as programs that will (just to name a few):
TTooppiicc Array, String and Input
44 Reading
By the end of this topic, you should be able to:
1. Describe the meaning of array;
2. Write Java program using array;
3. Write Java program that capable to perform String manipulation; and
4. Write a interactive Java program using Pembaca class.
LEARNING OUTCOMES

TOPIC 4 ARRAY, STRING AND INPUT READING 68
Process the marks of 100 students and determine the highest and lowest marks
Determine number of characters in a String
Enable an user to key in data during program run-time Next sections will elaborate on these constructs.
ARRAY 4.1
Array is a group of memory locations that are connected and has the same name and data type.
For the above problem, you are just required to declare five variables type of integer as shown below to store the studentsÊ marks: int student1, student2, student3, student4, student5;
Now consider the following situation:
„You have been required to write a program that will accept and store the marks for 500 students‰
For the above problem, are you going to declare 500 variables as shown below: int student1, student2, student3, student4,….,student499, student500;
It is very obvious that the above approach to write 500 variables is „tiring‰ and it is not a good approach. The solution is to use array: int[] student = new int [500];
Do not worry if you donÊt understand the above declaration because we are going to discuss it in a short while.
Ever wonder a situation where we can use an array in a program? Consider the following scenario:
„You have been required to write a program that will accept and store the marks for 5 students‰

TOPIC 4 ARRAY, STRING AND INPUT READING
69
We need to state the name of the array and the location in order to refer a particular memory location in the array. Figure 4.1 shows a visual representation of an array.
Figure 4.1: Visualization of an array
Array allows the programmer to collect a number of data from the same type by referring to only the name of a variable. Unlike C, the Java array is implemented as an object (the meaning of object will be elaborated in the next topic). Thus, we only need to know how to use it without having to know how it is implemented.
4.1.1 Array Declaration
An array object needs to be created in order to use it in a program. After it is created, the size of the array cannot be changed easily. We will not discuss how this size can change in this text. The following is the syntax of array declaration:
data_type[] name_variable = new data_type[size]; data_type is a type of data for elements that are intended for storing the array. variable_name is the array name and size is the number of elements than can be stored in the array. Array is an example of object where its creation has to be handled by the programmer. This is accomplished by using a new operator. Without it, the array object cannot be created. For example, the following statement would create the x array object, which consists of 10 int data type elements.
Number of elements in the array
Array name
integer data type
int[] x = new int[10];

TOPIC 4 ARRAY, STRING AND INPUT READING 70
The definition and creation of the array object can also be done separately as follows:
int[] x; This example is the same as above but it now consists of two stepsx = new int[10];
Another way to write the array definition as in C language is:
int x[] = new int[10]; Observe how the initial value can be provided during array declaration:
int[] number = { 3, 5, 4, 0}; char[] letter = {‘A’, ‘B’, ‘Z’, ‘E’};
The effect of the above declarations is shown below:
Number[0] 3 Number[1] 5 Number[2] 4 Number[3] 0
letter[0] A letter[1] B Letter[2] Z letter[3] E
Notice that in the two examples above, the new operator is not used. We can also give an initial value to an array that has no name definition as shown below:
new int[] {3, 7, 4, 9, 11} This statement will allocate a new array and add the value in parenthesis { }. The sum of initial value will be calculated and the array size is determined according to that sum. This type of syntax is used if we wish to send an array as a parameter to a particular method without creating a localized variable for it. For example:
printFiveEven(new int [ ] {2, 4, 6, 8, 10});

TOPIC 4 ARRAY, STRING AND INPUT READING
71
actually is the abbreviation for
int[] evenNum = { 2, 4, 6, 8, 10}; printFiveEven(evenNum); //send as a parameter in method
To refer to an array element, the usual method used in C can be used, that is by stating the array name and its index. For example:
x[0] = 10; x[1] = x[0] * 10;
4.1.2 Array as Object
When the array is assumed as an object, then it has attributes and methods that can be executed. (The meaning of object and attributes will be elaborated in the next topic).
4.1.2.1 Length Attribute
To determine the size of the array, use the statement
array_name.length
length is an attribute for the array that stores information on the size of the array. For example:
int[] evenNum = { 2, 4, 6, 8, 10}; for (i = 0; i < evenNum.length;i++) System.out.println(evenNum[i]);
Here evenNum.length is the size for the array evenNum. By referring to the evenNum array above, this means that the value for evenNum.length is 5. Therefore, the for loop above will be executed five times and will print the contents of the evenNum array beginning from the index 0 to evenNum.length-1, that is 4.

TOPIC 4 ARRAY, STRING AND INPUT READING 72
4.1.2.2 Arraycopy( ) Method
We can copy the contents of an array to another array by using the arraycopy() method available in the class System. The syntax for executing this task is as follows: System.arraycopy(source, sourceIndex, target, targetIndex, no);
source is the source array name whose contents are intended for copying
target is a new array which will store values that are copied
resourceIndex indicates the start of the content position of the array that is to be copied from the source array
targetIndex shows the start of the position at the target array that will be used to store the values that are to be copied
number is the number of the values copied. The following is an example of the program segment that shows how three out of five values copied from the evenNum array to the newNum array.
int[]evenNum = {2, 4, 6, 8, 10}; int[]newNum = {1000, 2000, 3000, 4000, 5000, 6000}; System.arraycopy(evenNum, 1, newNum, 2, 3); for (i = 0; i < newNum.length; i++){ System.out.println(“newNum[“+i+”]after copying: “+newNum[i]); }
arraycopy() method was used to copy the evenNum array element starting from index 1 position. The number of elements copied is three, therefore the elements that are copied are 4, 6, 8. These elements that are copied are then stored in the newNum array starting from the index 2 position. Therefore, the newNum[2] element, newNum[3] and newNum[4] each would be replaced by the values 4,6 and 8. The figure below shows the memory space for both arrays after the above program segment is executed:
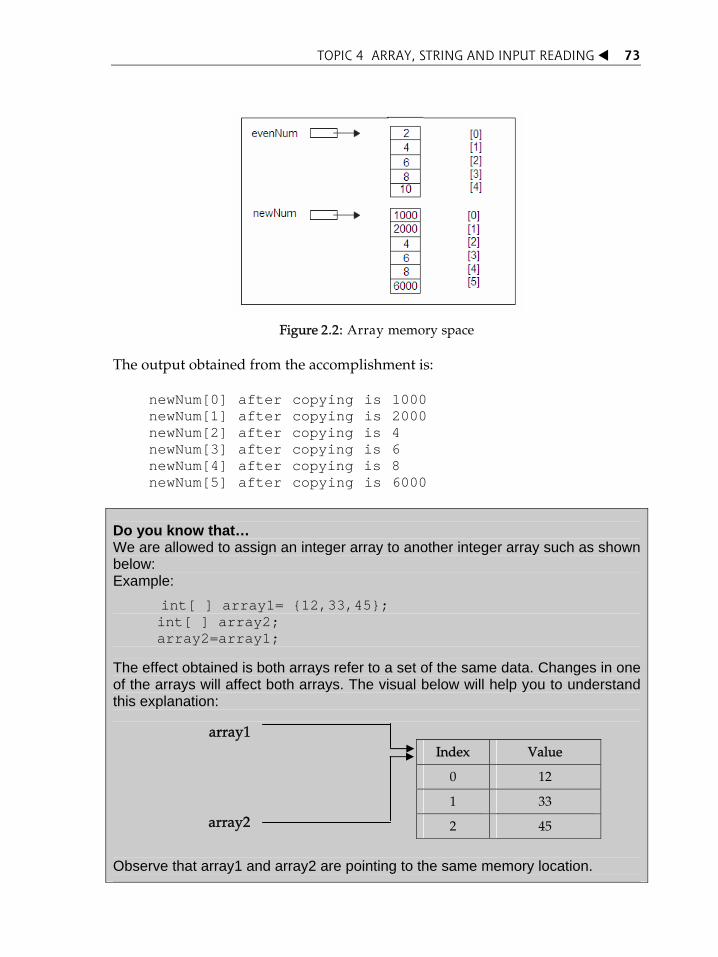
TOPIC 4 ARRAY, STRING AND INPUT READING
73
Figure 2.2: Array memory space
The output obtained from the accomplishment is: newNum[0] after copying is 1000 newNum[1] after copying is 2000
newNum[2] after copying is 4 newNum[3] after copying is 6
newNum[4] after copying is 8 newNum[5] after copying is 6000
Do you know that… We are allowed to assign an integer array to another integer array such as shown below: Example:
int[ ] array1= {12,33,45}; int[ ] array2; array2=array1;
The effect obtained is both arrays refer to a set of the same data. Changes in one of the arrays will affect both arrays. The visual below will help you to understand this explanation:
Index Value
0 12
1 33
2 45
Observe that array1 and array2 are pointing to the same memory location.
array2
array1
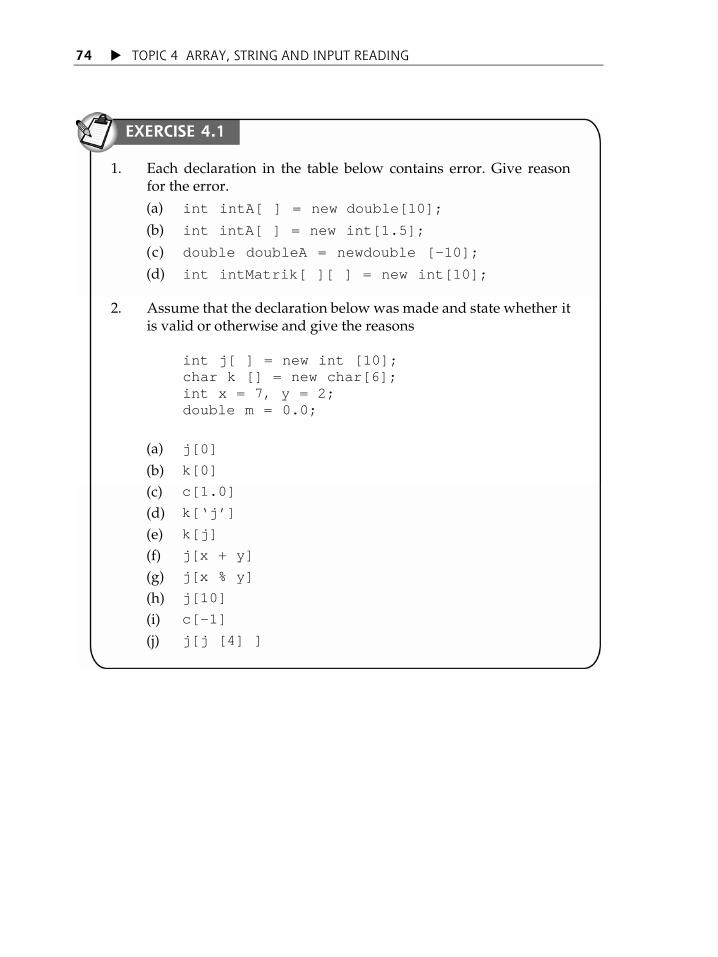
TOPIC 4 ARRAY, STRING AND INPUT READING 74
EXERCISE 4.1
1. Each declaration in the table below contains error. Give reason for the error. (a) int intA[ ] = new double[10];
(b) int intA[ ] = new int[1.5];
(c) double doubleA = newdouble [-10];
(d) int intMatrik[ ][ ] = new int[10]; 2. Assume that the declaration below was made and state whether it
is valid or otherwise and give the reasons
int j[ ] = new int [10]; char k [] = new char[6]; int x = 7, y = 2; double m = 0.0;
(a) j[0]
(b) k[0]
(c) c[1.0]
(d) k[‘j’]
(e) k[j]
(f) j[x + y]
(g) j[x % y]
(h) j[10]
(i) c[-1]
(j) j[j [4] ]

TOPIC 4 ARRAY, STRING AND INPUT READING
75
3. The following program will create an array and then values will be assigned to this array. These values will be displayed. Observe the usage of the for command in the program. In your opinion, what will be the output? Compare your answer with the computerÊs output.
arraycopy class { public static void main (String[ ] args){ int[ ] anArray; //declare array of integer type anArray = new int[10]; /* create array of integer type with the size of 10 */ //assign values for each element and display the content for (int i=0; i< 10; i++){ anArray[i]=i*2; System.out.println( anArray[i] + „ „); } //for }//main } //class
STRING 4.2 The character string, which is a combination of individual characters, is implemented as a string class. We no longer need to declare a variable that stores character string values as char type array. String constant consists of character strings that are in between two inverted signs „ „. This includes the empty space character that separates the words. Words, digits and special characters such as +, -, *, /, $, etc could be assigned to String variable in Java.
4.2.1 String Declaration
String zero = “ ”;//an empty string String university = “Open University Malaysia”; String courseCode = “CBOP3203”; String courseName= “Object Oriented Programming”;
Each declaration of the character string as shown in the above example is an object from the String class.

TOPIC 4 ARRAY, STRING AND INPUT READING 76
4.2.2 String Operation
SELF-CHECK 4.1
You have already learned about arrays. Do you know the difference between array and String?
Like A r r a y , String is implemented as an object (the meaning of object will be elaborated in the next topic). Thus, we only need to know how to use it without having to know how it is implemented. Java supports various manipulations of the character string. Next is the discussion on the operations that can be carried out on the String class. (a) Combining Strings
Java uses the Â+Ê operator to combine two strings.
String son = ‘Firdaus’;String Father = ‘Mohd’;String myName = son + father;
In the above example, the use of the Â+Ê operator will produce myName character string with the value ”FirdausMohd”. Note that there is no empty space in this string. The Â+Ê operator only acts to combine two strings according to the sequence that is stated.
When we try to combine a character string with a constant or variable that is not a character string, the constant value or the variable would be changed to character string. All Java class objects can be changed to character string with the Â+Ê operator. Note the following example:
String software = “OFFICE” + 2000;
Here the software is assigned to “OFFICE2000”. This approach is normally used in output statements and it mostly helps when we intend to print constant string and variable value. Below is one of its examples.
System.out.println(“Software that is used” + software);

TOPIC 4 ARRAY, STRING AND INPUT READING
77
The output obtained from the accomplishment of the above statement is as follows:
Software that is used OFFICE2000 (b) Sub String
To obtain only part of the complete string, we use the substring() method. This method is a library method available in String class. For example, let us look at the following program segment:
String IPTS = “Open University Malaysia”; String S = IPTS.substring(0,4);
The above program segment will create a substring “University”. Java calculates the character in a string starting from 0 (the same as C and C++). For example, the ‘O’ character in the IPTS string is the character that is at the 0 position, character ÂpÊ is at position 1, ÂeÊ in position 2 , ÂnÊ at position 3 and so on. The call for substring() method in the above example pass two parameters, that is 0 and 4. The second parameter is the first position in the IPTS string that we do not intend to copy. In this case, what we intend to accomplish is to copy the character from position 0 to 3. Therefore, the substring() method will calculate from position 0 (included) to position4 (excluded). The advantage of the calculation method used by the substring( ) method is that we can obtain the length of a substring. The length of s.substring (a,b) is b – a. Therefore, the length of substring ‘Open’ is 4 0 = 4.
(c) Length of String To find the length of a string, use the length()method. String IPTS = “Open University Malaysia”; int length = IPTS.length( ); //length value is 27 Note here that length() is a method. This is different from length
attribute that represents array size.

TOPIC 4 ARRAY, STRING AND INPUT READING 78
(d) String Comparison To test whether two strings have the same value, we can use equals() method. The expression
s.equals(r)
returns the true value if s and r strings are the same and false if otherwise. s and r can be either constant or string variable. If IPTS has “Open University Malaysia” value, then the statement has false value.
“Greetings”.equals(IPTS)
To compare two strings without concerning whether they are capital or small letters, use the equalIgnoreCase() method. “OPEN UNIVERSITY MALAYSIA”.equalIgnoreCase(IPTS)// this statement will return true value Never use Â==Ê operator to compare two strings. This operation will only check whether both strings are stored in the same location. Definitely the string stored at the same location will have the same value. But we can also store many strings that have the same value at different locations.
String class has made available from more than 50 methods to manipulate the string. The list of methods in the java.lang.String class can be seen in http://java.sun.com/products/jdk 1.2/docs/api/java/lang/ String.html
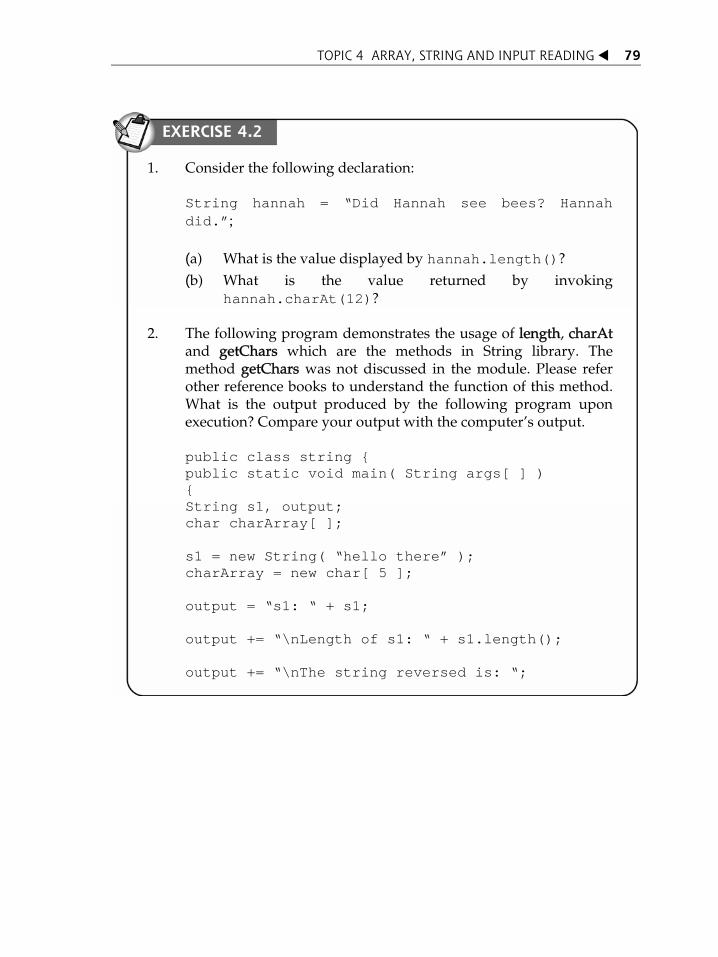
TOPIC 4 ARRAY, STRING AND INPUT READING
79
1. Consider the following declaration: String hannah = “Did Hannah see bees? Hannah
did.”;
(a) What is the value displayed by hannah.length()?
(b) What is the value returned by invoking hannah.charAt(12)?
2. The following program demonstrates the usage of length, charAt
and getChars which are the methods in String library. The method getChars was not discussed in the module. Please refer other reference books to understand the function of this method. What is the output produced by the following program upon execution? Compare your output with the computerÊs output.
public class string {
public static void main( String args[ ] ) { String s1, output; char charArray[ ];
s1 = new String( “hello there” ); charArray = new char[ 5 ];
output = “s1: “ + s1;
output += “\nLength of s1: “ + s1.length();
output += “\nThe string reversed is: “;
EXERCISE 4.2

TOPIC 4 ARRAY, STRING AND INPUT READING 80
for ( int count = s1.length() - 1; count >= 0; count— ) output += s1.charAt( count ) + “ “; s1.getChars( 0, 5, charArray, 0 ); output += “\nThe character array is: “; for ( int count = 0; count < charArray.length; count++ ) output += charArray[ count ]; System.out.println( output ); }//main }//class
Please use a different sheet to write the output.
CAPTURING INPUT FROM USER DURING RUNTIME
4.3
An interesting thing in writing the Java program is that the reading input process from the keyboard is not as simple as expected. Java allows the input/output process to use the process of inflow and outflow of data. With this concept, the data flow is received in the form of a byte sequence. The resources as well as the byte sequence destination of this data can consist of file, network link or a memory space block. Although data is usually in the byte sequence, it is easier to picture it as a high level structure such as a character or object sequence. In the Java program language, the object that allows us to read a data byte sequence from it is called input stream and the object that enables us to write outputs from it is known as output stream. Each is implemented by the InputStream class and the OutputStream class.
4.3.1 Using Pembaca Class
From the above explanation, it is clear that the difficulty that has to be faced to perform the input process. To write a program that can receive simple and easy input (Using the Java applications) is more difficult than reading the input using the program that uses the face-to-face user graphics (using the Java Applet).
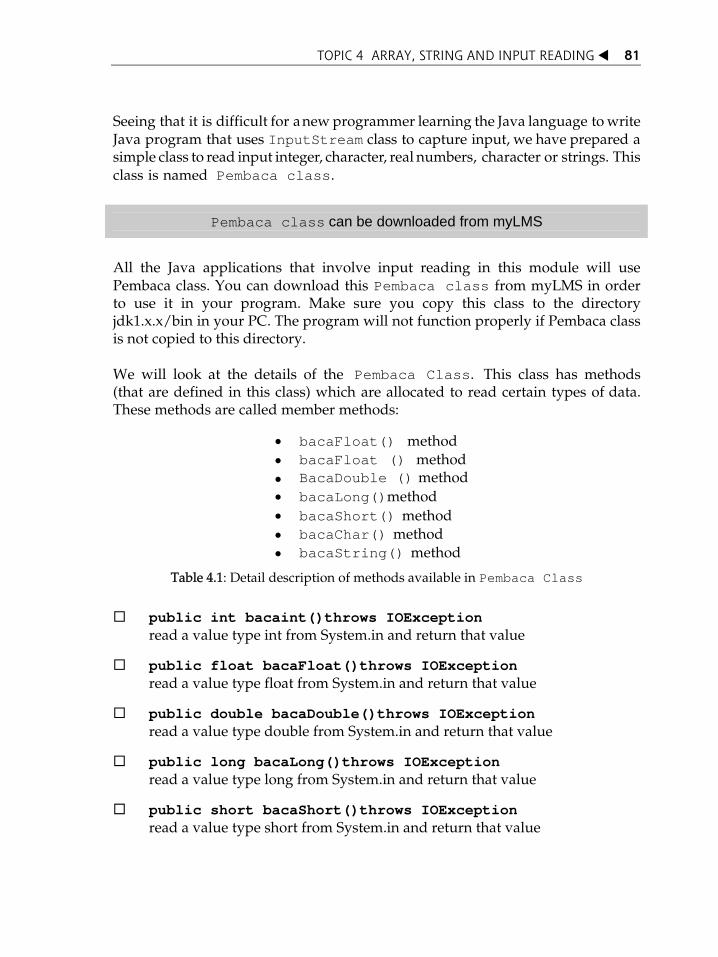
TOPIC 4 ARRAY, STRING AND INPUT READING
81
Seeing that it is difficult for a new programmer learning the Java language to write Java program that uses InputStream class to capture input, we have prepared a simple class to read input integer, character, real numbers, character or strings. This class is named Pembaca class.
Pembaca class can be downloaded from myLMS
All the Java applications that involve input reading in this module will use Pembaca class. You can download this Pembaca class from myLMS in order to use it in your program. Make sure you copy this class to the directory jdk1.x.x/bin in your PC. The program will not function properly if Pembaca class is not copied to this directory. We will look at the details of the Pembaca Class. This class has methods (that are defined in this class) which are allocated to read certain types of data. These methods are called member methods:
bacaFloat() method bacaFloat () method BacaDouble () method bacaLong()method bacaShort() method bacaChar() method bacaString() method
Table 4.1: Detail description of methods available in Pembaca Class
public int bacaint()throws IOException
read a value type int from System.in and return that value
public float bacaFloat()throws IOException read a value type float from System.in and return that value
public double bacaDouble()throws IOException read a value type double from System.in and return that value
public long bacaLong()throws IOException read a value type long from System.in and return that value
public short bacaShort()throws IOException read a value type short from System.in and return that value
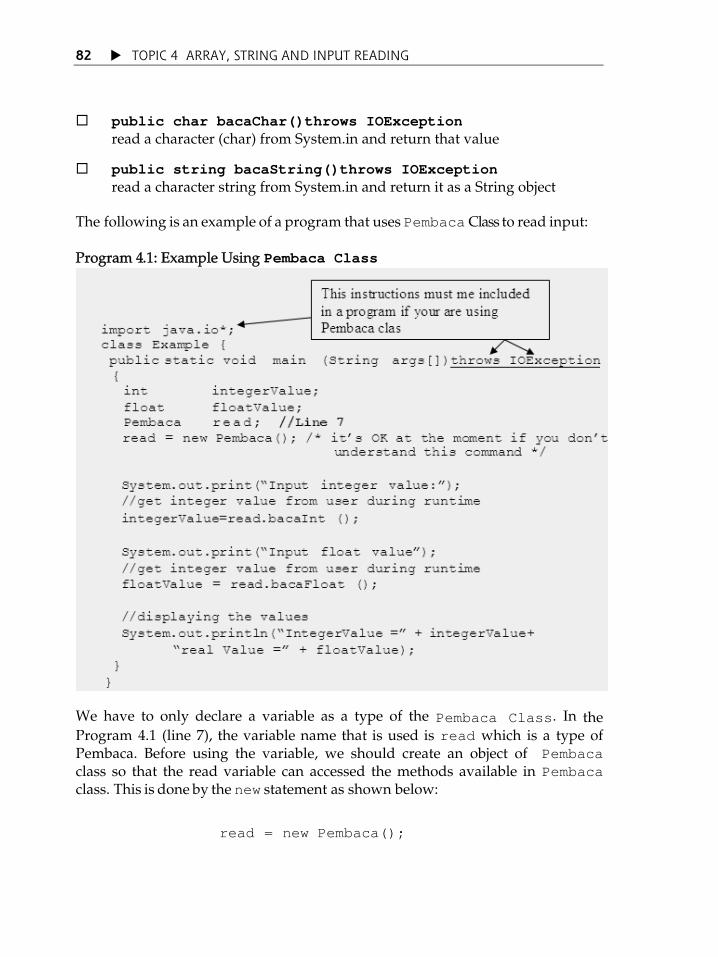
TOPIC 4 ARRAY, STRING AND INPUT READING 82
public char bacaChar()throws IOException read a character (char) from System.in and return that value
public string bacaString()throws IOException read a character string from System.in and return it as a String object
The following is an example of a program that uses Pembaca Class to read input: Program 4.1: Example Using Pembaca Class
We have to only declare a variable as a type of the Pembaca Class. In the Program 4.1 (line 7), the variable name that is used is read which is a type of Pembaca. Before using the variable, we should create an object of Pembaca class so that the read variable can accessed the methods available in Pembaca class. This is done by the new statement as shown below:
read = new Pembaca();

TOPIC 4 ARRAY, STRING AND INPUT READING
83
Now the memory space size for Pembaca Class is assigned and the variable read is now referred or shows to that memory space. To use the methods defined in that class, we can call the method in Table 4.1 by the following syntax:
read.method_name;
For example, to call bacaInt() method, the call has to be in the form read.bacaInt();. As this method returns the value int that is input by the user, thus the call should be in the form assignment as shown in line 14 that is integerValue = read.bacaInt();. Next, we can manipulate the value input whether to print or to use in arithmetic operations.
EXERCISE 4.3
Write a Java program that will accept three integer numbers from an user and display the maximun number among these three inputs.
OUTPUT FORMATTING 4.4 How can you format a numeric value or numeric number in Java? Example, how you can obtain 12.53 from 12.5323468787 or 1,267 from 1267. We can use the command from the library class DecimalFormat to format the numbers. As a example, the statement below will display the first three digits after the decimal point. DecimalFormat num = new DecimalFormat(„.000‰); The statement below will display three digits of a number as an output. If the number is less than three digits, then 0 will be appended at the front. If the digits of a number is greater than three, then all the digits in the number will be displayed. DecimalFormat num = new DecimalFormat(„000‰);

TOPIC 4 ARRAY, STRING AND INPUT READING 84
Try to execute the program below and see the effect:
import java.text.*; //compulsory if you are using DecimalFormat class Test { public static void main (String[ ] args){
int display=6; DecimalFormat num = new DecimalFormat(„000‰);
System.out.println(num.format(display)); System.out.println(num.format(18)); System.out.println(num.format(124)); System.out.println(num.format(23455));
} }
Now, replace the following statements to the statements that have been bolded in the above program. DecimalFormat num = new DecimalFormat(„0,000.000‰); Can you see any difference in the output upon executing the program?
A program is a sequence of instructions that a computer can execute to perform some tasks.
There are two basic blocks of programming: data and instructions.
To work with data, you need to understand variables and data types
To work with instructions, you need to understand control structures and method.
This topic has focused on array, String and how to capture input from user during program runtime.
Array is a group of memory locations that are connected and has the same name and data type.
String class in Java enable us to perform various manipulation on the String.
TOPIC 4 ARRAY, STRING AND INPUT READING
85
An interesting thing in writing the Java program is that the reading input process from the keyboard is not as simple as expected.
Class Pembaca have been prepared for you so that it could be used to develop interactive programs.
Array
String
Pembaca class
INTRODUCTION You may recall from Topic 1 that there are two types of Java programs: Application and Applet. Application can be further divided into two categories: Text-based application and Frame.
TTopic opic
55
Object Oriented Programming (Part 1)
LEARNING OUTCOMES
By the end of this topic, you should be able to:
1. Differentiate between object and class;
2. Describe the components that make up a class;
3. Describe about constructors and member methods and differentiate them; and
4. Write Java programs that use objects.

TOPIC 5 OBJECT ORIENTED PROGRAMMING (PART I)
87
Figure 5.1: Types of Java program
In Topic 2 Topic 4 we have focused on text-based application written in a structured manner. In this topic and the next two topics, we will learn of how we can write text-based application in an object oriented manner.
What are the advantages of object-oriented programs?
It allows reusability of codes
Programs are easy to maintain
Programs are more flexible and expandable
Before we proceed to write some programs using object-oriented approach it will be good if you understand the concepts of object and class which are the main "elements" in Object Oriented Programming (OOP).
OBJECTS AND CLASSES 5.1
All objects are unique. But at the same time they are also part of a class of objects (for example, a student is unique but he/she is also part of the class that is called „human beings‰). The class of human beings has a set of characteristics and behaviours in common which are different from other classes such as animal or vehicle classes. When we want to define an object in our program, we need to define its class first. An object is created from a class. If there is no class, then no object can be created.
TOPIC 5 OBJECT ORIENTED PROGRAMMING (PART I)
88
If we take the example of student class, each student has a set of variables (such as matric number, name, age, address, etc) and methods or behaviours (such as register course, withdraw course, etc). Each of the student has his/her own set of variables and can call the methods independently. Any call to methods will change itÊs variable. For example, a repeated call to the register course method will increase the value of the number of courses registered. Each object within a class has its own set of variables and methods. We can compare objects from the same class to individual student in a group. For example, imagine we have two objects, John and Brown that belong to the same class Student. John has his own set of variables: name, address, age, etc which the values are different with that of Brown. John also keep some of his variables such as age and address as private data (which are not accessible by other students) but he may let Brown to access other data such as name and matric number. Also, John may allow Brown to execute his method such as displayRegisteredSubjects() for him. And at the same time, John may not allow Brown to execute certain methods such as changeAddress() for him.
An object is a variable you name and define. Specifically, you define the object's state and behaviour using properties. Objects attempt to model real world items and how they operate or interact with other objects.
Source: http://java.sun.com/docs/books/tutorial/java/nutsandbolts/datatypes.html
A primitive type is predefined by the language and is named by a reserved keyword. In Java, there are eight primitive types: byte, short, int, long, float, double, boolean, char.
Ever wonder what the difference between a class and primitive data type such as int or double?
A class is a blueprint that defines the variables (or attributes) and the methods common to all objects of a certain kind. In the real world, we often have many objects of the same kind. For example, your car is just one of many cars in the world. In object-oriented context, we say that your car object is an instance of the class of objects known as cars. Cars have some state (current gear, current speed, four wheels) and behaviour (change gears, change speed) in common. However, each car's state is independent and can be different from that of other cars. When building them, manufacturers take advantage of the fact that cars share characteristics, manufacturing many cars from the same blueprint. It would be very inefficient to produce a new blueprint for every car manufactured. In object-
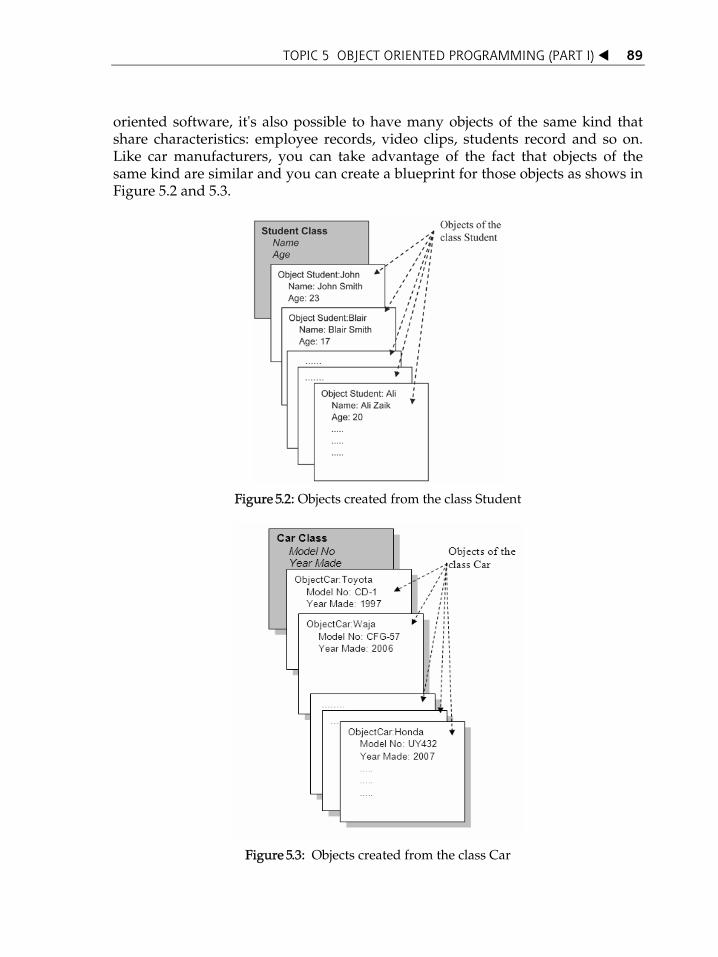
TOPIC 5 OBJECT ORIENTED PROGRAMMING (PART I)
89
oriented software, it's also possible to have many objects of the same kind that share characteristics: employee records, video clips, students record and so on. Like car manufacturers, you can take advantage of the fact that objects of the same kind are similar and you can create a blueprint for those objects as shows in Figure 5.2 and 5.3.
Figure 5.2: Objects created from the class Student
Figure 5.3: Objects created from the class Car

TOPIC 5 OBJECT ORIENTED PROGRAMMING (PART I)
90
5.1.1 Object Characteristics
As discussed before, object is an instance of class. Object is the most important thing in the object oriented paradigm. To be specific, we can define objects as a thing that has:
State Behaviour Identity
The table below gives explanation and examples of these object characteristics.
Table 5.1: Characteristics of an Object
Object Characteristic Explanation
State
Each object has properties that collectively represent the state. State can have dynamic values or permanent values. Examples of state that are dynamic are amount of money in an ATM machine, number of can drinks that are not yet sold, age, etc. Examples of permanent state which does not change are name, birth date, etc. In programming, state are represented by attributes.
Behaviour
Object behaviour is an object's response when the object receives a message. There are probably two types of actions that occurs which change the state of the object that receives the message or the state of the object that sends the message. Example: Consider the vending machine object. One of the messages that it probably receives is: release the can drink selected by the buyer. This message will be sent to the vending machine when the buyer pushes a button on the machine. The message received causes the object to show a behaviour, that is drink can selected by the buyer is released. Besides showing behaviour, an object can also send messages to other objects in response to a received message. There is a close relationship between behaviour and state. An objectÊs behaviour is influenced by the object's state. For example, assume that the number of cans in the machine is zero, that is all the cans in the machine are sold out. If the machine received the message to release a can drink, the object certainly cannot fulfill this request because of its state where the number of cans is zero. In programming, methods is used to define the behaviours that an object can perform.

TOPIC 5 OBJECT ORIENTED PROGRAMMING (PART I)
91
Identity
Identity is the property that distinguishes an object from all other objects. Each objects has their own unique identity. For example, a group of student objects could be identified with their unique identity such as StudentA, StudentB, studentC, etc. In programming, the name of the object will be used to recognise its identity.
DEFINING CLASSES
5.2
A class is the template for an object just like data type int. But there is a difference between class and primitive data type such as int or double. That is when you define a class, you need to tell Java the characteristics of the class you created but when you define an int data type, the compiler knows what an integer is and you are not required to specify anything.
Below is the structure of a class in Java:
class <class_name> { <attribute(s)> <operation(s)>
}
This declaration is divided into three components:
� <class_name> This component is the class name that we declare.
� <attribute(s)>
This component is the list of attributes for each object created from this class. In Java, the object attributes can be defined as variables and it is called as member variables or instance variables.
� <operation(s)>
This component is the list of behaviour for all objects created from this class. These behaviours are defined as member methods.
We define a class by using the class keyword followed by the class name. The class body is marked off by curly braces just like a program block. The following is Java class which does nothing.

TOPIC 5 OBJECT ORIENTED PROGRAMMING (PART I)
92
public class Student {
}
The above class Student is an empty class; it does nothing. However, you can compile the class and create an object from it. To make Student a useful class, it must have some attributes (that will represent its state) and methods (that will represent its behaviour). Assume the class Student will have the following states (we just limit to EIGHT states only): Student's Name
Student's matric number
Student's year birth
Student's age
Fees to be paid by the student
Number of courses registered by the student
Name of the subjects registered by the student
Registration status of the student
The above states are represented as attributes in a class. To declare attributes in a class, use the following syntax:
data_type attribute_name;
You need to type the appropriate date type followed by the name of the attribute as shown below:
Program 5.1:
public class Student {
private String name;
private int matricNo;
private int yearBirth;
private int age;
private double fees;
private int numberOfCoursesRegistered;
TOPIC 5 OBJECT ORIENTED PROGRAMMING (PART I)
93
private String[ ] subjectName;
private boolean registered;
}
Note: The keyword that is private written together with the attribute declaration in the above program is an access modifier and itÊs not compulsory. You will learn about access modifier in the next topic. The above class declares eight attributes (1 String type attribute, 4 integer type attributes, 1 double type attribute, 1 String type array and 1 boolean data type).
CREATING AN OBJECT FROM A DEFINED CLASS
5.3
When you create a class you are actually describing how objects of that class look and how they will behave. You donÊt actually get anything from this class until you create an object of that class with the keyword new. The following are syntax to create an object from a class: Class_Name Object_Name = new Constructor_Name( );
The following example shows how you can create an object from the Student class shown in Program 5.1 using the above syntax: Program 5.2 (a):
Line 1: class obj { Line 2: public static void main (String[ ] args ){ Line 3: Student John = new Student( ); // create the object Line 4: } Line 5: } The meaning for all the elements stated in Line 3 in the above program is given below:

TOPIC 5 OBJECT ORIENTED PROGRAMMING (PART I)
94
Take note that the Class_Name and the Constructor_Name are the same. Alternatively, you also can use the following syntax in order to create an object from a class: Class_Name Object_name;
Object_Name = new Constructor_Name( );
The following example shows how you can create an object from the Student class shown in Program 5.1 using the above syntax: Program 5.2 (b):
class obj { public static void main (String[ ] args ){
Student John ; //reference type John = new Student( ); // create the object
} } The state of the John object after execution of the Program 5.2(a) or Program 5.2(b) is diagrammatically shown below:
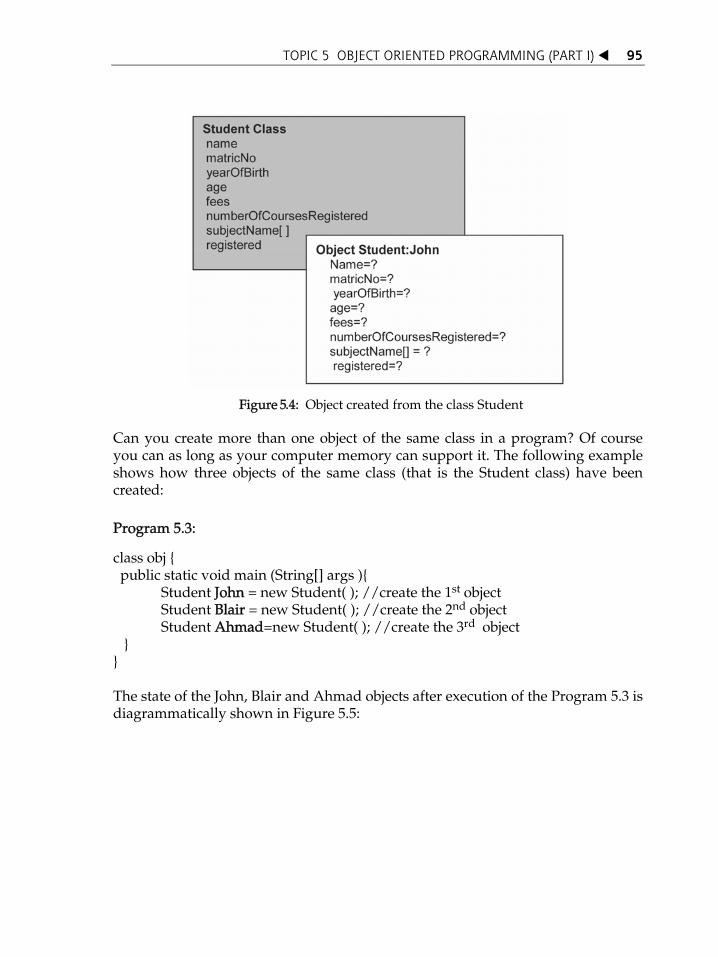
TOPIC 5 OBJECT ORIENTED PROGRAMMING (PART I)
95
Figure 5.4: Object created from the class Student Can you create more than one object of the same class in a program? Of course you can as long as your computer memory can support it. The following example shows how three objects of the same class (that is the Student class) have been created: Program 5.3:
class obj { public static void main (String[] args ){
Student John = new Student( ); //create the 1st object Student Blair = new Student( ); //create the 2nd object Student Ahmad=new Student( ); //create the 3rd object
} } The state of the John, Blair and Ahmad objects after execution of the Program 5.3 is diagrammatically shown in Figure 5.5:

TOPIC 5 OBJECT ORIENTED PROGRAMMING (PART I)
96
Figure 5.5: Three objects created from the class Student John, Blair and Ahmad are the objects from the Student class. The new operator creates an object as the program executes by obtaining enough memory to store an object of the type specified to the right of the new. The process of creating new objects is also known as creating an instance. The operator new is known as the dynamic memory allocation operator. After allocating enough memory, a method known as constructor is called to initialise the attributes. The next section explains of how an object is initialised using constructor.
TOPIC 5 OBJECT ORIENTED PROGRAMMING (PART I)
97
1. What are the three components of a class?
2. How does a class relates to an object?
EXERCISE 5.1
INITIALISING CLASS OBJECTS: CONSTRUCTORS
5.4
You could see in Figure 5.5 that the value of object attributes are not defined (i.e. the attributes are not given any value). In most cases, attributes in an object of a class need to be initialised. The best approach is by doing the initialisation when creating an object. This can be done using a special method called constructor. Constructor method is a special method that can be used when an object is created using the new keyword. This means that an object uses the constructor method once in a lifetime. Therefore, the object initialised code is more proper if we put it in together in the constructor method. It make sense that whenever an object is created, we have to do some initialisation to set the values of instance variables for each object. In Java, the class designer can guarantee initialisation of every object by providing a special method called constructor. When an object is created, its members can be initialised by a constructor method. The programmer provides the constructor and this constructor is invoked automatically each time an object of a class is created. A constructor can do anything that a normal method can do, but usually is used merely to initialise the attributes within the object. Since constructor is a kind of method, the format to write the constructor is almost similar to the ordinary method with some minor variations as shown below:
<modifier> <class_name> ([<parameter_list>]){
[<statements>]
}
The name of the constructor method must be the same as the class name. The <parameter_list> is same as for the method declaration (refer to the Topic 3). The valid modifiers (<modifier>) for constructors are public, private and protected which will be elaborated in the next topic. The constructor method cannot have return values. The void keyword should be avoided in the header of the method
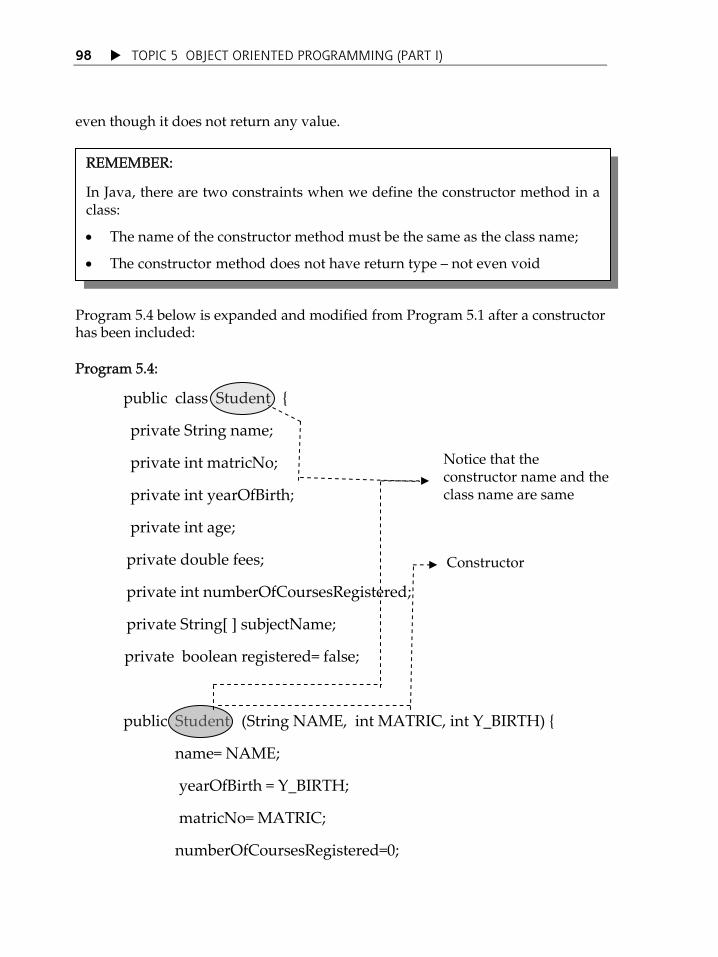
TOPIC 5 OBJECT ORIENTED PROGRAMMING (PART I)
98
even though it does not return any value.
REMEMBER:
In Java, there are two constraints when we define the constructor method in a class:
The name of the constructor method must be the same as the class name;
The constructor method does not have return type not even void
Program 5.4 below is expanded and modified from Program 5.1 after a constructor has been included: Program 5.4:
public class Student {
private String name;
private int matricNo;
private int yearOfBirth;
private int age;
private double fees;
private int numberOfCoursesRegistered;
private String[ ] subjectName;
private boolean registered= false;
public Student (String NAME, int MATRIC, int Y_BIRTH) {
Constructor
Notice that the constructor name and the class name are same
name= NAME;
yearOfBirth = Y_BIRTH;
matricNo= MATRIC;
numberOfCoursesRegistered=0;

TOPIC 5 OBJECT ORIENTED PROGRAMMING (PART I)
99
subjectName= new String[3]; /*create array to store the
name of three subjects */
} //constructor
} //class
You can recall that when new keyword is used to create a new object, the calling syntax is:
Class_Name Object_Name = new Constructor_Name( );
Notice that the constructor method is called during the creation of an object. The following program shows how an object of the class Student has been created: Program 5.5:
class obj {
public static void main (String[] args ){
Student John = new Student(„John Smith‰, 2345, 1969);
This statement is actually calling the constructor method available in the Student class
The effect of this new keyboard: Allocates necessary space to store the object John which is
the object of the class Student Invokes the constructor Returns reference to the appropriate object
}
}
It is not compulsory for us to assign initial values to all the attributes in the class. You could see that the attributes age and fees are not given any initial value in the constructor of the Program 5.4. Also, sometimes the initial also could be assigned during attribute declaration or in other operational methods. For example, the initial value for the attribute registered was assign during its declaration.

TOPIC 5 OBJECT ORIENTED PROGRAMMING (PART I)
100
Besides using constructors to initialise the attributes, it also can be used to perform tasks related to creation like performing initial calculations as shown in the following Program 5.6 which is revised from the Program 5.4:
REMEMBER:
Whether an attribute need to be given an initial value in a constructor method or to assign initial value for an attribute during its declaration are depends on the nature of the problem and of course your discretion as a programmer.
Program 5.6:
public class Student {
private String name;
private int matricNo;
private int yearOfBirth;
private int age;
private double fees;
private int numberOfCoursesRegistered;
private String[ ] subjectName;
private boolean registered= false;
public Student (String NAME, int MATRIC, int B_YEAR) {
name= NAME;
yearOfBirth= B_YEAR;
matricNo= MATRIC;
numberOfCoursesRegistered=0;
subjectName= new String[3];
calculateAge();
}
private void calculateAge(){
invokes
int currentYear=2008;
age= currentYear-yearOfBirth;

TOPIC 5 OBJECT ORIENTED PROGRAMMING (PART I)
101
}// calculateAge
} //
Now consider the following program: Program 5.7: Line 1: class obj { Line 2: public static void main (String[] args ){ Line 3: Student John = new Student(„John Smith‰, 2345, 1969); Line 4: Student Ahmad = new Student(„Ahmad Zaik‰, 1345, 1976); Line 5: } Line 6: } In Line 3, the constructor method Student(„John Smith‰, 2345, 1969) is called, then the constructor calls another method, calculateAge() that will calculate the age of the object John and the result will be assigned to the attribute age. In Line 4, the constructor method Student(„Ahmad Zaik‰, 1345, 1976) is called, then it calls another method, calculateAge() that will calculate the age of the object Ahmad and the result will be assigned to the attribute age. Take note that the variable declared in the calculateAge() method (of Program 5.6), that is currentYear is not an attribute but it is a local variable which only recognised in the body of the method calculateAge(). Also take note the calculateAge() method is an operational method (also known as member method). Unlike constructor method which initialise attributes, member method involves in performing more advance task such as calculate age, convert a value, etc. Member methods will be elaborated in the next section. When Program 5.7 is executed, the object John and Ahmad will have the following attribute values:

TOPIC 5 OBJECT ORIENTED PROGRAMMING (PART I)
102
Figure 5.6: Objects created from the same class having different attribute values Notice that the objects John and Ahmad are in the different states (i.e. attribute values are not same) even though they have been created from the same class.
Important Point to Note:
You may come across classes that do not have constructor method. Actually, it is not compulsory for you to include constructor method in a class. You must be careful when adopting this approach.
The compiler automatically provides a no-argument, default constructor for any class without constructor(s).
Nevertheless, it will be an error for calling a no-argument constructor when creating an object if a class already has constructor with argument unless you have already defined your own no-argument constructor in the class.
Source: http://java.sun.com/docs/books/tutorial/java/javaOO/constructors.html
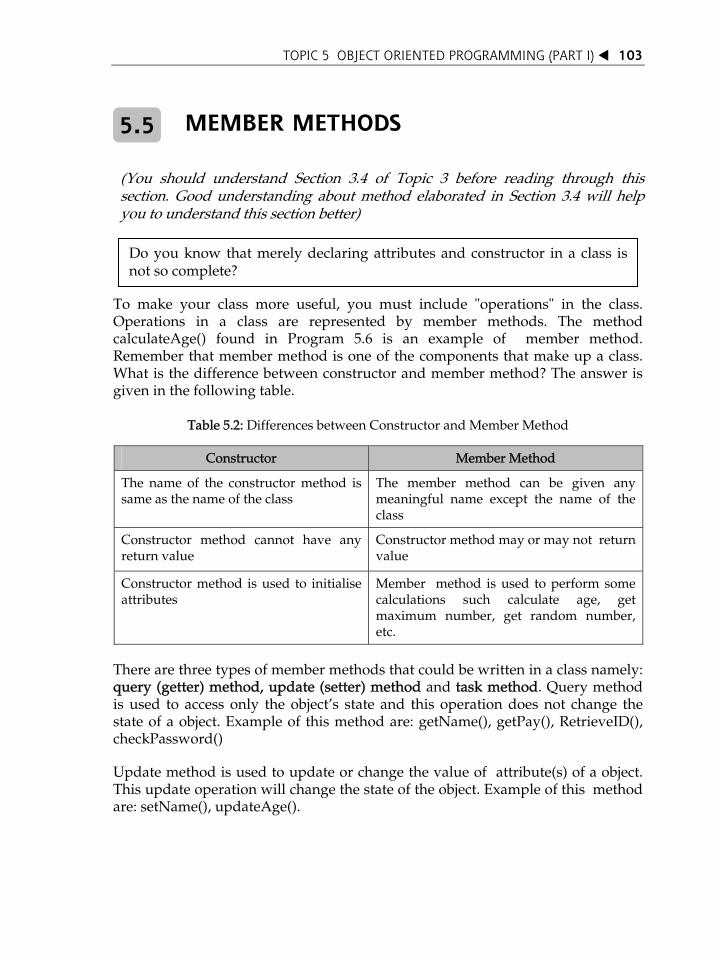
TOPIC 5 OBJECT ORIENTED PROGRAMMING (PART I)
103
MEMBER METHODS 5.5 (You should understand Section 3.4 of Topic 3 before reading through this section. Good understanding about method elaborated in Section 3.4 will help you to understand this section better)
Do you know that merely declaring attributes and constructor in a class is not so complete?
To make your class more useful, you must include "operations" in the class. Operations in a class are represented by member methods. The method calculateAge() found in Program 5.6 is an example of member method. Remember that member method is one of the components that make up a class. What is the difference between constructor and member method? The answer is given in the following table.
Table 5.2: Differences between Constructor and Member Method
Constructor Member Method
The name of the constructor method is same as the name of the class
The member method can be given any meaningful name except the name of the class
Constructor method cannot have any return value
Constructor method may or may not return value
Constructor method is used to initialise attributes
Member method is used to perform some calculations such calculate age, get maximum number, get random number, etc.
There are three types of member methods that could be written in a class namely: query (getter) method, update (setter) method and task method. Query method is used to access only the objectÊs state and this operation does not change the state of a object. Example of this method are: getName(), getPay(), RetrieveID(), checkPassword()
Update method is used to update or change the value of attribute(s) of a object. This update operation will change the state of the object. Example of this method are: setName(), updateAge().

TOPIC 5 OBJECT ORIENTED PROGRAMMING (PART I)
104
Finally, task methods is used to perform some specific task. This method may change the state of the object. Example of this method are: calculateAge(), convertToCelcius(). Unlike constructor method which is called during method creation, member method is called after an object has been created. To give you some example on member methods, we are going to expand Program 5.6 by adding the following operations:
Calculate fees - fees is calculated based on number of subjects registered
Capture the subject names to be registered by the students
Display the personal information of the student Note: Of course the list can be long but we just limit it to three operations only for the sake of the discussion. Each of the above operation can be represented by different member methods. After taking consideration the above operations, the new revised program with member methods is shown below: Program 5.8: public class Student { private String name; private int matricNo; private int yearOfBirth; private int age; private double fees; private int numberOfCoursesRegistered; private String[ ] subjectName; private boolean registered= false;
public Student (String NAME, int MATRIC, int B_YEAR) { name= NAME; yearOfBirth=B_YEAR;
matricNo= MATRIC; numberOfCoursesRegistered=0;
subjectName= new String[3]; calculateAge(); } private void calculateAge (){ int currentYear=2008; age= currentYear-yearOfBirth; }// calculateAge
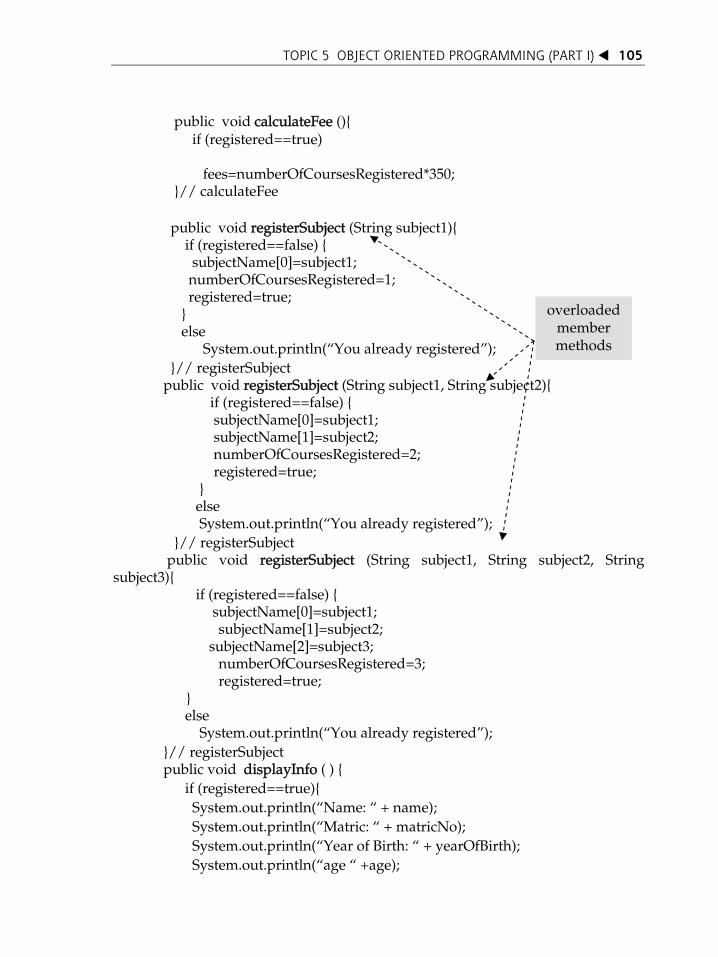
TOPIC 5 OBJECT ORIENTED PROGRAMMING (PART I)
105
public void calculateFee (){ if (registered==true) fees=numberOfCoursesRegistered*350; }// calculateFee public void registerSubject (String subject1){ if (registered==false) { subjectName[0]=subject1; numberOfCoursesRegistered=1; registered=true; } else System.out.println(„You already registered‰); }// registerSubject public void registerSubject (String subject1, String subject2){ if (registered==false) { subjectName[0]=subject1; subjectName[1]=subject2; numberOfCoursesRegistered=2; registered=true; } else System.out.println(„You already registered‰);
member methods
overloaded
}// registerSubject public void registerSubject (String subject1, String subject2, String subject3){ if (registered==false) { subjectName[0]=subject1;
subjectName[1]=subject2; subjectName[2]=subject3;
numberOfCoursesRegistered=3; registered=true; }
else System.out.println(„You already registered‰); }// registerSubject public void displayInfo ( ) { if (registered==true){ System.out.println(„Name: „ + name); System.out.println(„Matric: „ + matricNo); System.out.println(„Year of Birth: „ + yearOfBirth); System.out.println(„age „ +age);
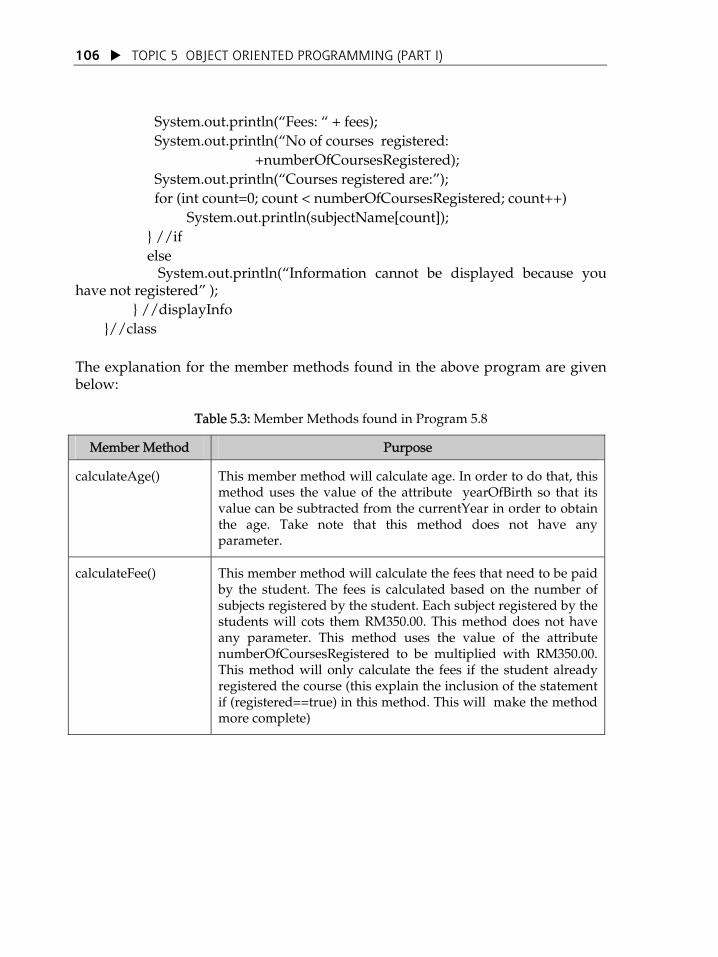
TOPIC 5 OBJECT ORIENTED PROGRAMMING (PART I)
106
System.out.println(„Fees: „ + fees); System.out.println(„No of courses registered: +numberOfCoursesRegistered); System.out.println(„Courses registered are:‰); for (int count=0; count < numberOfCoursesRegistered; count++) System.out.println(subjectName[count]); } //if else System.out.println(„Information cannot be displayed because you have not registered‰ ); } //displayInfo }//class The explanation for the member methods found in the above program are given below:
Table 5.3: Member Methods found in Program 5.8
Member Method Purpose
calculateAge() This member method will calculate age. In order to do that, this method uses the value of the attribute yearOfBirth so that its value can be subtracted from the currentYear in order to obtain the age. Take note that this method does not have any parameter.
calculateFee() This member method will calculate the fees that need to be paid by the student. The fees is calculated based on the number of subjects registered by the student. Each subject registered by the students will cots them RM350.00. This method does not have any parameter. This method uses the value of the attribute numberOfCoursesRegistered to be multiplied with RM350.00. This method will only calculate the fees if the student already registered the course (this explain the inclusion of the statement if (registered==true) in this method. This will make the method more complete)

TOPIC 5 OBJECT ORIENTED PROGRAMMING (PART I)
107
(Continued) Table 5.3: Member Methods found in Program 5.8
registerSubject(String subject1)
This method is used only to register one subject. It has one parameter which holds the name of the subject to be registered. The name of the subject will be assigned to the array subjectName[0] and at the same time the attribute value of numberOfCoursesRegistered will be assigned 1 (to reflect number of subject registered) and the attribute registered will be set to true.
This method will only allow the student to register subject if they have not done so (this explain the inclusion of the statement if (registered==false) in this method. This will make the method more complete).
registerSubject
(String subject1, String subject2)
This method is used to register two subjects. It has two parameters which holds the name of the subjects to be registered. The name of the subjects will be assigned to the array subjectName[0] and subjectName[1] respectively and at the same time the attribute value of numberOfCoursesRegistered will be assigned 2 (to reflect number of subjects registered) and the attribute registered will be set to true.
This method will only allow the student to register subject if they have not done so (this explain the inclusion of the statement if (registered==false) in this method. This will make the method more complete).
registerSubject
(String subject1, String subject2, String subject3)
This method is used to register three subjects. It has three parameters which holds the name of the subjects to be registered. The name of the subjects will be assigned to the array subjectName[0], subjectName[1] & subjectName[2] respectively and at the same time the attribute value of numberOfCoursesRegistered will be assigned 3 (to reflect number of subjects registered) and the attribute registered will be set to true.
This method will only allow the student to register subject if they have not done so (this explain the inclusion of the statement if (registered==false) in this method. This will make the method more complete).
displayInfo () This member method will display all the information of the student. No information will be displayed if the student has not registered any subject.

TOPIC 5 OBJECT ORIENTED PROGRAMMING (PART I)
108
Members methods also can be overloaded and overloaded methods must have same method name but with different signatures as you could see in the methods registerSubject() of the Program 5.8 (refer to section 3.4 in topic 3 for explanation on method overloading).
5.5.1 Calling Member Methods
In Program 5.8, we have included few member methods that represent few operations. How this method could be called to perform their designated task? Before a member method could be called, the object of the class must be created first. Then, the appropriate method could be called using the following syntax: <object_name>.member_method_name;
Remember that member methods are called after the object has been created. Here is how you can call member method calculateFee() available in the Student class of the Program 5.8: Program 5.9 (a):
class obj {
public static void main (String[ ] args ){
Student John = new Student(„John Smith‰, 2345, 1969);
John.registerSubject(„Java Programming‰);
The object John is calling the appropriate methods
John.calculateFee( );
}
}
Note that the object John has not invoked all the member methods in the Student class. It just invoke two member methods in the Student class, namely registerSubject() and calculateFee(). After executing the Program 5.9(a), the object John will be in the following state:

TOPIC 5 OBJECT ORIENTED PROGRAMMING (PART I)
109
Figure 5.7: The state of object John after execution of Program 5.9(a) Program 5.1 Program 5.9 is not interactive (that is the inputs are not key in by the user during the program run-time). The Program 5.9(b) below shows of how Program 5.9(a) has been amended to make it interactive:

TOPIC 5 OBJECT ORIENTED PROGRAMMING (PART I)
110
Program 5.9 (b):
import java.io.*;
class obj {
public static void main (String[ ] args ) throws IOException {
Pembaca read = new Pembaca();
System.out.println(“Enter name:”);
String name= read.bacaString ();
System.out.println(“Enter matric number:”);
int matric= read.bacaInt();
System.out.println(“Enter year birth:”);
int year= read.bacaInt();
System.out.println(“Enter subject name:”);
String subject= read.bacaString ();
Student John = new Student(name, matric, year);
John.registerSubject(subject);
John.calculateFee( );
}
}
The following statements are wrong because the object is trying to call the member method before its creation.
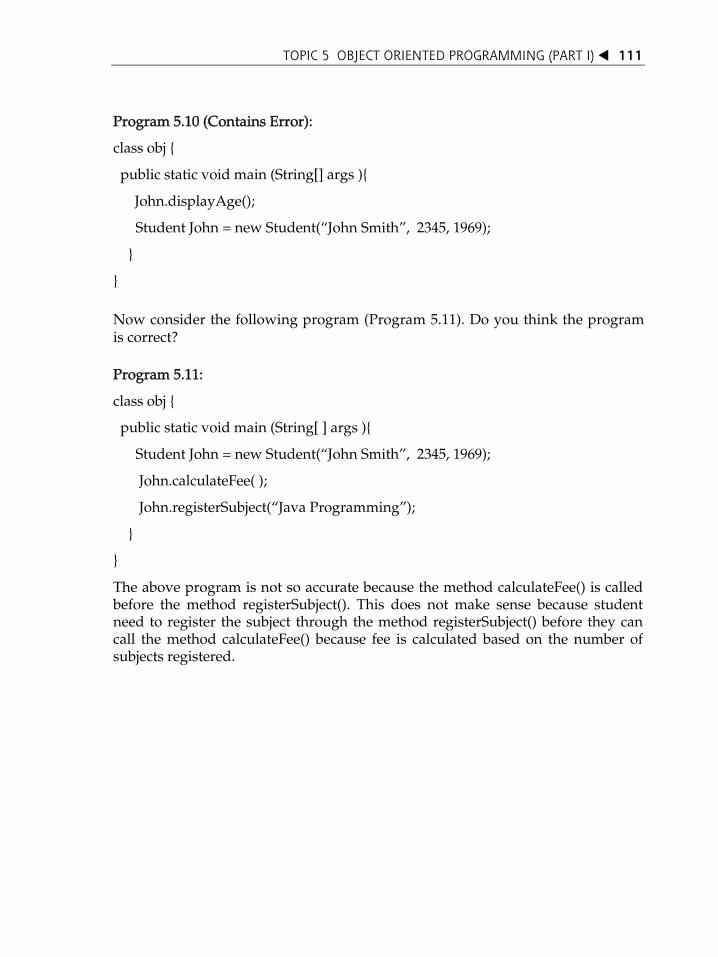
TOPIC 5 OBJECT ORIENTED PROGRAMMING (PART I)
111
Program 5.10 (Contains Error):
class obj {
public static void main (String[] args ){
John.displayAge();
Student John = new Student(„John Smith‰, 2345, 1969);
}
}
Now consider the following program (Program 5.11). Do you think the program is correct? Program 5.11:
class obj {
public static void main (String[ ] args ){
Student John = new Student(„John Smith‰, 2345, 1969);
John.calculateFee( );
John.registerSubject(„Java Programming‰);
}
}
The above program is not so accurate because the method calculateFee() is called before the method registerSubject(). This does not make sense because student need to register the subject through the method registerSubject() before they can call the method calculateFee() because fee is calculated based on the number of subjects registered.

TOPIC 5 OBJECT ORIENTED PROGRAMMING (PART I)
112
REMEMBER:
The sequence of methods calling by an object are very important. Objects need to call the methods according to the proper order.
For example, we cannot call method registerSubject() if an object Student has not done the registerSemester. To make a program more robust and tolerance for errors, it will be good idea to include codes in the member methods just to detect whether the method has been called prematurely. The inclusion of the statement „if (registered==true)‰ in the method calculateFee() in Program 5.8 is an example of this.
An object cannot call method that is not available in its class. The following statements in the Program 5.12 are wrong because the object John (which is an object of the class Student) is trying to call the method registerSemester() which does not exist in the class Student. Program 5.12 (Contains Error):
class obj {
public static void main (String[] args ){
Student John = new Student(„John Smith‰, 2345, 1969);
John.registerSemester( ); /* Error: method registerSemester() does not exist
in the class Student */
}
}
5.5.2 Overloaded SMember Methods
You have learned in Topic 3 that methods can be overloaded. It means that you can have more than one method with the same name but with different parameter list or method signature. Member methods in a class also can be overloaded. You can see in Program 5.8 that there are three methods of the name registerSubject() which are differentiated with their parameter lists. Which method will be invoked will depend on the number of arguments provided during the method invocation.
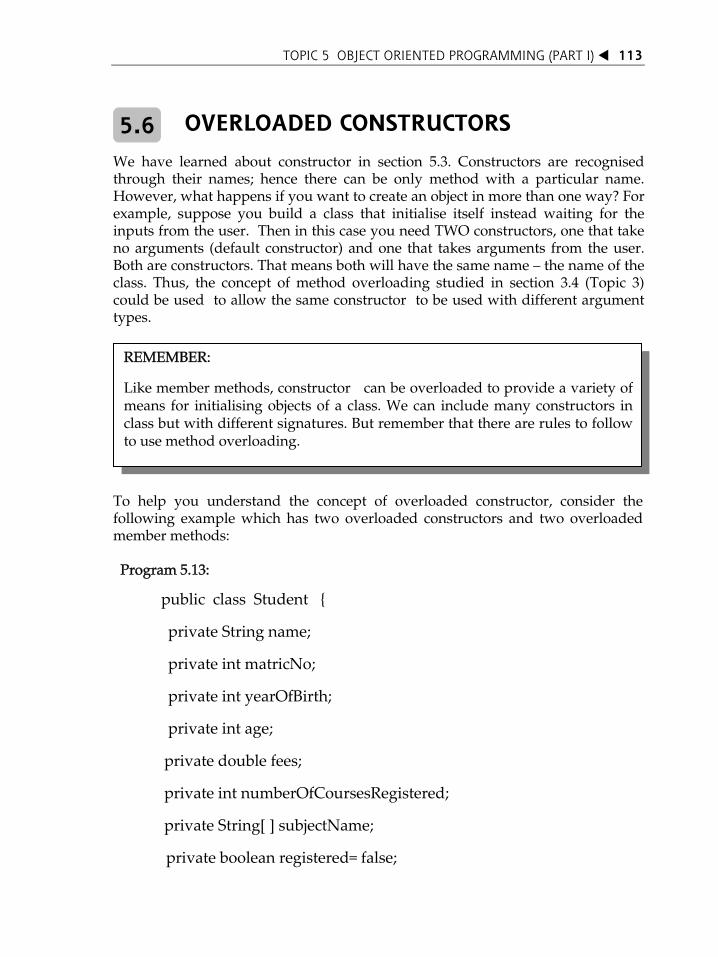
TOPIC 5 OBJECT ORIENTED PROGRAMMING (PART I)
113
OVERLOADED CONSTRUCTORS 5.6
We have learned about constructor in section 5.3. Constructors are recognised through their names; hence there can be only method with a particular name. However, what happens if you want to create an object in more than one way? For example, suppose you build a class that initialise itself instead waiting for the inputs from the user. Then in this case you need TWO constructors, one that take no arguments (default constructor) and one that takes arguments from the user. Both are constructors. That means both will have the same name the name of the class. Thus, the concept of method overloading studied in section 3.4 (Topic 3) could be used to allow the same constructor to be used with different argument types.
REMEMBER:
Like member methods, constructor can be overloaded to provide a variety of means for initialising objects of a class. We can include many constructors in class but with different signatures. But remember that there are rules to follow to use method overloading.
To help you understand the concept of overloaded constructor, consider the following example which has two overloaded constructors and two overloaded member methods: Program 5.13:
public class Student {
private String name;
private int matricNo;
private int yearOfBirth;
private int age;
private double fees;
private int numberOfCoursesRegistered;
private String[ ] subjectName;
private boolean registered= false;

TOPIC 5 OBJECT ORIENTED PROGRAMMING (PART I)
114
public Student (String NAME, int MATRIC, int B_YEAR) {
name= NAME;
yearOfBirth=B_YEAR;
matricNo= MATRIC;
numberOfCoursesRegistered=0;
//create array to store the name of the three subjects
subjectName= new String[3];
calculateAge();
Overloaded constructors
} //constructor
public Student (String NAME, int MATRIC) {
name= NAME;
matricNo= MATRIC;
numberOfCoursesRegistered=0;
//create array to store the name of the three subjects
subjectName= new String[3];
} //constructor

TOPIC 5 OBJECT ORIENTED PROGRAMMING (PART I)
115
private void calculateAge (){
int currentYear=2008;
age= currentYear‐yearOfBirth;
}// calculateAge
public void calculateAge (int YEAR_BIRTH){
Overloaded member methods
int currentYear=2008;
yearOfBirth=YEAR_BIRTH;
age= currentYear‐YEAR_BIRTH;
}// calculateAge
} //class
Note: For the sake of the discussion, other member methods have been omitted.
Program 5.13 above has two overloaded constructors with different parameters list: Constructor 1: public Student (String NAME, int MATRIC, int B_YEAR) Constructor 2: public Student (String NAME, int MATRIC) The difference between both constructors given in Program 5.13 are elaborated below:

TOPIC 5 OBJECT ORIENTED PROGRAMMING (PART I)
116
Table 5.4: The Difference between First and Second Contructors
Constructor Explanation
1st constructor in Program 5.13: public Student (String NAME, int MATRIC, int B_YEAR)
This constructor assigns the initial value for the attributes name, matricNo, yearOfBirth, age and numberOfCoursesRegistered. In order to set the value of age, this constructor calls the calculateAge() method available in the class to calculate the age. The constructor also create array to store the name of a three subjects. Note that the values for the attributes name, yearOfBirth and matricNo are depends on the value of the appropriate parameters in its method header while the value of the attribute numberOfCoursesRegistered is fixed at 0.
2nd constructor in Program 5.13: public Student (String NAME, int MATRIC)
This constructor assigns the initial value for the attributes name, matricNo and numberOfCoursesRegistered. Note that the values for the attributes name and matricNo are depends on the value of the appropriate parameters in the method header while the value of numberOfCoursesRegistered is fixed to 0. Besides that, the constructor also create array to store the names of the three subjects.
The difference between two overloaded member methods shown in Program 5.13 are elaborated below:
Table 5.5: The Difference between Two Overloaded Member Methods.
Constructor Explanation
calculateAge() This is a private member method that will calculate age. In order to do that, this method uses the value of the attribute year Of Birth so that its value can be subtracted from the current Year in order to obtain the age. Take note that this method does not have any parameter.
calculateAge(int B_YEAR)
This is a public member method that will calculate age. Before doing that, this method will assign the value B_YEAR from the parameter to the attribute year Of Birth. Then, the value of year Of Birth will be subtracted from the current Year in order to obtain the age.

TOPIC 5 OBJECT ORIENTED PROGRAMMING (PART I)
117
Two constructors are defined for the class Student in Program 5.13. However, only one will be invoked during object creation depending on the number of arguments given as shown in the next example:
Program 5.14:
Line 1 class obj1 {
Line 2 public static void main (String[ ] args){
Line 3 Student John = new Student(„John Smith‰, 2345, 1969);
Line 4 Student Blair = new Student(„Blair Thomson‰, 117);
Line 5 Blair.calculateAge(1985);
Line 6 }
Line 7 }
In Line 3, you create an Student object using three arguments. This matched to the first constructor in class Student. Thus, the first constructor will be invoked. In this case, name is set to „John Smith‰, matricNo is set to 2345 while age is set to 39 while yearOfBirth is set to 1969. In Line 4, you create an Student object using two arguments. This matched to the second constructor in class Student. Thus, the second constructor will be invoked. In this case, name is set to „Blair Thomson‰, and matricNo is set to 117. Notice that the value of attribute age is undefined when creating object using this constructor. Eventually, When Line 5 is executed, the attributes age and yearOfBirth for the object Blair will have the value 23 and 1985 respectively. In Line 3 (refer Figure 5.8) and Line 4 (Figure 5.9), the Java compiler can differentiate which overloaded method that has been called even though both having the same name by looking at respective arguments provided when calling the constructor. The following three figures visually shows you the effect to the John object state upon executing Line 3 Line 5 (refer Figure 5.10) in the Program 5.14:

TOPIC 5 OBJECT ORIENTED PROGRAMMING (PART I)
118
Figure 5.8: Effects when Line 3 is executed
Figure 5.9: Effects when Line 4 is executed

TOPIC 5 OBJECT ORIENTED PROGRAMMING (PART I)
119
Figure 5.10: Effects when Line 5 is executed Like member method, we cannot call a constructor that does not exist in class. For example, Line 3 in the following program is an error because it is calling constructor method with one argument. You may recall that there is no constructor with one parameter in the class Student. Program 5.15 (Contains Error):
Line 1 class obj1 {
Line 2 public static void main (String[ ] args){
Line 3 Student John = new Student(„John Smith‰); //ERROR
Line 4 }
Line 5 }
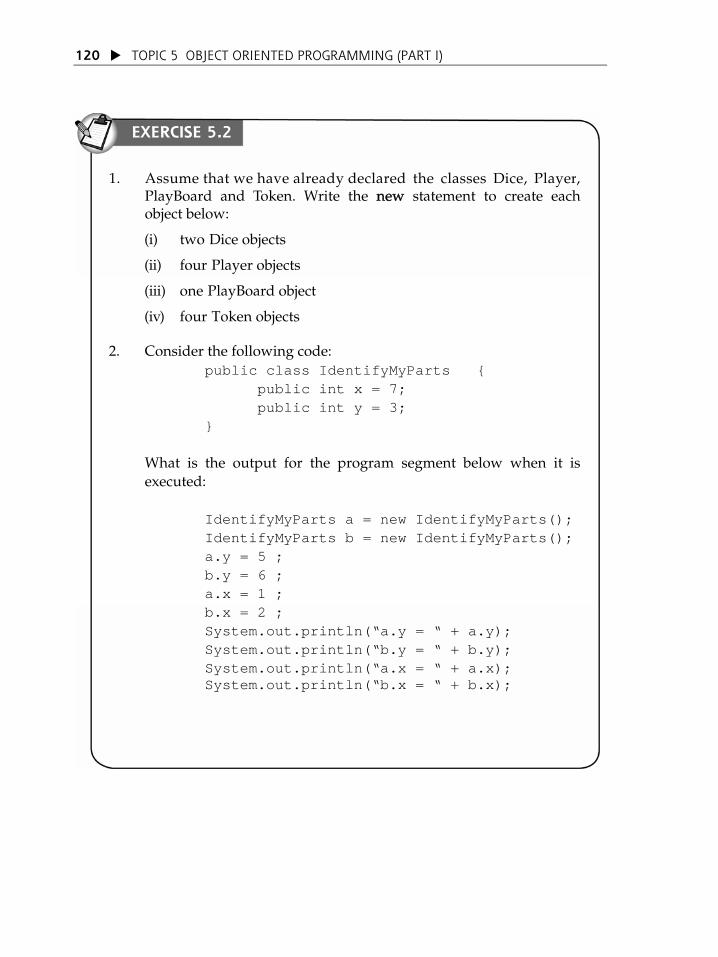
TOPIC 5 OBJECT ORIENTED PROGRAMMING (PART I)
120
1. Assume that we have already declared the classes Dice, Player, PlayBoard and Token. Write the new statement to create each object below:
(i) two Dice objects
(ii) four Player objects
(iii) one PlayBoard object
(iv) four Token objects 2. Consider the following code:
public class IdentifyMyParts { public int x = 7; public int y = 3; }
What is the output for the program segment below when it is executed:
IdentifyMyParts a = new IdentifyMyParts(); IdentifyMyParts b = new IdentifyMyParts(); a.y = 5 ; b.y = 6 ; a.x = 1 ; b.x = 2 ; System.out.println(“a.y = “ + a.y); System.out.println(“b.y = “ + b.y); System.out.println(“a.x = “ + a.x);
System.out.println(“b.x = “ + b.x);
EXERCISE 5.2

TOPIC 5 OBJECT ORIENTED PROGRAMMING (PART I)
121
3. Consider the class Square in the following declaration structure:
class Square { private double width; private double height;
public void setWidthHeight(int WidthValue, int HeightValue){
… } public double perimeter( ){ … } public double area( ){ … } }
Write the body of each method in the class. Use the following class to test the above class.
class Application { public static void main(String[]args) {
Square s4 = new Square( ); s4.setWidthHeight(9, 5);
System.out.println(“Perimeter”+s4.perimeter());
System.out.println(“Area : “+s4.area());
} }

TOPIC 5 OBJECT ORIENTED PROGRAMMING (PART I)
122
4. (a) Write a complete class definition with the name Account to model a bankÊs account. The information of the class is given below:
Class name: Account
Attributes: private int id
private double balance=0
Constructor: public Account (int Id, double balance) Purpose: This method will be invoked during the creation of this class object. This method contains two parameters - Id (type of int) and balance (type of double). This parameters will be used to assign values for attributes id and balance.
Member method:
public int getId() Purpose: To return the value of id
public double getBalance() Purpose: To return the value of balance
public void setId( int Id) Purpose: To set the new value to id
public void setBalance(double balance) Purpose: To assign the new value to balance
Member method:
public int getId() Purpose: To return the value of id
public double getBalance() Purpose: To return the value of balance
public void setId( int Id) Purpose: To set the new value to id
public void setBalance(double balance) Purpose: To assign the new value to balance
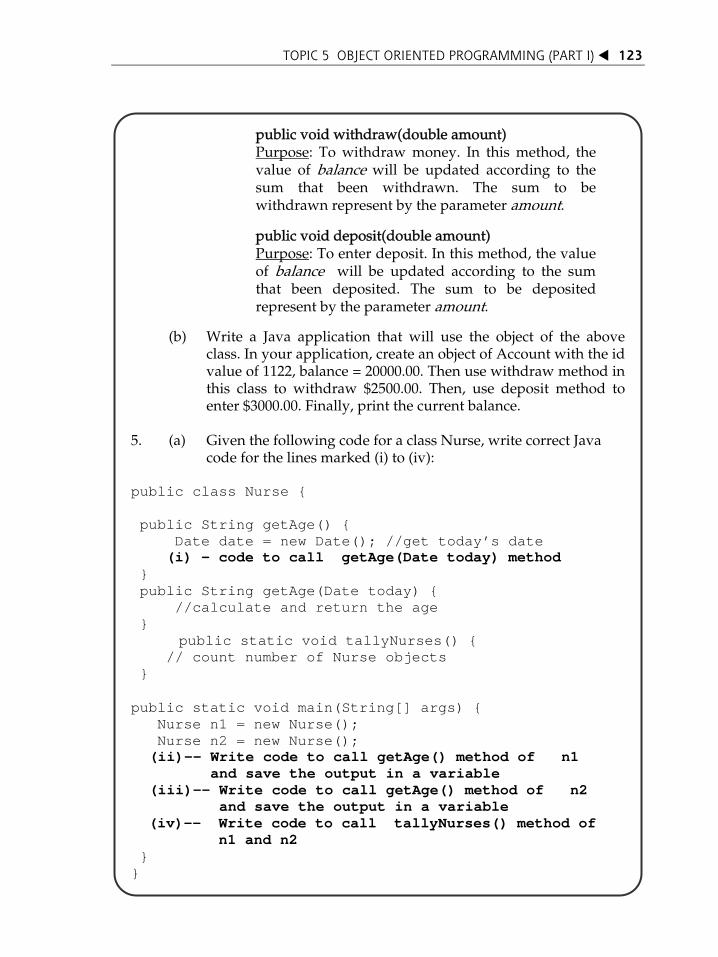
TOPIC 5 OBJECT ORIENTED PROGRAMMING (PART I)
123
public void withdraw(double amount)Purpose: To withdraw money. In this method, the value of balance will be updated according to the sum that been withdrawn. The sum to be withdrawn represent by the parameter amount.
public void deposit(double amount) Purpose: To enter deposit. In this method, the value of balance will be updated according to the sum that been deposited. The sum to be deposited represent by the parameter amount.
(b) Write a Java application that will use the object of the above
class. In your application, create an object of Account with the id value of 1122, balance = 20000.00. Then use withdraw method in this class to withdraw $2500.00. Then, use deposit method to enter $3000.00. Finally, print the current balance.
5. (a) Given the following code for a class Nurse, write correct Java
code for the lines marked (i) to (iv): public class Nurse { public String getAge() { Date date = new Date(); //get today’s date (i) – code to call getAge(Date today) method } public String getAge(Date today) { //calculate and return the age } public static void tallyNurses() { // count number of Nurse objects } public static void main(String[] args) { Nurse n1 = new Nurse(); Nurse n2 = new Nurse();
(ii)-- Write code to call getAge() method of n1 and save the output in a variable (iii)-- Write code to call getAge() method of n2 and save the output in a variable
(iv)—- Write code to call tallyNurses() method of n1 and n2 } }

TOPIC 5 OBJECT ORIENTED PROGRAMMING (PART I)
124
6. (a) Write a complete class definition that will change a value in
Celsius to a value in Fahrenheit. The specification of the class are as follows:
Class name: ChangeCelcius
Attribute: None
Constructor: None
Member
Method:
public double Calculate (double cels) Purpose: This method will change the Celsius to Fahrenheit. This method has one parameter type of double which is the value of Celsius. This method returns the value of Fahrenheit (type of double).
The formula to change Celsius to Fahrenheit is as follows:
Fahrenheit = (9.0/5)*Celcius+32
(b) By using the class object above, write a Java application that use for command to read 30 Celcius values and change it to Fahrenheit value. The output that should be produced is shown below. You may use Pembaca class to read the input.
Input/Output Example:
Enter Celcius: 40.0
Fahrenheit is: 104.00
...
⁄
Enter Celcius: 39.0
Fahrenheit is: 102.20

TOPIC 5 OBJECT ORIENTED PROGRAMMING (PART I)
125
In Topic 2 Topic 4 we have focused on text-based application written in a
structured manner.
In this topic we have learned of how we can Java programs in the object oriented manner.
A class is a blueprint that defines the variables (or attributes) and the methods common to all objects of a certain kind.
Components that make up a class are attributes, constructors and member methods
Constructors used to initialise the attributes while member methods are used to perform operations on the attributes while attributes represent the state of the object
There are some differences between constructor and member method in the aspects of the syntax and the nature of their tasks
Object is an instance of class.
Object is the most important thing in the object oriented paradigm.
To be specific, we can define objects as a thing that has state behaviour and identity
The keyword new is used to create an object from a class.
We can have more than one method or constructor with the same name differentiated by their signature. This concept is known as method overloading.
access modifier
attribute
class
constructor
member method
method overloading
new
object

INTRODUCTION In the previous topic you have learned on how to declare a class and create objects from a class. In object oriented programming, class and objects play an important role. Manipulating objects effectively is another important area that should be emphasized by programmers. This will enable them to write effective and efficient code. How objects could be handled effectively in a program? To answer this question, you should be well versed on the following concepts of object oriented programming (OOP):
Access modifiers of public and private
static class members
Using this keyword
TTooppiicc
66 Object
Oriented Programming (Part II)
6. Write Java program that will have all the above elements; and
7. Write programs using array of objects.
4. Explain of how objects could be passsed to methods;
5. Describe how objects could be a member of other class;
LEARNING OUTCOMES
By the end of this topic, you should be able to:
1. Explain the meaning of access modifiers of public and private;
2. Explain the meaning of static class members;
3. Explain the meaning of this keyword;
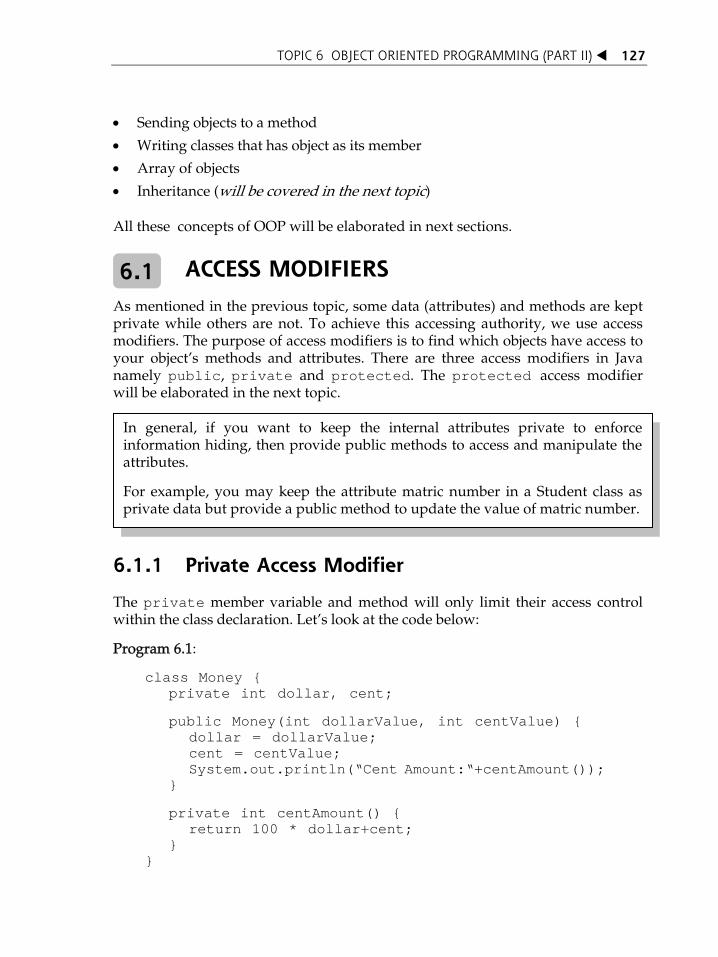
TOPIC 6 OBJECT ORIENTED PROGRAMMING (PART II)
127
Sending objects to a method
Writing classes that has object as its member
Array of objects
Inheritance (will be covered in the next topic) All these concepts of OOP will be elaborated in next sections.
ACCESS MODIFIERS 6.1 As mentioned in the previous topic, some data (attributes) and methods are kept private while others are not. To achieve this accessing authority, we use access modifiers. The purpose of access modifiers is to find which objects have access to your objectÊs methods and attributes. There are three access modifiers in Java namely public, private and protected. The protected access modifier will be elaborated in the next topic.
In general, if you want to keep the internal attributes private to enforce information hiding, then provide public methods to access and manipulate the attributes. For example, you may keep the attribute matric number in a Student class as private data but provide a public method to update the value of matric number.
6.1.1 Private Access Modifier
The private member variable and method will only limit their access control within the class declaration. LetÊs look at the code below: Program 6.1:
class Money { private int dollar, cent;
public Money(int dollarValue, int centValue) {
dollar = dollarValue; cent = centValue; System.out.println(“Cent Amount:“+centAmount());
}
private int centAmount() { return 100 * dollar+cent;
} }

TOPIC 6 OBJECT ORIENTED PROGRAMMING (PART II)
128
Program 6.2 (Contains Error):
class Application { public static void main (String[] args) { Money money = new Money(5,20);
/* The underlined statements below contain error */
System.out.println(“Money Amount:RM “+ money.dollar+ “.” + money.cent ); System.out.println(“cent:“+money.centAmount();
} }
In the class Money declaration, the member variable dollar and cent have been declared as private. Therefore, the attribute value can only be accessed by the methods declared in class Money. This is the explanation for the error message in statement money.dollar and money.cent in the main() method in the class Application. Other then member variable private, the class Money also declares a private member method which is centAmount( ). Because of the access control is declared as private, it can only be used within the class Money. ThatÊs why we get the error message in the last statement from the main( ) method in class Application. The centAmount ( ) is called by object money in Application class which is „located‰ outside of the class Money. The statement below is taken from the constructor method from the class Money. System.out.println(„Cent Amount:„+centAmount());
The above statement in constructor method calls another private method centAmount also located in the same class. The above statement is valid because class members are accessible by all methods of that class and can be referenced by name irrespective whether they have public or private access modifiers. Object attributes are encapsulated so that the object „secret‰ cannot be access directly by client. Based on this encapsulation principle, we are encouraged to declare the attribute as private. Methods are supposed to be declared as private if we know if it is only to be known within its own class. In other words, the method that we declare as private is the method that is used within the class and it is not known outside of this class.
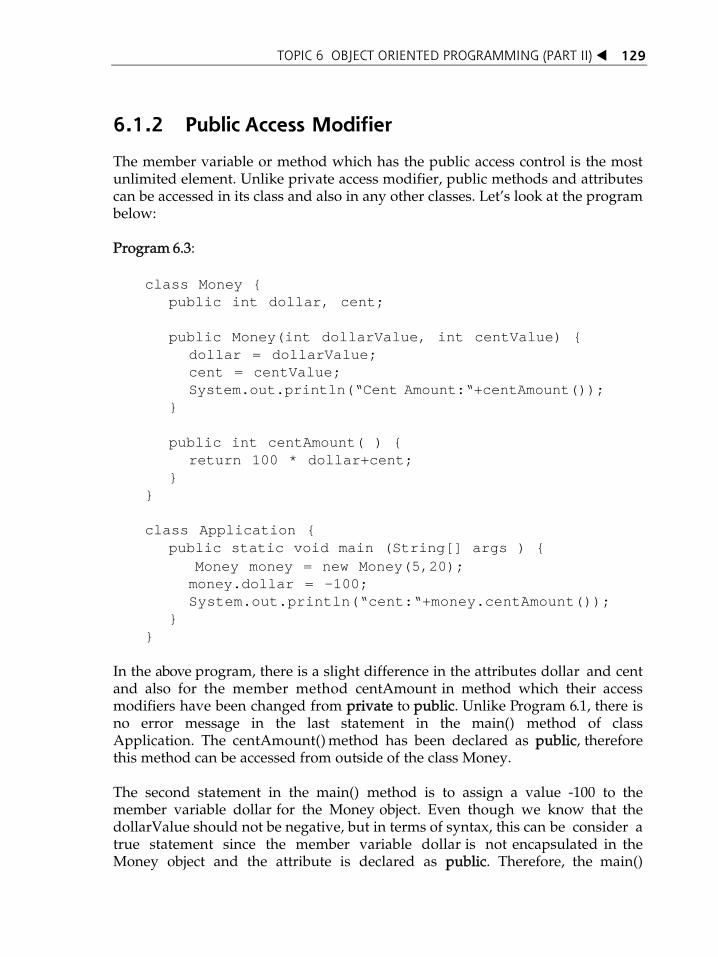
TOPIC 6 OBJECT ORIENTED PROGRAMMING (PART II)
129
6.1.2 Public Access Modifier
The member variable or method which has the public access control is the most unlimited element. Unlike private access modifier, public methods and attributes can be accessed in its class and also in any other classes. LetÊs look at the program below: Program 6.3:
class Money { public int dollar, cent;
public Money(int dollarValue, int centValue) {
dollar = dollarValue; cent = centValue; System.out.println(“Cent Amount:“+centAmount());
}
public int centAmount( ) { return 100 * dollar+cent;
} }
class Application {
public static void main (String[] args ) { Money money = new Money(5,20);
money.dollar = -100; System.out.println(“cent:“+money.centAmount());
} }
In the above program, there is a slight difference in the attributes dollar and cent and also for the member method centAmount in method which their access modifiers have been changed from private to public. Unlike Program 6.1, there is no error message in the last statement in the main() method of class Application. The centAmount() method has been declared as public, therefore this method can be accessed from outside of the class Money. The second statement in the main() method is to assign a value -100 to the member variable dollar for the Money object. Even though we know that the dollarValue should not be negative, but in terms of syntax, this can be consider a true statement since the member variable dollar is not encapsulated in the Money object and the attribute is declared as public. Therefore, the main()
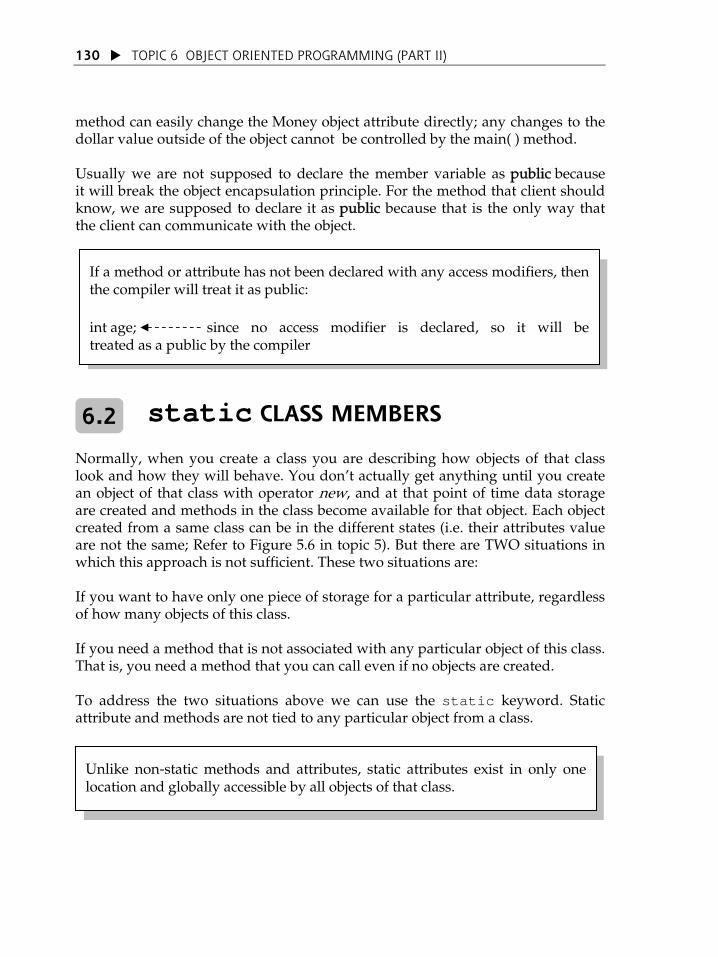
TOPIC 6 OBJECT ORIENTED PROGRAMMING (PART II)
130
method can easily change the Money object attribute directly; any changes to the dollar value outside of the object cannot be controlled by the main( ) method. Usually we are not supposed to declare the member variable as public because it will break the object encapsulation principle. For the method that client should know, we are supposed to declare it as public because that is the only way that the client can communicate with the object.
If a method or attribute has not been declared with any access modifiers, then the compiler will treat it as public:
int age; since no access modifier is declared, so it will be treated as a public by the compiler
static CLASS MEMBERS 6.2
Normally, when you create a class you are describing how objects of that class look and how they will behave. You donÊt actually get anything until you create an object of that class with operator new, and at that point of time data storage are created and methods in the class become available for that object. Each object created from a same class can be in the different states (i.e. their attributes value are not the same; Refer to Figure 5.6 in topic 5). But there are TWO situations in which this approach is not sufficient. These two situations are: If you want to have only one piece of storage for a particular attribute, regardless of how many objects of this class. If you need a method that is not associated with any particular object of this class. That is, you need a method that you can call even if no objects are created. To address the two situations above we can use the static keyword. Static attribute and methods are not tied to any particular object from a class.
Unlike non-static methods and attributes, static attributes exist in only one location and globally accessible by all objects of that class.

TOPIC 6 OBJECT ORIENTED PROGRAMMING (PART II)
131
A static attribute is declared in the same way as an non-static attribute but has the keyword static in front of it. In the following program, the variable count is declared static and thus this variable is the same for all objects of class Student.
Program 6.4: public class Student {
private String name;
private static int count=0; public Student (String NAME) {
Static attribute or also known as class attribute
Non-static attribute or also known as instance variable
name=NAME;
++count;
} public String getName( ){ return name;
} public static int getCount( ){ return count;
}
} The above program has two attributes name (type of String) and count (static int type). This class has one constructor. When this constructor is invoked during object creation, the attribute name will be assigned with the value of parameter in this constructor and at the same time the static attribute count will be added with 1. This class also has two member methods getName() method to retrieve the value of the attribute name and getCount() method to retrieve the value of the static attribute count. To execute the above program, we need to create an object of the class Student in the method main() as shown in the following program:

TOPIC 6 OBJECT ORIENTED PROGRAMMING (PART II)
132
Program 6.5:
Line 1 class obj {
Line 2 public static void main (String[ ] args){
Line 3 Student s1 = new Student (“Kamil”);
Line 4 System.out.println(“Name of s1=” + s1.getName());
Line 5 System.out.println(“count value =” + s1.getCount());
Line 6 Student s2 = new Student (“Ahmad”);
Line 7 System.out.println(“Name of s2=” + s2.getName());
Line 8 System.out.println(“count value =” + s2.getCount());
Line 9 s1=null;
Line 10 s2=null;
Line 11 System.out.println(ʺcount value =ʺ + Student.getCount());
Line 12 }
Line 13 }
The output for the above Program 6.5 is shown below: Name of s1=Kamil count value =1 Name of s2=Ahmad count value =2 count value =2

TOPIC 6 OBJECT ORIENTED PROGRAMMING (PART II)
133
The following figures 6.1(a), (b), (c) and (d) visualise of how the above output was obtained:
Figure 6.1(a): Effects in computer memory when Line 3 is executed
Student Class String name static int count
Object Sudent:s1 name=Kamil
count=1
Student Class String name static int count
Object Sudent:s1 name=Kamil
Object Sudent:s2 name=Ahmad
count=2
Figure 6.1(b): Effects in computer memory when Line 6 is executed. Notice that the
attribute static attribute count is shared by the objects s1 and s2

TOPIC 6 OBJECT ORIENTED PROGRAMMING (PART II)
134
Figure 6.1(c): Effects in computer memory when Line 9 is executed
Student Class String name static int count
Object Sudent: s1 name= null
Object Sudent:s2 name= Ahmad
count=2
Student Class String name static int count
Object Sudent:s1 name=null
count=2 Object Sudent:s2 name=null
Figure 6.1(d): Effects in computer memory when Line 10 is executed
Execution of lines 4, 5, 7 and 8 do not give any effect to the memory. The statements in these lines are merely retrieving the current value of the attributes from the memory and displaying them on the screen.
The following statements in Program 6.5 (Line 9 and Line 10) will assign a null value to the s1 and s2 objects. The effect of this instruction is s1 and s2 will not reference to any object.
s1=null;
s2=null;

TOPIC 6 OBJECT ORIENTED PROGRAMMING (PART II)
135
public void update1( ){ int result=a+b; //correct because static and non-static attributes can be used in an //instance method } public static void update2( ){ int total=a; //wrong a is a non-static attribute update1(); // wrong update1 is a non-static method }
} Source: Liang Y.D (2007)
static int b=7;
Static attributes and static methods can be used in both non-static methods or static methods. However, non-static methods and attributes can only be used in non-static methods and not in static methods. class A{
int a=9;
ClassName.StaticAttribute(); Note: Make sure StaticMethod() and StaticAttribute are declared as public if you want to call them from outside of the class in which they have declared (whatever you have learned in section 6.1 also apply for static attributes and methods) Caution⁄
Why using Student.getCount() in Line 11 instead of s1.getCount() or s2.getCount to retrieve the value of the static attribute count? In Line 10 and Line 11, the object s1 and s2 have been set to null. It means they do not reference to any objects. If you have never created an object of a class or has set the object to null, you can only call static method or access the static attribute using the class name (and not the object name) as shown in the following syntax: ClassName.StaticMethod(); OR

TOPIC 6 OBJECT ORIENTED PROGRAMMING (PART II)
136
Caution⁄ Static attributes exist in only one location and globally accessible by all objects of that class. But they are also subject to class scope if there are given private access modifiers. If a static attribute or method is given a private modifier it can only be accessed in that class. But we still can retrieve the value of a private static attribute from outside of a class using a public method (declared in the same class) that will returned the value of the private static attribute.
USING this REFERENCE 6.3
The object that receives a message are sometimes called receiver object because the object receives the message. For example, let us look at the statement below: John.calculateFee( ); In this statement, message calculateFee() will be received by the object John, that is the current execution object. This means that John is the receiver object of the sent message. When an object receives a message, it will respond by executing the proper method.
In the member method code of a class, sometimes we have to refer to the receiver object. In Java, this receiver object can be called using this keyword. Basically this keyword is used for the following situations:
First Situation: Differentiate attribute and local variable or parameter in a member method or constructor (if they declared with the same name)
Second Situation: Pass the current execution object as a parameter to another method
Third Situation: To call another constructor in the same class.
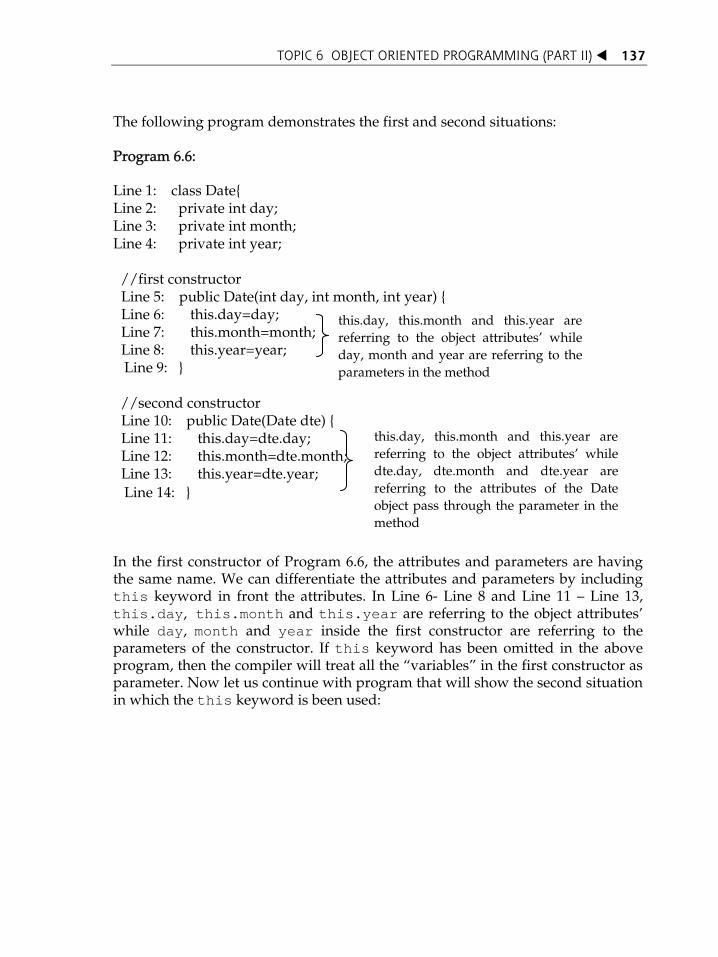
TOPIC 6 OBJECT ORIENTED PROGRAMMING (PART II)
137
The following program demonstrates the first and second situations: Program 6.6: Line 1: class Date{ Line 2: private int day; Line 3: private int month; Line 4: private int year; //first constructor
Line 5: public Date(int day, int month, int year) { Line 6: this.day=day; Line 7: this.month=month;
this.day, this.month and this.year are referring to the object attributesÊ while day, month and year are referring to the parameters in the method
Line 8: this.year=year; Line 9: } //second constructor
Line 10: public Date(Date dte) { this.day, this.month and this.year are referring to the object attributesÊ while dte.day, dte.month and dte.year are referring to the attributes of the Date object pass through the parameter in the method
Line 11: this.day=dte.day; Line 12: this.month=dte.month; Line 13: this.year=dte.year;
Line 14: }
In the first constructor of Program 6.6, the attributes and parameters are having the same name. We can differentiate the attributes and parameters by including this keyword in front the attributes. In Line 6- Line 8 and Line 11 Line 13, this.day, this.month and this.year are referring to the object attributesÊ while day, month and year inside the first constructor are referring to the parameters of the constructor. If this keyword has been omitted in the above program, then the compiler will treat all the „variables‰ in the first constructor as parameter. Now let us continue with program that will show the second situation in which the this keyword is been used:

TOPIC 6 OBJECT ORIENTED PROGRAMMING (PART II)
138
The new Date object is constructed from the current object using the above second constructor. this keyword is actually will refer to the current execution object to be known during execution Notice that this method return Date object. Besides primitive data types such as int or double, a method can also return an object.
//member method 1 Line 15: public Date addDays(int days) { Line 16: Date dte = new Date (this); Line 17: dte.day=dte.day+days; Line 18: return dte; Line 19: }
//member method 2
Line 20: public void display ( ){ Line 21: System.out.println(„Date: ‰ + day + „/‰ + month + „/‰ + year);
Line 22: } Line 23: }
We can use the following program to execute the above class: Program 6.7:
Line 1: class obj { Line 2: public static void main (String[] args){ Line 3: Date todayDate = new Date(20,7,1974); Line 4: Date nextWeekDate=todayDate.addDays(7); Line 5: nextWeekDate.display(); Line 6: } Line 7: } The output of the above program is: Date: 27/7/1974
Now let us look into Line 3 and Line 4 in the Program 6.7.
In Line 3 the object todayDate of the class Date will be created with the following state: todayDate day =20
month = 7 year = 1974

TOPIC 6 OBJECT ORIENTED PROGRAMMING (PART II)
139
In Line 4, the current execution object is todayDate as it will call the method addDays(7). Thus when this method is invoked by the todayDate, the keyword this that is available in Line 16 in Program 6.6 will be replaced with todayDate object (since this is the current execution object): Refers to the current execution
object that is object todayDate. During runtime, the compiler automatically will replace thiskeyword with the current execution object
Line 16 (Program 6.6): Date dte = new Date (this); Line 16 (of Program 6.6.) will be create new dte object of the class Date using the state of the object of todayDate. In Line 17 (of Program 6.6.), the attribute day of the dte object will be added with 7. In Line 18 (of Program 6.6), this dte object will be returned by the method which eventually will be received by the object nextWeekDate in Line 4 (Of Program 6.7). Thus, the execution of the Line 4 (Of Program 6.7) will have the following affect in the memory:
day = 20month = 7 year = 1974
todayDate
year = 1974
day = 27month = 7
nextWeekDate Line 5 (Of Program 6.7) will display the value of the attributes belong to the object nextWeekDate.
Thus, by using this keyword we are letting the compiler to replace the keyword this with the current execution object. If you donÊt want to use this keyword in Program 6.6, you need to explicitly state the name of the object in the appropriate method. For our case in the Program 6.6, the method addDays should be changed like this:
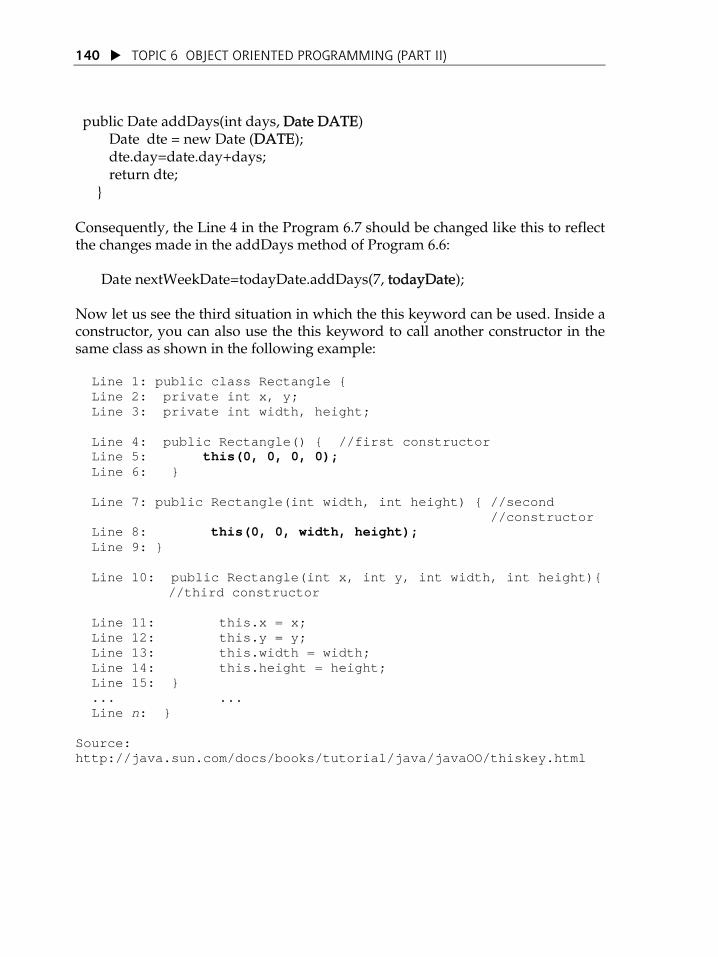
TOPIC 6 OBJECT ORIENTED PROGRAMMING (PART II)
140
public Date addDays(int days, Date DATE) Date dte = new Date (DATE); dte.day=date.day+days; return dte; }
Consequently, the Line 4 in the Program 6.7 should be changed like this to reflect the changes made in the addDays method of Program 6.6: Date nextWeekDate=todayDate.addDays(7, todayDate); Now let us see the third situation in which the this keyword can be used. Inside a constructor, you can also use the this keyword to call another constructor in the same class as shown in the following example: Line 1: public class Rectangle { Line 2: private int x, y; Line 3: private int width, height; Line 4: public Rectangle() { //first constructor Line 5: this(0, 0, 0, 0); Line 6: } Line 7: public Rectangle(int width, int height) { //second //constructor Line 8: this(0, 0, width, height); Line 9: } Line 10: public Rectangle(int x, int y, int width, int height){ //third constructor Line 11: this.x = x; Line 12: this.y = y; Line 13: this.width = width; Line 14: this.height = height; Line 15: } ... ... Line n: } Source: http://java.sun.com/docs/books/tutorial/java/javaOO/thiskey.html
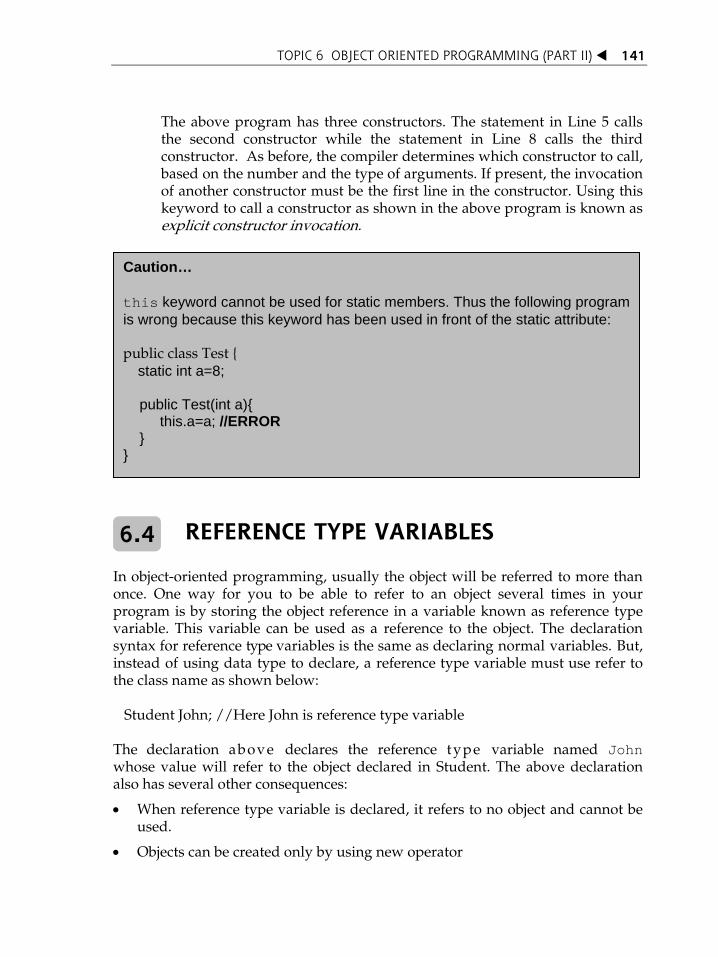
TOPIC 6 OBJECT ORIENTED PROGRAMMING (PART II)
141
The above program has three constructors. The statement in Line 5 calls the second constructor while the statement in Line 8 calls the third constructor. As before, the compiler determines which constructor to call, based on the number and the type of arguments. If present, the invocation of another constructor must be the first line in the constructor. Using this keyword to call a constructor as shown in the above program is known as explicit constructor invocation.
Caution… this keyword cannot be used for static members. Thus the following program is wrong because this keyword has been used in front of the static attribute: public class Test { static int a=8; public Test(int a){ this.a=a; //ERROR } }
REFERENCE TYPE VARIABLES 6.4
In object-oriented programming, usually the object will be referred to more than once. One way for you to be able to refer to an object several times in your program is by storing the object reference in a variable known as reference type variable. This variable can be used as a reference to the object. The declaration syntax for reference type variables is the same as declaring normal variables. But, instead of using data type to declare, a reference type variable must use refer to the class name as shown below: Student John; //Here John is reference type variable The declaration above declares the reference type variable named John whose value will refer to the object declared in Student. The above declaration also has several other consequences:
When reference type variable is declared, it refers to no object and cannot be used.
Objects can be created only by using new operator
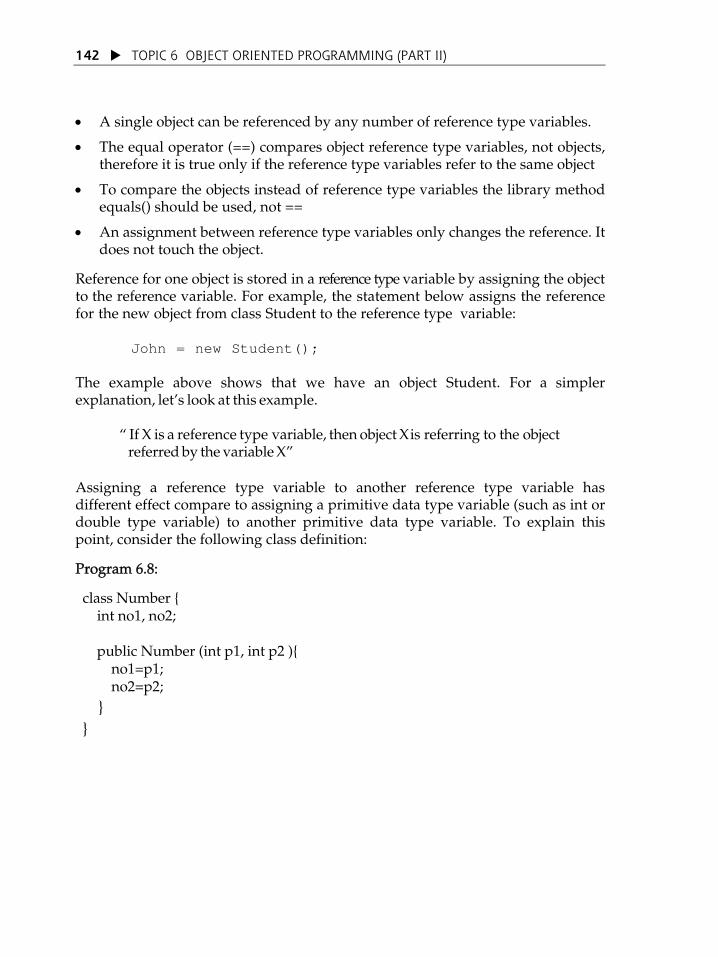
TOPIC 6 OBJECT ORIENTED PROGRAMMING (PART II)
142
A single object can be referenced by any number of reference type variables.
The equal operator (==) compares object reference type variables, not objects, therefore it is true only if the reference type variables refer to the same object
To compare the objects instead of reference type variables the library method equals() should be used, not ==
An assignment between reference type variables only changes the reference. It does not touch the object.
Reference for one object is stored in a reference type variable by assigning the object to the reference variable. For example, the statement below assigns the reference for the new object from class Student to the reference type variable:
John = new Student(); The example above shows that we have an object Student. For a simpler explanation, letÊs look at this example. „ If X is a reference type variable, then object X is referring to the object referred by the variable X‰ Assigning a reference type variable to another reference type variable has different effect compare to assigning a primitive data type variable (such as int or double type variable) to another primitive data type variable. To explain this point, consider the following class definition:
Program 6.8:
class Number { int no1, no2; public Number (int p1, int p2 ){ no1=p1; no2=p2; }
}

TOPIC 6 OBJECT ORIENTED PROGRAMMING (PART II)
143
Now consider the following code segment: Line 1: int a=23; Line 2: int b=a; Line 3: Number num1, num2; Line 4: num1 = new Number(12,67); Line 5: num2=num1; Line 6: num2=new Number(98,56);
In the above code segment, four variables have been created: two primitive data types of int (that is a and b) and two references of type Num (that is num1 and num2). In Line 1 a is declared with the initial value of 23:
In Line 2, the value of a is 23 and this value is assigned to b. Both a and b are independent variable they do not affect each other. Any changes made to variable a does not affect variable b.
In Line 3, two reference type variables, num1 and num2 are declared with the following state. Notice that they do not point to any object.
(Remember: When reference type variable is declared, it refers to no object and cannot be used) In Line 4, an object of Number is created with the following state. Notice that num1 now pointing to this Number object:

TOPIC 6 OBJECT ORIENTED PROGRAMMING (PART II)
144
In Line 5, the reference variable num1 is assigned to reference type variable num2. As a consequence of this, num2 now will refer to the object referred by num1 as shown in the following diagram:
When Line 6 is executed, num2 is now will point to new Number object as shown below:
(REMEMBER: An assignment between reference type variables only changes the reference. It does not touch the object).
Take Note.. An object which is not pointed by any reference type variables will be automatically deallocated in the memory by garbage collection.

TOPIC 6 OBJECT ORIENTED PROGRAMMING (PART II)
145
Take Note.. Strictly speaking, a reference type variable and an object are different, but most of time the difference between them can be ignored. So it is fine, for simplicity, to say that John is a Student object rather than the long-winded phrase stating that “John is a reference type variable that contains a reference to a Student object”. Source: Liang Y.D (2007)
EXERCISE 6.1
Explain what happens in all the lines of the following program segment which uses the class Number defined in Program 6.8:
int a=23; int b=a; Number num1 = new Number(12,67); Number num2= new Number(23,45); num2=num1; num2=new Number(98,56);
PASSING OBJECTS TO METHODS 6.5
So far you have been exposed to pass arguments of primitive types during the method invocation. We can also pass objects to methods. Passing an object is actually passing the reference of the object. Assume we have the following class Point. It has two attributes and a constructor that will assign initial values to these attributes.
Program 6.9:
class Point {
public int x;
public int y;
public Point(int xValue, int yValue){
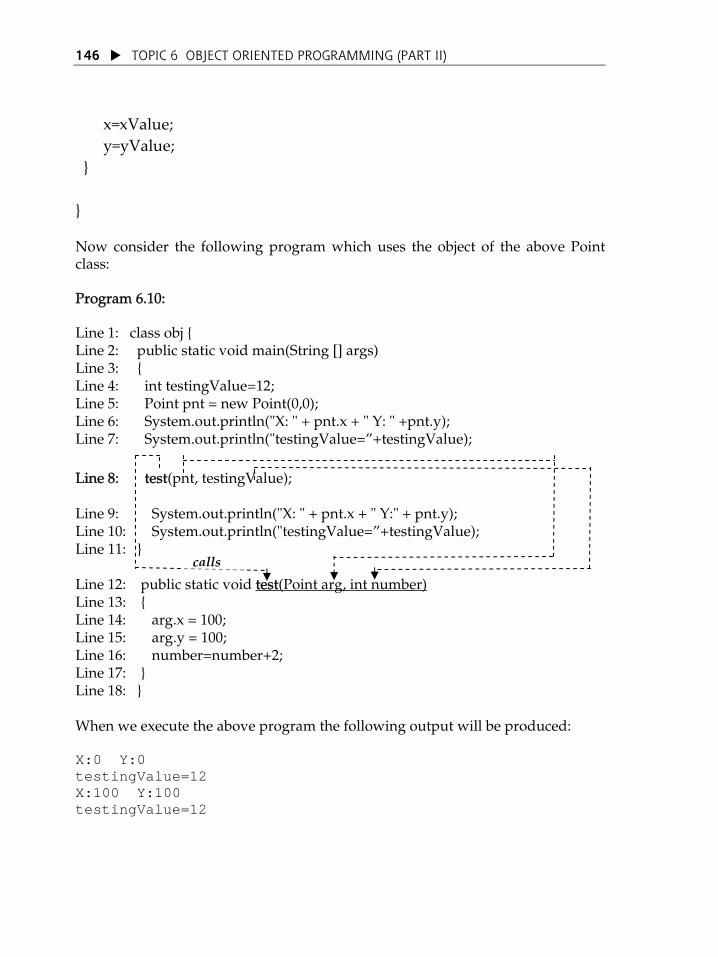
TOPIC 6 OBJECT ORIENTED PROGRAMMING (PART II)
146
x=xValue;
y=yValue;
}
} Now consider the following program which uses the object of the above Point class: Program 6.10: Line 1: class obj { Line 2: public static void main(String [] args) Line 3: { Line 4: int testingValue=12; Line 5: Point pnt = new Point(0,0); Line 6: System.out.println("X: " + pnt.x + " Y: " +pnt.y); Line 7: System.out.println("testingValue=‰+testingValue); Line 8: test(pnt, testingValue); Line 9: System.out.println("X: " + pnt.x + " Y:" + pnt.y); Line 10: System.out.println("testingValue=‰+testingValue); Line 11: }
Line 12: public static void test(Point arg, int number)
calls
Line 13: { Line 14: arg.x = 100; Line 15: arg.y = 100; Line 16: number=number+2; Line 17: } Line 18: } When we execute the above program the following output will be produced: X:0 Y:0 testingValue=12 X:100 Y:100 testingValue=12

TOPIC 6 OBJECT ORIENTED PROGRAMMING (PART II)
147
From the output you could see that the test() method successfully alters the value of pnt. In the main() method, pnt are nothing more than object references. When you pass pnt to the test() method (Line 8 of the program), Java passes the references by value just like any other parameter. This means the references passed to the method are actually copies of the original references. Now let us see of how the Program 6.10 produced the output by looking at the lines in the Program 6.10. The effect of executing Line 4 and Line 5 is shown in the following diagram:
12 testingValue
pnt
x = 0y = 0
Figure 6.2: The effect in memory for Line 4 and Line 5 (before test() method is called) In Line 6 and 7, the current value of testingValue is 12 while pnt.x=0 and pnt.y=0 as depicted in the above diagram will be displayed. Line 8 will invoke the test() method. As the consequence, the body of the test() method (that is Lines 14 Line 16) will be executed. The effect of executing Line 8 and the also Lines 14, 15 and 16 are shown in Figure 6.3 diagram:
testingValue
pnt arg
number
x = 100 y = 100
12
14
Notice that pnt and agr are pointing to the same object after Java passes the pnt object to the test method. Note that pnt object is received by arg object parameter in the test() method
Figure 6.3: After being passed to the test() method, an object will have at least two references

TOPIC 6 OBJECT ORIENTED PROGRAMMING (PART II)
148
In Line 9 and Line 10, the current value of testingValue, pnt.x=100 and pnt.y=100 will be displayed. Java copies and passes the reference by value, not the object. Thus, method manipulation will alter the objects, since the references point to the original objects. Oppositely, when passing an argument of primitive data type (such as int), the value of the argument is passed. In this case, the value of testingValue which 12 is passed to the parameter number in the test() method. Inside the test() method, the content of number is changes; but this does not affect the content of testingValue. This explains why the value of testingValue remains unchanged when Program 6.10 is executed. Besides passing objects to methods, a method also can returned an object as shown in the method addDays of the class Date in Program 6.6.
OBJECTS AS A MEMBERS OF OTHER CLASS 6.6
Up until this topic, classes that we have discussed only have primitive data type attributes. Besides primitive data type attributes in a class, a class can have objects of other classes as members. This capability is known as composition. For example, consider the following program: Program 6.11:
class Date{ private int day; private int month; private int year;
public Date(int dy, int mth, int yr) { day=dy; month=mth; year=yr;
}
public void display ( ){ System.out.println(„Birth Date: ‰ + day + „/‰ + month + „/‰ + year);
} }

TOPIC 6 OBJECT ORIENTED PROGRAMMING (PART II)
149
Now consider the following class which has included the object of the above class:
Program 6.12:
class Person { String name; // object of another class (String) int id; // attribute with primitive data type of int Date birthDate; // object of the class Date declared in Program 6.11 above public Person (String NAME, int ID, int DAY, int MONTH, int YEAR){ name=NAME; id=ID; birthDate=new Date(DAY,MONTH,YEAR); } public void displayInfo(){
System.out.println(„Name: ‰ + name); System.out.println(„Id: ‰ +id); birthDate.display();
} } To execute the above program we need to have another class which has main() method: Program 6.13:
class obj{ public static void main (String[] args){ Person person = new Person („Brown Smith‰, 675, 12, 11, 1985); person.displayInfo(); } }

TOPIC 6 OBJECT ORIENTED PROGRAMMING (PART II)
150
The output of the above program is shown below: Name: Brown Smith Id: 675 Birth Date: 12/11/1985
Diagrammatically, the state of the object person are shown in the following diagram:
person
Figure 6.4: The state of the person object. Notice that object birthDate has been included in the person object
Class Person uses class Date to demonstrate of how object of other class can be declared in another class. Besides that, class Person itself also has two another object of the class String to represent the name and the primitive data type of int to represent the id. Member birthDate are Date objects that contains attributes day, month and year. Class Person in Program 6.12 creates an object of Date, initializes and display the values of its attributes. The constructor of Person takes five arguments (NAME, ID, DAY, MONTH and YEAR) in which arguments DAY, MONTH and YEAR are passed to the Date constructor. Take note that that member object does not need to be initialized immediately with constructor arguments.
ARRAY OF OBJECTS
6.7
name= Brown Smithid= 675 birthDate
day = 12month=11 year = 1985
Array elements are not limited to primitive data types such integer or float. An object also can be the elements in an array.

TOPIC 6 OBJECT ORIENTED PROGRAMMING (PART II)
151
Consider the class Date in Program 6.11. Let say you need to declare 10 objects of class Date to represent birth date of 10 students. Thus, the program can be written like this: Program 6.14:
class obj{ public static void main (String[] args){
Date date1 = new Date(12, 11, 1985);
Date date2 = new Date(20, 10, 1980);
Date date3 = new Date(30, 12, 1974);
:
:
:
Date date9 = new Date(11, 2, 1970);
Date date10 = new Date(22, 12, 1979);
}
} The above program also can be written using array which was discussed in Topic 4. Here the array could be created using the Date object as shown in the following program: Program 6.15: class obj{
public static void main (String[] args){
Date[ ] date = new Date[10]; //declare the array
//remember that the index of array should start with 0
date[0] = new Date(12, 11, 1985);
date[1] = new Date(20, 10, 1980);
date[2] = new Date(30, 12, 1974);
:

TOPIC 6 OBJECT ORIENTED PROGRAMMING (PART II)
152
:
:
date[8] = new Date(11, 2, 1970);
date[9] = new Date(22, 12, 1979);
}
} Objects can be handled easily using loops such as for or while loops if array of objects is used in the program. The following program shows of how array of objects of class Date (Program 6.11) is used inside a for loop: Program 6.16: class obj{ public static void main (String[] args){ Date[ ] date = new Date[10]; //declare an array date[0] = new Date(12, 11, 1985); date[1] = new Date(20, 10, 1980); date[2] = new Date(30, 12, 1974); date[3] = new Date(11, 2, 1970); date[4] = new Date(22, 12, 1979); System.out.println("Students birthday:"); for (int counter=0; counter <=4; counter++) { date[counter].display(); } //for } //main }//class The output of Program 6.16 is shown below:

TOPIC 6 OBJECT ORIENTED PROGRAMMING (PART II)
153
The diagram below shows the array of object date after the array is created in Program 6.16:
Figure 6.5: The array of object date after the array is created in Program 6.16
EXERCISE 6.2
1. (a) Consider the class definition for Complex as shown below:
public class Complex { private double real; private double imaginary; Complex() { real = 0.0; imaginary = 0.0; } Complex(double re, double im) { real = re; imaginary = im; } public void setEqual(Complex number) { real = number.real; imaginary = number.imaginary; }

TOPIC 6 OBJECT ORIENTED PROGRAMMING (PART II)
154
public void showdata() { double c; char sign = '+'; c = imaginary; if (c < 0) { sign = '-'; c = -c; } System.out.println("The complex number is " + real + ' ' + sign + ' ' + c + "i\n"); } public static void main(String[] args) { Complex a = new Complex(); Complex b = new Complex(4.2, 3.6); a.showdata(); b.showdata(); a.setEqual(b); a.showdata(); } }
(i) List all the attributes owned by object Complex.
(ii) List all the attributes that could be invoked by object Complex.
(iii) Is the technique method overloading is used in the above class
definition? Explain your answer.
(iv) What is the output produced by the above class when executed?
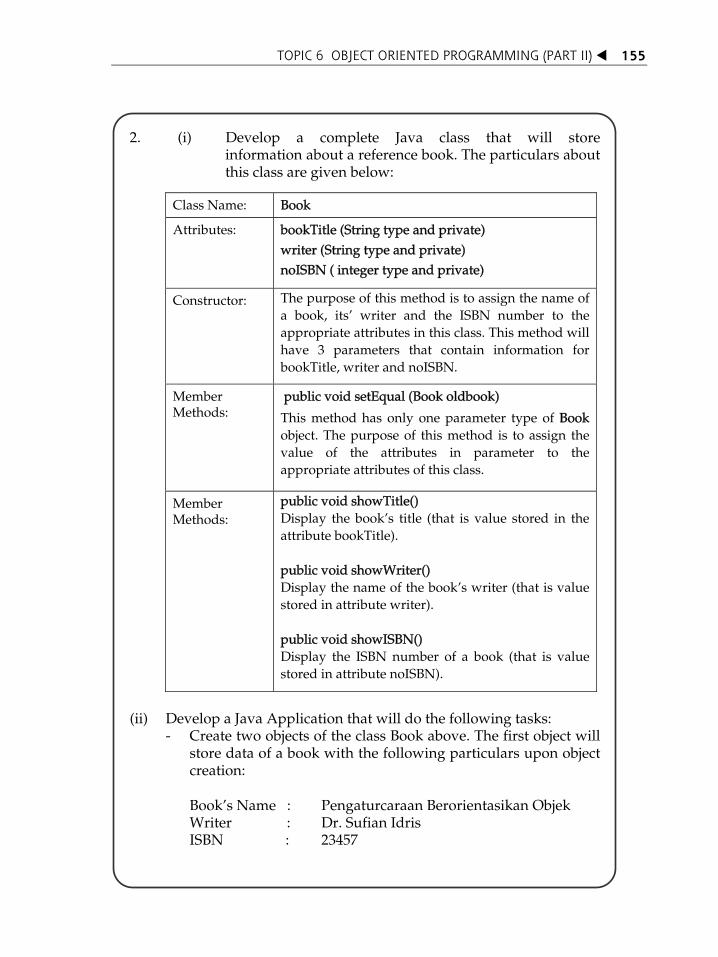
TOPIC 6 OBJECT ORIENTED PROGRAMMING (PART II)
155
2. (i) Develop a complete Java class that will store information about a reference book. The particulars about this class are given below:
Class Name: Book
Attributes: bookTitle (String type and private) writer (String type and private) noISBN ( integer type and private)
Constructor: The purpose of this method is to assign the name of a book, itsÊ writer and the ISBN number to the appropriate attributes in this class. This method will have 3 parameters that contain information for bookTitle, writer and noISBN.
Member Methods:
public void setEqual (Book oldbook)
This method has only one parameter type of Book object. The purpose of this method is to assign the value of the attributes in parameter to the appropriate attributes of this class.
Member Methods:
public void showTitle() Display the bookÊs title (that is value stored in the attribute bookTitle). public void showWriter() Display the name of the bookÊs writer (that is value stored in attribute writer). public void showISBN() Display the ISBN number of a book (that is value stored in attribute noISBN).
(ii) Develop a Java Application that will do the following tasks:
- Create two objects of the class Book above. The first object will store data of a book with the following particulars upon object creation:
BookÊs Name : Pengaturcaraan Berorientasikan Objek Writer : Dr. Sufian Idris ISBN : 23457

TOPIC 6 OBJECT ORIENTED PROGRAMMING (PART II)
156
The second object will store data of a book with the following particulars upon object creation:
BookÊs Name : Pengaturcaraan Komputer Writer : Dr. Alice Wong ISBN : 78709
- Then, you need to display the titles of this books using the
created objects. - Then, use the second object to assign all their attributes to the
attributes of first object using the method setEqual() that exists in class Book.
- Display all the values of the attributes in the first and the second object.
3. Consider the following class: class Hoo { int a; static String b; void method1(){ } static void method2(){ } } Which of the statements are correct: System.out.println(h.a); System.out.println(h.b); h.method1(); h.method2(); System.out.println(Hoo.a); System.out.println(Hoo.b); Hoo.method1(); Hoo.method2();

TOPIC 6 OBJECT ORIENTED PROGRAMMING (PART II)
157
4. Describe the role of the this keyword. What is wrong with the
following code:
class G { int k; public void setK (int k){
k=k; } }
In the previous topic you have learned on how to declare a class and create objects from a class.
In object oriented programming, class and objects play an important roles.
Manipulating objects and their elements effectively is another important area that should be emphasised by programmer.
This will enable them to write effective and efficient code.
Knowing the following concepts will help you to write effective object oriented programs in Java:
Access modifiers
Static class members
Using this keyword
Sending objects to a method
Writing classes that has object as its member
Array of objects
Inheritance (to be covered in the next topic)
TOPIC 6 OBJECT ORIENTED PROGRAMMING (PART II)
158
access modifier
method
pass-by-reference
public
private
receiver object
static
this
INTRODUCTION Inheritance is the capability of a class to use the properties and methods of another class while adding its own functionality. An example of where this could be useful is with an employee records system. You could create a generic employee class with states and actions that are common to all employees. Then more specific classes could be defined for salaried, commissioned and hourly employees. The generic class is known as the parent (or superclass or base class) and the specific classes as children (or subclasses or derived classes). The concept of inheritance greatly enhances the ability to reuse code as well as making design a much simpler and cleaner process.
TTooppiicc
7Object
7 Oriented Programming (Part III)
By the end of this topic, you should be able to:
1. Describe the meaning of inheritance;
2. Differentiate between method overloading and method overriding;
3. Write Java programs that have inheritance capability;
4. Describe the meaning of protected access modifier;
5. Write Java programs that have polymorphism capability; and
6. Descibe the meaning of final, abstract and super keywords.
LEARNING OUTCOMES

TOPIC 7 OBJECT ORIENTED PROGRAMMING (PART III)
160
Subclasses have all the characteristics and behaviour inherited from the superclass but have added some more characteristics and behaviours for themselves. For example, after we have created Student class, we could also define another classes for diploma students, master students, etc in which all will inherit the Student superclass. It would involve a lot of effort to create brand new class. However, it would be easier if we could take an existing, clone it and then make modifications to the clone to reflect the extra functionality. This is what we do with inheritance. Consider the following two classes which donÊt use any inheritance:
class Student {
private String name; private int age;
public Student(String NAME, int AGE) { name=NAME; age=AGE; }
public String getName () { return name; }
public int getAge(){ return age; } }
class DiplomaStudent {
private String name; private int age;
public DiplomaStudent(String NAME,int AGE) { name=NAME; age=AGE; } public String getName () { return name; } public int getAge(){ return age; }
public double computeFees(int totalSubject) { return (totalSubject*50.00);
} }
Explanation: Notice that the DiplomaStudent class has all the attributes and methods of Student class (except the constructor method of the Student class). The only methods added in DiplomaStudent class are computeFees() and a constructor method.

TOPIC 7 OBJECT ORIENTED PROGRAMMING (PART III)
161
This approach suggests that DiplomaStudent class is defined by copying the attributes and methods of the Student class and then modifying the DiplomaStudent class by adding the methods needed. This approach is not sufficient as we are not making use the existing class. We have copied „everything‰in Student class into DiplomaStudent class. Thus, the class DiplomaStudent becomes longer. The relation that exists between Student class and DiplomaStudent class is not shown in the DiplomaStudent class definition. The relation is the inheritance relation.
INHERITANCE 7.1
Inheritance is one of the most important concepts in object-oriented programming. It enables us to write a class that is similar to an existing class, but that still has some of its properties. To create the new class, you only have to specify how that class is different from the existing class. The inheritance gives you an automatic access to the existing class.
The keyword extends followed by class names indicates the class from which the new class inherits an existing class. For example: ClassB extends ClassA {
ClassB inherits ClassA. Thus, ClassB is subclass of ClassA (superclass). ClassA shoud be implemented first before ClassB can inherits ClassA.
Diagrammatically, if „classB extends classA‰, it could be illustrated as shown in Figure 7.1:
classB
classA
Figure 7.1: Diagrammatically showing classB inherits classA
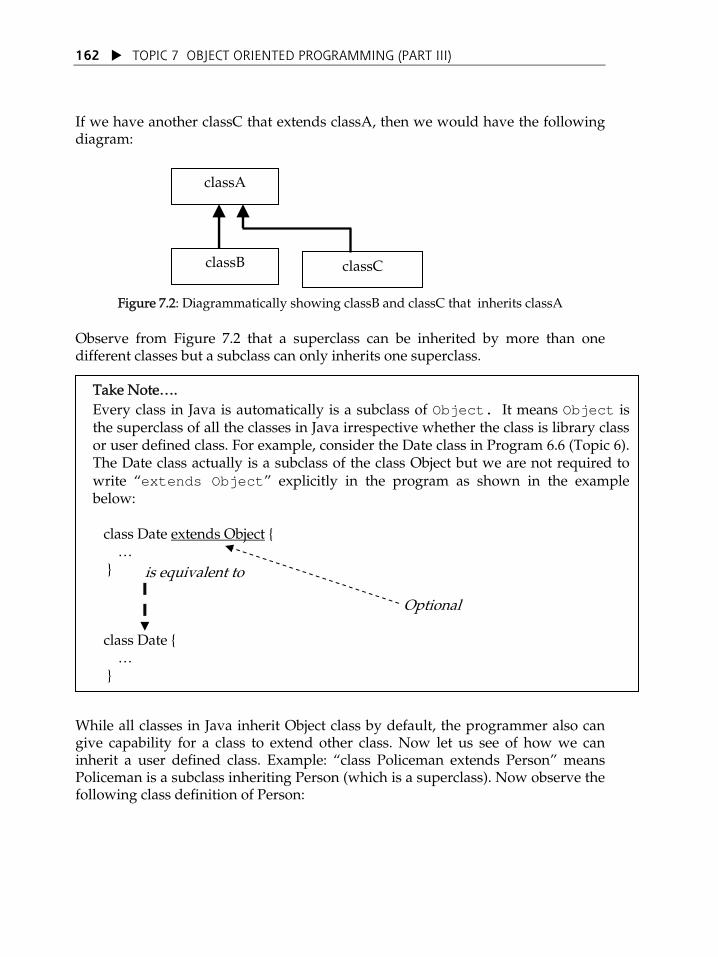
TOPIC 7 OBJECT ORIENTED PROGRAMMING (PART III)
162
If we have another classC that extends classA, then we would have the following diagram:
Figure 7.2: Diagrammatically showing classB and classC that inherits classA Observe from Figure 7.2 that a superclass can be inherited by more than one different classes but a subclass can only inherits one superclass.
Take Note⁄. Every class in Java is automatically is a subclass of Object. It means Object is the superclass of all the classes in Java irrespective whether the class is library class or user defined class. For example, consider the Date class in Program 6.6 (Topic 6). The Date class actually is a subclass of the class Object but we are not required to write „extends Object‰ explicitly in the program as shown in the example below: class Date extends Object { ⁄
} class Date { ⁄
}
is equivalent to
Optional
classB
classA
classC
While all classes in Java inherit Object class by default, the programmer also can give capability for a class to extend other class. Now let us see of how we can inherit a user defined class. Example: „class Policeman extends Person‰ means Policeman is a subclass inheriting Person (which is a superclass). Now observe the following class definition of Person:

TOPIC 7 OBJECT ORIENTED PROGRAMMING (PART III)
163
Program 7.1:
class Person{
private String name; p rivate int age;
public void setName(String NAME) { name=NAME; } public void setAge (int AGE) { age=AGE; } public String getName () { return name; } public int getAge(){ return age; } public void updateAge(int newAge){ age=newAge; }
}
In this base Person class, a Person is defined by its private data, such as name and age. These data are generic to every type of person. The private attributes in the Person class can be manipulated by the public methods such as getName(), getAge(), setName(), setAge() and updateAge(). The attributes and methods are all encapsulated in the class. Furthermore, the attributes are private in this class. It means they cannot be directly accessed from outside of the class. Only the classÊs public methods can access the attributes. By adopting this strategy, users cannot retrieve or update the value the private attributes directly. But this is possible with the public methods available in the class. This shows how encapsulation works.
Do you know⁄ Public methods such as getAge(), getName(),etc that returns the value of a private attribute are known as accessors while public methods such as setAge(..), setAddress(..), etc that assign a value to the private attributes are known as mutators.

TOPIC 7 OBJECT ORIENTED PROGRAMMING (PART III)
164
Now suppose you want to have create class for Policeman. We want ensure that the policemen is promoted when he/she is 45 years of old. Thus we could have new class Policeman that inherits the class Person thus releasing the burden of rewriting the codes of the personal information. Program 7.2:
class Policeman extends Person{
b oolean promoted =false;
public void promotion(){ if (getAge() >= 45) promoted=true; else promoted=false; }
}
Observe that Program 7.2 is much smaller than the superclass (Program 7.1) as it implicitly inherits all the attributes and methods (except private attributes) from the superclass Person. Besides promotion() method, the subclass Policeman has all other methods from the superclass like setName(), setAge(), getName(), getAge() and updateAge().
Now, let us see another example. Assume that you need to maintain student records in a university. The university has several different types of students: diploma students, degree students and master student and your program should be able to handle all of these students. In order to solve this problem, we can define a general class of Student that has attributes for name, age, matric number, etc which is common to all the students. However, at the same time, each type of student requires slightly different information such as fees calculation which is calculated using different formula for each type of the student (diploma students fees is calculated based on number of courses taken in a semester plus the laboratory fees, degree students fees is fixed while masters student fees is calculated based on number of courses taken in a semester and research fees). We can define a class called Student that describes the common characteristics of all students. For example:

TOPIC 7 OBJECT ORIENTED PROGRAMMING (PART III)
165
Program 7.3: class Student { private String name; private int age; private String matricNumber; public double fee=0.0; public Student(String NAME,int AGE, String MATRIC) { name=NAME; age=AGE; matricNumber=MATRIC;
} public String getName () { return name; } public int getAge(){ return age; } public String getMatric(){ return matricNumber; } public double getFees (){ return fee; } }
The above class can be executed in the following program:

TOPIC 7 OBJECT ORIENTED PROGRAMMING (PART III)
166
Program 7.4: class obj {
public static void main (String[ ] args ) {
Student std= new Student(„Ali‰, 26, „S235‰);
System.out.println(„Name is „+ std.getName() );
System.out.println(„Age is „+ std.getAge ());
System.out.println(„Matric is „+ std.getMatric() );
System.out.println(„Fee is „+ std.getFees() );
}
}
The output of the above program is given below: Name is Ali
Age is 26
Matric is S235
Fee is 0.0
In the computer memory, the object std will hold the following values as shown in Figure 7.3: std name = Ali
age = 26 matricNumber = S235 fee = 0.0
Figure 7.3: The state of the object std (object of the Student class)
Next, we can define a DiplomaStudent class that describes a particular type of student. The diploma students have the characteristics common to all students (as shown in the class Student), plus some additional ones. We can make DiplomaStudent inherit from Student with the following syntax: class DiplomaStudent extends Student and then add new specific method(s) and attribute(s) meant only for this DiplomaStudent class.

TOPIC 7 OBJECT ORIENTED PROGRAMMING (PART III)
167
The complete program for the DiplomaStudent class is given below: Program 7.5: class DiplomaStudent extends Student { private double labFees; private int numberOfCourses; //constructor public DiplomaStudent(String NAME,int AGE, String MATRIC, int COURSE, double LABORATORY_FEES) { super(NAME,AGE,MATRIC); /*call the superclass’s
constructor */ setTotalCourse(COURSE); setLabFees(LABORATORY_FEES); }
public void setTotalCourse(int c){ numberOfCourses=c; } public void setLabFees(double lab){ labFees=lab;} public double getFees(){ fee= (super.getFees())+(numberOfCourses*50.00 + labFees); return fee; }
}
The above class can be executed in the following program:
Program 7.6 (a):
class obj {
public static void main (String[ ] args ){
DiplomaStudent dip= new DiplomaStudent(„Ahmas‰, 26, „S135‰, 3, 65.00);
System.out.println(„Name is „+ dip.getName() );
System.out.println(„Age is „+ dip.getAge() );

TOPIC 7 OBJECT ORIENTED PROGRAMMING (PART III)
168
System.out.println(„Matric is „+ dip.getMatric() );
System.out.println(„Fee is „+ dip.getFees() );
}
}
The output for the above program is given below: Name is Ahmad
Age is 26
Matric is S135
Fee is 215.0
In the computer memory, the object dip will hold the following values as shown in Figure 7.4: dip
numberOfCourses = 3 labFees = 65.00
matricNumber = S135 fee = 215.0
name = Ahmadage = 26
Figure 7.4: The state of the object dip (object of the DiplomaStudent class which inherits
Student class) Compare Figure 7.3 and Figure 7.4. Can you see any difference?
} }
public static void main (String[ ] args ){ Student std= new Student(„Ali‰, 26, „S235‰); //OK DiplomaStudent dip= new DiplomaStudent(„Ali‰, 26, „S235‰, 3, 65.00);
//OK System.out.println(„Name is „+ dip.getName() ); //OK System.out.println(„Age is „+ dip.getAge() ); //OK std.setTotalCourses(5); /* ERROR! SUPERCLASS CANNOT ACCESS ITS SUBCLASS METHODS AND ATTRIBUTES */
class obj {
Take note⁄ Note that subclass can access all the public and protected methods and attributes in the superclass but not vice versa as shown in the following program:
TOPIC 7 OBJECT ORIENTED PROGRAMMING (PART III)
169
In Program 7.5, we have implemented class DiplomaStudent that inherits Student class. Many more classes that represent other types of students such as DegreeStudent and MasterStudent classes can be inherited from the Student class. We will not going show you the implementation of the DegreeStudent and MasterStudent classes but we will leave it as an exercise for you to try.
EXERCISE 7.1
Write the implementation of the DegreeStudent and MasterStudent classes that will inherit the Student class.
USING THE super KEYWORD 7.2
Did you notice the usage of super keyword in Line 5 and Line 16 of Program 7.5? What does that super statement do?
A subclass inherits all attributes and methods from the superclass provided the methods and attributes in the superclass are public or protected (protected will be elaborated in section 7.6). How about constructor in a superclass? Can subclass inherits or invokes the constructor of the superclass? The answer is CANNOT. Subclass cannot inherits or invoke the constructor of the superclass even tough constructor is declared as public. But subclass can call the constructor of the superclass through the super keyword. Actually, the keyword super could be used in the following ways in a subclass:
To call a superclass's constructor
To call a superclass's method
The above two ways will be elaborated in the following sections.
7.2.1 Calling Superclass's Constructor
The syntax to call the superclass's constructor from subclass is as shown below: super() this will call the constructor in the superclass which has no
argument
OR

TOPIC 7 OBJECT ORIENTED PROGRAMMING (PART III)
170
super(arguments) this will call superclass constructor that matches the
arguments.
You must use the keyword super if you want to invoke the superclass constructor from a subclass. You cannot invoke the superclass constructor in a subclass by its name.
Thus, in Line 5 of the Program 7.5, the statement super(NAME,AGE,MATRIC) actually invokes the constructor of the superclass. Notice that this super keyword has 3 arguments which exactly matched with the number of the parameters in the superclass constructor. One constraint that we face when we use the super keyword in executing the constructor method of parent class as explained above is that it must be the first statement of the subclass constructor method. Therefore, if we swap line 5 and line 6 in the constructor method of Program 7.5 such as shown below , the Java compiler will give a compilation error. public DiplomaStudent(String NAME,int AGE, String MATRIC, int COURSE, double LABORATORY_FEES) {
setTotalCourse(COURSE); super(NAME,AGE,MATRIC); //ERROR setLabFees(LABORATORY_FEES); }
7.2.2 Calling Superclass’s Methods
Besides calling the superclass of the constructor, the keyword super also could be used to invoke member methods from the superclass. For example, observe the following lines taken from Program 7.5:
Line 15: public double getFees(){ Line 16: return (super.getFees())+(numberOfCourses*50.00 + labFees); Line 17: }
The statement super.getFees( ) in Line 16 is actually invokes the getFees() method available in the superclass. Any overridden methods could be in invoked in the subclass by using the super keyword.
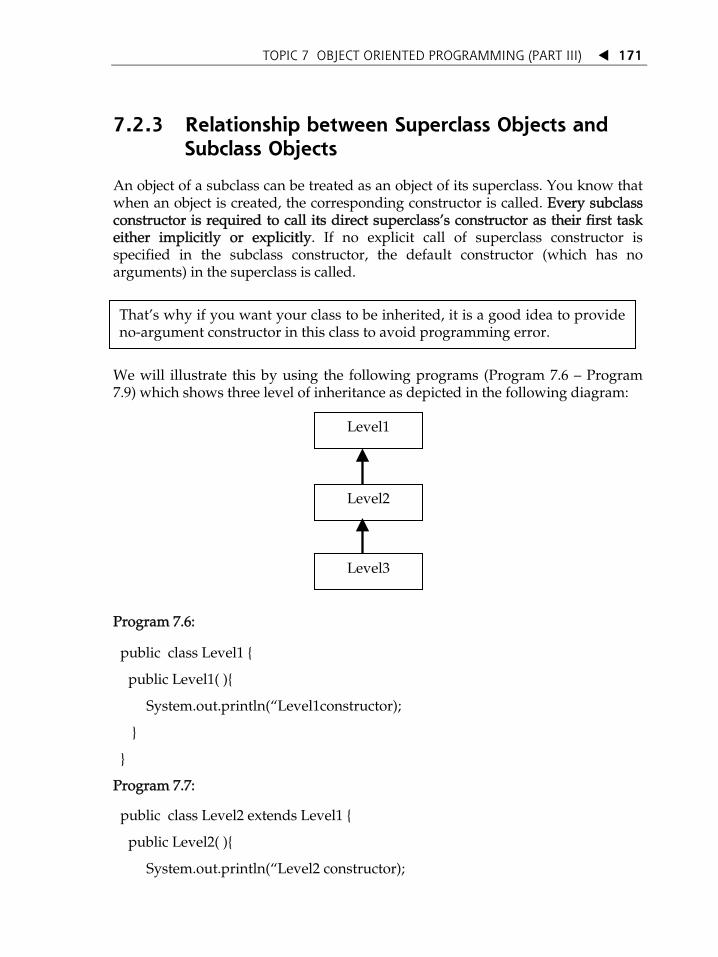
TOPIC 7 OBJECT ORIENTED PROGRAMMING (PART III)
171
7.2.3 Relationship between Superclass Objects and Subclass Objects
An object of a subclass can be treated as an object of its superclass. You know that when an object is created, the corresponding constructor is called. Every subclass constructor is required to call its direct superclassÊs constructor as their first task either implicitly or explicitly. If no explicit call of superclass constructor is specified in the subclass constructor, the default constructor (which has no arguments) in the superclass is called.
ThatÊs why if you want your class to be inherited, it is a good idea to provide no-argument constructor in this class to avoid programming error.
We will illustrate this by using the following programs (Program 7.6 Program 7.9) which shows three level of inheritance as depicted in the following diagram:
Level2
Level1
Level3
Program 7.6:
public class Level1 {
public Level1( ){
System.out.println(„Level1constructor);
}
}
Program 7.7:
public class Level2 extends Level1 {
public Level2( ){
System.out.println(„Level2 constructor);

TOPIC 7 OBJECT ORIENTED PROGRAMMING (PART III)
172
}
}
Program 7.8: public class Level3 extends Level2{
public Level3( ){
System.out.println(„Level3 constructor);
}
}
Now let us write that program that will create the object of the Level3 class shown above:
Program 7.9:
class obj {
public static void main (String[ ] args ){
Level3 l3 = new Level3();
}
}
The output for the Program 7.9 is shown below:
Level1 constructor
Level2 constructor
Level3 constructor
You could see that the construction happens from the base „outward‰ so the base class is initialised before the derived class can access it. Now let us consider another example:
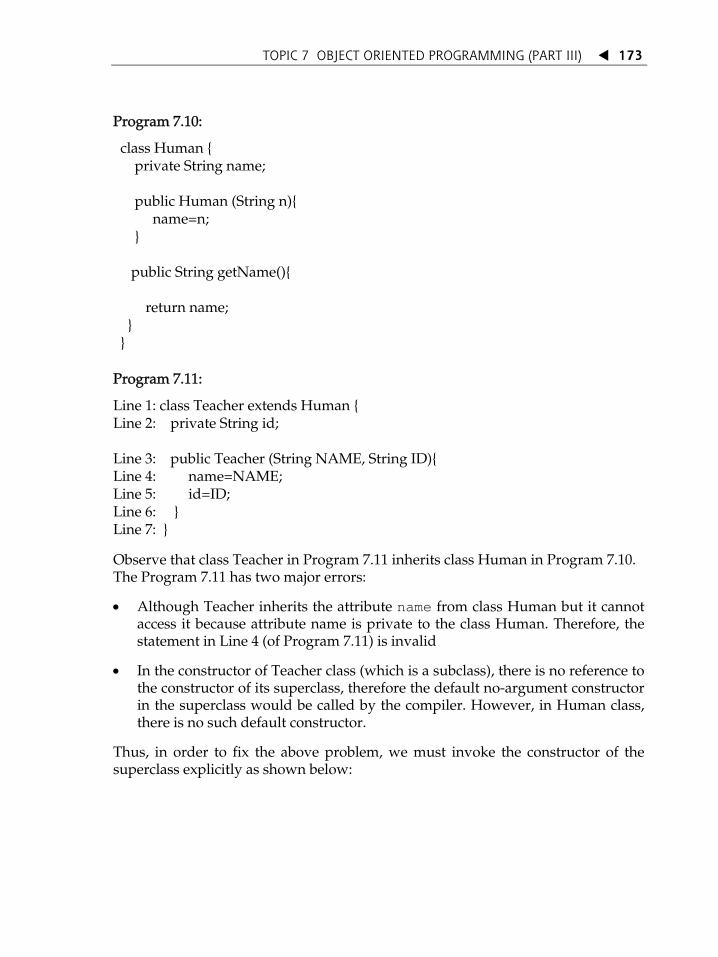
TOPIC 7 OBJECT ORIENTED PROGRAMMING (PART III)
173
Program 7.10:
class Human { private String name; public Human (String n){ name=n; } public String getName(){ return name; } }
Program 7.11:
Line 1: class Teacher extends Human { Line 2: private String id; Line 3: public Teacher (String NAME, String ID){ Line 4: name=NAME; Line 5: id=ID; Line 6: } Line 7: }
Observe that class Teacher in Program 7.11 inherits class Human in Program 7.10. The Program 7.11 has two major errors:
Although Teacher inherits the attribute name from class Human but it cannot access it because attribute name is private to the class Human. Therefore, the statement in Line 4 (of Program 7.11) is invalid
In the constructor of Teacher class (which is a subclass), there is no reference to the constructor of its superclass, therefore the default no-argument constructor in the superclass would be called by the compiler. However, in Human class, there is no such default constructor.
Thus, in order to fix the above problem, we must invoke the constructor of the superclass explicitly as shown below:
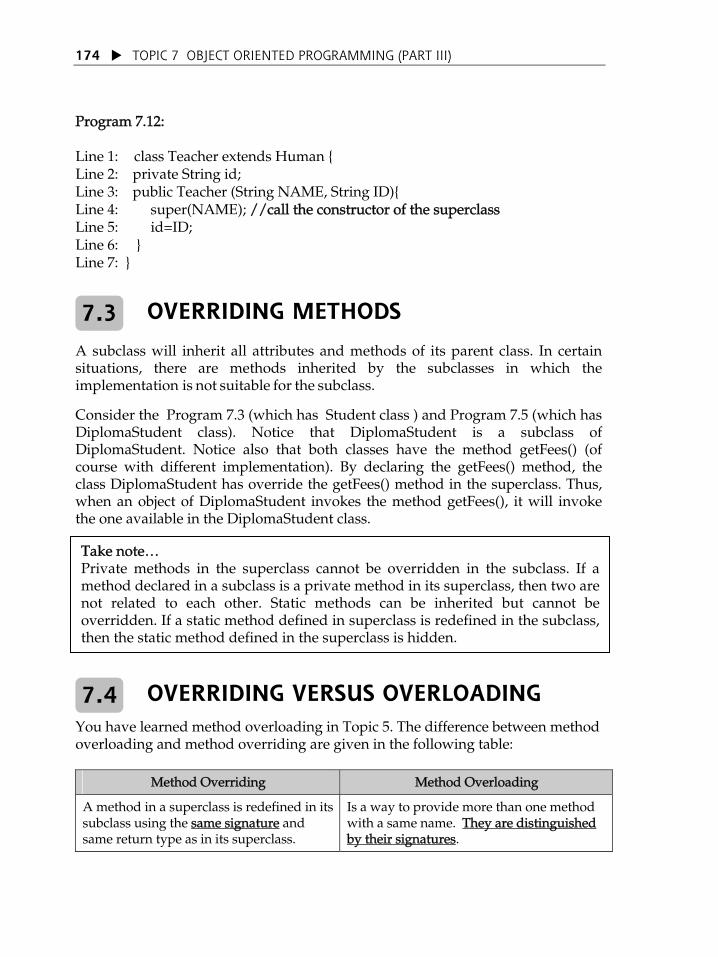
TOPIC 7 OBJECT ORIENTED PROGRAMMING (PART III)
174
Program 7.12: Line 1: class Teacher extends Human { Line 2: private String id; Line 3: public Teacher (String NAME, String ID){ Line 4: super(NAME); //call the constructor of the superclass Line 5: id=ID; Line 6: } Line 7: }
OVERRIDING METHODS A subclass will inherit all attributes and methods of its parent class. In certain situations, there are methods inherited by the subclasses in which the implementation is not suitable for the subclass.
Consider the Program 7.3 (which has Student class ) and Program 7.5 (which has DiplomaStudent class). Notice that DiplomaStudent is a subclass of DiplomaStudent. Notice also that both classes have the method getFees() (of course with different implementation). By declaring the getFees() method, the class DiplomaStudent has override the getFees() method in the superclass. Thus, when an object of DiplomaStudent invokes the method getFees(), it will invoke the one available in the DiplomaStudent class.
OVERRIDING VERSUS OVERLOADING 7.4
7.3
Take note⁄ Private methods in the superclass cannot be overridden in the subclass. If a method declared in a subclass is a private method in its superclass, then two are not related to each other. Static methods can be inherited but cannot be overridden. If a static method defined in superclass is redefined in the subclass, then the static method defined in the superclass is hidden.
You have learned method overloading in Topic 5. The difference between method overloading and method overriding are given in the following table:
Method Overriding Method Overloading
A method in a superclass is redefined in its subclass using the same signature and same return type as in its superclass.
Is a way to provide more than one method with a same name. They are distinguished by their signatures.
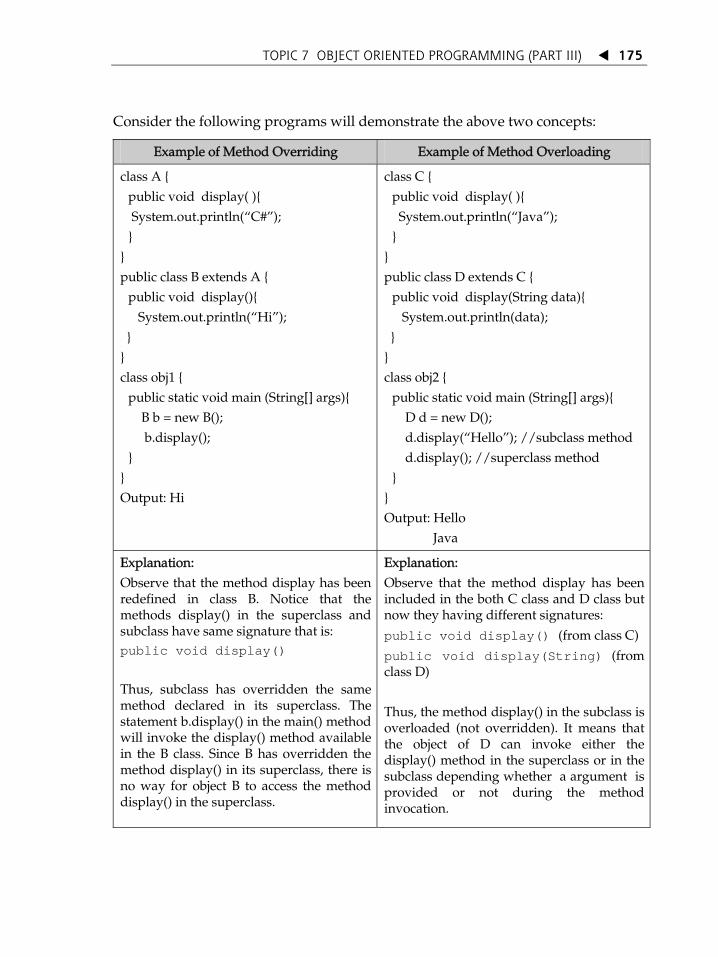
TOPIC 7 OBJECT ORIENTED PROGRAMMING (PART III)
175
Consider the following programs will demonstrate the above two concepts:
Example of Method Overriding Example of Method Overloading
class A { public void display( ){ System.out.println(„C#‰); }
} public class B extends A {
public void display(){ System.out.println(„Hi‰);
} } class obj1 {
public static void main (String[] args){ B b = new B(); b.display(); }
} Output: Hi
class C { public void display( ){ System.out.println(„Java‰); }
} public class D extends C {
public void display(String data){ System.out.println(data);
} } class obj2 {
public static void main (String[] args){ D d = new D(); d.display(„Hello‰); //subclass method d.display(); //superclass method }
} Output: Hello Java
Explanation: Observe that the method display has been redefined in class B. Notice that the methods display() in the superclass and subclass have same signature that is: public void display()
Thus, subclass has overridden the same method declared in its superclass. The statement b.display() in the main() method will invoke the display() method available in the B class. Since B has overridden the method display() in its superclass, there is no way for object B to access the method display() in the superclass.
Explanation: Observe that the method display has been included in the both C class and D class but now they having different signatures:
public void display() (from class C)
public void display(String) (from class D) Thus, the method display() in the subclass is overloaded (not overridden). It means that the object of D can invoke either the display() method in the superclass or in the subclass depending whether a argument is provided or not during the method invocation.
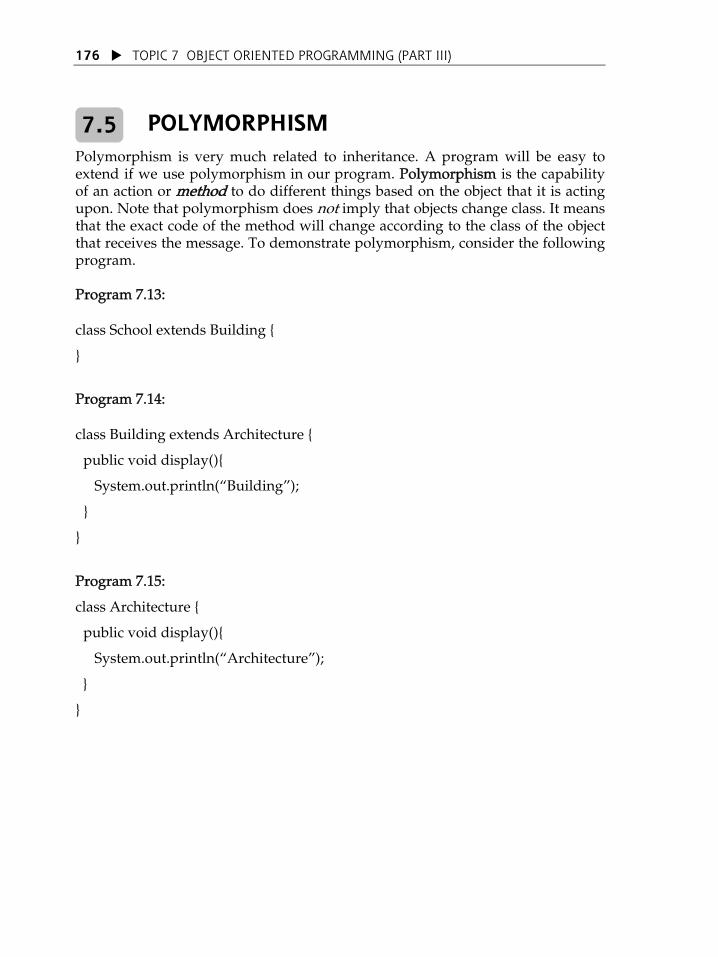
TOPIC 7 OBJECT ORIENTED PROGRAMMING (PART III)
176
POLYMORPHISM 7.5
Polymorphism is very much related to inheritance. A program will be easy to extend if we use polymorphism in our program. Polymorphism is the capability of an action or method to do different things based on the object that it is acting upon. Note that polymorphism does not imply that objects change class. It means that the exact code of the method will change according to the class of the object that receives the message. To demonstrate polymorphism, consider the following program. Program 7.13: class School extends Building {
}
Program 7.14: class Building extends Architecture {
public void display(){
System.out.println(„Building‰);
}
}
Program 7.15:
class Architecture {
public void display(){
System.out.println(„Architecture‰);
}
}
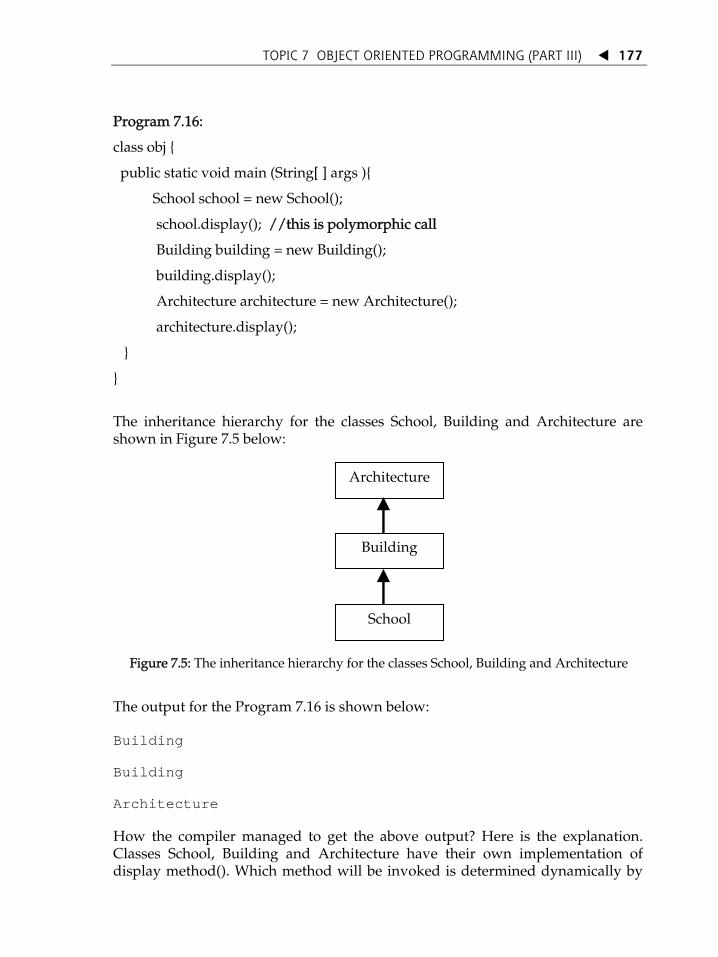
TOPIC 7 OBJECT ORIENTED PROGRAMMING (PART III)
177
Program 7.16:
class obj {
public static void main (String[ ] args ){
School school = new School();
school.display(); //this is polymorphic call
Building building = new Building();
building.display();
Architecture architecture = new Architecture();
architecture.display();
}
}
The inheritance hierarchy for the classes School, Building and Architecture are shown in Figure 7.5 below:
School
Building
Architecture
Figure 7.5: The inheritance hierarchy for the classes School, Building and Architecture
The output for the Program 7.16 is shown below: Building
Building
Architecture
How the compiler managed to get the above output? Here is the explanation. Classes School, Building and Architecture have their own implementation of display method(). Which method will be invoked is determined dynamically by
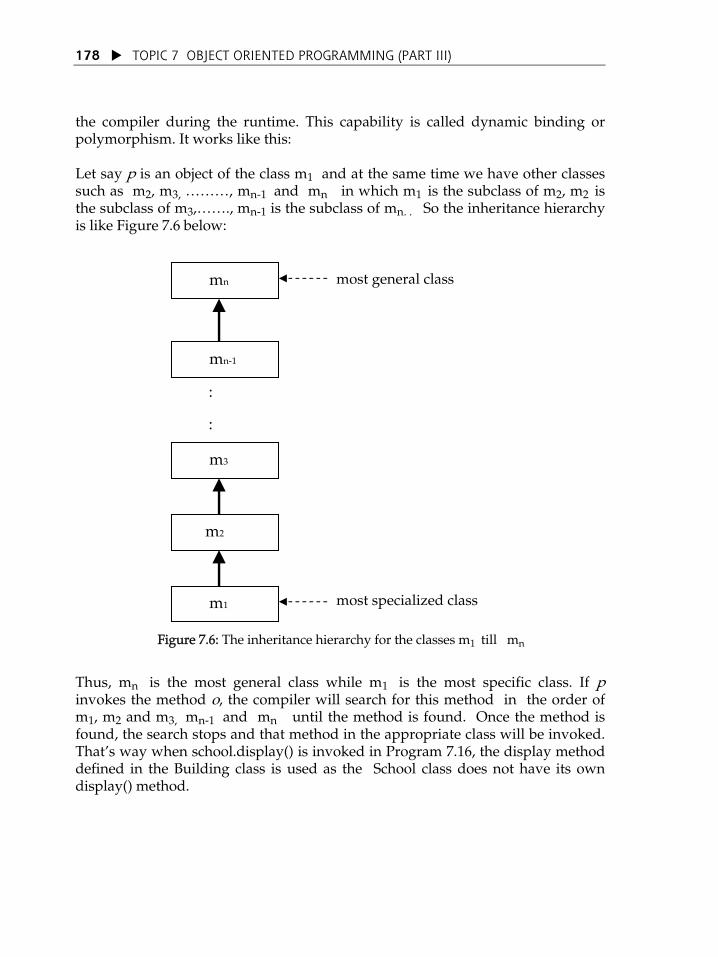
TOPIC 7 OBJECT ORIENTED PROGRAMMING (PART III)
178
the compiler during the runtime. This capability is called dynamic binding or polymorphism. It works like this: Let say p is an object of the class m1 and at the same time we have other classes such as m2, m3, ⁄⁄⁄, mn-1 and mn in which m1 is the subclass of m2, m2 is the subclass of m3,⁄⁄., mn-1 is the subclass of mn. . So the inheritance hierarchy is like Figure 7.6 below:
:
:
mn‐1
mn
m1
m2
m3
most specialized class
most general class
Figure 7.6: The inheritance hierarchy for the classes m1 till mn
Thus, mn is the most general class while m1 is the most specific class. If p invokes the method o, the compiler will search for this method in the order of m1, m2 and m3, mn-1 and mn until the method is found. Once the method is found, the search stops and that method in the appropriate class will be invoked. ThatÊs way when school.display() is invoked in Program 7.16, the display method defined in the Building class is used as the School class does not have its own display() method.
TOPIC 7 OBJECT ORIENTED PROGRAMMING (PART III)
179
TAKE NOTE⁄In section 6.4 (Topic 6), you have learned about reference type variables. When we declare a reference type variable using a particular class name, it can be used to refer to any object of that class or it also can refer to any object of any class that is related through its inheritance relationship. For example, if Student is the superclass for DiplomaStudent and MasterStudent and we have the following declaration: Student student; With this declaration, we can have not only student = new Student(); but also student = new DiplomaStudent(); or
USING protected ACCESS MODIFIER 7.6
As discussed in the previous topic, the scope for the private attributes and methods are limited to the class that defines the element. Other than private and public access control, we also have another type of access control, which is protected. This access control is used in the inheritance. We can access the protected methods and attributes not from its own class only, but it also allows us to access it from any other classes which inherits that class. As an example, consider Program 7.17(a). This program has defined a class named Payment. This class has two protected attributes, dollar and cent. It also has a protected method called centAmount() which does some calculation and return the value. Since the attribute and the method have been declared as protected in Payment class, it can be accessed from the Payment class and its subclass such as PaymentCheque class defined in Program 7.17(b).

TOPIC 7 OBJECT ORIENTED PROGRAMMING (PART III)
180
The direct access to the superclass attributes declared as protected was shown in constructor method in PaymentCheque class. As you can see, super is not used in this method to invoke the superclass constructor to assign value for the attributes. This is because class PaymentCheque can directly access the attributes of Payment class as the attributes are declared as proctected.
Now, letÊs look at the main( ) method in the Program 7.17(c). Object payment which is object of the class PaymentCheque has been created with appropriate arguments. Then the object invokes the method centAmount(). This is an error because method centAmount( ) is declared as protected. Thus, it could only be invoked in its class and from all its subclasses. The Program 7.17(c) does not inherits class Payment and its considered to be outside from the inheritance hierarchy of Payment class. Program 7.17 (a)
class Payment { protected int dollar, cent;
public Payment(int dollarValue, int centValue) {
dollar = dollarValue; cent = centValue;
}
protected long centAmount( ) { return dollar * 100 +cent;
} }
Program 7.17 (b)
class PaymentCheque extends Payment { private String nbrCheque;
public PaymentCheque(int dollarValue, int centValue, String chequeNo) {
dollar = dollarValue; cent = centValue; nbrCheque =chequeNo;
} }

TOPIC 7 OBJECT ORIENTED PROGRAMMING (PART III)
181
Program 7.17 (c) (Contains error)
class obj3 { public static void main (String[ ] args ) { PaymentCheque payment = new PaymentCheque (3, 20, ‰0053867‰); // The fol lowing statement contains ERROR System.out.println(„Amount(cent):„+ payment.centAmount( ); } }
USING final KEYWORD 7.7
Sometimes we donÊt want the class that we have created to be inherited by other classes or we donÊt want a method in a superclass to be overridden by its subclass. In Java, the final keyword is used for these purposes. Class declared as final cannot have subclasses. It means other classes cannot inherit the class. Method declared as final cannot be overridden by other subclasses. Consider the following programs:
Program 7.18:
public final class A {
⁄.
⁄.
}
class B extends A {
ERROR! Class B cannot extends class A because class A is a final class
⁄.
⁄.
}

TOPIC 7 OBJECT ORIENTED PROGRAMMING (PART III)
182
Program 7.19:
class M1 {
public final void display (){
System.out.println(„Hi‰);
}
}
class M2 extends M1 {
public void display (){
ERROR! Method display() cannot be overridden because it is declared as final in the superclass
System.out.println(„Hello‰);
}
}
ABSTRACT CLASSES AND ABSTRACT
METHODS 7.8
When discussing inheritance, we cannot avoid on discussing abstract and concrete classes. An abstract class is a class that never has any objects but can be inherited by other class. Consider this: would it make sense to have an object Fruit? Clearly not, as the class Fruit is an abstraction of a fruit, and not a fruit itself. In this case, Fruit is an abstract class and we cannot create object for this class. A concrete class is class that has objects. Up until this topic, all the classes we have discussed were concrete classes. Returning to abstract classes, if we cannot create object from an abstract class, why then we may have abstract class in our program? Actually, each abstract class represents some idea, although it will not be totally complete as some details and definitions will be left out to the concrete classes that inherit from the abstract class. The name of the abstract class should reflect that itÊs a concept rather than something specific. So ÂAccountÊ versus ÂChecking AccountÊ, or ÂVehicleÊ versus ÂTruckÊ. Note that abstract classes should not inherit from concrete classes, as it makes no sense to go from general to specific and back to general. For example consider the following class:
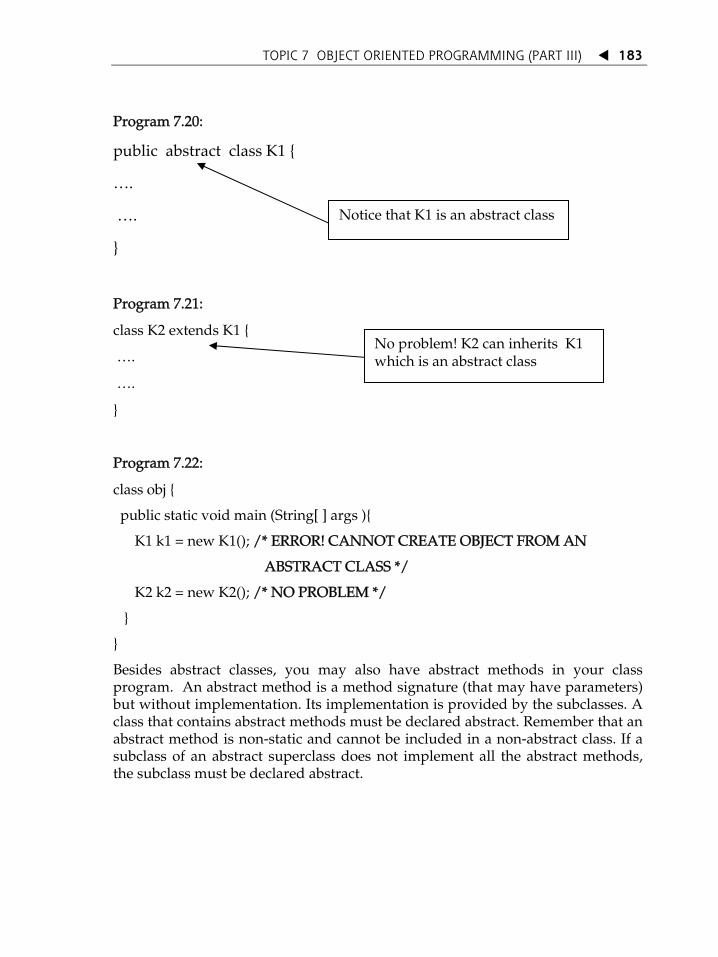
TOPIC 7 OBJECT ORIENTED PROGRAMMING (PART III)
183
Program 7.20:
public abstract class K1 {
Notice that K1 is an abstract class
….
….
}
Program 7.21:
class K2 extends K1 { No problem! K2 can inherits K1 which is an abstract class ⁄.
⁄.
}
Program 7.22:
class obj {
public static void main (String[ ] args ){
K1 k1 = new K1(); /* ERROR! CANNOT CREATE OBJECT FROM AN
ABSTRACT CLASS */
K2 k2 = new K2(); /* NO PROBLEM */
}
}
Besides abstract classes, you may also have abstract methods in your class program. An abstract method is a method signature (that may have parameters) but without implementation. Its implementation is provided by the subclasses. A class that contains abstract methods must be declared abstract. Remember that an abstract method is non-static and cannot be included in a non-abstract class. If a subclass of an abstract superclass does not implement all the abstract methods, the subclass must be declared abstract.

TOPIC 7 OBJECT ORIENTED PROGRAMMING (PART III)
184
EXERCISE 7.2
1. Consider the following two classes: public class ClassA { public void methodOne(int i) { } public void methodTwo(int i) { } public static void methodThree(int i) { } public static void methodFour(int i) { } }
public class ClassB extends ClassA { public static void methodOne(int i) { } public void methodTwo(int i) { } public void methodThree(int i) { } public static void methodFour(int i) { } }
(a) Which method overrides a method in the superclass?
(b) Which method hides a method in the superclass?
(c) What do the other methods do?

TOPIC 7 OBJECT ORIENTED PROGRAMMING (PART III)
185
class aplikasi {
public static void main (String[ ] args) {
Y pengira = new Y(2);
for (int i=1; i<3; i++){
int hasil =pengira.kira(i);
System.out.print(hasil+ “”);
} }
}
2. Consider the following class definition: class X { protected int atrib1; public X(int nilai) { atrib1=nilai; }
public int kira(int nilai){ int hasil = 1; for (int i=0; i<atrib1;i++) hasil=hasil*nilai; return hasil; } class Y extends X { public Y (int nilai) {
super(nilai);
}
public int kira(int nilai){
int hasil=0;
for (int i=0; i<atrib1; i++)
hasil=hasil+nilai;
return hasil;
}
}
Write the output for the following application:

TOPIC 7 OBJECT ORIENTED PROGRAMMING (PART III)
186
}
class Pembilang extends Penokok { private int nilaiAsal;
public Pembilang(int nilaiAwal) { super(nilaiAwal); nilaiAsal = nilaiAwal; } public void setNilaiAsal( ) { nilai = nilaiAsal; } }
State whether the concepts of method overriding and method overloading have been used in the above program. Explain your answer.
3. Consider the following program:
class Penokok {
protected int nilai;
public Penokok(int nilaiMula) {
nilai = nilaiMula;
}
public void tokok() {
nilai++;
}
public int nilainya() {
return nilai;
}

TOPIC 7 OBJECT ORIENTED PROGRAMMING (PART III)
187
4. Consider the following class:
public class Person {
private String name; public Person() { name = "No name yet."; } public Person(String n) { name = n; } public void setName(String newName) { name = newName; } public String getName() { return name; } public void print() { System.out.println("Name: " + name); } public boolean equals(Person p) { return name.equals(p.name); }
}
Create a class called Employee whose objects are records for an employee. This class will be a derived class of the class Person above which you will have to copy into a file of your own and compile. An employee record has an employee's name (inherited from the class Person), an annual salary represented as a single value of type double, a year the employee started work as a single value of type int and a national insurance number, which is a value of type String. Your class should have a reasonable number of constructors and member methods to retrieve the attributes value, as well as an equals method. Write another class containing a main method to fully test your class definition.

TOPIC 7 OBJECT ORIENTED PROGRAMMING (PART III)
188
5. Consider the following constructor method:
public ConferenceRoom(int rent, int cap){
super(rent,cap);
} State the purpose of the statement super(rent,cap) that exist in the method. Assume ConferenceRoom is a subclass. 6. Consider the following class definition:
class Pembilang {
p rotected int nilai;
public Pembilang() { nilai = 0; } public Pembilang(int nilaiAwal) { nilai = nilaiAwal; } public void kemaskini() { nilai++; } public int nilainya() { return nilai; }
}
Write a class definition for Pemasa class which extends Pembilang class to do the decreasing calculation and display the message „Ring⁄Ring⁄‰ when the value reaches zero.

TOPIC 7 OBJECT ORIENTED PROGRAMMING (PART III)
189
Inheritance is a type of relationship among classes, where one class shares the
structure or behaviour defined in one (single inheritance) or more (multiple inheritance) of the other classes.
The idea that different classes have shared common characteristics is explained by the concepts of superclasses, subclasses and inheritance.
We can illustrate these concepts by seeing student as the superclass, in which different subclasses such as diplomaStudent and mastersStudenrt with varying characteristics inherited from it.
Subclasses have all the characteristics and behaviour inherited from the superclass but have added some more characteristics and behaviours.
When discussing about inheritance, the following concepts cannot be avoided:
‐ Polymorphism
‐ Method overriding
‐ Abstract and concrete classes
‐ The usage of super and final keywords
‐ Protected access modifier
abstract classes
concrete classes
final
inheritance
method overriding
polymorphism
protected
super

INTRODUCTION Java programming starts with creating a class. While the programming is being done, the object of the class is created and destroyed according to the need of the program. We may not need to write all the classes that are required in a program. We can use the class that is readily available in the class library provided by JDK. For example, the class library that we used previously in Appendix 2 is the Pembaca class. We can still use Pembaca class without knowing how the class was made. The only thing we need to know is just the syntax on how to access the methods in that class. This is the encapsulation features in Java programming. Java provides a lot of class library for many different tasks in programming such as mathematical operation, organisation, sequence, graphic, multithreading and network. This chapter will discuss in detail the different types of Java class library and how to use it in programming.
TTooppiicc Java Class Library 88
By the end of this topic, you should be able to:
1. Describe the meaning of package in Java;
2. Describe the purpose of keyword import;
3. Describe of how classes in Java library can be used; and
4. Write a program that will demonstrate the usage of creating object, composition and subclass.
LEARNING OUTCOMES
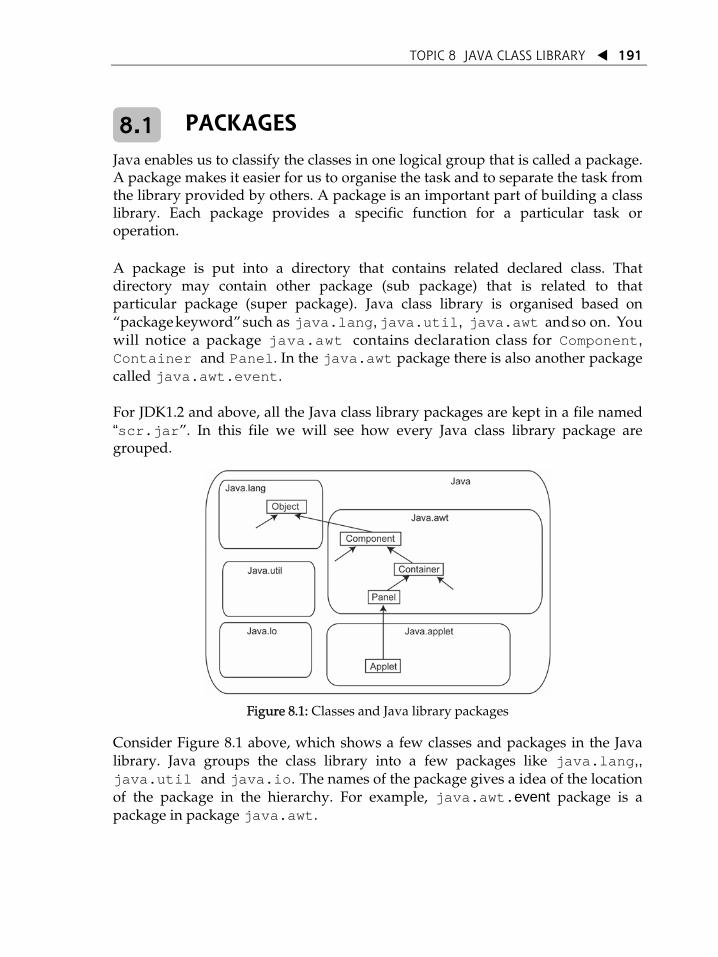
TOPIC 8 JAVA CLASS LIBRARY
191
PACKAGES 8.1 Java enables us to classify the classes in one logical group that is called a package. A package makes it easier for us to organise the task and to separate the task from the library provided by others. A package is an important part of building a class library. Each package provides a specific function for a particular task or operation. A package is put into a directory that contains related declared class. That directory may contain other package (sub package) that is related to that particular package (super package). Java class library is organised based on „package keyword‰ such as java.lang, java.util, java.awt and so on. You will notice a package java.awt contains declaration class for Component, Container and Panel. In the java.awt package there is also another package called java.awt.event. For JDK1.2 and above, all the Java class library packages are kept in a file named “scr.jar‰. In this file we will see how every Java class library package are grouped.
Figure 8.1: Classes and Java library packages
Consider Figure 8.1 above, which shows a few classes and packages in the Java library. Java groups the class library into a few packages like java.lang,, java.util and java.io. The names of the package gives a idea of the location of the package in the hierarchy. For example, java.awt.event package is a package in package java.awt.

TOPIC 8 JAVA CLASS LIBRARY
192
A package built in Java is not standalone package. Each package in Java has the object-oriented characteristic. Notice the inheritance relationship done in each package. A clear example is that each class in Java inherits the same class that is object. This means that Java allows the concept of inheritance on any class in a different package. For example in Applet class from package java.applet is inherits Panel class in the java.awt package. Inheritance relationship is not only allowed between classes in the different packages. Java also allows inheritance relationship to the classes in the same package. For example, Panel class inherits Container class, which in turn inherits Component class.
USING PACKAGE 8.2 There are two ways we can use public class in a package:
Using its absolute name; and
Using the keyword import.
Using Absolute Name The first way is to give an absolute name or a complete name for each package. For example:
java.util.Date DATE = new java.util.Date();
This method uses the package that contains the class followed by the actual name. For example, java.util package contain the class Date. This means that the absolute class name is java.util.Date. These techniques are quite tedious, especially if the sub package for a class referred to, is way down the hierarchy level or there are a lot of sub packages. The next best way is to use import keyword. Using import Keyword This technique is shorter compared to the first technique. We can refer to the classes in the related package without giving the full name. We can import the specific class or the whole package depending on the usage. In this technique we put the word import to the class/package that will be used in the program. Notice this in Program 8.1.
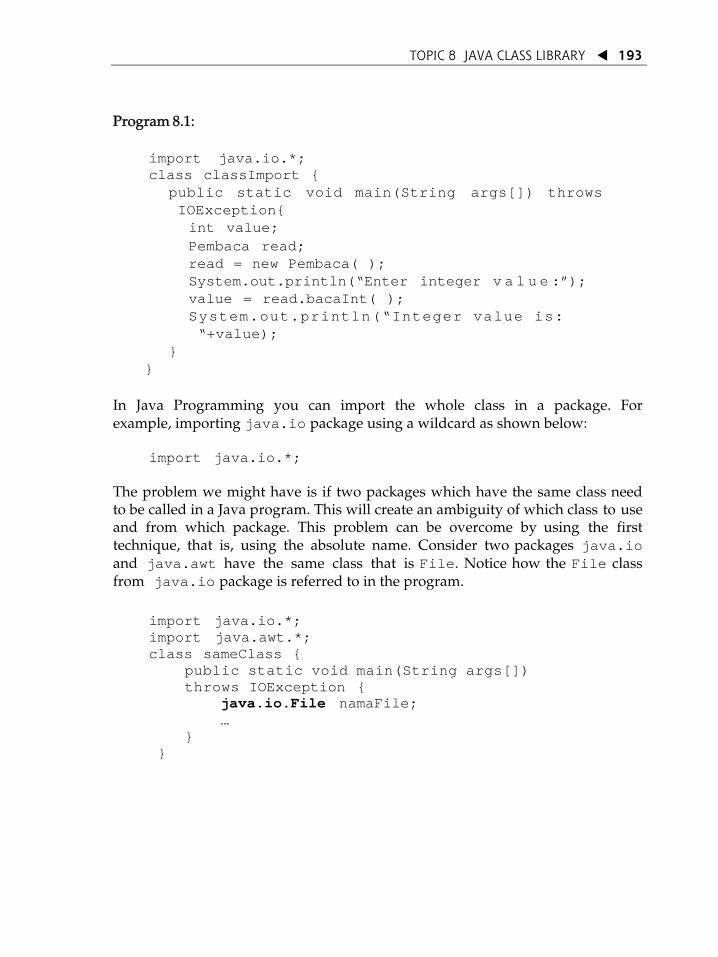
TOPIC 8 JAVA CLASS LIBRARY
193
Program 8.1:
import java.io.*; class classImport {
public static void main(String args[]) throws IOException{
int value; Pembaca read; read = new Pembaca( ); System.out.println(“Enter integer v a l u e :”); value = read.bacaInt( ); System.out.println(“Integer value is: “+value);
} }
In Java Programming you can import the whole class in a package. For example, importing java.io package using a wildcard as shown below:
import java.io.*; The problem we might have is if two packages which have the same class need to be called in a Java program. This will create an ambiguity of which class to use and from which package. This problem can be overcome by using the first technique, that is, using the absolute name. Consider two packages java.io and java.awt have the same class that is File. Notice how the File class from java.io package is referred to in the program.
import java.io.*; import java.awt.*; class sameClass {
public static void main(String args[]) thro n { ws IOExceptio
java.io.File namaFile; …
} }
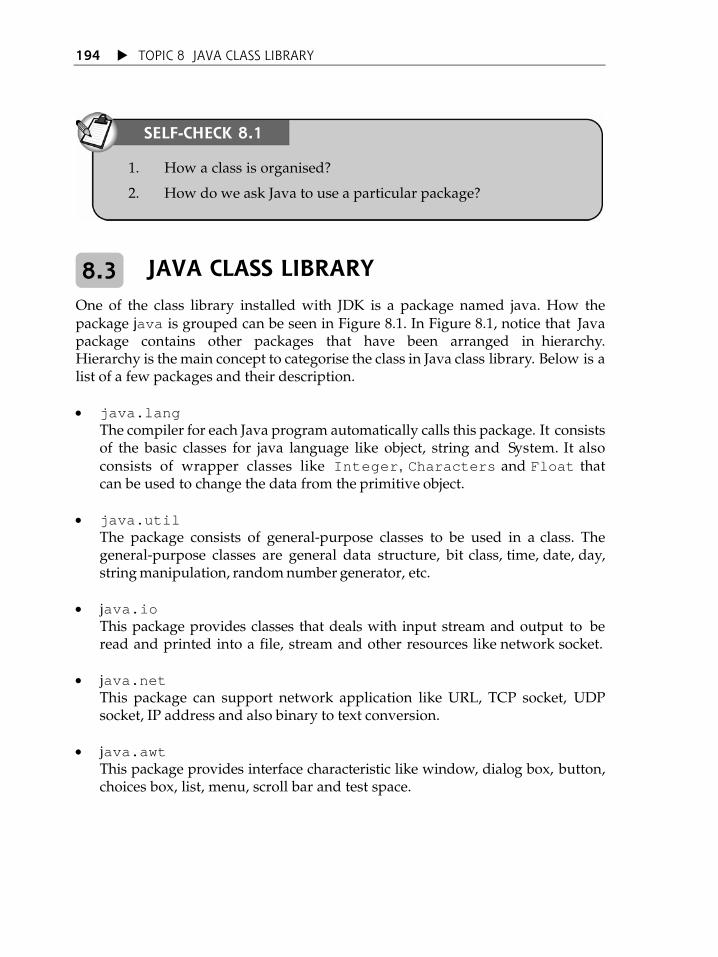
TOPIC 8 JAVA CLASS LIBRARY
194
SELF-CHECK 8.1
1. How a class is organised?
2. How do we ask Java to use a particular package?
JAVA CLASS LIBRARY 8.3 One of the class library installed with JDK is a package named java. How the package java is grouped can be seen in Figure 8.1. In Figure 8.1, notice that Java package contains other packages that have been arranged in hierarchy. Hierarchy is the main concept to categorise the class in Java class library. Below is a list of a few packages and their description. java.lang The compiler for each Java program automatically calls this package. It consists
of the basic classes for java language like object, string and System. It also consists of wrapper classes like Integer, Characters and Float that can be used to change the data from the primitive object.
java.util The package consists of general-purpose classes to be used in a class. The
general-purpose classes are general data structure, bit class, time, date, day, string manipulation, random number generator, etc.
java.io This package provides classes that deals with input stream and output to be
read and printed into a file, stream and other resources like network socket. java.net This package can support network application like URL, TCP socket, UDP
socket, IP address and also binary to text conversion. java.awt This package provides interface characteristic like window, dialog box, button,
choices box, list, menu, scroll bar and test space.

TOPIC 8 JAVA CLASS LIBRARY
195
To see more detail of Java Package please refer to
http://java.sun.com/products/jdk/doc/api
8.3.1 Methods to Use Java Class Library One of the important characteristics in Java class library is the reusable concept. This means that the programmer does not need to waste time to create class that already exists. Using the reusable concept, time spent in writing the program can be reduced. We can spend more time thinking ÂwhatÊ is required instead of ÂhowÊ to build a class. Classes in Java library can be used in many different ways. There are three common ways that we can manipulate the Java class library that is:
Creating object
Composition
Subclass
The three methods will be discussed in detail below:
Creating Object To create an object, the operation is the same as in Topic 5 which includes the following steps:
Determine the class package. Then you decide whether to use absolute name or import keyword for the class in the package;
Defining the object of this class. Class method cannot be used at this level; and
Creating an object using keyword ÂnewÊ. Then we can use any method for the class of this object.

TOPIC 8 JAVA CLASS LIBRARY
196
Program 8.2 below will clarify the above steps. Program 8.2
import java.util.Date; class thisYear{
public static void main (String args[]){ Date day;
day = new Date(); System.out.println(“This year:”+day.getYear()); }
}
In this program we will use again class Date available in the package java.util. Before we can use the class, first we must tell the computer that class Date is in package java.util. Then we have to define the variable day as an object of the class Date. Then the object from the class can be created using the keyword ÂnewÊ. After creating this, the object can access the methods of the class Date. For example, in the program above, the method used by the object day is getYear() which is readily available in the class Date from the package java.util.
Composition In object oriented programming an object must work together to solve a problem. Object used in a program is dynamic. That is, it can be „composed‰ to become a component of another object. This change enriches the characteristic in that particular object. Example of the object change can be seen in Program 8.3. Program 8.3
import java.awt.Color; class Ball {
private String brand; private Color color;
public Ball (String ballName, Color ballColor){ brand = ballName; color = ballColor; } }

TOPIC 8 JAVA CLASS LIBRARY
197
class Application { public static void main(String args []) {
Ball ball = new Ball(“Adidas”,Color.red); }
}
In Program 8.3 we used class String again. Class String is from package java.lang. It is not necessary to import it because Java will automatically import package java.lang when compiling the program. To use class color class, we have to import package java.awt.Color. We have to do this because the compiler does not automatically load this package.
Notice that the attribute value brand and color respectively refer to an object String and an object Color. When an object Ball is created, it will be assigned to an object String and Color through brand and color attributes. We can say that both object String and Color are the components of object Ball. Meanwhile, object Ball is created in class Application. The attributes of this class Ball have been initialised by objects String and Color.
Subclass Subclass is related to hierarchy. We have understood that a class can inherit attribute and character of another class. Using the same concept we can do it on other classes in Java library. Program 8.4
import javax, swing.*; import java.awt.*; public class EasyApplet extends Applet { public void paint(Graphics g){
g.drawString(“Hello World”, 50,50); }
} In Program 8.4, EasyApplet class inherits the characteristic or behavior of JApplet class from the package javax.swing. We also can override the methods in the main class (super class) by redefining it in the subclass. In the example above, we have overridden the method paint()in the main class iby redefining the method in EasyApplet class.

TOPIC 8 JAVA CLASS LIBRARY
198
1. Compose the following objects as component of other object:
(a) car
(b) house
(c) human 2. Analyse a few classes in the Java package and draw the class
hierarchy. Based on the class hierarchy, clarify the concept of subclasses used in the package.
3. Class library in Java is organised into 3 levels that is:
(a) All packages
(b) All classes (inside the package)
(c) A class (chosen class) Observe and clarify in detail the meaning of the three levels above. Note: You can use the example in the Java standard library to clarify your observation.
EXERCISE 8.1
Java programming starts with creating a class.
While the programming is being done, the object of the class is created and destroyed according to the need of the program.
We may not need to write all the classes that are required in a program
We can use the class that is readily available in the class library provided by JDK.
Java provides a lot of class library for many different tasks in programming such as mathematical operation, organisation, sequence, graphic, multithreading and network.
There are three common ways that we can manipulate the Java class library namely, creating object, composition and subclass.
TOPIC 8 JAVA CLASS LIBRARY
199
This topic has discussed in detail the different types of Java class library and how to use it in programming.
class library
composition
creating object
import
package
subclass

INTRODUCTION At this level we should be used to quite a number of Java programming commands. We may agree when we say that Java is a programming language that is object oriented which makes it easy for us to solve a problem with the help of the class library or userÊs defined classes. In Topic 1 Topic 7, we have written Java applications. Application is a stand-alone program that is done by directing the Java interpreter to translate the bytecode in the class file. Another type of Java program is known as Applet. This topic and onwards will focus on Applet.
DIFFERENCE BETWEEN APPLET AND APPLICATION
The specialty of Java is on its ability to build a program that can operate in a networking environment. To achieve this, Java programming using applet is introduced in this topic. Applet is a Java program that can be executed in a web page through the Java-enabled web browser. An example of Java browser that is Java enabled is Netscape 2.0 and upward versions and Internet Explorer. With applet, we can write a program that is interactive whereby the user use mouse and keyboard to interact with the program. The element of interfacing graphic
9.1
By the end of this topic, you should be able to:
1. Describe the meaning of Applet;
2. Differentiate between Java Application and Applet;
3. Explain the structure of an Applet program; and
4. Identify and decribe the library methods available in the JApplet class.
LEARNING OUTCOMES
TTooppiicc
99
Applet
TOPIC 9 APPLET 201
components can be done to the applet using classes in the java class library. Applet is different from application in a few important aspects that is:
• Applet is built for the web browser or appletviewer. It is not a stand-alone program; therefore it does not need main () method in the program block. To program an applet we need to create two separate files that is a file with HTML tag and a file with Java programming code.
• Applet programming is written with high safety control. Applet does not allow the program to read and write file to the client machine. Applet also does not allow any operation to be done on a client machine.
BUILDING AN APPLET
To build an applet and load it to the web browser, we have to create two separate files that is Java program code file and the HTML tag file. In Java 1.2 and onwards, we can built applet by creating a subclass for class JApplet. An applet will not be built unless we inherit the class from the super class, that is JApplet. Therefore we can say that an applet is just a java class that expands the JApplet class. The applet that has been created is the class from the java.applet package while JApplet class is from javax.swing package. An applet class that we develop will inherit the method that executes the default behavior of the main applet (super class).
9.2.1 Building an Applet with Default Behaviour
We can build an applet which has default behavior by defining it as a subclass of main class that is JApplet. We will write an applet program by overriding the default methods in the main class. Below is the simplest example of Java applet:
import javax.swing.*; public class EasyApplet extends JApplet { }
Notice that the applet does not have method main() like the application program. This is the main characteristic that differentiates an applet program from an application program. After writing the program, we must save it in a file with the same name as the name of the class applet. In the above program the file name must be class EasyApplet.java. Notice also that here we have to declare class EasyApplet as public. This is so that the web browser can access and run the applet.
9.2

TOPIC 9 APPLET
202
To build the byte-code for the class EasyApplet we must compile the program just like compiling the application program by using the command:
javac EasyApplet.java
If there is no error during compilation, the class that inherits class JApplet named EasyApplet will be created automatically. After compiling the Java file, Java also needs HTML file to run class applet. HTML file will connect to the web browser to run the stated class file. HTML file can be given any name. But to make it easier for the user, the same file name would be easier. In this example we use EasyApplet.html. Below are a few statements that must be included in file EasyApplet.html:
<HTML> <APPLET CODE=“EasyApplet.class” WIDTH=200 HEIGHT=200> </APPLET> </HTML>
A few tags are required in the HTML file. Notice that these are <APPLET> tag meaning that the file required to be displayed in the web browser is an applet. On the CODE tag is written the class name and the extension *.class; WIDTH and HEIGHT tag state the size of the window displaying the applet. Both measurements are in the form of pixel. We also need to put a tag </Applet> as an indicator that this is the end of the information regarding the applet. If the information required is not there, the web browser will be unable to run the applet. Remember that just like other HTML document files, this HTML file does not need to be compiled. After the HTML file is set up, we than can display the Applet. There are three ways to display the applet contents, that is: 1. Using appletviewer direct command provided in J2SDK:
appletviewer EasyApplet.html
Command line for the appletviewer is the HTML file name and not the class file name.
2. Using Netscape or Internet Explorer web browser by calling EasyApplet.html from the user directory. This command can be used by choosing the menu File =>Open and then choosing file location on the menu bar of a web browser. Netscape version 2.0 (and above) and Internet Explorer version 3.0 (and above) support Java applet. If this is not

TOPIC 9 APPLET 203
successful we have to download Java Plug-in to the computer. You can get the Java Plug-In from the sun website http://java.sun.com/product/plugin.
3. If your computer has a Netscape or Internet Explorer browser and HTML
file that has been associated to one of the software, we can double click on that HTML file.
9.2.2 Changing and Overriding Default Behavior Applet
This default applet behavior is static and is not doing any useful job. Therefore our job is to override this methods that we inherit from JApplet class. We can override this default methods by redefining the methods again. We can also add new methods in the applet. There are a few default methods that have been inherited from the main class - JApplet. One method is used to display text and image, that is paint() method. Program 9.1 shows how the paint() method is overridden to display the text „Welcome‰ in the applet on the coordinate location of (50,50) relative to the upper-left of the window. Program 9.1
import javax.swing.*; import java.awt.*;
public class EasyApplet extends JApplet { public void paint(Graphics g) {
g.drawString(“Welcome”,50, 50); }
} We not only can override the existing method but also can add a new method to the applet class shown in Program 9.2. Program 9.2
import javax.swing.*; import java.awt.*;
public class EasyApplet extends JApplet { private void drawRedBox(Graphics g){
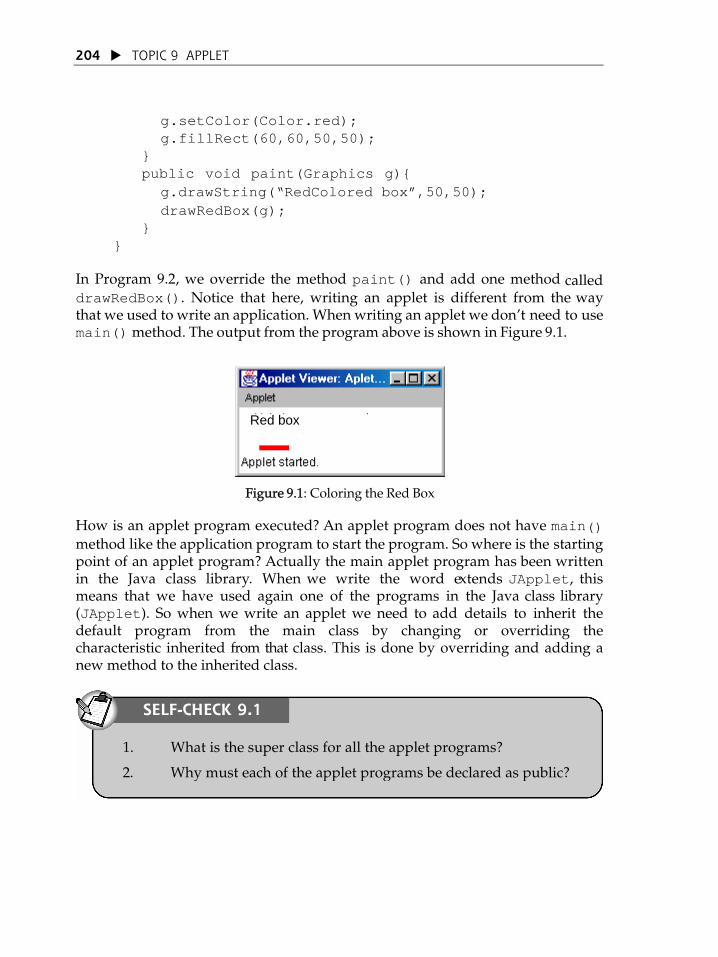
TOPIC 9 APPLET
204
g.setColor(Color.red); g.fillRect(60,60,50,50); } public void paint(Graphics g){ g.drawString(“RedColored box”,50,50); drawRedBox(g); } } In Program 9.2, we override the method paint() and add one method called drawRedBox(). Notice that here, writing an applet is different from the way that we used to write an application. When writing an applet we donÊt need to use main() method. The output from the program above is shown in Figure 9.1.
Figure 9.1: Coloring the Red Box
How is an applet program executed? An applet program does not have main() method like the application program to start the program. So where is the starting point of an applet program? Actually the main applet program has been written in the Java class library. When we write the word extends JApplet, this means that we have used again one of the programs in the Java class library (JApplet). So when we write an applet we need to add details to inherit the default program from the main class by changing or overriding the characteristic inherited from that class. This is done by overriding and adding a new method to the inherited class.
Red box
1. What is the super class for all the applet programs?
2. Why must each of the applet programs be declared as public?
SELF-CHECK 9.1
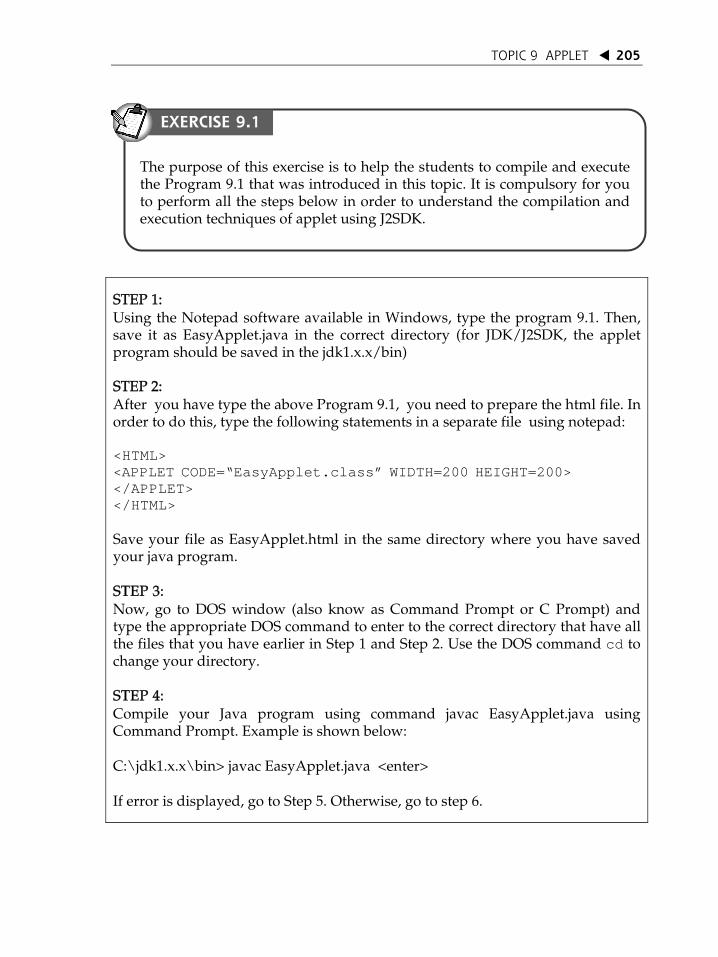
TOPIC 9 APPLET 205
STEP 1: Using the Notepad software available in Windows, type the program 9.1. Then, save it as EasyApplet.java in the correct directory (for JDK/J2SDK, the applet program should be saved in the jdk1.x.x/bin) STEP 2: After you have type the above Program 9.1, you need to prepare the html file. In order to do this, type the following statements in a separate file using notepad: <HTML> <APPLET CODE=“EasyApplet.class” WIDTH=200 HEIGHT=200> </APPLET> </HTML> Save your file as EasyApplet.html in the same directory where you have saved your java program. STEP 3: Now, go to DOS window (also know as Command Prompt or C Prompt) and type the appropriate DOS command to enter to the correct directory that have all the files that you have earlier in Step 1 and Step 2. Use the DOS command cd to change your directory. STEP 4: Compile your Java program using command javac EasyApplet.java using Command Prompt. Example is shown below: C:\jdk1.x.x\bin> javac EasyApplet.java <enter> If error is displayed, go to Step 5. Otherwise, go to step 6.
The purpose of this exercise is to help the students to compile and execute the Program 9.1 that was introduced in this topic. It is compulsory for you to perform all the steps below in order to understand the compilation and execution techniques of applet using J2SDK.
EXERCISE 9.1

TOPIC 9 APPLET
206
STEP 5: Return to your notepad in Windows and open the java source file that you typed in Step 1 (and at the same time do not close your Command Prompt window). Detect any errors in your source file and do the necessary correction. Make sure you save your file after doing the corrections. Now, go back to your Command Prompt window and repeat the steps shown in Step 4. STEP 6: Now you are ready to execute your applet program. In order to do this, type the appletviewer EasyApplet.html instruction in the Command Prompt as shown below: C:\jdk1.x.x\bin> appletviewer EasyApplet.html <enter> The output the applet will be displayed upon performing the above instruction. As an exercise to reinforce the Step 1 Step 6 above, type the Program 9.2 and get the output. Contact your tutor if problem persists.
THE LIFE CYCLE OF AN APPLET
When writing an applet, you know that we need to inherit the main class that is JApplet. We need to cancel (or override) a few required methods to make the inherited applet class more specialised. To enable us to cancel a few methods in the main class, we need to know a few methods exist in the main class. There are five methods in applet main class that give us the framework that enabling us to build a more specialized applet. These methods are init(), start(), stop()destroy() and paint(). We need to know when to use the methods and the required program code. (a) Initialisation Method: init ()
Header name: public void init()
This method is used to control any required statement in an applet. init() method is the same as a constructor method as discussed in the previous Topic 5. This method is executed automatically by the system when Java launches the applet for the first time.
9.3

TOPIC 9 APPLET 207
(b) Method to Start: start() Header name: public void start()
This method is executed automatically when Java has executed the init() method. This method is executed every time a user returns to the web that contains the applet after visiting other website. start() method can be executed more than once, not like init() method, which is executed only once.
start() method is executed when the user returns to the website. For example, start() method is used in executing thread to start an animation (when returning to the website).
(c) Method to Stop: stop() Header name: public void stop()
This method is executed when the user leaves the applet website (user moves to another website). It is done to stop running the applet. It can be done repeatedly in the same applet. This means that we can suspend running any process when moving to another website.
(d) Method to Destroy: destroy()
Header name: public void destroy()
Java will execute this statement when the web browser or the appletviewer is closed normally. This operation is done automatically when the web browser is closed. What is done by this method is to execute the last action before the applet is destroyed. For example, it will free all the resources used in the program.
(e) Method to Draw: paint()
Header name: public void paint()
This method is executed when the applet receives a message from the user to draw itself on the screen. This method can be repeated a number of times just like start() method. To redraw to the screen, the repaint() method or update() need to be executed.

TOPIC 9 APPLET
208
9.3.1 Program that Determines the Life Cycle of an Applet
The life cycle of an applet can be pictured as in Figure 9.2:
Figure 9.2: Life cycle of an applet
Notice that the init() and destroy() method is executed once in the life cycle. init() method is done when applet is first executed whereas destroy() method is executed when the web browser or appletviewer is closed. Method start() and stop() can be executed repeatedly. start() method is executed when init() method is executed or when the user moves from one other website to this applet website. stop() method is executed when the user leaves that website. We can test the life cycle of the program Java applet with the program 9.3 below: Program 9.3 import javax.swing.*; import java.awt.*; public class AppletLifeCycle extends JApplet { private int repeat; private int draw; public void init(){
System.out.println(“init(): Applet Initialisation”); repeat = 0; draw = 0;
}
public void start() { repeat++; System.out.println(“start():Applet started for:”+repeat+”times”);

TOPIC 9 APPLET 209
}
public void stop() { System.out.println(“stop():Applet stopped for :”+repeat+”times”);
}
public void paint(Graphics g){ draw++; System.out.println(“paint():Applet drawn for :”+draw+ “times”); g.fillRect(20,20,30,30);
}
public void destroy() {
System.out.println(“destroy(): Applet is destroyed”);
} }
LetÊs say that the applet is executed using appletviewer. So, when this applet is launched a messaged will be displayed.
init(): Applet Initialisation start():Applet started for:1 times paint(): Applet drawn for :1 times
LetÊs say we activate another window and return back to the applet window, this action will cause the applet to draw itself again by executing the paint()method. The message that will be displayed will be as shown below:
paint(): Applet drawn for :2 times
LetÊs say we minimise the applet window and return back to maximise the applet window, stop() method will be executed when the window is minimized. When the window is maximised again, start() and paint() method will be executed. The following message will be displayed for both actions.
stop(): Applet stopped for :1 times start(): Applet started for :2 times paint(): Applet drawn for :3 times
TOPIC 9 APPLET
210
When an applet is closed, destroy() method is executed. The following message is displayed:
destroy(): Applet is destroyed
• We may agree when we say that Java is a programming language that is object oriented which makes it easy for us to solve a problem with the help of the class library.
• There are two ways to write Java programs that is as an application or as an applet.
• Application is a stand-alone program that is done by directing the Java interpreter to translate the bytecode in the class file.
• Topic 1 Topic 7 have focus on developing Java applications.
• This topic focuses on Applet.
• All Applet program should extends JApplet.
1. What are the five default methods in applet?
2. How is paint() method is different from other default methods?
3. What is the difference between init() and start() in a life-cycle of an applet?
4. Write a default behaviour applet that has the name DefaultApplet which does not perform any operations.
5. Override the default paint() method in DefaultApplet above so that the applet can display the message „ How are you?‰
6. Draw a diagram that show the life-cycle of an applet?
EXERCISE 9.2
TOPIC 9 APPLET 211
• There are five main methods in JApplet that could be overridden by the programmer namely init(), paint(), start(), stop() and destroy()
• Each of these method have different purposes
• The exposure to the applet-based Java programs will help you to display the output of your program on the web.
Applet
Applet Life-cycle
appletviewer
JApplet
Java Appplication

INTRODUCTION
This topic will discuss on how to arrange the graphical user interface (GUI) components in Java applet. When Java was introduced, it contains a class library that supports the building of GUI. This class library was later named as AWT (Abstract Window Toolkit). With AWT, we can build an applet that has the basic GUI components like button, text input, scroll bar and others. We can also build a user interface component that has the same features and characteristic as the Microsoft Windows environment. AWT components have expanded very fast. In 1996, AWT class library was revolutionised and the Java GUI component was greatly improved by the introduction of the Swing class library. Swing class library was introduced so that the GUI components have the same features and characteristic even though it is in a different computer environment. Comparing AWT with Swing class library, Swing class library have many advantages and choices in terms of different types of GUI components, characteristic and running in different computer environment. Swing interface components was later known as JFC (Java Foundation Classes) which is an upgrade from IFC
TTooppiicc
1GUI
Components 100
By the end of this topic, you should be able to:
1. List the major components of GUI in Java Applet;
2. Write a GUI-based Applet program;
3. List and describe THREE major layout managers in Java; and
4. Arrange GUI components in Applet program using layout managers.
LEARNING OUTCOMES

TOPIC 10 GUI COMPONENTS
213
(Internet Foundation Classes). Now the Swing components have become part of the Java class library 1.2 and onwards. Figure 10.1 shows you an example of GUI.
Figure 10.1: Example of GUI
PLANNING AND BUILDING AN INTERFACE 10.1
SELF-CHECK 10.1
Do you know that we have to plan our interface first before we develop the actual interface?
The basic thing that we need to know when building an interface is the difference between a component and a container. Component is the basic item that is used to build GUI. Container is a place to put the component in. Form in VB (Visual Basic) is the easiest example to picture the concept of container in Java. To build a user interface, first we need to decide how to present the interface. This includes the type of components we want to use and how these components are going to be displayed. Unlike Visual Basic, Java requires us to write the program to display the user interface. In VB, the interface is built by dragging and dropping the GUI component onto the Form. Unfortunately Java language does not have this feature.

TOPIC 10 GUI COMPONENTS 214
You are encouraged to visit these websites for better description on graphic interface. 1. http://jav.sun.com/docs/books/tutorial/java
concepts/interface.html
2. http://jav.sun.com/docs/books/tutorial/java concepts/interpack/interfaces.html
There are various types of library in Swing that can be used when writing a user interface graphic program. The library can be classified into different types: Control Components
This is the basic component used for the interaction between the user and the machine. Examples of control components in Swing are JLabel, JButton, JCheckBox and JTextField.
Container
A container is a place where components are placed. It is a place that can support the various components chosen by the user. Examples are JFrame and JApplet.
Layout Manager
Determine how you arrange and display the GUI components. There are a few types of layout manager offered by Java like GridLayout and BorderLayout. Using different types of layout manager will determine the display arrangement of the user interface components.
As stated before, Java does not provide a skeleton program like the form in VB as a place to plan for the user interface. Here we have to write program code for each layout to be displayed. To build the user interface, we need to follow a few steps as stated below: Determine the Control Component in the User Interface
We need to determine the right control components at the appropriate place. For example JCheckBox is used for users who needed to make many choices at one time. JCheckBoxGroup is used when we need to make one choice at a time.

TOPIC 10 GUI COMPONENTS
215
Arranging the Placement Using Layout Manager After determining the control components, we need to choose the appropriate layout manager to display the components. The layout manager will manage the way the components are arranged in the container that we choose.
Handling the User Input and the Events The control components placed in the container will not do any action until directed to do so. We need to direct the program to act based on the input from the user and machine.
In this Topic we stress the building of the GUI components for the applets and not the application. This does not mean that we cannot build a user interface for application known as Frame.
10.1.1 Work Space for the JApplet
Before any components are placed, we must have a container first. To load the Swing control components to the applet, we must have a container for JApplet called content pane. Content Pane container is the main space for the JApplet window and it is used to load any Swing components. Program 10.1 below shows how JApplet and content pane is used. Program 10.1
import javax.swing.*; import java.awt.*; public class AppletSwing extends JApplet {
public void init(){
Container conpane=getContentPane(); conpane.setBackground(Color.blue); conpane.setLayout(new FlowLayout());
Provide work space for JApplet
} }
Observe each of the statement in the program above one by one. First, as we said before, AppletSwing class will inherit JApplet class. What is needed is for the program to override the default methods from the inherited class (that is the super class). To use any component in Swing we have to import javax.swing package. We also need to import java.awt package because we need to use a few classes in the package like Color class.
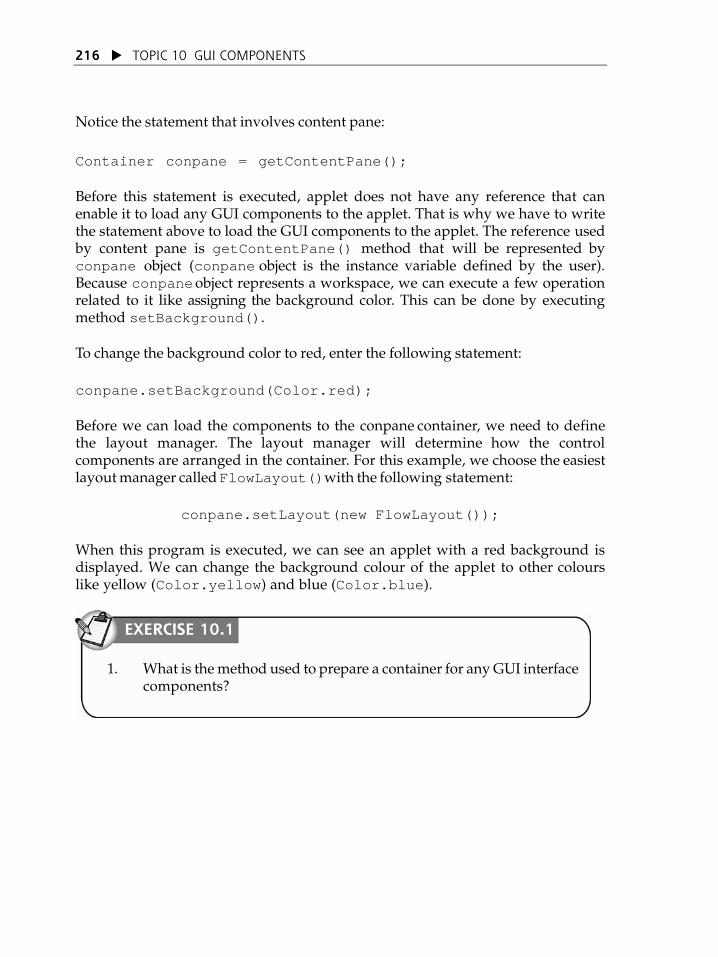
TOPIC 10 GUI COMPONENTS 216
Notice the statement that involves content pane: Container conpane = getContentPane();
Before this statement is executed, applet does not have any reference that can enable it to load any GUI components to the applet. That is why we have to write the statement above to load the GUI components to the applet. The reference used by content pane is getContentPane() method that will be represented by conpane object (conpane object is the instance variable defined by the user). Because conpane object represents a workspace, we can execute a few operation related to it like assigning the background color. This can be done by executing method setBackground(). To change the background color to red, enter the following statement: conpane.setBackground(Color.red); Before we can load the components to the conpane container, we need to define the layout manager. The layout manager will determine how the control components are arranged in the container. For this example, we choose the easiest layout manager called FlowLayout() with the following statement:
conpane.setLayout(new FlowLayout()); When this program is executed, we can see an applet with a red background is displayed. We can change the background colour of the applet to other colours like yellow (Color.yellow) and blue (Color.blue).
EXERCISE 10.1
1. What is the method used to prepare a container for any GUI interface components?

TOPIC 10 GUI COMPONENTS
217
CONTROL COMPONENTS 10.2
SELF-CHECK 10.2
Why are control components important? How do we use these components?
Control components are very important for the communication between the user and the machine. There are many control components in Java that offer different types of services. Here, we will discuss a few control components that are normally used.
All the components discussed here can be referred to at http://java.sun.com/products/jdk/1.2/docs/api/javax/swing
10.2.1 Buttons
A button in Swing library is known as JButton as in javax.swing.JButton package. A button is defined as a control component with a square label shape. The label can be a text, graphic or both. Normally a button is used as a control component to:
start an action
change a form or character
display a menu
display another window
Button has a label that describes the process that it will execute when clicking on it. Notice the algorithm below that creates a button in a workspace. 1. Start 1.1. Create a workspace 1.1.1. Make a reference to the content pane 1.2. Create the layout for the content pane
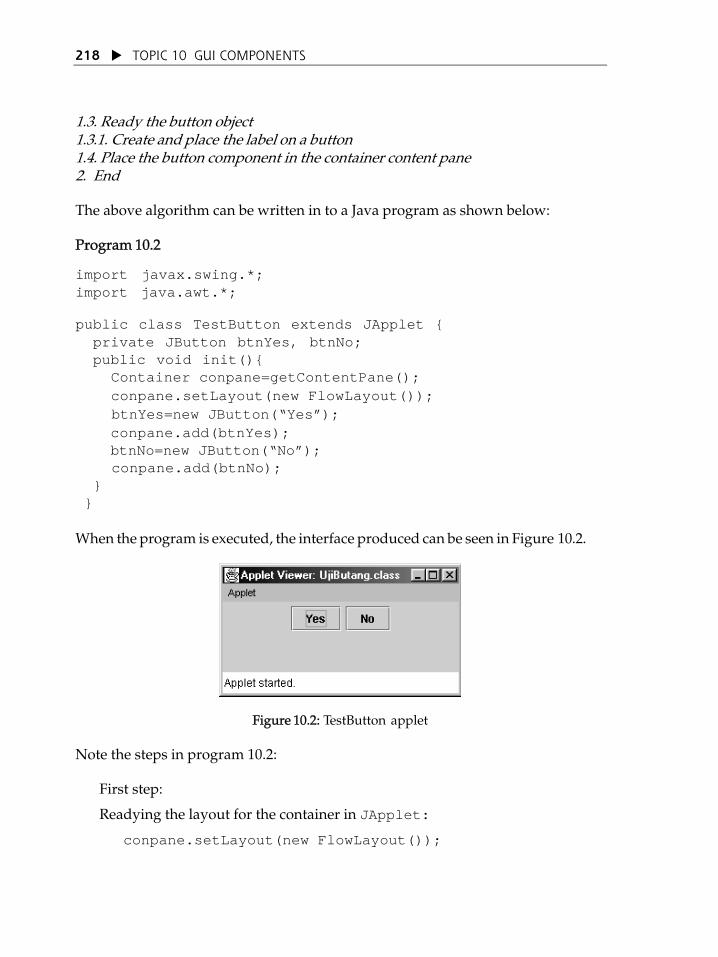
TOPIC 10 GUI COMPONENTS 218
1.3. Ready the button object 1.3.1. Create and place the label on a button 1.4. Place the button component in the container content pane 2. End The above algorithm can be written in to a Java program as shown below: Program 10.2 import javax.swing.*; import java.awt.*; public class TestButton extends JApplet { private JButton btnYes, btnNo; public void init(){ Container conpane=getContentPane(); conpane.setLayout(new FlowLayout()); btnYes=new JButton(“Yes”); conpane.add(btnYes); btnNo=new JButton(“No”); conpane.add(btnNo); } } When the program is executed, the interface produced can be seen in Figure 10.2.
Figure 10.2: TestButton applet Note the steps in program 10.2:
First step:
� Readying the layout for the container in JApplet:
conpane.setLayout(new FlowLayout());

TOPIC 10 GUI COMPONENTS
219
Second step:
� Creating the object for the button „Yes‰
JButton btnYes; <== declaring button object ÂYesÊ.
btnYes = new JButton(“Yes”);<== creating and labeling the
button „Yes‰.
conpane.add(btnYes); <== adding the button to the container conpane
Third step:
� Creating the object for the button „No‰
JButton btnNo; <== declaring button object ÂNoÊ.
btnNo = new JButton(“No”); <== creating and labeling the button
„No‰.
conpane.add(btnNo); <== adding the button to the container conpane
Please refer to website http://www.unitem.edu.my to see the animation.
10.2.2 Text Field
If we want the program to receive input from the user, we need to use the text field component. In Swing, the component used to receive the input from the user is called JTextField. The JTextField component allows the user to type in a sentence only. The programmer can determine the column and row size of the text. Loading in the text field component to the JApplet container is the same as adding the button. The following program segment is to add in the text field to the JApplet container. Container conpane=getContentPane(); conpane.setLayout(new FlowLayout()); JTextField txtName=new JTextField(20); conpane.add(txtName);

TOPIC 10 GUI COMPONENTS 220
10.2.3 Password Field
Like JTextField, JPasswordField are single-line areas in which text entered by the user from keyboard will be displayed. A JPasswordField will hide the data that is been entered assuming the data entered is secret is only known to the user. The following program segment is to add in the password field to the JApplet container. Container conpane=getContentPane(); conpane.setLayout(new FlowLayout()); JPasswordField p w d =new J P a s s w o r d F i e l d ( ) ; p w d . s e t E c h o C h a r ( ' * ' ) ; conpane.add(pwd);
The statement pwd.setEchoChar('*') in the above program segment will replace characters typed by the user the character *.
The output of the above program is shown below:
10.2.4 Text Label
If we want to label the container, we must build an object JLabel. Generally the object JTextField and JLabel are created together. Normally the JLabel object is placed ahead of JTextField. To build the text label is the same as building the GUI component. The following program segment will show how to add label to the container:
Container conpane=getContent Pane(); conpane.setLayout(new FlowLayout()); JLabel lblName=new JLabel(“Name:”); conpane.add(lblName); We can combine JLabel and JTextField components together to form a complete program as shown in Program 10.3:

TOPIC 10 GUI COMPONENTS
221
Program 10.3 import javax.swing.*; import java.awt.*; public class TextLabel extends JApplet { private JLabel lblLabel;
private JTextField txtField; public void init(){
Containter conpane = getContentPane(); conpane.setLayout(new FlowLayout()); lblLabel=new JLabel(“Name”); conpane.add(lblLabel); txtField = new JTextField(20); conpane.add(txtField); } }
When Program 10.3 is executed, the output can be seen in Figure 10.3 below:
Figure 10.3: TextLabel applet
10.2.5 Check Box and Radio Button
We have discussed earlier the use of text field to input data but this is not suitable if we want the user to choose from a list of choices. Swing has a component that is more suitable for this type of job that is the JCheckBox. If the user wants to choose only one from a list of choices, JRadioButton component can be used. In this section we will discuss how to write a program using JCheckBox and JRadioButton. Let us say we want to do a questionnaire regarding the favourite unpaid TV channels in Malaysia. The TV channels in Malaysia can be listed as TV1, TV2, TV3 and NTV7. Let us say a person can choose more than one favourite channel. Program 10.4 shows how we could use JCheckBox to solve this matter.
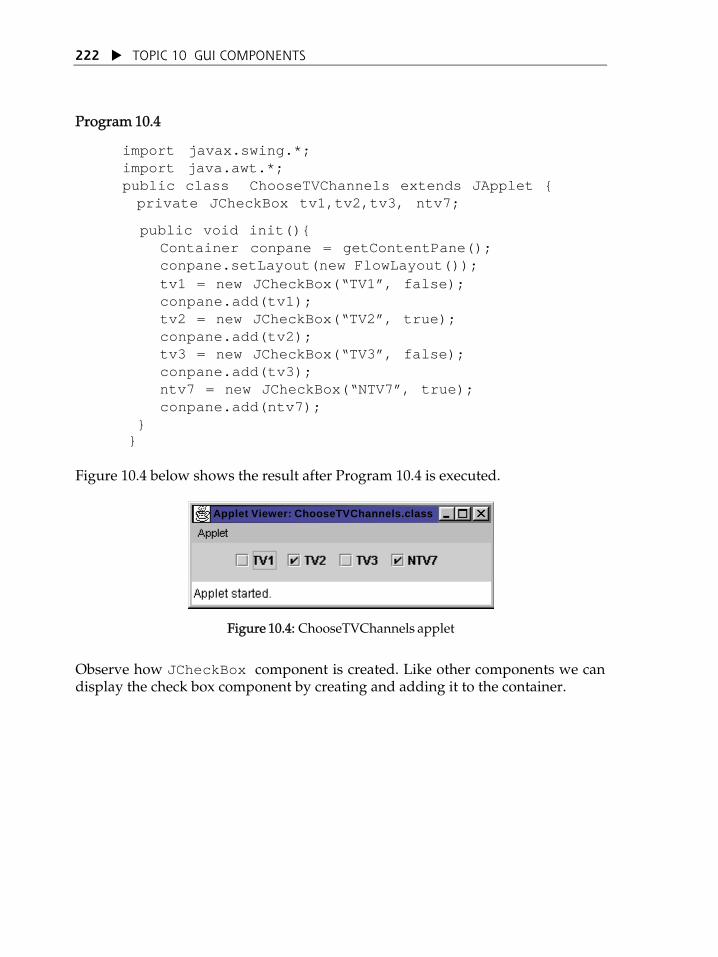
TOPIC 10 GUI COMPONENTS 222
Program 10.4
import javax.swing.*; import java.awt.*; public class ChooseTVChannels extends JApplet {
private JCheckBox tv1,tv2,tv3, ntv7;
public void init(){ Container conpane = getContentPane(); conpane.setLayout(new FlowLayout()); tv1 = new JCheckBox(“TV1”, false); conpane.add(tv1); tv2 = new JCheckBox(“TV2”, true); conpane.add(tv2); tv3 = new JCheckBox(“TV3”, false); conpane.add(tv3); ntv7 = new JCheckBox(“NTV7”, true); conpane.add(ntv7);
} }
Figure 10.4 below shows the result after Program 10.4 is executed.
Applet Viewer: ChooseTVChannels.class
Figure 10.4: ChooseTVChannels applet
Observe how JCheckBox component is created. Like other components we can display the check box component by creating and adding it to the container.
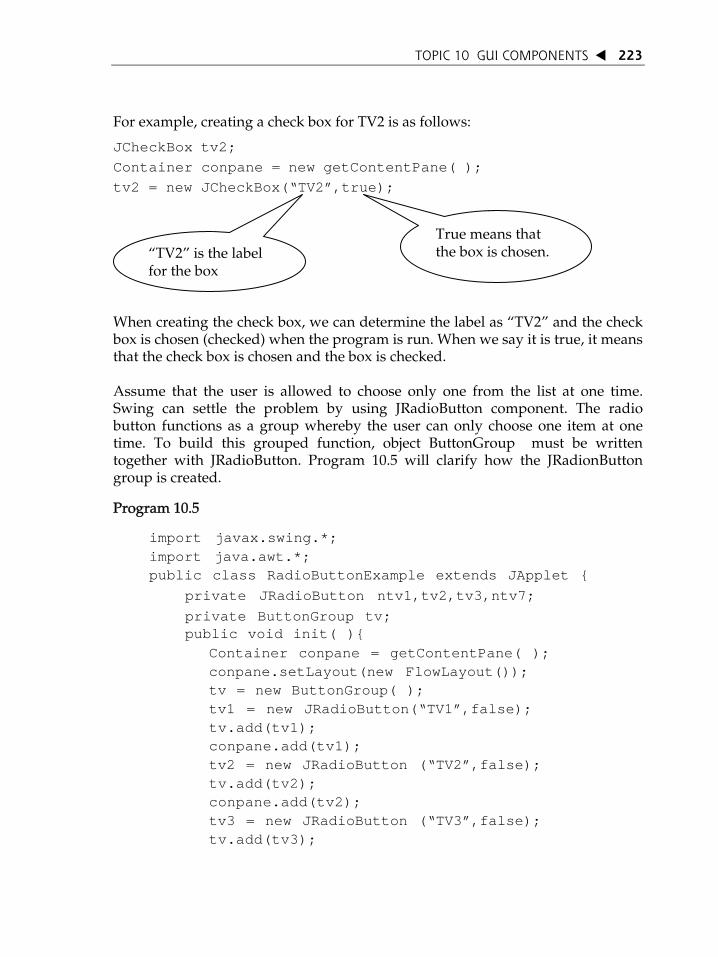
TOPIC 10 GUI COMPONENTS
223
For example, creating a check box for TV2 is as follows: JCheckBox tv2; Container conpane = new getContentPane( ); tv2 = new JCheckBox(“TV2”,true);
True means that the box is chosen.
„TV2‰ is the label for the box
When creating the check box, we can determine the label as „TV2‰ and the check box is chosen (checked) when the program is run. When we say it is true, it means that the check box is chosen and the box is checked. Assume that the user is allowed to choose only one from the list at one time. Swing can settle the problem by using JRadioButton component. The radio button functions as a group whereby the user can only choose one item at one time. To build this grouped function, object ButtonGroup must be written together with JRadioButton. Program 10.5 will clarify how the JRadionButton group is created. Program 10.5 import javax.swing.*; import java.awt.*; public class RadioButtonExample extends JApplet { private JRadioButton ntv1,tv2,tv3,ntv7; private ButtonGroup tv; public void init( ){ Container conpane = getContentPane( ); conpane.setLayout(new FlowLayout()); tv = new ButtonGroup( ); tv1 = new JRadioButton(“TV1”,false); tv.add(tv1); conpane.add(tv1); tv2 = new JRadioButton (“TV2”,false); tv.add(tv2); conpane.add(tv2); tv3 = new JRadioButton (“TV3”,false); tv.add(tv3);

TOPIC 10 GUI COMPONENTS 224
conpane.add(tv3); ntv7 = new JRadioButton (“NTV7”,true);
tv.add(ntv7); conpane.add(ntv7);
} }
When Program 10.5 is executed, the interface as shown in Figure 10.5 is displayed. Applet Viewer: RadioButtonExample.class
Figure 10.5: Output for Program 10.5 In writing the group check box, a few items need to be look into: Creating the button radio object like tv1, tv2, tv3 and ntv7:
tv1 = new JRadioButton(“TV1”,false); tv2 = new JRadioButton(“TV2”,false); tv3 = new JRadioButton(“TV3”,false); ntv7 = new JRadioButton(“NTV7”,true);
Creating a logical identifier for JRadioButton group:
tv=new ButtonGroup(); Adding radio button to the logical group tv:
tv.add(tv1); tv.add(tv2); tv.add(tv3); tv.add(ntv7);

TOPIC 10 GUI COMPONENTS
225
Adding the button radio object to the content pane
conpane.add(tv1); conpane.add(tv2); conpane.add(tv3); conpane.add(ntv7);
To create a radio button, the constructor method is initialised to true, for the box that was chosen for the first time, and false for others.
10.2.6 List
If we have many choices to choose from (maybe more than 5), radio button component is not a good choice. It would be better to use a list or what is known in Swing as JList. The list component will display a series of list. List component also enables the user to choose more than one at a time. Using the list component can solve the same problem like in Program 10.5 (that is unpaid tv channels), and the display would be different (Figure 10.6).
Figure 10.6: List component
In writing the list component, a few matters need to be looked into: Define the String array to be displayed or items to be added:
String[ ]item = {“TV1”, “TV2”, “TV3”, “NTV7”}; Creating a list object with a array data (above) as the parameter:
TVList =new JList(item); Making only 3 items that can be seen in the list at one time:
TVList.setVisibleRowCount(3);

TOPIC 10 GUI COMPONENTS 226
Enabling the user to choose only one item from the list: TVList.setSelectionMode(ListSelectionModel.SINGLE_SELECTION);
JList does not have a scrollbar, so we must create a scrollbar for the JList: JScrollPane scrollPane = new JScrollPane(TVList); Adding scrollbar object to the content pane: conpane.add(scrollPane);
If we want the user to choose a number of choices from the list, we can change the statement from
ListSelectionModel.SINGLE_SELECTION to
ListSelectionModel.MULTIPLE_INTERVAL_SELECTION The complete program to display the list can be referred to in Program 10.6 below: Program 10.6
import javax.swing.*; import java.awt.*;
public class List extends JApplet {
private JList TVList; private String[] item={“TV1”,”TV2”,”TV3”,”NTV7”};
public void init( ){
Container conpane = getContentPane(); conpane.setLayout(new FlowLayout()); TVList = new JList(item); TVList.setVisibleRowCount(3); TVList.setSelectionMode(ListSelectionModel.SINGLE_SELECTION);
JScrollPane scrollPane = new JScrollPane(TVList); conpane.add(scrollPane); } }

TOPIC 10 GUI COMPONENTS
227
10.2.7 Combo Box
Combo box is a component like the list component (JList) where the user has a multiple choices to make at one time. Combo box component in Swing is known as JComboBox. JComboBox is different from JList because it hides the list. When combo box is displayed the user needs to click the arrow displayed before the user can see the list. Then, the user can choose one item from the list. Figure 10.7 will show an example of combo box.
Click here to see the list
Applet Viewer: ComboBox.class
Figure 10.7: ComboBox applet
When the user clicks the arrow on the combo box, a list is displayed as shown in Figure 10.8 below:
Applet Viewer: ComboBox.class
Figure 10.8: Combo box applet displaying a list of items

TOPIC 10 GUI COMPONENTS 228
To produce a combo box applet as shown above, we need to write a program as shown in Program 10.7 below: Program 10.7
import javax.swing.*; import java.awt.*;
public class ComboBox extends JApplet {
private JComboBox cmbTV; private String [] item={“TV1”,”TV2",”TV3",”NTV7"}; public void init( ){
Container conpane= getContentPane(); conpane.setLayout(new FlowLayout()); cmbTV = new JComboBox(item); conpane.add(cmbTV);
} }
You can use a Combo Box or Radio Buttons if you want to develop a selection box. If you want to develop an interface for selections of 30 types of sports, which would you use and why?
ACTIVITY 10.1

TOPIC 10 GUI COMPONENTS
229
EXERCISE 10.2
1. Create an applet that can display the following component. No event handling is needed for the components. (Event handling will be studied in the next topic)
2. Create an applet that can display the following components. No
event handling is needed for the components.
10.2.8 Panel
In Swing, Panel is known as JPanel. Panel is a container-like content pane where you can place and arrange any Swing components in a particular window. Panel will act as a sub-container. Component arrangement is done by dividing the window space into groups of components. A panel is used to arrange the Swing components that have be arranged previously to be more exact. For example, we can build a Panel for the button and others for the list or combo box. We may have one panel or more in a program depends of how you want to arrange the GUI components. The result is that the components are arranged exactly. What we are required to do in order to use the Panel as a container is:
TOPIC 10 GUI COMPONENTS 230
Build a suitable panel container
Add the appropriate GUI component(s) to the appropriate panel
Add panel container to the main container The following statements are to add the object of JPanel to the applet: Container conpane =getContentPane(); JPanel panel=new JPanel(); //creating the JPanel Object conpane.setLayout(new FlowLayout()); conpane.add(panel);// adding JPanel object to the content pane If we need to place a button to the Panel and add it to the applet, we need to add the following statements to the program. Container conpane =getContentPane(); JPanel panel=new JPanel(); conpane.setLayout(new FlowLayout()); JButton btnYes = new JButton(“Yes”); JButton btnNo = new JButton(“No”); panel.add(btnYes); //adding object JButton “Yes” to the Panel
panel.add(btnNo); //adding object JButton “No” to the Panel
conpane.add(panel);//adding object JPanel to the main container
10.2.9 Text Area
In Swing, text area is known as JTextArea. The function is the same as JTextField. The difference is in the usage, where the height is more than a line. When a user places the JTextArea to a program, the user must state the number of line used. To add the text area to the applet we can write the following statement: Program 10.8
import javax.swing.*; import java.awt.*;
public class TextArea extends JApplet {
private JTextArea txtArea; public void init( ){
Container conpane = getContentPane(); conpane.setLayout(new FlowLayout()); JPanel panel = new JPanel();
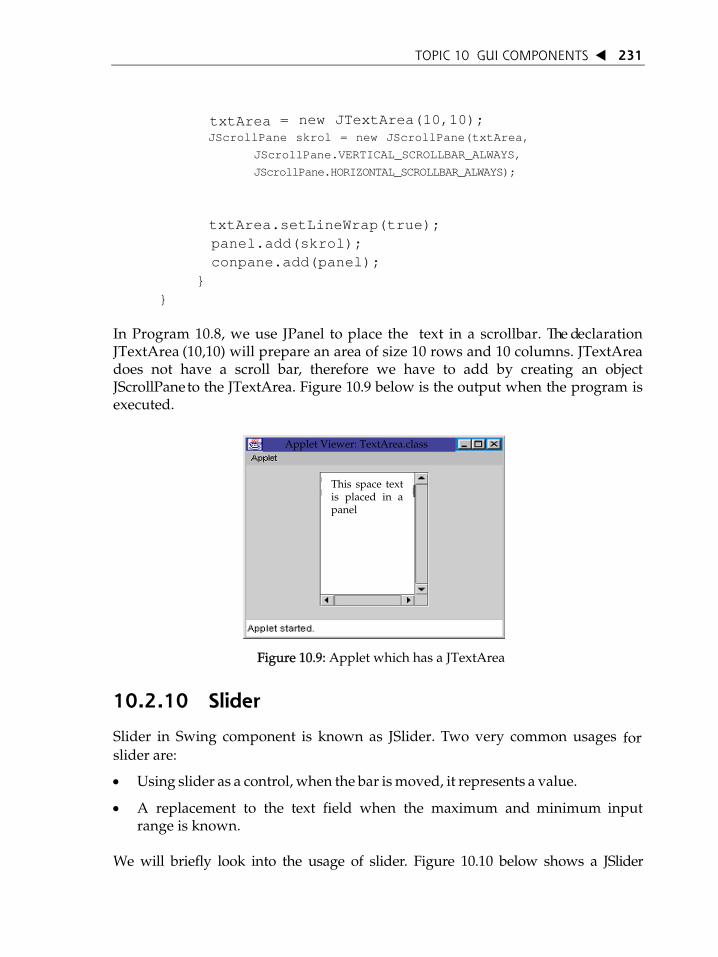
TOPIC 10 GUI COMPONENTS
231
txtArea = new JTextArea(10,10); JScrollPane skrol = new JScrollPane(txtArea,
JScrollPane.VERTICAL_SCROLLBAR_ALWAYS,
JScrollPane.HORIZONTAL_SCROLLBAR_ALWAYS);
txtArea.setLineWrap(true);
panel.add(skrol); conpane.add(panel);
} }
In Program 10.8, we use JPanel to place the text in a scrollbar. The declaration JTextArea (10,10) will prepare an area of size 10 rows and 10 columns. JTextArea does not have a scroll bar, therefore we have to add by creating an object JScrollPane to the JTextArea. Figure 10.9 below is the output when the program is executed.
Applet Viewer: TextArea.class
This space text is placed in a panel
Figure 10.9: Applet which has a JTextArea
10.2.10 Slider
Slider in Swing component is known as JSlider. Two very common usages for slider are:
Using slider as a control, when the bar is moved, it represents a value.
A replacement to the text field when the maximum and minimum input range is known.
We will briefly look into the usage of slider. Figure 10.10 below shows a JSlider

TOPIC 10 GUI COMPONENTS 232
component.
Figure 10.10: Slider applet Program 10.9, when executed, will display the result as shown in Figure 10.10. Program 10.9 import javax.swing.*; import java.awt.*; public class Slider extends JApplet { public void init( ){ Container conpane = getContentPane( );
conpane.setLayout(new FlowLayout( )); JSlider skrol = new JSlider(JSlider.HORIZONTAL,0, 100,50); skrol.setMajorTickSpacing(50); skrol.setMinorTickSpacing(5); skrol.setPaintTicks(true); skrol.setPaintLabels(true); conpane.add(skrol); } } Observe how the slider component can be displayed.
Slider can be created using the following command: JSlider skrol = new JSlider (JSlider.HORIZONTAL,0,100,50);
The command JSlider.HORIZONTAL means that the slider to be displayed is horizontal. The range is between 0 until 100. The initial value for the slider is 50 (the slider will point to this value).

TOPIC 10 GUI COMPONENTS
233
To set the scale for the range value: To set the scale for the range value:
skrol.setMajorTickSpacing(50); skrol.setMajorTickSpacing(50);
This command will set the major scale division to 50. Therefore the displayed label is 0,50,100. This command will set the major scale division to 50. Therefore the displayed label is 0,50,100.
To set the minor scale division where the major scale is split into smaller
scale: To set the minor scale division where the major scale is split into smaller
scale: skrol.setMinorTickSpacing(5); skrol.setMinorTickSpacing(5);
This command sets the scale between the main scales to the value of 5. Therefore the result is a smaller scale with a value of 0,5,10,15,20,25 ⁄ This command sets the scale between the main scales to the value of 5. Therefore the result is a smaller scale with a value of 0,5,10,15,20,25 ⁄
To display the major and minor scale we write the following statement. To display the major and minor scale we write the following statement.
skrol.setPaintTicks(true); skrol.setPaintTicks(true);
This command will display the scale on the slider. This command will display the scale on the slider. To display the label for the main scale To display the label for the main scale
skrol.setPaintLabels(true); skrol.setPaintLabels(true);
Refer to websitehttp://www.ibiblio.org/javafaq/course/week6/index.html to see examples of the usage of components in building interface. of the usage of components in building interface.
LAYOUT MANAGER LAYOUT MANAGER 10.3
SELF-CHECK 10.3
Do you know that without a layout manager, you are unable to arrange the control components well?
Layout manager is used to arrange the GUI components in the container. In building applets we cannot avoid using layout manager to arrange the
TOPIC 10 GUI COMPONENTS 234
components in the applet. Actually, we have already used the layout manager in the program written to the content pane. Every component to be displayed is managed by the layout manager in the container. Layout manager must be manipulated correctly because in the process of adding components to the container it is difficult to ensure the correct placement of the component. Using the layout manager will make the job easier for us to arrange the components in the container. Using the layout manager will bring in more flexibility to the displayed GUI, especially the GUI component size. The layout manager is in java.awt package. There are six-layout managers as listed below:
FlowLayout This is the easiest layout manager. The components are arranged horizontally until there is no more space, then a new line is added for the next component;
BorderLayout Divides the container into five areas that is north, south, east, west and center;
GridLayout Arranges all the components into rows and columns;
CardBagLayout This is the main layout for the entire layout manager. It has a grid and the grid size can be changed and the components can be placed in more than one grid;
CardLayout This layout is also known as tabbed. Each component is piled on top so that only one component is displayed at one time;
BoxLayout Each component is arranged from left to right or from top to bottom; and
Null Places the components into the container without a layout manager. We use the NULL layout manager when placing the component on the applet physical location. This is not recommended for application where the window always changes.
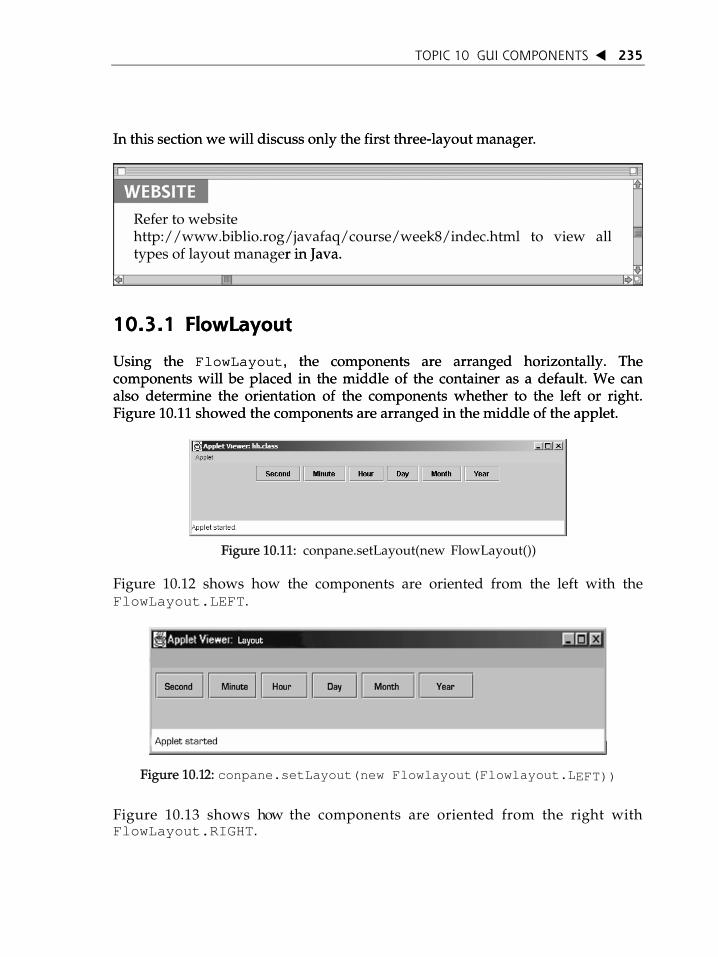
TOPIC 10 GUI COMPONENTS
235
In this section we will discuss only the first three-layout manager. In this section we will discuss only the first three-layout manager.
Refer to website http://www.biblio.rog/javafaq/course/week8/indec.html to view all types of layout manager in Java. r in Java.
10.3.1 FlowLayout 10.3.1 FlowLayout
Using the FlowLayout, the components are arranged horizontally. The components will be placed in the middle of the container as a default. We can also determine the orientation of the components whether to the left or right. Figure 10.11 showed the components are arranged in the middle of the applet.
Using the FlowLayout, the components are arranged horizontally. The components will be placed in the middle of the container as a default. We can also determine the orientation of the components whether to the left or right. Figure 10.11 showed the components are arranged in the middle of the applet.
Figure 10.11: conpane.setLayout(new FlowLayout()) Figure 10.12 shows how the components are oriented from the left with the FlowLayout.LEFT.
Figure 10.12: conpane.setLayout(new Flowlayout(Flowlayout.LEFT)) Figure 10.13 shows how the components are oriented from the right with FlowLayout.RIGHT.

TOPIC 10 GUI COMPONENTS 236
Figure10.13: conpane.setLayout(new FlowLayout(FlowLayout.RIGHT))
By using the same layout manager which is FlowLayout.RIGHT, observe how the display changes when the dimension of the applet is reduced (ie: window is resize).
Figure 10.14: Container is resized The button "Year" is below the line starting form the right. The button "Year" is in the second row because there is no more space to place it in the first row of the applet.
10.3.2 BorderLayout
BorderLayout manager divides the container into five different areas of north, south, east, west and center. Example of the interface using the BorderLayout manager is as shown in Figure 10.15.

TOPIC 10 GUI COMPONENTS
237
Figure 10.15: GridLayout layout manager Program 10.10 will display the interface as shown above.
Program 10.10
import javax.swing.*; import java.awt.*;
public class Layout extends JApplet { private JButton north,south,east,west,center;
public void init( ){ Container conpane = getContentPane( ); conpane.setLayout(new BorderLayout( ));
north = new JButton(“North”);south = new JButton(“South”);
east = new JButton(“East”); west = new JButton(“West”);
center = new JButton(“Center”); conpane.add(“North”,north); conpane.add(“South”,south); conpane.add(“East”,east); conpane.add(“West”,west); conpane.add(“Center”,center);
} }
When we neglect one of the areas in the BorderLayout interface, the result will be different. For example if we neglect the statement conpane.add(“Center”,center). The display would be as shown below in Figure 10.16.

TOPIC 10 GUI COMPONENTS 238
Figure 10.16: Neglecting the „Center‰ area We find that the button component for the „Center‰ is not in the content pane. In the next program, the „Center‰ button component is replaced with another component, which is, JPanel that has a JTextArea together with JScrollPane in it as shown in Program 10.11. Program 10.11
import javax.swing.*; import java.awt.*;
public class Layout2 extends JApplet {
private JButton north,south,east,west,center; private JPanel panel; private JTextArea text; public void init( ){
Container conpane = getContentPane(); conpane.setLayout(new BorderLayout());
north = new JButton(“North”);south = new JButton(“South”);east = new JButton(“East”); west = new JButton(“West”);
panel = new JPanel( ); text = new JTextArea(10,10); JScrollPane skrol = new JScrollPane(text, JScrollPane.VERTICAL_SCROLLBAR_ALWAYS, JScrollPane.HORIZONTAL_SCROLLBAR_ALWAYS);
text.setLineWrap(true); panel.add(skrol);

TOPIC 10 GUI COMPONENTS
239
conpane.add(“North”,north); conpane.add(“South”,south); conpane.add(“East”,east);
conpane.add(“West”,west); conpane.add(“Center”,panel); } }
Figure 10.17 is the display after executing Program 10.11.
Figure 10.17: Adding component into the „Center‰ Layout.
10.3.3 GridLayout
GridLayout arranges all the components into rows and columns. The arranged components size can change according to the window or container that displays the components. To determine 4 rows and 4 columns, we state the following in the constructor method:
container.setLayout(new GridLayout(4,4));

TOPIC 10 GUI COMPONENTS 240
Figure 10.17: GridLayout 4x4 Layout Manager All the components will have the same size if we are using GridLayout. The components will be added from the upper-left and will move from left to right until all the row has been occupied. Then, the same process will be continued in the next new line. Below is the program to display an applet as in Figure 10.17. Program 10.12
import java.awt.*; import javax.swing.*;
public class Calculator extends JApplet {
private JButton b0, b1, b2, b3, b4;
private JButton b5, b6, b7, b8, b9; private JButton b10, b11, b12, b13, b14, b15;
public void init( ) {
Container conpane = getContentPane( ); conpane.setBackground(Color.white);
conpane.setLayout(new BorderLayout()); JPanel panel = new JPanel( ); panel.setLayout(new GridLayout(4,4));
b7 = new JButton(“7”); panel.add(b7); b8 = new JButton(“8”); panel.add(b8); b9 = new JButton(“9”); panel.add(b9); b10 = new JButton(“/”); panel.add(b10);b4 = new JButton(“4”); panel.add(b4); b5 = new JButton(“5”); panel.add(b5);

TOPIC 10 GUI COMPONENTS
241
b6 = new JButton(“6”); panel.add(b6); b11 = new JButton(“*”); panel.add(b11);b1 = new JButton(“1”); panel.add(b1); b2 = new JButton(“2”); panel.add(b2); b3 = new JButton(“3”); panel.add(b3); b12 = new JButton(“-“); panel.add(b12);b0 = new JButton(“0”); panel.add(b0); b13 = new JButton(“.”); panel.add(b13);b14 = new JButton(“+”); panel.add(b14);b15 = new JButton(“=”); panel.add(b15);
conpane.add(“Center”,panel); }
}
CASE STUDY: DEVELOPING GUI-BASED APPLET WHICH HAS MANY LAYOUT MANAGAERS
10.4
Until now you have been shown GUI-based applet which has only one layout manager. Actually, a GUI-based applet can have more than one layout managers especially when it has many GUI components with various arrangement. Consider the following problem: Write a Java Applet that will produce the following output upon execution:
A simple user interface only involve one layout manager and few GUI components. Oppositely, the above Applet is complicated because it involves more than one JPanel and also more than one layout manager. DonÊt worry about

TOPIC 10 GUI COMPONENTS 242
this as we can use the „divide and conquer‰ approach to write the codes for the above Applet. The „divide and conquer‰ use the following steps:
Divide the components in the above Applet to different sections or regions. Each section will use different layout managers with their own JPanel.
Identify the layout managers to be used for the container taking into consideration the different sections or regions that you have created above.
Write the code. All the above steps will be discussed below. STEP 1: Divide the components in the above Applet to different sections or regions. Each section will use different layout managers with their own JPanel. The panels must be capable to accommodate the GUI components available in their section. In the our applet, we can identify TWO(2) sections for the Applet. Each section will use different layouts. The sections/regions are shown below: Section 1
Put all the components in this section in a JPanel (let say we call it as panel1). This pane1 will use GridlLayout manager that has 3 rows and 2 columns to put all the six components available in this section. Note: FlowLayout is not accurate to be used in this section.

TOPIC 10 GUI COMPONENTS
243
Section 2 Put the button component available in this section to the another JPanel
(let say we call it as panel2). This panel2 will use FlowLayout manager to put all the button component available in this section.
STEP 2: Identify the layout managers to be used for the container after taking into consideration the different sections or regions that you have created in Strategy 1.To identify the layout manager for the container, we need to determine how many panels that we have from the Strategy 1. In Strategy 1, we have TWO panels namely panel1 and panel2. Then, what is the most appropriate layout manager for the container? The answer is GridLayout() which has 2 rows and 1 column that can accommodate panel1 and panel2:
panel1 panel2
2 rows, 1 column
Note: Think panel1 and panel2 as a black box when putting them in the container. STEP 3: Now you are ready to type the code to solve the problem given. The following is the algorithm for this program. Your task is to convert the algorithm to the running code:

TOPIC 10 GUI COMPONENTS 244
import javax.swing.*; import java.awt.*; public class myApplet extends JApplet { declare all the GUI components declare two panels namely panel1 and panel2 public void init (){ create the objects for all the components declared above create the objects for all the panels declared above set the layout for panel1 set the layout for panel2 declare the main container set the layout for the main container put all the components available in Section 1 (refer Step 1) to the panel1 using the add command put all the component in available Section 2 (refer Step 1) to the panel2 using the add command put the panel1 to the main container using the add command put the pane2 to the main container using the add command } } The Java code for the above algorithm is given below: import javax.swing.*; import java.awt.*; public class myApplet extends JApplet { JLabel l1,l2,l3; JTextField t1,t2,t3; JButton b1; JPanel panel1, panel2;

TOPIC 10 GUI COMPONENTS
245
public void init (){ l1=new JLabel("Parameter"); l2=new JLabel("Parameter"); l3=new JLabel("Total"); t1=new JTextField(); t2=new JTextField(); t3=new JTextField(); b1=new JButton("OK"); panel1= new JPanel(); panel2= new JPanel(); panel1.setLayout( new GridLayout(3,2)); panel2.setLayout ( new FlowLayout (FlowLayout.CENTER)); Container con = getContentPane(); con.setLayout( new GridLayout(2,1));
panel1.add(l1); panel1.add(t1); panel1.add(l2); panel1.add(t2); panel1.add(l3); panel1.add(t3); panel2.add(b1); con.add(panel1); con.add(panel2); } } Save your program as myApplet.java. Then, compile the program. Do corrections if errors detected in your program. If there is no error, with HTML code as shown below and save it as myAplet.html:
<html> <applet code="myApplet.class" width=350 height=350> </applet> </html>
Finally, execute the HTML file using the command appletviewer myApplet.html from your JDK compiler.

TOPIC 10 GUI COMPONENTS 246
As an exercise, write a Java Applet that will produce the following output upon execution:

TOPIC 10 GUI COMPONENTS
247
Hints: Use the following guideline:
Panel p1 with FlowLayout.CENTER to accommodate JButton „Divide‰
Panel p2 with FlowLayout .CENTER to accommodate JButton „Minus‰
Main container with GridLayout(8,1)
EXERCISE 10.3
Write an applet that can display the following applets. You are not required to handle events.

TOPIC 10 GUI COMPONENTS 248
You must have come across the MediaPlayer program before this. Which layout manager and the control components will you use if you want to build an interface for the Media Player.
ACTIVITY 10.2
TOPIC 10 GUI COMPONENTS
249
This topic has discuss on how to arrange the graphical user interface (GUI) components in Java applet.
When Java was introduced, it contains a class library that supports the building of GUI.
This class library was later named as AWT (Abstract Window Toolkit).
With AWT, we can build an applet that has the basic GUI components like button, text input, scroll bar and others.
We can also build a user interface component that has the same features and characteristic as the Microsoft Windows environment.
AWT components have expanded very fast. In 1996, AWT class library was revolutionised and the Java GUI component was greatly improved by the introduction of the Swing class library.
Swing class library was introduced so that the GUI components have the same features and characteristic even though it is in a different computer environment.
Comparing AWT with Swing class library, Swing class library have many advantages and choices in terms of different types of GUI components, characteristic and running in different computer environment.
Swing interfacing components was later known as JFC (Java Foundation Classes) which is an upgrade from IFC (Internet Foundation Classes).
Now the Swing components have become part of the Java class library 1.2 and onwards.
Control components in Swing class such as JButton, JLabel, JTextField, etc are very important for the communication between the user and the machine.
Layout manager is used to arrange the GUI components in the container.
In building applets we cannot avoid using layout manager to arrange the components in the applet.
Every component to be displayed is managed by the layout manager in the container.

TOPIC 10 GUI COMPONENTS 250
Applet
BorderLayout
Button (JButton)
ButtonGroup
CheckBox (JCheckBox)
ComboBox (JComboBox)
Container
FlowLayout
GridLayout
Label (JLabel)
Layout Manager
List (JList)
Panel (JPanel)
PasswordField (JPasswordField)
RadioButton (JRadioButton)
ScrollPane (JCcrollPane)
Slider (JSlider)
Swing class
TextArea (JTextArea)
TextField (JTextField)

INTRODUCTION The GUI component developed in Topic 10 does not perform any actions on the users input. For example the button we developed did not give any response when it was pressed by the user. When developing an applet, we definitely would want some meaningful actions. We would probably want the applets to perform some calculations when an user clicks the button, or the background color changes when a user scrolls the scroll bar, and etc. To make our programs responsive or interactive, we need to write the commands in the code. This is known as Event Handling. The programs developed must react accordingly to the event in order to do something.
TTooppiicc Event Handling 1111
By the end of this topic, you should be able to:
1. Explain about two main objects that are included in the Event Delegation Model;
2. Identify four steps that must be performed in the Event Delegation Model;
3. Descibe how to use three event listener and the appropriate components; and
4. Write Java Applets which has event handling codes.
LEARNING OUTCOMES
TOPIC 11 EVENT HANDLING
252
The process of transferring events to the program is handled by the operating system. The operating system will transfer the events to Java program whenever there is an input such as mouse clicking or keyboard pressing. The program will decide on the necessary actions to be executed based on the event.
THE EVENT DELEGATION MODEL 11.1 Java 1.2 uses the event delegation model to handle events.
Event Delegation Model describes the steps that need to be followed by a programmer in order to insert codes for event handling in a program.
There are two important objects in this model, namely the event source and the event listener. Event source is an object that describes some change of state in a source. In another words, it is the object that generate the event. It receives event notifications. For example when the button is clicked, the hard disk will be formatted. In this example, the event source is the button and the event listener is the „click‰. In order for these two states to occur we need to:
Create a program framework as an event listener;
Register component(s) for the event listener;
Handle event components; and
Perform necessary actions to the event. All the steps above that we are going to discuss shortly form the event delegation model.
11.1.1 Event Listener Framework Program In order for the program to respond to the events, the EventListener interface object is used. This object will enable the program to inherit certain attributes from the object. Two main processes are involved in ensuring that the EventListener is used in the program: Make sure the java.awt.event.* package is imported into the program
using the following command: import java.awt.event.* Use the listener interface together with the implements statements Listener interface will depend on the type of component selected. The
implements declaration needs to be inserted so that the program can use more

TOPIC 11 EVENT HANDLING 253
than one listener interface provided by Java. This listener interface is used to generate events for GUI users. For example, if we want the button component to act as event listener, we write:
public class btnListener extends JApplet implements ActionListener If we want the JCheckBox component to act as event listener, we write: public class chkBox extends JApplet implements ItemListener If we want both components to be event listener, we write: public class chkbtn extends JApplet implements ActionListener, ItemListener
11.1.2 Registering the Event Listener Components
Until the event listener is registered, the event generation will not function. When it has been registered only then can the component listen to events that have been associated with it. Like the event listener, the method used to register component in the program depends on the type of component that needs to be registered. Observe the example of registering JButton component to the program using addActionListener(). Refer to Program 11.1 for the complete program. Program 11.1 import javax.swing.*; import java.awt.*; import java.awt.event.*; public class btnListener extends JApplet implements ActionListener { private JButton btnListen; public void init() {
Container conpane = getContentPane(); conpane.setLayout(new FLowLayout()); btnListen = new JButton(“Press”); btnListen.addActionListener(this); conpane.add(btnListen);

TOPIC 11 EVENT HANDLING
254
} public void actionPerformed(ActionEvent e){
} }
We need to perform the following modification if we want to replace JButton with the JCheckBox.
Replace the event listener, ActionListener with ItemListener; and
Replace the event register, addActionListener with addItemListener
Hence the new program is shown below: Program 11.1 (New) import javax.swing.*; import java.awt.*; import java.awt.event.*; public class btnListener extends JApplet implements ItemListener { private JCheckBox box1,box2; public void init( ) { Container conpane = getContentPane(); conpane.setLayout(new FLowLayout( )); box1 = new JCheckBox(“Box 1”,true); box2 = new JCheckBox(“Box 2”,false); box1.addItemListener(this); box2.addItemListener(this); conpane.add(box1); conpane.add(box2); } public void itemStateChanged(ItemEvent e){ } }
11.1.3 Handling Event for Component
Program 11.1 contains a registered component as an event listener and also a method for event handling. This method will be called automatically by the event listener. Same as event listener, the method for event handler depends on type of

TOPIC 11 EVENT HANDLING 255
the registered component. For example, in the case of JButton, the event handler for that component will be actionPerformed() method. Therefore, we need to add the following method in Program 11.1. Any tasks to be performed are put in the event handler method. For example if the JButton component is pressed, the instruction code for calculation has to be written in the actionPerformed method as follows: public void actionPerformed(ActionEvent e){
int a,b; a=100;
b=100; System.out.println(a + “ + “ b + “ = “ + (a+b)); }
The method will be called automatically when the program is compiled and executed.
EXERCISE 11.1
What is the process that must be performed in order to handle events in Java?
THE COMPONENTS OF ACTIONLISTENER LISTENER
11.2
SELF-CHECK 11.1
What are the components that can be used with the ActionListener?
There are a few components that can use the event listener ActionListener in order to handle events. Among the components that can use the event listener ActionListener are:
JButton;
JTextField;

TOPIC 11 EVENT HANDLING
256
JList; and
JMenuItem. As an example, we will only discuss the first two of components which is the JButton and the JTextField. Example 1: Write a program that can change the background colour of an applet. The background colour will change when a user clicks the button. These colours are labeled as red, green, and blue. The example of the GUI interface that needs to be created is as shown in Figure 11.1 below:
Figure 11.1: The colorApplet applet
Solutions: Create a class that will extends JApplet class. This class will execute
the class that will draw the background colour.
import javax.swing.*; import java.awt.*; public class colorApplet extends JApplet { public void intit( ){ Container conpane=getContentPane( ); conpane.add(new Pattern( )); } }
Create a new class that will draw the background colour.
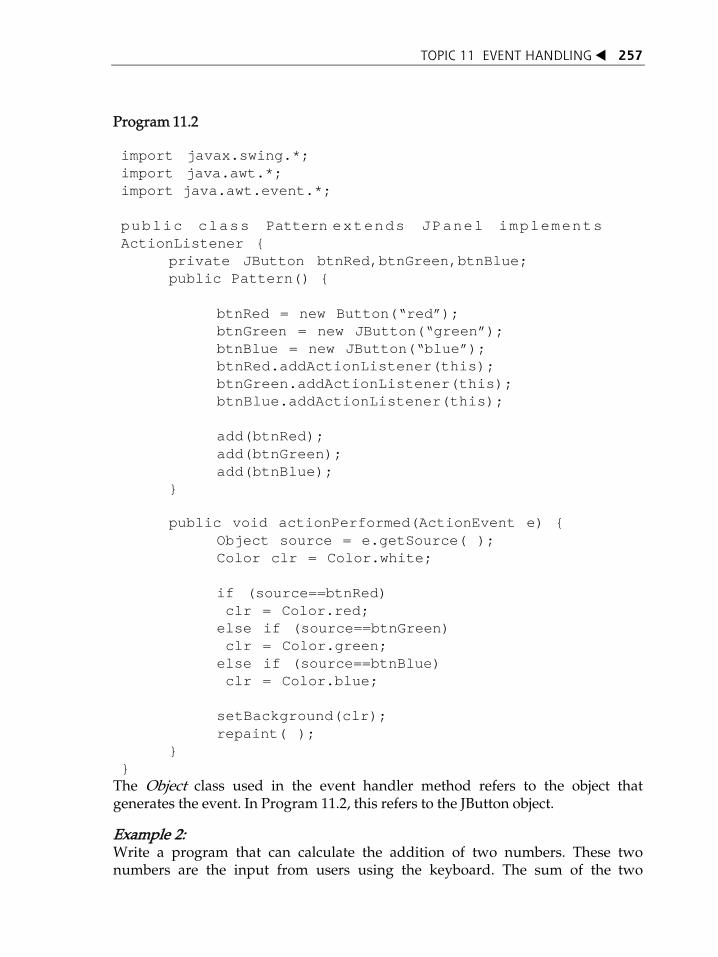
TOPIC 11 EVENT HANDLING 257
Program 11.2 import javax.swing.*; import java.awt.*; import java.awt.event.*; public class Pattern extends JPanel implements ActionListener {
private JButton btnRed,btnGreen,btnBlue; public Pattern() {
btnRed = new Button(“red”); btnGreen = new JButton(“green”); btnBlue = new JButton(“blue”); btnRed.addActionListener(this); btnGreen.addActionListener(this); btnBlue.addActionListener(this);
add(btnRed); add(btnGreen); add(btnBlue);
}
public void actionPerformed(ActionEvent e) {
Object source = e.getSource( ); Color clr = Color.white;
if (source==btnRed) clr = Color.red; else if (source==btnGreen) clr = Color.green; else if (source==btnBlue) clr = Color.blue;
setBackground(clr); repaint( );
} }
The Object class used in the event handler method refers to the object that generates the event. In Program 11.2, this refers to the JButton object. Example 2: Write a program that can calculate the addition of two numbers. These two numbers are the input from users using the keyboard. The sum of the two
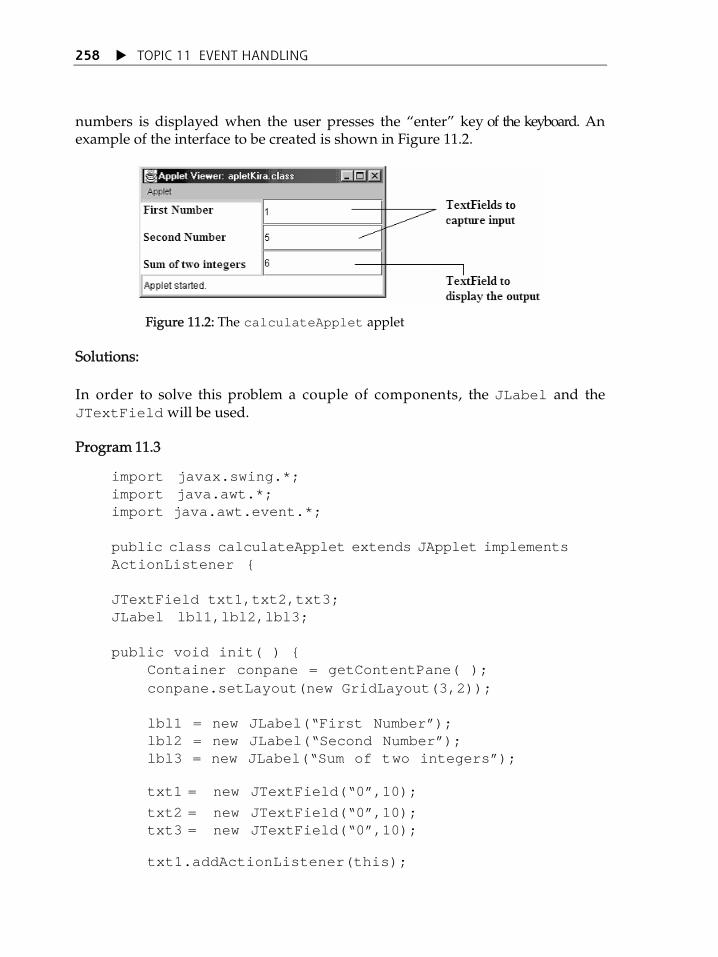
TOPIC 11 EVENT HANDLING
258
numbers is displayed when the user presses the „enter‰ key of the keyboard. An example of the interface to be created is shown in Figure 11.2.
Figure 11.2: The calculateApplet applet Solutions: In order to solve this problem a couple of components, the JLabel and the JTextField will be used. Program 11.3
import javax.swing.*; import java.awt.*; import java.awt.event.*; public class calculateApplet extends JApplet implements ActionListener { JTextField txt1,txt2,txt3; JLabel lbl1,lbl2,lbl3; public void init( ) { Container conpane = getContentPane( ); conpane.setLayout(new GridLayout(3,2)); lbl1 = new JLabel(“First Number”); lbl2 = new JLabel(“Second Number”); lbl3 = new JLabel(“Sum of two integers”);
txt1 = new JTextField(“0”,10); txt2 = new JTextField(“0”,10); txt3 = new JTextField(“0”,10);
txt1.addActionListener(this);

TOPIC 11 EVENT HANDLING 259
txt2.addActionListener(this); txt3.addActionListener(this); conpane.add(lbl1); conpane.add(txt1); conpane.add(lbl2); conpane.add(txt2); conpane.add(lbl3); conpane.add(txt3);
} public void actionPerformed(ActionEvent e) { int num1 = Integer.parseInt(txt1.getText( )); int num2 = Integer.parseInt(txt2.getText( )); int num3 = num1 + num2; txt3.setText(String.valueOf(num3)); } }
Ever wondered why we have used Integer.parseInt() and String.valueOf() in the above Program 11.3?
Integer.parseInt() will change String data into an integer data whereas String.valueOf() will change an integer data to a String data. We need to do this because all the inputs typed by user in a the GUI components like JTextField are treated as String (Ex: If you type 20 in a JTextField, the component will treat your input as string ‰20‰). Thus, we need to change it to integer using Integer.parseInt() in order to perform the calculation. Likewise, String.valueOf() is used to convert integer data to String data so that it can be written to the GUI component.
THE COMPONENTS OF ITEMLISTENER LISTENER
11.3
SELF-CHECK 11.2
Earlier on, you were exposed to the components that used the ActionListener listener. How about the ItemListener listener?
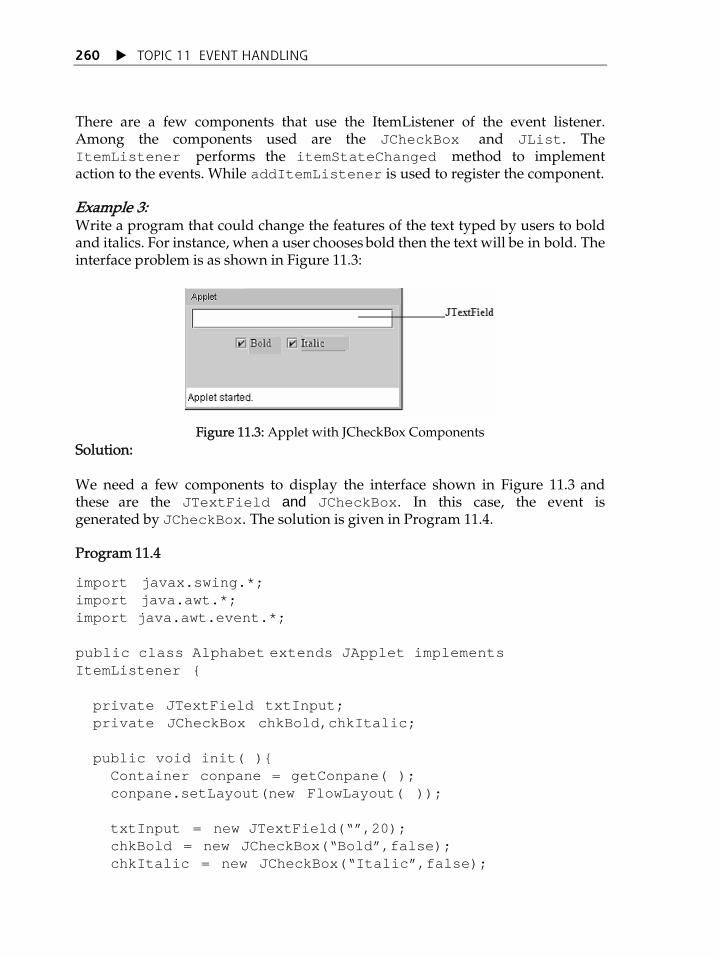
TOPIC 11 EVENT HANDLING
260
There are a few components that use the ItemListener of the event listener. Among the components used are the JCheckBox and JList. The ItemListener performs the itemStateChanged method to implement action to the events. While addItemListener is used to register the component. Example 3: Write a program that could change the features of the text typed by users to bold and italics. For instance, when a user chooses bold then the text will be in bold. The interface problem is as shown in Figure 11.3:
Figure 11.3: Applet with JCheckBox Components
Solution: We need a few components to display the interface shown in Figure 11.3 and these are the JTextField and JCheckBox. In this case, the event is generated by JCheckBox. The solution is given in Program 11.4.
Program 11.4
import javax.swing.*; import java.awt.*; import java.awt.event.*; public class Alphabet extends JApplet implements ItemListener { private JTextField txtInput; private JCheckBox chkBold,chkItalic; public void init( ){ Container conpane = getConpane( ); conpane.setLayout(new FlowLayout( )); txtInput = new JTextField(“”,20); chkBold = new JCheckBox(“Bold”,false); chkItalic = new JCheckBox(“Italic”,false);

TOPIC 11 EVENT HANDLING 261
chkBold.addItemListener(this); chkItalic.addItemListener(this);
conpane.add(txtInput); conpane.add(chkBold); conpane.add(chkItalic); } public void itemStateChanged(ItemEvent e){ int t=0,c=0; Font font; if (chkBold.isSelected( )) t = Font.BOLD; if (chkItalic.isSelected( )) c = Font.ITALIC;
font = new Font(“Serif”,t + c, 14); txtInput.setFont(font); } } To determine which checkbox is selected, we use the isSelected()method which is included in the JCheckBox object.
THE COMPONENTS OF ADJUSTMENTLISTENER
11.4
SELF-CHECK 11.3
What method is involved in generating events for JScrollBar?
One of components that could generate event using the AdjustmentListener event listener is the JScrollBar component. To trace the event generated, we need to use a method associated with AdjustmentListener, which is the adjustmentValueChanged(). To register the component so that we can track down the event generated, the addAdjustmentListener method will be used.

TOPIC 11 EVENT HANDLING
262
Example: Write a program that could display the RGB components. RGB color is represented by the RGB value, that is the brightness of the colours red (R), green (G), and blue (B). These colour value combinations will create a specific colour. Each RGB colour has a brightness range from 0 to 255. The interface to display RGB color component is shown in Figure 11.4.
Figure 11.4: The RGBColor applet
Solution: The components needed to solve this problem are the JScrollBar, JLabel and JPanel. When the JScrollBar is scrolled, it will return an integer value range from 0 to 255. The JPanel component will be used to group the JScrollBar component. Meanwhile the JLabel component is used to display „Red‰, „Green‰, and „Blue‰ labels in JApplet. Program 11.4 shows the solution to this problem. Program 11.5 import java.awt.*; import java.awt.event.*; import javax.swing.*; public class RGBColor extends JApplet implements AdjustmentListener{
private JLabel lblRed; private JLabel lblGreen;private JLabel lblBlue; private JScrollBar barRed; private JScrollBar barGreen;private JScrollBar barBlue;

TOPIC 11 EVENT HANDLING 263
private JPanel panelColor; public void init( ){ Container conpane = getContentPane( ); JPanel p = new JPanel( );
p.setLayout(new GridLayout(3, 2)); p.add(lblRed = new JLabel(“Red 0”); p.add(barRed=newScrollBar(Adjustable.HORIZONTAL, 0,
0, 0, 255)); barRed.setBlockIncrement(16); barRed.addAdjustmentListener(this); p.add(lblGreen = new JLabel(“Green 0”); p.add(barGreen = new
ScrollBar(Adjustable.HORIZONTAL , 0, 0, 0,255)); barGreen.setBlockIncrement(16); barGreen.addAdjustmentListener(this); p.add(lblBlue = new JLabel(“Blue 0”); p.add(barBlue= new
JScrollBar(Adjustable.HORIZONTAL, 0, 0, 0,255)); barBlue.setBlockIncrement(16); barBlue.addAdjustmentListener(this);
conpane.add(p, “South”);
panelColor = new JPanel( ); panelColor.setBackground(new Color(0, 0, 0)); conpane.add(panelColor, “Center”);
}
public void adjustmentValueChanged(AdjustmentEvent evt){
lblRed.setText(“Red” +barRed.getValue()); lblGreen.setText(“Green” +barGreen.getValue()); lblBlue.setText(“Blue” +barBlue.getValue()); panelColor.setBackground(new Color(barRed.getValue(),
panelColor.repaint(); barGreen.getValue( ), barBlue.getValue()));
} }

TOPIC 11 EVENT HANDLING
264
The following table summarized the main components in Java and their associate event handlers:
Components Event Register Method to Handle the Event
JButton JList JMenuItem JTextField JRadioButton
addActionListener
actionPerformed(...)
JCheckbox JChoice JList JRadioButton
addItemListener itemStateChanged(...)
JCheckBoxMenuItem JScrollBar
addAdjustmentListener adjustmentValueChanged(...)
Visit http//www.biblio.org/javfaq/course/week7/index.html for further explanation on events handler.
EXERCISE 11.2
1. Study and explain about the following event handlers and list all classes associated with them.
ActionListener AdjustmentListener ItemListener MouseListener MouseMotionListener WindowListener

TOPIC 11 EVENT HANDLING 265
2. Create the following applet. Users can paint the applet by selecting the „background‰ and „foreground‰ colours available in the JList object.
3. Create the following applet. Users can change the temperature from Fahrenheit to Celsius. Users will need to provide the input in JTextField and when the „Enter‰ key is pressed the temperature in Celsius will be displayed as follows.

TOPIC 11 EVENT HANDLING
266
The GUI component developed in Topic 10 does not perform any actions on the users input:
For example the button we developed did not give any response when it was pressed by the user.
When developing an applet, we definitely would want some meaningful actions.
We would probably want the applets to perform some calculations when a user clicks the button, or the background color changes when a user scrolls the scroll bar, and etc.
To make our programs responsive or interactive, we need to write the commands in the code. This is known as Event Handling.
The programs developed must react accordingly to the event in order to do something.
The Java 1.2 uses the event delegation model in Java gives us the framework to handle events.
Event Handling
Event Delegation Model
Event Listener
Event Source
INTRODUCTION
In the programs shown in the previous topics, it is assumed that user will key in the correct input. What will happen if user entered a wrong input? For example, user entered the character ÂaÊ when the program asked them to enter an integer input such as 8 to perform an arithmetic operation. If this happened, then the program will be terminated abruptly without producing the intended output. The problem of program being terminated abruptly due to wrong input can be overcome by using exceptional handling provided in JavaÊs library class. The try-catch block is used for this purpose.
TTooppiicc
1Exceptional Handling
122 LEARNING OUTCOMES
By the end of this topic, you should be able to:
1. Describe the meaning of exceptional handling;
2. List the types of exceptional classes in Java;
3. Describe the usage of try-catch and finally instructions;
4. understand the meaning of exceptional propagation;
5. Differentiate between throw and throws keywords; and
6. Develop a program that can handle exceptional situations in a program.

TOPIC 12 EXCEPTIONAL HANDLING
268
WHAT IS EXCEPTIONAL HANDLING?
A program will be terminated abruptly if wrong inputs entered during the program execution. This is known as exceptional situation. We need to include some specific codes in the program to handle this exceptional situation. This process of embedding codes to handle exceptional situation is known as exceptional handling.
12.1.1 Java’s Exceptional Classes
Do you know what kind of exceptional classes that can be found in Java? All exception types are subclasses of the built-in class Throwable. Throwable has two subclasses: Exception and Error subclasses.
Exception class is used for exceptional conditions that programs should catch. There is an important subclass of Exception, known as RuntimeException. Exceptions of this type are automatically defined for the programs that you write and include things such as division by zero. The other subclass of Throwable is Error class which defines exceptions that are not expected to be caught by userÊs program. Exceptions of type Error are used by the Java run-time system to indicate errors having to do with the run-time environment. Table 12.1 shows some of the exceptions and the situations that cause the exceptions to happen.
Table 12.1: Some of the common type of exceptions in Java
Exception Types When it Happens?
ArithmeticException (from class Exception/RunTimeException)
Division by 0 or other arithmetic errors
IndexOutOfBoundsException (from class Exception/RunTimeException)
Array index has exceed itÊs declared range
12.1
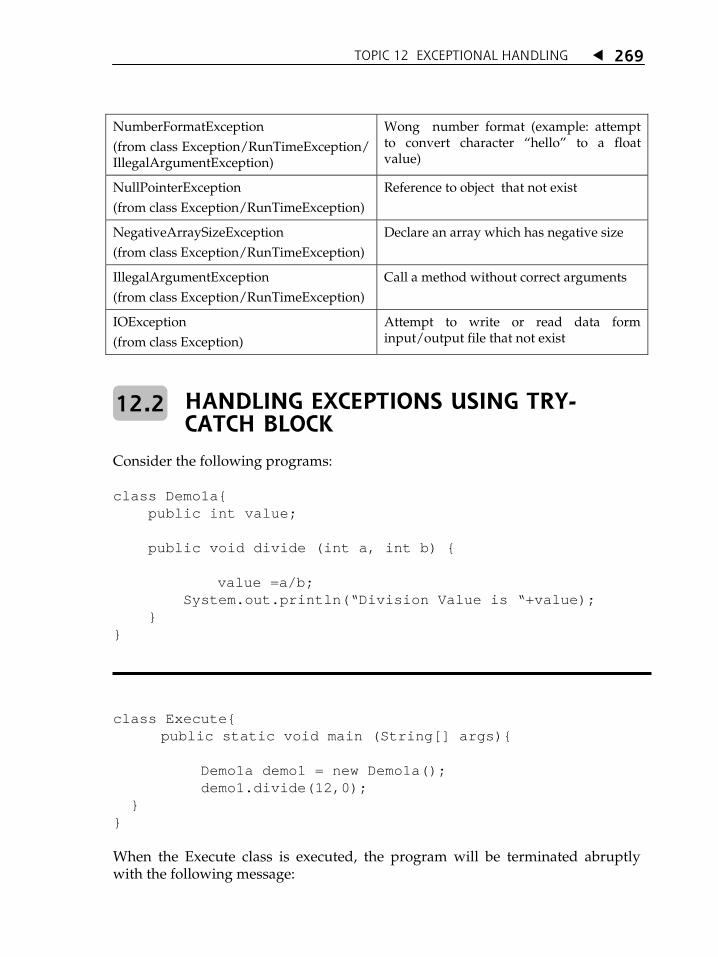
TOPIC 12 EXCEPTIONAL HANDLING 269
NumberFormatException (from class Exception/RunTimeException/ IllegalArgumentException)
Wong number format (example: attempt to convert character „hello‰ to a float value)
NullPointerException (from class Exception/RunTimeException)
Reference to object that not exist
NegativeArraySizeException (from class Exception/RunTimeException)
Declare an array which has negative size
IllegalArgumentException (from class Exception/RunTimeException)
Call a method without correct arguments
IOException (from class Exception)
Attempt to write or read data form input/output file that not exist
HANDLING EXCEPTIONS USING TRY- CATCH BLOCK
Consider the following programs: class Demo1a{ public int value; public void divide (int a, int b) { value =a/b; System.out.println(“Division Value is “+value); } }
12.2
class Execute{ public static void main (String[] args){ Demo1a demo1 = new Demo1a(); demo1.divide(12,0); } } When the Execute class is executed, the program will be terminated abruptly with the following message:

TOPIC 12 EXCEPTIONAL HANDLING
270
Exception in thread "main" java.lang.ArithmeticException: / by zero at Demo1a.divide(Demo1a.java:6) at Execute.main(Execute.java:5) The program has been terminated abruptly because division by zero has taken place is the divide method of the class Demo1a. Hence, an exception has been thrown in the program and the error message shown above is the effect of this exceptional occurrence. Can the programmer handle the errors thrown in a program? The answer is YES. We can use try-catch block for this purpose. Consider the following new program that been improved based on the previous example. class Demo1b{ int value; public void divide (int a, int b) { try{ value =a/b; System.out.println(“Division Value is “+value); } catch (ArithmeticException e){ System.out.println("Error: Division by Zero"); } finally{ value=0; } } } In the above program, the method divide has been improved by including the try-catch block. Observe the use of the try-catch statement in the program. In the program above, only the following line that capable to throw an exception:
value = a/b;

TOPIC 12 EXCEPTIONAL HANDLING 271
The type of exception that can be thrown by the above line is „Division of 0‰. Since the instruction above capable to throw an exception, we need to insert the instruction line in the try block. Any instructions/processing that need to be executed when an exception takes place must be put in the appropriate catch block. In our case, the program will display the message "Error: Division by Zero" if an exception is thrown in the try block. It should be stressed that all the line(s) below the line that has thrown an exception in the try block will be omitted and control will pass to the appropriate catch block to handle the exception. Thus, in the class Demo1b, the instruction System.out.println(“Division Value is “+value)that comes after instruction value =a/b in the try block will be omitted if the value =a/b line throws an exception. Then, the control will be passed to catch block in which all the instructions in the catch block will be executed. If there is no exception takes place, all the instructions in try block will executed in sequence and the catch block will be ignored (Refer to the diagram on the next page). If <t-statement2> has thrown an exception, the program flow will be as shown below:
If no exception thrown in the try block, the program flow will be as shown below:

TOPIC 12 EXCEPTIONAL HANDLING
272
REMEMBER..
When using try-catch block, try is a mandatory part and cannot be omitted.
USING THROW INSTRUCTION TO HANDLE EXCEPTIONS 12.3
In the previous program examples, you have only been catching exceptions that are thrown by the Java run-time system. However, it is also possible for your program to throw an exception explicitly by using the throw statement. The syntax declaration of throw is given here: throw ThrowableInstance; ThrowableInstance must be an object of type Throwable or a subclass of Throwable. // Demonstrate throw. class Demo2 { public void demo() {

TOPIC 12 EXCEPTIONAL HANDLING 273
try { int a=2; if (a==2) throw new NullPointerException(); } catch(NumberFormatException e) { System.out.println("NumberFormatException is caught"); } catch(NullPointerException e) { System.out.println("NullpointerException is caught"); } catch(Exception e) { System.out.println("Exception is caught"); } } } The flow of execution stops immediately after the throw statement; any subsequent statements are not executed. The nearest enclosing try block is inspected to see if it has a catch statement that matches the type of exception. If it does find a match, control is transferred to that statement. If not, then the next enclosing try statement is inspected, and so on. If no matching catch is found, then the system will halt the program. In class Demo2, it has more than one catch blocks. Which catch block will be executed if an exception is thrown in the program? If there is more than catch block, each catch block will be checked sequentially. Since the exception classes is arranged according to inheritance hierarchy, the specific exception class should be placed before the general exception class (example: NumberFormatException exception handler is place before the more general class of Exception). Certain Java compilers will produce error message if this rules was not followed. In the case of occurrence of exception in a program that has more than one catch blocks, then the appropriate catch block will be selected and other catch block(s) will be ignored. What will happen if an exception has occurred in the program but the program does not have any catch blocks or appropriate catch blocks to handle the exception? If this happens, system will handle the exception on its own.

TOPIC 12 EXCEPTIONAL HANDLING
274
USING FINALLY BLOCK 12.4
Observe the usage of finally block in class Demo1b (Section 12.2). All the instruction(s) in the finally block will be executed regardless whether an exception has occurred or not in the program. For example, if <t-statement2> throws an exception and <catch block 2> is the matching catch block, the program flow will be as shown below:

TOPIC 12 EXCEPTIONAL HANDLING 275
If the try block does not throw any exception, the program flow will be as shown below:
The usage of finally is not compulsory. ThatÊs why is not been included in Demo2 class in section 12.3. The purpose of finally instruction is to perform any execution without bothering whether an exception occurred in the program.
REMEMBER..
try-catch-finally clause, if present in your program, must be inthat order
There can be more than one catch block, but there can only be one finally clause
All the instructions in the finally block will be executed regardless whether an exception has occurred or not in the program.

TOPIC 12 EXCEPTIONAL HANDLING
276
EXCEPTION PROPAGATION AND THROWS INSTRUCTION
Sometimes we are not interested to include exception handling in a method but let the caller of the method to handle the exception. This can be done using the throws clause. Consider the following program: class Demo3{ int value; public void divide (int a, int b)throws ArithmeticException { value =a/b; System.out.println(“Division Value is “+value); } }
12.5
class Execute{ public static void main (String[] args){ try { Demo3 demo3 = new Demo3(); demo3.divide(12,0); } catch (ArithmeticException e){ System.out.println("Error caught in main method: Division by Zero"); } } } divide method in the class Demo3 has declared the throws clause to throw the exception of type ArithmeticException. It means the caller of this method will handle this exception. In our case, this method is invoked by method main from the class Execute. Thus, main method which has the catch block for the ArithmeticException will handle this exception on behalf of the divide method. If method main does not provide catch block for ArithmeticException, then the
TOPIC 12 EXCEPTIONAL HANDLING 277
system will handle this exception by abruptly terminates the program if ArithmeticException was thrown by the divide method. In the example, the divide method is an Exception Propagator while main method is an Exception Catcher.
12.5.1 Checked Exception
There are two types of exception:
Checked exception
Unchecked exception
For the checked exception, the compiler will make sure it is been handled either in the method itself by the try-catch block or by the caller of that method by using Exception Propagator and Exception Catcher approach. If checked exception was not handled somehow, then the compiler will display the following error message:
unreported exception
exception type must be caught or declared to be thrown
It is not compulsory for the programmer to insert try-catch block or throws clause to handle the unchecked exception.
All the exceptions from the class RuntimeException are unchecked exceptions. Thus, all exceptions in Table 12.1 are unchecked exceptions except IOException which is a checked exception. The programmer must insert codes in the program to handle checked exceptions (either by includes try-catch instruction in the method or let the caller of the method to handle the exception). Although unchecked exception is not compulsory to be handled in the program, it will be a good approach for a programmer to handle it explicitly in the program.
ACTIVITY 12.1
Find out other checked exceptions besides IOException.

TOPIC 12 EXCEPTIONAL HANDLING
278
REMEMBER..
When a class inheriting another class:
the overriding method in the subclass can only:
- throw checked exceptions specified in the throws clause of the overridden method in the superclass OR
- throw exceptions derived from those exceptions specified in the overridden method in the superclass OR
- throw any unchecked exception OR
- throw no exception at all
overloading methods can throw any exceptions
CASE STUDY 12.6
In this section, you will be shown of how exception handling can be dealt in an Applet program. Consider the following scenario:
‰Write an applet program will ask the user to enter two integers (assume no1 and no2). The program then will determine and display the division of no1/no2 when the <ENTER> is pressed‰
Can you name the type of exceptions that can be thrown by the system in the above scenario?
The system is capable to throw the following exceptions in the program for the above scenario:
NumberFormatException exception This exception will be handled if user enters wrong inputs in the JTextField.
Example of wrong inputs: character such as ÊcÊ or string such as ‰hello‰ that cannot be converted to an integer.
ArithmeticException exception The exception will be handled if division by 0 occurs.

TOPIC 12 EXCEPTIONAL HANDLING 279
The complete applet program for the above scenario is given below:
import javax.swing.*; import java.awt.*; import java.awt.event.*;
public class Input5 extends JApplet implements ActionListener{ int no1,no2, hasil; JTextField txt1, txt2; JLabel lbl1,lbl2,lbl3;
public void init (){ Container conpane=getContentPane(); conpane.setLayout(new FlowLayout());
lbl1=new JLabel("Enter first number (no1):"); lbl2=new JLabel("Enter second number (no2):"); lbl3=new JLabel();
txt1=new JTextField(10); txt2=new JTextField(10);
conpane.add(lbl1); conpane.add(txt1); conpane.add(lbl2); conpane.add(txt2); conpane.add(lbl3);
txt1.addActionListener(this); txt2.addActionListener(this);
}//init
public void actionPerformed(ActionEvent event){
try { no1=Integer.parseInt(txt1.getText()); no2=Integer.parseInt(txt2.getText()); hasil=no1/no2; lbl3.setText("no1/no2="+hasil); } catch (ArithmeticException e){ lbl3.setText("Error: You have entered 0 divisor"); } catch (NumberFormatException e){

TOPIC 12 EXCEPTIONAL HANDLING
280
lbl3.setText("Error: You should enter integer number as the input"); }
} //actionPerformed
}//class
Note that the try-catch statement has been embedded in the event handler method - actionPerformed. This is because the instruction to retrieve the input data from JTextField has been included in this method. Hence we need to put the try-catch block in this method to handle any exception that could be thrown in converting the input (String type input in the JTextField) to an integer type using Integer.parseInt() instruction.
The output for the program is shown below:
Figure 12.1(a): No exception is thrown in the program
Figure 12.1(b): NumberFormatException is thrown in the program
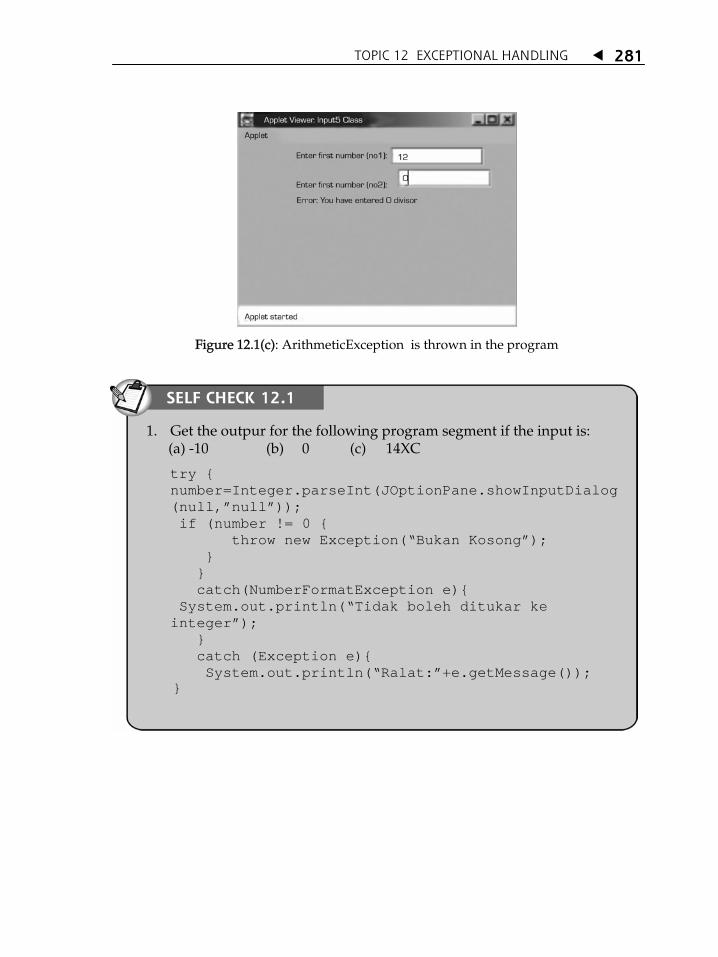
TOPIC 12 EXCEPTIONAL HANDLING 281
Figure 12.1(c): ArithmeticException is thrown in the program
1. Get the outpur for the following program segment if the input is:
(a) -10 (b) 0 (c) 14XC
try { number=Integer.parseInt(JOptionPane.showInputDialog(null,”null”)); if (number != 0 { throw new Exception(“Bukan Kosong”); } } catch(NumberFormatException e){ System.out.println(“Tidak boleh ditukar ke integer”); } catch (Exception e){ System.out.println(“Ralat:”+e.getMessage());
}
SELF CHECK 12.1

TOPIC 12 EXCEPTIONAL HANDLING
282
2. Get the output for the program segment below if the input is:(a) -10 (b) 0 (c) 14XC
try { number=Integer.parseInt(JOptionPane.showInputDialog(null,”null”)); if (number != 0 { throw new Exception(“Bukan Kosong”); } } catch(NumberFormatException e){ System.out.println(“Tidak boleh ditukar ke integer”); } catch (Exception e){ System.out.println(“Ralat:”+e.getMessage()); } finally { System.out.println(“Tamat”); }
3. What is the effect if the block catch(NumberFormatException e) is
written after the block catch (Exception e) in the question 2 above. Explain your answer using the inputs given in question 2.
In this topic, we have learned how to write Java programs that will tolerate
any errors.
It is very important for you to remember the types of exceptional classes in Java. This will help us handle the exceptions in the program.
Although the handling of unchecked exceptions using try-catch is not compulsory, but you are encouraged to handle this type of exception in the program.

TOPIC 12 EXCEPTIONAL HANDLING 283
Checked exception
Exception propagator
Exception catcher
Exceptional handling
Exceptional classes
Finally
Throw
Throws
Try-catch
Unchecked exception

REFERENCES 284
Brugali D., & Torchiano, M. (2005). Software development: Case studies in Java. Addison Wesley.
David, J., Eck. (2006). Introduction to programming using Java. Retrieved from
http://math.hws.edu/javanotes/ Harvey, M. D., & Paul, J. D. (2007). Java: How to program. 7/E. Prentice Hall. 2007. Kolbe K., & Geoffrey P., G. (2006). Object-oriented approach for software
development. Open University Malaysia. (Adopted from OUHK). Liang., Y. D. (2007). Introduction to Java programming: Fundamentals first. 6/E.
Prentice Hall. Sun Java Tutorial at: http://java.sun.com/docs/books/tutorial/java/index.html SL275-Java Programming Language. Volume 1. Sun Microsystems. 2001.