Cleaning and Sanitizing a Working Kitchen
25
8 Cleaning and Sanitizing a Working Kitchen Your Guide to Cleaning a Commercial Kitchen with Equipment How can we ensure that your equipment lasts longer, is more efficient, and cooks food properly with a consistently great taste and performance? By Keeping in mind how often you need to properly clean your commercial kitchen equipment, all the while adhering to food and safety protocols. Keep in mind that there are some jobs that need to be done multiple times a day, while others should be performed weekly or monthly. In these days of super viruses and issues, we truly need stronger sanitization procedures in place and when laid out on a checklist, can help to keep this sturdy protocol in place.
-
Upload
khangminh22 -
Category
Documents
-
view
0 -
download
0
Transcript of Cleaning and Sanitizing a Working Kitchen

8
Cleaning and Sanitizing a Working Kitchen
Your Guide to Cleaning a Commercial Kitchen with Equipment
How can we ensure that your equipment lasts longer, is more efficient, and cooks
food properly with a consistently great taste and performance? By Keeping in
mind how often you need to properly clean your commercial kitchen equipment,
all the while adhering to food and safety protocols.
Keep in mind that there are some jobs that need to be done multiple times a day,
while others should be performed weekly or monthly. In these days of super
viruses and issues, we truly need stronger sanitization procedures in place and
when laid out on a checklist, can help to keep this sturdy protocol in place.

9
Training
When it comes to effectively cleaning and maintaining restaurant kitchens, it is
imperative that your cleaning crew be properly trained on all of the items
discussed here and that training is a regular part of their duties.
In addition to training, it is equally important that they be educated on why
keeping all kitchen areas clean and healthy is so vitally important. Employees
should be taught the difference between Sanitizing and Disinfecting.
Disinfecting: Clean something, especially with a chemical in order to destroy
bacteria.
Sanitization: To free from dirt or germs by cleaning and sterilizing.
What to Wear
Many in-house cleaning people wear the same shoes to work that they wear
every day. The first concern with this is that you do not know where these shoes
have been.
The in-house cleaning crew should wear shoes specifically for cleaning and
working in the restaurant, and these should be slip-resistant shoes.
Two other items that owners or managers should insist their cleaning crews wear
are protective eye gear and gloves. Some of the chemicals used in cleaning are
very powerful. Even a small drop in the eyes or on the skin can cause injury.

10
Cleaning Agents to Use
Avoid abrasives, solvents, or any cleaning agent that could damage the interior
finishes or leave a chemical taste on foods. Follow manufacturer’s instructions.
Baking soda and water is a good choice for cleaning if odors exist.
Kitchen Items to Clean After Each Cooking Shift
• Wash and sanitize all surfaces including cutting boards, the line and prep
tables
• Wash your meat and cheese slicer after each use
• Put all cleaning rags in dirty laundry. Also, throw in all aprons and chefs
coats, but not in the same bin as the dirty rags.
• Clean the fryers
• Brush the grill
• Empty sanitizing buckets
• Make sure your steam table is empty and wiped clean
• If you have bins in your reach-in cooler, cover them in plastic wrap
• Wash your floor mats
• Sweep and mop the kitchen floor
• Sweep the walk-in cooler
Kitchen Items to Clean Monthly
• Clean freezers
• Empty and sanitize your ice machine
• Wash behind ovens, stoves, and fryers to eliminate grease build-up, which
can result in a major fire hazard
• Wash walls and ceilings for grease and food stains
• Wipe down all storage areas
• Change pest traps (if applicable)
• Clean the pilot lights on gas kitchen equipment
• Clean your hoods twice a year
• Check fire suppression systems and fire extinguishers

11
Kitchen Items to Clean Yearly
• Clean the pilot lights on gas kitchen equipment
• Clean your hoods twice a year
• Check fire suppression systems and fire extinguishers
Common Areas Often Forgotten
These areas are often forgotten during cleaning:
• High shelves
• Drains and gullies
• The space in between walls and equipment
• Underneath appliances: cookers/fridges/freezers and other surfaces
• Seals and fridge doors/shelves
• Filters and plenum chambers
• Ventilation systems
Touch Points
12
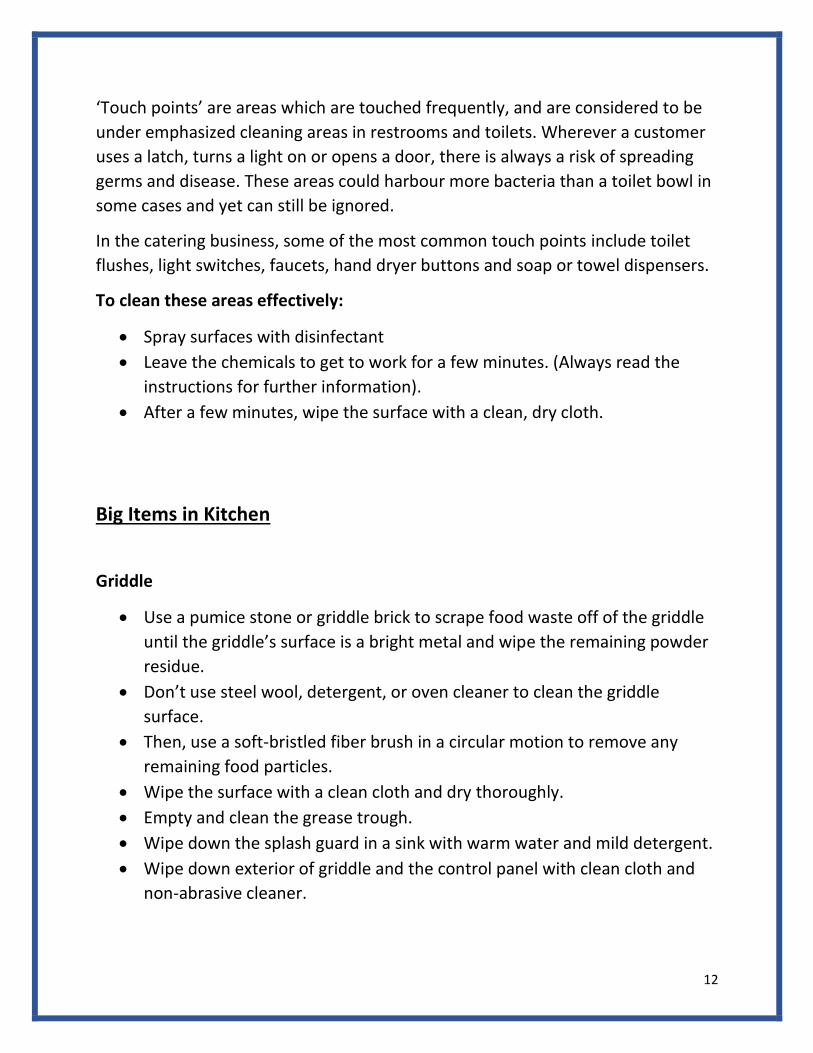
‘Touch points’ are areas which are touched frequently, and are considered to be
under emphasized cleaning areas in restrooms and toilets. Wherever a customer
uses a latch, turns a light on or opens a door, there is always a risk of spreading
germs and disease. These areas could harbour more bacteria than a toilet bowl in
some cases and yet can still be ignored.
In the catering business, some of the most common touch points include toilet
flushes, light switches, faucets, hand dryer buttons and soap or towel dispensers.
To clean these areas effectively:
• Spray surfaces with disinfectant
• Leave the chemicals to get to work for a few minutes. (Always read the
instructions for further information).
• After a few minutes, wipe the surface with a clean, dry cloth.
Big Items in Kitchen
Griddle
• Use a pumice stone or griddle brick to scrape food waste off of the griddle
until the griddle’s surface is a bright metal and wipe the remaining powder
residue.
• Don’t use steel wool, detergent, or oven cleaner to clean the griddle
surface.
• Then, use a soft-bristled fiber brush in a circular motion to remove any
remaining food particles.
• Wipe the surface with a clean cloth and dry thoroughly.
• Empty and clean the grease trough.
• Wipe down the splash guard in a sink with warm water and mild detergent.
• Wipe down exterior of griddle and the control panel with clean cloth and
non-abrasive cleaner.

13
Charbroiler
• Wipe exterior with a clean, soft cloth. Any discoloration can be removed
with a non-abrasive cleaner.
• Remove the water pan and cooking grates and wash in a sink.
• To clean the heating element, remove the grate and scrub with a stiff wire
brush or equivalent.
Refrigeration
• Wipe down the exterior, interior, and shelves daily with a clean, wet cloth
for the protection of your produce.
Additionally, you should clean the evaporator coil and condenser coil at least
every 3-4 months.
• Be sure that the unit is disconnected from power to clean the coils.
• Wipe the evaporator coil with a commercial coil cleaner.
• Then on the condenser coil, brush the fins from top to bottom (never side
to side).
These coils collect dust and lint that is in the air and can cause your refrigeration
to not cool properly if not cleaned regularly.
This simple step will keep your refrigeration running properly far longer!
Hoods and Hood Filter
• Wash stainless steel hoods on a regular basis using a clean cloth, warm
water, and mild soap or dish detergent.
• Clean in the direction of the polish lines.
• Rinse with clear water and immediately wipe dry.
Note: be cautious about using “new and improved” cleaning agents. Most
chemicals found in these cleaning agents react with the heat from being above
hot cooking equipment and may loosen the paint.

14
Aluminum mesh grease filters should be washed in your dishwasher
approximately every month, depending on the amount of usage, with a non-
phosphate detergent.
Using phosphate detergents may cause discoloration of the filter. Baffle filters are
made to operate for longer periods of time in high grease conditions. These need
to be cleaned on a regular basis (every other month depending on usage) with
soap and water.
Fryer and Fryer Filters
Clean outside daily and the kettle/tank once a week or as needed.
Cleaning the oil will vary depending on the make and model of your
fryer/filtration system, but it is important to clean the oil at least once a day,
though it is recommended to clean it more frequently.
This will decrease the chances of a grease fire, will allow your fryer to operate
more efficiently, and will give your food a better taste.
• Wipe the exterior with a soft cloth. Any discoloration can be removed with
a non-abrasive cleaner.
To clean the kettle of an open pot style fryer:
• Drain fat from fryer while the fat is warm, not hot.
• Rinse to remove all loose residue and crumbs.
• Fill with water, bring to a boil and add a fryer cleaner.
• Boiling time will depend on the condition of the fryer.
• Turn heat off, drain and rinse with water until clean.
• Use a vinegar rinse to stir, drain and rinse thoroughly with clean water.
• Wipe kettle with a soft cloth and allow to thoroughly dry.
To clean the tank of a tube style fryer:
• Drain the tank and flush out scraps and sediment with a small amount of
warm shortening using tank brush.
• Use a low foaming cleaner/ degreaser to clean the fry tank.
• Add commercial boil-out solution, allow the solution to simmer for 15 to 20
minutes and drain the cleaning solution from the tank.

15
• Close the drain valve and refill the tank with water.
• Add 1 cup of vinegar to neutralize alkaline left by the cleaner.
• Bring the solution to a simmer and allow to stand.
• Drain the tank and rinse thoroughly with hot water so that all traces of
cleaner are removed.
• Dry the tank and close the drain valve.
Cleaning and Maintaining the Inside of Refrigerators and Freezers
• Daily refrigerator maintenance makes cleaning easier.
• Wipe up refrigerator spills immediately with water and dishwashing
liquid, then rinse.
• Make it a habit to check perishable foods daily.
• Cooked leftovers should be consumed or frozen in 2-3 days.
• Check food “use by dates,” and discard if the date has passed.
• If you question the safety of a food remember “when in doubt, throw
it out.”
• Keep foods cold in an ice packed cooler.
• Bacteria grows rapidly on foods at room temperature, such as in the
kitchen sink or on the countertop.
• Foods held at temperatures above 4 C for more than 2 hours should
be discarded.
• Clean shelves and drawers.
• Remove refrigerator/freezer shelves and drawers for cleaning.
• Wash in water and dishwashing liquid soap.
• Rinse in water and sanitize with a chlorine bleach solution
(instructions following).
• Air dry shelves and drawers or dry with single use paper towels. Dish
towels can contaminate.
• Wash the interior.
• Wash the interior surfaces of the refrigerator and freezer, including
gaskets, with water and dishwashing liquid soap, then rinse.
• Sanitize accordingly (see Kitchen Sanitizing)

16
Cleaning Shelf Stable Food Storage
Cabinets and pantries are storage areas for shelf stable foods such as canned
foods, cereals, rice, pasta, baking mixes and spices.
• Dry storage areas should be well maintained. Spilled dry cereals, crumbs and
sugars attract insects; prompt clean-up prevents pests.
• Clean shelf surfaces with water and dishwashing liquid soap, rinse and air
dry.
How to Clean a Sink
A kitchen sink can soon become a hotbed of germs as it is constantly exposed to
dirt and kitchen waste, so it benefits massively from regular cleaning.
Heavy grease and oil can easily clog sinks in kitchens, and so it is now a
requirement for catering companies to keep these deposits under control.
Keeping your drains and piping hygienically clean and smelling neutral aren’t the
only benefits from using suitable grease-fighting equipment.
Sinks can be thoroughly sanitised by using commercial cleaning supplies such as a
dual-purpose cleaner and disinfectant.

17
How to Clean a Microwave
You can loosen the stains inside your microwave by placing a microwave-safe
bowl inside filled with roughly two cups of water.
After the microwave has been on full power for 2-3 minutes, use a multi-purpose
cleaning spray inside and wipe the inside clean with a dry cloth.
Cleaning Kitchen Floor Mats
Most restaurants today install slip-resistant, anti-fatigue mats throughout the
kitchen area.
These mats are often made of a heavy rubber and interconnected, making them
somewhat difficult to pick up, remove, and clean.
But they must be cleaned daily.
Sweeping or brushing them with a stiff-bristled broom will remove dry, loose soil
and debris, but it is the grease and oil that build up on the mats that are the big
concern.
If the grease and oil are not removed, over time they will degrade the rubber.
Mats should be cleaned using a commercial-grade or bio-enzymatic degreaser.
The degreaser, as the name implies, breaks down grease and oil.
A deck brush should be used to wash down the mats with the degreaser solution
and then the solution should be allowed to “saturate” on the mats for a few
minutes to help break down the grease and oil.
After this, the mats should be hosed down to rinse them, removing the grease,
oil, soil, and other contaminants.

18
During this process, if the degreasing solution becomes soiled, the solution should
be emptied and the bucket refilled with the new solution.
The degreaser will lose its potency if it becomes too soiled.
Cleaning Kitchen Floor
Safety first:
Before beginning any kitchen floor cleaning, a very wise step to take is to place
warning cones at all entries of the kitchen, especially if it is closed at the time of
cleaning.
Why? Simply because someone not on the cleaning crew may walk in
unexpectedly, and because floors can become very slippery when cleaning begins;
this can be a slip-and-fall accident just waiting to happen.
Having warning cones at the entries to the kitchen can help prevent this from
occurring.

19
Check the floor drains:
Before cleaning the floors, cleaning workers should double check that the floor
drains are unobstructed and working properly.
All too often it is only after floor cleaning begins that workers find out that the
drains are blocked.
To prevent this, restaurant owners or managers can select what are called “bio-
enzymatic drain maintainers.”
These systems drip into the drains automatically to help keep drains clean and
working properly.
They can also help reduce insects being able to sustain themselves in the drains.
Cleaning the floors:
Always use a commercial-grade degreaser; as the degreaser solution becomes
soiled, empty the bucket and refill it with fresh solution; allow the solution to
dwell on the floor for a few minutes; and then thoroughly rinse the floor.
A squeegee should be used to move moisture into floor drains for quicker drying.
Our goal here is to ensure that there is no chemical residue left on the floor and
that the floor dries as quickly as possible.

20
Cleaning Mops and buckets
Mops and buckets used to clean commercial kitchen floors and mats can become
very soiled.
After each use, the bucket should be thoroughly cleaned, rinsed and allowed to
air dry.
Mop heads should be changed daily when applicable.
The cleaner the mop heads and bucket are, the greater the efficacy of the
degreaser and cleaning solutions used and the more effectively soil and grease
will be removed from the floor.
Commercial Washing and Garbage Disposal Area Cleaning
Garbage disposal areas and dishwashing stations can become a breeding ground
for food-borne pathogens. It is imperative these areas are kept clean even though
they usually don’t come into contact with food preparation areas.
Stop the spread of germs from these areas by following these easy tips:
• Clean up spills as soon as they happen. Stagnant water is hazardous.
• Wipe down the sink frequently. Then, use commercial-grade disinfectant at
the end of service to wipe the sink and backsplash.

21
• Dispose of used scrubbers and cloths, or soak overnight in a diluted mixture
of chlorine.
• Remove trash and wash out garbage cans with chlorine.
• Sweep and mop floors with commercial-grade floor cleaner.
• Drain and switch off the dishwasher. Clean out the plug to remove debris,
then spray the interior with clean water to rinse.
• Once per month, thoroughly clean your dishwasher and use a descaling
product to remove lime scale and other build-up.
Machinery Used to Clean
Some common items would be:
• Pressure Washers. These are machines that use high-powered steam of
water to get rid of stains and dirt. ...
• Sweepers. These are large machines with a rotatory sweeping head located
underneath the front of the machine. ...
• Carpet Cleaners. ...
• Scrubbers. ...
• Polisher. ...
• Vacuum Cleaners.
AUTOMATIC ELECTRIC FLOOR SCRUBBER
Automatic Floor Scrubber Machines Offer Durable Construction and are typically
easy To Use.
Rotationally molded polyethylene tanks are corrosion and impact resistant. 18" to
24” cleaning pads provides wide cleaning paths for greater coverage in less time.

22
Pad Assist feature helps pull the machine forward by the friction of the scrub deck
pad against the floor, the operator simply needs to tilt the scrubber forward to
enable spinning pad to contact the floor.
The floor scrubber is powered by a 1.6HP or more motor that offers 113" and up
water lift, 180+ RPM and a coverage rate of 17,000 sq. ft. per hour.
The average scrubber features a 12+ gallon solution tank and a 15+ gallon
recovery tank.
The scrubber has a heavy-duty 30"W cast aluminum squeegee assembly for
removing cleaning solution.
20" Floor Machine 1.5 HP
Floor machines offer a low speed for use on wet hard floors, tile floors and
carpets.

23
Heavy duty 1.5HP and up motor with triple planetary, all steel gear box
transmission for long life and dependable service.
Safety lock-out switch on handle with easy access thumb control.
Wet Dry Vacuum Cleaners
(Industrial or Contractor Grade) can act as high-performance vacuum cleaners
while being able to convert to a wet vacuum and a carpet cleaner with the
addition of a few key features.

24
For dry pick-up the vacuum has a Tritex filter which is so efficient that it can be
used without bags but ultimately using with bags can provide better filtration,
airflow and performance but does depend on the job at hand.
A combination tool will easily glide over low pile carpet and brushes extract from
the head to clean bare floors.
For wet pick-up simply remove the bag and filter, insert the ball float and you're
ready to recover spills or even clean out drains.
If you want to shampoo carpets, upholstery, carpeted stairs or vehicles some of
these can easily convert into an extractor.
First you insert the removable clean water/solution tank then attach the
extraction tools and you're ready to wash!
Pressure Washers
A typical pressure washer has either a gas-fueled engine or electrically powered
motor that powers a water pump.

25
The pump accelerates the water, supplied from a garden hose or built in tank, to
produce high pressure.
When the trigger is pulled, the water mixes with the air and comes out of the
nozzle.
The only difference with power washing is the heat.
To be more explicit, the jet wash in a power washing machine uses heated water,
whereas the water in a pressure washer is not heated.
It is particularly recommended on surfaces such as concrete, which will not be
damaged by power washing.
You will use the appropriate machine for the job, so outdoors or outside windows
you can use gas but inside you will most likely use electric.
To prevent damage to your equipment you should:
1. Clean the filter after each use.

26
2. Check and clean the filter cage and float after each use.
3. Thoroughly clean the drum after each use.
4. Use the correct filter for your application or task.
5. Never store the machine with liquid inside the tank.
6. Make sure the hose is free of obstructions or debris.
7. Clean remaining air vents.
8. While unplugged, make sure the power cord is not cut, tore or frayed.
9. Oil your casters and wheels.
10. Follow all warnings, notes and operating instructions in your owners’ manual.
These machines can be time savers and back savers but remember that there are
specific times when you bring these out for work.
Offices will have different times, restaurants and so forth.
Kitchen Sanitizing
Your kitchen cleaning should include sanitizing. Once you have cleaned with water
and dishwashing liquid soap, then rinsed with water, you are ready to sanitize.

27
Items to sanitize:
• Refrigerator drawers and shelves.
• Sinks.
• Food contact surfaces.
• Equipment such as cutting boards.
Chlorine bleach is an effective, low cost sanitizer
Buy liquid, not gel, chlorine bleach when shopping. The bleach must
be unscented. Read the bleach label; it should state for kitchen or
food contact surface sanitizing.
You will also note, liquid bleaches have two levels of concentration. Check the
label and follow directions.
• Concentrated “ultra” bleaches, contain 6% sodium hypochlorite.
• Standard 5.25% sodium hypochlorite is “regular” bleach.
• Mix bleach solution in a kitchen spray bottle and label
Kitchen spray bottles work well for sanitizing and should be clearly labeled
containing “bleach sanitizer.”
Bleach sanitizer should be mixed fresh daily in the following proportions:
Ultra bleach (6% sodium hypochlorite):
• 2 1/2 teaspoons bleach per gallon of water, 3/4 teaspoon bleach per quarts
of water.
Regular bleach (5.25% sodium hypochlorite):
• 1 tablespoon bleach per gallon of water, 1 teaspoon bleach per quart of
water.
Once solution is mixed use test strips to test for proper levels
Commercial Storage Area Cleaning/Sanitizing

28
Dry storage areas should be emptied and cleaned once per week to prevent
spilled food attracting rodents and bacteria.
Cold storage areas, especially walk-ins, should be emptied and cleaned once per
week. This is best done at the end of the week before new produce is ordered.
To properly sanitize your cold storage:
• Remove produce, then remove racks and shelves and scrub in hot soapy
water, or run through the dishwasher if they fit.
• Wipe walls with disinfectant spray, then with a clean, damp cloth to
remove residue.
• Sweep, then scrub floors with commercial floor cleaner.
Dealing with Corona Virus Cleaning and Procedures
What you should know
• Commonly used cleaners and disinfectants are effective against COVID-19.
• Frequently touched surfaces are most likely to be contaminated.
• Use only disinfectants that have a Drug Identification Number (DIN). A DIN
is an 8-digit number given by Health Canada that confirms it is approved for
use in Canada.
• Check the expiry date of products you use and always follow
manufacturer’s instructions.

29
How to Clean/ Disinfect Properly
Surfaces:
• First, clean dirty surfaces with soap and water or detergent before
disinfecting.
• To prepare the bleach solution, mix 1/3 cup of bleach for one gallon of
water, or 4 teaspoons of bleach per one quart of water.
Linens, clothing, etc.:
• Do not shake the dirty laundry to prevent the virus from dispersing through
the air.
• Wash the laundry on the warmest setting appropriate according to the
manufacturer’s instructions.
• Dry completely.
Additional Precautions:
• Cleaning staff should wear disposable gloves and gowns during all cleaning
processes.
• Wash hands often for at least 20 seconds or use hand sanitizer that
contains 60%-95% alcohol.
• Don’t touch your face, mouth, eyes, or nose.

30
What to Sanitize:
All areas regularly touched by employees/guests should be regularly sanitized to
prevent the spread of the virus.
This includes:
• Restrooms (toilets, sinks, paper towel dispensers, etc.)
• Door handles
• Tables
• Touch screen registers
• Drive-thru windows/ledge
• Anything else applicable
Did you know the COVID-19 coronavirus can live on stainless steel surfaces for
up to three days? Using standard cleaners and polishers aren’t enough to
effectively kill the virus.
Below is a link to check the Approved Virus Killing Cleaners. Click the Hyperlink and enter the EPA Registration Number on your cleaning agent.
https://www.epa.gov/pesticide-registration/list-n-disinfectants-use-against-
sars-cov-2
Checklist of what restaurants need to do to protect against the
Coronavirus
• Limit the number of people – many provinces have closed restaurants for
in-person dining and play places.
• Require employees to wash hands even more frequently than normal.
• Increase the frequency of surface cleaning (see above instructions.)
• Regularly monitor employee’s temperatures and ensure that if someone is
not feeling well, they do not come in to work.
• Inform your customers on the extra safety precautions you are taking – via
email list, social media, signs on the building, etc.

31
• If able, provide take out options to still serve your customers.
• Prepare for additional numbers of employees to potentially be unable to
work due to sickness.
• Stay in touch with local health officials for additional guidance.
Cleaning Stainless Steel Equipment
It’s been confirmed that the COVID-19 coronavirus can live on a stainless-steel
surface for up to three days.
Therefore, it’s important to properly clean stainless-steel equipment regularly to
ensure all bacteria and viruses are killed.
Cleaners and polishers are great for keeping your stainless-steel prep surfaces
looking shiny, but they are not disinfectants strong enough to kill the virus.
Furthermore, using bleach is not a recommended method as it can corrode the
stainless-steel surface over time.
The best method to ensure your stainless-steel surface is free of bacteria and
viruses is disinfecting with isopropyl alcohol (aka, rubbing alcohol) or Quat
Sanitizer.

32
Step by Step Instructions for Killing the Coronavirus on Stainless Steel Surfaces
1. Fill a clean, empty spray bottle with isopropyl alcohol (rubbing alcohol.)
or Quat Cleaner.
2. Spray stainless-steel surfaces with the solution.
3. Let sit for twenty minutes.
4. Moisten a clean cloth with the solution and use it to wipe down the
surfaces.
5. Dry the stainless-steel surface with a clean cloth.