BSA Lifeguard Instructor Manual - Boy Scouts
132
BSA Lifeguard Instructor Manual 2017
-
Upload
khangminh22 -
Category
Documents
-
view
0 -
download
0
Transcript of BSA Lifeguard Instructor Manual - Boy Scouts

BSA Lifeguard
Instructor Manual 2017

ISBN 978-0-8395-4519-4 2020 Printing
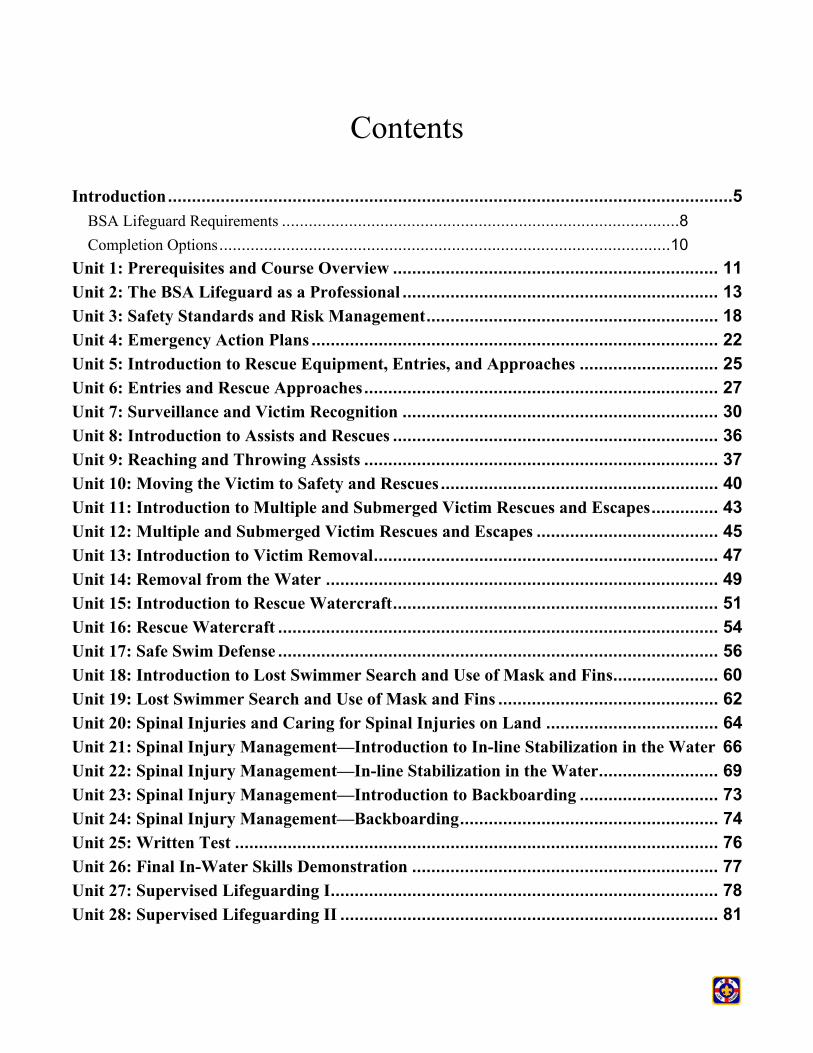
Contents
Introduction ......................................................................................................................5
BSA Lifeguard Requirements ......................................................................................... 8
Completion Options ..................................................................................................... 10
Unit 1: Prerequisites and Course Overview .................................................................... 11
Unit 2: The BSA Lifeguard as a Professional .................................................................. 13
Unit 3: Safety Standards and Risk Management ............................................................. 18
Unit 4: Emergency Action Plans ..................................................................................... 22
Unit 5: Introduction to Rescue Equipment, Entries, and Approaches ............................. 25
Unit 6: Entries and Rescue Approaches .......................................................................... 27
Unit 7: Surveillance and Victim Recognition .................................................................. 30
Unit 8: Introduction to Assists and Rescues .................................................................... 36
Unit 9: Reaching and Throwing Assists .......................................................................... 37
Unit 10: Moving the Victim to Safety and Rescues .......................................................... 40
Unit 11: Introduction to Multiple and Submerged Victim Rescues and Escapes .............. 43
Unit 12: Multiple and Submerged Victim Rescues and Escapes ...................................... 45
Unit 13: Introduction to Victim Removal ........................................................................ 47
Unit 14: Removal from the Water .................................................................................. 49
Unit 15: Introduction to Rescue Watercraft .................................................................... 51
Unit 16: Rescue Watercraft ............................................................................................ 54
Unit 17: Safe Swim Defense ............................................................................................ 56
Unit 18: Introduction to Lost Swimmer Search and Use of Mask and Fins ...................... 60
Unit 19: Lost Swimmer Search and Use of Mask and Fins .............................................. 62
Unit 20: Spinal Injuries and Caring for Spinal Injuries on Land .................................... 64
Unit 21: Spinal Injury Management—Introduction to In-line Stabilization in the Water 66
Unit 22: Spinal Injury Management—In-line Stabilization in the Water ......................... 69
Unit 23: Spinal Injury Management—Introduction to Backboarding ............................. 73
Unit 24: Spinal Injury Management—Backboarding ...................................................... 74
Unit 25: Written Test ..................................................................................................... 76
Unit 26: Final In-Water Skills Demonstration ................................................................ 77
Unit 27: Supervised Lifeguarding I ................................................................................. 78
Unit 28: Supervised Lifeguarding II ............................................................................... 81

Appendix ....................................................................................................................... 83
Aquatics Emergency Action Plan Example ..................................................................... 83
Knowledge Test Version A ....................................................................................... 87
Knowledge Test Version B ........................................................................................ 96
Knowledge Test Answer Sheet .................................................................................... 104
Knowledge Test A Answer Key .................................................................................. 105
Knowledge Test B Answer Key .................................................................................. 106
Application for BSA Lifeguard ................................................................................... 107
Application for BSA Lifeguard Instructor .................................................................... 109
Suggested Schedule for a Resident Scout Camp ............................................................ 110
Suggested Schedule for an Evening Course .................................................................. 113
Suggested Schedule for a Two Weekend Course ........................................................... 116
Suggested Schedule for Renewal Training .................................................................... 120
Suggested Schedule for Crossover Training .................................................................. 124
Buddy Board Examples .............................................................................................. 129
Lifeguard Rescue Reporting System ............................................................................ 131
Acknowledgements The Boy Scouts of America is grateful to Terry Budd (BSA Aquatics Instructor; Central Region Aquatics Chair; member of the National Aquatics Task Force; American Red Cross Lifeguard Instructor) for his leadership in developing and coordinating this revision of the BSA Lifeguard Instructor Manual. Thanks also to David Bell (BSA Aquatics Instructor; member of the National Aquatics Task Force; member of the National Health & Safety Committee; American Red Cross Lifeguard Instructor) for his substantial input in the process. The Boy Scouts of America is also grateful to the following volunteer reviewers and contributors who devoted countless hours to the project:
Tom Burke
Jeff Cannon
Brad Hatch
Bruce Hoover
Allen Hoy
Woody Lee
Mike Meenehan
Jesse Oltrogge
Larry Owens
Matt Vande Sande

BSA Lifeguard Instructor Manual — 5
Introduction The primary purpose of the BSA Lifeguard training program is to provide professional lifeguards for BSA operated facilities, council aquatics committees, and year-round aquatics programming. In addition, this training is intended to meet the requirements of government agencies for operations at a regulated swimming venue. The program is open to all registered adults and youth, age 15 and older. BSA Lifeguard is recommended for aquatics staff lifeguard training and for those who wish to work as lifeguards for BSA year-round aquatics programs. For those
supporting council aquatics committees, this training is the next step beyond the Aquatics Supervision program for unit leaders. This manual, along with the BSA Lifeguard Application, test questions, BSA referenced materials, and American Red Cross Lifeguarding Manual, are the supporting materials necessary for the instruction of BSA Lifeguard.
For three-quarters of a century, BSA Lifeguard and its predecessor, Scout Lifeguard, served the needs of both units and summer camps for water safety leadership training. Over that time, more and more programs requiring specialized skills were added, and at one point, BSA Lifeguard requirements included the skills for the Swimming, Lifesaving, Canoeing, Rowing, and First Aid merit badges. The skills that define the standard of care for professional lifeguarding, such as spinal injury management, have also evolved significantly. These changes have made it increasingly difficult to meet all the needs of the unit leader and the lifeguard for summer camp and year-round aquatics programs in a single training course of reasonable duration. As a result, the emphasis of BSA Lifeguard changed in 2009 from a training program designed to support the unit to one designed to support districts and councils.
Training requirements for lifeguards at regulated venues are more extensive where swimming is conducted in natural waters rather than engineered pools. BSA Lifeguard is recognized as both a pool and a waterfront training program.
Those familiar with American Red Cross (ARC) lifeguard training will notice the basic skills required for BSA Lifeguard are similar to those of the ARC Lifeguarding program. That association is deliberate. ARC training for professional lifeguards in non-surf situations is widely recognized, and ARC professionals work closely with BSA professionals and volunteers. The BSA, however, has extensive experience conducting youth swimming activities both inside and outside of camp and has program-specific needs that must be addressed. BSA Lifeguard training includes basic prevention strategies, such as universally applied swimmer classification tests and other operating procedures that are not included in sufficient detail in ARC training.
To best support teaching the skills and knowledge required for BSA Lifeguard, the American Red Cross Lifeguarding Manual is a required resource for BSA Lifeguard instructors and candidates. In addition, instructors are required to use the American Red Cross Lifeguarding video segments. These video segments are available on DVD or, for qualified ARC Lifeguarding Instructors, on-line using the American Red Cross Instructor’s Corner website. Finally, the American Red Cross Lifeguarding Instructors Manual is recommended. Local councils are strongly encouraged to buy at least one copy of these resources for use by their BSA Lifeguard Instructors.
Your key responsibility as a BSA Lifeguard Instructor is to make certain the candidate meets the standards of BSA Lifeguard, both in skills and attitude. This manual has been prepared to help you provide the training necessary to qualify those seeking training as a BSA Lifeguard.

BSA Lifeguard Instructor Manual — 6
Course Organization When conducting a BSA Lifeguard training program, classes should be organized with a ratio of 6 to 10 candidates per instructor. The training course is divided into 28 instructional units. Each unit has a prerequisite and an estimated or allotted time for completion. The allotted time for each unit varies, and flexibility in scheduling is allowed to accommodate different situations so long as the material from each unit is covered. The appendix includes suggested course schedules for teaching at different venues. The total time allotted for the course including prerequisite testing and course overview is 27 hours. This time may vary depending upon the number of candidates and their backgrounds.
Each unit specifies the unit objective, applicable requirements, learning objectives, and materials and equipment needed. The unit objective supports the BSA Lifeguard requirements and specifies the level of competency desired of the student.
Knowledge Level (Know)—The student is expected to recall from memory or correctly identify information.
Comprehension Level (Comprehend)—The student is expected to understand procedures or grasp the meaning of information. This is the first level of understanding by the student.
Application Level (Apply)—The student is expected to use information and skills to achieve an acceptable outcome in new or different situations.
Just as the unit objectives support the BSA Lifeguard requirements, the learning objectives are the means to achieving the unit objective. They are the observable and measurable behaviors the instructor should teach the student. Likewise, the student may use the objectives as a list of what he or she is expected to learn.
Course Records and Certificate Verification This section applies to both BSA Lifeguard and BSA Lifeguard Instructor training. The course instructor that signs the completed application and certificate has the primary responsibility to retain course records to confirm the validity of or to replace a certificate. Paper or digital copies of signed applications and course records should be maintained for six months beyond the certificate expiration date and then destroyed or deleted.
It is important that Instructors confirm with the local council service center that each participant’s digital BSA training record is updated after course completion to ensure accurate records of those completing BSA Lifeguard and BSA Lifeguard Instructor training. Those databases are linked to the participant’s unique registration number. Current BSA membership is required of all applicates and their membership numbers are captured on the applications. Youth training records are maintained in ScoutNET. Adult training records are maintained in My.Scouting.org. Units may also enter information in Scoutbook, but that information is not automatically linked to council and national records. The training code for BSA Lifeguard is S81. The training code for BSA Lifeguard Instructor is S98. The training code for BSA Aquatics Instructor (NCS Aquatics) is CS02.
Anyone with a concern about certificate validity or an individual’s performance should first contact the council indicated on the training certificate. The council in turn may contact the instructor of record and/or area or national personnel. All instructors must be approved by the local council. That council has the prerogative to suspend or revoke training certificates issued under its auspices.

BSA Lifeguard Instructor Manual — 7
Course Materials BSA Materials
The official source for Scouting merchandise is www.scoutstuff.org. The following items may be ordered online or purchased through your local council service center. Restricted items must be obtained through your council.
Aquatics Supervision, No. 621005 BSA Lifeguard patch, item 132 BSA Lifeguard pocket certificate (restricted), No. 618661
Other BSA program materials are available for free download at www.scouting.org. The following aquatics resources are found at: www.scouting.org/scoutsource.OutdoorProgram/Aquatics/forms.aspx
BSA Lifeguard application, No. 34435 BSA Aquatics Staff Guide
American Red Cross Reference Materials
Materials published by the American Red Cross and referenced in this course are available directly from the Red Cross Store at www.redcrossstore.org or a free digital download at www.redcross.org/participantmaterials.
Lifeguarding Manual, No. 755735 (available in printed or electronic format, required) Lifeguarding video segments (DVD or ARC instructors may download online, required) Lifeguarding Instructor’s Manual (recommended), No. 755736

BSA Lifeguard Instructor Manual — 8
BSA Lifeguard Requirements To be trained as a BSA Lifeguard, you must successfully complete the course as outlined in the BSA Lifeguard Instructor Manual and demonstrate the ability to perform each item specified in the following requirements:
Prerequisites Before doing requirements 6 through 26, complete the following: 1. Submit proof of age and BSA Registration. You must be at least 15 years old to participate. 2. Submit written evidence of fitness for swimming activities (signed health history). 3. Swim continuously for 550 yards in good form using the front crawl or breaststroke or a
combination of either, but swimming on the back or side is not allowed. 4. Immediately following the above swim, tread water for two minutes with the legs only and
the hands under the armpits. 5. Starting in the water, swim 20 yards using a front crawl or breaststroke, surface dive 7 to 10
feet, retrieve a 10-pound object, surface, swim on your back with the object 20 yards back to the starting point with both hands holding the object, and exit the water, all within 1 minute, 40 seconds.
Requirements Complete the following requirements within a 120-day period: 6. Show evidence of current training in American Red Cross First Aid and American Red
Cross CPR/AED for the Professional Rescuer or equivalent. 7. Show evidence of current training in the BSA online module for Safe Swim Defense. 8. Attend and actively participate in all activities, presentations, demonstrations, and skill
sessions involving lifeguard behavior, duties, responsibilities, surveillance, intervention and water rescue as prescribed in the BSA Lifeguard Instructor Manual.
9. Demonstrate reaching assists from the deck using an arm, a rescue tube, and a pole. 10. Demonstrate throwing assists using a throw bag and a ring buoy with a line attached. Throw
each device such that the line lands within reach of an active subject 30 feet from shore. 11. Demonstrate:
a) Rescue of an active subject in deep water using a rescue board, kayak, rowboat, canoe, or other rescue craft that would be available at your local facility.
b) Repeat for a passive subject. 12. Demonstrate an entry and front approach with a rescue tube to an active subject in deep
water 30 feet away from shore. Position the rescue tube to support the subject and then assist the subject to safety, providing direction and reassurance throughout.
13. Demonstrate an entry and rear approach with a rescue tube to an active subject in deep water 30 feet away from shore. Secure and support the subject from behind and then move the subject to safety, providing direction and reassurance throughout.
14. Demonstrate use of a rescue tube to assist two subjects grasping each other. Secure, support and reassure both subjects. With the assistance of a second guard, calm and separate the subjects and move them to safety.
15. Demonstrate both front and rear head-hold escapes from a subject’s grasp.

BSA Lifeguard Instructor Manual — 9
16. Demonstrate an entry and front approach with a rescue tube to a face-down passive subject 30 feet away at or near the surface in deep water. Use a wrist roll to position the subject face-up on the rescue tube, tow to safety, and remove them from the water with assistance within 90 seconds. Immediately perform a primary assessment and demonstrate one-person CPR for 3 minutes.
17. Demonstrate an entry and rear approach with a rescue tube to a face-down passive subject 30 feet away at or near the surface in deep water. Position the subject face-up, tow to safety and remove them from the water with assistance within 90 seconds. Immediately perform a primary assessment and demonstrate two-person CPR for 3-minutes.
18. In shallow water, demonstrate in-water ventilation of an unconscious subject when prompt removal from the water is not possible. Open the airway, position the mask, and simulate ventilations.
19. Demonstrate an entry and approach with a rescue tube for use when a passive subject is submerged face-down at or near the bottom in 6 to 8 feet of water. Bring the subject to the surface and tow to the nearest point of safety.
20. Remove a subject from the water using each of the following techniques in the appropriate circumstances with the aid of a second rescuer:
a) Extrication at the edge of a pool or pier using a backboard b) Walking assist c) Beach drag
21. Participate in multiple-rescuer search techniques appropriate for a missing subject in murky water:
a) Line search in shallow water b) Underwater line search in deep water without equipment c) Underwater line search in deep water with mask and fins
22. Demonstrate in-line stabilization for a face-down subject with suspected spinal injury in very shallow water (18 inches or less).
23. Demonstrate in-line stabilization for a suspected spinal injury in shallow water (waist to chest deep):
a) For a face-up subject b) For a face-down subject
24. Demonstrate in-line stabilization for a suspected spinal injury in deep water, swim the subject to shallow water, confirm vital signs, and with the assistance of others, remove the subject from the water using a backboard with straps and a head immobilization device.
25. Correctly answer 80 percent of the questions on the BSA Lifeguard knowledge test covering the course material. Review any incomplete or incorrect answers.
26. Serve as a lifeguard, under supervision, for at least two separate BSA swimming activities for a combined time of two hours. Afterward, discuss the experience with the lifeguarding instructor.

BSA Lifeguard Instructor Manual — 10
Completion Options Course completion cards are valid only when signed by either a current BSA Aquatics Instructor or BSA Lifeguard Instructor approved by the local council. Training is valid for two years, provided First Aid and CPR/AED for the Professional Rescuer training are kept current during that period.
There are five ways to obtain a course completion card: 1. Course Completion—Complete all requirements in the instructor manual during a
scheduled course of instruction. The participant must attend all course sessions. Makeup sessions are allowed at the instructor’s discretion. If an individual is unable to complete all requirements during the scheduled course, the instructor may elect to continue training until the participant is able to complete all the requirements provided the total elapsed time from start to finish does not exceed the 120-day period.
2. Renewal Challenge—Anyone with a BSA Lifeguard completion card that is current or has expired within six months may renew or extend the training by performing requirements 2 through 25 without attending the standard course sessions. Prior to the testing, the instructor may provide a renewal training session to review and update skills and information. Summer camp aquatics directors should renew training for aquatics staff members during pre-camp training while emphasizing local camp facilities, procedures, and emergency action plans.
3. Crossover Challenge—Anyone who holds current training in American Red Cross Lifeguarding, American Red Cross Waterfront Lifeguarding, or other lifeguard training programs may obtain a BSA Lifeguard completion card by performing requirements 1 through 26 without attending the standard course sessions. The lifeguard training program that issued the training certificate must be recognized by the local or state regulatory agency that sets standards for lifeguards at youth camps. The instructor may provide a crossover training session to review and update skills and information prior to the testing. The applicant may receive credit for requirement 26 if within the past 18 months he or she has served as a lifeguard, under supervision, or has supervised lifeguards, for at least two separate BSA swimming activities for a combined time of two hours. Otherwise, due to BSA procedures not implemented at other lifeguarding venues, the applicant must accomplish requirement 26.
4. Completion of BSA Aquatics Instructor – Anyone who completes BSA Aquatics Instructor training at National Camping School.
5. Co-instructors (BSA Aquatics Instructor or BSA Lifeguard Instructor) may each sign a completion card for the other at the conclusion of a BSA Lifeguard course if they satisfy requirements 2 through 24.
Note: These new requirements are effective May 1, 2017. The previous requirements may be used through August 31, 2017. After that date, all applications for BSA Lifeguard must be submitted using the new requirements. BSA Lifeguard certificates are valid for two years.

BSA Lifeguard Instructor Manual — 11
Unit 1: Prerequisites and Course Overview
Allotted Time 2 hours
Materials and Equipment 10-pound diving brick Stopwatch or timer Candidate roster
One per candidate of each of the following: BSA Lifeguard application, No. 34435, or list of requirements Aquatics Supervision, No. 621005 BSA Aquatics Staff Guide American Red Cross Lifeguarding Manual, No. 755735 Schedule (locally produced)
Course Prerequisites 1. Verify proof of age. You must be at least 15 years old to participate. The candidate must be 15 years old on the date the course begins. Request reasonable proof of age such as a birth certificate, passport, photo identification card, or other form of identification at the discretion of the instructor. 2. Submit written evidence of fitness for swimming activities (signed health history). Review the health history and discuss any physical limitations. 3. Swim continuously for 550 yards in good form using the front crawl or breaststroke or a combination of either, but swimming on the back or side is not allowed. The swimmer must be able to cover the distance with a strong, confident stroke. The 550 yards must not be the outer limit of the swimmer’s ability, and completion of the distance should demonstrate sufficient stamina to complete the course. Swim goggles may be used. 4. Immediately following the above swim, tread water for two minutes with the legs only and the hands under the armpits. The candidate must maintain an upright position in water over the head in depth. The hands must be placed under the armpits and the shoulders may remain under the water with only the head above water. 5. Starting in the water, swim 20 yards using a front crawl or breaststroke, surface dive seven to 10 feet, retrieve a 10-pound object, surface, swim on your back with the object 20 yards back to the starting point with both hands holding the object, and exit the water, all within 1 minute, 40 seconds. This prerequisite tests the candidate’s ability to surface dive, swim underwater, locate an object, and swim while burdened within a relatively short time. The candidate may swim on his or her back while keeping both hands on the object. In turbid water, the instructor may indicate the approximate location of the submerged object. However, the preference is to conduct most of the course in clear water. The candidate may not use a mask, goggles, or fins while performing this prerequisite. This requirement is not designed to be immediately after the treading water prerequisite.
Wrap-Up Congratulate those who successfully completed the prerequisites. Privately counsel and encourage those who were not able to complete the required skills.

BSA Lifeguard Instructor Manual — 12
Course Overview Introductions
o Instructors and staff o Candidates
Review the facility o Restroom location o Building exits o Drinking water o Severe weather shelter – Where to go in the event of a thunderstorm. o AED and emergency communication locations.
Distribute the following materials: o Aquatics Supervision, No. 621005 o American Red Cross Lifeguarding Manual, No. 755735 o Schedule (locally prepared)
Review the course objectives: o Prevent and respond to aquatics emergencies. o Prepare candidates for service as professional lifeguards. o Prepare lifeguards for service at Scouting venues and events, including: Resident camps District and council aquatics events
Completion standards: o Attend all sessions. o Satisfactorily perform the required skills. o Score a minimum of 80 percent on the knowledge test. o CPR/AED for the Professional Rescuer and First Aid Verify certificates of those who have already completed the training. Make arrangements for candidates to complete requirement 6 early in the course. Discuss completion options for CPR/AED for the Professional Rescuer and First Aid.
o If qualified, instructors may teach the courses concurrent with the lifeguard course or may use a qualified guest instructor. Note: Instructors are encouraged to seek qualification as a CPR and first aid instructor through the BSA Licensed Training Provider (LTP) Agreement with the American Red Cross.
o The BSA also has an instructor agreement with Emergency Care and Safety Institute (ECSI).
o Direct candidates to courses taught by others. o Complete all requirements within 120 days.
Set a date for those who have not completed Safe Swim Defense training within the past two years to complete the online training using the E-Learning Course Management System at my.scouting.org. The instructor may also conduct training using the required Safe Swim Defense DVD.
Review health histories and discuss privately with individuals if special accommodations are need. Keep health histories secure but readily available in case of a medical emergency during instruction. The BSA standard Health and Medical Record has a place for treatment options for minors in case a parent is not readily available.
Wrap-Up Answer questions and make study assignments for the next unit.

BSA Lifeguard Instructor Manual — 13
Unit 2: The BSA Lifeguard as a Professional
Allotted Time 1 hour, 45 minutes
Prerequisite Unit Unit 1 – Prerequisites and Course Overview
Unit Objective At the completion of this unit, each participant should:
Comprehend the expected standards of behavior and responsibilities of a BSA Lifeguard. Be able to apply decision-making strategies to solve problems. Know the legal considerations and responsibilities of a BSA Lifeguard. Know the type of supervision and support to expect from an aquatics director.
Learning Objectives
State the appropriate dress, demeanor, and punctuality of an aquatics staff member. Contrast the supervision and instruction required for the different stages of
youth development. Define legal considerations and identify how they affect a lifeguard. Identify examples of negligence by a lifeguard in a camp setting. Relate negligence to a failure to follow policies, standards, or rules. Describe the supervision and support a lifeguard should expect to receive from the
aquatics director.
Materials and Equipment Aquatics Supervision, No. 621005 BSA Aquatics Staff Guide American Red Cross Lifeguarding Manual, No. 755735 American Red Cross Lifeguarding DVD set, No. 755739, or online video segments Marker board with pens Flip charts, overhead projector, or video projector with screen DVD player and television, or video projector and screen

BSA Lifeguard Instructor Manual — 14
Characteristics and Responsibilities of a BSA Lifeguard Reference: Lifeguarding Manual, pages 2–5 Show the Lifeguarding video segment “The Professional Lifeguard” (3:38). Additional characteristics expected of a lifeguard at a Boy Scout camp:
o Because we are serving at a Boy Scout aquatics venue, there are additional expectations: The ideals of Scouting:
o The Boy Scouts of America is a character-building organization. o Professionalism in lifeguarding supports the aims of Scouting. o BSA Lifeguards are expected to follow the Scout Oath and Law.
Personal appearance: o Lifeguards should be well groomed. o Sit or stand upright at the lifeguard station. o Clothing:
Swimwear should be comfortable, functional, and simple—boxer-style (not briefs) for males and one-piece or modest two-piece (not bikini) for females.
Lifeguards on duty should wear a common uniform, as specified by their camp, that clearly identifies them as lifeguards.
o Hair should be maintained so it does not interfere with rescue procedures. o Jewelry, including any body piercing, should not expose the guard to potential
harm while performing duties, including rescues. Youth development:
o Preadolescent, preteens—respect for authority, developing physical coordination, limited attention span
o Adolescents, teenagers—peer pressure, puberty, increasing cognitive development, challenge authority
o Discuss how age development may affect how you interact with individuals. Non-emergency decision-making & conflict resolution skills:
o Preparing for common situations makes the decision easier. o Introduce the FIND model (Re: Lifeguarding Manual page 8) F-figure out the problem I-identify possible solutions N-Name the pros and cons for each solution D-decide which solution is best, then act on it
o Divide the buddy teams into three groups: Assign one scenario to each group. Have the group apply the FIND decision-making model to form a viable solution. Have a spokesperson for each group explain how they developed
their solution.

BSA Lifeguard Instructor Manual — 15
Scenario 1
“Who’s Your Buddy?” Two buddies are often several yards away from each other and unaware of the other’s situation. You call a buddy check. They initially can’t locate each other but finally “buddy up” just as you complete the count to 10.
Scenario 2
“Let’s Go Exploring!” Two buddies decide to do some exploring. You look down between the boards of the floating dock and realize they are under the dock in a convenient space between the floats. You admonish them and they return to the swimming area at your direction. A few minutes later, another guard makes a similar discovery of the same buddy pair in the area of the floating dock beneath his feet. They laugh and return to the swimming area at the guard’s direction.
Scenario 3
“Go Long!” A beginner is paired with a swimmer, and the buddy pair is checked in on the buddy board in the beginner area. You notice the buddy pair is missing from the beginner area. You find the beginner standing on the deck in the swimmer area throwing a ball to his buddy, the swimmer, who is in the water in the swimmer’s area. They’re having a great time.
Legal considerations. Discuss each of the following and examples of how they affect lifeguards (Re: Lifeguarding Manual page 8-9): o Duty to act – While on duty you have a responsibility to act in an emergency. o Standard of care – may be established by government regulation or industry standards. Recognize hazards and communicate to prevent injury Recognize when someone needs assistance Trained and prepared to employ adequate rescue methods Trained and equipped to provide an acceptable level of emergency care
o Negligence: Failure to act appropriately, or acting inappropriately, as indicated by training,
policies, standards, or rules Results in injury or causes further harm Examples at a Scouting venue
o Abandonment – Once care is initiated, it must be continued until EMS or someone with equal or greater training takes over. You can be held legally responsible for abandoning a person who requires ongoing care if you leave the scene or stop providing care.
o Confidentiality – Privacy laws exist to protect individual privacy o Documentation – Record the facts while they are still clear in your mind. Record only the
facts, not opinions. o Consent For an active person – state your name and level of training, ask if you may help For an unconscious person or someone confused or seriously injured, consent is
implied o Refusal of care – document, do not abandon, get a witness o Good Samaritan Laws – provide a copy of the Good Samaritan law for the state.

BSA Lifeguard Instructor Manual — 16
Supervision and support from the aquatics director: o Safe working environment, elimination of unsafe conditions o Training to deliver a safe program o Supervision and guidance in unusual situations o Equitable distribution of tasks, adequate breaks o Evaluation of performance and correction of unacceptable behavior
Employer Obligations o Proper equipment (rescue tubes, communication equipment, PPE, uniforms) o Lifeguard skills confirmation, including zone response prior to service o EAP review and practice prior to service o Regular in-service training o Hepatitis B vaccinations
Show the Lifeguarding video segment “The Unprofessional Lifeguard” (3:58) o Stop the video after the first segment – Ground Level Station.
Discuss any negative observations with the group. Responses may include: Looking unprofessional, not in appropriate uniform Hat on backwards/no sun protection Poor posture/slouching Not ready for entry/wearing shoes & socks Not holding the rescue tube in correct position.
Discuss any positive observations with the group. Responses may include: Good scanning Equipped and ready
o Play the second video segment – Elevated Station. Discuss any negative observations with the group. Responses may include:
Legs crossed/not in ready position Not actively scanning Distracted/looking at watch
Discuss any positive observations with the group. Responses may include: Wearing rescue tube correctly and holding slack Wearing layers of sun protection
o Play the third video segment – Elevated Station – Two Lifeguards. Discuss any negative observations with the group. Responses may include:
Lifeguard not wearing a hip pack Slack from rescue tube is hanging down Lifeguard distracted and stops scanning
Discuss any positive observations with the group. Responses may include: Good posture Scanning before the conversation
o Play the fourth video segment – Elevated Station – Rotations. Discuss any negative observations with the group. Responses may include:
Outgoing lifeguard did not wait for the incoming lifeguard to take over the zone before rotating.
Lifeguard not scanning Lifeguard did not safely climb down steps

BSA Lifeguard Instructor Manual — 17
Discuss any positive observations with the group. Responses may include: Both guards in uniform and good scanning Incoming lifeguard has good rotation, good posture and scanning after
taking position in the chair.
Summary BSA Lifeguards are professionals and serve as examples of Scouting values. Recognize the effect of age development in the supervision of youth. There are often several solutions to a situation. Decision-making techniques can be used to
help you choose from the alternatives. A lifeguard has several legal responsibilities, and failure to follow policies and procedures
can be considered negligence. Lifeguards can expect the aquatics director to serve as their supervisor and trainer. Lifeguards need to be equipped and ready – if not, they may not recognize or respond to an
emergency when required.
Wrap-Up Answer questions and make study assignments for the next unit.

BSA Lifeguard Instructor Manual — 18
Unit 3: Safety Standards and Risk Management
Allotted Time 1 hour 15 minutes
Prerequisite Unit Unit 1 – Prerequisites and Course Overview
Unit Objective At the end of this unit, each participant should:
Know the BSA policies and government rules that apply to Scouting aquatics venues. Comprehend the importance of rules and policies with regard to the safety of participants. Comprehend and apply communications strategies to ensure safety.
Learning Objectives
List BSA policies, standards, and rules for swimming with emphasis on those that are not common at public aquatics venues.
Examine government regulatory requirements that apply to a Scouting aquatics program. Describe how rules and regulations promote the safety of swimmers. Describe proper ways to interact with unit leaders. Identify common perceptions associated with various body languages. Describe the communication strategies used by lifeguards to ensure the safety of
swimmers. Describe the use of the whistle in Scout aquatics settings. Demonstrate techniques to deal with discipline problems. Illustrate how to get swimmers to comply with rules in various situations. Identify items on a safety check for pools, waterfronts, play structures, and boats. Examine examples of staff fatalities while instructing without backup. Summarize the importance of first-aid training for prevention and treatment of injuries at
an aquatics program area. Identify how to ensure swimmers’ safety when weather conditions create safety concerns.
Materials and Equipment: Aquatics Supervision, No. 621005 BSA Aquatics Staff Guide American Red Cross Lifeguarding Manual, No. 755735 American Red Cross Lifeguarding DVD set, No. 755739 Marker board with pens Flip charts, overhead projector, or video projector with screen DVD player and television, or video projector and screen

BSA Lifeguard Instructor Manual — 19
Safety Standards BSA standards:
o Discuss rules at a BSA aquatics facility that are not common at a public venue: Health history and medical screening Classification of swimming ability (the swim test) Ability groups Buddy system Lookout Guard ratios Maximum water depth Water clarity standards Vertical entry guidelines Life jackets worn for all boating
o Government regulations: Labor laws—lifeguards must be 15 or older at a pool, 16 or over for a swimming area
in a natural body of water. CDC’s Model Aquatic Health Code (MAHC) Health department:
Pool water quality—records of daily checks Shower rooms
Boat registration on public bodies of water USCG-approved life jackets Bloodborne pathogens
o Rules and regulations promote safety: Reinforces proper behavior (e.g., only USCG-approved devices permitted). Focuses on behaviors that have a high probability of causing injury (e.g., no running). Promotes proper equipment use, prevents misuse (e.g., one person on the diving
board at a time). Prevents spread of disease (e.g., shower with soap before entering water).
Communication strategies: o Q-1-2 process (from the YMCA)
Q: If a person appears to be about to violate a rule or do something dangerous, intervene and ask a polite question to see if they understand the situation.
1: If they violate a rule, tell the person what you saw, why it is dangerous, and what they should do. Issue a warning if necessary.
2: If they do it again, have a youth take a break, ask an adult to leave. o Manage risk and prevent injury. o Give examples of the use of each in the Scouting environment: Information regarding the potential for injury (broken step on ladder) Education to change inappropriate behavior (no fishing inside swim area)

BSA Lifeguard Instructor Manual — 20
o Body language: Form of nonverbal communication and can help or hinder communication Discuss the effect of the following:
Crossed arms in front—defensive posture, may communicate a closed attitude Eye contact:
o Removing sunglasses when having a one-on-one discussion increases eye contact
o Lack of eye contact may communicate indifference or lack of attention o Kneeling to lower eye level when speaking with a small child o “Rolling the eyes” communicates contempt or indifference
o Interaction with unit leaders: Show respect for adult leaders. Failure to stand when approached by an adult may communicate a lack of respect or
indifference. Importance of volunteers: They give their time and resources to Scouting. Recognize or acknowledge the presence of an adult leader at the waterfront.
Discuss the technique of “Stand, Smile, Shake” as one way to facilitate communication with adults.
Honor requests by adults for separate swim tests. Try to accommodate reasonable program requests.
How to get swimmers to comply with rules: o Buddy check o Use of whistle: May be used for buddy checks and as an emergency signal Not used as an attention signal as is commonly the practice at public pools. Frequent
use to gain attention, as commonly practiced at public pools, is not recommended. Verbal interactions, particularly for deck level or roving guards, is preferred. Overuse of the whistle leads to swimmers and staff ignoring it. Consider use of a bell or manual horn rather than a whistle for buddy checks.
Dealing with discipline problems: o Counseling session o Positive peer pressure—use of the senior patrol leader o Scoutmaster or Assistant Scoutmaster
Risk Management Aquatics staff fatalities: Discuss the following from actual BSA accident reports:
An aquatics staff member drowned during an instructional demonstration. The staff member was instructing alone, without a co-instructor or lifeguard. The youth in the class did not know the person was in trouble until it was too late.
An aquatics staff member was found drowned in the camp pool in the morning. He was last seen in the locker room after a staff swim the night before.
An aquatics staff member drowned while removing floating anchored docks from the water at the end of camp. Exhaustion was a factor.

BSA Lifeguard Instructor Manual — 21
A staff member drowned while returning to camp via boat from time off. He was intoxicated and was not wearing a life jacket.
Show the Lifeguarding video segment “Injury Prevention” (3:53). Facility safety checks identify and correct hazards before they cause injury:
o Responsibility may include routine safety checks during opening or closing. o Notify the guard team supervisor or aquatics director whenever you notice a hazard or
discrepancy. o Review items on a typical safety inspection sheet (see Lifeguarding Manual, page 31-
32). First aid training:
o Increases awareness of potential for injury o Importance of trained responders in high-risk activity areas
Weather o Learn the weather patterns of the area. Weather patterns on the Florida coast differ
greatly from the mountains of New Mexico and the lakes of Minnesota or the rivers of West Virginia. In addition to patterns, monitor current weather forecasts and conditions of your area.
o Camp Management should monitor weather alerts using a weather radio or other electronic communications. Management and Lifeguards should keep each other informed when there are indications of severe weather. When severe weather is detected, activate the camp’s appropriate Emergency Action Plan (EAP).
o Follow the weather guidelines in the Guide to Safe Scouting. o EAP’s for Weather are covered in Unit 4 – Emergency Action Plans.
Summary BSA aquatics areas have special rules and policies that help enhance safety and reduce risk. There are government regulations for the safety of the staff and campers. Communication strategies such as information, education, and enforcement are used to
manage risk and prevent injury. Rules are used to promote safety and prevent injury. Use recognized attention signals and positive peer pressure to maintain discipline. Aquatics staff members must assume responsibility for their own safety as well as the safety
of the participants. Risk management involves taking action to prevent or reduce the effects of hazards to
swimming.
Wrap-Up
Review progress and make a study assignment for the next unit.

BSA Lifeguard Instructor Manual — 22
Unit 4: Emergency Action Plans
Allotted Time 1 hour
Unit Objective At the end of this unit, each participant should:
Know the purpose and components of an emergency action plan. Comprehend the use of emergency action plans. Expect their employer to train them in facility specific EAP’s
Prerequisite Unit Unit 3 – Safety Standards and Risk Management Learning Objectives
Describe the purpose of an emergency action plan and how it applies to a lifeguard. List the components of an emergency action plan. Examine a typical camp-wide emergency action plan as it may apply to a lifeguard. Examine the steps of an emergency action plan that are specific to an unconscious victim. Examine the steps of an emergency action plan that are specific to an injury in the water
or on land. Describe the action to be taken for cardiac arrest in or near the water. Examine the steps of an emergency action plan that are specific to a drowning situation. State the purpose of a debriefing after an emergency. Examine a BSA accident report.
Materials and Equipment Aquatics Supervision, No. 621005 American Red Cross Lifeguarding Manual, No. 755735 American Red Cross Lifeguarding DVD set, No. 755739 Marker board with pens Flip charts, overhead projector, or video projector with screen DVD player and television, or video projector and screen

BSA Lifeguard Instructor Manual — 23
Emergency Action Plans
Show the Lifeguarding video segment “Emergency Action Plan” (5:45) Purpose of an emergency action plan:
o It is a written, practiced, team response to a potentially dangerous situation. o It gives a detailed plan of anticipated situations. o It describes the guard’s responsibilities.
Camp health officer: o Higher level of training o Better equipped
Components of an aquatics emergency action plan: o Recognition—The guard notices someone needs help. o Activation—That guard uses a prearranged signal to alert other personnel. o Emergency Services – Advanced help (EMS, law enforcement) is summoned as soon as
the need is clear, previously assigned personnel guide them to the scene. o Intervention—The guard performs the appropriate rescue, provide applicable care or
intervenes as necessary. o Assistance—Other guards bring equipment, provide back-up coverage, clear the swim
area. o Notification—Call supervisors and camp management staff.
After the emergency, the following are coordinated by management (not done on the initiative of the individual guards): o Unit leaders and emergency contacts for youth and/or adults are appraised of the situation
as appropriate. o Guards should refer any inquiries from leaders or the press to camp management. o Interview witnesses—Interview witnesses separately, privately, and as soon as possible
after the incident. Record facts rather than speculation. o Documentation—File reports with the local council and (with permission) Water Rescue
USA (see Lifeguard Rescue Reporting System in the appendix). o Equipment—Check equipment, decontaminate as necessary. o Take corrective action—Identify and eliminate the cause of the accident, if possible. o Follow-up discussion—Professional counseling may be needed if the incident involves
serious injury or death. Discuss ways to prevent a recurrence. Camp-wide emergency action plan (see National Camp Standards for Resident Camps):
o Lost or missing persons o Limitations on physical activity during elevated heat index o Limitations on physical activity during smog alerts o Aquatics—Lightning, small-craft warnings, high-water levels
Hazardous weather: o Severe weather recall and evacuation procedures o Responsibility to protect the swimmers o Lightning: Establish a severe weather shelter:
o Sturdy shelter from high winds o An enclosed building with grounding for the electrical wiring is normally
adequate. o A pavilion is not adequate for protection from lightning.
Wait 30 minutes after the last thunder before resuming activities.

BSA Lifeguard Instructor Manual — 24
Discuss procedures for life-threatening situations: o Cardiac arrest (on or near the water) o Loss of consciousness o Drowning
Discuss the local emergency action plan or use the example plan in the appendix. Examine a BSA Accident Report
(http://www.scouting.org/Home/HealthandSafety/incident_report.aspx ). Show the Lifeguarding video segment “Surveillance Activity 2” (5:42). Note: Although the video sequence of “Surveillance Activity 2”, “Surveillance” and “Surveillance Activity 1” in the lesson plan may seem out of order, this video provides a link between this unit on EAP’s and the next unit on Surveillance, and sets the stage for what follows.
Summary An emergency action plan is a detailed plan of steps to be followed for anticipated situations. Become familiar with the components of an aquatics emergency action plan and memorize
the critical steps. It is the joint responsibility of the lifeguards and their management to ensure that facility
specific emergency action plans are understood and practiced. Know your responsibility for the camp-wide emergency action plan.
Wrap-Up
Review progress and make a study assignment for the next unit.

BSA Lifeguard Instructor Manual — 25
Unit 5: Introduction to Rescue Equipment, Entries, and Approaches
Allotted Time 20 minutes
Prerequisite Unit Unit 1 – Prerequisites and Course Overview
Unit Objective At the completion of this unit, each participant should:
Know the type of rescue equipment commonly used by lifeguards. Be able to demonstrate the proper wear of a rescue tube.
Learning Objectives
Identify rescue equipment commonly used by lifeguards. Demonstrate the correct way to hold a rescue tube while standing and sitting. Describe the types of entries used by lifeguards and when they are used.
Materials and Equipment Aquatics Supervision, No. 621005 BSA Aquatics Staff Guide American Red Cross Lifeguarding Manual, No. 755735 American Red Cross Lifeguarding DVD set, No. 755739 DVD player and television, or video projector and screen Rescue tubes Hip packs with PPE Means to activate EAP (whistle)

BSA Lifeguard Instructor Manual — 26
Rescue Equipment Give out rescue tubes and have each participant demonstrate proper wear.
o Loop over the shoulder o Excess strap gathered into the hand o Tube across the waist or thighs in front of the body
Review hip packs o Show contents (CPR barrier, nitrile gloves, etc)
Nitrile Gloves o Show how to remove without contact to exterior o Show how to put on with wet hands
General procedures for a Water Emergency General order of rescue
o Activate EAP o Make an appropriate water entry, if necessary o Perform an appropriate rescue o Move the victim to a safe exit o Remove the victim from the water o Provide care as needed o Report, advise, release
Each step will be covered in detail during the course. How to enter the water is next topic.
Entries and Rescue Approaches
Show the Lifeguarding video segment “Entries and Approaches” (6:17). Note: If a pool is used for the majority of the instruction, beach skills (such as the run and swim entry) may be scheduled for a special session at a lake in conjunction with watercraft rescues (Units 15 & 16) and lost bather searches (Units 16 & 17).
After viewing the DVD segment, review the types of entries and when they are used. Review the two common strokes used for rescue approaches. Discuss when to use the run and swim entry and the importance of not diving.
Wrap-Up Answer questions and make a study assignment for the next unit.

BSA Lifeguard Instructor Manual — 27
Unit 6: Entries and Rescue Approaches
Allotted Time 45 minutes
Prerequisite Unit Unit 5 – Introduction to Rescue Equipment, Entries, and Approaches
Unit Objective At the end of this unit, each participant should be able to demonstrate an entry and approach to a responsive subject to the level of proficiency required in BSA Lifeguard requirements 12 and 13.
Learning Objectives
Demonstrate a slide-in entry with a rescue tube. Demonstrate a stride jump entry with a rescue tube. Demonstrate a compact jump entry with a rescue tube. Demonstrate a run and swim entry with a rescue tube.
Materials and Equipment Aquatics Supervision, No. 621005 BSA Aquatics Staff Guide American Red Cross Lifeguarding Manual, No. 755735, pages 148–149 Rescue tubes Hip packs with PPE Means to activate EAP (whistle)
Reducing Risk to the Lifeguard “Rule No. 1—Don’t become victim No. 2.” To reduce the risk and increase the probability of a successful rescue, always use a rescue
tube for support. o Always keep the rescue tube ready or within reach if performing surveillance from a
safety boat. o You may have heard, “Reach, Throw, Row, Go with support” for lay rescuers or
professional rescuers in dangerous situations. For rescues in a safe swim area: Lifeguards attempt to reach the subject with an arm or a rescue tube. If the subject is out of reach from the pool side or dock, lifeguards attempt to reach
the subject by throwing a ring buoy (if equipped). If a lifeguard can’t reach the subject, they immediately enter the water and wade or
swim to the subject with the rescue tube. When guarding at a pool, usually the lifeguard will not put the rescue tube down to
pick up a reach pole. Reach poles are used when not carrying a rescue tube – for example, by swim instructors conducting deep water entries for the first time.
When a guard is stationed on a rescue watercraft at the edge of a lakefront swimming area, a rescue tube or a rescue buoy is typically positioned in the watercraft.

BSA Lifeguard Instructor Manual — 28
Entries (with rescue tube) Ease-in (slide-in):
o Shallow water (e.g., beginner’s area) o Unknown bottom condition o Crowded area o Where minimum disturbance of the water is desired (suspected spinal injury in an area
that is not crowded) Leaping (stride jump):
o Height of deck above water not greater than 3 feet o Water at least 5 feet deep o Keep head above water to keep the subject in sight. o Names are somewhat misleading. It’s neither a leap nor a jump but rather a stride or step
into the water. Compact (feet-first):
o Height of deck above water greater than 3 feet (such as an elevated guard chair) o Water at least 5 feet deep (swimmer’s area) o Contact with bottom probable
Beach entry (run-and-swim): o Where there is no step down o Lakeshore or beach o Leap over small waves; lie on wave in deeper water. Do not dive headfirst
into a wave.
Approaches Front crawl (modified):
o Head up and eyes on the subject o Rescue tube in front under the arms o Rescue tube may trail if the approach is a long distance.
Breaststroke (modified): o Head up and eyes on the subject o Little or no glide o Rescue tube in front and under the arms o Rescue tube may trail if the approach is a long distance.
Ready position: o Final assessment (multiple subjects or position of the subject): o Obtain consent (e.g., tired swimmer) o Give instructions (e.g., “Grab the tube.”) o “Rule No. 1—Don’t become victim No. 2.”
Speed—Get there quickly, but balance the need for speed against the energy you will need on the return.

BSA Lifeguard Instructor Manual — 29
Skill Drill
Entry & Approach Stroke Drill o Have the participants simulate activating the EAP, preform the designated entry, and then
swim an approach stroke with the rescue tube for a significant distance. Participants will then climb out using a ladder and return to the starting point. Repeat drill until participants have done this several times with different entries, sometimes with the rescue tube under their armpits and other times with the rescue tube trailing behind.
o Give the participants different scenarios and let them determine the appropriate entry.
Wrap-Up
Review progress and make a study assignment for the next unit.

BSA Lifeguard Instructor Manual — 30
Unit 7: Surveillance and Victim Recognition
Allotted Time 1 hour, 30 minutes
Prerequisite Unit Unit 1 – Prerequisites and Course Overview
Unit Objective At the end of this unit, each participant should:
Be able to recognize when a swimmer needs assistance. Apply patron surveillance procedures and supervision used by lifeguards.
Learning Objectives
Examine the behaviors of those in the water that indicate the need for assistance. Explain the four elements of effective surveillance. Discuss the relationship between surveillance and intervention. Explain the scanning techniques used by lifeguards. Identify various types of lifeguard stations. Demonstrate how to perform a lifeguard rotation. Define total coverage, zone coverage, and combined coverage. State the coverage responsibility of the lookout. Identify guard zones for a typical pool and beach or waterfront layout. Use the “RID” factor to illustrate the cause of drowning in supervised areas. Modify surveillance techniques for facilities with special situations.
Materials and Equipment Aquatics Supervision, No. 621005 BSA Aquatics Staff Guide American Red Cross Lifeguarding Manual, No. 755735 American Red Cross Lifeguarding DVD set, No. 755739 Marker board with pens Flip charts, overhead projector, or video projector with screen DVD player and television, or video projector and screen

BSA Lifeguard Instructor Manual — 31
Victim Recognition (reference: Lifeguarding participant manual, pages 58-64; Aquatics Supervision, pages 90-92)
Show the Lifeguarding video segment “Surveillance” (8:03). A lifeguard’s primary responsibility is to ensure safety and protect lives. Distressed swimmer:
o Exhausted, various stages of panic o Cramp, medical condition, or injury o May call out for help o May become an active drowning victim
Active drowning victim: o Instinctive Drowning Response (Pia, 1974) o Unable to call for help o Unable to move toward help or reach for aid o May struggle for as little as 20 seconds
Passive drowning victim: o Unconscious or unresponsive o Assume EMS personnel are needed
Suspected spinal injury: o Bleeding of the head, neck, or back o Loss of movement of or feeling in any part of the body
Tired swimmer: o Weak stroke, short bursts, clinging to a boundary line o Usually calm, will reply to questions
Endangered swimmer: o Competent swimmer in an unusual situation o Extended time in cold water o Rip current o Fast-moving water
Victim School (reference: Aquatics Supervision, pages 90-92)
o Purpose is for participants to learn and practice how each of the victim types should act during rescues. This provides a realistic practice for the rescuer and helps them identify victim types throughout the course. Participants will be required to act both as victim and as rescuer.
o Lead participants through an in-water practice session of each of the victim behaviors: Tired swimmer:
Swimming ineffectually in short bursts Weak stroke, fatigued Calm, able to respond & cooperative
Distressed Swimmer: Normally vertical in the water, but could be diagonal or horizontal
depending on what the swimmer is using for support. Able to keep face out of water Not able to make swimming progress Able to call or wave for help

BSA Lifeguard Instructor Manual — 32
Active Drowning Victim Struggling at Surface
o Ineffective kick (to mimic this behavior, participants should not use legs for support)
o Head leaning back o Lacks ability to stay on the surface o Arms are extended to side or front, pressing down and
flapping (climbing the ladder). o Not able to call for help
Submerged o Climbing the ladder, fighting to get to the surface o Unable to make progress to the surface
Passive Drowning Victim Face down at surface
o Floating and limp o No movement o Horizontal or Vertical
Submerged o Underwater (at the bottom or sinking) and limp o No movement o Horizontal or Vertical
o Explain the importance of acting realistically in practice. If passive, remain
passive throughout the exercise. Do not assist rescuers by swimming or kicking. Acting like genuine victims will give the lifeguard rescuers a realistic practice in the lifesaving skill.
o Practice victims should not use the word “help” unless they really need it. An alternative word is not really needed since many victims cannot call for aid.
Effective Scanning (reference: Lifeguarding participant manual, pages 65-80) Show the Lifeguarding video segment “Scanning” (5:21). Surveillance is the primary tool used by lifeguards and where they spend most of their time.
o Intervention: Through surveillance, lifeguards recognize inappropriate behavior or identify problems and take action to prevent injury.
o Discuss examples. Effective surveillance has four elements:
o Recognition of the need for intervention (rule violation, victim characteristics) o Scanning techniques o Lifeguard stations o Area of responsibility
Scanning techniques: o Emphasize the difference between ‘Searching’ and ‘Watching’
Searching: a deliberate, active, proactive, requires your mind to be alert Watching: a passive, reactive, i.e. waiting for something to catch your attention, easy
for your attention to drift o Focus on your area of responsibility. Don’t get distracted.

BSA Lifeguard Instructor Manual — 33
o Scan above and below the surface. Scan the bottom in clear water. o Look for potential problems. Spend more time watching a weak swimmer than a strong
one, but don’t neglect anyone. o Slow down your scan in crowded areas. o Stop your scan only to correct behavior or respond to an emergency. o Change locations on the deck to reduce the glare of the sun, increase visibility, and
reduce blind spots. o RID factor:
Failure to Recognize the instinctive drowning response Secondary duties that Intrude on the guard’s primary responsibility Allowing Distractions to divert attention
Lifeguard stations: o Elevated (chair or tower) o Fixed (standing on the deck or in the water) o Roving or moving (e.g., on a deck or in a guard boat for open water swimming) o How do guard rotations keep you alert?
Walking increases blood flow. A new station provides a change of scenery. It’s a chance to take a break and get out of the sun. It’s an opportunity to get food and water.
Area of responsibility: Show the Lifeguarding video segment “Zones of Surveillance” (8:05). Refer to Aquatics Supervision, page 114. o Assigned by the aquatics director:
Total coverage (guards or the lookout watching the entire area) Zone coverage (different guards watching limited areas with some overlap) Combined coverage:
Zone coverage plus total coverage Provides overlapping coverage of all areas Preferred because it provides multiple coverage of all areas Discuss zones for a typical Scouting venue. (see Buddy Board 2 example in the
appendix) A railing separates the Swimmers area from the Beginners and Nonswimmers
area. This affects backup coverage. Note two lifeguards share the responsibility for the Beginners and
Nonswimmers areas while still maintaining a ratio of 1 guard for every 10 swimmers.
o Modify surveillance for special situations: Diving well Slides Floating dock or detached platform Inflated play structures
o Rotations at camp pools may be done during buddy checks or when pool is cleared between instructional classes.

BSA Lifeguard Instructor Manual — 34
Skill Drills Effective Scanning, Live Recognition and Lifeguard Rotations Drill
o Assign each participant a number and victim type (distressed, active or passive). Record names with numbers to avoid calling the number of one of those in a lifeguard role.
o Position participants as lifeguards, equipped with rescue tubes and hip packs, and assigned to a particular zone of coverage. Remainder of participants will be in the water as if it is recreational swim time.
o Advise participant not to react immediately when number is called. Rather, allow the lifeguard some time to scan the pool before assuming the role of victim.
o When a victim is recognized, the lifeguard should activate (or simulate) the EAP, point to the victim and state what type of victim they observe.
o Remind participants that they are to follow rotation procedures that maintain patron surveillance.
o Begin the activity with the lifeguard that has been assigned to be on duty. Call out the number of one that is in the pool. Provide guidance for both the victim recognition and lifeguard rotations.
o Continue the activity until everyone has had an opportunity to play lifeguard. Ask Drills
o Ask Drill is commonly used by facility managers and head lifeguards to identify what lifeguards can and cannot see from the top, middle or bottom of the water at their station.
o Position participants as lifeguards, equipped with rescue tubes and hip packs, and assigned to a particular zone of coverage. Remainder of participants will be in the water as if it is recreational swim time.
o While participants are in a different location and unable to see, place an object (such as a manikin, silhouette, ‘live victim’ or a sinkable object) in various locations.
o Have participants take turns acting as lifeguards at different stations. o Ask the lifeguards:
Can you see the objects? Which object(s) would cause you to respond and why?
o There are no wrong answers. If a victim or object is not spotted, they have identified a challenge for lifeguards at that station. Blind spots, visual obstacles, glare, water movements, heavy patron loads are some of the potential scanning challenges that could occur. Discuss options on how to improve the situation: relocate/reposition lifeguard station, change zone of coverage, add lifeguard to guard specific feature, modify lighting, etc.

BSA Lifeguard Instructor Manual — 35
Summary There are several types of victims. Recognition and response depend on victim
characteristics. Tired or poor swimmers can become victims. Surveillance is what you will be doing most of the time. Intervention prevents injury. Four elements of surveillance:
o Recognition of the need for intervention o Scanning techniques o Lifeguard stations o Area of responsibility
RID factor is the cause of most drowning in areas supervised by lifeguards:
o Recognition failure o Intrusion by other duties o Distractions that prevent drowning intervention
Coverage may need to be modified for special situations.
Wrap-Up
Review progress and make a study assignment for the next unit.

BSA Lifeguard Instructor Manual — 36
Unit 8: Introduction to Assists and Rescues
Allotted Time 20 minutes
Prerequisite Unit Unit 7 – Surveillance and Victim Recognition
Unit Objective At the completion of this unit, each participant should:
Know the procedures for reaching and throwing assists. Know the procedures for rescue of active and passive drowning victims.
Learning Objectives
List the types of assists. Identify equipment that may be used for reaching assists. List the general procedures for rescues.
Materials and Equipment Aquatics Supervision, No. 621005 BSA Aquatics Staff Guide American Red Cross Lifeguarding Manual, No. 755735 American Red Cross Lifeguarding DVD set, No. 755739 DVD player and television, or video projector and screen
Assists and Rescues
Show the Lifeguarding video segment “Water Rescues at or Near the Surface” (9:20) Stop the video at “Multiple Victim Rescue” at 4:06. Restart video at “Passive Victim Front Rescue” at 5:06
Review “Reaching Rescues” in Aquatics Supervision, Chapter 9. Note the addition of reaching rescues using arms.
Review “Throwing Rescues” in Aquatics Supervision, Chapter 9. Review the procedures for “Rescues at or Near the Surface” in the Red Cross Lifeguarding
participant manual, pages 149-150.
Wrap-Up Answer questions and make a study assignment for the next unit.

BSA Lifeguard Instructor Manual — 37
Unit 9: Reaching and Throwing Assists
Allotted Time 20 minutes
Prerequisite Unit Unit 8 – Introduction to Assists and Rescues
Unit Objective At the end of this unit, each participant should be able to perform reaching and throwing rescues accurately without instructor assistance to the level of proficiency required in BSA Lifeguard requirements 9 and 10.
Learning Objectives
Examine the steps of an emergency action plan that are specific to a drowning situation. Demonstrate reaching assists from the deck using an arm, a rescue tube, and a pole. Demonstrate the correct handling of a heaving line to pull the subject to safety. Demonstrate throwing assists using ring buoys and throw bags.
Throw each device such that the line lands within reach of an active subject 30 feet from shore.
Materials and Equipment Aquatics Supervision, No. 621005 American Red Cross Lifeguarding Manual, No. 755735, pages 154. Reach poles (10 feet minimum) USCG-approved Type IV ring buoys with line (40 feet of line minimum) Throw bags Rescue tubes Hip pack with PPE Means to activate EAP (whistle)

BSA Lifeguard Instructor Manual — 38
Assists Review the general steps of an emergency action plan. Discuss how candidates will simulate activation of the emergency action plan
during the course: o Point to subject and call out “activate EAP” or other phrase. o Develop the habit each time you practice.
Reaching assists: o Lying on the deck using arms (when subject cannot grasp a rescue tube) o Reach pole—Extend the reach pole to the side of the subject and sweep under the
subject’s arm into contact with his or her side. Do not aim the pole directly at the subject’s chest.
o Rescue tube extension from the pool deck or swim dock Throwing assists:
o Discuss advantages and disadvantages of different types of line: Polyester has excellent resistance to ultraviolet deterioration and abrasion, does not
float, is not damaged by oil or chemicals, low stretch, and does not coil well. Nylon has good resistance to ultraviolet deterioration and abrasion, does not float, is
not damaged by oil or chemicals, high stretch, and coils easily. Polypropylene (poly) floats, is susceptible to ultraviolet deterioration and is not as
strong as nylon or polyester. Recommended —Fifty feet of 3/8-inch polypropylene (solid-braid not hollow-braid
or laid (twisted)). Nylon is a second choice, but will not have the desirable characteristic of floating.
o Place one hand on your knee and fully extend the other arm to produce equal size loops to help prevent tangling. Maintain eye contact with victim.
o Secure the end of the line to the wrist with a loose loop. Stand on the end if the line is equipped with an end-float.
o Throwing a ring buoy: USCG-approved throwable floatation device for boats is recommended (formerly
called type-IV). A non-USCG approved version is available for pools. Both approved and non-approved versions vary between 20 and 30 inches in diameter. The smaller ones are easier to handle.
The grab line is for the subject to use. Attach the line around the ring buoy, not the grab line, using a bowline or running
figure-eight knot. To throw, hold the side of the ring buoy, not the grab line. Swing the buoy vertically and throw beyond the subject so the line is lying across the
subject’s shoulder. If you miss or the subject loses contact with the buoy, there is no need to recoil the
line. Drop the line at your feet as you pull in the buoy and then throw again. Practice until able to accurately reach a subject 30 feet away approximately
70 percent of the time (i.e., 4 of 5, 5 of 7, 7 of 10). Note: 70 percent is recommended to ensure the candidate has attained a reasonable level of proficiency. This is not a requirement. There is no requirement for timed accuracy.

BSA Lifeguard Instructor Manual — 39
o Pulling the subject to safety: Body position: Lean back and stay low. Make a quarter twist of the line with the thumb inward to prevent slipping. Allow the ring buoy to support the subject.
Throw bags: Preparing the bag for use Underhand and overhand throws Coil the line for a subsequent throw and partially fill the bag with water. Practice until able to accurately reach a subject 30 feet away approximately
70 percent of the time (i.e., 4 of 5, 5 of 7, 7 of 10). Note: 70 percent is recommended to ensure the candidate has attained a reasonable level of proficiency. This is not a requirement.
Wrap-Up
Review progress and make a study assignment for the next unit.

BSA Lifeguard Instructor Manual — 40
Unit 10: Moving the Victim to Safety and Rescues
Allotted Time 1 hour
Prerequisite Unit Unit 8 – Introduction to Assists and Rescues
Unit Objective At the end of this unit, each participant should be able to perform rescues of active and passive subjects to the level of proficiency required in BSA Lifeguard requirements 12, 13, 16 and 17.
Learning Objectives
Demonstrate a sidestroke with both a regular and inverted scissors kick. Demonstrate a rotary kick. Demonstrate a front approach to an active subject in deep water, push or extend the
rescue tube to the victim, push or tow to shore. Demonstrate a rear approach to an active subject in deep water, grasp from behind, and
tow the subject to shore. Demonstrate how to reassure an active subject while towing to shore. Demonstrate one-arm and two-arm tows of passive subjects. Demonstrate a front approach to a face-down, passive subject, and use a passive victim
front rescue (wrist tow) to place the subject face-up on the rescue tube, grasp the tube with the other arm and tow the victim to safety.
Demonstrate a rear approach to a face-down, passive subject. Position the rescue tube between the subject and the rescuer’s chest and then rotate to bring the subject face-up. Switch to a one-arm towing position and move the victim to safety, reversing direction if needed.
Identify the closest point of safety for various rescue situations.
Materials and Equipment Aquatics Supervision, No. 621005 American Red Cross Lifeguarding Manual, No. 755735 Rescue tubes Hip pack with PPE Means to activate EAP (whistle)

BSA Lifeguard Instructor Manual — 41
Moving the Victim to Safety Modified sidestroke:
o Used for passive victim rescues o Only one arm available to use for stroke o Use of inverted scissors kick—top leg back vs. regular scissor. Either allowed.
Rotary kick: o Variant when stroking on the back or side o Alternative to the whip kick or scissor kick o Avoids the pulsing or jerking motion of the whip kick
Two-arm tow—on back using rotary kick or whip kick: One-arm tow:
o Reach over the arm and grasp the tube. o Release the other arm. Don’t lose contact. o Modified sidestroke
Discuss the closest point of safety.
Active Victim—Front Rescue (push) Recognize need, activate EAP Entry and approach:
o Stride or compact entry from the pier or deck o Maintain control of rescue tube during entry and approach o Approach from the front with urgency.
Final assessment: o Position the tube between yourself and the subject, holding it with both hands. o Talk to the subject (e.g., tired swimmer).
Rescue tube extension: o With both arms extended, thrust the rescue tube slightly under the water and against the
victims chest. o Tell the subject to lean forward on the tube. o Keep kicking toward the subject.
Move the subject to the closest point of safety: o Reassure and watch the subject. o Encourage the subject to hold on and relax. o Change direction if necessary
Active Victim—Rear Rescue (scoop) Recognize need, activate EAP Entry and approach:
o Stride or compact entry from the pier or deck o Maintain control of rescue tube during entry and approach o Approach from the rear with urgency.
Final assessment: o Position the tube across your chest and under your arms. o Talk to the subject (e.g., tired swimmer).

BSA Lifeguard Instructor Manual — 42
Securing the subject: o With both arms over the tube, scoop under subject’s armpits and grasp the victim’s
shoulders firmly with both hands. o Move your head to one side to avoid contact with subject’s head. o Squeeze the tube between the victim’s back and your chest. o Lean back to support the victim’s face clear of the water.
Move the subject to the closest point of safety: o Reassure and watch the subject. o Encourage the subject to kick.
Passive Victim—Front and Rear Rescues at or near the Surface Recognize need, activate EAP Entry and approach:
o Stride or compact entry from the pier or deck o Maintain control of rescue tube during entry and approach o Approach with urgency.
Final assessment: o Position the tube between yourself and the subject. o Face-up or face-down? o Within easy reach of the surface? o In front or to the rear of the subject?
Securing the subject: o Front rescue (face-down) Grasp opposite wrist or forearm. Pull and roll subject face-up. Simultaneously insert tube under the subject’s back.
o Rear rescue (face-down) Swim up onto the subject’s back (with the tube across your chest) and reach under the
arms and across the shoulders. Turn subject face-up:
o Roll the victim face up by dropping one shoulder and continue on your back in the same direction.
o Move your head to one side to avoid contact with the subject’s head. o Transition to a one-arm towing position.
Move the subject to the closest point of safety: o Look for signs of life (e.g., coughing, movement, chest rising and falling). o Urgency: Unconsciousness is a life-threatening situation. o Where is the best place to quickly remove the subject?
Wrap-Up
Review progress and make a study assignment for the next unit.

BSA Lifeguard Instructor Manual — 43
Unit 11: Introduction to Multiple and Submerged Victim Rescues and Escapes
Allotted Time 20 minutes
Prerequisite Unit Unit 10 – Moving the Victim to Safety and Rescues
Unit Objective At the end of this unit each participant should:
Know the procedure for rescue of multiple victims. Know the procedures for front and rear head-hold escapes. Know the procedure for rescue of submerged victims.
Learning Objectives
Describe how to use a rescue tube to support two subjects grasping each other. Describe the procedure for a front head-hold escape. Describe the procedure for a rear head-hold escape. Describe when in-water ventilations are appropriate. Describe the procedure for a feet-first surface dive. Describe the procedure for rescue of a submerged subject face-down at or near the bottom in
6 to 8 feet of water.
Materials and Equipment Aquatics Supervision, No. 621005 American Red Cross Lifeguarding Manual, No. 755735 American Red Cross Lifeguarding DVD set, No. 755739 Marker board with pens Flip charts, overhead projector, or video projector with screen DVD player and television, or video projector and screen
Show the Lifeguarding video segment “Water Rescues at or Near the Surface.” Queue the video to begin at 4:06, Multiple-Victim Rescue (1:00). Stop at 5:06
Show the Lifeguarding video segment “When Things Do Not Go as Practiced” (2:45). Show the Lifeguarding video segment “Submerged Victim Rescues” (4:51).

BSA Lifeguard Instructor Manual — 44
Multiple Victim Rescue Multiple guards, if available (each guard approaches their subject from the rear) Single guard—Which subject do I rescue? (very unlikely at a Scouting venue):
o Adult vs. child o Swimmer vs. non-swimmer o Both simultaneously
Submerged Victims Release rescue tube Feet-first or head-first surface dive Moving the subject to safety:
o Grasp from the rear, around the chest. o Use the rescue tube lanyard to help pull to the surface. o Push off from the bottom, if able. o Use the free hand to insert the rescue tube between you and the subject. o Use a one-arm tow to the closest point of safety.
If the water is murky, grasp any part of the subject you are able to locate. Use only if no head, neck, or back injury is suspected.
Escapes “Suck, tuck, duck”
o Inhale a quick breath of air and hold breath. o Turn your head to the side and place chin on top of your shoulder. o Submerge: The instinctive drowning response will take over and cause the subject
to release. Grasp upper arms near the elbows for maximum leverage. After release, swim underwater several feet to get a safe distance away. Dry-land practice of escape procedure.
Wrap-Up
Review progress and make a study assignment for the next unit.

BSA Lifeguard Instructor Manual — 45
Unit 12: Multiple and Submerged Victim Rescues and Escapes
Allotted Time 1 hour
Prerequisite Unit Unit 11 – Introduction to Multiple and Submerged Victim Rescues and Escapes
Unit Objective At the end of this unit, each participant should be able to:
Apply procedures for the use of a rescue tube to assist multiple victims. Apply procedures for front and rear head-hold escapes. Apply procedures for in-water ventilations. Apply procedures for rescue of submerged victims.
Learning Objectives
Demonstrate the use of a rescue tube to support two subjects grasping each other. Demonstrate a front head-hold escape. Demonstrate a rear head-hold escape. Demonstrate in-water ventilations. Demonstrate the rescue of a submerged subject face-down at or near the bottom in 6 to 8 feet of water.
Materials and Equipment Aquatics Supervision, No. 621005 American Red Cross Lifeguarding Manual, No. 755735 Rescue tubes Hip pack with PPE Means to activate EAP (whistle)

BSA Lifeguard Instructor Manual — 46
Multiple Victim Rescue Instructor demonstration of support of two subjects with one rescue tube Practice skill.
Submerged Victims Practice feet-first surface dive. Practice moving the subject to safety:
o Grasp from the rear, around chest. o Use the rescue tube lanyard to help pull the victim to the surface. o Push off from the bottom, if able. o Use the free hand to insert the rescue tube between you and the subject. o Use a one-arm towing position to bring the victim to the closest point of safety.
In-Water Ventilations May be needed when the subject is not breathing and prompt removal from the water is not
possible due to distance from the shore or lack of adequate assistance or equipment. o Remove the resuscitation mask from your hip pack and shake it to remove excess water. o Place the rescue tube under the subject so the airway is open. o Move to a position above the subject’s head.
Escapes Discuss safety procedures for practicing escapes (e.g., three taps to release or release in three
seconds). “Suck, tuck, duck:”
o Inhale a quick breath of air and hold breath. o Turn your head to the side and place chin on top of your shoulder. o Submerge: The instinctive drowning response will take over and cause the subject
to release. Grasp upper arms near the elbows for maximum leverage. After release, swim underwater several feet to get a safe distance away.
Caution: Do not allow the practice session to degenerate into a free-for-all or competition.
Wrap-Up
Review progress and make a study assignment for the next unit.

BSA Lifeguard Instructor Manual — 47
Unit 13: Introduction to Victim Removal (with review activity)
Allotted Time 20 minutes
Prerequisite Unit Unit 1 – Prerequisites and Course Overview
Unit Objective At the end of this unit, each participant should know the steps for removing a subject from the water.
Review Activity Surveillance
Learning Objectives Describe a walking assist from the water. Describe a beach drag from the water. Describe a two-person removal from the water using a backboard.
Materials and Equipment Aquatics Supervision, No. 621005 American Red Cross Lifeguarding Manual, No. 755735 American Red Cross Lifeguarding DVD set, No. 755739 DVD player and television, or video projector and screen
Removal from the Water
Show the Lifeguarding video segment “Surveillance Activity 1.” (3:22) Lead a discussion on what participants see in each segment.
Show the Lifeguarding video segment “Extrications.” (7:21) Review the steps of each of the following:
o Walking assist: Tired or weak subject One-person or two-person
o Beach drag (unconscious subject): One-person (support head with forearms) Two-person (each person uses inside hand to support a subject’s head)
o Backboard extrications: Two to three rescuers Works best at a pool:
o Height of deck above water less than 18 inches o Secondary rescuer removes the head immobilizer from the backboard and places
the backboard in the water vertically. o Primary rescuer swims victim to side of pool o Secondary rescuer grasps the victims’ wrist with one hand while holding the
backboard with the other hand.

BSA Lifeguard Instructor Manual — 48
o Primary rescuer removes the rescue tube from under the victim and toward himself before the victim makes contact with the board.
o The secondary rescuer firmly holds the backboard with one hand and the victims’ wrist with the other. The primary rescuer stabilizes the backboard from the side.
o Once the victim is centered on the backboard, the secondary rescuer signals that they are ready to remove the victim. Maintaining hold on the victims’ arm, the secondary rescuer walks backward and pulls the backboard (and the victim) up on the deck while the primary rescuer pushes.
o If more than one on-deck responder is available, they should help hold the backboard and pull the backboard onto the deck.
o The secondary rescuer assesses the victim’s condition and provides appropriate care.
Steps from shallow water o Similar procedure except primary rescuer moves to foot of backboard and pushes
backboard. o Each facility and situation is unique. Before using this method, consider the size
and weight of the victim, number of steps, your own physical abilities, and whether or not additional lifeguards or responders are available to assist.
Steep steps or moving water o Primary rescuer supports the victim in a face up position with arms extended
along the head. In moving water, the head is pointed upstream to aid in body alignment.
o Secondary rescuer removes the head immobilizer from the backboard, enters the water, submerges the backboard and positions it under the victim. The backboard is raised under the victim.
o Each lifeguard moves to the victims’ head, grasps one of the victims’ wrists and one of the handholds on the backboard, and begins to move the victim to the exit point.
o Both rescuers carefully and gently drag the victim up the steps, take one step at a time until they reach the top of the steps.
o Both rescuers lower the backboard to the ground. Assesses the victim’s condition and provides appropriate care.
Zero depth entry o Same as steep steps, except no steps.
Wrap-Up
Review progress and make a study assignment for the next unit.

BSA Lifeguard Instructor Manual — 49
Unit 14: Removal from the Water (with water rescue drill)
Allotted Time 1 hour, 15 minutes
Prerequisite Unit Unit 13 – Introduction to Removal from the Water
Unit Objective At the end of this unit, each participant should be able to remove a victim from the water under different circumstances.
Learning Objectives Demonstrate a walking assist from the water. Demonstrate a beach drag from the water. Demonstrate a two-person removal from the water using a backboard.
Materials and Equipment: Aquatics Supervision, No. 621005 American Red Cross Lifeguarding Manual, No. 755735 Backboards Rescue Tubes Hip pack with PPE Means to activate EAP (whistle)

BSA Lifeguard Instructor Manual — 50
Removal from the Water Walking assist:
o Tired or weak subject o One-person or two-person
Beach drag (unconscious subject): o One-person (support head with forearms) o Two-person (each person uses inside hand to support subject’s head) Note: If instruction is primarily at a pool with a zero depth entry, this item may be combined with other waterfront skills during a single session held at a lakefront swimming area.
Backboard extrications: o Two or three rescuers o Practice with each candidate performing as the primary and secondary rescuer. o If facilities permit, practice shallow water, steep steps and/or zero entry extrication with a
backboard.
Skill Drill Lifeguard Station Response Time Drill
o Place the lifeguard at the station and support staff where they would normally be. o Place the victim in a pre-arranged location. (for example – submerged victim in
farthest portion of zone. o Have the lifeguard activate the EAP. o Time the response. Start timing at the EAP signal and stop when the victim has been
extricated from the water and 2 ventilations have been simulated. o Any lifeguard should be able to reach a victim within their zone, rescue a submerged
passive victim, extricate and provide 2 ventilations within 90 seconds. o Discuss modifications that can improve response time: Move emergency equipment
closer, change zone size or shape, etc.
Wrap-Up
Review progress and make a study assignment for the next unit.

BSA Lifeguard Instructor Manual — 51
Unit 15: Introduction to Rescue Watercraft
Allotted Time 20 minutes
Prerequisite Unit Unit 14 – Victim Removal from the Water
Unit Objective At the end of this unit, each participant should:
Know what type of life jackets are appropriate for guarding from boats and when they should be worn.
Comprehend the advantages and disadvantages of different watercraft available at Scout aquatics venues for surveillance and rescue during swimming activities.
Learning Objectives
Describe the care and use of life jackets. Summarize the advantages and disadvantages of various watercraft for surveillance
and rescue.
Materials and Equipment: Aquatics Supervision, No. 621005 American Red Cross Lifeguarding Manual, No. 755735 American Red Cross Lifeguarding DVD set, No. 755739 Marker board with pens Flip charts, overhead projector, or video projector with screen DVD player and television, or video projector and screen
Introduction to the Use of Rescue Watercraft Life jackets
o Must be USCG-approved type: Type III life jackets (vest style) are recommended for guards using watercraft. Type II (horse collar) and self-inflating styles are not recommended.
o Care and use of life jackets: Verify “USCG approval” is legible. Proper size and fit Keep all fasteners and buckles secure. Hang to dry away from direct sunlight.
o Guards wear life jackets while performing surveillance using watercraft. o Guards may need to remove life jackets to rescue a victim that submerges quickly. o Guards launching rescue boards or paddleboards for rescues from shore do not don life
jackets. o Guards stationed on a rescue board or other rescue watercraft should also carry a rescue
tube and may carry a reach pole or ring bouy for reaching or throwing assists from a boat. The majority of time on duty (stationed on a watercraft) is spent performing surveillance and
supervision of swimmers…same as stations on shore.

BSA Lifeguard Instructor Manual — 52
Rowboats are recommended for guarding open-water swimming (such as distance swims for the Mile Swim Award). Note that the Safe Swim Defense guidelines for water quality, depth and clarity apply to open water swimming.
Discuss the types of watercraft that are available for the course and other types that may be used at a Scout aquatics venue for surveillance and rescue. o Rowboats o Canoes o Kayaks o Rescue boards or paddleboards (including sailboards without the mast)
Review “Rowing Rescues” (includes canoe) in Aquatics Supervision. Show the Lifeguarding video segment “Waterfront Rescue Skills.” Queue the video to begin
at 10:50; “Approaching a Victim on a Rescue Board” (2:30). The techniques used for rescue boards may be used with sit-on-top kayaks. Summarize the advantages and disadvantages of each watercraft for surveillance and rescue.
o Rowboat Advantages: Very stable, good maneuverability, room for a second guard and
additional equipment (reach pole, throwable device, water bottle, sunscreen, communication radio)
Disadvantages: Response speed, difficult to enter in deep water o Canoe Advantages: Good speed and maneuverability, room for a second guard
and equipment Disadvantages: Unstable, difficult to enter in deep water
o Sit-on-top kayak Advantages: Excellent speed and maneuverability, ability to extract a passive or
passive subject without assistance Disadvantages: Lack of stability with a subject onboard, limited storage space
o Sit-inside kayak Advantages: Excellent speed and maneuverability, comfortable seating position
prevents fatigue Disadvantages: Towing a passive subject is the only option, low elevation for
surveillance, limited readily accessible storage space o Rescue board or paddleboard (including SUP designs) Advantages: Excellent speed and good maneuverability, ability to extract a passive or
unconscious subject without assistance Disadvantages: Guard tires more easily, low elevation for surveillance, lack of
stability with a subject onboard, no storage space

BSA Lifeguard Instructor Manual — 53
Review “Sightings and Cross Bearings,” in Lifeguarding Manual, page 155: o Requires two separate lines of sight. o Line of sight must extend through two fixed points. o Do not try to focus on a distant spot on the water.
o Consider carrying a marker buoy in the safety boat to mark the spot where the subject
was last seen. (Fishing marker buoys work well for this purpose.)
Wrap-Up
Review progress and make a study assignment for the next unit.

BSA Lifeguard Instructor Manual — 54
Unit 16: Rescue Watercraft
Allotted Time 1 hour, 30 minutes
Prerequisite Unit Unit 15 – Introduction to Rescue Watercraft
Unit Objective At the end of this unit, each participant should:
Use a variety of available watercraft for surveillance and rescue. Be able to demonstrate the use of at least one rescue watercraft to the level of proficiency
required in BSA Lifeguard requirement 11.
Learning Objectives
Note: The intent of the following objectives is for the candidates to receive instruction in the type or types of rescue watercraft in use where they are likely to serve. Ideally, instructors should offer instruction in several types of watercraft. This course anticipates such instruction will at least include rowboats and canoes unless facilities and equipment limitations prevent their use.
If the BSA lifeguard course is conducted at a facility other than the one where the participants will be employed, they should be informed that training specific to their location of employment is a requirement of pre-duty training by their employer.
Demonstrate the use of a rowboat for surveillance and rescue of responsive and unresponsive victims.
Demonstrate the use of a canoe for surveillance and rescue of responsive and unresponsive victims.
Demonstrate the use of a sit-on-top kayak for surveillance and rescue of responsive and unresponsive victims.
Demonstrate the use of a sit-inside kayak for surveillance and rescue of responsive and unresponsive victims.
Demonstrate the use of a rescue board or paddleboard for surveillance and rescue of responsive and unresponsive victims.
Materials and Equipment Aquatics Supervision, No. 621005 American Red Cross Lifeguarding Manual, No. 755735 Rescue Tubes Hip pack with PPE Means to activate EAP (whistle) Life jackets Rowboats (required) Canoes (required) Sit-on-top kayak (if available) Sit-inside kayak (if available) Rescue board or paddleboard (if available)

BSA Lifeguard Instructor Manual — 55
Rescue Watercraft Reference: American Red Cross Lifeguarding participant manual, pages 153. Review how to simulate activation of the emergency action plan while on the water. For this training session, all rescuers will wear a life jacket. All “victims” will also wear a
life jacket if the training is conducted outside an established swimming area. Demonstrate the use of each watercraft:
o Rowboat o Canoe o Sit-on-top kayak (if available) o Sit-inside kayak (if available) o Rescue board or paddleboard (if available)
Practice rescue of conscious and unconscious subjects—instructors may set up stations for each watercraft if resources permit.
Reinforce the advantages and disadvantages of each type of watercraft. Emphasize the importance of becoming proficient in the watercraft available at the
lifeguard’s individual waterfront.
Wrap-Up
Review progress and make a study assignment for the next unit.

BSA Lifeguard Instructor Manual — 56
Unit 17: Safe Swim Defense
Allotted Time 1 hour, 20 minutes
Prerequisite Unit Unit 1 – Prerequisites and Course Overview
Unit Objective At the end of this unit, each participant should be able to apply Safe Swim Defense to an aquatics activity at a typical Scouting venue.
Learning Objectives
Describe the key elements of Safe Swim Defense. Apply Safe Swim Defense to a typical swimming activity, showing the implementation
of each point. Summarize how Safe Swim Defense applies to a Scouting aquatics program. State the primary purpose of the buddy check. Review how Safe Swim Defense is applied to a unit swimming activity at a remote or
unimproved site versus a site where regulations require professionally trained and equipped lifeguards.
Materials and Equipment Aquatics Supervision, No. 621005 BSA Aquatics Staff Guide American Red Cross Lifeguarding Manual, No. 755735 Safe Swim Defense handout, No. 34370 Marker board with pens Flip charts, overhead projector, or video projector with screen DVD player and television, or video projector and screen Buddy tags Black, red, and blue marker pens
Safe Swim Defense Review each point of Safe Swim Defense. Contrast its use at a district or council aquatics
venue with that of a unit. o Qualified Supervision Aquatics director Discuss others who may serve as the qualified supervisor at summer camp (e.g.,
assistant aquatics director, trained lifeguards over 18). See National Camp Standards for Resident Camps (current year).
o Physical Fitness Reviewed during check-in. Discuss how information may be communicated to the
aquatics staff. Physical limitations noted. (Do not use a special color buddy tag or marking.) Adjust activities and provide accommodations.

BSA Lifeguard Instructor Manual — 57
o Safe Swimming Areas Non-swimmer, beginner, swimmer Area may have to be adjusted for smaller Cub Scouts. Checked daily for hazards 12 feet maximum for swimmers in clear water, 8 feet in turbid water—may be less Rescue equipment readily available
o Lookout Identifies violations of Safe Swim Defense guidelines Alerts rescue personnel as necessary Monitors the weather and environment May be in a tower. Must be able to see the entire area at all times. May also be the qualified supervisor. Not necessarily the qualified supervisor. Usually initiates the buddy check.
o Lifeguards (use example buddy boards in the appendix) At least one guard team supervisor per distinct swimming location (e.g. one for each
for a pool and a lake water attraction area that runs simultaneously). Note lifeguards are checked into their area of responsibility.
As a regulated facility that requires professionally trained lifeguards, BSA camps must meet state and local standards for the ratio of trained lifeguards to swimmers. The 1 to 10 ratio of response personnel to swimmers required by Safe Swim Defense for unit swims is a good target beyond code requirements.
Minimum of two guards. During times when there are only a few swimmers in the water (e.g., two swimmers doing an early morning swim), the aquatics director may allow a lookout who is also a lifeguard to serve as the second guard.
Depending upon the configuration of the pool or swim dock, additional guards may be needed (e.g., water slide, out-dock or detached floating platform).
o Swimming Ability Groups Non-swimmers and beginners should be encouraged to advance at any time during
their stay at camp. o Buddy System “Triples” do not fulfill the buddy function. Example buddy board 1 has two sets of
triples per ability area. The lower set of hooks is used by Cub Scouts. The second set may also be used in the event two separate instructional classes each have a triple.
Discuss ways to minimize triples during recreational and instructional swims. Buddy checks
Start with a buddy check, and end with a buddy check. Make a check approximately every 10 minutes, less frequently if buddies are
staying together and watching out for each other. The primary purpose is to remind buddies to look out for each other. Perform the check quickly and efficiently and let them get back to swimming. Recreational swims and instruction may occur at the same time, but are typically
scheduled separately.

BSA Lifeguard Instructor Manual — 58
o Discipline Encourage positive play and activities during recreational swims to avoid
“horseplay.” Enforce the rules fairly and equally.
Open-Water Swimming o Guarding with rowboats o Guarding a closed circuit o The environment for an open-water swim must conform to Safe Swim Defense guidelines
regarding hazards such as submerged trees, currents, or boat traffic as well as water quality, depth and clarity.
Aquatics Special Event o Guards are required for all swimming events. o Closely supervise check-in and check-out between events. o Possibility of distractions for the guard
Instruction o Importance of assistant instructor o A guard is needed if an assistant instructor is not available.
Staff Swim o Guards required o Temptation to relax the rules
Unimproved sites—Discuss how some of the facilities and equipment a lifeguard has available in a camp setting might change when Safe Swim Defense is used in an unimproved or outpost swim situation: o Reinforces training for unit leaders in Safe Swim Defense and Safety Afloat o Buddy board: Clipboard Tags pinned to towel Paired shoes Whittled pegs
o Rescue equipment (e.g., line and tender) o Safe swim area (checked for hazards, options for marking): Balloons Poles Discuss Line and Tender
Scout Advancement o During instructional or recreational periods, guard as normal. o Do not allow requests for assistance to distract from normal guard duties.

BSA Lifeguard Instructor Manual — 59
Summary Safe Swim Defense applies at camp as well as for the unit. As a guard, you are supporting the unit as they learn to run their own aquatics activities:
o Safe Swim Defense training o Scout advancement
Special activities require increased attention: o Open-water swimming o Aquatics special events
Wrap-Up
Review progress and make a study assignment for the next unit.

BSA Lifeguard Instructor Manual — 60
Unit 18: Introduction to Lost Swimmer Search and Use of Mask and Fins
Allotted Time 30 minutes
Prerequisite Unit Unit 12 - Multiple and Submerged Victim Rescues and Escapes
Unit Objective At the end of this unit, the candidate should:
Know the procedures for an underwater search of the swim area. Comprehend the risks of an underwater search. Comprehend the importance of a mask and fins for underwater searches.
Learning Objectives
Examine the steps of the lost swimmer search procedure. Describe the advantage of using a mask and fins in a deep-water line search. Discuss the risks associated with a lost swimmer search.
Materials and Equipment Aquatics Supervision, No. 621005 American Red Cross Lifeguarding Manual, No. 755735 American Red Cross Lifeguarding DVD set, No. 755739 Marker board with pens Flip charts, overhead projector, or video projector with screen DVD player and television, or video projector and screen Mask and fins for each candidate
Lost Swimmer Search:
Show the Lifeguarding video segment “Waterfront Rescue Skills” – Queue video to begin at 2:50, Searching Shallow Water Areas. Stop the video at 10:50, Approaching a Victim on a Rescue Board (8:00).
Review the lost swimmer search procedure: o Aquatics Supervision, pages 107-108 o American Red Cross Lifeguarding Manual, pages 155-160 o If a victim submerges during a rescue, the responding lifeguard should be able to quickly
find the victim without the need of an organized team search. It is a primary lifeguard responsibly to spot persons in need before they submerge.
o If a swimmer reports that a buddy is missing, a buddy check is performed immediately. o A lost swimmer search should be started immediately after a buddy check reveals a
missing swimmer. Do not delay to search locker rooms or campsites. o When the bottom is visible, a lost swimmer search can be conducted quickly from the
surface during the buddy check and normal rescue procedures are implemented. o If the bottom is not visible, then the EAP for a lost swimmer is activated. That includes
an immediate request for EMS. (If the system is working as it should, an unmatched buddy tag indicates someone is on the bottom and there should be no delay in summoning more advanced medical care.)

BSA Lifeguard Instructor Manual — 61
o If the bottom is not visible, Safe Swim Defense limits the maximum water depth to eight feet to facilitate an underwater search.
Shallow-water line search: o Grasp wrists or link arms o Sweep feet as you move forward. o Maximum chest-deep o Discuss sweeping with the line perpendicular to the shore: Arrange searchers from shortest to tallest. It saves time because searchers are only required to line up once.
o It is safe for untrained volunteers to participate, but the search should be started with already trained personnel rather than delayed. Instruct recruits who can be added as the search progresses.
Surface dives: o Feet-first surface dive: Unknown bottom conditions Need to go straight down (e.g., boundary of the swim area).
o Headfirst: Extend your legs above the water. Use the weight of your legs to push you down. Kick after your feet go below the surface.
Discuss the advantages of mask and fins. Deep water line search
o Only done with trained personnel at hand. Time is of the essence – do not rely on searchers to arrive from distant areas.
o Must be practiced before needed. o If practice runs take too long, consideration should be given to increasing the number
of trained personnel onsite, reducing the size or depth of the area, or implementing risk management procedures such as the use of life jackets.
o All persons involved in the search should be accounted for after each dive. Discuss risks:
o Murky or cold water o Physically demanding o “Rule No. 1—Don’t become victim No. 2.”
Wrap-Up
Review progress and make a study assignment for the next unit.

BSA Lifeguard Instructor Manual — 62
Unit 19: Lost Swimmer Search and Use of Mask and Fins
Allotted Time 30 minutes
Prerequisite Unit Unit 18 – Introduction to Lost Swimmer Search and Use of Mask and Fins
Unit Objective At the end of this unit, the candidate should be able to:
Apply procedures for the use of mask and fins. Apply procedures to perform an underwater line search of the swim area.
Learning Objectives
Demonstrate the use of mask and fins. Demonstrate a feet-first and headfirst surface dive with mask and fins. Complete a shallow-water line search. Demonstrate an underwater line search of the swim area without mask and fins. Demonstrate an underwater line search of the swim area with mask and fins.
Materials and Equipment Aquatics Supervision, No. 621005 American Red Cross Lifeguarding Manual, No. 755735 Marker board with pens Mask and fins for each candidate Optional – Rescue dummy Hip pack with PPE Means to activate EAP (whistle)

BSA Lifeguard Instructor Manual — 63
Lost Swimmer Search The practice of the Lost Swimmer Search is ideally conducted in turbid water. Review the lost swimmer search procedure:
o American Red Cross Lifeguarding participant manual, pages 155-160 o Aquatics Supervision, pages 107-108
Discuss risks: o Murky or cold water o Strenuous and stressful
Shallow-water line search Surface dives:
o Feet-first and Headfirst o Equalizing pressure in the inner ear
Deep-water line search: o Practice without a mask and fins. o Practice with a mask and fins. o Review the advantages of wearing a mask and fins.
Wrap-Up
Review progress and make a study assignment for the next unit.

BSA Lifeguard Instructor Manual — 64
Unit 20: Spinal Injuries and Caring for Spinal Injuries on Land
Allotted Time 20 minutes
Prerequisite Unit Unit 4 – Emergency Action Plans
Unit Objective At the end of this unit, the candidate should:
Know that emergency action plans should address suspected spinal injury. Know how spinal injuries can occur in aquatics environments. Apply the procedures to care for victims of spinal injury on land.
Learning Objectives Examine the steps of an emergency action plan for a suspected spinal injury. List the aquatics situations in which spinal injury is possible. Describe the signs and symptoms of a subject who may have a spinal injury. Demonstrate recognition of the signals of spinal injury. Demonstrate how to care for subjects with spinal injuries on land.
Materials and Equipment Aquatics Supervision, No. 621005 American Red Cross Lifeguarding Manual, No. 755735, pages 342 & 350 American Red Cross Lifeguarding DVD set, No. 755739 Marker board with pens Flip charts, overhead projector, or video projector with screen DVD player and television, or video projector and screen
Spinal Injury Management Potential for spinal injury: Spinal injuries include head, neck, and back. When to suspect a spinal injury:
o Injury as the result of a fall greater than standing height o Injury during an entry into shallow water o Injury while using a diving board o Person is holding neck or head and complaining of pain. o Tingling extremities, weakness o Obvious head or neck injury (bleeding, open wound)

BSA Lifeguard Instructor Manual — 65
Signals: o Change in level of consciousness o Severe pain or pressure in the head, neck, or back o Loss of balance o Loss of movement in any part of the body o Numbness, tingling o Bumps or bruises on the head, neck, or back o Seizures o Blood or excess fluids in the ears or nose o Bleeding of the head, neck, or back o Impaired breathing or vision o Nausea or vomiting o Bruising around the eyes and behind the ears
Emergency action plan for spinal injury: o Considerations: Location (shallow, deep, face-up, face-down) Equipment available Training should include the health officer:
o If the health officer can be at the aquatics facility as in-line stabilization is achieved, he could monitor victims condition and perform an assessment of vital signs during the boarding procedure.
o Review the steps of the emergency action plan. Spinal Injury on Land
Show the Lifeguarding video segment “Head, Neck or Spinal Injuries on Land” (1:49). Practice in-line stabilization: Lying on the ground Sitting Standing until the health officer arrives
Summary Spinal injuries may occur during falls, entry into shallow water, or diving. Symptoms may include bleeding, bumps, pain, and loss of consciousness. The lifeguard’s actions are designed to stabilize the injury until EMS personnel arrive.
Wrap-Up
Review progress and make a study assignment for the next unit.

BSA Lifeguard Instructor Manual — 66
Unit 21: Spinal Injury Management—Introduction to In-line Stabilization in the Water
Allotted Time 30 minutes
Prerequisite Units Unit 10 – Moving the Victim to Safety and Rescues Unit 20 – Spinal Injuries and Caring for Spinal Injuries on Land
Unit Objective At the end of this unit, the candidate should know the in-line stabilization procedures to care for victims of spinal injury.
Learning Objective Describe the steps for in-line stabilization of subjects with spinal injuries in the water.
Materials and Equipment Aquatics Supervision, No. 621005 American Red Cross Lifeguarding Manual, No. 755735 American Red Cross Lifeguarding DVD set, No. 755739 Marker board with pens Flip charts, overhead projector, or video projector with screen DVD player and television, or video projector and screen
Spinal Injury Management
Show the Lifeguarding video segment “Head, Neck, and Back Injuries in the Water.” Stop the video at 7:49, Spinal Backboarding and Removal (7:49).
Review the conditions that may be encountered: Face-up or face-down Very shallow water (18 inches or less) Shallow water (waist to chest deep) Deep water (over chest deep) Conscious or unconscious
Review the steps of the emergency action plan for spinal injury management:
Activate the emergency action plan Safely enter the water Perform a rescue providing in-line stabilization Move the subject to safety, shallow water if possible Check for consciousness and breathing. If not breathing, extricate immediately. If breathing, backboard the subject and remove them from the water Provide appropriate care

BSA Lifeguard Instructor Manual — 67
Very shallow water (18 inches or less): o Head splint—face-up:
Grasp victim’s upper arms from behind and move them alongside the head. Proper location on upper arm is midway between shoulder and elbow. Squeeze the victim’s head between the arms.
Apply pressure. o Head splint—face-down:
Start at victim’s side Grasp victim’s upper arms and move them alongside the head. Proper location on
upper arm is midway between shoulder and elbow. Squeeze the victim’s head between the arms.
Start the victim moving forward in the water. Roll toward you and move to head and move in line with the victim’s head. Your hands will rotate while doing so.
Shallow Water (waist to chest): o Entry:
Slide-in if the subject is close and not in a crowded area. Other entries if it is important to get to the subject quickly to prevent movement from
waves or contact with other people. o Head splint—face-up in shallow water:
Approach the subject from the side. Reach across the victim to grasp victim’s upper arms: right-to-left and left-to-right.
Proper location on upper arm is midway between shoulder and elbow. Move the victim’s arms alongside the head. Squeeze the victim’s head between the
arms. o Head splint—face-down:
Approach from the side. Grasp victim’s right upper arm with right hand, left upper arm with left hand. Proper
location on upper arm is midway between shoulder and elbow. Move the victim’s arms alongside the head. Squeeze the victim’s head between the
arms. Move forward while turning the victim face up. Continue to squeeze the head between the arms while moving toward the backboard. Switch to the overarm splint position:
Pull victim in toward you and hug tightly against your chest. Release your hand nearest your chest. Reach over and grab the victim’s outside
arm, next to your other hand. Release your arm that is under the victim and move it to the victim’s arm that is
against your chest. Continue to apply pressure with your arms to maintain inline stabilization.

BSA Lifeguard Instructor Manual — 68
o Head splint – deep water (at or near the surface) At or near the surface
Use a rescue tube to support the rescuer for both face up and face down victims. If possible, move the victim to shallow water while maintaining stabilization.
Submerged Release the rescue tube strap. Bring the subject up at an angle. Roll the victim face-up just before reaching the surface or at the surface. A second rescuer can place a rescue tube under your arms to help support you and
the victim. o Head and chin support:
This is an alternative to the head splint in-line stabilization technique. More appropriate than the head splint procedure in a limited number of cases, e.g. a
victim with only one arm. Not appropriate for face down victims in water less than 3 feet deep. This may be more difficult if the subject has a large chest or the lifeguard has short
arms. Review hand and arm placement. Approach from the side. Lifeguard’s body about shoulder level Place one forearm inline along victim’s chest and the other forearm inline along
victim’s spine. Squeeze forearms together, clamping the victim’s torso between them. Place one hand on the victim’s lower jaw and the other hand at the back of the head
near the base of the skull. Do not put pressure on the victim’s neck. If face down, move the victim forward to raise their legs. Submerge and roll under the
victim to bring them face up.
Summary Manual in-line stabilization is used until the subject can be secured to a backboard. The type of entry will depend upon the distance to travel and the need to avoid undue motion. The preferred method for in-line stabilization is the head splint. Head and chin support may
be used as an alternative in certain cases. The mechanics of the head splint will depend upon the depth of the water and the position of
the subject.
Wrap-Up
Review progress and make a study assignment for the next unit.

BSA Lifeguard Instructor Manual — 69
Unit 22: Spinal Injury Management—In-line Stabilization in the Water
Allotted Time 1 hour, 15 minutes
Prerequisite Unit Introduction to Spinal Injury Management
Unit Objective At the end of this unit the candidate should be able to:
Apply an emergency action plan to a suspected spinal injury. Apply the in-line stabilization procedures to care for victims of spinal injury in the water.
Learning Objectives
Demonstrate how to follow an emergency action plan for a spinal injury. Demonstrate in-line stabilization for a face-up subject with suspected spinal injury in
very shallow water (18 inches or less). Demonstrate in-line stabilization for a face-down subject with suspected spinal injury in
very shallow water (18 inches or less). Demonstrate in-line stabilization for a face-up subject suspected of spinal injury in
shallow water (waist to chest deep). Demonstrate stabilization for a face-down subject suspected of spinal injury in shallow
water (waist to chest deep). Demonstrate in-line stabilization with a rescue tube for a subject with a suspected spinal
injury floating face-up in deep water. Demonstrate in-line stabilization with a rescue tube for a subject with a suspected spinal
injury floating face-down in deep water. Demonstrate in-line stabilization with a rescue tube and a second rescuer for a submerged
subject with a suspected spinal injury. Swim a subject with a suspected spinal injury to shallow water while maintaining in-line
stabilization and confirm vital signs.
Materials and Equipment Aquatics Supervision, No. 621005 American Red Cross Lifeguarding Manual, No. 755735 American Red Cross Lifeguarding DVD set, No. 755739 Marker board with pens Flip charts, overhead projector, or video projector with screen DVD player and television, or video projector and screen Rescue tubes Spinal injury backboard with straps and head immobilization device Mask (for underwater viewing of demonstrations) Hip pack with PPE Means to activate EAP (whistle)

BSA Lifeguard Instructor Manual — 70
In-line Stabilization Note to instructor: The objective of this unit is for the candidate to become proficient at in-line stabilization using the head splint technique. Individual camps may also elect to include the use of the head-and-chin support procedure in their training and emergency action plans, but that is not a requirement for completion of BSA Lifeguard. During practice, victims should have their arms drooping naturally near their sides, not in a “glide” position above their heads to facilitate the process.
Review the conditions that may be encountered: Face-up or face-down Very shallow water (18 inches or less) Shallow water (waist to chest deep) Deep water (over chest deep) Conscious or unconscious
Practice the steps of the emergency action plan for spinal injury management. Activate the emergency action plan Safely enter the water Perform a rescue providing in-line stabilization Move the subject to safety, shallow water if possible Check for consciousness and breathing. If not breathing, extricate immediately. If breathing, backboard the subject and remove them from the water Provide appropriate care
Very shallow water (18 inches or less):
o Head splint—face-up: Grasp victim’s arms from behind and move them alongside the head. Squeeze the
victim’s head between the arms. Apply pressure.
o Head splint—face-down: Start at victim’s side Grasp victim’s arms and move them alongside the head. Squeeze the victim’s head
between the arms. Start the victim moving forward in the water. Roll toward you and move to head and
move in line with the victim’s head. Your hands will rotate while doing so. Shallow Water (waist to chest):
o Entry: Slide-in if the subject is close and not in a crowded area. Other entries if it is important to get to the subject quickly to prevent movement from
waves or contact with other people. o Head splint—face-up in shallow water:
Approach the subject from the side. Reach across the victim to grasp victim’s forearms: right-to-left and left-to-right. Move the victim’s arms alongside the head. Squeeze the victim’s head between the
arms.

BSA Lifeguard Instructor Manual — 71
o Head splint—face-down: Approach from the side. Grasp victim’s right forearm with right hand, left forearm with left hand. Move the victim’s arms alongside the head. Squeeze the victim’s head between the
arms. Move forward while turning the victim face up. Continue to squeeze the head between the arms while moving toward the backboard. Switch to the overarm splint position:
Pull victim in toward you and hug tightly against your chest. Release your hand nearest your chest. Reach over and grab the victim’s outside
arm, next to your other hand. Release your arm that is under the victim and move it to the victim’s arm that is
against your chest. Continue to apply pressure with your arms to maintain inline stabilization.
o Head splint – deep water (at or near the surface) At or near the surface
Use a rescue tube to support the rescuer for both face up and face down victims. If possible, move the victim to shallow water while maintaining stabilization.
Submerged Release the rescue tube strap. Bring the subject up at an angle. Roll the victim face-up just before reaching the surface or at the surface. A second rescuer can place a rescue tube under your arms to help support you and
the victim. o Head and chin support:
This is an alternative to the head splint in-line stabilization technique. More appropriate than the head splint procedure in a limited number of cases, e.g. a
victim with only one arm. Not appropriate for face down victims in water less than 3 feet deep. This may be more difficult if the subject has a large chest or the lifeguard has short
arms. Review hand and arm placement. Approach from the side. Lifeguard’s body about shoulder level Place one forearm inline along victim’s chest and the other forearm inline along
victim’s spine. Squeeze forearms together, clamping the victim’s torso between them. Place one hand on the victim’s lower jaw and the other hand at the back of the head
near the base of the skull. Do not put pressure on the victim’s neck. If face down, move the victim forward to raise their legs. Submerge and roll under the
victim to bring them face up.

BSA Lifeguard Instructor Manual — 72
Summary Manual in-line stabilization is used until the subject can be secured to a backboard. The type of entry will depend upon the distance to travel and the need to avoid undue motion. The preferred method for in-line stabilization is the head splint. Head and chin support may
be used as an alternative in certain cases. The mechanics of the head splint will depend upon the depth of the water and the position of
the subject.
Wrap-Up
Review progress and make a study assignment for the next unit.

BSA Lifeguard Instructor Manual — 73
Unit 23: Spinal Injury Management—Introduction to Backboarding
Allotted Time 15 minutes
Prerequisite Unit Unit 22 – Spinal Injury Management—In-line Stabilization in the Water
Unit Objective At the end of this unit, the candidate should know the procedures to place a victim of spinal injury on a backboard.
Learning Objectives
Summarize the actions to take if a subject with a suspected spinal injury is unconscious and not breathing.
Describe the procedures for the removal of a subject with a suspected spinal injury using a backboard with straps and a head immobilization device.
Materials and Equipment Aquatics Supervision, No. 621005 American Red Cross Lifeguarding Manual, No. 755735 American Red Cross Lifeguarding DVD set, No. 755739 DVD player, television, or video projector and screen
Using a Backboard
Show the Lifeguarding video segment “Head, Neck, and Spinal Injuries in the Water.” Queue video to begin at 7:49, “Spinal Backboarding and Extrication”. Stop the video at 10:20, Spinal Backboarding and Removal – Deep Water (3:44).
The first lifeguard is referred to as the “rescuing lifeguard.” Other lifeguards are referred to as “assisting responders.” Only trained personnel should assist with the backboarding procedure.
Discuss removal from the water if there are no signs of life. In a pool or dockside, two-person removal using a backboard (Lifeguarding Manual, page
185) At a beach or a pool with a zero-depth entry, use a beach drag or place the subject on a
backboard and walk out without securing straps or head immobilizer (Lifeguarding Manual page 188).
If a board is to be used at a beach, provide in-water ventilations until the board and additional guards arrive.
Wrap-Up
Review progress and make a study assignment for the next unit.

BSA Lifeguard Instructor Manual — 74
Unit 24: Spinal Injury Management—Backboarding
Allotted Time 1 hour, 30 minutes
Prerequisite Unit Spinal Injury Management—Introduction to Backboarding
Unit Objective At the end of this unit, the candidate should be able to apply procedures to place a victim of spinal injury on a backboard.
Learning Objectives
Demonstrate in-line stabilization for a suspected spinal injury in deep water and swim the subject to shallow water.
Demonstrate how to confirm vital signs for a subject with a suspected spinal injury. Demonstrate the procedures for the removal of a subject with a suspected spinal injury
from the water with the assistance of others using a backboard with straps and a head immobilization device.
Materials and Equipment Aquatics Supervision, No. 621005 American Red Cross Lifeguarding Manual, No. 755735 Rescue tubes Spinal injury backboard with straps and head immobilization device Mask (for underwater viewing of demonstrations) Hip pack with PPE Means to activate EAP (whistle)
Practice the placement of the hands and forearm for head and chin support. Remind candidates of the extra step involved when using the Head Splint technique. (Reference: American Red Cross Lifeguarding participant manual, page 346 & 367)
Spinal Injury Backboard Procedures Placing a victim on a backboard requires a minimum of two rescuers Move to shallow water if able:
o Check for consciousness and signs of life: Is the subject talking (breathing and conscious)? Is the subject unconscious? Listen for breathing and look for movement for
at least 5 seconds but no more than 10 seconds. Deep-water backboarding is not required for this course.
Spinal backboarding at the edge of a low deck in shallow water
o Rescuing lifeguard brings victim toward side using overarm head splint in-line stabilization.
o Assisting responder, grasping the head of the board, angles it into the water, ideally submerging the attachment location for the head immobilizer which has been removed.

BSA Lifeguard Instructor Manual — 75
o Rescuing lifeguard positions victim on the board (the rescuing lifeguard or another responder may need to hold down the foot of the board).
o With the head of the board resting on the deck and stabilized by the elbows of the assisting responder, the assisting responder takes over the head splint.
o After the rescuing lifeguard releases the victim, a rescue tube or additional responder may be used to support the foot of the board.
o The rescuing lifeguard secures the chest strap and provides stabilization using head and chin support with the upper hand grasping the victim’s chin and that arm along the victim’s chest. The rescuer’s other hand and arm are on the bottom of the board. The assisting responder at the head of the board, or a second responder in the water, lowers the victim’s arms out of the way along the victim’s torso.
o The assisting responder secures the head immobilizer, including a strap across the forehead.
o All responders work together to pull and push the backboard onto the deck and then provide care.
Spinal backboarding with high edges or a zero-depth exit
o Procedures are similar to those at a low edge except that the assisting responder enters the water with the board.
o Follow the skill sheet on page 368 of the Lifeguarding Manual, with additional responders if available.
Wrap-Up
Review progress and make a study assignment for the next unit.

BSA Lifeguard Instructor Manual — 76
Unit 25: Written Test
Allotted Time 1 hour, 20 minutes
Prerequisite Unit All except Supervised Lifeguarding I and Supervised Lifeguarding II
Unit Objective During this unit, the candidate will complete a comprehensive written test to validate his or her learning to the desired level of competence.
Materials and Equipment Written tests (one per candidate) Written test answer keys (one per candidate) Written test answer keys Pencils
Written Test Administer the written test. Allow one hour for the candidates to complete the test.
Scoring and Review Score the written test and identify trends. Review each question that was answered incorrectly with the candidates. Answer any
questions to ensure understanding.
Wrap-Up
Give instructions regarding the final in-water skills demonstration.

BSA Lifeguard Instructor Manual — 77
Unit 26: Final In-Water Skills Demonstration
Allotted Time 1 hour, 30 minutes
Prerequisite Unit All except Supervised Lifeguarding I and Supervised Lifeguarding II
Unit Objective: During this unit, the candidate will demonstrate selected lifeguard skills to validate their ability to apply lifeguard procedures to the desired level of competence.
Materials and Equipment Rescue tubes Hip pack with PPE Means to activate EAP (whistle) Manikins for CPR
Final Skills Demonstration Set up stations and instruct candidates to rotate through each skills demonstration station.
Instructors may use scenarios to test the candidates. The instructor may allow additional demonstrations if needed to confirm the ability to apply
each skill. Inability to perform rescues or performing rescues with significant deviations from
accepted techniques may indicate the need for additional instruction. Active victim (requirement 12 or 13):
o 30 feet away o Subject will simulate one of the following: Tired swimmer Distressed swimmer Active drowning victim (requiring either a front or rear approach)
Passive Victim (requirement 16, 17 or 19) o Subject will simulate one of the following: At or near the surface (front or rear approach) Submerged (6 to 8 feet of water) Remove the subject from the water with either an extrication at the pool edge using a
backboard (requirement 20a) or beach drag (requirement 20c) and perform primary assessment within 90 seconds. Time begins when the candidate simulates activating the EAP and enters the water.
After removing the subject from the water and performing a primary assessment, demonstrate two-person CPR on a manikin for 3 minutes.
Suspected spinal injury (requirement 24): o Deep water at or near the surface. o Subject may be either face-up or face-down. o Provide in-line stabilization and move the victim to safety.
Wrap-Up
Complete lifeguard applications and give instructions for the completion of any remaining items.

BSA Lifeguard Instructor Manual — 78
Unit 27: Supervised Lifeguarding I
Allotted Time 1 hour, 30 minutes
Prerequisite Units Prerequisites and Course Overview The BSA Lifeguard as a Professional Safety Standards and Risk Management Surveillance and Victim Recognition Entries and Approaches Reaching and Throwing Assists Moving the Victim to Safety and Rescues Emergency Action Plans Victim Removal from the Water Safe Swim Defense
Unit Objective This unit allows the candidate to apply Safe Swim Defense and lifeguard procedures while gaining experience as a lifeguard-in-training at a BSA swimming activity.
Learning Objectives
Complete a safety check of a swimming area and identify typical hazards. Apply Safe Swim Defense to a typical swimming activity, showing the implementation
of each point. Summarize how Safe Swim Defense applies to Scouting aquatics programs. State the primary purpose of the buddy check.
Materials and Equipment Aquatics Supervision, No. 621005 Lifesaving merit badge pamphlet, No. 35915 American Red Cross Lifeguarding participant manual, No. 755735 Reach poles Ring buoys Rescue tubes Buddy tags Black, red, and blue marker pens Hip pack with PPE Means to activate EAP (whistle) Sun protection Polarized sunglasses (if needed)

BSA Lifeguard Instructor Manual — 79
Supervised Lifeguarding During this unit, the candidates serve as lifeguards during an actual recreational swim at a pool or waterfront. The swimmers should be unscripted Scout-age youth. The candidate should spend the majority of the time with the actual responsibility for surveillance and safety of the swimmers. A minimal amount of time should be spent performing other lifeguard duties. Course instructors and other trained lifeguards should provide supervision and backup to ensure the safety of the swimmers. However, the candidates should not be so closely supervised that they perceive that they do not have any “real” responsibility.
Note: This unit may be accomplished after the completion of the lifeguard course. However, it must be supervised by a BSA Lifeguard Instructor or BSA Aquatics Instructor and completed within 120 days from the start of the original course.
Prior to the Swim Safety inspection:
o Before opening for the day o During the day o Closing: Secure equipment (inspect for excessive wear, replace parts) Order supplies (buddy tags, sunscreen, first aid supplies)
o Perform a safety inspection of the swim facility. Guard assignments
o Guard Team Supervisor—one per area o Guard stations and surveillance zones o Gate—one person or the aquatics director o Lookout—any dependable individual may serve
During the Swim Check-in at the buddy board:
o Use of turnstile or gate to control access to the swim area o Confirm each swimmer has a buddy and a tag. o Each buddy handles his own tag.
Buddy checks: o Before beginning the swim: Ensure everyone is in the area where they checked in. Ensure there is no confusion as to what buddies are linked.
o Purpose—reminder to: Stay near their buddy. Be aware of their buddy’s situation. Lend immediate assistance.
o Signal—Approximately every 10 minutes, more or less often as needed: One blast of a whistle, bell, or horn followed by “buddies” or “buddy check” Count to 10.
o Report received and confirmed. o Resume swimming (two blasts of a whistle, bell, or horn) o End of the swim period (three blasts of a whistle, bell, or horn). Note: The Red Cross
uses three blasts of a whistle throughout the DVD as the signal to activate the emergency action plan.

BSA Lifeguard Instructor Manual — 80
Surveillance—Candidates should be evaluated on the following: o Remaining at their assigned station until relieved o Discipline in the surveillance of their assigned zone o Not allowing others to distract or interfere with their surveillance o Enforcement of rules (if appropriate)
Guard rotation: o During a buddy check o During other times o Allow the candidates to remain at a station long enough to experience some boredom
normally associated with surveillance. Swim test (optional if time and facilities permit):
o This exercise should be accomplished in an area separate from the recreational swimmers.
o Demonstrate how to give a proper swim classification test. o Marking the buddy tag
After the Swim Debriefing and discussion:
o Ask the candidates to write down the things they noticed while at their station. o Compare what the candidates noticed with what the instructors noticed: Swimmers with marginal skills Playful activity that might have led to trouble Behavioral problems Distractions
Wrap-Up
Review progress and make a study assignment for the next unit.

BSA Lifeguard Instructor Manual — 81
Unit 28: Supervised Lifeguarding II
Allotted Time 1 hour, 30 minutes
Prerequisite Units Supervised Lifeguarding I Multiple and Submerged Victim Rescues
Unit Objective This unit allows the candidate to apply Safe Swim Defense and lifeguard procedures while gaining experience as a lifeguard-in-training at a BSA swimming activity.
Learning Objectives
Complete a safety check of a swimming area and identify typical hazards. Apply Safe Swim Defense to a typical swimming activity, showing the implementation
of each point. Summarize how Safe Swim Defense applies to Scouting aquatics programs. State the primary purpose of the buddy check.
Materials and Equipment Aquatics Supervision, No. 621005 Lifesaving merit badge pamphlet, No. 35915 American Red Cross Lifeguarding participant manual, No. 755735 Reach poles Ring buoys Rescue tubes Buddy tags Black, red, and blue marker pens Hip pack with PPE Means to activate EAP (whistle) Sun protection Polarized sunglasses (if needed)
Supervised Lifeguarding During this unit, the candidates serve as lifeguards during an actual recreational swim at a pool or waterfront. The swimmers should be unscripted Scout-age youth. The candidate should spend the majority of the time with the actual responsibility for surveillance and safety of the swimmers. A minimal amount of time should be spent performing other lifeguard duties. Course instructors and other trained lifeguards should provide supervision and backup to ensure the safety of the swimmers. However, the candidates should not be so closely supervised that they perceive that they do not have any “real” responsibility.
Note: This unit may be accomplished after the completion of the lifeguard course. However, it must be supervised by a BSA Lifeguard Instructor or BSA Aquatics Instructor and completed within 120 days from the start of the original course.

BSA Lifeguard Instructor Manual — 82
Prior to the Swim Safety inspection
During the Swim Operation and supervision of the buddy board Buddy checks Guard rotation Swim test (optional if time and facilities permit) Checkout
After the Swim Debriefing and discussion:
o Ask the candidates to write down the things they noticed while at their station. o Compare what the candidates noticed with what the instructors noticed: Swimmers with marginal skills Playful activity that might have led to trouble Behavioral problems Distractions

BSA Lifeguard Instructor Manual — 83
Appendix
Aquatics Emergency Action Plan Example The following is an example of an emergency action plan. This document is an example only for discussion purposes. An actual emergency action plan should contain procedures that are applicable to a specific location.
Emergency—A serious accident or injury has occurred, or there is an immediate threat of injury or death to one or more persons.
Emergency Response Coordinator—The aquatics director is the emergency response coordinator. He has direct communication (two-way radio, telephone, wireless phone, or runner) with the emergency response team (camp director, health officer, ranger, etc.). If the aquatics director leaves the waterfront, he will designate an acting director and ensure all waterfront personnel are aware who the acting director is.
Safety Boat—A boat designated for use in transporting equipment and personnel to the scene of an accident or injury. The boat may be pre-loaded or equipped with a first aid kit, breathing barrier, backboard, or AED. The boat may be either human-powered (paddle or oars) or motor-driven (electric or gasoline), depending on the anticipated distance.
Inside the Swimming Area
1. Active drowning, distressed, or submerged victim: a. Notify—The guard who sees the victim activates the emergency action plan using the
predetermined signal (e.g., “Guard in the Water!”)1. Other guards echo the activation and point to the guard making the rescue. This is to ensure the emergency response coordinator is aware of the situation and knows who is involved.
b. Perform rescue: i) Perform the appropriate rescue. ii) Other guards adjust to provide backup coverage. iii) Designated guard brings first aid kit (with CPR breathing barrier) and AED
(if available). iv) Emergency response coordinator contacts the camp medical officer and camp director
(e.g., “Distressed swimmer. Rescue in progress.”). c. Post-rescue:
i) Call for a buddy check and clear the swim area if directed by the emergency response coordinator.
ii) Provide first aid as necessary. iii) Replace rescue equipment. iv) Conduct an incident debrief. v) Provide post-incident counseling.
2. Missing swimmer: a. Notify:
i) Activate the emergency action plan (e.g., “Missing swimmer,”, “LSS” or “LBD”).
1 “Guard in the water!” or a similar phrase is an alternative to the use of a whistle for activating the emergency
action plan. The same procedure could be used if the guard was on the deck and reaching or throwing to the victim.

BSA Lifeguard Instructor Manual — 84
ii) The emergency response coordinator contacts the camp director and camp medical officer with the missing person’s name and last known location and assigned campsite.
iii) Clear the swim area. b. Search:
i) The camp director directs camp staff to look for the missing swimmer in other parts of camp (campsite, dining hall, etc.).
ii) Two guards begin an immediate search of the last known location of the missing swimmer.
iii) The designated guard brings masks and fins to the search area. iv) Additional guards perform an underwater line search of the entire swim area
beginning with the last known location of the missing swimmer. c. Post-rescue:
i) Provide rescue breathing or CPR as required. ii) Provide “near drowning” care. iii) Replace rescue equipment. iv) Provide post-incident counseling for witnesses and staff.
Outside the swimming area (boating area or open-water swim area): The condition of the victim or the type of injury will determine the level of response.
Injury, responsive victim—A responsive victim is able to follow instructions from the responding guard. He is able to grasp a reach pole, flotation device, or actively assist with transfer into a rescue boat. Time is not critical, and assistance is available from other guards or instructors.
Injury, incapacitated victim—The victim is not able to respond to instructions from the guard. He may be able to respond to questions from the guard to assist in determining the degree of the incapacitation. The guard needs assistance in transporting the person to the boat dock or removing the person from the water.
Life threatening injury—Time is critical. The person needs or potentially will need advanced life support.
1. Notify—When an accident or incident occurs while on the water and away from the boating launch area, use the following signals to activate the emergency action plan: Attention, assistance required—One 3-second blast from a whistle or horn; paddle, oar,
rescue tube, or arm raised vertically overhead; call out, “Injured boater!” Urgent, life threatening situation—Three 3-second blasts from a whistle or horn; paddle,
oar, rescue tube, or arm(s) waved overhead; radio call: “MAYDAY.” Contact the camp medical staff, direct them to call 911 and request emergency medical services (EMS) immediately. Respond to the scene with the first aid kit and other emergency equipment.
All clear—Two 3-second blasts from a whistle or horn; paddle, oar, rescue tube held horizontally overhead; arms extended parallel to ground; finger and thumb forming “OK signal” or “thumbs up” signal (no assistance required, situation resolved).
2. Respond—Provide assistance to the victim: a. Responsive victim—provide first aid or spinal injury management. Return to the boat
launch or dock. b. Incapacitated victim—provide first aid or spinal injury management. With the assistance

BSA Lifeguard Instructor Manual — 85
of another guard, remove the victim from the water. Return to the boat launch or dock. c. Life threatening injury—If CPR is required or may be required:
Open-water swimming (Mile Swim)—Move the victim to the nearest shore or dock where it is practicable to perform CPR. One guard rows while the other holds the victim at the transom of the guard boat (rowboat). Other guards will use the safety boat to bring the AED and first aid equipment to the scene.
Severe Weather (lightning, high wind, hail, tornado) 1. Notify:
a. Activate the emergency action plan (signal: attention or urgent).
b. Contact the camp director. (“Severe weather approaching. Securing the waterfront.”)
2. Recall—Signal all watercraft to return to the shore. Remove all swimmers from the swim area. Move all Scouts, leaders, and guests to the designated shelter area.
3. Secure—Bring watercraft ashore, secure sails, secure all loose equipment as time permits.
4. Shelter—Move to the designated severe weather shelter.
5. Post-incident actions—Document actions taken, perform safety checks, brief supervisors (aquatics director, camp director, medical officer, camp ranger).
Accident or injury
1. Notify:
a. Activate the emergency action plan (signal: assistance required or life threatening situation).
b. Contact the camp medical officer if the injury is severe or life threatening.
2. Survey the scene—Look to determine it is safe to approach the victim.
3. Care—Provide first aid and treat for shock until medical assistance arrives.
4. Post-incident actions—Document actions in the First Aid Log, replenish first aid supplies, replace emergency equipment, eliminate or minimize any contributing hazards, brief supervisors (aquatics director, camp director, medical officer, camp ranger).
Fire
1. Notify:
a. Activate the emergency action plan (signal: urgent).
b. Contact the camp director
2. Evacuate—Move all Scouts, leaders, and guests away from the fire.
3. Escort—Send a staff member to the main service road to meet firefighting personnel.
4. Extinguish—Attempt to extinguish the fire after everyone is away from the fire.
5. Post incident actions—Document actions taken, perform safety checks, brief supervisors (aquatics director, camp director, medical officer, camp ranger).
Fighting
1. Notify:
a. Activate the emergency action plan (signal: attention or urgent).
b. Contact the camp director.
2. Isolate—Restrain or separate the persons involved in the fight.

BSA Lifeguard Instructor Manual — 86
3. Care—Provide first aid as required.
4. Post-incident actions—Get identification and a statement from each witness to the incident. Brief supervisors (aquatics director, camp director, medical officer, camp ranger).
Disruptive Behavior
1. Notify:
a. Activate the emergency action plan (signal: assistance required).
b. Obtain assistance consistent with the severity of the situation (other staff member, aquatics director, adult leader).
2. Isolate—Move the person away from the program area to discuss the situation. Alternatively, move participants away from the person.
3. De-escalate—Ask the person to leave the area.
4. Post-incident actions—Document actions taken and brief supervisors (aquatics director, program director, camp director).
Intruder (An unauthorized person uses threatening behavior or causes a disturbance.)
1. Notify:
a. Activate the emergency action plan (signal: assistance required).
b. Contact the camp director immediately.
2. Isolate—Move all participants and staff away from the intruder. This may involve keeping all watercraft on the lake as opposed to recalling them to the shore or keeping all swimmers in the water or on the dock as opposed to clearing the swim area.
3. De-escalate—Ask the intruder(s) to leave the area. Inform the intruder that the camp is private property. Do not provoke or argue with the intruder(s).
4. Post-incident actions—Document actions taken, seek counseling for participants and staff as needed, brief supervisors (aquatics director, camp director, medical officer, camp ranger) and law enforcement authorities, if required (e.g., police, sheriff).
Weapon Threat (There is a person carrying a weapon and threatening to cause harm.)
1. Notify:
a. Activate the emergency action plan (signal: urgent)
b. Contact the camp director immediately.
2. Isolate—Move all participants and staff away from the threat. This may involve keeping all watercraft on the lake instead of recalling them to the shore or keeping all swimmers in the water or on the dock instead of clearing the swim area.
3. De-escalate—Do not approach the person with the weapon. However, if the person approaches you, move away and do not attempt to disarm him or her. Ask them to lay down the weapon. Do not provoke or argue with the person.
4. Post-incident actions—Document actions taken, seek counseling for participants and staff as needed, brief supervisors (aquatics director, camp director, medical officer, camp ranger) and law enforcement authorities (e.g., police, sheriff).

Knowledge Test Version A This written knowledge test contains 50 multiple-choice questions. Mark your answers on the separate answer sheet. You have 60 minutes to complete this test.
1. What is the minimum age of the supervisor required by the Safe Swim Defense plan?
a. 14
b. 16
c. 18
d. 21
2. What training is required for the supervisor under the Safe Swim Defense plan?
a. BSA Safe Swim Defense
b. CPR and Standard First Aid
c. BSA Swimming and Water Rescue
d. BSA Lifeguard or Red Cross Lifeguarding
3. What evidence of fitness for swimming is required by the Safe Swim Defense plan?
a. Signed release of liability
b. Signed health history form
c. Signed membership application
d. Signed permission to seek medical attention
4. What additional training must be valid for the BSA Lifeguard certification to be valid?
a. Safe Swim Defense and Safety Afloat
b. Aquatics Supervision: Swimming and Water Rescue
c. Aquatics Supervision and Youth Protection Training
d. First Aid and CPR/AED for the Professional Rescuer
5. What is the minimum age specified in the National Camp Standards to serve as a lifeguard for swimming activities in a natural body of water?
a. 14 years old
b. 15 years old
c. 16 years old
d. 18 years old
6. What is the meaning of negligence as a legal consideration for lifeguards?
a. The minimum level of required care
b. A failure to provide appropriate care that results in harm
c. The victim’s refusal of on-scene care
d. A moral responsibility to act with care

7. What are some things you can do as a lifeguard, not on surveillance duty, to facilitate communication with an adult leader?
a. Stand and make eye contact with the adult
b. Suggest the adult speak with your supervisor
c. Always have a buddy witness the conversation
d. Request the adult make an appointment for later
8. According to Safe Swim Defense, what is the maximum recommended water depth when swimming in turbid water?
a. 8 feet
b. 9 feet
c. 10 feet
d. 12 feet
9. What activities are not permitted when swimming in turbid water?
a. Run-and-swim entry
b. Stride or compact entry
c. Opening the eyes underwater
d. Diving and underwater swimming
10. What is the minimum depth when jumping feet-first into water?
a. Waist-deep
b. Chest-deep
c. Shoulder-deep
d. Over the head
11. What does the letter “N” in the FIND model remind you to do?
a. Name the pros and cons
b. Nullify the circumstances
c. Negate the adverse effects
d. Notify the lifeguard supervisor
12. What are the responsibilities of the lookout according to Safe Swim Defense?
a. Call for buddy checks every 10 minutes, operate the buddy board, guard the gate
b. Monitor the weather, alert rescue personnel, identify violations of Safe Swim Defense
c. Hang buddy tags on the buddy board, blow the whistle for buddy checks, guard the gate
d. Supervise the other guards, listen to the weather radio, activate the emergency action plan

13. Your primary responsibility as a lifeguard is to:
a. Ensure that the pool pumps, filters, and chemical feeds are functioning properly.
b. Prevent drowning and other injuries from occurring.
c. Report to work promptly, in good spirits, and complete all reports on time.
d. Effectively market your facility by interacting positively with Scouts and Scouters.
14. The CDC Model Aquatic Health Code states that lifeguards at a pool should be able to reach the furthest part of their zone within:
a. 30 seconds
b. 1-1/2 minutes
c. 45 seconds
d. 2 minutes
15. How long should you wait after the last lightning flash or thunder before leaving shelter?
a. 20 minutes
b. 25 minutes
c. 30 minutes
d. 45 minutes
16. What is the primary purpose of a buddy check?
a. Give lifeguards a break and a chance to rotate stations
b. Determine if someone is missing or has drowned without being noticed
c. Determine if all lifeguards are in position and ready to begin the activity
d. Remind participants to remain near their buddy so they can lend assistance
17. What should you do if buddies take longer than 10 seconds to find each other during a buddy check?
a. Remind them of their responsibility for the other’s safety.
b. Remove them from the water and notify their adult leader.
c. Require them to get out of the water for the rest of the day.
d. Require them to get out of the water until the next buddy check.
18. You cannot see some of the swimmers at one side of the swimming area from your station because of glare from the afternoon sun. You should:
a. Leave your station immediately to ask your supervisor to correct the problem.
b. Wait until you go off duty to report the problem to your supervisor.
c. Immediately adjust your position until you can see your entire zone.
d. Do the best you can from your assigned station.

19. You witness a swimmer in your zone grasp his chest and submerge. You should:
a. Use the FIND model to determine what to do.
b. Continue to scan the pool until emergency back-up coverage is available.
c. Exercise your duty to act and perform the appropriate rescue.
d. Signal off duty lifeguards to rescue the victim.
20. Who is responsible for the identification of potential hazards on or around the swim area?
a. Lifeguards
b. Aquatics Director
c. Guard Team Supervisor
d. All of the above
21. What are the proper actions for the lifeguard to take after the emergency action plan has been activated for someone who appears to be having a cardiac arrest in the water?
a. Move the victim to the side of the pool and stabilize the vital signs.
b. Remove the victim from the water and prepare to begin CPR/AED.
c. Remove the victim from the water and wait for advanced life support.
d. Remove the victim from the water and wait for the director’s instructions.
22. What is the maximum depth for the Beginner area?
a. Chest-deep
b. Standing depth
c. Shoulder depth
d. Just over the head
23. During the swim test, what should Scouts who declare themselves to be Non-Swimmers do?
a. Be encouraged to suit up and join in the testing.
b. Be given a chance to play and splash in the water.
c. Get acquainted with the instructor for Non-Swimmers.
d. All of the above.
24. What is the distance required for the Swimmer swim classification?
a. 50 feet
b. 50 yards
c. 100 feet
d. 100 yards

25. What does the color red on the upper half circle of the buddy tag indicate?
a. Adult leader
b. Beginner
c. Swimmer
d. Non-Swimmer
26. Under Safe Swim Defense, what is the minimum rescuer-to-swimmer ratio for a unit recreational swim where professional lifeguards are not provided by the facility?
a. One guard for every 5 Cub Scout participants
b. One guard for every 10 participants
c. One guard for every 20 participants
d. a and b
27. You have entered the water and are approaching a victim who is floating upright at the surface in 4 feet of water. The victim is facing you and appears to be unconscious. What rescue technique would be appropriate in this situation?
a. Active victim front rescue.
b. Submerged victim in shallow water.
c. Passive victim front rescue.
d. Passive victim in extreme shallow water – face up.
28. When caring for a suspected head, neck or spinal injury in water, proper manual in-line stabilization is:
a. Provided using the head splint technique.
b. Less important than on land due to the support provided by the water.
c. Likely the only necessary technique needed if EMS personnel are close by.
d. Is best performed by the victim’s buddy so that lifeguards can bring a backboard and clear the pool.
29. What is the maximum height for diving allowed by the BSA aquatics policy?
a. 18 inches
b. 40 inches
c. 48 inches
d. 60 inches
30. What type of entry should be used when entering the water from an elevated guard chair (greater than 3 feet)?
a. Compact jump
b. Run-and-swim
c. Slide-in entry
d. Stride jump

31. When should an injured subject on land be moved?
a. When there are other people to assist
b. When you need to treat severe bleeding
c. When they are in danger where they are
d. All of the above
32. You are a lifeguard on surveillance duty during a busy free swim at a Cub Scout family camp. You should:
a. Scan all areas in your assigned zone of coverage, wear your hip pack and carry your rescue tube with you at all times.
b. Have a first aid kit, an automated external defibrillator (AED) and a backboard immediately available to you on the pool deck next to your station.
c. Close off the swimmer area and confine everyone to the beginner and non-swimmer areas.
d. Have enough lifejackets on hand and require all non-swimmers to use them in deep water.
33. After removing a responsive victim with a suspected spinal injury from the water, you should do all the following except:
a. Double check that the EMS has been summoned per the EAP.
b. Loosen the chest strap and apply the pads of an AED.
c. Protect the victim from becoming cold.
d. Reassure the victim and perform a secondary assessment.
34. Which of the following skills would you use with a face-down victim of a suspected spinal injury in waist- to chest-deep water?
a. Head splint
b. Head and chin support
c. Hip and shoulder support
d. Either a or b
35. If the rescuing lifeguard has used a head splint to stabilize a subject with a suspected spinal injury, what should the assisting responder do after placing the backboard under the subject?
a. Remain on deck and take over stabilization b. Place a rescue tube under the subject’s knees c. Secure the subject to the board using a chest strap d. Secure the subject’s head using a head immobilizer

36. What should you do if you observe a person fail to surface after submersion in murky water?
a. Immediately undertake a rescue attempt.
b. Wait for mask and fins and begin a line search.
c. Wait for three additional guards, then begin a line search.
d. Activate a lost swimmer search (LSS) or lost bather drill (LBD).
37. You activate the EAP and enter the water to rescue a victim with a suspected spinal injury. You apply in-line stabilization and determine that the victim is not breathing. What should you do next?
a. Maintain stabilization while a second rescuer provides five in water ventilations.
b. Remove the victim water using a modified spinal backboarding procedure.
c. Remove the victim from the water using the Extrication Using a Backboard at the Pool Edge technique.
d. Remove the victim from the water using the spinal backboarding procedure.
38. What is the recommended procedure when using watercraft to guard a distance swim in open water?
a. Rowboats with two occupants accompanying each swimmer
b. Guards on rescue boards accompanying every two swimmers
c. Guards in anchored rowboats 100 yards apart along the course
d. Guards in canoes with rescue tubes accompanying each swimmer
39. In the event of a serious accident or injury, what action should you take with regard to notification of parents or guardian?
a. Ask his buddy to immediately notify the parents or guardian.
b. Tell anyone on the staff to contact his parents as soon as possible.
c. Use your cell phone to immediately notify the parents or guardian.
d. Allow the Scout Executive or representative to handle the notification.
40. The camp aquatics director expects the pool to be very busy during an afternoon free swim. The director sets up multiple lifeguard stations to reduce the number of Scouts watched by each lifeguard. This type of coverage is called:
a. Back-up coverage.
b. Rescue coverage.
c. Zone coverage.
d. Total coverage.

41. When a team of lifeguards is guarding an area near a floating play structure or other water attraction, they should be stationed to scan with an overall view of:
a. 60-degrees
b. 90-degrees
c. 180-degrees
d. 360-degrees
42. If you observe a swimmer in distress from a guard boat, and the swimmer is too far away for a simple reaching assist, you may consider what other option as the rower moves the boat closer:
a. Extension assist
b. Throwing assist
c. Wading assist
d. Going assist
43. When placing a responsive victim with a suspected head, neck or spinal injury on a backboard, what in-line stabilization technique should you use?
a. The head and chin support
b. The hand hold position
c. The over-arm head splint
d. The recovery position
44. During a safety check, you determine the water temperature of the lake is very cold due to a recent storm. You should:
a. Recommend that all swimmers wear a cotton T-shirt.
b. Focus on water depth since the water temperature is safe.
c. Alert swimmers to the cold water and watch for signs of hypothermia.
d. Wait to see if any swimmers notice the water temperature before alerting the other scouts.
45. You are a lifeguard on duty at a waterfront facility. You notice a swimmer in distress 100 feet outside the designated swim area. You should:
a. Ignore distractions that are outside the designated swim area and your assigned zone of coverage.
b. Initiate the facility EAP and use the available rowboat to rescue the distressed swimmer.
c. Alert other nearby lifeguards and monitor the situation.
d. Prepare to use the available backboard for extrication and initiate the facility EAP.

46. After a rescue has been completed, what should occur?
a. A report is filled out by the victim’s parents
b. A report is filled out by the lifeguard
c. A report is filled out by the victim.
d. A report is filled out by the camp director
47. You are at the entry to the swim area. What should you do if a unit leader asks to use the swimming area to test a Scout as part of the Second Class rank advancement?
a. Allow the unit leader to give the test to the Scout. Guard as needed.
b. Ask to see the unit leader’s current Safe Swim Defense training card.
c. Tell the unit leader only the aquatics staff may test rank advancement.
d. Do not let the leader into the swim area and notify the aquatics director.
48. What element of the RID Factor does the letter “I” represent?
a. Incident
b. Isolation
c. Intrusion
d. Independence
49. Lifeguards are conducting a lost swimmer search in deep water to locate a submerged victim. To see more clearly and cover more distance with less effort, the lifeguards should:
a. Recruit more staff to participate in the search
b. Use a watercraft
c. Wear lifejackets
d. Wear a mask and fins
50. What should you do if someone with a disability wants to check in for recreational swim with his buddy?
a. Allow them to swim in the non-swimmer area only
b. Buddy them with another lifeguard
c. Allow them to swim in the area that matches their ability
d. Deny them entry and immediately notify the aquatics director.

Knowledge Test Version B This written knowledge test contains 50 multiple-choice questions. Mark your answers on the separate answer sheet. You have 60 minutes to complete this test.
1. How many supervisors are required under the Safe Swim Defense Plan?
a. 1 b. 2 c. 3 d. 1 for every 10 swimmers
2. What is the minimum qualification to serve as a lookout under the Safe Swim Defense plan?
a. Trained in Swimming and Water Rescues b. Sound understanding of Safe Swim Defense c. Trained in CPR, AED, and Standard First Aid d. Currently trained lifeguard (BSA or Red Cross)
3. What evidence of fitness for swimming is required by the Safe Swim Defense plan?
a. Signed release of liability b. Signed health history form c. Signed membership application d. Signed permission to seek medical attention
4. What additional training must be valid in order for the BSA Lifeguard training to be valid?
a. Safe Swim Defense and Safety Afloat b. Aquatics Supervision: Swimming and Water Rescue c. Aquatics Supervision and Youth Protection Training d. First Aid and CPR/AED for the Professional Rescuer
5. What is the minimum age specified in the Department of Labor regulations to serve as a lifeguard for swimming activities in a pool?
a. 14 years old b. 15 years old c. 16 years old d. 18 years old
6. What is a good way, when not on surveillance duty, to show respect for an adult leader?
a. Block the entrance gate and ask, “How may I help you?” b. Ask a buddy to witness your conversation with the adult c. Keep your sunglasses on to hide your eyes from the adult d. Stand, smile, and extend your hand in the Scout handshake

7. According to Safe Swim Defense, what is the maximum recommended water depth when swimming in clear water?
a. 8 feet b. 9 feet c. 10 feet d. 12 feet
8. How is turbid water defined under Safe Swim Defense?
a. The bottom of the swim area is not visible. b. A swimmer treading water cannot see his feet. c. A 12-inch white disk is not visible 3 feet underwater. d. A 12-inch white disk is not visible 8 feet underwater.
9. What is the minimum water depth for a diving entry?
a. 6 feet b. 7 feet c. 8 feet d. 9 feet
10. What does the letter “F” in the FIND model remind you to do? a. Figure out what to do b. Figure out the problem c. Figure out the pros and cons d. Formulate possible solutions
11. Your primary responsibility as a lifeguard is to:
a. Ensure that the pool pumps, filters, and chemical feeds are functioning properly. b. Prevent drowning and other injuries from occurring. c. Report to work promptly, in good spirits, and complete all reports on time. d. Effectively market your facility by interacting positively with scouts and scouters.
12. The CDC Model Aquatic Health Code states that lifeguards at a pool should be able to reach the furthest part of their zone within:
a. 30 seconds b. 1-1/2 minutes c. 45 seconds d. 2 minutes
13. What action should you take when a thunderstorm threatens an outside aquatics area?
a. Go to the facility office for direction. b. Monitor forecasts on the radio and wait. c. At the first sound of thunder, clear the pool. d. Wait for a flash of lightning, then clear the pool.

14. You witness a swimmer in your zone grasp his chest and submerge. You should: a. Use the FIND model to determine what to do. b. Continue to scan the pool until emergency back-up coverage is available. c. Exercise your duty to act and perform the appropriate rescue. d. Signal off duty lifeguards to rescue the victim.
15. What legal consideration immediately applies to a lifeguard if an emergency occurs while he or she is performing surveillance?
a. Duty to Act b. Risk Assessment c. Informed Consent d. Pending Litigation
16. What is the primary purpose of a buddy check?
a. Give lifeguards a break and a chance to rotate stations b. Determine if someone is missing or has drowned without being noticed c. Determine if all lifeguards are in position and ready to begin the activity d. Remind participants to remain near their buddy so they can lend assistance
17. How often should guards perform a buddy check during a recreational swim?
a. Approximately every 10 minutes b. At the beginning and end of the recreational swim c. As often as needed to remind buddies to stay together d. All of the above
18. You cannot see some of the swimmers at one side of the swimming area from your
station because of glare from the afternoon sun. You should:
a. Leave your station immediately to ask your supervisor to correct the problem. b. Wait until you go off duty to report the problem to your supervisor. c. Immediately adjust your position until you can see your entire zone. d. Do the best you can from your assigned station.
19. Who is responsible for the identification of potential hazards on or around the swim area?
a. Lifeguards b. Aquatics Director c. Guard Team Supervisor d. All of the above
20. What is the purpose of an emergency action plan (EAP)?
a. Provide first aid to the victim until CPR can be started. b. Rescue the victim without creating liability for the BSA. c. Provide plans to contact EMS in the event of a near drowning. d. Provide a plan describing everyone’s responsibility in an emergency.

21. What is the maximum depth for the Non-Swimmer area?
a. Thigh to waist-deep b. Waist to chest-deep c. Chest to shoulder-deep d. Shoulder to head-deep
22. How long is a candidate required to float during a swim test
a. 30 seconds b. 1 minute c. 2 minutes d. Not specified
23. What parts of the swimming area are the responsibility of the lookout?
a. Swimmer area b. Beginner area c. Non-swimmer area d. All of the above
24. What is the distance required for the Beginner swim classification?
a. 50 feet b. 50 yards c. 100 feet d. 100 yards
25. What information should be printed on the back of the buddy tag?
a. The unit leader’s name and emergency contact number b. Known medical conditions, physical limitations, and allergies c. The place where the tag-holder lives in camp and the unit number d. The date of the swim classification test and the lifeguard’s initials
26. Under Safe Swim Defense, what is the minimum rescuer-to-swimmer ratio for a unit recreational swim where professional lifeguards are not provided by the facility?
a. One guard for every five Cub Scout participants b. One guard for every 10 participants c. One guard for every 20 participants d. a and b
27. You have entered the water and are approaching a victim who is floating upright at the surface in 2 feet of water. The victim is facing you and appears to be unconscious. What rescue technique would be appropriate in this situation?
a. Active victim front rescue.
b. Submerged victim in shallow water.
c. Passive victim front rescue.
d. Passive victim in extreme shallow water – face up.

28. When caring for a suspected head, neck or spinal injury in water, proper manual in-line
stabilization is: a. Provided using the head splint technique. b. Less important than on land due to the support provided by the water. c. Likely the only necessary technique needed if EMS personnel are close by. d. Is best performed by the victim’s buddy so that lifeguards can bring a backboard
and clear the pool.
29. What is the maximum recommended height for jumping feet-first into the water?
a. No higher than an average adult b. No higher than a table (table-high) c. No higher than one’s standing height d. No higher than one’s waist (waist-high)
30. What is the safest method to use to enter water when the depth is unknown?
a. Stride jump b. Slide-in entry c. Run-and-swim d. Compact jump
31. When should you use a walking assist to remove a victim from the water?
a. Only at a lake or ocean where there is a gradual slope to the bottom
b. When a conscious subject has hit his or her head on the bottom of the lake
c. When the subject has only minor injuries and is too weak to walk unassisted.
d. When you suspect the subject may have a dislocated shoulder or fractured arm
32. You are a lifeguard on surveillance duty during a busy free swim at a Cub Scout family camp. You should:
a. Scan all areas in your assigned zone of coverage, wear your hip pack and carry your rescue tube with you at all times.
b. Have a first aid kit, an automated external defibrillator (AED) and a backboard immediately available to you on the pool deck next to your station.
c. Close off the swimmer area and confine everyone to the beginner and non-swimmer areas.
d. Have enough lifejackets on hand and require all non-swimmers to use them in deep water.
33. When performing a beach drag, where do you position your forearms?
a. Under the subject’s head b. Around the subject’s arms c. Around the subject’s chest d. Under the subject’s armpits

34. What is the main purpose of in-line stabilization?
a. To keep the victim straight so that CPR could be performed, if necessary b. To stabilize and restrict motion of the head, neck, and back c. To move a victim quickly and safely to shallow water d. All of the above
35. If the rescuing lifeguard has used a head splint to stabilize a subject with a suspected spinal injury, what should the assisting responder do after placing the backboard under the subject?
a. Remain on deck and take over stabilization b. Place a rescue tube under the subject’s knees c. Secure the subject to the board using a chest strap d. Secure the subject’s head using a head immobilizer
36. What is the recommended course of action if you cannot rapidly locate a submerged victim?
a. Call for mask and fins and begin a line search with a least four guards b. Tell all strong swimmers to form a line and begin searching the bottom c. At least two guards begin a search of the area where the victim was last seen d. Clear the swim area and break out the SCUBA gear for an underwater search
37. You activate the EAP and enter the water to rescue a victim with a suspected spinal injury. You apply in-line stabilization and determine that the victim is not breathing. What should you do next?
a. Maintain stabilization while a second rescuer provides five in water ventilations.
b. Remove the victim water using a modified spinal backboarding procedure.
c. Remove the victim from the water using the Extrication Using a Backboard at the Pool Edge technique.
d. Remove the victim from the water using the spinal backboarding procedure.
38. What is the recommended procedure when using watercraft to guard a distance swim in open water?
a. Rowboats with two occupants accompanying each swimmer
b. Guards on rescue boards accompanying every two swimmers
c. Guards in anchored rowboats 100 yards apart along the course
d. Guards in canoes with rescue tubes accompanying each swimmer
39. In the event of a serious accident or injury, what action should you take with regard to notification of parents or guardian?
a. Ask his buddy to immediately notify the parents or guardian.
b. Tell anyone on the staff to contact his parents as soon as possible.
c. Use your cell phone to immediately notify the parents or guardian.
d. Allow the Scout Executive or representative to handle the notification.

40. The camp aquatics director expects the pool to be very busy during an afternoon free swim. The director sets up multiple lifeguard stations to reduce the number of Scouts watched by each lifeguard. This type of coverage is called:
a. Back-up coverage.
b. Rescue coverage.
c. Zone coverage.
d. Total coverage.
41. When a team of lifeguards is guarding an area near a floating play structure or other water attraction, they should be stationed to scan with an overall view of:
a. 60-degrees
b. 90-degrees
c. 180-degrees
d. 360-degrees
42. After a rescue has been completed, what should occur?
a. A report is filled out by the victim’s parents
b. A report is filled out by the lifeguard
c. A report is filled out by the victim.
d. A report is filled out by the camp director
43. When placing a responsive victim with a suspected head, neck or spinal injury on a backboard, what in-line stabilization technique should you use?
a. The head and chin support
b. The hand hold position
c. The over-arm head splint
d. The recovery position
44. What element of the RID Factor does the letter “D” represent?
a. Distress
b. Damaged
c. Discomfort
d. Distractions
45. Lifeguards are conducting a lost swimmer search in deep water to locate a submerged victim. To see more clearly and cover more distance with less effort, the lifeguards should:
a. Recruit more staff to participate in the search
b. Use a watercraft
c. Wear lifejackets
d. Wear a mask and fins

46. During a safety check, you determine the water temperature of the lake is very cold due to a recent storm. You should:
a. Recommend that all swimmers wear a cotton T-shirt.
b. Focus on water depth since the water temperature is safe.
c. Alert swimmers to the cold water and watch for signs of hypothermia.
d. Wait to see if any swimmers notice the water temperature before alerting the other scouts.
47. If you observe a swimmer in distress from a guard boat, and the swimmer is too far away for a simple reaching assist, you may consider what other option as the rower moves the boat closer:
a. Extension assist
b. Throwing assist
c. Wading assist
d. Going assist
48. You are a lifeguard on duty at a waterfront facility. You notice a swimmer in distress 100 feet outside the designated swim area. You should:
a. Ignore distractions that are outside the designated swim area and your assigned zone of coverage.
b. Initiate the facility EAP and use the available rowboat to rescue the distressed swimmer.
c. Alert other nearby lifeguards and monitor the situation.
d. Prepare to use the available backboard for extrication and initiate the facility EAP.
49. You are at the entry to the swim area. What should you do if a unit leader asks to use the swimming area to test a Scout as part of the Second Class rank advancement?
a. Allow the unit leader to give the test to the Scout. Guard as needed.
b. Ask to see the unit leader’s current Safe Swim Defense training card.
c. Tell the unit leader only the aquatics staff may test rank advancement.
d. Do not let the leader into the swim area and notify the aquatics director.
50. What should you do if someone with a disability wants to check in for recreational swim with his buddy?
a. Allow them to swim in the non-swimmer area only
b. Buddy them with another lifeguard
c. Allow them to swim in the area that matches their ability
d. Deny them entry and immediately notify the aquatics director.

Knowledge Test Answer Sheet
Name Date Version a b
Fill in the circle corresponding to your answer choice. Do not mark on the test.
1. a b c d
2. a b c d
3. a b c d
4. a b c d
5. a b c d
6. a b c d
7. a b c d
8. a b c d
9. a b c d
10. a b c d
11. a b c d
12. a b c d
13. a b c d
14. a b c d
15. a b c d
16. a b c d
17. a b c d
18. a b c d
19. a b c d
20. a b c d
21. a b c d
22. a b c d
23. a b c d
24. a b c d
25. a b c d
26. a b c d
27. a b c d
28. a b c d
29. a b c d
30. a b c d
31. a b c d
32. a b c d
33. a b c d
34. a b c d
35. a b c d
36. a b c d
37. a b c d
38. a b c d
39. a b c d
40. a b c d
41. a b c d
42. a b c d
43. a b c d
44. a b c d
45. a b c d
46. a b c d
47. a b c d
48. a b c d
49. a b c d
50. a b c d

Knowledge Test A Answer Key
Version a b
Fill in the circle corresponding to your answer choice. Do not mark on the test.
1. a b c d
2. a b c d
3. a b c d
4. a b c d
5. a b c d
6. a b c d
7. a b c d
8. a b c d
9. a b c d
10. a b c d
11. a b c d
12. a b c d
13. a b c d
14. a b c d
15. a b c d
16. a b c d
17. a b c d
18. a b c d
19. a b c d
20. a b c d
21. a b c d
22. a b c d
23. a b c d
24. a b c d
25. a b c d
26. a b c d
27. a b c d
28. a b c d
29. a b c d
30. a b c d
31. a b c d
32. a b c d
33. a b c d
34. a b c d
35. a b c d
36. a b c d
37. a b c d
38. a b c d
39. a b c d
40. a b c d
41. a b c d
42. a b c d
43. a b c d
44. a b c d
45. a b c d
46. a b c d
47. a b c d
48. a b c d
49. a b c d
50. a b c d

Knowledge Test B Answer Key
Version a b
Fill in the circle corresponding to your answer choice. Do not mark on the test.
1. a b c d
2. a b c d
3. a b c d
4. a b c d
5. a b c d
6. a b c d
7. a b c d
8. a b c d
9. a b c d
10. a b c d
11. a b c d
12. a b c d
13. a b c d
14. a b c d
15. a b c d
16. a b c d
17. a b c d
18. a b c d
19. a b c d
20. a b c d
21. a b c d
22. a b c d
23. a b c d
24. a b c d
25. a b c d
26. a b c d
27. a b c d
28. a b c d
29. a b c d
30. a b c d
31. a b c d
32. a b c d
33. a b c d
34. a b c d
35. a b c d
36. a b c d
37. a b c d
38. a b c d
39. a b c d
40. a b c d
41. a b c d
42. a b c d
43. a b c d
44. a b c d
45. a b c d
46. a b c d
47. a b c d
48. a b c d
49. a b c d
50. a b c d

APPLICATION FOR
BSA LIFEGUARD
COUNCIL RECORD Is instructor trained and registered? _________________________________________________
Is applicant registered? ___________________________________________________________
Applicant’s ScoutNET record updated (training code S81) ________________________________
Filed for year-end report and with the council aquatics committee ___________________________
This form to be used in local council only
, Name BSA Membership Number
who lives at , , City or Town State Zip Code
has satisfactorily completed all requirements for BSA Lifeguard. Date of completion Completion Option No.
Instructor’s Name(s) BSA Membership Number Signature(s) Date
❑ BSA Aquatics Instructor ❑ BSA Lifeguard Instructor
BSA LIFEGUARD TRAINING PROCEDURE
1. Only those persons currently trained as BSA Aquatics Instructor or as BSA Lifeguard Instructor may train the completion of BSA Lifeguard requirements.
2. Training as BSA Lifeguard is valid for two years from the date of completion.
3. All requirements must be met. (See completion options.)
4. The completed application is forwarded to the local council
service center, where the individual’s training record is annotated.
5. To qualify for BSA Lifeguard, the candidate must complete the BSA Lifeguard course under the direction of either a BSA Lifeguard Instructor or a BSA Aquatics Instructor. The course for the BSA Lifeguard is in the BSA Lifeguard Instructor Manual.
INSTRUCTOR’S RESPONSIBILITY
Scouts, Venturers, or adults who become trained BSA Lifeguards must be well-qualified and able to use their knowledge as a lifeguard in case of need without undue danger to themselves and with a reasonable chance of success. The instructors are responsible for the strict interpretation of requirements and the elimination of applicants who in their judgment are not qualified by strength, judgment, or ability to put their knowledge into practice as lifeguards.
The reputation of the instructors as experts depends to a great extent on the actual performance of those they qualify. Therefore, they should be certain the candidate’s ability is, without doubt, of the highest caliber. It is expected that the BSA Lifeguard emblem and card will always stand for a very high standard of skill. The instructors to whom this responsibility is entrusted are expected to maintain that standard. For interpretation of requirements, see the BSA Lifeguard Instructor Manual.
BSA LIFEGUARD REQUIREMENTS
To be trained as a BSA Lifeguard, you must successfully complete the course as outlined in the BSA Lifeguard Instructor Manual and demonstrate the ability to perform each item specified in the following requirements:
Prerequisites Date Instructor’s Initials
Before doing requirements 6 through 26, complete the following:
1. Submit proof of age and BSA Registration. You must be at least 15 years old to participate.
2. Submit written evidence of fitness for swimming activities (signed health history).
3. Swim continuously for 550 yards in good form using the front crawl or breaststroke or a combination of either, but swimming on the back or side is not allowed.
4. Immediately following the above swim, tread water for two minutes using the legs only and with the hands under the armpits.
5. Starting in the water, swim 20 yards using a front crawl or breaststroke, surface dive 7 to 10 feet, retrieve a 10-pound object, surface, swim on your back with the object 20 yards back to the starting point with both hands holding the object, and exit the water, all within 1 minute, 40 seconds.
Requirements Date Instructor’s Initials
Complete the following requirements within a 120-day period:
6. Show evidence of current training in American Red Cross First Aid and American Red Cross CPR/AED for the Professional Rescuer or equivalent.
7. Show evidence of current training in the BSA online module for Safe Swim Defense.
8. Attend and actively participate in all activities, presentations, and skill sessions involving lifeguard behavior, duties, responsibilities, surveillance, intervention and water rescue as prescribed in the BSA Lifeguard Instructor Manual.
9. Demonstrate reaching assists from the deck using an arm, a rescue tube, and a pole.
10. Demonstrate throwing assists using a throw bag and a ring buoy with a line attached. Throw each device such that the line lands within reach of an active subject 30 feet from shore.

BSA LIFEGUARD REQUIREMENTS
Date Instructor’s
Initials
11. Demonstrate:
a Rescue of an active subject in deep water using a rescue board, kayak, rowboat, canoe, or other rescue craft that would be available at your local facility.
b Repeat for a passive subject.
12. Demonstrate an entry and front approach with a rescue tube to an active subject in deep water 30 feet away from shore. Position the rescue tube to support the subject and then assist the subject to safety, providing direction and reassurance throughout.
13. Demonstrate an entry and rear approach with a rescue tube to an active subject in deep water 30 feet away from shore. Secure and support the subject from behind and then move the subject to safety, providing direction and reassurance throughout.
14. Demonstrate use of a rescue tube to assist two subjects grasping each other. Secure, support, and reassure both subjects. With the assistance of a second guard, calm and separate the subjects and move them to safety.
15. Demonstrate both front and rear head-hold escapes from a subject’s grasp.
16. Demonstrate an entry and front approach with a rescue tube to a face-down passive subject 30 feet away at or near the surface in deep water. Use a wrist roll to position the subject face-up on the rescue tube, tow them to safety, and remove them from the water with assistance within 90 seconds. Immediately perform a primary assessment and demonstrate one-person CPR for three minutes.
17. Demonstrate an entry and rear approach with a rescue tube to a face-down passive subject 30 feet away at or near the surface in deep water. Position the subject face-up, tow them to safety, and remove them from the water with assistance within 90 seconds. Immediately perform a primary assessment and demonstrate two-person CPR for three minutes.
18. In shallow water. demonstrate in-water ventilation of an unconscious subject when prompt removal from the water is not possible. Open the airway, position the mask, and simulate ventilations.
19. Demonstrate an entry and approach with a rescue tube for use when a passive subject is submerged face-down at or near the bottom in 6 to 8 feet of water. Bring the subject to the surface and tow to the nearest point of safety.
20. Remove a subject from the water using each of the following techniques in the appropriate circumstances with the aid of a second rescuer:
a Extrication at the edge of a pool or pier using a backboard
b Walking assist
c Beach drag
21. Participate in multiple-rescuer search techniques appropriate for a missing subject in murky water:
a Line search in shallow water
b Underwater line search in deep water without equipment
c Underwater line search in deep water with mask and fins
Date Instructor’s Initials
22. Demonstrate in-line stabilization for a face-down subject with suspected spinal injury in very shallow water (18 inches or less)
23. Demonstrate in-line stabilization for a suspected spinal injury in shallow water (waist to chest deep):
a For a face-up subject
b For a face-down subject
24. Demonstrate in-line stabilization for a suspected spinal injury in deep water, swim the subject to shallow water, confirm vital signs, and with the assistance of three others, remove the subject from the water using a backboard with straps and a head immobilization device.
25. Correctly answer 80 percent of the questions on the BSA Lifeguard knowledge test covering the course material. Review any incomplete or incorrect answers.
26. Serve as a lifeguard, under supervision, for at least two separate BSA swimming activities for a combined time of two hours. Afterward, discuss the experience with the lifeguarding instructor.
Completion Options
Course completion cards are valid only when signed by either a current BSA Aquatics Instructor or BSA Lifeguard Instructor approved by the local council. Training is valid for two years, provided First Aid and CPR/AED for the Professional Rescuer training are kept current during that period.
There are five ways to obtain a course completion card: 1. Course Completion — Complete all requirements in the instructor manual during a scheduled course of instruction. The participant must attend all course sessions. Makeup sessions are allowed at the instructor’s discretion. If an individual is unable to complete all requirements during the scheduled course, the instructor may elect to continue training until the participant is able to complete all the requirements provided the total elapsed time from start to finish does not exceed the 120-day period.
2. Renewal Challenge — Anyone with a BSA Lifeguard completion card that is current or has expired within six months may renew or extend the training by performing requirements 2 through 25 without attending the standard course sessions. Prior to the testing, the instructor may provide a renewal training session to review and update skills and information. Summer camp aquatics directors should renew training for aquatics staff members during precamp training while emphasizing local camp facilities, procedures, and emergency action plans.
3. Crossover Challenge — Anyone who holds current training in American Red Cross Lifeguarding, American Red Cross Waterfront Lifeguarding, or other lifeguard training programs may obtain a BSA Lifeguard completion card by performing requirements 1 through 26 without attending the standard course sessions. The lifeguard training program that issued the training certificate must be recognized by the local or state regulatory agency that sets standards for lifeguards at youth camps. The instructor may provide a crossover training session to review and update skills and information prior to the testing. The applicant may receive credit for requirement 26 if within the past 18 months he or she has served as a lifeguard, under supervision, or has supervised lifeguards, for at least two separate BSA swimming activities for a combined time of two hours. Otherwise, due to BSA procedures not implemented at other lifeguarding venues, the applicant must accomplish requirement 26.
4. Completion of BSA Aquatics Instructor — Anyone who completes BSA Aquatics Instructor training at National Camping School may obtain a BSA Lifeguard completion card.
5. Co-Instructors - (BSA Aquatics Instructor or BSA Lifeguard Instructor) may each sign a completion card for the other at the conclusion of a BSA Lifeguard course if they satisfy requirements 2 through 24.
430-033WB 2020 Revision

Application for BSA Lifeguard Instructor Name of candidate BSA Member ID# Birth date
Mailing address
City State ZIP
Email Address (optional) Phone Number (optional)
The above candidate has satisfactorily completed all requirements as noted below.
Signature of BSA Aquatics Instructor BSA Member ID#
Printed name of BSA Aquatics Instructor
Expiration date of BSA Aquatics Instructor certification
Council verification of candidate’s current registration with BSA and Member Number
Council approval (Scout Executive signature)
Council name Council number Date
Certificate issued Expires (5 years after approval) Entered into individual’s training record
Approved application sent to Director of Outdoor Programs, National Council, BSA (date)
Purpose The BSA Lifeguard Instructor designation exists solely to train BSA Lifeguard candidates. The BSA Lifeguard Instructor fills a very important role to train responsible individuals, who as BSA Lifeguards fill the role as professional lifeguards for BSA Aquatics venues and year-around aquatics events. The applicant should accept this responsibility and be willing to serve the council as a resource trained in aquatics safety to perform this function.
Prerequisites and Procedure 1. Applicant must be at least 18 years old, a current registered
member of the BSA, and have the approval of the local council Scout executive.
2. To enter the training program the BSA Lifeguard Instructor candidate must have a current BSA Lifeguard training certificate and current training in CPR/AED for the Professional Rescuer training and first aid.
3. Completion of the requirements must be certified by a current BSA Aquatics Instructor. The BSA Aquatics Instructor completes and signs this application and submits to the local council. The local council issues the BSA Lifeguard Instructor certificate upon completion of requirements and approval by the Scout Executive.
4. The completed application is forwarded by the council to the director of Outdoor Programs, National Council, BSA.
5. Instructor authorization is valid for five years from the date of approval by the Scout Executive.
Requirements 1. Course Orientation - The formal beginning of the course starts
with an orientation session (approximately 1 to 2 hours) with the candidate, the BSA Lifeguard course instructor(s), and the BSA Aquatics Instructor. During the orientation session the course outline, course expectations and the expected performance standards the candidate must meet to become a BSA Lifeguard Instructor will be discussed. In addition, a significant portion of the orientation will cover the BSA method of aquatics instruction.
Instructor Initials Date
2. Assist in Conducting BSA Lifeguard Course - The candidate will act as an assistant instructor to a BSA Lifeguard Instructor or a BSA Aquatics Instructor in conducting a complete BSA Lifeguard course (not including renewal or crossover courses). During the BSA Lifeguard course, the candidate will actively teach and evaluate the students in at least three individual requirement elements. Prior to teaching each element, the candidate will review the expected objective and the standard of performance for the element. After each session, the candidate and the instructor(s) will critique the session and note any points for improvement.
Instructor Initials Date
3. Conduct a BSA Lifeguard Course Under Supervision - Under the direct supervision and in the presence of the BSA Lifeguard Instructor Course instructor(s) organize and conduct a complete BSA Lifeguard course. At the close of each teaching session the candidate and instructor(s) should review and critique the session activities and note any items to improve prior to next session. At the end of the BSA Lifeguard course the BSA Aquatics Instructor or the BSA Lifeguard Instructor will verify course completion of the BSA Lifeguards. The BSA Lifeguard Instructor candidate and the instructor(s) will meet to review the performance of the candidate in conducting the course.
Instructor Initials Date
4. BSA Lifeguard Course Review with Instructor(s) - At the close of the instructor course the candidate and the instructor(s) will meet to review the course, the candidate’s performance throughout the course and his/her feedback on the course. The instructor(s) will then sign and date the candidate’s application and submit it to the local council for approval.
Instructor Initials Date

BSA Lifeguard Instructor Manual — 110
Suggested Schedule for a Resident Scout Camp
Recommended Unit Prerequisite Unit(s) Time
Monday Morning
Prerequisites and Course Overview 2:00 The BSA Lifeguard as a Professional (discussion)
Prerequisites and Course Overview 1:45
Monday Afternoon
Safety Standards and Risk Management (discussion)
Prerequisites and Course Overview 1:15
Emergency Action Plans (discussion)
Moving the Victim to Safety and Rescues (in-water)
1:00
Introduction to Rescue Equipment, Entries, and Approaches (DVD)
Prerequisites and Course Overview 0:20
Entries and Rescue Approaches (in-water)
Introduction to Rescue Equipment, Entries, and Approaches (DVD)
0:45
Tuesday Morning
Surveillance and Victim Recognition (discussion)
Prerequisites and Course Overview 1:30
Introduction to Assists and Rescues (DVD)
Surveillance and Victim Recognition (discussion) 0:20
Reaching and Throwing Assists (in-water)
Introduction to Assists and Rescues (DVD) 0:20
Moving the Victim to Safety and Rescues (in-water)
Introduction to Assists and Rescues (DVD) 1:00
Introduction to Multiple and Submerged Victim Rescues and Escapes (DVD and practice)
Moving the Victim to Safety and Rescues (in-water)
0:20
Multiple and Submerged Victim Rescues and Escapes (in-water)
Introduction to Multiple and Submerged Victim Rescues and Escapes (DVD and practice)
1:00
Tuesday Afternoon
Introduction to Rescue Watercraft (discussion)
Victim removal From the Water (in-water)
0:20
Rescue Watercraft (in-water)
Introduction to Rescue Watercraft (discussion)
1:30
Introduction to Victim Removal (DVD and practice)
Prerequisites and Course Overview 0:20
Victim Removal from the Water (in-water)
Introduction to Victim Removal (DVD and practice)
0:75

BSA Lifeguard Instructor Manual — 111
Suggested Schedule for a Resident Scout Camp (continued)
Recommended Unit Prerequisite Unit(s) Time
Wednesday Morning
Safe Swim Defense (discussion)
Prerequisites and Course Overview 1:20
Introduction to Lost Swimmer Search and Use of Mask and Fins (DVD and discussion)
Multiple and Submerged Victim Rescues and Escapes (in-water)
0:30
Lost Swimmer Search (in-water)
Introduction to Lost Swimmer Search and Use of Mask and Fins (DVD and discussion)
0:30
Wednesday Afternoon
Spinal Injuries and Caring for Spinal Injuries on Land (Discussion, DVD, and practice)
Emergency Action Plans (discussion) 0:20
Spinal Injury Management—Introduction to In-line Stabilization in the Water (DVD and discussion)
Moving the Victim to Safety and Rescues (in-water)
0:30
Spinal Injury Management—In-line Stabilization in the Water (in-water)
Spinal Injury Management—Introduction to In-line Stabilization in the Water (DVD and discussion)
1:15
Thursday Morning
Spinal Injury Management— Introduction to Backboarding (discussion)
Spinal Injury Management—In-line Stabilization in the Water (in-water)
0:15
Spinal Injury Management — Backboarding (in-water)
Spinal Injury Management—Introduction to Backboarding (discussion)
1:30
Thursday Afternoon
Written Test (classroom) All Instructional Units 1:20 Final In-Water Skills Demonstration (in-water)
All Instructional Units 1:30

BSA Lifeguard Instructor Manual — 112
Suggested Schedule for a Resident Scout Camp (continued)
Recommended Unit Prerequisite Unit(s) Time
Friday Morning
Supervised Lifeguarding I (in-water) Prerequisites and Course Overview 1:30 The BSA Lifeguard as a Professional (discussion) Safety Standards and Risk Management
(discussion)
Surveillance and Victim Recognition (discussion) Entries and Rescue Approaches (in-water) Reaching and Throwing Assists (in-water) Emergency Action Plans (discussion) Moving the Victim to Safety and Rescues
(in-water)
Victim Removal from the Water (in-water) Safe Swim Defense (discussion)
Friday Afternoon
Supervised Lifeguarding II (in-water) Supervised Lifeguarding I (in-water) 1:30

BSA Lifeguard Instructor Manual — 113
Suggested Schedule for an Evening Course Recommended Unit Prerequisite Unit(s) Time
First Evening
Prerequisites and Course Overview 2:00
Second Evening
The BSA Lifeguard as a Professional (discussion)
Prerequisites and Course Overview 1:45
Safety Standards and Risk Management (discussion)
Prerequisites and Course Overview 1:15
Emergency Action Plans (discussion) Moving the Victim to Safety and Rescues (in-water)
1:00
Third Evening
Introduction to Rescue Equipment, Entries, and Approaches (DVD)
Prerequisites and Course Overview 0:20
Entries and Rescue Approaches (in-water)Introduction to Rescue Equipment, Entries, and Approaches (DVD)
0:45
Surveillance and Victim Recognition (discussion)
Prerequisites and Course Overview 1:30
Introduction to Assists and Rescues (DVD)
Surveillance and Victim Recognition (discussion) 0:20
Reaching and Throwing Assists (in-water)
Introduction to Assists and Rescues (DVD) 0:20
Introduction to Multiple and Submerged Victim Rescues and Escapes (DVD and practice)
Moving the Victim to Safety and Rescues (in-water)
0:20
Multiple and Submerged Victim Rescues and Escapes (in-water)
Introduction to Multiple and Submerged Victim Rescues and Escapes (DVD and practice)
1:00
Fourth Evening
Introduction to Victim Removal (DVD and practice)
Prerequisites and Course Overview 0:20
Moving the Victim to Safety and Rescues (in-water)
Introduction to Assists and Rescues (DVD)
1:00
Victim Removal from the Water (in-water)
Introduction to Victim Removal (DVD and practice)
0:75
Introduction to Rescue Watercraft (discussion)
Victim Removal from the Water (in-water)
0:20

BSA Lifeguard Instructor Manual — 114
Suggested Schedule for an Evening Course (continued)
Recommended Unit Prerequisite Unit(s) Time
Fifth Evening
Rescue Watercraft (in-water) Introduction to Rescue Watercraft (discussion) 1:30 Safe Swim Defense (discussion) Prerequisites and Course Overview 1:20
Sixth Evening
Introduction to Lost Swimmer Search and Use of Mask and Fins (DVD and discussion)
Multiple and Submerged Victim Rescues and Escapes (in-water)
0:30
Lost Swimmer Search (in-water) Introduction to Lost Swimmer Search and Use of Mask and Fins (DVD and discussion)
0:30
Spinal Injuries and Caring for Spinal Injuries on Land (discussion, DVD, and practice)
Emergency Action Plans (discussion) 0:20
Spinal Injury Management—Introduction to In-line Stabilization in the Water (DVD and discussion)
Moving the Victim to Safety and Rescues (in-water)
0:30
Seventh Evening
Spinal Injury Management—In-Line Stabilization in the Water (in-water)
Spinal Injury Management—Introduction to In-line Stabilization in the Water (DVD and discussion)
1:15
Spinal Injury Management— Introduction to Backboarding (discussion)
Spinal Injury Management—In-line Stabilization in the Water (in-water)
0:15
Supervised Lifeguarding I (in-water) Prerequisites and Course Overview 1:30 The BSA Lifeguard as a Professional (discussion) Safety Standards and Risk Management
(discussion)
Surveillance and Victim Recognition (discussion) Entries and Rescue Approaches (in-water) Reaching and Throwing Assists (in-water) Emergency Action Plans (discussion) Moving the Victim to Safety and Rescues
(in-water)
Victim Removal from the Water (in-water) Safe Swim Defense (discussion)

BSA Lifeguard Instructor Manual — 115
Suggested Schedule for an Evening Course (continued)
Recommended Unit Prerequisite Unit(s) Time
Eighth Evening
Spinal Injury Management— Backboarding (in-water)
Spinal Injury Management—Introduction to Backboarding (discussion)
1:20
Supervised Lifeguarding II (in-water) Supervised Lifeguarding I (in-water) 1:30
Ninth Evening
Written Test (classroom) All Instructional Units 1:20 Final In-Water Skills Demonstration (in-water)
All Instructional Units 1:30

BSA Lifeguard Instructor Manual — 116
Suggested Schedule for a Two Weekend Course Recommended Unit Prerequisite Unit(s) Time
1st Weekend—Friday PM
Prerequisites and Course Overview 2:00
1st Weekend—Saturday Morning
The BSA Lifeguard as a Professional (discussion)
Prerequisites and Course Overview 1:45
Safety Standards and Risk Management (discussion)
Prerequisites and Course Overview 1:10
Emergency Action Plans (discussion) Moving the Victim to Safety and Rescues (in-water)
1:00
1st Weekend—Saturday Afternoon
Introduction to Rescue Equipment, Entries, and Approaches (DVD)
Prerequisites and Course Overview 0:20
Entries and Rescue Approaches (in-water)
Introduction to Rescue Equipment, Entries, and Approaches (DVD)
0:45
Surveillance and Victim Recognition (discussion)
Prerequisites and Course Overview 1:30
Introduction to Assists and Rescues (DVD)
Surveillance and Victim Recognition (discussion)
0:20
Reaching and Throwing Assists (in-water)
Introduction to Assists and Rescues (DVD) 0:20
Moving the Victim to Safety and Rescues (in-water)
Introduction to Assists and Rescues (DVD) 1:00
Introduction to Multiple and Submerged Victim Rescues and Escapes (DVD and practice)
Moving the Victim to Safety and Rescues (in-water)
0:20

BSA Lifeguard Instructor Manual — 117
Suggested Schedule for a Two Weekend Course (continued)
Recommended Unit Prerequisite Unit(s) Time
1st Weekend—Saturday Evening
Multiple and Submerged Victim Rescues and Escapes (in-water)
Introduction to Multiple and Submerged Victim Rescues and Escapes (DVD and practice)
1:00
Introduction to Victim Removal (DVD and practice)
Prerequisites and Course Overview 0:20
Victim Removal from the Water (in-water)
Introduction to Victim Removal (DVD and practice)
0:75
1st Weekend—Sunday Morning
Introduction to Rescue Watercraft (discussion)
Victim Removal from the Water (in-water) 0:20
Rescue Watercraft (in-water) Introduction to Rescue Watercraft (discussion) 1:30
1st Weekend—Sunday Afternoon
Safe Swim Defense (discussion) Prerequisites and Course Overview 1:20
Introduction to Lost Swimmer Search and Use of Mask and Fins (DVD and discussion)
Multiple and Submerged Victim Rescues and Escapes (in-water)
0:30

BSA Lifeguard Instructor Manual — 118
Suggested Schedule for a Two Weekend Course (continued)
Recommended Unit Prerequisite Unit(s) Time
2nd Weekend—Saturday Morning
Lost Swimmer Search (in-water) Introduction to Lost Swimmer Search and Use of Mask and Fins (DVD and discussion)
0:30
Spinal Injuries and Caring for Spinal Injuries on Land (discussion, DVD, and practice)
Emergency Action Plans (discussion) 0:20
Spinal Injury Management— Introduction to In-line Stabilization in the Water (DVD and discussion)
Moving the Victim to Safety and Rescues (in-water)
0:30
Supervised Lifeguarding I (in-water) Prerequisites and Course Overview 1:30 The BSA Lifeguard as a Professional
(discussion)
Safety Standards and Risk Management (discussion)
Surveillance and Victim Recognition (discussion)
Entries and Rescue Approaches (in-water) Reaching and Throwing Assists (in-water) Moving the Victim to Safety and Rescues
(in-water)
Victim Removal from the Water (in-water) Safe Swim Defense (discussion) Emergency Action Plans (discussion)
2nd Weekend—Saturday Afternoon
Spinal Injury Management—In-line Stabilization in the Water (in-water)
Spinal Injury Management—Introduction to In-line Stabilization in the Water (DVD and discussion)
1:15
Supervised Lifeguarding II (in-water) Supervised Lifeguarding I (in-water) 1:30 Spinal Injury Management— Introduction to Backboarding (discussion)
Spinal Injury Management—In-line Stabilization in the Water (in-water)
0:15

BSA Lifeguard Instructor Manual — 119
Suggested Schedule for a Two Weekend Course (continued)
Recommended Unit Prerequisite Unit(s) Time
2nd Weekend—Saturday Evening
Spinal Injury Management— Backboarding (in-water)
Spinal Injury Management—Introduction to Backboarding (discussion)
1:20
2nd Weekend—Sunday Morning
Written Test (classroom) All Instructional Units 1:20 Final In-Water Skills Demonstration (in-water)
All Instructional Units 1:30

BSA Lifeguard Instructor Manual — 120
Suggested Schedule for Renewal Training
Prerequisites Registration 0:15 Verification of BSA Lifeguard training within the past four years Health Form Review Safe Swim Defense and Safety Afloat Training (date of last training) Current training in First Aid Current training in CPR/AED for the Professional Rescuer Lifeguarding under supervision for total of two hours within the past 12 months Break—Prepare for In-Water Session 0:10 In-Water Session: Swimming Skills Test 0:35 Submerged Object Retrieval (0:01:40 maximum) Start in the water Swim 20 yards using front crawl or breaststroke Surface dive 7 to 10 feet Retrieve a 10-pound object Surface and swim 20 yards back to starting point Exit the water 550-yard swim includes: 100 yards of front crawl 100 yards of breaststroke Tread water for two minutes immediately after 550-yard swim
Entries and Rescue Approaches (in-water)
Slide-In Entry 0:15 Run-and-Swim Entry Stride Jump (Leaping Entry) Compact Jump Timed Approach (Feet-first Entry, Rescue Tube, 25-yard Approach Stroke in 25 Seconds)

BSA Lifeguard Instructor Manual — 121
Suggested Schedule for Renewal Training (continued)
Reaching and Throwing Assists (in-water) Extension Assist from the Deck (arms and reach pole) 0:15 Reaching Assist with Equipment (rescue tube extension from deck) Throwing Assist
Moving the Victim to Safety and Rescues (in-water)
Swimming Extension Rescue (rescue tube extension and tow) 0:20 Active Drowning Victim - Rear Rescue Passive Drowning Victim Front Rescue (grab wrist and roll to a face-up position) Rear Rescue (reverse direction and return) Rear Rescue (roll to a face-up position)
Multiple and Submerged Victim Rescues and Escapes (in-water)
Multiple-Victim Rescue 0:15 Front and Rear Head-Hold Escapes Submerged Victim—Deep Water In-water ventilations – shallow and deep water
Removal from the Water (in-water)
Walking Assist 0:15 Beach Drag (one-person and two-person) Two-Person Removal from the Water Using a Backboard
Rescue Watercraft (in-water) Rowboat—Active and Passive Victim Rescues 0:30 Canoe—Active and Passive Victim Rescues Rescue Board—Active and Passive Victim Rescues (if available) Sit-on-top Kayak—Active and Passive Victim Rescues (if available)

BSA Lifeguard Instructor Manual — 122
Suggested Schedule for Renewal Training (continued)
Discussion2 How Safe Swim Defense and Safety Afloat Apply at Camp 0:10 Camper Check-in 0:10 Health Review Notification of Health Concerns Respect of Camper Privacy Pre-Camp Swim Checks Swimmer Classifications Options Available When Parents are Present Typical Swim Activity 0:10 Buddy Check Buddy System for the Aquatics Staff Buddy Board Procedures (see example buddy boards) Open Water Swimming 0:15 Aquatics Special Event Instruction Staff Swim Remote Site Swim Unit Run Swim at the Camp Advancement at the Waterfront Accident Reports 0:15 Emergency Action Plans Staff Fatalities Lost Swimmer Search Procedure
2 For applicants who do not have current lifeguarding experience

BSA Lifeguard Instructor Manual — 123
Suggested Schedule for Renewal Training (continued)
Lost Swimmer Search (in-water)
Shallow-Water Line Search 0:20 Head First Surface Dive Deep-Water Line Search without Mask and Fins Deep-Water Line Search with Mask and Fins
Spinal Injury Management—In-line Stabilization in the Water (DVD and in-water) DVD—In-Line Stabilization (Head, Neck, and Back Injuries in the Water, Stop at 7:49 [7:49]
0:10
In-Line Stabilization Techniques—Shallow Water 0:20 In-Line Stabilization Techniques—Deep Water In-Line Stabilization Techniques—Submerged Victim
Spinal Injury Management - Backboarding (DVD and in-water) Using a Backboard (Head, Neck, and Back Injuries in the Water, Spinal Backboarding and
Extrication) Start at 7:49 [3:44 DVD]0:10
Using a Backboard in Shallow Water (with the assistance of 3 other lifeguards) 0:30
Written Test (classroom) Written Test 0:60 Review Test 0:10
Total Suggested Time 6:30

BSA Lifeguard Instructor Manual — 124
Suggested Schedule for Crossover Training
Prerequisites Registration 0:15 Verification of current lifeguard training Health Form Review Safe Swim Defense and Safety Afloat Training (recommended) Current training in First Aid Current training in CPR/AED for the Professional Rescuer Lifeguarding under supervision for total of two hours within the past 12 months Break—Prepare for In-Water Session 0:10 In-Water Session: Swimming Skills Test 0:35 Submerged Object Retrieval (0:01:40 maximum) Start in the water Swim 20 yards using a front crawl or breaststroke Surface dive 7 to 10 feet Retrieve a 10-pound object Surface and swim 20 yards back to starting point Exit the water 550-yard swim includes: 100 yards of front crawl 100 yards of breaststroke Tread water for two minutes immediately after 550-yard swim
The BSA Lifeguard as a Professional (discussion) Dress, demeanor, punctuality 0:30 Body Language Youth Development Interaction with Adult Leaders
Safety Standards and Risk Management (discussion) BSA Aquatics Policies and Rules 0:30 The Whistle at the Waterfront Discipline Issues The Endangered Swimmer 0:30 Area of Responsibility: Total Coverage, Zone Coverage, Combined Coverage The Lookout’s Responsibility Guarding a pool Guarding a waterfront Guarding a shoreline or beach Special Situations—Procedures and Surveillance

BSA Lifeguard Instructor Manual — 125
Suggested Schedule for Crossover Training (continued)
Entries and Rescue Approaches (in-water)
Slide-In Entry 0:15 Run-and-Swim Entry Stride Jump (Leaping Entry) Compact Jump Timed Approach (Feet-first Entry, Rescue Tube, 25-yard Approach Stroke in 25 Seconds)
Reaching and Throwing Assists (in-water) Extension Assist from the Deck (arms and reach pole) 0:15 Reaching Assist with Equipment (rescue tube extension from deck) Throwing Assist 0:10 Ring Buoy Throw Bag
Moving the Victim to Safety and Rescues (in-water)
Active Drowning Victim—Front Rescue 0:20 Active Drowning Victim—Rear Rescue Passive Drowning Victim Front Rescue (grab wrist and roll to a face-up position) Rear Rescue (reverse direction and return) Rear Rescue (roll to a face-up position)
Multiple and Submerged Victim Rescues and Escapes (in-water)
Multiple-Victim Rescue 0:15 Front and Rear Head-Hold Escapes Submerged Victim—Deep Water In-water ventilations – shallow and deep water
Removal from the Water (in-water)
Walking Assist 0:15 Beach Drag (one-person and two-person) Two-Person Removal from the Water Using a Backboard
Introduction to Rescue Watercraft (discussion) Safety Afloat at a Resident Scout Camp 0:30 Care and Use of PFDs DVD—Waterfront Rescue Skills [2:30] queue to start at 10:50, Approaching a Victim on a
Rescue Board Surveillance and Rescue Afloat (buddy boat, guarding examples) Rescue Watercraft—Advantages and Disadvantages Sightings and Cross-Bearings Safety Boat

BSA Lifeguard Instructor Manual — 126
Suggested Schedule for Crossover Training (continued)
Rescue Watercraft (in-water)3 Rowboat—Active and Passive Victim Rescues 1:30 Canoe—Active and Passive Victim Rescues Rescue Board—Active and Passive Victim Rescues (if available) Sit-on-top Kayak—Active and Passive Victim Rescues (if available)
Safe Swim Defense (discussion) How Safe Swim Defense Apply at Camp 0:30 Camper Check-in 0:20 Health Review Notification of Health Concerns Respect of Camper Privacy Pre-Camp Swim Checks Swimmer Classifications Options Available When Parents are Present Typical Swim Activity 0:10 Buddy Check Buddy System for the Aquatics Staff Buddy Board Procedures (see example buddy boards) Open Water Swimming 0:20 Aquatics Special Event Instruction Staff Swim Remote Site Swim Unit Run Swim at the Camp Advancement at the Waterfront
Emergency Action Plans (discussion) Camp-Wide Emergency Action Plan 0:20 Accident Reports Staff Fatalities
3 Not required if the applicant has received previous lifeguard training in the use of a rescue watercraft
(e.g. Red Cross Waterfront Lifeguarding).

BSA Lifeguard Instructor Manual — 127
Suggested Schedule for Crossover Training (continued)
Introduction to Lost Swimmer Search and Use of Mask and Fins
(DVD and discussion)4 DVD—Waterfront Lifeguarding Rescue Skills [13:20] 0:30 Lost Swimmer Search Procedure Risks and Precautions
Lost Swimmer Search (in-water)
Shallow-Water Line Search 0:25 Headfirst Surface Dive Deep-Water Line Search Without Mask and Fins Deep-Water Line Search With Mask and Fins Advantages of Mask and Fins (discussion) 0:05
Spinal Injury Management—In-Line Stabilization in the Water (DVD and in-water) In-Line Stabilization Techniques—Shallow Water 0:20 In-Line Stabilization Techniques—Deep Water In-Line Stabilization Techniques—Submerged Victim
Spinal Injury Management—Backboarding (DVD and in-water) Using a Backboard in Shallow Water 0:20
Written Test (classroom) Written Test 0:60 Review Test 0:10
4 Not required if the applicant has received previous lifeguard training in underwater line search using
mask and fins (e.g. Red Cross Waterfront Lifeguarding)

BSA Lifeguard Instructor Manual — 128
Suggested Schedule for Crossover Training (continued)
Supervised Lifeguarding I (in-water)5
Buddy Board Check-In/Check-Out 1:00 Lifeguard Rotation Buddy Check Swim Test (optional)
Supervised Lifeguarding II (in-water)4
Buddy Board Check-In/Check-Out 1:00 Lifeguard Rotation Buddy Check Swim Test (optional)
Suggested Time6 8:00
Rescue Watercraft (in-water) 1:30
Introduction to Lost Swimmer Search and Use of Mask and Fins (DVD and discussion) 0:30
Supervised Lifeguarding I and II (in-water) 2:00
Total Suggested Time 12:30
5 Not required, if within the past 12 months the applicant has served as a lifeguard, under supervision,
or has supervised lifeguards for at least two separate BSA swimming activities for a combined time of two hours. 6 With previous waterfront lifeguard training and supervised BSA lifeguarding experience.

BSA Lifeguard Instructor Manual — 129
Buddy Board Examples Buddy Board 1
IN
Swimmers Beginners Nonswimmers
1-3/4” 3-1/2”
2”
31-1/2”
5-1/2”
4-1/2”
2-1/4”
10-1/2”
1-3/4” 2-1/2”
5”
48”
36”

BSA Lifeguard Instructor Manual — 130
Buddy Board Examples (continued)
Buddy Board 2
Nonswimmers
Beginners
Swimmers
IN
2-1/4”31-1/2”2-1/4”
4-1/2”
48”
5-1/2”
36”
1-3/4”
1-3/4”
2-1/2”

BSA Lifeguard Instructor Manual — 131
Lifeguard Rescue Reporting System
Water Rescue USA
The University of North Carolina at Charlotte’s Department of Kinesiology is hosting an anonymous reporting system to gather information about how lifeguards respond to all types of water-related incidents. The goal is to help training agencies learn more about what actually is taking place when lifeguards are called upon to respond to an emergency, such as conditions at the time of the rescue, how the lifeguard identified the emergency, and the type of equipment used.
The American Red Cross, the United States Lifesaving Association, and other agencies encourage lifeguards who have responded to an aquatics emergency to complete this survey as soon after the incident as possible. This information is completely anonymous and can have an impact on how lifeguards are trained in the future. Incidents with both positive and negative outcomes are solicited. All assists and rescues by lifeguards, other staff, adult leaders, bystanders, and buddies are important. Report assists or rescues of anyone needing help including tired or endangered swimmers along with distressed swimmers and active or passive victims.
BSA Lifeguards should consider contributing to the University of North Carolina at Charlotte reporting system provided such reporting is approved by the council Scout Executive or designee. Incident analysis should be an integral part of a camp or facility emergency action plan. Aquatics personnel should remember reports might contain sensitive information that should not be discussed outside of an incident de-briefing. Water Rescue USA is intended for the compilation of statistics and such details are not needed.

BSA Lifeguard Instructor Manual — 132
Lifeguard Rescue Reporting System Template
Site of Incident: Open Water Water Park Pool or Spa
Where was the victim located?
Time of Day?
Water Clarity?
Above Water Clarity?
Water Depth where the victim was located?
Attendance Level at the time of the rescue?
How the Victim was recognized?
Victim's activity prior to the rescue?
Type of rescue made?
Equipment Used?
Others Responding?
Type of aid given?
Injuries to victim?
Type of flotation device used by victim?
Victim's outcome?
Primary Rescuer's level of current training?
Where was the Rescuer at the time of incident?
How far did you have to travel on land to the water entry point or the victim?
How far did you have to travel in water to the victim?
Approximate age of the victim?
Complete the survey at: http://water-rescue.uncc.edu