Advanced Photoshop - TeachUcomp, Inc.
116
Advanced Photoshop Advanced Photoshop v. CS6 through CS A Presentation of TeachUcomp Incorporated. Copyright © TeachUcomp, Inc. 2012 teachUcomp, inc. ® …it’s all about you Sample- for evaluation purposes only!
-
Upload
khangminh22 -
Category
Documents
-
view
0 -
download
0
Transcript of Advanced Photoshop - TeachUcomp, Inc.

Advanced Photoshop
Advanced
Photoshop
v. CS6 through CS
A Presentation of TeachUcomp Incorporated.
Copyright © TeachUcomp, Inc. 2012
teachUcomp, inc.®
…it’s all about you
Sample
- for
evalu
ation
purp
oses
only!

2 Advanced Photoshop ©TeachUcomp, Inc.
Advanced Photoshop
Copyright:
TeachUcomp, Inc. provides this product “as is”, makes no representations or warranties with respect
to its contents or use, and specifically disclaims any expressed or implied warranties of merchantability or
fitness for any particular purpose. To the maximum extent permitted by applicable law, in no event shall
TeachUcomp, Inc. or its suppliers be liable for special, incidental, indirect, or consequential damages
whatsoever (including, without limitation, damages for loss of business information, or any other pecuniary
loss) arising out of the use of this product or contents, or the inability to use the software product, even if
TeachUcomp, Inc. has been advised of the possibility of such damages. Because some states and
jurisdictions do not allow the exclusion or limitation of liability for consequential or incidental damages, the
limitation may not apply to you. TeachUcomp, Inc. reserves the right to make changes to this product at
any time, without obligation to notify any person or entity of such changes.
No part of this product may be reproduced or transmitted in any form or by any means, electronic or
mechanical, including photocopying, recording, or information storage and retrieval systems, for any
purpose, without the express written consent of TeachUcomp, Inc.
TeachUcomp, Inc. is a registered trademark of TeachUcomp, Inc. All other registered trademarks
are the property of their respective companies and do not imply any association with TeachUcomp, Inc. All
rights reserved.
Copyright © TeachUcomp, Inc. All rights reserved. Printed in the United States of America. All
rights reserved.
Trademark Acknowledgements:
Adobe Photoshop, Adobe Photoshop Elements, Adobe Illustrator, Adobe ImageReady and Adobe
Acrobat are registered trademarks of Adobe Systems Incorporated. Other brand names and product names
are trademarks or registered trademarks of their respective holders.
Disclaimer:
While every precaution has been made in the production of this book, TeachUcomp, Inc. assumes
no responsibility for errors or omissions. Nor is any liability assumed for damages resulting from the use of
the information contained herein. These training materials are provided without any warranty whatsoever,
including, but not limited to, the implied warranties of merchantability or fitness for a particular purpose. All
names of persons or companies in this manual are fictional, unless otherwise noted.
Sample
- for
evalu
ation
purp
oses
only!

3 Advanced Photoshop ©TeachUcomp, Inc.
Welcome to Teachucomp, Inc.’s Advanced Photoshop
course. This class expands the students abilities in using
Adobe Photoshop, the most popular image creation and
editing software application available. This class is
designed to give a user with basic knowledge of Photoshop
the necessary skills to become a proficient user of the
Photoshop application. To that end, it is also an excellent
tutorial for those users who are already familiar with
Photoshop, but want to “fill-in” the gaps in their knowledge
of the program
Adobe Photoshop is an excellent program to learn, as
the skill, terms, and techniques that we learn and master in
this application can also be used throughout the rest of the
Adobe applications. For example, after learning this
application, you will find it easier to learn an application like
Adobe Illustrator or Adobe PageMaker.
This class will start by introducing the student to the
concept of layers in images. We will then spend much time
examining vector data in images starting with text and
moving into drawn objects, shapes and the Pen Tool. From
there, we will turn to channels and masking in images.
Finally, we will spend time examining more advanced tools
and techniques used in image manipulation and look more
closely at saving and printing options and learn how to
automate repetitive processes in Photoshop.
Introduction and Overview Sa
mple- f
or ev
aluati
on pu
rpos
es on
ly!

4 Advanced Photoshop ©TeachUcomp, Inc.
Table Of Contents
Topic: Page(s):
CHAPTER 9- Layers 5
9.1- Using Layers and Layer Groups/Sets 6
9.2- Creating Layers and Layer Groups/Sets 7
9.3- Stacking and Linking Layers 8-9
9.4- Moving Layer Content with the Move Tool 9
9.5- Locking Layers 9
9.6- Common Layer Management Tasks 10
9.7- Merging and Flattening Layers 11
Layers- Actions 12-15
Layers- Exercises 16-17
CHAPTER 10- Advanced Layers 18
10.1- Layer Styles 19-23
10.2- Adjustment Layers and Fill Layers 23-24
10.3- The Adjustments Panel 24-25
10.4- Masking Layers 26
10.5- The Masks Panel 27
10.6- Creating Clipping Groups 27
10.7- Creating Knockouts 28
10.8- Smart Objects 29
10.9- Smart Filters 29
Advanced Layers- Actions 30-33
Advanced Layers- Exercises 34-35
CHAPTER 11- Text 36
11.1- Text Basics 37
11.2- Entering Text 37-38
11.3- Selecting Text 38
11.4- Editing the Bounding Box 39
11.5- Creating a Type Selection 40
11.6- Applying Effects to Type Layers 40
11.7- Using the Character Panel 41-42
11.8- Checking for Spelling Errors 42
11.9- Using the Paragraph Panel 43
Text- Actions 44-49
Text- Exercises 50
CHAPTER 12- Drawing 51
12.1- Raster Vs. Vector 52
12.2- Shape Layers and Shape Options (CS6 & Later) 52-53
12.3- Shape Layers and Shape Options (CS-CS5) 53-54
12.4- Using the Shape Tools 55
12.5- Using the Pen Tools 56
12.6- Using the Anchor Point Tools 56
12.7- Using the Paths Panel 57
12.8- Working with Paths 57
Drawing- Actions 58-60
Drawing- Exercises 61
CHAPTER 13- Using Channels and Masking 62
13.1- Using the Channels Panel 63
13.2- Using Channels 64
13.3- Spot Colors 65
13.4- Blending Channels and Layers 65-66
13.5- Quick Mask Mode 66
13.6- Using Alpha Channels 67
Using Channels and Masking- Actions 68-71
Using Channels and Masking- Exercises 72
Topic: Page(s):
CHAPTER 14- Manipulating Images 73
14.1- Changing the Canvas Size 74
14.2- Rotating and Flipping Images 74
14.3- The Rotate View Tool 74
14.4- Cropping Images (CS6 & Later) 75
14.5- Cropping Images (CS-CS5) 76
14.6- The Perspective Crop Tool 77
14.7- The Slice Tools 77
14.8- The Free Transform Command 78
14.9- The Smudge Tool 79
14.10- Blurring and Sharpening Images 79
14.11- Using the Dodge Tool and the Burn Tool 79
14.12- The Sponge Tool 79
14.13- Filters and the Filter Gallery 80-81
14.14- The Liquify Command 81-82
14.15- Vanishing Point 82-83
14.16- Content-Aware Scaling 83
14.17- The Puppet Warp Tool 84
14.18- The Clone Stamp Tool 85
14.19- The Pattern Stamp Tool 85
14.20- The Healing Brush Tool 85
14.21- The Spot Healing Brush Tool 85
14.22- The Patch Tool 86
14.23- The Content-Aware Move Tool 86
14.24- The Red Eye Tool 86
Manipulating Images- Actions 87-92
Manipulating Images- Exercises 93
CHAPTER 15- Saving Images 94
15.1- Saving Images 95
15.2- The Save for Web Dialog Box 96
Saving Images- Actions 97
Saving Images- Exercises 98
CHAPTER 16- Printing 99
16.1- Printing Images 100
16.2- Setting Printing Options 100-101
Printing- Actions 102-103
Printing- Exercises 104
CHAPTER 17- Automating Tasks 105
17.1- Actions and the Actions Panel 106
17.2- Playing Actions 107
17.3- Editing Actions 107
17.4- Playing Pre-Loaded Actions 107
Automating Tasks- Actions 108-109
Automating Tasks- Exercises 110
CHAPTER 18- Help 111
18.1- Photoshop Help 112
18.2- System Info 112
18.3- Online Updates 112
Help- Actions 113
Help- Exercises 114
Photoshop Keyboard Shortcuts 115-116
Sample
- for
evalu
ation
purp
oses
only!

5 Advanced Photoshop ©TeachUcomp, Inc.
CHAPTER 9-
Layers
9.1- Using Layers and Layer Groups/Sets
9.2- Creating Layers and Layer Groups/Sets
9.3- Stacking and Linking Layers
9.4- Moving Layer Content with the Move Tool
9.5- Locking Layers
9.6- Common Layer Management Tasks
9.7- Merging and Flattening Layers
Sample
- for
evalu
ation
purp
oses
only!

6 Advanced Photoshop ©TeachUcomp, Inc.
Layers
9.1- Using Layers and Layer Groups/Sets:
In Photoshop, all of the elements that you manipulate are stored in layers. A layer is like a
transparent sheet on which the images are placed and edited. Where there is no image or content in a
layer, it is transparent, allowing you to see through it to the content below. You can stack several layers on
top of one another to separate the various individual image elements of a larger image file. This way, you
can manipulate the contents of a single layer without disturbing the content of the other layers. In this
chapter we will examine how we can create and edit the layers and their contents to produce various effects
in our image files. Understanding and using layers is one of the most critical aspects of being an effective
user of Photoshop.
Whenever you create a new image file in Photoshop that has a white or colored background, the
bottommost layer is called the background layer. An image file can only have one background layer, at
most. You cannot change the placement of the background layer in the layer stack, its opacity or its
blending mode. However, you can change this layer into a normal layer.
If you create a new image with a transparent background, then the image file does not have a
background layer. The bottommost layer is not constrained in the way that the standard background layer
is. So, you can move its position in the layer stack, change its opacity and even change its blending mode.
You use the “Layers Panel” to manage your layers in the selected image file. You can launch the
“Layers Panel,” if it isn’t displayed, by selecting “Window| Layers” from the Menu Bar. In the Layers Panel,
you will see the various layers in the current image file displayed in a list. Just as with your other panels that
you have seen, this panel has a panel options button that you can click to view the options for the panel in a
pop-up menu. Take a moment to examine the Layers Panel's features before using it.
Selected Layer
Layer Name
Layer Options
Master Opacity
Layer Locks
Layer Mask
Thumbnail
Layer Style
Add Vector Mask
New Layer Set / Group
New Fill or Adjustment Layer
New Layer
Delete Layer
Interior Opacity
Layer Visibility
Link Layers
Blending Mode
Layer Thumbnail
Layer Filtering
Sample
- for
evalu
ation
purp
oses
only!

7 Advanced Photoshop ©TeachUcomp, Inc.
Layers
9.2- Creating Layers and Layer Groups/Sets:
You can easily create layers in Photoshop. Many commands (like “Fill”) create layers from
selections automatically when you use them. You can also create blank layers and then add content to
them. To create a new blank layer, just click the “New Layer” button at the bottom of the Layers Panel. You
could also select “Layer| New| Layer…” from the Menu Bar. If you choose the former option, it creates a
new layer with a default name instantly in the Layers Panel. If you choose the latter option, you will launch
the “New Layer” dialog box. In this dialog box, you can type the name for the new layer in the “Name:” text
box. You can then set the color the layer will appear in the Layers Panel using the “Color:” drop-down. Use
the “Mode:” drop-down to set your desired blending mode. Then use the “Opacity:” slider to set the layer’s
opacity level. When you are ready to create the layer, click the “OK” button to add the layer.
To convert the “Background” layer into a normal layer, select the “Background” layer, first. Then
select “Layer| New| Layer from Background…” from the Menu Bar. This will launch the “New Layer” dialog
box as well, allowing you to name the layer and set additional options for it. When you click “OK” you will
convert the “Background” layer into the layer that you just created with the properties that you set. You can
also take a layer and convert it into the “Background” layer. To do this, just select the layer that you want to
use as the new background layer and then select “Layer| New| Background from Layer…” to convert the
selected layer into a background layer.
If you have so many layers that it is becoming difficult to track them, you can create a layer group
(called a layer set in earlier versions) into which you can group layers. A layer group/set is a collection of
layers that you can expand and collapse to better organize the layers in your image file. To create a new
layer group/set you can either click the “Create New Group” button or the “New Layer Set” button (in
versions prior to CS3) at the bottom of the Layers Panel to create a new layer group/set with the default
settings. You can also select “Layer| New| Group” from the Menu Bar (or “Layer| New| Layer Set…” from
the Menu Bar in versions prior to CS3) to launch the dialog box.
Here, you can then type the name that you want to give to the layer group or set into the “Name:”
text box. You can choose a color for the layer group/set in the Layers Panel by selecting your desired
choice from the “Color:” drop-down. This can help you easily identify and distinguish various layers in the
Layer Panel. You then select a blending mode from the “Mode:” drop-down, and a layer set opacity from the
“Opacity:” slider. When you are ready to create the new layer group/set, click “OK” to add it into the Layers
Panel. The set itself appears as a folder icon in the Layers Panel. Click the small arrow to the left of the
folder icon to expand and collapse the layers within the layer set.
To add any layers that you have already created to the group/set, just click and drag on the name of
the layer in the Layers Panel and drop the layer below the group. The layer should appear slightly indented
and below the group in the panel. If you want to remove a layer from the group, click and drag the layer
above the group in the list and release it there. That will free it from the layer set and it should no longer
appear indented.
Sample
- for
evalu
ation
purp
oses
only!

8 Advanced Photoshop ©TeachUcomp, Inc.
Layers
9.3- Stacking and Linking Layers:
In order to perform almost any task on a layer, you must first be able to select it. You can select a
layer by clicking on the layer that you would like to select in the Layers Panel. Then, any changes that you
make will affect only the selected layer, protecting the content of the other layers. However, this can also be
a source of aggravation for new Photoshop users. If you are trying to make a change to an image and you
find that the changes that you are trying to make aren’t being applied, check to make sure that you have the
correct layer selected! This is easy to forget when you are first starting out using layers, so be sure to
double-check your layer selection before making a change in a layered image file.
You can also hide or show layers in a layered image file. To change the visibility of a layer, click the
“eye” icon at the left end of the layer or layer group or set to toggle the selected layer or group’s visibility on
or off. A neat twist on this is used when you want to view only a single selected layer or layer group. You
can hold down the “Alt” key on your keyboard, and then click on the “eye” icon of the layer or group that you
want to view. All of the other layers will have their visibility turned off! This can be nice when you want to
concentrate on working with a specific image element in a layer without the distraction of content on the
other layers. You can also simply hold down the “Alt” key on your keyboard and then click the “eye” icon
again to make the hidden layers visible once again.
Version CS6 introduced layer filtering in the Layers Panel, which allows you to temporarily make
visible only the layers you choose. At the top of the panel, you can click on the “Filter Type” drop-down.
Once you select the type of layer you wish to see, choices will appear at the right that allow you further filter
the layers so you can work on them. For example, with Kind (the default option), you are presented with a
series of buttons representing each layer type to the right of the menu. If you click the icons for adjustment
layers and vector layers, only layers that meet those one of those two criteria, will remain visible. To
unselect a layer type, click its button a second time. If you choose Name, a text field will appear, allowing
you to type in a layer name to help you locate it.
You can also quickly duplicate a layer or group to create another copy of the content in the image or
in another image file. Be aware that if you duplicate the layer in an image file with a different pixel
resolution, that the layer’s content may appear a different size than you intended. If you want to create a
duplicate layer, just click and drag the layer or group in the Layers Panel and drop it on top of the “New
Layer” button at the bottom of the Layers Panel. Another way to perform this same function is to just select
“Layer| Duplicate Layer…” from the Menu Bar. In this case you will be presented with the “Duplicate Layer”
dialog box where you can type a name for the duplicate into the “As:” text box and then use the “Document:”
drop-down to select which one of the open image files you want to copy the duplicate into. Click “OK” when
you are ready to duplicate the selected layer in the Layers Panel.
Sample
- for
evalu
ation
purp
oses
only!

9 Advanced Photoshop ©TeachUcomp, Inc.
Layers
9.3- Stacking and Linking Layers (cont.):
You can change the order of the layers in an image. When you are using layers, the newly created
layers stack on top of the older layers. When a layer is stacked on another, the content of the layer on top
supersedes the content of the layer below. You can change the order of the layers in a stack very easily by
simply clicking and dragging the layers up or down in the Layers Panel. The bottommost layers are shown
at the bottom of the Layers Panel, increasing in order through the stack up to the topmost layer.
You may also link layers to allow you to move their content together. Also, when you perform
activities like copying and pasting the layers, the linked layers will be treated as if they were the same. So if
you copy a linked layer, you also copy the layer to which it is linked, as well. To link a layer, select the
layers or group in the Layers Panel and then click the “Link Layers” button in the lower-left corner of the
panel (or in the column immediately to the left of any layers that you want to link to the selected layer in CS2
and earlier). A “chain link” icon will appear in the column to let you know that you have linked the layers.
You can also click the “Link Layers” icon to un-link layers that were previously linked.
9.4- Moving Layer Content with the Move Tool:
You can use the “Move Tool” in the Toolbox to move layer content. To do this, just click the “Move
Tool” in the Toolbox and make sure that you have the correct layer in which you want to move the content
selected in the Layers Panel. Then place the “Move Tool” over the content in the layer that you wish to
move and click and drag with your mouse.
9.5- Locking Layers:
You can also fully or partially lock a layer or group to protect its contents. When you lock layers, a
“lock” icon will display to the right of the layer name in the Layers Panel. The “lock” icon will appear hollow
when the layer is only partially locked and will appear solid when the layer is fully locked. If you change the
individual settings of a locked layer within a locked layer group or set, the “lock” icon will appear dimmed.
To lock a layer or group, first select it in the Layers Panel. Then select what kind of a lock you want
to place on the layer: “full” or “partial.” If you want to apply a full lock, then just click the “lock” button towards
the top of the Layers Panel to fully lock the selected layer and all of its attributes. To partially lock a layer,
you can click any one of the other buttons that are available next to the lock button. They are (from left to
right): “Lock Transparency,” which prevents changes to the transparent pixels in a layer; “Lock Image
Pixels,” which prevents changes to the layer’s pixels with your painting tools; or “Lock Position,” which
prevents moving the layer’s pixels. If you happen to be working with a text layer, you’ll notice that the “Lock
Transparency” and “Lock Image Pixels” locks are selected by default. You cannot change these settings for
“type” layers.
Layer Locks
Sample
- for
evalu
ation
purp
oses
only!

10 Advanced Photoshop ©TeachUcomp, Inc.
Layers
9.6- Common Layer Management Tasks:
You can easily rename a layer that you have created. You may want to do this if you quickly create
layers using the “New Layer” button, which gives the layer a standard name that isn’t very descriptive. To
rename a layer, just double-click on the name of the layer that you want to rename in the Layers Panel. You
can then type a new name into the layer and then press “Enter” on your keyboard to set the new name.
You can also change the color-coding applied to layers and layer groups/sets. If you wish to change
the color of a layer, select the layer that you want to change, first. Then click the “Layer Options” button to
reveal the pop-up menu of choices. From the pop-up menu, select the “Layer Properties…” command. Use
the “Color:” drop-down to select the new layer color that you want to use. Click “OK” to set the new color.
You can also rasterize layers that you created using a vector-based tool (like the “Pen Tool” or the
“Horizontal Type Tool”). When you rasterize a layer, you change the vector-based graphics in the layer to
pixel-based. Then you can use your standard painting tools (which are pixel-based) to change and edit the
contents of the newly rasterized layer. To rasterize a layer for pixel-editing, select the layer that you want to
rasterize and then select “Layer| Rasterize” from the Menu Bar. From the side menu that appears, select
what elements you wish to rasterize. Note that one of the choices is to rasterize all of the layers in the
image, which you can do here as well.
To delete a layer or layer group/set after you have created it, you can simply select the layer to
delete and then click the “Trash Can” icon at the bottom of the Layers Panel to delete it. You will have to
confirm that you want to delete the selected layers in a pop-up dialog box by clicking “Yes” or “No.” If you do
not want to be prompted with the dialog box, you can simply click and drag the layer or group that you want
to delete onto the “Trash Can” icon to delete the layers without being prompted. Just remember that the
“History Panel” can fix it if you accidentally delete the wrong layer by accident.
Layer Options
Sample
- for
evalu
ation
purp
oses
only!

11 Advanced Photoshop ©TeachUcomp, Inc.
Layers
9.7- Merging and Flattening Layers:
When you add layers to a Photoshop file, you keep increasing the file size. You can then use the
“Merging” and “Flattening” features of Photoshop to reduce the number of layers and the overall file size.
You can merge several layers together to create an image element. Before you merge layers, it may be a
good idea to place them into the appropriate order within a layer group or set. That way, you won’t
accidentally merge all of the visible layers together. To merge a layer group or set, select it, and then select
“Layer| Merge Group” or “Layer| Merge Layer Set” (in CS2 and previous versions) from the Menu Bar.
If you simply wanted to merge all visible layers in the Layers Panel, you can show or hide all of the
layers as needed in the Layers Panel and then select “Layer| Merge Visible” from the Menu Bar.
In contrast to merging, flattening an image file merges all visible layers into the “Background” layer.
This will greatly reduce the file size. When you flatten an image, you discard all hidden layers from the
image file and fill in any remaining transparent areas with the color white. This is usually the last step when
working with an image file, after performing all of your necessary editing on the individual layers. To flatten
an image, select “Layer| Flatten Image” from the Menu Bar.
Sample
- for
evalu
ation
purp
oses
only!

12 Advanced Photoshop ©TeachUcomp, Inc.
ACTIONS-
Layers VIEWING THE LAYERS PALETTE:
1. Select “Window| Layers” from the Menu Bar to open and close the Layers Panel.
CREATING A NEW BLANK LAYER:
1. Click the “New Layer” button at the bottom of the Layers Panel to instantly create a layer with the
standard settings.
OR
1. You could also select “Layer| New| Layer…” from the Menu Bar.
2. In the “New Layer” dialog box, you can type the name for the new layer in the “Name:” text box.
3. You can then set the color the layer will appear in the Layers Panel from the “Color:” drop-down.
4. Use the “Mode:” drop-down to set your desired blending mode.
5. Then use the “Opacity:” slider to set the layer’s opacity level.
6. When you are ready to create the layer, click the “OK” button to add the layer to the Layers Panel.
CONVERTING A BACKGROUND LAYER TO A NORMAL LAYER:
1. Select the “Background” layer.
2. Select “Layer| New| Layer from Background…” from the Menu Bar.
3. In the “New Layer” dialog box, name the layer and the additional options you want.
4. Click “OK.”
CONVERTING A NORMAL LAYER TO A BACKGROUND LAYER:
1. Select the layer that you want to use as the new background layer.
2. Select “Layer| New| Background from Layer…” to convert the selected layer into a background layer.
CREATING A LAYER GROUP/SET:
1. Click the “New Layer Group/Set” button at the bottom of the Layers Panel to create a new layer group/set
with the default settings.
OR
1. Select “Layer| New| Group (or Layer Set)…” from the Menu Bar to launch the dialog box.
2. Type the name that you want to give to the layer group/set into the “Name:” text box.
3. Select a color for the layer set in the Layers Panel by selecting your desired choice from the “Color:”
drop-down.
4. Select a blending mode from the “Mode:” drop-down.
5. Set the layer set’s opacity using the “Opacity:” slider.
6. Click “OK” to add the layer set into the Layers Panel. Sample
- for
evalu
ation
purp
oses
only!

13 Advanced Photoshop ©TeachUcomp, Inc.
ACTIONS-
Layers ADDING AND REMOVING LAYERS IN A LAYER GROUP/SET:
1. To add any layers that you have already created to the group/set, just click and drag on the name of the
layer in the Layers Panel and drop the layer below the layer group/set. The layer should appear slightly
indented and below the layer group/set in the panel.
2. If you want to remove a layer from the group/set, click and drag the layer above the layer group/set in the
list and release it there. That will free it from the layer group/set and it should no longer appear indented.
SELECTING LAYERS:
1. To perform an activity on a layer, select it by clicking it in the Layers Panel.
SHOWING AND HIDING LAYERS:
1. Click the “eye” icon at the left end of the layer or layer set to toggle the selected layer or layer set’s
visibility on or off.
2. You can hold down the “Alt” key on your keyboard, and then click on the “eye” icon of the layer or layer
set that you want to view. All of the other layers will have their visibility turned off! You can also simply
hold down the “Alt” key on your keyboard and then click the “eye” icon again to make the hidden layers
visible once again.
DUPLICATING LAYERS:
1. Click and drag the layer or layer set in the Layers Panel and drop it on top of the “New Layer” button at
the bottom of the Layers Panel.
OR
1. Select “Layer| Duplicate Layer…” from the Menu Bar.
2. In the “Duplicate Layer” dialog box, you can type a name for the duplicate into the “As:” text box and then
use the “Document:” drop-down to select into which one of the open image files you want to copy the
duplicate.
3. Click “OK” when you are ready to duplicate the selected layer in the Layers Panel.
CHANGING THE STACKING ORDER OF LAYERS:
1. You can click and drag on the layers represented in the Layers Panel to change their stacking order.
LINKING AND UNLINKING LAYERS:
1. Select the layer or layer set in the Layer Panel which you want to link to another layer or layer set.
2. Click in the column immediately to the left of any layers which you want to link the selected layer. A
“chain link” icon will appear in the column to let you know that you have linked the layers.
3. You can also click the “chain link” icon to un-link layers that were previously linked. Sample
- for
evalu
ation
purp
oses
only!

14 Advanced Photoshop ©TeachUcomp, Inc.
ACTIONS-
Layers MOVING LAYER CONTENT:
1. Select the layer from the Layer Panel in which you wish to move the content.
2. Click the “Move Tool” button in the Toolbox.
3. Click and drag the content of the layer with your mouse to move it in the image file.
LOCKING LAYER CONTENT:
1. Select the layer from the Layer Panel in which you want to lock all or part of the layer’s content.
2. To fully lock the layer to prevent all changes, click the “Lock All” button above the layer listing in the
Layers Panel.
3. To prevent changes to the transparent pixels only, click the “Lock Transparency” button.
4. To prevent changes to the layer from painting tools, click the “Lock Image” button.
5. To prevent movement of the layer’s content, click the “Lock Transparency” button.
RENAMING A LAYER:
1. Double-click on the name of the layer displayed in the Layers Panel that you want to rename.
2. Type a new name for the layer.
3. Press “Enter” on your keyboard to set the new layer name.
CHANGING THE COLOR OF A LAYER IN THE LAYERS PANEL:
1. Select the layer for which you want to change the color-coding displayed in the Layer Panel.
2. Click the “Layer Options” button in the upper right corner of the Layers Panel.
3. Select the “Layer Properties…” command from the pop-up menu that appears.
4. Use the “Color:” drop-down to select the new display color of the layer in the Layers Panel.
5. Click “OK.”
RASTERIZING LAYERS:
1. Select the layer that you want to rasterize, and then select “Layer| Rasterize” from the Menu Bar.
2. In the side menu that appears, select what elements you wish to rasterize. Note that one of the choices is
to rasterize all of the layers in the image, which you can do here as well.
DELETING LAYERS:
1. Select the layer to delete and then click the “Trash Can” icon at the bottom of the Layers Panel to delete
it.
2. You will have to confirm that you want to delete the selected layers in a pop-up dialog box by clicking
“Yes” or “No.”
3. You can also click and drag the layer or layer set that you want to delete onto the “Trash Can” icon to
delete the layers without being prompted to confirm the deletion. Just remember that the “History Panel”
can fix a mistake if you accidentally delete the wrong layer. Sample
- for
evalu
ation
purp
oses
only!

15 Advanced Photoshop ©TeachUcomp, Inc.
ACTIONS-
Layers MERGING LAYERS:
1. Before you merge layers, it may be a good idea to place them into the appropriate order within a layer
set. That way, you won’t accidentally merge all visible layers together.
2. To merge a layer set, select the layer set with the layers that you wish to merge, and then select “Layer|
Merge Group (or Layer Set)” from the Menu Bar.
OR
1. If you simply wanted to merge a single layer with all of the layers that are below it in the Layers Panel,
you can select that layer in the Layers Panel and then select “Layer| Merge Down” from the Menu Bar.
OR
1. If you simply wanted to merge all visible linked layers together, you can do that too. You can perform this
command by selecting “Layers| Merge Linked” from the Menu Bar.
FLATTENING LAYERS:
1. To flatten an image, select “Layer| Flatten Image” from the Menu Bar.
Sample
- for
evalu
ation
purp
oses
only!

16 Advanced Photoshop ©TeachUcomp, Inc.
EXERCISES-
Layers Purpose:
1. To be able to use layers in an image file.
Exercises:
1. Open your Photoshop application.
2. Create a new document of whatever size your prefer with a white background .
3. Make sure that you can view the Layers Panel.
4. Use the “Elliptical Marquee Tool” to make a marquee selection in the Background Layer.
5. Select a desired foreground color and press “Alt” + “Delete” on your keyboard to fill it with the
foreground color choice.
6. Select “Layer| New| Layer…” from the Menu Bar.
7. Click “OK” to create the new layer.
8. Use the “Elliptical Marquee Tool” to make a marquee selection in the new layer. Try to slightly
overlap your original selection.
9. Select a desired foreground color and press “Alt” + “Delete” on your keyboard to fill it with the
foreground color choice.
10. Select “Layer| New| Layer…” from the Menu Bar.
11. Click “OK” to create the new layer.
12. Use the “Elliptical Marquee Tool” to make a marquee selection in the new layer. Try to slightly
overlap your original selection.
13. Select a desired foreground color and press “Alt” + “Delete” on your keyboard to fill it with the
foreground color choice.
14. Click once into the layer to deselect your selection.
15. In the Layers Panel, click and drag the “Layer 1” layer (the first layer) above the “Layer 2” layer (the
second layer) and release it. You will note that the content of the first layer is now visible over the
content of the second layer in places where they overlap.
16. Click the “eye” icon at the left end of the “Background Layer” to hide it.
17. Click the “eye” icon at the left end of the “Background Layer” to show it.
18. Click on the “Layer 2” layer in the Layers Panel to select it.
19. Select the “Move Tool” from the Toolbox.
20. Click and drag the oval shape in “Layer 2” to a new location and release it.
21. Click on the “Layer 1” layer in the Layers Panel to select it.
22. Select the “Move Tool” from the Toolbox.
23. Click and drag the oval shape in “Layer 1” to a new location and release it.
24. Select the “Layer 1” layer in the Layer Panel.
25. Select “Layer| Duplicate Layer…” from the Menu Bar.
26. Click “OK” in the “Duplicate Layer” dialog box.
27. Click and drag the “Layer 1 copy” layer in the Layers Panel onto the “Trash” icon at the bottom of the
Layers Panel to delete the duplicate layer.
28. Select “Layer| Flatten Image” from the Menu Bar to flatten and rasterize the image into a single
background layer.
29. Click the “New Layer” button at the bottom of the Layers Panel to create a new layer.
30. In the new layer, use the “Elliptical Marquee Tool” to make a marquee selection. Try to overlap your
original selection. Sample
- for
evalu
ation
purp
oses
only!

17 Advanced Photoshop ©TeachUcomp, Inc.
EXERCISES-
Layers Exercises (cont.):
30. Select a new foreground color, and then press “Alt” + “Delete” on your keyboard to fill-in the
selection in the new layer with the selected color.
31. Make sure that the new layer is selected in the Layers Panel, and use the drop-down in the upper
left corner to select a different layer blending mode. Feel free to experiment with this to familiarize
yourself with the layer blending mode effects.
32. Close the image file. You can save your work if you wish, but it isn’t required.
Sample
- for
evalu
ation
purp
oses
only!

18 Advanced Photoshop ©TeachUcomp, Inc.
CHAPTER 10-
Advanced Layers
10.1- Layer Styles
10.2- Adjustment Layers and Fill Layers
10.3- The Adjustments Panel
10.4- Masking Layers
10.5- The <Masks Panel
10.6- Creating Clipping Groups
10.7- Creating Knockouts
10.8- Smart Objects
10.9- Smart Filters
Sample
- for
evalu
ation
purp
oses
only!

19 Advanced Photoshop ©TeachUcomp, Inc.
Advanced Layers
10.1- Layer Styles:
Layer Styles allow you to apply various effects to a layer’s content. You can use several of the
predefined styles that are available to you or you can customize your own. When you apply a layer style to
a selected layer, an “fx” icon (“f” in versions CS2 and previous) appears to the right of the layer’s name in
the Layers Panel to indicate that the layer has a style applied. You can double-click the icon to view the
individual settings of the layer style and you can even edit them, if needed.
To use layer styles, select the layer whose style you wish to edit in the Layers Panel. Then click the
“Layer Options” button in the Layers Panel to reveal the pop-up menu of choices. From there, you can
select the “Blending Options…” menu command to reveal the “Layer Styles” dialog box. You could also just
have selected the layer and then selected “Layer| Layer Style| Blending Options…” from the Menu Bar to
also invoke the “Layer Style” dialog box.
This dialog box has many different sections that you can click on at the left side of the dialog box to
view the specific settings for that option at the right side of the dialog box. To apply a layer style, click the
“Styles” button at the left side of this dialog box. To the right of that, you’ll see the various styles that you
currently have loaded. You can click on any one of these preset layer styles to apply them to the selected
layer. If you want to load a different library of preset styles, click the “Layer Style Options” button in the
upper right corner of the “Styles” section to reveal a pop-up menu of choices. At the bottom of the pop-up
menu is a listing of the various preset layer style libraries that you can load into this window. Select the
library of layer styles that you want to load. Note that like our brush options that we set earlier, you have the
option of replacing or appending the selected library to the set of layer styles. To apply a selected style
within the loaded library, click on it to select it.
Back at the left, you can also click the “Blending Options” button to view the selected layer’s
blending options at the right. To the right, you can set the general blending mode of the layer with the pixels
in the layer below it from the “Blend Mode:” drop-down. You can also set the “Opacity:” of the layer using
the slider of the same name directly below the “Blend Mode:” drop-down. In the “Advanced Blending:”
section, you can use the “Fill Opacity:” slider to set the desired opacity of the fill for the layer. Fill opacity
affects the pixels painted in a layer and shapes drawn on a layer without affecting the opacity of any layer
effects that have been applied. You can then use the “Channels:” checkboxes to include or exclude
channels (colors) from the blending options being applied. Typically, blending affects all of the channels in
your color model, but you can exclude any channel in your color model here.
Sample
- for
evalu
ation
purp
oses
only!

20 Advanced Photoshop ©TeachUcomp, Inc.
Advanced Layers
10.1- Layer Styles (cont.):
Next, you’ll see the drop-down for your “Knockout:” options. We will examine this more closely when
we look at creating clipping groups. For now, just remember where this option is. Below that, we have
several checkboxes that allow us to determine the scope for blending our layers. You can check the “Blend
Interior Effects as Group” checkbox to apply the blending mode of the layer to layer effects that modify
opaque pixels. You can check the “Blend Clipped Layers as Group” to apply the blending mode of the base
layer to all of the other layers in a clipping group. We will examine this also when we work with clipping
groups later. Checking the “Transparency Shapes Layer” checkbox will restrict the selected layer effects to
only the opaque areas of the layer (not the transparent areas). Checking the “Layer Mask Hides Effects”
checkbox restricts layer effects to the areas defined by the layer mask, restricting the area that it will effect.
In a similar vein, checking the “Vector Mask Hides Effects” checkbox will restrict the layer effects to the area
defined by the applied vector mask.
Below the checkboxes are two sliders that then allow us to specify the range for blending layers.
You can use the sliders to determine which color pixels are dropped or allowed to show through the layer.
For example, if you applied a fill layer over a background image, you can first select a color from the “Blend
If:” drop-down to blend. Then use either the “This layer:” or the “Underlying Layer:” sliders to determine
which colors will be blended with the selected layer. This can be a way of defining a range of partially
blended pixels to transition between a fully blended and unblended area in the image.
After you have specified your blending options for the layer, back at the left you can apply various
different layer effects to enhance the layer’s appearance. These effects are simply checkboxes that you can
check or uncheck to apply the selected styles. If you check any one of the options, you will be presented
with the choices that you have for editing that option at the right. Once you have applied the layer styles that
you prefer here, just click the “OK” button in the upper right corner of the “Layer Style” dialog box to apply
the custom layer style. Let’s now look at some of the settings that we can apply.
Sample
- for
evalu
ation
purp
oses
only!

21 Advanced Photoshop ©TeachUcomp, Inc.
Advanced Layers
10.1- Layer Styles (cont.):
You can use any of these effects in your layers in Photoshop to apply layer styles of your own
design.
Style Name: Effect:
Drop Shadow Adds a shadow that falls behind the layer’s content onto the contents
of the layer below.
Inner Shadow Adds a shadow that falls just inside the edges of the layer content.
Outer Glow Adds a glow that seems to emanate from the outside edge of the
layer’s content.
Inner Glow Adds a glow that seems to emanate from the inside edge of the
layer’s content.
Bevel and Emboss Adds a beveled or embossed appearance to the layer’s content. Also
allows you to customize its appearance with the “Contour” and
“Texture” settings.
Satin Applies a shading to the inside of the layer’s content that gives it a
satin appearance.
Color Overlay Fills the layer’s content with a selected color overlay.
Gradient Overlay Fills the layer’s content with a selected gradient overlay.
Pattern Overlay Fills the layer’s content with a selected pattern overlay.
Stroke Outlines the object on the current layer with a color, gradient or
pattern.
Once you select a style to add to your layer style above, you simply change the settings to
customize and enhance the style. Below and continuing onto the next page is a listing of some of the
various layer style setting options that we can change in the “Layer Style” dialog box. Just as when we
customized our brush tips earlier, we will repeat the same steps as before; checking the style option that we
want to edit from the buttons available at the left side of the dialog box and then changing the default
settings as needed at the right side of the dialog box.
Style Option Name: Effect:
Angle Determines the angle of light at which the effect is displayed in the
image.
Anti-alias Blends curves in the layer content to reduce the appearance of
jagged edges in the effect.
Blend Mode Determines how the layer style will blend with other layers below it. Sample
- for
evalu
ation
purp
oses
only!

22 Advanced Photoshop ©TeachUcomp, Inc.
Advanced Layers
Style Option Name: Effect:
Choke Shrinks the boundaries of the matte when using the Inner Shadow or
Inner Glow prior to blurring.
Color Specifies the color of the shadow, highlight, or glow applied.
Contour Allows you to change the appearance of the edges of an effect.
Distance Specifies the offset amount for an effect from the layer content.
Depth Specifies the depth of a pattern or a beveled edge.
Global Angle Enables global lighting for the effect. Global lighting applies the same
lighting angle to all effects that have the “Global Angle” option
selected, creating the appearance of a consistent lighting source.
Gloss Contour Give the effect a glossy appearance.
Gradient Specifies the gradient of a layer effect.
Highlight or Shadow Mode Specifies the blending mode of a bevel effect, emboss effect, or
shadow effect.
Jitter Causes variations to appear in a gradient’s color and opacity.
Layer Knocks Out Drop Shadow Controls the visibility of a drop shadow in a semitransparent layer.
Noise Specifies the amount of randomness in the effect.
Opacity Set the opacity of the layer effect.
Pattern Allows you to add a pattern to the layer effect.
Position Specifies the position of a “stroke” effect.
Range Control which portion or range of the glow is targeted for the contour.
Size Specifies the amount of blur or amount of shadow applied.
Soften Blurs the results of shading before compositing to reduce unwanted
artifacts.
Source Specifies the source of the glow for an inner glow effect.
Spread Expands the boundaries of the matte prior to blurring.
Style Specifies the style of a beveled edge.
10.1- Layer Styles (cont.):
Sample
- for
evalu
ation
purp
oses
only!

23 Advanced Photoshop ©TeachUcomp, Inc.
Advanced Layers
Style Option Name: Effect:
Technique Used to set the mode used to create the effects in the bevel and
emboss effects.
Texture Allows you to set a pattern to used to texture a beveled effect.
10.1- Layer Styles (cont.):
10.2- Adjustment Layers and Fill Layers:
Superficially, adjustment layers and fill layers have many of the same options that normal layers
have. They have many of the same opacity and blending modes settings available to them. However,
adjustment layers allow you to apply a layer over an image element to experiment with color and tonal
adjustments in the image. Keeping the adjustment in a separate layer allows you to apply adjustments
without permanently altering the pixels in the image. An adjustment layer will affect all of the layers below it
in the image, allowing you to correct multiple layers with a single adjustment layer, rather than having to
adjust each layer separately.
A fill layer allows you to fill a layer with a solid color, pattern, or gradient. Unlike adjustment layers
they do not affect all layers beneath them.
To create a new adjustment layer, you can click the “New Fill or Adjustment Layer” button at the
bottom of the Layers Panel, and then choose the layer type that you want to create from the pop-up menu
that appears. You could also select “Layer| New Adjustment Layer” or “Layer| New Fill Layer” from the
Menu Bar and then select the type of adjustment or fill layer that you want to create from the side menu that
appears. Now let’s examine what the various types of adjustment layer do.
Layer Property: Effect:
Solid Color Lets you specify a solid fill color for the layer that you can select.
Gradient Lets you specify a gradient for the layer that you can select or create.
Pattern Lets you specify a pattern for the layer that you can select or create.
Brightness/Contrast Lets you set values for the image brightness and contrast.
Levels Allows you to set the values for the highlights, midtones and shadows.
Curves Allows you to adjust the intensity values of pixels along a 0-255 scale,
while keeping up to 15 other intensity values constant.
Exposure Allows you to adjust the exposure of an image.
Vibrance (CS5/CS4) Gives more precise controls over saturation.
Hue/Saturation Let you select which colors to edit, and specify new values for Hue,
Saturation, and Lightness.
Color Balance Lets you drag a slider to increase or decrease a color in the image.
Sample
- for
evalu
ation
purp
oses
only!

24 Advanced Photoshop ©TeachUcomp, Inc.
Advanced Layers
10.2- Adjustment Layers and Fill Layers (cont.):
Layer Property: Effect: Black & White Allows you to make a color image black & white.
Photo Filter Allows you to apply different photographic filters to an image.
Channel Mixer Allows you to make modifications to a selected channel in your image
file.
Color Lookup Allows for remapping every color in an image to a different one using
a lookup table (LUT).
Invert No options available.
Posterize Allows you to specify the number of tonal levels for the image.
Threshold Allows you to set a threshold level for the image.
Gradient Map Allows you to select a gradient and set the gradient options.
Selective Color Lets you select a color and use a slider to increase or decrease the
components in the selected color.
10.3- The Adjustments Panel:
Version CS4 introduced the Adjustments Panel which consolidates the adjustments you can perform
from the Menu Bar into one easy-access panel. The Adjustments Panel also allows you access to the
various controls of each adjustment and eliminates the dialog boxes when using the Menu Bar. If it is not
already visible, you can view it by selecting “Window| Adjustments” from the Menu Bar. The icons at the top
of the panel represent the various adjustments we talked about in the last lesson. Roll your mouse over the
icons to display the name of the adjustment. If you click on one of the icons, it selects it and applies the
adjustment layer (you will be able to see the new layer appear in the Layers Panel).
Below the icons are a list of adjustment presets that you can choose from, if you wish. Click on the
small grey arrows next to the preset names to expand or collapse the various options. And again, clicking
on any of these presets will apply the adjustment layer. At the bottom-left of the panel there is a button to
collapse or expand the Adjustments Panel for easier viewing. If you want to apply the adjustment to certain
layers, use the “Clip to Layer” button in the bottom-right corner of the panel. To do so, select your
adjustment then click the “Clip to Layer” button to attach it to that layer. Click the button again and you will
apply the adjustment to all the layers below it in the Layers Panel.
After you make a selection, the controls for that particular adjustment appear in the panel and it is
here where you make any changes. Notice that the bottom of the panel changes as well and presents us
with different icons. First, you can click the left-pointing arrow if you want to add another adjustment layer
on top of the current one. That will take you back to the list of icons and presets. You can switch back to
the current adjustment’s settings by clicking the right-pointing arrow that takes its place. After the arrow, we
have the expand/collapse command, the “Clip to Layer” button, and then the visibility icon. This works the
same was as in the Layer’s Panel. You can toggle the visibility of the layer on and off with this button.
Once you have made a change to the adjustment layer using the controls in the panel, you can then
click and hold the “Previous State” button. To view the image in the state before you made the change. Just
release the click when you are done viewing it in the previous state. Sample
- for
evalu
ation
purp
oses
only!

25 Advanced Photoshop ©TeachUcomp, Inc.
Advanced Layers
10.3- The Adjustments Panel (cont.):
The next button is the “Reset” button that allows you to return the adjustment to the original setting.
Finally, there is the familiar trash can icon. To delete the adjustment layer you’ve created, just click the
“Delete This Adjustment Layer” button.
You can save some adjustments you make as presets for future use. You can save presets for
Levels, Curves, Exposure, Hue/Saturation, Black & White, Channel Mixer, and Selective Color. After you
apply the adjustment, open the Adjustment Panel’s “Options” menu. Then, select “Save (Name) Preset”
where you will be presented with the “Save” dialog box. Save your preset with a descriptive name. To load
the preset layer you can then just select “Load (Name) Preset” from the same menu.
Adjustment
Icons
Presets
Expand/Collapse
Return to
Adjustment
Controls
Add Another
Adjustment Layer
Clip to Layer Layer Visibility
Previous State
Reset
Delete
Options
Menu
Sample
- for
evalu
ation
purp
oses
only!

26 Advanced Photoshop ©TeachUcomp, Inc.
Advanced Layers
10.4- Masking Layers:
When you apply a mask to a layer, you restrict the effects of the layer to only a selected region of
the layer. Probably the easiest way to create a mask for a layer is simply to use one of the selection tools to
create a selection of the area to which you want to apply the layer effect, and then create your new fill or
adjustment layer as normal. The effect will only be applied to the selected region in the new layer, and you
will see the mask applied linked to the right of the layer effect thumbnail in the Layers Panel.
You can also create a layer mask that shows or hides an entire layer. First, make sure that you don’t
have any selections made in the image. Otherwise, it will create the mask using the selection area. Next,
select “Layer| (Add) Layer Mask| Reveal All” to create a mask that reveals the entire layer or select “Layer|
(Add) Layer Mask| Hide All” to create a layer mask that hides the content of the layer. Remember that a
layer mask is just a grayscale image. What is painted in white in the layer mask will show and what is
painted in black will be hidden in the layer mask. If you use gray in the mask it will appear as semi-
transparent. You can edit the grayscale channel that is created either in the Channels Panel, or by selecting
the layer mask thumbnail in the Layers Panel. Then you can use your painting tools with black, white and
gray to show, hide, or make semi-transparent the area over which you paint. You can delete a layer mask
by dragging the thumbnail of the layer mask into the “Trash” icon at the bottom of the Layer Panel. You will
need to confirm your choice in the pop-up dialog box that appears.
In addition to layer masks you can create vector masks. The layer masks are bitmap images created
by the painting or selection tools. Vector masks, which are resolution independent, are created with the
vector-based tools, like the “Pen Tool.”
In the Layers Panel, you will see both types of masks appear as another thumbnail which appears to
the right of the layer thumbnail to which they are linked. The thumbnail displays the grayscale channel
created by the layer mask or the path that clips out the layer’s content, if using a vector mask.
If you want to create a vector mask that shows or hides the entire layer, select the layer to which you
would like to add a vector mask, and then select “Layer| (Add) Vector Mask| Reveal All” to add a vector
mask that shows the entire layer or select “Layer| (Add) Vector Mask| Hide All” to create a vector mask that
hides the entire layer. You can also create a vector mask based on a vector shape by first creating a vector
work path using one of the “Shape Tools” or the “Pen Tool.” You can then select “Layer| (Add) Vector Mask|
Current Path” from the Menu Bar to turn the work path into a vector mask. You can delete a vector mask by
clicking and dragging the thumbnail of the vector mask into the “Trash” icon at the bottom of the Layer
Panel. You will be prompted to confirm your choice in a pop-up dialog box.
Sample
- for
evalu
ation
purp
oses
only!

27 Advanced Photoshop ©TeachUcomp, Inc.
Advanced Layers
10.5- The Masks Panel :
Version CS4 introduced the “Masks Panel” which consolidates all the functions for creating and
refining your masks. If the panel is not already visible, you can select “Window| Masks” from the Menu Bar
to display it. You can then use the sliders to change the density and feathering of the mask. You can also
use the buttons in the “Refine” area to make further adjustments. Clicking on “Mask Edge” or “Color Range”
will display a dialog box where you can make your desired changes. You can even invert the mask by
clicking that button. At the bottom of the Masks Panel, you will find the button to apply the mask, a
visibility icon (the eye) to show or hide the mask and the “Delete” button (trash can) to remove it.
Version CS6 removed the Masks Panel and replaced the functionality with the Properties Panel.
Select “Window| Properties” and you can make all the same changes.
10.6- Creating Clipping Groups:
A clipping group is a grouped set of layers in which the bottom layer acts as a mask for the entire
group. For example, you may have a base (bottom) layer which contains a shape and a layer above that
which contains an image. If you define the layers as a clipping mask, you can then have the image appear
only within the area that the shape encompasses. The image also takes on the opacity of the base layer.
It is important to note that only layers that are adjacent can be included in a clipping group. The
order is also important. In a clipping group, the name of the base layer is underlined and the thumbnails for
the overlying layers appear indented. They will also show the clipping group icon, which is a small bent
arrow pointing downward.
So to create a clipping group, place the layers in the appropriate order using the Layers Panel. Then
click to select the base layer in the group. For the layers above that you want to include as part of the group,
link them using the “Link Layers” button in the lower-left corner of the Layers Panel, then select “Layer|
Create Clipping Mask” from the Menu Bar to a create clipping mask from the linked layers.
Sample
- for
evalu
ation
purp
oses
only!

28 Advanced Photoshop ©TeachUcomp, Inc.
Advanced Layers
10.7- Creating Knockouts:
You can create a knockout to have the topmost layer in a clipping group “punch through” to the
bottom layer of the clipping group or to the background layer. To do this, first create the desired clipping
group and then select the topmost layer in the group. From there, double-click the layer thumbnail to reveal
the “Layer Style” dialog box. Click the “Blending Options” button at the left of the “Layer Style” dialog box. In
the screen at the right, use the “Knockout:” drop-down to select either “Shallow” to punch through to the first
possible stopping point, like the bottom of the clipping group, or select “Deep” to knock through all the way
down to the background. If there is no background, “Deep” will knock through to transparency. Then you
must change the “Fill Opacity” or “Blending Mode” of the layer to create the knockout effect.
Sample
- for
evalu
ation
purp
oses
only!

29 Advanced Photoshop ©TeachUcomp, Inc.
Advanced Layers
10.8- Smart Objects:
Version CS3 introduced Smart Objects, which allow you to make what is called “nondestructive
editing,” meaning you can make changes to an image without overwriting the original data. Smart Objects
are simply layers that contain raster or vector images. You can create Smart Objects in several ways:
1. Select “File| Open As Smart Object…” from the Menu Bar to open an image as a Smart Object.
2. Select “File| Place…” from the Menu Bar to place an image as a Smart Object.
3. Select “Filter| Convert for Smart Filters” to convert an image to a Smart Object.
4. In Bridge, select “File| Place| In Photoshop” to import a document as a Smart Object.
5. Drag a PDF or Adobe Illustrator objects (or layers) into a Photoshop document.
To duplicate a Smart Object, select “Layer| New| Layer via Copy” from the Menu Bar, or drag the
Smart Object layer onto the “Create A New Layer” icon at the bottom of the Layers Panel. Changes you
make to either the copy or the original also change the other.
To edit content of a Smart Object, first select the object from the Layers Panel and select “Layer|
Smart Objects| Edit Contents” from the Menu Bar. You can also update the image in one or more instances
of the Smart Object by selecting “Layer| Smart Objects| Replace Contents” from the Menu Bar. To export
the contents of a Smart Object, select the Smart Object in the Layers Panel, and select “Layer| Smart
Objects| Export Contents” from the Menu Bar.
If you no longer need to edit the Smart Object and wish to convert it to a regular layer (which
rasterizes the content), select the Smart Object and select “Layer| Rasterize| Smart Object” from the Menu
Bar.
10.9- Smart Filters:
When you apply a filter to a Smart Object, you create what’s called a “Smart Filter.” You cannot
apply certain filters to a Smart Object, such as Extract, Liquify, Pattern Maker and Vanishing Point. Smart
Filters will appear in the Layers Panel, just below the Smart Object layer to which it is applied. To apply a
Smart Filter, select the Smart Object layer in the Layers Panel. If you wish to contain the effects to only a
certain area of the object, use a selection tool to make your selection. Then, apply your filter(s) as you
normally would. Select “Filter| Convert for Smart Filters” and click “OK.”
Sample
- for
evalu
ation
purp
oses
only!

30 Advanced Photoshop ©TeachUcomp, Inc.
ACTIONS-
Advanced Layers APPLYING LAYER STYLES AND OPTIONS:
1. Select the layer from the Layers Panel whose style you wish to edit.
2. Click the “Layer Options” button in the Layers Panel and select “Blending Options…” from the menu.
OR
2. Select “Layer| Layer Style| Blending Options…” from the Menu Bar.
3. To apply a layer style, click the “Styles” button at the left side of this dialog box.
4. To the right, you’ll see the various styles that you currently have loaded. You can click on any one of
these preset layer styles to apply them to the selected layer.
5. If you want to load a different library of preset styles, click the “Layer Style Options” button in the upper
right corner of the “Styles” section to reveal a pop-up menu of choices. At the bottom of the pop-up menu
are a listing of the various preset layer style libraries that you can load into this window. Select the library
of layer styles that you want to load. Note that like our brush options that we set earlier, you have the
option of replacing or appending the selected library to the set of layer styles.
6. Back at the left, you can click the “Blending Options” button to view the selected layer’s blending options
at the right.
7. At the right, you can set the general blending mode of the layer with the pixels in the layer below it from
the “Blend Mode:” drop-down.
8. You can also set the “Opacity:” of the layer using the slider of the same name directly below the “Blend
Mode:” drop-down.
9. In the “Advanced Blending:” section, you can use the “Fill Opacity:” slider to set the desired opacity of the
fill for the layer.
10. You can then use the “Channels:” checkboxes to include or exclude an channels (colors) from the
blending options being applied.
11. If you are creating a knockout image use the “Knockout:” drop-down to set the punch-through options.
12. You can check the “Blend Interior Effects as Group” checkbox to apply the blending mode of the layer to
layer effects that modify opaque pixels.
13. You can check the “Blend Clipped Layers as Group” to apply the blending mode of the base layer to all
of the other layers in a clipping group.
14. Checking the “Select Transparency Shapes Layer” checkbox will restrict the selected layer effects to
only the opaque areas of the layer (not the transparent areas).
15. Checking the “Layer Mask Hides Effects” checkbox restricts layer effects to the areas defined by the
layer mask, restricting the area that it will effect.
16. Checking the “Vector Mask Hides Effects” checkbox will restrict the layer effects to the area defined by
the applied vector mask.
17. You can use the two sliders available at the bottom of the dialog box to specify the range for blending
layers. You can use the sliders to determine which color pixels are dropped or allowed to show through
the layer.
18. Check any of the additional effects that you want to apply to the layer from the checkboxes listed at the
left side of the dialog box. Set any changes to the properties of the effects at the right side of the dialog
box.
19. When you are finished, click the “OK” button to set the layer effects and options.
Sample
- for
evalu
ation
purp
oses
only!

31 Advanced Photoshop ©TeachUcomp, Inc.
ACTIONS-
Advanced Layers CREATING ADJUSTMENT LAYERS AND FILL LAYERS:
1. Select “Layer| New Adjustment Layer” or “Layer| New Fill Layer” from the Menu Bar to create a layer of
the desired type. Or, in CS4, select an adjustment layer from the “Adjustments Panel.”
2. Set any options that are available for the type of layer that you are creating and then click “OK” to create
the new fill or adjustment layer.
CREATING MASKED ADJUSTMENT LAYERS AND FILL LAYERS:
1. Use one of the selection tools to select the area in the image which you want to use as the mask for the
fill or adjustment layer. The layer will only affect the selected area.
2. Select “Layer| New Adjustment Layer” or “Layer| New Fill Layer” from the Menu Bar to create a layer of
the desired type.
3. From the side menu that appears, select the type of fill or adjustment layer that you want to create.
4. In the dialog box that appears, set any options that are available for the type of layer that you are creating
and then click “OK” to create the new fill or adjustment layer.
CREATING A LAYER MASK THAT SHOWS OR HIDES THE LAYER:
1. Select “Layer| (Add) Layer Mask” from the Menu Bar.
2. To create a layer mask that shows all of the layer’s content, select “Reveal All.”
3. To create a layer mask that hides all of the layer’s content, select “Hide All.”
EDITING A LAYER MASK:
1. Select the thumbnail of the layer mask that you want to edit.
2. Select the painting tool (bitmap-based) that you want to use to edit the layer mask.
3. To show more of the layer, select the color “White” and click and drag in the image to reveal more of the
layer by painting.
4. To hide more of the layer, select the color “Black” and click and drag in the image to hide more of the
layer by painting.
5. To make part of the layer semi-transparent, select the color “Gray” and click and drag in the image to
make part of the layer semi-transparent.
DELETING A LAYER MASK:
1. Click and drag the thumbnail of the layer mask into the “Trash” icon at the bottom of the Layers Panel.
2. Click “Yes” or “No” to the “Discard Layer Mask” dialog box.
OR
1. Right-click on the thumbnail of the layer mask and select “Delete (or Discard) Layer Mask” from the pop-
up menu that appears.
Sample
- for
evalu
ation
purp
oses
only!

32 Advanced Photoshop ©TeachUcomp, Inc.
ACTIONS-
Advanced Layers CREATING A VECTOR MASK FROM A WORK PATH:
1. Select the vector-based tool that you want to use to create the work path from the Toolbox.
2. Select the “Work Path” button in the Options Bar.
3. Create the work path with the vector tool.
4. Select “Layer| (Add) Vector Mask| Current Path” from the Menu Bar.
CREATING A VECTOR MASK THAT SHOWS OR HIDES A LAYER:
1. Select “Layer| (Add) Vector Mask” from the Menu Bar.
2. From the side menu that appears, select “Reveal All” to show all of the layer.
3. Select “Hide All” from the side menu to hide all of the layer.
DELETING A VECTOR MASK:
1. Click and drag the thumbnail of the vector mask into the “Trash” icon at the bottom of the Layers Panel.
2. Click “Yes” or “No” to the “Delete Vector Mask” dialog box.
OR
1. Right-click on the thumbnail of the layer mask and select “Delete Vector Mask” from the pop-up menu
that appears.
CREATING CLIPPING GROUPS:
1. Place the layers in the appropriate order using the Layers Panel.
2. Click to select the base layer in the group.
3. For the layers above that you want to include as part of the group, click the gray “link” box to the left of
each successive layer above the base layer which you want to include in the group.
4. Once you have linked the layers together, select “Layer| Create Clipping Mask from Linked” from the
Menu Bar to a create clipping mask from the linked layers.
CREATING A KNOCKOUT IN A CLIPPING GROUP:
1. First create the desired clipping group and then select the topmost layer in the group.
2. Double-click the layer thumbnail to reveal the “Layer Style” dialog box.
3. Click the “Blending Options” button at the left of the “Layer Style” dialog box.
4. In the screen at the right, use the “Knockout:” drop-down to select either “Shallow” to punch through to
the first possible stopping point, like the bottom of the clipping group, or select “Deep” to knock through
all the way down to the background. If there is no background, “Deep” will knock through to
transparency.
5. Then you must change the “Fill Opacity” or “Blending Mode” of the layer to create the knockout effect.
6. Click “OK” to apply the effect.
Sample
- for
evalu
ation
purp
oses
only!

33 Advanced Photoshop ©TeachUcomp, Inc.
ACTIONS-
Advanced Layers CREATING A SMART OBJECT:
Do one of the following:
1. Select “File| Open As Smart Object…” from the Menu Bar to open an image as a Smart Object.
2. Select “File| Place…” from the Menu Bar to place an image as a Smart Object.
3. Select “Filter| Convert for Smart Filters” to convert an image to a Smart Object.
4. In Bridge, select “File| Place| In Photoshop” to import a document as a Smart Object.
5. Drag a PDF or Adobe Illustrator objects (or layers) into a Photoshop document.
CREATING A SMART FILTER:
1. Select the Smart Object’s layer in the Layers Panel.
2. Use a selection tool to contain the effects to only a certain area or do nothing to apply it to the entire
object.
3. Select “Filter| Convert for Smart Filters” from the Menu Bar.
4. Click “OK.”
Sample
- for
evalu
ation
purp
oses
only!

34 Advanced Photoshop ©TeachUcomp, Inc.
EXERCISES-
Advanced Layers Purpose:
1. To be able to apply layer styles and effects to selected layers.
Exercises:
1. Open your Photoshop application.
2. Open an image file that you can use for the exercise. You can make a copy of the image if you want
to keep the original image.
3. Make sure that you can view the Layers Panel.
4. Select “Layer| New| Layer…” from the Menu Bar.
5. In the “Name:” text box of the “New Layer” dialog box, type “Color Blob.”
6. Click “OK” to create the new layer.
7. Select the “Lasso Tool” from the Toolbox.
8. Make sure that the “Color Blob” layer is selected in the Layer Panel. Then click and drag an irregular
blob-shaped selection within the selected layer.
9. Select “Edit| Fill…” from the Menu Bar.
10. In the “Fill” dialog box, select “Pattern” from the “Use:” drop-down menu. Use the “Custom Pattern:”
drop-down to select a custom pattern.
11. Click “OK” to fill the selection with the pattern you selected.
12. Select “Edit| Stroke…” from the Menu Bar.
13. In the “Stroke” dialog box, type “3 px” in the “Width:” text box.
14. Click the “Color:” box to launch the “Color Picker” dialog box where you can make a color selection.
15. Click the “Outside” selection under “Location.”
16. Set the “Mode:” to “Normal,” if needed.
17. Type “100” into the “Opacity:” text box.
18. Click “OK” to apply the selected stroke to the selection.
19. Click once in the image to de-select the selection.
20. Select “Layer| New| Layer…” from the Menu Bar.
21. In the “Name:” text box, type “Knockout Layer.”
22. Click “OK.”
23. Click the “Rectangular Marquee Tool” from the Toolbox and click and drag a smaller rectangle over
the color blob in the new layer.
24. Press “D” on your keyboard to reset the foreground and background colors to black and white.
25. Press “Alt” + “Delete” on your keyboard to apply a black fill to the selected rectangle.
26. Click once into the image to de-select the selection.
27. In the Layers Panel, click the empty gray box at the left end of each layer (to the right of the “Eye”
icon) to link the two non-selected layers to the layer that is currently selected.
28. Select “Layer| Create Clipping Mask from Linked” from the Menu Bar.
29. Double-click the layer thumbnail image of the “Knockout Layer” in the Layer Panel to launch the
“Layer Style” dialog box.
30. In the “Advanced Blending” section, use the “Knockout:” drop-down to select either “Shallow” or
“Deep.”
31. Use the “Fill Opacity:” slider to slider down to “0” percent. You should see the background layer
through the two layers above it, but only where you had previously seen the black rectangle.
32. Click “OK.” Sample
- for
evalu
ation
purp
oses
only!

35 Advanced Photoshop ©TeachUcomp, Inc.
EXERCISES-
Advanced Layers Exercises (cont.):
33. Double-click the thumbnail image of the “Color Blob” in the Layer Panel to lunch the “Layer Style”
dialog box again.
34. Click the “Styles” button in the upper left corner of that dialog box.
35. Click on a layer style in the dialog box to view it applied in the image. When you find one that you
like, click “OK” to apply the layer style to the selection.
36. Close the image file. You can save your changes, if you like them and want to keep them.
Sample
- for
evalu
ation
purp
oses
only!

36 Advanced Photoshop ©TeachUcomp, Inc.
CHAPTER 11-
Text
11.1- Text Basics
11.2- Entering Text
11.3- Selecting Text
11.4- Editing the Bounding Box
11.5- Creating a Type Selection
11.6- Applying Effects to Type Layers
11.7- Using the Character Panel
11.8- Checking for Spelling Errors
11.9- Using the Paragraph Panel
Sample
- for
evalu
ation
purp
oses
only!

37 Advanced Photoshop ©TeachUcomp, Inc.
Text
11.1- Text Basics:
We can add text to the image files that we create in Photoshop. Text type is vector-based and
collected in a set of symbols and characters that we call a typeface (or “font”). There are two basic types of
text in Photoshop: “point type” and “paragraph type.” Point type is useful for entering a word or single line of
text and paragraph type is useful for entering and formatting multiple lines of text as one or more
paragraphs. In Photoshop, we use the “Type Tools” to create and edit text. Whenever you create text in a
Photoshop image file, a new text layer is added to the Layers Panel. When you click into an image with a
type tool, that sets the tool to its “Edit” mode. You can type your text and then make changes to its
properties in the Options Bar. When you are finished, you must click one of the two buttons at the right end
of the Options Bar: the “Commit” button (which looks like a checkmark), or the “Cancel” button (which looks
like the “Not” symbol) to either accept or reject the changes that you made and leave the tool’s “Edit” mode.
11.2- Entering Text:
Text type is vector-based and collected in a set of symbols and characters that we call a typeface (or
“font”). There are two basic types of text in Photoshop: “point type” and “paragraph type.” Point type is
useful for entering a word or single line of text and paragraph type is useful for entering and formatting
multiple lines of text as one or more paragraphs. Whenever you create text in a Photoshop image file, a
new text layer is added to the Layers Panel.
Let’s examine how we can create “point type” text in Photoshop. Point type allows you to create text
where each line of text is independent of the other lines. As you type, the length of the line will grow. If you
delete characters, the line of text will shrink. However, the line will not wrap to the next line of text. To create
a “point type” text layer, select either the “Horizontal Type” or the “Vertical Type” tool from the Toolbox. Your
mouse pointer will turn into an “I-beam” character. This character marks the baseline of the text. The
baseline is the line upon which the text will rest if it is horizontal, or it will mark the center axis of vertical
text. Click into the image at the place where you want the text baseline to appear.
Next, use the Options Bar to set your font options. The first button allows you to “Change Text
Orientation” button to switch the text orientation between the vertical and horizontal options. Use the “Font”
drop-down to select which typeface you want to use for the text. The “Font Style” drop-down allows you to
set whether the text is regular, bold, italic, etc…. This changes for each type of font typeface. Next, use the
“Font Size” drop-down to set the size of the font in points. You can also click into this text box and type your
own font size, if needed. Then set the anti-aliasing mode for the text, which prevents jagged text edges from
the next drop-down available. The next three buttons allow you to set the alignment of the text. You can
either click the “Left align” button to align multiple lines of text by their left sides; “Center align,” to align
multiple lines of text by their horizontal center points; or “Right align” to right align the text lines. Then click
the “Font Color” color box to launch the “Color Picker” dialog box, where you can select the font color to
create. You can click the “Create Warped Text” button to launch the warp text dialog box, where we can
apply a shape to our text. After that, you can click the “Toggle the Character and Paragraph Panel” button to
turn the Character and Paragraph Panels on and off. After setting your desired options, type the text that
you want using your keyboard. To apply your changes when you are finished, click the “Confirm” checkmark
button. To cancel your changes, click the “Cancel” button.
Sample
- for
evalu
ation
purp
oses
only!

38 Advanced Photoshop ©TeachUcomp, Inc.
Text
11.2- Entering Text (cont.):
Now let’s look at how we can create paragraph text in Photoshop. When you enter paragraph text,
the lines of type will wrap to fit the dimensions of its bounding box. You can enter in multiple lines of text
easily here with a paragraph alignment that you set in the Options Bar. You can then change the size of the
bounding box to change the flow of the text within the bounding box. You can do this while you are entering
text or later after creating the text. You can also use the bounding box to rotate, scale, and skew the type in
the bounding box.
To create paragraph text, select one of the type tools: “Horizontal Type Tool” or “Vertical Type Tool.”
Then click and drag with your mouse to set the border of the bounding box into which you will type the text.
Then set the options as you did with the point text, using the Options Bar. After that, type the text that you
want into the bounding box. You can press “Enter” on your keyboard to create a new paragraph. Unlike
point text, however, you do not need to press “Enter” to create a new line within the same paragraph, as the
text will automatically wrap when it encounters the edge of the bounding box. If you type more text than the
bounding box can hold, you’ll see a small icon appear that looks like a square divided into four quadrants.
That icon indicates that the text is overflowing the bounding box. You can resize, rotate or skew the
bounding box to adjust it as you type the text, if needed. When you are finished, just click the “Commit”
button to commit the changes to the text.
11.3- Selecting Text:
You can edit the text after you have typed it by selecting the type tool that you used to create the
text. Then click into the text that you want to select to place it into “Edit” mode, and drag over the text that
you want to select in the text bounding box or on the lines of point text to highlight the text. Then you can
use the buttons available in the Options Bar to change the aspects of the selected text.
There are also several other ways to select text once you have clicked into the text to place it into
“Edit” mode. You can select “Select| All” from the Menu Bar to select all of the text in the layer. This is the
same thing as quintuple-clicking (clicking five times) into the text.
Just as in our word processing applications, we can also double-click a single word to select it. You
can triple-click a line of text to select it. You may also quadruple-click a paragraph to select it. Most of your
traditional methods of text selection can be applied when using type layers.
Sample
- for
evalu
ation
purp
oses
only!

39 Advanced Photoshop ©TeachUcomp, Inc.
Text
11.4- Editing the Bounding Box:
You can click into the text in a bounding box to apply text effects to the bounding box. When you
click into a text box with one of the type tools, you’ll see the bounding box (assuming it isn’t “point” text).
You can move your mouse pointer over one of the small square handles in the bounding box until you can
see your mouse pointer turn into a small double-pointed arrow. When you see it do this, you can click and
drag to expand the border of the bounding box. If you hold the “Shift” key down while you do this, you’ll
resize the bounding box without warping its proportions.
To rotate the bounding box, roll your mouse pointer outside of the bounding border, by one of the
corner square handles until you see your mouse pointer turn into a small bent double-pointing arrow. Click
and drag at that point to rotate the bounding box. If you hold down the “Shift” key as you do that, you’ll
constrain the rotation to 15 degree angles. To change the location of the center point around which the text
will rotate, hold down the “Ctrl” key on your keyboard, and then click and drag the small circle in the center
of the bounding box to a new location. You can even drag the rotation point outside of the border of the
bounding box, if necessary to create the effect you desire.
If you want to skew the bounding box, which gives your text a slanted appearance, hold down the
“Ctrl” key and then click and drag one of the small squares at the top, bottom, left, or right sides of the
bounding box to skew the text. You can even perform this action on point text. Also note that if you hold
down the “Ctrl” key and then click and drag using one of the corner squares, you will scale the text to fit the
new bounding box shape. This also works with the “point” type as well.
Sample
- for
evalu
ation
purp
oses
only!
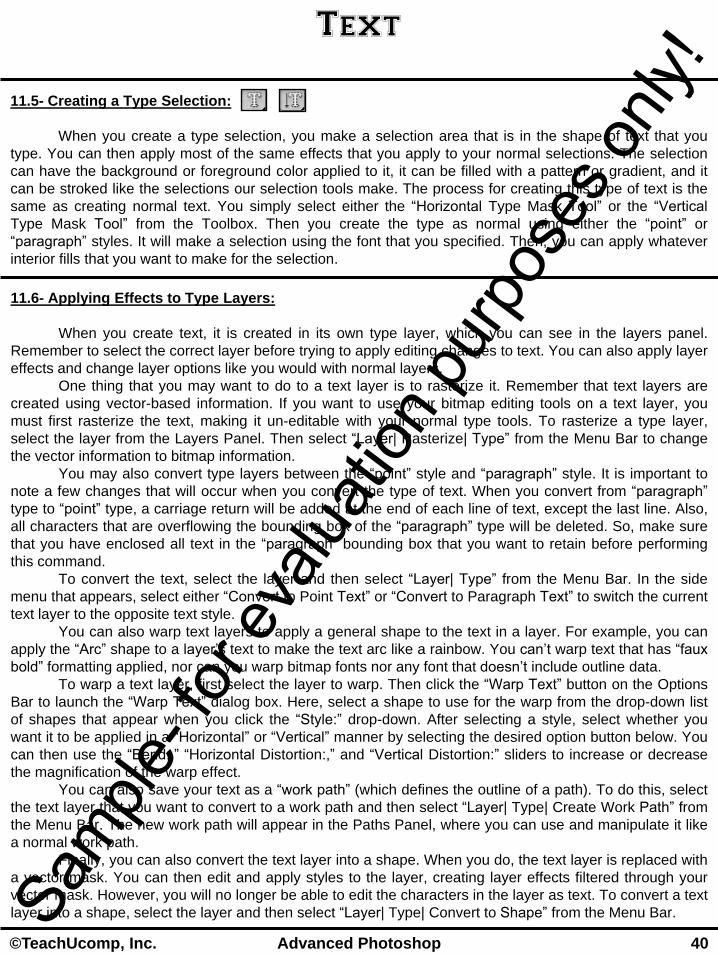
40 Advanced Photoshop ©TeachUcomp, Inc.
Text
11.5- Creating a Type Selection:
When you create a type selection, you make a selection area that is in the shape of text that you
type. You can then apply most of the same effects that you apply to your normal selections. The selection
can have the background or foreground color applied to it, it can be filled with a pattern or gradient, and it
can be stroked like the selections our selection tools make. The process for creating this type of text is the
same as creating normal text. You simply select either the “Horizontal Type Mask Tool” or the “Vertical
Type Mask Tool” from the Toolbox. Then you create the type as normal using either the “point” or
“paragraph” styles. It will make a selection using the font that you specified. Then, you can apply whatever
interior fills that you want to make for the selection.
11.6- Applying Effects to Type Layers:
When you create text, it is created in its own type layer, which you can see in the layers panel.
Remember to select the correct layer before trying to apply editing changes to text. You can also apply layer
effects and change layer options like you would with normal layers.
One thing that you may want to do to a text layer is to rasterize it. Remember that text layers are
created using vector-based information. If you want to use your bitmap editing tools on a text layer, you
must first rasterize the text, making it un-editable with your normal type tools. To rasterize a type layer,
select the layer from the Layers Panel. Then select “Layer| Rasterize| Type” from the Menu Bar to change
the vector information to bitmap information.
You may also convert type layers between the “point” style and “paragraph” style. It is important to
note a few changes that will occur when you convert the type of text. When you convert from “paragraph”
type to “point” type, a carriage return will be added at the end of each line of text, except the last line. Also,
all characters that are overflowing the bounding box of the “paragraph” type will be deleted. So, make sure
that you have enclosed all text in the “paragraph” bounding box that you want to retain before performing
this command.
To convert the text, select the layer and then select “Layer| Type” from the Menu Bar. In the side
menu that appears, select either “Convert to Point Text” or “Convert to Paragraph Text” to switch the current
text layer to the opposite text style.
You can also warp text layers to apply a general shape to the text in a layer. For example, you can
apply the “Arc” shape to a layer’s text to make the text arc like a rainbow. You can’t warp text that has “faux
bold” formatting applied, nor can you warp bitmap fonts nor any font that doesn’t include outline data.
To warp a text layer, first select the layer to warp. Then click the “Warp Text” button on the Options
Bar to launch the “Warp Text” dialog box. Here, select a shape to use for the warp from the drop-down list
of shapes that appear when you click the “Style:” drop-down. After selecting a style, select whether you
want it to be applied in a “Horizontal” or “Vertical” manner by selecting the desired option button below. You
can then use the “Bend:,” “Horizontal Distortion:,” and “Vertical Distortion:” sliders to increase or decrease
the magnification of the warp effect.
You can also save your text as a “work path” (which defines the outline of a path). To do this, select
the text layer that you want to convert to a work path and then select “Layer| Type| Create Work Path” from
the Menu Bar. The new work path will appear in the Paths Panel, where you can use and manipulate it like
a normal work path.
Finally, you can also convert the text layer into a shape. When you do, the text layer is replaced with
a vector mask. You can then edit and apply styles to the layer, creating layer effects filtered through your
vector mask. However, you will no longer be able to edit the characters in the layer as text. To convert a text
layer into a shape, select the layer and then select “Layer| Type| Convert to Shape” from the Menu Bar. Sample
- for
evalu
ation
purp
oses
only!

41 Advanced Photoshop ©TeachUcomp, Inc.
Text
11.7- Using the Character Panel:
After selecting text, you can use the “Character Panel” to apply formatting to the characters
selected. To display the Character Panel, you can click the “Toggle Character and Paragraph Panel” button
at the right end of the Options Bar, or you can select “Window| Character” from the Menu Bar. Many of the
options that we can set in the Character Panel are the same as the options that we can set from the Options
Bar when there is a text tool selected.
Font Style Font
Font Size Font Leading
Font Kerning Font Tracking
Vertically Scale Horizontally Scale
Baseline Shift Font Color
Faux Bold
Language
Strikethrough
Anti-aliasing
Faux Italic
All Caps
Underline
Subscript Small Caps Superscript
You use the “Font” drop-down to set the desired font of the selected text. Use the “Font Style” drop-
down to select which type of variation on the selected font that you wish to use, like “Bold,” “Italic” or others.
Some fonts do not have every style available to them. For example, the “Lucida Calligraphy” font only
allows the use of the “Italic” font style. If that is the case, don’t fret, you can use the buttons at the bottom of
this panel to apply several types of “faux” finishes, like “Faux Bold” or “Faux Italic” if the font doesn’t have a
natural stylistic variant.
You can use the “Font Size” drop-down to set the size of the font. The “Font Leading” drop-down
allows you to set the amount of space between the baselines of each line of text. Remember that the
baseline is the line upon which the text rests. Use the “Font Kerning” drop-down to set the amount of
specific space between characters pairs. You can manually control the kerning, or you can use the
automatic kerning built into the font by the font designer. Setting a positive kerning value increases the
space between the specified characters and setting a negative kerning value decreases the amount of
spacing between characters. Kerning can only be set on a selected set of two characters. To set kerning
manually, click between the two characters whose kerning you want to adjust, and then set the value from
the “Kerning” drop-down. To specify automatic kerning of character pairs, set the “Kerning” to “Metrics” from
the “Kerning” drop-down.
If you want to select more than two characters, use the “tracking” instead. Tracking is used to
specify the amount of space between a range of characters. You can select the characters for which you
want to set the tracking, and then use the “Font Tracking” drop-down to set the amount of space allowed for
tracking.
Sample
- for
evalu
ation
purp
oses
only!

42 Advanced Photoshop ©TeachUcomp, Inc.
Text
11.7- Using the Character Panel (cont.):
You can also use the “Vertically Scale” and “Horizontally Scale” text boxes to set a percentage of
the text to scale horizontally or vertically. Un-scaled characters have a scale of “100%.” You can adjust this
percentage to increase or decrease the selected characters width and height.
The “Baseline Shift” controls the amount of distance that the selected type will appear above or
below the baseline. This is useful for creating customized superscript and subscript characters and is also
used for creating “drop-caps” at the beginning of a news article, for example. The point value entered into
this text box will raise the selected text above the baseline by that many points, if it is positive; and will lower
the text below the baseline by that many points, if it is negative.
You can click the “Color” box to launch the “Color Picker,” where you can select the color of the font.
The “Faux Bold” button will apply a fake bold effect to the selected text. Clicking the “Faux Italic” button will
apply a fake italic appearance. To make the selected text all uppercase, you can click the “All Caps” button.
To give the appearance of having the selected text appear in all small uppercase letters, click the “Small
Caps” instead. You can click the “Superscript” or “Subscript” buttons to make the selected text appear as
traditional superscript and subscript text. You can also apply and underline or a strikethrough to selected
text by clicking the “Underline” or “Strikethrough” buttons available.
Below that, you can use the “Language” drop-down to set the language used for the text created.
After that, you can specify which style of anti-aliasing you wish to use from the “Anti-aliasing” drop-down.
11.8- Checking for Spelling Errors:
You can also check the text that you type for spelling errors. To do this, you can select the layer of
text that you want to spell check, or you can select just the text that you want to spell check by highlighting it
first. Then select “Edit| Check Spelling…” from the Menu Bar. At this point, Photoshop references its internal
dictionary, looking for words that you have typed that do not match entries in its dictionary. When it finds a
word, it will display it and give you options for correction. You can select the correct word that you meant to
type from a list of suggestions, or you can simply re-type the correct spelling of the word into the “Change
To:” text box. Then you must select what to do by clicking one of the button choices available to you.
Clicking “Ignore” will ignore the instance of the misspelled word. Clicking “Ignore All” will ignore that
instance and any future occurrences of the misspelled word in the selection. Clicking “Change” will change
the word that is currently displayed in the “Not in Dictionary:” text box into the word displayed in the
“Change To:” text box. Clicking “Change All” changes all instances of the word that is currently displayed in
the “Not in Dictionary:” text box into the word displayed in the “Change To:” text box for your entire
selection. If you click the “Add” button, you add the word currently displayed in the “Not in Dictionary:” text
box to the internal dictionary, so that it will never appear as a misspelled word in the future. This can be
handy when dealing with your own last name or company names. Then click “OK.”
Sample
- for
evalu
ation
purp
oses
only!

43 Advanced Photoshop ©TeachUcomp, Inc.
Text
11.9- Using the Paragraph Panel:
You can use the Paragraph Panel to make adjustments to the paragraphs of text in your text layers.
A paragraph in Photoshop can be defined as any line of text that contains a carriage return at the end. So,
for “point” text, each line is a separate paragraph. For “paragraph” text, it is wherever you pressed “Enter”
on your keyboard to create a carriage return.
All Justify
Justify Last Right
Justify Last Centered Justify Last Left
Right Align
Center Align
Left Align
Left Indent
First Line Indent
Right Indent
Before
Paragraph
Spacing
After Paragraph
Spacing
If the Paragraph Panel isn’t already displayed, you can do so by selecting “Window| Paragraph”
from the Menu Bar. You can use the “Left Align,” “Center Align,” and “Right Align” buttons to align the
selected paragraphs to the left edge, the horizontal center, or the right edge of the text. If you want to pull
the left and right edges out so that they are symmetrical, you want to apply one of the “Justify” alignments.
However, sometimes truly justifying the last line of a paragraph can produce some odd looking final lines.
So you need to select what to do with the last line when you apply the “Justify” format. You can justify every
line by clicking the “All Justify” button. You can use the “Justify Last Left” button to justify every line but the
last one, which will instead be left aligned. You can use the “Justify Last Centered” button to justify every
line but the last one, which will instead be center aligned. You can use the “Justify Last Right” button to
justify every line but the last one, which will instead be right aligned.
You can also control the indentation of paragraphs using the buttons in the Paragraphs Panel. You
can set the amount of space (in points) that you want for the entire left side of the paragraph in the “Left
Indent” text box. You can set the amount of space (in points) that you want for the entire right side of the
paragraph in the “Right Indent” text box. You can set the amount of space (in points) that you want for the
first line of the paragraph in the “First Line Indent” text box. You can also set the amount of space (in points)
that you want before the paragraph in the “Before Paragraph Spacing” text box. Use the “After Paragraph
Spacing” text box to set the amount of spacing after a paragraph.
To allow hyphenation of your paragraph text, check the “Hyphenate” check box. To adjust the
settings used for hyphenation, click the “Options” button in the upper right corner of the Paragraph Panel,
and select “Hyphenation…” from the pop-up menu. In the “Hyphenation” dialog box, you can set the number
of characters for hyphenation and the spacing needed, and then click “OK” to set the hyphenation. You can
also change the way that the words in your justified paragraphs are set by clicking the “Options” button and
then selecting “Justification…” from the pop-up menu that appears. In the “Justification” dialog box, you can
set the word, letter, and glyph (symbol) spacing used in your justified paragraphs. Once again, after
entering in any changes to this dialog box, click “OK” to see the changes applied.
Sample
- for
evalu
ation
purp
oses
only!

44 Advanced Photoshop ©TeachUcomp, Inc.
ACTIONS-
Text CREATING TEXT:
1. Select the tool that you want to use to create text from the Toolbox: “The Horizontal Type Tool,” or “The
Vertical Type Tool.”
2. If you want to create “point” text, click into the image at the place where you would like the baseline of the
text to be placed. If you want to create “paragraph” text, click and drag a bounding box for the text with
the selected type tool.
3. In the Options Bar, you can click the “Change Text Orientation/Direction” button to switch the text
orientation between the vertical and horizontal options.
4. Use the “Font” drop-down to select which typeface you want to use for the text.
5. Use the “Font Style” drop-down to set the font style used for the text.
6. Use the “Font Size” drop-down to set the size of the font in points. You can also click into this text box
and type your own font size, if needed.
7. Set the anti-aliasing mode for the text from the “Anti-aliasing” drop-down, which can help prevent jagged
text edges.
8. You can either click the “Left align” button to align multiple lines of text by their left sides; “Center align,”
to align multiple lines of text by their horizontal center points; or “Right align” to right align the text lines.
9. Click the “Font Color” color box to launch the “Color Picker” dialog box, where you can select the font
color to create.
10. You can click the “Warp Text” button to launch the warp text dialog box, where we can apply a shape to
our text.
11. You can click the “Toggle the Character and Paragraph Panel” button to turn the Character and
Paragraph Panels on and off.
12. Type the text that you want using your keyboard.
13. To apply your changes when you are finished, click the “Confirm” checkmark button.
14. To cancel your changes, click the “Cancel” button, instead of the “Confirm” button.
SELECTING TEXT:
1. Select the type tool that you want to use to edit the text from the Toolbox.
2. Click once into the text that you want to edit to place it into “Edit” mode.
3. To select text, click and drag over the text that you want to select to highlight it.
4. To select all text, select “Edit| Select All” from the Menu Bar or click the text five times.
5. To select a word, double-click the word.
6. To select a line, triple-click the line.
7. To select a paragraph, quadruple-click (four times) the paragraph.
RESIZING THE BOUNDING BOX FOR PARAGRAPH TEXT:
1. Click into the text with one of the type tools selected from the Tool box to place it into “Edit” mode.
2. Place your mouse pointer over one of the small resizing squares that appear around the perimeter of the
bounding box until your see your mouse pointer turn into a double-pointed arrow.
3. Click and drag when you see the double-pointed arrow to resize the bounding box. If you hold down the
“Shift” key as you click and drag, you will constrain the proportions of the bounding box to prevent
warping.
4. Click the “Confirm” button in the Options Bar to apply your changes. Sample
- for
evalu
ation
purp
oses
only!

45 Advanced Photoshop ©TeachUcomp, Inc.
ACTIONS-
Text ROTATING THE TEXT IN A BOUNDING BOX:
1. Click into the text with one of the type tools selected from the Tool box to place it into “Edit” mode.
2. If you want to change the rotation point by which you will rotate the text, hold down the “Ctrl” key on your
keyboard and then click and drag the small circle inside of the bounding box to the location by which you
want to rotate the text. Release the mouse and the “Ctrl” key when finished.
3. If you want to rotate in 15 degree increments, hold down the “Shift” key.
4. Place your mouse pointer outside of the bounding box next to one of the corner resizing squares until you
see the mouse pointer turn into a bent double-pointed arrow.
5. Click and drag to the rotate the text based on the position of the rotation point.
6. If you were holding down the “Shift” key to constrain the rotation to 15 degree increments, release it now.
SKEWING TEXT:
1. Click into the text with one of the type tools selected from the Tool box to place it into “Edit” mode.
2. Hold down the “Ctrl” key on your keyboard.
3. Place your mouse pointer over either the top, bottom, left or right squares in the bounding box that
appears.
4. Click and drag to slant the text.
SCALING TEXT:
1. Click into the text with one of the type tools selected from the Tool box to place it into “Edit” mode.
2. Hold down the “Ctrl” key on your keyboard.
3. Place your mouse pointer over one of the corner squares in the bounding box that appears.
4. Click and drag to scale the text to fit the new size of the bounding box that you are creating.
CREATING A TYPE SELECTION:
1. Select the tool that you want to use to create the type selection from the Toolbox: “The Horizontal Type
Mask Tool,” or “The Vertical Type Mask Tool.”
2. If you want to create “point” text, click into the image at the place where you would like the baseline of the
text to be placed. If you want to create “paragraph” text, click and drag a bounding box for the text with
the selected type tool.
3. In the Options Bar, you can click the “Change Text Direction” button to switch the text orientation
between the vertical and horizontal options.
4. Use the “Font” drop-down to select which typeface you want to use for the text.
5. Use the “Font Style” drop-down to set the font style used for the text.
6. Use the “Font Size” drop-down to set the size of the font in points. You can also click into this text box
and type your own font size, if needed.
7. Set the anti-aliasing mode for the text from the “Anti-aliasing” drop-down, which can help prevent jagged
text edges.
8. You can either click the “Left align” button to align multiple lines of text by their left sides; “Center align,”
to align multiple lines of text by their horizontal center points; or “Right align” to right align the text lines.
9. You can click the “Warp Text” button to launch the warp text dialog box, where we can apply a shape to
our text. Sample
- for
evalu
ation
purp
oses
only!

46 Advanced Photoshop ©TeachUcomp, Inc.
ACTIONS-
Text CREATING A TYPE SELECTION (CONT.):
10. You can click the “Toggle the Character and Paragraph Panel” button to turn the Character and
Paragraph Panels on and off.
11. Type the text that you want using your keyboard.
12. To apply your changes when you are finished, click the “Confirm” checkmark button.
13. To cancel your changes, click the “Cancel” button, instead of the “Confirm” button.
14. At that point, you have made a selection that appears as text. You can select “Edit| Fill…” to fill it with a
color, pattern, or gradient. You can stroke the selection by selecting “Edit| Stroke…” from the Menu Bar.
You can also apply any changes that you can to a normal selection.
RASTERIZING A TYPE LAYER:
1. Select the text layer that you want to rasterize from the Layers Panel.
2. Select “Layer| Rasterize| Type” from the Menu Bar.
CHANGING POINT TEXT TO PARAGRAPH TEXT:
1. Select the text layer that you want to convert from point text to paragraph text.
2. Select “Layer| Type| Convert Point to Paragraph” from the Menu Bar.
CHANGING PARAGRAPH TEXT TO POINT TEXT:
1. Select the text layer that you want to convert from paragraph text to point text. Make sure that you don’t
have any text in overflow, as that will be deleted during the conversion.
2. Select “Layer| Type| Convert Paragraph to Point” from the Menu Bar.
WARPING A TEXT LAYER:
1. Select the text layer that you want to warp in the Layers Panel.
2. Click the “Warp Text” button on the Options Bar.
3. In the “Warp Text” dialog box, use the “Style:” drop-down to select a shape for the text.
4. Select either to apply the shape in a “Horizontal” or “Vertical” manner by selecting the choice you want
from the option buttons available.
5. Use the “Bend:” slider to set the amount of warping to allow in the shape.
6. Use the “Horizontal Distortion:” slider to set the amount of horizontal warping to allow.
7. Use the “Vertical Distortion:” slider to set the amount of vertical warping to allow.
8. Click “OK” to apply the warp.
CONVERTING TEXT TO A WORK PATH:
1. Select the text layer that you want to convert into a work path in the Layers Panel.
2. Select “Layer| Type| Create Work Path” from the Menu Bar.
Sample
- for
evalu
ation
purp
oses
only!

47 Advanced Photoshop ©TeachUcomp, Inc.
ACTIONS-
Text CONVERTING A TYPE LAYER INTO SHAPES:
1. Select the text layer that you want to convert into a shape from the Layers Panel.
2. Select “Layer| Type| Convert to Shape” from the Menu Bar.
SHOWING AND HIDING THE CHARACTER AND PARAGRAPH PALETTE:
1. You can click the “Toggle Character and Paragraph Panel” button that appears at the right end of the
Options Bar when you are using one of the type tools to toggle the selected panel on and off each time
you click the button.
OR
1. Select “Window| Character” from the Menu Bar to show and hide the “Character Panel.” You can do the
same thing with the paragraph panel by selecting “Window| Paragraph” from the Menu Bar, as well.
USING THE CHARACTER PALETTE:
1. For the selected text, use the “Font” drop-down to set the desired font of the selected text.
2. Use the “Font Style” drop-down to select which type of variation on the selected font that you wish to use.
3. Use the “Font Size” drop-down to set the side of the font.
4. Use the “Font Leading” drop-down to set the amount of space between the baselines of each line of text.
5. Use the “Font Kerning” drop-down to set the amount of specific space between the two characters where
your insertion point is currently resting. To specify automatic kerning of character pairs, set the “Kerning”
to “Metrics” from the “Kerning” drop-down.
6. You can select the characters for which you want to set the tracking, and then use the “Font Tracking”
drop-down to set the amount of space allowed for tracking.
7. Use the “Vertically Scale” and “Horizontally Scale” text boxes to set a percentage of the text to scale
horizontally or vertically. Un-scaled characters have a scale of “100%.” You can adjust this percentage to
increase or decrease the selected characters width and height.
8. The “Baseline Shift” controls the amount of distance that the selected type will appear above or below the
baseline.
9. You can click the “Color” box to launch the “Color Picker,” where you can select the color of the font.
10. Clicking the “Faux Bold” button will apply a fake bold effect to the selected text.
11. Clicking the “Faux Italic” button will apply a fake italic appearance.
12. To make the selected text all uppercase, you can click the “All Caps” button.
13. To give the appearance of having the selected text appear in all small uppercase letters, click the “Small
Caps” instead.
14. You can click the “Superscript” or “Subscript” buttons to make the selected text appear as traditional
superscript and subscript text.
15. You can also apply and underline or a strikethrough to selected text by clicking the “Underline” or
“Strikethrough” buttons available.
16. Below that, you can use the “Language” drop-down to set the language used for the text created.
17. You can specify which style of anti-aliasing you wish to use from the “Anti-aliasing” drop-down.
Sample
- for
evalu
ation
purp
oses
only!

48 Advanced Photoshop ©TeachUcomp, Inc.
ACTIONS-
Text CHECKING FOR SPELLING ERRORS:
1. Select the text layer or text that you want to check for spelling errors.
2. Select “Edit| Check Spelling” from the Menu Bar.
3. When it finds a word, it will display it in the “Not in Dictionary:” text box and give you options for
correction.
4. You can select the correct word that you meant to type from a list of suggestions, or you can simply re-
type the correct spelling of the word into the “Change To:” text box.
5. Clicking “Ignore” will ignore the instance of the misspelled word.
6. Clicking “Ignore All” will ignore that instance and any future occurrences of the misspelled word in the
selection.
7. Clicking “Change” will change the word that is currently displayed in the “Not in Dictionary:” text box into
the word displayed in the “Change To:” text box.
8. Clicking “Change All” changes all instances of the word that is currently displayed in the “Not in
Dictionary:” text box into the word displayed in the “Change To:” text box for your entire selection.
9. If you click the “Add” button, you add the word currently displayed in the “Not in Dictionary:” text box to
the internal dictionary, so that it will never appear as a misspelled word in the future.
10. Click “OK” when the spelling check is complete.
USING THE PARAGRAPH PALETTE:
1. For the selected text, click the “Left Align,” “Center Align,” or “Right Align” buttons to align the selected
paragraphs to the left edge, the horizontal center, or the right edge of the text.
2. If you want to pull the left and right edges out so that they are symmetrical, click the “All Justify” button.
3. Click the “Justify Last Left” button to justify every line but the last one, which will instead be left aligned.
4. Click the “Justify Last Centered” button to justify every line but the last one, which will instead be center
aligned.
5. Click the “Justify Last Right” button to justify every line but the last one, which will instead be right
aligned.
6. Set the amount of space (in points) that you want for the entire left side of the paragraph in the “Left
Indent” text box.
7. Set the amount of space (in points) that you want for the entire right side of the paragraph in the “Right
Indent” text box.
8. Set the amount of space (in points) that you want for the first line of the paragraph in the “First Line
Indent” text box.
9. Set the amount of space (in points) that you want before the paragraph in the “Before Paragraph
Spacing” text box.
10. Use the “After Paragraph Spacing” text box to set the amount of spacing after a paragraph.
11. To allow hyphenation of your paragraph text, check the “Hyphenate” check box.
Sample
- for
evalu
ation
purp
oses
only!

49 Advanced Photoshop ©TeachUcomp, Inc.
ACTIONS-
Text CHANGING HYPHENATION SETTINGS:
1. Select the text layer or text for which you want to set the hyphenation settings.
2. Click the “Options” button in the Paragraph Panel.
3. Select “Hyphenation…” from the pop-up menu.
4. In the “Hyphenation” dialog box, change the hyphenation settings as needed.
5. Click “OK” to apply the hyphenation settings.
CHANGING JUSTIFICATION SETTINGS:
1. Select the text layer or text for which you want to set the justification settings.
2. Click the “Options” button in the Paragraph Panel.
3. Select “Justification…” from the pop-up menu.
4. In the “Justification” dialog box, change the justification settings as needed.
5. Click “OK” to apply the justification settings.
Sample
- for
evalu
ation
purp
oses
only!

50 Advanced Photoshop ©TeachUcomp, Inc.
EXERCISES-
Text Purpose:
1. To be able to create text within our images.
Exercises:
1. Open your Photoshop application.
2. Create a new image document with a white background.
3. Click the “Horizontal Type Tool” in the Toolbox.
4. Click and drag over the area into which you want to place the paragraph text to create a bounding
box for the text.
5. In the Options Bar, use the “Font” drop-down to select a typeface.
6. In the Options Bar, use the “Font Size” drop-down to select a typeface size.
7. In the Options Bar, click the “Font Color” box to select a font color from the “Color Picker” dialog box.
8. Type whatever text you would like to gave appear in the bounding box.
9. When you are finished, click the “Confirm” checkmark button at the right end of the Options Bar.
10. Click into the text to edit the text again.
11. Place your mouse pointer slightly outside of the bounding box next to a corner handle until you see
the cursor turn into a bend double-pointed arrow. Click and drag when you see it do that to rotate the
bounding box.
12. When you are finished, click the “Confirm” checkmark button at the right end of the Options Bar.
13. Select “Edit| Check Spelling…” from the Menu Bar to review your text for typos. Correct any typos in
your text.
14. Select “Layer| Rasterize| Type” from the Menu Bar to rasterize (or “turn into pixels”) the type layer
that you created.
15. Close the document without saving your changes.
Sample
- for
evalu
ation
purp
oses
only!

51 Advanced Photoshop ©TeachUcomp, Inc.
CHAPTER 12-
Drawing
12.1- Raster Vs. Vector
12.2- Shape Layers and Shape Options - CS6 & Later
12.3- Shape Layers and Shape Options - CS5-CS
12.4- Using the Shape Tools
12.5- Using the Pen Tools
12.6- Using the Anchor Point Tools
12.7- Using the Paths Panel
12.8- Working with Paths
Sample
- for
evalu
ation
purp
oses
only!

52 Advanced Photoshop ©TeachUcomp, Inc.
Drawing
12.1- Raster Vs. Vector:
Much of the discussion of Photoshop up until this point has focused on what we can do to edit our
raster image elements. Remember that raster image elements are pixel-based. So when we use any of our
painting tools, we are creating changes to the pixels in the specified layer.
When we now turn to the drawing tools, we are beginning to learn how to create vector-based image
elements. Remember that a vector object is one that is defined by mathematical terms. As such, they can
be resized, moved and warped without losing any of the original object’s resolution. It is for just such
reasons that the text that we create in our images is so often vector-based. It allows for resizing and
manipulation of the text without sacrificing text edge clarity and definition. Now we will examine what other
tools we have that allow us to create vector-based shapes in our images.
12.2- Shape Layers and Shape Options (CS6 and later):
In Photoshop, we can use the “Shape Tools” located in the Toolbox to create various vector shapes
in our image. When you create a vector shape in an image in CS6 and later, it will be created in its own
“vector layer.” Having familiarized ourselves with how layers and layer masks work earlier in the Photoshop
tutorial, this concept shouldn’t be too hard to grasp. When you create a new shape with one of the shape
tools, it creates a new vector layer in the Layers Panel. The layer is then filled with the currently selected
foreground color (although we can specify and change the fill as needed), and the outline of the shape that
is drawn on the layer is actually stored as a linked vector mask that is linked to the layer- restricting the
display of the layer to the pattern stored in the linked vector mask.
As such, we can then draw multiple shapes on a single layer, adding to our original shapes drawn
on the vector mask for a single layer. You can even determine how overlapping shapes in a vector layer are
to interact with one another.
To create a new vector layer with a shape in it, right-click the “Shape Tool” button in the Toolbox and
select which shape you would like to draw. When you do this, the Options Bar will change, allowing you to
specify the settings for the selected tool. Let’s look at what some of the options that we can set here are.
You can use the “Shape Options” drop-down to select the type of shape you wish to create. Select
“Shape” to create a new vector shape in a layer, or you can select “Path” to create a work path, or you can
select “Pixels” to fill-in pixels in a raster layer in the desired shape. Version CS6 changed the old shape
layer functionality and replaced it with Vector Layers, which allow for true fill and stroke and a number of
other functions that were never possible with the old Shape Layers. You can click the “Fill” option, for
example, to fill your shape with a color, gradient or pattern by selecting that option in the drop-down that
appears. You can also add a stroke to the shape by selecting your desired option in the “Stroke” drop-
downs and then applying the size and type of stroke, as we discussed in the “Filling and Stroking” chapter. Sample
- for
evalu
ation
purp
oses
only!

53 Advanced Photoshop ©TeachUcomp, Inc.
Drawing
12.2- Shape Layers and Shape Options (CS6 and later) (cont.):
You can also set a specific “width” and “height” to your shape by entering the desired values in
those text boxes in the Options bar and then easily create it by single-clicking into your image where you
want the shape to appear. By default, the shape tools draw a new Shape Layer every time you click and
drag with the tool. However, you can add several shapes to the same layer. The “Path Operations” drop-
down is where you choose what type of interaction you want your shape to have with the shape layer. You
can select “New Layer” to have the shape that you draw in the image appear in a new layer as an attached
vector mask. Click the “Combine Shapes (Add to Shape Layer in CS5 and previous)” button to allow the
shape that you draw to add its outline to the vector mask attached to the layer currently selected in the
Layers Panel. If you click “Subtract from Shape Layer,” the shape will be subtracted from the current layer
shape vector mask selected in the Layers Panel. If you select the “Intersect with Shape Area” choice, the
shape that you draw will only display the foreground color in areas where the shape that you draw
intersects other previously drawn shapes in the associated shape layer. If you click the “Exclude
Overlapping Shape Areas” button, the foreground color will display in the non-overlapping areas of shapes
that overlap in the shape layer.
With multiple shapes selected, you can use the Path Alignment and Path Arrangement drop-downs
to choose to align selected shapes (to the Selection or Canvas), distribute shapes, and/or change the
stacking order of shapes.
After making your selections, you can click and drag to create a new shape. If you had selected the
“New Shape Layer” options, the shape will appear as a new layer. Otherwise, it will interact with the current
layer selected in the Layers Panel in the way prescribed by the options that you set in the Options Bar. 12.3- Shape Layers and Shape Options (CS-CS5):
In Photoshop, we can use the “Shape Tools” located in the Toolbox to create various vector shapes
in our image. When you create a vector shape in an image, it will be created in its own “shape layer.”
Having familiarized ourselves with how layers and layer masks work earlier in the Photoshop tutorial, this
concept shouldn’t be too hard to grasp. When you create a new shape with one of the shape tools, it
creates a new shape layer in the Layers Panel. The layer is then filled with the currently selected
foreground color (although we can specify and change the fill as needed), and the outline of the shape that
is drawn on the layer is actually stored as a linked vector mask that is linked to the layer- restricting the
display of the layer to the pattern stored in the linked vector mask.
As such, we can then draw multiple shapes on a single layer, adding to our original shapes drawn
on the vector mask for a single layer. You can even determine how overlapping shapes in a shape layer are
to interact with one another.
To create a new shape layer with a shape in it, right-click the “Shape Tool” button in the Toolbox and
select which shape you would like to draw. When you do this, the Options Bar will change, allowing you to
specify the settings for the selected tool. Let’s look at what some of the options that we can set here are.
Tool
Presets
Shape
Layers
Paths
Fill
Pixels
Pen
Tool
Freeform
Pen Tool
Rectangle
Rounded
Rectangle
Ellipse
Polygon
Line
Tool
Custom
Shape
Shape
Options Radius
New Shape Layer
Add to Layer
Subtract from Layer
Intersect Area
Exclude Overlap
Set/Clear Layer
Layer Style
Layer Color
Sample
- for
evalu
ation
purp
oses
only!

54 Advanced Photoshop ©TeachUcomp, Inc.
Drawing
12.3- Shape Layers and Shape Options (CS-CS5) (cont.):
You can click the “Shape Layers” button to create a new vector shape in a layer, or you can click the
“Paths” button to create a work path, or you can click the “Fill Pixels” button to fill-in pixels in a raster layer in
the desired shape. You can switch which vector-based shape tool you are using by selecting either the “Pen
Tool,” “Freeform Pen Tool,” “Rectangle,” “Ellipse,” “Line Tool,” or “Custom Shape” buttons available. To
view whatever options you can set for the tool provided, you can click the small drop-down arrow for the
“Shape Options,” which you can set from the drop-down menu that appears. Each tool has additional
settings that you can set here, if desired.
You can use the “Radius:” setting to determine the rounding of corners if you have selected the
“Rounded Rectangle” shape tool. Otherwise, you’ll see any special options for the currently selected tool in
this area of the Options Bar.
In the next section, you can choose what type of interaction you want your shape to have with the
shape layer. You can select “New Shape Layer” to have the shape that you draw in the image appear in a
new layer as an attached vector mask. Click the “Add to Shape Layer” button to allow the shape that you
draw to add its outline to the vector mask attached to the layer currently selected in the Layers Panel. If you
click “Subtract from Shape Layer,” the shape will be subtracted from the current layer shape vector mask
selected in the Layers Panel. If you select the “Intersect with Shape Area” choice, the shape that you draw
will only display the foreground color in areas where the shape that you draw intersects other previously
drawn shapes in the associated shape layer. If you click the “Exclude Overlapping Shape Areas” button, the
foreground color will display in the non-overlapping areas of shapes that overlap in the shape layer.
The next button is a link that allows you to use the settings of the currently selected shape layer to
create a new shape layer. You can use this if you created a shape layer, changed the foreground color, and
then wanted to create a new shape layer with the same settings versus the default color shown in the
Toolbox.
You can use the “Style:” drop-down to apply a layer style that will then appear as the foreground fill
for the selected shape layer. The “Color:” box, when clicked, launches the “Color Picker” dialog box, where
you can select a foreground color for the shape layer when you create the shape.
After that, you can usually just click and drag to create a new shape. If you had selected the “New
Shape Layer” option, the shape will appear as a new shape layer with an associated vector mask in the
Layers Panel. Otherwise, it will interact with the current layer selected in the Layers Panel in the way
prescribed by the options that you set in the Options Bar.
Sample
- for
evalu
ation
purp
oses
only!

55 Advanced Photoshop ©TeachUcomp, Inc.
Drawing
12.4- Using the Shape Tools:
You can select the “Rectangle Tool” in the Toolbox to create rectangles by simply clicking and
dragging from one corner diagonally across to the other corner over the area in the image where you want
the rectangle to be placed. You may hold down the “Shift” key after you begin to click and drag to draw a
perfect square instead of a rectangle, if needed. Be careful not to press this key before dragging your
mouse, after drawing your first shape. Pressing “Shift” is also the keyboard shortcut for “Add to Selection”
and it will act as such if you depress it before drawing a new shape when there is a shape layer selected!
This also is the same way that we draw “Rounded Rectangles.”
When you select the “Ellipse” tool, you will draw an oval shaped area from corner to corner over the
area that the ellipse will cover. If you want to draw a perfect circle, hold down the “Shift” key after you begin
to click and drag the mouse. You can also draw from the center of where you want the circle to be placed
diagonally outward while holding down the “Alt” key to draw an ellipse, if desired. Be careful not to press the
“Alt” key before dragging your mouse, after drawing your first shape. Pressing “Alt” is also the keyboard
shortcut for “Subtract from Selection” and it will act as such if you depress it before drawing a new shape
when there is a shape layer selected!
Drawing a polygon is like drawing the ellipse while holding down the “Alt” key: you click and drag
from the center of where you want the polygon to be placed, outward to its edge and it will grow as you drag
it in all directions. Note that in the Options Bar, you can specify how many sides you want the polygon to
have in the “Sides:” text box.
You can select the “Line Tool” from the Toolbox to draw a line of the width that you type in pixels
into the “Weight:” text box in the Options Bar. Then you simply click and drag to create a straight line.
Using the “Custom Shape” tool is a bit different from using the other drawing tools. First, select
which shape you want to draw after selecting the “Custom Shape” tool by selecting a shape from the
“Shape:” drop-down that appears in the Options Bar. Then click and drag in the image file to create the
selected shape. Remember that holding down the “Shift” key after you begin to click and drag to create the
object will constrain its proportions, if you wish.
Sample
- for
evalu
ation
purp
oses
only!
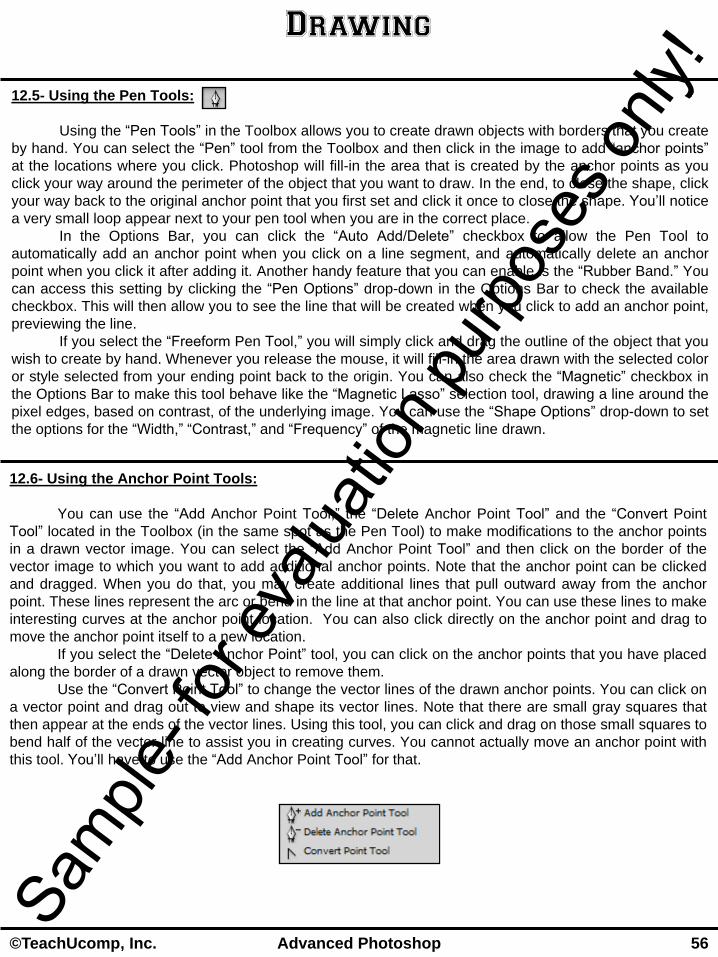
56 Advanced Photoshop ©TeachUcomp, Inc.
Drawing
12.5- Using the Pen Tools:
Using the “Pen Tools” in the Toolbox allows you to create drawn objects with borders that you create
by hand. You can select the “Pen” tool from the Toolbox and then click in the image to add “anchor points”
at the locations where you click. Photoshop will fill-in the area that is created by the anchor points as you
click your way around the perimeter of the object that you want to draw. In the end, to close the shape, click
your way back to the original anchor point that you first set and click it once to close the shape. You’ll notice
a very small loop appear next to your pen tool when you are in the correct place.
In the Options Bar, you can click the “Auto Add/Delete” checkbox to allow the Pen Tool to
automatically add an anchor point when you click on a line segment, and automatically delete an anchor
point when you click it after adding it. Another handy feature that you can enable is the “Rubber Band.” You
can access this setting by clicking the “Pen Options” drop-down in the Options Bar to check the available
checkbox. This will then allow you to see the line that will be created when you click to add an anchor point,
previewing the line.
If you select the “Freeform Pen Tool,” you will simply click and drag the outline of the object that you
wish to create by hand. Whenever you release the mouse, it will fill-in the area drawn with the selected color
or style selected from your ending point back to the origin. You can also check the “Magnetic” checkbox in
the Options Bar to make this tool behave like the “Magnetic Lasso” selection tool, drawing a line around the
pixel edges, based on contrast, of the underlying image. You can use the “Shape Options” drop-down to set
the options for the “Width,” “Contrast,” and “Frequency” of the magnetic line drawn.
12.6- Using the Anchor Point Tools:
You can use the “Add Anchor Point Tool,” the “Delete Anchor Point Tool” and the “Convert Point
Tool” located in the Toolbox (in the same spot as the Pen Tool) to make modifications to the anchor points
in a drawn vector image. You can select the “Add Anchor Point Tool” and then click on the border of the
vector image to which you want to add additional anchor points. Note that the anchor point can be clicked
and dragged. When you do that, you may create additional lines that pull outward away from the anchor
point. These lines represent the arc or bend in the line at that anchor point. You can use these lines to make
interesting curves at the anchor point location. You can also click directly on the anchor point and drag to
move the anchor point itself to a new location.
If you select the “Delete Anchor Point” tool, you can click on the anchor points that you have placed
along the border of a drawn vector object to remove them.
Use the “Convert Point Tool” to change the vector lines of the drawn anchor points. You can click on
a vector point and drag out to view and shape its vector lines. Note that there are small gray squares that
then appear at the ends of the vector lines. Using this tool, you can click and drag on those small squares to
bend half of the vector line to assist you in creating curves. You cannot actually move an anchor point with
this tool. You’ll have to use the “Add Anchor Point Tool” for that.
Sample
- for
evalu
ation
purp
oses
only!

57 Advanced Photoshop ©TeachUcomp, Inc.
Drawing
12.7- Using the Paths Panel:
When you create shapes, note that one of the available options in the Option Bar is the “Paths”
option. You can click use this to draw a path (line) instead of a shape. A path can be saved in the Paths
Panel. Here you will see the name and thumbnail of each saved path and the current vector mask. Because
they take up less data storage space than pixel-based paths, vector work paths can be used for long-term
storage of simple masks. You can also use the paths to make selections and fills and even stroke the paths
with the current brush settings, if desired.
You can edit the path with your “Anchor Point” tools in the Toolbox. You can also draw multiple
paths on the same work path layer. If you wish to select the various objects drawn in the work path, you can
select the work path with the multiple objects drawn in it.
You use the shape and pen tools to create your path with the “Paths” setting selected in the Options
Bar. You can see the paths in the image file by then viewing the Paths Panel. If you don’t see it, you can
select “Window| Paths” from the Menu Bar to bring it up.
At the bottom of the Paths Panel are a few buttons that you can use: “Fill Path with Foreground
Color,” to fill the selected path with the selected foreground color; “Stroke Path with Brush,” to stroke the
path with the current brush settings; “Load Path as Selection,” to load the path as a selection; “Make Work
Path from Selection,” which makes a work path from a pixel-based selection; “Create New Path,” which
creates a new path; and “Delete Path,” which deletes the selected path.
If you wish to save the current path, you can click the “Options” button within the Paths Panel and
then select “Save Path…” from the pop-up menu that appears. In the “Save Path” dialog box, you can then
type a name for the path into the dialog box and then click “OK” to save it. Remember that work paths are a
temporary thing and must be saved with the image file if you want to use them in the future.
12.8- Working with Paths:
If you have multiple shapes drawn in a single path, you can also select the individual shapes in a
path by using the “Path Selection Tool” in the Toolbox. You can then click on the individual shapes in the
path to select them and view their vector and directional lines. You can select multiple path objects by then
holding down the “Shift” key and clicking on other shapes in the path. Note in the Options Bar that you then
can align and distribute the selected path elements by the sides or along their centers by clicking the
available buttons on the Options Bar. You can also check the “Show Bounding Box” checkbox to allow you
to resize, move, and rotate the path as if it were a text box with a bounding box (like the “paragraph” text).
Also note that you can right-click on a single selected path component to view the pop-up menu of choices.
Note that it is possible to fill or stroke just one component of the path, if you so desire.
You can also use the “Direct Selection Tool,” to directly select path elements. Click once on a path
element with this tool to view its path segments. You can click an drag on the path segments directly here to
warp the shape as you desire. You can even delete a path segment by clicking on it once and then pressing
“Delete” on your keyboard to remove that segment.
Sample
- for
evalu
ation
purp
oses
only!

58 Advanced Photoshop ©TeachUcomp, Inc.
ACTIONS-
Drawing DRAWING SHAPES:
1. Use the shape from the “Shape Tools” button that you want to draw.
2. Click the “Shape Layers” button to create a new vector shape in a layer, or click the “Paths” button to
create a work path, or click the “Fill Pixels” button to fill-in pixels in a raster layer.
3. You can switch which vector-based shape tool you are using by selecting either the “Pen Tool,”
“Freeform Pen Tool,” “Rectangle,” “Ellipse,” “Line Tool,” or “Custom Shape” buttons available.
4. To view the options you can set for the tool provided, you can click the small drop-down arrow for the
“Shape Options,” which you can set from the drop-down menu that appears.
5. Click either the “New Shape Layer” button to have the shape that you draw in the image appear in a new
layer as an attached vector mask; the “Add to Shape Layer” button to allow the shape that you draw add
its outline to the vector mask attached to the layer currently selected in the Layers Panel; the “Subtract
from Shape Layer” button to allow the shape to be subtracted from the current layer shape vector mask
selected in the Layers Panel; the “Intersect with Shape Area” button to set the shape that you draw to
only display the foreground color in areas where the shape that you draw intersects other previously
drawn shapes in the associated shape layer; or the “Exclude Overlapping Shape Areas” button to allow
the foreground color to display in the non-overlapping areas of shapes that overlap in the shape layer.
6. Click the “link” button to allow you to use the settings of the currently selected shape layer to create a
new shape layer.
7. You can use the “Style:” drop-down to apply a layer style that will then appear as the foreground fill for
the selected shape layer.
8. The “Color:” box, when clicked, launches the “Color Picker” dialog box, where you can select a
foreground color for the shape layer when you create the shape.
9. If you selected the “Rectangle Tool” or “Rounded Rectangle Tool” in the Toolbox just click and drag from
one corner diagonally across to the other corner over the area in the image where you want the rectangle
to be placed. You may hold down the “Shift” key after you begin to click and drag to draw a perfect
square instead of a rectangle, if needed.
10. If you selected the “Ellipse” tool, click and drag to draw an oval shaped area from corner to corner over
the area that the ellipse will cover. If you want to draw a perfect circle, hold down the “Shift” key after you
begin to click and drag the mouse. You can also draw from the center of where you want the circle to be
placed diagonally outward while holding down the “Alt” key to draw an ellipse, if desired.
11. If you selected the “Polygon Tool” click and drag from the center of where you want the polygon to be
placed, outward to its edge and it will grow as you drag it in all directions.
12. If you selected the “Line Tool” from the Toolbox, click and drag to draw a line of the width that you type
(in pixels) into the “Weight:” text box in the Options Bar.
13. If using the “Custom Shape” tool, select which shape you want to draw by selecting a shape from the
“Shape:” drop-down that appears in the Options Bar. Then click and drag in the image file to create the
selected shape. Remember that holding down the “Shift” key after you begin to click and drag to create
the object will constrain its proportions, if you wish.
Sample
- for
evalu
ation
purp
oses
only!

59 Advanced Photoshop ©TeachUcomp, Inc.
ACTIONS-
Drawing USING THE PEN TOOL:
1. Click the “Pen Tool” from the Toolbox.
2. Then click in the image to add “anchor points” at the locations where you click. Photoshop will fill-in the
area that is created by the anchor points as you click your way around the perimeter of the object that
you want to draw.
3. To close the shape, click your way back to the original anchor point that you first set and click it once to
close the shape. You’ll notice a very small loop appear next to your pen tool when you are in the correct
place.
4. You can also check the “Auto Add/Delete” checkbox in the Options Bar to allow the Pen Tool to
automatically add an anchor point when you click on a line segment, and automatically delete an anchor
point when you click it after adding it.
5. You can enable the “Rubber Band” preview by clicking the “Shape Options” drop-down in the Options Bar
to check the available checkbox. This will then allow you to see the line that will be created when you
click to add an anchor point, previewing the line.
USING THE FREEFORM PEN TOOL:
1. Click the “Freeform Pen Tool” from the Toolbox.
2. Click and drag the outline of the object that you wish to create by hand.
3. Whenever you release the mouse, it will fill-in the area drawn with the selected color or style selected
from your ending point back to the origin.
4. You can check the “Magnetic” checkbox in the Options Bar to make this tool behave like the “Magnetic
Lasso” selection tool, drawing a line around the pixel edges of an image element. This will create anchor
points based on the contrast of the underlying image. You can use the “Shape Options” drop-down to set
the options for the “Width,” “Contrast,” and “Frequency” of the magnetic line drawn.
USING THE ADD ANCHOR POINT TOOL:
1. Click the “Add Anchor Point Tool” from the Toolbox.
2. Click on the border of the vector image to which you want to add additional anchor points.
3. You can click and drag the anchor point to reveal the direction lines for the anchor point. You can click
and drag these lines to make curves at the anchor point location. You can also click directly on the
anchor point and drag it to a new location to move the anchor point itself.
USING THE DELETE ANCHOR POINT TOOL:
1. Click the “Delete Anchor Point Tool” from the Toolbox.
2. Click on the anchor points that you have placed along the border of a drawn vector object to remove
them.
Sample
- for
evalu
ation
purp
oses
only!

60 Advanced Photoshop ©TeachUcomp, Inc.
ACTIONS-
Drawing USING THE CONVERT POINT TOOL:
1. Click the “Convert Point Tool” from the Toolbox.
2. You can click on a vector point and drag out to view and shape its vector direction lines.
3. Note that there are small gray squares that then appear at the ends of the vector direction lines. Using
this tool, you can click and drag on those small squares to bend half of the vector line to assist you in
creating curves.
4. You cannot actually move an anchor point with this tool. You’ll have to use the “Add Anchor Point Tool”
for that.
USING THE PATHS PALETTE:
1. You can view the Paths Panel by selecting “Window| Paths” from the Menu Bar, if it isn’t visible.
2. You can click the “Fill Path with Foreground Color” button to fill the selected path with the selected
foreground color.
3. You can click the “Stroke Path with Brush” button to stroke the path with the current brush settings.
4. You can click the “Load Path as Selection” button to load the path as a selection.
5. You can click the “Make Work Path from Selection” button, which makes a work path from a pixel-based
selection.
6. You can click the “Create New Path” button, which creates a new work path.
7. You can click the “Delete Path” button, which deletes the selected path.
8. If you wish to save the current path, click the “Options” button within the Paths Panel and then select
“Save Path…” from the pop-up menu that appears.
9. In the “Save Path” dialog box, type a name for the path into the dialog box and then click “OK” to save it.
USING THE PATH SELECTION TOOL:
1. Click the “Path Selection Tool” in the Toolbox.
2. Click on a shape (path component) in the selected work path.
3. You can select multiple path objects by then holding down the “Shift” key and clicking on other shapes in
the path.
4. You then can align and distribute the selected path elements by the sides or along their centers by
clicking the available buttons on the Options Bar.
5. Check the “Show Bounding Box” checkbox to resize, move, or rotate the path as if it were a text box with
a bounding box.
6. You can right-click on a single selected path component to view the pop-up menu of choices. Note that it
is possible to fill or stoke just one component of the path from this pop-up menu, if you so desire.
USING THE DIRECT SELECTION TOOL:
1. Click the “Direct Selection Tool” in the Toolbox.
2. Click once on a path element (shape) with this tool to view its path segments.
3. You can click an drag on the path segments directly to warp the shape as you desire.
4. You can delete a path segment by clicking on it once and the pressing “Delete” on your keyboard to
remove that segment. Sample
- for
evalu
ation
purp
oses
only!

61 Advanced Photoshop ©TeachUcomp, Inc.
EXERCISES-
Drawing Purpose:
1. To be able to create basic drawn objects in the Photoshop application.
Exercises:
1. Open your Photoshop application.
2. Create a new document with a transparent background.
3. Select a favorite foreground color.
4. Select the “Rounded Rectangle Tool” from the Toolbox.
5. Click and drag in the image to create a large rounded rectangle shape with the fill of the current
foreground color.
6. Select the “Custom Shape Tool” from the Toolbox.
7. Use the “Shape:” drop-down in the Options bar to select a shape to draw.
8. Click the “Subtract from shape area” button in the Options Bar.
9. Click and drag within the rectangle shape that you drew to knockout the shape from the rectangle.
10. Click the “Create new shape layer” button in the Options Bar to reset it back to its default value.
11. Click the “Freeform Pen Tool” in the Toolbox.
12. Click and drag to trace the outline of the shape which you want to create in the layer. Note that we
created a new layer when we drew the new shape.
13. Double-click the “Vector Mask Thumbnail” image in the Layers Panel to launch the “Layer Style”
dialog box.
14. Check the “Inner Shadow” checkbox and change any settings, as desired at the right.
15. When you are satisfied with its appearance, click “OK.”
16. Close the image file when you are finished. You don’t have to save your changes.
Sample
- for
evalu
ation
purp
oses
only!

62 Advanced Photoshop ©TeachUcomp, Inc.
CHAPTER 13-
Using Channels and Masking
13.1- Using the Channels Panel
13.2- Using Channels
13.3- Spot Colors
13.4- Blending Channels and Layers
13.5- Quick Mask Mode
13.6- Using Alpha Channels
Sample
- for
evalu
ation
purp
oses
only!

63 Advanced Photoshop ©TeachUcomp, Inc.
Using Channels and Masking
13.1- Using the Channels Panel:
A channel is a grayscale image used to store information about your image file. You can see the
channels for a selected image in the Channels Panel. You can access this panel by selecting “Window|
Channels” from the Menu Bar, if it isn’t visible.
You can basically break down channels into three distinct types. The first type are “Color Information
Channels,” which are created automatically when you open a new image file. The color mode used by the
image determines the number of color channels. For example, in a RGB color mode, you have four color
information channels- one for each color (red, blue, green) and one composite channel used for image
editing. You can also create “Alpha Channels” to create grayscale masks that allow you to isolate, select or
protect specific parts of an image. You can also create “Spot Channels,” which allow you to specify
additional “plates” for use with printing in spot color inks.
Your image file can have up to twenty-four channels. The TIFF and PSD (Photoshop) formats allow
you to compress the channels and save space on your computer. As long as you save a file in a format that
supports the image’s color mode, the color channels will be preserved. Alpha channels are only saved
when you save using either the “Photoshop” (PSD) format, PDF, PICT, Pixar, TIFF, or RAW formats. Using
the DCS 2.0 format only preserves spot channels. Saving in other file formats may cause you to lose some
channel information.
We can use the Channels Panel to create and manage our channels. You will see any channels
created here, with the composite channel listed first, then the individual color channels, spot color channels,
and finally any alpha channels that you have created. The “eye” icon at the left end of each channel’s
thumbnail can be clicked to hide and show that channel. In alpha channels, selected pixels appear as white,
unselected pixels appear black, and semi-transparent pixels appear gray. However, if you display an alpha
channel at the same time that you display the color channels, the alpha channel will appear as a color
overlay (like a “rubylith” in printing). You do have control over the color of this overlay, if you need to change
it.
You can use the painting and editing tools that are provided in Photoshop to edit the grayscale
channels themselves when selected in the Channels Panel. Remember that when you paint the color white
on the channel, that will add the color of the channel at 100% intensity. Painting in black fully removes that
color from the black areas in the channel. Painting with shades of gray allows various amounts of semi-
transparency.
When you want to delete a channel, it is just like deleting a layer. You can click and drag the
channel on top of the small “Trash” icon at the bottom of the Channels window to delete the selected
channel.
Sample
- for
evalu
ation
purp
oses
only!

64 Advanced Photoshop ©TeachUcomp, Inc.
Using Channels and Masking
13.2- Using Channels:
Now let’s look at what you can do to manipulate the channels in the Channels Panel. One thing that
you can do is duplicate channels. This may be a good task to do before editing a channel. To do this, select
a channel to duplicate from the Channels Panel, and then click the “Options” button in the Channels Panel.
From the pop-up menu that appears, select “Duplicate Channel….” In the dialog box that appears, type a
name in to the text box, and select the destination image (if there is more than one open) for the channel.
You can duplicate a channel into another image, but they must have identical pixel dimensions. Just click
“OK” to create the duplicate channel.
You can also mix the color channels to make color adjustments that aren’t easily reproducible with
other color adjustment tools, create high-quality grayscale images or create high-quality tinted images, for
example. This is basically the same thing as applying the “Channel Mixer” adjustment layer, except that it
affects the selected channel directly (thus the image), versus being applied through a layer. In versions CS5
& CS4, you can access the Channel Mixer by selecting “Layer| New Adjustment Layer| Channel Mixer” from
the Menu Bar. You will need to give the new layer a name in the “Name:” text box and click “OK.” Or, you
can just select the “Channels Mixer” icon located in the Adjustments Panel, or even select one of the
Channels Mixer Presets that are available. In versions CS3 and earlier, select “Image| Adjustments|
Channel Mixer…” from the Menu Bar.
Once you have the “Channel Mixer” dialog box open in the Adjustments Panel, use the drop-down at
the top to select into which channel you want to blend the other colors. Then just click and drag on any of
the available sliders to increase or decrease the slider color channel’s amount of color contributed to the
selected output channel. You can use the “Constant” slider to increase or decrease the amount of black and
white in a separate channel. You can select the “Monochrome” checkbox to control the contrast in an image
that you plan to convert to grayscale. If you check and then uncheck the “Monochrome” checkbox, you can
then use the sliders to create a hand-tinted appearance for your image. In versions CS4 and later, the
changes will take place right away, or you can delete them by clicking the trash can icon. In CS3 and
earlier, click “OK” to accept the channel adjustments, or click “Cancel” to discard the changes you made.
Sample
- for
evalu
ation
purp
oses
only!

65 Advanced Photoshop ©TeachUcomp, Inc.
Using Channels and Masking
13.3- Spot Colors:
You can create spot colors, which add an additional color that can be used in addition to the CMYK
inks, or instead of one of those inks. If you plan on doing spot color printing, you need to create spot
channels to store the colors. It may also be important to note that in order to export the spot channels, you
need to save the file in DCS 2.0 format or the PDF format.
To create a new spot color, you can first make or load a selection, if needed. Then click the
“Options” button in the Channels Panel, and select “New Spot Channel…” from the pop-up menu that
appears. In the “New Spot Channel” dialog box, type a name for the spot color channel into the “Name:” text
box. Then click the “Color:” box and select the color of the channel in the “Color Picker.” In the “Solidity:”
box, enter the solidity of the spot color. If you ever print the image to a composite color printer, the solidity
will be used to determine the opacity of the spot channel. On-screen, a value of 100% will simulate an ink
that completely covers the inks beneath it, and a 0% value simulates an ink that completely reveals the inks
below it. Make sure that you do name your spot channels so that other programs that read your image file
will recognize them. Otherwise, they might not print!
Once they are created, spot channels can be edited in the Channels Panel like other channels. You
can paint with black, white and gray to add more or less spot color, thus adding more or less ink to the
actual printed output. If you ever need to edit the settings of the spot channel, you can double-click its
thumbnail in the Channels Panel to re-open the “New Spot Channels” dialog box where you can rename it,
change the ink color, or change the solidity setting.
13.4- Blending Channels and Layers:
You can combine layer blending effects amongst images and within images using the “Apply Image”
and “Calculations” commands located under “Image” in the Menu Bar. The “Apply Image” command allows
you to blend one image’s layer and channel (the “Source”) into the layer and channel of another image (the
“Destination”). To do this, though, the images used in the calculations must have the same pixel
dimensions.
To use the “Apply Image” command, open the necessary images and select the layer and channel
that you want as the destination. Select “Image| Apply Image…” from the Menu Bar. In the dialog box that
appears, select the source image, layer and channel that you want to combine with the destination. If you
want to use all the layers, select “Merged” for the “Layer:” choice. If you click the “Invert” checkbox, you will
instead use the negative values of the channel contents. For the “Blending,” select a layer blending mode.
You will also have two modes that are available only here and in the “Calculations” command: “Add” and
“Subtract.” The “Add” choice adds pixels in two channels. This is a great way to combine non-overlapping
images in two channels into one. The “Subtract” mode, subtracts pixels in the source from pixels in the
destination. After selecting a blending mode, use the “Opacity” text box to set the strength of the effect. You
can check the “Preserve Transparency” check box to preserve transparent pixels in the destination layer. If
you want to specify a mask for the effect, click the “Mask…” checkbox, which extends the dialog box. In the
new area that appears, select the image and layer that contains the mask you’d like to use. Selecting
“Invert” here will reverse the mask. To preview the effect, click the “Preview” checkbox to check it. To then
apply the changes, click “OK.”
You can use the “Calculations” command to blend two individual channels in one or more images.
You can then set the results in a new image, or as a new channel or selection in the active image. You
cannot calculate composite channels. Sample
- for
evalu
ation
purp
oses
only!

66 Advanced Photoshop ©TeachUcomp, Inc.
Using Channels and Masking
13.4- Blending Channels and Layers (cont.):
To use the “Calculations” command, open the image files that you want to use and then select
“Image| Calculations…” from the Menu Bar. First, select from the “Source 1:” drop-down the image that you
want to use as the first source. Below that, select the layer that you wish to use, and then the “Channel” you
want to use. Repeat the steps for the “Source 2:” section.
Below that, select a blending mode from the “Blending:” drop-down and set the strength of the effect
in the “Opacity:” text box. If you want to constrain the effect to a mask, click the “Mask…” checkbox which
extends the dialog box. In the new area that appears, select the image and layer that contains the mask
you’d like to use. Selecting “Invert” here will reverse the mask. To preview the effect, click the “Preview”
checkbox to check it.
All that is left is to specify the “Result:” using the drop-down available. You can put the blended
result in a new image file, in a new channel in the active image, or as a selection in the active image. Just
click “OK” to make the selected result when you are finished.
13.5- Quick Mask Mode:
Applying masks allows you to restrict effects applied to images and protect specified image sections
when you are editing or painting the image file. We have already used masks in various ways throughout
the tutorial lessons. It is important to remember that masks are stored as 8-bit grayscale channels that you
can refine and edit in the Channels Panel. You can also save masks as alpha channels, which can be
converted to a selection in the future, if needed. You can create “Quick Masks,” which aren’t saved, but can
be useful for working on an image file. You can also use the layer and vector masks that we created when
we were working with layers and drawn vector objects. Since we already know how to create vector and
layer masks, let’s now look at creating Quick Masks and alpha channels.
To create a Quick Mask, use a selection tool to select the part of the image you want to change.
Then click the “Quick Mask” button, near the bottom of the Toolbox. That will then fill-in the non-selected
areas with a rubylith mask, protecting those areas from change. To then edit the mask, select a painting or
editing tool and paint on the mask. Remember that white removes areas from the mask, painting in black
adds area to the mask, and painting in gray or another color will produce a semi-transparent area of the
mask. When you are finished editing the mask, click the “Standard Mode” button in the Toolbox (in the
same location as the “Quick Mask” button. A selection border now appears over the area in the mask that
you can edit. Just apply the changes that you want to the selected areas.
Sample
- for
evalu
ation
purp
oses
only!

67 Advanced Photoshop ©TeachUcomp, Inc.
Using Channels and Masking
13.6- Using Alpha Channels:
You can store a mask permanently as an “alpha channel,” allowing you to edit it later or even load it
into another image. You can create an alpha channel in the Channels Panel and then apply a mask to it, or
you can save a selection that you have made as an alpha channel that will then appear in the Channels
Panel.
If you want to create an alpha channel and then use your painting or editing tools to draw the mask
in it, you can start by clicking the “New Channel” button from the Channels Panel. You can double-click on
the name of the alpha channel to rename it. You can then click the “eye” icon next to the color channels or a
composite channel to view the alpha channel as a rubylith overlay that you can then edit and save as if it
were a Quick Mask. However, unlike the Quick Mask it is saved with the image.
You can also create an alpha channel from a selection you have made in an image. Start by using
your selection tools to create the selection in the image that you want to retain as an alpha channel mask.
Then just click the “Save selection as channel” button at the bottom of the Channels Panel. It will appear as
a new alpha channel, and you can then double-click its name in the Channels Panel to rename it. You can
also make future selections and then add them or subtract them from the alpha channel mask that you have
already created. To do this, make another selection in the image file that you want to add or remove from
the original mask saved as an alpha channel. Then choose “Select| Save Selection…” from the Menu Bar to
launch the “Save Selection” dialog box. Here you can select into which open document you want to save
the channel selection. If you want to save it into a preexisting selection, choose its name from the “Channel”
drop-down. In that case, you then have to choose how the selection that you made should interact with the
current selection. It can replace, add, subtract, or intersect the mask in the alpha channel. Choose your
options and then click “OK” to change the selected alpha channel mask.
When you want to use your saved alpha channel to make a selection in the image file, you have to
load the selection from the mask in the alpha channel. You can easily do this by holding down the “Ctrl” key
and clicking on the saved alpha channel that you want to load. You could also select “Select| Load
Selection…” from the Menu Bar. In this case, you would then select which open image file you want to
make the selection in from the “Document:” drop-down in the “Load Selection” dialog box. Next, select
which alpha channel to load from the “Channel:” drop-down. Below that, select (if applicable), how you want
the loaded selection to interact with any other selections currently made in the image file. When you are
ready to load the selection, click “OK.”
Sample
- for
evalu
ation
purp
oses
only!

68 Advanced Photoshop ©TeachUcomp, Inc.
ACTIONS-
Using Channels and Masking SHOWING/HIDING THE CHANNELS PALETTE:
1. Select “Window| Channels” from the Menu Bar, to show and hide the Channels Panel.
SHOWING/HIDING THE CHANNELS IN THE CHANNELS PALETTE:
1. Click the “eye” icon at the left end of each channel’s thumbnail to hide and show that channel.
EDITING A CHANNEL (CREATING A MASK IN A CHANNEL):
1. Select the painting and/or editing tools that you want to use to edit the channel.
2. When you paint the color white on the channel, that will add the color of the channel at 100% intensity.
3. Painting in black fully removes that color from the black areas in the channel.
4. Painting with shades of gray allows various amounts of semi-transparency.
DELETING A CHANNEL:
1. Click and drag the channel on top of the small “Trash” icon at the bottom of the Channels window to
delete the selected channel.
DUPLICATING A CHANNEL:
1. Select a channel to duplicate from the Channels Panel.
2. Click the “Options” button in the Channels Panel and select “Duplicate Channel…” from the pop-up
menu.
3. In the dialog box that appears, type a name in to the “Name:” text box, and select the destination image
(if there is more than one open) for the channel.
4. Click “OK” to create the duplicate channel.
MIXING CHANNELS:
1. Select “Layer| New Adjustment Layer| Channel Mixer” from the Menu Bar (CS4) or “Image| Adjustments|
Channel Mixer…” from the Menu Bar (CS3 and earlier).
2. In the “Channel Mixer” dialog box that appears, use the drop-down at the top to select into which channel
you want to blend the other colors.
3. Click and drag on any of the available sliders to increase or decrease the slider color channel’s amount of
color contributed to the selected output channel.
4. Click and drag the “Constant” slider to increase or decrease the amount of black and white in a separate
channel.
5. You can check the “Monochrome” checkbox to control the contrast in an image that you plan to convert to
grayscale, if needed.
6. If you check and then uncheck the “Monochrome” checkbox, you can then use the sliders to create a
hand-tinted appearance for your image, if needed.
7. In versions CS3 and earlier, click “OK” to accept the channel adjustments you made. Sample
- for
evalu
ation
purp
oses
only!

69 Advanced Photoshop ©TeachUcomp, Inc.
ACTIONS-
Using Channels and Masking CREATING A NEW SPOT COLOR:
1. Make or load a selection, if needed.
2. Click the “Options” button in the Channels Panel, and select “New Spot Channel…” from the pop-up
menu that appears.
3. In the “New Spot Channel” dialog box, type a name for the spot color channel into the “Name:” text box.
4. Click the “Color:” box and select the color of the channel in the “Color Picker.”
5. In the “Solidity:” box, enter the solidity of the spot color.
6. Click “OK” to save the spot color channel.
USING THE “APPLY IMAGE” COMMAND:
1. Open the necessary images and select the layer and channel that you want as the destination.
2. Select “Image| Apply Image…” from the Menu Bar.
3. In the dialog box that appears, select the source image, layer and channel that you want to combine with
the destination. If you want to use all the layers, select “Merged” for the “Layer:” choice.
4. If you click the “Invert” checkbox, you will instead use the negative values of the channel contents.
5. For the “Blending,” select a layer blending mode.
6. Use the “Opacity” text box to set the strength of the effect.
7. You can check the “Preserve Transparency” check box to preserve transparent pixels in the destination
layer.
8. If you want to specify a mask for the effect, click the “Mask…” checkbox, which extends the dialog box. In
the new area that appears, select the image and layer that contains the mask you’d like to use. Selecting
“Invert” here will reverse the mask.
9. To preview the effect, click the “Preview” checkbox to check it.
10. To apply the changes, click “OK.”
USING THE “CALCULATIONS” COMMAND:
1. Open the image files that you want to use and then select “Image| Calculations…” from the Menu Bar.
2. Select from the “Source 1:” drop-down the image that you want to use as the first source.
3. Below that, select the layer that you wish to use, and then the “Channel” you want to use.
4. Select from the “Source 2:” drop-down the image that you want to use as the second source.
5. Below that, select the layer that you wish to use, and then the “Channel” you want to use.
6. Then select a blending mode from the “Blending:” drop-down.
7. Set the strength of the effect in the “Opacity:” text box.
8. If you want to constrain the effect to a mask, click the “Mask…” checkbox which extends the dialog box.
In the new area that appears, select the image and layer that contains the mask you’d like to use.
Selecting “Invert” here will reverse the mask.
9. To preview the effect, click the “Preview” checkbox to check it.
10. Specify the “Result:” using the drop-down available to place the blended result in a new image file, in a
new channel in the active image, or as a selection in the active image.
11. Click “OK” to make the selected result when you are finished.
Sample
- for
evalu
ation
purp
oses
only!

70 Advanced Photoshop ©TeachUcomp, Inc.
ACTIONS-
Using Channels and Masking TO CREATE A QUICK MASK:
1. Use a selection tool to select the part of the image you want to be able to change after creating the mask.
2. Click the “Quick Mask” button in the Toolbox.
3. To edit the rubylith mask, select a painting or editing tool and paint on the mask. Remember that white
removes areas from the mask, painting in black adds area to the mask, and painting in gray or another
color will produce a semi-transparent area of the mask.
4. When you are finished editing the mask, click the “Standard Mode” button in the Toolbox.
5. A selection border now appears over the area in the mask that you can edit.
6. Just apply the changes that you want to the selected areas.
CREATING AN ALPHA CHANNEL MASK:
1. Start by clicking the “New Channel” button from the Channels Panel.
2. You can double-click on the name of the alpha channel to rename it.
3. You can click the “eye” icon next to the color channels or a composite channel to view the alpha channel
as a rubylith overlay that you can then edit and save
OR
1. Start by using your selection tools to create the selection in the image that you want to retain as an alpha
channel mask.
2. Then click the “Save selection as channel” button at the bottom of the Channels Panel.
3. You can then double-click its name in the Channels Panel to rename it.
ADDING AND REMOVING SELECTIONS TO AN ALPHA CHANNEL MASK:
1. Make another selection in the image file that you want to add or remove from the original mask saved as
an alpha channel.
2. Then choose “Select| Save Selection…” from the Menu Bar to launch the “Save Selection” dialog box.
3. Select into which open document you want to save the channel selection.
4. If you want to save it into a preexisting selection, choose its name from the “Channel” drop-down.
5. You then have to choose how the selection that you made should interact with the current selection. It
can replace, add, subtract, or intersect the mask in the alpha channel. Choose your desired option.
6. Click “OK” to change the selected alpha channel mask.
Sample
- for
evalu
ation
purp
oses
only!

71 Advanced Photoshop ©TeachUcomp, Inc.
ACTIONS-
Using Channels and Masking LOADING AN ALPHA CHANNEL MASK AS A SELECTION:
1. Hold down the “Ctrl” key and click on the saved alpha channel that you want to load.
OR
1. Select “Select| Load Selection…” from the Menu Bar.
2. Select which open image file you want to make the selection in from the “Document:” drop-down.
3. Select which alpha channel to load from the “Channel:” drop-down.
4. Select (if applicable), how you want the loaded selection to interact with any other selections currently
made in the image file.
5. When you are ready to load the selection, click “OK.”
Sample
- for
evalu
ation
purp
oses
only!

72 Advanced Photoshop ©TeachUcomp, Inc.
EXERCISES-
Using Channels and Masking Purpose:
1. To be able to protect image elements with masks and use channels.
Exercises:
1. Open your Photoshop application.
2. Select an image that you can use for the exercise. You can make a copy of it first if you want to keep
a backup of the original for safekeeping.
3. Click the “Quick Mask Mode” button in the Toolbox.
4. You should see a rubylith overlay appear over your image.
5. Select a foreground color of “white.”
6. Select the “Brush Tool” from the Toolbox.
7. Click and drag in the areas of the image that you want to select to wipe out the protective red mask
from those areas.
8. Click the “Edit in Standard Mode” button in the Toolbox when finished.
9. The areas that you just painted over should appear selected.
10. Select “Edit| Fill…” from the Menu Bar.
11. Select “Pattern” from the “Use:” drop-down and select a pattern below that.
12. Click “OK” to fill-in the selected areas with the pattern.
13. Select “Select| Deselect” from the Menu Bar to deselect the current selection.
14. Use one of the selection tools from the Toolbox to select an object within the image.
15. Make sure that you can view the “Channels Panel.”
16. Click the “Options” button in the Channels Panel.
17. Click the “Save selection as channel” button at the bottom of the Channels Panel. You will see the
current selection saved as an alpha channel in the Channels Panel.
18. Make the channel visible by selecting it in the Channels Panel and then clicking the “eye” box at the
left end of the channel layer to show the saved mask that was made from the selection. Click the
“eye” icon again to toggle the channel’s visibility off again.
19. Select “Select| Deselect” from the menu bar to deselect the selection.
20. Select “Select| Load Selection…” from the Menu Bar.
21. In the “Load Selection” dialog box use the “Channel:” drop-down to select the name of the alpha
channel
22. Click “OK” to make the same selection as you did originally.
23. You can close the document without saving changes, if you want to discard the changes to the
image. You can also save your changes if you like.
Sample
- for
evalu
ation
purp
oses
only!

73 Advanced Photoshop ©TeachUcomp, Inc.
CHAPTER 14-
Manipulating Images
14.1- Changing the Canvas Size
14.2- Rotating and Flipping Images
14.3- The Rotate View Tool
14.4- Cropping Images- CS6 & Later
14.5- Cropping Images- CS5-CS
14.6- The Perspective Crop Tool
14.7- The Slice Tools
14.8- The Free Transform Command
14.9- The Smudge Tool
14.10- Blurring and Sharpening Images
14.11- Using the Dodge Tool and the Burn Tool
14.12- The Sponge Tool
14.13- Filters and the Filter Gallery
14.14- The Liquify Command
14.15- Vanishing Point
14.16- Content-Aware Scaling
14.17- The Puppet Warp Tool
14.18- The Clone Stamp Tool
14.19- The Pattern Stamp Tool
14.20- The Healing Brush Tool
14.21- The Spot Healing Brush Tool
14.22- The Patch Tool
14.23- The Content-Aware Move Tool
14.24- The Red Eye Tool Sample
- for
evalu
ation
purp
oses
only!

74 Advanced Photoshop ©TeachUcomp, Inc.
Manipulating Images
14.1- Changing the Canvas Size:
You can use the “Canvas Size” command in the Menu Bar to add or remove workspace around the
actual image file. You can also use this command to crop an image by decreasing the canvas size.
To use this command, select “Image| Canvas Size…” from the Menu Bar. In the “Width:” text box,
type the number that you want for the width and then use the drop-down to the right of the text box to select
the unit of measurement that you want. In the “Height:” text box, type the number that you want for the
height and then use the drop-down to the right of the text box to select the unit of measurement that you
want. If you check the “Relative” checkbox, which resets any measurements that you have made, you can
re-enter the numbers and units and it will adjust the canvas size in relation to the size that it currently is.
In the “Anchor” section, click to place the white square into the section of the image by which you
want to anchor the image. The growth (or shrinkage) of the canvas will occur in the direction that the black
arrows point. Below that area, use the “Canvas extension color:” drop-down to select which color you want
for the canvas extension. You can also just click the small color box to the right of that drop-down to select a
custom color using the “Color Picker,” if you prefer. To then apply the change that you set, click “OK.”
14.2- Rotating and Flipping Images:
You can rotate and flip an image you are working on in the canvas non-destructively (meaning you it
doesn’t actually transform the image). This can make tasks such as painting easier. You must rotate or flip
the entire image using this command. You cannot rotate or flip layers, paths, or selection borders. To either
rotate or flip an active image, select “Image| Image Rotation” (or “Image| Rotate Canvas” in CS3 and
previous versions) from the Menu Bar. From the side menu that appears, select the command that you want
to perform: “180°,” to rotate the image 180 degrees (half of a circle); “90° CW,” to rotate the image 90
degrees clockwise (a quarter of a circle to the right); “90° CCW,” to rotate the image 90 degrees counter-
clockwise (a quarter of a circle to the left); “Arbitrary…,” which allows you to enter a number of degrees and
select either clockwise or counter-clockwise rotation in a dialog box; “Flip Canvas Horizontal,” which flips
the canvas horizontally; or “Flip Canvas Vertically,” which flips the canvas vertically.
14.3- The Rotate View Tool:
Version CS4 introduced the “Rotate View” tool which allows you to rotate your images quickly and
easily. Select the tool from the Toolbox. Then, click and drag into the image to rotate the canvas. You will
see a large compass appear. It will indicate the northern direction in the image, no matter at which angle
you have the canvas set.
In addition, if you prefer you can set a numeric value (in degrees) for the angle of the rotation in the
Options Bar by entering a value of your choosing. If you want to set the canvas back to its original position,
just click “Reset View.” If you have more than one window open, you can click the checkbox for “Rotate All
Windows” which will rotate each of the windows you have open at the same time and same angle.
Sample
- for
evalu
ation
purp
oses
only!

75 Advanced Photoshop ©TeachUcomp, Inc.
Manipulating Images
14.4- Cropping Images (CS6 and later):
Cropping allows you to trim away parts of an image that are unnecessary, which can enhance the
composition of your image. You can crop an image using the “Crop Tool” in the Toolbox, which has the
most options for cropping available to you. To crop an image, click the “Crop Tool” to enable that feature.
When you do, you will see a dotted line around the perimeter of the image, along with “handles” at the
corners and sides of the image. Hover your mouse over any of these handles until your cursor turns into a
double-sided arrow. Click and hold on one of the handles and you can drag it to create the crop. The area
that appears inside the dotted line is what you will keep.
You can also select an “Overlay” (or shield) from the “View:” drop-down in the Options Bar. You can
choose from “Rule of Thirds,” “Grid” “Golden Ratio” and others. If you select one of these overlays, it will
appear as you crop your image. Each of the overlays relates to commonly accepted compositional
techniques in photography. To the right of that drop-down, you will see the “Crop Options” button (which
looks like a cog wheel). Click this button, and you can adjust how the crop shield is displayed, among other
options.
If you want to constrain your crop, a drop-down menu in the Options bar gives you a choice of
aspect ratios including square, 4:3 and 16:9 – and you can create your own by choosing “Unconstrained”
from the drop-down and entering your own values in the text boxes to the right.
Once you have made a crop, you will see three buttons appear at the far-right of the Options bar.
You can click the “Reset” button to reset the image back to before the crop, “Cancel” to cancel the current
crop operation altogether, or the “Commit” (checkmark) button to complete the desired crop. If you turn off
“Delete Cropped Pixels” in the Options bar, Photoshop keeps the trimmed areas as part of the document in
case you want to bring them back in later. This is called “non-destructive” editing.
Also in the Options bar, you will see the “Straighten” tool. The “Straighten Tool” can come in handy
for times when you want to correct a “crooked” picture. You can specify a new straight edge and then rotate
the image according to your line. To use this tool, select the “Straighten Tool” from the Options bar and
draw your new line in your image that represents the new straight edge by clicking and dragging to form the
line. Your image will be straightened along that line when you release your mouse button.
Sample
- for
evalu
ation
purp
oses
only!

76 Advanced Photoshop ©TeachUcomp, Inc.
Manipulating Images
14.5- Cropping Images (CS5-CS):
Cropping allows you to trim away parts of an image that are unnecessary. You can crop an image
using the “Crop Tool” in the Toolbox, which has the most options for cropping available to you. To crop an
image, click the “Crop Tool” to enable that feature, and then examine the Options Bar. If you do not want
the cropped selection to be resampled when it is cropped, then ensure that the text boxes in the Options
Bar are cleared of values. If, however, you do wish to resample the image after cropping it, then enter a
width, height, or resolution for the cropped image into the appropriate box(es).
Next, click and drag around the area that you want to keep to select it. The marquee that appears
can be adjusted later, if necessary. Then note that your options available in the Options Bar have changed.
You can select either “Hide” to hide the area that will be cropped away, or you can select “Delete” to delete
the area that will be cropped away. Note that in Photoshop, you cannot crop a “Background” layer by
“Hiding.” Use the “Crop Guide Overlay” (available in CS5) to select which (if any) displayed guidelines you
would like. These guides can help you when placing other elements in your image. Choose “Rule of Thirds”
for guides that divide the image into one-third increments, “Grid” to display fixed guides with spacing
dependent on the size of the image, or “None” for no guides. Next, check the “Shield” checkbox if you want
the area to be discarded to appear shaded. If you want a shield, you can set its color and opacity next to the
“Shield:” checkbox.
If you need to adjust the cropped selection, you can click and drag on the small resizing squares
that surround the selection area to scale the selection. You can click and drag in the selection borders to
move the selection. You can also click and drag slightly outside of the selection area to rotate the selection.
If you want to change the center point around which the marquee rotates, just click on that center point and
drag it to your new desired location. When you are ready to crop away the unselected areas, click the
“Confirm” checkbox in the Options Bar, or click the “Cancel” button to not complete the crop.
Another neat thing that you can do while using the Crop Tool is change the perspective on the
image. You may use this to change the “angle” that the photo appears to have been taken from. For
example, if you took an image of a tall building taken from the ground floor, the top of the building appears
to taper off in the photograph. You can then use the Crop Tool to change the perspective so that it appears
as though the image were taken from directly across from the building instead of below and under it. You
can make the image appear as if were being viewed from almost any angle using the feature. To use it,
open the image in which you want to change the perspective. Select the object in the image whose
perspective you wish to adjust. Then click the “Perspective” checkbox in the Options Bar. Notice that you
now have additional resizing handles that appear at the sides of the image. Click and drag the borders of
the selection inward or outward until they trace the border of the object whose perspective you are trying to
change. When you have accomplished this, click the “Confirm” checkbox in the Options Bar to confirm your
perspective shift.
Cropping Marquee
Sample
- for
evalu
ation
purp
oses
only!

77 Advanced Photoshop ©TeachUcomp, Inc.
Manipulating Images
14.6- The Perspective Crop Tool:
Photoshop CS6 introduced the Perspective Crop tool. This tool allows you to take an image and
change the perspective of the subject. For example, if you have an image of a building that was taken from
the ground, looking up and you want to change the image to make it look as though the picture was taken
straight-on, you can use the Perspective Crop tool.
To use the Perspective Crop tool, first open the image you want to adjust. Then choose the tool from
the Toolbox. It shares a space with the Crop tool. Then, click and drag around the object that you want to
adjust. Click and drag the corner resizing handles to adjust the object in the image. When you are done,
click “Enter” or the “Commit” checkmark in the Options bar. Remember, if you didn’t get it quite right, just
undo your last action and try again until you get just the look you want.
14.7- The Slice Tools:
The Slice tool allows you to divide an image into smaller sections which fit together like a jigsaw
puzzle. The pieces (or separate images) can then be reassembled on a web page using an HTML table or
CSS (Cascading Style Sheet) layers. You can then export a sliced image using the “Save For Web”
command. Photoshop will save each slice you create as a separate file and will generate the HTML or CSS
code needed to display the sliced image.
There are two tools: Slice (which creates the slices) and Slice Select (which enables you to select
and modify existing slices). To use the Slice tool, open the image you want to slice. Select the Slice tool in
the toolbox. It shares a spot with the Crop tools. Then, just click and drag into the image over the image in
the area where you wish to make a slice. Then, release your mouse button. You can then repeat the
process for other slices. As you do, Photoshop creates the necessary number of slices, with the active slice
highlighted. By default, Photoshop names each slice based on the filename and the slice number. You can
then choose the Slice Select tool from the toolbox to move and resize slices by dragging inside a slice, or
by dragging the handles. Using the Slice Select tool, double-click into one of the slices to open the “Slice
Options” dialog box. In this box, you can add a URL, Alt Tag information and more (see our Dreamweaver
tutorial for more information on web design).
When you are done creating your slices, choose “File| Save For Web” from the Menu Bar. Please
see the lessons on saving images for detailed information on how to save images. Once your image is
saved, it can be uploaded to your site and will retain the links and other information you added.
Sample
- for
evalu
ation
purp
oses
only!

78 Advanced Photoshop ©TeachUcomp, Inc.
Manipulating Images
14.8- The Free Transform Command:
When you transform an object, you can scale, resize, skew or otherwise adjust the boundaries of the
selected object. There are many things that be transformed, like layers, selections and shapes. So to first
apply a transformation, you’ll need to have the object that you wish to transform selected.
Then you can apply an individual transformation by using the commands listed in the side menu that
appears when you select “Edit| Transform” from the Menu Bar to apply a specific transformation. You can
select either: “Scale,” which scales the object in relation to a given reference point; “Rotate,” which rotates
the object around a reference point; “Skew,” which allows you to horizontally and vertically slant the object;
“Distort,” which allows you to warp an object in any direction by stretching it; or “Perspective,” which allows
you to change the perspective you appear to have in regards to the object. You can also choose “Warp.”
When you do, you can select from several pre-made warp options from the drop-down in the Options Bar,
or you can click on any of the anchor points to warp the image yourself.
If you want to apply multiple transformations, you may find it easier to select “Edit| Free
Transform…” from the Menu Bar. This command allows you to perform all of the transformations in one tool,
instead of having to perform multiple transformations individually. When you transform a bitmap image,
pixels are often added so that the image becomes less sharp with each individual transformation. You can
use the “Free Transform” command to apply multiple transformations at once and avoid losing sharpness in
bitmap images that you are transforming.
When you select the “Free Transform” command, you will see the bounding box surround the
selected object. Note the small circle (crosshair) in the middle of the bounding box. This is the reference
point around which the transformations will occur. You can click and drag the small circle to a new location
if you want to change the given “center” for the transformation effect. You can also click on one of the small
squares in the “Reference Point Location” button in the Options Bar to set the point, as well.
You can then scale the object by placing your mouse pointer over one of the square handles and
clicking and dragging with the mouse. You can hold down the “Shift” key and drag from one of the corner
handles as you perform this task to scale while maintaining perspective. You could also enter a new width
and height for the object by typing it into the “W:” and “H:” text boxes in the Options Bar.
To rotate the object, place your mouse pointer outside of the bounding box until it becomes a bent,
double-pointed arrow. When you see that icon, click and drag with the mouse to rotate the object freely. You
can also hold down the “Shift” key to constrain the rotation to 15° increments. You can also type a rotation
degree into the “Rotate” text box in the Options Bar to do the same thing.
To distort the image in relation to the currently selected reference point, hold down the “Alt” key on
your keyboard and click and drag one of the handles to distort the object. You can distort the object freely
by simply holding down the “Ctrl” key on your keyboard and then clicking and dragging one of the selection
handles.
To skew the object, hold down “Ctrl”+“Shift” on your keyboard and then click and drag with the
mouse on one of the handles that appear at the side of the object’s bounding border to slant the object. You
can also skew by typing values into the “H:” and “V:” text boxes in the Options Bar.
You can change the perspective by holding down “Ctrl”+“Alt”+“Shift” on your keyboard and then
clicking and dragging by one of the corner selection handles.
If you want to move the selected object, place your mouse inside of the bounding border, over the
object and click and drag with the mouse to move it to a new location. When you are finished making your
transformations, click the “Confirm” checkmark in the Options Bar, or click the “Cancel” button in the
Options Bar.
Sample
- for
evalu
ation
purp
oses
only!

79 Advanced Photoshop ©TeachUcomp, Inc.
Manipulating Images
14.9- The Smudge Tool:
When you select the “Smudge Tool” from the Toolbox and click and drag it in your image, the effect
produced is similar to the effect of dragging your finger through wet paint. The tool picks up the color of the
place at which you click and then pushes that color through the rest of the stroke as you drag the mouse.
To use this, first select the “Smudge Tool” from the Toolbox. In the Options Bar, set the brush stoke
and other brush options, as desired. You can then select a blending mode and strength from the drop-down
and slider available. You can check the “Sample All Layers” (called “All Layers” in CS and previous
versions) checkbox to select using the combined color value from all layers. If unchecked it will only
smudge the color from the currently visible layer. You can check the “Finger Painting” checkbox to smudge
using the selected foreground color at the beginning of each stroke. If this is deselected, the tool will instead
use the color under the pointer at the beginning of the stroke. After setting your options, all you must do is
then click and drag in the image to smudge the paint where you click and drag.
14.10- Blurring and Sharpening Images:
You can select the “Blur Tool” to soften hard edges or reduce fine detail in an image. Contrary to
that, the “Sharpen Tool” increases edge clarity and detail visibility in an image. To use these tools, select
the one that you want from the Toolbox (they share a space with the Smudge Tool). Then set the brush
options, as desired, in the Options Bar. You can then select a blending mode and strength from the drop-
down and slider available. You can check the “Sample All Layers” checkbox (called “All Layers” in CS and
previous versions) to blur or sharpen the pixel data using the combined data from all layers. Otherwise it will
only use data from the currently selected layer. After setting your options, click and drag over the area in the
image which you want to blur or sharpen.
14.11- Using the Dodge Tool and the Burn Tool:
You can use the “Dodge Tool” and the “Burn Tool” to produce tonal adjustments in an image. You
use the “Dodge Tool” to lighten an area in the image, and you can use the “Burn Tool” to darken an image
area.
To use these tools, first select the tool that you want to use from the Toolbox. In the Options Bar, set
your brush options and then use the “Range:” drop-down to select what to change in the image: “Midtones,”
to change the middle range of grays; “Shadows,” to change the dark areas; or “Highlights” to change the
light areas. Then use the “Exposure:” slider to set the intensity of the effect. You can also click to “Protect
Tones” from unwanted changes. Then, click and drag over the part of the image that you want to modify.
14.12- Using the Sponge Tool:
You use the “Sponge Tool” to make subtle changes to the color saturation of an area. To use the
Sponge Tool, select that button from the Toolbox. In the Options Bar, set your brush options and use the
“Mode:” drop-down to select either “Desaturate,” which reduces the color saturation or “Saturate,” which
increases color saturation. Then use the “Flow:” slider to set the strength of the selected effect. Selecting
the “Vibrance” checkbox reduces the clipping in fully saturated or desaturated colors. At that point, you can
click and drag in the selected layer to increase or decrease the saturation of the color.
Sample
- for
evalu
ation
purp
oses
only!

80 Advanced Photoshop ©TeachUcomp, Inc.
Manipulating Images
14.13- Filters and the Filter Gallery:
There are numerous filters that you can apply to create different artistic effects in your images. You
can access the filters through the “Filter” command on the Menu Bar or by selecting an effect from the
“Filter Gallery.” You can view the effect groups in the bottom section of the “Filter” menu drop-down. You
can slide over the name of a group, like “Artistic” to view the names of the filters within that group. You can
then click on one of the names of the filters to apply the filter directly or though a dialog box that launches.
Some of the commands, when clicked will launch the “Filter Gallery” where you can change their settings, if
desired.
You can also select a filter from the Filter Gallery by selecting “Filter| Filter Gallery…” from the Menu
Bar. The “Filter Gallery” allows you to apply some of the available effects independently or in layered
combinations. You can click on one of the names of the effect groups, which appear here as folders in the
middle pane, to reveal the individual filter effects listed in that category. You can then click on one of the
filters in that category to view the settings for it in the right pane. You can then use the sliders, color boxes,
and drop-downs that appear to change the settings of the selected effect.
Note that at the bottom of the right pane there is the name of the filter, which appears in a layer. You
can add another layer to multiply the effects by clicking the “New Effect Layer” button at the bottom of the
right pane. This will add another layer that you can then click to select. Then you can click on another filter
effect to apply it to the selected layer. Just as with our regular layers, you can click and drag the effect
layers above or below other effect layers to change the overall effect produced. You can also delete an
effect layer by clicking it to select it, and the clicking the “Delete Effect Layer” button at the bottom of the
rightmost pane. When you are finished applying effects, which you can preview in the left pane, click “OK”
to apply the effects to the selected layer. Note that the effects are not actually added as layers that appear
in the Layers Panel, but rather they are applied to the selected layer contents directly.
New Effect Layer &
Delete Effect Layer
Sample
- for
evalu
ation
purp
oses
only!

81 Advanced Photoshop ©TeachUcomp, Inc.
Manipulating Images
14.13- Filters and the Filter Gallery (cont.):
Many of the other filter effects that you can apply are not able to be applied through the Filter gallery.
You actually have many more effects that you can set by using the “Filter” command in the Menu Bar. Make
sure that you have the correct layer selected in the Layers Panel before you apply filter effects. If you make
a mistake when you apply a filter, just remember that you can use the “History Panel” to reverse your
mistakes.
Version CS5 introduced a new filter called “Automatic Lens Correction” which can save you time by
correcting various lens distortions, chromatic aberration and vignetting. Photoshop uses an images EXIF
data (Exchangeable Image File Format) – which is the metadata detailing the type of camera and lens used
– to make adjustments to the image. So, you must know this information in order to use the filter.
To use the “Automatic Lens Correction” filter, select “Filter| Lens Correction” from the Menu Bar.
That will launch the “Lens Correction” dialog box. In the “Correction” area, select the type of correction you
wish to fix by clicking the appropriate checkbox. If the corrections you make scale the image beyond the
original dimensions, you can select “Auto Scale Image” to correct it. The “Edge” drop-down specifies what
to do with the blank areas that result from some corrections. You can select black or white color,
transparency, or to extend the pixels at the edge of the image. In the “Search Criteria” area, select the make
and model of the camera and the lens model and profile used to take the image. If you cannot locate the
correct profile, click the “Search Online” button to try and locate it.
As long as you have the “Preview” checkbox checked, you’ll be able to see adjustments to the
image as you make your selections. Also, note in the upper-left corner of the dialog box that you have some
familiar tools you can use to correct distortions. You can use the “Remove Distortion Tool” to click and drag
in the image and correct a distortion or use the “Straighten Tool” to straighten a crooked image.
You can also manually correct lens distortions, if you prefer. To do so, click the “Custom” tab
(located be “Cancel” in the upper-right corner of the “Lens Correction” dialog box). Then, use the various
sliders and tools to make your desired corrections.
When you are done making your corrections, click “OK.”
14.14- The Liquify Command:
You can use the “Liquify” command to interactively distort an image. You can liquify a layer by
selecting the layer to which you want to apply the effect, and then by selecting “Filter| Liquify…” from the
Menu Bar. This will then launch the “Liquify” dialog box, where you can make distortions to the selected
layer’s content.
To begin, you can select which areas of the image layer you want to “freeze,” protecting them from
distortions. You can also “thaw” frozen areas, making them editable again. To freeze a section of the layer,
select the “Freeze Mask Tool” from the left side of the “Liquify” dialog box. At the right side of the “Liquify”
dialog box, you will need to set the size of the brush that you will use, its density of application, and its
brush pressure. Then just click and drag to paint a mask over the areas of the image that you want to
freeze. The tint of the mask indicates the degree of freezing, so be careful how you apply it. If you only
freeze 50% of the pixels, for example, the area will still be distorted, but only about half as much as the
surrounding unfrozen areas will be. You can also unfreeze masked areas by selecting the “Thaw Mask
Tool” and then clicking and dragging over the masked areas to unfreeze them, making them distortable
again. If you need more precision while making your selections, notice that you have the “Hand Tool” and
“Zoom Tool” available from the left side of the “Liquify” dialog box. Also, if you don’t see the mask as you
are painting it, make sure that you have the “Show Mask” checkbox checked at the right side of this dialog
box. You can also uncheck it to preview how the distorted image will appear without the mask interfering. Sample
- for
evalu
ation
purp
oses
only!

82 Advanced Photoshop ©TeachUcomp, Inc.
Manipulating Images
14.14- The Liquify Command (cont.):
If you only want to see the active layer in the preview window of the “Liquify” dialog box, then
uncheck the “Show Backdrop” checkbox. If you check the “Show Backdrop” checkbox, you can specify
which layers to use in the “Use:” drop-down. Below that, you can choose to view the additional layer(s) in
either “Behind,” “In front,” or “Blend” modes by selecting the choice you want from the “Mode:” drop-down.
The “Opacity:” slider allows you to set the opacity of the other layers in the preview window.
To then apply a distortion to the unmasked areas, select the distortion tool that you want to use from
the list of buttons at the left side of the “Liquify” dialog box. Use the “Forward Warp” brush to move the
pixels in a forward blend with your brush stroke. Use the “Reconstruct Tool” to reconstruct areas of the
image that you have distorted. Note that once you click “OK” to accept image distortions, you cannot use
this tool at a later time to reconstruct previously made distortions. Use the “Twirl Clockwise” tool to spin the
pixels that you click and drag over with your brush in a clockwise direction. Also note that you can hold
down the “Alt” key while using this tool to spin in a counter-clockwise direction. Use the “Pucker Tool” to pull
the sides of the brush stroke inward towards the center of the brush stroke. Use the “Bloat Tool” to push the
pixels from the center of the brush towards the outer edge of the brush. Use the “Push Left Tool” to move
the pixels in a perpendicular direction from the direction that you drag the brush stoke. For example, if you
drag the brush down,, the pixels will be pulled from the left to the right as you drag downward. As you drag
upward, the pixels will be pulled from right to left. You can also hold down the “alt” key while dragging to
reverse the direction from which the pixels will be pulled. The “Mirror Tool” copies pixels to the brush area
as your drag. You can click and drag with this tool to reflect pixels that are perpendicular to the direction in
which you drag. The “Turbulence Tool” scrambles pixels, but leaves a smooth appearance, similar to
clouds or waves.
If you want to save all of the commands you make in the Liquify dialog box, click the “Save Mesh”
button. Enter a name in the “Save As:” dialog box and click “Save.” You can load the saved Mesh, using the
“Load Mesh” button for later use.
If you click the “Restore All” button at the right, all of the changes that you have made in the current
session will be reversed, and the image restored. When you are finished applying the changes to the
image, you can click “OK” to apply the liquefaction to the selected image layer.
14.15- Vanishing Point:
Editing in images that contain perspective planes can be tricky. For example, if you are working with
an image that has a floor, wall, or side of a building, where the image my extend to a distance, and
therefore change the perspective, editing can become difficult. Vanishing Point allows you to indicate the
planes in your image and then make your edits, honoring the perspective you set.
To use this tool, select “Filter| Vanishing Point…” from the Menu Bar. This will launch the
“Vanishing Point” dialog box. In this dialog box, Photoshop sets what it perceives to be the correct
perspective by overlaying a blue grid. You can adjust this grid by clicking the “Edit Plane Tool” in the upper-
left corner and then clicking and moving the plane within the dialog box, using the resizing handles to
change the perspective. Along the upper-left side of the dialog box, you will see familiar tools, which work
in the same manner as the rest of Photoshop (Marquee, Stamp, Brush, Transform, Eyedropper, Measure,
Hand and Zoom). Make your edits in the dialog box using these tools and when you are done, click “OK.”
If you prefer to set your own plane, you can do so by clicking the “Create Plane Tool” in the
Vanishing Point dialog box and setting the four corners (by clicking) of your plane in the image, and re-
sizing as needed. Sample
- for
evalu
ation
purp
oses
only!

83 Advanced Photoshop ©TeachUcomp, Inc.
Manipulating Images
14.15- Vanishing Point (cont):
It’s also a good idea to create a new layer before you start working in Vanishing Point, which will
preserve your original image.
14.16- Content-Aware Scaling:
Version CS4 first introduced Content-Aware Scaling. Prior to this, scaling an image up or down
would add or remove pixels regardless of their importance to the final outcome. Content-Aware Scaling
allows you to resize an image while maintaining your important content. To use the feature, you must be
working with a layer that isn’t a background layer. Then, select “Edit| Content-Aware Scale” from the Menu
Bar. Drag the handles that appear on the bounding box to scale the image to your liking. Then, click “Enter”
on your keyboard.
Sample
- for
evalu
ation
purp
oses
only!

84 Advanced Photoshop ©TeachUcomp, Inc.
Manipulating Images
14.17- The Puppet Warp Tool:
Version CS5 introduced the Puppet Warp tool, which allows you to distort specific areas of an image
while leaving other areas unaltered. You can apply Puppet Warp to images, shapes, text layers and layer
and vector masks. Puppet Warp works by placing bending/warping points around your image and then
using them to warp the various parts of that image.
To use Puppet Warp, first select the layer or mask you want to transform. If you are working with a
single image as a background, select the element in the image you want to transform and save it as a New
Layer with Layer Mask in the “Refine Edge” dialog box that we looked at earlier, or save it as a smart object.
After selecting the layer, choose “Edit| Puppet Warp” from the Menu Bar. Photoshop will display a mesh
over the image. You can toggle the view of the mesh on and off by selecting or de-selecting “Show Mesh” in
the Options Bar. Also in the Options Bar, use the “Mode” drop-down to set the overall elasticity of the mesh.
“Distort” will give a highly elastic mesh which is good for warping wide-angle images. “Density” determines
the spacing of the mesh points. The more points you have, the greater precision control, but adds more
processing time when adjusting the image. “Expansion” contracts or expands the outer edge of the mesh.
Then, in the image, click to add the pins. These pins are used both to warp the image as well as
anchor parts of the image you don’t want to change. This isn’t an exact science. Experiment with the best
placement of pins to create the joints you wish to use to warp the image. You can hide the pins in the image
by holding down the “H” key on your keyboard. Releasing it displays the pins again. To delete a pin, select it
and click “Delete” on your keyboard. Or, you can remove all the pins you’ve placed by clicking the “Remove
All Pins” button in the Options Bar. To reveal a mesh area you’ve overlapped with another, click the Pin
Depth buttons in the Options Bar. To rotate the mesh around a pin, select it, then press the “Alt” key. Place
the cursor near to, but not over the pin. When the circle appears, drag to rotate the mesh.
The degree of rotation appears in the options bar. To rotate the mesh automatically based on the selected
Mode option, choose Auto from the Rotate menu in the Options Bar. To bend or warp the image, click on
any of the pins and drag them to the new desired location. When you have made the changes you desire,
click “Enter” on your keyboard.
Sample
- for
evalu
ation
purp
oses
only!

85 Advanced Photoshop ©TeachUcomp, Inc.
Manipulating Images
14.19- The Pattern Stamp Tool:
The Pattern Stamp Tool allows you to paint a pattern into a selected layer. To use this tool, just
select it from the Toolbox, set the desired brush options and pattern in the Options Bar, and then click and
drag in the image layer into which you want to paint the selected pattern.
14.20- The Healing Brush Tool:
The Healing Brush Tool lets you correct slight imperfections in an image, blending them with the
pixels in the surrounding image. This tool works in the same manner as the “Clone Stamp” tool, however,
this tool will also match the texture, shading, and lighting of the sampled pixels to the source pixels so that
the cloned pixels blend seamlessly into their new location.
To use this tool, select the “Healing Brush Tool” from the Toolbox and set your desired options in the
Options Bar. Next, hold down “Alt” on your keyboard and click on the area that you want to use as the
reference point for the pixels that you want to copy to another location. Then release the “Alt” key. Next,
click and drag with the tool in the area to which you want to copy the pixels that you clicked. As you click
and drag, you will copy the pixels from the selected area to the new area. If you have version CS5 or CS4
and the right graphics card, you will also have “Live Preview,” which displays what will be stamped within
your brush.
14.21- The Spot Healing Brush Tool:
The Spot Healing Brush Tool works similarly to the Healing Brush Tool, and lets you correct slight
imperfections in an image, blending them with the pixels in the surrounding image, matching the texture,
shading, and lighting. The difference is that the Spot Healing Brush does not require you to identify a
sample spot. Instead, it samples pixels from the area around the retouched area.
To use this tool, select the “Spot Healing Brush Tool” from the Toolbox and set your desired options
in the Options Bar. Under “Type Match,” choose “Proximity Match” to use the pixels around the edge of your
selection as the sample for repair. In more complex images, you may wish to try using “Create Texture,”
which uses all the pixels in a selection to create a texture to use for repair. “Content-Aware” compares
nearby image content to fill the selection, and tries to maintain key details such as shadows and object
edges. Then, simply click into the image on the area you wish to repair. You can also click and drag in
larger areas in more complex images to get a larger sampling.
14.18- The Clone Stamp Tool:
You can use the Clone Stamp Tool to take a sample of an image, which you can then clone into
another image or into another section of the same image. Each stroke of the tool paints on more of the
sample pixels that you select.
To use this tool, select it from the Toolbox, set your desired brush options, and hold down “Alt” on
your keyboard and click on the area that you want to use as the reference point for the pixels that you want
to copy to another location. Then release the “Alt” key. Next, click and drag with the tool in the area to which
you want to copy the pixels that you clicked. As you click and drag, you will copy the pixels from the
selected area to the new area, re-creating a clone of the original area that was selected in a new location. If
you have version CS5 or CS4 and the right graphics card, you will also have “Live Preview,” which displays
what will be stamped within your brush.
Sample
- for
evalu
ation
purp
oses
only!

86 Advanced Photoshop ©TeachUcomp, Inc.
Manipulating Images
14.24- The Red Eye Tool:
The Red Eye Tool (available in versions CS2 and higher) removes the red eye caused by flashes in
photographs. It’s incredibly easy to use. Select the Red Eye Tool from the Toolbox. Then, simply click into
the red eye. If you don’t like the results, you can also set options in the Options Bar. “Pupil Size” will
increase or decrease the size affected by the tool. “Darken Amount” changes how dark the correction is.
14.22- The Patch Tool:
You can use the Patch Tool to repair a selected area with pixels sampled from another area or from
a selected pattern. This tool also attempts to match the texture, lighting and shading of the sampled pixels
to the source pixels. You can also use the patch tool to close isolated areas of an image. It is important to
note that when you make the sample selection with this tool, you’ll find the results are improved if you select
a small area to produce the best results.
To use this tool, select the Patch tool from the Toolbox and make a selection of pixels to use as the
sample. Select “Destination” in the Options Bar. Then just click and drag the selection that you made and
drop it on top of the area that you want to patch.
Version CS6 introduced the “Content-Aware” option to the Patch tool. The updated Patch tool
includes a Content-Aware option that seamlessly replaces unwanted image elements by synthesizing
nearby content. The results are similar to Content-Aware Fill, but the Patch tool lets you select the area
from which the fill is drawn. To use this option, after selecting the Patch tool, use the “Patch” drop-down in
the Options bar and select “Content-Aware.” Make a selection over the area you wish to replace and then
drag it to the area you wish to sample.
14.23- The Content-Aware Move Tool:
The Content-Aware Move tool lets you quickly recompose images without layering or having to
make slow, precise selections. You can use the “Extend” mode to expand or contract objects such as hair,
trees, or clouds. “Move” mode lets you place objects in completely different locations. This is accomplished
most effectively when the background remains similar.
To use this feature, select the Content-Aware Move tool from the toolbox. In the Options bar, choose
Mode > Extend or Move. You can also select from the “Adaptation” options drop-down, which controls how
closely the new area reflects existing image patterns. “Very Strict” gives Photoshop very little room to
analyze pixels for blending. “Very Loose” gives Photoshop more flexibility in analyzing the pixels. Then, in
the image, circle the object you want to extend or move, and drag it to a new location.
Sample
- for
evalu
ation
purp
oses
only!

87 Advanced Photoshop ©TeachUcomp, Inc.
ACTIONS-
Manipulating Images CHANGING THE CANVAS SIZE:
1. Select “Image| Canvas Size…” from the Menu Bar.
2. In the “Width:” text box, type the number that you want for the width and then use the drop-down to the
right of the text box to select the unit of measurement that you want.
3. In the “Height:” text box, type the number that you want for the height and then use the drop-down to the
right of the text box to select the unit of measurement that you want.
4. If you check the “Relative” checkbox, which resets any measurements that you have made, you can re-
enter the numbers and units and it will adjust the canvas size in relation to the size that it currently is.
5. In the “Anchor” section, click to place the white square into the section of the image by which you want to
anchor the image. The growth (or shrinkage) of the canvas will occur in the direction that the black arrow
point.
6. Use the “Canvas extension color:” drop-down to select which color you want for the canvas extension.
7. You can also just click the small color box to the right of that drop-down to select a custom color using the
“Color Picker,” if you prefer.
8. To apply the change that you set, click “OK.”
ROTATING AND FLIPPING IMAGES:
1. Select “Image| Rotate Canvas” from the Menu Bar.
2. From the side menu that appears, select the command that you want to perform: “180°,” to rotate the
image 180 degrees (half of a circle); “90° CW,” to rotate the image 90 degrees clockwise (a quarter of a
circle to the right); “90° CCW,” to rotate the image 90 degrees counter-clockwise (a quarter of a circle to
the left); “Arbitrary…,” which allows you to enter a number of degrees and select either clockwise or
counter-clockwise rotation in a dialog box; “Flip Canvas Horizontal,” which flips the canvas horizontally;
or “Flip Canvas Vertically,” which flips the canvas vertically.
CROPPING IMAGES (CS6 & Later):
1. Click the “Crop Tool” in the Toolbox.
2. In the Options Bar you can select an “Overlay” (or shield) from the “View” drop-down.
3. To constrain the crop to pre-determined proportions, choose one of the aspect ratios in the Options bar.
4. Hover your mouse over one of the resizing handles and click and drag to create your crop.
5. To complete the crop, click the “Confirm” checkbox in the Options bar.
CROPPING IMAGES (CS5 & Earlier):
1. Click the “Crop Tool” in the Toolbox.
2. Click and drag around the area you want to keep to select it.
3. In the Options Bar you can select either “Hide” to hid the area that will be cropped away, or you can
select “Delete” to delete the area to be cropped away.
4. Check the “Shield” checkbox if you want the area to be discarded to appear shaded. If you want a shield,
you can set its color and opacity next to the “Shield:” checkbox.
5. Adjust the crop selection by clicking and dragging the small resizing squares to scale the selection.
6. You can click and drag in the selection borders to move the selection.
7. You can click and drag slightly outside the selection area to rotate the selection.
8. When you are ready to complete the crop, click the “Confirm” checkmark in the Options bar. Sample
- for
evalu
ation
purp
oses
only!

88 Advanced Photoshop ©TeachUcomp, Inc.
ACTIONS-
Manipulating Images ALTERING THE PERSPECTIVE OF IMAGES WITH THE PERSPECTIVE CROP TOOL:
1. Click the “Perspective Crop Tool” in the Toolbox.
2. Click and drag around the area in the image for which you wish to adjust the perspective.
3. Click and drag on the corner re-sizing handles to adjust the crop and perspective.
4. Click the “Commit” checkmark in the Options bar to complete the perspective crop adjustment.
5. Undo and repeat until the new perspective is what you desire.
FREELY TRANSFORMING OBJECTS AND SELECTIONS:
1. Select “Edit| Free Transform…” from the Menu Bar.
2. You can click and drag the small circle in the middle of the object to a new location if you want to change
the given “center” for the transformation effect or you can also click on one of the small squares in the
“Reference Point Location” button in the Options Bar to set the point, as well.
3. You can then scale the object by placing your mouse pointer over one of the square handles and clicking
and dragging with the mouse. You can hold down the “Shift” key and drag from one of the corner handles
as you perform this task to scale while maintaining perspective. You could also enter a new width and
height for the object by typing it into the “W:” and “H:” text boxes in the Menu Bar.
4. To rotate the object, place your mouse pointer outside of the bounding box until it becomes a bent,
double-pointed arrow. When you see that icon, click and drag with the mouse to rotate the object freely.
You can also hold down the “Shift” key to constrain the rotation to 15° increments. You can also type a
rotation degree into the “Rotate” text box in the Options Bar to do the same thing.
5. To distort the image in relation to the currently selected reference point, hold down the “Alt” key on your
keyboard and click and drag one of the handles to distort the object. You can distort the object freely by
simply holding down the “Ctrl” key on your keyboard and then clicking and dragging one of the selection
handles.
6. To skew the object, hold down “Ctrl”+“Shift” on your keyboard and then click and drag with the mouse on
one of the handles that appear at the side of the object’s bounding border to slant the object. You can
also skew by typing values into the “H:” and “V:” text boxes in the Options Bar.
7. You can change the perspective by holding down “Ctrl”+“Alt”+“Shift” on your keyboard and then clicking
and dragging by one of the corner selection handles.
8. If you want to move the selected object, place your mouse inside of the bounding border, over the object
and click and drag with the mouse to move it to a new location.
9. When you are finished making your transformations, click the “Confirm” checkmark in the Options Bar, or
click the “Cancel” button in the Options Bar.
Sample
- for
evalu
ation
purp
oses
only!

89 Advanced Photoshop ©TeachUcomp, Inc.
ACTIONS-
Manipulating Images USING THE SMUDGE TOOL:
1. Select the “Smudge Tool” from the Toolbox.
2. In the Options Bar, set the brush stoke and other brush options, as desired.
3. Select a blending mode and strength from the drop-down and slider available.
4. You can check the “All Layers” checkbox to select using the combined color value from all layers. If
unchecked it will only smudge the color from the currently visible layer.
5. You can check the “Finger Painting” checkbox to smudge using the selected foreground color at the
beginning of each stroke. If this is deselected, the tool will instead use the color under the pointer at the
beginning of the stroke.
6. After setting your options, all you must do is then click and drag in the image to smudge the paint where
you click and drag.
USING THE BLUR TOOL OR THE SHARPEN TOOL:
1. Select either the Blur Tool or the Sharpen Tool from the Toolbox.
2. Set the brush options, as desired, in the Options Bar.
3. Select a blending mode and strength from the drop-down and slider available.
4. You can check the “All Layers” checkbox to blur or sharpen the pixel data using the combined data from
all layers. Otherwise it will only use data from the currently selected layer.
5. After setting your options, click and drag over the area in the image which you want to blur or sharpen.
USING THE DODGE TOOL OR THE BURN TOOL:
1. Select either the Dodge Tool or the Burn Tool from the Toolbox.
2. In the Options Bar, set your brush options and then use the “Range:” drop-down to select what to change
in the image: “Midtones,” to change the middle range of grays; “Shadows,” to change the dark areas; or
“Highlights” to change the light areas.
3. Use the “Exposure:” slider to set the intensity of the effect.
4. To then apply the effect, click and drag over the part of the image that you want to modify.
USING THE SPONGE TOOL:
1. Select the Sponge Tool from the Toolbox.
2. In the Options Bar, set your brush options and use the “Mode:” drop-down to select either “Desaturate,”
which reduces the color saturation or “Saturate,” which increases color saturation.
3. Use the “Flow:” slider to set the strength of the selected effect.
4. Click and drag in the selected layer to increase or decrease the saturation of the color.
Sample
- for
evalu
ation
purp
oses
only!

90 Advanced Photoshop ©TeachUcomp, Inc.
ACTIONS-
Manipulating Images SELECTING FILTERS FROM THE MENU BAR:
1. Select the image, layer, or selection to which you want to apply the effect.
2. Select “Filter” from the Menu Bar.
3. At the bottom section of the menu drop-down, roll your mouse pointer down to the name of the effect
category for which you want to view the effects.
4. From the side menu that appears, select the filter to apply.
5. You may have to set additional setting, if necessary in either the “Filter Gallery” or a separate dialog box
specifically for that effect. When you have changed the settings as you would like. Click “OK” to apply the
effect.
SELECTING FILTERS USING THE FILTER GALLERY:
1. Select the image, layer, or selection to which you want to apply the effect.
2. Select “Filter| Filter Gallery…” from the Menu Bar.
3. In the Filter Gallery, click on the name of the effect category in the middle pane which you want to expand
to view the effects.
4. Click on an effect in the expanded section to view it applied in the left pane.
5. In the right pane, change any settings that are available for the selected effect, if desired.
6. If you wish to add another effect layer, click the “New Effect Layer” button at the bottom of the right pane
and repeat steps 3 and 4 above.
7. To delete a layer, click on its name in the effects layer section at the bottom of the right pane, and then
click the “Delete Layer” button at the bottom of the right pane.
8. When the desired effect is produced, click the “OK” button to add the effect to the selection.
USING THE LIQUIFY COMMAND:
1. Select an image, layer, or selection, first.
2. Then select “Filter| Liquify…” from the Menu Bar.
3. Select which areas of the image layer you want to “freeze,” by selecting the “Freeze Tool” from the left
side of the “Liquify” dialog box. At the right side of the “Liquify” dialog box, you will need to set the size of
the brush that you will use, its density of application, and its brush pressure.
4. Just click and drag to paint a mask over the areas of the image that you want to freeze.
5. You can also unfreeze masked areas by selecting the “Thaw Tool” from the left side of the “liquify” dialog
box and then clicking and dragging over the masked areas to unfreeze them, making them distortable
again.
6. To apply a distortion, select the distortion tool that you want to use from the list of buttons at the left side
of the “Liquify” dialog box.
7. Click and drag or simply click and hold down the mouse to apply the selected distortion.
8. If you click the “Restore All” button at the right, all of the changes that you have made in the current
session will be reversed, and the image restored.
9. Click “Load Mesh” to save your distortions for future use by entering a name in the text box and clicking
“Save.”
10. When you are finished applying the changes to the image, you can click “OK” to apply the liquefaction to
the selected image layer. Sample
- for
evalu
ation
purp
oses
only!

91 Advanced Photoshop ©TeachUcomp, Inc.
ACTIONS-
Manipulating Images
USING THE CLONE STAMP TOOL:
1. Select the “Clone Stamp Tool” from the Toolbox.
2. Select the image from which you want to sample pixels.
3. Hold down “Alt” on your keyboard and click on the area that you want to use as the reference point for the
pixels that you want to copy to another location. Then release the “Alt” key.
4. Next, click and drag with the tool in the area of the image layer to which you want to copy the pixels that
you clicked.
USING VANISHING POINT:
1. Select the “Filter| Vanishing Point” from the Menu Bar.
2. In the Vanishing Point Dialog Box, click the “Edit Plane Tool” to make any adjustments to the plane, and
use the resizing handles to change the perspective, as needed.
3. Make your edits in the dialog box using the available tools.
4. Click “OK.”
USING CONTENT-AWARE SCALING:
1. Select the non-background layer you wish to change.
2. Select “Edit| Content-Aware Scale” from the Menu Bar.
3. Drag the handles that appear in on the bounding box.
4. Press “Enter” or click “Commit” in the Options Bar to make the transformation.
USING THE PUPPET WARP TOOL:
1. Select the layer or mask you want to transform.
2. Select “Edit| Puppet Warp” from the Menu Bar.
3. Use the “Mode” drop-down in the Options Bar to set the elasticity of the mesh.
4. Set the spacing of the mesh points with the “Density” drop-down in the Options Bar.
5. Expand or contract the edges of the mesh using the “Expansion” slider.
6. Click into the image to set the bending/warping pins in your image.
7. To rotate the mesh around a pin, select it and press the “Alt” key on your keyboard. Place the cursor
near the pin. When the circle appears, drag it to rotate the mesh.
8. Click and drag on the points to warp the image.
9. When you are done, click “Enter” on your keyboard.
Sample
- for
evalu
ation
purp
oses
only!

92 Advanced Photoshop ©TeachUcomp, Inc.
ACTIONS-
Manipulating Images
USING THE RED EYE TOOL:
1. Select the “Red Eye Tool” from the Toolbox.
2. Select the desired settings in the Options Bar to increase or decrease the pupil size affected and how
dark to make the correction.
3. Click into the red eye.
USING THE PATCH TOOL:
1. Select the “Patch Tool” from the Toolbox.
2. Make a selection of pixels to use as the sample patch.
3. Select “Destination” in the Options Bar.
4. In version CS6 and later, select “Content-Aware” from the “Patch” drop-down in the Options bar to
replace unwanted image elements by synthesizing nearby content.
5. Click and drag the selection that you made and drop it on top of the area that you want to patch.
USING THE PATTERN STAMP TOOL:
1. Select the “Pattern Stamp Tool” from the Toolbox.
2. Set the desired brush options and select a pattern in the Options Bar.
3. Click and drag in the image layer into which you want to paint the selected pattern.
USING THE HEALING BRUSH TOOL:
1. Select the “Healing Brush Tool” from the Toolbox.
2. Set your desired brush options in the Options Bar.
3. Next, hold down “Alt” on your keyboard and click on the area that you want to use as the reference point
for the pixels that you want to copy to another location. Then release the “Alt” key.
4. Next, click and drag with the tool in the area to which you want to copy the pixels that you clicked.
USING THE SPOT HEALING BRUSH TOOL:
1. Select the “Spot Healing Brush Tool” from the Toolbox.
2. Set your desired brush options and “Type Match” in the Options Bar.
3. Next, click or click and drag with the tool in the area to which you want to copy the pixels that you clicked.
USING THE CONTENT-AWARE MOVE TOOL:
1. Select the “Content-Aware Move Tool” from the Toolbox.
2. In the Options bar, select “Mode| Extend (or Move).”
3. Click and drag to circle the object in the image you wish to move.
4. Click and drag in the selection to move it to a new location.
Sample
- for
evalu
ation
purp
oses
only!

93 Advanced Photoshop ©TeachUcomp, Inc.
EXERCISES-
Manipulating Images Purpose:
1. To be able to edit images effectively in the Photoshop application
Exercises:
1. Open your Photoshop application.
2. Select an image that you can use for the exercise. You can make a copy of it first if you want to keep
a backup of the original for safekeeping.
3. Select “Image| Rotate Canvas| 90° CW” from the Menu Bar to rotate the image 90 degree clockwise.
4. Select “Image| Rotate Canvas| 90° CCW” from the Menu Bar to rotate the image 90 degree
counterclockwise.
5. Select an image element using one of your selection tools from the Toolbox.
6. Select “Edit| Free Transform” from the Menu Bar.
7. Use the combinations of “Ctrl,” “Alt,” and “Shift” along with the bounding box of the selection to apply
any sort of transformation you want to the selected image element.
8. Click the “Confirm” checkmark at the right end of the Options Bar to confirm your transformations
after you have made them.
9. Select the “Smudge Tool” from the Toolbox.
10. Click and drag in the image to create a “finger paint” effect.
11. Select “Filter| Artistic| Paint Daubs” from the Menu Bar.
12. In the “Filter Gallery,” change the settings for the “Paint Daubs” at the right of the dialog box by
changing the value of the sliders and looking at how it will affect the image in the preview at the left
side of the dialog box.
13. Click the “New Effect Layer” button at the bottom right of the “Filter Gallery.”
14. Click the “Artistic” folder at the top of the middle pane to collapse those effects.
15. Click the “Distort” folder to view the effects.
16. Click the “Glass” effect.
17. Click “OK” to apply and combine the layered effects.
18. Select “Filter| Liquify…” from the Menu Bar.
19. Click the “Twirl Clockwise Tool” from the left side of the dialog box.
20. Set the brush attributes for that tool using the slider settings at the right side of the dialog box.
21. Click and hold down the mouse button over a place in the image which you want to twirl in a circle.
22. Click the “Restore All” button at the right side of this dialog box to reset the image back to its default
appearance.
23. Click the “Cancel” button to cancel our changes and return to the unaltered image.
24. Find an object in your image that you want to duplicate.
25. Click the “Clone Stamp Tool” in the Toolbox.
26. Use the “Brush:” drop-down in the Options Bar to set the size of the brush used for this effect.
27. Hold down the “alt” key on your keyboard and click on the area of the image that you want to clone.
28. Click and drag or click repeatedly in another area of the image where you want to place the pixels
that you just cloned.
29. Close the document without saving to discard your changes.
Sample
- for
evalu
ation
purp
oses
only!

94 Advanced Photoshop ©TeachUcomp, Inc.
CHAPTER 15-
Saving Images
15.1- Saving Images
15.2- The Save for Web Dialog Box
Sample
- for
evalu
ation
purp
oses
only!

95 Advanced Photoshop ©TeachUcomp, Inc.
Saving Images
15.1- Saving Images:
You have several options available to you when you want to save your Photoshop image files. There
are many different formats that you can save the file to, depending on your needs. You can use the “Save”
command under the “File” Menu Bar command to save changes to your current Photoshop image file. The
changes will always be saved in the file’s current format. You can use the “Save As…” command that is
located under the “File” command to save a copy of the image with a different format, with a new name, or
to a new location. You can also take advantage of the “Save for Web…” command, which optimizes the
image for online display.
To save a file and change its format, you can select “File| Save As…” from the Menu Bar. In the
“Save As” dialog box, you select where to save the file by selecting a location from the “Save in:” drop-
down. Then, make sure that you have the name that you want to give to the file typed into the “File name:”
text box. If you want to change the file format, just select the format that you desire from the “Format:” drop-
down. Also note that you have additional saving options at the bottom of this dialog box, such as if you want
to save the color profile along with the image. You can check any of these checkboxes that you want or
have available to you, depending on the format selected. Then just click “Save” to save the file with the
settings specified.
Sample
- for
evalu
ation
purp
oses
only!

96 Advanced Photoshop ©TeachUcomp, Inc.
Saving Images
15.2- The Save for Web Dialog Box:
If you want to save the image you are creating for web display, then you can use the “Save for Web”
dialog box to make sure that the image file is as small as possible without sacrificing image quality, while
ensuring that the format that you use will display correctly online.
To view this dialog box, select “File| Save for Web…” from the Menu Bar. You can then use the
settings available at the right side of this dialog box to determine the size and download time for the image
once it is uploaded to the web. At the right, you can use the “Preset:” drop-down to select a type of preset
format for your image. You can also select your own options in the area below that by using the settings
available to create your own customized format. You can save a simple, vector drawing with few colors as a
“GIF.” You can then click into the “Color Table” to change advanced color options (such as removing colors
from your image, etc.) You can save more complex photography with many colors as a “JPEG” or “PNG”
graphic. Many times, however, the file that you have created in Photoshop is just too large for easy
download on the web. In that case, you can use the “Image Size” area towards the bottom of the right side
of the dialog box. Here you can set a new “Width” and “Height” for your image. You can also check the
“Constrain Proportions” chain link icon (this is a checkbox in CS3 and earlier) to keep the image from
warping. Use the “Quality” drop-down to select which resampling method you want to use for the graphic.
Note that in the lower left corner of the image preview are the current settings for the image. You will
see its format, then its actual file size. Below that you will see how long it will take to download at a given
speed of internet connectivity. If you right-click in this area, you will see a pop-up menu where you can
change the download connectivity rate (and thus the download time) to view how long it will take people
with different rates of internet connectivity to download your image. When you are ready to save your
graphic for the web, you can click the “Save” button to launch the “Save Optimized As” dialog box, where
you can select to where you want to save the optimized image file and what to call it. Just click “Save” again
in this dialog box to save the optimized image.
Sample
- for
evalu
ation
purp
oses
only!

97 Advanced Photoshop ©TeachUcomp, Inc.
ACTIONS-
Saving Images SAVING IMAGES:
1. Select “File| Save As…” from the Menu Bar.
2. Select where to save the file by selecting a location from the “Save in:” drop-down.
3. Make sure that you have the name that you want to give to the file typed into the “File name:” text box.
4. If you want to change the file format, select the format that you desire from the “Format:” drop-down.
5. Also note that you have additional saving options at the bottom of this dialog box, such as if you want to
save the color profile along with the image. You can check any of these checkboxes that you want or
have available to you, depending on the format selected.
6. Click “Save” to save the file. Depending on the format selected, you may have to make additional choices
in another pop-up dialog box before you can save the file.
USING THE “SAVE FOR WEB” DIALOG BOX:
1. Select “File| Save for Web…” from the Menu Bar.
2. Use the “Preset:” drop-down to select a type of preset format for your image.
3. You can also select your own options in the area below that by using the settings available to create your
own customized format.
4. To change the size of the image file saved, you can click the “Image Size” tab towards the bottom of the
right side of the dialog box. Here you can set a new “Width” and “Height” for your image. You can also
check the “Constrain Proportions” checkbox to keep the image from warping. Use the “Quality” drop-
down to select which resampling method you want to use for the graphic. To then apply the resampling,
click the “Apply” button below that area.
5. Note that in the lower left corner of the image preview are the current settings for the image. You will see
its format, then its actual file size. Below that you will see how long it will take to download at a given
speed of internet connectivity. If you right-click in this area, you will see a pop-up menu where you can
change the download connectivity rate (and thus the download time) to view how long it will take people
with different rates of internet connectivity to download your image.
6. When you are ready to save your graphic for the web, click the “Save” button.
7. In the “Save Optimized As” dialog box select to where you want to save the optimized image file and
what to call it using the “Save in:” drop-down and the “File name:” text box.
8. Click “Save” again in this dialog box to save the optimized image.
Sample
- for
evalu
ation
purp
oses
only!

98 Advanced Photoshop ©TeachUcomp, Inc.
EXERCISES-
Saving Images Purpose:
1. None
Exercises:
1. There are no exercises for this lesson.
Sample
- for
evalu
ation
purp
oses
only!

99 Advanced Photoshop ©TeachUcomp, Inc.
CHAPTER 16-
Printing
16.1- Printing Images
16.2- Setting Printing Options
Sample
- for
evalu
ation
purp
oses
only!

100 Advanced Photoshop ©TeachUcomp, Inc.
Printing
16.1- Printing Images:
Now we will look at some of the basic concepts of printing. When you print from Photoshop, you can
send the image to a printing device to be transferred onto paper, film, a printing plate, or sent directly to a
digital printing press. When you print a complex graphic, in order to create the illusion of continuous tones
when printed, images are broken down into a series of dots. This process is called “halftoning.” When you
change the sizes of the dots in a halftone screen it creates the illusion of variations of gray or continuous
color in the image.
When you are having it printed in a commercial printing situation, each color in the image must be
printed on separate master plates. This is the process of color separation, and typically uses CMYK inks.
You can adjust how the plates are created and also make traps for color in Photoshop.
To print one copy of the current image to your default printer with the default settings, select “File|
Print One Copy” from the Menu Bar. To set printing options, select “File| Print…” instead. This will launch
the “Print” dialog box, where you can select a printer and set the print options.
16.2- Setting Printing Options:
You have several options when printing in Photoshop. You can perform printing and scaling on an
image, set your output options and also your color management options. Select “File| Print…” from the
Menu Bar in versions CS3 and later to launch the “Print” Dialog Box where you will see the various options
available. In previous versions, these options are available using “Print with Preview” by selecting “File|
Print with Preview…” from the Menu Bar.
First, you can select your printer, the number of copies you want, or click “Print Settings” to change
your printer options. If you want to change the orientation of the image, you can click either the “Portrait” or
“Landscape” buttons. Next, you can set the positioning and scaling options for your image. In the preview
image in the upper left corner of the “Print” dialog box you can both position and scale the image using the
mouse. If you want to set the placement of the image file in the paper, make sure that the “Center”
checkbox is unchecked in the “Position” section. You can then click and drag on the image in the preview
window to set the placement of the image on the page. You could also use the “Top:” and “Left:” text boxes
in the “Position” section to set the placement of the top and left edges of the image. If you want the image to
print in the exact center of the page, then check the “Center Image” checkbox.
You can scale the image by simply placing your mouse pointer over the edge of the image file in the
preview window until you see a resizing arrow. You can then click and drag to scale the image. If you don’t
see the bounding box, check the “Bounding Box” checkbox to be able to resize the image with your mouse.
You can also scale the image by setting a percentage of the original size in the “Scale:” text box. You can
also use the “Height:” and “Width:” text boxes to set the scaling, as well. If you click the “Scale to Fit Media”
checkbox, the image will scale itself to fit the available page.
In the upper-right corner of the dialog box, use the drop-down to select “Output” to change advanced
Print options. Under “Printing Marks,” you can print calibration bars and registration marks around the
image by checking the “Registration Marks” checkbox. You can check the “Corner Crop Marks” checkbox to
print crop marks where the page is to be trimmed at the corners. Check the “Center Crop Marks” to print
crop marks at the center of each image edge.
Checking the “Description” checkbox allows you to print any caption entered into the “File Info”
dialog box. Checking the “Labels” checkbox prints the filename above the image. You can check the
“Emulsion Down” checkbox to make type readable when printing on film with the photosensitive layer facing
away from you. Checking the “Negative” checkbox prints an inversion of the entire output including all
masks and background color selections, converting the output to a negative. Sample
- for
evalu
ation
purp
oses
only!

101 Advanced Photoshop ©TeachUcomp, Inc.
Printing
16.2- Setting Printing Options (cont.):
In the “Functions” section, you can click the “Background…” button to call up the “Color Picker”
dialog box and select a background color for printing outside of the image. You can click the “Border…”
button to print a black border around an image. In the dialog box that appears, you simply type in a number
and select a measurement unit.
You can click the “Bleed…” button to print crop marks inside rather than outside of the image file.
You can use this to trim the image within the graphic. You have to type in a number and set the unit of
measurement to specify the width of the bleed.
If you are using an printer capable of interpolation, you can check the “Interpolation” checkbox to
automatically resample a low-res image up while printing. Interpolation is a process where the software
adds new pixels to an image based on the color values of the surrounding pixels. Interpolation is used when
an image is upsampled to increase its resolution. This may, however, blur the output. If you checked the
“Calibration Bars” checkbox, it prints an 11-step grayscale in transition of 10% increments from 0% to
100%. If using a CMYK separation, a gradient tint bar is instead printed to the left of each CMY plate and a
progressive color bar is printed at the right.
If you set the drop-down at the top of the additional options section to “Color Management” you can
set the color management to the “Document:” or “Proof:” setup. You can set the “Color Handling:” drop-
down to have Photoshop, your printer, or neither manage your color profile. You can set advanced color
management options at this point using the drop-downs and checkboxes below. If you are not familiar with
the choices, roll your mouse pointer over the areas to see a description of each. When you are finished,
click the “Print…” button to launch the normal “Print” dialog box where you can set the normal print settings
for your printer.
Once you have made your choices, click the “Print” button to print your image or “Done” to save the
settings for future use.
Sample
- for
evalu
ation
purp
oses
only!

102 Advanced Photoshop ©TeachUcomp, Inc.
ACTIONS-
Printing BASIC PRINTING:
1. To print one copy of the current image to your default printer with the default settings, select “File| Print
One Copy” from the Menu Bar.
2. To set basic printing options, select “File| Print…” instead. This will launch the “Print” dialog box, where
you can select a printer and set the print options.
SETTING ADVANCED PRINTING OPTIONS:
1. Select “File| Print” from the Menu Bar.
2. To see all available options, check the checkbox for that says “Show More Options.”
3. Uncheck the “Center Image” checkbox to then click and drag on the image in the preview window to set
the placement of the image on the page. You could also use the “Top:” and “Left:” drop-downs in the
“Position” section to set the placement of the top and left edges of the image.
4. If you want the image to print in the exact center of the page, then check the “Center Image” checkbox.
5. You can scale the image by simply placing your mouse pointer over the edge of the image file in the
preview window until you see a resizing arrow. You can then click and drag to scale the image. If you
don’t see the bounding box, check the “Show Bounding Box” checkbox to be able to resize the image
with your mouse. You can also scale the image by setting a percentage of the original size in the “Scale:”
text box. You can also use the “Height:” and “Width:” drop-downs to set the scaling, as well. If you click
the “Scale to Fit Media” checkbox, the image will scale itself to fit the available page.
6. If you make a selection with the rectangular marquee tool to select only a part of an image file to print,
and then check the “Print Selected Area” checkbox, it will print only the selected area.
7. You can use the drop-down at the top of the extra options section to select “Output.”
8. You can click the “Background…” button to call up the “Color Picker” dialog box and select a background
color for printing outside of the image.
9. You can click the “Border…” button to print a black border around an image. In the dialog box that
appears, you simply type in a number and select a measurement unit.
10. You can click the “Bleed…” button to print crop marks inside rather than outside of the image file. You
have to type in a number and set the unit of measurement to specify the width of the bleed.
11. If you are using an printer capable of interpolation, you can check the “Interpolation” checkbox to
automatically resample a low-res image up while printing. This may, however, blur the output.
12. If you check the “Calibration Bars” checkbox, it prints an 11-step grayscale in transition of 10%
increments from 0% to 100%. If using a CMYK separation, a gradient tint bar is instead printed to the left
of each CMY plate and a progressive color bar is printed at the right.
13. You can print registration mark around the image by checking the “Registration Marks” checkbox.
14. You can check the “Corner Crop Marks” checkbox to print crop marks where the page is to be trimmed
at the corners.
15. Check the “Center Crop Marks” to print crop marks at the center of each image edge.
16. Checking the “Caption” checkbox allows you to print any caption entered into the “File Info” dialog box.
Sample
- for
evalu
ation
purp
oses
only!

103 Advanced Photoshop ©TeachUcomp, Inc.
ACTIONS-
Printing SETTING ADVANCED PRINTING OPTIONS (CONT.):
17. Checking the “Labels” checkbox prints the filename above the image.
18. You can check the “Emulsion Down” checkbox to make type readable when printing on film with the
photosensitive layer facing away from you.
19. Checking the “Negative” checkbox prints an inversion of the entire output including all masks and
background color selections, converting the output to a negative.
20. If you set the drop-down at the top of the additional options section to “Color Management” you can set
the color management to the “Document:” or “Proof:” setup.
21. When you are finished, click the “Print…” button to launch the normal “Print” dialog box where you can
set the normal print settings for your printer.
Sample
- for
evalu
ation
purp
oses
only!

104 Advanced Photoshop ©TeachUcomp, Inc.
EXERCISES-
Printing Purpose:
1. None
Exercises:
1. There are no exercises for this lesson.
Sample
- for
evalu
ation
purp
oses
only!

105 Advanced Photoshop ©TeachUcomp, Inc.
CHAPTER 17-
Automating Tasks
17.1- Actions and the Actions Panel
17.2- Playing Actions
17.3- Editing Actions
17.4- Playing Pre-Loaded Actions
Sample
- for
evalu
ation
purp
oses
only!

106 Advanced Photoshop ©TeachUcomp, Inc.
Automating Tasks
17.1- Actions and the Actions Panel:
Actions are a set of Photoshop commands that you can record and then playback in the future to
execute automatic changes on images. Most commands and Toolbox tool operations can be recorded in
actions. Photoshop already ships with several pre-created actions that you can use to apply creative
effects, like a water reflection.
We use the Actions Panel to record, play and edit actions. You can view the Actions Panel by
selecting “Window| Actions” from the Menu Bar. You can expand and collapse the sets, actions and
commands that are listed in the Actions Panel by clicking the right-pointing triangle to the left of the set,
action or command to expand its contents. That will display its contents and point the arrow downward.
Click the downward-pointing arrow again to collapse the contents again. You can then click on the
individual actions to select them. You can hold down “Shift” on your keyboard and click on two non-adjacent
actions to select all actions between and including the two actions upon which you clicked.
When you are ready to record action, bear in mind a few rules. First, when you are recording actions
involving dialog box and panel settings, only settings that are changed are recorded. Also, modal operations
and tools use the units currently specified by the ruler for measurements. A “modal operation” is one that
makes you press the “Enter” key to return a value, like the “Crop” and “Transform” commands do. Many of
the selection tools also record ruler position, as well. Also, you can record the “Play” command in an action
to call another action from an action that is played. Now when you create a new action, any commands you
use or tools you select and use are added to the action until you stop recording.
To create a new action, open a file and click the “Create New Action” button in the Actions Panel. In
the “New Action” dialog box, type a name for the action into the “Name:” text box. You can specify a set for
the action by using the “Set:” drop-down. A set can contain many actions, and you can create a new set by
clicking the “Create New Set” button at the bottom of the Actions Panel and typing a name for the set into
the text box that appears. You can use the “Function Key:” drop-down to select a function key to assign as a
shortcut key for the action’s playback. You can check the “Shift” and “Control” checkboxes to assign those
keys to the keyboard shortcut as well. You can then use the “Color:” drop-down to select the color for the
action in the Actions Panel.
When you are ready to record your actions, click the “Record” button. The “Record” button in the
Actions Panel will turn red to indicate that Photoshop is recording your actions. Now you just perform the
activities that you want to record and Photoshop will record the commands and tools that you use and what
you do with them for future playback.
To stop recording, click the “Stop” button in the Actions Panel, or press the “Esc” key on your
keyboard. To resume recording in the same action, select “Start Recording” from the “Options” menu in the
Actions Panel.
Sample
- for
evalu
ation
purp
oses
only!

107 Advanced Photoshop ©TeachUcomp, Inc.
Automating Tasks
17.2- Playing Actions:
When you play an action, you playback the recorded actions from a previous recording session. To
play an entire action, open the file and select the action name in the Actions Panel. Then click the “Play
Selection” button in the Actions Panel. You can also press the keyboard short cut for the action, if you
assigned one when you recorded the file. You can also select a command within the action from which to
start playback by selecting it in the Actions Panel, and then clicking “Play” to start playback from the
selected command downward. To play a single command line, hold down the “Ctrl” key on your keyboard,
and then click the “Play” button in the Actions Panel to play back the selected command.
17.3- Editing Actions:
You can rearrange actions and commands, record additional commands, re-record commands and
duplicate and delete commands and actions in the Actions Panel. To rearrange actions, click and drag the
action to a new location in the Actions Panel. You can also click and drag the commands within an action to
a new place to rearrange those, as well.
You can add additional commands to an action by clicking on the command in the action after which
you want to start adding commands. Then click the “Record” button again and record your additional
activities. Just click the “Stop” button to stop recording when you are finished.
To re-record an action, select the action to re-record and then click the “Options” button in the
Actions Panel. From the pop-up menu that appears, select “Record Again…” to set new values for it. To re-
record a single command again, double-click the command in the Actions Panel. Then enter the new
values, and click “OK.”
To duplicate a set, action or command, hold down the “Alt” key on your keyboard, and then click and
drag the set, action or command that you want to duplicate to a new location in the Actions Panel.
To delete an action or command, click and drag the selected action or command to the “Trash”
button at the bottom of the Actions Panel and drop it there to delete it. If you want to clear all the existing
actions in the Actions Panel, click the “More Options” button to reveal the side-menu that appears and
select “Clear All Actions.”
17.4- Playing Pre-Loaded Actions:
Photoshop also comes with several pre-loaded preset actions which you can apply in a few easy
clicks. There are Commands, Frames, Image Effects, the new LAB Black & White technique, Production,
Star Trails, Text Effects, Textures and Video Actions.
These action effects are loaded into the Actions Panel by clicking the “More Options” button and
then selecting the action you want to load. For example, if you wanted to apply the “Light Rain” effect to
your image, click the “More Options” button and then select “Image Effects” from the menu. You’ll see the
effects loaded into the Actions Panel. Locate “Light Rain” and click to select it. Then, simply click the “Play”
button to complete the action. It’s that simple!
Although there are many ways to create a black and white image in Photoshop, version CS5
enhanced the process by adding the “Lab B&W” action into the Actions Panel. Run the action in the same
manner as described above to create beautiful black and white images with greater ease and speed.
Sample
- for
evalu
ation
purp
oses
only!

108 Advanced Photoshop ©TeachUcomp, Inc.
ACTIONS-
Automating Tasks USING THE ACTIONS PANEL:
1. You can view the Actions Panel by selecting “Window| Actions” from the Menu Bar.
2. You can expand and collapse the sets, actions and commands that are listed in the Actions Panel by
clicking the right-pointing triangle to the left of the set, action or command to expand its contents. That
will display its contents and point the arrow downward. Click the downward-pointing arrow again to
collapse the contents again.
3. You can then click on the individual actions to select them. You can hold down “Shift” on your keyboard
and click on multiple non-adjacent actions to select them.
CREATING A NEW SET:
1. You can create a new set by clicking the “New Set” button at the bottom of the Actions Panel and typing a
name for the set into the text box that appears.
2. Click “OK” to create the new set.
CREATING A NEW ACTION:
1. To create a new action, open a file and click the “New Action” button in the Actions Panel.
2. In the “New Action” dialog box, type a name for the action into the “Name:” text box.
3. You can specify a set for the action by using the “Set:” drop-down.
4. You can use the “Function Key:” drop-down to select a function key to assign as a shortcut key for the
action’s playback. You can check the “Shift” and “Control” checkboxes to assign those keys to the
keyboard shortcut, as well.
5. You can then use the “Color:” drop-down to select the color for the action in the Actions Panel.
6. When you are ready to record your actions, click the “Record” button.
7. Perform the activities that you want to record and Photoshop will record the commands and tools that you
use and what you do with them for future playback.
8. To stop recording, click the “Stop” button in the Actions Panel, or press the “Esc” key on your keyboard.
9. To resume recording in the same action, select “Start Recording” from the “Options” menu in the Actions
Panel.
PLAYING BACK AN ACTION:
1. To play an entire action, open the file and select the action name in the Actions Panel. Then click the
“Play” button in the Actions Panel.
2. You can also press the keyboard short cut for the action, if you assigned one when you recorded the file.
3. You can also select a command within the action from which to start playback by selecting it in the
Actions Panel, and then clicking “Play” to start playback from the selected command downward.
4. To play a single command line, hold down the “Ctrl” key on your keyboard, and then click the “Play”
button in the Actions Panel to play back the selected command.
Sample
- for
evalu
ation
purp
oses
only!
109 Advanced Photoshop ©TeachUcomp, Inc.
ACTIONS-
Automating Tasks EDITING ACTIONS:
1. To rearrange actions, click and drag the action to a new location in the Actions Panel. You can also click
and drag the commands within an action to a new place to rearrange those, as well.
2. You can add additional commands to an action by clicking on the command in the action after which you
want to start adding commands. Then click the “Record” button again and record your additional
activities. Just click the “Stop” button to stop recording when you are finished.
3. To re-record an action, select the action to re-record and then click the “Options” button in the Actions
Panel. From the pop-up menu that appears, select “Record Again…” to set new values for it.
4. To re-record a single command again, double-click the command in the Actions Panel. Then enter the
new values, and click “OK.”
5. To duplicate a set, action or command, hold down the “Alt” key on your keyboard, and then click and drag
the set, action or command that you want to duplicate to a new location in the Actions Panel.
6. To delete an action or command, click and drag the selected action or command to the “Trash” button at
the bottom of the Actions Panel and drop it there to delete it.
PLAYING PRE-LOADED ACTIONS
1. Open the image to which you wish to apply the preset actions or effects.
2. Click the “More Options” button in the Actions Panel.
3. Select the action from the side menu that appears.
4. In the Actions Panel, select the action you wish to play.
5. Click the “Play” button.
Sample
- for
evalu
ation
purp
oses
only!

110 Advanced Photoshop ©TeachUcomp, Inc.
EXERCISES-
Automating Tasks Purpose:
1. None.
Exercises:
1. There are no exercises for this lesson.
Sample
- for
evalu
ation
purp
oses
only!

111 Advanced Photoshop ©TeachUcomp, Inc.
CHAPTER 18-
Help
18.1- Photoshop Help
18.2- System Info
18.3- Online Updates
Sample
- for
evalu
ation
purp
oses
only!

112 Advanced Photoshop ©TeachUcomp, Inc.
Help
18.1- Photoshop Help:
You can select “Help| Photoshop Online Help…” from the Menu Bar to launch the Photoshop Help in
a separate window. This is a web-based help file that runs off of web page files on the Adobe website. In
versions CS3 and earlier, these are web page files loaded onto your computer during installation. If you are
using CS4 and later, simply enter your question into the text search box and hit “Enter” on your keyboard to
look for an answer. Click on the hyperlinks to make your selection.
If you are using a version prior to CS4, then there are two panes in the help window. At the left is the
help navigation pane, where you can click on the various hyperlinks to view the associated help files in the
pane at the right. In CS3, you can use the “Browse” drop-down to select the proper Adobe product to search
for help on. There are three ways that you have of finding help: “Contents,” “Index,” and “Search.” You can
click the “Contents” hyperlink to view the contents of the help files listed below. You can click on one of the
listed content titles to have the page appear at the right. You can then read the file and continue clicking the
small blue hyperlinks to open additional files. If you click the “Index,” you’ll see the alphabetical listing of
help files below the link. You can click a page number or letter to find topics by their title index. You can
then read those help files at the right. You can click into the “Search” text box and type in the word or
phrase that you would like to search for into the box. Then click the “Enter” button (“Search” in CS2 and
previous versions) to search for the text that you selected within the available help files.
18.2- System Info:
You can use the “System Info” screen to view the system information available for Photoshop. You
can check to see if your computer has enough free memory and drive space to effectively run the
Photoshop application, and you can also see the plug-ins that are installed in the Photoshop program. You
can access this window by selecting “Help| System Info…” from the Menu Bar.
18.3- Online Updates:
If you have a connection to the internet established, then you can select “Help| Updates…” from the
Menu Bar to launch Internet Explorer and connect to the Adobe web site’s download page. Here you can
find updates for Photoshop and other Adobe products you may have installed on your computer. After
Adobe locates any available updates, you can see what they are by clicking the left-pointing arrows to
reveal the updates in the applications. When you are ready, just click “Update” to begin the download.
Sample
- for
evalu
ation
purp
oses
only!

113 Advanced Photoshop ©TeachUcomp, Inc.
ACTIONS-
Help USING PHOTOSHOP HELP:
1. Select “Help| Photoshop Help…” from the Menu Bar.
2. In CS5 or CS4, enter your question into the Help text box and press “Enter” on your keyboard.
3. Click either the “Contents,” “Index,” or “Search” hyperlinks. Then click on the help topic you want to
see at the right side of the screen or type in a search criteria to use. Or, in CS2, you can click the
“Search” text box and enter text to search on.
4. The help topic that you select to view displays at the right side of the screen.
VIEWING SYSTEM INFO:
1. Select “Help| System Info…” from the Menu Bar.
2. Click “OK” when you are finished reviewing the information.
GETTING ONLINE UPDATES:
1. Select “Help| Updates…” from the Menu Bar.
2. At the Adobe download page, you can click on the update that you want to download and install to
update your Photoshop installation.
Sample
- for
evalu
ation
purp
oses
only!

114 Advanced Photoshop ©TeachUcomp, Inc.
EXERCISES-
Help Purpose:
1. None
Exercises:
1. There are no exercises for this lesson.
Sample
- for
evalu
ation
purp
oses
only!

115 Advanced Photoshop ©TeachUcomp, Inc.
Photoshop Keyboard Shortcuts
“File” Shortcuts Key
New Document Ctrl + N
Open Ctrl + O
Open As Alt + Ctrl + O
Close Ctrl + W
Close All Alt + Ctrl + W
Save Ctrl + S
Save As Shift + Ctrl + S
Save for Web Alt + Shift + Ctrl + S
Revert F12
File Info Alt + Ctrl + I
Page Setup Shift + Ctrl + P
Print with Preview Alt + Ctrl + P
Print Ctrl + P
Print One Copy Alt + Shift + Ctrl + P
Exit Ctrl + Q
“Edit” Shortcuts Key
Undo (one action) Ctrl + Z
Step Backwards (multiple actions) Alt + Ctrl + Z
Step Forwards (multiple actions) Shift + Ctrl + Z
Fade Shift + Ctrl + F
Cut Ctrl + X
Copy Ctrl + C
Copy Merged Shift + Ctrl + C
Paste Ctrl + V
Paste Into Shift + Ctrl + V
Fill Shift + F5
Free Transform Ctrl + T
Color Settings Shift + Ctrl + K
Edit General Preferences Ctrl + K
“Image” Shortcuts Key
Adjust Levels Ctrl + L
Auto Levels Shift + Ctrl + L
Auto Contrast Alt + Shift + Ctrl + L
Auto Color Shift + Ctrl + B
Curves Ctrl + M
Color Balance Ctrl + B
Hue/Saturation Ctrl + U
“Image” Shortcuts (cont.) Key
Desaturate Shift + Ctrl + U
Invert Ctrl + I
“Layer” Shortcuts Key
New Layer Shift + Ctrl + N
Layer via Copy Ctrl + J
Create Clipping Mask Ctrl + G
Release Clipping Mask Shift + Ctrl + G
Merge Layers Ctrl + E
Merge Visible Shift + Ctrl + E
“Select” Shortcuts Key
Select All Ctrl + A
Deselect Ctrl + D
Reselect Shift + Ctrl + D
Inverse Shift + Ctrl + I
Feather Alt + Ctrl + D
“Filter” Shortcuts Key
Last Filter Effect Applied Ctrl + F
Extract Alt + Ctrl + X
Liquify Shift + Ctrl + X
Pattern Maker Alt + Shift + Ctrl + X
“View” Shortcuts Key
Proof Colors Ctrl + Y
Gamut Warning Shift + Ctrl + Y
Zoom In Ctrl + ‘+’
Zoom Out Ctrl + ‘-’
Fit On Screen Ctrl + 0 (zero)
Actual Pixels Alt + Ctrl + 0
Extras Ctrl + H
Target Path Shift + Ctrl + H
Grid Ctrl + ‘
Guides Ctrl + ;
Rulers Ctrl + R
Snap Shift + Ctrl + ;
Lock Guides Alt + Ctrl + ;
Sample
- for
evalu
ation
purp
oses
only!

116 Advanced Photoshop ©TeachUcomp, Inc.
Photoshop Keyboard Shortcuts
“Window” Shortcuts Key
Actions Panel Alt + F9
Brushes Panel F5
Color Panel F6
Info Panel F8
“Help” Shortcuts Key
Photoshop Help F1
Sample
- for
evalu
ation
purp
oses
only!