A62500GNW0 NL VRIEZER GEBRUIKSAANWIJZING 2 EN ...
60
A62500GNW0 NL VRIEZER GEBRUIKSAANWIJZING 2 EN FREEZER USER MANUAL 21 PT CONGELADOR MANUAL DE INSTRUÇÕES 39
-
Upload
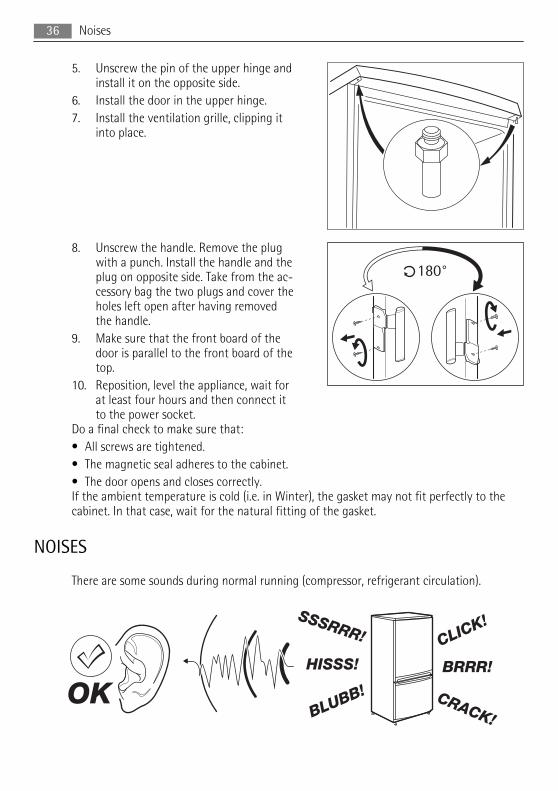
khangminh22 -
Category
Documents
-
view
1 -
download
0
Transcript of A62500GNW0 NL VRIEZER GEBRUIKSAANWIJZING 2 EN ...

A62500GNW0 NL VRIEZER GEBRUIKSAANWIJZING 2EN FREEZER USER MANUAL 21PT CONGELADOR MANUAL DE INSTRUÇÕES 39

VOOR PERFECTE RESULTATEN
Bedankt dat u voor dit AEG product heeft gekozen. Ditapparaat is ontworpen om vele jaren uitstekend tepresteren, met innovatieve technologieën die het levengemakkelijker helpen maken – functies die gewoneapparaten wellicht niet hebben. Neem een paar minutende tijd om het door te lezen zodat u er optimaal van kuntprofiteren.
ACCESSOIRES EN VERBRUIKSARTIKELEN
In de AEG webshop vindt u alles wat u nodig heeft om aluw apparaten van AEG mooi te houden en perfect telaten functioneren. Ook vindt u hier een groot aantalaccessoires die zijn ontworpen en gebouwd volgens dehoge kwaliteitsnormen die u verwacht, van speciaalkookgerei tot bestekmandjes en van flessenhouders totwaszakken…
Bezoek onze webshop opwww.aeg.com/shop
2

INHOUD
4 Veiligheidsinformatie7 Bedieningspaneel
10 Het eerste gebruik10 Dagelijks gebruik11 Handige aanwijzingen en tips12 Onderhoud en reiniging13 Problemen oplossen15 Technische gegevens15 Montage18 Geluiden20 Het milieu
In deze gebruiksaanwijzing worden devolgende symbolen gebruikt:
Belangrijke informatie over uw persoonlijkeveiligheid en informatie over het voorkomenvan schade aan het apparaat.
Algemene informatie en tips
Milieu-informatie
Wijzigingen voorbehouden
Inhoud 3

VEILIGHEIDSINFORMATIE
In het belang van uw veiligheid en om een correct gebruik te kunnen waarborgen is het vanbelang dat u, alvorens het apparaat te installeren en in gebruik te nemen, deze gebruiks-aanwijzing, inclusief de tips en waarschuwingen, grondig doorleest. Om onnodige vergissin-gen en ongevallen te voorkomen is het belangrijk ervoor te zorgen dat alle mensen die hetapparaat gebruiken, volledig bekend zijn met de werking ervan en de veiligheidsvoorzienin-gen. Bewaar deze instructies en zorg ervoor dat zij bij het apparaat blijven als het wordtverplaatst of verkocht, zodat iedereen die het apparaat gedurende zijn hele levensduur ge-bruikt, naar behoren is geïnformeerd over het gebruik en de veiligheid van het apparaat.Voor de veiligheid van mensen en eigendommen dient u zich aan de voorzorgsmaatregelenuit dit instructieboekje te houden, de fabrikant is niet verantwoordelijk voor schade die doorhet niet opvolgen van de aanwijzingen veroorzaakt is.
Veiligheid van kinderen en kwetsbare mensen• Dit apparaat is niet bedoeld voor gebruik door personen (waaronder begrepen kinderen)
met verminderde fysieke, zintuiglijke vermogens of een gebrek aan ervaring en kennis,tenzij dit onder toezicht gebeurt van een voor hun veiligheid verantwoordelijke persoonof tenzij zij van een dergelijke persoon instructie hebben ontvangen over het gebruik vanhet apparaat.Houd kinderen uit de buurt om te voorkomen dat ze met het apparaat gaan spelen.
• Houd alle verpakkingsmateriaal buiten het bereik van kinderen. Gevaar voor verstikking.• Als u het apparaat afdankt trek dan de stekker uit het stopcontact, snij de voedingskabel
door (zo dicht mogelijk bij het apparaat) en verwijder de deur om te voorkomen dat kin-deren een elektrische schok krijgen of zichzelf in het apparaat opsluiten.
• Als dit apparaat, dat voorzien is van een magnetische deursluiting, een ouder apparaatvervangt, dat voorzien is van een veerslot (slot) op de deur of het deksel, zorg er dan voordat u het slot onbruikbaar maakt voordat u het oude apparaat weggooit. Dit voorkomtdat kinderen er in opgesloten kunnen raken.
Algemene veiligheidWAARSCHUWING!
Houd de ventilatieopeningen altijd vrij van obstructies; dit geldt zowel voor losstaande alsingebouwde modellen.• Dit apparaat is bedoeld voor het bewaren van levensmiddelen en/of dranken in een ge-
woon huishouden, zoals uitgelegd in dit instructieboekje.• Gebruik geen mechanische hulpmiddelen of kunstgrepen om het ontdooiproces te ver-
snellen.• Gebruik geen andere elektrische apparaten (bijvoorbeeld ijsmachines) in koelkasten, tenzij
ze voor dit doel goedgekeurd zijn door de fabrikant.• Let op dat u het koelcircuit niet beschadigt.• Het koelmiddel isobutaan (R600a) bevindt zich in het koelcircuit van het apparaat, dit is
een natuurlijk gas dat weliswaar milieuvriendelijk is, maar ook uiterst ontvlambaar.
4 Veiligheidsinformatie

Controleer of de onderdelen van het koelcircuit tijdens transport en installatie van hetapparaat niet beschadigd zijn geraakt.Indien het koelcircuit beschadigd is:– open vuur en ontstekingsbronnen vermijden– de ruimte waar het apparaat zich bevindt grondig ventileren
• Het is gevaarlijk om wijzigingen aan te brengen in de specificaties of dit product op eni-gerlei wijze te modificeren. Een beschadigd netsnoer kan kortsluiting, brand en/of eenelektrische schok veroorzaken.
WAARSCHUWING!Alle elektrische onderdelen (netsnoer, stekker, compressor) mogen om gevaar te voorkomenuitsluitend worden vervangen door een erkende onderhoudsdienst of gekwalificeerd onder-houdspersoneel.
1. Het netsnoer mag niet verlengd worden.2. Verzeker u ervan dat de stekker niet platgedrukt of beschadigd wordt door de ach-
terkant van het apparaat. Een platgedrukte of beschadigde stekker kan oververhitraken en brand veroorzaken.
3. Verzeker u ervan dat u de stekker van het apparaat kunt bereiken.4. Trek niet aan het snoer.5. Als de stekker los zit, steek hem dan niet in het stopcontact. Dan bestaat er een risi-
co op een elektrische schok of brand.6. U mag het apparaat niet gebruiken zonder de afdekking van het lampje1) voor de
binnenverlichting.• Dit apparaat is zwaar. Wees voorzichtig als u het apparaat verplaatst.• Haal geen artikelen uit het vriesvak en raak ze niet aan als uw handen vochtig/nat zijn,
dit kan uw huid beschadigen of vrieswonden veroorzaken.• Stel het apparaat niet langdurig bloot aan direct zonlicht.• Gloeilampjes2) gebruikt voor dit apparaat is een speciaal lampje voor huishoudelijke ap-
paraten. De lampjes zijn niet geschikt voor de verlichting van ruimtes.
Dagelijks gebruik• Zet geen hete potten op de kunststof onderdelen in het apparaat.• Bewaar geen brandbare gassen of vloeistoffen in het apparaat, deze kunnen ontploffen.• Zet geen levensmiddelen direct tegen de luchtopening in de achterwand. 3)
• Diepgevroren voedsel mag niet opnieuw worden ingevroren als het eenmaal ontdooid is.• Bewaar voorverpakte diepvriesproducten volgens de aanwijzingen van de fabrikant.• U dient zich strikt te houden aan de aanbevelingen van de fabrikant van het apparaat
met betrekking tot het bewaren van voedsel. Raadpleeg de betreffende aanwijzingen.• Leg geen koolzuurhoudende of mousserende dranken in de vriezer, deze veroorzaken
druk op de fles die daardoor kan ontploffen, dit kan schade toebrengen aan het apparaat.
1) Als er een afdekking voor het lampje is voorzien.2) Als er is voorzien in een lamp.3) Als het apparaat vorstvrij is.
Veiligheidsinformatie 5
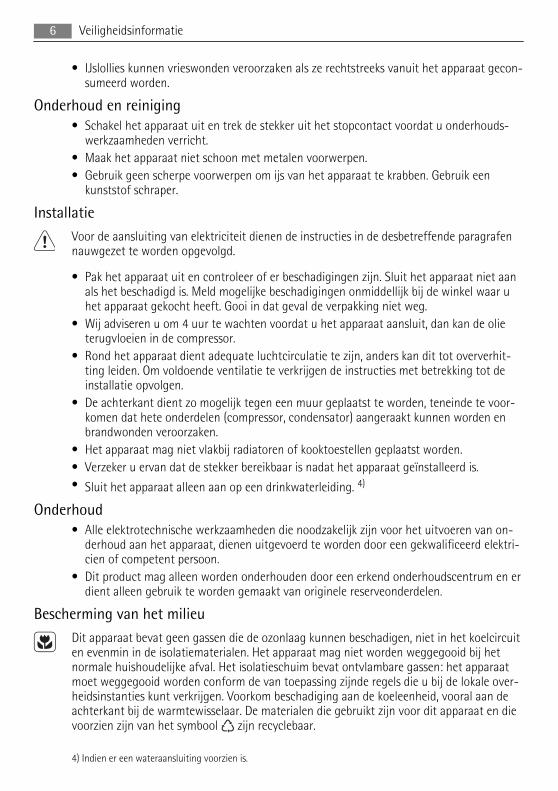
• IJslollies kunnen vrieswonden veroorzaken als ze rechtstreeks vanuit het apparaat gecon-sumeerd worden.
Onderhoud en reiniging• Schakel het apparaat uit en trek de stekker uit het stopcontact voordat u onderhouds-
werkzaamheden verricht.• Maak het apparaat niet schoon met metalen voorwerpen.• Gebruik geen scherpe voorwerpen om ijs van het apparaat te krabben. Gebruik een
kunststof schraper.
InstallatieVoor de aansluiting van elektriciteit dienen de instructies in de desbetreffende paragrafennauwgezet te worden opgevolgd.
• Pak het apparaat uit en controleer of er beschadigingen zijn. Sluit het apparaat niet aanals het beschadigd is. Meld mogelijke beschadigingen onmiddellijk bij de winkel waar uhet apparaat gekocht heeft. Gooi in dat geval de verpakking niet weg.
• Wij adviseren u om 4 uur te wachten voordat u het apparaat aansluit, dan kan de olieterugvloeien in de compressor.
• Rond het apparaat dient adequate luchtcirculatie te zijn, anders kan dit tot oververhit-ting leiden. Om voldoende ventilatie te verkrijgen de instructies met betrekking tot deinstallatie opvolgen.
• De achterkant dient zo mogelijk tegen een muur geplaatst te worden, teneinde te voor-komen dat hete onderdelen (compressor, condensator) aangeraakt kunnen worden enbrandwonden veroorzaken.
• Het apparaat mag niet vlakbij radiatoren of kooktoestellen geplaatst worden.• Verzeker u ervan dat de stekker bereikbaar is nadat het apparaat geïnstalleerd is.• Sluit het apparaat alleen aan op een drinkwaterleiding. 4)
Onderhoud• Alle elektrotechnische werkzaamheden die noodzakelijk zijn voor het uitvoeren van on-
derhoud aan het apparaat, dienen uitgevoerd te worden door een gekwalificeerd elektri-cien of competent persoon.
• Dit product mag alleen worden onderhouden door een erkend onderhoudscentrum en erdient alleen gebruik te worden gemaakt van originele reserveonderdelen.
Bescherming van het milieuDit apparaat bevat geen gassen die de ozonlaag kunnen beschadigen, niet in het koelcircuiten evenmin in de isolatiematerialen. Het apparaat mag niet worden weggegooid bij hetnormale huishoudelijke afval. Het isolatieschuim bevat ontvlambare gassen: het apparaatmoet weggegooid worden conform de van toepassing zijnde regels die u bij de lokale over-heidsinstanties kunt verkrijgen. Voorkom beschadiging aan de koeleenheid, vooral aan deachterkant bij de warmtewisselaar. De materialen die gebruikt zijn voor dit apparaat en dievoorzien zijn van het symbool zijn recyclebaar.
4) Indien er een wateraansluiting voorzien is.
6 Veiligheidsinformatie

BEDIENINGSPANEEL
1 2 3 4 5 6
1 ON/OFF-toets2 Mode-toets3 OK-toets4 Toets temperatuur lager5 Toets temperatuur hoger6 Display
Het ingestelde geluid van de toetsen kan harder worden gezet door een paar seconden ge-lijktijdig te drukken op de toets Mode en de toets Temperatuur lager. De wijziging kan weerongedaan worden gemaakt.
Display
3 4 5 621
1 Timer-functie2 FROSTMATIC-functie3 Minute Minder-functie4 functie Kinderslot5 Indicatielampje alarm6 Temperatuurlampje
InschakelenGa als volgt te werk om het apparaat in te schakelen:1. Steek de stekker in het stopcontact.2. Druk op de ON/OFF -knop als het display uit is.3. Het alarm kan na een paar seconden afgaan.
Zie 'Alarm hoge temperatuur' voor informatie over het resetten van het alarm.4. If "dEMo" verschijnt op het display, het apparaat staat in de demonstratiestand. Zie de
paragraaf 'Problemen oplossen'.5. Het temperatuurlampje toont de ingestelde standaardtemperatuur.Zie 'Temperatuurregeling' om een andere temperatuur in te stellen.
UitschakelenGa als volgt te werk om het apparaat uit te schakelen:
Bedieningspaneel 7

1. Druk op de ON/OFF-knop voor 5 seconden.2. Het display wordt uitgeschakeld.3. Trek de stekker uit het stopcontact om de stroomtoevoer naar het apparaat af te slui-
ten.
TemperatuurregelingDe ingestelde temperatuur van de vriezer kan worden aangepast door op de temperatuur-knop te drukken.Standaard ingestelde temperatuur:• -18 °C voor de vriezerDe temperatuurweergave toont de ingestelde temperatuur.De ingestelde temperatuur zal binnen 24 uur worden bereikt.
Na een stroomonderbreking blijft de ingestelde temperatuur opgeslagen.
FROSTMATIC-functieOm de functie aan te zetten:1. Druk op de Mode-toets tot het bijbehorende pictogram verschijnt.
Het FROSTMATIC-lampje knippert.2. Druk op de toetsOK om te bevestigen.
Het FROSTMATIC-lampje wordt getoond.Deze functie stopt automatisch na 52 uur.Om de functie uit te schakelen voor deze automatisch afloopt:1. Druk op de Mode-knop tot het FROSTMATIC-lampje knippert.2. Druk op de toetsOK om te bevestigen.3. Het FROSTMATIC-lampje gaat uit.
De functie gaat uit door een andere ingestelde vriezertemperatuur te selecteren.
Minute Minder-functieDeMinute Minder -functie wordt gebruikt om een akoestisch alarm in te stellen op een ge-kozen tijd. Dit is bijvoorbeeld nuttig wanneer een recept gedurende een bepaalde tijd moetafkoelen of wanneer u niet wilt vergeten dat u flessen in de vriezer hebt geplaatst om zesnel te laten afkoelen.Om de functie aan te zetten:1. Druk op de Mode-toets tot het bijbehorende pictogram verschijnt.
Het Minute Minder -lampje knippert.De timer toont gedurende enkele seconden de ingestelde waarde (30 minuten).
2. Druk op de timerknop om de waarde van de timer te wijzigen van 1 tot 90 minuten.3. Druk op de OK-toets om te bevestigen.
Het Minute Minder -lampje wordt getoond.De timer begint te knipperen (min).
Op het einde van de aftelling knippert het Minute Minder -lampje en klinkt een alarm:
8 Bedieningspaneel
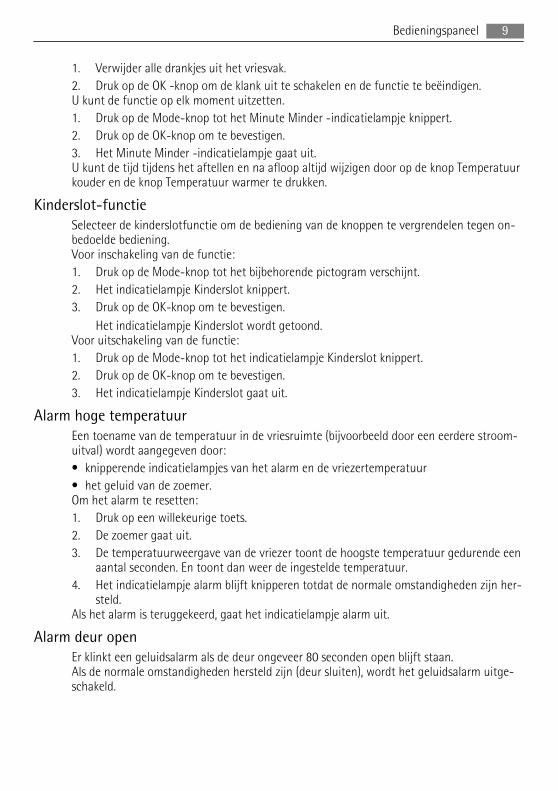
1. Verwijder alle drankjes uit het vriesvak.2. Druk op de OK -knop om de klank uit te schakelen en de functie te beëindigen.U kunt de functie op elk moment uitzetten.1. Druk op de Mode-knop tot het Minute Minder -indicatielampje knippert.2. Druk op de OK-knop om te bevestigen.3. Het Minute Minder -indicatielampje gaat uit.U kunt de tijd tijdens het aftellen en na afloop altijd wijzigen door op de knop Temperatuurkouder en de knop Temperatuur warmer te drukken.
Kinderslot-functieSelecteer de kinderslotfunctie om de bediening van de knoppen te vergrendelen tegen on-bedoelde bediening.Voor inschakeling van de functie:1. Druk op de Mode-knop tot het bijbehorende pictogram verschijnt.2. Het indicatielampje Kinderslot knippert.3. Druk op de OK-knop om te bevestigen.
Het indicatielampje Kinderslot wordt getoond.Voor uitschakeling van de functie:1. Druk op de Mode-knop tot het indicatielampje Kinderslot knippert.2. Druk op de OK-knop om te bevestigen.3. Het indicatielampje Kinderslot gaat uit.
Alarm hoge temperatuurEen toename van de temperatuur in de vriesruimte (bijvoorbeeld door een eerdere stroom-uitval) wordt aangegeven door:• knipperende indicatielampjes van het alarm en de vriezertemperatuur• het geluid van de zoemer.Om het alarm te resetten:1. Druk op een willekeurige toets.2. De zoemer gaat uit.3. De temperatuurweergave van de vriezer toont de hoogste temperatuur gedurende een
aantal seconden. En toont dan weer de ingestelde temperatuur.4. Het indicatielampje alarm blijft knipperen totdat de normale omstandigheden zijn her-
steld.Als het alarm is teruggekeerd, gaat het indicatielampje alarm uit.
Alarm deur openEr klinkt een geluidsalarm als de deur ongeveer 80 seconden open blijft staan.Als de normale omstandigheden hersteld zijn (deur sluiten), wordt het geluidsalarm uitge-schakeld.
Bedieningspaneel 9

HET EERSTE GEBRUIK
De binnenkant schoonmakenVoordat u het apparaat voor de eerste keer gebruikt, wast u de binnenkant en de interneaccessoires met lauwwarm water en een beetje neutrale zeep om de typische geur van eennieuw product weg te nemen. Droog daarna grondig af.
Gebruik geen oplosmiddelen of schuurmiddelen. Deze beschadigen de lak.
If “dEMo” verschijnt op het display, het apparaat staat in de demonstratiestand. Raadpleegde paragraaf "Problemen oplossen".
DAGELIJKS GEBRUIK
Vers voedsel invriezenHet vriesvak is geschikt voor het invriezen van vers voedsel en voor het voor een lange pe-riode bewaren van ingevroren en diepgevroren voedsel.Om levensmiddelen in te vriezen, activeert u de functie FROSTMATICminimaal 24 uur voor-dat u deze in het vriesvak legt.Zet het verse voedsel dat u in wilt vriezen in de twee bovenste vakken.De maximumhoeveelheid levensmiddelen die in 24 uur kunnen worden ingevroren, is aan-gegeven op het typeplaatje , een label dat zich aan de binnenkant van het apparaat be-vindt.Het invriesproces duurt 24 uur: voeg gedurende deze periode niet meer in te vriezen voed-sel toe.
Het bewaren van ingevroren voedselAls u het apparaat voor het eerst of na een periode dat het niet gebruikt is inschakelt, hetapparaat minstens 2 uur op een hoge instelling laten werken voordat u er producten inplaatst.
In het geval van onbedoelde ontdooiing, bijvoorbeeld als de stroom langer is uitgevallendan de duur die op de kaart met technische kenmerken onder "tijdsduur" is vermeld, moethet ontdooide voedsel snel geconsumeerd worden of onmiddellijk bereid worden en danweer worden ingevroren (nadat het afgekoeld is).
Kalender ingevroren voedsel
De symbolen geven verschillende soorten ingevroren levensmiddelen aanDe cijfers geven de bewaartijd in maanden aan voor de bijbehorende ingevroren levensmid-delen Of de hoogste of laagste waarde van de aangegeven bewaartijd van toepassing is,hangt af van de kwaliteit van het voedsel en eventuele bereiding voordat het werd ingevro-ren.
10 Het eerste gebruik

OntdooienDiepgevroren of ingevroren voedsel kunt, voordat het gebruikt wordt, in het koelvak of opkamertemperatuur laten ontdooien, afhankelijk van de hoeveelheid tijd die hiervoor nodigis.Kleine stukken kunnen zelfs rechtstreeks vanuit de vriezer gekookt worden als ze nog be-vroren zijn: in dat geval zal de bereiding iets langer duren.
Koude accumulatorsDe vriezer is voorzien van een of meer koudeaccumulators; hierdoor blijft het voedsel lan-ger koud als de stroom uitvalt of als er een storing is.
HANDIGE AANWIJZINGEN EN TIPS
Tips voor het invriezenOm u te helpen om het beste van het invriesproces te maken, volgen hier een paar belang-rijke tips:• de maximale hoeveelheid voedsel die in 24 uur ingevroren kan worden. is vermeld op het
typeplaatje;• het invriesproces duurt 24 uur. Voeg gedurende deze periode niet meer in te vriezen
voedsel toe;• vries alleen vers en grondig schoongemaakte levensmiddelen van uitstekende kwaliteit
in;• bereid het voedsel in kleine porties voor, zo kan het snel en volledig worden ingevroren
en zo kunt u later alleen die hoeveelheid laten ontdooien die u nodig heeft;• wikkel het voedsel in aluminiumfolie of plastic en zorg ervoor dat de pakjes luchtdicht
zijn;• leg vers, nog niet ingevroren voedsel niet tegen het al ingevroren voedsel, om te voorko-
men dat dit laatste warm wordt;• smalle pakjes zijn makkelijker op te bergen dan dikke; zout maakt voedsel minder lang
houdbaar;• water bevriest, als dit rechtstreeks uit het vriesvak geconsumeerd wordt, kan het aan de
huid vastvriezen;• het is aan te bevelen de invriesdatum op elk pakje te vermelden, dan kunt u zien hoe
lang het al bewaard is;
Tips voor het bewaren van ingevroren voedselOm de beste resultaten van dit apparaat te verkrijgen, dient u:• er zich van te verzekeren dat de commercieel ingevroren levensmiddelen op geschikte
wijze door de detailhandelaar werden opgeslagen;• ervoor te zorgen dat de ingevroren levensmiddelen zo snel mogelijk van de winkel naar
uw vriezer gebracht worden;• de deur niet vaker te openen of open te laten staan dan strikt noodzakelijk.
Handige aanwijzingen en tips 11

• Als voedsel eenmaal ontdooid is, bederft het snel en kan het niet opnieuw worden inge-vroren.
• Bewaar het voedsel niet langer dan de door de fabrikant aangegeven bewaarperiode.
ONDERHOUD EN REINIGING
LET OP!Voordat u welke onderhoudshandeling dan ook verricht, de stekker uit het stopcontacttrekken.
Het koelcircuit van dit apparaat bevat koolwaterstoffen; onderhoud en herladen mag alleenuitgevoerd worden door bevoegde technici.
Periodieke reinigingHet apparaat moet regelmatig worden schoongemaakt:• maak de binnenkant en de accessoires schoon met lauw water en wat neutrale zeep.• controleer de afdichtingen regelmatig en wrijf ze schoon om u ervan te verzekeren dat
ze schoon zijn en vrij van restjes zijn.• spoel ze af en maak ze grondig droog.
Trek niet aan leidingen en/of kabels aan de binnenkant van de kast en verplaats of bescha-dig ze niet.Gebruik nooit schoonmaakmiddelen, schuurpoeders, erg geparfumeerde reinigingsproduc-ten en waspolijstmiddelen om de binnenkant schoon te maken, aangezien deze het opper-vlak beschadigen en een sterke geur achterlaten.
Maak de condensor (zwart rooster) en de compressor op de achterkant van het apparaatschoon met een borstel of stofzuiger. Deze handeling zal de prestatie van het apparaat ver-beteren en het elektriciteitsverbruik besparen.
Zorg ervoor dat u het koelsysteem niet beschadigt.
Veel normaal verkrijgbare keukenreinigers bevatten chemicaliën die de kunststoffen die indit apparaat gebruikt zijn kunnen aantasten/beschadigen. Daarom wordt het aanbevolen debuitenkant van dit apparaat alleen schoon te maken met warm water met een beetje af-wasmiddel.Steek, na het schoonmaken van het apparaat, de stekker weer in het stopcontact.
Het ontdooien van de vriezerHet vriesvak van dit model is een "no-frost"-type. Dit betekent dat zich in het vriesvak geenijs vormt als deze in bedrijf is, noch tegen de wanden noch op de levensmiddelen.Het voorkomen van ijsvorming wordt gerealiseerd door een continue circulatie van koudelucht in het vak, die aangedreven wordt door een automatisch geregelde ventilator.
Periodes dat het apparaat niet gebruikt wordtAls het apparaat gedurende lange tijd niet gebruikt wordt, neem dan de volgende voor-zorgsmaatregelen:
12 Onderhoud en reiniging

• trek de stekker uit het stopcontact• verwijder al het voedsel,• ontdooi de koelkast5), en maak het apparaat en alle accessoires schoon,• laat de deur/deuren op een kier staan om de vorming van onaangename luchtjes te
voorkomen.Als uw apparaat aan blijft staan, vraag dan iemand om het zo nu en dan te controleren, omte voorkomen dat het bewaarde voedsel bederft, als de stroom uitvalt.
PROBLEMEN OPLOSSEN
WAARSCHUWING!Voordat u problemen oplost, trekt u eerst de stekker uit het stopcontact.Het opsporen van storingen die niet in deze handleiding vermeld zijn, dient te worden ver-richt door een gekwalificeerd technicus of deskundig persoon.
Probleem Mogelijke oorzaak Oplossing
Het apparaat werkt niet. Het apparaat is uitgeschakeld. Schakel het apparaat in.
De stekker zit niet goed in hetstopcontact.
Steek de stekker goed in het stop-contact.
Het apparaat krijgt geen stroom.Er staat geen spanning op hetstopcontact.
Sluit een ander elektrisch appa-raat aan op het stopcontact.Neem contact op met een gekwa-lificeerde elektricien.
Het alarmlampje knippert. De temperatuur in het vriesvakis te hoog.
Zie "Alarm hoge temperatuur".
De compressor werkt con-tinu.
De temperatuur is niet goed in-gesteld.
Stel een hogere temperatuur in.
De deur is niet goed gesloten. Zie "De deur sluiten".
De deur is te vaak open gedaan. Laat de deur niet langer openstaan dan noodzakelijk.
De temperatuur van het voedselis te hoog.
Laat het voedsel afkoelen tot ka-mertemperatuur voordat u hetconserveert.
De kamertemperatuur is tehoog.
Verlaag de kamertemperatuur.
De functie FROSTMATIC is inge-schakeld.
Raadpleeg " FROSTMATIC functie".
De temperatuur in de vrie-zer is te laag.
De temperatuur is niet goed in-gesteld.
Stel een hogere temperatuur in.
De functie FROSTMATIC is inge-schakeld.
Raadpleeg " FROSTMATIC functie".
5) Indien nodig,
Problemen oplossen 13

Probleem Mogelijke oorzaak Oplossing
De temperatuur in hetvriesvak is te hoog.
De temperatuur is niet goed in-gesteld.
Stel een lagere temperatuur in.
De deur is niet goed gesloten. Zie "De deur sluiten".
De temperatuur van het voedselis te hoog.
Laat het voedsel afkoelen tot ka-mertemperatuur voordat u hetconserveert.
Er zijn veel producten tegelijkgeconserveerd.
Conserveer minder producten te-gelijk.
Producten liggen te dicht opelkaar.
Berg de producten zodanig op dater koude lucht kan circuleren.
Een grote hoeveelheid ijsbedekt het bovenste vak inhet apparaat.
Er is te veel rijp en ijs op de ver-damper van het apparaat, dedeur heeft te lang open gestaan.
Zie 'De verdamper reinigen'.
Er wordt een vierkantjeboven- of onderin hettemperatuurdisplay weer-gegeven.
Er is een fout opgetreden in detemperatuurmeting.
Neem contact op met de klanten-service (het koelsysteem blijftwerken om uw levensmiddelenkoud te houden, maar de tempe-ratuur kan niet aangepast wor-den).
dEMo verschijnt op hetdisplay.
Het apparaat staat in de demon-stratiestand (dEMo).
Houd de knop OK ongeveer 10 se-conden ingedrukt tot er een langzoemgeluid klinkt en het displayeven uit gaat: het apparaat startregelmatig met werken.
De deur sluiten1. Maak de afdichtingen van de deur schoon.2. Stel de deur, indien nodig, af. Raadpleeg "Montage".3. Vervang, indien nodig, de defecte deurafdichtingen. Neem contact met de service-af-
deling.
De verdamper schoonmaken1. Schakel het apparaat uit.2. Trek de stekker uit het stopcontact.3. Haal alle levensmiddelen uit de vriezer en leg ze op een koele plaats.4. Verplaats het apparaat ver weg van de muur.5. Laat de deur open staan.6. Na ongeveer 20 minuten begint er uit de afvoerslang op de achterkant van het meubel
water in de opvangbak te stromen.
14 Problemen oplossen

7. Om te voorkomen dat het water over-stroomt uit de bak, afdrogen met eenspons.
8. Het ontdooiproces is afgelopen als ergeen water meer uit de slang druppelt.Dit kan wel enkele uren duren als hetprobleem al langer bestond.
9. Zet het apparaat weer op zijn oorspron-kelijke plaats.
10. Maak de binnenkant van het apparaatschoon en droog.
11. Steek de stekker in het stopcontact.12. Schakel het apparaat in.
TECHNISCHE GEGEVENS
Afmetingen van de uitsparing
Hoogte 1800 mm
Breedte 600 mm
Diepte 650 mm
Tijdsduur 20 h
Spanning 230-240 V
Frequentie 50 Hz
De technische gegevens staan op het typeplaatje aan de linker binnenkant in het apparaaten op het energielabel.
MONTAGE
WAARSCHUWING!Lees voor uw eigen veiligheid en correcte werking van het apparaat eerst de "veiligheidsin-formatie" aandachtig door, alvorens het apparaat te installeren.
Technische gegevens 15

PlaatsHet apparaat moet ver van hittebronnen, zoals ra-diatoren, boilers, direct zonlicht enz., vandaanworden geïnstalleerd. Zorg er voor dat lucht vrijkan circuleren aan de achterkant van het meubel.Als het apparaat onder een hangend keukenkastjewordt geplaatst, moet de minimale afstand tussende bovenkant van het meubel en het wandkastjeminstens 100 mm bedragen om optimale presta-ties te garanderen. Voor de beste prestatie kunt uhet apparaat beter niet onder een hangend keu-kenkastje zetten. De verstelbare voetjes aan deonderkant van het apparaat garanderen eennauwkeurig horizontale uitlijning.Als het meubel in een hoek is geplaatst en de zij-kant bevat scharnieren die naar de muur wijzen, moet de afstand tussen de muur en hetmeubel ten minste 10 mm zijn om de deur ver genoeg open te krijgen zodat de plankenverwijderd kunnen worden.
WAARSCHUWING!Het moet mogelijk zijn het apparaat van de hoofdstroomtoevoer af te koppelen; de stekkermoet daarom na installatie gemakkelijk toegankelijk zijn.
OpstellingWAARSCHUWING!Als u een oud apparaat weggooit dat voorzien is van een deurslot of vergrendeling, zorg erdan voor dat dit onbruikbaar gemaakt wordt, zodat kinderen er niet in opgesloten kunnenraken.
De stekker van het apparaat moet na installatie toegankelijk zijn.
Installeer dit apparaat op een plaats waar de omgevingstemperatuur overeenkomt met deklimaatklasse die vermeld is op het typeplaatje van het apparaat:
Klimaatklasse Omgevingstemperatuur
SN +10°C tot + 32°C
N +16°C tot + 32°C
ST +16°C tot + 38°C
T +16°C tot + 43°C
Elektrische aansluitingZorg er vóór het aansluiten voor dat het voltage en de frequentie op het typeplaatje over-eenkomen met de stroomtoevoer in uw huis.Het apparaat moet geaard zijn. De netsnoerstekker is voorzien van een contact voor ditdoel. Als het stopcontact niet geaard is, sluit het apparaat dan aan op een afzonderlijk aar-
10mm
10mm
100m
m
16 Montage

depunt, in overeenstemming met de geldende regels, raadpleeg hiervoor een gekwalificeerdelektricien.De fabrikant neemt geen verantwoordelijkheid op zich als de bovenstaande veiligheids-maatregelen niet worden nageleefd.Dit apparaat voldoet aan de EU. richtlijnen.
Afstandsstukken achterkantIn het apparaat vindt u twee afstandsstukkendie geplaatst moeten worden zoals aangegevenop de afbeelding.Draai de schroeven los en plaats het afstandsstukonder de kop van de schroef, draai daarna deschroeven weer vast
Omkeerbaarheid van de deurWAARSCHUWING!Voordat u werkzaamheden uitvoert, haalt u de stekker uit het stopcontact.
Wij raden u aan de volgende werkzaamheden uit te voeren met iemand die de deur van hetapparaat tijdens de werkzaamheden stevig vasthoudt. Plaats het apparaat voorzichtig metde achterkant op de grond.Als u de richting waarop de deur opengaat wilt veranderen, voert u de volgende procedureuit:1. Verwijder het klik-in ventilatierooster, verwijder de dop (e) van het ventilatierooster en
monteer de dop aan de andere kant.
Montage 17

2. Verwijder het onderste scharnier (A)door de bevestigingsschroeven los tedraaien.
3. Verwijder de deur.4. Schroef de pen (f) op het onderste
scharnier los en monteer de pen op deandere kant.
5. Schroef de pen op het bovenste schar-nier los en monteer de pen op de anderekant.
6. Plaats de deur in het bovenste scharnier.7. Installeer het ventilatierooster door het
rooster vast te klikken.
8. Schroef de hendel los. Verwijder de dopmet een drevel. Installeer de hendel ende dop aan de andere kant. Haal detwee doppen uit het zakje met de acces-soires en maak de gaten die na de ver-wijdering van de hendel zijn overgeble-ven, daarmee dicht.
9. Verzeker u ervan dat de voorste plaatvan de deur zich evenwijdig bevindt aande voorste plaat van de bovenkant.
10. Zet het apparaat op zijn plaats, water-pas, en wacht minstens vier uur voordat u de stekker in het stopcontact steekt.
Voer een laatste controle uit om te zorgen dat:• Alle schroeven zijn aangehaald.• De magnetische pakking goed aansluit op de koelkast.• De deur goed open en dicht gaat.Als de omgevingstemperatuur laag is (bijv. in de winter), kan het zijn dat de pakking nietprecies op de koelkast past. Wacht in dat geval tot de pakking op natuurlijke wijze gaat pas-sen.
GELUIDEN
Tijdens normaal gebruik hoort u geluiden (compressor, koelmiddelcirculatie).
A e
f
A
180°
18 Geluiden
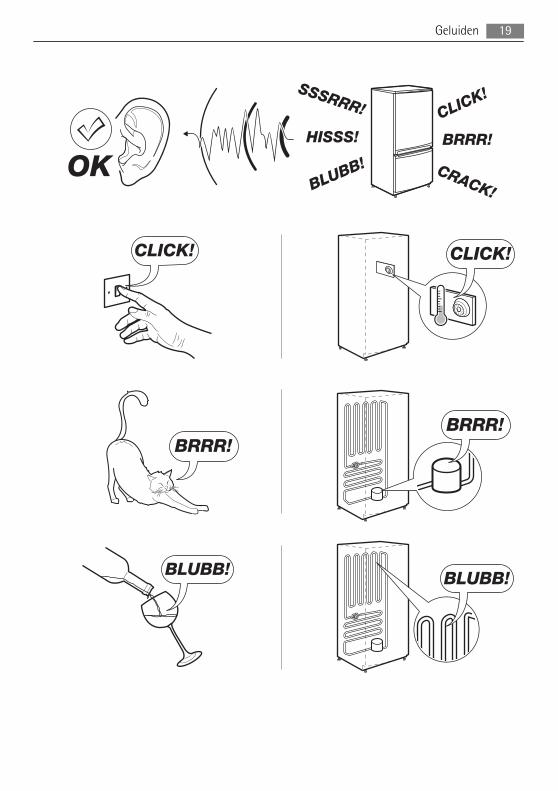
BRRR!HISSS!
CLICK
!
BLUBB! CRACK!
SSSRRR!
OK
CLICK!CLICK!
BRRR!BRRR!
BLUBB! BLUBB!
Geluiden 19

HISSS!HISSS!
SSSRRR! SSSRRR!
CRACK!CRACK!
HET MILIEU
Het symbool op het product of op de verpakking wijst erop dat dit product niet alshuishoudafval mag worden behandeld, maar moet worden afgegeven bij een verzamelpuntwaar elektrische en elektronische apparatuur wordt gerecycled. Als u ervoor zorgt dat ditproduct op de juiste manier wordt verwijderd, voorkomt u mogelijke negatieve gevolgenvoor mens en milieu die zich zouden kunnen voordoen in geval van verkeerdeafvalverwerking. Voor gedetailleerdere informatie over het recyclen van dit product, kunt ucontact opnemen met de gemeente, de gemeentereiniging of de winkel waar u het producthebt gekocht.
20 Het milieu

FOR PERFECT RESULTS
Thank you for choosing this AEG product. We havecreated it to give you impeccable performance for manyyears, with innovative technologies that help make lifesimpler – features you might not find on ordinaryappliances. Please spend a few minutes reading to get thevery best from it.
ACCESSORIES AND CONSUMABLES
In the AEG webshop, you’ll find everything you need tokeep all your AEG appliances looking spotless andworking perfectly. Along with a wide range of accessoriesdesigned and built to the high quality standards youwould expect, from specialist cookware to cutlery baskets,from bottle holders to delicate laundry bags…
Visit the webshop at:www.aeg.com/shop
21

CONTENTS
23 Safety information25 Control panel28 First use28 Daily use29 Helpful Hints and Tips30 Care and cleaning31 What to do if…33 Technical data33 Installation36 Noises38 Environmental concerns
The following symbols are used in this usermanual:
Important information concerning yourpersonal safety and information on how toavoid damaging the appliance.
General information and tips
Environmental information
Subject to change without notice
22 Contents

SAFETY INFORMATION
In the interest of your safety and to ensure the correct use, before installing and first usingthe appliance, read this user manual carefully, including its hints and warnings. To avoidunnecessary mistakes and accidents, it is important to ensure that all people using the ap-pliance are thoroughly familiar with its operation and safety features. Save these instruc-tions and make sure that they remain with the appliance if it is moved or sold, so that ev-eryone using it through its life will be properly informed on appliance use and safety.For the safety of life and property keep the precautions of these user's instructions as themanufacturer is not responsible for damages caused by omission.
Children and vulnerable people safety• This appliance is not intended for use by persons (including children) with reduced physi-
cal, sensory or mental capabilities, or lack of experience and knowledge, unless they havebeen given supervision or instruction concerning use of the appliance by a person re-sponsible for their safety.Children should be supervised to ensure that they do not play with the appliance.
• Keep all packaging well away from children. There is risk of suffocation.• If you are discarding the appliance pull the plug out of the socket, cut the connection
cable (as close to the appliance as you can) and remove the door to prevent playing chil-dren to suffer electric shock or to close themselves into it.
• If this appliance featuring magnetic door seals is to replace an older appliance having aspring lock (latch) on the door or lid, be sure to make that spring lock unusable beforeyou discard the old appliance. This will prevent it from becoming a death trap for a child.
General safetyWARNING!
Keep ventilation openings, in the appliance enclosure or in the built-in structure, clear ofobstruction.• The appliance is intended for keeping foodstuff and/or beverages in a normal household
as explained in this instruction booklet.• Do not use a mechanical device or any artificial means to speed up the thawing process.• Do not use other electrical appliances (such as ice cream makers) inside of refrigerating
appliances, unless they are approved for this purpose by the manufacturer.• Do not damage the refrigerant circuit.• The refrigerant isobutane (R600a) is contained within the refrigerant circuit of the appli-
ance, a natural gas with a high level of environmental compatibility, which is neverthe-less flammable.During transportation and installation of the appliance, be certain that none of the com-ponents of the refrigerant circuit become damaged.If the refrigerant circuit should become damaged:– avoid open flames and sources of ignition
Safety information 23
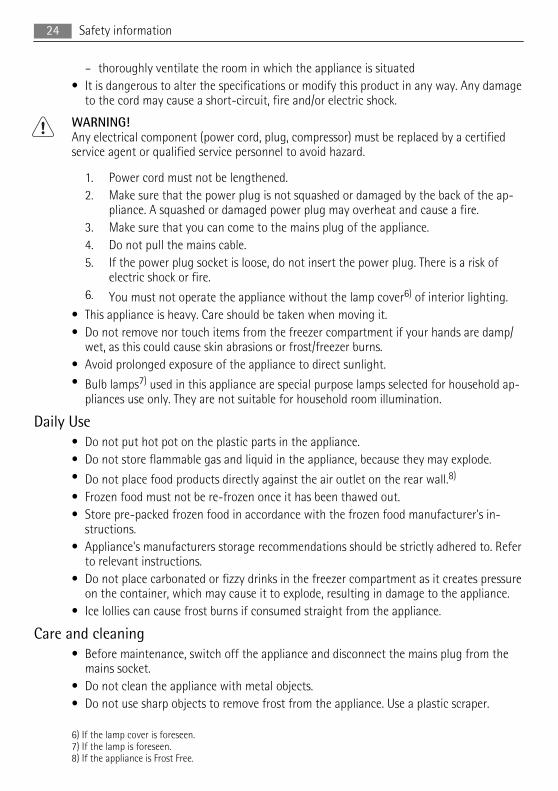
– thoroughly ventilate the room in which the appliance is situated• It is dangerous to alter the specifications or modify this product in any way. Any damage
to the cord may cause a short-circuit, fire and/or electric shock.
WARNING!Any electrical component (power cord, plug, compressor) must be replaced by a certifiedservice agent or qualified service personnel to avoid hazard.
1. Power cord must not be lengthened.2. Make sure that the power plug is not squashed or damaged by the back of the ap-
pliance. A squashed or damaged power plug may overheat and cause a fire.3. Make sure that you can come to the mains plug of the appliance.4. Do not pull the mains cable.5. If the power plug socket is loose, do not insert the power plug. There is a risk of
electric shock or fire.6. You must not operate the appliance without the lamp cover6) of interior lighting.
• This appliance is heavy. Care should be taken when moving it.• Do not remove nor touch items from the freezer compartment if your hands are damp/
wet, as this could cause skin abrasions or frost/freezer burns.• Avoid prolonged exposure of the appliance to direct sunlight.• Bulb lamps7) used in this appliance are special purpose lamps selected for household ap-
pliances use only. They are not suitable for household room illumination.
Daily Use• Do not put hot pot on the plastic parts in the appliance.• Do not store flammable gas and liquid in the appliance, because they may explode.• Do not place food products directly against the air outlet on the rear wall.8)
• Frozen food must not be re-frozen once it has been thawed out.• Store pre-packed frozen food in accordance with the frozen food manufacturer's in-
structions.• Appliance's manufacturers storage recommendations should be strictly adhered to. Refer
to relevant instructions.• Do not place carbonated or fizzy drinks in the freezer compartment as it creates pressure
on the container, which may cause it to explode, resulting in damage to the appliance.• Ice lollies can cause frost burns if consumed straight from the appliance.
Care and cleaning• Before maintenance, switch off the appliance and disconnect the mains plug from the
mains socket.• Do not clean the appliance with metal objects.• Do not use sharp objects to remove frost from the appliance. Use a plastic scraper.
6) If the lamp cover is foreseen.7) If the lamp is foreseen.8) If the appliance is Frost Free.
24 Safety information

InstallationFor electrical connection carefully follow the instructions given in specific paragraphs.
• Unpack the appliance and check if there are damages on it. Do not connect the appli-ance if it is damaged. Report possible damages immediately to the place you bought it.In that case retain packing.
• It is advisable to wait at least four hours before connecting the appliance to allow the oilto flow back in the compressor.
• Adequate air circulation should be around the appliance, lacking this leads to overheat-ing. To achieve sufficient ventilation follow the instructions relevant to installation.
• Wherever possible the back of the product should be against a wall to avoid touching orcatching warm parts (compressor, condenser) to prevent possible burn.
• The appliance must not be located close to radiators or cookers.• Make sure that the mains plug is accessible after the installation of the appliance.• Connect to potable water supply only. 9)
Service• Any electrical work required to do the servicing of the appliance should be carried out by
a qualified electrician or competent person.• This product must be serviced by an authorized Service Centre, and only genuine spare
parts must be used.
Environment ProtectionThis appliance does not contain gasses which could damage the ozone layer, in either itsrefrigerant circuit or insulation materials. The appliance shall not be discarded togetherwith the urban refuse and rubbish. The insulation foam contains flammable gases: the ap-pliance shall be disposed according to the applicable regulations to obtain from your localauthorities. Avoid damaging the cooling unit, especially at the rear near the heat exchang-er. The materials used on this appliance marked by the symbol are recyclable.
CONTROL PANEL
1 2 3 4 5 6
1 ON/OFF button2 Mode button3 OK button4 Temperature colder button
9) If a water connection is foreseen.
Control panel 25

5 Temperature warmer button6 Display
It is possible to change predefined sound of buttons to a loudly one by pressing togetherMode button and Temperature colder button for some seconds. Change is reversible.
Display
3 4 5 621
1 Timer function2 FROSTMATIC function3 Minute Minder function4 Child Lock function5 Alarm indicator6 Temperature indicator
Switching onTo switch on the appliance do these steps:1. Connect the mains plug to the power socket.2. Press the ON/OFF button if the display is off.3. The alarm buzzer could operate after few seconds.
To reset the alarm refer to "High temperature alarm".4. If "dEMo" appears on the display, the appliance is in demonstration mode. Refer to
"What to do if..." paragraph.5. The temperature indicators show the set default temperature.To select a different set temperature refer to "Temperature regulation".
Switching offTo switch off the appliance do these steps:1. Press the ON/OFF button for 5 seconds.2. The display switches off.3. To disconnect the appliance from the power disconnect the mains plug from the pow-
er socket.
Temperature regulationThe set temperature of the freezer may be adjusted by pressing the temperature button.Set default temperature:• -18°C for the freezerThe temperature indicator shows the set temperature.The set temperature will be reached within 24 hours.
After a power failure the set temperature remains stored.
26 Control panel

FROSTMATIC functionTo switch on the function:1. Press the Mode button until the corresponding icon appears.
The FROSTMATIC indicator flashes.2. Press the OK button to confirm.
The FROSTMATIC indicator is shown.This function stops automatically after 52 hours.To switch off the function before its automatic end:1. Press the Mode button until the FROSTMATIC indicator flashes.2. Press the OK button to confirm.3. The FROSTMATIC indicator goes off.
The function switches off by selecting a different freezer set temperature.
Minute Minder functionThe Minute Minder function is to be used to set an acoustic alarm at the preferred time,useful for example when a recipe requires to cool down a mixture for a certain lenght oftime, or when a reminder is needed in order not to forget the bottles placed in the freezerfor fast cooling.To switch on the function:1. Press the Mode button until the corresponding icon appears.
The Minute Minder indicator flashes.The Timer shows the set value (30 minutes) for a few seconds.
2. Press the Timer regulator button to change the Timer set value from 1 to 90 minutes.3. Press the OK button to confirm.
The Minute Minder indicator is shown.The Timer start to flash (min).
At the end of the countdown the Minute Minder indicator flashes and an audible alarmsounds:1. Remove any drinks contained in the freezer compartment.2. Press OK button to switch off the sound and terminate the function.It is possible to deactivate the function at any time during the countdown:1. Press the Mode button until the Minute Minder indicator flashes.2. Press the OK button to confirm.3. The Minute Minder indicator goes off.It is possible to change the time during the countdown and at the end by pressing the Tem-perature colder button and the Temperature warmer button.
Child Lock functionTo lock the buttons from unintentional operation select the Child Lock function.To switch on the function:1. Press the Mode button until the corresponding icon appears.
Control panel 27
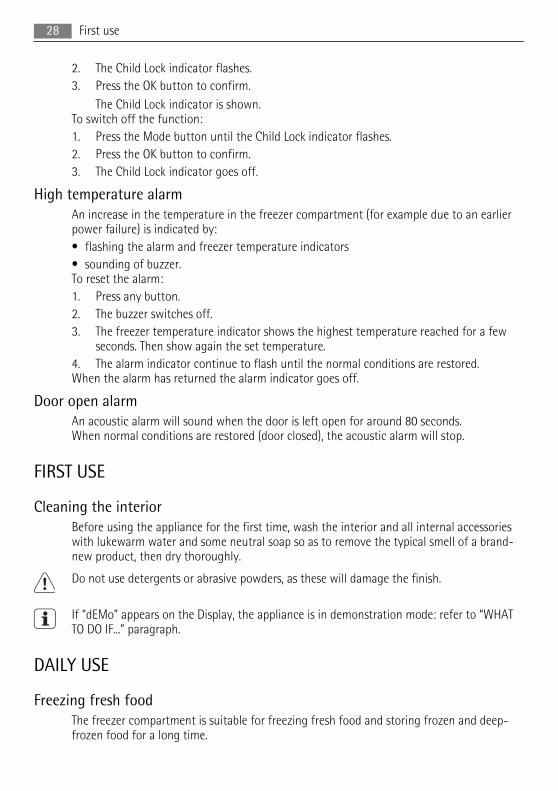
2. The Child Lock indicator flashes.3. Press the OK button to confirm.
The Child Lock indicator is shown.To switch off the function:1. Press the Mode button until the Child Lock indicator flashes.2. Press the OK button to confirm.3. The Child Lock indicator goes off.
High temperature alarmAn increase in the temperature in the freezer compartment (for example due to an earlierpower failure) is indicated by:• flashing the alarm and freezer temperature indicators• sounding of buzzer.To reset the alarm:1. Press any button.2. The buzzer switches off.3. The freezer temperature indicator shows the highest temperature reached for a few
seconds. Then show again the set temperature.4. The alarm indicator continue to flash until the normal conditions are restored.When the alarm has returned the alarm indicator goes off.
Door open alarmAn acoustic alarm will sound when the door is left open for around 80 seconds.When normal conditions are restored (door closed), the acoustic alarm will stop.
FIRST USE
Cleaning the interiorBefore using the appliance for the first time, wash the interior and all internal accessorieswith lukewarm water and some neutral soap so as to remove the typical smell of a brand-new product, then dry thoroughly.
Do not use detergents or abrasive powders, as these will damage the finish.
If “dEMo” appears on the Display, the appliance is in demonstration mode: refer to “WHATTO DO IF...” paragraph.
DAILY USE
Freezing fresh foodThe freezer compartment is suitable for freezing fresh food and storing frozen and deep-frozen food for a long time.
28 First use

To freeze fresh food activate the FROSTMATIC function at least 24 hours before placing thefood to be frozen in the freezer compartment.Place the fresh food to be frozen in the two top compartments.The maximum amount of food that can be frozen in 24 hours is specified on the ratingplate, a label located on the inside of the appliance.The freezing process lasts 24 hours: during this period do not add other food to be frozen.
Storage of frozen foodWhen first starting-up or after a period out of use, before putting the products in the com-partment let the appliance run at least 2 hours on the higher settings.
In the event of accidental defrosting, for example due to a power failure, if the power hasbeen off for longer than the value shown in the technical characteristics chart under "risingtime", the defrosted food must be consumed quickly or cooked immediately and then re-frozen (after cooling).
Frozen Food Calendar
The symbols show different types of frozen goods.The numbers indicate storage times in months for the appropriate types of frozen goods.Whether the upper or lower value of the indicated storage time is valid depends on thequality of the foods and treating before freezing.
ThawingDeep-frozen or frozen food, prior to being used, can be thawed in the refrigerator compart-ment or at room temperature, depending on the time available for this operation.Small pieces may even be cooked still frozen, directly from the freezer: in this case, cookingwill take longer.
Cold accumulatorsOne or more cold accumulators are supplied in the freezer; these increase the length oftime for which food will keep in the event of a power failure or breakdown.
HELPFUL HINTS AND TIPS
Hints for freezingTo help you make the most of the freezing process, here are some important hints:• the maximum quantity of food which can be frozen in 24 hrs. is shown on the rating
plate;• the freezing process takes 24 hours. No further food to be frozen should be added during
this period;• only freeze top quality, fresh and thoroughly cleaned, foodstuffs;• prepare food in small portions to enable it to be rapidly and completely frozen and to
make it possible subsequently to thaw only the quantity required;
Helpful Hints and Tips 29

• wrap up the food in aluminium foil or polythene and make sure that the packages areairtight;
• do not allow fresh, unfrozen food to touch food which is already frozen, thus avoiding arise in temperature of the latter;
• lean foods store better and longer than fatty ones; salt reduces the storage life of food;• water ices, if consumed immediately after removal from the freezer compartment, can
possibly cause the skin to be freeze burnt;• it is advisable to show the freezing in date on each individual pack to enable you to keep
tab of the storage time.
Hints for storage of frozen foodTo obtain the best performance from this appliance, you should:• make sure that the commercially frozen foodstuffs were adequately stored by the retail-
er;• be sure that frozen foodstuffs are transferred from the foodstore to the freezer in the
shortest possible time;• not open the door frequently or leave it open longer than absolutely necessary.• Once defrosted, food deteriorates rapidly and cannot be refrozen.• Do not exceed the storage period indicated by the food manufacturer.
CARE AND CLEANING
CAUTION!Unplug the appliance before carrying out any maintenance operation.
This appliance contains hydrocarbons in its cooling unit; maintenance and recharging musttherefore only be carried out by authorized technicians.
Periodic cleaningThe equipment has to be cleaned regularly:• clean the inside and accessories with lukewarm water and some neutral soap.• regularly check the door seals and wipe clean to ensure they are clean and free from
debris.• rinse and dry thoroughly.
Do not pull, move or damage any pipes and/or cables inside the cabinet.Never use detergents, abrasive powders, highly perfumed cleaning products or wax polishesto clean the interior as this will damage the surface and leave a strong odour.
Clean the condenser (black grill) and the compressor at the back of the appliance with abrush. This operation will improve the performance of the appliance and save electricityconsumption.
Take care of not to damage the cooling system.
30 Care and cleaning

Many proprietary kitchen surface cleaners contain chemicals that can attack/damage theplastics used in this appliance. For this reason it is recommended that the outer casing ofthis appliance is only cleaned with warm water with a little washing-up liquid added.After cleaning, reconnect the equipment to the mains supply.
Defrosting of the freezerThe freezer compartment of this model, on the other hand, is a "no frost" type. This meansthat there is no buildup of frost when it is in operation, neither on the internal walls nor onthe foods.The absence of frost is due to the continuous circulation of cold air inside the compart-ment, driven by an automatically controlled fan.
Periods of non-operationWhen the appliance is not in use for long periods, take the following precautions:• disconnect the appliance from electricity supply• remove all food• defrost10) and clean the appliance and all accessories• leave the door/doors ajar to prevent unpleasant smells.If the cabinet will be kept on, ask somebody to check it once in a while to prevent the foodinside from spoiling in case of a power failure.
WHAT TO DO IF…
WARNING!Before troubleshooting, disconnect the mains plug from the mains socket.Only a qualified electrician or competent person must do the troubleshooting that is not inthis manual.
Problem Possible cause Solution
The appliance does notoperate.
The appliance is switched off. Switch on the appliance.
The mains plug is not connectedto the mains socket correctly.
Connect the mains plug to themains socket correctly.
The appliance has no power.There is no voltage in the mainssocket.
Connect a different electrical ap-pliance to the mains socket.Contact a qualified electrician.
The Alarm light flashes. The temperature in the freezer istoo high.
Refer to "High temperaturealarm"
The compressor operatescontinually.
The temperature is not set cor-rectly.
Set a higher temperature.
The door is not closed correctly. Refer to "Closing the door".
The door has been opened toofrequently.
Do not keep the door open longerthan necessary.
10) If foreseen.
What to do if… 31

Problem Possible cause Solution
The product temperature is toohigh.
Let the product temperature de-crease to room temperature be-fore storage.
The room temperature is toohigh.
Decrease the room temperature.
The FROSTMATIC function isswitched on.
Refer to "FROSTMATIC function".
The temperature in thefreezer is too low.
The temperature regulator is notset correctly.
Set a higher temperature.
The FROSTMATIC function isswitched on.
Refer to "FROSTMATIC function".
The temperature in thefreezer is too high.
The temperature regulator is notset correctly.
Set a lower temperature.
The door is not closed correctly. Refer to "Closing the door".
The product temperature is toohigh.
Let the product temperature de-crease to room temperature be-fore storage.
Many products are stored at thesame time.
Store less products at the sametime.
Products are too near to eachother.
Store products so that there iscold air circulation.
A large quantity of dropsice covers the top com-partment inside the appli-ance.
There is too much frost and iceon the evaporator of the appli-ance, the door was open for toolong time.
Refer to "Cleaning the evapora-tor".
Upper or lower square isshown in the temperatureDisplay.
An error has occurred in meas-uring the temperature.
Call your service representative(the cooling system will continueto keep food products cold, buttemperature adjustment will notbe possible).
dEMo appears on the Dis-play.
The appliance is in demonstra-tion mode(dEMo) .
Keep pressed approximately 10sec. theOK button since a longsound of buzzer is heard and theDisplay shut off for a short while:appliance start works regularly.
Closing the door1. Clean the door gaskets.2. If necessary, adjust the door. Refer to "Installation".3. If necessary, replace the defective door gaskets. Contact the Service Center.
Cleaning the evaporator1. Switch off the appliance.
32 What to do if…

2. Disconnect the mains plug from the mains socket.3. Remove all foods from the freezer and put them in a fresh place.4. Move the appliance far from the wall.5. Leave the door open.6. After approximately 20 minutes the drain hose at the rear of the cabinet starts to dis-
charge water into the drip tray.7. To prevent the water overflowing from
the drip tray dry with a sponge.8. The defrosting process ends when the
water stops dripping. It may take severalhours if the problem started long before.
9. Move the appliance to the original posi-tion.
10. Clean and dry the inside of the appli-ance.
11. Connect the mains plug into the mainssocket.
12. Switch on the appliance.
TECHNICAL DATA
Dimension of the recess
Height 1800 mm
Width 600 mm
Depth 650 mm
Rising Time 20 h
Voltage 230-240 V
Frequency 50 Hz
The technical information are situated in the rating plate on the internal left side of theappliance and in the energy label.
INSTALLATION
WARNING!Read the "Safety Information" carefully for your safety and correct operation of the appli-ance before installing the appliance.
Technical data 33

LocationThe appliance should be installed well away fromsources of heat such as radiators, boilers, directsunlight etc. Ensure that air can circulate freelyaround the back of the cabinet. To ensure bestperformance, if the appliance is positioned belowan overhanging wall unit, the minimum distancebetween the top of the cabinet and the wall unitmust be at least 100 mm . Ideally, however, theappliance should not be positioned below over-hanging wall units. Accurate levelling is ensuredby one or more adjustable feet at the base of thecabinet.If the cabinet is placed in a corner and the sidewith the hinges facing the wall, the distance be-tween the wall and the cabinet must be at least 10 mm to allow the door to open enoughso that the shelves can be removed.
WARNING!It must be possible to disconnect the appliance from the mains power supply; the plugmust therefore be easily accessible after installation.
PositioningWARNING!If you are discarding an old appliance that has a lock or catch on the door, you must ensurethat it is made unusable to prevent young children being trapped inside.
The appliance shall have the plug accessible after installation.
Install this appliance at a location where the ambient temperature corresponds to the cli-mate class indicated on the rating plate of the appliance:
Climate class Ambient temperature
SN +10°C to + 32°C
N +16°C to + 32°C
ST +16°C to + 38°C
T +16°C to + 43°C
Electrical connectionBefore plugging in, ensure that the voltage and frequency shown on the rating plate corre-spond to your domestic power supply.The appliance must be earthed. The power supply cable plug is provided with a contact forthis purpose. If the domestic power supply socket is not earthed, connect the appliance to aseparate earth in compliance with current regulations, consulting a qualified electrician.The manufacturer declines all responsibility if the above safety precautions are not ob-served.
10mm
10mm
100m
m
34 Installation

This appliance complies with the E.E.C. Directives.
Rear spacersInside the appliance you find two spacers whichmust be fitted as shown in the figure.Slacken the screws and insert the spacer underthe screw head, then retighten the screws.
Door reversibilityWARNING!Before carrying out any operations, remove the plug from the power socket.
To carry out the following operations, we suggest that this be made with another personthat will keep a firm hold on the door of the appliance during the operations. Gently lay theappliance on its back.To change the opening direction of the door, do these steps:1. Remove the clip-in ventilation grille, remove the plug (e) from the ventilation grille
and install it on the opposite side.2. Remove the bottom hinge (A) by un-
screwing the fixing screws.3. Remove the door.4. Unscrew the pin (f) of the bottom hinge
and install it on the opposite side.
A e
f
A
Installation 35
5. Unscrew the pin of the upper hinge andinstall it on the opposite side.
6. Install the door in the upper hinge.7. Install the ventilation grille, clipping it
into place.
8. Unscrew the handle. Remove the plugwith a punch. Install the handle and theplug on opposite side. Take from the ac-cessory bag the two plugs and cover theholes left open after having removedthe handle.
9. Make sure that the front board of thedoor is parallel to the front board of thetop.
10. Reposition, level the appliance, wait forat least four hours and then connect itto the power socket.
Do a final check to make sure that:• All screws are tightened.• The magnetic seal adheres to the cabinet.• The door opens and closes correctly.If the ambient temperature is cold (i.e. in Winter), the gasket may not fit perfectly to thecabinet. In that case, wait for the natural fitting of the gasket.
NOISES
There are some sounds during normal running (compressor, refrigerant circulation).
BRRR!HISSS!
CLICK
!
BLUBB! CRACK!
SSSRRR!
OK
180°
36 Noises

CLICK!CLICK!
BRRR!BRRR!
BLUBB! BLUBB!
HISSS!HISSS!
Noises 37

SSSRRR! SSSRRR!
CRACK!CRACK!
ENVIRONMENTAL CONCERNS
The symbol on the product or on its packaging indicates that this product may not betreated as household waste. Instead it should be taken to the appropriate collection pointfor the recycling of electrical and electronic equipment. By ensuring this product isdisposed of correctly, you will help prevent potential negative consequences for theenvironment and human health, which could otherwise be caused by inappropriate wastehandling of this product. For more detailed information about recycling of this product,please contact your local council, your household waste disposal service or the shop whereyou purchased the product.
38 Environmental concerns

PARA RESULTADOS PERFEITOS
Obrigado por escolher este produto AEG. Criámo-lo paralhe oferecer um desempenho impecável durante váriosanos, com tecnologias inovadoras que tornam a sua vidamais fácil – funcionalidades que poderá não encontrarem aparelhos convencionais. Continue a ler durantealguns minutos para tirar o máximo partido do produto.
ACESSÓRIOS E CONSUMÍVEIS
Na loja web AEG, encontrará tudo aquilo de que necessitapara manter os seus aparelhos AEG imaculados e afuncionarem na perfeição. A par de uma vasta gama deacessórios projectados e concebidos de acordo com ospadrões de elevada qualidade que esperaria, de utensíliosde cozinha especializados a cestos de talheres, desuportes para garrafas a delicados sacos para roupa...
Visite a loja online emwww.aeg.com/shop
39
ÍNDICE
41 Informações de segurança44 Painel de controlo47 Primeira utilização47 Utilização diária48 Sugestões e dicas úteis49 Manutenção e limpeza50 O que fazer se…52 Dados técnicos52 Instalação55 Ruídos57 Preocupações ambientais
Os símbolos que se seguem são utilizados nopresente manual:
Informações importantes relativas àsegurança de pessoas e à prevenção dedanos a aparelhos.
Informações gerais e conselhos úteis
Informações ambientais
Sujeito a alterações sem aviso prévio
40 Índice

INFORMAÇÕES DE SEGURANÇA
Para a sua própria segurança e para garantir uma utilização correcta, antes de instalar eusar o aparelho pela primeira vez, leia atentamente este manual do utilizador, incluindo assuas sugestões e advertências. Para evitar erros e acidentes desnecessários, é importanteque todas as pessoas que utilizam o aparelho conheçam o seu funcionamento e as caracte-rísticas de segurança. Guarde estas instruções e certifique-se de que elas acompanham oaparelho em caso de transferência ou venda, para que todos os que venham a usá-lo este-jam devidamente informados quanto à sua utilização e segurança.Para sua segurança e da propriedade, guarde as precauções destas instruções de utilização,uma vez que o fabricante não é responsável pelos danos causados por omissão.
Segurança para crianças e pessoas vulneráveis• Este aparelho não se destina a ser utilizado por pessoas (incluindo crianças) com capaci-
dades físicas, sensoriais ou mentais reduzidas ou sem experiência e conhecimento, ex-cepto se lhes tiver sido dada supervisão ou instrução relativa à utilização do aparelho poruma pessoa responsável pela sua segurança.As crianças devem ser vigiadas para assegurar que não brincam com o aparelho.
• Mantenha todas as embalagens fora do alcance das crianças. Existe o risco de asfixia.• Se eliminar o aparelho retire a ficha da tomada, corte o cabo eléctrico (o mais perto do
aparelho possível) e retire a porta para evitar que crianças a brincar sofram choqueseléctricos ou se fechem dentro do aparelho.
• Se este aparelho, com vedantes de porta magnéticos for substituir um aparelho mais ve-lho com fecho de mola (lingueta) na porta ou tampa, certifique-se de que o fecho demola está desactivado antes de eliminar o velho aparelho. Tal irá evitar que se torne nu-ma armadilha fatal para uma criança.
Segurança geralADVERTÊNCIA
Mantenha as aberturas de ventilação na caixa do aparelho ou na estrutura integrada, semobstruções.• O aparelho tem como objectivo guardar alimentos e/ou bebidas numa casa normal, como
explicado neste manual de instruções.• Não utilize um dispositivo mecânico ou qualquer meio artificial para acelerar o processo
de descongelação.• Não utilize outros aparelhos eléctricos (tais como máquinas de fazer gelados) dentro dos
aparelhos de refrigeração, a não ser que sejam aprovados para este fim pelo fabricante.• Não danifique o circuito refrigerante.• O refrigerante isobutano (R600a) está contido no circuito refrigerante do aparelho, um
gás natural com um alto nível de compatibilidade ambiental, que é, no entanto, inflamá-vel.Durante o transporte e a instalação do aparelho, certifique-se de nenhum dos compo-nentes do circuito refrigerante está danificado.
Informações de segurança 41

Se o circuito refrigerante se danificar:– evite chamas livres e fontes de ignição– ventile totalmente a divisão onde o aparelho se encontra
• É perigoso alterar as especificações ou modificar este produto. Quaisquer danos no cabopoderão provocar um curto-circuito, incêndio e/ou choque eléctrico.
ADVERTÊNCIAA substituição de qualquer componente eléctrico (cabo de alimentação, ficha, compressor)tem de ser efectuada por um agente de assistência certificado ou por pessoal técnico quali-ficado, para evitar perigo.
1. Não deve colocar extensões no cabo de alimentação.2. Certifique-se de que a ficha não está esmagada ou danificada pela parte traseira do
aparelho. Uma ficha esmagada ou danificada pode sobreaquecer e causar um incên-dio.
3. Certifique-se de que consegue alcançar a ficha do aparelho.4. Não puxe o cabo de alimentação.5. Se a tomada estiver solta, não introduza a ficha. Existe um risco de choque eléctrico
ou incêndio.6. Não deve utilizar o aparelho sem a tampa da lâmpada11) de iluminação interior.
• Esta máquina é pesada. Tenha cuidado quando a deslocar.• Não retire nem toque nos itens do compartimento do congelador se estiver com as mãos
húmidas/molhadas, pois pode causar abrasões na pele ou queimaduras provocadas pelogelo.
• Evite a exposição prolongada do aparelho à luz solar directa.• Lâmpadas 12)utilizadas neste aparelho são lâmpadas especiais, seleccionadas apenas para
aparelhos domésticos. Não são adequadas para iluminação doméstica.
Utilização diária• Não coloque panelas quentes nas partes de plástico do aparelho.• Não guarde gases ou líquidos inflamáveis no aparelho, porque podem explodir.• Não coloque alimentos directamente contra a saída de ar na ventilação traseira. 13)
• Depois de descongelados, os alimentos não devem ser recongelados.• Guarde alimentos congelados pré-embalados de acordo com as instruções do fabricante
do alimento congelado.• As recomendações de armazenamento dos fabricantes do aparelho devem ser estrita-
mente cumpridas. Consulte as respectivas instruções.• Não coloque bebidas gaseificadas dentro do congelador, uma vez que cria pressão no re-
cipiente, podendo fazer com que expluda, provocando danos no aparelho.• Os gelados de gelo podem provocar queimaduras de gelos se forem consumidos imedia-
tamente depois de retirados do aparelho.
11) Se estiver prevista uma tampa de lâmpada.12) Se as lâmpadas estiverem previstas.13) Se o aparelho for Frost Free.
42 Informações de segurança

Limpeza e manutenção• Antes da manutenção, desligue o aparelho e desligue a ficha de alimentação eléctrica da
tomada.• Não limpe o aparelho com objectos de metal.• Não utilize objectos afiados para retirar o gelo do aparelho. Utilize um raspador de plás-
tico.
InstalaçãoPara efectuar a ligação eléctrica, siga atentamente as instruções fornecidas nos parágrafosespecíficos.
• Desembale o aparelho e verifique se existem danos. Não ligue o aparelho se estiver dani-ficado. Em caso de danos, informe imediatamente o local onde o adquiriu. Nese caso,guarde a embalagem.
• É recomendável aguardar pelo menos duas horas antes de ligar o aparelho, para permitirque o óleo regresse ao compressor.
• Assegure uma circulação de ar adequada à volta do aparelho, caso contrário pode provo-car sobreaquecimento. Para garantir uma ventilação suficiente, siga as instruções rele-vantes para a instalação.
• Sempre que possível, a traseira do aparelho deve ficar virada para uma parede para evitartoques nas partes quentes (compressor, condensador) e possíveis queimaduras.
• Não coloque o aparelho perto de radiadores ou fogões.• Certifique-se de que a ficha de alimentação fica acessível após a instalação do aparelho.• Ligue apenas a uma fonte de água potável. 14)
Assistência• Quaisquer trabalhos eléctricos necessários para a manutenção do aparelho devem ser
efectuados por um electricista qualificado ou pessoa competente.• A manutenção deste produto deve ser efectuada por um Centro de Assistência autoriza-
do, o qual deverá utilizar apenas peças sobressalentes originais.
Protecção ambientalEste aparelho não contém gases que possam danificar a camada de ozono, tanto no circuitorefrigerante como nos materiais de isolamento. O aparelho não deverá ser eliminado junta-mente com o lixo doméstico. A espuma de isolamento contém gases inflamáveis: o aparelhodeverá ser eliminado de acordo com as normas aplicáveis que pode obter junto das autori-dades locais. Evite danificar a unidade de arrefecimento, especialmente na parte traseira,perto do permutador de calor. Os materiais utilizado neste aparelho marcados pelo símbolo
são recicláveis.
14) Se estiver prevista uma ligação hídrica
Informações de segurança 43

PAINEL DE CONTROLO
1 2 3 4 5 6
1 Botão ON/OFF2 Botão Mode3 Botão OK4 Botão de diminuição da temperatura5 Botão de aumento da temperatura6 Visor
É possível alterar o som predefinido de botões para outro mais facilmente audível premindosimultaneamente o botão Mode e o botão de diminuição da temperatura durante algunssegundos. A alteração é reversível.
Visor
3 4 5 621
1 Função temporizador2 Função FROSTMATIC3 Função Minute Minder4 Função bloqueio de segurança para crianças5 Indicador de alarme6 Indicador de temperatura
LigarPara ligar o aparelho, efectue os seguintes passos:1. Ligue a ficha do aparelho à tomada.2. Prima o botão ON/OFF se o display estiver desligado.3. O alarme sonoro poderá funcionar após alguns segundos.
Para reiniciar o alarme consulte "Alarme de temperatura elevada".4. Se o display indicar "dEMo" , o aparelho está em modo de demonstração. Consulte o
parágrafo "O que fazer se...".5. Os indicadores de temperatura apresentam a temperatura predefinida.Para seleccionar uma temperatura regulada diferente, consulte "Regulação da temperatu-ra".
DesligarPara desligar o aparelho, efectue os passos seguintes:
44 Painel de controlo

1. Prima o botão ON/OFF durante 5 segundos.2. O visor desliga-se.3. Para desligar o aparelho da corrente desligue a ficha da tomada.
Regulação da temperaturaA temperatura definida do congelador pode ser regulada pressionando o botão da tempera-tura.Temperatura predefinida regulada:• -18 °C para o congeladorOs indicadores de temperatura apresentam a temperatura regulada.A temperatura regulada será alcançada dentro de 24 horas.
Após uma falha de energia a temperatura regulada permanece memorizada.
Função FROSTMATICPara ligar a função:1. Prima o botão Mode até aparecer o ícone correspondente.
O indicador FROSTMATIC fica intermitente.2. Prima o botão OK para confirmar.
O indicador FROSTMATIC é apresentado.Esta função pára automaticamente após 52 horas.Para desligar a função antes do seu fim automático:1. Prima o botão Mode até o indicador FROSTMATIC ficar intermitente.2. Prima o botão OK para confirmar.3. O indicador FROSTMATIC apaga-se.
A função é desligada se for seleccionada uma temperatura diferente para o congelador.
Função Minute MinderA função Minute Minder destina-se a ser utilizada para regular um alarme acústico parauma hora escolhida, sendo útil, por exemplo, quando uma receita requer o arrefecimento deuma mistura durante um determinado período de tempo ou quando é necessário um avisopara não se esquecer das garrafas colocadas no congelador para arrefecimento rápido.Para ligar a função:1. Prima o botão Mode até aparecer o ícone correspondente.
O indicador Minute Minder fica intermitente.O Temporizador apresenta o valor definido (30 minutos) durante alguns segundos.
2. Prima o botão regulador do Temporizador para alterar o valor definido do Temporiza-dor de 1 até 90 minutos.
3. Prima o botão OK para confirmar.O indicador Minute Minder é apresentado.O Temporizador começa a piscar (min). .
Painel de controlo 45

No final da contagem decrescente, o indicador Minute Minder pisca e é emitido um alarmesonoro:1. Retire quaisquer bebidas do interior do compartimento do congelador.2. Prima o botão OK para desligar o som e terminar a função.É possível desactivar a função a qualquer altura, durante a contagem decrescente:1. Prima o botão Mode até o indicador Minute Minder ficar intermitente.2. Prima o botão OK para confirmar.3. O indicador Minute Minder apaga-se.É possível alterar a hora, durante a contagem decrescente e no final, premindo o botão dediminuição da temperatura e o botão de aumento da temperatura.
Função Bloqueio de Segurança para CriançasPara evitar o funcionamento não intencional dos botões, seleccione a função Bloqueio deSegurança para Crianças.Para ligar a função:1. Prima o botão Mode até aparecer o ícone correspondente.2. O indicador Bloqueio de Segurança para Crianças pisca.3. Prima o botão OK para confirmar.
O indicador Bloqueio de Segurança para Crianças é apresentado.Para desligar a função:1. Prima o botão Mode até o indicador Bloqueio de Segurança para Crianças piscar.2. Prima o botão OK para confirmar.3. O indicador Bloqueio de Segurança para Crianças apaga-se.
Alarme de temperatura elevadaUm aumento da temperatura no compartimento do congelador (por exemplo, devido a umafalha de alimentação) é indicado por:• intermitência do alarme e indicadores de temperatura do congelador• activação do alarme sonoro.Para reiniciar o alarme:1. Prima qualquer botão.2. O alarme sonoro desliga-se.3. O indicador de temperatura do frigorífico apresenta a temperatura mais elevada atin-
gida durante alguns segundos. Em seguida, apresenta novamente a temperatura regu-lada.
4. O indicador de alarme continua a piscar até o restabelecimento das condições normais.Quando o alarme é restabelecido o indicador de alarme apaga-se.
Alarme de porta abertaOuve-se um alarme acústico quando a porta é deixada aberta durante aprox. 80 segundos.Quando as condições normais forem restabelecidas (porta fechada), o alarme sonoro pára.
46 Painel de controlo

PRIMEIRA UTILIZAÇÃO
Limpeza do interiorAntes de utilizar o aparelho pela primeira vez, limpe o interior e todos os acessórios comágua morna e sabão neutro de modo a remover o cheiro típico de um produto novo, deseguida, seque minuciosamente.
Não utilize detergentes ou pós abrasivos, pois estes danificam o acabamento.
Se o visor indicar “dEMo”, o aparelho está em modo de demonstração: consulte o parágrafo"O QUE FAZER SE...".
UTILIZAÇÃO DIÁRIA
Congelação de alimentos frescosO compartimento congelador é adequado para a congelação de alimentos frescos e para aconservação a longo prazo de alimentos congelados e ultracongelados.Para congelar alimentos frescos active a função FROSTMATIC, pelo menos, 24 horas antesde colocar os alimentos a congelar no compartimento congelador.Coloque os alimentos frescos a serem congelados nos dois compartimentos superiores.A quantidade máxima de alimentos que podem ser congelados em 24 horas está indicadana chapa de identificação, uma etiqueta presente nas paredes internas do aparelho.O processo de congelação dura 24 horas: durante este período, não introduza novos ali-mentos a congelar.
Armazenamento de alimentos congeladosQuando ligar pela primeira vez ou após um período sem utilização, antes de colocar os pro-dutos no compartimento, deixe o aparelho em funcionamento durante no mínimo 2 horasnas definições mais elevadas.
Em caso de descongelação acidental, por exemplo, devido a falta de electricidade, se a ali-mentação estiver desligada por mais tempo que aquele mostrado na tabela de característi-cas técnicas em "tempo de reinício", os alimentos descongelados têm de ser consumidos ra-pidamente ou cozinhados imediatamente e depois, novamente congelados (depois de arre-fecerem).
Calendário de alimentos congelados
Os símbolos apresentam diferentes tipos de alimentos congelados.Os números indicam os tempos de armazenamento em meses para os respectivos tipos dealimentos congelados. A validade dos limites superior ou inferior do tempo de armazena-mento indicado depende da qualidade dos alimentos e do tratamento antes da congelação.
Primeira utilização 47

DescongelaçãoOs alimentos congelados, antes de serem utilizados, podem ser descongelados no comparti-mento do frigorífico ou à temperatura ambiente, dependendo do tempo disponível para es-ta operação.Os pedaços pequenos podem mesmo ser cozinhados ainda congelados, directamente docongelador: neste caso, a confecção irá demorar mais.
Acumuladores de frioO congelador está equipado com um ou mais acumuladores de frio; estes aumentam otempo de manutenção dos alimentos em caso de falha de corrente eléctrica ou de avaria.
SUGESTÕES E DICAS ÚTEIS
Conselhos para a congelaçãoPara o ajudar a tirar partido do processo de congelação, eis alguns conselhos importantes:• a quantidade máxima de alimentos que pode ser congelada em 24h. está mostrada na
placa de dados;• O processo de congelamento demora 24 horas. Não devem ser adicionados mais alimen-
tos para congelação durante este período;• congele apenas alimentos de alta qualidade, frescos e extremamente limpos;• Prepare os alimentos em pequenas quantidades para permitir que sejam rápida e com-
pletamente congeladas e para tornar possível subsequentemente descongelar apenas aquantidade necessária;
• embrulhe os alimentos em folha de alumínio ou politeno e certifique-se de que as emba-lagens são herméticas;
• Não permita que os alimentos frescos e descongelados entrem em contacto com os ali-mentos já congelados, evitando assim o aumento de temperatura dos alimentos congela-dos;
• os alimentos sem gordura são melhores para armazenar que os alimentos com gordura;o sal reduz o tempo de armazenamento dos alimentos;
• a água congela. Se for consumida imediatamente após a remoção do compartimento docongelador, poderá causar queimaduras de gelo na pele;
• é aconselhável que anote a data de congelação em cada embalagem individual para per-mitir que saiba o tempo de armazenamento.
Conselhos para o armazenamento de alimentos congeladosPara obter o melhor desempenho deste aparelho, deve:• certificar-se de que os alimentos congelados comercialmente foram armazenados ade-
quadamente pelo vendedor;• ter a certeza que os alimentos congelados são transferidos do supermercado para o con-
gelador no tempo mais curto possível;• não abra muitas vezes a porta nem a deixe aberta mais tempo do que o necessário.
48 Sugestões e dicas úteis

• Uma vez descongelados, os alimentos degradam rapidamente e não podem tornar a sercongelados.
• Não exceda o período de armazenamento indicado pelo fabricante de alimentos.
MANUTENÇÃO E LIMPEZA
CUIDADORetire a ficha da tomada antes de efectuar qualquer operação de manutenção.
Este aparelho contém hidrocarbonetos na sua unidade de arrefecimento; a manutenção e arecarga devem, por isso, ser efectuadas exclusivamente por técnicos autorizados.
Limpeza periódicaO equipamento tem de ser limpo regularmente:• limpe o interior e os acessórios com água morna e sabão neutro.• verifique regularmente os vedantes de porta e limpe-os para se certificar de que estão
limpos e sem resíduos.• lave e seque minuciosamente.
Não puxe, desloque nem danifique quaisquer tubos e/ou cabos dentro do armário.Nunca utilize detergentes, pós abrasivos, produtos de limpeza muito perfumados ou cera depolir para limpar o interior, pois isto irá danificar a superfície e deixar um odor forte.
Limpe o condensador (grelha preta) e o compressor que está no fundo do aparelho, comuma escova. Esta operação irá melhorar o desempenho do aparelho e poupar consumo deelectricidade.
Tenha cuidado para não danificar o sistema de arrefecimento.
Muitos agentes de limpeza de superfícies de cozinhas contêm químicos que podem atacar/danificar os plásticos usados neste aparelho. Por esta razão é aconselhável que a estruturaexterior deste aparelho seja limpa apenas com água morna com um pouco de solução delimpeza adicionada.Após a limpeza, volte a ligar o equipamento à tomada de alimentação.
Descongelar o congeladorO compartimento do congelador deste modelo, por sua vez, é do tipo "no frost". Isto signifi-ca que não há qualquer formação de gelo durante o seu funcionamento, quer nas paredesinteriores, quer nos alimentos.A ausência de gelo deve-se à circulação contínua de ar frio no interior do compartimento,accionado por um ventilador controlado automaticamente.
Períodos de inactividadeQuando o aparelho não é utilizado por longos períodos, observe as seguintes precauções:• desligue o aparelho da tomada da electricidade• retire todos os alimentos
Manutenção e limpeza 49

• descongelação15) e limpe o aparelho e todos os acessórios• deixe a(s) porta(s) aberta(s) para evitar cheiros desagradáveis.Se o armário for mantido ligado, peça a alguém para o verificar esporadicamente, para evi-tar que os alimentos no interior se estraguem em caso de falha eléctrica.
O QUE FAZER SE…
ADVERTÊNCIAAntes da resolução de problemas, retire a ficha de alimentação eléctrica da tomada.A resolução de problemas que não se encontram neste manual só deve ser efectuada porum electricista qualificado ou por uma pessoa competente.
Problema Causa possível Solução
O aparelho não funciona. O aparelho está desligado. Ligue o aparelho.
A ficha de alimentação eléctricanão está correctamente inseridana tomada.
Ligue a ficha correctamente à to-mada.
O aparelho não tem alimenta-ção. Não existe corrente na to-mada.
Ligue um aparelho eléctrico dife-rente à tomada.Contacte um electricista qualifi-cado.
A luz de alarme está inter-mitente.
A temperatura no congeladorestá demasiado elevada.
Consulte "Alarme de temperaturaelevada"
O compressor funcionacontinuamente.
A temperatura não está definidacorrectamente.
Defina uma temperatura maiselevada.
A porta não está correctamentefechada.
Consulte a secção "Fechar a por-ta".
A porta foi aberta demasiadasvezes.
Não mantenha a porta abertamais tempo do que o necessário.
A temperatura de algum produ-to está demasiado elevada.
Deixe que a temperatura do pro-duto diminua até à temperaturaambiente antes de o guardar.
A temperatura ambiente estádemasiado elevada.
Reduza a temperatura ambiente.
A função FROSTMATIC está liga-da.
Consulte "Função FROSTMATIC".
A temperatura no conge-lador está demasiado bai-xa.
O regulador da temperatura nãoestá definido correctamente.
Defina uma temperatura maiselevada.
A função FROSTMATIC está liga-da.
Consulte "Função FROSTMATIC".
15) Se previsto.
50 O que fazer se…

Problema Causa possível Solução
A temperatura no conge-lador está demasiado ele-vada.
O regulador da temperatura nãoestá definido correctamente.
Seleccione uma temperatura maisbaixa.
A porta não está correctamentefechada.
Consulte a secção "Fechar a por-ta".
A temperatura de algum produ-to está demasiado elevada.
Deixe que a temperatura do pro-duto diminua até à temperaturaambiente antes de o guardar.
Guardou demasiados produtosao mesmo tempo.
Guarde menos produtos ao mes-mo tempo.
Os produtos estão demasiadoperto uns dos outros.
Armazene os produtos de forma ahaver circulação de ar frio.
Há demasiado gelo a co-brir o interior do compar-timento superior do apa-relho.
Há demasiado gelo no evapora-dor do aparelho, o que significaque a porta esteve aberta dema-siado tempo.
Consulte "Limpar o evaporador".
O display da temperaturaapresenta o quadrado su-perior ou inferior.
Ocorreu um erro na medição datemperatura.
Entre em contacto com o seu re-presentante de assistência (o sis-tema de refrigeração continuará amanter os produtos alimentaresfrios, mas o ajuste da temperatu-ra não será possível).
dEMo aparece no display. O aparelho está no modo de de-monstração (dEMo).
Mantenha o botãoOK premidodurante 10 segundos após ouvirum sinal sonoro longo e o visor seapagar por um breve momento: oaparelho começa a funcionarnormalmente.
Fechar a porta1. Limpe as juntas da porta.2. Se necessário, ajuste a porta. Consulte "Instalação".3. Se necessário, substitua as juntas de porta defeituosas. Contacte o Centro de Assistên-
cia.
Limpeza do evaporador1. Desligue o aparelho.2. Desligue a ficha da tomada eléctrica.3. Retire todos os alimentos do congelador e coloque-os num local fresco.4. Afaste o aparelho da parede.5. Deixe a porta aberta.6. Após aproximadamente 20 minutos, a mangueira de drenagem na parte traseira do ar-
mário começa a descarregar água para o tabuleiro de recolha.
O que fazer se… 51

7. Para evitar derrames de água do tabu-leiro de recolha, seque com uma espon-ja.
8. O processo de descongelação terminaquando a água pára de pingar. Pode de-morar várias horas, se o problema tiverocorrido muito tempo antes.
9. Desloque o aparelho para a posição ori-ginal.
10. Limpe e seque o interior do aparelho.11. Ligue a ficha do aparelho à tomada de
alimentação.12. Ligue o aparelho.
DADOS TÉCNICOS
Dimensão do nicho de instala-ção
Altura 1800 mm
Largura 600 mm
Profundidade 650 mm
Tempo de reinício 20 h
Tensão 230-240 V
Frequência 50 Hz
As informações técnicas encontram-se na placa de características no lado esquerdo internodo aparelho e na etiqueta de energia.
INSTALAÇÃO
ADVERTÊNCIALeia as "Informações de segurança" cuidadosamente para a sua segurança e funcionamentocorrecto do aparelho antes de o instalar.
52 Dados técnicos

LocalO aparelho deve ser instalado afastado de fontesde calor, como sejam radiadores, termoacumula-dores, luz solar directa, etc. Certifique-se de que oar pode circular livremente na traseira do apare-lho. Para garantir o melhor desempenho, se oaparelho estiver sob um armário de parede sus-penso, a distância mínima entre o topo do armá-rio e o armário de parede deverá ser de, no míni-mo, 100 mm . No entanto, o aparelho não deveser colocado sob armários suspensos. O nivela-mento preciso é garantido por um ou mais pésajustáveis na base do aparelho.Se o aparelho for colocado num canto e em que olado com dobradiças fique virado para a parede, adistância entre a parede e o armário tem de ser, no mínimo, de 10 mm para permitir que aporta abra o suficiente para poder retirar as prateleiras.
ADVERTÊNCIATem de ser possível desligar o aparelho da fonte de corrente; Assim, a ficha tem de estarfacilmente acessível após a instalação.
PosicionamentoADVERTÊNCIASe for eliminar um aparelho velho que tem um bloqueio ou um fecho na porta, certifique--se de não funciona para evitar que as crianças fiquem trancadas lá dentro.
O aparelho deverá ter a ficha acessível após a instalação.
Instale este aparelho num local com uma temperatura ambiente que corresponde à classeclimática indicada na placa de dados do aparelho:
Classe climática Temperatura ambiente
SN +10 °C a + 32 °C
N +16 °C a + 32 °C
ST +16 °C a + 38 °C
T +16 °C a + 43 °C
Ligação eléctricaAntes de ligar, certifique-se de que a tensão e a frequência indicadas na placa de dadoscorrespondem à fonte de alimentação doméstica.O aparelho deve ter uma ligação à terra. A ficha do cabo de alimentação é fornecida comum contacto para este objectivo. Se a tomada da fonte de alimentação doméstica não esti-ver ligada à terra, ligue o aparelho a uma ligação à terra separada, em conformidade com asnormas actuais, consultando um electricista qualificado.
10mm
10mm
100m
m
Instalação 53

O fabricante declina toda a responsabilidade caso as precauções de segurança acima nãosejam cumpridas.Este aparelho cumpre com as directivas. E.E.C.
Separadores traseirosNo interior do aparelho, existem dois espaçado-res que devem ser instalados conforme ilustra-do.Desaperte os parafusos, introduza o separador de-baixo da cabeça do parafuso e volte a apertar osparafusos.
Reversibilidade da portaADVERTÊNCIAAntes de efectuar qualquer operação, retire a ficha da tomada.
Recomendamos que execute as seguintes operações com outra pessoa que irá segurar aporta do aparelho durante as operações. Apoie cuidadosamente o aparelho sobre a partetraseira.Para alterar o sentido de abertura da porta, execute estes passos:1. Retire a grelha de ventilação de encaixe, retire o tampão (e) da grelha de ventilação e
instale no lado oposto.2. Retire a dobradiça inferior (A), desaper-
tando os parafusos de fixação.3. Retire a porta.4. Desaperte o pino (f) da dobradiça inferi-
or e instale no lado oposto.
A e
f
A
54 Instalação

5. Desaperte o pino da dobradiça superiore instale no lado oposto.
6. Instale a porta na dobradiça superior.7. Instale a grelha de ventilação, encaixan-
do-a na posição.
8. Desaperte a pega. Retire o tampão, exer-cendo alguma força. Instale a pega e otampão no lado oposto. Retire os doistampões do saco de acessórios e tape osorifícios que ficaram abertos após a re-moção da pega.
9. Certifique-se de que a placa frontal daporta está paralela à placa frontal dotampo.
10. Volte a colocar o aparelho no sítio e ni-vele-o, aguarde, pelo menos, quatro ho-ras e, de seguida, ligue-o à tomada.
Faça uma verificação final para se certificar de que:• Todos os parafusos estão apertados.• A junta magnética adere ao armário.• A porta abre e fecha correctamente.Se a temperatura ambiente for baixa (por exemplo, no Inverno), a junta pode não aderircorrectamente ao armário. Nesse caso, aguarde que a junta adira naturalmente.
RUÍDOS
Existem alguns ruídos durante o funcionamento normal (compressor, circulação do refrige-rante).
180°
Ruídos 55

BRRR!HISSS!
CLICK
!
BLUBB! CRACK!
SSSRRR!
OK
CLICK!CLICK!
BRRR!BRRR!
BLUBB! BLUBB!
56 Ruídos

HISSS!HISSS!
SSSRRR! SSSRRR!
CRACK!CRACK!
PREOCUPAÇÕES AMBIENTAIS
O símbolo no produto ou na embalagem indica que este produto não pode ser tratadocomo lixo doméstico. Em vez disso, deve ser entregue ao centro de recolha selectiva para areciclagem de equipamento eléctrico e electrónico. Ao garantir uma eliminação adequadadeste produto, irá ajudar a evitar eventuais consequências negativas para o meio ambientee para a saúde pública, que, de outra forma, poderiam ser provocadas por um tratamentoincorrecto do produto. Para obter informações mais pormenorizadas sobre a reciclagemdeste produto, contacte os serviços municipalizados locais, o centro de recolha selectiva dasua área de residência ou o estabelecimento onde adquiriu o produto.
Preocupações ambientais 57

58

59

www.aeg.com/shop 222356702-A-132011