
Create an ETD Using Adobe Acrobat Lesson 2: Create a 1 Create a
Upload
khangminh22Category
view
2download
0
1
ABE Digital Case History Exam – Registering and Uploading Your Portfolio
Submitting Your Portfolio Online
The American Board of Endodontics and its staff have tried to make this online version of the Case History Exam a convenient and time saving process, however, instructions do need to be followed very closely. You will still be graded for accuracy as well as content of your portfolio, so we urge you to read these instructions very carefully, along with the Digital Case History Portfolio Guidelines. A Word About the Process The case history form required for the digital upload process is a PDF form that you must first download. You will save the form onto your computer and use it for each one of your cases. Only when you have completed the form will you upload it to the Case History Exam website. All five completed case history forms should be saved on your computer, as well as all of your images and supporting documentation. Again, you should upload each form when it is your final, completed form that is ready for grading. Adobe Acrobat Reader and Acceptable Web Browsers You must OPEN and FILL OUT YOUR FORM using Adobe Acrobat Reader. If you do not currently have this on your computer, you can download it for free by going to adobe.com and going to the “Downloads” tab. Adobe makes a version for the Mac and a version for the PC, so please be sure to choose the correct one. Helpful Hint: If Adobe Acrobat Reader is not set as your computer’s default to open PDF’s, please be certain that you always open the case history form with Adobe Acrobat Reader. If you open it with a different type of pdf reader, you risk damaging the file. Please use the most current version of your web browser as well. How Do I Begin? You do not need to be registered to download a digital case history form. Simply go to: http://www.amboardendo.org. There you will be able to download the case history form PDF file. You can begin filling out your form(s) at any time. When Should I Register For the Exam? You can register as soon as you are ready to begin filling out the case history forms, but you do not need to register until you are ready to SUBMIT your forms and accompanying images and documentation. How Do I Register? Please go to http://www.amboardendo.org and select “Register for Case History Exam”. Note: In order to register for the Case History Portfolio Examination, you must:
• Be a Board Eligible Candidate within your period of eligibility for the current exam. • Have your Candidate Number • Pay for the examination • Complete the registration
2
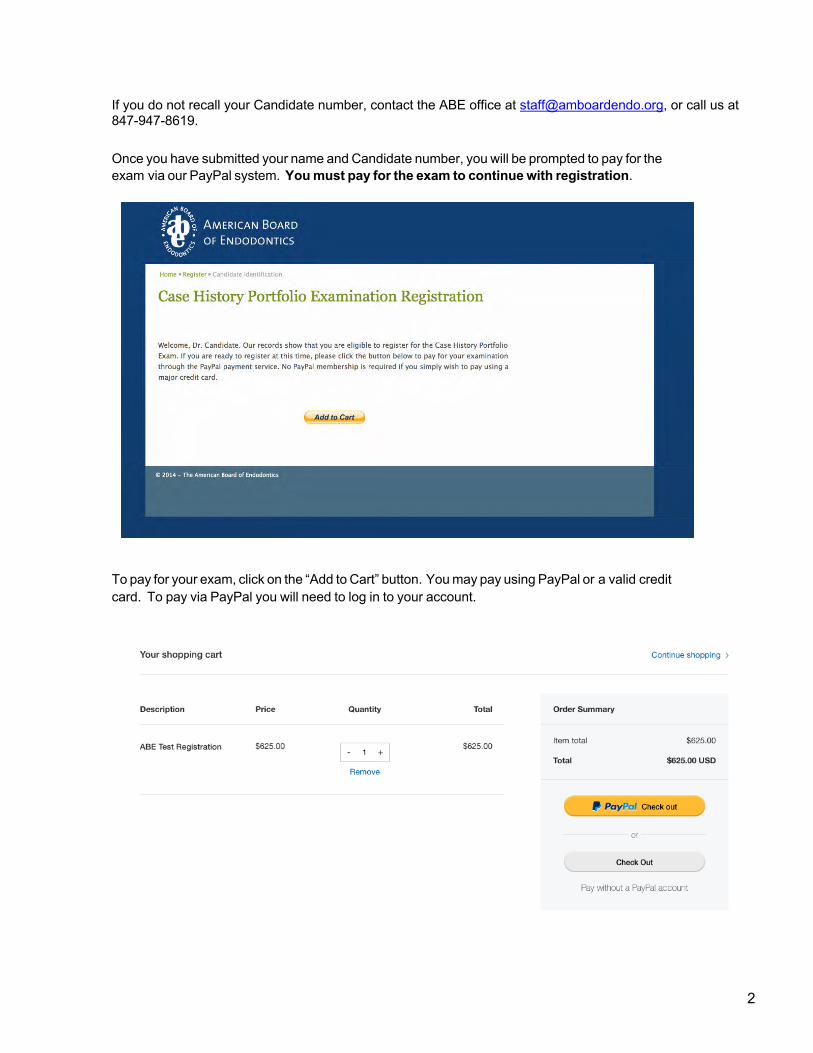
If you do not recall your Candidate number, contact the ABE office at [email protected], or call us at 847-947-8619. Once you have submitted your name and Candidate number, you will be prompted to pay for the exam via our PayPal system. You must pay for the exam to continue with registration.
To pay for your exam, click on the “Add to Cart” button. You may pay using PayPal or a valid credit card. To pay via PayPal you will need to log in to your account.
3
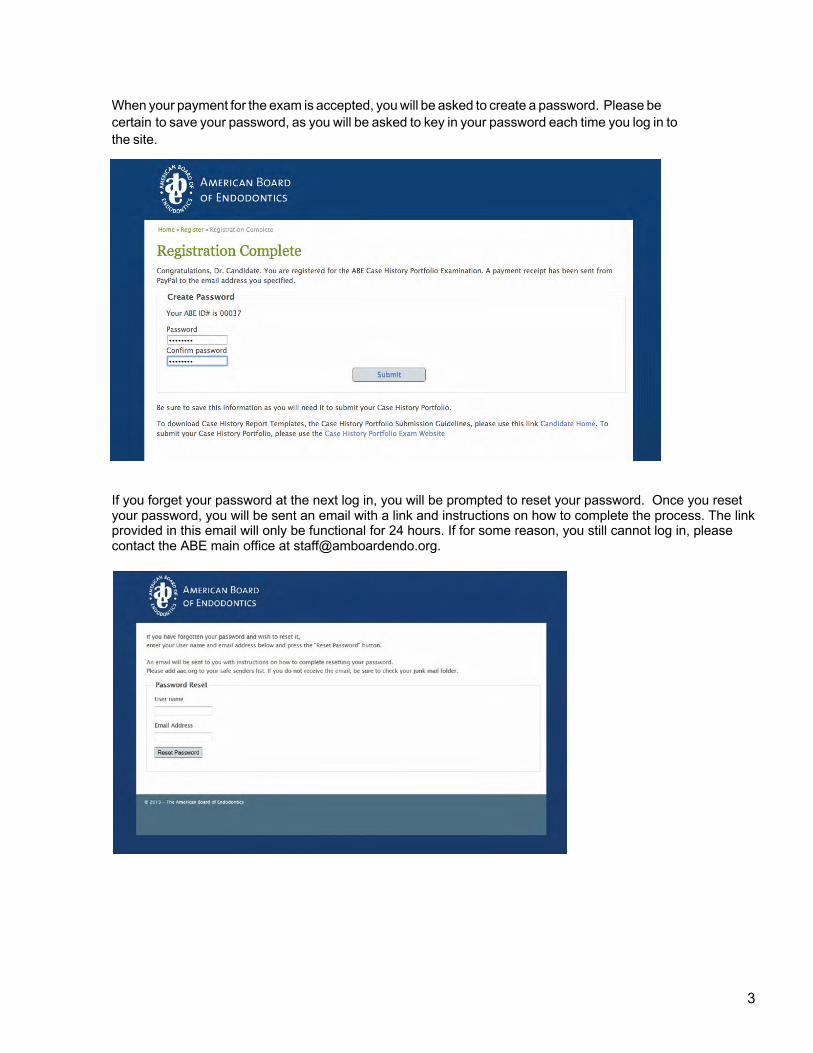
When your payment for the exam is accepted, you will be asked to create a password. Please be certain to save your password, as you will be asked to key in your password each time you log in to the site.
If you forget your password at the next log in, you will be prompted to reset your password. Once you reset your password, you will be sent an email with a link and instructions on how to complete the process. The link provided in this email will only be functional for 24 hours. If for some reason, you still cannot log in, please contact the ABE main office at [email protected].
4
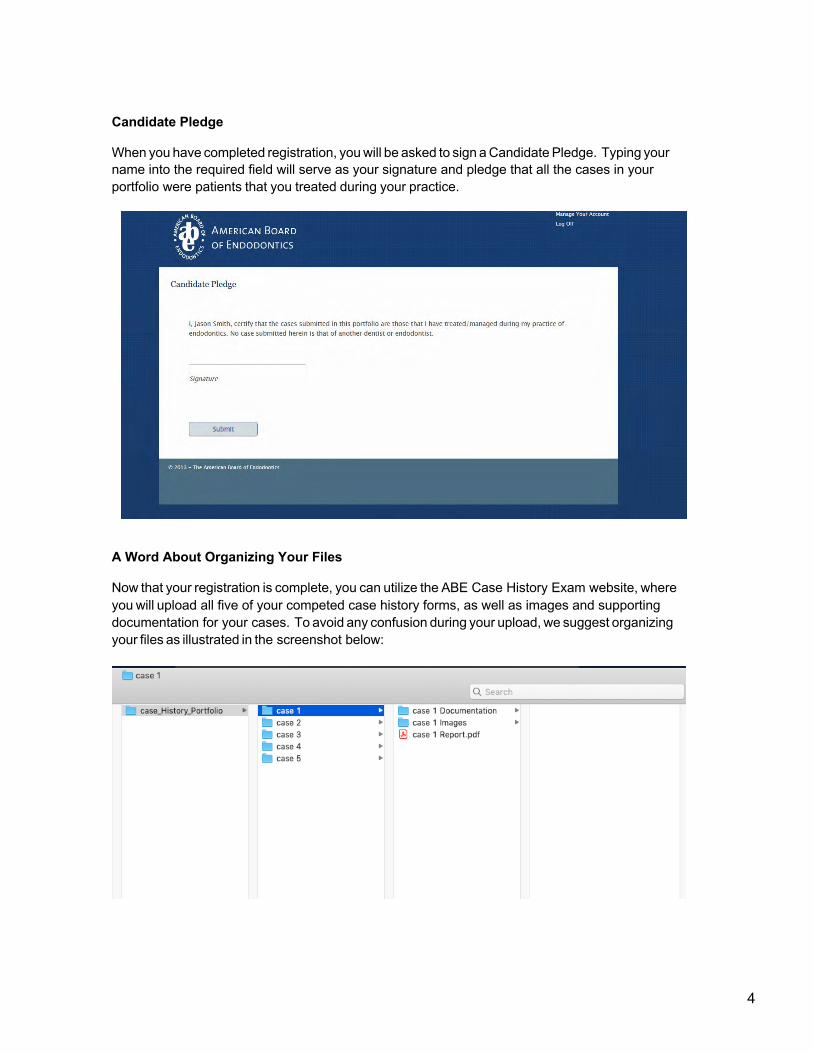
Candidate Pledge When you have completed registration, you will be asked to sign a Candidate Pledge. Typing your name into the required field will serve as your signature and pledge that all the cases in your portfolio were patients that you treated during your practice.
A Word About Organizing Your Files Now that your registration is complete, you can utilize the ABE Case History Exam website, where you will upload all five of your competed case history forms, as well as images and supporting documentation for your cases. To avoid any confusion during your upload, we suggest organizing your files as illustrated in the screenshot below:
5
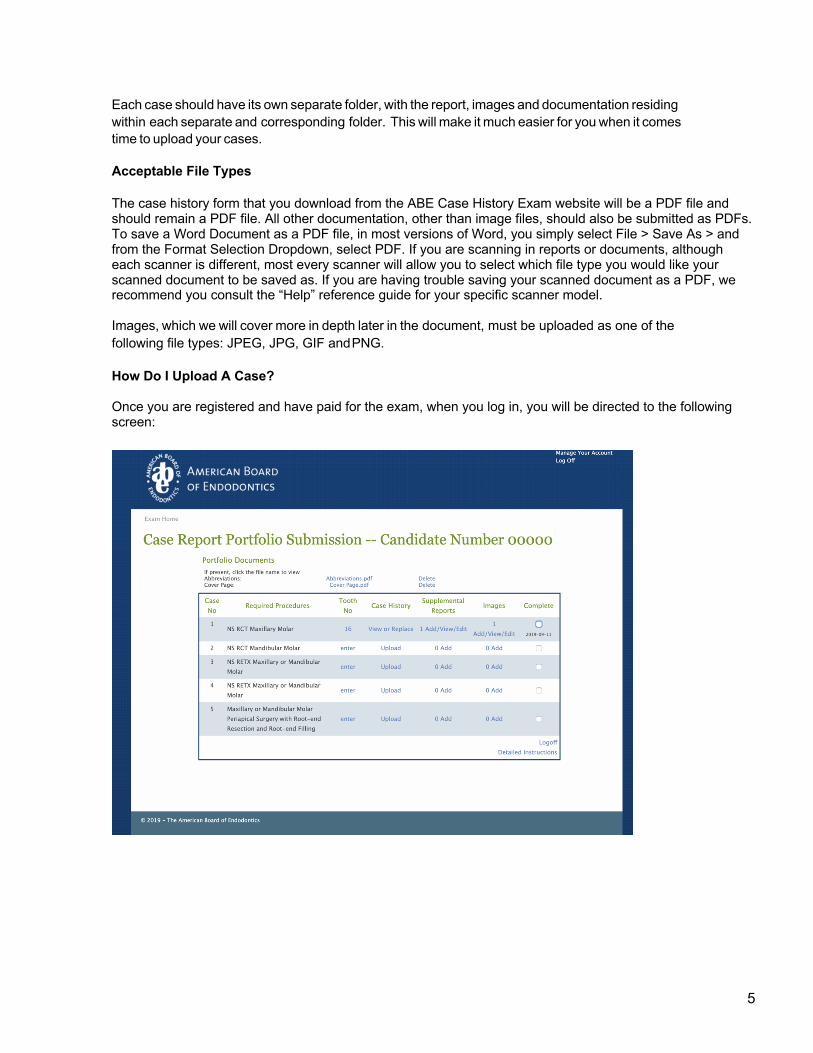
Each case should have its own separate folder, with the report, images and documentation residing within each separate and corresponding folder. This will make it much easier for you when it comes time to upload your cases. Acceptable File Types The case history form that you download from the ABE Case History Exam website will be a PDF file and should remain a PDF file. All other documentation, other than image files, should also be submitted as PDFs. To save a Word Document as a PDF file, in most versions of Word, you simply select File > Save As > and from the Format Selection Dropdown, select PDF. If you are scanning in reports or documents, although each scanner is different, most every scanner will allow you to select which file type you would like your scanned document to be saved as. If you are having trouble saving your scanned document as a PDF, we recommend you consult the “Help” reference guide for your specific scanner model. Images, which we will cover more in depth later in the document, must be uploaded as one of the following file types: JPEG, JPG, GIF and PNG. How Do I Upload A Case? Once you are registered and have paid for the exam, when you log in, you will be directed to the following screen:
6
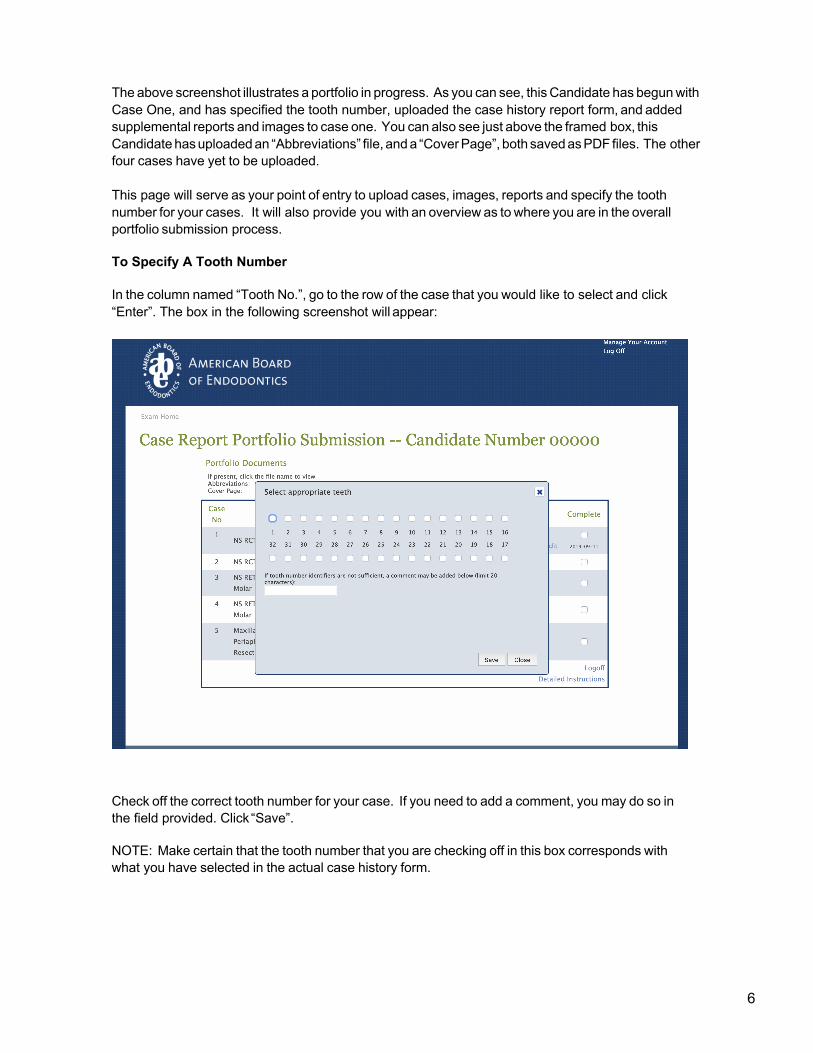
The above screenshot illustrates a portfolio in progress. As you can see, this Candidate has begun with Case One, and has specified the tooth number, uploaded the case history report form, and added supplemental reports and images to case one. You can also see just above the framed box, this Candidate has uploaded an “Abbreviations” file, and a “Cover Page”, both saved as PDF files. The other four cases have yet to be uploaded. This page will serve as your point of entry to upload cases, images, reports and specify the tooth number for your cases. It will also provide you with an overview as to where you are in the overall portfolio submission process. To Specify A Tooth Number In the column named “Tooth No.”, go to the row of the case that you would like to select and click “Enter”. The box in the following screenshot will appear:
Check off the correct tooth number for your case. If you need to add a comment, you may do so in the field provided. Click “Save”. NOTE: Make certain that the tooth number that you are checking off in this box corresponds with what you have selected in the actual case history form.
7
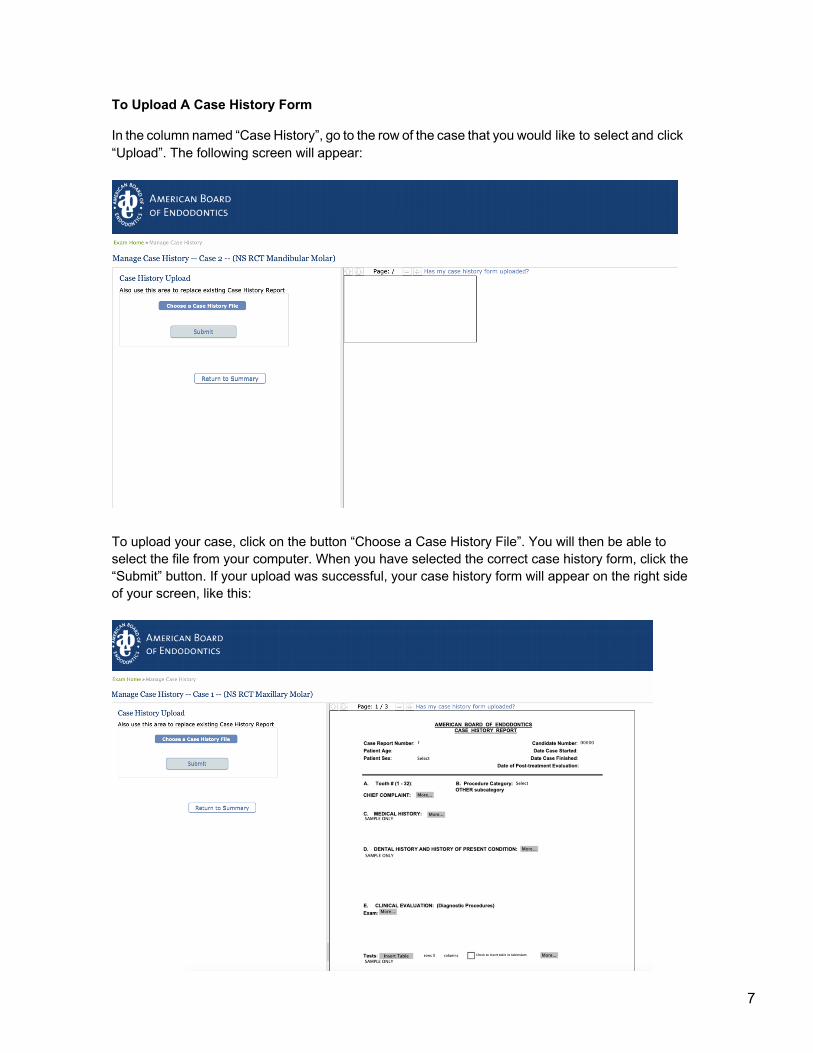
To Upload A Case History Form In the column named “Case History”, go to the row of the case that you would like to select and click “Upload”. The following screen will appear:
To upload your case, click on the button “Choose a Case History File”. You will then be able to select the file from your computer. When you have selected the correct case history form, click the “Submit” button. If your upload was successful, your case history form will appear on the right side of your screen, like this:

8
To go back to the case history Summary screen, simply click the “Return to Summary” button. Please note: You can only view your case history form on this screen, but you cannot make changes to the form. If you notice an error on your form, you will need to go back to the form ON YOUR COMPUTER, make corrections, save the form, and upload the form again. To Upload A Supplemental Report In the column named “Supplemental Reports”, go to the row of the case that that you would like to select and click “Add”. The following screen will appear:
From the “Report Type” drop down box, select the correct report type. Then click on the “Choose a Report” button. You will then be able to select the file from your computer. Once you have selected the appropriate file, click “Submit”. A Word About Image Files Please begin with high quality images. Unacceptable features include radiographs/images that are too dark, too light, not clear, or too small. Recommended image size: Minimum image size: 200 KB AND 540 x 360 pixels. For better image resolution, image size: 300 KB and higher AND 800 x 600 pixels and higher. Image files should not exceed 4 MB. Only JPEG, JPG, GIF and PNG radiographs/image files are acceptable. To Upload Image Files In the column named “Images”, go to the row of the case that you that you would like to select and click “Add”. The screen image to the right will appear.

9
You will be asked to enter a date from a pop-up calendar (this should be the date that the image was taken), and a brief description of the image. When you have selected the correct image file, click “Submit”. If you have successfully uploaded your image file, this screen should appear:
The above screenshot illustrates a case with two uploaded images. On this screen you can upload another image, see thumbnail views of the images that you have uploaded for each of your cases and the dates and descriptions you have labeled each of your image files. You can also zoom in on your image by clicking on the “View” link located just below each of your image thumbnails. If you notice that the date or description of an image is incorrect, you can edit either of these fields by clicking on the “Edit Image” just next to the “View” link just below each of your image thumbnails. Images MUST be presented in chronological order. If your images are not in chronological order, you can use the “drag and drop” functionality in the image screen to place them in the correct order:
functionality to organize images in chronological sequence.
Simply click on the image that you want to move. While holding down your mouse, drag it to the correct sequential order, and drop it by releasing mouse.
10
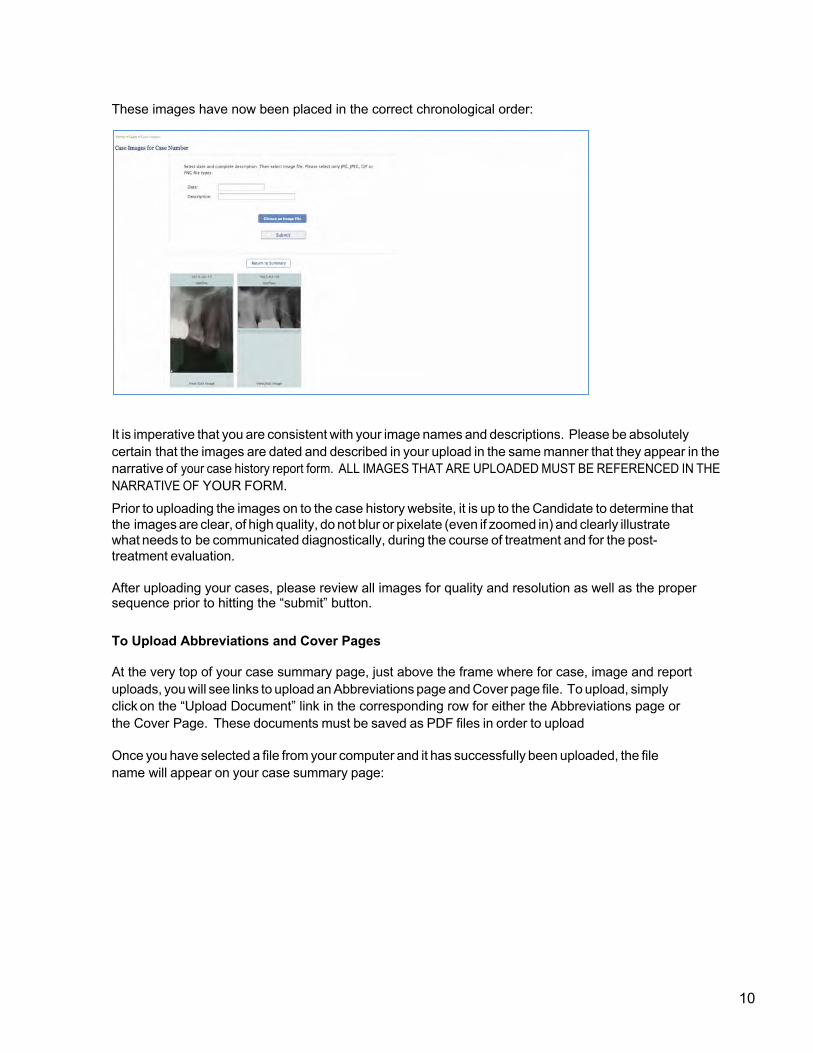
These images have now been placed in the correct chronological order:
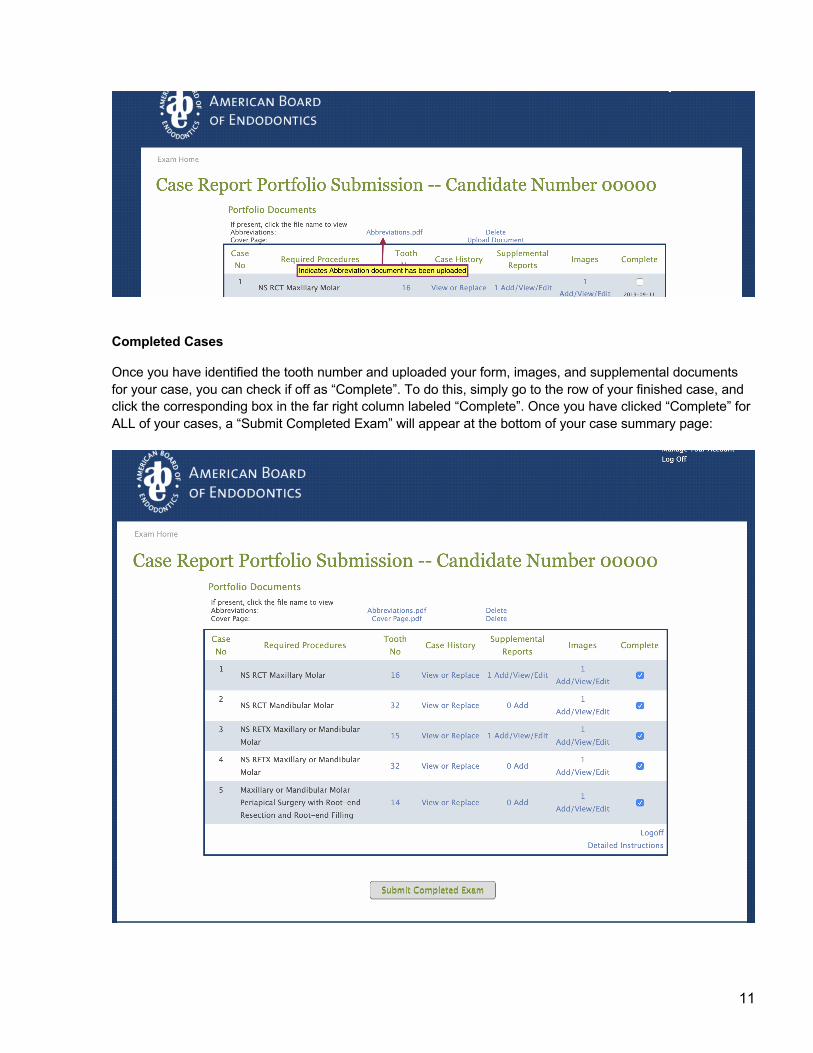
It is imperative that you are consistent with your image names and descriptions. Please be absolutely certain that the images are dated and described in your upload in the same manner that they appear in the narrative of your case history report form. ALL IMAGES THAT ARE UPLOADED MUST BE REFERENCED IN THE NARRATIVE OF YOUR FORM. Prior to uploading the images on to the case history website, it is up to the Candidate to determine that the images are clear, of high quality, do not blur or pixelate (even if zoomed in) and clearly illustrate what needs to be communicated diagnostically, during the course of treatment and for the post- treatment evaluation. After uploading your cases, please review all images for quality and resolution as well as the proper sequence prior to hitting the “submit” button. To Upload Abbreviations and Cover Pages At the very top of your case summary page, just above the frame where for case, image and report uploads, you will see links to upload an Abbreviations page and Cover page file. To upload, simply click on the “Upload Document” link in the corresponding row for either the Abbreviations page or the Cover Page. These documents must be saved as PDF files in order to upload Once you have selected a file from your computer and it has successfully been uploaded, the file name will appear on your case summary page:
11
Completed Cases Once you have identified the tooth number and uploaded your form, images, and supplemental documents for your case, you can check if off as “Complete”. To do this, simply go to the row of your finished case, and click the corresponding box in the far right column labeled “Complete”. Once you have clicked “Complete” for ALL of your cases, a “Submit Completed Exam” will appear at the bottom of your case summary page:
12
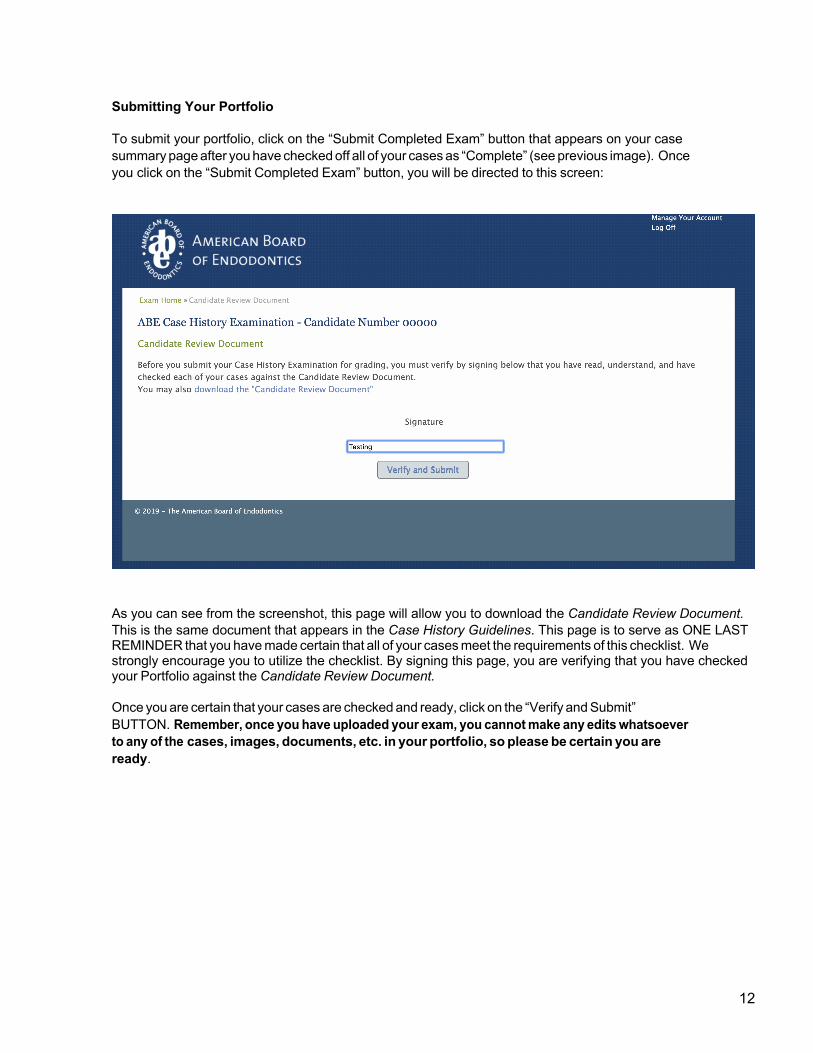
Submitting Your Portfolio To submit your portfolio, click on the “Submit Completed Exam” button that appears on your case summary page after you have checked off all of your cases as “Complete” (see previous image). Once you click on the “Submit Completed Exam” button, you will be directed to this screen:
As you can see from the screenshot, this page will allow you to download the Candidate Review Document. This is the same document that appears in the Case History Guidelines. This page is to serve as ONE LAST REMINDER that you have made certain that all of your cases meet the requirements of this checklist. We strongly encourage you to utilize the checklist. By signing this page, you are verifying that you have checked your Portfolio against the Candidate Review Document. Once you are certain that your cases are checked and ready, click on the “Verify and Submit” BUTTON. Remember, once you have uploaded your exam, you cannot make any edits whatsoever to any of the cases, images, documents, etc. in your portfolio, so please be certain you are ready.
13
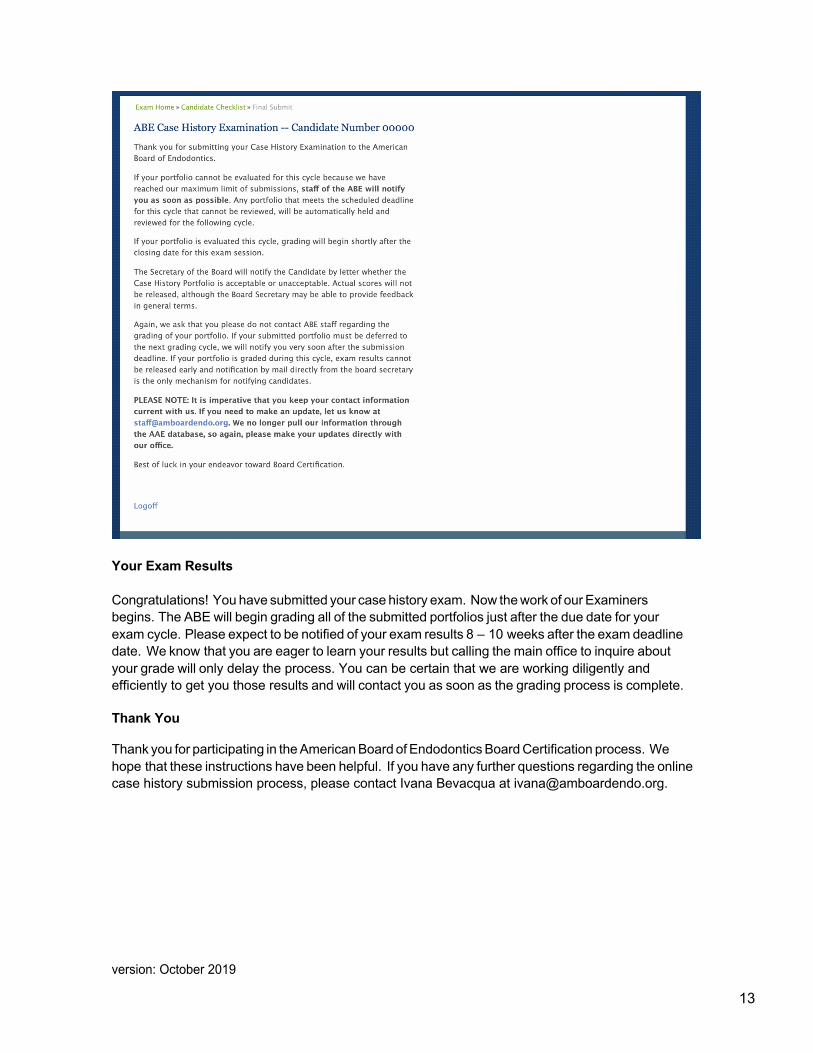
Your Exam Results Congratulations! You have submitted your case history exam. Now the work of our Examiners begins. The ABE will begin grading all of the submitted portfolios just after the due date for your exam cycle. Please expect to be notified of your exam results 8 – 10 weeks after the exam deadline date. We know that you are eager to learn your results but calling the main office to inquire about your grade will only delay the process. You can be certain that we are working diligently and efficiently to get you those results and will contact you as soon as the grading process is complete. Thank You Thank you for participating in the American Board of Endodontics Board Certification process. We hope that these instructions have been helpful. If you have any further questions regarding the online case history submission process, please contact Ivana Bevacqua at [email protected]. version: October 2019
Copyright © 2022 FDOKUMEN