Email Connection Guide
15
Email Connection Guide
-
Upload
khangminh22 -
Category
Documents
-
view
1 -
download
0
Transcript of Email Connection Guide
Email Connection Guide
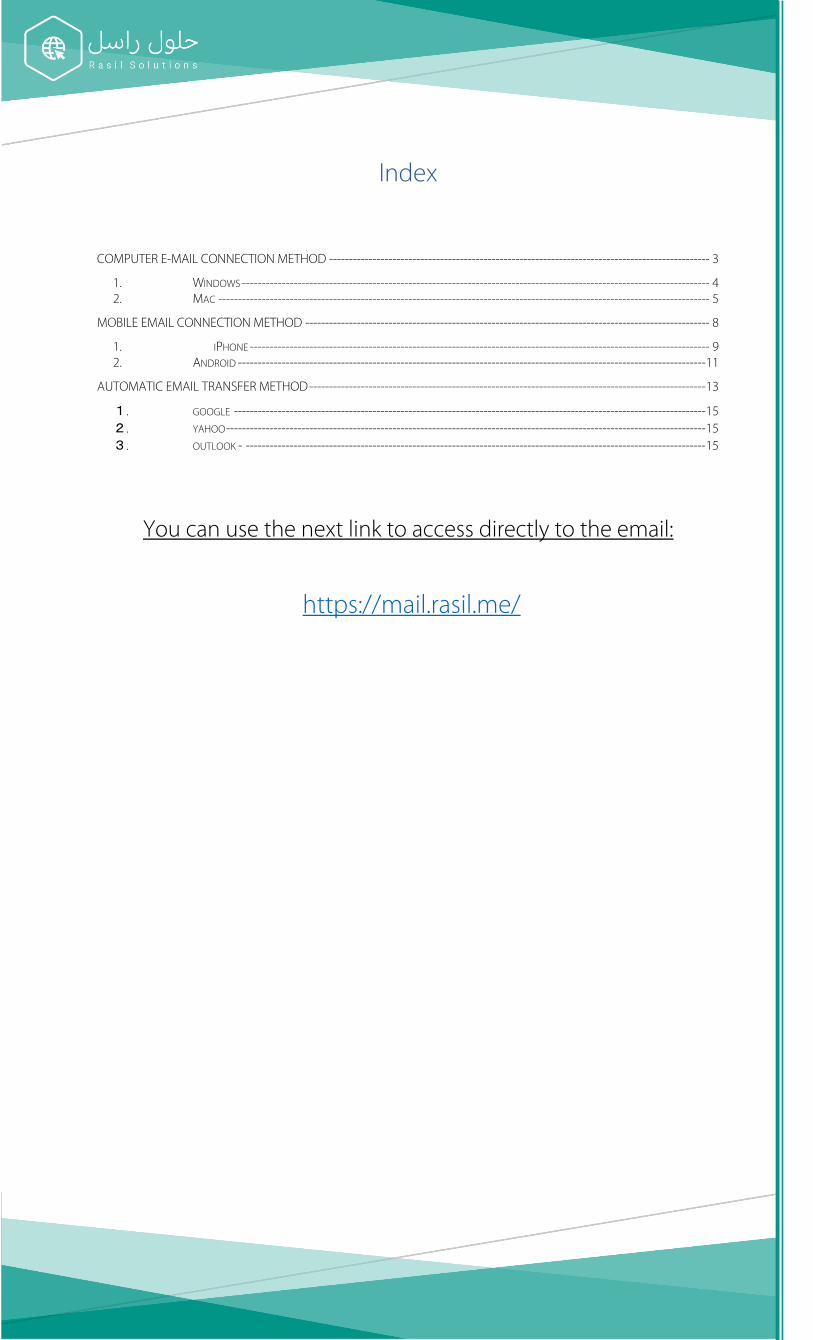
Index
COMPUTER E-MAIL CONNECTION METHOD ------------------------------------------------------------------------------------------------ 3
1. WINDOWS ---------------------------------------------------------------------------------------------------------------------- 4 2. MAC ---------------------------------------------------------------------------------------------------------------------------- 5
MOBILE EMAIL CONNECTION METHOD ------------------------------------------------------------------------------------------------------ 8
1. IPHONE -------------------------------------------------------------------------------------------------------------------- 9 2. ANDROID ---------------------------------------------------------------------------------------------------------------------- 11
AUTOMATIC EMAIL TRANSFER METHOD ---------------------------------------------------------------------------------------------------- 13
1. GOOGLE ----------------------------------------------------------------------------------------------------------------------- 15 2. YAHOO ------------------------------------------------------------------------------------------------------------------------- 15 3. OUTLOOK - -------------------------------------------------------------------------------------------------------------------- 15
You can use the next link to access directly to the email:
https://mail.rasil.me/
Computer E-mail connection Method
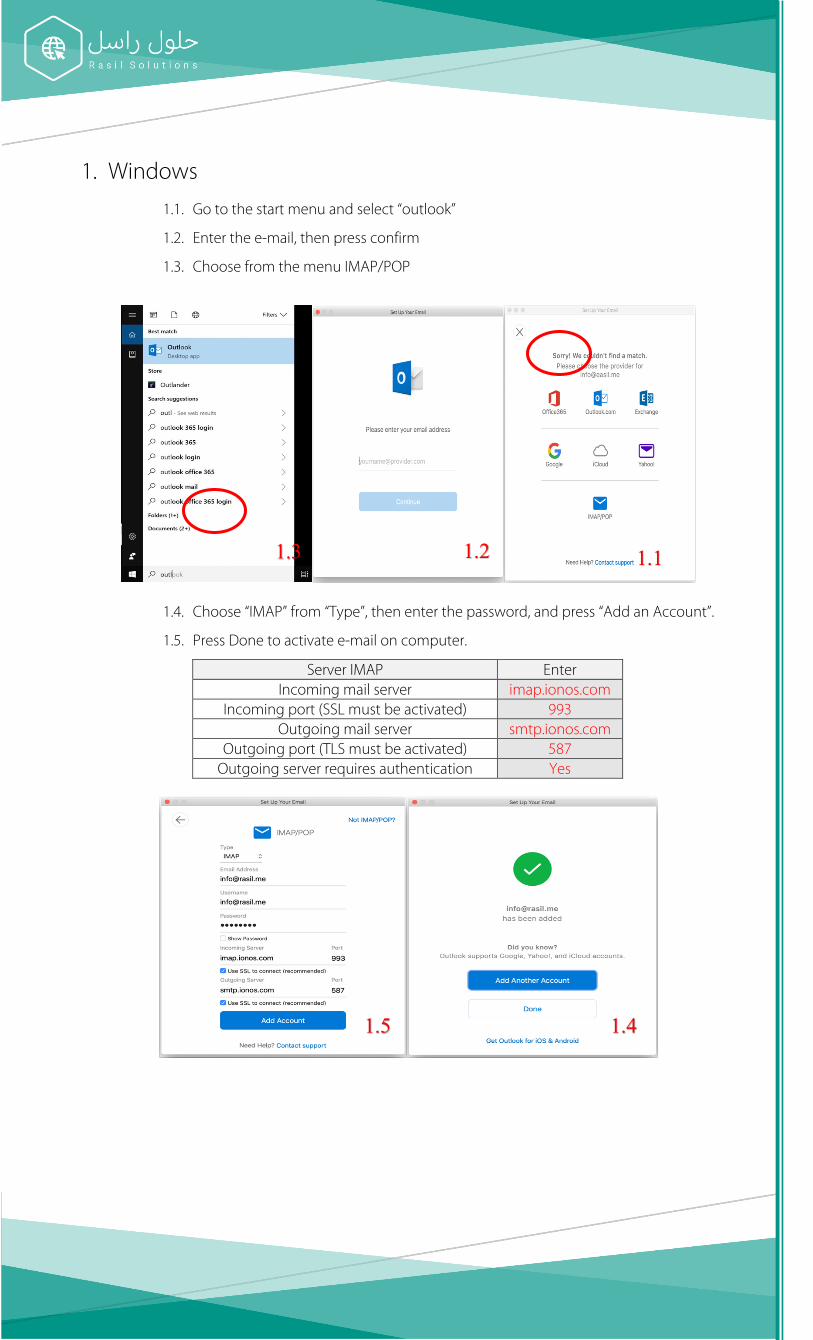
1. Windows 1.1. Go to the start menu and select “outlook”
1.2. Enter the e-mail, then press confirm
1.3. Choose from the menu IMAP/POP
1.4. Choose “IMAP” from “Type”, then enter the password, and press “Add an Account”.
1.5. Press Done to activate e-mail on computer.
Enter Server IMAP imap.ionos.com Incoming mail server
993 Incoming port (SSL must be activated) smtp.ionos.com Outgoing mail server
587 Outgoing port (TLS must be activated) Yes Outgoing server requires authentication
1.4
1.5
1.2 1.1
1.3
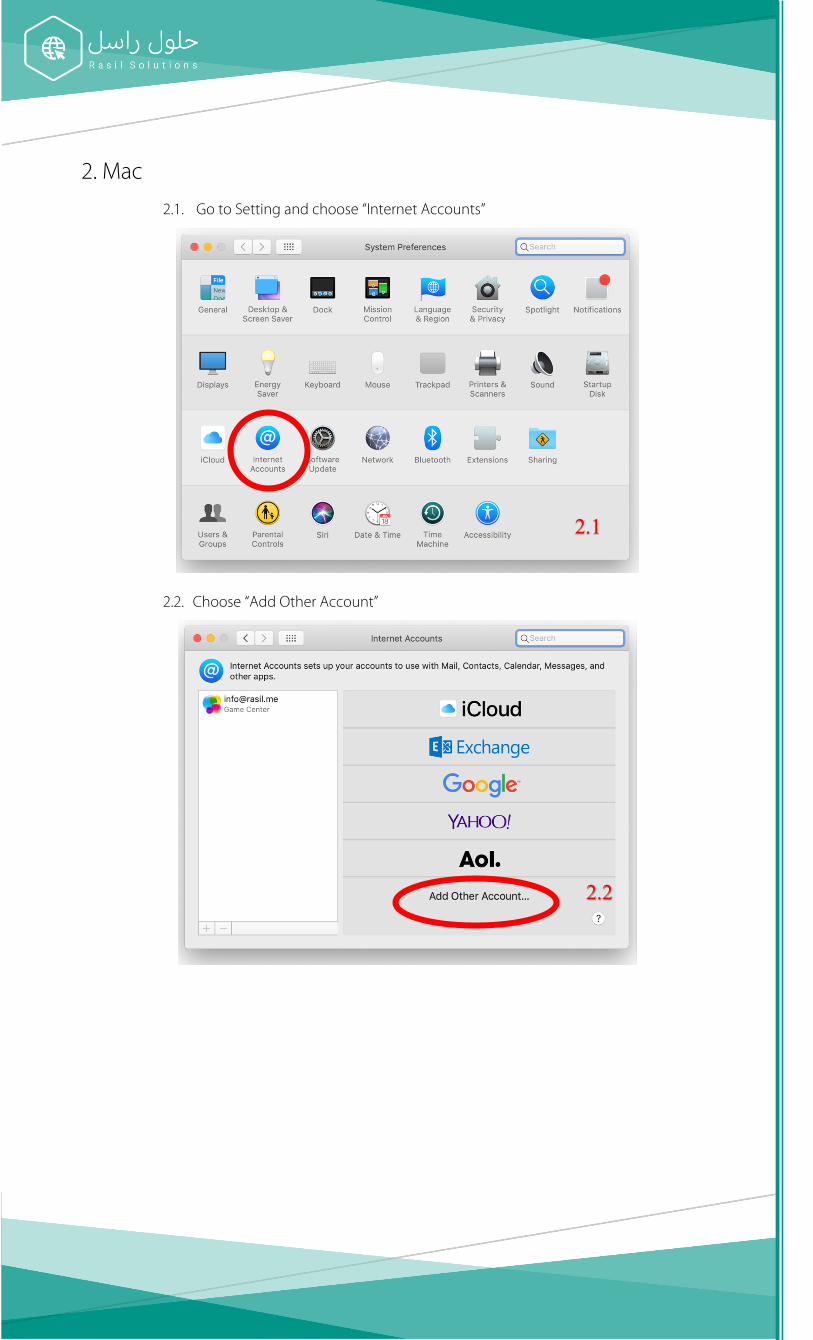
2. Mac 2.1. Go to Setting and choose “Internet Accounts”
2.2. Choose “Add Other Account”
2.1
2.2
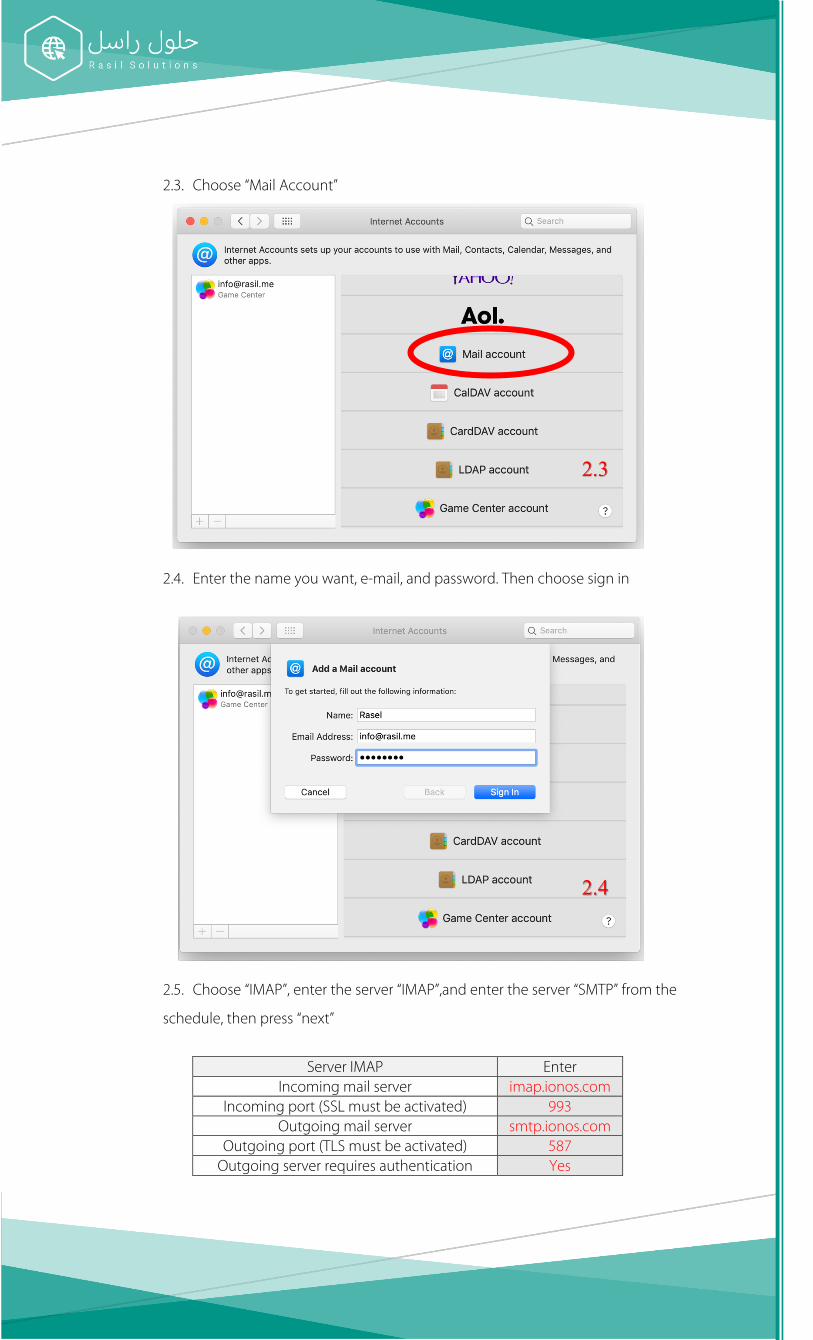
2.3. Choose “Mail Account”
2.4. Enter the name you want, e-mail, and password. Then choose sign in
2.5. Choose “IMAP”, enter the server “IMAP”,and enter the server “SMTP” from the
schedule, then press “next”
Enter Server IMAP
imap.ionos.com Incoming mail server 993 Incoming port (SSL must be activated)
smtp.ionos.com Outgoing mail server 587 Outgoing port (TLS must be activated) Yes Outgoing server requires authentication
2.3
2.4
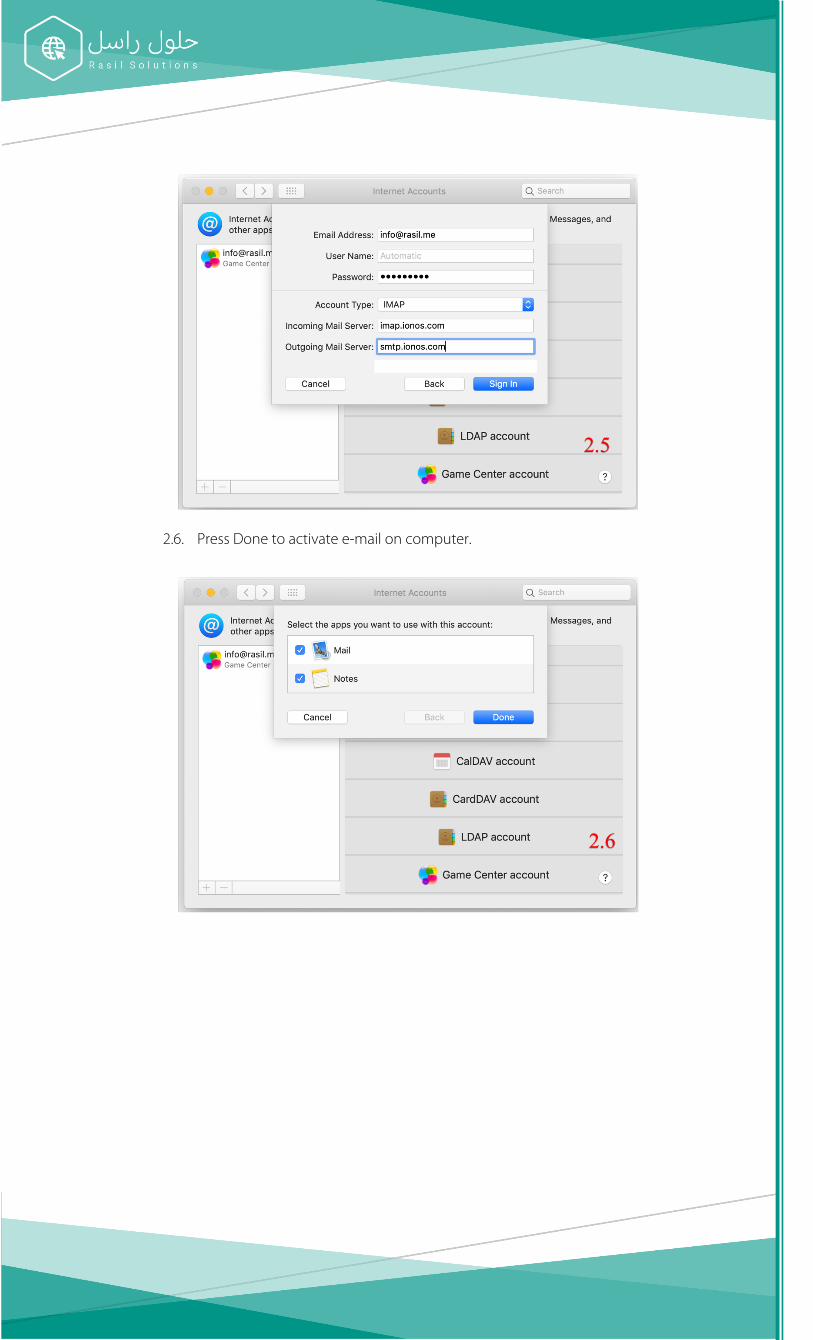
2.6. Press Done to activate e-mail on computer.
2.5
2.6
Mobile email connection Method
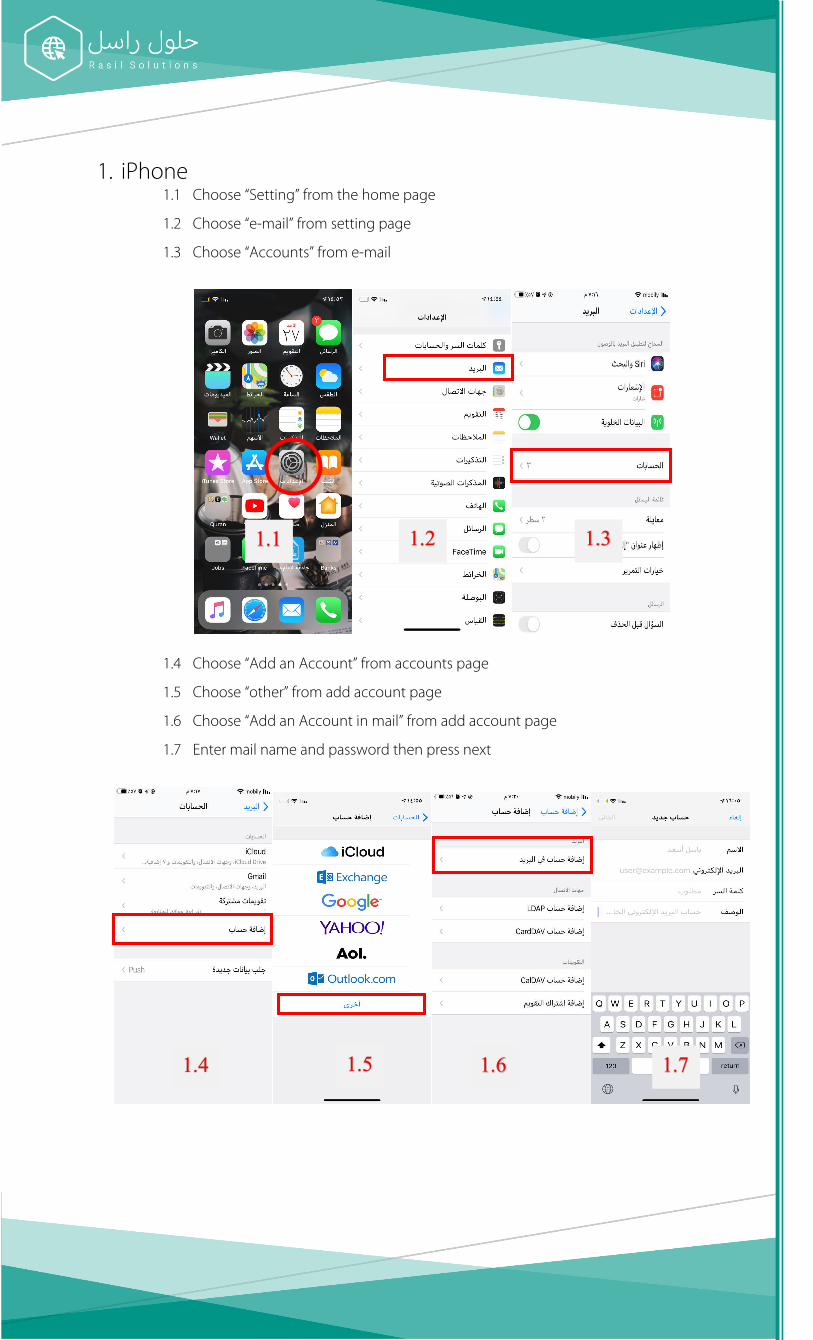
1. iPhone 1.1 Choose “Setting” from the home page
1.2 Choose “e-mail” from setting page
1.3 Choose “Accounts” from e-mail
1.4 Choose “Add an Account” from accounts page
1.5 Choose “other” from add account page
1.6 Choose “Add an Account in mail” from add account page
1.7 Enter mail name and password then press next
1.1 1.2 1.3
1.4 1.5 1.6 1.7
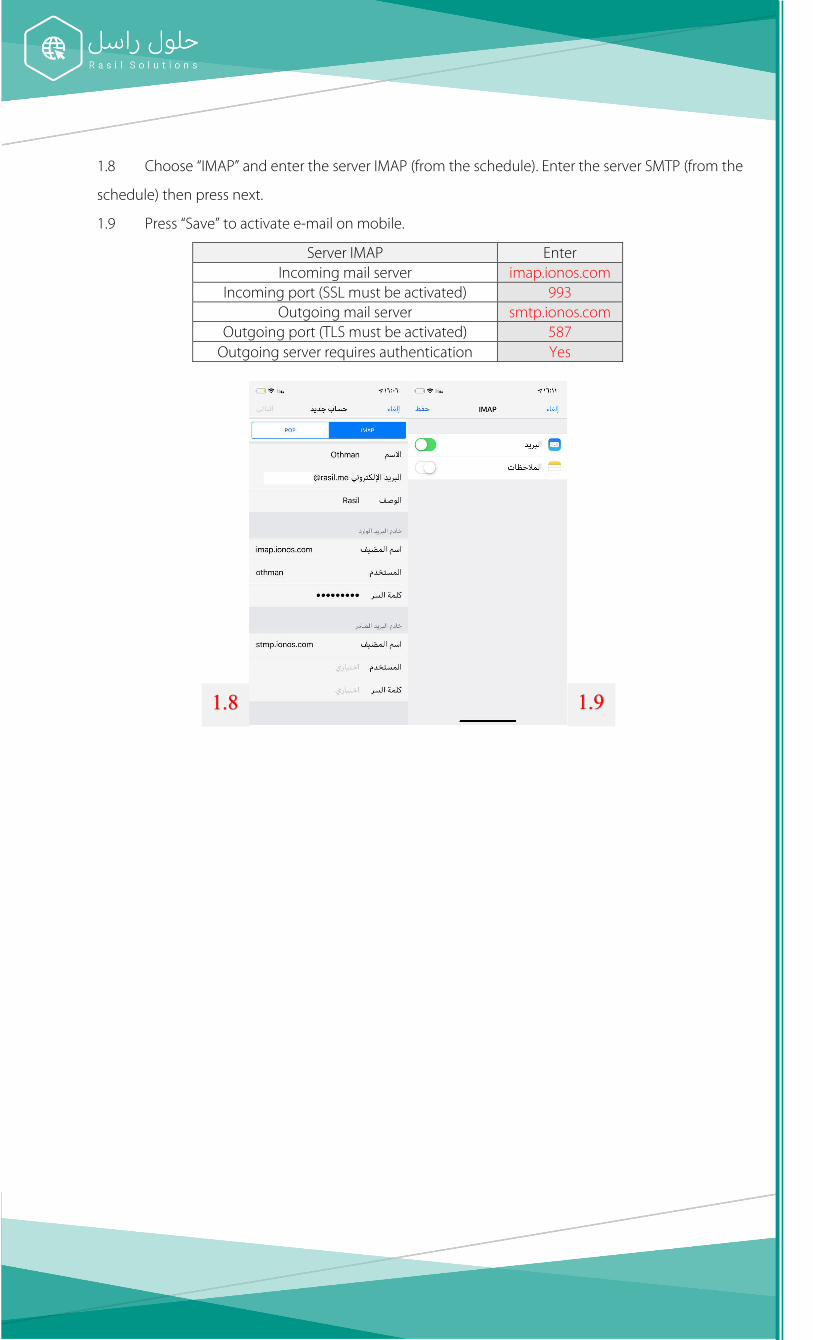
1.8 Choose “IMAP” and enter the server IMAP (from the schedule). Enter the server SMTP (from the
schedule) then press next.
1.9 Press “Save” to activate e-mail on mobile.
Enter Server IMAP imap.ionos.com Incoming mail server
993 Incoming port (SSL must be activated) smtp.ionos.com Outgoing mail server
587 Outgoing port (TLS must be activated) Yes Outgoing server requires authentication
1.8 1.9
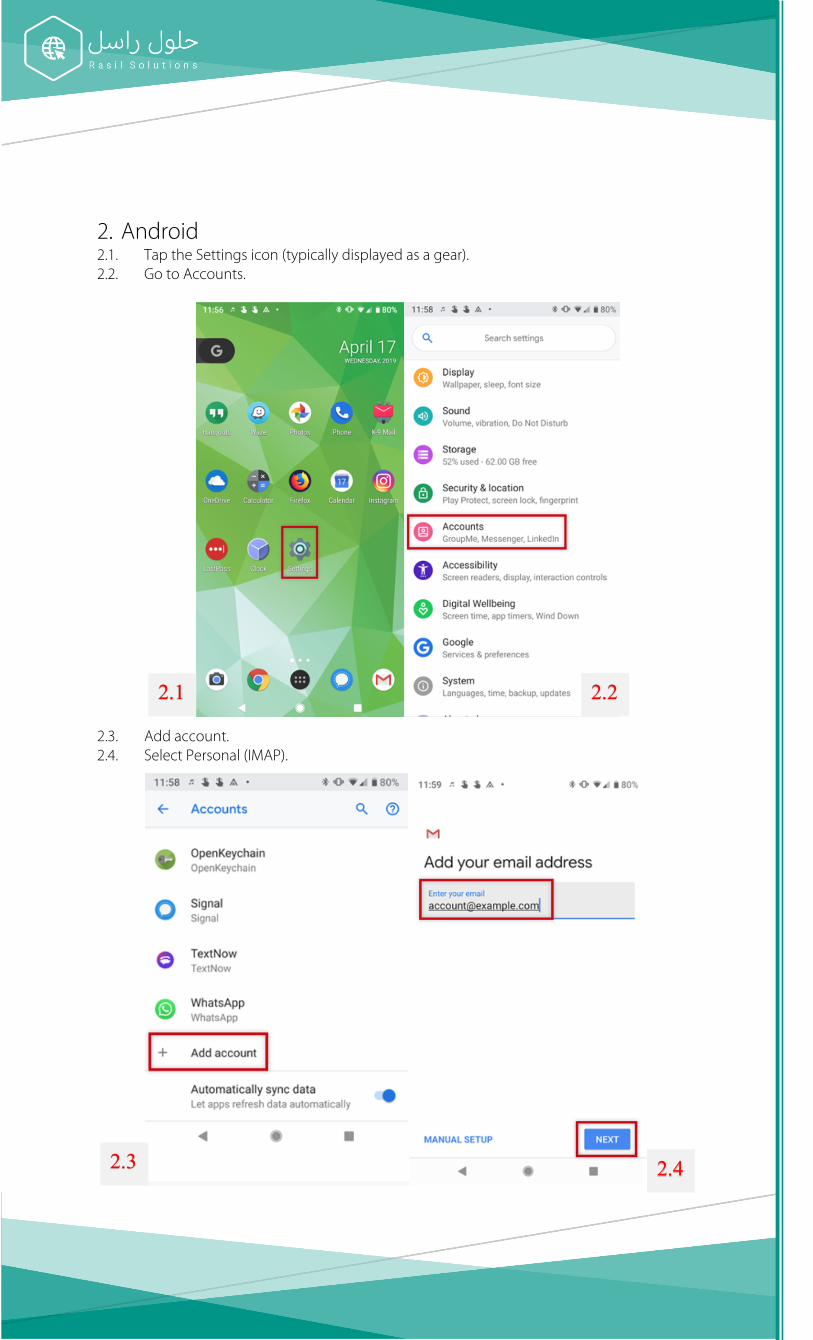
2. Android 2.1. Tap the Settings icon (typically displayed as a gear). 2.2. Go to Accounts.
2.3. Add account. 2.4. Select Personal (IMAP).
2.1 2.2
2.3 2.4
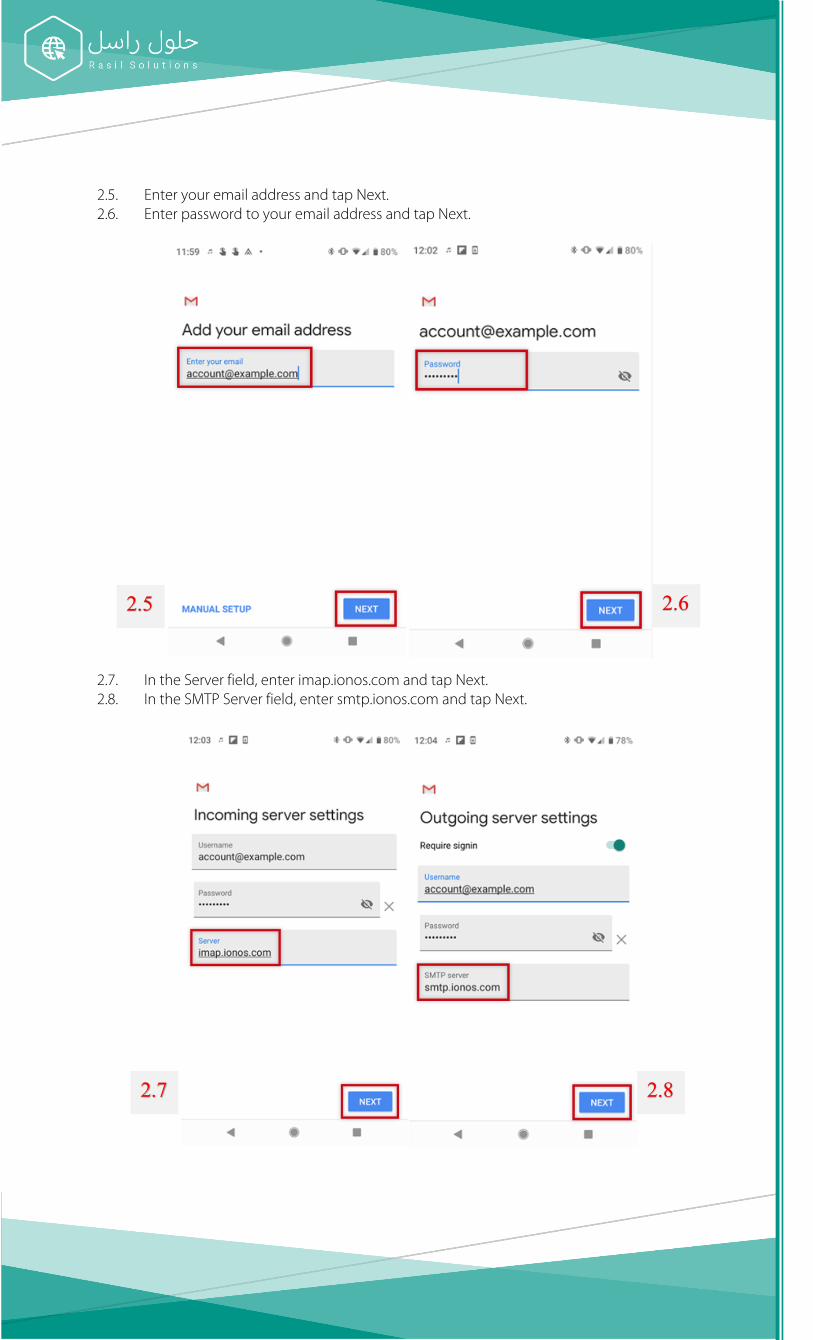
2.5. Enter your email address and tap Next. 2.6. Enter password to your email address and tap Next.
2.7. In the Server field, enter imap.ionos.com and tap Next. 2.8. In the SMTP Server field, enter smtp.ionos.com and tap Next.
2.5 2.6
2.7 2.8
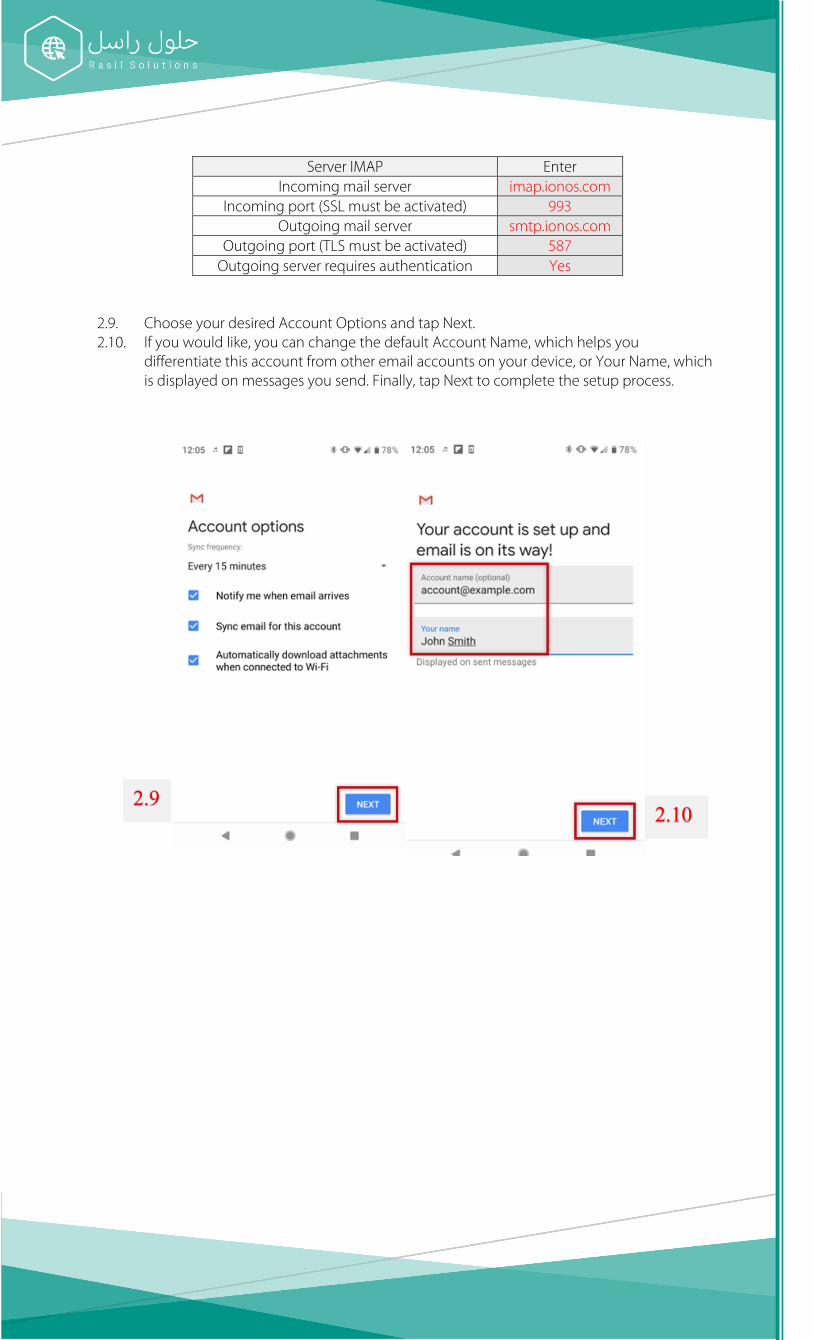
Enter Server IMAP imap.ionos.com Incoming mail server
993 Incoming port (SSL must be activated) smtp.ionos.com Outgoing mail server
587 Outgoing port (TLS must be activated) Yes Outgoing server requires authentication
2.9. Choose your desired Account Options and tap Next. 2.10. If you would like, you can change the default Account Name, which helps you
differentiate this account from other email accounts on your device, or Your Name, which is displayed on messages you send. Finally, tap Next to complete the setup process.
2.9 2.10

Automatic email transfer method
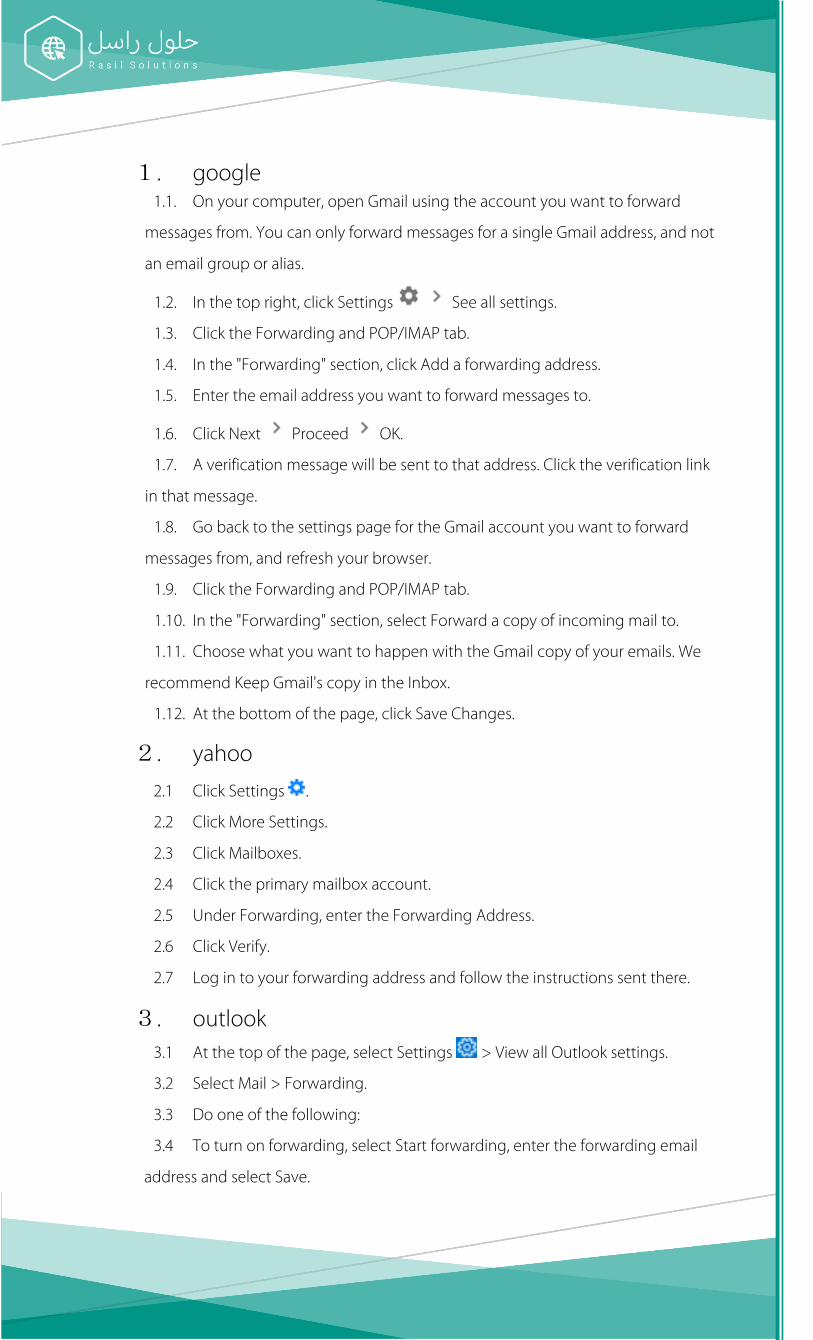
1. google 1.1. On your computer, open Gmail using the account you want to forward
messages from. You can only forward messages for a single Gmail address, and not
an email group or alias.
1.2. In the top right, click Settings See all settings.
1.3. Click the Forwarding and POP/IMAP tab.
1.4. In the "Forwarding" section, click Add a forwarding address.
1.5. Enter the email address you want to forward messages to.
1.6. Click Next Proceed OK.
1.7. A verification message will be sent to that address. Click the verification link
in that message.
1.8. Go back to the settings page for the Gmail account you want to forward
messages from, and refresh your browser.
1.9. Click the Forwarding and POP/IMAP tab.
1.10. In the "Forwarding" section, select Forward a copy of incoming mail to.
1.11. Choose what you want to happen with the Gmail copy of your emails. We
recommend Keep Gmail's copy in the Inbox.
1.12. At the bottom of the page, click Save Changes.
2. yahoo
2.1 Click Settings .
2.2 Click More Settings.
2.3 Click Mailboxes.
2.4 Click the primary mailbox account.
2.5 Under Forwarding, enter the Forwarding Address.
2.6 Click Verify.
2.7 Log in to your forwarding address and follow the instructions sent there.
3. outlook 3.1 At the top of the page, select Settings > View all Outlook settings.
3.2 Select Mail > Forwarding.
3.3 Do one of the following:
3.4 To turn on forwarding, select Start forwarding, enter the forwarding email
address and select Save.