Development of a CAN-FD Sniffer using Python - UPCommons
62
-
Upload
khangminh22 -
Category
Documents
-
view
1 -
download
0
Transcript of Development of a CAN-FD Sniffer using Python - UPCommons


D E V E L O P M E N T O F A C A N - F D S N I F F E R U S I N GP Y T H O N
joaquín cortés fuentes
Master’s degree in Industrial EngineeringElectronic Engineering
Universitat Politècnica de CatalunyaEscola Tècnica Superior d’Enginyeria Industrial de Barcelona
(ETSEIB)
June 2019

Abstract
Today, the CAN-FD protocol is taking over classical CAN, as it allows afaster transfer speed, and as technology is being developed, more and moreinformation is needed to be sent and processed between several devices con-nected all together in order to perform. In this project, a CAN-FD sniffer1
software has been developed in Python language, in order to be able tocommunicate through a CAN-FD network, using a CAN-FD controller andtransceiver, a SPI interface, and a FTDI-USB cable to connect this device to aPC.
A Python library has been written in order to implement the communica-tion of the PC and the CAN-FD. Currently, there are already libraries to dothis functionality in other languages (such as C and C++), but Python waschosen because this language is lacking this kind of libraries that supportCAN-FD (there are CAN libraries, but very few have CAN-FD support, andmost of them have limited support), and it is being more used every day indata analysis and machine learning tasks, so it is very important to be ableto capture all possible information about several devices in order to gatherdata and perform analysis.
Finally, a GUI is implemented, in order to have a basic layout for usingthe library functions and perform simple tests so as to verify the library.
1 A sniffer is a device (usually a software program, but can be also a combination of softwareand hardware) that is able to capture all the traffic between other devices connected to anetwork with a shared media. It is usually used in network tests and analysis, but also formalicious ends, such as personal data spying.

ContentsList of Figures iiiList of Tables ivListings vGlossary vi1 objectives 1
2 overview of concepts 2
2.1 CAN-FD . . . . . . . . . . . . . . . . . . . . . . . . . . . . . . . . 2
2.2 SPI protocol . . . . . . . . . . . . . . . . . . . . . . . . . . . . . . 5
3 description of hardware 7
3.1 MCP2157FD . . . . . . . . . . . . . . . . . . . . . . . . . . . . . . 7
3.2 MPSSE . . . . . . . . . . . . . . . . . . . . . . . . . . . . . . . . . 9
4 description of the proposed software and state of the
art 11
4.1 Other libraries . . . . . . . . . . . . . . . . . . . . . . . . . . . . . 11
4.1.1 python-can . . . . . . . . . . . . . . . . . . . . . . . . . . . 11
4.1.2 Microchip API . . . . . . . . . . . . . . . . . . . . . . . . 12
4.2 Minimal functionalities . . . . . . . . . . . . . . . . . . . . . . . . 13
5 development of the library 14
5.1 Initial configurations . . . . . . . . . . . . . . . . . . . . . . . . . 14
5.2 MPSSE . . . . . . . . . . . . . . . . . . . . . . . . . . . . . . . . . 14
5.3 Adafruit library . . . . . . . . . . . . . . . . . . . . . . . . . . . . 15
5.4 Microchip API . . . . . . . . . . . . . . . . . . . . . . . . . . . . . 18
5.4.1 Constants . . . . . . . . . . . . . . . . . . . . . . . . . . . 18
5.4.2 Registers . . . . . . . . . . . . . . . . . . . . . . . . . . . . 18
5.4.3 CAN-FD functions . . . . . . . . . . . . . . . . . . . . . . 19
5.4.4 Main . . . . . . . . . . . . . . . . . . . . . . . . . . . . . . 20
5.5 Python library: canfdlib . . . . . . . . . . . . . . . . . . . . . . . . 22
5.5.1 canfdlib: Registers . . . . . . . . . . . . . . . . . . . . . . . 22
5.5.2 canfdlib: CAN-FD functions . . . . . . . . . . . . . . . . . 24
5.5.3 canfdlib: Main tasks . . . . . . . . . . . . . . . . . . . . . . 26
5.5.4 GUI . . . . . . . . . . . . . . . . . . . . . . . . . . . . . . . 28
6 tests 33
6.1 SPI read . . . . . . . . . . . . . . . . . . . . . . . . . . . . . . . . 33
6.2 SPI write . . . . . . . . . . . . . . . . . . . . . . . . . . . . . . . . 33
6.3 canfdlib read . . . . . . . . . . . . . . . . . . . . . . . . . . . . . . 35
6.4 canfdlib write . . . . . . . . . . . . . . . . . . . . . . . . . . . . . . 36
6.5 RAM test . . . . . . . . . . . . . . . . . . . . . . . . . . . . . . . . 37
6.6 Register test . . . . . . . . . . . . . . . . . . . . . . . . . . . . . . 37
6.7 Operation mode test . . . . . . . . . . . . . . . . . . . . . . . . . 38
6.8 Tx-Rx tests . . . . . . . . . . . . . . . . . . . . . . . . . . . . . . . 39
6.8.1 Test 1: Tx . . . . . . . . . . . . . . . . . . . . . . . . . . . . 39
6.8.2 Test 2: Tx with different DLC . . . . . . . . . . . . . . . . 40
6.8.3 Test 3: Rx . . . . . . . . . . . . . . . . . . . . . . . . . . . . 41
i

6.8.4 Test 4: Rx with different DLC and ID . . . . . . . . . . . 43
6.8.5 Test 5: Rx with random data . . . . . . . . . . . . . . . . 44
6.9 GUI test . . . . . . . . . . . . . . . . . . . . . . . . . . . . . . . . 45
7 future work 47
8 temporal schedule 48
9 budget and costs 49
10 environmental impact 50
11 conclusions 51
12 bibliography 52
ii

List of Figures
Figure 1 CAN data frame. Source: [1]. . . . . . . . . . . . . . . . 2
Figure 2 Extended CAN data frame. Source: [2] . . . . . . . . . . 3
Figure 3 CAN vs CAN-FD. Source: [3]. . . . . . . . . . . . . . . . 4
Figure 4 SPI interface with a master device and three slaves.Source: [4]. . . . . . . . . . . . . . . . . . . . . . . . . . . 5
Figure 5 The four different configurations of the SPI. Source: [5]. 6
Figure 6 Memory map of the MCP2517FD. Source: [6]. . . . . . 8
Figure 7 MCP2517FD Click. Source: own. . . . . . . . . . . . . . 9
Figure 8 MPSSE signals and terminations. Source: [7]. . . . . . . 10
Figure 9 USB Vendor ID and Product ID values from the man-ual. Source: [7]. . . . . . . . . . . . . . . . . . . . . . . . 15
Figure 10 USB Vendor ID and Product ID values read from soft-ware (among others). Source: own. . . . . . . . . . . . . 15
Figure 11 Instruction Cycle for the MCP2517FD. Source: [6]. . . . 16
Figure 12 OSC register values after reset from the manual. Source:[6]. . . . . . . . . . . . . . . . . . . . . . . . . . . . . . . . 17
Figure 13 State machine of the main function in the API. Source:own. . . . . . . . . . . . . . . . . . . . . . . . . . . . . . . 20
Figure 14 State machine of the main function in the canfdlib li-brary. Source: own. . . . . . . . . . . . . . . . . . . . . . 28
Figure 15 Template of the GUI. Source: own. . . . . . . . . . . . . 29
Figure 16 GUI. Source: own. . . . . . . . . . . . . . . . . . . . . . . 32
Figure 17 Devices used in testing. Source: own. . . . . . . . . . . 39
Figure 18 Oscilloscope signal for test 1. Source: own. . . . . . . . 40
Figure 19 Data received for test 1. Source: own. . . . . . . . . . . 40
Figure 20 Oscilloscope signal for test 2. Source: own. . . . . . . . 41
Figure 21 Data received for test 2. Source: own. . . . . . . . . . . 41
Figure 22 Data sent for test 3. Source: own. . . . . . . . . . . . . . 42
Figure 23 Oscilloscope signal for test 3. Source: own. . . . . . . . 42
Figure 24 Data sent for test 4. Source: own. . . . . . . . . . . . . . 43
Figure 25 Oscilloscope signal for test 4. Source: own. . . . . . . . 43
Figure 26 Part of the data sent for test 5. Source: own. . . . . . . . 44
Figure 27 The device is manually connected. Source: own. . . . . 46
Figure 28 DLC is set to a different value. Source: own. . . . . . . 46
Figure 29 Mode is set to External Loopback. Source: own. . . . . 46
Figure 30 Message is transmitted and received After reset, nomessage is received. Source: own. . . . . . . . . . . . . . 46
Figure 31 Gantt diagram. Source: own. . . . . . . . . . . . . . . . . 48
Figure 32 Frame duration of CAN and some configurations ofCAN-FD. Source: [8] . . . . . . . . . . . . . . . . . . . . 50
iii

List of Tables
Table 1 CAN data frame fields. Source: [1]. . . . . . . . . . . . . 3
Table 2 Corresponce of DLC bits between CAN and CAN-FDprotocols. Source: [3]. . . . . . . . . . . . . . . . . . . . . 4
Table 3 MPSSE connections. Source: own. . . . . . . . . . . . . . 10
Table 4 Mode values. Source: [6] . . . . . . . . . . . . . . . . . . 38
Table 5 Costs. Source: own. . . . . . . . . . . . . . . . . . . . . . 49
iv

Listings
Listing 1 SPI Python example. . . . . . . . . . . . . . . . . . . . . 15
Listing 2 SPI Python example with modified ft library. . . . . . . 16
Listing 3 Register definition. . . . . . . . . . . . . . . . . . . . . . 18
Listing 4 Tx object (representation of the frame) initialization. . . 22
Listing 5 Time test performed. Result is in seconds. . . . . . . . . 23
Listing 6 init method of canfdlib . . . . . . . . . . . . . . . . . . . 25
Listing 7 init method of the GUI . . . . . . . . . . . . . . . . . . . 29
Listing 8 SPI write test . . . . . . . . . . . . . . . . . . . . . . . . . 33
Listing 9 canfdlib read test. . . . . . . . . . . . . . . . . . . . . . . 35
Listing 10 canfdlib write test. . . . . . . . . . . . . . . . . . . . . . . 36
Listing 11 RAM test . . . . . . . . . . . . . . . . . . . . . . . . . . . 37
Listing 12 Register test . . . . . . . . . . . . . . . . . . . . . . . . . 37
Listing 13 Operation mode test . . . . . . . . . . . . . . . . . . . . 38
Listing 14 Test 1 . . . . . . . . . . . . . . . . . . . . . . . . . . . . . 40
Listing 15 Test 2 . . . . . . . . . . . . . . . . . . . . . . . . . . . . . 41
Listing 16 Test 3 . . . . . . . . . . . . . . . . . . . . . . . . . . . . . 42
Listing 17 Test 4. . . . . . . . . . . . . . . . . . . . . . . . . . . . . . 43
Listing 18 Test 5. . . . . . . . . . . . . . . . . . . . . . . . . . . . . . 44
v

Glossary
.c, .h C file extensions.
.py Python file extension.
API Application Programming Interface.
bin Binary.
CAN Controller Area Network.CAN-FD CAN with Flexible Data-Rate.CLK Clock signal.CS, nCS Chip Select signal.
FIFO First In First Out stack.
GND Ground.GPIO General Purpose Input-Output.GUI Graphical User Interface.
hex Hexadecimal.
I2C Inter-Integrated Circuit.
JTAG Joint Test Action Group.
LSB Least Significant Bit.
MB MegaByte.MB MegaBit.MISO, SDI Master Input Slave Output.MOSI, SDO Master Output Slave Input.MPSEE Multi-Protocol Synchronous Serial Engine.MSB Most Significant Bit.
OS Operating System.
R/W Read/Write.RAM Random Access Memory.Rx Reception.
SPI Serial Peripheral Interface.
Tx Transmission.
VCC Input voltage.
vi

1 Objectives
This Project was proposed by the Department of Electronic Engineering inorder to develop the required software for the MCP2157FD CAN-FD receiverand transmitter to work in a PC with Windows, using the Python program-ming language. This language has been chosen as, for today, no public li-brary available for Python was found to control this device (and there arevery few libraries to work with a CAN-FD frame). The increasing use ofPython, particularly in fields such as Data Analysis and Machine Learning,makes the necessity of being capable of gathering data from many sources,with can be working with different communication protocols, and as theCAN-FD protocol is also increasing in the industry (specially in the automo-tive sector), this kind of library is also needed in order to make possible thedata collection and work with it in later analysis in the easier way possible.
In this project, a base library software will be developed, so it can beimplemented in later applications. Also, a GUI interface application will bedeveloped in order to test the base library and to have a basic graphicalsoftware that is capable of transmitting and reading messages from a CAN-FD device. External libraries will be used, as well as the necessary driversand hardware to connect the MCP2157FD to a USB port. The objectives are,in this case:
• Develop a Python library to make possible the communication of thePC with the MCP2157FD device, using SPI protocol.
• Extend this library to be capable of reading and writing data to thedevice.
• Develop this software using as few external libraries as possible, so itcan be more portable.
• Develop a Graphical User Interface (GUI) to test the library and tohave a basic application for reading and writing messages in a CAN-FD frame.
1

2 Overview of concepts
In this chapter, some general concepts present in the project will be ex-plained in order to understand the following chapters and the developmentof the software. Knowledge in digital electronics and programming is re-quired to understand the explained concepts.
2.1 CAN-FD
CAN-FD protocol is a communication protocol conceived in 2012 by Boschin order to have a superior version of the CAN protocol, able to transmit asmuch as eight times faster, as described in [9]. Before discussing the detailsof the CAN-FD protocol and its improvements, the CAN protocol should beexplained before.
The CAN protocol is a communication protocol designed in the mid-80sand widely used in the industry since the 90s, particularly in the automotivesector. It allows to communicate several processing units (microcontrollers,sensors and actuators) without the need of a host computer, as describedin [10]. The main characteristic of this protocol is how the data is transmit-ted across devices, with data packets (frames) containing information of themessage (such as identication, length of message, etc.) and the actual data tobe transmitted, between 0 and 8 bytes. It has a maximum speed of 1 Mb/s.Figure 1 details how a data frame is constructed. Here, the fields of the stan-dard base format of the frame can be seen, and in Table 1, the detail of eachone is described.
Figure 1: CAN data frame. Source: [1].
The most important fields are the identifier (which identifies the priority ofthe message) and the data field (which contains the actual data being trans-mitted). All the other fields perform auxiliary functions in order to properlytransmit the message.
In addition to this standard frame, there is also the extended frame, whichallows to have a 29-bit identifier, as well as two reserved bits. This extendedfields are shown in Figure 2.
2

2.1 can-fd 3
Field name Length (bits) Purpose
Start-of-frame 1 Denotes the start of frame transmission
Identifier 11 A (unique) identifier which also represents the message priority
Remote transmission request (RTR) 1 0 for data frames and 1 for remote request frames
Identifier extension bit (IDE) 1 0 for base frame format with 11-bit identifiers
Reserved bit (r0) 1 Reserved bit. Must be 0, but accepted as either 0 or 1.
Data length code (DLC) 4 Number of bytes of data (0–8 bytes)
Data field 0-64 Reserved bit. Data to be transmitted (length in bytes dictated by DLC field)
CRC 15 Cyclic redundancy check. Used to detect errors in the data transmission
CRC delimiter 1 Must be 1
ACK slot 1 . Transmitter sends 1 and any receiver can assert a 0
ACK delimiter 1 . Must be 1
End-of-frame 7 Must be 1
Table 1: CAN data frame fields. Source: [1].
Figure 2: Extended CAN data frame. Source: [2]
As it can be seen, it has a 11-bit base identifier, followed by the SDR (Sub-stitute remote request) bit, which must be always 1, the IDE bit, an extendedidentifier (of 18 bits), the RTR field, and an extra reserved bit. The main ad-vantaged of this extended frame is being able to have a larger identifier, aswell as having more reserved bits for future updates or additional features.
The ISO 11898 specification [10] has all of the details in architecture of thenetwork, as well as electrical specifications, and will not be discussed here.
The main disadvantage of the CAN protocol is the maximum size of thethe packets (8 bytes), as well as the speed of transmissions (1 Mb/s). TheCAN-FD protocol does not have these limitations, as it allow speeds as highas 5 Mb/s and data messages of 64 bytes, as described in [11]. As it is anupdated version of the CAN protocol, it inherits many of its characteristics,and the modifications needed to change a CAN network to a CAN-FD oneare minimal. In Figure 3, the CAN-FD data frame is shown in comparisonto the standard (non-extended) CAN frame.

2.1 can-fd 4
Figure 3: CAN vs CAN-FD. Source: [3].
The main differences between the protocols are:
• The following fields are added to the data frame:
– RRS (Remote Request Substitution): The CAN-FD does not allowfor remote frames, and the bit is substituted with this one.
– FDF (FD Format): Denotes that the frame is of CAN-FD type. Instandard CAN, this bit is always 0, whereas in CAN-FD, is 1.
– res: reserved bit. It has the same function as the CAN r0.
– BRS (Bit Rate Switch): Indicates if the transmission speed is setat the arbitration rate (of maximum 1 Mb/s) if set to 0, or if thetransfer speed is higher (up to 10 Mb/s) if set to 1.
– ESI (Error Status Indicator): Indicates that there is a failure in thesystem if set to 1.
– STC (Stuff Bit Content): It consists of three bit in Gray code and aparity bit. It helps to improve the reliability of the communication.
• The DLC field has the same 4 bits as in the CAN frame, but also allowsto use up to 64 bytes, having consistency with the standard CAN frameup to 8 bytes. The Table 2 shows how both protocols use the DLC fieldconsistently.
• The CRC field is expanded from 15 bits to 17 bits (if the data transmit-ted is between 0 and 16 bytes), or to 21 bits (if the number of data bytesis higher).
DLC (bin) 0000 0001 0010 0011 0100 0101 0110 0111 1000 1001 1010 1011 1100 1101 1110 1111
DLC (dec) 0 1 2 3 4 5 6 7 8 9 10 11 12 13 14 15
Classic CAN 0 1 2 3 4 5 6 7 8 8 8 8 8 8 8 8
CAN FD 0 1 2 3 4 5 6 7 8 12 16 20 24 32 48 64
Table 2: Corresponce of DLC bits between CAN and CAN-FD protocols. Source: [3].
The CAN-FD protocol has more bits than the classic CAN, so it may seemthat it can not transfer as many frames as the standard CAN per unit of time.This is in fact true if the speed is set to the arbitration rate and the data sentis of the same size (maximum 8 bytes), but the CAN-FD allows for highertransmission speed using the BRS bit, so the actual data bytes can be sent orreceived in less amount of time.

2.2 spi protocol 5
Also, due to the greater length of the data bytes, as much as 8 times moredata can be transmitted in a similar amount of time.
The CAN-FD protocol is actually used in the ECU systems in electricalvehicles and advanced driving systems [12], robotics [13], and has improvedsecurity [14].
2.2 SPI protocol
The SPI (Serial Peripheral Interface) protocol is a synchronous serial commu-nication interface used in short distance communication (typically between10 and 100 meters). The interface was developed by Motorola in the 80sand is widely used in today industry. One of its main characteristics is themaster-slave architecture, where the master device reads data from the slavesand writes to them. It allows full-duplex communication2. It has a four-wireserial bus with the following signals:
• SCLK (Serial Clock, also called SCK): it synchronizes the transmissionof data between the devices. This makes the interface a synchronousone.
• MOSI (Master Output Slave Input, also called SDO): it is the data out-put of the master device.
• MISO (Master Input Slave Output, also called SDI): data input of themaster device.
• SS (Slave Select, also called CS): it allows the master device to selectbetween slave devices to communicate.
Figure 4 shows a typical bus between devices. As it can be seen, whenthere is more than one slave, the master device needs additional SS channels.Some devices allow to have daisy chain connections between devices, orallow to multiplex the signal in time or frequency
Figure 4: SPI interface with a master device and three slaves. Source: [4].
2 Full-duplex communication is the capacity to transmit data while simultaneously readingfrom the same device.

2.2 spi protocol 6
The SPI has four different modes, each one being a combination on the dif-ferent values of the CPOL and CPHA, which determine the polarity of theclock and the timing of the data bits relative to the clock pulses. This con-figurations allow more flexibility between devices communicating. Figure 5
showcases the different configurations.
Figure 5: The four different configurations of the SPI. Source: [5].
The main advantages of the SPI protocol are the arbitrary size of messagesand simple hardware interfacing. In the other hand, it only supports onemaster device (although certain hardware implementations may allow tohave more than one master) and there is no defined protocol to check errors.

3 Description of Hardware
In this section, the hardware used in the project will be discussed. Details ofeach device and its technical implementations will not be discussed in theproject, only its main aspects and characteristics.
3.1 MCP2157FD
The MCP2157FD chip is a CAN FD controller, designed by Microchip, witha SPI interface. It allows for communication with both CAN and CAN-FDnetworks. Its main characteristics are:
• Conforms to ISO11898-1:2015.
• Supports both CAN 2.0 and CAN FD.
• Arbitration Bit Rate up to 1 Mb/s.
• Data Bit Rate up to 8 Mb/s3.
• Up to 20 MHz SPI Clock Speed.
• VDD: 2.7 V-5.5 V.
• 2 kB RAM.
• Three interrupt pins.
• Up to 40 MHz internal clock.
• 20 MHz of SPI clock.
• Supports SPI modes 0 and 1.
• GPIO pins.
• 31 FIFOs for transmit and receiving of messages.
In Figure 6, the memory map of the controller is seen. A more detailedview of the memory map and the internal registers functions can be seen in[6].
3 Theoretical. In practice, it goes up to ≈ 5.5 Mb/s
7

3.1 mcp2157fd 8
Figure 6: Memory map of the MCP2517FD. Source: [6].
In this project, the MCP2517FD CLICK device is used, which combinesthis controller chip with a ATA6563 high speed CAN transceiver (also fromMicrochip) and a standard DB9 pin male connector. This device needs both5 V supply and 3.3 V. The MPSSE cable can supply 3.3 V, and an extra USBcable is used to power the 5 V needed (with no data transmission, only aspower supply).
The ATA6563 is a CAN transceiver that interfaces between a CAN con-troller and the physical CAN bus. It allows for 5 Mb/s speed. It is integratedin the MCP2517FD CLICK device, and together with the MCP2517FD, it al-lows for transmittion and reception of messages from a physical CAN net-work, using the DB9 connector.
In Figure 7 the device is shown. The two main chips are seen, along withthe DB9 connector and pin connections to the MCP2517FD

3.2 mpsse 9
Figure 7: MCP2517FD Click. Source: own.
3.2 MPSSE
The MPSEE (Multi-Protocol Synchronous Serial Engine) cable, developedby FTDI, allows for communication between a USB port and several com-munication interfaces, such as SPI, JTAG and I2C. It contains the FT232Hchip, which handles all the USB communications and protocols, allowingto connect devices with several synchronous communication protocols to acomputer or any other device with USB ports. The cable has at one end tenwires to be interfaced to a male header in the device of interest.
The main features of the cables are the following:
• USB protocol handled on the chip.
• USB powered.
• Data speed up to 30 Mb/s.
• 1 kB receive and transmit buffers.
In this project, the cable is used to interface the CAN-FD controller with aPC, using SPI communication. Figure 8 shows the cables on the device andhow they relate to the signals on the device.

3.2 mpsse 10
Figure 8: MPSSE signals and terminations. Source: [7].
Table 3 shows the description of the signals used in the SPI interface, andthe relation between the device signals and the connections between theMCP2517FD pins. The MPSSE cable acts as the Master device in the SPIinterface, and the MCP2517FD as the Slave.
Color Pin Number Name MCP2517FD pin MCP2517FD name Description
Red 1 VCC +3.3V 7 Power supply output to target
Black 10 GND 8 GND Device ground
Orange 2 SK 4 SCK Serial Clock
Yellow 3 DO 6 MOSI Serial Data Output (for Master device)
Green 4 DI 5 MISO Serial Data Input (for Master device)
Brown 5 CS 3 CS Serial Chip Select
Table 3: MPSSE connections. Source: own.
The MPSSE cable incorporates the FT232H chip, which allows for USB-SPIconnnection.

4 Description of the proposedsoftware and state of the art
4.1 Other libraries
Before explaining the proposed software developed in this project, the stateof the art in CAN-FD libraries will be discussed. As the CAN-FD technologyis relatively new (as 2019, it has been around 7 years), there is not a largenumber of available libraries. There is a popular Python library for CANcommunication frame, the python-can library [15], which is easily availablein Python environments with its pip package-management system . It hassupport for different device interfaces, and its main functionalities will bediscussed in this section.
There is also an API to use with the controller proposed in this project,but it uses a library developed by Microchip written in C, and it is designedto be used with a Teensy 3.2 board4. This library will be also discussed, andit will be the starting point for developing the library for this project, as itincorporates the basic functions for using the controller.
4.1.1 python-can
This library allows to establish communication between a CAN controllerand any kind of device capable of running Python. It has the architectureto allow for communication in a CAN frame, and has support for severaldevices and interfaces. In order to do this, it does an abstraction task inthe operations performed in the CAN communication so it can read andtransmit messages and all the necessary data in a CAN network.
This library has several available interfaces for different hardware devices,but only some of them support CAN-FD frames, which are the following:
• SocketCAN: This package is designed for implementation of CANcommunication between devices in a Linux environment and imple-ments the CAN device drivers as network interfaces.
• Kvaser’s CANLIB: This interface allows for communication with a de-vice of the Kvaser family.
• NEOVI Interface: This part of the library allows to communicate a de-vice of the Intrepid Control Systems family.
• Vector: This part of the package allows for communication with devicesof the Vector family.
4 The Teensy board is a embedded system for fast development that incorporates a 32-bit ARMCortex processor.
11

4.1 other libraries 12
As it can be seen, none of the available interfaces of this library have sup-port for the device used in this project (the Microchip MCP2517FD) in aWindows OS. Additional interfaces can be added via plugins, but the pro-cess is complex and documentation of the process has not been found for aWindows machine and this specific device. Moreover, this project uses an in-termediate device to communicate the CAN-FD controller and the USB portof the computer via SPI communication, and this library does not allow thiskind of interface directly, and to do so, modifications of the library shouldbe made, which is out of the scope of this project.
4.1.2 Microchip API
This API is developed to use the MCP2517FD device with the Teensy board.It has all the necessary packages to use the functionalities of the controller,as well as SPI communication and all the needed configurations, and a mainfunction for demonstration purposes, which has the needed configurationsfor initializing the device, configuring the transmit and receiving FIFOs,transmittion and reception of messages with the FIFO and the interrupt pin(R/W of individual bytes, 32-bit words, byte arrays and word arrays, usingCRC or not), and testing the RAM and registers read and write capabilities.
This library has all the needed capabilities for this project for using thecontroller. However, it has two main drawbacks:
• It is developed to be used with a Teensy board, which uses an specificprocessor, with its own instructions and interfaces.
• It is written in C.
Despite of this, this library will be used as a starting point for this project,as it has the necessary functions for communicating with the Microchip spe-cific device (as it is developed by the same company). The CAN-FD functionswill be translated from the C files to Python in order to be able to performthis functions in Python language.
As it can be seen, the available libraries have some mayor drawbacks: theydo not support directly the device used in this project in a Windows OSand using Python, and modifications to do so are out of scope. Communica-tion between this device and a PC may be easier in a Linux environment orsubstituting the PC with a embedded device (like the Teensy board), but themain objective of this project is to be able to communicate this specific devicewith a PC in a Windows environment using Python, an as it has been seen,there are no available solutions for this specific problem (at least in publicdomains). The official library by Microchip is a good starting point, as itincorporates the necessary functions to communicate with the MCP2517FDcontroller via SPI interface. The SPI protocol interface is not going to be de-veloped, and instead, an already available Python library will be used, whichwill be discussed in the next chapter. This library allows for communicationwith a USB port using SPI and the MPSEE cable.
In the following section, the minimal specifications of the proposed librarywill be discussed, as well as the desired behaviour of its function.

4.2 minimal functionalities 13
4.2 Minimal functionalities
The proposed software needs to be able to do the following functions inorder to perform communication in a CAN-FD network:
• SPI R/W: The library needs to be able to read and write bytes via SPIprotocol between the PC and the device.
• R/W messages: Bytes, 32-bit words, byte arrays and word arrays mustbe able to be read and written.
• R/W CAN-FD messages: Full CAN-FD frames must be recognized andtreated correctly, giving the resulting data in them.
• Configuration: FIFOs, channels, and internal configurations should becorrectly set.
• Checking FIFO status: the software must be able to check the status ofthe FIFOs in order to know if messages can be read or written.
• Tests: several tests should be available so as to know if the device isperforming correctly.
• GUI: a basic GUI should be also be developed, in order to make moreaccessible all of the functions of the library and to demonstrate thecapabilities of the library.
The CAN-FD controller can work with an interruption system or with apolling one. This latter one will be the one used in this project, as the MPSEEcable used does not support interruptions. Also, half-duplex communicationwill be used for the same reasons, even in the controller supports full-duplex.
There are more options and functions available in the device, such asmasks and filters, but they are not going to be discussed in this project.

5 Development of the library
After checking the minimal functionalities that the proposed library shouldhave, it seems that translating the C code from the API is the best option.However, before doing that, the following tasks need to be done in order toproperly set the device working:
• The MPSSE cable must be correctly installed and configured so as tobe used in a Windows OS with Python.
• The SPI functions must be ported.
• The C library must be correctly understood in order to port it toPython.
5.1 Initial configurations
The correct drivers for the MPSEE cable must be installed in the computer inorder to put the cable to work, as well as the necessary libraries to connect tothe device. The Adafruit GPIO FT232H library has all the needed functionsto easily connect any device to a computer via USB ports, using SPI protocol5.The next steps need to be done so as to install correctly the device and itsassociated libraries:
1. Install the drivers distributed by FTDI located at [16] so as the MPSEEcable appears as a COM port.
2. Substitute the VCP drivers installed by the libusB using the Zadig soft-ware located at [17].
3. Install the Python libftdi library, and the Adafruit library, both locatedat [18].
All this process is done accordingly to the instructions seen in [18]. Afterthis process, the SPI communication can be now be controlled in Python.
5.2 MPSSE
In order to test the correct installation, FTDI distributes a software to checkthe devices in the COM ports, and in the case of the MPSEE cable, see itsinternal values, like the serial number. Checking these values and comparingit to the ones in the manual [7], it can be seen that the device is correctlyinstalled. In Figures 9 and 10 this values can be seen.
5 This library also supports other communication protocols, like I2C, serial UART and JTAG,but as they are not needed in this project, they will not be discussed.
14

5.3 adafruit library 15
Figure 9: USB Vendor ID and Product ID values from the manual. Source: [7].
Figure 10: USB Vendor ID and Product ID values read from software (among oth-ers). Source: own.
5.3 Adafruit library
In order to test the SPI communication, the MPSEE cable is connected tothe MCP2517FD in the configuration seen in Table 3. The Adafruit library isthen used to communicate the controller with the Python environment. Todo so, Code 1 is used. Here, the register OSC, located at address 0xE00, isread using the functions from the library. Comparing the values with thereset values referenced in the manual [6], the correct communication can betested. The read process consists of writing the read instruction, followed bythe address. Then, the data can be read at the MISO channel. The data mustbe a Python array consisting of 8-bit integers, and the returned data is abytearray object. As the address has a length of 12 bits, it must be divided intwo chunks.
# Test 1 . SPI readimport Adafruit_GPIO . FT232H as f t
# Temporarily d i s a b l e FTDI s e r i a l d r i v e r s .f t . use_FT232H ( )# I n i t i a l i z e a FT232H o b j e c tf t232h = f t . FT232H ( )# Create a SPI o b j e c tsp i = f t . SPI ( f t232h , cs =3 , max_speed_hz =20000000 , mode=0 , b i t o r d e r =
f t . MSBFIRST )
# I n s t r u c t i o n s to read and writecINSTRUCTION_READ = 0x03
cINSTRUCTION_WRITE = 0x02

5.3 adafruit library 16
# Prepare data to wri tespiTransmitBuf fer = [ ]address = 0xE00
spiTransmitBuf fer . append ( ( cINSTRUCTION_READ << 4 ) + ( ( address >> 8 )& 0xF ) )
spiTransmitBuf fer . append ( address & 0xFF )spi . wri te ( spiTransmitBuf fer )# Read data (4 bytes )response = spi . read ( 4 )
p r i n t ( ’ Reading OSC r e g i s t e r with SPI . Resul t : ’ )p r i n t ( "32− b i t word : { } " . format ( b i n a s c i i . h e x l i f y ( response ) ) )p r i n t ( " Bytes : { } " . format ( l i s t ( response ) ) )
Listing 1: SPI Python example.
However, these instructions do not perform as required. This is becausethe library has a different instruction cycle that the needed in the controller.The library puts the CS signal at a high level before writing or reading, andthen lowers it .In Figure 11 the controller instruction cycle is shown, and itis seen that it needs the CS signal to go to low level before writing the readinstruction, and go high after reading.
Figure 11: Instruction Cycle for the MCP2517FD. Source: [6].
After inspecting the Adafruit library, the problem is solved by comment-ing the assert/deassert commands in the R/W functions and doing themmanually according to the instruction cycle. This modified library (withoutchanging CS signal in R/W functions) is saved as ft.py an used for the restof the project. In Code 2 the modified test is seen, and the printed results arenow correct.# Test 2 . SPI read with modified f t l i bimport f t
# Temporarily d i s a b l e FTDI s e r i a l d r i v e r s .f t . use_FT232H ( )# I n i t i a l i z e a FT232H o b j e c tf t232h = f t . FT232H ( )# Create a SPI o b j e c tsp i = f t . SPI ( f t232h , cs =3 , max_speed_hz =20000000 , mode=0 , b i t o r d e r =
f t . MSBFIRST )
# I n s t r u c t i o n s to read and writecINSTRUCTION_READ = 0x03
cINSTRUCTION_WRITE = 0x02
# Prepare data to wri tespiTransmitBuf fer = [ ]

5.3 adafruit library 17
address = 0xE00
spiTransmitBuf fer . append ( ( cINSTRUCTION_READ << 4 ) + ( ( address >> 8 )& 0xF ) )
spiTransmitBuf fer . append ( address & 0xFF )spi . _ a s s e r t _ c s ( )sp i . wri te ( spiTransmitBuf fer )response_0 = spi . read ( 4 )sp i . _ d e a s s e r t _ c s ( )
p r i n t ( ’ Reading OSC r e g i s t e r with SPI . Resul t : ’ )p r i n t ( "32− b i t word : 0x { } " . format ( b i n a s c i i . h e x l i f y ( response ) ) )p r i n t ( " Bytes : { } " . format ( l i s t ( response ) ) )
>> Reading OSC r e g i s t e r with SPI . Resul t :>> 32− b i t word : 0 x60040000
>> Bytes : [ 9 6 , 4 , 0 , 0 ]
Listing 2: SPI Python example with modified ft library.
The binascii library is used to visualize better the results in a human-readable way. The result is printed in 32-bit word format (in hex) and asa byte array. As it can be seen, the results are the same as stated in the man-ual, but care must be taken in the bit and byte order: the first byte in thearray corresponds to the leftmost byte in the word, and to the first byte inthe word (bits 0 to 7). The LSB of the read word corresponds to the MSB ofthe value in memory (bits 24 to 31). In Figure 12, the values of the registerare seen, as well as the location of its bits.
Figure 12: OSC register values after reset from the manual. Source: [6].
This bit and byte order is used for all the values read and written in thedevice.

5.4 microchip api 18
5.4 Microchip API
The C API developed by Microchip is very complete, as it has all the neces-sary functions to read and write messages in a CAN-FD frame, as well assubfunctions needed to do this. It has also more functions to operate the de-vice in more advanced ways, such as using filters, masks, remote modes, andmany more. Only the necessary functions of this library will be translated.The API is structured in the following way:
• System configuration: Clock and ports configurations are made. Thispart will be omitted as it does not apply to this project.
• SPI functions: The SPI protocol is configured and function to read andwrite are defined. This part will be also be omitted, as in this project,the SPI communication is made using the Adafruit library.
• CAN-FD functions: All functions needed to establish communicationwith the controller, including reading and writing of messages in RAMmemory, use FIFOs for transmission and reception, interpreting theCAN-FD frames, configure all possible registers (at bit, byte or wordlevel), resetting the device, etc.
• Main: A main loop with the logic of the program, showing the initial-ization and the different states of the API and which functions areexecuted in each one.
• Registers definition: The registers of the controller are defined in soft-ware, with its individual bits defined.
• Constants: Constants definition, such as reset values and several ad-dresses are defined.
In the following sections, these files and its functions will be discussed,but without going into detail. These files can be seen at [19].
5.4.1 Constants
Constant values, such as memory addresses of certain registers, reset values,baudrate, clock settings, etc, are in this file.
5.4.2 Registers
Each register is defined in this file using the struct and union data types. InCode 3 the OSC register definition is seen. The other registers follow thesame structure.
typedef union _REG_OSC {// B i t s in r e g i s t e rs t r u c t {
u i n t 3 2 _ t P l lEnable : 1 ;u i n t 3 2 _ t unimplemented1 : 1 ;u i n t 3 2 _ t OscDisable : 1 ;u i n t 3 2 _ t unimplemented2 : 1 ;u i n t 3 2 _ t SCLKDIV : 1 ;

5.4 microchip api 19
u i n t 3 2 _ t CLKODIV : 2 ;u i n t 3 2 _ t unimplemented3 : 1 ;u i n t 3 2 _ t PllReady : 1 ;u i n t 3 2 _ t unimplemented4 : 1 ;u i n t 3 2 _ t OscReady : 1 ;u i n t 3 2 _ t unimplemented5 : 1 ;u i n t 3 2 _ t SclkReady : 1 ;u i n t 3 2 _ t unimplemented6 : 1 9 ;
} bF ;// 32− b i t wordu i n t 3 2 _ t word ;// Array of 4 bytesu i n t 8 _ t byte [ 4 ] ;
} REG_OSC ;
Listing 3: Register definition.
5.4.3 CAN-FD functions
These functions define the CAN-FD communication. The functions of inter-est are the following:
• Reset: Writes the reset command.
• ReadByte: Reads one byte from the memory address indicated.
• ReadWord: Reads a word from the memory address indicated.
• ReadByteArray: Reads an array of bytes, starting from the memory ad-dress indicated.
• ReadWordArray: Reads an array of words, starting from the memoryaddress indicated.
• Write functions: Analogous to the read functions but adding an extraparameter with the data to write.
• Configure: Configures the CiCON (CAN Control Register) register.
• OperationModeSelect: Selects the operation mode of the controller.
• OperationModeGet: Gets the current operation mode of the controler.
• TransmitChannelConfigure: Configures the transmit FIFO CiFIFOCONregister in the corresponding channel used for transmittion.
• TransmitChannelLoad: Checks that the message to transmit is put ona transmit buffer, is of correct length, updates status in the transmitFIFO CiFIFOSTA, gets RAM address to write message in from theCiFIFOUA register, and constructs the CAN-FD frame with the cor-responding headers and fields.
• TransmitChannelStatusGet: Checks the transmit FIFO status.
• ReceiveChannelConfigure: Configures the receive FIFO CiFIFOCON reg-ister in the corresponding channel used for reception.

5.4 microchip api 20
• ReceiveChannelStatusGet: Checks the receive FIFO status.
• ReceiveMessageGet: Checks that the FIFO selected is a receive buffer, isof correct length, updates status in the receive FIFO CiFIFOSTA, getsRAM address to read message from the CiFIFOUA register, and ex-tracts data from the CAN-FD frame received.
• EccEnable/Disable: Enables/Disables the ECC (Error Correction Code)function of the RAM memory.
• BitTimeConfigureNominalXXHz: Configures the CiNBTCFG register ac-cording to the desired bit time XX. (clock speed, in MHz).
This functions allow to communicate in a CAN-FD network.
5.4.4 Main
In the main file, the logic of the system is defined. There are two demos inthe API: one is used to transmit a image file and receive messages usingLEDs as indicators and buttons as command controls; the other is a simplerfunction, passing sequentially through the states, including tests, configura-tion, reception and transmittion. More functions are used in both demos ofthe API (like the use of TEF6 and interrupt pins), but only the main ones(the necessary functions needed to establish communication in a CAN-FDnetwork and configuring the device) are considered here. The basic statelogic of this last demo is seen in Figure 13.
Figure 13: State machine of the main function in the API. Source: own.
6 The Transmit Event FIFO (TEF) stores the messages IDs of the transmitted messages.

5.4 microchip api 21
The states are sequential, but a loop can be easily be implemented in orderto check the state periodically and executing the functions needed. Also,there is no input in the simple demo: the message to transmit is hard-coded,and consists of 64 random bytes.In each state, a series of functions are executed to perform the task. Theseare the following:
• Init: Initial state, variables are initialized.
• Reset: The device is reset.
• Configs: The controller is configured. This includes the CAN ControlRegister, Tx and Rx FIFOs, RAM, and Normal Mode is selected so thedevice can start operating. It should be noted that at least one filterobject should be configured and linked to the Rx FIFO for the deviceto work.
• RAM test: Data is written in RAM memory and then read in order toverify it. The data consists of n random bytes, where n goes from 4 tothe maximum length of messages (64 bytes) in steps of 4
7.
• Register test: Same as the RAM test, but now data is written in registersCiFLTOBJ.
• Tx: Transmission of message. This task consists of three subtasks:
– Config: The header of the frame is prepared, as seen in Code 4.
– Check flags: Check if the Tx buffer is not full. If not, load themessage; else, it finishes the task.
– Load: The message is put on a Tx buffer (a FIFO configured as atransmit one). The header of the frame is set with the Control Reg-ister (CiFIFOCON) corresponding to the Tx channel. The addressin RAM memory where to write the message is read from theUser Address Register (CiFIFOUA) and is written, and the statusis updated and can be read from the Status Register (CiFIFOSTA).
• Rx: Reception of message. This task is also divided in separate sub-tasks:
– Check flags: Check if the Rx buffer is not empty. If not, proceedsto receive task; else, skips it.
– Receive: The status is read from the CiFIFOSTA register corre-sponding to the Rx channel; the memory address where to readthe message is get from the CiFIFOUA register; the header of themessage is set to the CiFIFOCON register, and the status is up-dated.
• Request/Wait config: Sets the operation mode of the controller to Config-uration Mode, and waits until the operation is done. Then, it resets thedevice and the routine restarts from the Init state.
7 This is because RAM can only be accessed in multiples of 4 bytes

5.5 python library : canfdlib 22
// Assemble t ransmit message : CAN FD Base frame with BRS , 64 databytes
CAN_TX_MSGOBJ txObj ;u i n t 8 _ t txd [MAX_DATA_BYTES ] ;
// I n i t i a l i z e ID and Control b i t stxObj . word [ 0 ] = 0 ;txObj . word [ 1 ] = 0 ;
txObj . bF . id . SID = txCounter ; // Standard or Base IDtxObj . bF . id . EID = 0 ;
txObj . bF . c t r l . FDF = 1 ; // CAN FD frametxObj . bF . c t r l . BRS = 1 ; // Switch b i t r a t etxObj . bF . c t r l . IDE = 0 ; // Standard frametxObj . bF . c t r l . RTR = 0 ; // Not a remote frame requesttxObj . bF . c t r l .DLC = CAN_DLC_64 ; // 64 data bytes// Sequence : doesn ’ t get transmit ted , but w i l l be s tored in TEFtxObj . bF . c t r l . SEQ = 1 ;
Listing 4: Tx object (representation of the frame) initialization.
5.5 Python library: canfdlib
In order to design the Python library, the functionalities of the Microchiplibrary are taken and translated to Python code. Given the differences inboth languages and how they work, this is not a trivial task.
First of all, the library needs the SPI functions in order to communicate.The best option for implementing the SPI library is creating a class, namedcanfdlib, that inherits all the SPI functions in the modified Adafruit library,and adding the functions described in Section 5.4.3. A separate file withconstant values is made, as well as another for registers definitions. The mainloop will be discussed, but it will not be implemented in the main library,but rather in the GUI application. Finally, this methodology allows to haveseveral connections simultaneously, having them in seperate instances of theclass.
5.5.1 canfdlib: Registers
The registers can not be defined in the same way as in the C library, asPython does not directly support the struct and union datatypes. At first,the ctypes library was used, which allows to create classes with the samebehaviour as the C data types, allowing to create a variable with a fixed bitlength and that can be accessed as a 32-bit integer, a 4 byte array, or bitwise,using the same structure as in section 5.4.2 (exactly in the same order aswritten in the C library).
This solution was tested, but suffered a problem: the bit and byte orderdid not correspond with the ones in the device, neither with the ones in theC library. There are two workarounds for this problem:
• Re-arrange the bit and byte order dynamically in runtime, preservingthe same structure as in the C library.

5.5 python library : canfdlib 23
• Re-arrange the bit and byte order manually during definition.
The first solution is not suitable as it would be called each time a registeris read or written, and considering the number of operations that can bepotentially be made in a unit of time, this would add a bottleneck and slowdown the performance of the software. Giving that Python is already not asoptimized as C for working directly with memory and low-level instructions,this solution is discarded.
The other solution, in the other hand, would not add any time constraintin the software, as it consists only in changing the order of each bit in eachstruct. However, as the registers were already defined in the initial order (thesame as in the C library), re-arranging them would be very time consuming,and it would be confusing for other users, as the orders would not coincidewith the ones in the manual.
Finally, the solution adopted was to use the ctypes library only for a fewvariables of internal use, in order to easily access the individual bits. As inthese variables the bit fields are the only ones used, its order is irrelevant,and only the value is used. As for all other registers used, a 32-bit word isused as a base value (that depends on the register and the function, and canbe a reset value, a defined value, or a read value), and then each necessarybit of this integer is changed according to the context. Although it may be alittle cumbersome, this approach preserves the same bit and byte order as inthe controller, and the time needed to perform the bit masking is very low.
Nevertheless, these three approaches were tested in order to check anysignificant differences in time execution. In Code 5 the time test performedis seen, as well as its results. Each of these methods is executed 100000 timesand timed. The results show that the proposed approach is faster than theothers, even faster that instantiating the class in the correct bit order. How-ever, the results are very similar, and repeating the test, sometimes it hadthe opposite results. Nevertheless, the proposed approach is maintained asit requires less manual work in assembling the correct word.
def reverse ( n ) :array = [ i n t ( hex ( i n t ( n ) >> i & 0 x f f ) . r e p l a c e ( ’L ’ , ’ ’ ) , 16 ) f o r iin ( 2 4 , 16 , 8 , 0 ) ]
new = [ ]f o r byte in array :
aux = bin ( byte ) . r e p l a c e ( ’ 0b ’ , ’ ’ )while len ( aux ) < 8 :
aux = ’ 0 ’ + auxnew . append ( i n t ( aux [ : : − 1 ] , 2 ) )
re turn i n t ( b i n a s c i i . h e x l i f y ( bytearray (new) ) , 16 )
def s e t _ b i t ( v , index , x ) :mask = 1 << indexv &= ~maski f x :
v |= maskreturn v
def method1 ( ) :# S t r u c t r e g i s t e r .# Reverse the b i t order in each byte of the wordreg = REG_CiCON ( ) # r e g i s t e r i n s t a n c ereg . IsoCrcEnable = 1 # b i t i s changed

5.5 python library : canfdlib 24
re turn reverse ( reg . word ) # r e s u l t to wri te
def method2 ( ) :# Change b i t of wordword = 0
re turn s e t _ b i t ( word , 5 , 1 ) # r e s u l t to wri te
def method3 ( ) :# r e g i s t e r i n s t a n c e with modified b i t orderreg = REG_CiCON ( )reg . IsoCrcEnable = 1
# reg . word i s r e s u l t to wri te
i f __name__ == ’ __main__ ’ :p r i n t ( t i m e i t . t i m e i t ( " method1 ( ) " , setup=" from __main__ import
method1 " , number=100000) )p r i n t ( t i m e i t . t i m e i t ( " method2 ( ) " , setup=" from __main__ import
method2 " , number=100000) )p r i n t ( t i m e i t . t i m e i t ( " method3 ( ) " , setup=" from __main__ import
method3 " , number=100000) )
>> 1 .44910316838
>> 0 .0353271315938
>> 0 .0401096362199
Listing 5: Time test performed. Result is in seconds.
5.5.2 canfdlib: CAN-FD functions
The functions of the C library are written in the class as methods. Fromthese, the different tasks are encapsulated as functions as well and mademethods of the class. Most of the variables have the same role and type, butregisters have been changed and discussed in 5.5.1. Also, some values, suchas length of messages and channels are now attributes of the class and canbe modified in runtime.
In Code 6, the __ i n i t __ method of the class is shown. Here, the __ i n i t__ method of the SPI class defined in the Adafruit library is called. Afterthat, some internal parameters are defined, such as states, configurable pa-rameters and some register definitions. To initialize the canfdlib needs thefollowing parameters:
• ft232h: An instance of a ft232h object from the Adafruit library. Thisobject creates the connection with the MPSSE cable.
• cs: Chip Signal.
• max_speed_hx: Maximum SPI speed.
• mode: SPI mode.
• bitorder: Bit order (MSB or LSB).
• SPI_DEFAULT_BUFFER_LENGTH: Default length of the SPI buffer.
• SPI_MAX _BUFFER_LENGTH: Maximum length of the SPI buffer.
• SPI_BAUDRATE: Baud rate.

5.5 python library : canfdlib 25
def _ _ i n i t _ _ ( s e l f , f t232h , cs , max_speed_hz , mode , b i torder ,SPI_DEFAULT_BUFFER_LENGTH, SPI_MAX_BUFFER_LENGTH, SPI_BAUDRATE) :# Cal l _ _ i n i t _ _ from parent c l a s ssuper (CANFD_SPI , s e l f ) . _ _ i n i t _ _ ( f t232h , cs , max_speed_hz , mode ,b i t o r d e r )
# I n t e r n a l parameterss e l f . SPI_DEFAULT_BUFFER_LENGTH = SPI_DEFAULT_BUFFER_LENGTHs e l f . SPI_MAX_BUFFER_LENGTH = SPI_MAX_BUFFER_LENGTHs e l f . SPI_BAUDRATE = SPI_BAUDRATE
s e l f . c l k = CAN_SYSCLK_40Ms e l f . txFromFlash = Trues e l f . switchChanged = Trues e l f . r a m I n i t i a l i z e d = Fa lse
# Config i n t e r n a l r e g i s t e r ss e l f . can_conf ig = REG_CAN_CONFIG( )
s e l f . rxF lags = CAN_RX_FIFO_NO_EVENTs e l f . t x F l a g s = CAN_RX_FIFO_NO_EVENTs e l f . e r r o r F l a g s = CAN_ERROR_FREE_STATE
s e l f . txConfig = CAN_TX_FIFO_CONFIG ( )s e l f . rxConfig = CAN_RX_FIFO_CONFIG ( )
# Message o b j e c t ss e l f . txObj = CAN_TX_MSGOBJ( )s e l f . rxObj = CAN_RX_MSGOBJ( )
s e l f . txCounter = 0
s e l f . t r a n s m i t B u f f e r = [ ]s e l f . r e c e i v e B u f f e r = [ ]
# Configurable parameterss e l f . opMode = NORMAL_MODEs e l f . se lec tedBi tT ime = CAN_500K_2Ms e l f . txchannel = CAN_FIFO_CH2
s e l f . rxchannel = CAN_FIFO_CH1
s e l f . t x d l c = CAN_DLC_64
# S t a t e of the program .s e l f . s t a t e = " i d l e " # APP_STATE_INIT
Listing 6: init method of canfdlib
The functions described in Section 5.4.3 are written in Python. Some arepractically the same, and others have been written in a more pythonic way,(using lists comprehension for example), and others have been completelychanged, as Python does not support directly the use of pointer variablesand union data types like C. The main changes done between languages arethe following:
• SPI communication is changed completely, and to full-duplex (original)to half-duplex.
• Returned data from SPI is transformed differently: in C, pointer vari-ables are used to access memory directly and bitwise operations are
5.5 python library : canfdlib 26
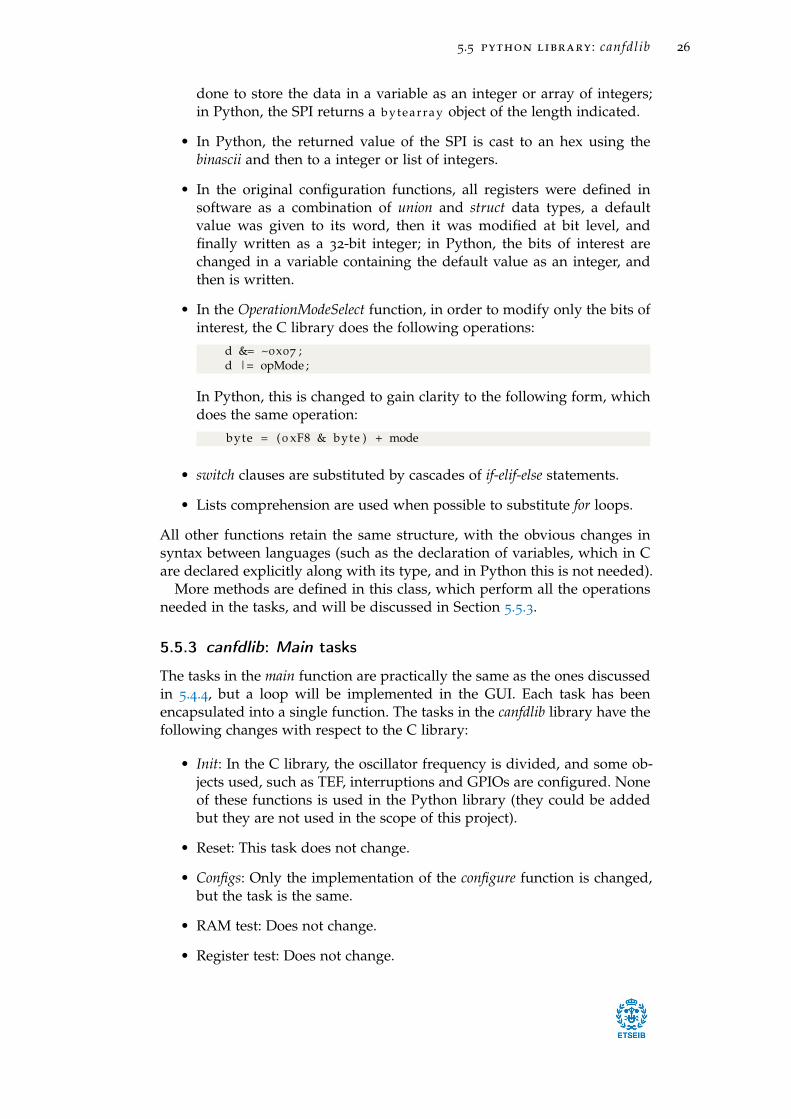
done to store the data in a variable as an integer or array of integers;in Python, the SPI returns a bytearray object of the length indicated.
• In Python, the returned value of the SPI is cast to an hex using thebinascii and then to a integer or list of integers.
• In the original configuration functions, all registers were defined insoftware as a combination of union and struct data types, a defaultvalue was given to its word, then it was modified at bit level, andfinally written as a 32-bit integer; in Python, the bits of interest arechanged in a variable containing the default value as an integer, andthen is written.
• In the OperationModeSelect function, in order to modify only the bits ofinterest, the C library does the following operations:
d &= ~0x07 ;d |= opMode ;
In Python, this is changed to gain clarity to the following form, whichdoes the same operation:
byte = (0 xF8 & byte ) + mode
• switch clauses are substituted by cascades of if-elif-else statements.
• Lists comprehension are used when possible to substitute for loops.
All other functions retain the same structure, with the obvious changes insyntax between languages (such as the declaration of variables, which in Care declared explicitly along with its type, and in Python this is not needed).
More methods are defined in this class, which perform all the operationsneeded in the tasks, and will be discussed in Section 5.5.3.
5.5.3 canfdlib: Main tasks
The tasks in the main function are practically the same as the ones discussedin 5.4.4, but a loop will be implemented in the GUI. Each task has beenencapsulated into a single function. The tasks in the canfdlib library have thefollowing changes with respect to the C library:
• Init: In the C library, the oscillator frequency is divided, and some ob-jects used, such as TEF, interruptions and GPIOs are configured. Noneof these functions is used in the Python library (they could be addedbut they are not used in the scope of this project).
• Reset: This task does not change.
• Configs: Only the implementation of the configure function is changed,but the task is the same.
• RAM test: Does not change.
• Register test: Does not change.

5.5 python library : canfdlib 27
• Tx: A new method is defined that accepts one parameter (the messageto transmit, as an array of bytes) and calls the following methods:
– Config: The header of the message is configured.
– Check flags: Task does not change.
– Load: The message is written in FIFO, and the status is updated.
• Rx: A new method is also defined for Rx. It returns the received mes-sage as an array of bytes.
– Check flags: Does not change.
– Receive: The message is read from FIFO and returned.
• Request/Wait config: Does not change.
The new state machine of the program (with the loop implemented forlater use) is shown in Figure 14. The tasks are the same as before, but thelogic of the system is changed so after each task finishes, it goes to a newtask, Change state, where the state of the system is updated. The state can bealso changed by user input, and the value of the state variable determineswhich task to execute next. As the main loop is not implemented directlyin the library, but rather in the GUI application, it can be configured by theuser as desired given the task functions (it can be modified to add moreconfigurations, interruptions can be implemented by other means, etc).

5.5 python library : canfdlib 28
Figure 14: State machine of the main function in the canfdlib library. Source: own.
5.5.4 GUI
The GUI application is designed in order to test the library and to have aminimum, verifiable and complete example. It is a separate entity from thelibrary, so it can used and modified without changing the base files.
The main loop is implemented, where the state is check periodically andthe corresponding task is executed. Several elements are needed in the GUIso as to change the state of the program, as well as to configure some param-eters. These elements are the following ones:
• Connect button: To establish connection with the device.
• Reset button: Button to reset the device when it is clicked.
• Stop button: Halts the program.

5.5 python library : canfdlib 29
• Tx button and input box: A message that the user wants to transmit iswritten in the input box as an array of bytes.
• Rx box and button: A text box where the received message is shown,as well as program messages and other information.
• Clear button: Button to clear the Rx text box.
• Config droplist and button: To select a operation mode of the controllerand configuring it.
• DLC droplist and button: To select the length of the messages.
• Tx and Rx channel input and button: To change the channels used fortransmition and reception.
In Figure 15, a template of the position of this elements is shown.
Figure 15: Template of the GUI. Source: own.
The mttkinter package is used, as it allows to develop graphical elementsvery easily and has support for parallel executions. A class is created toencapsulate the functionalities of the GUI. Inside this class, all its graphi-cal elements will be attributes, and an instance of the canfdlib is made anattribute and used for accessing its methods.
In Code 7 the __ i n i t __ method is shown. Here, all the elements are po-sitioned according to the template. In order to do so, several frames aredefined, corresponding to the colored zones in the template. Each frame canhave its own number of rows and columns, so the distribution can be styl-ized. For each element, positioning and size are passed. Finally, if debug wasset to Fa lse , the main loop function is attached to run after each loop of themttkinter root function8, and then tries to connect to the device. If not, itwrites an error message and the controller should be manually connected. Ifdebug was set to True, the device is not connected automatically, and no loopis attached.
def _ _ i n i t _ _ ( s e l f , inputDic t=None , debug=Fa lse ) :s e l f . inputDic t = inputDicts e l f . debug = debug
s e l f . rxd = [ ]s e l f . txd = [ ]
s e l f . window = tk . Tk ( )s e l f . window . t i t l e ( window_tit le )
8 The mttkinter executes a loop so as to refresh the GUI elements.

5.5 python library : canfdlib 30
s e l f . window . geometry ( window_size )
s e l f . r ight_frame = tk . Frame ( s e l f . window , width =450 , he ight=100)
s e l f . l e f t _ f r a m e = tk . Frame ( s e l f . window , width =250 , he ight=100)
s e l f . corner_frame = tk . Frame ( s e l f . window , width =100 , he ight=20)
s e l f . extra_frame = tk . Frame ( s e l f . window , width =30 , he ight=100)
s e l f . window . grid_columnconfigure ( 1 , weight =1)s e l f . r ight_frame . gr id ( row=0 , column=1 , s t i c k y =" nsew " )s e l f . l e f t _ f r a m e . gr id ( row=0 , column=0 , s t i c k y =" nsew " )s e l f . corner_frame . gr id ( row=1 , column=0 , s t i c k y ="sw" )s e l f . extra_frame . gr id ( row=0 , column =2)
# t e x t b o t f o r rxs e l f . r x _ b o x _ s c r o l l b a r = tk . S c r o l l b a r ( s e l f . l e f t _ f r a m e )s e l f . rx_box_text = tk . Text ( s e l f . l e f t_ f rame , height=
rx_textbox_height , width=rx_textbox_width )s e l f . r x _ b o x _ s c r o l l b a r . gr id ( column=1 , row=0 , s t i c k y =tk .N+tk .
S+tk .W)s e l f . rx_box_text . gr id ( column=0 , row=0)s e l f . r x _ b o x _ s c r o l l b a r . conf ig (command= s e l f . rx_box_text . yview )s e l f . rx_box_text . conf ig ( yscrollcommand= s e l f . r x _ b o x _ s c r o l l b a r
. s e t )
# rx buttons e l f . r e c e i v e _ s t a r t _ b u t t o n = tk . Button ( s e l f . r ight_frame , t e x t
=" S t a r t RX" , command = s e l f . r e c e i v e )s e l f . r e c e i v e _ s t a r t _ b u t t o n . gr id ( column=0 ,row=0 , pady=5)
# c l e a r rx box windows buttons e l f . c l e a r _ b u t t o n = tk . Button ( s e l f . r ight_frame , t e x t =" Clear "
, command= s e l f . c l e a r )s e l f . c l e a r _ b u t t o n . gr id ( column=0 , row=1 , pady=5)
# tx buttons e l f . t r a n s m i t _ s t a r t _ b u t t o n = tk . Button ( s e l f . corner_frame ,
t e x t =" S t a r t TX" , command= s e l f . t ransmit )s e l f . t r a n s m i t _ s t a r t _ b u t t o n . gr id ( column=2 ,row=0)
# tx messages e l f . tx_msg = tk . Entry ( s e l f . corner_frame , width=tx_msg_width
)s e l f . tx_msg . gr id ( column=1 ,row=0)
# tx l a b e ls e l f . t x l b l = tk . Label ( s e l f . corner_frame , t e x t ="TX Message : " )s e l f . t x l b l . gr id ( column=0 , row=0)
# rx channel buttons e l f . rx_channel_button = tk . Button ( s e l f . r ight_frame , t e x t ="
Set RX channel " , command= s e l f . setRXchannel )s e l f . rx_channel_button . gr id ( column=1 , row=3 , pady=5)
# rx channels e l f . rx_channel = tk . Entry ( s e l f . r ight_frame , width =10)s e l f . rx_channel . gr id ( column=1 , row=4 , pady=5)
# tx channel button

5.5 python library : canfdlib 31
s e l f . tx_channel_button = tk . Button ( s e l f . r ight_frame , t e x t ="Set TX channel " , command= s e l f . setTXchannel )
s e l f . tx_channel_button . gr id ( column=0 , row=3 , pady=5)
# tx channels e l f . tx_channel = tk . Entry ( s e l f . r ight_frame , width =10)s e l f . tx_channel . gr id ( column=0 , row=4 , pady=5)
# r e s e t buttons e l f . r e s e t _ b u t t o n = tk . Button ( s e l f . r ight_frame , t e x t =" Reset
Device " , command= s e l f . r e s e t )s e l f . r e s e t _ b u t t o n . gr id ( column=0 ,row=2 , pady=5)
# opMode d r o p l i s t and buttonOPTIONS = [ "NORMAL_MODE" , "SLEEP_MODE" , "
INTERNAL_LOOPBACK_MODE" , "LISTEN_ONLY_MODE" , "CONFIGURATION_MODE" ,"EXTERNAL_LOOPBACK_MODE" , "CLASSIC_MODE" , "RESTRICTED_MODE" , "INVALID_MODE" ]
s e l f . d r o p l i s t = tk . Str ingVar ( s e l f . l e f t _ f r a m e )s e l f . d r o p l i s t . s e t (OPTIONS [ 0 ] ) # d e f a u l t value
w = tk . OptionMenu ( s e l f . r ight_frame , s e l f . d r o p l i s t , *OPTIONS)w. grid ( column=1 ,row=1 , padx=5)
s e l f . opmode_button = tk . Button ( s e l f . r ight_frame , t e x t =" Setconf ig mode" , command= s e l f . changemode )
s e l f . opmode_button . gr id ( column=1 ,row=2 , pady=5)
# stop buttons e l f . s top_button = tk . Button ( s e l f . r ight_frame , t e x t ="STOP" ,
command= s e l f . stop )s e l f . s top_button . gr id ( column=1 , row=0 , pady=5)
# connect buttons e l f . connect_button = tk . Button ( s e l f . extra_frame , t e x t ="
CONNECT" , command= s e l f . connect )s e l f . connect_button . gr id ( column=0 , row=2 , pady=0) # enlarges e l f . connect_button . conf ig ( height =3 , width =15)
# dlc d r o p l i s t and buttonOPTIONS_dlc = [ "CAN_DLC_0" , "CAN_DLC_1" , "CAN_DLC_2" , "
CAN_DLC_3" , "CAN_DLC_4" , "CAN_DLC_5" , "CAN_DLC_6" , "CAN_DLC_7" , "CAN_DLC_8" , "CAN_DLC_12" , "CAN_DLC_16" , "CAN_DLC_20" , "CAN_DLC_24" , "CAN_DLC_32" , "CAN_DLC_48" , "CAN_DLC_64" ]
s e l f . d r o p l i s t _ d l c = tk . Str ingVar ( s e l f . extra_frame )s e l f . d r o p l i s t _ d l c . s e t ( OPTIONS_dlc [ −1 ] ) # d e f a u l t value
w_dlc = tk . OptionMenu ( s e l f . extra_frame , s e l f . d r o p l i s t _ d l c , *OPTIONS_dlc )
w_dlc . gr id ( column=0 , row=0 , padx=5)
s e l f . dlc_button = tk . Button ( s e l f . extra_frame , t e x t =" Set DLC", command= s e l f . changedlc )
s e l f . dlc_button . gr id ( column=0 , row=1 , pady=5)
s e l f . canfd = None
i f s e l f . debug :# s e l f . window . a f t e r ( 1 0 0 0 , s e l f . dummy_main)

5.5 python library : canfdlib 32
passe l s e :
t r y :s e l f . connect ( )
except RuntimeError :s e l f . rx_box_text . i n s e r t ( tk .END, " Device not ready .
Connect manually . " + ’\n ’ )s e l f . window . a f t e r ( 0 , s e l f . main )
s e l f . window . mainloop ( )
Listing 7: init method of the GUI
This class accepts two parameters: a input dictionary containing all thenecessary parameters needed to create an instance of the canfdlib class, anda boolean value that puts the GUI in debug mode. In this mode, the devicedoes not execute the main loop, and the device must be manually initialized.Each button has a function associated, which is a method of the class. Thesefunctions have all a similar structure:
• If needed, a parameter is read from the input box and passed to acanfdlib method.
• The state is changed if the function uses the device (this does not hap-pen in the Clear method, for example). The main loop then executes thenecessary task.
• If a result is returned, this is printed in the Rx box.
The resulting GUI is shown in Figure 16.
Figure 16: GUI. Source: own.
The tests explained in Chapter 6 are also implemented in the GUI, andcan be easily accessible writing t e s t X in the Tx message input box, where Xis the number of the test (as there are several tests integrated).

6 Tests
In order to check the correct behaviour of the library and the GUI, severaltests are defined. Several tests are done to check other functions, and willbe discussed in this chapter. The tests are first written in a plan script, andwhen they successfully completed, they are encapsulated in a function andthen grouped in a dictionary of functions so they can be easily accessiblefrom external files. Also, this facilitates the task of implementing the tests inthe GUI. In this Section, the shown tests are plain scripts, and in the Annex,the encapsulated version is present.
All numbers have a fixed width of 8 or 32 bits, so to compare them toother references (such as the values in manual), extra 0s should be addedwhen necessary so as to have the correct bit length.
6.1 SPI read
This test has already been shown in Code 2. It uses the Adafruit library toread a register in the device. Comparing the values with the reset values ofthe manual, it is seen that the SPI reading operation works well.
6.2 SPI write
This test is shown in Code 8. The register CiCON, located at address 0x000
is read in order to check the initial value, and then some data is written onit. Finally, the register is read once again in order to check if the data waswritten.spiTransmitBuf fer = [ ]address = 0 x000
spiTransmitBuf fer . append ( ( cINSTRUCTION_READ << 4 ) + ( ( address >> 8 )& 0xF ) )
spiTransmitBuf fer . append ( address & 0xFF )spi . _ a s s e r t _ c s ( )sp i . wri te ( spiTransmitBuf fer )response_0 = spi . read ( 4 )sp i . _ d e a s s e r t _ c s ( )p r i n t ( ’CiCON r e g i s t e r before wri t ing : ’ )p r i n t ( b i n a s c i i . h e x l i f y ( response_0 ) )p r i n t ( l i s t ( response_0 ) )
spiTransmitBuf fer = [ ]data = [ 0 , 0 , 0 , 0 ]addressW = 0 x000
spiTransmitBuf fer . append ( ( cINSTRUCTION_WRITE << 4 ) + ( ( addressW >>8 ) & 0xF ) )
spiTransmitBuf fer . append ( addressW & 0xFF )spiTransmitBuf fer = spiTransmitBuf fer + data
spi . _ a s s e r t _ c s ( )
33

6.2 spi write 34
sp i . wri te ( spiTransmitBuf fer )sp i . _ d e a s s e r t _ c s ( )
spiTransmitBuf fer = [ ]spiTransmitBuf fer . append ( ( cINSTRUCTION_READ << 4 ) + ( ( address >> 8 )
& 0xF ) )spiTransmitBuf fer . append ( address & 0xFF )
spi . _ a s s e r t _ c s ( )sp i . wri te ( spiTransmitBuf fer )response_1 = spi . read ( 4 )sp i . _ d e a s s e r t _ c s ( )p r i n t ( ’CiCON r e g i s t e r modified : ’ )p r i n t ( b i n a s c i i . h e x l i f y ( response_1 ) )p r i n t ( l i s t ( response_1 ) )
# ResetspiTransmitBuf fer = [ ]spiTransmitBuf fer . append (cINSTRUCTION_RESET << 4 )spiTransmitBuf fer . append ( 0 )sp i . _ a s s e r t _ c s ( )sp i . wri te ( spiTransmitBuf fer )sp i . _ d e a s s e r t _ c s ( )
spiTransmitBuf fer = [ ]spiTransmitBuf fer . append ( ( cINSTRUCTION_READ << 4 ) + ( ( address >> 8 )
& 0xF ) )spiTransmitBuf fer . append ( address & 0xFF )
spi . _ a s s e r t _ c s ( )sp i . wri te ( spiTransmitBuf fer )response_1 = spi . read ( 4 )sp i . _ d e a s s e r t _ c s ( )p r i n t ( ’CiCON d e f a u l t : ’ )p r i n t ( b i n a s c i i . h e x l i f y ( response_1 ) )p r i n t ( l i s t ( response_1 ) )
>> CiCON r e g i s t e r before wri t ing :>> 0 x60079804
>> [ 9 6 , 7 , 152 , 4 ]>> Data to wri te (4 bytes ) :>> [ 0 , 0 , 0 , 0 ]>> CiCON r e g i s t e r modified :>> 0 x00000000
>> [ 0 , 0 , 0 , 0 ]>> CiCON d e f a u l t :>> 0 x60079804
>> [ 9 6 , 7 , 152 , 4 ]
Listing 8: SPI write test
In order to change any value written to its default, the reset command iswritten before each test. In order to check the correct behaviour of the reset,it is written after this test and the register is read. As it is seen, the registerhas returned to its default value.

6.3 canfdlib read 35
6.3 canfdlib read
In this test, the functions developed in the library for reading are tested. Theregister CiCON is read in several ways:
• As an array of bytes with readByteArray.
• As a 32-bit word with readWord.
• Its 1st byte only, with readByte.
• As a 32-bit word array, along with the next register CiNBTCFG withreadWordArray.
The results are shown in Code 9. All the values read have the same valuesas the default ones.
address = 0 x000
word = canfd . readWord ( address )byte = canfd . readByte ( address )byteArr = canfd . readByteArray ( address , 4 ) # read 4 byteswordArr = canfd . readWordArray ( address , 2 ) # read 2 wordsp r i n t ( ’ Reading CiCON as 32− b i t word with CAN FD l i b , using readWord
: ’ )p r i n t ( word )p r i n t ( hex ( word ) )
p r i n t ( ’ Reading 1 s t byte of CiCON with CAN FD l i b , using readByte : ’ )p r i n t ( byte )p r i n t ( hex ( byte ) )p r i n t ( ’ Reading CiCON as array of bytes with CAN FD l i b , using
readByteArray : ’ )p r i n t ( l i s t ( byteArr ) )p r i n t ( ’ Reading CiCON and CiNBTCFG as array of two 32− b i t words with
CAN FD l i b , using readWordArray : ’ )p r i n t ( l i s t ( wordArr ) )
Reading CiCON as 32− b i t word with CAN FD l i b , using readWord :>> 1611110404
>> 0 x60079804
>> Reading 1 s t byte of CiCON with CAN FD l i b , using readByte :>> 96
>> 0x60
>> Reading CiCON as array of bytes with CAN FD l i b , usingreadByteArray :
[ 9 6 , 7 , 152 , 4 ]>> Reading CiCON and CiNBTCFG as array of two 32− b i t words with CAN
FD l i b , using readWordArray :>> [1611110404 , 252657152 ]
Listing 9: canfdlib read test.

6.4 canfdlib write 36
6.4 canfdlib write
In this test, data is written in the register CiCON in several ways:
• An array of bytes with writeByteArray.
• A 32-bit word with writeWord.
• A single byte with writeByte.
• A word array with writeWordArray
The value is read after each writing, and the device is resetted so that thevalue of the register is set to default. Results are seen in Code 10. As it canbe seen, the read values coincide with the written data.
address = 0 x000
word = canfd . readWord ( address )p r i n t ( ’ Reading CiCON: ’ )p r i n t ( word )write_word = 0 x600798F4
p r i n t ( "Word to wri te : " )p r i n t ( write_word )canfd . writeWord ( address , write_word )word = canfd . readWord ( address )p r i n t ( ’ Reading CiCON with 0 x600798F4 wri t ten on i t : ’ )p r i n t ( word )canfd . r e s e t ( )wri te_byte = 0x6Fcanfd . wri teByte ( address , wri te_byte )word = canfd . readWord ( address )p r i n t ( ’ Reading CiCON with 0x00 wri t ten on i t s 1 s t byte : ’ )p r i n t ( word )canfd . r e s e t ( )wr i te_byte_array = [0 x60 , 0x07 , 0x98 , 0xF4 ]canfd . writeByteArray ( address , wr i te_byte_array )word = canfd . readWord ( address )p r i n t ( ’ Reading CiCON with [0 x60 , 0x07 , 0x98 , 0xF4 ] array wri t ten on
i t (4 bytes ) : ’ )p r i n t ( word )canfd . r e s e t ( )write_word_array = [0 x600798F4 , 0 x 7 f 0 f 3 e f f ]canfd . writeWordArray ( address , write_word_array )word = canfd . readWordArray ( address , 2 )p r i n t ( ’ Reading CiCON and CiNBTCFG with [0 x600798F4 , 0 x 7 f 0 f 3 e f f ]
wr i t ten on i t : ’ )p r i n t ( word )
>> Reading CiCON:>> 1611110404
>> Word to wri te :>> 1611110644
>> Reading CiCON with 0 x600798F4 wri t ten on i t :>> 1611110644
>> R e s e t t i n g . . .>> Reading CiCON with 0x00 wri t ten on i t s 1 s t byte :>> 1862768644
>> R e s e t t i n g . . .>> Reading CiCON with [0 x60 , 0x07 , 0x98 , 0xF4 ] array wri t ten on i t
(4 bytes ) :>> 1611110644

6.5 ram test 37
>> R e s e t t i n g . . .>> Reading CiCON and CiNBTCFG with [0 x600798F4 , 0 x 7 f 0 f 3 e f f ] wr i t ten
on i t :>> [1611110644 , 2131705599 ]
Listing 10: canfdlib write test.
6.5 RAM test
The RAM test is executed, where random bytes are written in RAM withvarious lengths of messages. The test returns -1 if some value is mismatched,and stops the test. If nothing goes wrong, it returns 1. In Code 11 the test isshown. The results can be seen at the Annex.
def ramTest ( s e l f ) :# v e r i f y R/Wf o r length in range ( 4 , MAX_DATA_BYTES + 1 , 4 ) :
txd = [ ( randint ( 0 , RAND_MAX) & 0xFF ) f o r e in range ( 0 ,length ) ]
# p r i n t ( " Data wri t ten on RAM: { } " . format ( txd ) )s e l f . writeByteArray (cRAMADDR_START, txd )rxd = s e l f . readByteArray (cRAMADDR_START, length )# p r i n t ( " Data read on RAM: { } " . format ( rxd ) )f o r i in range ( 0 , length ) :
good = txd [ i ] == rxd [ i ]i f not good :
p r i n t ( " Data mismatch ! " )re turn −1
re turn 1
r e s u l t = canfd . ramTest ( )i f r e s u l t == −1:
p r i n t ( "RAM t e s t f a i l e d ! " )e l s e :
p r i n t ( ’RAM t e s t s u c c e s f u l ! ’ )
Listing 11: RAM test
6.6 Register test
This test is very similar to the RAM test, so its detailed code is not presented.In Code 12 the test is shown. The results can be seen at the Annex.
r e s u l t = canfd . r e g i s t e r T e s t ( )i f r e s u l t == −1:
p r i n t ( " R e g i s t e r t e s t f a i l e d ! " )e l s e :
p r i n t ( ’ R e g i s t e r t e s t s u c c e s f u l ! : ’ )
Listing 12: Register test

6.7 operation mode test 38
6.7 Operation mode test
In this test, the operation mode of the device is changed and then is readfrom the device in order to check if the change was successful. Code 13
shows the test and its results. The mode after reset is checked, then changeda few times, and finally, the mode after initialization is seen in order tocheck it is correct. In Table 4, the correspondence between the mode and itsassociated integer value is seen.
Mode Value (int) Value (bit)
NORMAL_MODE 0 000
SLEEP_MODE 1 001
INTERNAL_LOOPBACK_MODE 2 010
LISTEN_ONLY_MODE 3 011
CONFIGURATION_MODE 4 100
EXTERNAL_LOOPBACK_MODE 5 101
CLASSIC_MODE 6 110
RESTRICTED_MODE 7 111
Table 4: Mode values. Source: [6]
mode = canfd . operationModeGet ( )p r i n t ( " After r e s e t mode : { } " . format (mode) )p r i n t ( " s e l e c t i n g NORMAL_MODE mode" )canfd . operationModeSelect (NORMAL_MODE)mode = canfd . operationModeGet ( )p r i n t ( " Device mode : { } " . format (mode) )p r i n t ( " s e l e c t i n g INTERNAL_LOOPBACK_MODE mode" )canfd . operationModeSelect (INTERNAL_LOOPBACK_MODE)mode = canfd . operationModeGet ( )p r i n t ( " Device mode : { } " . format (mode) )p r i n t ( " s e l e c t i n g CONFIGURATION_MODE mode" )canfd . operationModeSelect (CONFIGURATION_MODE)mode = canfd . operationModeGet ( )p r i n t ( " Device mode : { } " . format (mode) )p r i n t ( " s e l e c t i n g mode a f t e r i n i t " )canfd . i n i t i a l i z e ( )mode = canfd . operationModeGet ( )p r i n t ( " Device mode : { } " . format (mode) )
After r e s e t mode : 4
s e l e c t i n g NORMAL_MODE modeDevice mode : 0
s e l e c t i n g INTERNAL_LOOPBACK_MODE modeDevice mode : 2
s e l e c t i n g CONFIGURATION_MODE modeDevice mode : 4
s e l e c t i n g mode a f t e r i n i tECC enabledRAM i n i t i a l i z e dDevice mode : 0
Listing 13: Operation mode test

6.8 tx-rx tests 39
6.8 Tx-Rx tests
Several tests are made in order to check the transmission and reception. Inorder to do them, the following devices are used:
1. Host PC: The PC where this project has been developed and the libraryis running.
2. MCP2517FD click + MPSEE cable: The controller is connected to thehost PC and to a CAN-FD model with the DB9 connector.
3. Oscilloscope: It is used to verify that signals are transmitted.
4. CAN-FD model: This model, developed by the Electronic Engineeringdepartment, is able to transmit data using CAN-FD frames in order tosimulate the ECU system of a automobile, and has a sniffer system in-corporated, so that data can be seen with a suitable device, in a similarfashion to the project developed here. It also works as an intermediatedevice between both computers so they can communicate.
5. Transmitter-receiver (TRx) PC: This PC is connected to the model so itcan read and write messages to it, as well as to the host PC. It has acustom software to transmit and receive messages.
These devices are shown in Figure 17.
Figure 17: Devices used in testing. Source: own.
6.8.1 Test 1: Tx
In this test, a single message of 64 bytes is transmitted from the host to theTRx PC. The code for this test is shown in 14. The data received in the TRxPC is shown on screen, and with the oscilloscope, it can be verified thatdata is being transmitted. In Figure 18 the oscilloscope signal is seen, and inFigure 19 the data received is shown.

6.8 tx-rx tests 40
canfd . i n i t i a l i z e ( )txd = range ( 0 , canfd . dlcToDataBytes ( canfd . t x d l c ) ) # 64 bytes of datap r i n t ( " ( TEST ) message to transmit : { } " . format ( [ hex ( a ) f o r a in txd ] )
)canfd . transmitMessageTasks ( txd )
>> ( TEST ) message to transmit : [ ’ 0x0 ’ , ’ 0x1 ’ , ’ 0x2 ’ , ’ 0x3 ’ , ’ 0x4 ’ , ’0x5 ’ , ’ 0x6 ’ , ’ 0x7 ’ , ’ 0x8 ’ , ’ 0x9 ’ , ’ 0xa ’ , ’ 0xb ’ , ’ 0 xc ’ , ’ 0xd ’ , ’ 0
xe ’ , ’ 0 xf ’ , ’ 0x10 ’ , ’ 0x11 ’ , ’ 0x12 ’ , ’ 0x13 ’ , ’ 0x14 ’ , ’ 0x15 ’ , ’ 0
x16 ’ , ’ 0x17 ’ , ’ 0x18 ’ , ’ 0x19 ’ , ’ 0x1a ’ , ’ 0x1b ’ , ’ 0 x1c ’ , ’ 0x1d ’ , ’ 0
x1e ’ , ’ 0 x1 f ’ , ’ 0x20 ’ , ’ 0x21 ’ , ’ 0x22 ’ , ’ 0x23 ’ , ’ 0x24 ’ , ’ 0x25 ’ , ’ 0
x26 ’ , ’ 0x27 ’ , ’ 0x28 ’ , ’ 0x29 ’ , ’ 0x2a ’ , ’ 0x2b ’ , ’ 0 x2c ’ , ’ 0x2d ’ , ’ 0
x2e ’ , ’ 0 x2 f ’ , ’ 0x30 ’ , ’ 0x31 ’ , ’ 0x32 ’ , ’ 0x33 ’ , ’ 0x34 ’ , ’ 0x35 ’ , ’ 0
x36 ’ , ’ 0x37 ’ , ’ 0x38 ’ , ’ 0x39 ’ , ’ 0x3a ’ , ’ 0x3b ’ , ’ 0 x3c ’ , ’ 0x3d ’ , ’ 0
x3e ’ , ’ 0 x3 f ’ ]
Listing 14: Test 1
Figure 18: Oscilloscope signal for test 1. Source: own.
Figure 19: Data received for test 1. Source: own.
6.8.2 Test 2: Tx with different DLC
In this test, a single message of 32 bytes is transmitted from the host to theTRx PC. The code for this test is shown in 15. In Figure 20 the oscilloscopesignal is seen, and in Figure 21 the data received is shown.

6.8 tx-rx tests 41
canfd . i n i t i a l i z e ( )canfd . t x d l c = 13 # DLC value f o r payload of 32 bytestxd = range ( 0 , canfd . dlcToDataBytes ( canfd . t x d l c ) ) # 32 bytes of datatxd = txd [ : : −1 ]p r i n t ( " ( TEST ) message to transmit : { } " . format ( [ hex ( a ) f o r a in txd ] )
)canfd . transmitMessageTasks ( txd )
>> ( TEST ) message to transmit : [ ’ 0 x1 f ’ , ’ 0 x1e ’ , ’ 0x1d ’ , ’ 0 x1c ’ , ’ 0
x1b ’ , ’ 0x1a ’ , ’ 0x19 ’ , ’ 0x18 ’ , ’ 0x17 ’ , ’ 0x16 ’ , ’ 0x15 ’ , ’ 0x14 ’ , ’ 0
x13 ’ , ’ 0x12 ’ , ’ 0x11 ’ , ’ 0x10 ’ , ’ 0 xf ’ , ’ 0xe ’ , ’ 0xd ’ , ’ 0 xc ’ , ’ 0xb ’ ,’ 0xa ’ , ’ 0x9 ’ , ’ 0x8 ’ , ’ 0x7 ’ , ’ 0x6 ’ , ’ 0x5 ’ , ’ 0x4 ’ , ’ 0x3 ’ , ’ 0x2 ’ ,
’ 0x1 ’ , ’ 0x0 ’ ]
Listing 15: Test 2
Figure 20: Oscilloscope signal for test 2. Source: own.
Figure 21: Data received for test 2. Source: own.
6.8.3 Test 3: Rx
In this test, a single message of 64 bytes is transmitted from the TRx PC tothe host PC. In Figure 22 the data sent is shown, in Figure 23 the oscilloscopesignal is seen, and in 16 the code for this test is shown, along with the datareceived.

6.8 tx-rx tests 42
Figure 22: Data sent for test 3. Source: own.
Figure 23: Oscilloscope signal for test 3. Source: own.
canfd . i n i t i a l i z e ( )while True :
# r e c e i v e messagerxd = canfd . receiveMessageTasks ( )i f rxd i s not None : # p r i n t message when rece ived
p r i n t ( " ( TEST ) rece ived message : { } " . format ( [ hex ( a ) f o r a inrxd ] ) )
>> ( TEST ) rece ived message : [ ’ 0x1 ’ , ’ 0x2 ’ , ’ 0x3 ’ , ’ 0x12 ’ , ’ 0xa ’ , ’ 0
xb ’ , ’ 0x0 ’ , ’ 0x0 ’ , ’ 0x0 ’ , ’ 0x0 ’ , ’ 0x0 ’ , ’ 0x0 ’ , ’ 0x0 ’ , ’ 0x0 ’ , ’ 0
x0 ’ , ’ 0x0 ’ , ’ 0x0 ’ , ’ 0x0 ’ , ’ 0x0 ’ , ’ 0x0 ’ , ’ 0x0 ’ , ’ 0x0 ’ , ’ 0x0 ’ , ’ 0
x0 ’ , ’ 0x0 ’ , ’ 0x0 ’ , ’ 0x0 ’ , ’ 0x0 ’ , ’ 0x0 ’ , ’ 0x0 ’ , ’ 0x0 ’ , ’ 0x0 ’ , ’ 0
x0 ’ , ’ 0x0 ’ , ’ 0x0 ’ , ’ 0x0 ’ , ’ 0x0 ’ , ’ 0x0 ’ , ’ 0x0 ’ , ’ 0x0 ’ , ’ 0x0 ’ , ’ 0
x0 ’ , ’ 0x0 ’ , ’ 0x0 ’ , ’ 0x0 ’ , ’ 0x0 ’ , ’ 0x0 ’ , ’ 0x0 ’ , ’ 0x0 ’ , ’ 0x0 ’ , ’ 0
x0 ’ , ’ 0x0 ’ , ’ 0x0 ’ , ’ 0x0 ’ , ’ 0x0 ’ , ’ 0x0 ’ , ’ 0x0 ’ , ’ 0x0 ’ , ’ 0x0 ’ , ’ 0
x0 ’ , ’ 0x0 ’ , ’ 0x0 ’ , ’ 0x1 ’ , ’ 0 x f f ’ ]
Listing 16: Test 3

6.8 tx-rx tests 43
6.8.4 Test 4: Rx with different DLC and ID
In this test, a single message of 8 bytes is transmitted from the TRx PC to thehost PC, changing the ID from the previous test. In Figure 24 the data sentis shown, in Figure 25 the oscilloscope signal is seen, and in 17 the code forthis test is shown, along with the data received.
Figure 24: Data sent for test 4. Source: own.
Figure 25: Oscilloscope signal for test 4. Source: own.
canfd . i n i t i a l i z e ( )while True :
# r e c e i v e messagerxd = canfd . receiveMessageTasks ( )i f rxd i s not None : # p r i n t message when rece ived
p r i n t ( " ( TEST ) rece ived message : { } " . format ( [ hex ( a ) f o r a inrxd ] ) )
>> ( TEST ) rece ived message : [ ’ 0x1 ’ , ’ 0x2 ’ , ’ 0x3 ’ , ’ 0 xf ’ , ’ 0xa ’ , ’ 0
xb ’ , ’Oxc ’ , ’ 0x0 ’ ]
Listing 17: Test 4.

6.8 tx-rx tests 44
6.8.5 Test 5: Rx with random data
In this test, several messages transmitted by the model are received. The datahas random elements, length and IDs. In Figure 26, part of the data sent isshown, and in 18 the code for this test is shown, along with part of the datareceived.
Figure 26: Part of the data sent for test 5. Source: own.
canfd . i n i t i a l i z e ( )while True :
# r e c e i v e messagerxd = canfd . receiveMessageTasks ( )i f rxd i s not None : # p r i n t message when rece ived
p r i n t ( " ( TEST ) rece ived message : { } " . format ( [ hex ( a ) f o r a inrxd ] ) )
>> ( TEST ) rece ived message : [ ’ 0 xfb ’ , ’ 0x73 ’ , ’ 0 x3c ’ , ’ 0x69 ’ , ’ 0x17 ’ ,’ 0x3 ’ , ’ 0 xa l ’ , ’ 0 x l ’ , ’ 0 x3 f ’ , ’ 0xd6 ’ , ’ 0 xf ’ , ’ 0xed ’ , ’ 0x13 ’ , ’ 0
x41 ’ , ’ 0xa7 ’ , ’ 0 x f f ’ , ’ 0xb4 ’ , ’ 0xa8 ’ , ’ 0 x9e ’ , ’ 0 xf4 ’ , ’ 0xda ’ , ’ 0
x63 ’ , ’ 0xb7 ’ , ’ 0 x3c ’ , ’ 0xb5 ’ , ’ 0 x6e ’ , ’ 0x84 ’ , ’ 0x89 ’ , ’ 0x85 ’ , ’ 0
xd2 ’ , ’ 0 x5c ’ , ’ 0x19 ’ ]>> ( TEST ) rece ived message : [ ’ 0 xlb ’ , ’ 0 xc4 ’ , ’ 0x47 ’ , ’ 0 xe6 ’ , ’ 0x9d ’ ,
’ 0 xc5 ’ , ’ 0 xf ’ ]>> ( TEST ) rece ived message : [ ’ 0x48 ’ , ’ 0 xf0 ’ , ’ 0x61 ’ , ’ 0x7b ’ , ’ 0xb7 ’ ,
’ 0 xe7 ’ , ’ 0x32 ’ , ’ 0x6a ’ ]>> ( TEST ) rece ived message : [ ’ 0 x f l ’ , ’ 0x77 ’ , ’ 0x37 ’ , ’ 0x4b ’ , ’ 0 x e l ’ ,
’ 0 x l ’ , ’ 0x75 ’ , ’ 0x42 ’ , ’ 0 xbl ’ , ’ 0 xc ’ , ’ 0xd4 ’ , ’ 0 x5 f ’ , ’ 0xad ’ , ’ 0
x3 ’ , ’ 0xa0 ’ , ’ 0x18 ’ , ’ 0xa6 ’ , ’ 0 x2 f ’ , ’ 0xed ’ , ’ 0x27 ’ , ’ 0xa2 ’ , ’ 0
xf6 ’ , ’ 0 xlb ’ , ’ 0 x2c ’ ]>> ( TEST ) rece ived message : [ ’ 0x2a ’ , ’ 0x0 ’ , ’ 0 xfa ’ , ’ 0x1b ’ ]>> ( TEST ) rece ived message : [ ’ 0 xe8 ’ , ’ 0x6a ’ , ’ 0 x l ’ , ’ 0x24
’ , ’ 0x98 ’ , ’ 0 xef ’ , ’ 0x4 ’ , ’ 0 xlb ’ , ’ 0 x5e ’ , ’ 0 x5e ’ , ’ 0x35 ’ , ’ 0x29 ’ , ’ 0
x8c ’ , ’ 0xaa ’ , ’ 0x56 ’ , ’ 0x2 ’ ]>> ( TEST ) rece ived message : [ ’ 0x50 ’ ]>> ( TEST ) rece ived message : [ ’ 0 xc2 ’ , ’ 0xbc ’ , ’ 0 x3 f ’ , ’ 0x1 ’ ]>> ( TEST ) rece ived message : [ ’ 0 xf8 ’ , ’ 0x97 ’ , ’ 0x67 ’ , ’ 0x46 ’ , ’ 0 x9e ’ ,
’ 0x60 ’ , ’ 0 xc8 ’ , ’ 0x75 ’ , ’ 0x3b ’ , ’ 0x2a ’ , ’ 0x7 ’ , ’ 0 x8e ’ , ’ 0x87 ’ ,’ 0 xf2 ’ , ’ 0x85 ’ , ’ 0x13 ’ , ’ 0x4d ’ , ’ 0xe ’ , ’ 0 xc9 ’ , ’ 0x3d ’ , ’ 0 x7e ’ , ’0 x l c ’ , ’ 0 xf9 ’ , ’ 0 xc9 ’ , ’ 0x12 ’ , ’ 0xad ’ , ’ 0x14 ’ , ’ 0x85 ’ , ’ 0xa2 ’ , ’0 xbl ’ , ’ 0 xf5 ’ , ’ 0 x9e
’ , ’ 0 xc7 ’ , ’ 0xa2 ’ , ’ 0x8 ’ , ’ 0xa6 ’ , ’ 0x30 ’ , ’ 0x71 ’ , ’ 0 xc9 ’ , ’ 0x68 ’ , ’ 0
x85 ’ , ’ 0x31 ’ , ’ 0 x l ’ , ’ 0 x6c ’ , ’ 0 x f f ’ , ’ 0x84 ’ , ’ 0 xc0 ’ , ’ 0x48 ’ , ’ 0
xc4 ’ , ’ 0 xc8 ’ , ’ 0x19 ’ , ’ 0xad ’ , ’ 0x3 ’ , ’ 0x2 ’ , ’ 0an ’ , ’ 0x2d ’ , ’ 0xd4
’ , ’ 0x87 ’ , ’ 0xa4 ’ , ’ 0xcd’ , ’ 0xcd ’ , ’ 0 x6c ’ , ’ 0x2d ’ , ’ 0 x4 f ’ ]>> ( TEST ) rece ived message : [ ’ 0xb4 ’ , ’ 0 x3c ’ , ’ 0x7 ’ ]>> ( TEST ) rece ived message : [ ’ 0xb3 ’ , ’ 0 x f c ’ , ’ 0x42 ’ , ’ 0x95 ’ , ’ 0 xf4 ’ ]>> ( TEST ) rece ived message : [ ’ 0x43 ’ , ’ 0 xac ’ , ’ 0x85 ’ , ’ 0x55 ’ , ’ 0x50 ’ ,
’ 0 xfe ’ , ’ 0xa ’ , ’ 0x24 ’ , ’ 0xbe ’ , ’ 0x55 ’ , ’ 0xbe ’ , ’ 0xb7 ’ , ’ 0x2a ’ ,’ 0 xec ’ , ’ 0x37 ’ , ’ 0x4a ’ , ’ 0 xc9 ’ , ’ 0 x la ’ , ’ 0 xc7 ’ , ’ 0x62 ’ , ’ 0x24 ’ ,

6.9 gui test 45
’ 0 x5 f ’ , ’ 0x9b ’ , ’ 0xbc ’ , ’ 0x93 ’ , ’ 0 x2 f ’ , ’ 0x98 ’ , ’ 0 xf8 ’ , ’ 0x7b ’ ,’ 0x80 ’ , ’ 0 x f l ’ , ’ 0x5 ’ ]
>> ( TEST ) rece ived message : [ ’ 0x88 ’ , ’ 0x4b ’ , ’ 0x27 ’ , ’ 0x88 ’ , ’ 0xa ’ ]>> ( TEST ) rece ived message : [ ’ 0x1a ’ , ’ 0 xc9 ’ , ’ 0xd8 ’ , ’ 0 x5e ’ , ’ 0x3b ’ ,
’ 0x58 ’ , ’ 0x62 ’ , ’ 0x3 ’ , ’ 0xd8 ’ , ’ 0 xe8 ’ , ’ 0x46 ’ , ’ 0x10 ’ , ’ 0x67 ’ ,’ 0x65 ’ , ’ 0x26 ’ , ’ 0xcd ’ , ’ 0xb3 ’ , ’ 0x50 ’ , ’ 0 xe9 ’ , ’ 0x6b ’ ]
>> ( TEST ) rece ived message : [ ’ 0x23 ’ , ’ 0x4 ’ , ’ 0x5d ’ , ’ 0 xc6 ’ , ’ 0x43 ’ ,’ 0x56 ’ , ’ 0xa4 ’ , ’ 0 x7c ’ , ’ 0 x7 f ’ , ’ 0 x3 f ’ , ’ 0x53 ’ , ’ 0 xec ’ , ’ 0x80 ’ ,’ 0 xf8 ’ , ’ 0x10 ’ , ’ 0xa8 ’ , ’ 0xcd ’ , ’ 0x11 ’ , ’ 0 x5 f ’ , ’ 0 c0 ’ ]
>> ( TEST ) rece ived message : [ ’ 0 xac ’ ]>> ( TEST ) rece ived message : [ ’ 0x89 ’ , ’ 0x17 ’ , ’ 0 x l c ’ , ’ 0 xaf ’ , ’ 0 xld ’ ,
’ 0 x l ’ , ’ 0xb0 ’ , ’ 0 xa l ’ , ’ 0xb2 ’ , ’ 0x5a ’ , ’ 0x36 ’ , ’ 0xd5 ’ , ’ 0x95 ’ ,’ 0xa9 ’ , ’ 0xd7 ’ , ’ 0 xe8 ’ ]
>> ( TEST ) rece ived message : [ ’ 0x20 ’ , ’ 0x48 ’ , ’ 0xb0 ’ , ’ 0xC5 ’ , ’ 0xa1 ’ ,’ 0xa2 ’ , ’ 0x2d ’ , ’ 0x89 ’ ]
>> ( TEST ) rece ived message : [ ’ 0 x3c ’ , ’ 0x86 ’ , ’ 0x79 ’ , ’ 0 xfe ’ , ’ 0 x l ’ ,’ 0x33 ’ , ’ 0 xf5 ’ , ’ 0 xdf ’ , ’ 0x48 ’ , ’ 0xa7 ’ , ’ 0x69 ’ , ’ 0x95 ’ , ’ 0x89 ’ ,’ 0 xe6 ’ , ’ 0 xdl ’ , ’ 0x99 ’ , ’ 0 x9c ’ , ’ 0 xef ’ , ’ 0x93 ’ , ’ 0xed ’ , ’ 0 x3c ’ ,’ 0x81 ’ , ’ 0 x5c ’ , ’ 0 xc7 ’ , ’ 0x3d ’ , ’ 0 xbl ’ , ’ 0xb8 ’ , ’ 0 xfa ’ , ’ 0x8d ’ ,’ 0x2d ’ , ’ 0x74 ’ , ’ 0x24 ’ , ’ 0 xec ’ , ’ 0x4d ’ , ’ 0xb4 ’ , ’ 0x9a ’ , ’ 0x6b ’ ,’ 0 xdf ’ , ’ 0xd3 ’ , ’ 0x14 ’ , ’ 0xa6 ’ , ’ 0 xaf ’ , ’ 0 xfd ’ , ’ 0x17 ’ , ’ 0 xc1 ’ ,’ 0xd8 ’ , ’ 0 x8e ’ , ’ 0x26 ’ , ’ 0x23 ’ , ’ 0 xce ’ , ’ 0x29 ’ , ’ 0xa7 ’ , ’ 0 xf5 ’ ,’ 0x27 ’ , ’ 0x98 ’ , ’ 0x97 ’ , ’ 0x59 ’ , ’ 0x2a ’ , ’ 0x67 ’ , ’ 0xed ’ , ’ 0x6b ’ ,’ 0x23 ’ , ’ 0 x3 f ’ , ’ 0 x c f ’ ]
>> ( TEST ) rece ived message : [ ’ 0x3 ’ , ’ 0x78 ’ , ’ 0x0 ’ , ’ 0 xf4 ’ , ’ 0 xac ’ , ’0 xe4 ’ , ’ 0 xee ’ , ’ 0x73 ’ , ’ 0 xe5 ’ , ’ 0x40 ’ , ’ 0x92 ’ , ’ 0x9 ’ , ’ 0x66 ’ , ’ 0
x14 ’ , ’ 0 xe2 ’ , ’ 0 x9e ’ ]>> ( TEST ) rece ived message : [ ’ 0x75 ’ , ’ 0xa0 ’ , ’ 0xcd ’ , ’ 0 x4e ’ , ’ 0xbb ’ ,
’ 0 x8 f ’ , ’ 0x26 ’ , ’ 0x93 ’ , ’ 0 xfd ’ , ’ 0x44 ’ , ’ 0 xa l ’ , ’ 0xa8 ’ , ’ 0x18 ’ ,’ 0x4 ’ , ’ 0 xe0 ’ , ’ 0 xae ’ , ’ 0 xf9 ’ , ’ 0x48 ’ , ’ 0x7a ’ , ’ 0 xe8 ’ , ’ 0xd7 ’ ,
’ 0x4a ’ , ’ 0x98 ’ , ’ 0x28 ’ , ’ 0x33 ’ , ’ 0 x4 f ’ , ’ 0x50 ’ , ’ 0 xfd ’ , ’ 0x91 ’ ,’ 0xb7 ’ , ’ 0 xc1 ’ , ’ 0x99 ’ , ’ 0 xf3 ’ , ’ 0 xc6 ’ , ’ 0 xf3 ’ , ’ 0x84 ’ , ’ 0 x la ’ ,’ 0x30 ’ , ’ 0x6a ’ , ’ 0x3 ’ , ’ 0 x7c ’ , ’ 0x66 ’ , ’ 0x91 ’ , ’ 0x46 ’ , ’ 0x4 ’ , ’ 0
xa3 ’ , ’ 0 xc3 ’ , ’ 0x54 ’ ]>> ( TEST ) rece ived message : [ ’ 0x35 ’ , ’ 0xb7 ’ , ’ 0 xlb ’ , ’ 0 x8c ’ , ’ 0 x8 f ’ ]>> ( TEST ) rece ived message : [ ’ 0x84 ’ , ’ 0x44 ’ , ’ 0x77 ’ , ’ 0 xe8 ’ , ’ 0x72 ’ ,
’ 0xb4 ’ , ’ 0 x l ’ , ’ 0xa9 ’ , ’ 0x70 ’ , ’ 0 x l ’ , ’ 0xd3 ’ , ’ 0x30 ’ , ’ 0x69 ’ , ’0 xbl ’ , ’ 0x56 ’ , ’ 0x20 ’ , ’ 0x63 ’ , ’ 0x8 ’ , ’ 0x42 ’ , ’ 0x74 ’ , ’ 0 x8 f ’ , ’ 0
x23 ’ , ’ 0x84 ’ , ’ 0 xf2 ’ , ’ 0x12 ’ , ’ 0xd4 ’ , ’ 0 xea ’ , ’ 0x70 ’ , ’ 0x91 ’ , ’ 0
x41 ’ , ’ 0x94 ’ , ’ 0 xca ’ , ’ 0 x7 f ’ , ’ 0x3b ’ , ’ 0x1b ’ , ’ 0 x9e ’ , ’ 0x26 ’ , ’ 0
x5 f ’ , ’ 0 x7e ’ , ’ 0 xce ’ , ’ 0x76 ’ , ’ 0 xef ’ , ’ 0 xdl ’ , ’ 0xb3 ’ , ’ 0x91 ’ , ’ 0
x6e ’ , ’ 0xa4 ’ , ’ 0x21 ’ ]
Listing 18: Test 5.
6.9 GUI test
In this final test, the GUI is tested to see if its functionalities work as ex-pected. To do so, the different buttons and droplists are tested in order tocheck if they work properly, with the GUI not in debug mode. The followingoperations are made, in this order:
• The device is manually connected.
• DLC is set to a different value.
• Mode is set to External Loopback.

6.9 gui test 46
• A message is transmitted.
• The message is checked in the reception FIFO.
• The device is reset.
• Rx FIFO is checked again to see if the message is gone (and thus con-firming the reset).
All the results are shown in Figures 27 to 30.
Figure 27: The device is manually connected. Source: own.
Figure 28: DLC is set to a different value. Source: own.
Figure 29: Mode is set to External Loopback. Source: own.
Figure 30: Message is transmitted and received After reset, no message is received.Source: own.

7 Future work
Although the main objective of this project has been accomplished, there isstill much more work to do in this library. All files are uploaded in GitHub[20], so anyone can access the library and improve it.
The main proposed improvements are the following:
• More functionality: This library only incorporates the basic functionsof the Microchip API. Advanced functions, such as the use of the TEF,filters, masks, CRC use, and more, can be implemented.
• Further testing: Several tests have been done in this project in order tocheck the library and its functions, but other aspects, such as operationspeed and additional bit time configurations, should be tested in moredetail.
• Optimization: Some parts of the code could be improved in order togain clarity and to improve performance. This includes the registerproblem discussed in 5.5.1. The access and modification of registervariables should be unified and generalized in order to easily accessand modify registers at bit, byte and word level, preserving the correctbit and byte order.
• The ctypes library should be totally implemented or discarded.
• Better GUI: The GUI developed in this project is made for demonstra-tions purposes of the library. It may have more advanced functions,such as configuration of additional parameters of the device, save logfiles, etc.
• Error handling: Most of the errors in the device operation go silentlyor stop the execution of the program. Exceptions and error handlingshould be added with try-except clauses, so that errors are noticed andtreated correctly
• Updating: A major drawback of this library is the use of the Adafruitlibrary, which forces the environment to be in Python 2.7, which isbeing deprecated (current version of Python is 3.7) and lacks somefeatures, such as native support for struct-like data types. This librarydoes not work in the newer versions of Python. Another library canbe used to establish SPI communication, or the Adafruit library can bemodified to work with newer versions of Python. Although the use ofa virtual environment with Python 2.7 solves this problem when usinga device with newer versions, a future goal could be the native supportfor Python 3.7
• Other OS support: Although the objective was to develop this libraryfor use with Windows, it would be interesting to have support forLinux and Mac OS.
47

8 Temporal schedule
In Figure 31, a Gantt diagram of this project is seen. The Research task in-cludes all the research done in other libraries, the devices used in this project,the Microchip library, as well as information on the CAN, CAN-FD and SPIprotocols, and information about C and Python instructions. The Setup taskincludes the installation of all the necessary libraries and drivers. The rest ofthe tasks are self-explanatory.
Figure 31: Gantt diagram. Source: own.
48

9 Budget and costs
The budget of this project is presented here, which can be seen in Table 5.The activities cost was calculated using the total time spent in the project(approximately 360h) with an hourly salary of 20 €. The hardware costs arevery low, and all software and libraries used have no cost and license to bemodified and distributed as desired, even for commercial use. Most of thecost comes from the human resources.
Product Price (€)
MCP2517FD click 22.05
MPSEE cable C232HM-DDHSL-0 24.26
PC with Windows license 499.99
Activities (human resources) 7200
TOTAL 7746.3
Table 5: Costs. Source: own.
The lifetime of the software developed in this project is not expected tobe very long, as it has some major drawbacks which need to be improved,as discussed in Section 7. The Python version needed is being deprecatedand will not be updated any more in 2020; nevertheless, it is a good startingpoint for developing a more robust library with a longer life and support.
If the library was to be marketed and sold (which is not the case, as thelibrary is designed to have a free license to use and modify), it would be in-teresting to know its value. The python-can library has around 299.985 down-loads9. Supposing this library is as downloaded as the python-can one, eachdownload of the library should cost at least 2.5 cents in order to amortizethe investment, which is a very low price. In fact, it may be even distributedas free software and obtain income from other ways, such as maintenance oradvertisement, thus obtaining better acceptance in the public.
Considering its actual state, its life would not be longer than 2 years. Ifits lifetime wants to be enlarged, more time would be required in orderto update the library. This would take an estimated time of 140 h, whichtranslates to an increase in 2800 € in the budget. This would increase theestimated value of the library to 3.5 cents/download.
9 This metric has been obtained from the Google Cloud Platform and only accounts the down-loads from pip
49

10 Environmental impact
The use of CAN-FD protocol over classical CAN has the advantage of in-creasing the data transfered over unit of time, and thus requieres less timeto transfer a certain amount of data. Consider the energy consumed by thisdevice transfering 1 Mb (10
6 bits) of data at its maximum speed, in bothCAN and CAN-FD modes. Figure 32 shows the duration of the frames inCAN protocol and some configurations of CAN-FD.
Figure 32: Frame duration of CAN and some configurations of CAN-FD. Source: [8]
From here, the required time to transfer 1 Mb of data at maximum speedis calculated, as shown in Equations 1 and 2 for the CAN frame, and inEquations 3 and 4 for the CAN-FD frame.
n =data
26=106
64= 15625 frames (1)
t = n x 111 µs ≈ 1.734s (2)
n =data
29=106
512= 1954 frames (3)
t = n x 96.375 µs ≈ 0.188s (4)
The operating current of the device at 5.5 V and 40 MHz is approximately12 mA, so its power consumption is of 66 mW. The total energy consumptionof the transmission is 114 mJ for the CAN frame and 12.4 mJ. The differenceis astonishing, with the CAN-FD frame consuming only 10.8 % of the energyrequired for the classical CAN.
The CO2 emissions for consuming electrical energy are, according to [21],about 0.27 tons of CO2 per MWh consumed at the endpoint. Thus, the useof the CAN-FD protocol produces a saving of 7.62 µg of CO2 per Mb ofdata transmitted. Taking an example, autonomous cars will treat as much as4.000 GB of data per hour in the near future, as seen in [22]; the use of theCAN-FD protocol could save 243 g of CO2 emissions per hour in a single car,which represents about a 1.95 % of saving in its hourly emissions10.
10 Considering a mean speed of 70 km/h and emissions of 178 g/km, which is a the mean valueof emissions of a gasoline car in Spain at November 2016 given by [23]
50

11 Conclusions
The objectives in this project have been accomplished. A basic library hasbeen developed for Python to communicate a PC with Windows with theMCP2517FD click device through SPI communication, using a MPSEE ca-ble with a USB port. This library is capable of reading data from a CAN-FDframe as well as writing to it. It can also access all internal registers of the de-vice and configure it. It only uses four additional libraries (Adafruit for SPI,ctypes for some register-like objects, binascii for casting bytearray objects to in-tegers, and random for generating some random data), and only one of these(Adafruit) is an external library, as all others are incorporated in Python. Fi-nally, a basic GUI has also been developed to test the library, incorporatingsome tests. All of these files are located at [20], with GNU General PublicLicense v3.0
This library is a starting point to develop more advanced libraries able totake advantage of all the functionalities of the controller. Although the life-time of the library is somewhat limited, an update for working with newerversions of Python could extend it for several years. Nevertheless, the poten-tial use of this library is very interesting, as it is now possible to connect theMCP2517FD with a computer, using Windows and Python 2.7, and severaltasks, such as gathering data for analysis in real time, can be done easily in asingle language. As all of the software has free license, any user can developan application and contribute to this project, so both companies workingwith CAN-FD networks and home users developing its own projects.
51

12 Bibliography
[1] CAN bus. https://en.wikipedia.org/wiki/CAN_bus. Accessed: 2019-02-20.
[2] Introduction to CAN bus. https://learn.sparkfun.com/tutorials/
ast-can485-hookup-guide/introduction-to-can-bus. Accessed: 2019-03-13.
[3] National Instruments. CAN FD EXPLAINED - A SIM-PLE INTRO. https://www.csselectronics.com/screen/page/
can-fd-flexible-data-rate-intro/language/en. Accessed: 2019-02-26.
[4] Serial Peripheral Interface. https://en.wikipedia.org/wiki/Serial_
Peripheral_Interface. Accessed: 2019-03-15.
[5] Total Phase. Beagle Protocol Analyzers, 1 2008. Rev. 3.02.
[6] Microchip Technology Inc. External CAN FD Controller with SPI Interface,2017. Rev. 1.
[7] Future Technology Devices International Ltd. USB 2.0 HI-SPEED TOMPSSE CABLE Datasheet, 2016. Rev. 1.2.1.
[8] Universitatea Politehnica Timisoara. CAN with Flexible Data-Rate- CAN-FD. http://www.aut.upt.ro/~pal-stefan.murvay/teaching/
nes/Lecture_05_CAN-FD.pdf. Accessed: 2019-02-26.
[9] G. Marcon Zago and E. Pignaton de Freitas. A Quantitative Perfor-mance Study on CAN and CAN FD Vehicular Networks. IEEE Transac-tions on Industrial Electronics, 65(5):4413–4422, May 2018.
[10] International Standards Organization. Road vehicles - interchange of digi-tal information - controller area network (CAN) for high-speed communication,11 1993. Rev. 1.
[11] Bosch. CAN with Flexible Data-Rate, 4 2012. Rev. 1.
[12] T. Nguyen, B. M. Cheon, and J. W. Jeon. CAN FD performance analysisfor ECU re-programming using the CANoe. In The 18th IEEE Interna-tional Symposium on Consumer Electronics (ISCE 2014), pages 1–4, June2014.
[13] Robert I. Davis, Alan Burns, Reinder J. Bril, and Johan J. Lukkien. Con-troller area network (CAN) schedulability analysis: Refuted, revisitedand revised. Real-Time Systems, 35(3):239–272, Apr 2007.
52

bibliography 53
[14] S. Woo, H. J. Jo, I. S. Kim, and D. H. Lee. A Practical Security Architec-ture for In-Vehicle CAN-FD. IEEE Transactions on Intelligent Transporta-tion Systems, 17(8):2248–2261, Aug 2016.
[15] Thorne B. and P. Ben. python-can library. https://python-can.
readthedocs.io/en/stable/index.html. Accessed: 2019-04-1.
[16] Future Technology Devices International Ltd. Ftdi virtual com portdrivers. https://www.ftdichip.com/Drivers/VCP.htm. Accessed: 2019-03-01.
[17] Batard P. Zadig. https://zadig.akeo.ie/. Accessed: 2019-03-01.
[18] DiCola T. Mpsee windows setup. https://learn.adafruit.com/
adafruit-ft232h-breakout/windows-setup. Accessed: 2019-03-01.
[19] Microchip Technology Inc. Mcp2517fd c api. http://ww1.microchip.
com/downloads/en/DeviceDoc/MCP2517FD_canfdspi_API_v1.0.zip. Ac-cessed: 2019-02-20.
[20] J. Cortes. canfdlib. https://github.com/jcf9410/canfdlib.
[21] Departamento de Planificación y Estudios. FACTORES DE CON-VERSIÓN ENERGÍA FINAL -ENERGÍA PRIMARIA y FACTORES DEEMISIÓN DE CO2, 11 2011.
[22] Krzanich B. The coming flood of dta in autonomous vehicles. In LAAuto Show’s AutoMobility conference, 2016.
[23] IDAE, ANFAC and ANIACAM. Guía de Vehículos Turismo de ventaen España, con indicación de consumos y emisiones de CO2, 3 2016.
[24] Microchip Technology Inc. Mc2517fd api. http://ww1.microchip.
com/downloads/en/DeviceDoc/MCP2517FD_canfdspi_API_v1.0.zip. Ac-cessed: 2019-03-01.
[25] Ràfols Bellés J. Development of a Python application for monitoring RFmessages using one NRF24L01 board and a USB-MPSSE cable. Degree’sfinal project, Universitat Politècnica de Catalunya, 2016.
[26] Fructuoso Keller D. LoRa sniffer using python and one MPSSE cable.Degree’s final project, Universitat Politècnica de Catalunya, 2018.
[27] MicroControl GmbH & Co. KG. Can fd. an introduction. http://
www.microcontrol.net/en/know-how/bus-systems/can-fd/. Accessed:2019-02-25.
[28] National Instruments. Understanding can with flexible data-rate(can fd). http://www.microcontrol.net/en/know-how/bus-systems/
can-fd/. Accessed: 2019-02-25.
[29] Motorola. SPI Block Guide, 1 2003. Rev. 3.06.