
Design Build Manual - Dubai Municipality
90
-
Upload
khangminh22 -
Category
Documents
-
view
0 -
download
0
Transcript of Design Build Manual - Dubai Municipality

Press on these buttons to navigate between pages faster
Next Previous Home Page Page
Interactive booklet Gudie
Add Design & Build Activity to Company Profile
Login
Technical Staff Application Submission
Charges Payment
Create a Consultant Account
Login
Create Username and Password
Submit for Building Permit
Login
Create application
Follow up
Table of Contents
Section1
Section2
Section3
Section 1 Add Design & Build Activity to
Company Profile
I-I
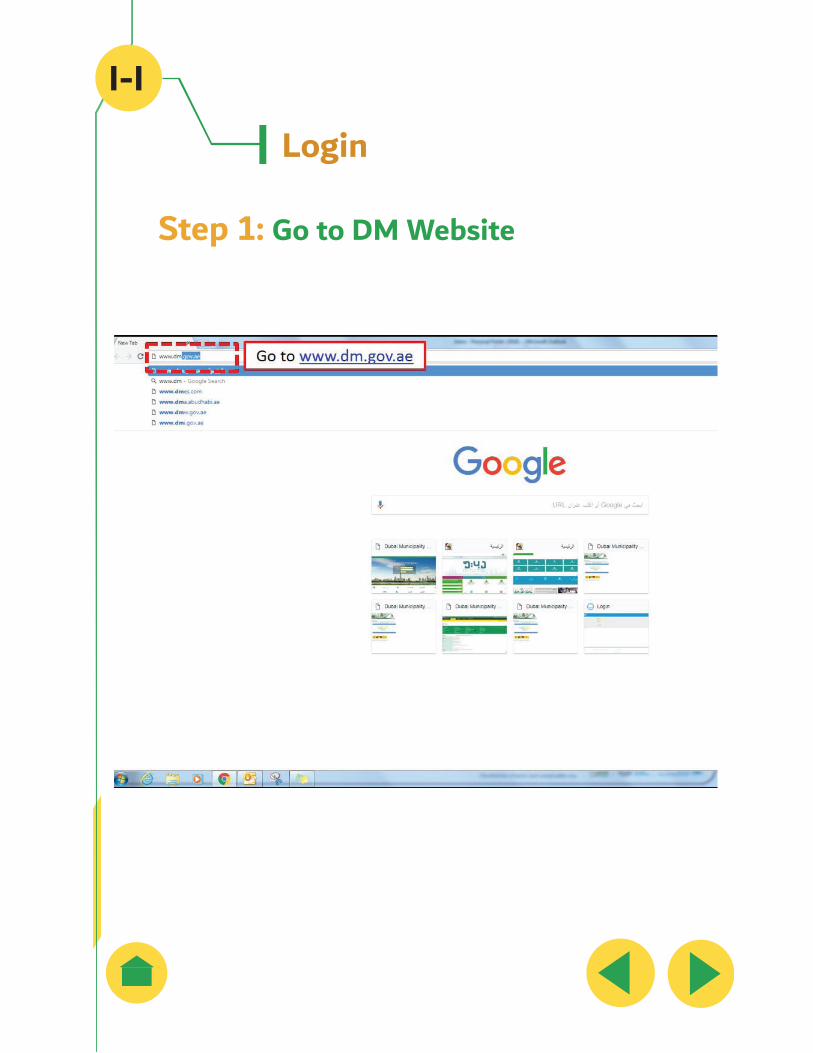
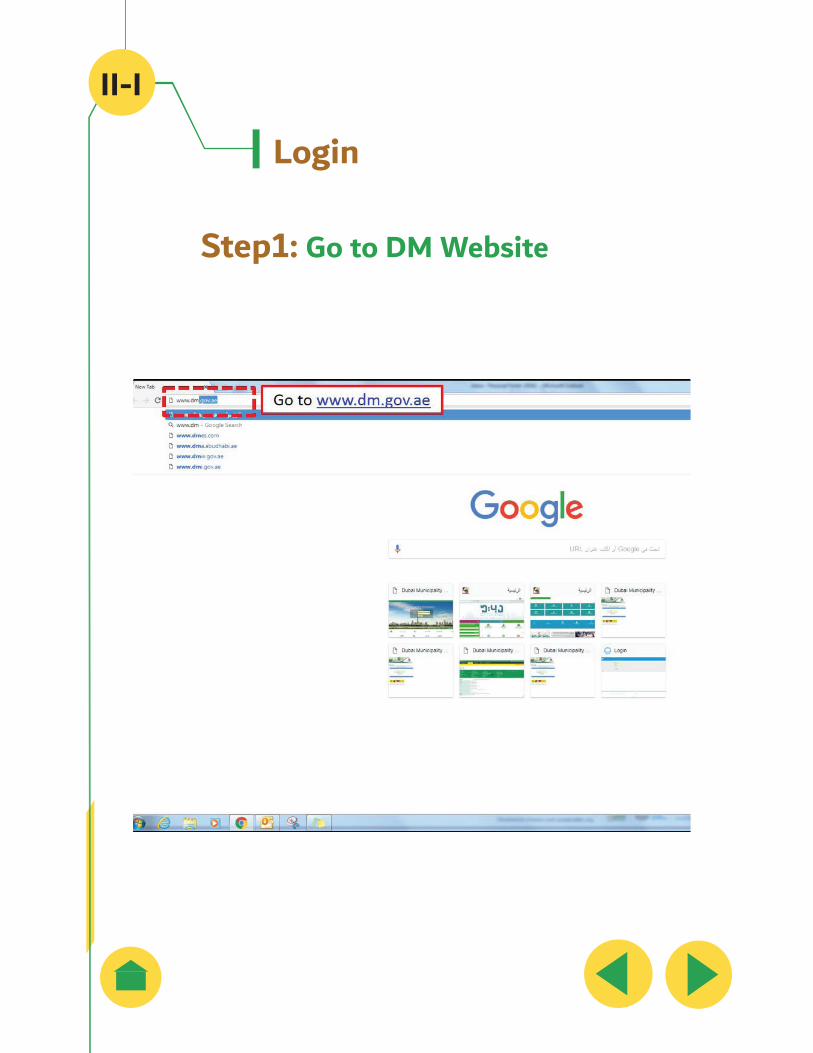
Login
Step 1: Go to DM Website
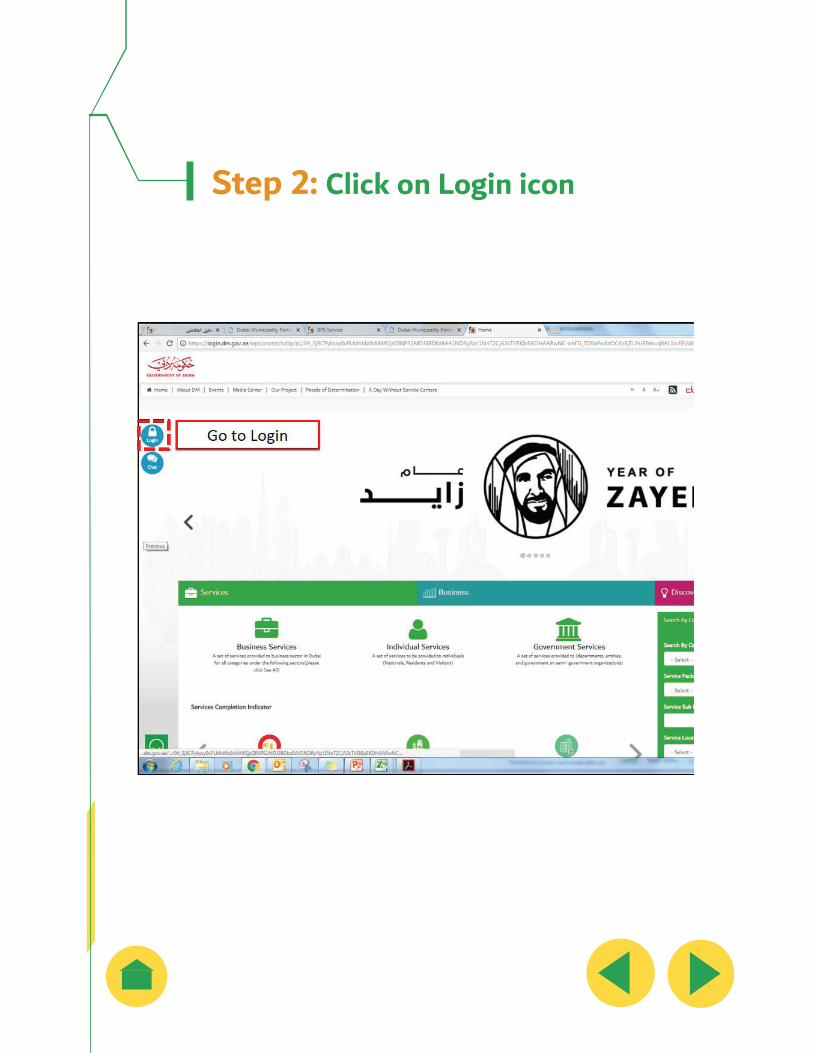
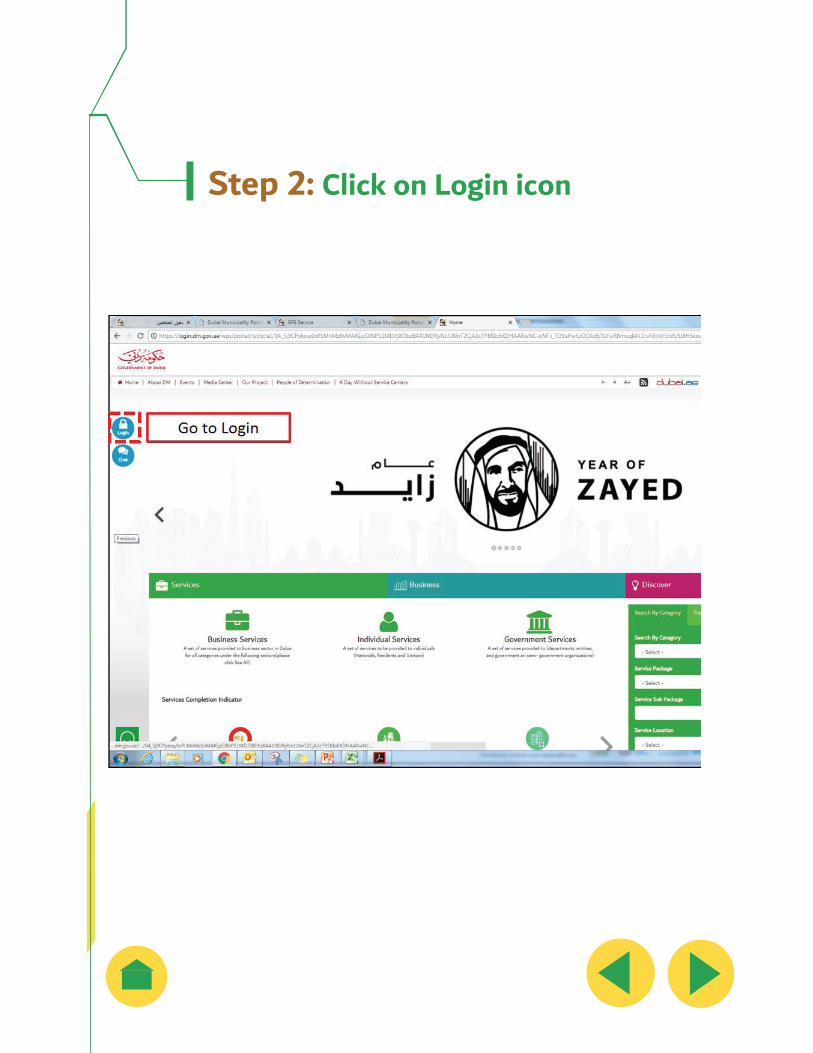
Step 2: Click on Login icon
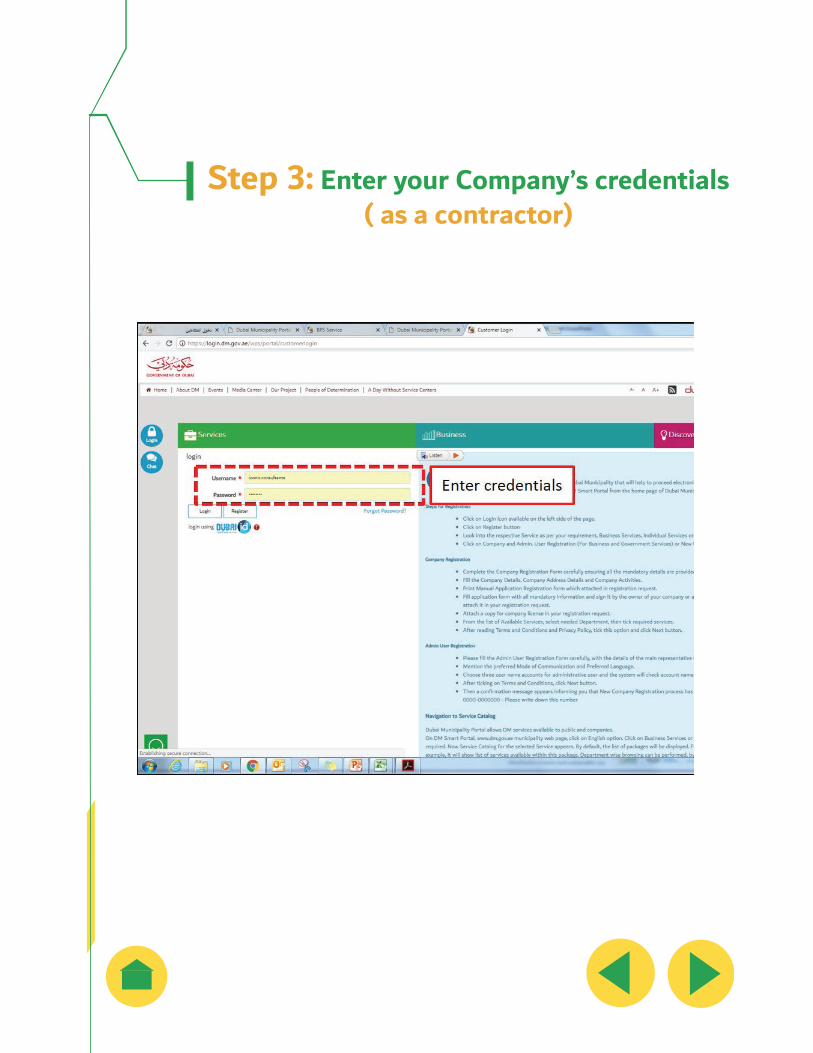
Step 3: Enter your Company’s credentials ( as a contractor)

I-II
Technical Staff Application Submission
Step 1: Go to Login Screen Select (my services)
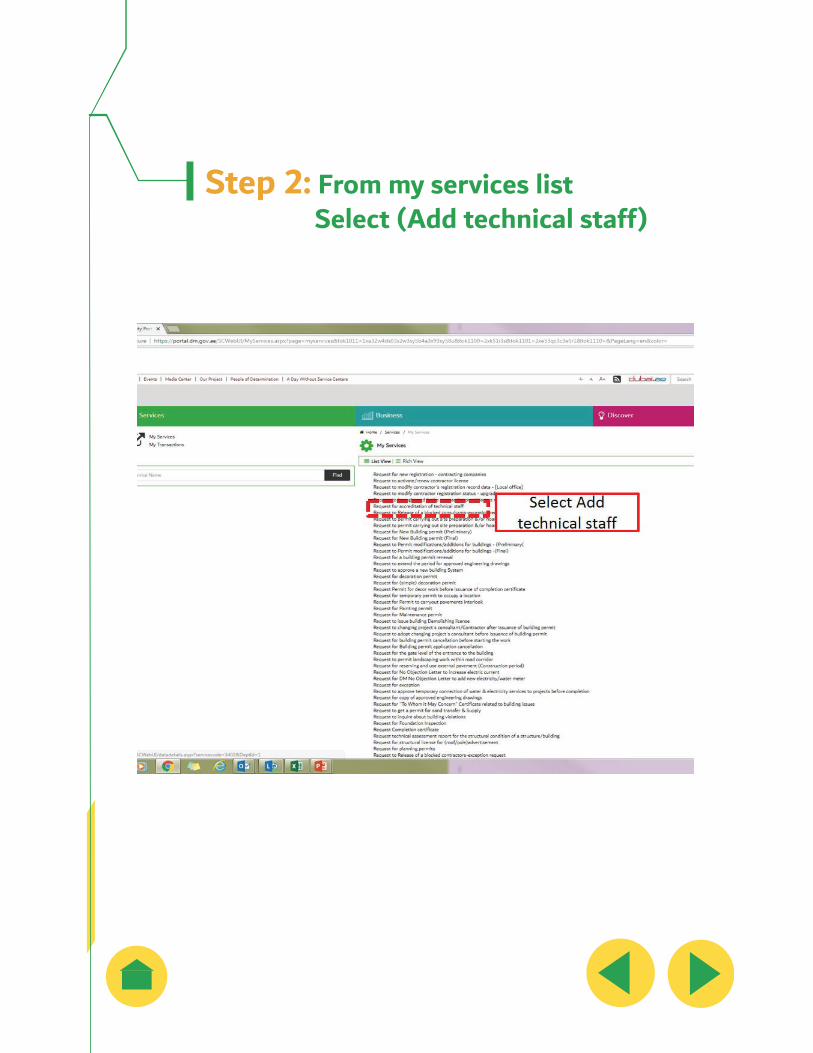
Step 2: From my services list Select (Add technical staff)

The portal will take you to the selected service catalogue
Step 3: View the service requirements Then Select (Run service)
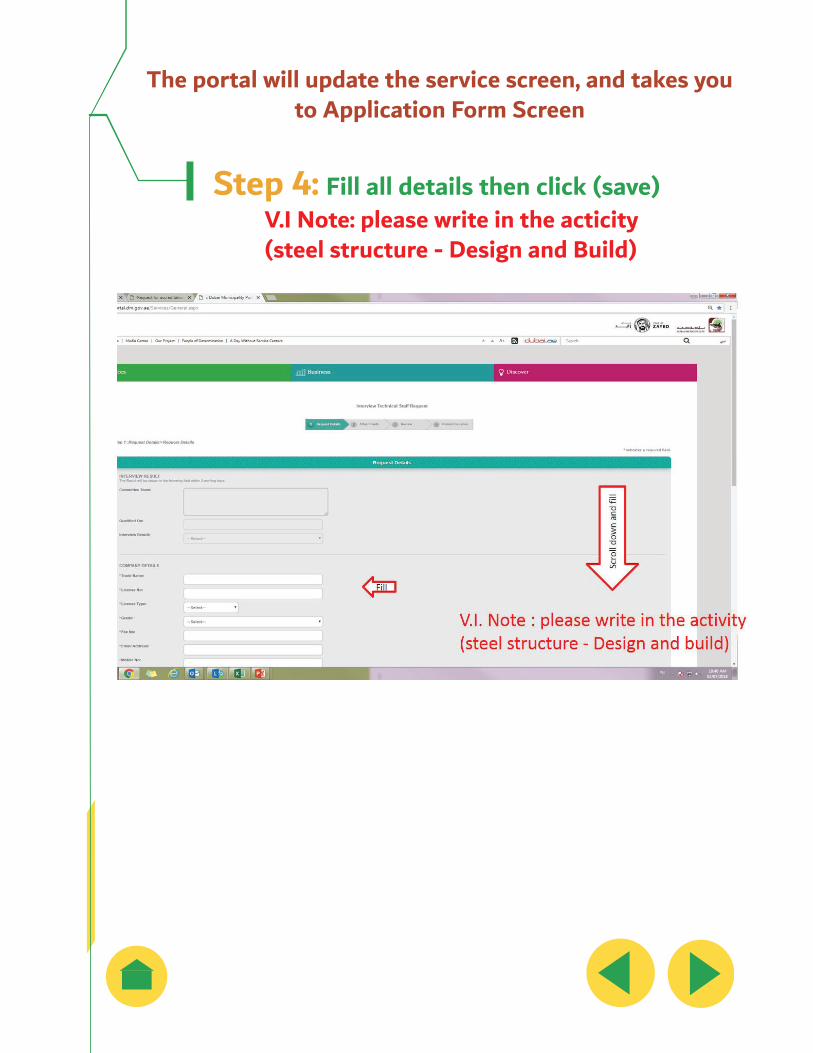
The portal will update the service screen, and takes you to Application Form Screen
Step 4: Fill all details then click (save) V.I Note: please write in the acticity (steel structure - Design and Build)
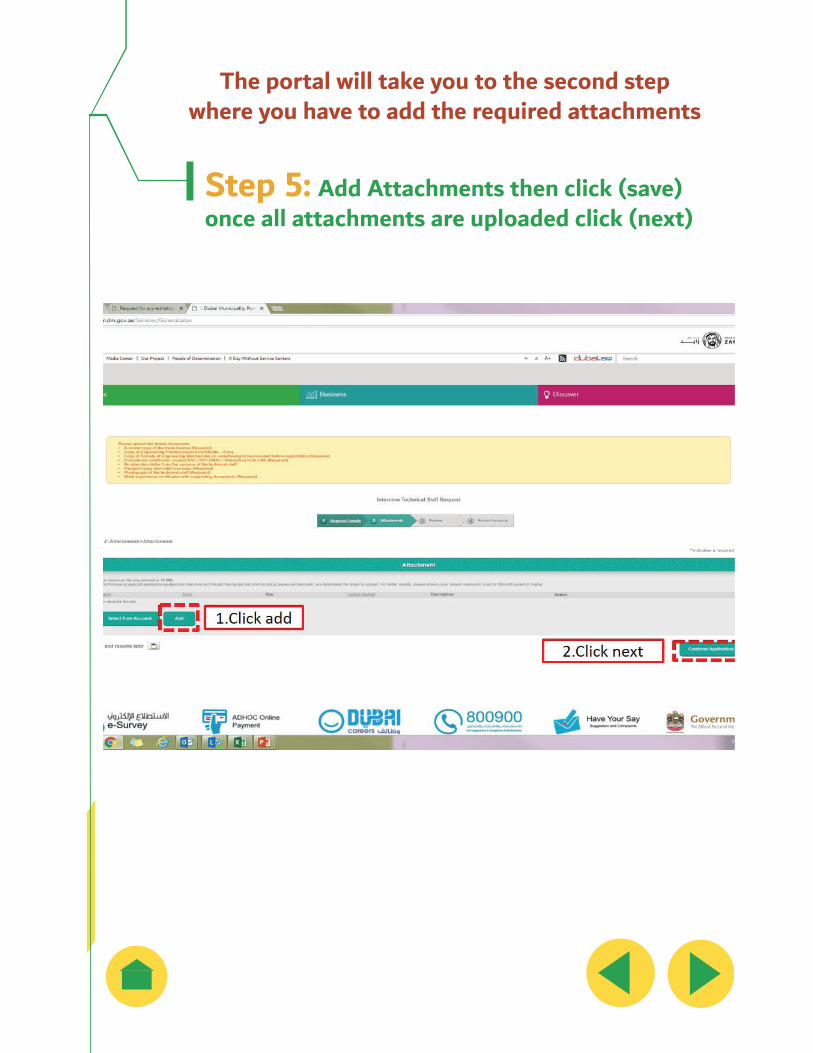
The portal will take you to the second step where you have to add the required attachments
Step 5: Add Attachments then click (save) once all attachments are uploaded click (next)
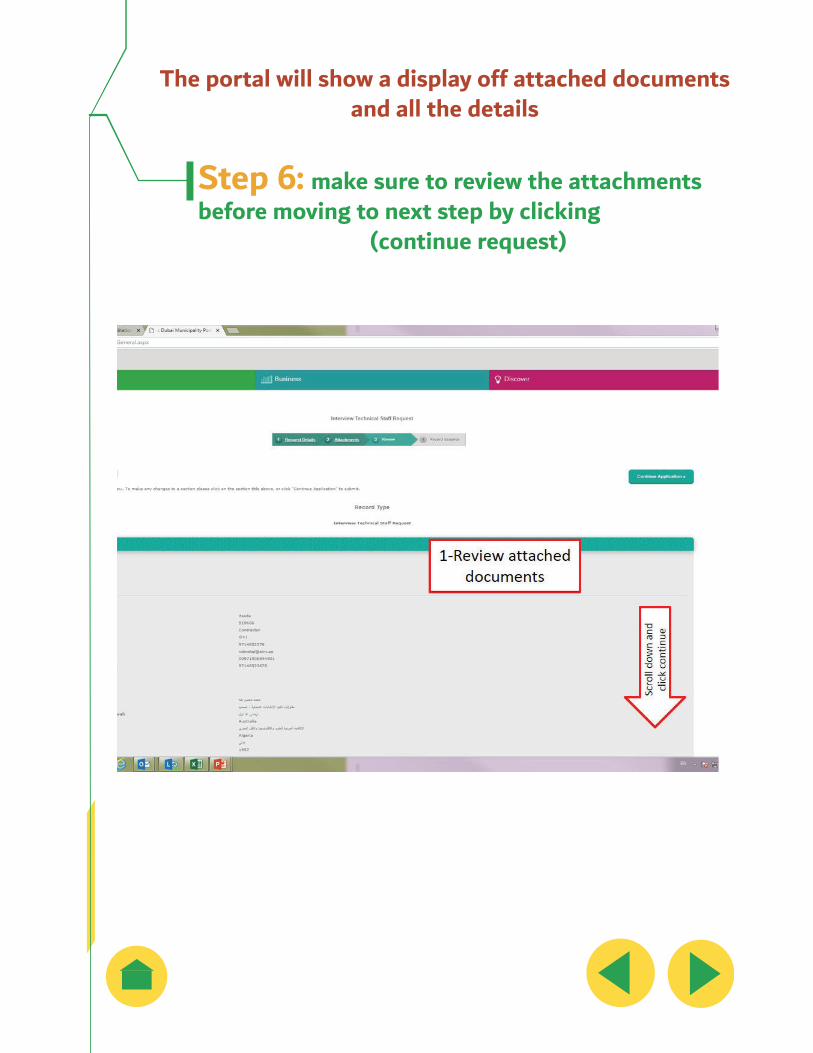
The portal will show a display off attached documents and all the details
Step 6: make sure to review the attachments before moving to next step by clicking
(continue request)
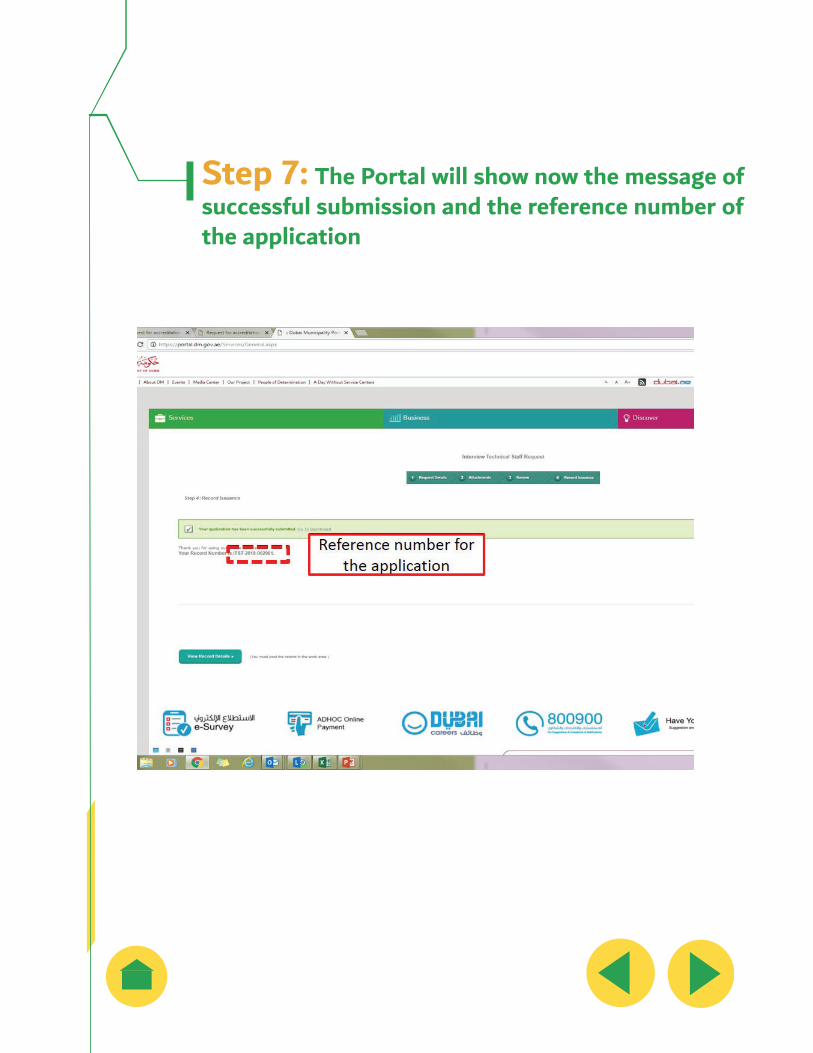
Step 7: The Portal will show now the message of successful submission and the reference number of the application
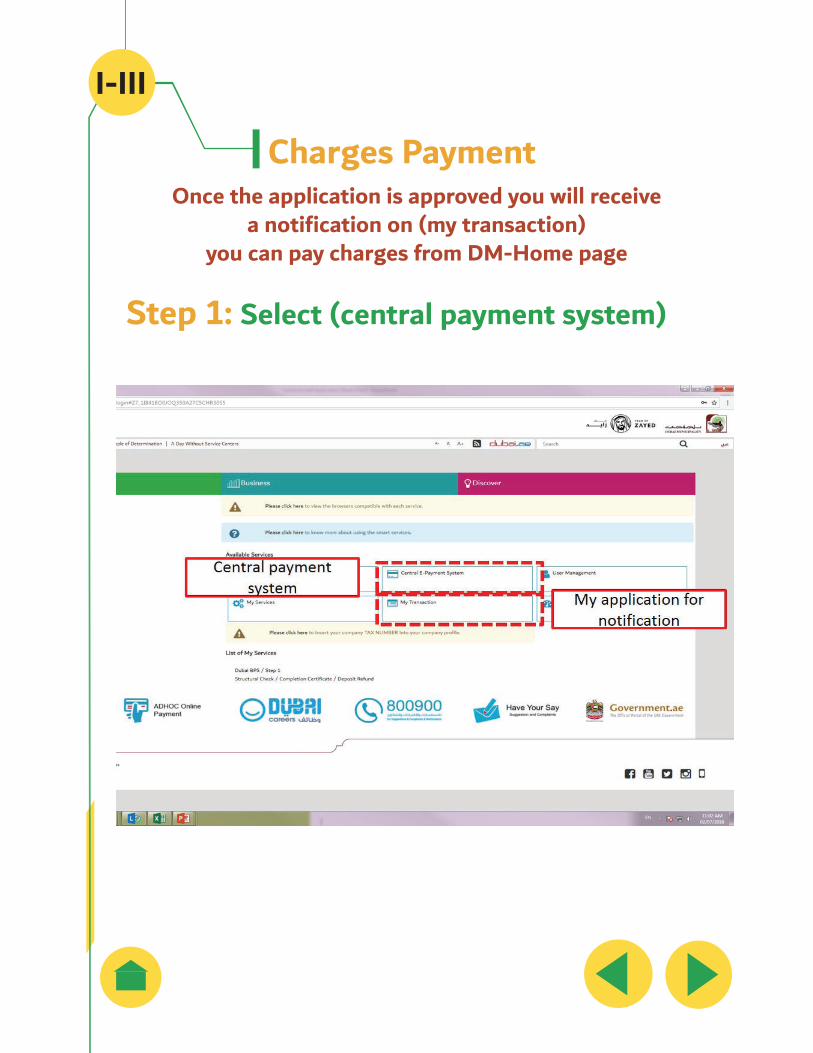
I-III
Charges Payment Once the application is approved you will receive
a notification on (my transaction) you can pay charges from DM-Home page
Step 1: Select (central payment system)
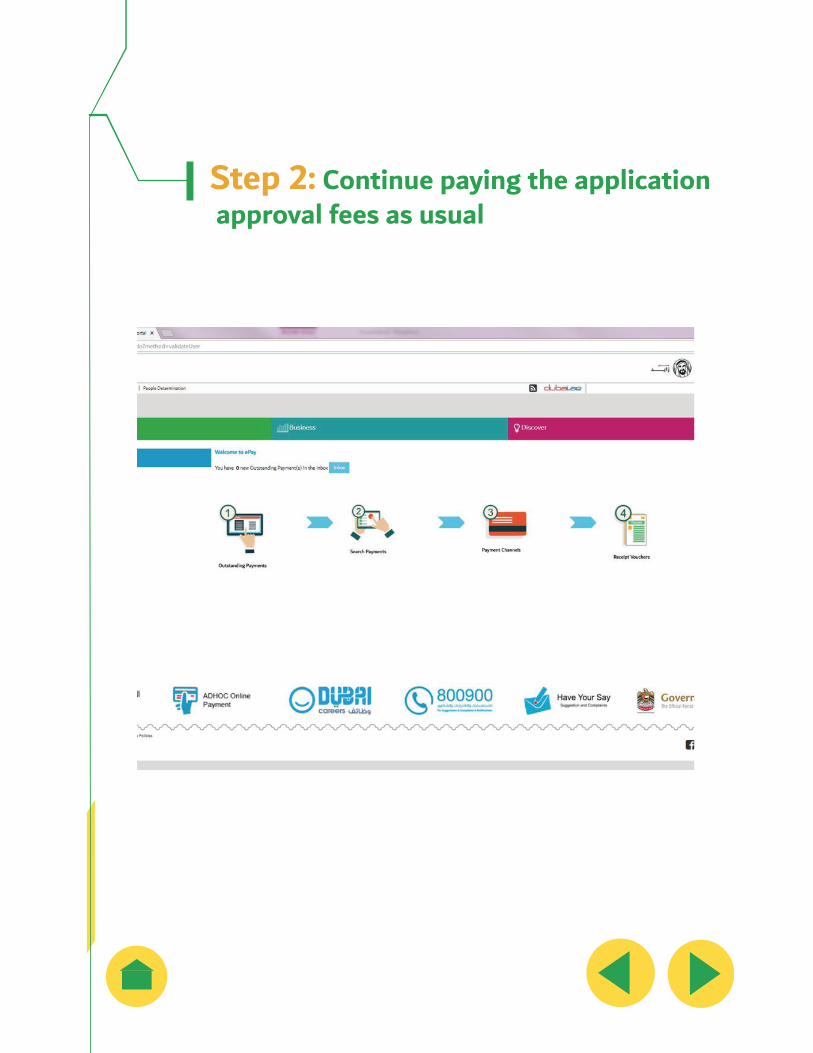
Step 2: Continue paying the application approval fees as usual
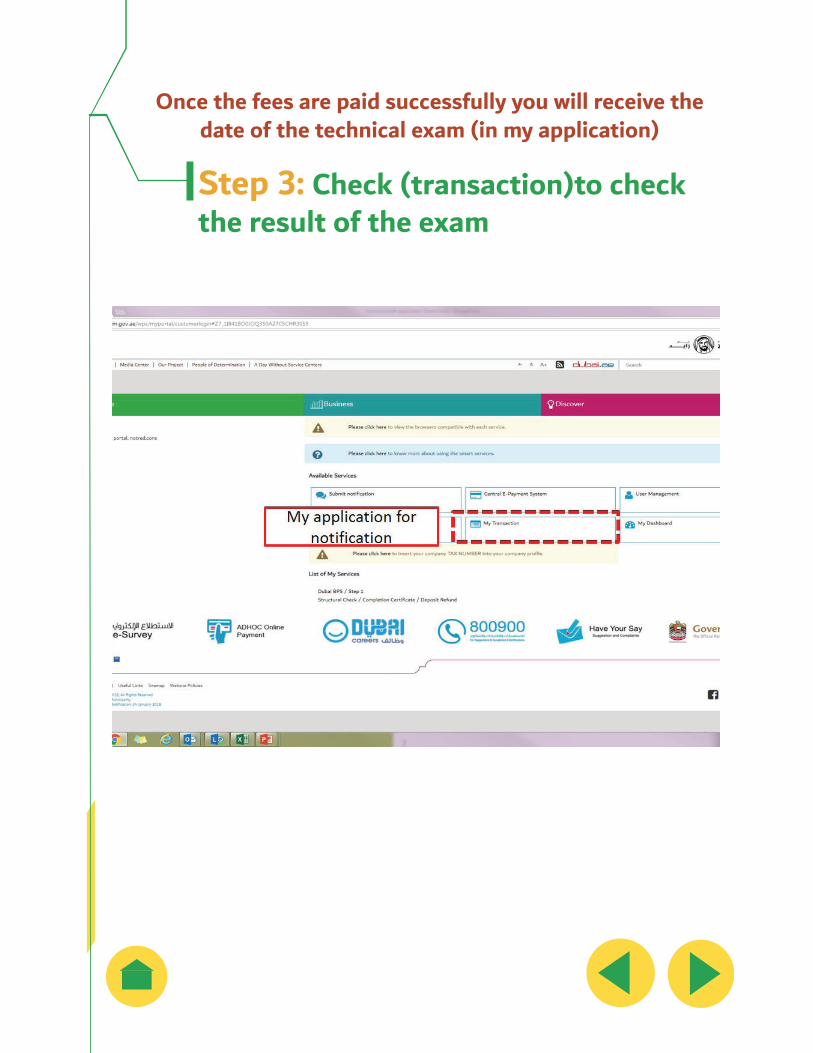
Once the fees are paid successfully you will receive the date of the technical exam (in my application)
Step 3: Check (transaction)to check the result of the exam
If the engineer passed the exam you have to create a consultant account as explained in Section II of this manual
Section 2
Create a Consultant Account
II-I
Login
Step1: Go to DM Website
Step 2: Click on Login icon
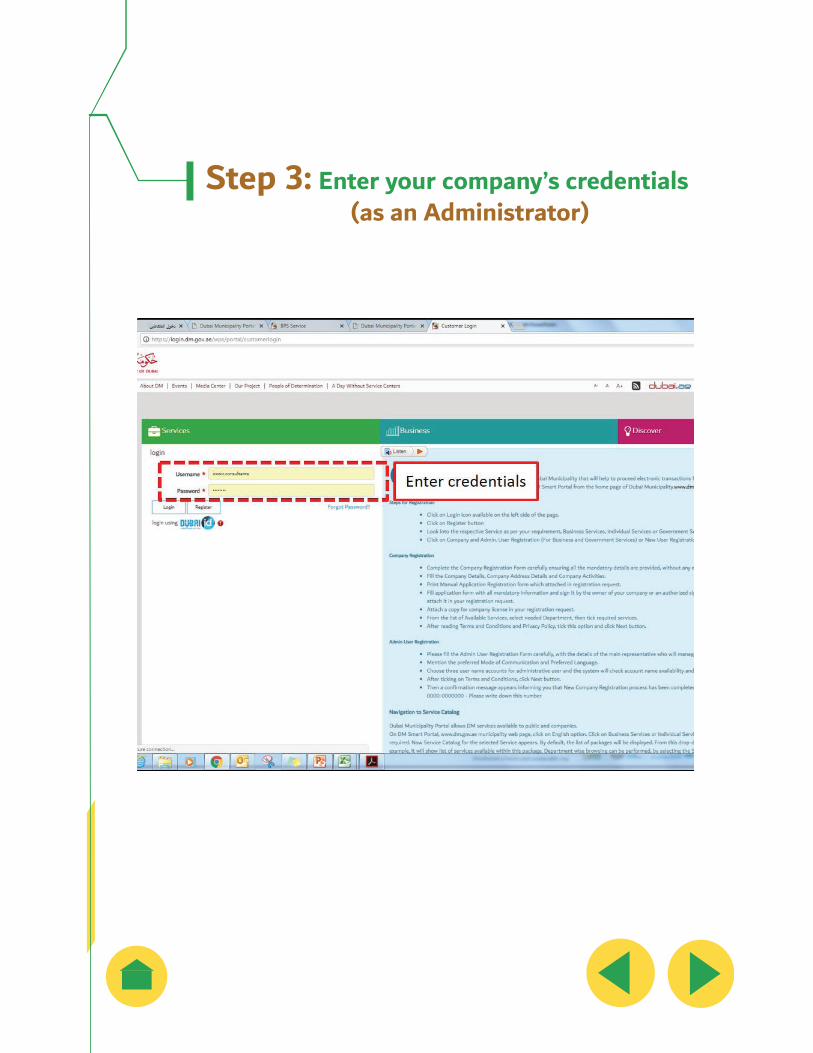
Step 3: Enter your company’s credentials (as an Administrator)
II-II
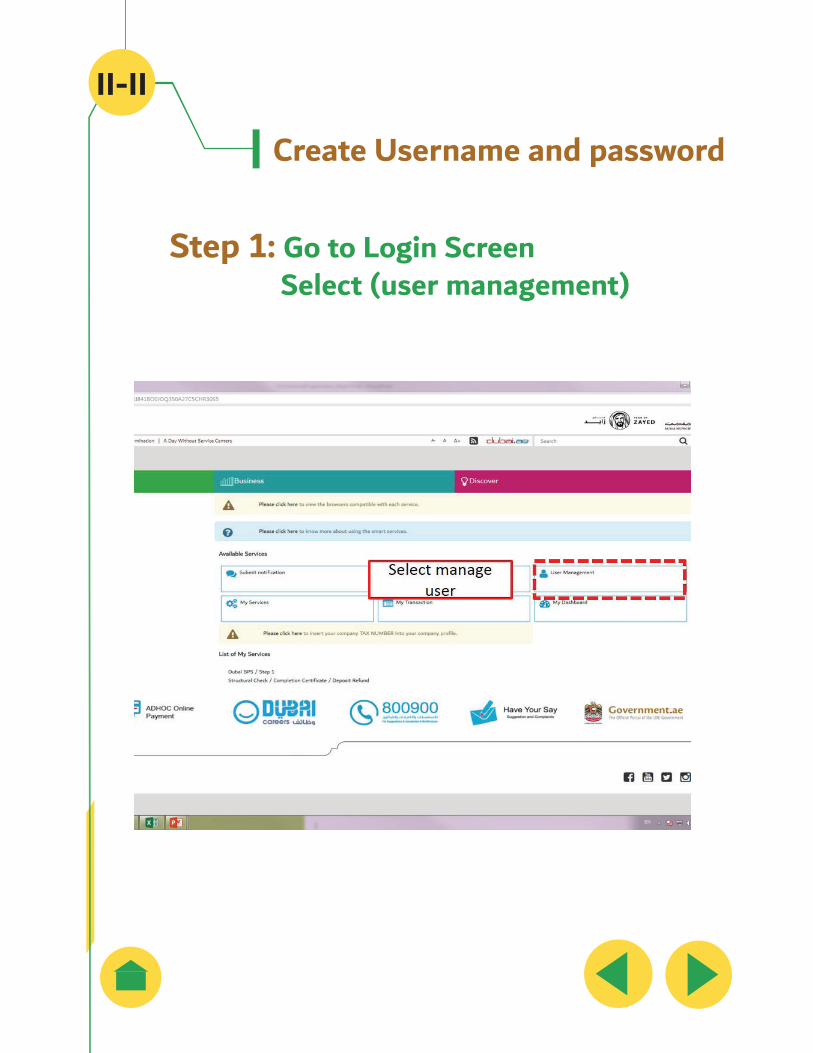
Create Username and password
Step 1: Go to Login Screen Select (user management)
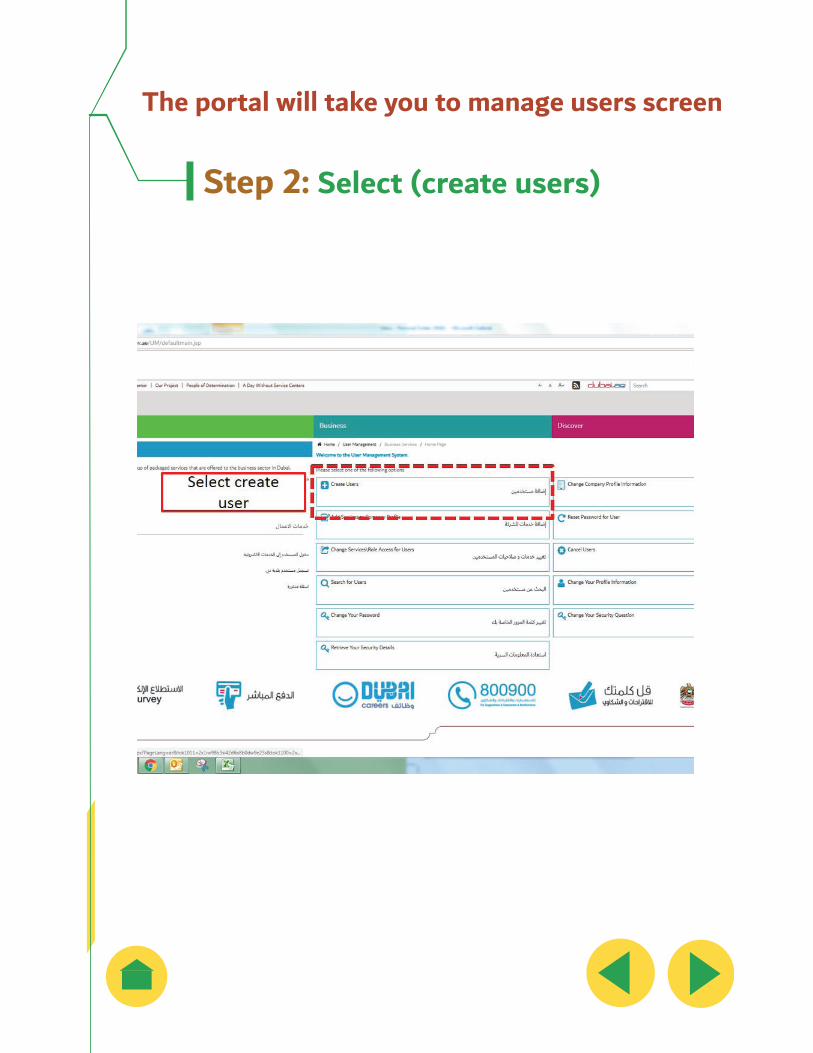
The portal will take you to manage users screen
Step 2: Select (create users)
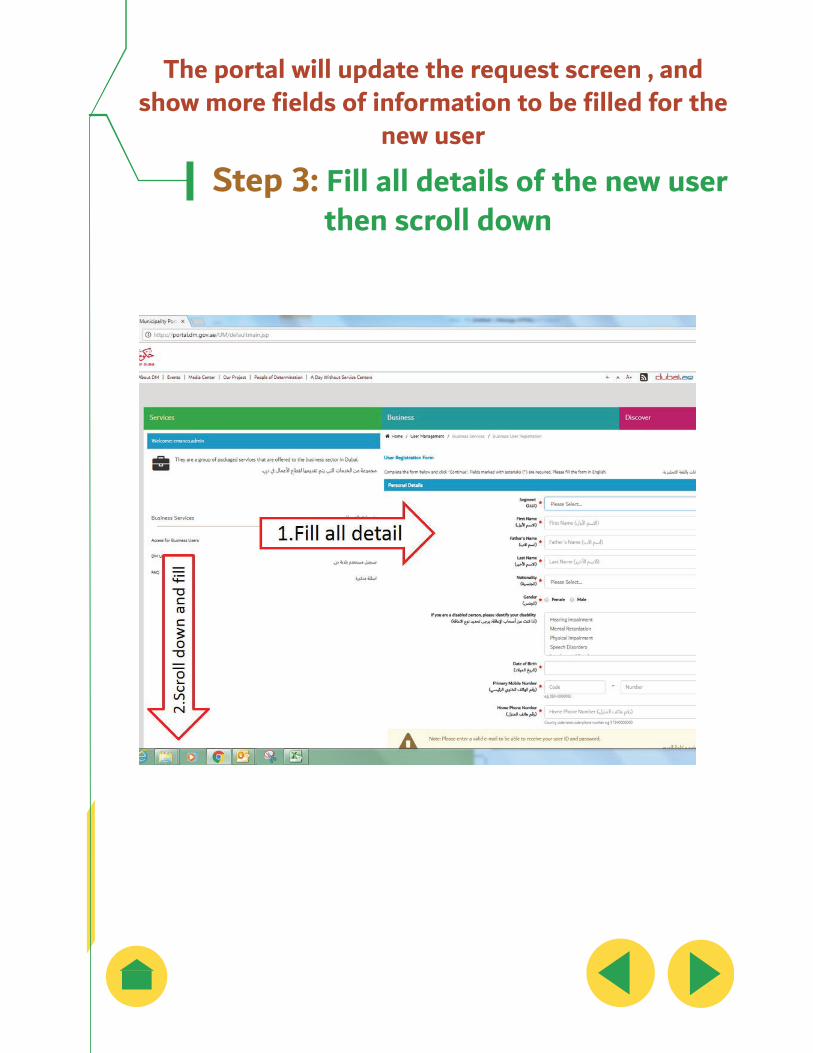
The portal will update the request screen , and show more fields of information to be filled for the
new user
Step 3: Fill all details of the new user then scroll down
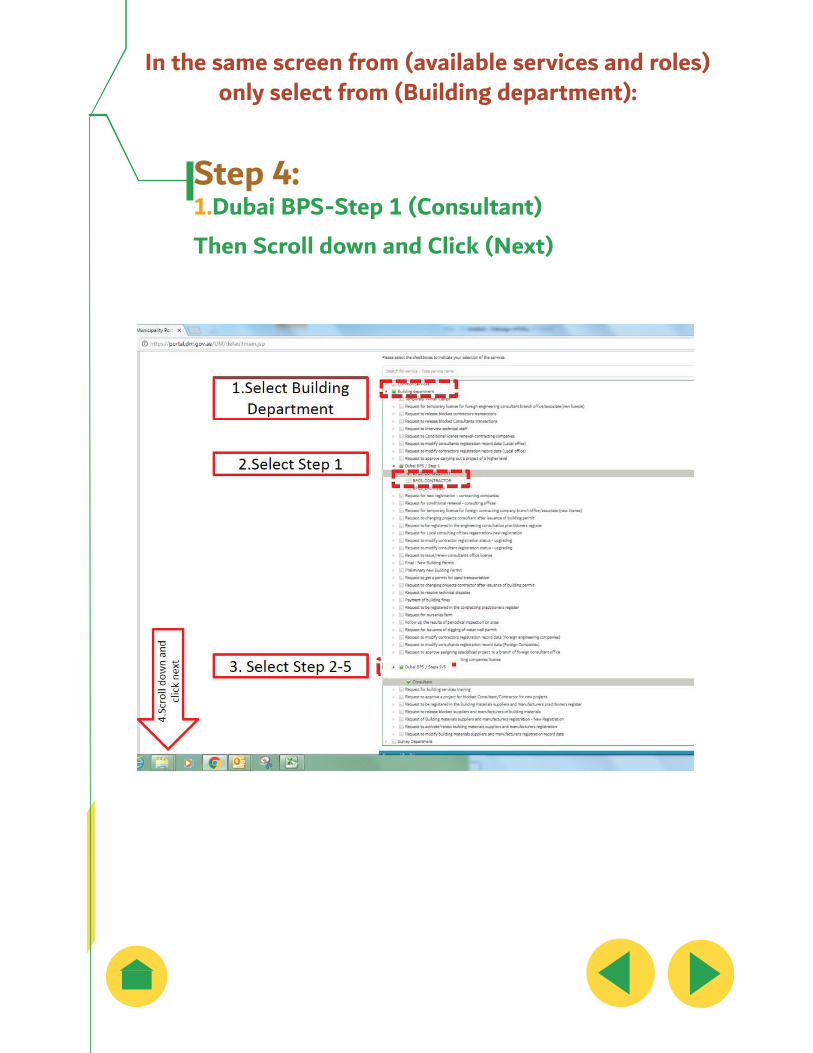
In the same screen from (available services and roles) only select from (Building department):
Step 4:1.Dubai BPS-Step 1 (Consultant) Then Scroll down and Click (Next)
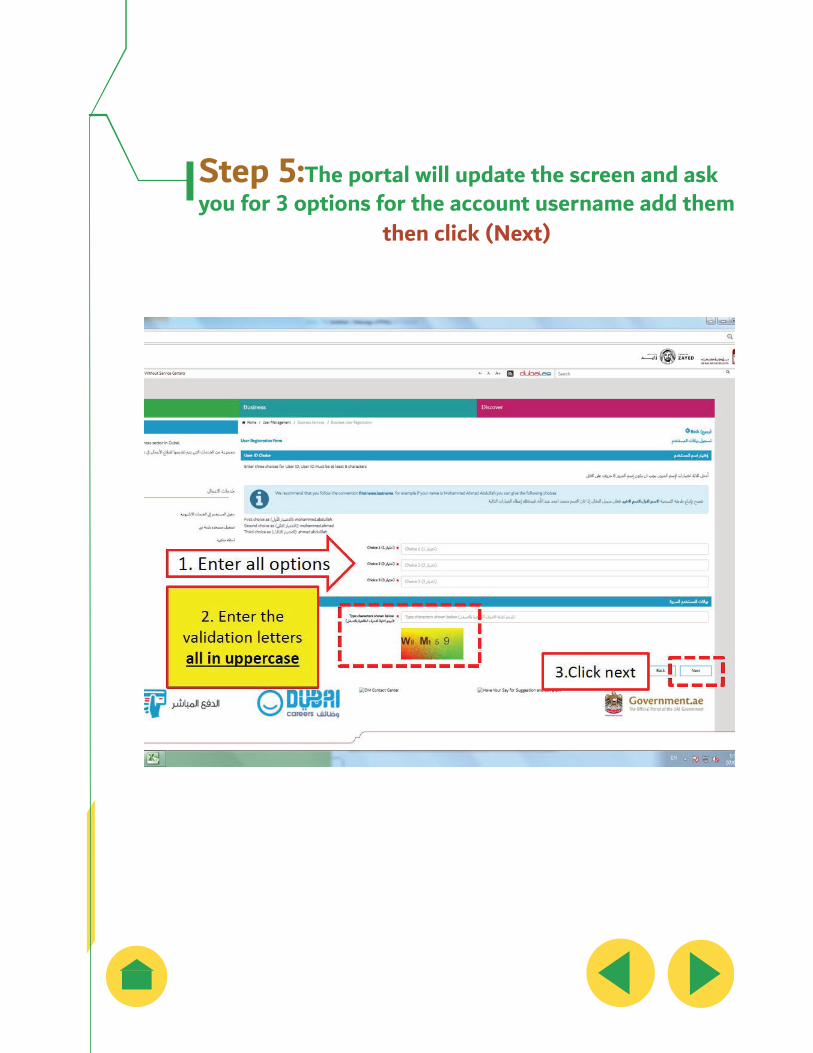
Step 5:The portal will update the screen and ask you for 3 options for the account username add them
then click (Next)
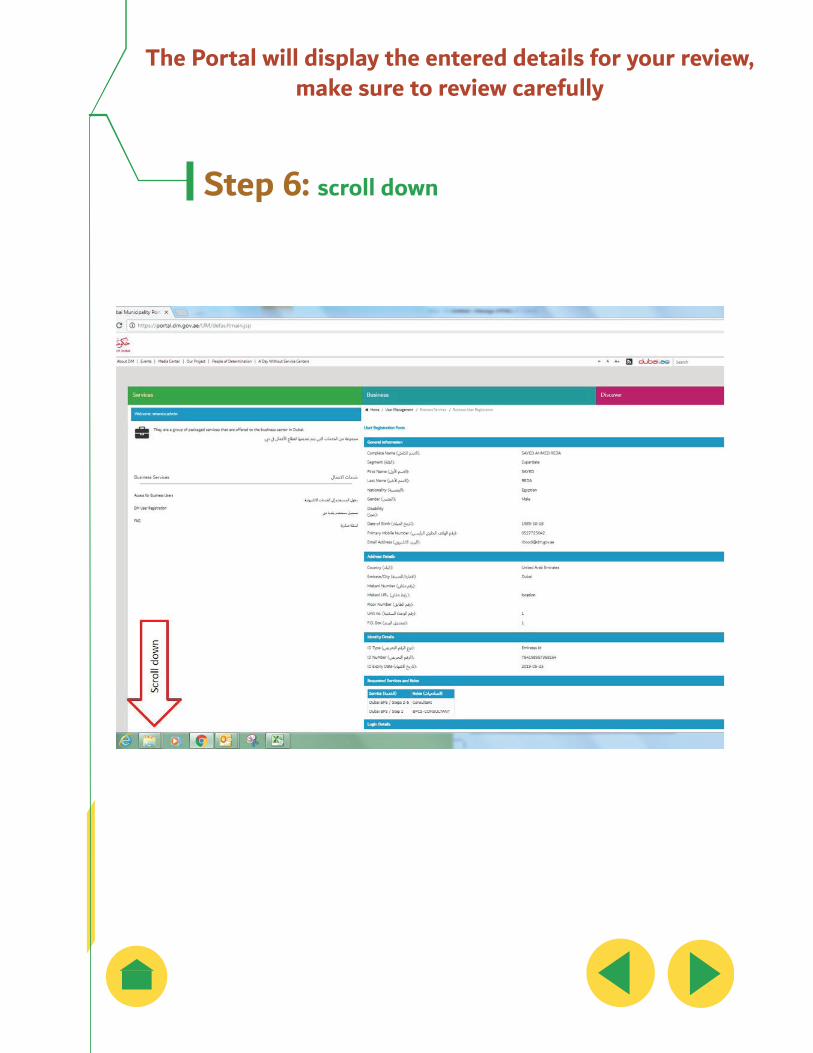
The Portal will display the entered details for your review,make sure to review carefully
Step 6: scroll down
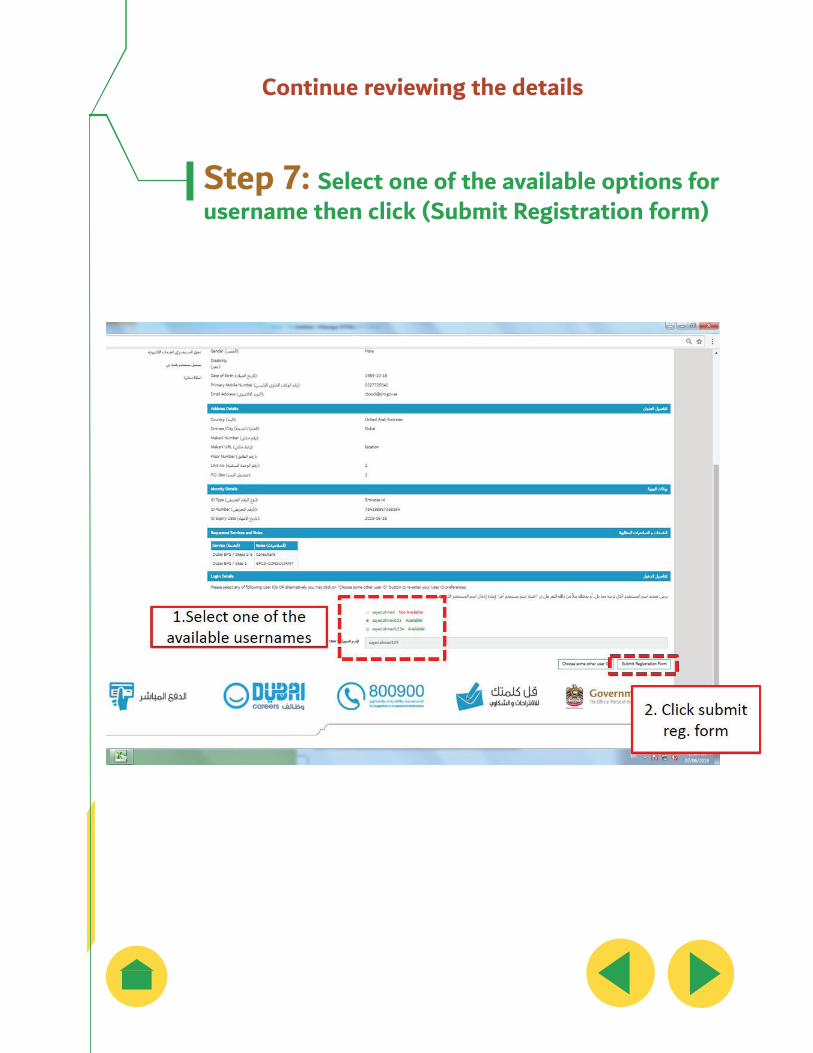
Continue reviewing the details
Step 7: Select one of the available options for username then click (Submit Registration form)
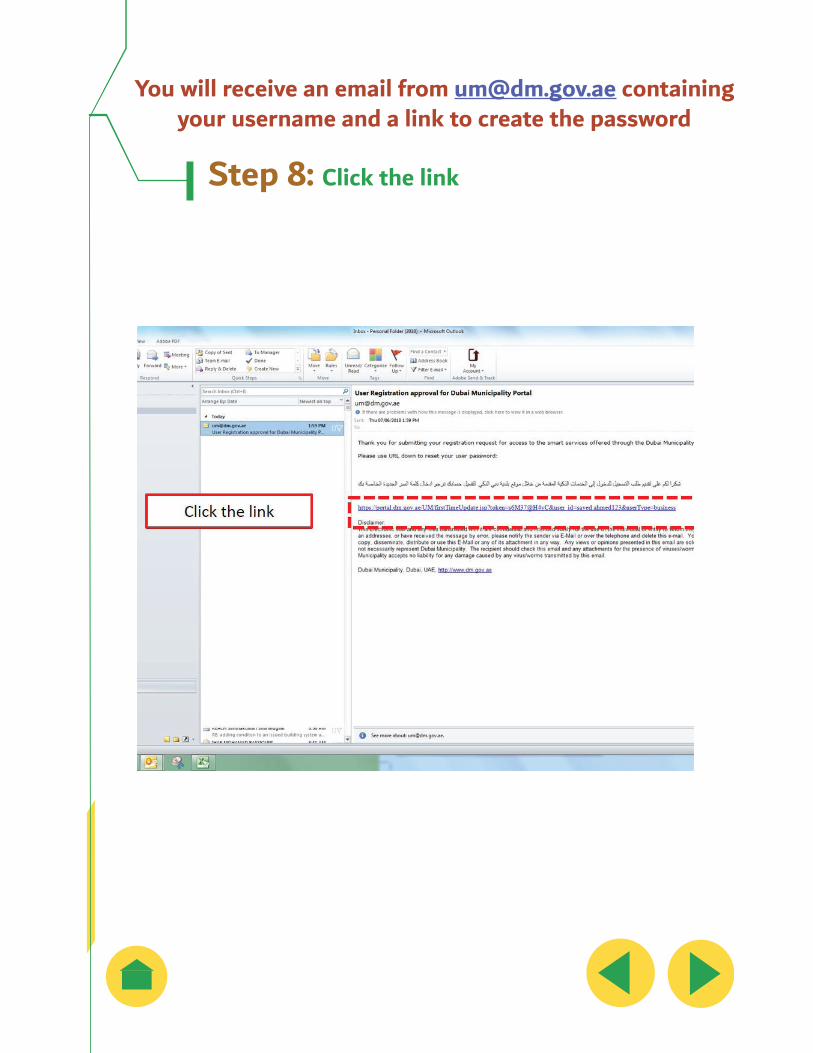
You will receive an email from [email protected] containing your username and a link to create the password
Step 8: Click the link
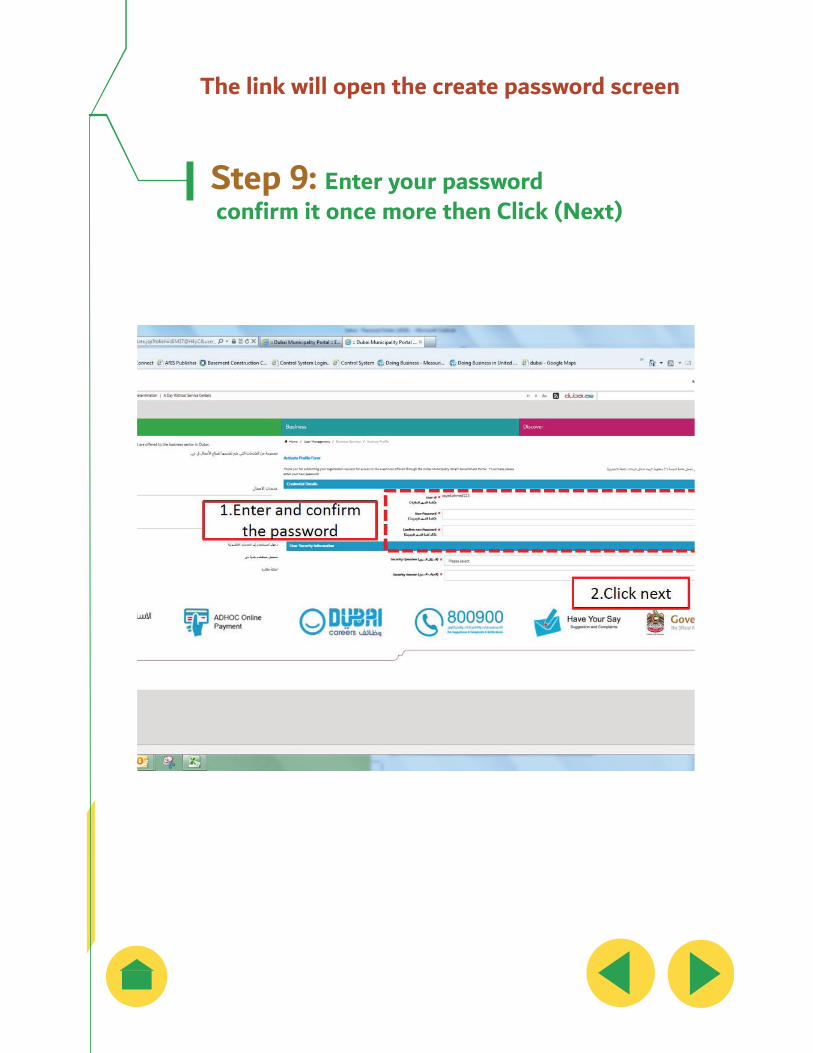
The link will open the create password screen
Step 9: Enter your password confirm it once more then Click (Next)

Your account as a consultant is ready to use!if you face any problems
make sure to send* the company name , trade license no,
username and the password to [email protected]
follow-up with Eng. Abed al Fattah Heissat on 04-2063255
*press on the email here to send your details Immediately
Section 3
Submit For Building Permit
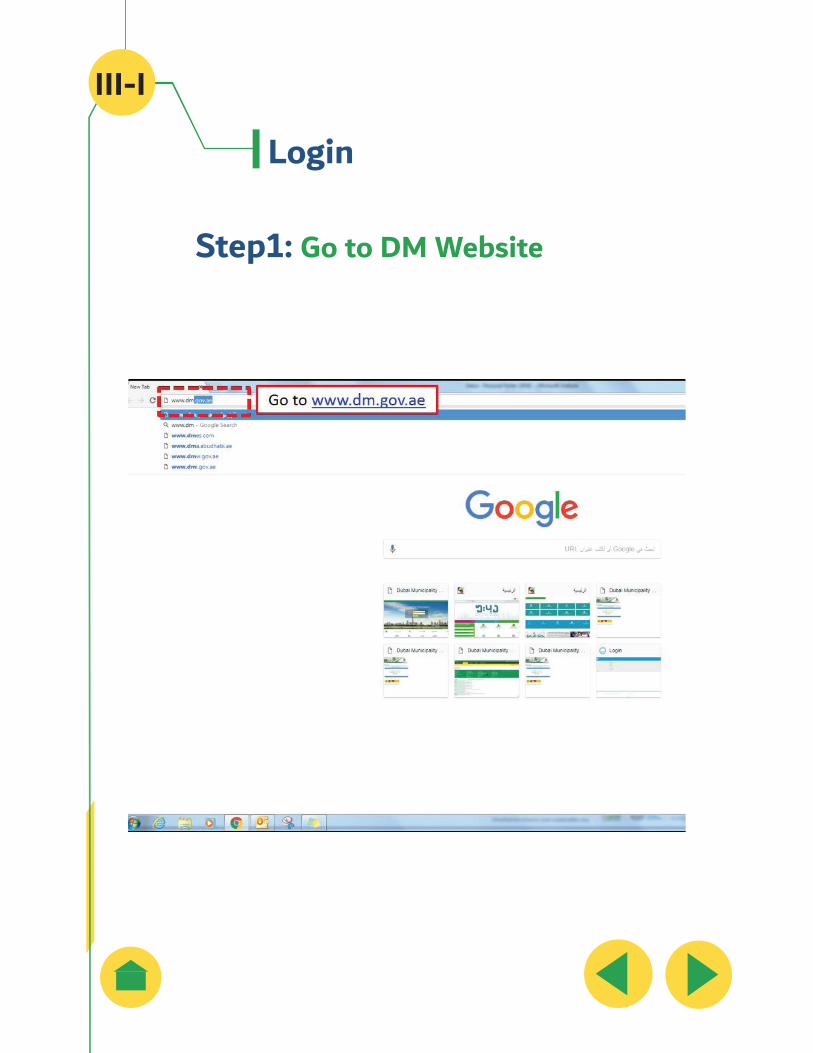
III-I
Login
Step1: Go to DM Website
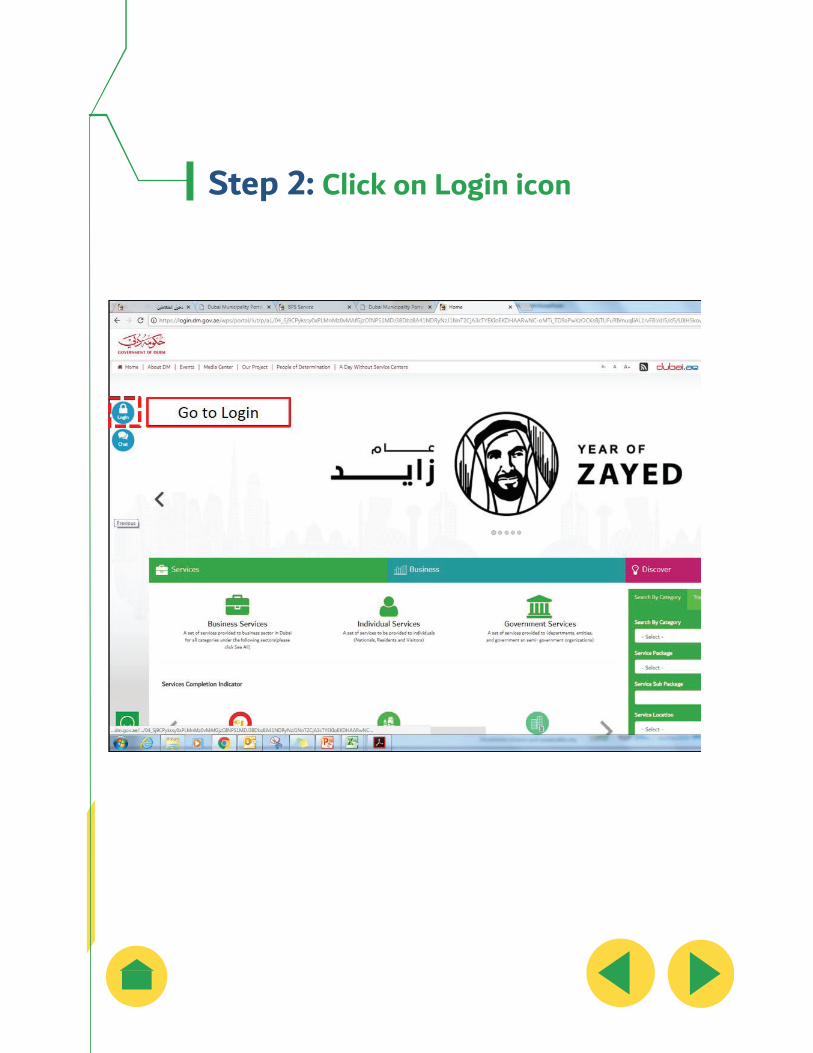
Step 2: Click on Login icon
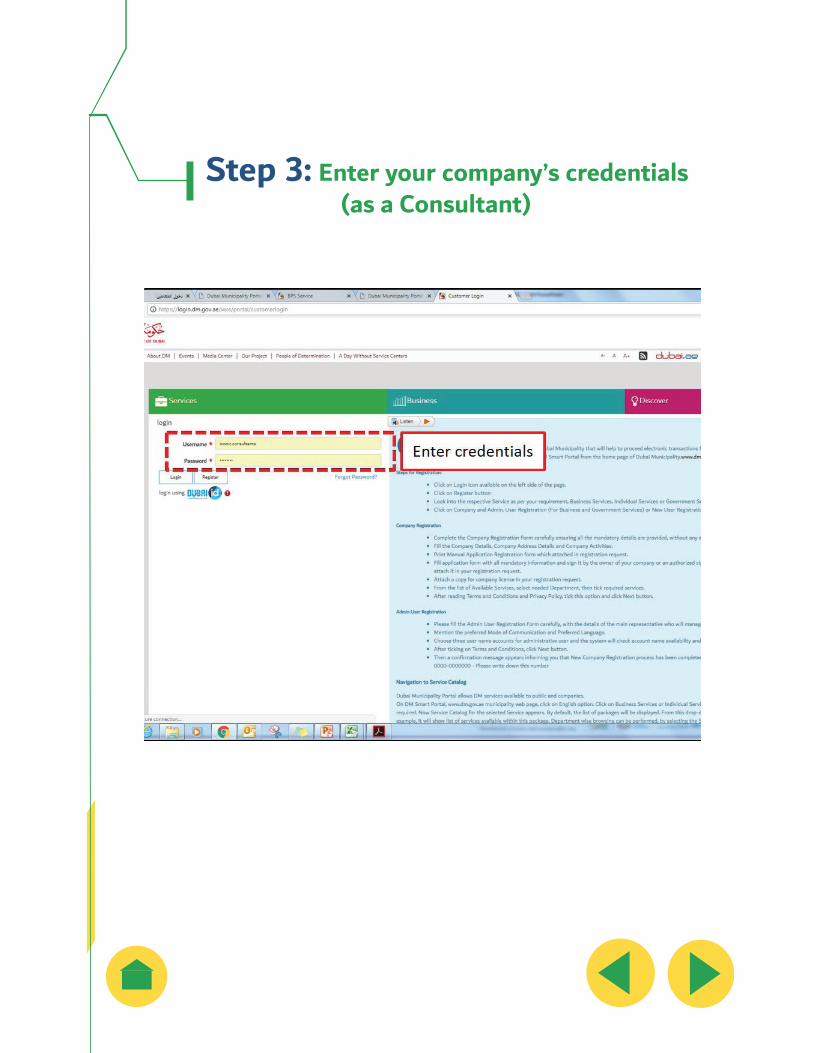
Step 3: Enter your company’s credentials (as a Consultant)
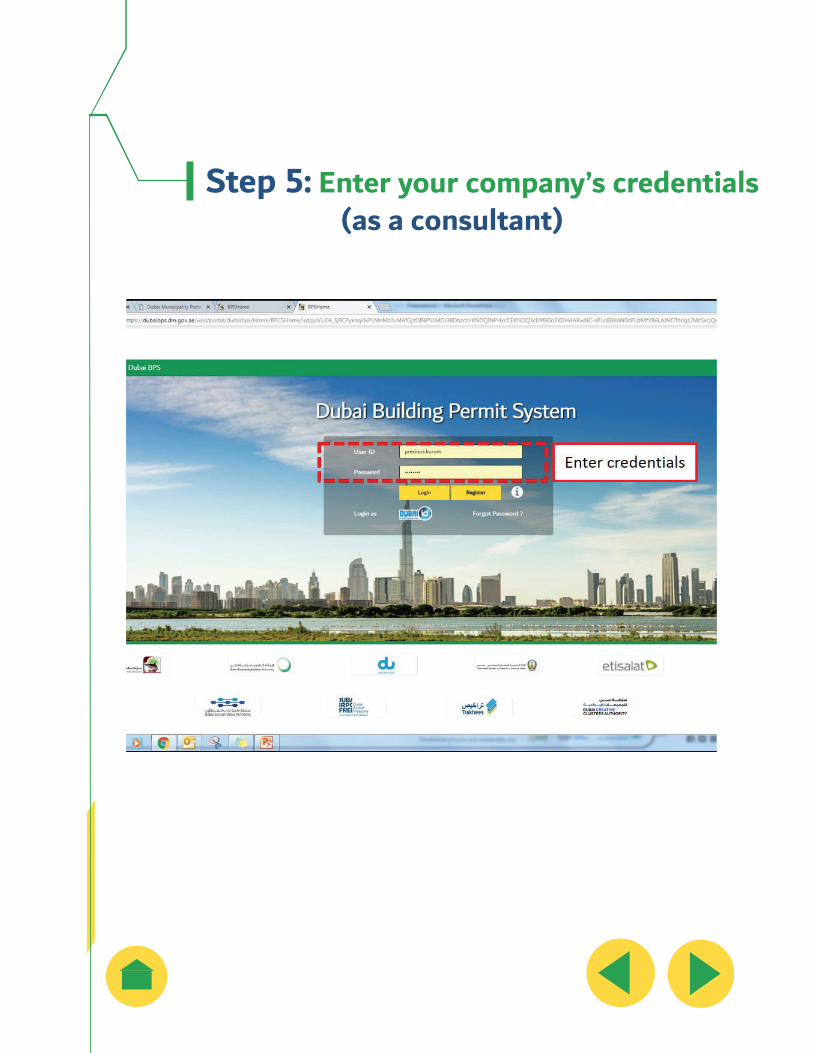
Step 5: Enter your company’s credentials (as a consultant)
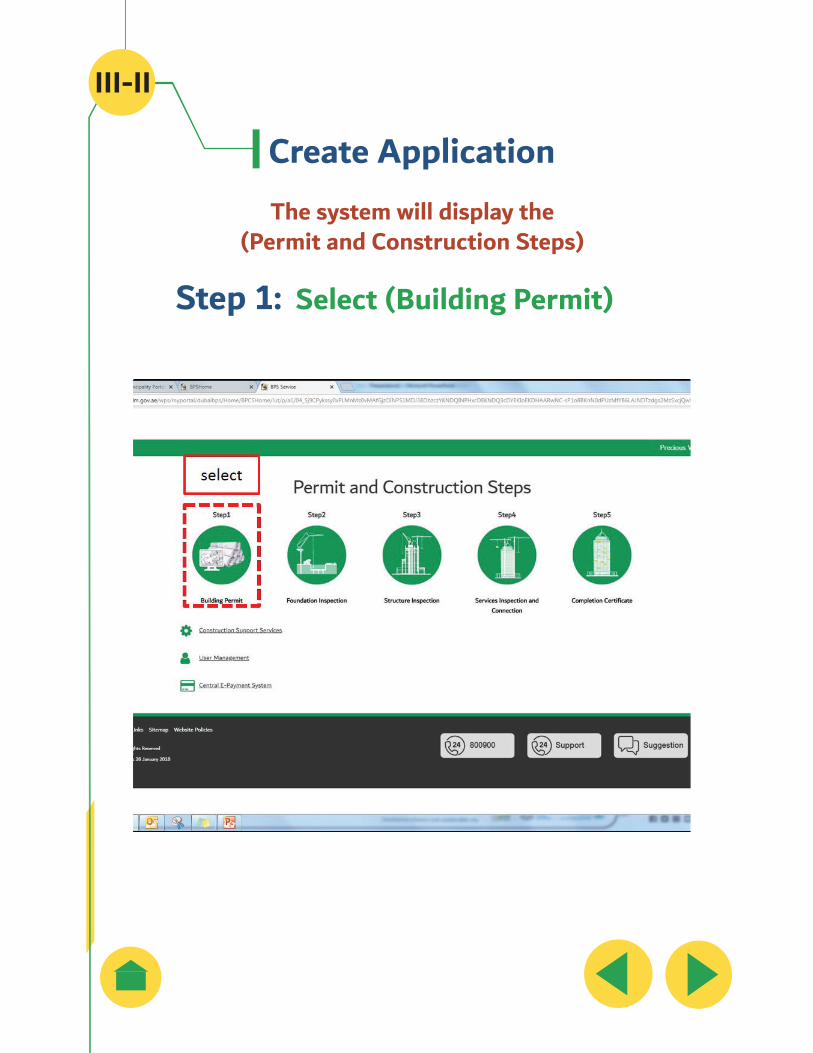
III-II
Create Application The system will display the
(Permit and Construction Steps)
Step 1: Select (Building Permit)
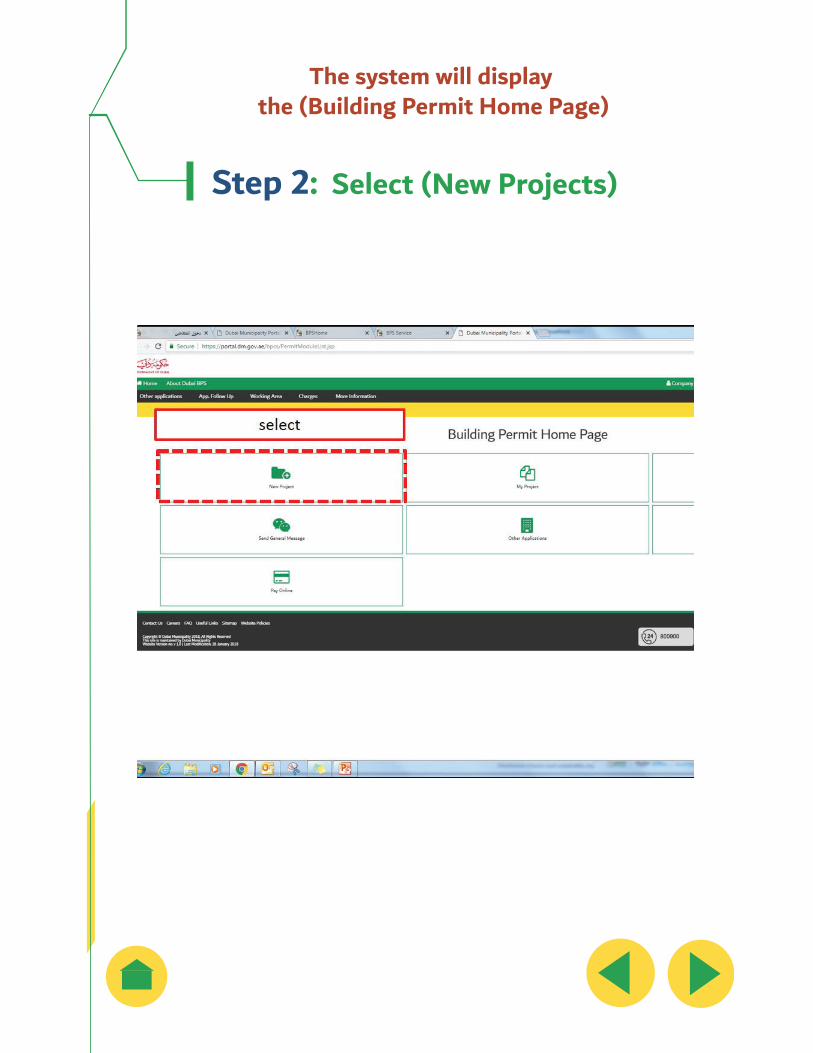
The system will display the (Building Permit Home Page)
Step 2: Select (New Projects)
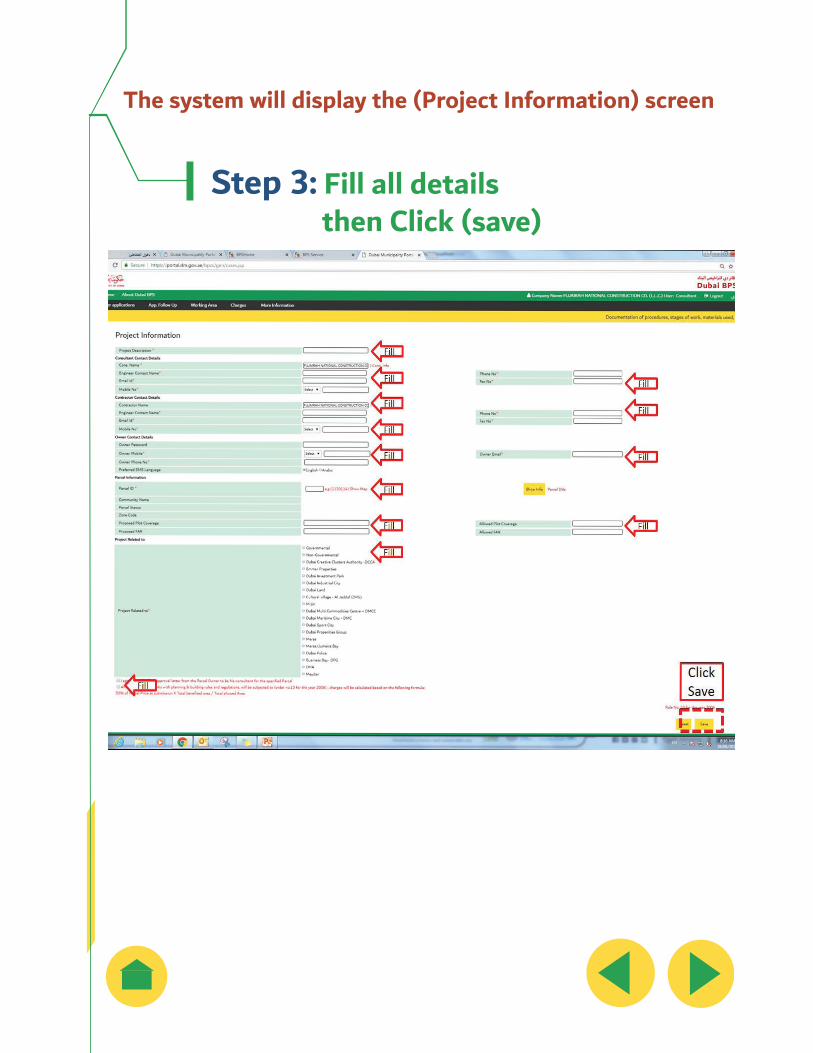
The system will display the (Project Information) screen
Step 3: Fill all details then Click (save)
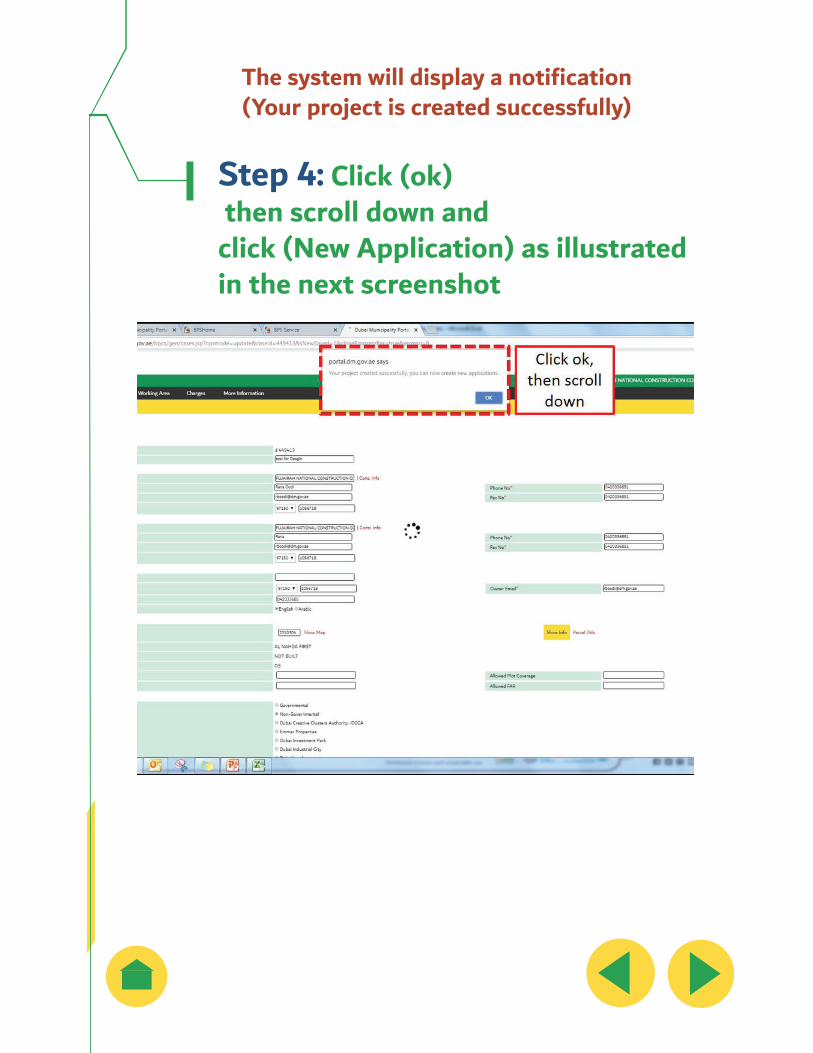
The system will display a notification (Your project is created successfully)
Step 4: Click (ok) then scroll down and click (New Application) as illustrated in the next screenshot
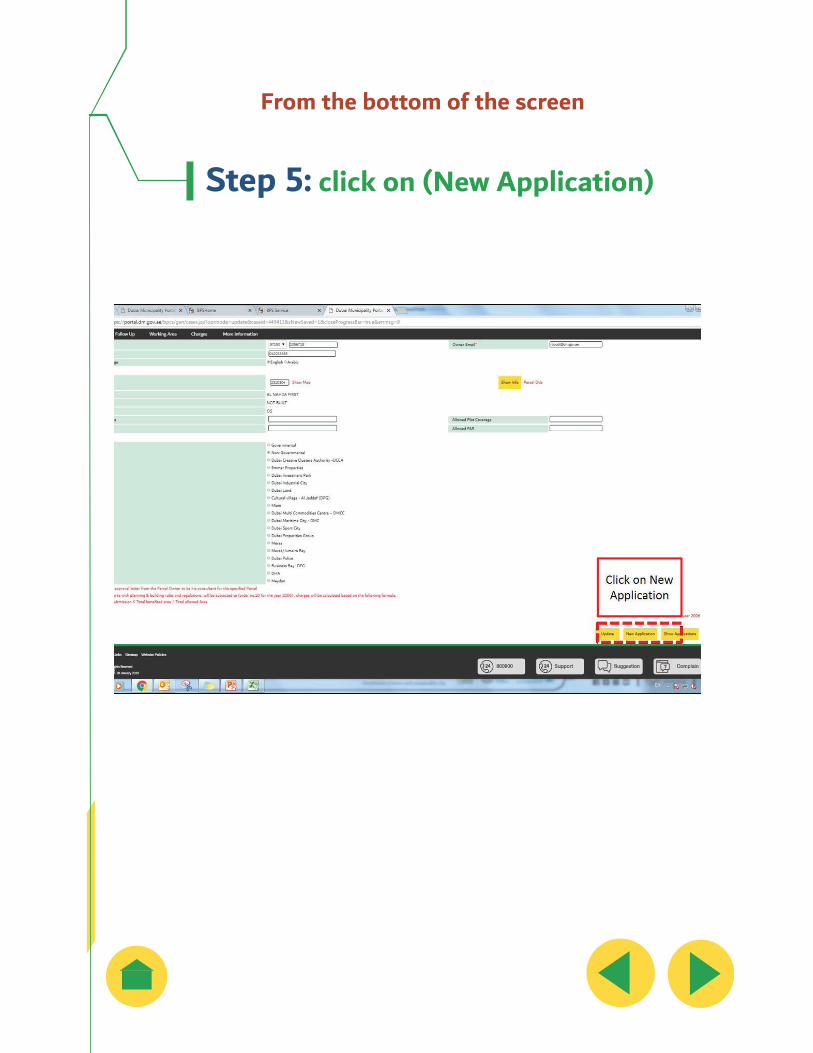
From the bottom of the screen
Step 5: click on (New Application)
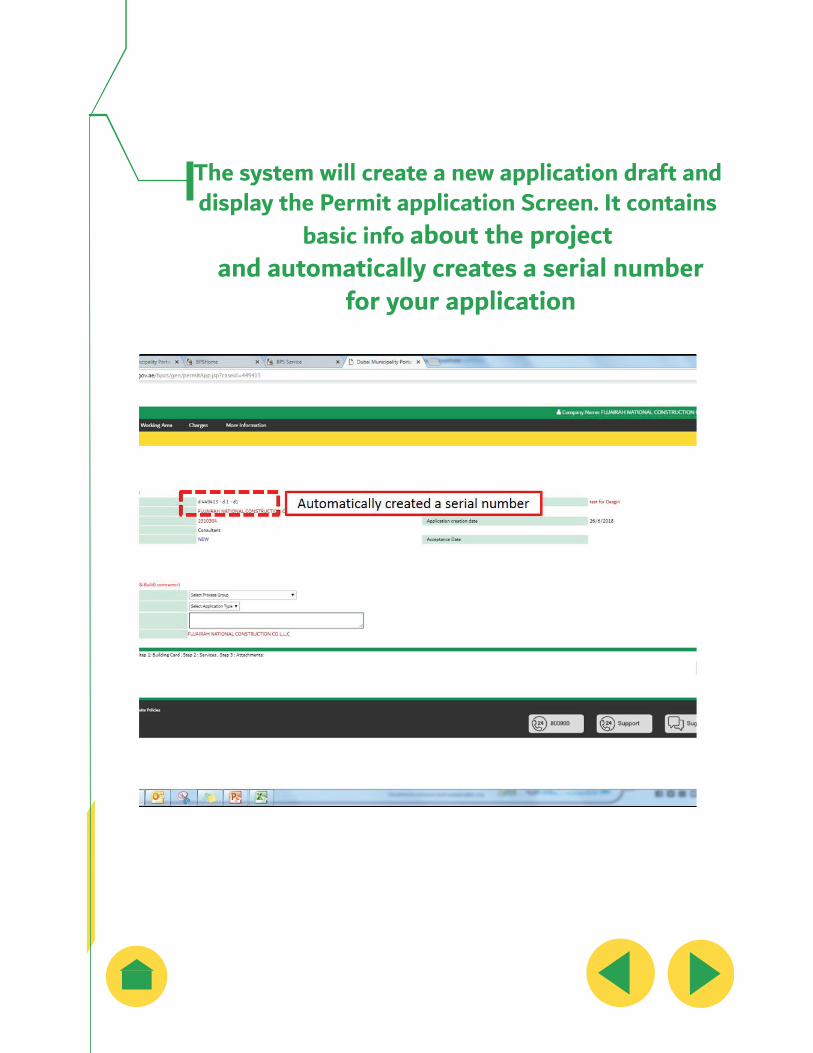
The system will create a new application draft and display the Permit application Screen. It contains
basic info about the project and automatically creates a serial number
for your application
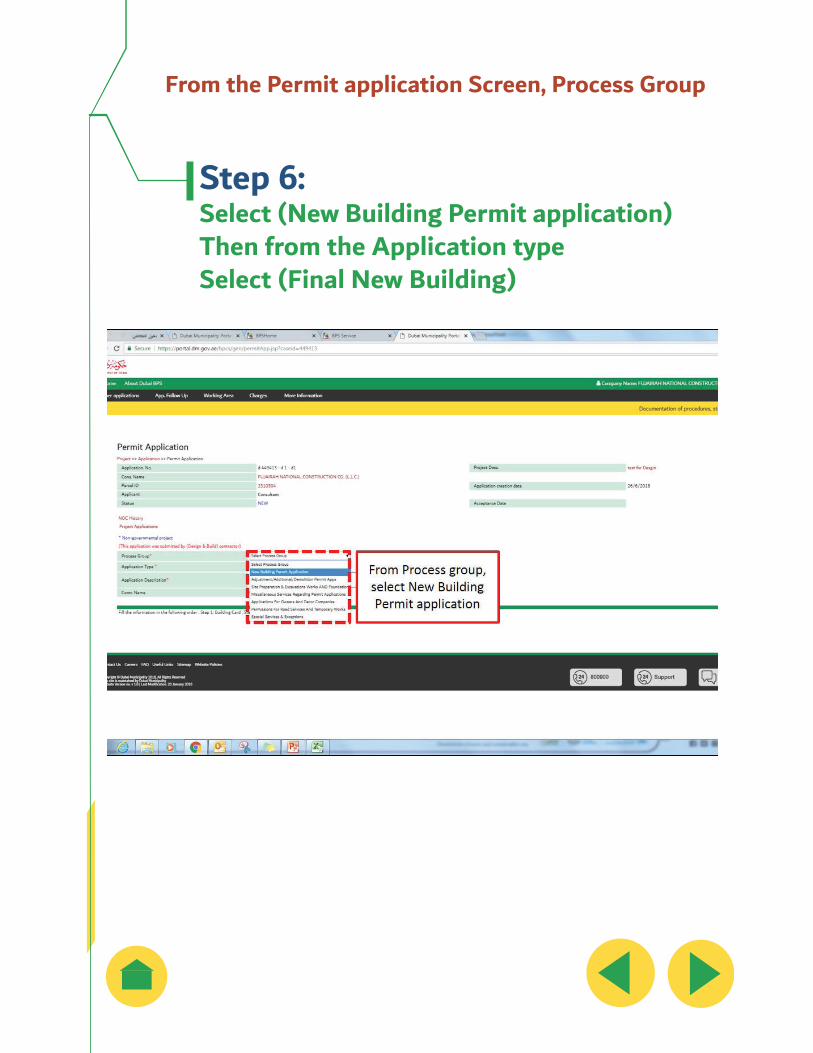
From the Permit application Screen, Process Group
Step 6:Select (New Building Permit application) Then from the Application type Select (Final New Building)
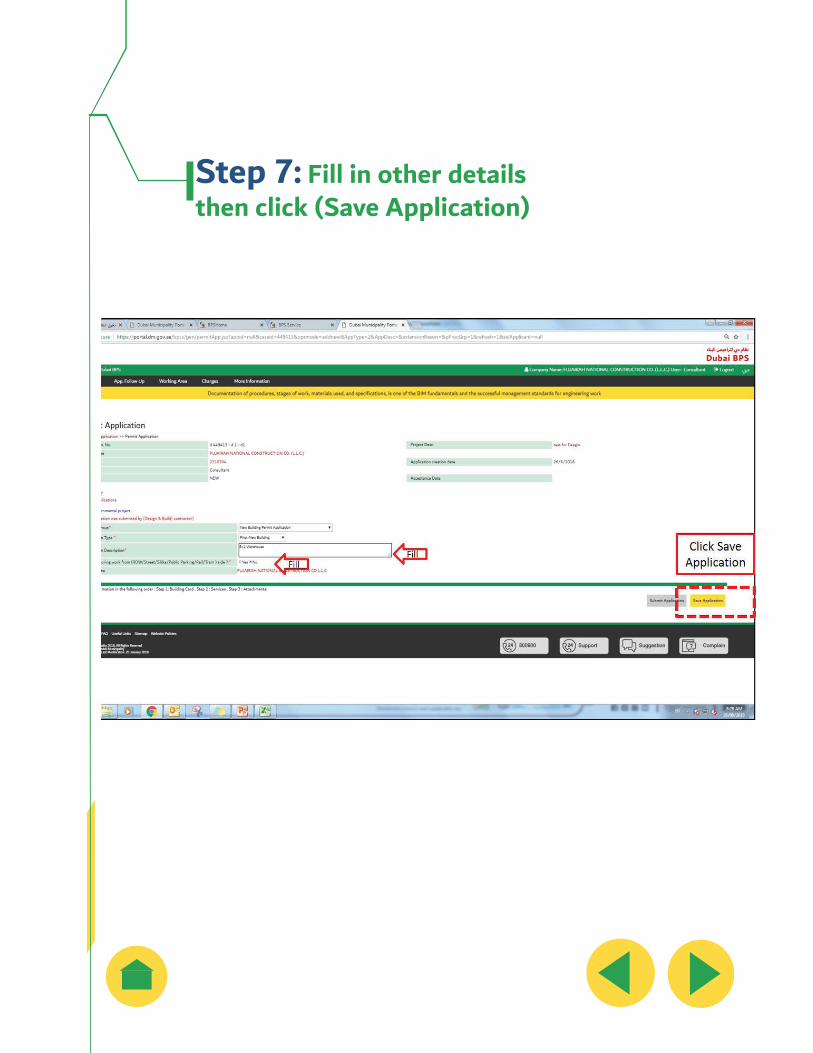
Step 7: Fill in other details then click (Save Application)
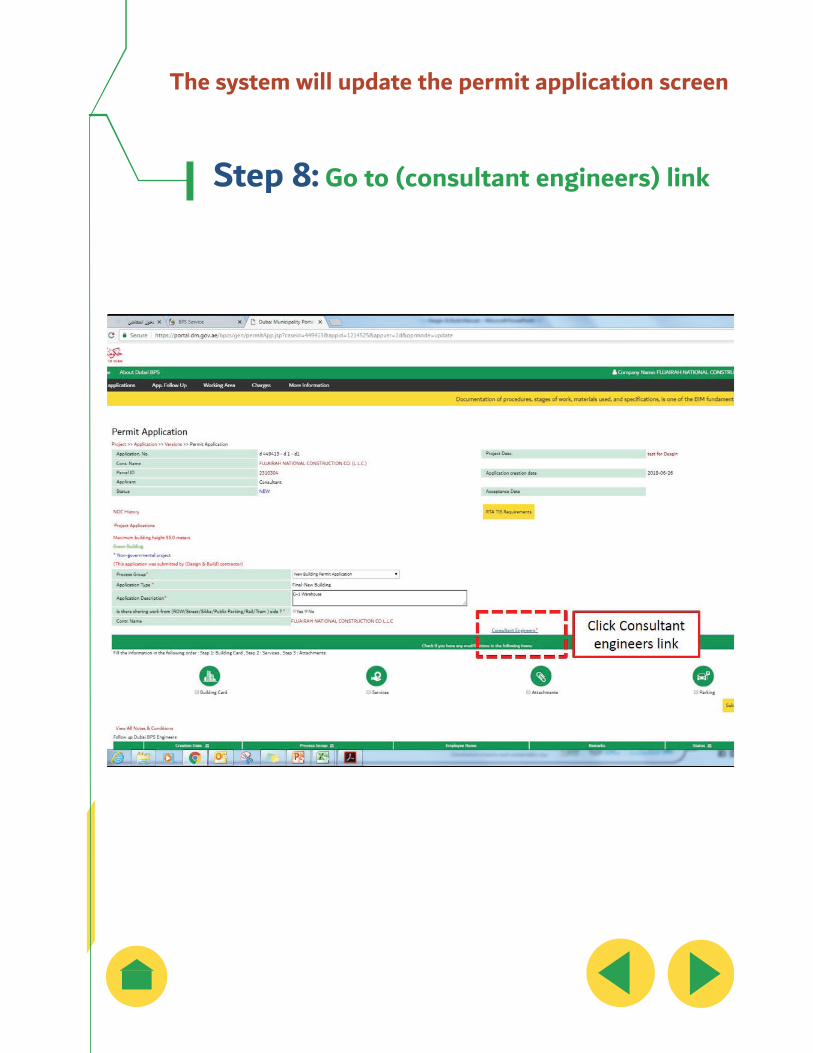
The system will update the permit application screen
Step 8: Go to (consultant engineers) link
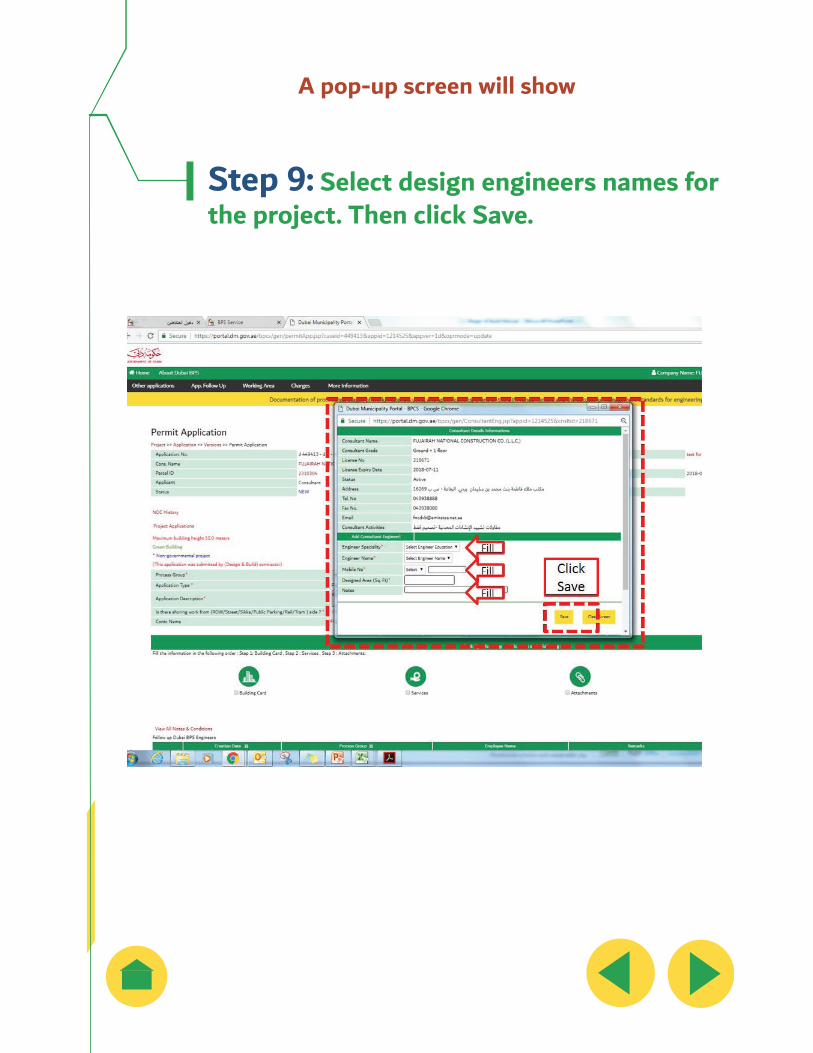
A pop-up screen will show
Step 9: Select design engineers names for the project. Then click Save.
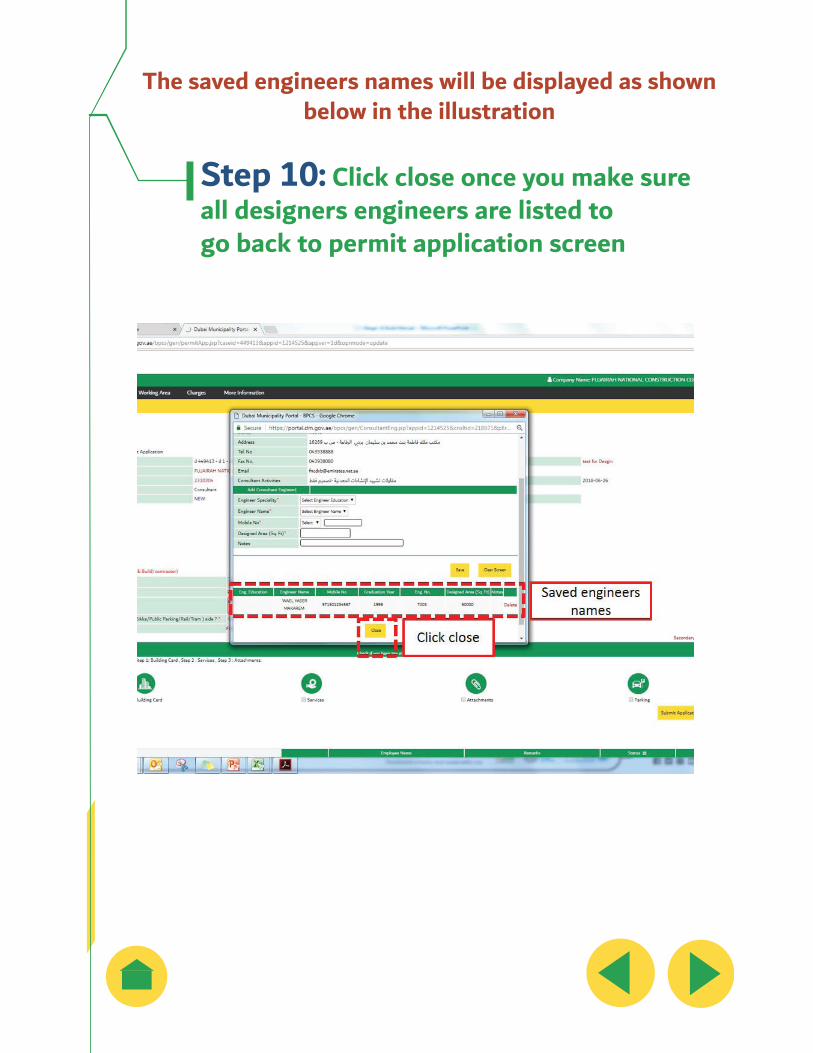
The saved engineers names will be displayed as shown below in the illustration
Step 10: Click close once you make sure all designers engineers are listed togo back to permit application screen
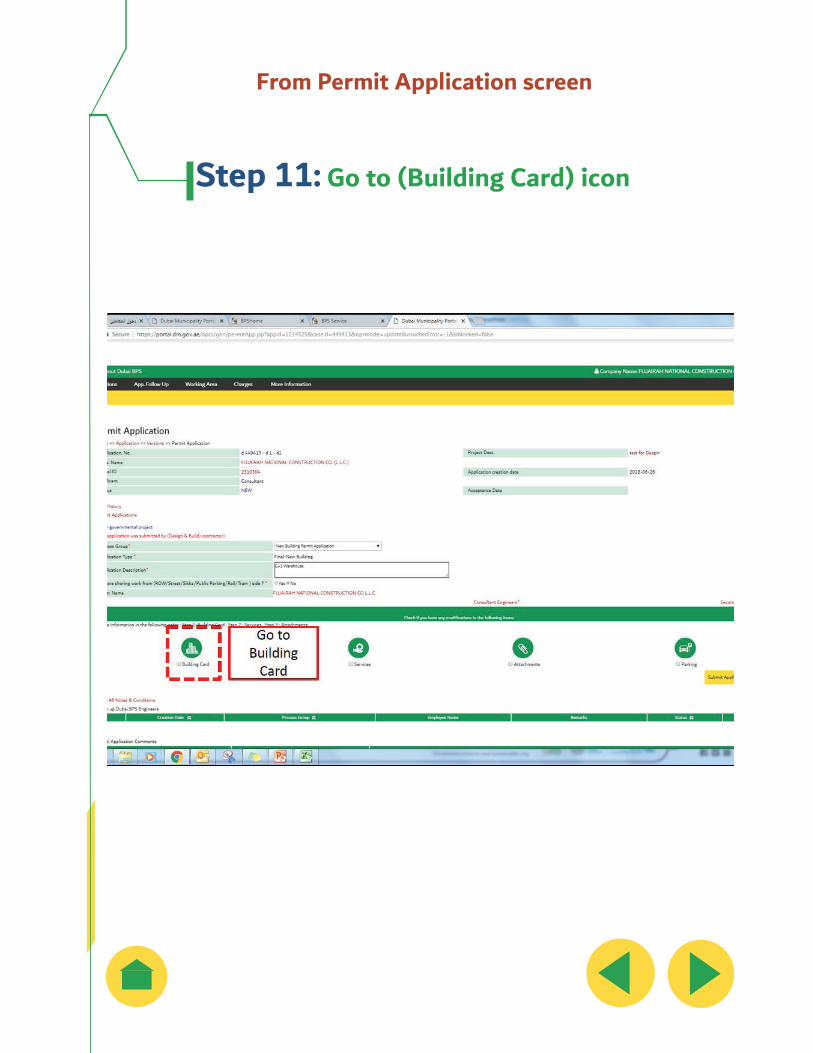
From Permit Application screen
Step 11: Go to (Building Card) icon
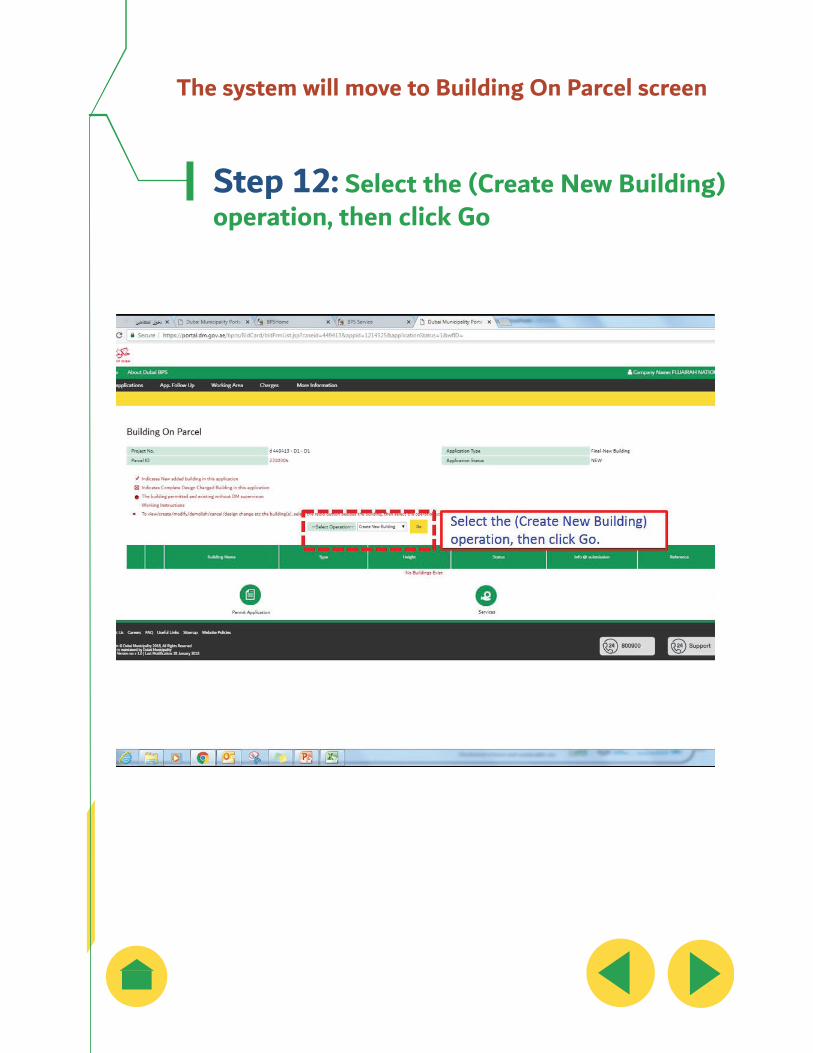
The system will move to Building On Parcel screen
Step 12: Select the (Create New Building) operation, then click Go
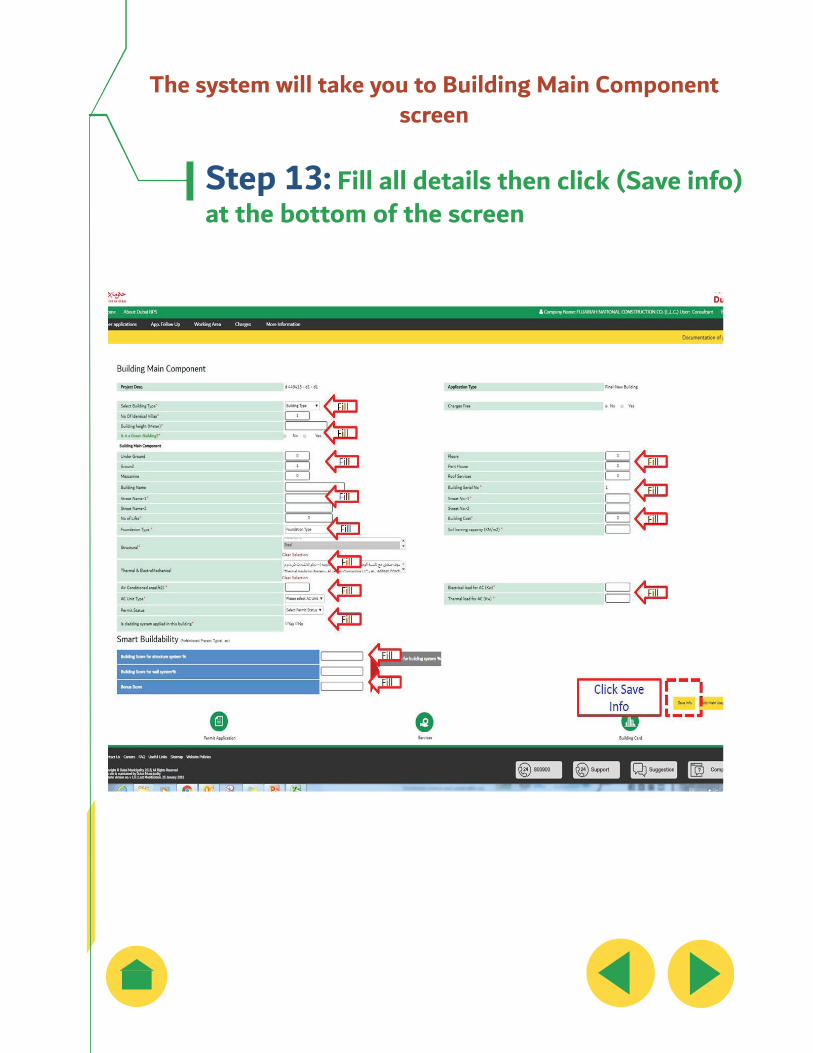
The system will take you to Building Main Component screen
Step 13: Fill all details then click (Save info) at the bottom of the screen
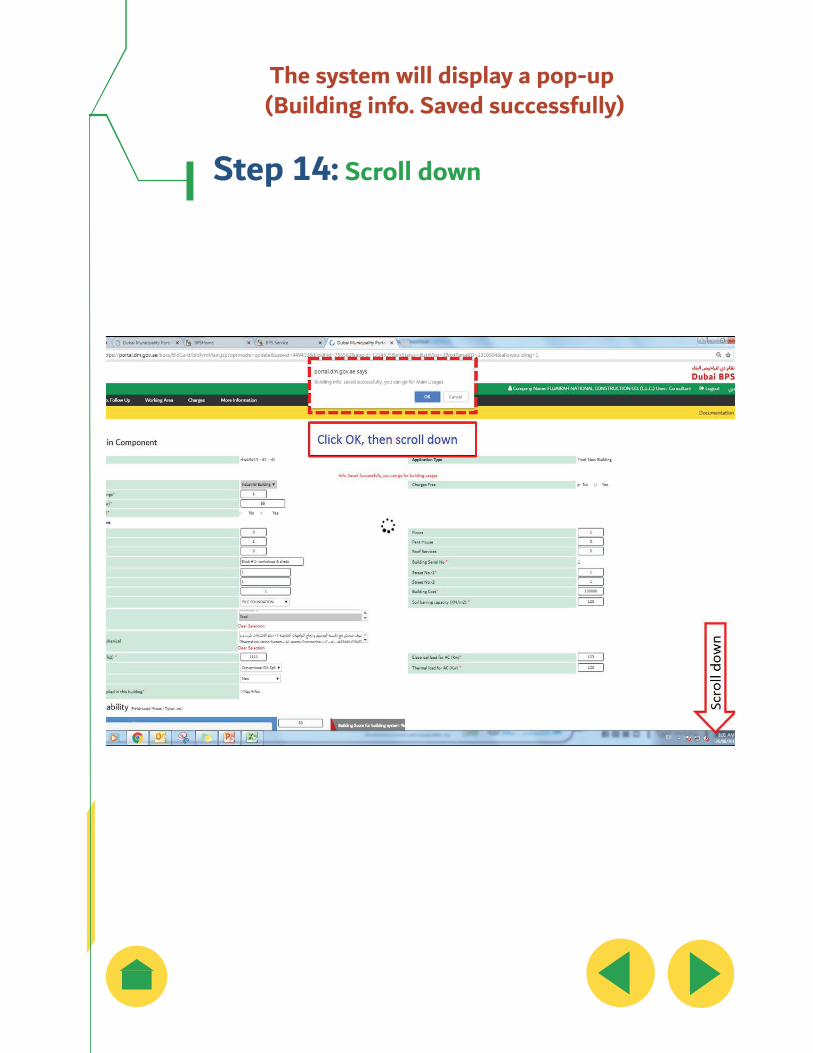
The system will display a pop-up (Building info. Saved successfully)
Step 14: Scroll down
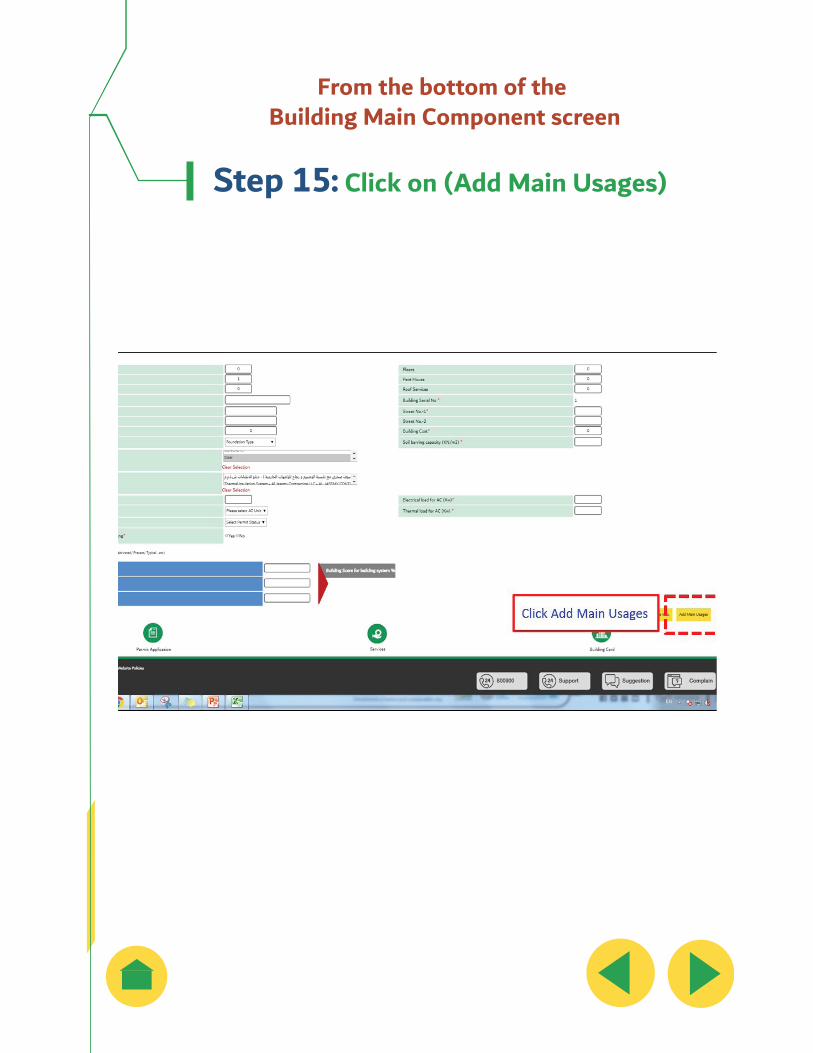
From the bottom of the Building Main Component screen
Step 15: Click on (Add Main Usages)
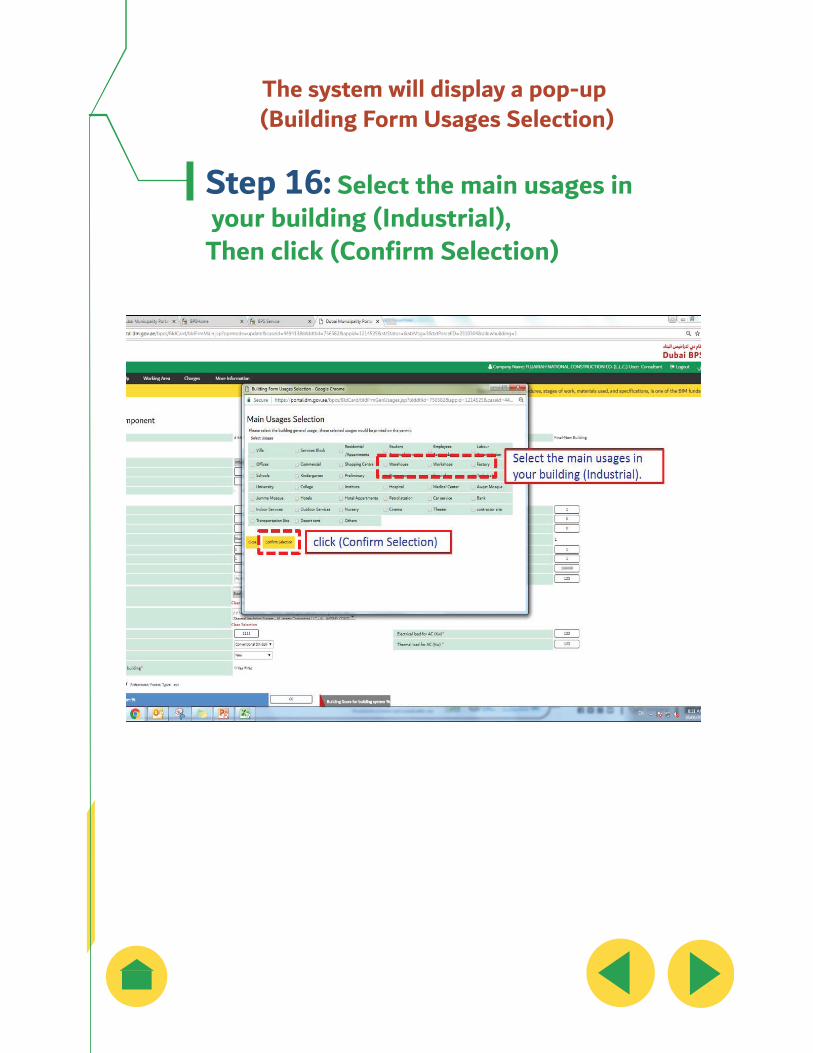
The system will display a pop-up (Building Form Usages Selection)
Step 16: Select the main usages in your building (Industrial), Then click (Confirm Selection)
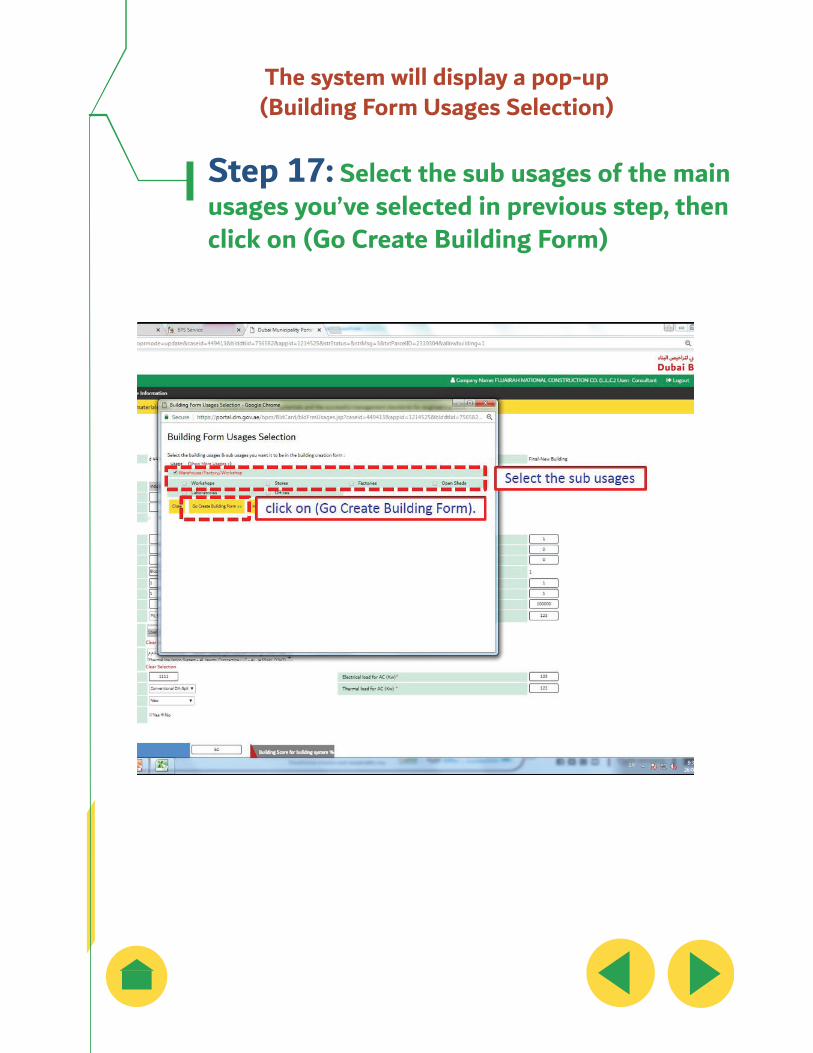
The system will display a pop-up (Building Form Usages Selection)
Step 17: Select the sub usages of the mainusages you’ve selected in previous step, then click on (Go Create Building Form)
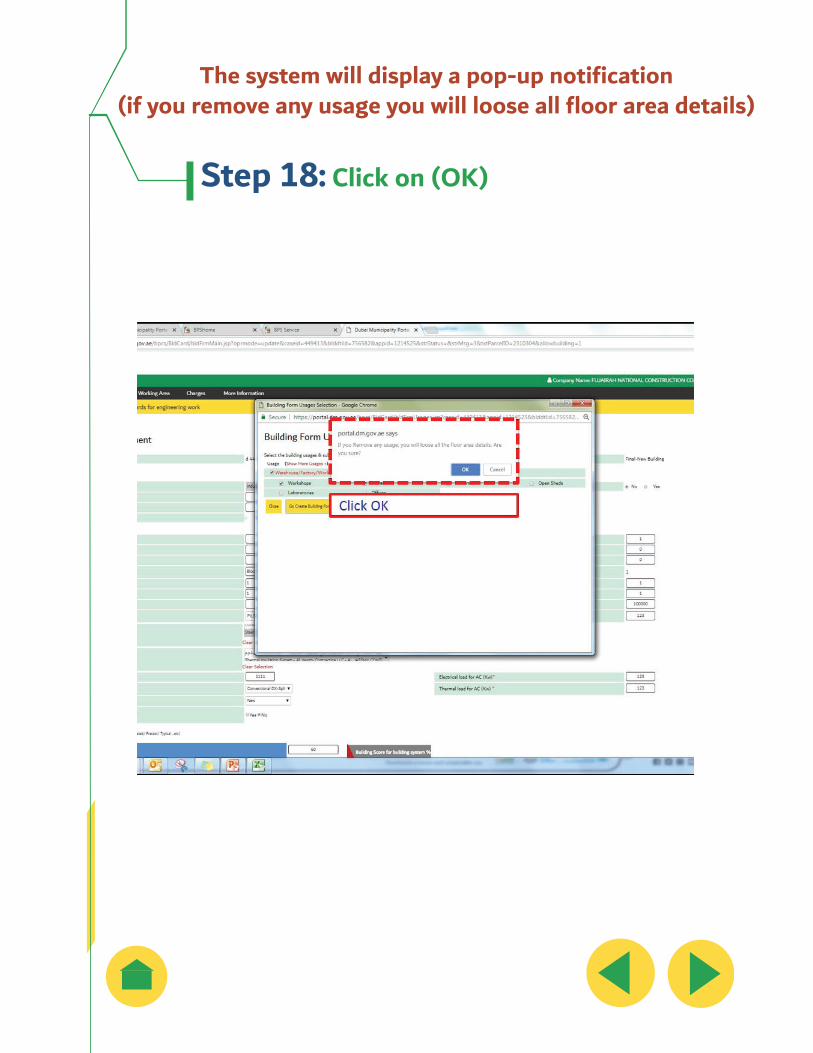
The system will display a pop-up notification (if you remove any usage you will loose all floor area details)
Step 18: Click on (OK)
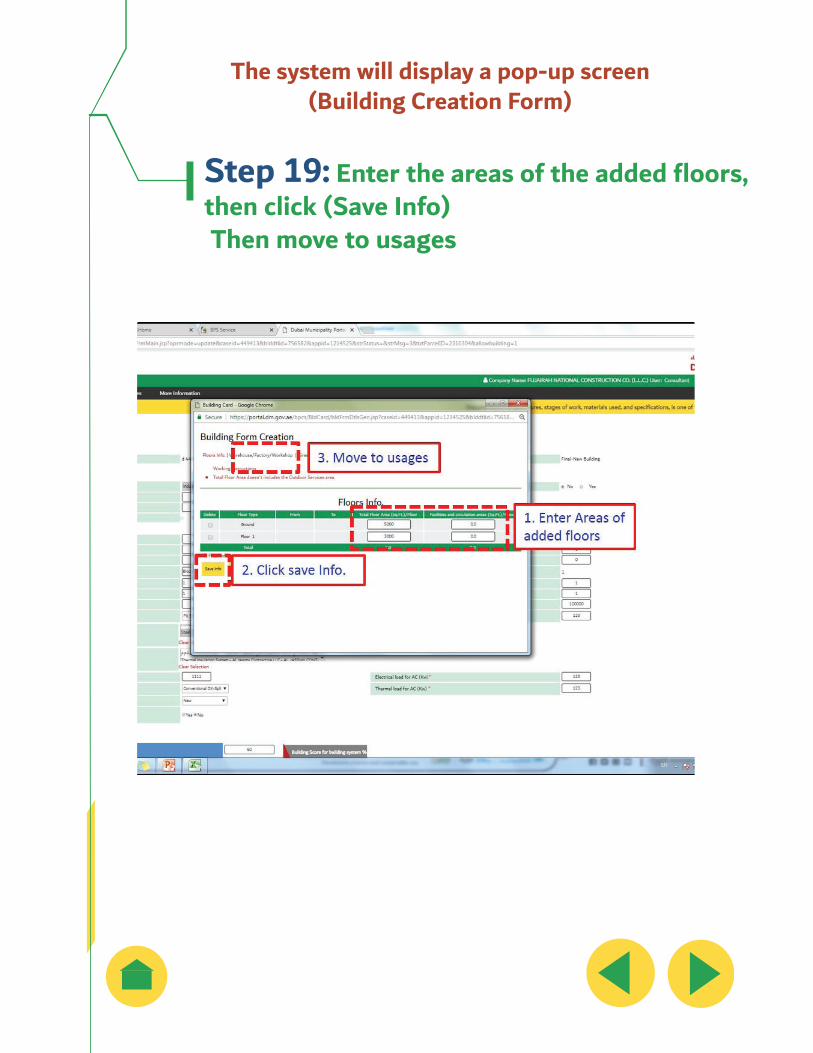
The system will display a pop-up screen (Building Creation Form)
Step 19: Enter the areas of the added floors, then click (Save Info) Then move to usages
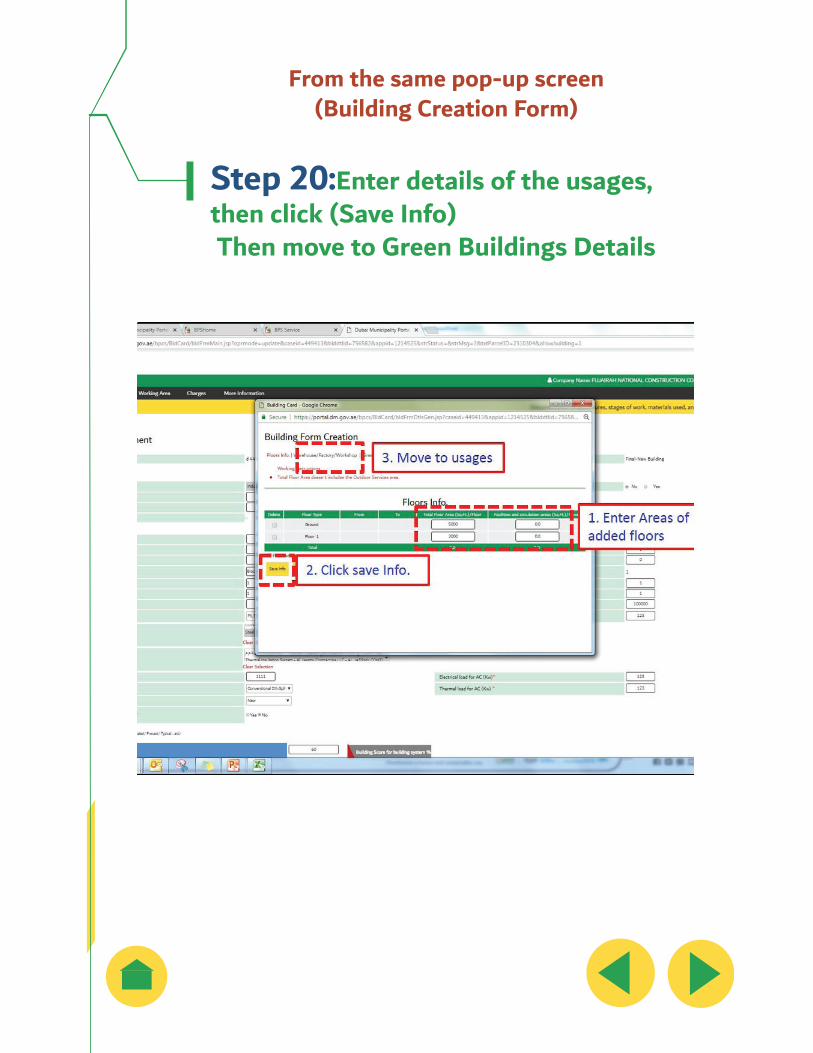
From the same pop-up screen (Building Creation Form)
Step 20:Enter details of the usages, then click (Save Info) Then move to Green Buildings Details
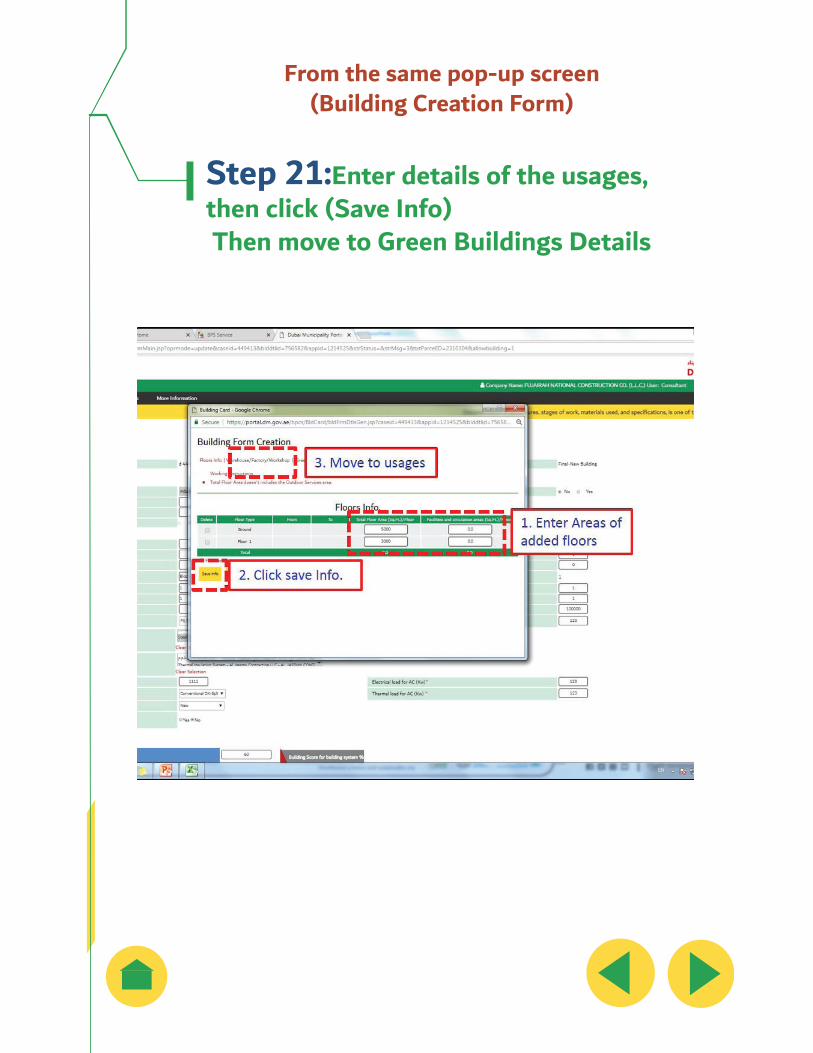
From the same pop-up screen (Building Creation Form)
Step 21:Enter details of the usages, then click (Save Info) Then move to Green Buildings Details
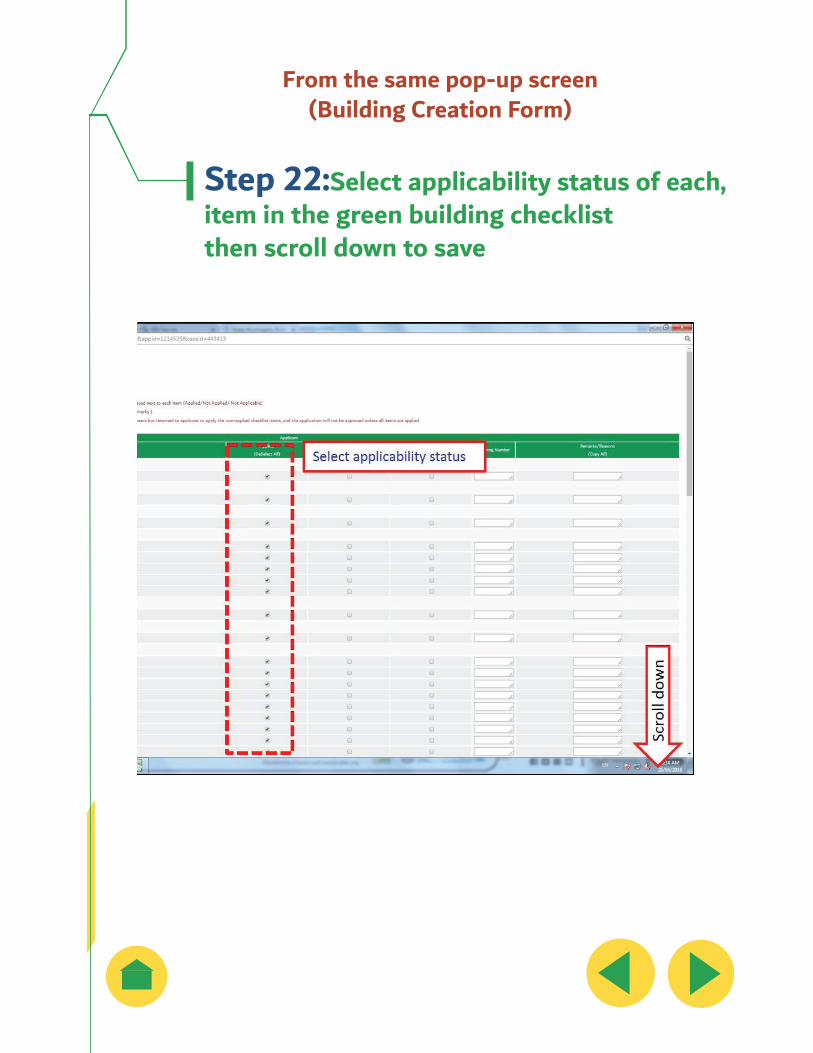
From the same pop-up screen (Building Creation Form)
Step 22:Select applicability status of each, item in the green building checklist then scroll down to save
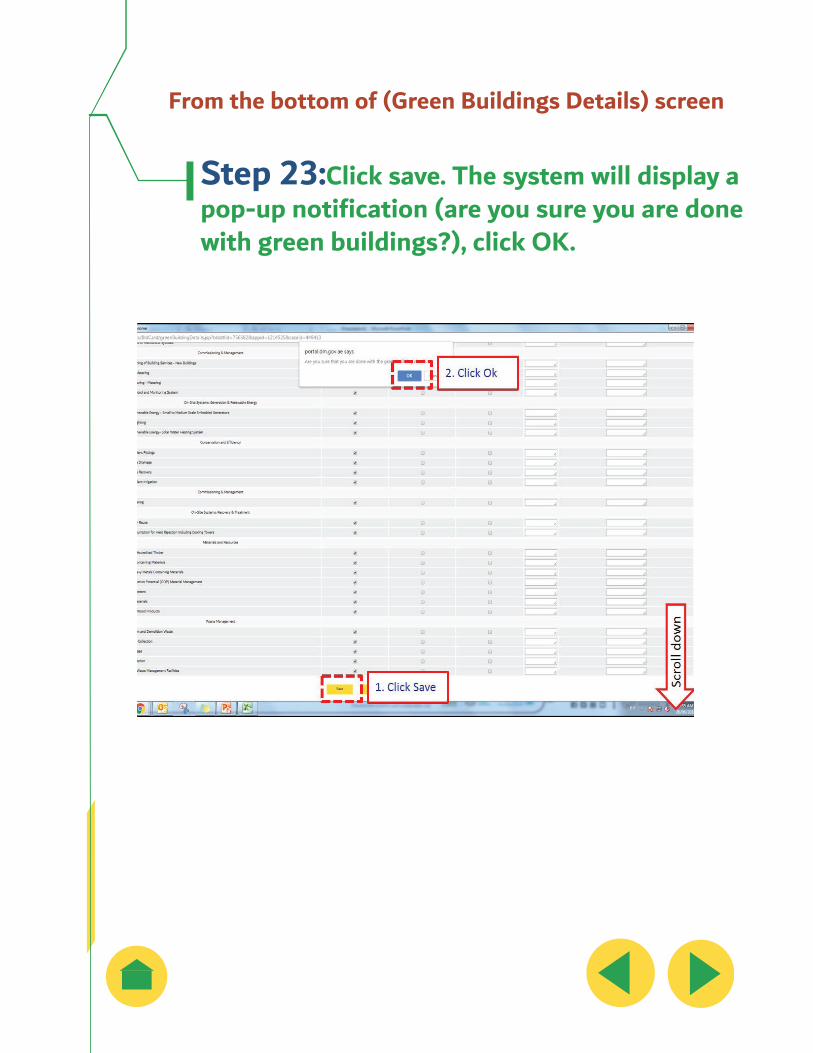
From the bottom of (Green Buildings Details) screen
Step 23:Click save. The system will display a pop-up notification (are you sure you are done with green buildings?), click OK.

The system will update (Green Buildings Details) screen and display a notification indicating success of saving details
Step 24: Click Close to go back to Building Main Component screen
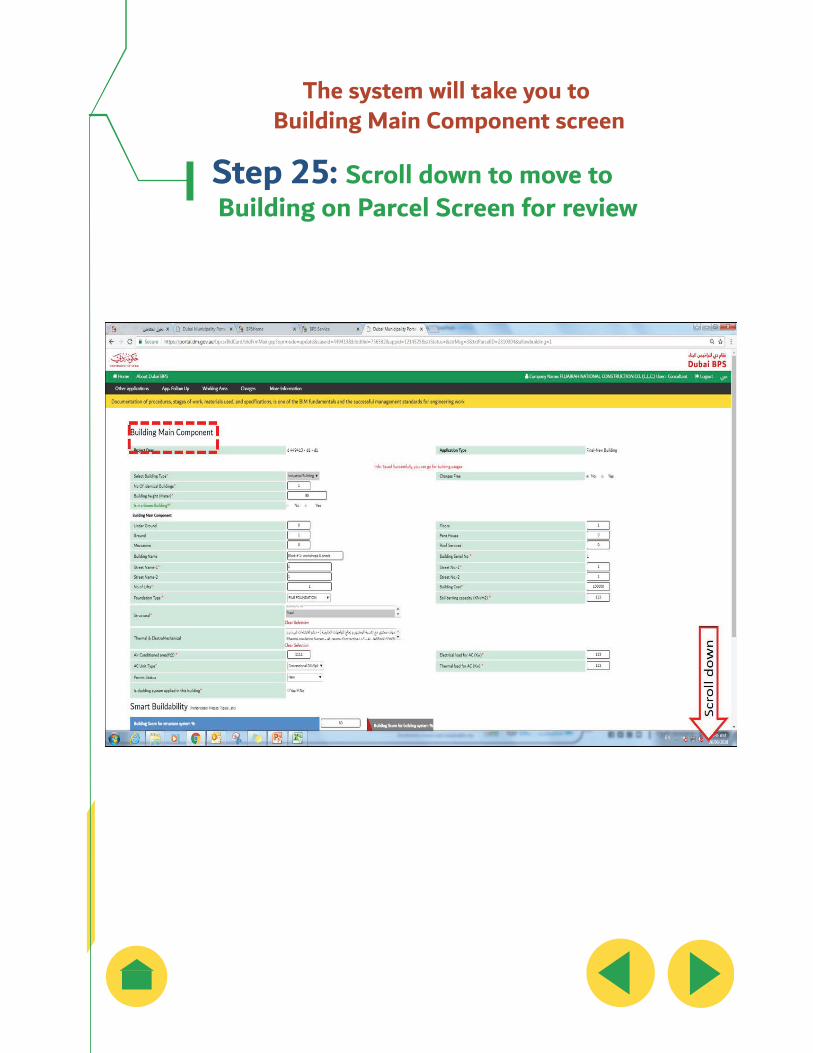
The system will take you to Building Main Component screen
Step 25: Scroll down to move to Building on Parcel Screen for review
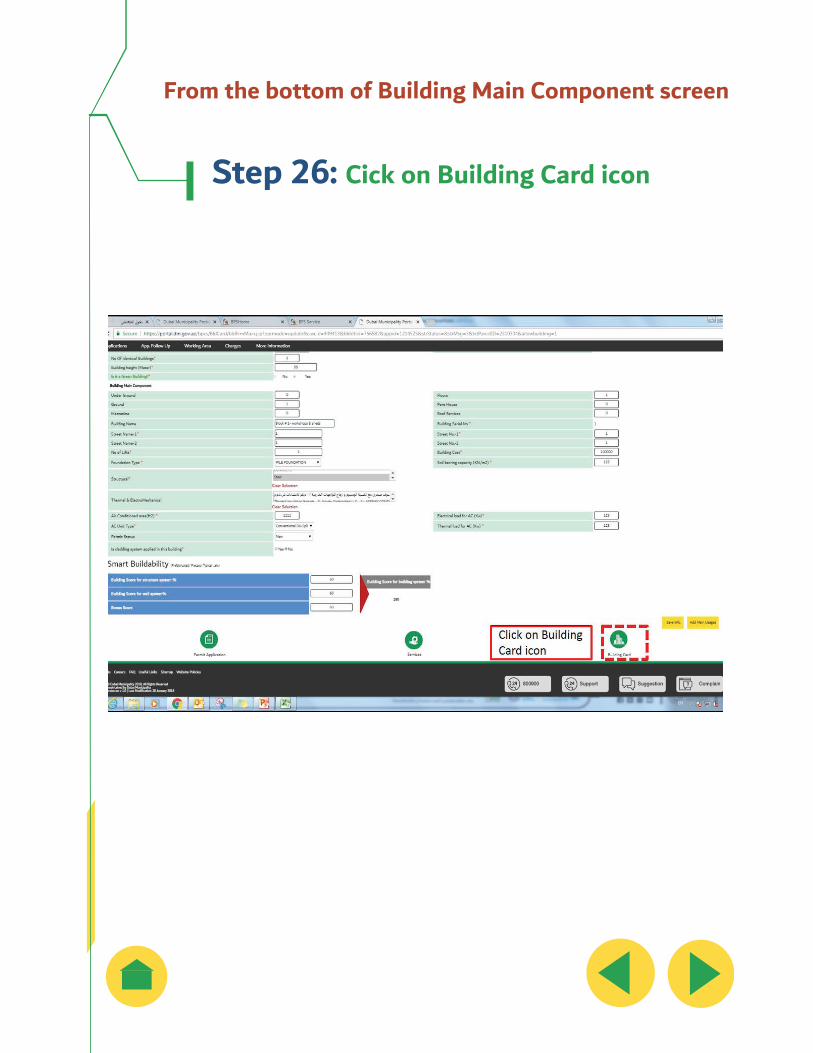
From the bottom of Building Main Component screen
Step 26: Cick on Building Card icon
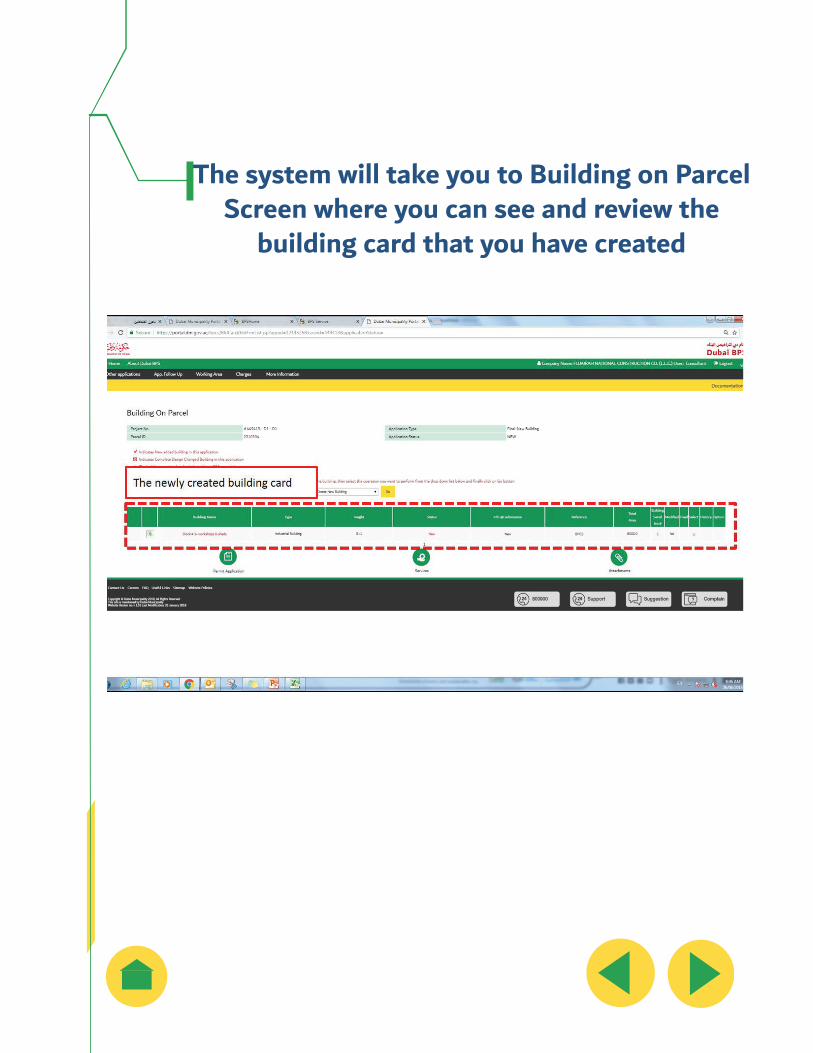
The system will take you to Building on Parcel Screen where you can see and review the
building card that you have created
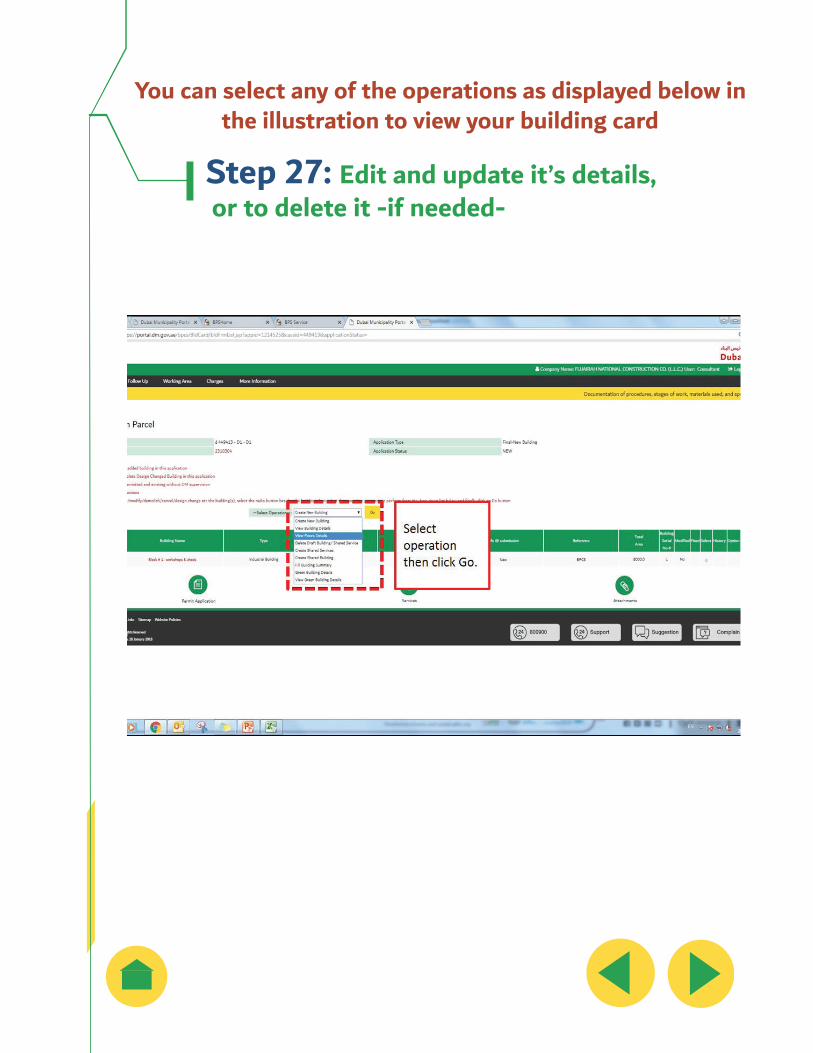
You can select any of the operations as displayed below in the illustration to view your building card
Step 27: Edit and update it’s details, or to delete it -if needed-
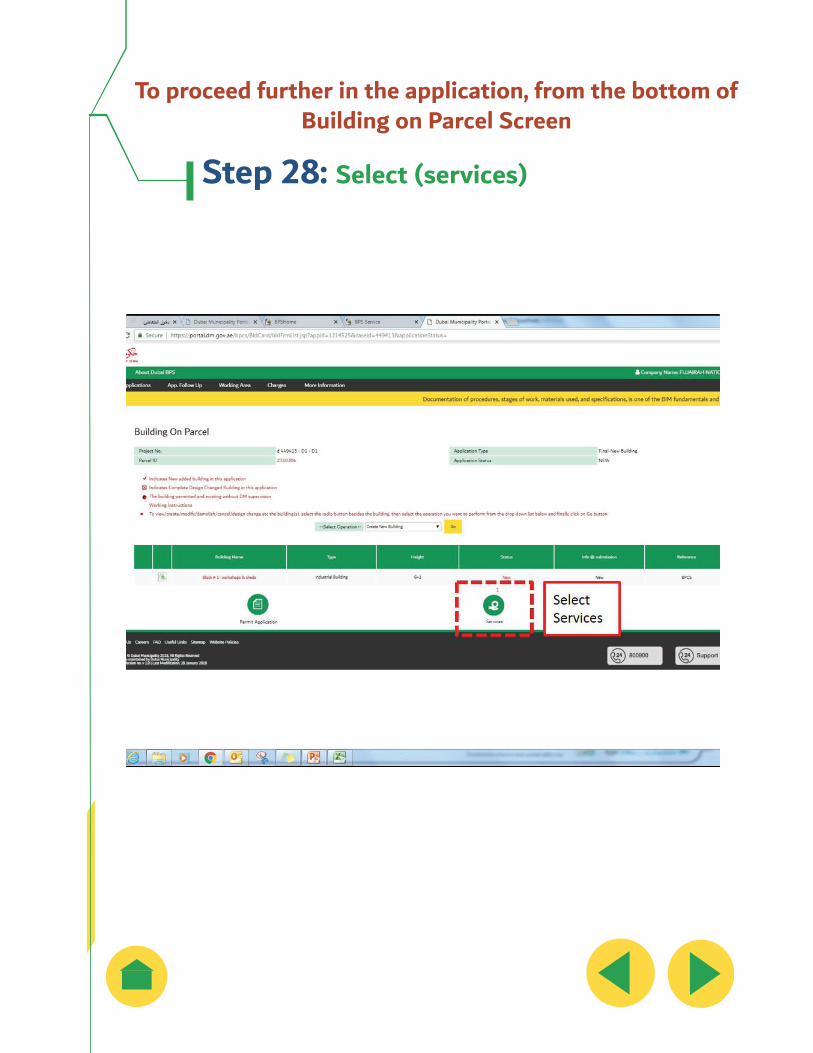
To proceed further in the application, from the bottom of Building on Parcel Screen
Step 28: Select (services)
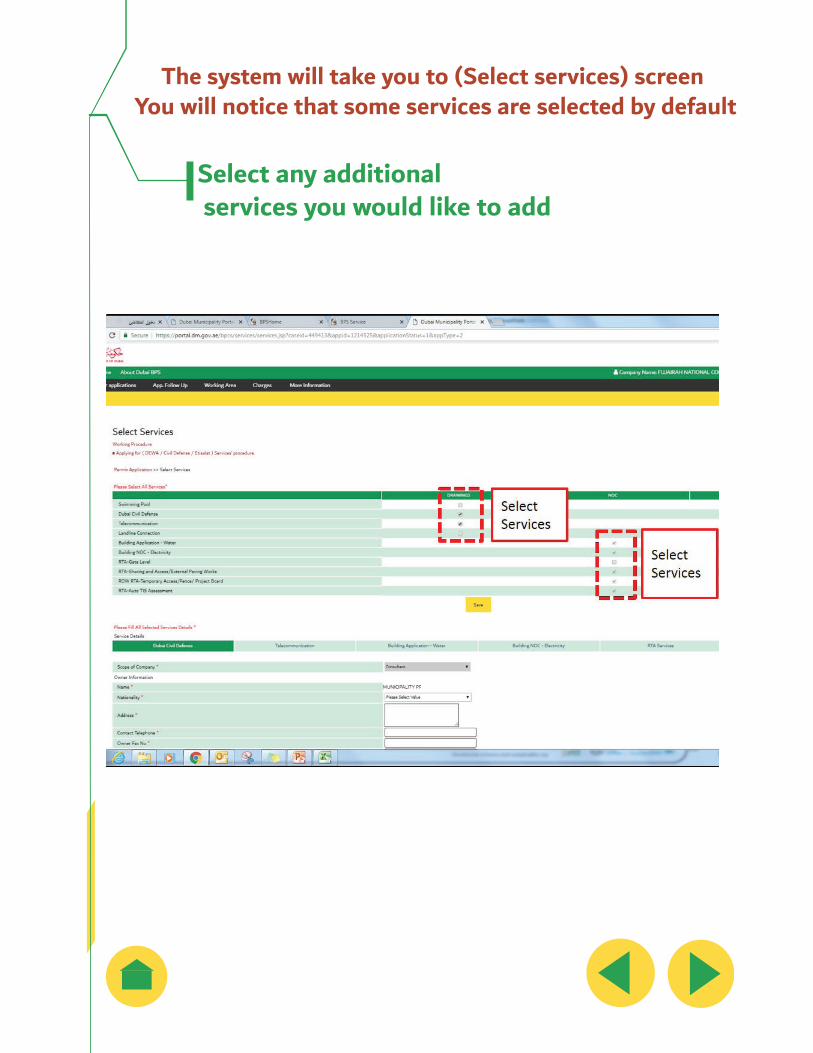
The system will take you to (Select services) screen You will notice that some services are selected by default
Select any additional services you would like to add
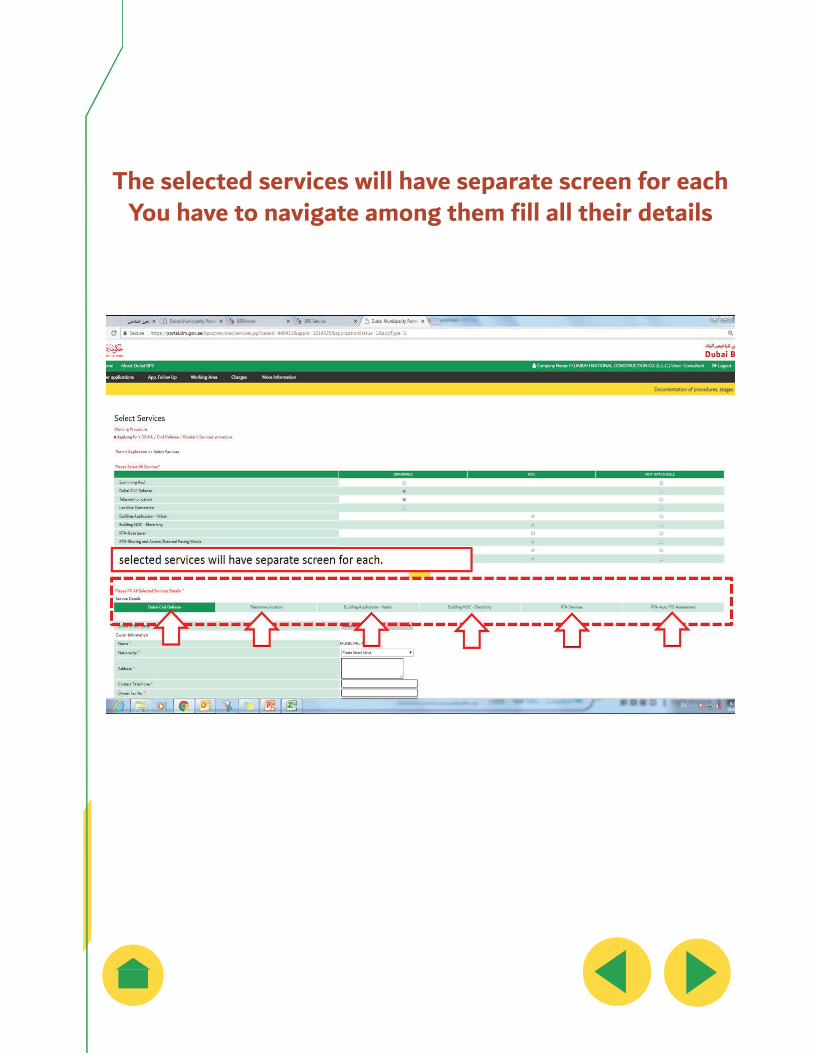
The selected services will have separate screen for each You have to navigate among them fill all their details
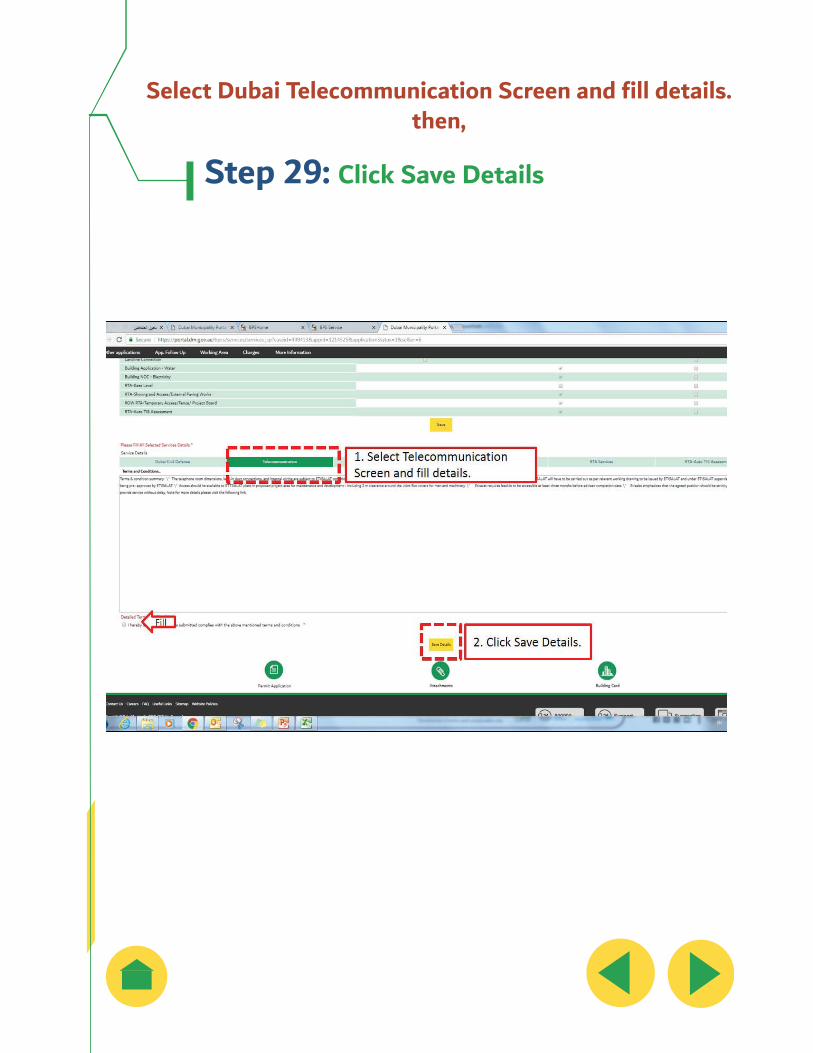
Select Dubai Telecommunication Screen and fill details. then,
Step 29: Click Save Details

Select DEWA-W Screen and fill details Then,
Step 30: Click Save Details
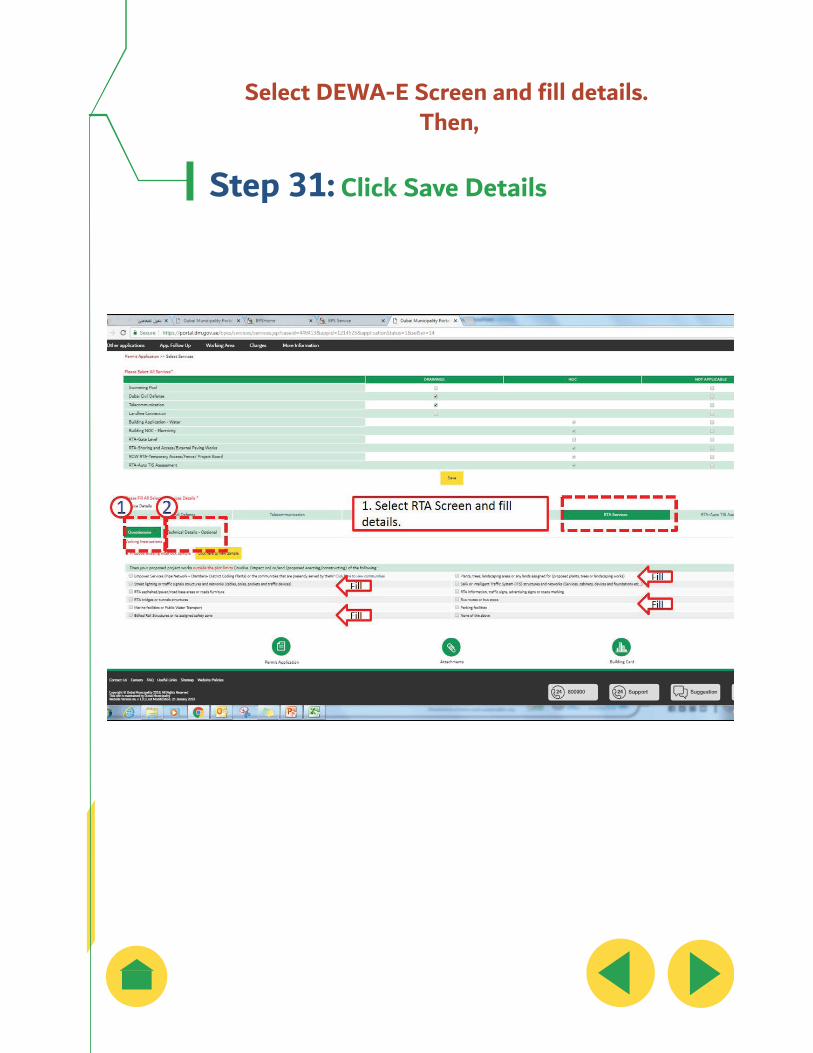
Select DEWA-E Screen and fill details. Then,
Step 31: Click Save Details

The same action of moving across service screens
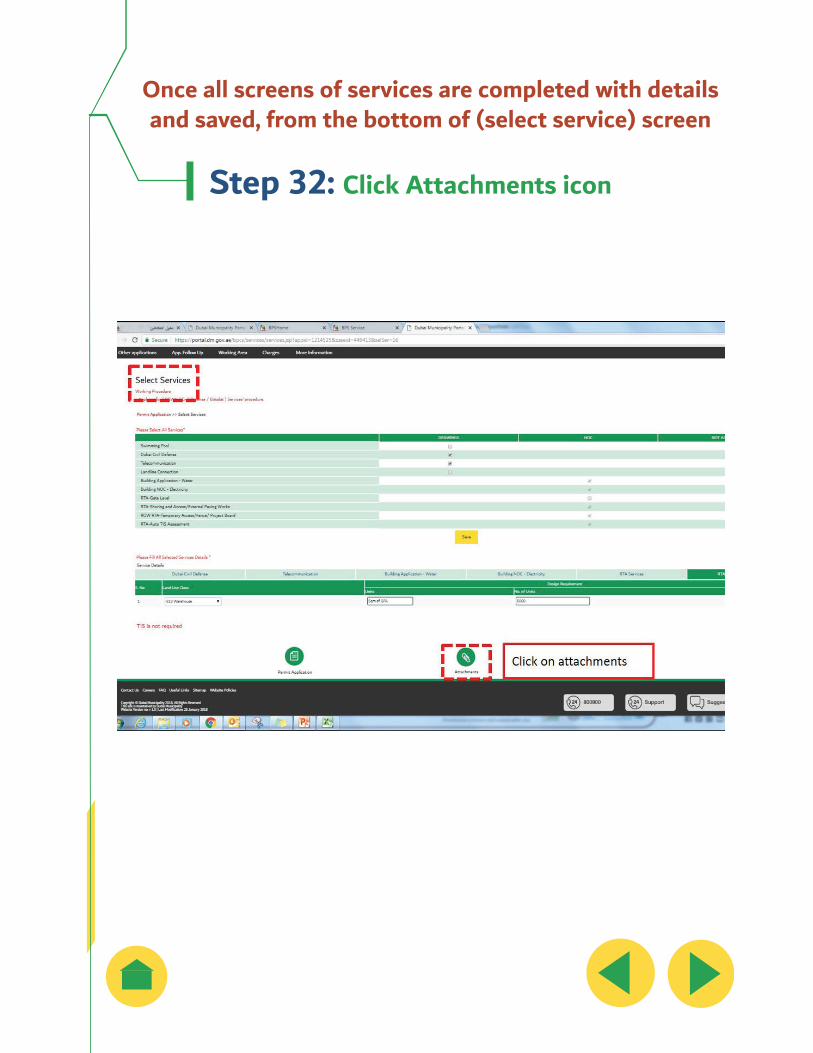
Once all screens of services are completed with details and saved, from the bottom of (select service) screen
Step 32: Click Attachments icon
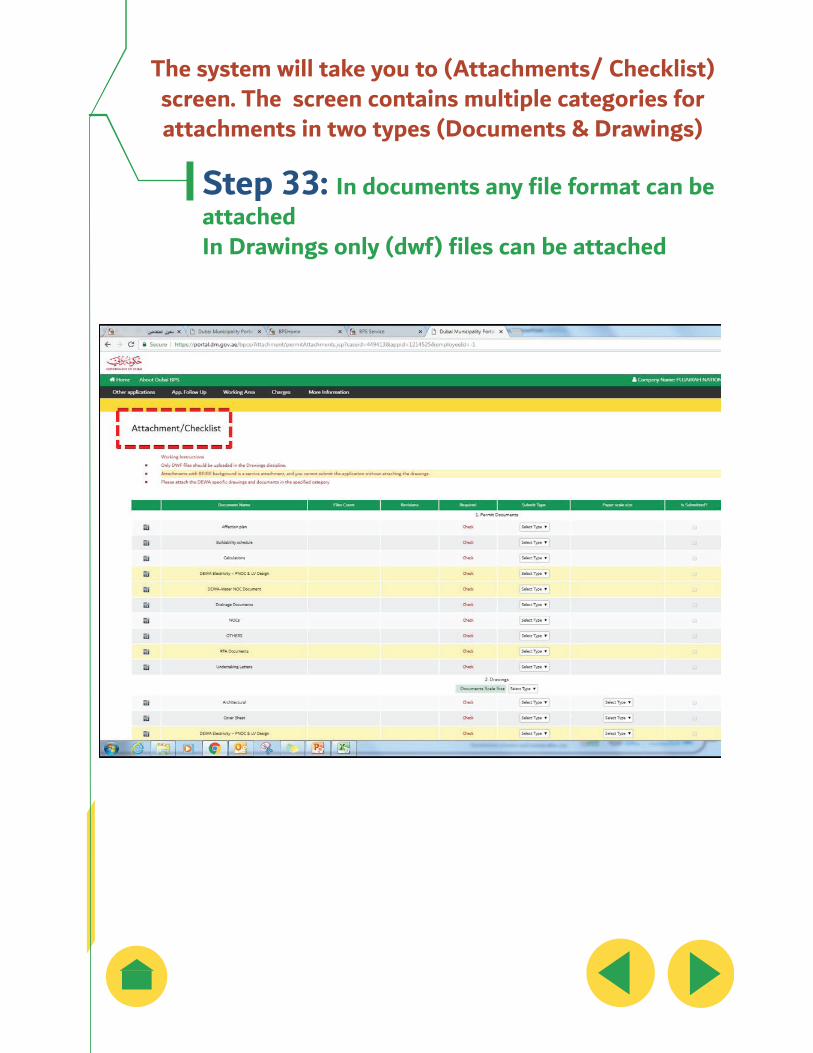
The system will take you to (Attachments/ Checklist) screen. The screen contains multiple categories for attachments in two types (Documents & Drawings)
Step 33: In documents any file format can be attached In Drawings only (dwf) files can be attached
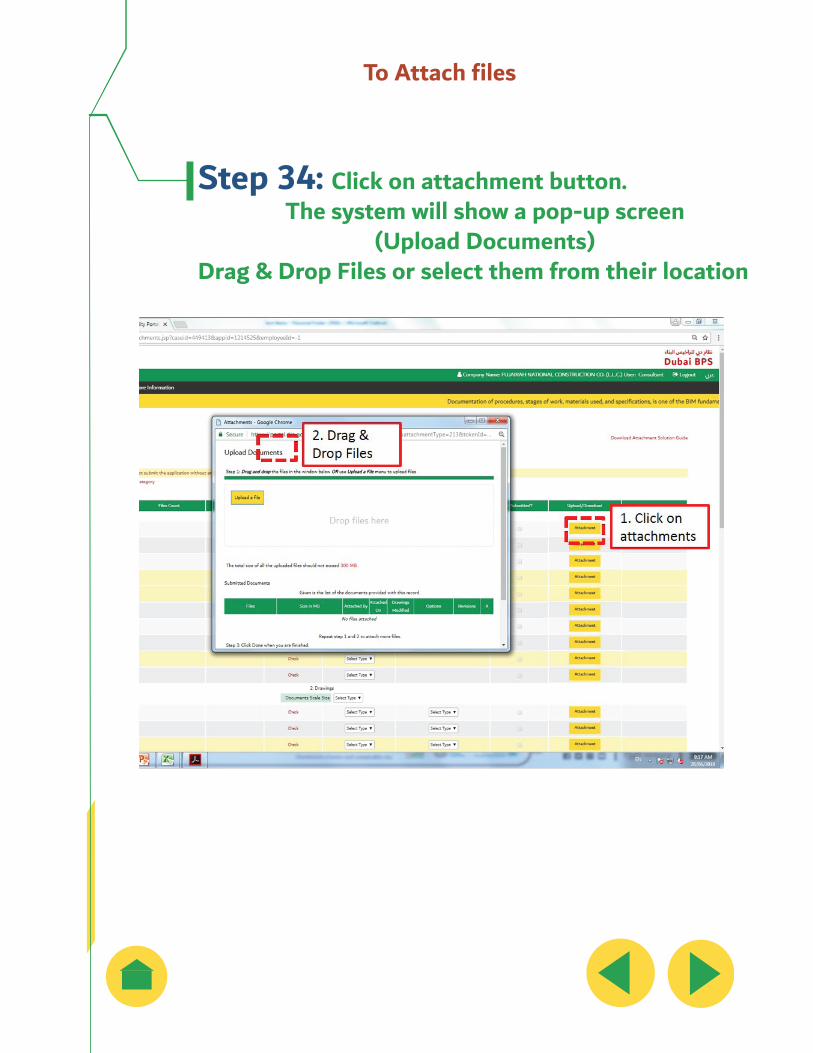
To Attach files
Step 34: Click on attachment button. The system will show a pop-up screen
(Upload Documents) Drag & Drop Files or select them from their location
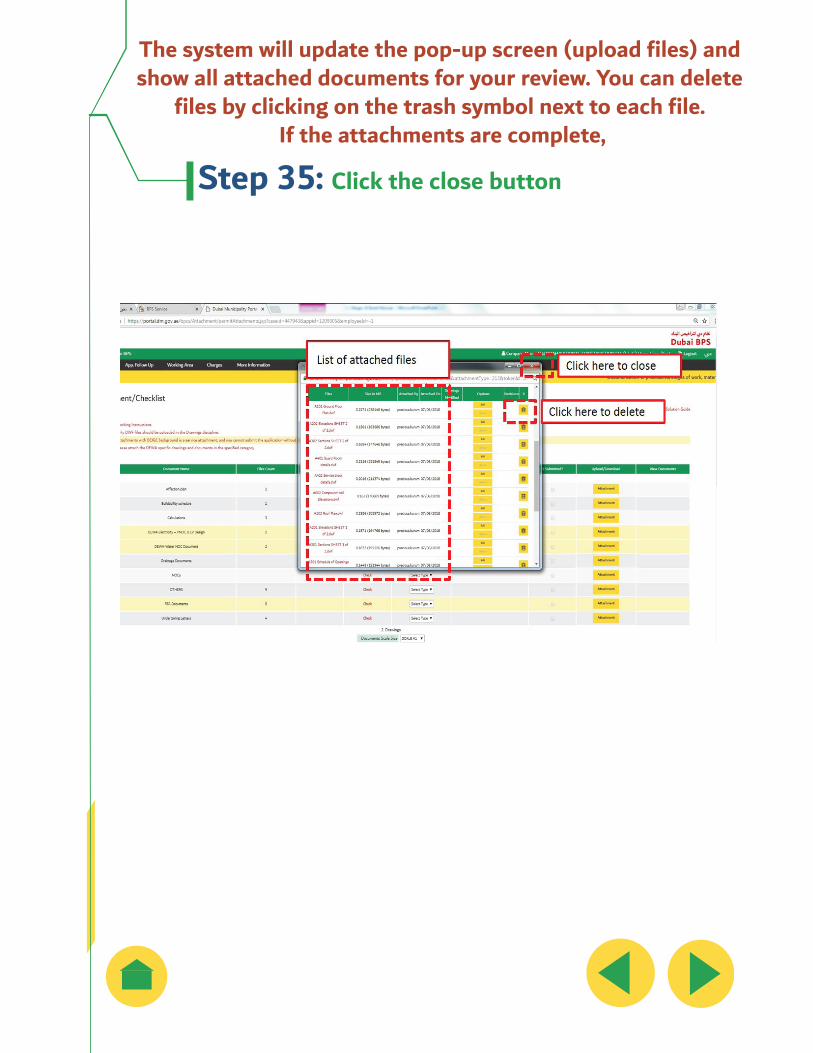
The system will update the pop-up screen (upload files) and show all attached documents for your review. You can delete
files by clicking on the trash symbol next to each file. If the attachments are complete,
Step 35: Click the close button
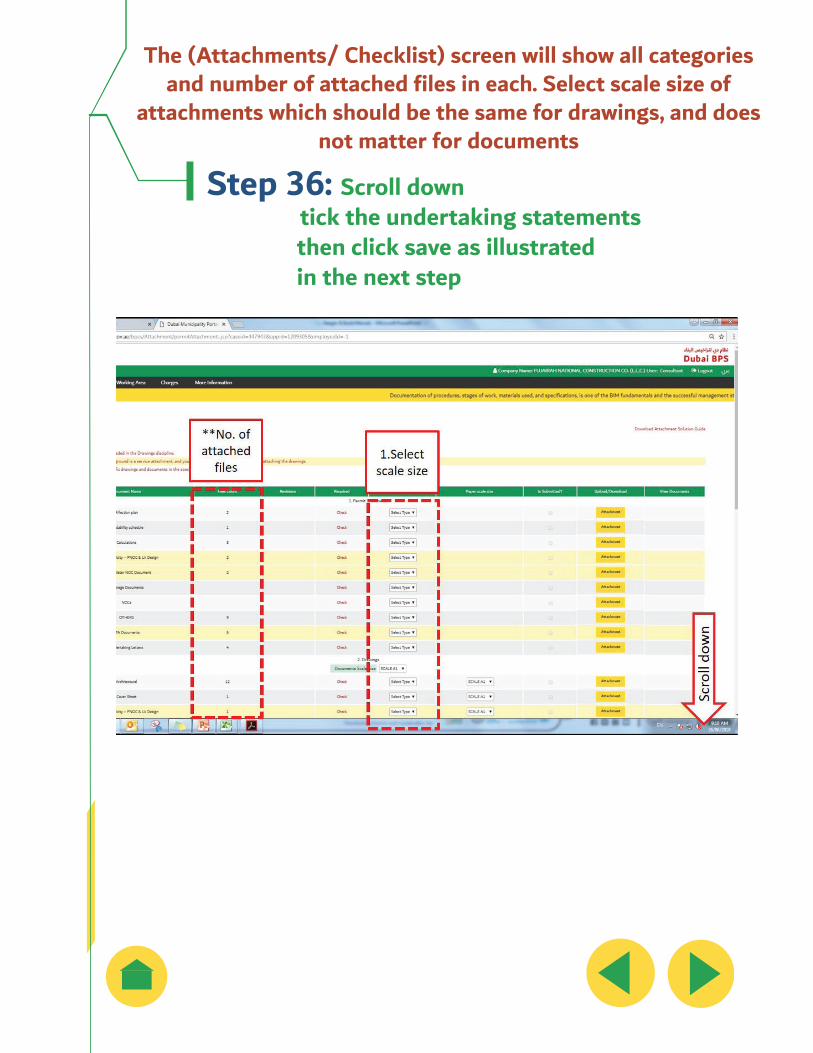
The (Attachments/ Checklist) screen will show all categories and number of attached files in each. Select scale size of
attachments which should be the same for drawings, and does not matter for documents
Step 36: Scroll down tick the undertaking statements then click save as illustrated in the next step
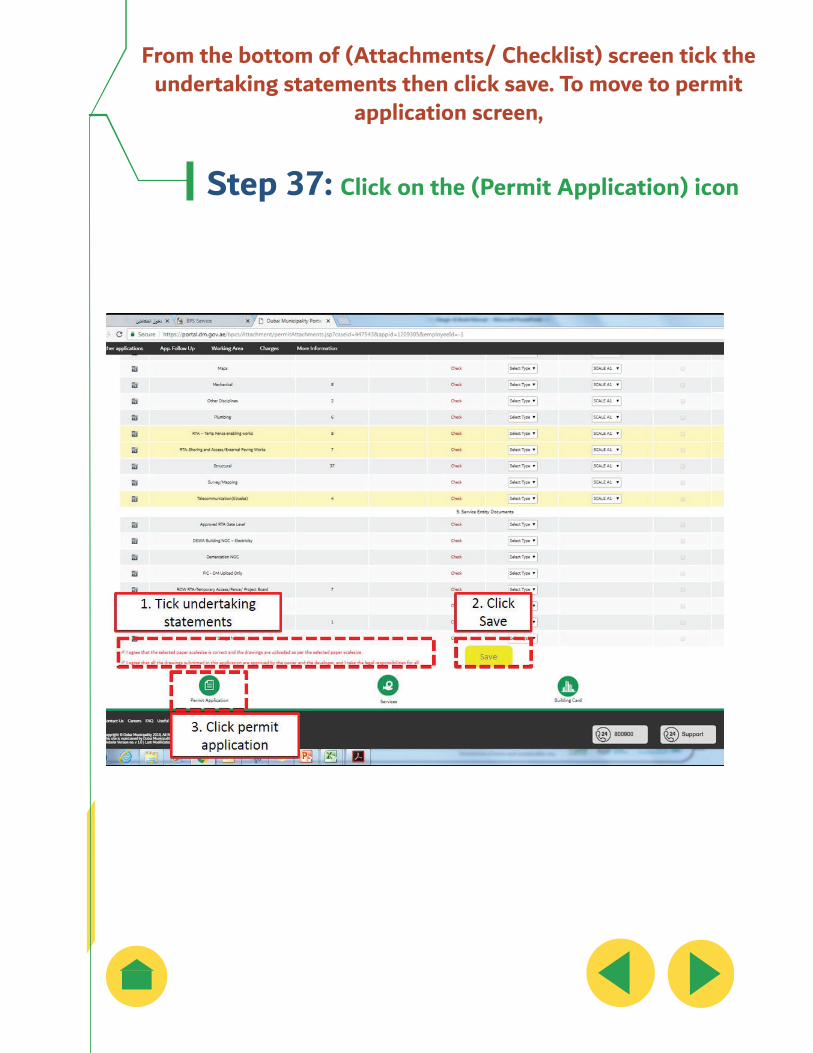
From the bottom of (Attachments/ Checklist) screen tick the undertaking statements then click save. To move to permit
application screen,
Step 37: Click on the (Permit Application) icon
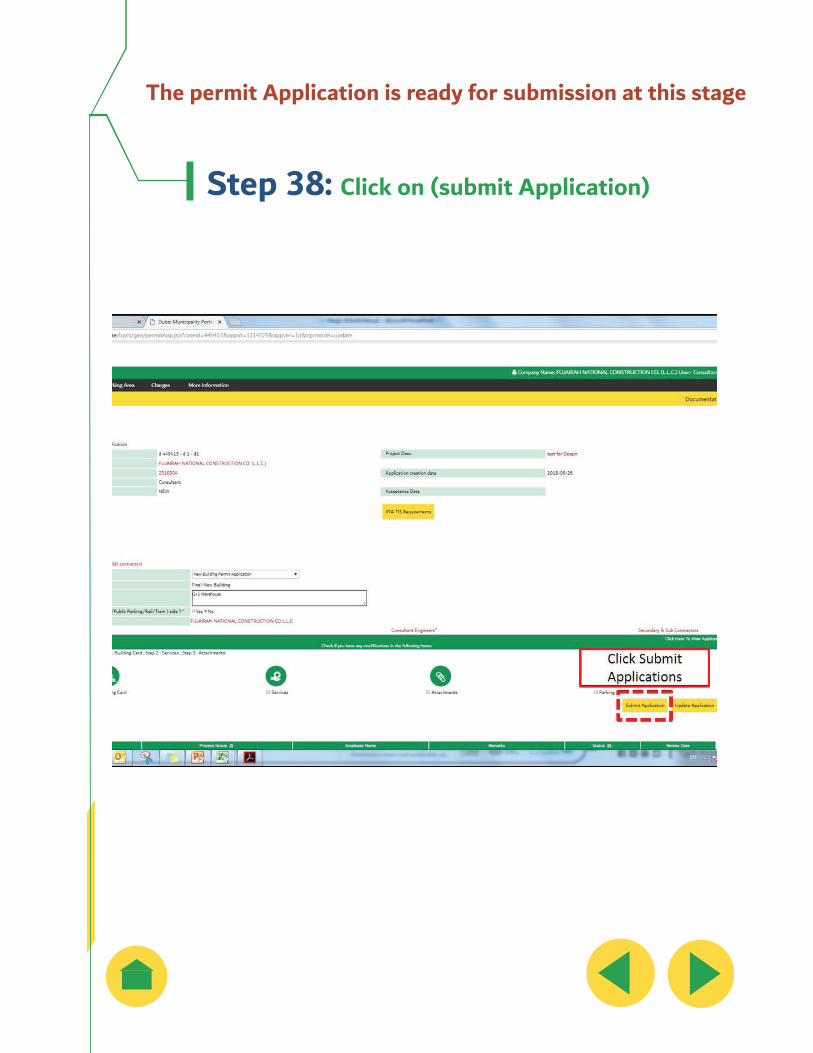
The permit Application is ready for submission at this stage
Step 38: Click on (submit Application)
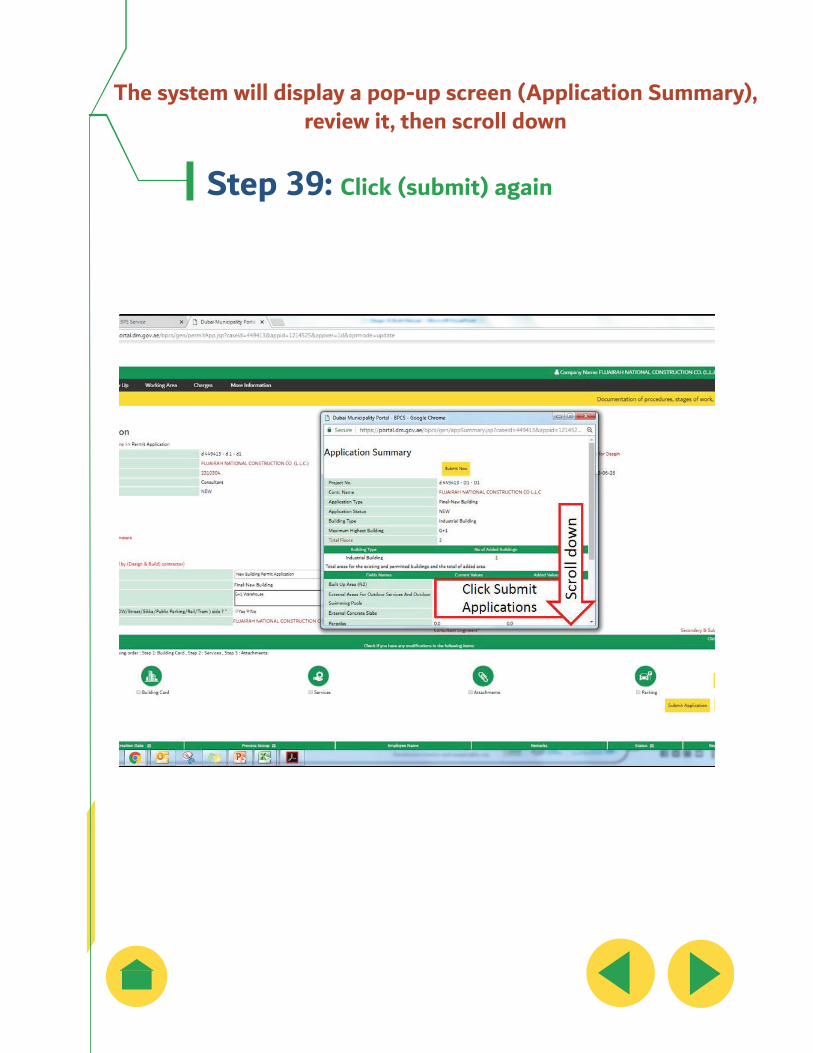
The system will display a pop-up screen (Application Summary), review it, then scroll down
Step 39: Click (submit) again
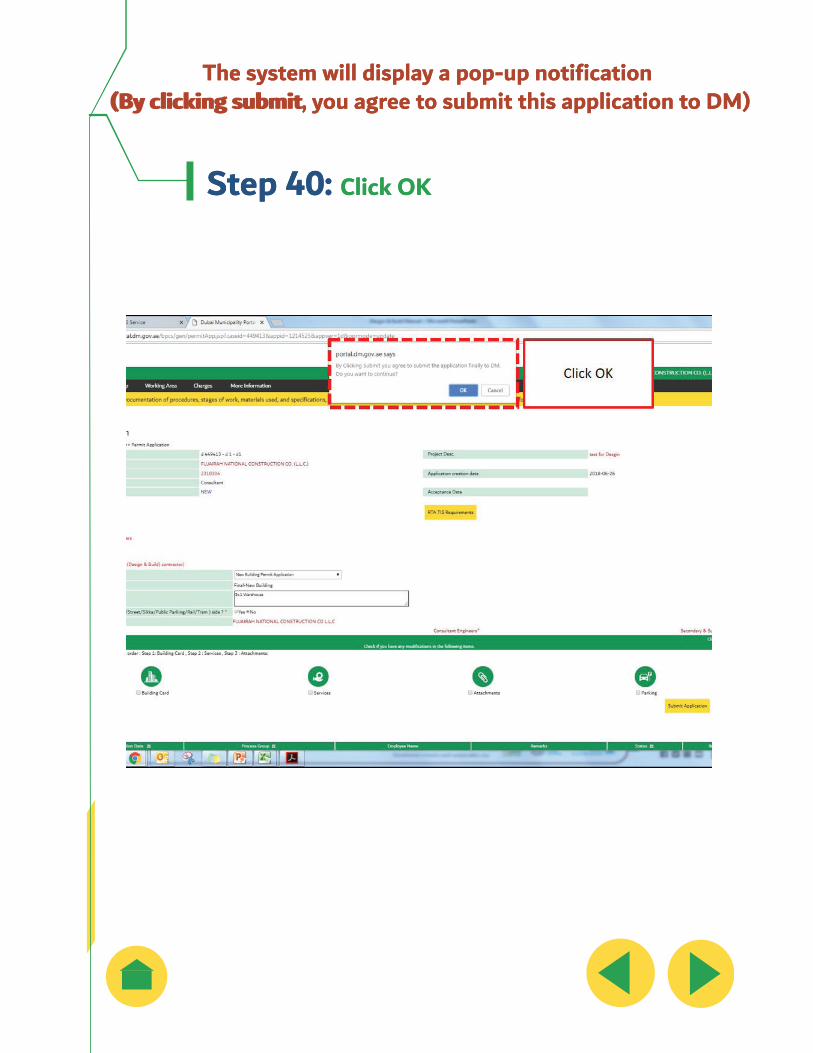
The system will display a pop-up notification (By clicking submit, you agree to submit this application to DM)
Step 40: Click OK
The system will display a pop-up notification (By clicking submit, you agree to submit this application to DM)
Step 40: Click OK

The system will Process the Permit fees of the application
Step 41: Wait until payment voucher gets generated. Don’t close the processing pop-up
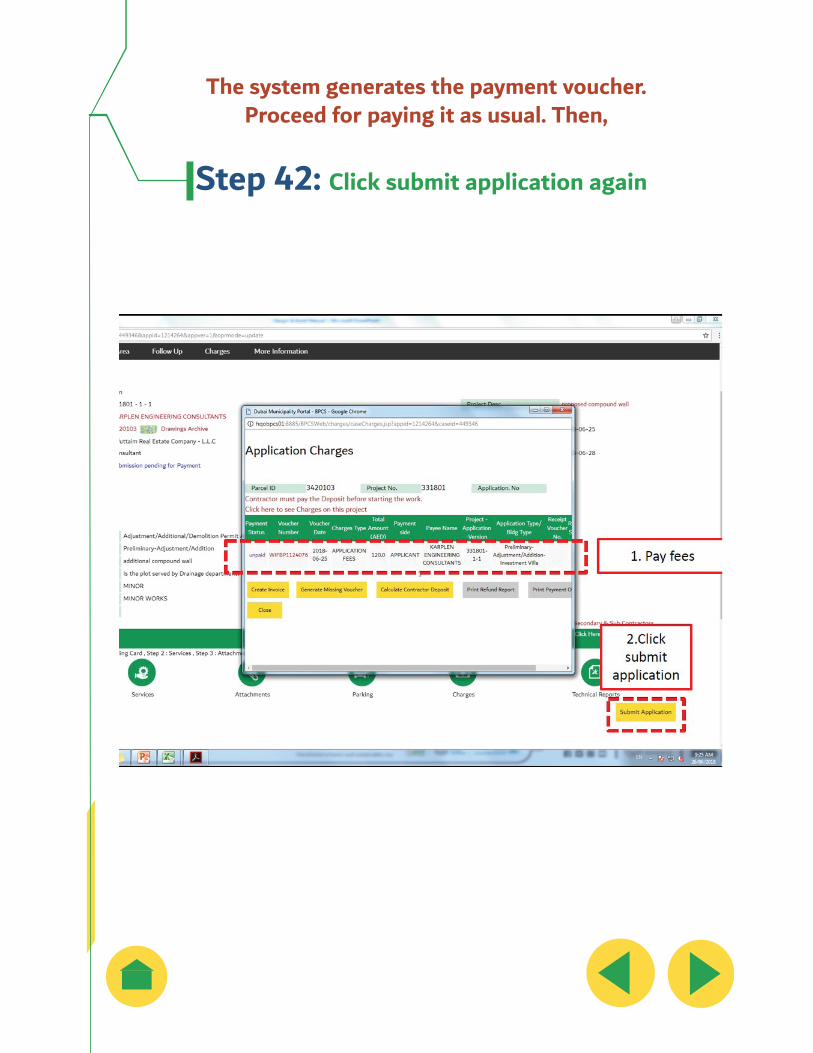
The system generates the payment voucher. Proceed for paying it as usual. Then,
Step 42: Click submit application again
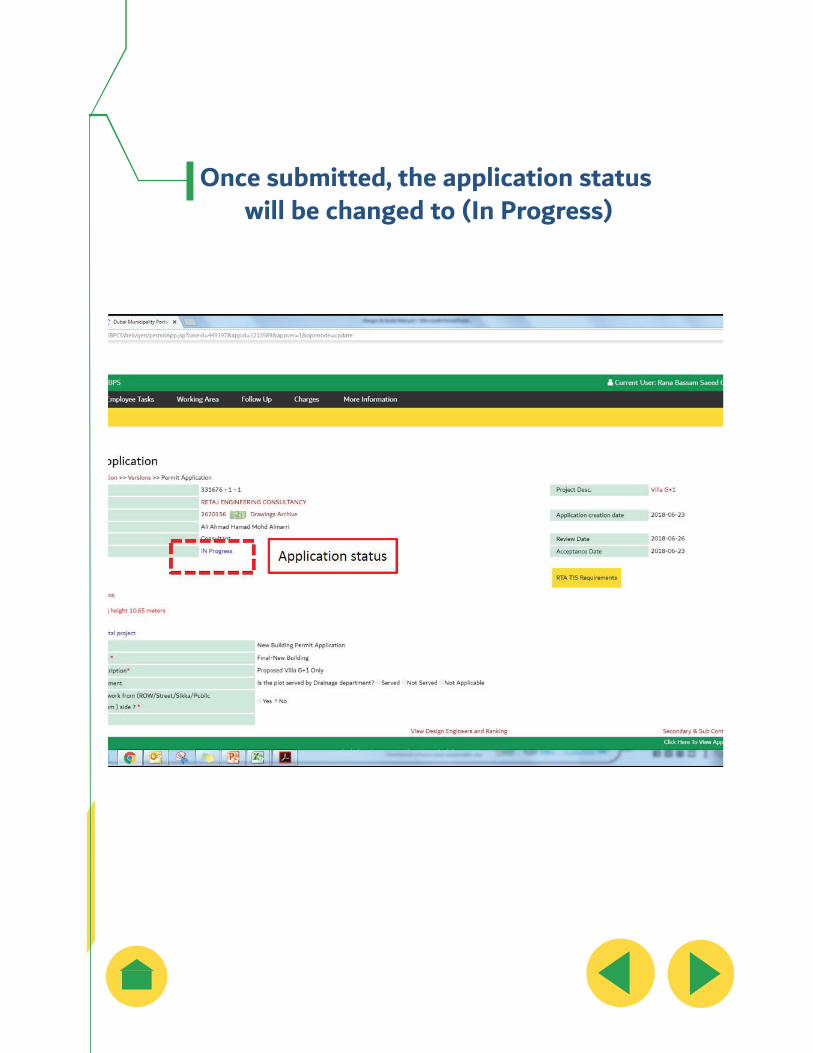
Once submitted, the application status will be changed to (In Progress)
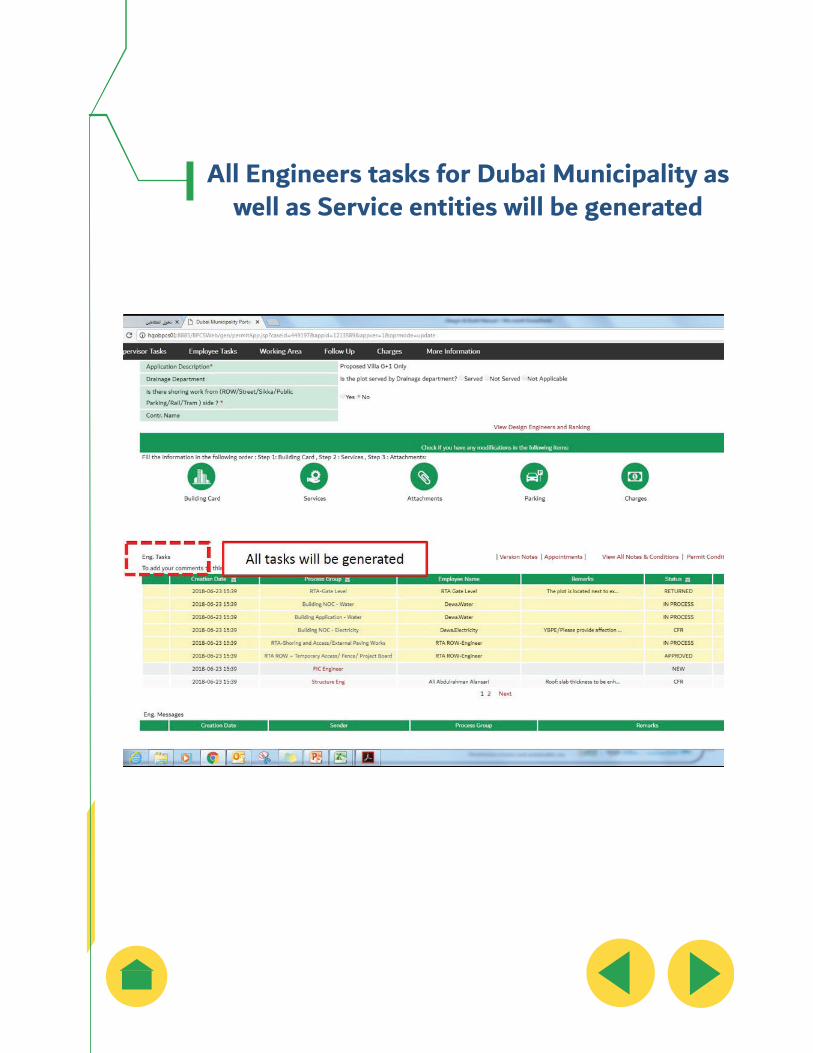
All Engineers tasks for Dubai Municipality as well as Service entities will be generated

III-III
Follow up
From Building Permit Home Page
Step1: go to (my notifications)
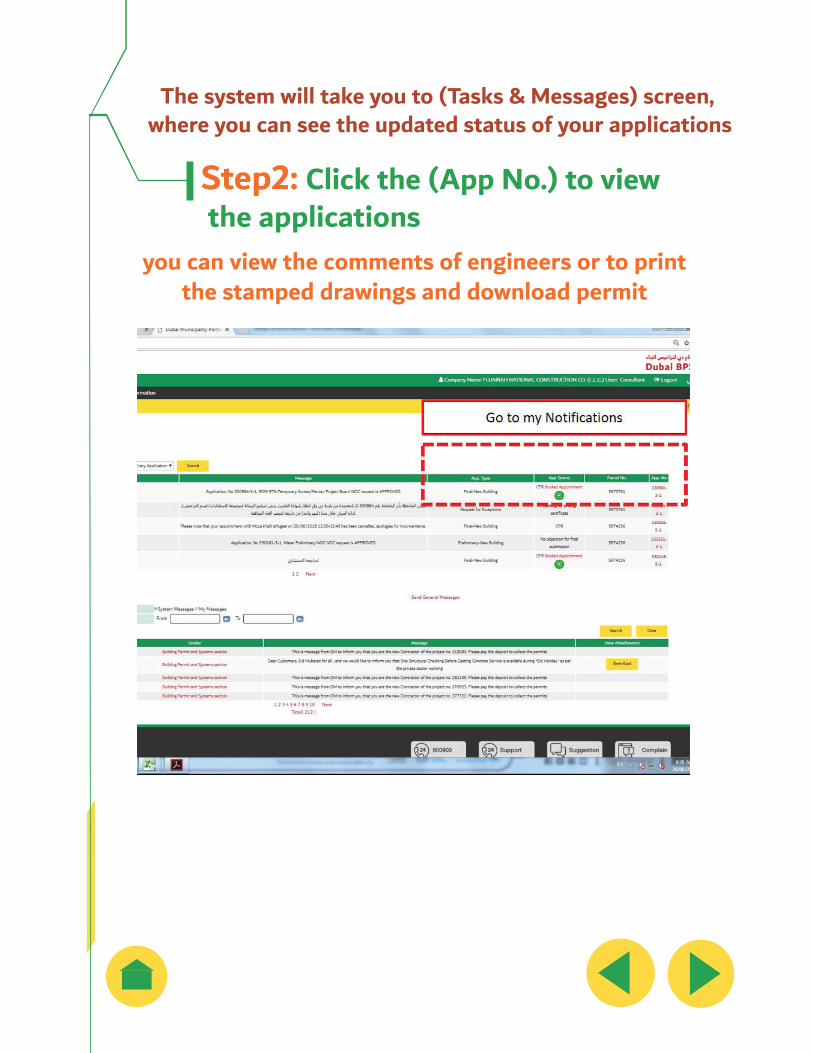
The system will take you to (Tasks & Messages) screen, where you can see the updated status of your applications
Step2: Click the (App No.) to view the applications
you can view the comments of engineers or to print the stamped drawings and download permit