Booklet_Master_EN_printer friendly.pdf - Mythic Games
20
1 Guide to expansions Base game Barbarians Bandits Dracons Cultists Goblins Gnolls Unicorns Undead Odyssey expansion Gladiators Centaurs Medusae Harpies Mummies Mermaids Classes Banners AI Deck Event Deck Dark Elves Angels Fairies Demons Mages Golems Troglodytes Slime Wound Deck Overlords Expansion EastQuest expansion Gladiators Centaurs Medusae Harpies Mummies Mermaids Classes Banners Quests Automa Deck Mythic Deck
-
Upload
khangminh22 -
Category
Documents
-
view
2 -
download
0
Transcript of Booklet_Master_EN_printer friendly.pdf - Mythic Games

1
Guide to expansions
Base game
BarbariansBandits DraconsCultists GoblinsGnolls UnicornsUndead
Odyssey expansion
GladiatorsCentaurs MedusaeHarpies MummiesMermaids ClassesBanners AI Deck Event Deck
Dark ElvesAngels FairiesDemons MagesGolems TroglodytesSlime Wound Deck
Overlords Expansion
EastQuest expansion
GladiatorsCentaurs MedusaeHarpies MummiesMermaids ClassesBanners Quests Automa Deck Mythic Deck

2
Game Setup
1 Each player takes 5 Crystals .2 Each Player takes a “Fist” and “of Enchanting” card.3 Each player chooses one Kingdom Deck, then
shuffle them together to create the Adventure Deck.4 Search the bottom of the Adventure deck for a total of
6/9/12 (for 2/3/4 players) Item and Enchantment Cards and add them to the top of Adventure
Deck. Return any Monster and Dragons you put aside back to the bottom of the deck. This way you’ll have a chance to equip yourselves before monsters come.
5 Place 6 cards from the top of the Adventure Deck on the Journey Track.
6 Randomly choose one of the Village Cards .7 Pick the first player. You are ready to play.
Two playersIn a two player game, each player chooses 2 decks. From the 4 selected decks, take only the cards marked with a “2” on the back, and shuffle them together to form the Adventure Deck.
First gameIf this is your first game of Enchanters consider taking Decks from amongst: Cultists, Goblins, Unicorns and Bandits.
Fast invasionIf you prefer a shorter game, remove 5 cards from the Adventure Deck for every player that wants to participate. Those cards have to be put in the box (outside the game), not on the discarded cards pile.
Village Card6
12

3
Journey Track Adventure Deck5 3
12
Your Magical ArtifactEach player will craft one Magical Artifact. Items are placed in one pile on the left and Enchantments in another on the right.
All visible symbols, actions and abilities are always active.All hidden symbols, actions and abilities are inactive.
Do not change order of the cards unless game asks you to.
Subsequent cards are placed on top of previous ones of the same type so that the lower part (under the horizontal line) of the previous card is always visible.
Lower part
Upper partThe same rules apply to monsters and dragon cards.
always active
inactive once covered
Covered card

44
Flow of The Game
The game is played in turns. Each turn a player takes one Major Action:
Journey - the player takes a card from the Journey Track, paying Crystals . This is the main way to obtain Item and Enchantment Cards and to fight Monsters and Dragons .
Rest - the player uses one of the available options from the Village Card or one of their own cards. Resting allows you to collect Crystals
and heal Wounds . After each Rest action the first card on the Journey Track is discarded at the end of the turn.
After each Major Action, cards in the Journey Track are slid down toward the Village Card , then a new card is drawn from the Adventure Deck and added to the last space. There should always be 6 cards on the Journey Track, if possible.
Additionally, the player may use any available Minor Actions.
Actions in General
Most actions in the game can be described in the following manner:
“Cost Effect”Only after the Cost is paid, does the Effect take place. The cost must be fully paid, while the effect has to be implemented as much to the utmost extent.
The actions a player may take are the ones described on the Village Card, Overlord Card and the visible parts of the player’s own Item , Enchantment , Monsters /Dragon Card piles.
Multi-action can be used as many times as players want. Double Action used twice in a turn. Every other action may only be played once per turn.
The action’s effect (such as Attack or Defense boost) stays in play till the end of the player’s turn.
Example (Scimitar): “ 3 ” John pays 1 Crystal and receives a +3 bonus to his attack this turn only.
Major Action: Rest
A player needs to pick one of the actions with a in the cost, to get the benefits of this action.
The icon should be read as: Use your Major Action as a Rest Action. Then at the end of your turn discard the card on the Journey Track nearest to the Village
Card and draw a new card from Adventure Deck to fill the last space on the Journey Track.
Rest actions are on every Village Card, but can be also found on some Item or Enchantment Cards.
Taking a Rest is a standard way of gaining Crystals and healing Wounds .
Example (Normaltown): “ 3 ” Jack uses his Major Action to Rest and get 3 Crystals. Then, because he can’t do anything else, he finishes his turn, discards the card nearest to the Village Card, moves the remaining 5 cards on the Journey Track toward the Village Card, draws a new card and places it after the last card on the Journey Track.
5
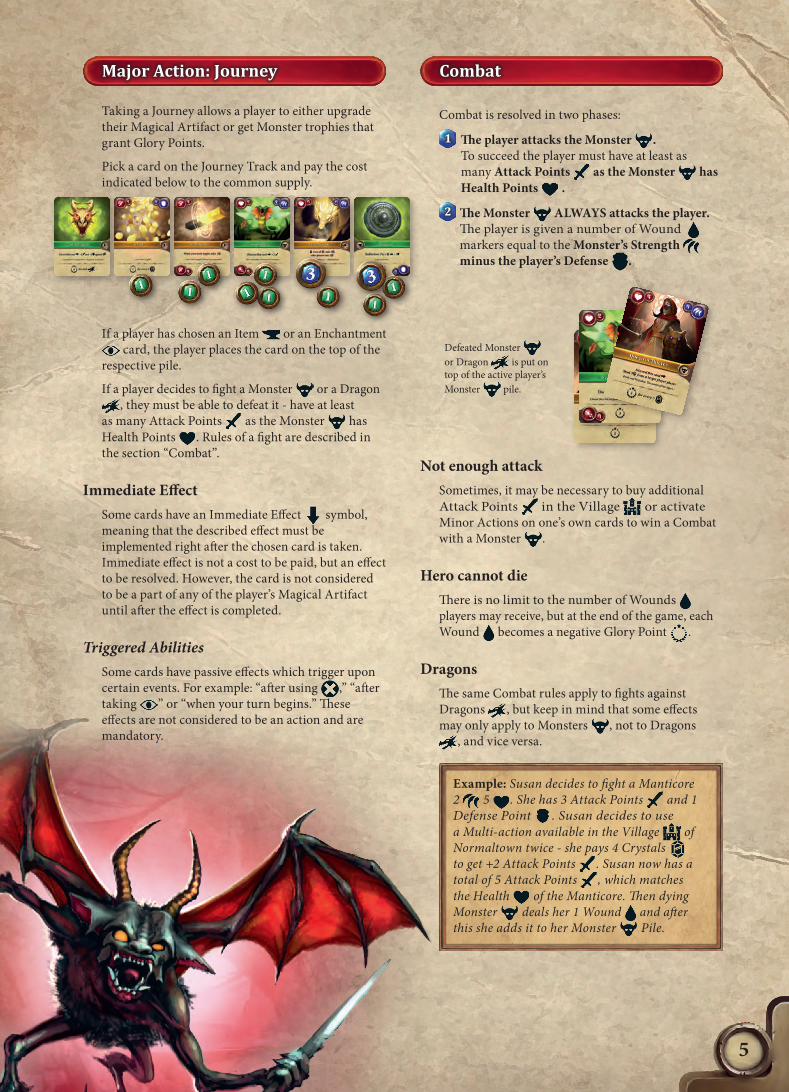
Major Action: Journey
Taking a Journey allows a player to either upgrade their Magical Artifact or get Monster trophies that grant Glory Points.
Pick a card on the Journey Track and pay the cost indicated below to the common supply.
If a player has chosen an Item or an Enchantment card, the player places the card on the top of the
respective pile.
If a player decides to fight a Monster or a Dragon , they must be able to defeat it - have at least
as many Attack Points as the Monster has Health Points . Rules of a fight are described in the section “Combat”.
Immediate EffectSome cards have an Immediate Effect symbol, meaning that the described effect must be implemented right after the chosen card is taken. Immediate effect is not a cost to be paid, but an effect to be resolved. However, the card is not considered to be a part of any of the player’s Magical Artifact until after the effect is completed.
Triggered AbilitiesSome cards have passive effects which trigger upon certain events. For example: “after using ,” “after taking ” or “when your turn begins.” These effects are not considered to be an action and are mandatory.
Combat
Combat is resolved in two phases:
1 The player attacks the Monster . To succeed the player must have at least as many Attack Points as the Monster has Health Points .
2 The Monster ALWAYS attacks the player. The player is given a number of Wound markers equal to the Monster’s Strength minus the player’s Defense .
Defeated Monster or Dragon is put on top of the active player’s Monster pile.
Not enough attackSometimes, it may be necessary to buy additional Attack Points in the Village or activate Minor Actions on one’s own cards to win a Combat with a Monster .
Hero cannot dieThere is no limit to the number of Wounds players may receive, but at the end of the game, each Wound becomes a negative Glory Point .
DragonsThe same Combat rules apply to fights against Dragons , but keep in mind that some effects may only apply to Monsters , not to Dragons
, and vice versa.
Example: Susan decides to fight a Manticore 2 5 . She has 3 Attack Points and 1 Defense Point . Susan decides to use a Multi-action available in the Village of Normaltown twice - she pays 4 Crystals to get +2 Attack Points . Susan now has a total of 5 Attack Points , which matches the Health of the Manticore. Then dying Monster deals her 1 Wound and after this she adds it to her Monster Pile.
5

6
End of The Game
The game ends when all cards from both the Adventure Deck and the Journey Track have been taken or discarded. Every player sums all Glory Points from their cards: Monsters , Dragons , Items and Enchantments . Each player must then add or subtract Glory Points according to the rules below:
Minus 1 Glory Point for each Wound . Additional Glory Points as described on the
Village Card.
Endgame TiesIn case of a tie the player with more Crystals win. If players are tied for crystals, the player with less wounds win. If players are tied for wounds, the player with more cards (of all types) wins.
Game Variants
Fast invasionIf you prefer a shorter game, remove 5 cards from the Adventure Deck for every player that wants to participate. Those cards have to be put in the box (outside the game), not on the discarded cards pile.
Superfast invasionFor an extremely short game, use only cards with “2” on their backs from each Kingdom Deck. Put the rest of the cards in the box (outside the game), not on the discarded cards pile. During step 4 of setup only put 2 cards per player (Items and Enchantments) instead of 3.
Dragons in the depthsTo make sure that Dragons won’t come up too early, before you’re ready for them, change the standard setup as described below:1 Remove Dragon Cards from the chosen
Kingdom Decks.2 Take half of the Adventure Deck.3 Shuffle the Dragon Cards into it and put it
on bottom of the deck.
Overlords
If this is your first game of Enchanters consider skipping this point altogether and playing without the Overlord Card. Overlords were designed with advanced players in mind and might turn out to be confusing for new players.
Setup
Randomly choose one of the Overlord Cards . Place 1 Reward Token for each player on the Overlord Card.
1
2
3
1 Invasion 2 Challenge 3 Reward
Invading Cards
The card discarded as a part of the Rest action is considered to be an Invading Card. Check the Overlord card to see if they react to its type. In that case, resolve the proper invasion.
Example: After using a Rest Action Jack discards a Gnoll . He checks the Overlord Card - Cho’mun, the Ogre General. His rule for an invading Monster state: “ : Overlord attacks current player.” Cho’Mun attacks Jack with Strength 4. Fortunately Jack has 3 points of Defense so he only takes 1 point of damage.
New Major Action: Challenge
Challenge actions are always marked by a symbol preceding its cost. Challenge actions are found on every Overlord Card.
The icon should be read as: Use your Major Action as a CHALLENGE action and discard the top card of Adventure Deck or the last card on Journey Track, if the Adventure deck is empty.
Upon paying the cost of the action, player immediately starts a fight against the Overlord. The combat follows the same rules as combat with a Monster or a Dragon . If the player is

7
victorious, they receive one Reward Token from Overlord Card.Challenging the Overlord is a action, and not
action, and thus does not trigger any “After using …” abilities or invasions.The effects of a Reward Token are always described on the bottom of an Overlord Card. Each Reward Token is virtually a card containing the exact text in that section of the Overlord CardMost of them give Glory Points at the end of the game and an ability that can be used during the game. The effects of multiple Reward Tokens
stack.
Example: Mary challenges Sathi, the High Priestess. She needs to take a wound to initiate the fight. She defeats the Overlord and takes the Reward Token: “3 , when your turn begins, take 1 ”. Next turn she defeats Sathi, the High Priestess again and now holds two of her Reward Tokens. Each turn she receives 2 Crystals and when the game ends she gets 6 Glory points .
Defeating Overlord
When an Overlord runs out of Reward Tokens they are defeated. The rules for invasions no longer apply and players can no longer challenge them. They still can use the abilities of collected Reward Tokens .
Overlord Variants
Hard ModeOverlord starts with 4 reinforcement tokens - two for and two for .
Death ModeIf an Overlord still has any reward tokens at the end of the game, all players lose the game.
ReinforcementAfter each fight with an Overlord, put a random reinforcement token on the Overlord. When playing a 2-players game, add an additional reinforcement token.
7
8
Universal Keywords
BuryBurying means placing a card on the bottom of the appropriate stack. When game asks you to “bury top
”, take top card on the item stack and put it on the bottom of the stack. A card cannot be buried if it is the only card in the stack.
UnburyUnburying means placing a card on the top of an appropriate stack.
Distance The number of cards between a card on Journey track and Village Card. Most of the time equals the number of crystals you need to pay for the journey. A card on “ 3 or more” refers to cards on 4th, 5th or 6th spot on Journey track.
SwapCards that are swapped change their respective places. If the swap is not possible (if there is no card on one or both respective slots) just skip it. Swapped cards don’t activate their abilities and do not trigger “After taking” abilities.
Steal CardNew effects in game allow players to steal cards from other players. Stolen cards don’t activate their abilities and do not trigger “After taking” abilities.
GraveyardAll cards discarded during the game are considered a graveyard. Players may look through the graveyard at any time, but should not change the order of the cards. If more than one card is placed in the graveyard simultaneously current player decides which one goes on top.
Negative StatsA Broken Sword icon means negative Attack Points , and a Broken Shield icon means negative Defense Points . Players Attack and Defense Points can never go below zero.
FAQ
1 If the text on a card doesn’t refer to a particular card (e.g. Top Item), the owner of the targeted cards may choose which card will be affected.
Example: John took Bolas from the Journey Track and chose Ann to discard one of her Monsters . Ann has three Monsters : a Gnoll on the bottom of her pile, a Unicorn in the middle and a Manticore on top, so she chooses to discard the Unicorn, as it’s worth the least amount of Glory Points .

9
Base Game
Bandits (Port Aurisan)
It is all about the money. Crystals to be exact. Earn or steal enough of them and you might buy yourself a victory.
Thieves deck gives you a unique opportunity to score points for your crystals. Think of ways to get more crystals and snatch the cards that score for them.
Barbarians (Fjordosan)
The might is right. Train with barbarians, fight dire wolves and wrestle with ice giants. Raise in power like never before.
Monster cards in Barbarians set tend to have and icons. The icon means negative defense points. Both these icons are counted toward the players’ total attack and defense. You can score big for your attack value.
Cultists (Normaltown)
Feel the power of evil life-stealing rituals, heartless Black Knights and Elder Beings. Maybe even learn a few tricks from them.
Cultists deck allows for giving wounds to other players. While it may be counterintuitive, with these cards in play it is better to have some wounds to spare.
Transfering wounds: When transferring wounds, simply give a wound you own to another player. The wound is not considered “healed”. The target player who received a wound is considered to have “taken a wound”.
Dracons (Dracopolis)
Other monsters just hang on your mantelpiece. But these have a lasting effect. Whether it is a poison, mutagens or a shell harder than steel.
Monster cards in Dracons set tend to have and icons on them. The icon means negative attack points. Both these icons are counted toward the players’ total attack and defense. You also may consider aiming to get the dragons, since there are extra points for those.
Trap: After taking this card from the Journey Track, the player must give this card to another player. The card is placed on top of the receiving player’s Item Card pile.
Gnolls (Hateville)
For gnolls, “person” is just another word for “ food”. The same goes for “monsters”. Use monsters to fuel your spells, bait larger monsters or just sell them for profit.
Gnoll set features cards that allow you to sacrifice creatures to get some profits. It might be worth to get some low-glory monsters just for that reason.
“Target player discards a ”: The current player picks a target player, then the target player picks a monster to discard (it does not have to be the top monster).
Manticore: If a player does not have any monsters, they don’t need to discard Manticore. Manticore is not considered in their monster pile when the effect takes place.
Roc: The current player picks a target player, then the target player picks a monster to give to the current player. This monster will be placed under the Roc card.
of Rage: upon activation, the player receives an Attack Point for every two Monsters they have.
Goblins (Dwarfburg)
Dwarves have a saying: “The best defense is the best defense.” Armor up and face goblin suicide squads, massive ogres and even bigger giants.
Goblin set is all about rewarding you for your defense. You should think of a way to get defense quick, or you’ll be forced to skip on some high scoring monsters.
Axe: After taking this card, but before adding it to your Items Pile , every other player is dealt 1 Wound for every 2 Attack Points you have. Consider raising your Attack Points, before taking an Axe.
of Fire: Upon activation, the player receives an Attack Point for every Defense Point they have. Their Defense Points remain at the same value.
Double Damage: double damage means that the player receives twice the number of Wounds for each not blocked with the .
Attacks all players: When a player fights a Monster with this ability, during the “Monster’s Attack” phase of the combat, resolve it for each player, one-by-one. Other players may NOT use any actions or effects during this attack (e.g. activate a Helmet). The “Player’s attack” phase goes by the standard rules.

10
Undead (Gravekill Mounds)
The cemetery is open. Bring back discarded cards and collect skulls of the famous undead warriors for glory.
The Undead set can score you points for getting monsters with the skull icon. This is made easier with the ability to get cards out of the graveyard. If you see a player really going for those, be sure to stop them.
Journey for the top card from the graveyard:Some cards allow players to journey to the graveyard to retrieve the top discarded card. Cards obtained through this journey are considered the same way as the cards obtained from the Journey Track and so all abilities as well as “After taking” abilities apply. Players need to fight monsters and dragons they encounter on the journeys to the graveyard.
Undead Icon The icon does not grant any special effects by itself. Just treat it as a card type depiction. Other cards have interaction with this icon (for example: “Ghouls” and “of Death” give Glory Points for each Undead Icon)
Skeleton: If there is no card in Graveyard just ignore this ability. Otherwise, remember that the swap is mandatory.
Shield: Other players that use or activate abilities that affect “another player”, “target player”, “player on your side” can’t pick you as a target and must pick another player. If there is no valid target for the ability, just ignore the ability. If the ability was a cost (i.e. “Another player heals 1 Wound”), the cost is
considered to not have been paid. For abilities affecting “all players” or “other players” activated by other players, ignore the effect that relates just to you. Note that the shield also blocks abilities that might be beneficial for you.
Ghoul/Of Death: “Remove from the game” means you must put the card in the box, not in the discard pile. That card can no longer enter play during this game.
Using “Ghoul” or “Of Death” is a minor action and does not end your turn. You can use it, then take a regular major action (Rest/Journey/Challenge).
Unicorns (Holy Grove)
Time heals all wounds. As do the unicorn horn and a Treeman apple. So don’t be afraid to go all-in and stack up the wounds. They’ll heal.
Unicorn set has a lot of ways to heal your wounds. It encourages play where you don’t worry that much about getting hurt and heal the wounds later.
Pink Dragon: After winning a fight with this Dragon count the total number of Wounds you have. Then take the same number of Wound Markers from the general supply and add it to the Wounds you already have.
CreditsDesigner: Rafał Cywicki
Game Developers: Jacek Gołębiowski
Art Direction: Bartosz Repetowski
Illustrations: Bartosz Repetowski, Tomasz Mroziński
Layout: Marta Fleter, Paweł Niziołek, Krzysztof Bernacki and Beata Smugaj
Proofreading: Bruno Cailloux (Mythic Games Edition)
All mentioned icons are licensed under CC BY 3.0 (https://creativecommons.org/licenses/by/3.0/)
- Modification of “Crowned skull” from https://game-icons.net/ made by Lorc
11
Overlords Expansion
Wound deck
Whenever a player has 10 or more Wound markers, they must draw 2 Wound cards, choose one, and discard their other along with 10 Wound markers. Wound cards are kept in a separate stack, in the same manner as Item or Enchantment Cards.
A Wound Card is still considered to be 10 Wounds (-10 Glory Points at the end of the game), but also imposes some extra restrictions on a player and compensates for that with a few Glory Points .
When a player heals, they always need to discard Wound markers first. When no Wound markers are left and a player heals, they may discard a Wound Card and replace it with 10 Wound markers, and then heal the appropriate amount.
Angels (Sun Tower)
Pious clerics, iron-clad paladins, and luminous angels. Good deeds are the thing. Heal other players and benefit.
Angel set is all about healing other players to benefit. Wounds other players have are a currency you can spend to forward your efforts.
“Another player heals 1 ”: When this phrase is used as a cost in card ability it means that: you pick a player who has wounds, this player heals 1 wound and you get the benefit. If no other player has any wounds you cannot use the ability because the cost cannot be paid.
Angel: The healing is applied after the combat is resolved and so the current player can get wounded and become the “player with most Wounds”.
White Dragon: After getting the White Dragon, your wounds can no longer be healed, even by others players. They can still be transferred with abilities that state “transfer X of your Wounds to other players”.
Dark Elves (Benzomeranzan)
Why heal, when you can make your wounds work for you - that’s what blood magic is all about.
Dark Elves will give you benefits for your Wounds. You can get crystals, attack bonuses or straight up points. When playing with Wound deck you might break even point-wise.
Demons (Hell’s Gate)
Nobody wants those pesky little demons and their foul magic. That’s why they make the best presents for your enemies.
Monster cards in the Demon set give negative points, but thankfully you can send them your opponent’s way. Unless you have some way to benefit out of those.
Fairies (Lost Horseshoe)
Fairies just want to have fun. And their idea of fun is basically giving your stuff to other players.
Fairy set will make you give your crystals, items, and monsters to other players. If you plan around this strategically, this might actually be a good thing for you.
“Give X of your to another player”: You may spend your crystals on minor actions (for example village card’s multi-action) before taking the card. If you don’t have any crystals you don’t need to give them to another player.
Golems (Santa Gnomonica)
“When in a hole, dig deeper” - that is the philosophy behind gnomish technology. Bury your items to use their power.
Golems will often make you bury your cards to gain some benefit. They are also crazy durable, you should find a way to ramp up your attack.
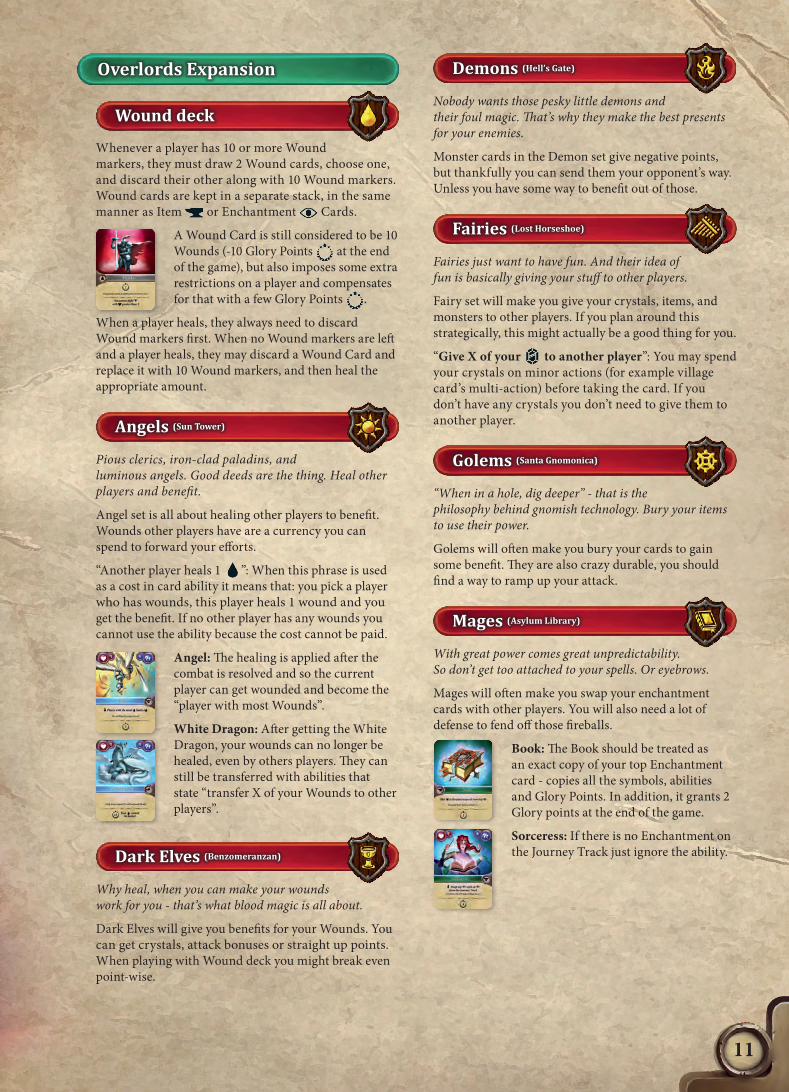
Mages (Asylum Library)
With great power comes great unpredictability. So don’t get too attached to your spells. Or eyebrows.
Mages will often make you swap your enchantment cards with other players. You will also need a lot of defense to fend off those fireballs.
Book: The Book should be treated as an exact copy of your top Enchantment card - copies all the symbols, abilities and Glory Points. In addition, it grants 2 Glory points at the end of the game.
Sorceress: If there is no Enchantment on the Journey Track just ignore the ability.

12
Slimes (Slug Canal)
Fighting slimes is stinky business. They get stronger the dirtier you get. And you’ll get pretty dirty, believe me.
Slime set features monsters that grow in strength and offer bigger rewards, based on how many Slime Icons the player has. Getting too many of them may not be a super good idea.
Slime Icon :The icon does not grant any special effects by itself. Just treat it as a card type depiction. Other cards have interaction with this icon. Slimes have their power increased based on how many icons the current player has.
Brainellum: The easier way to understand the scoring on Brainellum is: 2/8/18/32/50 Glory Points for 1/2/3/4/5 Reward tokens.
Troglodytes (Mycelium Halls)
What goes down, must go up. Including your items and spells. Even the kinds you would rather keep deep down.
This deck consists of cards you would rather keep on the bottom of the stacks. The Monsters will make it hard for you though as most of them require you to unbury your cards.
Hide Armor / Eye /of Acid: Upon taking these cards immediately put them at the bottom of the appropriate stacks.
Subterranean Dragon: Each player in the clockwise order can choose to bury or unbury any of their Items or Enchantments. Those can be top, bottom or any other card. Only one such manipulation is allowed per player.
Credits
Designer: Rafał Cywicki
Game Developer: Jacek Gołębiowski, Krzysztof Rudek
Art Direction: Bartosz Repetowski
Illustrations: Bartosz Repetowski, Mariusz Gandzel, Mateusz Michalski, Daria Zersen and Paweł Fotek
Layout: Paweł Niziołek, Krzysztof Bernacki and Beata Smugaj.
Proofreading: Rachael Mortimer, Joshua Ross, Piotr Chmielewski, Bruno Cailloux (Mythic Games Edition)
Rafał’s special thanks: to my wife, Beata, for her invaluable help in everything. To Krzysztof and Katarzyna Cywicki, as well as Anna and Maciek Nowakowski, for their support and aid during numerous tests.
Jacek’s special thanks: Piotr Chmielewski for helping on numerous occasions, as well as Michał Oracz and Marcin Świerkot for all their advisory help.

13
Odyssey
Enchanters: Odyssey features 6 new Kingdom decks themed around ancient Kingdoms and epic journeys. Use those the same way you would use any other Kingdom deck. Each new deck features a new mechanic that allows for new strategies.
Banners and ClassThese two sets of cards are used to replace your starting Fist of Enchanting and will give your character a little back story - where they come from and what they were doing before advancing to the prestige class of Enchanter.
Instead of handing out Fists of Enchanting during the game setup, deal each player two Banner cards and two Class Enchantment cards. Each player picks one Banner and one Enchantment.
Banners tend to give new ways of getting , or heal, while Class Enchantments will help you with crystals and Attack.
Both Banner and Class Enchantment have their rule written on the bottom of the card which means that they are usable throughout the whole game.
Using this variant will make the game a bit easier difficulty-wise, but also bit harder rules-wise.
Event deck
As the extra step of game setup: Shuffle the Event deck, then take three cards per player, without looking at them. Then put them in random spots throughout the Adventure deck (we recommend to not shuffle the Adventure deck).
Contrary to other cards in Enchanters, Event cards activate when they show up on Journey track (hence the “Arrow up” symbol ). So when you draw the Event card immediately resolve it.
Some Event cards will just have a one-time effect that fires immediately. After resolving it just remove the card from the game and refill the Journey track, if needed.
Other Event Cards will attach themselves to different types of cards on Journey Track. Attaching a card means that you slide the Event card under the indicated card type leaving the bottom of the card visible. From now on, the cards move together on the Journey track. While on Journey track the rule on Event Card is in play for all players. If the cards are taken, swapped or discarded, remove the event card from the game.
This variant will make your game a bit more unpredictable and exciting, but also harder difficulty and rules-wise.
If an event card is discarded as part of “challenge Overlord” Action , resolve the card, then discard another card from the Adventure Deck.
Centaurs (Equos Plains)
Are you a fan of long-ranged combat? You will see that distance makes a difference.
Centaur set features cards that are highly dependent on the positioning. You should aim to get the monsters while they are further away. Keeping a Pegasus on top of your monster pile might help you with that.
Distance Icon The number of cards between a card on Journey track and Village Card. Most of the time equals the number of crystals you need to pay for the journey.
A card on “3 or more” refers to cards on 4th, 5th or 6th spot on Journey track.
Gladiators (Arena Mundi)
Enchanters enter full PvP battle royale mode. Fight other players to become the champion of the arena.
Dueling other players might be a way to victory. Ramp up your Attack to deal them massive wounds or gather you defenses to shrug off attacks from other players.
Duels: Duels between players are simple and straightforward. Both players deal each other number of wounds equal to their current reduced by the opponent’s .
Before the duel, both players (current player first) have a chance to use minor actions on their cards and/or Village card.
Attacking another Player means that the attacker deals the target Player as many as the attacker’s minus the target’s .
Harpies (Upper Olympolis)
Did you know flying is cheaper than walking? Fly where eagles dare.
Harpy set has icons that will make your journeys cheaper. They are great if taken up early.
Speed Icon When going on a journey reduce the cost of cards on Journey track by 1 for each Icon you have.
Note: Costs cannot become negative and thus earn you crystals, you greedy goblin, you…

14
Medusae (Lower Olympolis)
You feel your legs getting heavy. That’s the gravity… of heavy weaponry… and petrification.
Cards in Medusae set have Weight Icons, that will make you pay extra for your journeys. They may be worth it though, as there are score multipliers for those icons.
Weight Icon At the end of a turn during which you made a journey, lose 1 for each Weight Icon you have.
Note: This is not the same as saying “your journey costs are higher”.
Mermaids (Concholia)
Pearls are like underwater rechargeable batteries. They can power your artifacts every turn.
Mermaid set features Pearls icons, which will help you with powering your minor actions and as such give extra value to cards that have those.
Pearl Icon Pearls are akin to improved crystals that can be use every turn, BUT they cannot pay for your journeys.
At all points in the game keep the amount of Pearl Tokens equal to Pearl Icons on your cards. When you spend Pearls, flip them to the darker side. When your turn begins, flip them back.
Mummies (Ne-Ne-Ne-Sethos)
There are two kinds of weather in Sethos: Scorching Sun or Sandstorm. They brought both with them.
Mummy set features the Desert Token that affects the stats of monsters for all players. Flipping it at the right moment might make your fights easier or the fights of your opponents harder.
Desert Token: The first time when the game asks you to Flip Desert Token you need to actually throw the token into the air and allow it to land on either side. Later in game Flip Desert Token means simply turning it to the other side. Desert token applies to all
, , and Overlords.
If two effects require you to double the effects of Desert Token, quadruple it. If three - multiply further.
Monster’s Health and Strength cannot go below zero.
Scorching sun side:+1 Attack, -1 Life
Sandstorm side:-1 Attack, +1 Life
CreditsDesigner: Rafał Cywicki, Jacek Gołębiowski
Game Developers: Jacek Gołębiowski, Krzysztof Rudek
Art Direction: Bartosz Repetowski
Illustrations: Bartosz Repetowski, Vasiliy Gromov, Alexey Zaporozhets, Anton Zemskov, Kostya Chernianu, Long Le
Layout: Krzysztof Bernacki and Beata Smugaj.
Proofreading: Piotr Chmielewski, Bruno Cailloux (Mythic Games Edition)
Testers: Ernest Kiedrowicz, Wojciech Gruchała, Krzysztof Rudek
All mentioned icons are licensed under CC BY 3.0 (https://creativecommons.org/licenses/by/3.0/)
- “Ionic column icon” from https://game-icons.net/ made by Delapouite
- “Direction sign icon” from https://game-icons.net/ made by Delapouite
- “Wingfoot icon” from https://game-icons.net/ made by Lorc

15
EastQuest
Enchanters: East Quest features 6 new Kingdom decks themed around ancient Asian kingdoms. Use those the same way you would use any other Kingdom decks.
East Quest cards tend to have more written text on the bottom part of the cards and tend to make games more complex. Some decks also feature a new mechanic that allows for new strategies.
Quest DeckAt the beginning of the game randomly draw four Quest cards and lay them out in the common area for all players to see.
Each Quest card has a minor action that a player can perform on their turn. Most of them require a condition to be met as a cost while the reward tells you to claim the Quest Card.
Claiming means taking the Quest Card and placing it in your play area. For most Quests, this can only be done while the Quest Card is in the common area. Only Quest Cards with the clause “Can be claimed from other players” can be taken when they already belong to someone else. Those Quests should always be kept fully visible. Don’t place other Quests on them once collected.
When taking a Quest Card, the Immediate Effect is resolved. Quests give an extra incentive to follow a given strategy, while also giving beginning players an objective to pursue.
If you feel that two quests are too similar in nature feel free to replace one of them.
Mythic DeckMythic Deck represents the end of time that is about to happen. When the world ends the different universes collide and monsters from other realities enter the Enchanters world.
Cards in Mythic deck are all Monsters with very high stats and giving very high rewards. These monsters often require an amount of preparation to deal with and may change the scoring in a drastic way.
Setup: After assembling Adventure Deck randomly draw one card per player from Mythic deck. Show them to all the players (so that they know what is coming), then shuffle them together and put them on the bottom of Adventure Deck.
Some cards will make you “ignore all items” or “ignore all enchantments” - this rule only affects printed Attack and Defense symbols on the given cards. You may still use abilities on the cards, even if they grant Attack and Defense. This way you do not have to track where a given bonus comes from.
Automa Deck
Automa mode is a game variant that adds a virtual player to the game. It can be used to play a challenging solo mode or used as an extra player in a regular game.
You can play it either by using Enchanters: Companion app or with a physical Automa deck.
At the beginning of each round, which consists of 1 of each player’s turn, draw a card from the Automa deck. Automa deck cards instruct which card from the Journey Track has to be put in a special Market pile, that you can place in any convenient location.
After resolving the Automa card, refill the Journey Track. On top of that, every player has the option to use the ability on the top Automa card during their turn.
When Automa deck runs out of cards, shuffle all Automa cards and make a new deck.
Special situationsIf an Automa card targets an empty space on the Journey Track (during the final rounds), apply the rule to the closest possible card on the Journey Track.
Remember: Market is not a part of the Journey Track, so ignore any rules related to the Journey Track when you take a card from the Market pile.
Additional rules in Solo versionYou win, if you get at least 50 by the end of the game.
If you use an Overlord, put 2 tokens on them.
If a card orders you to steal , take it from bank.
Monsters from Demons deck give you positive points instead of negative. You can’t use Gladiators deck with Automa.
Resolve any other actions that target another player with the Market pile according to the rules below:
Discard a card: discard the top Market card.
Give a card: you can either put it on the top or bottom of the Market pile.
Swap cards / Take a card / Bury a card: you may use the top market card for this, but only if the type of that card is matching with the rules.
Unbury a card: same as above but for bottom card.
Damage inflicted to another player: put the Wounds token next to the Market. At the end of the game they count as positive Glory Points for you.

16
Geishas (Bonsai Court)
Bonsai Court is where diplomacy happens. Tea ceremonies, music, negotiating… and poisoning. Sadly, there is a lot of poisoning going around.
Geishas set gives players a unique opportunity to avoid the negative “Immediate effects” from taking a card. This is essential to getting points from monsters in this set.
Monks (Hidden Valley Temple)
Monkeys of Hidden Valley tend to take it slow. True self-realization comes from introspection and that takes time. So rest awhile and chill.
Monks deck features a lot of abilities that trigger when you rest. Furthermore, some cards will require you to rest on the next turn, after taking it. If a player would forget about the rule, they are dealt 10 Wounds.
Nagas (Ganeshian Market)
Ganeshian artificers value balance and beauty over all things. Nagas also like beautiful things, balance - not so much.
The Items and Enchantments in this deck are a great source of Glory Points and allow for manipulation of cards in the stacks. On the other side, they offer only one time bonuses or require a careful balance of items and enchantments.
Ninjas (Shadow Fox Dojo)
The philosophy of ninjas of Shadow Fox clan is “kill fast and die young”. They are efficient with their equipment and spells. Those have a lot of power, but a limited number of uses.
Items and Enchantments in Ninja set have a special currency called “charges”. Think of it as an ammo for your abilities. Charges are mostly gained when picking up cards from Ninja set and can only be spent when you possess a proper ability on a card you own.
One card (Grappling Hook) in this set refers to distance . Distance is the number of cards between a card on Journey Track and a Village Card. Most of the time it equals the number of crystals you need to pay for the journey.
Distance “3 or more” refers to the 4th, 5th and 6th spot on the Journey Track (counting from the first card next to the Village card).
Pirates (Fleet City)
The Six-Seas was never a safe place. Now that the pirates of Jade Sea set sail, no crystals are safe.
Pirate set is all about making the crystals go around. No special rules are required to handle that. Also Pirates don’t like rules.
Samurai (Taigaa Castle)
A samurai spends his life mastering a weapon, preparing for a fight that will bring him the greatest honor or death in glory.
Samurai deck features some very powerful monsters marked with icon that do not move on Journey Track. When updating the Journey Track do not move them, leave them where they are on the Journey Track. If necessary move other cards around them.
Only when there would be no more cards in the Adventure Deck to fill the empty card spot these Monsters will start their march toward the Village.
Warning! It is a very bad idea to use Event Deck alongside Samurai Deck. Do it on your own risk and remember we warned you.
Credits
Designer: Rafał Cywicki
Game Developers: Jacek Gołębiowski, Piotr Chmielewski
Art Direction: Bartosz Repetowski
Illustrations: Bartosz Repetowski, Vasiliy Gromov, Artyom Malkin, Alexey Zaporozhets and Tomasz Mroziński
Illustrations Mythic Deck: Stéphane Gantiez, Christophe Madura, Guillem Pongiluppi, Stefan Kopinski and Bayard Wu.
Layout: Beata Smugaj
Proofreading: Piotr Chmielewski, Bruno Cailloux (Mythic Games Edition)
Testers: Piotr Chmielewski, Marek Małagocki, Marta Bilska
All mentioned icons are licensed under CC BY 3.0 (https://creativecommons.org/licenses/by/3.0/)
- Modification of “Shuriken icon” fromhttps://game-icons.net/ made by Lorc
- Mashup of “Wrecking ball” and “Manacles” icons fromhttps://game-icons.net/ made by Lorc

17
Coop ModeCoop Mode is a game variant for Enchanters in which players unite as members of a newly formed Enchanters Guild to repel a powerful Overlord.
The goal of the game is to kill the Overlord and scare off the rest of their horde. To do that you have to lower their Health Points (HP) from 99 to 0 and avoid reaching your Wound Threshold.
Game setup
1 When assembling the Adventure Deck, take halves (marked with “2” on the backs) of 2 Kingdom decks for each player.
2 Pick the Enchanters Guild as the Village Card for the game. Choose an Overlord from the Wanted List.
3 Prepare the AI Deck. Add dedicated Overlord cards if necessary (see below).
4 Choose a difficulty level card to set the Wound threshold On Easy difficulty, your Wound threshold is 50 On Normal difficulty, it is 40 On Hard, it is 30 On Very Hard difficulty, it is 25
5 Prepare the Adventure Deck and Journey Track the same way as you would in a regular game.
6 Set Overlord Dial to 99 HPTo play solo, use setup for 2 players game and make decision for both of “players”.
The flow of the game
The Coop Mode is played in a series of rounds, each consisting of the following steps:
1 At the beginning of each round, draw a card from the Overlord Deck.
2 Read the card’s effects aloud and apply them to all players.
3 All players play 1 turn each, in regular play order. Then the next round begins.
Winning and Losing
You WIN when the Overlord’s HP is reduced to 0.
There are two ways in which players can reduce the Overlord’s HP:
A successful fight subtracts amount (typically 10) from the Overlord’s remaining HP.
The special action associated with the Enchanters Guild Village Card allows you to remove from the game the top card from any of your stacks ( , , or / ) to deal the Overlord a number of Wounds equal to the value of that card. This follows all the usual rules for minor actions.
You LOSE when, as a group, you receive a total number of Wounds equal to or exceeding the threshold for the chosen difficulty level or if there are no more cards in the Journey Deck and the Journey Track.
Rule Changes
Rule of thumb: If a rule in a competitive game would benefit
another player, it benefits the Overlord instead. If it would harm another player, it harms the
Overlord instead.
General rules Overlord Deck - This deck of cards is the core of
the Coop Mode. Each card in the deck has an effect that depends on the Overlord’s rage level, which increases as the Overlord’s HP drops below the indicated thresholds.
Wounds - You, as a group, have a shared Wound pool. If you ever reach the Wound Threshold for the difficulty, you lose the game.
Round - Consists of 1 turn per player, performed in regular turn order.
As in the regular game, Players can’t use any abilities outside of their turn. The same goes for temporary boosts - they are lost when a player’s turn ends.
“All Players” or “Each player” - means that each player is subject to the AI card effects separately.
Challenge or Duel - After you defeat the Overlord using the Major Action: Challenge you don’t receive a Reward token; instead, the Overlord loses 10 HP. Additionally, the Overlord becomes stronger - place 1 Attack token and 1 Health token on the Overlord. Also, in the Coop Mode you do not Duel players, but the Overlord instead. A Duel is not a Challenge, so you don’t discard the top card of the Adventure Deck after Duelling the Overlord.
Attacking another Player means that the attacker deals the target Player as many wounds, as the attacker’s minus the target’s .

18
If the card ability says “another player” or “other players” (for example “Black Knight”) - it targets the Overlord only instead.
If the card ability says “target player” you can choose any player or the Overlord.
If a Monster card has a “Bury ” ability, treat it as a “Discard ” ability instead.
Give/Discard/Steal/Force to Give you card - Consider whether the effect would be positive, or negative for the current player in a regular game. If positive, remove one chosen Reinforcement Token from the Overlord. If negative, place one Reinforcement Token on the Overlord.
Example 1: The Manticore forces an opponent to discard a Monster. In Coop Mode it would remove one Token from the Overlord. The Trap Item card would work the same way.
Example 2: The Nymph makes you give a monster to another player. In Coop Mode, you discard the monster and the Overlord gains a Reinforcement Token.
Give crystals - The Overlord stores the crystals on their sheet and automatically exchanges each 5 for 1 Reinforcement Token.
If the card ability says “steal X ”, take any that have been placed on the Overlord sheet first, and when there are none left, take the rest from the bank.
When playing with the Event Deck, remove the Overlord Rising and Magic Overload cards from the deck before you setup the game.
Pay a total - Players can decide how they split the payment between them.
When you remove with a passive hindrance (ie. White Dragon: “Your cannot be healed”) to deal
to the Overlord, add a random Reinforcement Token to the Overlord after you deal them the amount of Wounds indicated by the card’s value.
Specific deck rules Demons - Treat penalty points as regular points,
but if you give a card to the Overlord using their abilities, remove 1 of their Reinforcement Tokens instead of damaging Overlord.
Specific card rules Book Mimic - Ignore its ability. Shield - Discard to prevent the effect of an Overlord
Card that was just drawn. The effect is cancelled for all Players.
Wanted list
Four Overlords have been designed specifically for use with the Coop Mode:
Ryma, the Titan She-Boar Whimper, the Underlord The Grey Council Cerberus
They are intended to pose a really tough challenge - to defeat them on higher difficulty levels you need to have a very good grasp on the game’s mechanics. They also include Overlord Cards that should be added into the basic Overlord Deck when playing against these Overlords.
We also provide 16 overlay cards for existing Overlords. These will be an easier challenge than the previously mentioned Coop Mode exclusive Overlords.
Lukah, the Archangel King Arsen III, the Immortal Vragan, The Blackest Knight Jabar Rephet, Grand Vizer Xavras, the Puppeteer Cho’mun, the Ogre General Dorhka, the Seer Failurn, the Trickster Beatrix, the Spelleater Theria, the Dragonhead Hydra Zeupitter, the Highest Hierarch Petra, the Gorgon Godmother Monophemus, The Cyclops Leader Sa’akara, the Gamerunner Doggon, the Shar’khan of Sixseas Lerxos, the Ancient Sphinx
Coop Overlays cards

19
Beginning of the turn
1 “When your turn begins” abilities.2 Minor action window3 Pick a major action
Journey Rest Challenge (Overlord)
1 Pick a card2 Pay crystals
or ?:1 Minor action window2 Resolve 3 “After taking” triggers4 Add to the stack
or ?1 Minor action window2 Combat
Player Attacks Monster Monster Attacks Player
3 Resolve 4 “After taking” triggers5 Add to the stack
1 Pick one 2 Pay any extra cost3 Perform the effect4 “After using ” abilities5 Discard first card
on Journey track6 Check for invasions
1 Pay any extra cost2 Minor action window3 Combat
Overlord Attacks Player Player Attacks Overlord
4 Take Reward Token5 Resolve 6 Discard top card from the
Adventure Deck
End of the turn
4 Minor action window5 Slide cards6 Refill Journey Track
If at any point in the game two effects were to happen during the same step of the table above, the current player decides which one gets performed first.
19
Timing table

20
The Help Page
Shortened setup:1 Each player takes 5 crystals .2 Each player takes Fist of Enchanting.3 Shuffle the Kingdom decks (one per player or 4 halved
decks for 2 players) together.4 Find 6/9/12 (for 2/3/4 players) Item and Enchantment
Cards on the bottom of Adventure deck and put on the top.
5 Place 6 cards from the top of the Adventure Deck onto the Journey Track.
6 Choose a Village Card .7 Pick the first player.
During their turn, a player may: Journey: Take a card from the Journey Track, paying the cost in crystals .
OR Rest : Use one of the available actions. The first card on the Journey Track is discarded at the end of the turn.
ADDITIONALLY Use any Minor Actions Cost Effect from the Village Card or your own topmost cards, each once.
Combat: The player attacks the Monster . The player must have Attack Points equal to or greater than the Monster’s Health Points .
A Monster ALWAYS attacks a player. The player gets a number of Wound Markers equal to the difference between the Monster’s Strength and the player’s Defense .
Final score: Glory Points from the Cards collected by the player. - 1 Glory Point for each Wound . Additional Glory Points as described on the Village Card .
Icon rundown
Monster Card
Dragon Card
Item Card
Enchantment Card
Village Card
Overlord Card
The Cost — Effect action
Monster’s Health Points
Monster’s Strength
Content
1018 Normal Cards (63x88mm)
28 Kingdom Decks (each with 25 cards + randomizer) Wound Deck (25 + Art card dummy) Banners and Classes (52 in Odyssey, 12 in EastQuest) Event Deck (26) Quest Deck (58) AI Deck (52) Automa Deck (12) Overlords Overlays (8 in Odyssey + 3 in EastQuest) Wound Treshholds Cards (2) Mythic Deck (30) (AD-DON) Fist of Enchanting (4 sets of 2 cards) Mega Crystal (1)
85 Big Cards (130x90mm)
23 Villages (Base Game) 8 Villages (Overlords Expansion) 7 Villages (Odyssey) 6 Villages (EastQuest) 17 Overlords (Overlords Expansion) 10 Overlords (Odyssey) 6 Overlords (EastQuest) 4 Help Card 4 tableaux Attaque/Défense
Tokens
Crystals (30 “1”, 24 “3” and 12 “10”) Wounds (25 “-1” and 21 “-5”) Reinforcements (12 in Overlords +3 in Odyssey) Attack and Defense pointers (4 sets of 2) Shurikens/Charges (25) Pearls (25) Weather token (1) Journey Cost (6) Cerberus (1) Rewards (12)
Other
Game Mat 4 Player dashboards 39 deck separators Overlord Dial 1 leaflet Quickstart 1 leaflet 3D tokens This Rulebook
Player’s Attack
Player’s Defense
Immediate Effect
Glory Points
Reward Token
Rest Action
Challenge Action
Wound
Crystals